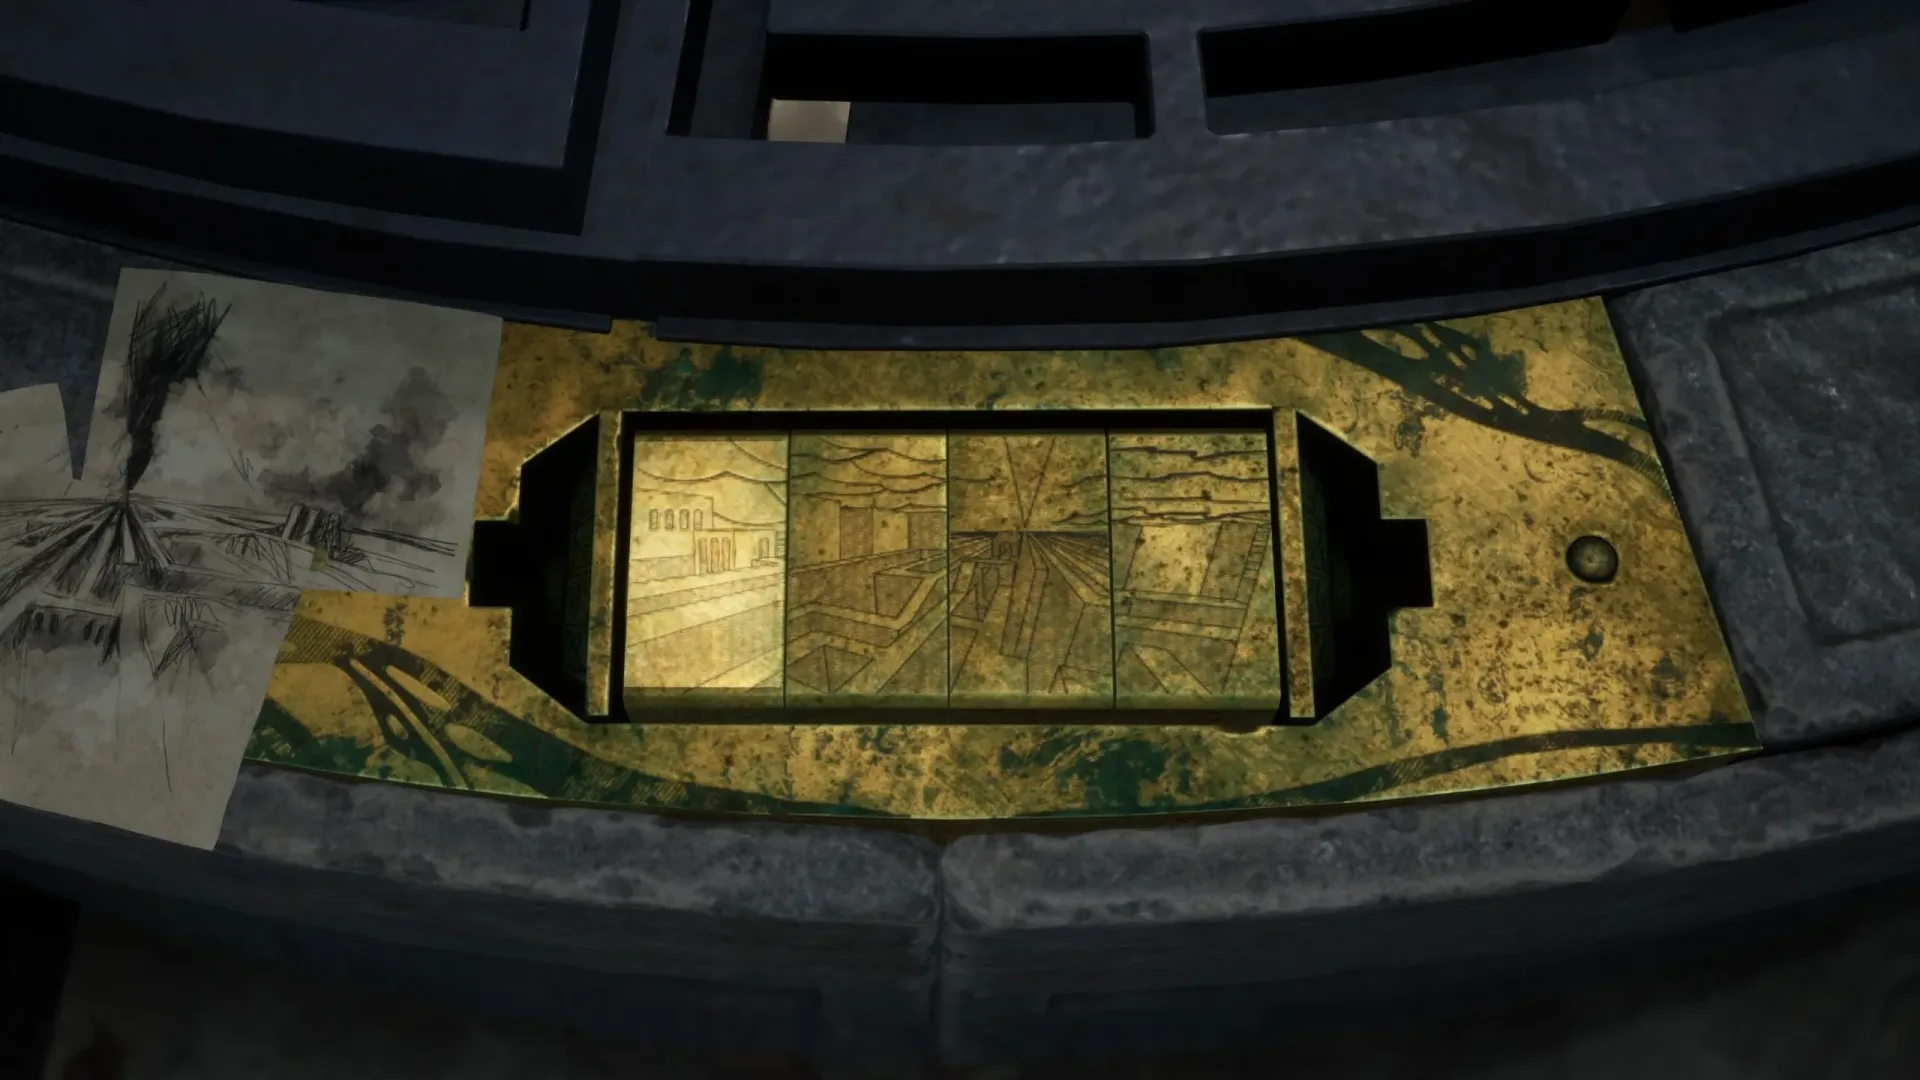
The well puzzle in Hellraiser Revival is a two-stage objective: first locate three missing picture blocks in the surrounding area, then rotate all four blocks until their images recreate the labyrinth sketches provided at the well. Completing it opens the well and leads to the Tongue statue piece, an item needed for the final statue gate on the route toward Charlotte.
The essential thing to know is that this is not simply a matter of putting each recovered block into a particular slot. Once the pieces are collected, the game places them into the gold mechanism in their intended order. The actual solution is in the image variation shown on each rotating block. Look for specific scenery and path details—not merely the general labyrinth motif.
When and where the well puzzle begins
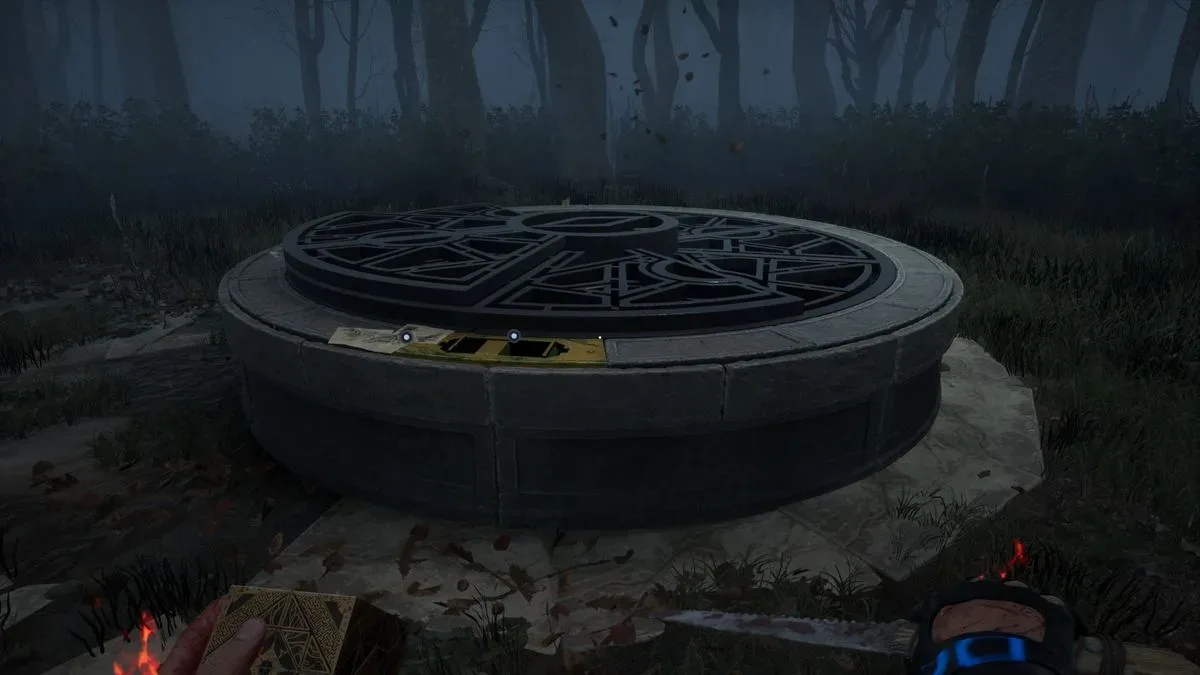
You reach this puzzle after solving the Genesis configurations associated with the Head statue. Pass through the gate that opens afterward and continue until you arrive at a well.
On the well’s rim are several important clues and interaction points:
- A crumpled paper ball.
- A gold block slot.
- One labyrinth-picture block that is already installed.
- Three empty spaces for the blocks still missing: one on the left and two on the right.
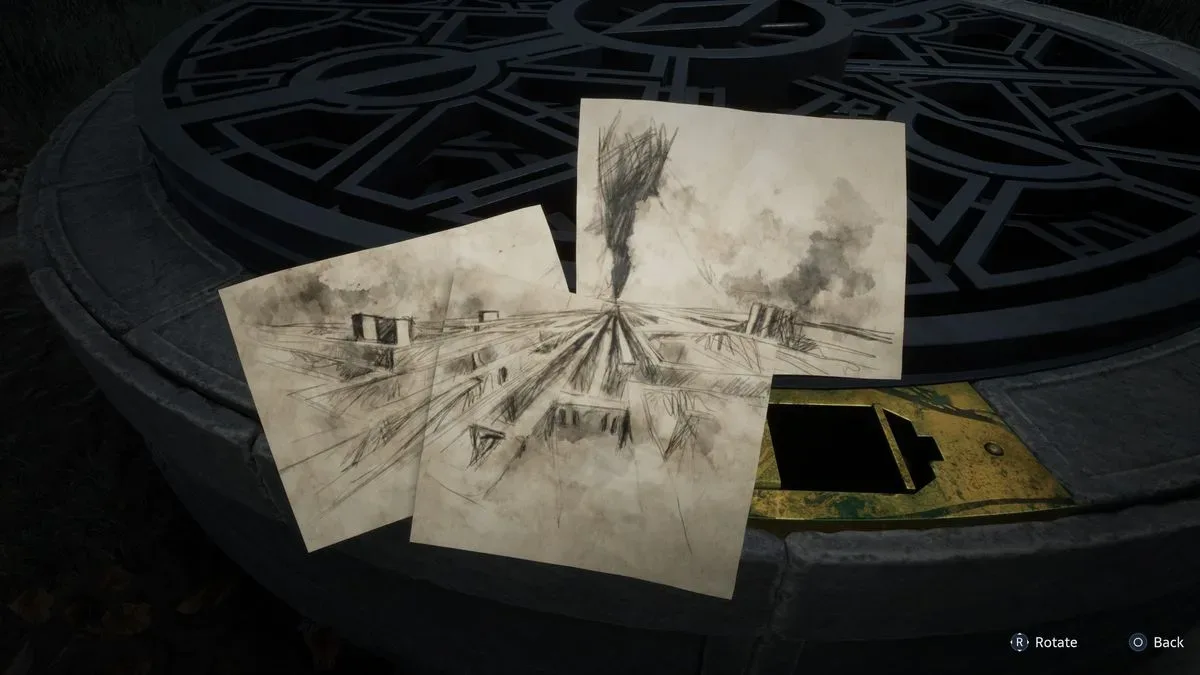
Interact with the paper ball before setting off. It unfolds into three sheets bearing labyrinth sketches. Those drawings are your visual reference for the four-block image. The individual blocks offer similar-looking alternatives when rotated, so the notes provide the details needed to distinguish the correct configuration.
If you are unsure whether you are at the right puzzle, check the structure rather than the broader area: the target is specifically the well with the gold slot and a partly completed row of image blocks.
All three Hellraiser Revival well block locations
The missing blocks are distributed across three nearby landmarks. Each pickup also brings an enemy encounter, making it worthwhile to know where you are going before grabbing an item and triggering the next threat.
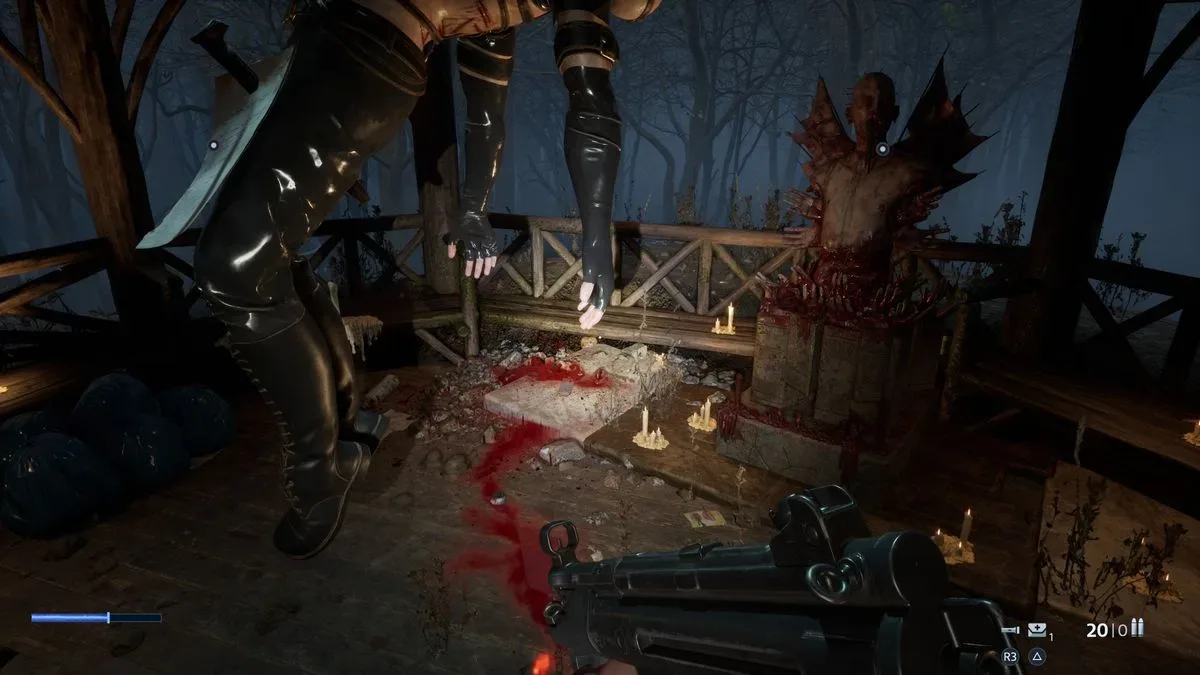
Block one: the gazebo cultist
Stand facing the well, then turn completely around. Take the left-hand route up the hill toward the wooden gazebo. Inside, a suspended cultist is holding the first puzzle block.
Collect it from the cultist’s hand, but do not assume the return trip is quiet. Several bloated blue, exploding Unworthy run uphill toward the gazebo after the block is taken. The immediate practical implication is simple: pick up the block only when ready to respond to enemies in the confined hill approach, rather than treating the gazebo as a purely safe item stop.
Block two: the boat at the pier
From the hill, head back down and travel forward past the well until you reach a small pier. Go all the way to the pier’s end and look out across the water. The second block is on a small boat offshore.
The boat cannot be looted from its initial position. Use the mooring bollard—the post used to secure the boat—to pull it in. Once it is close enough, take the block.
More Unworthy appear as soon as you collect this piece. Deal with them before continuing along the path on the right toward the children’s play park. This encounter is tied to the pickup, so reaching the pier is only half of the task; be prepared for the follow-up fight before moving on.
Block three: the merry-go-round cultist
The final piece is in the children’s play park. Find the cultist positioned on the merry-go-round and take the block from its hand.
This pickup also causes Unworthy to emerge. By this point, Aidan has a fire ability that is useful against them, so use it to clear the immediate danger before returning to the well. With all three recovered blocks in hand, go back to the gold mechanism on the well rim.
How the rotating labyrinth blocks work
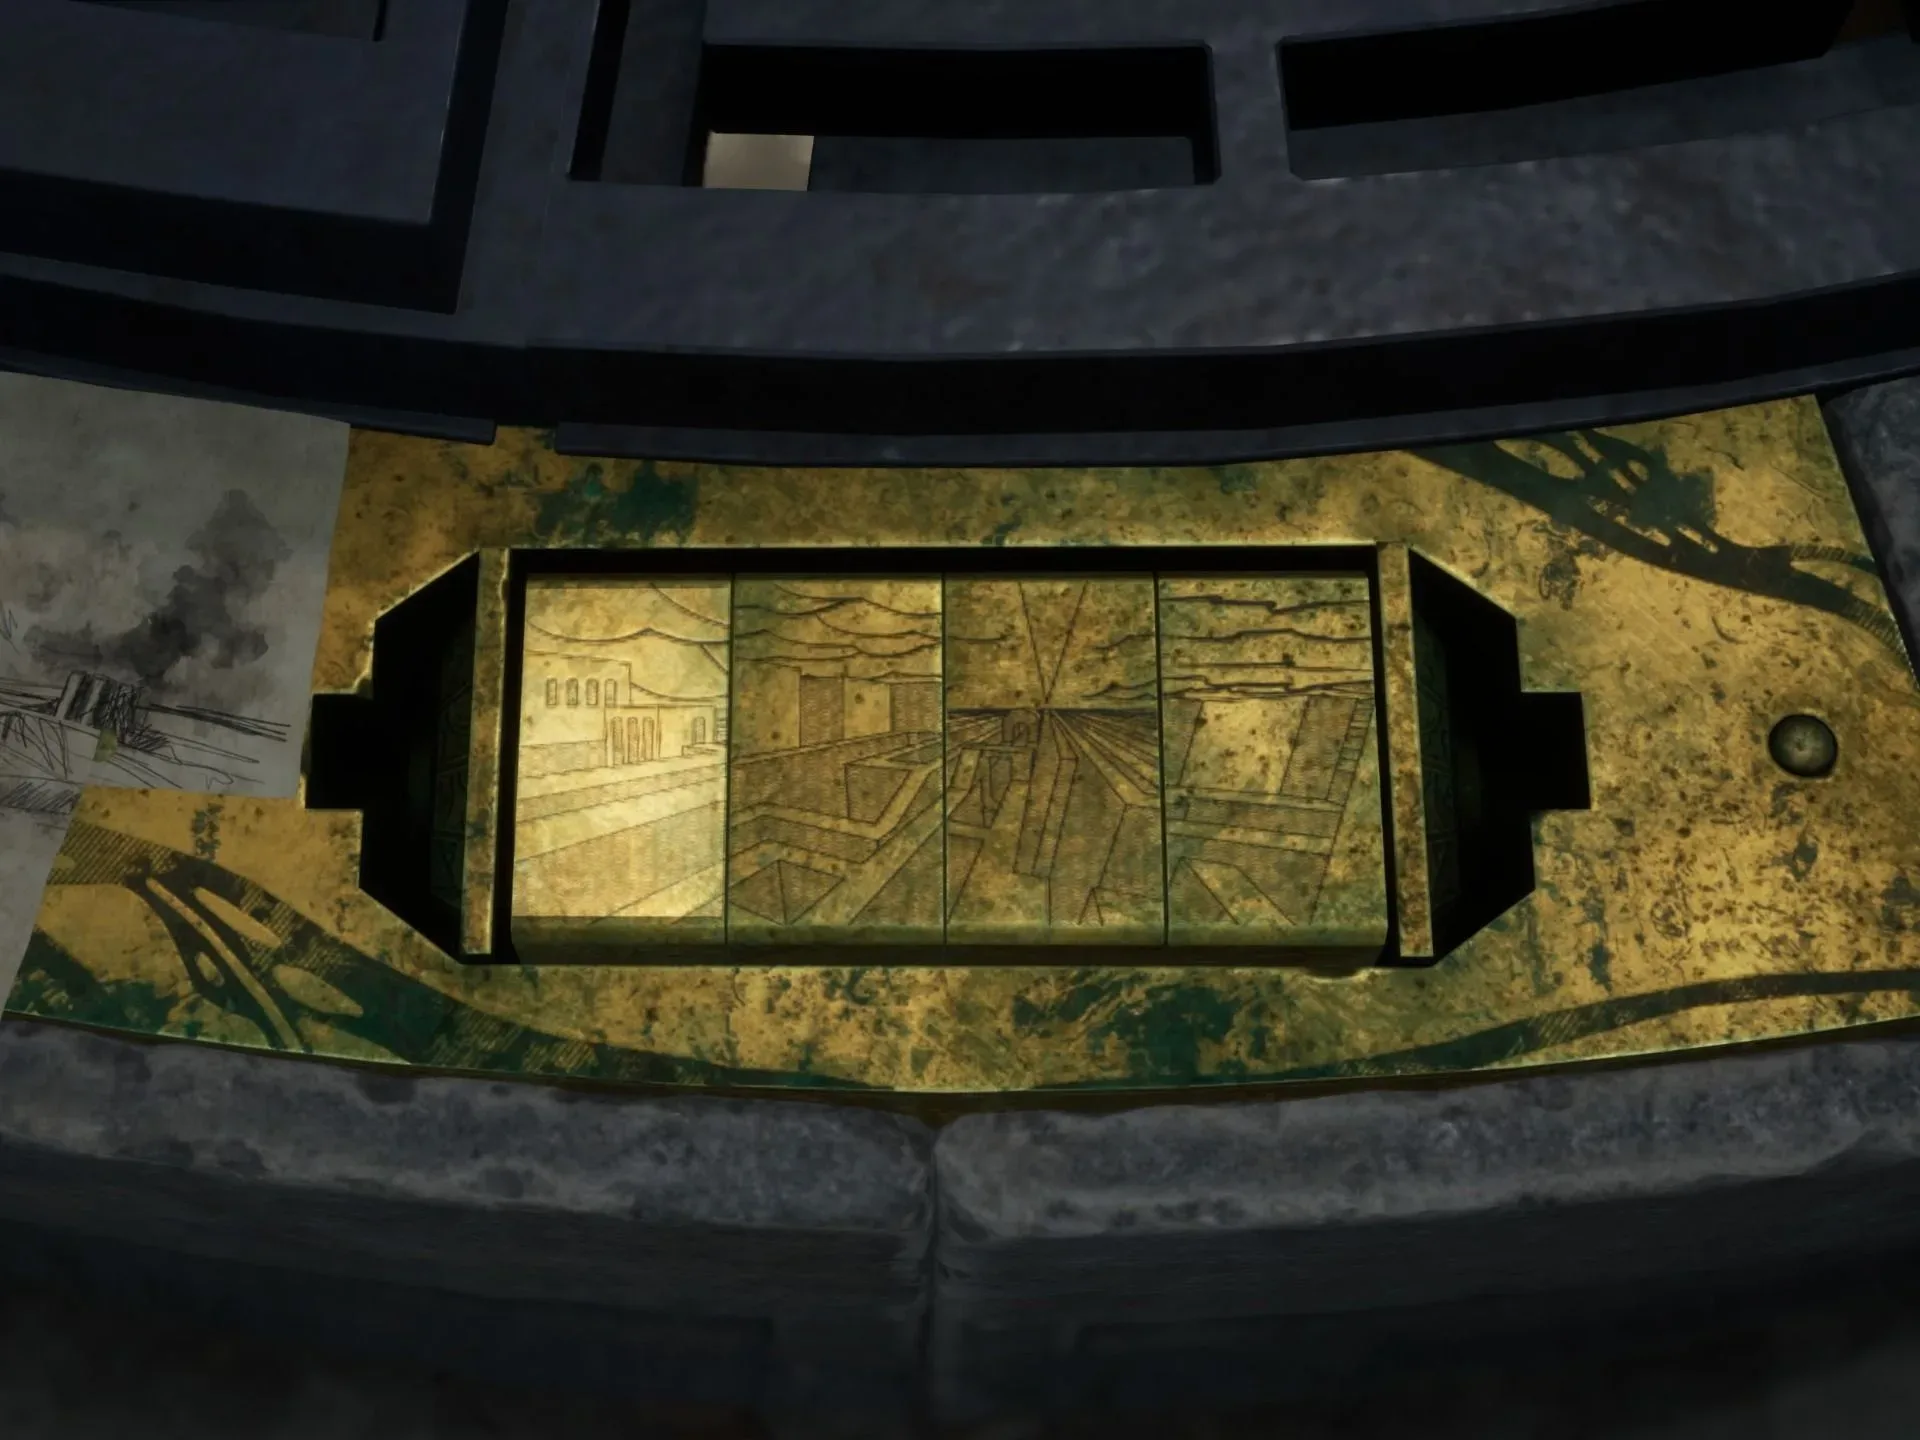
At the well, interact with the gold slot and select the three blocks you recovered. Their placement is handled automatically. You will now have four adjacent picture blocks in total, including the one that was present from the start.
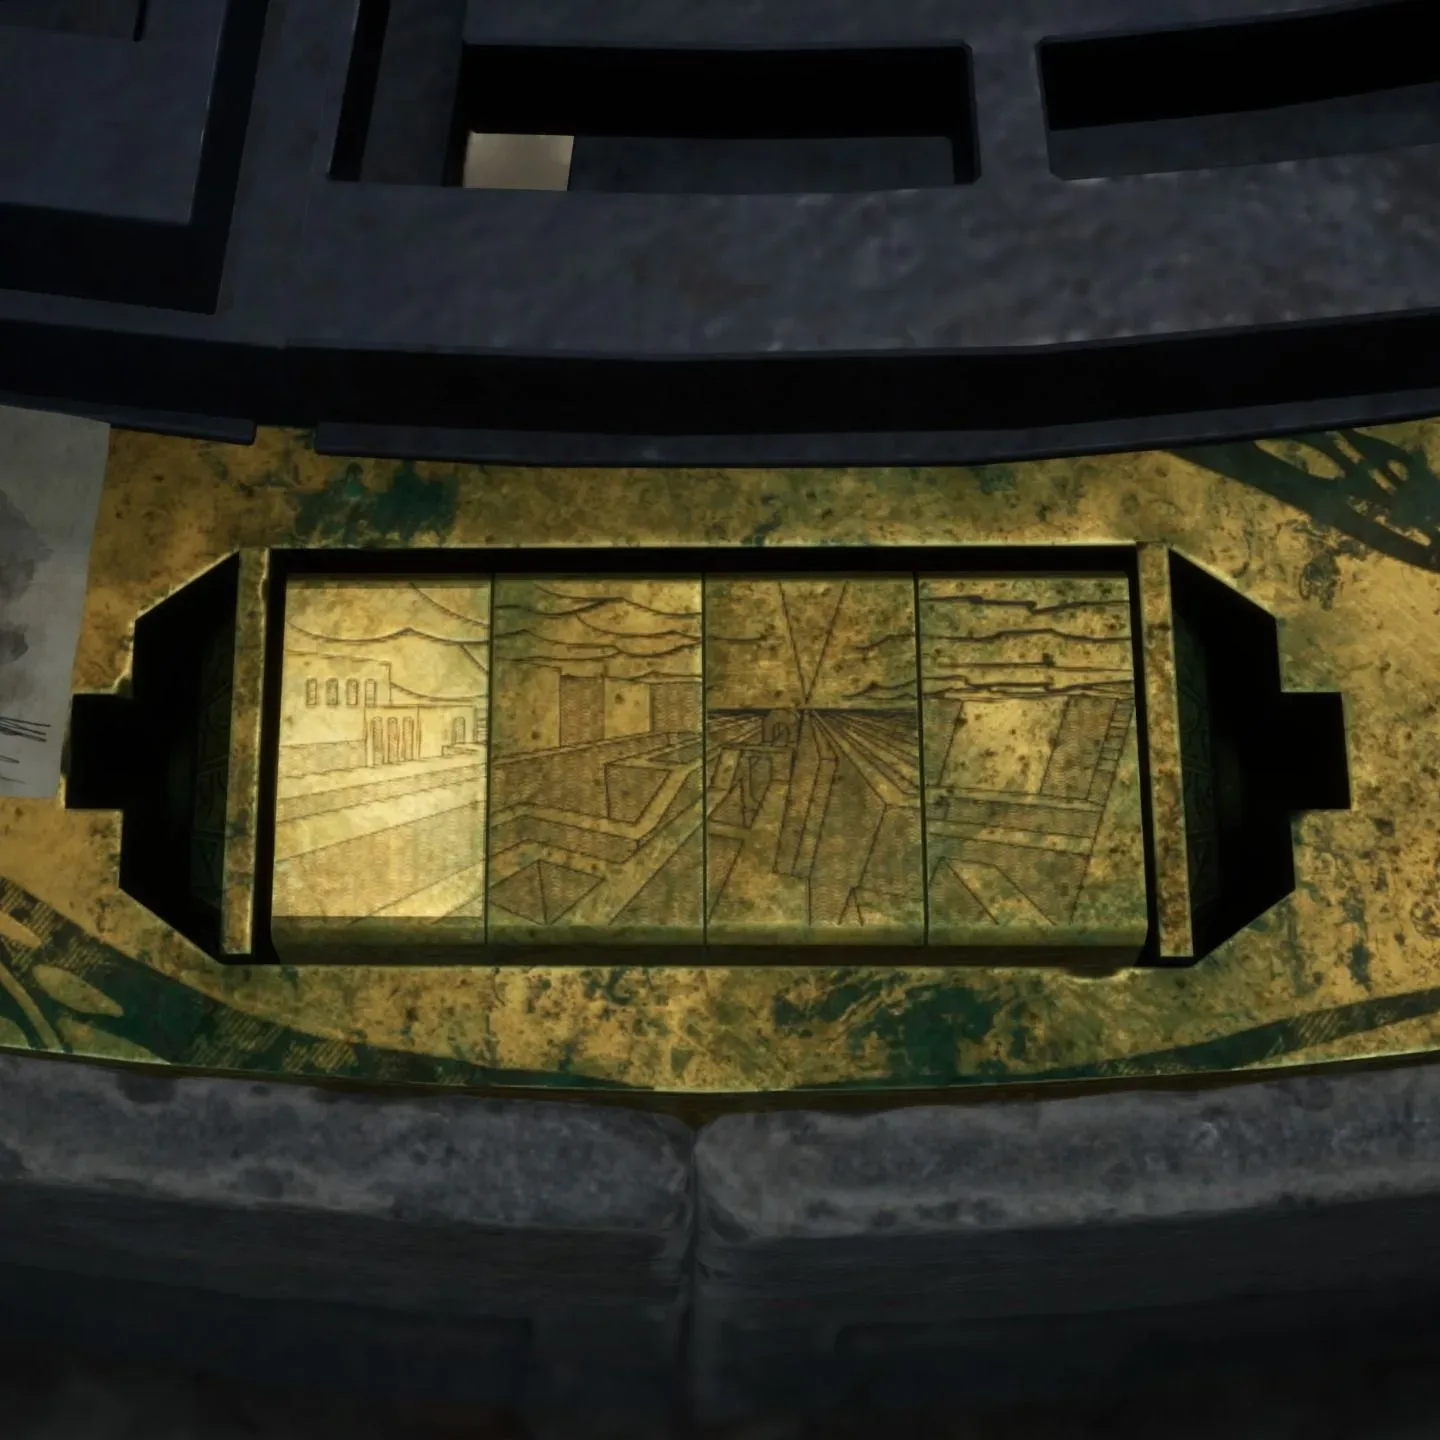
Each block represents one section of the larger labyrinth scene. Rotating a block changes the picture to a closely related version of that area. The differences can be subtle: a changed path formation, a different number or type of structure, or a new feature in the sky. That is why trying to match a vague impression of “ruins under clouds” can leave the well closed even when the scene looks nearly right.
Use the unfolded papers as a composite image. Your job is to make the separate blocks collectively match those sketches. In other words, the puzzle is a visual reconstruction: select the correct variant on every individual tile until the entire row agrees with the clue.
Exact well puzzle solution
Rotate the blocks until they show the following elements. The numbering below follows the four-block arrangement at the well, including the pre-installed block.
- Puzzle block 1: smoke-like clouds in the sky, with two box-like buildings below them.
- Puzzle block 2: smoke-like clouds, one small box-like building in the distance, and a foreground path shaped like a capital H.
- Puzzle block 3: smoke-like clouds cut through by a prominent, large V-shaped mark.
- Puzzle block 4: smoke-like clouds and two tall tower-like buildings on the right.
The repeated cloud detail is intentional and is not enough to identify a correct block on its own. Prioritize the unique markers:
- Two low, box-like buildings for block one.
- The H-shaped foreground route and distant small building for block two.
- The large V cutting through the cloud area for block three.
- Two tall towers on the right side for block four.
A helpful way to work through the mechanism is to settle one unmistakable marker at a time. The H-shaped path and the large V are particularly clear visual checks. Then verify the building silhouettes and their placement. This is more reliable than rapidly cycling every block while trying to memorize the whole scene at once.
What happens after solving the well
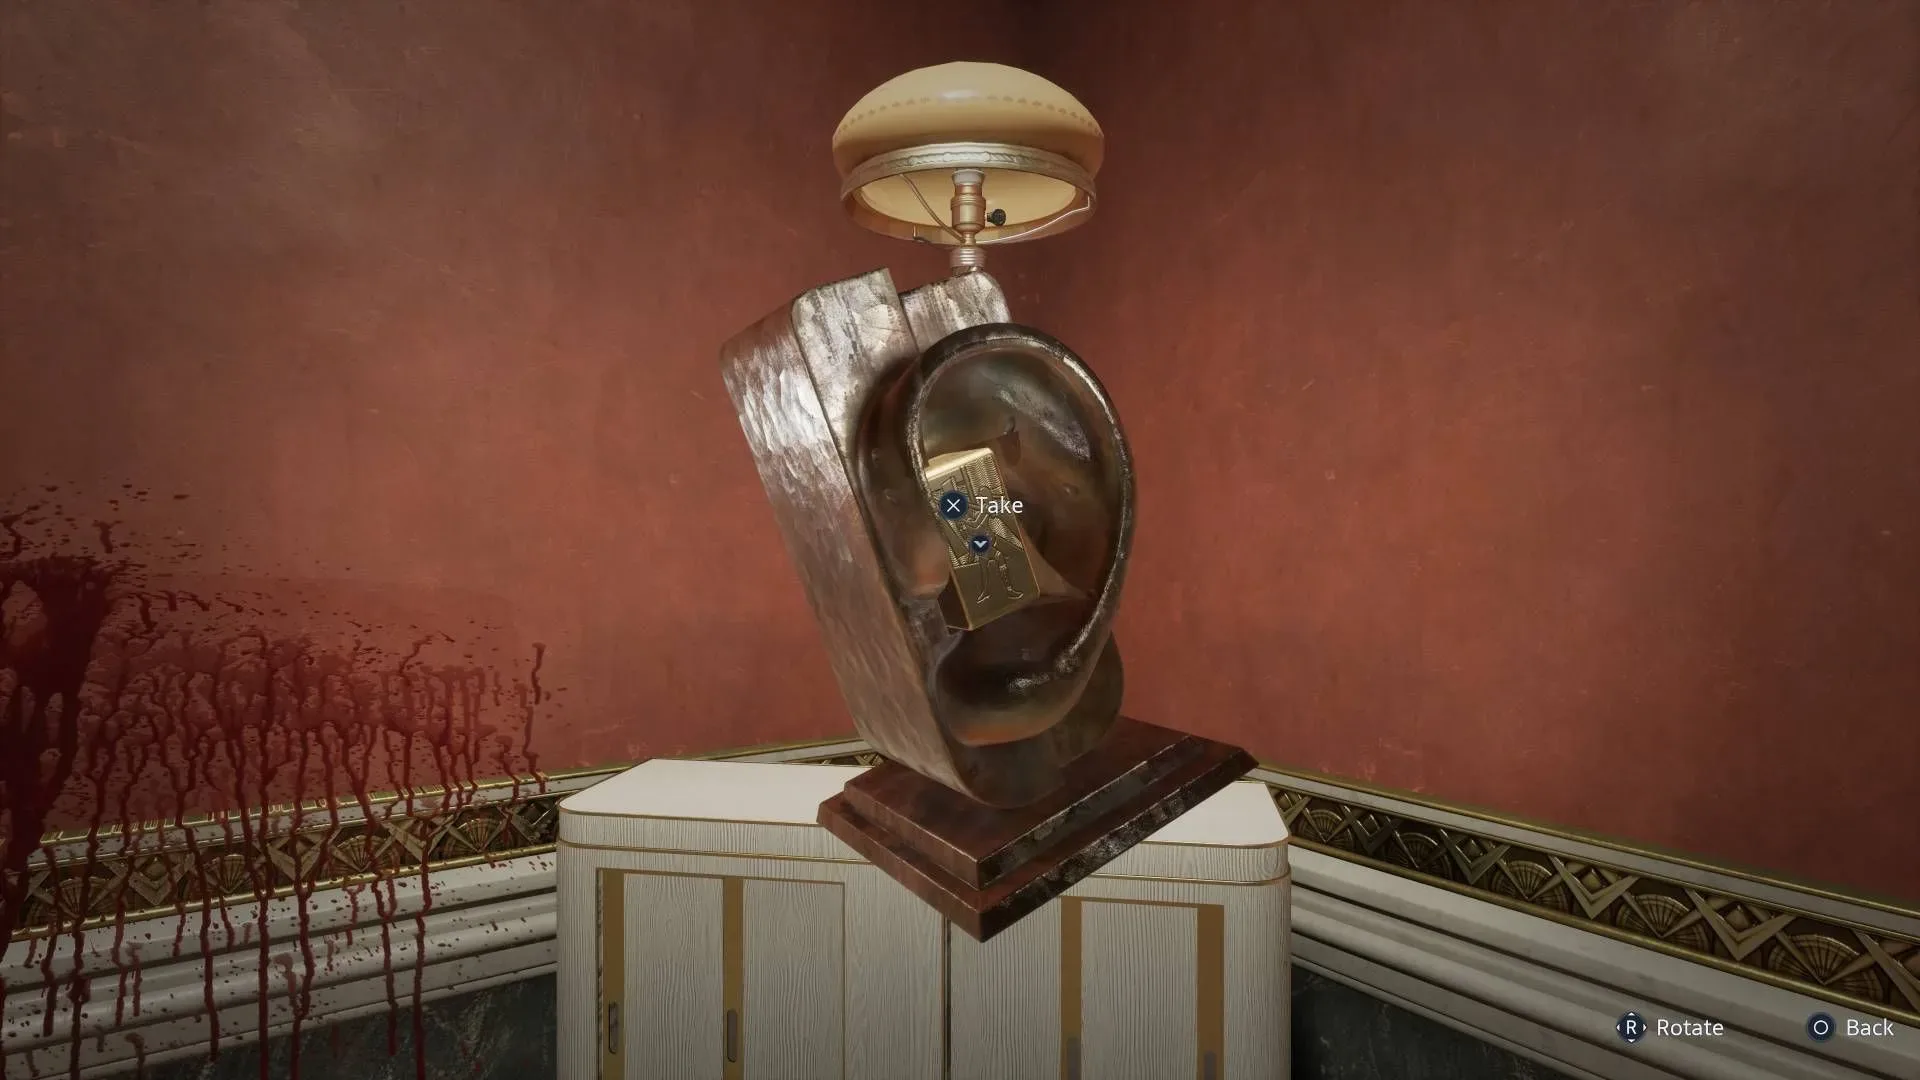
When all four images match the labyrinth sketch, the well opens. A ladder becomes available, allowing Aidan to climb down and collect the Tongue statue piece.
Expect another Unworthy encounter around the payoff. Clear the enemies, then take the piece. The Tongue is not an optional scenery reward: it is needed to open the final statue gate, beyond which Charlotte awaits. That makes the well sequence a required progression puzzle rather than a side detour.
Quick route and solution checklist
- Complete the Head statue’s Genesis configurations and go through the opened gate.
- Reach the well and uncrumple the paper ball to reveal the labyrinth sketches.
- Turn around from the well, take the left hill path, and collect a block from the suspended cultist in the gazebo.
- Go past the well to the pier, use the mooring bollard to bring in the boat, and take the second block.
- Follow the right path to the play park and take the final block from the cultist on the merry-go-round.
- Return to the well, insert the three blocks through the gold slot, and rotate all four images.
- Set the blocks to: two box buildings; H-shaped path with one distant small building; a large V in the clouds; then two tall right-side towers.
- Enter the opened well, deal with the Unworthy, and retrieve the Tongue piece.
The puzzle’s focus on a well gives the sequence a horror-game visual cousin in an entirely different form: Sadako’s Ring Nendoroid also uses a miniature well as part of its display. In Hellraiser Revival, though, the well is all about careful visual decoding, a short item-collection loop, and surviving the encounters that follow each block.