A retro game can look sharp and still look wrong. Circles become ovals, characters appear unusually wide, or a heads-up display seems pushed toward the edges even though the emulator is rendering at a much higher resolution. Increasing the resolution does not solve those problems because detail and geometry are separate decisions.
The black bars are often doing their job. A 4:3 game displayed on a 16:9 television needs empty space at the sides if the complete picture is preserved without distortion. Before changing a setting, identify whether you are seeing pillarboxing, letterboxing, deliberate in-game borders, overscan that used to be hidden on a CRT, or a stretched image.
The four ratios people accidentally merge
Output resolution is the number of pixels in an image being rendered or sent through a digital video path. A 640x480 image contains fewer pixels than a 1280x960 image, but both dimensions form a 4:3 rectangle. The larger image can provide more detail or a cleaner basis for scaling; it does not automatically become widescreen.
Display aspect ratio describes the shape of the complete visible picture. A 4:3 image is narrower than a 16:9 image. Pixel aspect ratio describes the shape of each individual picture element. Older television systems could use non-square pixels or analog sampling conditions, so the stored framebuffer dimensions do not always tell you the shape viewers were intended to see.
Active image area is another useful term. It means the portion that contains the game picture rather than black padding, overscan margin, or an emulator border. A 4:3 active picture can sit inside a 16:9 output window with side bars. That is different from a 16:9 image that contains black bars above and below as part of its composition.
This is why resolution numbers should not be treated as a complete video specification. Two images can have different pixel dimensions while presenting the same shape. Conversely, the same stored dimensions can be displayed differently if the viewport, pixel interpretation, crop, or output device changes.
- Treat resolution as a detail and scaling question, not as proof of the intended shape.
- Treat pixel aspect ratio as a property of picture elements and display aspect ratio as a property of the whole image.
- Ask which pixels contain game content before judging the dimensions of the entire capture or emulator window.
Use a shape test before touching settings
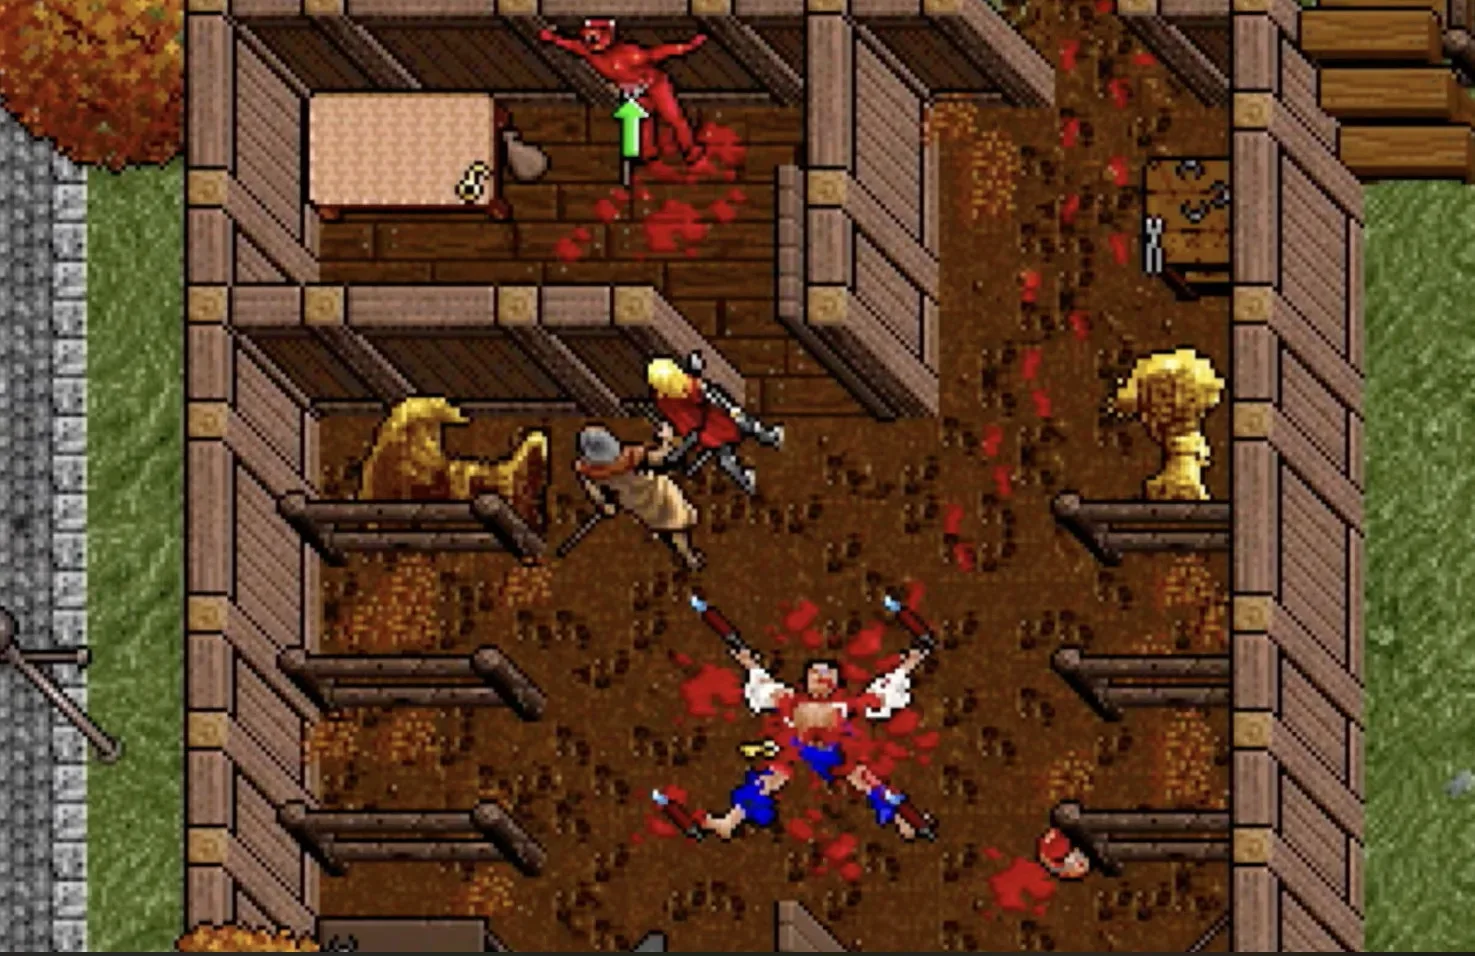
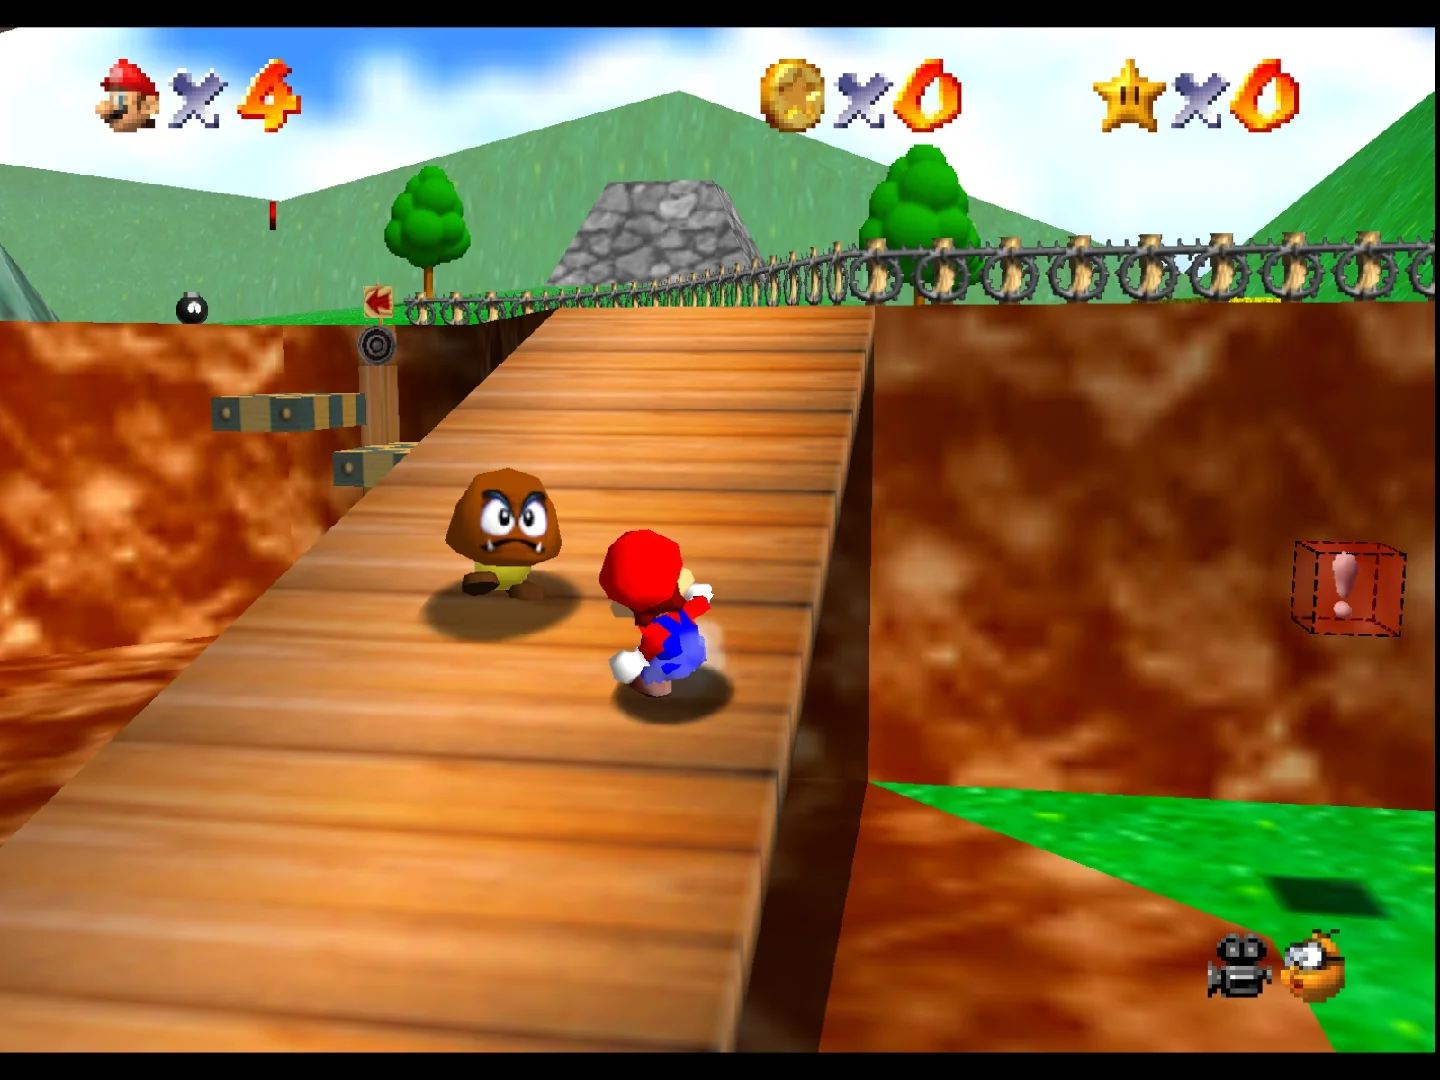
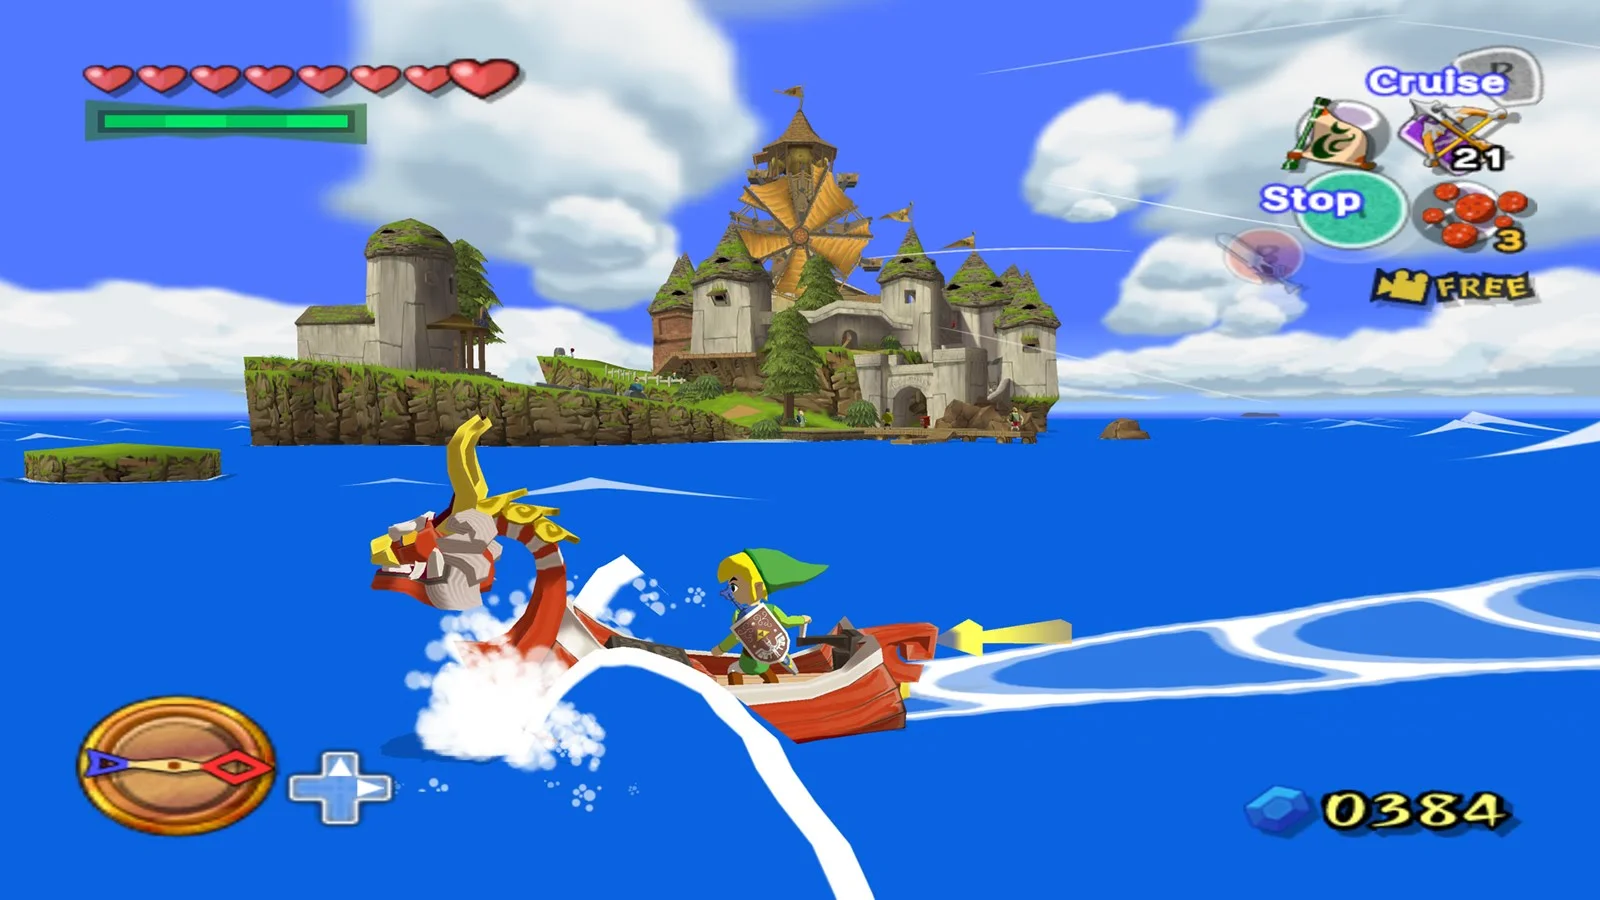
Use geometry as your first diagnostic. A circular object, a round HUD icon, a coin, or a character’s face should retain its intended proportions. In Super Mario 64, Mario’s face and round visual elements make a useful sanity check. In The Wind Waker, Link’s body and circular interface elements can expose horizontal stretching. These checks are more useful than assuming a screenshot’s file dimensions reveal the original signal.
A screenshot cannot prove whether a picture came from original hardware, a capture device, an emulator, or a resized editorial asset. It also cannot establish the exact regional timing, pixel shape, or video mode. Use still images to inspect composition, but use the game’s documented options and the emulator’s current documentation to establish what a mode actually does.
Look for four different symptoms. If everything is wider, the image is probably stretched. If the picture is the right shape but some edges are missing, it is probably cropped or affected by overscan. If the picture changes shape between gameplay, menus, and videos, different game components may use different presentation rules. If the picture is correctly shaped with bars at the sides, the bars may be the intended result.
- Check circles and character proportions before changing resolution.
- Compare the position of HUD elements with the active picture, not the full monitor.
- Do not use a screenshot’s width and height as evidence of native widescreen support.
The decision tree for black bars and distortion
Start by asking whether the image is geometrically correct. If circles look circular and characters look natural, leave the aspect ratio alone. Side bars on a widescreen display are the expected consequence of fitting a 4:3 image inside a wider space. You can adjust the size of the correctly proportioned image, but filling every pixel of the monitor requires either cropping or distortion.
If the picture is stretched horizontally, choose an aspect-preserving presentation first. A global 16:9 output setting can make a 4:3 image fill the window while changing every object’s width. That is not a resolution problem. If only one game behaves incorrectly, investigate its per-game display behavior rather than changing the global setting for every title.
If bars appear above and below, determine whether they belong to the game. Letterboxing places black space at the top and bottom, often to create a wider cinematic frame inside a taller display area. Zooming into it may remove the bars, but it also crops image information. Pillarboxing places bars at the sides, commonly because a narrower 4:3 image is being preserved on a 16:9 screen.
A useful decision tree is therefore simple: first ask whether the active picture is distorted; next ask whether it is cropped; then determine whether the bars are outside the game image or part of it; only after those questions should you consider a wider mode or a patch.
- Correct geometry first; pursue a larger picture second.
- Use side bars as the safe default for an original 4:3 game on a widescreen display.
- Do not zoom away bars until you know whether they are part of the game’s composition.
Resolution is not the target
Internal resolution controls how finely an emulator renders a three-dimensional scene or scales a source image. It can reduce the visibility of jagged edges and make text easier to read, but it cannot decide whether the active picture is 4:3 or 16:9. A high-resolution render placed in the wrong viewport is still the wrong shape.
A 4:3 image rendered at 640x480 can be enlarged to 1280x960 and remain 4:3. A 16:9 monitor may then display that image with side bars. Alternatively, a program can render internally at a high resolution and stretch the final result across the monitor. The second picture may look detailed while making Mario, Link, or a circular icon too wide.
Integer scaling addresses a different concern again. Enlarging a source by whole-number factors can preserve consistent pixel blocks and avoid uneven softness, especially for low-resolution 2D graphics. It does not determine the correct display aspect ratio. RetroArch documents integer-scale and aspect-ratio controls as separate presentation choices, which is the useful mental model: first preserve the shape, then choose how the pixels should look.
The same separation matters in emulator troubleshooting. If a game is stretched, changing from one internal resolution to another may make the image sharper without making it narrower. If the image is correct but soft, a filter or scaling method may help. If the image is cropped, a higher resolution does not restore the missing edges.
- Use higher internal resolution for clarity, not for aspect-ratio correction.
- Keep integer scaling conceptually separate from aspect correction.
- If a sharper image still looks wide, inspect the viewport or aspect setting.
Why CRT overscan makes old borders confusing
A CRT could hide parts of the outer picture through overscan. The signal still contained edge information, but the television’s visible area did not necessarily show every pixel or border. A modern display, capture device, or emulator window may reveal those edges, making an old image appear to have unexpected margins.
Overscan is not the same as deliberate letterboxing. An edge that was historically hidden is different from black space added above and below to create a cinematic frame. Likewise, a modern emulator may add a border around a correctly scaled image, while the original console’s signal did not contain a literal black frame in the same way.
Older systems also complicate the relationship between stored dimensions and the final picture. A framebuffer that looks close to a square-pixel 4:3 rectangle may have been intended for display through a television standard with different horizontal proportions. That is why exact measurements need caution when the source, region, capture hardware, and display chain are unknown.
A practical user does not need to reconstruct every analog timing detail to make a good choice. Preserve recognizable geometry, check whether the HUD is being cropped, and avoid treating every visible border as a fault.
- Distinguish hidden edges from black space intentionally added to the active composition.
- Check for cropped HUD elements before widening or zooming the picture.
- Avoid making exact claims from a single capture without knowing its signal path.
Super Mario 64: keep the N64 original in its 4:3 lane
The original Nintendo 64 version of Super Mario 64 belongs to the 4:3-era baseline. On a modern widescreen television, the faithful presentation is a 4:3 picture with side bars or a proportionally scaled window. Making it fill a 16:9 display means choosing a compromise: stretch the picture, crop part of it, or use a separate widescreen modification.
Those options should not be described as equivalent. Stretching changes Mario and every environment object. Cropping preserves proportions but removes information at the sides or top and bottom, depending on the crop. A widescreen modification may alter the camera or rendering behavior, but it is an unofficial alternative rather than a native widescreen mode in the original release.
The original-platform imagery supplied for this article is useful as a visual reference for the game’s 4:3 presentation, but its file dimensions do not prove the exact Nintendo 64 signal timing. If a modified or recompiled version is being used, record that distinction in the setup notes. Otherwise, start with aspect preservation and let the bars remain visible.
This is also a good example of why a modern television’s full-screen mode can be misleading. Mario may look more prominent when the image is stretched, but the extra screen coverage does not represent extra game information. It is simply a wider display of the same 4:3 composition.
- Use 4:3 as the original Nintendo 64 starting point.
- Label a widescreen modification as a modification, not an original game option.
- Do not judge the original presentation by whether it fills a modern monitor.
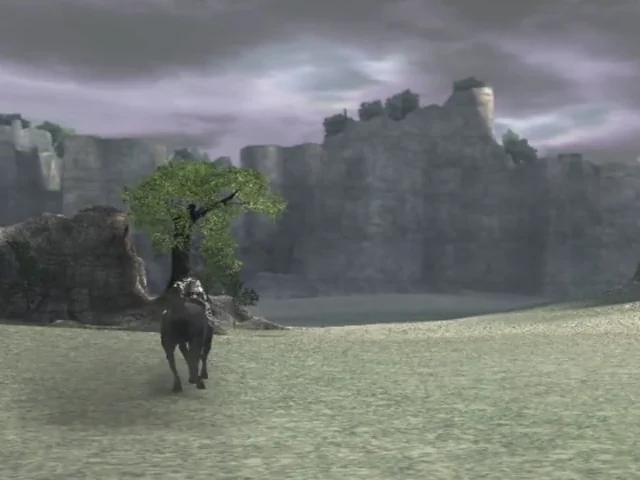
Shadow of the Colossus: a genuine built-in widescreen case
Shadow of the Colossus on PlayStation 2 is a useful contrast because the game includes a built-in 16:9 widescreen mode. That is different from forcing a 4:3 picture to occupy a 16:9 window. The documented game behavior changes the visible composition, showing more of the world rather than simply making the same 4:3 frame wider.
PCSX2 still has more than one relevant layer of control. An emulator output aspect setting determines how the rendered result is presented, while a game-level widescreen patch modifies particular software behavior. PCSX2’s documentation describes widescreen patches as targeted code modifications and supports aspect values such as 4:3 and 16:9 within patch definitions. Therefore, selecting a 16:9 output shape does not by itself prove that a game is running its native widescreen mode.
The distinction matters when a game has both an original option and an emulator patch. The built-in PlayStation 2 mode belongs to the game’s own software design. A PCSX2 patch belongs to the emulator configuration and may change camera behavior, field of view, or other game calculations. They should not be described as interchangeable.
Menus, heads-up displays, and pre-rendered videos can also behave differently from gameplay. A transition back to 4:3 does not necessarily mean the emulator is broken; it may reflect how that component was authored. When using PCSX2, verify the current game documentation and distinguish the built-in option from a patch before comparing screenshots or saving a configuration.
- Prefer the game’s documented 16:9 option when available.
- Do not call a global emulator stretch native widescreen support.
- Expect menus or videos to use a different shape from gameplay in some titles.
The Wind Waker: separate GameCube support from emulator enhancement
The original GameCube version of The Legend of Zelda: The Wind Waker should be treated as a 4:3 baseline unless a particular edition or modification is being discussed. Nintendo’s support archive lists the original GameCube instruction manual, which is useful for separating documented original-game behavior from later software enhancements. The original GameCube release should not be confused with the later Wii U HD edition or with settings supplied by an emulator.
Dolphin’s widescreen hack is an emulator-side enhancement, not proof that the original GameCube software had a native widescreen option. Depending on the game and modification, a hack may expand the camera view, expose areas that were not intended to be seen, leave interface elements in their old positions, or introduce culling and composition quirks. Those tradeoffs can be worthwhile for a user who wants a wider scene, but they are different from simply preserving the original picture.
For an unmodified original release, begin with a proportionally scaled 4:3 image. If you choose a Dolphin enhancement, save it as a per-game alternative and inspect gameplay, maps, menus, and cutscenes separately. A wider window is not automatically a more accurate presentation.
This example is especially useful because modern emulator screenshots can look so clean that the distinction disappears. High internal resolution and widescreen presentation are independent choices. A sharp 16:9 image may be an enhancement, a stretch, or a correctly supported game mode; the screenshot alone cannot tell you which.
- Treat original GameCube Wind Waker as a 4:3 baseline.
- Identify Dolphin widescreen behavior as an emulator enhancement.
- Check HUD placement and scene edges before deciding that a wider view is preferable.
Integer scaling, filtering, and a safe order of operations
Once geometry is correct, decide how the pixels should be presented. Integer scaling can keep low-resolution pixels uniform, while filtering can create a softer image. Shader effects may simulate display characteristics or add borders, but they should not be used to disguise a wrong aspect ratio. Libretro’s documentation separates shader behavior from broader display decisions, supporting the practice of handling these choices in sequence.
A sensible order is to identify the game’s intended display shape, preserve that shape in the emulator or display, choose a viewport that fits without cropping, and only then select integer scaling, filtering, or a shader. If the result is too small, enlarge the correctly proportioned picture. If there is unused space, that is preferable to making every object wider.
Keep per-game overrides where a title genuinely differs from the system baseline. A native 16:9 option in Shadow of the Colossus should not force Super Mario 64 or the original Wind Waker into a 16:9 presentation. Global settings are convenient, but they can silently make several unrelated games look wrong.
For users working in RetroArch, the important conceptual separation is between the core’s intended aspect presentation, the frontend’s viewport choice, integer scaling, filtering, and shaders. The exact labels can vary by version and interface, so consult the current documentation rather than relying on an old menu guide.
- Set geometry before filters or shaders.
- Use per-game settings for genuine exceptions.
- Prefer a smaller correct image over a larger distorted one.
A symptom table for common mistakes
Stretched circles usually indicate that a narrower active image has been expanded to fill a wider viewport. Restore aspect preservation before changing internal resolution. Thin side bars with correct-looking characters are usually harmless; removing them may require stretching or cropping.
Thick borders can mean the emulator is preserving a 4:3 image inside a wide window, but they can also indicate an undersized viewport or an added border shader. Compare the active picture with the game’s HUD and inspect whether the borders are symmetrical. A cropped HUD points toward zoom, overscan, or an incorrectly sized viewport rather than a need for more resolution.
A game that changes shape only during videos or menus may be switching between authored display areas. If one emulator shows a different result from another, compare the emulator’s aspect model and the game’s per-title documentation instead of assuming the console software changed. A widescreen patch may also alter gameplay while leaving interface assets untouched.
If only the outermost edge appears missing, check for crop or overscan before switching to widescreen. If the entire image is wider, correct the aspect setting first. If the image is correct but simply too small, adjust the viewport or scaling mode. These are different problems with different fixes.
- Stretched objects: restore aspect preservation.
- Cropped HUD: undo zoom or inspect overscan and viewport settings.
- Shape changes between scenes: check the game component before changing the global display mode.
- Correct shape with side bars: usually leave it alone.
When a widescreen patch is reasonable
A documented per-game widescreen patch can be a sensible choice when the user values a wider composition and accepts that it is an alteration. It is more defensible than a universal stretch because it may adjust camera behavior or game calculations for a particular title. PCSX2’s patch documentation makes the distinction important: patches are targeted code modifications, not merely output-window settings.
The tradeoff is that a patch can have version-specific limitations. It may move or leave HUD elements, expose geometry outside the original camera design, affect culling, or behave differently across regional releases and emulator versions. A community modification also changes what should be compared with original screenshots and guides.
Use a patch when you understand what it changes and can disable it without losing the original configuration. Keep the unmodified 4:3 setup available, especially for games whose menus, videos, and gameplay use different layouts. The goal is not to reject enhancements; it is to describe them accurately and choose them deliberately.
A good patch should answer more than “does the game fill the screen?” Check whether it preserves circles, expands the camera rather than merely stretching the image, keeps interface elements usable, and works with the specific game revision. If those questions cannot be answered, the original aspect-preserving setup is the safer choice.
- Prefer documented, game-specific modifications over global stretching.
- Keep an unmodified configuration for comparison.
- Check version, region, HUD, menus, videos, camera framing, and scene edges.
The final rule: preserve the picture before filling the screen
Black bars are often the visible cost of keeping an old game’s geometry honest. A 4:3 image on a 16:9 display will not fill the screen without either unused space, cropping, or distortion. Of those choices, side bars are usually the safest starting point because they preserve the complete composition and keep circles circular.
Then investigate exceptions. Shadow of the Colossus demonstrates why a native widescreen mode deserves separate treatment. Super Mario 64 demonstrates why an original 4:3 baseline should not be rewritten as native widescreen. The Wind Waker demonstrates why an emulator enhancement should remain clearly labeled as an enhancement. Once those categories are separated, resolution, integer scaling, filtering, and patches become manageable choices instead of guesses.
The most reliable setup process is therefore conservative: establish the original game’s display shape, preserve it, check for cropping, and only then decide whether you want a sharper image, softer filtering, a CRT-style shader, or a documented widescreen modification. Each choice should solve a specific problem rather than being used to chase a larger number or a completely filled monitor.
- Preserve proportions before pursuing full-screen coverage.
- Use documented native modes when the game provides them.
- Treat patches and emulator hacks as optional alternatives, not evidence about the original release.
The best-looking retro setup is not necessarily the one with the fewest black pixels. It is the one that keeps the active picture correctly proportioned, avoids unwanted cropping, and makes any enhancement clear. Start with circles, faces, characters, and HUD placement; then adjust resolution and pixel treatment.
If the bars are symmetrical and the game looks natural, they are probably preserving the image rather than revealing a failure. Leave them in place unless a native widescreen option or a documented per-game modification gives you a deliberate reason to choose something else.