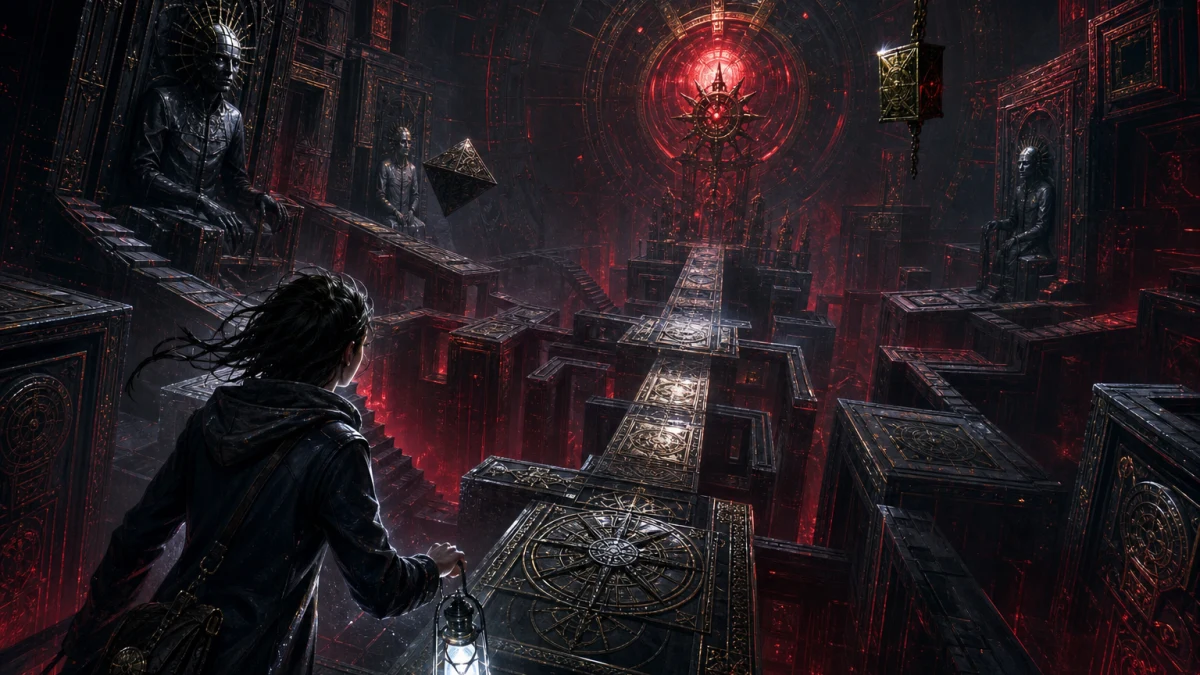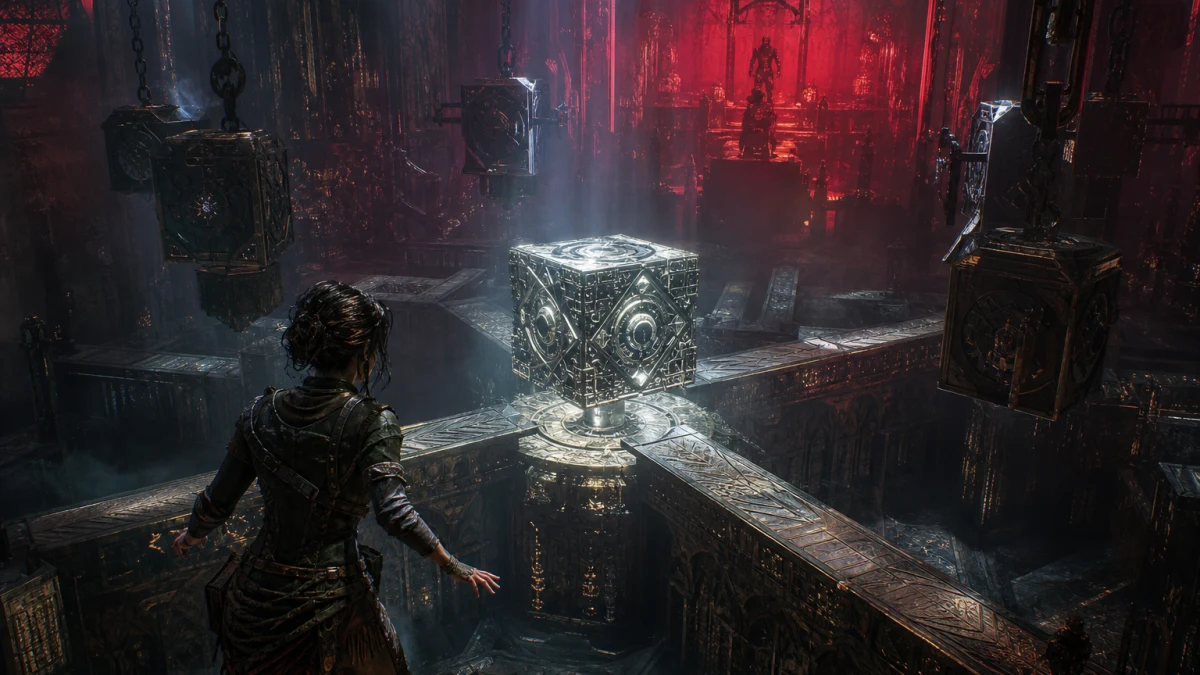
Clive Barker’s Hellraiser: Revival released on October 8, 2026 for PlayStation 5, Xbox Series X|S, Nintendo Switch 2 and PC through Steam. Its Genesis Configuration is more than a story object carried between encounters. The transforming box enables supernatural attacks, draws upon a combat resource called Suffering, manipulates parts of the environment, changes shape to fit mandatory locks and remains central to the campaign’s supernatural conflict.
Those functions share an object and visual identity, but they do not all obey the same rules. A full Suffering gauge does not make every prop movable. Fire may be ammunition, a traversal tool, a puzzle clue or decorative scenery. A Configuration lock may require both halves of the box to be selected and rotated independently. Another apparatus may remain unusable until a missing physical component is installed. Apparent repetition can even be intentional Labyrinth logic rather than a broken trigger.
This reference explains how to distinguish those situations without publishing exact room answers. It contains light mechanical and progression spoilers concerning named powers, Configuration locks, Suffering Pillars, saving and one-way progression. It does not reveal completed lock silhouettes, keypad codes, item-by-item routes, late bosses, endings or the answers already handled by Joking Joystick’s dedicated Private Rooms and Well puzzle guides.
Evidence note: Research was independently checked through October 10, 2026. Official sources confirm the October 8 release date, platforms, single-player first-person format, offline support, ordinary weapon categories, named Configuration powers, executions as a Suffering source, environmental manipulation, hostile groups seeking the box and developer-demonstrated puzzle examples. Shape-lock counts, Suffering Pillars, the blue gauge, damage-based Suffering gains, autosaves, inaccessible areas, objective-based campaign organization and the absence of chapter select rely on specialist release-build testing. Exact ability costs, refill values, capacity increments, damage statistics, ranges, cooldowns and unrestricted manual-save conditions were not reliably documented and are not asserted. No official final-game patch changelog was located by the research cutoff.
What This Guide Covers—and What It Deliberately Leaves Out
Hellraiser: Revival is a released single-player, first-person action-horror game, making this a post-launch systems reference rather than a speculative preview. Official descriptions establish the Genesis Configuration’s intended combat and puzzle functions. Specialist release-build testing fills in details about its interface, Suffering meter, permanent upgrades and campaign structure. Those evidence layers are kept distinct because promotional demonstrations can explain design intent without documenting every condition found in the public game.
The central purpose is diagnosis. When the box appears relevant, the useful question is not immediately which exact answer should be entered. It is what role the box is performing. It may be supplying a combat power, consuming a resource, controlling a mechanism, creating a geometric key or completing a larger puzzle whose prerequisite has not yet been found. Correctly identifying that role usually eliminates more wasted experimentation than copying an isolated solution.
Exact solutions are intentionally outside the scope. This guide does not reproduce the completed outlines for the five Configuration locks documented in specialist testing. It does not list the blocks required by the Private Rooms or Well puzzles, disclose keypad combinations, identify every prerequisite item or convert the campaign into a room-by-room route. Hypothetical notches and projections appear only to teach the interface’s underlying grammar.
The same boundary applies to ordinary combat. Firearms and melee weapons remain important, but weapon rankings, crafting priorities and general ammunition management belong in Joking Joystick’s separate combat guide. They are discussed here only where they interact directly with the Configuration. Suffering Pillars receive similar treatment: this article explains why they matter and how to verify their activation, while the completion roadmap owns their exact locations.
The game’s supernatural box is specifically called the Genesis Configuration. Calling it the Lament Configuration imports a different name from wider Hellraiser mythology and can make searches, prompts and troubleshooting less precise. Revival gives its device a distinct name and an unusually broad mechanical identity.
The progression discussion becomes more explicit later. Specialist completion testing reports five Suffering Pillars, five mandatory shape locks, no chapter select and areas that close after story advancement. Those details are mechanical spoilers rather than narrative revelations. No boss identity, ending, late-game bargain or exact power-unlock objective is disclosed.
This reference reflects evidence available through October 10, 2026. Saber recommends downloading current patches, but no official final-game patch changelog was located by that cutoff. If an installed update changes an interface, prompt or save restriction, current in-game behavior takes priority over launch-period documentation.
Dedicated solution articles and this guide serve different needs. A room walkthrough can identify a missing object or provide a finished answer when a player wants direct help. This systems reference explains why that answer works, how the same principles recur elsewhere and what should be checked before leaving an area permanently.
- Use this guide for systems, puzzle grammar and safe progression rather than copied room answers.
- Expect mechanical progression details but no ending or boss spoilers.
- Distinguish official design information from specialist release-build testing.
- Use the name Genesis Configuration when checking objectives, prompts and support material.
The Genesis Configuration’s Five Connected Roles
The clearest mental model divides the Genesis Configuration into five connected roles. First, it is a source of supernatural combat power. Telekinesis, Pyrokinesis and Hell Chains are verified capabilities associated with it. Their existence does not make the box an unlimited weapon, because availability depends on Suffering, environmental support and the interface presented in the current encounter.
Second, the Configuration is a consumer of Suffering. The blue lower-left gauge identified through release-build testing represents the current supernatural reserve. Combat can replenish that reserve, while Configuration attacks spend it. The resulting loop links ordinary aggression, executions and supernatural opportunity without making every action follow an identical exchange rate.
Third, the box manipulates the environment. Official material shows it interacting with fire, objects, machinery and sections of the Labyrinth. Some environmental effects resemble combat powers, but resemblance does not guarantee identical controls. A movable puzzle block may follow an authored contextual path rather than behaving like a Telekinesis projectile.
Fourth, the Configuration becomes a shape-changing key. Specialist testing documents five dedicated locks required for story progress. Each half can be adjusted independently, with configuration selection determining geometry and rotation determining orientation. This is a geometric interface, not a test of combat resources.
Fifth, it is a narrative stake sought by hostile groups. Official material identifies both the Scarlet Church and the Unworthy as pursuing the Genesis Configuration for their own purposes. Its possession and contextual availability are connected to campaign events. If a function is absent during a particular story state, that does not immediately establish a bug or a depleted meter. Objectives and current prompts matter alongside the physical surroundings.
These roles overlap, but they should not be collapsed. Suffering powers combat actions; the evidence does not establish that every story lock charges the same gauge. Pyrokinesis can affect enemies and environmental targets, yet not every flame is recognized. Hell Chains belong to the Configuration’s offensive identity, but official documentation does not fully define whether every chain appearance uses the same selectable interface.
A useful diagnostic model has four layers. The resource layer asks whether sufficient current Suffering is available. The context layer asks what the room supplies: eligible projectiles, active fire, machinery or a contextual prompt. The form layer concerns the two halves and their receiving silhouette. The campaign layer asks whether the objective and story state currently permit the interaction.
Each layer communicates through different feedback. Combat uses the HUD, targeting recognition and enemy response. Shape locks use their receiving boundary and two-part interface. Environmental puzzles communicate through moving architecture, altered hazards and newly exposed routes. Campaign conditions are best checked through objectives, contextual prompts and save-file position.
The box’s visual presence therefore indicates relevance, not necessarily method. Its appearance beside a slot points toward geometric transformation. Its availability near a flame suggests a power relationship. Its use at a pedestal may activate an entire room. Mastery begins with identifying which system is active before attempting to solve it.
- Combat source: Telekinesis, Pyrokinesis and Hell Chains.
- Resource consumer: supernatural attacks use Suffering.
- Environmental controller: objects, mechanisms and routes can respond to it.
- Transforming key: two independently manipulated halves create one silhouette.
- Narrative stake: hostile groups seek the box, and availability can depend on campaign state.
The Box Does Not Replace Your Other Hand
Official descriptions place the Genesis Configuration alongside ordinary melee and ranged weapons. That language defines its combat role. The box expands Aidan’s options but does not erase the practical need for conventional attacks. Its regular demonstrated powers are strongly context-sensitive: Telekinesis needs an eligible object, Pyrokinesis needs recognized fire and Hell Chains are presented as a major destructive capability rather than constant background firepower.
Ordinary weapons consequently provide the reliable fallback when the room does not support a useful Configuration action. A suspended blade, rail spike or available fire source may justify supernatural expenditure. An arena containing only decorative clutter may not. Refusing to force the box into an unsupported situation is correct system use, not a failure to engage with the game’s signature mechanic.
Official PlayStation material illustrates this dual-hand design with R2 for an earthly weapon and L1 for a Configuration action. Those inputs are PlayStation-specific examples. They should not be projected onto Xbox Series X|S, Nintendo Switch 2 or PC, and rebinding or accessibility settings may change them even on PlayStation 5. The installed control display remains authoritative.
The two categories of attack can create a cycle. Independent release-build testing reports that inflicting damage replenishes Suffering, while official material specifically identifies executions as a way to gather it. Recovered Suffering can then fund a supernatural action that changes the next stage of the encounter. This is a relationship between systems, not proof of one fixed return for every hit or execution.
The correction matters because executions are not the only released-game refill behavior reported by established testing. PowerPyx’s release-build coverage reports that damaging enemies restores Suffering, and GameWatcher independently describes the meter filling through damage. Executions remain the clearest officially named source, but a post-launch guide should not imply that only executions move the gauge.
No reliable source retrieved for this article establishes exact per-hit gains, execution bonuses, difficulty modifiers or universal refill rates. Watch the actual blue gauge rather than planning around an undocumented number. Different attacks may produce different practical results, and future patches could adjust the economy without changing its broad loop.
A Configuration action does not need to finish an encounter to be useful. It may remove a dangerous enemy, interrupt pressure or create room for an ordinary weapon. Conversely, conventional attacks can preserve Suffering when the environment offers no strong supernatural target. The systems are complementary rather than competitors for exclusive use.
Think of encounters in phases. The opening may present a conspicuous projectile or fire source. The middle may favor dependable weapons after that environmental opportunity disappears. Damage or an execution may then restore enough Suffering for another supernatural decision. Reassess the arena instead of choosing one tool for the entire room.
This article does not rank firearms or melee options because those details would duplicate separate combat coverage. Its narrower rule is sufficient: use the Configuration when the current environment, target and reserve support it; return to ordinary weapons when they do not.
- Keep conventional weapons as the dependable fallback.
- Use Configuration powers where the environment creates a clear opportunity.
- Remember that released-game testing reports Suffering gains through damage, while executions are officially confirmed.
- Treat PlayStation button examples as platform-specific.
- Reassess after each major action because environmental opportunities can disappear.
How Suffering Powers the Configuration
Suffering is the resource associated with the Genesis Configuration’s supernatural combat capabilities. Release-build testing identifies it as the blue gauge in the lower-left portion of the HUD. Official material confirms executions as a method of gathering Suffering, while independent specialist testing reports that damaging enemies also fills the meter. The latter is released-game evidence rather than an official numerical specification.
Current Suffering and maximum Suffering are separate values. Current Suffering is the reserve available to spend. Maximum capacity is the amount the meter can hold. Specialist completion testing reports that Suffering Pillars permanently increase the maximum. They are therefore progression upgrades rather than ordinary one-time refills.
That distinction prevents two common misunderstandings. Refilling the current meter through combat does not permanently enlarge it. Activating a Pillar can enlarge the meter without proving that its new space will always be filled automatically. When checking an upgrade, inspect the maximum boundary and completed interaction rather than asking only whether the blue portion looks full.
A larger reserve improves flexibility without proving any increase to individual power damage. It can allow Aidan to carry more Suffering between engagements or retain another supernatural option after one expenditure. The amount added by each Pillar and the exact costs of powers were not reliably documented, so no numerical breakpoint should be assumed.
Environmental opportunity should influence spending. If an arena visibly contains several recognized sharp objects or an active flame beyond the first enemy, emptying the gauge immediately may remove a useful later option. Scan the broader space before committing the reserve to a manageable opening threat.
The opposite extreme is also unhelpful. A full meter produces no benefit if it is preserved through a lethal situation. Spend when the relationship between source, target and position is strong. Preserve Suffering when no recognized object, flame or high-impact action is available and ordinary weapons already provide control.
Damage-based replenishment makes the economy more fluid than an execution-only model, but it does not justify careless assumptions. The evidence does not establish that every point of damage yields the same amount, that environmental damage always counts identically or that Suffering regenerates passively. Observe the gauge during the installed version’s encounters.
Executions are a confirmed part of the refill loop, but their positioning cost still matters. Pursuing an execution through an exposed lane may create more danger than its resource return resolves. The meter is one consideration alongside health, enemy placement and escape routes.
Do not diagnose every failed Configuration interaction as insufficient Suffering. Shape locks, contextual mechanisms and prerequisite puzzles can involve the box without following the regular combat economy. A rejected silhouette usually calls for geometric analysis. An incomplete structure calls for exploration. A silent pedestal may depend on objective state.
After activating a permanent upgrade, remain long enough to verify it. Seeing a Pillar is not the same as completing its interaction. That difference becomes important because specialist testing reports no chapter select and areas that can become inaccessible.
A practical Suffering reading consists of three questions: how much is available, what credible opportunities can restore it and what supported action would spend it well? Damage and executions belong in the second category, but exact future gains should not be presumed. Recognized projectiles, fire and clearly available Hell Chains belong in the third.
Capacity upgrades alter the margin for error without changing that decision process. More room in the gauge does not make decorative props interactive, establish lower costs or turn a weak target relationship into a strong one. Continue reading the arena rather than treating the larger meter as an undocumented power increase.
- Blue gauge: current spendable Suffering.
- Combat damage: reported by independent release-build testing to restore Suffering.
- Executions: an officially confirmed source of Suffering.
- Pillars: permanent maximum-capacity increases.
- Do not invent costs, refill values, passive regeneration or upgrade percentages.
Telekinesis: Read the Arena Before Spending
Telekinesis is a verified Genesis Configuration power. Official material shows it launching environmental objects such as saw blades and rail spikes at enemies. Its tactical identity therefore depends on what the arena supplies rather than an abstract inventory of supernatural projectiles.
The first Telekinesis action should be observation. Look beyond the nearest enemy for conspicuously positioned sharp or heavy objects. Industrial machinery and exposed materials may suggest candidates, but appearance alone is insufficient. Target recognition, a prompt or another clear interface response is better evidence that a prop is eligible.
Not every loose-looking object can be thrown. Decorative clutter may share textures with usable scenery, and puzzle pieces may follow bespoke interactions rather than combat targeting. If a candidate remains inert after a safe angle adjustment, stop treating it as guaranteed ammunition and return to another option.
Positioning matters even without verified range or damage statistics. Consider the line connecting Aidan, the object and the intended target. A promising projectile may be blocked by architecture or require dangerous exposure to acquire. A modest lateral move can create a better relationship, but a long sprint through enemy pressure may erase the benefit.
Line of sight is practical guidance rather than a claim about every collision rule. If the interface recognizes an object from one angle but not another, use that feedback. If it never responds, the limitation may be eligibility, puzzle state or story context rather than an invisible range threshold.
Object placement can affect target priority. An enemy standing beside a recognized blade or spike may become a better supernatural target than a closer isolated opponent. That does not make repositioning automatically safe. Health, cover, additional enemies and the escape route still determine whether the opportunity is worth pursuing.
Eligible environmental weapons may also be finite within an encounter. Once launched, an object may no longer support another use. If the first enemy is easily controlled with ordinary attacks, preserving an obvious projectile for a more dangerous threat can be sensible. No verified damage table supports a universal ranking based on size or material.
After using Telekinesis, rebuild the room model. The source may be gone, enemies may have moved and damage may have restored some Suffering. A second use should be based on the new state rather than a reflexive repetition of the first successful action.
Combat Telekinesis and environmental manipulation share the same supernatural theme but should not be assumed to use identical rules. A block that moves along a prescribed puzzle relationship is not proof that every block can be hurled freely. A control mechanism may respond contextually without becoming a combat target.
Mixed rooms make that distinction especially important. If an object responds through the combat targeting state, evaluate it as a weapon. If it moves only from a fixed puzzle position or after a prescribed interaction, treat it as part of the mechanism. Trust the interface over visual resemblance.
Scanning should be brief and purposeful. The goal is to identify one or two credible object-to-target relationships, not to catalogue every prop while under attack. If searching exposes Aidan longer than the likely projectile would save, ordinary combat is already the better answer.
Telekinesis is strongest as a contextual decision: recognized object, useful target, workable line and justified expenditure. If one of those elements is absent, preserve the option for a room that actually supports it.
- Scan the arena before spending Suffering.
- Use interface recognition rather than appearance to confirm eligibility.
- Consider the object-to-target line and the exposure needed to create it.
- Remember that usable environmental projectiles may be finite.
- Separate combat Telekinesis from bespoke puzzle-object movement.
Pyrokinesis: Fire Is Both Ammunition and a Clue
Pyrokinesis is a verified Configuration power that absorbs available fire and redirects it toward enemies or parts of the environment. The phrase available fire defines its contextual nature. It should not be treated as an unlimited projectile that can be created in every room.
When Pyrokinesis appears relevant, inspect active lamps, braziers and other visible flames. These are candidate categories, not a promise that every example is interactive. A recognized targeting state or contextual prompt remains more reliable than color, brightness or real-world assumptions about combustibility.
Fire performs two visual roles. In an encounter it may be supernatural ammunition. During exploration it may identify a mechanism, obstruction or destination. Read the rest of the scene before acting. Hostile positioning may suggest combat use, while an unlit fixture, blocked route or aligned apparatus may indicate a puzzle relationship.
Specialist testing describes an early sequence involving transferred fire and movable blocks. The broader lesson is that Pyrokinesis can be one element in a chain rather than a complete solution. A fire source, movable component, destination and opened route may all need to align.
Think in terms of source and destination. First find a flame the game recognizes. Then identify an enemy or environmental target that the interface supports. Finally, consider whether another mechanism must be moved before that transfer becomes useful. This structure is more reliable than firing at every object that appears flammable.
Enemy grouping and route shape are reasonable qualitative considerations, but the evidence does not establish a universal spread radius, burn duration or damage-over-time formula. It also does not establish immunity based on appearance. Read the actual enemy response rather than importing elemental assumptions from another game.
The same restraint applies to scenery. Wooden surfaces, cloth, pools and containers are not automatically combustible. Their appearance can justify inspection but cannot establish interaction. If the interface provides no recognition, forcing repeated inputs is unlikely to reveal a hidden universal fire system.
If only one obvious source is present, inspect the wider room before using it. The flame may support an enemy attack, an environmental transformation or a later stage. Do not presume that it is infinitely reusable or permanently consumed until the current interaction demonstrates its state.
After transferring fire, observe the source and destination. A continuing flame may support another use. A changed or extinguished source may alter the remaining plan. Those observations describe the present room; they should not be converted into a rule governing every fire source in the campaign.
In combat, positioning still matters. A recognized source beside a safe route is easier to exploit than one requiring Aidan to stand in a choke point. If the setup costs more safety than the likely result provides, an ordinary weapon is preferable.
Color can direct attention but is not a sufficient test. Display calibration, accessibility options and environmental lighting may change how conspicuous a flame appears. Interaction feedback is the firmer boundary between usable source and scenery.
A failed Pyrokinesis attempt should produce a category check: active recognized source, supported destination, current Suffering and correct interaction mode. If those conditions are absent, do not conclude that the entire power is malfunctioning.
- Locate an active source the interface recognizes.
- Decide whether fire supports combat, traversal or a multi-stage puzzle.
- Identify the destination before committing the source.
- Do not assume universal combustion, spread, duration or immunity rules.
- Observe how the source and destination change after the transfer.
Hell Chains: Treat the Spectacle as a Finisher-Level Resource
Hell Chains are an officially verified offensive capability associated with the Genesis Configuration. Official language frames them as an especially destructive expression of the box’s power. That establishes their broad identity, but it does not document every activation condition, resource cost or interface state in the released game.
Released-game reporting places their availability later than the introductory powers. This guide does not name an exact objective because that detail is unnecessary for a broad systems reference and would add avoidable progression spoilers. The game also organizes progress around named objectives rather than conventional chapter labels.
The official emphasis on ultimate destruction should be interpreted as role and presentation, not an undocumented mathematical guarantee. It does not prove that Hell Chains kill every target, ignore encounter rules or always outperform environmental powers. Treat them as a major option whose value must still be judged in context.
An important interface boundary remains uncertain. The available official material does not fully establish whether Hell Chains always occupy the same selectable structure as Telekinesis and Pyrokinesis, whether some appearances are contextual or how bespoke prompts differ from ordinary use. The installed HUD and tutorial should decide that question during play.
A dedicated prompt may represent an opening authored for one encounter. It need not share the targeting rules, Suffering cost or repeatability of a normal selectable action. Seeing chains during a dramatic sequence therefore does not establish unrestricted manual access in every later room.
When the game clearly offers Hell Chains as an active combat choice, evaluate them against the current threat, remaining encounter space and available alternatives. A powerful-looking option may still be unnecessary if ordinary attacks already control the room. In a severe pressure state, preserving Suffering merely for its own sake can be equally wasteful.
Calling the ability finisher-level is a strategic description, not a claim about a formal execution category. It means the option deserves a proportionate target and clear expected benefit. The label does not imply a verified health threshold, guaranteed kill or fixed number of affected enemies.
Do not infer a universal cost or cooldown from one use. A tutorial, set piece, selected difficulty or future patch may affect its presentation. Watch the actual gauge and interface in the installed build rather than relying on a remembered value from another encounter.
Not every visible chain is necessarily a player-controlled power. Chains are part of Hellraiser’s supernatural visual language. The relevant distinction is whether the game exposes an actionable prompt, selectable state or authored event. Spectacle alone does not establish direct control.
If Hell Chains appear in a normal selectable mode, treat them as part of the Suffering economy. If they appear only through a dedicated prompt, treat that use as contextual until the game proves otherwise. This simple distinction prevents a memorable set piece from creating false expectations.
The safest strategy is neither constant hoarding nor automatic activation. Verify that the option is genuinely available, identify whether it is standard or contextual, and spend when its expected impact justifies surrendering other Configuration possibilities.
That conclusion preserves what the evidence supports without inventing a cost, cooldown, range, target limit or unrestricted activation rule.
- Hell Chains are a verified offensive Configuration capability.
- Official presentation marks them as a high-impact option.
- Do not assume every chain animation is unrestricted player-controlled use.
- Follow the installed HUD and prompts for availability.
- Avoid unsupported claims about exact cost, cooldown, range or unlock timing.
A Practical Power-Selection Decision Tree
Begin by confirming that the current situation is actually combat. A receiving slot, control pedestal or fixed environmental interaction may involve the Configuration without requiring combat-power selection. This first distinction prevents wasted Suffering analysis when the real issue is geometry, machinery or an absent prerequisite.
In combat, inspect what the arena provides. A recognized sharp or heavy object makes Telekinesis a candidate. An active recognized flame with a useful target makes Pyrokinesis a candidate. A clearly available Hell Chains option becomes relevant when the encounter’s pressure justifies a major supernatural response.
Next evaluate position. A projectile that can be acquired from cover is preferable to one requiring a run through open space. A fire source beside a safe lane is more practical than one inside a choke point. A strong power relationship can still be a poor choice if establishing it creates disproportionate risk.
For Telekinesis, ask whether the object is eligible, whether the path to the target is plausible and whether the target matters enough to justify expenditure. If recognition disappears or the line becomes obstructed, switch tools rather than forcing the original plan.
For Pyrokinesis, confirm both source and destination. Fire without a recognized target is merely a visual clue. A supported destination without an active source cannot complete the relationship. In a mixed puzzle room, determine whether the transfer serves combat or the environment before committing it.
For Hell Chains, identify the activation mode first. A normal selectable state can be judged as a resource decision. A bespoke prompt should be treated according to that encounter’s context. In either case, the expected result should match the apparent importance of the option.
If none of those branches has environmental support, preserve Suffering and use ordinary weapons. This fallback is built into the game’s complementary arsenal design. The Configuration does not need to be used merely because the gauge contains some resource.
Damage dealt during conventional combat can rebuild the gauge according to independent release-build testing, and executions are officially confirmed as a Suffering source. That means falling back to ordinary attacks can also prepare a later supernatural decision. Exact returns remain undocumented, so monitor the meter rather than assuming a fixed recovery plan.
Consider what remains in the room. Spending on the first manageable enemy may remove a stronger later opportunity. Hoarding through immediate lethal pressure is no better. The correct choice depends on visible threats, credible environmental support and the current reserve.
After any supernatural action, reassess. The object may be gone, the flame may have changed, enemies may have repositioned and combat damage may have restored part of the gauge. The decision tree loops after each meaningful state change.
Outside combat, replace power selection with puzzle classification. A silhouette calls for shape matching. Moving architecture calls for observation. Repeated space calls for perspective testing. An incomplete structure calls for retrieval. A safe or picture lock calls for conventional clues.
A compact version uses five questions: Is this a combat interaction? Is a source recognized? Can it reach a valuable target safely? Is Suffering available? Is this better than using an ordinary weapon or preserving the reserve? An early no is a reason to take the fallback, not repeat an unsupported input.
- Classify combat versus puzzle before selecting a power.
- Confirm an eligible object, recognized flame or genuine Hell Chains opportunity.
- Compare positional risk with likely benefit.
- Use ordinary weapons when the environment does not support the box.
- Reassess after every supernatural action or significant enemy movement.
Three Families of Genesis Configuration Puzzles
Genesis Configuration puzzles fall into three useful families: shape-key locks, mechanical transformations and traversal transformations. The categories are diagnostic rather than absolute. Revival can wrap prerequisite searches, environmental powers and navigation around one central interaction, creating a sequence that moves from one family to another.
Shape-key locks ask the player to transform the Configuration until its combined exterior matches a receiving silhouette. Specialist release-build testing documents five dedicated locks and describes them as mandatory story gates. Their exact completed shapes are omitted here so this systems guide does not duplicate direct solution coverage.
The defining feature of a shape lock is that the answer resides in the geometry of the box. Each half can be adjusted separately. Selecting a configuration changes a half’s underlying form; rotating it changes the direction that form faces. Progress comes from comparing the combined outline with the receiver.
Mechanical transformations use the Configuration to influence a larger apparatus. The official giant-wheel demonstration is the clearest example: box input rotates a mechanism that realigns narrow walkways through a hazardous chamber. Here, the box acts as a control while the room displays the output.
That family requires observation after activation. The important question is not whether the box itself looks correct but which platforms, wheels, hazards or sightlines changed. A successful input may create an unhelpful state, an optional route or the required path.
Traversal transformations alter relationships between spaces, particularly in the Labyrinth. A route may open, connect or appear from a different perspective. The Configuration can initiate the transformation without completing the navigation problem. The player may still need to reverse direction, inspect a new sightline or identify a safe branch.
Mechanical and traversal families overlap. A mechanism may move architecture specifically to create a route. The functional distinction concerns the next reasoning step: first determine what the device changed, then determine how that state can be traversed.
Prerequisite-object puzzles can surround any family. Official material shows a structure requiring a missing statue component before the box can serve as the matching key. In that case, no amount of rotating the Configuration will substitute for finding the absent physical piece.
Visible incompleteness is the strongest clue. An empty recess, broken assembly or unmatched component suggests retrieval. Once the object is installed, the puzzle may move into shape matching or environmental activation. Re-examine the apparatus after every prerequisite stage.
Some sequences combine powers with movable elements. Specialist testing describes an early transferred-fire and block sequence, demonstrating that environmental use extends beyond silhouettes. The relevant lesson is dependency: source, movable object, destination and route may need to be handled in a particular conceptual order.
Mixed puzzles are easiest to understand as verbs: retrieve, configure, activate, observe and traverse. Not every room uses all five, and the developers have confirmed that some puzzles permit more than one solution. Nevertheless, identifying the current verb stops the player from solving a future stage before the present one exists.
A common error is remaining in shape-matching mode after the lock has accepted the Configuration. Acceptance may end the geometry problem and begin the room-state problem. Watch the environment instead of continuing to manipulate the box.
The reverse error is studying every distant platform while the immediate control still displays a receiving silhouette. If the interface isolates both halves and outlines a slot, complete the local geometric gate before trying to infer the room’s final route.
Official material distinguishes puzzles with binary outcomes from puzzles allowing multiple solutions, but it does not identify every flexible case. Do not assume all shape locks accept approximations, and do not assume every environmental chamber has only one useful arrangement.
Visual emphasis helps select a starting family. A prominent silhouette suggests shape matching. A control overlooking moving architecture suggests mechanical transformation. Spatial discontinuity or rearranging corridors suggest traversal. An incomplete structure suggests retrieval.
A successful interaction is not always a completed puzzle. A lock can accept the box and activate machinery without immediately exposing the final exit. A room can enter a valid state that reveals an optional branch instead of the main objective. Inspect the result before deciding what remains.
- Shape lock: match the combined outline.
- Mechanical transformation: identify what the apparatus moved.
- Traversal transformation: find the route created or revealed.
- Prerequisite puzzle: recover or position the missing component.
- Mixed puzzle: identify the current stage before attempting the next one.
How to Read a Shape-Key Lock
Treat a shape-key interface as four elements: the receiving silhouette, the Configuration’s first half, its second half and the final combined boundary. Because the halves can be manipulated independently, systematic isolation is more reliable than changing both after every rejection.
Study the receiver before touching the box. Trace its outer edge and identify large landmarks: long flat sides, deep notches, projecting corners, unequal widths, sloping sections or near symmetry. Broad proportions eliminate more incorrect forms than decorative details.
Choose one distinctive region and decide which half must create it. If the receiver has a hypothetical stepped outer edge, begin with a configuration containing a step. Do not worry about its direction until the required geometry is present.
Once a plausible form is selected, rotate it until its landmark faces the correct way. Keep the other half stable during this test. If one side aligns convincingly, preserve it and move to the unsolved half rather than resetting the entire object.
The center seam matters, but the outer perimeter remains the primary comparison. Two halves can look individually plausible while combining into the wrong overall width or producing an incorrect central recess. After solving each side locally, assess the complete silhouette again.
Negative space can be easier to read than the ornate solid box. A narrow gap around part of the receiver implies that the corresponding edge must remain narrow. A broad pocket implies a projection. Looking at the empty boundary reduces distraction from surface decoration.
Symmetry can reduce the search space. If the receiver is broadly mirrored, begin with forms capable of producing that balance. Then use a small asymmetrical notch to determine orientation. Do not assume perfect symmetry merely because the first impression appears balanced.
Reject impossible forms before testing rotations. If a form remains uniformly narrow, it cannot create a receiver’s wide base regardless of how it is turned. If it lacks a required diagonal or notch, orientation cannot manufacture one.
A hypothetical receiver might have a broad lower section, narrow upper extension and right-side notch. First choose a form capable of producing the broad-to-narrow transition. Then select one containing a notch. Only after those features exist should rotation place the notch on the right.
Another hypothetical slot might look symmetrical except for a shallow projection on its upper-left edge. Begin with the overall symmetrical family, then use that projection to resolve which orientation is correct. Starting with the smallest feature would make the larger relationship harder to preserve.
Verbal labels can help retain progress. Think of a solved half as wide base with outward notch, or narrow top with flat outside edge. That description is easier to reconstruct than a vague memory of a visually complex state.
If the combined outline appears correct but is rejected, inspect subtle edge direction, overall width and the center join. Also check whether the receiving apparatus is physically complete. Correct geometry cannot replace a missing statue component or other prerequisite.
Avoid uninterrupted brute force. Test one plausible form through its meaningful orientations, record the result and then change form if necessary. Randomly altering both halves destroys information and makes repeated states feel new.
The receiver should remain the reference throughout. The Genesis Configuration’s ornamentation may make one state look particularly dramatic, but visual spectacle is not evidence of a geometric match. Follow the perimeter.
Do not assume both halves must contribute equal complexity. One may create the receiver’s defining projection while the other supplies a simple supporting edge. Judge each side by the final silhouette rather than an expectation of visual balance.
- Read the receiving silhouette before changing the box.
- Choose the required geometry before adjusting orientation.
- Work on one half at a time and preserve a convincing match.
- Compare outer edges, negative space, width and the center seam.
- Check for a missing prerequisite if the apparatus remains incomplete.
Configuration Versus Rotation: The Most Important Distinction
Configuration selection and rotation perform different jobs. Configuration changes a half’s underlying geometry. Rotation changes the direction in which that geometry faces. In simple terms, one chooses the piece and the other turns it.
Imagine a hypothetical half with a deep notch and broad projection. Rotation can move the notch from the upper edge to the side or bottom, but it cannot replace that notch with a diagonal slope. If the receiver requires a diagonal, another configuration is needed.
The reverse error is equally common. If the selected form already contains the required diagonal but points inward, changing configuration abandons correct geometry. Rotation is the appropriate operation because the feature exists and merely faces the wrong direction.
Use one verbal test whenever progress stalls: is the required feature absent, or is it present in the wrong place? An absent notch, projection, slope or width requires another configuration. A correct feature on the wrong edge requires rotation.
Large mismatches usually indicate configuration. If the overall width, contour or proportion cannot fit, orientation alone is unlikely to help. Smaller directional mismatches usually indicate rotation. Correct proportions with a misplaced projection suggest that the chosen geometry should be retained.
Once one half aligns, leave it untouched. Exhaust meaningful rotations of a plausible form on the other half before cycling to another geometry. A consistent order turns each rejection into useful information and prevents accidental returns to previously discarded states.
The interface itself can create errors. Before making a change, confirm which half is selected and which operation the prompt controls. If the expected side does not move, the issue may be input focus rather than geometric reasoning.
A three-level diagnosis is useful. Wrong overall dimensions point toward the wrong configuration. Correct dimensions with features on the wrong edges point toward rotation. Correct outer edges with a bad center join point toward two individually plausible forms that do not make the correct pair.
Visual closeness is not proof. A nearly fitting shape can still use the wrong form if one projection can never occupy the required edge. Conversely, a correct form may look completely wrong until rotated into the receiver’s orientation.
A disciplined order is form, orientation, seam and full outline. Select geometry containing the needed feature, rotate it into place, inspect how it joins the other half and then compare the combined perimeter. When failure appears at one stage, return to that stage rather than randomizing everything.
Rapid cycling can become counterproductive. Passing quickly through forms makes it easy to miss the correct geometry in an incorrect orientation. Pause whenever a candidate contains a major required feature and test its rotations deliberately.
This distinction also supplies a recovery method after an accidental change. Restore the half’s underlying form first, then recover its orientation. Trying to recover both properties through undirected cycling usually creates more uncertainty.
If none of the available forms contains the receiver’s defining feature, reconsider the apparatus rather than assuming an enormous hidden combination. A missing component or incomplete earlier stage may be preventing the genuine shape task from becoming available.
Separating configuration from rotation converts trial and error into controlled elimination. Instead of asking whether the whole box is right, determine whether each half has the right geometry, whether that geometry faces correctly and whether the two halves combine properly.
- Missing feature: select another configuration.
- Correct feature on the wrong edge: rotate.
- Incorrect overall dimensions: reconsider the form.
- Correct edges with a bad join: reconsider the pair.
- Change one property at a time and preserve solved work.
When the Entire Room Is the Puzzle Interface
Some Configuration puzzles extend their interface across an entire chamber. The official giant-wheel example links box input to the alignment of narrow walkways through a hazardous space. The pedestal receives the command, but the platforms and hazards communicate whether the resulting state is useful.
Establish a baseline before activating the mechanism. Locate Aidan’s starting point, the apparent destination, visible platforms, major hazards and the route back to the control. Without this initial map, movement becomes spectacle rather than evidence.
After each input, pause and identify the output. Which structure rotated? Did a walkway align with the current floor, an intermediate landing or the destination? Did a hazard become exposed? Did a new sightline reveal another control or optional branch?
Do not enter a path merely because something moved. Trace the connection from beginning to end. A walkway can align near the starting ledge while terminating against a wall, sitting at the wrong elevation or crossing an active hazard farther ahead.
If the new state creates no safe route, return to the control where possible. The intended reasoning loop is activation, transformation, observation and traversal decision. Crossing before completing the observation stage makes states harder to compare.
Camera perspective can create false alignments. Move laterally or change elevation before deciding that two surfaces connect. Labyrinth architecture, repeated materials and deep shadows can make separated platforms appear continuous from one angle.
Hazards are not just punishments; they can describe the state. A blade, gap or exposed lane may show that a route remains unusable. This does not mean every hazard has an off switch. Its position simply contributes information about the current arrangement.
Sightlines can be informative even when they do not immediately create access. A transformed room may expose the destination or another mechanism without opening the route. That visual reveal can establish where a later platform must lead.
When several components move together, compare them with fixed landmarks. Doorways, stationary supports and wall ornaments can show which pieces rotated and by how much. Without a stable reference, large transformations may look deceptively similar.
The developers have said some puzzles allow multiple solutions, though they did not publicly identify every example. A room state that does not lead directly to the objective may expose an optional conventional puzzle, supply cache or permanent upgrade. Inspect its practical value before resetting it.
If several controls are present, test one at a time. Activate a control, observe its output and return to a known state before changing another mechanism when possible. Altering multiple systems without examining intermediate results obscures cause and effect.
An accepted Configuration input is not the same as a solved chamber. Animation and sound confirm that the apparatus responded. Only a safe useful route confirms that the resulting state serves the intended purpose.
Optional exploration complicates the word useful. One arrangement may create the main path; another may reveal a side branch. Before advancing, determine whether the alternative state can be explored and whether the control remains reachable afterward.
The box is only the local control surface. In this puzzle family, the true interface consists of architecture, hazards, elevations and routes. Read the entire room rather than staring at the device after it has already accepted the command.
- Survey the starting state before activation.
- Identify exactly which structures and hazards changed.
- Trace a complete route rather than trusting apparent alignment.
- Use fixed landmarks to compare room states.
- Distinguish a responsive mechanism from a useful solution state.
Perspective, Reversal and Apparent Loops
Revival does not always treat forward motion as progress. Official puzzle demonstrations use direction, perspective and repetition to challenge that assumption. The correct conceptual move may be stopping, turning around or revisiting the space just left.
Repeated rooms should be investigated before being dismissed as failed scripting. Compare lighting, objects, openings, sounds and spatial distortions. Repetition creates a controlled comparison, allowing small differences to communicate the room’s rule.
If crossing the same threshold repeatedly produces no progress, test reversal. Turning around is not a universal solution, but it challenges the assumption that the destination must remain ahead. Within the Labyrinth, facing and direction can function as inputs.
Perspective also matters at smaller scales. A symbol may align only from a particular position. A path may hide behind foreground architecture. A mechanism’s effect may become legible only after backing away. Change viewpoint before deciding that nothing happened.
Environmental distortion becomes evidence when it reacts consistently. Ask what preceded the change. Did moving forward reset the room? Did looking away permit a transformation? Did returning expose another opening? A repeatable relationship is more useful than strangeness by itself.
An officially demonstrated Chatterer sequence uses repeated teleportation to encourage route observation. The problem is not simply how to overpower the pursuer. It is where the Chatterer appears, which paths trigger that appearance and which route remains unoccupied.
Map branches as unsafe, clear, untested or dependent on timing. If the pursuer repeatedly appears along one path, that pattern is data. A branch where it does not appear becomes a stronger candidate, though the next transition must still be observed before assuming the rule remains unchanged.
The Configuration can be central to reaching such a sequence without directly solving its navigation. Do not spend Suffering merely because the surrounding space is supernatural. A route puzzle remains a route puzzle unless the interface supplies a valid power relationship.
Test apparent loops methodically. Cross one threshold, note the room state, return where possible and then change direction or viewpoint. Running randomly through several passages makes it difficult to determine which choice altered the environment.
Audio can support visual comparison. A repeated cue at the same threshold may indicate a reset, while a changed sound can mark advancement. Sound should supplement the spatial evidence rather than substitute for it.
Repetition can also accompany a technical fault. A designed loop usually reacts predictably to direction, crossing or observation and contains meaningful differences. If objectives, prompts and scenery remain completely inert after reasonable tests, preserve the save state and reload.
Because no official final-game patch changelog was found by the research cutoff, neither extreme is safe. Do not immediately call every loop a launch bug, but do not experiment indefinitely with an unresponsive state. Test the established puzzle language, then use protected saves for troubleshooting.
A brief observation record prevents circular testing. Note the threshold, facing direction, changed landmark and pursuer appearance. Even a mental sequence such as forward reset, reverse changed lighting and left branch triggered pursuit is more valuable than a vague impression formed under pressure.
During a chase, observation and survival compete for attention. Use safe pauses to identify one variable rather than attempting a complete map at once. The goal is a repeatable viable route, not exhaustive testing of every possible failure.
- Compare repeated spaces before assuming a technical problem.
- Test reversal when continued forward movement only resets the space.
- Change viewpoint to inspect hidden alignment or depth.
- Record where a pursuer appears and which branches remain clear.
- Preserve saves before troubleshooting an apparently inert state.
Recognizing When the Box Is Not the Whole Answer
The Configuration’s prominence encourages players to use it on every obstacle. Revival deliberately includes situations that resist that habit. Some supernatural apparatuses require a missing physical component, while safes, lock-picking devices and picture locks follow separate conventional rules.
Read the obstacle’s visual grammar. A box-shaped receiving outline suggests form matching. A pedestal overlooking moving architecture suggests environmental control. An empty recess, broken statue or incomplete assembly suggests retrieval. A dial, tumbler or picture sequence suggests a conventional puzzle.
Official material demonstrates a missing statue component that must be recovered before the Configuration becomes the matching key. If the receiver is visibly incomplete, searching connected rooms is more productive than endlessly rotating the box.
Traditional clues can appear in diagrams, readable information or nearby visual relationships. Examine them before brute forcing. A diagram may establish orientation, order or correspondence without providing a direct numeric code.
Reward patterns can offer secondary context. Official information says optional traditional puzzles may provide ammunition, crafting materials, upgrades or weapons. Specialist testing describes the five dedicated Configuration locks as mandatory story gates. A side-room safe and a supernatural slot blocking the sole route therefore have different likely functions.
That tendency is not an absolute rule. Conventional interactions can appear along required paths, while supernatural imagery can decorate optional spaces. Objective text, route structure and interface feedback should confirm the classification.
Use four primary questions. Is something visibly missing? Does the input move the environment? Is there a receiving silhouette? Is the obstacle actually a conventional lock? Those answers suggest exploration, room-state observation, geometric configuration or local clue reading respectively.
A fifth question helps with mixed structures: has an earlier stage already altered the apparatus? Installing a component or moving a mechanism may unlock the next interaction. Inspect the object again after each prerequisite rather than assuming the first failed prompt still defines its state.
Interface silence has several possible causes. The object may be decorative, the wrong power may be selected, a prerequisite may be absent or the current objective may not permit interaction. Environmental context narrows those possibilities. An active prompt confirms permission to interact but not the complete answer.
A full Suffering gauge is not a universal key. It cannot supply a missing statue piece or convert a safe into a supernatural lock. The combat resource and contextual puzzle permissions are related through the same box but remain distinct systems.
Search radius should follow evidence. An incomplete assembly suggests nearby connected spaces where its counterpart might be found. A readable diagram suggests examining related objects in the immediate environment. A complete supernatural slot suggests working through the Configuration interface.
A conventional clue can still inform a supernatural mechanism. A diagram may explain orientation before the final box interaction. Classifying the clue as conventional means reading it rather than trying to affect it with Telekinesis or Pyrokinesis.
When an obstacle remains unresolved, record its category instead of merely calling it unfinished. Missing component, shape mismatch, room state unclear or conventional clue unread points toward a next action. Box puzzle is too broad to be diagnostically useful.
Mastery of the Genesis Configuration includes knowing when it is one stage of the answer and when it is not the answer at all.
- Missing component: explore connected spaces.
- Receiving silhouette: manipulate form and rotation.
- Moving architecture: observe the changed room state.
- Conventional lock: inspect local diagrams and readable clues.
- No prompt: check category, prerequisite and current objective.
Suffering Pillars and Permanent Capacity Growth
Progression spoiler: specialist completion testing identifies five Suffering Pillars in the released campaign. Activating each one permanently raises the Genesis Configuration’s maximum Suffering capacity. Their exact locations are omitted so this article remains distinct from the completion roadmap.
Activation is the essential condition. Finding, seeing or walking past a Pillar does not grant the upgrade. Remain at the structure until its interaction and associated feedback have completed. Treat visual discovery and permanent registration as separate milestones.
Verify the result before leaving. Check the maximum capacity rather than only the current blue fill. Interface presentation may vary with settings or patches, so the reliable principle is to confirm that the capacity boundary changed and the interaction remains completed in the active save.
Capacity growth and current refill are separate systems. Combat damage is reported to restore current Suffering, and executions are an officially confirmed source. Pillars increase how much can be held. One fills the existing container; the other enlarges it.
A larger capacity improves tactical flexibility rather than proving a damage increase. It may allow Aidan to carry a larger reserve between encounters or retain another Configuration option after spending. The amount added by each Pillar was not verified, so no percentage or power threshold should be inferred.
The upgrade’s strategic value accumulates across the campaign. It is not merely a reward for the room containing it. Additional reserve capacity changes future resource margins, particularly where several environmental opportunities appear before the player can rebuild the meter.
Specialist testing reports that areas can become inaccessible after story advancement and that the game lacks chapter select. A missed Pillar therefore should not be assumed recoverable through a later cleanup menu. Search optional branches before obvious transitions.
Likely transition warnings include elevators, long drops, major encounter staging and prominent interactions that advance the named objective. These signs do not prove a one-way boundary in every case, but they justify checking whether a nearby Pillar has been fully activated.
Make a manual save before leaving where the current state permits it. Manual saving is documented on PlayStation, but the available evidence does not establish unrestricted saving in every room, animation or encounter. Preserve an older file where multiple slots are available.
If a Pillar appears not to register, confirm three things: the structure was located, its interaction completed and the maximum-capacity increase appears in the active save. Those are different questions. A reload after failure may also return the player to a state before activation.
Do not judge registration solely by whether the current gauge looks full. An enlarged gauge can be partially filled, while a smaller unchanged gauge can be completely blue. Current amount and maximum boundary must be read separately.
The count of five comes from specialist completion testing rather than an official systems manual. Future patches could alter progression behavior, although no official final-game changelog located during research documented such a change.
Pillars should be prioritized over expendable supplies during a pre-transition audit. Missing ammunition can often be mitigated through later play. Missing permanent capacity in a game without chapter select can require loading an older save or beginning another playthrough.
Treat each Pillar as completed only after the permanent benefit is verified. That single habit is more important than memorizing its appearance.
- Five Pillars are reported by specialist completion testing.
- Complete the interaction; discovery alone is insufficient.
- Verify maximum capacity rather than only current fill.
- Do not confuse permanent growth with combat-based refilling.
- Check optional branches before likely one-way transitions.
Safe Progression in a Game Without Chapter Select
Specialist release-build testing reports no chapter-select feature and identifies areas that become inaccessible after story progression. Optional upgrades and puzzle rewards therefore should not be assumed available for post-game cleanup.
The campaign uses named objectives rather than conventional chapter labels. Check the Objectives menu when similar-looking Labyrinth spaces make location unclear. The objective shown on a save file can also identify where that file sits in the campaign more reliably than a visual description alone.
Before following an obvious main route, inspect reachable side branches. Corridors ending in upgrade structures, conventional puzzle interfaces or resource rooms may be optional. Resolve or consciously classify them before committing to a transition that looks difficult to reverse.
Potential warning signs include elevators, long drops, doors that close behind Aidan, narrow transition passages, major encounter staging and prominent interactions that advance the objective. None is universally irreversible, but each justifies a short progression audit.
Prioritize permanent consequences. An unresolved Suffering Pillar or unique upgrade deserves more attention than a small quantity of expendable ammunition. Supplies remain useful, but their absence is usually easier to mitigate than a missed permanent increase without chapter select.
Check whether apparently completed interactions actually registered. A Pillar must increase maximum capacity. A conventional puzzle should deliver its reward. A prerequisite item should alter the apparatus. Visual contact alone is not completion.
Make a manual save wherever the current game state permits it. The PlayStation Store lists manual saving, and specialist testing demonstrates autosaves and fixed save points, but the evidence does not establish that saving is available in every room or encounter state.
Maintain more than one manual file where the installed version and platform permit it. One can preserve the earlier objective before a suspected transition while another records current exploration. This is precautionary advice, not a guarantee that every platform exposes identical slot behavior.
Autosaves are useful recovery points but may occur after a one-way transition. They can return Aidan to the beginning of some encounter spaces, yet that does not mean they preserve access to an upgrade left behind in the previous area.
Check a file’s objective and timestamp before relying on it. If two files show different objectives, retain the earlier one until the later area is confirmed stable and the previous region has been audited.
Record why unresolved interactions remain. Missing prerequisite, optional safe clue not found or shape receiver incomplete gives the issue a useful category. A vague note that one puzzle remains unfinished does not indicate whether more local exploration is worthwhile.
A pre-transition audit should be finite: check the objective, inspect reachable branches, classify unresolved interactions, verify permanent upgrades and create a recoverable save where possible. Once those tasks are complete, move forward rather than repeatedly sweeping the same empty corridors.
Do not assume that a route remains accessible merely because it currently looks open. An objective update can change access without a traditional chapter title or explicit point-of-no-return warning. The named objective is therefore an important campaign marker.
Save files can function as a lightweight route map. Where custom labels are unavailable, timestamps and objective text can distinguish pre-transition, exploration and post-encounter states. Avoid overwriting the only file that clearly predates a major objective change.
If the game refuses a manual save in the current state, do not infer that manual saving is generally absent. Move to a safe supported state, check the menu again and preserve the most recent recoverable file before advancing.
- Check the named objective before major transitions.
- Explore reachable side paths and prioritize permanent upgrades.
- Verify that Pillars and other permanent interactions registered.
- Save where permitted and preserve multiple files when possible.
- Do not rely on chapter select, broad backtracking or guaranteed post-game cleanup.
Saving, Patches and Platform Boundaries
The PlayStation Store lists manual saving, while specialist testing demonstrates autosaves and designated save points in the released game. The available evidence does not establish that a manual save can be created during every encounter, animation or puzzle state. Use the option when available and confirm that the file’s timestamp or objective changed.
Autosaves are recovery tools rather than a complete archive. Some can return the player to the beginning of an encounter space, but an autosave made after a one-way transition may not recover a missed Pillar or optional reward. Do not overwrite the sole earlier manual file until the new area is secure.
An internet connection is not required to play Hellraiser: Revival. Saber nevertheless recommends connecting to obtain current patches. Updating before diagnosing a reproducible progression or stability problem is sensible when connectivity permits.
No official final-game patch changelog was located by the October 10, 2026 research cutoff. Saber expects corrective patches, but that statement is not evidence that any specific reported problem has already been fixed. Demo patch notes must not be represented as final-build notes.
Saber’s FAQ says there are no plans for DLC or content updates while patches for problems are expected. That policy may change, but at publication it distinguishes corrective maintenance from unannounced powers, rooms or campaign expansions.
Control examples must be platform-labelled. The official PlayStation R2 and L1 illustration does not establish Xbox, Switch 2 or PC mappings. Rebinding and accessibility options can also change controls on the same platform. Follow the current on-screen display.
Technical behavior should not be generalized across platforms without evidence. If an interaction remains blocked, record the platform, installed version, named objective, save-file position and last successful action before consulting support.
Troubleshoot by category. No prompt can indicate a missing prerequisite or unavailable objective state. A prompt followed by large-scale movement calls for environmental observation. A rejected silhouette calls for configuration and rotation checks. A questionable Pillar calls for examining maximum capacity.
If a mechanism accepted the box but no useful path appeared, distinguish an unhelpful room arrangement from a technical failure. The machinery may have responded correctly while creating the wrong traversal state. Observe moving parts and attempt a controlled alternate state before reloading.
If the room remains inert after reasonable tests, stop overwriting saves. Reload the newest protected file first, then an older pre-transition file if necessary. Updating and reloading are troubleshooting steps, not proof that a reported issue has a universal solution.
A future patch can alter prompts, performance or progression behavior without changing the broad puzzle grammar. If an updated interface conflicts with launch-period guidance, prioritize the installed build’s direct feedback.
When reporting a possible defect, describe expected and observed behavior separately. Saying the Configuration was accepted but no platform moved is more useful than saying the puzzle is broken. Include whether the condition survived a reload and whether the game was updated.
Online advice should be evaluated with the same boundaries. A workaround observed on one platform or version does not prove identical behavior elsewhere. Compare objectives, interface state and prerequisites before adopting platform-specific troubleshooting.
Preserving several manual files is precautionary advice, not a universal feature promise. Check the installed save menu. Where protection is limited, retain a file immediately before an obvious objective transition rather than repeatedly replacing it during uncertain exploration.
Patch claims should be dated. A launch report may become obsolete after an update, while a promised patch does not establish that a fix is already live. Version-specific observations are more useful than saying the game is broadly fixed or broken.
- Confirm manual saves through timestamp or objective changes.
- Do not assume an autosave protects content left before a transition.
- Install current patches where possible.
- Do not claim a specific launch issue is fixed without evidence.
- Treat controls and technical reports as platform-specific.
- Record platform, version, objective and observed behavior for troubleshooting.
Spoiler-Light Configuration Checklist
When progress stalls, begin with classification. Decide whether the problem is combat, shape matching, mechanical movement, traversal, prerequisite retrieval or a conventional lock. The Genesis Configuration touches several categories, but it performs a different job in each.
For combat, inspect current Suffering and local environmental support. Telekinesis needs an eligible recognized object. Pyrokinesis needs active recognized fire and a supported destination. Hell Chains should be considered only when the game clearly makes the capability available.
Remember that released-game testing reports Suffering gains from damaging enemies, while executions are the clearest officially confirmed source. Watch the actual gauge rather than assuming a fixed refill value. Current Suffering and maximum capacity remain separate measurements.
If no supernatural relationship is strong, use ordinary weapons. This is the intended fallback for a context-sensitive power system, not an abandonment of the Configuration.
For shape locks, inspect the receiver before changing the box. Select a configuration containing the required feature and then rotate that feature into orientation. Work on one half at a time, preserve a convincing match and check the combined perimeter and center seam.
For room mechanisms, establish the starting arrangement and observe exactly what changes after activation. Trace the entire safe route before crossing. Movement confirms response; it does not guarantee that the current state is the solution.
For apparent loops, compare repeated spaces, test reversal and change perspective. In Chatterer-style route logic, record where the pursuer appears instead of treating direct confrontation as the only answer.
For incomplete supernatural structures, search for a physical prerequisite. For safes, picture locks and lock-picking interfaces, study nearby diagrams and readable clues rather than forcing a Configuration power.
Before advancing the named objective, inspect alternate paths for Suffering Pillars and optional rewards. Complete permanent interactions and verify their benefits. The absence of chapter select makes this confirmation more important than visual discovery.
Save before likely one-way transitions wherever saving is currently permitted. Preserve an older file when possible. Do not assume a fresh autosave retains access to the area just left.
If the game appears unresponsive, use the narrowest test relevant to the category. Rotate one selected form, activate one mechanism state, traverse one branch or reload one protected file. Simultaneous experimentation obscures cause and effect.
A rapid visual diagnosis can use the obstacle’s strongest cue. A combat gauge points toward resource management. A recognized loose object points toward Telekinesis. Recognized active fire points toward Pyrokinesis. A receiving outline points toward shape matching. Large moving architecture points toward room-state observation.
An empty recess points toward retrieval. A dial, picture arrangement or conventional mechanism points toward local clues. Repeated architecture with controlled differences points toward perspective or directional logic.
Before leaving a major area, ask four final questions: Is the objective about to change? Are reachable side paths checked? Have permanent interactions registered? Does a recoverable save reflect the intended state? If the answers are satisfactory, progression is informed rather than hopeful.
The complete working principle is straightforward: identify the system, read the feedback appropriate to that system, alter one relevant variable and verify the result before committing to the next stage.
- Classify the obstacle before acting.
- Check Suffering, eligible objects, active fire and contextual prompts in combat.
- Separate configuration selection from rotation in shape locks.
- Observe environmental changes before entering a transformed route.
- Search for prerequisites and verify permanent upgrades before leaving.
- Preserve a save before likely one-way transitions whenever the game permits it.
The Genesis Configuration becomes manageable when it is treated as several connected systems rather than a universal supernatural answer. In combat, it converts Suffering and environmental opportunities into force. At shape locks, its independently manipulated halves form a geometric key. At mechanisms, it controls a larger room state. Within the Labyrinth, perspective and route observation may finish a problem that the box only begins.
The most reliable habit is to diagnose before acting. Read the HUD for combat resources, targeting feedback for eligible objects and fire, the receiving silhouette for geometry, moving architecture for room state and the Objectives menu for campaign context. Damage and executions can rebuild current Suffering, while Pillars permanently expand its maximum; confusing those functions leads to poor planning.
Progression deserves the same precision. With no chapter select reported and some areas closing behind the story, explore side branches, complete Pillar interactions and verify permanent upgrades before obvious exits. Save where permitted, retain older files where possible and let the installed build’s interface take priority over platform-generalized controls or unsupported patch claims.
Sources
- Clive Barker’s Hellraiser: Revival FAQ
- Clive Barker’s Hellraiser: Revival Genesis Configuration Trailer and Steam News
- Explore Horror’s Furthest Sensations in Clive Barker’s Hellraiser: Revival
- Inside the Brutal Puzzles of Clive Barker’s Hellraiser: Revival
- All Hellraiser Revival Genesis Configuration Puzzle Solutions
- Clive Barker’s Hellraiser: Revival 100% Walkthrough
- All Five Suffering Pillar Locations and How to Activate Them
- Clive Barker’s Hellraiser: Revival Review
- Clive Barker’s Hellraiser: Revival PS5 Review