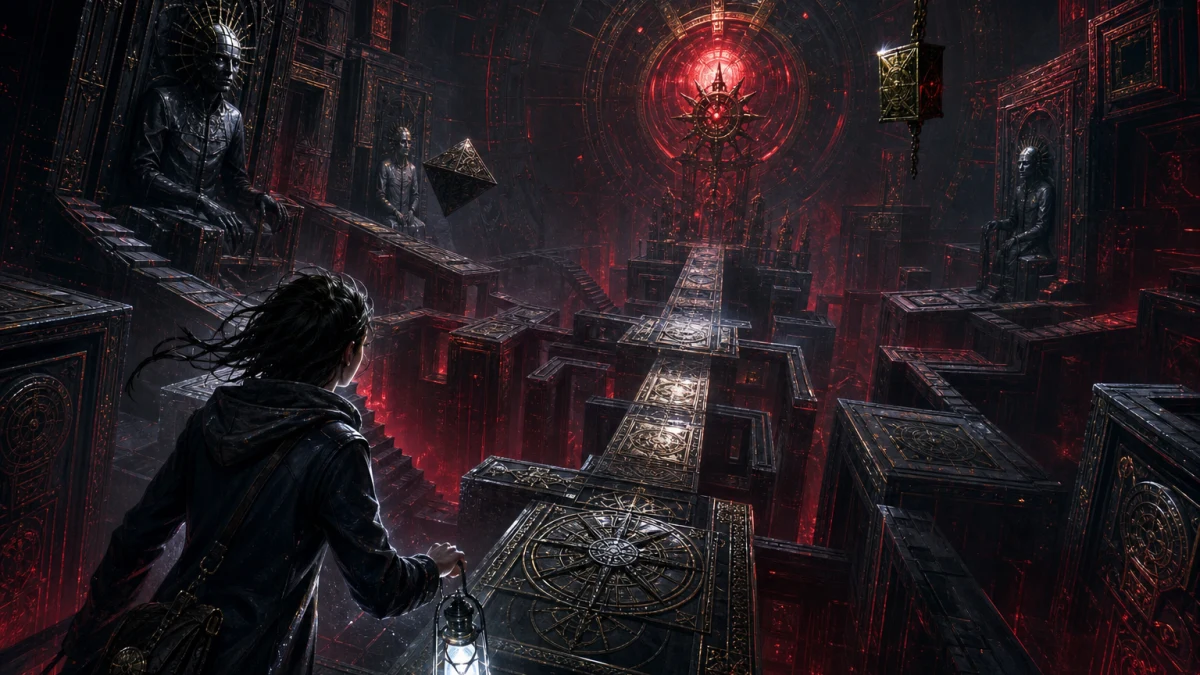
Clive Barker’s Hellraiser: Revival is a single-player, first-person action-horror survival game built around scarcity, exploration and the dangerous capabilities of the Genesis Configuration. Its official premise follows Aidan as he tries to help Sunny escape the Labyrinth, with Pinhead and the consequences of a supernatural bargain hanging over that journey. That is as far as this guide needs to go into the story.
The campaign is officially estimated at roughly eight to twelve hours, depending on play style, but the most useful beginner lessons emerge much earlier. Inventory slots are contested by weapons, ammunition, healing supplies and valuables. Melee tools deteriorate. Stealth can provide an opening without guaranteeing a safe reset. Maps help with looping environments, while the Genesis Configuration turns objects and hazards within a room into potential resources. These systems reward preparation more consistently than reflexive aggression.
This guide does not claim a single perfect route or prescribe exact inventory quantities. Those details depend on difficulty, current supplies, platform version and the way an individual encounter is arranged. Instead, it provides a repeatable framework: observe the room, identify the objective and escape path, estimate the cost of each available approach, and preserve flexibility for whatever follows.
Evidence note: This post-launch guide combines official release, storefront, support and developer information with observations from specialist testing. Inventory limits, satchel upgrades, ammunition stacking, crafting, breakable melee weapons, repair kits, armor interactions, stealth behavior, environmental projectiles, Suffering, health-restoring finishers, maps and selected puzzle behavior were not all documented in the official FAQ and are therefore presented as reported mechanics rather than universal guarantees. Enemy behavior, performance and balance may vary by platform, difficulty and patch. No dedicated official patch-note archive was located as of October 10, 2026.
What This Guide Will and Will Not Spoil
This is a systems guide rather than a walkthrough. It limits story context to the premise disclosed by Saber and the platform storefronts: Aidan possesses and uses the Genesis Configuration while attempting to help Sunny escape the Labyrinth, and Pinhead is central to the resulting bargain. It does not identify bosses, later characters, chapter names, endings, major revelations or the order in which significant locations appear.
Weapon categories and broad supernatural functions are discussed because they affect basic survival decisions from the beginning. Knowing that melee weapons can break, that armor changes which melee tool is efficient, or that environmental objects can become supernatural projectiles does not disclose a narrative turn. It allows a new player to understand why picking up every gun or swinging the same blade at every target can create trouble later.
Puzzle advice follows the same boundary. Revival contains traditional mechanisms as well as spaces shaped by reality-warping architecture. Some mechanisms involve manipulating parts of the Genesis Configuration into a required form. This guide explains how to separate clues from movable components, how to observe changes and when to revisit the map. It does not provide combinations, block placements, banner arrangements or step-by-step door solutions.
That distinction matters because a direct solution often removes the central act of reading the environment. A beginner who learns to classify information can solve unfamiliar mechanisms without having every answer revealed. Start by asking three questions: what appears to be a clue, what can actually be manipulated, and what changed after the last interaction? Those questions remain useful even when the room’s appearance tries to make ordinary spatial logic feel unreliable.
Readers looking for exact answers to the Private Rooms door or well-related block puzzles should use Joking Joystick’s dedicated solution pages. The separate Genesis Configuration reference also covers that tool in greater mechanical detail, while the combat guide handles specific weapons and enemy tactics. Keeping those subjects separate lets this article remain useful without becoming a disguised full walkthrough.
The guide also avoids declaring that every encounter supports stealth, an environmental kill or a clean escape. Specialist testing establishes that those possibilities exist, not that every room contains all of them. Likewise, reported enemy behavior may vary with difficulty, encounter scripting or patches. Treat each recommendation as a decision method to apply after observation, not as a promise about every confrontation.
A spoiler-light approach does not mean withholding important warnings. Broad enemy categories officially include wretches, deviants, cultists and infernal priests, and combat involves melee equipment, firearms and Genesis abilities. Those labels establish that the threats are not mechanically interchangeable. The practical lesson is to inspect what is in front of you before committing a limited tool, rather than assuming one favorite response will remain efficient throughout the campaign.
- No chapter names, boss identities, late locations or endings
- No exact combinations, block placements or door solutions
- Broad weapon, armor, stealth and Genesis functions are covered
- Dedicated combat and puzzle articles remain the place for exact tactics
Launch Status, Platforms and Version Check
Clive Barker’s Hellraiser: Revival launched on October 8, 2026. This guide was prepared after release rather than from pre-release impressions alone, and the advice combines official documentation with observations from specialist post-launch testing. The game is available for PlayStation 5, Xbox Series X|S, Nintendo Switch 2 and PC through Steam.
Install the latest available update before beginning. Saber’s official FAQ says an internet connection is not required for play, but it recommends connecting to receive current patches. The publisher also says it expects to issue patches for post-launch problems. That makes an update check especially worthwhile for a new release in which progression, resource balance and environmental interactions are important.
No dedicated official patch-note archive or comprehensive known-issues page for Revival was located by the publication date. Consequently, this guide does not attach unverified launch-version numbers to its recommendations or treat every reported behavior as immutable. A mechanic documented by official materials is firmer than an enemy response observed by a specialist under one version and difficulty setting.
This distinction is important for stealth. Testing indicates that alerted enemies do not reliably return to their original patrol state. That makes an escape route prudent, but it does not establish a universal timer or guarantee that every enemy stays alerted forever. Patches, encounter scripting and difficulty may all affect the result. The durable lesson is to prepare for failed stealth instead of depending on a reset.
Storefront metadata can lag behind reality. The PlayStation listing retained some pre-order wording after the verified release, even though the game had launched. Its accessibility declarations remain useful, but stale promotional language should not be used to classify the game as unreleased. The official FAQ and Steam release status provide the clearest launch confirmation.
Players who sampled the free Steam demo should also avoid assuming every demo behavior defines the final campaign. The demo covers the Prologue, in which Aidan follows Sunny into the shifting Labyrinth, but demo save-transfer behavior was not verified through a primary source. Begin the full game by reviewing its current tutorials and checking the actual inventory, controls and save options rather than relying on remembered demo conditions.
Version awareness should remain practical rather than obsessive. Update the game, restart it if a patch was applied while it was open, review any notices available on the title screen, and test basic settings before committing to a long session. If behavior differs from a guide, trust the current game state. Do not spend scarce supplies trying repeatedly to reproduce an interaction that may have changed.
Saber currently says there are no plans for future DLC or content updates, while patches are expected. That means the immediate version risk concerns fixes and possibly related balance behavior rather than an announced expansion of the campaign. The publisher’s plans could change, but optional future possibilities should not influence a beginner’s opening inventory decisions.
- Confirm the game has installed its latest platform update
- Review in-game notices after patching
- Treat observed enemy behavior as version-sensitive
- Do not confuse stale storefront wording with launch status
Choose Settings Before Entering the Labyrinth
Configure readability and controls before scarcity or pursuit adds pressure. The PlayStation Store lists adjustable preset difficulty, including the ability to reduce the challenge. Exact difficulty names and whether the selection can be changed during an active campaign were not independently verified, so make the initial choice according to what you want from the survival loop rather than assuming a free mid-campaign switch.
A lower difficulty is not at odds with learning the systems. If limited ammunition, weapon degradation and spatial pressure prevent you from observing how the systems connect, reducing the challenge can create room to learn. Conversely, players seeking harsher resource decisions can choose a more demanding preset. The useful benchmark is whether mistakes produce understandable lessons, not whether a menu label validates the experience.
On PlayStation 5, listed accessibility options include large text and large subtitles, separate volume controls, and mono audio. These can have direct mechanical value. Larger interface information may make item descriptions and prompts easier to process. Adjusting dialogue, effects and music separately can help a player distinguish important environmental sounds without merely turning the entire mix louder.
The PS5 listing also identifies stick-sensitivity and inversion controls. Revival is played in first person, and several actions require scanning rooms, tracking close threats or manipulating mechanisms. A sensitivity that is too high can make detailed inspection unpleasant, while one that is too low can make retreating from close-range pressure cumbersome. Test both deliberate object inspection and a quick turn before settling on a value.
Vibration, adaptive triggers, motion and touch controls are not required on PlayStation according to the storefront accessibility information. If strong feedback makes aiming, prolonged play or tense sequences less comfortable, disable or reduce it. If feedback helps communicate weapon use, retain it. Controls should convey information without fighting the player’s ability to make measured decisions.
Tutorial reminders can be reviewed after their initial appearance on PlayStation. Use that feature when a mechanic has been introduced during a stressful scene. A reminder is more reliable than guessing whether an icon relates to concealment, inventory management or another system. Returning to an explanation also avoids wasting resources in an improvised test that the tutorial already clarifies.
Manual saving is listed for PlayStation, including the ability to return to the location where the save was created. Equivalent behavior was not independently documented for every platform, and this guide does not assume saving is permitted during every dangerous sequence. Where the option is available, create a save before extended experimentation, a major inventory reorganization or an apparently consequential interaction.
Treat saves as a laboratory, not merely an insurance policy. If you are unsure how armor responds to a weapon class or what a mechanism changes, a recent save can make a controlled test less costly. Observe one variable at a time. That process teaches more than rapidly exhausting every item and reloading without understanding why one approach worked.
Finally, check display brightness in the actual game environment rather than only on a calibration image. Darkness participates in stealth, so raising brightness until all shadow disappears may flatten useful visual information, while setting it too low can obscure routes and interactable objects. Aim for readable dark detail without erasing the contrast the concealment system expects you to recognize.
- Select a difficulty that leaves room to understand mistakes
- Set subtitles, text size and audio separation for clarity
- Tune sensitivity for both inspection and fast turns
- Review tutorials instead of guessing at unfamiliar icons
- Use manual saves for controlled experiments where supported
Understand the Survival Loop
Revival becomes easier to reason about when its systems are treated as one loop. Exploration produces ammunition, materials, valuables, equipment, information and routes. Encounters consume some combination of those resources. Puzzles and environmental changes open new paths or alter existing ones. Inventory and map checks then determine whether you are prepared to continue or should revisit a nearby area.
The first part of the loop is observation. On entering a space, avoid immediately moving toward the most obvious object. Identify exits, blocked routes, cover, darkness, hazards and anything that might become a projectile or explosive. If enemies are present, count visible threats and consider where unseen ones could enter. This initial scan is cheap; discovering the same facts after combat begins may cost health or ammunition.
The second part is classification. Decide whether the room primarily presents an exploration problem, a combat problem, a stealth opportunity, a mechanism or a pursuit. Some spaces blend several categories, but naming the dominant pressure prevents confused responses. A puzzle should not be treated as a shooting gallery merely because a threatening sound is present, and a pursuit should not become a resource-draining stand when escape is the intended priority.
The third part is cost selection. Ask whether the obstacle can be bypassed, distracted, handled through the environment, engaged in melee, addressed with firearms or influenced through the Genesis Configuration. These are complementary tools, not isolated play styles. A bottle may separate one enemy, a takedown may reduce the group, a blunt weapon may remove armor and a firearm may finish an exposed threat. One encounter can involve several low-cost stages.
The fourth part is recovery and accounting. Once immediate danger passes, do not rush through the newly opened doorway. Check health, weapon durability, loaded ammunition, reserve stacks, crafting materials and available inventory space. If an interaction moved architecture or opened a shortcut, reopen the map. The room you just survived may now be part of a safer return route or contain supplies overlooked during pressure.
The fifth part is deciding when to leave. Survival-horror exploration often tempts players to clear every corner immediately, but limited capacity changes the meaning of completion. A valuable object that fills the final slot may prevent you from carrying a healing item found seconds later. It can be rational to note an object, continue with space available and return after selling or using supplies.
The Genesis Configuration belongs inside this loop rather than outside it. Official descriptions explicitly pair its powers with conventional weapons, while specialist testing shows environmental objects such as saw blades and nails being propelled as weapons. A room with suitable objects may reduce ammunition costs. A room without them may require a different plan. Scan first so the environment can participate in the decision.
A useful measure of success is not whether every enemy dies. It is whether Aidan reaches the next meaningful decision with enough health, capacity and equipment variety to respond. Avoiding one unnecessary fight can be more valuable than ending it flawlessly, especially if the avoided ammunition and durability later solve a mandatory confrontation.
This loop also explains why no universal loadout can be prescribed. Available objects, armor, concealment, inventory upgrades and current supplies change the calculation. The consistent skill is reassessment: observe, classify, choose the lowest sensible cost, recover, update the map and inventory, then advance.
- Observe the room before collecting or fighting
- Classify the main problem
- Choose among avoidance, distraction, environment, melee, firearms and Genesis powers
- Account for health, ammunition, durability and space afterward
- Update the map and leave with flexibility
Treat Inventory Space as a Survival Resource
Post-launch specialist testing reports sharply limited inventory capacity near the beginning, with satchels increasing carrying space. That makes capacity a resource in its own right. A full inventory is not simply evidence of thorough scavenging; it can mean the player has lost the ability to accept the next useful item without discarding, consuming or backtracking.
Ammunition illustrates the problem. Ammunition stacks have limits, and multiple stacks compete with healing supplies, weapons, crafting materials and valuables. Carrying ammunition for every firearm may feel cautious, but it can reduce practical readiness if several stacks support weapons you do not intend to use soon. Ammunition has value only when paired with an accessible weapon and a plausible need.
Artifacts and relics create another tension. Testing reports that these valuables occupy inventory space and can be sold. They therefore represent future purchasing power at the cost of current flexibility. Whether to carry one depends on distance to a shop, the pressure in the current area, open capacity and the supplies left behind. No universal sell value or merchant schedule should be assumed.
Use a four-way decision for each contested item: keep, craft, sell or leave. Keep an item if it addresses a likely near-term problem or preserves an important option. Craft when doing so meets a defined need and the finished result is more useful than retaining the materials. Sell valuables when access permits and their space is more urgently needed. Leave recoverable supplies when taking them would damage the loadout’s balance.
Leaving an item is not the same as wasting it. In a looping area, a known supply can function as a reserve cache. This is safest when the route remains accessible and the game state has not signaled a transition. Because not every area remains open forever and this guide avoids progression spoilers, do not build a plan that requires indefinite return access. Use nearby leftovers as opportunities, not guarantees.
Inventory decisions should consider function rather than item count. A compact loadout needs a way to recover health, a dependable response to ordinary threats, a response to armor and enough free space to exploit discoveries. It does not require one example of every possible weapon. Hoarding too many melee tools can be as restrictive as carrying excessive ammunition.
Satchel upgrades alter the calculation but do not eliminate it. Additional capacity can be used to broaden options, carry more valuables or reduce backtracking. It should not automatically become an excuse to collect redundant equipment. New space is most valuable when it protects adaptability: one slot for an unexpected key item or healing supply can matter more than another reserve stack for a weapon that is already well supplied.
Crafting health supplies and ammunition from scavenged materials has been reported by specialist testing. Exact recipes, material yields and stack sizes were not firmly established in primary documentation, so avoid crafting merely to tidy the menu. Raw materials may support more than one need, while crafted items may immediately occupy constrained space. Craft because you know what shortage you are solving.
Repairs deserve similar discipline. A repair kit can preserve the usefulness of a favored melee weapon, but carrying repair capacity for a poor or redundant tool may not be worthwhile. Consider the weapon’s condition, role and replacement prospects. A useful blunt option may deserve preservation if your other melee equipment is sharp, while two damaged tools filling the same role may justify consolidation.
Before leaving any storage, shop or quiet room, perform a capacity audit. Identify what you would discard first if a crucial item appeared. If there is no answer, the loadout is probably too crowded. Deliberately creating one flexible slot can prevent a forced decision under pressure.
- Keep items with a clear near-term role
- Craft only to solve a defined shortage
- Sell valuables when their future value outweighs current space
- Leave recoverable excess rather than damaging loadout balance
- Preserve at least one flexible slot when practical
Scavenge in Deliberate Passes
Efficient scavenging is not the same as pressing the interaction button against every surface. Revival’s looping spaces reward a staged search that separates immediate survival from detailed collection. Deliberate passes reduce the chance of reading an item description while exposed, missing a retreat route or filling the inventory before discovering the resource the current area actually demands.
The first pass is tactical. Locate exits, choke points, concealment, cover and environmental hazards. Note explosive containers and loose objects that may become projectiles. If enemies are present, observe routes before entering the center of the room. The objective is not to collect everything; it is to understand how the space can help or trap you.
During this pass, distinguish a true exit from an attractive dead end. A narrow opening may be useful for retreat even when it does not advance the objective. A locked door may indicate a future shortcut rather than an immediate puzzle. Do not spend ammunition probing scenery or assume every obstructed path can be opened from the current side.
The second pass begins when immediate danger is controlled or bypassed. Search containers, edges, side rooms and alternate paths for ammunition, materials, valuables and equipment. Move methodically from one landmark to another so you can tell which portions have been checked. Randomly crossing the room several times wastes attention and makes overlooked corners harder to identify.
Inventory capacity should shape this search. If only one slot remains, inspect before automatically collecting. A saleable relic may be less urgent than a healing supply, while a repair resource may matter more if the only blunt weapon is close to breaking. The point is not to know every item in advance but to preserve the ability to choose after seeing it.
A third, shorter pass may become worthwhile after opening a shortcut, moving a major component or altering the environment. Reality-warping mechanisms can change access or reveal a relationship that was not visible earlier. Recheck the nearby room and reopen the map rather than assuming the only result is the most obvious moving wall or door.
Do not convert this routine into the expectation that every decorative object, dead end or locked door conceals a reward. Horror environments use visual detail to establish atmosphere and misdirection as well as to communicate mechanics. A search method should reduce uncertainty, not produce frustration when an ordinary shelf remains ordinary.
Sound can support the visual sweep, but it should not replace it. Adjusting the audio mix may help separate nearby activity from music, yet an audible threat does not establish its exact path. Pair what you hear with cover, the concealment indicator and map structure. If the source remains uncertain, maintain an escape line until the room is understood.
When enemies interrupt the second pass, return to the tactical model rather than stubbornly continuing to collect. Reassess count, armor, cover and exits. The room has shifted from scavenging back to survival. Resume collection only when doing so no longer exposes you to an avoidable hit or forces a rushed inventory decision.
Finally, remember where intentionally abandoned resources are located. Use a distinctive landmark and the map where possible. A vague memory that ammunition was somewhere in the previous area is less useful than associating it with a particular junction or mechanism. Even then, retrieve it only if the expected gain exceeds the cost and risk of backtracking.
- First pass: threats, exits, concealment and hazards
- Second pass: containers, materials, valuables and side routes
- Third pass after changes: new access and altered geometry
- Inspect before collecting when capacity is tight
- Do not assume every dead end contains a reward
Read the Map After Every Meaningful Change
Specialist testing reports maps or minimaps that support navigation through areas designed to double back. Use them as active planning tools rather than emergency aids opened only after becoming lost. A map can reveal how a new doorway reconnects with an earlier corridor, whether a retreat leads toward safety and how much backtracking a forgotten item would require.
The map is most useful when paired with categories. If the interface permits markers or distinctions, separate blocked routes, unresolved mechanisms and exhausted rooms. A blocked route may need access from the other side. An unresolved mechanism needs information or manipulation. An exhausted room has been searched sufficiently for the moment. Confusing these categories produces unnecessary revisits.
Even without custom markers, build a compact mental notation. Associate each junction with one unresolved fact: locked door, shaped recess, merchant route, abandoned supply or unexplored branch. Do not try to memorize every decorative detail. The goal is to retain decision-relevant information that can be checked against the map.
Reopen the map after any meaningful environmental change. That includes opening a shortcut, rotating or reshaping a mechanism, completing a major interaction with the Genesis Configuration, or seeing architecture visibly shift. The route that was previously a dead end may now be the shortest path, while a familiar landmark may no longer align with your first mental picture.
Landmarks still matter, but they should confirm the map rather than replace it. Choose stable features such as a distinctive junction, large mechanism or unusual lighting boundary. In reality-warping spaces, visual familiarity can be misleading. If the map and memory conflict, pause and determine whether the environment changed instead of forcing an outdated route.
Maps also help with resource economics. Before backtracking for one stack or a saleable artifact, estimate the route length and likely danger. A nearby reserve may be worth retrieving; a distant item beyond repopulated or uncertain territory may not be. Capacity and travel risk should determine whether theoretical value becomes practical value.
During pursuit-oriented sequences, route recognition may matter more than complete map study. If opening the interface is unsafe or unavailable, remember broad directional decisions and obvious obstacles. Once pressure ends, consult the map to reconstruct where you arrived and whether the chase changed access. Do not assume a pursuit returns you to the same spatial state.
A mechanism can create a misleading sense of completion. The central object may react, but the actual result may occur elsewhere in the area. After interacting, compare the room, check nearby passages and consult the map before cycling the same input again. Repeating an already successful action can obscure the evidence of what changed.
Mapping also reduces needless combat. If two routes reach the same destination, one may avoid a known group or provide better environmental options. A shortcut can convert a dangerous supply run into a short walk. The benefit comes from checking the route before moving, not discovering the shortcut’s usefulness only after spending resources along the longer path.
Use the map whenever one of four events occurs: a route opens, architecture changes, you acquire a likely progression item, or you finish a costly encounter. These are the moments when old assumptions are most likely to be wrong. A brief check can prevent several minutes of confused movement and the supplies that confusion may consume.
- Distinguish blocked routes, unresolved mechanisms and searched rooms
- Check the map after shortcuts or environmental changes
- Use landmarks to confirm, not replace, mapped information
- Estimate backtracking cost before retrieving optional supplies
- Reassess routes after pursuits and major encounters
Plan Encounters Before Spending Ammunition
Ammunition is only one possible payment for an encounter. Before firing, identify the number of visible enemies, whether any wear armor, what cover they can use and where you can retreat. Testing indicates that enemies may use cover or wait for exposure rather than always rushing directly toward Aidan, so a doorway is not automatically a safe shooting lane.
Look upward, downward and behind the apparent combat line for environmental options. Specialist testing has identified loose saw blades, nails and explosive objects as potential weapons or hazards. Darkness and cover may support stealth. Bottles or rocks may create a distraction. None of these options appears in every room, but overlooking them guarantees they cannot reduce the cost.
Next, define the objective. If the goal is to cross the room, total elimination may be unnecessary. If an interaction requires time or traps Aidan in place, leaving active threats may be too risky. If the area loops back, a bypassed group could complicate later travel. The cheapest immediate solution is not always the cheapest across the entire route.
Estimate four costs: health risk, ammunition, melee durability and supernatural resources. A blunt weapon may conserve bullets against armor but expose Aidan to close-range hits. A firearm may be safer but occupy several inventory stacks. A Genesis ability may use Suffering yet exploit an object that otherwise has no value. Compare the whole transaction rather than one resource.
Set a retreat trigger before attacking. It can be as simple as losing sight of a second enemy, breaking the current melee weapon, or seeing the route become flanked. Deciding in advance prevents the common mistake of continuing an inefficient plan merely because resources have already been spent. Past ammunition cannot be recovered by wasting more ammunition.
The absence of a conventional melee block, as reported in specialist testing, increases the importance of spacing. Enter close range only when the target, exit and surrounding threats are understood. Avoid backing into unexplored space. A planned retreat corridor is valuable because it has already been checked for obstacles and additional enemies.
Environmental explosives can replace repeated shots, but they also require timing and positioning. Do not stand beside the hazard you intend to use, and do not assume every enemy will move into its effective area. A missed environmental opportunity should prompt reassessment, not a stream of shots fired in frustration.
Mixed tactics often provide the best economy. A distraction can isolate one target, a stealth takedown can reduce the group, a blunt tool can strip armor, and a firearm can resolve the dangerous final stage. The purpose of planning is not to remain loyal to one style; it is to make each limited resource perform the job for which it is best suited.
Detailed weapon rankings, exact enemy tactics and progression-specific recommendations belong in the separate combat guide. For beginner purposes, remember that no damage number matters if the weapon is inaccessible, broken, poorly matched to armor or supported by ammunition that displaced needed healing.
After an encounter, perform an honest audit. If the room consumed more than expected, ask what information was missed: armor, a second entrance, an environmental hazard or a poor retreat line. That answer is more useful than merely deciding to aim better. Survival improves when the next plan incorporates the last room’s lesson.
- Count threats and identify armor
- Locate cover, hazards, concealment and the retreat route
- Define whether bypass or elimination serves the objective
- Compare health, ammunition, durability and Suffering costs
- Set a condition for retreating or changing tactics
Use Stealth as an Opening Advantage, Not a Complete System
Revival’s reported stealth tools are straightforward: crouching, cover, darkness or concealment, and an eye indicator that communicates whether Aidan is hidden. These systems can create a favorable opening, but they should not be mistaken for a deep guarantee that every encounter can be cleared invisibly.
Begin by observing the concealment indicator while moving between shadow and exposure. Learn what the interface considers hidden before enemies are nearby. Visual darkness alone may not tell the whole story, especially after brightness adjustments. The indicator is the game’s direct feedback and should outweigh assumptions based on how dark a corner appears.
Thrown bottles and rocks can distract enemies. Use a distraction to create a specific result: turn a target away, separate it from a group, clear a route or expose it to a takedown. Throwing an object without a follow-up plan may simply move uncertainty to another part of the room.
Before throwing, identify where the enemy is likely to investigate and where Aidan will move. The ideal destination pulls attention away from both the objective and the escape line. A poor distraction can place an enemy directly on the route you intended to use or cause several threats to overlap.
Stealth takedowns can reduce a group before open combat. Their value is not only the removal of one enemy but the reduction of crossfire, flanking pressure and ammunition demand if the rest become alerted. Choose a target whose removal improves the geometry of the room, not merely the closest target.
Post-launch testing reports that, once stealth is broken, enemies do not reliably return to their original patrol behavior. The practical response is to prepare for persistence. Before attempting a takedown, know where to retreat, which cover can break sight and what weapon will be ready if detection occurs. Do not rely on hiding briefly and repeating an identical approach.
That reported behavior should remain qualified. Alert persistence may differ by encounter, difficulty or patch, and no universal reset timing has been officially documented. Treat the warning conservatively: if enemies do reset, the plan still works; if they do not, Aidan is not stranded without a response.
Stealth can also be used for reconnaissance without a takedown. Moving concealed long enough to identify armor, cover and environmental objects may improve the later combat plan. Information gained without spending ammunition is itself a resource. There is no requirement to convert every concealed approach into an attack.
Avoid overcommitting to crouched movement after detection. Once enemies know Aidan’s position, slow movement through exposed space can become a liability. Shift deliberately from concealment to combat or escape. A clear transition is safer than behaving as though the encounter remains in its earlier state.
Finally, do not assume every dark route is safe or every enemy is susceptible to the same takedown. The official threat categories and specialist observations establish variety, not universal vulnerability. Use the eye indicator and actual prompts, keep an alternative ready, and regard successful stealth as a reduction in cost rather than a required standard of play.
- Verify concealment through the eye indicator
- Throw distractions toward a planned investigation point
- Choose takedown targets that simplify the whole room
- Prepare a weapon and retreat route before acting
- Assume detection may persist until the encounter proves otherwise
Match Melee Tools to the Target
Melee weapons are not interchangeable reserves of free damage. Specialist testing reports that sharp tools are more suitable for exposed flesh and unarmored enemies, while armored targets resist them more effectively. Blunt weapons can batter armor away and expose vulnerable flesh. Recognizing that relationship preserves both durability and health.
Inspect a target before committing. Armor should change the opening choice, not become an explanation after a blade breaks. If the target is protected and a blunt option is available, use the appropriate tool to strip or damage that protection before switching to a sharper weapon or another finishing method.
This does not mean every player must carry a large collection of melee equipment. Limited inventory argues against redundancy. A balanced approach is to retain distinct functions where capacity permits: one dependable option for exposed targets and one answer to armor. The specific weapons can change as replacements and upgrades appear.
Melee durability makes poor matching doubly expensive. Swinging a sharp tool against resistant armor consumes time and weapon condition while keeping Aidan close to danger. Even if the enemy eventually falls, the degraded weapon may fail during the next confrontation, turning one inefficient choice into a later emergency.
Weapon condition should be checked during quiet inventory moments rather than discovered in combat. If the interface communicates deterioration, include that information in the post-encounter audit. A nearly broken weapon can still have value for an appropriate low-risk target, but it should not be the only planned answer to the next armored threat.
Repair kits can preserve the usefulness of favored melee weapons according to specialist testing. Use them based on role, not sentiment. A weapon that fills a unique gap in the current inventory may merit repair. A damaged duplicate may not, particularly if carrying the kit and weapon prevents collection of healing or ammunition.
Because testing reports no conventional melee block, close-range combat should emphasize spacing and exit lines. Approach when the enemy is isolated or recovering, then create distance before the situation becomes crowded. This guide does not prescribe exact attack timings because those can vary by weapon, enemy and difficulty.
Terrain can make an otherwise appropriate melee plan unsafe. A blunt weapon may be mechanically suitable against armor, but not if using it places Aidan between two threats or beside an explosive hazard. The correct damage type does not override room geometry. Reposition or use another resource when the approach lane is poor.
Melee also interacts with firearm economy. Stripping armor with a blunt tool may make subsequent ammunition more effective, while weakening an unarmored target in melee may save a shot. Mixed sequences can be efficient, but only if the transition is deliberate. Fumbling through an overcrowded inventory at close range defeats the purpose.
Do not interpret repair capability as a command to preserve one weapon forever. Replacement, capacity, condition and target mix all matter. The beginner principle is simpler: stop treating durability as invisible, avoid wasting sharp edges on armor, and keep at least one credible response for the enemy type the current weapon handles poorly.
- Use sharp tools on exposed or unarmored targets
- Use blunt force to break or strip armor
- Check condition before the next encounter
- Repair weapons that fill a needed role
- Avoid redundant melee tools when capacity is tight
Firearms Are Emergency Capacity, Not Just Damage
Specialist testing reports a broad arsenal including pistols, revolvers, shotguns, submachine guns and assault rifles. Knowing those categories exist does not mean a beginner should carry every firearm and ammunition type. Each gun represents not just offensive power but an inventory commitment: the weapon itself, supporting stacks and the opportunity cost of whatever cannot be carried.
Think of firearms as stored emergency capacity. Ammunition can solve a dangerous problem quickly, create distance from a close threat or finish an encounter that has outlasted a melee tool. Its value lies partly in being available when a safer but slower method fails. Spending it on every isolated target can remove that safety margin.
Stack limits make distribution important. Several partial or full ammunition stacks can crowd out healing, crafting materials, repair supplies and valuables. Exact stack sizes were not verified and should be read directly from the current game. The broader decision remains the same: support the guns you are likely to use rather than maintaining deep reserves for every possible firearm.
A new weapon is not automatically a loadout upgrade. Compare its role with the current arsenal, the ammunition already carried and the supplies likely to be abandoned. If it duplicates an existing function while introducing another ammunition burden, leaving or storing it may be more sensible than equipping it immediately.
Weapon upgrades can affect properties such as magazine capacity or ammunition behavior according to specialist testing. Evaluate upgrades through actual use rather than assumed superiority. An improvement to a weapon that rarely leaves the inventory may offer less survival value than maintaining the equipment used consistently. This guide avoids unverified costs and progression order.
Environmental explosives can substitute for repeated gunfire. Before aiming directly at an enemy, scan for objects that can damage several threats or disrupt a defended position. The opportunity is strongest when enemies are already near the hazard. Trying to force an elaborate setup after detection may cost more ammunition than direct fire would have.
Enemies may use cover or wait for Aidan to expose himself. Do not empty a magazine into the edge of cover in the hope that pressure alone solves the encounter. Change angle, use the environment, retreat to more favorable ground or wait for a clear opportunity. Ammunition spent without a clear target produces no compensating advantage.
Reload state matters even without discussing numerical magazine sizes. After danger, make sure the active firearm is ready before entering an unknown corridor, but do not perform careless inventory actions while a second threat remains possible. The purpose is to prevent an emergency weapon from becoming an empty promise.
When capacity becomes constrained, decide which firearm covers the widest current need and which has enough support to be credible. A weapon with no meaningful ammunition supply is mostly occupied space. Conversely, excess ammunition for a gun left behind cannot answer an immediate threat. Keep weapon and ammunition decisions synchronized.
The best firearm outcome is not always the fewest shots in one room. It is arriving at the next mandatory pressure point with an effective, loaded option and enough capacity for healing and utility. Treat every stack as a reserve of future choices, then spend it decisively when it prevents greater loss.
- Carry firearms with a defined role
- Support selected guns instead of every ammunition type
- Use hazards before committing repeated shots
- Avoid firing blindly into cover
- Keep an emergency weapon loaded and accessible
Use the Genesis Configuration as Part of the Room
The Genesis Configuration is both a central supernatural tool and a component of environmental puzzle design. Official descriptions say its powers can be combined with conventional weapons. The most useful beginner mindset is therefore not to treat it as a separate spell list, but as another way of reading and manipulating the room.
Specialist testing reports telekinetic force capable of launching environmental objects such as saw blades and nails. These objects are effectively latent resources. They do not occupy inventory space while sitting in the environment, and using them may preserve conventional ammunition. Their availability, angle and suitability vary by room, so scan before combat rather than assuming one will appear when needed.
A proper scan looks for more than obvious explosives. Identify loose sharp objects, suspended hazards, fire sources and anything positioned along likely enemy routes. Consider where a propelled object will travel and what remains behind it. An environmental weapon is valuable only if it can be used without exposing Aidan to greater danger.
Fire manipulation is also among the repeatedly reported supernatural functions. Treat flame as part of the environment and encounter geometry rather than a universal answer. Its usefulness depends on available sources, positioning and the room’s hazards. Do not stand in the space you intend to make dangerous.
The franchise’s iconic hook chains also appear as an occasional supernatural combat option according to specialist testing. This guide avoids detailing acquisition order, costs or progression because those elements were not firmly established for a spoiler-light beginner article. Respond to the tutorials and prompts available in the current game rather than expecting every function immediately.
Suffering operates as a resource connected to Genesis abilities. That means supernatural actions are not free simply because they preserve bullets. Compare the current need, environmental opportunity and remaining resource. There is insufficient evidence for a universal rule to spend Suffering immediately or hoard it indefinitely; either extreme ignores encounter context.
The Configuration can also participate in puzzle mechanisms. When an environment appears to require a particular shape or alignment, inspect the box and compare its movable structure with nearby symbols or recesses. Do not rapidly manipulate every part. Controlled changes make it easier to identify which action produced a response.
In combat, combine powers with conventional tools. A propelled object may create an opening rather than finish a target. Fire may alter movement. A melee weapon may exploit the resulting exposure. Official framing supports this mixed approach, and it reduces dependence on any one resource pool.
In exploration, ask whether the environment contains objects that seem mechanically emphasized even when no enemy is present. They may relate to traversal, a nearby puzzle or a future combat space. Observation does not require immediate activation. Remember the object and consult the map if a later mechanism creates a connection.
Because specialist sources differ on the breadth and depth of the power set, this guide confines itself to repeatedly demonstrated functions. Follow in-game tutorials for current controls and availability. The durable principle is that the Genesis Configuration draws meaning from the surrounding space: look at the room before deciding what the box can do for you.
- Scan for saw blades, nails, fire and explosive hazards
- Treat environmental objects as inventory-free resources
- Compare Suffering cost with ammunition and health risk
- Combine Genesis powers with conventional weapons
- Manipulate puzzle forms one controlled step at a time
Recovery and Finishers
Specialist testing reports that certain staggered supernatural enemies can be finished at close range with the Genesis Configuration to restore health. This interaction is useful because it links aggression, recovery and supernatural combat, but it should not be treated as guaranteed free healing.
First, the target must be in an appropriate staggered state. Do not approach every wounded enemy expecting the same prompt or result. Threat categories differ, and the reported interaction applies to certain supernatural enemies rather than every opponent. Let the current interface and tutorial feedback confirm eligibility.
Second, the recovery requires close range. Closing distance can expose Aidan to another enemy, environmental damage or a target that recovers before the interaction is completed. Before moving in, check the sides of the room and verify that the approach does not abandon the only retreat route.
Third, health restoration does not erase the resources used to create the opportunity. If staggering the enemy requires excessive ammunition, durability or Suffering, the resulting health may not make the exchange efficient. Compare the full sequence with using a carried healing item or avoiding the confrontation.
The interaction is most attractive when the target is already staggered through a plan that served another purpose. For example, a controlled encounter may naturally create a finisher opportunity. Chasing recovery by prolonging combat or taking intentional damage reverses the logic and can leave Aidan worse off.
Keep an exit line before committing. If the prompt disappears, another threat enters or the position becomes unsafe, retreat instead of forcing the attempt. A potential heal is not worth becoming surrounded. The ability to decline a risky recovery is part of resource discipline.
This mechanic also affects inventory thinking. Knowing that situational recovery exists can reduce panic when health supplies are low, but it should not justify abandoning all carried healing. The relevant enemies and stagger opportunities are not guaranteed to appear exactly when needed. Conventional supplies remain the dependable reserve.
Do not assume the interaction can be used repeatedly without constraints. Exact availability, resource relationships and enemy eligibility were not publicly documented in Saber’s FAQ. Follow the current game’s prompts and avoid building a route around an unverified farming loop.
Manual saves, where supported and permitted, can help a player learn the interaction without permanently spending scarce resources. Save before a controlled experiment in a safe context, observe what establishes the stagger and what the finisher returns, then apply that understanding naturally. Do not assume saving is possible during every active danger sequence.
The beginner rule is conservative: recognize the prompt, clear the approach, take the recovery when the exchange is already favorable, and withdraw when it is not. The finisher is a tactical opportunity, not a replacement for health management.
- Confirm the target is eligible and staggered
- Check for additional threats before closing distance
- Compare the full resource exchange, not only the healing gained
- Keep an exit line during the approach
- Retain conventional healing for situations without a finisher opportunity
Puzzle Reading Without Puzzle Answers
Revival combines recognizable survival-horror mechanisms with impossible-looking architecture and reality-warping changes. A reliable puzzle method begins by separating three kinds of information: symbolic clues, mechanical parts and environmental results. Confusion often comes from treating all three as if they were inputs.
Symbolic clues communicate relationships. They may indicate order, shape, orientation or correspondence, but not every image in a richly decorated horror environment is part of a code. Favor repeated, isolated or mechanically adjacent symbols over background decoration. A clue becomes stronger when the mechanism provides a matching category.
Mechanical parts are the objects the player can actually manipulate. Identify how many independent parts exist and what kind of change each permits. Rotation, placement, alignment and shape transformation are different operations. Test one operation at a time so the resulting evidence remains readable.
Environmental results are what change after an input. A sound, movement, newly opened path or altered object can indicate partial or complete success. After every meaningful interaction, stop and compare the room with its previous state. Rapidly cycling inputs can undo progress before the player realizes anything happened.
Some reported puzzles require twisting or rotating parts of the Genesis Configuration into a required shape. When a nearby mechanism suggests a silhouette, recess or symbolic form, inspect the box itself. Compare structure and orientation carefully instead of assuming the clue refers to an inventory item found much later.
Use screenshots or written notes only if they improve accessibility and enjoyment. A short record of symbol order or component orientation can prevent repeated backtracking without revealing anything beyond what the player has already observed. Notes are especially helpful when the clue and mechanism occupy separate rooms.
Before deciding that a missing item lies in a distant future area, recheck the immediate surroundings. Look for a second face of the mechanism, an overlooked side passage, a changed doorway or an environmental result behind the player. Consult the map to see whether the puzzle area connects with a nearby unexplored branch.
A locked route and an unresolved puzzle are not necessarily the same thing. Some doors may become shortcuts from the far side, while some mechanisms require information found locally. Classify the obstacle before spending time on it. If the game provides no manipulable component or matching clue, the route may simply not be solvable from the current position.
If experimentation becomes expensive because enemies or resources are involved, use a manual save where the platform and current situation permit. Change one input, observe, then either continue from the new information or reload. A controlled test is more productive than exhausting every combination at random.
This guide intentionally does not reproduce the Private Rooms door solution, embossed block locations, banner arrangement, well blocks or Labyrinth image settings. Exact solutions are available in Joking Joystick’s dedicated puzzle coverage. The transferable skill is learning to identify clue, mechanism and result without having later rooms spoiled.
When stuck, take one complete loop through the nearby area rather than staring indefinitely at the mechanism. Search for repeated symbols, movable components and changed architecture. Then return and articulate the hypothesis in plain language. If you cannot state what the clue appears to control, more observation is probably needed before more input.
- Separate clues, movable parts and resulting changes
- Manipulate one component at a time
- Inspect the Genesis Configuration when shape is emphasized
- Check nearby rooms and the map before assuming distant progression
- Use dedicated solution pages only when an exact answer is wanted
How to Approach the Labyrinth
The Labyrinth is central to the official premise, but it should not be approached as merely another combat arena. Specialist accounts indicate that some visits emphasize basic puzzles, pursuit and escape rather than ordinary weapon combat. The safest expectation is that the current objective may change the value of the loadout.
Do not assume every pursuer can or should be defeated. When the environment presents a clear route, closing obstacles or repeated escape openings, movement may be the intended solution. Standing to test weapon effectiveness can spend ammunition and health without changing the threat. Try to read the sequence before committing scarce equipment.
Route recognition comes first. Identify the next opening, the obstacle immediately after it and any branch that could become a dead end. During a chase, remembering two decisions ahead is more useful than trying to memorize the entire environment. Once pressure ends, use the map if available to rebuild a broader understanding.
Look for environmental communication. Lighting, motion, framing and newly opened spaces can indicate the route without an explicit arrow. Reality-warping architecture may make an apparently familiar corridor unreliable, so confirm each transition through current landmarks rather than assuming it retains its previous destination.
Obstacles can serve as information as well as barriers. A narrow passage, closing gate or interactive object may create distance. Notice which actions slow Aidan and avoid unnecessary inventory management in the middle of escape. Prepare a suitable active item before entering a sequence that appears likely to remove quiet decision time.
Pursuit changes the meaning of exploration. A side opening may contain a supply, but collecting it can be more expensive than leaving it if the pursuer closes distance. Prioritize survival and route continuity. An item that remains accessible can be reconsidered later; an item inside a committed escape should not automatically override the objective.
Manual saves may support experimentation where available, but do not assume the game permits saving during every danger sequence. Save before an extended puzzle or an apparently consequential threshold when the option is active. If saving is unavailable, rely on route observation and checkpoint feedback rather than repeatedly opening menus.
The Labyrinth may also alter the relevance of conventional weapons. A well-stocked firearm cannot solve a spatial problem by itself, while an inventory crowded with ammunition can leave less room for healing or useful discoveries. This reinforces the broader lesson that preparedness means flexibility rather than maximum firepower.
If repeated attempts fail, diagnose the failure category. Were you moving toward the wrong landmark, stopping to fight, missing an obstacle interaction or losing time through uncertain controls? Adjust that variable on the next attempt. Repeating the same route at greater speed will not solve a mistaken directional assumption.
After escaping or completing a spatial challenge, pause when safe. Check whether health, inventory, map state or available routes changed. A pursuit can leave the player disoriented even after danger ends, and rushing onward may turn temporary confusion into avoidable resource loss.
The spoiler-light rule for the Labyrinth is therefore simple: believe the behavior of the current sequence. If it emphasizes motion and escape, prioritize motion and escape. If it gives room for observation, inspect its symbols and geometry. Do not force every visit into the same combat template.
- Assume some sequences prioritize escape over combat
- Recognize the next two route decisions
- Use current landmarks instead of trusting old geometry
- Ignore optional pickups when collecting them threatens the escape
- Diagnose direction, interaction and timing failures separately
A Low-Risk Beginner Routine
A repeatable routine reduces the number of decisions made under pressure. It should not become rigid, because rooms differ, but it can ensure that important checks happen before scarce resources are spent. Begin every play session with the game updated, controls comfortable and tutorials accessible.
On entering a new area, stop at the safest available edge. Locate the most obvious exit, a fallback route, concealment and environmental hazards. Check for loose objects, explosives and cover before focusing on collectibles. If enemies are present, observe enough to distinguish armor and patrol movement.
Classify the room. Decide whether it is primarily exploration, combat, stealth, puzzle or pursuit. This determines the first tool to consider. In an exploration space, search in passes. In combat, compare costs. In a puzzle, identify clue, mechanism and result. In pursuit, prioritize openings and obstacles.
Spend the cheapest appropriate option first, not merely the cheapest-looking one. Avoidance is inexpensive when the enemy will not obstruct later travel. A distraction is useful when it creates a clear route or takedown. Environmental projectiles preserve ammunition when they are safely positioned. Melee preserves bullets but consumes durability and increases health risk.
Before initiating stealth, identify what happens if it fails. Ready an appropriate weapon, choose cover and know the retreat path. If detection occurs and enemies do not reset, transition to the backup instead of waiting indefinitely for patrol behavior that may not return.
Against armor, avoid grinding away with a sharp weapon. Use blunt force where practical to remove protection, then switch according to the exposed target and surrounding danger. Watch condition and repair equipment that maintains a useful balance rather than automatically preserving every weapon.
Use firearms when they prevent a larger loss, resolve a dangerous range problem or complete a mixed plan. Do not carry ammunition for every gun solely because it might become useful. Support the selected loadout, keep an emergency option ready and preserve space for health and utility.
Use Genesis abilities after looking at the room. Identify projectiles, flame and hazards before spending conventional ammunition. Compare Suffering with the supplies a power would save. If a supernatural enemy becomes eligible for a health-restoring finisher, clear the approach and keep an exit line rather than rushing automatically.
After danger, conduct a thirty-second reset. Check health, reload state, melee condition, Suffering, capacity and the item you would discard first. Craft only if a defined shortage exists. Repair only if the weapon fills a needed role. Note supplies left behind rather than forcing them into a full inventory.
Check the map after opening a shortcut, changing architecture, acquiring a likely progression object or finishing a costly encounter. Reclassify blocked routes and unresolved mechanisms. If the area loops to a merchant or safe route, decide whether selling valuables now is worth the travel.
Before an irreversible-looking commitment, major mechanism or prolonged experiment, create a manual save where supported and permitted. Do not assume saving is available in every dangerous sequence. The purpose is to protect learning and reduce random repetition, not to eliminate all consequences.
Finally, stop the routine from becoming compulsive. Not every shelf needs a third inspection, not every enemy must be defeated and not every abandoned item deserves a return trip. The routine succeeds when it preserves options and forward understanding, not when it produces theoretical perfection.
- Patch and configure before playing
- Scan exits, concealment, hazards and enemy armor
- Classify the room before choosing a tool
- Spend environmental opportunities before scarce ammunition when sensible
- Reset health, equipment, inventory and map after danger
- Save before major experiments when the game allows it
Platform and Edition Notes
Saber’s FAQ lists 30 and 60 frames-per-second modes for PlayStation 5 and Xbox Series X. Xbox Series S and Nintendo Switch 2 are listed with a 30 FPS target. Do not assume a 60 FPS option exists on those latter systems merely because it appears on the more powerful consoles.
Frame-rate choice can affect control preference. If a platform offers both modes, retest stick sensitivity after switching because camera response may feel different. The official listing establishes mode availability, not an assurance that every scene, display or patch behaves identically. This guide does not invent unverified resolution or performance figures.
A PlayStation developer presentation states that PS5 Pro supports higher graphics settings and PSSR. That is an officially shown platform feature rather than a requirement for play. Beginners should choose readability and stable control response according to their own display rather than treating enhanced hardware as part of the survival strategy.
Xbox Play Anywhere is officially supported. This can be useful for players who move between compatible Xbox and PC environments, but platform synchronization should not be confused with a manual-save guarantee on every version. Verify that the expected account and save state are present before continuing a campaign elsewhere.
On PC, official minimum requirements include 8 GB of memory, 80 GB of available storage and 64-bit Windows 10 with the 22H2 update or later. Saber recommends an SSD. Check the current Steam and support listings before installation in case requirements change, and leave enough storage headroom for patches rather than treating the listed game space as the only disk requirement.
The Deluxe Edition’s Nailer is a functional melee weapon, but it is not placed directly into Aidan’s hands at the opening. Saber’s FAQ says it becomes available through Zora’s shop at the first encounter with that shop. Avoid reorganizing an opening loadout around an item that has not yet become obtainable.
Deluxe weapon skins also require the corresponding base weapons to have been acquired. A skin’s presence in purchased content does not unlock the underlying weapon early. This prevents confusion when optional cosmetic content does not appear immediately in menus or on equipment.
The Deluxe content includes an optional 1980s horror-film filter accessed through the options menu. Because visual clarity matters for concealment, objects and route reading, test the filter before using it for a demanding sequence. It changes presentation, not the underlying requirement to observe the environment.
None of the Deluxe additions is necessary for the survival framework in this guide. The Nailer should not be assumed indestructible, dominant or essential, and no verified evidence supports treating it that way. Standard-edition players retain access to the game’s ordinary melee, ranged and Genesis systems.
Switch 2 visual quality, loading behavior and handheld performance were not independently established by the specialist sources used here. The official 30 FPS target is the appropriate confirmed boundary. Players should apply platform updates and use their own current version rather than relying on unsupported comparisons.
Accessibility details in this guide are specifically attributed to the PlayStation listing when equivalent documentation was not verified elsewhere. Some options may also exist on other platforms, but they should be confirmed in the local menu rather than assumed. Platform storefronts do not always describe identical feature sets with equal detail.
Edition and platform choices can affect presentation, entitlement and performance modes, but they do not alter the beginner principles: preserve capacity, read armor, inspect rooms, use the map and avoid spending a scarce resource before understanding the problem.
- PS5 and Xbox Series X list 30 and 60 FPS modes
- Series S and Switch 2 are officially listed at 30 FPS
- Xbox Play Anywhere is supported
- The Deluxe Nailer is acquired through Zora’s shop, not at the opening
- Deluxe skins require their base weapons
- The optional 1980s filter is not a survival requirement
Content Warning and Stopping Points
Revival is designed around explicit horror rather than merely implied menace. Official storefront descriptors cover intense violence, blood and gore, strong sexual content, nudity, strong language and drug use. Prospective players should treat that list as a substantive warning, not as decorative genre labeling.
The official FAQ states that there is no streamer mode that removes or alters the explicit material. Content creators therefore should not assume the game can automatically conceal nudity, sexual imagery or graphic violence. Platform broadcast tools and manual scene management are not equivalent to an in-game content filter.
For individual players, settings can improve comfort without changing the intended subject matter. Subtitle size, text size, mono audio and separate volume controls are listed on PlayStation. Lowering effects volume or changing display settings may reduce sensory strain, but it does not remove the underlying imagery or themes.
The PlayStation accessibility listing says gameplay and cinematics can be paused during offline play. Use pause support when a sequence becomes overwhelming or an interruption occurs. This guide does not universalize that exact declaration to every platform without equivalent documentation, so verify local behavior before depending on it.
Planned stopping points are particularly useful in an eight-to-twelve-hour campaign built around sustained tension. A good stopping point follows an inventory audit, map check and manual save where available. Ending a session while disoriented, over capacity or immediately before an unresolved resource decision makes returning unnecessarily difficult.
Take a break after repeated failed pursuits or puzzle attempts. Fatigue narrows attention and encourages random input, missed landmarks and wasteful combat. A short pause can restore the ability to compare environmental changes. This is practical survival advice, not a judgment about tolerance for horror.
Players sensitive to particular content should not depend on a spoiler-light guide to identify every occurrence. Avoiding narrative details necessarily prevents scene-by-scene warnings here. Consult dedicated content resources if precise advance notice is more important than preserving surprises.
The game’s mature material should not be minimized through jokes or presented as a challenge to endure. Horror is most effective when the player can engage on informed terms. Adjust difficulty, audio, subtitles and session length according to what supports that engagement.
If streaming or sharing footage, remember that the absence of a filter also affects audiences and platform rules. Review the policies of the service being used and consider delay, scene transitions or other external safeguards. The game itself does not promise automated protection from explicit scenes.
A stopping routine can mirror the survival routine: reach a quiet moment, save if permitted, record the current objective in a few words, note any abandoned supplies and close the game only after checking that the save completed. This reduces friction when returning without revealing or documenting future plot information.
Finally, settings are not permanent declarations of skill or commitment. Lowering difficulty, changing vibration, enlarging subtitles or taking a break are tools for maintaining comprehension. Revival’s systems are easier to appreciate when the player can read the environment and make deliberate choices rather than simply withstand discomfort.
- Expect explicit violence, gore, sexual content, nudity, language and drug use
- Do not rely on a streamer mode; none is provided
- Verify pause and save behavior on the current platform
- Stop after saving and recording the immediate objective
- Use settings and breaks to preserve comprehension
The safest path through Clive Barker’s Hellraiser: Revival is not built around hoarding every item or defeating every threat. It comes from preserving choices. Inventory capacity, ammunition, melee durability, health and Suffering all represent different forms of flexibility, while maps, concealment and environmental objects can reduce how much of that flexibility an encounter consumes.
Enter each area by reading it before acting. Locate exits and hazards, distinguish armor from exposed targets, decide whether stealth has a credible failure plan, and inspect the room before treating ammunition as the default answer. Afterward, update the map, repair or craft for a specific need, and leave enough space to respond to the next discovery.
The Labyrinth is meant to disrupt certainty, but a disciplined routine remains reliable even when the architecture is not: classify the problem, change one variable at a time, observe the result and keep an exit line. That approach protects the story’s surprises while giving Aidan the resources and room required to survive them.
Sources
- Clive Barker’s Hellraiser: Revival Official Site
- Clive Barker’s Hellraiser: Revival FAQ
- Clive Barker’s Hellraiser: Revival on Steam
- Clive Barker’s Hellraiser: Revival PlayStation Store Listing
- Clive Barker’s Hellraiser: Revival Xbox Store Listing
- Clive Barker’s Hellraiser: Revival Deluxe Content Xbox Listing
- Inside the Brutal Puzzles of Clive Barker’s Hellraiser: Revival
- Explore Horror’s Furthest Sensations in Clive Barker’s Hellraiser: Revival
- Hellraiser: Revival Review — Analog Stick Gaming
- Clive Barker’s Hellraiser: Revival Review — Creative Bloq
- Clive Barker’s Hellraiser: Revival Review — GamesRadar+
- Hellraiser: Revival Review — Radio Times
- Hellraiser: Revival Is Intense, Graphic and Disturbing — Tom’s Guide
- Clive Barker’s Hellraiser: Revival Review — WayTooManyGames