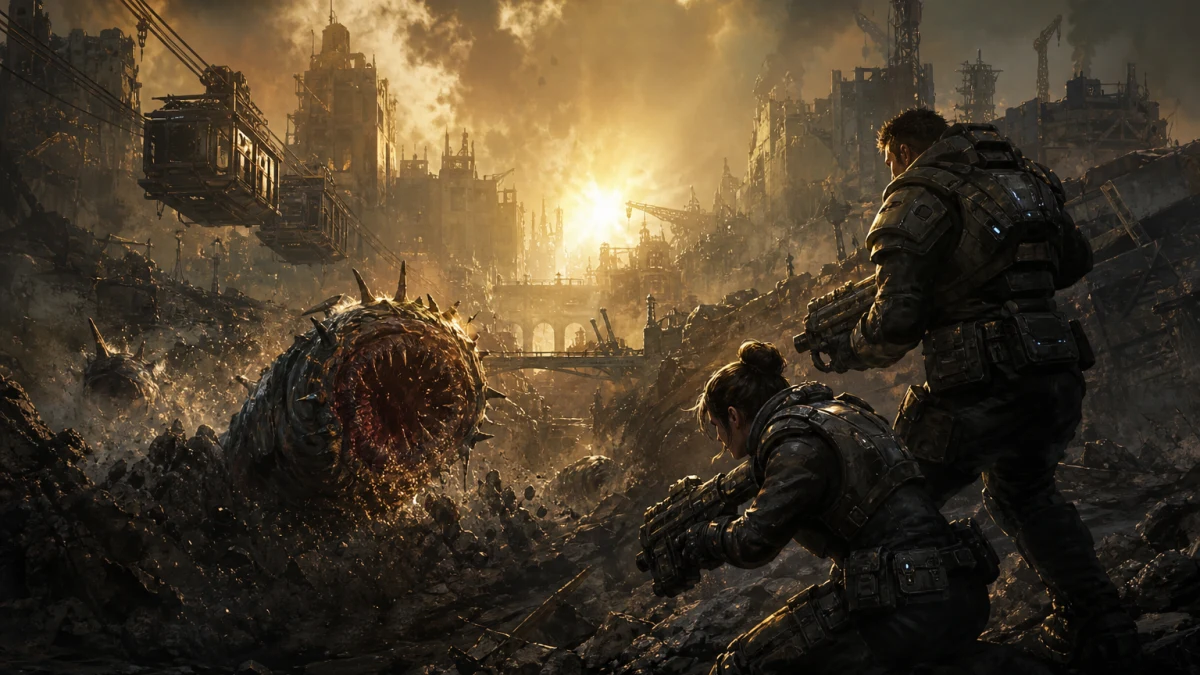
Gears of War: E-Day begins with humanity encountering the Locust, but a beginner’s immediate challenge is more practical: surviving one contested space at a time. The campaign organizes combat around four pillars identified by The Coalition—movement, cover, weapons, and enemies—and none operates in isolation. The right weapon accomplishes little from a dominated angle, strong cover can deteriorate, and a successful flank can still harm the squad if nobody can safely reach the player who attempted it.
The fundamentals remain recognizable to returning Gears players, but familiar actions require fresh judgment. Movement carries momentum and commitment. Cover comes in more shapes and heights, sometimes contains usable gaps, and may lose its upper section under fire. Sliding, jumping, and direct climbing open additional routes. Simulated projectile travel makes distant moving targets less straightforward, while new interface and accessibility choices can substantially improve how quickly a player reads danger.
This guide covers the public campaign as of October 10, 2026, assuming the October 5 update or something newer is installed. It stays spoiler-light and does not provide chapter solutions, boss scripts, collectible coordinates, modification rankings, or late-story details. Its purpose is to build transferable habits: configure the game around readable information, recognize the immediate tactical problem, choose an appropriate response, and keep that response recoverable if circumstances change.
Evidence note: This guide reflects the public game and official information available on October 10, 2026, assuming the October 5 update or later is installed. The official news listing checked on October 10 did not show a newer patch note. Normal and Hardcore are supported by specialist post-launch coverage, while Insane is confirmed through the official achievement list; a complete named difficulty menu was not established from a retrieved first-party reference. Tactical recommendations are reasoned applications of documented systems rather than claims of first-hand play or testing. Official launch materials and storefronts checked for this article did not list PlayStation 5.
What This Beginner’s Guide Covers
This is a campaign systems reference, not a walkthrough. It will not tell you which doorway begins a named encounter, where to stand during a boss sequence, or where an individual collectible is hidden. Those instructions belong in mission and completion guides. The objective here is to help you interpret unfamiliar spaces independently by understanding protection, movement commitment, weapon range, enemy pressure, and squad support.
The advice assumes the October 5 update or something newer is installed. The patch addressed stability, performance, hardware compatibility, online-session behavior, and particular campaign progression problems. Its campaign fixes included objective or side-objective cases in Act 2 Chapter 2, Act 4 Chapter 1, and Act 4 Chapter 2. That provides a sensible launch baseline, but it does not support the broader claim that every conceivable progression fault has been eliminated.
E-Day’s campaign is primarily linear, although larger pockets provide alternate routes, exploration areas, optional objectives, and flanking opportunities. It is not an open world, but neither is every battle a straight corridor. The campaign rewards reading local possibilities without requiring a sweeping exploration build or one permanent tactical role.
Several adjacent subjects remain deliberately limited. Enemy examples explain priority rather than reproducing a full Locust taxonomy. Weapon modifications appear only as adaptable campaign tools, without ranked combinations, numerical comparisons, or Hard Case routes. Co-op discussion concerns campaign support instead of Versus or Horde Siege. Exploration advice avoids totals, achievement routing, and claims about missability.
The central principle is adaptation. A useful wall can be damaged into poor low cover. A long firing lane can collapse into close combat. A specialized weapon may become inefficient when the next arena changes range. A route that initially looks like a strong flank may become indefensible after an enemy relocates. Reliable players revise decisions when the evidence changes instead of protecting a favorite tactic.
Apply the guide one habit at a time. In one early encounter, concentrate on weapon range. In another, inspect both shoulder angles before firing. During a later battle, watch how enemies influence movement rather than automatically targeting the largest body. Isolating one lesson reduces overload and makes it easier to understand why a different choice improved the outcome.
Failure should be diagnosed rather than generalized. A player downed while crossing open ground may have chosen the wrong route, moved at the wrong time, missed an unseen angle, or used an action whose commitment exceeded the available window. Repeated ammunition shortages can indicate poor accuracy, unsuitable engagement range, unnecessary fire, or missed resupply. Difficulty is only one possible cause.
The sections that follow therefore explain documented systems and decision boundaries. They cover low-ground and destructible protection, revised movement, projectile travel, active reloads, the downs counter, Supply Caches, navigation assistance, and campaign readability options. They do not claim one universally optimal setting or loadout. The goal is to provide enough structure for informed choices while preserving the campaign’s encounters and surprises.
- Use this guide for transferable campaign fundamentals, not chapter solutions.
- Install the October 5 update or a newer available update.
- Treat loadouts, routes, and positions as adaptable choices.
- Practice one unfamiliar habit at a time.
- Diagnose the decision that failed before changing broad difficulty.
Before Starting: Verify Platform and Update Status
Gears of War: E-Day launched worldwide on October 6, 2026. Official launch information lists Xbox Series X|S, Xbox on PC, Steam, cloud, and supported handheld play. Xbox Play Anywhere is available for eligible purchases within the Xbox ecosystem. The official materials checked for this guide do not list PlayStation 5, despite that platform appearing in the supplied release record. Unless Microsoft or The Coalition announces otherwise, PlayStation 5 should not be treated as a supported version.
Platform affects more than the purchase location. Two-player split-screen campaign is available on console, while online campaign supports up to four players. Online console play is subject to the applicable Xbox subscription requirements. PC, cloud, and handheld arrangements have their own input, account, networking, and display considerations, so verify the conditions attached to the version you intend to use.
Finish installing updates before beginning a long session. A preload or partially completed background installation may provide access before every component is current. The October 5 patch included campaign progression and online join-in-progress changes, making version verification particularly sensible for a group that downloaded the game before release.
Version consistency matters in online co-op. If joining fails, first make sure every participant has completed the available update and restarted as required by the platform. Confirm account sign-in, online privileges, and normal network status before interpreting a connection problem as a campaign defect. A few minutes of preparation avoids making other players wait while one system completes an overlooked installation.
If campaign progression appears to stop, do not immediately assume a known bug remains. Confirm that the active objective has been completed, required interactions are finished, no hostile remains, and all co-op participants have reached the relevant space. If the state still appears wrong, preserve the safest available checkpoint, restart cautiously, and consult current official support information. The launch patch fixed specific cases, not every hypothetical cause of stalled progress.
PC players should separate combat guidance from hardware prescriptions. Performance depends on the system, display, drivers, and selected graphics configuration. This guide does not assert a universal resolution or frame rate. Establish a stable, readable presentation before pursuing higher visual settings. Consistent input response and clear silhouettes matter more to learning than a target a particular computer cannot sustain.
Cloud and handheld play add readability and latency considerations. A small display can make distant targets, cover gaps, subtitles, and threat indicators harder to distinguish. An unstable stream can disrupt active-reload timing or make committed movement feel inconsistent. Use Boot Camp or Combat Training to compare repeated actions before blaming campaign balance. Interface sizing, contrast, or another play method may address the underlying issue.
Xbox Play Anywhere can make changing devices convenient, but allow normal synchronization to finish before resuming elsewhere. After a long or cooperative session, avoid rushing through a save conflict based only on a familiar device name. Likewise, confirm that every participant has the same updated version before reorganizing a co-op group around a problem that may only be an installation mismatch.
- Use an officially listed Xbox or PC ecosystem platform; no official PlayStation 5 listing was verified.
- Install the October 5 update or anything newer offered.
- Remember that split-screen campaign is a two-player console feature.
- Check current subscription terms for online console co-op.
- Prioritize stable input and readable combat information.
- Confirm version consistency and save synchronization before group play or device changes.
Choose Solo, Split-Screen, or Online Co-op Deliberately
Solo play offers the clearest environment for self-directed learning. You can pause to inspect settings, study a new space, test a weapon, or investigate a side route without negotiating the group’s pace. One player controls when exploration ends and the story resumes. Solo still requires squad awareness, however; allied positioning remains relevant to support, pressure, and recoverability.
The available primary evidence does not precisely document AI revival reliability or every squadmate behavior. Do not base a risky push on an assumption that computer-controlled allies will always repair it. If the squad remains behind while the proposed route crosses several firing lanes, determine whether you are creating a real flank or simply leaving support.
Two-player console split-screen makes communication immediate but reduces each participant’s view. Smaller personal screen space can make distant silhouettes, peripheral danger, subtitles, and directional warnings less obvious. Configure interface text, subtitle size, contrast, and camera comfort for the actual split-screen seating distance. Settings that look adequate while standing near the display may be insufficient from a sofa.
Local conversation does not erase tactical distance. Two players in the same room can still separate across several hostile lanes or trigger different activities. Agree on basic encounter and exploration timing. A simple call before entering a new space, climbing to a side route, or stopping to search prevents physical proximity from creating false confidence about in-game support.
Online campaign supports up to four players. More human participants can create better crossfire, distribute attention, and provide flexible rescues, but they also introduce competing intentions. One player may search every room, another may advance immediately, and a third may swap away from the squad’s only long-range weapon. Briefly announcing a flank, cache change, or detour prevents many avoidable problems.
Co-op does not make exposed downs harmless. A revival requires somebody to interrupt damage, reach the fallen player, and remain vulnerable long enough to help. If the down occurs beyond several enemy-controlled lanes, a second player may be lost trying to correct it. Stay close enough to support one another without clustering behind the same object.
Establish a loose group convention rather than rigid classes. The squad might hold its main line until everyone is ready, announce major cache changes, and regroup before crossing a clear transition. During combat, one player can state an intention to hold while another checks a side angle. Making intent visible is more useful than assigning permanent roles before seeing the arena.
Exploration also benefits from agreement. Decide whether the group will follow obvious side paths, react to collectible chimes, or search broadly after fights. A story-focused player can become frustrated by exhaustive inspections, while an exploration-focused player can lose optional content when somebody triggers the next sequence. A shared stopping rule accommodates both preferences.
Choose the mode that matches the desired pace instead of assuming more players automatically make the campaign easier. A careful beginner may learn systems fastest alone. Two patient newcomers can learn effectively together. A four-person group can coordinate elaborate pressure, but raw numbers cannot replace cover discipline, suitable weapon range, and recoverable positioning.
Treat the first session as calibration. Split-screen readability, online delay, incompatible exploration habits, or differing difficulty preferences may only become clear after combat begins. Changing the arrangement is not a failure. The best format is the one in which the participants can read the game and communicate their choices consistently.
- Choose solo for independent pacing and experimentation.
- Use split-screen when immediate communication outweighs reduced personal screen space.
- In online co-op, announce flanks, cache changes, and detours.
- Remain supportable without stacking everyone behind one object.
- Agree on exploration and transition rules.
- Never treat another player’s revival ability as permission for a reckless down.
Set Up the Game Before Judging Its Difficulty
Campaign challenge is not just a global tier. It is the combined result of enemy pressure, visual clarity, sound, aiming support, control familiarity, camera comfort, and tactical understanding. E-Day permits customized campaign gameplay settings, although changing certain options can cause the game to reclassify the current difficulty tier. If named-difficulty credit matters, read any displayed warning before confirming changes.
Normal and Hardcore appear in specialist post-launch coverage, and the official achievement list confirms campaign-completion objectives tied to Insane. A complete first-party menu list was not established for this guide, so no additional names should be inferred. A first-time Gears player should begin near the standard or default experience unless deliberately seeking severe consequences. Insane is an advanced objective, not a learning baseline.
Reduce broad challenge when ordinary engagements repeatedly collapse before there is enough time to understand why. If sound positioning, appropriate range, and reasonable threat responses still produce overwhelming pressure, a lower tier can create room to learn. That adjustment is more targeted than enduring frustration until poor emergency habits become automatic.
Use narrower assistance when the barrier is narrower. If targets are difficult to acquire with a controller but route choice feels sound, increase aim help. If grenades and major attacks appear to arrive without readable warning, enable threat indicators or threat audio. If navigation, text, or visual separation is the issue, adjust those systems rather than first changing combat durability.
Controller aim support includes Off, Default, Snap Aim, and Lock-on Aiming, with an optional target-lock audio cue. Stronger assistance can help a newcomer learn enemy motion and useful weapon distance without simultaneously struggling against the stick. It can be revisited later if target acquisition becomes comfortable. The sensible setting is the one that makes aiming accessible enough for tactical decisions to matter.
Controller presets include Default, Modern, Modern Alt, Legacy, and Legacy Alt. Do not choose a scheme simply because a veteran prefers familiar mappings. Exact inputs vary by preset, so learn the labels and prompts shown for the selected configuration instead of relying on an unverified universal button layout. Consistent execution is more valuable than borrowed tradition.
Comfort affects practical difficulty. Excessive camera shake may obscure incoming direction. Small subtitles can hide useful combat information. Insufficient contrast can make enemies merge with dense environments. Adjusting those factors does not remove tactical demands; it ensures the information required to meet them can be perceived.
Revisit settings after substantial combat. Initial choices are guesses made before the game’s visual and mechanical load is known. Change one or two variables at a time. If sensitivity, contrast, assistance, controls, and global difficulty all change together, it becomes difficult to determine what actually improved the experience.
Classify recurring failures. Movement deaths suggest route, timing, commitment, or warning problems. Sustained ineffective fire suggests range, recoil, aiming, or target-priority issues. Failed rescues suggest spacing and lane control. Repeated disorientation in larger spaces suggests a navigation aid. Broad difficulty cannot distinguish those causes, but diagnosis can.
In co-op, each participant can choose an individual difficulty. That gives a mixed-experience group more flexibility than forcing every player into one identical challenge setting. It does not eliminate the shared consequences of poor spacing, unsafe revivals, or conflicting plans, so personal difficulty should complement rather than replace squad coordination.
If achievements or named-tier completion matter, separate that objective from experimentation. The evidence confirms that some gameplay customization can reclassify difficulty, but it does not justify saying every accessibility aid changes credit. Use the game’s current notices as the authority. Do not assume visual, subtitle, audio, or navigation assistance automatically invalidates an achievement without explicit confirmation.
- Begin near the standard experience unless you already understand Gears combat.
- Use global difficulty changes for broad pressure problems.
- Use aim, threat, navigation, and readability options for specific barriers.
- Watch for notices about difficulty reclassification.
- Remember that co-op participants can select difficulty independently.
- Choose controls you can execute consistently.
- Reassess settings after real combat and alter only a few variables at once.
Beginner-Friendly Accessibility and Interface Setup
Threat indicators identify the direction of imminent high-damage attacks and nearby grenades or explosives. Optional audio feedback can reinforce those warnings when the screen is crowded. They do not choose the escape route, but they increase the chance that the player can make a deliberate choice before impact. Enable them when explosive danger seems difficult to locate.
Campaign enemy health bars can be shown for every enemy, limited to large enemies, or limited to bosses. Displaying all bars can help a beginner determine whether shots connect and whether a target is nearly finished. Selective bars reduce clutter while retaining information for major threats. Use the setting to answer an actual uncertainty rather than automatically maximizing information.
Subtitles, subtitle sizing, speaker names, and ambient combat subtitles can preserve useful calls during loud scenes. Speaker names help distinguish squad information from other voices. Increase text for the real viewing distance, especially in split-screen. Ambient combat captions are most useful when dialogue and sound effects otherwise conceal tactical information outside the current camera view.
High-contrast character options can assign separate colors to the player, squad, allies, and enemies in Campaign and Horde Siege. In campaign play, this can make crowded scenes easier to classify. Test the selected colors in motion; a vivid value in a menu may blend with fire, lighting, or scenery once combat starts. The best combination is the one that keeps categories distinct.
Campaign camera shake can be adjusted independently from multiplayer modes. Lowering it can improve comfort and stabilize target tracking without requiring the same choice in every mode. Brightness, contrast, UI text size, color-blind filters, and graphics preferences should likewise be configured for readability rather than left at an arbitrary default.
Audio controls permit enemy, player, and squad footsteps to be adjusted independently. Raising hostile footsteps relative to friendly movement can clarify close approaches. Make incremental changes rather than silencing everything else, because dialogue, environmental information, and collectible cues remain useful. The aim is prioritization, not stripping the scene of context.
Midnight audio is a situational option that reduces dynamic range for more consistent volume at low listening levels. It may make loud peaks easier to manage in a shared space, but judge it by whether important warnings remain distinguishable. It is not a universal tactical recommendation. Separate volume controls should be tested during both quiet exploration and active fighting.
Visual and audio navigation aids can guide players toward the next objective continuously or when Tac-Com is pressed. On-demand use preserves more environmental discovery, while continuous guidance can reduce frustration in a confusing area. A separate audio ping can point toward the nearest Supply Cache or RIG, helping players find practical resources without an exhaustive search.
Build the interface around priority. Enabling all health bars, captions, guidance, high contrast, target cues, and warnings at once can create competition for attention. Begin with the options tied to the main barrier. Add another layer only when it answers a recurring question. A player who already reads target health but misses grenades needs threat feedback, not more status information.
Use Combat Training or an early encounter to validate the setup. Compare camera shake, aim support, health-bar density, contrast colors, and footstep balance under repeatable pressure. A setting succeeds when it makes relevant information easier to interpret without introducing greater confusion elsewhere.
- Enable threat indicators and audio if heavy attacks or explosives are difficult to locate.
- Choose enemy health-bar coverage according to the feedback needed.
- Configure subtitles, speaker names, and combat captions for the viewing distance.
- Reduce campaign camera shake if it affects comfort or tracking.
- Prioritize enemy footsteps without erasing useful environmental audio.
- Use high contrast, objective guidance, and cache pings when needed.
- Avoid interface overload that buries urgent warnings.
Use Boot Camp and Combat Training First
Boot Camp is a short training course for the revised controls and movement systems. It is worthwhile even for returning players because E-Day distinguishes movement choices more deliberately and adds direct jumping and climbing. Its purpose is not mastery. It is to ensure that a pressured campaign encounter is not the first time you learn how a core action behaves.
Combat Training provides a larger practice area where weapons can be tested and short Locust encounters spawned. It also supports four-player co-op, making it useful for a campaign group that wants to compare controls and weapon handling together. Use it to answer narrow questions: how far a cover entry travels, when a sprint can become a slide, which surfaces can be climbed, how shoulder swapping changes an angle, and how a weapon behaves at different distances.
Practice cover entry from several directions and allow each action to finish before adding another input. This builds respect for commitment and makes an unintended result easier to diagnose. Compare ordinary approaches with sprinting and sliding entries. The objective is to recognize distance and endpoint, not to perform the fastest possible chain.
Test sprinting, evading, sliding, jumping, and climbing as separate choices. Slide toward known protection and through an appropriate gap. Jump or mantle a reachable object without first attaching to it as cover. Evade one immediate attack, then return to a protected position. The comparison demonstrates that the moves solve different problems.
Shoulder swapping merits dedicated repetition. Find cover that obstructs one firing side, aim briefly, swap, and compare the exposure from the opposite edge. Repeat with reversed geometry. The lesson is not that one shoulder is superior. It is that camera side should follow the object and firing lane rather than habit.
Practice blind fire and melee defensively. Blind fire can discourage a close approach while reducing head exposure, whereas melee answers a threat that has already reached close range. The prologue’s emphasis on melee establishes it as a real survival tool, but training should not turn that fact into a habit of manufacturing unnecessary rushes.
Reload practice should include ordinary and active timing. Try the centered active-reload display and, if useful, the traditional upper-right position. Test the selected automatic or manual behavior. With the Gnasher or Breechshot, observe how loading one or two rounds returns the weapon to service without waiting for a complete refill.
Use the practice space to compare accessibility settings against a repeatable encounter. If aiming remains difficult, compare assistance modes with the same target pattern. If hostile footsteps disappear beneath the squad, alter those categories incrementally. If high-contrast colors merge with the environment, adjust them before relying on the feature in the campaign.
Do not mistake training performance for universal campaign readiness. Story encounters add destructible protection, changing sightlines, mixed enemy roles, and spectacle. Training teaches vocabulary; the campaign teaches judgment. A technique that works cleanly in a controlled room may require a different timing window when several enemies apply pressure.
Leave when actions feel deliberate. Extended sterile practice can make the campaign resemble an examination and is unnecessary for most beginners. Return only when one specific action remains unclear. Boot Camp and Combat Training should remove avoidable control confusion, not become a mastery prerequisite.
- Complete Boot Camp to learn the revised control vocabulary.
- Use Combat Training for controlled comparisons.
- Practice cover entry, slide timing, jumping, climbing, and shoulder swaps.
- Try defensive blind fire, melee, and partial reloads.
- Validate aim, audio, and interface settings.
- Begin the campaign once actions are intentional rather than perfect.
The Core Rule: Cover Is a Network, Not a Permanent Home
Treat cover as a connected system of temporary positions, not a destination. Before occupying the nearest wall or vehicle, identify where you would move if it stopped working. Looking one position ahead is adequate; noting a second option is better when the arena is complicated. The point is to avoid discovering the escape route only after concentrated fire makes it urgent.
Cover should be judged by geometry rather than size. Ask what it blocks, which firing edges it provides, how enemies can approach it, and whether squadmates can support the position. A tall isolated wall with no safe retreat may be worse than a smaller barrier connected to neighboring protection and a useful crossfire.
E-Day supports varied cover shapes and heights. Low-ground protection behind short walls or debris can leave the character almost prone, with slower movement and a somewhat more exposed profile. It can save a crossing or provide emergency protection, but it is often a poor location for a prolonged exchange. Stabilize there, then consider whether a better position is reachable.
Protection can deteriorate. Gunfire may remove an object’s upper portion, reducing it to low-ground cover. Larger structural hazards can also change a battlefield. When the cover’s state changes, reassess immediately. The remaining piece may still be useful, but it no longer performs the same job or blocks the same angles.
Do not wait for an object to disappear completely before responding. Breaking material, increasing exposure, and newly visible tracers are evidence that the position is becoming unreliable. A transfer during a manageable lull is safer than a desperate exit after the last useful protection has failed.
Evaluate a fallback from the enemy’s perspective. If both the current object and the fallback sit inside the same controlled lane, moving between them may not meaningfully improve safety. Prefer a route that breaks the hostile angle or forces opponents to shift. A few steps that change geometry can be more valuable than a long move along the same line.
Consider where a down would occur. A character downed beside connected cover may be recoverable. One downed in the center of a lane can force another squad member to cross open ground. Before attempting a push, imagine the rescue route if it fails. That converts personal risk into the correct squad-wide calculation.
Avoid stacking the entire squad behind one attractive object. Shared cover concentrates firing angles and lets explosives, structural damage, or a large attack threaten several players together. Neighboring positions can maintain mutual support while creating more than one line of fire.
Remaining in place is sometimes the strongest action. Official launch advice supports holding defensible ground and allowing enemies to approach. If opponents must cross exposed terrain while the squad has useful angles, advancement discards an advantage. Use the time to maintain ammunition, watch side routes, and remove enemies as they enter poor ground.
Relocate because the tactical relationship changed: an enemy flanked, an explosive arrived, a large threat invalidated the wall, the structure deteriorated, or the position lost useful range. Do not move solely because remaining still feels passive. Good cover is accomplishing work whenever it forces enemies to accept greater exposure than the squad.
- Judge cover by blocked angles, firing options, support, and exits.
- Treat low-ground cover as emergency or transitional protection.
- Reassess immediately when destructible cover changes.
- Prefer fallbacks that break the hostile angle.
- Consider the rescue route before making a risky crossing.
- Hold useful ground when enemies must expose themselves to approach.
Movement Has Commitment and Momentum
E-Day separates sprinting, evading, sliding, and cover entry into distinct movement choices. Cover-entry cancellation is more committed than in recent Gears games and only becomes available near the destination. Movement also preserves momentum, making instant direction reversals less practical. Indiscriminate cover bouncing is therefore less reliable than selecting a valid endpoint.
Assign a purpose before pressing the movement input. Sprint when distance is the main problem and the route is sufficiently clear. Evade when a short displacement avoids an immediate attack. Slide to lower the profile, cross a brief exposed interval, pass under a suitable gap, or extend entry into cover. Use cover entry when the destination provides protection and a usable angle.
Beginners should allow one important movement choice to resolve before improvising another. Frantic inputs can produce an unintended attachment, jump, or slide. Deliberate sequencing also improves diagnosis. If a move fails, you can distinguish a poor route from poor timing or an inappropriate action instead of treating the result as arbitrary.
Movement timing begins before motion. Watch enemy bursts, attention, allied pressure, and the condition of the destination. A clear route crossed during concentrated fire may still be fatal. A more exposed path can become viable when opponents reload, turn toward another squad member, or lose sight through smoke.
Sprinting is a distance tool, not a default state. Use it to cross a known route, leave a structural threat, or reach selected protection. It is less suitable when the endpoint remains uncertain or the player needs time to inspect multiple gaps and objects. Speed cannot compensate for missing the information required to choose safely.
An evade answers immediate danger with short displacement. After avoiding the attack, establish protection and orientation. Repeated evades without a destination can leave the character recovering in another exposed place. The first action solves the attack; the second decision must solve the position.
Momentum means late reversals may not behave like instant corrections. Returning players should resist importing every aggressive cover-bounce instinct without adjustment. Smooth E-Day movement comes from choosing destinations earlier, not constantly reversing after commitment has begun.
If a move lands badly, stabilize before escalating. Use nearby protection, create distance from the immediate threat, or retreat toward support. Do not repair one overextension with a longer unsupported flank. Health recovery and a reconnected squad line usually provide more value than forcing a hurried kill from an exposed endpoint.
When an enemy relocates during a committed move, respond to the new reality rather than the original plan. The intended cover may no longer block the important angle. Finish the safest available part of the action, then break sight or move again when possible. A plan remains useful only while the battlefield still supports it.
Deliberate movement eventually becomes faster because it eliminates correction. A player who chooses one suitable destination spends less time than one who sprints to the wrong object, reverses, and slides into another bad angle. Early caution is not the final objective. The objective is a dependable relationship between intention, input, and endpoint.
- Assign a tactical purpose to every major movement action.
- Account for cover-entry commitment and momentum.
- Start crossings during pressure lulls.
- Let one movement choice resolve before adding another while learning.
- Use sprint for distance and evade for immediate displacement.
- Stabilize rather than escalating after a poor landing.
Slide, Jump, Climb and Flank With Intent
Sliding connects sprinting to safety. It can lower the character’s profile, pass beneath suitable gaps, assist an approach, and enter cover from farther away. Its value depends on knowing the endpoint. Before starting, identify where the slide finishes, which angles can see that space, and whether protection or support exists there.
Firing during a slide is possible, but it should remain opportunistic. Use it when the shot helps complete the movement or stops an immediate close threat. For accurate sustained fire, a stable protected position is generally easier to control. The existence of sliding fire does not make every crossing an attack run.
The move cannot be spammed continuously, reinforcing its role as a timed tool. A useful slide connects two decisions: why the current position must be left and what the destination provides. If neither can be answered, remain protected long enough to inspect the lane rather than substituting momentum for judgment.
Dedicated jumping, ledge grabbing, and climbing create vertical and lateral choices. Reachable walls, vehicles, and other objects can be mounted without first attaching to them as cover. These additions create flanking and traversal opportunities; they do not transform the campaign into a platforming game.
Use a jump or climb when it solves geometry. A higher route might bypass pressure, produce crossfire, or reach protection otherwise inaccessible. Height alone is not safety. An elevated character may become visible to more enemies, so inspect the side angles and locate a route down or across before beginning a long exchange.
Do not drop into an unseen space because the game permits it. Check the landing area, likely threats, return options, and whether the squad can support a down there. In co-op, announce the move. A player separated beyond practical rescue distance is not providing a useful flank merely by standing somewhere different.
A proper flank needs three elements: pressure from the main squad, a route that limits exposure, and an endpoint that affects the enemy. Without main-line pressure, opponents can turn toward the flanker. Without a supportable route, the move may fail before arrival. Without a useful endpoint, the accepted risk produces no meaningful crossfire.
Some protection contains gaps that can be ducked or slid through, used as low lean-out positions, or fired through. Treat openings symmetrically. If they create an angle for the player, they may also permit hostile fire. Inspect windows, holes, and broken sections before assuming a wall is solid protection.
Gaps change value when enemies move. An opening harmless against the original front may become dangerous after a Drone shifts laterally. Conversely, a small opening can permit a brief low-exposure shot when a target crosses its line. Use it as a temporary angle, not a guaranteed one-way firing port.
Expanded traversal is most useful when it changes tactical relationships. Slide to safety, climb to crossfire, jump to a connected route, or pass through a gap that breaks pressure. Movement performed solely because the animation is available adds risk without solving a problem.
- Slide toward a known endpoint.
- Treat slide shooting as situational rather than standard.
- Use jumping and climbing to solve geometry or create crossfire.
- Inspect elevated positions for side exposure and exits.
- Require main-line pressure, a supportable route, and a useful endpoint for a flank.
- Treat cover gaps as both opportunities and threats.
Aim From the Side That Protects You
Third-person visibility and safe firing exposure are not identical. E-Day allows the aiming shoulder to be swapped, changing which side of the character and cover the camera favors. If the current object blocks the line or forces broad exposure, try the other shoulder before abandoning a potentially useful position.
Shoulder selection should follow geometry, not a permanent left-or-right preference. Recheck it after every major relocation. A camera side that worked behind one wall may be wrong beside the next vehicle, window, or short barrier. Building the check into arrival at cover prevents repeated attempts from an obstructed edge.
Expose as little as practical. Most engagements require some risk, but there is no benefit in presenting the same broad target to several enemies simultaneously. Use a controlled burst or deliberate shot, then release the angle when return fire intensifies. Repeatedly aiming from a known edge invites concentrated pressure.
The camera may reveal enemies while the character remains protected, but aiming can move the body into their line. Test an angle briefly instead of assuming camera visibility equals a safe shot. Information gathered without firing may be enough to justify a shoulder swap, target change, or relocation.
Blind fire attacks from cover without fully exposing the head. Official launch advice identifies it as particularly useful against enemies pressing close while health recovers. Accuracy is lower, so it is not a substitute for distant aimed fire. Its job is to discourage an approach, finish a nearby target, or maintain limited pressure while preserving protection.
Use blind fire at a range where imperfect accuracy can still matter. Spraying toward a distant enemy may waste ammunition without changing behavior. Once health and position stabilize, return to a proper aimed angle or select another route. Blind fire is a defensive bridge, not the foundation of every firefight.
The center-screen damage Omen provides directional blood effects that indicate incoming-hit direction. Combine it with tracers, muzzle flashes, threat indicators, footsteps, and combat calls. If damage repeatedly arrives from one side whenever you aim, stop treating faster accuracy as the only solution. Change shoulder, block that line, or relocate.
Directional damage should inform the route rather than trigger panic. The nearest object may remain inside the same hostile lane. Identify protection that actually breaks the angle. A longer move behind genuine obstruction may be safer than a short transfer that preserves the enemy’s line of sight.
When several enemies already dominate one lane, reduce the problem before challenging it again. Let squad pressure pull attention, use a different edge, select another target, or reposition. Prolonged aiming is especially dangerous when multiple opponents can attack the exposed character at once.
Smoke grenades block both player and AI sightlines and can enable retreat, repositioning, or a close-range advance. Use smoke for a named purpose and, in co-op, communicate that purpose. Unplanned smoke may also remove the squad’s view of targets it was suppressing. Obscuration is valuable when everyone knows what the temporary information loss is intended to accomplish.
- Select the shoulder that requires the least exposure.
- Recheck camera side after relocating.
- Use brief firing windows instead of remaining aimed from one edge.
- Blind fire against close pressure or while recovering.
- Interpret the damage Omen and tracers as directional evidence.
- Use smoke to enable a specific movement or rescue.
Understand Range, Recoil and Projectile Travel
All weapon projectiles use simulated ballistics and travel time. A distant moving target may therefore require lead instead of aiming only at its current position. Official material does not establish identical drop behavior for every weapon, so avoid applying one exaggerated correction universally. Begin with modest lateral lead and adjust from visible results.
Projectile travel matters most when distance and predictable motion combine. A stationary distant target may require patience but little lateral adjustment. A target crossing consistently can move beyond the original aim point before the projectile arrives. Lead in its direction of travel rather than guessing alternately on both sides.
Do not overcomplicate ordinary close-range shots. At short distances, basic tracking and center-mass placement remain the practical priority. Beginners can become less accurate by attempting dramatic ballistic compensation where travel time has little tactical consequence.
Some automatic weapons reward controlled bursts because recoil makes sustained distant fire inefficient. Fire a short sequence, let the weapon settle, and repeat. Close range may justify a longer burst because the target occupies more of the aiming area and immediate stopping pressure is valuable. Firing rhythm should follow distance.
The official weapon descriptions demonstrate meaningful differences. The Hammerburst fires an accurate six-round burst, and its perfect active reload increases its rate of fire. The Lancer MK1 is dangerous close up but requires control of strong recoil at greater distance. The Prototype Lancer offers a high rate of fire and relatively deep magazine. Treat those as handling profiles, not a universal ranking.
First-person scopes include sway. A precision shot therefore requires timing as well as placement. Observe the motion and fire during a controllable part of it. If incoming pressure does not permit that brief settling period, leave the scope and improve the position rather than waiting for perfection while exposed.
When a weapon-range match is poor, change distance, weapon, or target. Move closer along protection, draw a more suitable firearm, or address a nearer disruptive enemy. Repeatedly spending ammunition on low-probability shots is not persistence; it is a resource leak that leaves fewer options when the fight reaches the weapon’s intended range.
The Snub can fire as quickly as the trigger is pulled and is quick to draw and stow. It is therefore useful for cleaning up a weakened target or continuing pressure while a primary weapon needs attention. Finishing with the sidearm can preserve specialized ammunition and postpone a dangerous primary reload.
Suppressive fire can be useful when it enables movement, but unsupported long-range spraying often accomplishes little. Ask whether the shots are landing, changing enemy behavior, or creating a window for the squad. If none is true, stop and conserve the magazine for a better opportunity.
Accuracy begins with the position. A precision weapon cannot compensate for an angle controlled by several enemies, and a recoil-heavy automatic becomes harder to manage when the player is forced to flinch and retreat. Create enough safety to use the weapon properly, or select a tool that can answer the immediate pressure with less exposure.
- Lead distant lateral movement modestly and correct from results.
- Keep close-range aiming simple.
- Use controlled bursts when recoil makes sustained fire inefficient.
- Respect scope sway and disengage if the angle is too dangerous.
- Change distance, weapon, or target when the matchup is poor.
- Use the Snub for quick cleanup and ammunition conservation.
Active Reload Without Turning Every Reload Into a Gamble
Active reload remains an important Gears rhythm, but a usable weapon matters more than perfect timing. Learn the visual sequence after an encounter or behind stable protection. Do not make a contested lane the place where all attention shifts to a narrow timing window.
The active-reload display appears at the center of the screen by default. That can help beginners monitor it without looking far from the action. Players with established series habits can restore the traditional upper-right position. Neither location is inherently better; choose the one that requires less harmful attention shift.
Develop timing in stages. First perform dependable ordinary reloads from safety. Next attempt active timing after encounters. Then use it during clear combat lulls. This progression prevents the system from becoming a reflexive gamble and teaches the more important skill of recognizing when the attempt is tactically appropriate.
Do not chase perfection while an enemy rushes, a grenade warning is active, or cover is failing. A successful active input may not compensate for the damage taken while watching the indicator. Break contact, defend, or move first. Mechanical execution only matters when the situation permits it.
Reload behavior can be automatic, manual through the reload input, or manual using either reload or fire once the weapon is empty. Choose the behavior whose consequences are easiest to predict. If reloads repeatedly begin or fail to begin contrary to expectation, inspect this setting before assuming an input was ignored.
A safe reload window begins after pressure has been interrupted, not simply after firing stops. Check nearby movement, explosive warnings, and cover condition. A character behind a wall is not necessarily safe to reload if the wall is deteriorating or a close attacker is about to reach it.
The Gnasher and Breechshot reload round by round. One or two rounds can be inserted before firing resumes, avoiding the need to complete a full reload under pressure. If one shell can answer the immediate threat, load one and reassess. Continue filling only while the lull remains real.
The Gnasher holds six shells rather than the eight associated with several earlier entries. Notice when a close fight consumes most of the load, but do not compulsively top off after every shot. An incomplete weapon ready to fire can be more valuable than a full weapon trapped in an interrupted reload.
Weapon switching may be safer than reloading. The Snub’s quick handling supports finishing a weakened enemy while a primary remains unavailable. That does not eliminate the reload; it postpones it until the battlefield offers a better interval. Immediate survival takes priority over restoring every magazine to an ideal state.
Active reload should enhance a sound combat rhythm rather than dictate it. Take cover because it blocks pressure, not merely because the reload bar appeared. Attempt timing because the lull allows it, not because every magazine must produce a perfect result. The correct reload is the one that returns appropriate fire without sacrificing position.
- Practice active timing during safe intervals.
- Place the reload display where it minimizes divided attention.
- Prioritize movement or defense over a perfect result.
- Select a predictable automatic or manual behavior.
- Use partial Gnasher and Breechshot reloads under pressure.
- Switch weapons when a quick finish is safer than reloading.
Build a Flexible Two-Range Loadout
A beginner loadout should answer more than one distance problem. Pair a close-range answer with a dependable mid- or long-range tool, or use a mid-and-long combination when the squad already has reliable close protection. The framework matters more than a fixed pairing: avoid carrying two weapons that become inefficient in the same situation.
Before replacing a weapon, identify what the current pair handles well and what it cannot solve. Consider the likely arena, available ammunition, and other squad members’ roles. A powerful specialist weapon can still weaken the overall loadout if both slots now demand the same engagement distance.
The Chainsaw Lancer is presented officially as a flexible close-to-mid-range weapon and offers a sensible baseline while learning. Flexibility reduces the number of situations in which a beginner has no practical answer. It is not mandatory forever. Keep it when its role is useful; change it when the space or squad requires something more specialized.
The Gnasher provides point-blank damage. Use it for deliberate close engagements, defensive stops, and supported advances. Repeated distant shots consume its six-shell load for little return. If carrying it into a space with long lanes, ensure the other weapon can contribute without requiring an unsafe approach.
The Longshot fills a distant precision role. The Hammerburst supplies an accurate six-round burst. The Lancer MK1 emphasizes dangerous close-range fire with recoil that must be controlled farther out. The Prototype Lancer combines a high rate of fire with a relatively deep magazine. These descriptions identify different jobs rather than an absolute tier list.
Use the Snub to complement the two primary roles. Its fast draw and stow behavior makes it practical for finishing weakened targets, preserving specialized ammunition, or continuing to fight while a primary reload would be unsafe. A sidearm is not merely decorative insurance.
Supply Caches around Kalona allow loadout changes, so an early choice does not permanently lock the campaign role. Use caches to respond to new range demands or squad composition. In co-op, announce a major replacement before taking it. Accidentally removing the group’s only distant or close-pressure answer can make the next encounter harder.
Campaign weapons can also be altered through modifications. Treat mods as adaptable tools that reinforce a chosen role, not as proof that one gun must remain equipped permanently. Exact builds, numerical effects, Hard Case locations, and optimal routes are outside this guide. A separate build reference is the appropriate place for those details.
Heavy weapons slow the carrier even though most normal movement remains available. Recalculate crossings and support distance while carrying one. A route comfortable with a standard loadout may be unsafe at the reduced pace. Heavy firepower does not erase the positional cost of slower movement.
Think at squad scale in co-op. Multiple players can share a range role when an encounter justifies it, but unplanned duplication can leave a gap. A brief cache conversation is sufficient: determine who can stop close pressure, cover the main lane, and address distant or elevated targets. These are temporary responsibilities, not permanent classes.
- Carry weapons that cover complementary distance bands.
- Use the Chainsaw Lancer as a flexible baseline, not a compulsory choice.
- Reserve the Gnasher for deliberate close-range work.
- Consider ammunition and heavy-weapon movement costs.
- Use caches to change roles when the arena changes.
- Announce major co-op loadout changes.
Read Enemy Roles Before Focusing Fire
Target priority begins with function rather than size. On entering combat, identify what is pinning the squad, approaching at close range, flanking, disorienting, transporting reinforcements, or forcing movement. The largest visible enemy is not automatically the most urgent if a smaller one is already destroying safe options.
A useful first division is immediate, enabling, and durable threats. Immediate threats can cause a down or disrupt movement now. Enabling threats create favorable conditions for other enemies by pinning, disorienting, reinforcing, or flushing the squad. Durable threats require sustained attention but may not need every weapon simultaneously. These categories can change as the fight develops.
Remove close disruptors before committing all fire to a distant damage sponge. Armored Wretches can scream to disorient players and limit actions. Drone variants use different equipment and can work together, allowing one element to maintain pressure while another changes angle. Watch behavior, not merely body type.
Enemy teamwork means the loudest shooter may not be the most dangerous participant. A quieter flanker can invalidate cover while the main group attracts attention. Use hostile footsteps, combat subtitles, allied calls, tracers, and the damage Omen to detect movement beyond the current camera direction.
E-holes can open during encounters and add Locust. A well-placed grenade can close one before reinforcement pressure grows. Do so when a safe throwing window exists. Do not ignore a close attacker, abandon viable cover, or endanger a teammate merely because closing the source would be valuable in isolation.
Focus fire is strongest when removing a target restores an option. Eliminating a disruptor may reopen a revival route. Closing an E-hole may stop the arena from becoming more crowded. Pressuring a relocated threat may recover the squad’s fallback. Ask what becomes possible after the target is removed.
Reavers can deliver Drone squads, remain as heavy battlefield threats, and relocate onto elevated walls. Their movement can transform previously safe angles. When one changes position, reassess the arena rather than continuing to use the old map in your head.
Seeders function as tactical mini-bosses whose vulnerable head must be exposed by approaching and provoking them. The broad lesson is to recognize encounter state. If ordinary fire appears inefficient, do not automatically spend more ammunition; observe whether movement or positioning is required to create the useful damage opportunity.
Low-health Boomers can be finished with a Lancer chainsaw, potentially shortening an encounter. Treat this as coordinated aggression. Confirm the target is ready, dangerous lanes are controlled, and the approach remains supportable. Sending one player unsupported turns a valuable opportunity into a likely rescue problem.
Keep the taxonomy brief during actual play. You do not need to recite every variant and counter. Identify the role currently removing the squad’s choices, deal with immediate disruption, control reinforcement when safe, and reassess when a large or mobile threat changes the arena. Detailed enemy behavior belongs in the separate Locust field guide.
- Prioritize enemy function rather than size.
- Remove immediate close disruptors first.
- Watch for pinning fire paired with flanking movement.
- Close E-holes when the throwing window is safe.
- Reassess after Reavers or other major threats relocate.
- Coordinate aggressive Boomer finishes.
Squad Awareness: Never Create a Bad Revival
Good spacing balances support and separation. Remain close enough for allies to cover a move or reach a downed player, but do not occupy one vulnerable object as a group. Neighboring positions can maintain mutual aid while creating crossfire and reducing the chance that one explosive or structural event harms everyone.
Supportable distance is determined by the route, not the number of steps. A nearby ally may be unreachable if several hostile angles, an elevation change, or a structural obstacle lies between players. Someone slightly farther away may be easy to reach through connected cover. Evaluate access rather than apparent proximity.
Before taking a flank, count the dangerous lanes between the squad and the destination. Crossing one controlled gap with allied pressure may be reasonable. Crossing several independent sightlines for an uncertain angle often creates a bad down. The route should improve collective pressure without transferring the encounter into a rescue operation.
Some large attacks and structural dangers invalidate clustered cover. Fan out enough that one event must choose whom to threaten. Dispersal does not mean scattering across the arena; it means avoiding identical vulnerability while preserving visibility and connected routes.
The downs counter records how many Down But Not Out incidents remain before a full Omen causes immediate death. Treat it as a shrinking risk budget. Repeated successful revivals do not make previous downs irrelevant. A player with less remaining margin should avoid speculative advances, while teammates preserve clearer rescue access.
Before reviving, control the condition that caused the down. Suppress the relevant lane, use appropriate obstruction, or wait for a short lull. Running directly into the same concentrated fire can create a second casualty. A fast revival is only useful if it does not immediately repeat the original failure.
A flashy kill is rarely worth an exposed rescue. This is particularly true of isolated chainsaw attempts, pursuits, or drops into unseen areas. If failure places the character beyond support, the potential reward must be weighed against the time and position the entire squad will surrender.
Co-op teams should announce low ammunition, planned flanks, weapon-role changes, and unsafe revival conditions. These calls need not become constant chatter. A short warning before a major action lets others provide pressure, preserve the route, or explain why the timing is poor.
Solo players can apply the same logic by watching squad position. If allies remain behind while the player crosses multiple lanes, pause and determine whether support can realistically follow. Primary evidence does not establish universal AI revival behavior, so conservative positioning is safer than testing an assumed rescue rule.
Crossfire should grow from a connected line. Two players using neighboring angles can divide enemy attention while retaining a protected route between them. If both advance to isolated forward edges, neither can help the other. Separation has tactical value only when the squad remains capable of acting as a squad.
- Maintain supportable spacing without clustering.
- Judge support by the route between players.
- Count hostile lanes before a flank.
- Fan out against attacks that punish groups.
- Watch the downs counter and reduce speculative risk.
- Control the cause of a down before reviving.
- Preserve a rescue route before pursuing a kill.
Explore Without Losing the Campaign’s Pace
The campaign is mostly linear but includes larger pockets, alternate paths, flanking routes, exploration spaces, and optional objectives. Curiosity is worthwhile, but the structure does not require an open-world sweep. Read obvious environmental branches before following the main objective, then decide whether the detour serves tactical, narrative, or resource goals.
Separate tactical exploration from completion exploration. A side route visible before a fight may offer a better angle, fallback, or cache and therefore affects survival. A quiet room inspected afterward may contain lore or resources. Do not abandon a stable firing line merely because an unexplored doorway exists.
Entering an area with a collectible can trigger a sharp audio chime. Treat the chime as a prompt to inspect the immediate surroundings, not as a precise locator. Collectibles include lore entries, some written by squad members. Exact totals, chapter placements, and missability are outside this systems guide.
Search after combat. A collectible cue, cache, or side path is not worth ignoring a live flanker. Once pressure ends, check plausible branches and accessible surfaces. This preserves both safety and the ability to appreciate what is found without incoming fire dominating attention.
Tac-Com navigation can guide players toward the next objective continuously or when requested, depending on settings. On-demand assistance supports environmental discovery, while continuous guidance can help when a larger pocket becomes confusing. Use whichever balance prevents navigation from turning into frustration.
An audio ping can indicate the direction of the nearest Supply Cache or RIG. This is useful when the search has a practical objective such as changing the loadout. Following a ping is optional, not evidence that every resource is required for campaign completion.
Optional side missions can involve helping soldiers or civilians, provide additional story context, and frequently reward a weapon modification. Frequently does not mean every optional objective has the same reward. Pursue them for extra context and tools, but do not treat them as mandatory campaign steps.
Adopt a stopping rule. For example: investigate a chime, inspect obvious side rooms, follow clearly signposted optional routes, and then continue. A personal rule prevents every scene from becoming an exhaustive inspection of similar corners. It also lets players preserve urgency without abandoning all optional content.
In co-op, announce the scope of a detour. State that the group is checking a chime, following a nearby cache ping, or exploring an obvious side route. Regroup before advancing. This prevents one player from entering the next sequence while another remains several spaces behind.
Efficient exploration is not hurried exploration. It is curiosity with a boundary. Use available cues, distinguish practical routes from lore searches, clear danger first, and stop when the search ceases to serve the campaign experience you want. Dedicated completion coverage can provide exact routing later.
- Inspect plausible branches without treating the game as open world.
- Distinguish tactical routes from post-combat searches.
- Listen for the collectible chime.
- Use Tac-Com and resource pings when helpful.
- Expect optional objectives to often, not always, reward modifications.
- Set a stopping rule and regroup after co-op detours.
A Repeatable Combat Loop for the First Several Hours
Begin an unfamiliar encounter by scanning before firing. Identify the nearest useful protection, elevated angles, gaps, destructible objects, likely side routes, and the squad’s position. The objective is not perfect knowledge. It is enough of a map to avoid attaching to the first visible wall without understanding what surrounds it.
Include sound in the scan. Enemy footsteps, combat subtitles, squad calls, and weapon fire can reveal pressure outside the camera. Do not remain fixed on the most obvious lane while a quieter route develops. The opening seconds should reveal the most likely source of the first tactical change.
Identify reinforcement sources and disruptive roles. Determine whether something is closing distance, maintaining pinning fire, changing angle, disorienting the squad, or adding enemies. Address the role that most immediately removes safe choices rather than automatically attacking the healthiest target.
Select a protected fighting position that suits the present range. Consider what it blocks and which edge provides the least exposure. Avoid choosing cover solely because it is closest. If it is low, destructible, isolated, or open to a gap, understand that limitation before depending on it.
Match the weapon to the immediate problem. Use close-range tools when pressure reaches the squad, rifles where their handling remains efficient, and precision weapons when the position permits careful alignment. If neither primary fits, use the Snub, alter distance, or change targets rather than wasting ammunition.
When movement becomes necessary, choose the action according to the problem. Sprint across known distance, evade an immediate attack, slide through a suitable interval, or climb when geometry supports it. Begin during a pressure lull and avoid chaining inputs merely to appear mobile.
During lulls, perform maintenance in order of consequence. Control danger around a downed ally and revive. Load urgently needed ammunition. Finish a longer reload if time permits. Collect nearby resources only when doing so does not reopen the fight on unfavorable terms. A lull can end before every task is complete.
Reassess when cover breaks, an enemy relocates, reinforcements arrive, or the arena opens. The old tactical map is no longer sufficient after those events. Recheck angles, range, squad spacing, and target function instead of continuing a plan built for the previous state.
Advance when the squad can support the next engagement. Check that allies are upright, immediate weapons are usable, the main pressure is controlled, and the route does not create an unreasonable rescue problem. Forward motion is a squad condition, not an individual urge.
Condensed into a repeatable routine: scan the space, classify immediate pressure, choose suitable protection, match weapon and range, move only when the problem requires it, use lulls for maintenance, and reassess after every major change. This sequence turns a visually chaotic battle into a small number of decisions.
- Scan sightlines, cover condition, routes, and sound before firing.
- Identify reinforcement and disruption roles.
- Choose protection according to geometry and range.
- Use the weapon suited to the immediate target.
- Perform revivals and reloads during genuine lulls.
- Reassess after destruction, relocation, or reinforcement.
- Advance only when the squad can support the next state.
Common Beginner Mistakes and Their Corrections
Mistake: treating cover as invulnerable. Low protection can expose too much, destructible objects can lose height, side routes can invalidate a wall, and large threats can force movement. Correction: understand the current object’s limitations and note an exit before deterioration becomes an emergency.
Mistake: sliding, jumping, or climbing because the action is available. Expanded movement creates choices, not automatic safety. Correction: move to break a sightline, reach connected protection, cross dangerous ground, create crossfire, or solve specific geometry. If no tactical outcome can be named, gather more information first.
Mistake: aiming too long from one edge. Once several enemies control that line, minor accuracy improvements may not rescue the exchange. Correction: release the angle, swap shoulders, use defensive blind fire against close pressure, obscure a purposeful movement, or relocate.
Mistake: forcing every active reload. A perfect timing result is not worth being caught in the open or rushed with an unavailable weapon. Correction: take safe ordinary reloads, use one or two shells with round-by-round weapons, and switch to the Snub when a quick finish is safer.
Mistake: carrying two weapons for the same range without a squad plan. Correction: select complementary jobs and use caches to adapt. In co-op, check whether an attractive replacement would remove the group’s only practical answer to close, main-lane, or distant pressure.
Mistake: chasing an isolated enemy beyond support. A pursuit can cross several sightlines or end behind geometry that blocks a rescue. Correction: preserve a return route and let opponents re-enter controlled ground when possible. A temporarily surviving enemy is usually less dangerous than an unreachable down.
Mistake: assuming the largest target must be killed first. Correction: identify which role is removing movement, revival, or cover options. A close disruptor, flanker, disorienting threat, or reinforcement source may be more urgent than a durable enemy farther away.
Mistake: treating every retreat as failure. Correction: withdraw toward connected protection that restores a favorable range or forces enemies to expose themselves. A controlled retreat differs from directionless flight because it preserves squad support and creates a better next exchange.
Mistake: reloading whenever a magazine is imperfect. Correction: ask whether pressure has truly stopped and whether the remaining ammunition can answer an immediate rush. A partly loaded gun ready to fire may be safer than a full reload interrupted by danger.
Mistake: confusing physical proximity with support. Nearby squadmates can still be divided by hostile lanes or obstacles. Correction: assess the route between positions and preserve at least one protected approach for assistance or revival.
Mistake: searching during live combat. Correction: secure the area before responding to a chime, cache ping, or side route. Tactical survival comes first, and optional content is easier to appreciate when nobody is drawing enemy fire into the search.
Mistake: copying a veteran’s settings. Traditional indicator placement, legacy controls, or minimal aim assistance may suit established muscle memory and obstruct a newcomer. Correction: compare settings in training and use the configuration that produces consistent actions and readable information.
Mistake: escalating after one bad movement decision. A poor slide leads to a deeper sprint; an exposed flank leads to a farther climb. Correction: stabilize with nearby protection, distance, and reconnection to the squad before improvising again.
Mistake: treating additional co-op players as a substitute for discipline. More people can provide angles and revivals, but they can also produce incompatible plans. Correction: announce flanks, weapon changes, exploration detours, and transitions so individual actions contribute to one understandable state.
Mistake: assuming lower global difficulty is the only assistance option. Correction: tune threat feedback, aim support, enemy health information, camera shake, contrast, subtitles, footsteps, controls, reload behavior, and navigation according to the actual barrier. Lower broad challenge when broad pressure remains the problem.
- Plan for cover to fail.
- Tie movement to a specific outcome.
- Break contact with dominated angles.
- Value a functioning weapon over a perfect reload.
- Cover complementary ranges.
- Keep pursuits inside a supportable route.
- Prioritize enemy roles that remove options.
- Tune presentation and controls before blaming every problem on difficulty.
E-Day’s beginner challenge is not finding one dominant weapon or memorizing a script for every Locust. It is learning to identify the current problem accurately. Read protection as temporary geometry, select movement according to purpose, use a weapon within a sensible range, and preserve the squad’s ability to help if an aggressive choice fails.
Configure accessibility and interface options so important information is readable, then judge difficulty through actual combat rather than pride or assumption. Use training to remove control confusion, but let the campaign teach application. Search after battles, adapt at Supply Caches, and reconsider the plan whenever protection breaks or a mobile threat changes the arena.
The dependable routine is compact: scan, classify pressure, choose protection, match range, act during a useful window, and reassess after change. That foundation remains valuable throughout the campaign without revealing mission solutions or replacing the satisfaction of discovering them.
Sources
- Gears of War: E-Day Gameplay Updates
- Gears of War: E-Day – Surviving the First Night of Emergence
- Accessibility in Gears of War: E-Day
- October 05 Patch Notes
- Gears of War: E-Day Multiplayer Deep Dive
- Gears of War: E-Day Gameplay Reveal Deep Dive
- Rebuilding Brotherhood: How Gears of War: E-Day Renews a Legendary Franchise
- Gears of War: E-Day Achievements List
- Buy Gears of War: E-Day
- Gears of War: E-Day on Steam
- Gears of War: E-Day Review – Terrific Shooting Buoys a Sluggish Campaign