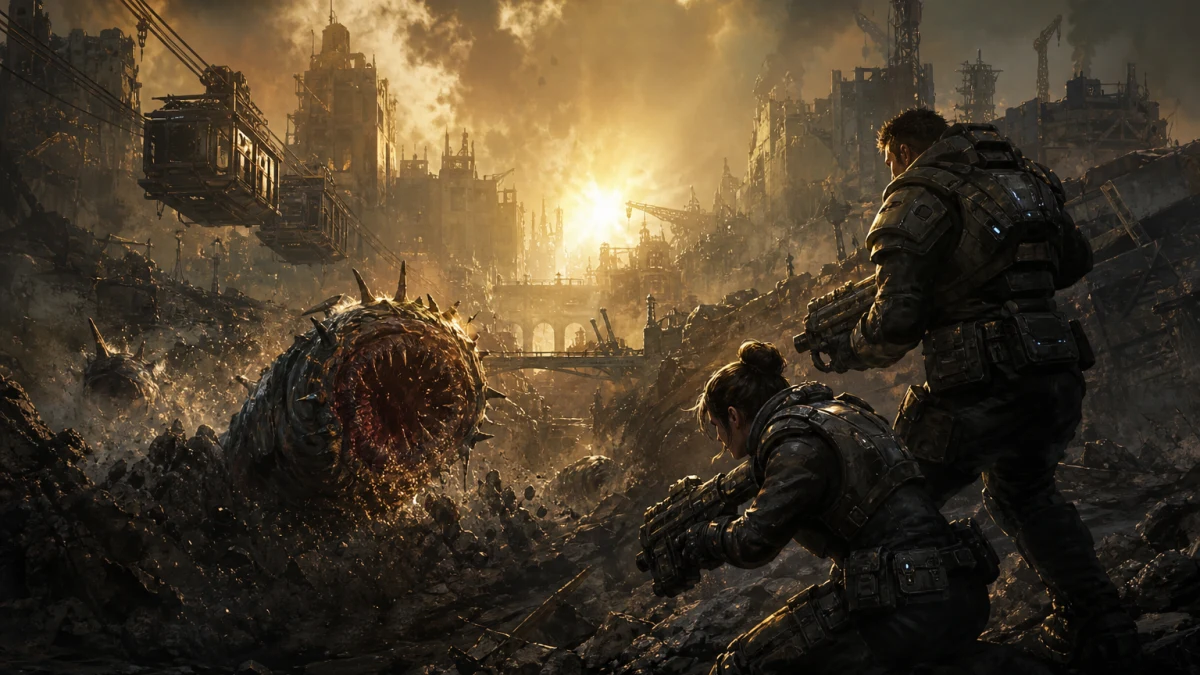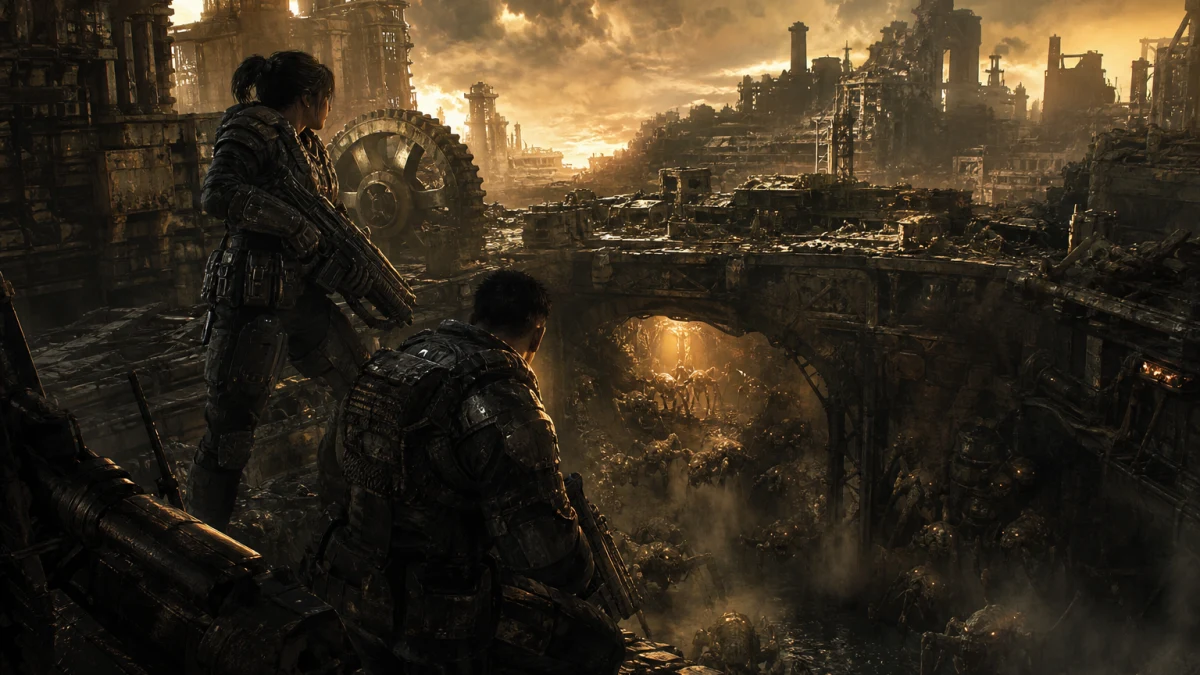
Gears of War: E-Day builds encounters around combinations rather than isolated targets. A Drone behind cover creates familiar rifle pressure. Add a Wretch crossing the floor, a sniper beam sweeping the lane or an Emergence Hole supplying reinforcements, and that same Drone becomes part of a system designed to divide attention. Surviving that system depends less on memorizing one rigid kill order than on recognizing which enemy is changing the battlefield right now.
This field guide uses a behavior-first taxonomy. It identifies silhouettes, equipment, warning cues, preferred positions and the kind of pressure each Locust applies. Counterplay is expressed through broad responses such as breaking line of sight, preserving distance, moving laterally, concentrating fire or controlling a reinforcement source. It deliberately avoids weapon builds, upgrade prescriptions, exact ammunition counts and unsupported health values.
The early sections remain light on campaign spoilers and discuss recurring enemy families. Large or mission-specific creatures appear later with explicit warnings. Unless noted otherwise, the guidance concerns the campaign in the public launch-era version rather than Horde Siege, whose larger maps, 12-player structure and encounter tuning should not be assumed to behave identically.
Evidence note: This reference combines official post-launch documentation with clearly bounded specialist campaign observations. Enemy names or behaviors identified principally through specialist testing include Tickers, Rushers, Grinders, Flayers, Bilefrogs, Spore Matrons and Scoria, plus certain encounter-specific weak points and staged mechanics. No complete official campaign roster or controlled cross-difficulty health table was available. The target-priority ladder is an editorial framework derived from documented enemy roles, not an official ordering from The Coalition. Reproducible campaign guides identify the Flayer’s weapon pickup as Gorehook, although one review calls it Goreshot; Gorehook is used here with that discrepancy disclosed. The retrieved evidence supports the harpoon’s immediate-kill danger but does not establish a universal Flayer preparation animation, fixed wind-up or guaranteed attack window. The October 5 release note remained the latest official patch entry visible on October 10, 2026. Horde Siege behavior and tuning may differ from the campaign.
Scope, version and spoiler policy
Gears of War: E-Day received its worldwide standard-edition launch on October 6, 2026, placing this guide five days after release rather than in the preview period. Its officially listed launch platforms are Xbox Series X|S and PC through the Xbox app, Microsoft Store and Steam. The supplied release record also named PlayStation 5, but the official game and storefront pages do not support that platform claim. PlayStation 5 is therefore excluded rather than treated as an announced or implied version.
The latest official release note retrieved before the scheduled October 11 publication was The Coalition’s October 5 update, issued immediately before the worldwide launch. Its campaign changes included objective and progression fixes, but the notes did not announce a broad rebalance of enemy health, damage, aggression or weak points. The advice below consequently describes the launch-era campaign as documented through official material and post-launch specialist observation. Later patches could alter tuning even when each enemy’s broad battlefield role remains recognizable.
This is not an exhaustive roster certification. No retrieved official source provides a complete list of every enemy appearing across the campaign and Horde Siege. Several names and behaviors, particularly those belonging to newly introduced creatures, come from reproducible campaign observations rather than a formal bestiary published by The Coalition. Variant labels can reveal less than players might expect: the campaign may identify standard, Elite or Scorched forms without publishing their statistical differences.
The guide also avoids treating inherited franchise knowledge as automatic proof. E-Day is set fourteen years before the original Gears of War and uses returning names such as Drone, Wretch and Boomer, but The Coalition says its gameplay foundation, animations, assets and features were built from scratch. Familiar silhouettes can help recognition; they do not establish that an enemy has precisely the same health, timings, artificial intelligence or damage reactions as an older version.
The recurring infantry, pack-attacker and heavy-unit sections are spoiler-light. The Corpser, Brumak, Spore Matron and Scoria sections necessarily identify major or later creatures and explain their encounter mechanics. They do not disclose mission outcomes, the ending or the final commander. Readers who prefer to discover every large creature without advance warning should stop before the section on armored diggers and staged weak points.
Campaign behavior is the default throughout. Horde Siege is a separate 12-player PvE mode in which three COG squads operate across larger maps. Even when an enemy name is shared, health, composition, positioning, reinforcement logic and target priority may change with mode rules and player count. Nothing here proves that every campaign creature appears in Horde Siege or that shared enemies retain identical tuning there.
- Public version covered: launch-era campaign following the October 5 update
- Verified launch platforms: Xbox Series X|S and PC
- Unsupported platform excluded: PlayStation 5
- Default context: campaign, not Horde Siege
- Spoiler boundary: recurring units first; major and late-campaign threats clearly signposted
How to read the Locust instead of memorizing health bars
The Coalition identifies movement, cover, weapons and enemies as the four central pillars of E-Day’s combat. That framing supports a field guide based on relationships rather than raw durability. An enemy matters because of what it does to movement, which cover it invalidates, what attack its equipment announces and how its behavior interacts with the rest of the Locust formation.
Begin with silhouette and equipment. A compact creature running low to the ground threatens space differently from a tall infantry unit holding a rifle. A shotgun signals closing pressure; a long-range aiming beam identifies a firing process that can be interrupted by breaking sight. A massive launcher suggests intermittent explosive control, while a sustained heavy gun turns an open lane into a suppression zone. Recognizing the tool often tells you what the enemy wants before its formal name matters.
Next, read spawn position and preferred range. Elevated enemies seek angles over or around conventional cover. Infantry entering at medium distance may advance by alternating between movement and protected fire. An unarmed Drone appearing on a flank is not simply an inferior version of rifle infantry; its lack of a gun signals direct-contact pressure. Small attackers entering near the squad can be more urgent than a distant heavy because their job is to interrupt aiming and expose players to everything behind them.
Audio and visual tells convert apparent chaos into timed decisions. A Sniper’s red beam shows that a shot is being prepared. A Boomer’s call warns of incoming explosive fire. Red smoke and rupturing ground announce an Emergence Hole. A Bilefrog opening its mouth signals both an acid attack and a reported vulnerability window. Glowing pools mark temporarily lost ground, while the luminous center of a Spore Matron provides a repeatable visual focus point.
Movement itself is another tell. A Drone transferring between cover positions is maintaining an infantry line; an empty-handed Drone running directly at the player has changed the problem. A Rusher committing to a charge creates a shorter decision window than a Grenadier advancing between obstacles. A Reaver that lands has shifted from an elusive elevated platform into a more accessible focus-fire opportunity. Scoria alternate between airborne and grounded states, making position a direct indicator of the current response.
The final question is what pressure the unit imposes. Ordinary damage reduces the margin for mistakes. Displacement forces movement or physically removes a player from a position. Suppression makes return fire unsafe. Area denial converts usable ground into a hazard. Reinforcement sources prolong the encounter. Incapacitation threats can tackle, knock down, hook or otherwise produce an immediate loss of control. A target’s urgency follows the pressure it creates, not its physical size alone.
Exact health tables are excluded because the available evidence does not establish controlled values across difficulty settings, variants, solo play and cooperative play. Ammunition requirements are affected by weapon choice, accuracy, upgrades, squad contribution and scripted damage gates. An apparent weak point can also be a mission-specific progression trigger rather than a universal multiplier. The more durable lesson is behavioral: identify the cue, understand the battlefield change and choose the response that restores options.
E-Day’s expanded movement and varied cover make that response broader than simply remaining attached to the nearest wall. Sprinting, sliding, jumping, climbing and mantling can open routes around denial effects. Shoulder swapping can reduce exposure when a threat occupies one side of cover. Blind fire can contest an approaching enemy without presenting the player’s head and upper body. These are not universal solutions; they are ways to preserve control while reading the next cue.
- Identify silhouette and carried equipment
- Check whether the enemy seeks distance, elevation or direct contact
- Listen and look for attack tells
- Name the pressure: damage, displacement, suppression, denial, reinforcement or incapacitation
- Respond to the battlefield effect before chasing raw damage
The target-priority ladder
A practical priority ladder begins with an immediate incapacitation or lethal-contact threat. A Ticker about to detonate, a Rusher entering its charge, an unarmed Drone closing for a tackle or a Flayer threatening a lethal harpoon strike cannot wait merely because a larger enemy has more health. The useful question is not which target is strongest in a vacuum, but which one can remove control before the next safe decision.
This first tier is state-dependent. A Rusher on the far side of the arena may not yet outrank a Sniper whose beam is already aligned. A Ticker behind solid geometry can remain secondary until it rounds the obstacle. Conversely, an ordinary Wretch that has crossed into leaping range can become more urgent than a Boomer between shots. Names establish likely roles, but current posture, distance and geometry determine whether the danger has matured.
Second are active reinforcement sources. An open Emergence Hole can replace defeated infantry and turn efficient shooting into a losing exchange. A Reaver completing a Drone deployment changes the population of the arena. A Spore Matron releasing smaller airborne threats similarly acts as a source, although a nearby projectile can temporarily become the first priority when it is about to connect. Controlling a source limits future pressure instead of merely reducing present pressure.
Reinforcement control is not a command to cross unsafe ground. If closing an Emergence Hole requires running past an unarmed Drone or exposing the squad to a prepared Sniper shot, the immediate danger must be stabilized first. The source remains strategically important, but a tactically reckless approach can surrender the control needed to close it. Create a delivery angle, deny the contact route and then address the source.
Third are enemies making the current position untenable. Bilefrog acid, charging packs and explosives can invalidate cover that remains structurally intact. This category often overlaps with immediate threats: a Wretch at a distance is displacement pressure, while one already leaping into the squad is an immediate interruption. A Boomer between shots controls future space; a projectile already arriving controls the current second. Deal with the stage of the attack, not a static classification.
Fourth are suppressors and elevated threats that deny safe return fire. A Sniper lining up a shot, a Grinder maintaining a Troika stream or a Reaver firing down from a wall can trap players while other units advance. These enemies may rise to first priority whenever their active attack permits no exposure. Breaking line of sight can be enough to buy time. Target priority concerns neutralizing pressure, and that does not always require an immediate kill.
Durable tanks and standard infantry generally follow once the squad has breathing room. That does not make Drones harmless. Even a few overlapping rifle lanes can punish open movement. It means their routine pressure can often be managed through cover while a Ticker, open hole or charging Rusher cannot. Once special pressure is contained, reducing Drone numbers widens every later movement route.
Boss mechanics and scripted objectives override the ladder. A protected Seeder has to be provoked into exposing itself, so raw focus fire during its closed posture is not the answer. A documented Corpser encounter asks the player to manipulate a charge into structural pillars. An armored Brumak can present staged components. In those situations, the encounter’s state determines what progress means.
Apply the ladder as a recurring scan: what can remove control immediately, what is generating more enemies, what has taken away safe ground, what prevents a response, and what remains once those pressures are contained? Repeat the scan after every spawn, landing, scream, explosion or posture change. The target that was correct three seconds ago may no longer be the target that restores control.
- Stop the grab, charge, tackle or imminent detonation
- Control open reinforcement sources
- Escape or remove active area denial
- Break suppression and elevated firing angles
- Then reduce tanks and baseline infantry
- Override the ladder when the objective teaches a specific mechanic
Standard infantry: Drones and their changing behavior
Drones are the campaign’s baseline armed Locust infantry, but baseline does not mean disposable. Specialist campaign observation describes them using cover and advancing in groups. Their sustained ranged pressure creates the conditions under which almost every specialist enemy becomes more dangerous.
A Drone formation should be read geographically. Identify which units are directly in front, which can fire across an intended escape route and which are moving toward a flank. Eliminating the nearest visible Drone is not automatically useful if another has the stronger angle. Likewise, chasing an injured unit behind cover may expose the player to two healthy riflemen. The objective is to dismantle the formation’s coverage, not merely finish targets in the order they were first damaged.
Their defining strength is how easily they support another role. A Bilefrog removes the safest exit and Drones punish the alternative. A Wretch turns the player away from the firing line and Drones exploit that interruption. A Boomer forces movement on its firing rhythm and Drones cover the destination. When no special enemy is immediately attacking, reducing Drone numbers is valuable because every removed lane makes later repositioning safer.
Equipment changes the reading. An unarmed Drone does not behave like a less capable rifleman. Official demonstrations show unarmed Drones charging instead of settling into cover, with the ability to tackle a player when a flank is left unguarded. Empty hands are therefore an actionable warning cue. Preserve distance, deny a direct route and move the charging unit above passive rifle infantry once it commits.
A Drone can remain dangerous after losing its apparent role. Officially shown behavior includes some Drones becoming aggressively melee-focused after losing a weapon or entering a downed state. Do not assume disarmament has neutralized the enemy. Watch posture and movement. A sudden direct rush means the unit has shifted from lane damage to contact pressure and should be reclassified in the priority order.
This transition affects confirmation discipline. Turning away immediately after an apparent disable can be unsafe when another enemy has already compressed the battlefield. Confirm whether the Drone remains passive, is attempting to recover or is beginning a rush. That does not mean standing exposed to watch it. It means using movement and cover while treating current behavior as more important than the unit’s previous state.
Specialist preview coverage observed a Drone using smoke to obscure vision before entering the cloud and attacking at close range. That documented incident supports a cautious rule rather than a universal claim: smoke is not empty concealment. If sight disappears, protect likely exit lines, preserve a retreat path and avoid staring into the cloud while another flank remains open. The available evidence does not establish that every Drone uses smoke or follows the same sequence.
Smoke can conceal a broader role transition as well. Rifle infantry may emerge at much shorter range than expected, while Grenadiers or unarmed units can exploit the visual obstruction to complete an approach. Indefinite blind fire into an uncertain location is not a complete answer. Separate the cloud from the squad with geometry where possible and reassess as silhouettes emerge.
The Coalition confirms multiple Drone varieties and describes elite units as combining tougher tactics and loadouts inside enemy squads. The retrieved material does not establish exact health, armor, damage or artificial-intelligence differences for every standard, Elite or Scorched label. Read visible equipment, position and current behavior first. A variant name can justify caution, but it cannot support an invented statistical table.
- Respect overlapping Drone firing lanes
- Read empty hands as a charge warning
- Reclassify disarmed or downed Drones if they enter melee aggression
- Treat smoke as possible concealment for a close push
- Do not invent fixed statistics for Elite or Scorched variants
Close-range infantry: Grenadiers and Rushers
Grenadiers and Rushers both want to reduce distance, but they create different emergencies. Specialist campaign testing identifies Grenadiers as shotgun-equipped infantry that attempt to close on the squad. Their advance compresses the usable portion of an arena: cover that was comfortable against rifles becomes dangerous once a Grenadier reaches its far side. The general response is to preserve separation and contest the approach rather than accept the point-blank trade the unit is trying to force.
A Grenadier’s urgency depends on route length and supporting pressure. One crossing an open lane may be manageable. One approaching while a Sniper beam prevents a safe peek is a compound threat. If it has reached the last obstacle before the squad, it can outrank distant infantry because the next movement may produce a close-range encounter. Relocating early is usually better than waiting until both sides occupy the same cover.
Watch routes, not only straight-line distance. A Grenadier separated by a long, exposed lane may be easier to manage than one briefly visible between connected cover positions. Corners, smoke and elevation changes can conceal the final part of the approach. If its route terminates at the player’s cover, movement should begin while another defensible position remains available.
Blind fire has a limited but relevant defensive role when a close enemy is approaching the opposite side of cover. Official launch guidance confirms that blind fire can inflict damage while reducing the need to expose the player’s head and upper body. It can contest the final approach, but it should not become an excuse to remain trapped until the Grenadier arrives. Maintaining an exit is the stronger long-term defense.
Campaign observations identify standard, Elite and Scorched Grenadier labels, but the available evidence does not provide a controlled comparison of their health, armor, damage or reactions. Visibly tougher variants warrant caution. The labels do not justify universal shot counts, exact rankings or promises that one form will always be interrupted by a particular amount of damage.
Rushers are larger, melee-focused enemies built around direct incapacitation pressure. Specialist testing reports that they can knock Marcus down and trigger a struggle sequence if they make contact. Their silhouette and committed forward movement should therefore be read differently from a Grenadier’s shotgun advance. A Grenadier threatens shrinking distance; a Rusher threatens an immediate loss of control at the end of its charge.
Once a Rusher commits, it generally moves above routine rifle infantry in target priority. Create lateral separation and keep meaningful obstacles between the charge and the player where the arena allows. Moving directly backward can preserve the collision line, whereas lateral movement changes its geometry. The escape route must still be checked for acid pools, Tickers and hostile firing lanes.
If the Rusher is distant or obstructed while a Ticker is already beside the squad, the immediate threat still wins. If the player is safely behind geometry that blocks a Sniper, the Rusher can be handled without first eliminating the elevated enemy. Priority is a relationship among distance, attack state and available protection rather than a fixed order beside enemy names.
No exact stagger threshold is established across difficulties, weapons and squad configurations. The dependable counter is spatial rather than numerical: identify the approach, avoid being cornered, preserve an escape line and respond before the struggle begins. A failed damage race often begins with waiting too long to acknowledge that the Rusher already controls the route.
- Grenadier: preserve distance and deny the final approach
- Rusher: react to the committed charge before routine rifle damage
- Reposition early instead of waiting for shared cover
- Let immediate contact risk determine priority
- Avoid relying on an assumed universal stagger count
Pack attackers: Wretches, Armored Wretches and Tickers
The first-wave Wretches are officially presented as hungry, unarmored shock troops with the character of attack animals. Specialist campaign observation describes ordinary Wretches attacking in groups, leaping at players and knocking Marcus down when a pack surrounds him. Their role is not simply to cause close-range damage. They collapse the physical and visual space needed to aim at the ranged formation behind them.
A single Wretch is often less important than the route opened by the pack. Several entering from different sides can force the player away from cover, rotate the camera away from a firing lane and interrupt a planned attack. Their arrival should therefore trigger a positional scan. Before committing to the first visible creature, determine whether more are approaching from a second entrance or crossing behind the squad.
Later Wretches can appear bulkier and armored, establishing visible escalation within the family. Official material identifies Armored Wretches and gives them a scream that disorients the player and limits available actions. The scream makes the creature an interruption threat before physical contact. Its real value to the Locust formation is what that short loss of control permits every supporting enemy to do.
When an Armored Wretch triggers disruption, read beyond the creature itself. A Boomer may already be preparing its next shot, a Grenadier may be one cover position away, or a Sniper beam may be moving into alignment. The scream can convert manageable background pressure into an immediate compound problem. Recover control and escape the overlap before attempting a prolonged attack.
The evidence does not support a complete Wretch variant tree. Official material clearly distinguishes armored forms, while specialist observations sometimes use ordinary or Feral terminology. Those descriptions do not establish every naming relationship or statistical progression. For tactical purposes, visible armor signals greater persistence and the scream signals disruption; neither requires an invented taxonomy.
Tickers are identified through post-launch campaign testing as explosive crawlers that charge toward the squad and detonate at close range. Their urgency rises sharply with proximity. A distant Ticker is an approaching hazard. One crossing the final stretch is an imminent blast capable of interrupting movement and punishing grouped players. Destroy it before it enters the squad’s footprint when the firing line can be taken safely.
The Ticker’s small size can pull attention and aim downward at exactly the wrong moment. If a Sniper or Drone formation covers its approach, use geometry to screen the ranged pressure while addressing the crawler. Stepping into an open lane to destroy a distant Ticker may exchange a future risk for immediate rifle damage. Where solid cover permits it, let the crawler enter a controllable sightline rather than competing across every lane at once.
Specialist testing reports that Tickers can continue entering a boss arena through active burrows. In that context, killing individual crawlers produces only temporary control. The source belongs to the larger encounter mechanic and may demand attention between waves. It should not automatically be treated as an ordinary Emergence Hole because scripted creature burrows can use arena-specific progression rules.
Pack attackers become most dangerous beside long-range control. While the player looks down to clear Wretches, a Sniper lines up a shot. While Tickers force movement, a Boomer places an explosive into the intended destination. Use brief close-range clearing actions, blind fire where appropriate and movement that keeps solid geometry between the squad and distant support. The objective is to reclaim aiming space, not to demonstrate loyalty to one weapon category.
After the nearby pack is controlled, raise the scan back to medium and long range immediately. Swarmers frequently function as an interruption phase rather than the encounter’s main body. Continuing to search the floor after the local threat is gone gives Drones, Snipers and heavies time to establish better angles. Clearing the pack solves only half the problem; the rest is using the recovered space before something else takes it away.
- Stop packs before they surround the squad
- Treat the Armored Wretch scream as a control-loss warning
- Destroy Tickers before they enter detonation range
- Look for a continuing source when small enemies keep arriving
- After clearing the floor, immediately reassess long-range threats
Long-range control: Snipers
Specialist campaign testing places Snipers in elevated positions and identifies a visible red aiming beam as their central warning cue. The beam converts the attack into a readable process rather than an unexplained burst of damage. When it reaches the player, the first response is to break line of sight instead of gambling on an exposed damage race.
Use genuinely intervening geometry. E-Day includes varied cover heights and conditions, and official design commentary notes that low cover can leave players more exposed. If the red beam continues tracking across the character, the obstacle is not providing adequate separation. A cover attachment by itself does not prove that the position blocks an elevated firing angle.
Breaking sight does not require immediately killing the Sniper. A wall or sufficiently tall structure can suspend its active pressure while the squad addresses a Rusher or nearby Ticker. This is the difference between neutralizing an enemy’s current role and eliminating its owner. The Sniper remains a future concern, but its prepared shot has been denied without forcing an unsafe counter-peek.
Repositioning matters because repeatedly using the same edge preserves the relationship the Sniper already controls. Shoulder swapping while aiming is officially supported and can reduce exposure when engaging from the opposite side of cover. Use it after denying the prepared shot or changing the angle. It does not make remaining inside a tracked beam safe.
E-Day’s projectiles use simulated travel time, so distant moving targets can require aim leading rather than purely hitscan reactions. That affects the return shot, not the defensive priority. First leave the prepared line. Then account for the target’s motion and distance when deciding whether the new angle offers a reasonable attack. Mechanical ambition should not override the beam’s warning.
Sniper pressure is particularly effective at encouraging tunnel vision. Boomers, Brumaks and other large creatures naturally draw the eye, but their size does not interrupt an elevated firing process. If the beam reaches the player, the Sniper temporarily outranks a durable target unless solid cover already neutralizes the shot. A Rusher at contact range can still outrank the Sniper while the player remains protected from the elevated lane.
Swarmers make counter-sniping difficult by denying a stable firing position. Clear only enough close pressure to create a safe peek, then relocate before engaging the nest. Remaining exposed to finish a Wretch pack may solve the foreground threat while giving the Sniper the uncontested shot it wanted. If the pack can be handled behind tall cover, there is no reason to fight both layers simultaneously.
The beam also provides directional information. Its movement reveals which edge, route or squad member is being controlled. If it sweeps away, a short movement opportunity may exist. If it settles on the intended exit, another route is required. No universal alignment duration is established, but the relationship among beam, target and geometry still guides the decision.
This guide does not offer a universal list of Sniper locations. Elevated nesting is a battlefield tendency documented through campaign observation, not proof that every balcony, rooftop or tower contains one. Mission scripting determines placements. Look for the red beam and firing angle rather than relying on assumptions imported from another chapter or an older Gears game.
- Red beam: break line of sight immediately
- Confirm that cover is tall and solid enough
- Change angle before returning fire
- Do not let a large target conceal Sniper pressure
- Use the cue, not an assumed universal spawn location
Explosive tanks: Boomers
Boomers are slow, heavily armored Locust carrying a prototype Heavy Boomshot. Their battlefield function combines durability with intermittent explosive control. Unlike the sustained streams attributed to Grinders, a Boomer creates a rhythm of warning, shot, impact and recovery. Understanding that rhythm makes the threat more readable without making it harmless.
Specialist testing reports an audible call before the Boomer fires. Treat that sound as a movement cue rather than background characterization. Get behind genuinely solid cover before the projectile arrives, then use the interval after impact to reposition or apply pressure. Low or incomplete cover should not be trusted merely because the player can attach to it; an explosive controls nearby space rather than only the exact point of impact.
The safest response often begins before the call. Keep track of the nearest tall structure and avoid entering pockets with only one exit while the Boomer remains active. If Wretches arrive, clear them in a way that preserves access to protection. If acid occupies the route, identify another before the next shot. Preparation turns the audio warning into a usable interval rather than a panic signal.
Official commentary describes E-Day’s Boomers as larger and tougher than before, capable of dominating an area by absorbing damage. Developer material presents the redesigned creature as more than nine feet tall and capable of knocking players back at close range. Its bulk is therefore both protection and pressure. Closing carelessly can remove the positional advantage the player hoped to gain.
Slow movement does not mean low urgency. A Boomer does not need to reach the squad if its explosives control the destination of every dodge. Its advance also changes the direction from which each shot must be answered. Track whether it has moved around a structure that was previously safe. Solid cover works only while it remains between the player and the launch point.
The Boomer becomes more dangerous when rush units distort its timing. Wretches encourage frantic cleanup, a Grenadier pushes toward the same cover and a Rusher demands immediate attention. If the pre-shot call sounds during that exchange, stop treating the smaller enemy as an isolated problem. Move through the explosive timing first, clear anything physically blocking the route and then resume the local fight.
The opposite problem is remaining hidden indefinitely. Passive shelter can allow Drones or Grenadiers to occupy stronger positions. Use the interval following a shot to reduce those enablers or move to a better piece of geometry. The objective is not simply to survive beside one wall; it is to exploit the Boomer’s intermittent pattern to dismantle the formation between attacks.
Official material confirms that low-health Boomers can be finished with a Lancer chainsaw execution. This is an opportunity, not an instruction to approach every Boomer. A Sniper line, nearby Wretch or second explosive can turn an execution window into a trap. Use the finish only after the surrounding pressure is sufficiently controlled.
No universal ammunition count belongs here. Difficulty, accuracy, squad contribution, upgrades and weapon choice all affect expenditure. The durable rules are to respect the call, use solid cover, maintain an exit, attack during safer intervals and refuse to let the Boomer’s health pool distract from an immediate contact threat.
- Listen for the pre-shot call
- Reach solid cover before impact
- Use the post-shot interval rather than peeking randomly
- Keep rush units from disrupting the explosive rhythm
- Attempt a low-health chainsaw finish only when the surrounding arena is controlled
Sustained suppression and lethal harpoons: Grinders and Flayers
Grinders and Flayers are both armored heavies, but treating them as interchangeable tanks hides the decision that matters. Specialist campaign testing describes Grinders sustaining long streams of Troika fire. Specialist reporting identifies Flayers as armored Gorehook users and describes their harpoon attacks as capable of an immediate kill. One role suppresses exposure over time; the other carries a potentially decisive attack.
A Grinder’s stream creates a suppression window. Do not rise into the center of that fire simply because the target is visible. Remain behind adequate cover, observe whether the stream stops, and use an interruption to move or return fire. If the stream controls one side of an obstacle, shoulder swapping or changing position can offer a safer angle, provided another enemy is not already covering it.
The exact duration and cadence of Grinder fire have not been established across difficulty levels or encounter configurations. The appropriate method is therefore relational: observe when the stream begins, which lane it controls and when that lane becomes traversable again. Do not rely on a memorized universal count. A pause is useful because of what it permits, not because it is guaranteed to last a fixed number of seconds.
Suppression enables lesser infantry to advance. A Grinder may not be the nearest enemy, yet its Troika can prevent the player from addressing a Grenadier crossing the arena. Breaking the Grinder’s angle may therefore matter more than attempting to attack the Grenadier through unsafe exposure. Relocating behind geometry that blocks the stream can solve both problems by creating a protected engagement with the advancing infantry.
A dropped heavy weapon is an encounter resource, not an objective. Crossing an active Troika lane to retrieve one gives the Grinder exactly the exposed movement it is built to punish. Wait until the lane is no longer controlled, reach the item through a protected route or leave it behind when the risk exceeds its immediate value.
The Flayer presents a different evidence boundary. Campaign guides and several post-launch reports identify its harpoon weapon as the Gorehook, while one review calls it the Goreshot. The in-game pickup name reported by reproducible campaign guides is Gorehook, which is the term used here. The retrieved evidence does not document a universal preparation animation, dependable weapon-orientation tell, fixed wind-up or guaranteed safe attack window.
Do not wait in the open for an assumed cue. Limit exposure, attack from positions with a rapid line-of-sight break and avoid crossing broad open ground merely to improve damage. If the Flayer is not currently visible, retain awareness of the lane from which its harpoon can threaten rather than assuming silence means safety.
The reported immediate-kill danger raises the Flayer’s priority when the squad must expose itself to its lane. Position can still neutralize that urgency. If a solid wall fully separates the Flayer while a Ticker is entering detonation range, the Ticker comes first. If movement requires crossing the Flayer’s lane, create another route or reduce the threat before beginning the crossing.
The contrast with the Grinder is consequently simple. Against the Grinder, observe the stream and act when suppression stops. Against the Flayer, deny open exposure because the available evidence supports the severity of the harpoon but not a reliable timing script. Both enemies are armored, yet one is answered mainly through timing and the other through conservative geometry.
If the two appear together, choose cover that separates the Flayer first, then observe the Grinder’s suppression from that protected position. Reversing the logic can leave the squad exposed to the attack with the more decisive reported consequence. Heavy weapon drops may help later, but collecting them never outranks survival through the current overlap.
- Grinder: observe the Troika stream and act when suppression breaks
- Flayer: treat unobstructed Gorehook exposure as potentially lethal
- Do not claim a universal Flayer wind-up or safe attack window
- Do not treat both armored heavies as interchangeable tanks
- Collect dropped heavy tools only when the position is safe
Area denial: Bilefrogs
Specialist campaign observation identifies Bilefrogs as acid-spitting creatures whose attacks leave persistent glowing pools. Their tactical importance comes from the ground they remove. Cover beside a pool can remain structurally intact while becoming practically inaccessible, making the Bilefrog an area-denial unit rather than merely another ranged attacker.
The mouth opening is the central reported cue. Campaign testing identifies it as both the beginning of the acid attack and a vulnerable point. That produces a risk-and-reward window: the creature exposes a target while preparing to make part of the arena unsafe. Concentrated fire can exploit the opening, but the available evidence does not establish that damage will reliably cancel every attack.
Separate three decisions. First, identify the mouth opening. Second, track where the acid projectile is likely to land. Third, decide whether attacking the reported weak point leaves access to the route needed after impact. A weak point is not a command to remain stationary. The spatial result of the attack can matter more than the temporary damage opportunity.
Once acid lands, route around it instead of remaining attached to the same cover. E-Day supports sprinting, sliding, jumping, climbing and mantling, so the answer is not limited to moving along one wall. Choose a route that preserves separation from close enemies and avoids known Sniper or Grinder lanes. The shortest path is not necessarily the safest.
Treat the glowing pool as temporarily lost ground even if its edge appears close enough to challenge. The available testing establishes persistent hazard behavior but not one universal duration or precise boundary across every encounter. Skirting it too tightly introduces avoidable uncertainty. Use clear space and wait for the visible hazard to resolve instead of importing a timer from another appearance.
Bilefrogs become especially dangerous beside Drones. Acid takes away the protected exit, and rifle fire punishes the exposed alternative. With a Sniper, the pool can force movement precisely when the red beam is aligning. With a Grinder, it can remove the route normally used to escape suppression. In each case, evaluate the acid and supporting fire as one connected problem.
Response order depends on geometry. If tall cover already blocks a Sniper, move around the acid without forcing an immediate counter-shot. If the pool traps the squad in a Troika lane, escaping suppression may be more urgent than damaging the open mouth. If no supporting enemy controls the exit, the reported vulnerability can be exploited more aggressively.
If the mouth closes and the pool already dominates the local area, survival matters more than continuing damage. Relocate, establish another firing angle and wait for a later opening. Conversely, if nothing can punish a brief exposure, the mouth cue offers a useful focus point. Context determines whether it is an attack warning, an offensive opportunity or both.
The weak-point account comes from specialist testing rather than a complete official damage model. It is not established whether every Bilefrog appearance uses identical multipliers, difficulty scaling or scripted gates. The reliable observed sequence is sufficient for tactical planning: the mouth opens, acid is launched, a glowing hazard persists and the arena’s safe routes change.
- Watch for the mouth to open
- Track both the projectile and its landing area
- Treat the glowing pool as temporarily lost ground
- Use movement routes beyond the current cover edge
- Reassess Drones, Snipers and suppressors before choosing an exit
Mobile deployment platforms: Reavers
Reavers change roles during an encounter. Official material confirms that they can transport and deploy Drone squads before remaining as mobile heavy threats. Killing the delivered infantry does not erase the platform, and attacking the platform does not erase troops already deployed. The encounter expands first through reinforcement and then through mobile or elevated pressure.
Before deployment, consider whether the action can be interrupted safely or whether immediate ground threats make that unrealistic. Once the Drones are present, use the priority ladder instead of automatically focusing the largest silhouette. A charging unit beside the squad can require attention first. If the ground infantry is contained and the Reaver becomes accessible, concentrated fire can prevent it from dictating the next phase.
Deployment changes the arena’s population and coverage. Newly arrived Drones may occupy lanes that were empty when the Reaver first appeared. Recheck both flanks rather than assuming previous routes remain safe. The platform draws attention through size and motion, making the quieter spread of ordinary rifle pressure easier to miss.
Official material also confirms that Reavers can leap onto and cling to high walls. From there they fire downward at angles that change ordinary cover assumptions. Tall cover protects against horizontal lanes, but an elevated Reaver can look over or around it. If incoming fire continues despite a seemingly secure wall, check above before deciding that ground infantry completed a flank.
A wall-clinging Reaver can reverse the value of the arena’s geometry. The structure that blocked distant Drones may become the perch producing the dangerous angle. Move beneath an overhang, behind taller geometry or far enough laterally to break sight. Do not remain attached to cover solely because it was safe before the Reaver changed elevation.
That angle can combine with deployed infantry. Moving away from overhead pressure may carry the player directly into the Drones’ horizontal lane. Seek geometry that separates the two layers rather than retreating in the most obvious direction. If no position blocks both, handle them sequentially: deny the elevated angle, reduce the nearest ground lane and move again.
Specialist testing reports that landed Reavers can be brought down quickly with concentrated squad fire. The useful conclusion is state-dependent opportunity, not a promised time to kill. Landing reduces mobility and can produce a shared focus window. Exploit it only when immediate infantry contact and firing lanes do not make the exposure unsafe.
Landing also makes finishing distance relevant. Specialist observation reports that Reavers explode when killed. Do not crowd a grounded target merely because it is easier to hit. Preserve space, wait for the death blast and only then reclaim the area or inspect anything it left behind.
Destroying the Reaver does not remove Drones that have already deployed. Reassess immediately after the explosion rather than treating the platform’s death as the end of the encounter. Its role is best understood as a sequence: transport, reinforcement, elevation, landing opportunity and death hazard. Not every appearance needs to display every phase, but watching for the transitions is more valuable than treating it as a stationary tank.
- Recognize the transport phase and the post-deployment heavy phase
- Do not ignore Drones already delivered
- Look upward when normal cover stops working
- Concentrate fire when the Reaver lands
- Keep distance from the death explosion
Burrowed artillery: Seeders
Seeders return as Nemacyst launchers and appear both in anti-air contexts and as ground-level miniboss encounters. Their artillery function is clear at range, but the documented ground fight is governed by posture rather than ordinary damage. The creature protects itself behind an armored shell and must be induced to reveal its vulnerable area.
Official design material describes the intended interaction: approach the Seeder, provoke or taunt it into leaving its protected posture, and cause it to flip over so its fleshy head is exposed. This creates a deliberate cycle of approach, bait and punish. Firing endlessly into the armored protection misunderstands the encounter because progress begins with changing the creature’s behavior.
The important cue is not simply whether the Seeder is visible. It is whether the creature is protected, reacting to the approach or fully inverted with the vulnerable head available. Each state supports a different action. Advance during a manageable interval, prepare for its reaction and concentrate damage when the target is actually exposed.
Approach does not mean careless contact. Observe incoming artillery, use the arena’s protection and move when the route permits. The objective is to enter the range that provokes the posture change while retaining enough room to respond. If other enemies or living projectiles occupy the path, clear the minimum necessary obstruction rather than forcing the mechanic through uncontrolled pressure.
Specialist campaign testing reports that an active Seeder disrupts squad communications while launching living mortar projectiles. That observation reinforces its command-and-control role: it does more than inflict direct damage. It degrades the squad’s ability to process the encounter while continuing bombardment. Solo players still face the projectile and visibility pressure even if communication disruption is most obvious in cooperative play.
The disruption makes physical state cues particularly important. Track the protected shell, provoked reaction and exposed head instead of relying exclusively on spoken information. The encounter communicates progress through posture. That remains readable even when the surrounding presentation becomes less dependable.
Once the creature flips, the exposed head is a limited opportunity rather than permission to forget the arena. Incoming hazards may still require movement. Concentrated fire is appropriate because the state makes progress possible, but survival remains the condition for using another cycle if the Seeder recovers.
Ground encounters should not be conflated with anti-air sequences. A Seeder acting as a Nemacyst launcher inside a larger set piece can use a different objective, position or damage process. The approach-and-flip interaction is the documented ground-miniboss model, not proof that every appearance accepts the same tactic at every moment.
No fixed number of attacks or ammunition expenditure is supported across difficulty, accuracy and squad configurations. Follow the state sequence instead: protected posture, careful approach, provocation, flip, exposed head, damage window and possible reset. That behavioral cycle remains useful when numerical tuning changes.
- Identify whether the encounter is a ground miniboss or an anti-air sequence
- Do not waste attention on the protected shell
- Approach carefully to provoke the posture change
- Focus the exposed fleshy head
- Prepare for the cycle to reset rather than relying on a fixed damage count
Armored diggers and staged weak points: Corpsers and Brumaks
Spoiler warning: this section discusses mechanics belonging to major creature encounters, though it avoids their story outcomes. Corpsers and Brumaks demonstrate why weak points cannot always be reduced to generic damage bonuses. Their armor, attack cycles and specific arenas determine when an apparent target can be used.
Specialist campaign testing reports that Corpsers protect their vulnerable faces with armored front legs and expose the target area during portions of their attack cycle. Do not treat the armored legs as a permanent invitation to fire. Watch for the opening, apply pressure to the glowing face and return to defense when the protection closes.
The cycle converts defense into timing. When the legs form a shield, conserve the exposure that would otherwise be spent attacking armor. Observe the Corpser’s movement and prepare for the next opening. When the face appears, use the window without assuming it will remain available. This is a state-driven encounter rather than a continuous damage race.
At least one documented Corpser encounter requires baiting a charge into structural pillars. That is a mission-specific environmental objective, not proof that every Corpser must be fought through pillars. In the relevant arena, positioning becomes part of the attack: establish the charge line, clear it at the correct time and use the collision to advance the encounter.
Successful baiting requires an exit. The player needs enough room to leave the projected charge without evading into another hazard. Moving too early can change the relationship; moving too late risks contact. The pillar is therefore an objective element around which spacing and timing are organized, not a universal weak point belonging to the species.
Brumaks are broader mobility tests. Official launch guidance warns that remaining behind one static piece of cover is unsafe, particularly against the identified chain-weapon variant. Plan continued movement, use arena geometry to interrupt weapon lines and preserve enough open space to change direction.
Static cover fails when a large weapon dominates the lane around it or the Brumak changes angle until the obstacle no longer intervenes. Judge a position by its next exit as well as its present protection. Entering a deep pocket may solve one attack but leave no answer to the following sweep.
Specialist observations distinguish a Brumak defeated through general damage from a more heavily armored Brumak whose mounted weapons and helmet can be stripped away in stages. Treat those destructible components as encounter-defined objectives. Removing a weapon can reduce one source of pressure; removing protection can open the next stage. It does not follow that every Brumak has the same components or sequence.
Component destruction matters because of its battlefield effect. If the encounter permits a mounted weapon to be removed, reducing the weapon that most restricts movement can improve the later phases. The exact order must still follow what that appearance exposes and what the objective recognizes rather than a supposedly universal anatomy chart.
Both families punish cover fixation. The Corpser asks players to manipulate a charge and exploit cyclical exposure. The Brumak applies large-scale pressure that makes relocation essential. In neither case should a glowing element be assumed available at all times. Read the state, follow the arena mechanic and do not universalize one mission’s script.
- Corpser: wait for the armored legs to expose the face
- Use pillar baiting only where the objective and arena support it
- Brumak: plan movement instead of relying on one cover point
- Strip documented components when the encounter presents them
- Treat staged mechanics as mission-specific, not universal biology
Airborne source pressure: Spore Matrons
Spoiler warning: this section identifies a later airborne enemy and its central combat role. A reproducible post-launch campaign guide reports the on-screen objective name as Spore Matron. Some external and earlier site coverage has used Spore Maiden, but this field guide standardizes on Spore Matron because that is the objective label supported by the retrieved campaign observation. The site’s existing Spore Maiden headline should be checked against the current build and corrected if necessary.
Spore Matrons float above conventional cover lines and release smaller airborne, spiked threats. Their elevation changes aiming priorities: looking upward can expose the squad to ground infantry, while ignoring the source allows airborne pressure to accumulate. The Matron is therefore both an aerial target and a reinforcement source.
The reported focus point is the luminous central area, which produces clear hit feedback under sustained fire. That visual response is more useful than an unsupported universal health estimate. When the nearby airspace is safe, concentrate damage there. When a spawned threat is already approaching the squad, interrupt source damage long enough to remove the immediate danger.
This creates a repeating priority exchange. The Matron is strategically important because it produces future pressure. Its offspring become tactically urgent when they are about to connect. Clear only what is necessary, return attention to the luminous center and continue checking ground-level flanks. Spending too long on every distant projectile can allow the source to replenish them.
The distinction between source and product is central. Attacking only the Matron can permit smaller threats to overwhelm the squad before source damage matters. Attacking only those threats can create an indefinite cycle. The practical answer is alternating control: remove imminent danger, spend the resulting window on the source and reassess before another projectile reaches the squad.
Conventional cover provides incomplete protection because the Matron and its offspring occupy a vertical layer above ordinary rifle lanes. A wall that blocks Drones may not block an airborne approach. Move beneath geometry that offers real overhead separation where available, or maintain enough lateral space to observe and avoid incoming threats.
Ground infantry amplifies the role. Drones punish the upward-facing player, Grenadiers advance while attention is elevated and Snipers exploit a stationary firing posture. Use short damage windows rather than staring at the source continuously. After each burst, lower the scan, verify the flanks and relocate if the current angle exposes too many ground lanes.
Target priority may reverse several times within one cycle. A Rusher about to make contact outranks the Matron. Once the Rusher is stopped, an approaching airborne threat can become next. When those immediate dangers are clear, the source returns to high priority because it will produce the next problem. A static kill order is poorly suited to this fight.
The existing standalone coverage owns the creature’s ammunition-attrition discussion. This field guide therefore does not prescribe modifications, provide a full Missing Convoy walkthrough or state a required ammunition reserve. Its narrower tactical conclusion is to distinguish the source from its products, attack the luminous center when safe and preserve awareness across both vertical layers of the arena.
- Use Spore Matron as the standardized observed objective name
- Treat the Matron as an airborne reinforcement source
- Clear only immediately dangerous spawned threats
- Return fire to the luminous central area
- Keep checking ground flanks while aiming upward
Late-campaign airborne threats: Scoria
Late-campaign spoiler warning: this section names and describes an airborne enemy encountered later in the story. It does not discuss the ending, the narrative resolution, the circumstances surrounding the encounter or the final commander. Only the details needed to recognize and answer the Scoria’s battlefield states are included.
Specialist campaign testing identifies Scoria as large winged enemies that alternate between circling and landing. That state change defines the tactical problem. A circling Scoria is an aerial tracking threat whose approach must be monitored across a broad arc. A grounded Scoria is more accessible, but its landing does not suspend the rest of the encounter or remove the need to prepare for another aerial phase.
Silhouette and behavior separate the Scoria from an airborne source such as the Spore Matron. The Matron is defined by the smaller hazards it releases and the need to alternate between source and offspring. The Scoria is defined by movement state and direct beam pressure. Confusing the roles leads to the wrong response: projectile cleanup answers the Matron, while route geometry answers the Scoria.
While the Scoria circles, avoid narrowing attention to a single point in the sky. Track its direction and identify geometry that can actually interrupt an attack from that angle. Cover that blocks a ground-level Drone may offer little protection from above. Select routes for lateral space and overhead relationship, not merely because they provide a standard cover prompt.
The clearest reported attack is a broad beam. Specialist testing identifies lateral movement out of its path as the defensive response. Moving directly backward can preserve the relationship between the player and the beam, especially if the attack controls a broad corridor. A sideways route changes that relationship and exits the threatened strip more efficiently.
Lateral movement still requires preparation. Before the beam develops, note acid pools, low obstacles, dead ends and infantry lanes on both sides. A nominally correct dodge can fail if it carries the player into Bilefrog acid, a waiting Grenadier or Drone crossfire. The Scoria does not erase the ground encounter; it exploits route restrictions already created there.
The available evidence does not establish a universal wind-up duration. Begin moving when the direction becomes readable rather than waiting for a memorized count. Once the creature commits to a line, leave that line and maintain movement until the broad threat has passed. Do not stop at the apparent edge if the beam is still sweeping.
The circling state rewards tracking and survival over continuous damage. If a stable shot appears without compromising movement, use it, but do not become stationary merely to maintain fire on a mobile target. Simulated projectile travel also means a distant moving creature may require aim leading, making prolonged exposure even less attractive when another attack is developing.
A landing changes the opportunity. The creature becomes more accessible and concentrated pressure can be applied to a more predictable target. Grounded does not mean harmless. Preserve separation, watch its posture and retain a path back to lateral movement. The landing is a temporary offensive phase, not permission to surround the creature or abandon every exit.
Other enemies can alter the cycle. Drones may cover one side of the lateral escape, Grenadiers can occupy the destination, Wretches can interrupt the sprint and Snipers can punish a stationary shot at the airborne creature. Those ground units may need to be reduced during a landing so that the next aerial phase has a clean corridor.
If a close attacker blocks the beam route, solve only the part of that problem necessary to move. Chasing it across the arena wastes the warning. A short interruption, an evasive direction change or movement around geometry may be enough. Once outside the beam, rebuild the target-priority ladder from the safer position.
No universal damage multiplier, stagger threshold, state duration or ammunition requirement is established. The reliable framework is behavioral: circling creates tracking pressure, the broad beam demands lateral escape, and landing creates a temporary attack opportunity. That cycle provides actionable counterplay without exposing the late campaign’s story outcome.
- Track direction while the creature circles
- Prepare lateral space before the broad beam commits
- Move across the beam’s path rather than retreating along it
- Use grounded states as temporary pressure windows
- Clear ground enemies that obstruct the next escape corridor
- Do not assume fixed state durations or universal stagger thresholds
Emergence Holes as enemies without bodies
Emergence Holes are battlefield actors even though they do not carry weapons or move. Specialist campaign testing reports that they continue introducing Locust while open. That gives the hole a reinforcement role whose strategic danger can exceed that of any one Drone emerging from it.
Reported cues include red smoke followed by rupture of the ground. Those signs provide a recognition window before the source becomes fully active. When they appear, identify the likely opening area, check whether a rush unit is already threatening contact and prepare to address the source. The hole should not become a reason to ignore an imminent tackle or detonation.
The cue allows planning before newly arrived infantry spreads through the arena. Identify solid cover from which the opening can be addressed and note which enemies control that route. If a Sniper beam covers the necessary angle, break it first. If an unarmed Drone is already closing, stop the tackle. The source is strategically urgent, but control must be preserved long enough to act on it.
Once open, the source often rises above routine infantry in priority. Defeating one Drone while another replaces it does not improve the long-term state. Closing the hole caps future pressure and allows the squad to reduce the remaining population permanently. This is the clearest example of why target selection must account for encounter systems rather than spectacle or health.
The number of enemies already present still matters. A nearly empty arena can make immediate closure straightforward. A crowded one may require a short stabilization phase. Reduce only the units preventing safe access, then return to the source before continuing reinforcement restores the problem. Waiting for complete safety can be self-defeating because the open hole is generating the reason safety never arrives.
Closure itself creates exposure. A player concentrating on the opening can be tackled by an unarmed Drone, rushed by a Grenadier or pinned by a Sniper. Establish a safe delivery angle, use cover where appropriate and avoid crossing open space without checking immediate contact threats. Control the few seconds needed for closure instead of charging reflexively.
The broad closure principle is explosive, but this guide does not specify a universal grenade count or assume every explosive tool behaves identically in every scripted situation. Use the method communicated by the encounter and confirm that the opening has actually closed before redirecting attention. If reinforcements continue, determine whether the original source remains active or another has opened.
Confirmation matters because smoke, debris and living enemies can obscure the result. Do not assume the source is sealed simply because attention shifted elsewhere. Watch for the visible state and the cessation of spawns. A failed attempt returns the hole to high priority once immediate contact pressure is stable.
The priority ladder still governs the approach. A Ticker at detonation range comes first because it can remove control now. The Emergence Hole follows because it creates future enemies. A distant Boomer between shots may remain temporarily secondary when solid cover neutralizes its current attack. This order follows time and pressure, not physical size.
Do not confuse an ordinary Emergence Hole with a burrow tied to a boss mechanic. Ticker entrances, Corpser movement and other creature-specific openings can be scripted infrastructure with different rules. Red smoke, ground rupture and continuing standard reinforcement identify the functional Emergence Hole pattern discussed here. A specific objective’s instructions override the general closure model.
- Red smoke and rupture indicate a developing source
- Check for immediate rush threats before exposing yourself
- Close the source to stop future reinforcements
- Confirm that the opening is actually sealed
- Do not assume every creature burrow follows Emergence Hole rules
Compound-pressure case studies
Wretches or Tickers combined with Drones illustrate interruption pressure. The small enemies force the player to look down, retreat or stop aiming while Drones maintain rifle fire from cover. The solution is not automatically to kill every Drone first or every swarmer first. Clear the creatures already capable of contact, move behind geometry that blocks rifle lanes and reduce the infantry before another pack arrives.
The common failure is prolonged local cleanup. Chasing the final Wretch into open ground grants Drones an unobstructed lane. Standing still to destroy every distant Ticker lets several close together and compress the reaction window. Reclaim a small defensible area, deny immediate contact and use the resulting space to dismantle the ranged support.
Grenadiers or Rushers combined with Snipers create forward and long-range pressure. The approaching enemy prevents comfortable counter-sniping, while the red beam discourages open movement. First deny contact without standing inside the beam. Break Sniper sight with tall geometry, preserve distance from the advancing unit and return to the elevated threat from a new angle once the foreground is controlled.
That combination punishes late relocation. Waiting until a Grenadier reaches the final cover can make every available exit cross the Sniper’s lane. The safer decision occurs earlier, while several routes remain. Move while the close-range threat is still approaching and use geometry to block the beam rather than trying to win both damage contests from one position.
A Boomer paired with swarmers weaponizes timing. Wretches demand close clearing just as the Boomer announces a shot, and Tickers can make the obvious escape unsafe. The Boomer’s call should govern the immediate rhythm. Reach solid cover before impact, clear only the small enemy physically obstructing that movement and use the post-shot interval to reclaim local space.
Tunnel vision is especially dangerous in that pairing because both layers look urgent. The swarmer is physically close, but the explosive is already controlling the player’s location. A brief evasive action can be more valuable than completing a kill. Survive the projectile, then finish nearby attackers before the next call resets the cycle.
A Bilefrog with a suppressor removes exits. Acid marks one route as hazardous while a Grinder or Sniper covers another. Before the pool completes the trap, identify a third line: a mantle, alternate cover edge, deeper retreat or lateral passage. If no safe route remains, escaping or breaking the suppressor’s angle can matter more than attacking the Bilefrog’s open mouth.
The reported weak point can function like bait in this combination. The open mouth invites damage at the same moment the projectile is preparing to remove ground. Remaining stationary for a longer attack can leave the player caught between acid and suppression. Take only the opening the route can support, then move before the denial effect controls the area.
A Reaver plus deployed Drones produces sequential escalation. The transport increases the ground population and can then become elevated armor capable of defeating ordinary cover. Contain the closest deployed infantry, check whether the Reaver has landed or climbed and focus it during a favorable state. Its death explosion does not remove its passengers, so reassess immediately afterward.
If the Reaver climbs, the best ground cover can become the worst place to remain. If it lands, the platform may become the strongest focus opportunity while Drones are temporarily contained. The correct target changes with elevation. Reclassification after deployment is more useful than committing to either the Reaver or its passengers for the entire encounter.
A Spore Matron with ground infantry divides vertical attention. Looking up at the source permits a flank below; concentrating only on Drones allows airborne threats to accumulate. Use short cycles: remove an imminent aerial hazard, check the ground, attack the luminous center and relocate before repeating. This generalized pattern is more useful than memorizing one chapter’s spawn sequence.
The same vertical division can occur with a wall-clinging Reaver or circling Scoria, but their roles are different. The Matron generates additional threats, the Reaver changes the firing angle and the Scoria creates direct beam pressure. Identifying that distinction determines whether the next response should be projectile cleanup, line-of-sight denial or lateral movement.
An Emergence Hole beside a durable heavy demonstrates strategic versus tactical priority. The heavy is visually dominant and may absorb sustained damage, but the open source is expanding the formation. If solid cover neutralizes the heavy’s current attack, use that protection to close the hole. If the heavy has made the route lethal, create one safe interval before attempting closure.
Across all these examples, the central principle is that enemies amplify one another by removing options. Counterplay should restore an option: a firing lane, movement route, break in reinforcement or a few seconds without contact pressure. Once that space exists, ordinary damage becomes easier and safer to apply.
A useful diagnostic question is which enemy is making another one effective. The Wretch enables Drone fire by interrupting aim. The Bilefrog enables suppression by removing an exit. The Grinder enables a Grenadier’s approach. The Matron enables ground flanks by pulling attention upward. Removing the enabler, breaking its angle or leaving its effect can collapse the combination without requiring simultaneous kills.
Reassess after every state change. A landed Reaver, sealed Emergence Hole, closed Bilefrog mouth or grounded Scoria changes the priority structure. Continuing to follow the previous plan wastes the advantage just created. Target order is not written once at the start of a fight; it is rebuilt whenever the battlefield’s available options change.
- Ask which enemy is enabling the others
- Stop immediate contact before attempting a long exposure
- Break one firing angle to create a movement route
- Attack reinforcement sources during the resulting window
- Reassess after every state change, deployment or death explosion
A quick-reference battlefield role matrix
Drones — Primary role: baseline ranged pressure and group advancement. Most important cues: visible equipment, cover use and movement with other infantry. Urgency: overlapping lanes punish open ground. Default response: reduce firing angles from cover. Priority exception: an unarmed, disarmed or enraged Drone charging into contact moves above passive riflemen.
Grenadiers — Primary role: close-range shotgun pressure. Most important cue: continued approach toward point-blank range. Urgency: they compress safe distance and contest the same cover. Default response: preserve separation and damage the approach. Priority exception: a Sniper or incoming explosive may first require a line-of-sight break.
Rushers, observed in specialist testing — Primary role: direct incapacitation. Most important cues: large melee silhouette and committed charge. Urgency: contact can cause knockdown and a struggle. Default response: leave the charge line and concentrate pressure before contact. Priority exception: an adjacent Ticker or another immediate lethal threat can be more urgent.
Wretches and Armored Wretches — Primary role: pack displacement and interruption. Most important cues: low sprinting silhouettes, leaps and, for armored forms, a disorienting scream. Urgency: surrounding attacks remove aiming space. Default response: brief close-range clearing followed by repositioning. Priority exception: strong separation can leave a Sniper or open Emergence Hole as the greater threat.
Tickers, observed in specialist testing — Primary role: explosive contact pressure. Most important cue: a small crawler charging directly toward the squad. Urgency: close-range detonation. Default response: destroy at distance and inspect the route for more. Priority exception: in scripted arenas, controlling an active burrow may matter more than repeatedly clearing individual Tickers.
Snipers, observed in specialist testing — Primary role: long-range lane control. Most important cues: elevated position and red aiming beam. Urgency: a prepared shot punishes prolonged exposure. Default response: break sight, change angle and then return fire. Priority exception: immediate melee contact must be stopped while adequate cover continues to block the Sniper.
Boomers — Primary role: timed explosive control and tanking. Most important cues: massive silhouette, prototype Heavy Boomshot and audible pre-shot call. Urgency: explosions invalidate exposed space. Default response: use solid cover and act between shots. Priority exception: rush units can temporarily take precedence; a low-health chainsaw execution is sensible only after local control is restored.
Grinders, observed in specialist testing — Primary role: sustained suppression. Most important cue: long Troika firing streams. Urgency: the stream prevents safe peeking or movement. Default response: observe the lane and act when suppression stops. Priority exception: a close incapacitation threat can take precedence while cover neutralizes the stream.
Flayers, described in specialist testing and reporting — Primary role: lethal harpoon pressure. Most important established identifier: the armored heavy carries the Gorehook. Urgency: specialist reporting describes the harpoon as capable of an immediate kill. Default response: deny unobstructed exposure with solid geometry and use short, protected attack opportunities. Priority exception: do not cross another active heavy lane merely to improve the angle. No universal preparation tell or fixed safe window is claimed.
Bilefrogs, observed in specialist testing — Primary role: persistent area denial. Most important cues: opening mouth, acid projectile and glowing pool. Urgency: safe ground and exits disappear. Default response: route around the pool and attack the reported mouth vulnerability when safe. Priority exception: survival and relocation outrank weak-point damage when a suppressor controls the exit.
Reavers — Primary role: troop deployment followed by mobile elevated pressure. Most important cues: Drone transport, landing and wall-clinging. Urgency: they increase enemy count and defeat conventional cover angles. Default response: contain deployed troops, concentrate fire on a landed Reaver and keep death-blast distance. Priority exception: immediate ground contact outranks the transport.
Seeders — Primary role: artillery and protected miniboss pressure. Most important cues: Nemacyst launch, armored posture and provoked flip. Urgency: bombardment continues while the vulnerable area is hidden. Default response: approach carefully, trigger the posture change and attack the fleshy head. Priority exception: anti-air sequences can use different objectives.
Corpsers, observed in specialist testing — Primary role: armored staged assault. Most important cue: front legs shielding a glowing face. Urgency: charges and armor restrict ordinary damage opportunities. Default response: punish attack-cycle openings. Priority exception: pillar baiting applies to the documented arena objective and should not automatically be applied to every Corpser.
Brumaks — Primary role: large-scale mobility and weapon pressure. Most important cues: mounted weapons, armored components and sweeping chain attacks in the relevant variant. Urgency: static cover becomes unsafe. Default response: keep moving and strip components presented by the encounter. Priority exception: component order and damage method can be mission-specific.
Spore Matrons, observed in specialist testing — Primary role: airborne reinforcement source. Most important cues: floating body, released spiked threats and luminous center. Urgency: aerial hazards accumulate while attention shifts upward. Default response: clear imminent offspring, attack the center and check ground flanks. Priority exception: nearby projectiles temporarily outrank source damage.
Scoria, observed in specialist testing, late campaign — Primary role: state-changing aerial beam pressure. Most important cues: circling, landing and a broad beam. Urgency: the beam can sweep a movement corridor. Default response: move laterally and exploit grounded opportunities. Priority exception: clear or avoid any ground threat that blocks the lateral escape.
Emergence Holes, observed in specialist testing — Primary role: reinforcement infrastructure. Most important cues: red smoke, rupturing ground and continuing spawns. Urgency: they prolong and expand the encounter. Default response: establish a safe angle and close them using the encounter’s explosive method. Priority exception: stop an immediate tackle, charge or detonation before exposing the squad to seal the source.
The matrix is a starting scan, not a substitute for reading current state. A Rusher that has not begun closing may be less urgent than an aligned Sniper. A Boomer between shots can be temporarily contained by solid geometry. A landed Reaver can present a stronger focus opportunity than its remaining infantry, while a wall-clinging Reaver may demand immediate relocation. Cue, distance and geometry always modify the default.
When uncertain, ask five questions in order: can anything remove control immediately; is anything generating more enemies; has safe ground been taken away; is a firing angle preventing a response; and which durable or baseline targets remain after those problems are stabilized? That sequence converts the matrix back into a live battlefield decision.
- Immediate contact beats distant durability
- Reinforcement sources outrank replaceable infantry when safely addressable
- Area denial matters when it removes the current route
- Suppression can often be answered by breaking its angle rather than forcing a kill
- Scripted boss objectives override the general ladder
E-Day’s Locust are easiest to understand as a network of battlefield jobs. Drones maintain damage, Wretches and Rushers collapse space, Snipers and Grinders restrict exposure, Bilefrogs erase ground, Reavers and Emergence Holes add bodies, and larger creatures impose state-driven mechanics. An encounter becomes more manageable when those jobs are identified before target selection begins.
The default priority is simple but flexible: stop imminent incapacitation, control reinforcement, escape denial, break suppression and then work through tanks and ordinary infantry. Audio calls, beams, glows, postures and movement paths indicate when an enemy has changed category. Reassessing those cues is more dependable than always attacking the largest silhouette.
Several newly introduced names and mechanics are documented through specialist campaign observation rather than an official complete bestiary. Later patches and controlled testing may refine individual details. The role-based framework should remain useful even if numerical tuning changes: protect control, restore safe space and attack during the opportunities supported by documented behavior.
Sources
- Gears of War: E-Day Gameplay Updates
- Gears of War: E-Day – Surviving the First Night of Emergence
- Gears of War: E-Day Official Xbox Product Page
- Gears of War: E-Day Official Game Page
- Gears of War: E-Day on Steam
- Gears of War: E-Day Gameplay Reveal Deep Dive
- Gears of War: E-Day Multiplayer Deep Dive
- October 05 Patch Notes
- Gears of War: E-Day Enemy Types: How to Kill Each One
- Missing Convoy in Gears of War: E-Day: How to Kill the Spore Matrons
- Gears of War: E-Day Campaign Hands On
- Gears of War: E-Day Review
- Gears of War: E-Day Review
- Gears of War E-Day Campaign Review