
Castlevania: Belmont’s Curse is built around the satisfying kind of confusion: side paths, hidden rooms, combat challenges, environmental hazards and puzzles that reward a player who stops to inspect the details. That makes it a game where getting stuck does not necessarily mean progress has halted. Often, it means the game has supplied a clue in a menu, a room layout, a piece of map information or a system that has not yet been fully explained.
Rose has several tools for dealing with that friction. Some are straightforward accessibility and difficulty options; others are progression systems that can turn an unpleasant return trip or a demanding encounter into a much more manageable task. The important distinction is that these choices do not erase the game’s exploratory structure. They let players decide which part of the challenge they want to preserve: the platforming, combat, puzzle-solving, backtracking, or all of the above.
1. Adjust gameplay settings before a roadblock becomes a wall
Gameplay settings are not merely a last resort. They are a practical way to tailor the portion of Belmont’s Curse that is proving least enjoyable without flattening everything around it. The available options can change whether Rose dies, how much damage she receives, how much damage she inflicts, how quickly she gains experience, the amount of trap damage she takes, and her standard supply of healing potions.
That range matters because difficulty is not one single problem. A player who enjoys boss mechanics but is frustrated by the trek back after every loss has a different issue from someone who likes exploring but keeps dying to spike pits. The game addresses both. Selecting the option to respawn outside a boss door reduces the repeated journey after defeat. Lowering trap damage gives more room to learn a platforming sequence. Additional healing potions can provide a safety margin in a difficult area without necessarily changing ordinary enemy encounters.
Experience gain is especially useful when combat is the sticking point. Raising Rose’s experience gains allows her to become stronger more quickly, which can help if enemy damage or a boss’s endurance is outpacing a player’s current level. Conversely, adjusting outgoing damage gives a direct way to soften combat while leaving navigation and puzzle work intact.
Practical approach: make one small adjustment that targets the specific frustration rather than turning on every aid at once. If the boss is enjoyable but the runback is not, use the boss-door respawn. If a room full of traps is stopping exploration, reduce trap damage. That preserves the aspects of the game a player still wants to solve on their own.
There is also an option to disable death entirely. That will be the right fit for some players, particularly those who want to focus entirely on the castle’s secrets and route-finding. There is no universal “proper” setting here. The useful setting is the one that keeps the player engaged with the game rather than locked in an exhausting loop.
2. Treat the map as a puzzle tool, not a position tracker
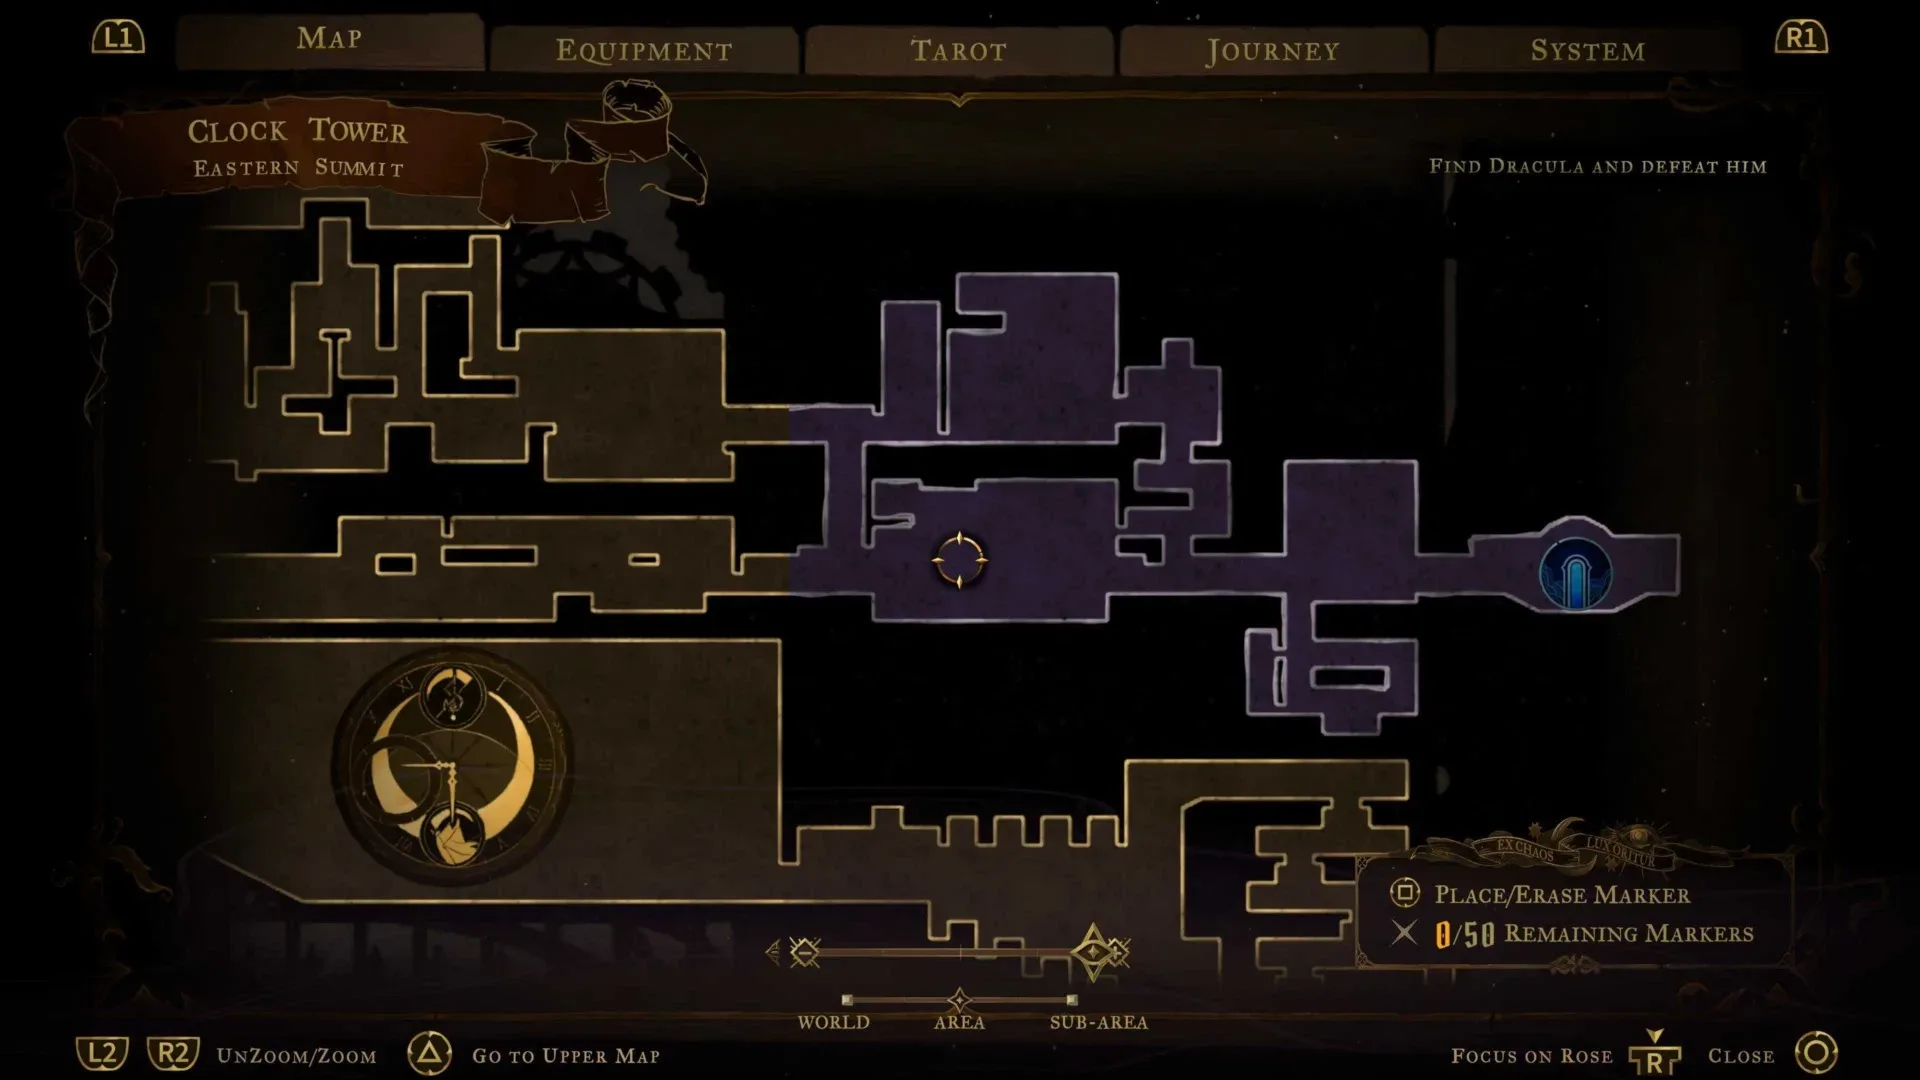
The map in Belmont’s Curse communicates more than Rose’s current location. Its room colors provide a quick audit of incomplete exploration: a brown room background indicates completion, while a purple background means that the room still contains something undiscovered. That simple color language can save a great deal of aimless retracing.
In a game built around hidden rooms, the difference is substantial. When an unexplored corridor leads nowhere, it is easy to wonder whether the missing objective lies behind a breakable route, in a room already visited, or in a completely separate section. Purple rooms narrow the search. Rather than sweep an entire zone for the third time, prioritize locations the game itself identifies as unfinished.
The map also becomes more specific in Dracula’s Castle and Notre Dame. Important rooms can be rendered with meaningful detail, and that detail can function as a puzzle hint. One clear example involves the Sage: the map indicates how many chains must be broken and points players toward the general direction in which they can be found. It does not simply hand over the answer, but it turns an opaque scavenger hunt into a puzzle with readable parameters.
What to check before leaving an area:
- Look for purple rooms that indicate an undiscovered secret remains.
- Inspect any unusually detailed map room for visual or directional clues.
- Check whether the current objective involves a count, such as the chains connected to the Sage.
- Ask whether a previously inaccessible room is worth revisiting after gaining a spell, weapon or other progression tool.
Players also receive 50 map markers. These are most useful when used for questions rather than answers: a suspicious wall, a chest behind an obstacle, a locked route, or an object whose purpose is unclear. A marker preserves that uncertainty without requiring the player to memorize it. It makes backtracking intentional rather than vague.
Good marker discipline can be surprisingly valuable. A useful habit is to reserve markers for places where a concrete change may matter later: an inaccessible ledge, a sealed passage, or a puzzle feature that seems to require another ability. Marking every mildly interesting room will make the map noisy; marking the few places that clearly invite a return turns it into a working notebook.
3. Complete Works of Mercy to get the most from tarot spells
Rose can find weapons across seven weapon categories, offering options for different combat preferences. But the bigger leap in offensive and defensive strength comes through tarot cards. Each defeated boss grants a new spell, and every boss also has an associated side quest called a Work of Mercy. Completing that Work of Mercy upgrades the corresponding spell.
In practical terms, these are not side activities to automatically postpone. Spell upgrades can dramatically change later encounters, especially when paired with a stronger Rose. A player who finds a boss arena overwhelming may get more value from pursuing the relevant Work of Mercy than from repeatedly challenging the same fight with the same build.
The Brittle King’s spell is a particularly useful example. Fully upgraded, it substantially improves Rose’s survivability while also adding offensive power. That makes it valuable beyond a single boss battle: a spell that keeps Rose alive longer and contributes more damage can help in combat arenas as well.
Some Works of Mercy are also less demanding than their name may suggest. The Brittle King’s task of defeating 25 haunted armor enemies may already be partly or fully complete by the time Rose reaches that boss, simply through normal progress. That is worth checking before assuming every upgrade requires a long detour.
A sensible spell-upgrade routine:
- After defeating a boss, identify the spell gained from that fight.
- Check the associated Work of Mercy immediately.
- See whether its requirement overlaps with enemies or activities already encountered.
- Prioritize upgrades that address the current problem, whether that is survival, damage, or difficult arenas.
The broader lesson is that the game’s build system is more flexible than weapons alone suggest. Weapons decide how Rose approaches routine engagements, while tarot spells can reshape the stakes of tougher fights. Players who are experimenting with their options may also enjoy seeing how another game makes classes and systems central to play in this look at D&D World of Warcraft’s hero classes and dungeon design.
4. Kneel before mirrors after Dracula’s Castle opens
Mirrors initially look like conventional save points, but they have a second, easily missed purpose. After Dracula’s Castle has been unlocked, kneeling in front of a mirror opens access to fast travel. This transports Rose to a hidden space containing almost all mirrors already unlocked within that area, allowing a destination mirror to be selected.
The input is important: simply reaching a mirror is not the whole interaction. Kneeling is what reveals the travel function. Since the game does not strongly foreground this mechanic, players who rely on mirrors only for saving may spend far longer on foot than necessary.
Fast travel is initially limited by zone. Until the mirror world’s own puzzle has been solved, mirrors can move Rose around within the current zone but not from one zone to another. For inter-zone travel, the Ferryman remains necessary. This is a useful distinction when planning cleanup. If several purple rooms are scattered through the same region, mirrors can drastically reduce the time spent returning to them. If the target is in another region, work the Ferryman into the route.
The mirror world contains a puzzle, but there is no need to spoil its solution to make use of the immediate benefit. The essential takeaway is simple: once Dracula’s Castle is available, test the kneeling interaction at mirrors and begin treating them as a travel network as well as save locations.
5. In Notre Dame, defeat the boss before attempting every laser challenge
Notre Dame presents a very specific mid-game efficiency problem. After Dracula’s Castle is unlocked, Rose heads to the old church, where three lasers block the final boss room. These beams are disabled one at a time, but they are not confined to the boss gate. They also complicate secrets and platforming challenges throughout the area.
That creates a tempting but inefficient approach: try to finish every chest, challenge and secret while the lasers are still active. It is possible to do so, but it asks the player to deal with additional hazards while attempting some of Notre Dame’s most awkward routes. A chest at the end of a dangerous platforming segment is harder to pursue when a laser can repeatedly interrupt the run.
The more practical order is to make reaching and defeating the zone’s boss the priority, then circle back. Once the boss-door lasers are shut down, those lasers are disabled everywhere in Notre Dame. The cleanup pass becomes much simpler because the area’s platforming challenges no longer have the same laser pressure.
This is not a warning to ignore exploration completely. Notre Dame still contains secrets and useful challenges. It is a route-planning recommendation: take what is convenient on the first pass, note anything that is laser-heavy or unusually frustrating, and return after the boss has removed the shared obstacle.
Notre Dame checklist:
- Recognize that the three lasers protecting the boss room also affect the wider area.
- Do not mistake a laser-dependent challenge for a mandatory test of immediate execution.
- Use map markers on chests or routes worth revisiting.
- Focus on the boss path, then revisit unfinished rooms after the beams are gone.
That sequence fits the game’s wider design. Belmont’s Curse repeatedly rewards attention, but attention does not always mean forcing a room immediately. Sometimes it means noticing the obstacle, marking it, advancing through the larger objective, and returning once the game’s systems have made the task more reasonable.