Windows 11 can run games perfectly well without an afternoon spent spelunking through Settings. But its default setup also leaves several useful controls switched off, while allowing a steady trickle of recommendations, promotional prompts and background conveniences that may not be convenient at all. For a PC used for games, school, work, Discord, mods, screenshots and the occasional urgent browser search, small configuration choices can make the desktop feel substantially less hostile.
This is not a magic frame-rate guide. Changing a notification preference will not transform hardware performance, and selecting a performance-focused power mode comes with a power-use trade-off. The value here is control: fewer accidental interruptions, less time repeating mundane actions and clearer choices about what runs, downloads and appears on the screen.
Windows menus can move as the operating system changes, so treat the paths below as a useful map rather than a promise that every label will remain identical forever. The safest approach is to alter one group of settings at a time, then use the PC normally for a while before deciding whether it suits your setup.
Start with the apps Windows opens by default
Default apps determine which program opens a particular file type or web link. This sounds basic, but it matters every time a downloaded guide opens in an unwanted browser, a text configuration file launches in the wrong editor, or a PDF refuses to use the reader you prefer.
Open Settings with Win + I, then go to Apps > Default apps. Selecting an installed app displays the file types it can handle, allowing those associations to be changed individually. Browser choices have a more direct option at the top of the relevant app page: Make [app] your default browser.
There is also a file-first route. At the bottom of the Default apps list, choose Choose defaults by file type. This is especially useful when the decision is not “which app should do everything?” but “what should open this one extension?” A TXT file, for example, can be assigned to the text editor you actually use.
For players who download patches, readme files, save-related notes or community-made documentation, this removes an unnecessary right-click-and-Open with detour. It is a modest change, but it pays off through repetition.
Turn on Clipboard History, then use it deliberately
The ordinary clipboard holds only the most recently copied or cut item. Copy a second thing and the first is gone. Windows 11’s Clipboard History expands that one-slot system into a short list of recent text and images.
Enable it at Settings > System > Clipboard, then press Win + V whenever you want to browse what has been copied. The history stores the last 25 clipped items. That is enough to be helpful without making it a long-term archive.
The practical upside is obvious for anyone moving between a game, a browser and a chat window. A server address, a line of troubleshooting text, a search term or a few notes can remain available after another copy action. Entries needed frequently can be kept using the Pin icon. The three-dot menu also offers Paste as Text, which strips formatting; that can prevent a copied passage from arriving in a document with unwanted styling.
There is an optional cross-device setting, Clipboard history across your devices, for people with more than one PC. Its purpose is to make copied material available on another device, such as moving something from a laptop to a desktop. That is a convenience decision rather than a necessity. Before enabling it, consider what sorts of material you routinely copy and whether cross-device access is appropriate for it.
Players wanting more capacity and organization may consider ClipClip, a third-party clipboard tool described as supporting more snippets and folders for pinned clips. Windows’ built-in option, however, is the sensible first stop because it solves the single-item limitation with no extra program to maintain.
Take back the Start menu, search and lock screen
One of the biggest quality-of-life wins is simply reducing the number of places where Windows offers suggestions. These can include tips, new-app prompts, subscriptions and other recommendations. Even when each appears harmless on its own, the combined effect is extra visual noise on a machine that should be ready to launch a game or get work done.
Begin at Settings > Personalization > Start and turn off Show recommendations for tips, shortcuts, new apps, and more. This keeps those recommended prompts out of the Start menu.
Next, go to Privacy & security > Search and disable Show search highlights. Search becomes more focused on the contents and applications of the PC rather than additional highlighted material.
The lock screen has its own set of choices. In Personalization > Lock screen, disable Get fun facts, tips, tricks, and more on your lock screen. Changing the lock-screen personalization menu away from Windows spotlight also helps cut down that layer of supplied material. Remove widgets that serve no purpose in your daily routine and turn off Suggest widgets for your lock screen if suggestions are the part you do not want.
Also review Personalization > Device usage and disable its toggles to avoid recommendations based on supposed ways you might use the PC. This is not about breaking a core Windows function. It is about declining a stream of prompts that does not improve the machine’s usefulness.
Finish the recommendation sweep
There are more controls elsewhere, which explains why this cleanup is easy to only half-complete. Visit Settings > Privacy & security > Recommendations & offers and disable both Personalized offers and Recommendations and offers in Settings.
Then check Settings > System > Notifications. After the list under “Notifications from apps and other senders” appears, switching the sorting option to Name can make the list easier to scan. Find Suggested and disable it. At the bottom, open Additional settings and turn off both checkboxes there.
This is worth doing before a long session because notifications are not all equal. Keep alerts from the apps that genuinely matter; remove the rest. The goal is not a silent PC by default, but a PC where anything appearing over a game or task has earned the interruption.
Check preinstalled apps before they live at startup forever
Open Settings > Apps > Installed apps and examine the software that arrived with the computer. Some manufacturer-provided tools can be worthwhile, particularly utilities used to update drivers. Others may duplicate Windows features or amount to trial versions of cloud or security services that you do not plan to use.
Do not uninstall indiscriminately. The better rule is to identify what each item does, keep software with a clear purpose and remove software that has none for you. This is also a good moment to review startup apps. Programs often add themselves to startup with little fanfare, then stay in the background for the entire session. Trimming that list so it contains only essentials can reduce needless resource use after boot.
That concern connects directly to gaming, but it is not a claim that every startup app is bad or that disabling all of them is safe. It is a reminder that background activity should be intentional. If an app is only needed occasionally, it does not automatically need to launch every time Windows does.
For a broader hardware-minded angle on keeping a gaming setup healthy, see why airflow matters more than console orientation aesthetics.
Make system behavior fit your schedule
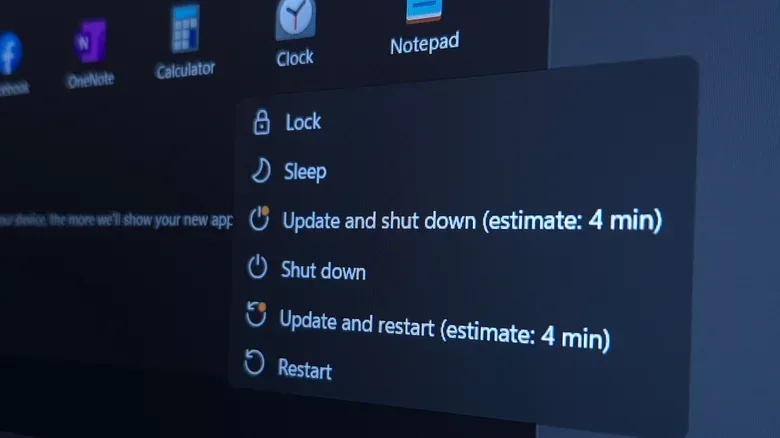
Windows Update is important, but surprise restarts are less disruptive when Windows knows when the PC is usually in use. Go to Settings > Windows Update > Advanced options > Active hours, select Manually, then choose a start and end time. Windows will not automatically restart to install updates during that period.
Active hours are therefore a scheduling guardrail, not a switch that makes updates disappear. The practical benefit is predictability: choose the hours when the machine is most likely to be used for a match, co-op session, work or creative project, and keep automatic restarts out of that window.
In the same broader update area, inspect Delivery optimization. When Allow downloads from other devices is enabled, Windows can share portions of update data through a peer-to-peer connection. Limiting this to Devices on my local network can make sense where several household PCs are involved. Selecting Devices on the internet, however, can consume bandwidth outside the home. For connections where every gigabyte or every bit of upload capacity matters, that distinction is practical.
Use the small tools that save big annoyances
Several less visible controls are useful precisely because they address specific moments of friction.
- End Task: At Settings > System > Advanced, enable End Task to add a process-termination shortcut to the taskbar right-click menu. This can be helpful when an app stops responding and needs to be closed quickly. It is a force-close tool, so use it with care: unsaved work in that application can be lost.
- Night light: Find this at Settings > System > Display. It warms the screen’s colors for use at night. Scheduling can be set from sunset to sunrise or with manual times, and the strength can be adjusted. It is a comfort preference, not a universal requirement; tune it until it is pleasant rather than distracting.
- Storage Sense: Under Settings > System > Storage, Storage Sense can automatically clear selected material when space runs low. You can choose what is deleted and how frequently it acts. This is useful maintenance, especially where large games and captures make free storage valuable.
- Power mode: Go to Settings > System > Power and choose Best performance when maximizing performance is the priority and increased energy use is acceptable. If that selection is unavailable there, search Start for Control Panel and use Power Options. The trade-off matters most on devices where power consumption is a concern, so this setting should match the machine’s circumstances rather than become an automatic recommendation.
- Windows Hello PIN: At Settings > Accounts > Sign-in options > PIN (Windows Hello), set a device-specific PIN. It avoids entering the full Microsoft account password at every sign-in and can be used with supported apps, including 1Password. A PIN being unique to the device also limits the damage compared with using the wider account password if that PIN is compromised.
Disable one easy-to-trigger multitasking trick
Finally, visit Settings > System > Multitasking and consider switching off Title bar window shake. The feature minimizes other windows when a window is clicked and shaken. That may sound efficient, but it is easy to trigger accidentally while dragging a window around a crowded desktop. Reopening everything after an accidental shake is rarely worth the shortcut’s occasional convenience.
The strongest Windows 11 setup is not the one with every available feature enabled or every prompt shut down. It is the one shaped around how the PC is actually used. Set your preferred defaults, preserve the notifications that matter, protect active hours, control background behavior and enable the few tools that repeatedly save time. Those choices will not make a weaker PC into a stronger one, but they can make every session less cluttered and more predictable.