Remote access is one of the most useful things a Raspberry Pi can do. A small computer running a home project is often deliberately placed somewhere inconvenient: beside a router, behind a television, in a cabinet, or simply left running while its owner is away. The problem has traditionally been reaching it from outside the local network without turning router configuration into an unexpected side quest.
Raspberry Pi Connect is designed to make that task less intimidating. The official tool provides a way to communicate with a Raspberry Pi over the internet without port forwarding. It offers two distinct ways in: a browser-based remote shell for command-line work and screen sharing for a graphical desktop session where the configuration supports it.
That difference matters. “Remote access” can mean anything from quickly checking a process to taking full control of a desktop. Connect separates those jobs instead of treating them as one feature with the same requirements and resource cost.
What Connect changes
Older approaches commonly involved a VNC service or an SSH tunnel, and accessing either from outside a home network could mean forwarding a port on the router. Port forwarding is a router rule that directs incoming traffic from the internet to a particular device inside a private network. It can be effective, but it also requires a user to understand which service is being exposed, which port it uses and how the router is configured.
For more context, explore White DualSense Reportedly Drops to $54, Giving PS5 Players a Lower-Cost Official Spare.
Connect avoids that particular setup. It works over the internet and requires both an internet connection and a Raspberry Pi Connect account, but it does not ask the user to create a forwarded router port. For people who want to administer a Pi while away from home, that removes a meaningful setup barrier.
The tool uses WebRTC, a technology for direct communication between web browsers, through a secure tunnel. In practical terms, the browser is part of the remote-access experience rather than merely a page for downloading another client. The connection model is also intended to work through restrictive firewalls and NATs.
NAT, short for network address translation, is the mechanism commonly used by a home router to let multiple private devices share one outward-facing internet connection. It is useful for normal networking, but it is also one reason incoming connections to a particular device are not automatically possible. Connect’s value is that it is built to establish access without asking a beginner to manually solve that routing problem.
Two connection modes, two different jobs
Remote shell: the lightweight option
The remote shell behaves like an SSH terminal in a browser. SSH is a command-line method of logging in to another computer and running commands. For a Pi used headlessly—without a keyboard, mouse or monitor attached—that can be the most practical choice. It is suitable for monitoring a project, examining its status or carrying out command-line administration from afar.
A key distinction is that remote shell does not depend on an active desktop session. That makes it the relevant option for Pi OS Lite installations, which are designed around a lighter, command-line-focused environment. It is also the sensible mode when a graphical desktop is unnecessary: if the task is fundamentally text commands, streaming a screen adds overhead without adding much value.
Screen sharing: a browser-based desktop view
Screen sharing turns the browser into a remote desktop for the Pi. This is the mode to choose when the task genuinely needs the graphical interface, such as working with a desktop application or visually navigating settings.
There are requirements to keep straight. Screen sharing uses a Wayland session, needs an active desktop session and consumes Pi resources while it runs. Wayland is the display-session technology named in the compatibility requirements; it is important here because Connect’s screen-sharing feature is built around it rather than every possible Linux desktop arrangement.
Pi OS Lite and X11 are not compatible with Connect’s screen-sharing feature. X11 refers to another display-system setup, while Lite is the Pi OS variant intended for remote-access and command-line use rather than a full graphical desktop. That does not make either unsuitable for Connect as a whole: it specifically limits screen sharing. Remote shell remains the appropriate route for the lightweight use case.
Older Pi hardware may need an updated Pi OS installation before screen sharing is available. Compatibility is therefore not just a question of which Raspberry Pi board is on the desk; the operating system version and desktop configuration matter too.
Who can use it
Raspberry Pi Connect works automatically on systems running Bookworm or later. Devices on older software have more limited Connect options, though Pi OS and Pi OS Lite users can set it up through a small number of terminal commands. That makes the operating-system check the sensible first step before planning around either connection mode.
The package choice should follow the intended use:
- rpi-connect is the full package, including screen-sharing support for compatible Pi units connected to a display.
- rpi-connect-lite is the lighter package for remote access without the graphical screen-sharing component.
This is not merely a naming detail. Installing the full package does not override the requirement for a supported Wayland desktop session, and installing the Lite package does not turn a command-line system into a remotely shareable graphical desktop. Choosing the package is the first expression of what the Pi actually needs to do.
Setup: a short path with an important choice
Start an SSH session with the Pi and install the package that matches the planned workflow:
sudo apt install rpi-connect
Use that command for the full package.
sudo apt install rpi-connect-lite
Use this one for the Lite package.
After installation, enable Connect with:
rpi-connect on
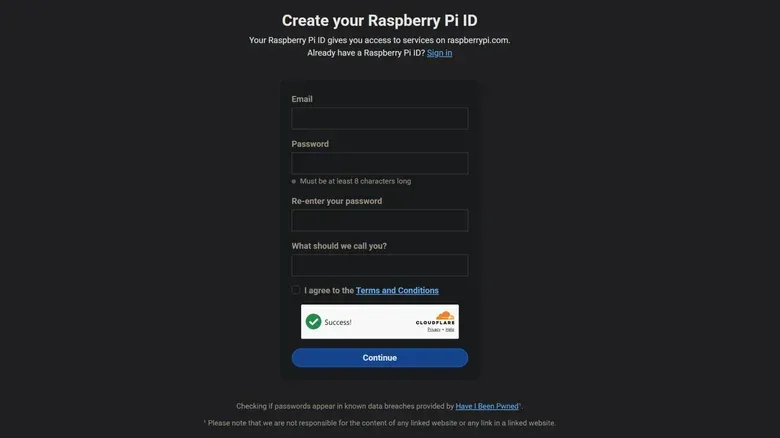
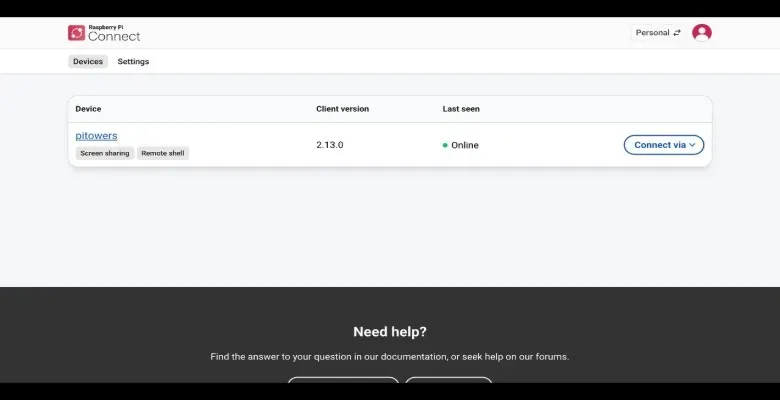
From there, visit connect.raspberrypi.com, sign in with a Pi account, and link the Pi to that account using the Get Started instructions available there. Once the device is linked, selecting its Connect via option presents the available connection method. The choice will be remote shell, screen sharing, or whichever option the device’s setup supports.
Those steps imply a useful order of operations: decide whether the goal is terminal management or graphical control, verify the Pi OS and desktop situation, install the matching package, then link the device. It is cleaner than treating remote access as a generic checkbox and discovering later that the graphical mode is unavailable.
Practical implications for Pi projects
Connect is particularly attractive for the Pi that is meant to run unattended. A home project does not need to be physically beside its owner to remain manageable; a browser can provide either the shell needed for maintenance or the desktop view needed for a visual task. The account link keeps that access centered on the user’s Pi account rather than an exposed router rule.
It is also a useful distinction for performance-conscious setups. Screen sharing requires an active desktop and uses device resources, while remote shell does not. A user monitoring a process or issuing a few commands can therefore choose the lower-demand route rather than opening a graphical session by default.
There is still no substitute for understanding which mode is being used. Browser-based shell access is command-line administration, not a remote desktop. Screen sharing is graphical control, but only when the Wayland and active-session requirements are met. Keeping that boundary clear helps prevent the most likely setup misunderstanding: assuming that any Pi running Connect can provide any kind of remote display.
For a broader walkthrough of the same no-port-forwarding approach, see this Raspberry Pi Connect guide.
Before relying on it away from home
- Confirm the Pi has internet access and that a Raspberry Pi Connect account is available.
- Check whether the system is running Bookworm or later; older installations have limited options.
- Use rpi-connect when compatible screen sharing is needed, or rpi-connect-lite for remote-access-only use.
- For screen sharing, verify that there is an active Wayland desktop session. Pi OS Lite and X11 do not support that feature.
- Use remote shell for monitoring and command-line changes when a desktop is not needed.
The appeal of Raspberry Pi Connect is not that it makes every remote-access scenario identical. It makes the basic path more approachable while preserving a straightforward split between a lightweight terminal and a full screen share. For Pi owners who previously saw router configuration as the cost of reaching a device remotely, that is a genuinely useful simplification.