Wii Sports Strategy Guide: All Five Sports, Training, and Golf
Get better at the original Wii Sports with practical guides to Tennis, Baseball, Bowling, Golf, and Boxing. Learn repeatable motions, common mistakes, all fifteen training activities, and a shot plan for each of the nine golf holes. Set useful goals for Pro status, medals, and more consistent scores.


Find a copy
Wii Sports Wii
We may earn a commission if you buy through these links, at no extra cost to you. As an Amazon Associate I earn from qualifying purchases.
Opens retailer search results. Check the model, edition, seller, availability and current price before buying.
Before you begin
Wii Sports has no story campaign to finish. Progress comes from learning its five sports, improving your skill ratings, earning training medals, and producing results you can repeat. This guide explains the original game's motions and scoring, then turns those basics into practice routines and match strategies.
Use the chapter list to focus on the sport you are playing. Keep sport skill, training medals, and golf scores as separate goals: a strong result in one does not automatically complete the others. The golf chapters cover all nine original holes, while the training chapters help you choose a useful drill for a specific weakness.
Set yourself up for the run
Choose the correct handedness for your Mii before practicing timing and shot direction.
Use the Wii Remote alone for Tennis, Baseball, Bowling, and Golf; connect the Nunchuk for Boxing.
Secure the wrist strap, clear space around you, and use controlled motions.
Warm up with a few short attempts before measuring a serious score or skill run.
Track your sport skill, training medals, and golf scores separately.
Pro status begins above 1,000 skill points and can be lost after weaker results.
Play against the CPU when pursuing skill gains in Tennis, Baseball, or Boxing; human matches do not change those sports' skill ratings.
Set up your Mii and a useful practice plan
Use a saved Wii Console Mii, set the correct handedness for each sport, and match the right controller to the event before you start chasing records. In original Wii Sports on Nintendo Wii, your long-term progress is not a story ending. It is your Mii's separate skill ratings, Pro status in each sport, personal bests, golf and bowling results, and training medals. A short warmup and a quick control check before serious play will make the rest of the guide easier to follow.
Choose the Mii that should keep your records
From the player-select screen, choose Wii Console if you want lasting progress. The instruction booklet says Wii Sports automatically saves each player's records, but it also warns that records are not saved when you use a Guest Mii or a Mii loaded from a Wii Remote.
Give every regular player a separate saved Mii. That keeps skill ratings, best scores, and medal dates from mixing together. If you later delete that Mii from the Mii Channel, its Wii Sports records are erased too, so do not build a long practice file on a throwaway character.
- Choose Wii Console for your main records file.
- Avoid Guest for serious progress tracking.
- Keep separate Miis for separate players.
Set handedness correctly before practicing
After choosing a Mii, pick the hand you actually use for that sport. The game asks you to choose which hand to use for each sport, so do not treat this as a one-time global option. If you naturally swing right-handed in Bowling and Golf but prefer a different lead in Boxing, set each one the way you really play.
If your stance looks mirrored or your motion timing feels backward, back out and fix handedness immediately. It is much easier to correct this before you build habits for serves, swings, releases, and punches.
- Check handedness the first time you enter each sport.
- Recheck it if movement feels mirrored.
- Do not force the same choice across every sport if it feels wrong.
Match the correct controller to each sport
Original Wii Sports does not require Wii MotionPlus. Tennis, Baseball, Bowling, and Golf use a Wii Remote. Boxing is the exception and uses both a Wii Remote and a Nunchuk.
The main menu lists the player counts clearly: Tennis 1 to 4, Baseball 1 to 2, Bowling 1 to 4, Golf 1 to 4, Boxing 1 to 2, Training 1 to 4, and Fitness Test is single-player. In Tennis, each active player needs a Wii Remote. In Boxing, each boxer needs both a Wii Remote and a Nunchuk. The manual also explicitly notes that Golf can be shared on a single Wii Remote for up to four players, and Training can also be shared on one Wii Remote among multiple players.
- Tennis: Wii Remote, 1 to 4 players.
- Baseball: Wii Remote, 1 to 2 players.
- Bowling: Wii Remote, 1 to 4 players.
- Golf: Wii Remote, 1 to 4 players.
- Boxing: Wii Remote and Nunchuk, 1 to 2 players.
- Training: 1 to 4 players.
- Fitness Test: 1 player.
Know what counts as progress
Wii Sports has no overall game-clear flag. Think of completion as a set of separate goals tied to your saved Mii: learn all five sports, raise skill in each one, earn Pro status where you can, improve your best bowling and golf results, and collect stronger medals across the 15 training activities.
The skill display after play rises or falls with performance. When a sport goes above 1,000 points, that Mii becomes a Pro in that sport. That title is not permanent. If the rating drops again, you can lose Pro status. The manual also states that skill will not change when you play another human in Tennis, Baseball, or Boxing, so use solo play when you want rating progress in those sports.
- Treat each sport as its own long-term track.
- Aim for Pro status in all five sports over time.
- Use match skill, personal bests, and training medals as parallel goals.
Use a short warmup before harder attempts
Start each session with a two-minute motion check instead of jumping straight into your highest-pressure mode. Take three easy Tennis swings or three Baseball batting swings to settle your timing, then make two smooth Bowling releases with attention on a clean forward swing and release point, then finish with two half Golf swings to feel a controlled follow-through.
If Boxing is your focus, add a brief guard-reset drill: throw one left, one right, then return both hands to guard before the next pair. The goal is not fatigue or power. The goal is to confirm that your movements register cleanly and feel repeatable.
- Begin with gentle swings, not maximum force.
- Stop once your timing feels consistent.
- Use the same short routine every time so bad habits stand out quickly.
Fix setup problems before blaming your timing
Wear the wrist strap, clear the play area, and stay about three feet from the television. Nintendo's Wii guidance also tells players to make sure there are no people or objects around them and to swing gently. Do that before every session, especially if players rotate in and out.
If swings stop registering well, simplify the motion. Keep the remote oriented the way the sport expects, shorten the swing, and remove any extra wrist flick until the game reads you cleanly again. Many early mistakes come from rushing, changing handedness accidentally, using the wrong remote for the current player, or forgetting to connect the Nunchuk for Boxing.
- Wrist strap on.
- Enough open room around the player.
- About three feet from the TV.
- Smaller, cleaner motions first when control goes wrong.
Set one main goal and one side goal for each session
A simple practice loop works better than mindless repetition. Play one regular match or round in the sport you want to improve, then one related Training activity, then one retry in the sport while focusing on only one correction. This gives you both skill practice and a medal target without pretending the game has a final campaign ending.
Good early goals are practical ones: stable wins in each sport, a saved Mii with no setup mistakes, and at least a basic medal start across the training board. Once your controls are reliable, then start pushing for Pro ratings and stronger score targets.
- Pick one sport for the day's main push.
- Pair it with one matching Training activity.
- Finish with one focused retry using the lesson you just practiced.
Before you move on
- You have selected a saved Wii Console Mii for long-term records.
- You know the handedness setting is chosen per sport and have checked it for the sports you plan to practice.
- You know Tennis, Baseball, Bowling, and Golf use the Wii Remote, while Boxing requires both Wii Remote and Nunchuk.
- You understand that Pro status begins above 1,000 skill points and can be lost if the rating falls.
- You have a short warmup routine and a simple match-plus-training practice loop ready for later chapters.
Tennis: serve and keep the rally alive
Original Wii Sports tennis on Nintendo Wii is always doubles, and the game moves your Miis into position automatically. You do not steer them around the court. Your job is to read which Mii is taking the shot, swing on the correct side, and use timing to keep the ball in play until you can move the other team. A reliable serve, safe central returns, and one deliberate directional change per rally will win far more points than big uncontrolled swings.
Know exactly what you control
In this edition, tennis is a doubles sport for 1 to 4 players, and each human player uses a Wii Remote. The manual is explicit that you simply swing the Wii Remote and do not need to press buttons during rallies. The game handles movement for both Miis on your side, so stop searching for footwork controls and keep your eyes on the incoming ball instead.
Your side always has a front Mii near the net and a back Mii closer to the baseline. The front Mii is better for quick interceptions and simple put-aways. The back Mii handles most serves, returns, and longer rallies. If the ball is clearly arriving to the nearer player, make a short, tidy volley swing. If it is dropping deeper, let the back player take it and use a full but calm groundstroke.
Match the swing side to the ball. When the ball comes to your right side, use a forehand-style motion. When it approaches your left side, use a backhand-style motion. Keep the motion compact. Wii Sports reads clean timing better than frantic arm speed.
- Do not try to move your Miis manually.
- Identify whether the front or back Mii is taking the shot.
- Use forehand on the right side and backhand on the left side for your chosen handedness.
Build a serve you can repeat under pressure
Start every service point with the same rhythm. Raise the Wii Remote to begin the toss, or press A to toss the ball, then make one smooth serving swing to hit it. Separate the toss and the hit in your mind. Most beginner faults come from rushing both motions together and flailing before the ball reaches a comfortable height.
Your first goal is not an ace. Your first goal is an in-bounds serve that begins a neutral rally. Use a normal racket-like motion and avoid chopping hard across the ball. Once you can land serves consistently, try contacting the ball a little earlier in its rise or near the top of the toss for a firmer serve. If you start missing long, go back to the safer rhythm immediately.
When a service game gets shaky, simplify the pattern: toss, watch, one swing. Do not add extra wrist snaps or second swipes. Wii Sports rewards clean separation of actions more than dramatic effort.
- Use either an upward toss motion or the A button to start the toss.
- Make one clean service swing after the toss.
- Choose consistency before power.
Keep your early rally balls deep and simple
After the serve or return, play the first few shots for height and depth rather than the sideline. A straighter, safer return buys time, keeps the CPU from attacking the net immediately, and reduces your own unforced errors. Deep middle balls are especially useful while you are learning the timing of faster opponents.
If a fast ball reaches your front Mii, shorten the motion and block it back into court instead of trying for a flashy winner. The goal is survival first. The longer you keep the rally alive, the more chances the opposing team has to leave a ball sitting up or miss outright.
Do not swing at every ball as if it must end the point. In Wii Sports tennis, a calm return that clears the net is usually worth more than an overhit attempt that flies wide.
- Aim your first rally balls safely back into court.
- Use short volley motions at the net.
- Treat one extra clean return as a win in the learning phase.
Use timing to steer the ball
The manual states that the timing of your stroke determines the direction the ball travels. Think in three timings: early, middle, and late. Middle timing gives you the safest, straighter reply. Early and late contact send the ball toward opposite sides of the court.
For right-handed play, an earlier forehand tends to send the ball more to the left side of the court, while a later forehand tends to leave it more to the right. If you play left-handed, reverse that expectation. You do not need perfect geometry. You only need to feel that earlier and later contact create different lanes.
Practice this with small changes, not extreme ones. If you are rallying comfortably down the middle, choose one ball and contact it slightly earlier or slightly later to move the other team. Then return to your safer middle timing on the next shot unless you receive an obvious sitter.
- Use middle timing for your safest straight ball.
- Use slightly early or slightly late contact to change direction.
- Reverse your expectations if you switch the game to left-handed play.
Understand the score and choose the right match length
Each game uses standard tennis point scoring: 15, 30, 40, then game. At 40-40, the score is deuce. Win the next point to gain advantage. Win again from advantage to take the game. If the advantaged side loses the next point, the score returns to deuce.
Wii Sports lets you choose a single game, Best of 3, or Best of 5. Single game is ideal for quick serving and returning practice. Best of 3 is the best learning format once you can hold rallies, because you get a chance to recover after a bad game instead of restarting immediately. Best of 5 is better once your consistency is already dependable.
On deuce or advantage points, do not invent a harder shot. Serve safely, return deep, and make the opponents earn the miss.
- Remember 15, 30, 40, deuce, advantage, game.
- Use single game for quick drills and Best of 3 for steadier practice.
- Play safer, not riskier, on the biggest points.
Run a repeatable five-point practice sequence
Use the same short routine whenever you start a session. Point 1: land a simple serve and do not aim away from the middle on the next shot. Point 2: repeat that pattern and try to keep three balls in play. Point 3: still start safely, but make one small directional change with timing after the rally is stable.
Point 4: look for a ball your front Mii can reach comfortably and finish with a controlled volley only if it is clearly above net height. If the chance is not clean, reset with another safe return instead. Point 5: play the whole point normally, but judge it afterward by decision quality, not just whether you won. Did you serve in, identify the correct hitter, and use timing on purpose.
This routine teaches the right order of skills: first get the ball in, then keep it deep, then move the opponents, then finish when the opening is obvious.
- Start with safe in-bounds serves.
- Keep the first returns central and deep.
- Add only one planned directional change before looking for a finishing volley.
Before you move on
- You can begin most points with an in-bounds serve using a consistent toss-and-swing rhythm.
- You no longer look for manual movement controls and can explain the front-net and back-baseline roles.
- You can rally with several safe returns in a row before attempting one intentional change of direction.
- You understand 15, 30, 40, deuce, and advantage, and you can pick single game, Best of 3, or Best of 5 to match your practice goal.
Tennis: make the opponent move
Against stronger CPU pairs in original Wii Sports tennis, you win more points by controlling direction and choosing the right player to take the shot than by swinging harder. Your Miis move automatically in doubles, so your jobs are to read whether the front or back player should handle the ball, change direction with timing, and attack only the volleys that arrive in a comfortable spot. Build the point safely first, then use placement to pull one CPU out of position.
Let the right Mii take the rally ball
Start by reading which of your two Miis is actually set for contact. The baseline Mii is the safer neutral hitter because deep shots and body-line balls usually give that player more room to swing through cleanly. The front Mii is strongest when the ball sits up near net height and reaches that side early enough for a calm volley.
Do not force the front player into every exchange. If the shot is already traveling through or past the net player toward the back court, a late poke at it often creates the exact errors better CPU teams punish: a netted touch, a weak floater, or an angled miss. When the front Mii looks stretched, turned late, or jammed by pace, let the baseline partner take over and reset the point.
- Use the baseline Mii for most neutral and defensive exchanges
- Use the front Mii when the ball arrives high enough and early enough for a settled volley
- If the net player is reaching awkwardly, leave the ball for the back player
Move the opponents with timing, not wild swings
The official controls are simple, but direction still matters. The manual confirms that stroke timing controls where the ball travels. For a right-handed forehand, earlier contact tends to send the ball more to the player’s left and later contact more to the right. The pattern reverses with handedness and changes with forehand versus backhand, so treat your own Mii’s setup as the reference.
Against better CPU teams, make your first priority a safe return that lands in. Once the rally is stable, change direction with a small timing adjustment rather than a bigger arm motion. That is how you pull one opponent wide and open the other side on the next ball. If your directional changes feel random, the usual problem is inconsistent contact point, not lack of swing force.
- Send the first neutral ball safely deep before trying a sharper angle
- Use slightly earlier or later contact to change sides
- Keep the swing smooth and change timing first
Attack only the volley that is truly there
An early aggressive volley from the front Mii can finish a point, but only when the ball reaches that player in a comfortable window. If the CPU sends back a slower, floating return that sits above net height, meet it promptly and direct it into the open court. That cuts down the opponents’ reaction time and often ends the rally immediately or forces a desperate reply.
Rally example one: you return a serve deep to the CPU baseline player. Their answer comes back slower and through the middle. Your front Mii is already lined up, so you volley early into the uncovered half. This is the ideal put-away pattern.
Rally example two: the CPU drives a lower, faster ball toward the front Mii’s outside shoulder. Swinging at it just because it is reachable often produces a rushed error. The better play is to leave that ball alone, let it continue to the baseline partner, and rebuild the rally from the back court.
- Finish points on high floaters and comfortable middle volleys
- Do not force low, body-jamming, or wide volleys
- If the contact feels rushed before you swing, the attack probably is not there
Use spin and height as controlled variations
The original manual confirms that you can lob and give the ball spin depending on how you hit. A well-established specialist guide further describes an over-the-top contact motion producing a lower dipping topspin shot, while a more undercut slicing motion can send a higher lob with backspin. Use that information as a controlled option, not as a guaranteed special move.
The practical use is simple. Add height when the opposing front player is crowding the net and you need the ball to travel over that interception zone. Keep the reply lower when you already control the rally and want a ball that stays awkward at the opponents’ feet. Do not assume a violent swing automatically creates a better or faster winner; placement and timing remain more dependable.
- Use a higher reply to get over an aggressive net player
- Use a lower dipping ball when you are already balanced in the point
- Keep the motion readable enough that you still contact the ball cleanly
Fix the common stronger-CPU mistakes
If you keep hitting the net, you are usually taking the ball too late, trying to volley from too low a height, or using the wrong Mii for the situation. Back off from forced net interceptions and meet easier volleys a touch earlier.
If you keep sending balls long or wide, stop aiming for the sideline from neutral rallies. Return to a safer target and make only a mild directional change until your timing is reliable again.
If returns keep going to the wrong side, watch the ball against your Mii’s body line sooner. The manual’s basic rule is still the fix: when the ball comes to your right side, swing on the right; when it comes to your left, swing on the left. Stronger CPU pairs expose hesitation, so recognizing forehand-side versus backhand-side contact earlier matters.
- Net errors: attack less often and contact easier volleys earlier
- Out errors: choose bigger targets and smaller timing changes
- Wrong-side returns: read left-side versus right-side contact sooner
Before you move on
- You can keep points alive with the baseline Mii until a clear net chance appears.
- You can deliberately send some rally balls to either side through timing changes.
- You recognize when the front Mii should leave a deeper or rushed shot alone.
- Your missed points are less often simple nets, long balls, or mistimed interceptions and more often genuine pressure from the CPU.
Tennis training: accuracy before speed
The three original Tennis training drills in Wii Sports teach one chain of skills: first make clean contact, then control direction through timing, then manage rebound height and pace. In ordinary Training, each drill is a score run that usually stops on your first failure, so the best improvement comes from calm, repeatable swings instead of desperate last-second flailing. Wii Fitness uses the same ideas, but it samples a shortened or fixed-format version for that day's test rather than your best medal run.
Returning Balls: survive the pace increase without changing your swing
Your only job in Returning Balls is to send each ball back into the court. Do not worry about moving your Mii. The game handles your positioning for you, so watch the ball and prepare the correct forehand or backhand side. In normal Training, the drill ends on the first miss or first shot that does not land in, so the safest habit is a medium, compact swing you can repeat under pressure.
The pattern is useful to memorize. You begin from the baseline, then after ten successful feeds you move in for five quick net volleys, then the cycle repeats. The net section is where many good runs die because players keep using a full baseline swing. As soon as your Mii steps forward, shorten the motion into a brief punch. You are not trying to overpower the ball. You are only redirecting it cleanly before it gets past you.
Use this independent practice routine: play three warm-up attempts where you ignore score and focus only on landing the first ten baseline balls safely down the middle. On the next two attempts, treat the transition to the net as the real drill. Say to yourself baseline, baseline, baseline, then short volley, short volley, short volley. If your misses go long, shrink the swing. If they keep hitting the net, meet the ball a touch earlier and keep the racket face path cleaner instead of swinging harder.
- Ignore movement and track the ball
- Baseline phase: repeat one controlled swing
- Net phase: switch immediately to a much shorter volley motion
- If you lose two runs by hitting long, reduce force before changing anything else
- If quick feeds make you panic, start the Wii Remote ready earlier between balls
Timing Your Swing: learn to aim by contact timing, not by steering the Remote
This drill adds an orange target zone behind the opposite court. You still have to clear the net, but now the return must also pass through that orange zone. As the run continues, the zone gets smaller, and it can shift position. In normal Training, the run ends on the first ball that misses the zone or the first complete whiff, so treat every feed as a timing problem first and an aiming problem second.
For a right-handed Mii, earlier contact sends the ball more left and later contact sends it more right. For a left-handed Mii, that relationship reverses. The important lesson is that you do not aim this drill by waving the Wii Remote left and right. Keep one comfortable forehand shape and alter only when you meet the ball.
Use this independent drill: spend one full attempt intentionally sending the first few balls toward the left side of the target lane, even if that is not where the orange zone is. Spend the next attempt trying for center. Spend the third trying for the right side. Once you can move the ball on purpose, start chasing the actual orange zone. If you keep missing the same side, diagnose it in words: early for my handedness or late for my handedness. That is faster and more useful than experimenting with wild swing angles.
- One repeatable forehand motion
- Change timing by small amounts only
- Right-handed: early tends left, late tends right
- Left-handed: early tends right, late tends left
- Repeated misses to one side mean timing is off, not that you need a bigger swing
Target Practice: control the rebound and protect the wall
Target Practice is the touch drill. You volley the ball against a wall and try to hit a target that relocates after each success. The danger is the wall itself. Repeated impacts in the same area darken the bricks, then open a hole. If the ball goes through a hole in normal Training, or you otherwise fail the sequence, the run ends immediately. Power is the usual mistake here. A hard shot gives you less time to react, a wilder rebound, and more damage concentrated in one lane.
Play this drill with soft hands. A gentler return creates a slower rebound and buys you time to line up the next target. Also vary your rebound height. If every ball hits chest-high in the same strip, you are digging your own trap. Mix in a slightly higher return when you need extra time, then go lower again once you are settled.
Use this independent practice routine: ignore the target for one attempt and focus on alternating two rebound heights without losing the ball. On the next attempt, add target aiming while keeping that height variation. If a poor bounce sends you off line, do not force a hero shot at the next target. Your first recovery goal is to contact the ball in a fresh part of the wall and reestablish a readable rebound. Saving the wall often keeps a long run alive better than gambling on one difficult hit.
- Favor soft, readable volleys over hard smashes
- Spread impacts across different wall heights
- After an awkward bounce, recover the pattern before chasing precision
- If holes keep forming, your contact lane is too repetitive
- If rebounds feel rushed, shorten the swing and add height
Use the drills differently in ordinary Training and in Wii Fitness
Ordinary Training is where you chase medals and personal bests, so a single error usually ends the tennis drill right away. Wii Fitness is different. It appears once per day per saved Mii and samples three activities for a Fitness Age result. When Tennis shows up there, the drill keeps going in a test format instead of acting like a normal medal run.
For Tennis specifically, the Fitness versions are fixed samples: Returning Balls continues through 50 feeds, Timing Your Swing continues through 30 feeds, and Target Practice continues until 10 targets are cleared. A miss in Fitness costs performance, but it does not end the session the same way ordinary Training does. That means your best practice plan is to use normal Training for focused repetition and save Wii Fitness for a quick pressure check on that day's form.
A simple repeatable block is enough: one warm-up attempt in Returning Balls, one serious attempt in Timing Your Swing, and one patient attempt in Target Practice. Stop when your timing turns sloppy. Tennis training rewards control long before it rewards speed.
- Normal Training: first mistake usually ends the run
- Wii Fitness: same drill ideas, but sampled test format
- Returning Balls Fitness sample: 50 feeds
- Timing Your Swing Fitness sample: 30 feeds
- Target Practice Fitness sample: clear 10 targets instead of treating one mistake as the end
Before you move on
- You can explain that normal Tennis training usually ends on the first failure, while Wii Fitness uses sampled test versions of the same drills.
- You can handle the Returning Balls switch from baseline feeds to short net volleys without changing into a wild full-arm swing.
- You can intentionally send shots left, center, or right in Timing Your Swing by adjusting contact timing for your Mii's handedness.
- You can keep longer runs alive in Target Practice by using softer rebounds, varying height, and moving impacts away from a damaged wall lane.
Baseball: build a productive inning
In original Wii Sports for Nintendo Wii, batting success comes from patience and repeatable timing more than from huge swings. Baseball is only three innings long, each side is retired after three outs, and both fielding and baserunning are automatic, so your offensive job is to read pitches, take balls, and make clean contact that the defense cannot turn into an easy out. Four balls give you a walk, three strikes retire the batter, and the original manual describes a mercy rule if one player scores more than five runs over the opponent. Because the game is so short, one disciplined inning is often enough to decide it.
Understand what you do and do not control
Before the first pitch, remember that Wii Sports baseball strips the mode down to batting and pitching. You do not manually run the bases, order runners to hold, steal, slide, or direct fielders. Once the ball is put in play, the game resolves the result from the quality and placement of the contact and how fast the defense gets to it.
That makes bad contact especially costly. A topped ball back into the infield usually becomes an automatic out. A firm ball into the gaps or over the infield gives the automatic runners time to advance and turns one good swing into a real scoring chance.
- Three outs end your half-inning.
- Games are only three innings long, so every at-bat matters.
- Expect the game to handle all fielding and all baserunning automatically.
Wait for a pitch you can actually drive
Your safest habit is to delay the swing decision until the ball is clearly coming toward the plate. Fastballs are the easiest pitches to time because they stay true. Breaking pitches ask you to wait longer so you can read the bend instead of committing the instant the ball leaves the pitcher’s hand.
The splitter is the pitch that punishes impatience most often. It starts temptingly, then drops late. If you swing as though it will stay up, you will often miss over it. If you only clip it after the drop, the contact is usually weak, producing a harmless infield ball or a shallow out instead of damage. When you begin to recognize that late fall, make the pitcher prove it is a strike before you offer.
- If you keep swinging under the ball, you are committing too early.
- If you keep seeing soft contact on low pitches, stop chasing the splitter.
- Taking a close ball is better than donating an easy out in a three-inning game.
Use timing to place the ball
Bat control in Wii Sports comes from timing, not from a wild full-body hack. Use one compact, repeatable swing. Early contact tends to pull the ball, on-time contact sends it more nearly up the middle, and late contact pushes it the other way. For a right-handed batter, earlier swings usually send the ball toward left field and later swings toward right field. Reverse that field direction for a left-handed batter.
Start by trying to square up fair contact. Once you can do that reliably, adjust your timing on purpose. If the defense keeps turning center contact into outs, shade a little earlier or later to send the next fair ball away from the nearest fielders. The goal is a hard ball into outfield space, not a desperate uppercut at every strike.
- Build one repeatable swing instead of changing mechanics every pitch.
- Use early timing to pull and late timing to go the other way.
- Aim for hard fair contact before you start hunting home runs.
Manage the count differently with empty bases and runners on
With the bases empty, play for a favorable count. If the first pitch looks like a breaking ball starting off line or a splitter beginning to sink, take it. Getting ahead 1-0 matters in a short game because the pitcher is then more likely to challenge the zone. You are not trying to win the inning with one swing. You are trying to avoid a free out and wait for a strike you can drive.
With runners on base, think line drive first and hero swing second. Example: one out, runner on second, even count. If the pitch is belt-high and straight, stay compact and try to drive it into left-center or right-center. That kind of contact often lets the automatic runner score or at least move to third without you gambling on a perfect home-run swing.
With two outs, the inning is fragile, but the count still starts fresh for each batter. Two outs do not mean the next called strike or the next miss automatically ends the inning. A batter is only retired on strike three or on a ball put in play for an out. Example: runner on third, two outs, first pitch just off the plate. Taking that pitch for ball one keeps the inning alive and improves the at-bat. Be ready to attack an early strike, but do not turn two outs into an excuse to chase obvious junk.
- Bases empty: take more borderline pitches and try to get ahead in the count.
- Runners on: value hard outfield contact over all-or-nothing swings.
- Two outs: stay disciplined unless it is a pitch you can truly square up.
- Keep outs and strikes separate in your head: the inning ends at the third out, not at the first strike of a new at-bat.
Push for a big inning without giving it back
Once you have strung together hits or a walk, keep the same rhythm that created the rally. Players often waste their best inning by seeing runners on base and suddenly swinging at the first low pitch they see. If the pitcher stops attacking the zone, let the walk come. Another baserunner is valuable because the game advances runners automatically.
For the original Wii release, stick to the manual’s wording on the mercy rule: it applies if one player scores more than five runs over the opponent. Treat that as a six-run margin and as a reason to stay selective. If you are close to that cushion, a patient single or walk can matter more than three rushed misses at pitches that were never good to hit.
- Do not abandon patience just because you already have runners aboard.
- A walk can be as useful as a risky swing when the pitcher loses the zone.
- If you are close to a six-run margin, keep building the inning with controlled at-bats.
Before you move on
- You can describe the mode correctly: three innings, three outs per side, automatic fielding, automatic baserunning, and normal ball-strike counts.
- You are laying off obvious splitters and other low junk often enough to reach better counts or draw walks.
- With empty bases, you can wait for a hittable strike instead of giving away the first out of the inning.
- With runners on, you are trying to drive hard fair balls into the outfield rather than swinging wildly for home runs.
- In a two-out situation, you understand that the inning only ends on the third out, and that a fresh batter still has to accumulate strikes normally.
- You know the original manual describes the mercy rule as more than five runs over the opponent, so a six-run margin is the threshold to keep in mind.
Baseball: mix pitches and protect a lead
Original Wii Sports baseball rewards variety more than gimmicks. The official Wii manual shows four pitch types and makes two other points that matter every inning: pitch speed changes with how quickly you swing the Wii Remote, and you can shift the pitch inside, outside, or leave it right over the plate. Use those tools to stay ahead in the count, change what the batter sees, and avoid the easy mistake of throwing the same trick pitch until the CPU starts driving it.
Learn the original Wii pitching controls first
Use the original Wii Sports setup: swing the Wii Remote down as if you are throwing the ball. A quicker motion produces a faster pitch, while a calmer motion takes pace off even when you use the same pitch type. That speed change is one of your best tools, because the batter is often more vulnerable to a mixed rhythm than to raw speed alone.
The original button map is fastball with no button, curveball with A, screwball with B, and splitter with A+B. The manual’s pitching illustration is drawn for a right-handed pitcher and shows the fastball going straight, the curveball breaking to one side, and the screwball breaking to the other. If you play left-handed, treat that picture as mirrored when you judge which pitch will run toward the hitter and which will move away.
Before each throw, use the Control Pad to change location. The manual specifically illustrates pitching inside or outside, or leaving the ball right over the plate. Think of that as a placement choice layered on top of your pitch type. A fastball inside, a slower fastball outside, and a breaking ball starting near the middle are all different looks even before the batter reacts.
- Fastball: no button
- Curveball: A
- Screwball: B
- Splitter: A+B
- Faster swing adds velocity
- Use the Control Pad to shift location before the pitch
Open the at-bat with a strike the hitter does not love
Your first goal is not a highlight-reel strikeout. It is strike one without giving away the middle of the plate. Start with a controllable pitch near an edge: a fastball with ordinary speed, or a breaking ball that begins close enough to the zone that the hitter has to respect it.
Do not begin every batter with maximum speed. If the CPU sees the same hard pitch in the same lane, solid contact starts coming quickly. A calm first pitch on the corner often works better because it shows the batter one speed, then lets you speed up or bend the next ball elsewhere.
If the hitter was badly late, you can challenge again with a faster strike. If the hitter pulled the ball hard or lined one foul, move immediately. Change side, change speed, or change break. The lesson is simple: get ahead, then stop being predictable.
- Aim for strike one near an edge
- Avoid center-cut first pitches
- Read whether the batter was early, late, or comfortable
- Change something after loud contact
Use the two-strike count to create doubt
Two strikes is where the splitter becomes valuable, but not magical. It is dangerous because it can look tempting and then finish too low to drive. It is also risky because if the batter does not chase, it is just a ball. Save it for moments when you have already shown enough strikes that the hitter feels pressure, or when that batter has proven swing-happy.
A dependable two-strike sequence is this: first pitch edge fastball for a strike, second pitch curveball or screwball to the opposite side for strike two or a foul, then splitter below the zone. That works because the hitter has to cover both a different speed and different movement. Repeating the same breaking ball three times is much easier for the CPU to time.
If the batter has shown patience, do not insist on the low splitter. Instead, finish with a pitch that clips the zone late: for example, a breaking ball that starts safe enough to invite a swing, or a faster fastball on the corner after two softer offerings.
- Use splitters as chase pitches, not automatic finishers
- Pair movement changes with speed changes
- Against patient hitters, keep a put-away option that can still be a strike
When the count turns bad, stop chasing the perfect pitch
A one-run lead disappears faster from walks than from the occasional single. At 2-0 or 3-1, your job changes. Throw a pitch you can land. Usually that means a fastball or a gentler breaking ball aimed near the edge, not a splitter buried low and hoping for panic.
Work through a full example. First pitch: ordinary-speed fastball for a called strike. Second pitch: screwball just off the plate, 1-1. Third pitch: faster fastball inside, fouled back, 1-2. Fourth pitch: splitter below the zone. If the batter chases, the at-bat is over. If not, it is 2-2 and you can still return to a safer corner strike. That is much better than wasting two splitters, falling behind, and having to throw a gift down the middle.
If you do reach 3-1, think damage control. A controllable strike is the right play even if it produces contact. Original Wii Sports handles fielding automatically, so your influence ends at the release. Protecting the lead starts with avoiding free baserunners.
- At 2-0 or 3-1, prioritize a controllable strike
- Do not spam splitters when a walk is the main danger
- Treat 2-2 as a balanced count, not permission to miss wildly
Protect a lead by changing pace and pattern
Late in the game, many players panic and throw only their nastiest pitch as hard as possible. That usually makes you easier to read. Instead, think in pairs and trios: hard fastball inside, softer fastball away, then breaking ball to a new lane. Or soft curveball for timing disruption, then firmer fastball before the batter settles back in.
There is no single guaranteed CPU-killer pitch. If screwballs worked in the first inning, that does not mean they are still safe in the third. If a splitter was taken twice, the hitter may have stopped chasing. Adjust based on what the previous batter showed you.
Pitch to weak contact when necessary. A popup, foul, or routine grounder counts the same as a strikeout when you are nursing a lead. The calm pitcher who varies speed and avoids walks usually finishes games better than the one searching for one unstoppable button combination.
- Mix hard and soft versions of your pitches
- Change both location and movement, not just one or the other
- Do not assume the same out pitch works forever
- Accept weak contact if it comes from a smart strike
Before you move on
- You can name all four original pitch inputs without hesitation.
- You can explain how you will try to get strike one on the next batter.
- With two strikes, you choose a put-away pitch based on whether the batter chases or takes.
- When ahead late, you are allowing fewer walks because you re-establish the zone instead of fishing constantly.
- You are varying both speed and location rather than repeating the same breaking ball pattern.
Baseball training: power, direction and timing
These three Baseball training drills split batting into three skills: driving the ball out, steering it by timing, and repeating contact through a long sequence. Use the original Wii Sports Wii Remote batting grip from the manual, keep the button side facing you, and build one short swing you can repeat before you chase bigger scores.
Start with one repeatable batting setup
Hold the Wii Remote with both hands like a bat, with the button side facing you. Stand the same way every round so your contact point does not drift. The baseball drills reward timing much more than dramatic body movement, so a stable ready position helps more than a harder swing.
Use a short, readable swing first. If the game is missing your input or you keep clipping weak fouls, your motion is probably getting too long or too rushed. Let the ball come to the plate and make clean contact before you try to add power.
- Use the same stance for the whole drill.
- Keep your swing compact enough to repeat 10 or 30 times.
- Fix missed registration by shortening the motion, not by swinging wilder.
Hitting Home Runs: chase flush contact first
This drill gives you 10 pitches. The goal is to hit as many balls over the fence as possible, and the game also records distance, so a square hit is worth more than a panicked lash that barely touches the ball.
Do not react to an early miss by muscling up. In Wii Sports Baseball, wild effort often turns into late contact, foul contact, or a high weak fly. Instead, keep the same swing size and focus on meeting the ball cleanly as it crosses the plate. Once you can drive several balls solidly, then add a little more speed.
A useful practice loop is three controlled rounds in a row where you care only about crisp contact, then one round where you add a little extra bat speed. That builds carry without destroying your timing.
- Rule: 10 pitches.
- What earns results: home runs, with distance also tracked.
- Common mistake: overswinging after one miss and ruining the next few swings.
- Correction routine: three control rounds, then one stronger round.
Swing Control: steer with timing, not with panic
This drill also gives you 10 pitches, but now the field is divided into scoring areas. The target pattern is fixed: the first four pitches want a straight, center hit, the next three want the ball pulled to the left side, and the final three want it sent to the right side.
Treat this as a timing lesson. For the center target, swing on time as the ball reaches the plate. To send the ball left, make contact a little earlier. To send it right, wait a fraction longer. The closer you land to the highlighted center of the target area, the better the score.
The common error is trying to carve the ball with a completely different arm motion every pitch. That usually causes whiffs or harmless mishits. Keep one basic swing and make only a small early or late adjustment.
- Rule: 10 pitches with shifting target zones.
- What earns points: contacting the ball and landing it closer to the highlighted center area.
- Common mistake: rebuilding your whole swing for left and right targets.
- Correction routine: say center, early, or late before each pitch and commit to only that timing change.
Batting Practice: survive all 30 balls with rhythm
Batting Practice throws 30 balls in one continuous sequence. This is the consistency drill. You score by making solid contact; misses do not score, and tiny foul nicks behind you do not help. A ball hit into play counts, and deep contact can still count even if it drifts foul, so the real goal is firm repeated contact, not a perfect spray chart.
Because the pitcher keeps feeding balls, long follow-throughs become a problem. Reset quickly and keep your bat path short. Think contact, reset, contact. If you start trying to crush the late balls, your timing usually falls apart before the round ends.
Break the round into three mental sets of 10. In the first 10, lock in rhythm. In the middle 10, keep your swing size identical. In the last 10, ignore score pressure and look only at the pitcher’s release and the plate.
- Rule: 30 straight pitches.
- What earns points: repeated solid contact across the whole sequence.
- Common mistake: taking bigger swings as the round goes on.
- Correction routine: count the round in three sets of 10 and keep the same compact motion in all three.
Use the drills in a useful order
If you want better medals instead of random hot streaks, start with Swing Control to tune your early, on-time, and late contact. Move to Hitting Home Runs next so you can add force without losing the timing you just found. Finish with Batting Practice, where the only question is whether that same motion still works 30 times in a row.
When a round goes wrong, diagnose the miss before restarting. Late popups usually mean you began too late. Hooked or pulled balls that miss the intended zone mean you were early. Repeated weak contact usually means your swing grew too long or you started steering the Remote instead of trusting timing.
- Practice order: Swing Control, Hitting Home Runs, then Batting Practice.
- Adjust timing first, power second.
- Restart only after you know whether you were early, late, or over-swinging.
Before you move on
- You can describe what each drill tests: power contact, directional timing, and repeated contact.
- You can intentionally hit center, then left, then right targets in Swing Control by changing timing.
- You can play Hitting Home Runs without immediately swinging harder after a miss.
- You can finish Batting Practice using the same compact swing you used at the start of the round.
Bowling: develop a repeatable strike shot
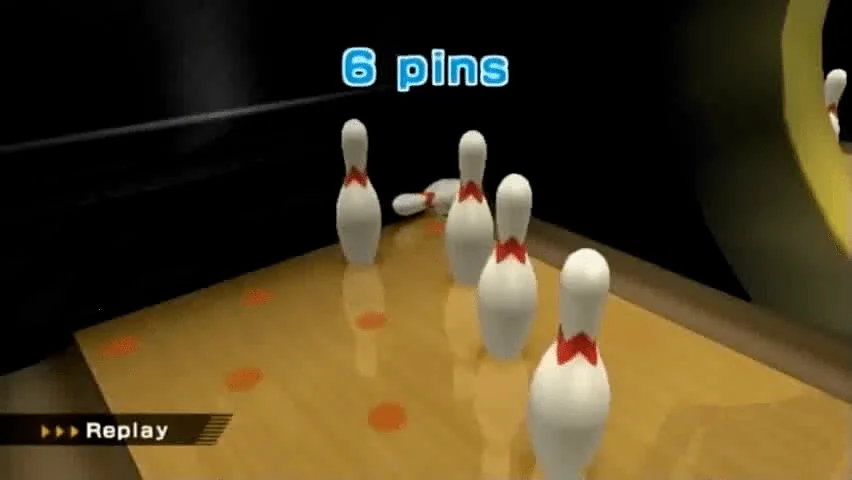
In original Wii Sports Bowling on Nintendo Wii, the fastest way to improve is to stop chasing a giant hook and build one dependable first ball. Set your feet and aim on purpose, hold B through the approach, release at the bottom of the forward swing, and add only enough twist to help the ball enter the pocket with some angle. Once you can send that same shot to the pocket over and over, your strike rate rises and the bonus scoring starts doing real work for you.
Use the lane setup controls before every first ball
Do not walk straight into the swing. On the setup screen, press A to switch between two adjustment modes: where your Mii stands and where the ball aims. Once a mode is selected, press left or right on the +Control Pad to move that setting. Treat this as part of every frame, not as a menu you only touch when something goes wrong.
For a right-handed strike line, begin a little right of center and aim inward toward the pocket between the 1 and 3 pins. For a left-handed strike line, mirror that idea from the other side and work toward the pocket between the 1 and 2 pins. Keep the opening angle modest. A small starting angle is easier to repeat, and small misses are easier to diagnose.
- Press A to switch between standing-position mode and aiming mode.
- Use left and right on the +Control Pad to change the selected mode.
- Aim for the 1-3 pocket as a right-hander or the 1-2 pocket as a left-hander.
- Start with a readable line, not an exaggerated edge-to-edge hook.
Make one clean baseline release
Hold the Wii Remote in your throwing hand and hold B to begin the throw. Raise the remote to your chest, swing back, then swing forward as if you are rolling a real bowling ball. Release B at the bottom of the forward swing. That is the game’s basic release, and it gives you the cleanest starting point for building a dependable strike ball.
Keep the whole motion smooth. The game reads both timing and speed, so huge changes in tempo usually create misses that look like aiming errors. If one frame goes badly, resist the urge to throw much harder on the next ball. A repeatable motion teaches you what your current setup actually does.
- Hold B through the setup and swing.
- Release B at the bottom of the forward swing.
- Use the same swing tempo from frame to frame.
- Fix the result with a small adjustment, not with a wild power jump.
Add only enough spin to help the ball enter the pocket
Wii Sports lets you curve the ball by twisting the Wii Remote during the throw. Use that twist to create a gentle inward finish, not a dramatic arcade-style bend across the entire lane. The goal is simple: arrive at the pocket with some angle so the ball keeps driving through the pins instead of bouncing straight off the head pin.
If you are right-handed and the ball keeps diving too far left before it reaches the pocket, reduce the twist first. If it keeps arriving too straight and leaving corner pins, keep the same release point and add a little more inward curve. Left-handed players should make the same kind of small correction in the mirrored direction. The best strike ball is the one you can repeat next frame, not the one lucky throw that looked spectacular once.
- Use a light twist for a controlled curve.
- Right-handers want a gentle right-to-left finish into the 1-3 pocket.
- Left-handers want the mirrored finish into the 1-2 pocket.
- Change spin in small amounts before rebuilding your whole line.
Read the miss and change one variable at a time
When you hit the head pin almost square and leave bad splits or weak carry, your entry angle is usually too straight. Keep your basic release and make one small change with either stance, aim, or spin. When the ball reaches too much of the inside of the pocket, soften the curve or aim a touch farther outside. When it misses light and barely reaches the pocket, start slightly wider or add a little more inward finish.
Only change one thing after each read. If you move your feet, change the aim, throw harder, and add more twist all at once, you will not learn which adjustment helped. Wii Sports bowling gets more reliable when every miss produces one clear correction.
- Head-pin or flat-pocket contact usually means you need better entry angle.
- High hits usually call for less hook or a slightly wider target.
- Light hits usually need a bit more inward finish or a wider starting line.
- After each miss, change one variable only.
Know exactly why a strike is worth more than 10
Wii Sports uses standard ten-pin scoring across ten frames. In frames one through nine, a strike scores 10 plus the pins from your next two rolls. A spare scores 10 plus the pins from your next one roll. If you leave pins standing after two balls, that frame is just the total number of pins you knocked down.
Use this example to read the scoreboard correctly. If frame 1 is a strike and frame 2 is 7 then 2, frame 1 is worth 19 and frame 2 is worth 9, so your total after two frames is 28. If frame 1 is a spare made with 7 and 3, and the next frame starts with 6, that spare frame is worth 16. That is why a repeatable strike shot changes the whole game: later rolls keep increasing the value of earlier strike frames.
- Strike: 10 plus the next two rolls.
- Spare: 10 plus the next one roll.
- Open frame: just count the pins knocked down in that frame.
- Read the running total, not only the pins from the current frame.
Play the tenth frame with the same formula
The tenth frame gives bonus rolls so marked frames can be completed properly. If you throw a strike in the tenth, you earn two extra balls. If you make a spare in the tenth, you earn one extra ball. The scoring changes, but your throwing plan should not. This is the worst time to invent extra speed or a huge hook that you have not used all game.
That bonus structure is also why a perfect game is 12 strikes, not 10. You need strikes in each of the first nine frames, then three more deliveries in the tenth. In a perfect game, every frame ends up worth 30, which produces 300. If you reach the last frame with a strong score, trust the same first-ball setup that got you there and make only the smallest read-based correction.
- Tenth-frame strike gives two bonus rolls.
- Tenth-frame spare gives one bonus roll.
- Twelve consecutive strikes make 300.
- Do not abandon your repeatable first-ball line in the final frame.
Before you move on
- You can explain that A switches between standing-position mode and aiming mode, and left or right on the +Control Pad adjusts the selected mode.
- Your first ball usually reaches the correct pocket for your handedness, even if it is not a strike every time yet.
- You can bowl several first balls in a row with the same B-hold and bottom-of-swing release timing.
- You understand why a strike adds the next two rolls, why a spare adds the next one, and why the tenth frame can award bonus balls.
- You are correcting misses one variable at a time instead of rebuilding the entire shot after every frame.
References for this chapter
Bowling: save frames when the first ball misses
Good Wii Sports bowling scores survive on cleanup. After a missed strike ball, keep your normal throwing motion and make the smallest correction that lines up the spare. Most leaves are easier with a straight ball, while only a few wider leaves benefit from a gentle curve. Treat every spare as a choice between a realistic conversion line and a safe pin count that protects the rest of the game.
Build every spare from the same base throw
Do not invent a new motion just because the first ball missed. In original Wii Sports, your spare shot still starts the same way: set your position and aim, hold B through the backswing, then release B at the bottom of the forward swing. The manual also shows that left and right on the Control Pad handle both standing position and aim, while A switches between those two adjustment modes.
Use that menu order every time. First decide whether you need to move your Mii left or right. Then press A if you need to change the ball’s line instead of the starting spot. Only after those two adjustments should you think about adding or removing spin. This keeps your spare game readable. If you change position, aim, release timing and wrist twist all at once, you will not know what actually fixed the leave.
For most spare shots, reduce the twist on the Wii Remote and favor a cleaner, straighter roll. Nintendo’s Bowling training advice specifically points to straight accuracy for sleeper-pin setups, and that same principle helps in normal ten-frame games whenever you need exact contact instead of maximum pin scatter.
- Press A to switch between standing position and aiming mode.
- Use left and right on the Control Pad to make only a small correction first.
- Keep the same hold-B swing and release timing you trust on your first ball.
- Default to less twist on precision spares.
Single pins and easy pairs: hit the front of the problem
For a single corner pin, play the direct lane to it. A right-handed player usually moves left for the 10 pin and right for the 7 pin, then rolls as straight as possible through the target. Left-handed players reverse that idea. You are not trying to recreate your strike entry angle. You just need full contact.
For two pins that stand side by side, or one directly behind the other, aim for the pin that naturally carries into the second. On a 3-6 or 2-4 style pair, throw through the front pin with a firm straight line. On a sleeper-style leave, the danger is bending away too early, so remove curve before you add power.
If you keep missing the same corner pin, change only one thing on the next attempt. Either move one notch farther across the lane or take even more twist out of the release. Do not swing harder. In Wii Sports, spare misses usually come from line and spin, not from lack of force.
- Single pin: choose a direct line and little or no curve.
- Adjacent pair: hit the front pin so the ball or pin carries through.
- Sleeper leave: straighter is usually better than harder.
- Repeat misses: make one small left-right or spin correction only.
When a light curve helps and when it hurts
A slight curve is useful only when the outside pin needs to fall inward across the deck. Think of a wider leave where a straight shot would clip the edge but not drive across the second pin. In that case, keep the curve gentle. You still want the ball to enter the pins, not to spend half the lane drifting.
A makeable example is a 3-10 split for a right-handed player or a 2-7 split for a left-handed player. Instead of throwing directly at the back pin, cut the nearer pin so it kicks across. This is still a control shot, not a full strike-ball hook. Set the lane position first, then add only enough twist to create the angle.
Curve hurts you most on narrow targets. If the ball starts on line and then leaks away late, your wrist turn is too strong. Flatten the release next time. If the ball reaches the pin line too early and crosses in front of the target, reduce the amount of stance or aim correction instead of adding even more hook.
- Use curve only when the pin action needs to travel sideways.
- Keep the curve light; spare shots are accuracy shots.
- For a makeable split like 3-10, cut the nearer pin toward the back pin.
- If the ball bends away late, reduce twist first.
Hard splits: protect the frame when the miracle line is not there
Some leaves are realistic, and some are not worth wrecking the frame for. If you leave a true low-percentage split such as 7-10, your best decision is usually to take one pin cleanly unless you specifically want to practice trickier conversions. Missing both by forcing a dramatic hook is worse than taking the count and moving on.
Use the same judgment on ugly three-pin spreads. Ask one question before you throw: can the ball or the first pin reasonably travel into the others from this angle? If yes, attack the chain-reaction side. If no, choose the easiest pin or pair and limit the damage. Over ten frames, one disciplined open frame costs less than repeated hero attempts that create more opens.
This decision matters most late in a good game. If you already have several strikes or clean spare frames, protect the scorecard. A controlled 8 or 9 keeps pressure off the next first ball. Chasing a conversion with almost no practical lane leaves you depending on luck instead of repeatable motion.
- Recognize low-percentage splits early.
- Attack the side that can create a real chain reaction.
- Take the easiest pin or pair when the conversion line is unrealistic.
- Protect a good game instead of forcing miracle shots.
Three games to improve spare percentage for real
Game 1 is your reading game. Track how many first balls hit the pocket cleanly and how many spare chances you get. For a right-hander, a pocket hit is the ball entering between the 1 and 3 pins. For a left-hander, it is between the 1 and 2 pins. Write down whether your misses leave mostly single pins, small clusters, or bad splits.
Game 2 is your discipline game. Before every spare attempt, say the plan out loud: straight single-pin ball, straight front-pin pair ball, or light-curve chain-reaction ball. This forces you to choose a method before swinging. After the game, divide made spares by spare chances for a simple spare percentage.
Game 3 is your correction game. Pick only one focus: improve pocket-hit count on the first ball, or improve spare percentage on cleanup. If your first ball finds the pocket more often, your leaves become easier. If your cleanup improves, your score rises even without extra strikes. Either result is meaningful progress toward cleaner rounds.
After these three games, you should know two things clearly: which side single pin gives you the most trouble, and whether your open frames start with poor strike lines or poor cleanup choices. That diagnosis is the real goal. Once you know the source of the leak, your next practice block becomes much more efficient.
- Game 1: count pocket hits and classify the leaves you create.
- Game 2: call the spare plan before every shot and record spare percentage.
- Game 3: focus on either better first balls or better cleanup, not both.
- Use the notes to identify your hardest side single pin and your main cause of open frames.
Before you move on
- You can switch between standing-position and aiming adjustments with A, then use left and right on the Control Pad for the selected mode.
- You know when to roll straight at a spare and when a gentle curve actually creates better pin action.
- You have a repeatable plan for right-side and left-side single pins based on your handedness.
- You can name one makeable split you will attack and one low-percentage split you will usually score safely instead.
- You have tracked both first-ball pocket hits and spare percentage across a three-game practice block.
Bowling training: spares, power and spin
Original Wii Sports Bowling on Nintendo Wii has three training drills with different goals. Picking Up Spares and Spin Control are 20-lane survival challenges that end after five total failures. Power Throws is a separate ten-stage score attack with one throw per stage, growing pin racks, strike doubles, and a 91-pin final setup. This version keeps the original Wii Remote controls and does not use Resort or Club rules.
Carry the main bowling controls into Training
Use the same setup and throw controls you use in standard Bowling. On the setup screen, left and right on the Control Pad adjust either where your Mii stands or the aiming angle, and the mode switch is A. For the throw itself, hold B, swing forward as if rolling a real ball, and release at the bottom of the swing. Twisting the Wii Remote during the throw adds spin, so if a ball is bending when you do not want it to, flatten your wrist before changing your line.
Treat Training as a repeatability test, not a place to reinvent your motion every lane. Make one small adjustment, throw, and read the result. If you change stance, angle, and wrist twist all at once, you learn nothing from the miss. That matters most in the two 20-lane drills because a wasted experiment costs one of your five failures. The official Nintendo tips also call out lofting as useful when extra spin is ruining a straight shot.
- Press A to switch between standing-position and aiming adjustments.
- Hold B through the approach and release at the bottom of the forward swing.
- Fix accidental spin with a flatter wrist before you make a big aiming change.
Picking Up Spares: protect your five failures
The goal is to clear one spare setup after another and reach lane 20. You do not move on until the current spare is made, and the run ends after five failures total. Nintendo's tips note that the early patterns resemble ordinary spare leaves, later lanes add sleeper pins hidden behind front pins, and splits begin appearing from lane 11 onward.
Start with the simplest possible line. For most early leaves, stand where the ball can travel straight through the pin you actually need to drive, instead of curving at the whole cluster. On sleeper-pin lanes, think about sending the visible front pin backward into the hidden one, so a slight side entry is often stronger than a dead-center hit. That is an inference from the layouts and from standard pin carry, not a special game mechanic.
If your ball keeps bending away from a narrow leave, use lofting as a correction, not as a default style. Nintendo describes lofting as lifting the ball into the air so the landing impact deadens most of the spin. In practice, that makes it helpful when a normal release hooks too much late in the lane. Try stance first, then angle, then loft. Save heavy curve for rare split angles rather than forcing hook on every lane.
- Remember that the five failures cover the whole run, not one lane.
- On sleeper lanes, aim to drive the front pin into the hidden pin.
- If two attempts miss the same way, flatten the wrist or loft before adding more curve.
Power Throws: score by clearing, not by muscling the ball
Power Throws is not normal ten-frame scoring. You get one throw on each stage, the rack grows by adding a new back row, and stage 10 contains 91 pins. You score one point per pin knocked down, but if you bowl a strike, you earn double the number of pins for that stage. That makes a full clear far more valuable than a messy high-count hit.
The safest habit is to chase pocket entry and let the pin action work. Nintendo's tip page specifically says you do not have to throw hard here because the lane uses bumpers instead of gutters and the ricochets create extra carry. So do not aim straight at the red head pin by default. Pick a modest angle into the pocket, and only increase aggression if your current line repeatedly leaves a thick front wall standing.
A light bumper bank is a useful scoring tool, especially as the formation widens, but it is still a tool and not a requirement. Nintendo suggests aiming just past the first Wii Sports logo on the bumper so the rebound heads toward the pocket, and also notes that this does not guarantee a strike. Use that as your stage-by-stage adjustment plan. Reach stage 10 consistently first. Then decide whether you want a safe pocket line for a normal score or the high-risk secret bumper route that can clear all 91 pins if the loft lands perfectly on the rail.
- Judge your throw by strike chance, not by raw pin count alone.
- Use bumpers to improve pocket entry instead of firing straight at the head pin.
- Treat the 91-pin secret as optional once you already reach the final stage reliably.
Spin Control: align first, then bend around the barriers
Spin Control is another 20-lane challenge with five total failures, but each lane only asks you to hit one pin. The barriers are the real test. Nintendo's official tips say the first six lanes can be solved with a straight ball, while later ones demand a mix of straight shots, spin, loft, and eventually banked or edge-riding routes.
Begin every lane by looking for a clean straight path. Move your Mii and aim until the guide line threads the opening. If that line exists, throw flat and simple. This is the chapter's most important habit because players often fail by adding curve before they have even checked whether a straight route is available. On easier lanes, clean alignment beats flair.
When the barriers fully block the direct line, decide whether you need a late curve, a lofted landing, or an edge ride. Late-curve shots work when there is open lane early and a turn near the pin. Lofting helps when the early barrier placement punishes an ordinary spinning release. Nintendo's tips also state that several shots reward riding the gutter edge so the ball stays outside the barrier line before curving back in. Use that only on lanes that clearly call for it, especially in the later half of the set.
- Check for a straight route before you try spin.
- Choose one route type per lane: straight, late-curve, lofted, or edge-riding.
- If a curve keeps clipping the first obstacle, test a lofted version of the same line.
Retry discipline for medal pushes
The back half of Picking Up Spares and Spin Control is where strong runs usually collapse, so use a fixed correction order. After any miss, identify one cause: wrong starting position, wrong angle, too much spin, or too little spin. Change only that variable on the next ball. This is practical coaching based on the drills' limited-failure structure, not a hidden rule.
A good short practice loop is one full run of Picking Up Spares for straight accuracy, one full run of Power Throws for strike entry, and one full run of Spin Control for controlled curve. Then return to standard Bowling and see whether your first ball reaches the pocket more often and your spare shooting feels calmer. Because the drills share the same base controls as regular Bowling, the motion transfers cleanly.
- Name the miss before you throw again.
- In the survival drills, protect failures more than you chase flashy solutions.
- Use Training to sharpen standard Bowling, not as a separate trick-only mode.
Before you move on
- You can explain that Picking Up Spares and Spin Control are 20-lane drills with five total failures, while Power Throws is a separate ten-stage score challenge.
- You use A to switch setup modes, left and right on the Control Pad to adjust the selected mode, and B-release timing to control the throw.
- In Power Throws, you intentionally seek a pocket line and value strike doubles more than a loud high-speed hit.
- In Spin Control, you now test straight alignment first and only add loft, edge-riding, or extra curve when the barrier layout actually demands it.
Golf: choose a shot before swinging
In original Wii Sports golf on Nintendo Wii, lower scores come from deciding the landing area first and the swing second. Pick a club, line up a safe target, check the wind, and only then commit to the shot. The manual’s controls make that planning simple: left and right set direction, up and down change clubs, and the actual shot only happens when you swing while holding A. On the green, use the lay-reading view before every important putt so you are choosing a miss that stays playable instead of chasing every flag or every long putt.
Start with the landing spot, not the flag
Before every full shot, decide where you want the ball to finish. Wii Sports golf is stroke play, so the best shot is usually the one that leaves the easiest next shot, not the one that aims closest to the hole right away.
Use left and right on the Control Pad to aim and up or down to change clubs. The course map in the corner shows your expected line for a normal strike. Treat that line as a guide only. Wind changes the flight, and rough or bunker lies change how far the ball carries.
Make one or two rehearsal swings without holding A if you need to feel the tempo. Those practice swings do not hit the ball. When you are ready, hold A and make one smooth committed swing instead of fidgeting through several false starts.
- Pick a landing area before you think about maximum distance.
- Aim with left and right, then choose the club with up and down.
- Use practice swings for rhythm, then hold A only for the real shot.
Use the power gauge as your main distance control
The manual states that a 50 percent swing sends the ball to about halfway down the displayed line. That makes the power gauge your simplest distance reference on full shots and chips alike.
Stay in the blue zone whenever the hole gives you room to play normally. If you push into the red, the game warns that the shot can slice or hook. Extra distance is sometimes useful, but it is never free accuracy.
A repeatable blue swing is worth more than occasional heroic distance. On a tight fairway or an approach between hazards, choose the club that lets you make a controlled swing instead of trying to squeeze extra carry out of an overswing.
- Use the gauge to match club and swing length.
- Favor blue-zone swings on routine tee shots and approaches.
- Only accept red-zone risk when the safer shot still leaves serious trouble.
Read wind and elevation together
Check the wind arrow and speed before every non-putt. Crosswinds move the ball sideways, headwinds reduce carry, and tailwinds can add carry and rollout. The stronger the wind, the more you should aim toward the wide safe side of the fairway or green.
Elevation matters just as much. An uphill approach effectively plays longer, and a downhill one tends to fly farther. Instead of memorizing a fixed wind formula, compare the wind, the height difference, and the size of the safe landing area.
If one side of the target is guarded by water or out-of-bounds, miss to the other side whenever possible. Rough is inconvenient. Water hazards and out-of-bounds cost a one-stroke penalty and send you back to replay the shot from the previous spot.
- Adjust for sideways wind and for targets above or below you.
- Aim away from penalty areas first, and worry about pin proximity second.
- Use the widest safe landing zone when the wind is strong.
Respect rough and bunkers before and after the miss
The official manual notes that carry depends on whether the ball lands in the rough or a bunker. Do not plan the next shot as if those lies behave like fairway turf.
From the rough, lower the ambition unless the green entrance is very open. A clean shot to the front of the green or back into fairway is often better than forcing a perfect flag attack with reduced carry.
From a bunker, make escaping to a simple follow-up your first goal. This is why good planning begins one stroke earlier. On longer holes, a layup short of bunkers or rough can create an easier scoring chance than a longer first shot that reaches trouble.
- Expect weaker or less convenient carry from rough and sand.
- Choose the next easiest position, not the fanciest recovery.
- Lay up before obvious trouble if the landing area beyond it is narrow.
Worked example: safe approach and two-putt plan
Suppose you are in the fairway on a par 4 with a mid-iron approach. The green has a bunker short right, water long left, and the wind is crossing into your face. Start by ignoring the pin if it sits near the water.
Choose the club that can reach the middle of the green with a controlled swing. Then aim for the safer half of the putting surface. If the headwind is modest, add a little more swing. If the shot is also uphill, favor a little more club or a slightly firmer blue swing. Do not jump straight to red power unless you truly cannot carry the trouble otherwise.
If that conservative shot finishes on the green or even just in light rough beside it, you still have a fair chance to save par or bogey. If you force the tucked pin and fly long left, the penalty is immediate and you replay from the previous spot.
Once on the green, press 1 to read the lay and 2 to change the camera. Read the slope first, then choose pace. On a long uphill putt, hit firmly enough to climb the slope and finish close if you miss. On a downhill or sharply breaking putt, play more cautiously and try to leave an easy second putt below or beside the cup instead of racing far past.
- Middle of the green is the default target when the pin is near water or out-of-bounds.
- Add power or club for headwind and uphill shots, but keep the swing controlled when possible.
- Use 1 to read the green and pace long putts to finish close if they miss.
Before you move on
- You can explain your landing target, club choice, and hazard plan before each swing.
- You normally stay in the blue zone and only risk red power when the hole truly demands it.
- You adjust your aim for wind and elevation instead of relying on one fixed power pattern.
- You use 1 and 2 on the green to read slope and camera angle before important putts.
- When a pin is tucked near danger, you are willing to take center green and trust the next putt.
Golf: a plan for holes 1–3
The original Wii Sports beginner set on Nintendo Wii uses the first three holes of the nine-hole course, with pars of 4, 3, and 5. The practical target is simple: play for par, accept bogey after one bad swing, and avoid turning one mistake into two by recovering back to fairway or onto the front of the green instead of forcing miracle shots.
Before the first tee: play the course, not the power meter
These three holes teach the same lesson in different ways. The line on the map is only an estimate, and the manual makes clear that wind and bad lies change carry, so do not treat a full swing as a guarantee. Use the fairway or the wide middle of the green as your default landing area.
A good beginner round here is boring in the best way. Choose a club and a landing area first, make one clean swing, and only take on the tucked line when the wind is mild and your lie is perfect. If you reach rough or sand, lower the ambition immediately and recover to a place that restores a normal next shot.
- First goal for the set: three steady pars, with bogey as the acceptable save after trouble
- Before every full swing: check wind, landing space, and what happens if the ball releases long
- After a bad lie: recover to fairway or front green instead of chasing the flag
Hole 1, Par 4: center the drive and keep the water out of play
Hole 1 is a straightforward opener, but it is not completely harmless. The fairway is the clear tee target, and the easiest mistake is letting the drive drift far enough toward the water or rough that the second shot becomes awkward. A controlled driver swing to the middle of the short grass is better than a red-zone attempt that brings the shoreline into the hole.
If the wind is blowing across the hole, aim a little into the wind and trust the correction. Do not try to fix a crosswind by swinging harder. The safe approach is from the fairway, and the hole becomes much easier if your first job is only to leave a clean iron or wedge distance.
On the approach, favor the front-middle portion of the green unless the pin is sitting very safely. The biggest wasted stroke here is not missing short; it is flying long or missing from rough and leaving a difficult recovery. If you do end up in rough, play onto the green or just onto its front edge and take the putt you earn. The putting surface is gentler than later holes, so pace matters more than heroic read-making.
- Safe tee target: middle of the fairway, away from the shoreline side
- Biggest hazard: water and rough turning an easy second shot into a scramble
- Wind-sensitive choice: adjust aim slightly into a crosswind instead of adding reckless power
- Recovery line: from rough, take green-front safety before attacking the cup
Hole 2, Par 3: aim for the open half of the green
Hole 2 is the first one-shot test. You can reach the green immediately, but the right play is usually the middle or the open half away from the greenside bunker, not a direct attack at every pin. On a calm shot, that still gives you a birdie chance. In helping or quartering wind, it also prevents a good swing from skipping into sand or carrying too far.
Your wind-sensitive choice here is club and landing depth. If the breeze helps, shave the swing down and let the ball release. If the breeze is into you or the green sits a little uphill from your lie, give yourself enough carry to clear the front safely without forcing the red zone.
The bunker is the hole’s clearest punishment. If you find it, forget the highlight shot. The goal is a clean escape onto the green or to a level just past the cup, then try to save the putt. On the green, short putts can still slide because the surface has enough contour to punish lazy aim, so combine a firm read with controlled pace rather than jabbing at the ball.
- Safe target: middle or open side of the green away from the bunker lip
- Aggressive target: the flag only when wind and lie are comfortable
- Biggest hazard: the greenside bunker on the dangerous side of the target
- Recovery line: bunker escape first, one-putt save second
Hole 3, Par 5: play the dogleg in three calm parts
Hole 3 is where a clean beginner scorecard usually survives or falls apart. The fairway bends, and the tempting idea is to cut too much off the corner. There is a smaller inside landing area that can reward a bold line, but it is not the percentage route for a normal round. The reliable par plan is to use the broader fairway around the bend as your landmark and keep the tee shot in play.
Wind matters more here because a pushed or pulled drive can finish in rough, sand, or an angle that ruins the next decision. When the wind is against you, accept that this is a true three-shot hole and lay farther back on the first swing rather than forcing a corner-cutting carry.
Your second shot should be chosen by the third shot you want. From a clean fairway lie, advance the ball to a comfortable layup spot that opens the green. From rough, do not try to manufacture distance and precision at the same time. Move the ball back to fairway grass, then attack with the third. On the final approach, front-safe is the winning miss. Reaching the green in regulation for par is the real success here, not gambling for eagle.
Once on the green, protect the round. If you are already on pace for par or better, make the sensible first putt that leaves a tap-in range and avoid a wild charge that races well past the cup.
- Safe tee target: the broad fairway route around the dogleg
- Risky option: the smaller inside patch only with favorable wind and a confident driver swing
- Biggest hazard: overcutting the bend and creating a bad lie or blocked next angle
- Safe layup: leave a full, comfortable third shot from fairway grass
- Putting concern: preserve par instead of forcing an unlikely eagle line
Scorecard thinking for the whole beginner set
A strong first target is even par for the three-hole set, but do not treat that as mandatory. If you par Hole 1 and safely reach Hole 2’s green, you are already positioned for a calm round. On Hole 3, think in fairway, layup, approach order and let the par 5 stay a par 5.
The fast way to lose strokes is chasing them back immediately. After one miss, shift into damage control. One bogey on these holes is recoverable. A second risky swing from rough, sand, or a bad angle is what usually turns a decent round into a poor one.
- Best realistic early target: around even par, with bogey saves keeping the round alive
- Protect good rounds by avoiding red-zone overswings into hazards
- If the lie is bad, take the next easiest shot, not the fanciest one
Before you move on
- You can explain Hole 1 as a fairway-first drive followed by a controlled approach that respects the shoreline and wind.
- On Hole 2, you normally choose the open side of the green away from the bunker unless the pin and wind make an attack clearly safe.
- On Hole 3, you can describe both the safe route around the dogleg and the reason the inside shortcut is optional rather than mandatory.
- Your beginner-course scores are improving because you are taking fewer recovery shots from rough, sand, and water trouble.
Golf: a plan for holes 4–6
These directions are for original Wii Sports golf on Nintendo Wii. The intermediate set is where careless full swings start costing more than a missed birdie chance, so use each hole's safest landing area first and let wind, lie, and pin position decide whether to attack.
Use the same decision order on all three intermediate holes
Before every full shot, check the wind, then the landing space, then the pin position, then the cheapest miss. In Wii Sports the target line is only a starting estimate. Wind, rough, bunkers, and overswing all change the real result, so do not lock yourself into a single power mark for these holes.
On this set, the safest scoring habit is to choose the grass you want to stand on after the shot, not the shortest path to the hole. If the pin is near an edge, or the wind is strong enough to push a normal shot toward trouble, play for the middle of the safe area and trust the putter or your next chip.
- Read wind before changing clubs or aiming.
- Use the green view before every approach and first putt.
- If the lie is rough or sand, lower your ambitions for that shot and get back to clean turf.
Hole 4, par 3, 139 yards: clear the front bunker and stay short of trouble long
Hole 4 is a short par 3, but it punishes greed. The key landmarks are the bunker in front of the green and the water beyond the back edge. Your safe target is the center portion of the green, favoring enough carry to clear the bunker without chasing the rear edge. If the pin is tucked near the front or back, still aim for the middle unless the wind is very calm.
A tailwind makes this hole dangerous because a normal swing can fly past the putting surface. When the wind helps, take a little speed off and keep the motion smooth. When the wind is into you, take more club or a fuller swing, but keep it controlled so you do not add a hook or slice through overswing. If the wind is crossing, start the ball slightly into it and keep the target well away from the back edge.
Your aggressive option is only for mild wind and a pin that is not sitting on an edge. Then you can shade closer to the flag and try to leave one makeable putt. If you miss short into the bunker, play out to the widest part of the green instead of trying to force a hero splash at a tucked pin. If you miss into rough, use a lofted recovery that lands on quickly rather than trying to run the ball across the full green.
- Main goal: green in one, then two putts for par.
- Short is usually better than long on this hole.
- Do not red-zone overswing just to chase a back pin.
Hole 5, par 5, 361 yards: decide early whether you are laying up or cutting the corner
From the tee, hole 5 points you through a slab of rough toward a bending fairway. The safe play is to keep the first shot on the broad fairway before the corner and set up a comfortable second shot from short grass. That gives you an easy three-shot hole: drive to fairway, advance to open grass, then attack the green with your third.
The aggressive option is the corner carry. There is a smaller far-side landing area that can shorten the hole, but it is only worth trying when the wind is not fighting you and you are confident you can keep the ball from dying in rough or skipping into a bad angle. If the tee shot does not finish cleanly in the fairway, abandon the birdie chase. A bad first lie is your signal to lay the second shot into open grass and play the green with the third.
On the approach, choose the side of the fairway that leaves the green open instead of bringing trees or rough into play. If the wind is helping, resist the urge to smash a second shot from an awkward lie. If it is into you or crossing hard, lean even more toward a layup because a blocked or drifting second shot can turn a scoring hole into a recovery hole. Around the green, pay attention to the higher northern side. Putts from above that section need pace control more than bravado. If you are in rough near the trees, pitch back to fairway or to the open approach lane and take bogey or par from there.
- Safe plan: fairway, fairway, green.
- Attack the corner only from a normal stance with favorable wind.
- If the first or second shot finds rough, reset the hole instead of forcing distance.
Hole 6, par 4, 335 yards: use the bunker side off the tee and treat the river as the round-ending hazard
Hole 6 is the risk hole of the intermediate set. The river makes the playable fairway feel narrower than it is, so your safe line is toward the side with the bunker rather than the water side. Landing near that bunker gives you a longer second shot, but it keeps the ball in play and leaves a much calmer angle to the green.
The aggressive line is the shorter route closer to the river side, but treat that as optional rather than standard. Only take that line when the wind is not pushing toward the water and your swing timing feels steady. Even then, the reward is a slightly easier approach, not a guaranteed birdie. If the wind is blowing toward the river, aim farther away from it than your eyes first suggest. If the wind is blowing back toward the bunker side, you can aim more centrally and let the wind work with you.
The second shot is the real test. The approach is protected by side bunkers, with rough waiting beyond the best landing area, so pick the fattest safe part of the green unless the pin is clearly accessible. Do not use a fixed dot count here. Judge the club and power from the day's wind and from where your tee shot finished. From rough beside the fairway, your first priority is restoring a playable angle. From a greenside bunker, splash out to the broadest section and accept the putt. If you take a water penalty, stop chasing par immediately and switch to a clean bogey plan: next shot to grass, then onto the green, then finish without another mistake.
- Tee shot priority: stay on the bunker side, away from the river.
- Approach priority: center green over a river-side pin.
- After any penalty, play the remainder of the hole as damage control.
How to protect your score through the intermediate set
A practical target on holes 4 through 6 is one clean par chance on each hole and no penalty strokes. Hole 4 should give you routine par looks if you clear the bunker and avoid going long. Hole 5 rewards patience more often than bravery. Hole 6 is the place to save your round by choosing position over distance.
If you are already having a good round, make your conservative choice earlier, not later. Take the middle of the green on 4, accept the three-shot route on 5 when the wind is awkward, and choose the bunker-side fairway on 6. Most lost strokes on this stretch come from one extra-risk decision followed by a rushed recovery.
- Count penalty shots and missed fairways, not just birdie chances.
- If your swing timing feels late or wild, shorten the next full swing and re-center your target.
- A successful hole 6 is any hole completed without water.
Before you move on
- You can name the safe target and the aggressive option on holes 4, 5, and 6 before hitting the tee shot.
- On hole 4, you consistently plan around the front bunker and the danger long.
- On hole 5, you switch to a three-shot fairway plan whenever the corner carry or second shot is not clearly on.
- On hole 6, you choose the bunker-side tee line by default and only challenge the shorter river-side route when wind and lie actually support it.
- Your scores improve on this set because you are taking fewer penalties and fewer desperate recovery swings.
Golf: a plan for holes 7–9
The final three holes in original Wii Sports Golf on Nintendo Wii decide whether a solid round stays solid. Hole 7 is a par 4 dogleg with the green screened by trees. Hole 8 is a par 3 carry to a narrow green where distance control matters more than flag hunting. Hole 9 is a par 5 built around island landing zones, so the safest scoring route is usually a planned three-shot hole, not a desperate water carry. Play these holes to stay in play first, then take the aggressive line only when the wind, lie and angle genuinely support it.
Use a score-preserving routine before every shot
On these expert holes, choose the landing area before you think about power. Check the wind arrow, use the map and camera to confirm the line, and make a practice swing with the same tempo you intend to use for the real shot. A controlled swing that finishes on short grass is better than an overswing that adds slice or hook and brings water or trees into play.
If your ball is in rough or sand, lower your ambition immediately. The lie reduces control, so the next target should usually be the widest safe part of the fairway or the middle of the green. These three holes punish greed much harder than they reward it.
- Pick a safe finish point before choosing club and power.
- Use a practice swing to settle your tempo.
- From rough or bunker, favor the center of the next safe area over the pin.
Hole 7, par 4: narrow fairway first, shortcut only when it is really there
From the tee, the obvious danger is the tree wall that hides and guards the green around the dogleg. The normal play is not straight at the hidden target. Aim for the narrow fairway strip ahead and treat the first shot as a placement ball. A tee shot that lands on that strip and stays away from the bunker side and the water-side trouble gives you a much better chance to play the second shot around the trees.
After a safe tee shot, check your approach angle instead of staring at the flag. If the trunks still cover too much of the green, do not force a miracle. Aim for the front or the wider side of the putting surface, or even just short of it if that leaves an easy chip. Saving par with a chip and two putts is realistic here. Hitting a branch and dropping into rough usually turns par into bogey or worse.
There is a genuine aggressive option on this hole. With a calm wind or a helping wind, and only when your lie is perfect and your swing is reliable, you can try to cut directly toward the green from the tee. This is not mandatory, and it is not impossible either. The risk is highest when the wind crosses the line or blows in your face, because even a slightly pushed ball can catch branches or run out into trouble. If you try it and fail, spend the next shot getting back to a clear angle instead of attacking through more trees.
On the green, treat a back or upper pin with respect. A putt that finishes below the hole is easier than one that runs above it and must come back across slope.
- Default line: place the tee shot on the narrow fairway, then attack with a clear second shot.
- Aggressive line: only challenge the trees when the wind is favorable and your lie is clean.
- Blocked second shot: play short or wide, chip on, and keep double bogey out of the round.
Hole 8, par 3: take the green, then accept the long birdie putt
Hole 8 is a direct carry hole, so the entire plan is built around landing on the green or on the safest fringe near it. The water and narrow approach make short misses expensive, and the putting surface is awkward enough that a safe middle target is usually the correct choice. Use the green view, note where the pin sits, then pick the club and power that reach the middle or front-middle with your normal swing.
If the wind is in your face, add enough carry to remove the short splash from play. If the wind helps, resist the urge to force extra power and let the ball land more softly. When the pin is tucked on one side, remember that a putt from the center is still a birdie chance, while a miss to the hazard side is an immediate lost stroke.
A practical safe miss is the short fringe or rough directly before the green, because it leaves a simple recovery compared with water or a severe side angle. On the green itself, expect putts from the right side or from above the hole to move more and feel faster. When in doubt, leave the first putt beneath the cup instead of charging past.
If you do miss into rough or sand, play the recovery onto the middle of the green and take the putt. This is not a hole for a heroic flop-style save.
- Default target: center or front-center of the green.
- Against headwind, make sure the shot fully carries the danger.
- Prefer a simple chip from short grass to a risky flag attack that can find water.
Hole 9, par 5: treat the islands as planned landing zones
Hole 9 looks tempting, but the safest scoring route is usually simple. The broad right island is the normal tee-shot target because it gives the largest landing area and the cleanest next decision. Try to finish toward the front-left portion of that island if the wind allows, since that can open more distance for your second shot without forcing the all-or-nothing carry from the tee.
The aggressive alternative is the left island off the tee. That line can work with helpful wind and a committed full drive, but it is a specialist play, not your default route. If the wind is neutral, crossing, or hurting, the water penalty is not worth the gamble when you are protecting a score.
From the right island, decide early whether the second shot is truly a green attempt or clearly a layup. Do not split the difference. If the wind, lie or carry number make the green doubtful, lay up to one of the smaller middle landing zones and leave yourself a controlled third shot. That is the reliable par route, and it still creates birdie chances if the wedge or short iron finishes close.
The approach to the green should usually favor the center unless the pin is very accessible. The green has enough contour that simply being on the correct level is more important than hunting a tucked flag. From an island-edge lie, use a shorter club and a fuller, balanced swing rather than trying to muscle a longer club over water.
- Default tee shot: broad right island.
- Only attack the left island when the wind and your confidence clearly support it.
- If the second shot is not a comfortable carry, lay up and play the hole as a clean three-shot par 5.
Finish the round by protecting the card you already earned
Use the score to choose your risk. If you reach hole 9 at one under par or even with a personal-best pace, the smart finish is not a desperate eagle chase. Play to the right island, lay up if the green is not a comfortable carry, hit the middle of the green with your third, and make the putts you deserve. That line keeps water out of the round and gives you a strong chance to finish with par.
The same idea applies on hole 7. If your round is alive, the fairway route is usually the correct call. Save the direct tee shot at the green for rounds where you need to make up strokes and the wind actually grants the chance. A controlled closing stretch with three safe pars will beat one birdie mixed with a water ball or a tree kick into trouble.
- When your score is good, choose the larger landing area instead of the flashier carry.
- Do not attack pins from rough, sand or island-edge lies.
- Judge success on these holes by staying in play first and scoring second.
Before you move on
- You can explain a standard hole 7 plan that uses the narrow fairway first and only cuts at the green when wind and lie make it reasonable.
- You can play hole 8 for a green hit or an easy short-side recovery instead of gambling everything on a perfect pin-high strike.
- You can name the default landing sequence on hole 9 and decide clearly between a layup route and an all-the-way carry.
- You can protect a promising score through the final three holes by choosing par routes over low-percentage hero shots.
Golf training: putting, approaches and targets
Golf Training in original Wii Sports on Nintendo Wii works best when you treat the three drills as different jobs instead of one generic swing test. Putting is about reading break and matching pace. Hitting the Green is scored by total distance left from the hole, so lower is better and safe shots matter. Target Practice flips that logic and asks for the highest point total across 10 shots by landing on one of two greens, with the farther bull's-eye worth 100 and the nearer bull's-eye worth 75. Use a repeatable routine in all three drills, because medal progress comes from steady reads and centered contact, not from forcing red-meter swings.
Putting: read the line before you think about speed
Handle every putt in the same order. First decide which way the green falls. Then decide how hard the ball must be struck to survive that slope and still reach the cup. If you judge speed first and line second, you will keep missing without knowing whether the real mistake was aim or pace.
Use the green view before every attempt. Find the high side, the low side, and any ridge the ball must cross. On a left-to-right putt, begin the ball left of the cup and let the slope feed it back. On an uphill putt, give the ball enough pace to climb the rise. On a downhill putt, shorten the stroke and trust the slope instead of jabbing at the Remote.
Build one tempo and keep it. Make one or two small rehearsal motions, then copy that same rhythm on the real stroke. On long putts, try to finish pin-high even if you miss. A miss level with the cup teaches you whether the read was high or low. A ball left far short teaches very little.
Repeatable practice method: spend one session classifying every miss as high, low, short, or long. High means you did not allow enough break. Low means you allowed too much. Short usually means you under-hit an uphill section. Long usually means you ignored how much a downhill section would accelerate the ball.
- Read the slope before choosing stroke length
- Start the ball on the high side of the hole
- Use the same rehearsal tempo every putt
- Judge misses as high, low, short, or long
Hitting the Green: lower totals come from safe surfaces first
Hitting the Green scores you by total remaining distance from the pin after each shot, so lower is better. That means the smartest training answer is usually a controlled shot that lands on the putting surface, not a reckless attack that barely misses the flag and runs into trouble.
Keep the same pre-shot routine every time. Check the map, note the wind, pick the club that can reach your landing area without needing a wild overswing, then make a calm practice motion. Your target is not maximum power. Your target is solid contact on a predictable line.
When a swing feels imperfect, switch immediately into damage control. Save the shot by finding any safe part of the green. Even a putt from the wrong side usually protects your total better than a miss into rough, sand, or water. Until your contact is consistent, center-green is a stronger training choice than flirting with edges.
Repeatable practice method: rate each shot only as on green, near-green miss, or major miss. Stay with surface-first golf until on-green results become normal. After that, begin trimming the leftover distance by aiming away from sharp edges and matching swing length more precisely to wind and elevation.
- Remember that the best score here is the lowest total distance
- Aim for the safest useful part of the green, not always the flag
- Choose a controlled swing before a forced overswing
- Turn a shaky strike into an on-green finish whenever possible
Target Practice: take the points you can keep
Target Practice gives you 10 shots at two greens. The farther target has the 100-point bull's-eye and the nearer target has the 75-point bull's-eye. Higher points are better in this drill. Because the game scores where the ball lands rather than where it rolls afterward, straight contact matters more than trying to overpower every shot.
A useful rule from Nintendo's own Target Practice advice is to stay in the blue part of the power meter for most swings. A red overswing can push the ball off center, which is dangerous in a drill built around landing accuracy. The opening shots are the best time to attack the far target because the wind is absent or very light, so establish your score early instead of giving those chances away.
As the wind builds, aim into it before you add more power. Harder swings may solve distance but often create fresh direction problems. If reaching the far green would require an uncomfortable red-meter smash or a huge correction, switch to the nearer 75-point target and bank the points. A clean 75 is better than a zero from chasing 100 under bad wind.
Repeatable practice method: split the round into phases. On shots 1 through 3, attack the far 100-point target with your normal blue-meter swing. On shots 4 through 7, stay on the far target only when the wind picture is simple. On shots 8 through 10, protect a good run instead of gambling the whole score. Target Practice is the last golf drill to appear, so clear Putting first, then clear Hitting the Green to unlock it.
- Remember that this drill wants the highest point total
- Attack the far 100-point green early when wind is calm or nearly calm
- Aim into the wind before deciding to swing harder
- Switch to the nearer 75-point target when the far shot stops being comfortable
- Complete Putting, then complete Hitting the Green, to open Target Practice
Before you move on
- You read the break before every putt and can describe a miss as high, low, short, or long.
- In Hitting the Green, you usually choose a safe landing area and keep most shots on the putting surface.
- In Target Practice, you deliberately choose between the 100-point and 75-point greens instead of attacking the far one automatically.
- You can explain the scoring difference from memory: Putting is one-putt execution, Hitting the Green is lower total distance, and Target Practice is higher total points.
- You have cleared Putting, then cleared Hitting the Green, and know that this is what opens Golf Target Practice.
Boxing: defend, counter and beat stronger opponents
Original Wii Sports Boxing on Nintendo Wii is won with compact motions, a disciplined guard, and counters after the opponent misses. You are not trying to throw nonstop punches. You are trying to stay covered, make the other boxer open up, land two or three clean shots, and recover before the return fire arrives.
Enter the match with the right setup and a real guard
Boxing uses both the Wii Remote and the Nunchuk. In a two-player match, each player needs their own pair. Once the round starts, hold both controllers up in front of your chest and face, because that is your block and your home position between attacks.
Keep the motions short. The game reads clean thrusts better than big looping swings, and compact punches let you get back to guard faster. If your hits start missing the game’s input, shorten the distance and punch straight from your guard instead of winding up.
Think of every exchange in three parts: block or dodge, punch, then reset. If you finish a combination with both hands low, stronger opponents answer immediately.
- Use a Wii Remote and Nunchuk for Boxing.
- Return both hands to the center after every attack.
- Favor short punches over wide swings.
Aim your punches with purpose
To attack the head, punch upward. To attack the body, punch downward. That gives you two simple lanes to work with, and switching between them matters more than throwing harder.
Start by learning one safe two-punch pattern. A good basic choice is head, body, then guard. Another is body, head, then guard. The value is not the exact order. The value is learning a burst you can land without losing your defensive shape.
Do not keep alternating left and right just because you can. If the opponent has already covered the line you are punching into, stop the sequence and reset. Accurate punches that connect are worth more than extra swings that hit gloves.
- Head shots go upward.
- Body shots go downward.
- Use short two-hit or three-hit bursts, then recover guard.
Read the opponent’s guard before you swing
Watch where the opponent is holding their gloves. If the guard stays high, test the body. If the gloves dip lower, look upstairs. Your goal is to punch where the cover is late, not where it is already waiting.
If the first hit of your pattern is blocked twice in a row, change levels on the next opening instead of insisting on the same lane. A body shot that pulls the cover down can create the head shot that was not there a second earlier.
This is also how you avoid panic punching against stronger CPU boxers. They become much easier to handle when you treat every opening as brief and deliberate.
- Attack the side or level the opponent is not covering well.
- Change levels when one target keeps getting blocked.
- Do not force a full combo into a closed guard.
Make dodges create your best damage
The safest offense comes after the opponent misses. Keep your guard up and shift your body left, right, forward, or back to avoid the punch. When the attack whiffs, answer immediately with one or two quick punches before the rival settles again.
Do not try to trade every time you see motion. Against better opponents, trading usually means you both throw at once and you lose the exchange. Slipping first gives you the cleaner opening.
If your dodge leaves you leaning too far or off balance, skip the counter and come back to the middle. A clean evade with no follow-up is still better than eating a return punch because you swung from a bad position.
- Dodge with your body while keeping both controllers up.
- Counter right after a miss, not during the opponent’s punch.
- If you are off balance, reset before attacking again.
Win rounds with controlled combinations and smarter pacing
Each match has three one-minute rounds. The first boxer to be knocked out loses immediately. If neither boxer is finished after round three, the match goes to the judges, so clean scoring throughout the fight matters even when you do not get a knockout.
Because of that, your best round-winning rhythm is patient pressure. Block or dodge, land two clean shots, recover guard, and wait for the next mistake. When you get overexcited and keep punching into gloves, you often throw away the round you were winning.
When you hurt the opponent, keep your technique compact. Straight, readable punches that register cleanly are more reliable than desperate haymakers. When you are the one under pressure, survive first. Cover up, make the opponent miss, and steal back momentum with the next clean counter.
- Remember the three one-minute round structure.
- Fight for clean exchanges even if no knockout comes.
- When ahead, protect the round instead of chasing reckless damage.
Work up to Matt and use the Silver Gloves correctly
As you keep winning in single-player Boxing, the opposition improves until you reach Matt, the original Wii Sports boxing champion. Treat that match as the proof that your defense is working. If you can make Matt miss and punish him with short counters, you are boxing correctly.
Against Matt, do not rush the opening seconds. Stay compact, test his reactions with short attacks, and rely on dodges to create your best counters. If he starts reading your favorite pattern, switch from head-first attacks to body-first attacks, or from body-first attacks back to the head.
After you defeat Matt, you can use the Silver Gloves. Start a Boxing match and hold the 1 button while the match is starting or loading so your boxer enters wearing them. If they do not appear, back out and try again before the next match begins.
- Matt is the original Wii Sports boxing champion.
- Use patience and counters instead of trying to overwhelm him.
- After beating Matt, hold 1 while starting a Boxing match to wear the Silver Gloves.
Before you move on
- You can keep your guard up between exchanges and naturally return to it after attacking.
- You can explain the difference between a head attack, a body attack, and a dodge-created counter.
- You can win rounds with short combinations and defensive resets rather than nonstop flailing.
- You know Boxing is three one-minute rounds with knockout or judges' decision.
- You know Matt is the champion in original Wii Sports and you know the verified Silver Gloves activation after beating him.
Boxing training: bags, dodges and mitts
These three Boxing drills in the original Wii Sports all use the normal Boxing setup for Nintendo Wii: a Wii Remote in one hand and a Nunchuk in the other. The manual’s core motions still matter in training: thrust a controller forward to punch with that hand, keep both hands in front of you when resetting, and shift your body to dodge instead of making huge, messy movements. Clean reads and compact recovery matter more than raw speed.
Set your guard and make the game read both hands cleanly
Before every drill, raise both hands to chest height and face the screen squarely. In Wii Sports Boxing, the Wii Remote and Nunchuk are your gloves, so if one hand drops too low or drifts too far outside your shoulders, the next punch often comes out late or at the wrong line. Keep your ready position narrow and obvious.
Think in short actions. Punch with a quick forward thrust, then pull that hand straight back to guard. Dodge with the smallest lean that clears the object, then return to center immediately. The drills get harder by asking for faster repeats, so recovery is part of every successful hit or slip.
- Start with both gloves up near your chest.
- Punch forward and retract instead of windmilling.
- After every punch or dodge, come back to center before the next prompt.
Working the Bag: win with steady contact, not wild swings
Working the Bag scores by having you hit hanging bags until they weaken enough to fly off their chains. The safest way to do that is with straight alternating jabs. StrategyWiki’s training notes also point out that the more you hit a bag without missing, the more powerful your punches become, so rhythm matters as much as force.
Use a left-right-left-right cadence and keep your fists traveling on short lines. If you miss, do not answer with a huge correction punch. Re-center your shoulders first, then resume the same compact rhythm. You lose more time from two ugly whiffs than from one brief reset.
As the bags toughen, stay disciplined. Stronger targets tempt you to throw from the shoulder, but the drill still rewards repeatable contact. If a bag survives longer than expected, keep punching straight through the middle of it and do not switch into looping hooks unless straight punches are consistently misreading for you.
- Alternate hands instead of spamming one glove.
- Value uninterrupted hits more than oversized swings.
- If you miss once, reset your stance before resuming.
Working the Bag correction: fix unregistered punches fast
When punches stop registering, the most common problem is overextension. Players often shove a hand too far out, leave it there, and then try to punch again from a bad starting point. The manual’s punch input is a thrust, so make that thrust short, clear, and followed by an immediate pullback to guard.
The other common problem is punching across your own body. If your right hand keeps sliding leftward or your left hand keeps cutting inward, the game can read a sloppy angle instead of a clean jab. Square your chest to the screen, point the hand straight at the bag, and practice three deliberately short hits before speeding up again.
- Return each glove to guard after every hit.
- Shorten the motion if the game stops counting clean jabs.
- Punch through the center line of the bag, not across your torso.
Dodging: slip the tennis balls and reset immediately
In Dodging, the trainer throws tennis balls at you and your job is to avoid them cleanly. Treat every throw as a lane to clear, not a cue to throw your whole body sideways. A compact slip is better because it gets you back to neutral sooner for the next ball.
Watch the trainer’s release instead of waiting for the ball to reach your face. Seeing the throw early lets you lean only as far as needed. If two balls come in close sequence, clear the first one with the smallest possible movement so you are not stranded on the wrong side for the second.
Your goal is a clean run with very few hits, so do not accept a dramatic dodge that leaves you off-balance. The right pace is calm and compact: slip, recover, slip again. If you keep your head and hands centered between throws, late balls are much easier to save.
- Read the trainer’s release as early as you can.
- Move only far enough to let the ball pass.
- Re-center before the next throw instead of weaving continuously.
Dodging correction: stop over-leaning before it ruins the run
Over-leaning is the main way this drill collapses. If you bend too far to one side, you may avoid one ball but you usually recover too slowly for the next one. Shrink your movement until it feels almost conservative, then let your faster reset do the rest of the work.
If you get hit several times in a row, do not answer by dodging harder. Spend the next attempt practicing smaller slips and faster returns to center. Once your reset is clean again, your survival rate usually jumps without any extra effort.
- Use a small slip, not a deep side bend.
- Prioritize recovery speed over dramatic movement.
- If your timing falls apart, deliberately shrink the next few dodges.
Throwing Punches: hit the mitts cleanly and leave the trainer alone
In Throwing Punches, the trainer raises punch mitts as targets, sometimes one at a time and sometimes together. GameFAQs and StrategyWiki both describe this as an accuracy drill first, even though the pace rises later. You help your score by landing on the mitts cleanly, and random flailing only increases bad contacts and wasted motion.
For a single mitt, punch with the matching hand when possible and pull it back right away. For two mitts, do not try to crash both fists forward at exactly the same instant. A quick one-two is usually cleaner and keeps your hands from drifting into the trainer instead of the targets.
As the drill speeds up, shorten your punches instead of swinging bigger. Speed only helps if the game can still read precise hits. If you start clipping the trainer or missing outside the mitts, slow down for one beat, re-center both hands, and rebuild your rhythm from accurate singles into accurate pairs.
- Look at the mitt that is raised before you throw.
- Use a quick one-two on double targets instead of simultaneous flailing.
- If accuracy drops, shorten the punch before trying to go faster again.
A repeatable practice loop for stronger medal attempts
Use one Dodging run to settle your body movement, then one or two Working the Bag runs to establish jab rhythm, then one or two Throwing Punches runs while your hands are loose. That order teaches center recovery first, clean repeated punching second, and target precision last. It also keeps fatigue from turning the mitt drill into random swinging. This is a recommended routine, not an in-game requirement.
After each attempt, name one fault only. Good examples are: right hand stayed extended on the bag, leaned too far left in Dodging, or threw both fists at once on double mitts. Correcting one specific error per run is more effective than trying to change your whole style at once.
- Open with Dodging, then Bag, then Mitts.
- Choose one concrete correction between attempts.
- Stop and restart later if your motions become large and sloppy.
Before you move on
- You can clear Working the Bag with a visible alternating jab rhythm and very few empty swings.
- In Dodging, you regularly return to center after each ball instead of continuing to sway.
- In Throwing Punches, you handle two raised mitts with a controlled one-two more often than with simultaneous flailing.
- You know the two main self-fixes for this chapter: shorten and retract punches when they stop registering, and reduce your lean when Dodging starts to unravel.
References for this chapter
Fitness tests and a completion checklist
Use Fitness Test as a once-per-day benchmark for one saved Mii, then keep separate goals for medals, Pro status, and a cleaner nine-hole golf round. This chapter gives you a practical way to log all 15 training activities, avoid record-saving mistakes, and choose the next practice target without pretending Wii Sports has one final ending.
Use Fitness Test as a daily benchmark, not a grind mode
On the original Wii Sports menu, this mode is labeled Fitness Test. It is single-player, and the manual marks it as once a day per Mii. Treat it like a short daily snapshot, not something to loop for an hour.
Fitness Test picks three training games and converts your results into a Wii Fitness Age. The manual says the exam judges balance, stamina, and speed, then records the result on the Wii Message Board. Use that as a game-performance trend line only. It is not a medical reading, not a body-fat estimate, and not a substitute for health advice.
Run the test with the same saved Mii every time. That way your message-board history, sport records, and personal-best notes all point to one file. If you swap Miis, your progress log stops being useful because your Fitness Test days, medals, and skill numbers are split across different profiles.
If a drill behaves a little differently inside Fitness Test than in normal Training Mode, do not assume the game is glitching. The Wii Fitness version reuses training challenges, but some of them keep going after a miss instead of ending immediately. That is normal for this mode.
- Use Fitness Test once per real day with your main saved Mii.
- Write down the date, Wii Fitness Age, and which three challenges appeared.
- Treat a better result as cleaner game execution, not a health claim.
- If one challenge goes badly, make that sport your first short practice block next session.
Open and log all 15 training activities
Training Mode starts with one activity available in each sport. Clearing an activity unlocks the next one in that sport, so the fastest way to open the full set is simple: clear the first drill in every sport, then clear the second drill in every sport, then the third.
Do not track training with only one big note like golf done or boxing weak. Use a four-part line for each activity: unlocked, best medal, best score or distance, and next focus. That last field matters because the drills test different things. Some want survival, some want points, some want distance, and some punish one bad miss.
Use this exact list when you check your file so you do not overlook a drill that is still locked or still missing a medal.
- Tennis - Returning Balls: unlocked, medal, best, next focus.
- Tennis - Timing Your Swing: unlocked, medal, best, next focus.
- Tennis - Target Practice: unlocked, medal, best, next focus.
- Baseball - Hitting Home Runs: unlocked, medal, best, next focus.
- Baseball - Swing Control: unlocked, medal, best, next focus.
- Baseball - Batting Practice: unlocked, medal, best, next focus.
- Bowling - Picking Up Spares: unlocked, medal, best, next focus.
- Bowling - Power Throws: unlocked, medal, best, next focus.
- Bowling - Spin Control: unlocked, medal, best, next focus.
- Golf - Putting: unlocked, medal, best, next focus.
- Golf - Hitting the Green: unlocked, medal, best, next focus.
- Golf - Target Practice: unlocked, medal, best, next focus.
- Boxing - Working the Bag: unlocked, medal, best, next focus.
- Boxing - Dodging: unlocked, medal, best, next focus.
- Boxing - Throwing Punches: unlocked, medal, best, next focus.
Set sport goals that match how Wii Sports actually measures progress
Wii Sports does not have a campaign-clear flag, so make your own finish line. A strong all-around target is to unlock all 15 training activities, earn at least one medal in each, push your weaker sports toward Pro status, and maintain a full nine-hole golf scorecard you can compare over time.
For sport goals, keep them concrete. In Tennis, aim to win rallies by keeping returns in play and steering pressure away from obvious errors. In Baseball, aim to score reliably in the three-inning format and protect a lead with deliberate pitching. In Bowling, count repeatable pocket hits and spare conversions instead of thinking only about strikes. In Golf, measure total score, penalty strokes, and three-putts across all nine holes. In Boxing, set goals around defense, clean counters, and round control rather than wild punching.
Pro status begins above 1000 skill points, and skill can also fall. Because of that, do not treat one lucky spike as done forever. A better milestone is this: reach Pro once, then keep that sport stable enough that you can recover it if you lose it later.
- Write down current skill for Tennis, Baseball, Bowling, Golf, and Boxing.
- Mark which sports are still below Pro and which are already above 1000.
- Choose one match-play goal for each sport, not just one training-drill goal.
- Review the weakest sport first whenever two or more sports need attention.
Keep a separate nine-hole golf card
Golf improves fastest when you log a full round instead of remembering one good hole. Use one card for holes 1 through 9 and record strokes on each hole, total score relative to par, penalty strokes from water or out of bounds, bunker recoveries that cost an extra shot, and the number of three-putts.
This separate card gives you the next practice target immediately. Too many penalty strokes means your shot planning is the problem. Too many bunker or rough recoveries means your landing zones are too aggressive. Too many three-putts means you should move Putting and Hitting the Green higher in your weekly rotation.
Your first realistic file goal is not eagle on every long hole. A better goal is one controlled nine-hole round with fewer wasted recovery shots than your previous attempt.
- Log hole-by-hole strokes for holes 1 to 9.
- Count penalty strokes separately from ordinary misses.
- Count three-putts separately from total putts if you want a quick putting alarm.
- After each round, write one sentence naming the biggest scoring leak.
Use a weekly practice loop that stays short and repeatable
Use this as a suggestion, not an unlock requirement. Day 1: take Fitness Test if it is available, then spend 10 to 15 minutes on the weakest challenge it exposed. Day 2: play one full match sport and one related drill, such as Tennis plus Returning Balls or Boxing plus Dodging. Day 3: play Golf for three holes, then one golf training event. Day 4: bowl two full games and track first-ball pocket hits and spare conversions. Day 5: play Baseball with one batting focus and one pitching focus. Day 6: revisit the lowest medal on your whole file. Day 7: play one full game in your strongest sport and one in your weakest sport.
Keep sessions short enough that your motion stays consistent. Wii Sports rewards clean timing more than exhaustion. If your swing path, release, or punch line starts getting sloppy, stop and come back later instead of teaching yourself bad timing.
When you repeat a drill, repeat with intent. Do not just replay until the score climbs by accident. Decide what you are fixing first: late tennis contact, chasing bad baseball pitches, over-hooking bowling spares, under-reading golf break, or dropping your guard in boxing.
- Pair one full sport with one related drill each session.
- Revisit the weakest medal at least once per week.
- Stop when your motion quality drops instead of pushing through fatigue.
- End each session by naming one thing to keep and one thing to change next time.
Fix missing records, wrong handedness, and wasted Pro-status sessions
If records appear to vanish, check the Mii you selected before anything else. The manual says records are not saved when you use a Guest Mii or a Mii stored on a Wii Remote. It also warns that deleting a Mii from the Mii Channel deletes that Mii's Wii Sports records permanently. For long-term progress, always pick the same Mii stored on the Wii console itself.
If your skill number is not moving, check the mode you played. The manual states that your skill level will not change when you play against another player in tennis, baseball, or boxing. That means head-to-head sessions in those sports are fine for fun and practice, but poor choices if your actual goal is Pro status. Bowling and Golf track your own scoring performance, so they are still useful for personal-skill work even with multiple players involved.
If shot direction feels backward or inconsistent, confirm handedness. Wii Sports lets you choose your hand for each sport. If your Mii is set left-handed while you keep using right-handed timing advice, ball direction and release corrections will feel wrong. Keep the same handedness every session unless you are deliberately training the other side.
If your training goals feel vague, rewrite them as visible errors. Do not write improve bowling. Write missed the pocket on 6 of 10 first balls, missed two single-pin spares, or over-curved three spare attempts. Specific notes produce specific fixes.
- Use one saved console Mii for records, skill, and Fitness Test history.
- Do not expect head-to-head tennis, baseball, or boxing to raise skill.
- Check handedness whenever your usual directional cues stop matching the result.
- Replace vague notes with visible mistakes you can count next session.
Completion check for this guide
A practical Wii Sports completion target is to have the whole practice structure working, not to pretend the game ends after one screen. When this guide's goals are met, you should have every training activity unlocked, a medal logged for each one, current skill values written down for all five sports, and at least one full nine-hole golf card saved in your notes.
For a stronger personal finish line, repeat Fitness Test on multiple days with the same saved Mii, reach Pro in the sports you care about most, and keep improving the weakest line on your log sheet instead of chasing only the events you already handle well.
Once you reach that point, your next target is easy to choose. Raise the lowest medal, recover a lost Pro status, or cut one specific golf leak such as penalty strokes or three-putts. That keeps progress measurable and prevents random rematches from replacing real practice.
- All 15 training activities unlocked.
- At least one medal recorded for every training activity.
- Current skill values written down for all five sports.
- At least one full nine-hole golf round logged hole by hole.
- Fitness Test used on multiple days with the same saved Mii.
- One clear next target chosen from your weakest medal, lowest skill sport, or biggest golf scoring leak.
Before you move on
- You understand that Fitness Test is a once-per-day benchmark for one Mii and you treat its age result as an in-game performance measure only.
- You have a written log covering all 15 training activities, including medal status and the next correction for each weak drill.
- You know which sessions are useful for Pro-status progress and which human-versus-human modes will not change skill in tennis, baseball, or boxing.
- You have at least one full nine-hole golf record with total score, penalty strokes, and a clear note about the biggest leak to fix next.
Finishing up
Play all five sports with a repeatable technique and record a useful personal target for each.
Try all fifteen training activities and note your strongest and weakest medals.
Complete all nine golf holes in one round using a deliberate shot plan.
Use Wii Fitness as an optional game challenge and revisit the drills that expose your recurring mistakes.
Choose your next gameScreenshots & video
Game imagery for reference. Follow the written chapters above for the route and strategies.

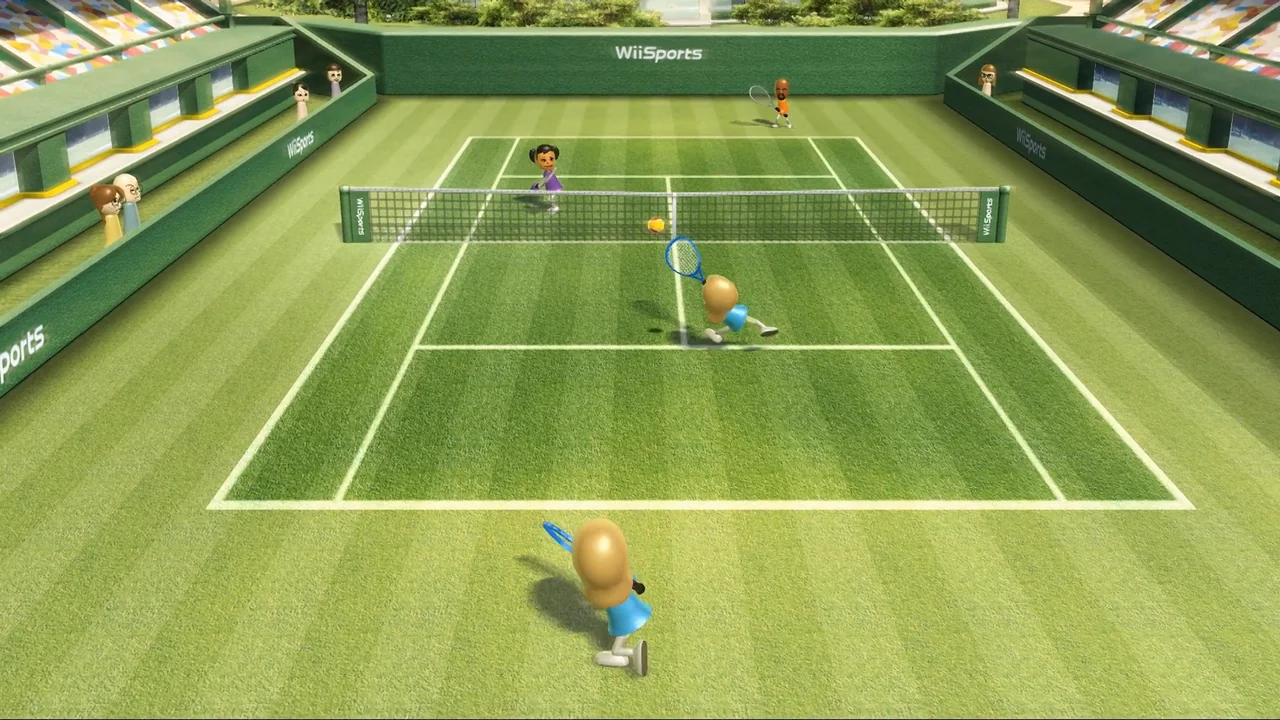
Sources & references
Our original guide draws on the references below. Check the edition at the top of this page before following controls or unlock requirements.
- Wii Manuals | Nintendo Support
- manual_Wii_covers
- Health & Safety Precautions: Wii | Nintendo Support
- RSPE01 - Wii Sports | GameTDB
- Wii Sports instruction manual PDF
- Wii Sports/Tennis — StrategyWiki | Strategy guide and game reference wiki
- Tennis | Wii Sports Wiki | Fandom
- Tennis Scoring: Points, Sets & Games | USTA
- Wii Manuals | Nintendo Support
- Wii Sports/Tennis Training — StrategyWiki
- Wii Sports/Wii Fitness — StrategyWiki
- Tennis | Wii Sports Wiki | Fandom
- Wii Sports - Training Mode FAQ - Wii - By NESgamemaster - GameFAQs
- Wii Sports/Baseball — StrategyWiki | Strategy guide and game reference wiki
- Wii Sports - Baseball FAQ - Wii - By psigaming - GameFAQs
- Wii Sports - Guide and Walkthrough - Wii - By KeyBlade999 - GameFAQs
- Wii Sports - Strategy Guide - Wii - By brian_sulpher - GameFAQs
- Wii Sports/Baseball Training — StrategyWiki
- BOWL.com | USBC Playing Rules
- BOWL.com | Striking 101
- Get the ball rolling in Wii Sports Bowling | Nintendo UK
- Wii Sports/Bowling Training — StrategyWiki
- On target with Wii Sports golf | 2008 | News | Nintendo UK
- Wii Sports/Golf — StrategyWiki | Strategy guide and game reference wiki
- Wii Sports Golf Walkthrough | Ludo
- Wii Sports/Walkthrough — StrategyWiki | Strategy guide and game reference wiki
- Wii Sports - Strategy Guide - Wii - By Crazyreyn - GameFAQs
- Wii Sports Manual PDF (ManualLib mirror)
- Cameos in Wii Sports | Wii Cameos | NinDB
- Wii Sports/Golf Training — StrategyWiki
- Boxing | Wii Sports Wiki | Fandom
- Matt | Wii Sports Wiki | Fandom
- Wii Sports/Boxing Training — StrategyWiki | Strategy guide and game reference wiki
- Wii Sports/Gameplay — StrategyWiki
- Wii Sports/Training — StrategyWiki
About the game & collecting notes
- Platform
- Wii
- Developer
- Nintendo
- Publisher
- Nintendo
- Release Date
- 2006-12-08
- Region
- Europe
- Genre
- Sports / party
- Content Rating
- PEGI 7
- Players
- 1–4, depending on sport and mode
Wii Sports includes tennis, baseball, bowling, golf, and boxing, using Wii Remote motion controls. Boxing also uses the Nunchuk. Nintendo’s product reference describes the use of Mii characters and lists one to four players across the game’s modes.
The release date shown is the European date, December 8, 2006. Regional packaging and later editions should be documented separately when evaluating a physical copy.
For a used purchase, inspect the disc and verify the controllers required for the sports you intend to play. Follow Nintendo’s wrist-strap and play-space guidance. A bundle is more useful when its parts have been identified and demonstrated than when it simply contains a large number of plastic accessories.
Collector notes
Check the precise packaging edition and included printed materials. Do not confuse Wii Sports with Wii Sports Resort or Wii Sports Club.Darryl Polo
Darryl Polo loves tinkering with emulation and revisiting retro games. He enjoys exploring how old favorites play on different setups and sharing what he learns along the way. At Joking Joystick, he writes about the games, hardware, and small discoveries that keep the hobby fun.
Our editorial standardsFound a step that needs another look? Help us improve this guide.