Tony Hawk's Pro Skater (Sega Dreamcast, North America) — Strategy Guide
Practical, platform-accurate strategy for the original Tony Hawk's Pro Skater on Sega Dreamcast (North America release). Covers Dreamcast-specific controls and settings, core trick and scoring systems, career-objective structure, efficient single-run and 100% approaches, multiplayer/free-skate practice, and finishing the game's campaign and completion checklist.

Find a copy
Tony Hawk's Pro Skater Dreamcast
We may earn a commission if you buy through these links, at no extra cost to you. As an Amazon Associate I earn from qualifying purchases.
Opens retailer search results. Check the model, edition, seller, availability and current price before buying.
Before you begin
This guide is written for the original Tony Hawk's Pro Skater on Sega Dreamcast using the North American release.
It focuses on the Dreamcast port's controls, options, Career progression, six five-goal objective stages, and three medal-based competitions without importing mechanics from later sequels or remakes.
You will get platform-accurate advice for completing the Career route, earning all 30 ordinary-stage tapes, winning the competitions, building reliable scores, practicing routes, and verifying the Dreamcast-specific bonus rewards.
Set yourself up for the run
Use a working Dreamcast with a VMU in controller port A and ensure you have at least one memory file slot free to save Career progress.
Prefer the stock Dreamcast controller (analog thumb pad) but confirm button mapping in Options → Controls; remap face buttons if you prefer a PS-style layout for grabs/flips.
Turn off unnecessary HUD options in Display/Options if you want clearer camera sightlines; preserve the default 2-minute timer per timed run—Career uses that limit.
Start in Free Skate to test trick timing, landings and common gaps in each level before attempting Career objectives.
Pick a pro skater that matches your intended style: higher balance or special meters help with long combos; test at least two pros to find one whose animation timing you can chain reliably.
Practice the basic trick set (ollie, flips, grabs, grinds and specials) and a basic combo loop (ollie → flip → grind → manual/landing) until you can land each component consistently under the Dreamcast control feel.
Save replays (if available) and use split-screen or local two-player modes to practice contest lines without risking your Career save data.
Preparation: VMU, controller, options and session planning
Prepare the original North American Dreamcast release before starting Career. Connect the controller to Control Port A and insert a VMU before powering on so the game can save progress. Check the VMU Manager for free space before creating a new Career, because the game does not simply overwrite an existing Career file. Use Options to test or remap Player 1 controls, enable Trick Tips while learning, and keep Score Display on if you want trick names and values visible. Remember the Dreamcast control split: the D-pad handles ground steering, braking, leaning, and grind or lip balance; the Analog Thumb Pad turns while airborne; and L or R perform fixed 180-degree airborne turns. Spend an orientation session in Free Skate before attempting timed Career goals.
1. Connect the controller and VMU before powering on
With the Dreamcast powered off, connect your main controller to Control Port A. Insert a VMU into Expansion Slot 1 before turning on the console. The Dreamcast manual identifies the VMU as required for saving game progress, so do not begin a Career session expecting to save later without one.
If you are starting a new Career, open the Dreamcast VMU Manager first and check that the VMU has available space. The game’s manual states that a new game cannot simply overwrite an existing Career file. If the VMU contains the Career you want, use the game’s load or continue option instead of creating another file.
Keep the controller and VMU connected while saving. Do not remove the VMU, disconnect the controller, or power down the Dreamcast during a save operation. These precautions apply to both Career progress and other VMU data such as saved replays.
- The controller is connected to Control Port A.
- A VMU is inserted in Expansion Slot 1 before power-on.
- The VMU has room for a new Career or contains the intended Career file.
- The VMU will remain connected during saving.
2. Learn the Dreamcast control roles
The default face-button layout is A for Jump or Ollie, X for Flip Trick, B for Grab Trick, and Y for Grind Slide. The D-pad is the primary directional control on the ground: Left and Right steer, Down brakes and leans backward, and Up leans forward or exits a pool. Left and Right also provide grind and lip balance inputs when the skater is on a rail or pool edge.
Do not treat the Analog Thumb Pad as a second ground-steering control for this game. The Dreamcast manual assigns it to turning while airborne. Use it to adjust the skater’s facing during a jump, then prepare to land in the direction of the surface. The L and R triggers are not variable spin controls; each performs a fixed 180-degree airborne turn to its respective side.
Press Start to pause. In Free Skate, test each action in an open area: hold A to crouch and gain speed, release A to ollie, then perform one flip, one grab, and one grind. Practice short balance corrections instead of holding Left or Right continuously.
- A, X, B, and Y produce ollies, flips, grabs, and grinds.
- The D-pad steers on the ground and handles braking, leaning, and balance.
- The Analog Thumb Pad turns the skater while airborne.
- L and R perform left and right 180-degree airborne turns.
- Start pauses the current session.
3. Configure controls and display settings
From the main menu, choose Options, then open Player 1 Controls. The Options menu allows the control setup to be customized with the directional buttons. Remap only one action at a time and test it immediately in Free Skate. Keep Ollie, Flip, Grab, and Grind on buttons you can reach without losing control of the D-pad.
The manual also lists Trick Tips and Score Display in Options. Turn Trick Tips on while learning unfamiliar actions; turn Score Display on if you want trick names and point values shown during practice. These settings help identify inputs, but they do not replace learning the correct approach speed, jump height, landing direction, or balance correction.
If a remap causes accidental inputs, restore the default layout before trying another arrangement. Do not import a later THPS control scheme that depends on manuals, reverts, or other mechanics absent from this original release.
- Player 1 Controls has been opened from Options.
- Each remapped action has been tested in live gameplay.
- Trick Tips are enabled while learning, if needed.
- Score Display is configured for practice.
- The final layout preserves easy access to Ollie and directional inputs.
4. Use Free Skate as the route-planning session
Choose Free Skate and select the first available level. The manual describes Free Skate as having no time limit, no high scores, and no pressure, making it the correct place to learn the environment before spending Career attempts. Skate a slow circuit and identify the starting area, main ramps, quarter pipes, rails, lower sections, gaps, dead ends, and elevated routes.
Locate the S-K-A-T-E letters and investigate unusual ramps, side areas, and high platforms that may lead toward the hidden tape. You do not need to complete every objective during this orientation. Instead, determine where extra speed is needed and which approaches leave enough room for a safe landing.
Finish by repeating one dependable line, such as an aerial into a broad rail followed by an open landing. Since manuals are not part of this original game, practice direct links between aerials, gaps, grinds, lips, and additional aerials rather than planning manual chains.
- The main landmarks and safe landing areas are familiar.
- You have investigated the letter route and hidden-tape approach.
- You can repeat one short aerial-to-grind or grind-to-aerial line.
- Your practice does not depend on manuals or reverts.
5. Begin Career with focused attempts and deliberate saves
Enter Career after the Free Skate orientation. Use the first timed run to learn the opening route, timer pressure, approach speeds, and easiest visible objectives. Do not force every goal immediately if doing so makes you rush. After each meaningful run, review the progress shown by the game and identify the next specific objective to target.
When a rail, gap, landing, or tape approach repeatedly causes a bail, stop spending timed attempts on it. Return to Free Skate and approach the section more slowly, from a different angle, or with a shorter setup. Repeat the action until the landing is dependable, then return to Career.
To leave a run safely, press Start, choose End Run, choose Quit, and accept the save prompt when offered. Wait for the save to finish before returning to the main menu or turning off the console. Do not use the Dreamcast five-button soft reset as a substitute for saving; holding A, B, X, Y, and Start returns to the title screen and may discard unsaved progress.
- The first Career attempt starts with a practiced opening line.
- Progress is reviewed after each useful run.
- Repeated failures are practiced in Free Skate before another timed attempt.
- The normal End Run, Quit, and save sequence has been used.
- The console is not powered down during saving.
Before you move on
- The controller and VMU are connected before the session begins.
- The correct Career file has been created or continued without overwriting the wrong data.
- The control layout has been tested for ollies, flips, grabs, grinds, steering, airborne turns, and balance.
- A no-pressure Free Skate orientation has been completed in the first available level.
- You can start Career, review progress, exit through End Run and Quit, save successfully, and shut down without interrupting the VMU.
Dreamcast controls and Options
Set up a controller in Port A and insert a VMU before powering on if you want to save Career progress, high scores or preferences. The USA Dreamcast manual assigns A to Jump/Ollie, X to Flip Trick, B to Grab Trick and Y to Grind Slide. The Direction Buttons steer, brake, lean and control grind balance. The Analog Thumb Pad turns while airborne, while L and R perform left and right 180-degree turns in the air. Start pauses the game and opens the run menu. Use Options to customize Player 1 or Player 2 controls, but keep the four main actions on accessible face buttons. Exit through Start, End Run and Quit when you need the save prompt. The five-button A+B+X+Y+Start combination returns to the title screen and can discard unsaved progress, so use it only when abandoning the current session is acceptable.
1. Prepare the Dreamcast controller and VMU
Connect the controller to Control Port A and insert a VMU into Expansion Slot 1 before turning on the console. The manual identifies the VMU as optional for playing but required to save game progress. You can enter a session without one, but do not expect Career progress or other save data to persist safely.
If you use a Jump Pack, put it in Expansion Slot 2. The manual warns that Slot 1 is for the VMU and that the Jump Pack may not connect correctly if placed in the wrong slot. Leave the Analog Thumb Pad and both L/R triggers untouched while powering on; moving them during controller initialization can cause a malfunction.
Do not remove the VMU, disconnect the controller or switch off the Dreamcast while a VMU or VM-specific game file is being saved. Make sure the VMU has enough free blocks before starting a Career session or saving a replay.
- Controller connected to Port A
- VMU inserted in Expansion Slot 1
- Jump Pack, if used, installed in Expansion Slot 2
- Analog Thumb Pad and L/R triggers untouched during power-on
- Enough VMU space for the intended save
2. Learn the documented default layout
A is Jump/Ollie. Hold A while rolling to crouch and prepare the jump, then release it to ollie. X performs Flip Trick, B performs Grab Trick and Y performs Grind Slide. Combine the Direction Buttons with X or B to choose directional flip and grab variations. Use Y when approaching a rail, ledge or wallride surface.
The Direction Buttons handle normal steering and braking. The manual assigns Up to leaning forward and exiting a pool, Left and Right to moving left or right and balancing while grinding, and Down to braking or leaning backward. During a grind, make short corrective taps instead of holding one direction continuously; watch the balance indicator and correct toward its center.
The Analog Thumb Pad is not unused: the manual assigns it to turning while airborne. Use it when you need to change the skater's facing direction during a jump. L performs a left 180-degree turn in the air and R performs a right 180-degree turn in the air. Treat these as fixed half-turn commands, not as variable-spin controls. Start pauses the game.
- A: Jump/Ollie
- X: Flip Trick
- B: Grab Trick
- Y: Grind Slide
- Direction Buttons: steering, braking, leaning and grind balance
- Analog Thumb Pad: turn while airborne
- L: left 180-degree turn while airborne
- R: right 180-degree turn while airborne
- Start: pause
3. Customize controls through the Options menu
From the main menu, choose Options, then open Player 1 Controls or Player 2 Controls. The manual states that the Direction Buttons customize the controller setup. Use the on-screen control list to identify the selected action and confirm the assignment before leaving the menu.
The safest recommendation is to keep the default A/X/B/Y arrangement until you have practiced the game. If the default feels uncomfortable, change only one action at a time. Keep Ollie, Flip, Grab and Grind on four easily reached face buttons, because those actions are used together during normal aerial-to-rail sequences. After each change, enter Free Skate and test the assignment rather than assuming the new layout is active.
An alternative layout should preserve the same four actions, not introduce new moves. For example, you can move Ollie to the face button that is easiest for your thumb to press repeatedly, then place Flip, Grab and Grind on the remaining accessible face buttons. Keep the Direction Buttons, Analog Thumb Pad and L/R airborne functions clear in your notes, because remapping the action buttons does not change those documented movement roles.
- Open Options from the main menu
- Select Player 1 Controls or Player 2 Controls
- Confirm assignments using the on-screen control list
- Keep Ollie, Flip, Grab and Grind easy to reach
- Test changes in Free Skate before Career
4. Practice the input rhythm in Free Skate
Choose Free Skate when learning a level or checking a new layout. This mode removes the pressure of a timed Career run, letting you test ramps, rails and gaps repeatedly. Hold A on the approach, release it to ollie, then press X or B with a Direction Button for a flip or grab. As you descend toward a rail or ledge, press Y to initiate the grind.
Practice a short sequence rather than immediately attempting a huge combo: ollie, perform one flip or grab, land on a rail, then correct grind balance with brief Left or Right taps. Add an Analog Thumb Pad turn only after you can land the basic line. Use L or R when a fixed 180-degree rotation is the correct orientation for the landing; do not expect either trigger to provide a variable amount of rotation.
This original release does not use the Manual or Revert systems associated with later Tony Hawk games. Build longer combinations from aerials, grinds, wallrides, lip tricks and special tricks connected through the environment. A shorter line that lands repeatedly is more useful in Career than a spectacular attempt that usually ends in a bail.
- Practice crouch-to-ollie timing
- Add one directional flip or grab
- Connect the landing to a grind
- Correct grind balance with brief Direction Button taps
- Use the Analog Thumb Pad for airborne turning
- Use L or R for fixed airborne 180-degree turns
- Do not plan combos around Manuals or Reverts
5. Save normally and reserve the soft reset for abandonment
To end a session without using the reset command, press Start to pause, choose End Run and then choose Quit. The game gives you the option to save. Choose Yes when you want Career progress, high scores or preferences written to the VMU; choose No only when you deliberately do not want to preserve that session.
The manual also documents a software reset: hold A, B, X, Y and Start simultaneously. This returns the game to the title screen. It bypasses the normal End Run and Quit process, so any unsaved progress may be lost. It is not a faster saving method and should not replace the normal exit route after completing a Career objective.
If you fail a practice attempt, use the pause menu and normal exit process whenever possible. Before accepting a save prompt, keep the controller connected and do not remove the VMU. After saving, confirm that the game returns to the main menu before switching off the console.
- Press Start to pause
- Choose End Run, then Quit
- Select Yes when progress must be saved
- Do not interrupt an active VMU save
- Use A+B+X+Y+Start only when abandoning unsaved progress is acceptable
Before you move on
- You can ollie with A, perform a flip with X, perform a grab with B and initiate a grind or wallride with Y.
- You can steer, brake, lean and correct grind balance with the Direction Buttons.
- You can turn while airborne with the Analog Thumb Pad.
- You can perform a left or right airborne 180-degree turn with L or R.
- You have opened Options and confirmed the Player 1 or Player 2 assignments on your copy.
- You have tested the normal Start, End Run and Quit route and seen the VMU save prompt.
- You can distinguish the normal save route from the emergency A+B+X+Y+Start soft reset.
References for this chapter
Core mechanics, tricks and scoring in the original Dreamcast release
Tony Hawk's Pro Skater on Dreamcast uses the original trick system, without Manuals or Reverts. A performs an Ollie, B performs Grab Tricks, X performs Flip Tricks, and Y performs Grinds, Wall Rides, and related Lip or Handplant actions. The Directional Buttons steer, brake, lean, and balance grinds; the Analog Thumb Pad turns the skater while airborne; L and R each perform a fixed 180-degree airborne turn. Build score by linking aerial tricks into grinds, wall rides, lips, and another aerial before landing. A combo's value grows through its trick multiplier, rotations, held grabs, varied tricks, and special moves, while repeated tricks lose value. Since a normal landing ends the combo and a Bail forfeits its accumulated points, a shorter line that you can land consistently is more useful than an ambitious sequence that usually fails.
1. Learn the Dreamcast controls before practicing score lines
Use A to crouch and Ollie. While airborne, combine a Directional Button with B for a Grab Trick or with X for a Flip Trick. Use Y when contacting a rail, ledge, wall, or ramp coping to perform the available Grind, Wall Ride, Lip, or Handplant action. The Directional Buttons steer on the ground, brake with Down, lean forward or backward, and balance the skater during a grind.
The Analog Thumb Pad is the Dreamcast control for turning while airborne. Use it when you need to rotate gradually or correct the skater's facing before landing. L and R are different: each performs a fixed 180-degree turn in the corresponding direction while airborne. They are not variable-spin controls, so do not hold them expecting to increase the rotation continuously. Start practice with a straight Ollie, then add one familiar Flip Trick, one Grab Trick, and a short Grind.
- A performs the Ollie.
- B performs Grab Tricks.
- X performs Flip Tricks.
- Y performs Grinds and related rail or coping actions.
- The Analog Thumb Pad turns while airborne.
- L and R perform fixed 180-degree airborne turns.
2. Use aerials, grabs, and flips as the foundation of a score
Flip Tricks are quick and useful when the landing area is narrow. Grab Tricks can produce more points when held, but the skater must finish the grab before touching down. Release B early enough for the board to return to a stable landing position. Begin with a straight approach to a quarter pipe or ramp, Ollie with A, and perform a familiar B or X combination without adding a rotation until the landing is dependable.
The available move list depends on the skater. Each professional has a particular set of regular and Signature Tricks, and some regular tricks are limited by whether the skater is classified as Vert or Street. Check the in-game move list for the selected skater rather than assuming that another character's command will work.
- Use Flip Tricks when airtime or landing space is limited.
- Hold Grab Tricks only as long as you can still land safely.
- Release the Grab button before touchdown.
- Check the selected skater's move list and style restrictions.
3. Link tricks through rails, walls, and lips without Manuals
A combo remains active when one trick flows directly into another without an ordinary ground landing. A practical original-game line is an aerial Flip Trick or Grab Trick into a Grind, followed by an Ollie out and another aerial. Wall Rides and Lip Tricks can also link sections when the level provides a suitable wall or coping. Aim toward the next object before the current trick ends, because there is no Manual to carry the combo across a flat section.
To Grind, approach the rail or edge with enough speed, Ollie with A, and press Y as the skater reaches the object. While grinding, use Left and Right on the Directional Buttons for balance. If the balance position becomes difficult to recover, Ollie out before the rail ends and land on clear ground. For a Lip Trick or Handplant, approach the coping of a quarter pipe or pool and use the appropriate Y direction from the move list. These actions can extend a combo, but leaving the coping still requires a safe landing or another reachable object.
- Plan the next rail, wall, or ramp before starting the current trick.
- Press Y at contact height rather than during the early approach.
- Use small Left and Right balance corrections.
- Exit a grind or lip when the next link is uncertain.
4. Understand combo multipliers, rotations, and repeated tricks
The game totals the tricks performed before the combo ends and applies a growing combo multiplier based on the sequence. Adding another successful aerial, Grind, Wall Ride, or Lip increases the potential value, so connecting several manageable tricks is usually better than performing one isolated move. Rotations also raise trick value: use the Analog Thumb Pad for airborne turning when you need a controlled rotation, or use L or R for a fixed 180-degree turn. Always prioritize facing the landing correctly over adding another rotation.
A trick's contribution falls when the same move is repeated. Mix a safe Flip Trick, a Grab Trick, a Grind, and a rotation instead of repeating one command throughout the line. Held Grabs gain value with time, and larger rotations can raise the result, but only if the skater completes the action and lands. A failed landing awards none of the unbanked combo score and can empty the Special meter, so the effective value of a trick is zero if the sequence ends in a Bail.
- Add different tricks to grow the combo rather than repeating one move.
- Use the Analog Thumb Pad for controlled airborne turning.
- Use L or R when a fixed 180-degree turn is appropriate.
- Do not sacrifice landing alignment for a larger rotation.
- Remember that an unlanded combo awards no accumulated score.
5. Fill and spend the Special meter deliberately
Successful landed tricks build the Special meter. When it is full, perform the selected skater's Signature Trick using the exact directional sequence shown in the move list. Specials are high-value actions, but they require enough airtime and a clear landing. Practice them in Free Skate from a large quarter pipe or half-pipe before using one during a timed Career run.
Do not assume every Special works from every ramp or that every skater can use the same command. Vert and Street classifications affect some move availability, and the move list identifies the selected skater's commands. Add a Special to a score route only after you can land it repeatedly. A failed Special wastes the attempted combo and removes the meter gained for the next attempt.
- Confirm that the Special meter is full.
- Use the selected skater's exact Signature Trick command.
- Choose a ramp with enough airtime and visible landing space.
- Practice the Special before relying on it for a Career score goal.
6. Cash out before a reliable combo becomes a Bail
A normal ground landing banks the accumulated combo score and ends that combo. Because the original Dreamcast release has no Manuals or Reverts, do not try to preserve an aerial by forcing a flat-ground continuation. Route from one ramp, rail, wall, or lip to the next, then deliberately finish on a clear landing when the camera or balance becomes difficult to read.
A dependable line might use a Grab Trick, a short Grind, an Ollie into a Flip Trick, and a final clean landing. Once that line consistently clears the required score, add a rotation or Special. This staged approach is safer than attempting a maximum-value sequence immediately. In Career, several repeatable medium combos are often more effective than one spectacular line that repeatedly ends in a Bail.
- Know where the combo will end before starting it.
- Bank the score on a clear landing when the next link is unreliable.
- Add rotations and Specials only after the basic line is repeatable.
- Use Free Skate to rehearse the full route before entering Career.
Before you move on
- You can perform an Ollie, Flip Trick, Grab Trick, Grind, and Wall Ride using the Dreamcast controls.
- You can use the Analog Thumb Pad to turn while airborne.
- You can use L or R for a fixed 180-degree airborne turn.
- You can link an aerial into a Grind and then into another aerial without using a Manual or Revert.
- You can balance and safely exit a short Grind or Lip Trick.
- You can perform at least one assigned Signature Trick after filling the Special meter.
- You can complete a varied combo, land it cleanly, and see the accumulated score awarded.
- You can clear a score target with a repeatable route instead of relying on an unpracticed maximum-risk attempt.
Career mode structure and per-level objectives
The Dreamcast Career contains six ordinary objective levels and three competitions. Each ordinary level gives five videotape goals: two score targets, the five S-K-A-T-E letters, a level-specific task, and the hidden tape. A two-minute run is enough to attempt them, but completed goals remain recorded, so you can divide them across several sessions. Career progression uses tapes and competition medals: later levels open after specific requirements shown by the Career route, with Roswell requiring 26 tapes from earlier levels. The three competitions have no five-goal lists. They use three one-minute rounds, and a third-place finish or better earns the medal needed for progress. For a complete Career file, earn all 30 ordinary-level tapes, pass Roswell, and confirm the medals and unlocked rewards in the progress and menu screens.
1. Separate objective levels from competitions
The Career route has nine locations, but they do not all use the same rules. Warehouse, School, Mall, Downtown, Downhill Jam, and Streets are ordinary objective levels. Each has five videotape goals: two score requirements, the S-K-A-T-E letter collection, a level-specific task, and a hidden tape.
Skate Park, Burnside, and Roswell are competitions. They do not contain the ordinary five-goal list. Instead, each contest gives three one-minute rounds judged by score. The worst round is discarded and the remaining two determine your result. Treat these as medal events rather than tape-collection stages.
- Recognize six ordinary objective levels and three competition levels.
- Expect five tapes on each ordinary level only.
- Prepare for three one-minute rounds in competitions.
2. Read the five goals before starting an ordinary level
When an ordinary level loads, inspect its goal list before committing to a route. The two score goals are separate requirements, so one score medal does not complete the other. The S-K-A-T-E goal requires collecting all five letters. The level-specific goal normally asks you to destroy, grind, open, or otherwise interact with five named objects. The final goal is the hidden videotape placed in a harder-to-reach part of the level.
Use Free Skate to identify the letter order, the object group, and the approach to the tape. Then return to Career for the timed attempt. This prevents wasting most of a two-minute run searching for an entrance you could have mapped first.
- Read both score thresholds.
- Identify the five letters and their route.
- Note the exact level-specific objects or action.
- Locate the hidden tape in Free Skate before attempting it under time pressure.
3. Use the two-minute runs to bank goals over several attempts
Ordinary Career runs last two minutes. You do not need to complete all five goals in one run. Once a goal is completed, it remains credited when the run ends, so use separate attempts for incompatible tasks. A practical first run is S-K-A-T-E or the level-specific object challenge. A later run can focus on the hidden tape, and another can build a score line without detouring for collectibles.
Start with the route-based goals when you are still learning the level. For a score attempt, use a repeatable line through ramps, rails, and quarter pipes. Land the combo after reaching the required score instead of adding an unnecessary trick that could cause a bail. If a run fails, only the unfinished goal needs another attempt.
- Bank easy route goals before attempting difficult scores.
- Split the hidden tape from a score attempt when their routes conflict.
- End a successful combo safely after reaching the required threshold.
4. Follow the verified progression requirements
The early route opens through tape totals. School requires two tapes from Warehouse. Mall requires five tapes. Skate Park requires eight tapes and is the first competition. After that contest, Downtown requires one competition medal. Downhill Jam requires 13 tapes, Burnside requires 18 tapes and is the second competition, and Streets requires two competition medals. Roswell, the final competition, opens after 26 tapes have been earned from earlier objective levels.
Use the Career route or level-select progress display to check what is missing. If a stage is locked, complete the easiest unearned tape in an available level rather than repeatedly attacking a score threshold. Competition medals are separate from ordinary tapes, so a large score in a regular level cannot replace a required contest result.
- Earn two tapes for School.
- Reach eight tapes before Skate Park.
- Earn one medal before Downtown.
- Reach 13 tapes before Downhill Jam.
- Earn 18 tapes before Burnside.
- Earn two medals before Streets.
- Reach 26 tapes before Roswell.
5. Approach competitions as medal runs
In Skate Park, Burnside, and Roswell, the objective is placement, not collecting five tapes. Each round lasts one minute. Build a dependable score in the first two rounds and use the third as a controlled attempt to improve your total. Avoid a high-risk final trick when you already have a competitive score; a bail can ruin the round and leave you dependent on the remaining attempts.
A medal requires third place or better. Passing the final Roswell competition completes the main Career route. Roswell is especially punishing, so practice its half-pipes, rails, and long grind lines in Free Skate before trying to preserve two strong judged rounds.
- Aim for third place or better in every competition.
- Use stable lines instead of maximum-risk combos when near a qualifying score.
- Pass Roswell to finish the main Career progression.
6. Verify 100 percent completion separately from Career completion
Passing Roswell does not automatically prove that every ordinary objective is complete. Return to Warehouse, School, Mall, Downtown, Downhill Jam, and Streets and confirm that all five goals are recorded on each level. Six levels multiplied by five goals gives 30 ordinary-level tapes.
Then confirm that Skate Park, Burnside, and Roswell each show a qualifying medal, with Roswell passed. If you want the game's major tape-based reward, verify that all 30 tapes are present; the Dreamcast unlock listings associate all 30 Career tapes with Officer Dick. Check the appropriate video, character, or extras menus after saving, but do not count a menu reward as a substitute for a missing level goal.
- Confirm five completed goals on all six ordinary levels.
- Confirm qualifying medals at Skate Park, Burnside, and Roswell.
- Confirm Roswell was passed.
- Confirm the total reaches 30 ordinary-level tapes.
- Save and check the relevant unlock or video menus.
Before you move on
- Warehouse, School, Mall, Downtown, Downhill Jam, and Streets each show five completed goals.
- The total ordinary-level tape count is 30.
- Skate Park, Burnside, and Roswell each show a qualifying competition medal.
- Roswell has been passed in third place or better.
- The Career progress display shows no remaining standard objective tapes, and the relevant reward or video menus reflect the completed file.
Efficient Single-Run Approaches: Combining Objectives in Two Minutes
The original Dreamcast Career levels use two-minute runs and five goals per ordinary stage: two score targets, S-K-A-T-E, a level-specific object challenge and the hidden tape. Warehouse, School and Mall can be routed efficiently in one run once their lines are practiced. Downtown and Downhill Jam are possible but require precise movement and should be split if the tape jump repeatedly costs the run. Streets is the clear exception: complete the four nearby goals and build the 50,000-point score first, then make a dedicated attempt for the hidden tape. Use Free Skate to learn each route, but perform the actual objectives in Career so they register. If an early mistake destroys the route, retry before banking a new goal; after a goal has registered, keep the save and finish the remaining objectives in later attempts.
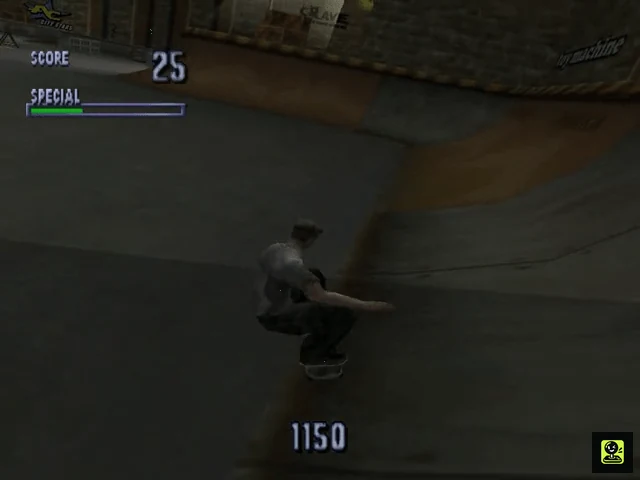
Prepare the route and protect the save
Use Free Skate to rehearse the route in the same direction you will use in Career. Mark the order of the S-K-A-T-E letters, the five level-specific objects, the score section and the hidden-tape launch. The objective is not merely to know where each item is; you need to know where you land afterward and which ramp or street leads to the next target.
In Career, a clean all-in-one attempt is most useful when the route-based goals overlap. Collect letters and level objects during the opening travel line, then use a nearby ramp-and-rail section for score. If the tape is distant or requires a separate high-speed approach, complete the easier objectives first and reserve the final part of the run for the tape only when the setup is already reliable.
Retry after a route-breaking mistake such as missing a letter, losing access to a required object or bailing before a long tape approach. Continue after a minor bail if the next objective is still nearby. When a goal has already registered, do not reset the console merely to preserve a theoretical five-goal run unless that single-run achievement is your specific target; normal Career completion records goals across attempts.
- Practice the route in Free Skate before spending Career attempts.
- Identify where each missed jump deposits you and how to rejoin the route.
- Use retry for a broken plan, not for every small mistake.
- Keep a current VMU save before attempting difficult single-run goals.
Warehouse: boxes, letters and the halfpipe tape
Start by turning right to collect the first box, then descend the roll-in and jump across the halfpipe toward the secret room. Aim to pass through the hidden room and collect the tape while moving toward the ledge containing the second box. Land on or beside that ledge, collect the box, then drop to the left.
Continue forward to the taxi and collect the A. Transfer over the hip ahead and collect the third box during the crossing. Turn left over the kicker gap for S, then move to the nearby ledge for the fourth box. Continue to the quarter pipe at the end of the room, collect E and the fifth box, then leave the pipe toward the large rail.
Use the rail and the next quarter pipe to reach K. From there, jump across the halfpipe and collect T. This completes the movement objectives in a continuous loop and leaves the rest of the run for score. The best score section is the warehouse's linked quarter-pipe, rail and halfpipe line: use an aerial, a grind and another aerial, then land safely before repeating. Because the tape is collected near the opening halfpipe, Warehouse is one of the strongest candidates for all five goals in one run.
If the opening tape jump fails, do not chase the box route from an awkward landing. Re-enter through the normal warehouse floor, collect the remaining boxes and letters on a second run, then make the tape the first objective on the next attempt.
- First box, hidden room tape, second box.
- A at the taxi, third box over the hip.
- S over the kicker, fourth box on the ledge.
- E and fifth box at the end quarter pipe.
- K from the large rail line, then T over the halfpipe.
- Use the quarter-pipe and rail area for both score targets.
School: tables and letters through the central route
Turn left from the starting roof and take the downhill path into the large open area. Grind the first lunch table on the right, then collect E near the center. Exit toward the long halfpipe and jump from it to collect T. Follow the halfpipe route into the next open section instead of turning back through the starting area.
In the second open area, turn right and grind the next table. Move slightly left of the halfpipe exit for the third table, then grind the nearby rail carrying A. At the bottom of the stairs, use the kicker gap to collect K. Turn right after landing and grind the fourth table. Reverse direction, grind up the stairs and collect S on the way. At the top, turn right and grind the final table.
The five tables and S-K-A-T-E now form one practical route. Use the roof as the closing detour: turn left into the covered ramp and climb to the rooftop. On the roof, get onto the large box, grind the wooden plank onto the metal awning and jump from the awning's end for the hidden tape. School's tape is the main route conflict because it is above the roof rather than along the ground loop. If the tape jump is missed, land in the rooftop area or lower courtyard, return through the covered ramp and repeat the roof approach; do not waste the remaining run searching for a new route.
Build score on the opening downhill, halfpipe and stair-rail sections. If the 25,000-point target is not secure by the time the tables and letters are complete, split the tape from the score and use a separate run for a reliable central-area combo.
- First table, E, then T at the long halfpipe.
- Second and third tables, A on the nearby rail.
- K at the stair kicker, fourth table, S on the stairs.
- Fifth table, rooftop box, wooden plank and awning tape.
- Use the central halfpipe and stair rails for scoring.
Mall: follow the linear course and take the upper rail tape detour
Collect S while descending the opening roll-ins. At the central ramp, go up and destroy the first directory, then continue straight through the ledges and gaps to the directory at the far end. Turn right, jump down and move back slightly to collect K from the ledge before continuing forward on the right side.
When you reach the section with the car and the low wall on its left, grind that wall. At the end, jump onto one of the raised metal rails and follow it to the hidden tape. This is the correct point for the tape because the rail carries you above the course; after collecting it, turn around rather than trying to continue forward from the upper route.
On the return, destroy the nearby directory and collect A from the water just behind it. Turn around, descend the escalator and enter the next open section. Destroy the directory on the central ledge, then grind the adjacent rails to collect T. Continue into the final open area, jump from the bump for E and destroy the last directory at the far end.
Mall is the easiest stage for a full route because its objectives lie along one mostly linear pass. Score during the opening roll-in, the central ramp and the raised rail section. If the upper rail tape is missed, drop back to the mall floor, continue through the remaining directory and letter route, and make the tape the first priority on the next attempt.
- S on the opening roll-in.
- First two directories, then K on the return ledge.
- Low wall beside the car, raised rail and hidden tape.
- Nearby directory and A in the water.
- Directory on the central ledge, rails for T.
- Bump for E and final directory.
Downtown: signs, fountain letters and the rooftop tape
Jump from the first ramp onto the ledge and grind the rail while collecting S. Turn left toward the fountain and destroy the first No Skating sign. Stay alert on the roads because taxis can interrupt the line. Ollie over the fountain for K, then leave the fountain area along the path and destroy the second sign.
Use the large triangular funbox near this exit to reach the third sign on top. Drop into the street and destroy the fourth sign on the right. Continue to the quarter pipe at the street's end and collect A from the air. In the next area, find the final sign on a ledge and destroy it.
Return down the street. The T is visible in the glass passage above, but do not take it immediately. Instead, use the ramp on the right to reach the high rail and collect E. Then turn around, use the ramp on the back of the truck and enter the elevated passage. Collect T inside to complete S-K-A-T-E.
The passage ends at a small ramp leading to the large rooftop bowl. Build speed, launch from the ramp aimed toward the opposite roof and collect the hidden tape across the gap. This is the stage's major split point. If the rooftop launch is unreliable, finish the five signs, letters and one or both score goals in separate runs, then make a tape-only attempt beginning with the truck ramp.
For scoring, use the fountain, funbox and elevated passage as one linked set, but bank the combo before entering traffic. A taxi collision can ruin both score and route progress.
- S on the opening ledge.
- Signs at the fountain path, exit, funbox and street.
- K over the fountain, A at the quarter pipe.
- Final sign on the next ledge, then E from the high rail.
- Truck ramp into the glass passage for T.
- Rooftop bowl ramp across the gap for the tape.
Downhill Jam: valves first, then the long tape approach
At the bottom of the opening slope, move right to the bump and use it to reach the high rails. Grind the rails to open the first valve, then angle slightly left and jump the ramp for S. Turn right toward the next ramp and open the second valve while taking a large aerial for score.
Approach the large halfpipe on the right. Jump from the ramp and grind the high rails to collect K. Return toward the halfpipe area, climb the opposite side and grind the rail above it to open the third valve. Collect A just beyond the top of the quarter pipe, then grind across the large chasm to the opposite ledge.
Use the vert transfer across the hole and the fastplant route over the following gaps to reach the high dirt path. The next high ledge points toward a pillar topped with four rails. Aim for one of those rails and grind it to collect the hidden tape. This is the critical detour: missing it usually costs too much time to improvise a second approach.
After the tape, continue downhill and use the ramp to reach the large dirt slope. Open the fourth valve at the top, roll down and launch from the final ramp for T. In the broad area with vert ramps, use the wallride route to open the fifth valve. Turn back uphill, build speed on the vert walls and launch left onto the wall rail for E.
Downhill Jam can combine all five objectives only after the tape line is consistent. Otherwise, run the opening valves and S-K-A-T-E first, then make the pillar tape the opening priority of a dedicated attempt. Score on the second valve ramp, halfpipe rails and final vert walls; do not sacrifice the tape for an unbanked combo.
- High rails for valve one, ramp for S.
- Second-valve ramp and K on the halfpipe rail.
- Third valve above the halfpipe, then A.
- Transfer across the chasm and fastplant to the high path.
- Pillar rails for the hidden tape.
- Dirt slope valve, ramp for T, wallride for valve five and wall rail for E.
Streets: complete four goals, then take the pagoda tape separately
Begin by grinding the police car behind the starting point. Turn around, use the ramp on the right and descend the building ledges without falling. At the last ledge, turn right and collect K, then jump through the window and grind the second cop car beside the donut shop.
Continue along the road past the building with the stairs. Grind the third and fourth cop cars, then turn toward Chinatown. Transfer between the two quarter pipes at the back of the area to collect A. Return toward the paired cars, pass them and follow the road until you see the ramp into the windowed room. Enter and collect T.
Leave through the grated door and ollie from the upper ledge. At the central rail-and-water section, turn right and use the next window to reach the bowl. Get enough air to collect E, then exit the way you entered. Follow the road around to the final cop car and grind it. This completes the five cop cars.
Continue to the large grassy area with ramps and ledges. Use the left ramp to collect S. If you have been scoring on the car grinds, Chinatown transfers and window bowls, this run can also clear the 25,000- and 50,000-point targets. Streets is the least practical all-in-one stage because the hidden tape sends you away from this four-goal route and demands a long, careful roof line.
For the dedicated tape attempt, go toward the central fountain and use the small ledge to reach the wavy path. Cross it and launch to the roof or upper ledge. Follow the elevated route around its ramps, controlling speed so you do not fall. At the top, turn around, climb the long wooden ramp at full speed and jump from the building toward the pagoda roof. The hidden tape is collected during the descent. If you miss, land on the lower streets, return to the fountain and repeat the elevated route; do not try to recover by chasing the tape from ground level.
Treat the four-goal run and tape run as the recommended plan. A single-run attempt is possible only for a highly practiced route and is not required for normal Career completion.
- First cop car behind the start, then K and the donut-shop car.
- Third and fourth cop cars on the road.
- Chinatown quarter-pipe transfer for A.
- Windowed room for T, bowl room for E.
- Final cop car and grassy-area ramp for S.
- Separate fountain-to-roof route for the pagoda tape.
Choose between one run and focused attempts
Combine objectives when the next letter or level object lies directly on the travel line and the tape can be taken without a long return. Warehouse and Mall are particularly suitable. School can also work if the rooftop tape jump is practiced. In these stages, the safest order is movement goals first, score second and tape last only if the tape route is stable.
Split the attempt when the tape is a precision jump that interrupts the route. Downtown's rooftop transfer and Downhill Jam's pillar rail are the usual breaking points. Complete the route objectives and score in one attempt, then begin the next run with the tape setup fresh. Streets should normally be split into a four-goal run and a tape-only run.
Do not spend the final seconds searching for a missing letter or object. If the run is still salvageable, finish the nearby objective and record the remaining target. Then use Free Skate to adjust one part of the route: letter order, launch angle, speed control or the point where the scoring combo is banked. Consistency matters more than copying a risky line that succeeds only once.
- Combine clustered letters, objects and nearby score lines.
- Split precision tapes from incompatible score routes.
- Use Streets' four-goal plus tape-two-run plan.
- Practice one route change at a time.
- Confirm goals on the level progress screen after the run.
Before you move on
- Warehouse shows both score goals, all five boxes, S-K-A-T-E and the hidden tape.
- School shows both score goals, five tables, S-K-A-T-E and the rooftop awning tape.
- Mall shows both score goals, five directories, S-K-A-T-E and the raised-rail tape.
- Downtown shows both score goals, five No Skating signs, S-K-A-T-E and the rooftop tape.
- Downhill Jam shows both score goals, five valves, S-K-A-T-E and the pillar tape.
- Streets shows both score goals, five cop cars, S-K-A-T-E and the pagoda-roof tape.
- If a stage was completed across several runs, verify that every individual goal remains marked after returning to Career or the progress screen.
- Check contest medals separately; Skate Park, Burnside and Roswell do not use the five-objective route structure.
- For the requested Career finish, verify that the final Roswell competition has been reached and cleared in addition to completing the ordinary-level objectives.
Navigating landmarks, hazards and camera traps
The Dreamcast version of Tony Hawk’s Pro Skater is easiest to control when every risky line has a known landing and recovery route. Learn the level’s ramps, rails, banks, pits, and lower sections in Free Skate before combining them with objectives. Approach gaps straight, use neutral ollies when the landing is hidden, and end grinds before a wall or drop removes your correction space. A bail costs the current unbanked combo, but the timed session can continue if you recover in open space. Use quarter pipes and banks to rebuild speed, then return to the objective route instead of forcing another trick from a bad angle.
1. Build a safe route around permanent landmarks
Begin each unfamiliar level with a no-trick scouting pass in Free Skate. Find one open area where you can turn around safely, one transition that restores speed, and one flat section where you can line up a jump. These become your recovery points when an objective attempt fails.
Use the level’s major structures as navigation anchors. The Warehouse is built around ramps, pipes, rails, and gaps. School has dumpsters, picnic tables, long rails, and pools. The Mall combines stair sets, escalators, and an upper level. Downtown has traffic, a central fountain, long rails, and roof routes. Downhill Jam is a speed-focused descent with high rails and overhead paths, while Streets contains recognizable areas such as Hubba Hideout, EMB, Lombard Street, and Chinatown. Remember the route from these landmarks rather than trying to follow the camera alone.
- Locate an open recovery area before attempting objectives.
- Identify the nearest quarter pipe, bank, or broad ramp from each objective cluster.
- Perform one scouting pass without tricks on every unfamiliar high-risk route.
2. Approach gaps and narrow landings conservatively
Line up a gap before reaching the takeoff. Hold a mostly straight approach, ollie from the center of the ramp or bank, and aim for the widest part of the landing. On a first attempt, use a plain ollie rather than adding a flip, grab, or rotation. Once the distance is reliable, add a trick only if it does not change the landing angle or timing you need.
Treat narrow rails as a positioning challenge rather than an invitation to hold the grind indefinitely. Enter with enough speed to reach the rail, center the skater over it, and release before the exit funnels toward a wall, pit, stair edge, or blind drop. In a score run, a short landed grind is worth more than a longer attempt that bails and loses the entire unbanked combo.
- Scout the distance of an unfamiliar gap with a neutral ollie.
- Aim for broad landing surfaces instead of maximum distance.
- Release grinds before the rail points toward a hazard.
3. End doomed combos and recover from bails
If the landing is no longer aligned, stop adding tricks. Land on a safe flat section and accept the smaller score, or intentionally abandon the line in open space. A bail ends the current combo and discards its unbanked points, but it does not automatically end the two-minute run. After recovering, face the nearest transition and rebuild speed before attempting another objective.
Do not choose a recovery point beside a pit, at the edge of a roof, or in the path of traffic. If a fall leaves the skater facing the wrong direction, take a wide turn through the next bank or quarter pipe. Repeatedly jumping at the missed obstacle from a standstill usually creates another bail and wastes more of the timer.
- Bank a combo before a dangerous landing when possible.
- Bail only into open, recoverable space when the line cannot be saved.
- After a fall, restore direction and speed before restarting the objective attempt.
4. Handle camera blind spots and multi-level drops
When a ramp lip, wall, or elevated platform hides the landing, make a scouting pass first. Approach slowly enough to see the exit, then use a neutral ollie until the route is familiar. Avoid committing a special trick at a blind edge; the extra animation and altered movement can turn a safe jump into a missed landing.
Drops in Downtown, Mall, Downhill Jam, and other multi-level routes may preserve speed while removing access to an upper objective. Before taking the drop, check whether the lower section has a bank, quarter pipe, or return route. If it does not, collect nearby objectives first and use the descent only when it is part of the planned line.
- Scout every blind landing without a scoring trick.
- Confirm where a drop leaves the skater before using it in Career.
- Use the lower route only when it preserves access to the next objective.
5. Preserve momentum with transitions and banks
Ramps, banks, quarter pipes, and rails are both scoring tools and recovery infrastructure. After collecting a letter or completing a level-specific interaction, aim for the next transition instead of stopping on flat ground. A clean aerial from a quarter pipe can restore speed and set the correct direction for the next object.
If a rail is missed, circle through the nearest bank and make a second approach rather than steering sharply at the last moment. On Downhill Jam, protect forward speed through turns and use the descent’s ramps and overhead paths only when the landing is visible. In Streets and Downtown, use long rails and broad concourses to connect objectives, but leave room to brake or turn before traffic, fountain edges, and roof transitions.
- Move from one objective to the next through a transition whenever possible.
- Use banks to redirect instead of making a last-second sharp turn.
- Retry missed rails from a new approach angle.
- Preserve downhill speed without committing to blind jumps.
Before you move on
- In Free Skate, you can travel each required level’s main route and name one open recovery area plus one speed-restoring transition.
- You can complete every required gap, rail, or object interaction after first testing its landing without an added trick.
- During Career, you can survive a failed jump or grind, regain speed, and reach another objective without restarting the session.
- You can identify which drops are one-way or inconvenient before using them in an all-objective run.
- Your final attempts bank a combo before a hazardous landing instead of continuing a line solely to increase its multiplier.
- You can use the Warehouse, School, Mall, Downtown, Downhill Jam, and Streets landmarks to orient yourself when the camera changes direction.
Using Free Skate and Multiplayer to Build Consistency
Free Skate is the safest place to learn a Dreamcast level before spending Career attempts. It removes the two-minute limit and Career objectives, allowing you to repeat ramps, rails, gaps, letter routes, and hidden-tape approaches until the movement feels automatic. The Dreamcast manual notes that only the first level is available initially; later stages become available as Career progress unlocks them. Two-player modes are optional competitive practice tools. Trick Attack compares complete lines, Graffiti tests route efficiency through environmental objects, and Horse isolates individual tricks. None of these modes is required for Career progression.
Enter Free Skate and prepare the level
From the main menu, choose Free Skate and select a level that has been unlocked through Career. The Dreamcast version begins with only one level available, so return to Career when a stage is unavailable rather than treating it as a missing menu option. Use the same skater you expect to use in your next Career attempt so the skater's speed, balance, air, and special-trick inputs remain familiar.
Make one calm orientation lap without chasing points. Identify the starting area, the safest return route, nearby quarter pipes, long rails, ramps, and gaps that can carry you toward the SKATE letters or the level-specific objective. Free Skate has no time limit and no normal Career objective pressure, so use it to understand the level's shape rather than to imitate a two-minute run immediately.
- Choose Free Skate from the main menu.
- Use a level already unlocked through Career.
- Use the same skater planned for the next Career attempt.
- Make one slow orientation lap before practicing objectives.
Map letters, tape approaches, and objective clusters
Rehearse the order in which you will collect the SKATE letters. Begin from the normal Career starting position, follow the route at ordinary speed, and observe where each pickup leaves you. If a letter sends you toward a wall, drop, narrow landing, or awkward camera angle, repeat the approach until you know which direction to hold after collecting it.
Practice the hidden videotape as a separate route. First reach the platform, rail, ramp, or elevated area that leads to the tape without attempting a score line. Repeat the final approach several times, then connect it to the nearest safe landing. Once that route is reliable, link it to a score line or nearby objective cluster. This prevents the tape detour from consuming the opening portion of a timed Career run.
- Trace the SKATE letters from the Career starting position.
- Practice the hidden videotape route separately.
- Identify a safe landing after each difficult pickup.
- Connect the tape route to a nearby recovery line.
Build a repeatable score line
Choose one nearby sequence containing an aerial, a grind, and a second aerial. Perform the first jump, land the grind with enough speed to continue, then launch from the next ramp or transition. This is a suitable foundation for the original Dreamcast release because it uses the game's established aerial, grind, and landing systems without relying on manuals, reverts, or other mechanics from later entries.
Repeat the line until you can land it five times in a row. Only then add a grab, flip, spin, or special trick. A shorter line that survives consistently is more useful in Career than a spectacular attempt that usually ends in a bail. Practice ending the combo deliberately in an open, level area so the next attempt does not begin against a wall or in a camera blind spot.
- Land an aerial-to-grind-to-aerial sequence five times consecutively.
- Add only one new trick after the base line is reliable.
- Finish the combo in an open recovery area.
- Use special tricks only after the landing route is dependable.
Practice difficult gaps in isolation
For a troublesome gap, approach from the same direction each time and use a fixed visual landmark for the ollie. Repeat that gap ten times, counting only clean landings. A scrape, wall hit, bailout, or incomplete landing does not qualify. If the attempt fails repeatedly, rebuild speed with a longer or straighter approach instead of changing speed, direction, and trick input simultaneously.
After ten clean attempts, connect the gap to the trick or rail immediately before it. Then connect its landing to the next safe transition. This reveals whether the real problem is the jump itself, the landing direction, or the recovery afterward. If the gap remains unreliable after several practice cycles, split it from the Career route and secure other objectives first.
- Repeat one difficult gap ten times.
- Use the same approach landmark for every attempt.
- Rebuild speed before changing multiple inputs.
- Connect the gap to both its entry and exit after mastering it alone.
Use two-player modes for comparison and timing
Connect a second controller and select Two Players. Trick Attack is a two-minute split-screen competition for the highest score, so use it to compare complete lines and test whether a route remains stable under a clock. Graffiti tests environmental routing: players tag objects with tricks, and a stronger trick can take an already tagged object. Use it to identify which rails, ramps, pipes, and pool lips can be reached efficiently. Horse is best for isolated execution because players alternate attempts at a single trick; the player who fails to match the opposing score receives a letter, and the first player to complete the word loses.
These modes are competitive rather than cooperative, but a second player can still serve as a timing reference. Watch where the other skater slows down, launches, or recovers after a bail, then test the same section in Free Skate. Do not treat a multiplayer win as Career progress. The modes are optional entertainment and benchmarking tools, not alternate ways to unlock stages or complete objectives.
- Use Trick Attack to compare complete two-minute lines.
- Use Graffiti to test efficient object-to-object movement.
- Use Horse to practice one difficult trick at a time.
- Treat all multiplayer results as practice or competition, not Career progress.
Convert practice into a Career attempt
Leave Free Skate only after you can state your opening line, letter route, and tape approach without hesitation. In Career, begin with the practiced score line if it is near the spawn point, then collect nearby letters or level-specific objects while momentum is available. Career objectives remain completed once earned, so do not insist on collecting every objective in one run if a difficult tape route or high score disrupts the rest of the attempt.
After a bail, use the recovery position to decide whether to continue. If you are close to an objective and still have a useful route ahead, simplify the next trick and finish the run. If the bail leaves you far from the planned line, treat the remainder as reconnaissance. Return to Free Skate and practice the specific failure point instead of repeating the entire level without changing the approach.
- Know the opening score line before starting Career.
- Rehearse any unreliable route again instead of gambling every run.
- Use completed objectives as permanent progress.
- Use failed attempts to identify one specific improvement.
Before you move on
- You can complete the chosen aerial-to-grind-to-aerial line five times in a row in Free Skate.
- You have landed one difficult gap cleanly ten times and can connect it to the surrounding route.
- You can describe the opening Career line, the SKATE-letter route, and the hidden-tape approach before starting the timed run.
- You have used at least one two-player mode to benchmark timing or route efficiency without treating it as required progression.
- You know which objectives can be completed separately because already-earned Career objectives remain recorded.
Level types and general target strategies for the game's nine stages
The original North American Dreamcast release has nine Career stages. Warehouse, School, Mall, Downtown, Downhill Jam, and Streets each contain five goals: two score targets, S-K-A-T-E, a level-specific object challenge, and a Secret Tape. Skate Park, Burnside, and Roswell are competitions with three one-minute runs and judged medal results instead of tapes. Use Free Skate to memorize each route, then split score, collection, and Secret Tape attempts unless a practiced all-five run is comfortable. The six objective routes below use the original Dreamcast layouts and identify the required objects, letter order, reliable landmarks, and tape launches. Career progression only requires enough tapes to unlock later stages and a top-three result at Roswell; completing all 30 tapes and earning all three gold medals is the fuller completion target.
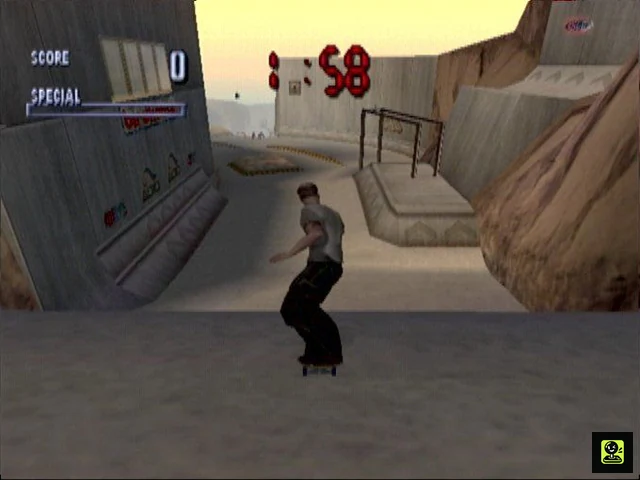
1. Recognize the nine-stage Career structure
The Career sequence is Warehouse, School, Skate Park, Mall, Burnside, Downtown, Downhill Jam, Streets, and Roswell. Warehouse, School, Mall, Downtown, Downhill Jam, and Streets are two-minute objective stages. Their five goals are High Score, Pro Score, S-K-A-T-E, the Secret Tape, and one named level challenge.
Skate Park, Burnside, and Roswell are competitions. Each gives three one-minute runs. Perform a repeatable line, avoid bails, and finish in the top three to earn a medal and continue Career. At Roswell, third place or better completes the main Career; gold medals and all 30 tapes are additional targets.
Before a timed attempt, use Free Skate to identify the starting landmark, the object route, the letter route, the tape launch, and one safe scoring line. Goals remain completed between runs, so a failed combined attempt can be followed by a focused collection or scoring run.
- Confirm whether the stage shows five goals or a competition.
- Record the exact missing goal after every run.
- Do not treat the three competition parks as five-tape stages.
2. Warehouse: boxes, compact lines, and the secret room
Warehouse goals are 5,000 points, Smash the Boxes, S-K-A-T-E, the Secret Tape, and 15,000 points. From the start, turn right for the first box, then drop down the roll-in and clear the half-pipe toward the raised ledge with the second box. Continue toward the hip and collect the next box, then turn left over the kicker for S. Take the box on the nearby ledge, clear the quarter-pipe for E and the final box, then grind the large rail across the room for K. Use the speed from that line to jump the half-pipe and collect T.
The Secret Tape is in the elevated back section. Approach from the warehouse floor with enough speed to clear the half-pipe and land in the raised secret-room route; collect the tape before returning to the main floor. For scoring, repeat the quarter-pipe to rail line, adding a grab or flip before landing in the open floor. Warehouse is the best stage for learning a safe aerial-to-grind combo.
- Collect boxes in the order: start-side box, raised ledge, hip-side box, far ledge, final quarter-pipe box.
- Use the half-pipe jump to enter the elevated secret-room route.
- Finish long combos in the open floor instead of forcing a difficult landing.
3. School: tables first, then the rooftop tape
School goals are 7,500 points, Grind 5 Tables, S-K-A-T-E, the Secret Tape, and 25,000 points. Turn left from the start and follow the path into the large area. Grind the first lunch table, collect E in the center, then leave toward the long half-pipe and take T from its exit. In the next open area, grind the table on the right, then the nearby table beside the half-pipe exit. Grind the rail carrying A, clear the kicker gap for K, and turn right after landing to grind the fourth table. Return up the stairs, collect S, and grind the final table at the top.
For the Secret Tape, enter the rooftop area using the covered ramp after the final table. On the roof, climb the large box, grind the wooden plank onto the metal awning, and ollie from the awning's end into the tape. A dependable score line uses the long half-pipe followed by table or rail grinds; bank the combo before the rooftop detour if the 25,000-point goal is still incomplete.
- Table order: first large-area table, second table near the pipe exit, A rail, fourth table after K, final upper table.
- Collect E, T, A, K, and S in that route order.
- Reach the roof through the covered ramp and launch from the metal awning.
4. Mall: follow the downhill line and destroy five directories
Mall goals are 10,000 points, Destroy 5 Directories, S-K-A-T-E, the Secret Tape, and 30,000 points. Collect S on the opening roll-in. Use the central ramp to reach the first directory, then continue straight through the next ledges and gaps to the second directory. Turn right at the far end, drop down, and reverse briefly to collect K from the ledge.
Stay to the right through the car section. Grind the low wall beside the car, transfer to the elevated metal rails, and follow those rails to the Secret Tape. Turn around after the tape, destroy the nearby directory, and collect A from the water channel. Continue down the escalator, destroy the directory on the central ledge, and grind the nearby rails for T. In the open area, jump from the bump for E and destroy the final directory.
The long walls, escalator rails, and central ramps form the safest score line. If the tape jump or directory route costs too much speed, complete the 30,000-point goal separately by repeating the opening ramps and long rail sections.
- Directory order: central ramp, far-end directory, post-tape directory, escalator-area directory, final open-area directory.
- Use the right-side low wall to reach the elevated rails and Secret Tape.
- Collect S, K, A, T, and E along the downhill route.
5. Downtown: signs, fountain, glass passage, and rooftop tape
Downtown goals are 15,000 points, Break 5 No Skating Signs, S-K-A-T-E, the Secret Tape, and 40,000 points. From the start, launch onto the first ledge and grind the rail for S. Follow the path toward the fountain and break the first sign. Ollie over the fountain for K, then take the exit path and break the second sign. Ride onto the large triangular fun-box and break the third sign. Continue down the street, break the sign on the right, and use the quarter-pipe at the street's end to collect A. Break the final sign on a ledge in that area.
Return toward the street and collect E from the high rail beside the ramp. Then use the truck ramp to enter the glass passage and collect T inside, completing S-K-A-T-E. Build score in this passage with aerials and grinds before taking the tape route. At the end, use the small ramp on the left to enter the rooftop bowl, gain maximum speed, and launch across the gap toward the opposite roof. The Secret Tape hangs over the gap.
Taxis are the main hazard. Stay on ledges and rails when crossing the roads, and use the fountain or triangular fun-box as reliable reset points after a bail.
- Break signs in the opening path, fountain exit, triangular fun-box, street, and far ledge areas.
- Collect S at the start rail, K over the fountain, A at the quarter-pipe, E from the high rail, and T inside the glass passage.
- Launch the Secret Tape from the rooftop bowl toward the opposite roof.
6. Downhill Jam: valves, speed preservation, and the difficult tape jump
Downhill Jam goals are 20,000 points, Open 5 Valves, S-K-A-T-E, the Secret Tape, and 40,000 points. At the start, use the bump on the right to reach the high rails and open the first valve. Land slightly left and jump the ramp for S. Turn right to the next ramp and open the second valve while performing a large aerial for score.
At the large half-pipe, stay right and grind the high rails for K. Return to the opposite side, climb the slope, and grind the rail over the half-pipe to open the third valve. Collect A above the quarter-pipe, then grind across the large chasm to the opposite ledge. Transfer the next hole, fastplant onto the dirt path, and fastplant across the following hole.
From the high ledge, aim for the pillar topped by four rails and grind one rail to collect the Secret Tape. Continue downhill, use the ramp to reach the large dirt slope, and open the fourth valve near its top. Launch from the ramp at the slope's end for T. In the final area, wallride down the slope to open the last valve, then use the vert walls to gain height and grind the wall rail for E.
The tape and final valve route is difficult to combine with both score targets. Practise the tape from the high ledge in Free Skate, then use a separate run for the 40,000-point goal if momentum is lost.
- Valve order: opening high rails, second ramp, rail above the half-pipe, dirt slope, final wallride.
- Collect S before the second ramp, K above the half-pipe, A after the third valve, T at the dirt-slope launch, and E near the finish.
- Use the four-rail pillar as the Secret Tape launch landmark.
7. Streets: cop cars, windows, Chinatown, and the pagoda tape
Streets goals are 25,000 points, Smash 5 Cop Cars, S-K-A-T-E, the Secret Tape, and 50,000 points. Grind the police car behind the start, return to the opening ramp, and descend the building ledges. Collect K from the final ledge, jump through the window, and grind the second cop car beside the donut shop. Continue down the road and grind the two cop cars near the building with the stairs.
Enter Chinatown and transfer between the rear quarter-pipes to collect A. Return toward the paired cop cars, continue past them, and use the right-side ramp to enter the windowed room containing T. Exit through the grated door, ollie from the upper ledge, and use the bowl inside the next room to collect E. Exit the way you entered and follow the road to the final cop car. Finish the ordinary route in the large grassy area by using the left ramp to collect S.
The Secret Tape is a separate, slower route. From the fountain, ollie onto the wavy path, cross the gap to the roof ledge, and follow the raised route around the ramps. At the top, turn to the long wooden ramp, gain full speed, and jump from the building toward the pagoda roof to collect the tape. Because this detour conflicts with the five-cop-car route, Streets is normally safer as two focused runs.
- Cop-car order: start car, donut-shop car, two road cars, final road car.
- Collect K from the opening ledges, A in Chinatown, T through the first window, E in the bowl room, and S in the grassy-area ramp section.
- Reach the pagoda tape from the fountain's wavy path and long wooden ramp.
8. Skate Park, Burnside, and Roswell competitions
Skate Park is the first competition. Use the large bowl and quarter-pipe walls to build speed, then chain a high aerial into a lip or grind on the opposite transition. Release the combo on a visible landing. Burnside is tighter and more bowl-focused: stay near the perimeter, transfer between the bowl walls, and use the central or side extensions for a controlled special before returning to the transition.
Roswell is the final competition and provides the Career completion check. Use the half-pipe and surrounding quarter-pipes as a repeating wall-to-wall route. The safest medal attempt is three clean runs: establish the line in the first, add a special or longer grind in the second, and improve only where the landing is dependable in the third. A top-three result is enough to finish Career; pursue gold separately if completing every medal.
- Each competition has three one-minute runs.
- A clean top-three result matters more than one spectacular but failed combo.
- Confirm Roswell places you third or higher before treating Career as complete.
Before you move on
- Warehouse, School, Mall, Downtown, Downhill Jam, and Streets each show all five goals completed.
- The six level-specific challenges are recorded: Smash the Boxes, Grind 5 Tables, Destroy 5 Directories, Break 5 No Skating Signs, Open 5 Valves, and Smash 5 Cop Cars.
- Skate Park and Burnside each show a medal result, and Roswell shows a top-three result or better.
- For the full objective target, all 30 tapes are collected. All three gold medals and Officer Dick are optional rewards beyond basic Career completion.
- The Career progress screens show the final competition cleared and no remaining required objective.
Advanced score-building: chaining, specials and maximizing multiplier value
The original Dreamcast release rewards varied landed combos rather than later-series manual or revert chains. Build the Special gauge with safe grabs, flips and grinds, then spend a skater-specific special from a launch with enough height and a visible landing. Link nearby ramps, rails, lips and quarter pipes instead of forcing a route across a large gap. Each added trick improves the combo multiplier, but repeating the same trick reduces that trick’s base value. A shorter line that lands is more useful for Career than a spectacular attempt that bails. Bank the score before a blind landing, and use compact aerial-to-grind-to-aerial routes for repeatable farming. When a level objective requires several objects, register those interactions with controlled short combos before returning to the best scoring line.
1. Build the Special gauge with safe, varied tricks
Start beside a launch, quarter pipe or broad rail that you can approach straight. Use a grab, flip trick or grind with a landing you can see. A landed trick contributes to the run and helps fill the Special gauge; a bail ends the current combo and empties the gauge, so an unfinished attempt is not useful preparation for a special.
Vary the trick selection while building the gauge. In this game, repeating the same trick reduces its individual value during the sequence. A simple grab followed by a different flip and a grind is therefore more productive than repeating one familiar move. Hold a grab only as long as the landing remains safe; extra hold time is worthwhile only when it does not turn a controlled landing into a bail.
- Begin near a predictable launch or rail.
- Use different grab, flip and grind tricks while building Special.
- Treat the gauge as ready only after the preceding tricks have been landed.
2. Spend a special from a predictable launch
When the Special gauge is full, use the special assigned to the selected skater. Special inputs differ between skaters, so check the game's trick information or the unlocked move list rather than assuming that another skater's combination works. Practice the input in Free Skate before making it part of a Career score attempt.
Choose a launch with clear height and a visible landing. A quarter pipe, half-pipe wall or large bank is safer than a low kicker because it gives you time to enter the direction-and-button input and align the board afterward. Begin the special while airborne. If the move travels toward a rail or lip, decide on that follow-up before takeoff; otherwise, aim for a clean landing and secure the special's value.
- Confirm the selected skater's special input in-game.
- Use a launch that supplies enough airtime for the complete input.
- Prefer a visible landing over an ambitious continuation.
3. Link nearby objects without later-series mechanics
Tony Hawk's Pro Skater does not have the manual system introduced in the sequel, and this Dreamcast release should not be routed as if manuals or reverts were available. Build the line from objects already close together. A dependable pattern is an aerial into a nearby grind, followed by an exit toward a second ramp or quarter pipe. Leave the rail early enough to prepare for the next landing instead of grinding until the approach becomes blind.
The directional controls handle steering and balance functions, while the Analog Thumb Pad is used for turning while airborne. L and R perform the manual-documented left and right 180-degree airborne turns; they are not variable rotation controls. Use the Thumb Pad or a fixed 180-degree turn only when the landing stays visible. A larger rotation is useful only if the jump and approach support it.
- Identify the next ramp or rail before leaving the current object.
- Use aerial-to-grind-to-aerial routes rather than manual or revert chains.
- Use airborne turning and fixed 180-degree turns only when the landing is reliable.
4. Combine a special with varied follow-up tricks
The most dependable high-score pattern is a valuable special followed by several different, controllable tricks. For example, launch a skater-specific special from a quarter pipe, land into a broad grind, leave toward another ramp, then perform a different grab or flip before landing. The special supplies a large base value, while the added tricks increase the combo multiplier.
Do not repeat one move merely because it is comfortable. Repetition still contributes to the combo, but the repeated trick's own base value falls. Substitute a simple grab, flip, alternate grind or controlled airborne turn whenever the route allows it. A varied combo that lands is a better Career tool than a difficult special sequence that loses everything at the final transition.
- Place the special at the beginning or middle of a line with a planned landing.
- Change trick types when the route permits.
- Make the final landing part of the route plan.
5. Bank the combo before the risk outweighs the reward
End the combo when the next connection is uncertain, balance is deteriorating, or the route turns into a blind drop. A successful landing banks the accumulated score. Bailing discards the active combo and empties the Special gauge, so extending a safe line after the target is already cleared is usually wasteful.
For a Career score goal, use the opening part of the run for one dependable scoring line. If it clears the target, spend the remaining time on SKATE letters, the level-specific objective or the hidden tape. If the first line falls short, repeat it with one controlled change, such as a longer grab, one extra grind or a safer special, rather than replacing it with an untested mega-combo.
- Bank before a blind landing or deteriorating balance state.
- Stop extending once the score goal is safely cleared.
- Change one part of a failed route at a time.
6. Farm compact ramp-and-rail lines safely
For repeatable scoring, find a compact cluster with a launch ramp, a grindable rail and another launch close enough to reach without losing speed. Perform a grab or flip from the first launch, transfer into the rail, leave toward the next ramp, land, and circle back if the level layout allows it. This creates several multiplier-building opportunities without relying on a bug or exploit.
Keep object objectives separate from record attempts. If a goal requires using several rails, ramps or other objects, approach each target under control and confirm that the interaction registers. Short landed combos are preferable for this task. After the required objects are complete, return to the repeatable ramp-and-rail cluster for the score target. If the cluster is too dangerous, use two smaller lines rather than risking the whole run on one long attempt.
- Choose a route with at least two nearby launch opportunities.
- Repeat only lines whose landings are predictable.
- Verify every required object interaction before ending the run.
Before you move on
- Clear a Career score target with a landed combo; a high total followed by a bail does not secure the score.
- Perform and land at least one special using the selected skater's documented in-game input.
- Complete a repeatable aerial-to-grind-to-aerial line without manuals or reverts.
- Compare a varied line against a repeated-trick line and use the one you can land consistently.
- For an object-based goal, verify every required interaction before ending the run.
- Repeat the chosen scoring route successfully in Free Skate before using it as the primary Career attempt.
Unlocks, secret skaters and cheats on the Dreamcast — what to expect
The North American Dreamcast release separates ordinary Career progression from its bonus rewards. Complete enough goals to open later stages and earn competition medals to advance through the contest sequence, but reaching the final contest does not automatically award every secret. Officer Dick becomes selectable after one Career file records all 30 secret tapes. Three competition medals with any character unlock the Bails video, while three gold medals unlock that character’s ending video. After Officer Dick is available, earning three medals with him unlocks the Neversoft Bails video. Treat button codes as optional testing tools: code-enabled levels, tapes, or characters are not evidence of legitimate completion. Verify a clean file by checking each level’s five goals, the competition results, the 30-tape total, the character-select roster, and the View Videos menu.
1. Track Career progress and bonus rewards separately
Start with Career Mode and use the progress display to record which goals are complete on each stage. The normal level set is opened by completing enough goals, while the competition sequence is advanced by earning medals. These are progression requirements; they are not the same as every bonus unlock in the game.
For a clean completion file, maintain separate notes for level goals, secret tapes, and competition medals. A skater can reach the final contest while still missing tapes, score goals, or level-specific objectives. Do not treat an unlocked stage or a finished contest as automatic proof that the entire game is complete.
- Use Career Mode rather than a level-select code for legitimate progression.
- Record missing goals and tapes by level.
- Record competition medals separately from ordinary level objectives.
- Check the progress display after returning to the menu so the result is written to the VMU.
2. Unlock Officer Dick with all 30 secret tapes
Officer Dick is the primary legitimate secret-skater reward on the Dreamcast version. Collect all 30 secret tapes in Career Mode with any one skater. The requirement is the tape total itself, not merely reaching the final contest and not merely completing one level’s five goals.
Use Free Skate to learn a tape route without the Career timer, then return to the corresponding Career level and collect it during a focused run. If a tape is already recorded, do not spend another run repeating it. Instead, consult the level progress display and target the next missing tape or goal. After the thirtieth tape registers, return to the main menu and inspect character select for Officer Dick.
- The save records all 30 secret tapes.
- Officer Dick appears on the character-select screen.
- The character is still present after leaving and re-entering the menu.
- The VMU save is allowed to finish before powering off.
3. Earn the competition videos in the correct order
The Dreamcast unlock listing gives the ordinary Bails video for earning three competition medals with any character. It separately gives the character-ending video for earning three gold medals with any character. A medal is enough for the first reward; the ending video requires gold results in all three competitions.
Use a conservative contest plan. Start with a repeatable line built from aerials, grinds, and special tricks you can land, then stop extending the combo once its score is safely competitive. A bail at the end of a long attempt can erase the advantage of a risky line. After the required result is recorded, return to the main menu and open View Videos to verify the reward.
- Three competition medals are recorded for the Bails video.
- Three gold medals are recorded for the character-ending video.
- The expected videos appear under View Videos.
- Do not confuse a single gold medal with the requirement for the complete character-ending video.
4. Use Officer Dick for the extra Bails reward
Once all 30 tapes have unlocked Officer Dick, select him and earn three competition medals while playing as him. This awards the Neversoft Bails video. The requirement is character-specific, so medals earned earlier with another professional do not satisfy this extra reward.
You do not need to replay every level with Officer Dick for this purpose. Enter the competitions, earn the required three medals, and then check View Videos. If the reward does not appear, verify that Officer Dick was the active skater for all three medal results and that the save was written afterward.
- Officer Dick is selected before entering each required competition.
- Three medals are earned while playing as Officer Dick.
- The Neversoft Bails video appears in View Videos.
- The result is confirmed on the intended VMU save.
5. Treat cheats and Private Carrera as optional content
The Dreamcast release has codes for effects such as level access, all tapes, and unlocking everything. These are useful for testing or casual play, but they should not be used to establish a legitimate 100 percent Career file. In particular, the documented Officer Dick requirement warns that code-obtained tapes do not count for the normal unlock.
Private Carrera is associated with a pause-screen code route in Dreamcast references. Because that route is cheat-enabled rather than a normal objective reward, keep it separate from the clean Career checklist. Save before experimenting if you want to preserve an untouched completion file, and do not count a code-enabled character, tape total, or level as ordinary Career progress.
- Use a separate save before testing codes.
- Do not use an all-tapes or unlock-everything code on the clean file.
- Do not count Private Carrera from a code as a normal Career unlock.
- Return to the unmodified save when checking legitimate completion.
6. Perform the final 100 percent verification
Open the Career progress display and inspect every level. Each level should show both score goals, the SKATE letters, the hidden tape, and the level-specific objective as completed. Also verify that the final contest has been won. If one item is missing, select that level and pursue only the missing objective; replaying completed objectives wastes timed runs.
Then check the 30-tape total and character select for Officer Dick. Open View Videos and confirm the Bails video, the character-ending video, and, if the Officer Dick requirement was completed, the Neversoft Bails video. This separates campaign completion, tape completion, and bonus-video completion instead of relying on a single menu state.
- Every level shows all five objective categories completed.
- The final contest is recorded as won.
- All 30 secret tapes are recorded.
- Officer Dick is selectable.
- The three expected competition rewards are visible when their conditions are met.
- No cheat-enabled result is being used as evidence for clean completion.
- The VMU save remains present after returning to the main menu.
Before you move on
- Career progress shows every stage completed across all five objective categories.
- The final contest has been won on the clean save.
- All 30 secret tapes are recorded and Officer Dick appears at character select.
- Three competition medals have been earned for the ordinary Bails video.
- Three gold medals have been earned for the character-ending video.
- Three medals have been earned while playing as Officer Dick for the Neversoft Bails video.
- The relevant entries are visible in View Videos.
- No code-enabled progress is being used as evidence of normal Career completion.
Timed runs, contest runs and competitive Career stages
Tony Hawk's Pro Skater on Dreamcast divides timed play into ordinary Career sessions and competition stages. Standard Career levels use two-minute runs for score goals, SKATE letters, the hidden tape and the level-specific challenge. Three Career stages are competitions instead: each gives three one-minute judged runs and awards a medal based on the combined result. They do not use the normal five-goal layout. Build a reliable scoring line before attempting risky extensions, bank a good combo rather than chasing an uncertain record, and use Free Skate to test routes without the timer. The Dreamcast release has no separate Tournament Mode; do not look for a multi-course tournament menu or include one in the completion checklist.
1. Identify which kind of timed stage you are entering
Ordinary Career levels give you a two-minute session. During that run, work on the goals shown for the level: the two score targets, the SKATE letters, the hidden tape and the level-specific challenge. Completed goals remain recorded, so you do not need to force every objective into one attempt unless you are deliberately making a single-run challenge.
The three competition stages are different Career levels. They replace the usual objective hunt with three separate one-minute runs in which you perform for judges and try to earn the strongest medal available. Do not spend these stages searching for SKATE letters, a hidden tape or an environmental goal; those tasks belong to the ordinary free-roam stages, not the competitions.
The Dreamcast main menu does not include a separate Tournament Mode. Its relevant single-player choices are Career Mode, Single Session and Free Skate. Competition skating is encountered as part of Career progression, so treat winning the Career competitions as the required competitive objective.
- Ordinary Career stage: one two-minute objective run.
- Competition Career stage: three one-minute judged runs.
- Dreamcast completion does not require a separate Tournament Mode.
2. Warm up before committing a timed run
Use Free Skate on the level whenever it is available to learn the opening line, the safest quarter pipe or rail, and the direction of your landing. The purpose of the warm-up is route verification: check whether you reach the first ramp with enough speed, whether the camera shows the landing clearly and where you can safely bail out of a failed attempt.
For an ordinary Career level, identify objectives that overlap naturally. A letter route may pass over the same ramps used for a score combo, and a level-specific object challenge may sit along the route to the tape. Practice that combined path, but do not sacrifice an already completed goal merely to preserve an all-in-one attempt.
- Test the first scoring line in Free Skate or a low-pressure attempt.
- Check the landing direction after each major ramp.
- Practice an awkward tape or object detour separately before combining it with scoring.
3. Use a three-part plan for ordinary two-minute runs
Open with a dependable scoring line while the timer is full and your momentum is intact. Aim to make meaningful progress toward the easier score target through a sequence you can land repeatedly. An aerial into a grind and a second aerial is useful only when the landings are familiar; a shorter completed combo is better than a spectacular bail that leaves no score recorded.
Use the middle portion of the run for nearby objectives. Collect SKATE letters or hit level-specific objects while moving between ramps and rails. Avoid crossing the entire map for one item unless it is the hidden tape or another goal that cannot be reached by your main route. If the tape is close to a known line, take the detour after securing useful score; if it is remote, give it a focused run rather than damaging every attempt with an uncertain diversion.
Reserve the final 20–30 seconds for a nearby unfinished objective or a safe scoring line. Do not begin a distant route or an unfamiliar long combo when there is not enough time to recover from a bail.
- Opening: establish a repeatable score line.
- Middle: complete clustered letters and level-specific interactions.
- Final 20–30 seconds: finish a nearby goal or bank safe points.
4. Build competition scores across three one-minute runs
Start the first competition run with a controlled baseline. Use a familiar ramp-to-rail route and land a compact sequence of aerials, grinds and, when reliable, a special trick. The first run should show you how much score the line produces under the one-minute limit; it does not need to be an all-or-nothing record attempt.
Use the second run for your best established scoring route. Extend the combo only when you know the next landing and have enough speed to reach it. In the original game, a landed medium-length sequence is more valuable than repeatedly attempting a theoretical maximum that ends in a bail.
Use the third run to improve the weakest part of your result. If the earlier runs were stable, add one practiced extension or special. If they were unsuccessful, return to the safest line and secure a score rather than repeating the same failed approach. The objective is a strong judged total across the competition, not three identical attempts at the highest-risk route.
- Run one: establish a safe baseline.
- Run two: use the strongest reliable line.
- Run three: make one practiced improvement or protect the result with a safe score.
- Bank the combo before control becomes uncertain.
5. Recover correctly after a bail
A bail does not end the competition run. As soon as control returns, regain speed with the nearest ramp, quarter pipe or straightforward rail instead of forcing the failed line again. A simple aerial followed by a clean landing can still contribute useful points during the remaining seconds.
In an ordinary Career run, decide whether the failed attempt affected a required objective. If the score target is already secure, switch to letters, objects or the tape. If the bail happened before the main score line, use the remaining time for a smaller combo and retry the full route on the next run rather than turning the rest of the session into uncontrolled improvisation.
- After a bail, choose the nearest safe recovery line.
- Do not immediately repeat the failed extension.
- Protect completed objectives and use later attempts for unfinished goals.
6. Confirm competitive progress without looking for a nonexistent mode
After finishing a competition level, check the Career progress display and the medal result shown by the game. For Career completion, the three competition stages must be cleared as required for progression, and the ordinary levels must have their required goals completed to unlock the later stages and final contest.
For a broader 100 percent target, verify every ordinary level's five goals, the results for all three competition stages and the final Career contest. Do not add a Tournament Mode result to this list: that mode is not part of the North American Dreamcast release.
- All three Career competition stages show successful medal results.
- The final Career contest is won.
- Every ordinary level has its five goals recorded for a full objective completion.
- The Career progress screen shows no remaining required stage or goal.
Before you move on
- Every ordinary Career level shows its five required goals recorded: two score goals, SKATE, the hidden tape and the level-specific challenge.
- All three Career competition stages have been completed with successful medal results.
- The final Career contest has been won and the later progression is no longer locked.
- The Career progress display shows no unfinished required stage or objective.
- No separate Tournament Mode check is needed for the Dreamcast release.
All-in-one-run and 100% attempts: step-by-step planning
The six ordinary Dreamcast Career stages each contain five tapes: High Score, Pro Score, S-K-A-T-E, a hidden tape, and one level-specific challenge. You can earn them across separate two-minute runs, so an all-in-one run is an efficiency challenge rather than a progression requirement. Use Free Skate to learn the exact route, then combine objectives only when they naturally overlap. Warehouse, School, Mall, Downtown, and Downhill Jam have workable five-tape routes after practice. Streets is more reliable as two runs because the pagoda hidden tape requires a long, high-risk detour. Competitions are different: Skate Park, Burnside, and Roswell use three one-minute rounds, and placing third or better earns the medal needed for progression. Gold medals are optional for the strongest completion target. Save after each successful level and verify the Career screen before moving on.
Prepare the route in Free Skate
Before entering Career, run the level in Free Skate and identify four things in order: the S-K-A-T-E letters, the level-specific objects, the hidden-tape launch setup, and one dependable score line. The original Dreamcast release has no manuals or reverts, so build lines from ollies, flip tricks, grabs, grinds, lip tricks, and transfers that you can land consistently.
Practice the hidden tape from its first setup feature rather than only practicing the final jump. Note the ramp or rail that provides the launch, the direction of the landing, and the safest route back into the level if you miss. A tape route that cannot be repeated from the start is not ready for an all-in-one attempt.
Use Career progress to confirm registrations. A goal reached immediately before a bail may still count, but do not rely on memory. After each run, check the objective list and repeat only the missing goal.
- Mark every letter in collection order.
- Identify all five level-specific objects and their direction of travel.
- Practice the complete hidden-tape approach and recovery.
- Choose a score line that does not require manuals or reverts.
Warehouse: boxes, letters, and the secret room
Turn right from the start and smash the first box. Continue down the roll-in, then clear the halfpipe toward the secret room; take the hidden tape while crossing the upper route. Land on or near the ledge containing the second box, smash it, and drop left toward the taxi carrying the A.
Continue across the hip and smash the box on the way. Turn left over the kicker gap for S, then take the box on the nearby ledge. Go over the quarter pipe at the far end for E and the final box. Grind the large central rail, launch from the quarter pipe for K, then use the speed from that line to clear the halfpipe and collect T.
This route naturally combines all three non-score objectives with the hidden tape. Bank points on the halfpipe and central rail early, then stop taking risks once 15,000 points registers. If you miss a box, finish the remaining route and repeat the box objective separately rather than reversing across the room.
- Boxes: start right, secret-room route, hip, opposite ledge, far quarter pipe.
- Letters: A, S, E, K, T.
- Hidden tape: halfpipe crossing into the secret room.
- Score line: halfpipe, central rail, and quarter-pipe launches.
School: five tables and the rooftop tape
Turn left from the starting roof and trick down the path. When it opens into the large courtyard, turn right and grind the first table. Collect E in the center, then follow the long halfpipe and jump from it for T.
Continue along the pipe into the next open area. Turn right to grind the second table, then use the nearby rail carrying A. At the foot of the stairs, clear the kicker gap for K. Turn right after landing and grind the fourth table, then return up the stairs and collect S while grinding the route upward. Grind the final table at the top.
After the fifth table, turn left and take the covered ramp to the rooftop. Use the large box as your setup: grind the wooden plank onto the metal awning, then jump from the awning’s end for the hidden tape. The rooftop detour is the route conflict, so secure the 25,000-point goal and all five tables before committing to the tape if your opening was slow.
If you miss the awning jump, land on the roof or lower walkway and restart the tape attempt from the box rather than trying to improvise from the ground.
- Tables: first courtyard table, second open-area table, rail with A, stair-area table, rooftop-side table.
- Letters: E, T, A, K, S.
- Hidden tape: rooftop box to wooden plank to metal awning.
- Score line: opening roof drop and halfpipe transitions.
Mall: use the downhill flow
Collect S on the opening roll-ins. Take the central ramp and smash the first directory at the top, then continue straight through the next directory across the ledges and gaps. Turn right, jump off, reverse briefly, and collect K from the ledge before facing downhill again.
Stay right through the car section. Grind the low wall beside the car, jump from its end onto the elevated metal rail, and follow that rail to the hidden tape. Turn around after collecting it, smash the nearby directory, and collect A from the water section.
Continue downhill through the escalator. In the next area, smash the directory on the central ledge and grind the nearby rails for T. Exit into the open area, jump from the bump for E, and smash the final directory at the far end. Because the level is linear, Mall is one of the best stages for a genuine five-tape attempt. If the elevated rail is missed, finish the letters and directories, then use a dedicated tape run.
- Directories: central ramp, far end of first section, elevated-rail area, escalator section, final open area.
- Letters: S, K, A, T, E.
- Hidden tape: low wall beside the car into the elevated metal rail.
- Score line: repeat the central ramp, ledges, and rail sections.
Downtown: signs, fountain, and the roof gap
Launch from the first ramp onto the ledge and grind toward S. Turn left toward the fountain, breaking the first No Skating sign on the route. Ollie over the fountain for K, then take the path out and break the second sign.
Use the triangular fun-box for the third sign. Drop to the street, avoid the taxis, and break the fourth sign on the right. At the quarter pipe, collect A. In the next ledge area, break the final sign, then return toward the glass passage. Do not take T yet.
Use the ramp near the passage to reach the high rail and collect E. Turn back, ride up the truck ramp into the passage, and collect T inside to finish S-K-A-T-E. Use the concealed passage and its ramps for the 40,000-point target, then launch from the upper bowl toward the opposite roof. The hidden tape is suspended across this gap.
Downtown is safer as two runs if traffic causes repeated bails. For a combined attempt, complete signs and letters first, then use the passage for score before taking the roof jump. If the jump is missed, land on the lower street, return through the truck ramp, and repeat only if enough time remains.
- Signs: fountain approach, exit path, triangular fun-box, street right side, final ledge area.
- Letters: S, K, A, E, T.
- Hidden tape: upper bowl launch toward the opposite roof.
- Hazard recovery: avoid taxis and use the truck ramp to regain the passage.
Downhill Jam: valves first, tape at the upper rails
At the start, turn right at the bottom of the slope and use the bump to reach the high rails. Grind them to open the first valve, then go slightly left and jump the ramp for S. Turn right to the next ramp and activate the second valve; use this launch for a controlled high-value trick toward the 20,000-point goal.
Approach the large halfpipe on the right. Jump to the high rails for K, then return to the opposite side of the halfpipe and grind the rail above it to activate the third valve. Collect A from the quarter-pipe launch in the landing area. Grind across the large chasm to the far ledge.
Clear the holes with controlled transfers and fastplants, then use the high ledge to launch toward the pillar with four rails. Grind one rail for the hidden tape. Continue downhill, launch onto the large dirt slope, and activate the fourth valve at its top. Roll down and launch from the end for T.
In the final vert area, wallride down the slope for the fifth valve. Return upward using the vert walls, launch left onto the wall rail, and grind it for E. Downhill Jam is the hardest practical all-in-one route; split the valves and letters from the tape if the chasm transfers are not consistent.
- Valves: opening high rails, second ramp, rail above halfpipe, dirt-slope top, final wallride.
- Letters: S, K, A, T, E.
- Hidden tape: high ledge and pillar with four rails.
- Recovery: use the halfpipe and vert walls to rebuild speed after a missed transfer.
Streets: use two focused runs
Treat Streets as a split-run level. The first run targets the 50,000-point score, five cop cars, and S-K-A-T-E. Grind the police car behind the start, turn around, and descend the building ledges. Collect K on the last ledge, jump through the window, and grind the cop car by the donut shop.
Continue along the road past the stair-front building and grind the next two cop cars. Enter Chinatown and transfer between the rear quarter pipes for A. Return toward the paired cars, pass them, and use the ramp on the right to enter the room containing T. Exit through the grated door, ollie through the next window, and use the bowl to collect E. Return to the road, grind the last cop car, then enter the large grass area and use the left ramp for S.
Keep scoring during this route because the 50,000-point Pro Score is demanding. The hidden tape is a separate detour: go to the central fountain, ollie onto the wavy path, launch to the roof, and follow the upper ramps carefully to the long wooden ramp. From its top, jump off the building toward the pagoda roof to collect the tape.
If the pagoda jump is missed, return to the fountain and repeat the upper route in a dedicated run. Do not sacrifice a completed four-tape run trying to force the hidden tape with seconds remaining.
- Cop cars: start, donut shop, two along the road, final road car.
- Letters: K, A, T, E, S.
- Hidden tape: fountain, wavy path, upper ramps, wooden ramp, pagoda jump.
- Score line: extend combos on cars, rails, quarter pipes, and the Chinatown transfer.
Verify Career completion and competition progress
The three competition stages are not five-goal routes. Skate Park, Burnside, and Roswell use three one-minute rounds; the weakest round is discarded and the remaining two determine the result. Place third or better to earn the medal needed for progression. For the strongest completion target, earn gold in all three, but do not confuse gold with the minimum requirement to advance.
Career completion requires clearing the final Roswell competition with a qualifying result. A full objective target is five goals on each of Warehouse, School, Mall, Downtown, Downhill Jam, and Streets, for 30 tapes total. Save after successful runs and inspect Career progress before leaving the session.
All 30 tapes unlock Officer Dick. Three competition medals unlock the Bails video, while three gold medals unlock the selected skater’s character-ending video. These are optional rewards and do not replace the requirement to qualify at Roswell.
- Six ordinary stages each show five completed goals.
- Skate Park, Burnside, and Roswell each show a competition medal if pursuing full completion.
- Roswell has been cleared with a qualifying placement.
- The save has been written to the VMU.
- Officer Dick and competition videos are checked only if optional unlocks are desired.
Before you move on
- Warehouse, School, Mall, Downtown, Downhill Jam, and Streets each show High Score, Pro Score, S-K-A-T-E, Hidden Tape, and the level-specific challenge completed.
- The level-specific challenges are Smash the Boxes, Grind 5 Tables, Destroy 5 Directories, Break 5 No Skating Signs, Open 5 Valves, and Smash 5 Cop Cars.
- Skate Park, Burnside, and Roswell each have a recorded competition result; gold medals are present if pursuing the strongest target.
- Roswell has been completed with a qualifying top-three placement.
- The completed Career save has been written to the VMU.
- Officer Dick is available after all 30 tapes, the Bails video is available after three medals, and the selected skater’s ending video is available after three gold medals.
Finishing Career mode, verifying completion and next steps
Finish the original Dreamcast Career by reaching Roswell and placing third or better in the final competition. The six ordinary stages—Warehouse, School, Mall, Downtown, Downhill Jam, and Streets—each contain five tapes: two score goals, S-K-A-T-E, a hidden tape, and a level-specific challenge. Together these provide the full 30-tape target. Skate Park, Burnside, and Roswell are different: they are competitions with three one-minute judged sessions and medal results rather than five ordinary goals. After the final contest, audit both sets of records separately, allow the Career save to update on the VMU, and check optional rewards such as Officer Dick and the competition videos.
1. Reach and clear the Roswell competition
Continue Career by collecting enough tapes and earning the required competition results to unlock the later stages. When Roswell becomes available, enter it from the Career progression screen. Roswell is the ninth and final stage in the original nine-level Career structure, and it is a competition rather than an ordinary objective level.
Roswell uses three one-minute sessions. Treat the first session as a safe baseline: use a line you can land, include a few reliable aerials or grinds, and avoid ending with an unnecessary high-risk trick. In later sessions, repeat the line if it is scoring well or add one controlled extension when you need to improve your standing. Bails damage the competition result, so consistency matters more than attempting an unpracticed special.
After the third session, check the placement and medal result. A third-place finish or better is enough to complete the Career path at Roswell. First place is not required for the ending, although earning gold is the stronger completionist target. Stay at the results and progression screens long enough for the game to update the Career save before powering off.
- Roswell is unlocked and entered from Career.
- The final competition ends with a third-place finish or better.
- The result remains present after returning to the Career or main menu.
- The Dreamcast has been given time to write the updated Career data to the VMU.
2. Audit the six ordinary five-goal stages
Review Warehouse, School, Mall, Downtown, Downhill Jam, and Streets one at a time. These are the only six stages that contribute to the 30 ordinary tapes. Each stage has five goals: the first score target, the higher score target, the S-K-A-T-E letters, the hidden videotape, and a level-specific challenge such as destroying objects or grinding designated targets.
Use the progress display in Career to identify missing goals instead of relying on memory. A stage may show four completed goals even though the hidden tape or level-specific challenge is still missing. Replay the appropriate objective directly: use a score-focused run for a score target, a route-focused run for S-K-A-T-E or the hidden tape, and a short controlled run for object challenges.
Free Skate is useful for learning a route, but it does not register a Career goal. After practicing, return to the same stage through Career and complete the objective during the timed session. If the tape route and score line interfere with one another, split them across separate runs rather than risking both on one attempt.
- Warehouse, School, Mall, Downtown, Downhill Jam, and Streets have all been reviewed.
- Both score goals are complete in each of the six stages.
- S-K-A-T-E, the hidden tape, and the level-specific challenge are complete in each stage.
- The ordinary-stage total reaches 30 tapes when all six five-goal sets are finished.
3. Check competition medals separately
Do not apply the five-goal checklist to Skate Park, Burnside, or Roswell. These three stages have no ordinary tape set. Each instead uses three one-minute competition sessions. The game scores the sessions through the judges and determines a final placement, awarding bronze, silver, or gold according to the result.
Confirm that Skate Park and Burnside each have a recorded medal and that Roswell has a recorded qualifying result. The Career route requires advancing through the competitions and finishing Roswell in third place or better; it does not require gold medals at all three locations.
If you want the strongest completion record, replay any non-gold competition and aim for first place. Build a dependable line, land each run cleanly, and improve only when you can repeat the added trick. Three gold medals are optional for reaching the end of Career, but they provide an additional competition reward and are worth tracking separately from the 30 tapes.
- Skate Park has a recorded medal.
- Burnside has a recorded medal.
- Roswell has a recorded medal and a third-place-or-better result.
- All three competitions are gold if pursuing the optional completionist target.
4. Verify rewards and protect the finished save
After the Career records have updated, inspect the game's video, skater, and extra-content areas. Collecting all 30 tapes with one Career skater unlocks Officer Dick. Earning three competition medals unlocks the competition bail video, while earning three gold medals unlocks the character-ending video. These rewards confirm progress, but they should not replace checking the individual stage records.
If an expected reward is missing, return to Career and verify the underlying requirement. Do not assume that every locked video means a hidden tape is missing: some rewards depend on medals, gold results, or the skater used.
Keep the completed VMU save intact. If you have another VMU or a compatible Dreamcast save-management method, make a backup after confirming the save reloads correctly. The manual confirms that Career progress is stored on the VMU and that the Dreamcast VMU Manager can be used to inspect available storage. Avoid deleting the original until the backup has been tested.
- The 30-tape target is complete when pursuing all ordinary goals.
- Officer Dick is available after the 30-tape requirement is met.
- The competition videos have been checked against the medal and gold requirements.
- The completed Career save reloads with its records intact.
- A backup exists when the available VMU hardware or save-management method supports one.
5. Continue with post-Career practice
Use Free Skate to refine hidden-tape approaches, object routes, and repeatable scoring lines without the two-minute pressure. When a route is reliable, test it in Single Session or return to Career only if a specific goal remains incomplete.
For score practice, favor a line you can land repeatedly: use an aerial into a grind, continue into another aerial when the approach is stable, and end the combo before the landing becomes uncertain. Two-player Trick Attack, Graffiti, and HORSE are optional ways to compare lines with another player; none is required for Career completion.
Maintain the finished save as an archive and use a separate save or backup for experimental runs whenever possible. This preserves the completed medals, tapes, and unlocks while allowing continued practice.
- Any missed objective has been identified from the progress records rather than guessed.
- Free Skate practice has been converted into an actual Career completion when needed.
- Post-Career score attempts do not overwrite the protected completion save.
Before you move on
- Roswell is complete with a third-place finish or better.
- Warehouse, School, Mall, Downtown, Downhill Jam, and Streets each show five completed ordinary goals when pursuing the full 30-tape target.
- The six ordinary stages account for all 30 tapes; no competition tape is included in that total.
- Skate Park, Burnside, and Roswell each show a recorded competition medal.
- All three competitions show gold medals if pursuing the optional completionist target.
- The Career save reloads with the completed records intact.
- Officer Dick and the competition videos are available when their separate requirements have been met.
Finishing up
Career cleared: progress through the ordinary stages, clear Skate Park, Burnside, and Roswell as competitions, and finish Roswell with a qualifying medal result.
Full objective completion: Warehouse, School, Mall, Downtown, Downhill Jam, and Streets each show all five goals complete: two score targets, S-K-A-T-E, the hidden tape, and the level-specific challenge, for 30 tapes total.
Competition completion: Skate Park, Burnside, and Roswell each show a recorded medal; earn all three gold medals only if pursuing the optional character-ending video.
Optional reward verification: Officer Dick is available after all 30 tapes, the Bails video after three competition medals, the character-ending video after three gold medals, and the Neversoft Bails video after three medals earned as Officer Dick. Save the completed VMU file.
Choose your next gameScreenshots & video
Game imagery for reference. Follow the written chapters above for the route and strategies.
Sources & references
Our original guide draws on the references below. Check the edition at the top of this page before following controls or unlock requirements.
- Tony Hawk's Pro Skater USA Dreamcast instruction manual
- Tony Hawk's Pro Skater/Controls
- Tony Hawk's Pro Skater/Gameplay
- Tony Hawk's Pro Skater – Dreamcast Mini-FAQ
- Tony Hawk's Pro Skater Walkthrough – StrategyWiki
- Tony Hawk's Pro Skater — Roswell Level Guide — Planet Tony Hawk
- Tony Hawk's Pro Skater Dreamcast cheats and unlockables – GameFAQs
- Tony Hawk's Pro Skater – All-In-One-Run FAQ – Dreamcast
- Tony Hawk's Pro Skater/Maps – StrategyWiki
- Tony Hawk’s Pro Skater/Gaps — StrategyWiki
- Tony Hawk’s Pro Skater — Dreamcast FAQs, Walkthroughs, and Guides — GameFAQs
- Tony Hawk's Pro Skater — gameplay and modes reference
- Tony Hawk's Pro Skater DreamCast Cheats
- Tony Hawk's Pro Skater
- Tony Hawk's Pro Skater – The GamesFirst! Archive
About the game & collecting notes
- Platform
- Dreamcast
Practical, platform-accurate strategy for the original Tony Hawk's Pro Skater on Sega Dreamcast (North America release). Covers Dreamcast-specific controls and settings, core trick and scoring systems, career-objective structure, efficient single-run and 100% approaches, multiplayer/free-skate practice, and finishing the game's campaign and completion checklist.
Darryl Polo
Darryl Polo loves tinkering with emulation and revisiting retro games. He enjoys exploring how old favorites play on different setups and sharing what he learns along the way. At Joking Joystick, he writes about the games, hardware, and small discoveries that keep the hobby fun.
Our editorial standardsFound a step that needs another look? Help us improve this guide.