The Legend of Zelda: Twilight Princess — GameCube (Original) Complete Walkthrough
Step-by-step coverage of the original GameCube edition from Ordon Village through the final duel with Ganondorf and the game's ending. Focused on GameCube controls, dungeon routes, boss strategies, warp and horse sections, and the finish conditions required to trigger the canonical ending on the original release.

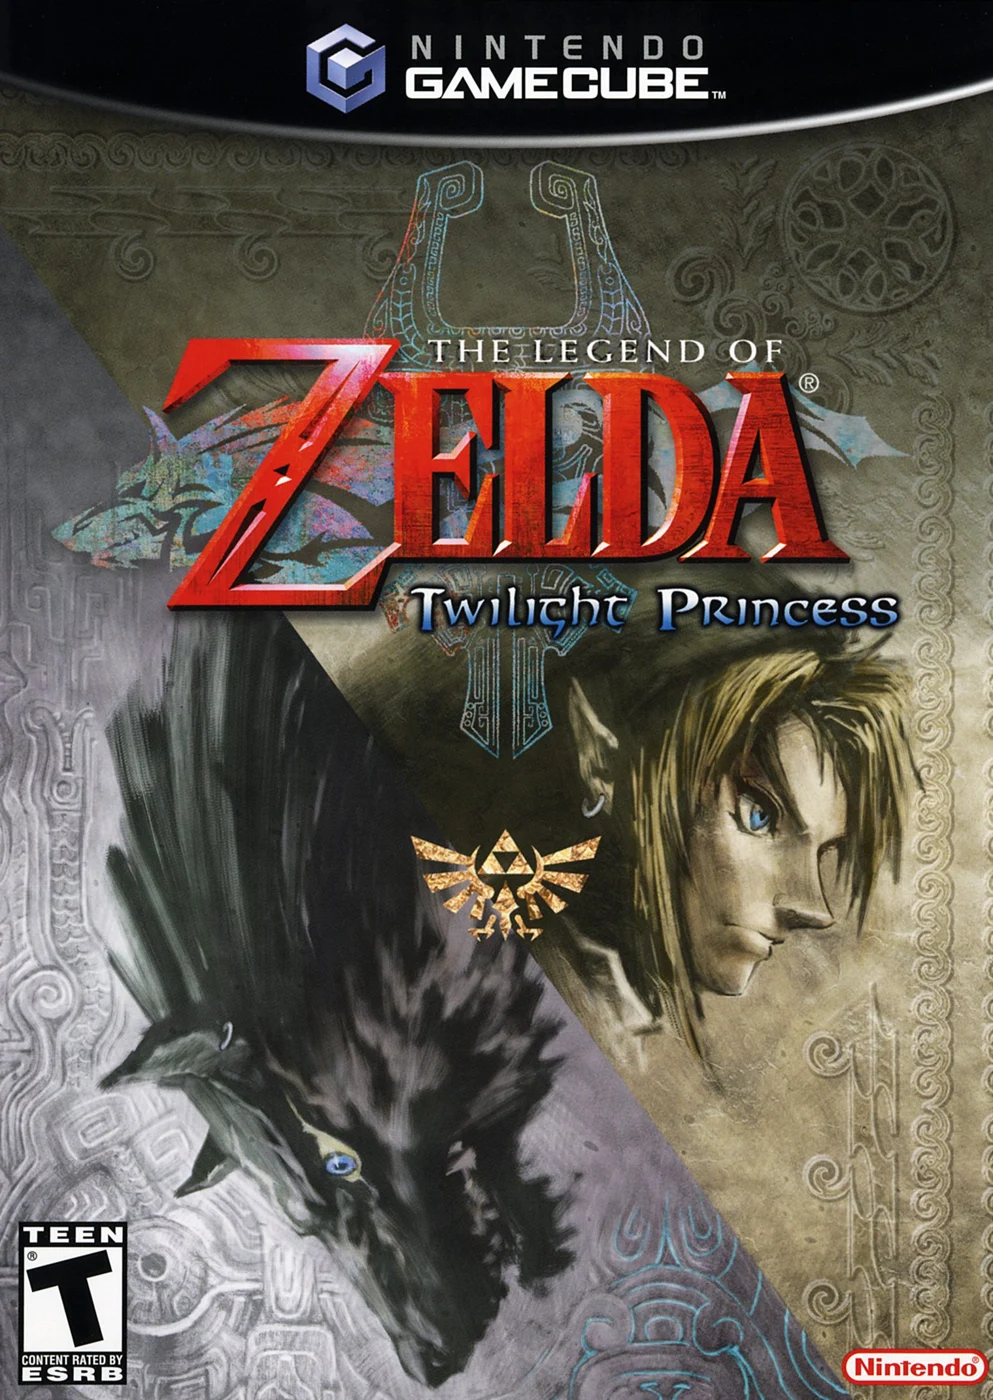
Find a copy
The Legend of Zelda: Twilight Princess Nintendo GameCube
We may earn a commission if you buy through these links, at no extra cost to you. As an Amazon Associate I earn from qualifying purchases.
Opens retailer search results. Check the model, edition, seller, availability and current price before buying.
Before you begin
You are preparing to play the original GameCube release of The Legend of Zelda: Twilight Princess.
This walkthrough assumes you are playing from the GameCube disc or an accurate GameCube image, using the standard GameCube controller and a GameCube memory card.
The GameCube version keeps the classic button-driven controls (targeting with the L button, limited two-item equip slots, free camera control) and differs in control layout and some equips from the Wii and later HD rereleases.
Follow these chapters in order for a clear route through the main campaign.
Each chapter explains where to go, what to do, how to handle boss encounters, how to recover from common mistakes, and how to verify you have completed the required objective before moving on.
Optional and post-game objectives are separated so you can choose a focused main-story run or a completionist sweep.
Set yourself up for the run
Hardware: Use a Nintendo GameCube or an accurate GameCube environment, the original Twilight Princess GameCube release, and a compatible memory card or verified virtual memory card.
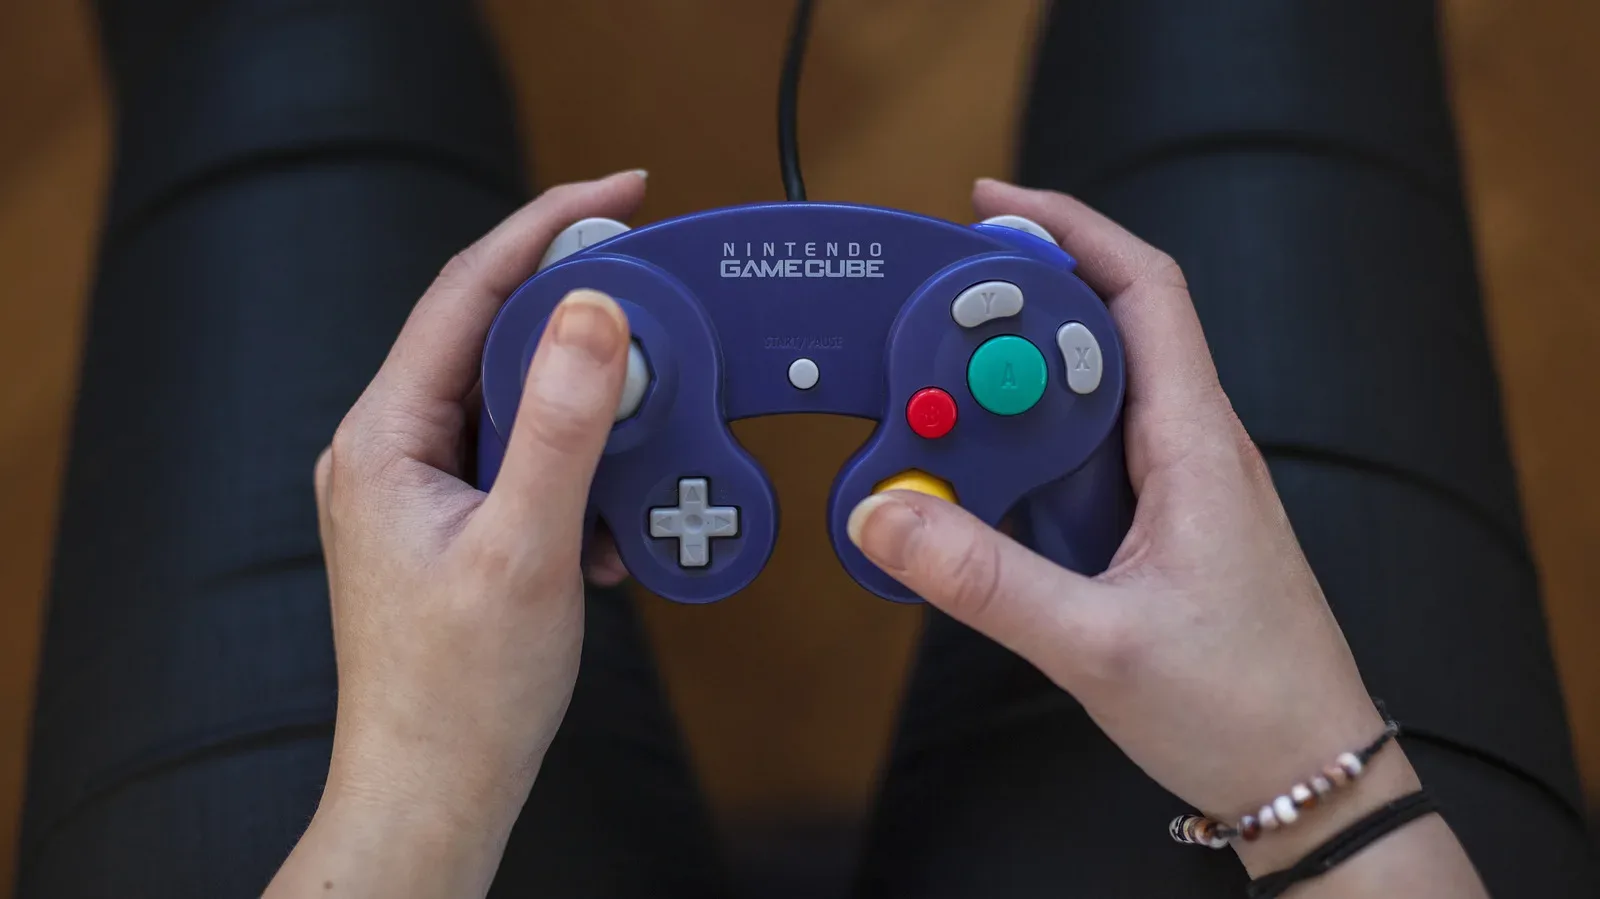
Controller: Use a standard GameCube controller. L is the primary lock-on button, Z calls or interacts with Midna, and X and Y assign the two currently equipped secondary items.
Saving: Use Save from the Quest screen before major transitions, before boss attempts, and after important overworld progress. A dungeon save normally returns Link to the dungeon entrance while preserving completed progress; use Ooccoo where available when you need a dungeon return point.
Keep a separate Quest Log for optional exploration or a pre-boss backup. Do not overwrite the only file containing the last confirmed story milestone.
Before dungeons, carry dependable healing and replenish arrows, bombs, lantern oil, and other supplies when the route requires them.
The GameCube release assigns only two secondary items at once, so pause and change X and Y assignments as puzzles and bosses require.
Wolf Link cannot use human secondary items. Learn Senses, scent tracking, digging, Midna-assisted jumps, and the charged Shadow Attack.
The GameCube world is not mirrored like the Wii release. Do not transplant Wii or HD left-right directions, controls, item layouts, or edition-specific rewards into this walkthrough.
Use the GameCube manual for controller-neutral-position reset instructions if the analog sticks or buttons behave incorrectly.
Prologue — Ordon Village and Ordon Escape
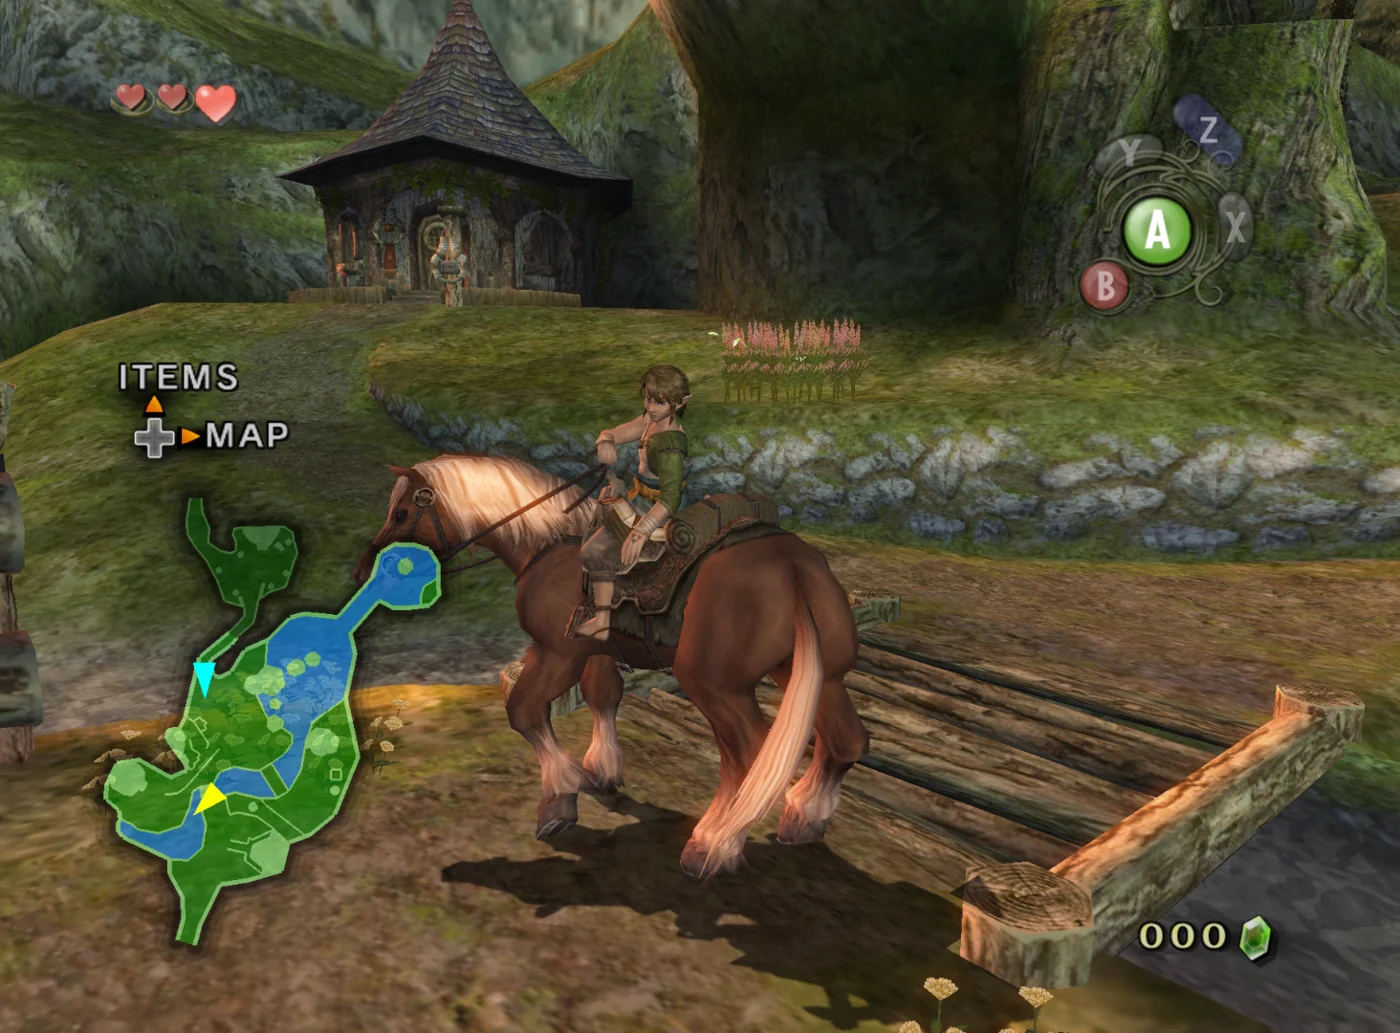
Complete the opening Ordon Ranch lesson, recover Uli’s cradle, obtain the Fishing Rod and Slingshot, learn the Wooden Sword techniques, rescue Talo and the female monkey in Faron Woods, complete the later twenty-goat lesson, and enter Ordon Spring through the original GameCube crawlspace. This chapter ends at the Twilight transition. The Ordon Sword and Ordon Shield are not recovered until the following chapter.
1. Call Epona and complete the ten-goat lesson
Leave Link’s house and follow the path to Ordon Spring. Speak with Ilia near Epona, pick up the horse grass beside the water, and use it to call Epona. Ride back toward the village and continue south to Ordon Ranch. Speak with Fado and agree to herd the goats.
The first lesson has ten goats. Ride behind the animals and press A to whoop, driving them toward the barn. Approach from behind or at an angle instead of charging through the herd, since goats can turn around when Link blocks their path. Circle around the outside of the pasture to collect stragglers.
After all ten goats enter the barn, Fado sets up fences for jumping practice. Gallop straight toward each fence and press A near the obstacle to make Epona jump. Complete the practice route, then jump the ranch gate to return to the village. Use the offered save opportunity. This is the best early checkpoint because it prevents repeating the opening ranch lesson after a failed attempt later.
- Call Epona at Ordon Spring.
- Herd all ten goats into the barn.
- Complete the fence-jumping practice.
- Jump the ranch gate and save when prompted.
2. Trigger the village events and recover Uli’s cradle
On the following day, leave Link’s house and speak with the children as the story directs. Enter Ordon Village and talk to the villagers involved in the morning events. Speak with Mayor Bo when the runaway-goat event becomes available. Face the charging goat and press A when it reaches Link. If the grab fails, speak with Bo again and repeat the attempt.
Find Jaggle near the raised rock formation by the village water. Climb the vines, jump to the nearby platform, and pick up Hawk Grass. Use it to call a hawk and aim at the bee nest above Hanch. Knocking down the nest is part of opening the village route and also provides access to useful rupees.
Continue across the roof and ledge route to the second Hawk Grass patch. Face the monkey holding Uli’s cradle across the water and release the hawk at the cradle. Carry the recovered cradle back to Uli near the creek, then follow Uli to her house. Her conversation gives Link the Fishing Rod.
- Complete Mayor Bo’s runaway-goat event.
- Use Hawk Grass to knock down the bee nest.
- Use the second Hawk Grass patch to retrieve Uli’s cradle.
- Return the cradle to Uli and receive the Fishing Rod.
3. Complete the original GameCube cat sequence and buy the Slingshot
Go behind Jaggle and Pergie’s house to the dock where Sera’s cat is watching the water. Equip the Fishing Rod and catch two Greengills. After the first fish, cast again. The cat takes the second fish and runs back to Sera’s Sundries; follow it into the shop.
Speak with Sera. She gives Link a half-full bottle of milk and then allows him to purchase the Slingshot for 30 rupees. If you do not have enough money, collect rupees from the village rooftops, ledges, vines, pumpkins, rocks, and the cucco route before buying it. Do not spend the needed money on optional purchases first.
The milk is optional after Sera gives it to you, but the bottle is useful. Bee Larva can be collected from the fallen bee nest and may be placed in the bottle, although it is not required for the main path.
- Catch two Greengills at the dock.
- Follow Sera’s cat into the shop.
- Receive the bottle of milk.
- Buy the Slingshot for 30 rupees.
4. Obtain the Wooden Sword and learn the sword controls
Return to Link’s house and speak with Talo, Malo, and Beth to begin their Slingshot practice. Destroy the scarecrows and the red targets. A Skullwalltula blocks the ladder to the house, so equip the Slingshot, use L-targeting, and shoot it down.
Climb into the house and open Rusl’s chest to obtain the Wooden Sword. Return outside and speak with the children again to begin the sword lesson. On the GameCube controller, B performs sword attacks. While L-targeting, a forward stick direction with B produces a stab, holding B and releasing it charges the Spin Attack, and A performs the Jump Strike when the lesson calls for it.
Finish the demonstrations. When the monkey appears, mount Epona and follow the children north through Ordon Woods. Jump the gate into Faron Woods and continue toward the dark tunnel.
- Complete the Slingshot target practice.
- Shoot the Skullwalltula from the ladder.
- Collect the Wooden Sword from Rusl’s chest.
- Complete the sword lesson.
- Follow the children and monkey into Faron Woods.
5. Receive the Lantern and rescue Talo and the female monkey
In Faron Woods, dismount when Epona refuses to enter the dark tunnel. Take the GameCube route to Coro’s house and speak with him to receive the Lantern. Light the nearby fire if needed, then enter the tunnel. Use the Lantern to burn the spider webs blocking the passage. Avoid leaving it equipped continuously because it consumes oil; light fixed torches and put it away when visibility allows.
Before leaving the tunnel, take the side passage for its optional rupee chest if desired. In the larger Faron Woods area, enter the northeastern cave. Defeat the Keese and Bokoblin, then open the chest for the Small Key. Lighting both torches reveals the optional Piece of Heart chest.
Return outside and go to the southwestern locked gate. Use the Small Key, defeat the Bokoblins, and continue north. Trill’s shop is on this route. Paying for oil or a potion is optional, but stealing or refusing payment causes the shopkeeper to treat Link as a thief, so use the shop only if you intend to pay.
Continue along the path, checking the side route for the optional rupee chest. At the cage, defeat the two Bokoblins and cut the cage open. This frees Talo and the female monkey. No other kidnapped children are rescued in this chapter.
- Receive the Lantern from Coro.
- Burn the tunnel webs without wasting all the oil.
- Collect the required Small Key in the northeastern cave.
- Open the southwestern gate.
- Free Talo and the female monkey.
6. Complete the required twenty-goat lesson
After the Faron Woods rescue scene, the story returns Link to Ordon Ranch. Pick up the horse grass, call Epona, and speak with Fado. This is the second ranch lesson and contains twenty goats, not ten.
Herd the goats exactly as before: stay behind or to the side of each animal, use A to whoop, and work around the outside of the herd when it spreads out. Do not cut through the middle, since this can send goats in opposing directions. Continue until Fado accepts the completed lesson.
If the lesson is failed or the herd becomes difficult to control, repeat it. The ranch sequence must be accepted before the final Ordon route opens. Afterward, leave the ranch and follow the story back toward Link’s house and Ordon Spring.
- Call Epona at Ordon Ranch.
- Herd all twenty goats into the barn.
- Repeat the lesson if Fado does not accept it.
- Leave the ranch after the lesson is complete.
7. Lend the Wooden Sword and enter Ordon Spring
After the ranch sequence, follow the story toward Link’s house. Before going north, you may enter the house and use the Lantern in the basement to open the optional rupee chest. Then return outside and speak with Talo and Malo. Let them borrow the Wooden Sword. This is required to pass them; do not look for the Ordon Sword or Ordon Shield yet, because those belong to the next chapter.
Continue north through Ordon Woods to Ordon Spring. Speak with Colin and Ilia at the closed spring entrance. Colin explains that there is a secret path. Return south into the small clearing between the spring and Link’s house and search the west to northwest side of the clearing for the crawlspace. Press A to enter and crawl through.
The cutscene inside the spring leads directly to the kidnapping. Bulblins seize Ilia and the children, and Link is pulled into the Twilight. Link transforms into Wolf Link and is imprisoned. Midna appears and begins the escape sequence. Follow her instructions through the prison route; completing that escape is the handoff to the next chapter.
- Finish the twenty-goat lesson first.
- Lend the Wooden Sword to Talo and Malo.
- Reach Ordon Spring and speak with Colin and Ilia.
- Use the GameCube crawlspace on the west to northwest side of the clearing.
- Watch the kidnapping and Twilight transformation.
- Complete the initial prison escape with Midna.
Before you move on
- The ten-goat ranch lesson and its save checkpoint are complete.
- Link has obtained the Fishing Rod, bottle of milk, Slingshot, Lantern, and Wooden Sword.
- Talo and the female monkey have been freed in Faron Woods.
- Fado has accepted the twenty-goat ranch lesson.
- The Wooden Sword has been lent to Talo and Malo.
- Link has entered Ordon Spring through the GameCube crawlspace.
- The kidnapping cutscene and Wolf Link transformation have occurred.
- Midna has appeared and the initial prison escape is complete.
- The Ordon Sword and Ordon Shield have not been incorrectly counted as chapter rewards; they remain objectives for Chapter 2.
References for this chapter
- CHAPTER 1 — The Legend of Zelda: Twilight Princess Walkthrough & Guide — GameCube
- The Legend of Zelda: Twilight Princess — Guide and Walkthrough — GameCube
- Part 1: Ordon Village — Twilight Princess Walkthrough
- Ordon Village — The Legend of Zelda: Twilight Princess Walkthrough
- The Legend of Zelda: Twilight Princess GameCube Manual
- Chapter 1: Ordon Village — Zelda Universe
Into the Twilight — Faron Region, Wolf Form, Meet Midna
After the children are abducted, Link crosses the first Twilight barrier and is transformed into Wolf Link. Midna helps him escape Hyrule Castle, meet Princess Zelda, and return to Ordon for the sword and shield. Link then reenters the Faron Twilight, restores the Light Spirit by collecting all 16 Tears of Light, unlocks practical use of Midna’s warp ability, and opens the route to the Forest Temple.
Cross the first Twilight barrier
After completing the Ordon Village opening and the horseback escape, follow the kidnapped children toward Faron Woods. Continue along the route until the purple wall of Twilight blocks the path. Approach it to trigger the transformation into Wolf Link and the castle prison sequence.
Wolf Link cannot use the sword, shield, lantern, or secondary items. On the GameCube controller, X activates Senses, A performs a dash or context-sensitive action, and B attacks. Use L to target enemies, Midna, and interactive jump points.
- Follow the children toward Faron Woods.
- Approach the first purple Twilight barrier.
- Confirm that Link has changed into Wolf Link before continuing.
Escape the castle prison and meet Zelda
Wolf Link wakes in a cell beneath Hyrule Castle. Midna appears outside and becomes your partner. Attack the wooden crate inside the cell to expose the soft-earth escape point, activate Senses, and dig through it.
In the corridors beyond the cell, follow Midna’s instructions. Stand at the marked ledges, target Midna, and press the action button to perform her assisted jumps. Use Senses when the route seems empty or when an enemy is difficult to see. Keep following the passage until you reach the castle interior and the room where Princess Zelda is held.
Zelda explains what happened to Hyrule and why Link has been cursed. After the conversation, Midna returns Link to the Light World at Ordon Spring. This is not yet the Faron Tear hunt; first recover the equipment needed for the next section.
- Dig out of the prison cell.
- Use Midna-assisted jumps to cross the castle passages.
- Reach Princess Zelda and complete her conversation.
- Return to Ordon Spring with Midna.
Recover the Ordon Shield and Ordon Sword
At Ordon Spring, speak with Midna and follow her instructions to enter Ordon Village as a wolf. Stay out of sight while Rusl and Uli discuss the recent events. Their conversation identifies the locations of the two items you need.
For the Ordon Shield, climb to the upper ledge near Sera’s Sundries and use Midna’s jump assistance to reach the roof. Drop into the house through the opening and dash into the wall or supporting area as instructed by the game until the shield falls. Pick it up and leave through the available exit.
For the Ordon Sword, use Senses to track the children’s scent near the village house. Enter the house through the roof opening and take the sword from its resting place. Dig out through the soft ground to leave. Return to Ordon Spring and speak to Midna when both items are in your inventory.
Midna then takes Link to the southern Faron Woods Twilight entrance. This equipment sequence is mandatory; trying to proceed without both the sword and shield leaves the story unable to advance.
- Obtain the Ordon Shield.
- Obtain the Ordon Sword.
- Return to Ordon Spring and speak with Midna.
- Enter the southern Faron Woods Twilight with Midna.
Defeat the first Shadow Beasts
Proceed north through the Twilight-covered Faron Woods. A group of three Shadow Beasts creates a barrier. Defeat one normally with targeted Wolf Link attacks. The remaining beasts can revive one another, so do not leave them separated for long.
When two are near each other, hold B to charge Midna’s Shadow Attack. The energy field expands around Wolf Link; release B while both enemies are inside it to destroy them together. The barrier disappears after the group is defeated, and the route to the Faron Spring opens.
Continue north to the spring and examine the spirit in the water. Faron, the Light Spirit, gives Link the Vessel of Light and explains that 16 Dark Insects have stolen the region’s light.
- Defeat the first Shadow Beast group.
- Use the charged B attack to destroy the final two together.
- Reach Faron Spring.
- Receive the Vessel of Light.
Collect the first Tears of Light
Open the map and use Senses frequently. The GameCube release requires 16 Tears of Light in the Faron sequence. The insects are visible while Senses is active, and their positions are reflected on the area map.
Follow the tunnel from the spring toward the crossroads. Defeat the first two insects in the tunnel. At Coro’s Lantern Shop, dash into the crates on the north side to expose another insect, then use the ramp on the south side and Midna’s jump assistance to enter the house through the open window. Inside, activate Senses and speak to Coro’s spirit to reveal two more insects.
Return outside and approach the locked gate leading toward the Forest Temple path. With Senses active, inspect the ground beside the gate and dig through the soft-earth opening. Defeat the two insects on the far side, then continue through the tunnel.
In the next Faron Woods area, avoid the purple poison fog. Knock the insects from the wall by dashing into it, then target and attack them. Use the exposed branch and the sequence of Midna jumps to cross the fog safely. On the central island, use the charged B attack against the group of three insects. Continue across the remaining jump points; the final two in this section must be dug out before they can be defeated.
- Collect the insects in the tunnel and around Coro’s shop.
- Enter Coro’s house through the upper window.
- Dig under the gate beside the Forest Temple path.
- Use Midna’s jumps to cross the poison fog.
- Collect the insects on the central island and dig out the next pair.
Finish the Faron vessel and unlock the route forward
After crossing the fog, pass through the Forest Temple entrance area. Three Shadow Beasts block the northern path. Defeat one with ordinary attacks, then group the other two and use the charged B attack before they can revive one another.
Continue north toward the Forest Temple gate. Two final Shadow Insects are near a monkey being attacked at the gate. Activate Senses, defeat both insects, and collect their Tears. When all 16 Tears are in the Vessel of Light, Link is automatically returned to Faron Spring.
Faron restores the light and returns Link to human form. The Hero’s Clothes are added automatically, and the sword and shield become usable again. Save after this restoration if possible.
Return to Coro’s shop and speak with him. He gives Link the Small Key needed to open the gate blocking the Forest Temple path. Coro also offers a second bottle containing lantern oil for 100 rupees. The bottle is optional for main-story progress, but the extra oil can be useful in the next passage.
Use the Small Key on the gate, travel through the dark tunnel, and follow the monkey through the poisonous section. The monkey carries the lantern across and returns it with the oil spent. Refill it if you bought the second bottle, then continue north. In the next area, fight the Stalfos and learn the Ending Blow by knocking it down, targeting it, and pressing A when the finishing prompt appears. Burn the web at the end of the route to enter the Forest Temple.
- Defeat the second Shadow Beast group.
- Collect the final two Tears near the Forest Temple gate.
- Fill the Faron Vessel with all 16 Tears of Light.
- Return to human form and receive the Hero’s Clothes.
- Obtain Coro’s Small Key.
- Open the Forest Temple path gate.
- Learn Ending Blow and enter the Forest Temple.
Before you move on
- Link has obtained the Ordon Sword and Ordon Shield.
- Faron’s Vessel of Light is full with 16 Tears of Light.
- Faron has restored the region and Link is human again in the Hero’s Clothes.
- Midna’s warp menu is available from an activated portal.
- Coro has given Link the Small Key and the Forest Temple path gate is open.
- Link has learned Ending Blow and crossed into the Forest Temple.
Forest Temple — First Full Dungeon
Enter the Forest Temple through the restored Faron Woods, rescue all eight monkeys, defeat Ook to obtain the Gale Boomerang, collect the Compass and Big Key, and defeat Twilit Parasite: Diababa. These directions are for the original Nintendo GameCube layout. The Wii release mirrors the world, so east and west references from Wii guides may not match this route.
Enter the temple and rescue the first two monkeys
After restoring light to Faron Woods and receiving the Lantern from Coro, follow the cleared forest path to the Forest Temple entrance. Use the large central chamber as your main landmark. When a route ends or a newly freed monkey follows you, return here to choose the next accessible branch.
Proceed through the opening rooms, defeat the Deku Baba and Skulltula, and cross the rotating wind bridge when it reaches the opposite ledge. Open the chest beyond the bridge for a Small Key, then return to the central chamber and unlock the barred route.
In the next room, defeat the Bokoblins around the caged monkey. Roll into the supporting pillar until the cage drops, then free the monkey. The two rescued monkeys can now form a swinging chain across the nearby gap. Use their chain to reach the next section of the temple.
- Enter through the cleared Faron Woods route.
- Collect the Small Key beyond the first rotating bridge.
- Free the second monkey by striking its supporting pillar with roll attacks.
- Use the two monkeys to cross the first gap.
Rescue the third and fourth monkeys
Use the monkey-assisted crossing to reach the west-side route of the central chamber in the GameCube layout. Burn the spiderweb with the Lantern. In the next rooms, handle the Baba Serpents carefully and use Bomblings to destroy the Deku Like and the boulders blocking the upper route.
In the third monkey’s room, roll into the pillar supporting the chest and open the fallen chest for another Small Key. Tile Worms can erupt from the floor, so watch their movement and avoid standing on their visible patterns. Light the two unlit torches with the Lantern to complete the staircase, defeat the Skulltula above, and unlock the monkey’s cage.
Continue through the larger vertical room to reach the fourth monkey. Keep outside the Big Baba’s reach and strike after its head lunges forward. Once it becomes a stationary bud, place a Bombling beside it to destroy the bud and reveal a Small Key. Use that key on the fourth monkey’s cage.
A Piece of Heart is available in a lower side room near this route. It is optional and does not affect the temple’s required progression.
- Burn the web with the Lantern.
- Use Bomblings to clear Deku Likes and blocking boulders.
- Collect the Small Key from the chest supported by a pillar.
- Free the third and fourth monkeys.
- Treat the Piece of Heart as optional.
Cross to Ook and obtain the Gale Boomerang
Return to the broken bridge near Ook’s chamber. With four monkeys rescued, they form a swinging chain. Jump to the next monkey only when the prompt appears, and release at the end of the final swing to land on the far side.
Defeat the Baba Serpents in Ook’s arena before focusing on the miniboss. Ook jumps between pillars and throws his Gale Boomerang. Wait for him to throw it, then roll into the pillar where he is standing. The returning boomerang strikes him and knocks him down.
While Ook is stunned, target him and attack his exposed rear with a Jump Attack followed by sword strikes. Retreat when he recovers and repeat the pillar interruption. His later throws travel shorter distances, so be ready to react immediately.
After Ook is defeated, collect the Gale Boomerang. Target the wind spinner above the sealed exit and strike it repeatedly until the door opens. Keep the Gale Boomerang equipped for the temple’s remaining spinner, bridge, web, and Bombling puzzles.
- Cross the four-monkey chain without jumping early.
- Defeat the Baba Serpents in Ook’s room.
- Roll into Ook’s pillar after he throws the boomerang.
- Attack Ook from behind while he is stunned.
- Collect the Gale Boomerang and open the exit.
Rescue the fifth monkey and collect the Compass
Use the Gale Boomerang to rotate the wind bridges outside Ook’s chamber. Align the bridges into a continuous route, cross to the far side, defeat the Bokoblin near the cage, and cut the web holding the fifth monkey with the boomerang.
Return to the familiar vertical room. The four torches there can be extinguished with the Gale Boomerang to reveal an optional Piece of Heart. This reward is not needed for the boss route.
Return to the central chamber and look above the altar. A chest is suspended by webbing. Target the web with the Gale Boomerang to drop the chest, then open it to obtain the Compass. Use the Compass to check remaining chest and monkey locations if you are unsure which branch to take next.
- Align and cross the wind bridges.
- Free the fifth monkey by cutting its web.
- Drop and open the suspended Compass chest.
- Only extinguish the torches if you want the optional Piece of Heart.
Open the Big Key gate and rescue monkeys six through eight
From the central chamber, take the GameCube-layout east route into the water-filled room. In the room with four wind spinners, examine the Z-shaped marking on the floor. Start with the spinner at the southwest, lower-left end of the visible pattern, then target the remaining spinners in sequence by following the Z from one end to the other. The correct route is defined by the floor marking; do not substitute a memorized Wii-direction list if the room’s orientation appears different. When the pattern is completed, the gate opens and you can collect the Big Key.
Return to the northern route and rotate the bridges with the Gale Boomerang. Enter the sixth monkey’s room, defeat or bypass the floor enemies, and use a Bombling against the Deku Like to reveal a Small Key. Pull a Bombling toward the nearby boulder with the Gale Boomerang, destroy the boulder, climb the revealed vines, and use another Bombling to clear the obstruction near the monkey’s cage.
Return to the rotating-bridge room and align the bridge toward the GameCube-layout west-side chamber. Defeat the large Skulltulas, burn the web covering the floor opening, and drop through it to reach the seventh monkey. Free it and climb back to the main route.
Reach the remaining chamber and clear the Tile Worms, Skulltula, and Walltulas blocking the vines. At the top, target both wind spinners beside the eighth monkey’s cage with the Gale Boomerang to open it.
- Read the floor’s Z marking before activating the four spinners.
- Begin at the southwest, lower-left end of the visible Z pattern and follow the line across the floor.
- Collect the Big Key after the gate opens.
- Use the Small Key and Bomblings to reach the sixth monkey.
- Burn the web and rescue the seventh monkey.
- Activate both spinners to free the eighth monkey.
Cross the final chain and defeat Diababa
Return to the monkey gathering room. Once all eight monkeys are free, they form the final swinging chain. Jump from one monkey to the next when the prompt appears, then release at the end of the swing to land near the boss-door side of the room. Use the Big Key to enter the boss chamber.
During the first phase, Diababa attacks with two side heads. Target a Bombling near the floating logs, then target one side head and release the Gale Boomerang. The boomerang carries the explosive into the head. Repeat for the other side head. Remain on the safe platform and use the shield against lunges instead of entering the poisoned water.
The central head appears after both side heads are destroyed. Ook then swings across the arena carrying a Bombling. Target Ook first, then target Diababa’s central head, and release the Gale Boomerang so the Bombling hits the head. When Diababa collapses, target the exposed eye and attack with a Jump Attack followed by sword strikes.
Repeat the Ook, Bombling, and exposed-eye sequence. When the final attack prompt appears, use Ending Blow to finish the encounter. Collect the Heart Container and Fused Shadow after the battle, then leave through the post-boss sequence.
- Rescue all eight monkeys before attempting the final chain.
- Use Bomblings against both side heads.
- Use Ook’s carried Bombling against Diababa’s central head.
- Attack the exposed eye only after the central head collapses.
- Use Ending Blow when the finishing prompt appears.
- Collect the Heart Container and Fused Shadow.
Before you move on
- The Gale Boomerang is in Link’s inventory.
- All eight Forest Temple monkeys have been freed and have formed the final chain.
- The Big Key has been obtained and used on the boss door.
- Twilit Parasite: Diababa has been defeated.
- The Heart Container and Fused Shadow have been collected.
- Midna’s post-boss sequence begins and the story advances toward the next Fused Shadow objective.
Goron Mines and Lakebed Temple — Fire, Water, and Fused Shadow Progression
Complete the required Eldin and Lanayru progression after the Forest Temple. Restore Eldin’s Light Spirit, fail the first Death Mountain climb, return to Ordon Village for Mayor Bo’s sumo lesson, rescue Colin from King Bulblin, and use the Iron Boots to enter Goron Mines. Clear the GameCube Goron Mines route, defeat Dangoro and Fyrus, and claim the second Fused Shadow. Then thaw Zora’s Domain, obtain the Zora Armor, restore Lanayru’s Light Spirit, and enter Lakebed Temple. Activate its water systems, defeat Deku Toad, collect the Clawshot and Big Key, defeat Morpheel, and claim the third and final Fused Shadow. The chapter continues through Zant’s ambush at Lanayru Spring, Princess Zelda’s intervention, the Sacred Grove and Skull Kid sequence, and the Master Sword retrieval. It ends with Link human again and ready to travel toward Arbiter’s Grounds.
1. Restore Eldin’s Light Spirit
After leaving the Forest Temple, return to Faron Woods and follow Midna’s route into the Twilight-covered Eldin Province. Enter Kakariko Village and use Wolf Link’s senses to locate the Dark Insects carrying Eldin’s light. Search the village, the surrounding field, and Death Mountain approach until all sixteen Eldin Tears of Light have been recovered.
Return to the Light Spirit’s spring after filling the vessel. Eldin’s Light Spirit restores the province and returns Link to human form. Speak with Renado and the children in Kakariko Village, then leave through the northern passage toward Death Mountain. The Gorons and their Fused Shadow are the next required objective.
- Enter Twilight Eldin after the Forest Temple.
- Collect all sixteen Eldin Tears of Light.
- Restore Eldin’s Light Spirit.
- Speak with Renado and confirm that Death Mountain is the next destination.
2. Fail the first Death Mountain climb
Climb Death Mountain from Kakariko Village without the Iron Boots. When a Goron rolls down the path, brace for the impact, but allow the collision to knock Link back. This apparent failure is required; the Gorons will not permit Link to reach the mine entrance yet.
Return to Kakariko Village and speak with Renado. He directs Link to Mayor Bo in Ordon Village, because Bo previously earned the Gorons’ respect. Epona becomes available near the village during this sequence. Regain control of her, then ride south through Faron Province and continue to Ordon Village.
- Attempt the first Death Mountain climb without the Iron Boots.
- Let the rolling Goron knock Link back.
- Return to Kakariko Village and speak with Renado.
- Regain control of Epona and ride to Ordon Village.
3. Learn sumo wrestling and obtain the Iron Boots
Enter Mayor Bo’s house in Ordon Village and speak with him to begin the sumo lesson. In the GameCube version, use the Control Stick to sidestep, B to slap, and A to charge or grapple. Keep Link centered, avoid being pushed toward the edge, and use slaps to interrupt Bo before attempting a charge.
The first match teaches the controls. Win the decisive rematch to open the chest containing the Iron Boots. They are required for the Goron entrance challenge, magnetic floors and walls in Goron Mines, underwater movement, Dangoro’s fight, Fyrus’s chain, and Morpheel’s first phase.
The later twenty-goat activity is optional. It can provide a Piece of Heart, but it is not needed for the Iron Boots or Goron Mines. After receiving the boots, return to Kakariko Village with Epona.
- Complete Mayor Bo’s sumo lesson.
- Win the decisive match.
- Open the chest and obtain the Iron Boots.
- Return to Kakariko Village.
4. Rescue Colin from King Bulblin
When Link re-enters Kakariko Village after returning from Ordon, King Bulblin raids the town and captures Colin. Follow the fleeing riders through the northern gate and into Eldin Hyrule Field. The pursuit ends at the Bridge of Eldin.
Use Epona’s dash to catch Bulblin’s boar, but do not spend every dash at once. Close the distance, ride alongside him, and attack during the pass. At the bridge, Bulblin charges directly toward Link. Move slightly off the center line and strike as the two riders pass each other. Repeat the exchange until Bulblin falls and Colin is rescued.
Return to Kakariko Village after the cutscene. The Hylian Shield sold through Malo Mart is optional; it is useful against fire hazards but is not required to enter or clear Goron Mines.
- Trigger King Bulblin’s raid.
- Follow Bulblin into Eldin Hyrule Field.
- Rescue Colin at the Bridge of Eldin.
- Return to Kakariko Village.
5. Enter Goron Mines and collect the first key shard
Climb Death Mountain again with the Iron Boots. When the rolling Goron approaches, equip the boots and endure the impact. At the upper ring, speak with Gor Coron and win the Iron Boots sumo match. The entrance to Goron Mines opens after the victory.
Inside the mine, use the Iron Boots on magnetic plates and remove them when returning to ordinary floors. Watch fire jets, lava vents, and moving platforms before committing to a crossing. Weight-sensitive switches generally require the boots, while normal movement is faster without them.
Reach Gor Amoto in the first elder room. Speak with him to receive the first key shard, then open the chest behind him for the Dungeon Map. Ooccoo in the nearby pot is optional and can provide a way out of the dungeon later.
- Defeat Gor Coron in the Iron Boots rematch.
- Enter Goron Mines.
- Use magnetic surfaces to reach Gor Amoto.
- Receive the first key shard.
- Collect the Dungeon Map if desired.
6. Collect the second key shard and defeat Dangoro
Continue through the lower water and magnetic sections. Equip the Iron Boots underwater to activate switches and walk along magnetic surfaces. On rotating platforms, wait for a stable landing position and keep the boots equipped while the platform changes orientation.
Find Gor Ebizo and receive the second key shard. Continue to the magnetic arena to begin the Dangoro fight.
Dangoro is resistant to ordinary sword attacks while armored. Stand near the edge of the platform and wait for him to raise his arms and slam down. Attack his exposed belly. When he curls into a rolling ball, keep the Iron Boots equipped, let him approach, grab him, and throw him into the lava. Repeat the process three times.
After the fight, open the chest for the Hero’s Bow. Use the bow immediately on the rope holding the metal bridge beyond the arena.
- Cross the lower water and magnetic rooms.
- Receive the second key shard from Gor Ebizo.
- Strike Dangoro’s exposed belly after his slam.
- Grab and throw Dangoro into the lava three times.
- Collect the Hero’s Bow.
7. Assemble the Goron Mines Big Key
Use the Hero’s Bow to shoot the eyes of Beamos statues. Once disabled, push or pull the statues as needed to open the surrounding routes. Fire enemies and rope mechanisms can also be handled with the bow.
Find Gor Liggs and receive the third key shard. The three elder shards combine into the Goron Mines Big Key, so this dungeon does not use a separate Big Key chest in the usual format.
Continue through the magnetic crane and lava sections. Shoot bridge ropes with the bow, activate the magnetic switches, and cross the lowered bridge. Use the completed Big Key on the boss door.
- Disable the Beamos statues.
- Receive the third key shard from Gor Liggs.
- Confirm that all three shards have formed the Big Key.
- Cross the magnetic crane and bridge route.
- Open the boss door.
8. Defeat Fyrus and claim the second Fused Shadow
Fyrus is the corrupted Goron chief. Keep your distance and watch the glowing crystal on his forehead. Shoot it with the Hero’s Bow when it is exposed. The arrow stuns him and creates the opening for the next step.
Run behind Fyrus and grab one of the chains attached to his back while wearing the Iron Boots. Pull until he falls. Move to the exposed crystal on his face and attack it with the sword. Release the chain and retreat before he recovers. Repeat the bow, chain, and sword sequence until the battle ends.
After Fyrus is defeated, Darbus is restored. Collect the Heart Container and speak with Midna. She awards the second Fused Shadow, not the final one. Use her portal to leave the dungeon and save in the overworld.
- Shoot Fyrus’s forehead crystal.
- Pull a rear chain while wearing the Iron Boots.
- Attack the exposed face crystal.
- Defeat Fyrus and collect the Heart Container.
- Confirm receipt of the second Fused Shadow.
9. Thaw Zora’s Domain and prepare for Lakebed Temple
Follow the story route through Kakariko Village and Death Mountain. Midna carries a molten rock from Death Mountain to the frozen Zora region, thawing Zora’s Domain and reopening the waterways. Continue through the Zora and Castle Town events involving the injured Zora prince.
Visit the Zora graveyard and meet Queen Rutela. Complete the required encounter and accept her request to help her son. The reward is the Zora Armor, which lets Link swim and breathe underwater while equipped. It is essential for practical underwater travel in Lakebed Temple.
Travel to Lake Hylia and restore Lanayru’s Light Spirit by collecting all sixteen Lanayru Tears of Light. Before entering the temple, obtain Water Bombs from Barnes in Kakariko Village or otherwise ensure that you have a way to destroy underwater obstructions. Ordinary Bombs and Bomb Arrows are also useful for stalactites, boulders, and Deku Toad’s mouth.
At the bottom of Lake Hylia, destroy the obstruction blocking the temple entrance and enter Lakebed Temple.
- Thaw Zora’s Domain and the water route to Lake Hylia.
- Complete Queen Rutela’s required sequence.
- Obtain the Zora Armor.
- Collect all sixteen Lanayru Tears of Light.
- Prepare Water Bombs or another underwater bomb option.
- Open the Lakebed Temple entrance.
10. Activate the first water route and defeat Deku Toad
Swim through the temple entrance and surface in the opening chamber. Use the hanging handles and Bomb Arrows to drop stalactites where they create crossings or expose routes. Continue to the central rotating-staircase room, using the GameCube layout and its visible water machinery as landmarks rather than Wii-mirrored compass directions.
Follow the first side route to its flood-gate handle and pull it to release water into the temple machinery. Return toward the central room and use the moving platforms to reach the Small Key route. Unlock the lower door and follow the underwater passage.
Equip the Iron Boots to walk against the current. Destroy the underwater boulder with a Water Bomb or equivalent bomb method, then surface in the miniboss chamber.
Deku Toad first releases Toado enemies. Defeat them with sword attacks or Spin Attacks. Watch the boss’s shadow when it jumps, move away from the landing point, and attack the exposed tongue after the impact. When Deku Toad opens its mouth toward Link, fire a Bomb Arrow inside or use a Bomb. Repeat these openings until the boss is defeated. Open the chest for the Clawshot.
- Reach the central rotating-staircase room.
- Activate the first flood gate.
- Collect the Small Key.
- Cross the underwater current with the Iron Boots.
- Defeat the Toado enemies.
- Defeat Deku Toad.
- Collect the Clawshot.
11. Activate the second water route and collect the Big Key
Use the Clawshot to leave the Deku Toad chamber and reach the opposite side of the temple. Follow the red targets, vines, handles, and upper ledges to the second flood-gate mechanism. Pull the handle and operate the connected control so the second water route begins working.
Return to the central machinery and use the Clawshot on the rotating gears and targets to reach the GameCube-side passage. In the underwater maze, equip the Iron Boots to sink and use Water Bombs or bomb fish to clear the boulders. Surface at the far end and continue through the next room.
Defeat the Chu Worm, then use the Clawshot on the overhead switch to open the gate. Drop to the chest platform and collect the Big Key. Optional compass, rupee, and Piece of Heart rooms can be skipped if the goal is story completion.
Return to the central chamber and use the operating water routes and rotating staircase to raise the central pool. Follow the newly accessible route to the boss door.
- Reach the second water wing with the Clawshot.
- Activate the second flood gate and connected control.
- Cross the rotating gears and underwater maze.
- Defeat the Chu Worm.
- Collect the Big Key.
- Raise the central pool and reach the boss door.
12. Defeat Morpheel and claim the third Fused Shadow
Equip the Iron Boots at the start of Morpheel’s first phase and sink to the lakebed. Keep away from the tentacles and watch for the eye moving within Clawshot range. Pull the eye free with the Clawshot and slash it with the sword. Avoid Bomb Fish and retreat if a tentacle begins a grab. Repeat the eye pull and sword attacks until Morpheel leaves the sand.
Remove the Iron Boots for the second phase and swim after Morpheel. Stay above or to the side of its head instead of swimming directly into its mouth. Target the eye on Morpheel’s back with the Clawshot to pull Link onto the creature, then slash the eye. When Morpheel throws Link off, reposition and repeat the Clawshot attack.
After Morpheel is defeated, collect the Heart Container and receive the third and final Fused Shadow. Use Midna’s portal to leave the temple. The chapter does not end here; the mandatory Zant and Master Sword sequence follows immediately.
- Use the Iron Boots during Morpheel’s first phase.
- Pull the eye from the tentacle and attack it.
- Remove the Iron Boots for the swimming phase.
- Clawshot onto Morpheel’s back and attack the eye.
- Defeat Morpheel and collect the Heart Container.
- Confirm receipt of the third and final Fused Shadow.
- Leave Lakebed Temple through Midna’s portal.
13. Survive Zant’s ambush at Lanayru Spring
After leaving Lakebed Temple, Midna takes Link to the Lanayru Light Spirit’s spring. A cutscene begins in which Zant ambushes the pair. He removes all three Fused Shadows from Midna and places Link under a curse that leaves him trapped in wolf form.
Do not treat this as a normal battle. The scene is fixed and cannot be won by attacking Zant. When Zant exposes Midna to the Light Realm, the Light Spirit intervenes and transports Link and the weakened Midna away. The new objective is to take Midna to Princess Zelda at Hyrule Castle.
- Reach Lanayru Spring after Morpheel.
- Watch Zant take the three Fused Shadows.
- Confirm that Link is forced back into wolf form.
- Follow the Light Spirit’s instruction to seek Princess Zelda.
14. Bring Midna to Princess Zelda
Use Midna’s warp ability to reach Castle Town and enter Hyrule Castle. Take Midna to Princess Zelda’s chamber. Zelda explains that the curse can be broken only by retrieving the Master Sword, which is kept in the Sacred Grove in Faron Woods.
Zelda gives up her remaining power to restore Midna’s condition. After the scene, Midna is able to travel with Link again, but Link remains a wolf until the Master Sword is recovered. Leave the castle and follow Midna’s direction toward Faron Woods.
- Reach Castle Town with Midna.
- Enter Hyrule Castle and meet Princess Zelda.
- Complete Zelda’s restoration scene.
- Receive the instruction to seek the Master Sword in the Sacred Grove.
15. Follow the Sacred Grove route and defeat Skull Kid
Return to Faron Woods and follow the path toward the Sacred Grove. When the forest route becomes unclear, use the lantern lights as landmarks. Skull Kid appears and retreats deeper into the grove. Follow the trail rather than wandering back toward the field.
The first Skull Kid encounter is a pursuit and combat sequence. Track him through the grove and strike him whenever you corner him. Wolf Link’s senses can help identify the route when the forest becomes visually confusing. Continue following the lantern trail until the encounter is complete.
At the Sacred Grove puzzle, move the two guardian statues according to the available spaces so that they return to their matching positions. The solved arrangement opens the route to the ruined temple and the Master Sword pedestal. If the statue puzzle is reset, study the empty spaces and move one statue at a time rather than trying to force both into place.
- Reach the Sacred Grove from Faron Woods.
- Follow Skull Kid’s lantern trail.
- Complete the required Skull Kid encounter.
- Solve the guardian-statue puzzle.
- Reach the Master Sword pedestal.
16. Retrieve the Master Sword and restore human transformation
Enter the ruined temple area and approach the Master Sword pedestal. When Link pulls the sword free, the blade breaks Zant’s curse. Link returns to human form, and the Master Sword becomes his permanent sword. This is the required transformation milestone before Arbiter’s Grounds.
After the cutscene, use the nearby portal or return through the Sacred Grove route as directed by Midna. Confirm that Link can now change freely between human and wolf forms. The next major destination is the Gerudo Desert and Arbiter’s Grounds; the optional Cave of Ordeals is not required for this transition.
- Pull the Master Sword from its pedestal.
- Confirm that Link has returned to human form.
- Confirm that human and wolf transformation is available again.
- Leave the Sacred Grove with the Master Sword.
- Begin the route toward Gerudo Desert and Arbiter’s Grounds.
Before you move on
- Eldin’s Light Spirit has been restored.
- The first Death Mountain climb has failed and Renado has directed Link to Mayor Bo.
- Mayor Bo’s decisive sumo match has been won and the Iron Boots have been collected.
- King Bulblin’s raid has occurred and Colin has been rescued at the Bridge of Eldin.
- Gor Coron has been defeated and Goron Mines has been entered.
- Gor Amoto, Gor Ebizo, and Gor Liggs have provided all three key shards.
- Dangoro has been defeated and the Hero’s Bow has been obtained.
- Fyrus has been defeated and the second Fused Shadow has been awarded.
- Zora’s Domain and the route to Lake Hylia have been thawed.
- Queen Rutela’s sequence has been completed and the Zora Armor has been obtained.
- Lanayru’s Light Spirit has been restored after collecting all sixteen Lanayru Tears of Light.
- Water Bombs or an equivalent underwater bomb method is available and Lakebed Temple has been entered.
- Deku Toad has been defeated and the Clawshot has been collected.
- Both Lakebed Temple water routes have been activated.
- The Big Key has been collected and used to reach Morpheel.
- Morpheel has been defeated and the third and final Fused Shadow has been awarded.
- Zant has ambushed Link at Lanayru Spring and taken all three Fused Shadows.
- Midna has been brought to Princess Zelda at Hyrule Castle.
- The Sacred Grove route and required Skull Kid encounter have been completed.
- The guardian-statue puzzle has been solved and the Master Sword has been retrieved from its pedestal. Link is human again, can transform freely, and has left the Sacred Grove ready to proceed toward Gerudo Desert and Arbiter’s Grounds.
References for this chapter
- The Legend of Zelda: Twilight Princess — Guide and Walkthrough — GameCube
- Part 3: Goron Mines — Twilight Princess Walkthrough
- CHAPTER 3 — The Legend of Zelda: Twilight Princess Walkthrough & Guide — GameFAQs
- The Legend of Zelda: Twilight Princess — GameCube Guide and Walkthrough
- Part 4: Lakebed Temple — Twilight Princess Walkthrough
- CHAPTER 4 — The Legend of Zelda: Twilight Princess Walkthrough & Guide — GameFAQs
- Twilight Princess Walkthrough — Zelda’s Palace
Arbiter's Grounds — Enemy Patterns and Clawshot Puzzles
Begin this chapter after Chapter 4’s post-Lakebed sequence is complete: Zant has ambushed Link at Lanayru Spring, Link has met Princess Zelda, completed the Sacred Grove and Skull Kid sequence, drawn the Master Sword, and regained free human and wolf transformation. From that milestone, travel through Lake Hylia to obtain Auru’s Memo, use it with Fyer to reach the Gerudo Desert, cross the desert to the Bulblin encampment, and enter Arbiter’s Grounds. Inside the dungeon, restore the four stolen flames, defeat Death Sword, obtain the Spinner, and destroy the Twilit Fossil Stallord. This chapter uses the original GameCube orientation, not the mirrored Wii layout.
Start after the Master Sword and reach Gerudo Desert
Do not begin this chapter at the dungeon entrance. Chapter 4 ends after the Sacred Grove sequence, the Master Sword has been recovered, and Link can change between human and wolf form at will. Leave the Sacred Grove and return to Lake Hylia. Speak with Auru on the tall platform overlooking the lake. His conversation provides the memo needed for the next transport step.
Take Auru’s Memo to Fyer at the Lake Hylia cannon platform. Show it to him and accept the cannon ride to Gerudo Desert. This is the required route into the desert on the normal GameCube campaign; if Fyer does not respond, recheck that Auru’s conversation has finished and that the memo is in the quest progression before speaking to him again.
After arriving in the desert, follow the open routes toward the large Bulblin camp and the prison-like structure at the far end. Epona is not required for the dungeon itself, but riding her across the open desert makes the approach safer and faster. Defeat the Bulblins that block the approach, then enter the building marked by the large stairs and prison entrance. Save before entering if you have not saved since completing the Master Sword sequence.
- Master Sword sequence and free transformation are complete.
- Auru has provided the memo at Lake Hylia.
- Fyer has launched Link to Gerudo Desert.
- The Bulblin encampment has been crossed and Arbiter’s Grounds has been entered.
Enter Arbiter’s Grounds and restore the first two flames
The opening rooms contain sand, broken platforms, Stalkin, Stalfos, and other prison hazards. Advance into the large central chamber. A cutscene shows four Poes stealing the flames from the room’s torches. Restoring all four flames is the required objective that opens the dungeon’s deeper section.
The first Poe is in the central chamber. Transform into Wolf Link, activate your senses, and attack the visible Poe. After defeating it, Link carries the recovered flame automatically. Return it to one of the central torches. Use the scent trail left by the Poe to identify the intended route rather than wandering through the sand-filled rooms.
The next route uses the dungeon’s west side in the GameCube version. Cross sand quickly, use available Clawshot targets and ledges, and defeat the enemies that block the passage. When a Stalfos collapses, destroy its remains with a Bomb or Bomb Arrow if it begins to reform. Find the second Poe, defeat it with Wolf Link’s senses active, and return its flame to the central chamber. Do not confuse this GameCube west-side route with the mirrored Wii directions.
- The four-flame cutscene has played.
- The first Poe has been defeated and its flame restored.
- The west-side GameCube route has been opened.
- The second Poe has been defeated and its flame restored.
Complete the remaining Poe routes
Use the central room’s staircase, rotating mechanism, and opened passages to reach the remaining sections. Some routes cross chandeliers, sand, rotating blades, and separated platforms. Move deliberately around the hazards; a long melee string is unsafe when Stalkin, rats, or blade traps can interrupt Link from the side.
Search side rooms as you progress. The dungeon map, compass, keys, rupees, heart resources, and Pieces of Heart are useful but not all are required for the story. If a chest is positioned beyond an obvious Spinner rail or socket, mark it mentally and return after obtaining the dungeon item instead of treating the room as a permanent dead end.
In Poe rooms, activate Wolf Link’s senses to separate the real Poe from decoys. Defeat the genuine target, recover its flame, and return it to the central chamber. Repeat this for the third and fourth flames. Once all four torches are lit, the central staircase and the route to the dungeon’s second half become available.
- The rotating-room mechanism and opened passages have been used.
- The third Poe and flame have been completed.
- The fourth Poe and flame have been completed.
- The deeper staircase is open.
Defeat Death Sword and obtain the Spinner
Follow the opened route through the northern and deeper sections. Expect quicksand, rotating blades, Stalfos, Clawshot crossings, and gates controlled by nearby enemies or mechanisms. If a gate remains closed, clear the room and inspect its switches before backtracking. The Clawshot remains useful for reaching existing targets, but it is not the new dungeon item.
In the sealed chamber, cut one of the bindings around the sword to awaken Death Sword. Stay in wolf form and use Wolf Link’s senses so the translucent enemy can be seen. Circle away from its swings. When Death Sword drives its sword into the floor, attack during that brief opening and retreat before the next swing.
When Death Sword becomes a solid floating enemy, change to human form. Use the Bow to bring it down when it is within a clear shooting lane. After it is grounded, approach and strike with the sword, then back away when it rises. Repeat the ranged interruption and grounded punishment until Death Sword is defeated.
Proceed through the opened gate and take the Spinner from the chest. On the GameCube controller, assign it to an available X or Y item button. The Spinner attaches to its wall rails when Link rides over them and the item is active. Practice mounting and dismounting on the first rail before continuing.
- Death Sword’s seal has been cut.
- Wolf Link’s senses were used during the translucent phase.
- Death Sword has been defeated.
- The Spinner is present in Link’s inventory and assigned to an item button.
Use the Spinner to reach the Boss Key and Stallord
Ride the Spinner through the upper rail rooms. Jump off at platforms, doors, and safe ledges instead of staying attached through every turn. Several side branches contain optional supplies or Pieces of Heart. Required progress leads upward through the rails, rotating mechanisms, and blade-trap sections to the Boss Key.
Use the Spinner on the central socket to raise the spiral track. Follow it to the upper level, take the Boss Key, and use the rotating wall mechanisms to return to the central route. If you fall, return to the nearest visible rail or platform and remount it; do not attempt repeated blind jumps across quicksand.
Enter the boss chamber and approach the fossil to begin the Stallord battle. During the first phase, ride the Spinner around the outer track and attack Stallord’s exposed spine from the side or rear. Strike it three times. Destroy Staltroops with Spinner attacks when they block the route, and keep moving so the sand and minions cannot surround Link.
After the sand drains, use the Spinner on the hole in the central platform to raise the route. Use the central track to climb. When Stallord’s skull launches fireballs, move to the outer wall or another safe rail position, then return to the central route when the attack ends. Jump from the rail into the skull with the Spinner. When Stallord falls, climb onto the skull and slash the sword embedded in it with the Master Sword.
Repeat the rail approach, Spinner impact, and sword strikes until Stallord is defeated. Later attempts add blade-trap hazards, so change position before a trap reaches Link rather than following it around the rail. Collect the Heart Container after the battle and use the arena’s Spinner mechanism to reach the Mirror Chamber. The post-boss sages and Mirror of Twilight scene then play; the dungeon is complete, but the Mirror is not restored in this chapter.
- The Spinner has opened the upper rail route.
- The Boss Key has been obtained.
- Stallord’s spine has been struck three times in the first phase.
- The skull has been rammed with the Spinner and its embedded sword has been struck in later phases.
- Stallord is defeated and the Heart Container has been collected.
- The Mirror Chamber sequence has played.
Before you move on
- The Master Sword and free human/wolf transformation were obtained before the desert approach.
- Auru’s Memo was collected and used with Fyer to reach Gerudo Desert.
- Arbiter’s Grounds has been entered through the GameCube desert route.
- All four dungeon flames have been restored and the deeper staircase is open.
- Death Sword has been defeated and the Spinner is in Link’s inventory.
- The Boss Key has been obtained and the boss door has been opened.
- Twilit Fossil Stallord has been defeated and the Heart Container has been collected.
- The Mirror Chamber and sages sequence has played, leaving the campaign ready for the next Mirror of Twilight objectives.
References for this chapter
- Arbiter's Grounds - The Legend of Zelda: Twilight Princess Walkthrough
- Twilight Princess Walkthrough - Arbiter's Grounds
- Twilight Princess Video Walkthrough - Arbiter's Grounds
- Part 6: Arbiter's Grounds - Twilight Princess Walkthrough
- Chapter 11: Gerudo Desert - Zelda Universe
- The Legend of Zelda: Twilight Princess GameCube Manual
- The Legend of Zelda: Twilight Princess — Guide and Walkthrough — GameCube — DarkFury3827
Snowpeak Ruins and Cold-Region Tactics
Reach Snowpeak by tracking a Reekfish scent as Wolf Link, follow Yeto down the mountain, and clear the Snowpeak Ruins mansion. The original GameCube release has no cold meter, warming item or cold-resistance equipment. Progress depends on keys, cannonballs, the Ball and Chain, Clawshot targets, sliding blocks and swinging chandeliers. Defeat Blizzeta in the bedroom to obtain the second Mirror Shard and continue toward the Temple of Time.
Track the Reekfish scent to Snowpeak
After the events in Gerudo Desert, return to Telma’s Bar in Hyrule Castle Town and speak with the group. The map points you toward Ashei at Snowpeak, west of Zora’s Domain. Speak with Ashei, then show her sketch to Prince Ralis in the Kakariko Village graveyard. Ralis explains that the creature is eating Reekfish and gives you the Coral Earring, which allows you to catch one.
Go to the Mother-and-Child Rocks in Zora’s Domain and fish for a Reekfish. Transform into Wolf Link and use your senses on the fish to learn its scent. Return to the Snowpeak entrance and follow the scent trail. When the trail rises up cliffs, use the surrounding path to circle around and rejoin it. At the section near Ice Keese, ram the snow-covered cliff to make a climbable route. Continue to the Howling Stone, complete its wolf interaction, then follow the scent to the mountain cave.
Enter the cave, climb the ladder and take the marked western exit on the GameCube layout. Continue across the ledges and vines, leave through the door and defeat the Shadow Beasts. Kill the isolated beast first, then defeat the two close together with a single area attack. With the blizzard gone, approach Yeto near the tree.
- Obtain the Coral Earring from Prince Ralis.
- Catch a Reekfish at the Mother-and-Child Rocks and learn its scent as Wolf Link.
- Follow the scent through the cliff routes, Howling Stone area and mountain cave.
- Defeat the Shadow Beasts and meet Yeto.
Snowboard down to the ruins and prepare
Ram into the tree near Yeto to begin the snowboard descent. Steer around trees and rocks, use broad corrections on the slope and press A when a jump is needed. The route automatically handles some gaps, but falling or colliding can force a retry. At the bottom, enter Yeto and Yeta’s home; this is the Snowpeak Ruins dungeon.
Speak with Yeta in the southern room. She gives you the dungeon map and marks the location of the Bedroom Key. There is no cold timer, environmental cold damage or required warming mechanic in the original GameCube release. Yeto’s soup is optional healing. You can bottle the initial soup immediately, then improve it later with the Pumpkin and Ordon Goat Cheese found during the dungeon.
- Complete the snowboard descent and enter the mansion.
- Speak with Yeta and receive the dungeon map.
- Use soup or another healing item if your health is low; no warming item is required.
Get the first key and the Pumpkin
From Yeto’s room, break jars if you want to release Ooccoo, then go north into the eastern room with two sliding blocks. Push the block nearest the switch east. Push the other block west, south, east and south so it lands on the switch and opens the western exit.
In the thin eastern hallway, transform into Wolf Link and dig through the snow to enter the central room. Defeat or bypass the wolves, then use Wolf Link’s senses and dig at the buried chest in the northern part of the room. Open it to obtain the Small Key. Return through the hallway and use the key on the northern door.
Defeat the three spinning ice enemies in the small northern room. The door into the northeastern room opens. Approach the chest; two Ice Warriors appear and lock the room. Defeat them, then open the chest to obtain Ordon Pumpkin. Return to Yeto and give him the Pumpkin so he improves the soup. Speak with Yeta afterward to make her open the next route.
- Solve the first two-block switch puzzle.
- Dig up the buried chest in the central room and obtain the Small Key.
- Defeat the three ice enemies in the northern room.
- Give the Ordon Pumpkin to Yeto and speak with Yeta again.
Find the Ball and Chain
Enter the central room through the route Yeta opens. The thick snow slows human Link, so use Wolf Link to defeat the wolves if they block you. From the central room, take the northwest route through the windowsill. In the ice room, use the Clawshot on the spinning ice enemies from safe ground, then collect the cannonball.
Carry the cannonball through the narrow route to the cannon. Load it, rotate the cannon toward the nearby ice wall and fire it to open the exit. Cross the room with the thin wooden beams. White sections are slippery, so walk carefully and use the Clawshot target to avoid unnecessary falls. The compass is optional; continue back toward the central room and dig up the buried chest there if you still need the key route.
Use the Small Key on the western door from the central area. In the next room, defeat the two ice-breath enemies with the Ball and Chain only after their attacks leave an opening. Continue up the ramp to the second floor and enter the unlocked room. This begins the Darkhammer battle.
Darkhammer throws the Ball and Chain and has a dangerous frontal attack. Clawshot the overhead target to reposition behind him, dodge his committed swing and attack his exposed rear. Do not stand directly in front of him or trade blows. After several successful openings, the fight ends and Darkhammer leaves the Ball and Chain. Pick it up; this is the dungeon’s required item.
- Transport the first cannonball to the cannon and open the ice-blocked exit.
- Use the Clawshot and careful movement to cross the beam room.
- Use the Small Key to reach Darkhammer.
- Defeat Darkhammer and collect the Ball and Chain.
Use the Ball and Chain to reach the Bedroom Key
Return through the northern room and smash the ice blocking the route. In the first room beyond it, destroy the armor statues if you want rupees or the optional Poe Soul, then take the Ordon Goat Cheese from the chest. Bring it back to Yeto; the improved soup restores more health and is useful before the boss, but it is not required.
Follow Yeta’s newly marked route. Smash the ice, defeat the Freezards and move a cannonball through the transfer mechanism. In the upper room, destroy the ice around the cannon, then use the nearby bombable floor if you want the optional Heart Piece. In the adjacent room, defeat the Ice Warrior, smash the ice to reveal a Clawshot target and strike the chandelier with the Ball and Chain. Jump onto it while it swings, then jump to the chest for a Small Key.
Use that key to reach the second-floor rooms. Cross the chandelier sections by striking each chandelier with the Ball and Chain, waiting for a safe swing and jumping only when the platform comes within reach. Optional Heart Pieces are found along these routes. In the southeast ice room, destroy the spinning enemies and smash the ice to reveal the optional Poe.
Return to the block room and expose the central switch by breaking its ice covering. For the required arrangement, push block B west; push the newly freed block C east, north and west; then push block B south, east, north and west. The switch opens the second-floor route. Cross to the courtyard, defeat the Ice Warriors and use the Clawshot target through the northern gap.
In the upper eastern route, collect another Small Key after crossing the chandeliers. Return to the room with the two Freezards, push the blocks aside and transfer a cannonball to the upper cannon. Fire it back into the previous room, move it to the courtyard cannon and aim at the distant Freezard guarding the final route. After the shot, enter the western upper room, defeat all Ice Warriors and open the chest to obtain the Bedroom Key.
- Collect the Ordon Goat Cheese and optionally improve Yeto’s soup.
- Use the Ball and Chain, Clawshot and chandeliers to collect the required Small Keys.
- Solve the second block puzzle with the B-west, C-east-north-west, B-south-east-north-west sequence.
- Fire the courtyard cannon at the distant Freezard.
- Defeat the Ice Warriors in the upper western room and obtain the Bedroom Key.
Open the bedroom and prepare for Blizzeta
Return to the central courtyard area and take the upper route to the locked bedroom door. Yeta is available after the Bedroom Key sequence and can guide you toward the door, but the key itself is what permits entry. Before opening it, refill your health with improved soup, bottled healing, fairies or another available item. Assign the Ball and Chain to an item button so it is immediately accessible.
The bedroom becomes an ice arena when Yeta approaches the Mirror Shard. There is no cold-status effect to manage. The danger comes from the slick floor, the ice projectiles and being knocked into the icicle patterns. Use wide movements instead of repeated rolls and keep the Ball and Chain ready.
- Obtain the Bedroom Key before returning to the upper bedroom door.
- Refill health before entering the bedroom.
- Assign the Ball and Chain to an accessible GameCube item button.
Defeat Blizzeta and finish Snowpeak Ruins
Blizzeta’s first phase is a large ice mass that moves around the arena. L-target her and throw or swing the Ball and Chain when she comes within range. Keep moving around the room rather than allowing her to pin you against a wall. Her smaller ice projectiles are secondary; prioritize damaging the main ice mass while preserving a clear escape route.
In the second phase, Blizzeta rises and drops a line of large icicles toward Link. Watch their reflections in the ice floor and run diagonally away from the line. The icicles then form a ring around Link. As they fall, use the Ball and Chain to destroy enough of them to create a gap. Move through the gap before Blizzeta lands, then strike the exposed boss with the Ball and Chain. Repeat the falling-line, ring and opening sequence until she is defeated.
After the battle, collect the Heart Container. The post-boss scene with Yeto and Yeta plays, and the second Mirror Shard is recovered. Exit through the portal to leave Snowpeak. The next main-story route leads back through the Mirror Chamber and toward the Sacred Grove and Temple of Time.
- Damage the moving ice mass with the Ball and Chain.
- Use floor reflections to avoid the first icicle line.
- Break a gap in the icicle ring and escape before Blizzeta lands.
- Strike Blizzeta after each landing and repeat until victory.
- Collect the Heart Container and second Mirror Shard.
Before you move on
- Blizzeta is defeated and the Heart Container appears.
- The second Mirror Shard is recovered during the post-boss scene.
- The scene with Yeto and Yeta has played and the portal out of the dungeon is available.
- Snowpeak Ruins is exited, and the next main objective points toward the Sacred Grove and Temple of Time route.
Temple of Time — Midgame Keys and Upgrades
After Snowpeak Ruins, reopen the Sacred Grove route and enter the Temple of Time through the Pedestal of Time. Climb the dungeon, defeat its Iron Knuckle miniboss, obtain the Dominion Rod, escort the large statue through the lower floors, collect the Big Key, and defeat Armogohma for the third Mirror Shard. Then complete the required story sequence involving Renado, Telma, the Castle Town doctor, Telma's cat, the undead dogs, Ilia, Darbus, the Hidden Village, Impaz, and Ilia's Charm. End this chapter in Kakariko Village with the Ancient Sky Book ready to show Shad. The six Sky Characters, cannon repair, and City in the Sky belong to the next chapter.
Reopen the Temple of Time entrance
Return to the Sacred Grove after completing Snowpeak Ruins. Follow the route toward the Master Sword clearing and begin the renewed Skull Kid pursuit. Track him through the glowing openings and attack when he lands. When he retreats to elevated positions, use the Bow; three successful arrow hits finish the encounter and reopen the route to the sword chamber.
In the Master Sword chamber, use the nearby block and the connected passages to reach the pedestal area. Place the Master Sword into the pedestal as directed by the scene. Return through the upper section, defeat the group of Shadow Beasts, and enter the newly revealed passage where the owl statue stood. Follow the stairs down to the Pedestal of Time.
Place the Master Sword into the second pedestal. The blue staircase appears, Ooccoo and Ooccoo Jr. arrive, and the Temple of Time entrance opens. Optional chests and a Poe can be collected around the entrance area, but neither is required for story progress. Before entering, make sure the Bow, Clawshot, Spinner, Bombs, and a healing option are available through the GameCube item screen; only the items needed for the current room need to be assigned to the two item buttons.
- Snowpeak Ruins and its Mirror Shard are complete.
- The renewed Skull Kid encounter has been cleared.
- The Master Sword has been placed in the Sacred Grove pedestal and the Pedestal of Time.
- The blue staircase and Temple of Time entrance are open.
Reach the Iron Knuckle and obtain the Dominion Rod
Enter the dungeon and work upward through the opening rooms. Use pots or other movable objects on floor switches, light the required torches, and collect the first Small Key before returning to the locked door. In the early upper rooms, use the Spinner across the broken stair route and defeat the Lizalfos, Armos, and other enemies that block the passages.
Continue through the rotating central machinery, crystal-switch rooms, Beamos hazards, scales, pendulums, and rolling traps. The dungeon's first half is designed to make you revisit the central room from different elevations, so check the map and use unlocked doors rather than searching for a new entrance on every floor. Collect the Dungeon Map and Compass if encountered; they are optional for the completion check but make the return routes much easier to follow.
When the upper route opens, enter the miniboss room and face the Iron Knuckle. Keep L-targeting active and avoid trading blows directly in front of it. Circle at medium range, wait for the overhead sword attack, then sidestep or backflip out of its path and punish the recovery. After the armor is removed, continue using short attacks after its committed swings. Defeating it opens the chest containing the Dominion Rod.
- The first Small Key and the dungeon navigation items needed for the route have been collected.
- The central machinery, scale rooms, and upper hazards have been crossed.
- The Iron Knuckle has been defeated.
- The Dominion Rod is in the inventory.
Use the Dominion Rod to reach the Big Key
Activate the large statue with the Dominion Rod and guide it onto the transport bell. In the next room, use the statue's hammer to destroy gates and moving barriers. Position it beside the white platform, lower the platform with the floor switch, then reactivate the statue and let the platform carry it upward. Do not stand in the statue's hammer arc while commanding it.
Guide the statue through the electrical barrier by letting it stand on the switch that disables the barrier, then deactivate it before crossing yourself. Use its hammer against the rolling spiked hazards and White Beamos statues. Where a horned small statue is needed on a second switch, remember that commanding the small statue temporarily releases control of the large one; finish the small-statue placement before resuming the escort.
Return to the central machinery and use the rotating platform to reunite with the large statue. Lead it around the room and balance the later scale sequence with the available weights and small statues. Continue through the Young Gohma and Baby Gohma rooms, use the Dominion Rod to place the small statues on their switches, and take the Clawshot route past the upper gap.
At the final locked section before the boss corridor, use the small statue on the first switch, cross the opened gate, then command it from a distance to release the first switch and open the next gate. Defeat the remaining enemies, collect the Big Key, and prepare the Bow and Dominion Rod before opening the boss door.
- The large statue has been transported through the bells.
- The electrical barriers and moving hazards have been cleared.
- The Dominion Rod scale and small-statue puzzles are complete.
- The Big Key is in the inventory and the boss route is open.
Defeat Armogohma and claim the third Mirror Shard
Armogohma moves across the ceiling and pauses to fire streams of flame. Follow it with the Bow and shoot the exposed eye when it opens. The arrow knocks Armogohma to the floor near one of the four room corners. Immediately target the nearby large statue with the Dominion Rod and command it to strike the fallen boss.
Repeat the ceiling shot and statue strike until three successful statue attacks have broken the boss's armor. Baby Gohmas appear after the strikes; destroy them when they are about to hatch or when they interfere with your movement. Roll away from the flame attack instead of trying to maintain a close position beneath the boss.
After the third statue hit, the armored form is gone and the exposed eye becomes the remaining target. Manually aim the Bow and hit the eye three more times while the smaller Gohmas retreat around the room. Collect the Heart Container, then approach Midna to leave the dungeon. The reward is the third Mirror Shard.
- Armogohma has been knocked down with an arrow.
- The large statues have struck Armogohma three times.
- The exposed eye has been hit three additional times after the armor breaks.
- The Heart Container and third Mirror Shard have been collected.
Complete the required route through Kakariko and Castle Town
After leaving the Temple of Time, return to the Sacred Grove and use the Dominion Rod on the owl statue in the southern section. Move it aside and enter the revealed area if you want the nearby optional rewards, then continue through the story scene. The Dominion Rod is drained outside the dungeon at this point; do not mistake that for a missing item or a failed puzzle.
Warp to Kakariko Village, transform into human form, and enter Renado's house at the southern end of town. Speak with Renado to receive Renado's Letter. Take it to Telma in her bar in Hyrule Castle Town. Telma gives you an Invoice; carry that Invoice to the Doctor's Clinic in the back alley and show it to the doctor.
In the clinic's rear room, move the wooden crate to expose the medicine. Transform into Wolf Link and sniff it to learn the Medicine Scent. Follow the scent trail out of the clinic and through Castle Town. It leads to Telma's cat, Louise, outside Telma's Bar. Speak to Louise to learn about the skeletal enemies that appear beyond the southern gate at night.
Leave Castle Town through the southern gate and wait in the field area near the stone-and-grass boundary until night. Walk around the area between the stairs and the Goron so all of the undead dogs emerge, then defeat every one. When the area is clear, the Wooden Statue appears. If you leave before finishing the encounter, the enemies can reset when you return, so complete the fight in one visit.
- Renado's Letter has been obtained and delivered to Telma.
- Telma's Invoice has been delivered to the Doctor.
- Wolf Link has learned the Medicine Scent.
- Louise has been questioned and all nighttime undead dogs have been defeated.
- The Wooden Statue has been collected.
Use the Wooden Statue to reach the Hidden Village
Warp to Kakariko Village, transform into human form, and show the Wooden Statue to Ilia in Renado's house. The scene gives Ilia a partial memory and marks the next destination. Speak with Gor Coron as required, then prepare Epona for the long ride; the direct bridge route is unavailable, so follow the marked route through the connected field paths.
Ride to the marked location near the Hidden Village. Darbus is waiting at the blocked passage and destroys the rockslide. Enter the Hidden Village and trigger the battle. Twenty Bulblins must be defeated. Enemies occupy the street, buildings, roofs, and side passages, so check elevated positions and interiors rather than assuming the counter is stuck.
Use the Bow for distant archers and narrow roof positions, then clear the remaining enemies at close range. Do not leave the village before the counter reaches zero, because leaving can reset the encounter. Once all 20 enemies are defeated, the scene awards Ilia's Charm.
- Ilia has examined the Wooden Statue.
- Darbus has opened the route to the Hidden Village.
- All 20 Hidden Village enemies have been defeated.
- Ilia's Charm has been obtained.
Restore Ilia's memory and obtain the Ancient Sky Book
Exit the Hidden Village through the northern route before attempting to warp. Return to Kakariko Village, enter Renado's house, and show Ilia's Charm to Ilia. The scene restores her memory and converts the charm into the Horse Call, which lets you call Epona without finding horse grass first.
The conversation points you back to the Hidden Village and Impaz. Return there and enter Impaz's house in the southern part of the village. Show the Dominion Rod to Impaz. This is the required trigger: the Ancient Sky Book is obtained from Impaz only after the Ilia's Charm sequence has been completed.
Return to Kakariko Village with the Ancient Sky Book. Enter Renado's house and stop at the basement entrance where Shad is waiting. Do not begin the six Sky Character hunt yet. Showing Shad the book, moving the sealed owl statue, paying Fyer to repair the cannon, and launching to the City in the Sky are objectives for Chapter 8.
- Ilia's Charm has been shown to Ilia.
- The Horse Call has been received.
- Impaz has been shown the Dominion Rod.
- The Ancient Sky Book is in the inventory.
- Link has returned to Kakariko Village and is ready to show the book to Shad.
Before you move on
- Snowpeak Ruins is complete and the Temple of Time has been entered through the Pedestal of Time.
- The Iron Knuckle has been defeated and the Dominion Rod is in the inventory.
- The Big Key has been collected and used to reach Armogohma.
- Armogohma has been defeated, the Heart Container has been collected, and the third Mirror Shard is in the inventory.
- Renado's Letter, Telma's Invoice, the Doctor's Medicine Scent, Louise's clue, and the Wooden Statue sequence are complete.
- Darbus has opened the Hidden Village route and all 20 Hidden Village enemies have been defeated.
- Ilia's Charm has been returned to Ilia, awarding the Horse Call.
- Impaz has received the Dominion Rod and given Link the Ancient Sky Book.
- Link has returned to Kakariko Village with the Ancient Sky Book, ready to show it to Shad; the six Sky Characters and cannon repair remain for Chapter 8.
City in the Sky — Vertical Navigation and Wind Puzzles
Finish the Ancient Sky Book sequence on the original Nintendo GameCube release, repair the Sky Cannon at Lake Hylia, enter the City in the Sky, obtain the Double Clawshots, defeat Argorok, and collect the fourth Mirror Shard.
Complete the Ancient Sky Book
Begin with the Ancient Sky Book already obtained from Impaz in the Hidden Village. Warp to Kakariko Village and enter Renado’s basement. Show the incomplete book to Shad. His attempt to decipher it restores the Dominion Rod’s power and causes the remaining owl-statue locations to be marked on your map.
Visit the six marked statues in any order. At each location, use the powered Dominion Rod to move the owl statue away from its circular pedestal, then step onto the exposed symbol to add a Sky Character to the Ancient Sky Book. The exact GameCube locations are as follows.
At the north end of the Bridge of Eldin, climb to the owl statue on the west side of the bridge and move it aside without pushing it off the ledge. The Sky Character is on the pedestal underneath it.
In Kakariko Gorge, travel to the marked area north of the gorge and move the statue to expose the second pedestal.
In Faron Woods, go north of Coro’s lantern shop. Bomb the boulder blocking the side passage, enter the revealed area, and move the owl statue to reach the third pedestal.
At the Castle Town amphitheater east of Castle Town, move the statue near the steps. Use the seating and the top of the statue to reach the raised pedestal and collect the fourth Sky Character.
Near Lake Hylia, use the statue by the Great Bridge of Hylia. Position it beneath the hanging vines, Clawshot to the vines, and drop onto the statue or adjacent ledge so you can reach the fifth pedestal.
At Gerudo Mesa, move the statue from its raised position and arrange it beside the stone structure. Climb the nearby pillars and jump from the statue to the golden pedestal for the sixth Sky Character.
- Have the Ancient Sky Book from Impaz before beginning this chapter.
- Show the incomplete book to Shad in Renado’s basement.
- Collect the Sky Characters at Bridge of Eldin, Kakariko Gorge, Faron Woods, the Castle Town amphitheater, Lake Hylia, and Gerudo Mesa.
- Confirm that all six symbols or characters have been added to the book.
Return to Shad and uncover the Sky Cannon
After collecting all six Sky Characters, warp back to Kakariko Village and return to Renado’s basement. Show the completed Ancient Sky Book to Shad. He uses it to unseal the owl statue in the basement, then leaves the room.
Use the restored Dominion Rod to move the now-active owl statue aside. Walk through the passage behind it and enter the chamber containing the Sky Cannon.
Shad must no longer be standing beside the cannon before Midna can warp it. If Midna will not offer the cannon-warp option, speak to Shad again so he dismisses himself from the room, then approach the cannon and ask Midna to warp it to Lake Hylia.
- Return to Shad only after all six Sky Characters are collected.
- Show Shad the completed Ancient Sky Book.
- Move the unsealed owl statue with the Dominion Rod.
- Reach the Sky Cannon and make sure Shad has left before requesting the warp.
Repair the cannon and launch to the City in the Sky
At Lake Hylia, find Fyer near the relocated cannon. Speak with him and pay the required repair fee of 300 rupees. If you are short on money, leave the area and open ordinary overworld chests or explore caves before returning; the story cannot continue through the cannon until it is repaired.
After Fyer finishes the repair, walk behind the cannon. Use the Clawshot on the target attached to its rear. Link is fired directly to the City in the Sky. This is the original GameCube layout, so do not reverse directions based on Wii walkthroughs.
- Have at least 300 rupees when visiting Fyer.
- Pay Fyer to repair the Sky Cannon.
- Clawshot the target on the rear of the repaired cannon.
- Arrive in the City in the Sky.
Cross the City entrance and reach the first Aeralfos
Explore the opening exterior platforms carefully. Speak with Ooccoo in the entrance area; she joins your inventory and provides a way to leave the dungeon if necessary. Use the Clawshot on grates, vines, and fixed targets instead of attempting blind jumps over open gaps.
Proceed through the entrance rooms and use the switches to control the large fans. Wind can shove Link from narrow platforms, so stop the relevant fan before crossing whenever the room provides a switch. When a fall occurs, inspect the lower ledges before climbing the entire route again; several vertical rooms are designed with recoverable platforms.
Continue through the central structure until the Aeralfos miniboss room. Fight from stable flooring. When the Aeralfos raises its shield, use the Clawshot to pull it within sword range, then attack. If it takes flight, wait for a safe lock-on and repeat the pull. Defeat it to open the route to the chest containing the second Clawshot.
- Speak with Ooccoo.
- Use switches to control dangerous fans.
- Reach the Aeralfos miniboss room.
- Pull the shielded Aeralfos close with the Clawshot and defeat it.
- Open the chest containing the second Clawshot.
Use the Double Clawshots and collect the Big Key
With both Clawshots, chain from one target to another without dropping. Use the new ability on ceiling grates, wall targets, vines, fan structures, and suspended platforms. Operate crystal or egg switches as required, then search the connected side rooms for the Compass and remaining Small Keys.
The later northern section contains two Aeralfos. Defeat them separately with the same shield-pull method. Stay near solid platforms and avoid letting either enemy drive Link toward an open edge.
After the two Aeralfos are defeated, continue upward through the newly available route. Use the Double Clawshots across the upper rooms and collect the Big Key. Return to the boss door, heal, and replenish arrows or other supplies before entering Argorok’s arena.
- Use chained Double Clawshot targets to climb the central routes.
- Collect the remaining Small Keys needed for progression.
- Defeat the two-Aeralfos encounter.
- Obtain the Big Key.
- Open the boss door after preparing your health and supplies.
Defeat Twilit Dragon Argorok
In the first phase, climb the grates on the surrounding towers. Argorok’s wingbeats and fire can knock Link away, so climb promptly and equip the Iron Boots when you are positioned to pull the dragon. When Argorok hovers over the arena, target its tail with the Clawshots and put on the Iron Boots to drag it down. Repeat the tail pull a second time. This removes the rest of its armor and begins the storm phase.
During the second phase, climb to a tower and Clawshot from Peahat to Peahat around the arena. Argorok breathes fire across parts of the circuit, so keep moving and change direction when its attack blocks the current path. Your objective is to reach the dragon’s rear, not to attack from the ground.
When you are behind Argorok, manually aim the Clawshot at the exposed crystal on its back and pull Link onto the dragon. Slash the crystal, then repeat the Peahat circuit. Strike the exposed crystal three times total to defeat Argorok. The fourth Mirror Shard and a Heart Container appear after the battle.
- Pull Argorok down twice with the tail and Iron Boots.
- Use the Peahats to circle behind Argorok during the storm phase.
- Clawshot onto the exposed back crystal.
- Strike the crystal three times.
- Collect the fourth Mirror Shard and Heart Container.
Before you move on
- All six Sky Characters have been collected and the Ancient Sky Book is complete.
- Shad has been shown the completed book in Renado’s basement.
- The owl statue has been moved and the Sky Cannon has been exposed.
- Shad has left the cannon chamber, Midna has warped the cannon, and Fyer has repaired it for 300 rupees.
- Link has launched from the rear Clawshot target and entered the City in the Sky.
- The Double Clawshots have been obtained.
- The two later Aeralfos have been defeated and the Big Key has been collected.
- Argorok has been defeated.
- The fourth Mirror Shard and post-battle Heart Container have been collected.
- Midna has taken Link out of the City in the Sky and the story is ready to proceed toward the Palace of Twilight.
References for this chapter
- The Legend of Zelda: Twilight Princess — Chapter 8 Walkthrough
- The Legend of Zelda: Twilight Princess — Guide and Walkthrough — GameCube
- The Legend of Zelda: Twilight Princess — GameCube Guide and Walkthrough
- Twilight Princess Walkthrough — City in the Sky
- Twilight Princess Walkthrough — City in the Sky
Palace of Twilight and Twilight-World Returns
Enter the Palace of Twilight through the restored Mirror of Twilight, recover both Sols, infuse the Master Sword with light, collect the Big Key, and defeat Zant through six distinct arena phases. This route is for the original Nintendo GameCube release. The palace has no Tears of Light collection; its optional rewards are treasure chests and Heart Pieces.
Enter the Palace of Twilight
After completing the Temple of Time and City in the Sky, return to the Mirror Chamber. The four pieces of the Mirror of Twilight have reassembled. Walk up the stairs, approach the mirror, and press A at the entrance to enter the Twilight Realm. Continue up the stairs after the cutscene to enter the Palace of Twilight.
Midna hides inside Link for the palace sequence, but Link can still use his normal equipment. Carry the Gale Boomerang, Bow, Clawshots, Iron Boots, Zora Armor, and Ball and Chain. The palace uses both human and wolf form: black fog transforms Link into Wolf Link, while the Light Sword later lets human Link cut through that fog. On the GameCube, use L-targeting and ordinary button controls; no Wii motion aiming is involved.
- Enter through the restored Mirror of Twilight.
- Bring the Gale Boomerang, Bow, Clawshots, Iron Boots, Zora Armor, and Ball and Chain.
- Remember that black fog can force Wolf Link form.
West corridor: compass, small key, and first Sol
Cross the opening bridge and enter the west corridor. Defeat the twilit Deku Babas and Keese, then target the large Zant Mask. Block its fireballs with the shield and use a Shield Attack to reflect them back. When the mask is stunned, slash it. A chest appears with a small key. Use the Clawshot on the target at the north end and open the locked door.
The next room is filled with black fog. Enter it to become Wolf Link, activate your senses, and run toward the northeast side. Leave the fog and return to human form if you need to fight a Zant Mask with the shield technique. After defeating the mask, collect the compass from the southeast chest and the small key from the northern chest. Use the Clawshot targets to reach the locked northern door.
The following room begins the first Phantom Zant encounter. Shadow walls close around the room while Phantom Zant summons shadow enemies. Defeat the summoned enemies with spin attacks, then chase Phantom Zant and strike him whenever he stops long enough. Continue clearing enemies and pursuing him until he disappears and the room fills with fog.
Go to the northern hand and slash it to release the first Sol. Carry the Sol toward the center; its light clears nearby black fog and restores affected Twili. When Zant’s Hand detaches and pursues you, stun it with arrows or the Clawshot. Three ranged hits temporarily stop it. Place the Sol in the central socket to raise the staircase, then carry it through the lower route. Drop it into sockets when necessary to raise platforms or stairs, and pull it across gaps with the Clawshot. In the room with the fog waterfall, use the Sol’s light to reveal the path and restore the Twili. Return to the central chamber and place the Sol in one of the two sockets. The illuminated platform carries you to the east side.
- Defeat the first Zant Mask and collect the small key.
- Collect the compass and the second small key in the fog room.
- Defeat Phantom Zant and release the first Sol.
- Use the Sol to clear fog, restore Twili, and reach the east corridor.
East corridor: dungeon map and second Sol
In the east corridor, defeat the Keese, drop to the lower area, and use the Clawshots on the wall and ceiling targets to reach the moving platform. Cross the moving platforms toward the north side and defeat the Zant Mask by reflecting its fireballs. A chest appears with a small key.
Enter the black fog and defeat the Shadow Beasts as Wolf Link. The room contains several chests reached with the wall and ceiling Clawshot targets. Collect the dungeon map and the small key required for the northern locked door. The other chests contain optional rewards.
The next room repeats the Phantom Zant battle. Defeat the summoned shadow enemies and strike Phantom Zant whenever he pauses. When he vanishes, go to the northern hand and release the second Sol. Carry it into the central socket, defeat the Shadow Beast and other enemies, then use the raised staircase and Clawshot targets to move the Sol upward.
Carry the second Sol through the next fog-filled room. Use the glowing crystal to create moving platforms. Take the route across the platforms, using the Sol to activate crystals and clear the darkness, until you reach the southern exit. The Twili outside returns to normal. Step on the square platform to ride back to the central chamber and place the second Sol in the remaining socket.
The two Sols infuse the Master Sword with golden light. The game may refer to this as the Light Sword; it is the Master Sword empowered by the Sols, not a separate item in the inventory. Its light lets Link cut through the palace’s permanent black fog and defeats Zant Masks in a single sword strike.
- Collect the east-side small key and dungeon map.
- Defeat the second Phantom Zant encounter.
- Carry the second Sol through the crystal-platform room.
- Place both Sols in the central chamber to infuse the Master Sword.
Upper palace and the Big Key
From the central chamber, go north toward the black-fog waterfall. Defeat the Shadow Kargaroks and stand on the red symbol. Perform a Spin Attack to clear the fog temporarily, cross the gap, and enter the next room.
Use the Light Sword to cut through the fog and defeat the Shadow Keese, Shadow Deku Babas, and Shadow Vermin. At the north end, find the two unpowered Sols and place them in their floor sockets. This raises the central staircase. Climb it, strike the unlit crystal with the Light Sword, and ride the platform to the east side.
Defeat the Shadow Deku Baba, activate the three crystals with a Spin Attack, and defeat the Zant Masks that appear. Because the Master Sword is infused with light, one sword strike destroys each mask. A chest appears with a small key. Use the three crystals again to create the moving platform that carries you to the upper west balcony, then unlock the door.
Clear the Shadow Beasts, Shadow Kargaroks, and Zant Masks on the balcony and the southern island. Activate the paired crystals to move between platforms. After defeating the next group of masks, collect the small key from the chest at the north end. Use a Spin Attack to clear the black-fog waterfall, then climb the wall targets with the Clawshots and Double Clawshots. At the top, use the ceiling target to reach the chest containing the Big Key.
Clear the fog again and take the locked northeastern door. In the next room, activate the four crystals with a Spin Attack and use the moving platforms and Clawshot targets to climb around the room. Defeat the Zant Masks to make the final small-key chest appear. Use that key on the upper locked door. In the last approach room, cut through the fog and defeat every wave of Shadow Beasts. When the barrier disappears, use the Big Key on the northern boss door.
- Use the Light Sword to cross the upper palace.
- Place the two unpowered Sols to raise the staircase.
- Collect the required small keys in the upper rooms.
- Climb behind the black-fog waterfall and collect the Big Key.
- Defeat every Shadow Beast in the final barrier room.
Defeat Zant in six phases
Phase 1: Forest Temple boss arena. Zant floats around the room and fires rapid projectiles. Block them with the shield or move sideways. When he teleports, target him and throw the Gale Boomerang to pull him down. Run to his landing point and slash him. Repeat the pattern until the arena changes.
Phase 2: Goron Mines magnetic plate. Equip the Iron Boots so Zant’s jumps cannot knock Link into the lava. Block his projectiles with the shield. When he slumps forward after firing, remove the Iron Boots, run to him, and attack with the sword. Re-equip the boots before the next series of jumps.
Phase 3: Lakebed Temple arena. Equip the Zora Armor and Iron Boots. When Zant appears inside the large mask, block his projectiles, then use the Clawshot to pull him out and slash him. Later, four masks appear around the arena. Watch for the mask that opens with Zant inside, block his attack, pull him out with the Clawshot, and strike him.
Phase 4: Forest Temple miniboss room. Remove the Iron Boots and use normal armor. Zant jumps between the pillars. When he settles on one, roll into that pillar twice in succession to knock him down. Slash him while he is on the floor, then repeat.
Phase 5: Snowpeak Ruins bedroom. Watch Zant’s reflection on the icy floor to anticipate his landing. Roll away from the impact or position yourself between his feet. Target one foot and hit it with the Ball and Chain. He shrinks after being struck; chase him and slash repeatedly before he grows again.
Phase 6: Hyrule Field steps near Castle Town. Zant attacks with sword-like blades and a fast spinning assault. During ordinary slashes, use a Back Slice or a controlled sword strike. Do not trade blows during the rapid spin. Dodge or hold the shield, then attack when he slows down and leans forward. Repeat until the fight ends.
- Use the Gale Boomerang in phase one.
- Use the Iron Boots on the magnetic plate in phase two.
- Use Zora Armor, Iron Boots, and the Clawshot in phase three.
- Roll into the pillar twice in phase four.
- Use the Ball and Chain against Zant’s foot in phase five.
- Dodge the spin and punish Zant’s recovery in phase six.
Post-battle recovery and handoff
After the six-phase battle, go to the throne and collect the Heart Container. Approach Midna and watch the complete post-battle scene in which the Fused Shadows are recovered and Zant’s connection to the greater threat is revealed.
Return to the exterior portal, stand on the golden symbol, and press A to return to the Mirror Chamber. Save here if you want a separate file before the final approach. This chapter ends at the restored Mirror Chamber; the next chapter covers the post-Zant transition, Zelda’s restoration scene, the Sacred Grove sequence, and preparation for Hyrule Castle. Do not repeat the Palace route or fight Zant again.
- Defeat all six phases of Zant.
- Collect the Heart Container.
- Watch the full Fused Shadow recovery scene.
- Return to the Mirror Chamber and save before continuing.
- Hand off to the post-Zant chapter for the Sacred Grove and final-approach preparation.
Before you move on
- Both Sols are placed in the central chamber and the Master Sword is visibly infused with light.
- The Light Sword has been used to clear the upper palace fog.
- The Big Key has been collected and used at the boss door.
- Zant has been defeated through all six phases.
- The Heart Container has been collected.
- The complete post-battle Fused Shadow scene has played.
- Link has returned to the Mirror Chamber, ready for the post-Zant chapter and Hyrule Castle preparation.
References for this chapter
- Palace of Twilight - Zelda Dungeon Walkthrough
- Palace of Twilight — Thonky's The Legend of Zelda: Twilight Princess Walkthrough
- The Legend of Zelda: Twilight Princess — Guide and Walkthrough — GameCube — DarkFury3827
- The Legend of Zelda: Twilight Princess — GameCube Guide and Walkthrough
- The Legend of Zelda: Twilight Princess GameCube Manual
After Zant — Midna’s Restoration and the Return to Castle Town
After defeating Zant in the Palace of Twilight, recover the Fused Shadows, leave the Twilight Realm, and return to Castle Town. This chapter ends in Castle Town before the Hyrule Castle barrier scene. The Sacred Grove, Master Sword, Shadow Crystal, Mirror Chamber, and Zelda restoration events are earlier prerequisites and are not repeated here.
Finish the Zant sequence and recover the Fused Shadows
After the final phase of the Zant battle, allow the complete cutscene to play. Midna uses the power of the Fused Shadows against Zant, and the three recovered shadows remain with her afterward. There is no second Zant battle and no additional Palace of Twilight dungeon route after this scene.
Collect the Heart Container in the boss area if you want the optional permanent health increase. It is not required for story completion. When ready, use the warp point to leave the Palace of Twilight and return to the area outside the dungeon.
- Zant is defeated in the Palace of Twilight.
- The post-battle cutscene has finished.
- The three Fused Shadows are back with Midna.
- The optional Heart Container has been collected if desired.
- You have left the Palace of Twilight.
Confirm the earlier story prerequisites
Before this chapter, Link should already have completed the earlier post-Lakebed story sequence: Zant’s ambush at Lanayru Spring, the visit to Princess Zelda, the Sacred Grove events, the Master Sword sequence, and the restoration of free human and wolf transformation. Those events do not happen again after Zant.
Do not search the Sacred Grove for another statue puzzle, another Master Sword pull, or another Shadow Crystal scene. The objective after leaving the Palace of Twilight is to return to the World of Light and prepare for the final approach.
- Free human and wolf transformation was restored before entering the Palace of Twilight.
- The Master Sword and Mirror Chamber story events are already complete.
- You are not repeating the earlier Zelda or Sacred Grove sequence.
Warp back to Castle Town
Once outside the Palace of Twilight, speak with Midna and follow her explanation that Ganondorf used Zant to return to the World of Light. Midna identifies Hyrule Castle as the next major destination and says that Zelda is in danger.
Use Midna’s warp menu to travel to Hyrule Castle Town. This is the correct stopping area for this chapter. Do not continue north to trigger the castle barrier scene yet; the barrier and the route into Hyrule Castle belong to the later castle-approach chapter.
- You are outside the Palace of Twilight in the World of Light.
- Midna has explained the next objective involving Ganondorf and Hyrule Castle.
- You have warped to Hyrule Castle Town.
- The Hyrule Castle barrier scene has not yet been triggered.
Save and prepare without advancing the castle approach
In Castle Town, make a manual save on the GameCube memory card before beginning optional preparation. Restore your hearts and replenish arrows, bombs, lantern oil, or bottle supplies as needed. If you use bottled fairies, potions, or milk, stock them now or during Chapter 11’s optional preparation route.
The GameCube version lets you assign items to the X and Y buttons from the inventory screen. Set a practical pair such as the Bow and Bombs, but remember that assignments can be changed later when a specific castle puzzle requires another item. Epona is not needed to complete this chapter, and no mounted siege occurs here.
Optional heart pieces, Poe Souls, equipment upgrades, and the Cave of Ordeals remain outside the main-story requirement. Chapter 11 covers optional preparation; Chapter 12 begins with the trip from Castle Town toward Hyrule Castle and includes Midna’s barrier-removal scene.
- A current GameCube save exists in or near Castle Town.
- Health and essential ammunition have been restored.
- Useful items are assigned to X and Y or ready to assign.
- Optional cleanup has been postponed or deliberately reserved for Chapter 11.
- You have stopped before traveling to the Hyrule Castle barrier.
Before you move on
- Zant has been defeated and the complete post-battle scene has ended.
- Midna has recovered the three Fused Shadows.
- Link has left the Palace of Twilight and returned to the World of Light.
- Link has warped to Castle Town.
- A save has been made after the return, if desired.
- The chapter ends before Midna destroys the Hyrule Castle barrier and before castle entry.
References for this chapter
Hyrule Field — Preparation, Poe Souls and Optional Upgrades
This optional preparation chapter begins in Castle Town after Chapter 10, while the Hyrule Castle barrier is still intact and before the approach handled in Chapter 12. Use the time to collect convenient Heart Pieces, improve arrow or bomb capacity, complete the optional Malo Mart and Magic Armor route, hunt Poe Souls, or attempt the Cave of Ordeals. None of these activities is required for the original Nintendo GameCube campaign. When finished, save with full supplies and proceed to Chapter 12 for Midna’s barrier-removal scene and the Hyrule Castle approach.
1. Start in Castle Town and confirm the story position
Chapter 10 leaves Link in Castle Town before the Hyrule Castle approach. Do not walk north to trigger Midna’s barrier-removal scene yet if you want to complete optional preparation first. The castle barrier should still be present, and Hyrule Castle itself should not yet have been entered.
Use Castle Town as your planning hub. Check your hearts, Bottle contents, arrows, bombs, wallet space, and rupees. This is also a good point to make a separate save if your memory card has room, preserving a clean pre-castle file before optional errands or the final story sequence.
Midna’s warp points let you reach distant provinces quickly. After warping, change to human form when necessary and use Epona for long field crossings. Group errands by region rather than repeatedly traveling between Castle Town, Kakariko Village, Lake Hylia, and the desert.
- Begin in Castle Town after Chapter 10.
- Confirm that Midna has not removed the Hyrule Castle barrier yet.
- Make a separate pre-castle save if possible.
- Use Midna’s warps and Epona to organize regional errands.
2. Prioritize easy Heart Pieces and useful capacity upgrades
Heart Pieces are optional, but extra health is the most reliable improvement for the castle and final encounters. Take any unfinished Heart Pieces whose locations and prerequisites you already know, especially those near Castle Town, Kakariko Village, Lake Hylia, and Hyrule Field. Skip searches that require a long detour if your goal is a focused story completion.
The Castle Town Star Game is useful if you want more arrow capacity. The first course can be attempted with the Clawshot. After obtaining the Double Clawshots, the later course becomes available and rewards the larger quiver upgrade. These upgrades are optional and do not unlock Hyrule Castle or any final boss.
Bomb Bag upgrades are also optional. Buy or collect them if you regularly run out of bombs, but do not delay the main story merely to maximize every ammunition container. Refill your supplies after attempting the Star Game or another minigame.
- Collect convenient Heart Pieces rather than beginning a full sweep.
- Use the Clawshot for the first Star Game course.
- Use the Double Clawshots for the later quiver course.
- Increase Bomb Bag capacity only if your current supply is inconvenient.
3. Complete the Malo Mart route for the optional Magic Armor
The Magic Armor is not required for Hyrule Castle or the ending, but it can reduce damage during difficult combat and is particularly useful in the lower floors of the Cave of Ordeals. It consumes rupees while equipped, so do not spend your entire reserve on it unless you intend to use it selectively.
At Malo Mart in Kakariko Village, donate 1,000 rupees to repair the bridge leading toward Castle Town. After the bridge is repaired, speak with Gor Liggs outside Malo Mart. He offers a barrel of Hot Spring Water for the tired Goron near the Castle Town bridge.
Carry the barrel along the field route. If enemies approach, set the barrel down before fighting; attacking while carrying it can break or drop it. Move quickly because the water cools if you take too long. At the tired Goron, throw the barrel to splash him. The successful delivery restores the hot-spring-water business and reduces Malo Mart’s later Castle Town relocation payment to 200 rupees.
Return to Malo Mart and pay the reduced 200-rupee relocation cost. If you do not complete the Hot Spring Water delivery, the relocation payment is 2,000 rupees instead. Once the Castle Town branch opens, enter it and buy the Magic Armor for 598 rupees. Keep it unequipped during normal travel and activate it only when its protection is worth the rupee drain.
- Donate 1,000 rupees to repair the bridge.
- Carry Gor Liggs’s Hot Spring Water barrel to the tired Goron.
- Pay 200 rupees for the relocation after completing the delivery, or 2,000 without it.
- Buy the Magic Armor for 598 rupees if you still have enough for supplies.
- Unequip the armor when you do not need its protection.
4. Hunt Poe Souls only with a defined goal
Poe Souls are optional. At night, use Wolf Senses to reveal overworld Poes, attack them in wolf form, and use the Ending Blow when the Poe is exposed. Return Souls to Jovani in Castle Town to advance that side quest and receive its rewards.
Use Midna’s regional warps to visit areas with known Poe locations, then ride Epona between nearby landmarks. Keep your own checklist if you are pursuing the complete collection; the original GameCube release does not give you a location-by-location list of every remaining Poe.
Three Poe Souls are inside the Cave of Ordeals, on floors 17, 33, and 44. Do not enter the Cave solely for one of these Souls unless you are prepared for the complete gauntlet. For a main-story run, stop Poe hunting whenever the travel time outweighs the optional reward.
- Search most overworld Poes at night.
- Use Wolf Senses and the Ending Blow to finish Poe encounters.
- Track locations separately if pursuing the full collection.
- Remember that the Cave contains Poe Souls on floors 17, 33, and 44.
5. Attempt the Cave of Ordeals only as a planned challenge
The Cave of Ordeals is beneath Gerudo Mesa in the Gerudo Desert. Its entrance is revealed after the broken Bridge of Eldin section has been restored and the bridge piece has been warped back to its original location. Warp to Gerudo Mesa and enter the exposed opening beneath the former bridge position.
The Cave contains 50 combat floors and is completely optional. Great Fairy rewards appear during the run, and completing the final floor provides Great Fairy’s Tears in an available Bottle. The three Poe Souls on floors 17, 33, and 44 are also optional.
Save before entering. Bring dependable healing, enough arrows and bombs for your intended tactics, and rupees if you plan to use the Magic Armor. The Cave does not function like a normal dungeon with a convenient story checkpoint; failure can force you to restart the gauntlet. If you only want to finish the campaign, skip it and continue to Chapter 12.
If you do attempt it, ration resources instead of spending everything on early floors. The lower floors contain tougher enemies and narrow recovery margins. The Double Clawshots, Ball and Chain, Spinner, Dominion Rod, and normal sword techniques all contribute to a full clear, but the Cave is not a prerequisite for Hyrule Castle.
- Confirm that the Bridge of Eldin piece has been restored.
- Save before entering the Cave.
- Bring healing, arrows, bombs, and rupees if using the Magic Armor.
- Treat all 50 floors and their rewards as optional.
6. Make the final GameCube equipment and save check
When your chosen errands are complete, refill every available Bottle with a dependable healing option such as a fairy, potion, or another item you trust. Replenish arrows and bombs at the appropriate shops and leave enough rupees for a last purchase or selective Magic Armor use.
The GameCube version allows two secondary items to be assigned for immediate use at once. This does not remove items from your inventory; pause and replace the assigned items whenever the next room requires a different tool. For the castle approach, keep the Bow, Bombs, and Double Clawshots available in the inventory, then assign the two needed for the immediate route.
The Master Sword remains your normal combat weapon. If you own the Magic Armor, leave it unequipped unless you deliberately want its defensive effect. Save in Castle Town or another safe light-world location before beginning the required transition.
End this chapter before walking north to Hyrule Castle. Chapter 12 begins with the approach from Castle Town, Midna’s destruction of the barrier, the GameCube-specific courtyard route, and entry into the castle.
- Every available Bottle contains a healing item or fairy.
- Arrows and bombs are replenished.
- The Bow, Bombs, and Double Clawshots are in the inventory.
- Two appropriate secondary items are assigned for the immediate next route.
- A prepared save exists before Midna removes the Hyrule Castle barrier.
- Chapter 12 is the next required step.
Before you move on
- You are in Castle Town after Chapter 10, before Midna removes the Hyrule Castle barrier.
- You have decided whether to collect optional Heart Pieces, capacity upgrades, Poe Souls, Magic Armor, or the Cave of Ordeals.
- Every available Bottle contains a healing item or fairy.
- Arrows and bombs are replenished.
- The Bow, Bombs, and Double Clawshots are available for assignment under the GameCube two-slot limit.
- If you chose the Magic Armor, the Malo Mart bridge, Hot Spring Water, relocation, and purchase steps are complete and you still have rupees for supplies.
- A prepared GameCube save is stored before the next required transition.
- Your next objective is Chapter 12: approach Hyrule Castle and trigger Midna’s barrier-removal scene.
References for this chapter
- The Legend of Zelda: Twilight Princess — GameCube Guide and Walkthrough
- The Legend of Zelda: Twilight Princess GameCube Manual
- The Legend of Zelda: Twilight Princess Walkthrough — Cave of Ordeals
- Cave of Ordeals — Zelda Dungeon Wiki
- The Legend of Zelda: Twilight Princess Walkthrough — The Final Fight
- Twilight Princess Upgrades — Zelda Dungeon Wiki
- Poe Souls — StrategyWiki
Hyrule Castle Approach — GameCube Courtyards, Castle Interior, and Final Route
After the Palace of Twilight, warp to Castle Town, restock, and approach Hyrule Castle. Midna destroys the barrier around the grounds. On the original GameCube layout, take the west-side courtyard route first to reach King Bulblin and obtain the Small Key required for castle entry. Return to the front courtyard, unlock the castle entrance, then clear the east-side courtyard through the Bulbo barricades and windmill puzzle. The graveyard branch is optional. Inside the castle, clear the opening barrier, defeat the Darknut, and use the GameCube east-side route through the lantern puzzle and Dynalfos room. The other interior branch contains the opposing enemy encounters and connects with the battlement route. The Aeralfos provides the later Small Key, while the resistance-group scene opens the route to the Big Key. Cross the damaged tower, defeat the final Darknut, and open the throne-room door. Epona is transportation only during this approach; no mandatory mounted siege occurs before the fixed finale.
Prepare in Castle Town and reach Hyrule Castle
After leaving the Palace of Twilight, warp to Castle Town and restock before traveling north. Healing items, arrows, bombs, and Lantern Oil are useful for the castle. Make sure the Gale Boomerang, Hero’s Bow, Clawshot or Double Clawshots, Spinner, and Dominion Rod are available; the Dominion Rod is needed only for the optional graveyard branch.
Leave through the northern gate and follow the road to Hyrule Castle. Midna appears near the approach and uses the Fused Shadows to destroy the barrier. Ride Epona if convenient, but there is no mounted battle here. Dismount before entering the castle grounds and save if you want a clean retry point.
- Warp to Castle Town.
- Restock healing items and ammunition.
- Reach Hyrule Castle.
- Let Midna destroy the exterior barrier.
- Treat Epona as transportation only.
Take the west-side courtyard route to King Bulblin
Enter the castle grounds and take the west-side route on the original GameCube layout. Defeat the enemy groups that form the barriers, then continue through the western door. Pull the chain to open the gate and follow the raised path to the arena.
King Bulblin blocks frontal sword attacks with his axe. Keep him targeted, circle around him, and punish the recovery after his swings with Back Slices, Shield Bashes, Helm Splitters, or Jump Attacks. Move away from the spinning axe attack instead of trading hits. When he is defeated, collect the Small Key he leaves behind.
Return to the central courtyard through the southern route. This is the required entry key. Do not confuse it with the Small Key in the optional graveyard.
- Use the west-side GameCube courtyard route.
- Clear the barrier encounters.
- Pull the chain and enter King Bulblin’s arena.
- Defeat King Bulblin.
- Collect his Small Key.
- Return to the front courtyard.
Use the key and clear the east-side Bulbo route
Use King Bulblin’s Small Key on the castle entrance. Then return to the courtyard and take the east-side GameCube route. Defeat the Bulblin archers and Bokoblins, then continue to the Bulbos and wooden barricades.
Mount a Bulbo and charge through the barricades. Use its momentum to destroy the wooden obstacles and open the northern section. Dismount when the route is clear. Use the Gale Boomerang to remove the leaves near the gate and reveal the windmill diagram.
Activate the four windmills in the order shown by the uncovered pattern. The gate opens and the Dungeon Map is available beyond it. The map is optional; opening the gate is the progression requirement. This windmill puzzle is separate from the lantern puzzle inside the castle.
- Use King Bulblin’s Small Key at the castle entrance.
- Take the east-side GameCube courtyard route.
- Ride a Bulbo through the wooden barricades.
- Remove the leaves with the Gale Boomerang.
- Read the revealed windmill pattern.
- Activate the four windmills in that order.
- Collect the Dungeon Map if desired.
Optional: clear the graveyard treasury branch
The graveyard is optional. Its Small Key is not required for castle entry, the Aeralfos route, the resistance-group scene, the Big Key, or the throne-room route. Near the windmill area, remove the leaves and dig at the revealed spot as Wolf Link to enter the hidden graveyard.
Use Wolf Link’s senses to find the buried rock near the tree. Bomb it and activate the switch, then return to the graveyard and light the nearby torch. The rain stops temporarily. Quickly reach the eastern side and light the two torches by the gate. If the rain returns, relight the first torch and repeat the run.
Move the Dominion Rod statues into the floor recesses so you can cross them, pull the chain, and open the chest containing the optional Small Key. Return through the dig passage. Do not use this key as a substitute for King Bulblin’s key or the later Aeralfos key.
- Decide whether to pursue the optional branch.
- Enter the graveyard as Wolf Link.
- Bomb the buried rock and activate the switch.
- Light the rain-stopping torch.
- Light the two gate torches.
- Move the Dominion Rod statues into position.
- Collect the optional Small Key if desired.
Enter the castle interior and defeat the first Darknut
Return to the main courtyard and enter through the unlocked castle door. A barrier forms around Link. Defeat the Bokoblins and Lizalfos until it disappears. The chandelier hall then becomes accessible. The Compass chest can be reached with the Clawshot, but it is optional.
Use the chandeliers to reach the northern door and enter the Darknut room. Keep your shield ready, wait for the Darknut to complete an attack, and punish its recovery. Shield Bash, Back Slice, Helm Splitter, and Jump Attacks are effective once its armor opens. Bombs can help remove armor if you need distance.
After the Darknut falls, light the required torches to raise the platforms. Use the Gale Boomerang on the remaining lit torch when necessary to raise the final platform. From the upper route, follow the GameCube east-side branch for the lantern-and-Dynalfos progression.
- Enter through the main castle door.
- Clear the interior barrier encounter.
- Collect the Compass if desired.
- Defeat the first Darknut.
- Raise the platforms with the torches.
- Use the Gale Boomerang where required.
- Take the GameCube east-side interior branch.
Solve the lantern puzzle and defeat the Dynalfos
Enter the dim room with four unlit lanterns. Shoot the cord holding the wall painting so it falls and exposes the diagram. On the original GameCube layout, light the lanterns in this order: southwest, northeast, northwest, southeast.
Keese attack as soon as the sequence begins. Keep moving, light each torch promptly, and use quick sword strikes if a Keese interrupts you. If the order fails, relight the lanterns from the beginning.
The southern door opens when the sequence is correct. Defeat both Dynalfos, then use the northern door between the suits of armor to reach the switch that lowers a chandelier and creates a shortcut. Return through the opened route to the connecting corridors.
- Drop the painting with an arrow.
- Read the revealed diagram.
- Light southwest first.
- Light northeast second.
- Light northwest third.
- Light southeast last.
- Defeat both Dynalfos.
- Activate the chandelier shortcut.
Clear the converging interior routes
The castle interior divides into two required branches after the first Darknut. The east-side GameCube branch is the lantern-and-Dynalfos route described above. The opposing branch contains the Lizalfos encounter, the painting or switch interaction, and the Darknut battle. Clear the branch you enter and use the returning doors and shortcuts to reach the exterior battlements.
Do not treat the two branches as a fixed Aeralfos-then-Big-Key sequence. Their purpose is to open the connected castle route. The Aeralfos is on the battlement side and supplies the Small Key needed for the later locked door. The resistance-group scene opens the route to the Big Key. Both milestones are required, but their presentation can be followed as converging sections rather than as one rigid order.
When the resistance group appears, Rusl, Auru, Ashei, and Shad deal with the attacking Lizalfos and Bulblin archers. Enter the opened tower and collect the Big Key from the large chest.
- Clear the lantern-and-Dynalfos branch.
- Clear the opposing Lizalfos and Darknut branch.
- Use the connecting doors and shortcuts.
- Reach the battlements.
- Trigger the resistance-group scene.
- Collect the Big Key from the opened route.
Defeat the Aeralfos and collect its Small Key
On the battlements, a barrier traps Link with an Aeralfos. Keep the Clawshot ready. When the Aeralfos raises its shield, target the shield and pull the enemy down. Attack with the sword while it is grounded, then retreat when it regains altitude. Repeat until it is defeated.
Open the chest beyond the arena and collect the Small Key. This is the required key for the later locked route toward the upper castle and tower. The optional graveyard key is not required for this door.
If you reach the battlements before completing the resistance-group section, return through the connected castle routes and complete that scene and the Big Key route as well. The important completion condition is to obtain both the Aeralfos Small Key and the Big Key without assigning them an unsupported fixed order.
- Reach the battlements.
- Defeat the Aeralfos with the Clawshot and sword.
- Collect its Small Key.
- Complete the resistance-group and Big Key route.
- Keep the optional graveyard key separate from the required keys.
Cross the damaged tower and reach the throne room
Use the Aeralfos Small Key on the later locked door. In the damaged tower, transform into Wolf Link and activate your senses. Charged attacks remove Ghoul Rats. Follow the ghost soldiers, who indicate the safe direction across the collapsing floor. If a tile falls, reload the latest save or reenter the room and follow the ghost directions again.
Continue north after the ghost sequence. Defeat the Lizalfos on the broken stairs, then use the Double Clawshots across the wide gaps. On the upper climb, ride the Spinner tracks and move between tracks to avoid the moving blades.
A final Darknut guards the upper approach. Defeat it by waiting for attacks to finish and punishing the recovery rather than committing to long exchanges. Use the Big Key on the throne-room door. The next fixed sequence begins with Puppet Zelda. No mandatory mounted siege occurs during this approach; the horseback Ganondorf battle comes later in the finale.
- Use the Aeralfos Small Key on the later locked door.
- Cross the damaged tower as Wolf Link.
- Follow the ghost soldiers across the collapsing floor.
- Defeat the Lizalfos on the broken stairs.
- Use the Double Clawshots across the gaps.
- Ride the Spinner tracks past the blade traps.
- Defeat the final Darknut.
- Use the Big Key on the throne-room door.
- Begin the Puppet Zelda sequence.
Before you move on
- Midna has destroyed the barrier around Hyrule Castle.
- King Bulblin was defeated through the west-side GameCube exterior route.
- King Bulblin’s Small Key was collected.
- The castle entrance was opened with that key.
- The east-side Bulbo barricade route was cleared.
- The leaves were removed and the visible windmill pattern was activated.
- The optional graveyard branch was completed or deliberately skipped.
- The castle interior was entered.
- The first Darknut was defeated.
- The GameCube east-side lantern-and-Dynalfos branch was cleared.
- The lanterns were lit southwest, northeast, northwest, southeast.
- The opposing interior branch and its connecting route were cleared.
- The Aeralfos was defeated and its Small Key was collected.
- The resistance-group scene occurred and the Big Key was obtained.
- The later locked door was opened with the Aeralfos Small Key.
- The damaged tower was crossed.
- The final Darknut was defeated.
- The Big Key opened the throne-room door.
- The next fixed sequence begins with Puppet Zelda.
- No mandatory mounted siege was required before the finale.
References for this chapter
- Part 11: Hyrule Castle - Twilight Princess Walkthrough
- Hyrule Castle - The Legend of Zelda: Twilight Princess Walkthrough
- Chapter 21: Hyrule Castle - Zelda Universe
- Twilight Princess Video Walkthrough - Hyrule Castle
- The Legend of Zelda: Twilight Princess — GameCube Guide and Walkthrough
- The Legend of Zelda: Twilight Princess — Nintendo GameCube Manual
Dark Beast Sequence and Final Preboss Steps
The fixed final sequence proceeds through Puppet Zelda, Dark Beast Ganon, and the horseback pursuit against Ganondorf. The first Dark Beast phase requires human Link and the bow; the later phase requires Wolf Link and Midna’s interception. After Ganondorf is knocked from his horse, the game transitions directly to the enclosed arena for the final sword duel. This chapter ends at that transition and does not cover the duel itself.
Defeat Puppet Zelda
Puppet Zelda opens the final sequence with three attacks: a downward sword dive, a damaging energy field beneath Link, and a glowing projectile. Keep moving away from the energy field and sidestep or back away from the sword dive. Do not stand directly beneath her when she rises above the arena.
When Zelda launches the glowing projectile, face her and swing the sword as the projectile reaches Link. L-targeting helps keep the return shot directed toward her, but the timing must still be deliberate. A premature sword swing can miss or leave Link exposed.
When the reflected projectile strikes Zelda, move in and attack her with the sword. This is the safe damage window. Repeat the reflection and counterattack pattern until Zelda has been hit three times. The following cutscene changes the encounter to Dark Beast Ganon. Use any recovery opportunity before the transformation sequence finishes, because the next battle follows immediately.
- Avoid the sword dive and ground-based energy field.
- Reflect each glowing projectile with the sword.
- Attack only after the reflected projectile hits Zelda.
- Complete three successful damage cycles.
Fight Dark Beast Ganon as human Link
The opening Dark Beast Ganon phase is fought as human Link. Keep the bow ready and watch Ganon’s movement rather than trying to attack his armored body with the sword. When he charges across the arena, shoot the glowing jewel on his forehead. A successful hit staggers him and exposes the vulnerable area on his belly.
Run to the exposed belly and attack with the sword before Ganon recovers. The opening closes quickly, so prioritize reaching the weak point over collecting nearby hearts or repositioning for a better angle.
When Ganon disappears, watch the portals around the arena. One portal becomes active before he emerges. Face the active opening and prepare to shoot the forehead jewel as he charges out. If he appears overhead, move away from the shadow beneath him, then turn back toward him and attack the forehead jewel when the opportunity appears. Do not fire repeatedly at the armored body; arrows are most useful when aimed at the glowing forehead target.
Repeat the forehead shot followed by belly attacks until the battle changes phases. The required objective in this part is to create openings with the bow, not to defeat Ganon through ordinary sword strikes against his armor.
- Remain in human form during the opening Dark Beast phase.
- Keep the bow ready and target the glowing forehead jewel.
- Attack the exposed belly after each successful stagger.
- Move clear of Ganon’s shadow when he appears above Link.
- Do not waste arrows on the armored body.
Use Wolf Link and Midna to expose Ganon’s belly
After the human-form phase, transform into Wolf Link. Ganon continues to emerge from portals and charge across the arena. L-target him and hold the A Button when the on-screen push command appears. Keep holding A while moving the Control Stick left or right to make Midna seize and throw Ganon onto his side.
The throw is the opening creator; Wolf Link is not meant to damage Ganon’s armored body through ordinary attacks. Once Ganon is down, transform back into human Link and reach the exposed belly. Attack with the sword before he stands. The transformation and approach must be quick because the vulnerable window is short.
If the interception fails, do not chase Ganon into a blind melee exchange. Retreat, watch for the next portal, and prepare to hold A as he charges again. Repeat the Wolf Link interception and human-form belly attack until Dark Beast Ganon is defeated.
The final Dark Beast hit triggers the next cutscene. Link and Zelda are moved outside the castle, and Epona becomes available for the horseback pursuit.
- Transform into Wolf Link after the phase change.
- L-target Ganon and hold A when the interception command appears.
- Move the Control Stick left or right while holding A to throw him.
- Transform back into human Link and attack the exposed belly.
- Repeat the interception until the Dark Beast fight ends.
Complete the horseback pursuit against Ganondorf
Link begins this section on Epona while Ganondorf rides ahead on a dark horse. Zelda accompanies Link and supplies the Light Arrows. L-target Ganondorf and stay close enough for Zelda to fire at him. The required stun comes from Zelda’s Light Arrow; Link’s ordinary bow is not a substitute for this attack.
When Zelda fires, avoid sharp steering changes. Keeping Epona under control makes it easier for the Light Arrow to connect. Once Ganondorf is glowing and slowed by the hit, close the remaining distance and strike him with Link’s sword. A sword attack or spin attack can be used during the stun, provided Link reaches him safely.
If the Light Arrow misses, regain position instead of attacking Ganondorf while he is protected. Make a broad turn, maintain the target, and wait for Zelda to create another opening. Ganondorf can also send ghost riders across the route. Pass through a visible gap when it is safe, or ride around the outside of the group and circle back. Avoid forcing a head-on collision, since taking a hit can separate Link from Ganondorf and waste the opening.
Repeat Zelda’s Light Arrow stun followed by Link’s mounted sword attack until Ganondorf is knocked from his horse. No additional item is required for this section.
- Remain mounted on Epona.
- L-target Ganondorf and keep within Zelda’s firing range.
- Allow Zelda’s Light Arrow to stun him.
- Attack with Link’s sword only during the stun.
- Avoid or route around the ghost riders.
- Repeat the stun-and-attack sequence until Ganondorf falls.
Stop at the enclosed sword-duel arena
After Ganondorf is knocked from his mount, allow the transition sequence to play without resetting or leaving the game. There is no field search, extra item pickup, or separate mounted objective after the final knockdown.
The game then places Link in the enclosed arena for the Dark Lord Ganondorf sword duel. When control returns there, this chapter is complete. The next chapter should begin with spacing, L-targeting, sword-struggle timing, counterattacks, and the Ending Blow; those mechanics are intentionally not repeated here.
- Ganondorf has been knocked from the dark horse.
- The horseback pursuit has ended.
- The transition cutscene has finished.
- Link is standing in the enclosed arena immediately before the final sword duel.
Before you move on
- Puppet Zelda has been defeated after three reflected-projectile damage cycles.
- Dark Beast Ganon’s opening phase has been cleared with human-form shots to the forehead jewel followed by attacks on the exposed belly.
- The later Dark Beast phase has been cleared by using Wolf Link and Midna to throw Ganon, followed by human-form belly attacks.
- The horseback pursuit has ended with Ganondorf knocked from his mount.
- The transition has completed and Link is standing in the enclosed arena before the final sword duel.
References for this chapter
- The Legend of Zelda: Twilight Princess - Walkthrough - GameCube - By TheSoundDefense
- Hyrule Castle - The Legend of Zelda: Twilight Princess Walkthrough
- The Legend of Zelda: Twilight Princess — SDA Knowledge Base, Version Differences
- The Legend of Zelda: Twilight Princess Walkthrough — The Final Fight
- The Legend of Zelda: Twilight Princess — Nintendo GameCube Manual
Final Duel — Ganondorf and the Ending Blow
After the horseback pursuit, a cutscene moves Link into the enclosed arena for the final one-on-one battle with Ganondorf. Keep Ganondorf targeted, maintain enough distance to trigger the Chance sword clash, win the struggle with A-button presses, land a short controlled sword punish, and retreat. Repeat that pattern until Ganondorf falls and the Ending Blow prompt appears. This duel is the last playable battle; no additional beast phase follows the finishing thrust.
Enter the final sword arena
The horseback battle ends with a cutscene. When control returns, Link is standing inside the enclosed final arena with Ganondorf on foot. This is the transition into the chapter’s battle: there is no return to Hyrule Castle between the horseback encounter and the sword duel, and no equipment-based phase follows it.
Use the GameCube controls normally. Press L to keep Ganondorf targeted, move with the Control Stick, press B to swing the Master Sword, and use A for the context-sensitive Chance and Ending Blow commands. The duel does not require arrows or Silver Arrows. If Link is badly injured, heal during a safe opening or before committing to close combat, then keep the Master Sword ready.
- Confirm that the horseback pursuit has ended.
- Keep Ganondorf targeted with L.
- Use the Master Sword and GameCube controls.
- Do not waste time trying to use arrows or Silver Arrows.
Create distance and trigger Chance
Keep L-targeting active and back away from Ganondorf until there is a clear gap between you. The safest general plan is defensive: do not charge into his guard or begin a long attack string from the front. Ganondorf can block direct attacks, kick Link away, and punish attacks that leave Link recovering.
From a suitable distance, Ganondorf will eventually advance or charge. Watch for the Chance prompt at the bottom of the screen. Press A as soon as the prompt appears, then continue pressing A during the sword struggle. Link and Ganondorf will lock blades; winning the struggle forces Ganondorf back and creates the dependable opening for damage.
If Ganondorf reaches Link before the prompt appears, back away while preserving the lock-on instead of trying to trade sword blows. If the Chance prompt does not appear, reset the spacing and wait for another approach. The timing is easier when Link is facing Ganondorf directly and the camera is centered on him.
- Maintain L-targeting.
- Stay far enough away to invite Ganondorf’s charge.
- Press A immediately when Chance appears.
- Continue pressing A during the sword struggle.
- Reset the spacing if the prompt fails to appear.
Punish the sword struggle, then retreat
After winning the sword struggle, press B for a short, controlled series of sword strikes. Do not keep mashing after the opening closes. The purpose of the punish is to deal damage while Ganondorf is exposed, not to begin a prolonged exchange at close range.
When the brief opening ends, move away and rebuild the gap. Repeat the same sequence: wait at range, respond to Chance with A, win the sword struggle, deliver a short sword punish, and disengage. Continue until Ganondorf is knocked down and the finishing opportunity appears.
Other sword attacks may connect when Ganondorf’s guard is briefly open, but they are less reliable than the Chance-counter pattern. Use them only when the opening is obvious. Avoid jump attacks and extended front-facing combinations unless you are certain Ganondorf is vulnerable, because he can interrupt Link during recovery.
- Use B for a short sword punish after a successful struggle.
- Stop attacking when the opening closes.
- Retreat and restore the original spacing.
- Repeat the bait-and-counter pattern until Ganondorf falls.
- Treat ordinary sword openings as optional rather than the main strategy.
Recover after a missed Chance or failed punish
Missing the Chance prompt does not require restarting the finale. Keep Ganondorf targeted, retreat immediately, and wait for him to approach again. Do not chase him across the arena or continue attacking beside him after he blocks.
If Link loses the sword struggle or is struck during the exchange, create distance before healing. Ganondorf’s close-range attacks can remove substantial health, so trying to recover while standing beside him is dangerous. Once the gap is restored, return to the same defensive rhythm.
A failed attempt is recoverable as long as Link survives. The fight has no requirement to restart the earlier Puppet Zelda, Dark Beast Ganon, or horseback encounters merely because the sword duel’s opening was missed.
- Retreat after a missed Chance prompt.
- Do not force attacks at close range.
- Heal only after creating a safe gap.
- Wait for another approach instead of restarting the finale.
Use Ending Blow to finish the battle
When the repeated counterattack pattern has reduced Ganondorf and he falls onto his back, keep him targeted and watch for the Ending Blow command. Press A when the prompt appears. Link performs the required finishing thrust with the Master Sword.
If the prompt is missed, remain calm and reset the distance. Ganondorf can recover, allowing you to repeat the Chance sword struggle and short punish until another finishing opening is created. Do not leave the arena or expect a new item phase.
When the Ending Blow connects, the duel ends permanently. No additional playable beast transformation, second sword arena, or Silver Arrow sequence follows. The game moves into the closing story scenes after the finishing animation, so allow the transition to continue rather than resetting immediately.
- Wait for Ganondorf to fall and the Ending Blow prompt to appear.
- Keep L-targeting active.
- Press A when Ending Blow is displayed.
- Repeat the counter pattern if the prompt is missed.
- Let the closing scenes begin after the finishing thrust.
Before you move on
- Ganondorf falls during the final enclosed sword duel.
- The Ending Blow animation completes.
- The game transitions into the closing story scenes without returning Link to the castle.
- The ending and credits are allowed to play to completion.
- The completed GameCube save can then be checked after the credits using the game’s normal save behavior.
References for this chapter
Ending and Credits — Completion Verification
The original Nintendo GameCube campaign ends in a fixed sequence: Puppet Zelda, Dark Beast Ganon, the horseback Ganondorf encounter, and the enclosed final sword duel. After performing the Ending Blow, allow the defeat scenes, closing story sequence, and complete staff credits to finish. The completed GameCube Quest Log can then display a completion star, while loading that file still returns Link to the latest save made before the final battle. This is normal and does not indicate a failed ending or create a post-credits free-roaming world.
1. Confirm the fixed finale order
The final sequence must be completed in this order. First defeat Puppet Zelda in the throne room. Dark Beast Ganon follows in the open arena. The third encounter is the horseback battle against Ganondorf, during which Zelda provides Light Arrows that create the attack openings. The finale ends with the enclosed sword duel against Ganondorf.
During the sword duel, wait for the opening that allows Link to knock Ganondorf down. Approach the fallen Ganondorf and perform the Ending Blow when the game presents the finishing prompt. This is the final playable attack of the campaign. No additional playable beast phase follows it, and the Light Arrows belong to the horseback encounter rather than a separate Silver Arrow objective.
- Puppet Zelda was defeated first.
- Dark Beast Ganon followed Puppet Zelda.
- The horseback Ganondorf battle followed Dark Beast Ganon.
- The enclosed sword duel came last.
- The Ending Blow connected against Ganondorf.
2. Let the ending and credits finish
After the Ending Blow, do not press Reset, power off the GameCube, or return to the system menu. Leave the game running through the defeat scene, the closing story scenes, and the complete staff credits. The game does not require you to make a new ordinary save during this presentation.
Wait until the credits conclude and the game returns to its normal title-screen flow. The ending sequence is part of the campaign completion requirement, and interrupting it leaves you without a reliable confirmation that the final sequence was allowed to finish. The game does not open a permanent post-credits version of Hyrule for continued play.
- The defeat scene played after the Ending Blow.
- The closing story scenes were shown.
- The staff credits reached their conclusion.
- The console was not reset during the ending.
- The game returned to the title-screen flow after the credits.
3. Verify the completed GameCube Quest Log
Return to the Quest Log after the credits and inspect the same GameCube journal used for the campaign. A completed file can display a completion star after the final battle and credits have been completed. Use that star together with the viewed ending as the practical completion check for the original GameCube release.
The star does not represent a new post-game area or change the normal story state. It records that the campaign finale has been completed at least once. The file may still describe the world as being before the final battle when loaded, because the game preserves the pre-finale gameplay state so you can continue optional activities and replay the ending.
- The correct original GameCube Quest Log was opened.
- The fixed four-encounter finale was completed.
- The Ending Blow was performed.
- The complete ending and credits were viewed.
- A completion star is visible on the completed Quest Log.
4. Understand the reload behavior
Loading the starred Quest Log does not place Link in a permanently cleared Hyrule Castle. Instead, the game returns to the latest saved position from before the final battle. Depending on where you last saved, this can be near the Hyrule Castle approach, the final castle interior, or another earlier save point.
This is normal behavior. Ganondorf can remain available for another attempt because the playable world is restored to its pre-finale state. The completion star is the record that the final battle has already been cleared; the unchanged world is not evidence that the victory failed.
Use this pre-finale state for optional activities such as the Cave of Ordeals, Heart Pieces, Poe Souls, Golden Bugs, equipment upgrades, and other cleanup. Those objectives are separate from the main-story completion requirement and do not need to be completed before the ending unless you want them included in a broader completion goal.
- The cleared file reloads at its latest pre-final-battle save position.
- The Quest Log shows the completion star.
- No permanent post-credits overworld is expected.
- Optional cleanup can be performed from the restored pre-finale state.
- Returning to the castle or seeing Ganondorf again does not invalidate the completion.
5. Recover from an interrupted ending or missing marker
If the console was reset or powered off before the credits finished, reload the latest intact Quest Log and repeat the finale. You do not need to replay the campaign from the beginning. Restock health and ammunition at the last available preparation point, then complete Puppet Zelda, Dark Beast Ganon, the horseback Ganondorf encounter, and the final sword duel again.
If the completion star is absent, first confirm that the credits actually reached their conclusion and that you inspected the same Quest Log afterward. If the ending was interrupted, repeat the final sequence without resetting. If the star still does not appear, preserve the file and avoid overwriting other journals; inspect the memory card and copy intact data before attempting any troubleshooting.
Do not interpret the pre-finale reload position as a failed ending. A successful file is expected to return to that earlier gameplay state while retaining the completion star.
- The latest intact GameCube Quest Log was loaded.
- The finale was repeated if the credits were interrupted.
- The same journal was inspected after the credits.
- The completion star was checked on the Quest Log.
- Other journals were not overwritten during recovery.
- The file was judged by both the star and the completed ending sequence.
Before you move on
- Puppet Zelda, Dark Beast Ganon, horseback Ganondorf, and the final sword duel were completed in that order.
- The Ending Blow was performed against Ganondorf.
- The defeat scenes, closing story scenes, and complete staff credits were viewed without resetting.
- The original GameCube Quest Log remains intact.
- A completion star is visible on the completed Quest Log.
- Loading the file returns Link to the normal pre-final-battle save position.
- No post-credits free-roaming world is expected.
- Optional Cave of Ordeals and collectible objectives remain separate from the main-story completion requirement.
References for this chapter
- The Legend of Zelda: Twilight Princess — Nintendo GameCube Manual
- The Legend of Zelda: Twilight Princess GameCube Manual
- Twilight Princess - Game Not Saved After Completion???
- How can I save my game after beating Ganon in Twilight Princess?
- The Legend of Zelda: Twilight Princess — GameCube Guide and Walkthrough
Post-game — Cave of Ordeals and Optional Challenges
The Cave of Ordeals is an optional 50-floor combat challenge in the Gerudo Desert. It is available after the broken section of Eldin Bridge has been returned to Eldin Province. The original GameCube release contains three Poe Souls in the cave, Great Fairy rewards at every tenth floor, and a final bottle of Great Fairy’s Tears after the floor 50 reward sequence.
1. Open the entrance at Gerudo Mesa
Complete the story event that restores the missing section of Eldin Bridge. After Midna warps that bridge segment back to Eldin Province, warp to the Gerudo Mesa location in Gerudo Desert. The hole beneath the place where the bridge section had been is now accessible. Drop through it to enter the Cave of Ordeals.
The cave is optional and is not required for the main campaign or the ending. The safest time to attempt it is after completing the Palace of Twilight, because you will then have the late-game equipment needed to pass every item gate. You can also complete it before Hyrule Castle if you want its healing rewards available for the final dungeon.
- Restore the missing Eldin Bridge section.
- Warp to Gerudo Mesa in the Gerudo Desert.
- Save before entering the hole.
2. Prepare the GameCube loadout
Bring full health and several dependable healing items. Fairies, red or blue potions, soup, and Great Fairy’s Tears are all useful. The cave does not provide an ordinary shop or a permanent save checkpoint between floors, so do not enter with a nearly empty bottle supply.
Have the Spinner, Ball and Chain, Dominion Rod, Double Clawshots, bow, bombs, and a way to use bomb arrows available. The cave’s progression gates require these items at different milestones. On the GameCube controller, only two secondary items can be assigned at once, so pause and change the equipped items whenever a room demands a different tool.
Magic Armor is useful for the late floors, but it consumes rupees while active. Enter with a healthy rupee reserve and use it selectively rather than leaving it equipped for the entire challenge.
- Full hearts and stocked bottles.
- Spinner, Ball and Chain, Dominion Rod, and Double Clawshots obtained.
- Bow, bombs, and bomb-arrow supplies replenished.
- Magic Armor available if you intend to use it.
3. Understand the floor and retreat rules
The Cave contains 50 consecutive combat floors. A floor’s exit opens only after every enemy in that floor has been defeated. Before dropping from an upper ledge, look for archers, ceiling enemies, or targets that can be safely removed from above. This reduces the number of threats active when Link reaches the floor.
The Great Fairy appears at floors 10, 20, 30, 40, and 50. The tenth-floor rooms are the reliable retreat points. If you leave at one of these rest areas, the rewards already unlocked remain active, but the next attempt begins again at floor 1; the cave does not save a mid-run floor checkpoint.
- Confirm that the exit has opened before advancing.
- Use ledges to remove ranged or exposed enemies first.
- Treat every tenth floor as a planned stopping point, not as a permanent save.
4. Clear floors 1 through 20
The first ten floors introduce basic enemies: Bokoblins, Keese, rats, Baba enemies, Skulltulas, Bulblin archers, Torch Slugs, Fire Keese, Dodongos, Tektites, and Lizalfos. Use the ledges to target archers and ceiling enemies before dropping down. Shielding, short sword strings, and Spin Attacks are safer than standing in the center of a crowd.
At floor 10, speak to the Great Fairy. Fairies are released into the Ordon Spring. Continue through floors 11 to 19, where the Spinner opens the route beyond floor 11. Use the Clawshot against Chus and Chu Worms, transform into wolf form for the Poe and undead enemies on floor 17, and dig at marked locations when a room contains hidden hearts or rupees.
The Poe Soul on floor 17 is easy to miss. Defeat the Stalhounds first, then use Wolf Link’s senses to reveal and defeat the Poe. Collect its soul before taking the exit. At floor 20, the Great Fairy releases fairies into the Faron Spring.
- Receive the Ordon Spring fairy reward at floor 10.
- Use the Spinner to continue beyond the first rest section.
- Collect the Poe Soul on floor 17 if pursuing all 60 souls.
- Receive the Faron Spring fairy reward at floor 20.
5. Clear floors 21 through 40
The Ball and Chain is required to proceed beyond floor 21. Use it against Ice Keese, ReDeads, Stalkin, Freezards, and other enemies that are dangerous at close range. On floor 22, remain in human form for ordinary enemies, then switch to wolf form and activate your senses to reveal the Phantom Rats. Dig in the center for recovery hearts before leaving.
Floor 26 contains Stalfos; bomb their remains after defeating them so they cannot rebuild. On floor 33, eliminate the ReDeads before changing into wolf form to fight the Poe and collect the second Poe Soul. At floor 30, the Great Fairy releases fairies into the Eldin Spring in Kakariko Village.
The Dominion Rod is required to continue beyond floor 31. Use it to move the statues blocking the exit after clearing the Beamos and Keese. Floors 35 through 39 combine Ice Keese, Freezards, Chilfos, and Darknuts. Use the ledge to thin the room with arrows or bomb arrows, then use the Ball and Chain on frozen targets. Fight the two Darknuts on floor 39 one at a time. The Great Fairy at floor 40 releases fairies into the Lanayru Spring at Lake Hylia.
- Use the Ball and Chain to pass the floor 21 obstacle.
- Collect the Poe Soul on floor 33.
- Use the Dominion Rod to open the floor 31 route.
- Fight Darknuts separately on floor 39.
- Receive the Eldin and Lanayru Spring rewards at floors 30 and 40.
6. Finish floors 41 through 49
The Double Clawshots are required to continue beyond floor 41. Floor 41 contains numerous Armos enemies; activate only a few at a time so the room does not surround Link. Continue using ledges against archers and switch to wolf form whenever Phantom Rats or the Poe on floor 44 are present. Defeat the Armored Lizalfos on floor 44, then use Wolf Link’s senses to locate and defeat the Poe Soul.
Floor 45 combines archers, ReDeads, and Chus. Remove the archers from their towers first, then use the Ball and Chain against the ReDeads while keeping room to retreat. Floor 46 combines Chilfos, Freezards, Ice Keese, and Phantom Rats; use bomb arrows or ordinary arrows from the ledge where possible, then defeat the remaining enemies with the Ball and Chain and wolf senses.
Floor 48 contains two aerial enemies and one Darknut. Eliminate the aerial enemies before committing to the Darknut. Floor 49 contains three Darknuts. Keep them grouped only when using a deliberate area attack; otherwise, draw one away from the others. Bombs can remove their armor, after which shield techniques, Back Slices, Helm Splitters, and Jump Strikes create safer openings. Magic Armor is most valuable here if you have enough rupees to keep it active.
- Use the Double Clawshots to pass the floor 41 gate.
- Collect the Poe Soul on floor 44.
- Save healing and rupees for floors 46 through 49.
- Defeat all three Darknuts on floor 49 before entering floor 50.
7. Claim the final reward and verify completion
After floor 49 is cleared, enter floor 50 and speak to the Great Fairy. She fills one of Link’s bottles with Great Fairy’s Tears. The item fully restores health and provides its attack-strengthening effect while the conditions for the boost are active. This is a reward placed in an existing bottle, not an additional bottle container.
After the first completion, the fairies released at the Ordon, Faron, Eldin, and Lanayru Springs remain available. When Great Fairy’s Tears are not already in your inventory, visiting a released Spirit Spring lets you refill a bottle with the tears. The three Cave of Ordeals Poe Souls remain counted for Jovani’s quest; they are located on floors 17, 33, and 44.
You may leave through the rest-area route after receiving the reward. The cave remains available for repeat attempts, but the first completion is the important completionist milestone.
- The floor 50 Great Fairy fills a bottle with Great Fairy’s Tears.
- The four Spirit Springs contain the released fairies.
- The three Cave of Ordeals Poe Souls are counted if pursuing the full Poe Soul quest.
- The cave can be re-entered for another 50-floor run.
Before you move on
- The Gerudo Mesa entrance is open after the Eldin Bridge section has been restored.
- All 50 floors have been cleared.
- The three Darknuts on floor 49 have been defeated.
- The Great Fairy on floor 50 has filled a bottle with Great Fairy’s Tears.
- Fairies are available at the Ordon, Faron, Eldin, and Lanayru Spirit Springs.
- The three Poe Souls from floors 17, 33, and 44 have been collected if pursuing optional Poe Soul completion.
Optional Completion — Heart Pieces, Poe Souls, and Sidequests
Use the GameCube edition's optional quests to improve health, ammunition and rupee capacity without confusing its layout with the mirrored Wii release or the altered Twilight Princess HD version. The most useful order is to collect nearby Heart Pieces and Golden Bugs during normal travel, return for item-gated locations after later dungeons, and leave a complete Poe Soul sweep until Wolf Link can move freely between provinces.
Upgrade the wallet, quiver and bomb bags
Visit Agitha in Castle Town as soon as you have a Golden Bug. Giving her the first bug awards the Big Wallet, which raises the GameCube rupee limit to 600. Continue delivering the remaining insects as you find them. After all 24 Golden Bugs have been delivered, Agitha awards the Giant Wallet, raising the limit to 1,000 Rupees. The 2,000-Rupee capacity belongs to Twilight Princess HD and should not be expected on GameCube.
Enter the STAR Game in Castle Town after obtaining the Clawshot. Completing the first version awards the Big Quiver. After obtaining the Double Clawshots in the City in the Sky, return and clear the second version for the Giant Quiver. These upgrades are optional, but the extra arrows are useful in the City in the Sky, Hyrule Castle and the final encounters.
Obtain the two additional bomb bags when their events become available. One comes from freeing the Goron trapped inside the rock in the water area of Zora's Domain with a Water Bomb. The other is awarded by Iza after completing the required Rapids Ride challenge in Upper Zora's River. After obtaining the extra bags, repeat Iza's challenge and score at least 25 points to receive the Giant Bomb Bag, which increases the capacity of every bomb bag. The GameCube file can therefore hold three bomb bags, not merely one enlarged bag.
- Give Agitha the first bug for the 600-Rupee Big Wallet.
- Deliver all 24 bugs for the 1,000-Rupee Giant Wallet.
- Clear STAR Game versions one and two for the two quiver upgrades.
- Obtain both extra bomb bags and complete Iza's 25-point challenge.
Collect Heart Pieces by availability rather than by a rigid story route
There are 45 Heart Pieces in the original game, and five pieces combine into one additional Heart Container. Collect easy pieces in Ordon Village, Faron Woods, Kakariko Village, Death Mountain, Lake Hylia, Castle Town and the surrounding fields whenever you already possess the required item. This steadily improves survivability without creating unnecessary detours.
Mark locations that require the Clawshot, Spinner, Ball and Chain, Dominion Rod, Double Clawshots or late-game wolf abilities. Return after the relevant dungeon instead of repeatedly checking an inaccessible ledge or cave. Several pieces come from short minigames, fishing areas, lantern caves, Bombing-Ball or Bombling routes, and Castle Town activities; these are worthwhile only if the reward is worth the time for your current objective.
A full set of 45 pieces produces nine additional Heart Containers, bringing the completed health meter to 20 hearts when all dungeon containers are also obtained. The GameCube game does not award a special separate prize for collecting every Heart Piece, so a story-focused player should prioritize pieces near the next dungeon and postpone difficult minigames.
- Use five pieces for each additional Heart Container.
- Record item-gated locations and revisit them after the relevant upgrade.
- Confirm that all 45 pieces have become nine extra containers if pursuing full optional completion.
Sweep Golden Bugs by province
Golden Bugs are easiest to track in regional groups. Search Faron and Ordon first, then Eldin and Kakariko, Lanayru and Lake Hylia, Gerudo Desert, Snowpeak and the late-game regions. Look for their glow and listen for their distinctive sound, especially at night. Wolf Link's senses are useful for confirming nearby targets, but the insects themselves are collected in human form.
Use Epona for field travel and Midna's warp points to move between provinces. Turn bugs in to Agitha whenever you pass through Castle Town, particularly before a large rupee expense such as the Malo Mart donations or Magic Armor purchase. Pair rewards provide Rupees, while the first bug and complete collection provide the two wallet upgrades.
Keep a written list organized by province and insect type. The GameCube collection screen records captured Golden Bugs, but it does not replace a location checklist for identifying which specific insect is missing.
- Search by province and mark each of the 24 insects immediately.
- Return to Agitha for the 600-Rupee and 1,000-Rupee wallet rewards.
- Use landmarks and warp points rather than copying unverified Wii left-right directions.
Complete useful shopping and equipment quests
The Malo Mart sequence in Kakariko Village and Castle Town is optional. If you want its shop access and related supplies, save Rupees from field chests, Golden Bugs and ordinary enemies, then make the required donations when the shop asks for them. Do not delay the main story solely to farm money; the quest helps with preparation but is not required for the ending.
Before Hyrule Castle, restock arrows, bombs, lantern oil and healing items. On GameCube, only two secondary items can be assigned at once. Set the pair before entering a dungeon or boss area, and change them between encounters when the room allows it. This limitation is different from later interfaces and is one reason to finish capacity upgrades before the final approach.
- Complete Malo Mart only if its supplies or optional progress are useful.
- Restock healing items and ammunition before the final areas.
- Plan the two equipped secondary items around the next puzzle or boss.
Begin the Poe Soul sweep after the early story restrictions are gone
Poe Souls are obtained from defeated Poes. Most overworld Poes appear at night, while dungeon and cave Poes can be encountered without waiting for night. Transform into Wolf Link, activate the senses to reveal the Poe, attack it until it collapses, and press the prompted action to tear out the soul before it recovers.
The GameCube release contains 60 Poe Souls. The Poe in Jovani's house counts toward the total. After collecting 20 souls, return to Jovani in Castle Town to receive a Bottle filled with Great Fairy's Tears. Do not expect the Ghost Lantern: that reward was added in Twilight Princess HD. After all 60 souls are delivered, Jovani is fully restored, and his cat Gengle can provide 200 Rupees whenever you speak to it.
For efficient travel, clear Faron and Eldin, then Kakariko and Death Mountain, Lanayru and Lake Hylia, Gerudo Desert, Snowpeak, dungeons and the Palace-related areas. Some locations require the Master Sword, Clawshot, Ball and Chain, Dominion Rod or access to later dungeon regions, so record inaccessible lanterns and return after unlocking the necessary route.
- Hunt overworld Poes at night and dungeon Poes whenever accessible.
- Use Wolf Link's senses and complete the final soul-collection prompt.
- Return at 20 souls for the Great Fairy's Tears Bottle.
- Return at 60 souls for Jovani's restoration and Gengle's repeat Rupee reward.
Verify the GameCube collection file
For a broad optional-completion check, confirm 45 Heart Pieces, 24 Golden Bugs, 60 Poe Souls, the Big and Giant Wallet rewards, both STAR Game quiver rewards, three bomb bags and the Giant Bomb Bag. Also verify any desired bottles, hidden skills, minigame rewards and Malo Mart progress separately; they are not represented by one universal percentage counter.
The GameCube world orientation differs from the Wii release because the Wii version mirrors the map. When using an external list, prefer area names, bridges, towers, caves, trees and warp points over left-right or east-west instructions unless the guide explicitly identifies the edition. Twilight Princess HD also changes some rewards and adds features that do not exist on the original GameCube file.
Do not chase every ordinary Rupee chest or difficult minigame during a focused story run. For the main campaign, the highest-value optional goals are nearby Heart Pieces, the first wallet upgrade, the quiver upgrades if you use many arrows, and the additional bomb capacity before the Cave of Ordeals or Hyrule Castle.
- 45 Heart Pieces collected and converted into nine extra containers.
- 24 Golden Bugs delivered to Agitha; Giant Wallet received.
- 60 Poe Souls delivered to Jovani; final reward confirmed through Gengle.
- Three bomb bags, Giant Bomb Bag, Big Quiver and Giant Quiver confirmed.
- Edition-specific GameCube directions used for any remaining locations.
Before you move on
- Confirm the health meter has nine extra Heart Containers from all 45 Heart Pieces, in addition to the dungeon containers.
- Confirm Agitha has received all 24 Golden Bugs and awarded the 1,000-Rupee Giant Wallet.
- Confirm the first and second STAR Game rewards are recorded as Big Quiver and Giant Quiver.
- Confirm the two extra bomb bags and the Giant Bomb Bag have been obtained.
- Confirm the Poe total reaches 60 and Jovani's final restoration reward has been received.
- Confirm all remaining optional objectives with a personal checklist rather than relying on a single percentage indicator.
References for this chapter
- The Legend of Zelda: Twilight Princess — 100% Collectible Guide — GameCube
- The Legend of Zelda: Twilight Princess — Guide and Walkthrough — GameCube
- Twilight Princess Upgrades — Zelda Dungeon Wiki
- Twilight Princess Poe Souls — Zelda Dungeon Wiki
- Poe Soul — Zelda Wiki
- Golden Bug — Zelda Dungeon Wiki
- The Legend of Zelda: Twilight Princess/Minigames — StrategyWiki
- The Legend of Zelda: Twilight Princess GameCube Manual
Troubleshooting — Common Stuck Points, Save Recovery and Glitches
On the original Nintendo GameCube release, most apparent dead ends come from using the wrong item, missing a story trigger, misunderstanding dungeon save behavior, or overlooking a route that becomes usable only after obtaining the dungeon item. Use manual saves deliberately, preserve a pre-problem journal, and follow the recovery procedures below before restarting the campaign.
1. Use manual saves as recovery points
Open the Quest screen and choose Save before entering a dungeon, before a miniboss or boss approach, and after completing a major story event. Twilight Princess does not return Link to the exact position of every manual save. A save made inside a dungeon normally resumes at that dungeon’s entrance, so save there only when you are prepared to retrace the rooms between the entrance and your current location.
Dungeon progress is not normally erased by this restart. Collected small keys, dungeon keys, opened chests, defeated minibosses, and acquired dungeon items remain part of the file. If you load at the entrance, check the map and retrace the route rather than assuming the dungeon has reset completely.
When a problem begins in an ordinary field or town area, save in a nearby safe location, quit to the title screen, and reload the same journal. This is useful if Link is trapped against scenery, a camera angle has become unhelpful, or an NPC event did not advance after leaving and returning.
- Keep a recent main-story journal before each dungeon transition.
- Create a second journal for optional exploration or risky experimentation by using the game’s journal-copy function.
- Do not erase the only file that contains the last confirmed story milestone.
- After loading, confirm the map, item inventory, heart gauge, and current objective before moving on.
2. Preserve a dungeon position with Ooccoo
When Ooccoo is available in a dungeon, find her before committing to a long session. Using Ooccoo sends Link out of the dungeon and establishes a return point. After reaching the exterior, save normally. On the next load, use Ooccoo again to return to the room where the dungeon position was preserved instead of walking through the entrance.
Do not walk back into the dungeon before using Ooccoo to return. Entering normally can replace the preserved return point with the dungeon entrance. This technique is especially useful before a miniboss, after collecting a dungeon item, or when you need to leave to refill bottles and ammunition.
This method is not universal. Ooccoo is unavailable in some late-game areas, including the Palace of Twilight and Hyrule Castle. In those areas, make a safe save before entering and expect a reload to place Link at the area’s designated restart point rather than beside the room where he fell.
- Find Ooccoo before leaving a dungeon voluntarily.
- Use Ooccoo to exit, save outside, reload, and use Ooccoo again before re-entering on foot.
- Do not rely on Ooccoo to create a return point in the Palace of Twilight or Hyrule Castle.
- Keep a separate pre-dungeon save if you are about to test an unfamiliar route.
3. Check the GameCube item assignment and controls
The GameCube version assigns two usable items to X and Y. Open the item screen and confirm that the tool needed for the obstacle is actually assigned. A locked-looking route may require the Clawshot, Gale Boomerang, Bow, Bombs, Ball and Chain, Spinner, or Dominion Rod rather than a key.
Use L to target enemies and suitable objects, and use the C-Stick to correct the camera before judging a jump or projectile line. For manual aiming, use the Control Stick while holding the assigned item button. If Link’s movement or camera seems wrong immediately after powering on, release the buttons and sticks and reset the controller using the manual’s controller-reset procedure.
Check the distinction between a small key, a dungeon key, and a dungeon item. A key opens a matching locked door; it does not activate crystals, eyes, rails, magnetic surfaces, or movable statues. Conversely, an item obtained from a miniboss may be required in an earlier room rather than the next door you see.
- Assign the suspected tool to X or Y before testing it.
- Try L-targeting on a target before concluding that an arrow, Clawshot, or Boomerang cannot connect.
- Recenter the camera with L and inspect the area with the C-Stick.
- If the controller behaves incorrectly from startup, reset the controller rather than changing the puzzle solution.
4. Reset puzzles without making random changes
If a block, water route, rotating mechanism, scale, chandelier, Spinner rail, or magnetic surface appears to be in the wrong position, stop moving objects at random. Return to the room entrance if possible and identify the required starting state. Many puzzles require one switch to be active while another is inactive, or require a block to be moved away from a wall before the intended path opens.
In Arbiter’s Grounds, retrace the Spinner tracks and inspect walls for matching rails before assuming a missing route is a glitch. In Snowpeak Ruins, return to the mansion’s central corridors and test the Ball and Chain against cracked ice, frozen obstacles, and suspiciously placed armor or statues. In the Temple of Time, recheck statue positions and the route between floors after obtaining the Dominion Rod.
If the room contains a dig spot, crawlspace, Clawshot target, pushable object, or hidden switch, search the perimeter from a different camera angle. If an enemy reward or chest was required to progress, confirm that it was actually collected rather than merely seen.
- Restore a two-state mechanism to its known starting state before trying the alternate position.
- Search above and below Link, not only at floor level.
- Use the dungeon map to identify an unexplored room or corridor behind the apparent dead end.
- Leave and re-enter through a normal doorway when the room can be safely reloaded.
5. Re-trigger story events in the intended order
If an NPC is absent, a gate remains closed, or Midna does not offer the expected warp, return to the last place where the objective changed. Speak to the relevant character again, complete every available conversation, leave through a normal exit, and re-enter through the intended route. Do not assume that a missing character means the file is damaged.
Story events can depend on an earlier conversation, a cutscene, or entering an area from its normal approach. If the problem began immediately after skipping or interrupting a major scene, reload the journal made before that scene and perform the sequence again without attempting a shortcut.
Do not apply Wii-specific cannon-room instructions to the GameCube release. The well-known Shad cannon-room save problem concerns an early Wii revision, while the GameCube version is documented as having that glitch fixed. Sequence breaks and emulator-specific behavior are not reliable recovery methods for a normal GameCube campaign.
- Return to the previous quest giver and exhaust the available dialogue.
- Leave and re-enter through a normal doorway or field entrance.
- Reload the pre-event journal if the NPC, warp, or gate still fails to appear.
- Avoid sequence breaks when preserving a campaign intended for completion.
6. Recover safely from a failed boss attempt
Before entering a boss room, save in the nearest safe area after restoring hearts and preparing the items that the dungeon uses. Do not depend on an automatic pre-boss checkpoint. If Link is defeated, use the last manual save or the normal restart location, then retrace the dungeon route as needed.
If a boss appears to stop responding, stop attacking and watch its complete pattern. Several encounters advance only after Link performs the required counter, reflects an attack, uses the dungeon item, or strikes during a specific opening. Re-entering the room after a reload is safer than repeatedly spending healing items against a phase that has not been triggered correctly.
For Ganondorf and the ending sequence, keep a pre-final-battle journal. If the fight is interrupted, reload that file and prepare again. Once the final battle ends, allow the ending scenes and credits to play before powering down if you are verifying that the campaign has reached its conclusion.
- Maintain one pre-boss save and one ordinary progression save.
- Restock before retrying instead of exhausting every bottle, arrow, or bomb in the arena.
- If the game returns Link to an unexpected place, check the map and reload the pre-boss journal when necessary.
- Do not reset during the final ending sequence when confirming campaign completion.
7. Protect the save when hardware or storage is suspect
If the console freezes, wait to confirm that the save operation has finished before touching the power switch or memory card. Do not repeatedly remove and reinsert a card while the game is writing data. After restarting, load the affected journal before making any new save.
If one journal loads correctly and another does not, stop overwriting files. Use the GameCube save menu’s normal copy and erase functions only after confirming which file is healthy. Preserve the working campaign on reliable hardware and keep optional progress in another journal when possible.
Avoid unofficial save editors, questionable third-party memory devices, and improvised transfers. They are not required to solve ordinary dungeon or story problems and can turn a recoverable progression mistake into damaged save data.
- Verify that a journal loads before deleting or replacing another file.
- Do not interrupt an active save operation.
- Use the built-in journal-copy function for a second campaign copy.
- Archive a completed file only with hardware and procedures you trust.
Before you move on
- The main campaign journal loads normally and returns Link to an expected safe restart point.
- Dungeon progress remains intact after a test save and reload, with collected keys, items, and cleared minibosses still recorded.
- A dungeon position has been preserved with Ooccoo where that feature is available, or a pre-entry save exists for areas without Ooccoo.
- Every apparent dead end has been tested with the correctly assigned GameCube item, L-targeting, camera adjustment, a room re-entry, and a return to the previous story trigger.
- A separate journal preserves optional progress or a pre-boss position, and the completed campaign file loads normally after the final battle and credits.
References for this chapter
- The Legend of Zelda: Twilight Princess — Nintendo GameCube Manual
- The Legend of Zelda: Twilight Princess — GameCube Guide and Walkthrough
- The Legend of Zelda: Twilight Princess — GameCube Guide and Walkthrough
- The Legend of Zelda: Twilight Princess — SDA Knowledge Base, Version Differences
- The Legend of Zelda: Twilight Princess — GameCube Controls Reference
Final Checks, Save Archival and Replay Options
Complete the original Nintendo GameCube finale, allow the ending and credits to finish, then verify the completed Quest Log using both its completion star and its normal reload state. Preserve the file before optional cleanup or starting a separate replay, and keep GameCube procedures separate from the Wii and HD releases.
Finish the complete finale before checking the file
The original GameCube finale must be completed in this order: Puppet Zelda, Dark Beast Ganon, the horseback pursuit against Ganondorf, and the enclosed sword duel with Ganondorf. During the final duel, create the required opening, win the exchange, and perform the Ending Blow to trigger the closing sequence.
Do not switch off the console immediately after the final strike. Continue through the post-battle scenes and allow the credits to reach their end. The game does not turn the completed file into a normal free-roaming post-credits version of Hyrule, so the expected reload behavior is not evidence of a failed finale.
- Puppet Zelda is defeated.
- Dark Beast Ganon is defeated.
- The horseback Ganondorf pursuit is completed.
- The final sword duel is completed.
- The Ending Blow has been performed.
- The ending scenes and credits have finished.
Verify the completed GameCube Quest Log
After the credits, return to the title screen and inspect the same GameCube Quest Log. A completed original GameCube file can show a completion star beside the Quest Log. Treat that star as an additional confirmation that the finale has been cleared.
Load the file as a second check. The game normally returns Link to the save state from before the final battle instead of placing him in a permanently altered post-credits Hyrule. You may therefore need to replay the finale if you want to view the ending again, but this reload state does not cancel the completion recorded on the Quest Log.
If the star is absent, the credits were interrupted, or you are uncertain whether the final sequence finished, preserve the file before changing anything. Replay the finale from the existing pre-battle save and let every ending scene and the credits run to completion. Do not erase the Quest Log while investigating.
- The credits have been viewed to completion.
- The completed Quest Log shows its completion star.
- The same GameCube Quest Log can be loaded afterward.
- The file returns to its expected pre-final-battle state.
- The Quest Log has not been deleted while completion is being checked.
Preserve the original GameCube save
Use the GameCube memory-card copy function to make a second copy when you have a compatible destination card with enough free space. After copying, start Twilight Princess with the destination card inserted and confirm that the copied Quest Log appears and loads. A backup that is only visible in a file browser has not been verified.
Keep the original memory card untouched and label the duplicate as the original GameCube release. Do not assume that a Wii or Wii U Twilight Princess save can be read by the GameCube game, or that saves from different regional releases are interchangeable. Regional save identifiers can prevent a file from being recognized.
If specialized hardware or an emulator is involved, preserve the untouched original before importing, converting, or editing anything. Test-load the backup before deleting or modifying the source.
- A second copy exists on a compatible destination.
- The duplicate Quest Log loads in the intended GameCube edition.
- The original memory card remains intact.
- The backup is not being treated as interchangeable with Wii or HD save data.
Use the completed file for optional cleanup
The completed file remains useful for optional activities because the final battle does not create a permanent post-credits overworld state. Use the pre-final-battle save to collect Heart Pieces and Poe Souls, finish minigames, complete equipment upgrades, or enter the Cave of Ordeals.
The Cave of Ordeals is beneath Gerudo Mesa. Its entrance becomes available after the Bridge of Eldin has been restored and moved back to its original position. The challenge contains 50 consecutive combat floors, with Great Fairy rest areas at floors 10, 20, 30, 40, and 50. Reaching the final floor provides Great Fairy’s Tears. The Cave is optional and is not required for the main-story completion check.
Track dungeon chests, Heart Pieces, Poe Souls, minigames, upgrades, and Cave of Ordeals progress separately. Back up the completed file before making extensive changes if preserving the original completion record matters to you.
- The Cave of Ordeals is recorded as a 50-floor optional challenge.
- The Great Fairy’s Tears reward is recorded separately from story completion.
- Optional cleanup is performed only after the save has been backed up.
Start a replay with a separate Quest Log
The original GameCube release does not provide a conventional New Game Plus campaign. Start a replay in a different Quest Log and expect to begin without the completed run’s hearts, dungeon items, upgrades, or equipment.
Choose the purpose of the new run before starting: a story-only playthrough, a low-heart challenge, all dungeon chests, every Heart Piece, every Poe Soul, the Cave of Ordeals, or a broader completion target. Keep the finished Quest Log available for optional cleanup and for replaying the final approach.
- A separate Quest Log is chosen for the replay.
- The completed file remains available.
- The replay has a defined objective before the opening sequence begins.
Keep GameCube, Wii, and HD procedures separate
The Wii release uses Wii Remote and Nunchuk controls and mirrors the world horizontally compared with the GameCube release. The GameCube version uses its original controller layout and unmirrored route orientation. Do not carry east, west, left, or right directions from a Wii guide into a GameCube run without checking the edition.
Twilight Princess HD is a separate Wii U release with separate save data and edition-specific interface and gameplay changes. A completion state in HD does not verify a GameCube Quest Log, and a GameCube memory-card file should not be treated as an HD save.
Record the exact platform and edition before beginning another playthrough. Keep the original GameCube card and its verified backup until the other version has been tested independently.
- The finished file is identified as the original Nintendo GameCube edition.
- Wii and HD save data are treated as separate files.
- Controls, directions, save handling, and completion checks match the edition being played.
Before you move on
- Puppet Zelda, Dark Beast Ganon, horseback Ganondorf, and the final sword duel are complete.
- The Ending Blow has been performed.
- The ending scenes and credits have finished.
- The original GameCube Quest Log displays its completion star.
- The GameCube Quest Log reloads from the expected pre-final-battle state.
- A verified backup exists before replaying, converting, or performing extensive optional cleanup.
- Optional goals such as the Cave of Ordeals, Heart Pieces, Poe Souls, minigames, upgrades, and dungeon chests are tracked independently.
References for this chapter
- The Legend of Zelda: Twilight Princess GameCube Manual
- The Legend of Zelda: Twilight Princess — Guide and Walkthrough — GameCube
- Cave of Ordeals — Zelda Wiki
- Cave of Ordeals — Zelda Dungeon Wiki
- Iwata Asks: The Legend of Zelda: Twilight Princess — GameCube and Wii versions
- Nintendo Japan: Differences Between the Wii and GameCube Versions
- The Legend of Zelda: Twilight Princess HD Electronic Manual
Finishing up
The nine main dungeons have been completed in sequence, including Goron Mines between the Forest Temple and Lakebed Temple.
Zant has been defeated, Midna’s Fused Shadows have been recovered, the Sacred Grove and Master Sword story transition is complete, and the route to Hyrule Castle is open.
The fixed final sequence has been completed in order: Puppet Zelda, Dark Beast Ganon, horseback Ganondorf, and the final sword duel ending with the Ending Blow.
The full closing story and credits have played. Loading the GameCube Quest Log afterward normally returns to the latest pre-final-battle save state; this is normal and is not evidence that the ending failed.
Cave of Ordeals, Heart Pieces, Poe Souls, upgrades, and other optional objectives are separate from the main-campaign completion check.
Choose your next gameScreenshots & video
Game imagery for reference. Follow the written chapters above for the route and strategies.
Sources & references
Our original guide draws on the references below. Check the edition at the top of this page before following controls or unlock requirements.
- CHAPTER 1 — The Legend of Zelda: Twilight Princess Walkthrough & Guide — GameCube
- The Legend of Zelda: Twilight Princess — Guide and Walkthrough — GameCube
- Part 1: Ordon Village — Twilight Princess Walkthrough
- Ordon Village — The Legend of Zelda: Twilight Princess Walkthrough
- The Legend of Zelda: Twilight Princess GameCube Manual
- Chapter 1: Ordon Village — Zelda Universe
- The Legend of Zelda: Twilight Princess — Nintendo GameCube Manual
- The Legend of Zelda: Twilight Princess - Walkthrough - GameCube - By TheSoundDefense
- Twilight Princess Walkthrough - Faron Woods: Twilight
- Twilight Princess Walkthrough: Forest Temple — Zelda Universe
- Twilight Princess Walkthrough — Forest Temple — Zelda Dungeon
- Twilight Princess Walkthrough: Forest Temple — Zelda Central
- Part 3: Goron Mines — Twilight Princess Walkthrough
- CHAPTER 3 — The Legend of Zelda: Twilight Princess Walkthrough & Guide — GameFAQs
- The Legend of Zelda: Twilight Princess — GameCube Guide and Walkthrough
- Part 4: Lakebed Temple — Twilight Princess Walkthrough
- CHAPTER 4 — The Legend of Zelda: Twilight Princess Walkthrough & Guide — GameFAQs
- Twilight Princess Walkthrough — Zelda’s Palace
- Arbiter's Grounds - The Legend of Zelda: Twilight Princess Walkthrough
- Twilight Princess Walkthrough - Arbiter's Grounds
- Twilight Princess Video Walkthrough - Arbiter's Grounds
- Part 6: Arbiter's Grounds - Twilight Princess Walkthrough
- Chapter 11: Gerudo Desert - Zelda Universe
- The Legend of Zelda: Twilight Princess — Guide and Walkthrough — GameCube — DarkFury3827
- Dungeon 5: Snowpeak Ruins Walkthrough - GameCube
- The Legend of Zelda: Twilight Princess Game Guide
- Temple of Time — The Legend of Zelda: Twilight Princess Walkthrough
- Chapter 16: Temple of Time — Zelda Universe
- The Legend of Zelda: Twilight Princess — Chapter 8 Walkthrough
- Twilight Princess Walkthrough — City in the Sky
- Twilight Princess Walkthrough — City in the Sky
- Palace of Twilight - Zelda Dungeon Walkthrough
- Palace of Twilight — Thonky's The Legend of Zelda: Twilight Princess Walkthrough
- The Legend of Zelda: Twilight Princess — GameCube Guide and Walkthrough
- Part 11: Hyrule Castle - Twilight Princess Walkthrough
- The Legend of Zelda: Twilight Princess Walkthrough — Cave of Ordeals
- Cave of Ordeals — Zelda Dungeon Wiki
- The Legend of Zelda: Twilight Princess Walkthrough — The Final Fight
- Twilight Princess Upgrades — Zelda Dungeon Wiki
- Poe Souls — StrategyWiki
- Hyrule Castle - The Legend of Zelda: Twilight Princess Walkthrough
- Chapter 21: Hyrule Castle - Zelda Universe
- Twilight Princess Video Walkthrough - Hyrule Castle
- The Legend of Zelda: Twilight Princess — SDA Knowledge Base, Version Differences
- The Legend of Zelda: Twilight Princess — Boss Guide — GameCube
- Twilight Princess - Game Not Saved After Completion???
- How can I save my game after beating Ganon in Twilight Princess?
- The Legend of Zelda: Twilight Princess — Guide and Walkthrough — GameCube
- The Legend of Zelda: Twilight Princess/Cave of Ordeals — StrategyWiki
- The Legend of Zelda: Twilight Princess — 100% Collectible Guide — GameCube
- Twilight Princess Poe Souls — Zelda Dungeon Wiki
- Poe Soul — Zelda Wiki
- Golden Bug — Zelda Dungeon Wiki
- The Legend of Zelda: Twilight Princess/Minigames — StrategyWiki
- The Legend of Zelda: Twilight Princess — GameCube Controls Reference
- Cave of Ordeals — Zelda Wiki
- Iwata Asks: The Legend of Zelda: Twilight Princess — GameCube and Wii versions
- Nintendo Japan: Differences Between the Wii and GameCube Versions
- The Legend of Zelda: Twilight Princess HD Electronic Manual
About the game & collecting notes
- Platform
- Nintendo GameCube
Step-by-step coverage of the original GameCube edition from Ordon Village through the final duel with Ganondorf and the game's ending. Focused on GameCube controls, dungeon routes, boss strategies, warp and horse sections, and the finish conditions required to trigger the canonical ending on the original release.
Darryl Polo
Darryl Polo loves tinkering with emulation and revisiting retro games. He enjoys exploring how old favorites play on different setups and sharing what he learns along the way. At Joking Joystick, he writes about the games, hardware, and small discoveries that keep the hobby fun.
Our editorial standardsFound a step that needs another look? Help us improve this guide.