The Legend of Zelda: The Wind Waker GameCube Walkthrough
A full campaign walkthrough for the North American Nintendo GameCube release of The Wind Waker, guiding you from Outset Island through the Triforce hunt, Ganon's Tower, and the ending. The structure separates required story progress from optional upgrades, flags original GameCube-specific steps such as Tingle chart deciphering, and keeps the route practical for a first-time player.

Before you begin
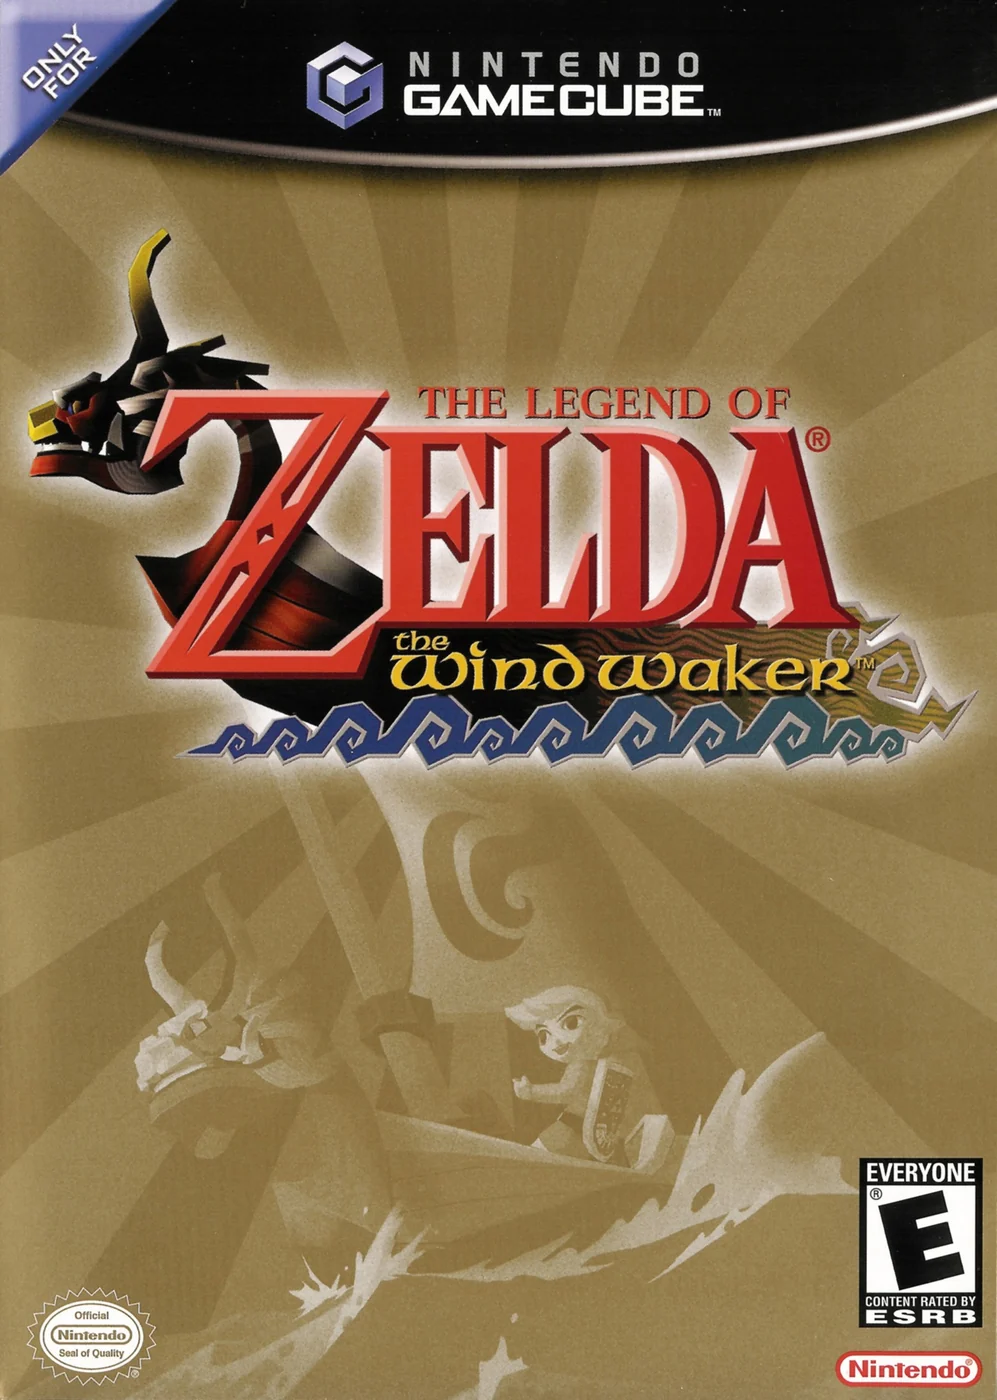
This route follows the original North American GameCube version of The Wind Waker.
You should expect the original sailing pace, the full late-game Triforce hunt, and optional Game Boy Advance Tingle Tuner support rather than the convenience changes added later in The Wind Waker HD.
You can treat heart pieces, most side minigames, figurines, and many sea charts as optional unless a chapter calls them out for a required reward.
When the route sends you away from the obvious next island, it should be for a story item, a required song, a dungeon entrance, a sage, a Triforce chart, or a final-battle prerequisite.
Set yourself up for the run
Use the Fishmen early and often.
Keep All-Purpose Bait in your inventory so you can fill in the Sea Chart as you travel and reduce blind searching later.
Do not spend every rupee as soon as you earn it.
The original GameCube version makes you pay Tingle to decipher Triforce Charts, so the late game is much smoother if you build a rupee reserve.
Treat the Tingle Tuner as optional.
Buy Hyoi Pears before the Triforce Chart portion.
One required chart involves controlling a seagull, and it is annoying to interrupt the route just to restock.
Once you learn Ballad of Gales, use it aggressively.
It is not the whole game, but it cuts down the Great Sea travel time enough that it should become your default way to start long detours.
Break pots, cut grass, and open obvious side chests inside dungeons even on a main-story run.
The game hides useful rupees, arrows, bombs, and magic refills in places you are already passing.
Keep at least one bottle available for fairies or restorative items when possible.
If you unlock Grandma's Elixir Soup later, it is one of the safest ways to cover mistakes in long dungeons and the endgame.
Remember that the guide targets the GameCube control layout and original item flow.
Do not substitute HD-only conveniences such as the Swift Sail or the revised late-game shard shortcuts.
Outset Island Prologue and Departure
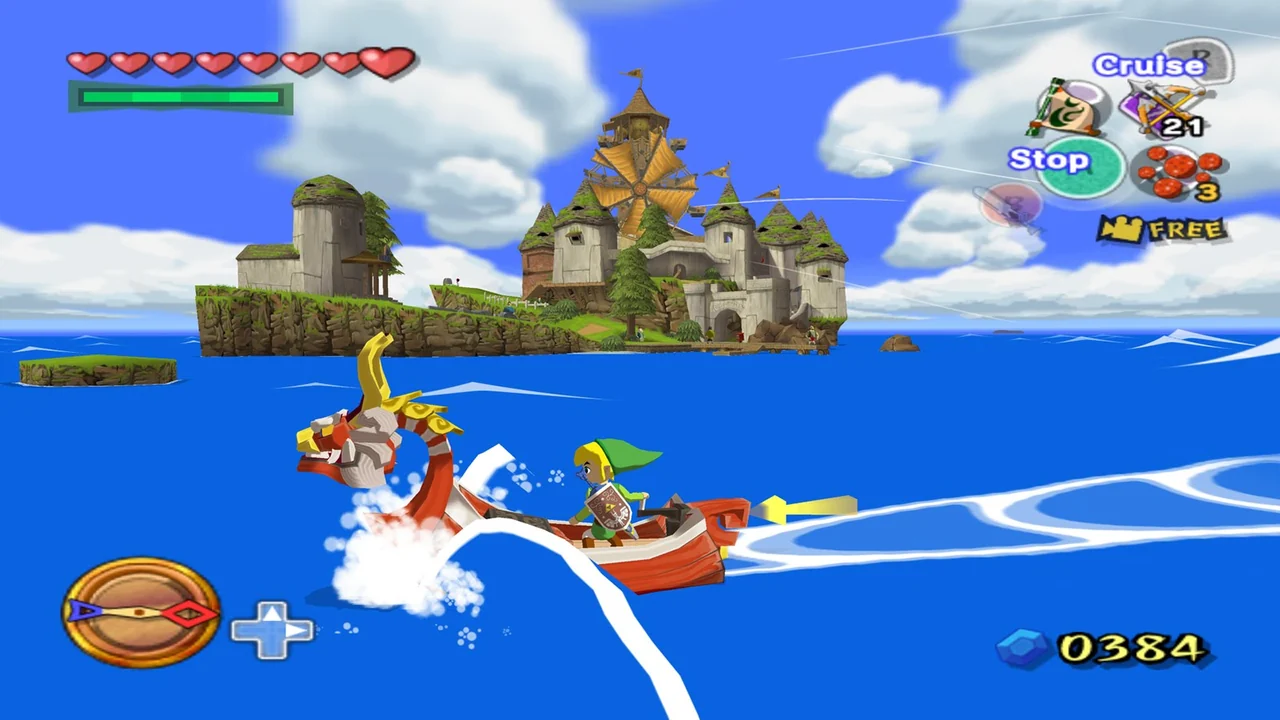
Begin on Outset Island by collecting the Telescope, triggering the pirate arrival scene, learning the village layout around Link's house and Orca's home, then taking the Hero's Sword before heading into the forest. Rescue Tetra by following the upper ledge route through the woods, watch Aryll get carried away, return home for the Hero's Shield, and then board the pirate ship to end the prologue. This route is for the North American Nintendo GameCube original release and keeps optional errands separate from the required story path.
Get the Hero's Clothes, the Telescope, and the first island bearings
After the opening scene on Aryll's lookout, do what she asks and head to your home. Climb the ladder inside and speak with Grandma to receive the Hero's Clothes. This visit also teaches the first useful landmark loop on Outset. Your house is the home base at this stage, the nearby two-story building is Orca's place, and the uphill path behind the lookout leads toward the forest where the first rescue sequence happens.
Leave the house, return to Aryll's lookout, and speak with her to receive the Telescope. Assign it, use it, and look at the red postbox down in the village. Keep watching until the mail delivery and pirate chase cutscene finishes. This is the moment that drops Tetra into the woods and turns the birthday opening into the real quest.
Before you run uphill, remember the basic movement habits the opening expects from you right away. Run in straight lines before jumps, roll when you need a little more speed across open ground, and pay attention to the action prompt whenever you stand near doors, ladders, objects, or climbable edges. The game uses the same interaction logic for talking, lifting, opening, and many simple contextual actions, so reading the prompt matters more than guessing.
- Receive the Hero's Clothes from Grandma.
- Receive the Telescope from Aryll.
- Use the Telescope on the red postbox to trigger the pirate arrival scene.
- Note the positions of Link's house, Orca's house, and the uphill forest path.
Visit Orca before the forest and claim the Hero's Sword
Do not head into the woods unarmed. Go into the two-story house near your home and speak with Orca on the ground floor. Accept his lesson and finish the short training sequence. When you complete it, he gives you the Hero's Sword, which is required for both the blocked path ahead and the fights in the forest.
This is the right time to settle the first combat habits that will keep paying off. Use targeting so enemies stay in front of you instead of circling behind your swings. Attack in short strings and let the lock-on movement help you stay aligned. If an enemy commits to a hit, avoid panic slashing. A clean dodge, sidestep, or timed counter is safer than flailing. Orca's lesson is also your early warning that timing matters more than raw aggression in this game.
Once you step back outside, test a few field basics before moving on. Rolling gets you across the village faster. Ledge climbing happens automatically if you jump toward an edge and catch it. Lifting and carrying jars or other objects uses the same context-sensitive action style you have already seen at doors and ladders. Those small habits make the next few rooms and set pieces feel much smoother.
- Speak to Orca and clear his sword lesson.
- Receive the Hero's Sword.
- Understand targeting, short attack strings, dodging, rolling, and ledge grabbing before leaving the village.
Follow the forest path and rescue Tetra from the upper ledge
Return to the path behind the lookout and head uphill. A line of small trees blocks the route for now, so cut them down with the Hero's Sword and keep climbing. Soon you will reach a broken bridge. Do not creep forward from a standstill. Back up a little, run, and jump the gap in one motion. If you fall short, climb back up and try again immediately. The reset is short.
Keep moving into the forest until you meet your first Bokoblin. Target it and fight cleanly instead of chasing it with wild swings. After this enemy, the rescue route continues upward. Climb onto the tree stump ahead, jump and grab the higher ledge, then pull yourself up. Run across the fallen log to the next clearing and drop down. This is the part of the opening that proves Tetra is not reached by a straight ground-level walk.
Two more Bokoblins appear in the clearing below Tetra's position. Defeat them and the rescue scene will complete. This is the first moment where movement and combat are chained together in quick order: cut the obstacle, clear the jump, climb the ledge, cross the log, then win the fight. If you take a hit, reset your footing with targeting instead of mashing to finish faster.
- Cut through the blocked forest path.
- Cross the broken bridge with a running jump.
- Defeat the first Bokoblin in the woods.
- Climb the tree stump, pull up to the higher ledge, cross the fallen log, and clear the second Bokoblin fight to free Tetra.
Watch Aryll's kidnapping and return home for the Hero's Shield
After Tetra is safe, the scene outside the forest turns against you immediately. Helmaroc King swoops down and kidnaps Aryll instead. This is the real objective hook of the entire game. Tetra agrees that Aryll must be pursued, but she does not want to take Link along unless he can defend himself properly.
As soon as control returns, go straight back to your house. Do not assume there is another rescue route hidden on Outset, and do not feel pressured to clean up side content first. Climb to the upper floor. The shield that used to hang upstairs is gone from the wall, so head back down and speak with Grandma. She gives you the Hero's Shield, completing the basic equipment Tetra expects you to have.
Now you can combine offense and defense instead of relying only on movement. In early fights, target enemies, block when you need a safe read on their next swing, and answer with a short combo or a timed counter. That simple rhythm is enough for the next sequence. You do not need a bottle, extra chart, or any optional island reward before leaving home.
- Watch Aryll get taken by Helmaroc King.
- Return directly to Link's house.
- Speak to Grandma and receive the Hero's Shield.
- Be ready to combine targeting, blocking, and short sword attacks.
Board the pirate ship and finish the departure sequence
Go to the dock and speak with Tetra to board the pirate ship. Once aboard, go below deck and meet Niko in the hold. He gives you the rope-swinging swabbie test, which is a useful tutorial for lining up jumps and adjusting on hanging ropes before the game sends you into larger danger.
Step on the switch to raise the platforms, then make each jump only when Link is lined up with the next landing spot. You do not need huge swings. Small, controlled momentum is better. If your angle is poor, settle the rope, adjust, and then jump. Finishing the course earns the Spoils Bag and gives you practice with a style of movement the game expects you to understand from here on out.
After the test, head back to the deck and climb up to speak with Tetra when you are ready. The departure cutscene carries the story away from Outset and into the first assault on Forsaken Fortress. This ends the chapter cleanly. Any remaining island errands can wait; they are not part of the required departure route.
- Board Tetra's ship at the dock.
- Clear Niko's rope challenge in the hold.
- Collect the Spoils Bag from the chest after the challenge.
- Return to the deck and speak with Tetra to leave Outset behind.
Before you move on
- You received the Hero's Clothes, then used Aryll's Telescope on the red postbox to trigger the pirate arrival scene.
- You learned the key opening landmarks around Link's house, Orca's home, and the forest path behind the lookout.
- You earned the Hero's Sword from Orca and used it to cut through the forest route, defeat the Bokoblins, and rescue Tetra.
- You watched Aryll get carried off by Helmaroc King and then obtained the Hero's Shield from Grandma.
- You boarded Tetra's ship, completed Niko's rope tutorial, and triggered the departure toward Forsaken Fortress.
References for this chapter
Forsaken Fortress First Infiltration
Your first trip into Forsaken Fortress is a stealth-heavy story chapter, not a full dungeon clear. Tetra fires Link toward the stronghold in a barrel, the landing goes badly, and Link loses only the Hero's Sword. He must cross guarded walkways, shut down the searchlights that make sneaking harder, use the jail escape route when necessary, reclaim the sword near the upper tower, and reach Aryll's prison cell. The Helmaroc King then interrupts the rescue on purpose, carrying Link away so the plot can move to Windfall Island. If you saw that scene, you finished everything this first visit is meant to accomplish.
Land at the fortress and switch into infiltration mode
After the pirate cannon launch, Link splashes down outside Forsaken Fortress instead of landing cleanly on top. As soon as you climb onto the stone path, Tetra speaks through the Pirate's Charm and warns you about the fortress patrols. The key change here is that Link has lost the Hero's Sword, but not everything else. You still have the Hero's Shield, and you can also use loose Boko Sticks when the game gives you the chance.
For the opening approach, act like every Moblin is a reset trigger. If a searchlight catches you while you are moving, or if a Moblin spots you before you are ready, you get thrown into the jail cell rather than killed outright. That is frustrating, but it is also the game's built-in recovery system. Do not waste time trying to improvise fancy escapes once a guard has clearly found you.
- Climb out of the water and head up the main stairs.
- Listen for Tetra's advice through the Pirate's Charm.
- Remember that losing the sword does not mean losing the shield.
- Treat capture as a setback, not a failed run.
Cross the first courtyard and disable the first searchlight
At the first open area, pick up a barrel from the middle of the walkway. Link hides underneath it, which lets you move through the searchlight yard much more safely. The rule here is simple: standing still under the barrel is safe even if the beam passes over you, but moving while the beam is on you gets you caught. Use short movements from one safe corner to the next instead of trying to cross in one push.
Once you reach the top hallway, set the barrel down and take the ramp on the right. Near the stairs, Tetra warns you that a Bokoblin is operating the searchlight above. Climb up and deal with it now. There is a pot nearby that provides Boko Sticks, and you can also defend with the Hero's Shield until the Bokoblin leaves an opening. Knock it out and the first searchlight shuts off for good, making the fortress much easier to read.
- Carry a barrel through the opening spotlight yard.
- Freeze in place if the beam reaches you.
- Go up the right-hand ramp from the top hall.
- Use a Boko Stick or your shield to beat the first Bokoblin and turn off that light.
Use the jail route to reach the map and the middle floors
Go back down the ramp, but do not return all the way outside. At the bottom, use the nearby door and head deeper into the interior. Very soon you will be dealing with Moblins in cramped hallways while still missing your sword. This is one place where the cleanest answer is not heroic at all: if you are unsure of the sneaking line, let a Moblin catch you and use the jail route the game opens from there.
Inside the cell, climb onto the table, jump to the shelf, move the pot, and crawl through the hidden passage. That crawlspace puts you back out on an upper ledge. Follow the hall to the chest for the Dungeon Map, then swing across the gap using the hanging lantern. From here, the critical path becomes more straightforward because each branch leads you toward another searchlight platform or the upper tower route.
- Do not force an unarmed Moblin sneak if it is going badly.
- From jail, use table, shelf, pot, and crawlspace to escape.
- Open the chest on the ledge for the Dungeon Map.
- Swing across the gap and continue deeper into the fortress.
Turn off the remaining searchlights before pushing for the tower
After swinging across from the map room, take the left-side path and climb the ladder to another Bokoblin-controlled searchlight. Break the nearby pot for a Boko Stick if needed, defeat the Bokoblin, and shut off the second light. Then work back through the interior, crossing into the other side of the second floor. A chest with the Compass sits behind barrels on this route. Take it if you like, but keep your attention on the climb rather than on optional cleanup.
Continue along the eastern side of the fortress, swing across the next gap, and follow the opening and ramp that lead to the third searchlight. Disable that final light the same way as the others. With all three searchlights down, the upper sneaking section becomes much safer because you no longer have the moving beams exposing you in the courtyard and on the outside paths.
- Climb to the second Bokoblin platform and disable that light.
- Cross to the eastern route of the second floor.
- Grab the Compass only if it does not break your focus.
- Reach and disable the third searchlight before attempting the tower approach.
Sneak past the Moblins and recover the Hero's Sword
Now go through the room where two Moblins patrol with rats running around the floor. Use the barrel in that room and move very slowly. Rats can bump the barrel off Link, so do not cut too close to them and do not panic if a Moblin turns around. Stop completely, wait for the path to clear, and then continue to the double doors. This is the hardest pure stealth room of the chapter, so patience saves more time than speed.
Beyond the double doors, climb the long stairway outside. Use another barrel to pass the lone Moblin on the upper path. Soon you will reach a broken walkway with a gap you cannot jump. Face the wall on the right and sidle across the narrow ledge, then do the same around the next corner. This leads you to the platform where your Hero's Sword was dropped during the crash. The moment you rush in, a Green Bokoblin attacks. Pick up the sword immediately and defeat it. From this point on, you can fight normally again, although there is no reason to backtrack and clear the fortress yet.
- Use a barrel to get through the Moblin-and-rat room.
- Pass through the double doors and take the outside stair path upward.
- Sidle across both narrow ledges on the right-hand wall.
- Grab the Hero's Sword as soon as you reach it.
- Defeat the Bokoblin guarding the sword platform.
Reach Aryll's cell and accept the forced failure
Go through the door past the sword platform and keep moving forward into the prison chamber. Link finds Aryll here along with other captives, which confirms that you reached the correct destination. Do not stop to look for a boss key, rescue switch, or alternate escape route. The game is about to end this visit through a cutscene, and there is no secret sequence that lets you finish the fortress now.
The Helmaroc King swoops in, grabs Link, and carries him upward to a higher platform where a mysterious figure observes him. Link is then thrown into the sea, and the King of Red Lions rescues him. That setback is the intended ending of the first infiltration. Story progress continues on Windfall Island, and Forsaken Fortress will only become a true clear later when you return with the proper tools and a different objective.
- Enter the room beyond the sword platform.
- Approach Aryll's cell to trigger the cutscene.
- Do not search for a way to free Aryll on this visit.
- Count the chapter complete once the Helmaroc King carries Link away and the game shifts to Windfall Island.
Before you move on
- You entered Forsaken Fortress after the pirate cannon launch and understood that only the Hero's Sword was lost.
- You used stealth, the jail escape route, and the searchlight shutdowns to reach the upper tower path.
- You reclaimed the Hero's Sword from the upper platform and defeated the Bokoblin guarding it.
- You reached Aryll's prison cell and saw the Helmaroc King carry Link away.
- The story moved to Windfall Island, confirming that the first Forsaken Fortress visit is finished even though Aryll is not rescued yet.
References for this chapter
Windfall Island, the Sail, and the Road to Dragon Roost
After the failed first rescue at Forsaken Fortress, Link washes ashore on Windfall Island. Your only required job here is to meet the King of Red Lions, raise 80 rupees, and buy the Sail from Zunari so sea travel can properly begin. Once the Sail is yours, take the straightforward eastbound route to Dragon Roost Island, learn Wind's Requiem there, and enter the Rito settlement so the next story chapter can start cleanly.
Wake up on Windfall and get your bearings
When you regain control on the small beach cove, go straight to the red boat in the water and talk to him. This is the King of Red Lions. From now on, he is your story transport across the Great Sea, and he makes the immediate goal simple: you need a Sail before he can carry you onward at full speed.
Climb the path from the cove into town. Windfall is your first real hub, but do not treat it like a full cleanup stop yet. Learn the basic layout instead. The central plaza is the important landmark, with paths and stairways branching away from it. Zunari's stall is the place you need, and it sits right in the middle of town.
If you do not already have enough money, gather quick rupees from the easiest breakables nearby. Cut grass, smash pots, and open obvious containers around the plaza and lower town. You do not need a minigame chain or a long sidequest here. The only requirement is reaching 80 rupees so you can buy the Sail and leave.
- Talk to the King of Red Lions on the beach.
- Climb into Windfall's central area and locate Zunari's stall.
- Collect enough rupees to reach 80 without getting pulled into optional errands.
Buy the Sail before spending on anything else
Speak with Zunari in the plaza and buy the item at his stall for 80 rupees. This item is the Sail, and it is the real gate that locks story progress. If you spend money elsewhere first, you only delay your own departure.
After buying it, assign the Sail to an item button so it is ready the moment you board the King of Red Lions again. The game will let you wander around Windfall, but this is the right point to stay disciplined and leave.
If you notice places like the jail, the auction building, or NPCs with personal requests, ignore them for now unless you specifically want to return later. None of that is required before Dragon Roost, and overcommitting here makes the early route slower and less clear.
- Buy the Sail from Zunari for 80 rupees.
- Set the Sail to an item button.
- Leave Windfall side activities for later unless you deliberately want an optional detour.
Use the Sea Chart and make the first trip east
Return to the dock, board the King of Red Lions, and use the Sail once you are on the water. Sailing is now your main way of moving through the world. The basic rule is that wind direction matters. If the wind is behind you, travel is smooth. If you try to force the boat against it, you crawl forward and waste time.
For this first trip, keep the route simple. Dragon Roost Island lies to the east of Windfall, so steer that way and keep the boat lined up instead of weaving. Check the Sea Chart when you need to confirm your heading. The chart is divided into sea sectors, and getting used to checking it early prevents later navigation mistakes.
If an enemy platform or boat fires at you, do not stop in front of it unless you want optional combat. Keep moving and angle away in a shallow curve. Constant motion is safer than drifting in cannon range. If you accidentally beach at the wrong island or reef, board the boat again, reopen the chart, and correct back toward Dragon Roost.
- Board the King of Red Lions and use the Sail rather than paddling slowly.
- Watch the wind and keep the bow pointed east for the first voyage.
- Use the Sea Chart whenever you need to confirm your route.
Land at Dragon Roost and learn how wind control changes travel
As soon as you reach Dragon Roost Island, the King of Red Lions gives you the Wind Waker. This is one of the key tools for the rest of the game. Go through the beachside tunnel toward the small shrine area and examine the stone tablet there to learn Wind's Requiem.
Practice the song right away. In the original GameCube release, this is the moment when travel changes from following whatever wind you are given to setting a useful direction yourself. Before this point, you mostly work with the current breeze. After learning Wind's Requiem, you can turn the wind to support the route you want to take.
This is also the right place to learn the long-term Sea Chart habit for the Great Sea. Fishmen can fill in island sectors on your chart, but you need a Bait Bag and All-Purpose Bait from Beedle before you can feed them. Treat that as your routine from this point forward: once you can carry bait, stop at a Fishman near each new island sector and have him mark it for you. It is useful, but it is not a reason to postpone Dragon Roost's main story tasks right now.
- Receive the Wind Waker on arrival at Dragon Roost Island.
- Learn Wind's Requiem at the nearby shrine.
- Understand that Fishman charting becomes practical once you have a Bait Bag and bait from Beedle.
Enter Dragon Roost proper and hand off to the next chapter
With the Wind Waker in hand, head back from the shrine toward the beach path and start climbing the island. Early obstacles here teach the next layer of field movement. Pick up bomb flowers and throw them at the rock blockage when the path is sealed.
Keep following the mountain route. When the trail narrows, sidle across the ledge carefully instead of rushing and falling. Continue through the tunnel and up toward the Rito settlement. You are finished with the travel chapter once you are inside the village approach and ready to continue the Komali and Medli story line.
Do not sail away again yet unless you intentionally want to explore. The clean story route is to stay on Dragon Roost, continue into the village, and let the first major island sequence lead into the game's first true dungeon.
- Use bomb flowers to clear the blocked path on Dragon Roost.
- Sidle across the narrow ledge and continue into the island interior.
- Reach the Rito settlement approach, ready for the next chapter.
Before you move on
- You spoke to the King of Red Lions on Windfall Island and understood that the Sail is the immediate requirement for open-sea travel.
- You bought the Sail from Zunari for 80 rupees and equipped it.
- You sailed from Windfall Island to Dragon Roost Island without needing optional sidequest progress.
- You received the Wind Waker, learned Wind's Requiem at the shrine, and reached the route into the Rito settlement so the Dragon Roost story section can begin.
References for this chapter
- Nintendo GameCube and Game Boy Advance Manuals | Nintendo Support ↗
- The Legend of Zelda: The Wind Waker Walkthrough - GameSpot ↗
- The Legend of Zelda: The Wind Waker - Guide and Walkthrough - GameCube - By CyricZ - GameFAQs ↗
- Dragon Roost Cavern (F2) — The Legend of Zelda: The Wind Waker eGuide | Prima Games eGuides ↗
- Bait Bag - Zelda Dungeon Wiki, a The Legend of Zelda wiki ↗
Dragon Roost Island and Dragon Roost Cavern
Arrive at Dragon Roost Island, climb into the Rito settlement, and solve the required letter sequence that proves Prince Komali will not hand over Din's Pearl until Valoo is calmed. From there, help Medli reach the upper ledge, use her Empty Bottle to restore the dried bomb flower that opens the way, and enter Dragon Roost Cavern. Clear the dungeon by steadily climbing through key doors, lava rooms, narrow walkways, and grapple gaps until you defeat Gohma. When Valoo settles down, return to Komali for Din's Pearl.
Reach the Rito settlement and start the Komali sequence
As soon as you land, head into the island instead of making this a free-roam stop. Follow the path through the tunnel and keep climbing toward the settlement. This short ascent teaches the habits you need here: climb whenever the wall allows it, sidle along narrow ledges instead of trying risky jumps, and use the island's bomb flowers only when the path is clearly blocked by cracked rock.
Enter the Rito settlement and speak with the Chieftain and Quill. The problem is not just that Komali is upset. Valoo's anger has stopped the Rito coming-of-age ceremony, so nobody can continue normally until the source of the trouble is dealt with. Quill gives you the Delivery Bag because the next required item is handled as mail.
Climb the interior ramps to Medli's room and talk to her to receive Father's Letter. Then go to Prince Komali's room. Open the Delivery Bag, assign Father's Letter to a button, and present it to Komali. This scene does not win the pearl yet. It confirms that Komali will not cooperate until Valoo's problem is solved, which sets the actual objective for the rest of the island.
- Reach the Rito settlement.
- Speak with the Chieftain and Quill.
- Receive the Delivery Bag.
- Get Father's Letter from Medli and deliver it to Komali.
Go straight from Komali to Medli and open the route to the cavern
Do not stop for side content here. If you cleared Niko's rope course on the pirate ship earlier, you already have the Spoils Bag, so this island is not where that progression item comes from. The mail-sorting room is optional background activity and should not distract you from the main route.
Leave the central chamber and head outside to the ledge where Medli is waiting near the pond. Pick her up, stand on the raised spot, and wait for the wind to blow toward the higher platform. Throw her only when the gust is lined up. If she misses, reset and throw again from the same spot. Do not wander around looking for another path because helping Medli this way is the intended trigger.
After she reaches the ledge, meet her near the path to the dungeon entrance. She gives you an Empty Bottle. Fill it with water from the nearby pool right away. Climb to the dried bomb flower plant and pour the water onto it to revive it. Pick that bomb flower and use it to destroy the large rock that is blocking the spring. Once the water starts flowing again, the route to Dragon Roost Cavern opens properly.
At the lava gap just before the entrance, use the nearby bomb flowers to knock down the stone statues that hold the pots. Those toppled pieces create the safe bridge across the lava. Cross carefully and enter Dragon Roost Cavern.
- Ignore the optional mail room and continue the main route.
- Throw Medli to the upper ledge using the wind.
- Receive the Empty Bottle and fill it with water.
- Revive the bomb flower, blast the rock, cross the lava bridge, and enter Dragon Roost Cavern.
Clear the early floors and learn the dungeon's rhythm
In the first room, move the statues out of the way to uncover the crawlspace. Inside the next rooms, defeat the Bokoblins and use a burning stick to light the torches that reveal your first small key. This sets the tone for the dungeon. Progress usually comes from simple environmental actions such as moving blocks, using fire, checking ledges above you, or spotting bombable rock, not from brute-forcing every room.
As you continue upward, pay close attention to lava timing. When the floor erupts or a platform sits over open lava, wait for a safe gap before committing to a jump. In rooms with water pots, use them to cool small patches of lava into temporary footing and move across quickly before the surface disappears. If a jump looks awkward, stop and look for a block to pull or a different ledge height instead of burning health on repeated guesses.
Dragon Roost Cavern becomes much safer if you clear flying enemies before crossing thin bridges. Keese can knock you off narrow walkways, so deal with them first, then cross. Against Magtails, back off when they curl into a spiked ball and only attack when they stretch out again. Let cramped enemies come to you instead of fighting on the lip of a lava pit.
- Open the crawlspace by moving the statues.
- Light the torches to earn the first small key.
- Use water pots, blocks, and bombs to keep climbing.
- Fight carefully on narrow bridges and around lava.
Rescue Medli at the summit and use the Grappling Hook to take control of the dungeon
Keep following the route upward until you reach the high outside section near Valoo's roost. Climb the crumbling stairs quickly because they collapse under your feet. At the top, defeat the Bokoblins, then prepare for the Moblin that gets dropped into the fight. Give the Moblin space, do not stand directly in front of its spear, and clean up the smaller threats so they do not interrupt your movement.
Talk to Medli after the fight to receive the Grappling Hook. This is the key item for the rest of the dungeon, so equip it immediately and get comfortable with it. Aim for overhead pegs, start your swing, and release near the forward part of the arc for the safest landing. If you miss a gap, reset your angle from solid ground instead of trying to save the jump at the last moment.
From here on, older rooms change meaning because the path is now above you as often as it is ahead of you. Use the Grappling Hook to swing across the next gaps, smash wooden barriers that block narrow passages, and watch for hooks over lava rooms and outdoor ledges. If you uncover warp pots along the way, remember them. They are your best recovery option if you fall or need to backtrack toward the boss door.
- Reach the summit encounter.
- Defeat the Bokoblins and Moblin guarding Medli.
- Receive and equip the Grappling Hook.
- Use grapple pegs and opened warp pots to continue the upper climb.
Finish the upper route and defeat Gohma
The final stretch mixes grappling swings, upper ledges, keys, and more lava timing. Keep favoring height over detours. If you can open a locked door, reach a higher platform, or use a newly spotted hook point, that is usually the correct route. Save optional treasure for later if a room clearly branches away from the boss path.
Before entering the boss door, make sure you understand that Gohma's first phase is not a normal sword fight. When the battle starts, look up and use the Grappling Hook on Valoo's hanging tail. Swing across so Valoo reacts and drops the overhead rock onto Gohma. Repeat this until the armor breaks. In the North American GameCube route, trying to hack at the shell wastes time and exposes you to needless damage.
Once the shell is gone, Gohma's eye becomes the weak point. Use the Grappling Hook to yank the eye toward you, then run in with a short burst of sword strikes and back away before the next movement. Stay mindful of your footing near the lava rim. Controlled, repeatable punishes are much safer than greedy combos.
After Gohma falls, take the Heart Container and step into the blue warp. Outside, Valoo calms down and the island's crisis ends. Return to Komali for the follow-up scene. Now that he has seen what you accomplished, he finally hands over Din's Pearl. Do not sail away before this scene finishes, because the pearl is the chapter's required reward.
- Follow the upper route to the boss door.
- Drop the ceiling rock on Gohma by grappling Valoo's tail.
- Pull Gohma's eye in with the Grappling Hook and finish the second phase.
- Collect the Heart Container, leave the dungeon, and receive Din's Pearl from Komali.
Before you move on
- You entered the Rito settlement, received the Delivery Bag, and used it to deliver Father's Letter to Prince Komali.
- You helped Medli outside, received the Empty Bottle, restored the bomb flower, and opened the way into Dragon Roost Cavern.
- You obtained the Grappling Hook and used it to finish the dungeon climb.
- Gohma is defeated, Valoo has calmed down, and Komali has given you Din's Pearl.
References for this chapter
- Nintendo GameCube and Game Boy Advance Manuals | Nintendo Support ↗
- The Wind Waker Walkthrough - Dragon Roost Cavern - Zelda Dungeon ↗
- Dragon Roost Island - Zelda Dungeon Wiki, a The Legend of Zelda wiki ↗
- The Legend of Zelda: The Wind Waker/Dragon Roost Cavern — StrategyWiki | Strategy guide and game reference wiki ↗
- The Legend of Zelda: The Wind Waker/Pirate Ship — StrategyWiki | Strategy guide and game reference wiki ↗
- The Legend of Zelda: The Wind Waker Walkthrough - GameSpot ↗
Forest Haven and Forbidden Woods
Sail from Dragon Roost Island to Forest Haven and rescue Makar so the Koroks can complete their ceremony. This North American GameCube route teaches the first real Deku Leaf glides, the wind setup needed to reach Forbidden Woods, the dungeon's central-room loop, and the Boomerang-based route to Kalle Demos and Farore's Pearl.
Reach the Great Deku Tree and learn why Makar matters
Sail into the Forest Haven sector and bring the King of Red Lions close to the inner island path. You cannot sail straight into the Great Deku Tree's chamber, so leave the boat and work upward on foot. Cut down Boko Babas if they block the narrow ledges, or slip past them if you do not want to spend time farming spoils right now. When the path narrows beside the water, watch the Octoroks and use your shield to bounce shots back if they keep interrupting your jumps.
Use the Grappling Hook on the overhead branch to swing across to the next small landing, then continue through the passage into the Great Deku Tree's hollow. Stand on the central lily pad and roll into the trunk to knock the Red and Green ChuChus down. Defeat them all before talking to the Great Deku Tree. The Koroks cannot begin their ceremony without Makar, and the tree will not hand over Farore's Pearl until Makar is rescued from Forbidden Woods.
- Leave the boat and take the upper footpath into Forest Haven.
- Use the Grappling Hook swings instead of forcing risky standing jumps.
- Roll into the Great Deku Tree to drop the ChuChus, then clear them out.
- Talk to the Great Deku Tree so the rescue objective is set.
Climb to the Deku Leaf
After the conversation, face the tree and use the Baba Buds around the trunk to launch upward. These launches are easier if you aim before each release. Do not just hold forward and hope for the best. Line Link up with the next bud, let the current one fire him, and adjust again only after you land. Partway up, you also need one Grappling Hook swing across a gap before the bud chain continues.
At the top, open the chest to claim the Deku Leaf. This is your first major movement upgrade, but it is not free flight. If you use it while standing still, it creates a gust that can push switches, platforms, leaves, and light objects. If you jump first and then use it, Link glides and drains magic until he lands. Keep an eye on the green magic meter under your hearts. If it empties in midair, Link drops immediately.
- Aim each Baba Bud launch before releasing.
- Make the required Grappling Hook swing during the climb.
- Open the chest at the top to get the Deku Leaf.
- Remember the two uses: standing gust and jumping glide.
Set the wind and cross to Forbidden Woods
From the Deku Leaf area, glide to the nearby ledge marked by arrow-shaped grass and follow that passage outside. A Korok waits on the ledge and the next gap is too wide for a normal jump, so use Wind's Requiem before you commit. Set the wind to carry you toward the small rest platform between Forest Haven and the dungeon. Jump, open the Deku Leaf, and drift to that platform instead of trying to save time with a longer gamble.
Once you land, cut the grass to refill magic. Now face Forbidden Woods, change the wind again so it carries you toward the dungeon entrance, and watch the moving cyclone outside. The entrance sits higher than your starting point, so the wind alone is not enough. Wait until the cyclone passes close, jump with the Deku Leaf open, and let the updraft lift you before gliding the rest of the way. If you miss the lift or come up short, fall back safely, refill, and try again. Do not burn the last of your magic trying to correct a failed line in midair.
- Use Wind's Requiem before each major glide if the wind is wrong.
- Take the short glide to the refill platform first.
- Refill your magic from the grass before the final jump.
- Use the cyclone for height, not just the wind for distance.
Open the dungeon and use the main hub as your landmark
Inside Forbidden Woods, keep the early route simple. Clear what is directly in your way, grab the Dungeon Map if you want easier orientation, and learn the flower doors. Some doors stay sealed by thick plants until you throw a Boko Nut into them at the right moment. Pick the nut up quickly, wait for the opening, and throw cleanly instead of rushing into the thorns. Soon after, the dungeon starts mixing short Deku Leaf glides with gust-based puzzles that move platforms or push carried objects out of danger.
The most important navigation tip here is to recognize the big central chamber as the dungeon's anchor point. You will enter it, leave it for side rooms, and come back multiple times. Early on, keep working upward. Use Baba Buds, moving flowers, and gust-driven platforms to climb rather than wandering the lower floors too soon. When you reach a locked door on the upper route, go through it and press onward toward the mini-boss instead of second-guessing every side branch.
- Learn which flower doors need a thrown Boko Nut to open.
- Use the Deku Leaf for both movement and wind puzzles.
- Treat the large central chamber as your reference point.
- Prioritize the upper path until you reach the mini-boss route.
Win the Boomerang and reopen the center of the dungeon
Past the upper locked route, defeat the giant Mothula to earn the Boomerang. This is the dungeon item that turns the rest of Forbidden Woods into a much cleaner route. It can target several objects in one throw, cut vines from a distance, and hit switches too far apart for any other tool you currently have. The multi-target lock is the whole point, so take a second to mark every vine in a cluster before you throw.
Back in the central chamber, use the Boomerang on the vines suspending the huge flower overhead. Cut the full set holding it up so the flower drops and opens the way to the lower half of the dungeon. From there, continue through the newly available rooms. Expect more vine walls, hanging growths, and crystal switches that are meant to be hit in sequence. When you find the room with five crystal switches spaced around the center, lock onto all five with one Boomerang throw to reveal the Big Key chest.
- Defeat Mothula to get the Boomerang.
- Use multi-target locks instead of single quick throws.
- Cut the vines holding up the giant flower in the main chamber.
- Hit all five crystal switches in one sequence to claim the Big Key.
Return to the boss door and defeat Kalle Demos
After taking the Big Key, climb back toward the upper side of the main chamber and return to the boss door. If you lose your bearings, look for the paths you opened with the Boomerang and the updrafts that feed back into the higher route. The dungeon is less confusing once you think of it as one hub with a before-Boomerang half above and an after-Boomerang half below.
In the boss room, rush toward Makar and the fight starts. Kalle Demos hangs from the ceiling by several vines, so sword attacks are a waste until you cut it down. Lock onto as many support vines as possible with the Boomerang and sever them quickly. When the boss crashes to the floor and its core opens, run in and attack with your sword. Do not overstay the damage window. Pull back as the petals close so you are not caught underneath the counterattack. Repeat the pattern of Boomerang first, sword second until the boss falls, then take the Heart Container and use the warp out.
- Use the opened hub paths to climb back to the boss door.
- Start each Kalle Demos cycle by cutting the hanging vines with the Boomerang.
- Attack the exposed core only after the boss drops.
- Collect the Heart Container and leave through the warp.
Finish the Forest Haven story and take Farore's Pearl
Back in Forest Haven, speak with Makar and the Great Deku Tree to complete the Korok ceremony sequence. This is the story payoff for the whole chapter. Rescuing Makar is not just a side rescue; it is the condition that lets the Koroks continue their work and finally allows the Great Deku Tree to reward Link.
Take Farore's Pearl and make that your completion check before you sail away. You can restock magic or spoils if you want, but do not feel pressured into optional island cleanup now. Once the pearl is in your inventory, return to the King of Red Lions and prepare for the next main objective.
- Talk to Makar and the Great Deku Tree after leaving the dungeon.
- Watch the Korok ceremony resolution.
- Receive Farore's Pearl before leaving the area.
- Return to the King of Red Lions when you are ready to sail on.
Before you move on
- Makar has been rescued from Forbidden Woods and returned to Forest Haven.
- Kalle Demos is defeated, the Heart Container has been collected, and the dungeon warp has been used.
- The Korok ceremony scene has resolved with the Great Deku Tree.
- Farore's Pearl is now in your inventory and you are ready to sail to the next story destination.
References for this chapter
- Nintendo GameCube and Game Boy Advance Manuals | Nintendo Support ↗
- The Wind Waker Walkthrough - Forest Haven - Zelda Dungeon ↗
- The Legend of Zelda: The Wind Waker/Forest Haven — StrategyWiki | Strategy guide and game reference wiki ↗
- The Legend of Zelda: The Wind Waker/Forbidden Woods — StrategyWiki | Strategy guide and game reference wiki ↗
- Forbidden Woods - Zelda Dungeon Wiki, a The Legend of Zelda wiki ↗
Greatfish Isle, Windfall Pirates, Bombs, and Jabun
Your next pearl lead ends in a deliberate setback. Greatfish Isle has already been destroyed, so this stretch is about following the redirect cleanly: learn where Jabun fled, spy on the pirates at Windfall, win Bombs from Niko, then break into Jabun's hidden refuge behind Outset Island to claim Nayru's Pearl and end the endless night.
Treat Greatfish Isle as a checkpoint, not a dungeon
Leave Forest Haven and sail to Greatfish Isle as instructed. When you arrive, do not waste time searching for a temple entrance or trying to clear the shattered terrain. The island has already been devastated, and this visit exists to push the story somewhere else.
Walk far enough onto the broken island to trigger Quill's scene. He explains that Jabun escaped before the attack and is now hiding on Outset Island, your home island. He also makes the key problem clear: Jabun is protected behind a sealed stone barrier, so you still cannot reach him with your current gear.
Quill also points you toward Windfall by revealing that Tetra's pirates were investigating Jabun's hiding place. Follow that lead first. The cursed endless night that begins around this event is another sign that Greatfish Isle is not the place to solve anything right now.
- Trigger Quill's explanation on Greatfish Isle.
- Understand that Jabun is no longer here.
- Set Windfall Island as the next required stop, not Outset Island yet.
Sneak behind the Bomb Shop and hear the current password
Sail to Windfall Island and head for the Bomb Shop on the southern side of town. The shop is closed, which is your clue that the pirates are inside. From the front door, move around the left side of the building and sidle along the narrow ledge behind it.
Once you reach the rear wall, climb the vines and crawl through the small opening. Stay inside long enough to watch the whole scene. The pirates have tied up the shop owner while they search for a way to reach Jabun, and during their talk they reveal the ship password for your save file.
Do not rely on a remembered answer from another run. The password changes between games, and watching this cutscene is the progression trigger even if you happen to know one of the possible words already. As soon as the scene ends, leave the shop and go straight to the pirate ship.
- Reach the hidden rear entrance to the Bomb Shop.
- Watch the pirate conversation from start to finish.
- Memorize the exact password from your file.
Re-enter the pirate ship and beat Niko's harder test
Go to the pirate ship anchored at Windfall and examine the cabin door. Enter the password you just heard to get below deck. Niko is still there, and this time his challenge is tougher because the room no longer has resting platforms across the middle. You have to swing from rope to rope and reach the far side before the gate closes.
Take the course one rope at a time instead of trying to rush. Build a steady swing, release only when Link is centered toward the next target, and be ready for the later ropes to behave differently. The third and fourth ropes drift forward and backward unless you are holding them, so hesitate for a moment to line up your jump before committing.
If you fall, do not panic. Climb back up and repeat the sequence. A missed jump costs less time than a bad release that sends you wide. In some cases, if you land on the crates below near the end, you can still jump back up to the fourth rope instead of restarting from the very beginning. Reach the far side and open the chest to receive Bombs.
- Use the correct current password to enter the pirate ship.
- Clear Niko's second rope challenge.
- Open the chest and collect Bombs.
Learn the two immediate uses for Bombs
Before you leave Windfall, make sure you understand what Bombs just unlocked. On land, they destroy cracked barriers and other blocked openings that your sword cannot handle. At sea, the King of Red Lions can fire them as a cannon shot, which turns naval travel from simple avoidance into real offense.
You do not need to turn this into a full cleanup tour yet. The important lesson for the story route is that Jabun's refuge can only be opened from the water with the boat cannon. If enemy boats or cannons bother you on the trip, keep your distance, point the bow where you want to shoot, and fire only after the boat has stopped turning.
If you need supplies, restock quickly and leave. The endless night will continue until you finish the Jabun sequence, so there is little reason to linger on side content here.
- Equip Bombs so you can use them on foot.
- Understand that the boat can fire Bombs at sea.
- Set course for Outset Island right away.
Circle behind Outset and break into Jabun's refuge
Sail to Outset Island and take the boat around to the back side of the island instead of stopping at the front beach. You are looking for the large sealed stone entrance built into the cliff face. The approach is dangerous because a whirlpool forms in front of the door and starts pulling the King of Red Lions inward.
As the whirlpool draws you closer, switch to the cannon and focus on the stone door itself. Destroy it section by section rather than firing wildly while the boat is still turning. Straighten your aim, wait until the target fills more of the screen, and keep shooting until the barrier breaks apart and the passage opens.
Once the entrance is clear, sail into the cave. Inside, a story scene with Jabun and the King of Red Lions will play out, and Jabun gives you Nayru's Pearl. This is the third pearl you need for the next main objective. When the conversation ends, the endless night is lifted, and the game points you toward the three marked triangle islands where the pearls must be placed.
- Reach the rear of Outset Island with the King of Red Lions.
- Destroy the sealed stone entrance while dealing with the whirlpool.
- Enter Jabun's cave and receive Nayru's Pearl.
Before you move on
- You triggered Quill's scene at Greatfish Isle and learned that Jabun fled to Outset Island.
- You watched the pirates inside Windfall's Bomb Shop and learned the current password for your file.
- You boarded the pirate ship, cleared Niko's second challenge, and obtained Bombs.
- You destroyed the sealed entrance behind Outset Island, entered Jabun's cave, and received Nayru's Pearl.
- The endless night ended and the route forward is now the three triangle islands and the Tower of the Gods.
The Three Pearls and Tower of the Gods
With all three Goddess Pearls collected, the next story step is short on the sea map and much more involved inside the dungeon that follows. Sail to the three marked Triangle Islands and place each pearl in its matching statue's hands: Din's Pearl at Northern Triangle Island, Farore's Pearl at Eastern Triangle Island, and Nayru's Pearl at Southern Triangle Island. When the third statue is filled, the Tower of the Gods rises in the center of the marked area. Inside, this dungeon teaches the habits you will use again later: watching the water level, moving statues and stone pillars to the correct floor marks, and using the Command Melody to guide the Tower's servants. Finish the tower, claim the Hero's Bow, defeat Gohdan, and ring the great bell to open the route to the next story area below the sea.
Place the three pearls at the Triangle Islands
Open your Sea Chart after leaving Jabun and head for the three marked islands. You do not need a special route here. Sail to whichever marked point is most convenient from your current position, then continue until all three are done.
Use the correct match at each island. Put Din's Pearl at Northern Triangle Island, Farore's Pearl at Eastern Triangle Island, and Nayru's Pearl at Southern Triangle Island. Each stop is brief. Walk up to the statue, interact with it, and place the pearl in its hands.
After the third placement, the statues awaken and beams connect the islands. The Tower of the Gods rises from the sea at the center of the triangle. Sail straight there and go in. Save any optional island cleanup for later.
- Place Din's Pearl at Northern Triangle Island
- Place Farore's Pearl at Eastern Triangle Island
- Place Nayru's Pearl at Southern Triangle Island
- Enter the Tower of the Gods after it rises
Clear the flooded lower floor and open the mouth entrance
The first half of the tower is built around the changing water level and the King of Red Lions. Treat the main room as a hub. Do not rush jumps while the water is moving. If a bridge or ledge only works at low water, wait for the level to settle before carrying anything important.
Start by using the small statue near the locked door in the northeast corner of the room to hold down its switch and open the first side room. In the connected room, put a box on the floor switch in the pit so the bridge of light appears, then cross when the water is low and carry the stone pillar back to the main room. Set that pillar into the empty groove to open the next path.
Take the boat down the new passage. Use the two nearby statues on their switches to open the next door, then line up the four boxes in the pit beyond so you can use a burning stick to light the two torches and claim a small key. Back in the main chamber, use the boat cannon to break the cracked wall on the west side, unlock the door there, defeat the Yellow ChuChus inside, and carry the second stone pillar back to its groove. Placing it stops the water flow and opens the way forward through the giant stone mouth.
- Use the first small statue to open the northeast route
- Return the first stone pillar to its floor groove
- Light the two torches in the box room to earn the small key
- Bomb the west cracked wall, use the key, and return the second pillar
- Enter the stone mouth after the water flow stops
Learn the Command Melody and understand servant control
In the next section, the tower switches from water timing to servant puzzles. In the first room, put the two stone statues on the two switches and stand on the third switch yourself to raise the moving platforms. Follow the only open route until you reach a living servant statue.
Call that servant to make it follow you, then lead it safely back toward the central chamber. Once it reaches its resting place, a stone tablet appears. Conduct the song on the tablet to learn the Command Melody.
This song is essential, not optional. Use it near a servant to take direct control and walk that servant onto distant switches or across hazards while Link stays behind. The safe habit is simple: move Link into a good position first, switch control to the servant, park the servant where the puzzle needs it, then return to Link and finish the room.
- Open the upper platforms with two statues and Link on the third switch
- Lead the first servant back to its altar
- Learn the Command Melody from the tablet
- Use the song to control servants directly when puzzles demand it
Take the west route and claim the Hero's Bow
Go through the newly opened west door. This section immediately tests the new song. Use the Grappling Hook and Deku Leaf to reach the far side, then command the servant across the light bridge and back through the room so it can reach its place in the center chamber.
With that servant restored, head into the miniboss room. Defeat the Darknut to earn the Hero's Bow. If you are new to Darknuts, stay locked on, wait for clean openings, and use parries or repeated sword pressure to knock off its armor before finishing it. Do not mash attacks from the front and let it trade hits with you.
From here on, the bow is both a combat tool and a puzzle key. Use it on large eye switches whenever a platform, gate, or path seems locked from a distance. It is also the cleanest answer for airborne threats such as Wizzrobes and for enemies guarding narrow carrying routes.
- Use Command Melody and traversal tools to restore the second servant
- Defeat the Darknut miniboss
- Open the chest for the Hero's Bow
- Start using the bow on eye switches and ranged threats
Solve the scale rooms, get the Big Key, and reach the boss
Take the north route from the central servant room. The upper tower mixes scales, moving platforms, lasers, and servant placement. First, use the side room with eye switches and moving platforms to collect the required small key. Then return to the scales and use the loose statues as weights so one side rises enough for Link to cross.
In the laser room beyond, stand on the central block and use the Deku Leaf to float over the beams. Call the servant over, use the Command Melody to walk it safely through the hazard, and place it on the switch that disables the path for Link. Bring it back with you when you leave.
The next scale puzzle asks for more weight management. Use the loose statues to tilt the scale, then carry the servant across to the final altar. Once the last servant takes its place, a portal carries you to the top floor. There, place the two nearby statues on the two floor switches and stand on the third yourself to reveal the Big Key. After that, push through the Beamos hallway, shoot the blue Beamos with arrows, restock from the pots and fairies at the end, and unlock the boss door.
- Get the upper-floor small key from the moving platform room
- Use loose statues to balance the scales
- Guide the servant through the laser room with the Command Melody
- Restore the final servant and take the portal upward
- Claim the Big Key and unlock the boss door
Defeat Gohdan and ring the Bell of the Gods
Gohdan is a pattern fight built around the Hero's Bow and Bombs. Start by shooting the eye in each hand until both hands go limp. Once both hands are disabled, Gohdan opens the eyes on his face. Shoot both face eyes, then wait for the head to slump forward and the mouth to open.
As soon as the mouth opens, throw a bomb inside. That finishes one full damage cycle. Repeat the same sequence until Gohdan has taken enough damage to yield. If you run short on arrows, stay calm. The fight provides more. The main danger is getting knocked from the platform and taking damage from the electrified floor below, so keep moving sideways instead of standing still in front of the hands.
After the fight, take the light upward, climb the ladder, and use the Grappling Hook on the bell above you. Ringing the Bell of the Gods completes the trial and opens the path onward beneath the Great Sea. Step back outside and follow the King of Red Lions into the new portal to continue the story.
- Disable both hand eyes with arrows
- Shoot both face eyes when they open
- Throw a bomb into Gohdan's mouth during each stun
- Take the light upward after the fight
- Ring the Bell of the Gods with the Grappling Hook
Before you move on
- All three Goddess Pearls have been placed at their correct Triangle Islands.
- The Tower of the Gods has been cleared, including the Command Melody and the Hero's Bow.
- Gohdan has been defeated and the Bell of the Gods has been rung.
- The portal below the sea has opened and you are ready to continue to the next story section.
Forsaken Fortress Return, Skull Hammer, and the Master Sword
In the original North American GameCube route, this chapter begins the moment Tower of the Gods is cleared. Step into the glowing portal the tower creates and follow the King of Red Lions beneath the sea to Hyrule Castle. The castle is frozen and safe at first, so solve the central block puzzle, open the hidden basement, and draw the Master Sword before returning to the surface. Only after that story beat should you sail back to Forsaken Fortress for the real assault. Enter through the southern sea gate with Bombs, defeat Phantom Ganon to claim the Skull Hammer, shut down the active searchlights on your climbing route, reach the prison tower, and survive the collapsing staircase escape. Break Helmaroc King's mask with the Skull Hammer, finish the fight with the Master Sword, then watch the required Ganondorf sequence and the return to Hyrule that closes this middle act cleanly.
Take the portal under Tower of the Gods and enter frozen Hyrule
Do not sail off to a side island after ringing the bell at Tower of the Gods. The next required route is the glowing portal that appears nearby. Sail into it with the King of Red Lions to descend into Hyrule Castle.
The first pass through Hyrule Castle is quiet. Enemies do not attack until after you remove the sword, so use the calm to learn the room layout. Go into the main hall and inspect the large Triforce mark on the floor beneath the central statue.
Push the nearby stone blocks so they fill the Triforce outline correctly. When the pattern is complete, the central statue slides aside and reveals the way down. Follow the basement path to the pedestal and pull the Master Sword. This is the real story trigger for the fortress return, so do not skip the follow-up combat on the way out.
- Enter the gold portal immediately after Tower of the Gods.
- Solve the floor Triforce block puzzle in the main hall.
- Descend to the basement and draw the Master Sword.
Clear the awakened castle and return to the Great Sea
Once the Master Sword comes free, Hyrule Castle awakens and enemy knights begin moving through the halls. Fight your way back instead of wandering. Use L-targeting, stay patient around shielded foes, and punish openings rather than mashing attacks into their guard.
If you take damage here, break pots for recovery before leaving. You do not need to hunt treasure or solve extra puzzles. Your goal is simply to defeat the active enemies blocking the way out and return to the King of Red Lions.
When you regain sea travel, set your course for Forsaken Fortress. This second visit is no longer a forced stealth failure like the first one, but alarms still create pressure, so treat it as an armed assault rather than a casual cleanup trip.
- Defeat the castle enemies that wake after the sword is drawn.
- Leave Hyrule as soon as the route opens again.
- Sail directly to Forsaken Fortress for the required second clear.
Blast open the southern sea entrance and defeat Phantom Ganon
Approach Forsaken Fortress from the south side. Your clean entry is not the old cannon launch from the prologue. Stay in the boat and use Bombs to destroy the wooden barrier in the sea-level entrance. Two solid hits are enough to break it open.
Dock inside and go up to the main door. Phantom Ganon appears here as the gatekeeper to the rest of the fortress. This fight is a sword duel built around returning his energy ball. Lock on, face the projectile, and swing at a steady rhythm to send it back. After several returns it will stun him, giving you time for direct sword hits.
If he uses the cluster of smaller dark shots, move decisively and answer with a wider attack instead of trying to bat each shot one by one. When he falls, open the chest he leaves behind to get the Skull Hammer. Equip it immediately. The hammer is slower than your sword, but it is the key to pegs, barriers, and Helmaroc King's armor.
- Open the southern sea gate with Bombs.
- Beat Phantom Ganon at the main entrance.
- Collect and equip the Skull Hammer right away.
Climb the changed fortress route and disable the active lights
Go through the big door and start retracing the interior and exterior climb. The route is familiar from the first visit, but several obstacles are different now. Hammer down large pegs and smash the spiked barriers that block halls and staircases. Whenever you see an obvious hammer object, clear it before backtracking needlessly.
On the outer walkways, searchlights matter because they support the assault with enemy pressure. Climb to each active light on your route and defeat the Bokoblin working it. You do not need to scour the entire fortress for every possible enemy, but the lights that watch your ladders and bridges are worth removing because they make the rest of the ascent much safer.
Use the Deku Leaf only for the short glides the route demands. If you miss a jump, recover from the last stable platform and watch your magic instead of forcing a panic glide. Miniblins are mostly there to slow you down, so cut through the ones in your path and keep moving. If a Floormaster drags you off, treat it as a setback, not a reset, and resume the climb quickly.
- Use the Skull Hammer on pegs and spiked barriers as soon as you reach them.
- Disable the searchlights that cover the exterior climb.
- Save time by ignoring minor enemies that are not blocking your route.
Trigger the prison tower sequence and escape upward
Keep climbing until you reach the prison level near Aryll's cell. The story scene here handles the rescue for you: Tetra and her crew free Aryll and the other girls, but Link is left behind because Helmaroc King attacks the tower.
Once control returns, stop fighting for room clears and run upward. The spiral staircase and platforms begin collapsing behind you. Keep your camera forward, take clean corners, and commit to the next intact section instead of hesitating near broken edges.
Near the top, Helmaroc King blocks the path closely enough for the Skull Hammer to matter. Strike when you get the opening to knock the bird away and force the boss battle proper.
- Reach the prison tower and trigger the rescue scene.
- Run the collapsing upward path instead of stopping for extra fights.
- Use the Skull Hammer to start the Helmaroc King battle.
Break Helmaroc King's mask and finish the fortress for real
In the arena, Helmaroc King's metal mask is the first target. Stay at medium range and bait the beak slam. Dodge late so the attack commits into the floor. When the beak sticks, rush in and smash the mask with the Skull Hammer. Back off before the next pass instead of trying to squeeze in greedy extra hits.
Repeat the same punish pattern until the mask breaks. Once the face is exposed, switch back to the Master Sword for faster damage. The fight is much cleaner if you keep the same rhythm: avoid the charge, punish the grounded beak, then reset your spacing.
Pick up the Heart Container after the win. The fortress path opens onward into the required Ganondorf sequence. Watch the scenes through to the return to Hyrule Castle, then go down to the Master Sword chamber again for the next revelation. That follow-up scene is the true handoff into the later half of the game, so do not detour away before it plays.
- Use the Skull Hammer until Helmaroc King's mask breaks.
- Switch to the Master Sword for the exposed phase.
- Collect the Heart Container and continue into the mandatory post-boss scenes.
Before you move on
- You entered the portal after Tower of the Gods, solved the Hyrule Castle floor puzzle, and pulled the Master Sword from its pedestal.
- You returned to Forsaken Fortress through the southern sea gate, defeated Phantom Ganon, and obtained the Skull Hammer.
- You climbed to the prison tower, triggered Aryll's rescue sequence, and defeated Helmaroc King.
- You watched the required post-fortress scenes and returned to Hyrule Castle for the story handoff into the next arc.
References for this chapter
- Nintendo GameCube and Game Boy Advance Manuals | Nintendo Support ↗
- NINTENDO THE LEGEND OF ZELDA: THE WIND WAKER USER MANUAL Pdf Download | ManualsLib ↗
- The Legend of Zelda: The Wind Waker - Guide and Walkthrough - GameCube - By Masamune2-0 - GameFAQs ↗
- Forsaken Fortress - Zelda Wiki ↗
- Forsaken Fortress - Zelda Dungeon Wiki, a The Legend of Zelda wiki ↗
Ballad of Gales, Mother and Child Isles, Fire Mountain, and Ice Ring Isle
After pulling the Master Sword, the next required progress is an equipment sweep across the Great Sea. In this North American GameCube route, Ballad of Gales is no longer just a convenience. Earlier in the game you could live without it, but now you need it because warping is the way into Mother and Child Isles, and that is where the Fairy Queen upgrades your bow with Fire and Ice Arrows. Once you have those arrows, use Ice Arrows to shut down Fire Mountain long enough to claim the Power Bracelets, then use Fire Arrows to thaw Ice Ring Isle long enough to claim the Iron Boots. Do not move on to the sage routes until all four gains from this chapter are secured: Ballad of Gales, Fire and Ice Arrows, Power Bracelets, and Iron Boots.
Confirm or learn Ballad of Gales before doing anything else
If Ballad of Gales is already in your song list, this is the point where it becomes part of the required route. If you never stopped Cyclos earlier, make that your first job now. You can still sail normally across the Great Sea, but you cannot simply dock at Mother and Child Isles and walk in from the outside, so the chapter does not continue until the song is learned.
Sail into one of the giant cyclones on the Great Sea and keep the King of Red Lions under control while you look upward. Cyclos hovers above the whirlwind. Use the Hero's Bow and keep firing when you have a clean angle on him. Once he gives up, he teaches Ballad of Gales.
When you conduct it in the original GameCube version, set the rhythm to 4/4 and play the notes down, right, left, up. The song only works while you are on the King of Red Lions out at sea. Treat it as both a major travel shortcut and the key that opens the next mandatory upgrade.
- If Ballad of Gales was missing, learn it from Cyclos now.
- Make sure the song is available before you leave the cyclone encounter.
- Do not head for Mother and Child Isles until Ballad of Gales is ready to use.
Warp inside Mother and Child Isles and take the bow upgrade
Now use Ballad of Gales and choose Mother and Child Isles. This is the important gate in the route. The rocky outer ring blocks ordinary entry to the Mother half of the island, but the warp drops you inside the enclosure. That is why the song is required here even though it was optional earlier.
Walk into the fairy haven and speak to the Fairy Queen. Because Aryll has already been rescued by this point in the story, she upgrades the Hero's Bow to use both Fire Arrows and Ice Arrows. There is no dungeon here and no payment required. Just make sure you leave with the upgrade secured.
Before departing, check your magic. Fire and Ice Arrows consume magic with every shot, and both elemental islands use timed hazard windows after the correct arrow hits. Starting full makes both runs much safer and prevents needless resets.
- Warp to Mother and Child Isles with Ballad of Gales.
- Speak to the Fairy Queen inside the Mother island.
- Leave with the Fire and Ice Arrows added to your Hero's Bow.
Freeze Fire Mountain and claim the Power Bracelets
You can clear the two islands in either order, but Fire Mountain first keeps the logic simple. Sail to Fire Mountain and aim an Ice Arrow at the volcanic plume on the summit. A proper hit freezes the eruption and opens a five minute window to enter and finish the island challenge.
Land quickly, climb the outer path, and drop into the opening at the top. The timer keeps running inside, so keep moving and ignore anything that is not directly blocking the route. Cross the lava platforms without hesitating too long on any one foothold.
At the end of the cave, defeat the enemies that gate the reward chest and open it for the Power Bracelets. Once you have them, you have the important reward. Use the new strength immediately on the giant boulder in the cave to make your exit cleaner. These bracelets are the item that lets Link lift the huge stone markers that seal later routes, including the one that leads to the Earth Temple setup.
- Hit Fire Mountain with an Ice Arrow, not a Fire Arrow.
- Enter and finish the cave before the five minute window closes.
- Open the chest and confirm the Power Bracelets are in your inventory.
Melt Ice Ring Isle and collect the Iron Boots
Next go to Ice Ring Isle, one sea square west of Forest Haven. This island is the reverse of Fire Mountain. Shoot a Fire Arrow at the freezing source on the island to stop the icy blast and open another five minute window.
Once the island is safe enough to approach, move around the outer ice carefully and head for the dragon mouth entrance. Slipping, falling into freezing water, or taking awkward jumps is what usually wastes time here, not enemy damage. Stay patient at gaps and take the clean line instead of forcing rushed movement.
Inside the cave, follow the icy interior route and deal with Keese or other nuisances only when they threaten to knock you off course. Keep your balance on the slick surfaces and continue toward the reward chest. Open it to get the Iron Boots.
After collecting them, equip the Iron Boots when strong gusts try to push you around. They are not just a late game convenience. They are the item that lets Link hold position against severe wind, which is the core requirement for opening Gale Isle and later handling parts of the Wind Temple route.
- Hit Ice Ring Isle with a Fire Arrow, not an Ice Arrow.
- Use the thawed window to reach the cave and stay on the direct route.
- Open the chest for the Iron Boots and use them when wind blocks the exit.
Close the chapter with every required tool in hand
Do not leave this setup chapter half done. The game now expects you to have the movement and access tools for both sage lines. Ballad of Gales gets you where normal sailing cannot. Fire and Ice Arrows unlock the two elemental islands. Power Bracelets open heavy stone barriers. Iron Boots solve violent wind obstacles.
If either timed island run goes poorly, just reset from the boat and try again with full magic and a cleaner path. Neither island is mainly testing damage output. The real test is getting the correct arrow shot first and then staying focused on the shortest route to the chest.
Once everything listed above is secured, you are ready for the next two chapters without another required item detour. Headstone Island and Gale Isle both make sense now because you finally have the equipment each route was waiting on.
- Ballad of Gales is learned and usable at sea.
- Your bow can switch between normal, Fire, and Ice shots.
- The Power Bracelets and Iron Boots are both in your inventory.
- Do not begin the Earth or Wind Temple setup chapters until all four gains are confirmed.
Before you move on
- You have Ballad of Gales and can warp across the Great Sea.
- The Fairy Queen at Mother and Child Isles upgraded the Hero's Bow with Fire and Ice Arrows.
- You collected the Power Bracelets from Fire Mountain.
- You collected the Iron Boots from Ice Ring Isle.
- You are ready to open both the Earth Temple and Wind Temple setup routes without another required equipment stop.
References for this chapter
- Nintendo GameCube and Game Boy Advance Manuals | Nintendo Support ↗
- The Legend of Zelda: The Wind Waker - Guide and Walkthrough - GameCube - By BakonBitz - GameFAQs ↗
- Ballad of Gales - Zelda Dungeon Wiki, a The Legend of Zelda wiki ↗
- Mother and Child Isles - Zelda Dungeon Wiki, a The Legend of Zelda wiki ↗
- Ice Ring Isle - Zelda Dungeon Wiki, a The Legend of Zelda wiki ↗
- The Legend of Zelda: The Wind Waker - 100% Item Walkthrough - GameCube - By Lando_Kashmir - GameFAQs ↗
Headstone Island and Medli's Awakening
With the Power Bracelets collected, the next main task is to reopen the Earth Temple line and start restoring the Master Sword. Headstone Island hides the entrance, Laruto explains why the sword's power faded, and Medli must be awakened as the new Sage of Earth before the seal will break. This is a required story route, not an optional character scene, and it leads directly into the first of the two sage dungeons.
Open Headstone Island and learn why the sages matter
Sail to Headstone Island after clearing the second Forsaken Fortress visit, reaching Hyrule, and collecting the Power Bracelets from Fire Mountain. Do not come here early expecting another trick item to work. The huge stone head on the island is the lock. Walk up to it, lift it with the Power Bracelets, and throw it aside to uncover the cave entrance below.
Go inside and approach the large stone tablet with musical markings. Pull out the Wind Waker in front of it to trigger the next scene. Laruto, the former Sage of Earth, appears and explains the problem clearly: the Master Sword is no longer fully empowered because the sages who maintained its prayer have been lost. The Earth Temple and the Wind Temple must both be restored if you want the sword to regain its full power to repel evil.
Laruto then teaches you the Earth God's Lyric. This song belongs only to the Earth Temple line. Keep the names straight from here on out. Earth God's Lyric is for Laruto and Medli. Wind God's Aria is for the later temple and a different partner. The immediate lesson from this scene is that Link cannot finish the Earth Temple setup alone. You need the living successor who can answer Laruto's song.
- Reached Headstone Island with the Power Bracelets
- Lifted the giant stone marker and entered the cave
- Learned the Earth God's Lyric from Laruto
- Understood that restoring the sages is mandatory to restore the Master Sword
Go to Dragon Roost Island and reach Medli's perch
Leave Headstone Island and return to Dragon Roost Island. Once inside the main Rito settlement, climb up to the second floor where the postal counter sits. Use the nearby doorway that leads outside onto the mountain ledges instead of continuing to wander through the lower village rooms.
Out on the exterior path, turn right and cross the gap with the Grappling Hook. After that, continue upward by climbing to the higher ledge. Medli is waiting up here by herself, practicing her harp. This is the same upper mountain route that branches away from the main interior, so if you are still seeing the lower mail-sorting area, you have not gone high enough yet.
Talk to Medli, then take out the Wind Waker in front of her and conduct the Earth God's Lyric. The scene that follows awakens her as Laruto's successor. This is not optional flavor text. Medli is the required partner for the Earth Temple, and the temple entrance will not open without her. When the scene ends, Link and Medli are placed back at the King of Red Lions together, which is your cue to leave immediately for Headstone Island.
- Returned to Dragon Roost Island after learning the song
- Reached the outside upper ledge beyond the postal-counter door
- Played the Earth God's Lyric for Medli
- Awakened Medli as the Sage of Earth and regrouped at the King of Red Lions
Bring Medli back to Headstone Island and break the seal
Sail back to Headstone Island with Medli. If you learned Ballad of Gales earlier, use it to shorten the trip to a nearby warp point, then finish the approach by sea. If you do not have that song yet, normal sailing is fine. Either way, the destination is the same cave beneath the broken stone marker.
Enter the cave with Medli and approach the large sealed tablet at the back. Do not waste time trying bombs, the Master Sword, or the Skull Hammer here. This barrier only responds to the proper ceremony. Stand in place with Medli beside you and conduct the Earth God's Lyric again. The duet shatters the seal and opens the Earth Temple.
This is the first half of the Master Sword restoration route. The game now expects you to continue with Medli, not to leave her behind and look for a solo workaround. Once the stone breaks, proceed forward together. The first room immediately proves the point by asking you to use Medli's carrying and flight ability to cross the opening gap.
- Returned to Headstone Island with Medli
- Brought Medli into Laruto's cave
- Used the Earth God's Lyric at the rear seal
- Opened the Earth Temple entrance
Use the Command Melody the right way
From this point on, treat the Command Melody as your main partner-management tool. When Medli is with you, playing the Command Melody lets you control her directly instead of waiting for her to stand in the perfect place on her own. This matters because Earth Temple puzzles are built around exact placement, light angles, and switch positions.
Medli's role is different from Link's. She can fly across short gaps, and if Link picks her up before a jump, she can carry both of you in a slow glide for a limited distance. She also uses her harp to reflect light, which is the key to opening paths and handling several Earth Temple obstacles. If you solve the combat part of a room but the puzzle still seems inactive, the missing step is often proper Medli positioning.
A good habit is to secure the room with Link first, then place Medli where the puzzle needs her. When you stop controlling her, she stays where you left her, which is useful for floor switches and reflected-light setups. If progress stalls, do not assume you missed an item. First check whether Medli is standing on the correct spot, facing the correct direction, or needs to be carried across the next gap.
- Ready to use Command Melody for precise partner control
- Understand that Medli can glide and reflect light
- Know that many Earth Temple puzzles depend on her exact placement
- Know to check Medli's position before assuming you are stuck
Enter the Earth Temple ready for a partner dungeon
Step into the Earth Temple only after the seal is broken and Medli is traveling with you. The opening rooms are designed to teach the partnership immediately, so do not separate story setup from dungeon expectations in your mind. If you see isolated platforms, sunlight, or switch combinations, assume the intended answer involves both Link and Medli.
If you have been low on healing items or magic, this is a smart pause point before going deep. The Earth Temple is less about raw damage than about managing space, keeping Medli nearby, and using the Command Melody without confusion. Once you enter with that mindset, you are set up correctly for the dungeon proper and the first restored sage line of the late game.
- Entered the Earth Temple with Medli present
- Ready for immediate partner puzzles
- Prepared for the first half of restoring the Master Sword
Before you move on
- You lifted the giant stone marker on Headstone Island and learned the Earth God's Lyric from Laruto.
- You found Medli on Dragon Roost Island's upper exterior path and awakened her with the Earth God's Lyric.
- You returned to Headstone Island with Medli and broke the temple seal by performing the duet.
- You entered the Earth Temple understanding that Command Melody control and Medli's light-reflection abilities are required for the dungeon.
Earth Temple
Escort Medli through the Earth Temple by treating her as both a movement tool and a light source, then add Link’s Mirror Shield after the Stalfos miniboss so the two of you can complete the basement mirror network, claim the Boss Key, defeat Jalhalla, and restore one half of the Master Sword’s lost power in the North American GameCube story route.
Cross the entrance and set the rule for the whole dungeon
After you open the entrance with the Earth God’s Lyric, pick Medli up before you leave the first platform. Jump while carrying her to glide across the opening gap and reach the first door. If you ever cross a room and forget Medli behind, stop and bring her forward immediately. Earth Temple progress is built around keeping both characters together, not around solving everything with Link first.
In the first large chamber, clear the enemies before you try to direct light or fly between ledges. Carry Medli up the stairs, jump to the pillar switch with Link, then use the Command Melody so Medli can fly to the matching switch and open the exit. When a room asks you to split up, always think about the return trip as well as the immediate puzzle. Medli can fly, reflect light, and help with long jumps, but she is easy to leave on a ledge that forces unnecessary backtracking.
- Use Medli’s carry-glide for opening gaps and controlled descents.
- Use Command Melody only after the room is calm enough for a clean landing.
- Before every door or drop, check that Medli can still rejoin Link without a long reset.
Use Medli’s harp to claim the early items and the first key
The next rooms teach you how the temple handles darkness. Use Medli’s reflected light to solidify shimmering chests, starting with the chest that gives the Dungeon Map. When Dark ChuChus appear, drag them into sunlight or a reflected beam so they petrify, then use them as safe obstacles or break them once they are no longer in the way. Do not waste time trying to brute-force every dark enemy before you understand the light mechanic.
Soon you reach the large chamber with the giant sun face. Do not expect the face to open immediately. First, work on the side paths that let you clear the smoky floor around the hammer switch and bring natural light farther into the dungeon. Use Medli’s light to create a safe lane through the haze, switch back to Link, and strike the floor switch with the Skull Hammer to open the next route. In the nearby rooms, move blocks, reveal another chest with reflected light, and collect the first small key before returning to the locked path.
- Solidify shimmering chests with Medli before assuming they are decorative.
- Petrified Dark ChuChus are puzzle tools as much as enemies.
- If the giant sun face does not react yet, keep following the key route instead of forcing the central room.
Open the upper route and prepare for the Mirror Shield
Past the first locked door, keep using light to shape the room rather than fighting in darkness. Bring sunlight in where you can, burn away blockers when the room provides a valid fire target, and place petrified Dark ChuChus on floor switches when a stairway or door needs multiple weights. This stretch is where many players lose time because they solve one symbol, leave Medli behind, and then have to rebuild the room just to move her forward. Finish each room with both characters standing near the exit.
As you climb, you will start seeing Poes, coffins, and ReDeads. Medli’s light is what exposes Poes so Link can finish them. ReDeads are much less dangerous if you fight in a light patch or remove the target statue they are guarding before wandering deeper into the room. Keep collecting required keys and opening the route methodically; the goal here is not optional treasure, but reaching the Stalfos miniboss with your supplies intact and Medli still with you.
- Leave rooms with both Link and Medli near the same exit.
- Use light to expose Poes before committing to melee.
- Save health by fighting ReDeads and other undead in lit space whenever possible.
Defeat the Stalfos and change the dungeon with the Mirror Shield
In the miniboss room, focus on one Stalfos at a time. Knock it apart with sword attacks, then immediately swap to the Skull Hammer and smash the skull before the bones reassemble. Zelda Dungeon and the other walkthrough references agree that two more Stalfos emerge after the first, so do not relax when one drops. Fight in open space so the skull pieces do not roll out of sight behind coffins or walls.
When the third Stalfos is finished, open the chest for the Mirror Shield. This is the major progression item for the temple. From this point on, think in two-stage reflections: Medli can stand in a light beam and angle her harp, while Link catches that beam with the Mirror Shield and redirects it to symbols, statues, or sun-marked mechanisms. The large sun face near the middle of the dungeon is now solvable because you can light both eyes by combining Medli’s position with Link’s shield angle.
- Against every Stalfos, break the body first and the skull second.
- Expect three Stalfos total in the miniboss sequence.
- After getting the Mirror Shield, start looking for paired reflections instead of single-beam answers.
Work through the basement mirrors and claim the Boss Key
Use the newly opened path below the giant face to enter the basement. This section mixes smoky skull barriers, sealed music tablets, movable mirrors, statues that crumble under reflected light, and enemy rooms that punish careless separation. When you meet a stone tablet marked with notes, play the Earth God’s Lyric with Medli to break it open. When a bridge is blocked by smoky skulls, clear them with the appropriate tool before trying to fly Medli across. Keep reading the room from the light source outward: first find the beam, then set Medli, then decide where Link must stand with the Mirror Shield.
The largest basement chamber is the real test. Use Medli from the central pedestals to reveal hidden objects, solidify any shimmering chest that matters to progress, and light the wall symbols that let Link move the room’s mirrors into place. Once both sides of the chamber are solved, illuminate the final sun-face eyes, enter the last combat room, and clear every enemy for the Boss Key. The cited guides agree that this final guard room includes smoky skull obstacles and a Darknut, so save some health and magic before you step in.
- Music tablets in this dungeon open with the Earth God’s Lyric, not the Command Melody.
- Set the light source first, then place Medli, then aim Link’s Mirror Shield.
- Do not leave the basement mirror chain until you have the Boss Key and Medli beside you.
Defeat Jalhalla and finish the sage prayer
Jalhalla is a giant Poe cluster, and the fight is all about chasing the active light beam. Only one overhead light opening is active at a time, so move quickly into the lit patch and use the Mirror Shield to shine light onto Jalhalla until he solidifies and drops. Pick him up at once and throw him into one of the spiked pillars around the arena. That impact breaks him into smaller Poes. Slash as many as you can before they regroup. If he blows fire, sidestep it; if he crushes you and reverses movement, get back to the light and reset your spacing instead of swinging wildly.
Repeat the cycle of light, throw, and Poe cleanup until Jalhalla falls. Take the Heart Container, then watch Medli’s Sage of Earth prayer with Laruto. This scene restores part of the Master Sword’s former power, but not all of it. The blade is only fully restored after the Wind Temple sage line is also completed, so your next story destination remains mandatory.
- Stun Jalhalla with reflected light before trying to grab him.
- Throw the solid body into a spiked pillar, then cut down the loose Poes fast.
- Treat the post-boss prayer as one half of the Master Sword restoration, not the full repair.
Before you move on
- Link has the Mirror Shield in inventory.
- Jalhalla is defeated and the Earth Temple boss room is cleared.
- Medli has completed the Sage of Earth prayer scene with Laruto.
- The story confirms that only one half of the Master Sword’s lost power has been restored, pointing you toward the Wind Temple next.
References for this chapter
- Nintendo GameCube and Game Boy Advance Manuals | Nintendo Support ↗
- The Legend of Zelda: The Wind Waker/Earth Temple — StrategyWiki ↗
- The Legend of Zelda: The Wind Waker Walkthrough - GameSpot ↗
- The Legend of Zelda: The Wind Waker - Guide and Walkthrough - GameCube - By Mr_Jason - GameFAQs ↗
- The Wind Waker Walkthrough - Earth Temple - Zelda Dungeon ↗
- Earth Temple - Zelda Wiki ↗
Gale Isle, Makar's Return, and Wind Temple Entry
With the Earth Temple complete in the North American GameCube release, the next story step is to restore the second sage line. This chapter is short, but it matters because it unlocks the final major dungeon and teaches the partner rules you will rely on inside it. Sail to Gale Isle, force your way through the headwind with the Iron Boots, learn the Wind God's Aria from the stone tablet, then return to Forest Haven and awaken Makar in his hidden practice room behind the waterfall. After that, bring Makar back to Gale Isle, perform the duet at the inner seal, and open the Wind Temple.
Start from the correct story state and pack for another dungeon
Do not begin this route until the Earth Temple is fully cleared and Jalhalla is defeated. In normal story progression, that is the point where the game advances the second sage line and allows Makar to appear in his hiding place at Forest Haven. If you already learned the Wind God's Aria earlier but never found Makar, this is usually the missing trigger.
Before sailing out, make sure the Iron Boots and Skull Hammer are both easy to reach in your item layout. You will also want the Wind Waker, the Grappling Hook, and a little healing. This setup chapter does not demand heavy combat, but the Wind Temple begins as soon as the seal opens, so it is smarter to prepare now than to backtrack after waking Makar.
If you learned Ballad of Gales earlier, warp to Windfall Island and sail north to Gale Isle. If you never picked up that warp song, ordinary sailing still works. The destination is the windy island directly north of Windfall, and the giant stone face on shore makes it obvious you are in the right place.
- Earth Temple cleared and Jalhalla defeated
- Keep Iron Boots, Skull Hammer, Wind Waker, and Grappling Hook ready
- Bring basic healing and enough magic to handle early Wind Temple movement
Break through Gale Isle's wind barrier and learn the Wind God's Aria
Land at Gale Isle and walk toward the path blocked by violent wind. Trying to dash through normally will only shove Link backward, so equip the Iron Boots before you push forward. Move steadily instead of trying to fight the gusts with jumps or rolls. If the wind knocks you off the ledge or back toward the beach, climb up again, put the boots back on, and repeat with a straight approach.
At the end of the path, the wind is coming from a stone statue. Pull out the Skull Hammer and smash it. Once the statue breaks, the gale stops and the cave entrance behind it becomes safe to enter. Go inside and examine the stone tablet at the back with the Wind Waker to learn the Wind God's Aria.
Fado's spirit appears after the song is learned. His message gives you the key clue for the new sage: look for the one who plays the same instrument. That points to Makar, the Korok musician from Forest Haven. This is also your reminder that the Master Sword still needs the Wind Sage's prayer, so this temple line is required story progress, not a side detour.
- Use Iron Boots to walk through the gale
- Smash the wind statue with the Skull Hammer
- Learn the Wind God's Aria from the cave tablet
- Listen to Fado's clue about the new sage's instrument
Find Makar in the hidden waterfall alcove at Forest Haven
Return to Forest Haven after leaving Gale Isle. Stay outside on the island approach instead of going up into the Great Deku Tree's inner chamber. Makar is not inside the main haven. He is hiding in a small cave behind one of the outer waterfalls where he is practicing his music alone.
Climb the outer path the same way you would when approaching Forest Haven from the shore. Watch for floating musical notes coming out from a waterfall. That visual cue matters more than memorizing the exact ledge, because it tells you which opening is the correct one. Stand on the nearby ledge, look up, and hook the overhead branch with the Grappling Hook. Swing toward the waterfall and release so Link passes through the water curtain into the hidden alcove behind it.
If you miss the opening, do not search the whole island. Just climb back to the same ledge and try the swing again. Once inside, speak to Makar and conduct the Wind God's Aria for him. The cutscene confirms his awakening as the new Wind Sage. If the alcove is empty, stop here and verify that Jalhalla is already defeated, because that is the usual reason Makar has not appeared yet.
- Stay on the exterior Forest Haven approach
- Follow the floating musical notes to the correct waterfall
- Use the Grappling Hook to swing through the waterfall
- Play the Wind God's Aria for Makar to awaken him
Bring Makar to Gale Isle and open the Wind Temple
After the awakening scene, Makar becomes your required partner for the next dungeon. Take him back to the King of Red Lions and return to Gale Isle. Treat him the same way you learned to treat Medli: he is not optional cargo, and the next area is built around switching between characters and keeping your partner safe.
Go back through the cave you opened earlier. Walk Makar to the large stone seal deeper inside. Stand in front of it and conduct the Wind God's Aria again. Makar joins the performance, the slab shatters, and the route into the Wind Temple opens.
Use this moment to save your game if you want a clean restart point before the dungeon proper. Once you step through, the game shifts immediately into Wind Temple progression, so this is the natural handoff between world travel and dungeon play.
- Take Makar onto the boat and return to Gale Isle
- Re-enter the cave behind the broken wind statue
- Play the Wind God's Aria at the inner seal with Makar
- Open the Wind Temple entrance
Understand Makar's job before you step inside
The Wind Temple is not another mirror dungeon. Makar's role is mobility and environmental setup. When you use the Command Melody, he can flutter across gaps under his own power, and when he reaches soft dirt patches he can plant seeds to grow trees. Those trees become platforms, puzzle pieces, and later Hookshot anchors. Keep that in mind from the start so the dungeon's logic makes sense as rooms get taller and more complicated.
Because the temple leans much harder on vertical movement than the Earth Temple, get into the habit of checking three things before every advance: where Makar is standing, whether Link has enough magic for Deku Leaf recovery, and whether wind or fan pressure will separate the two of you. If you rush, it is easy to strand your partner on the wrong ledge and turn a simple room into needless backtracking.
This first room also marks the point where companion control becomes a core mechanic rather than a one-off puzzle. Slow, tidy movement will save more time than reckless jumping. Secure Makar first, then read the room, then move Link.
- Remember that Makar's specialty is flying and planting trees
- Expect stronger emphasis on height, wind, and recovery movement
- Use Command Melody and careful positioning from the moment the dungeon starts
Before you move on
- You reached Gale Isle, crossed the headwind with the Iron Boots, and learned the Wind God's Aria from the cave tablet.
- Fado identified the need for a new Wind Sage, pointing you back to Makar.
- You found Makar behind the waterfall at Forest Haven and awakened him with the Wind God's Aria.
- You returned with Makar to Gale Isle, performed the duet at the stone seal, and opened the entrance to the Wind Temple.
References for this chapter
- Nintendo GameCube and Game Boy Advance Manuals | Nintendo Support ↗
- The Wind Waker Walkthrough - Wind Temple - Zelda Dungeon ↗
- Gale Isle - Zelda Dungeon Wiki, a The Legend of Zelda wiki ↗
- Forest Haven - Zelda Dungeon Wiki, a The Legend of Zelda wiki ↗
- Makar - Zelda Dungeon Wiki, a The Legend of Zelda wiki ↗
- The Legend of Zelda: The Wind Waker - Guide and Walkthrough - GameCube - By CyricZ - GameFAQs ↗
Wind Temple
The Wind Temple is the last main dungeon before the Triforce quest in the North American GameCube release. Bring Makar through every required room, plant every seed patch as soon as you see it, earn the Hookshot, and use the dungeon’s tree anchors to climb back through the main shaft until you can defeat Molgera and fully restore the Master Sword.
Enter the temple and build the first tree routes
After opening the Wind Temple with Makar, carry him into the first real room and expect the pair to split roles right away. Link handles the combat and the heavy floor switches, while Makar handles narrow flights, seed patches, and remote ledges. In the opening chambers, do not rush past dirt patches. Every tree Makar plants becomes a permanent travel point for later Hookshot movement, so treating those patches as optional is the easiest way to make the dungeon harder than it needs to be.
In the first room below, clear the enemies before trying to guide Makar. Have him plant the available seeds, then fly him up to the high ledge the room is steering you toward. As Link, use the Iron Boots on the floor switches that launch you upward, then use the Deku Leaf to cross back to Makar’s side. In the next room, defeat the Armos, blow the propeller with the Deku Leaf to raise the barrier, and bring Makar across to plant the pair of seeds that unlock the way forward.
From here you reach the central shaft, which is the dungeon’s real hub. Do not think of it as a random vertical maze. It is a tower with side rooms that each pay off in one of three ways: a key, a switch or barrier change, or a new planted tree that improves your return route.
- Plant every seed patch as soon as Makar can reach it.
- Use Link first to make rooms safe before conducting Makar through hazards.
- Treat the central shaft as a hub and remember which side doors you have already opened.
Use the east-side route to get the first Small Key and the Hookshot
From the main shaft, take the side route that leads through Peahats, a Floormaster, and cyclone rooms. Use the Deku Leaf to move propellers and line up gates, then ride the air currents carefully instead of trying to force long glides. If you miss a landing, re-enter the hub through the nearest open doorway and rebuild from there rather than wandering upward at random.
This branch drops you into a lower chamber where Link must do the work alone. Use the Iron Boots and spring pads to climb to the chest holding the first Small Key. Spend that key on the locked door in this lower route and defeat the Wizzrobe inside to claim the Hookshot. The moment you get it, stop and learn its limits. It grabs marked targets, wooden posts, and the trees Makar planted. It does not stick to plain stone walls, so always pause and look for a real anchor before jumping again.
The Hookshot is also your recovery tool. If a fan gust throws you off a ledge or you land on the wrong balcony, do not panic and waste magic trying to improvise with the Deku Leaf. First check for a hook point above, beside, or behind you. If you cannot recover from that ledge, drop safely and return through the main shaft using the side doors and trees you already opened.
- Follow the side rooms until you earn the first Small Key.
- Use that key on the route to the Hookshot mini-boss room.
- Start using the Hookshot as both progression and recovery, not just as a forward jump.
Climb back up, rescue Makar, and secure the second Small Key and Big Key
With the Hookshot, climb the shaft wall targets until you reach Makar’s cage. The rescue is not just a simple latch-and-pull. Stand where the temple gives you a clean line on the stone obstruction, use the Iron Boots to keep your footing, and use the Hookshot to yank the statue piece down so Makar can get out. Once he is free, keep him with you. From this point on, the dungeon expects you to alternate between Link’s strength and Makar’s mobility in nearly every remaining branch.
Your next important stop is the room where defeating multiple Armos opens the chest with the second Small Key. After that, guide Makar to the proper side ledge, return Link to him, and continue into the room with the large stone tablet. Clear the Peahats and Floormaster, spin the propeller to move the gate, and then use Wind God’s Aria with Makar to break the stone barrier. The chamber beyond contains the Darknut fight that awards the Big Key.
This part is where players often feel lost because the dungeon loops back through familiar floors. The cure is simple: whenever you return to the shaft, ask what your newest gain was. If the answer is second Small Key, Big Key, or a newly planted tree, you are still on track. The game keeps sending you through the hub because each pass gives you a new way to reach a higher or previously blocked door.
- Free Makar only after you climb back up with the Hookshot and Iron Boots.
- Pick up the second Small Key before committing to the later upper routes.
- Beat the Darknuts for the Big Key as soon as the tablet route opens.
Finish the upper routes with Makar and use the second Small Key correctly
After the Big Key, the temple is much easier if you always send Makar first wherever the room clearly favors flight. In the gap rooms and bubble rooms, clear the dangerous enemies with Link, then guide Makar to each dirt patch and plant every seed immediately. Those trees are the intended ladder for the end of the dungeon. If you skip one, the final climb feels much more confusing than it really is.
Soon you reach a room where Link and Makar must stand on paired switches to open the lower fan section. Wait for the airflow to stop, drop through cleanly, and use the second Small Key on the locked door below. The enemy room beyond contains optional treasure, but the important part is the eastern exit that continues the critical path. Keep moving east through the combat room and the cyclone room, letting Makar cross first to plant the next tree so Link can follow with the Hookshot.
The final ascent is the dungeon testing whether you understood its rules. Kill Wizzrobes, Blue Bubbles, and anything else that can interrupt your aim before making precision Hookshot moves. Park Makar on safe ground whenever Link needs to fight. If you fall, return to the last planted tree or the nearest opened door and climb back in pieces. Do not restart the whole route from memory when the dungeon itself has already created shortcuts for you. Once the route reaches the highest chamber and the boss door, unlock it with the Big Key.
- Use the second Small Key on the lower locked door after the twin-switch fan room.
- Take the mandatory eastward path even when a treasure chest in the room is optional.
- Clear enemies before aiming the Hookshot on narrow ledges or in strong wind.
Defeat Molgera and finish the Master Sword restoration
Molgera fights in a sand pit where the terrain is as dangerous as the boss. Keep moving and watch the sand itself. A dark circular swell shows where Molgera is about to burst out. When the boss rises and exposes its mouth and tongue, lock on with the Hookshot and pull the tongue out, then rush in with sword strikes on the exposed weak point. Back away before the mouth closes again instead of getting greedy for one more hit.
After Molgera takes damage, smaller sand creatures can join the fight. If they are directly interrupting your aim or crowding your movement, pull them out with the Hookshot and dispatch them before committing to the next opening on the real boss. When Molgera flies up and circles the room, keep moving until it dives, then reset your spacing and wait for another clear tongue opening. The fight is much safer when you react to the boss’s tells instead of chasing it through the center of the arena.
When Molgera falls, collect the Heart Container and complete the post-battle scene with Makar. His prayer restores the wind sage line, and with both sage dungeons finished, the Master Sword returns to full power. That is the real end of this chapter. Do not drift into optional sea cleanup yet unless you want supplies, because the story is now pointing you toward the mandatory late-game Triforce work.
- Watch the dark sand and open mouth, then Hookshot the tongue.
- Clear the small sand spawn if they are ruining your next opening.
- Confirm the post-boss scene so the Master Sword is fully restored.
Before you move on
- You reached the Hookshot chest, used the Hookshot to free Makar, and used planted trees as regular movement anchors afterward.
- You obtained both Small Keys and the Big Key and used them to finish the upper Wind Temple route.
- Molgera is defeated and the Heart Container has been collected.
- Makar remains behind as the awakened Wind Sage and the Master Sword is fully restored, opening the final story stretch after this dungeon.
References for this chapter
Triforce Quest Preparation and Required Side Objectives
Before you start chasing Triforce Charts, stop and set up the North American GameCube version correctly. This release uses the long late-game route: first collect all eight Triforce Charts, then pay Tingle to decipher them, and only after that salvage the eight Triforce Shards from the sea. The HD remake cuts that work down, but this version does not. Your goal here is not broad cleanup. It is to remove the specific blockers that can waste whole voyages later: make sure Tingle has been freed, make sure you can enter Private Oasis, carry Hyoi Pears for Bird's Peak Rock, raise your wallet enough to afford translations, and treat Ballad of Gales as a standard travel tool rather than something optional.
Understand what the GameCube version still demands
Treat charts and shards as two separate jobs. In this version, a Triforce Chart is not the shard itself. You first win or find the chart, then take it to Tingle for translation, and only then can you sail to the marked square and pull up the shard with the salvage crane. If you come from later versions, this is the biggest place to reset your expectations.
The fee matters. Tingle charges 398 Rupees for each of the eight Triforce Charts, so the required deciphering total is 3184 Rupees. That is the mandatory bill for story completion in this edition. The IN-credible Chart from Tingle's mail is useful support because it shows where the Triforce Charts and later the shard marks are, but it is not one of the eight required translations and you do not need it to continue if you already know the route.
Keep the chapter focused. You are not trying to finish every Windfall errand or every Great Sea secret before the ending. You are only removing the jobs that would otherwise stop the next chapter from flowing.
- Expect three late-game phases in this version: collect charts, pay for deciphering, then salvage shards.
- Budget 3184 Rupees for the eight mandatory Tingle fees.
- Treat the IN-credible Chart as optional support, not as one of the required Triforce Charts.
Free Tingle on Windfall if you skipped him earlier
If Tingle is still locked in Windfall's jail, correct that first. Go into the jail, move the pots hiding the floor switch, and step on it to open his cell. Talk to him after he comes out. On GameCube he gives you the Tingle Tuner, and his release is what matters for the Triforce quest because it opens the later chart-deciphering path tied to him.
Do not confuse this with the deciphering itself. Freeing Tingle is the setup step, not the full reward. You are making sure the translation service exists before you start hauling charts around. If he was already freed earlier, this whole stop is just a quick confirmation and you can move on immediately.
If you have not checked a postbox in a while, remember that Tingle's mail can also be waiting by now. After Aryll was rescued from Forsaken Fortress, he can send the IN-credible Chart letter with 201 Rupees of postage due. Pay that only if you want the helper chart. The mandatory piece here is still Tingle's release, not the mail chart.
- Open Tingle's cell on Windfall if it is still closed.
- Speak to Tingle once he is free.
- Check postboxes when convenient, but keep the 201 Rupee IN-credible Chart purchase optional.
Treat Ballad of Gales as baseline kit, not a luxury
By the time you reach Triforce preparation, Ballad of Gales should already be in your song list. It is not just a nice travel shortcut at this stage. You needed it earlier to warp into Mother and Child Isles, where the Queen of Fairies gave you the Fire and Ice Arrows. Those arrows then opened Fire Mountain and Ice Ring Isle so you could obtain the Power Bracelets and Iron Boots for the Earth and Wind Temple lines.
That means the question is no longer whether you should bother learning Ballad of Gales. If you are truly at the Triforce quest, you should already have it. From here onward, use it aggressively. Warp travel cuts out the longest dead sailing in the late game, lets you bounce between Tingle, Windfall, Outset, Greatfish, and Tower of the Gods quickly, and makes recovery from failed cave attempts much less painful.
Build your mental route around the warp points now. Even if the next chapter sends you to several chart islands in a row, open with the closest warp and only sail the final short leg. That keeps your rupee farming, chart pickups, and translation visits from becoming separate chores.
- Confirm Ballad of Gales is learned before starting the chart hunt.
- Remember why it is already required: Mother and Child Isles, Fire and Ice Arrows, Fire Mountain, and Ice Ring Isle all depended on it.
- Use warp points as the backbone of your Triforce route from here on out.
Secure the Cabana Deed before you ever sail to Private Oasis
One required Triforce Chart is inside the cabana at Private Oasis. The butler at the door will not treat you as the owner without the Cabana Deed, so showing up empty-handed only creates an extra round trip. Fix that on Windfall before the chart sweep starts.
The deed comes from Mrs. Marie after you give her 20 Joy Pendants. If you already have the deed in your Delivery Bag, you are done. If not, bring the pendants now. If you are short, use the Grappling Hook on Bokoblins while revisiting lookout platforms, submarines, and other combat stops that naturally fit the next leg of your route instead of turning the whole session into pendant grinding.
Once the deed is in your bag, keep it there and do not forget why you got it. The reward is not the paper itself. The reward is guaranteed access to the Private Oasis cabana when the next chapter sends you there for the chart.
- Check your Delivery Bag for the Cabana Deed before leaving Windfall.
- If you do not have it, turn in 20 Joy Pendants to Mrs. Marie.
- Do not schedule Private Oasis until the deed is secured.
Fix your wallet first, then decide whether to carry the whole translation bill
The original GameCube wallet starts at 200 Rupees. That is not enough to pay even one 398 Rupee Triforce translation, so at least one wallet upgrade is effectively required for story completion here. One upgrade raises your cap to 1000 Rupees, and the second raises it to 5000. In this version, the Outset Island fairy gives the 1000 Rupee wallet and Northern Fairy Island gives the 5000 Rupee wallet.
If you only have the 1000 Rupee wallet, the quest is still possible, but your route needs more Tingle stops because you can only afford two translations before you have to refill. If you have the 5000 Rupee wallet, you can carry the entire 3184 Rupee translation budget at once and decouple money management from the chart route. That is the cleaner setup and the one worth doing if you want the next chapter to stay smooth.
As you gather money, stop bleeding it away on nonessential purchases. Skip expensive optional buys until the charts are translated. Open chests and rupee pots instead of ignoring them because your wallet is full. The entire point of this prep step is to prevent the next chapter from collapsing into repeated breaks just to go earn another few hundred Rupees.
- Raise your wallet above the 200 Rupee base cap before the Triforce hunt.
- Prefer to secure the 5000 Rupee wallet so you can hold the full 3184 Rupee deciphering budget.
- Decide now whether you are funding all eight translations upfront or planning repeated refill trips.
Pack the small supplies that keep required chart routes from stalling
Buy Hyoi Pears from Beedle before you head out. Bird's Peak Rock uses a seagull switch puzzle, and a pear is required to control the bird and hit the white crystals on the rock spires. Carry more than one so a missed attempt does not force a shopping detour. This is a simple prep item, but forgetting it means sailing to the island for nothing.
Then confirm that your story inventory is really late-game ready. By now the main dungeon progression should already be complete through the Wind Temple arc, so you should not be missing core tools like Bombs, Grappling Hook, Deku Leaf, Hookshot, Skull Hammer, Power Bracelets, and Iron Boots. If one of those is absent, stop and resolve that gap before you begin the chart chapter. The Triforce route assumes you are arriving as a fully equipped late-game file, not as someone still missing a major story tool.
Finally, stock support items without drifting into completionism. Carry extra All-Purpose Bait if you still want Fishman map notes while routing the sea. Keep at least one bottle reserved for a safety item such as a fairy, potion, or Elixir Soup so a mistake inside a combat cave, ghost ship room, or gauntlet does not force a long reload and re-sail. These are not hard requirements, but they are the kind of prep that turns the last long sea chapter from annoying into stable.
- Buy at least 2 Hyoi Pears before leaving your supply stop.
- Verify that your major story traversal gear is complete.
- Carry at least one emergency healing option in a bottle if possible.
- Bring spare bait only as support, not as a new mandatory side project.
Before you move on
- Tingle has been freed on Windfall and spoken to, so the later chart-deciphering path is available.
- You understand the GameCube late-game flow: eight Triforce Charts, eight paid decipherings, then eight shard salvages.
- Ballad of Gales is already learned and ready to anchor your sea routing.
- The Cabana Deed is in your Delivery Bag for the Private Oasis chart route.
- You have Hyoi Pears ready for Bird's Peak Rock.
- Your wallet has been upgraded enough to pay Tingle, ideally to the 5000 Rupee cap.
- Your late-game tool set is complete and you have optional support supplies such as bait and bottle healing ready for the chart hunt.
References for this chapter
- Nintendo GameCube and Game Boy Advance Manuals | Nintendo Support ↗
- The Legend of Zelda: The Wind Waker/Triforce of Courage — StrategyWiki ↗
- Wallet - Zelda Wiki ↗
- Jail - Zelda Wiki ↗
- IN-credible Chart - Zelda Dungeon Wiki, a The Legend of Zelda wiki ↗
- Ballad of Gales - Zelda Dungeon Wiki, a The Legend of Zelda wiki ↗
- Fire & Ice Arrows - Zelda Dungeon Wiki, a The Legend of Zelda wiki ↗
- Cabana Deed - Zelda Dungeon Wiki, a The Legend of Zelda wiki ↗
- Bird's Peak Rock - Zelda Dungeon Wiki, a The Legend of Zelda wiki ↗
Collecting the Eight Triforce Charts
This chapter covers the original North American GameCube Triforce Chart hunt, not the shard salvage that comes after it. Your goal is to leave with Triforce Charts 1 through 8, plus the separate Ghost Ship Chart from Diamond Steppe Island so the Ghost Ship can be boarded for Triforce Chart 4. Any order can work once the late-game item set is complete, but the route below keeps the long cave runs grouped sensibly and leaves the Savage Labyrinth for last, close to home.
Prepare for a chart-only sweep
Do not start this leg until the late-game access tools are ready. You need Bombs, the Hero's Bow, the Grappling Hook, the Deku Leaf, the Skull Hammer, the Hookshot, and the Power Bracelets. You also need the Cabana Deed for Private Oasis and at least one Hyoi Pear for Bird's Peak Rock. Carry a spare pear if possible so one failed seagull flight does not force a shopping stop.
Treat this chapter as collection only. Ignore unrelated salvage rings and do not pay Tingle yet. If a combat cave leaves you low on arrows, bombs, or hearts, restock before the next gauntlet. The chart sources save time more cleanly when you tackle them with a full stock rather than trying to limp through several in a row.
- Bombs, Bow, Grappling Hook, Deku Leaf, Skull Hammer, Hookshot, and Power Bracelets are in your inventory
- Cabana Deed is already obtained
- You have Hyoi Pears, healing, and a reasonable arrow stock
Open the sweep with Islet of Steel and the gold warship near Needle Rock Isle
Start with Islet of Steel for Triforce Chart 1. Enemy warships circle the area, and one blocks the water entrance into the structure. Use the King of Red Lions' cannon to sink the blocker first. If the side ships are pressuring you, widen your turn, destroy them, and then line up on the entrance instead of trading shots in place. Once the opening is clear, sail into the islet, dock inside, climb up, stand on the wind crest, and play Wind's Requiem to reveal the chest.
Then head toward Needle Rock Isle for Triforce Chart 5. The chart is not inside the island. Look for the small fleet near the island and identify the gold warship among the normal cannon boats. Sink the gold ship with your own cannon. A salvage ring appears where it went down, so stop directly over the glowing spot and use the Grappling Hook to pull up the reward. If you miss the first pull, slow down and realign from straight above the ring instead of drifting around while the remaining boats keep firing.
- Triforce Chart 1 collected from Islet of Steel
- Gold warship near Needle Rock Isle destroyed
- Triforce Chart 5 salvaged from the sea
Use the Cabana Deed and clear the Private Oasis basement correctly
Go to Private Oasis for Triforce Chart 2. Show the Cabana Deed at the front door, enter the cabana, and look up at the hanging switch above the fireplace. Use the Grappling Hook on it to put out the fire, then drop through the opening behind the fireplace into the basement maze.
From the basement entrance, walk straight ahead and take the first right. At the next fork, take the right path again and drop into the hole there. Crawl into the tunnel on the right side and follow the crawlspace in this order: left, right, straight, then right. Climb the ladder when you emerge and hammer both wooden pegs in that room with the Skull Hammer.
Now drop through the remaining hole in that room and return through the other tunnel path rather than trying to force the newly opened gate immediately. Follow the crawlspace to the next ladder and climb up into the second peg room. Hammer the peg here as well, but do not go through that gate yet. Work back toward the entrance-side corridor, turn into the right-hand hall, take the first left after the already-smashed peg area, and drop through the hole that does not have a ladder. That drop puts you in the room with two ReDeads.
Defeat the ReDeads before they pin you in the narrow space. Break the pots along the wall to uncover the hidden crawlspace, crawl through it, and climb the last ladder. In the reward room, stand on the wind crest and play Wind's Requiem to make the chest appear, then open it for Triforce Chart 2. Hammer the nearby peg before leaving so your way out is straightforward.
- Fireplace passage opened with the Grappling Hook
- Both early peg rooms cleared with the Skull Hammer
- Two-ReDead room reached and cleared
- Triforce Chart 2 collected from Private Oasis
Solve Bird's Peak Rock, then earn the Ghost Ship Chart at Diamond Steppe Island
Sail to Bird's Peak Rock for Triforce Chart 3. Land on the main island, clear any nearby Kargarocs that will immediately harass your setup, and use a Hyoi Pear. Take control of the seagull and hit every switch on the surrounding spires in one flight. Stay wide around active Kargarocs when possible, and if the bird gets struck down, simply land, use another pear, and restart cleanly. Once all switches are triggered, the metal gate on the main island opens. Enter the cave and play Wind's Requiem on the crest to reveal the chest with Triforce Chart 3.
Next go to Diamond Steppe Island for the Ghost Ship Chart. Use the Hookshot to climb the stepped ledges all the way up, and avoid falling into the water because the current pushes you back to the bottom. Inside the cave, jump into the only warp pot in the first clearing. In the next area, ignore the nearby wrong choices and move around the wooden barrier to the pot guarded by the Floormaster. Remove the cover from that pot and enter it. It sends you to a wrecked ship deck.
Open the small chest there if you want the extra reward, then drop through the gap in the ship's railing to the clearing below and enter the pot directly under that opening. In the next room, take the pot that sits behind and to the left of the Floormaster. The final destination contains the chest with the Ghost Ship Chart. Do not improvise once you are inside this cave. One wrong pot sends you back and wastes the climb.
- Triforce Chart 3 collected at Bird's Peak Rock
- Diamond Steppe Island climbed with the Hookshot
- Correct warp-pot path followed through the cave
- Ghost Ship Chart obtained
Use the Ghost Ship Chart at night and claim Triforce Chart 4
The Ghost Ship Chart is a setup item, not one of the eight Triforce Charts. Wait for night, open that chart, and check which island is currently marked. Sail to the marked island's waters and look for the ship surrounded by blue flame. Before you own the chart, the ship vanishes when you get close. Now it stays solid, and you can board it by sailing straight into it.
Inside, clear every enemy so the ladder drops. Take out the Wizzrobe quickly so it does not drag the fight out by summoning help. Use the light in the room with your Mirror Shield to deal with the undead threats safely instead of brawling in the dark. When the room is clear, climb the ladder and open the chest for Triforce Chart 4. That finishes the Ghost Ship requirement for the GameCube story route.
- Ghost Ship location checked at night on the Ghost Ship Chart
- Ghost Ship boarded successfully
- Triforce Chart 4 collected from the chest inside
Clear the two combat caves at Stone Watcher Island and Overlook Island
Go to Stone Watcher Island for Triforce Chart 7. Lift the giant stone head with the Power Bracelets and drop into the cave. The structure is simple once you read it correctly: four side rooms must be cleared before the center room spawns the final armored fight. You can do the four outer rooms in any order, but a steady loop keeps you from losing track. Save arrows for the Wizzrobe room so they cannot scatter the battle. After the center Darknut fight opens the last door, enter the reward room, stand on the wind crest, and conduct Wind's Requiem for the chest.
Then travel to Overlook Island for Triforce Chart 8. Use the Hookshot to pull from palm tree to palm tree until you reach the secret cave near the top. This cave uses the same structure as Stone Watcher but with tougher enemies, including a heavier final Darknut battle. Move carefully, isolate targets, and do not mash attacks into groups of armored foes. Once all side rooms and the center room are cleared, head through the unlocked door, play Wind's Requiem on the crest, and claim Triforce Chart 8.
- Stone Watcher Island cave cleared
- Triforce Chart 7 collected
- Overlook Island cave reached with the Hookshot
- Triforce Chart 8 collected
Finish at Outset Island in the Savage Labyrinth
Leave the Savage Labyrinth for last so a failed deep run does not interrupt the rest of the chart sweep. Return to Outset Island and go behind Grandma's house. Hookshot to the high ledge by the tree, lift the stone head with the Power Bracelets, and enter the labyrinth. Restock before dropping in. This is an endurance gauntlet, not a quick puzzle cave.
You only need floor 30 for Triforce Chart 6. The lower floors are manageable if you stay patient and avoid wasting bombs and arrows on weak targets. Use the rest floors to heal and settle yourself instead of charging ahead. When you reach floor 30, stand on the wind crest and play Wind's Requiem to reveal the chest containing Triforce Chart 6. At that point, the mandatory chart hunt is done. Floors 31 through 50 are optional for story completion, so leave whenever you are ready rather than risking a long unnecessary loss.
- Savage Labyrinth entered from the ledge behind Grandma's house
- Reached floor 30
- Triforce Chart 6 collected
- All eight Triforce Charts and the Ghost Ship Chart are now in your inventory
Before you move on
- You have Triforce Charts 1 through 8 for the original North American GameCube release.
- You also have the Ghost Ship Chart from Diamond Steppe Island.
- You cleared the required chart sources at Islet of Steel, Private Oasis, Bird's Peak Rock, the Ghost Ship, the gold warship near Needle Rock Isle, Stone Watcher Island, Overlook Island, and floor 30 of the Savage Labyrinth.
- You are ready for the next chapter, which is paying Tingle to decipher the charts and salvaging the eight Triforce Shards.
References for this chapter
- Nintendo GameCube and Game Boy Advance Manuals | Nintendo Support ↗
- The Legend of Zelda: The Wind Waker/Triforce of Courage — StrategyWiki ↗
- The Wind Waker Walkthrough - The Triforce - Zelda Dungeon ↗
- The Legend of Zelda: The Wind Waker - Guide and Walkthrough - GameCube - By lighterfluid6 - GameFAQs ↗
- The Legend of Zelda: The Wind Waker - Guide and Walkthrough - GameCube - By Zyre | GameFAQs ↗
Deciphering Charts and Salvaging the Eight Triforce Shards
This is one of the biggest version-specific stretches in the North American GameCube release. Unlike the later HD version, you are still working through all eight Triforce Charts here. Each one must be deciphered by Tingle before it becomes useful, and the full bill is 3184 rupees. Once the charts are readable, each shard is recovered as sea treasure in the marked square near its destination island. Treat this chapter as a focused salvage route, not a sightseeing detour. Translate every chart, clear local threats before lowering the line, and leave as soon as each shard is aboard so the Triforce of Courage can reform and open the way back to Hyrule.
Translate every chart before you start the sea loop
Go to Tingle Island with all eight Triforce Charts in hand. Climb the tower and speak to Tingle. In this GameCube version he charges 398 rupees for each chart, so the full cost is 3184 rupees. If your wallet cannot hold enough to pay for all eight at once, do not wait for one giant cash pile. Pay for as many translations as you can, leave to refill, and come back until the whole set is done.
This is not the moment for optional shopping. Bomb refills, bait, and emergency potion space are fine if you truly need them, but chart deciphering is the required expense. The easiest money habit here is to spend rupees on translation the moment you have enough instead of sailing around with a full wallet. Once the set is readable, you can run the shard route cleanly instead of interrupting it with repeated trips back to Tingle.
- All 8 Triforce Charts are in your inventory
- Tingle has deciphered every chart
- You are treating 3184 rupees as the chapter's mandatory cost before optional spending
Use the boat and chart together instead of guessing
Each deciphered Triforce Chart works like a treasure map for one sea square. Enter the correct square, open the matching chart, and line the King of Red Lions up over the marked spot before dropping the Grappling Hook. Make very small steering corrections. Wide circles are what usually cause missed pulls and wasted time.
Do not lower the line while enemies are still landing hits on the boat. In calm squares you can salvage immediately, but in hostile squares it is faster to remove the threat first and then make one accurate pull. If you miss, raise the line, check the chart again, and nudge the boat a little at a time rather than drifting across the whole square.
- You are opening the matching deciphered chart in each destination square
- You are using short steering adjustments instead of broad turns
- You are clearing active threats before starting a pull in dangerous squares
Recover the first four shards: Greatfish Isle, Gale Isle, Stone Watcher Island, and Outset Island
Start with the straightforward pulls if you want momentum. Triforce Chart 1 leads to Greatfish Isle. Sail into that square, center yourself over the mark, and raise the shard. Triforce Chart 2 leads to Gale Isle and is handled the same way once you are positioned properly.
Triforce Chart 3 leads to Stone Watcher Island. Slow down before you commit here, because nearby cannon boats can interrupt the pull. Sink them first, then salvage in peace. Triforce Chart 4 leads to Outset Island. This is another standard recovery, so line up carefully, raise the shard, and move on instead of drifting into optional treasure hunting.
- Greatfish Isle shard recovered
- Gale Isle shard recovered
- Cannon boats removed before salvaging at Stone Watcher Island
- Outset Island shard recovered
Recover the next two shards: Cliff Plateau Isles and Southern Triangle Island
Triforce Chart 5 marks the shard near Cliff Plateau Isles. This is mainly a clean positioning check. Use the chart, make fine adjustments, and pull the chest up without lingering. The point of this route is progress, not extra chart cleanup.
Triforce Chart 6 marks the shard near Southern Triangle Island. This square is more annoying because Seahats can crowd the boat and knock you off rhythm. Cut them down with the Boomerang before dropping the line. Once the area is under control, settle the boat over the mark and bring the shard up in one go.
- Cliff Plateau Isles shard recovered
- Seahats cleared at Southern Triangle Island before salvage
- Southern Triangle Island shard recovered
Finish the set at Seven-Star Isles and Two-Eye Reef
Triforce Chart 7 sends you to Seven-Star Isles. Do not treat this as only an air threat. Kargarocs and cannon boats can both get in the way, so clear the square first. After that, line up on the chart mark and recover the shard without fighting the camera, the wind, and the enemies all at once.
Triforce Chart 8 leads to Two-Eye Reef. Save this for last and clear it deliberately. Because the salvage point is inside the reef area, you do not want wall cannons or enemy boats peppering you while the line is down. Blast the defenses, remove anything still close enough to interfere, then steer into place and raise the final shard.
- Seven-Star Isles enemies cleared before salvage
- Seven-Star Isles shard recovered
- Two-Eye Reef defenses and nearby threats cleared
- Final shard recovered at Two-Eye Reef
Confirm the Triforce of Courage and head back to the Hyrule entrance
After the eighth shard is recovered, the Triforce of Courage assembles automatically. That is your sign that the mandatory salvage hunt is over. There is no extra shard-processing step and no reason to keep delaying the story with optional treasure unless you want supplies.
Your next story destination is the Tower of the Gods portal area, the handoff point back to submerged Hyrule. Warp there with Ballad of Gales if you have been using it, or sail there directly. Before you descend, top off healing if needed and make sure bombs, arrows, and magic are not running low, because the game now turns from open-sea cleanup into the endgame assault.
- All 8 Triforce Shards are in hand
- The Triforce of Courage has assembled
- You have returned to the Tower of the Gods portal area ready for the endgame
Before you move on
- Tingle has deciphered all eight Triforce Charts.
- You have salvaged shards near Greatfish Isle, Gale Isle, Stone Watcher Island, Outset Island, Cliff Plateau Isles, Southern Triangle Island, Seven-Star Isles, and Two-Eye Reef.
- The Triforce of Courage assembled automatically after the eighth recovery.
- You are back at the Tower of the Gods portal area and ready to descend to Hyrule for the final story sequence.
References for this chapter
- Nintendo GameCube and Game Boy Advance Manuals | Nintendo Support ↗
- The Wind Waker Walkthrough - The Triforce - Zelda Dungeon ↗
- The Legend of Zelda: The Wind Waker - Guide and Walkthrough - GameCube - By DarthMarth - GameFAQs ↗
- The Legend of Zelda: The Wind Waker - Triforce Chart Guide - GameCube - By nazguldragon15 - GameFAQs ↗
Return to Hyrule and Ganon's Tower Trials
With the Triforce of Courage restored, the last story push begins under the sea in Hyrule. This chapter covers the Zelda handoff in Hyrule Castle, the approach to Ganon's Tower, the four mandatory dungeon-themed trial wings, the candle-order switch puzzle, the Phantom Ganon maze, the Light Arrows, and the final stairway battle that unlocks the last doors before the end bosses.
Return beneath the sea and clear Hyrule Castle's final interruption
Sail to the Tower of the Gods sector and enter the portal back to Hyrule after collecting all eight Triforce Shards. Go into Hyrule Castle and head for the basement chamber where Zelda is being kept. You are not here for a long puzzle sequence. As soon as Link closes in, the scene turns against you and Zelda is taken away.
Two Mighty Darknuts drop into the room and trap you inside a ring of fire. Defeat both to regain control of the chamber. Fight them the same way you handled other Darknuts, but respect the extra durability and the cape protection on their backs. If you get flustered, keep your shield up, wait for clean parry chances, and avoid getting stuck between both enemies at once inside the small arena.
Once the room is safe, go back up and let the story pull you toward the rear exit of the castle. Outside, cross the bridge until you reach the purple barrier that had sealed Hyrule earlier. Strike it with the restored Master Sword to shatter it, then follow the only path forward toward Ganon's Tower. The road is straightforward, but there are enough enemies here that you should not throw away health before the tower even starts. Clear what blocks your movement, then use the Hookshot across the broken bridge to reach the tower entrance.
- Return to Hyrule only after the full Triforce of Courage is assembled.
- Defeat the two Mighty Darknuts in the castle basement to complete the Zelda handoff.
- Break the outer barrier with the Master Sword and reach Ganon's Tower by following the path and Hookshot gaps.
Break the tower's first seal through the four mandatory trial wings
Inside Ganon's Tower, enter the main circular chamber and face the giant sealed door ahead. This lock does not open until you clear all four side wings. Each wing is a compact test built around one of the major dungeons you already finished, and each ends with a required boss rematch. You may do them in any order, but none of them is optional.
The Dragon Roost Cavern wing is about lava movement and Grappling Hook traversal before Gohma. The Forbidden Woods wing uses Deku Leaf movement and platform control before Kalle Demos. The Earth Temple wing brings back coffins, undead pressure, light use, and switch handling before Jalhalla. The Wind Temple wing checks Iron Boots launches, Deku Leaf drifting, Hookshot movement, and a short setup before Molgera. These are not full dungeon repeats, so stay focused on the main mechanic each room is recalling instead of searching for side treasure or overthinking the route.
After each boss win, you are sent back to the central chamber and one mark on the sealed door is restored. Keep going until all four are lit and the middle path opens. On the stairs leading upward, ignore the temptation to stop for every Miniblin. They exist to chip you down and waste time. Knock them aside if they block you, but save your attention for the more important fights still ahead.
- Clear all four trial wings and their boss rematches.
- Use the same core boss methods that worked in the original dungeons.
- Wait for all four symbols on the central seal before moving upstairs.
Use the candle clue, unlock the retreat portal, and enter the maze
On the next floor, enter the right-hand room first. This room exists to show you the solution. Watch the order of the lit candles carefully and memorize it. The count and sequence matter. Do not try to solve anything in this room.
Leave and enter the opposite room. Here you will find the switches that match the clue. Use the Boomerang to lock onto the switches in the same order shown by the candles. If you fire them in the wrong order, you only waste time and have to reset your own attempt. When you get it right, a portal opens that leads back out above the sea, giving you a clean retreat route for restocking before the tower's harsher interior stretch.
If your bottles are empty, your health is weak, or your magic support is poor, this is the best moment to leave and fix it. If you are ready, go back to the candle room and jump down into the pit. That drop is the intended route into the Phantom Ganon maze, not a trap.
- Read the candle order in the right-hand room first.
- Repeat that order with the Boomerang switches in the other room.
- Use the portal to restock only if your supplies are not stable for a long final climb.
Follow Phantom Ganon correctly and claim the Light Arrows
The maze below is built to confuse players who rush. After each Phantom Ganon fight, he leaves a sword on the floor. Let it settle and read the hilt. The hilt points toward the correct door. That is the rule that gets you through. If you guess or pick random doors, you loop back through the maze and spend extra health, time, and patience.
Phantom Ganon is more dangerous here than in the Forsaken Fortress, but the fight is still manageable if you stay patient. Reflect his normal energy attack back with the Master Sword until he is knocked down. If he creates a ring of copies, avoid the swing or identify the real one instead of slashing wildly. When he falls, finish the opening cleanly, then stop moving long enough to read the sword direction before touching any door.
Continue until you reach the differently colored final room of the maze. Beat Phantom Ganon there and open the chest for the Light Arrows. Equip them right away, but do not start treating them like free damage. They consume magic, and you are entering the stretch where both Light Arrows and good magic discipline matter.
- After every Phantom Ganon win, follow the door indicated by the fallen sword's hilt.
- Use controlled reflections and punishes instead of reckless chasing.
- Open the final maze chest and equip the Light Arrows immediately.
Break the upper barrier and defeat the six guards on the stairway
Go through the exit door from the Light Arrow room and you will return to the upper chamber. Phantom Ganon appears one last time here. This time, the fight ends instantly if you lock on and hit him with a single Light Arrow. Pick up the sword he drops and use it on the marked brick barrier to open the only path forward.
Beyond that wall is the tower's last long stairway before the boss chapter. This is where you must control the pace of the fight. The required guard lineup is three Moblins, one Darknut, and two Mighty Darknuts spread across the climb. They do not all attack in one clump immediately, so use the landings to separate threats when you can. Moblins are the easiest targets to remove quickly. The Darknut and especially the two Mighty Darknuts are the real danger if you rush uphill and let armored enemies trap you in close quarters.
You can conserve Light Arrow magic by using normal sword-and-shield play on openings you trust, then spending Light Arrows only when a fast cleanup is clearly worth the magic. Break jars on the landings for recovery, and remember that the room back by the broken brick wall is still a useful fallback if the climb turns messy. Most importantly, do not expect the final double doors to open early. They unlock only after all six enemies on the stairway are defeated.
- Destroy the last Phantom Ganon with one Light Arrow and break the brick barrier with his sword.
- Fight through the real stairway lineup: three Moblins, one Darknut, and two Mighty Darknuts.
- Defeat all six guards before expecting the final double doors to open.
Stop at the last doors and prepare for the final battles
Once the stairway is clear and the double doors unlock, do not rush through them on momentum alone. This is the true handoff into the final battle sequence. On the other side, the game moves directly into the closing boss chain, so this is your last comfortable pause point.
Check your health, bottles, and magic before opening the doors. If you burned too many Light Arrows, refill now from jars or retreat through the tower's available exit route instead of gambling on a thin resource pool. A fairy, healing potion, and enough magic for repeated Light Arrow use will make the next chapter much steadier than trying to scrape through on fumes.
- Reach the final double doors with health recovery ready.
- Keep a safe reserve of magic for immediate Light Arrow use in the next chapter.
- Treat this doorway as the last preparation point before the end bosses.
Before you move on
- The Hyrule Castle return scene has played, Zelda has been taken, and the two Mighty Darknuts in the basement have been defeated.
- The path from Hyrule Castle to Ganon's Tower has been opened by breaking the barrier with the restored Master Sword.
- All four mandatory trial wings and boss rematches inside Ganon's Tower are complete, and the central seal has been broken.
- The Light Arrows are in your inventory, Phantom Ganon has been removed from the upper chamber with one of them, and the brick barrier beyond him has been broken.
- The stairway battle against three Moblins, one Darknut, and two Mighty Darknuts is finished, and the final double doors are unlocked for the last boss chapter.
References for this chapter
- Nintendo GameCube and Game Boy Advance Manuals | Nintendo Support ↗
- The Wind Waker Walkthrough - Ganon's Tower - Zelda Dungeon ↗
- Ganon's Tower - Legend of Zelda Wind Waker Walkthrough ↗
- The Legend of Zelda: The Wind Waker - Guide and Walkthrough - GameCube - By CyricZ - GameFAQs ↗
- The Legend of Zelda: The Wind Waker - Guide and Walkthrough - GameCube - By lighterfluid6 - GameFAQs ↗
- The Legend of Zelda: The Wind Waker - Guide and Walkthrough - GameCube - By nintendo_girl21 - GameFAQs ↗
Puppet Ganon, Ganondorf, and the Ending
Finish Ganon's Tower by clearing all three Puppet Ganon forms, climbing the final interior shaft, and winning the rooftop duel with Ganondorf. In the North American GameCube release, Puppet Ganon always falls to Light Arrows on the blue orb at the end of its tail, while Ganondorf himself must be opened up with parries and the final Mirror Shield setup with Zelda.
Prepare at the last doorway
Before entering the boss room, put the Hero's Bow with Light Arrows on an easy slot and keep the Boomerang ready as your second fast swap. Puppet Ganon's weak point is the blue orb on its tail in every phase, and the first form specifically asks you to manage its strings with the Boomerang before taking clean Light Arrow shots.
Do not waste magic on panic shots. If your magic is nearly empty, refill before committing, because the entire Puppet Ganon fight depends on repeated Light Arrow hits. The room also contains minor enemies during some phases, and those can drop supplies if you need a little recovery during the battle.
- Equip Light Arrows on the bow.
- Keep the Boomerang ready for fast swapping.
- Enter with enough magic to fire repeated Light Arrows.
Puppet Ganon first form
The first form hangs from the ceiling like a huge puppet and swings its arms to cover the center of the room. Stay mobile and work from an angle instead of lingering directly in front of its body. Your goal is to cut the blue cords with the Boomerang, especially the cord controlling the tail, while ignoring the central red support cord that cannot be severed.
Once the tail is hanging still enough to read clearly, line up a Light Arrow on the blue orb at the end of it. If you take too long, the puppet can be lifted to repair itself, so treat each opening as a short cycle: cut cords, fire one clean Light Arrow, then reset your position instead of trying to force extra damage. Repeat until the first form breaks.
- Cut blue cords with the Boomerang.
- Ignore the red center cord.
- Fire at the blue tail orb with Light Arrows.
Puppet Ganon second form
The second form becomes a spider that rises to the ceiling, spins, and drops toward you. The easiest read is not straight overhead. Use the shallow water on the floor as a mirror so you can track where the body is descending and where the tail will settle when the spin stops.
Move out from directly under the body before you aim. When the drop path becomes clear, loose one Light Arrow into the tail orb. There is no benefit to rushing shots here; the safe pattern is watch the reflection, sidestep, shoot once, then clear space for the next drop. Repeat until the spider form is gone.
- Watch the floor reflection, not just the ceiling.
- Step aside before aiming upward.
- Take single accurate shots at the tail orb.
Puppet Ganon third form
The last form is a fast snake that whips around the room and becomes the most chaotic part of the fight. If the floor feels too cramped, use the Hookshot to reach the wooden platforms around the outer wall. That higher position gives you more room to watch the tail line and avoids getting trapped in the snake's path.
Keep your eyes on the tail, not the head. Fire when the snake straightens, rebounds, or circles tightly enough for the orb to cross your line. If you need a brief opening, a hit to the head can stun it for a moment, but that is only a helper tactic. The reliable win condition is still repeated Light Arrow hits to the blue orb on the tail.
- Use outer platforms if the floor is too dangerous.
- Aim for the tail orb, not the head.
- Treat head stuns as backup, not the main plan.
Climb to the rooftop and refill
After Puppet Ganon falls, stand on the center platform and jump to the red rope it leaves behind. Climb upward, then use the Grappling Hook on the beams above to continue from ledge to ledge. Near the top you can find supplies, and you should smash the jars for health and magic before advancing.
Keep climbing until you can Hookshot to the upper doorway. This is the handoff into the final duel, so enter with the Master Sword ready and your health stabilized. If your bow magic is low, refill now rather than hoping the rooftop battle gives you time to recover.
- Jump to the red rope from the center platform.
- Use the Grappling Hook to climb the shaft.
- Break jars and refill before the final doorway.
Ganondorf first and second phases
On the rooftop, direct sword pressure does not work. Ganondorf blocks normal attacks, so play patiently and let him attack first. Back away far enough to see his full combo, then use the parry on the late hit that actually opens him up. When the parry connects, rush in with the Master Sword for your damage before retreating again.
Zelda supports you with Light Arrows during this part of the fight, and her hits can also create openings, but do not stand still waiting for her to solve the phase. Keep Ganondorf occupied, survive his pressure, and keep taking your parry punishments. After Zelda lands enough support shots, Ganondorf knocks her aside and the duel continues in a more dangerous version of the same timing test. Stay disciplined and keep relying on clean parries instead of random swings.
- Do not mash normal sword attacks.
- Parry late in Ganondorf's combo.
- Capitalize quickly, then reset your spacing.
Final phase and ending check
When Zelda recovers, talk to her positionally by giving her a shooting lane. Ganondorf starts shutting down ordinary openings, so the finish changes. Keep him lined up between you and Zelda, raise the Mirror Shield, and hold your ground long enough for Zelda's Light Arrow to hit the shield and reflect into Ganondorf. When the reflected shot stuns him, run forward immediately and trigger the final blow prompt.
That finishing strike ends the battle. After Ganondorf falls, watch through the collapse, farewell scenes, surfacing sequence, and credits. For this guide's completion goal, the story route is complete once Ganondorf has been defeated and the ending scenes and credits have fully played.
- Keep Ganondorf between Link and Zelda.
- Reflect Zelda's Light Arrow with the Mirror Shield.
- Take the final blow as soon as Ganondorf is stunned.
- Watch the ending scenes and credits to confirm completion.
Before you move on
- Puppet Ganon has been defeated in all three forms by striking the blue tail orb with Light Arrows.
- You climbed the interior shaft after Puppet Ganon and reached the rooftop confrontation.
- Ganondorf was defeated by parry-based pressure followed by the final Mirror Shield and Zelda Light Arrow setup into the finishing blow.
- The ending cutscenes and credits played, confirming story completion for the North American GameCube route.
References for this chapter
- Nintendo GameCube and Game Boy Advance Manuals | Nintendo Support ↗
- The Legend of Zelda: The Wind Waker/Ganon's Tower — StrategyWiki ↗
- Puppet Ganon - Zelda Wiki ↗
- Chapter 25 - Final Boss - Zelda Universe ↗
- The Legend of Zelda: The Wind Waker - Guide and Walkthrough - GameCube - By KeyBlade999 - GameFAQs ↗
Finishing up
You should finish Dragon Roost Cavern, Forbidden Woods, Tower of the Gods, Earth Temple, and Wind Temple before the final assault.
You should have the fully restored Master Sword, the Hero's Bow upgrades needed for Fire and Ice Arrows and Light Arrows, and the dungeon tools required to solve the late-game tower.
You should collect all eight Triforce Shards in this version, not just the charts.
If the Triforce of Courage is not assembled, you are not ready for the final sequence.
You should return to Hyrule after the Triforce quest, complete the Zelda revelation sequence, and enter Ganon's Tower with Light Arrows in hand.
A story clear means you defeat both Puppet Ganon and Ganondorf and watch the full ending.
Optional cleanup such as heart pieces, the Nintendo Gallery, and Savage Labyrinth rewards can be left for before that final point of no return.
If you want a stronger-than-required finish, pick up late Great Fairy upgrades, extra bottles, and a healthy stock of arrows and magic before committing to Ganon's Tower.
Choose your next gameScreenshots & video
Game imagery for reference. Follow the written chapters above for the route and strategies.
Sources & references
Our original guide draws on the references below. Check the edition at the top of this page before following controls or unlock requirements.
- Nintendo GameCube and Game Boy Advance Manuals | Nintendo Support ↗
- The Wind Waker Walkthrough - Outset Island - Zelda Dungeon ↗
- Chapter 1: Outset Island - Zelda Universe ↗
- The Legend of Zelda: The Wind Waker Walkthrough - GameSpot ↗
- Chapter 2: The Pirate's Ship - Zelda Universe ↗
- The Legend of Zelda: The Wind Waker - Guide and Walkthrough - GameCube - By Masamune2-0 - GameFAQs ↗
- The Wind Waker Walkthrough - Forsaken Fortress - Zelda Dungeon ↗
- The Legend of Zelda: The Wind Waker - Guide and Walkthrough - GameCube - By CyricZ - GameFAQs ↗
- Dragon Roost Cavern (F2) — The Legend of Zelda: The Wind Waker eGuide | Prima Games eGuides ↗
- Bait Bag - Zelda Dungeon Wiki, a The Legend of Zelda wiki ↗
- The Wind Waker Walkthrough - Dragon Roost Cavern - Zelda Dungeon ↗
- Dragon Roost Island - Zelda Dungeon Wiki, a The Legend of Zelda wiki ↗
- The Legend of Zelda: The Wind Waker/Dragon Roost Cavern — StrategyWiki | Strategy guide and game reference wiki ↗
- The Legend of Zelda: The Wind Waker/Pirate Ship — StrategyWiki | Strategy guide and game reference wiki ↗
- The Wind Waker Walkthrough - Forest Haven - Zelda Dungeon ↗
- The Legend of Zelda: The Wind Waker/Forest Haven — StrategyWiki | Strategy guide and game reference wiki ↗
- The Legend of Zelda: The Wind Waker/Forbidden Woods — StrategyWiki | Strategy guide and game reference wiki ↗
- Forbidden Woods - Zelda Dungeon Wiki, a The Legend of Zelda wiki ↗
- Chapter 8: Locating Jabun - Zelda Universe ↗
- The Wind Waker Walkthrough - Nayru's Pearl - Zelda Dungeon ↗
- The Wind Waker Walkthrough - Tower of the Gods - Zelda Dungeon ↗
- Command Melody - Zelda Wiki ↗
- NINTENDO THE LEGEND OF ZELDA: THE WIND WAKER USER MANUAL Pdf Download | ManualsLib ↗
- Forsaken Fortress - Zelda Wiki ↗
- Forsaken Fortress - Zelda Dungeon Wiki, a The Legend of Zelda wiki ↗
- The Legend of Zelda: The Wind Waker - Guide and Walkthrough - GameCube - By BakonBitz - GameFAQs ↗
- Ballad of Gales - Zelda Dungeon Wiki, a The Legend of Zelda wiki ↗
- Mother and Child Isles - Zelda Dungeon Wiki, a The Legend of Zelda wiki ↗
- Ice Ring Isle - Zelda Dungeon Wiki, a The Legend of Zelda wiki ↗
- The Legend of Zelda: The Wind Waker - 100% Item Walkthrough - GameCube - By Lando_Kashmir - GameFAQs ↗
- The Wind Waker Walkthrough - Earth Temple - Zelda Dungeon ↗
- Earth God's Lyric - Zelda Wiki ↗
- The Legend of Zelda: The Wind Waker/Earth Temple — StrategyWiki ↗
- The Legend of Zelda: The Wind Waker - Guide and Walkthrough - GameCube - By Mr_Jason - GameFAQs ↗
- Earth Temple - Zelda Wiki ↗
- The Wind Waker Walkthrough - Wind Temple - Zelda Dungeon ↗
- Gale Isle - Zelda Dungeon Wiki, a The Legend of Zelda wiki ↗
- Forest Haven - Zelda Dungeon Wiki, a The Legend of Zelda wiki ↗
- Makar - Zelda Dungeon Wiki, a The Legend of Zelda wiki ↗
- Wind Temple (The Wind Waker) - Zelda Dungeon Wiki, a The Legend of Zelda wiki ↗
- The Legend of Zelda: The Wind Waker - Guide and Walkthrough - GameCube - By Myke - GameFAQs ↗
- The Legend of Zelda: The Wind Waker/Triforce of Courage — StrategyWiki ↗
- Wallet - Zelda Wiki ↗
- Jail - Zelda Wiki ↗
- IN-credible Chart - Zelda Dungeon Wiki, a The Legend of Zelda wiki ↗
- Fire & Ice Arrows - Zelda Dungeon Wiki, a The Legend of Zelda wiki ↗
- Cabana Deed - Zelda Dungeon Wiki, a The Legend of Zelda wiki ↗
- Bird's Peak Rock - Zelda Dungeon Wiki, a The Legend of Zelda wiki ↗
- The Wind Waker Walkthrough - The Triforce - Zelda Dungeon ↗
- The Legend of Zelda: The Wind Waker - Guide and Walkthrough - GameCube - By lighterfluid6 - GameFAQs ↗
- The Legend of Zelda: The Wind Waker - Guide and Walkthrough - GameCube - By Zyre | GameFAQs ↗
- The Legend of Zelda: The Wind Waker - Guide and Walkthrough - GameCube - By DarthMarth - GameFAQs ↗
- The Legend of Zelda: The Wind Waker - Triforce Chart Guide - GameCube - By nazguldragon15 - GameFAQs ↗
- The Wind Waker Walkthrough - Ganon's Tower - Zelda Dungeon ↗
- Ganon's Tower - Legend of Zelda Wind Waker Walkthrough ↗
- The Legend of Zelda: The Wind Waker - Guide and Walkthrough - GameCube - By nintendo_girl21 - GameFAQs ↗
- The Legend of Zelda: The Wind Waker/Ganon's Tower — StrategyWiki ↗
- Puppet Ganon - Zelda Wiki ↗
- Chapter 25 - Final Boss - Zelda Universe ↗
- The Legend of Zelda: The Wind Waker - Guide and Walkthrough - GameCube - By KeyBlade999 - GameFAQs ↗
About the game & collecting notes
- Platform
- Nintendo GameCube
A full campaign walkthrough for the North American Nintendo GameCube release of The Wind Waker, guiding you from Outset Island through the Triforce hunt, Ganon's Tower, and the ending. The structure separates required story progress from optional upgrades, flags original GameCube-specific steps such as Tingle chart deciphering, and keeps the route practical for a first-time player.
Darryl Polo
Darryl Polo loves tinkering with emulation and revisiting retro games. He enjoys exploring how old favorites play on different setups and sharing what he learns along the way. At Joking Joystick, he writes about the games, hardware, and small discoveries that keep the hobby fun.
Our editorial standardsFound a step that needs another look? Help us improve this guide.