The Legend of Zelda: Ocarina of Time Nintendo 64 Main Story Walkthrough
Follow the North American Nintendo 64 version of Ocarina of Time from Kokiri Forest to the ending without mixing in 3DS or Master Quest changes. This route focuses on required songs, dungeon items, age swaps, temple order, boss methods, and the few side trips that are effectively mandatory for smooth story completion.

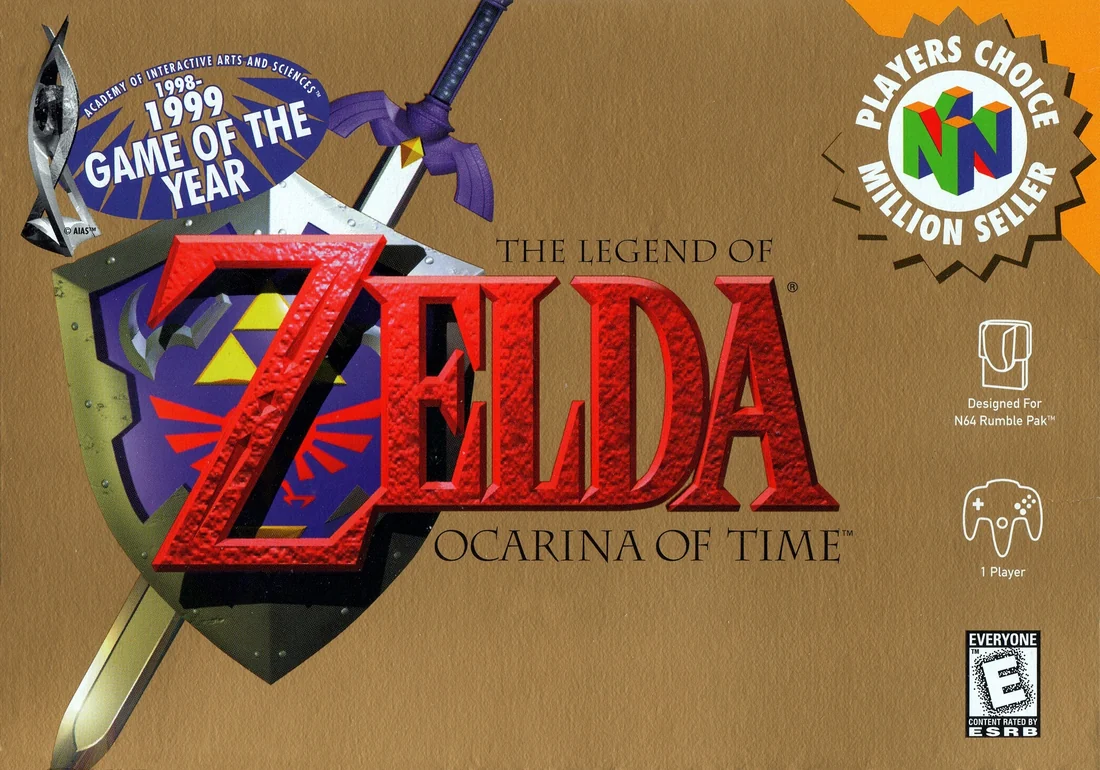
Find a copy
The Legend of Zelda: Ocarina of Time Nintendo 64
We may earn a commission if you buy through these links, at no extra cost to you. As an Amazon Associate I earn from qualifying purchases.
Opens retailer search results. Check the model, edition, seller, availability and current price before buying.
Before you begin
This route is built for the original Nintendo 64 version of Ocarina of Time, using the North American USA Rev B cartridge as the target edition.
You will go in main-story order from Link's first errands in Kokiri Forest to the final escape and last battle, with only the side trips that meaningfully support progression folded into the route.
If you get stuck, do not assume the answer is hidden in a random field.
First check which song or item you most recently earned, whether the Temple of Time age swap is now part of the puzzle, and whether your current dungeon item opens the obstacle directly in front of you.
Ocarina of Time often teaches the next step through songs, shortcuts, and revisiting a familiar place with new equipment.
Set yourself up for the run
Set Z Targeting to Switch if you are new to the game.
It makes circling enemies, aiming, and boss fights much easier to manage on Nintendo 64.
Learn the core combat rhythm early: lock on, keep your shield ready, and use jump attacks when you have a safe opening.
Many bosses are simpler when you stay locked on and wait for a clear punish window.
Keep a shield available before entering areas with Deku Scrubs, ranged enemies, or fire hazards.
If your Deku Shield burns, replace it before pushing deeper into child-era progression.
Use your bottles carefully.
One empty bottle is effectively required for the Zora storyline, and later bottles make fish, blue fire, fairies, and potions far easier to manage.
Save after major rewards such as songs, dungeon items, medallions, and age swaps.
The game rewards steady checkpoint habits more than marathon sessions.
When a dungeon changes its layout, especially the Water Temple, stop and note what changed before you move on.
A minute of orientation saves a long backtrack.
Do not ignore song cutscenes.
Zelda's Lullaby, Saria's Song, Song of Time, Song of Storms, and the warp songs are all progression tools, not flavor rewards.
Treat optional upgrades as support, not requirements.
Extra heart pieces, bigger quivers, wallet upgrades, and Biggoron's Sword help, but the route below keeps the main ending separate from full completion.
Kokiri Forest Opening and First Gear
This opening chapter covers the original Nintendo 64 North American quest, including the USA Rev B cartridge revision. Your only job here is to get the two items Mido demands, learn how Kokiri Forest teaches movement and navigation, and reach the Great Deku Tree with the right equipment ready for the first dungeon.
Wake up, leave the house, and read the village layout
After the opening scene, walk out of Link's house and climb down the ladder. You begin on a raised platform above the main part of Kokiri Forest, which makes this a safe place to learn how the game communicates routes. Ladders are for vertical movement, narrow openings in walls are crawlspaces, and short ramps or ledges usually connect back toward the center of the village.
Talk to Saria if you want the clearest early story nudge. She points your attention toward the Great Deku Tree, but you do not need to stop for every conversation in the village. The important thing right now is understanding the compact layout: the center clearing is your hub, the shop is nearby, the path to the Great Deku Tree is blocked by Mido, and the training area holds your first weapon.
Before moving on, get comfortable with the basic feel of movement. Climb back up a ledge if you want, hop down safely, and try Z Targeting on something harmless. Kokiri Forest is the game's first tutorial space even when nobody is spelling everything out, so use it to settle in before the first dungeon starts asking for quick reactions.
- Leave Link's house and reach the village floor.
- Use the center clearing as your main landmark.
- Identify the shop, the blocked Great Deku Tree path, and the training area route.
Check the Great Deku Tree path once so Mido states the requirement
Go to the path watched by Mido before you start collecting gear. This is the simplest way to confirm the game's first progression gate. Mido refuses to let you through until Link has a sword and shield, so there is no reason to waste time probing other exits or looking for some hidden event outside the village.
This moment teaches an important habit for the rest of the game. When a character blocks the way, listen for the exact condition. Here the answer is direct and local. You are not missing a song, a key, or a separate dungeon. Everything you need is already in Kokiri Forest.
Once you have seen the gate for yourself, turn around and handle the sword first. It is the faster of the two required pickups, and having it equipped makes the village feel more manageable while you gather rupees for the shield.
- Speak to or approach Mido at the blocked path.
- Confirm that the immediate goal is a sword and shield.
- Turn back toward the village instead of searching for another story route.
Take the Kokiri Sword from the training area maze
Head to the training area. This section is a small maze with fences, short ledges, and a hole in the wall that you must crawl through. It is a very deliberate lesson in reading the environment: if a path looks too low to walk through, it probably wants a crawl; if a ledge lines up with your route, it probably exists to guide you forward rather than to trick you.
Go through the crawlspace and continue into the hidden nook beyond it. Watch your corners and do not rush blindly around the bends. Open the chest at the far side to get the Kokiri Sword. This is your required child weapon for the opening of the game.
Pause and equip the sword right away. That keeps the route clean and prevents the easy mistake of grabbing the item but forgetting to place it on your active equipment. Then retrace your steps through the same crawlspace back to the main part of the forest. The return trip is short, and learning that quick route now will help you trust similar backtracks later in the game.
- Reach the training area.
- Use the crawlspace in the wall.
- Open the chest for the Kokiri Sword and equip it immediately.
Buy the Deku Shield with nearby village rupees
Your second required item is the Deku Shield from the Kokiri Shop, and it costs 40 Rupees. Stay in Kokiri Forest for this. The village already contains enough easy money to pay for the shield, so there is no need for a long grind or any trip outside the intended opening area.
Take the simple pickups the game places around you. Cut grass, lift rocks, and check obvious little hiding spots around the village. If you still need more, open the free chests inside Mido's house and sweep up any nearby rupees you passed while learning the layout. Treat this as a short cleanup pass, not as a side quest.
Once you have 40 Rupees, go straight to the Kokiri Shop and buy the Deku Shield. Equip it as soon as you leave the shop menu. The shield matters immediately because it satisfies Mido's requirement and prepares you for Deku Scrub projectile play in the dungeon ahead.
- Collect 40 Rupees from easy Kokiri Forest pickups.
- Buy the Deku Shield at the Kokiri Shop.
- Equip the Deku Shield before returning to Mido.
Use the village as a safe practice loop
With both items equipped, take one short loop through the village before advancing. Draw the sword, raise the shield, and use Z Targeting so Link faces what you want him to face. This is the right time to feel out the rhythm of locking on, circling, defending, and striking without pressure.
Pay attention to how Kokiri Forest keeps leading you back to readable landmarks. Raised platforms connect to ladders, open clearings help you reset your bearings, and obvious special terrain like crawlspaces or narrow bridges usually means there is a usable route rather than decoration. The game is teaching you how to read space before the first dungeon asks you to do it indoors and vertically.
Do not overstay here. The point is only to remove some clumsiness before real enemies and dungeon puzzles begin. Once the controls and layout feel clear enough, go back to the blocked path and continue the story.
- Practice locking on with Z Targeting.
- Test a few sword swings and shield raises.
- Recognize ladders, crawlspaces, and the central clearing as navigation cues.
Pass Mido and stop at the Great Deku Tree entrance
Return to Mido with both the Kokiri Sword and Deku Shield equipped. He moves aside and opens the route to the Great Deku Tree. Follow the path forward. The enemies here are simple, so do not turn this stretch into a detour. Clear anything directly in your way and keep moving.
When you reach the Great Deku Tree, speak to him and watch the story scene that explains why you were called. Afterward, his mouth opens and the first dungeon becomes available. This is the correct endpoint for the chapter because you now have the required gear, the first route gate is cleared, and the game is ready to shift from village tutorial to dungeon play.
If you want a clean break between chapters, stop on the threshold rather than pushing deeper immediately. Your next move from here is straightforward: enter Inside the Great Deku Tree and begin the first dungeon route.
- Return to Mido with sword and shield equipped.
- Follow the opened path to the Great Deku Tree.
- Trigger the entrance scene and stop at the dungeon doorway ready to go in.
Before you move on
- Link has the Kokiri Sword equipped.
- Link has the Deku Shield equipped.
- Mido has stepped aside and the path to the Great Deku Tree is open.
- The Great Deku Tree has opened the dungeon entrance, and Link is standing ready to begin it.
References for this chapter
Inside the Great Deku Tree and Queen Gohma
Treat the Great Deku Tree as a vertical lesson rather than a straight hallway. The main chamber is a hollow trunk with ledges wrapped around a central drop, so falling usually means climb back up and try again, not that you chose the wrong path. Your real goal is to go high first for the Fairy Slingshot, then use that item plus fire and a few intentional drops to reopen the lower floors from new angles. Once you reach the basement loop, the dungeon starts testing whether you noticed the difference between a dead end, a shortcut, and a planned one-way fall.
Climb the main chamber and collect the Fairy Slingshot first
Step inside and use the opening room as your mental map for the whole dungeon. The center is a tall wooden shaft with shallow water at the bottom, while doors and branches circle the outside on several levels. Kill the Deku Babas near the entrance so you have room to move and a chance at extra Deku Sticks or Deku Nuts if you need them.
Climb upward by ladder or vines and work around the trunk. Open the nearby chest on the way for the Dungeon Map, then go through the side door that leads away from the shaft. In the next room, stop the Deku Scrub by locking on, raising your shield, and bouncing its nut back at it. The scrub gives a hint, and the door ahead opens.
Cross the wobbling center platform quickly to reach the chest with the Fairy Slingshot. Equip it right away. Before you leave, shoot the hanging ladder above the entry door so it drops and creates a fast return path. This is the dungeon's first strong reminder that faraway targets can change the room itself, not just hit enemies.
- If you fall while crossing the wobbling platform, climb the vines and try again instead of restarting the route.
- Leave the Fairy Slingshot on a C button because several immediate progression checks depend on it.
- Knock down the ladder before returning to the main chamber.
Finish the upper loop and make the first big drop on purpose
Back in the trunk room, use the Slingshot to clear the Skullwalltulas from the vines you need to climb. Go up to the highest level and enter the side room there. Step on the floor switch to raise the temporary platforms, cross them for the Compass, then use the nearby torch and a Deku Stick to light the unlit torch across the room and open the barred door. This door returns you to the upper ring of the main chamber.
Kill the Big Skulltula blocking the narrow ledge by waiting for it to turn and striking its soft back. Once the path is clear, move to the giant web stretched across the middle of the trunk. This drop is deliberate. Fall onto the web from the upper ledge so it breaks and sends you down to the watery lower floor.
Do not worry if this seems risky. The dungeon wants you to think vertically. The whole point of the upper climb was to earn the Slingshot and then revisit the bottom from above.
- Shoot wall spiders before climbing the final vine so they do not knock you down.
- Use the torch room on the top level to learn that fire can open barred progress, not just hurt enemies.
- Break the center web only after you already have the Fairy Slingshot.
Use fire and the Slingshot to open the lower route
After landing in the basement pool, climb onto the dry platform with the switch and torch. Step on the switch, then light a Deku Stick from the torch. Carry that fire to the web-covered doorway on the side platform and burn it open. Go through and handle the Deku Scrub inside the same way as before by reflecting its shot. When it is stunned, listen to the hint, then use the Fairy Slingshot on the silver eye switch above the locked door to open the next room.
The next chamber has shallow water, an underwater switch, and a spiked log rolling overhead. Dive to hit the switch and lower the water long enough to use the moving platform to pass safely under the log. On the far side, kill the blocking Skulltula and continue into the torch room beyond.
In that room, light both unlit torches with a Deku Stick to open the next door. The following area leads toward the last crawlspace of the dungeon. Clear out the immediate threats, watch for Gohma Eggs overhead, and burn the web blocking the low opening. Crawl through it. This loops you back to the earlier water room, but now on a higher ledge.
Push the nearby block off the ledge before dropping down. That block becomes your shortcut back up. Once it is in place, light a Deku Stick from the torch below, climb back up using the block, and burn the web stretched over the floor hole above. Drop through. This is the correct one-way commitment to the boss approach.
- Burn web doors with a lit Deku Stick; sword swings will not open them.
- Use the eye switch room to confirm the Slingshot is now part of normal puzzle solving, not just combat.
- Push the block down before burning the upper floor web so you do not create unnecessary backtracking.
Solve the final scrub room and enter the boss chamber
At the bottom of the second web drop, you reach a room with three Deku Scrubs guarding the last door. This time the order matters. Count them from left to right and reflect their attacks in the order 2, 3, 1. In practical terms, hit the middle scrub first, then the right scrub, then the left scrub.
If you get the order wrong, reset your position and try again rather than wasting health chasing them. The room is small, so steady shield timing works better than rushing. After the correct sequence, the last scrub reveals the boss hint and the barred door opens.
Break pots or cut grass here if you need a little recovery, then go through the boss door. The fight starts when you look up and trigger the ceiling ambush.
- Use shield reflection, not wild sword swings, in the three-scrub room.
- Remember the sequence as middle, right, left if the numbered clue is easier to forget.
- Top off your health before the boss if you took extra hits in the basement.
Defeat Queen Gohma safely and leave the forest on the intended route
Queen Gohma is much easier if you keep your distance and wait for the eye instead of standing under her body. Lock on and watch for the eye to turn red. When it does, shoot it with the Fairy Slingshot to stun her and knock her down. Run in for a short sword combo on the eye, then back away before she recovers. A few controlled punish windows are safer than trying to stay glued to her.
If she climbs onto the ceiling, keep her in view. When the eye opens red again, shoot quickly to interrupt her before the room fills with larvae. If eggs do hatch, clear the small enemies first so you do not get boxed in while waiting for the next stun chance. Deku Nuts can help in a pinch, but the Slingshot is the normal, reliable answer in the original Nintendo 64 release.
When Queen Gohma falls, take the Heart Container and step into the blue warp. Outside, the Great Deku Tree gives you the Kokiri Emerald and sends you toward Hyrule Castle. After the scene, leave the clearing and head for Kokiri Forest's exit. Saria stops you before the village gate and gives you the Fairy Ocarina, and the path into Hyrule Field is now the active main route. Do not drift into side errands here. The next story destination is the castle.
- Wait for the red eye before firing the Slingshot.
- Take only a brief sword punish after each stun, then retreat.
- Collect the Heart Container, receive the Kokiri Emerald, and leave Kokiri Forest toward Hyrule Field.
Before you move on
- You obtained the Fairy Slingshot and used it on both room objects and eye-switch progression checks inside the dungeon.
- You cleared the basement route, solved the final Deku Scrub order puzzle, and defeated Queen Gohma.
- You collected the Heart Container, received the Kokiri Emerald outside, and left the dungeon sequence ready to head from Kokiri Forest into Hyrule Field.
Hyrule Castle, Princess Zelda, and Zelda's Lullaby
Leave Kokiri Forest and use this first trip across Hyrule Field to advance the main story, not to sample every side area. Your job here is to reach Market, find Malon at Hyrule Castle, get the Weird Egg, wake Talon, slip into the castle through the moat-side crawlspace, sneak through the courtyard, and meet Princess Zelda. The visit is only complete once you leave with both Zelda's Letter and Zelda's Lullaby, because those two rewards open the next required route through Kakariko, Death Mountain, waterfalls, and royal-family symbols.
Cross Hyrule Field and go straight to Market
From Kokiri Forest, enter Hyrule Field and make the Market drawbridge your target. This is the first big open area in the game, but the intended route is still focused. Do not peel off toward Lon Lon Ranch, Kakariko Village, Gerudo Valley, or Zora's River yet. You will visit all of those places later, but the Princess Zelda meeting is the next real story gate.
If you reach the drawbridge at night and find it raised, stay outside in Hyrule Field until morning. Time passes in Hyrule Field and in the castle approach, but it does not keep moving while you stand inside town interiors. Once the bridge lowers, run through Market and take the north exit toward Hyrule Castle without stopping for mini-games or shopping detours.
- Reach the Market drawbridge from Hyrule Field.
- Wait outside town for daytime if the bridge is closed.
- Pass through Market and exit north toward Hyrule Castle.
Trigger Malon at the castle gate and take the Weird Egg
On your first trip toward the castle, keep moving until you enter the castle approach and see the owl scene near the road. After that, turn around, go back through Market, and then return to Hyrule Castle. This second pass is important because it places Malon by the vines near the gate. If you walk up and she is not there, you usually skipped that loop or have not returned correctly yet.
Talk to Malon beside the vines. She explains that her father Talon came to the castle and likely fell asleep somewhere inside. She gives you the Weird Egg. Keep it with you as you move forward. After enough time passes outdoors, it hatches into a Cucco, which is the intended way to wake Talon. This is also your introduction to the ranch family, which matters again when you return later for a required bottle.
- Enter the castle approach once, then return to Market and come back if needed to make Malon appear.
- Speak to Malon by the vines.
- Receive the Weird Egg and keep it assigned for later use.
Sneak through the outer castle grounds and wake Talon
Climb the vines beside Malon to get over the blocked front path. At the top, follow the upper ledge and drop down beyond the gate. Guards patrol this area, but the route is fixed and short. Move left of the obvious road instead of trying to run directly toward the castle doors. Use the slope and the quieter edge paths to stay out of their line of sight.
Keep left until you reach the climbable rough wall on the far side. Go up there, drop down toward the moat, and jump into the water instead of forcing your way through the guarded gate. Swim along the moat to the corner, climb out, and continue to the stone platform where Talon is sleeping. By now the Weird Egg will usually have hatched. If it has not, wait in this outdoor area until it becomes a Cucco.
Stand next to Talon and use the Cucco to wake him. After he realizes Malon is waiting for him, he runs off. Now push both milk crates into the moat gap where he had been blocking the path. They stack into a step that lets you climb up and reach the drainage crawlspace. Use that opening to enter the next area. If it is nighttime when you finish the crate setup, wait for day before crawling through so the next courtyard section works cleanly.
- Use the vines and left-side route to get past the outer guards.
- Reach Talon by following the moat route.
- Wake Talon with the hatched Cucco.
- Push both milk crates into place and crawl through the moat-side opening.
Clear the castle courtyard without losing your bearings
The courtyard is a stealth sequence, but it is not a maze. Every time the camera changes, stop for a moment and use the nearest hedge, wall, or corner as cover. If you are caught, you restart only at the crate entrance, so think of each screen as one short patrol puzzle rather than a long punishment.
In the first area, wait for the single guard to turn away and slip around the hedge along the left side. In the second, hide by the hedge near the entrance and dash left along the lower path when both guards circle the far sides of the fountains. In the third, ignore the rupees in the middle. They are bait. Take the stairs and cross the wooden walkway over the topiary to avoid the guard below.
In the fourth area, use the stone wall as cover, then cut left when the guards move around the statue and leave an opening. In the final stretch, stay patient at the last hedge and move only when the nearest guard walks away from your lane. The route always keeps pulling you left and forward toward the garden at the end. When you see the quieter inner garden with Zelda near the window, the stealth section is over.
- Treat each camera change as a separate patrol screen.
- Use hedges, walls, and the topiary walkway instead of chasing rupees.
- Keep working left and forward until you reach Zelda's garden.
Finish the audience with Princess Zelda and collect the real rewards
Walk up to Princess Zelda and talk to her. Stay through the entire conversation. She notices your fairy, asks about the Spiritual Stone of the Forest, and explains why she is worried about Ganondorf. This scene is not just flavor. It is the story checkpoint that converts your trip to Hyrule Castle into actual progress.
Do not back out mentally after the first exchange. Keep answering and let the whole sequence play until Zelda gives you Zelda's Letter. That letter is your proof of royal support later when you need to open the route from Kakariko Village toward Death Mountain Trail.
After the conversation, Impa takes over the exit for you, so you do not need to sneak back through the courtyard. Outside the garden, she teaches you Zelda's Lullaby. Take out the Fairy Ocarina and repeat the notes correctly to learn it. This song matters immediately. It activates royal-family symbols, opens Darunia's chamber in Goron City, and opens the waterfall gate into Zora's Domain. Once you have both the letter and the song, this chapter is complete and the child-era main route is properly unlocked.
- Complete Zelda's full conversation.
- Receive Zelda's Letter before considering the castle visit finished.
- Learn Zelda's Lullaby from Impa on the Fairy Ocarina.
- Leave the castle sequence with both the letter and the song.
Before you move on
- You have reached Princess Zelda in the castle garden and played through the full audience scene.
- Zelda's Letter is in your inventory for the Kakariko guard check later.
- Zelda's Lullaby has been learned on the Fairy Ocarina.
- You understand that royal symbols, Darunia's door, and the Zora waterfall gate can respond to Zelda's Lullaby.
- You are back out of the castle sequence with the next required route opened toward Kakariko Village and Death Mountain.
References for this chapter
- The Legend of Zelda: Ocarina of Time instruction booklet
- The Legend of Zelda: Ocarina of Time | Nintendo 64 | Games | Nintendo UK
- Ocarina of Time walkthrough - Castle Town Market and Hyrule Castle - Zelda's Palace
- The Legend of Zelda: Ocarina of Time - Guide and Walkthrough - Nintendo 64 - By MrShotgun - GameFAQs
- Ocarina of Time Walkthrough – Princess of Destiny - Zelda Dungeon
- Zelda: Ocarina of Time - Walkthrough: Hyrule Castle
Kakariko Setup, Saria's Song, and Opening Dodongo's Cavern
This chapter turns Zelda's Letter into real progress on the Nintendo 64 main quest. You will open Death Mountain access from Kakariko Village, return through Kokiri Forest and the Lost Woods to learn Saria's Song, then use that song in Goron City to earn the Goron's Bracelet. With that strength upgrade, you can finally use Bomb Flowers the way this route expects and blast open Dodongo's Cavern for the second dungeon.
Open the Death Mountain gate in Kakariko Village
Leave Hyrule Castle for Kakariko Village and head uphill through town toward the guarded gate that leads to Death Mountain Trail. This is the first place where Zelda's Letter matters as a progress item instead of just story flavor. Stand in front of the guard and show him the letter.
Once the conversation ends, the gate is no longer a roadblock. You do not need to stop for village side jobs, graveyard rewards, or cucco errands to continue the story. Keep the route focused. Your next required goal is Saria's Song, because Goron City will not fully open its story branch without it.
Go through the gate and start up Death Mountain Trail. Early enemies here are more of a warning than a wall, so shield if needed and keep moving. Follow the path until you reach the broader section marked by a large red banner. The big doorway on the right leads into Goron City. This is your landmark for later. You can step inside briefly to orient yourself if you want, but do not sink time into the city yet if you have not learned Saria's Song.
- Reach the Kakariko guard at the Death Mountain gate
- Use Zelda's Letter to open the route permanently
- Recognize the Goron City entrance on Death Mountain Trail for your return trip
Go back through Kokiri Forest and enter the Lost Woods
Turn around and return to Hyrule Field, then run south to Kokiri Forest. Ignore house visits and optional village chatter. Pass through the forest to the tunnel that leads into the Lost Woods, because that is the direct required path to Saria.
In the Lost Woods, you can either follow the louder music at each fork or memorize the route to Sacred Forest Meadow. From the forest entrance, go right, left, right, left, straight, left, and right. If you choose a wrong tunnel, the woods usually spit you back near the start. That is annoying, but it does not cost anything except the short retry.
Treat this stretch as a navigation lesson, not a combat dungeon. Stay alert for branch points, keep your shield ready if something harasses you on the way, and keep moving toward the meadow. Saria's Song is required for the Goron storyline, so this trip is mandatory even if other Lost Woods rewards are available nearby.
- Return to Kokiri Forest from Hyrule Field
- Enter the Lost Woods and follow the route to Sacred Forest Meadow
- Do not get distracted by optional Lost Woods minigames or side rewards
Push through Sacred Forest Meadow and learn Saria's Song
At the entrance to Sacred Forest Meadow, defeat the Wolfos to open the barred path. Lock on, keep your shield up, and wait for a clean opening after its attack instead of mashing at it. Once it falls, the gate lifts and the real route opens.
The maze beyond is guarded mainly by Mad Scrubs. They fire in bursts, so advance with your shield raised and punish when you get close enough. You do not need to clear every corner. Use the layout to keep moving forward until you find the ladder and stairway that lead deeper into the meadow.
After the ladder, continue up the stairs and through the last guarded stretch to reach Saria. Talk to her to trigger the reunion scene and learn Saria's Song. Do not leave without it. If you return to Goron City without this song, Darunia's story event will still stall and you will have to make this trip again.
- Defeat the Wolfos at the meadow entrance
- Cross the Mad Scrub maze to the rear platform
- Learn Saria's Song from Saria before leaving
Return to Goron City and calm Darunia
Head back out of the meadow and return through the Lost Woods. If you lose your bearings, simply work your way back to Kokiri Forest and retrace the route through Hyrule Field to Kakariko and Death Mountain. The path is longer, but it is perfectly valid. If you stay composed, the only real penalty for getting turned around is time.
Climb Death Mountain Trail again and enter Goron City. The city is built in stacked circular levels around a central chamber. Drop down toward the bottom floor where the large decorated stone door sits on its own wall. A nearby Goron gives the key hint, but you already have the needed song.
Stand on the rug in front of Darunia's door and play Zelda's Lullaby. Enter, walk up to Darunia, and then play Saria's Song. This is the exact story trigger the Gorons are waiting for. After the scene, Darunia rewards you with the Goron's Bracelet. This strength item lets child Link pick up Bomb Flowers, and that ability is what truly opens the next dungeon.
- Return to Goron City after learning Saria's Song
- Play Zelda's Lullaby on the rug to open Darunia's chamber
- Play Saria's Song for Darunia and receive the Goron's Bracelet
Use the Goron's Bracelet to open Dodongo's Cavern
Leave Darunia's chamber and make your way back toward the city entrance. Ignore optional torch puzzles, the spinning pot, and other side rewards unless you deliberately want extras. For story progress, the bracelet should immediately send your attention back outside.
From the Goron City entrance area on Death Mountain Trail, head to the right instead of going all the way back down toward Kakariko. On the nearby ledge, you will find a Bomb Flower beside a fence overlooking the blocked cavern below. This is the intended opening method, and the new bracelet is what finally lets you use it.
Pick up the Bomb Flower, face the boulder sealing Dodongo's Cavern, and throw. A normal clean toss is enough; you do not need a trick angle. If the flower hits the wall or falls short, grab another and try again from a steadier position. Once the boulder explodes, go down to the newly opened entrance. Before stepping in, make sure you are still child Link and have your sword, shield, Fairy Ocarina, Zelda's Lullaby, Saria's Song, and the Goron's Bracelet. That is the correct handoff into the second dungeon.
- Reach the Bomb Flower ledge outside Goron City
- Use the Goron's Bracelet to pick up and throw a Bomb Flower
- Destroy the boulder and stand at Dodongo's Cavern ready to enter
Before you move on
- The Kakariko guard has seen Zelda's Letter and opened the Death Mountain gate.
- You have learned Saria's Song from Saria in Sacred Forest Meadow.
- Darunia has rewarded you with the Goron's Bracelet.
- The boulder sealing Dodongo's Cavern is destroyed and you are standing at the dungeon entrance.
Dodongo's Cavern and the Goron Ruby
Enter Dodongo’s Cavern with the Goron’s Bracelet already earned from Darunia. This dungeon is built around one big central chamber with a giant stone skull in the middle, lava around the edges, side ladders, and upper walkways that eventually bring you back above the skull. The early half teaches you how to use fixed Bomb Flowers, the middle gives you the Bomb Bag, and the second half asks you to use your own bombs to open the skull’s mouth and reach King Dodongo. Clear it cleanly and you leave Death Mountain with the Goron Ruby and the tools needed for the next bottle and Zora route.
Enter the cavern and use the main room as your landmark
After blowing open the entrance outside, step inside and use a nearby Bomb Flower on the cracked wall straight ahead to reveal the true start of the dungeon. When the huge main chamber opens up, stop and read the room before charging forward. The giant skull in the middle is the lock on the back half of the dungeon, while the side ledges and ladders around the lava are the safe ways to move from objective to objective. If the Beamos in the center is pressuring you, ignore the middle route and hug the outer ground by the lava until you reach a ladder.
Your first required stop is the left side of the chamber. Use the Bomb Flower there to open the cracked wall and take the Dungeon Map. Then cross to the opposite side of the same main room. One cracked wall on that side only hides a Gossip Stone, but the farther cracked wall is the one you want. Blow it open and go through. This early loop is the dungeon’s basic language: if a wall is cracked and you do not have bombs yet, look nearby for planted Bomb Flowers.
- Open the front wall with a Bomb Flower and enter the real main chamber.
- Grab the Dungeon Map from the left-side room.
- Blow open the farther cracked wall on the right side to reach the first side route.
Clear the early side route and reach the upper main-room door
The next corridor introduces Baby Dodongos. Let them come close, cut them down, and immediately back away because they explode after defeat. At the end of the corridor, you reach a floor switch in front of a barred door. Do not stand there trying to sprint through it. Pull one of the nearby Armos statues onto the switch so the door stays open, then continue.
Past the short Keese hallway, the first Lizalfos fight locks the room until both enemies are down. Stay locked on, block their slashes, and counter when one commits. When the doors open, move into the Dodongo room beyond. The large Dodongos in here are slow but dangerous if you crowd them. Bait a fire breath, circle behind, and hit the tail. Once the room is safe, light the three unlit torches with a burning Deku Stick from the lit torch near the entrance. That opens the way forward.
The next stop is an upper ledge back in the main chamber. Step on the floor switch there to open the barred door across the room, then drop down and make your way through that newly opened door. You can detour for the Compass from the room on the left side of the Big Steps area if you want it, but it is not required for finishing the dungeon. The critical path is onward into the bomb-heavy rooms that lead to the Bomb Bag.
- Use an Armos statue to hold the floor switch and pass the barred door.
- Beat the first Lizalfos pair, then clear the Dodongo room.
- Light all three torches in the Dodongo room to unlock the forward path.
- Step on the upper main-room switch to open the next required door across the chamber.
Solve the bomb-flower stair puzzle and claim the Bomb Bag
In the next sequence, the dungeon shifts from simple bomb walls to timing puzzles. Move through the Big Steps area and into the room lined with Bomb Flowers. The goal here is to trigger the line of Bomb Flowers so the blast reaches the middle and lowers the central staircase. If your throw lands badly, do not force it. Wait for the Bomb Flowers to regrow and try again from a better angle. Once the stairs lower, climb up, step on the switch at the top, and take the opened route onward.
The following rooms are a chain of small checks that all point toward the dungeon item. In the Fire Keese and Armos room, pull the single movable statue away from the ladder, climb up, and hit the switch. Cross the rear catwalks above the main chamber, watch for Fire Keese on the narrow bridge, then continue through the blade-trap room by using the stone block to reach the higher ledge. From there, bomb the wall above the ladder, go through the single-eye room, win the upper Lizalfos fight, and then clear the double-eye room by shooting both eye switches with the Fairy Slingshot.
At the end of that run, open the large chest for the Bomb Bag. This is the turning point of Dodongo’s Cavern. From here on, you are no longer dependent on planted Bomb Flowers. Any earlier obstacle that looked like a cracked wall, fragile floor, eye-socket target, or bomb trigger can now be handled directly as long as you keep bombs stocked.
- Lower the central staircase by setting off the Bomb Flowers correctly.
- Use the ladder-and-switch room, catwalks, blade-trap room, and eye-switch rooms to reach the dungeon item.
- Open the large chest and take the Bomb Bag.
Use bombs to open the giant skull and enter the last loop
With the Bomb Bag in hand, return to the upper rear side of the main chamber. Step on the nearby switch to extend a rising platform as a shortcut. Then continue onto the bridge over the skull and read the stone clue nearby if you want confirmation of the puzzle. Stand above each eye socket and drop a bomb through the hole so it lands inside the skull. After both eyes are hit, the skull’s mouth opens below.
If your shield was lost to Fire Keese earlier, there is a nearby recovery chest behind a bombable wall, but treat that as recovery only. The required route is down through the opened mouth. Once you descend, you are entering the final loop of the dungeon, so stop wandering the main room and commit to the back section.
- Activate the shortcut switch on the upper rear bridge.
- Drop bombs into both skull eye sockets from above.
- Go through the opened mouth to begin the last section.
Open the boss door and break through to King Dodongo
Beyond the skull mouth, you loop through a square room and then an S-shaped room with more Fire Keese, ledges, and one bombable wall on a raised platform. Use the climbable blocks to cross safely instead of rushing the jumps. After that side route, you return to the square room from a higher position and find the stone block needed for the boss-door puzzle. Push the block off the ledge first, drop down after it, then push and pull it into the hole in the center floor switch. When it settles into place, the boss door stays open.
Inside the boss antechamber, there is a weak floor patch that hides the arena. Blow open the cracked floor with a bomb, and use the small chest there to refill bombs if you need them before dropping in. If your health is poor, leave and recover before committing. There is no hidden small key left to find here. If the boss door is open and the floor is broken, you have solved the dungeon correctly.
- Cross the back rooms and return to the square room from above.
- Drop the stone block down and move it into the center hole to hold the boss door open.
- Bomb the weak floor in the boss antechamber and restock bombs from the chest if needed.
Defeat King Dodongo and leave with the Goron Ruby
King Dodongo only becomes messy if you panic in front of him. Start at medium range and watch for the moment he plants himself and opens his mouth to inhale before breathing fire. Throw a bomb into the open mouth during that windup. If the timing is right, he swallows it, the blast stuns him, and he collapses. Run in only while he is down, land a few safe sword hits, then get back out before he stands. Jump attacks work well if you are confident, but plain controlled slashes are safer for a first clear.
When he recovers, he curls into a rolling attack around the arena. Do not flail around the outer ring near the lava. Either hold a stable line where he will not clip you, use a corner or the inner space to avoid crossing directly in front of him, or block with the Hylian Shield if you already bought it earlier. Once he stops rolling, reset to medium range and repeat the bomb-in-mouth pattern. After enough cycles, he falls into the lava. Take the Heart Container, step into the blue warp, and watch the scene outside where Darunia awards the Goron Ruby. Your next intended story route is back down the mountain, then to Lon Lon Ranch for the bottle and onward to Zora’s Domain.
- Stun King Dodongo by throwing a bomb into his mouth during the inhale.
- Use short, safe sword damage only while he is stunned.
- Collect the Heart Container, enter the warp, and receive the Goron Ruby from Darunia.
Before you move on
- The Bomb Bag is in your inventory, so you can place bombs without relying on planted Bomb Flowers.
- The skull-mouth puzzle is solved, the boss floor is broken, and King Dodongo is defeated.
- You used the blue warp and Darunia has given you the Goron Ruby.
- Your next main-route destination is away from Death Mountain and toward the bottle at Lon Lon Ranch before opening the Zora path.
References for this chapter
Lon Lon Ranch Bottle, Din's Fire, and the Road to Zora's Domain
After Dodongo's Cavern, your next required destination is Zora's Domain and then Lord Jabu-Jabu. The cleanest route includes one useful child-era detour for Din's Fire and, if you want extra safety, one optional bottle stop at Lon Lon Ranch. That Talon's bottle is not required to continue. The story itself gives you the bottle you need when you retrieve Ruto's Letter from Lake Hylia. Once King Zora reads that letter, the same bottle becomes empty again and can immediately be used for the fish that opens Jabu-Jabu.
Optional support stop: win Talon's bottle at Lon Lon Ranch
Leave Death Mountain and cross Hyrule Field to Lon Lon Ranch if you want an extra bottle early. This is a recommended convenience stop, not a story requirement. Because you already woke Talon at Hyrule Castle earlier, he is back at the ranch and his chicken game is available inside the house by the entrance.
Talk to Talon and pay to play his cucco game. He tosses three special cuccos into the room and you must pick out all three before time expires. Do not waste time trying to memorize where they land. Instead, sweep the room quickly and methodically, lifting birds one after another until Talon confirms each correct pick.
Winning gives you a bottle filled with Lon Lon Milk. That milk is good emergency healing, but the real value is the spare bottle for later fairies, potions, or bugs. If you do not feel like playing the minigame, skip it and continue. You can still clear the main route of this chapter with only the bottle from Ruto's Letter.
- Optional: visit Lon Lon Ranch as child Link.
- Optional: beat Talon's cucco game.
- Optional: receive the bottle filled with Lon Lon Milk.
Pick up Din's Fire now while bombs are fresh
Before going to Zora's River, make the short detour to Hyrule Castle for Din's Fire. This spell is not needed for Jabu-Jabu, but it is required later to open the Shadow Temple, so collecting it now prevents a needless return trip after the game world becomes much busier.
Go from Market toward Hyrule Castle. On the castle approach, take the path to the right instead of the route leading to the front gate. You will find a cracked wall near a sign marking the dead end. Place a bomb there, then crawl through the opening you reveal.
Inside the Great Fairy's Fountain, step onto the Triforce emblem and play Zelda's Lullaby. The Great Fairy gives you Din's Fire. Leave once the spell is learned. Do not get distracted by other errands here. The point of this detour is to bank a required late-game tool while it is directly on your child-era route.
- Return to the Hyrule Castle approach with bombs.
- Blow open the cracked wall by the dead-end sign.
- Play Zelda's Lullaby and learn Din's Fire.
Climb Zora's River and open Zora's Domain
Now take the eastern branch of Hyrule Field into Zora's River. This is the real story route forward, so ignore side attractions like frogs, beans, and optional rupee hunts for now. Your job is simply to keep moving upstream.
The river path is a sequence of narrow ledges, shallow crossings, ladders, and short jumps. Octoroks fire rocks from the water and Tektites hop onto the path, but most of them are there to knock you off your line rather than to force a full fight. Use your shield and Z targeting when an enemy is blocking a jump, and if you fall into the water, just climb back up and keep following the river's curve.
At the top, face the waterfall and stand on the Triforce mark in front of it. Play Zelda's Lullaby to part the falls and reveal the entrance to Zora's Domain.
- Enter Zora's River from Hyrule Field.
- Follow the river path all the way to the waterfall.
- Play Zelda's Lullaby at the waterfall gate.
- Enter Zora's Domain.
Get the Silver Scale, then retrieve Ruto's Letter from Lake Hylia
Inside Zora's Domain, head up to King Zora's chamber so you understand the problem. Princess Ruto is missing, and King Zora will not move until you bring proof of what happened. The next required step is the diving game off to the side of this same upper area.
Talk to the Zora running the diving game and collect all the thrown rupees before time runs out. Winning earns the Silver Scale. This is the key upgrade for the chapter because it lets child Link dive deep enough to use the underwater passage on the floor of the main pool.
Jump back into the water and look for the tunnel at the bottom of the pool. Dive down with the Silver Scale and enter it. Follow the passage to Lake Hylia. Near the tunnel exit, look to the lake floor for the bottle containing Ruto's Letter. Take it immediately and then turn around. This is why Talon's bottle is optional: the story itself has now provided the bottle needed to move forward.
Do not wander off into Lake Hylia side activities yet. The clean route is to go right back through the tunnel to Zora's Domain and deliver the letter.
- Speak with King Zora or at least reach his chamber to orient yourself.
- Win the diving game and receive the Silver Scale.
- Use the underwater tunnel in the domain pool.
- Collect Ruto's Letter in its bottle from Lake Hylia.
- Return to Zora's Domain through the same tunnel.
Show the letter, reuse the bottle, and open Lord Jabu-Jabu
Climb back to King Zora and show him Ruto's Letter. This is the event that changes the route. After he reads it, he slowly slides aside and opens the way to Zora's Fountain behind his throne.
As soon as the letter has been delivered, that same bottle is free for reuse. This is the key bottle logic for the chapter. You do not need Talon's bottle in order to proceed. If you won the ranch bottle earlier, great. If not, the letter bottle is enough.
Before you approach Lord Jabu-Jabu, make sure you have a fish in a bottle. The simplest method is to catch one in the domain once the letter is delivered. If you are carrying milk in Talon's bottle, either save it and use the letter bottle for the fish, or drink the milk first so one bottle is available. What matters is that you arrive at the fountain with one bottled fish.
Go through the passage behind King Zora into Zora's Fountain. Approach Lord Jabu-Jabu and use the bottled fish in front of him. This opens the dungeon access sequence. If you want the chapter break right before the dungeon, stop with the fish ready on the fountain shore. If you want a clean handoff into the next chapter, feed the fish and let Jabu-Jabu inhale Link.
- Show Ruto's Letter to King Zora.
- Watch King Zora move and open the path to Zora's Fountain.
- Confirm that one bottle is now empty and available for reuse.
- Catch a fish in a bottle.
- Bring the fish to Lord Jabu-Jabu and use it to open the dungeon.
Before you move on
- You optionally collected Talon's bottle from Lon Lon Ranch, or deliberately skipped it knowing it is not required.
- Din's Fire is learned from the Great Fairy near Hyrule Castle.
- Zora's Domain is open.
- You won the diving game and earned the Silver Scale.
- You collected Ruto's Letter from Lake Hylia and showed it to King Zora.
- King Zora moved aside and opened the path to Zora's Fountain.
- You have a bottled fish and have opened Lord Jabu-Jabu, or you are standing at his entrance ready to do it immediately.
References for this chapter
- The Legend of Zelda: Ocarina of Time instruction booklet
- The Legend of Zelda: Ocarina of Time/Hyrule Castle — StrategyWiki
- The Legend of Zelda: Ocarina of Time/Items — StrategyWiki
- The Legend of Zelda: Ocarina of Time/Fairy Fountains — StrategyWiki
- The Legend of Zelda: Ocarina of Time/Jabu-Jabu's Belly — StrategyWiki
Inside Jabu-Jabu's Belly, the Zora Sapphire, and the Master Sword
Finish the last child-era dungeon by treating Princess Ruto as the key to the layout instead of an escort mistake. The Boomerang is the turning-point item, Barinade is safest when you create openings instead of forcing damage, and the reward sequence leads directly to Hyrule Castle, the Ocarina of Time, the Song of Time, and Link’s first transformation into Adult Link in the original Nintendo 64 game flow.
Enter Jabu-Jabu and accept that carrying Ruto is the dungeon mechanic
Bring a fish in a bottle to Lord Jabu-Jabu at Zora’s Fountain and place it in front of him to be swallowed. Inside, go forward through the first fleshy corridor, deal with the opening Octoroks, and shoot the switch on the ceiling to open the first veined door. Continue until you meet Princess Ruto in the upper room. She falls through the hole on purpose, and you are supposed to follow her instead of searching for another path.
After dropping into the lower room, speak to Ruto again until she lets you carry her. From here on, stop thinking of her as baggage and start using her as the dungeon key. She can weigh down switches, she can be thrown onto ledges you cannot reach while holding her, and some short sections intentionally make you leave her on a switch and come back. If you lose her, she normally resets to the lower room where she first agreed to be carried, so backtrack there before assuming you missed something permanent.
Take Ruto through the nearby door into the shallow-water room with Stingers. Throw her onto the high ledge first, clear the enemies below while the water is low, then step on the floor switch to raise the water and climb back up to her. This room is the game teaching you the rhythm for the rest of the dungeon: place Ruto where she needs to be, solve the room, then regroup and keep moving.
- Use the fish to enter Lord Jabu-Jabu.
- Talk to Ruto until she becomes carriable.
- Use the first water-raising room to learn the throw-Ruto-then-solve pattern.
Use the room full of holes as your hub and get the Boomerang first
Soon you will start looping through a large chamber with several holes in the floor. Treat this as the dungeon’s central landmark. If you ever feel turned around, return to this room and check which side doors and drops are now useful. That habit prevents most of the confusion people have in Jabu-Jabu’s Belly.
With Ruto in hand, use her on the needed floor switch in the upper route to open the combat room that contains the Boomerang chest. Clear the Stingers to make the chest appear and take the Boomerang immediately. This is the item that makes the dungeon readable: it hits switches, stuns electric enemies, cuts down the colored tentacles blocking doors, stabilizes the moving fleshy platforms near the end, and creates the safe openings for Barinade. Keep it on a C button you can reach quickly.
Do not try to finish the dungeon before collecting this item. If a door is sealed by a colored tentacle or a target looks awkwardly placed, the answer is almost always the Boomerang. Once you have it, the second half of the dungeon becomes a sequence of short revisits rather than one long maze.
- Use the big room of holes as your reset point.
- Open the Boomerang chest before pushing deeper into the dungeon.
- Keep the Boomerang equipped for switches, tentacles, and boss control.
Clear the colored tentacles, then take the lower route with Ruto
After the Boomerang, work through the colored tentacle doors connected to the hub. Some routes ask you to leave Ruto on a blue switch while you clear a short side room, then come back for her. That separation is intended, so do not waste time hunting for a way to carry her into every single room. Remove each tentacle you can reach, then return to the hub instead of drifting forward through side passages.
When the tentacles are gone, the central room’s lower route becomes the real way forward. Drop through the correct lower opening from the hub, clear the enemies, pick Ruto back up, and continue through the door to the chamber where she spots what she believes is her Spiritual Stone. Throw her onto the raised platform when she asks. The platform rises, Ruto disappears with the Zora Sapphire sequence, and the game drops you straight into the Big Octo miniboss.
The order to remember is simple: Boomerang first, tentacle cleanup second, lower hub route third. If you follow that order, Jabu-Jabu stops being messy and becomes a short final run to the boss.
- Use the Boomerang to remove the colored tentacles blocking progress.
- Return to the hub after each side clear instead of wandering.
- Throw Ruto onto the platform when she calls for it.
Beat Big Octo and open the boss door cleanly
Big Octo runs around the spiked center in a loop. The safe approach is to watch which way the spikes are turning, run with that direction, and use the Boomerang when his back lines up. When he is stunned or turned around, slash the weak point on his rear and then reset rather than getting greedy. If he bumps you and reverses direction, reverse with him and start another lap.
After the fight, ride the platform up and continue through the next rooms. Use the Boomerang on the wobbling fleshy platforms so they stiffen long enough for you to cross. In the upper approach room, place a crate on the floor switch to open the next path. Then climb and angle a Boomerang throw around the barrier to hit the ceiling target that unlocks the boss door. If the switch seems protected from a straight shot, move to the side and let the curved return path do the work.
- Chase Big Octo with the rotation, then strike the back.
- Stabilize the wobbling platforms with the Boomerang before jumping.
- Use the crate and then the angled Boomerang throw to reach the boss door.
Defeat Barinade by creating openings, not by forcing damage
Barinade starts attached to the ceiling by three electric supports. Circle the edge of the room and cut those supports with the Boomerang one by one while staying out from directly underneath the body. Once the supports are severed, the barrier of floating Bari becomes the next problem, not a sign that you should rush in with your sword.
Use the Boomerang to thin the jellyfish screen and to stun the core whenever a gap opens. In the moving phase, Barinade circles the room with smaller jellyfish around it. Keep moving, throw the Boomerang through the opening, and step in only when the body is stunned. A quick sword combo or a jump slash is enough before you back away again. The fight becomes much safer if you respect the cycle of cut supports, break the Bari ring, stun, punish, retreat.
When Barinade falls, take the Heart Container and enter the blue warp. Outside, Ruto gives you the Zora Sapphire, completing the three Spiritual Stones needed for the Door of Time.
- Cut the three ceiling supports first.
- Use the Boomerang to break the Bari screen and stun the core.
- Take the Heart Container and the Zora Sapphire.
Recover the Ocarina of Time and become Adult Link
Leave the Zora region and go straight to Hyrule Castle Town. At the castle gate, the story advances immediately now that you have all three Spiritual Stones. Zelda and Impa flee on horseback, Ganondorf arrives, and Zelda throws the Ocarina of Time into the moat during the escape. When the cutscene ends, jump into the moat and pick up the Ocarina yourself. Link then receives Zelda’s message and learns the Song of Time. Do not leave for side content until you have both the instrument and the song.
From the moat, head into the Temple of Time in Market. Stand before the altar and play the Song of Time. The Spiritual Stones respond, the Door of Time opens, and the path to the Master Sword pedestal is finally clear. Walk up and draw the Master Sword to trigger the seven-year leap.
The next scene matters for orientation. Link first awakens in the Temple of Light, where Rauru explains what happened during the seven years, tells you that Ganondorf has taken power, and gives you the Light Medallion. After that, you return to the Temple of Time as Adult Link and meet Sheik, who points you toward Kakariko Village as the next destination. This is the proper end point for the chapter: you are now in the adult era, and the Master Sword pedestal will later serve as the age-swap point for quests that require returning to childhood.
- Trigger the castle gate cutscene after collecting all three Spiritual Stones.
- Dive into the moat, recover the Ocarina of Time, and learn the Song of Time.
- Open the Door of Time, pull the Master Sword, and finish the chapter as Adult Link after the Temple of Light and Sheik scenes.
Before you move on
- Barinade is defeated, you collected the Heart Container, and Ruto awarded the Zora Sapphire.
- You returned to Hyrule Castle, recovered the Ocarina of Time from the moat, and learned the Song of Time.
- The Door of Time is open and the Master Sword has been drawn from its pedestal.
- Link has awakened in the Temple of Light, received the Light Medallion, returned to the Temple of Time, and met Sheik as Adult Link.
References for this chapter
- The Legend of Zelda: Ocarina of Time instruction booklet
- Ocarina of Time Walkthrough - Inside Jabu-Jabu's Belly - Zelda Dungeon
- The Legend of Zelda: Ocarina of Time - Guide and Walkthrough - Nintendo 64 - By TheSoundDefense - GameFAQs
- Jabu-Jabu's Belly - The Legend of Zelda: Ocarina of Time Guide and Walkthrough
- The Legend of Zelda: Ocarina of Time - Guide and Walkthrough - Nintendo 64 - By Zauron - GameFAQs
Adult Link Setup, the Hookshot, and Forest Temple Entry
After drawing the Master Sword, resist the urge to treat adult Hyrule as a giant cleanup break. The main quest points you toward Kakariko Village first, because Dampé’s crypt holds the Hookshot and the Forest Temple is the intended first adult dungeon. This chapter covers the shortest reliable story route: leave the Temple of Time, claim the Hookshot, return to the forest, learn the Minuet of Forest from Sheik, and enter the Forest Temple with the correct age and equipment.
Go from the Temple of Time straight to Kakariko Village
Finish the post-Master Sword scene, leave the Temple of Time, and head across Hyrule Field to Kakariko Village. Sheik’s guidance after the time skip points you away from random exploration and toward Kakariko because the next required tool is there. You can roam later, but doing that now only delays the first adult dungeon and leaves you without the item the forest route expects.
Once you arrive in Kakariko, do not stop for side quests, Epona setup, or trading-sequence errands. Go uphill into the Graveyard immediately. The graveyard is the chapter’s real destination, and Dampé’s crypt can only be entered as adult Link.
- Reach Kakariko Village as adult Link.
- Ignore optional detours and enter the Graveyard.
Open Dampé’s grave and finish the crypt race
On the west or left side of the Graveyard, find the grave marked by flowers near the soft soil patch. Pull that gravestone back and jump into the hole. This is Dampé’s crypt, and the Hookshot reward comes from keeping up with Dampé’s ghost all the way to the end rather than from beating an especially strict time target on the first run.
During the race, keep moving forward and use Dampé’s flame trail only as a guide to the correct bends. The usual failure is hesitating at corners or drifting so far behind that a timed door closes in your face. If that happens, you are not lost; you simply retry. Stay on the forward path, cut your turns tightly, and do not waste time attacking anything in side passages.
At the finish, open the chest for the Hookshot. This is now part of your core adult toolkit. From here, continue through the next doorway instead of turning around. A blue Song of Time block seals the exit route, so play the Song of Time to move it, then climb up and come out through the Windmill.
- Pull open Dampé’s flower-marked grave.
- Complete the race and collect the Hookshot.
- Use the Song of Time block to leave through the Windmill.
Return to Kokiri Forest and use Saria’s Song to clear the way
After dropping out of the Windmill, leave Kakariko and head back to Kokiri Forest. Even though several adult-only options are now open elsewhere, the intended item curve starts with the Forest Temple because that dungeon provides the Fairy Bow and anchors the rest of the adult toolkit.
Enter the Lost Woods by the same forest entrance you used as a child and follow the route toward Sacred Forest Meadow. Do not assume the Hookshot replaces this part of the route. The road back into the deep woods still runs through the Lost Woods first. If Mido blocks the final forest passage, play Saria’s Song to prove your link to Saria and make him step aside.
- Return to Kokiri Forest.
- Follow the Lost Woods route toward Sacred Forest Meadow.
- Use Saria’s Song if Mido stops you.
Cross the adult Sacred Forest Meadow and learn the Minuet of Forest
The meadow approach is no longer the child-era scrub maze. Adult Link faces Moblins in the run-up to the clearing, capped by a Club Moblin near the final stairs. Treat this area like a lane-and-corner obstacle course. Move from cover point to cover point, stay out of a Moblin’s straight charge line, and pass openings cleanly instead of trying to win a long frontal brawl in a narrow corridor.
At the end of the maze, climb the stairs into the open meadow and meet Sheik. Sheik teaches the Minuet of Forest here, and that song permanently warps you back to the Triforce warp just before the Forest Temple entrance. Learn it now and remember it as your first major adult fast-travel tool, not as optional flavor.
- Slip through the Moblin maze without wasting health on unnecessary fights.
- Reach the open meadow and learn the Minuet of Forest.
Read the temple approach correctly and enter the first adult dungeon
Face the ruined structure ahead. The broken stairway is the chapter’s visual clue that adult Link is meant to use the Hookshot here. Look above the collapsed approach for the wooden target and latch onto it to pull yourself across to the Forest Temple doorway. This is the point where the Hookshot is mandatory for progression.
Before you walk in, do one quick story-readiness check. You should still be adult Link, you should have the Hookshot ready on a C button, and you should have the Ocarina of Time with Saria’s Song and the newly learned Minuet of Forest available. Do not leave for Epona, Biggoron, or broad overworld cleanup. The Forest Temple is the intended first adult dungeon, and entering now keeps the main quest flowing exactly as the game’s equipment progression expects.
- Use the Hookshot to cross the broken approach.
- Confirm that you are entering as adult Link with the Hookshot equipped.
- Step into the Forest Temple.
Before you move on
- You are still adult Link.
- The Hookshot is in your inventory from Dampé’s crypt.
- You learned the Minuet of Forest from Sheik in Sacred Forest Meadow.
- You returned through Kokiri Forest and the Lost Woods instead of breaking route for optional errands.
- You are standing at the Forest Temple entrance or have just stepped inside, ready to begin the first adult temple.
References for this chapter
- The Legend of Zelda: Ocarina of Time instruction booklet
- The Legend of Zelda: Ocarina of Time Release Information for Nintendo 64 - GameFAQs
- Ocarina of Time Walkthrough - Forest Temple - Zelda Dungeon
- Graveyard (Ocarina of Time) - Zelda Dungeon Wiki, a The Legend of Zelda wiki
- Minuet of Forest - Zelda Wiki
- Forest Temple (Ocarina of Time) - Zelda Dungeon Wiki, a The Legend of Zelda wiki
Forest Temple and Phantom Ganon
The Forest Temple on the original Nintendo 64 route is a looped dungeon built around one grand central hall, two ruined outdoor courtyards, and four Poe sisters who stole the flames from the entrance chamber. Do not read it as a straight line. Every time you return to the hub, look for what changed: a new key, a newly drained area, a corridor that now twists or untwists, or a Poe room that is finally active. Your first goal is to gather the keys that make the west side practical. Your middle goal is to win the Fairy Bow and use it to manipulate the temple’s silver eye switches and portrait fights. Your last goal is to restore the basement elevator, open the boss route, beat Phantom Ganon, then return to the Temple of Time for Prelude of Light before moving on to Goron City.
Enter the temple and learn the central loop
Approach the Forest Temple entrance as Adult Link with the Hookshot already in hand. In the first outdoor entry area, defeat or avoid the Wolfos, then climb the vines on the right. Work around the branches to the chest on the opposite tree and take the Small Key. This is the entrance key that starts the temple properly.
Go through the short entry hall and into the grand central room. The four Poe sisters steal the flames and scatter. From now on, treat this room as your map anchor. The north stairs lead to an early Stalfos fight, the northwest door hides a Song of Time block and the first courtyard route, the west side leads toward the Bow, and the center floor will matter again after all four sisters are defeated.
This temple punishes rushed combat and bad camera control more than raw damage. In Stalfos fights, stay locked on, keep your shield ready, and take short safe hits after their swing or jump recovery instead of committing to long strings.
- Collect the entrance Small Key from the front courtyard.
- Watch the Poe sister scene so the dungeon objective is clear.
- Use the grand hall as your reference point whenever the route loops back.
Take the north key, then the northwest courtyard key
From the grand hall, climb the stairs and enter the north door. Pass the Blue Bubble room and step into the Stalfos chamber. Fight carefully with Z targeting. Back away when a Stalfos raises its weapon, block the swing, then punish with one or two quick hits or a jump slash if the opening is obvious. When both are down, open the chest for another Small Key.
Return to the grand hall and go to the northwest door blocked by a blue Song of Time block. Play the Song of Time to remove it. In the ruined courtyard beyond, go right and climb the vines. Use the Hookshot to clear the lower Skulltulas if they interfere, then reach the upper doorway.
In the next room, defeat the Blue Bubble to make the chest appear and claim the Dungeon Map. Continue forward into the connected upper part of the courtyard and hit the eye switch to drain the well below. Drop down, enter the drained well, and open the chest at the far end for the next Small Key. Climb back out and return to the grand hall. You now have the keys needed to push cleanly into the west wing.
- Defeat the north Stalfos pair for a Small Key.
- Use Song of Time at the northwest door.
- Drain the courtyard well and take the Small Key from the bottom.
Work through the west wing and claim the Fairy Bow
Use a key on the west locked door in the grand hall. Pass the Skulltula hallway and enter the tall block room. This room introduces one of the temple’s most important ideas: sometimes the answer is in the room next to the corridor, not in the corridor itself. Move the blue block into place so you can climb higher, then uncover and push the red block into position as well. Ignore the silver eye switch at the top for now because you still need the Bow.
Go through the west twisted corridor and keep moving through the angled room so the Wallmaster does not grab you and throw you back to the start of the dungeon. The next Poe room is not active yet. Go down the stairs into the Bow room.
The Bow room is a real pacing check. First defeat one Stalfos. After the floor fills in, two more appear. Stay near safe footing, do not roll into the pit, and keep the fight orderly. If one is almost defeated, finish it quickly so you are not dragged into an endless reset. When the room clears, open the large chest for the Fairy Bow.
The Fairy Bow changes the temple immediately. It solves silver eye switches, lets you answer portrait puzzles from a distance, and makes several later encounters safer because you can create openings before enemies close in.
- Solve the west block room enough to reach the upper locked door.
- Cross the west twisted corridor without a Wallmaster reset.
- Defeat the Stalfos sequence and collect the Fairy Bow.
Untwist, retwist, and clear the first two Poe sisters
Backtrack to the top of the west block room and shoot the silver eye switch over the door. This changes the west twisted corridor from outside the corridor itself. Go back through it at once. The angled room now lines up differently, letting you reach the large chest with the Boss Key. Take it now so the late dungeon does not force a long return trip.
After taking the Boss Key, drop through the hole below and continue until you reconnect with the northwest side area. Find the hidden side door that leads to a Floormaster fight. Stay shielded until it slams down, counterattack, and be ready to kill the smaller split forms quickly so they do not recombine. The reward chest contains another Small Key.
Use the shortcut back to the west block room, climb it again, and shoot the same silver eye switch a second time to restore the hallway to its original twisted state. Now go back through the west twisted corridor to Joelle’s room. Stand where you can see several portraits. Wait for the real painting to settle, then shoot it before the ghost jumps again. After enough portrait hits, Joelle appears below. Fight her like a normal Poe: guard, wait for the opening, then strike. Take the Small Key she leaves.
Continue forward through the Bow room to Beth’s room and repeat the portrait pattern. Beth does not change the route alone, but defeating her restores another flame and keeps the west side progression moving toward the east-side sequence.
- Shoot the west silver eye switch to straighten the hall and collect the Boss Key.
- Defeat the Floormaster and take its Small Key.
- Retwist the west hall, then defeat Joelle and Beth.
Use the east-side changes to reach Amy and trigger Meg
From Beth’s room, use the upper locked door to enter the east-side twisted route. Move through the angled room and hallway until you reach the lava room. The point here is not to solve the corridor from inside it. Use the moving platforms and your Bow to hit the iced silver eye switch across the room, or get close enough to melt it with fire if needed. Once the switch is activated, the east corridor changes shape.
Backtrack into the east twisted hall and drop through the new opening. This leads to the checkerboard room with the falling ceiling. Move patiently. Let each ceiling drop show you the safe squares before you commit. Avoid rushing into shadows where Skulltulas can fall directly onto your path. Reach the far switch to open the next door.
In Amy’s room, shoot the portrait to start the block puzzle. Assemble the falling pieces into the picture before time runs out. If the layout goes bad, leave and reenter to reset it instead of wasting time trying to force a broken arrangement. Defeat Amy after the puzzle is solved, then continue through the next passage to return to the upper ledge of the grand hall.
Drop into the center of the grand hall and confront Meg. She splits into four copies. Do not slash at random. Watch their spin closely. The real Meg turns differently from the fakes. Target the real one and shoot with the Bow. Repeat until she falls. When Meg is defeated, the central basement elevator rises and the temple’s last route opens.
- Use the lava room switch to change the east corridor.
- Cross the checkerboard room and solve Amy’s block puzzle.
- Defeat Meg and restore the central elevator.
Open the basement path and defeat Phantom Ganon
Ride the elevator down into the basement. The rotating room is the final structural puzzle before the boss. Push one of the handles to rotate the walls a quarter turn at a time. Each alignment exposes a different alcove. Step on the floor switches in the newly opened alcoves as they appear, then rotate again. If the hallway ahead is still barred, keep rotating and checking the newly exposed spaces rather than assuming you missed some far-off side room.
Enter the boss chamber and walk up the stairs. When the room seems empty, turn around to leave and Phantom Ganon begins the fight. In the painting phase, watch both pictures when he creates a fake and a real approach. The real rider commits to coming out. Shoot him with the Fairy Bow before he fully emerges and fires into the center of the room. Staying off the middle emblem gives you more safety. After several successful shots, the horseback phase ends.
In the second phase, keep a comfortable distance and Z target Phantom Ganon. When he throws an energy ball, return it with the Master Sword. More distance gives you more time to react during the volley. Once the reflected shot stuns him and drops him, run in with a jump slash and a few fast follow-up strikes, then back off before he recovers. If he charges directly, shield or sidestep instead of getting greedy.
Take the Heart Container and enter the blue warp to receive the Forest Medallion from Saria. After the sage scene and the short Kokiri Forest aftermath, leave for the Temple of Time. This next visit matters. Speak to Sheik there after earning the Forest Medallion to learn Prelude of Light. Get that song now, before heading on to Goron City and the Fire Temple route, because later warp and age-swap routing assumes you have already unlocked fast returns to the Temple of Time.
- Rotate the basement room until the boss corridor bars are gone.
- Beat Phantom Ganon in both the painting and volley phases.
- Collect the Heart Container, receive the Forest Medallion, then return to the Temple of Time and learn Prelude of Light from Sheik before moving on.
Before you move on
- You entered the Forest Temple on the original Nintendo 64 route, collected the entrance key, and used the grand hall as the dungeon’s main hub.
- You defeated the north Stalfos pair, drained the northwest well, and used those early keys to open the west side cleanly.
- You obtained the Fairy Bow, used silver eye switches to change corridor states, and defeated Joelle, Beth, Amy, and Meg.
- You collected the Boss Key, opened the basement route, defeated Phantom Ganon, and received the Forest Medallion.
- You returned to the Temple of Time afterward and learned Prelude of Light from Sheik, so the next adult-era route is fully set up.
References for this chapter
- The Legend of Zelda: Ocarina of Time instruction booklet
- Ocarina of Time Walkthrough - Forest Temple - Zelda Dungeon
- The Legend of Zelda: Ocarina of Time/Forest Temple — StrategyWiki | Strategy guide and game reference wiki
- The Legend of Zelda: Ocarina of Time/Temple of Time — StrategyWiki | Strategy guide and game reference wiki
- Prelude of Light - Zelda Dungeon Wiki, a The Legend of Zelda wiki
Fire Temple, the Goron Tunic, and Volvagia
After the Forest Temple, the intended next stop is Goron City. This chapter prepares Adult Link for Death Mountain's heat, walks the original Nintendo 64 Fire Temple in a landmark-based order, and keeps the key idea simple: rescue Gorons, open the nearby chest, and use each new key or item to reopen the temple from a better angle. The Megaton Hammer is the turning point that converts suspicious blocks, rusted switches, and statue barriers into the final route to Volvagia. Finish with the Fire Medallion, then leave Death Mountain ready to follow the story toward the frozen Zora region.
Get the Goron Tunic before entering the crater
Go to Goron City as Adult Link immediately after clearing the Forest Temple. The city is mostly deserted, but Darunia's son is still rolling around the middle level. Stand where he will pass and drop a bomb in his path to stop him. Speak to him afterward to receive the Goron Tunic for free. This also opens access in the city that was closed before.
Equip the Goron Tunic now. The crater and Fire Temple are built around extreme heat, and the tunic removes the need to rush a damage timer while you are learning paths, climbing, or fighting near lava. Treat it as required preparation, not as an optional safety upgrade.
Go down to Darunia's chamber on the lower level of Goron City. Pull the large stone statue at the back of the room to reveal the hidden passage into Death Mountain Crater.
- Adult Link is active
- You stopped the rolling Goron with a bomb
- Goron Tunic is equipped before entering the crater
Cross Death Mountain Crater and learn Bolero of Fire
Enter the crater through the passage behind Darunia's chamber. Near the start, use the Hookshot to cross the broken bridge section instead of trying to jump it. A short distance ahead, Sheik appears and teaches you Bolero of Fire.
Bolero of Fire matters right away. It gives you a direct warp back to Death Mountain Crater if you need supplies, leave the temple, or make a mistake later. Learn it before committing to the dungeon route so you never have to repeat the whole mountain approach unless you want to.
After learning the song, continue deeper into the crater. Follow the path down toward the lower ledges and ladder route that leads to the temple entrance. Be careful around long drops. If you can climb down safely, do that instead of throwing away health on a blind fall.
Enter the Fire Temple once you reach the doorway set into the crater wall.
- Hookshot used to cross the broken bridge
- Bolero of Fire learned from Sheik
- Fire Temple reached through the crater path
Open the early route by rescuing Gorons and using each Small Key immediately
At the entrance, go up the main staircase and take the left-hand door to meet Darunia. After the scene, start the dungeon in the lava room just beyond him. Jump across the platforms on the left side, step on the floor switch to open the first cell, speak to the Goron, and open the chest behind him for your first Small Key.
Return to the main central room and use that key on the locked door straight ahead. This next area teaches the Fire Temple's core structure. Go left first to free another Goron and open the nearby chest for a Small Key. Return to the room's center, then check the right side for a bombable wall. Blow it open, free the trapped Goron there, and collect the next Small Key from the chest behind him.
Now use the far locked door in the same room. Slide down the wooden plank, climb the wire fence on the right, defeat the Fire Keese so they do not knock you off, and drop onto the block below. Push that block off its ledge so it becomes your lift to the next section. This is the first good example of how the temple keeps reconnecting old space from new heights.
Open the next locked door and continue upward. In the tall room with another imprisoned Goron you cannot reach yet, climb the ledges on the left side. Push the block down, pull it into position, then use the diamond switch to lower the fire barrier so you can climb the fence before the flames return. This sends you into the upper half of the dungeon.
- First three Goron rescues completed
- Bombable wall in the early loop was opened
- You used the fallen block and fence climb to reach the upper route
Use the rolling-boulder maze and fire maze to reach the Megaton Hammer
The next major landmark is the rolling-boulder room. Stay close to the outside wall so the rocks are easier to read. Free the Goron on one side and take the Small Key from his chest, then circle the room to free the second Goron and take that chest as well. The point of this section is not to clear every side room. It is to keep converting rescues into keys until the locked doors on the upper ring stop resisting you.
When a door leads you into the room with the eye switch above a door, shoot the eye with an arrow to open the side room if you want the Dungeon Map, then continue through the required locked path. Cross the narrow ledges and fences carefully, return to the boulder room from above, and look for the cracked floor patch. Bomb it to drop down and free another Goron, then open his chest for the next key.
From there, continue toward the central pillar and the fire maze. This room looks messy, but the rule is simple: let the moving walls of flame define your lane instead of sprinting into them. If you reach a suspicious door that will not behave normally, test it with a bomb. The fake door leads to the first Flare Dancer.
Defeat Flare Dancer by stripping away its flames with a bomb or a Hookshot hit, then slash the small black core when it breaks loose. Do not chase too closely from behind. Let the core circle back toward you and strike when it passes. After the fight, ride the lift upward, climb the next fence sequence, trigger the timed switch at the top, and run the circular staircase fast enough to reach the big chest with the Megaton Hammer.
- Rolling-boulder room cleared by following the outer wall
- Cracked floor was bombed to free another Goron
- First Flare Dancer defeated
- Megaton Hammer collected
Turn the dungeon around with the Hammer and secure the Boss Key
The Megaton Hammer is the temple's turning-point item. Start using it immediately on rusted floor switches, hammer-faced blocks, and heavy statue barriers. Rooms that looked decorative before now become the intended way forward. Right after getting the Hammer, use it on the nearby switch-block and statue obstacles to continue through the connected rooms.
In the next stretch, use a crate on the blue switch to hold a door open, then smash the rusted switch to continue. A little farther on, use Song of Time where required, free another Goron, and open the chest for the final Small Key you need for the main route. Then use the large hammer block to drop back down toward the lower part of the temple.
Once you reconnect with the entrance side, climb the big stairs again and check the left side near the statue barrier that previously blocked progress. Smash the statue with the Hammer to open the path. Clear the room beyond, survive the flying tiles without getting cornered, defeat the second Flare Dancer the same way as the first, and continue onward.
The final Goron rescue on this route rewards the Boss Key. Open the cell, speak to the Goron, and take the key from the chest. At that point, the late dungeon is finished. Return to the boss door near the top of the entrance staircase by the room where you first met Darunia.
- Hammer used on rusted switches and hammer blocks
- Return path toward the entrance side reopened
- Second Flare Dancer defeated
- Boss Key collected from the final rescue route
Defeat Volvagia and leave Death Mountain ready for the Zora route
In Volvagia's arena, stay calm and read the holes in the floor. The attack window you want is the grounded head pop-up. Wait until the dragon's head is fully exposed, then run in and strike with the Megaton Hammer to stun it. While it is stunned, add a few safe sword hits and back away before the counterattack catches you. This fight rewards discipline far more than aggression.
If Volvagia erupts farther out of the floor or begins circling in the air, switch from offense to survival. Give the body room, keep your shield ready when fire breath threatens your lane, and do not stand in front of a hole guessing where the next opening will be. During the falling-rock phase, watch the shadows on the platform and sidestep only when one is about to land on you. Getting greedy here costs more health than the grounded phase ever should.
Repeat the grounded Hammer punish whenever the head rises cleanly. Do not force damage during the movement-heavy phases. Once Volvagia is defeated, collect the Heart Container and step into the blue warp. In the Chamber of Sages, Darunia awakens as the Sage of Fire and gives you the Fire Medallion.
With the temple complete, your main route leaves Death Mountain behind for a while. The next story push is the frozen Zora region, where you will need an empty bottle, Blue Fire, and the equipment that opens the Water Temple.
- Volvagia was stunned with the Megaton Hammer during head pop-ups
- Heart Container collected after the boss
- Blue warp used and Fire Medallion received
- You are ready to leave for the frozen Zora route next
Before you move on
- Bolero of Fire is learned and appears on the Quest Status screen.
- The Fire Temple is cleared, Volvagia is defeated, and the Fire Medallion appears on your medallion row.
- You have the Megaton Hammer and can recognize rusted switches and heavy barriers as valid targets for it.
- Your next main-quest destination is the frozen Zora region that leads into Ice Cavern and the Water Temple setup.
References for this chapter
- The Legend of Zelda: Ocarina of Time instruction booklet
- The Legend of Zelda: Ocarina of Time - Fire Temple Walkthrough - Nintendo 64 - By Ernest_64 - GameFAQs
- Ocarina of Time walkthrough - Fire Temple - Zelda's Palace
- The Legend of Zelda: Ocarina of Time/Fire Temple — StrategyWiki | Strategy guide and game reference wiki
Ice Cavern, Blue Fire, Iron Boots, and Water Temple Entry
Return to the Zora region as Adult Link and read the frozen domain as your next clear story signal. Your job here is to cross into Zora's Fountain, clear the Ice Cavern for the Iron Boots, leave with Blue Fire still bottled, free King Zora for the Zora Tunic, then warp to the drained Lake Hylia and open the Water Temple from below. This chapter ends only after you are inside the temple and have seen the first water-level clue that defines the dungeon ahead.
Go back to frozen Zora's Domain and prepare one empty bottle
From the Temple of Time region or Kakariko, head across Hyrule Field to Zora's River and re-enter Zora's Domain by playing Zelda's Lullaby at the waterfall if needed. As soon as you arrive, the story clue is obvious: the whole domain is frozen, most of the Zoras are trapped in ice, and normal progress through this region has been replaced by a cold-weather detour.
Before you commit to that detour, make sure at least one bottle is empty. Blue Fire is the key item for this entire stretch. If all your bottles are full when you enter the Ice Cavern, you will only create extra backtracking for yourself. Do not stop for optional errands here. Your route is to move through the frozen domain, continue on to Zora's Fountain, and use the ice platforms there to reach the cave that was not available as a child.
Do not worry about thawing King Zora before entering the Ice Cavern. In the adult era, the main clue is that Zora's Fountain itself leads you onward: Lord Jabu-Jabu is gone, the fountain is rimmed with floating ice, and the Ice Cavern is now the place the game wants you to explore.
- Be Adult Link
- Keep at least one bottle empty
- Use Zelda's Lullaby at the waterfall gate if needed
- Pass through frozen Zora's Domain without detouring into optional errands
- Continue on to Zora's Fountain and hop across the ice to the Ice Cavern entrance
Work through Ice Cavern slowly and bottle Blue Fire early
Ice Cavern is short, but it punishes sloppy movement. The hazards are not complicated on their own: slippery floors, spinning blades, falling icicles, Freezards, Ice Keese, and red ice walls. The danger comes from trying to rush across narrow frozen ground while enemies or traps are already active. Take a second to watch each room before you sprint through it.
In the early silver rupee room, treat the rupees as the room's lock rather than as a collectible challenge. Sweep the room in a circle, grab the rupees around the spinner first, then collect the higher one from the ledge. When the bars open, move on. In the next major chamber, climb carefully along the narrow ledges and bottle Blue Fire as soon as you reach it. From here on, think of Blue Fire as your route key. Use it on red ice that blocks progress, not on every frozen object you happen to see.
The first important red ice chest contains the Dungeon Map, but your main concern is learning the pattern the cavern expects. Refill Blue Fire whenever you pass a source and your bottle is empty. Later, another red ice path opens the way toward the compass side room, and the final large sliding-block room asks you to gather more silver rupees by pushing the block into position and climbing from it. If you shove the block into a pit by mistake, let it reset and start the setup again rather than trying to salvage a bad position.
Once every silver rupee in the block room is collected, the hallway forward opens. Keep Blue Fire in reserve for the last red ice barrier, then step through to the White Wolfos arena. Defeat it with the same patience you use against normal Wolfos: shield the swipes, wait for an opening, then counter instead of flailing at its face.
- Move carefully in rooms with spinning blades or icy footing
- Collect silver rupees to open the route forward
- Bottle Blue Fire at the first safe chance
- Use Blue Fire on route-blocking red ice first
- Reset the sliding block if it gets stuck in a bad position
- Defeat the White Wolfos to trigger the reward chest
Take the Iron Boots, learn Serenade of Water, and leave with Blue Fire still bottled
Open the large chest after the White Wolfos fight to get the Iron Boots. This is the mandatory reward from the Ice Cavern and the item that actually opens the Water Temple approach. In the original Nintendo 64 release, boots are changed from the equipment screen, so get used to the idea that the next dungeon will ask you to pause and swap deliberately whenever you need to sink or float.
Sheik appears immediately afterward and teaches Serenade of Water. This song is not just a convenience prize. It places a permanent warp directly at Lake Hylia, which is exactly where your next main objective begins. Listen to the scene, learn the song, and keep the destination in mind: the drained lake is the visible symptom of the Water Temple's problem.
Before you leave the cavern for good, make sure you still have Blue Fire in a bottle. Use the small underwater exit beyond the boots room to loop back out, then climb back onto dry ground and head for the exit. If you spent your last bottle charge on the final red ice wall, refill it before leaving. Walking out empty-handed usually means an unnecessary return trip.
- Open the chest for the Iron Boots
- Learn Serenade of Water from Sheik
- Remember that boot changes are manual in the N64 equipment menu
- Use the underwater exit to start your way back out
- Refill Blue Fire before leaving if your bottle is empty
Free King Zora for the Zora Tunic, then move on to Lake Hylia
Back in the frozen domain, use your bottled Blue Fire on King Zora's red ice. This is the clean intended follow-up after Ice Cavern. Freeing him is not what makes Water Temple access possible, but it does give you the Zora Tunic, which lets you stay underwater indefinitely and makes the next stretch much safer and less cramped. Talk to him after thawing him to receive it.
If you still have extra Blue Fire, you can also melt the red ice at the shop entrance, but that is not the main priority. The important result is that your underwater kit is now complete in the way the game clearly expects: Iron Boots to sink, Zora Tunic to breathe freely, and Serenade of Water to return to the lake whenever needed.
This is a good moment to tidy your equipment mentally before entering the next dungeon. Hookshot, Ocarina, and a sword should be easy to reach. The Water Temple is less about surviving hard enemies than it is about understanding where the water level changed and what that revealed.
- Use Blue Fire on King Zora
- Speak to King Zora to receive the Zora Tunic
- Treat the tunic as major preparation, even though the Iron Boots are the true hard requirement
- Keep Hookshot and Ocarina ready for the next destination
Warp to the drained lake, open the underwater gate, and establish the Water Temple route
Play Serenade of Water to warp to Lake Hylia. The lake is still mostly drained, which is your landmark that the Water Temple has not been cleared yet. Move across the exposed lakebed and ruined walkways toward the small island with the Triforce pedestal. The temple entrance is below the remaining pool beside that island, so if you are wandering the wider dry basin, correct your line and come back to the center.
Equip the Zora Tunic and Iron Boots, drop into the water near the island, and sink to the bottom. At the temple doorway you will see the locked mechanism above the gate. Stand close to the entrance and use the Hookshot on the crystal-shaped lock above the door to release it and open the way forward. Follow the short underwater approach and enter the Water Temple.
Do not stop the chapter the moment you cross the threshold. In the first chamber, take off the Iron Boots so you can orient yourself, then sink again and use the bottom passage between the torches on the east side. Follow the curved corridor to the room where Ruto appears. After the scene, float upward, go through the door she leads you toward, and stand before the Triforce mark on the wall. Play Zelda's Lullaby there to lower the water and confirm how this dungeon works.
That first symbol is the warning for the entire temple: almost every major route change depends on where the water level currently sits. From this point on, success comes from remembering what changed after each song trigger. If you lose track of that, the Water Temple becomes confusing. If you keep it in mind, the structure starts to make sense.
- Warp to Lake Hylia with Serenade of Water
- Head for the island with the Triforce pedestal
- Sink in the remaining pool with Iron Boots and Zora Tunic
- Hookshot the lock above the underwater gate
- Enter the Water Temple
- Follow the first bottom passage to Ruto
- Play Zelda's Lullaby at the first Triforce mark to establish the water-level mechanic
Before you move on
- You obtained the Iron Boots from Ice Cavern.
- You learned Serenade of Water from Sheik.
- You left Ice Cavern with Blue Fire handled cleanly and used it to free King Zora.
- You received the Zora Tunic and are ready for longer underwater movement.
- You opened the underwater gate at Lake Hylia and entered the Water Temple.
- You reached the first Triforce mark inside and used Zelda's Lullaby, so you understand that the next dungeon revolves around deliberate water-level changes and room memory.
References for this chapter
Water Temple, the Longshot, and Morpha
This chapter follows the original Nintendo 64 Water Temple layout. Treat the dungeon as one three-story hub built around the large main chamber and the hollow central pillar. Almost every major route starts by returning to that main room, checking your current water height, and choosing the door that now makes sense. The three Zelda's Lullaby symbols control the whole temple, so do not think of them as simple switches. Each one changes which floors are exposed, which ledges line up, and which keys you can reasonably reach. If you ever feel lost, stop in the main chamber and name the current state out loud: low water, middle water, or high water. That habit prevents most backtracking mistakes.
Lower the water and clear the first basement loop
From the entrance, sink with the Iron Boots and take the passage between the two torches. Follow Princess Ruto's route until you can rise back up inside the temple. At the top symbol, play Zelda's Lullaby to drop the temple to its lowest water level. This is the state that exposes the early basement doors and lets you start building your Small Key supply.
Open the nearby room for the Dungeon Map, then return to the main chamber and drop to the lower floor. In the room with one lit torch and two unlit torches, light the other two quickly. Fire arrows are not required here; use a normal arrow through the flame, or Din's Fire if you prefer a simple solution. The opened door leads to Shell Blades and your first Small Key.
Next, work through the west-side basement route. Push the block in the low west passage until it drops into place, then dive through the underwater gap. Cross the first water-column room, then handle the spinning dragon room by using the Iron Boots to hold your place on the dragon body and the Hookshot to trigger the switch in its mouth. Reach the chest beyond for another Small Key, then work your way back to the main chamber.
- Lower the temple to low water from the top symbol.
- Collect the first Small Key from the torch room route.
- Collect the second Small Key from the west basement and spinning dragon route.
Raise the temple to middle water and do not miss the hidden center-pillar key
Now use one Small Key on the locked door inside the central pillar. Hookshot up inside the shaft and play Zelda's Lullaby to raise the temple to the middle water level. This is the dungeon's most notorious trap on the original Nintendo 64 version, because the game does not make the next key obvious for long.
Do not leave the pillar immediately. When the water rises, the central block floats upward and reveals a hole underneath it. Equip the Iron Boots, drop down through that newly exposed opening, and follow the submerged passage. Clear the Shell Blades and spike hazards in the room beyond, then surface in the correct corner to claim another Small Key. If you skip this key, the rest of the dungeon starts feeling impossible later.
After that, return to the main room and revisit the east route where you first met Ruto. There is a cracked wall there that bombs can open. Blow it up and take the Small Key from the chest behind it. With those keys secured, your route is back on track and you are ready to use the middle-water doors without starving yourself for the upper path.
- Use a key on the central pillar door and raise the temple to middle water.
- Sink through the hole revealed under the floating block for the hidden Small Key.
- Bomb the cracked wall in the Ruto passage for another Small Key before committing to the upper route.
Use the middle-water west route to reach high water, then defeat Dark Link for the Longshot
At middle water, take the west-side locked door that now lines up properly. This path uses a water column room to lift you to an alcove beside the final Zelda's Lullaby symbol. Play the song there to raise the temple to high water. This is the state that opens the upper west path toward the dungeon item.
With the water high, go through the west side again and enter the large waterfall room. Ride the moving platforms upward instead of rushing risky jumps. At the top, go through the next locked door and solve the statue-and-water-switch room by raising and lowering the local water until each Hookshot target and statue head lines up in sequence. Keep moving deliberately here; the room rewards calm setup more than speed.
The next room is the illusion arena with the tree in the middle. Walk to the far door and turn around to trigger Dark Link. Fight patiently. Repeated Z-target sword swings let him mirror you too easily, so use spacing, untargeted slashes, jump attacks when he leaves himself open, or heavier alternatives like the Megaton Hammer if standard duels keep stalling. When he falls, continue into the next room and open the chest for the Longshot. Play the Song of Time behind the chest and drop through the opening to continue.
- Use the middle-water west path to reach the final water-level symbol.
- Raise the temple to high water.
- Defeat Dark Link and claim the Longshot.
Use the Longshot to finish the last Small Key cleanup
The Longshot is the temple's turning point. It does not just reach farther than the Hookshot; it turns several earlier dead ends into real routes. After the Longshot chest, follow the rushing-water passage carefully. Swim with the current when possible, but use the Iron Boots briefly if you need to hold position near a corner or avoid being dragged into a whirlpool. Hit the timed eye switch at the end and Longshot across before the grate closes to reach another Small Key chest.
Now return to the main chamber and reset the water deliberately. First lower it to low through the Ruto side route. Then enter the central pillar and raise it back to middle. With middle water active, face the south corridor blocked by a timed grate and an eye switch. Shoot the eye with the Bow and immediately Longshot through the open gap. Inside is a red block puzzle that must be done in two visits.
On the first visit, pull the red block as far as it will go, then leave by using the Longshot target overhead. Reopen the grate the same way, reenter, and now push the block deeper from the other side to uncover the hidden passage and chest with the last Small Key on the main route. If you are missing one key late in the dungeon, this south grated corridor is the first place to recheck.
- Clear the river passage after the Longshot for another Small Key.
- Cycle the temple back to low water, then middle water.
- Solve the south eye-switch grate and red block puzzle in two passes for the final Small Key.
Take the north route for the Boss Key and reopen the high-water boss path
With the Longshot and your remaining keys, head to the north lower route from the main chamber. This late section mixes spikes, Tektites, currents, rolling boulders, and bombable walls. Use the Longshot to cross awkward gaps cleanly instead of trying to inch along every ledge. In the large watery chamber, bomb the cracked walls to reveal the movable block needed for the local water puzzle.
This room uses its own small water mechanism and is separate from the temple's global low, middle, and high states. Push and pull the block until it drops onto the underwater switch and keeps the room's water raised, then continue up the stairs. Cross the water-column bridge room, move through the sloped corridor with the rolling boulder, and sink through the low tunnel at the end to reach the last locked door. The chest beyond it holds the Boss Key.
Once you have it, return to the main chamber and raise the temple to high water one final time. The Longshot can now reach the dragon-head target on the upper north side. Cross to the boss approach, run straight up the slippery spike corridor without hesitating, and unlock the boss door.
- Clear the north lower route and solve the block puzzle in the large watery room.
- Pick up the Boss Key.
- Raise the temple to high water again and Longshot to the upper north dragon target for the boss door.
Defeat Morpha and leave with the correct next destination
Morpha is safer if you control the fight from the outer edge of the arena instead of chasing it through the center water. Watch the pool for a tentacle to rise. When the red core becomes exposed inside the water body, target it with the Longshot and yank it onto the platform or dry edge near you, then punish quickly with the Master Sword before it slips free.
Do not stand too close to the waterline for long. Morpha's main threat is grabbing you, crushing you, and throwing you across the room. Back away as each tentacle forms, keep your footing, and only attack when the core is truly in reach. As the fight goes on, more tentacles can appear at once, but the rhythm stays the same: avoid the grab, pull the core out, strike, and reset your spacing.
Take the Heart Container and step into the blue warp for the Water Medallion. After the Chamber of Sages scene, the story momentum points back toward Kakariko Village as adult Link. That does not mean you should walk straight into Shadow Temple yet. Your next major progress beat is the Kakariko event and the windmill clue that leads into the Lens of Truth setup.
- Fight Morpha from the edge and avoid getting dragged into the pool.
- Use the Longshot on the red core before each sword punish.
- Collect the Water Medallion and head back toward adult Kakariko Village for the next story trigger.
Before you move on
- You have cleared the original Nintendo 64 Water Temple route, including Dark Link.
- The Longshot, Boss Key, and Water Medallion are all in your inventory.
- Morpha is defeated and the blue warp has been used.
- Your next clear story lead is back to adult Kakariko Village for the event that sets up the Bottom of the Well and Shadow Temple route.
References for this chapter
Song of Storms, Child Return, and Bottom of the Well
After the Water Temple in this route, your next important stop is Kakariko Village as adult Link. Approach from Hyrule Field to trigger the burning-village scene, learn Nocturne of Shadow from Sheik, then go straight into the windmill to learn the Song of Storms from the musician. Carry that clue back to the child era, drain the village well, and make a short focused run through Bottom of the Well. The dungeon is built to trick you with false walls, hidden pits, and grabbing hands, but the required reward is close once you use the main chamber correctly, drain its inner water with Zelda's Lullaby, and take the dry pit route to Dead Hand. Leave as soon as the Lens of Truth is yours, then restore your adult setup with Nocturne of Shadow, Din's Fire, and the Lens ready for the Shadow Temple sequence.
Trigger the Kakariko crisis and learn Nocturne of Shadow
Leave Lake Hylia and make your way to Kakariko Village as adult Link. For this chapter, do not warp straight into the graveyard or wander in from another branch first. Enter Kakariko from Hyrule Field so the next story event fires in the intended place. In this route you already have the Forest, Fire, and Water Medallions, so the village scene should be the next major push.
When you step in, Kakariko is in flames and the action centers on the well. Watch the full scene rather than trying to detour into shops or houses. Sheik confronts the shadow spirit that escaped from the well, Link is knocked back, and when the scene ends Sheik teaches you Nocturne of Shadow. That song matters immediately for the overall game because it is the warp tied to the Shadow Temple entrance, but do not go there yet. This chapter still needs the Lens of Truth first.
- Approach Kakariko as adult Link from Hyrule Field.
- Watch the burning-village cutscene at the well.
- Learn Nocturne of Shadow from Sheik before doing anything else in Kakariko.
Use the windmill clue right away
As soon as the cutscene is over, head uphill into the windmill. Speak to the musician inside as adult Link. He is the source of the Song of Storms, and this conversation is the clue that explains how the well can be changed in the child era.
Keep this sequence tight. The clean route here is Nocturne first, Song of Storms second, then a direct trip back to the Temple of Time. Avoid turning Kakariko into a side-quest stop. The whole point of this chapter is to convert an adult-era clue into a child-era solution and come back with the one item the Shadow Temple expects.
- Enter the windmill immediately after the Nocturne scene.
- Learn the Song of Storms from the musician.
- Go to the Temple of Time instead of lingering in Kakariko.
Return to child Link and drain the well
At the Temple of Time, place the Master Sword back in the pedestal to return to childhood. Then go back to Kakariko Village and re-enter the same windmill. Stand near the mechanism and play the Song of Storms. The windmill spins up, and the village well outside is drained.
Leave the windmill and drop into the now-empty well. This is the real payoff for the time-travel clue. You do not need to hunt for another village trigger. Once you land, move through the opening passage into Bottom of the Well and treat everything here with suspicion. This mini-dungeon is designed to mislead you, not to test whether you found the wrong entrance.
- Return to child Link at the Temple of Time.
- Play Song of Storms inside the child-era windmill.
- Drop into the drained well and enter Bottom of the Well.
Use the main chamber correctly before exploring side rooms
The large central chamber is the anchor for the whole well. Think of it as a ring around a middle section, with dangerous floor gaps and misleading dead ends all over the place. Do not start opening every branch. Your goal is to change the room state first, then take the shortest route to the Lens of Truth.
Use the outer water path as your safe guide around the room. Follow it to the far side until you reach the Triforce mark on the floor. Stand on it and play Zelda's Lullaby. This drains the interior water inside Bottom of the Well and turns the room into the state you need for the required route.
After the water is gone, head back toward the side where you first entered the chamber. Stay on the perimeter instead of cutting straight across open floor, because this is where hidden holes and false routes punish rushed movement. Near the entrance side, the newly dry pit becomes usable. Drop into it, crawl through the opening, clear the immediate threat in the passage, and continue up the vines and through the next door toward the required boss room.
- Treat the central chamber as a loop, not as a full-clear checklist.
- Use the outer path to reach the Triforce mark and play Zelda's Lullaby.
- Return to the entrance-side dry pit and take the crawlspace route deeper in.
Expect deception and recover calmly if the well knocks you off route
Bottom of the Well is short for main-story purposes, but it is one of the game's most deceptive dungeons. Some walls are fake and can be walked through. Some open floor is not safe and drops you into lower space if you charge across it. The floor hands are placed to make you panic and swing in bad positions. Once you understand that theme, the dungeon becomes much easier to read.
If you hit what looks like a dead end too early, test the room before assuming the path is wrong. If you fall, do not improvise a full dungeon clear trying to fix it from below. Re-center on the main chamber, confirm the water has been drained with Zelda's Lullaby, and work back to the dry pit route near the entrance side. Recovery here is faster than forcing an optional branch.
For this guide, ignore optional side rewards unless you deliberately want them. The Dungeon Map, Compass, small key branches, and Skulltulas are not the objective of this chapter. The Lens of Truth is.
- Assume fake walls and hidden holes are intentional design, not navigation failure.
- If you get turned around, return to the main chamber and reset the route from there.
- Skip optional rooms unless you are collecting extras on purpose.
Defeat Dead Hand without panicking
In the boss room, the floor hands are the trigger. Let one grab Link, mash free, and immediately move to clearer ground so another hand does not lock you in place. Dead Hand rises from the ground and shambles toward you. The safe opening is when it leans its head down for the bite. Strike the head, then back off and wait for the next clean attack rather than crowding the body.
Treat this as a timing fight, not a damage race. Standing in the hand patches is what makes the room feel chaotic. Trigger the encounter, break free, relocate, punish the lowered head, and reset your spacing. Repeat that loop until Dead Hand stays down.
When the fight ends, open the large chest to get the Lens of Truth. This is the item the chapter is built around. It reveals hidden passages, fake surfaces, and invisible hazards, but it consumes magic while active. Build the habit now: switch it on to read the room, then switch it off once you know the path. That habit pays off in the Shadow Temple.
- Use a floor hand to start the fight, then move out of the grab zone.
- Attack Dead Hand when it lowers its head for the bite.
- Open the chest and collect the Lens of Truth.
Leave the well and restore your adult setup
Once the Lens of Truth is in your inventory, your required work in Bottom of the Well is finished. Backtrack out through the crawlspace route, return to the main chamber, and leave the dungeon. Do not let the mini-dungeon sprawl into an optional cleanup unless you want that for your own file.
Go back to the Temple of Time and become adult Link again. Before starting the Shadow Temple sequence, confirm that three things are now in place. You have Nocturne of Shadow from the burning Kakariko event. You have the Lens of Truth from Bottom of the Well. You also still have Din's Fire from the earlier child-era pickup near Hyrule Castle. Those three pieces complete the setup for the next chapter.
This closes the chapter cleanly. You used the adult-era village crisis to collect Nocturne of Shadow, learned the Song of Storms in the windmill, changed the child era by draining the well, and took the shortest reliable route to the Lens of Truth.
- Leave Bottom of the Well as soon as the Lens of Truth is collected.
- Return to adult Link at the Temple of Time.
- Confirm that Nocturne of Shadow, Song of Storms, the Lens of Truth, and Din's Fire are all secured for the Shadow Temple route.
Before you move on
- As adult Link, you entered Kakariko Village from Hyrule Field, watched the burning-village event, and learned Nocturne of Shadow from Sheik.
- Still as adult Link, you entered the windmill and learned the Song of Storms from the musician.
- As child Link, you played Song of Storms in the windmill and drained Kakariko Well.
- Inside Bottom of the Well, you used Zelda's Lullaby to drain the interior water, took the entrance-side dry pit route, defeated Dead Hand, and collected the Lens of Truth.
- You can now return to adult Link with Nocturne of Shadow, Song of Storms, the Lens of Truth, and Din's Fire ready for Shadow Temple progress.
Shadow Temple and Bongo Bongo
This chapter begins after the Kakariko Village crisis has already happened and adult Link already knows Nocturne of Shadow. With the Lens of Truth from Bottom of the Well and Din's Fire in your inventory, warp to the graveyard ledge behind Kakariko and open the temple instead of revisiting the earlier cutscene. Shadow Temple is less about raw combat than about reading deception correctly: fake walls, invisible ledges, guillotines, spike traps, and fan rooms all try to make you waste magic or panic-jump. The key habits are simple. Use the Lens to confirm a route, then turn it off and move. Wear Hover Boots only when a gap or invisible platform expects them. Switch back to normal boots or Iron Boots when traction matters. Once you claim the Hover Boots, the rest of the dungeon opens into a sequence of key loops, a valuable shortcut near the boat, and a final boss built around stunning hands, exposing an eye, and taking short safe punish windows.
Open Shadow Temple from the graveyard ledge
As adult Link, play Nocturne of Shadow to warp to the upper graveyard platform behind Kakariko. Walk down to the circular seal in front of the closed entrance. Stand in the middle and cast Din's Fire to light the full ring of torches at once. That opens the stone doorway immediately. If the ring stays dark, you are missing Din's Fire rather than standing in the wrong place.
Inside, keep the Lens of Truth ready but do not leave it running out of habit. The first room teaches the dungeon's basic rule: what looks solid often is not, and what looks like a dead end may be the actual route. Longshot across the opening pit, walk toward the wall ahead, and pass through the fake wall to continue.
- Adult Link is active
- Nocturne of Shadow is already learned
- Lens of Truth is in inventory
- Din's Fire is available
- Entrance opened from the torch ring
- Longshot used across the first pit
Push to Dead Hand and claim the Hover Boots
After the first fake wall, ignore the central bird statue puzzle for now. Turn left and use the Lens briefly to reveal the hidden passage set behind one of the skull-marked wall sections. Enter and follow the right wall through the two taunting illusion rooms. The path is much simpler than it sounds if you hug the right side instead of wandering in circles.
Clear the small room with the ReDead and Keese if you want the Dungeon Map, then continue following the right wall through the next illusion passage. This leads to the Dead Hand room. The fight works the same way as in Bottom of the Well: let a hand catch you, break free quickly, and strike Dead Hand when it lunges close enough to expose itself. As adult Link, your sword damage is much better, so stay calm and take clean swings instead of rushing.
Open the chest that appears to get the Hover Boots. These are the temple's turning-point item, but do not treat them as a permanent upgrade. Their value is short gliding over gaps and invisible footing. Their weakness is poor traction, which makes stopping, turning, and close combat sloppier than on normal boots.
- Hidden passage found with the Lens
- Right-wall route through the illusion rooms followed
- Dead Hand defeated
- Hover Boots collected
- Boot traction warning understood
Solve the bird statue and take the first key loop
Backtrack to the bird statue near the entrance side. Use the Lens to examine the ring of skull torches around the room. Only one skull is real, and its position can vary, so do not assume a fixed answer. Push or pull the bird statue until its beak points at the real skull. When aligned correctly, the gate across the gap opens.
Equip the Hover Boots and make a committed run toward the statue's tongue. You should just make the crossing and grab on. Continue into the Beamos hub. Both side walls here are fake. One side hides the Compass, but the required progress is the opposite hidden route leading to the spinning scythe room. Collect all five Silver Rupees there to open the cell with your first Small Key. One rupee sits on high logs, so use the Longshot rather than trying to force a risky jump.
Return to the Beamos room. Bomb the real cracked wall and spend that Small Key on the locked door. This leads into the long guillotine cavern, where patience matters more than speed. Move down the curved hall carefully, watch for Skulltulas dropping from above, and do not let the narrow platforms bully you into bad Hover Boots movement. On the floating guillotines, normal footing is actually safer than sliding.
- Real skull torch identified
- Bird statue aimed correctly
- Hover Boots used to reach the tongue
- First Small Key earned from the Silver Rupee room
- Bombed wall opened in the Beamos hub
- Guillotine cavern entered
Clear the large cavern and the hidden block room
After the first guillotine sequence, beat the Stalfos and continue deeper into the cavern. Before dropping too far, remember that not every suspicious side path is mandatory right away. The goal is to reach the lower right side of the large chamber, collect the Silver Rupees near the Beamos and blade traps, and open the next corridor.
In the spike-crusher room beyond, do not try to sprint through the falling spiked platforms. Read the room correctly instead. Use the Lens to reveal the hidden stone block tucked in the wall, pull it out, and push it beneath the traps to create your safe 'stone umbrella.' Once the block is positioned, pull it to the far end, climb on top, then climb onto the crushers themselves to reach the upper side. Step on the switch there and Longshot to the chest that appears to collect another Small Key.
This room is a common place to get disoriented after success. Reset your mental route before leaving: you used a hidden block to neutralize the spikes, climbed to the upper side, hit the switch, and Longshoted to the key chest. With that key in hand, return to the main cavern rather than searching every side alcove.
- Lower right route in the large cavern completed
- Silver Rupees around the Beamos gathered
- Hidden stone block revealed with the Lens
- Spike crushers crossed using the block
- Switch pressed and key chest reached with the Longshot
- Second Small Key obtained
Take the invisible platform branch, survive the fan rooms, and build the shortcut
Back in the cavern, use the Lens to find the invisible platforms leading to the locked door across the gap. In the invisible spike room ahead, keep the Lens on only long enough to mark where the spikes really sit, then switch it off and move deliberately. Defeat the ReDeads, gather the Silver Rupees, and continue to the skull chamber. Throw a Bomb Flower into the giant flaming skull to destroy it and reveal the next Small Key.
Longshot to the target above the upper door and move into the fan corridor. This stretch expects smarter boot swaps than most of the game. In the narrow hall, either wait for the fan to stop and Hover across the pit or use Iron Boots and the Longshot for the steadier method. In the larger wind room, Iron Boots let you walk safely against the gusts. When you need to cross the hidden side lane revealed by the Lens, switch back to Hover Boots only for the actual wind-assisted glide.
After the Gibdo room, bomb the cracked dirt pile near the entrance and use the Lens to reveal the invisible chest holding another Small Key. Unlock the next door to reach the boat room. Before doing anything else, pull and push the giant stone block into the floor slot beside the ladder. This creates the dungeon shortcut. If the boss defeats you later, this shortcut saves a long return through earlier illusion and guillotine sections.
- Invisible platform route found with the Lens
- Skull chamber key collected after bombing the flaming skull
- Fan corridor crossed with deliberate boot swaps
- Invisible chest revealed after bombing the dirt pile
- Boat room reached
- Stone block shortcut created before riding the boat
Ride the boat, collect the Boss Key, and reach Bongo Bongo
Board the boat, stand on the Triforce symbol, and play Zelda's Lullaby to start the ride. Two Stalfos attack during the trip. Keep your shield ready, stay measured, and avoid backing yourself off the edge. When the boat reaches the far end, jump to the left platform before it falls away.
The next area is an invisible-wall maze with several side doors. Keep this simple. Take the south door first and clear the invisible Floormaster room to earn the Small Key there. Return to the maze, continue clockwise, and enter the north door for the Boss Key branch. In that room, use Din's Fire to burn away the wooden spike walls, defeat the enemies, and open the chest with the Boss Key. Once you have it, return to the boat room side rather than lingering in optional branches.
Back in the upper boat area, look across the gap and shoot the Bomb Flowers at the base of the tall statue. The explosion topples it into a bridge. Cross over, unlock the last door, and enter the room of invisible pillars. Use the Lens just long enough to line up each landing, then make full run-up Hover Boots jumps. Hesitation causes more falls here than committed movement.
- Boat activated with Zelda's Lullaby
- Left-side jump made before the boat collapses
- Small Key collected from the invisible Floormaster branch
- Boss Key collected from the Din's Fire room
- Statue bridge dropped with an arrowed Bomb Flower
- Invisible pillar room crossed to the boss door
Defeat Bongo Bongo and leave with the Shadow Medallion
Drop into the boss arena and switch back to normal boots if you were still wearing Hover Boots. The fight takes place on a moving drum over poison, and slippery footing usually makes recovery worse, not better. Keep your Bow ready and stay far enough back that you can see both hands clearly.
The safest rhythm is hands first, eye second, sword third. Shoot one hand to stun it, then quickly stun the other before the first recovers. When both hands are disabled, Bongo Bongo exposes the eye. Use the Lens of Truth briefly if the body motion makes the eye hard to track, then fire an arrow into it. That drops the boss into a vulnerable state.
Run in for a short sword combo and immediately back out. Do not get greedy under the boss, and do not chase extra hits while the drum is bouncing. If you get knocked into the poison, climb back up, restore your spacing, and resume the same pattern. Repeat the cycle until Bongo Bongo falls.
Take the Heart Container, enter the blue warp, and watch the Chamber of Sages scene to receive the Shadow Medallion from Impa. With Shadow Temple cleared, the main quest can shift west toward Gerudo Fortress, the Haunted Wasteland, and the Spirit Temple setup.
- Normal boots used for steadier boss movement
- Both hands stunned before going for the eye
- Eye shot with an arrow during the opening
- Short safe sword punish used after each stun
- Heart Container taken
- Shadow Medallion received from Impa
Before you move on
- You started from the correct post-cutscene state with adult Link already holding Nocturne of Shadow, the Lens of Truth, and Din's Fire.
- You opened Shadow Temple from the graveyard ledge and collected the Hover Boots from Dead Hand.
- You navigated the dungeon's required fake walls, guillotines, invisible platforms, spike crushers, fan rooms, boat ride, and Boss Key branch without relying on remake-only shortcuts.
- You created the stone-block shortcut near the boat so the dungeon is easier to recover from after a mistake or defeat.
- You defeated Bongo Bongo by stunning both hands, exposing the eye, and taking short safe sword punish windows.
- You received the Shadow Medallion and are ready to continue toward Gerudo Fortress and the desert route.
Gerudo Fortress, Haunted Wasteland, and Spirit Temple Child Half
This chapter covers the original Nintendo 64 main route through Gerudo Fortress and the setup for Spirit Temple's split-age structure. As Adult Link, free the four carpenters to earn legal passage through Gerudo territory, cross the Haunted Wasteland to Desert Colossus, learn Requiem of Spirit, then return as Child Link to clear the temple's early half and collect the Silver Gauntlets for your later adult return.
Cross Gerudo Valley and reach Gerudo Fortress as Adult Link
Ride west across Hyrule Field to Gerudo Valley. In the adult era the bridge is broken, so use one of the two intended ways across for this stage of the game. If you already have Epona, build speed and jump the gap. If you prefer not to rely on the horse, stand near the broken bridge and use the Longshot on the target point above the far side to pull yourself across.
Once you land on the fortress side, follow the path past the carpenter tent and continue into Gerudo Fortress. Expect resistance immediately. White-clothed guards act as untouchable spotters, while purple-clothed patrolling guards can be knocked out if you catch them first with an arrow. If a lookout sees you, you are thrown into a jail cell, but this is only a short setback. Use the Longshot on the wooden overhang above the window to escape and continue.
Treat the fortress as a compact stealth-and-duel area rather than a giant maze. Move one lane at a time, stop at corners, and use the Bow before stepping into open ground. Your goal here is not treasure or minigames. You only need to rescue the four carpenters and receive the card that removes the constant arrests.
- Cross the broken Gerudo Valley bridge with Epona or the Longshot.
- Enter Gerudo Fortress as Adult Link.
- Understand that being caught sends you to jail, but the Longshot lets you recover quickly.
Rescue the four carpenters and earn the Gerudo Membership Card
A simple way to clear the fortress is to work from the lower rescue rooms toward the more hidden upper one. After escaping the first jail cell, go into the nearby doorway on the left to find the first carpenter. Speak to him to trigger a Gerudo guard duel. In every one of these fights, keep Z-targeting active, hold your shield up when she closes in, and do not get greedy after a block. Her leaping spin is the move most likely to punish panic. Let her finish an attack, then answer with one or two sword strikes and back off again.
Continue through the connected walkways and exterior ledges to the next prison rooms. Another carpenter waits in an upper interior section, a third is reached from the lower level beneath the vine area, and the last is tucked beyond the room with the large cooking pot and the crate hiding spot outside. If you lose track of the route, remember the fortress loops around central courtyards and balconies. Look for doors with imprisoned carpenters rather than exploring every rooftop.
For the last rescue, patience matters more than speed. Hide behind the crate, wait for the passing guard to move, then slip into the final doorway and win the last duel. When all four men are free, the Gerudo leader appears and gives you the Gerudo Membership Card. This is the point of the whole fortress run. From now on, you can move through the fortress freely, the guards stop throwing you in jail on sight, and the path toward the desert can be opened legally.
- Free all four carpenters.
- Win the four Gerudo guard duels without relying on a full restart.
- Receive the Gerudo Membership Card.
Open the desert gate and cross the Haunted Wasteland
With the card in hand, go to the northwest side of Gerudo Fortress and climb the ladder beside the large desert gate. Speak to the Gerudo posted above to have the gate opened. Step through and prepare for two separate navigation tests.
The first obstacle is the river of sand near the entrance. Equip the Hover Boots and glide straight across. Do not wander in the sand looking for a shortcut. Get on firm ground first, then reorient. After that, follow the line of flags through the storm. These markers are the intended route across the visible half of the wasteland. If you try to cut diagonally through open desert, the area can dump you back and waste time.
Eventually you will reach a stone structure. Climb it and use the Lens of Truth. A ghost guide appears for the final stretch. Follow it closely through the invisible portion of the path until you emerge at Desert Colossus. Save some magic for this last section instead of burning Lens use the entire way through the flagged half.
- Open the Haunted Wasteland gate after earning the membership card.
- Use the Hover Boots to cross the river of sand safely.
- Follow the flags through the storm.
- Use the Lens of Truth at the stone structure and follow the ghost guide to Desert Colossus.
Learn Requiem of Spirit and set up the age swap
At Desert Colossus, head toward the Spirit Temple entrance. The lobby itself tells you the temple is split by age: one path is a small crawlspace meant for Child Link, while the other is blocked by a giant silver block meant for later. Walk back outside and Sheik will appear nearby to teach Requiem of Spirit.
This song is the real reward for reaching the desert now. Child Link cannot normally make this trip through Gerudo Fortress and the Haunted Wasteland, so Requiem of Spirit becomes your direct return route to the temple. Do not try to force the adult half first. Instead, use Prelude of Light to return to the Temple of Time, replace the Master Sword, and become Child Link.
As Child Link, immediately play Requiem of Spirit to warp back to Desert Colossus. This keeps the route clean and prevents a lot of unnecessary backtracking. You are now returning to the Spirit Temple at the correct age for the first half.
- Trigger Sheik outside the Spirit Temple.
- Learn Requiem of Spirit.
- Return to the Temple of Time and switch back to Child Link.
- Warp back to Desert Colossus as Child Link.
Enter the Spirit Temple as Child Link and clear the early rooms
Go inside and climb the stairs on the left. Speak with Nabooru blocking the crawlspace. Keep the conversation moving by giving the harmless answers and agree to help her recover the Silver Gauntlets. Once she moves aside, crawl into the child-only passage. This is the intended start of the temple.
In the first corridor, clear the flying enemies so they do not harass you while you line up shots. Enter the left-hand room and defeat the Stalfos carefully. Child Link has short reach, so stay patient and punish after its swing rather than charging in. Once the room is safe, hit the crystal switch behind the raised bridge. The Boomerang is the easiest answer here because it can curve around the barrier, though a careful Slingshot shot through the gap also works. Cross when the bridge lowers.
In the next room, deal with the Anubis by using the room's fire against it. Because it mirrors your movement, guide it toward the flames or use Din's Fire if you want a faster clear. Beyond that, you will reach a room built around five silver rupees and a Wallmaster threat. Grab all five rupees to lower the bridge, keep moving when the shadow appears overhead, and use the opened route to continue toward the Small Key you need for the locked child-side door.
Return to the north crawlspace door with that key and unlock it. In the Bombchu room, kill the Skullwalltulas on the climbable wall and go up. If you are low on Bombchus, use the crystal switch in the room to reveal supply chests. Then send a Bombchu into the cracked wall so the sunlight breaks through onto the sun emblem on the floor. That opens the next door and confirms you solved the room correctly.
- Speak to Nabooru and enter the child crawlspace.
- Beat the Stalfos and hit the fenced crystal switch with the Boomerang or Slingshot.
- Use fire against the Anubis.
- Collect the silver rupees and advance to the Small Key route.
- Unlock the child-side locked door.
- Use a Bombchu to break the wall and shine sunlight onto the floor sun emblem.
Finish the child half, defeat Iron Knuckle, and take the Silver Gauntlets to adulthood
The remaining child-side rooms teach the temple's light-and-switch puzzle language. In the large statue chamber, use the local switch setup to open the way forward, then continue into the Beamos and sun-marked rooms. Clear dangerous enemies before solving anything. Bombs or Bombchus are the safest way to remove Beamos. Gather the silver rupees in the room to trigger the next change, then use the lit flame and movable sun block to redirect sunlight where the temple expects it. When the final child-side door opens, you are on the last stretch to the reward.
The next battle is your first Iron Knuckle. Strike the seated statue to wake it. This enemy is slow but brutally strong, so do not trade hits. Hold Z-target, stay just outside axe range, bait a swing, hop or step back, then move in for one clean counter. Repeat. If it breaks the throne or pillars, grab the recovery hearts only when the arena is safe. The fight becomes much easier when you stop trying to combo and instead treat every hit as a separate opening.
After the Iron Knuckle falls, go through the now-open door and step out onto the temple's outer hand. Open the chest there to receive the Silver Gauntlets. Child Link cannot use them, but the cutscene that follows makes their purpose obvious: they are the key that will let Adult Link move the giant silver block in the Spirit Temple entrance.
When the scene ends, your work here is done for now. Use Prelude of Light to return to the Temple of Time, become Adult Link again, and play Requiem of Spirit one more time to warp back to Desert Colossus. You are now positioned exactly where the second half of the temple begins, with the item required to open it.
- Clear the final child-side light and switch sequence.
- Defeat the first Iron Knuckle by baiting swings and countering safely.
- Open the chest on the temple's outer hand to get the Silver Gauntlets.
- Return to adulthood.
- Warp back to Desert Colossus, ready to push the giant block in the Spirit Temple lobby.
Before you move on
- Gerudo Fortress is cleared and you hold the Gerudo Membership Card.
- You have opened and crossed the Haunted Wasteland to reach Desert Colossus.
- Requiem of Spirit is on your song list.
- As Child Link, you completed the crawlspace half of the Spirit Temple and beat the first Iron Knuckle.
- The Silver Gauntlets have been collected.
- You have returned to Adult Link and can now reopen Spirit Temple by moving the giant silver block in the entrance hall.
References for this chapter
Spirit Temple Adult Half and Twinrova
Come back to the Spirit Temple as Adult Link after finishing the child half and collecting the Silver Gauntlets. This return trip is the payoff for the temple's split structure: adult strength opens the route, Zelda's Lullaby and the Megaton Hammer unlock upper access, and the Mirror Shield turns sunlight into the final key that leads to Twinrova and the Spirit Medallion.
Use the Silver Gauntlets to reopen the temple and claim the first adult key
Enter the Spirit Temple through the main front hall as Adult Link. The giant silver block on the right side of the entrance is the first hard proof that the child-half reward matters now. Push it forward until it drops into the hole and opens the sunken section below.
Ignore the Beamos and spike trap in that lower strip if they are not directly in your way. Look up and hit the crystal switch hanging from the ceiling to unlock both nearby doors. Take the left door first. In the small room beyond, defeat the Wolfos, stand on the Triforce symbol, and play Zelda's Lullaby. A chest appears above the sand pit. Longshot to it for the Compass, then leave the room.
Now take the opposite door. In the rolling-boulder room, collect all five Silver Rupees to open the far door. Four are tucked in the side alcoves. The center one is the awkward pickup, so climb up and use the Hover Boots to drift onto it instead of trying to force a tight jump. Go through the opened door, defeat the Like Like that drops in, and take the Small Key from the chest. Backtrack to the Beamos strip and use the locked door there.
This opening section teaches the adult-half logic clearly. If a route asks for raw strength, tall ledges, Longshot range, or Hover Boots control, you are on the correct half of the temple. Do not waste time revisiting child crawlspaces once the adult route is open.
- Push the giant silver block into the hole.
- Open both entrance-side doors with the ceiling crystal switch.
- Take the left room for the Compass, then the right route for the Small Key.
- Unlock the adult-side door and continue deeper instead of returning to child passages.
Clear the mid-temple puzzles and use the statue room as your anchor
After the locked door, work through the trap-heavy rooms until you reach the area with the movable mirror and several sun faces. Clear nearby threats first so you are not trying to line up the mirror while under pressure. Rotate the mirror to hit the sun faces in sequence. The early hits produce chests, but the important result is the door that opens when the correct face is lit. That exit sends you back toward the huge central statue chamber from a higher route.
Treat that large statue room as your navigation anchor for the rest of the dungeon. It connects strength checks, song checks, and later sunlight puzzles. If you fall to the lower floor, recover your position from the staircases and Longshot targets instead of assuming you are lost. The room is meant to be revisited several times from better angles.
From the upper side of the statue room, jump with the Hover Boots onto the nearer hand that has a Triforce symbol and play Zelda's Lullaby. This creates the chests and access points you need for the next loop. Drop to the floor, light both torches near the statue with Din's Fire or Fire Arrows to reveal the Dungeon Map chest, then climb back up to the southeast side and Longshot to the small chest that appeared across the gap. Use the Megaton Hammer on the rusty switch behind it to open the barred door in the middle of the room.
This is the heart of the temple's split identity. Earlier child progress got you the Silver Gauntlets. Adult movement, the hammer, and songs now assemble the upper route piece by piece. Keep asking what category a puzzle belongs to: strength, song, or later reflected light.
- Solve the movable-mirror room until the correct door opens.
- Return to the statue room and use it as your central landmark.
- Play Zelda's Lullaby on the statue hand.
- Light the torches for the Dungeon Map and hammer the rusty switch to open the central barred door.
Beat the adult Iron Knuckle and collect the Mirror Shield
Go through the newly opened middle route into the Armos room. The center floor switch opens the locked door to the right, but it will not stay down on its own. Wake or shoot an Armos from a safe position near the door, lure it so that its jump lands on the switch, and slip through the door before it shuts again. Climb the stairs beyond to reach the second adult Iron Knuckle.
Fight Iron Knuckle with patience. Let the axe swing finish before stepping in. One or two hits after each committed attack are enough. These enemies punish panic more than low damage output. If there are pillars or the throne in the room, use them to disrupt the rhythm of its approach, but do not back yourself into a corner where a wide swing can catch you.
After the Iron Knuckle falls, go through the passage behind the throne and step outside onto the statue's left hand. A large chest drops here with the Mirror Shield. This is the adult-half turning point. Up to this point, sunlight sources and sun symbols have mostly been hints. From here on, they become direct progression tools.
Keep the temple's logic straight after this pickup. Strength opened the route. The Mirror Shield now finishes it. When you see sunlight, a sun face, or a beam path, stop thinking in terms of combat and start thinking about angle, distance, and where the next reflection must land.
- Use the Armos room switch puzzle to open the right-side door.
- Defeat the second adult Iron Knuckle safely.
- Open the outdoor chest on the statue's left hand.
- Equip the Mirror Shield and start treating sunlight puzzles as progression.
Turn the Mirror Shield into the route to the Boss Key
Return to the Armos room. On the side opposite the Iron Knuckle door, use the Mirror Shield to reflect sunlight onto the sun face and open another small side room. Take the Small Key there, then backtrack to the earlier route and use the next locked door.
Continue through the trap corridor and up into the short Triforce hall. Play Zelda's Lullaby on the floor symbol to open the way ahead. In the Boss Key room, destroy the false wall next to the flaming chest to expose a gold eye switch. Shoot it to create the extra ice platform, Longshot up, cross carefully, and step on the switch that lowers the flames long enough for you to open the Boss Key chest below.
This section is where the temple stops being about finding the correct wing and starts checking whether you can apply your whole toolset in order: key from reflected sunlight, song trigger, bow shot, Longshot movement, and timed platform use. If you get turned around, reset your thinking to the last permanent state change you caused, such as opening a door or revealing a target, instead of wandering room to room.
Do not skip the small reflected-light key room on the way to the Boss Key. Missing that one detour is an easy way to convince yourself the temple is more confusing than it really is.
- Reflect sunlight in the Armos room to reveal the next Small Key route.
- Play Zelda's Lullaby in the Triforce corridor.
- Reveal the gold eye switch in the Boss Key room.
- Claim the Boss Key before moving to the final mirror sequence.
Finish the mirror chain, break the statue face, and reach Twinrova
After getting the Boss Key, take the plain door that leads into the late mirror puzzle. This is one place where the original Nintendo 64 layout matters. In this version, the crystal switch is behind the bars, so hit it through the fence to open the next door. Do not look for the 3DS floor-switch placement here.
Move through the White Bubble and cobra-statue rooms carefully. Bomb the odd-shaped wall to open the hidden passage, then rotate the first cobra so its light shines into the newly opened room. In the next room, turn the second cobra statue so the beam is sent back out into the main mirror apparatus. Once the light path is aligned, return to the lower mirror platform where the beam now shines down and use the Mirror Shield to reflect it onto the sun face. That lowers the platform into the main statue chamber.
Now face the giant statue's head. Stand in the light and hold the reflection on the face until it crumbles away. Longshot to the exposed grating inside the opening and unlock the Boss Door.
Just before the boss arena, Twinrova leaves one last Iron Knuckle in your way. Fight it like the others, but stay especially alert because this one leads straight into a story reveal. When the armor breaks, it is Nabooru underneath. After the cutscene, go through the last door, climb to the center platform, and prepare for the boss.
- Hit the behind-bars crystal switch in the N64 mirror room.
- Align both cobra-statue light paths.
- Lower the platform and reflect light onto the giant statue's face.
- Open the Boss Door and defeat the final Iron Knuckle guarding Nabooru.
Defeat Twinrova and take the Spirit Medallion
Twinrova starts in the separate-sisters phase. Kotake attacks with ice and Koume attacks with fire. Keep moving so missed beams do not trap you in lingering elemental patches. When one sister fires, raise the Mirror Shield and angle the reflected beam into the other sister. You can target or free-aim, but the important part is facing the shooter first and turning the reflection toward her partner. Repeat until they merge.
In the fused phase, stop trying to reflect one witch into the other. Now the Mirror Shield absorbs elemental shots. Let it take three attacks of the same type in a row. After three matching fire blasts or three matching ice blasts, your shield is charged and releases the stored power toward Twinrova if you are facing her. If she switches to the opposite element before you finish the set, dodge it. Mixed elements ruin the charge and waste the opening.
When the charged blast stuns her and she drops onto a platform, close in fast and land a short sword combo. Do not overstay. Back off as she recovers, reset your spacing, and build the next three-shot charge. This is a pattern fight, not a race. Reading the element sequence correctly matters more than squeezing in one extra swing.
After the last stun cycle, Twinrova collapses and the witches bicker away in defeat. Collect the Heart Container and step into the blue warp. In the Chamber of Sages, Nabooru awakens as the Sage of Spirit and gives you the Spirit Medallion. With the desert temple complete and all six medallions gathered, the next mandatory story step is back at the Temple of Time for the Light Arrow event.
- Phase one: reflect each sister's beam into the other sister.
- Phase two: absorb three shots of the same element and avoid mixed charges.
- Punish only during the stun windows after the charged release.
- Take the Heart Container, enter the warp, and receive the Spirit Medallion from Nabooru.
Before you move on
- The giant silver block in the front hall has been moved with the Silver Gauntlets and the adult route has been fully opened.
- The Mirror Shield has been collected from the outdoor chest on the statue's left hand.
- The Boss Key has been obtained and the statue's face has been broken open with reflected sunlight.
- The final Iron Knuckle has been defeated, Twinrova has been beaten in both phases, and Nabooru has awarded the Spirit Medallion.
- You are finished with the Spirit Temple and ready to return to the Temple of Time for the Light Arrow sequence.
References for this chapter
Light Arrows and the Six Trials of Ganon's Castle
After the Forest, Fire, Water, Shadow, and Spirit Medallions are in hand, return to the Temple of Time as Adult Link for the final story handoff before the ending. Sheik reveals Zelda's identity, Ganondorf interrupts, and Zelda leaves you the Light Arrows. Those arrows are not just for the final boss. They are the key that removes each trial barrier inside Ganon's Castle. Once the cutscene ends, go to the castle ruins, approach the broken gap, and let the sages form the rainbow bridge into the final dungeon. Inside, treat the castle as a hub with six short trial branches around one sealed central tower. Shadow is the most useful first branch because it gives the Golden Gauntlets, which immediately matter elsewhere. Clear every trial, destroy every barrier core with a Light Arrow, then climb the newly opened center tower and collect the Boss Key before you stop at Ganondorf's door.
Return to the Temple of Time and secure the Light Arrows
As soon as the five adult temples are complete, warp or travel back to the Temple of Time as Adult Link. Entering now triggers the last major Zelda scene before the finale. Let it play through completely. You leave this sequence with the Light Arrows, and this chapter starts in earnest the moment they are added to your bow.
After the scene, head for the ruined castle grounds. Walk toward the gap facing Ganon's Castle and the sages will create the rainbow bridge for you. Cross it and enter. When you pass the entrance stairs, ignore the Beamos and go straight into the main chamber. The center tower is blocked by a painful energy seal, and six color-coded trial doors circle the room.
Before you begin, make one practical equipment check. Keep the Master Sword available, make sure the Fairy Bow has a healthy arrow stock, and bring enough magic to cover repeated Light Arrow use plus Din's Fire or Lens use where needed. Fire Arrows help in a few rooms, but they are still optional for story completion. This chapter keeps the original Nintendo 64 layout and does not rely on 3DS shortcuts or Master Quest room changes.
- Required story state: Forest, Fire, Water, Shadow, and Spirit Medallions obtained
- Required new reward: Light Arrows from Zelda at the Temple of Time
- Core equipment for the trials: Fairy Bow, Longshot, Lens of Truth, Megaton Hammer, Mirror Shield, Hover Boots, Goron Tunic, Song of Time, Zelda's Lullaby, Din's Fire
- Optional convenience: Fire Arrows
Read the castle correctly before choosing a door
The main room is a hub, not a full-size maze. Each side branch ends at a glowing barrier core. When you shoot that core with a Light Arrow, the matching sage destroys one section of the seal around the middle tower and sends you back to the hub. Your real objective is barrier removal, not chest sweeping.
There is also a hidden recovery room in the hub. Drop to the lower level beneath the bridge leading toward the central tower and use the Lens of Truth on the southern wall. Inside are fairies and Business Scrubs, which makes this the best place to reset if you run low on health, arrows, or magic between trials.
For a clean first-time route, start with Shadow for the Golden Gauntlets, then use that new strength in Forest, Water, Spirit, Fire, and finally Light. Water and Spirit can be swapped if you prefer, but delaying Shadow only creates unnecessary backtracking because the gauntlets are part of several later checks.
- Think of the castle as six short branches around one sealed tower
- Every branch ends the same way: shoot the barrier core with a Light Arrow
- Best first stop for a practical route: Shadow Trial
Clear Shadow first, then use the Golden Gauntlets where they matter
Enter the Shadow Trial through the purple door. This room is about temporary platforms, invisible footing, and one key reward. Make your way across the opening section carefully and do not rush the pit jumps just because the room is short. The Like Like is a bigger threat than the enemies around it because getting knocked off wastes time and breaks your rhythm.
Use the Lens of Truth whenever the floor disappears from view, and use the Megaton Hammer on the rusted switch when you reach it. Once the chest appears, Longshot to it and open it for the Golden Gauntlets. This is the last major strength upgrade in the game, and it is the whole reason to do Shadow early.
Finish the branch and destroy the Shadow barrier core with a Light Arrow before you leave. From here on, remember that the Golden Gauntlets are not just a late bonus. They are immediately needed for later castle progress, including a giant pillar in Forest Trial, the heavy obstacle in Light Trial, and the large block inside Fire Trial.
- Main reward from Shadow Trial: Golden Gauntlets
- Key tools used here: Lens of Truth, Megaton Hammer, Longshot, Light Arrows
- Do not move on until the Golden Gauntlets are collected and the Shadow barrier is gone
Handle Forest and Water with deliberate item use, not random exploring
Go to Forest Trial next. Defeat the Wolfos, then solve the torch gate correctly. Din's Fire lights the four ground torches around the center. If you already have Fire Arrows, use one on the high torch above the exit door. If you skipped Fire Arrows, stand so a lit lower torch is between Link and the high torch, then fire a normal arrow through that flame to ignite the torch over the door. Din's Fire alone does not open this door, so do not waste magic recasting it and waiting for the top torch to light itself.
The next Forest room is the real route check. Play the Song of Time at the entrance when needed, use the Hover Boots to manage the fan-blown gaps, and use the Longshot after the floor switch reveals the target post. One silver rupee is tied to the giant pillar, so use the Golden Gauntlets to throw that pillar and continue collecting the full set. Once the last rupee opens the door, enter the barrier room and destroy the Forest core with a Light Arrow.
Now clear Water Trial. In the first room, beat the Freezards, bottle Blue Fire, and melt the red ice blocking the way forward. Keep at least one bottle filled until the entire branch is solved. In the timed block room, push the first block into the floor gap, route the second block into climbing position, melt the next red ice wall, smash the rusted switch with the Megaton Hammer, and get through the timed door before it closes. Finish by shooting the Water barrier core with a Light Arrow.
If you waste Blue Fire or push the ice blocks into an awkward setup, it is faster to reset the room and repeat the short puzzle cleanly than to improvise under the timer.
- Forest Trial checks: Din's Fire, Bow and normal arrows, Song of Time, Hover Boots, Longshot, Golden Gauntlets, Light Arrows
- Water Trial checks: empty bottle, Blue Fire, Megaton Hammer, Light Arrows
- Do not leave either branch until its barrier core is broken
Use the N64 Spirit layout, then finish Fire and Light
Take the orange Spirit Trial with the original Nintendo 64 room layout in mind. In the first room, collect the silver rupees while managing the traps and destroy the Beamos if it is blocking your line. Use the Longshot for the high rupee. In the next room, remember the critical N64-specific detail: the crystal switch for the Bombchu chest is across the fence, not placed for an easy direct hit. Use a spin attack from your side to trigger it, open the chest, then send a Bombchu through the opening so it reaches the distant switch and opens the way forward.
In the sunlight room, let the puzzle tell you what it wants. The web above blocks the light beam. If you have Fire Arrows, burn it directly. If you skipped them, line up a normal arrow through the nearby torch flame from the previous area and burn the web that way. Once the light is coming through, use the Mirror Shield on the correct sun face just around the left corner from where you entered. The others are traps. Continue and destroy the Spirit barrier core with a Light Arrow.
Move on to Fire Trial with the Goron Tunic equipped. This room is built around sinking lava platforms and silver rupees. The Golden Gauntlets are mandatory here because one large block must be thrown aside to expose a rupee and a safe route. The Hover Boots help stabilize movement on the sinking center path, and the Longshot finishes the route to the exit once the rupee set opens the door. Clear the barrier room and remove the Fire core with a Light Arrow.
Light Trial should be last because its entrance is blocked by a huge silver stone that only the Golden Gauntlets can move. Once inside, use the Lens of Truth early to reveal the hidden threats in the first room and earn the first Small Key. In the next room, play Zelda's Lullaby on the Triforce symbol to reveal the second key. In the boulder room, collect the silver rupees patiently, using the Longshot for the elevated one instead of forcing risky jumps. Near the end, the room that seems empty is a fake dead end. Use the Lens again, walk through the false wall, and destroy the true Light barrier core with a Light Arrow.
- Spirit Trial checks: Longshot, Bombchus, spin attack for the fenced switch, Mirror Shield, Bow, Light Arrows
- Fire Trial checks: Goron Tunic, Golden Gauntlets, Longshot, Hover Boots, Light Arrows
- Light Trial checks: Golden Gauntlets, Lens of Truth, Zelda's Lullaby, two Small Keys, Longshot, Light Arrows
Open the central tower, take the Boss Key, and stop prepared
After all six barrier cores are gone, return to the hub and look at the center. The seal around the tower disappears, which confirms that trial cleanup is complete. If your health, arrows, or magic are in bad shape, use the hidden recovery room one last time before you start climbing. This is the clean point to restock because the game is about to shift from short branch puzzles into a straight combat ascent.
Enter the center tower and work upward room by room. The climb is mostly a series of enemy checks, so slow down and fight cleanly instead of sprinting into damage. The key milestone is the Stalfos room. Defeat both Stalfos and open the chest that appears. That chest contains the Boss Key, and collecting it is the actual goal of the tower ascent in this chapter.
Continue through the remaining rooms until you reach Ganondorf's door, but stop here. Make this your final pre-boss check. Re-equip the Master Sword if you swapped it out during puzzle rooms. Keep the bow ready. Stabilize your health, make sure you have enough arrows for repeated Light Arrow setups, and keep enough magic for several Light Arrow shots in the battles ahead. Once that is done, this chapter is complete and you are ready to begin the endgame fight sequence.
- All six barrier cores destroyed
- Central seal removed and center tower climbed
- Boss Key collected after the Stalfos fight
- At Ganondorf's door: Master Sword ready, Bow stocked, magic reserve healthy, healing plan in place
Before you move on
- You returned to the Temple of Time as Adult Link, watched the Zelda reveal scene, and received the Light Arrows.
- You approached the castle ruins, crossed the sages' rainbow bridge, and entered Ganon's Castle.
- You cleared all six trials and destroyed every barrier core with Light Arrows.
- You obtained the Golden Gauntlets from Shadow Trial and used them where the castle expects them, including Forest, Fire, and Light Trial progress.
- You handled the original Nintendo 64 Spirit Trial setup with the fenced Bombchu-chest switch and finished the sunlight puzzle without treating Fire Arrows as mandatory.
- You climbed the center tower, defeated the Stalfos, collected the Boss Key, and reached Ganondorf's door ready for the final chapter.
References for this chapter
- The Legend of Zelda: Ocarina of Time instruction booklet
- Ocarina of Time Walkthrough - Ganon's Castle - Zelda Dungeon
- Ganon's Castle: The Final Dungeon - The Legend of Zelda: Ocarina of Time Guide and Walkthrough
- Din's Fire & Fire Arrows - ZeldaSpeedRuns
- Vanilla Dungeon Requirements - OoT Randomizer Wiki
Ganondorf, the Castle Escape, Final Ganon, and the Ending
With the Boss Key already earned and the six trials behind you, the last push in the original Nintendo 64 version is a straight climb up Ganon's Tower, a two-part boss sequence, a timed escape, and one final finishing strike. The safest approach is to conserve your focus instead of forcing speed. Refill before the last door, fight Ganondorf from the outer platforms, follow Zelda closely during the collapse, and treat Ganon's tail as the only worthwhile target until the game hands you the final opening.
Climb Ganon's Tower and prepare at the last safe room
From the central chamber of Ganon's Castle, use the completed path to enter the middle tower and begin the final ascent. This section is no longer about puzzle solving. Each room is a combat checkpoint followed by another staircase. Clear the enemies, take the newly opened door, and keep moving upward. If you take a bad hit, stop on the next landing and recover before rushing into the next room. Losing your bearings is more dangerous here than moving slowly.
The climb tests enemies you already know how to fight. Shield discipline matters more than fancy offense. Let Dinolfos and Stalfos come to you, punish after their swings, and do not stand between two heavy enemies if you can peel one away first. The Iron Knuckles near the top hit hard enough to ruin a good run, so fight them one at a time instead of charging both. When you reach the room with jars before the last stairway, treat it as your final preparation point. That room can supply arrows and magic, and the next door leads directly into the Ganondorf sequence.
Use the Boss Key door, go up the final stairs, and enter ready to fight immediately. Your health and magic are restored by the scene, but you still want your buttons arranged before control returns. Put the Master Sword where you can use it instantly and keep Light Arrows assigned where you can reach them without menu fumbling.
- Enter the final climb with healing if you have it, but do not delay the run for optional supplies.
- Use your shield and stable footing during the tower enemies instead of trying to sprint past everything.
- Before the last door, make sure Light Arrows are equipped and you still have enough magic to fire them during the boss fight.
Beat Ganondorf from the outer platforms
Ganondorf opens the fight by blasting apart the blocks nearest the center. Do not stand your ground in the middle. Move to one of the outer platforms and fight from there. Unlike many earlier fights, Navi cannot help you lock on here, so keep the camera lined up manually and face him squarely before trying to answer his attacks. The basic plan is to win the volley exchange, not to run up and swing first.
His main attack is the glowing energy orb. Time a sword swing to send it back. Keep returning it until it finally strikes him and stuns him on the center platform. The moment he is stunned, shoot him with a Light Arrow, then cross to the middle and land a short sword combo. Two or three clean hits are better than staying too long and getting blasted away on the recovery. As soon as he starts to stand again, retreat to an outer platform and reset the fight.
If he begins charging the larger dark attack, do not panic and run in a straight line too early. Either keep moving and dodge late, or interrupt the setup with a clean Light Arrow if you already have the shot lined up. The most consistent pattern is simple: outer platform, return the orb, Light Arrow during the stun, short punish, retreat. Repeat that cycle until the fight ends. If you run low on magic or arrows, the lower area beneath the platform has refill jars, so drop down, restock quickly, and climb back up instead of gambling on a sloppy final exchange.
- Fight from the outer platforms rather than lingering on the center blocks.
- Win the energy-volley exchange with your sword before trying to damage Ganondorf.
- After he is stunned, use a Light Arrow, then take only a brief sword punish before backing away.
Follow Zelda through the collapsing tower
After Ganondorf falls, Zelda is freed and the tower starts to collapse. This is a timed retreat, but the route is far more linear than it first appears. The correct habit is to stay close enough to see Zelda's next door, while leaving yourself enough room to avoid debris and sudden stops. Do not treat this as a fresh maze. It is the same tower in reverse, with Zelda acting as your guide.
Run behind her down the ramps and through the doors she opens. If rocks fall in your path, sidestep and keep moving. The one major stop is the Stalfos room, where flames trap Zelda and force you to defeat two Stalfos before she can continue. Handle them cleanly, because if you leave one standing too long while working on the other, the fight drags out and costs precious health. Once they are down, collect the recovery hearts if you need them and immediately get moving again.
Near the end of the descent you pass back through the main room area. A ReDead appears on the bridge late in the escape. Unless it actually catches you, do not waste time fighting it. Keep following Zelda through the last doorway and down the final stairs. When you exit, keep your footing through the last cutscene setup and let the collapsing tower finish sinking. The outside battle begins almost immediately after the rubble settles, so do not assume the danger is over just because you made it out.
- Stay on Zelda's route and let her opened doors guide the descent.
- Defeat the forced Stalfos pair quickly so the timer does not become a problem.
- Ignore late distractions like the bridge ReDead if the path out is already open.
Survive the first phase against Ganon and recover the Master Sword
When Ganondorf rises from the rubble as Ganon, the arena is sealed with fire and the opening scene knocks the Master Sword out of your hands. This phase is about survival and clean tail hits, not aggression from the front. Ganon's body is huge and his frontal swings cover too much space to challenge directly. Circle at medium distance, wait for a committed attack, and move around him instead of backing straight away forever.
His tail is the real target. The straightforward method is to get around him and strike the tail with the Megaton Hammer or the Biggoron's Sword if you have it. If running directly around him feels unsafe, wait for him to overcommit and slip past. Some players roll between his legs to reach the back faster, but the safer newcomer method is wide circling with patience so you do not run into a surprise turn or body collision. One solid hit, then retreat and set up again. Do not mash in place.
After enough tail damage, the ring of fire temporarily drops. Your first priority is not more damage. Run to the Master Sword and reclaim it immediately. The battle can continue without it for a while, but the game does not end properly until you use the Master Sword in the closing sequence. Once you have it back, re-center yourself before re-engaging. This second half is easier if you stay calm and continue forcing clean openings instead of trying to finish the fight in one reckless rush.
- Do not fight from directly in front of Ganon unless you are only baiting a swing.
- Hit the tail, then retreat instead of trying to stack multiple greedy attacks.
- As soon as the fire barrier drops, reclaim the Master Sword before doing anything else.
Finish Ganon and watch the ending through the credits
With the Master Sword recovered, keep working the same battle plan with better control. Light Arrows can now help create safer openings by stunning Ganon from the front, after which you can move to his back and strike the tail. Even with the sword back in hand, the tail remains the damage point you care about during the active fight. Keep enough distance to read his swings, avoid standing at his face, and do not let the size of the arena fool you into running too far away to counterattack.
After enough damage, Ganon collapses and Zelda restrains him. This is the real ending window. Do not hesitate and do not switch to a novelty weapon. Run to the front and deliver the final blow with the Master Sword. That hit triggers the ending sequence. From there the rest is automatic: Zelda and the sages seal Ganon away, the aftermath scenes play, and the game moves into its closing resolution.
Your completion point for the main story is not merely seeing Ganon fall over once. The chapter is complete when the sealing scene begins and the ending continues into the credit roll. If you reached the credits after the final Master Sword strike, you have finished the main quest and brought this route to a proper ending.
- Use Light Arrows only to make a safe opening, then return to tail damage.
- When Zelda restrains Ganon, run in and finish with the Master Sword.
- Wait for the sealing sequence and the beginning of the credits as your true completion confirmation.
Before you move on
- You climbed Ganon's Tower, cleared the final rooms, and reached Ganondorf with Light Arrows and sword ready.
- Ganondorf was defeated by returning his energy volleys, stunning him, and punishing safely on the center platform.
- You escaped the collapsing tower by following Zelda all the way outside and clearing the forced Stalfos stop.
- During the Ganon fight, you recovered the Master Sword after the fire barrier fell.
- You delivered the final blow with the Master Sword after Zelda restrained Ganon.
- The sealing scene played and the ending credits began, confirming the main story is complete.
References for this chapter
- The Legend of Zelda: Ocarina of Time instruction booklet
- Ocarina of Time Walkthrough - Ganon's Castle - Zelda Dungeon
- The Legend of Zelda: Ocarina of Time - Guide and Walkthrough - Nintendo 64 - By TheSoundDefense - GameFAQs
- The Legend of Zelda: Ocarina of Time - Ganon Castle Walkthrough - Nintendo 64 - By _Elusive_ - GameFAQs
Finishing up
You should finish the child arc with all three Spiritual Stones, the Ocarina of Time, and access to the Master Sword in the Temple of Time.
Before the final dungeon stretch, make sure you have cleared the Forest, Fire, Water, Shadow, and Spirit Temples and claimed the matching medallions.
You are ready for the ending only after Zelda gives you the Light Arrows and the six barriers inside Ganon's Castle have been broken.
Your final completion check is simple: defeat Ganondorf, escape the collapsing tower, reclaim the Master Sword during the last battle, defeat Ganon, and watch the ending credits.
If you want more after the credits route is secure, clean up heart pieces, Gold Skulltulas, bottles, the Biggoron sword trade, and any missed Great Fairy rewards.
If progression ever feels unclear late in the game, revisit the Temple of Time and your song list first.
Most dead ends in Ocarina of Time are really item or age-swap checks.
Choose your next gameScreenshots & video
Game imagery for reference. Follow the written chapters above for the route and strategies.
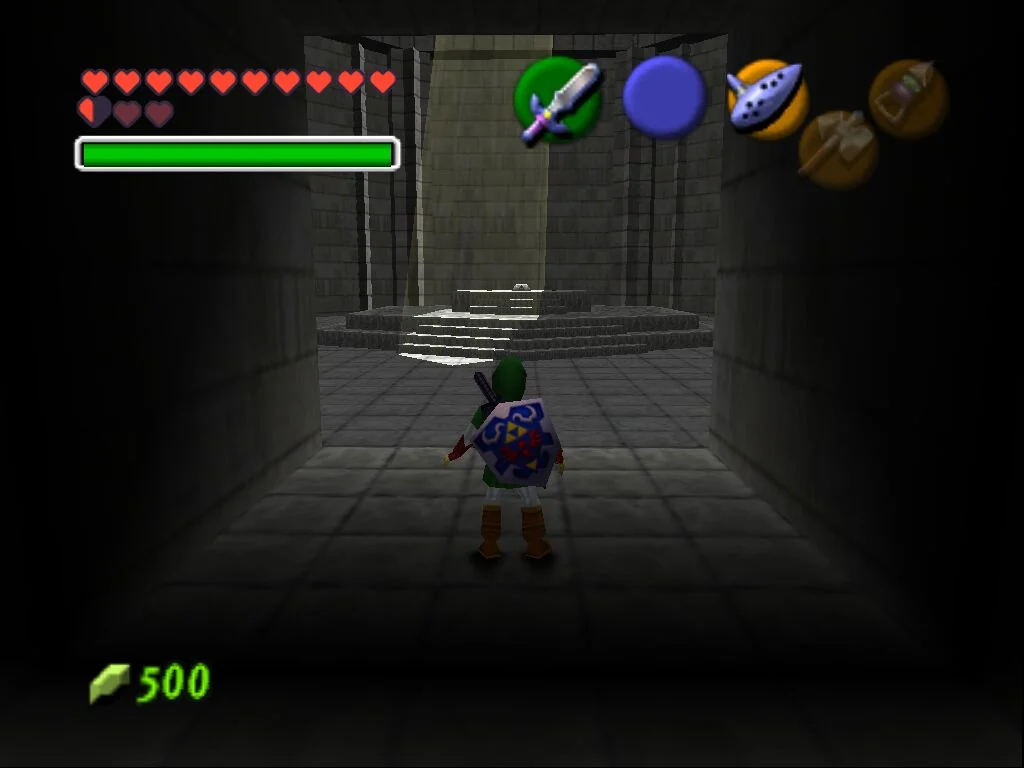
Sources & references
Our original guide draws on the references below. Check the edition at the top of this page before following controls or unlock requirements.
- The Legend of Zelda: Ocarina of Time instruction booklet
- The Legend of Zelda: Ocarina of Time | Nintendo 64 | Games | Nintendo UK
- Ocarina of Time Walkthrough - Inside The Great Deku Tree - Zelda Dungeon
- Ocarina of Time walkthrough - Kokiri Forest - Zelda's Palace
- Version Differences - ZSR.GG
- The Great Deku Tree Walkthrough - Ocarina of Time Guide
- Part 2: Deku Tree - Ocarina of Time Walkthrough
- Ocarina of Time walkthrough - Castle Town Market and Hyrule Castle - Zelda's Palace
- The Legend of Zelda: Ocarina of Time - Guide and Walkthrough - Nintendo 64 - By MrShotgun - GameFAQs
- Ocarina of Time Walkthrough – Princess of Destiny - Zelda Dungeon
- Zelda: Ocarina of Time - Walkthrough: Hyrule Castle
- Ocarina of Time Walkthrough - Dodongo's Cavern - Zelda Dungeon
- The Legend of Zelda: Ocarina of Time - Guide and Walkthrough - Nintendo 64 - By winnie_the_poop - GameFAQs
- The Legend of Zelda: Ocarina of Time/Dodongo's Cavern — StrategyWiki
- The Legend of Zelda: Ocarina of Time/Hyrule Castle — StrategyWiki
- The Legend of Zelda: Ocarina of Time/Items — StrategyWiki
- The Legend of Zelda: Ocarina of Time/Fairy Fountains — StrategyWiki
- The Legend of Zelda: Ocarina of Time/Jabu-Jabu's Belly — StrategyWiki
- Ocarina of Time Walkthrough - Inside Jabu-Jabu's Belly - Zelda Dungeon
- The Legend of Zelda: Ocarina of Time - Guide and Walkthrough - Nintendo 64 - By TheSoundDefense - GameFAQs
- Jabu-Jabu's Belly - The Legend of Zelda: Ocarina of Time Guide and Walkthrough
- The Legend of Zelda: Ocarina of Time - Guide and Walkthrough - Nintendo 64 - By Zauron - GameFAQs
- The Legend of Zelda: Ocarina of Time Release Information for Nintendo 64 - GameFAQs
- Ocarina of Time Walkthrough - Forest Temple - Zelda Dungeon
- Graveyard (Ocarina of Time) - Zelda Dungeon Wiki, a The Legend of Zelda wiki
- Minuet of Forest - Zelda Wiki
- Forest Temple (Ocarina of Time) - Zelda Dungeon Wiki, a The Legend of Zelda wiki
- The Legend of Zelda: Ocarina of Time/Forest Temple — StrategyWiki | Strategy guide and game reference wiki
- The Legend of Zelda: Ocarina of Time/Temple of Time — StrategyWiki | Strategy guide and game reference wiki
- Prelude of Light - Zelda Dungeon Wiki, a The Legend of Zelda wiki
- The Legend of Zelda: Ocarina of Time - Fire Temple Walkthrough - Nintendo 64 - By Ernest_64 - GameFAQs
- Ocarina of Time walkthrough - Fire Temple - Zelda's Palace
- The Legend of Zelda: Ocarina of Time/Fire Temple — StrategyWiki | Strategy guide and game reference wiki
- Ocarina of Time Walkthrough - Ice Cavern - Zelda Dungeon
- Ocarina of Time Walkthrough - Water Temple - Zelda Dungeon
- The Legend of Zelda: Ocarina of Time/Water Temple — StrategyWiki
- Version Differences - ZeldaSpeedRuns
- Ocarina of Time walkthrough - Water Temple - Zelda's Palace
- The Legend of Zelda: Ocarina of Time - Guide and Walkthrough - Nintendo 64 - By N64Gamerz - GameFAQs
- Ocarina of Time Songs - Zelda Dungeon Wiki, a The Legend of Zelda wiki
- Kakariko Village - Zelda Wiki
- Nocturne of Shadow - Zelda Wiki
- Ocarina of Time Walkthrough - Bottom of The Well - Zelda Dungeon
- Ocarina of Time Walkthrough – Shadow Temple - Zelda Dungeon
- The Legend of Zelda: Ocarina of Time – Shadow Temple Walkthrough - GameFAQs
- Ocarina of Time walkthrough - Zelda's Palace
- The Legend of Zelda: Ocarina of Time/Gerudo Fortress — StrategyWiki | Strategy guide and game reference wiki
- The Legend of Zelda: Ocarina of Time/Spirit Temple — StrategyWiki
- Ocarina of Time Walkthrough - Spirit Temple - Zelda Dungeon
- The Legend of Zelda: Ocarina of Time - Guide and Walkthrough - Nintendo 64 - By Nexxt - GameFAQs
- Ocarina of Time Walkthrough - Ganon's Castle - Zelda Dungeon
- Ganon's Castle: The Final Dungeon - The Legend of Zelda: Ocarina of Time Guide and Walkthrough
- Din's Fire & Fire Arrows - ZeldaSpeedRuns
- Vanilla Dungeon Requirements - OoT Randomizer Wiki
- The Legend of Zelda: Ocarina of Time - Ganon Castle Walkthrough - Nintendo 64 - By _Elusive_ - GameFAQs
About the game & collecting notes
- Platform
- Nintendo 64
Follow the North American Nintendo 64 version of Ocarina of Time from Kokiri Forest to the ending without mixing in 3DS or Master Quest changes. This route focuses on required songs, dungeon items, age swaps, temple order, boss methods, and the few side trips that are effectively mandatory for smooth story completion.
Darryl Polo
Darryl Polo loves tinkering with emulation and revisiting retro games. He enjoys exploring how old favorites play on different setups and sharing what he learns along the way. At Joking Joystick, he writes about the games, hardware, and small discoveries that keep the hobby fun.
Our editorial standardsFound a step that needs another look? Help us improve this guide.