The Legend of Zelda: Majora's Mask — Nintendo 64 (USA) Complete Campaign Walkthrough
Step-by-step coverage of the original Nintendo 64 (USA) edition of Majora’s Mask through the game’s true ending on the Moon. Focuses on N64 mechanics: three-day cycle, Song of Time saving, Owl Statues and Song of Soaring, masks, main dungeons and the final confrontation with Majora. Includes time-management tactics and required sidequest checkpoints.

Find a copy
The Legend of Zelda: Majora's Mask Nintendo 64
We may earn a commission if you buy through these links, at no extra cost to you. As an Amazon Associate I earn from qualifying purchases.
Opens retailer search results. Check the model, edition, seller, availability and current price before buying.
Before you begin
This walkthrough is written for the original Nintendo 64 United States edition of The Legend of Zelda: Majora’s Mask (released in North America October 26, 2000).
It assumes N64 hardware (Expansion Pak required by the original cartridge) and the original N64 save and time systems rather than later remake changes.
Follow the chapter order to reach each temple, handle the repeating three-day cycle, and learn the mask and transformation progression used on the N64 release.
You will get concrete, in-game tasks: where to go, which NPCs to prioritize, how to open each temple, boss strategies for each dungeon, what to save before you reset time, and the clear completion checks for the true ending on the Moon.
Optional mask and sidequest chapters explain how to collect important rewards such as the Fierce Deity’s Mask and utility masks that ease travel and combat.
Set yourself up for the run
Hardware and game edition: use the Nintendo 64 cartridge for the USA release (Expansion Pak required).
Confirm your console and controller are functional and comfortable with analog movement and C-button ocarina input.
Understand the time cycle and saves: the Song of Time resets you to the First Day (this is the N64-era save/reset mechanic) and Owl Statues provide activated warp points and temporary saves; learn the Song of Soaring as early as possible to reduce travel.
Use Owl Statues to secure progress before attempting risky tasks.
Familiarize with the Bomber’s Notebook: it records NPC schedules and sidequests.
Check it frequently for timed events and key character locations before you reset the three-day cycle.
Inventory basics: bottles, arrows, bombs and a steady supply of rupees matter.
Use the bank in Clock Town to store large sums before you resettime.
If you plan optional completion (all masks, 100% sidequests), keep track of which masks are still missing and deposit rupees often.
Control setup and ocarina mapping: place the Ocarina on a convenient C-button and practice the basic songs (Song of Time, Song of Soaring, Song of Healing, Song of Double Time).
On N64 the limited camera control makes positioning and Z-targeting essential, so practice those early.
Time management strategy: plan each three-day cycle by listing goals (main goal + optional tasks).
Prioritize tasks that unlock access to a temple (masks, key NPCs, necessary items) before using the Song of Time to reset.
Safety saves and recovery: before attempting a dungeon or a long, timed sidequest, activate a nearby Owl Statue and, when possible, deposit your rupees at the bank.
If you lose progress or run out of time within a cycle you will be returned to the Happy Mask Salesman with most temporary progress reset; permanent saves you made at Owl Statues remain as allowed by the N64 system.
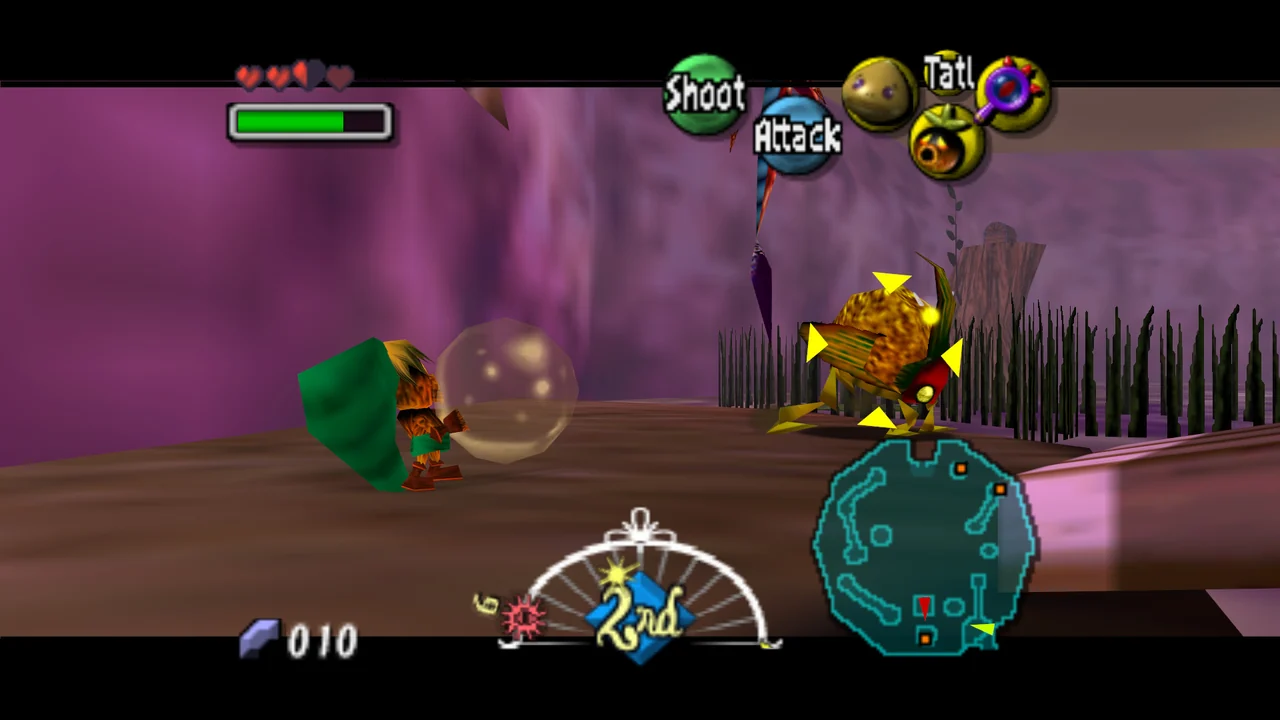
Core mechanics: Time, Saving and Masks (N64 rules)
The original North American Nintendo 64 release uses a repeating three-day cycle with two different kinds of saving. Playing the Song of Time creates the lasting save, returns Link to 6:00 a.m. on the First Day and resets most temporary world activity. An activated Owl Statue provides an interrupt save for stopping in the middle of a cycle, but that save is consumed when continued. The Deku, Goron and Zora Masks are permanent transformation masks and form the mechanical backbone of the Woodfall, Snowhead and Great Bay routes.
Understand the three-day cycle
Time continues to pass during normal play, although it pauses during conversations and while the game is paused. If the third day ends without Link playing the Song of Time, the game returns him to the last successful Song of Time save. To control the cycle, use the Ocarina of Time and play the Song of Time before the deadline. Link returns to 6:00 a.m. on the First Day, and the game records the progress that the original N64 version allows to pass through time.
A reset restores most characters, sub-events and ordinary environmental puzzles to their original state. Opened temporary chests, defeated routine enemies, activated dungeon switches, solved room mechanisms and unfinished NPC events generally have to be handled again. This is normal: the game is designed around repeating a route with permanent tools rather than preserving every action in the world.
The Song of Time does preserve major inventory and quest data. Masks, instruments, songs, quest-status items, maps, dungeon maps, compasses, notebook notes and rupees deposited in the Clock Town bank remain available. Small Keys, the Boss Key, Stray Fairies, ordinary usable-item quantities and rupees still in Link’s wallet do not carry through the reset. Therefore, finish a dungeon before resetting if you want to avoid recollecting its keys and fairies, but do not worry about losing its map or compass once those have been obtained.
- Play the Song of Time before the cycle expires.
- Expect NPC schedules, temporary puzzles, opened ordinary chests and dungeon keys to reset.
- Remember that dungeon maps and compasses persist on the N64 version.
- Deposit rupees before resetting because wallet rupees are not protected.
Use the Song of Time for lasting saves
When you are ready to preserve progress and begin a new cycle, play the Song of Time and wait for the game to display the First Day transition before turning off the Nintendo 64. This is the dependable long-term save method in the original release. It records masks, songs, quest items, maps, notebook notes, dungeon maps, compasses and banked rupees, but it does not preserve temporary room states or most timed events.
Learn the Inverted Song of Time soon after recovering the Ocarina. Playing the Song of Time’s notes in reverse slows the passage of time and gives you a much larger working window for dungeon exploration, regional errands and timed quests. The Song of Double Time advances the clock to a selected future hour. Use it when you have already identified the hour at which an NPC or event becomes available; otherwise, it can move you past an opportunity.
A practical routine is to complete one major objective, return to Clock Town or an activated Owl Statue, deposit important rupees, and then play the Song of Time. If you are still in the middle of a dungeon and need to preserve your current room, use an Owl Statue interrupt save instead of resetting immediately.
- Use the Song of Time after acquiring a major song, mask or permanent quest item.
- Use the Inverted Song of Time before long dungeon work.
- Use the Song of Double Time only when a specific future hour is useful.
- Wait for the First Day transition before switching off the console.
Activate Owl Statues and use interrupt saves
In the Nintendo 64 version, strike an Owl Statue with the sword to activate it. Activated statues become destinations for the Song of Soaring, which Link learns after recovering the Ocarina of Time. Play the Song of Soaring and select any statue you have already activated to cross Termina quickly. Activate the Clock Town statue and every regional statue you pass, especially those near Woodfall, Snowhead, Great Bay and Ikana.
An activated Owl Statue also provides the N64 interrupt-save feature. Examine the statue and confirm the save prompt. The game records Link’s current status, including his time of day, position, masks, items and conversations, then returns to the title screen. This is useful when you need to stop without advancing to the First Day.
The interrupt save is temporary rather than a second permanent file. After you continue from that owl-marked file, the interrupt save is deleted. If you make additional progress and turn the system off without saving again, the game falls back to the last Song of Time save. After loading an Owl Statue save, either visit an Owl Statue again and make another interrupt save or play the Song of Time to establish a lasting save. Do not treat an owl-marked file as a checkpoint that can be reloaded repeatedly.
- Strike each Owl Statue with the sword when you first reach it.
- Learn Song of Soaring and use it to reach activated regional statues quickly.
- Use an Owl Statue interrupt save when stopping mid-cycle.
- After continuing an interrupt save, save again before quitting.
Obtain and use the Deku Mask
During the opening Clock Town sequence, return the Ocarina of Time and play the Song of Healing for the cursed form of the Deku Butler’s son. Link receives the Deku Mask and can then switch between human Link and Deku Link whenever the mask is equipped.
Deku Link launches from Deku Flowers, hovers briefly after a launch, fires bubble shots and skims across shallow water. These abilities are central to the Southern Swamp and Woodfall approach and are used repeatedly in Woodfall Temple. Deku Link is vulnerable to fire and cannot use the normal sword, bow or several human-only tools, so change back to human Link before performing those actions.
The Deku Mask remains in the inventory after every Song of Time reset. It is the first transformation mask and an essential regional tool, although not every step in Southern Swamp requires wearing it.
- Recover the Ocarina and obtain the Deku Mask before planning the Woodfall route.
- Use Deku Flowers for controlled launches across gaps.
- Change to human Link for the sword, bow and other human-only equipment.
Obtain and use the Goron Mask
In the Snowhead region, use the Lens of Truth to follow Darmani’s spirit back to the Goron Graveyard. Play the Song of Healing for Darmani and receive the Goron Mask. This mask is needed for the Goron Village and Snowhead progression, including the actions that lead to the Goron Lullaby and the removal of the supernatural blizzard blocking Snowhead Temple.
Goron Link can punch, ground-pound, carry out heavy actions and roll. A powered Goron roll consumes magic while the spikes are active, so do not keep the powered roll running when ordinary walking is sufficient. Keep a magic refill available before long mountain crossings or repeated attempts at a rolling jump.
The Goron Mask is permanent. If a cycle ends during the Snowhead sequence, the mask remains available, but frozen NPCs, opened routes and temporary dungeon activity may need to be restored.
- Follow Darmani with the Lens of Truth to the Goron Graveyard.
- Play the Song of Healing to obtain the Goron Mask.
- Use Goron Link for heavy switches, rolling travel and Snowhead tasks.
- Watch the magic meter during powered rolls.
Obtain and use the Zora Mask
Reach Great Bay and find the injured Zora guitarist Mikau near the shore. After hearing his account, play the Song of Healing to receive the Zora Mask. Zora Link is required for the underwater route and the machinery-related preconditions that lead to Great Bay Temple.
On the original N64 release, Zora Link swims rapidly, dives, walks along the sea floor, throws his fins as boomerangs and can create an electric barrier while swimming when magic is available. These abilities are used for underwater navigation, combat and switches. Preserve magic before entering a long underwater section, and surface or change forms when you need to use ordinary human-Link equipment.
The Zora Mask is permanent and remains available after a Song of Time reset. Great Bay’s temporary currents, enemies, switches and NPC events may reset, so use Song of Soaring and the regional Owl Statue to rebuild the route efficiently.
- Heal Mikau with the Song of Healing to obtain the Zora Mask.
- Use Zora Link for underwater travel, diving, sea-floor movement and aquatic combat.
- Carry magic recovery for the electric barrier and extended swimming.
- Do not apply the later 3DS swimming controls or save rules to this N64 route.
Know which masks are required for the campaign
The three core transformation masks correspond to the first three main regions: Deku Mask for the Southern Swamp and Woodfall route, Goron Mask for Snowhead and its temple approach, and Zora Mask for Great Bay and Great Bay Temple. They remain in Link’s inventory permanently and should be kept readily accessible on the item screen.
Ikana Canyon and Stone Tower do not require a fourth transformation mask. Their progression uses ordinary equipment together with regional tools and utility masks. Garo’s Mask is important for interacting with Garo enemies and learning the route information that opens the deeper Ikana progression, but it does not transform Link or replace any of the three main masks. Other utility masks, such as the Stone Mask or Captain’s Hat, can help with particular encounters but are not substitutes for Deku, Goron or Zora Link.
The Fierce Deity’s Mask is optional. It is obtained on the Moon by giving masks to the Moon Children after defeating the four temple bosses and is not needed to enter the Moon, reach Majora or receive the normal ending.
- Confirm that Deku, Goron and Zora Masks are in the permanent inventory.
- Use Garo’s Mask as an Ikana route tool, not as a transformation mask.
- Treat Fierce Deity’s Mask as an optional final-battle reward.
- Keep the original N64 saving and swimming rules separate from the 3DS remake.
Before you move on
- The player can explain that the Song of Time saves lasting progress and returns Link to 6:00 a.m. on the First Day.
- The player understands that an Owl Statue interrupt save preserves a current cycle only until that save is continued.
- The player knows that masks, songs, quest items, maps, dungeon maps, compasses, notebook notes and banked rupees persist.
- The player knows that NPC schedules, temporary puzzles, wallet rupees, usable-item quantities, Small Keys, the Boss Key and Stray Fairies do not persist through a Song of Time reset.
- The Clock Town Owl Statue and regional statues encountered so far have been activated, and Song of Soaring is available.
- The Deku, Goron and Zora Masks are recognized as the three permanent transformation masks needed for the main regional route.
- The player is following the original North American Nintendo 64 rules rather than the 3DS remake’s saving and swimming systems.
Starting Clock Town and the First Three Days
The opening cycle teaches the essential Clock Town route and ends with Link recovering the Ocarina of Time, learning the Song of Time, restoring his human form and obtaining the Deku Mask. On the original Nintendo 64 release, the first Bomber game gives you the hideout password, while the Bomber’s Notebook is acquired later after you return as human Link. Optional minigames, extra masks and most Clock Town sidequests can wait until the main route is open.
1. Enter Clock Town and identify the important districts
The game begins with Link arriving in South Clock Town at 6:00 a.m. on the First Day. South Clock Town contains the Clock Tower, the town’s southern owl statue and the main entrances to the other districts. North Clock Town contains the Great Fairy fountain, the playground and the large Majora’s Mask balloon used to begin the Bomber sequence. East Clock Town contains the Astral Observatory hideout entrance, the Stock Pot Inn, the Shooting Gallery and the mayor’s office. West Clock Town contains the bank, the Post Office, the Trading Post and the sword training area. The Laundry Pool is reached through the southwest corner of South Clock Town.
The Happy Mask Salesman is in the Clock Tower basement, but you cannot reach him again until the opening cycle is nearly complete. His eventual reward is required: after you recover the Ocarina of Time, he teaches the Song of Healing and gives you the Deku Mask. The bank, shops, Post Office, Shooting Gallery, sword training and most other residents are useful to learn about but are not required before the first dungeon.
- Locate the Great Fairy fountain in North Clock Town.
- Locate the Bombers’ hideout entrance in northeast East Clock Town.
- Locate the bank in West Clock Town.
- Remember that the Happy Mask Salesman’s required conversation happens after recovering the Ocarina.
2. Restore the Great Fairy and obtain the Magic Meter
Travel from South Clock Town to the Laundry Pool and collect the Stray Fairy. During the daytime it hovers above the water. If night has already arrived, look in the plaza of East Clock Town instead. Deku Link cannot swim, but he can hop across the shallow Laundry Pool to reach the fairy.
Take the Stray Fairy to the Great Fairy fountain in North Clock Town. The restored Great Fairy gives Deku Link the Magic Meter and the Bubble Blast attack. This is the first required reward of the opening cycle. You need the Bubble Blast to pop the large balloon in North Clock Town and begin the Bomber challenge.
If you are moving slowly and the Stray Fairy is no longer in the Laundry Pool, check East Clock Town at night rather than wasting the cycle searching every district. The fairy’s day and night locations are fixed for this opening event.
- Collect the Stray Fairy.
- Return it to the Great Fairy fountain in North Clock Town.
- Receive Magic Power and the Bubble Blast attack.
3. Complete the first Bomber game and record the password
After receiving the Magic Meter, return to North Clock Town and use a charged Bubble Blast to pop the large Majora balloon beside Jim, the Bomber leader. Speak to Jim and accept the hide-and-seek challenge. You must catch all five Bomber children before the cycle reaches the next morning. When a child sees you, it runs, so use Deku Link’s spin attack to close the distance and Bubble Blast to stun a child if it keeps escaping.
On the original Nintendo 64 arrangement, one child is near the tree by the Great Fairy path in North Clock Town, one is above the Milk Bar in East Clock Town and carries a Cucco, one is on the Stock Pot Inn roof, and one patrols West Clock Town near the Post Office. Jim is also hiding in North Clock Town behind the slide. The exact chase can be made easier by catching the nearby North Clock Town children first, then using the East Clock Town flower or the Inn’s roof access to reach the elevated targets.
Winning this first game does not give the Bomber’s Notebook. Jim gives you a five-number password made from the numbers 1 through 5. Write it down. The password is randomized for the file and is required to enter the hideout as Deku Link. The yellow-capped Bomber guards the entrance in northeast East Clock Town. Give him the password and enter the tunnel.
- Pop the balloon beside Jim.
- Catch all five Bombers.
- Write down the password.
- Enter the hideout through the yellow-capped Bomber in East Clock Town.
4. Reach the Astral Observatory and trade the Moon’s Tear
Follow the hideout tunnel, defeat or bypass the Big Skulltula and destroy the balloon blocking the large chamber with another Bubble Blast. Climb the ladder to the Astral Observatory and speak with the astronomer. Use the telescope and zoom in on the top of the Clock Tower until you see Skull Kid. A Moon’s Tear then falls outside the observatory.
Leave through the observatory exit and collect the Moon’s Tear. Return through the hideout to South Clock Town. The Business Scrub beside the yellow Deku Flower blocks the flower and asks for the Moon’s Tear. Place the Moon’s Tear on an item button and give it to him. In exchange, he gives you the Land Title Deed and leaves the flower available to Deku Link.
The trade is required for the practical opening route because the Deku Flower lets Deku Link fly to the ledge above the Clock Tower entrance. The Piece of Heart on that ledge is optional. You can ignore the Post Office, lottery, Shooting Gallery, sword training, Stock Pot Inn activities and other optional rewards while waiting for the final night.
- Use the telescope to find Skull Kid.
- Collect the Moon’s Tear outside the observatory.
- Trade it to the South Clock Town Business Scrub.
- Keep the Land Title Deed; the optional ledge Piece of Heart can be collected later if desired.
5. Wait for the final night and recover the Ocarina
The Clock Tower entrance remains closed during the First and Second Days. Use the remaining time to learn the town’s layout, earn rupees or try optional activities, but return to South Clock Town before midnight on the Final Day. If you want to advance time without waiting through the entire cycle, the Song of Double Time is not available yet, so simply remain in town and avoid risky detours.
At midnight on the Final Night, the Clock Tower opens. Use the yellow Deku Flower if you want to reach the upper ledge, then enter the open doorway and climb the stairs. Skull Kid is waiting at the top. Target him and fire a charged Deku Bubble when he pauses. The hit makes him drop the Ocarina of Time. Pick it up immediately.
A memory of Princess Zelda then teaches Link the Song of Time. This is the first reliable permanent save method: playing the Song of Time sends Link to 6:00 a.m. on the First Day and saves major progress. Do not allow the moon to fall before recovering the Ocarina.
- Be in South Clock Town before midnight on the Final Night.
- Enter the Clock Tower after it opens.
- Hit Skull Kid with a charged Deku Bubble.
- Recover the Ocarina of Time.
- Learn the Song of Time.
6. Return to the First Day, restore human Link and obtain the Notebook
Play the Song of Time as soon as you regain control after the Zelda memory. Link returns to the dawn of the First Day with the Ocarina, learned songs, masks and other permanent quest progress intact. Temporary conversations, completed minigames, dungeon states, ordinary wallet rupees and most NPC events reset. Deposited bank rupees remain saved.
Before leaving the Clock Tower basement, speak with the Happy Mask Salesman. Play the Song of Healing when prompted. The troubled magic is converted into the Deku Mask, and Link returns to human form. The Deku Mask is permanent and lets you switch between human Link and Deku Link whenever needed.
Now obtain the Bomber’s Notebook on the Nintendo 64 version. As human Link, return to the Bomber entrance in northeast East Clock Town and enter the password. Walk through the hideout and exit again. Jim recognizes that you solved the challenge and gives you the Bomber’s Notebook. An alternative is to pop the balloon in North Clock Town as human Link and complete the hide-and-seek game a second time. The Notebook records useful NPC information and is especially valuable for later timed quests, but it is not needed to enter the first dungeon.
Activate the South Clock Town owl statue by striking it with the sword. On N64, an activated owl statue provides a temporary interrupt save and later serves as a Song of Soaring destination once that song is learned. The interrupt save is not the same as a Song of Time save: after loading an owl save, make another permanent Song of Time or owl save before quitting. Deposit any rupees you want to preserve at the West Clock Town bank.
- Play the Song of Time and return to the First Day.
- Visit the Happy Mask Salesman in the Clock Tower basement.
- Learn the Song of Healing and receive the Deku Mask.
- Return to the Bomber hideout as human Link and obtain the Bomber’s Notebook.
- Activate the South Clock Town owl statue.
- Deposit spare rupees at the West Clock Town bank.
Before you move on
- The Magic Meter and Bubble Blast were received from the restored Great Fairy.
- The first Bomber hide-and-seek game was completed and its password was recorded.
- The Astral Observatory was reached and the Moon’s Tear was collected.
- The Moon’s Tear was traded to the South Clock Town Business Scrub.
- The Clock Tower was entered on the Final Night and the Ocarina of Time was recovered.
- The Song of Time was learned and used to return to the First Day.
- The Happy Mask Salesman taught the Song of Healing and gave Link the Deku Mask.
- The Bomber’s Notebook was obtained as human Link.
- The South Clock Town owl statue was activated and desired rupees were deposited at the bank.
Deku Mask and the Southern Swamp approach
Recover the Ocarina of Time, obtain the Deku Mask, rescue Koume, learn the Sonata of Awakening, raise Woodfall Temple and defeat Odolwa in the original Nintendo 64 version. After the boss, complete the required regional cleanup by carrying the Deku Princess back to the Deku King. The Deku Butler race and Mask of Scents are optional rewards, not requirements for the main campaign.
Recover the Ocarina and obtain the Deku Mask
After reaching the Clock Tower on the Final Night, confront the Skull Kid and recover the Ocarina of Time. If you are not ready to continue immediately, play the Song of Time to return to the First Day. Visit the Happy Mask Salesman inside the Clock Tower and play the Song of Healing when prompted. This removes the cursed Deku form and gives you the Deku Mask while restoring Link’s normal form.
The Deku Mask is required for the Southern Swamp route. Deku Link can launch from Deku Flowers, hop across small stretches of water and pass the Deku Palace guards. Before leaving Clock Town, activate the Clock Town Owl Statue with your sword if you have not already done so. The optional Bombers’ quests, town minigames and extra masks are not needed before starting this chapter.
- Recover the Ocarina of Time.
- Play the Song of Healing for the Happy Mask Salesman.
- Receive the Deku Mask.
- Activate the Clock Town Owl Statue.
Reach the Southern Swamp and rescue Koume
Leave Clock Town through the south gate and follow the road into the Southern Swamp. The first building is the Swamp Tourist Center, also associated with the Magic Hags. Continue toward the Woods of Mystery. Much of the swamp water is poisoned at this stage, so use solid walkways, wooden platforms and Deku Flowers instead of treating the water as a normal swimming route.
Enter the Woods of Mystery and find Koume lying injured along the forest path. Speak with her, then return to Kotake in the Potion Shop. Kotake gives you a Red Potion in a Bottle. Carry it back through the Woods of Mystery and give it to Koume. Once Koume is restored, return to the Tourist Center and speak with her to begin the boat tour.
The boat tour takes you to the Deku Palace and is the required route for this part of the campaign. The Pictograph contest, extra rupees, Heart Pieces and the swamp shooting game are optional. If the cycle is running short, ignore them and continue with the palace objective.
- Reach the Southern Swamp.
- Find Koume in the Woods of Mystery.
- Take Kotake’s Red Potion to Koume.
- Return to Koume and use the boat tour to reach the Deku Palace.
Enter the Deku Palace and learn the Sonata of Awakening
At the Deku Palace, wear the Deku Mask before speaking with the guards. Deku Link is allowed through the entrance. Follow the palace passage to the royal chamber and speak with the Deku King. You learn that the Deku Princess is missing and that the imprisoned monkey is being blamed.
Leave the chamber through the palace gardens. The monkey outside explains that a Magic Bean can help you reach the upper route. Use the garden paths to reach the Bean Salesman, obtain the free Magic Bean and plant it in the soft soil. Fill a Bottle with spring water from the nearby pool and water the bean unless the rain has already done so. Ride the grown plant to the upper ledge and enter the hidden route to the monkey’s cage.
Inside the cage, change to normal Link and speak with the monkey. When the Ocarina does not produce the correct response, wear the Deku Mask and play the Ocarina again. The monkey teaches the Sonata of Awakening, which is the song needed to reveal Woodfall Temple. The song remains learned if you reset the three-day cycle.
- Pass the palace entrance as Deku Link.
- Speak with the Deku King.
- Use the palace garden route to reach the monkey’s cage.
- Play the Ocarina while wearing the Deku Mask.
- Learn the Sonata of Awakening.
Reach Woodfall and raise the temple
After learning the Sonata, the Deku guards throw Link out of the palace area. Use the Deku shortcut: from outside, travel across the lily pads toward the small southeastern island with a Deku Flower, then launch through the opening to the elevated Southern Swamp route. Follow the chain of Deku Flowers and platforms toward the waterfall. Watch for Dragonflies while flying; keep moving rather than hovering in their attack range.
In the original Nintendo 64 version, Kaepora Gaebora appears along this route and teaches the Song of Soaring. Follow the owl’s instructions before proceeding if you have not learned the song. Song of Soaring is especially useful for returning to activated Owl Statues after a failed dungeon attempt.
Enter Woodfall and activate the Woodfall Owl Statue with your sword. The statue provides a permanent warp destination for Song of Soaring, although the temporary save function of an Owl Statue is separate from ordinary progress. As Deku Link, stand on the Deku symbol and play the Sonata of Awakening. Woodfall Temple rises from the swamp. Use the Deku Flower on the main platform to launch to the temple entrance.
- Use the Deku shortcut from the palace area.
- Learn the Song of Soaring from Kaepora Gaebora if necessary.
- Activate the Woodfall Owl Statue.
- Reach the Deku symbol in Woodfall.
- Play the Sonata of Awakening as Deku Link.
- Launch to and enter Woodfall Temple.
Clear Woodfall Temple’s required route
Woodfall Temple uses both normal Link and Deku Link. Early rooms involve torches, suspended platforms and poisoned water. Light the torches required to open doors, then use Deku Flowers to cross the larger gaps. The temple’s water is hazardous until the dungeon’s central water supply is purified, so avoid unnecessary falls and use the room’s platforms whenever possible.
Explore for Small Keys and follow the opened doors until you obtain the Hero’s Bow. The bow is the temple’s required dungeon item. Use arrows on distant eye switches, crystal switches and enemies that are unsafe to approach. After activating a switch, look around the room for the resulting change: some switches open doors, lower flames or move platforms rather than immediately producing a chest.
The Dinolfos encounter is part of the route to the bow. Keep your shield ready and attack after its movement gives you an opening. The Gekko and Snapper encounter is optional for the main campaign and is associated with the temple’s Stray Fairy collection. The fifteen Stray Fairies are also optional, although returning them to the Great Fairy in Woodfall grants a useful spin-attack upgrade in the N64 version.
Continue through the required rooms until you reach the final chamber before the boss. If the cycle is nearly over, prioritize the Small Keys, Hero’s Bow, boss route and Odolwa rather than searching for optional Stray Fairies or rupees.
- Collect the Small Keys required for progression.
- Obtain the Hero’s Bow.
- Use arrows on distant switches and dangerous enemies.
- Defeat the required Dinolfos miniboss.
- Skip Gekko and Stray Fairies if focusing only on the campaign.
- Reach the boss door.
Defeat Odolwa on the Nintendo 64 version
Odolwa fights in a circular arena and uses a large sword with substantial reach. Lock on to him and keep enough distance to see his stance. Raise the shield when he begins a sword sweep, spinning attack or close-range rush. Normal Link with the Hero’s Bow, sword and shield is the safest general approach for the N64 battle.
Fire an arrow when Odolwa’s guard is down, when he begins chanting or dancing, or just before he commits to an attack. A successful hit stuns him. Close the distance immediately and use sword strikes, preferably a Jump Attack, then retreat before he recovers. If he jumps or teleports behind Link, keep him targeted, strafe away from the landing point and wait for the follow-up rush to miss before firing another arrow.
Odolwa can summon beetle-like enemies, Moths and falling boulders. Shooting Odolwa while he chants can interrupt the summon and stun him. If the enemies are already present, move toward the outside of the arena and eliminate anything blocking your escape. Beetles can provide recovery hearts, while bombs, the Blast Mask or the Bomb Flowers around the arena can clear groups of insects. When Odolwa creates a ring of fire, do not rush through it. Wait for the barrier to disappear or use a safe opening to resume the arrow-and-sword pattern.
Odolwa’s spinning sword attack can be blocked while locked on, or avoided by creating distance and stunning him with an arrow. Deku Link can be used, but the N64 arena’s flaming barrier makes staying in Deku form risky. Do not use the Nintendo 3DS strategy of dropping a Deku Nut onto a rear eye; that rear-eye weakness is not the original N64 method.
After Odolwa falls, collect the Heart Container and enter the blue light. You receive Odolwa’s Remains, meet the freed Woodfall Giant and learn the Oath to Order. The battle and temple are now complete, but the Southern Swamp cleanup is not finished yet.
- Use arrows to interrupt Odolwa during chants or exposed movement.
- Use the shield against sword swings and the spinning attack.
- Attack with the sword only after an arrow stun or a missed rush.
- Keep moving when insects, fire or boulders appear.
- Collect the Heart Container.
- Collect Odolwa’s Remains and learn the Oath to Order.
Rescue the Deku Princess after Odolwa
After the Giant sequence, Link appears in a hidden chamber beneath Woodfall Temple. Turn around and cut through the vines covering the doorway. The Deku Princess is inside. Assign an empty Bottle to a button, stand close to her and use the Bottle to capture her. This is the required regional cleanup step that the temple boss fight alone does not complete.
Leave the hidden chamber through the southern exit and return to Woodfall. Travel north through Woodfall and exit into the Southern Swamp. Jump into the now-cleansed water, swim toward the shore near the Deku Palace and enter the palace as Deku Link. The guards will allow Deku Link through the same route used earlier.
Return to the royal chamber and stand before the Deku King’s throne. Use the Bottle containing the princess to release her. The princess returns to the throne area, the monkey is spared and the regional rescue sequence is complete. You do not need to repeat the Woodfall Temple after this point unless you reset the cycle before completing the cleanup.
The Deku Butler race in the shrine west of the palace is optional. Completing it awards the Mask of Scents, which is useful for later optional activities but is not required for Snowhead, Great Bay, Ikana or the Moon. Likewise, restoring the Woodfall Great Fairy by returning all fifteen Stray Fairies is optional, though its N64 spin-attack upgrade is helpful.
- Enter the hidden chamber beneath Woodfall Temple after the Giant sequence.
- Capture the Deku Princess in an empty Bottle.
- Carry her through Woodfall and the Southern Swamp.
- Enter the Deku Palace as Deku Link.
- Release the princess before the Deku King.
- Optionally complete the Deku Butler race for the Mask of Scents.
- Optionally return all Woodfall Stray Fairies to the Great Fairy.
Before you move on
- The Deku Mask is in the mask inventory and the Sonata of Awakening is recorded among the learned songs.
- Koume has been rescued and the boat route to the Deku Palace is available.
- The Woodfall Owl Statue has been activated.
- Woodfall Temple has been raised and entered.
- Odolwa has been defeated.
- The Heart Container has been collected.
- Odolwa’s Remains is in the inventory and the Oath to Order has been learned.
- The Southern Swamp’s water has been purified.
- The Deku Princess has been captured in a Bottle and released before the Deku King.
- The monkey has been spared and the regional princess rescue is complete.
- If pursuing optional rewards, the Woodfall Great Fairy has been restored and the Deku Butler race has been completed for the Mask of Scents.
Snowhead approach and Goht (Goron progression)
Reach Mountain Village and Goron Village, recover Darmani’s Goron Mask, thaw the Goron Elder, learn the Goron Lullaby, open the Snowhead route, clear Snowhead Temple and defeat Goht in the original Nintendo 64 version. After the boss, complete the required Powder Keg and Romani Ranch checkpoint to regain access to Epona. The Goron Shrine chandelier, Rock Sirloin, Don Gero’s Mask, Goron Racetrack reward, alien defense and Cremia escort are optional.
Reach Goron Village and recover the Goron Mask
After completing the Woodfall sequence, travel north from Clock Town through Mountain Village. The region is frozen, and the route toward the upper Snowhead area is blocked by the mountain’s storm. Do not try to force the upper path before obtaining the Goron Mask.
In Mountain Village, cross the frozen lake toward the far side and follow the feathers dropped by Kaepora Gaebora across the invisible platforms. Enter the cave at the end of the path and open the chest to obtain the Lens of Truth. Turn the Lens on to reveal Darmani’s spirit, then follow him back through the mountain route. Turn the Lens off between sections to conserve magic, but reactivate it whenever Darmani disappears or the path becomes unclear.
Darmani leads Link to his grave in the Goron Graveyard. Speak to his spirit and play the Song of Healing. Darmani’s spirit becomes the Goron Mask, which permanently adds Goron transformation to the inventory. Goron Link can punch heavy snowballs and obstacles, ground-pound switches, walk across lava and perform a high-speed roll when the spikes appear.
- Obtain the Lens of Truth from the cave above Mountain Village.
- Follow Darmani’s spirit to the Goron Graveyard.
- Play the Song of Healing and collect the Goron Mask.
- Assign the Goron Mask to an accessible C-button slot.
Speak to the Goron baby and learn the Goron Lullaby
Enter Goron Village and use Goron Link’s ground-pound entrance action to open the Goron Shrine. Climb to the upper room and speak to the crying Goron baby while wearing the Goron Mask. This conversation is required before the thawed elder will teach the first section of the Goron Lullaby.
Return to the Goron Graveyard and pull the large gravestone backward as Goron Link. This reveals a hot spring. Fill an empty Bottle with Hot Spring Water and carry it quickly; the water cools if you take too long. If necessary, melt the ice on the third island along the Mountain Village route with Hot Spring Water to expose another spring for later attempts.
The Goron Elder is frozen inside a snowball that is slightly larger than the surrounding snowballs. His location changes with the day. On the First Day, search near the island closest to Goron Village. On the Second Day, search between the first island and the slope leading back toward Mountain Village. On the Final Day, search near the Mountain Village Owl Statue at the end of the frozen stream. Break the unusually large snowball with a Goron punch, then pour Hot Spring Water over the elder.
Speak to the thawed elder twice while wearing the Goron Mask. Because you already spoke with the baby, the elder teaches the Goron Lullaby Intro. Return to the Goron Shrine and play that intro for the baby. The baby supplies the missing section and teaches the complete Goron Lullaby.
- Speak with the crying Goron baby before searching for the elder.
- Pull back Darmani’s gravestone and bottle Hot Spring Water.
- Find the elder’s large snowball according to the current day.
- Thaw the elder and speak with him twice.
- Play the Lullaby Intro for the baby and learn the full Goron Lullaby.
Open the Snowhead route and enter the temple
Go to the Snowhead approach in the northwest part of the mountain. Near the obstruction, equip the Goron Mask and play the complete Goron Lullaby. The invisible Biggoron appears, falls asleep and drops out of the way, opening the route to the upper mountain.
Continue as Goron Link through the exposed mountain pass. Charge a Goron roll on a broad, level stretch so the spikes appear before reaching a ramp. Use the ramps to cross the gaps. Snowballs can knock Link out of his roll, so destroy or avoid them before committing to a jump. If a jump fails, use the lower ledge to recover rather than repeatedly charging from an unsafe position.
At the Snowhead entrance, activate the nearby Owl Statue with a sword strike if it is not already active. This provides a useful warp point for the original N64 route. Enter Snowhead Temple after crossing the cleared pass.
The Goron Shrine chandelier sequence is optional. Completing it can lead to the Rock Sirloin and Don Gero’s Mask, but neither is required to enter Snowhead Temple, defeat Goht or continue to Great Bay.
- Play the Goron Lullaby near the Snowhead obstruction.
- Cross the upper mountain pass with charged Goron rolls.
- Activate the Snowhead Owl Statue.
- Enter Snowhead Temple.
Clear Snowhead Temple and obtain the Fire Arrows
Snowhead Temple is organized around a central chamber with multiple floors and colored doors. Use Goron Link for heavy blocks, Goron switches and breakable obstacles, but change to human Link for normal sword combat and precise platforming. For long bridges and narrow gaps, begin rolling far enough away to reach full speed before the jump.
In the opening rooms, collect Small Keys and open the routes leading back to the central chamber. Use Bombs where the dungeon presents suspicious walls or blocked passages. In the stalactite room, shoot the hanging stalactites with arrows. This clears the route and exposes the platforms and chest needed to continue.
The lower Wizrobe is the first miniboss. Fire arrows at the real Wizrobe before it completes its attack. When multiple warp points become active, watch the figures carefully and target the one performing the real casting animation; the copies are decoys. Defeat it to make the chest appear, then collect the Fire Arrows.
Return to the central chamber and use Fire Arrows to melt ice covering doors, blocks and Freezzards. Defeat Freezzards with Fire Arrows, light the required torches and use Goron ground pounds on the colored pillars. Continue upward through the opened routes.
The second Wizrobe guards the upper progression. Use the same method: identify the real figure, attack it before or during its casting sequence and avoid wasting arrows on the decoys. After the miniboss is defeated, collect the Boss Key. Return to the top level, use a maximum-speed Goron roll across the final bridge and enter the boss door.
- Collect the required Small Keys.
- Defeat the lower Wizrobe and obtain the Fire Arrows.
- Melt the temple’s ice barriers and defeat the Freezzards.
- Defeat the upper Wizrobe and collect the Boss Key.
- Cross the final bridge and enter Goht’s chamber.
Defeat Goht in the original Nintendo 64 version
Goht begins frozen. Shoot the boss with a Fire Arrow to awaken it, then immediately equip the Goron Mask. Hold the Goron roll until the spikes appear and pursue Goht around the circular arena.
Stay toward the inside of the track whenever possible. Goht usually travels around the outer edge, so the shorter inside line helps Link catch up. Ram Goht with the spiked Goron roll. Avoid rocks kicked backward by the boss and steer away from the slow blue energy projectile. If Goht gets far ahead, it can turn and fire a more direct blast that knocks Link out of the roll, so keep the boss within sight.
A collision can make Goht fall over. While it is down, continue damaging it with Goron attacks, then resume the chase when it rises. The arena becomes more hazardous as the battle continues: stalactites fall from the ceiling and bombs appear on the track. Leave the roll briefly to steer around an obstacle if necessary, then restart from a clear section.
Green pots placed around the arena restore magic. Break them when the magic meter is low so the Goron roll can continue. They do not restore hearts, so prepare a bottled fairy, potion or other healing item before entering if your health is limited. If the chase becomes unsafe, allow Goht to pass, avoid one complete attack pattern and restart from a clear stretch rather than making a risky collision.
When Goht is defeated, collect the Heart Container and enter the blue light to receive Goht’s Remains. The boss victory restores spring to Mountain Village, Mountain Lake and Goron Village for the current three-day cycle. This restoration is not permanent across a Song of Time reset: after returning to the First Day, the blizzard returns and Goht must be defeated again if you need spring conditions in that cycle.
- Awaken Goht with a Fire Arrow.
- Use charged Goron rolls to ram the boss.
- Use Goron attacks when Goht falls.
- Collect the Heart Container.
- Enter the blue light and collect Goht’s Remains.
- Confirm that the mountain is in its spring state during the current cycle.
Post-Goht requirement: obtain Powder Keg access
After Goht is defeated and the mountain is in spring, return to Goron Village. Cross the thawed lake and enter the cave in the village wall that was previously sealed by ice. Inside, speak to the large Goron commonly identified as Medigoron while wearing the Goron Mask.
Medigoron gives Link a Powder Keg as a test. Carry it out of the cave, throwing it up the slopes when necessary and quickly rolling after it. Cross the bridges and islands of Mountain Village, then take the route toward the Goron Racetrack. Place the keg beside the large boulder blocking the racetrack entrance and let it explode. The test is about delivering the keg to the boulder; winning the Goron Racetrack is not required for Powder Keg certification.
Once the boulder is destroyed, return to Clock Town or use an available warp route. If the current cycle is too late to complete the ranch step, deposit your rupees and play the Song of Time to return to the First Day. The Powder Keg certification remains available, while the thawed mountain itself will need to be restored again by defeating Goht in the new cycle.
On the First Day, buy a Powder Keg from the Goron in the West Clock Town Bomb Shop while wearing the Goron Mask. Carry it to Milk Road and place it beside the large boulder blocking the entrance to Romani Ranch. The keg opens the road for that cycle. If necessary, use an arrow to detonate it without waiting beside the fuse.
- Defeat Goht and return to the thawed Goron Village.
- Enter the formerly frozen cave and speak to Medigoron as Goron Link.
- Deliver the test Powder Keg to the Goron Racetrack boulder.
- Obtain certification to purchase Powder Kegs.
- On the First Day, buy a Powder Keg from the West Clock Town Bomb Shop.
- Destroy the Milk Road boulder blocking Romani Ranch.
Required Romani Ranch checkpoint: learn Epona’s Song
Enter Romani Ranch during the daytime on the First Day, before Romani’s training window closes in the evening. Speak to Romani as human Link. She asks Link to become her assistant and begins the balloon practice challenge.
The practice takes place on Epona. Shoot all ten balloons around the ranch within Romani’s one-minute target. The balloon layout is spread around the ranch, so keep moving in a broad circle and use the map landmarks to avoid doubling back. This is a training challenge, not the later alien-defense mission.
After the practice is completed, Romani teaches Epona’s Song. Playing the song lets Link summon Epona from suitable outdoor areas, including Termina Field and Milk Road. This is the required checkpoint for the ordinary Great Bay and Ikana route: Epona is needed to cross the fences into Great Bay and to reach the Gorman Track, where Garo’s Mask begins the normal Ikana Canyon route.
The alien defense at 2:00 AM on the First Night is optional for the main campaign. It awards a Bottle if completed, but it is not needed to learn Epona’s Song or enter the remaining dungeons. Cremia’s later milk escort is also optional, as is the Romani’s Mask reward connected with completing the ranch sidequest. If the goal is only to continue the campaign, learn Epona’s Song and leave the ranch.
- Enter Romani Ranch during the First Day daytime window.
- Speak with Romani as human Link.
- Complete the ten-balloon Epona practice.
- Learn Epona’s Song.
- Confirm that Epona can be summoned before leaving the ranch.
- Treat the alien defense, Cremia escort and Romani’s Mask as optional content.
Before you move on
- The Goron Mask and complete Goron Lullaby are recorded in the inventory.
- The Snowhead obstruction has been removed by putting the invisible Biggoron to sleep.
- Fire Arrows and the Snowhead Temple Boss Key have been obtained.
- Goht is defeated, Goht’s Remains and the Heart Container are collected.
- The mountain is thawed during the current cycle.
- Powder Keg certification has been earned by destroying the Goron Racetrack boulder.
- The Milk Road boulder has been destroyed on the First Day.
- Romani’s ten-balloon practice has been completed and Epona’s Song has been learned.
- The player understands that the alien defense, Cremia escort, Romani’s Mask, Goron Racetrack race and Don Gero’s Mask are optional.
- Epona can be summoned for the Great Bay and Ikana portions of the campaign.
References for this chapter
- The Legend of Zelda: Majora’s Mask Nintendo 64 Instruction Manual
- Majora’s Mask Walkthrough – Snowhead
- Majora’s Mask Walkthrough – Spring, Romani Ranch and Ikana Graveyard
- 5. Snowhead Temple – Zelda Universe
- The Legend of Zelda: Majora’s Mask – Guide and Walkthrough for Nintendo 64
- The Legend of Zelda: Majora’s Mask/Snowhead Temple – StrategyWiki
Great Bay and Gyorg (Zora progression)
After Snowhead, learn Epona’s Song, summon Epona in Termina Field and cross the west fence into Great Bay Coast. Heal Mikau for the Zora Mask, infiltrate the Gerudo Pirates’ Fortress for the Hookshot and four Zora Eggs, exchange a Gerudo Pictograph for the Seahorse, recover the remaining three eggs from Pinnacle Rock, learn New Wave Bossa Nova and clear Great Bay Temple. The boss strategy below is for the original Nintendo 64 release, including its platform-based Gyorg fight and Zora Link Electrical Barrier attack.
Confirm Epona’s Song and ride to Great Bay
Great Bay is normally reached after the Snowhead section, once Romani has taught you Epona’s Song. Do not treat Epona as an unexplained starting assumption. From Clock Town, leave through the west gate into Termina Field, play Epona’s Song and mount her. Ride toward the western side of the field and use the carrots to make Epona jump the large fence leading into Great Bay Coast. The horse is required for this normal entrance; walking around the fence is not the intended route for this chapter.
Once inside Great Bay Coast, ride toward the beach and dismount near the water. The Leevers in this area are less troublesome while you are mounted, so cross the open ground quickly before beginning the underwater portion. If you need to return to the area later, activate the Owl Statue on the teapot-shaped offshore building after obtaining the Zora Mask.
- Epona’s Song was learned after Snowhead.
- Epona was summoned by playing Epona’s Song in Termina Field.
- Epona jumped the west Termina Field fence into Great Bay Coast.
- Great Bay Coast has been reached without relying on a remake-only route.
Heal Mikau and obtain the Zora Mask
From the Great Bay Coast beach, look for the seagulls circling over the injured Zora, Mikau. Swim behind him and grab him, then push him toward the shore. After he reaches land, speak with him and play the Song of Healing. Mikau’s spirit will be laid to rest and the Zora Mask will appear.
Put on the Zora Mask to become Zora Link. In the original Nintendo 64 version, Zora Link can swim rapidly, dive and walk underwater, throw his fin blades, and create an electrical barrier by pressing R while swimming. The barrier consumes magic, so reserve it for enemies, emergency defense and the Gyorg battle rather than leaving it active constantly.
Before continuing, swim to the teapot-shaped building offshore. Climb onto its platform, remove the Zora Mask and strike the Owl Statue with your sword. This activates the Great Bay Coast warp point. The statue also gives you a temporary save point in the N64 version, but the Song of Time remains the reliable way to preserve permanent campaign progress when resetting the cycle.
- Mikau was pushed onto the beach.
- The Song of Healing was played for Mikau.
- The Zora Mask was obtained.
- The Great Bay Coast Owl Statue was activated.
Enter Pirates’ Cove and collect the four fortress eggs
Use Zora Link to swim to the northern part of Great Bay Coast, along the wall associated with the Gerudo Fortress. Dive to the seafloor and find four wooden boards marked with skulls. Swim into the second board from the left to reveal the underwater entrance to Pirates’ Cove.
The cove contains patrol boats. Stay underwater or keep outside the guards’ view; being spotted sends you back to Great Bay Coast. Swim to the left side of the cove and climb onto the northern platform. Put on the Goron Mask and use a Goron Pound on the Goron Switch. This opens the gate that allows water to flow into the route. Return to Zora Link and follow the opened passage through the underwater channel and its obstructions until you reach the upper platform leading into the fortress.
Inside the fortress, the Hookshot is the first required objective. Use arrows or other attacks to stun Gerudo guards, then move between cover and ladders rather than trying to fight them permanently. Reach the upper routes, enter the egg rooms and collect each glowing Zora Egg with an empty Bottle. There are four fortress eggs. Keep the bottles available for this task and avoid filling them with optional items until all four eggs have been secured.
- The second skull-marked board was used as the underwater entrance.
- The Goron Switch was activated with a Goron Pound.
- The Hookshot was obtained inside the fortress.
- Four fortress Zora Eggs are being carried in Bottles.
Deposit the fortress eggs and take a Gerudo Pictograph
Return to Great Bay Coast and enter the Marine Research Lab. Climb onto the upper ledges around the large aquarium and stand over the tank before releasing each egg. If an egg does not drop into the water, reposition yourself over the center of the aquarium and try again. Deposit all four fortress eggs.
Before leaving the fortress area permanently, make sure you have taken a Pictograph of a Gerudo pirate. If necessary, return to the fortress, photograph one of the pirates and leave with the image. This Pictograph is needed for the Seahorse exchange at the Fisherman’s Hut.
The eggs carried in Bottles should not be treated as a safe cycle checkpoint. If you reset while still carrying them, you should expect to repeat the collection. Once the eggs have been deposited and the later song has been learned, the main quest state is preserved as a key progression result, while ordinary carried items and dungeon resources are not.
- All four fortress eggs were deposited in the Marine Research Lab aquarium.
- A clear Gerudo Pictograph was obtained.
- The bottles used for the fortress eggs are empty.
- The eggs have not been mistaken for permanent carried inventory.
Exchange the Pictograph for the Seahorse
Go to the Fisherman’s Hut on Great Bay Coast with the Gerudo Pictograph. Speak with the Fisherman and exchange the picture for the Seahorse in a Bottle. This is the normal original N64 route to Pinnacle Rock.
With the Seahorse in your Bottle, swim toward the northern part of Great Bay, where two large stone pillars rise from the water. Swim between the pillars and continue to the signs below the surface. Release the Seahorse there. It will guide you through the murky passage toward Pinnacle Rock. Although a player who already knows the correct turns can navigate without following it, using the Seahorse is the dependable route for a first playthrough.
Pinnacle Rock contains eight Deep Python dens distributed through the passage. Three of the dens contain the remaining Zora Eggs. Lure each Deep Python from its hole, then attack the exposed neck with Zora Link’s Electrical Barrier. The barrier uses magic, so collect green magic jars between encounters and activate it only when the snake’s vulnerable section is exposed. You can also use charged Zora fin attacks from the ledges if you need to conserve magic. Collect the three eggs in empty Bottles and return through the passage to Great Bay Coast.
- The Gerudo Pictograph was exchanged for the Seahorse.
- The Seahorse was released between the two northern stone pillars.
- All three Pinnacle Rock Zora Eggs were collected.
- All seven eggs are now available for the Marine Research Lab sequence.
Learn New Wave Bossa Nova and reach Great Bay Temple
Return to the Marine Research Lab and deposit the three Pinnacle Rock eggs into the aquarium with the four fortress eggs. When all seven eggs are present, the tadpoles will arrange themselves and display a musical pattern. Stand in front of the aquarium, take out the Ocarina and play the displayed notes. You will learn New Wave Bossa Nova.
Travel through the passage from Great Bay Coast into Zora Cape and find Lulu. While wearing the Zora Mask, play New Wave Bossa Nova for her. The song restores her voice and summons the giant turtle. Hookshot the target on the turtle’s shell to ride it to Great Bay Temple.
The Beaver races, Oceanside Spider House, optional Heart Pieces and other Great Bay rewards are not required for temple access. Before riding the turtle, fill spare Bottles with fairies or another healing item, and make sure you have arrows and enough magic for Zora Link’s Electrical Barrier. The temple can be completed without collecting its Stray Fairies.
- All seven Zora Eggs were deposited in the aquarium.
- New Wave Bossa Nova was learned.
- The song was played for Lulu while wearing the Zora Mask.
- The giant turtle carried Link to Great Bay Temple.
Route through Great Bay Temple
Great Bay Temple is controlled by water flow. The central chamber contains the color-coded routes, and each switch changes which pipes carry water. At the beginning, follow the active yellow route from the central chamber, then use Zora Link to swim through the green passage when the route directs you there. Collect the early Small Keys and open the dungeon map and compass rooms as needed. The Hookshot is required for several upper platforms and targets.
To obtain the Ice Arrows, follow the lower red route from the central chamber to the room containing the Octorok and then the Wart mini-boss. Defeat Wart by exposing its eye, attacking it while the eye is visible and avoiding the bouncing body. Afterward, collect the Ice Arrows.
In the N64 version, Ice Arrows can freeze suitable water surfaces even when there is no special sparkling target. Use them to create temporary ice platforms. Return to the red-pipe rooms and use frozen Octoroks or Blue ChuChus as temporary blocks where necessary to reach the red switches. The second red switch requires crossing an icy section and using a frozen Blue ChuChu while protecting yourself from the Real Bombchu.
After the red flow is restored, use the red route to reach the room with the second mini-boss, Gekko. Defeat the Mad Jellies or shield them away while chasing Gekko. When the jellies combine into a blob on the ceiling, shoot the blob with an Ice Arrow while it is fully formed overhead. Strike Gekko when he falls and repeat the process. The Boss Key is in the chest beyond this battle.
Next, return to the waterwheel area and adjust the red and yellow switches so the waterwheel changes direction. Follow the rotating platforms to the northern side of the central chamber and freeze the waterfall with an Ice Arrow. In the green-pipe room, create ice platforms across the water, reach the green switch and activate it. Continue through the green route to the moving-platform and see-saw rooms. Use Fire Arrows to melt frozen water when a see-saw or platform must be raised, then reach and activate the second green switch.
Once the green pipes carry water through the bottom route, follow that route to the final room. The last green switch opens the water pump. Wait for the pump to lower, jump onto it and ride it to the Boss Door. Optional Stray Fairies can be ignored; the required dungeon items are the Ice Arrows, Boss Key and the completed pipe route.
- The Ice Arrows were obtained after defeating Wart.
- Both red-pipe switches were activated.
- Gekko was defeated and the Boss Key was collected.
- The waterwheel was redirected through the red and yellow systems.
- Both green switches were activated.
- The final green route and water pump opened the Boss Door.
Defeat Gyorg in the original N64 battle
Gyorg’s Nintendo 64 battle uses a central platform surrounded by deep water. Stay near the middle of the platform rather than standing at its edge. When Gyorg backs away and charges, move sideways to avoid the impact. If it jumps over the platform, roll or run clear of its path. Falling into the water is dangerous because Gyorg can bite Zora Link for heavy damage, so climb back onto the platform as soon as possible.
Follow Gyorg with Z-targeting and watch the bubbles to track its position. When it is swimming in a safe line or has finished an attack, fire an arrow into it. The arrow stuns Gyorg and leaves its body vulnerable underwater. Do not use the later 3DS eye-and-spike-mines method; that is not the original N64 fight.
As soon as Gyorg is stunned, equip the Zora Mask, jump into the water and swim directly toward its limp body while holding R to activate the Electrical Barrier. The barrier damages Gyorg’s body. Make the attack brief, then swim back to the platform immediately. Zora Link’s fin attacks can also hurt it, but the Electrical Barrier is the more effective N64 option when magic is available.
Gyorg eventually releases smaller fish. If health is low, stun Gyorg with an arrow, enter the water as Zora Link and clear the fish with the Electrical Barrier. The fish can drop Recovery Hearts. Green magic jars are available underwater, while jars on the platform can replenish arrows. Return to the platform after collecting recovery and repeat the arrow-stun, short barrier attack and retreat pattern until Gyorg is defeated.
Collect the Heart Container first, then take Gyorg’s Remains. The following guardian scene confirms that Great Bay’s guardian has been freed and advances the main campaign. If you die, the dungeon is not cleared. Reload the most recent N64 save or continue point, refill arrows and magic, and repeat the fight. The dungeon route and learned songs remain part of your campaign progress after a proper reset, but carried arrows, magic, keys and other temporary resources must be restored.
- Gyorg was stunned with ordinary arrows from the central platform.
- Zora Link used the Electrical Barrier against Gyorg underwater.
- Small fish were cleared for Recovery Hearts when necessary.
- Gyorg was defeated.
- The Heart Container and Gyorg’s Remains were collected.
- The Great Bay guardian scene advanced the campaign.
Before you move on
- Epona’s Song was learned after Snowhead and Epona was summoned in Termina Field.
- Epona jumped the west fence and Great Bay Coast was reached.
- Mikau was healed and the Zora Mask was obtained.
- The Great Bay Coast Owl Statue was activated.
- The Hookshot and all four fortress Zora Eggs were obtained.
- All four fortress eggs were deposited in the Marine Research Lab.
- A Gerudo Pictograph was exchanged for the Seahorse.
- The three Pinnacle Rock eggs were recovered and all seven eggs were deposited.
- New Wave Bossa Nova was learned and played for Lulu.
- The giant turtle carried Link to Great Bay Temple.
- The Ice Arrows and Boss Key were obtained, the red, yellow and green pipe route was completed and the Boss Door was opened.
- Gyorg was defeated using the original N64 arrow-stun and Electrical Barrier method.
- The Heart Container and Gyorg’s Remains were collected, and the Great Bay guardian sequence advanced.
References for this chapter
- Majora’s Mask Walkthrough – Great Bay and Zora Cape
- Majora’s Mask Walkthrough – Great Bay Temple
- Great Bay Temple – Zelda Dungeon Wiki
- The Legend of Zelda: Majora’s Mask Nintendo 64 Instruction Manual
- The Legend of Zelda: Majora’s Mask Nintendo 64 Guide and Walkthrough
- The Legend of Zelda: Majora’s Mask – Guide and Walkthrough – Nintendo 64 – Ikana and Song of Storms
Ikana Canyon, the Stone Tower route and Twinmold
After learning Epona’s Song, win the Gorman Brothers’ race to obtain Garo’s Mask and enter Ikana Canyon. The required route then runs through Ikana Graveyard, the Music Box House, Beneath the Well and Ikana Castle before opening Stone Tower Temple. On the original Nintendo 64 version, collect Light Arrows, invert the temple, defeat Gomess and the second Eyegore, take the Giant’s Mask, and defeat Twinmold.
Win the Gorman Brothers’ race and enter Ikana Canyon
Make sure Epona’s Song has already been learned at Romani Ranch. Travel to Milk Road, play Epona’s Song, and mount Epona. Enter the fenced Gorman Track and speak to either brother while riding. Pay to begin the race. The race is required for Garo’s Mask; the milk sold at the track is optional.
Stay near the inside of the course without cutting through the large mud patches. Use carrots to maintain speed before jumps, but avoid exhausting every carrot immediately. Jump the fences cleanly and minimize collisions with the brothers. If you lose, pay for another attempt and repeat the race. Winning awards Garo’s Mask permanently.
Ride east toward the Ikana Canyon entrance. At the high ledge, wear Garo’s Mask to make the Garo reveal the route across the gap. Use the Hookshot on the tree across the gap and follow the upper path into Ikana Canyon. Activate the Ikana Canyon Owl Statue as soon as you arrive. Garo’s Mask opens the crossing, but the Hookshot is still required to use it.
- Epona’s Song learned.
- Epona summoned on Milk Road.
- Gorman Brothers’ race won.
- Garo’s Mask obtained.
- Hookshot available.
- Ikana Canyon Owl Statue activated.
Awaken Skull Keeta and obtain the Captain’s Hat
Go to Ikana Graveyard and find the enormous skeleton beneath the bridge. Play the Sonata of Awakening near Skull Keeta to awaken him. This is the first graveyard task; do not attempt to command the Stalchildren before obtaining the Captain’s Hat.
Skull Keeta runs away when the battle begins. Chase him along the graveyard path and use arrows to stop or slow him when he gains distance. When you catch up, attack with the sword while avoiding his sweeping attacks. Defeat him to reveal a large chest, then open it to receive the Captain’s Hat.
The Captain’s Hat is the item that lets Link command Stalchildren. Skull Keeta and the Captain’s Hat sequence is separate from the later Song of Storms sequence, so finish this battle before returning to the grave at night.
- Skull Keeta awakened with the Sonata of Awakening.
- Skull Keeta chased and defeated.
- Captain’s Hat collected from the revealed chest.
Open the grave and learn the Song of Storms
Return to Ikana Graveyard at night after obtaining the Captain’s Hat. Wear the hat and speak to the Stalchildren guarding the large grave. Order them to open it, then enter the grave and defeat the Iron Knuckle. Continue into the chamber where Flat is imprisoned.
Speak with Flat and play the Song of Healing when prompted. Flat teaches the Song of Storms. This song is permanent and is required to remove the curse affecting Sharp and restore the Music Box House area. If the Song of Storms was learned in an earlier cycle, this grave sequence does not need to be repeated.
- Captain’s Hat obtained before returning to the grave.
- Stalchildren commanded to open the grave.
- Iron Knuckle defeated.
- Song of Storms learned from Flat.
Restore the Music Box House and obtain the Gibdo Mask
Return to Ikana Canyon and follow the dry river toward the cave north of the Music Box House. Enter the cave and find Sharp. Play the Song of Storms for him. The song removes Sharp’s curse and restores the river’s flow, causing the Music Box House to operate.
When the music begins, go to the house and wait for Pamela to leave and investigate. Enter while the door is open. Go downstairs and find Pamela’s father in the lower room. Play the Song of Healing near him to remove his curse. He gives Link the Gibdo Mask.
The Gibdo Mask is needed for the Beneath the Well route because it allows Link to approach the Gibdos and answer their requests without immediately starting a fight. The Song of Storms, the restored river and the Gibdo Mask are permanent progression.
- Song of Storms played for Sharp in the cave north of the Music Box House.
- River restored and Music Box House activated.
- Pamela’s father found downstairs.
- Song of Healing played.
- Gibdo Mask received.
Complete Beneath the Well and collect the Mirror Shield
Enter Beneath the Well wearing the Gibdo Mask. Prepare the supplies before committing to the route. On the original N64 version, the Gibdos request five Magic Beans, ten Deku Nuts, ten Bombs, one Fish, one captured Big Poe and one bottle of Milk. The Fish, Big Poe and Milk must be carried in bottles; the other supplies can be carried normally. The quantities differ in the 3DS remake, so use the N64 quantities here.
Use the Gibdo Mask to speak with the well’s inhabitants and satisfy each request in sequence. Follow the opened passages through the well. When the Big Poe appears, avoid its charge, strike it from behind with arrows, and repeat until it is defeated. Capture the defeated Big Poe in a bottle for the later request.
Give the required Fish, Big Poe and Milk to the appropriate Gibdos, then reach the final chamber. Light all of its torches with Fire Arrows or Deku Sticks to make the chest appear. Open it to obtain the Mirror Shield. Reflect light onto the nearby sun symbol and light block to reveal the exit ladder. The Mirror Shield, not the Gibdo Mask, is the required tool for the light puzzles in Ikana Castle.
- Gibdo Mask equipped.
- Five Magic Beans, ten Deku Nuts and ten Bombs prepared.
- Bottle containing a Fish prepared.
- Big Poe defeated and captured in a bottle.
- Bottle of Milk prepared.
- Mirror Shield collected.
Clear Ikana Castle and learn Elegy of Emptiness
Enter Ikana Castle through the route from the well or through the shortcut near the castle entrance, now that the Mirror Shield is available. Work through the courtyard and interior rooms, defeating ReDeads, Blue Bubbles, Floormasters and the castle guards as necessary. Reflect sunlight onto the castle’s sun symbols to remove the light barriers.
Use Deku Link for the castle’s flower and launch-pad section, then return to human form for ordinary combat. Continue to the throne room and defeat the King of Ikana. After the fight, play the Song of Healing. The king teaches Link Elegy of Emptiness.
Elegy creates a stationary copy of Link in his current form. Use it as human Link and while wearing the Deku, Goron and Zora Masks to create four different statues. The statues disappear after a cycle reset or when the setup is otherwise lost, but the song remains permanently learned.
- Castle light barriers solved with the Mirror Shield.
- Deku launch section completed.
- King of Ikana defeated.
- Song of Healing played after the battle.
- Elegy of Emptiness learned.
Open the Stone Tower entrance
Travel to the Stone Tower approach in upper Ikana Canyon. The entrance platform contains four pressure switches. Create four Elegy statues: one as human Link, one as Deku Link, one as Goron Link and one as Zora Link. Place the statues on the four switches until the entrance route opens.
The statues are temporary. If you play the Song of Time or otherwise lose the setup, return and recreate all four before attempting to open Stone Tower again. Activate the Stone Tower Owl Statue before entering the temple so you have a recovery point for supplies, missed switches or a failed dungeon attempt.
The Stone Tower entrance and the Stone Tower Temple are separate locations. Opening the entrance with Elegy does not invert the temple; inversion is performed later with a Light Arrow.
- Human Elegy statue placed.
- Deku Elegy statue placed.
- Goron Elegy statue placed.
- Zora Elegy statue placed.
- Stone Tower entrance opened.
- Stone Tower Owl Statue activated.
Clear the upright temple and obtain the Light Arrows
Enter Stone Tower Temple in its upright orientation. The opening route uses the Hookshot, Bow, Bombs or Bombchus, Mirror Shield and the transformation masks. Follow the dungeon’s weight, light, lava and platform puzzles. Stray Fairies are optional and can be skipped when the goal is to reach Twinmold efficiently.
Advance to the Garo Master miniboss. Keep moving to avoid its surprise attacks and strike when it becomes vulnerable. Defeating the Garo Master awards the Light Arrows.
Return to the temple entrance area and locate the red jewel on the Stone Tower structure outside. Fire a Light Arrow at the jewel to invert the temple. The inversion changes the dungeon’s floor and ceiling orientation and is required to reach the later rooms, Gomess and the boss route.
- Upright Stone Tower route completed.
- Garo Master defeated.
- Light Arrows obtained.
- Red exterior jewel struck with a Light Arrow.
- Temple inverted.
Clear the inverted temple and collect the Giant’s Mask
Re-enter Stone Tower in its inverted orientation. Use the Majora’s Mask floor symbol, exposed exterior platforms and sun symbols as landmarks while navigating the reversed rooms. Previously safe floors may now be ceilings, so check each landing before committing to a jump or Hookshot target.
Use Light Arrows to defeat Gomess. The arrows remove the protective swarm around him and expose his vulnerable body. Attack during that opening, then retreat before the bats surround Link again. After Gomess falls, collect the Boss Key and continue through the inverted temple.
In the original N64 version, defeat the second Eyegore in the room before the boss approach. Its eye can be exposed with a Light Arrow, after which regular arrows or close-range attacks can damage it. Defeating this Eyegore causes a large chest containing the Giant’s Mask to appear. This placement is different in Majora’s Mask 3D, where the mask is obtained during the Twinmold battle. Collect the Giant’s Mask before entering the boss room.
- Inverted temple route completed.
- Gomess defeated.
- Boss Key collected.
- Second Eyegore defeated.
- N64 Giant’s Mask collected from the resulting chest.
Defeat Twinmold on Nintendo 64
Enter the Twinmold arena with the Giant’s Mask, a strong supply of magic and healing available. On the original N64 version, both worms can be damaged from the beginning. Equip the Giant’s Mask to become Giant Link, then attack the exposed head or tail of either Twinmold with sword swings. Move around the arena instead of standing directly underneath a worm, and strike as it passes within range.
The Giant’s Mask drains magic continuously. Break the stone pillars around the arena to release magic refills, but remove the mask before collecting them because Giant Link cannot pick them up while transformed. Re-equip the mask after refilling. If magic runs low, disengage, recover as normal Link, and resume rather than continuing until the transformation ends at a dangerous moment.
Twinmold can also be defeated as normal Link with arrows, although this takes longer and requires more careful positioning. Continue damaging the worms until both are defeated. Collect the Heart Container and the light containing Twinmold’s Remains. The Remains are permanent proof that the fourth dungeon has been cleared.
- Twinmold defeated.
- Heart Container collected.
- Twinmold’s Remains collected.
- Giant’s Mask used, or the normal-Link arrow strategy completed.
Before you move on
- Epona’s Song was learned and used to summon Epona on Milk Road.
- The Gorman Brothers’ race was won and Garo’s Mask was obtained.
- The Ikana Canyon crossing was opened with Garo’s Mask and the Hookshot.
- Skull Keeta was awakened with the Sonata of Awakening, defeated, and followed to the Captain’s Hat chest.
- The Captain’s Hat was used to open the grave, and the Song of Storms was learned from Flat.
- The Song of Storms was played for Sharp, the Music Box House was restored, and the Gibdo Mask was obtained.
- Beneath the Well was completed and the Mirror Shield was collected.
- The King of Ikana was defeated and Elegy of Emptiness was learned.
- The Stone Tower entrance was opened with human, Deku, Goron and Zora Elegy statues.
- The Light Arrows were collected and used to invert Stone Tower Temple.
- Gomess and the second Eyegore were defeated.
- The N64 Giant’s Mask was collected from the second Eyegore’s chest.
- Twinmold was defeated, and its Remains and the Heart Container were collected.
- The Ikana Canyon and Stone Tower Owl Statues were activated for recovery and travel.
References for this chapter
- Majora’s Mask Walkthrough – Spring, Romani Ranch and Ikana Graveyard
- Majora’s Mask Walkthrough – Ikana Canyon
- Majora’s Mask Walkthrough — Well and Ikana Castle
- Majora’s Mask Walkthrough – Stone Tower Temple
- Collection in Ikana — The Legend of Zelda: Majora’s Mask Walkthrough and Guide
- The Legend of Zelda: Majora’s Mask N64 Player’s Guide
Moon approach: accessing the Moon and pre-final preparations
After defeating Odolwa, Goht, Gyorg, and Twinmold, carry their four Remains to the Final Day and use Oath to Order on the Clock Tower roof. The Four Giants hold back the Moon and open the final area. The Moon trials are optional for reaching Majora, but completing all four and donating all 20 ordinary masks earns the Fierce Deity’s Mask before the final battle.
Confirm the four dungeon victories
The Moon becomes accessible after you have defeated the four main dungeon bosses and collected their Remains: Odolwa’s Remains from Woodfall Temple, Goht’s Remains from Snowhead Temple, Gyorg’s Remains from Great Bay Temple, and Twinmold’s Remains from Stone Tower Temple. These four boss masks are permanent inventory items and are required for the final Clock Tower sequence.
You do not need every Piece of Heart, every bottle, the Couple’s Mask, or the Fierce Deity’s Mask to reach the Moon or complete the campaign. You also do not need to replay a dungeon after resetting time once its boss has been defeated. If any Remains is missing, finish that dungeon before beginning the final cycle.
- Odolwa’s Remains collected.
- Goht’s Remains collected.
- Gyorg’s Remains collected.
- Twinmold’s Remains collected.
Prepare a fresh final cycle
Reset to the First Day if necessary, then use the available time to restore your health and magic, replenish arrows, and prepare healing. A bottled fairy is a dependable emergency recovery item. Chateau Romani is useful if you already obtained it, but it is optional; normal magic refills are sufficient if you conserve magic during the Moon trials.
The Moon contains four optional trials. The Deku trial needs the Deku Mask, the Goron trial needs the Goron Mask, and the Zora trial needs the Zora Mask. The fourth trial is completed as ordinary Link and is best attempted with the Hookshot, Bombs or Bombchus, and the Hero’s Bow available. These items are not all required to reach the Moon, but lacking them can prevent progress in the normal-Link trial.
Carry a strong sword if available. The Gilded Sword and Great Fairy’s Sword are optional upgrades, not Moon-entry requirements, but either makes the trials and the final battle safer. Make sure the items you expect to use are assigned to convenient C-buttons before entering the Clock Tower.
- Health and magic restored.
- Arrows replenished.
- At least one healing bottle prepared.
- Deku, Goron, and Zora Masks retained.
- Hookshot and bow available.
- Bombs or Bombchus available for the normal-Link trial.
- Strongest available sword equipped or ready.
Reach the Clock Tower on the Final Day
Be in Clock Town on the Final Day and wait until after midnight. The Clock Tower door in South Clock Town opens during the Final Night. Enter, climb to the roof, and approach Skull Kid. Play Oath to Order on the Ocarina of Time.
The Four Giants will answer the call and hold the Moon away from Termina. A sequence then carries Link into the Moon. Treat playing Oath to Order as the final commitment for that cycle: there is no ordinary route back to Clock Town after entering the Moon, so finish shopping, healing, banking, and equipment setup beforehand.
- All four Remains are in the inventory.
- Link is in Clock Town on the Final Day.
- The Clock Tower door has opened after midnight.
- Oath to Order is ready to play.
Choose whether to pursue the Fierce Deity’s Mask
The Moon opens into a grassy field with a large tree and five children. Four children wear the Remains of the dungeon bosses and lead to optional trials. The fifth child sits beneath the tree wearing Majora’s Mask and leads directly to the final battle.
If you only want to finish the campaign, speak to the child wearing Majora’s Mask and accept the game. You will enter the final chamber without the Fierce Deity’s Mask and must defeat Majora using Link’s normal equipment and the four dungeon Remains.
If you want the Fierce Deity’s Mask, do not begin the final battle yet. Complete the four Remains children’s trials first and retain the three transformation masks needed to enter them.
- Decide whether the optional Fierce Deity route is wanted.
- Do not speak to the Majora child until the four trials are complete if pursuing the mask.
- Retain the Deku, Goron, and Zora Masks.
Complete the four Moon trials
The children require ordinary masks before allowing Link into their trials. The Odolwa child requires 1 ordinary mask to enter and 1 more after the trial to leave. The Goht child requires 2 to enter and 2 to leave. The Gyorg child requires 3 to enter and 3 to leave. The Twinmold child requires 4 to enter and 4 to leave. This consumes all 20 ordinary masks.
The trial themes match the required form. Use Deku Link in the Odolwa trial, Goron Link in the Goht trial, and Zora Link in the Gyorg trial. The Twinmold trial is completed as ordinary Link and includes combat, switches, and item-use sections. Search each route carefully because each trial also contains a Piece of Heart, although those rewards are optional.
The Deku, Goron, and Zora Masks are not part of the 20-mask donation pool. They remain in the inventory and are needed to enter their corresponding trials. Boss Remains are also not donated. If you have fewer than 20 ordinary masks, you can still complete the trials you can afford, but the Majora child will not award the Fierce Deity’s Mask until all 20 have been given away and all four children’s trials have been cleared.
- Odolwa trial entered with 1 ordinary mask and completed with 1 additional donation.
- Goht trial entered with 2 ordinary masks and completed with 2 additional donations.
- Gyorg trial entered with 3 ordinary masks and completed with 3 additional donations.
- Twinmold trial entered with 4 ordinary masks and completed with 4 additional donations.
- All 20 ordinary masks donated.
- Transformation masks retained.
Receive the Fierce Deity’s Mask or enter the final chamber
After the four trials are complete and the children have received all 20 ordinary masks, return to the child beneath the tree wearing Majora’s Mask. Speak with him and agree to play. Because Link has no ordinary masks left to offer, the child gives him the Fierce Deity’s Mask and sends him into the final battle.
The Fierce Deity’s Mask is optional. It is not required for Moon access, the normal ending, or campaign completion. When worn in the final chamber, it transforms Link into Fierce Deity Link and greatly changes the battle by providing powerful sword attacks and ranged sword beams. The mask can only be obtained before the battle begins; if you skip the trials, proceed with normal Link instead.
If Link dies during the Moon sequence, use the resulting retry or reset as a reason to re-enter the final cycle with better healing and ammunition. If you need to redo the Moon trials, plan to obtain the ordinary masks again before entering the Moon, because the original Nintendo 64 route does not provide a normal in-Moon save point that replaces the preparation cycle.
- Fierce Deity’s Mask received, if all 20 ordinary masks were donated.
- Normal-Link equipment is ready if the mask was skipped.
- Majora’s child has been approached only after the desired trials are complete.
- Link is ready for the final boss sequence.
Before you move on
- All four dungeon Remains are in the inventory before the Final Day approach.
- The Clock Tower roof sequence has been triggered with Oath to Order after midnight on the Final Day.
- Link reaches the Moon and can choose either the four optional trials or the direct final-battle route.
- The Fierce Deity’s Mask appears only after all four trials are cleared and all 20 ordinary masks are donated.
- The child wearing Majora’s Mask sends Link into the final chamber, confirming that the Moon approach is complete.
Final confrontation: Majora’s Mask boss sequence (N64)
After defeating the four main bosses, use the Ocarina of Time at the Clock Tower on the Final Day and play the Oath to Order. The Giants stop the Moon long enough for Link to enter it. Inside, you can either speak directly to the child wearing Majora’s Mask or complete the four optional child trials to exchange all 20 ordinary masks for the Fierce Deity’s Mask. The final battle always follows the same order: Majora’s Mask, Majora’s Incarnation, and Majora’s Wrath.
Prepare before starting the final battle
The Moon’s grassy field is a safe preparation area, and time does not continue there. Four children wear the remains of Odolwa, Goht, Gyorg and Twinmold. Their trials are optional if you only want to finish the campaign, but they are required for the Fierce Deity’s Mask. Each child takes ordinary masks, not the Deku, Goron or Zora Masks. To receive Fierce Deity’s Mask, collect all 20 ordinary masks, give them to the four children in their Moon trials, then speak to the child sitting beneath the tree wearing Majora’s Mask. The child gives you Fierce Deity’s Mask immediately before the battle begins.
Before talking to the final child, fill your health and magic as far as practical. Carry arrows, Light Arrows and several healing items or bottled fairies. If you are not using Fierce Deity’s Mask, Light Arrows are especially valuable for Majora’s Wrath. If you have the Great Fairy Sword, assign it before entering the fight, but the Kokiri Sword or Gilded Sword can also complete the battle.
Speaking to the Majora-masked child begins the confrontation. There is no ordinary return path to Clock Town from the Moon, so finish the mask trials and any preparations before starting. The four boss remains are not required as usable equipment during the fight.
- Four main bosses defeated and their remains collected.
- Health and magic restored.
- Arrows, Light Arrows and healing supplies available.
- All four Moon trials completed first if you want Fierce Deity’s Mask.
- Ready to begin immediately after speaking to the final child.
Phase one: Majora’s Mask
Majora’s Mask flies around the arena, with its back and underside exposed as it moves. Keep moving around the outside of the room instead of standing beneath it. Raise your shield when the mask approaches or begins an attack, then wait for a clear shot.
The dependable N64 method is to hit the mask with an arrow when it turns or passes through an unobstructed line of fire. The impact knocks it down briefly. Run to the fallen mask and strike it with your sword, then retreat before it rises. If the mask comes close enough, a spin attack can also knock it away and create a sword-opening, but arrows are safer for a newcomer.
After taking enough damage, the four boss remains leave the walls and begin moving around the arena. They are additional hazards and targets, not a required part of the basic damage route. You can destroy them with Light Arrows, sword beams while using Fierce Deity’s Mask, or by reflecting Majora’s laser with the Mirror Shield. If you are conserving ammunition, concentrate on Majora and avoid unnecessary exchanges.
- Circle the room and keep the mask in view.
- Use an arrow to knock Majora’s Mask down.
- Close in for sword strikes only while it is stunned.
- Avoid wasting ammunition on the floating boss remains unless they are obstructing you.
Phase two: Majora’s Incarnation
Majora’s Incarnation is fast, unpredictable and difficult to track at close range. It runs and dances around the arena, occasionally stopping to fire a quick energy attack. Keep your shield ready while watching its movement. Do not chase it continuously; let it run across your field of view and attack when it passes within reach.
A Light Arrow or ordinary arrow can stun Incarnation if you have a clean shot. When it is stunned, move in for sword strikes and then back away. Another safe option is to use Goron Link’s powered rolling attack when you have enough open floor to line up the approach, but do not roll blindly into the boss’s energy attack.
There is no need to shoot the four boss remains to create an opening. Focus on Incarnation itself, preserve your health and avoid getting trapped against the arena wall. If your arrows are running low, rely on shielded positioning and short sword attacks rather than firing at every movement.
- Keep open space behind Link.
- Hold the shield while Incarnation is moving toward you.
- Stun it with an arrow when it crosses your line of fire.
- Land a short sword combo, then disengage.
Phase three: Majora’s Wrath
Majora’s Wrath grows a head and develops long whip-like arms. The arms can strike from a distance, grab Link and throw him, while staying too close allows Majora to kick Link away. Maintain a moderate distance and keep the boss targeted so you can read the arms’ movement.
Use a Light Arrow when the body is not attacking. A successful hit stuns Wrath, allowing you to approach and strike with the sword. Retreat as soon as the stun ends. If you are short on Light Arrows, break the jars around the arena before Majora’s whips destroy them. Ordinary arrows can be used as a backup, but Light Arrows are the more reliable ranged option for this phase.
Later in the phase, Wrath releases spinning blade traps that travel around the arena and eventually explode. Keep near the outer wall, raise the shield and deflect them when they approach. Do not let the traps distract you into standing beside Majora’s body after a successful hit. Heal after a grab, knockdown or heavy attack rather than trying to force the next opening.
- Stay outside the immediate kick range but close enough to keep Majora targeted.
- Block the whips with the shield when a clean Light Arrow shot is unavailable.
- Stun with Light Arrows, strike briefly, then retreat.
- Deflect or avoid the spinning blade traps near the arena wall.
- Heal before attempting another close-range exchange.
Using the Fierce Deity’s Mask
Fierce Deity’s Mask can be equipped only inside boss rooms in the original Nintendo 64 game. When used here, Link becomes Fierce Deity Link and gains a powerful double-helix sword. While targeting a boss and retaining magic, sword swings can release large energy beams. The beams consume magic, so close-range strikes are preferable if your magic supply is low.
Fierce Deity Link still faces all three forms in order, but each form requires far less damage. Against Majora’s Mask, target the flying mask and use sword beams whenever it is aligned with Link. Against Incarnation, stay targeted and attack as it crosses the arena. Against Wrath, beams let you damage the body without spending as much time near the whips. The mask greatly reduces the length and difficulty of the fight but does not remove the need to avoid grabs and attacks.
If magic runs out, continue with normal sword strikes. Do not assume Fierce Deity Link is invulnerable, and keep at least one healing item available until Wrath is defeated.
- Equip Fierce Deity’s Mask after entering the boss room.
- Target Majora before using sword beams.
- Use beams while magic is available and normal sword strikes afterward.
- Continue blocking and dodging despite the mask’s increased power.
Recovering from defeat and confirming completion
If Link dies, reload the most recent N64 save and repeat whatever portion of the Final Day route is necessary. Depending on when you last saved, this may place you before the Clock Tower confrontation rather than directly inside the Moon. The four defeated bosses, collected masks and other permanent progress remain recorded in the save, but the unfinished final battle must be attempted again.
After Majora’s Wrath is defeated, allow the ending scenes and credits to play. The Moon disappears, Termina is saved and the game presents its ending sequence. Seeing the ending begin and reaching the credits confirms that the main campaign has been completed.
The N64 version does not create a normal post-game world in which you can continue after the ending. To resume optional activities, reload your last save after the credits. That returns you to the saved pre-finale state, where you can continue collecting masks, completing sidequests or attempt the final battle again.
- Majora’s Mask defeated first.
- Majora’s Incarnation defeated second.
- Majora’s Wrath defeated last.
- The Moon disappears and the ending scenes begin.
- The credits are viewed.
- Reloading the save returns you to the playable pre-finale state for optional cleanup or another final attempt.
Before you move on
- The three forms are defeated in order: Majora’s Mask, Majora’s Incarnation, then Majora’s Wrath.
- The Moon is removed from the sky.
- The ending scenes begin and the credits are reached.
- A reload returns to the saved pre-finale game state with permanent masks and completed progression intact.
Time management tactics and cycle routing
The original Nintendo 64 version is easiest to manage when each three-day cycle has one permanent objective, one regional route and a deliberate stopping point. Use the Bomber’s Notebook to identify event windows, activate every Owl Statue you pass, bank loose rupees before resetting, and use the Inverted Song of Time whenever a dungeon or multi-stage quest needs more working time. A cycle does not need to contain an entire dungeon. The safest checkpoint is a permanent reward, song, mask, activated route or defeated boss, followed by a Song of Time reset.
Plan the cycle around permanent progress
At the start of a cycle, choose one main objective that will still be available after the Song of Time: obtaining a transformation mask, learning a song, opening a regional route, defeating a dungeon boss or receiving a permanent mask or item. Treat ordinary enemy defeats, loose rupees, most opened chests and NPC positions as temporary unless the game has clearly awarded a permanent item.
Use the Bomber’s Notebook as an event index. It records people and their three-day activity patterns after you encounter them, but it is not a replacement for remembering the next location in a linked quest. Write down the landmark associated with the appointment, such as the Stock Pot Inn, Laundry Pool, Milk Road, Milk Bar, Romani Ranch or Ikana Graveyard. The notebook is especially useful for grouping optional errands around a fixed appointment rather than trying to complete every task in one cycle.
Play the Inverted Song of Time near the beginning of a demanding cycle. It slows the clock and gives enough flexibility for travel, dungeon exploration and recovery from mistakes. Use the Song of Double Time only when you intentionally need to reach a later event window. Do not advance time simply because the next appointment is several hours away; use that gap for travel, supplies or a nearby permanent objective.
- Choose one required permanent objective before adding optional errands.
- Check the Bomber’s Notebook for active characters and their landmarks.
- Use the Inverted Song of Time for dungeons and multi-stage quests.
- Keep a known route to an activated Owl Statue available.
Bank rupees and understand Owl Statue saves
Activate every Owl Statue encountered on the main route by striking it with the sword as normal Link. Activated statues provide Song of Soaring destinations and can create a temporary save. On the original N64 rules, that Owl Statue save is a one-use continuation point. After loading it and playing again, it is no longer a substitute for the last permanent Song of Time save, so save properly with the Song of Time before shutting down for the day.
Before resetting, return to Clock Town when practical and deposit loose rupees with the Banker. Rupees held in Link’s wallet are lost when the cycle is reset, while banked rupees remain available. If you are deep in a region, use Song of Soaring to reach Clock Town, bank the money, play the Song of Time, then begin the next cycle with the Inverted Song of Time and warp back to the regional statue.
A statue is a travel and emergency stopping point, not proof that a quest is complete. The statue remains activated after a reset, but NPC schedules and temporary quest states return to their cycle beginnings. Use a received mask, learned song, bottle, dungeon reward, boss remains or other inventory item as the real checkpoint.
- Every new regional Owl Statue has been activated.
- Loose rupees have been deposited before resetting.
- You know whether you are using an Owl Statue temporary save or a Song of Time permanent save.
- The next cycle begins with the required transformation mask and supplies.
Starter template: Clock Town to Woodfall
After recovering the Ocarina and obtaining the Deku Mask from the Happy Mask Salesman, obtain the Bomber’s Notebook as human Link. In North Clock Town, pop the Majora balloon as Deku Link, then complete the Bombers’ hide-and-seek game, or use the known code to enter the Observatory route and return to receive the Notebook. Activate the South Clock Town Owl Statue and bank rupees whenever you are preparing to reset.
Travel south through Termina Field to Southern Swamp and activate the swamp Owl Statue. Follow the swamp sequence through the boat tour and Deku Palace. Rescue the injured witch’s sister in the Woods, return for the potion and continue the boat route. The Deku Palace and Woodfall access sequence is a good first-cycle objective because the statue activations and regional route remain useful even if there is not enough time to finish the temple.
On the next cycle, warp to Southern Swamp, continue through the already-open route and reach Woodfall. Activate the Woodfall Owl Statue before committing to the temple. With the Inverted Song of Time active, a careful player can clear Woodfall in one cycle, but there is no need to force the attempt. If health, magic or time becomes unsafe, retreat to the entrance or use Song of Soaring, bank rupees and reset.
Defeating Odolwa is the meaningful completion point. The boss reward and restored swamp state provide permanent campaign progress, allowing the next cycle to focus on the mountain route rather than repeating the swamp sequence.
- Deku Mask and Bomber’s Notebook are obtained.
- The Southern Swamp and Woodfall Owl Statues are active.
- The swamp boat and Woodfall route are open.
- Odolwa is defeated before Woodfall is treated as complete.
Standard template: Snowhead, Milk Road and Great Bay
Warp to Mountain Village and activate its Owl Statue if necessary. Reach the Goron Graveyard, follow Darmani’s spirit and use the Song of Healing to obtain the Goron Mask. At the Goron Shrine, find the Elder and learn the first part of the Goron Lullaby. Carry hot spring water to the Elder’s child and learn the complete song.
Use Goron Link to roll along the Road to Snowhead, activate the Snowhead Owl Statue and play the Goron Lullaby to remove the sleeping Goron blocking the mountain path. If the route has consumed most of the cycle, reset after the path is open and begin the dungeon on a fresh cycle. Defeating Goht permanently restores the mountain and makes the Powder Keg transition available.
The post-Goht transition should be planned as its own required checkpoint. Obtain Powder Keg access, use a keg to destroy the Milk Road boulder on the First Day, enter Romani Ranch before its access cutoff, complete Romani’s balloon practice and learn Epona’s Song. The alien defense and Cremia escort are optional; Epona’s Song is the required result for later western routes.
Summon Epona with Epona’s Song and ride through the opened Milk Road route to Great Bay Coast. Obtain the Zora Mask from Mikau, activate the Great Bay Coast Owl Statue and collect the four Pirate Fortress eggs. Deliver them to the Marine Research Lab aquarium, then collect the remaining eggs in Pinnacle Rock. Return to Zora Hall and play New Wave Bossa Nova for Lulu. The awakened sea turtle then carries Link to Great Bay Temple.
The egg route can safely occupy a separate cycle. Activating the coastal statues before entering the fortress prevents repeated long rides. Once the turtle route is open, reset if needed and begin the temple from a fresh cycle with arrows, magic and healing prepared.
- Goron Mask, complete Goron Lullaby and the Snowhead route are secured.
- Goht is defeated.
- Powder Keg access, the opened Milk Road, Epona’s Song and usable Epona access are secured.
- The Zora Mask, required eggs and New Wave Bossa Nova are obtained.
- The sea turtle route to Great Bay Temple is open.
Completionist cycles for fixed-time events
Treat Kafei and Anju, Romani Ranch, the Postman, the Bremen Mask and similar activities as separate cycle anchors. Reach the first appointment before its window, follow the linked stages in order and reset only after receiving the permanent reward or reaching a clearly recorded checkpoint. Do not place a remote dungeon objective between two appointments that must occur in the same cycle.
For Kafei and Anju, choose the Stock Pot Inn or Laundry Pool opening route at the beginning of the cycle and reserve the later meeting stages for the same cycle. Keep the late-day Kafei and Anju rendezvous as the priority once the quest is active. If a linked stage is missed, reset and start again rather than trying to continue from an invalid schedule.
Group optional work geographically. Handle Clock Town masks while banking rupees, combine mountain errands with Goron preparation, and combine Great Bay errands with the Zora Egg route. Optional tasks should never delay a required song, transformation mask, dungeon or boss.
- The cycle has one timed quest anchor and at most one nearby optional task.
- The next linked checkpoint is known before resetting.
- Optional errands are grouped by region.
- A sidequest does not put a required dungeon or boss at risk.
Full template: Ikana, Stone Tower and the Moon
Do not begin the Ikana route until Epona’s Song has been learned, Epona can be summoned and Garo’s Mask has been won from the Gorman Brothers’ race. The practical order is to defeat Goht, obtain Powder Keg access, open the Milk Road boulder on the First Day, enter Romani Ranch, complete Romani’s balloon practice, learn Epona’s Song, summon Epona and win the Gorman race.
Ride Epona to Ikana Graveyard. On the first night, enter the graveyard and play the Sonata of Awakening in front of the large sleeping skeleton, Skull Keeta. Chase and defeat Skull Keeta, then open the chest to obtain the Captain’s Hat. This is the required order: the Captain’s Hat is obtained from Skull Keeta and is then used for the next graveyard step.
Return to the graveyard at night wearing the Captain’s Hat and command the Stalchildren guarding the grave to open it. Enter the grave and complete the underground fight and puzzle route to learn the Song of Storms. Only after this sequence should you proceed to the Music Box House, Beneath the Well and Ikana Castle route. The Captain’s Hat is not a prerequisite for defeating Skull Keeta; it is the reward that allows Link to command the Stalchildren afterward.
Continue through the Music Box House and Beneath the Well to obtain the Gibdo Mask and Mirror Shield. Clear Ikana Castle and learn Elegy of Emptiness. Carry Elegy to the Stone Tower entrance, create the required statue copies and open Stone Tower Temple. Acquire Light Arrows, invert the temple by shooting the red jewel switch, complete the inverted section, obtain the Giant’s Mask and defeat Twinmold. The N64 Twinmold battle uses the Giant’s Mask to fight the two large worms directly; do not substitute the altered 3DS boss method.
After all four bosses are defeated, confirm that Odolwa’s, Goht’s, Gyorg’s and Twinmold’s remains are present. On the final night, reach the Clock Tower roof and play the Oath to Order. The four Giants stop the Moon, and Link can then enter the Moon. Before doing this, fill bottles with healing or fairies, carry arrows and magic recovery, and bank any remaining rupees.
For Fierce Deity’s Mask, collect all 20 regular, non-transformation masks before entering the Moon. Speak to the four children around the tree and give masks to them to enter their four trials. The Deku, Goron and Zora transformation masks are not surrendered, and the Fierce Deity’s Mask does not count toward the 20-mask requirement. After all four trials and all 20 mask donations are complete, the child wearing Majora’s Mask gives Link the Fierce Deity’s Mask. It is optional for the normal ending and can only be used in boss rooms on the N64 version.
- Epona’s Song was learned after the Powder Keg and Romani Ranch transition.
- Epona can be summoned and Garo’s Mask was won from the Gorman Brothers.
- Skull Keeta was awakened with the Sonata of Awakening and defeated.
- The Captain’s Hat was obtained and then used to open the grave and learn the Song of Storms.
- The Music Box House, Beneath the Well and Ikana Castle route are complete.
- Elegy of Emptiness has been learned.
- Stone Tower has been completed in both orientations, including Light Arrows, Giant’s Mask and Twinmold.
- All four boss remains are available before the Clock Tower roof sequence.
- The Oath to Order has been played on the Clock Tower roof and the Moon has been entered.
- All 20 regular masks were collected before entering the Moon if Fierce Deity is desired.
Before you move on
- Each cycle has one identified permanent objective before optional errands are added.
- The Bomber’s Notebook has been checked for active appointments and their landmarks.
- Rupees are banked before every Song of Time reset.
- Woodfall, Snowhead, Great Bay and Stone Tower have each been completed and their bosses defeated.
- The Snowhead-to-Milk-Road transition produced Epona’s Song, usable Epona access and Garo’s Mask before Ikana progression began.
- Skull Keeta was defeated before the Captain’s Hat was used to open the grave and learn the Song of Storms.
- The four boss remains are present before the Clock Tower roof sequence.
- The Oath to Order was played on the final night, the Moon was entered, Majora’s Mask, Majora’s Incarnation and Majora’s Wrath were defeated, and the ending sequence and credits played.
- For the optional Fierce Deity route, all 20 regular masks were collected and donated through the four Moon Children trials before the final child granted Fierce Deity’s Mask.
References for this chapter
- The Legend of Zelda: Majora’s Mask – Guide and Walkthrough – Nintendo 64 – Bomber’s Notebook and Owl Statues
- Majora's Mask — Guide and Walkthrough by BakonBitz
- The Legend of Zelda: Majora’s Mask – Guide and Walkthrough – Nintendo 64 – Ikana and Song of Storms
- Majora’s Mask Walkthrough – Spring, Romani Ranch and Ikana Graveyard
- Majora’s Mask Walkthrough – Stone Tower Temple
- The Moon Walkthrough - Zelda Dungeon
- Fierce Deity’s Mask - Zelda Dungeon Wiki
- Majora’s Mask Masks — Zelda Dungeon Wiki
Clock Town and long-form sidequests: Kafei, Anju and others
The Anju and Kafei quest, Romani Ranch events and related Clock Town activities are optional for the main campaign. One Romani Ranch step is different: First Day balloon practice with Romani teaches Epona’s Song, and that song is required for later travel to Great Bay and Ikana. The First Night alien defense, its Bottle reward, Cremia’s milk escort and Romani’s Mask are optional sidequest content. The Couple’s Mask, Bunny Hood, Postman’s Hat and Chateau Romani-filled Bottle are also optional, although the Bunny Hood and Chateau Romani can make timed routes and late-game preparation easier on the original Nintendo 64 release.
Prepare the correct cycle
Return to the First Day before beginning a missed sidequest. Play the Inverted Song of Time if you want a slower cycle, and deposit rupees at the Clock Town bank before resetting. Activate the Clock Town Owl Statue so you can return quickly with Song of Soaring. The Bomber’s Notebook records schedules and appointments, but it does not preserve unfinished event states after the Song of Time.
The full Anju and Kafei route is easiest after you have Epona’s Song, the Hookshot and Garo’s Mask. Epona’s Song lets you summon Epona outside Clock Town, the Hookshot is needed for the Ikana Canyon route to Sakon’s Hideout, and the Garo’s Mask is needed to reveal the path into upper Ikana Canyon.
If you intend to complete the ranch content as well, obtain a Powder Keg after Snowhead and use it to clear the Milk Road boulder on the First Day. Do not treat the entire Romani sequence as optional: Romani’s balloon practice is the required checkpoint for Epona’s Song. Everything that happens after learning the song is optional for the main campaign.
- The Inverted Song of Time is active if you want more working time.
- Kafei’s Mask, Epona’s Song, Hookshot and Garo’s Mask are available for the complete Kafei route.
- Rupees are deposited before a planned reset.
- A Powder Keg is available if the Romani Ranch route is being attempted.
Obtain Kafei’s Mask and start Anju’s schedule
During the daytime on the First or Second Day, enter the Mayor’s Residence in East Clock Town. Speak with Madame Aroma in the room on the right while she is there. She gives you Kafei’s Mask, which is the permanent item needed to begin the search for Kafei.
On the First Day, wait until after the Postman has delivered Kafei’s letter to Anju at the Stock Pot Inn. Speak with Anju while wearing Kafei’s Mask during her afternoon window. She will arrange a meeting in the Inn’s kitchen later that night.
Getting the Room Key from Anju earlier on the First Day is recommended but not strictly necessary. Speak to her as Goron Link during the afternoon reservation window and she will mistake you for the Goron with the same name. The key lets you enter through the front door after hours. Without it, use the Deku Flower outside the Inn to reach the unlocked upstairs entrance.
- Madame Aroma has given you Kafei’s Mask.
- Anju has received Kafei’s letter.
- Anju has arranged the late-night kitchen meeting.
- The Room Key has been obtained, or the Deku Flower route into the Inn is understood.
Receive and mail Anju’s letter
Go to the Stock Pot Inn kitchen late on the First Night and wait for Anju. Speak with her to receive the letter addressed to Kafei. Place the letter in any Clock Town mailbox before the Postman collects the mail the next morning. Mailing it during the night is safe; you do not need to wait for daylight.
Do not give a letter to the hand in the Stock Pot Inn restroom during this route. More importantly, do not stop the Bomb Shop Old Lady from being robbed on the First Night. Let Sakon take the Bomb Bag. If Sakon is stopped, he will not be available for the Final Day hideout event, preventing the normal completion of the Kafei sequence in that cycle.
The Bomber’s Notebook can help you track this schedule, but the mailbox delivery is the actual progression flag. If you reset before mailing the letter, begin this part again on the next cycle.
- Anju’s letter is in a mailbox before the morning collection.
- Sakon successfully robbed the Bomb Shop Old Lady on the First Night.
- No restroom hand event has consumed the letter.
- The cycle still has enough time remaining for the Second Day meeting.
Meet Kafei in the Laundry Pool
On the Second Day, be in the Laundry Pool before the Postman arrives in the mid-afternoon. Watch for the Postman to deliver Anju’s letter to the small masked figure. As Kafei leaves to collect it, follow him through the back door of the Curiosity Shop and wait inside.
Speak with Kafei. He removes the Keaton Mask, explains that Sakon stole the Sun’s Mask and gives you the Pendant of Memories. Take the Pendant to Anju at the Stock Pot Inn during the late afternoon or evening of the Second Day. If you miss that window, the Pendant can still be delivered during the first part of the Final Day.
Giving Anju the Pendant changes her temporary schedule so she waits for Kafei instead of abandoning the meeting. This is not permanent across a Song of Time reset, so repeat the delivery if the cycle fails later.
- The Postman has delivered Anju’s letter to Kafei.
- Kafei has given Link the Pendant of Memories.
- Anju has received the Pendant before the Final Night whenever possible.
- The final Ikana route is prepared before the Third Day.
Recover the Sun’s Mask on the Final Day
After delivering the Pendant, return to the Laundry Pool on the Final Day during the afternoon. Enter the Curiosity Shop back room and speak with the proprietor. He gives you Kafei’s Keaton Mask if you did not already receive it and provides Express Mail to Mama during the available Final Day window.
Before evening, travel to Ikana Canyon with Epona, the Hookshot and Garo’s Mask. Use the Garo’s Mask to reveal the upper route, then continue toward the area containing Sakon’s Hideout. Arrive early and hide behind the rocks near the entrance. Kafei is waiting there. Do not let Sakon see you, or he will leave without opening the hideout.
When Sakon opens the door in the evening, follow Kafei inside. The sequence alternates between Link and Kafei. As Kafei, push the block onto the first switch so Link can advance. In the conveyor-belt room, yellow switches slow the belt, red switches speed it up, and blue switches open the route for Link. As Link, defeat the Deku Babas and Wolfos and activate the available switches. In the last room, activate both switches with the two characters to recover the Sun’s Mask.
If the sequence fails, do not wait for the next morning and hope it repairs itself. Reset to the First Day and repeat the letter, Pendant and Ikana setup. The Couple’s Mask cannot be obtained unless the Sun’s Mask is recovered during that cycle.
- Epona, Hookshot and Garo’s Mask are available.
- Kafei is waiting behind the rocks before Sakon arrives.
- Sakon enters the hideout without seeing Link.
- The Sun’s Mask has been recovered.
Complete the reunion and choose the Express Mail reward
After recovering the Sun’s Mask, immediately play Song of Soaring to return to Clock Town. Enter the Stock Pot Inn and go to the employee room upstairs. It is unlocked for the reunion sequence. Wait there through the Final Night until Anju and Kafei arrive and combine their masks. They give Link the Couple’s Mask shortly before the moon falls.
The Couple’s Mask is optional, but it can be shown to the Mayor during the daytime to end the council meeting and receive a Piece of Heart. It is not required for any dungeon, the Moon or the normal ending.
The Express Mail creates a separate choice. Take it to Madame Aroma in the Latte Milk Bar while wearing Kafei’s Mask to receive a Bottle filled with Chateau Romani. Alternatively, give it to the Postman at the Post Office. Follow him to the Latte Milk Bar, then speak with him outside afterward to receive the Postman’s Hat. These rewards require separate cycles if you want both. The Couple’s Mask reunion is a separate reward and can still be completed after either choice if the Sun’s Mask route was finished.
- The Sun’s Mask was recovered before the reunion window.
- The Couple’s Mask was received in the Stock Pot Inn employee room.
- The Express Mail was delivered to either Madame Aroma or the Postman.
- A second cycle is planned if both the Chateau Romani Bottle and Postman’s Hat are wanted.
Complete the required Romani checkpoint
After Snowhead, use a Powder Keg to destroy the large boulder blocking Milk Road on the First Day. Enter Romani Ranch and speak with Romani as human Link. Accept her balloon-shooting practice and complete it while riding Epona. Romani then teaches Epona’s Song. This song is permanent and is required to summon Epona for the later Great Bay and Ikana routes.
The First Night alien defense is optional. If you accept it, return to Romani’s ranch house around 2:00 AM and begin the defense when Romani is ready. Patrol the ranch, watch the map for approaching targets and shoot enemies before they reach the barn. The dog’s reaction and the map help identify threats, including approaches from behind the house and from the ranch entrance. Surviving until dawn earns a Bottle of Milk.
Cremia’s milk escort on the Second Day is also optional. Speak with her at the ranch and meet her wagon around 6:00 PM. During the ride to Clock Town, use the Bow to drive back the Gorman Brothers. If the escort succeeds with milk remaining, Cremia gives Romani’s Mask later that evening. Romani’s Mask grants entry to the Latte Milk Bar. Chateau Romani can then be purchased there and is useful for magic-intensive dungeon or Moon preparation, but neither the escort nor the mask is required for campaign completion.
- The Milk Road boulder has been destroyed with a Powder Keg.
- Romani’s balloon practice has been completed.
- Epona’s Song has been learned.
- The alien defense is completed only if the optional Bottle is wanted.
- Cremia’s escort and Romani’s Mask are treated as optional rewards.
Obtain the Bremen Mask and Bunny Hood
Visit the Laundry Pool at night and speak with the traveling musician to receive the Bremen Mask. This is an optional Clock Town reward and is unrelated to the Bomber’s Notebook.
Take the Bremen Mask to the Cucco Shack at Romani Ranch. Wear it and march until the chicks follow Link. Continue marching until they mature into adult Cuccos. The ranch keeper then gives you the Bunny Hood.
The Bunny Hood is optional but valuable. Its speed makes it easier to reach scheduled NPCs, cross large overworld areas and complete timed errands. It does not replace Epona’s Song and does not unlock the required Great Bay or Ikana routes by itself.
- The Bremen Mask has been collected.
- The chicks have been gathered and matured into Cuccos.
- The Bunny Hood has been received.
- The Bunny Hood is being used as an optional movement aid, not a progression requirement.
Recover safely after a missed event
If Anju’s letter was not mailed, Kafei did not receive the letter, the Pendant was not delivered, or Sakon was stopped on the First Night, play the Song of Time and restart the sequence. Permanent masks, songs, activated Owl Statues and banked rupees remain, but the temporary schedules and conversations return to their starting states.
If the Sun’s Mask sequence fails, do not attempt to improvise by waiting in Ikana. Start a new cycle and repeat the letter, Pendant and Final Day setup. If the Couple’s Mask reunion is missed, the quest can be repeated in another cycle using the permanent Kafei’s Mask and the same schedule.
If the ranch defense or Cremia escort fails, Epona’s Song is still permanent if the First Day balloon practice was completed. You only need to repeat the Powder Keg entrance and ranch schedule if you want the optional Bottle or Romani’s Mask. None of these failures blocks Woodfall, Snowhead, Great Bay, Stone Tower or the normal ending.
- Permanent rewards are distinguished from temporary event states.
- A failed Kafei cycle is restarted from the First Day rather than continued after a missed trigger.
- Epona’s Song is retained even if the optional ranch defense fails.
- Main-story dungeon progression is not delayed by optional sidequest failures.
Before you move on
- Kafei’s Mask was obtained from Madame Aroma.
- Anju’s letter was mailed and Kafei gave Link the Pendant of Memories.
- The Pendant was delivered to Anju.
- Sakon’s Bomb Bag robbery was allowed to occur on the First Night.
- The Sun’s Mask was recovered in Sakon’s Hideout using the Link and Kafei switch sequence.
- The Couple’s Mask was received in the Stock Pot Inn employee room.
- Epona’s Song was learned from Romani’s First Day balloon practice.
- Romani’s Bottle, Cremia’s escort and Romani’s Mask were obtained only if the optional ranch content was intended.
- The Bunny Hood was obtained if the optional movement aid was desired.
- The Postman’s Hat or Chateau Romani-filled Bottle was obtained, with the other reward requiring another cycle if both are wanted.
- The player understands that these sidequests do not replace the required Woodfall, Snowhead, Great Bay or Stone Tower progression.
References for this chapter
- The Legend of Zelda: Majora’s Mask Nintendo 64 Instruction Manual
- The Legend of Zelda: Majora’s Mask Nintendo 64 Guide and Walkthrough
- The Legend of Zelda: Majora’s Mask Bombers’ Notebook Guide
- Anju and Kafei Quest — Zelda Dungeon
- Romani Ranch — The Legend of Zelda: Majora’s Mask Walkthrough and Guide
Mask collection and utility masks (practical uses)
Majora’s Mask on Nintendo 64 contains 24 wearable masks: 20 ordinary masks, the Deku, Goron and Zora transformation masks, and the optional Fierce Deity’s Mask. The four dungeon boss remains are permanent quest items, not wearable masks. The three transformation masks are required for the main regional routes. Several ordinary masks are needed for Ikana progression, while the rest provide travel advantages, optional rewards or access to the Fierce Deity route.
Separate required masks, transformation masks and boss remains
Obtain the Deku Mask during the opening Clock Town sequence after recovering the Ocarina of Time and learning the Song of Healing. Deku Link can use Deku Flowers, skim across water, launch from flowers and enter passages designed for Deku Scrubs. The mask is required for the Southern Swamp and Woodfall route.
Obtain the Goron Mask by reaching the Goron Graveyard, following Darmani’s spirit and playing the Song of Healing at his grave. Goron Link can roll at high speed, punch, pound switches, carry heavy objects and walk across lava. These abilities are required for the Snowhead approach and Snowhead Temple.
Obtain the Zora Mask by finding the injured Mikau at Great Bay Coast and playing the Song of Healing for him. Zora Link can swim, dive, walk along the seabed, attack underwater and use his fins as ranged weapons. The mask is required for the Zora Egg sequence and Great Bay Temple.
Garo’s Mask is required for the normal route into Ikana Canyon. After learning Epona’s Song, summon Epona and win the Gorman Brothers’ race at the Gorman Track on Milk Road. The reward is Garo’s Mask. Wearing it at the entrance to Ikana Canyon summons a Garo who reveals the route forward.
The Captain’s Hat is another required Ikana-route mask, but it is obtained separately from Garo’s Mask. Reach Ikana Graveyard and play the Sonata of Awakening near the giant skeleton, Skull Keeta, to awaken him. Chase Skull Keeta through the graveyard, defeat him, and take the Captain’s Hat from the chest that appears. Wearing the hat lets Link command Stalchildren and open the correct graves.
The Song of Storms and Gibdo Mask are separate steps after obtaining Captain’s Hat. Use the hat to command Stalchildren and open the grave that contains the Song of Storms. Play that song to restore the river in Ikana Canyon, then enter the Music Box House and play the Song of Healing for Pamela’s father to receive the Gibdo Mask. The Gibdo Mask lets Link approach Gibdos safely and makes Redeads dance, allowing the Beneath the Well route to be completed.
The Giant’s Mask is found inside Stone Tower Temple after defeating the Eyegore. It makes Link enormous and is intended for the original N64 Twinmold battle. The four boss remains from Odolwa, Goht, Gyorg and Twinmold are not masks and cannot be worn, but collecting all four is required to open the Moon.
- Obtain the Deku Mask before beginning the Woodfall route.
- Obtain the Goron Mask before attempting Snowhead Temple.
- Obtain the Zora Mask before beginning the Great Bay Temple route.
- Win the Gorman Brothers’ race for Garo’s Mask.
- Awaken and defeat Skull Keeta, then take Captain’s Hat from the revealed chest.
- Use Captain’s Hat to obtain Song of Storms, then obtain Gibdo Mask from Pamela’s father.
- Collect Giant’s Mask before fighting Twinmold.
- Do not count the four boss remains as wearable masks.
Obtain the early utility masks
Return the Clock Town Stray Fairy to the Great Fairy’s Fountain as Deku Link during the opening cycle to receive the Magic Meter. After returning to human form, find the Clock Town Stray Fairy again on a later cycle and return it to the fountain. The Great Fairy then awards the Great Fairy’s Mask. Wearing it attracts nearby dungeon Stray Fairies and makes the mask’s hair react when an uncollected fairy is nearby. It does not collect fairies automatically.
The Blast Mask comes from stopping Sakon’s robbery of the old woman in North Clock Town at midnight on the First Night. It creates an explosion in front of Link. Raise the shield before activating it if you need to avoid the blast’s damage. It is a useful substitute for bombs in some situations, but it does not replace every bomb-related item.
Obtain the Bremen Mask from Guru-Guru in the Laundry Pool at night during the First or Second Night. At Romani Ranch, enter the Cucco shack and hold the Bremen Mask button while walking until all ten chicks follow Link. Keep marching until they mature, then speak with Grog to receive the Bunny Hood. The Bunny Hood improves normal running speed and jump distance, making it one of the best optional travel masks and a useful aid for the Postman’s challenge.
Find Kamaro dancing on the mushroom-shaped rocks north of Clock Town at night. Play the Song of Healing to obtain Kamaro’s Mask. Its dance can be taught to the Rosa Sisters for an optional Piece of Heart, but it has no required dungeon function.
- Get the Great Fairy’s Mask on a later cycle after obtaining the Magic Meter.
- Stop Sakon’s robbery for the Blast Mask if you want an emergency explosive option.
- Use the Bremen Mask to mature all ten Cuccos and obtain Bunny Hood.
- Treat Kamaro’s Mask as optional.
Obtain exploration and information masks
Clear the Swamp Spider House by defeating all 30 Gold Skulltulas inside. The reward is the Mask of Truth. It allows Link to receive information from Gossip Stones and read the thoughts of dogs. The mask is optional, but it can assist with information checks and the Doggy Race.
Complete the Deku Butler’s race after rescuing the Deku Princess and returning her to the Deku King to receive the Mask of Scents. Wearing it reveals scent trails associated with certain mushrooms. This is an optional route that can lead to a Magic Mushroom and Blue Potion, so it should not delay the required Woodfall Temple objectives.
The N64 Stone Mask is obtained from the invisible soldier Shiro on the road toward Ikana Canyon, not from the Pirates’ Fortress. Bring the Lens of Truth and a Red Potion or Blue Potion. Find the circle of stones near the Ikana approach, use the Lens of Truth to reveal Shiro, and give him the potion. He rewards Link with the Stone Mask. It causes many ordinary enemies and guards to ignore Link, which makes the Pirates’ Fortress and some Ikana paths safer. It does not protect against bosses, hazards or every enemy.
Don Gero’s Mask comes from helping the hungry Goron in Mountain Village. As Goron Link, strike the chandelier fixtures in the Goron Shrine until the Rock Sirloin falls. Carry the sirloin to the hungry Goron to receive the mask. Don Gero’s Mask lets Link speak with the frogs involved in an optional chorus and Piece of Heart.
- Clear Swamp Spider House only if you want Mask of Truth.
- Complete the Deku Butler race for Mask of Scents if pursuing optional items.
- Carry the Lens of Truth and a potion when seeking Stone Mask.
- Use Goron Link to retrieve the Rock Sirloin for Don Gero’s Mask.
Complete the long sidequest masks
Obtain Kafei’s Mask from Madame Aroma in the Mayor’s Residence during the First or Second Day. Wear it when speaking with Anju to begin the Anju and Kafei quest. After delivering the Pendant of Memories and following the quest to Kafei’s hideout, continue the Final Day sequence at the Curiosity Shop. The shop owner gives Link the Keaton Mask and a Special Delivery for Kafei.
The Keaton Mask summons a Keaton from suitable moving-grass patches. Answer its questions correctly to receive an optional Piece of Heart. The Special Delivery can be given to the Postman for an optional timed challenge. Completing that challenge awards the Postman’s Hat. Wearing the hat lets Link inspect Clock Town mailboxes for an optional Piece of Heart.
Complete the Anju and Kafei quest by meeting the couple at the Stock Pot Inn near the end of the Final Night. Their final reward is the Couple’s Mask. It is optional for the campaign but is one of the 20 ordinary masks required for the Fierce Deity route.
Romani’s Mask is awarded after completing Romani Ranch’s nighttime alien defense and protecting Cremia’s milk wagon on the Second Day. It grants access to the Milk Bar without the usual membership requirement. The mask is optional for the four dungeons, but it is needed for the N64 Milk Bar performance that awards Circus Leader’s Mask.
Enter the Milk Bar after 10 p.m. while wearing Romani’s Mask. Speak with Toto and perform the music as Human, Deku, Goron and Zora Link. Gorman awards Circus Leader’s Mask. This mask has limited practical use, but it counts toward the 20 ordinary masks needed for Fierce Deity’s Mask.
- Begin the Anju and Kafei quest with Kafei’s Mask.
- Continue the Final Day sequence to obtain the Special Delivery and optional Postman’s Hat.
- Complete Romani Ranch before using Romani’s Mask for Milk Bar access.
- Perform in all four forms at the Milk Bar to obtain Circus Leader’s Mask.
- Include Couple’s Mask and Circus Leader’s Mask in the Fierce Deity collection.
Use the full mask list and plan the Fierce Deity route
The 20 ordinary masks on the original Nintendo 64 release are Postman’s Hat, Keaton Mask, Romani’s Mask, Kamaro’s Mask, All-Night Mask, Bremen Mask, Circus Leader’s Mask, Gibdo Mask, Blast Mask, Bunny Hood, Kafei’s Mask, Garo’s Mask, Stone Mask, Don Gero’s Mask, Couple’s Mask, Captain’s Hat, Great Fairy’s Mask, Mask of Scents, Mask of Truth and Giant’s Mask.
The All-Night Mask is purchased from the Curiosity Shop on the Final Night for 500 Rupees after Link has stopped Sakon’s First Night robbery. It prevents Link from falling asleep during the Stock Pot Inn grandmother’s stories. This mask is optional and is usually collected for completion rather than for a major gameplay advantage.
For a campaign-focused run, prioritize Deku Mask, Goron Mask, Zora Mask, Garo’s Mask, Captain’s Hat, Gibdo Mask and Giant’s Mask. Great Fairy’s Mask is strongly recommended if you intend to collect dungeon Stray Fairies. Bunny Hood and Stone Mask reduce travel time and danger, but neither is required to defeat the four main bosses.
For the Fierce Deity route, collect all 20 ordinary masks before entering the Moon. After defeating the four dungeon bosses, play the Oath to Order on the Final Night and enter the Moon. Speak with the four children around the tree. Each child leads to a short trial and asks Link to surrender ordinary masks. Complete all four trials and give away all 20 ordinary masks. The Deku, Goron and Zora Masks are not accepted.
When every ordinary mask has been surrendered and all four trials are complete, speak with the child wearing Majora’s Mask beneath the tree. That child awards Fierce Deity’s Mask. It is optional and is not required for the normal ending. In the final boss room, it transforms Link into Fierce Deity Link, who uses a powerful sword and can fire sword beams while targeting. The mask cannot be used freely throughout the overworld.
- Confirm that all 20 ordinary masks are in the inventory before entering the Moon.
- Do not attempt to donate the Deku, Goron or Zora transformation masks.
- Complete all four Moon-child trials and surrender all 20 ordinary masks.
- Speak with the Majora-masked child beneath the tree to receive Fierce Deity’s Mask.
- Remember that Fierce Deity’s Mask is optional and is not required to finish the campaign.
Before you move on
- The Magic Meter was obtained from the opening Clock Town fairy as Deku Link.
- The Great Fairy’s Mask was obtained by returning the Clock Town fairy as human Link on a later cycle.
- Deku, Goron and Zora Masks are in the inventory.
- Garo’s Mask was obtained from the Gorman Brothers’ race.
- Skull Keeta was awakened with the Sonata of Awakening, defeated, and the Captain’s Hat was taken from the revealed chest.
- Song of Storms was learned through the Captain’s Hat grave sequence.
- Gibdo Mask was obtained from Pamela’s father in the Music Box House.
- Giant’s Mask was collected inside Stone Tower Temple before Twinmold.
- All 20 ordinary masks are present before entering the Moon if Fierce Deity’s Mask is desired.
- All four Moon trials are complete, all 20 ordinary masks have been donated, and the child beneath the tree has awarded Fierce Deity’s Mask.
References for this chapter
- The Legend of Zelda: Majora’s Mask Nintendo 64 Instruction Manual
- The Legend of Zelda: Majora’s Mask — Masks, Nintendo 64, GameFAQs
- The Legend of Zelda: Majora’s Mask – Guide and Walkthrough for Nintendo 64
- Majora’s Mask Masks — Zelda Dungeon Wiki
- Majora’s Mask walkthrough — Ikana Road and Ikana Graveyard, Zelda’s Palace
- The Legend of Zelda: Majora’s Mask N64 Player’s Guide
Dungeon item usage and puzzle solutions (N64-specific)
The four main dungeons each provide a major ranged item that changes how later rooms are solved: the Hero’s Bow in Woodfall Temple, Fire Arrows in Snowhead Temple, Ice Arrows in Great Bay Temple and Light Arrows in Stone Tower Temple. Use those items together with Link’s transformation masks, bombs, Bombchus, the Hookshot, the Lens of Truth and the Mirror Shield. The directions below apply to the original Nintendo 64 release, not Majora’s Mask 3D.
Woodfall Temple: use the Hero’s Bow to cleanse the water and open the upper route
Find the large chest containing the Hero’s Bow inside Woodfall Temple. After collecting it, test arrows against crystal switches, distant enemies, torches and eye targets. A successful hit should produce a visible result such as an opened gate, a moving platform, a lit torch or a newly created chest. Do not waste arrows on targets that do not react.
In the upper part of the central wooden room, stand near the floor switch and aim at the wooden shrine. Shoot an arrow through the existing flame so the shrine catches fire. It rises and begins cleansing the poisoned water throughout the temple. Once the water is safe, you can swim through areas that were previously hazardous and use the rotating wooden platform created by the mechanism.
From the rotating platform, face the unlit torch on the far northwest platform. Shoot another arrow through the nearby flame to light it. The resulting door opening is the confirmation that the upper route is complete. Use Deku Link for flower launches and small platforms, and inspect high ledges for additional switches or beehives before assuming a room is finished.
The Bow remains useful after Woodfall. Keep arrows available for overworld switches, beehives and distant enemies. It is also useful for safely stunning Odolwa, although the boss can be defeated with sword attacks and other close-range openings.
- Collect the Hero’s Bow before attempting the upper central-room sequence.
- Shoot through an existing flame to ignite the wooden shrine and cleanse the water.
- Light the high torch from the rotating platform to open the upper route.
- Check high ledges, bridges and ceilings for Bow targets before searching for another path.
Snowhead Temple: combine Fire Arrows with Goron Link
Fire Arrows are found inside Snowhead Temple after the Wizrobe encounter. They consume magic and can melt ice, ignite torches, thaw frozen enemies and remove frozen barriers. They do not replace Goron Link: many solutions require Fire Arrows to clear the obstruction and Goron Link to push, pound or roll through the newly opened route.
Before entering Snowhead Temple, remember the correct Goron Elder dependency. The Elder is not thawed with Fire Arrows. First obtain Hot Spring Water from the spring beneath Darmani’s grave, carry it to the Elder’s current snowball location and break the snowball with Goron Link’s Fire Punch, a Bomb or the Blast Mask. Speak to the Elder after thawing him to learn the first part of the Goron Lullaby. Play it for his son in Goron Shrine to learn the complete song. Fire Arrows only become available later inside the temple.
Inside the temple, melt ice covering doors, switches and passages before attempting the physical part of the puzzle. When a block must hold a pressure switch, push it fully into position and confirm that the gate or mechanism remains active. Fire Arrows also clear frozen obstacles around the central pillar, allowing access to higher levels as the pillar’s usable routes change.
At Goht’s chamber, Fire Arrows melt the frozen boss and begin the battle. On the original N64 version, put on the Goron Mask and roll after Goht, using the circular track and its magic jars to maintain the spiked roll. Colliding with Goht damages him. If the chase is difficult, use Fire Arrows to stun him, then switch to Goron Link and attack quickly. Refill magic before the fight and avoid spending it on unnecessary enemies.
- Obtain Fire Arrows inside Snowhead Temple, not during the earlier Goron Elder sequence.
- Use Hot Spring Water to thaw the Goron Elder before learning the full Goron Lullaby.
- Melt ice before pushing blocks or attempting covered switches.
- Melt Goht with a Fire Arrow, then use Goron Link’s N64-appropriate attack method.
Great Bay Temple: follow the pipe network and use Ice Arrows on water and targets
Great Bay Temple is organized around red, yellow and green water pipes. As Zora Link, follow the active current and return to the central machinery area after changing a valve or switch. A rotating propeller, a newly flowing pipe or a changed water current confirms that the mechanism worked. If a pipe remains inactive, inspect the other colored network instead of repeatedly checking the same room.
After defeating Wart, collect the Ice Arrows. In the N64 version, shoot any suitable water surface to create a temporary ice platform; the sparkling-water restriction belongs to the 3DS remake. Use these platforms to cross gaps, reach ledges and access switches. Ice Arrows can also freeze certain enemies into temporary blocks. Position a frozen Blue ChuChu or Octorok where its height lets you reach an elevated switch or valve, then complete the pipe sequence before leaving.
One important combination uses both elemental arrows. Create ice platforms to reach an alcove or upper route, then use a Fire Arrow to melt an ice-covered door or frozen obstruction. If an ice platform disappears before you finish, create another from a nearby water surface rather than searching for a hidden permanent platform.
Ice Arrows also matter outside the temple. In the river at Ikana Canyon, freeze the two Octoroks into temporary blocks and jump across them. Use the Hookshot on the trees and ledges on the far side to continue toward Ikana. This is part of the normal N64 progression route.
Do not treat Ice Arrows as the main Gyorg weapon. Use the arena platforms to shoot or stun Gyorg when exposed, then enter the water as Zora Link during a safe opening and attack with the electrical barrier or Zora strikes. Return to a platform when smaller enemies crowd the water or your magic is running low.
- Track the red, yellow and green pipe systems separately.
- After each valve or switch, confirm a current, propeller or pipe visibly changes.
- Use Ice Arrows on ordinary water surfaces in the N64 version.
- Freeze the Ikana Canyon Octoroks to cross the river before Stone Tower.
- Use platforms and safe openings against Gyorg rather than wasting Ice Arrows as general attacks.
Stone Tower Temple: collect Light Arrows and deliberately change orientation
Light Arrows are collected during the upright Stone Tower Temple route. They consume magic and arrows, so use ordinary sword attacks, the Hookshot or transformation attacks against enemies that do not require light. Light Arrows are needed for Sun Faces, Sun Blocks, certain armored enemies and the Stone Tower inversion mechanism.
When the upright temple route is complete, exit to the exterior. Activate the rightmost exterior floor switch and play the Elegy of Emptiness to leave a statue holding it down. Stand on one of the side blocks and shoot the exposed red emblem with a Light Arrow. In the N64 version, this flips the exterior Stone Tower and the temple upside down. The statue-and-switch setup is therefore part of the required procedure, not an optional preparation.
Write down the current orientation before entering. Some rooms are designed to be solved upright and revisited inverted. Floors become ceilings, lava routes change, and chests or doors can be reachable only after the flip. In the room with the Majora’s Mask-shaped block, push the block as far as possible, change the room’s orientation with the red emblem, then continue pushing. The reliable completion check is that the block reaches the opposite corner and the door opens.
In the inverted sections, use Light Arrows on Sun Blocks and Death Armos when necessary. A Light Arrow can flip a Death Armos so it lands on itself after attacking. In the N64 version, the Mirror Shield, Hookshot and transformation masks remain important support tools. Keep magic and arrows available for Gomess, the inversion route and the final boss approach.
When the route requires the opposite orientation, return outside, repeat the rightmost-switch and Elegy setup, and shoot the emblem again. Do not assume a missing door or chest requires a new key until you confirm whether the temple is currently upright or inverted.
- Collect Light Arrows before attempting the final Stone Tower route.
- Use the rightmost exterior switch, an Elegy statue and a side-block shot to flip the N64 tower.
- Record whether the temple is upright or inverted before entering.
- Move the Majora’s Mask block, flip the room when necessary and confirm that its final position opens the door.
- Repeat the exterior setup whenever the final route requires the opposite orientation.
Recurring puzzle method and item carryover
When entering any dungeon room, inspect crystal switches, torches, cracked walls, movable blocks, elevated ledges, water surfaces and colored pipes before spending ammunition. Test the newest item against targets that visibly resemble its function. Listen for the activation sound and look for a physical result: a gate opening, platform moving, chest appearing, current changing, torch lighting or temple orientation flipping.
Bombs and Bombchus handle cracked walls, boulders and narrow timed routes. Use a Bombchu when the fuse must travel around a corner or through a confined passage, and check the detonation point before releasing it. The Hookshot reaches marked targets, chests and distant ledges. The Lens of Truth reveals invisible floors, platforms, enemies and passages. These tools frequently explain why a room remains incomplete after the dungeon’s main item has been collected.
Transformation masks supply the physical half of many solutions. Deku Link crosses flower gaps and reaches elevated platforms, Goron Link breaks obstacles and operates heavy switches, and Zora Link handles underwater routes, valves and electrical attacks. If an arrow, bomb or Hookshot appears ineffective, check the room’s elevation, current water flow, required transformation or temple orientation before assuming the item is wrong.
A puzzle is complete only when the environment confirms it. Do not rely on merely hitting a switch, defeating an enemy or opening a chest if the required gate remains closed. If nothing changes, inspect the opposite side of the room, look above and below the current platform, and verify that the correct form or elemental item was used.
- Inspect the complete room before spending arrows, bombs or magic.
- Use visible environmental changes as the completion check.
- Combine dungeon items with the correct transformation mask.
- Check water flow and temple orientation before repeating an action.
- Carry enough ammunition and magic to pass the next known item gate.
Before you move on
- The Hero’s Bow has been collected in Woodfall and used to ignite the wooden shrine, cleanse the water and open the upper route.
- The Goron Elder has been thawed with Hot Spring Water before the Snowhead Temple Fire Arrows are obtained.
- Fire Arrows have been collected in Snowhead and used to melt temple ice, ignite required targets and melt the frozen Goht.
- Ice Arrows have been collected in Great Bay, used for N64 temporary ice platforms and frozen blocks, and used to cross the Ikana Canyon river.
- Light Arrows have been collected in Stone Tower and used with the N64 exterior switch-and-Elegy setup to flip the tower.
- The Majora’s Mask block route has been completed by changing orientation as required rather than repeatedly searching in one state.
- Bombs, Bombchus, the Hookshot, Lens of Truth, Mirror Shield and transformation masks are being used as support tools alongside the four main dungeon items.
- Every required item action has a visible completion result: cleansed water, opened gates, changed pipe flow, moved platforms, cleared ice or changed temple orientation.
References for this chapter
- Majora’s Mask Walkthrough – Woodfall Temple
- Majora’s Mask Walkthrough – Snowhead
- Majora’s Mask Walkthrough – Snowhead Temple
- Majora’s Mask Walkthrough – Great Bay Temple
- Majora’s Mask Walkthrough – Ikana Canyon
- Majora’s Mask Walkthrough – Stone Tower Temple
- The Legend of Zelda: Majora’s Mask – Guide and Walkthrough for Nintendo 64
- The Legend of Zelda: Majora’s Mask Nintendo 64 Instruction Manual
Survival tips: health, magic, bottles and rupees
Use bottles as flexible emergency storage, protect your money through the Clock Town Bank, and prepare healing and magic before every major dungeon fight. The original Nintendo 64 release has six bottles, but only the first is connected directly to the early Southern Swamp route. The remaining bottles are optional rewards from regional challenges and timed sidequests. Keep at least one bottle available whenever entering a new region because several main-route tasks require carrying eggs, spring water, the Deku Princess, or other temporary contents.
Obtain the first bottle in Southern Swamp
During the Southern Swamp approach, follow the path through the Woods of Mystery until you find Koume injured in her clearing. Leave the woods, enter the Magic Hags' Potion Shop, and speak with Kotake. She gives you a bottle filled with Red Potion. Return through the Woods of Mystery and use the potion on Koume. After she recovers, the bottle remains in your inventory.
This is the only bottle needed for the early swamp sequence, but it is also your first dependable healing container. After using the Red Potion on Koume, refill the bottle with a fairy, Red Potion, or another useful item before entering Woodfall Temple. Do not mistake the later Koume target-shooting bottle for an N64 reward. That extra target-shooting bottle belongs to Majora's Mask 3D, not the original Nintendo 64 release.
- Find Koume in the Woods of Mystery.
- Get the Red Potion bottle from Kotake.
- Use the potion on Koume and keep the bottle afterward.
- Refill the bottle before beginning Woodfall Temple.
Know all six N64 bottle locations
The original N64 game contains six bottles. The first comes from Kotake during the Koume rescue. After defeating Goht and restoring spring to the mountain, obtain a Powder Keg from the large Goron and use it to open the Goron Racetrack. Win the Goron Race to receive a bottle containing Gold Dust. Gold Dust is useful for the sword upgrade, so do not consume or discard it if you intend to improve your sword.
The Romani Ranch bottle is obtained by opening the ranch on the First Day, helping Romani prepare for the nighttime invasion, and successfully protecting the cows until morning. The reward is a bottle containing milk. This is separate from the Chateau Romani bottle. Chateau Romani can be purchased later in the Milk Bar after obtaining Romani's Mask, and a bottle containing Chateau Romani is also awarded by Madame Aroma during the final stage of the Anju and Kafei quest.
The Beaver Brothers provide another bottle. Reach their waterfall course in Great Bay as Zora Link and defeat both races. The first race is followed by a second, longer race; win both to receive the bottle. The sixth bottle is found in Ikana Graveyard on the Final Night. Wear the Captain's Hat and order the Stalchildren to open the grave. Inside, guide Dampé to the dirt patches. Once the required flames are uncovered, defeat the Big Poe and open the resulting chest.
The final bottle reward in the six-bottle total comes from Madame Aroma, so the complete list is Koume, Goron Race, Romani Ranch, Beaver Brothers, Ikana Graveyard, and Madame Aroma. The Zora eggs do not award bottles. You temporarily use bottles to carry the eggs from the Pirate Fortress and Pinnacle, then the containers become available again after delivery.
- Remember that N64 has six bottles, not the seven found in the 3DS remake.
- Keep Gold Dust for the sword upgrade if that optional improvement is planned.
- Use bottles for the Zora eggs only temporarily; the eggs are not bottle rewards.
- Treat the Beaver, Ikana Graveyard, and Madame Aroma bottles as optional campaign support.
Choose useful bottle contents
For ordinary travel, carry one direct healing item and leave another bottle empty. Red Potion restores health, while a bottled fairy restores Link after fatal damage if the fairy is still stored when Link's health reaches zero. A fairy is particularly useful before a boss, but do not rely on it as a substitute for learning the encounter. If you use the fairy, refill that bottle before the next dungeon or sidequest.
Blue Potion restores both health and magic and is the best general emergency item when a dungeon depends heavily on transformation abilities. Green Potion restores magic only and is useful before Snowhead or Stone Tower if you expect extensive Goron rolling, Zora combat, or repeated use of the Light Arrows. Chateau Romani gives unlimited magic for the remainder of the current three-day cycle, but it is optional and does not persist through a Song of Time reset.
Leave at least one empty bottle when entering a region with an unfinished objective. The Great Bay sequence needs bottles for Zora eggs, and other tasks may require Spring Water, the Deku Princess, bugs, fish, or other temporary items. After delivering a quest item, refill the newly empty container at the nearest safe source instead of continuing with several bottles occupied by objects that cannot help in combat.
- Carry one fairy, Red Potion, or Blue Potion before a major boss.
- Use Blue Potion when both health and magic are at risk.
- Reserve an empty bottle for regional quest items.
- Do not treat Chateau Romani as mandatory for the final campaign.
Recover health and magic safely
Hearts and magic jars can come from broken pots, grass, crates, and defeated enemies, but individual drops are not guaranteed. Use ordinary drops to top off resources after clearing a room, not as your only preparation for a boss. Deku Babas, Keese, pots, and other common enemies can provide useful refills, but the safest approach is to combine this supply with a potion or bottled fairy.
Before entering Odolwa, Goht, Gyorg, or Twinmold, clear the approach area and collect visible hearts, magic jars, arrows, and bombs. For Goht, preserve magic for Goron rolling and avoid spending the entire meter on unnecessary movement before the fight. For Stone Tower, enter with enough magic for the Light Arrows and transformation abilities rather than assuming the boss area will refill you.
If a failed attempt consumes your fairy or potion, leave the immediate area when possible and rebuild your supplies before trying again. If the cycle is running short, play the Song of Time only after depositing your rupees, then use activated Owl Statues and Song of Soaring to return efficiently. Dungeon completion and permanent equipment remain available after the reset, so restarting with full supplies is usually better than forcing a low-health attempt.
- Clear nearby rooms for visible refills before a boss.
- Restore magic before Snowhead, Great Bay, and Stone Tower encounters.
- Replace consumed healing items before repeating a failed attempt.
- Restart the cycle if preparation is poor and the remaining time is unsafe.
Bank rupees before resetting time
The N64 Clock Town Bank is in West Clock Town. Deposit rupees before playing the Song of Time because rupees in Link's wallet are lost when the three-day cycle resets. The banked balance persists, making the bank the safest place to store money collected from chests, enemies, field exploration, and minigames.
Deposit money whenever the wallet becomes nearly full instead of waiting until the Final Day. This is especially helpful after collecting large rupee chests or winning regional challenges. A practical routine is to return to Clock Town after a major objective, deposit the money, buy any needed arrows, bombs, or potions, and then continue. If the cycle must be reset, the banked balance is protected even though the wallet is emptied.
The bank milestone at 200 deposited rupees increases wallet capacity. The larger 5,000-rupee deposit milestone awards a Piece of Heart and is optional. It is not required for any dungeon, boss, or ending, so do not delay the main campaign solely to reach it. If pursuing it, deposit progressively over multiple cycles rather than carrying large sums through dangerous areas.
- Visit the West Clock Town banker before every Song of Time reset.
- Deposit money after valuable chests, minigames, or profitable enemy drops.
- Use the 200-rupee milestone to expand the wallet when convenient.
- Treat the 5,000-rupee Piece of Heart as optional completion content.
Use a reliable pre-boss supply plan
Before a normal dungeon attempt, aim for full or nearly full hearts, a full magic meter when the dungeon uses transformation abilities, and at least one bottle containing a fairy or healing potion. Refill arrows and bombs at a shop or from safe regional pickups. Exact quantities depend on your route and accuracy, but entering with a reserve is safer than expecting every needed item to appear in the boss arena.
Gold Dust is not a combat refill, so keep it separate from your emergency supplies if the Razor Sword or Gilded Sword is still planned. Similarly, do not enter Great Bay with every bottle filled by potions if you still need to transport the Zora eggs. Complete the delivery first, then refill the bottles before the temple and Gyorg attempt.
For long timed sidequests, gather healing and money before starting the event. Romani Ranch is safer when Link arrives with arrows and at least one recovery item. The Anju and Kafei quest benefits from a similar approach: keep a bottle available for the final reward and use the bank before any cycle reset. Successful sidequest progress that is not permanently recorded should be treated as cycle-bound, so plan the event around the available time rather than beginning it immediately before a reset.
- Start major boss attempts with full hearts and appropriate magic.
- Keep a flexible bottle open for Great Bay and other regional tasks.
- Preserve Gold Dust if a sword upgrade is planned.
- Bank rupees before restarting a cycle after failure.
Before you move on
- You have the Southern Swamp bottle and can refill it before Woodfall Temple.
- You know the six original N64 bottle locations and which rewards are optional.
- You keep at least one bottle available for temporary regional quest items.
- You can identify when a fairy, Red Potion, Blue Potion, Green Potion, or Chateau Romani is the appropriate preparation.
- You deposit rupees in West Clock Town before playing the Song of Time.
- You can enter each major boss encounter with health, magic, ammunition, and at least one recovery option prepared.
References for this chapter
Recovering from failure: what resets and what sticks
The North American Nintendo 64 version uses two different kinds of saving. Playing the Song of Time returns Link to the Dawn of the First Day and establishes the permanent campaign record. Saving at an activated Owl Statue creates a temporary interrupt save that preserves the current cycle only until it is loaded. Treat the Owl save as a way to stop safely, not as a replacement for the Song of Time. Knowing which records persist prevents you from repeating completed temples, losing banked resources, or restarting timed quests unnecessarily.
Use the Song of Time for permanent campaign progress
When you are ready to end a cycle, play the Song of Time on the Ocarina of Time. Link returns to 6:00 a.m. on the First Day, and the game records the permanent progress listed on the Quest Status screen and related campaign records. This is the normal permanent save method in the original North American Nintendo 64 release.
Permanent records include obtained masks, learned songs, instruments and major equipment such as the Hookshot. Dungeon maps and compasses are retained, as are defeated dungeon bosses and the boss remains they provide. Permanent weapon and capacity upgrades, heart containers and other completed rewards also remain available after the reset. You do not need to defeat a temple boss again merely because you later used the Song of Time.
The reset is not a rewind of Link’s entire account. It is a controlled return to the beginning of the cycle while preserving the game’s permanent quest records. Before resetting, finish the specific reward sequence you care about. For example, do not reset while merely carrying a temporary quest object or before the NPC has actually awarded the mask, item or upgrade.
- Use the Song of Time when you want the current cycle’s completed campaign progress written permanently.
- Verify that a mask, song, dungeon item, boss reward or upgrade has actually been received before resetting.
- After the Dawn of the First Day appears, allow the save sequence to finish before turning off the console.
Know what the three-day reset removes
The world returns to its cycle-start condition when you play the Song of Time. NPC schedules, ordinary enemies, opened temporary chests, room switches and most unfinished sub-events return to their earlier states. A dungeon that was only partly explored must be navigated again. Small Keys, Big Keys and Stray Fairies are not permanent records, so they are lost when the cycle is reset. Dungeon maps and compasses are the important exception: once obtained, they remain on the Quest Status screen even though the dungeon itself is restored.
The current contents of Link’s wallet do not survive a Song of Time reset. Deposit rupees in the Clock Town bank first. Banked rupees remain available in later cycles, making the bank the correct place to protect money for purchases, upgrades and timed activities. Current ammunition and other usable supplies should also be treated as cycle resources. Refill bombs, arrows, magic and healing items after the reset instead of assuming that the quantities currently displayed in the inventory will remain unchanged.
Unfinished timed quests normally return to the appropriate starting conditions for a new cycle. Missing an appointment is inconvenient rather than permanently damaging. The exception is any reward or permanent record that was never actually obtained: if the game did not give you the mask, item or upgrade, you must repeat the relevant sequence.
- Bank rupees before every planned Song of Time reset.
- Expect dungeon keys, Stray Fairies, room progress and temporary quest objects to be lost.
- Keep dungeon maps, compasses, boss remains and permanent equipment; do not repeat a completed boss without checking your inventory first.
- Treat arrows, bombs, magic and wallet rupees as resources to restock in the new cycle.
Save safely at an Owl Statue
In the North American N64 release, first strike an Owl Statue with the sword to activate it. Then interact with the statue and choose the interrupt-save option. Wait for the title screen before switching off the console. This saves Link’s current status, location, time of day and current cycle temporarily, allowing you to stop in the middle of a three-day cycle.
An Owl Statue save is not permanent. After you load that save, the temporary file is consumed. The manual specifically warns you to save again by playing the Song of Time or by visiting an Owl Statue before quitting. If you load an Owl save, make progress, and then turn off the console without creating another save, the game can return you to the last permanent Song of Time save rather than preserving that later progress.
Activated Owl Statues also serve as Song of Soaring destinations. Activate the Clock Town statue and each regional statue when you reach it. Before beginning a remote dungeon attempt, save at the nearby statue if you need to stop safely. This does not preserve opened dungeon rooms or keys after a Song of Time reset, but it lets you resume the current cycle without starting from the last permanent Dawn of the First Day save.
- Strike each new regional Owl Statue before relying on it as a travel or save point.
- Use the statue’s save command, not merely the sword strike, when you want to stop playing.
- After loading an Owl save, create another Owl save or use the Song of Time before turning off the console.
- Use Song of Soaring to return to activated statues when restocking or recovering from a failed attempt.
Recover after an accidental Song of Time reset
Do not automatically repeat the entire previous cycle. First inspect the Quest Status screen and inventory. Confirm your masks, songs, dungeon maps, compasses, permanent equipment and boss remains. Check the Clock Town bank for protected rupees. If the dungeon boss remain and temple reward are present, the boss is complete even though the temple rooms and keys have reset.
Next, return to Clock Town and restock only what is needed. Withdraw banked rupees, buy or collect ammunition, refill magic and healing supplies, and activate the Clock Town Owl Statue if necessary. Play the Inverted Song of Time when a timed quest or dungeon route requires more room on the clock. Then use Song of Soaring to reach a regional Owl Statue instead of walking across Termina again.
If a sidequest was missed, write down its fixed appointments from the Bomber’s Notebook and begin a fresh cycle with the next required starting step. Do not rely on having reached an intermediate location; only the completed reward or permanent record is safe through a Song of Time reset. For a multi-day quest, slow time before beginning and reset only after the final reward is in hand.
- Check permanent masks, songs, dungeon maps, compasses, equipment and boss remains before redoing anything.
- Withdraw banked rupees and restock supplies after the new cycle begins.
- Use the Inverted Song of Time for difficult timed routes.
- Repeat only the unfinished portion of a quest or dungeon; permanent rewards do not need to be earned again.
Recover after death, a missed appointment or a shutdown
If Link dies during a dungeon, determine whether the game still offers a continuation that leaves the current cycle usable. If so, refill health and magic, return to the dungeon and continue only if enough time remains. If the attempt has become too rushed, abandon it, use an activated Owl Statue or return to Clock Town, and prepare for the next cycle. A failed attempt is usually less costly than entering the final rooms without enough health or time.
If the three-day timer reaches its end, the game resumes from the last permanent Song of Time save rather than preserving the unfinished cycle. Apply the same recovery method: inspect permanent records, banked rupees and inventory before repeating tasks. If the console was switched off after loading an Owl save, assume that progress made after the load may be gone unless you created another Owl save or used the Song of Time.
When a timed appointment is missed, do not spend the remainder of the cycle improvising unrelated tasks if the quest is your priority. Reset deliberately, slow time, activate the required warp points and travel to the next appointment early. The Bomber’s Notebook records useful NPC information, but it does not turn every intermediate sidequest action into a permanent save.
- After death or a failed dungeon run, decide early whether the remaining cycle is still practical.
- After a shutdown, verify the loaded file and compare it with the last permanent Song of Time progress.
- If a quest appointment is missed, restart the sequence in a controlled cycle rather than waiting for the next disaster.
- Use regional Owl Statues as local recovery points, but remember that they do not make dungeon keys permanent.
Avoid the most damaging save mistakes
Do not play the Song of Time while carrying wallet rupees that you intend to keep. Deposit them first. Do not assume that a sword strike on an Owl Statue has created a save; activation and saving are separate actions. Do not quit immediately after loading an Owl save. Either make another temporary save at an Owl Statue or return to the Dawn of the First Day with the Song of Time.
Do not confuse a completed temple with a preserved room layout. A completed boss, boss remain, dungeon map, compass and permanent reward remain recorded, but the temple’s ordinary enemies, room puzzles, keys and Stray Fairies are cycle-based. Activate the nearest Owl Statue before entering remote areas, and make a final permanent save after a major reward sequence is complete.
The safest routine is simple: bank rupees, finish the reward you want, confirm the permanent item or boss record, activate a nearby Owl Statue, and then play the Song of Time. After loading an Owl save, immediately plan the next save rather than treating the loaded file as an ordinary permanent file.
- Bank rupees before resetting.
- Confirm permanent rewards instead of relying on location or partial quest progress.
- Activate and save at nearby Owl Statues before remote dungeon attempts.
- After loading a temporary Owl save, save again before quitting.
- Use the Song of Time after a successful major objective when you want a permanent campaign checkpoint.
Before you move on
- A deliberate Song of Time reset returns Link to the Dawn of the First Day while retaining completed masks, songs, permanent equipment, dungeon maps, compasses, boss remains and other completed campaign records.
- Banked rupees remain available after the reset, while wallet rupees and cycle-based dungeon and quest progress do not.
- An activated Owl Statue can be used as a Song of Soaring destination and can create a temporary interrupt save in the North American N64 release.
- After loading an Owl Statue save, another Owl save or a Song of Time save has been made before the console is turned off.
- A failed dungeon or missed appointment has been recovered by checking permanent records first, restocking, slowing time where useful and repeating only the unfinished work.
Optional completion: 100% masks, sidequests and post-game targets
The original Nintendo 64 release contains 20 ordinary masks, three transformation masks, and the Fierce Deity’s Mask. The ordinary masks are optional for reaching the ending, but all 20 are required if you want to trade masks to the Moon Children and receive the Fierce Deity’s Mask. A practical completionist route prioritizes permanent upgrades, separates long timed quests into dedicated cycles, and verifies the inventory before entering the Moon.
Set the mask completion target
The 20 ordinary masks are the Great Fairy’s Mask, Blast Mask, Stone Mask, Keaton Mask, Bremen Mask, Bunny Hood, Don Gero’s Mask, Mask of Scents, Romani’s Mask, Circus Leader’s Mask, Kafei’s Mask, Couple’s Mask, Postman’s Hat, All-Night Mask, Kamaro’s Mask, Gibdo Mask, Captain’s Hat, Garo’s Mask, Giant’s Mask, and Mask of Truth.
The Deku Mask, Goron Mask, and Zora Mask are transformation masks and are retained during the Moon sequence. Do not trade them to the Moon Children. The Giant’s Mask is included among the 20 ordinary masks even though it is used during the Twinmold battle. The Fierce Deity’s Mask is the reward for completing the Moon mask exchanges, not one of the required donations.
If you only want the normal ending, you can skip the ordinary-mask collection, optional dungeon fairies, Spider Houses, most mini-games, and the Fierce Deity route. You still need to defeat Odolwa, Goht, Gyorg, and Twinmold before the Moon becomes available.
- All 20 ordinary masks are identified.
- Deku, Goron, and Zora Masks are kept in the inventory.
- The Fierce Deity’s Mask is treated as an optional final-battle reward.
Collect early utility masks and Great Fairy rewards
During the opening cycle, return the Clock Town stray fairy to the North Clock Town Fairy Fountain while Link is in Deku form to receive the first Magic Meter. On a later cycle, return the Clock Town stray fairy as human Link to receive the Great Fairy’s Mask. The second reward is not another magic upgrade.
The Great Fairy’s Mask helps locate stray fairies in the four temples. The Bunny Hood is a high-priority travel mask because its speed increase shortens many errands. The Stone Mask is useful for passing enemies unnoticed, and the Blast Mask provides an emergency explosive attack at the cost of health.
The Mask of Truth comes from completing the Swamp Spider House. The Oceanside Spider House has a separate reward in the N64 release: clear it on the First Day to receive the Giant’s Wallet. If the All-Night Mask is part of your target, obtain that wallet first, save the old woman from the Bomb Shop burglar on the First Day, and buy the All-Night Mask from the Curiosity Shop on the Final Night for 500 rupees.
- The Great Fairy’s Mask is obtained as human Link.
- The Bunny Hood, Stone Mask, and Blast Mask are collected if useful.
- The Swamp Spider House is completed for the Mask of Truth.
- The Oceanside Spider House is completed on the First Day if the Giant’s Wallet is wanted.
- The All-Night Mask is purchased on the Final Night if desired.
Secure Epona’s Song before optional Romani’s Mask content
After clearing Snowhead Temple and gaining access to Powder Kegs, open the Milk Road boulder on the First Day and enter Romani Ranch. Complete Romani’s daytime balloon-practice exercise to learn Epona’s Song. This is the important progression checkpoint because Epona’s Song lets you summon Epona for Great Bay travel and the Gorman Brothers’ race for Garo’s Mask.
Romani’s nighttime alien defense is separate. If you defend the barn successfully, return on the Second Day and complete Cremia’s milk-cart escort to receive Romani’s Mask. These events are not required for Epona’s Song, Great Bay, Ikana Canyon, or the normal ending. They are required only if Romani’s Mask is part of the 20-mask collection.
If the defense is missed, reset the cycle and repeat the ranch sequence. Do not confuse the optional ranch failure with lost main-story progress.
- Milk Road is opened on the First Day.
- Romani’s daytime practice is completed.
- Epona’s Song is learned.
- Romani’s defense and Cremia’s escort are completed only if Romani’s Mask is wanted.
Plan the Anju and Kafei cycle carefully
Obtain Kafei’s Mask from Madame Aroma, then speak with Anju while wearing it. Meet Anju in the Stock Pot Inn kitchen late on the First Night and accept her letter. Place the letter in a mailbox before the Postman collects it on the Second Day. Find Kafei in the Laundry Pool, receive the Pendant of Memories, and give it to Anju.
On the Final Day, enter Kafei’s hideout after the Curiosity Shop owner has provided the priority letter. Go to Sakon’s Hideout in Ikana Canyon, enter when Kafei opens it, and help recover the stolen Sun’s Mask. Return to the Stock Pot Inn’s back room before the cycle ends to receive the Couple’s Mask.
The Postman’s Hat is a separate branch of this quest. On the Final Night, give Kafei’s priority letter to the Postman at the Post Office. Follow him to the Latte Milk Bar and speak with him after he completes the delivery to receive the Postman’s Hat. Delivering the letter to Madame Aroma instead gives a different reward, so plan separate cycles if you want both outcomes associated with the quest.
- Kafei’s Mask is obtained.
- The Couple’s Mask is received from the completed reunion.
- The Postman’s Hat is obtained by using the Final Night Postman branch.
- The quest is scheduled as a dedicated cycle rather than mixed with an overloaded dungeon route.
Complete dungeon fairies and optional permanent upgrades
Each main dungeon contains 15 stray fairies. Returning all 15 to that dungeon’s Great Fairy grants a permanent upgrade. In the original Nintendo 64 release, Woodfall Temple awards the enhanced Spin Attack, Snowhead Temple awards Double Magic, Great Bay Temple awards Double Defense, and Stone Tower Temple awards the Great Fairy’s Sword.
The Woodfall and Snowhead reward assignment is especially important for edition accuracy. The reward swap commonly described for those two temples belongs to Majora’s Mask 3D; it should not be applied to the original Nintendo 64 game. Do not use the remake’s reward order when planning this chapter.
These upgrades are optional. Double Magic and Double Defense make later dungeon and Moon attempts safer, while the Great Fairy’s Sword is a powerful optional weapon. The Great Fairy’s Mask makes missed fairies easier to locate, but you can also complete the main campaign without collecting any dungeon fairies.
Other optional targets include Pieces of Heart, both shooting galleries, the Goron race, Zora competitions, treasure-chest contests, archery, and both Spider Houses. Finish required dungeon progress first if a limited number of cycles matters more than full completion.
- Woodfall’s 15 fairies are returned for the enhanced Spin Attack.
- Snowhead’s 15 fairies are returned for Double Magic.
- Great Bay’s 15 fairies are returned for Double Defense.
- Stone Tower’s 15 fairies are returned for the Great Fairy’s Sword.
- The reward order is not confused with the 3DS remake.
Exchange the masks on the Moon and obtain Fierce Deity
After defeating Odolwa, Goht, Gyorg, and Twinmold, reach the top of the Clock Tower on the Final Night and play the Oath to Order. When the Four Giants restrain the Moon, enter it and speak with the four children wearing the defeated bosses’ remains.
The Odolwa child takes one ordinary mask before the Deku challenge and one after it. The Goht child takes two before and two after the Goron challenge. The Gyorg child takes three before and three after the Zora challenge. The Twinmold child takes four before and four after the final human-Link challenge. The total is 20 ordinary masks.
Each Moon route contains an optional Piece of Heart. Complete the routes to reach the required mask exchanges, but the Pieces of Heart are not required for Fierce Deity. Carry the Deku, Goron, and Zora Masks into the Moon because the corresponding challenges require those forms.
After all four children have received the 20 ordinary masks, speak with the child beneath the tree wearing Majora’s Mask. He gives Link the Fierce Deity’s Mask and sends him to the final battle. The mask can be used in boss rooms and is not required for the standard ending.
- All four dungeon bosses are defeated.
- All 20 ordinary masks are in the inventory before entering the Moon.
- Deku, Goron, and Zora Masks are retained.
- All four Moon-child routes are completed.
- The child beneath the tree awards the Fierce Deity’s Mask.
Before you move on
- The inventory contains all 20 ordinary masks plus the Deku, Goron, and Zora Masks before entering the Moon.
- Epona’s Song is learned, regardless of whether Romani’s Mask was obtained.
- The Anju and Kafei rewards, Spider House rewards, dungeon fairy rewards, and mini-game prizes are checked off according to the chosen completion target.
- All four Moon-child challenges are cleared and all 20 ordinary-mask exchanges are made.
- The child beneath the tree awards the Fierce Deity’s Mask.
- Majora is defeated and the ending sequence and credits play.
References for this chapter
- The Moon Walkthrough - Zelda Dungeon
- Fierce Deity’s Mask - Zelda Dungeon Wiki
- The Legend of Zelda: Majora’s Mask – Mask List – Nintendo 64 – Nemesis
- The Legend of Zelda: Majora’s Mask – Guide and Walkthrough – Nintendo 64 – ZeldaDungeon
- Postman’s Hat, Zelda Dungeon Wiki
- The Legend of Zelda: Majora’s Mask N64 Player’s Guide
Final checklist and post-end notes
Use this Nintendo 64 checklist before calling the Four Giants, then complete the Moon sequence and verify the ending correctly. The Fierce Deity’s Mask is optional for the campaign, but the original N64 game requires all 20 non-transformation masks, the four Moon Child trials and a successful defeat of Majora before the mask is permanently retained on the save file.
1. Confirm the required campaign progress
Before beginning the final cycle, confirm that you have defeated all four dungeon bosses: Odolwa in Woodfall Temple, Goht in Snowhead Temple, Gyorg in Great Bay Temple and Twinmold in Stone Tower Temple. Their Remains should appear in the inventory. Defeating the bosses, not merely entering the temples or collecting their dungeon items, is what completes the main dungeon requirement.
The four Remains are the permanent proof that the dungeon portion of the campaign is complete. You do not need every dungeon stray fairy, every dungeon chest or every Heart Piece to reach the ending. Those are optional rewards and can be collected before the final run if you want a stronger inventory, but they are not required to call the Four Giants.
Make sure the Ocarina of Time is available and that you know the Oath to Order. On the Final Day, travel to the Clock Tower rooftop, wait for the final confrontation sequence to be available, then play the Oath to Order. The Four Giants will restrain the Moon and open the entrance to the final area.
- Odolwa’s Remains collected.
- Goht’s Remains collected.
- Gyorg’s Remains collected.
- Twinmold’s Remains collected.
- The Oath to Order is available.
- Any desired dungeon upgrades or Heart Pieces are finished before the final cycle.
2. Prepare health, magic and equipment
Enter the final cycle with full or nearly full health. Extra Heart Containers and Pieces of Heart are optional, but they provide a useful margin for mistakes during Majora’s three forms. Carry at least one dependable healing item in a bottle if possible. A bottled Fairy or red potion is more useful for a cautious final attempt than an empty bottle reserved for an unrelated sidequest.
Restock magic, arrows and bombs before entering the final sequence. Arrows are useful for creating openings against Majora’s Mask and Majora’s Incarnation, while bombs or other explosive items provide an alternative when arrows are low. The exact inventory quantity is not a campaign requirement, but arriving with empty ammunition makes the non-Fierce-Deity battle unnecessarily risky.
Keep the Deku Mask, Goron Mask and Zora Mask in your inventory. They are needed for the Moon Child trials if you want the Fierce Deity’s Mask. The Bunny Hood is useful for ordinary travel and some optional activities, but it cannot replace the three transformation masks in the Moon trials.
- Full or near-full health.
- At least one reliable healing item.
- Magic meter filled or readily restockable.
- Arrows and bombs restocked.
- Deku Mask, Goron Mask and Zora Mask present.
- Any preferred sword upgrade and shield equipped before the final approach.
3. Protect permanent progress and finish optional preparation
Activate any Owl Statue that will help with your final-cycle travel, especially statues near Clock Town, the Great Bay route or the canyon route. In the original Nintendo 64 game, an activated Owl Statue provides a travel destination and a temporary save option. Once you have learned the Song of Soaring, use it to reduce travel time between regions rather than crossing Termina on foot repeatedly.
Deposit spare rupees in the Clock Town bank before playing the Song of Time. Ordinary carried rupees are lost when the cycle is reset, while banked rupees are retained. Finish purchases, ammunition restocking and any optional mask quest before beginning the final run. The bank is not needed to defeat Majora, but preserving money prevents an avoidable recovery trip afterward.
Do not reset the cycle after entering the Moon. The Moon is the final sequence, and you should treat the point where you call the Four Giants as a commitment. Complete optional mask collection, bottle upgrades, sword upgrades, Heart Pieces and sidequests beforehand. If you only want the normal ending, you can omit the optional mask route and proceed directly through the Moon.
- Useful Owl Statues activated.
- Song of Soaring learned.
- Spare rupees deposited.
- Optional masks and sidequests completed if wanted.
- No current-cycle event is being abandoned accidentally.
- Final inventory checked before calling the Four Giants.
4. Obtain the Fierce Deity’s Mask if desired
The Fierce Deity’s Mask is optional. It is not required to reach the ending or defeat Majora, but it greatly simplifies the final battle. To qualify, collect all 20 non-transformation masks. This includes the ordinary masks obtained from Clock Town residents, sidequests, races, special events and optional exchanges. The Deku, Goron and Zora Masks are not part of the 20 masks that must be donated.
Enter the Moon after calling the Four Giants and speak to the four running Moon Children wearing the dungeon-boss masks. Each one starts a short trial. Give that child the requested number of ordinary masks, complete the trial and locate the child at the end. Repeat this for all four trials. The transformation masks are used for the trials and remain available; do not attempt to donate them as ordinary masks.
After all four trials are complete and all 20 non-transformation masks have been handed over, return to the child beneath the tree wearing Majora’s Mask. Speak to that child and choose to play. Because the ordinary masks have all been given away, the child awards the Fierce Deity’s Mask before sending Link into the final battle.
Do not play the Song of Time after receiving the Fierce Deity’s Mask if your goal is to preserve it through the normal N64 route. Complete the battle, watch the ending sequence and allow the game’s automatic end-of-game save to finish. The original N64 version restores the traded masks and retains the Fierce Deity’s Mask when the completed file is loaded.
- All 20 non-transformation masks collected.
- Deku, Goron and Zora Masks retained.
- All four Moon Child trials completed.
- All 20 ordinary masks handed over.
- Fierce Deity’s Mask received before entering Majora’s chamber.
- Majora defeated before turning off or resetting the system.
5. Enter the Moon and verify the ending
On the Final Day, go to the Clock Tower rooftop and play the Oath to Order after the final confrontation begins. The Four Giants stop the Moon, and Link enters the Moon through the opening that appears. Once inside, either complete the four child trials for the Fierce Deity route or speak to the child beneath the tree to proceed directly to Majora.
The required boss order is Majora’s Mask, Majora’s Incarnation and Majora’s Wrath. Without the Fierce Deity’s Mask, use defensive movement and attack during clear openings. Arrows, the Hookshot, bombs and carefully timed sword strikes can all help create opportunities. Preserve healing for mistakes in the later forms rather than spending every bottle during the first form.
With the Fierce Deity’s Mask, Link changes form only in the boss area and gains a powerful two-handed sword capable of projecting damaging sword beams while Z-targeting. The mask makes all three forms much shorter, but it does not remove the need to avoid contact or wait for Link’s transformation to finish before attacking.
After Majora’s Wrath is defeated, watch the remaining scenes and credits. The ending shows the Moon’s destruction being prevented, Termina’s inhabitants safe and Link departing with Epona. The game does not create a permanently altered, free-roaming post-game version of Termina. Instead, after the ending save is completed, reopening the file returns you to the normal cycle-based game with permanent equipment and masks retained.
- Majora’s Mask defeated first.
- Majora’s Incarnation defeated second.
- Majora’s Wrath defeated last.
- Ending scenes and credits viewed.
- The game’s end-of-game save allowed to complete.
- File reopened to verify retained permanent progress.
6. Continue with optional cleanup safely
After reopening the file, use the normal Dawn of the First Day state to continue optional content. The ending does not lock the file or create a separate post-game map. You can collect remaining Heart Pieces, masks, bottle upgrades, Great Fairy rewards, mini-game prizes and stray fairies by using the same three-day cycle and Song of Time system as before.
If you obtained the Fierce Deity’s Mask, verify that it is present after reloading the file. The original N64 route restores the 20 masks given to the Moon Children and retains Fierce Deity after the final battle save. The mask can then be used in later boss rooms on that file. If the mask is missing, the likely cause is turning off the system before the final save completed or using a different version with different save behavior.
For schedule questions, consult the Bomber’s Notebook in the game first, then compare the relevant event with an original-edition walkthrough or map. The Nintendo 64 instruction manual is useful for saving, the three-day cycle and basic controls. Avoid guides written for Majora’s Mask 3D when they discuss changed save statues, revised swimming, altered boss behavior or convenience features.
- Completed file loads successfully.
- Fierce Deity’s Mask is present if obtained.
- The 20 traded masks have returned.
- Remaining masks, Heart Pieces and sidequests listed.
- Optional cleanup grouped into manageable cycles.
- Any later boss rematch planned using Nintendo 64 instructions.
Before you move on
- All four dungeon Remains are in the inventory.
- Majora’s Mask, Majora’s Incarnation and Majora’s Wrath are defeated.
- The ending scenes and credits have been viewed.
- The file can be reopened in the normal cycle-based game.
- Permanent masks and equipment remain available after reloading.
- If pursuing Fierce Deity, all 20 ordinary masks were donated, the mask was awarded and it remains after the final save.
- If pursuing optional completion, remaining masks, Heart Pieces, fairies and sidequests have been recorded for later cycles.
References for this chapter
Finishing up
You have defeated Majora in its final sequence on the Moon and watched the standard ending for the Nintendo 64 edition.
You have cleared, in any order required by your route, the four main temples (Woodfall, Snowhead, Great Bay, Stone Tower/Ikana) and collected each area’s guardian or progression item that unlocks the next region.
You understand the N64 save mechanics used in this edition: when you reset the three-day cycle via the Song of Time, the world resets to the First Day while activated Owl Statue warps and other permanent progress (collected permanent masks and certain permanent items) persist as described in the manual for the N64 edition.
You can access the optional final-mask reward: if you collected and donated all eligible masks to the Moon Children prior to the final confrontation, you will receive the Fierce Deity’s Mask and its effects in the final boss arena (optional reward coverage is provided).
Choose your next gameScreenshots & video
Game imagery for reference. Follow the written chapters above for the route and strategies.
Sources & references
Our original guide draws on the references below. Check the edition at the top of this page before following controls or unlock requirements.
- The Legend of Zelda: Majora’s Mask Nintendo 64 Instruction Manual
- Owl Statue — Zelda Wiki
- Song of Time — Zelda Wiki
- The Clock System — StrategyWiki
- The Legend of Zelda: Majora’s Mask — Guide and Walkthrough — GameFAQs
- Majora’s Mask Walkthrough: First Three Days
- The Legend of Zelda: Majora’s Mask Bombers’ Notebook Guide
- Chapter 1: The First Three Days
- Majora’s Mask Walkthrough – Southern Swamp
- Majora’s Mask Walkthrough – Woodfall Temple
- The Legend of Zelda: Majora’s Mask – Guide and Walkthrough for Nintendo 64
- The Legend of Zelda: Majora’s Mask Nintendo 64 Instruction Manual
- Majora’s Mask Walkthrough – Snowhead
- Majora’s Mask Walkthrough – Spring, Romani Ranch and Ikana Graveyard
- 5. Snowhead Temple – Zelda Universe
- The Legend of Zelda: Majora’s Mask/Snowhead Temple – StrategyWiki
- Majora’s Mask Walkthrough – Great Bay and Zora Cape
- Majora’s Mask Walkthrough – Great Bay Temple
- Great Bay Temple – Zelda Dungeon Wiki
- The Legend of Zelda: Majora’s Mask Nintendo 64 Guide and Walkthrough
- The Legend of Zelda: Majora’s Mask – Guide and Walkthrough – Nintendo 64 – Ikana and Song of Storms
- Majora’s Mask Walkthrough – Ikana Canyon
- Majora’s Mask Walkthrough — Well and Ikana Castle
- Majora’s Mask Walkthrough – Stone Tower Temple
- Collection in Ikana — The Legend of Zelda: Majora’s Mask Walkthrough and Guide
- The Legend of Zelda: Majora’s Mask N64 Player’s Guide
- The Moon Walkthrough - Zelda Dungeon
- 12. The Moon — Zelda Universe walkthrough
- The Legend of Zelda: Majora’s Mask — Masks — StrategyWiki
- Final Boss: Majora — The Legend of Zelda: Majora’s Mask Walkthrough
- The Legend of Zelda: Majora’s Mask – Guide and Walkthrough – Nintendo 64 – Bomber’s Notebook and Owl Statues
- Majora's Mask — Guide and Walkthrough by BakonBitz
- Fierce Deity’s Mask - Zelda Dungeon Wiki
- Majora’s Mask Masks — Zelda Dungeon Wiki
- Anju and Kafei Quest — Zelda Dungeon
- Romani Ranch — The Legend of Zelda: Majora’s Mask Walkthrough and Guide
- The Legend of Zelda: Majora’s Mask — Masks, Nintendo 64, GameFAQs
- Majora’s Mask walkthrough — Ikana Road and Ikana Graveyard, Zelda’s Palace
- Majora’s Mask Walkthrough – Snowhead Temple
- Majora's Mask Bottles — Zelda Dungeon Wiki
- Clock Town Bank — Zelda Dungeon Wiki
- Majora's Mask — Empty Bottle Guide by Nemesis
- How to Save the Game — The Legend of Zelda: Majora’s Mask Walkthrough
- Saving — Zelda Wiki
- Owl Statue — Zelda Dungeon Wiki
- Nintendo 64 Instruction Manual: The Legend of Zelda: Majora’s Mask
- The Legend of Zelda: Majora’s Mask – Mask List – Nintendo 64 – Nemesis
- The Legend of Zelda: Majora’s Mask – Guide and Walkthrough – Nintendo 64 – ZeldaDungeon
- Postman’s Hat, Zelda Dungeon Wiki
- Nintendo 64 Games Manuals: The Legend of Zelda: Majora’s Mask
- Moon - Zelda Dungeon Wiki
About the game & collecting notes
- Platform
- Nintendo 64
Step-by-step coverage of the original Nintendo 64 (USA) edition of Majora’s Mask through the game’s true ending on the Moon. Focuses on N64 mechanics: three-day cycle, Song of Time saving, Owl Statues and Song of Soaring, masks, main dungeons and the final confrontation with Majora. Includes time-management tactics and required sidequest checkpoints.
Darryl Polo
Darryl Polo loves tinkering with emulation and revisiting retro games. He enjoys exploring how old favorites play on different setups and sharing what he learns along the way. At Joking Joystick, he writes about the games, hardware, and small discoveries that keep the hobby fun.
Our editorial standardsFound a step that needs another look? Help us improve this guide.