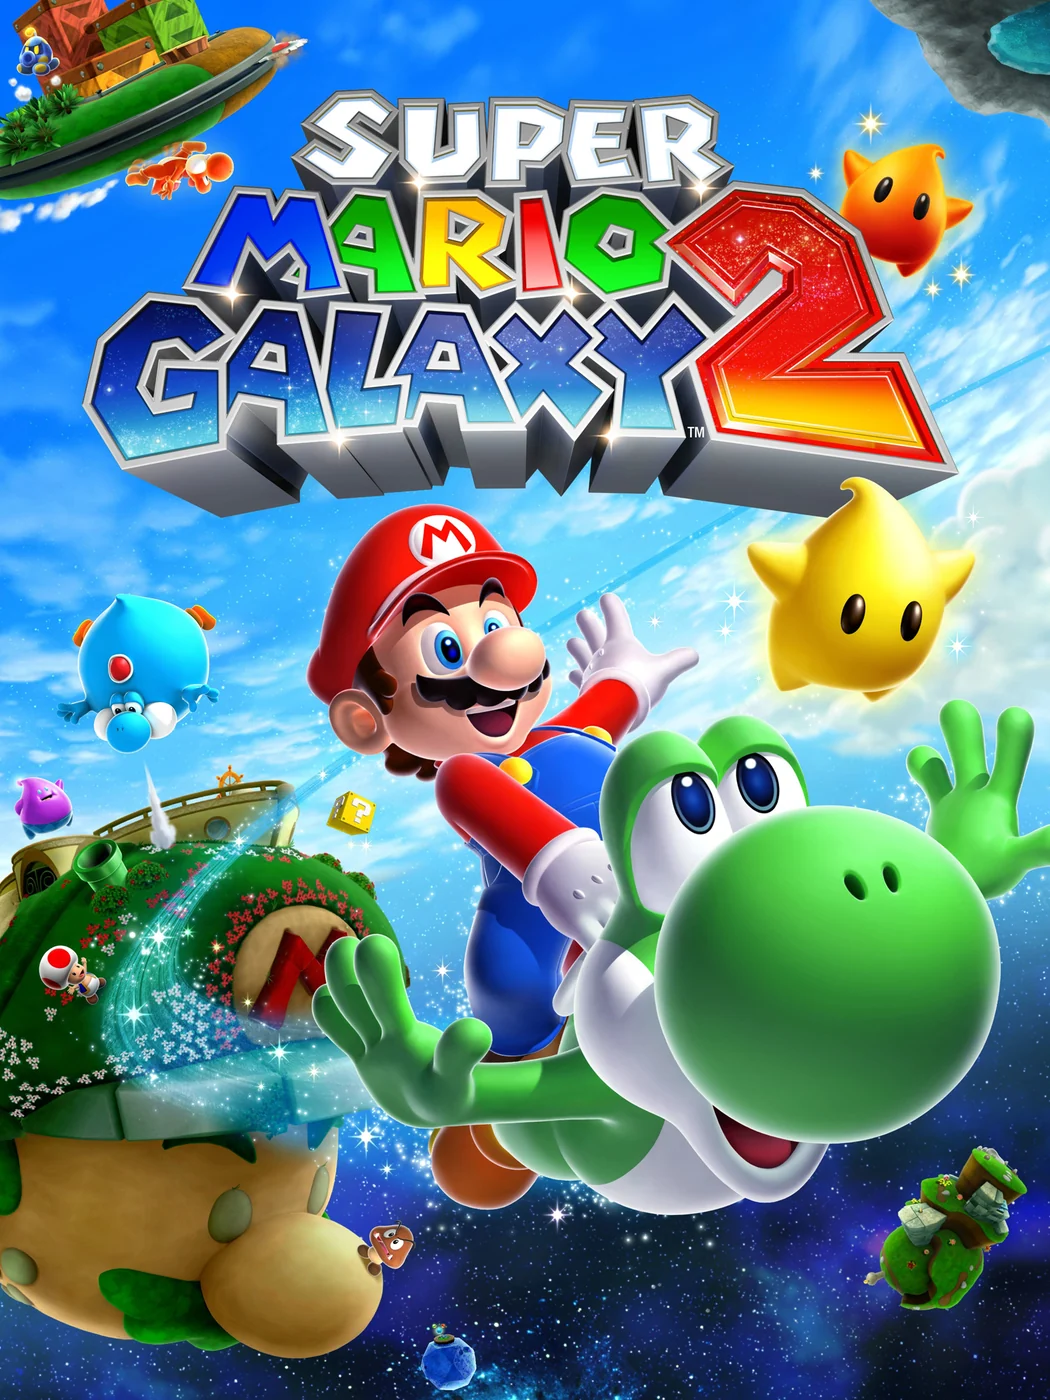
Super Mario Galaxy 2 (Wii) — Complete Campaign Walkthrough
Step-by-step coverage of Super Mario Galaxy 2 for the original Nintendo Wii release.

Find a copy
Super Mario Galaxy 2 Wii
We may earn a commission if you buy through these links, at no extra cost to you. As an Amazon Associate I earn from qualifying purchases.
Opens retailer search results. Check the model, edition, seller, availability and current price before buying.
Before you begin
You’re about to run through Super Mario Galaxy 2 on the original Nintendo Wii release.
Expect tightly designed planetary platforming, mandatory and optional Power Stars, Yoshi-based puzzles, and boss encounters culminating in Bowser’s Galaxy Generator.
Follow the route chapters to reach the final Bowser battle and use the postgame chapters if you want every Green Star and the Grandmaster Galaxy.
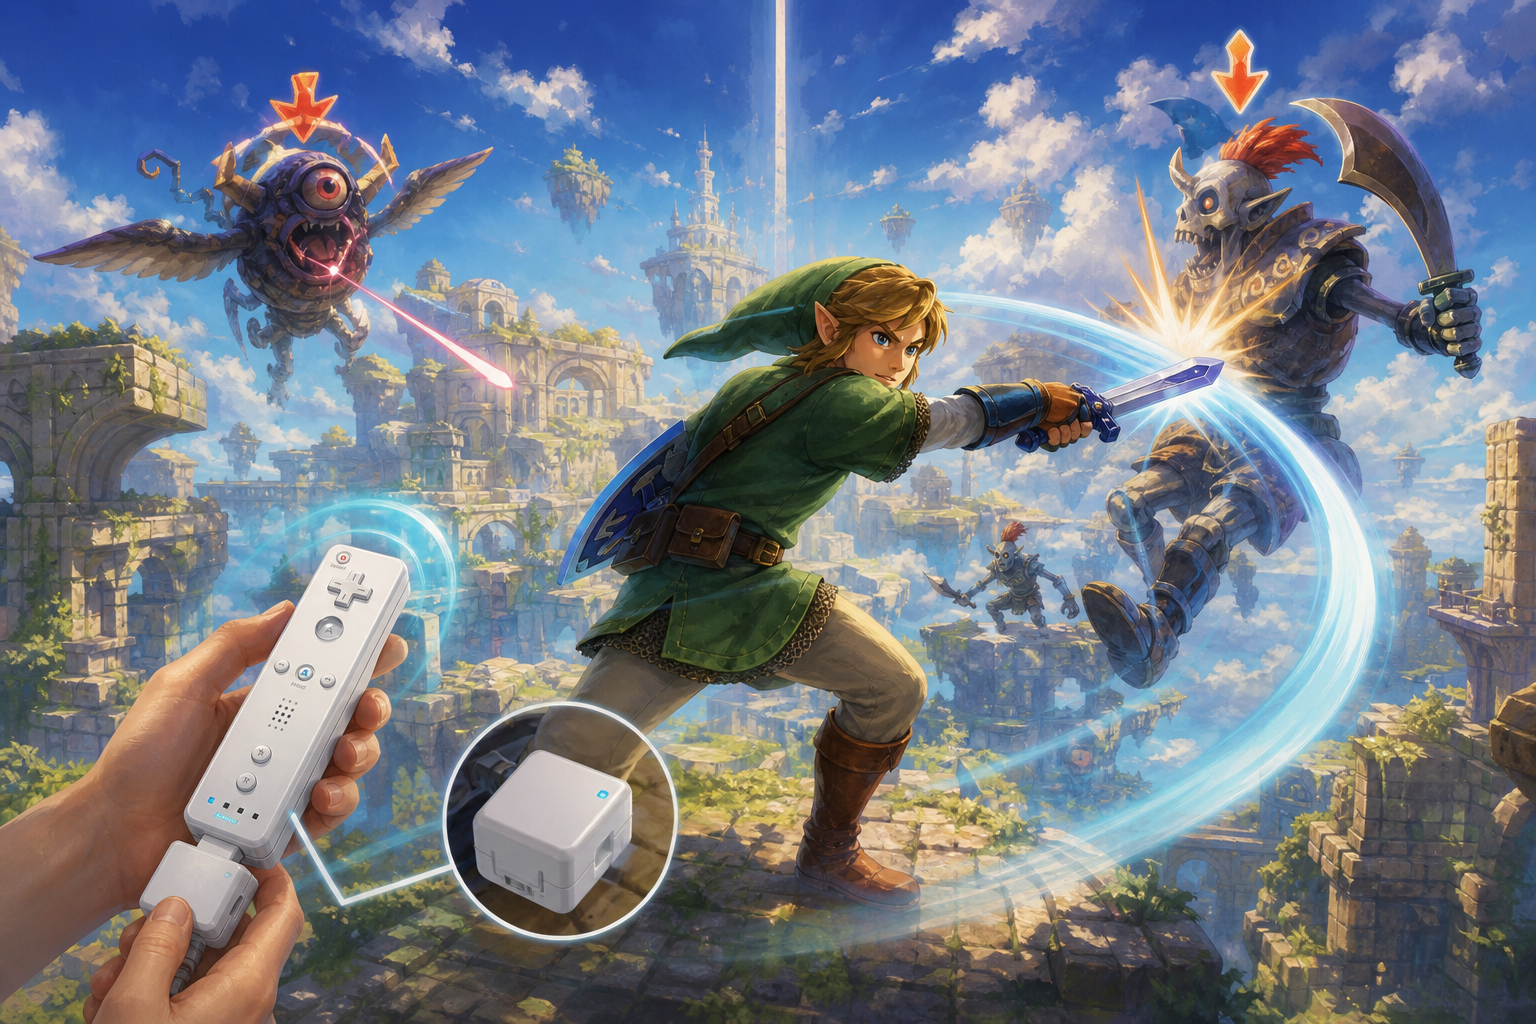
This guide assumes you will play on the original Wii hardware or an identical control setup (Wii Remote + Nunchuk).
It tells you what to collect to open new worlds, how to use Yoshi and temporary power-ups safely, how to recover from deaths or missed objectives, and what the concrete checks are to confirm you’ve finished the campaign or the completionist route.
Set yourself up for the run
Set up the original Nintendo Wii release with a Wii Remote and Nunchuk. The game is playable solo; Co-Star Mode is optional.
Learn movement, jumping, spinning, ground pounds, long jumps, wall jumps, pointer actions, and the Star Pointer controls from the manual.
Use the Star List to track regular Power Stars, Bronze Stars, Green Stars, Comet Medals, and galaxy crowns.
Bank Star Bits with Banktoad when convenient. On the original Wii route, The Perfect Run requires 9,999 Star Bits stored with Banktoad.
Yoshi is first introduced through Yoshi Star Galaxy after the first Power Star in Sky Station Galaxy. Yoshi does not carry between missions.
Temporary abilities and Yoshi fruit effects are mission-specific. Scout the next landing before activating Cloud, Rock, Spring, Fire, Dash Pepper, Blimp Fruit, or Bulb Berry routes.
Star Barriers gate later galaxies. Bowser's Galaxy Generator opens at 70 Power Stars, including one from Battle Belt Galaxy or Slimy Spring Galaxy.
The Green Star challenge becomes available after collecting 120 regular Power Stars and completing Bowser's Fortified Fortress again. Bronze Stars still count toward the visible Star total for this milestone, but they must be replaced with gold Stars before Grandmaster Galaxy can unlock.
World S becomes available after the first completion of Bowser's Fortified Fortress. Grandmaster Galaxy is separate and requires 240 qualifying Stars: 120 regular Stars with no Bronze Star remaining and all 120 Green Stars.
For the original Wii 242-Star route, complete The Ultimate Test, collect its Comet Medal, deposit 9,999 Star Bits with Banktoad, and complete The Perfect Run.
Getting Started: Controls, Saves, Co-Star & Banktoad
Set up one of Super Mario Galaxy 2’s three in-game save files, learn the original Wii Remote and Nunchuk controls, and understand what Co-Star Mode can and cannot do. The game automatically saves after completed scenarios, and you can also choose Save and Quit from the World Map. The in-game file screen lets you change an icon or erase a file; it does not copy files between slots. For a separate backup, use the Wii console’s system save-data tools and an SD card if the game and console permit it. After collecting seven Power Stars, Banktoad appears beside Starship Mario’s wheel. He stores up to 9,999 Star Bits in a balance shared by the save files. That bank is useful throughout the campaign and becomes a requirement for the original Wii version’s final Grandmaster Galaxy mission.
Create and protect a save file
Start the game from the Wii Menu and select an empty planet on the File Selection Screen. Choose an icon, using a stored Mii if desired, and confirm the prompts. Super Mario Galaxy 2 provides three in-game save files. Each file tracks its own Power Stars, galaxy progress, and completion status.
The File Selection Screen lets you start a file, change its icon, or erase it. Erasing is permanent, so check the planet icon and Power Star total before confirming. There is no in-game copy command for duplicating one file into another slot. If you want a separate backup, leave the game and use the Wii’s system-level Save Data Management tools to copy the game’s save data to compatible SD storage. Do not treat another in-game slot as an automatic backup, because starting a new file there creates separate progress rather than a protected snapshot.
- Use one of the three planet slots for the main campaign.
- Confirm the icon and Power Star total before erasing any file.
- Use Wii system save-data management, not the game’s file screen, for an external backup.
- Remember that a backup can only be restored if the Wii system accepts the copied data.
Learn the Wii Remote and Nunchuk controls
Move Mario with the Nunchuk Control Stick. Press A to jump. To perform a double or triple jump, keep moving and press A again when Mario lands; pressing A while already airborne does not start another normal jump. Press Z while airborne to ground-pound. Press Z while running and then A to perform a long jump. Pressing A against a wall initiates a wall jump when the wall and timing allow it. Shake the Wii Remote or Nunchuk to spin, including a midair spin, activate certain objects, and perform actions such as throwing or skating when the situation calls for them.
Press Z on the ground to crouch and combine Z with the Control Stick to crawl. Press C to reset the camera. The + Control Pad adjusts the camera where permitted, and pressing Up on it enters first-person view in suitable areas. The Wii Remote pointer is the Star Pointer. Mario collects a Star Bit by touching it or moving the pointer over it. Press B to fire a Star Bit at a target; holding B fires continuously while ammunition is available. A remains the normal button for jumping, speaking, reading, and confirming pointer-based menu choices.
- Nunchuk Control Stick: move Mario.
- Wii Remote A: jump, speak, read, and confirm selections.
- Wii Remote or Nunchuk shake: spin and context-sensitive object actions.
- Nunchuk Z: crouch, crawl, ground-pound, or begin a long jump with A.
- Wii Remote B: fire Star Bits.
- Nunchuk C: reset the camera; + Control Pad: camera controls.
Use Co-Star Mode correctly
Connect a second Wii Remote and select the Co-Star option from the multiplayer prompt or the file-selection controls display. Player 1 continues to control Mario with the Wii Remote and Nunchuk. Player 2 uses the second Wii Remote’s pointer and does not directly move, jump, or steer Mario.
The Co-Star Luma can collect distant Star Bits, coins, mushrooms, and other reachable items with the pointer and A. Holding the pointer over an enemy stops it temporarily. Shaking the second Wii Remote while an enemy is stopped can defeat enemies that are vulnerable to the Co-Star Luma’s spin. Player 2 can also activate some objects, checkpoints, switches, and certain level interactions, but these actions are support tools rather than a replacement for Mario’s movement. A solo player can ignore Co-Star Mode; no story mission requires a second player.
- Player 1 uses Wii Remote plus Nunchuk to control Mario.
- Player 2 uses a pointer and does not control Mario directly.
- Use the Co-Star Luma to collect items, stop targets, and assist with selected objects.
- Do not rely on Co-Star actions for jumps, boss positioning, or other core movement.
Unlock and use Banktoad
Collect seven Power Stars during the opening progression. Banktoad then appears beside the wheel on Starship Mario. Speak to him to open the deposit and withdrawal menu. Deposit Star Bits whenever you return to the ship after a mission with a substantial haul, and withdraw them later when a Hungry Luma or another Starship Mario exchange requires them.
The bank holds up to 9,999 Star Bits, and the stored balance is available from the different in-game save files. Banktoad also accrues interest over time. This makes the bank useful for transferring Star Bits to a new file, but it does not merge Power Stars or galaxy progress between files. Star Bits collected during a mission are not discarded when Mario loses a life; they are added to his total when he returns to Starship Mario. Power-ups are lost when Mario dies or leaves the galaxy, so banking Star Bits is a long-term resource practice rather than a way to preserve temporary abilities.
- Collect seven Power Stars to make Banktoad appear.
- Use the deposit option beside Starship Mario’s wheel.
- Withdraw Star Bits from Banktoad when a later exchange needs them.
- Remember that Star Bit storage is shared, but campaign progress is not.
Plan for the original Wii endgame requirement
For a normal campaign, deposit Star Bits regularly and keep only what you need for immediate Hungry Luma purchases or other exchanges. You do not need 9,999 banked Star Bits to reach the first ending or to activate the Green Star challenge.
For the original Wii release, the final mission in Grandmaster Galaxy becomes available only after the preceding Grandmaster mission has been completed and the other late-game requirements are satisfied, including depositing 9,999 Star Bits with Banktoad. Check Banktoad’s stored balance rather than Mario’s on-hand total. A total of 9,999 carried during a mission is not the same as a 9,999 deposit in the Wii version. Once the bank reaches its maximum, leave the balance there while completing the remaining Green Star, Comet Medal, and Grandmaster objectives.
- Deposit early instead of spending every Star Bit immediately.
- Check Banktoad’s stored balance, not only Mario’s current total.
- Reserve the 9,999 deposit goal for the late 242-Star completion route.
- Do not apply the original Wii Banktoad rule to a different edition.
Before you move on
- One of the three in-game save files is created, and you can distinguish starting, changing an icon, and erasing from the file screen.
- You can move, jump, perform repeated ground-contact jumps, spin, crouch, ground-pound, long-jump, reset the camera, and fire Star Bits with the correct buttons.
- You understand that the pointer collects Star Bits and B fires them.
- Co-Star Mode is understood: Player 2 can assist with the pointer, stop or defeat certain enemies, collect items, and activate selected objects, but cannot control Mario.
- Banktoad is available after seven Power Stars, and you have successfully deposited an initial Star Bit reserve.
- For an original Wii 242-Star route, your checklist includes depositing 9,999 Star Bits with Banktoad after the other Grandmaster prerequisites are in place.
Core Movement, Combat & Recovery
Super Mario Galaxy 2 rewards controlled movement rather than rushed inputs. Learn to chain ordinary jumps with the Wii Remote spin, long jumps, wall jumps, ground pounds, and dives. Activate every checkpoint flag before entering a dangerous section, then treat the next attempt as a fresh route if you lose a life: temporary power-ups, Yoshi, enemies, and moving-platform timing may not be preserved. Pull Stars, Sling Stars, and Launch Stars are deliberate route elements, not substitutes for scouting. If you lose Yoshi or a temporary ability, first check whether the route can be retraced or the item reacquired; otherwise restart the mission deliberately instead of spending lives on an impossible section.
Build Mario’s basic movement chain
Move with the Nunchuk Control Stick and press A to jump. Shake the Wii Remote to spin. Mario’s spin can stun or defeat many enemies, break certain objects, activate mechanisms, and extend a jump slightly when used in midair. Use one deliberate spin near an enemy or breakable object instead of shaking repeatedly and losing control of the landing.
For a long jump, run, press Z to crouch, then press A. Use it when you have already identified the landing surface. To ground-pound, jump and press Z while Mario is airborne. Ground pounds break marked objects, activate ground-pound switches, and attack targets directly below him. Triple jumps require three consecutive jumps with clean landings; do not press the button rapidly without allowing each jump to complete.
- Practice spinning, long jumping, ground pounding, and triple jumping in a safe area.
- Use the camera and Star Pointer to inspect the destination before a long jump.
- Ground-pound only after confirming what is below Mario.
Use wall jumps, dives, and spins deliberately
When Mario touches a suitable wall during a jump, press A to wall jump away from it. In a narrow shaft, aim the Control Stick toward the next wall before Mario reaches it, then alternate walls rather than holding one direction continuously. If the shaft contains several walls, the camera angle is often more important than speed; recenter it when the next surface becomes difficult to see.
Press Z underwater to dive. A dive changes Mario’s depth and is useful for reaching lower objects, but it is not a safe correction for an unscouted route. On land, a midair spin can adjust a jump and add a little height, while a long jump commits Mario to a faster forward arc. Use a Pull Star, Sling Star, or Launch Star when the stage presents one as the intended transfer.
To use a Pull Star, point at it until it is targeted and hold A. Mario travels toward it while A is held. Release with A for a gentle release, or use Z or a spin for a faster release when the destination is directly below or beside you. Before leaving the current platform, identify the next Pull Star or solid landing area; do not release simply because Mario has reached the middle of a route.
- Face or aim toward the next wall before beginning a wall-jump sequence.
- Locate the next star or landing surface before leaving a platform.
- Use a controlled Pull Star release instead of relying on a last-second spin.
Activate checkpoint flags before risky sections
When you touch a checkpoint flag, it changes from the Bowser-side marker to Mario’s active checkpoint. If Mario’s health reaches zero or he falls into a bottomless hole, he loses a life and normally returns at the latest checkpoint that was activated in the mission. If no checkpoint has been activated, the return point is the mission start.
A checkpoint does not preserve every part of the level. After respawning, temporary power-ups may be gone, Yoshi may need to be found again, enemies may have returned, and moving platforms may be on a different cycle. Reacquire the required item and wait for the route to line up before attempting the hazard again.
Some short missions and challenge sequences provide no useful checkpoint or return Mario to the beginning after a death. When a mission repeatedly sends you to its opening, stop treating it like a checkpointed stage and practice the entire route in sections.
- Touch every visible checkpoint flag before entering a new hazard section.
- After respawning, check whether Mario still has Yoshi or a power-up.
- If the mission restarts from the beginning, practice the route rather than assuming progress was saved.
Recover after losing Yoshi
If Mario is knocked off Yoshi, Yoshi runs away rather than automatically remaining mounted at the previous platform. Look for him immediately and catch up if the surrounding ground is safe. Mario can remount by jumping onto Yoshi, spinning near him, or using the normal approach shown by the stage. If Yoshi has fallen into a hazard or the route has separated you from him, continue as Mario only if the mission permits it.
To dismount intentionally, press Z and A together while riding Yoshi. This is useful when Mario must enter a narrow passage or land on a separate platform, but do not dismount near a gap unless you have confirmed where Mario will land. While riding Yoshi, hold A in midair to flutter and gain extra airtime. Point at an enemy, fruit, or object and press B to use Yoshi’s tongue; shake to perform Yoshi’s head shake, which can stun enemies, break obstacles, or activate objects.
- After taking damage, look for Yoshi before committing to a dangerous jump.
- Use fluttering for controlled short-gap recovery, not for blind crossings.
- Dismount only when Mario’s landing route is visible.
Recover when a power-up expires
Temporary abilities are usually provided for a particular obstacle sequence. When one expires, pause your movement and identify the ordinary route that replaces it. Do not assume Cloud Mario, Rock Mario, Spring Mario, or another form makes Mario permanently safe; the ability can disappear at a bad point and leave him needing a normal platforming fallback.
If the objective cannot be completed without the ability, return to the nearest known item location or allow the mission to restart. Repeatedly forcing a jump without the required form wastes lives and can make the route appear impossible. When a checkpoint is nearby, use it first, then reacquire the power-up before attempting the next section.
- Before taking a power-up, observe which obstacle it is meant to solve.
- Keep a visible fallback platform in mind before entering a long temporary-form sequence.
- Reacquire the item or restart deliberately if the objective becomes unreachable.
Respond to a missed jump or fatal fall
If Mario misses a platform, quickly look for a lower ledge, Pull Star, or Launch Star. A spin can alter an interaction or help reach a nearby surface, but it cannot save a fall when no platform or star is within range. Falling into a black hole, lava, or another instant-death hazard cannot be corrected after the fall has begun; accept the life loss and use the checkpoint route on the next attempt.
After two failures at the same transfer, stop repeating the same timing. Watch the moving-platform cycle, recenter the camera, and identify the immediate landing rather than aiming at the final destination. The safest recovery is to reach solid ground, pause, and rebuild the route from there.
- Aim for the next safe surface, not the farthest visible destination.
- Wait for moving platforms to reach a predictable position.
- Change timing or camera position after repeated failures.
Before you move on
- You can perform a spin, long jump, ground pound, wall jump, triple jump, and underwater dive with the Wii Remote and Nunchuk.
- You know that Z performs the airborne ground pound and that Z plus A dismounts Mario from Yoshi.
- You have activated a checkpoint and can identify where Mario will return after losing a life.
- You can use a Pull Star by pointing and holding A, then release safely with A, Z, or a spin.
- After losing Yoshi or a temporary power-up, you can retrace the route, reacquire what is needed, or restart the mission deliberately.
- You change your timing or camera angle after repeated failures instead of repeating an unscouted jump.
References for this chapter
Yoshi: Where to Get Him, Fruit Effects and Practical Uses
Yoshi first becomes available in World 1 after you collect the first Power Star in Sky Station Galaxy. That opens Yoshi Star Galaxy, whose first mission, Saddle Up with Yoshi, teaches the basic Yoshi route. Defeat the Magikoopa guarding the egg, hatch Yoshi, use his tongue to eat enemies and pull objects, then follow the Launch Star route to the Power Star. Yoshi is mission-specific: he does not remain with Mario after leaving a mission, and each later mission supplies an egg when Yoshi is intended to be used. His three special foods are Dash Pepper, Blimp Fruit, and Bulb Berry. Dash Yoshi runs extremely fast, climbs steep slopes, and crosses water; Blimp Yoshi rises through the air while a meter drains; and Bulb Yoshi reveals temporary hidden platforms. Yoshi can also swallow Spinies twice to create a Spiny ball, then spit it at glass barriers, enemies, and bosses. Use each ability only after scouting the route, because damage can knock Mario off Yoshi and timed transformations can expire before the next safe landing.
Unlock Yoshi Star Galaxy
Complete Peewee Piranha's Temper Tantrum in Sky Station Galaxy and collect its first Power Star. Return to Starship Mario and follow the newly opened route to Yoshi Star Galaxy. You do not need a Grand Star for this opening; the first Sky Station Power Star is the relevant prerequisite. Yoshi Star Galaxy is the first galaxy in the original Wii game where Yoshi appears.
Select Saddle Up with Yoshi. This is the introductory mission and the first required opportunity to learn Yoshi's basic movement, tongue, flutter jump, and fruit interactions. The egg is not available in every mission, so do not expect to summon Yoshi from the Starship or carry him into another galaxy.
- The first Power Star in Sky Station Galaxy is complete.
- Yoshi Star Galaxy is visible on the World Map.
- Saddle Up with Yoshi is selected from the galaxy mission list.
Complete Saddle Up with Yoshi
Move uphill from the starting area, avoiding the prickly plants and other enemies. Use the spring to reach the raised section where a Magikoopa guards Yoshi's Egg inside a barrier. Defeat the Magikoopa with a spin attack or jump on it, while avoiding the Mini Goombas it summons. Once the Magikoopa is defeated, the barrier disappears.
Spin into the Yoshi Egg to hatch Yoshi, then jump onto him. Aim the Wii Remote pointer at nearby fruit or enemies and press B to use Yoshi's tongue. Continue forward and use the tongue on the large fruit near the volcano. Pull it away from its resting point until the Launch Star appears, then use the Launch Star to leave the starting planet.
On the next small planet, pass the checkpoint and reveal the Launch Star from the crystal. On the tall tower planet, use Yoshi's tongue on the flower and swing upward to the small wooden orb. From there, take the Launch Star to the final planet. Follow the flowers, movable blocks, and platforms to reach the crystal containing the Power Star, then break it and collect the star.
- The Magikoopa and its summoned Mini Goombas are no longer blocking the egg.
- Yoshi has been hatched and mounted.
- The large fruit has been pulled far enough to reveal the Launch Star.
- The Power Star has been collected at the end of the route.
Use Yoshi's basic moves safely
Press B while pointing at an enemy, fruit, or interactive object to extend Yoshi's tongue. Yoshi can eat many enemies and objects from a distance, which is safer than walking directly into them. Some enemies have special results: in Spiny Control, swallow a Spiny once, then swallow it again to form a Spiny ball. Press B to spit the ball at glass barriers, distant targets, or King Lakitu. Against King Lakitu, return the Spinies he throws rather than trying to attack the boss directly.
Yoshi's flutter jump extends his airtime. Jump normally, then hold A to flutter and correct your position toward the next platform. Fluttering helps with gaps and recovery, but it does not protect Mario from hazards. Spikes, lava, falling into a hole, or a direct enemy hit can knock Mario off Yoshi or end the attempt.
To dismount deliberately, crouch with Z and press A. Use this when a route requires Mario to enter a pipe, take a separate Launch Star, or leave Yoshi near a safe platform. If Yoshi is lost, look for the mission's next egg or retrace the route only if a safe path back exists; otherwise restart the mission rather than making a blind jump.
- B is being used for Yoshi's tongue rather than Mario's Star Bits.
- A is held after jumping to perform a flutter.
- Z plus A is used when a deliberate dismount is required.
- Spinies are swallowed twice before being spat as Spiny balls.
Dash Pepper: speed, slopes, and water
Eat a Dash Pepper to become Dash Yoshi. The transformation gives Yoshi very high running speed, lets him climb steep slopes, and allows him to run across water. Hightail Falls Galaxy's Hot-Stepping Dash Pepper mission is the clearest early example: wait until you have identified the slope or water route, then eat the pepper and commit to the run.
Use small control-stick corrections. Dash Yoshi is difficult to stop or turn sharply, so avoid consuming the pepper before a narrow platform sequence or a set of disappearing platforms. If the route contains a sharp turn, position Yoshi first and take the pepper only when the intended direction is clear. The effect is temporary; if it expires in an unsafe place, Mario may be left without enough speed to reach the next ledge.
- The route is scouted before eating the Dash Pepper.
- Dash Yoshi is used for steep slopes and water crossings.
- Large control-stick movements are avoided during high-speed sections.
- A safe landing is identified before the timed effect begins.
Blimp Fruit: controlled vertical movement
Eat a Blimp Fruit to inflate Yoshi and rise slowly. Steer with the Nunchuk Control Stick. Press and hold A to hold Yoshi's breath and stop rising while the meter continues to drain. Release A when you need to continue upward, and aim for a solid platform or opening before the meter empties.
Blimp Yoshi is used for vertical routes such as the upper sections of Tall Trunk Galaxy and other missions that place fruit above ordinary jump height. Do not drift away from every solid surface while searching for the next target. If the meter runs out, Yoshi stops floating and returns to normal movement. Shaking the Wii Remote does not serve as a universal cancel command; while riding Yoshi, it performs the spin action, and a deliberate dismount uses Z plus A.
- The next platform is identified before eating the Blimp Fruit.
- A is used to pause the ascent when lining up a landing.
- The meter is monitored throughout the climb.
- Mario is not dismounted accidentally during the ascent.
Bulb Berry: reveal hidden platforms
Eat a Bulb Berry to become Bulb Yoshi. Yoshi emits a golden light that reveals hidden platforms for a short time. The route becomes visible only while the effect lasts, so begin moving after the platforms appear instead of spending most of the effect standing still. Eat another Bulb Berry when one is available to refresh the effect.
Keep Mario over a known platform while planning the next jump. If the light expires, do not leap toward a route you can no longer see. Return to a solid platform and locate another Bulb Berry, or retreat to the last visible section. Bulb Yoshi is for revealing and crossing concealed paths; it does not make Mario invulnerable.
- The hidden route is examined immediately after eating the berry.
- A safe platform remains behind Mario during the crossing.
- The effect is refreshed before entering a long concealed section.
- Hazards are treated as dangerous even while Bulb Yoshi is active.
Know where Yoshi is required
Yoshi Star Galaxy introduces the core mechanics through Saddle Up with Yoshi and Spiny Control. Later missions deliberately build around his abilities. Hightail Falls Galaxy uses Dash Pepper for steep climbs and water routes. Tall Trunk Galaxy uses Blimp Fruit and Yoshi's fluttering for elevated paths. Other Yoshi-focused missions appear in galaxies including Haunty Halls, Beat Block, Bowser Jr.'s Fearsome Fleet, Starshine Beach, Sweet Mystery, Flash Black, Bowser's Galaxy Generator, Twisty Trials, and Grandmaster Galaxy.
These galaxy names do not mean Yoshi is available in every mission within them. Check the starting area for a Yoshi Egg and follow the mission's supplied route. If there is no egg, complete the section with Mario and the power-up or vehicle provided there. Yoshi cannot be brought from another mission, and collecting a Power Star ends the current ride rather than storing Yoshi for the next star.
- A Yoshi Egg is located before planning a Yoshi route.
- Dash, Blimp, or Bulb effects are used only where the mission supplies them.
- Yoshi is not expected to carry over after a Launch Star or completed mission.
- The mission objective and Power Star are completed before leaving the galaxy.
Before you move on
- The first Power Star from Sky Station Galaxy has opened Yoshi Star Galaxy.
- Saddle Up with Yoshi is complete and its Power Star is recorded on the Star List.
- You can hatch and mount Yoshi, use B for the tongue, flutter with A, and dismount with Z plus A.
- You can use a swallowed Spiny as a projectile in Spiny Control and understand that two tongue interactions are needed to form the Spiny ball.
- You can identify Dash Pepper, Blimp Fruit, and Bulb Berry and match each one to its intended timed route.
- You understand that later Yoshi missions provide their own access and that Yoshi cannot be carried between missions.
References for this chapter
- Super Mario Galaxy 2 — English Wii Instruction Booklet
- Super Mario Galaxy 2 — English Wii Instruction Manual
- Yoshi Star Galaxy — Super Mario Galaxy 2
- Super Mario Galaxy 2 — GameSpot walkthrough
- Super Mario Galaxy 2 — Guide and Walkthrough — GameFAQs, Wii
- Super Mario Galaxy 2 Mission List — Super Mario Wiki
World 1: Sky Station Through the First Grand Star
Super Mario Galaxy 2 begins in Sky Station Galaxy, not Gateway Galaxy. Complete Peewee Piranha’s Temper Tantrum to earn the first Power Star and open Yoshi Star Galaxy. Finish Saddle Up with Yoshi, then collect three total Stars including that Yoshi Star to open Spin-Dig Galaxy. Its first mission opens Fluffy Bluff Galaxy and Rightside Down Galaxy. After Saddle Up with Yoshi, the Hungry Luma on the World 1 map can be fed 300 Star Bits to create Flip-Swap Galaxy. The required route to World 1’s boss needs seven Power Stars, including one from Fluffy Bluff Galaxy. Once that threshold is met, enter Bowser Jr.’s Fiery Flotilla, cross its lava hazards, and defeat Gobblegut by striking all six exposed bellyache bulges during its tunneling attack. The resulting Grand Star opens World 2. Secret Stars and Comet Medals help with later cleanup but are not required for this first Grand Star.
1. Complete Sky Station Galaxy’s opening mission
After the opening story, enter Sky Station Galaxy. Follow the Lumas through the starting planet, using Sling Stars and Launch Stars as they appear. The route teaches the Star Pointer, spin attack, gravity-based movement, and basic platforming. Collect the Checkpoint Flag and Life Mushroom before continuing whenever they are safely available.
In Peewee Piranha’s Temper Tantrum, follow the main route across the cylindrical and two-sided planets until the Launch Star sends Mario to Peewee Piranha’s planet. Peewee charges, jumps, and tries to land on Mario. Spin into the shell covering its glowing rear to break the shell. Once the rear is exposed, strike it with a spin attack while Peewee runs away. The shell reforms after the hit, so repeat the shell-breaking and rear-strike sequence once more. Two successful hits on the exposed rear defeat Peewee and release the first Power Star.
The first Sky Station Star is the required opening collectible. Gateway Galaxy belongs to the original Super Mario Galaxy and is not part of this game’s World 1 route.
- Complete Peewee Piranha’s Temper Tantrum.
- Break Peewee’s shell before attacking its exposed rear.
- Hit the exposed rear twice and collect the first Power Star.
- Confirm that Yoshi Star Galaxy is available.
2. Complete Saddle Up with Yoshi
Enter Yoshi Star Galaxy and select Saddle Up with Yoshi. Follow the opening route to Yoshi’s egg. Defeat the nearby Magikoopa, then spin the egg to release Yoshi and jump onto him. Yoshi’s tongue can eat enemies and pull objects, while the flutter jump helps extend or correct a jump after leaving a platform.
Continue to the fruit near the Octoombas. Use Yoshi’s tongue on the fruit to create the Launch Star, then follow the remaining planets to the mission’s Power Star. Keep Yoshi with Mario by avoiding unnecessary hazards and by facing the next landing before using a flutter jump.
The Comet Medal is on a small hill to the left of the fruit area. It can be reached by jumping onto the hill, but collecting it is optional for World 1’s first Grand Star. After Saddle Up with Yoshi is complete, the Yoshi platform begins orbiting Starship Mario and the World 1 Hungry Luma becomes available on the map.
- Complete Saddle Up with Yoshi.
- Use Yoshi’s tongue to interact with the fruit and create the Launch Star.
- Use the flutter jump to correct a landing without jumping blindly.
- Confirm that the Hungry Luma is present on the World 1 map.
3. Open Spin-Dig Galaxy and defeat Digga-Leg
Spin-Dig Galaxy opens after three Power Stars have been collected, with the first Yoshi Star mission included in that total. Enter Digga-Leg’s Planet and pick up the Spin Drill. Use it on the marked soft-soil sections to travel through the planet or reach higher platforms. Before drilling, look toward the destination whenever the camera permits so Mario does not emerge into an enemy or off a narrow edge.
Follow the Launch Star route through the Drill Zone Planet, Steel Ring Planet, and Dirt Tower Planet. Use each Spin Drill section to reach the next Luma or Launch Star. Checkpoint Flags and the Starshroom provide recovery points, so use them instead of rushing through a missed jump.
On Digga-Leg’s planet, the boss jumps around the circular arena and sends Diggas through the ground. Pick up a Spin Drill and burrow through the planet. The Power Star is held in a cage on Digga-Leg’s underside. Emerge beneath the boss and drill into that cage to damage it. Repeat this three times while avoiding the boss’s landings and the Diggas. Digga-Leg explodes and releases the Power Star.
Completing Digga-Leg’s Planet opens Fluffy Bluff Galaxy and Rightside Down Galaxy. Silver Stars Down Deep and Digga-Leg’s Daredevil Run are optional at this stage.
- Collect three total Power Stars, including Saddle Up with Yoshi.
- Complete Digga-Leg’s Planet.
- Use the Spin Drill to reach and strike the cage beneath Digga-Leg three times.
- Confirm that Fluffy Bluff Galaxy and Rightside Down Galaxy are open.
4. Collect the Stars needed for Bowser Jr.’s Fiery Flotilla
Enter Fluffy Bluff Galaxy and complete Search for the Toad Brigade Captain. Collect the Cloud Flower and create cloud platforms only when they are needed for the next climb. Cloud Mario can create a limited number of clouds, so look ahead and avoid spending them on optional coins when the required route is not yet secure. This mission supplies the Fluffy Bluff Star required for Bowser Jr.’s Fiery Flotilla.
Rightside Down Galaxy is also open after Digga-Leg’s Planet. In Breaking the Laws of Gravity, follow the arrows and watch the current gravity direction before jumping. A jump that would land safely on the floor can send Mario into a hazard after the stage turns him onto a wall or ceiling. The Great Crate Incinerator is optional but provides another early Star if needed.
To create Flip-Swap Galaxy, feed the Hungry Luma on the World 1 map 300 Star Bits. The Luma appears after Saddle Up with Yoshi. In Think Before You Shake, spinning flips the red and blue panels, so identify the next safe panel before shaking. Flip-Swap is optional for the boss route but can provide another Power Star.
You need seven total Power Stars, including at least one from Fluffy Bluff Galaxy, to open Bowser Jr.’s Fiery Flotilla. Use the Star List to check the total instead of assuming every opened galaxy must be cleared.
- Complete Search for the Toad Brigade Captain in Fluffy Bluff Galaxy.
- Collect at least one Fluffy Bluff Power Star.
- Use Rightside Down or Flip-Swap for additional Stars if the total is short.
- Feed the World 1 Hungry Luma 300 Star Bits if you want Flip-Swap Galaxy.
- Reach seven total Power Stars.
5. Optional early secret Star and Comet Medal cleanup
The first optional Fluffy Bluff secret mission is Every Planet Has Its Price. Re-enter Search for the Toad Brigade Captain and follow the early route toward the elevated area near the tree and pink Luma. The Hungry Luma there asks for 100 coins. Collect coins during the mission, return when the requirement is met, and enter the bonus planet it creates to complete the short challenge for the secret Power Star.
The Star List distinguishes completed normal missions from additional secret, comet, and later Green Star objectives. Use it to choose a specific cleanup target before re-entering a galaxy. Comet Medals are optional for World 1’s first Grand Star, but collecting an accessible medal during a normal run reduces later backtracking and contributes toward Prankster Comet availability.
Do not restart a mission merely because a Comet Medal or secret Star is missing. Finish the required campaign route first unless the optional objective is directly along your current path.
- Use the Star List to identify optional secret missions and Comet Medals.
- Complete Every Planet Has Its Price only if you want the early secret Star.
- Treat Comet Medals as optional for reaching Bowser Jr.’s Fiery Flotilla.
- Record the objective before re-entering a galaxy.
6. Defeat Gobblegut in Bowser Jr.’s Fiery Flotilla
When the Star List shows seven Power Stars, including one from Fluffy Bluff Galaxy, enter Bowser Jr.’s Fiery Flotilla. Cross the opening fortress path, pass the Fire Bar and Thwomp hazards, and activate the switch that opens the Bowser Jr. door. On the lava planet, use the safe platforms and Launch Star route. Long jumps can cross some gaps, but do not trade health for a shortcut. A Life Mushroom is available near the final Launch Star.
On Gobblegut’s planet, wait for the dragon to circle and dive through the dirt planet. When Gobblegut tunnels through the planet, its six bellyache bulges become temporarily stuck along the surface. Spin into an exposed bulge to destroy it, then move away before the body passes over Mario. Do not attack the ordinary armored body while it is circling.
After three bulges are destroyed, Gobblegut moves faster and begins adding fireballs that create lava pools. Keep moving around the planet and prioritize a safe position over an immediate attack. Destroy all six bulges to defeat Gobblegut. The boss explodes and releases the World 1 Grand Star.
Collect the Grand Star and allow the game to register the completion. Starship Mario then opens the route to World 2 and Puzzle Plank Galaxy.
- Enter Fiery Flotilla with seven Power Stars, including one from Fluffy Bluff Galaxy.
- Cross the lava and Fire Bar sections without spending health on risky shortcuts.
- Strike all six bellyache bulges only while they are exposed during Gobblegut’s tunneling attack.
- Adapt when Gobblegut speeds up after three bulges are destroyed.
- Collect the Grand Star and confirm that World 2 is open.
Before you move on
- Sky Station Galaxy’s Peewee Piranha’s Temper Tantrum is complete and its first Power Star is recorded.
- Saddle Up with Yoshi is complete, and the Yoshi platform is orbiting Starship Mario.
- Digga-Leg’s Planet is complete, with the boss defeated by three successful attacks on its underside cage.
- Fluffy Bluff Galaxy and Rightside Down Galaxy are open.
- The Star List shows at least seven Power Stars, including a Star from Fluffy Bluff Galaxy.
- Bowser Jr.’s Fiery Flotilla is complete and all six of Gobblegut’s bellyache bulges were destroyed.
- The World 1 Grand Star is recorded and the Starship Mario map displays the route to World 2 and Puzzle Plank Galaxy.
References for this chapter
- Super Mario Galaxy 2 English Instruction Manual, Nintendo Wii
- World 1 — Super Mario Galaxy 2
- Peewee Piranha’s Temper Tantrum — Super Mario Galaxy 2
- Yoshi Star Galaxy — Super Mario Galaxy 2
- Digga-Leg’s Planet — Super Mario Galaxy 2
- Fluffy Bluff Galaxy — Super Mario Galaxy 2
- Bowser Jr.’s Fiery Flotilla — Super Mario Galaxy 2
- Gobblegut — Super Mario Galaxy 2
- Hungry Luma — Super Mario Galaxy 2
World 2–4: Midgame Momentum and Required Star Routing
Worlds 2 through 4 introduce larger Star Barriers and combine lava, ice, gravity shifts, Yoshi routes, Pull Star chains, underwater passages and moving platforms. Prioritize ordinary missions that open new galaxies, then clear each required Bowser or Bowser Jr. galaxy as soon as its barrier is available. World 2’s Bowser’s Lava Lair requires 16 Power Stars, including one from Cosmic Cove, Wild Glide or Honeybloom Galaxy. World 3’s Bowser Jr.’s Fearsome Fleet requires 28 Power Stars and completion of Bowser’s Big Lava Power Party. World 4’s Bowser’s Gravity Gauntlet requires 40 Power Stars, including a first Power Star from Starshine Beach or Chompworks Galaxy. Comet Medals are optional for the main route: they unlock particular Prankster Comets, not later Worlds.
1. Build World 2’s total and open Bowser’s Lava Lair
After World 1 opens World 2, begin with the available missions in Puzzle Plank Galaxy and then follow the new galaxy markers on Starship Mario. Hightail Falls, Boulder Bowl, Cosmic Cove and Wild Glide provide a practical route toward the first barrier. Honeybloom Galaxy is an additional Hungry Luma option if you have enough Star Bits for its entry requirement.
Bowser’s Lava Lair opens at 16 Power Stars, but the total alone is not sufficient. At least one of those stars must be the first Power Star from Cosmic Cove, Wild Glide or Honeybloom Galaxy. If the barrier remains closed at 16 stars, check the Star List for this requirement instead of repeatedly replaying unrelated missions. You do not need to clear every optional mission before entering the lair.
- Reach 16 Power Stars.
- Make sure one of those stars is the first star from Cosmic Cove, Wild Glide or Honeybloom Galaxy.
- Enter Bowser’s Lava Lair once both conditions are satisfied.
2. Cross Bowser’s Lava Lair and defeat Giant Bowser
Defeat the Magikoopa near the beginning to reveal the Pull Star. On the cylindrical lava planet, wait for the rotating platforms to bring a safe landing position close enough for the next jump. Use the Spring Mushroom route to reach the fireball planet, then move through the rotating hazards and defeat the Hammer Bros. The revealed Swing Star carries you onward.
In the Whomp section, approach each Whomp until it begins its slam, move clear, then jump onto its exposed back and ground-pound the weak point. Continue through the pole and launch route to reach Bowser’s arena. Collect a Life Mushroom if you need a buffer before the battle.
Bowser drops meteorites onto the planet and then searches for Mario with a large circle of light before punching the ground. Keep the meteorites intact, wait for the punch to raise them, then jump onto one and ground-pound it toward Bowser. Four successful meteorite hits defeat him. After the second hit, he adds fire breath, so keep moving around the planet and reposition near an intact meteorite when the attack ends. Collect the Grand Star after the battle.
- Use each Whomp’s exposed back as its attack point.
- Keep the meteorites intact until Bowser’s ground punch raises them.
- Ground-pound four meteorites into Bowser and collect the Grand Star.
3. Reach World 3’s barrier and enter Bowser Jr.’s Fearsome Fleet
The Grand Star from Bowser’s Lava Lair opens World 3. Clear the available ordinary missions in Tall Trunk and Cloudy Court, then continue through the galaxy markers that appear for Haunty Halls, Freezy Flake and Rolling Masterpiece. Beat Block Galaxy and Sweet Mystery Galaxy are additional routes when their Hungry Luma or galaxy requirements are available; neither needs to be treated as an immediate detour if another mission supplies the required total.
Bowser Jr.’s Fearsome Fleet requires 28 Power Stars and completion of Bowser’s Big Lava Power Party in World 2. Once both conditions are met, enter the fleet. Yoshi is required for the Bullet Bill interactions in this mission. In the opening area, use Yoshi to eat Bullet Bills and spit them into the glass sphere blocking the route. Continue across the Gunner Path, use Bullet Bills to break the required barriers, and take the Sling Star before the black hole pulls Mario away.
- Complete Bowser’s Big Lava Power Party.
- Reach 28 Power Stars.
- Keep Yoshi available for the Bullet Bill sections.
4. Defeat Megahammer in Bowser Jr.’s Fearsome Fleet
Stay on the yellow-and-white moving platform while avoiding Space Mines. Use Bullet Bills to break the glass barriers and continue across the airships. If Yoshi is lost, return to a nearby Yoshi location when the route permits. If a required Bullet Bill interaction can no longer be completed, restarting the mission is safer than attempting to force the remaining route without him.
Megahammer’s arena is a ring over a black hole. Its attacks break sections of the ring, so keep moving toward intact ground and avoid standing beside a segment that is already cracking. Have Yoshi eat incoming Bullet Bills and spit them at the boss’s glass targets and exposed sections. Attack after Megahammer commits to a hammer strike or projectile, then move away before another part of the ring collapses. Continue breaking the exposed sections until the machine is destroyed, then collect the Grand Star to open World 4.
- Redirect Bullet Bills into Megahammer’s glass targets.
- Stay on intact portions of the arena ring.
- Defeat Megahammer and collect World 3’s Grand Star.
5. Build World 4’s total and meet the Gravity Gauntlet prerequisite
World 4 begins with Supermassive Galaxy. Clear its accessible ordinary missions, then use Flipsville, Starshine Beach, Chompworks, Sweet Mystery and Honeyhop as they become available. Sweet Mystery is a Hungry Luma galaxy, so treat it as an optional source of stars if another available mission is easier or more convenient.
Bowser’s Gravity Gauntlet requires 40 Power Stars and a first Power Star from either Starshine Beach Galaxy or Chompworks Galaxy. Check the Star List to confirm that the qualifying star is specifically the first star of one of those galaxies. Once both requirements are met, enter the Gravity Gauntlet.
The level changes gravity frequently and includes lava, Fire Bars, electric hazards, an underwater passage and black holes. Read the arrows showing the current gravitational direction before jumping. In the underwater section, collect Coins to maintain Mario’s air supply, and use checkpoint flags as reset points if a later section repeatedly causes deaths.
- Reach 40 Power Stars.
- Collect the first Power Star from Starshine Beach or Chompworks.
- Enter Bowser’s Gravity Gauntlet only after both requirements are met.
6. Complete Bowser’s Gravity Gauntlet and plan comet cleanup separately
Follow the gravity arrows through the castle rather than jumping toward a platform before its pull is clear. After the early hazards, use the underwater passage carefully and avoid the Fire Bars even when they move through the water. Continue through the Whomp section and use the spinning-wheel route to reach the large door. Ground-pound the three meteorites into the door’s locks, then proceed to the final checkpoint before Bowser.
The Gravity Gauntlet Bowser battle follows the same meteorite method as the World 2 fight, but the meteorites and Bowser’s punches create shockwaves. Jump over the shockwaves and stay near an intact meteorite without allowing Bowser to destroy it. When his punch raises the meteorites, ground-pound one toward him. Four successful meteorite hits defeat Bowser. After the second hit, he adds fire breath and later leaves a fire trail, so keep moving and approach the next meteorite only after the flame path is clear. Collect the Grand Star to open World 5.
Do not revisit earlier galaxies merely because a Comet Medal is missing. Return for a medal when you intend to activate that galaxy’s Prankster Comet or during a planned cleanup pass. Comet Medals affect comet availability and galaxy completion records, but they are not direct requirements for opening World S or continuing the main campaign.
- Use gravity arrows to plan each landing.
- Ground-pound all three meteorites into the door’s locks.
- Defeat Bowser with four meteorite hits and collect the Grand Star.
- Reserve missing Comet Medals for a planned comet or cleanup route.
Before you move on
- World 2’s 16-Star barrier is crossed with a qualifying first star from Cosmic Cove, Wild Glide or Honeybloom Galaxy.
- Bowser’s Big Lava Power Party is complete and its Grand Star is collected after four meteorite hits.
- World 3’s 28-Star requirement is met and Bowser Jr.’s Fearsome Fleet is open.
- Megahammer is defeated using Yoshi and Bullet Bills, and World 3’s Grand Star is collected.
- World 4’s 40-Star requirement is met with the first star from Starshine Beach or Chompworks.
- Bowser’s Gravity Gauntlet is complete, Bowser is defeated with four meteorite hits, and its Grand Star is collected.
- The Star List shows the three required boss galaxies completed; optional Prankster Comets and missing Comet Medals remain separate cleanup goals.
References for this chapter
- Super Mario Galaxy 2 English Instruction Manual, Nintendo Wii
- Bowser’s Lava Lair, Super Mario Wiki
- Bowser’s Gravity Gauntlet, Super Mario Wiki
- Super Mario Galaxy 2/Bowser’s Lava Lair, StrategyWiki
- Super Mario Galaxy 2/Bowser’s Gravity Gauntlet, StrategyWiki
- Super Mario Galaxy 2 — Guide and Walkthrough — GameFAQs, Wii
- Super Mario Galaxy 2 — GameSpot walkthrough
World 5–6: High-Risk Platforming and Bowser Jr. Gauntlets
World 5 introduces rotating platforms, quicksand, gravity changes, poisonous hazards and the final Bowser Jr. battle. Complete Follow Me, Bob-omb in Space Storm Galaxy, then recover 55 Power Stars, including Space Storm’s first star, to open Bowser Jr.’s Boom Bunker. Defeating the Boomsday Machine gives access to World 6. World 6 has no additional Grand Star before the final galaxy: instead, its galaxies open through Star Gates at 60, 65 and 70 Power Stars. To open Bowser’s Galaxy Generator, collect 70 Power Stars and make sure at least one is from Battle Belt Galaxy or Slimy Spring Galaxy. Use the Star List to identify the shortest route if you are below a gate.
Clear World 5 and open Bowser Jr.’s Boom Bunker
Begin with Space Storm Galaxy and complete Follow Me, Bob-omb. This first mission is a direct prerequisite for Bowser Jr.’s Boom Bunker, not merely a recommended early star. Afterward, clear the first available missions in Slipsand Galaxy, Shiverburn Galaxy, Boo Moon Galaxy and Upside Dizzy Galaxy. Fleet Glide Galaxy is optional and appears after feeding the World 5 Hungry Luma 1,500 Star Bits.
When your save file has at least 55 Power Stars, including Space Storm’s first star, Bowser Jr.’s Boom Bunker becomes available. You do not need every World 5 galaxy before entering it. Use the Star List to confirm the total rather than replaying missions at random.
- Complete Follow Me, Bob-omb in Space Storm Galaxy.
- Recover at least 55 Power Stars.
- Confirm that Space Storm’s first Power Star is among the total.
- Open Bowser Jr.’s Boom Bunker from the World 5 map.
Cross the opening planets in Boom Bunker
On the starting planet, move toward the Bullet Bill cannons and let a Bullet Bill follow Mario. Lead it around the goop and rotating obstacle to the glass cage on the opposite side. Stand behind the cage so the Bullet Bill crashes into it, then enter the cannon. Aim at the large red-and-white target on the next planet; striking the target’s center awards a 1-Up but is not required for progress.
Defeat the two Boomerang Bros. on the next planet with spin attacks, then kick or otherwise finish them when they are stunned. The Launch Star appears after both are defeated. On the following cannon planet, use the cannon to reach the large target while avoiding the orbiting Space Mines and the electric fence. Continue to the checkpoint before the moving-platform section.
- Use a Bullet Bill to break the starting glass cage.
- Defeat both Boomerang Bros. to create the Launch Star.
- Avoid the Space Mines when firing from the cannon.
- Touch the checkpoint before the final approach.
Use moving platforms and Cloud Flowers
The next planet contains colored platforms rotating around a black hole. Watch one full movement cycle before crossing. Move with the platform’s rotation instead of trying to counter it, and reserve the midair spin for a small landing correction. The Comet Medal is positioned between Space Mines; collect it only when the surrounding platforms give a clear approach.
Cloud Flowers appear on this planet. Use them to reach the upper platforms, then ground-pound the stone wheels surrounded by mines to reveal the Launch Star. If a cloud disappears, return to a permanent platform and wait for another Cloud Flower rather than attempting a blind jump over the black hole. The Launch Star leads to the Boomsday Machine planet.
- Approach rotating platforms from their center whenever possible.
- Use Cloud Flowers for height, not for uncontrolled long crossings.
- Ground-pound the stone wheels to reveal the Launch Star.
- Do not jump toward the boss planet until the Launch Star is active.
Defeat the Boomsday Machine
The Boomsday Machine is defeated by ground-pounding Bowser Jr.’s glass cockpit three times. Use the air vents and the Cloud Flowers on the boss planet to rise to the cloud platforms around the machine. From a stable cloud, jump toward the cockpit and ground-pound the glass. A normal jump does not count as a hit.
After each hit, regain a stable cloud or permanent platform before attempting the next one. The Cloud Flower platforms disappear quickly, so plan the next landing before using the current cloud. The upper route is safer than dropping toward the lava and fire hazards. Repeat the updraft-to-cloud approach until the third ground pound breaks the machine and reveals the Grand Star.
- Reach the boss planet with at least one health unit intact.
- Use the vents and Cloud Flowers to reach cockpit height.
- Ground-pound the cockpit three times.
- Collect the Grand Star to open World 6.
Open World 6 in the required order
After the World 5 Grand Star, Melty Monster Galaxy opens. Complete at least one Melty Monster mission to open Clockwork Ruins Galaxy. The 60-Star gate then opens Throwback Galaxy, but the total must include a Power Star from Clockwork Ruins. The 65-Star gate opens Battle Belt Galaxy, and the total must include Throwback’s first star.
Flash Black Galaxy is reached through the Hungry Luma on the World 6 map after feeding it 1,800 Star Bits. Slimy Spring Galaxy opens after the first Flash Black star. These Luma galaxies are optional for reaching the final gate except that a Power Star from Slimy Spring can satisfy the special final requirement.
- Complete a star in Melty Monster Galaxy.
- Use a Clockwork Ruins star when opening the 60-Star route to Throwback Galaxy.
- Use Throwback’s first star when opening the 65-Star route to Battle Belt Galaxy.
- Feed the World 6 Hungry Luma 1,800 Star Bits only if you want the Flash Black route.
Reach the 70-Star final barrier
Bowser’s Galaxy Generator opens at 70 Power Stars, with one of those stars required to come from either Battle Belt Galaxy or Slimy Spring Galaxy. Battle Belt is usually the direct choice because it follows the 65-Star gate; complete its first mission and check the total. If you instead use Slimy Spring, complete the Flash Black prerequisite first, then obtain Slimy Spring’s first star.
World 6 does not award another Grand Star before Bowser’s Galaxy Generator. If the final galaxy remains locked, check both conditions: the save file must show 70 Power Stars, and Battle Belt or Slimy Spring must be represented in the count. Once the galaxy opens, an easy completed mission can be used to stock extra lives before starting the final fortress.
- Reach 70 Power Stars.
- Confirm that at least one counted star is from Battle Belt Galaxy or Slimy Spring Galaxy.
- Select Bowser’s Galaxy Generator from the World 6 map.
- Do not wait for a separate World 6 Grand Star before entering the final galaxy.
Before you move on
- World 5’s Grand Star from Bowser Jr.’s Boom Bunker is collected.
- World 6 is open and at least one mission in Melty Monster Galaxy is complete.
- The required World 6 Star Gates have been passed using the specified predecessor stars if following the direct route.
- The save file shows at least 70 Power Stars.
- The Star List confirms that Battle Belt Galaxy or Slimy Spring Galaxy contributed one of those stars.
- Bowser’s Galaxy Generator is selectable from the World 6 map.
References for this chapter
- World 5 (Super Mario Galaxy 2) — Super Mario Wiki
- Bowser Jr.'s Boom Bunker — Super Mario Wiki
- World 6 (Super Mario Galaxy 2) — Super Mario Wiki
- Bowser’s Galaxy Generator — Super Mario Wiki
- Super Mario Galaxy 2 — Guide and Walkthrough — GameFAQs, Wii
- Super Mario Galaxy 2 English Instruction Manual, Nintendo Wii
Bowser's Galaxy Generator: The Final Boss Run
Bowser's Galaxy Generator opens after you collect 70 Power Stars, including at least one Star from Battle Belt Galaxy or Slimy Spring Galaxy. Its first mission, Bowser's Fortified Fortress, is the final story mission of the original Wii campaign. The approach uses the Spin Drill, Cloud Flower, Yoshi, Dash Pepper, moving platforms, and meteorites to open the final door. Checkpoints divide the route into recoverable sections. Bowser's first phase requires four meteorite hits. After the Grand Star appears and Giant Bowser begins the second phase, land four additional meteorite hits. Collect the final Grand Star on the Garden Planet and allow the ending sequence and credits to finish. The first ending does not require 120 regular Stars or any Green Stars.
1. Confirm the unlock condition and prepare for the mission
Collect 70 Power Stars and make sure at least one of them came from Battle Belt Galaxy or Slimy Spring Galaxy. Reaching the visible total without the required World 6 progression is not enough. From Starship Mario, travel to World 6, enter Bowser's Galaxy Generator, and select Bowser's Fortified Fortress.
This is a long mission, but checkpoints divide the route. If you lose a life after activating a checkpoint, you return to that section while keeping the mission active. Bring extra lives if your reserve is low. A Co-Star can gather Star Bits and briefly stun suitable enemies, but Player 1 must handle the movement, Yoshi actions, ground pounds, and meteorite aiming.
- The save file shows at least 70 Power Stars.
- At least one qualifying Star came from Battle Belt Galaxy or Slimy Spring Galaxy.
- Bowser's Fortified Fortress is selected.
2. Cross the opening planets and reach the first checkpoint
On the Starting Planet, move left and climb the tall pole to collect the Life Mushroom if you want the extra health. Return to the main route, use the Launch Star, and continue to the Platform Planet. Defeat the three Hammer Bros. with jumps and Spin attacks. Their defeat causes the Floaty Fluff to appear.
Use the Floaty Fluff to glide through the Volcanic Planet. Keep moving across the fireball-cannon section and descend toward the small dirt area. Prioritize a safe landing over speed. The Spin Drill is on the lower route; collect it and drill through the dirt patch to enter the Banzai Bill Planet.
On the Banzai Bill Planet, use the curved terrain and recessed areas as cover. Let each Banzai Bill pass before moving to the next safe pocket. Continue around the planet while retaining the Spin Drill, then locate the correct square dirt patch and drill through it to reveal the Launch Star. Continue through the Bullet Bill section and touch the first checkpoint.
- The three Hammer Bros. are defeated.
- The Floaty Fluff route is crossed safely.
- The Spin Drill is collected and used on the correct dirt patch.
- The first checkpoint is activated.
3. Use Cloud Flower platforms to climb the generator route
From the checkpoint, proceed through the Bullet Bill and platform section until you reach the Cloud Flower. Each Cloud Flower lets Mario create three temporary cloud platforms by spinning. Make only the clouds needed for a landing you can see; do not spend all three while crossing an unscouted gap.
When the route drops toward lava, create a cloud and let the fan carry Mario across. Land on the next safe surface, collect another Cloud Flower, and continue upward. Use short jumps or backflips for nearby ledges. Long blind jumps are dangerous because the clouds disappear quickly and Bullet Bills can knock Mario off course.
Reach the Launch Star at the top and continue across the bridge. Defeat or safely pass the Magikoopa before approaching the Yoshi egg. Activate the next checkpoint when it appears so a later failure does not return you to the Cloud Flower section.
- Cloud Flower charges are used for visible landings.
- The fan-assisted lava crossing is completed.
- The next checkpoint is activated.
- The Magikoopa near the bridge is defeated or passed safely.
4. Free Yoshi and cross the closing magma route
Break the Yoshi egg on the right side of the bridge section. Use Yoshi's tongue on the flower pegs to swing to the next platform, then defeat the Hammer Bros. with Yoshi's jump and Spin. Activate the switch to open the corridor. Feed Yoshi the Dash Pepper and immediately follow the corridor through its changing openings.
After the Launch Star, ride the purple moving platforms upward. Defeat or stun the Magikoopa when the platform gives you a safe position. When Magmaarghs emerge from alternating sides, flutter to the opposite side, then switch back when the next threat appears. Do not jump early; landing behind the moving platforms can leave Mario or Yoshi without a safe surface.
The Comet Medal and Blimp Fruit in this section are optional. If collecting the medal, use the lower peg to reach it and the upper peg to swing back to the moving platforms. Blimp Fruit can help avoid some hazards, but the normal platform route is usually more controllable. If you lose Yoshi, recover by returning along the route to the next egg when possible; some later actions are much harder without him.
At the end, climb the pole. A Life Mushroom is available behind the charred rock on the far left. On the Galaxy Generator Door Planet, ground-pound the incoming meteorites into the three stone locks. Approach from the opposite side of each intended lock so the meteorite travels toward its Bowser symbol. When all three locks are struck, enter the opened door and let the gravity field pull Mario into the boss arena.
- Yoshi is released from the egg.
- Dash Pepper carries Yoshi through the closing corridor.
- The moving-platform and Magmaargh section is crossed.
- The three meteorites open the final door.
5. Defeat Bowser in the first battle phase
On the Bowser Battle Planet, keep moving and watch the attack indicators. Bowser's punch creates shockwaves that travel across the planet. Jump over them and wait briefly before crossing their fading paths, because the area remains hazardous after the waves pass.
Bowser drops glowing meteorites onto the planet. When he punches and the meteorites rise, jump onto one and ground-pound it toward him. Use the white marking to judge the launch direction: the meteorite travels away from the direction from which you strike it, so position Mario on the side opposite Bowser before ground-pounding.
Land four meteorite hits in this first phase. After the first two hits, Bowser begins adding fire breath to the pattern, so avoid committing to a meteorite while the fire attack covers the route. Lure him near a meteorite, evade the fist and shockwaves, then strike quickly. After the fourth hit, Bowser appears defeated and the Grand Star becomes visible. Approach it, but do not assume the mission is over: Bowser returns, takes the Grand Star, and becomes Giant Bowser.
- Shockwaves are allowed to dissipate before crossing.
- Meteorites are ground-pounded from the correct side.
- Four meteorite hits connect during the first phase.
- The Grand Star appears before Giant Bowser begins the second phase.
6. Defeat Giant Bowser and complete the campaign
The second phase takes place over a black hole. Mario is drawn toward the available meteorite platforms. Ground-pound each meteorite so it travels toward Giant Bowser, aiming according to his position rather than striking randomly. If Bowser is above and to one side, stand on the opposite side of the meteorite before attacking.
Giant Bowser advances through the arena and can curl into a spinning shell. Do not waste a meteorite while he is spinning; wait until he is exposed. If a meteorite disappears, remain on the current platform until another becomes available. The mission supplies replacements, so a blind jump is unnecessary.
Land four additional meteorite hits during the Giant Bowser phase. This makes eight successful meteorite hits across both phases: four before the Grand Star appears and four afterward. Giant Bowser then falls into the black hole, and Mario is taken to the Garden Planet. Move to the final Grand Star and collect it.
Finish the victory scenes and ending credits before returning to Starship Mario so the completion is registered. This completes the main campaign. The 120-Star requirement applies to later postgame milestones, not to this first ending.
- Meteorites are aimed at Giant Bowser rather than ground-pounded blindly.
- Four additional hits connect during the second phase.
- Eight total meteorite hits have been completed across both phases.
- Giant Bowser falls into the black hole.
- The final Grand Star is collected on the Garden Planet.
- The ending sequence and credits finish playing.
Before you move on
- Bowser's Fortified Fortress is marked complete in Bowser's Galaxy Generator.
- The save-file total increases by the final Grand Star.
- Mario reaches the Garden Planet and collects the final Grand Star.
- Four meteorite hits were landed in the first Bowser phase and four additional hits in the Giant Bowser phase.
- The ending sequence and credits have played completely.
- Returning to Starship Mario shows the completed main-campaign state.
- Green Stars remain a separate postgame objective and are not required for this chapter's completion goal.
Immediate Post-credits: Activating the Green Star Quest
On the original Wii release, Green Stars become available after the save file reaches 120 regular Power Stars and Mario completes Bowser’s Fortified Fortress again. The 120-star total may include Bronze Stars earned with the Cosmic Guide; those stars count for activating the Green Star challenge. After the repeat Bowser clear and its ending sequence, Green Star missions appear throughout the galaxy map. Green Stars are hidden inside previously completed stages rather than being separate conventional levels. Use the Star List to identify exact missing entries. Comet Medals and ordinary Prankster Comets are separate objectives, while galaxy crowns are useful progress indicators but should not replace the Star List as the final tracker. Bronze-Star replacement matters later, because Grandmaster Galaxy requires 120 regular Power Stars with no Bronze Stars, in addition to all 120 Green Stars.
1. Reach 120 regular Power Stars
Collect the complete set of 120 regular Power Stars on the save file. This total includes ordinary mission Stars, Hidden Stars, Prankster Comet Stars, Hungry Luma Stars, and Grand Stars earned during the main progression. Green Stars are not part of this first 120-star requirement, and the two Grandmaster Galaxy Stars are separate endgame rewards.
A Power Star earned with the Cosmic Guide is recorded as a Bronze Star, but it still contributes to the 120 regular-Star total needed to activate the Green Star challenge. Do not stop at 119 because you are searching for a replacement gold Star; first verify whether the file has actually reached 120 regular Stars.
If the count is short, open the Star List and inspect galaxies one at a time. Check for uncompleted Hidden Star missions, ordinary Prankster Comets whose Comet Medals have already been collected, Hungry Luma galaxies, and late-game missions that became available after opening additional worlds. The Star List is more reliable than guessing from the number of completed galaxy icons.
- The save file contains 120 regular Power Stars.
- The 120 total includes every required regular and Grand Star entry.
- Any Bronze Stars are noted, but they have not been incorrectly treated as a blocker for Green Star activation.
2. Replay Bowser’s Fortified Fortress
After the save file reaches 120 regular Power Stars, travel to Bowser’s Galaxy Generator in World 6. Select its first mission, Bowser’s Fortified Fortress. This is the same final-Bowser mission completed during the original campaign, not one of the later Green Star searches.
Complete the fortress route and defeat Bowser again. Follow the mission through the Grand Star collection and the transition afterward. Reaching 120 Power Stars alone does not make the Green Star missions appear; the repeat completion of Bowser’s Fortified Fortress is the second required step.
The game does not require you to replace Bronze Stars before this replay. If you used the Cosmic Guide during one or more missions, those Bronze Stars may remain on the file while you activate Green Stars. Replace them later when preparing to unlock Grandmaster Galaxy.
- The file already has 120 regular Power Stars before the replay.
- The selected mission is Bowser’s Fortified Fortress.
- Bowser is defeated and the mission’s Grand Star is collected.
- The post-mission transition is allowed to finish.
3. Confirm the Green Star announcement
Remain in the game after the second Bowser clear and let the ending and follow-up announcement play. The game introduces the Green Star challenge and updates the galaxy map. Do not reset immediately after collecting the Grand Star if you have not yet reached the map or seen the new postgame state.
Return to Starship Mario and inspect the world and galaxy selections. Green Star content now appears in the applicable galaxies. The game places these Stars inside earlier stages, so selecting a Green Star entry sends Mario back into a familiar mission area rather than opening a completely separate level.
There are 120 Green Stars in total. Each galaxy has as many Green Stars as it has regular Power Star opportunities, except Grandmaster Galaxy, which has no Green Stars because collecting all 120 Green Stars is part of that galaxy’s unlock route.
- The second Bowser completion has fully registered.
- The Green Star announcement or equivalent postgame transition has played.
- Green Star mission entries or Green Star map indicators are visible.
4. Select a Green Star mission correctly
Enter a galaxy showing Green Star content and open its mission list. Select the Green Star entry rather than an ordinary yellow-Star mission. The stage may use the same route as an earlier mission, but the goal is now to locate the hidden Green Star.
Search away from the normal objective path. Green Stars are commonly placed on distant ledges, above or below the usual route, behind structures, across long gaps, or in areas that require a specific power-up, Yoshi, wall jumps, Launch Stars, Pull Stars, or careful platforming. Listen for the Green Star’s distinctive chime; it becomes more noticeable when Mario is near the correct location.
When Mario touches the Green Star, the mission is completed immediately. You do not need to finish the original mission objective afterward. If you fail, select the same Green Star entry again and approach the location using a safer route. A missed jump may require restarting the mission rather than attempting a blind recovery over an instant-death drop.
- A galaxy with Green Star content is selected.
- The intended Green Star mission is chosen from the mission list.
- The hidden Green Star is collected.
- The mission completion is allowed to register before leaving.
5. Organize the 120-Green-Star cleanup
A dependable cleanup method is to work world by world, beginning in World 1. In each galaxy, use the Star List to identify every available Green Star, then finish that galaxy before moving on. This minimizes repeated searches and makes it easier to identify whether the missing entry is Green Star 1, 2, or 3.
You may instead collect the first Green Star in many galaxies and return later for the remaining entries, but record each result immediately. Several Green Stars reuse the same mission area, and selecting the wrong entry can make a location appear missing even though the Star is available only from its corresponding Green Star selection.
Ordinary Comet Medals are not universal requirements for Green Stars. They unlock ordinary Prankster Comet missions in their associated galaxies and contribute to broader galaxy completion, but they do not need to be collected before an already available Green Star can be claimed. Keep those tasks on a separate cleanup list.
- The route is organized by world and galaxy.
- Each galaxy’s individual Green Star entries are checked in the Star List.
- Ordinary Comet Medal and Prankster Comet work is tracked separately.
- Grandmaster Galaxy is excluded from the 120-Green-Star count.
6. Read crowns and the Star List without confusing their meanings
Use the Star List as the definitive tracker for exact progress. It shows the individual regular Power Stars, Green Stars, Grand Stars, and Comet Medals associated with the file. When a galaxy is incomplete, inspect its entries rather than relying only on the world-map icon.
Galaxy crowns are useful summaries, but they combine several kinds of completion information. A silver crown generally indicates completion of the galaxy’s pre-Green-Star content, while a gold crown indicates that the galaxy’s Green Star content has also been completed. Crown color therefore helps locate unfinished galaxies, but it does not identify which specific Star is missing.
An incomplete crown does not automatically prove that a Green Star is missing. The remaining task could instead be a regular Star or Comet Medal. Conversely, do not assume that a galaxy is fully complete merely because its regular missions and Comet Medal are finished; inspect the Green Star entries after activation.
Bronze-Star replacement is a later requirement. Before attempting Grandmaster Galaxy, replay every Bronze-Star mission without the Cosmic Guide so the file has 120 qualifying gold regular Power Stars. For this chapter’s milestone, however, Bronze Stars may remain while the Green Star challenge is being activated and collected.
- The Star List is used for exact missing-entry checks.
- Crowns are treated as supplementary indicators rather than proof of a particular missing Star.
- Comet Medals remain separate from Green Star progress.
- Bronze Stars are scheduled for replacement before the Grandmaster Galaxy unlock attempt.
Before you move on
- The save file contains 120 regular Power Stars of any Bronze/gold mixture.
- Bowser’s Fortified Fortress has been completed again after reaching 120 regular Power Stars.
- The post-clear Green Star announcement has finished.
- Green Star entries or indicators are available in the applicable galaxy lists.
- The Star List records collected and missing Green Stars individually.
- Ordinary Comet Medals and crown status have been reviewed separately from Green Star progress.
- All 120 Green Stars are eventually collected before attempting Grandmaster Galaxy.
- Every Bronze regular Power Star is replaced with a gold Star before the Grandmaster Galaxy requirement is checked.
Green Stars: Route Planning & Hidden-Star Techniques
On the original Wii release, collect 120 regular Power Stars, then replay the first mission of Bowser’s Galaxy Generator, Bowser’s Fortified Fortress. This activates the Green Star challenge; Bronze Stars do not have to be replaced before this point. Green Star missions appear through Green Comets and use familiar galaxy routes with hidden stars placed in difficult or unusual locations. Select the relevant Green Star entry from the galaxy mission list, then listen for its nearby chime while checking upper ledges, undersides, rear platforms, distant launch points, alternate gravity routes, and areas beyond the normal path. Use temporary abilities conservatively and scout the destination before spending Cloud Flower clouds or Yoshi fruit. Ordinary Comet Medals unlock ordinary Prankster Comets and are not universal Green Star prerequisites. Track progress through the Star List rather than relying only on crowns. After all 120 Green Stars are collected, Grandmaster Galaxy becomes available only if the 120 regular Stars are non-Bronze. Complete The Ultimate Test, collect its Comet Medal, deposit 9,999 Star Bits with Banktoad, and then clear The Perfect Run for the original Wii release’s 242-Star total.
1. Reach 120 regular Stars and activate Green Stars
Collect all 120 regular Power Stars, including ordinary mission Stars, Hidden Stars, Comet Stars, Hungry Luma Stars, Grand Stars, and the regular Stars in later worlds. A Bronze Star earned with the Cosmic Guide still contributes to the visible regular-Star total, so it does not prevent Green Star activation.
After the save file reaches 120 regular Power Stars, return to World 6 and select Bowser’s Galaxy Generator. Enter Bowser’s Fortified Fortress, the first mission, and complete it again. Defeat Bowser and allow the mission to finish so the game registers the second clear. Green Comets and Green Star entries should then begin appearing across the galaxy map.
Do not spend time replacing Bronze Stars before this activation step unless you want to improve the save file early. Bronze-Star replacement becomes important for the later Grandmaster Galaxy requirement, not for opening the Green Star challenge.
- The save file shows 120 regular Power Stars
- Bowser’s Fortified Fortress has been completed a second time
- Green Comet entries appear on eligible galaxies
- No Bronze-Star replacement was incorrectly treated as an activation requirement
2. Use the Star List to choose an efficient route
Open the Star List before choosing a galaxy. Green Star entries are listed separately from the regular missions, and their labels identify whether you are selecting Green Star 1, Green Star 2, or Green Star 3. The number of entries corresponds to the Green Stars assigned to that galaxy; Grandmaster Galaxy has no Green Stars.
A reliable cleanup order is to work through the worlds from earliest to latest, completing every Green Star in one galaxy before moving on. After each mission, reopen the Star List and confirm the individual entry is filled. This is more dependable than judging progress from the galaxy crown alone.
Selecting a Green Star entry sends Mario into the associated mission route. The course is usually a familiar stage rather than a completely new level, but the target may be placed away from the normal objective. If a Green Star entry is absent, confirm that the second Bowser clear registered and that you are viewing the correct galaxy rather than an ordinary comet mission.
- Open the Star List before each cleanup session
- Select the individual Green Star entry from the galaxy menu
- Complete all listed Green Stars in one galaxy before changing worlds
- Use the entry itself, not only the crown, to confirm completion
3. Follow the Green Star chime
A nearby Green Star produces a distinctive chime. When the sound becomes louder, stop advancing and rotate the camera. The star may be above Mario, below the current platform, behind a structure, or outside the direction suggested by the normal route.
Search the upper and lower sides of planetoids, the backs of walls, narrow overhangs, distant ledges, and areas beyond the standard camera framing. In gravity sections, inspect the surface Mario will reach after the next gravity change rather than assuming the star is on the current plane.
When the star is visible across a gap, first identify the intended launch point and the surface that will catch Mario. A long jump, backflip, wall jump, or midair spin can extend a jump, but these moves should begin from a stable platform whenever possible. If the route includes a Launch Star, Pull Star, Sling Star, pipe, switch, or gravity change, use that device instead of forcing a blind jump.
- Stop and rotate the camera when the chime grows louder
- Inspect above, below, behind, and beyond the normal route
- Identify a recovery surface before attempting a long jump
- Use stage devices instead of forcing an unsafe shortcut
4. Search alternate sides and hidden route branches
Circle large planetoids and buildings when the Green Star is not visible from the main path. Check rear ledges, undersides of bridges, narrow gaps, and platforms revealed only after a switch or gravity change. Familiarity with the regular mission route can make these locations easy to overlook.
If a wall or gap appears impossible to cross, look for the stage’s intended solution. Pipes, Launch Stars, Sling Stars, Pull Stars, wall-jump surfaces, gravity arrows, and temporary platforms often provide the approach. Repeatedly jumping against a blocked wall usually wastes lives and gives no additional information.
In Boo, shadow, disappearing-platform, and moving-platform sections, clear nearby enemies when possible and move in short controlled increments. The Green Star can be beside a hazard rather than at the end of the regular mission route, so reaching the original Star’s endpoint does not prove that the Green Star is absent.
- Circle major structures instead of searching only forward
- Check the rear and underside of platforms
- Look for pipes, switches, launch devices, and gravity routes
- Use short movements near hazards and loud chimes
5. Preserve temporary power-ups
For Cloud Flower routes, scout the complete sequence before spending clouds on optional coins or exploratory jumps. Reserve enough clouds for the actual Green Star approach and the final return to stable ground. If the clouds expire while Mario is still committed to the route, restart rather than improvising a risky fall.
For Rock Mario and Spin Drill sections, identify the required object or destination first. The Green Star may be beyond the object that must be broken or after the tunnel that must be drilled, so activating the ability too early can leave Mario unable to complete the final approach.
Use Fire Flower and other temporary abilities immediately before the interaction they enable. Avoid taking a long detour after collecting one. Checkpoints help with positioning after a failure, but they do not restore a missed power-up or move an unreachable Green Star.
- Scout the route before collecting a temporary ability
- Reserve Cloud Flower clouds for required platforms
- Identify the Rock Mario or Spin Drill target first
- Avoid long detours while a temporary ability is active
6. Plan Yoshi and fruit-based approaches
When a Green Star requires Yoshi, locate the destination before eating a Dash Pepper or Blimp Fruit. Dash Pepper is best used for a known horizontal route; Blimp Fruit is more suitable for controlled upward movement. Using either fruit without checking the landing area can carry Yoshi beyond a safe platform or into an instant-death hazard.
Use Bulb Berry only after identifying the next part of the temporary route. Position Mario near the first reachable platform before activating the reveal, then move decisively while the hidden platforms remain visible.
If Mario is separated from Yoshi, return to the nearest Yoshi Egg provided by the mission. If the star requires Yoshi and the current route cannot be reconstructed, restarting is usually safer than continuing through a section without the required ability. Yoshi is supplied by individual missions and is not carried between galaxies.
- Find the destination before using fruit
- Use Dash Pepper for planned horizontal movement
- Use Blimp Fruit for controlled vertical movement
- Stand near the intended route before using Bulb Berry
- Restart if a required Yoshi cannot be recovered
7. Keep Green Stars separate from Comet Medals and crowns
Ordinary Comet Medals unlock ordinary Prankster Comets after the game’s comet conditions are met. These missions include challenge types such as Speedy Comet, Daredevil Comet, Purple Coin, and other regular comet variations. If an ordinary comet is missing, return to the galaxy’s normal missions, collect its Comet Medal, and check the map again.
Do not collect every Comet Medal merely because a Green Star is missing. Green Stars use their own Green Comet entries after the 120-Star requirement and second Bowser clear. A Green Star may reuse terrain associated with another mission, but ordinary Comet Medal completion is not a universal prerequisite.
The Star List is the primary tracker. A silver or gold crown indicates galaxy completion status, while the Comet Medal icon records ordinary medal progress. These indicators are useful for optional cleanup but should not replace checking the individual Green Star entries.
- Use Comet Medals to unlock ordinary Prankster Comets
- Use Green Comet entries to select Green Star missions
- Treat crowns and medal icons as separate progress indicators
- Check the Star List before replaying a galaxy
8. Complete the Green Stars and unlock Grandmaster Galaxy
Continue through the Star List until all 120 Green Star entries are collected. If the total is short, compare the list with each galaxy’s mission screen. A completed-looking crown does not substitute for verifying every individual Green Star entry.
After all 120 Green Stars are collected, Grandmaster Galaxy becomes available only when the regular 120-Star set contains no Bronze Stars. Revisit any mission completed through the Cosmic Guide and earn its normal gold Star before expecting the final galaxy to unlock.
Enter Grandmaster Galaxy and complete The Ultimate Test. Collect the Grandmaster Galaxy Comet Medal, then make sure Banktoad has 9,999 Star Bits deposited on the original Wii release. The Perfect Run should then become available as the final comet mission. Complete it to finish the two Grandmaster Galaxy Stars and reach the 242-Star total.
- The Star List shows all 120 Green Stars
- All 120 regular Stars are gold rather than Bronze
- Grandmaster Galaxy is available
- The Ultimate Test is completed
- The Grandmaster Galaxy Comet Medal is collected
- Banktoad holds 9,999 Star Bits
- The Perfect Run is completed
- The save file reaches 242 Stars
Before you move on
- The save file contains 120 regular Power Stars.
- Bowser’s Fortified Fortress has been completed a second time after reaching 120 regular Stars.
- Green Comet entries appear and all 120 Green Stars are recorded in the Star List.
- Every regular Star is gold rather than Bronze before attempting Grandmaster Galaxy.
- The Ultimate Test and its Grandmaster Galaxy Comet Medal are complete.
- Banktoad holds 9,999 Star Bits on the original Wii release.
- The Perfect Run is complete and the save file shows 242 Stars.
References for this chapter
- Super Mario Galaxy 2 Green Star
- Grandmaster Galaxy — Super Mario Wiki
- Super Mario Galaxy 2 — Super Mario Wiki
- Super Mario Galaxy 2 Star List
- Prankster Comet — Super Mario Wiki
- Super Mario Galaxy 2 Gameplay
- Super Mario Galaxy 2 Grandmaster Galaxy
- Super Mario Galaxy 2 — Guide and Walkthrough — GameFAQs
- Super Mario Galaxy 2 — Guide and Walkthrough — GameFAQs, Wii
- Super Mario Galaxy 2 English Instruction Manual, Nintendo Wii
World S and Grandmaster Galaxy: Unlock Conditions and Strategy
World S opens after the first completion of Bowser’s Fortified Fortress, which becomes available at 70 Power Stars, including one Star from Battle Belt Galaxy or Slimy Spring Galaxy. Its six regular galaxies use cumulative Star Barriers: Rolling Coaster at 75 Stars, Twisty Trials at 80, Stone Cyclone at 90, Boss Blitz at 100, and Flip-Out at 110 plus 2,000 Star Bits fed to the World S Hungry Luma. Green Stars activate separately: collect 120 regular Power Stars, then defeat Bowser again and finish the resulting ending sequence. Bronze Stars can count toward that activation, but all 120 regular Stars must later be gold for Grandmaster Galaxy. After collecting all 120 Green Stars and replacing every Bronze Star, The Ultimate Test opens. Collect its Comet Medal and keep 9,999 Star Bits deposited with Banktoad on the original Wii release to unlock The Perfect Run, completing the 242-Star route.
1. Finish the first Bowser campaign and open World S
Collect 70 Power Stars and make sure at least one of them comes from Battle Belt Galaxy or Slimy Spring Galaxy. Those are the specific World 6 missions that satisfy the final access condition for Bowser’s Galaxy Generator. If the galaxy remains closed at 70 Stars, check the Star List for this requirement rather than collecting random additional Stars.
Enter Bowser’s Galaxy Generator and choose Bowser’s Fortified Fortress. Work through the fortress using the available launch routes, gravity changes, lava hazards, and power-up sections. At the final arena, avoid attacking Bowser while he is protected or out of position; wait for his landing and movement pattern to expose the safe counter opportunity, then use the arena’s terrain to damage him.
After the fight, allow the ending sequence and credits to finish. Return to Starship Mario and open the World Map. World S should now appear beyond the World 6 route, with Mario Squared Galaxy available as its first galaxy.
- 70 Power Stars collected
- At least one Star from Battle Belt Galaxy or Slimy Spring Galaxy
- Bowser’s Galaxy Generator unlocked
- Bowser’s Fortified Fortress completed
- Ending sequence and credits finished
- World S visible on the map
2. Unlock and clear the six regular World S galaxies
Begin with Mario Squared Galaxy. Its first mission is available as soon as World S opens. Complete it before trying to open the next Star Barrier. This first mission is also the required World S progress referenced by the Rolling Coaster barrier.
Rolling Coaster Galaxy opens at 75 Power Stars, including the first Mario Squared Star. Complete its main mission, then continue collecting regular Stars elsewhere if the next barrier is not yet met. Rolling Coaster’s Star Ball section rewards controlled movement: use short corrections rather than holding a direction continuously near narrow platforms.
Twisty Trials Galaxy opens at 80 Stars, including the first Rolling Coaster Star. Stone Cyclone Galaxy opens at 90 Stars, including the first Twisty Trials Star. Boss Blitz Galaxy opens at 100 Stars, including the first Stone Cyclone Star. These are cumulative requirements, so both the numerical total and the preceding World S mission must be complete.
Flip-Out Galaxy opens at 110 Stars, including the first Boss Blitz Star. Then return to the Hungry Luma on the World S map and feed it 2,000 Star Bits. The Luma transforms and creates the route to Flip-Out. This payment is separate from the Star Bits deposited with Banktoad later.
- Mario Squared Galaxy cleared
- Rolling Coaster opened at 75 Stars
- Twisty Trials opened at 80 Stars
- Stone Cyclone opened at 90 Stars
- Boss Blitz opened at 100 Stars
- Flip-Out opened at 110 Stars
- 2,000 Star Bits fed to the World S Hungry Luma
3. Activate the Green Star campaign without confusing it with Grandmaster requirements
Green Stars do not appear after the first Bowser clear. Continue collecting regular Power Stars until the file displays 120 regular Stars. At this point, a Bronze Star earned with Cosmic Guide may still count toward the visible 120-Star total; do not delay Green Star activation solely because one of these Stars is bronze.
Re-enter Bowser’s Galaxy Generator and complete Bowser’s Fortified Fortress a second time. Defeat Bowser and let the post-battle sequence finish. After returning to the map, Green Star missions begin appearing in the galaxy mission lists. Use the Star List to select them rather than searching for hidden Star locations before the missions are active.
Ordinary Prankster Comet missions and Comet Medals remain separate from Green Stars. A Comet Medal activates its ordinary comet when the relevant comet conditions are met, but it does not replace a Green Star and is not a universal prerequisite for Green Star missions.
- 120 regular Power Stars displayed
- Second Bowser’s Fortified Fortress clear completed
- Second ending sequence finished
- Green Star missions visible
- Bronze Stars not incorrectly treated as a Green Star activation blocker
4. Complete the regular and Green Star totals required for Grandmaster Galaxy
Collect all 120 Green Stars through the Star List. World S has Green Star missions as well, but Grandmaster Galaxy itself has none because all 120 Green Stars must already be collected before Grandmaster opens. Track ordinary comet entries separately so an unfinished Comet Medal does not make you misdiagnose a missing Green Star.
Before Grandmaster can open, every one of the 120 regular Power Stars must be a qualifying gold Star. If Cosmic Guide previously completed a mission, its Bronze Star can remain part of the visible count but does not qualify. Re-enter that mission, decline Cosmic Guide, and finish the mission normally. The replacement gold Star then satisfies the regular-Star requirement.
When the file contains 120 qualifying gold regular Stars and 120 Green Stars, return to World S. Grandmaster Galaxy appears after Flip-Out Galaxy. The unlock is based on the complete 240-Star requirement, not merely on reaching a visible total of 240 while a Bronze Star remains.
- 120 Green Stars collected
- 120 regular Star entries reviewed
- Every Bronze regular Star replaced
- 120 qualifying gold regular Stars recorded
- Grandmaster Galaxy visible
5. Clear The Ultimate Test and collect its Comet Medal
Enter Grandmaster Galaxy and select The Ultimate Test. The mission chains together several mechanics: Yoshi’s flower grapples, Flipswitch Panels, Pull Stars, electric hazards, moving platforms, power-up sections, and a final combat area. Treat each transition as a separate checkpoint in your practice. Before launching or swinging, identify the next landing platform and avoid committing to a long jump without confirming its position.
In the opening Yoshi section, use the tongue and flower grapples deliberately. Watch for Space Mines and Bullet Bills before swinging, and release only when Mario and Yoshi are aligned with the next safe route. On the Flipswitch planet, activate panels methodically while keeping Sentry Beams from forcing a rushed jump.
Finish the mission to receive the first Grandmaster Star. During the mission, collect the Grandmaster Galaxy Comet Medal. It is a separate item from the Power Star and is required before the final comet can become available. If you fail, restart the mission and isolate the section that caused the loss instead of changing the entire route.
- The Ultimate Test completed
- First Grandmaster Star collected
- Grandmaster Galaxy Comet Medal collected
- 240 qualifying Stars still recorded
6. Deposit 9,999 Star Bits and complete The Perfect Run
On the original Wii release, The Perfect Run requires 241 Stars, the Grandmaster Galaxy Comet Medal, and 9,999 Star Bits deposited with Banktoad. Carrying Star Bits during a mission is not the same as depositing them. Visit Banktoad on Starship Mario and confirm that the stored balance reaches 9,999.
If the balance is short, replay missions with dense Star Bit routes, return to Starship Mario, and deposit the winnings. Avoid spending the stored balance at Hungry Lumas while preparing for this requirement. Once the medal and balance are registered, revisit Grandmaster Galaxy and select The Perfect Run under the Daredevil Comet.
The Perfect Run uses the Grandmaster route with one-hit failure conditions. Plan each launch, Cloud Flower jump, Pull Star transfer, electric-barrier passage, moving-platform landing, and boss approach before acting. Any damaging contact ends the attempt, so prioritize a stable landing over a faster route. Complete the final encounter to receive the second Grandmaster Star.
- 241 Stars recorded
- Grandmaster Comet Medal collected
- Banktoad balance is 9,999 deposited Star Bits
- The Perfect Run appears
- The Perfect Run completed
- Second Grandmaster Star collected
Before you move on
- World S is visible after the first Bowser’s Fortified Fortress clear.
- All six regular World S galaxies are open and their main missions are complete.
- Flip-Out Galaxy’s Hungry Luma has received 2,000 Star Bits.
- The save file has 120 regular Power Stars with no Bronze Star remaining.
- All 120 Green Stars are recorded.
- The Ultimate Test and its Grandmaster Galaxy Comet Medal are complete.
- Banktoad stores 9,999 deposited Star Bits.
- The Perfect Run is complete.
- The save file displays 242 total Stars.
References for this chapter
- Super Mario Galaxy 2 English Instruction Manual, Nintendo Wii
- Super Mario Galaxy 2 — Super Mario Wiki
- World S - Super Mario Wiki
- Bowser’s Galaxy Generator — Super Mario Wiki
- Grandmaster Galaxy — Super Mario Wiki
- The Ultimate Test - Super Mario Wiki
- The Perfect Run — Super Mario Wiki
- Super Mario Galaxy 2 Route Planning Info, SDA Knowledge Base
Boss Tactics: Bowser Jr., Magma Foes and Late-Game Encounters
Main-story bosses in Super Mario Galaxy 2 are safest when handled as pattern fights: preserve the mission’s required tool, watch one attack cycle, strike only during the exposed window, and retreat before the next hazard. Yoshi, the Spin Drill, Fire Flower, Cloud Flower, Bullet Bills, reflected coconuts and meteorites each have specific purposes. The required bosses are presented in campaign order, followed by Bugaboom and Fiery Gobblegut as optional encounters. Co-Star actions can stun or collect items, but they do not replace Mario’s required spins, ground pounds, fireballs, reflected projectiles or meteorite attacks. The Bowser sections avoid assigning an unsupported hit count to the earlier phases; the Giant Bowser phase in Bowser’s Galaxy Generator requires four meteorite hits.
Prepare before entering a boss arena
Activate the last checkpoint before the arena and collect nearby coins or a Life Mushroom if the route provides them. Do not waste a required power-up on enemies immediately before the fight. If Yoshi is supplied, keep him until the arena unless the mission removes him automatically.
Watch the boss complete one attack cycle before trying to deal damage. Stay near the center when possible, keep an escape route away from black holes and lava, and attack only after a charge, slam, projectile volley or protected animation ends. A fall into a bottomless gap or lava normally costs a life, so do not trade damage for a dangerous position.
If a fight supplies a special tool, learn where the next replacement is before using the first one. This matters in missions with Fire Flowers, Cloud Flowers, Bullet Bills or a Spin Drill, because rushing into the arena without the required tool usually makes the boss invulnerable rather than merely harder.
- Activate the final checkpoint before the arena.
- Preserve the power-up, projectile or companion required by the fight.
- Observe one complete attack cycle before committing to damage.
Early bosses: Peewee Piranha, King Lakitu, Digga-Leg and Gobblegut
Peewee Piranha is fought by breaking the egg shell with a spin, then attacking the exposed rear when the boss charges past. Move aside immediately after the hit. Peewee becomes faster, so do not follow directly behind it or attempt a second attack while it is turning.
King Lakitu, also called Giga Lakitu in some reference material, is fought with Yoshi in Yoshi Star Galaxy. When a Spiny Egg lands, hit it with Yoshi’s tongue twice so it becomes a Spiny ball, then spit it at the boss. Aim at King Lakitu’s current path rather than its previous position. Move away from the lightning and recover Yoshi before attempting another shot if Mario is separated from him.
Digga-Leg requires the Spin Drill. Drill through the planet to reach the glass weak point beneath its head, then immediately move away because the boss follows with a crushing jump. Yellow Diggas can be drilled through or bypassed; do not remain under Digga-Leg while waiting for another opening.
Gobblegut is damaged by spinning into the exposed bulges along its body. Let the dragon pass, strike a reachable bulge, and run parallel to its body instead of crossing beneath the head. The boss becomes more dangerous as the fight continues, so prioritize a safe approach over trying to hit several bulges in one pass.
- Break Peewee Piranha’s shell, then strike its exposed rear.
- Use Yoshi’s two-step Spiny interaction against King Lakitu.
- Use the Spin Drill on Digga-Leg’s glass weak point.
- Spin into Gobblegut’s exposed body bulges and retreat.
Puzzle Plank, Boulder Bowl and the first Bowser battle
Mandibug Stack is defeated with ground pounds. Target the upper Mandibug when the stack is aligned, then finish the remaining enemy. Use the open area to avoid being trapped against the edge, and wait for a clean jump if the stack is moving toward Mario.
Against Rollodillo, stay out of the rolling line and move sideways as it charges. When the roll ends and the rear is exposed, jump or spin into the vulnerable area. Do not stand in front of the boss to force an attack; the charge covers too much ground for a late reaction.
The first Bowser battle uses meteorites. Stand near a usable rock, bait Bowser into punching it, then ground-pound the glowing meteorite so it rolls into him. Jump over the shockwave or ground attack after the impact, then reposition beside another rock. Repeat the sequence until the battle advances; the earlier phase should not be described with an unsupported fixed hit count.
- Ground-pound Mandibug Stack when the enemies are aligned.
- Attack Rollodillo only after its charge ends.
- Bait Bowser’s punch near a rock and ground-pound the resulting meteorite.
- Jump over the shockwave after each successful meteorite hit.
Sorbetti, Megahammer and Glamdozer
Sorbetti’s red nose is the target. Let the boss roll past, then jump onto or spin into the nose when it is safely exposed. Sorbetti accelerates after successful hits, so use the wide part of the arena and avoid attacking during a turn.
Megahammer’s glass weak points are destroyed with Bullet Bills. Lure or redirect Bullet Bills into the exposed glass orbs while staying clear of the hammer swings and electric shockwaves. Once the armor is damaged, continue using Bullet Bills against the exposed cockpit when Bowser Jr. becomes vulnerable. Return to a safe platform after each successful shot instead of waiting beside the robot for the next projectile.
Glamdozer moves around a disc-shaped arena with its spiked back protected. Let it pass, get underneath the softer underside and spin when the vulnerable area is exposed. After a hit, avoid the falling goo and wait for another clean pass rather than chasing the boss around the edge.
- Strike Sorbetti’s red nose after its roll.
- Use Bullet Bills against Megahammer’s glass orbs and cockpit.
- Attack Glamdozer from below and avoid its spiked back.
Second Bowser battle, Squizzard, Prince Pikante and Boomsday Machine
The second Bowser battle follows the meteorite method but adds more dangerous shockwaves after punches and impacts. Remain near a usable rock, jump over each wave, and ground-pound the meteorite only after Bowser finishes the punch. Keep moving until the arena is safe again.
Squizzard requires Fire Mario. Collect the Fire Flower, circle the arena and throw fireballs during openings. After the fight escalates, cannons and additional projectiles join the attack, so keep moving rather than standing directly in front of the boss. If the power-up expires, use the arena route to obtain another Fire Flower before attempting damage.
Prince Pikante launches coconuts and burning rocks. Spin the coconuts back toward the boss; do not try to reflect the burning rocks. Watch the wagon and the central siphon, clear the incoming coconut and return it only when the angle is safe. The reflected coconut is the required damage method.
Boomsday Machine requires Cloud Flowers and the arena’s vents. Ride a vent upward, create clouds to reach the higher platforms and ground-pound Bowser Jr.’s cockpit. Electric orbs erase clouds, while the fire wheels punish low routes. When the machine pulls clouds inward, wait for the pull to finish or create a replacement cloud from a safe platform. The cockpit becomes harder to reach after each successful hit, so use the next Cloud Flower and vent rather than attempting a direct jump from below.
- Use meteorites against the second Bowser encounter.
- Use Fire Mario against Squizzard.
- Reflect Prince Pikante’s coconuts and avoid burning rocks.
- Use Cloud Flowers and vents to reach Boomsday Machine’s cockpit.
Whomp King and optional secret bosses
For Whomp King in Throwback Galaxy, stand in front of the boss until it commits to a face-first slam, then move aside and ground-pound its exposed back. Jump during the quake so Mario is not stunned on the ground. Defeat small Whimps only when they obstruct the approach; do not chase them toward the arena edge.
Bugaboom and Fiery Gobblegut are optional encounters, not required campaign bosses. Bugaboom is damaged by ground-pounding its exposed back. Use the available Cloud Flowers, platforms or launch routes to get above its flight path, then wait for the boss to pass underneath before attacking.
Fiery Gobblegut uses the same general body-bulge idea as Gobblegut, but its body is covered with flames and the arena contains additional fire hazards. Strike only a bulge that is not burning, then retreat immediately. Avoid crossing active fire pools to force one more hit; the faster movement and falling fireballs make patience more reliable.
- Dodge Whomp King’s slam and ground-pound its back.
- Treat Bugaboom as optional and attack its exposed back from above.
- Strike only safe bulges on Fiery Gobblegut.
- Keep away from fire pools and falling fireballs.
Final Bowser fight in Bowser’s Galaxy Generator
The final approach contains a checkpoint before the arena. Use it, collect the available health items and avoid taking damage during the last platforming section. The boss fight begins with the familiar meteorite method: bait Bowser’s punch, ground-pound a glowing meteorite into him and jump over the resulting shockwave or spreading attack. Continue until the scene changes rather than relying on an unverified hit count for this phase.
The Giant Bowser phase requires four successful meteorite hits. The arena provides meteorites for the sequence, including one available before the battle area. Stay near the center enough to react but close enough to a meteorite that Bowser cannot force you across the entire planet. After every impact, clear the shockwave or ground pattern before setting up the next meteorite.
After the fourth Giant Bowser meteorite hit, the fight concludes and the Grand Star becomes available. Collect it and allow the ending sequence and credits to finish so the campaign clear registers.
- Use the final checkpoint before the arena.
- Repeat the meteorite counter until the first final phase advances.
- Land four meteorite hits during the Giant Bowser phase.
- Collect the Grand Star and view the ending credits.
Recover after a failed boss attempt
If Mario dies after touching the boss checkpoint, the retry normally returns to that checkpoint or the associated arena approach. Recollect the required power-up, projectile or companion before entering the fight again. Coins can restore health, but they do not replace a missing Fire Flower, Cloud Flower or Spin Drill.
If the same mistake happens twice, change one variable: wait through another attack cycle, use the opposite side of the arena, attack from farther away or stop attacking when the boss enters a protected animation. The Cosmic Guide may appear after repeated failures. It is optional and can be declined without affecting campaign progress.
For King Lakitu, recover Yoshi before attempting more Spiny attacks. For Bowser, do not chase a meteorite across a dangerous section; survive the current pattern and use the next safe rock. For power-up bosses, retreat to the known supply route rather than forcing damage without the required tool.
- Reclaim the checkpoint and required tool before retrying.
- Restore health before triggering the next attack cycle.
- Change positioning or timing instead of repeating the same unsafe approach.
- Decline the Cosmic Guide if you want to complete the fight unaided.
Before you move on
- Peewee Piranha, King Lakitu, Digga-Leg, Gobblegut, Mandibug Stack, Rollodillo, Sorbetti, Megahammer, Glamdozer, Squizzard, Prince Pikante, Boomsday Machine and Whomp King are defeated in their required campaign missions.
- The first, second and final Bowser encounters are cleared using meteorite counters, with four meteorite hits completed during the Giant Bowser phase in Bowser’s Galaxy Generator.
- Each boss mission’s Power Star or Grand Star is collected after the fight.
- The next world route or Star Barrier opens after returning to Starship Mario.
- Bowser’s Galaxy Generator is available through the campaign’s required progression; defeating its final Bowser encounter, collecting the Grand Star and viewing the ending credits completes the main campaign.
- Bugaboom and Fiery Gobblegut remain correctly classified as optional encounters rather than required campaign victories.
References for this chapter
- Super Mario Galaxy 2 English Instruction Manual, Nintendo Wii
- Super Mario Galaxy 2 — Guide and Walkthrough — GameFAQs
- Super Mario Galaxy 2 — Guide and Walkthrough by Iceman22n86
- Super Mario Galaxy 2 — GameSpot walkthrough
- Bowser’s Galaxy Generator, StrategyWiki
- Super Mario Galaxy 2 — Bowser Jr.’s Boom Bunker StrategyWiki guide
- Super Mario Galaxy 2 — Super Mario Wiki
Power-ups, Temporary Items & Their Best Uses
Super Mario Galaxy 2’s special forms are temporary tools built around specific obstacles. Cloud Mario creates up to three short-lived cloud platforms from one Cloud Flower. Rock Mario rolls through enemies and objects that normal Mario cannot break. Fire Mario throws bouncing fireballs for a short period, while Spring Mario reaches high platforms but is difficult to steer. The Spin Drill burrows through suitable ground and can cross a planet, but it cannot penetrate every surface. Yoshi’s Dash Pepper enables extremely fast runs up steep slopes and across water; Blimp Fruit lets Yoshi rise through the air while a meter drains. These abilities are not protection from pits, lava, crushing hazards or ordinary damage. Before collecting a temporary power-up, identify the next safe platform, pipe, checkpoint or required exit. Launch Stars, damage, water and other specific hazards can remove forms, while timed effects simply expire. Mario’s transformations and Yoshi’s fruit abilities are separate: Yoshi must be present for Dash Pepper or Blimp Fruit, and Mario cannot substitute a Cloud Flower or Rock Mushroom for a Yoshi fruit puzzle.
Cloud Flower: create the route, then preserve the final cloud
Collect a Cloud Flower to become Cloud Mario. Jump and shake the Wii Remote in midair to create a cloud platform beneath or ahead of Mario. One Cloud Flower provides up to three clouds. The clouds disappear after a short time, so place them only when the next landing is clear. Do not spend all three while still far from solid ground; keep the last cloud for the final gap or recovery jump.
Cloud Mario is particularly useful in open vertical areas, wind sections and routes where ordinary jumps cannot reach the next ledge. Watch a moving platform or fan for one cycle before starting. Place a cloud where Mario’s jump will finish over the platform rather than at its edge. Touching water or taking damage removes the form, and some stages can also leave Mario without the ability after all available clouds have been used. If the route becomes uncertain, stop and locate the next refill flower before continuing.
- Count the clouds needed to reach the next solid platform.
- Keep one cloud in reserve when the route is long.
- Avoid water, enemies and hazards until the climb is complete.
Rock Mushroom: use short, deliberate rolls
The Rock Mushroom turns Mario into Rock Mario. Shake the Wii Remote to curl into a rolling boulder. Rock Mario can bowl over enemies and break certain crystals, blocks and objects that a normal spin cannot affect. Start the roll from a broad, level surface and line up the target before shaking; the form is fast and awkward to steer near edges.
Do not roll through an entire area without checking where the boulder will stop. A roll can carry Mario into a black hole, lava or another instant-death hazard. Damage or contact with a Launch Star removes Rock Mario. If a barrier is beside a drop, approach from the side and use the shortest possible roll. Once the marked obstruction is broken, return to normal movement rather than continuing at speed.
- Identify the target and stopping area first.
- Use short rolls near edges and slopes.
- Expect damage or a Launch Star to remove the form.
Fire Flower: spend the short duration on required targets
Collecting a Fire Flower changes Mario into Fire Mario. Shake the Wii Remote to throw fireballs. They are useful for defeating enemies or activating targets from a safer distance, but the effect wears off after a short time. Move directly toward the required combat or switch section instead of exploring while the timer is running.
Fire Mario is not invulnerable and does not protect against pits, lava, crushing hazards or contact attacks. If several Fire Flowers are available, use one for the immediate group and leave later flowers for the next combat section. When the effect expires, Mario returns to normal, so make sure the next obstacle can be handled without fireballs.
- Use the form on the enemies or targets that require it.
- Do not enter a long detour after collecting the flower.
- Plan a normal-Mario fallback before the effect ends.
Spring Mushroom: prioritize wide landings and controlled height
The Spring Mushroom turns Mario into Spring Mario. Press A with appropriate timing as Mario contacts the ground to bounce especially high. Spring Mario automatically wall-jumps when he reaches a suitable wall, allowing climbs that normal jumps cannot make. The form is less precise than ordinary Mario, so aim for broad platforms and visible landing zones.
Spring Mario cannot be treated as a general movement upgrade. If a normal backflip, wall jump or long jump reaches the next platform, that route is usually safer. Taking damage or entering a Launch Star removes the form; water and other stage hazards can also end a run. Begin a spring sequence only after checking the next bounce and the wall positions.
- Use timed A presses at ground contact.
- Aim for wide, visible platforms.
- Avoid improvising above unseen pits or hazards.
Spin Drill: verify both sides of the planet before digging
Touch a Spin Drill to pick it up, then shake the Wii Remote to burrow through suitable soft ground. The drill can take Mario through a planet and out on another exposed surface, and it can defeat certain enemies. It cannot penetrate every material, so look for the intended dirt or drillable surface before committing.
Study the planet’s shape and the expected exit. Entering from the wrong side may leave Mario underneath a platform, on a dangerous underside or away from the required Launch Star. Mario loses the drill after taking damage or using a Launch Star; water and some transitions can also remove it. Because the drill changes the route rather than simply opening a door, confirm whether the objective is above, below or on the opposite side before shaking.
- Locate the entry and exit surfaces first.
- Drill through marked or suitable soft ground only.
- Do not spend the drill immediately before a required Launch Star.
Dash Pepper: use Dash Yoshi for slopes and water
Feed Yoshi a Dash Pepper to make him run at extreme speed. Dash Yoshi can climb steep slopes, run up suitable walls and cross water. Use the fruit when the stage clearly requires one of those abilities, and begin the dash close to the slope, wall or water route so the limited effect is not wasted.
High speed reduces turning precision. Hold a steady direction through narrow runs and avoid unnecessary corrections. Straight routes are safer than sharp turns, especially in timed or elevated sections. Reach the next solid platform before the effect ends. Dash Pepper affects Yoshi, not Mario; dismounting or losing Yoshi ends the practical use of the transformation.
- Start near the obstacle that requires speed.
- Favor straight lines over sharp turns.
- Reach safe ground before the effect expires.
Blimp Fruit: control altitude instead of simply rising
Feed Yoshi a Blimp Fruit to inflate him and rise through the air for a limited time. Use the Control Stick to steer toward platforms. Hold A to make Yoshi hold his breath and stop rising; release it when more height is needed, then hold it again before reaching a ceiling or small landing. The meter drains while the effect is active, and Yoshi stops floating when it reaches zero.
Begin under the destination whenever possible. Collect nearby Blimp Fruits before entering a long vertical route so a failed approach can be retried without abandoning the section. Yoshi can bounce from some objects, but do not rely on an unseen rebound over a pit. If the fruit effect ends or Yoshi is lost, return through the normal platform route and find the next egg or fruit rather than attempting the same ascent without its required ability.
- Watch the meter during every ascent.
- Use A to brake below ceilings and align with ledges.
- Keep enough room to correct before landing.
Power-up transitions and Yoshi restrictions
Mario’s Cloud, Rock, Fire, Spring and Spin Drill abilities are separate from Yoshi’s Dash Pepper and Blimp Fruit effects. A Yoshi section does not let Mario perform the fruit ability, and riding Yoshi does not let him use Mario’s transformations as substitutes. Some missions force a dismount, remove Yoshi at a transition or place a Launch Star between the power-up and the next area.
Treat every transition as a checkpoint in your plan. Before touching a Launch Star, entering water or taking a risky jump, check whether the current form is still needed. If it is, complete the form-specific task first. If it is not, take the transition and continue with normal movement instead of trying to preserve a power-up that the stage is about to remove.
- Use Mario power-ups only for Mario’s route mechanics.
- Use Yoshi fruit only while riding Yoshi.
- Complete the required power-up task before a transition that may remove it.
Before you move on
- You can select the correct ability for cloud-platform, rolling-impact, ranged-combat, high-jump, drilling, high-speed or controlled-ascent sections.
- You can identify the next safe platform, pipe, checkpoint or transition before collecting a temporary power-up.
- You know that Cloud Flower supplies up to three clouds and that those platforms disappear after a short time.
- You can preserve a Spin Drill, Rock Mushroom or Spring Mushroom until its required obstacle is complete.
- You can use Dash Yoshi for steep slopes and water, and Blimp Yoshi’s A-button braking to control altitude.
- You know which transitions, hazards or expired meters require a return to normal movement or a retraced route.
Comet Medals, Prankster Comets & Time-Challenge Management
Super Mario Galaxy 2 has 49 Comet Medals, with one placed in the first mission of each galaxy. A medal is registered only when you finish the mission successfully, so the route from the pickup to the Power Star matters. Prankster Comets begin appearing after you collect four Power Stars from World 3. Each individual comet then requires its galaxy's medal, all preceding normal missions, the relevant global medal total, and any named comet prerequisite. Only three comets can be active in one World at once. World S's six comet missions require totals from 38 to 48 medals. Learn each route in its ordinary version before attempting Speedy, Double Time, Romp, Cosmic Clone, Daredevil, or Purple Coin variants. Track comet stars separately from Green Stars, ordinary stars, and Comet Medals.
Meet the global condition and unlock individual Prankster Comets
Collect four Power Stars from World 3. This is the condition that allows Prankster Comets to begin appearing; Tall Trunk's Big Slide and a conversation with a Whittle on Starship Mario are not activation requirements.
After comets begin appearing, each galaxy is checked separately. To unlock a comet, complete every normal scenario listed before that comet in the galaxy's mission list, collect the Comet Medal in that galaxy, and reach the comet's required total number of Comet Medals. Secret Stars listed after the comet are generally not required for that comet's appearance.
Only three Prankster Comets can be active in a single World at one time. If a qualifying comet does not appear, complete one of the active comet missions and check the map again. Some galaxies have a Comet Medal but never receive a Prankster Comet, so do not treat every medal as a promise of another mission.
- Collect four Power Stars from World 3.
- Complete all normal missions before the desired comet in that galaxy.
- Collect the galaxy's Comet Medal and meet its global medal threshold.
- Clear an active comet if three comets are already present in that World.
Collect and register the 49 Comet Medals
There are 49 Comet Medals in the original Wii game, one in the first mission of each galaxy. They are usually placed away from the main route: check isolated platforms, lower ledges, side paths reached with Pull Stars, and areas that require Yoshi or a temporary power-up.
Touching the medal is not enough. You must finish the mission and collect its Power Star. If Mario loses a life after taking the medal and still completes the mission, that medal is not added to the permanent total; replay the mission and secure both the medal and Star in one successful attempt.
When collecting a medal, first identify the safest route back to the main path or the Power Star. Avoid experimental shortcuts after the pickup. Confirm the medal was registered through the Star List or another progress display before leaving the galaxy.
- Search the first mission of every galaxy for its medal.
- Scout the return route before touching the medal.
- Reach the Power Star without losing a life after the pickup.
- Verify the permanent medal total increased.
Check local, global, and named comet prerequisites
A local medal alone does not unlock its comet. Open the galaxy's mission list and complete every normal Star shown before the comet Star. In the original Wii release, the list places normal Stars before comet Stars and secret Stars after them, making the required order visible.
Some comet missions also depend on another comet. If a mission remains unavailable after its medal and global threshold are satisfied, check the named prerequisite rather than repeatedly entering the galaxy. The most important examples are Cloudy Court's The Shadow Lining and Puzzle Plank's Purple Coin Shadow Vault, which gate several later comet missions.
Once a comet is available, it remains attached to that galaxy until completed. Clearing available comet missions both awards their Stars and frees space under the three-active-comet limit, allowing additional qualifying comets to appear.
- Check every normal Star before the comet in the mission list.
- Confirm the local Comet Medal is registered.
- Confirm the global medal threshold.
- Check for a named prerequisite comet.
- Clear an active comet when the World has reached its three-comet limit.
Route World S's six comet thresholds
World S uses global Comet Medal totals rather than medals found within World S. Mario Squared Galaxy's Luigi's Purple Coin Chaos requires 38 medals. Rolling Coaster Galaxy's Purple Coins on the Rainbow Road requires 40 and Puzzle Plank's Purple Coin Shadow Vault. Twisty Trials Galaxy's Turning Turning Double Time requires 42. Flip-Out Galaxy's Cosmic Clone Wall Jumpers requires 44 and Cloudy Court's The Shadow Lining. Stone Cyclone Galaxy's Tox Box Speed Run requires 46. Boss Blitz Galaxy's Throwback Throwdown Speed Run requires 48.
If one of these missions is missing, check four items in order: the current global medal count, the local medal, the required preceding normal mission, and the named prerequisite. Do not assume that collecting more medals alone will reveal a mission blocked by another comet.
- Reach 38 medals for Mario Squared.
- Reach 40 for Rolling Coaster and complete Puzzle Plank's required comet.
- Reach 42 for Twisty Trials.
- Reach 44 for Flip-Out and complete Cloudy Court's required comet.
- Reach 46 for Stone Cyclone.
- Reach 48 for Boss Blitz.
Prepare for Speedy, Double Time, and Purple Coin missions
Clear the ordinary version first and memorize every Launch Star, Pull Star, transformation, moving platform, and forced camera transition. Timed missions favor a clean route over unnecessary combat. Pass harmless enemies, use stable landings, and reserve a power-up for the section that actually requires it.
When a Speedy Comet provides +Clock pickups, take one only when the approach and landing are safe. A dangerous detour can cost more time than the pickup saves. For Double Time missions, study the ordinary platform cycle so you know which hazards accelerate. For Purple Coin missions, divide the route into main-path groups and deliberate side-path groups before starting the timed attempt.
Checkpoint and death behavior can change between an ordinary mission and its comet version. If a comet removes checkpoints or forces a full restart, practice the entire route in the normal mission and begin the comet attempt only when you can finish the route consistently.
- Scout the standard mission before attempting its comet.
- Take +Clock pickups only when the landing is safe.
- Skip harmless enemies during timed runs.
- Plan Purple Coin groups before moving.
- Assume a failed comet may require a full restart until proven otherwise.
Handle Romp and Cosmic Clone missions
Romp missions require defeating a target group of enemies within a time limit. Identify which enemies can be defeated immediately and which require Yoshi, a Rainbow Star, a power-up, or an environmental attack. Start with nearby reliable groups, then follow a route that avoids backtracking. Do not cross a dangerous gap for one missed enemy if another group is safer.
Cosmic Clone missions add pursuing copies of Mario to a modified route. Keep moving and prepare the next landing before the current platform becomes unsafe. Hesitation is especially dangerous before switches, springs, narrow wall jumps, and gravity transitions. Enter technical sections with the clones at a manageable distance instead of waiting until they are already beside Mario.
After a failed attempt, replay the ordinary mission and record the order of enemy groups or platform transitions. Repeat the safe order in the comet version, then improve speed only after the route is reliable.
- Plan the enemy order before a Romp mission.
- Use the required ability instead of improvising against resistant enemies.
- Keep moving through Cosmic Clone sections.
- Practice difficult transitions in the ordinary mission first.
Keep comet Stars separate from Green Star cleanup
After the Green Star challenge becomes available, use the Star List to inspect ordinary Stars, comet Stars, and Green Stars independently. A galaxy can have its Comet Medal and comet Star completed while still missing one or more Green Stars.
Do not force a Green Star route during a timed comet when the comet changes the route, removes a useful power-up, or creates a dangerous timing problem. Finish the comet first, then replay the ordinary mission for the Green Star.
Comet Medals and comet Stars affect Prankster Comet progression and galaxy completion, but they are not universal prerequisites for every Green Star. Use the Star List to identify the missing category instead of relying only on a galaxy crown or icon.
- Review medals, comet Stars, and Green Stars separately.
- Use ordinary missions to scout Green Star routes.
- Replay a normal mission when comet rules make cleanup unsafe.
- Use the Star List as the final progress record.
Before you move on
- The save file records 49 Comet Medals if pursuing the complete medal objective.
- Four Power Stars from World 3 have been collected, allowing Prankster Comets to begin appearing.
- Every desired comet has its local medal, preceding normal missions, global medal threshold, and any named prerequisite satisfied.
- World S thresholds have been checked: Mario Squared 38, Rolling Coaster 40, Twisty Trials 42, Flip-Out 44, Stone Cyclone 46, and Boss Blitz 48.
- Every available comet Star is recorded separately from the Green Star entries.
- For the separate Grandmaster objective, The Ultimate Test is unlocked at 240 qualifying Stars; The Perfect Run requires 241 qualifying Stars, the Grandmaster Comet Medal, and 9,999 Star Bits stored with Banktoad on the original Wii release.
Luigi, Two-player Mode and Second-Run Mechanics
In the original Wii release of Super Mario Galaxy 2, Luigi is an alternate character within the same save file, not a second 120-Star campaign. After clearing Bowser's Big Lava Power Party and collecting three Power Stars in World 3, Luigi begins appearing at the entrance to selected missions. Speaking to him lets Luigi attempt that mission in Mario's place. Clearing a mission as Luigi also creates a Luigi staff ghost that can guide you toward useful routes, hidden items, or Secret Stars. After clearing Bowser's Fortified Fortress, Luigi becomes permanently available through the L-marked door on Starship Mario. Luigi jumps higher and runs faster than Mario but has less traction, so he needs earlier braking and more care on ice and narrow platforms. Playing missions as Luigi does not award duplicate Stars and is not required for the 242-Star completion route. That total consists of 120 regular Power Stars, 120 Green Stars, and two Grandmaster Galaxy Stars. There is no separate Super Luigi Galaxy-style campaign in this sequel.
1. Unlock Luigi's temporary mission appearances
Progress through the main campaign until you clear Bowser's Big Lava Power Party in World 2. Then collect three Power Stars from World 3. Once both conditions are met, Luigi can begin appearing at the entrance to selected missions. The appearances are not a new save mode and do not require creating another file.
When Luigi is standing near the mission's starting point, speak to him before launching the Star. Accept his offer to take Mario's place. You will control Luigi for that attempt, but the objective, route, Star requirement, and mission record remain those of the selected mission. If Luigi is absent, leave the galaxy and try another available mission or continue the campaign until another appearance is triggered.
- Clear Bowser's Big Lava Power Party.
- Collect three Power Stars in World 3.
- Look for Luigi at the entrance to selected missions, not as a separate campaign option.
2. Use Luigi's staff ghosts correctly
Completing a mission as Luigi creates a Luigi staff ghost for that mission. A staff ghost is not another playable character and does not award a duplicate Star. In a later attempt, touch the ghost to make it move through a route associated with that completed Luigi run. Follow it when you want help locating a hidden route, item, or Secret Star.
The ghost is a navigation aid, so do not treat every movement as a required path for the main Star. If you are pursuing a normal mission objective, follow the mission's ordinary route. If you are hunting a Secret Star or an out-of-the-way collectible, return to the relevant galaxy after the ghost has been created and watch where it travels before committing to a difficult jump.
- Finish the mission as Luigi to create its staff ghost.
- Touch the ghost during a later attempt to activate it.
- Use the ghost as a route clue, not as a second Star objective.
3. Adjust to Luigi's movement
Luigi's higher jump and faster running speed are useful for vertical platforming, long wall-jump chains, and ledges that Mario reaches only narrowly. His reduced traction is the tradeoff: he slides farther after releasing the Control Stick and takes longer to stop. This is especially noticeable on ice, small planetoids, moving platforms, and narrow bridges.
Begin braking before the point where Mario would normally stop. On small platforms, use shorter jumps and turn away from the edge early. Do not rely on Luigi's higher jump to repair a bad approach; extra height can make him overshoot a ledge or carry too much horizontal momentum into an obstacle. For a difficult mission, practice the route as Mario first, then switch to Luigi only if his jump height benefits that particular section.
- Release the Control Stick earlier when approaching an edge.
- Use short hops on ice and compact platforms.
- Choose Luigi for height and reach, not automatically for every difficult mission.
4. Unlock permanent switching on Starship Mario
Clear Bowser's Fortified Fortress, the first mission of Bowser's Galaxy Generator and the final story mission of the main campaign. After this mission is cleared, Luigi becomes permanently available for ordinary level selection. Return to Starship Mario and enter the door marked with an L. Use the character-switch option there whenever you want to play as Luigi, then return to the same door to switch back to Mario.
This is a character swap on the current save, not a restart. Your completed Stars, opened galaxies, Comet Medals, Green Stars, lives, and other progression remain intact. You do not need to erase the file, create a backup slot, or replay the story from the beginning. The permanent door also replaces the earlier system of waiting for Luigi to appear at selected mission entrances.
- Clear Bowser's Fortified Fortress.
- Return to Starship Mario after the mission is recorded.
- Use the L-marked door to change between Mario and Luigi.
5. Understand what Luigi does and does not unlock
Playing as Luigi is optional for the campaign and for the full Star total. Replaying a completed mission as Luigi does not create a second regular Power Star, and there is no separate Luigi-only 120-Star route in Super Mario Galaxy 2. Use him as a handling preference, to create staff ghosts, or to practice sections that benefit from his jump height.
Do not confuse this structure with the first Super Mario Galaxy, which has a distinct Luigi campaign after Mario's completion. Super Mario Galaxy 2 instead keeps Mario and Luigi on the same save progression. There is also no separate Grand Finale Galaxy tied to completing both characters. The endgame challenge is Grandmaster Galaxy, which is shared by both characters.
- Do not count Mario and Luigi clears as separate Stars.
- Do not start a second file solely to play Luigi.
- Treat Grandmaster Galaxy as the endgame challenge for the shared save.
6. Follow the real 242-Star completion route
For the original Wii release, the commonly documented total is 242 Stars: 120 regular Power Stars, 120 Green Stars, and two Stars in Grandmaster Galaxy. Luigi may collect any of these, but playing them with both characters does not double the total. After the regular Star campaign and the required final Bowser progression, the Green Star content becomes available; collect all 120 Green Stars to open the first Grandmaster Galaxy mission.
The second Grandmaster Galaxy Star is the Perfect Run. Its Prankster Comet is tied to Banktoad's Star Bit total: deposit 9,999 Star Bits to make that final challenge available. Complete both Grandmaster missions, then verify that the save file shows 242 Stars. A final Rosalina appearance and the completed save-file crown provide additional completion signals, but neither requires a second Luigi campaign.
- Collect 120 regular Power Stars.
- Collect all 120 Green Stars.
- Deposit 9,999 Star Bits with Banktoad for the Perfect Run comet.
- Complete both Grandmaster Galaxy missions and verify 242 Stars.
Before you move on
- Bowser's Fortified Fortress has been cleared and the L-marked door on Starship Mario is available.
- Mario and Luigi can be selected from the same save without restarting the campaign.
- The save file contains 120 regular Power Stars, 120 Green Stars, and both Grandmaster Galaxy Stars for a total of 242.
- Banktoad has received 9,999 Star Bits and the Perfect Run has been completed.
Common Hazards and How to Recover from Failures
Late-game Super Mario Galaxy 2 missions are usually lost through rushed movement, poor camera positioning or treating instant-death hazards like ordinary damage. Before every difficult jump, identify the next solid landing, a wall, or a visible Pull Star or Launch Star. Checkpoint Flags provide a temporary restart point after a life loss, but leaving the mission for the World Map or receiving a Game Over removes that checkpoint progress. Use the Star List to separate an unfinished objective from a failed attempt, then rebuild lives, health and Star Bits in safe missions before retrying. Banktoad is useful for protecting a reserve, while the 9,999-Star-Bit requirement matters only for the optional final Grandmaster Galaxy mission on the original Wii release.
React to black holes and bottomless pits
Black holes and bottomless pits are immediate-death hazards, not surfaces that can be crossed by taking damage. If Mario is near a black hole, hold the Control Stick toward the nearest visible planet surface and jump only when a landing is actually reachable. A midair spin can adjust a nearby jump, but it cannot save a fall through empty space. Do not attack the black hole or continue moving toward its center while searching for a solution.
For a normal gap, stop at the edge and identify the destination before jumping. Use a short jump for a nearby platform, then reserve the midair spin for correcting direction or extending the landing. If the route includes a Pull Star, Launch Star or wall, aim for that recovery object rather than trying to land on a distant platform. When no reachable surface is visible, the useful response is to learn the required route and retry, not to repeat the same blind long jump.
- Face the intended landing before leaving the platform.
- Look for a wall, Pull Star or Launch Star before attempting a long gap.
- Use the spin only to correct a reachable landing; it cannot stop an unrecoverable fall.
Cross lava, fire and instant-death floors
Treat lava, fire pools and other instant-death floors as route timers. Watch the movement cycle of platforms, rotating bars or lift surfaces before committing, then cross using the safest sequence rather than the fastest-looking one. Do not wait on a platform that is shrinking, sinking or moving toward lava. If the next safe platform is not aligned, wait for the next cycle instead of forcing a jump from the edge.
Plan temporary power-ups before collecting them. Fire Flower, Rock Mushroom, Cloud Flower and Spring Mushroom abilities can be lost or expire, and some transitions remove a power-up when Mario enters a Launch Star or another restricted section. Identify the fallback route first. If the power-up is required to reach the next platform, move directly through the necessary obstacles instead of spending its duration collecting optional Star Bits. Coins restore one point of the Life Meter, and a Life Mushroom temporarily raises the meter's maximum, so take safe recovery items before a long hazard sequence when they are available.
- Observe one full platform cycle when the route is unfamiliar.
- Know where the power-up is needed and where it can be lost.
- Collect coins or a Life Mushroom before a long lava section when the route provides them.
Handle gravity changes and moving surfaces
Gravity-flip panels, switches and rotating platforms punish automatic movement. Before activating a change, move Mario toward the center of the current surface and look toward the floor that will become usable. Trigger the change while facing the next safe area, then stop briefly after the transition so the camera and gravity direction can settle.
On tilting or rotating platforms, make small directional corrections instead of holding the Control Stick continuously. If the camera turns or the floor changes orientation, use the visible platform edges and Mario's shadow to confirm where the new landing surface is. When the next platform is moving, wait for it to approach a predictable position rather than chasing it from the edge.
- Center Mario before changing gravity.
- Confirm the new floor direction after the transition.
- Wait for moving platforms when a safe cycle is available.
Use Checkpoint Flags correctly
Touch every Checkpoint Flag you pass. Its Bowser emblem changes to Mario's emblem, and a later life loss sends Mario back to that point instead of the beginning of the mission. This protection is temporary: returning to the World Map or allowing a Game Over removes the checkpoint progress and restarts the mission from its beginning when you enter again.
After a death, repeat the known route to the checkpoint and change the action that caused the failure. Slow down before the hazard, preserve the required power-up, approach with more health, or wait for a better platform cycle. Do not use the checkpoint as permission to rush; it saves distance, not the lives, power-ups or positioning from the previous attempt.
- Touch each visible Checkpoint Flag.
- After dying, identify the exact failed action before moving.
- Do not leave for the World Map if you intend to preserve the current checkpoint.
Choose between retrying and returning to the Star List
Retry immediately when a checkpoint is active, you still understand the route and the failure was a specific timing mistake. Return to Starship Mario when the same section has killed Mario repeatedly, when you need a different power-up or when your health and lives are too low to practice productively. From the ship, open the Star List and check the galaxy's mission entries before choosing another attempt.
A missing crown or incomplete galaxy entry means an objective remains; it does not mean the game failed to save the stars you already collected. The game saves after completing challenges, so use the Star List to confirm the target Power Star or Comet Medal. If the difficult mission is optional, clear an easier available star first and return later. If it is required for the next Star Barrier, practice it after rebuilding resources rather than spending lives on unchanged attempts.
- Verify the target star in the Star List before replaying a mission.
- Retry a known timing error; leave when the approach itself is not working.
- Use an easier mission for practice or resources before returning to a required challenge.
Restore lives, health and Star Bits
When lives are low, choose a short early mission with predictable platforms, coins and Star Bits. Coins restore health, and returning to Starship Mario with 100 coins grants an extra life. Collecting Star Bits also contributes to extra-life rewards, while 1-Up Mushrooms provide an immediate life. The Starshroom and Toad Brigade can supply useful items in missions where they appear, and Co-Star assistance can help collect Star Bits or stun enemies without directly controlling Mario.
Deposit Star Bits with Banktoad near the helm of Starship Mario when you are carrying a reserve through difficult missions. A normal death does not erase the Star Bits accumulated during the mission; they are added when Mario returns to the ship, but Mario can drop currently held Star Bits when damaged. Banktoad deposits are shared between the game's save files on the original Wii release, making them safer than relying on a large in-mission balance.
For ordinary campaign completion, spend Star Bits when a Hungry Luma is required to open a galaxy or obtain a star. If pursuing all 242 stars, reserve time to deposit 9,999 Star Bits after the other Grandmaster requirements are met. That Banktoad amount unlocks the optional Perfect Run; it is not needed to defeat Bowser or finish the ending credits.
- Rebuild lives in a safe early mission before retrying a major boss or platforming stage.
- Use coins, Star Bits and 1-Up Mushrooms to recover resources when available.
- Deposit Star Bits at Banktoad instead of carrying the entire reserve through dangerous missions.
- Do not confuse the optional 9,999-Star-Bit Perfect Run requirement with main-story progression.
Before you move on
- You can identify a safe landing, wall, Pull Star or Launch Star before crossing a dangerous gap.
- You know that a Checkpoint Flag helps after a life loss but is erased by leaving the mission or receiving a Game Over.
- The Star List confirms whether the troublesome galaxy still contains an uncollected required star or medal.
- You can restore health and lives through coins, Star Bits, 1-Up Mushrooms or a safer mission before retrying.
- Banktoad holds the Star Bits you intend to reserve for the original Wii release's optional 9,999-Star-Bit Perfect Run.
Optimization: Minimizing Backtracking While Hitting Star Barriers
Use the Star List and World Map to advance through the shortest safe route. Prioritize normal missions and boss Grand Stars before difficult secret Stars or Prankster Comets. The campaign barriers require 3, 7, 16, 28, 40, 55, 60, 65, and 70 Power Stars, with World S continuing at 75, 80, 90, 100, and 110. Bronze Stars earned with the Cosmic Guide count toward ordinary progression, but they must later be replaced by gold Stars to unlock Grandmaster Galaxy. Green Stars begin after collecting 120 regular Power Stars and clearing the first mission of Bowser’s Galaxy Generator again. Collect all 120 Green Stars, then complete Grandmaster Galaxy’s first mission, collect its Comet Medal, and deposit 9,999 Star Bits with Banktoad to unlock The Perfect Run.
1. Check the Star List before taking a detour
Return to Starship Mario after each mission and open the Star List before selecting the next galaxy. Read the entries by World and identify unfinished regular missions, Hidden Stars, Prankster Comets, Hungry Luma galaxies, and later Green Star missions. The Star List is more reliable than judging completion from a galaxy icon alone, especially after several types of Stars become available.
Look at the next Star Barrier on the World Map, then choose the safest unfinished mission that will bring your total to the required number. A normal mission in an already-open galaxy is usually better than attempting a difficult comet or secret route that does not immediately open a new branch.
If the Cosmic Guide appears and you accept its help, the mission awards a Bronze Star. That Star is usable for ordinary map progression, but mark the mission for later replay. To qualify for Grandmaster Galaxy, replay every Bronze-Star mission without the Cosmic Guide and collect the gold replacement.
- Record the next Star Barrier requirement.
- Choose the safest unfinished mission that advances toward it.
- Treat Bronze Stars as temporary for full completion.
- Use the Star List to distinguish missing Stars from optional cleanup.
2. Open the principal route through Worlds 1–3
In World 1, collect three Power Stars to open Spin-Dig Galaxy and the Hungry Luma route to Flip-Swap Galaxy. At seven Stars, the path to Bowser Jr.’s Fiery Flotilla opens. Complete that boss galaxy and take its Grand Star promptly; there is no need to finish every optional World 1 mission before moving on.
At 16 Stars, the World 2 barrier opens Bowser’s Lava Lair. At 28 Stars, the World 3 barrier opens the route to Bowser Jr.’s Fearsome Fleet. Between those barriers, clear the easiest normal missions in the galaxies already available. Leave demanding comets and awkward Hidden Stars for later unless one is the shortest available way to reach the next threshold.
After each boss, return to the Star List and recount the remaining requirement. A Grand Star opens the next route only when your total also satisfies the relevant barrier, so do not assume that defeating a boss automatically opens every nearby galaxy.
- 3 Stars: open Spin-Dig Galaxy and the Flip-Swap Hungry Luma route.
- 7 Stars: open Bowser Jr.’s Fiery Flotilla.
- 16 Stars: open Bowser’s Lava Lair.
- 28 Stars: open the route to Bowser Jr.’s Fearsome Fleet.
- Take boss Grand Stars as soon as their galaxies are available.
3. Continue through Worlds 4–6 and enter the final galaxy at 70 Stars
The 40-Star barrier opens Bowser’s Gravity Gauntlet. The 55-Star barrier opens Bowser Jr.’s Boom Bunker. Clear the normal missions closest to your current position and collect each available boss Grand Star before spending time on difficult timed missions.
In World 6, 60 Stars open Throwback Galaxy and 65 open Battle Belt Galaxy. The 70-Star barrier opens Bowser’s Galaxy Generator. Do not describe 71 Stars as the entry requirement: the barrier opens at 70, and completing the first mission inside the galaxy awards the next Star.
If the immediate goal is the main campaign, enter Bowser’s Galaxy Generator as soon as the 70-Star barrier opens. Comet Medals, Hidden Stars, Hungry Luma galaxies, and difficult Prankster Comets can be deferred unless one is the safest way to reach 70.
- 40 Stars: open Bowser’s Gravity Gauntlet.
- 55 Stars: open Bowser Jr.’s Boom Bunker.
- 60 Stars: open Throwback Galaxy.
- 65 Stars: open Battle Belt Galaxy.
- 70 Stars: open Bowser’s Galaxy Generator.
- Clear its first mission and view the ending credits for campaign completion.
4. Collect Comet Medals without creating unnecessary repeats
Collect a Comet Medal during a normal mission when it is close to the route or requires only a short, controlled detour. Medals may be placed on side platforms, beneath the main route, or along a power-up path. After collecting one, finish the mission successfully; do not assume a medal from a failed attempt will remain collected.
A Comet Medal does not guarantee that a Prankster Comet appears immediately. The galaxy, mission, and wider comet progression must be eligible. Continue the campaign when a newly visible comet does not provide the quickest next Star.
Play a comet immediately when it supplies the final Star needed for a barrier and is safer than the alternatives. Otherwise postpone Speedy, Daredevil, race, and other high-risk comets until the main route is open. This limits repeated trips through the same galaxy while you are still learning its movement sequence.
- Take medals that lie close to the normal route.
- Finish the mission after collecting a medal.
- Use a comet for progression only when it is the shortest safe option.
- Leave difficult comet cleanup until the campaign route is open.
5. Use Hungry Lumas and Banktoad to protect the long-term route
Feed a Hungry Luma when the resulting galaxy offers several accessible Stars or is needed for the next barrier. Check the requested Star Bit amount first. If the new galaxy is an expensive side route and another open galaxy has an easier normal mission, take the easier Star first and return to the Hungry Luma later.
Deposit surplus Star Bits with Banktoad whenever you return to Starship Mario, especially if you intend to complete the original Wii version’s full 242-Star route. Banking keeps the reserve separate from Star Bits spent on Hungry Lumas and reduces the risk of exhausting the amount needed for the final Grandmaster comet.
The 9,999-Star-Bit target is not needed for the first Bowser ending, World S, Green Star activation, or the first Grandmaster mission. Save that requirement for the endgame. After completing Grandmaster Galaxy’s first mission and collecting its Comet Medal, make sure Banktoad holds 9,999 Star Bits before attempting to unlock The Perfect Run.
- Feed Hungry Lumas that open useful content first.
- Deposit spare Star Bits during routine returns to Starship Mario.
- Avoid spending the reserve on optional purchases during full-completion cleanup.
- Save the 9,999-Star-Bit requirement for the final Grandmaster comet.
6. Separate campaign completion, World S, Green Stars, and Grandmaster Galaxy
After the first completion of Bowser’s Galaxy Generator, World S becomes available. Its progression uses barriers at 75, 80, 90, 100, and 110 Power Stars. These open Rolling Coaster Galaxy, Twisty Trials Galaxy, Stone Cyclone Galaxy, Boss Blitz Galaxy, and the Hungry Luma route to Flip-Out Galaxy, respectively. The Flip-Out Galaxy Hungry Luma requires 2,000 Star Bits once its route is available.
Green Stars do not require 120 qualifying gold Stars at the activation stage. Collect 120 regular Power Stars, then replay the first mission of Bowser’s Galaxy Generator and complete it again. The post-mission sequence activates the Green Star challenge. Bronze Stars can contribute to the visible regular-Star total for this step, so do not delay Green Star activation solely to replace them.
Once Green Stars are active, use the Star List and Green Comet entries to select the relevant mission. Green Stars are hidden within previously completed missions, and a galaxy may contain one, two, or three of them. Ordinary Comet Medals are not universal prerequisites for Green Stars.
For Grandmaster Galaxy, replace every Bronze Star with its gold version so that all 120 regular Stars are qualifying gold Stars. Then collect all 120 Green Stars. Grandmaster Galaxy becomes available after both requirements are satisfied. Complete The Ultimate Test for the first Grandmaster Star, collect its Comet Medal, confirm that Banktoad holds 9,999 Star Bits, and then complete The Perfect Run for the 242nd Star.
- 70 Stars: open Bowser’s Galaxy Generator and complete the main campaign.
- First Bowser’s Galaxy Generator clear: make World S available.
- 75, 80, 90, 100, and 110 Stars: open the regular World S barriers and Flip-Out route.
- 120 regular Power Stars plus another first-mission clear: activate Green Stars.
- Replace Bronze Stars before pursuing Grandmaster Galaxy.
- 120 Green Stars: unlock Grandmaster Galaxy.
- Complete The Ultimate Test, collect its Comet Medal, and deposit 9,999 Star Bits.
- Complete The Perfect Run for 242 total Stars.
Before you move on
- The route is efficient when each Star Barrier is opened with the shortest suitable unfinished mission and boss Grand Stars are collected as soon as their galaxies become available.
- The main campaign is complete after Bowser’s Galaxy Generator opens at 70 Power Stars, its first mission is cleared, the resulting Star is collected, and the ending credits are viewed.
- World S is confirmed after the first completion of Bowser’s Galaxy Generator and the World S route becomes available.
- The Green Star challenge is active after 120 regular Power Stars are collected and the first mission of Bowser’s Galaxy Generator is cleared again.
- The 240-Star milestone is complete after all 120 qualifying gold regular Stars and all 120 Green Stars are collected, unlocking Grandmaster Galaxy.
- The original Wii 242-Star route is complete after The Ultimate Test, its Comet Medal, the 9,999-Star-Bit Banktoad requirement, and The Perfect Run are all completed.
- Verify the final Star total and save-file completion indicators after the game registers the last Star.
References for this chapter
Final Cleanup: Crowns, Missing Stars, and the 242 Tally
Use the Star List to separate unfinished regular Stars, Bronze Stars, Green Stars, Grandmaster missions, and Comet Medal progress. On the original Wii release, the complete Power Star total is 242: 120 regular Power Stars, 120 Green Stars, and two Grandmaster Galaxy Stars. Bronze Stars earned through Cosmic Guide assistance can contribute to the visible 120-Star total and do not block the second Bowser clear or the Green Star challenge. They must be replaced with normal gold Stars before Grandmaster Galaxy will unlock. After collecting all 120 regular Stars, replay Bowser’s Galaxy Generator and finish the ending sequence to activate Green Stars. After collecting all 120 Green Stars and ensuring all 120 regular Stars are gold, clear The Ultimate Test, collect its Comet Medal, deposit 9,999 Star Bits with Banktoad, and complete The Perfect Run. The final save state shows the platinum crown and Master of Galaxies rank.
1. Audit the Star List before cleanup
Open the Star List from Starship Mario or the pause menu and inspect every world and galaxy. Check the individual Power Star entries instead of relying only on the accumulated total. Mark unfinished regular Stars, Bronze Stars, Green Stars, Grand Stars, and galaxies whose Comet Medal has not yet been collected.
A silver crown indicates that a galaxy’s regular Star content is complete while its Green Stars remain unfinished. After the Green Stars are available, a gold crown indicates that the galaxy’s Star completion has been finished. The Comet Medal icon is tracked separately, so a missing medal icon should not be mistaken for a missing Power Star.
Review boss galaxies, Hungry Luma galaxies, World S galaxies, and Grandmaster Galaxy. If a mission is unavailable, check its Star Barrier, Hungry Luma feeding requirement, Comet Medal trigger, or postgame condition before replaying unrelated missions.
- Review every world and galaxy in the Star List.
- Mark Bronze Stars separately from missing Stars.
- Check Green Star entries after they become available.
- Use crowns as route markers.
- Treat Comet Medal icons as separate progress information.
2. Reach the 120 regular-Star total
Collect the complete set of 120 regular Power Stars. This includes ordinary mission Stars, Hidden Stars, Hungry Luma Stars, Prankster Comet Stars, and Grand Stars counted in the regular campaign total.
If Cosmic Guide assistance was used, the result is a Bronze Star. A Bronze Star can still contribute to the visible regular-Star total, so do not stop the campaign merely because one is present. The presence of Bronze Stars does not prevent you from reaching 120 regular Stars, replaying Bowser’s Galaxy Generator, or activating the Green Star challenge.
Keep using the Star List to identify the remaining regular Star entries. Ordinary Comet Medals are only relevant when they are needed to make a particular Prankster Comet mission appear; collecting every medal is not itself an additional Power Star category in the 242 total.
- Collect all 120 regular Power Stars.
- Allow Bronze Stars to count toward the visible 120-Star total if necessary.
- Finish any Prankster Comet mission needed for a missing regular Star.
- Do not delay the second Bowser clear solely because a Bronze Star remains.
3. Activate the Green Star challenge
Once the regular-Star total reaches 120, enter Bowser’s Galaxy Generator and complete the final Bowser mission again. Finish the victory sequence and credits so the new save state registers. The Green Star challenge requires both the 120 regular-Star total and this second completion of the final Bowser mission.
After the sequence is complete, return to the map and inspect the Star List. Green Star entries will appear for the regular galaxies. Select a Green Star entry directly from the mission list, then replay the indicated mission and search its route for the hidden Star. Green Stars are often placed above the normal route, behind structures, beyond launch paths, or in areas that the original mission never required you to visit.
Collect all 120 Green Stars. A galaxy may still show a silver crown while Green Stars remain, and its separate Comet Medal icon may remain absent even after all of its Power Stars are complete.
- Have 120 regular Power Stars recorded.
- Replay Bowser’s Galaxy Generator.
- Complete the ending sequence and credits.
- Confirm Green Star entries in the Star List.
- Collect all 120 Green Stars.
4. Replace Bronze Stars and unlock Grandmaster Galaxy
After the Green Star collection is complete, replace every Bronze regular Star with a normal gold Star. Replay each affected mission without accepting Cosmic Guide assistance. Confirm in the Star List that every one of the 120 regular Star entries is gold rather than Bronze.
Grandmaster Galaxy requires the full set of 120 Green Stars and 120 qualifying regular Stars. This is the stage at which Bronze Stars matter. If Grandmaster Galaxy does not appear, check for a remaining Bronze regular Star or a missing Green Star before looking for another unlock condition.
Enter Grandmaster Galaxy and complete The Ultimate Test. Its route combines demanding platforming, power-up sections, Yoshi movement, Pull Stars, Flipswitches, rotating platforms, and enemy hazards. Favor safe landings and checkpoint consistency over optional Star Bits or risky shortcuts. Completing the mission awards the first Grandmaster Star, bringing the total to 241.
- All 120 Green Stars are complete.
- Replay every Bronze regular mission.
- Confirm all 120 regular Stars are normal gold Stars.
- Grandmaster Galaxy appears.
- Complete The Ultimate Test for Star 241.
5. Collect the medal and unlock The Perfect Run
Replay The Ultimate Test if necessary and collect its Grandmaster Galaxy Comet Medal. This specific medal is required for the final mission; ordinary Comet Medals from other galaxies do not substitute for it.
On the original Wii release, speak with Banktoad aboard Starship Mario and deposit Star Bits until the stored balance reaches 9,999. The requirement is the Banktoad balance, not merely Star Bits currently carried into a mission. If The Perfect Run does not appear immediately, leave Grandmaster Galaxy, return to Starship Mario, and check the map again after the game updates its state.
Select The Perfect Run after it appears. It reuses the Grandmaster route under Daredevil conditions, so one damaging hit ends the attempt. Practice The Ultimate Test route first, then use conservative movement, avoid unnecessary attacks, and treat every checkpoint as a reset point for your rhythm. Completing The Perfect Run awards Star 242.
- Collect The Ultimate Test’s Comet Medal.
- Deposit 9,999 Star Bits with Banktoad.
- Confirm 120 gold regular Stars and 120 Green Stars.
- Complete The Perfect Run.
- Verify the total reaches 242.
6. Verify the final Wii save file
Return to Starship Mario or the world map after collecting Star 242 and allow the result to save before quitting. The completed total is 242 Power Stars: 120 qualifying regular Power Stars, 120 Green Stars, and two Grandmaster Galaxy Stars.
The save-file progression indicators distinguish the major milestones. The second Bowser clear after the 120 regular Stars activates the Green Star challenge and produces the silver-crown stage. Completing all Green Stars and unlocking Grandmaster Galaxy advances the file to the gold-crown stage. Completing both Grandmaster missions produces the platinum crown and the Master of Galaxies rank.
Do not require every galaxy to show a gold crown as proof of the 242-Star total. Crowns summarize galaxy completion, while the Star List total and save-file rank verify the main milestone. Ordinary Comet Medal cleanup can still be performed afterward unless a particular missing medal is preventing a Prankster Comet mission from appearing.
- The Star List reports 242 Power Stars.
- The breakdown is 120 gold regular, 120 Green, and two Grandmaster Stars.
- No Bronze regular Stars remain.
- The Ultimate Test and The Perfect Run are complete.
- The Ultimate Test Comet Medal is recorded.
- The save file shows the platinum crown and Master of Galaxies rank.
- Any remaining ordinary Comet Medals are identified as optional cleanup unless they block a mission.
Before you move on
- The Star List reports 242 Power Stars: 120 qualifying gold regular Stars, 120 Green Stars, and two Grandmaster Galaxy Stars.
- Every regular Bronze Star has been replayed and replaced with a normal gold Star.
- Bowser’s Galaxy Generator was cleared again after the 120 regular-Star total was reached.
- All 120 Green Stars are collected.
- The Ultimate Test and The Perfect Run are complete.
- The Ultimate Test Comet Medal is recorded.
- Banktoad has reached 9,999 deposited Star Bits.
- The save file shows the platinum crown and Master of Galaxies rank.
- Any remaining ordinary Comet Medals are understood as optional cleanup unless one is blocking an unfinished Prankster Comet mission.
Optional Challenges: Time Trials, Speed Comets and High-difficulty Runs
Prankster Comets are separate Power Star missions that alter earlier stages. Clear the ordinary mission and collect its Comet Medal before attempting the comet version. Speedy Comets impose a time limit; some provide +Clock pickups that add time, while others use a fixed timer. Daredevil Comets limit Mario or Luigi to one hit point, so a single mistake restarts the attempt. The original Wii release has eleven Speedy Comets and six Daredevil-style missions, including The Perfect Run in Grandmaster Galaxy. Learn each route in the ordinary mission, divide difficult stages into landmarks, and prioritize safe movement over untested shortcuts. Record the Power Star immediately after each successful run and use the Star List to confirm that the galaxy is complete.
Prepare each comet attempt
Complete the ordinary mission first and collect that galaxy's Comet Medal. The comet mission becomes selectable when its matching Prankster Comet is in orbit; the medal is not optional preparation because it is the normal prerequisite for the comet mission. Before starting, replay the ordinary version and identify Launch Stars, power-ups, dangerous landings, boss attack cycles, and any checkpoint flag that exists in the ordinary route.
Do not assume the comet preserves every feature of the ordinary mission. Some comet stages remove checkpoints, replace enemies, alter planets, or send you directly to a boss arena. Learn the ordinary route for movement practice, then inspect the comet's opening before committing to a long attempt. If repeated failures occur at one obstacle, return to the standard mission and practice that movement without the comet's timer or one-hit restriction.
- Clear the source mission.
- Collect its Comet Medal.
- Check the comet's stated time or health rule.
- Practice the final section in the ordinary mission when possible.
- Keep several extra lives available before repeated attempts.
Use the correct Speedy Comet method
Speedy Comets are time attacks, but they do not all work the same way. Peewee Piranha's Speed Run starts with a short timer and places +Clocks along the route. Bowser's Lava Lair, Bowser's Gravity Gauntlet, Bowser's Big Bad Speed Run, and Tox Box Speed Run also use +Clocks. Collect a clock when it lies on the safe route; do not take a dangerous detour for a few seconds if the jump can cost the entire attempt.
Other Speedy Comets use fixed time limits without +Clocks. Fiery Flotilla Speed Run, Hightail Falls Speed Run, Masterpiece Speed Run, Big Wigglers Speed Run, Whomp Silver Star Speed Run, and Throwback Throwdown Speed Run require route efficiency from the start. Use long jumps, backflips, wall jumps, and Launch Stars promptly, but do not improvise shortcuts until the normal route is consistent. If the timer is no longer recoverable, restart rather than spending a life on a run that cannot finish.
- Identify whether the mission has +Clocks.
- Ignore optional enemies and coins unless they are on the route.
- Use the intended power-up where it removes a major delay or hazard.
- Restart early when the remaining time cannot cover the route.
Prioritize Speedy Comets from safest to hardest
A practical progression is Peewee Piranha's Speed Run, Fiery Flotilla Speed Run, Hightail Falls Speed Run, Masterpiece Speed Run, Big Wigglers Speed Run, Whomp Silver Star Speed Run, Tox Box Speed Run, Lava Lair Speed Run, Gravity Star Speed Run, Bowser's Big Bad Speed Run, and finally Throwback Throwdown Speed Run. This is a learning order rather than a required unlock order.
Throwback Throwdown Speed Run is a boss gauntlet in Boss Blitz Galaxy. You have five minutes to defeat Dino Piranha, King Kaliente, Major Burrows, Bouldergeist, and Fiery Dino Piranha. There are no +Clocks, and the ordinary mission's checkpoint and Lumalee before Bouldergeist are absent. Practice every boss separately in the ordinary mission, then use the same damage methods without pausing to explore. Avoid risky damage trades: losing health does not directly end the Speedy mission, but recovery time and missed attack windows can make the timer impossible.
Bowser's Big Bad Speed Run begins with approximately thirty seconds and adds ten seconds for each collected clock. It is the only Speedy Comet with a checkpoint flag. Reach the checkpoint safely before attempting faster movement through later fortress sections. Preserve the route's relevant power-up instead of using it early for a minor shortcut, and remember that the speed version changes some enemies, including the Hammer Bro section.
- Learn each boss before attempting Throwback Throwdown.
- Do not search for clocks in Boss Blitz Galaxy; none are provided.
- Use the checkpoint in Bowser's Big Bad Speed Run as a recovery point.
- Treat a missed major jump as a reason to restart if the timer cannot be recovered.
Handle the six Daredevil and Perfect Run missions
The original Wii release has six one-hit challenges: Digga-Leg's Daredevil Run in Spin-Dig Galaxy, Megahammer's Daredevil Bash in Bowser Jr.'s Fearsome Fleet, Squizzard's Daredevil Run in Slipsand Galaxy, Boomsday Machine Daredevil Run in Bowser Jr.'s Boom Bunker, Mini-Planet Daredevil Run in Battle Belt Galaxy, and The Perfect Run in Grandmaster Galaxy. Most repeat a boss fight with one hit point; Mini-Planet Daredevil Run repeats the enemy-clearing course instead of sending you directly to a boss.
For Digga-Leg, remain away from the drill's landing point and use the same drill-based counter from the ordinary fight. For Megahammer and Boomsday Machine, position yourself before the attack window, damage the exposed target, and retreat instead of trying to extend the opening. For Squizzard, keep moving around the arena and wait for a clean opening to return projectiles or attack; do not stand still after the later attack cycles begin.
Mini-Planet Daredevil Run requires clearing every enemy across the sequence of small planets with one hit point. Treat each planet as an individual room: finish the current enemy group, stabilize Mario's landing, and only then use the next Sling Star or key route. The ordinary mission is the place to learn which enemies must be defeated and which hazards can be bypassed.
The Perfect Run is the final Grandmaster Galaxy mission on the Wii version. It requires the Comet Medal from The Ultimate Test and 9,999 Star Bits deposited with Banktoad. It combines the Grandmaster route with the Daredevil one-hit rule. Divide the stage into landmarks and practice each transition in The Ultimate Test first. On the Wii version, a mistake sends you back to the start of the challenge, so a conservative route is better than an untested shortcut. Pause only on genuinely safe ground to reset the camera and plan the next movement.
- Learn every boss's attack cycle in the ordinary mission.
- Wait for reliable attack openings.
- Treat every landing as a separate movement check.
- For Mini-Planet Daredevil Run, clear one planet before planning the next.
- For The Perfect Run, deposit 9,999 Star Bits and collect the preceding Comet Medal first.
Recover efficiently between attempts
After a failure, identify whether the cause was route knowledge, camera position, timing, or an unsafe attack. Change that specific factor before retrying. Do not repeatedly spend lives on the same blind jump. Return to a short, dependable earlier galaxy to collect an extra life or Life Mushroom if your reserve is low, then resume the comet from the galaxy map.
For a Speedy Comet, restart when the timer is irrecoverable. For a Daredevil mission, restart immediately after taking damage; there is no benefit to continuing a failed one-hit attempt. Co-Star pointer assistance can collect Star Bits or stun some enemies, but it cannot replace correct positioning and should not be part of a route that only works with co-op help.
- Record the reason for each failed attempt.
- Refill lives in a reliable earlier mission when necessary.
- Restart immediately after damage in a Daredevil mission.
- Do not spend Star Bits on avoidable conveniences while preparing for The Perfect Run.
Confirm completion and combine cleanup
When a comet is cleared, wait for the Power Star result and return to the mission list or Starship Mario. Confirm that the new star is recorded on the Star List before leaving the galaxy. The galaxy crown should reflect the additional completed mission when that galaxy's required stars are finished.
For efficient cleanup, collect a Comet Medal during the ordinary mission whenever it is already on your route, then return after the comet appears. Do not combine Green Star searching with a timed comet attempt: the comet's altered layout and objective can hide the landmarks needed for a Green Star. Finish the comet first, then replay the ordinary mission for Green Star work. Before ending the session, check every galaxy with an active or incomplete comet marker rather than relying on memory.
- Wait for the Power Star to register.
- Verify the mission on the Star List.
- Check the galaxy crown after returning to the map.
- Separate comet completion from Green Star searching.
- Confirm that no active comet mission remains unmarked.
Before you move on
- Each completed comet mission has a Power Star recorded in its galaxy mission list.
- The Star List and galaxy crowns show the expected completed missions.
- All eleven Speedy Comet missions are cleared if pursuing the comet challenges: Peewee Piranha's Speed Run, Fiery Flotilla Speed Run, Hightail Falls Speed Run, Lava Lair Speed Run, Masterpiece Speed Run, Big Wigglers Speed Run, Gravity Star Speed Run, Whomp Silver Star Speed Run, Bowser's Big Bad Speed Run, Tox Box Speed Run, and Throwback Throwdown Speed Run.
- All six one-hit challenges are cleared if pursuing the full challenge set: Digga-Leg's Daredevil Run, Megahammer's Daredevil Bash, Squizzard's Daredevil Run, Boomsday Machine Daredevil Run, Mini-Planet Daredevil Run, and The Perfect Run.
- The Perfect Run is recorded in Grandmaster Galaxy after its final Power Star appears.
- No required comet marker remains incomplete on the galaxy map or Star List.
References for this chapter
- Super Mario Galaxy 2 — English Wii Instruction Manual
- Prankster Comet — Super Mario Wiki
- Super Mario Galaxy 2 — Guide and Walkthrough — GameFAQs, Wii
- Super Mario Galaxy 2 — Guide and Walkthrough — GameFAQs, Wii
- Throwback Throwdown Speed Run — Super Mario Wiki
- Bowser's Big Bad Speed Run — Super Mario Wiki
- Digga-Leg's Daredevil Run — Super Mario Wiki
- Squizzard's Daredevil Run — Super Mario Wiki
- Boomsday Machine Daredevil Run — Super Mario Wiki
- Mini-Planet Daredevil Run — Super Mario Wiki
- The Perfect Run — Super Mario Wiki
- Grandmaster Galaxy — Super Mario Wiki
Endgame Checklist and Save Verification
The original Wii campaign ends in Bowser’s Galaxy Generator. Collect 70 Power Stars, including one from Battle Belt Galaxy or Slimy Spring Galaxy, then clear Bowser’s Fortified Fortress, collect the final Grand Star and let the ending sequence and credits finish. World S opens after this first clear. For the Green Star campaign, collect all 120 regular Power Stars; Bronze Stars may remain at this stage. Clear Bowser’s Fortified Fortress again to activate the Green Star challenge. Collect all 120 Green Stars, then replace any Bronze regular Stars with gold versions to satisfy the Grandmaster requirement. Grandmaster Galaxy contains The Ultimate Test and, after its Comet Medal is collected and 9,999 Star Bits are stored with Banktoad, The Perfect Run. Clearing both missions produces the original Wii release’s 242-star total, platinum crown and Master of Galaxies rank.
Verify the first campaign ending
Collect 70 Power Stars and make sure at least one came from Battle Belt Galaxy or Slimy Spring Galaxy. Bowser’s Galaxy Generator does not open from the total alone; this World 6 condition is part of its entrance requirement. The game’s Star Barriers show the final regular threshold at 70 stars.
Enter Bowser’s Galaxy Generator and select Bowser’s Fortified Fortress. Follow the fortress route through lava, electricity, moving platforms, Snake Blocks and power-up sections. Yoshi is needed for portions of the approach, but he is unavailable during the final Bowser battle.
In the battle, stay mobile on the small planet and use the meteors when Bowser creates the damage opportunity. Avoid standing where his landing shockwave or rolling movement will reach you. Continue through the battle’s later arena transition, then collect the Grand Star on the garden planet after Bowser is defeated.
Allow the ending sequence and credits to finish before returning to Starship Mario. Confirm that the Grand Star is recorded and that World S is available. This first clear does not activate the Green Star challenge.
- 70 Power Stars collected.
- At least one Power Star came from Battle Belt Galaxy or Slimy Spring Galaxy.
- Bowser’s Fortified Fortress cleared.
- Final Grand Star collected.
- Ending sequence and credits viewed.
- World S is available after returning to Starship Mario.
Collect the 120 regular Power Stars
Continue through the regular mission list until the file contains all 120 regular Power Stars. This total includes ordinary missions, Hidden Stars, Prankster Comet missions, Hungry Luma missions and the required Grand Stars that belong to the regular 120-star set.
A Bronze Star earned after allowing the Cosmic Guide to complete a mission still contributes to the visible regular-star total. Therefore, do not stop at 119 because one or more regular missions show Bronze results. The 120-star total is enough to proceed to the second Bowser clear.
Use the Star List to identify the missing regular missions. At this point, Bronze Stars do not prevent the Green Star challenge from activating, but they will prevent the later Grandmaster and 242-star completion route until those missions are replayed for gold Stars.
- The Star List shows 120 regular Power Stars.
- Regular mission categories and Hungry Luma missions have been checked.
- Any Bronze Stars are noted for later replacement.
- The first Bowser clear and credits have already been completed.
Activate the Green Star challenge
After the regular total reaches 120, replay Bowser’s Galaxy Generator and clear Bowser’s Fortified Fortress a second time. You do not need to replace Bronze Stars before this clear. The second completion requirement is the 120-star total plus the repeat Bowser victory.
Finish the mission and allow the post-clear sequence to register before leaving the game. When you return to the file-selection or save information, look for the silver crown and the rank “The Green Star Challenge Is On!”.
Open completed galaxies and inspect their mission lists. Green Star entries now appear in the regular galaxies. Ordinary Comet Medals are not a universal requirement for activating this challenge, although they still control ordinary Prankster Comet content and related galaxy completion indicators.
- 120 regular Power Stars recorded.
- Bowser’s Fortified Fortress cleared a second time.
- Second-clear sequence completed.
- Silver crown appears on the save file.
- The rank reads “The Green Star Challenge Is On!”.
- Green Star entries are visible in galaxy mission lists.
Collect and verify all 120 Green Stars
Select Green Star entries from the relevant galaxy’s mission list. The game sends Mario into the associated mission scenario, where the Green Star is hidden along, above, below or beyond the normal route. Listen for its distinctive jingle and search alternate elevations before committing to a dangerous jump.
Check distant ledges, launch-star routes, hidden platforms, power-up paths and Yoshi sections. Some galaxies place multiple Green Stars in related mission scenarios, so select the numbered Green Star entry again if you leave without collecting the intended one.
Track progress with the Star List. Galaxy crowns help identify incomplete areas, but the Star List is the dependable final count. Ordinary Comet Medals remain separate from the Green Star total. Collecting all 120 Green Stars brings the file to the 240-star milestone and opens Grandmaster Galaxy, provided the regular-star results later meet the no-Bronze requirement.
- Green Star entries are selected from galaxy mission lists.
- Alternate routes and elevations have been searched.
- The Star List confirms all numbered Green Stars.
- The Green Star total reaches 120.
- The combined visible total reaches 240 stars.
Prepare Grandmaster Galaxy
Grandmaster Galaxy requires all 120 Green Stars and all 120 regular Power Stars as gold Stars. Replay every regular mission that produced a Bronze Star and collect its normal gold Star. A displayed total of 240 is not sufficient if a Bronze Star remains in the qualifying regular set.
Once the no-Bronze regular set and all Green Stars are complete, enter Grandmaster Galaxy and clear The Ultimate Test. Collect the Grandmaster Galaxy Comet Medal during that mission. If you finish without the medal, replay the mission and collect it, then complete the stage so the medal is registered.
The Ultimate Test provides the first Grandmaster Star. Its Comet Medal is needed for the final mission, but it does not by itself open The Perfect Run.
- 120 regular Power Stars are gold rather than Bronze.
- 120 Green Stars are recorded.
- Grandmaster Galaxy is available.
- The Ultimate Test is cleared.
- The Ultimate Test Comet Medal is recorded.
Open and clear The Perfect Run
Visit Banktoad on Starship Mario and deposit Star Bits until the stored total reaches 9,999. On the original Wii release, the relevant requirement is the amount held by Banktoad, not merely the Star Bits currently carried by Mario.
Return to Grandmaster Galaxy and inspect the mission list. The Perfect Run becomes available when The Ultimate Test is complete, its Comet Medal is collected and Banktoad has stored 9,999 Star Bits. If the mission is missing, recheck those three conditions.
Enter The Perfect Run and treat it as a no-checkpoint endurance run. Damage or a fall sends Mario back to the beginning. Practice the route in The Ultimate Test first, then use controlled landings and conservative movement for the later electric, flipping-platform and Hammer Bro sections. Clearing The Perfect Run awards the second Grandmaster Star.
- Banktoad stores 9,999 Star Bits.
- The Ultimate Test is complete.
- The Ultimate Test Comet Medal is recorded.
- The Perfect Run is selectable.
- The Perfect Run is cleared.
Perform the final Wii save verification
Return to Starship Mario and allow the final result to register. The Star List should show 242 Stars: 120 gold regular Power Stars, 120 Green Stars and the two Grandmaster Galaxy Stars.
Check the save-file information. After the Green Star challenge begins, the file uses a silver crown and the rank “The Green Star Challenge Is On!”. After all 120 Green Stars, before the two Grandmaster Stars are complete, the file uses a gold crown. After both Grandmaster missions are cleared, the original Wii release shows the bejeweled platinum crown and the rank “Master of Galaxies!”.
Speak with Mailtoad if you want to check for the optional Wii Message Board completion photograph. The decisive completion evidence is the 242-star total, both Grandmaster Stars, the platinum crown and the “Master of Galaxies!” rank. Do not turn off the console before the relevant clear and return sequence has finished saving.
- The Star List shows 242 Stars.
- Both Grandmaster Galaxy Stars are recorded.
- The save file displays the platinum crown.
- The rank reads “Master of Galaxies!”.
- The Wii Message Board photograph is present if messaging is available.
Before you move on
- Main campaign complete: Bowser’s Galaxy Generator and Bowser’s Fortified Fortress cleared, the final Grand Star collected and the credits viewed.
- Green Star challenge active: 120 regular Power Stars collected, Bowser’s Fortified Fortress cleared again and Green Star entries visible.
- Green Star collection complete: all 120 Green Stars collected and Grandmaster Galaxy unlocked.
- Full original Wii completion complete: all regular Stars are gold, The Ultimate Test and The Perfect Run are cleared, and the Star List shows 242 Stars.
- Final save verified by the platinum crown and the “Master of Galaxies!” rank.
Finishing up
Main campaign complete: Bowser's Galaxy Generator is entered, Bowser's Fortified Fortress is completed, the final Grand Star is collected, and the ending credits are viewed.
Initial-route check: the save file shows the final story Grand Star and World S is available. World S is not part of the minimum first-ending requirement.
Green Star activation check: all 120 regular Power Stars are collected, including any Bronze Stars if necessary, Bowser's Fortified Fortress is completed a second time, and the Green Star announcement and Green Comet state have appeared.
Green Star completion check: all 120 Green Stars are collected and the save file shows a 240-star total. Bronze-Star replacement is not required to activate Green Stars, but every Bronze regular Star must be replaced before Grandmaster Galaxy unlocks. Ordinary Comet Medals are only required when needed for an unfinished regular Prankster Comet Star.
Grandmaster check: Grandmaster Galaxy is unlocked after 120 Green Stars and no Bronze Star remains among the 120 regular Stars. The Ultimate Test and its Comet Medal are complete, Banktoad holds 9,999 Star Bits, and The Perfect Run is available or completed.
Original Wii 100% check: all 242 Stars are recorded—120 qualifying gold regular Power Stars, 120 Green Stars, and the two Grandmaster Galaxy Stars—and the final save-file completion crown and rank are displayed. Ordinary Comet Medals not needed for an unfinished regular Star may remain as separate optional cleanup.
Choose your next gameScreenshots & video
Game imagery for reference. Follow the written chapters above for the route and strategies.
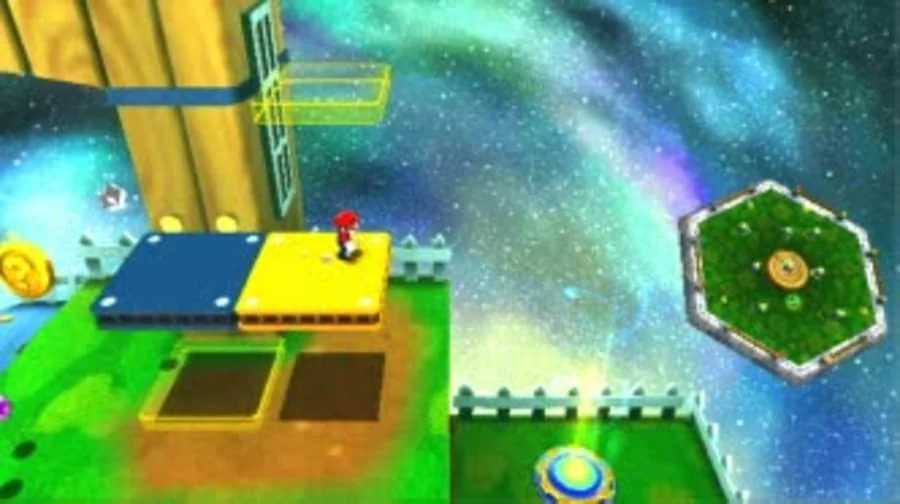
Sources & references
Our original guide draws on the references below. Check the edition at the top of this page before following controls or unlock requirements.
- Super Mario Galaxy 2 English Instruction Manual, Nintendo Wii
- Super Mario Galaxy 2 — Super Mario Wiki
- Banktoad — Super Mario Wiki
- Completion — Super Mario Wiki
- How to Copy Save Data to an SD Card — Nintendo Support
- Super Mario Galaxy 2 — Instruction Booklet
- Super Mario Galaxy 2 — Guide and Walkthrough by Iceman22n86
- Super Mario Galaxy 2 — Guide and Walkthrough by Milkncooke
- Super Mario Galaxy 2 — Guide and Walkthrough — GameFAQs, Wii
- Super Mario Galaxy 2 — English Wii Instruction Booklet
- Super Mario Galaxy 2 — English Wii Instruction Manual
- Yoshi Star Galaxy — Super Mario Galaxy 2
- Super Mario Galaxy 2 — GameSpot walkthrough
- Super Mario Galaxy 2 — Guide and Walkthrough — GameFAQs, Wii
- Super Mario Galaxy 2 Mission List — Super Mario Wiki
- World 1 — Super Mario Galaxy 2
- Peewee Piranha’s Temper Tantrum — Super Mario Galaxy 2
- Digga-Leg’s Planet — Super Mario Galaxy 2
- Fluffy Bluff Galaxy — Super Mario Galaxy 2
- Bowser Jr.’s Fiery Flotilla — Super Mario Galaxy 2
- Gobblegut — Super Mario Galaxy 2
- Hungry Luma — Super Mario Galaxy 2
- Bowser’s Lava Lair, Super Mario Wiki
- Bowser’s Gravity Gauntlet, Super Mario Wiki
- Super Mario Galaxy 2/Bowser’s Lava Lair, StrategyWiki
- Super Mario Galaxy 2/Bowser’s Gravity Gauntlet, StrategyWiki
- World 5 (Super Mario Galaxy 2) — Super Mario Wiki
- Bowser Jr.'s Boom Bunker — Super Mario Wiki
- World 6 (Super Mario Galaxy 2) — Super Mario Wiki
- Bowser’s Galaxy Generator — Super Mario Wiki
- Bowser's Fortified Fortress — Super Mario Wiki
- Super Mario Galaxy 2 — Guide and Walkthrough — GameFAQs
- Super Mario Galaxy 2 Green Star
- Super Mario Galaxy 2 Star List
- Super Mario Galaxy 2 Gameplay
- Super Mario Galaxy 2/Items — StrategyWiki
- Grandmaster Galaxy — Super Mario Wiki
- Prankster Comet — Super Mario Wiki
- Super Mario Galaxy 2 Grandmaster Galaxy
- World S - Super Mario Wiki
- The Ultimate Test - Super Mario Wiki
- The Perfect Run — Super Mario Wiki
- Super Mario Galaxy 2 Route Planning Info, SDA Knowledge Base
- Bowser’s Galaxy Generator, StrategyWiki
- Super Mario Galaxy 2 — Bowser Jr.’s Boom Bunker StrategyWiki guide
- Spin Drill — Super Mario Galaxy Object Database
- Super Mario Galaxy 2 English Instruction Manual
- Comet Medal
- World S
- History of Luigi — Super Mario Wiki
- Secrets, Unlocks and Tricks — Nintendo Support
- Grandmaster Galaxy — Wikibooks
- Star Bit — Super Mario Wiki
- Star Barrier — Super Mario Wiki
- Throwback Throwdown Speed Run — Super Mario Wiki
- Bowser's Big Bad Speed Run — Super Mario Wiki
- Digga-Leg's Daredevil Run — Super Mario Wiki
- Squizzard's Daredevil Run — Super Mario Wiki
- Boomsday Machine Daredevil Run — Super Mario Wiki
- Mini-Planet Daredevil Run — Super Mario Wiki
- Mailtoad — Super Mario Wiki
About the game & collecting notes
- Platform
- Wii
Step-by-step coverage of Super Mario Galaxy 2 for the original Nintendo Wii release.
Darryl Polo
Darryl Polo loves tinkering with emulation and revisiting retro games. He enjoys exploring how old favorites play on different setups and sharing what he learns along the way. At Joking Joystick, he writes about the games, hardware, and small discoveries that keep the hobby fun.
Our editorial standardsFound a step that needs another look? Help us improve this guide.