Sonic the Hedgehog 4: Episode I — Wii (WiiWare) Complete Campaign Walkthrough
Step-by-step campaign walkthrough for the original WiiWare release of Sonic the Hedgehog 4: Episode I. Covers controls and physics, every zone (Acts and boss fights), Special Stages and Chaos Emeralds, unlocking and beating the E.G.G. Station final encounter, and optional Super Sonic / post‑credit content needed for 100% campaign completion.


Find a copy
Sonic the Hedgehog 4: Episode I Wii
We may earn a commission if you buy through these links, at no extra cost to you. As an Amazon Associate I earn from qualifying purchases.
Opens retailer search results. Check the model, edition, seller, availability and current price before buying.
Before you begin
You are Sonic: fast, fragile without rings, and expected to move.
This walkthrough covers the original Nintendo Wii WiiWare release of Sonic the Hedgehog 4: Episode I.
Use the sideways Wii Remote for ordinary gameplay. The directional pad handles movement, Down plus 2 performs a Spin Dash, and 2 jumps or performs the Homing Attack when Sonic is airborne and a target is available.
After Splash Hill Act 1, the world map lets you choose among the available ordinary zones, but each zone still requires Acts 1, 2, 3, and its boss before that zone is complete.
Focus on momentum, safe landings, and ring preservation rather than collecting every visible item.
Special Stages use the Wii Remote's supported maze controls and are separate from ordinary platforming controls.
This walkthrough explains the required Acts and bosses, the E.G.G. Station finale, the seven Special Stages, Super Sonic, recovery from failures, and the checks that confirm completion.
Set yourself up for the run
Hold the Wii Remote sideways before starting and test Left, Right, Down, 2, Plus, and 1 in the opening Act or options screen.
Use the directional pad for movement. Press Down and then 2 on the ground for a Spin Dash; press 2 in the air when a target cursor appears for a Homing Attack.
Remember that rings absorb a normal hit but do not protect Sonic from pits, drowning, crushers, or other instant-death hazards.
Prioritize reaching checkpoints and stable ground over risky ring or item detours.
Decide whether your goal is the main campaign only or the optional seven-Emerald and Super Sonic completion.
For Special Stages, practise rotating the maze with the supported Wii Remote input and use small corrections rather than treating the stage like normal left-right platforming.
Use the world map or stage-selection screen to replay cleared Acts, bosses, and completed Special Stages when practising.
Episode II and Episode Metal are outside the WiiWare release and are not part of this guide's completion target.
Edition, Profiles, World Map, and Save Management
This chapter identifies the original Nintendo WiiWare edition of Sonic the Hedgehog 4: Episode I and explains how to select a profile, use the World Map, replay cleared content, enter the seven Special Stages, and verify campaign progress. It does not apply mechanics or menus from Episode II, mobile releases, remasters, or other platforms.
Confirm the release before starting
This walkthrough covers Sonic the Hedgehog 4: Episode I for Nintendo Wii, distributed through WiiWare. Nintendo’s European listing gives the Wii release date as October 15, 2010. North American reference listings commonly give October 11, 2010. These are regional release dates for the same WiiWare edition, not separate gameplay versions.
Episode I is a self-contained platforming campaign starring Sonic. Do not import Episode II features such as Tails partnership play, Episode Metal, or Episode II’s half-pipe Special Stages. Episode II was not released for WiiWare. The original Wii edition also differs from versions that use an analog stick or touchscreen: the ordinary Acts use the Wii control layout, while the Special Stages can use Wii Remote motion to rotate the maze.
- Confirm that the title is Sonic the Hedgehog 4: Episode I.
- Confirm that the system is Nintendo Wii and the game is the WiiWare release.
- Do not use Episode II, Episode Metal, mobile, PC, PlayStation 3, or Xbox 360 instructions for Wii-specific menus or controls.
Select the correct profile and protect progress
At the title screen, choose the profile that contains the progress you intend to continue, then enter the campaign or stage-selection screens from that profile. The profile is the container for cleared stages, records, and Chaos Emerald progress. If multiple people use the same Wii, use separate available profiles rather than assuming that a single profile will keep independent campaigns apart.
For a clean run, choose an unused profile only if you want separate progress. Otherwise, continue with the established profile and use its replay options after stages become available. If a newly selected profile shows locked zones or no Emeralds, first switch back to the profile you normally use; that situation usually means you selected a different progress file, not that the original campaign was erased.
Do not close the game during a stage-clear or Special Stage result sequence. Let the game return to its map or selection screen, then check the same profile. This is the practical point at which you should confirm that a cleared Act, boss, or Emerald has been recorded.
- Choose the intended profile before entering Story mode.
- Use another profile only when you want genuinely separate progress.
- Allow the complete results sequence to finish before leaving the game.
- If progress looks missing, verify the selected profile before replaying or replacing anything.
Use the World Map and follow the required campaign order
The campaign begins with Splash Hill Zone. Once the opening progression makes the map available, use it to select the zones and cleared Acts that the current profile has unlocked. The map is not an unrestricted menu at the start: locked destinations become available as you complete the required content. If a zone or Act is unavailable, return to the map and finish the currently open objective rather than assuming the save is damaged.
Episode I’s four main zones are Splash Hill Zone, Casino Street Zone, Lost Labyrinth Zone, and Mad Gear Zone. Each has Acts 1, 2, and 3, followed by its boss encounter. The boss is a separate required stage, so clearing the three regular Acts does not by itself finish that zone. Complete the boss encounters for all four main zones to unlock E.G.G. Station, the final campaign zone.
Use the map or stage-selection interface to replay any completed regular Act or boss. This is useful for practising a difficult section, improving a time, or making another Emerald attempt. Do not expect Act 3 to provide a Giant Ring in the original console/WiiWare progression; the verified Giant Ring opportunities are after Acts 1 and 2.
- Start with Splash Hill Zone.
- Clear Acts 1, 2, and 3 in each main zone.
- Clear each main-zone boss separately.
- Complete all four main zones and their bosses before expecting E.G.G. Station to unlock.
- Use the map to replay cleared stages rather than restarting the whole campaign.
Enter Special Stages and collect the Chaos Emeralds
On the original WiiWare and other original console releases, the Giant Ring opportunity is tied to Act 1 or Act 2. Finish one of those Acts with at least 50 Rings. When Sonic reaches the goal, the Giant Ring appears in the goal area; jump into it before the post-stage transition carries you away. Act 3 remains necessary for story progression, but it is not the listed Giant Ring route for this edition.
Each successful Special Stage awards one Chaos Emerald. Episode I contains seven Special Stages, so full Emerald completion requires seven successful clears. Missing a ring opportunity does not permanently block the collection goal: replay a cleared Act 1 or Act 2, preserve at least 50 Rings until the goal, and enter the ring when it appears.
The Special Stages use rotating mazes. Sonic moves through the maze while the player rotates the field to guide him toward the Chaos Emerald and away from blocks, bumpers, and other hazards. On Wii, the game supports Wii Remote motion control for rotating the maze; follow the on-screen instructions and use small, deliberate tilts rather than large movements. If the menu offers button-based rotation, use whichever method gives you finer control. The regular Act controls should not be assumed to work identically in this mode.
After the Special Stage becomes available in the profile’s selection interface, use that interface to practise or replay it where permitted. If you fail, use the retry option when offered instead of repeatedly replaying the entire Act. You still need to complete the associated stage or result sequence for the Emerald to remain recorded.
- Replay Act 1 or Act 2 of a cleared zone.
- Reach the goal with at least 50 Rings.
- Jump into the Giant Ring that appears at the goal.
- Complete the rotating-maze Special Stage to receive its Emerald.
- Repeat until all seven Chaos Emeralds are recorded.
Verify story completion and optional Emerald completion
The main campaign goal is separate from the Emerald goal. Story completion requires clearing Splash Hill, Casino Street, Lost Labyrinth, and Mad Gear through their boss encounters, then completing E.G.G. Station. Wait through the final results and ending sequence before checking the map or returning to the title screen.
For a practical completion check, reopen the same profile and confirm that the four main zones are cleared, E.G.G. Station is available or marked complete, and the game has returned to its post-clear state. If E.G.G. Station is still locked, revisit the map and identify which main-zone boss remains incomplete; regular Act completion alone is not enough.
Full optional completion requires all seven Chaos Emeralds. Once all seven are collected, Super Sonic becomes available during eligible gameplay when Sonic has at least 50 Rings. The transformation is therefore an optional post-collection reward, not a requirement for defeating E.G.G. Station. Episode I’s former online leaderboard functionality should not be treated as a current WiiWare feature; local campaign progress, stage replay, and Emerald collection are the relevant completion systems.
- Clear all twelve regular Acts and all four main-zone boss encounters.
- Unlock and clear E.G.G. Station.
- Allow the ending and result sequence to finish.
- For optional completion, confirm all seven Chaos Emeralds in the same profile.
- For Super Sonic, enter eligible gameplay with all seven Emeralds and at least 50 Rings.
Before you move on
- The game is confirmed as Sonic the Hedgehog 4: Episode I on Nintendo WiiWare.
- The selected profile can reopen the cleared main-zone Acts and bosses through the map or stage-selection interface.
- Splash Hill, Casino Street, Lost Labyrinth, and Mad Gear are complete through their boss encounters.
- E.G.G. Station has been unlocked and cleared, and the ending sequence has played.
- For optional full completion, the profile records all seven Chaos Emeralds.
- Super Sonic can be selected or activated during eligible gameplay after the seven Emeralds are collected and Sonic has at least 50 Rings.
References for this chapter
- SONIC THE HEDGEHOG Episode I | Nintendo UK WiiWare listing
- Special Stage — Sonic the Hedgehog 4: Episode I — Sonic Wiki Zone
- Sonic the Hedgehog 4: Episode I — The Sonic the Hedgehog Wiki: Special Stage access, controls and Super Sonic
- Sonic the Hedgehog 4: Episode I — Wikipedia
- Longplay of Sonic the Hedgehog 4: Episode I - Wii
- Manual Archive | The Sonic Center
Controls, Core Mechanics, and Movement Tricks
The original WiiWare release uses a sideways Wii Remote for ordinary stages. The directional pad handles movement, the 2 button handles jumping and Homing Attacks, and Down followed by 2 performs a Spin Dash. Good runs depend on managing momentum, choosing controlled landings, protecting rings, and using the Wii Remote carefully during the rotating-maze Special Stages.
Set up the sideways Wii Remote
Hold the Wii Remote horizontally, with the directional pad on the left and the 2 button on the right. In ordinary Acts, use Left and Right to move Sonic, Down to crouch or roll, and 2 to jump. Press Plus to pause the game.
Before beginning a serious run, test the layout in Splash Hill Act 1. Move left and right on level ground, press 2 for a spin jump, and press Plus to confirm that the pause screen appears. This prevents confusion with control schemes from other versions of Sonic the Hedgehog 4: Episode I.
The WiiWare release also uses the 1 button for Super Sonic after all seven Chaos Emeralds have been collected. Super Sonic still requires at least 50 rings during the Act, so unlocking the form does not remove the need to build a ring supply before transforming.
- Hold the Wii Remote sideways before entering an Act.
- Use the directional pad to move Sonic left and right.
- Press 2 on level ground to jump.
- Press Plus during an Act to verify the pause control.
- After collecting all seven Emeralds, remember that 1 activates Super Sonic only when the ring requirement is met.
Use the normal jump before Homing Attack
Press 2 once while Sonic is on the ground to jump. A regular spin jump is usually the safest option for low enemies, short gaps, and narrow landings because it leaves you more control over Sonic's position. Start the jump before reaching the edge of a platform; waiting until Sonic is already falling often makes a recovery impossible.
While Sonic is airborne, a nearby valid target can display a lock-on cursor. Press 2 again when the target is marked to perform a Homing Attack. Depending on the situation, the target may be an enemy, spring, switch, monitor, or other interactive object. Homing Attack can bridge gaps and redirect Sonic toward alternate routes, but it is not automatically safer than a normal jump.
When several targets are grouped together, pause briefly to identify the intended one. After each Homing Attack, watch Sonic's height and direction before pressing 2 again. Blindly chaining attacks can send him into spikes, a bad landing, or a bottomless pit. If no valid target cursor appears, use normal movement and jumping rather than repeatedly pressing 2.
- Clear a nearby enemy with a regular spin jump.
- Repeat the section and use Homing Attack only after a target cursor appears.
- Stop after one Homing Attack and confirm that the next landing is safe.
- Use a normal jump when the destination is directly below or on a narrow platform.
Build and control momentum
Sonic gains useful speed on downhill slopes and loses speed when climbing, braking, or making unnecessary jumps. On a familiar downhill section, remain on the ground when possible so Sonic carries momentum into the next jump or loop. On an unfamiliar section, reduce speed before the landing area becomes difficult to see.
To Spin Dash, press Down while Sonic is standing or crouched, then press 2. Release Down to launch Sonic forward. Use a short charge for a nearby obstacle or a controlled burst. Charge longer only when the route ahead is visible and there is enough room to stop or land safely.
Maximum speed is not always the correct choice. A fast approach is valuable on an open straightaway, but it becomes dangerous near hidden drops, crushers, spikes, moving platforms, and narrow ledges. Slow down before learning a new sequence, then rebuild speed once you know where Sonic must land.
Springs, boosters, loops, bumpers, and Homing Attack targets often determine Sonic's next direction. Watch the result of the first launch instead of assuming that holding a direction will produce the desired landing. Small directional corrections are safer than holding one direction throughout a long jump.
- Run down a slope without jumping and observe how far Sonic travels.
- Perform a short Spin Dash on level ground.
- Brake before an unfamiliar landing instead of carrying full speed into it.
- Use small directional corrections during long jumps.
- Rebuild speed only after the route is understood.
Recover a failed approach without repeating it
If Sonic reaches an incline or vertical sequence without enough speed, look for a stable platform or flat section where you can retreat. Back up, face the correct direction, and make another approach with a better starting position. Repeating the same jump from the same weak position usually produces the same failure.
After a spring or Homing Attack, allow Sonic to land if the next target is not clearly aligned. A controlled landing is more useful than forcing another attack simply because a target is visible. This is especially important around spike beds, crushers, and platforms that move out of position.
If Sonic falls from a platform but lands on a lower safe route, stop and reassess before trying to return upward. Some stages are designed with alternate paths, and an apparently slower route is preferable to a blind jump back toward a missed item or platform.
- Identify a safe platform before attempting a recovery.
- Retreat and rebuild speed when the first approach was too weak.
- Do not force a second Homing Attack when the landing is uncertain.
- Use a lower safe route rather than making a blind jump toward an optional shortcut.
Protect rings instead of chasing every item
Rings absorb a normal hit. When Sonic is carrying rings, damage scatters them and usually allows the Act to continue; taking a hit with no rings is much more dangerous. During a first clear, choose the route that keeps Sonic alive rather than the route that offers a difficult item box, optional shortcut, or extra ring cluster.
A Shield, Invincibility, Power Sneakers, or Super Ring can improve a run, but do not cross a hazardous gap solely to collect one. Reaching the next checkpoint with a modest ring reserve is more valuable than losing a life while attempting a difficult detour. Return for optional pickups after the main route is consistent.
Use fast lines on repeat attempts, not as a substitute for learning. Slow down when the camera reveals the next obstacle late, especially around moving platforms, concealed drops, and bounce sections.
- Enter unfamiliar hazard sections with rings whenever possible.
- Ignore an item box if reaching it requires an uncertain jump.
- Choose a safe route to the next checkpoint.
- Return for optional items only after the main path is reliable.
Recover safely after taking damage
When Sonic is hit, first move away from the enemy, projectile, or hazard that caused the damage. The scattered rings are not worth an immediate return through the same danger. Once Sonic is on stable ground, collect only the rings that lie along a safe path.
If the hit occurs near a checkpoint or the entrance to the next section, prioritize reaching that safe position. Recovering a few rings is useful, but trying to collect the entire scattered group can cause a second hit or a fall. If Sonic has no practical recovery route, continue carefully and focus on reaching the next checkpoint rather than turning around.
When a life is lost, change the approach on the next attempt. Common causes include carrying too much speed into a blind landing, selecting Homing Attack when a normal jump was safer, or reversing direction to recover rings through the original hazard.
- Retreat immediately after a deliberate test hit.
- Recover only rings that can be reached safely.
- Use the next checkpoint as the new learning point.
- Change the approach if the same hazard causes repeated damage.
Handle Special Stages as a separate control challenge
Special Stages are rotating mazes containing rings, bumpers, barriers, time-related pickups, and a Chaos Emerald. Sonic remains inside the maze while you rotate the maze around him. This is different from an ordinary Act: normal running momentum and Homing Attack timing do not control the maze's movement.
On the Wii version, rotate the Special Stage by tilting the Wii Remote. Use small, controlled tilts rather than large movements. After each tilt, return the controller briefly toward neutral and watch Sonic's path before making the next adjustment. Continuous over-rotation can send Sonic into a bumper, a dead end, or a hazard before the route is visible.
The 2 button provides the Special Stage jump or shake action, making Sonic hop within the maze. Use it deliberately when a small hop helps clear an obstruction or adjust position; do not treat it as a replacement for careful maze rotation. Bumpers can redirect Sonic sharply, so study their placement before committing to a turn.
To enter a Special Stage from an ordinary Act, finish an eligible Act with at least 50 rings and enter the Giant Ring near the end. Do not sacrifice a safe Act clear for a Giant Ring that requires an uncertain jump. If an attempt fails, replay the Act and rebuild the ring total. The Special Stages become more demanding as their layouts progress, so practise the tilt rhythm early: brief movement, neutral pause, observe, then correct.
- Enter a Giant Ring only with at least 50 rings and a safe approach.
- Use Wii Remote tilts to rotate the maze.
- Make small tilts followed by brief neutral pauses.
- Watch Sonic's path before making the next correction.
- Use the 2 button's hop deliberately rather than repeatedly.
- Treat each Special Stage as a separate maze pattern and timing exercise.
Before you move on
- You can hold the Wii Remote sideways and move Sonic with the directional pad.
- You can jump with 2 and perform a Homing Attack after a valid target cursor appears.
- You can perform a Spin Dash by pressing Down followed by 2.
- You can carry momentum down slopes, slow before blind landings, and rebuild speed after a failed approach.
- You can choose a safe route instead of risking an optional item or shortcut.
- You can retreat after taking damage and recover only rings that are safely reachable.
- You can enter a Giant Ring with at least 50 rings.
- You can rotate the WiiWare Special Stage maze with small Wii Remote tilts followed by brief neutral pauses.
- You understand that the 2 button's Special Stage action makes Sonic hop and is separate from ordinary Homing Attack use.
- After collecting all seven Chaos Emeralds, you know that Super Sonic requires at least 50 rings and is activated with 1.
World Map, Act Select, and Progression Rules
The WiiWare edition begins with a required Splash Hill Act 1. After that Act is complete, the world map becomes the main progression screen and lets you choose among the four ordinary zones. Each ordinary zone contains three standard Acts. Clearing all three opens that zone’s separate Eggman boss stage. Defeat all four zone bosses to unlock E.G.G. Station, the final zone. Its single Act is a continuous endgame sequence containing five boss encounters, so it should be treated as the campaign finale rather than as another ordinary platforming Act.
1. Clear Splash Hill Act 1 and reach the world map
Start the campaign by completing Splash Hill Zone Act 1 and touching the Goal Plate at the end. Finish the results sequence and continue to the map interface. This first Act is the opening progression requirement; you do not begin with unrestricted access to every stage.
Once the world map is displayed, use it to select the next available zone or return to a stage that has already been cleared. The game does not require you to finish Splash Hill Acts 2 and 3 before visiting another ordinary zone. The map is therefore both the story-progression screen and the replay interface for improving previous runs.
- Complete Splash Hill Zone Act 1.
- Wait until the results sequence returns you to the world map.
- Confirm that the other ordinary zones can be selected from the map.
2. Choose a practical zone order
The four ordinary zones are Splash Hill, Casino Street, Lost Labyrinth, and Mad Gear. After Splash Hill Act 1, the game allows you to choose their order. The map may show several zones at once, but freedom of selection does not remove the internal requirement for each individual zone: its three ordinary Acts must be cleared before its boss opens.
For a first campaign, a straightforward route is to finish Splash Hill, then Casino Street, Lost Labyrinth, and Mad Gear. This is a recommendation rather than a rule. Splash Hill introduces the game’s movement and homing-attack rhythm, Casino Street adds bumpers and pinball-style hazards, Lost Labyrinth emphasizes water and air management, and Mad Gear places greater pressure on platform timing and industrial obstacles. If a zone is causing repeated deaths, leave it from the map and return after practising another available zone.
- Use the suggested order if you want a gradual difficulty curve.
- Remember that the order is flexible after the opening Act.
- Use the map to leave and revisit zones without discarding completed progress.
3. Clear all three ordinary Acts in a zone
Work through Act 1, Act 2, and Act 3 of the selected zone. These are the ordinary platforming stages and are separate from the boss encounter. Clearing only one or two Acts does not open that zone’s boss. You must complete all three standard Acts in that same zone.
Check the zone’s map markers after each result screen. A completed Act remains available for replay, while the uncleared Act remains part of the route to the boss. Do not count a Special Stage as one of the three required Acts. Special Stages are optional bonus stages reached through Giant Rings and are not needed to open a boss or unlock the final zone.
- Clear Act 1 in the selected zone.
- Clear Act 2 in the same zone.
- Clear Act 3 and verify that the boss marker becomes available.
4. Defeat the zone boss
After the zone’s three ordinary Acts are complete, select its separate boss stage from the map. The boss is not an ordinary fourth Act, and entering it does not require all seven Chaos Emeralds. Defeat Eggman’s machine to mark that zone’s campaign progression as complete.
If you lose, return to the map and select the available boss again. You do not need to replay all three ordinary Acts merely because the boss attempt failed. Replay those Acts only when you need to practise their hazards, collect rings, or improve your preparation for the rematch. The map preserves cleared-stage access, allowing you to separate practice from required progression.
- Enter the boss only after all three ordinary Acts in that zone are cleared.
- Defeat the boss and complete the result sequence.
- Verify that the zone is marked as finished before moving on.
5. Complete all four ordinary zones
Repeat the Act-and-boss structure for Splash Hill, Casino Street, Lost Labyrinth, and Mad Gear. The required ordinary-zone campaign route is twelve standard Acts in total: three Acts in each of the four zones. After those stages, defeat the four corresponding zone bosses.
The game does not require a specific order for these four zones once the world map opens. Missing Special Stages, low scores, slow times, and incomplete Emerald collection do not prevent the next ordinary zone from opening. Concentrate on clearing the required Acts and bosses first if your immediate goal is to reach the ending.
- Complete three ordinary Acts in Splash Hill and defeat its boss.
- Complete three ordinary Acts in Casino Street and defeat its boss.
- Complete three ordinary Acts in Lost Labyrinth and defeat its boss.
- Complete three ordinary Acts in Mad Gear and defeat its boss.
6. Unlock and enter E.G.G. Station
When all four ordinary zones and their bosses are complete, return to the world map. E.G.G. Station becomes selectable as the fifth and final zone. If it is still locked, inspect the four ordinary zones for an uncleared Act or an undefeated boss; Chaos Emerald collection is not the missing requirement.
E.G.G. Station contains one Act, but do not interpret that as a short single-boss stage. The Act links together five consecutive boss encounters, including rematches of earlier machines and the final Death Egg Robot encounter. Treat the stage as one continuous endgame run and prepare to finish the entire sequence rather than expecting the map to return after each individual fight.
- Confirm that all twelve ordinary Acts are complete.
- Confirm that all four ordinary-zone bosses are defeated.
- Select E.G.G. Station from the world map.
- Clear its single Act and all five consecutive boss encounters.
7. Handle campaign completion and optional collection separately
For a normal completion, finish the four ordinary zones and then clear E.G.G. Station. You do not need all seven Chaos Emeralds to unlock the final zone or complete the campaign. If you miss a Giant Ring during an Act, continue toward the Goal Plate instead of restarting solely for the optional Special Stage.
For a fuller collection run, revisit cleared Acts from the map and finish an Act with at least 50 rings so the Giant Ring can be used. Each successful Special Stage awards one Chaos Emerald, and seven Emeralds unlock Super Sonic. Pursue this after or alongside the campaign according to your preference; it is an optional objective, not part of the map’s required unlock chain.
- Finish E.G.G. Station for the normal campaign ending.
- Replay cleared Acts for missed Giant Rings if desired.
- Complete the seven Special Stages separately if you want Super Sonic.
Before you move on
- The map shows Splash Hill, Casino Street, Lost Labyrinth, and Mad Gear with all three ordinary Acts cleared in each zone.
- The boss stage for each of the four ordinary zones has been defeated.
- E.G.G. Station is visible and selectable on the map.
- The E.G.G. Station Act has been cleared through its five-boss sequence.
- The campaign ending has played; seven Chaos Emeralds are only required for the optional Super Sonic unlock.
Splash Hill Zone — Acts 1–3: Getting Comfortable with Momentum
Splash Hill Zone is the opening zone in the original WiiWare release of Sonic the Hedgehog 4: Episode I. Its three Acts teach the basic rhythm of running, braking, rolling, using springs, chaining Homing Attacks and choosing between safer lower routes and faster upper routes. Acts 1 and 2 can lead to Special Stages when Sonic reaches the Goal Plate with at least 50 Rings. Act 3 is a required story stage but does not provide a Giant Ring opportunity in this edition.
Act 1: Learn the opening route and protect your Rings
Move right through the opening grassy section and avoid trying to collect every Ring. Splash Hill rewards steady movement more than reckless jumps, especially while you are still learning how Sonic’s momentum carries him down slopes. When Choppers emerge from the water near the bridge, wait until their jump arcs are clear before using a Homing Attack. If the timing looks poor, let the enemy pass and continue across the bridge rather than forcing an attack over the water.
Use the early Bubbles as Homing Attack targets when they form a visible chain. The chain can carry Sonic toward higher ground and a Sneakers power-up, but it is not necessary to destroy every enemy to finish the Act. A missed target is usually recoverable if you land on solid ground; do not immediately jump again without checking where Sonic will land.
- Approach the Chopper bridge instead of rushing onto it.
- Use Homing Attack chains only when the next target is clearly visible.
- Keep at least one Ring before entering a spring or unfamiliar drop.
Act 1: Handle hidden springs, Newtrons and the final approach
Activate the first Lamp Post checkpoint as soon as you reach it. Some springs are hidden under breakable rocks, so use a Homing Attack on an isolated rock when the surrounding route suggests that a spring is underneath. If the launch sends Sonic toward an unfamiliar platform, release unnecessary directional input during the flight and prepare to correct only when the landing is visible.
Newtrons can appear from walls and fire projectiles while their position is protected by the terrain. Do not stand beneath a firing Newtron waiting for an opening. Run past its firing position, or jump over the projectile if the passage is wide enough. Near the end of the Act, slow down after a speed booster and check the landing area. Spikes and a Buzzer can punish a jump made while Sonic is carrying too much horizontal speed.
- Touch the Lamp Post before attempting the later platforming.
- Break rocks only when the hidden spring is a clear route option.
- Move past wall-mounted Newtrons instead of waiting beneath their shots.
- Reduce speed before the final booster and spring sequence.
Act 1: Finish with the Giant Ring opportunity
Reach the Goal Plate with 50 or more Rings if you want the first Special Stage opportunity. In Splash Hill Act 1, the Giant Ring appears in the goal area after the finish sign. Jump into it before leaving the area to enter the next available Special Stage. If you have fewer than 50 Rings, finish the Act normally and replay it later through Act Select rather than taking dangerous detours for a few extra Rings.
A Special Stage already cleared for an Emerald will not provide another uncompleted Emerald when the same Act is replayed. For later Emerald attempts, use another eligible Act whose Special Stage has not yet been cleared.
- Reach the Goal Plate with at least 50 Rings.
- Look for the Giant Ring immediately after the finish sign.
- Enter the Giant Ring deliberately instead of jumping through it at full speed.
- Replay an uncleared eligible Act when you need another Emerald attempt.
Act 2: Use the vines and choose stable routes
Act 2 introduces swinging vines and more pronounced route choices. At the first vine, swing left and right to build height before releasing toward the next platform. The lower route is generally easier to control during a first clear, while the upper route can save time but demands more accurate landings. After the early corkscrew and loop, use the vine to reach the higher ledge; if the jump falls short, use the nearby recovery path rather than repeatedly attempting a blind correction.
Continue to the Lamp Post before the longer sequence of loops, springs and vines. An Invincibility monitor appears along the route and can make the next group of hazards safer, but do not stop in an exposed position to collect it. When Sonic reaches another vine near the upper path, wait for the swing to carry him into a useful arc before correcting toward the next platform.
- Build height on vines before releasing.
- Choose the lower route when the upper landing is uncertain.
- Activate the Act 2 checkpoint before the longer vine sequence.
- Use Invincibility as protection, not as a reason to rush blindly.
Act 2: Cross the final vines and enter the second Giant Ring
The later section combines boosters, corkscrews, springs and Bubbles. Stay high when the route clearly leads toward a spring or upper ledge, but do not chase Ring trails across a gap. A missed vine or spring can leave Sonic below the intended route; if that happens, continue through the lower path and look for the next spring rather than trying to jump back up from an unsafe position.
Near the final climb, Bubbles can provide Homing Attack targets and help Sonic gain height. A Buzzer near the exit can usually be bypassed. Finish the Act with at least 50 Rings to receive the Giant Ring in the goal area. Act 2 is the second Splash Hill entry point for the Special Stage sequence; Act 3 is not.
- Use the lower route when vine timing becomes unreliable.
- Do not chase Rings across a gap after committing to a spring or vine.
- Bypass the Buzzer if attacking it would risk the landing.
- Enter the Giant Ring after Act 2 only if you have 50 or more Rings.
Act 3: Ride the ziplines and complete the story stage
Act 3 introduces ziplines and places greater emphasis on committing to a route before jumping. Follow the opening path to the first zipline, then remain aligned with it rather than making large directional changes. After dismounting, watch for Newtrons and Bubbles around the platforms. If a projectile is already traveling toward Sonic, keep moving through the passage instead of stopping to attack.
The middle portion uses springs, angled platforms and additional ziplines. After the spike sections, use the lower route when it offers a clearer landing or a protective monitor. Several Bubbles are positioned to help Sonic reach the next platform; attack them only when the targets form a stable chain. Missing one is less dangerous than jumping toward spikes without confirming the next landing.
Near the final spring, reduce horizontal movement before Sonic touches down. Overshooting can send him into spikes or below the intended zipline. Continue right through the final sequence and reach the Goal Plate. Splash Hill Act 3 is required for zone completion, but in the WiiWare edition it is a normal story Act without a Giant Ring opportunity. Replay it for practice, safer route testing or ordinary completion, not for another Special Stage entry.
- Stay aligned with each zipline before jumping onto it.
- Use lower routes when they provide a safer landing.
- Treat Bubbles as optional Homing Attack targets unless they are required to reach the next platform.
- Line up the final spring carefully and finish the Act normally.
Before you move on
- Splash Hill Acts 1, 2 and 3 are marked complete on the WiiWare world map.
- Act 1 can be cleared while handling the Chopper bridge, hidden springs, Newtrons and the final booster safely.
- Act 2 can be cleared while using the vines and corkscrew routes without repeatedly losing all Rings.
- Act 3 can be completed while riding the ziplines, avoiding spikes and controlling the final spring.
- You have reached the Goal Plate in Splash Hill Act 1 or Act 2 with at least 50 Rings and entered the Giant Ring for a Special Stage.
- For Emerald collection, use an Act 1 or Act 2 Giant Ring whose associated Special Stage has not already been cleared.
Splash Hill Boss: Approach and Safe Windows
Splash Hill Act 4 is a separate boss stage unlocked after you clear Splash Hill Acts 1, 2, and 3. Dr. Eggman pilots the Egg Mobile-H, a wrecking-ball machine based on the classic Egg Wrecker. The fight has two phases. You must land five hits during the normal wrecking-ball cycle, then three more after Eggman changes to a 360-degree slam attack. The WiiWare version uses Sonic 4’s revised handling and Homing Attack timing, so do not rely on the exact method used for the original Sonic 1 boss.
1. Enter Act 4 with a survival-first plan
Choose Splash Hill Act 4 from the world map after the three regular Splash Hill Acts are complete. This is a contained boss arena rather than another platforming route. You do not need to carry a specific item into the fight, but entering with several rings gives you room to survive a mistake and continue learning the pattern.
The arena has a floor and raised platforms that let Sonic approach Eggman from above. At the start, watch the wrecking ball instead of immediately jumping. Eggman deploys the ball before the normal attack cycle begins, and the vehicle cannot be damaged during the initial protected portion of that deployment.
- Clear Splash Hill Acts 1, 2, and 3 before selecting Act 4.
- Treat the opening deployment as an observation phase.
- Keep a useful ring supply whenever possible, but do not risk a hit to collect distant rings.
2. Attack only after the ball has moved away
During the first phase, Eggman moves the wrecking ball across the arena. The safest attack opportunity comes after the ball has been fully deployed and is moving away from Sonic. Follow the ball visually, wait for it to clear your approach path, then jump toward the Egg Mobile-H and use a controlled Homing Attack when the targeting opportunity appears.
The old Sonic 1 tactic of repeatedly jumping from one platform into the vehicle is unsafe here because Sonic 4 changes the timing and collision behavior. Do not attack while the ball is still being pulled out, traveling toward Sonic, or passing directly beneath your intended landing point. Let the weapon complete its dangerous movement, reposition to the opposite side if necessary, and wait for the next opening.
- Wait through the initial deployment.
- Use the ball’s direction as the attack signal rather than a fixed rhythm.
- Make one deliberate approach, then move away after the hit.
3. Land the first five hits without rushing
Repeat the normal cycle until you have struck Eggman five times. After each successful Homing Attack, Sonic rebounds from the machine. Use that moment to regain distance and watch the ball’s next movement instead of immediately jumping again. The timing is more reliable when you reset your position for every cycle.
If the ball hits Sonic, the rings scatter around the arena. Do not run directly beneath Eggman to recover them. First identify where the wrecking ball is moving, then collect only nearby rings during the part of the cycle when the weapon is traveling away. A partial recovery is preferable to taking another hit while crossing the boss’s active path.
- Land five hits during the normal wrecking-ball phase.
- Reset your position after every successful attack.
- Recover scattered rings only when the ball is moving away.
4. Recognize the post-fifth-hit slam pattern
After the fifth hit, Eggman retracts the wrecking ball and begins the second phase. He flips the machine through a 360-degree motion and slams the ball toward the side of the arena where Sonic is standing. This attack is the main change from the opening cycle, so stop using the first-phase timing once the ball has been retracted.
Stand near one side of the arena with enough room to react. When Eggman begins the flip, move or jump toward the opposite side. Jumping as the flip starts can carry Sonic over the danger, while running away may be safer if you are low on rings or poorly positioned. Avoid remaining beneath the vehicle while the slam is being aimed.
- Switch strategies immediately after the fifth hit.
- Watch for the ball being pulled back before the slam.
- Move away from the targeted side and avoid cornering yourself.
5. Use the retraction window for the final three hits
The second-phase attack also creates its own opening. Once Eggman has completed the slam and begins retracting the wrecking ball to prepare the next one, the Egg Mobile-H becomes vulnerable. Approach during this retraction window and land one Homing Attack. Then retreat immediately, because the next slam can begin before Sonic has much time to recover.
You need three hits in this phase. If you miss an opening, do not force a second jump under the vehicle. Run to the safer side, observe the next flip, and try again during the following retraction. The boss does not require a fast finish; preserving rings and waiting for a clear vulnerability is the consistent method.
- Attack during the ball’s retraction after a slam.
- Land three additional hits in the second phase.
- Abandon a missed opening instead of forcing contact with the machine.
6. Recover from damage and verify completion
After losing rings, stay alive first. Move away from the wrecking ball, collect only reachable rings when the weapon has cleared the area, and return to a side position before attempting another attack. If Sonic is knocked away from Eggman, use the next cycle to study the telegraph rather than trying to retaliate immediately.
Eight total hits destroy the Egg Mobile-H: five in the first phase and three in the slam phase. Eggman retreats after the explosion, and Sonic can open the animal capsule in the completed arena. The game then marks Splash Hill Zone as finished and returns progression to the world map. If you lose the attempt, select Splash Hill Act 4 again and practice the transition after hit five; that is the point where the attack pattern changes.
- Confirm five hits before the slam phase begins.
- Confirm three more hits during the retraction openings.
- Open the animal capsule after the Egg Mobile-H is destroyed.
- Verify that Splash Hill Zone is marked complete on the world map.
Before you move on
- Splash Hill Acts 1, 2, and 3 are cleared before Act 4 is selected.
- The Egg Mobile-H has received five hits during the normal wrecking-ball phase.
- The Egg Mobile-H has received three further hits during the post-fifth-hit slam phase.
- The Egg Mobile-H explodes and Eggman retreats.
- The animal capsule can be opened in the arena.
- Splash Hill Zone is shown as complete on the world map.
Casino Street Zone — Acts 1–3: Momentum Meets Concealed Routes
Casino Street Zone is the second main zone in the WiiWare version of Sonic the Hedgehog 4: Episode I. Its three regular Acts use pinball bumpers, slot-machine structures, giant playing cards, springs, and cannons to interrupt Sonic’s normal running rhythm. The safest first-clear strategy is to treat each launcher as a setup for the next landing rather than holding forward and hoping the stage carries you through. The console version’s Act 2 is the Road of Cards stage; do not follow guides for the mobile-only 100,000-point slot challenge.
Enter the zone and learn the visual signals
Choose Casino Street Zone from the world map after the game makes the main zones available. The zone has three regular Acts, with the separate Catch Eggman boss encounter appearing afterward. For the first run, do not make score or speed your primary objective. Your immediate goals are to reach each checkpoint, keep at least one ring, and learn which objects take control of Sonic’s movement.
Neon signs, oversized cards, slot-machine scenery, springs, and cannon mouths are useful warnings that the next section will alter Sonic’s speed or direction. Before entering a bumper group or cannon, look for the first stable platform after the launch. If you cannot identify the landing area, slow down on the preceding ground instead of entering at maximum speed.
The Homing Attack is most useful when a visible enemy, spring, or other target provides a deliberate recovery point. Do not use it repeatedly just because Sonic is airborne; an untargeted jump often leaves him with no way to correct a bad line.
- Keep one ring before entering every bumper or cannon sequence.
- Identify the next stable landing before committing to a launcher.
- Use Homing Attack for a visible target or recovery point, not as a substitute for route reading.
Act 1: control the pinball sections
Casino Street Act 1 alternates between ordinary side-scrolling ground and short pinball-style areas. Build speed on continuous floors, but release forward pressure when the path narrows around bumpers or slot-machine structures. The objective is to leave each chamber on a controlled trajectory, not to touch every bumper.
When Sonic is bounced upward, hold the direction of the next broad platform and watch the arc. If the chamber offers a lower platform, prefer it during a first clear. A lower landing may cost a few rings or points, but it gives you a stable place from which to restart the next jump. Do not chase a high ring cluster if reaching it requires crossing a bumper at an awkward angle.
Some sections send Sonic through the casino machinery and back toward the main route. If a slot-machine or bumper interaction throws you into an unexpected lane, stop at the next safe floor and reorient before running again. Moving left is sometimes the correct response in Sonic 4, so do not assume that every safe route continues right.
After a checkpoint, you can experiment with the upper lines without risking the entire Act. For a first completion, take the route that keeps Sonic on wider surfaces and exits the pinball areas quickly.
- Release forward pressure before entering dense bumper groups.
- Use the lower recovery platform when the upper route is uncertain.
- Remember that a safe route can briefly move left before continuing toward the goal.
- Practise optional upper paths only after passing a checkpoint.
Act 2: follow the Road of Cards
On WiiWare, Casino Street Act 2 is the Road of Cards layout. The mobile version’s small slot-machine room and 100,000-point objective do not appear here. Expect large playing cards, card platforms, and transitions that carry Sonic along a raised route before returning him to conventional platforming.
Approach the first card sequence with enough running speed to activate the moving card path, but do not jump blindly when the cards begin to shift. Let the sequence carry Sonic until the next landing is visible. When the card route ends, prepare for a normal jump immediately; the transition from automatic movement back to player-controlled platforming is a common place to run off an edge.
Card faces and raised card surfaces can hide the safest line. If the stage presents a choice between a broad lower landing and a narrow upper card carrying extra rings, choose the broad landing on a first attempt. The upper line is worthwhile for score practice only after you know where the card route releases Sonic.
If you take damage in the card section, do not reverse direction in the middle of the moving route to recover scattered rings. Continue to the next stable platform or checkpoint. A second collision during a forced-movement sequence is more dangerous than the lost rings.
- Use the WiiWare Road of Cards route, not the mobile 100,000-point challenge.
- Let the card sequence reveal its landing before jumping.
- Prepare for manual control when the card route ends.
- Recover lost rings only from a stable platform.
Act 3: chain cannons and bumpers carefully
Act 3 places greater emphasis on small cannons and extended bumper arrangements. Before entering a cannon, identify whether the launch is meant to end on a platform, another cannon, or a Homing Attack target. If another cannon is the intended continuation, keep Sonic aligned with it during the first flight instead of jumping early.
After a cannon launch, resist the automatic habit of pressing jump. Sonic may already be on a safe trajectory, and an unnecessary jump can carry him over the intended platform. In a cannon-to-cannon sequence, use the first attempt to learn the rhythm; on later attempts, make the correction earlier and keep the input brief.
Bumper fields should be treated as individual launches. Hold toward the next visible safe surface, then reassess after Sonic leaves the bumper. Continuous forward input can turn a controlled rebound into a collision with the next obstacle. If a lower surface is available after a failed bounce, take it rather than forcing a Homing Attack toward a distant target.
The final approach is a survival section. Keep your rings, avoid optional detours, and reach the goal before attempting a risky shortcut. If you finish with 50 or more rings and the Giant Ring is available near the goal route, enter it only when the approach is secure. Missing the Special Stage is preferable to losing the life immediately before the goal.
- Read the cannon’s exit before entering it.
- Do not jump automatically after every cannon launch.
- Reassess Sonic’s trajectory after each bumper contact.
- Choose the goal route over a dangerous final shortcut.
Use a safe route first, then optimize
For the first clear of all three Acts, collect rings placed directly on the main route and ignore isolated clusters beside bumpers, card edges, or cannon exits. Checkpoints are more valuable than a short-lived score increase because they let you retry the difficult section with less risk.
For later score or time attempts, change one section at a time. Revisit Act 1 to practise the pinball exits, Act 2 to learn where the card route releases Sonic, and Act 3 to improve cannon-to-cannon transitions. Do not replace the entire route after one failed attempt; identify the exact launcher or landing that caused the failure and practise that section from the nearest checkpoint.
When Sonic is hit, move toward a stable floor before trying to recover the scattered rings. The rings return toward Sonic only briefly, and entering another bumper or cannon sequence while turning around often causes a second hit. Once you have recovered or accepted the loss, continue with survival as the priority.
- First clear: use broad platforms and direct ring lines.
- Time and score practice: improve one checkpoint section at a time.
- After damage, recover from stable ground rather than inside a launcher sequence.
- Treat the Giant Ring as optional until the Act route is consistent.
Before you move on
- Casino Street Acts 1, 2, and 3 are marked complete on the WiiWare world map or level-selection interface.
- You can identify the Road of Cards route in Act 2 and are no longer using instructions for the mobile-only slot challenge.
- You can reach the end of Act 1 without committing blindly to every bumper or slot-machine launch.
- You can pass Act 2’s card transitions while preserving at least one ring or reaching the next checkpoint safely.
- You can clear Act 3 by reading cannon exits and using controlled corrections through the bumper fields.
- If pursuing Chaos Emeralds, you can finish an Act with at least 50 rings and make a safe attempt at the Giant Ring rather than sacrificing the run for it.
References for this chapter
Casino Street Boss: Pattern Recognition and Patience
Casino Street Zone Act 4 pits Sonic against Catch Eggman in a pinball-style arena. The encounter requires eight successful hits, divided into two four-hit sections. The reliable method is not to attack Eggman directly whenever he is visible. Instead, wait for the yellow claw attack, avoid the claw as it approaches, then use a Homing Attack on the claw after it misses and rises. The rebounding claw strikes Eggman and creates the damage opportunity. After four hits, Eggman adds a shielded spinning attack. Survive that phase, then repeat the claw method for the final four hits.
Enter the fight prepared
Casino Street Zone Act 4 is a separate boss stage after the three ordinary Casino Street Acts. Bring at least one ring into the arena, and preferably enter with a larger reserve from Act 3. A ring allows Sonic to survive one damaging mistake, but losing all rings makes the next hit fatal, so do not spend the opening moments chasing incidental pickups or forcing an attack.
The arena contains two flippers, platforms, bumpers, and a central lower area with spikes. The flippers are useful for gaining height, but they are not a permanent safe position. Sonic can be launched into the claw, projectiles, or spikes if he remains without control after a bounce. Keep moving enough to avoid being trapped, but prioritize seeing the claw’s path over maintaining maximum speed.
- Enter with at least one ring and preferably several.
- Keep the central spikes and both flippers visible when possible.
- Do not attack merely because Eggman is on screen; wait for the correct attack cycle.
Recognize the claw cycle
Catch Eggman’s important attack begins when he fires the yellow claw toward Sonic. The claw is dangerous if it catches Sonic and carries him over the spikes, but it is also the object that must be used to damage the boss. Watch the claw rather than trying to jump straight at Eggman.
When the claw travels toward Sonic, move out of its immediate path. The claw can miss, travel upward, and then fall back into the arena. Avoid jumping into it too early. If it catches Sonic, the resulting drop over the central spikes can cost the life even when Sonic entered with rings.
- Treat the fired claw as a telegraphed attack cycle.
- Move away from the claw’s approach instead of homing directly toward Eggman.
- Wait until the claw has missed and is descending before attacking it.
Use the claw to damage Eggman
After the claw misses and rises, jump toward the falling claw and perform a Homing Attack on it. Sonic does not need to strike Eggman directly. The Homing Attack redirects the claw across the arena, where it rebounds into Catch Eggman and damages the machine. This is the central technique for the first half of the battle.
Once the claw has hit Eggman, regain control of Sonic and prepare for the next cycle. Do not continue pressing forward in an attempt to chain several direct attacks. A flipper may launch Sonic toward the boss, but an uncontrolled bounce is not a reliable opening. If the claw is not positioned for a safe Homing Attack, let the cycle continue instead of gambling a ring.
Repeat the dodge, falling-claw Homing Attack, and retreat sequence until Catch Eggman has taken four hits. Small pink projectiles may appear during later cycles, and Eggman may also use a laser. Let those hazards pass before homing onto the claw; hitting the claw is useful only if Sonic survives the approach.
- Homing Attack the falling claw, not the unprotected Egg Mobile as a default tactic.
- After the claw hits Eggman, return attention to Sonic’s landing position.
- Pause your approach for pink projectiles or a laser.
- Count four confirmed hits before treating the first phase as complete.
Survive the shielded spinning phase
After the fourth hit, Catch Eggman changes behavior. A shield surrounds the machine while it spins around the arena. Contact with the shielded machine damages Sonic, and the boss cannot be damaged by the normal claw method during this part of the cycle.
Do not chase the spinning Egg Mobile. Use the available width of the arena to keep distance, and move away when the machine approaches Sonic’s position. The lower center is especially dangerous because the spikes can punish a forced landing or a claw-related mistake. Ignore nearby rings if collecting them would place Sonic directly in the machine’s path or against an arena edge.
The spinning phase ends when Eggman returns to his ordinary, unshielded state. Only then resume watching for the yellow claw. The shield transition is a common place to lose a run because the player continues attacking after the fourth hit instead of waiting for vulnerability to return.
- Do not Homing Attack the shielded machine.
- Use distance and controlled movement rather than trying to outrun every spin at close range.
- Avoid risky ring grabs beside the machine or near the spikes.
- Resume attacks only after the shield disappears.
Finish the last four hits
The second half uses the same basic solution: evade the claw, wait for it to miss and fall, then Homing Attack the claw so it rebounds into Catch Eggman. Continue counting confirmed hits. Pink projectiles and the laser can overlap the claw cycle, so wait a moment when necessary rather than homing into a hazard.
Near the final hit, Eggman can move upward and a horizontal reticule may sweep across the arena before he descends. Watch where the reticule settles, move away from that landing point, and jump as Eggman is about to strike the floor. Being airborne avoids the impact stun and leaves Sonic in position to Homing Attack when the machine becomes vulnerable. Do not stand directly beneath the predicted landing point.
After the eighth hit, Catch Eggman is defeated and retreats. Move out of the arena and open the capsule to complete Casino Street Zone Act 4. The boss stage is cleared only after this exit sequence, not merely when the final hit connects.
- Complete eight total hits.
- Jump to avoid the final landing impact when Eggman descends with the reticule.
- Homing Attack only after the final vulnerability appears.
- Leave the arena and open the capsule after Eggman retreats.
Recover from a failed attempt
If Sonic is hit but retains a ring, immediately prioritize a stable landing and a safe position. Do not attempt an emergency attack while Sonic is still rolling, rebounding from a flipper, or recovering near the spikes. The next claw cycle will provide another opportunity.
If Sonic loses all rings, play defensively until the next clear opening; taking another hit ends the life. After a failure, use the WiiWare level or act selection to replay Casino Street Zone Act 4 directly. Practise one objective at a time: first survive the claw, then redirect it consistently, then learn the shielded spin, and finally rehearse the reticule landing. Repeating the whole zone is unnecessary once the boss stage is available for selection.
- After taking damage, stabilize before attacking.
- Do not pursue a missed claw into the spikes.
- Replay Casino Street Zone Act 4 directly for practice.
- Practise the four-hit transition and final landing separately.
Before you move on
- Casino Street Zone Act 4 is marked cleared on the WiiWare world map or level-selection screen.
- Catch Eggman retreats after eight total hits.
- Sonic exits the pinball arena and opens the capsule.
- Lost Labyrinth Zone becomes available as the next main-zone destination.
References for this chapter
Lost Labyrinth Zone — Acts 1–3: Water, Air, and Survival
Lost Labyrinth Zone is the third zone in the original Nintendo WiiWare edition of Sonic the Hedgehog 4: Episode I. Its three acts use different hazards: rolling boulders and medicine-ball rides in Act 1, darkness and timed torches in Act 2, and underwater passages, rising water, motion puzzles, and looping slides in Act 3. Rings are useful protection, but they should never take priority over a safe landing, a checkpoint, or the next source of air.
1. Clear Act 1’s opening ruins
Act 1 begins with shallow pools, Burrobots, spike hazards, and narrow gaps. The shallow water at the beginning is safe to stand in, so do not treat every water patch as a drowning area. Use a Spin Dash through groups of Burrobots when the passage is too cramped for a clean jump.
Spiked obstacles are more dangerous in water because Sonic has less control while moving through it. At the falling-ball sections, wait until the balls settle before crossing. Some gaps are bottomless, so do not jump simply because a moving platform is nearby. Use the lamppost and springs to reach the upper route, keeping Sonic centered during the bounce sequence.
- Use shallow pools for safe footing rather than rushing through them.
- Spin Dash through Burrobots in confined corridors.
- Wait for falling balls to settle before crossing a gap.
2. Control the boulder and medicine-ball rides
When you reach a large movable boulder, push it into position, jump on, and hold the opposite direction from its movement to brake and steady it. Holding forward continuously can carry Sonic into a wall or off the next platform. Correct small movements are safer than trying to maintain maximum speed.
During the later medicine-ball sequence, watch for the chasing ball and run toward the recessed pocket in the route. Duck inside the pocket and let the ball pass before continuing. Take the upper path after the chase when it is available; it shortens the route and avoids some of the lower hazards. Several rides follow, including a long final ride where the track appears to break. Do not jump early at the break. Keep Sonic on the ball and allow the sequence to carry him toward the goal.
- Brake rolling objects with the opposite direction.
- Use the recessed pocket to avoid the pursuing medicine ball.
- Stay on the final ball ride when the track breaks.
3. Use the torch correctly in Act 2
Act 2, World of Darkness, limits visibility to the area around Sonic and the torch he carries. Light the torches and pods along the route to expand visibility and create temporary platforms. Light fuses to destroy blocking rock, then move away before the explosion reaches Sonic. If a route appears blocked, search the nearby lit area for a torch, pod, or switch rather than repeatedly attacking the obstruction.
Burrobots are difficult to see in the dark, so a Spin Dash is safer than trying to make a precise jump over them. Take a Shield when it is directly on the route, but do not make a dangerous detour for it. A missed jump or an enemy hit can cost valuable time, and Act 2 has several sections where running out of time is a genuine danger.
- Light torches and pods to reveal the route and form platforms.
- Back away after lighting each fuse.
- Search for switches when a wall blocks the apparent path.
4. Solve the four-torch platform puzzle
In the major timed torch room, identify the four torch holders from left to right. Leave the second torch alone. Light the first torch, then the fourth, and then the third. The temporary structures appear and disappear on different timers, so move immediately after the third torch is lit. Use the resulting platforms to cross rather than waiting for every platform to stabilize.
Some walkthrough descriptions phrase the opening action differently because they number the torches from the opposite side. The reliable visual solution for the left-to-right layout is first, fourth, third, with the second untouched. If the route closes, restart the act and repeat the sequence without stopping to collect optional rings.
- Count the four torches from left to right.
- Use the first, fourth, and third torches only.
- Do not spend time collecting rings during the timed crossing.
5. Finish Act 2 through the mine carts
After the torch puzzle, continue lighting the upper torches and fuses. Use the springs and curved wall to reach the higher fuse route when possible; the higher route is safer than the lower alternative. Keep away from each blast, then proceed to the mine-cart sections.
During the first cart ride, an exclamation mark does not always mean that Sonic must jump. One crash is scripted and launches Sonic into the next section. In the later ride, jump when the warning signs mark genuine track gaps. Maintain rightward momentum so Sonic reaches the spring and platform when the ride ends. After the later cart sequence, the goal completes Act 2.
- Use the safer upper route after the timed puzzle.
- Do not jump from the cart merely because the cart is about to crash.
- Jump at the marked gaps during the later cart ride.
6. Survive Act 3’s underwater route
Act 3 is the main underwater trial. Before dropping into a submerged section, identify the next air bubble or surface opening. Ground bubbles are the most dependable emergency targets. When the drowning countdown begins, stop chasing rings and move directly toward air; rings cannot protect Sonic from drowning.
Underwater movement is slower and less responsive than movement on dry ground. Use short, deliberate jumps and avoid fighting Jaws or Orbinauts in narrow passages unless they block the route. Ride loose blocks downward while watching for the next bubble. If a Shield or Invincibility item is on the main route, take it when safe, but never trade breathing time for an optional item.
- Plan the next air source before descending.
- Ignore ring trails that pull Sonic away from air.
- Use short jumps and avoid unnecessary underwater combat.
7. Escape the rising water and complete the final switches
After the early underwater route, Sonic is sent through water slides and enclosed channels. Some slides loop indefinitely until Sonic jumps out at the correct opening, so watch both sides of the screen and leave only when the exit is visible. In the rooms with loose blocks, use the Wii control movement to shift the block free, but make small adjustments because spikes are difficult to see along the walls.
A lamppost begins the fast wall-chase section. Run continuously and ignore optional rings and enemies. Stay ahead of the rising water and crushing wall until Sonic reaches the dry section and the next lamppost. After collecting the nearby defensive items, activate the first switch and follow the route upward. The second barrier switch is beneath a ten-ring arrangement; collect the rings only as part of reaching the switch, then activate it.
Return to the water-slide route after both switches are active. The right-hand route leads onward, but do not exit at the first surface opening. Jump for the later opening and continue to the goal. If Sonic misses the exit, the slide loops again; wait for the next pass rather than making a blind jump.
- Leave looping slides only at a visible exit.
- During the wall chase, prioritize forward movement over collectibles.
- Activate both barrier switches, including the one beneath the ten-ring arrangement.
- Use the later right-hand slide exit to reach the goal.
Before you move on
- Act 1 is complete when the final long medicine-ball ride carries Sonic to the goal.
- Act 2 is complete after the later mine-cart ride and the goal at the end of the World of Darkness route.
- Act 3 is complete when both barrier switches have been activated and Sonic reaches the goal through the later right-hand slide exit.
- The Lost Labyrinth Zone boss becomes available from the area map after all three normal acts in the zone are cleared.
References for this chapter
- Sonic the Hedgehog 4: Episode I - Guide and Walkthrough | GameFAQs
- Sonic the Hedgehog 4: Episode I Walkthrough — Lost Labyrinth Zone Act 1: Ancient Maze of Mystery
- Sonic the Hedgehog 4: Episode I Walkthrough — Lost Labyrinth Zone Act 2: World of Darkness
- Sonic the Hedgehog 4: Episode I Walkthrough — Lost Labyrinth Zone Act 3: Underwater Maze Escape
- Lost Labyrinth Zone — Sonic Wiki Zone
Lost Labyrinth Boss: Dealing with Underwater and Arena Hazards
Lost Labyrinth Zone Act 4 is a two-phase Egg Mobile encounter. The first phase is a rising-water escape through a trap-filled route. You can attack Eggman with Homing Attacks while climbing, but survival is the priority. The second phase takes place in a sealed chamber where pillars rise from the floor, walls, and ceiling. Follow the safe pillar route toward Eggman, strike him once a Homing Attack reticle appears, and retreat before the formation closes. The encounter ends after eight total hits across both phases.
Start the boss act with survival in mind
At the beginning of Lost Labyrinth Zone Act 4, Sonic starts near rings while Dr. Eggman waits in the Egg Mobile. Collect the nearby rings immediately, then move toward Eggman. He flies upward and the water begins rising from below. This section does not provide the normal air-bubble safety used in the regular Lost Labyrinth acts, so the route is an escape rather than a conventional arena fight.
Do not stop to collect every ring or defeat every Badnik. The useful preparation is simply to leave the starting area with enough rings to survive one mistake. Once the water rises, a hit scatters your rings but does not necessarily end the attempt. A second mistake, a fall, or remaining underwater too long is much more dangerous than abandoning a few scattered rings.
- Collect the opening rings, then follow Eggman upward.
- Treat the first phase as a timed climb with rising water.
- Do not search for air bubbles that are not part of this boss route.
Climb the flooded passage safely
Move through the upward corridor using short, controlled jumps. The route combines narrow ledges, spikes, spear-like traps, Badniks, gaps, and springs. Keep enough forward motion to reach the next platform, but release the direction briefly before a hazard if running would carry Sonic into it. The safest line is normally the obvious upward route rather than a detour for rings.
Use a Homing Attack on a Badnik only when the target leads to a safe landing. A successful attack is not helpful if it sends Sonic beside a spike, into a wall trap, or over a gap. If Sonic is hit, continue climbing immediately. Reversing direction to retrieve scattered rings usually allows the water to catch up and can turn a recoverable mistake into a death.
- Prioritize the next solid platform over rings below you.
- Use springs only after confirming the landing area.
- Avoid Homing Attacks that end beside a hazard or over a gap.
Attack Eggman only when the route is safe
Eggman can be struck during the rising-water chase. When the Egg Mobile moves close enough for a Homing Attack reticle to appear and the approach does not cross a trap, jump and attack. A successful hit counts toward the encounter’s eight-hit total. After connecting, immediately resume the climb instead of waiting for a second opening.
You do not need to defeat Eggman during the chase to proceed. Reaching the upper section is the reliable first-clear objective. Skilled players can land several hits before the arena, and it is possible to finish the entire eight-hit requirement before entering the pillar room, but that requires precise movement and is not necessary for normal completion. If Eggman is too far away or the route below him is unsafe, ignore the opportunity.
- Attack Eggman only when a Homing Attack has a safe landing.
- Do not chase a missed attack backward.
- Reach the upper room even if you have landed few or no hits.
Read the pillar arena before attacking
After the chase, Sonic reaches a bounded chamber. Eggman positions the Egg Mobile above the room, and pillars rise from the floor, sides, and ceiling. The pillars create the route to Eggman but can also crush Sonic if he remains in the wrong gap. Eggman moves to one of several elevated positions, so watch where he goes before committing to a jump.
Follow the active pillars as they form. The safest approach is to treat them as temporary stairs: climb the blocks that rise toward Eggman, pause on a stable surface, and wait until the Homing Attack reticle appears. Do not jump toward Eggman’s previous position after a new formation begins. His movement is the indication of which side or route is currently safe.
- Watch Eggman’s destination before choosing a route.
- Use raised pillars as steps rather than attempting a blind cross-room jump.
- Wait for a clear Homing Attack reticle before striking.
Use one hit, then retreat
The most dependable pillar-phase tactic is hit-and-run. Climb the safe formation, Homing Attack Eggman once, and move away from the boss’s immediate position as soon as Sonic lands. The pillars retract after the attack sequence, and a new arrangement begins. Staying underneath Eggman or between moving pillars after a hit gives Sonic less room to escape when the pattern changes.
Some formations allow an earlier attack from the end of a ground pillar. Sonic can jump as the pillar rises and Homing Attack Eggman before the complete route is visible. This is faster but less forgiving. For a first completion, wait for the route to form and take the attack from a secure raised pillar. Eggman does not need to be attacked continuously; patience is safer than forcing an opening.
- Land one safe hit, then leave the attack area.
- Do not stand beneath a pillar that is retracting or rising around Sonic.
- Prefer a repeatable route over an early attack.
Understand the eight-hit total
The boss requires eight successful hits across the complete encounter. Hits landed during the rising-water chase count toward that total, so the pillar phase may require fewer than eight attacks. If you reach the chamber without attacking Eggman, you must complete the remaining hits there. The exact number of pillar patterns therefore depends on how many chase attacks connected.
After the eighth hit, the active pillars retract, the Egg Mobile explodes, and Eggman flees. If the boss seems to continue after several pillar patterns, count only attacks that visibly connect with the Egg Mobile. A near miss or a Homing Attack that strikes a Badnik does not advance the total.
- Count confirmed Egg Mobile hits across both phases.
- Do not assume the pillar phase always has the same number of attacks.
- Wait for the defeat animation after the final successful hit.
Recover from a mistake and finish the zone
If Sonic loses rings during the chase, continue upward unless a ring is directly on the next safe platform. There is no dependable air-bubble reset in this route, and falling back costs more time than the rings are worth. On the next attempt, avoid optional Badnik attacks and use the safest upward line until the spring sends Sonic toward the chamber.
If the chase is consistent but the arena causes deaths, stop attempting early pillar attacks. Watch Eggman’s movement, identify the safe formation, climb one section at a time, and attack only when the reticle is clear. If the arena is manageable but the chase is not, ignore all offensive opportunities and focus solely on maintaining upward progress.
Once the Egg Mobile is defeated, allow the defeat and escape animation to complete. Sonic can then move to the capsule and open it. The capsule sequence records Lost Labyrinth Zone as cleared and makes the next zone available from the progression screen.
- After losing rings, keep climbing instead of reversing.
- Practice the chase and pillar room as separate problems.
- Open the capsule after Eggman flees to record the zone clear.
Before you move on
- Sonic reaches the upper pillar chamber without drowning.
- The Egg Mobile receives eight confirmed hits in total across the chase and pillar phases.
- The Egg Mobile explodes and Eggman escapes.
- The pillars retract and the defeat transition completes.
- Sonic opens the capsule and Lost Labyrinth Zone is recorded as cleared.
- The next zone becomes available from the game’s progression screen.
References for this chapter
- Egg Mobile (boss) | Sonic Wiki Zone
- Sonic the Hedgehog 4: Episode I - Guide and Walkthrough | GameFAQs
- Sonic the Hedgehog 4: Episode 1 Walkthrough: Lost Labyrinth Zone Boss: Trap-Filled Ruins | PortForward
- Speed Demos Archive: Sonic the Hedgehog 4 Episode I
- Sonic the Hedgehog 4: Episode 1 Review (WiiWare) | Nintendo Life
Mad Gear Zone — Acts 1–3: Industrial Speed and Platform Timing
Mad Gear Zone is Eggman’s industrial base, built around steam vents, conveyor belts, gears, presses, teleporters, bumpers and vertical machinery. The safest approach is controlled momentum: keep moving when the level or Act 3’s advancing wall demands it, but stop briefly whenever a press, Slicer, spike ceiling or hidden landing makes a blind rush dangerous. This chapter targets the original Nintendo Wii WiiWare release of Sonic the Hedgehog 4: Episode I.
Act 1: Reach the upper machinery without wasting rings
Ride the opening moving platform upward, use the spring, and follow the steam vents to gain height. A vent’s circular warning indicator shows when it is about to fire. Wait for the charge to complete, then let the blast launch Sonic instead of jumping into an unconfirmed stream. Keep steering away from overhead spikes while the steam is carrying you.
The first machinery sections introduce Bubbles, Slicers, Shellcrackers and Asterons. Clear Bubbles before using them as stepping points. A Slicer exposes itself when its blades retract; attack during that opening or simply pass it when the route is wide enough. Shellcracker’s claw gives a short warning before it strikes, so approach from above or wait for the claw to finish. Asterons are especially dangerous in narrow spaces because their projectiles spread outward; do not linger beside one while looking for rings.
- Ride the first platform and use the spring.
- Wait for the steam warning indicator before taking a boost.
- Attack Slicers only when their blades retract.
- Do not remain beside Asterons in confined shafts.
Act 1: Use the central press route and read the teleporters
After the conveyors and early item boxes, continue through the steam and transporter sections. Keep Sonic near the middle of moving platforms until the next landing is visible. Steam can move Sonic sideways as well as upward, so avoid jumping during a blast unless the destination is aligned.
When the route reaches the press sequence, do not automatically choose the highest path. Use the central or lower surfaces, and never stand beneath a descending press. In the section with Bubbles and a press, use the bubbles to gain height, then move onto the safe middle area of the press rather than its spiked edges. After the first press, drop to the lower continuation and watch for the Asteron before entering the teleporter.
Teleporters connect different portions of the act. Treat each one as a route landmark: clear nearby enemies first, then enter it rather than jumping around while the next section is still unfamiliar. If Sonic loses his rings, prioritize reaching stable ground and rebuilding a small reserve before the next steam or press sequence. Invincibility and shield items are optional protection; they do not make pits, spikes or crushers safe.
- Prefer the central or lower press route on a first clear.
- Use Bubbles to reach the press safely.
- Drop below the first press and avoid the Asteron before the teleporter.
- Recover rings on stable ground instead of chasing them beside hazards.
Act 2: Climb the gears and activate the route
Act 2 opens with a vertical gear climb. Make short jumps from one rotating gear to the next and land before committing to the following jump. Step on the early button to make the missing platform appear, then take the shield if it is safely reachable and enter the teleporter.
Use the triangular bumpers to climb. Aim for the lower part of a bumper when height is needed, then correct Sonic’s horizontal position during the rebound. In the next machinery section, run against the large cog to move it into the neighboring gear and raise the wall. Continue through the upper bumpers and collect the invincibility item when available; it helps against the enemy-heavy route but does not protect against pits or crushing hazards.
Ride the connected cogs and use the raised wall as your progress marker. Jump over the cog when the route turns right, then continue across the boosted surfaces. A Slicer can be bypassed by moving quickly, but do not jump into its extended blade. If the cog route feels too fast, wait for the blade to retract before proceeding rather than trying to force a homing attack.
- Activate the early button before crossing the appearing platform.
- Use triangular bumpers to gain height and correct your position in midair.
- Run against the large cog to move it into the wall mechanism.
- Use invincibility for enemies, not for pits or crushers.
Act 2: Take the lower rejoin route and finish the climb
After the spring and Shellcracker section, the gear route can be ridden downward to open a wall, but dropping to the bottom is the simpler option. Both paths lead back to the same continuation. Enter the teleporter, then Spin Dash through the rapidly moving press section instead of trying to make several small jumps between closing surfaces.
Press the button to create the temporary platforms. Climb them and use the upper button to restore the route, then jump through the broken floor when the continuation opens. Move promptly after activating the next button because the raised wall does not remain a permanent shortcut. Ride the long cog and use the small platforms to work around the barrier.
On the final ascent, carry momentum over the curved surfaces, but use Homing Attack only when a visible target or recovery point is available. After the last cog, avoid the Slicer, use the spring and take the 1-Up only if the approach is safe. The final boost carries Sonic toward the goal; do not let an optional item pull you back into the machinery.
- Use the lower route after the spring unless you specifically want to practise the alternate gear path.
- Spin Dash through the fast press section.
- Activate both platform buttons before using the broken-floor route.
- Use Homing Attack for controlled recovery, not blind movement.
Act 3: Outrun the advancing wall
Act 3 begins with a steam boost and introduces the advancing grinding wall. Move right immediately and use the boosters and vents that extend the distance between Sonic and the wall. Optional rings are secondary. If a press is closing, choose the open lane first and collect only what remains on the safe line.
The opening chase combines presses, steam and overhead spikes. Stay low where the ceiling is dangerous, and steer toward the open platform after each boost. The first teleporter stops the wall temporarily, giving you time to read the next vertical sequence. Climb carefully, then use the tilting platforms to descend through the intended route. Do not assume the shaft permits unlimited correction; make each landing deliberate.
Use the next steam boost to restart the chase. Jump across the conveyor belts, hit the button that raises the wall, and continue right through the double-press section. At the second teleporter, take the shield if it is available, deal with or bypass the Slicer, and ride the cog to the right. Cross the following presses with measured jumps, then use the yellow bumpers to reach the upper route. Keep Sonic centered during the rebounds so he does not land against spikes or the pursuing wall.
Continue through the final machinery and use every required switch and booster. The route includes another tilt section, an invincibility item and a final button that raises the wall before a high-speed escape. Once the wall closes in again, do not turn back for rings. Follow the open platforms and reach the goal post. If you die, replay the act by learning the sequence from the two teleporters onward; the reliable recovery priority is the next switch, teleporter or booster, not ring collection.
- Move immediately after the opening steam boost.
- Use the first teleporter to inspect the vertical route before climbing.
- Hit the conveyor-section button before the wall reaches the passage.
- Use the second teleporter, shield and cog route to reset the chase pressure.
- Reach the goal post to clear Act 3.
Before you move on
- Mad Gear Zone Acts 1, 2 and 3 are marked complete on the WiiWare world map or act-selection screen.
- The Mad Gear Zone boss round is available after the three normal Acts are cleared.
- You can reach the first Act 3 teleporter consistently and understand that it temporarily halts the advancing wall.
- You can complete the Act 2 button, platform and broken-floor sequence without relying on the optional ring route.
- For preparation before the boss, replay the act where a press, cog, bumper or steam vent repeatedly causes a death and practise the safer line until the hazard is no longer the source of the failure.
References for this chapter
Mad Gear Boss: Mech Patterns and Final Windows
The Mad Gear Zone boss, Flying Eggman, has two distinct phases. First, Eggman surrounds his machine with eggs that hatch into bouncing decoys. Sonic must trigger the eggs, avoid the resulting mini-Eggmen and strike the real Eggman when he is exposed. After that machine is damaged enough, Eggman flees and the fight becomes a side-scrolling chase. Stay close enough to attack him while avoiding the different mini-Eggman hazards he throws behind him.
Enter the boss round prepared
The boss follows Mad Gear Zone Act 3, so it is a separate boss stage rather than another section of the act. Carry as many rings as you can into the opening, but do not take a dangerous route merely to raise the total. Rings are most useful here as a safety buffer while you learn the two phases.
The first phase is based on patience. Do not immediately jump toward Eggman or treat the surrounding eggs as platforms. They are part of the attack pattern, and contact with an egg or the creature that emerges from it can cost your rings. Use the opening moments to watch the arena and identify which object is active before moving into attack range.
- Enter with a useful ring reserve.
- Treat every egg as a hazard until its behavior is clear.
- Use the first attempt to learn the transition between phases rather than forcing attacks.
Trigger the eggs and avoid the decoys
In the enclosed opening phase, Eggman is protected by eggs positioned around his machine. Strike an egg to make it hatch. A small Eggman decoy emerges and begins bouncing through the arena. The decoy cannot be used as a safe platform, so move away from its path instead of trying to jump on it.
The decoys differ in speed. Some bounce slowly enough to avoid with a short step or jump, while blue versions move more quickly and are harder to clear. Keep Sonic on the side of the arena that gives him room to react, and do not attack an egg repeatedly while a decoy is still moving through the area. Wait until the immediate hazard has passed before setting up the next opening.
- Hit an egg to start its attack cycle.
- Move away from the emerging mini-Eggman.
- Give faster blue decoys extra space.
- Do not use the eggs as launch platforms.
Attack the real Eggman during the opening
After an egg has been activated and the decoy sequence has played out, watch Eggman’s protection. When the real machine is exposed, jump and use a Homing Attack on Eggman. The target is the real boss, not the bouncing decoy. If the decoy is between Sonic and Eggman, delay the attack rather than homing into the wrong object.
Eggman’s position and the active hazards determine whether an attack is safe. A single controlled hit is enough; immediately return to a position where you can see the next egg and the bouncing decoy. Do not remain underneath Eggman or attempt to chain several attacks without checking whether the next hazard has entered Sonic’s path.
Repeat the egg, decoy and opening sequence until the first phase ends. The phase changes after enough successful hits, so continue playing after Eggman appears to retreat instead of assuming the boss is already defeated.
- Attack Eggman only when the real machine is unprotected.
- Avoid homing into a decoy.
- Land safely and reassess after each hit.
- Continue when Eggman retreats; the fight has a second phase.
Pursue Eggman in the chase phase
The second phase is a horizontal pursuit. Sonic runs after Eggman while the boss throws small bouncing hazards backward. Stay close enough that a Homing Attack can reach Eggman, but do not run directly into a thrown object while trying to close the gap.
The ordinary pale or white mini-Eggmen bounce toward Sonic in a comparatively readable pattern. Blue versions travel faster and require an earlier jump or a wider change of position. When Eggman throws a large yellow hazard, staying close to Eggman is generally safer than hanging far behind, because the large object occupies more of the route as it travels. Approach from a clear line, jump when Eggman is within Homing Attack range, and then continue the chase rather than stopping to fight the hazards.
- Keep moving to maintain the chase.
- Use early jumps against fast blue hazards.
- Stay near Eggman when the large yellow hazard is thrown.
- Homing-Attack Eggman only from a clear approach.
Recover after damage and confirm completion
If Sonic is hit, first create distance from the next hazard. Recover rings only when they are directly along the safe route; turning around or dropping into a dangerous position for a scattered ring can cause a second hit. If you lose all rings, concentrate on avoiding the next hazard and reaching the following opening instead of attempting a desperate attack.
If a chase attempt fails, replay the boss from Act Select and practice one phase at a time. The most useful goals are surviving the first egg cycle, landing the first exposed hit, and staying close during the large yellow hazard. Once the final chase attacks connect, Flying Eggman is defeated and the Mad Gear completion sequence begins.
Allow the completion sequence to finish and return to the zone or progression screen. Mad Gear is cleared only after its boss round, not merely after Acts 1–3. The E.G.G. Station route becomes available after the required main-zone boss rounds have all been completed.
- Retreat before collecting scattered rings.
- Use Act Select to rehearse the boss without replaying the acts.
- Wait for the boss-clear sequence to finish.
- Confirm that Mad Gear is marked complete on the progression screen.
Before you move on
- The egg-and-decoy phase has ended and the chase phase has been completed.
- Flying Eggman’s machine is destroyed and the boss-clear sequence begins.
- Mad Gear Zone is marked complete after the boss round.
- The progression screen permits movement toward E.G.G. Station once the other required zone bosses are also cleared.
- Act Select can be used to replay the Mad Gear boss for practice.
References for this chapter
E.G.G. Station Zone — Unlocking and First Approach
E.G.G. Station is the fifth and final zone in the original Nintendo Wii WiiWare edition of Sonic the Hedgehog 4: Episode I. It unlocks after you clear Acts 1–3 and the boss encounter in Splash Hill, Casino Street, Lost Labyrinth, and Mad Gear. The zone is a boss rush against altered versions of the four earlier machines, followed by the Death Egg Robot. Prepare by replaying difficult bosses from the stage-selection menu, entering with a useful ring reserve, and treating survival as more important than forcing every possible attack.
1. Finish the four main zones and their bosses
Complete Acts 1, 2, and 3 in each of the four main zones: Splash Hill, Casino Street, Lost Labyrinth, and Mad Gear. Each zone then opens its own boss encounter. The required progression is the completion of all four zones and all four of their bosses, not merely clearing the regular Acts.
After the fourth main-zone boss is defeated, return to the world map. E.G.G. Station appears as the fifth zone. It is not a normal three-Act zone: selecting it begins the final boss-rush sequence. The game allows the four main zones to be tackled in different orders after the opening Splash Hill progression, so use that freedom to complete easier zones first or to practise a difficult boss before attempting the finale.
- Splash Hill Acts 1–3 and its boss are complete.
- Casino Street Acts 1–3 and its boss are complete.
- Lost Labyrinth Acts 1–3 and its boss are complete.
- Mad Gear Acts 1–3 and its boss are complete.
- E.G.G. Station is visible and selectable on the world map.
2. Practise the earlier bosses before entering
Use stage selection to replay any main-zone boss that regularly costs you rings or lives. E.G.G. Station reuses the four machines in a fixed sequence, but the encounters are modified. The Splash Hill rematch adds vertically moving platforms. The Casino Street rematch introduces spikes that rise and retract in the lower middle of the arena. The Lost Labyrinth and Mad Gear rematches begin at later portions of their original encounters rather than reproducing the entire fights from the beginning.
Practise identifying the end of an attack cycle before committing to a Homing Attack. If an opening is awkward, wait for the next one. A missed attack is safer than landing beneath a moving machine or beside an active spike. When a hit scatters your rings, collect only a nearby safe ring; do not cross a hazard or move beneath the boss just to restore your ring count.
The four rematches require four successful hits each. This applies to the Splash Hill, Casino Street, Lost Labyrinth, and Mad Gear encounters. Do not prepare for Splash Hill as a five-hit fight: the rematch is completed after four hits.
- You can recognize the safe opening in each main-zone boss fight.
- You have practised the later Lost Labyrinth and Mad Gear patterns.
- You know when to retreat after taking damage.
- You can use controlled jumps and Homing Attacks without attacking every time a target appears.
- You are counting four hits for the Splash Hill rematch.
3. Enter with a conservative ring and life plan
Collect rings on the approach when they are on the safe route, but do not take a dangerous detour for a larger total. E.G.G. Station is a continuous sequence, so the rings you preserve through the early rematches are useful when you reach the Death Egg Robot. There is no special equipment loadout to select; your preparation is movement control, boss familiarity, and enough rings to survive an accidental hit.
Regular Sonic is the dependable choice for learning the zone. Super Sonic is an optional reward for collecting all seven Chaos Emeralds, but the E.G.G. Station route should not depend on that unlock. Enter with at least one ring whenever possible, keep a life available for practice, and favor a repeatable safe route over a risky attack that might end the attempt.
After taking damage, regain the nearest safe ring and reset your position. Do not immediately attack while Sonic is still beside the boss or while a projectile, spike, or moving platform is active.
- You enter E.G.G. Station with a ring reserve rather than zero rings.
- You have at least one life available for learning the sequence.
- You prioritize safe ring recovery over an extra hit.
- You use Homing Attack only when the target is clearly reachable.
4. Clear the four rematches in order
The Splash Hill machine appears first. Use the moving platforms to adjust Sonic’s height, then attack when the machine exposes its vulnerable area. Land one controlled hit and return to a stable platform instead of remaining underneath it. The altered encounter ends after four total hits.
The Casino Street machine follows. Spikes rise and retract in the lower middle of the arena, so avoid waiting directly beneath the boss. Stay near a safe portion of the floor, watch the movement cycle, and attack after the machine completes its movement. Four hits clear the rematch.
The Lost Labyrinth rematch begins at the later phase of its original battle. Give yourself room to move around the arena hazards and use short, safe attack windows. Four hits complete the encounter. Do not remain close to the machine after a successful attack if the next hazard is already active.
The Mad Gear rematch also begins at its later phase. Eggman can throw spike balls in this version. Watch the projectile first, move clear of its path, and attack during the recovery window. Four hits finish the rematch. Sonic then gives chase and the Death Egg Robot encounter begins.
- Use the moving platforms deliberately in the Splash Hill rematch.
- Defeat Splash Hill’s rematch with four total hits.
- Avoid the lower-middle spikes in the Casino Street rematch.
- Treat the Lost Labyrinth arena hazards as the main threat.
- React to Mad Gear’s spike balls before attempting a Homing Attack.
- Confirm the chase sequence begins after the fourth rematch.
5. Prepare for the Death Egg Robot
The Death Egg Robot begins with a landing pattern. Watch the targeting crosshair and move away from the marked landing area when it settles. After landing, the robot fires its arms across the arena and retracts them. Stay far enough away to see the arm attack, then wait for the recovery window before jumping at the robot.
Do not attack while the robot’s arms are raised, because this signals a counterattack. After several successful hits, the robot becomes surrounded by electricity and cannot be damaged directly. When a detached arm rises and falls back toward the arena, avoid its path and strike the arm. Knocking it back into the robot disables the electrical protection briefly and creates the next body-attack opening.
Later patterns add pink projectiles and a ground-level laser. Preserve horizontal space so you can see the warnings. Jump over or move away from the laser, avoid chasing the robot across the arena, and wait for the arm-disruption opening. The encounter becomes easier when you treat each cycle as survival first, attack second.
- Move away from the stopped landing crosshair.
- Avoid attacking while the robot’s arms are raised.
- Strike the detached arm during the electrical phase.
- Watch for pink projectiles and the ground-level laser.
- Attack the body only after the electrical protection is disabled.
6. Handle the final collapsing-floor sequence
Near the end of the Death Egg Robot fight, the robot rises and begins destroying the station floor. This remains an active gameplay section rather than an automatic cutscene. Continue watching the robot and land the final attack before the floor disappears. If the floor collapses first, Sonic falls and loses a life.
After the final hit, the ending sequence begins. Sonic remains controllable during the ring-collection portion. Those rings affect the ending pose when combined with the Chaos Emerald total, but collecting them is not required to unlock the basic campaign ending. Let the credits play as the reliable confirmation that the main story is complete.
After completion, use stage selection to replay E.G.G. Station and practise the rematches or attempt a no-damage clear. If one section repeatedly ends your run, practise that earlier boss separately before attempting the entire sequence again.
- The Death Egg Robot is defeated before the station floor fully collapses.
- The ending sequence begins after the final hit.
- The credits play.
- The optional ending ring collection is completed only if you want the alternate ending result.
Before you move on
- Acts 1–3 and the boss encounter of Splash Hill are complete.
- Acts 1–3 and the boss encounter of Casino Street are complete.
- Acts 1–3 and the boss encounter of Lost Labyrinth are complete.
- Acts 1–3 and the boss encounter of Mad Gear are complete.
- E.G.G. Station is selected from the world map.
- The Splash Hill, Casino Street, Lost Labyrinth, and Mad Gear rematches are each defeated with four hits.
- The Death Egg Robot is defeated before the final floor collapse.
- The ending sequence and credits play.
- Chaos Emerald collection and the optional ending ring sequence are complete only if those additional goals are desired.
E.G.G. Station Final Boss: Full Encounter and Winning the Campaign
E.G.G. Station is the fifth and final zone of Sonic the Hedgehog 4: Episode I on WiiWare. It begins with a continuous boss rush against revised versions of the four earlier zone bosses, followed immediately by the Death Egg Robot. The final battle changes behavior during the encounter: first, attack the robot during its normal openings; then avoid its electrically protected body and use the detached arm to disable that protection. The last phase ends with a timed strike before the station floor collapses. Defeating the robot and completing the escape sequence finishes the main campaign. The seven Chaos Emeralds and Super Sonic are optional expanded goals.
Enter E.G.G. Station with a survival plan
E.G.G. Station becomes available after clearing Splash Hill Zone, Casino Street Zone, Lost Labyrinth Zone, and Mad Gear Zone, including each zone's boss. Select it from the world map and start the final zone. This is not a normal platforming zone with three standard Acts. The playable sequence is a boss rush followed by the Death Egg Robot encounter.
The boss rush uses revised versions of the earlier machines. The fights are shorter than their original appearances, but their patterns are altered: the first two rematches introduce later behavior earlier, while the third and fourth rematches emphasize their later-phase attacks. Treat the sequence as one continuous endurance test. Surviving with rings is more important than taking every possible attack opportunity.
If a hit scatters your rings, wait until the machine has completed its current attack before collecting them. Do not cross beneath an active boss or chase rings toward an arena edge while another projectile, sweep, or machine movement is still in progress. A cautious rematch clear leaves more room for error in the Death Egg Robot fight.
- Clear all four main zones and their bosses before selecting E.G.G. Station.
- Expect a boss-rush act rather than ordinary platforming Acts.
- Use the original boss patterns as references, but watch for earlier or modified later-phase attacks.
- Recover scattered rings only after the current attack has ended.
Defeat the four boss rematches
The rematches appear in this order: Egg Wrecker, Catch Eggman, Egg Mobile, and Flying Eggman. Egg Wrecker and Catch Eggman bring their later attack behavior into the rematch sooner than in the original encounters. Wait for each machine to finish its movement or attack, then use the same kind of opening that worked in the original fight rather than trying to interrupt it repeatedly.
The Egg Mobile and Flying Eggman rematches focus on their more advanced attack behavior. Keep enough horizontal space to see the vehicle's approach and avoid attacking simply because it passes near Sonic. Take one controlled hit when the boss is exposed, then move to a position where the next attack can be read. Staying at the arena edge can reduce your escape options, so move away from the boundary whenever the machine begins a horizontal or sweeping attack.
After Flying Eggman is defeated, Sonic pursues Eggman into the next room. The Death Egg Robot begins immediately afterward; there is no ordinary level between the last rematch and the final boss. Use the final rematch to settle into a patient rhythm instead of spending rings on unnecessary risks.
- Defeat Egg Wrecker during clear openings rather than while it is attacking.
- Keep reaction space during the Catch Eggman rematch.
- Watch for the later-phase behavior of the Egg Mobile.
- Attack Flying Eggman only when its exposure is clear, then retreat.
- Be ready for the Death Egg Robot immediately after the fourth rematch.
Attack the Death Egg Robot during its normal phase
At the start of the final battle, the Death Egg Robot moves slowly, launches its detached arms, and attempts to crush Sonic by dropping its body. Track the robot itself and the arm it has fired. When the robot begins descending, move out from beneath it rather than trying to remain in place for another attack.
The safest damage opening occurs after the robot commits to an attack and becomes reachable. Jump into the body with a Homing Attack, then immediately move away. Do not stand underneath the robot to force several hits. One confirmed attack followed by a retreat is safer than an extra attempt that leaves Sonic beneath the machine or in the path of a returning arm.
Continue attacking during these normal openings until the robot stops behaving normally and becomes surrounded by electricity. This phase change is visible and does not require counting hits. Once the electrical field appears, direct Homing Attacks against the robot's body are no longer safe. Preserve any remaining rings for the more demanding phase instead of trying to force the transition faster.
- Watch both the robot and its launched arms.
- Move away before the robot drops its body.
- Use a single Homing Attack during each safe body opening, then retreat.
- Stop attacking the body when the electrical field appears.
- Do not rely on a fixed hit count to identify the phase change.
Disable the electrical field with the detached arm
When the robot is electrically protected, it moves more erratically, can leap across the arena, and fires its arms more rapidly. It may also attack from above with red energy projectiles. Give these projectiles and the robot's movement priority over an attempted attack. If Sonic is positioned under the robot or near an arena boundary, move to open space before the next arm sequence begins.
Wait for a detached arm to fall back into the arena. Approach only when the arm's path is clear and Sonic has enough room to correct a missed jump. Strike the arm three times. The important goal is not to rush the first contact but to complete all three hits without being caught by the arm's electrical contact area or the robot's next movement. If an attempt is missed, reset Sonic's position and wait for the next arm opportunity instead of pursuing the arm into danger.
After the third successful strike, the arm crashes into the robot and temporarily disrupts the electrical protection. Use this short opening to attack the robot's body. Leave the body as soon as the protection returns or the robot begins another movement. In the WiiWare version, later attacks can include red shots and a powerful beam traveling along the ground. Jump or reposition for the beam before attempting another attack.
Repeat the detached-arm sequence and the temporary body opening until the robot reaches its final attack. The arena center usually provides more reaction time against arms arriving from either side, but it is not mandatory; move wherever the current attack leaves the safest escape route.
- Do not Homing Attack the electrically protected body.
- Wait for a detached arm to return to the arena.
- Strike the arm three times.
- Use the temporary body vulnerability after the arm crashes into the robot.
- Prioritize red projectiles and the ground-level beam over an attack attempt.
- Do not chase a missed arm while another attack is active.
Survive the final strike and finish the campaign
After the last body vulnerability is used, the Death Egg Robot rises for a final attack. The machine moves above the arena and prepares to strike the floor. Stay alert and avoid the blow. When the head becomes exposed, hit it with a Homing Attack before the floor collapses. Missing this timed opportunity causes Sonic to fall and lose the attempt, so do not stop providing input merely because the robot appears to be defeated.
Once the final strike succeeds, the Death Egg Robot is destroyed and Sonic begins the station escape sequence. Continue through the escape until the game takes control and the ending begins. The ending and credits are the completion check for the main Episode I campaign. You do not need all seven Chaos Emeralds to complete the ordinary story ending.
For the expanded completion goal, collect all seven Chaos Emeralds through the Special Stages and replay Acts with the Emeralds unlocked. Super Sonic is available in an Act only after Sonic has at least 50 rings; the form consumes rings while active, so the transformation is temporary rather than a permanent state. The seven-Emerald completion also enables the additional post-credits scene associated with the continuation of the story. Watch through the credits if you want to verify that outcome.
- Avoid the robot's final floor-breaking attack.
- Strike the exposed head before the floor collapses.
- Complete the station escape sequence after the robot is defeated.
- Watch the ending and credits to confirm the main campaign clear.
- Collect all seven Chaos Emeralds for the expanded completion goal.
- In a replayed Act, reach 50 rings and transform into Super Sonic.
- Watch the post-credits sequence to verify the seven-Emerald outcome.
Before you move on
- All four E.G.G. Station boss rematches are defeated in order: Egg Wrecker, Catch Eggman, Egg Mobile, and Flying Eggman.
- The Death Egg Robot's normal phase is cleared by attacking during its safe body openings.
- The electrically protected phase is cleared by striking a detached arm three times and using the temporary body vulnerability.
- The final exposed head is struck before the floor collapses.
- The station escape sequence completes without Sonic falling.
- The ending and credits play, confirming the Episode I campaign clear.
- All seven Chaos Emeralds are collected for the expanded completion goal.
- A replayed Act allows Super Sonic after Sonic reaches 50 rings.
- The additional post-credits scene appears after the seven-Emerald completion.
References for this chapter
- SONIC THE HEDGEHOG Episode I | Nintendo UK WiiWare listing
- Death Egg Robot (Sonic the Hedgehog 4: Episode I) | Sonic Wiki Zone
- E.G.G. Station Zone | Sonic Wiki Zone
- Sonic the Hedgehog 4: Episode I - Guide and Walkthrough | GameFAQs
- Sonic the Hedgehog 4: Episode I - E.G.G. Station Zone, Final Boss, Credits, Good Ending | YouTube
Special Stages and Chaos Emeralds — Seven Emeralds and Super Sonic
The original Nintendo Wii WiiWare edition of Sonic the Hedgehog 4: Episode I contains seven Special Stages, each holding one Chaos Emerald. A new Special Stage attempt is available after completing Act 1 or Act 2 of a Zone with at least 50 Rings. At the goal, jump into the Giant Ring before Sonic runs off the finish area. The Special Stage is a rotating maze: Sonic moves through the course while you rotate the maze to line up corridors, Ring Gates, bumpers, and the Emerald. Collecting all seven Emeralds unlocks Super Sonic in regular Acts when you have at least 50 Rings.
1. Prepare an eligible Act and reach the goal with 50 Rings
Choose Act 1 or Act 2 of a Zone. These are the non-boss Acts that can provide a new Giant Ring opportunity. Act 3 is not the route to use for a new Emerald attempt, so do not rely on it when planning your collection run.
Protect your Ring total through the final section. You need at least 50 Rings when Sonic reaches the goal. A late hit can scatter enough Rings to drop you below the requirement, so take the safer route near the finish instead of risking an optional shortcut or bonus item.
After Sonic reaches the goal sign, look for the Giant Ring at the finish area and jump into it. Do this promptly; simply completing the Act with 50 Rings is not enough if you allow Sonic to leave the goal area without entering the Ring.
- Select Act 1 or Act 2, not Act 3.
- Reach the goal with at least 50 Rings.
- Jump into the Giant Ring at the goal area.
2. Rotate the Wii Special Stage maze deliberately
The WiiWare Special Stage is not controlled like an ordinary Act. Sonic continually spins through the maze, while your input rotates the maze around him. Use the Wii Remote tilt method documented for the Wii version: hold the Remote consistently, make a controlled tilt, observe how the corridors move, and then return toward neutral or make a second correction.
Some Wii control configurations also allow directional input for rotating the maze. Whichever method is active, avoid rapid back-and-forth corrections. A large rotation can move a wall, bumper, or Goal block into Sonic's path before you have time to react.
Think in terms of positioning the maze rather than steering Sonic directly. Line up an open corridor with Sonic's current trajectory, then stop rotating long enough to let him pass through it. Use the jump button when a jump is necessary to clear a gap or reach the next section, but do not treat repeated jumping as a substitute for reading the maze.
- Confirm how your Wii Remote is rotating the maze before committing to a route.
- Use small corrections first.
- Let Sonic travel through an aligned corridor before making another major rotation.
- Use jumping only when the route requires it.
3. Open Ring Gates and manage the timer
Special Stages are timed. The Chaos Emerald is the objective, but the timer is the immediate limit on the attempt. Time Bonus orbs add time when collected, so take one when it lies close to your route or when the extra seconds will help with a difficult section. Do not make a long detour for a distant orb if the detour risks a collision or costs more time than it provides.
Ring Gates are striped barriers marked with the number of Rings needed to open them. Collect Rings in the surrounding path until the displayed requirement is met, then approach the gate again. If the gate is still closed, search the nearby branches rather than repeatedly pushing against it.
Ring collection inside the Special Stage is separate from the 50-Ring requirement used to enter. The entry requirement has already been checked before the maze begins. Once inside, focus on the Rings needed for the next gate and on maintaining a route toward the Emerald.
- Watch the countdown while planning each turn.
- Collect the Rings required by the next Ring Gate.
- Take nearby Time Bonus orbs when they do not force a dangerous detour.
- Recheck a closed gate instead of repeatedly colliding with it.
4. Avoid Goal blocks and recover from a bad line
Goal blocks are hazards inside the maze, not the objective. Touching one ends the Special Stage without awarding the Emerald. When rotating a section containing a Goal block, use small inputs and keep Sonic in the open corridor. If the block moves toward Sonic, rotate away from it rather than trying to force a direct approach.
Bumpers can redirect Sonic into another passage, but an uncontrolled rebound can send him toward a wall, Goal block, or dead end. Use a bumper only when the maze is positioned so the rebound leads toward the next safe corridor. If there is a longer route around it, the safer route is usually preferable when the timer allows.
If Sonic is pressed against a wall or bumper, stop making large corrections and watch the maze's current orientation. A brief pause to identify the open exit is safer than repeatedly tilting and causing another collision. If the timer is nearly empty, take the shortest controlled route to the Emerald instead of attempting a complicated recovery.
- Treat Goal blocks as failure hazards.
- Approach bumpers only when their rebound direction is useful.
- Use controlled rotations when Sonic is trapped or pressed against an obstacle.
- Prioritize the Emerald route when the timer is low.
5. Collect and practise all seven Emeralds
Each cleared Special Stage awards one Chaos Emerald, and Episode I has seven Special Stages in total. The Emeralds are collected individually, so keep returning to eligible Act 1 or Act 2 goal areas until all seven have been obtained.
After a Special Stage has been cleared, it can be selected again from Level Select for practice. The cleared stage replaces its Emerald with a 1-Up, so replaying it does not award a second copy of the same Emerald. This makes Level Select the appropriate place to practise a difficult maze without risking campaign progress.
Learn the early stages by practising neutral positioning and small rotations. For later stages, establish a sequence: collect the Rings needed for the next gate, take a safe nearby Time Bonus orb, align the next corridor, and then continue toward the Emerald. Do not assume that a technique that works in one maze will solve the next one; layouts and hazard arrangements differ.
- Clear all seven Special Stages.
- Confirm that all seven Chaos Emeralds appear in the collection display.
- Replay cleared stages through Level Select to practise them.
- Expect a 1-Up rather than another Emerald on a cleared-stage replay.
6. Activate Super Sonic after collecting every Emerald
Once all seven Chaos Emeralds are collected, enter a regular Act and gather at least 50 Rings. Super Sonic does not activate automatically merely because the Emerald collection is complete. While airborne in a regular Act, press Wii Button 1 to transform. The ability is not available during boss fights.
Super Sonic is faster and protected from ordinary damage, but the Ring total drains continuously while the transformation lasts. Collect more Rings when the route is safe, and remember that reaching zero ends the transformation. Use Super Sonic for dangerous stretches or fast traversal, but return to normal play when a precision section makes the extra speed harder to control.
- Collect all seven Chaos Emeralds.
- Enter a regular Act and reach 50 Rings.
- Become airborne and press Wii Button 1.
- Do not attempt to activate Super Sonic during a boss fight.
- Monitor the draining Ring total while transformed.
Before you move on
- All seven Chaos Emeralds are shown in the collection display.
- Each Emerald was obtained from a completed Special Stage entered through the Giant Ring after Act 1 or Act 2.
- A cleared Special Stage is available from Level Select and shows a 1-Up in place of the collected Emerald.
- In a regular Act, Sonic can gather 50 Rings, jump, and press Wii Button 1 to transform.
- The Ring total visibly drains while Super Sonic is active.
- The seven Special Stages remain replayable for practice after their Emeralds are collected.
References for this chapter
- Special Stage — Sonic the Hedgehog 4: Episode I — Sonic Wiki Zone
- Sonic the Hedgehog 4: Episode I/Controls | StrategyWiki
- Sonic the Hedgehog 4: Episode I — The Sonic the Hedgehog Wiki: Special Stage access, controls and Super Sonic
- Sonic the Hedgehog 4: Episode 1 Review (WiiWare) | Nintendo Life
- Sonic the Hedgehog 4: Episode I — Wikipedia
Super Sonic, Post-Credits Content and Optional Unlocks
Collect all seven Chaos Emeralds through the seven Special Stages to unlock Super Sonic in regular Acts. On the original WiiWare edition, Super Sonic is an optional replay ability rather than a separate campaign. Episode II and the Episode Metal content are unavailable on WiiWare, so the Wii version’s completion target is Episode I’s main story, its Emeralds, and Super Sonic access.
1. Collect all seven Chaos Emeralds
The seven Chaos Emeralds are obtained from the seven Special Stages. On the WiiWare version, finish Act 1 or Act 2 of a main zone while carrying at least 50 Rings, then jump through the Giant Ring that appears after the goal. Act 3 and boss rounds are not the routes to a Special Stage. The Giant Ring is an optional exit immediately after the normal goal, so do not run past it when attempting an Emerald.
Each Special Stage awards one Chaos Emerald when Sonic reaches the Emerald target. Once that Special Stage’s Emerald has been collected, repeating the same Act does not provide a duplicate Emerald. If you miss the Giant Ring, fail the Special Stage, or finish the act with fewer than 50 Rings, replay an eligible Act 1 or Act 2 through Act Select rather than restarting the whole campaign.
The Special Stages use rotating mazes. In the Wii version, tilt the Wii Remote to rotate the maze and guide Sonic toward the Emerald. Sonic moves through the maze by bouncing and rolling, so your main task is to turn the field so that walls, passages and bumpers place him on the desired route. Collect Rings needed to open Ring Gates, avoid Goal blocks and other hazards, and use time bonuses when they are safely reachable. Later stages demand more careful rotation, so practise the maze controls before attempting a difficult Emerald run.
- All seven Chaos Emeralds have been collected.
- Every Emerald attempt began from Act 1 or Act 2 with at least 50 Rings at the act’s finish.
- You understand that Act 3 and boss rounds do not provide the Giant Ring route.
- The Emerald display or equivalent completion indicator shows no remaining Special Stage reward.
2. Enter a regular Act with at least 50 Rings
After collecting the seventh Emerald, choose a normal platforming Act from the world map or Act Select. Super Sonic is not selected as a character from the map and does not automatically replace Sonic at the start of every level. You must collect at least 50 Rings during the current regular Act before activating the form.
Rings do not carry from one completed Act into the next for this purpose. If Sonic finishes one stage with 80 Rings, the next stage still begins with its own Ring counter, and you must reach 50 again before transforming. For a reliable test, choose a familiar regular Act with early Ring lines and few unavoidable hazards.
Do not use a Boss Act as the test stage. Super Sonic is intended for regular platforming Acts, not the zone bosses or the E.G.G. Station final encounter. If the transformation input does nothing during a boss round, the Emerald unlock is not malfunctioning; that stage is outside the normal Super Sonic restriction.
- The selected stage is a regular platforming Act.
- The current Ring counter has reached 50 or more.
- You are in active gameplay, not on the map, results screen or a boss encounter.
3. Activate Super Sonic with the Wii control
On the WiiWare release, press the Wii Remote 1 button after Sonic has at least 50 Rings. This is separate from the 2 button used for jumping and Homing Attacks. Activate the form during the regular Act; it cannot be selected from the map screen.
If nothing happens, verify the three requirements in order: all seven Emeralds must be collected, the current stage must be a regular Act, and the current Ring counter must be at least 50. Do not rely on Rings carried from a previous stage. Once the requirements are satisfied, the transformation should occur when 1 is pressed during gameplay.
Super Sonic provides increased speed and protection from ordinary enemy contact, but he is not safe from every stage hazard. Bottomless pits, drowning conditions and other instant-death situations remain dangerous. Continue watching springs, moving platforms, slopes, narrow ledges and gaps instead of treating the form as a substitute for route control.
- The Wii Remote 1 button is being used for transformation.
- Sonic visibly changes into Super Sonic.
- The transformation was attempted in a regular Act with at least 50 current Rings.
- The player continues to avoid pits and other instant-death hazards.
4. Manage the Ring drain
Super Sonic consumes Rings continuously, at approximately one Ring per second. The Ring counter is therefore both your health buffer and the form’s time limit. Collect Rings that are directly along a safe route, but do not make a dangerous detour just to extend the transformation. Losing the run to a pit is worse than allowing the form to expire early.
The ability is especially useful in regular Acts containing dense enemy groups, long high-speed sections or difficult recovery sequences. When the Ring counter becomes low, stop pursuing optional routes and follow the most dependable line toward the goal. Avoid unnecessary enemy contact even though Super Sonic is protected from ordinary damage, because missed jumps and environmental hazards remain fatal.
When the Ring counter reaches zero, Super Sonic changes back to normal Sonic. This does not remove the Emerald unlock. It only ends the temporary transformation for that run. Continue the Act normally, or restart if you were specifically practising a section with Super Sonic.
- The Ring counter is monitored throughout the transformation.
- Safe Ring lines are preferred over risky detours.
- You understand that zero Rings ends Super Sonic but does not erase the unlock.
- Pits, drowning and comparable instant-death hazards are still avoided.
5. Use Super Sonic as optional replay content
Super Sonic is not required to unlock the fifth zone, clear the E.G.G. Station sequence or finish the main story. Complete the campaign with ordinary Sonic if you want the most direct first clear. Afterward, use the map or Act Select to replay regular Acts and practise the transformed form on routes you already know.
Collecting all seven Emeralds also produces the game’s improved ending outcome, but it does not create a second campaign, new WiiWare zone or separate Super Sonic story. The Emerald hunt is an optional completion objective with a gameplay reward. The main story and Emerald collection can be pursued in either order, although learning the ordinary Acts first usually makes Special Stage access and Super Sonic testing easier.
For a first Emerald run, prioritize reaching the Giant Ring safely over score or speed. Preserve Rings through the eligible Act 1 or Act 2 route, enter the Giant Ring after the goal, and use Act Select to repeat another eligible act when you need a fresh attempt. Once the Emeralds are complete, test Super Sonic in a familiar regular Act rather than combining the first transformation attempt with an unfamiliar hazard section.
- The main story is complete, or the player is deliberately replaying regular Acts.
- Super Sonic is being used as optional regular-Act content.
- The seven Emeralds are treated as a completion goal, not as a requirement for ordinary story progression.
- The player is not expecting Super Sonic to replace boss progression.
6. Do not expect Episode II or Episode Metal on WiiWare
The WiiWare release of Episode I is self-contained. Sonic the Hedgehog 4: Episode II was not released for WiiWare, so the Wii version cannot detect an Episode II purchase or save file and cannot unlock a combined Episode Metal campaign through an in-game cross-episode feature.
Instructions describing Episode Metal, Episode II save-data recognition or a combined Sonic 4 menu apply to platforms where both episodes were available. They should not be followed for the original WiiWare edition. There is no hidden Wii map branch, post-credits code or extra completion requirement that produces those episodes.
The correct WiiWare completion target is therefore to finish the main Episode I campaign, collect all seven Chaos Emeralds if seeking full episode completion, and activate Super Sonic in a regular Act with at least 50 Rings. Episode II and Episode Metal are outside the WiiWare release.
- The copy is being treated as the original WiiWare Episode I release.
- No Episode II or Episode Metal menu branch is expected.
- Episode I’s seven Emeralds and Super Sonic are counted separately from unavailable cross-episode content.
- The campaign, Emerald collection and optional Super Sonic test are all recognized as distinct completion goals.
Before you move on
- All seven Chaos Emeralds have been collected from the seven Special Stages.
- Each Special Stage was accessed through the Giant Ring after Act 1 or Act 2 with at least 50 Rings.
- A regular Act has been started on the WiiWare edition and Sonic has reached at least 50 current Rings.
- Pressing Wii Remote 1 successfully transforms Sonic into Super Sonic.
- The Ring counter visibly drains while Super Sonic is active.
- The player understands that Boss Acts, including E.G.G. Station, are outside normal Super Sonic use.
- The main campaign and its ending have been completed if full Episode I completion is intended.
- No Episode II or Episode Metal branch is being counted as part of WiiWare completion.
References for this chapter
- Sonic the Hedgehog 4: Episode I — The Sonic the Hedgehog Wiki: Special Stage access, controls and Super Sonic
- Special Stage — Sonic the Hedgehog 4: Episode I — Sonic Wiki Zone
- Sonic the Hedgehog 4: Episode I | Sonic Wiki Zone
- Sonic the Hedgehog 4: Episode I — GameFAQs Wii listing
- Sonic the Hedgehog 4: Episode II — WiiWare release cancellation information
Time Attack, Score Runs, Troubleshooting, and Next Steps
The WiiWare edition lets you replay cleared Acts, boss encounters, and completed Special Stages from its stage-selection screen. Use those entries to isolate mistakes before attempting serious Time Attack or Score Attack runs. Time Attack is a one-life speed trial, while Score Attack rewards a strong total rather than the shortest route. Establish a safe clear first, then change one decision at a time. The original release included online leaderboard features, but local records are the reliable fallback when online comparison is unavailable.
Open Stage Select and choose a cleared target
From the WiiWare title screen, choose Start and enter the stage-selection screen. Select a Zone, Act, or boss that you have already reached or cleared. Completed Special Stages can also be replayed from Level Select; after an Emerald has been collected, its target is replaced by a 1-Up on the replay version. If an entry is missing, return to the normal campaign and clear the required preceding content before looking for it again.
Use this menu to isolate the exact place where a run fails. For a platforming Act, practise the opening route, the most dangerous central sequence, and the approach to the Goal separately in your mind, then link them in one attempt. For a boss, repeat the encounter until its attack cycle and safe recovery positions are familiar rather than restarting the whole campaign after every mistake.
- Select a cleared Act, boss, or completed Special Stage.
- Confirm whether the target is being played in normal, Score Attack, or Time Attack mode.
- Practise the dangerous section before attempting a full best-time or best-score run.
Use Time Attack to build a repeatable route
At Stage Select, switch the selected cleared stage to Time Attack. The objective is to finish as quickly as possible with one life, so there is no spare-life strategy for rescuing a failed attempt. In this mode, 1-Up monitors are replaced by Super Ring monitors, and normal Act checkpoints are not part of the same safety net. A death ends that attempt; restart only after identifying what caused it.
Begin with the safest route that keeps Sonic moving. Learn where to reduce speed before springs, bumpers, crushers, conveyor sections, vertical drops, and unfamiliar camera reveals. Once the route is reliable, remove pauses one at a time. First cut unnecessary stops, then shorten detours, and only then replace a cautious jump with a controlled Homing Attack. A landing that succeeds consistently is worth more than a theoretical shortcut that repeatedly causes a death.
- Finish the selected stage normally before optimizing it.
- Mark the precise point where speed, rings, or control are lost.
- Change one route decision per attempt so the result is measurable.
- Do not count on 1-Up monitors in Time Attack.
Practise bosses by recognizing the complete cycle
Boss practice should begin with survival, not maximum damage speed. Watch for the movement, animation, or attack completion that exposes the boss, then attack only when Sonic has a clear escape route. After a successful hit, retreat to a safe position instead of forcing another strike during an uncertain transition. The goal is to learn the full cycle, including the part immediately after a hit when careless movement can cause the next damage.
If Sonic loses rings, do not chase scattered replacements through an active attack pattern. Stay away from arena edges, wait for the next predictable opening, and use the next attempt to improve positioning. A useful benchmark is completing the boss while retaining enough rings to survive one mistake. Once that is consistent, shorten the interval between attacks.
- Recognize each major attack before trying to speed up the fight.
- Identify a safe position between attack windows.
- Practise the final portion without rushing after the last successful hit.
- Use the cleared boss entry in Stage Select instead of replaying its entire Zone.
Build a Score Attack route around safe bonuses
Choose Score Attack after you can clear the selected stage consistently. The goal is to improve the score, so the fastest route is not automatically the best route. Collect rings and item-box bonuses that sit directly on your line, defeat enemies when doing so does not break your movement, and preserve enough rings to prevent one mistake from destroying a large portion of the attempt.
Add optional scoring detours one at a time. A slightly longer route is worthwhile when it collects a dense ring group, defeats several enemies safely, or reaches a bonus item without adding a serious pit or collision risk. If a detour causes repeated deaths, remove it and stabilize the rest of the route before testing it again. Record your best result locally if online leaderboard submission is unavailable.
- Clear the stage reliably before adding score detours.
- Prioritize concentrated, low-risk rings and enemies.
- Avoid a bonus route that costs more failed attempts than it adds in points.
- Keep a local note of the best score and the route used.
Troubleshoot repeated ring loss
When the same section strips Sonic's rings repeatedly, identify the actual trigger instead of treating the hit as random. The cause may be a missed jump, a late Homing Attack, a bumper redirecting Sonic into a hazard, a sudden camera reveal, or an approach taken with too much speed. Replay only that Act and enter the problem section slowly enough to observe the launch point and landing point.
Then revise the route. Approach with less speed, jump from a different position, delay the Homing Attack, skip the tempting ring line, or use a lower platform if it gives Sonic a safer landing. Rings are protection, not a requirement to collect every visible item. If the preferred route remains inconsistent, switch to the backup line for complete runs rather than repeatedly sacrificing attempts to a small bonus.
- Name the exact hazard that causes the hit.
- Test a slower approach before testing a faster one.
- Skip risky rings when they compromise survival.
- Adopt the backup route when it produces consistent clears.
Move from isolated practice to complete runs
Use this order: normal clear, repeatable safe clear, clean Time Attack finish, then Score Attack experimentation. Do not start a serious speedrun while a boss or Special Stage still depends on a lucky pattern. Complete each required stage normally, practise the bosses from Stage Select, and replay the Special Stages until the rotating maze and bumper corrections no longer cause panic near the Emerald target.
When one Act is stable, link it with the next target during a longer session. If fatigue produces careless deaths, return to the individual Act rather than discarding several full-campaign attempts. The original WiiWare release included online result comparison, but the game can still be practised and documented without it: write down the stage, mode, score or time, and the route used.
- Normal clears are consistent.
- Bosses can be completed without desperate ring grabs.
- Special Stages are repeatable before pursuing faster campaign runs.
- At least one controlled Time Attack finish is recorded.
- At least one deliberate Score Attack result is recorded.
- You can state the cause of your usual ring loss and the route change that prevents it.
Before you move on
- You can open Stage Select and replay a cleared Act or boss without restarting the entire campaign.
- You can replay completed Special Stages and understand that the collected Emerald target is replaced by a 1-Up.
- You have completed each difficult Act normally and identified a safer backup route for its main hazard.
- You can finish the relevant bosses consistently before attempting faster attack cycles.
- You have completed one controlled Time Attack run under the one-life rules.
- You have completed one deliberate Score Attack run and recorded the result locally.
- You can explain the cause of your usual ring loss and the concrete route change that prevents it.
References for this chapter
- Time Attack | Sonic Wiki Zone
- Sonic the Hedgehog 4: Episode I | Sonic Wiki Zone
- Sonic the Hedgehog 4: Episode 1 Review (WiiWare) | Nintendo Life
- Sonic the Hedgehog 4: Episode I/Controls | StrategyWiki
- Sonic the Hedgehog 4: Episode 1 Review | TheSixthAxis
- Sonic the Hedgehog 4: Episode 1 (Wii) | RetroAchievements
Finishing up
You reach the campaign ending after clearing the E.G.G.
Station final encounter and viewing the ending cutscene — that is the game's main ending on WiiWare.
Collecting all seven Chaos Emeralds requires completing the seven Special Stages; after collecting them you can transform into Super Sonic (requires 50 rings during play) — this is optional but documented here.
Confirm each zone is cleared: all Acts and the boss act for Splash Hill, Casino Street, Lost Labyrinth and Mad Gear must be completed to unlock the E.G.G.
Station final zone.
Completion checklist: (1) All main Acts cleared, (2) All zone boss fights cleared, (3) E.G.G Station cleared and final boss defeated, (4) (Optional) Seven Chaos Emeralds collected via Special Stages and Super Sonic tested.
If you want 100% on leaderboards or trophies (platform dependent), replay Time Attack and Score modes for individual Acts after campaign completion.
Choose your next gameScreenshots & video
Game imagery for reference. Follow the written chapters above for the route and strategies.
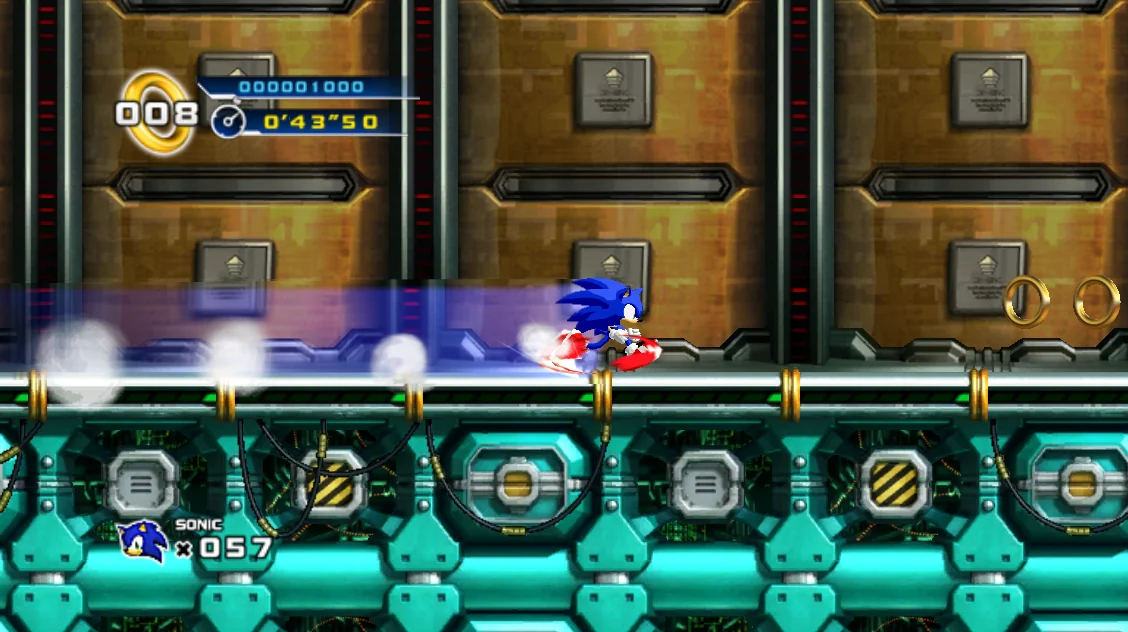
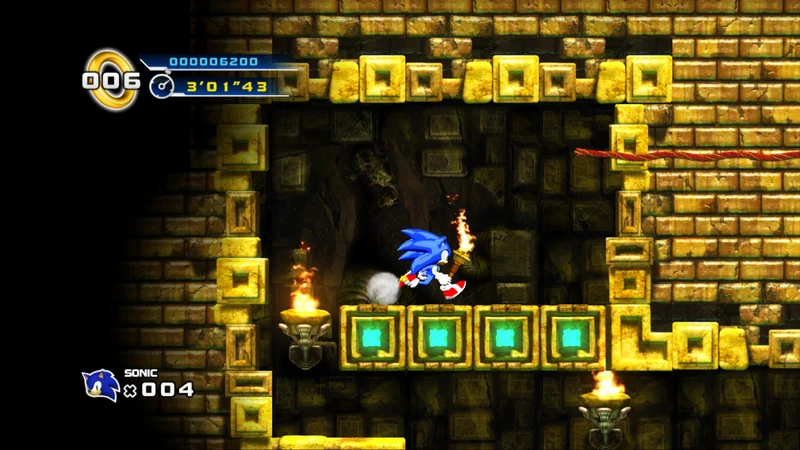
Sources & references
Our original guide draws on the references below. Check the edition at the top of this page before following controls or unlock requirements.
- SONIC THE HEDGEHOG Episode I | Nintendo UK WiiWare listing
- Special Stage — Sonic the Hedgehog 4: Episode I — Sonic Wiki Zone
- Sonic the Hedgehog 4: Episode I — The Sonic the Hedgehog Wiki: Special Stage access, controls and Super Sonic
- Sonic the Hedgehog 4: Episode I — Wikipedia
- Longplay of Sonic the Hedgehog 4: Episode I - Wii
- Manual Archive | The Sonic Center
- Sonic the Hedgehog 4: Episode 1 Review (WiiWare) | Nintendo Life
- Sonic the Hedgehog 4: Episode I | Sonic Wiki Zone
- Sonic the Hedgehog 4: Episode I/Controls | StrategyWiki
- Sonic the Hedgehog 4: Episode 1 Review — GameSpot
- Sonic the Hedgehog 4: Episode I — StrategyWiki
- Sonic the Hedgehog 4: Episode I Walkthrough — StrategyWiki
- Level Select — Sonic Wiki Zone
- Sonic the Hedgehog 4: Episode I - Guide and Walkthrough | GameFAQs
- Sonic the Hedgehog 4: Episode I/Splash Hill Zone — StrategyWiki
- Sonic the Hedgehog 4: Episode 1 Walkthrough Splash Hill Zone Boss: Showdown with Dr. Eggman
- Egg Wrecker | Sonic Wiki Zone
- Casino Street Zone | Sonic Wiki Zone
- Sonic 4: Episode I - Full Game Walkthrough | Nintendo Wii footage and act timestamps
- Sonic the Hedgehog 4: Episode I | Giant Bomb Video Game Wiki
- Catch Eggman — Sonic Wiki Zone
- Untouchable achievement in Sonic The Hedgehog 4: Episode I
- Speed Demos Archive: Sonic the Hedgehog 4 Episode I
- Sonic the Hedgehog 4: Episode I Walkthrough — Lost Labyrinth Zone Act 1: Ancient Maze of Mystery
- Sonic the Hedgehog 4: Episode I Walkthrough — Lost Labyrinth Zone Act 2: World of Darkness
- Sonic the Hedgehog 4: Episode I Walkthrough — Lost Labyrinth Zone Act 3: Underwater Maze Escape
- Lost Labyrinth Zone — Sonic Wiki Zone
- Egg Mobile (boss) | Sonic Wiki Zone
- Sonic the Hedgehog 4: Episode 1 Walkthrough: Lost Labyrinth Zone Boss: Trap-Filled Ruins | PortForward
- Sonic the Hedgehog 4: Episode 1 Walkthrough Mad Gear Zone Act 1: Dr. Eggman’s Secret Base
- Sonic the Hedgehog 4: Episode 1 Walkthrough Mad Gear Zone Act 3: Impending Doom
- Sonic the Hedgehog 4: Episode 1 Walkthrough — Mad Gear Zone Boss: Defeat the Real Dr. Eggman
- Mad Gear Zone | Sonic Wiki Zone
- Egg Bouncer | Sonic Wiki Zone
- Sonic the Hedgehog 4: Episode I — All Bosses, including Wii footage
- Sonic the Hedgehog 4: Episode 1 Walkthrough E. G. G. Station Zone: Final Showdown in Space
- Death Egg Robot (Sonic the Hedgehog 4: Episode I) | Sonic Wiki Zone
- Sonic the Hedgehog 4: Episode I Review for Wii
- E.G.G. Station Zone | Sonic Wiki Zone
- Sonic the Hedgehog 4: Episode I - E.G.G. Station Zone, Final Boss, Credits, Good Ending | YouTube
- Sonic the Hedgehog 4: Episode I — GameFAQs Wii listing
- Sonic the Hedgehog 4: Episode II — WiiWare release cancellation information
- Time Attack | Sonic Wiki Zone
- Sonic the Hedgehog 4: Episode 1 Review | TheSixthAxis
- Sonic the Hedgehog 4: Episode 1 (Wii) | RetroAchievements
About the game & collecting notes
- Platform
- Wii
Step-by-step campaign walkthrough for the original WiiWare release of Sonic the Hedgehog 4: Episode I. Covers controls and physics, every zone (Acts and boss fights), Special Stages and Chaos Emeralds, unlocking and beating the E.G.G. Station final encounter, and optional Super Sonic / post‑credit content needed for 100% campaign completion.
Darryl Polo
Darryl Polo loves tinkering with emulation and revisiting retro games. He enjoys exploring how old favorites play on different setups and sharing what he learns along the way. At Joking Joystick, he writes about the games, hardware, and small discoveries that keep the hobby fun.
Our editorial standardsFound a step that needs another look? Help us improve this guide.