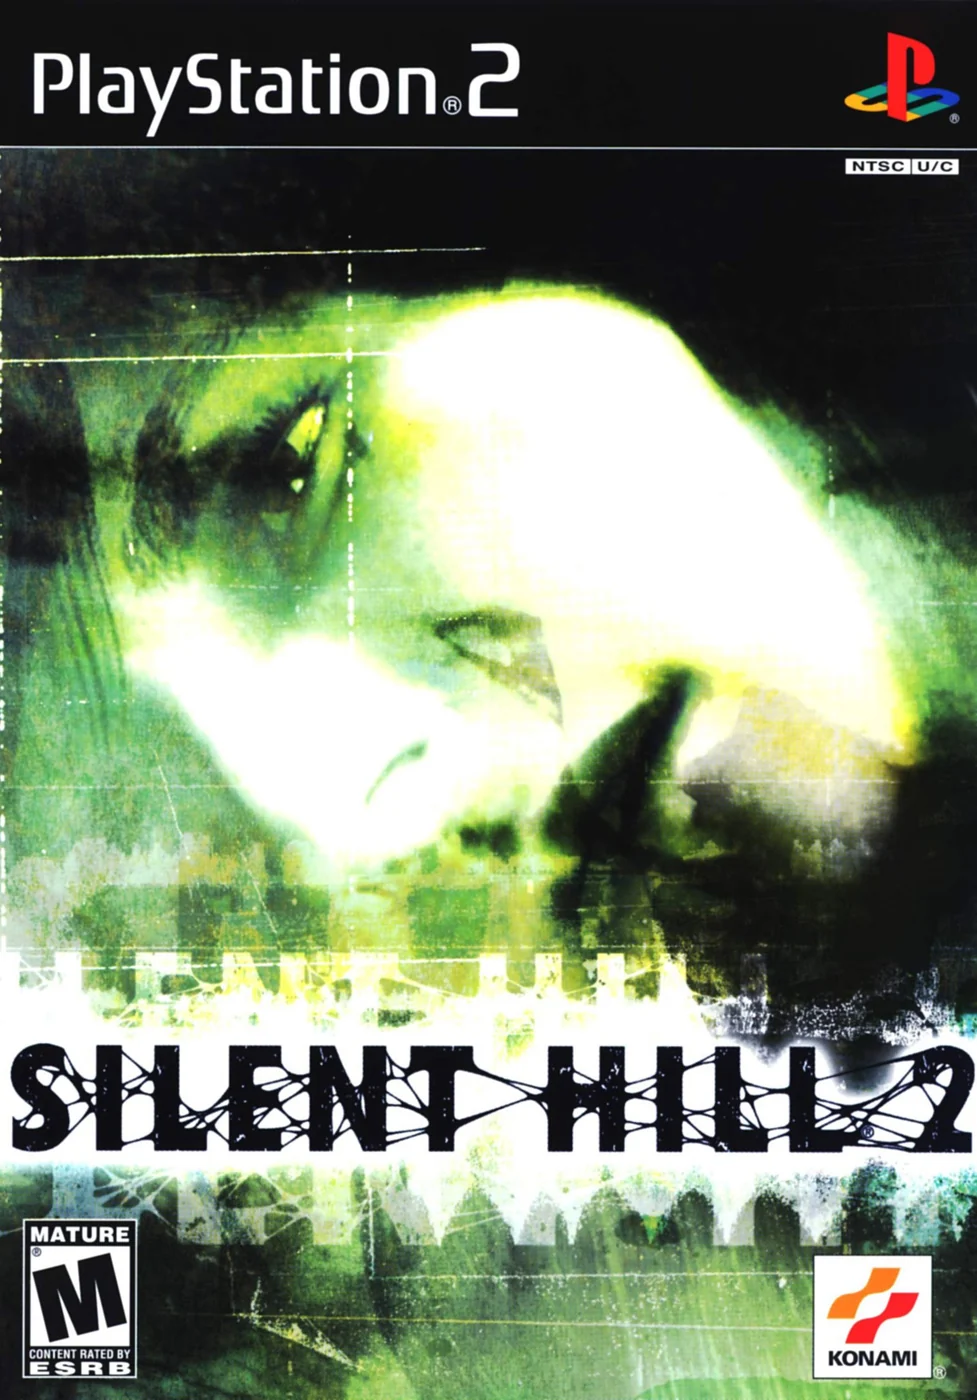
Silent Hill 2 — PlayStation 2 (USA) Complete Campaign Walkthrough (Original PS2 release)
Step-by-step directions to finish the original PlayStation 2 release of Silent Hill 2 (Letter from Silent Heaven campaign). Covers survival basics, progression through every major area, practical boss tactics (including both Pyramid Head encounters), how the five official original PS2 endings work, and concrete completion checks for a finished campaign on the North American PS2 release.

Find a copy
Silent Hill 2 PlayStation 2
We may earn a commission if you buy through these links, at no extra cost to you. As an Amazon Associate I earn from qualifying purchases.
Opens retailer search results. Check the model, edition, seller, availability and current price before buying.
Before you begin
You are about to play Silent Hill 2 on the original North American PlayStation 2 release.
This walkthrough assumes you are playing the Letter from Silent Heaven main scenario supplied with the retail PS2 disc and will guide you through every mandatory area, critical puzzle, the principal boss encounters and the ending conditions used by the original PS2 code.
Follow the area-by-area objectives and the boss tactics to move forward with minimal backtracking.
Take this as a practical survival guide, not a narrative summary.
I explain what to prepare, how to handle combat and puzzle bottlenecks, where to look for keys and relics needed for specific endings, and how to recover from failure.
If your copy is a later ‘Greatest Hits/Director’s Cut’ or a PC/Xbox/HD remaster, consult the Accuracy Notes — that release adds bonus content and an extra ending that this original-PS2-focused walkthrough treats as optional extra material.
Set yourself up for the run
Verify the game disc before starting: the original North American PS2 release is serial SLUS-20228. Greatest Hits SLUS-20228GH and European Director's Cut releases are expanded editions with different content.
Use the maps and red square save points throughout the campaign. Silent Hill 2 has no normal autosave, so save after major keys, puzzles, boss encounters and area transitions.
Choose the control type and action/riddle difficulties before beginning. Test movement, running, sidestepping, camera focus, weapon readiness, item use and manual saving in the opening area.
Keep separate files for ordinary progression, ending experiments and completed-result data. Do not rely on one overwritten save when pursuing multiple endings.
Carry the currently useful weapon, ammunition, healing items and puzzle objects. There is no fixed modern hotbar limit, but inventory management and safe distance before opening menus remain important.
The main route is: East South Vale, Wood Side Apartments, Blue Creek Apartments, West South Vale, Brookhaven Hospital, Nightmare Hospital, Dark South Vale, Silent Hill Historical Society, Toluca Prison, Labyrinth, Toluca Lake, Lake View Hotel and Nightmare Hotel.
Controls, Saves and Inventory — Immediate Survival
Set up the original North American PlayStation 2 version of Silent Hill 2, confirm its manual-save routine, and learn the movement and combat controls before the opening town route becomes dangerous. The first area is also where you should establish a safe habit of separating exploration saves from recovery saves.
1. Confirm the default DualShock 2 controls
The original PS2 release uses the D-pad or left analog stick for movement. Press and hold Square while moving to run. X accepts menu choices, examines objects, attacks with a readied weapon, and performs a stomp or kick when an enemy is down. Circle cancels or exits menus and puzzles and toggles James’s flashlight. Triangle cancels in many menus and opens the quick map once a map has been obtained.
Hold R2 to ready the equipped weapon. While R2 is held, press X to fire a firearm or swing a melee weapon. L1 sidesteps left and R1 sidesteps right when the selected control arrangement supports those actions. Press L1 and R1 together for James’s fast 180-degree turn. Hold L2 to position the camera behind James; while L2 is held, the right analog stick provides a forward search view where the location permits it.
Start opens the Item Screen, where you can equip weapons, use healing items, inspect objects, read memos, and adjust options. Select pauses the game. The Item Screen is not a safe combat pause: entering and leaving it causes a visual transition while enemies can remain active, so create distance before using supplies.
- Press Start and identify the weapon, item, memo, map, and option sections.
- Hold R2, then press X with the Wooden Plank when it becomes available.
- Test Circle for the flashlight and L2 for the camera-behind-James view.
- Practice L1 plus R1 for the 180-degree turn before entering a narrow route.
2. Choose the control type before practicing movement
The Options menu provides 3D Type and 2D Type controls. 3D Type is the original default and is the safest recommendation for a first playthrough because the left stick moves James relative to the direction he is facing. Camera changes can make the screen appear to rotate, but James’s facing direction remains the reference for forward, backward, and turning movement.
2D Type changes movement behavior so the left stick is tied more directly to the screen direction. It can feel more immediate, but switching types after learning the opening route can make familiar dodge inputs behave differently. The Options menu also includes Walk/Run Control, which can reverse the normal Square-based running arrangement. Leave it at Normal until you have tested the alternative.
Strafing is not the same as running. L1 or R1 moves James sideways while preserving his facing direction and is useful when an enemy is directly ahead. Square produces a faster run for crossing an attack lane, escaping through a doorway, or opening space before an enemy reaches striking range.
- Confirm whether Control Type is set to 3D Type or 2D Type.
- Keep Walk/Run Control at Normal unless you deliberately prefer Reverse.
- Practice walking, running, sidestepping, and turning in an empty outdoor area.
3. Find and use the first red save sheet
Silent Hill 2 does not save automatically during normal exploration. The save points are red square sheets of paper placed on walls, tables, fences, or other surfaces. Face one and press X to examine it, then choose a memory-card file from the Save Screen.
The first save point is inside the well on the nature trail, shortly before the main cemetery gates. After the opening forest walk, inspect the well rather than immediately continuing through the gate. This is the correct place to establish your first file. The red square sheet is the save interface; it is not an item that enters the inventory.
The US PS2 manual states that each game save requires at least 93 KB of memory-card space. Use an 8 MB PlayStation 2 memory card, confirm that it is inserted before starting, and never remove it while saving or loading. After making the first save, return to the title screen and use Load to verify that the file appears. Continue loads the newest file, while Load lets you choose an older slot.
- Save at the red sheet in the well before entering the cemetery.
- Verify that the file appears in the title-screen Load menu.
- Keep a current save and, when possible, an earlier fallback save in separate slots.
- Do not confuse the red sheet with an autosave or checkpoint system.
4. Organize equipment without treating the inventory as a hotbar
Silent Hill 2 does not use a small modern quick-access inventory. You can carry and inspect weapons, ammunition, healing items, keys, and puzzle objects from the Item Screen. The practical limit is not a fixed number of visible slots; it is the need to recognize what is useful now and avoid wasting time in menus while enemies are nearby.
At the start, James does not have the Handgun. The first weapon is the Wooden Plank, obtained during the initial encounter after the radio is found. Later, the Handgun is collected in Wood Side Apartments. Until then, do not waste time searching the opening forest for firearms.
For the first hour, keep the current melee weapon ready while exploring quiet streets, carry the healing items you have found, and leave puzzle objects in the inventory after collecting them. Once the Handgun is available, equip it before entering a room where distance or a narrow approach makes melee unsafe. Carrying a weapon does not consume a separate equipment slot, so there is no need to discard tools or keys to make room.
- Use the Wooden Plank for isolated early enemies when there is room to retreat.
- Equip the Handgun after obtaining it in Wood Side Apartments rather than expecting it at the start.
- Check James’s health before entering a building or narrow corridor.
- Use Triangle for directions when you only need the map.
5. Practice combat safely and finish downed enemies
Hold R2 to face and ready the current weapon, then press X to attack. With the Wooden Plank, attack an isolated Lying Figure from a position that leaves room behind James. After it falls, press X again from the correct position to stomp or kick if it is still alive. The radio’s static is a useful warning that another enemy may be close, but it does not replace checking the camera and surroundings.
Use melee against a lone weak enemy only when the floor plan gives you space to retreat. If two enemies overlap, the camera is obstructed, or an enemy is guarding a doorway, run through the route or use the Handgun once it is available. Ammunition is best spent to create safe distance rather than on attacks made while James is trapped against scenery.
Heal from the Item Screen only after reaching a doorway, open street, or other position where an enemy cannot immediately strike. The screen transition is not a reliable pause. The status display and controller vibration warn that James is badly hurt; do not wait for a near-death state before using a Health Drink or stronger recovery item.
- Practice one melee attack and one stomp in the first safe combat area.
- Use Square to run past a threat and L1 plus R1 to reverse direction quickly.
- Create distance before opening Start and using a healing item.
- Reload after a mistake instead of spending several healing items recovering from a bad position.
6. Establish the repeatable save routine
Save at every red sheet after obtaining an important key, solving a puzzle, surviving a difficult encounter, or entering a new major building. Keep one recent file for normal progress and one older file before a risky section. This is especially valuable when you want to revisit an area for missed supplies without sacrificing the main route.
A successful opening setup means you can identify the Wooden Plank, later equip the Handgun, use the Item Screen, read the quick map, run, sidestep, turn around, recenter the camera, heal safely, and save at a red sheet. Once those actions are familiar, continue through the cemetery and into the first town streets.
- Maintain a recent safety save and an earlier fallback save when memory-card space permits.
- Do not overwrite every save slot with the same moment.
- Continue only after confirming that your first save can be loaded successfully.
Before you move on
- You can identify X, Square, Circle, Triangle, Start, Select, R2, L2, L1, and R1 and describe their main functions.
- You have found the red save sheet in the well and created a file on a PlayStation 2 memory card.
- The file appears in the title-screen Load menu and can be selected successfully.
- You know that the Wooden Plank is the opening weapon and that the Handgun is obtained later in Wood Side Apartments.
- You have practiced running, sidestepping, the 180-degree turn, camera recentering, weapon readiness, a melee finish, and safe healing.
- Your current inventory contains the available weapon, healing items, and necessary puzzle objects without any attempt to manage a nonexistent hotbar limit.
Rosewater Park & Cemetery — First Objectives and A Taste of the World
The opening chapter begins at the observation deck, crosses the forest path and cemetery, and then enters East South Vale. Rosewater Park is not reachable during this first visit. Your immediate objectives are to meet Angela, enter Silent Hill, find the note at the mobile home, investigate Neely’s Bar, recover the Apartment Gate Key from the north end of Martin Street, and enter Wood Side Apartments.
Leave the observation deck and follow the forest path
After the opening scene, leave the restroom and return to the observation deck. James cannot continue in his car, so walk down the marked path into the forest. Stay on the maintained trail and follow it through the woods. This opening stretch contains no required combat, so conserve your stamina and do not waste time searching off the path.
Continue until the route reaches a wooden bridge and then follow the trail toward the cemetery. A brief viewpoint scene confirms that you are still moving in the intended direction. Near the cemetery entrance, look for the small stone well beside the path.
- You have left the observation deck on foot.
- You have followed the forest trail to the cemetery entrance.
- The well is visible beside the cemetery path.
Use the first save point at the well
Face the well and examine the red square inside it. This is the first save point in the original PlayStation 2 release. When James is facing a save point, press the X button to open the Save Screen, then select a memory-card slot and confirm the save. The game does not provide automatic checkpoints, so do not continue until the file has been written successfully.
The well is the first dependable save landmark after the opening scene. Keep this file in a separate slot if you want to preserve the beginning of the campaign. You will later find another save point in a mobile home after entering town, but the well is the safest place to record the opening progress before meeting Angela.
- The Save Screen opened after examining the red square.
- The new file is visible on the memory card.
- You know that saving is manual and that there is no autosave protection.
Meet Angela in the cemetery
Enter the cemetery through the nearby gate and follow the central walkways. Angela Orosco is standing among the graves. Approach her to trigger the required conversation and allow the scene to finish before leaving. This encounter is a progression event; there is no item or combat objective to complete during the conversation.
A boarded building may be visible among the graves. It is not an available entrance during this chapter, so do not search the walls or spend time trying to find a key. After the conversation, move east through the cemetery and continue east or northeast until you reach the exit.
- Angela’s conversation has played to completion.
- You have left the cemetery through the eastern or northeastern exit.
- You have ignored the boarded caretaker’s building as an inaccessible landmark.
Cross the forest road into East South Vale
After leaving the cemetery, continue along the only maintained route. You will pass abandoned vehicles and the Silent Hill Ranch. The ranch is scenery during this visit and cannot be entered. Keep following the road until you reach a large fenced area; there is no usable entrance there, so continue forward until the path opens into town.
The camera changes to a behind-the-shoulder view near the town entrance. Open the gate and proceed along Wiltse Road beside the river. The first possible left is blocked by construction, so follow the bend until you reach the Wiltse Road and Sanders Street intersection.
- You passed the Silent Hill Ranch without looking for an entrance.
- You opened the town gate and entered Silent Hill proper.
- You reached Wiltse Road and the Sanders Street intersection.
Reach the mobile home and make a second save
At Wiltse and Sanders, cross toward the Flower Shop area and continue through the available streets. The route eventually takes you north on Lindsey Street, then back toward Sanders Street and Neely Street. Some streets and businesses are blocked, so use James’s map to identify red markings rather than forcing locked doors.
From Neely Street, travel south to the dead end and turn west onto Ward Street. At the end of Ward Street is an open mobile home. Enter it and read the note on the sofa, which tells James to wait at Neely’s Bar. A second save point is inside the mobile home. Save here before returning through the streets. This is the first practical save point after the cemetery and is the recommended checkpoint before the Neely’s Bar sequence.
- You entered the mobile home at the end of Ward Street.
- You read the note directing James to Neely’s Bar.
- You created a save at the mobile-home save point.
Enter Neely’s Bar and follow its clue
Leave the mobile home and return to Neely Street. The usable entrance to Neely’s Bar is on the east side of Neely Street, just north of Sanders Street. The main door is not the route; use the side entrance that is available from the street.
Inside the bar, examine the map on the counter. James copies its information to his own map, including a question mark at the north end of Martin Street. Also inspect the writing on the paper-covered window if you want the opening-area clue, then leave the bar. The map is the important progression aid: it points you toward the next investigation site.
- You entered Neely’s Bar through the available side entrance.
- You examined the map on the counter.
- The north end of Martin Street is marked as the next objective.
Find the Apartment Gate Key on Martin Street
From Neely’s Bar, go north on Neely Street, turn east onto Katz Street, and then turn north onto Martin Street. Continue toward the dead end. A Health Drink is near the fence on the way, and a white van is positioned near the far end. A Lying Figure can emerge from beneath or beside the van, so approach with the plank ready or run past it if the route is clear.
At the north end of Martin Street, leave the pavement and follow the blood trail beside the wooden fence. Examine the body at the end to obtain the Apartment Gate Key. Open the inventory and inspect the key if you need confirmation: its description identifies Wood Side Apartment as its destination.
Optional memo fragments can be found farther north on Neely Street near another body. They are not required for progression. If enemies are nearby, clear enough space before reading because James remains vulnerable while examining small notes.
- You reached the north end of Martin Street.
- You examined the body beside the wooden fence.
- You obtained the Apartment Gate Key.
- The key description identifies Wood Side Apartment.
Enter Wood Side Apartments and finish the chapter
Return to Katz Street and head west toward the large apartment complex marked on the map. The correct entrance is behind a fenced gate; the camera angle changes when you approach it. Use the Apartment Gate Key on the gate, then enter through the apartment doors immediately beyond it.
Before going upstairs, take the apartment map from the lobby wall and collect the nearby Health Drink if you need it. There is a save point on the east wall of the dark lobby. Use it before exploring the second floor. The next chapter begins inside Wood Side Apartments, where James must find a light source and begin the apartment puzzles.
Rosewater Park is not part of this opening route. It becomes accessible only after James completes the apartment sections and exits into western South Vale. Do not treat the park as a missed objective if it is not yet reachable.
- You used the key to open the Wood Side Apartments gate.
- You entered the apartment lobby and collected the building map.
- You saved at the lobby save point before going upstairs.
- You understand that Rosewater Park follows the apartment sections rather than the cemetery.
Before you move on
- The observation-deck and forest sequence is complete.
- Angela’s cemetery conversation has played and James has exited through the cemetery’s eastern or northeastern side.
- James has entered East South Vale, followed Wiltse Road and reached the town streets.
- The mobile-home note has been read and a save has been created there.
- James has entered Neely’s Bar and examined the map on the counter.
- The Apartment Gate Key has been recovered from the body at the north end of Martin Street.
- James has opened the Wood Side Apartments gate and saved inside the lobby.
- Rosewater Park has not yet been visited; that is correct for this chapter and does not indicate a missed objective.
Wood Side Apartments and the First Pyramid Head Sightings
Complete Wood Side Apartments by collecting the Flashlight, Handgun, Clock Key, Courtyard Key, Fire Escape Key, Canned Juice, and two coins, then meet Eddie in Apartment 101. The chapter ends when James uses the Fire Escape Key and crosses into Blue Creek Apartments. The first Pyramid Head survival encounter does not happen in Wood Side; it occurs later in Blue Creek after the apartment coin puzzle and the Apartment Stairway Key. Begin ch03 after crossing through the adjoining apartment window.
Save in the lobby and take the apartment map
Enter Wood Side Apartments through the main entrance. Take the Map of the Apt. Building from the noticeboard on the left side of the lobby. The red save point is on the right wall near the entrance. Save before exploring, because the PlayStation 2 original uses manual save points rather than an autosave system.
The lobby door leading toward the courtyard is locked for now. Do not waste time trying to force it open. Take the stairs to the second floor and begin with the rooms that can be reached from the main stairwell. Isolated Lying Figures can usually be avoided in the narrow corridors; if one blocks a doorway, use the Wooden Plank at close range rather than spending handgun ammunition unnecessarily.
- Take the Map of the Apt. Building.
- Save at the red marker in the lobby.
- Leave the locked courtyard entrance alone until you have the Courtyard Key.
- Use melee attacks on isolated enemies when the corridor gives you room.
Collect the Flashlight and Handgun
On the second floor, enter Apartment 205 and examine the illuminated mannequin to obtain the Flashlight. The mannequin farther inside the room becomes active, but you do not need to fight it to complete the pickup. Keep the Flashlight on when searching dark rooms; it is also required for the Handgun pickup.
Go to the third floor and enter Apartment 301. Examine the shopping cart while the Flashlight is on to obtain the Handgun. Search accessible rooms such as Apartment 210 for healing items and ammunition, but do not feel obligated to clear every enemy. The building is designed to open in stages, and several doors remain unusable until you collect later keys.
- Obtain the Flashlight from Apartment 205.
- Keep the Flashlight switched on when examining the cart in Apartment 301.
- Obtain the Handgun from Apartment 301.
- Search accessible rooms for supplies without spending ammunition on avoidable fights.
Solve the clock route
Return to the second floor and enter Apartment 208. After the sound at the hallway intersection, examine the shelf to take the Key to Room 202. Use that key on Apartment 202, then enter the bedroom with the butterfly-covered wall. Reach into the hole to obtain the Clock Key.
Return to Apartment 208 and use the Clock Key on the grandfather clock. Set the clock to 9:10:15. The hour hand points to nine, the minute hand points to two, and the second hand is already fixed at fifteen seconds. Once the clock is set correctly, move to its side and push it aside to reveal the passage into Apartment 209.
Apartment 209 contains the second Wood Side save point on a pushcart beside the kitchenette. Save there before continuing. The passage also gives access to the third-floor section needed for the remaining Wood Side objectives.
- Take the Key to Room 202 from Apartment 208.
- Use it in Apartment 202 and take the Clock Key.
- Set the clock to 9:10:15.
- Push the clock aside and enter Apartment 209.
- Save at the Apartment 209 marker.
Trigger the Wood Side Pyramid Head sighting and collect the next keys
Use the clock passage to reach the third-floor corridor and enter Apartment 307. A cutscene shows Pyramid Head behind the bars and attacking a Lying Figure. This is a scripted sighting, not a boss fight. James’s gunfire during the scene is not player-controlled, so do not waste ammunition trying to damage Pyramid Head or open a combat phase.
After the scene, take the Courtyard Key from the closet. Leave Apartment 307 and go to the nearby corridor where Laura kicked away another key. Pick up the Fire Escape Key. Search Apartment 303 for optional healing items and handgun ammunition, then use the eastern stairwell to reach the first floor.
- Enter Apartment 307 and watch the scripted Pyramid Head scene.
- Take the Courtyard Key from the closet.
- Take the Fire Escape Key from the third-floor corridor.
- Search Apartment 303 for optional supplies.
Use the Canned Juice and recover the Old Man coin
On the first floor, follow the accessible eastern corridor toward Apartment 107. The Canned Juice is near the end of the corridor. Take it, then leave through the eastern lobby doors and return to the original lobby area.
Go upstairs to the second-floor laundry room beside the garbage chute. Open your inventory and use the Canned Juice on the chute. This knocks loose the item lodged inside. Return to the first floor, exit through the lobby doors, and inspect the garbage at the bottom of the chute outside to obtain the Coin [Old Man].
The Canned Juice is a progression item, not a healing item. Do not discard or consume it before using it on the chute.
- Take the Canned Juice near Apartment 107.
- Use the Canned Juice on the second-floor garbage chute.
- Exit outside through the lobby.
- Collect the Coin [Old Man] from the garbage below the chute.
Collect the Snake coin and meet Eddie
Use the Courtyard Key on the locked courtyard entrance. The pool is drained, and three Lying Figures are gathered around the baby carriage. The safest approach is to defeat or separate the enemies before entering the pool. If you choose to run past them, enter only long enough to take the coin and use the steps to leave; being surrounded in the pool can cost more healing than the ammunition you save.
Examine the baby carriage to obtain the Coin [Snake]. Then enter the other building through the courtyard and go to Apartment 101. Investigate the bathroom to trigger Eddie’s scene. This meeting is required for Blue Creek Apartment 109 to open later. If you reload an earlier save after seeing Eddie, trigger the scene again before expecting that door to function.
- Unlock and enter the courtyard.
- Take the Coin [Snake] from the baby carriage.
- Enter Apartment 101 in the north building.
- Complete Eddie’s scene before leaving Wood Side.
Leave Wood Side and begin Blue Creek
Return to the second floor of Wood Side. You can reach the west side through the clock passage in Apartments 208 and 209, or return through the courtyard and lobby route. At the west end of the second-floor corridor, examine the blue door and use the Fire Escape Key.
The door does not lead to an exterior fire escape in this version. James crosses through a window into an adjoining apartment in Blue Creek Apartments. Once the transition finishes, Wood Side is complete and ch03 begins. The next chapter starts in Blue Creek Apartment 203, where you will obtain its map and begin the safe and coin-puzzle route.
Do not attempt to fight Pyramid Head before this transition. The Wood Side sightings are scripted, and the first controllable survival encounter takes place later in Blue Creek after you obtain the Apartment Stairway Key. The Blue Creek save point is reached during the next chapter, not before Wood Side is completed.
- Return to the west end of Wood Side’s second floor.
- Use the Fire Escape Key on the blue door.
- Cross through the adjoining apartment window.
- Confirm that James has entered Blue Creek Apartments.
- Begin ch03; do not treat the Blue Creek Pyramid Head encounter as part of this chapter.
Before you move on
- The Flashlight has been collected from Apartment 205.
- The Handgun has been collected from Apartment 301.
- The Clock Key has been used on the grandfather clock.
- The clock passage into Apartment 209 has been opened with the setting 9:10:15.
- The Courtyard Key has been collected from Apartment 307.
- The Fire Escape Key has been collected from the third-floor corridor.
- The Canned Juice has been collected and used on the second-floor garbage chute.
- The Coin [Old Man] has been recovered from the garbage outside.
- The Coin [Snake] has been taken from the drained courtyard pool.
- Eddie has been encountered in Apartment 101.
- The Fire Escape Key has been used at the west end of Wood Side’s second floor.
- James has crossed through the window into Blue Creek Apartments.
- The chapter ends before the Blue Creek coin desk, Apartment Stairway Key, and first controllable Pyramid Head encounter.
Blue Creek Apartments — Angela, Coins and the Apartment Stairway Key
Blue Creek Apartments is the third main-scenario area and begins after James crosses the broken fire escape from Wood Side Apartments into Room 203. Wood Side must already be complete, including Eddie’s scene in Room 101, because that event is required before Room 109 opens. This chapter covers the randomized Room 203 safe memo, the Angela scene and Prisoner Coin in Room 109, the three-coin desk in Room 105, the Lyne House Key, the Apartment Stairway Key in Room 208, and the timed Pyramid Head survival sequence in the north stairwell. Maria is not introduced here; James first meets her earlier at Rosewater Park. The correct destination after Blue Creek is West South Vale, not Wood Side or Brookhaven Hospital.
Confirm Wood Side is complete, then enter Room 203
Before beginning this route, make sure you have finished the required Wood Side Apartments progression and watched Eddie’s scene in Room 101. If that scene has not occurred, Room 109 in Blue Creek will remain locked later. You can return through the broken fire escape in Room 203, cross the courtyard, complete Eddie’s scene, and come back the same way.
After crossing the fire escape, James lands in Room 203. Move from the bedroom into the washroom and examine the toilet. Take the wallet and read the memo inside it. The memo gives the randomized safe combination for this playthrough, including the turning directions. Use the memo from this run rather than a remembered code from another game.
The locked safe is in the living room and is optional. It contains four boxes of Handgun Bullets, so opening it is useful if you want to increase your reserve, but it is not required for progression. The kitchenette also contains a Health Drink. To operate the safe, turn to the first value in either direction, then follow the memo’s arrows for the remaining values. On Hard, Roman numerals represent added values such as V and X; on Extra, letters represent values from 10 through 20.
- Confirm Eddie’s Room 101 scene in Wood Side has already occurred.
- Take the wallet memo from the toilet in Room 203.
- Record the safe combination and its directions exactly.
- Open the optional safe for Handgun Bullets if desired.
- Take the kitchenette Health Drink if needed.
Collect the building map and reach the first floor
Leave Room 203 and enter the second-floor hallway. The other rooms are locked for now. Follow the corridor toward the blue stairwell door beneath the glowing EXIT sign. With the Flashlight on, look to James’s left inside the stairwell and collect the Map of the West Apt. Bldg.
The stairs to the third floor are blocked, so do not spend time searching for an upper route. Descend to the first floor through the accessible stairwell door. A Lying Figure or Creeper may be nearby. Avoid them when the corridor gives you room, and use the Wooden Plank only when an enemy blocks the route or you need a safe finishing attack.
A First Aid Kit is in the laundry room near the stairwell, on a washing machine. Take it if you need the healing or want to secure the pickup before continuing.
- Collect the Map of the West Apt. Bldg. in the second-floor stairwell.
- Descend to the first floor.
- Take the laundry-room First Aid Kit if useful.
- Avoid spending handgun ammunition on enemies that can be bypassed.
Open Room 109 and complete Angela’s scene
Room 109 is near the stairwell. If its door will not open, return through Room 203 and complete Eddie’s Room 101 scene in Wood Side before trying again. Once the prerequisite is complete, enter Room 109 and collect the Handgun Bullets from the couch.
Go through the unlocked white door near the couch. The scene with Angela plays in the adjoining room. When she leaves, take Angela’s Knife and the Prisoner Coin from the nightstand. The torn photograph on the floor is optional story material and is not needed to solve the next puzzle.
Angela’s Knife is not a normal combat weapon. Its examination history can influence the ending calculation, so do not repeatedly inspect it if you are following a route that avoids that ending variable. Maria does not appear in Blue Creek and is not waiting in another apartment. Her first meeting occurs earlier at Rosewater Park, so continue with the Blue Creek objectives rather than searching for her here.
- Verify Eddie’s Room 101 scene if Room 109 is still locked.
- Take the Handgun Bullets from the Room 109 couch.
- Pass through the white door and complete Angela’s scene.
- Take Angela’s Knife and the Prisoner Coin.
- Leave the optional torn photograph unless you want the additional story detail.
Solve the three-coin desk in Room 105
Exit Room 109 and enter Room 105, the other unlocked apartment beside the stairwell. Examine the secretarial desk. You need the Old Man Coin and Snake Coin from Wood Side Apartments and the Prisoner Coin from Room 109. If the desk cannot be completed, check the inventory before retracing the earlier building.
Insert the coins according to your selected riddle difficulty. On Easy, use Old Man, empty, Snake, empty, Prisoner from left to right. On Normal, use empty, Old Man, Prisoner, empty, Snake. On Hard, use empty, Old Man, empty, Snake, Prisoner. On Extra, use Old Man, empty, Snake, Prisoner, empty.
When the arrangement is accepted, the desk opens and provides the Lyne House Key. A red save point is in the small passage directly behind the desk. Save there before returning upstairs. The key is for Room 209; it does not lead back toward Wood Side.
- Confirm that the Old Man, Snake and Prisoner Coins are in the inventory.
- Use the arrangement for the current riddle difficulty.
- Take the Lyne House Key from the opened desk.
- Save at the red save point behind Room 105.
Use Room 209 to reach Room 208
Return to the second floor and unlock Room 209 with the Lyne House Key. Search the apartment, then go from its living room onto the balcony. The balcony connects to Room 208.
In Room 208, collect the Handgun Bullets from the chair and the Apartment Stairway Key from the envelope on the bed. The key is the required item for the north stairwell. Use the red save point in the Room 208 bedroom before starting the next sequence. Keep at least one healing item available, but do not waste ammunition simply because a Pyramid Head encounter is ahead; the encounter ends through survival and scripting rather than a normal kill.
Return through Room 209 to the second-floor hallway. The north stairwell is past the Mannequin.
- Unlock Room 209 with the Lyne House Key.
- Cross the balcony from Room 209 into Room 208.
- Take the Handgun Bullets from the chair.
- Take the Apartment Stairway Key from the envelope on the bed.
- Save in Room 208 before opening the north stairwell.
Survive the north-stairwell Pyramid Head sequence
Use the Apartment Stairway Key on the locked north stairwell. The door jams behind James and Pyramid Head begins the short forced encounter. This is not a conventional boss fight: Pyramid Head cannot be permanently defeated here, and the objective is to stay alive until the siren causes him to leave.
Use the length of the stairwell and alternate between its opposite corners. Let Pyramid Head approach, then run past him toward the far corner after his ordinary swing. Avoid tight circles around him, because moving directly into his position can trigger a punch or grab. Handgun fire is optional; a few shots slow him and can shorten the sequence, but conserving ammunition is also safe.
Watch for the Great Knife overhead attack. Pyramid Head pauses at a distance and draws the weapon back before swinging. Move immediately to the opposite side, because this attack can kill James in one hit. When the siren sounds, do not follow Pyramid Head down the flooded stairs. His attacks become especially dangerous during the exit, and he can turn back if James is too close.
Wait until Pyramid Head has gone through the exit and the stairwell drains. Then descend through the same stairwell and leave the apartment complex. The next area is West South Vale. Brookhaven Hospital comes later, after the intervening town progression.
- Use the Apartment Stairway Key at the north stairwell.
- Alternate between the far corners instead of attempting sustained melee combat.
- Run immediately when Pyramid Head begins the overhead Great Knife swing.
- Survive until the siren and his departure.
- Do not follow him down the stairs while the exit sequence is active.
- Wait for the stairwell to drain, descend and exit into West South Vale.
Before you move on
- Wood Side Apartments is complete and Eddie’s Room 101 scene has occurred.
- The wallet memo has been collected in Room 203, and the optional safe has either been opened or deliberately skipped.
- The Map of the West Apt. Bldg. has been taken from the second-floor stairwell.
- The Room 109 Angela scene has occurred, and the Prisoner Coin has been collected.
- The Lyne House Key has been obtained from the Room 105 desk using the arrangement for the current riddle difficulty.
- Room 209 has been unlocked, the balcony crossing into Room 208 has been completed, and the Apartment Stairway Key has been collected.
- The Room 208 save point has been used before opening the north stairwell.
- Pyramid Head has left, the stairwell has drained, and James has exited Blue Creek into West South Vale.
Pete's Bowl-O-Rama and Streets — Laura, Maria and Tracking Flags
This chapter begins immediately after Blue Creek Apartments. James exits the apartment complex, reaches Rosewater Park, meets Maria and learns that the Lake View Hotel may be his intended destination. The route then crosses West South Vale through Jack’s Inn, Texxon Gas, Pete’s Bowl-O-Rama and Heaven’s Night before Laura leads James into Brookhaven Hospital. Collect the useful street supplies before entering the hospital, preserve a separate save if you intend to test endings, and treat Maria carefully because her survival, proximity and the way James responds to her contribute to the cumulative ending calculation.
Leave Blue Creek Apartments and meet Maria at Rosewater Park
After the Blue Creek Apartments sequence ends and James survives the encounter with Pyramid Head, follow the passage toward Rosewater Park. Search the park if you need supplies, but the required objective is the waterfront at the northern end. Continue to the overlook and speak with Maria. The conversation establishes that she resembles Mary and joins James for the next part of the route.
Once Maria begins following James, she can be harmed by monsters and by careless attacks. Keep enemies away from her when possible, avoid firing through her position and create space before using the wooden plank or steel pipe. Shooting Maria can cause an immediate game over, so do not treat her as harmless scenery.
- Confirm that the Blue Creek Apartments chapter is complete before leaving the area.
- Reach the Rosewater Park waterfront and finish the meeting with Maria.
- Begin protecting Maria from enemy attacks and accidental weapon hits.
Save at Jack’s Inn before crossing West South Vale
Leave the park by following the path around to its western side, then cross the street toward Jack’s Inn. The fenced parking area beside Rosewater Park is not the route forward. In the rear lot of Jack’s Inn, examine the car with the red save symbol and create a manual save.
Use a second memory-card slot if you plan to pursue different endings. This is an especially useful safety save because the next route contains optional supplies, Maria-related behavior and the transition into Brookhaven Hospital. Do not overwrite it while experimenting with ending actions.
- Reach the rear lot of Jack’s Inn.
- Save at the red marker on the car.
- Create a separate test save before making deliberate ending-specific choices.
Take the steel pipe and search the Texxon and Carroll Street supplies
From Jack’s Inn, travel west along Nathan Avenue. At the southeast corner of Nathan Avenue and Carroll Street, locate the running car at Texxon Gas. Examine the car and take the steel pipe when prompted. The pipe has greater reach than the wooden plank and is useful for conserving handgun ammunition against ordinary enemies.
Continue a short distance south on Carroll Street and look for the tire tracks on the eastern side of the road. Follow them to a group of health drinks and handgun ammunition. Return to Carroll Street, continue south to the next supply area on the same side, then turn back when the road ends. Travel north on Carroll Street and turn west onto Nathan Avenue.
If you are short on healing or ammunition, search the Texxon lot as well. The street enemies can usually be bypassed, so do not spend several handgun rounds on every creature. The bridge toward the hotel is destroyed, and the map near the corpse at the western end points James back toward Pete’s Bowl-O-Rama.
- Collect the steel pipe at Texxon Gas.
- Search both Carroll Street supply areas if you need resources.
- Check the western Nathan Avenue route and use the Bowl-O-Rama clue to confirm the destination.
Enter Pete’s Bowl-O-Rama and meet Eddie and Laura
Pete’s Bowl-O-Rama is on the south side of Nathan Avenue. The main double doors at the far end of the entrance hall are locked. Use the smaller door beside the entrance instead. Follow the accessible route into the side room and allow the conversation between Eddie and Laura to play out.
After control returns, move through the bowling-alley area to the other side and use the remaining exit. Laura sees James and runs away. Let the short scene finish, then leave through the same double-door route Laura uses. Maria will rejoin James outside and explain that Laura has gone ahead.
- Enter Pete’s Bowl-O-Rama from Nathan Avenue.
- Use the smaller door rather than the locked double doors at the far end.
- Allow the Eddie and Laura scenes to finish before leaving.
Follow Maria through the parking lot to Heaven’s Night
After leaving the bowling alley, move east along the outside wall. Enter the side parking lot, continue around the building and open the gate at the far end. Follow the narrow passage south until the fence blocks James and Maria. Maria points out that Laura slipped through a gap too narrow for them to use.
Examine the nearby locked side door when Maria directs James toward it. Maria unlocks the door, allowing the pair to enter the building. Go up the only stairway and use the green door with glass panes. This leads into Heaven’s Night.
Inside the bar, collect the health drink near the entrance and the first-aid kit on the chair farther inside if you need them. Leave through the gray front door beside the Heaven’s Night sign, then descend the stairs to rejoin Maria.
- Open the gate in the Bowl-O-Rama side parking lot.
- Use the side door Maria unlocks after the narrow passage.
- Go upstairs and enter Heaven’s Night through the green glass-paneled door.
- Collect the available healing items before continuing.
Follow Laura into Brookhaven Hospital
After leaving Heaven’s Night, descend the stairs and continue south along Carroll Street. Maria eventually sees Laura enter a building on the right. Follow Laura inside and around the entrance to reach Brookhaven Hospital. This is the required end point of the chapter.
Once inside, take the hospital map from the wall and enter the reception area. The first hospital save point is available near reception after the initial exploration begins. Save before starting the hospital route, then proceed to the next chapter for the examination-room key and hospital puzzles.
Do not detour into the Historical Society, Toluca Prison or other later destinations here. Those areas belong to later chapters. If you wanted the steel pipe, street ammunition or healing items, collect them before following Laura into the hospital.
- Follow Laura from Carroll Street into Brookhaven Hospital.
- Take the hospital map and locate the reception-area save point.
- Save inside the hospital before beginning the next chapter.
Manage ending behavior without importing remake rules
The original game calculates Leave, Maria and In Water from cumulative behavior rather than one choice in West South Vale. For Leave, heal James when he is injured, avoid unnecessary attention toward Maria and examine Mary’s photo or letter at least occasionally rather than treating Maria as the sole focus. Later, listen to the complete sickbed conversation in the hotel hallway.
For Maria, protect her from monsters, avoid attacking or repeatedly bumping into her, stay near her during this route and do not spend long periods running far away from her. Later in Brookhaven, return to Room S3 after Maria rests, and in the Labyrinth attempt to revisit the cell where Maria is found dead. These later actions are more significant than a single Bowl-O-Rama interaction.
For In Water, examine Angela’s knife when it becomes available, avoid promptly healing every injury and follow the reckless, self-destructive behavior pattern through later sections. The hospital rooftop diary, the later message in Neely’s Bar and the complete hallway conversation near the final boss are relevant to this route. Do not assume that one examination or one period of low health guarantees the ending.
Do not use remake-specific ending guides for this PS2 release. The three main endings are determined from multiple actions, and this chapter only establishes part of the final result.
- Leave: heal promptly, avoid excessive Maria focus and examine Mary’s keepsakes occasionally.
- Maria: protect Maria, remain close to her and complete the later Room S3 and Labyrinth visits.
- In Water: examine Angela’s knife, avoid consistently safe behavior and complete the later suicidal-material checks.
- Keep a separate save if you want to compare endings.
Before you move on
- James has completed the Blue Creek Apartments sequence and met Maria at Rosewater Park.
- The Jack’s Inn rear-lot save has been created, preferably in a slot separate from experimental ending saves.
- The steel pipe has been collected, or the player has deliberately chosen to leave it behind.
- The Texxon and Carroll Street supplies have been searched if additional healing or handgun ammunition is needed.
- James has entered Pete’s Bowl-O-Rama, completed the Eddie and Laura scenes and exited through the route Laura uses.
- Maria has unlocked the side door leading through the building and Heaven’s Night.
- James has followed Laura from Carroll Street into Brookhaven Hospital and saved near the hospital reception area.
- The player has chosen a general Leave, Maria or In Water behavior plan without overwriting the only reliable save.
Brookhaven/Nightmare Hospital — Nightmare Transition and Flesh-Lip Fights
After following Laura from West South Vale, James reaches Brookhaven Hospital with Maria. Search the hospital for the Examination Room Key, patient-wing access code, Lapis Eye Key, Roof Key and the two Louise Box codes. Defeat the three Flesh Lips, then navigate the altered Nightmare Hospital to obtain the Copper Ring and Lead Ring. Use the rings to open the Lady of the Door and survive the Pyramid Head chase. Leaving the hospital begins Dark South Vale, followed by the Silent Hill Historical Society and then Toluca Prison in the main route.
1. Enter Brookhaven Hospital and collect the opening items
After the entrance scenes, take the Hospital Map from the noticeboard in the lobby. Enter the Reception Office beside the lobby desk and use the red save marker. The Document Room beside the office contains the Purple Bull Key and a memo indicating that the key belongs to a box.
The Examination Room and Doctor's Lounge are locked at first. Use the open stairwell to reach the second-floor employee wing. Enter the Women's Locker Room, examine the teddy bear and take the Bent Needle. The open locker nearby contains the Shotgun. Cross the hall to the Men's Locker Room and inspect the bloody lab coat to obtain the Examination Room Key.
Keep the Handgun equipped for ordinary nurses and isolated enemies. Preserve the Shotgun and its ammunition for cramped encounters, especially the Flesh Lips battle. Before continuing into the patient wing, make sure you have healing items available and save if you want a safe restart point.
- Save in the Reception Office.
- Collect the Hospital Map, Purple Bull Key, Bent Needle, Shotgun and Examination Room Key.
- Keep healing items available before entering the patient wing.
2. Open the third-floor patient wing
Return to the first floor and use the Examination Room Key. Pass through the Examination Room into the Doctor's Lounge. Take the Shotgun Shells from the sink and examine the whiteboard beside the far door. The whiteboard provides the patient-wing keypad clue.
On Easy or Normal Riddle difficulty, enter 7335 at the third-floor keypad. On Hard or Extra Riddle difficulty, the whiteboard gives the T-shaped clue; the corresponding keypad sequence is 1328. These codes are fixed for their respective Riddle difficulty settings.
Return upstairs and use the keypad beside the locked third-floor patient-wing doors. Once the doors open, search the rooms in the order below rather than wandering through the still-locked sections.
- Read the Doctor's Lounge whiteboard if you want the in-game clue.
- Use 7335 on Easy or Normal Riddle difficulty.
- Use 1328 on Hard or Extra Riddle difficulty.
3. Search the patient wing and obtain the Roof Key
On the second-floor patient wing, enter Examining Room 3. Take the First-Aid Kit from the bed and inspect the typewriter. The carbon-paper imprint provides a four-digit code that is generated for the current playthrough. Record it exactly because it is used on the Louise Box.
Enter room M2 and take the Lapis Eye Key from the small nightstand drawer. Shotgun ammunition is nearby. Rooms M3 and M6 contain additional supplies, although nurses may be present, so collect them only if the route is safe.
Go upstairs to the third-floor patient wing and enter room S3. Maria is resting there. Take the Roof Key from the nightstand. Speaking with Maria or checking on her more than necessary can contribute to later ending calculations, so treat this as an optional interaction rather than a required step.
Use the employee-wing stairwell to reach the roof. The rooftop diary is optional. When James approaches the damaged fence, the fall is scripted and cannot be avoided. Save at the patient-wing marker before starting this sequence if you want an easier reload.
- Record the carbon-paper code from Examining Room 3.
- Collect the Lapis Eye Key and Roof Key.
- Decide whether to read the rooftop diary according to your ending plan.
- Save before the rooftop sequence if desired.
4. Solve the Louise Box and retrieve the Elevator Key
After the rooftop fall, James awakens in the third-floor Special Treatment Room. Heal if necessary, then enter the only open padded cell and examine the bloody writing on the wall. This provides a second four-digit code. Record it before leaving.
Return to the third-floor patient wing. Room S11 contains a save point and is a useful place to save before the upcoming boss. Room S14 contains the Louise Box. Use the Purple Bull Key and Lapis Eye Key on the box; they can be used separately or combined first.
The carbon-paper code belongs in the button lock. The bloody-wall code belongs in the turning lock. Both codes are generated for the current playthrough, so do not substitute numbers from another save or guide.
The opened box contains a Piece of Hair. Combine it with the Bent Needle, then use the combined item on the drain in the Shower Room. James retrieves the Elevator Key. Use it on the patient-wing elevator and select the first floor.
- Write down the bloody-wall code.
- Use both named keys on the Louise Box.
- Put the carbon-paper code in the button lock and the bloody-wall code in the turning lock.
- Combine the Piece of Hair with the Bent Needle before examining the shower drain.
5. Reach Laura and defeat the Flesh Lips
On the first-floor patient wing, room C3 contains additional Handgun Bullets and Shotgun Shells. Enter room C2 to find Laura. After the conversation, Laura locks James in Examining Room 2 and the Flesh Lips battle begins.
Equip and reload the Shotgun before speaking with Laura. Two Flesh Lips are active at the start, and a third enters after the first two have been defeated. Aim upward before firing because the creatures hang above James; firing immediately after raising the weapon can miss if the barrel has not fully aligned.
Fire once or twice when a Flesh Lip is within reliable range, then move across the room. Keep circling instead of backing into a wall, and use side movement to escape a sudden approach. If a creature lifts James for its strangulation attack, rapidly work the movement and shoulder controls to escape sooner.
Prioritize the closest target and avoid wasting shots while the creature is out of range. Once the first two are dead, the third Flesh Lip drops into the room. Use the Handgun for the final target if Shotgun ammunition is low. The fight ends after the third creature is defeated, followed by the hospital's Nightmare transition.
- Heal and reload before speaking to Laura.
- Aim upward before firing the Shotgun.
- Keep moving around the examination room.
- Use the Handgun on the final Flesh Lip if conserving Shotgun shells is necessary.
- Confirm the transition to Nightmare Hospital after the battle.
6. Search Nightmare Hospital and collect the Copper Ring
James awakens in the altered hospital garden. Collect the Shotgun Shells and use the save point on the garden fence if needed. Enter through the double doors and pass through the first-floor patient wing. Room C2 contains a First-Aid Kit and a Bubble Head Nurse; room C1 contains additional supplies. Use the elevator to reach the second floor.
In room M6, collect the Basement Storeroom Key and Dry Cell Battery. The room also contains ammunition and healing supplies. Read the memo explaining that a ring is hidden in the basement's basement. The employee-wing doors are not yet usable, and the fallen refrigerator in the Day Room cannot be opened by James alone.
Take the elevator to the third floor. Room S11 contains ammunition and an Ampoule, along with a memo explaining the strange stairwell door. Room S3 is empty except for Maria's medication and the sound of breathing. Enter the employee wing and move through the Storeroom to the stairwell. Save at the stairwell marker before descending.
Use the Basement Storeroom Key at the bottom of the stairwell. Inside, take the Shotgun Shells near the wreckage and push aside the shelf marked by bloody handprints. Descend the revealed ladder. Maria appears when James tries to go down and accompanies him again. Continue into the basement's basement and take the Copper Ring from the floor, then return upstairs with Maria.
- Save in the Nightmare Hospital garden or employee-wing stairwell.
- Collect the Basement Storeroom Key and Dry Cell Battery from M6.
- Push aside the shelf with bloody handprints.
- Take the Copper Ring from the basement's basement.
7. Get the Lead Ring, solve the optional chest and escape
Return to the second-floor Day Room through the patient-wing elevator. Maria helps James open the fallen refrigerator, revealing the Lead Ring. The Copper Ring and Lead Ring are both required for the exit door.
The Trick or Treat chest in the third-floor Storeroom is optional. During the elevator ride, the game asks three questions. The correct answers are Lakeside Amusement Park, Walter Sullivan and Nathan Avenue. Press the third button for the first question, the first button for the second and the third button for the third: 3-1-3. A correct solution opens the chest and awards Shotgun Shells and Ampoules. An incorrect submission damages James and permanently locks the chest for that playthrough.
Save in the employee-wing stairwell after handling the chest. Go to the strange third-floor door beside the patient-wing elevator and use the Copper Ring and Lead Ring on it. Combining the rings first is optional.
Follow the stairs downward and read the memo on the way. At the bottom, enter the hallway to begin the Pyramid Head chase. On Normal Action difficulty or lower, run continuously through the turning hallway to the elevator. Do not stop to fight and do not wait for Maria.
On Hard Action difficulty, Pyramid Head can kill Maria before the elevator. Equip the Handgun and fire a full clip when he appears, taking care not to hit Maria. At the fenced-window section, wait until Pyramid Head is visible and fire another full clip through the opening. Continue running once Maria is safely following behind you. The chase ends with a cutscene at the elevator.
The elevator carries James to the first-floor lobby. Enter the Director's Room, read the memo and obtain the Hospital Lobby Key. A save point is beside the lobby doors. Use the key to leave the hospital. The next route is Dark South Vale, then the Silent Hill Historical Society and Toluca Prison; those areas are covered in the following chapters.
- Collect both the Copper Ring and Lead Ring.
- Optional chest solution: 3-1-3.
- Use both rings on the strange third-floor door.
- On Hard Action, slow Pyramid Head with carefully aimed Handgun fire without hitting Maria.
- Obtain the Hospital Lobby Key in the Director's Room.
- Exit through the hospital lobby doors and continue into Dark South Vale.
Before you move on
- The Flesh Lips battle has ended and James has awakened in Nightmare Hospital.
- The Copper Ring and Lead Ring are in the inventory and have been used on the strange third-floor door.
- James has survived the Pyramid Head hallway chase and reached the first-floor lobby.
- The Hospital Lobby Key has been obtained from the Director's Room.
- James has saved at the lobby marker if desired and exited Brookhaven through the lobby doors.
- Dark South Vale has begun, with the Silent Hill Historical Society and Toluca Prison still ahead in the main campaign.
Toluca Prison and the Mid-Game Puzzle Bottlenecks
This route covers the complete original PlayStation 2 sequence from Nightmare Hospital to Lake View Hotel. It includes Dark South Vale, the Silent Hill Historical Society, Toluca Prison, the Labyrinth, Maria’s encounter, Angela’s confrontation with Abstract Daddy, the Eddie boss fight and the Toluca Lake crossing. The original Letter from Silent Heaven campaign does not use the 2024 remake’s gallows poem, numbered gallows arrangement or branching innocent-prisoner selection. Its prison progression is fixed: collect three tablets, place them at the courtyard scaffold, combine the Wax Doll, Horseshoe and Lighter to open the hatch, then descend into the Labyrinth. Ending-related behavior is tracked elsewhere through actions such as item examinations and treatment of Maria; the prison tablets, Labyrinth cube and hanged-man puzzle do not require a particular ending choice.
1. Leave Nightmare Hospital and cross Dark South Vale
After taking the Hospital Lobby Key from the Director’s Room, leave Nightmare Hospital through the lobby exit. Follow Carroll Street, turn onto Rendell, then continue along Munson and Saul Street. Use the open gate at the end of Saul and cross the damaged tunnel, moving carefully around the gaps in the path.
Continue through Neely Street, Sanders Street and Lindsey Street. Take the Wrench from the porch of the second house on the left side of Lindsey. Follow Lindsey to Katz Street, pass through the opening in the large sheet beyond the apartment area, then turn onto Munson and north toward Nathan Avenue.
Enter Rosewater Park from the Nathan Avenue side. On the right side of the entrance path, take the first stairs, descend the smaller steps and follow the path around to the praying-woman statue. Examine the disturbed ground behind the statue and use the Wrench on the revealed box to obtain the Old Bronze Key. Return to Nathan Avenue and follow it north to the Silent Hill Historical Society.
- Hospital Lobby Key collected and Nightmare Hospital exited.
- Wrench collected on Lindsey Street.
- Old Bronze Key recovered from the box behind the park statue.
- Save at the available Dark South Vale marker if you want a checkpoint before the Historical Society.
2. Enter the Historical Society and solve the trap-room keypad
Use the Old Bronze Key on the Silent Hill Historical Society entrance. A save point is available on the counter immediately inside; use it before proceeding. Walk through the exhibit rooms and examine the displays if you want the historical context, then enter the hole in the wall and follow the extremely long descending passage.
Continue through the rooms and past the Lying Figure until you reach the well. Jump into it. At the bottom, turn around and inspect the wall for the section that looks different. Strike that section with the Steel Pipe or Wooden Plank to reveal a door.
Enter the first room on the right and take the Spiral-Writing Key. Keep the flashlight on while exploring so the map can develop. In the insect-filled room, examine the keypad. The correct digits are the brighter numbers on the keypad. Depending on the riddle setting, two or three digits are highlighted. Try the possible repeated-digit arrangements until the lock opens; with two highlighted digits there are six arrangements, and the same applies to three distinct highlighted digits.
Use the Spiral-Writing Key on the locked gate in the floor and descend. This completes the Historical Society transition and places James in Toluca Prison.
- Save used at the Historical Society entrance.
- Spiral-Writing Key obtained.
- Trap-room keypad opened using the illuminated digits.
- James has descended through the floor gate into the prison.
3. Toluca Prison cafeteria and first tablets
James lands in the cafeteria after the long descent and meets Eddie. Wait for the scene to finish, then search the room. Take the Tablet of “Gluttonous Pig” from the pushcart at the back. Two Health Drinks are also available, and a red save marker is on a pillar near the rear of the cafeteria. Save here before entering the corridors.
Leave through the double doors. In the west corridor, turn left and move forward. Take the Handgun Bullets from the first desk near the open gate, then take the Prison Map from the next desk. The corridors are longer than their map outlines suggest, so use room entrances and cellblocks as landmarks.
From the map area, enter the shower room. Follow the northern route past the Lying Figure and enter the last open shower on the right. Take the Tablet of “The Seductress” from the floor, then leave the shower room rather than searching every closed stall.
Enter the upper south cellblock. Closed cells cannot be opened, so search only the open ones. Handgun Bullets are in the fifth cell. The required Wax Doll is on the bed in the ninth cell near the end of the block. Take it and exit through the eastern door.
- Saved in the cafeteria.
- Tablet of “Gluttonous Pig” collected.
- Prison Map collected.
- Tablet of “The Seductress” and Wax Doll collected.
4. Collect the final tablet and activate the scaffold
From the east corridor, take the Handgun Bullets from the first desk to the north. Enter the side room through the double doors and collect the Rifle Shells, then leave and continue north into the lower north cellblock.
Enter the seventh cell and take the Tablet of “The Oppressor” from the bed. When the cell door appears stuck, examine or attempt the exit several times; James eventually forces it open. This is scripted and does not indicate that a key is missing.
Return to the east corridor and enter the courtyard. The scaffold stands in the center and has three square recesses. Combine and use the Tablet of “Gluttonous Pig,” Tablet of “The Seductress” and Tablet of “The Oppressor” at the scaffold. The order does not matter. Wait for the scream, then return to the prison entrance. The Horseshoe will now be hanging from the left door; take it.
The original game has no gallows poem or prisoner-selection branch here. Do not search for remake instructions or assume that the tablet order determines Angela, Eddie or an ending.
- All three tablets collected.
- All three tablets placed into the scaffold.
- The scream has played.
- Horseshoe collected from the prison entrance door.
5. Reach the northwest corridor and open the escape hatch
Re-enter the lower north cellblock and pass through its far door. Take the nearby door into the glass-partitioned visiting room and collect the First-Aid Kit from the counter. The Lighter is visible on the opposite side of the partition but cannot be reached from this room.
Leave through the damaged visiting room to the north and pass into the northwest civilian corridor. Enter the corresponding visiting room from this side and take the Lighter. The Women’s Restroom contains an optional event; the Men’s Restroom contains a red save marker above the urinals. Save there before the final prison route.
Enter the Warden’s Office through the end door near the gate. Search the first room for a First-Aid Kit, Ampoule and Health Drink. In the armory beyond, collect the Handgun Bullets, Shotgun Shells, Rifle Shells and Hunting Rifle. The rifle is slow but valuable against later bosses, so avoid wasting its ammunition on ordinary Lying Figures.
Leave the office and pass through the gate. The escape hatch on the floor has no handle. Open the inventory and combine the Wax Doll, Horseshoe and Lighter together. James uses the Horseshoe as the handle, melts the Wax Doll with the Lighter and secures the repair. Use the completed handle on the hatch and descend.
- Lighter obtained from the civilian side of the visiting room.
- Optional Men’s Restroom save completed.
- Hunting Rifle and available ammunition collected.
- Wax Doll, Horseshoe and Lighter combined to repair the hatch.
- James has descended through the repaired hatch.
6. Descend to the Labyrinth and save at the entrance
At the bottom of the hatch, turn around and enter the morgue. Cross it and jump down the next hole. Continue through the following area, open the door and jump down another hole. The next room contains a large elevator.
Enter the elevator deeply enough to trigger its descent. During the long ride, collect the Handgun Bullets, Rifle Shells, Shotgun Shells and First-Aid Kit from the corners. When the elevator stops, leave and use the red save marker along the wall. This is the main completion checkpoint for Toluca Prison.
Proceed through the light-brown passage to enter the Labyrinth. Keep the flashlight on while exploring if you want James to draw the map. The Labyrinth is deliberately confusing; rely on ladders, distinctive rooms and the map rather than trying to memorize every corridor.
- Morgue crossed and required holes descended.
- Elevator supplies collected where possible.
- Save made at the Labyrinth entrance.
- Toluca Prison is complete and James has entered the Labyrinth.
7. Navigate the Labyrinth and meet Maria
From the Labyrinth entrance, turn left, take the second right and descend the ladder. Continue through the connected passages and climb the ladder at the opposite end to reach the rotating cube of faces.
On Easy or Normal Riddle difficulty, rotate the cube until the upside-down face with green eyes or the upside-down face with yellow eyes is displayed. On Hard or Extra, there is no single fixed orientation; use the two aligned doorways visible in the metallic room as the guide, or test the documented face rotations until the passage opens.
Go through the opened route and descend the stairs to meet Maria. After the scene, return to the nearby electrical box and take the Wire Cutter. Backtrack through the ladder network to the wire-blocked door, cut the wires and continue downward. Follow the succeeding ladder route until you reach the door before Abstract Daddy’s arena.
A save point is located beside the door up the ladder immediately before the Abstract Daddy encounter. Use it. The optional Great Knife is available through a side route, but it is not required for completion and is cumbersome to carry in ordinary combat.
- Face cube passage opened using the correct riddle-level method.
- Maria encounter completed.
- Wire Cutter obtained and used on the blocked door.
- Save made before the Abstract Daddy fight.
8. Defeat Abstract Daddy and solve the original hanged-man puzzle
In the Abstract Daddy arena, equip the Shotgun if ammunition allows. Fire about two shots, then run or strafe to the opposite side of the room. Repeat the pattern, using the room’s obstacles and Angela’s position to avoid being cornered. The required number of shots varies with difficulty, so prioritize spacing over a fixed ammunition count.
After the fight, proceed through the corridor to the two-room hanged-man puzzle. First enter the room displaying the hanged prisoners and identify which figure is marked as innocent. In the adjacent room, pull the noose occupying the same position as that innocent prisoner. The solution varies with Riddle difficulty: Easy uses Kidnapper, Normal uses Arsonist, Hard uses Counterfeiter and Extra uses Thief.
Return to the first room and take the Key of the Persecuted. Use it on the handcuffs blocking the gate. Descend the ladder, pass through the watery route and continue through the opened gate. Climb through the following passage to reach the catacomb.
- Abstract Daddy defeated.
- Correct hanged-man noose selected for the current riddle difficulty.
- Key of the Persecuted collected.
- Handcuffed gate opened and catacomb route reached.
9. Defeat Eddie, cross Toluca Lake and reach Lake View Hotel
Follow the catacomb route and enter the grave marked with James Sunderland’s name. Continue into the room beyond to begin the Eddie fight. In the first room, keep moving and attack when Eddie is exposed. On Normal or Hard, the Steel Pipe is a practical option because repeated overhead swings can force him toward the next room; on Easy, close Shotgun fire is effective.
In the second room, use the meat racks as cover. Approach for a Shotgun blast, retreat before Eddie reaches you and repeat. Eddie may move between the racks or hide behind them, so listen for his movement and avoid standing in the open. If Shotgun ammunition is low, the Handgun can finish the encounter, although it requires more careful positioning.
After Eddie falls, exit through the far doors and follow the dock to the lone barrel save point. Save before entering the boat. Board the rowboat and steer toward the distant light through the fog. On Normal Action or lower, use the D-pad or left analog stick. On Hard Action, use the two-stick rowing pattern required by the control scheme. The boat sequence ends when James reaches the opposite dock.
Leave the boat and follow the path into the Lake View Hotel grounds. The first hotel courtyard and entrance confirm that the prison-to-hotel transition is complete. The next chapter begins inside the hotel.
- Eddie defeated and the freezer exited.
- Save made at the Toluca Lake dock barrel.
- Rowboat boarded and guided toward the distant light.
- James has disembarked at Lake View Hotel.
- Lake View Hotel entrance reached, confirming completion of this chapter.
Before you move on
- James has left Nightmare Hospital, recovered the Old Bronze Key in Dark South Vale and entered the Silent Hill Historical Society.
- The Historical Society keypad has been opened, the Spiral-Writing Key used and the prison entrance reached.
- The Tablet of “Gluttonous Pig,” Tablet of “The Seductress” and Tablet of “The Oppressor” have been collected and placed at the courtyard scaffold.
- The execution scream has played and the Horseshoe has been taken from the entrance door.
- The Lighter and Hunting Rifle have been collected, and the Wax Doll, Horseshoe and Lighter have repaired the escape hatch.
- James has descended through the morgue and elevator and saved at the Labyrinth entrance.
- Maria has been encountered, the Wire Cutter has opened the blocked route and Abstract Daddy has been defeated.
- The correct original hanged-man puzzle solution has produced the Key of the Persecuted.
- Eddie has been defeated and James has saved at the Toluca Lake dock.
- James has crossed the lake and arrived at the Lake View Hotel entrance.
Lakeview Hotel Approach — Final Preparation and Boss Loadout
After crossing Toluca Lake, James reaches Lake View Hotel and begins the final normal-world section of the main Letter from Silent Heaven campaign. Search the hotel for three music boxes, temporarily store the inventory in the employee elevator room, escape the weaponless employee wing, recover the equipment, solve the lobby music-box puzzle, and reach Room 312. The Apartment Stairway Key is not involved here; it belongs to Blue Creek Apartments. Hotel access uses the Hotel Stairway Key obtained from the lobby music-box mechanism and the Key to Hotel Room 312 obtained at Reception.
1. Enter Lake View Hotel and collect the first items
After the Toluca Lake boat crossing, follow the dock path up to the hotel courtyard. Search the fountain on the left for the Little Mermaid Music Box, then continue through the courtyard and enter the hotel through the double doors at the top of the stairs.
Take the Hotel Map for Guests from the bulletin board in the entrance hall. Enter the Lake Shore Restaurant and take the Fish Key from the table. Leave through the restaurant exit to trigger Laura's scene. She gives James Laura's Letter and then leaves to search for another letter. Examining the piano afterward is optional and does not block progress.
Two Abstract Daddies appear in the hall outside the restaurant. On Normal or Hard combat difficulty, the Shotgun is an efficient choice: fire at close range, create space while an enemy recovers, and kick a downed enemy before turning to the other. If you are short on ammunition, move past them when possible and save shotgun shells for later dangerous encounters.
- Cross Toluca Lake and reach the hotel courtyard.
- Take the Little Mermaid Music Box from the fountain.
- Take the Hotel Map for Guests.
- Take the Fish Key from the Lake Shore Restaurant.
- Receive Laura's Letter.
2. Search the guest floors and save in the lobby
Before entering the lobby, search the unlocked Storeroom, shown as an unmarked grey area on the guest map. Defeat or bypass the Mannequins and enter the smaller room at the end to collect Rifle Shells and Handgun Bullets.
Go downstairs from the central hall to the basement. Pass the Mannequins and take the Thinner from the open elevator. Venus Tears Bar is locked at this stage, so return upstairs and enter the lobby through one of the large doors.
A save point is on a chair in the lobby's northwest corner. Save before starting the multi-floor hotel route. The large music-box player is also in the lobby, but it cannot be completed until you have all three music boxes.
- Search the Storeroom for ammunition.
- Take the Thinner from the basement elevator.
- Save at the lobby chair.
- Do not attempt the lobby music-box puzzle yet.
3. Obtain the Room 204 key and Cinderella Music Box
Enter the small Reception room behind the lobby desk and examine the key boxes to obtain the Key to Hotel Room 312. You cannot reach Room 312 yet because the third-floor gate is locked.
Go upstairs through the large lobby staircase and enter the second-floor Cloakroom. Search for supplies, then use the Fish Key on the locked briefcase to obtain the Key to Hotel Room 204.
Use that key on Room 204 in the west corridor. Take the Employee Elevator Key from the desk. Search the room for the opening in the wall leading into Room 202.
In Room 202, examine the photographs on the bed until James identifies the photograph showing the briefcase combination. Use the Thinner on that photograph to remove the black ink. Enter the revealed four-letter code into the briefcase and take the Cinderella Music Box. The code is randomized from the game's available word set, so use the photograph from your current playthrough rather than relying on a memorized answer.
- Take the Key to Hotel Room 312 from Reception.
- Use the Fish Key on the Cloakroom briefcase.
- Take the Key to Hotel Room 204.
- Take the Employee Elevator Key from Room 204.
- Use the wall opening to reach Room 202.
- Use the Thinner and open the briefcase.
- Take the Cinderella Music Box.
4. Activate the employee elevator and store the inventory
Go to the second-floor mideast corridor and use the Employee Elevator Key on the greyed-out Employee Elevator Room. A save point and healing items are nearby, so use them before starting the storage sequence if necessary.
Enter the employee elevator. The alarm will sound because the elevator is restricted to one person's weight. Examine the panel and read the weight notice. Only after reading it will James recognize that he can use the large shelf in the elevator room to store his equipment.
Examine the shelf and place every weapon, ammunition box, healing item, and puzzle item into storage one at a time. The Letter from Mary and Photo of Mary may remain with James, but leaving any other carried item behind can prevent the elevator from operating. Heal before storing the items if needed, then enter the elevator and press the available first-floor control.
- Read the elevator weight notice.
- Use the shelf only after reading the notice.
- Store all weapons, ammunition, healing items, and puzzle items.
- Leave only the permitted personal documents if desired.
- Ride the employee elevator to the first-floor employee wing.
5. Collect Snow White Music Box and escape the employee basement
Take the Hotel Map for Employees from the noticeboard outside the elevator. Enter the Pantry and collect the Snow White Music Box from the shelf. Then enter the Office and take the Videotape and Can Opener from the open safe. The Employee Lounge contains Rifle Shells on top of the refrigerator if you want the extra ammunition.
The employee elevator will not return you to the guest floors. Use the nearby stairwell to reach the employee basement. James is without weapons, flashlight, and radio during this section, so run past the Mannequins instead of trying to fight them. Use the narrow gaps beside walls to get around them.
Enter the Boiler Room and take the First-Aid Kit and Bar Key. Continue to the Kitchen and take the Health Drinks. Use the Can Opener on the large can on the counter to obtain the Light Bulb.
Enter Venus Tears Bar. Insert the Light Bulb into the lamp beside the exit so the keyhole becomes visible, then use the Bar Key to leave the bar and return to the guest-side basement.
- Take the employee map.
- Take the Snow White Music Box.
- Take the Videotape and Can Opener from the Office safe.
- Take the First-Aid Kit and Bar Key.
- Use the Can Opener on the kitchen can.
- Use the Light Bulb and Bar Key to escape Venus Tears Bar.
6. Recover the inventory and solve the lobby music-box puzzle
Return through the basement and first-floor guest areas to the second-floor Employee Elevator Room. Examine the large shelf and retrieve the entire inventory. Check the shelf before leaving so no weapon, key, ammunition box, healing item, or puzzle item remains behind.
Return to the lobby music-box player and place the Little Mermaid, Cinderella, and Snow White Music Boxes into the three open slots. The correct arrangement depends on puzzle difficulty. On Easy, any order works. On Normal, place Cinderella on the left, Snow White in the middle, and Little Mermaid on the right.
On Hard or Extra, place Cinderella on the left, Little Mermaid in the middle, and Snow White on the right. If the arrangement is wrong, the mechanism plays out of tune; remove the boxes and try again. When the arrangement is correct, the turntable rotates and reveals the Hotel Stairway Key on the middle music box.
The Hotel Stairway Key is the item required to open the third-floor gate. It is unrelated to the Apartment Stairway Key from Blue Creek Apartments.
- Retrieve the complete inventory.
- Use the arrangement for the selected puzzle difficulty.
- Take the Hotel Stairway Key from the music-box mechanism.
- Do not confuse the Hotel Stairway Key with the Apartment Stairway Key.
7. Reach Room 312 and begin Nightmare Hotel
From the lobby, go up the large staircase and pass through the west double doors. In the second-floor midwest area, use the slim staircase to reach the locked third-floor gate. Use the Hotel Stairway Key on the gate.
Continue along the third-floor hallway to Room 312. Unlock it with the Key to Hotel Room 312, then use the Videotape in the VCR and allow the scene to finish. This completes the normal Lake View Hotel section and begins the Nightmare Hotel transition.
The lobby save is useful before the hotel puzzle route, but it is not the immediate checkpoint for the double Pyramid Head encounter. Once Nightmare Hotel begins, continue into the next chapter and use the later save point outside Room 313 before the extended final sequence. Restock ammunition and healing supplies before committing to that route; keep the Shotgun available for close-range threats and later boss windows.
- Use the Hotel Stairway Key on the third-floor gate.
- Enter Room 312 with the correct room key.
- Play the Videotape in the VCR.
- Confirm that Nightmare Hotel has begun.
- Make the later Room 313 save before the final approach.
Before you move on
- The Little Mermaid, Cinderella, and Snow White Music Boxes have been collected.
- The Fish Key, Thinner, Key to Hotel Room 312, Key to Hotel Room 204, and Employee Elevator Key have been used for their intended hotel progression.
- James has completed the employee-elevator storage sequence and ridden to the employee wing.
- The Videotape and Can Opener have been taken from the Office safe.
- The Can Opener, Light Bulb, and Bar Key have been used to escape Venus Tears Bar.
- The complete inventory has been recovered from the employee-elevator shelf.
- The lobby music-box puzzle is solved and the Hotel Stairway Key has been obtained.
- The Hotel Stairway Key has opened the third-floor gate.
- The Videotape has been played in Room 312.
- The Nightmare Hotel transition has begun.
- A lobby save exists before the hotel route, and the later Room 313 save is made before the double Pyramid Head sequence.
Pyramid Head Duo — Practical Tactics and Recovery
The Nightmare Hotel lobby fight on the original PlayStation 2 release is a scripted battle against two Pyramid Heads. They share one health pool, so target selection is flexible, but their spear attacks punish close combat and greedy shooting. The reliable approach is to save at the Nine Red Squares before entering, create distance, fire short Hunting Rifle volleys from the lobby’s corners, and relocate before either enemy reaches spear range. Once enough damage has been dealt, both executioners stop and impale themselves. Examine both bodies, insert the two eggs into the southern doors, and continue through the final hallway. If the fight fails, reload the pre-fight save; do not depend on a post-fight return to that checkpoint.
Use the Nine Red Squares as the pre-fight checkpoint
After completing the Nightmare Hotel route, follow the employee-only corridors past the grated path and the enemies beneath it. Enter the small room immediately before the lobby’s central double doors. The wall contains the Nine Red Squares save marker. Save here before opening the doors.
This is the important retry point for the encounter. Equip and reload the Hunting Rifle before entering, and heal if James is already in dangerous condition. Keep the Shotgun or Handgun available as an alternative, but do not begin with an empty primary weapon. Once the battle is over, proceed forward rather than planning around a guaranteed return to this save location.
- Save at the Nine Red Squares before opening the lobby doors.
- Reload the Hunting Rifle while still in the safe room.
- Heal before entering if James has low health.
- Keep the pre-fight save available for retries.
Move immediately and establish a wide route
A cutscene shows Maria and the two Pyramid Heads before control returns to James. As soon as movement is available, run toward the lobby corner farthest from both enemies. Do not stand in the middle of the room, and do not try to fight them with the Great Knife or another melee weapon unless you deliberately want a high-risk alternative.
Hold L2 to keep the enemies in view while moving. Use the lobby’s open floor to travel in broad loops between distant corners. Strafing with L1 or R1 is safer than making tight circles. If one Pyramid Head starts closing the route, change direction early; trying to squeeze past a spear wielder usually costs more health than abandoning the attack window.
- Run to open space as soon as control returns.
- Keep both Pyramid Heads visible with the focus button.
- Use broad loops and distant corners.
- Avoid engaging both enemies at close range.
Fire short Hunting Rifle volleys
From a distant corner, aim at whichever Pyramid Head is closest to your escape route. On Normal difficulty, two or three rifle shots are commonly possible before the enemies close in, though spacing and positioning can reduce that to one or two shots. Sometimes the enemies slow near the end of the encounter and allow a longer volley. Treat these numbers as timing guidance, not a fixed ammunition requirement.
The duo shares one health pool, so there is no need to defeat one Pyramid Head before attacking the other. Shoot the immediate threat, then stop firing before spear range. The Hunting Rifle is powerful but slow to raise, fire and lower. A shot is not worth taking if James will still be recovering when an enemy reaches him. Move to the next corner as soon as either Pyramid Head becomes dangerous, then reload through the inventory during a safe movement break.
- Fire only when there is a clear escape route.
- Prefer the Pyramid Head closest to your planned exit path.
- Stop shooting before spear range.
- Reload from the inventory during a safe gap.
- Do not waste time trying to finish one target separately.
Recognize the scripted self-impalement
Continue alternating between distant corners and short ranged volleys. The fight is progressing when the Pyramid Heads stop their normal pursuit and move toward the center of the lobby. Do not follow them into the center and do not keep firing once the execution sequence is beginning.
A cutscene shows both Pyramid Heads turning their spears on themselves and impaling the undersides of their heads. James does not need to deliver a final melee attack. If rifle ammunition becomes scarce, the Handgun can still work with the same movement-first routine, although it requires substantially more shots. The Shotgun is also usable, but its handling is less forgiving when both enemies are approaching.
- Watch for both enemies to stop and move toward the lobby center.
- Stop attacking when the self-impalement sequence begins.
- Do not enter the center to perform a finishing attack.
- Confirm that both Pyramid Heads remain standing after the cutscene.
Examine both bodies and unlock the southern doors
When control returns after the self-impalement, walk to the two standing Pyramid Head remains in the center of the lobby. Examine each body separately. One gives the Rust-Colored Egg and the other gives the Scarlet Egg. Neither item should be assumed to enter the inventory automatically; confirm both item messages.
The two southern lobby doors are locked and each has an egg-shaped slot. Insert one egg into each door. The original release does not require a particular egg-to-door assignment: the Rust-Colored Egg can go in either door and the Scarlet Egg goes in the other. Both eggs must be inserted before either southern door unlocks. If nothing opens, check the inventory and examine the second body again.
- Rust-Colored Egg is confirmed in the inventory.
- Scarlet Egg is confirmed in the inventory.
- One egg is inserted into each southern door.
- At least one southern door has unlocked.
Leave the lobby and continue through the final hallway
Go through either unlocked southern door. The side routes are blocked, so follow the corridor ahead and pass through the back entrance door. Continue down the long misty hallway until you reach the door at the far end. Mary’s recording plays during this section; the route remains available while it plays.
After passing through the end door, follow the rainy path and climb the staircase. The staircase collapses behind James near the top, committing him to the final sequence. Approach the figure in the room to begin the final boss encounter. The Nine Red Squares save remains the recovery point for another attempt at the duo, so reload it if you die or spend too many supplies during the fight.
- The lobby has been exited through a southern door.
- The long hallway has been reached.
- The far hallway door has been crossed.
- James has begun the rainy staircase route toward the final boss.
- The pre-fight Nine Red Squares save remains available for retries.
Before you move on
- The duo has stopped pursuing James and completed the scripted self-impalement cutscene.
- The inventory has registered both the Rust-Colored Egg and Scarlet Egg.
- One egg has been inserted into each of the two southern lobby doors.
- James has left the lobby and reached the long hallway.
- The rainy staircase route toward the final boss has begun.
- The Nine Red Squares save is still available if the duo must be retried from before the battle.
Final Mechanical Complex and Last Boss — Execution and Endgame Decision Points
The original North American PlayStation 2 release has a short, linear endgame after the Lake View Hotel Pyramid Head duo. First collect the two eggs and open the southern lobby doors. Then choose between the normal final-boss route and the Dog route. Leave, Maria, In Water and Rebirth use the normal route; Dog ends earlier in the third-floor Observation Room. Ending results are calculated from accumulated behavior and qualifying inventory conditions rather than a final choice menu.
Finish the Pyramid Head sequence and use the eggs
When the two Pyramid Heads complete their scripted self-impalement, approach both standing remains in the center of the hotel lobby. Examine one body to obtain the Rust-Colored Egg and the other to obtain the Scarlet Egg. You must examine both bodies; the items are not automatically added merely because the battle has ended.
Go to the two locked doors on the south side of the lobby. Insert one egg into each door. The order does not matter, but both doors must receive an egg before the route opens. Once both doors unlock, choose either one and continue forward.
Do not return to the employee-only hallway or attempt to use the Nine Red Squares marker after this point. That save is the reliable pre-fight retry point for the Pyramid Head duo. If the battle went badly, reload it before the encounter, restock and retry. After the eggs are inserted, the correct action is to continue through the unlocked doorway.
- Both Pyramid Head bodies examined
- Rust-Colored Egg collected
- Scarlet Egg collected
- One egg inserted into each southern lobby door
- Pre-fight Nine Red Squares save retained
Select the normal route or the Dog route
Leave, Maria, In Water and Rebirth all continue through the normal closing sequence. Rebirth requires a qualifying replay after at least one completed game and possession of White Chrism, the Book of Lost Memories, the Obsidian Goblet and the Book of Crimson Ceremony. Keep all four items in the inventory through the ending route. The game checks their presence; there is no altar, final-use command or manual placement step.
Dog is an alternate route that bypasses the normal final boss. On a qualifying New Game Plus or Replay Game file, obtain the Dog Key from the doghouse in the open lot across from the Rosewater Park exit in West South Vale. Continue the main scenario and watch the videotape in Room 312. Then go to the third-floor Observation Room and use the Dog Key on its door. The Dog ending begins immediately, so do not use this door if you intend to fight Mary or Maria.
On the original North American release, the standard campaign has Leave, Maria, In Water, Rebirth and Dog. Born From a Wish and UFO instructions belong to expanded editions such as the PS2 Greatest Hits release, not the original SLUS-20228 disc.
- Desired ending route identified
- Rebirth items retained if pursuing Rebirth
- Dog Key obtained only on a qualifying replay if pursuing Dog
- Room 312 videotape watched before attempting the Dog route
- Correct edition confirmed before using expanded-edition instructions
Cross the final hallway and lock the ending calculation
From the unlocked lobby door, follow the forward corridor. The side passages are blocked, so continue through the rear doorway into the long mist-filled hallway. A recording of Mary speaking to James begins as you enter.
For a normal first completion, remain in the hallway and listen to the entire recording before using the door at the far end. The recording contributes to the ending calculation, but it does not independently select an ending. If you are deliberately pursuing another result, the recording can be handled as part of the broader behavior plan, not as a standalone final choice.
The ending calculation becomes fixed when James passes through the final door at the end of this hallway. After that point, changing weapons, healing, taking damage or performing differently during the last boss cannot change Leave, Maria or In Water. Rebirth is determined by the qualifying ceremonial inventory, while Dog has already bypassed this route through the Observation Room.
The three main endings are influenced by accumulated actions throughout the game. Relevant examples include how often James examines Mary’s photo or letter, how he treats and protects Maria, whether he checks Maria’s hospital room, whether he re-enters Maria’s Labyrinth cell, whether he examines Angela’s knife, whether he reads the hospital rooftop diary or Neely’s Bar message, how he manages his health and stamina, and whether he listens to the complete hallway recording.
- Long hallway entered
- Ending-related behavior already completed intentionally
- Recording handled according to the desired ending plan
- Final hallway door crossed only after the ending route is ready
- No expectation of changing the result during the boss fight
Cross the rainy platform and reach the final room
After the hallway door, James arrives on the rainy platform. Move ahead and take the path on James’s left, which appears as the right-hand path from his initial viewpoint. Follow the staircase upward.
Near the top, the staircase collapses behind James. This makes the route one-way, so do not leave health or ammunition preparation until this point. Continue into the upper room. Depending on the calculated ending state, the familiar figure may be lying on the bed or standing near the open window.
Approach the figure to start the final confrontation. There is no final dialogue menu that lets you select Leave, Maria, In Water or Rebirth. The figure and ending sequence reflect the state already calculated by the game.
- James’s left-hand route taken on the rainy platform
- Staircase climbed
- Collapsing staircase reached
- Final room entered
- Final figure approached
Defeat Mary or Maria safely
At the beginning of the fight, move toward a distant part of the arena and keep circling around the usable outer space. Leave room to pass around the bed and avoid the open gap where the staircase collapsed. The Hunting Rifle is a strong choice because it allows James to attack from a safer distance, but the Handgun is a practical fallback because James can move and fire more flexibly. The Shotgun works at closer range but leaves less time to escape.
Watch for the high-pitched screech that warns of the black moth swarm. Strafe or sprint sideways as soon as the warning begins; do not stand still trying to finish a reload or line up another shot. If the swarm catches James, rapidly move the directional and shoulder controls to shorten the stun. At close range, Mary/Maria can seize James with the long black tail. Break away before she reaches striking distance by moving laterally and continuing around the arena.
Fire only during clear openings, then resume movement. Reload through the inventory when safe rather than standing in place during a slow weapon reload. Continue until the boss falls in the frame. Falling does not complete the battle by itself. Approach the fallen boss and use an equipped weapon to deliver the required final close-range blow. Only after that strike does the ending sequence begin.
- Outer arena used for movement
- Moth-swarm screech recognized and avoided
- Tail grab avoided or escaped quickly
- Ranged attacks used during safe openings
- Health restored when necessary
- Fallen boss approached
- Final close-range blow delivered
Confirm completion and preserve the run
After the finishing strike, stop input and allow the ending movie to play. Leave, Maria and In Water each have their own ending sequence. Rebirth produces its alternate ending when all four qualifying items were collected and retained during the replay. Dog does not appear here because using the Dog Key ends the game in the Observation Room before this fight.
Treat the game as complete only after the selected ending movie and credits have finished. Record the ending shown and preserve the pre-fight Nine Red Squares save in a separate memory-card slot or backup location if you plan to test another ending. Do not overwrite the only save that supports your current route until the result has been confirmed.
- Ending movie played to completion
- Credits finished
- Ending result recorded
- Pre-fight Nine Red Squares save preserved separately
- Completed save retained before testing another ending
Before you move on
- Both Pyramid Head remains were examined and both eggs were collected.
- The Rust-Colored Egg and Scarlet Egg were inserted into the two southern lobby doors.
- The pre-fight Nine Red Squares save was preserved and not overwritten.
- The normal route was followed for Leave, Maria, In Water or Rebirth, or the Dog Key was used in the third-floor Observation Room for Dog.
- For Rebirth, White Chrism, the Book of Lost Memories, the Obsidian Goblet and the Book of Crimson Ceremony were collected during a qualifying replay and remained in inventory.
- James crossed the final hallway door, reached the rainy platform, climbed the collapsing staircase and entered the final room.
- Mary or Maria was defeated on the normal route and the fallen boss received the required finishing blow.
- The ending movie and credits finished, confirming campaign completion.
Handling the Two Pyramid Head Boss Patterns — Practical Combat Routines
The original North American PlayStation 2 campaign uses Pyramid Head in three distinct ways that should not be confused: the noncombat sighting through the Wood Side Apartments bars, the survival encounter in the Blue Creek Apartments stairwell, and the later Nightmare Hotel battle against two Pyramid Heads. The first two encounters are controlled mainly by spacing and escape routes. The hotel duo can be pressured with ranged fire, but the objective is to survive long enough for the scripted conclusion rather than to defeat either enemy independently. Save before each encounter, preserve healing items and ammunition, and reload the correct pre-fight save after a failed attempt.
Separate the Wood Side sighting from the Blue Creek encounter
During Wood Side Apartments, James sees Pyramid Head through the bars on the third-floor corridor. This is a scripted sighting, not a battle. Do not waste ammunition trying to attack through the barrier, and do not wait for a reward or combat-resolution trigger there.
The first playable Pyramid Head encounter begins later in Blue Creek Apartments. Complete the apartment route, solve the coin puzzle in Apartment 105, use the Lyne House Key to enter Apartment 209, cross the balcony into Apartment 208 and collect the Apartment Stairway Key from the bed. A save point is available in Apartment 208. Use it before opening the blue stairway door, because the encounter starts immediately after that door is unlocked.
- Treat the Wood Side barred scene as noncombat.
- Collect the Apartment Stairway Key in Apartment 208.
- Save in Apartment 208 before opening the stairway door.
- Enter with the handgun loaded and at least one usable healing item.
Survive the Blue Creek Apartments stairwell
When James enters the stairway, Pyramid Head is already nearby. Create distance as soon as control returns. Use the handgun for controlled shots that interrupt or slow his approach, but do not stop to reload in the open if the enemy is close. Reload through the inventory when you have a safe gap, then resume moving.
Use the stairwell’s available space to circle away from the executioner swing. Strafing can help James move laterally while keeping Pyramid Head in view, but do not run directly into him or trap yourself against the railing. A close hit can cause severe damage, and the overhead sword swing can be fatal. Melee attacks are not a practical solution here.
The encounter is not won by emptying a fixed number of bullets. On lower difficulties, a few controlled shots may be enough to create the necessary distance; on higher action settings, more shots or more evasive movement may be needed. The reliable objective is survival. After the encounter has lasted long enough or sufficient damage has been inflicted, a siren sounds. Pyramid Head then responds by walking down the flooded stairs and leaving through the exit. Do not follow him while he is descending. Wait until the water drains, then use the stairway to leave the building.
Once outside, recover any nearby supplies you need and use the next available save point before continuing through South Vale. If James is badly hurt, do not treat the drained stairway as a signal to keep exploring without preparation; the town route that follows contains additional enemies and mandatory progression.
- Keep moving and use handgun fire to buy space.
- Avoid prolonged melee and direct contact.
- Do not follow Pyramid Head into the flooded stairway.
- Wait for the siren, his retreat and the drained water.
- Leave through the stairway only after the route is safe.
- Save after exiting the apartments when the next save point is available.
Prepare at the Nine Red Squares
Near the end of Nightmare Hotel, follow the employee-only route until you reach the room with nine red save squares on the wall. This is the intended pre-battle save point. Save here before opening the central double doors. The hotel duo and the remaining endgame sequence follow this point with no ordinary exploration break that should be relied on for recovery.
On Normal difficulty, keep a reserve of ranged ammunition rather than spending everything on hotel enemies. The Hunting Rifle offers strong stopping power and is the most straightforward choice if you have enough rifle ammunition. The handgun is easier to raise and fire while moving, and the shotgun can help when a Pyramid Head closes the distance, but its shorter range makes careless close use dangerous. Carry several healing items and begin at full or near-full health.
There is no universal ammunition quota that applies to every PS2 run. Available supplies, action level, accuracy, weapon choice and positioning all change the fight. A conservative plan is to reserve the rifle or handgun ammunition gathered in the hotel for the duo, retain a few emergency shots for the final boss route, and avoid entering while already injured.
- Save at the Nine Red Squares before the double doors.
- Reload the weapon you intend to use.
- Keep multiple healing items available.
- Reserve ranged ammunition for the duo and final sequence.
- Do not create a post-fight save assumption: this is the retry checkpoint.
Use the lobby perimeter against the duo
After the cutscene, move toward a far corner or outer edge of the lobby. Keep both Pyramid Heads in view with the camera-focus control while aiming. Fire short volleys at the closer Pyramid Head, then immediately strafe or run toward the next open corner. The purpose of each volley is to create a brief flinch or delay, not to stand still and trade damage.
On Normal, the rifle commonly allows a few shots from a corner before the enemies close in, but the safe number changes with their spacing. If one blocks the route to the next corner, target that one. If both approach together, stop attacking and cross the lobby along the widest available path. Do not remain in the center and do not attempt sustained melee against both enemies.
Reload through the inventory rather than standing still for a vulnerable weapon reload. If a Pyramid Head is close, use lateral movement to escape the attack’s line and continue toward open space. A deliberate bait can sometimes help: move close enough to provoke a thrust, then strafe away during its recovery. This is a recovery option, not a guaranteed trick, so abandon it if the second Pyramid Head is covering the same route.
- Favor corners and the lobby perimeter.
- Focus on the Pyramid Head nearest to your escape path.
- Fire briefly, then move immediately.
- Abandon attacks when both enemies compress your space.
- Reload from the inventory during a safe gap.
- Heal before another attack is likely to connect.
Recognize the scripted ending and recover correctly
The two Pyramid Heads use a shared health pool. You do not need to defeat one before damaging the other. Continue the movement-and-fire routine until the encounter reaches its scripted conclusion. Near the end, both enemies can react to shots even when only one was targeted, and they move toward the center before impaling themselves.
Stop firing once the self-impalement sequence begins. The fight does not require a finishing attack from James. After the animation, examine both bodies manually to collect the Rust-Colored Egg and Scarlet Egg. Insert one egg into each of the two southern lobby doors; both eggs are required to open the route.
Do not plan to return to the Nine Red Squares after collecting the eggs. The useful save is the one made before the battle. If you die during the duo or enter the next sequence with critical health and depleted ammunition, reload the Nine Red Squares file, restock from the preceding hotel route if necessary, reload your weapon and try again. Once the doors are open, continue through the long hallway and final route without expecting another opportunity to reset the hotel encounter.
- Let the shared-health encounter reach its scripted conclusion.
- Wait for both Pyramid Heads to impale themselves.
- Examine both bodies for the Rust-Colored Egg and Scarlet Egg.
- Insert one egg into each southern lobby door.
- If the attempt fails, reload the pre-fight Nine Red Squares save.
- Proceed through the opened doors without relying on a post-duo save.
Before you move on
- The Wood Side barred sighting was passed as a scripted noncombat scene.
- The Blue Creek stairway encounter ended after the siren, Pyramid Head’s retreat and the draining of the water.
- James exited Blue Creek without following Pyramid Head into the flooded stairway.
- The Nine Red Squares save was created before opening the Nightmare Hotel lobby doors.
- Both Pyramid Heads completed the scripted self-impalement sequence.
- The Rust-Colored Egg and Scarlet Egg were examined from the two bodies.
- One egg was inserted into each southern lobby door.
- The opened route was followed into the final hallway without incorrectly expecting a post-duo save.
Endings Explained — How the Original PS2 Determines Outcomes
The North American black-label PlayStation 2 release of Silent Hill 2, serial SLUS-20228, contains the Letter from Silent Heaven campaign and five endings: Leave, Maria, In Water, Rebirth and Dog. Leave, Maria and In Water are determined by accumulated actions during the campaign. Rebirth and Dog require replay preparation, and their required items or flags must be recorded on the same completed save file. The ending calculation is finalized when James passes through the final door after the long hallway conversation with Mary.
1. Confirm the edition before planning endings
This chapter applies to the original North American PlayStation 2 release dated September 24, 2001. Its disc contains only the main Letter from Silent Heaven scenario and five endings. Born From a Wish and UFO are not part of this black-label release.
The North American Greatest Hits PS2 release, serial SLUS-20228GH, is an expanded edition with additional content. European Director’s Cut releases and other later versions also differ. Do not use expanded-edition instructions unless the disc label and menu confirm that edition.
When you complete an ending and save the results, the save-file information can display ending marks. Preserve the completed file and use Replay Game or a separate slot when pursuing another result.
- Black-label SLUS-20228: Leave, Maria, In Water, Rebirth and Dog.
- Greatest Hits or Director’s Cut: may include Born From a Wish and UFO.
- Keep an untouched completed save before experimenting with ending routes.
2. Understand the three ordinary endings
Leave, Maria and In Water are not selected by one final dialogue answer. The game starts each ending with different hidden values and adjusts them through health management, item examinations, Maria-related behavior, optional reading and the final hallway conversation. A single action rarely guarantees an outcome, so follow one route consistently.
The ending is determined when James crosses the last door after the sickbed conversation in the long hotel hallway. Make your final backup before entering that corridor. Reloading after the door has been crossed does not change the result unless you return to an earlier save.
- Create a separate save before the final hotel corridor.
- Do not assume the final boss itself selects Leave, Maria or In Water.
- Avoid mixing strong Maria-focused actions with strong In Water actions unless you accept an uncertain result.
3. Route for Leave
For Leave, keep James healthy and show attention to Mary’s memory without making Maria the center of the run. Heal when his health reaches a dangerous level and avoid remaining in critical condition for extended periods. Examine Mary’s photograph and letter during the campaign, preferably more than once, and listen through the entire hallway conversation before the final boss.
Reduce Maria-focused behavior: do not spend excessive time near her, do not repeatedly return to her hospital room, and do not deliberately allow her to take damage. Avoid repeatedly examining Angela’s knife, reading the hospital rooftop suicide diary or pursuing the other low-health behaviors associated with In Water.
- Heal promptly when James is badly injured.
- Examine Mary’s photograph and letter repeatedly enough to register their Leave influence.
- Listen to the entire hallway conversation.
- Avoid extended critical health and excessive Maria attention.
4. Route for Maria
For Maria, make her safety and companionship the focus of the journey. Stay near her while she follows James, avoid repeatedly colliding with her, protect her from monsters and return to her in hospital room S3 when the route allows it. In the Labyrinth, try to re-enter the cell containing Maria’s body as directed by the route; this is a Maria-influence action rather than a required progression step.
Avoid examining Mary’s photograph or letter repeatedly, avoid spending long periods away from Maria and do not deliberately keep James critically injured. In the final hallway, do not wait for the entire conversation to finish. Cross the final door before the complete exchange ends.
- Stay close to Maria during the escort sections.
- Protect her from enemy attacks and accidental damage.
- Visit room S3 in Brookhaven Hospital.
- Leave the final hallway before the full conversation concludes.
5. Route for In Water
For In Water, emphasize James’s guilt and physical deterioration. Examine Angela’s knife, read the suicidal diary on the hospital rooftop and inspect the new message on the wall at Neely’s Bar after the hospital sequence. Listen to the headphones in the Nightmare Hotel Reading Room and let the complete hallway conversation play before entering the final boss area.
Keeping James below half health for extended periods also contributes to this route, but it is dangerous. Use a separate save and heal before a fight if death is likely. Avoid Maria-focused behavior and do not spend excessive time escorting or revisiting her. The route is strongest when the injury, guilt and Mary-attachment actions are combined.
- Inspect Angela’s knife.
- Read the hospital rooftop diary.
- Read the post-hospital message at Neely’s Bar.
- Listen to the Reading Room headphones.
- Listen to the complete final hallway conversation.
- Maintain low health cautiously rather than risking an unrecoverable death.
6. Unlock Rebirth in New Game Plus
First complete the main scenario. Then load the completed save and choose Replay Game or begin the corresponding New Game Plus run. Collect all four ritual items during that replay: White Chrism in room 105 of Blue Creek Apartments; Lost Memories at the newspaper stand by the Texxon Gas Station in West South Vale; the Obsidian Goblet inside the broken display case in the Silent Hill Historical Society; and the Crimson Ceremony book on the bookshelf opposite the window in the Nightmare Hotel Reading Room.
Collecting the items is sufficient; James does not manually place them at a final altar. Continue through the ordinary final sequence and defeat the final bosses with all four items obtained. Rebirth then takes priority over the three ordinary endings. If you use the Dog Key in the Observation Room, Dog takes priority instead, so keep separate saves if you want both results.
- Complete the game once first.
- Start the replay from the completed save.
- Collect White Chrism, Lost Memories, Obsidian Goblet and Crimson Ceremony.
- Do not use the Dog Key on the Rebirth attempt.
- Finish the game with all four ritual items collected.
7. Unlock Dog and preserve the ending record
Dog requires ending history on one save file. The prerequisite is either Leave, In Water and Maria all recorded on that save, or the Rebirth ending recorded there. After that prerequisite is complete, use Replay Game for the next run.
During the replay, find the Dog Key in the doghouse in the open lot across from the exit path of Rosewater Park in West South Vale. The doghouse and key do not appear for the initial run. Carry the key through the campaign. In the Nightmare Hotel, watch the videotape in room 312 first, then use the Dog Key on the Observation Room door on the third floor. The Dog ending begins instead of the standard final sequence.
For reliable completion, keep separate saves before the hotel finale and do not overwrite the completed file that contains your earlier ending marks. There is no officially declared canonical ending among the five original outcomes.
- Record Leave, In Water and Maria on one save, or record Rebirth there.
- Choose Replay Game from that completed save.
- Take the Dog Key from the West South Vale doghouse.
- View the room 312 videotape.
- Use the key on the Nightmare Hotel Observation Room door.
- Confirm the Dog ending and preserve the updated save.
Before you move on
- The ending movie and credits finish without returning to gameplay prematurely.
- The result is recorded on the completed save through its ending mark or ending history display.
- For all five original-edition endings, record Leave, Maria, In Water, Rebirth and Dog on preserved save data.
- For Rebirth, verify that all four ritual items were collected during the qualifying replay.
- For Dog, verify that the prerequisite ending history was present before starting Replay Game and that the Dog Key was used after the room 312 videotape.
Rebirth Ending — Items and Step-by-Step Ritual Checklist (PS2 original)
On the original North American PlayStation 2 release of Silent Hill 2, the Rebirth ending is available after one completed main-scenario playthrough unlocks New Game Plus. During that repeat run, collect four ceremonial items: White Chrism, Book: Lost Memories, Obsidian Goblet, and Book: Crimson Ceremony. Keep all four in James’s inventory through the final sequence. There is no separate ritual menu, altar, or item-combination command. The game checks whether the complete set is present when the ending is selected. The original release contains the main Letter from Silent Heaven campaign and five endings; Born From a Wish and UFO belong to expanded editions.
1. Complete the main scenario and preserve the completed file
Finish the main Letter from Silent Heaven scenario once on the memory card. You do not need to obtain Leave, Maria, and In Water first. A single completed main-scenario file is enough to unlock the Rebirth items for New Game Plus on this original release.
After completing the game, keep the completed save on the memory card. At the title screen, make sure the memory card containing that file is inserted and confirm that New Game is highlighted in yellow. Starting without the completed file, or beginning a normal game with no qualifying completion data available, will leave the four ceremonial items absent.
- Complete the main scenario once.
- Keep the completed-game data on the same memory card.
- Start the next main scenario with New Game highlighted in yellow.
- Do not confuse the original PS2 version with Greatest Hits or Director’s Cut content.
2. Collect White Chrism in Blue Creek Apartments
During the repeat run, return to Blue Creek Apartments and enter room 105 on the first floor. White Chrism is on the kitchenette counter. Approach the counter and use the normal examination prompt to take the glass bottle.
This item does not appear during the initial playthrough. After picking it up, open the inventory and confirm that the name is White Chrism. It has no ordinary puzzle use, so leave it in the inventory and continue the apartment route. Saving in a separate slot after collecting it is sensible if you want a backup for later ending attempts.
- Reach Blue Creek Apartments during New Game Plus.
- Enter room 105 on the first floor.
- Take White Chrism from the kitchenette counter.
- Verify the item in the inventory.
3. Take Book: Lost Memories at Texxon Gas Station
While exploring West South Vale, visit the Texxon Gas Station. Book: Lost Memories is inside the newspaper stand. Approach the stand and take the book when the examination prompt appears. It is available during New Game Plus and may be collected during the town section before the later hospital, prison, and hotel areas.
Check the inventory immediately so you do not mistake it for another document. Once collected, keep it with the other ending items. The gas station becomes impractical to revisit after later story transitions, so do not postpone this pickup if you are already in the area.
- Visit Texxon Gas Station in West South Vale.
- Search the newspaper stand.
- Collect Book: Lost Memories.
- Confirm the exact inventory name.
4. Retrieve the Obsidian Goblet at the Historical Society
Proceed through the Silent Hill Historical Society until you reach the second exhibition room. Inspect the smashed display case there and collect the Obsidian Goblet. The case is an optional-looking object away from the main route, so deliberately check it before committing to the long descent beneath the building.
The goblet is available only in New Game Plus. It is not used in a puzzle and should remain in the inventory. Once James descends into the underground section, returning to the exhibition rooms is no longer a reliable recovery plan. If the display case is empty during a normal first playthrough, that is expected.
- Reach the second exhibition room of the Historical Society.
- Inspect the smashed display case.
- Take the Obsidian Goblet.
- Confirm it is listed before descending underground.
5. Obtain Book: Crimson Ceremony in the Nightmare Hotel
The fourth item is not in the opening graveyard. Continue through Lakeview Hotel and complete the required hotel progression, including the videotape sequence in room 312. After the hotel changes into its Nightmare form, reach the second-floor Reading Room.
In the Reading Room, search the shelf behind the headphones on the desk and collect Book: Crimson Ceremony. This is the final Rebirth item and appears only in New Game Plus. Because the book is obtained late, make a separate save after taking it if you want to preserve a branch for another ending. Confirm that all four names are present before entering the final corridors.
- Complete the hotel route far enough to view the videotape.
- Reach the second-floor Reading Room in the Nightmare Hotel.
- Take Book: Crimson Ceremony from the shelf behind the headphones.
- Confirm all four Rebirth items are in the inventory.
6. Keep the complete set through the ending
Continue normally after collecting Book: Crimson Ceremony. You do not need to examine any of the four items, combine them, or place them in a special location. They function as ending flags based on inventory possession. Keep White Chrism, Book: Lost Memories, Obsidian Goblet, and Book: Crimson Ceremony until the final ending is selected.
You may solve the remaining hotel puzzles, complete the Pyramid Head duo sequence, use the two eggs on the lobby doors, and defeat the final manifestation as usual. Do not use the Dog Key if you are pursuing Rebirth on a version where that item is available; opening the Observation Room produces the Dog ending instead.
- Keep all four ceremonial items.
- Do not discard or attempt to use them.
- Avoid the Dog Key route during this attempt.
- Complete the final hotel progression normally.
7. Finish and verify the Rebirth ending
Defeat the final boss and pass through the last exit sequence. With all four Rebirth items in the inventory, the game selects Rebirth automatically rather than comparing the ordinary Leave, Maria, and In Water behavior. No special button input is required at the ending door.
After the result has been recorded, open the save/load screen and use the directional buttons to view the ending letters associated with the file. R indicates that the Rebirth ending has been recorded. Preserve this completed file if you intend to continue toward the Dog ending, because the Rebirth result can satisfy that ending’s unlock requirement on the original release.
- Defeat the final boss while holding all four items.
- Complete the ending sequence and credits.
- Check the save-file ending record.
- Confirm that R appears.
Before you move on
- The run began from a completed original PS2 main-scenario file with New Game highlighted in yellow.
- White Chrism was collected from room 105 in Blue Creek Apartments.
- Book: Lost Memories was collected from the newspaper stand at Texxon Gas Station.
- The Obsidian Goblet was collected from the smashed display case in the second exhibition room of the Silent Hill Historical Society.
- Book: Crimson Ceremony was collected from the second-floor Reading Room of the Nightmare Hotel after viewing the videotape.
- All four items remained in James’s inventory through the final boss and ending sequence.
- The completed save/load record displays R for Rebirth.
Dog Ending and Joke Endings — How-To and When They Apply
The original North American black-label PlayStation 2 release of Silent Hill 2 supports the Dog ending, but it does not include Born From a Wish or the UFO ending. The Dog route becomes available after the game records Leave, In Water and Maria in the same save-file progression, or after Rebirth has been completed. You then load that completed data, start a new main scenario, collect the Dog Key from the doghouse west of Jack’s Inn, and use it in Lakeview Hotel after viewing the videotape. Keep a separate completed save before opening the Observation Room because doing so immediately replaces the normal final route with the Dog ending.
1. Verify the exact PlayStation 2 edition
The target North American original release is Silent Hill 2 for PlayStation 2, serial SLUS-20228, released September 24, 2001. Its main scenario is Letter from Silent Heaven, and the release contains five endings: Leave, Maria, In Water, Rebirth and Dog.
The North American Greatest Hits version uses serial SLUS-20228GH and is an expanded edition despite keeping the ordinary Silent Hill 2 title. It adds the Born From a Wish sub-scenario and the UFO ending. European Director’s Cut, Xbox Restless Dreams, Xbox Inner Fears, Japanese Saigo no Uta and the PC releases are also expanded versions. Do not use their Blue Gem or Maria-scenario instructions with a black-label SLUS-20228 disc.
- The disc is the original North American SLUS-20228 release if you are following the five-ending route only.
- There is no Born From a Wish scenario selection on the original disc.
- The original disc has the Dog ending even though it lacks the UFO ending.
2. Confirm the prerequisite ending data
Before looking for the Dog Key, the same save-file progression must contain the Leave, In Water and Maria endings, or it must contain Rebirth. You do not need all five endings, and you do not need Born From a Wish for the original PlayStation 2 Dog route.
To check the recorded results, open the save/load menu and move left or right with the D-pad until the ending letters appear beside the save information. L means Leave, M means Maria, W means In Water, R means Rebirth and D means Dog. For the Dog Key, confirm L, M and W are present together, or confirm R is present. If the letters are spread across unrelated saves that were not continued from the same result-bearing progression, the key may not appear.
- The completed save contains L, M and W, or it contains R.
- The ending-bearing save is still available on the memory card.
- A separate slot is reserved for the Dog attempt.
3. Load the completed data and start the replay
Load the save that contains the qualifying ending records, then choose New Game from the main menu. On this release, that completed data is what enables the replay-only items; the game does not require a separate menu labelled New Game Plus. Start the Letter from Silent Heaven scenario and proceed through the opening until James reaches West South Vale and Rosewater Park.
When leaving Rosewater Park for the first time, do not turn away from the exit route. Continue straight toward the open lot west of Jack’s Inn. A doghouse stands in this lot. Examine it and take the Dog Key. If the doghouse does not contain the key, stop and troubleshoot the save requirement rather than continuing the entire campaign: verify that the qualifying endings are on the file you loaded and that you started a new game after loading that data.
- The completed save was loaded before selecting New Game.
- The doghouse is in the open lot west of Jack’s Inn, across from the Rosewater Park exit route.
- The Dog Key appears in the inventory after examining the doghouse.
4. Protect the normal final route
Save the replay in a separate slot before the Lakeview Hotel videotape sequence. Keep the original completed save untouched, especially if you want to obtain Leave, Maria, In Water or Rebirth later. The Dog Key can coexist in the inventory with other ending-related items, but using it at the hotel changes the final route immediately.
If you are also collecting Rebirth items on this replay, do not use the Dog Key if your goal is Rebirth. The Dog ending takes priority once the key is used on the hotel’s Observation Room door, even if all four Rebirth ritual items are in the inventory.
- A backup save exists before the room 312 videotape.
- The Dog Key has not been used yet on the backup file.
- The normal final route remains available from another save slot.
5. Use the Dog Key in Lakeview Hotel
Continue through Lakeview Hotel until James reaches room 312 on the third floor. View the videotape there. After the tape ends, leave room 312 and follow the third-floor hallway to the Observation Room, the locked room next to the room 312 area.
Select the Dog Key at the Observation Room door and use it. The door opens and the Dog ending begins without requiring the normal final boss sequence. Allow the ending scene and credits to finish. Do not expect a conventional boss victory, boat sequence or Leave, Maria, In Water or Rebirth decision after opening this door.
- The videotape in room 312 was viewed first.
- The Observation Room is reached on the third-floor hotel hallway after the tape.
- Using the Dog Key starts the Dog ending immediately.
- The Dog ending scene and credits play to completion.
6. Handle expanded-edition joke content separately
The UFO ending is unavailable on the original black-label SLUS-20228 disc. It requires an expanded edition with the Blue Gem. On a confirmed Greatest Hits or Director’s Cut-style release, the Blue Gem becomes available after the main and Born From a Wish scenarios have been completed in the same file. The expanded route uses the Blue Gem at the Nightmare Hospital garden after the Flesh Lips encounter, at the Toluca Lake dock after Eddie and before boarding the boat, and near the back window of room 312 before viewing the videotape.
Born From a Wish is Maria’s separate playable sub-scenario and is also absent from the original North American black-label release. Do not search for its Baldwin Mansion route or expect a scenario-selection option on SLUS-20228. If your disc is SLUS-20228GH or another confirmed expanded edition, keep those tests on separate saves from the original-ending progression.
- Blue Gem instructions are used only on a confirmed expanded edition.
- Born From a Wish is available before attempting its completion check.
- The original SLUS-20228 disc is treated as a five-ending release with no UFO or Born From a Wish content.
- Expanded-ending experiments use a separate save slot or memory-card backup.
Before you move on
- The qualifying completed save shows L, M and W together, or shows R, in the save/load ending data.
- The replay was started only after loading that completed save.
- The Dog Key was collected from the doghouse in the open lot west of Jack’s Inn.
- The room 312 videotape was viewed before attempting the Observation Room door.
- The Dog Key opened the Observation Room on Lakeview Hotel’s third floor.
- The Dog ending scene and credits played.
- A separate save still preserves the completed ending progression for other ending attempts.
References for this chapter
Optional: The Making of DVD and Greatest Hits Differences
Identify the exact Silent Hill 2 release before following any expanded-content instructions. The original North American PlayStation 2 release contains only the Letter from Silent Heaven campaign and its five original endings: Leave, Maria, In Water, Rebirth and Dog. The later North American Greatest Hits release adds the Born From a Wish scenario and the UFO ending. European releases use different packaging: the 2001 Special 2 Disc Set includes a documentary Making of Silent Hill 2 DVD, while the later European Director's Cut Platinum release adds the expanded gameplay. A bonus DVD is not proof that the game disc contains the expanded scenario.
Check the game disc serial first
For the original North American PlayStation 2 release, inspect the small product code printed on the game disc or disc label. The original 2001 release is SLUS-20228. It is the non-expanded version targeted by this guide. The corresponding North American Greatest Hits reissue is SLUS-20228GH and contains the expanded content.
The case design alone is not always enough to identify a copy. Greatest Hits packaging can retain the standard Silent Hill 2 title rather than displaying a Restless Dreams subtitle. Use the game-disc serial as the primary check, then confirm the available menu options after starting the game.
The exact target edition here is the North American original release: SLUS-20228, released September 24, 2001. Its gameplay completion goal is reaching any one of the five original Letter from Silent Heaven endings.
- Original North American game disc: SLUS-20228.
- North American expanded Greatest Hits game disc: SLUS-20228GH.
- Do not classify the edition from a filename, cover image or bonus-disc label alone.
- A title screen without Born From a Wish is consistent with the original release.
Know what the original US release includes
The black-label North American disc contains James Sunderland's Letter from Silent Heaven campaign. It does not include a selectable Born From a Wish scenario and does not include the UFO ending. Nothing is missing if the main menu offers only the standard campaign.
The five original endings are Leave, Maria, In Water, Rebirth and Dog. Reaching one of those ending movies is the correct completion check for the original disc. Save the cleared game afterward if you want to preserve the completed-run file, then use a separate slot or a new run when testing different ending behavior.
Do not search the original disc for a hidden Maria chapter, UFO item or expanded-edition menu unlock. Those instructions belong to later versions and cannot be used to extend the content of SLUS-20228.
- The main campaign is the only playable scenario on the original US disc.
- Completion is confirmed by reaching Leave, Maria, In Water, Rebirth or Dog.
- Born From a Wish is not a required unlock on this edition.
- The UFO ending is not available on this edition.
Separate the European Making of DVD from expanded gameplay
The European launch release from November 23, 2001 was sold as a Special 2 Disc Set in several territories. Its package contains the Silent Hill 2 game disc plus a separate Making of Silent Hill 2 DVD, usually in a folding or digipack-style package. The DVD contains documentary footage, trailers, artwork and related production material.
The Making of DVD is not a second playable campaign. It does not add Born From a Wish to the game disc, and putting the DVD into a compatible player does not change which Silent Hill 2 gameplay edition you own.
Japan also received a separate non-interactive Art of Silent Hill DVD containing trailers, videos, artwork and other promotional material. That disc likewise cannot be used to identify a North American game disc as the expanded Greatest Hits edition. If a listing, dump name or package mentions Bonus, Art or DVD-Video, verify the actual game-disc serial before changing your walkthrough route.
- European Special 2 Disc Set: game disc plus documentary Making of DVD.
- The Making of DVD does not add a playable Maria campaign.
- Art of Silent Hill is separate non-interactive DVD material, not proof of expanded PS2 gameplay.
- The game-disc serial remains the reliable edition check.
Identify the expanded PS2 release
The North American Greatest Hits PS2 release is the expanded edition. Its game-disc serial is SLUS-20228GH. It adds Born From a Wish, a short separate scenario starring Maria, and the UFO ending, along with other version changes and fixes associated with the expanded release.
In Europe, the expanded PS2 version is sold as Silent Hill 2: Director's Cut, generally as a Platinum reissue. In Japan, the expanded PS2 release is Silent Hill 2: Saigo no Uta. The Xbox Restless Dreams and Inner Fears releases and the PC releases also contain the expanded material.
If the main menu offers Born From a Wish, select it as a separate scenario rather than expecting it to appear during James's campaign. It is optional for completing Letter from Silent Heaven. Completing Born From a Wish is not itself the requirement that unlocks the UFO ending; the UFO route uses expanded-edition conditions in the main game.
- North American expanded PS2: SLUS-20228GH.
- European expanded PS2: Director's Cut Platinum.
- Japanese expanded PS2: Saigo no Uta.
- Born From a Wish appears as a separate scenario.
- The UFO ending belongs to expanded releases, not the original SLUS-20228 disc.
Adapt the completion plan by edition
For the original North American disc, follow the main campaign chapters only. Confirm completion when one of the five original endings plays. Keep the completed save separate from experimental ending runs if you plan to replay the game.
For an expanded PS2 copy, complete Letter from Silent Heaven normally, then start Born From a Wish from its separate menu entry if you want the additional Maria scenario. Treat that scenario as optional expanded content rather than a prerequisite for Leave, Maria, In Water or Rebirth.
If you are testing the UFO ending on an expanded copy, use a separate save slot or a separate New Game Plus run. Do not transfer UFO instructions into the original US black-label route, and do not assume that finding a documentary or artwork DVD changes the game disc's ending list.
- SLUS-20228 goal: reach one of Leave, Maria, In Water, Rebirth or Dog.
- SLUS-20228GH goal: optionally complete Born From a Wish and pursue the UFO ending.
- European Director's Cut and Japanese Saigo no Uta are expanded versions.
- Preserve the original-disc completion file separately from expanded-content testing.
- A bonus DVD is documentary or promotional material unless the actual game disc is an expanded release.
Before you move on
- The game-disc serial has been checked rather than relying only on the box or filename.
- SLUS-20228 is treated as the original, non-expanded North American release.
- SLUS-20228GH is treated as the North American expanded Greatest Hits release.
- A black-label completion is confirmed by reaching Leave, Maria, In Water, Rebirth or Dog.
- If a separate Making of or Art of Silent Hill DVD is present, it is treated as documentary or promotional content, not a playable campaign.
- Expanded-edition instructions are used only when Born From a Wish is present in the game menu or the game-disc identification confirms an expanded version.
Post-Game Checks, Unlocks and a 100% Completion Checklist
The original North American PlayStation 2 release has no trophy list or formal 100% percentage. Its practical completion goals are preserving a clear file, recording all five original endings, unlocking the New Game Plus extras, and optionally auditing weapons, documents, supplies and side rooms. The original black-label game contains Leave, Maria, In Water, Rebirth and Dog. Born From a Wish and UFO belong to the expanded Greatest Hits and Director's Cut editions, not the original SLUS-20228 release.
1. Save the clear data without losing the finished run
After the ending movie and results screen, accept the prompt to save the Game Result or Clear Data. Use a new memory-card slot if possible and label it mentally as your master clear file. This is the file that preserves your ending record, total clear information and the conditions needed for later New Game Plus content.
Keep a separate pre-final save if you want to replay the last section for another normal ending. That save lets you repeat the final approach, but it does not replace the Clear Data file used to continue the ending record. Do not overwrite the master file with an ordinary in-progress save unless you have another copy.
- Save the post-ending Game Result or Clear Data file.
- Keep the last pre-final save in a different slot.
- Copy the master file to another memory card when available.
2. Verify the edition before pursuing extras
The original North American PlayStation 2 game is identified as SLUS-20228 and contains only the main Letter from Silent Heaven scenario with five endings. The North American Greatest Hits rerelease uses SLUS-20228GH and adds Born From a Wish and the UFO ending. A DVD or bonus packaging item does not by itself determine the game version; check the game disc serial and title screen.
There are no modern trophies on the original PS2 release. Count the five original endings, clear files and unlocked items as the meaningful completion records. Do not use Blue Gem, UFO or Born From a Wish instructions for the black-label disc.
- Check the game disc serial, not only the box.
- SLUS-20228 is the original North American edition.
- SLUS-20228GH is the expanded Greatest Hits edition.
- Do not mix expanded-edition unlocks into the original-disc checklist.
3. Confirm endings recorded on the memory card
From the save or load screen, highlight a Silent Hill 2 file and press left or right on the directional pad to cycle the information displayed beside it. The ending letters are L for Leave, M for Maria, W for In Water, R for Rebirth and D for Dog. On an original PS2 file, the goal is to see all five letters recorded across the continuing clear-data file.
After each completed ending, save the new Game Result data. To preserve accumulated ending records, load the latest result file before starting the next New Game. A separate run save is useful for testing a route, but an ending stored on an unrelated file will not automatically count toward the requirements for the Dog Key.
- Check for L, M, W, R and D.
- Save the result after every completed ending.
- Load the newest result file before beginning the next New Game Plus run.
4. Audit weapons, areas and personal 100% goals
For a personal collection audit, review the maps and inventory from your completed or in-progress files. Check the major locations individually: Wood Side Apartments, Blue Creek Apartments, Brookhaven Hospital, the Historical Society, Toluca Prison, the Labyrinth and Lakeview Hotel. Revisit your written notes for missed rooms, side corridors, documents and item pickups rather than assuming every nonessential room was empty.
Record the normal weapons and hidden rewards you actually obtained, including the Chainsaw and any Hyper Spray reward relevant to your chosen ranking goal. These are optional completion targets, not requirements for reaching an ending. Likewise, maps and notes are useful records but are not trophies and do not create an official completion percentage on the original console.
- Review each major area on a written checklist.
- Record weapons, secret rewards, documents and optional rooms.
- Separate required progression from personal collection goals.
5. Unlock Rebirth in New Game Plus
Load the latest Clear Data file first, then select New Game when it is highlighted in yellow. During this continuing run, collect the four Rebirth items: White Chrism on the kitchenette counter in Room 105 of Blue Creek Apartments; Lost Memories in the newspaper stand at the Texxon Gas Station; the Obsidian Goblet in the smashed display case in the second exhibition room of the Silent Hill Historical Society; and Crimson Ceremony on the shelf in the Reading Room of the Nightmare Hotel after viewing the videotape.
Keep all four items in the inventory and finish the normal final sequence. Do not use the Dog Key during that run, because opening the Observation Room with it takes priority and produces Dog instead of Rebirth.
- Collect White Chrism.
- Collect Lost Memories.
- Collect the Obsidian Goblet.
- Collect Crimson Ceremony.
- Finish normally without using the Dog Key.
6. Unlock Dog and protect the cumulative file
The Dog Key becomes available in New Game Plus after the same continuing file has recorded Leave, Maria and In Water, or after it has recorded Rebirth. Load that qualifying result file, start New Game, and leave Rosewater Park through the first exit route. Continue straight into the open lot west of Jack's Inn and inspect the doghouse to obtain the key.
Carry the key through the hotel. After viewing the videotape in Room 312, go to the third-floor hallway and use the Dog Key on the Observation Room door beside Room 312. This ends the game immediately with Dog, so make a separate pre-key save if you want to preserve the route for another ending.
- Confirm L, M and W together, or R, before searching for the key.
- Load that result file before starting New Game.
- Take the open-lot route west of Jack's Inn.
- Use the key in the third-floor Observation Room after the videotape.
7. Use safe memory-card procedures
Maintain three categories of files: an untouched master Clear Data file, a working cumulative result file, and temporary route saves. Never remove the memory card during a save or load message, and do not interrupt the console while it is writing data. If you have only one card, reserve several slots before beginning repeated ending attempts.
For a five-ending goal, the cumulative result file matters more than keeping every run in a separate slot. For experimentation, keep disposable pre-final saves separately, then return to the cumulative result file before starting the next New Game Plus run. Expanded-edition tests should also use disposable files so a black-label completion record is not confused with content the disc cannot contain.
- Keep one untouched master result.
- Keep one current cumulative result file.
- Use temporary slots for ending experiments.
- Back up the card when possible.
- Never interrupt memory-card access.
Before you move on
- A protected Game Result or Clear Data file exists on the memory card.
- The save/load screen shows the ending letters for every ending completed on the continuing file.
- For the original five-ending target, L, M, W, R and D are recorded.
- The four Rebirth items were collected during a qualifying New Game Plus run if Rebirth was pursued.
- The Dog Key was obtained only after the required ending record was present and was used in the hotel Observation Room after the Room 312 videotape.
- Weapons, documents, optional rooms and secret rewards have been logged separately as personal 100% goals.
- The game disc was verified as the original North American PS2 edition before excluding Born From a Wish and UFO.
Finishing up
Primary completion is reached when the final credits play for one of the endings available to the verified edition.
For the original North American PS2 release, the available endings are Leave, Maria, In Water, Rebirth and Dog. The Dog ending bypasses the normal final boss route after the Dog Key is used in the Nightmare Hotel Observation Room.
For Rebirth, verify that White Chrism, Book: Lost Memories, the Obsidian Goblet and Book: Crimson Ceremony were collected during a qualifying replay and remained in the inventory through the ending. They are not manually used at an altar.
For Leave, Maria or In Water, verify that the final boss was defeated, the final post-boss scene played and the credits completed.
Preserve the completed result data and a separate pre-final save if additional endings are planned. Born From a Wish and UFO are outside the original black-label PS2 scope and apply only to confirmed expanded editions.
Choose your next gameSources & references
Our original guide draws on the references below. Check the edition at the top of this page before following controls or unlock requirements.
- Silent Hill 2 PS2 US Manual
- Silent Hill 2 PS2 Digital Manual (US)
- Playing Silent Hill 2 — PS2 Controls and Health
- Silent Hill 2 Guide and Walkthrough by Conquerer
- Silent Hill 2 Versions
- Silent Hill 2 Walkthrough — East South Vale — Silent Hill Memories
- Silent Hill 2 Walkthrough - Wood Side Apartments
- Silent Hill 2 Walkthrough — Blue Creek Apartments
- Silent Hill 2 Speed Walkthrough
- Silent Hill 2 Frequently Asked Questions
- Silent Hill 2 - Guide and Walkthrough - PlayStation 2 - KRice
- Silent Hill 2 — Item List
- Silent Hill 2 Walkthrough - West South Vale, Silent Hill Memories
- Silent Hill 2 Endings
- Silent Hill 2 Walkthrough — Brookhaven Hospital
- Silent Hill 2 Walkthrough — Nightmare Hospital
- Silent Hill 2 Puzzles — Original Game Solutions
- Silent Hill 2 Walkthrough - Toluca Prison
- Silent Hill 2 Game Script
- Silent Hill 2 Walkthrough — Lake View Hotel, original 2001 version
- Silent Hill 2 Guide and Walkthrough — PlayStation 2
- Silent Hill 2 Walkthrough — Nightmare Hotel
- Silent Hill 2 - Guide and Walkthrough - PlayStation 2 - By cvxfreak
- Silent Hill 2 - Puzzle Guide - PlayStation 2 - By Conquerer
- Silent Hill 2 — Endings FAQ, PlayStation 2
- Silent Hill 2 — Guide and Walkthrough — PlayStation 2 — Miss_Allie
- Silent Hill 2 — Guide and Walkthrough — PlayStation 2 — Rob_Matter
- Silent Hill 2 — Item/Puzzle/Boss/Weapons FAQ, PlayStation 2
- Silent Hill 2 Unlockables and Secrets
- Silent Hill 2 — Item List/Locations Guide, PlayStation 2
- Making of Silent Hill 2 DVD FAQ
- Art of Silent Hill DVD Information
- Making of Silent Hill 2 DVD Information
About the game & collecting notes
- Platform
- PlayStation 2
Step-by-step directions to finish the original PlayStation 2 release of Silent Hill 2 (Letter from Silent Heaven campaign). Covers survival basics, progression through every major area, practical boss tactics (including both Pyramid Head encounters), how the five official original PS2 endings work, and concrete completion checks for a finished campaign on the North American PS2 release.
Darryl Polo
Darryl Polo loves tinkering with emulation and revisiting retro games. He enjoys exploring how old favorites play on different setups and sharing what he learns along the way. At Joking Joystick, he writes about the games, hardware, and small discoveries that keep the hobby fun.
Our editorial standardsFound a step that needs another look? Help us improve this guide.