Shadow of the Colossus Walkthrough: All 16 Colossi on PS2
Defeat every colossus in the original PlayStation 2 game on Normal difficulty. Each encounter includes the ride from the Shrine of Worship, the arena's climbing puzzle, weak-point tactics, stamina management, and a way to recover after a fall. Follow the complete campaign through the final shrine sequence and ending.

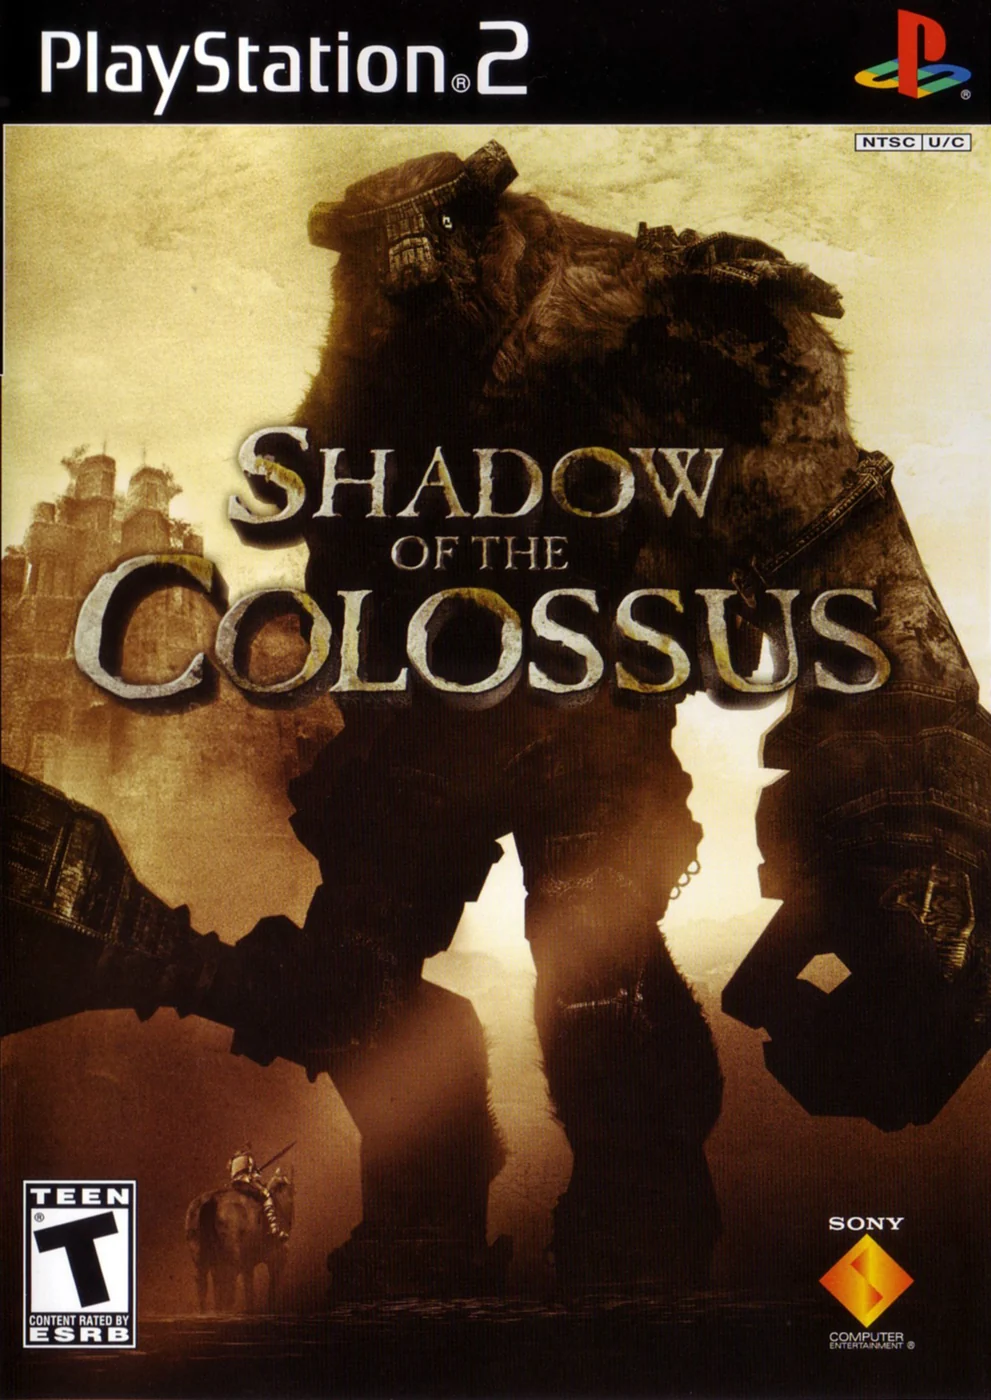
Find a copy
Shadow of the Colossus PlayStation 2
We may earn a commission if you buy through these links, at no extra cost to you. As an Amazon Associate I earn from qualifying purchases.
Opens retailer search results. Check the model, edition, seller, availability and current price before buying.
Before you begin
Every colossus is a navigation puzzle as well as a fight. You need to reach the arena, provoke the right behavior, find a climbing route, and manage your grip long enough to destroy its sigils. This walkthrough follows all sixteen encounters in story order on the original PlayStation 2 release's Normal difficulty.
Start each encounter with its approach section, then use the fight steps once you reach the arena. The familiar community names are included to make chapters easier to find. Hard-mode differences and later-release extras are outside the main route; the postgame section explains where to go after your first clear.
Set yourself up for the run
With the default PS2 controls, use R1 to grip, Triangle to jump, Square to attack, and Circle to raise the sword or pray.
For a sword stab while gripping, press Square to begin charging and press it again to strike when the charge is ready.
Follow the raised sword's converging beams in open light, then use landmarks where the light is unclear.
Rest on broad, stable surfaces to recover grip before making another climb.
Let Agro find a steady line across open ground instead of constantly overcorrecting the reins.
Save at shrine altars and keep a separate save before the final encounter.
Fruit and white-tailed lizards provide optional upgrades; they are not prerequisites for the Normal campaign.
Prepare for the first hunt
Before leaving the Shrine of Worship, spend a few minutes learning the original North American PlayStation 2 release on its own terms. This guide chapter is for a first Normal clear with the original PS2 controls, not later remasters. The important preparation is not early stat farming. It is knowing when the sword light will guide you, how grip recovery actually works, how to perform a charged sword stab while clinging to fur, and how to keep Agro under control before horseback aiming matters.
Set the expectations for this version
This walkthrough follows the 2005 North American PlayStation 2 release and a first-playthrough run on Normal difficulty. Community nicknames such as Valus or Quadratus are useful shorthand, but the game itself advances in a fixed colossus order and does not ask you to choose your own route through the main hunts.
Do not prepare as if this were a trophy list or a postgame cleanup file. Your first goal is simply to locate and defeat all sixteen colossi in order, reach the playable ending, and save cleared data. Optional upgrades exist, but they are support tools, not a requirement before the first hunt.
- You are planning a Normal first clear on the original PS2 release.
- You understand that fan names are only navigation shorthand.
- Your goal is the ordered sixteen-colossus clear and ending, not postgame completion before the first fight.
Memorize the core PS2 controls and camera behavior
Practice in the open ground outside the shrine until the basic layout feels natural. On this version, R1 is the grip button and also crouches on the ground. Triangle is your jump and your mount or dismount input. Square is the attack button. Circle raises the sword light and also handles prayer or other context actions when appropriate. X calls Agro on foot and spurs Agro while riding.
The camera buttons matter enough to learn immediately. L1 is the view or follow command used to keep the colossus in sight during a fight. L2 pulls the camera back behind Wander so you can recover your direction after a bad angle or a tight turn. Do not swap their jobs in your head. When the camera becomes awkward, tap L2 first, then decide whether you need L1 to keep a moving target framed.
- R1 grips surfaces and fur.
- Triangle jumps and mounts Agro.
- Square attacks.
- Circle raises the sword light and is also used for prayer in the right context.
- X calls Agro and increases speed while riding.
- L1 follows or views the colossus.
- L2 centers the camera behind Wander.
Use the sword light correctly
Take the sword into clear daylight before trusting it as a compass. Raise it and turn until the scattered glow tightens into a focused beam. That beam points toward the current objective only when the light is suitable. Deep shade, awkward interior spaces, or bad weather can make it much less useful, so treat it as direction rather than a promise of a straight route.
The sword also helps you read a colossus once you are in position. Small glowing wounds usually exist to trigger a reaction such as a kneel, a lowered body part, or a disabled hazard. Large sigils are the health-draining targets that actually matter for the kill. Learn this difference now, because several early fights use a small wound to create access before the major sigil becomes practical to stab.
- You only trust the beam in good light.
- You use the beam for direction, then read the terrain for the real path.
- You know that small wounds trigger behavior changes.
- You know that large sigils drain the colossus health bar.
Practice the grip rhythm and the original PS2 charged stab
Use the shrine steps, ledges, and low stonework to rehearse the basic climb rhythm. Jump with Triangle and be ready to hold R1 immediately when you reach an edge or a patch of fur. Many early falls come from a good jump followed by a late grip.
Watch the pink grip gauge whenever Wander is hanging, climbing, or resisting violent movement. If it empties, he falls. Recovery happens only when he is genuinely standing on a broad enough surface. A real shelf, a wide shoulder, a flat platform, or another solid standing spot refills grip. A narrow edge where he still looks half-suspended does not count as rest and will keep draining the gauge.
Now learn the charged sword stab exactly as this guide uses it on PS2. While you are gripping with R1, press Square to raise and build the stab. Let the power gather, then press Square again to plunge the blade. Use shorter stabs only when a full charge is too risky. Do not mix this up with bow handling. The bow is drawn and released. The sword stab while clinging is its own timing.
- You grip immediately after reaching a ledge or fur patch.
- You watch the grip gauge instead of mashing through shakes.
- You only expect grip recovery on a broad standing surface.
- You know the PS2 colossus stab rhythm used in this guide: hold R1, press Square to raise and charge, press Square again to stab.
- You keep bow timing separate from sword timing.
Settle Agro and build safe travel habits
Call Agro, mount up, and ride wide circles in the field before leaving for the first arena. Agro is strongest when you give room for turns instead of forcing constant tiny corrections. Look where you want to go, let the horse build speed, and make smooth adjustments early. That habit will matter later when you need a clean line before aiming backward or sideways.
Practice one more routine before you depart: stop at a field shrine, put yourself in position to pray, and save deliberately. The game returns you to the Shrine of Worship after each victory, but manual shrine saves still matter when you have been exploring or collecting supplies between hunts. White-tailed lizard tails raise grip over time, and fruit raises health over time. Both are helpful, and both are optional for a first Normal clear. This guide assumes you move on once the controls feel stable rather than grinding the landscape before colossus one.
- You can mount Agro smoothly and steer in wide, early arcs.
- You understand that direction comes before horseback aiming.
- You know how to use a shrine for a manual save.
- You expect to return to the Shrine of Worship after each colossus victory.
- You treat fruit and white-tailed lizards as optional support, not required preparation.
Before you move on
- You can explain the original PS2 essentials without borrowing remake controls: R1 grip, Triangle jump, Square attack, Circle sword light or prayer, X call or spur Agro, L1 follow the colossus, L2 center the camera.
- You can step into suitable light, raise the sword, and use the focused beam as direction rather than expecting it to ignore cliffs or sealed walls.
- You understand the difference between a small trigger wound and a major sigil.
- You know that grip recovers on a broad standing surface, not while clinging to a narrow edge.
- You can perform the PS2 charged stab sequence used in this guide while gripping a surface.
- You have made a manual shrine save and know that fruit and white-tailed lizards are optional help before the first hunt.
References for this chapter
Valus: the first climb
Valus is a fan nickname for the first colossus, useful here only as a navigation label. In the original North American PlayStation 2 release, this fight teaches the core pattern for the rest of the game: use the sword light only when you have enough sun to get a clear direction, locate a small trigger wound that changes the colossus's posture, then climb to the true major sigil that drains its health. On Normal, the small wound behind the colossus's own left lower leg forces the kneel. The only major sigil you need to finish the fight is on the crown of the head.
Ride south from the Shrine of Worship
Leave the altar and step far enough into open light to use the Ancient Sword. Press Circle to gather the beam. If the lighting is poor under shade or rock, the beam will not focus well, so move back into the sun before checking direction. For this first hunt, the beam points almost straight south toward a broad stone stairway cut into the cliff.
Your best landmarks are the two tall pillars framing that stair approach in the grassland below. Mount Agro with Triangle and ride toward those pillars instead of stopping every few seconds to recheck the beam. This is a short opening route, and the pillars plus the long stairway are easier to follow than the wavering camera.
At the top of the stairs, continue into the narrow rocky pass until the path stops being a riding route and becomes a climbing route. Dismount there. If the camera starts drifting while you line up jumps, tap L2 to center it behind Wander. Once Valus is active, use L1 when you want the camera to follow the colossus.
- Use Circle in proper sunlight to confirm the southern route.
- Ride Agro to the broad stairway between the two tall pillars.
- Dismount where the pass changes from a riding path to a climbing path.
Climb the introductory cliff route
Start up the vine-covered wall on the right side of the pass. Hold R1 to grip while climbing. Use Triangle for jumps, pull-ups, and the short leaps between ledges. The route is mostly linear: climb the wall, pull onto the broken stone path, cross the early gaps, and keep working upward through the ruined ledges.
Partway up, you need to get under a low obstruction before continuing. Slow down, line up Wander, and use the available dodge movement rather than rushing the camera. Near the top, the route bends around the cliff on a wrapping ledge. Grip the ledge, move around the corner, then jump back toward the path behind you to finish the ascent. This is the first awkward movement check of the game, so center the camera first and do not mash the jump.
Watch the grip meter during this climb. It only refills when Wander is truly standing on a broad surface. Hanging from a ledge, clinging to a narrow edge, or balancing in a partial perch does not restore grip. When you reach the final slope, run into the arena and let the opening scene finish.
- Climb the right-side vine wall to begin the pass.
- Take the wrapping ledge near the top and jump back to the upper path.
- Recover grip only on real standing surfaces, not while hanging.
Use the left-leg trigger wound to force the kneel
When control returns, do not challenge Valus from the front. Circle behind the colossus and move to its own left lower leg. Look for the furred patch and the small glowing wound there. This is a trigger wound that creates an opening. It is not the fight-ending sigil.
Jump into the fur and keep R1 held while the body sways. Wait for a calmer beat before attacking. On the original PS2 controls, the mounted charged stab works like this: keep R1 held to grip, press Square once to raise and charge the sword, wait for the charge to build, then press Square again to drive the stab in. Do not treat it like a hold-and-release input.
A proper hit to that left-leg wound makes Valus kneel and lowers the climb. Use that posture change immediately. On Normal, this setup wound is all you need before the head climb. There is no right-arm sigil in the Normal route for this fight.
- Approach from behind and mount the colossus at its own left lower leg.
- Stab the small glowing leg wound only to trigger the kneel.
- Do not confuse the trigger wound with the true damage sigil on the head.
Climb to the back, rest, and finish the crown sigil
As the kneel begins, climb past the knee and move onto the stone and fur above it. Do not try to sprint all the way to the head in one burst. First work up to the lower back. There is a broad standing section there, and it is the safest recovery point in the whole fight. Stand fully on that surface until your grip gauge refills.
Once your grip is back, climb the spine toward the shoulders and head. When Valus starts a heavy shake, stop advancing and just hold on with R1 until the movement settles. Pushing forward during the violent sways is the easiest way to lose the climb. Move during the calmer beats, then settle again if the body starts bucking.
At the crown, you will find the major sigil. This is the only health-draining sigil you need on Normal. Grip the fur around it, wait for a stable moment, then use the same original PS2 charged-stab input: keep R1 held to grip, press Square once to raise and charge the sword, wait for the charge, then press Square again to stab. Repeat on safe openings until the crown sigil fades and the health bar is emptied.
- Use the broad lower-back foothold to restore your grip gauge.
- Climb from the spine to the head during calmer movement cycles.
- Drain the single major crown sigil to finish the battle on Normal.
Recovery if the trigger or climb fails
If the leg stab does not cause a kneel, you usually hit from a poor angle or during a bad sway. Stay attached if you can, wait for a steadier moment, and strike the same left-leg wound again. If you lose position, drop clear of the feet and circle back behind that same leg instead of trying to improvise a front-side climb.
If you fall from the back or head, the arena remains active and you do not need to repeat the entire mountain approach. Heal if needed, tap L2 to re-center the camera, then rebuild the fight from the rear-left leg trigger. The first battle is designed to teach recovery after mistakes, not to demand a perfect single climb.
If your grip gauge is almost empty while you are still below the shoulders, aim for the broad lower-back standing area. If you are too high and cannot safely reach a true foothold before the meter empties, it is better to drop from a lower section on purpose and restart the climb than to black out near the head.
- Missed kneel: retry the same left-leg trigger wound from a steadier angle.
- Fall: re-approach from behind the colossus instead of from the front.
- Low grip: prioritize the lower-back platform before attempting the head climb.
Before you move on
- You followed the southern route from the Shrine of Worship to the broad stairway between the two tall pillars.
- You cleared the cliff approach and entered the arena without getting stuck on the wrapping ledge section.
- You mounted Valus from behind its own left lower leg and stabbed the small trigger wound there to force the kneel.
- You reached the broad lower-back foothold, restored grip, and then climbed to the head.
- You defeated the colossus by draining the single major crown sigil on Normal and watched the scripted return to the Shrine of Worship.
Quadratus: the beach giant
The second colossus in the original PlayStation 2 release waits on the north coast beyond the long natural bridge. This fight teaches you to separate a trigger weak point from a real finishing sigil. Shooting the glowing underside of a raised foot only forces Quadratus to kneel so you can climb. On PS2 Normal, the major sigils that actually drain its health are on the rear of the back near the tail base and on the head.
Ride north to the sealed seaside cave
Leave the Shrine of Worship and ride Agro across the broad field toward the long natural bridge directly north of the shrine. Cross the bridge, then stay on the sloping path that winds down from the higher ground to the beach below. Keep following the descent until you can see the shoreline and the large sealed stone doorway set into the cliff face.
Approach the open sand in front of that sealed cave to trigger the encounter. After the cutscene, move away from the cliff wall and fight in the middle stretch of beach whenever possible. The flat sand gives you the clearest view of Quadratus' legs and the safest room to reset the puzzle if you miss a shot or get knocked down. If the camera swings off target, use L1 to keep the colossus in view and L2 to center the camera behind Wander before you aim again.
- Cross the natural bridge north of the shrine.
- Descend the beach path instead of staying on the upper plateau.
- Trigger the fight at the sealed cave and pull the battle into open sand.
Bait a raised foot and force a kneel
Stay on foot for the opening. Face Quadratus from a moderate distance so it walks toward you across clear sand. Do not stand directly under its body. When it prepares a stomp, one of the front feet rises high enough to reveal the glowing underside. That glowing spot is your trigger target.
Draw the bow, line up the underside of the raised foot, and fire before the hoof comes down. A clean hit makes that leg buckle and lowers the body for a moment. Sprint in immediately toward the lowered leg. Front feet are usually the easiest beginner target because they lift higher and give you a larger, clearer opening than the rear feet.
If you miss, do not panic and rush underneath. Back out into open sand until Quadratus turns to face you again, then repeat the same bait. Clean spacing is safer than trying to squeeze a hurried shot between its legs.
- Stay in front of Quadratus with room to see the lifted hoof.
- Shoot the glowing underside of a raised front foot.
- Run to the lowered leg as soon as it buckles.
Climb from the leg to the back and destroy the rear sigil
Grab the fur on the lowered leg with R1 and start climbing at once. Pull yourself upward toward the shoulder area. The shoulder shelf is your first dependable recovery foothold because Wander can stand there instead of hanging. If your grip is low from the climb, settle on that broad area and let it refill before pushing higher.
From the shoulder, move onto the broad back and work toward the rear sigil near the tail base. Stay close to the spine when the body starts to shake, and stop advancing until the motion calms. The rear sigil is the first major health target in this route. Once you are planted beside it, use charged sword stabs carefully. On original PS2 controls, keep R1 held to stay attached, press Square once to raise and charge the sword, wait for the charge to build, then press Square again to drive the stab in. Repeat until the rear sigil disappears.
- Climb the lowered leg instead of trying to jump for the body from the beach.
- Use the shoulder as a real standing surface to recover grip.
- Drain the rear major sigil near the tail base until it vanishes.
Advance along the spine and finish the head
After the rear sigil is gone, head forward along the spine toward the neck and crown. Quadratus' bony ridges can interrupt a straight run, so move in short bursts and only jump when the body is comparatively steady. If a violent shake starts while you are lining up a transfer, cancel the jump and cling until it passes.
The final PS2 Normal sigil is on the head. This area bucks harder than the rear, so do not overcommit to long attacks when your grip is low. Short, well-timed charged stabs are safer than trying to squeeze in one more hit during a thrash. When the head sigil drains completely, the colossus collapses and the fight ends.
- Follow the spine from the rear toward the neck.
- Cross ridges only during calmer movement.
- Drain the head sigil to finish the battle.
Recovery if you fall, miss, or run out of grip
If you fall off before reaching the back, create distance and reset to the middle of the beach instead of chasing a leg from underneath the body. Let Quadratus face you, bait another raised front foot, shoot the glowing underside again, and reboard from the lowered leg. This is the safest repeatable loop for a first clear.
If you are thrown off after damaging the rear sigil, use the same remount method and return to whichever sigil remains. Once you are back on the colossus, refill grip only on a genuinely broad standing surface such as the shoulder shelf or a wide patch on the back. Hanging from fur or clinging to a narrow edge does not count as a safe recovery rest.
If the colossus crowds the cliff wall or your angle on the hooves becomes awkward, run out toward open sand and lure it away from the cave entrance before trying again. The puzzle is much easier when you can read the stomp cleanly from the front.
- Reset to open sand after a miss or fall.
- Repeat the raised-foot shot instead of improvising under the body.
- Recover grip on a broad standing area before attacking the remaining sigil.
Before you move on
- You rode north from the Shrine of Worship, crossed the natural bridge, descended to the beach, and triggered the fight at the sealed seaside cave.
- You baited a raised foot, shot its glowing underside, and climbed the lowered leg to board Quadratus.
- You destroyed the two PS2 Normal major sigils in this fight: the rear rump/back sigil and the head sigil.
- After the tendrils sequence, Wander returned to the Shrine of Worship and the second idol was broken.
Gaius: break the sword-arm guard
Players commonly call the third colossus Gaius. On the original North American PlayStation 2 release on Normal, this fight has two major sigils that drain its life, one on the head and one on the belly. The important trick is that the arena asks for two different sword slams in two different places. First, lure a slam onto the round metal plate in the middle to break the stone guard on the sword arm. After that, move away from the plate, bait a second slam into ordinary ground, run up the blade, and climb aboard.
Ride north to the lake platform
Leave the Shrine of Worship through the front entrance and ride toward the giant natural bridge on the north side of the central valley. Cross that bridge, the same landmark used to reach the second colossus, but do not take the descending route that drops toward the beach and seaside shrine door. Stay on the higher route instead and continue through the mountain pass beyond the bridge.
The path opens at a dark lake with a huge circular platform rising from the water. Ride down to the shore, dismount, and swim to the long sloping stone approach attached to the arena. Surface if your air and grip meter runs low. Climb the slope, cross the broken stone pieces near the top, and jump up onto the circular floor to start the battle.
- Crossed the northern natural bridge from the shrine valley.
- Ignored the beach descent and stayed on the upper mountain route.
- Reached the lake with the circular platform.
- Swam to the sloping stone access and climbed onto the arena.
Break the wrist guard on the center plate
Before trying to climb the colossus, find the round metal plate set into the middle of the arena. This specific plate is what breaks the stone guard on the sword arm. Keep the colossus in sight with L1 when you need to watch its approach, and tap L2 when you want the camera reset behind Wander as you run.
Stand on or very near the center plate and wait for a full overhead sword slam. Do not dodge too early. Move clear only as the blade is already coming down. If the hit lands on the metal plate, the impact breaks the stone guard at the wrist. Treat this as its own step. You are not climbing this sword strike. You are only exposing the wrist so a later strike can be used as a ramp.
- Located the metal plate in the arena center.
- Baited a full overhead sword slam onto the plate.
- Saw the wrist guard on the sword arm break.
Use a second slam as the boarding ramp
Once the guard is gone, leave the middle of the arena and stand on ordinary stone floor. Give the colossus room again and wait for another overhead strike. This time the goal is different. You want the sword stuck into normal ground so the flat of the blade becomes a ramp.
The moment the blade lodges in the floor, sprint straight up it toward the hilt and grab the exposed fur and stone holds near the wrist. No speedrun launch is needed. Climb up the forearm toward the shoulder, pausing through violent shakes instead of forcing upward movement. If you reach a broad part of the shoulder or upper back, stand there briefly to refill grip before moving higher.
- Moved away from the center plate after the guard broke.
- Baited a second sword strike into normal arena floor.
- Ran up the sword and grabbed on near the wrist.
- Reached the shoulder or upper back and recovered grip.
Finish the head sigil first
From the shoulders, climb the neck to the top of the head. The first major Normal sigil is there. Wait for a steadier moment before attacking. On original PS2 controls, keep R1 held so Wander stays attached, press Square once to raise and charge the sword, wait for the charge to build, then press Square again to stab. Do not switch this with the bow action. Bow shots use a hold and release, but colossus stabs on PS2 do not.
If the head starts shaking too hard, retreat to the neck or shoulders and recover instead of spending the last of your grip on weak hits. Stay patient and keep using charged stabs until the head sigil fades completely.
- Climbed from the shoulder area to the head.
- Destroyed the major head sigil.
Drop to the waist ledge and reach the belly
After the head sigil disappears, go back down over the shoulders and descend along the back. Do not try to force a direct frontside drop from the head to the belly. The safer route is the broad ledge around the waist. This beltlike stone and fur band is one of the best recovery points in the fight because you can actually stand there and refill grip.
From the waist ledge, work around toward the front of the torso and move underneath to the belly sigil. Attack during calmer moments with the same PS2 stab sequence: keep R1 held, press Square once to raise and charge, then press Square again to stab. If the colossus starts a heavy shake while you are hanging under the front, retreat to the waist ledge, recover, and try again. When the belly sigil vanishes, the fight is over.
- Returned safely from the head to the back and waist area.
- Used the waist ledge as the transfer point.
- Reached the belly sigil underneath the front torso.
- Destroyed the major belly sigil.
Recovery if the puzzle or climb fails
If the wrist guard does not break, the sword did not hit the center metal plate correctly. Go back to the middle and repeat that exact setup. Do not waste time trying to climb the arm before the guard is gone.
If the guard is already broken but you fall off, you do not need to repeat the center-plate step. Move onto ordinary ground, bait another embedded sword strike, and run up the blade again. If you fall into the lake before the battle area is re-entered, swim back to the same sloping stone access and climb up again.
If your grip gauge is nearly empty while you are on the body, aim for the shoulders, upper back, or especially the waist ledge. Those are real standing surfaces that restore grip. Clinging to a narrow edge will keep draining it. If you cannot reach a safe perch in time, dropping to the arena floor is better than exhausting the meter and being thrown into a worse position.
- Know to repeat the center-plate step only if the wrist guard is still intact.
- Know that later re-entries use an ordinary-ground sword ramp.
- Know the main recovery spots are the shoulders, upper back, and waist ledge.
Before you move on
- You crossed the northern bridge, stayed on the upper mountain route, reached the lake, swam to the sloping stone access, and climbed onto the circular arena.
- You broke the sword-arm guard with a slam on the center metal plate, then used a separate sword strike into ordinary ground to run up the blade and climb aboard.
- You destroyed both Normal major sigils, the head first and the belly second.
- After the return to the Shrine of Worship, the third idol is destroyed and you can save before riding out again.
References for this chapter
- Larger Than Life, Shadow of the Colossus Provides an Emotional Artistic Adventure Available Exclusively for PlayStation®2
- SHADOW OF THE COLOSSUS - (NTSC-U)
- Shadow of the Colossus/Gaius - Colossus 3 — StrategyWiki
- FAQ/Walkthrough
- Shadow of the Colossus - Guide and Walkthrough - PlayStation 2 - By selmiak
Phaedra: the burial mounds
Ride east from the Shrine of Worship, take the southern branch through the mountain pass, and descend into the broad grassy burial valley. The fourth colossus is solved by making it watch you enter one mound tunnel, then using the underground passages to come out behind it while it bends down to inspect the doorway where it last saw you. On the original North American PlayStation 2 release on Normal, the glowing wound at the back of the neck is only a trigger that lowers the head. The only major sigil that drains the health bar is on the head.
Ride from the Shrine of Worship to the grassy burial valley
Leave the Shrine of Worship across the main stone bridge and ride straight east over the open plain. If the sun is favorable you can raise the sword with Circle to confirm direction, but the important landmark is the mountain opening in the eastern wall.
When you reach the pass, take the lower southern branch rather than the route that climbs higher. Stay on the descending trail as the stone corridor opens into a greener basin. You are looking for a wide field with several raised burial mounds, each with tunnel entrances cut into the sides.
Ride deeper into the valley until the battle begins near the far side, then turn back toward the mound cluster. Agro is useful for the trip in, but once the fight starts it is safer to work on foot around the mounds so you can control exactly which entrance the colossus sees you use.
- Cross the main bridge from the shrine and ride east.
- Use the southern branch in the mountain pass.
- Reach the grassy valley with the burial mounds and trigger the battle near the far side.
Make the colossus commit to the entrance where it saw you
The puzzle only works reliably if the colossus clearly watches you go into one specific doorway. Stay in the open near the mound group until it turns toward you and begins to close the distance. If needed, shoot an arrow or whistle so it focuses on your position before you drop underground.
Run into one mound entrance and keep moving through the tunnel network. Do not come straight back out. You want enough time for the colossus to walk over and begin its inspection behavior above the entrance it just saw you use.
While underground, use L1 to keep Wander looking toward the colossus if the camera becomes awkward, and use L2 to center the camera behind Wander while you run through the tunnels. Wait for the heavier search cue before exiting: stronger tremors, falling dirt, and the sense that the colossus has stopped roaming and is looming over the entrance you used.
- Let the colossus clearly see you enter one doorway.
- Stay underground long enough for the search behavior to start.
- Use the tunnels rather than trying to circle it in the open.
Exit from a different mound and approach from behind
Use the connected tunnels to emerge from a different exit, preferably one opposite or off to the side of the entrance you used first. The important result is that the colossus is still facing the original doorway, with its tail and hindquarters toward you.
Before sprinting in, confirm the pose. You want to see it lower itself to inspect the original opening. If it is still pacing, lifting its head, or already turning toward your new exit, duck back underground and wait longer or choose another exit. The line-of-sight reset is what makes the rear approach safe.
Once the head is down and its attention is fixed on the first doorway, run directly to the tail from behind. Do not try to improvise around the front legs. A bad exit is faster to reset than a dangerous approach through its stomping range.
- Come out from a different exit than the one you entered.
- Wait until the colossus is bent over the original doorway.
- Approach from the rear and jump to the tail.
Climb to the neck trigger, then finish the head sigil
Pull yourself up the tail ridges and grab fur as soon as you can. Hold R1 through the first strong shake, then climb along the spine during calmer moments. If your grip is getting low, stop on a truly broad standing surface on the back before continuing. Hanging from a narrow edge does not restore grip.
At the back of the neck you will find a small glowing wound. On original PS2 Normal this is not the major sigil. Keep R1 held to stay attached, press Square once to raise and charge the sword, wait for the attack to build power, then press Square again to drive the stab in. A successful hit here makes the colossus lower its head.
Move onto the head as soon as it dips. The head contains the only major Normal sigil in this fight. Attack during the calmer parts of its movement cycle. For each charged stab, keep R1 held, press Square once to charge, wait for power, then press Square again to stab. Stay planted instead of rushing extra hits during violent shakes. When the head sigil disappears and the health bar is emptied, the fight is finished. Do not go looking for shoulder sigils in this Normal route.
- Climb from the tail onto the back and recover grip on broad surfaces when needed.
- Stab the neck wound only to force the head down.
- Drain the single major sigil on the head.
Recovery if the puzzle or climb fails
If the colossus refuses to lower itself at the mound, the usual cause is that it never clearly saw which entrance you used, or you emerged too early. Step back into the open, let it notice you again, enter one doorway in full view, and stay underground longer before trying another exit.
If you come out and find the head facing you, do not try to run around the front. Re-enter the nearest tunnel, loop to a different exit, and wait for the inspection pose again. The intended rear approach is much safer and more reliable than forcing a mount from a bad angle.
If you fall from the back or empty your grip gauge, reset the mound puzzle instead of chasing its legs in the open field. Reboarding from the tail after a proper inspection is the consistent recovery method. If you reach the shoulders with very little grip, stand fully on a broad section of the back before attempting the neck trigger or the move onto the head.
- No inspection pose: make sure it saw you enter and wait longer underground.
- Bad exit angle: retreat into the tunnels and come out behind it instead.
- Fall or empty grip: reset the mound setup and remount from the tail.
Before you move on
- You rode east from the Shrine of Worship, used the southern branch through the pass, and reached the grassy burial valley with the mound tunnels.
- You let the colossus see you enter one mound, stayed underground until it committed to searching that doorway, and emerged from a different exit behind it.
- You mounted from the tail, used the neck wound only to lower the head, and finished the single major Normal sigil on the head.
- The fourth colossus fell and Wander was returned to the Shrine of Worship.
References for this chapter
- WARNING: READ BEFORE USING YOUR PLAYSTATION®2 COMPUTER ENTERTAINMENT SYSTEM.
- Shadow of the Colossus - Guide and Walkthrough - PlayStation 2 - By nemes1ss - GameFAQs
- Shadow of the Colossus - Guide and Walkthrough - PlayStation 2 - By Xiamut - GameFAQs
- Shadow of the Colossus/Phaedra - Colossus 4 — StrategyWiki | Strategy guide and game reference wiki
Avion: the lake flight
The fifth colossus is the giant bird commonly called Avion by players. In the original North American PlayStation 2 release on Normal, this fight takes place over the eastern ruined lake. Ride to the flooded ruins, enter the inner basin through the submerged opening, wake the bird from the upper ruin, then return to water level and board it from a low swoop. The three Normal major sigils are at the tip of each wing and at the tail tip. Treat the broad back as your main recovery area, move only during calmer glides when a wing is comparatively level, and do not expect to finish every sigil in one perfect ride.
Ride east to the flooded ruins
Leave the Shrine of Worship and raise the sword in open sunlight to confirm the route to the east. Ride Agro along the mountain path used on the way toward the previous colossus, but do not drop into the grassy burial valley. Stay on the higher cliff route instead.
This path bends around the mountain, passes a save shrine, then narrows into a misty ledge section before opening into a broader grassy stretch. Keep following the visible trail until the ground ends at a lake filled with broken stone ruins. Agro will stop at the waterline, so dismount there and continue on foot.
- Take the eastern cliff path rather than the southern burial valley.
- Use the save shrine, misty ledge, and flooded ruins as landmarks.
- Dismount at the shoreline because Agro will not enter the flooded area.
Enter the inner basin and wake the colossus
Swim toward the central ruin and look for the broken outer wall section that continues below the water. Dive and pass through that submerged opening into the inner basin. Once inside, climb onto the low ring around the tower-like ruin in the middle and work your way up its ledges.
Cross the upper bridge and climb the steps on the far side to trigger the encounter. After the cutscene, do not stay on the upper ruin to fight. Drop through the nearby cracked opening to return to the water below, then swim toward the row of low rectangular stone platforms near the perched bird. Those low platforms are the real launch point for boarding.
- Swim through the underwater gap in the outer wall to reach the enclosed lake.
- Climb the central ruin, cross the bridge, and trigger the cutscene from above.
- Drop back to water level and head for the low platforms near the perch.
Bait the low swoop and grab on safely
Climb onto a low platform with a clear line toward the perch and equip the bow. Fire an arrow at the bird to make it take off and line up a low attack pass. Keep L1 ready so you can follow its approach and judge the timing of the swoop.
As it comes in low, face the section where the wing joins the body rather than the bare outer edge. Jump toward that furred wing-root area and immediately hold R1 when you connect. The first burst of movement is the roughest part of the fight, so do not try to run the instant you land. Surviving the opening flap matters more than rushing forward.
- Use a low water-level platform to trigger the attack pass.
- Shoot the perched bird with the bow to make it swoop.
- Jump for the furred area where the wing meets the body, not the thin wing tip.
Use the back as your rest area and clear both wing sigils
Climb up from the wing root onto the broad back. This is your safest place to recover because Wander can stand there during calmer glides and refill grip on a genuinely broad surface. Watch the bird's rhythm. When it flies straight and a wing lies comparatively level, move out along that side. Run only across the flatter section, then grip again as the wing narrows toward the end.
At the sigil, keep R1 held to stay attached, press Square once to raise and charge the sword, wait for the charge to build, then press Square again to stab. After a solid hit, the bird often rolls or turns upside down. Do not keep moving during that reaction. Hang on until it stabilizes, then work your way back to the broad back and recover fully before attempting the other wing.
Repeat the same process on the opposite wing. There is no need to force both wings in one frantic sequence. If the flight pattern stays rough, wait on the back instead of gambling with a half-empty grip gauge on a narrow wing.
- Stand and recover on the broad back whenever the glide steadies.
- Advance onto a wing only when it is comparatively level.
- Charge the stab with one Square press and complete it with a second Square press.
- Return to the back to refill grip before going after the other wing.
Finish the tail tip
Once both wing-tip sigils are gone, wait for another calm glide and start moving toward the tail. The farther back you go, the narrower the route becomes and the more the wind pushes Wander toward the rear. Use short, controlled bursts of movement and re-grip often instead of trying to sprint the whole length at once.
At the tail tip, hold on securely and use the same PS2 charged stab rhythm: press Square once to charge while gripping with R1, then press Square again to stab. If your grip is not healthy enough to finish the sigil, backtrack toward the broader body when the bird settles instead of risking an empty meter at the very end.
- Begin the tail run only after recovering grip on the back.
- Use short moves and frequent re-grips as the tail narrows.
- The final Normal major sigil is at the tail tip.
Recovery if the pattern goes wrong
If you miss the boarding jump or get thrown into the lake, swim back to the same low takeoff platforms and shoot the bird again. You do not need to reclimb the central ruin after the fight has started. The low platforms are the intended reset point.
If a wing never gives you a safe crossing window, stay on the back and wait through the unstable flight. If your grip gauge is close to empty while hanging on a wing or the tail, let go over open water before it drains completely. A controlled water reset is better than blacking out and losing your landing.
If you cleared only one or two sigils before falling, simply board again and continue from the remaining weak points. This battle does not require all three sigils to be destroyed in a single airborne cycle.
- After any fall, return to the low platforms and bait another swoop.
- Wait on the back through violent rolls instead of forcing movement.
- Continue from remaining sigils after a remount; one flight is not required.
Before you move on
- You rode east from the Shrine of Worship along the cliff path, reached the flooded ruins, and entered the inner basin through the submerged wall opening.
- You climbed the central ruin to wake the fifth colossus, then returned to water level and boarded it from a deliberate low swoop off the stone platforms.
- You destroyed the two wing-tip sigils and the tail-tip sigil on Normal.
- After the victory, Wander returned to the Shrine of Worship and you can save before setting out for the sixth colossus.
References for this chapter
- WARNING: READ BEFORE USING YOUR PLAYSTATION®2 COMPUTER ENTERTAINMENT SYSTEM.
- SHADOW OF THE COLOSSUS - (NTSC-U)
- Shadow of the Colossus - Guide and Walkthrough - PlayStation 2 - By T_Hayes - GameFAQs
- Shadow of the Colossus - Guide and Walkthrough - PlayStation 2 - By nemes1ss - GameFAQs
- Shadow of the Colossus - Guide and Walkthrough - PlayStation 2 - By Xiamut - GameFAQs
Barba: the underground giant
This chapter is for the original North American PlayStation 2 release of Shadow of the Colossus on a first Normal playthrough with the original controls. The sixth colossus is in the southwest desert inside a giant underground temple. This is not a stand-up duel. Your job is to lead the giant to the far roofed recess, make it bend low enough to inspect you, jump to the hanging beard, destroy the crown sigil, then work down to the colossus's own lower-left back sigil. On Normal, the hand wound is not part of the required route.
Ride from the Shrine of Worship to the southwest desert temple
Leave the Shrine of Worship and ride down into the southern field, then keep turning southwest as the grass gives way to a broad sandy basin. If the light is strong enough, use the sword beam with Circle to confirm the general direction, but do not expect a straight line through the cliffs. Keep working toward the far southwest wall of the desert.
Your landmark is a huge rectangular stone structure built into the mountain wall at the edge of the basin. It stands higher than the surrounding sand and has a clear central opening. Dismount there and go inside. This is the correct approach to the sixth fight.
- Reached the southwest desert instead of turning into the forest or canyon routes
- Found the giant stone platform and central entrance in the mountain wall
- Used the sword beam only as a direction check in open light
Descend into the arena without wasting health
Inside the temple, follow the broken stairways, arches, and ledges downward. Take the safe route from platform to platform instead of jumping off long drops. You want to arrive with a healthy life bar because the ground phase is about movement and positioning, not trading hits.
When you finally reach the long main hall, Barba enters from the far end behind you. Turn away from that entrance at once. The useful terrain is at the opposite end of the chamber, where a low roof and several pillars form a covered recess.
- Used the interior descent path instead of a damaging shortcut
- Reached the main hall with enough health to survive a mistake or two
- Identified the far roofed recess as the fight's setup point
Run the hall and trigger the beard opening
Sprint to the roofed recess at the far end of the chamber. Low barriers break up the hall. Vault them where you can, or angle around the damage if Barba smashes one apart, but keep moving. Do not linger near its feet and do not try to win from the floor. The puzzle only advances when you use the hiding place correctly.
Once under the roof, stay far enough inside that Barba has to lean down to inspect the shelter. If it pauses without lowering its face enough, step out just long enough to make sure it sees you, then tuck back in behind the pillars. The correct cue is a full search bend: the head drops, the upper body leans forward, and the beard hangs low near the shelter opening. That is your jump.
Run out from the recess only when the beard is clearly within reach. Jump and grab with R1. If the beard is still swinging too wildly, focus on staying attached first and start climbing only after the motion eases.
- Crossed the hall to the far covered recess
- Waited for the full low inspection bend instead of jumping early
- Grabbed the beard rather than trying to climb a leg from the floor
Climb to the crown sigil, then drop to the lower-left back
From the beard, climb upward onto the chest, then onto the shoulder and upper back. Use the broader stone and furred areas near the shoulder line to steady yourself. On original PS2 controls, keep R1 held to grip. For a heavy stab, press Square once to raise and charge the sword, wait for the charge to build, then press Square again to drive the blade in. Use that method on the crown sigil until it disappears.
Before leaving the head, return to a broad upper-back area and refill as much grip as you can. The second Normal sigil is on Barba's own lower-left back. Face toward the rear and work down the colossus's left side in short controlled movements. This descent is shakier than the head. If Barba begins a hard shake while you are too low, stop attacking and cling until the motion passes.
Attack the lower-left back sigil only when you are stable enough to survive the recoil. The thin lower-back lip is not a permanent resting floor. If you release there and Wander is still sliding or forced to cling, you have not found a true recovery spot. Climb back up toward the broader back plates whenever your grip gets low.
- Destroyed the crown sigil first
- Recovered grip on a broad upper-back surface before descending
- Moved to the colossus's own lower-left back and destroyed the second major sigil
Recovery if you miss the trigger, fall, or run out of grip
If Barba will not bend low enough, you are usually standing too far out in the open or not deep enough inside the covered recess. Reset by returning all the way to the far shelter, let it notice you again, and wait for the full inspection bend before jumping.
If you fall from the beard, shoulder, or back, do not stay under the colossus and improvise. Sprint the length of the hall back to the roofed recess and repeat the ambush. That is faster and safer than trying to grab a leg while it is stomping.
If your grip gauge is nearly empty on the body, stop stabbing immediately. Climb back toward the shoulder or a broad upper-back section and recover there. If you have already descended too far to do that safely, cling through the shake, look for the next calm moment, and retreat upward instead of gambling on one last stab.
- Returned to the covered recess after a failed bend or a fall
- Restarted the beard ambush instead of fighting beside Barba's feet
- Recovered grip on a broad standing surface before attempting the back sigil again
Before you move on
- You rode from the Shrine of Worship to the southwest desert and entered the huge temple set into the mountain wall.
- You descended to the main hall, ran to the far roofed recess, and used the inspection bend to board from Barba's beard.
- You destroyed Barba's crown sigil and then the major sigil on the colossus's own lower-left back on Normal.
- After the second sigil disappeared, Barba collapsed and the victory sequence returned Wander to the Shrine of Worship.
Hydrus: the electric lake
The seventh colossus, commonly called Hydrus by fans, waits in the far northwest lake. This fight is a moving climb, not a race to the head. The three small wounds at the bases of its electrical spines are trigger points that switch those hazards off. They are not the main damage sigils. Board from the tail, disable the three live spines in order, then move onto the head and finish the single major sigil there. On the original PlayStation 2 controls, hold R1 to grip, use L1 to keep the camera following the colossus, and use L2 to snap the camera behind Wander if your view turns sideways in the water.
Ride from the Shrine of Worship to the northwest lake
Leave the Shrine of Worship by the front causeway and cross the long bridge away from the temple. On the far side, follow the northern route left instead of riding into the central plain. Stay on the path as the terrain dries out and the rock walls begin to close around you.
Keep going until you reach the same broad lake region that holds the third colossus arena, then continue along the lakeside route between high cliffs toward the northwest. After the turns through the cliffs, the path opens into a wide area with a small tower in the distance. From there, angle left toward the tall pillars on the slope and pass through the thin arch in the wall beyond them.
Cross the bridge on the far side of that wall until you reach the broken section over the water. Dismount Agro, drop to the lower surviving span, and continue to the spiral ruin below. Follow the ruined spiral path down to the waterline. The central tower and the long serpent wake in the lake confirm you are in the right arena.
- You took the northern route from the shrine bridge.
- You passed the lakeside path and the cliff junctions into the far northwest area.
- You crossed the broken bridge approach and descended the spiral ruin to the water.
Make Hydrus surface and board from the tail
Swim out over the dark shape moving below the surface. Do not wait passively near the edge. Stay above Hydrus's path so it reacts and rises underneath you. As it comes up, the three glowing electrical spines appear before the rear of the body does.
Let those live spines pass first. Do not try to grab beside them, because contact with an active spine can shock you off immediately. As the tail lifts clear behind the last spine, grip the fur on the tail with R1. Hydrus will soon drag you back under. During that first dive, do not burn the whole meter trying to crawl forward. Just stay attached and wait for the next high surfacing window.
- You swam above the submerged body to draw the colossus upward.
- You waited for the live spines to pass before grabbing.
- You boarded from the tail instead of the electrified middle.
Disable the three spine-base trigger wounds
Move only during the moments when Hydrus's back rises well above the surface. When it dives, stop advancing and hold on. Your circular meter is serving as air and grip here, so reckless movement during a long submergence is the easiest way to fail the climb.
Approach the first spine only when the body is up and the water has settled enough for a short run. At the base of that spine is a small wound. Keep R1 held to remain attached, press Square once to raise and charge the sword, wait for the charge to build, then press Square again to stab. A successful hit shuts that spine down, making it safe to pass on the next rise.
Repeat the same process for the second and third spines. If Hydrus starts dipping while you are still short of the next trigger point, stop where you are and ride out the dive. Do not force your way through the shock area around a spine that is still active. Once a spine has been disabled, it stays harmless for the rest of that fight, even if you fall off and need to remount.
- You stabbed the small wound at the first spine base and turned that hazard off.
- You disabled the second spine before trying to push to the front.
- All three spine hazards are dark before you move for the head.
Finish the major sigil on the head
After the third spine is disabled, continue forward to the head. The head carries the single major sigil for this fight, and this is the point that drains the colossus's health. The movement is rougher near the front, so take damage opportunities only when the head is clearly above the water and you have enough meter left to recover afterward.
Use the same original PS2 stab rhythm here: keep R1 held, press Square once to raise and charge, then press Square again to drive the sword down. Re-grip immediately after each strike. If the meter is dropping too far during a long pull underwater, let go before it empties, swim clear, and set up another tail boarding pass. Losing ground is better than being forced off right beside a live hazard you did not finish disabling.
- You reached the head only after shutting down all three spine hazards.
- You are attacking the head's major sigil rather than repeating old trigger wounds.
- You are using surface windows to strike and simply holding on through dives.
Recovery if you miss the board, fall off, or run low on meter
If you miss the tail on the first pass, swim away from the glowing back and reset in open water above Hydrus's route. Watch for the orange glow and the wake beneath the surface, then line yourself up so the spines pass in front of you and the tail rises behind them again.
If you fall after disabling one or two spines, remount from the tail on the next pass. The spines you already switched off remain off, so your return climb will be shorter. If you are shocked near a spine that is still active, break away instead of trying to crawl past it in panic.
If the shared air and grip meter is running dangerously low during a long submergence, release early, surface, and reset. Do not rely on being dragged deeper with an empty meter. When you lose your bearings, face the spiral ruin and central tower on shore, then track the moving wake to predict Hydrus's next line through the lake.
- You know to reset in open water and reboard from the tail.
- You know previously disabled spines stay off for the rest of the battle.
- You know to release before the meter empties during a deep drag.
Before you move on
- You rode from the Shrine of Worship to the far northwest lake, crossed the broken bridge approach, and descended the spiral ruin to the water.
- You swam above Hydrus to make it surface and grabbed the tail only after the live electrical spines passed.
- You stabbed the small trigger wound at the base of each of the three electrical spines and turned all three hazards off.
- You reached the head, erased the single major sigil there, watched the colossus collapse, and returned to the shrine sequence.
References for this chapter
- WARNING: READ BEFORE USING YOUR PLAYSTATION®2 COMPUTER ENTERTAINMENT SYSTEM.
- Shadow of the Colossus - Guide and Walkthrough - PlayStation 2 - By T_Hayes - GameFAQs
- Shadow of the Colossus - Guide and Walkthrough - PlayStation 2 - By Xiamut - GameFAQs
- Shadow of the Colossus Walkthrough - GameSpot
- Shadow of the Colossus/Hydrus - Colossus 7 — StrategyWiki | Strategy guide and game reference wiki
Kuromori: the arena lizard
Ride southeast from the Shrine of Worship through the mountain ravine, pass the waterfall ledge and second cave, then enter the stone water temple beside the lake. Climb through the ruin into the circular arena, stay on the upper levels to draw the colossus onto the wall, shoot two glowing feet to make it fall, then descend and finish the two real underside sigils on PS2 Normal.
Ride southeast to the water temple
Leave the Shrine of Worship and face the southeastern light. Ride toward the mountain opening in that direction and pass through the ravine. On the far side is a broader grassy area with a cave ahead. Go through that cave to the narrow path beside the waterfall.
This ledge is awkward for Agro because of the rocks and trees crowding the route. For a first Normal clear, dismount and cross on foot. Whistle for Agro once you reach the wider ground beyond the ledge, then continue through the second cave.
You will emerge at a bright basin with a lake and a stone temple built into the cliff at the water's edge. This is the landmark you want. Leave Agro outside, approach the ruin on foot, and enter the doorway facing the lake.
- Passed through the southeastern mountain ravine.
- Crossed the narrow waterfall path safely.
- Reached the lake and entered the stone water temple on foot.
Climb through the ruin and enter from above
Inside the first chamber, use the side pillar to reach the upper ledge. Pull around the pillar, cross to the next platform, then move through the adjoining room by following the staggered ledges and drops. This short climb funnels you toward the arena entrance above the battlefield.
When you reach the circular chamber, do not run straight to the floor. You begin on the outer ring of stairs, windows, and broken walkways high above Kuromori. Stay on this upper level for the opening pattern because the walls and corners here give you cover from its poison volleys and a better angle on its feet when it climbs.
- Used the pillar route to clear the entry ruin.
- Reached the circular arena from the upper side.
- Stayed on the upper ring instead of dropping into the center immediately.
Make Kuromori climb the wall
Kuromori attacks with poisonous projectiles from its mouth. The hit is dangerous, and the residue it leaves behind remains harmful for a short time, so never stand in the open center trading shots. Show yourself near a window opening or stair edge to get its attention, then move sideways behind a stone corner when its mouth starts to glow.
Once it is focused on you, Kuromori will climb the wall toward your level. Shift to another opening if needed so you are not directly in front of its fire when it settles. L1 keeps the camera on the colossus when you need to watch its movement, and L2 centers the camera behind Wander if the ring's turns make you lose direction.
Wait until it clings to the wall and pauses. The glowing feet are puzzle targets, not major health sigils. There are four of them in total. Use the bow and shoot two glowing feet during the same wall-cling sequence. If your first angle only exposes one foot clearly, move to a neighboring opening and take the second shot from there. After two clean hits, Kuromori loses its grip and crashes onto its back on the arena floor.
- Used wall sections and corners to avoid direct poison fire.
- Drew Kuromori onto the wall near your level.
- Shot two glowing feet and knocked it onto its back.
Descend, mount from the tail, and finish the real sigils
As soon as it falls, start down immediately, but do not throw away health with a blind top-to-bottom jump. Use the broken edges, landings, and stair flights on the ring to shorten the descent. The goal is to reach the floor fast enough to use the knockdown, while still arriving with enough health to survive a mistake.
Approach from the tail end and climb onto the exposed underside. On PS2 Normal, the first major sigil to work is the lower belly sigil. Keep R1 held to stay planted. When you are in position, press Square once to raise and charge the sword while still gripping, wait for the charge to build, then press Square again to drive the stab. Do not try to use a hold-and-release sword stab here.
When the lower belly sigil is exhausted and disappears, move farther forward underneath the body for the second major sigil nearer the chest. These two underside sigils are the kill targets for this Normal route. If you have time, damage the chest-side sigil in the same knockdown. If the body begins to tense and twist before you finish, back out early rather than getting trapped under the roll.
- Reached the floor by controlled drops and stairs.
- Mounted from the tail side.
- Damaged the lower belly sigil first.
- Moved forward to the chest-side sigil when safe.
Escape before the roll and repeat the pattern if necessary
Your attack window underneath Kuromori is short. The moment the body starts to tighten, rock, or roll, stop forcing extra damage. Drop clear and sprint to the nearest stairway. If you linger underneath, it can right itself and pin you in close range where the poison attack becomes much harder to avoid.
From the stairs, rebuild the fight the same way: show yourself, shift out of the direct firing line, make it climb, then shoot two glowing feet again. If the lower belly sigil is already gone, use the next knockdown to go directly to the forward sigil near the chest. Fresh poison residue on the floor or lower steps is a reason to circle to the next stair rather than charging through it.
- Retreated to the stairs before Kuromori fully rolled upright.
- Reset the wall-climb pattern instead of fighting on the floor.
- Returned to the remaining underside sigil on the next knockdown if needed.
Recovery if the puzzle will not trigger
If Kuromori will not give you two clean foot targets, the usual problem is your angle. Change position on the upper ring and make it climb a different wall section. Briefly expose yourself, then sidestep behind another window or corner so it settles somewhere with two visible feet.
If you fall while Kuromori is upright, do not stay in the middle. Run for the nearest stairs or wall recess, let the poison volley pass, and re-establish the fight from above. If you reach the underside with a nearly empty grip gauge, abandon the attempt while it is still overturned. There is no broad standing rest spot on Kuromori itself, so low grip means retreat, recover on solid ground, and earn another knockdown.
- Know to rotate to a different wall angle if the feet are hidden.
- Can retreat to stairs and cover after a bad fall.
- Can reset the fight cleanly without restarting the encounter.
Before you move on
- You rode southeast from the Shrine of Worship, crossed the waterfall ledge, passed the second cave, and entered the lakeside water temple.
- You climbed through the ruin and used the upper ring of the circular arena as the safe opening position.
- You made Kuromori climb the wall and shot two glowing feet to flip it onto its back.
- You attacked the two real PS2 Normal major sigils from underneath in practical order: lower belly first, then the one farther forward near the chest.
- After the second underside sigil is depleted, the victory sequence begins and Wander is returned to the Shrine of Worship.
References for this chapter
- Shadow of the Colossus - Guide and Walkthrough - PlayStation 2 - By GhostOfLegault
- Shadow of the Colossus - Guide and Walkthrough - PlayStation 2 - By nemes1ss - GameFAQs
- Shadow of the Colossus Walkthrough - GameSpot
- Shadow of the Colossus/Kuromori - Colossus 8 — StrategyWiki | Strategy guide and game reference wiki
Basaran: the geyser puzzle
Ride from the Shrine of Worship to the stormy dry lake in the northwest, wake the ninth colossus at the cave in the north wall, then use Agro to lure the giant tortoise over a geyser. Wait for the blast to lift its body, shoot the exposed weak points on the supporting feet to flip it over, climb from the exposed underside, hold on as it rights itself, and finish the single Normal major sigil on the head.
Ride from the shrine to the dry lake under black clouds
Leave the Shrine of Worship and work around to the northwest side of the temple grounds. Take the western bridge route out of the central field rather than the far northern path used for some earlier hunts.
Keep riding northwest across the plain. As the land narrows against the mountain wall, follow the cliff line into the darker valley. Pass the dead trees, then cross the stone bridge over the ravine.
On the far side, the grass gives way to a broad barren basin with steam vents and dark clouds overhead. The activation point is the cave in the north cliff wall. Ride into that cave to awaken the colossus, then turn back into the open lake bed so you have room to maneuver.
- Reached the northwest basin by way of the western bridge, dead-tree stretch, and ravine bridge
- Identified the geyser-filled dry lake under the dark clouds
- Entered the cave in the north wall to start the ninth battle
Keep moving on Agro and line Basaran up with a geyser
Stay mounted whenever you can. Basaran is slow, but its electrical projectiles are much easier to survive when you have speed and turning room. Fight in the open center of the basin instead of near the cliff wall or cave mouth.
Pick one geyser and ride so the vent sits between you and Basaran. The goal is to make it march directly across the middle of the vent while pursuing you. If it stops short, plants itself beside the steam, or drifts across at an awkward angle, do not wait there. Ride out in a wide loop, come back from a different side, and make it straighten its approach.
The geyser is the real trigger. Steam alone is not enough. Wait until the water burst lifts Basaran's body and tilts it. Only during that lifted stagger are the needed foot weak points exposed.
- Stayed on Agro in the open basin
- Used a geyser as bait instead of circling Basaran at close range
- Reset the approach whenever Basaran stopped beside the vent instead of over it
Shoot the exposed supporting feet and flip it over
When the geyser erupts under Basaran, watch the side that remains braced against the ground. The glowing targets appear on the feet that are still supporting the tilted body. Before the lift, those targets are not properly open, so save your arrows until you clearly see the stagger.
Use the bow and shoot the exposed foot weak points quickly. A clean pair of hits on the supporting side topples Basaran and rolls it onto its back. If your angle is poor, move first and shoot from a clearer lane rather than wasting the window.
The instant Basaran falls, dismount and sprint to the exposed underside. Do not try to climb from the shell side. The opening you want is the overturned belly and underside fur.
- Waited for the geyser to lift the body before firing
- Shot the exposed weak points on the supporting feet
- Rolled Basaran onto its back and ran to the exposed underside
Climb from the belly and survive the roll back upright
Grab the exposed underside fur and climb upward along the belly plates. Get attached early. Basaran does not stay flipped forever, and the safest transfer happens when you are already holding on as it starts to recover.
When the body begins to roll back upright, keep R1 held and focus on staying attached. Move only in short adjustments during calmer moments. As the shell rises, shift with the motion until you can pull onto the upper side of the body.
Once upright, work forward over the shell route toward the head. If the shaking becomes violent, stop advancing and secure your position. When you can stand on a genuinely broad patch near the upper shell or shoulders, let the grip gauge refill there before continuing.
- Started from the exposed underside rather than the shell
- Stayed attached through Basaran's recovery roll
- Reached the upper shell route toward the head without wasting all grip
Finish the single Normal sigil on the head
On PS2 Normal, Basaran has one major damage sigil in this fight, and it is on the head. Do not search the shell for a second major target. Move onto the head when the shaking eases and wait for a stable attack window.
For the original PS2 charged stab while gripping, keep R1 held, press Square once to raise and charge the sword, wait for the power to build, then press Square again to stab. Repeat only when you are stable enough to survive the next shake.
If the grip gauge gets dangerously low, back off to a broad standing area near the shoulders, recover, then return to the head. The fight ends when the head sigil disappears and Basaran's health is fully drained.
- Reached the head instead of hunting for extra Normal sigils
- Used charged stabs on the head during calm windows
- Defeated Basaran and returned to the Shrine of Worship
Recover if the puzzle or climb fails
If Basaran refuses to trigger the flip, the usual cause is position. It must be over the center of a geyser when the burst goes off. If it plants beside the vent, make a wide mounted reset and approach from a cleaner angle.
If the geyser lifts it but you miss the foot shots, abandon that attempt and create another lift. Staying under the shell after the tilt ends only exposes you to stomps and projectiles.
If you fall during the righting motion or get thrown from the shell, put distance between yourself and the colossus, remount Agro, and set up another geyser cycle. If your grip gauge empties on top, retreat to a broad standing surface before attempting the head again. Hanging from a narrow edge will keep draining grip instead of restoring it.
- Know to reset the lure when Basaran stops beside a vent
- Know to restart the cycle after a missed foot-shot window
- Know to recover grip only on a real standing surface, not while clinging
Before you move on
- You reached the northwest dry lake by the western bridge route, followed the cliff past the dead trees, crossed the ravine bridge, and entered the cave in the north wall.
- You lured Basaran over a geyser, waited for the water burst to lift it, and shot the exposed supporting-foot weak points to roll it over.
- You climbed from the exposed underside, held on while it righted itself, and reached the head over the shell route.
- The head sigil vanished, the ninth colossus died, and you returned to the Shrine of Worship ready to save.
Dirge: the sand pursuit
Dirge, the tenth colossus, is a mounted pursuit in the far western sand cavern. On the original PlayStation 2 Normal route, the fight is not about trading blows in front of the beast. You must keep Agro moving, shoot one exposed eye while looking back during the chase, let the blinded rush smash into the cavern wall, then climb the raised rear back section and remove the two major sigils across repeated knockdowns.
Ride to the far western cavern
Leave the Shrine of Worship and raise the sword outside to confirm the western direction in open light. Do not try to ride straight west off the shrine side because the land breaks away there. Instead, ride around the left side of the shrine, pass between the two left-hand outer statues, and cross the long stone bridge over the water.
On the far side, continue across the broad field toward the western cliffs. Angle slightly right around the mountain wall, follow the path as it curves left, then drop into the next open field. Turn left there and ride past the solitary tower landmark. A cave mouth opens ahead in the western rock line. Follow that tunnel into the huge sand cavern with tall stone pillars. Stay on Agro when you enter because this battle is built around horseback movement.
- Cross the long bridge on the shrine's left side
- Ride across the western field and past the solitary tower
- Enter the sand cavern with Agro still mounted
Set up a clean chase lane before you fire
Ride into the open center until Dirge begins pursuing through the sand. Your first job is spacing. Keep Agro moving and make a long straight run across open ground before you worry about the bow. If you turn sharply while trying to aim, Agro will drift, you will lose room, and the blinded rush will not end in a useful wall crash.
Use L1 to keep the colossus in view while you establish the lane. Only start looking back to shoot after you are satisfied with where Agro is already headed. The safest runs are through broad, open sand with a solid wall ahead of you. Avoid corners and avoid threading between obstacles during the aiming phase. If the lane feels messy, abandon the shot and build another pass.
- Let Dirge commit to the chase first
- Choose a long straight run with a wall ahead
- Aim backward only after Agro's line is stable
Shoot the eye and force the crash
Equip the bow while riding. On the original PS2 controls, hold Square to draw and release Square to fire. Dirge's face rises behind you during the pursuit, but do not waste arrows on the snout in general. Wait until one glowing eye is clearly visible above the sand, then fine-aim and hit it.
A successful eye shot blinds Dirge only briefly, so keep riding straight toward a cavern wall or a large rock face. Do not cut away too early. If the line is good, Dirge plows ahead and crashes, leaving a rear section of its back exposed above the sand. Dismount quickly and approach from the side near the tail end rather than from the front of the head.
- Draw the bow while staying mounted
- Hit one clearly exposed glowing eye
- Keep the blinded charge pointed into a wall and move in from the side
Climb the exposed back and clear the first sigil
When Dirge is writhing after the crash, jump onto the raised rear section and grab the fur with R1. The lower major sigil along the back is the easier first target, so work from the rear forward only as far as needed. This keeps you in a more stable spot during the first knockdown.
For a charged sword strike on the original PS2 controls, keep R1 held to grip, press Square once to raise and charge the sword, wait for the power to build, then press Square again to stab. Do not mash during the hardest shaking. Get your damage during the brief calm moments and use the disappearing sigil, not a guessed stab count, as your cue that this section is finished. Once Dirge begins recovering and burrowing again, get off cleanly and return to Agro.
- Mount from the rear exposed section
- Finish the lower back sigil first if possible
- Disengage once the sigil is gone or the body starts to recover
Repeat the crash cycle for the upper back sigil
Reset exactly the same way: rebuild a straight lane, look back, shoot an exposed eye, and keep the blinded rush aimed into a wall. On the next good crash, climb higher along the spine to the remaining upper major sigil. Expect stronger shaking there and shorter safe attack windows.
Hold on through the violent motions and stab only when the body settles enough to keep control. If you cannot finish the upper sigil in one visit, do not gamble with an empty grip gauge. Drop away safely, remount Agro, and repeat the chase. Dirge is meant to be defeated across separate knockdowns. When the second major sigil disappears, the fight is over.
- Repeat the eye shot and wall crash setup
- Climb higher for the second major back sigil
- Reset again if grip or position becomes unsafe
Recovery if the puzzle does not work
If you miss the eye, keep riding. Make a wide loop through the open center, straighten Agro again, and wait for the next clean eye opening. Missing is harmless unless you panic and cut back across Dirge's path.
If you hit the eye but Dirge does not leave a usable opening, your crash angle was poor. On the next pass, begin your straight run earlier and point the blinded charge at a flatter wall instead of a bad corner. The eye shot starts the opening, but the wall impact is what creates the climbable back section.
If you are thrown off the body, move sideways out of the immediate path, whistle for Agro, and remount as soon as Dirge passes. A nearby rock outcrop or pillar can buy you a moment to regroup, but do not try to finish the battle on foot in open sand. If your grip gauge is nearly empty while clinging to Dirge, stop attacking and focus on surviving long enough to drop off safely and restart the mounted phase.
- Missed eye shot means rebuild the lane, not restart the fight
- Bad crash angle means choose a straighter approach to a wall
- Falls and low grip mean remount Agro and repeat the mounted setup
Before you move on
- You rode from the Shrine of Worship to the far western sand cavern using the bridge, western field, solitary tower, and cave entrance as landmarks.
- You stayed mounted, shot a glowing eye during the chase, and made the blinded rush crash into the cavern wall.
- You climbed the exposed rear back section and removed both major back sigils across one or more knockdown cycles.
- After the victory sequence, Wander returned to the Shrine of Worship and you can save for the next hunt.
References for this chapter
- Shadow of the Colossus – Release Details
- WARNING: READ BEFORE USING YOUR PLAYSTATION®2 COMPUTER ENTERTAINMENT SYSTEM.
- SHADOW OF THE COLOSSUS - (NTSC-U)
- Shadow of the Colossus - Guide and Walkthrough - PlayStation 2 - By T_Hayes - GameFAQs
- Shadow of the Colossus/Dirge - Colossus 10 — StrategyWiki | Strategy guide and game reference wiki
- Shadow of the Colossus - Guide and Walkthrough - PlayStation 2 - By ZenithWillRule - GameFAQs
Celosia: the fire guardian
Ride north from the Shrine of Worship to the great sinkhole in the northern canyon region, descend on the east side, and enter the small temple below the rim to face the eleventh colossus, commonly nicknamed Celosia. On Normal in the original PlayStation 2 release, this fight has one major sigil, hidden under its back armor. Your job is to use the braziers to obtain a burning stick, frighten the colossus backward over the chamber ledge so the armor shatters in the fall, then use either the first post-fall stun or the safer upper-room remount to finish the exposed back sigil.
Reach the fire chamber below the northern canyon rim
Leave the Shrine of Worship by the north side and ride across the broad natural land bridge into the northern highlands. Keep going until you reach the enormous circular pit set into the canyon country. This sinkhole is the landmark you want. Agro cannot follow all the way down, so stop at the rim and look along the east side for the descent path.
Go down on foot, drop into the water at the bottom, and swim across to the ruined opening. Follow the interior path and ramps until you reach a compact upper chamber with lit braziers around a narrow floor. Crossing into this room triggers the battle. Remember the room layout immediately: the braziers are both your puzzle tools and your safest recovery spots, while the open ledge at the far side is where you want to drive the colossus.
- Found the giant northern sinkhole and used the east-side descent
- Swam the pool and entered the ruin below the rim
- Reached the upper brazier chamber where the fight begins
Make the brazier drop the stick
Do not try to stab the colossus at once. In this armored state, the useful target is the environment. Celosia is small, fast, and dangerous if you stay on the floor in front of it. Run to one of the raised braziers and climb onto the top. The brazier top is a broad standing surface, so you can steady yourself there and watch its line of attack.
Wait for a clean ram into the brazier base. A solid hit dislodges a wooden stick and drops it to the floor. If the impact is glancing and nothing falls, stay patient and bait another straight charge rather than jumping down into its face. Once the stick is down and the charge animation finishes, drop, grab the stick, and get back to a brazier or at least give yourself room. If Celosia starts chaining rushes on the floor, use the space near the braziers and the side nooks to break the line before trying again.
- Climbed a brazier instead of standing in front of charges
- Baited a direct ram that knocked the stick loose
- Recovered the stick without getting trapped in a charge chain
Light the stick and force the armor break
Take the stick to a lit brazier and ignite it. Then face Celosia and present the flame while advancing in short, measured steps. The point is to pressure it backward, not to crowd it. If you close the gap too much, it may swipe or rush instead of retreating. Keep the fire between Wander and the beast and guide it toward the open ledge at the edge of the chamber.
If the flame goes out before it reaches the drop, break off immediately, climb back to a brazier, relight, and start again with more room. Do not chase it recklessly with an unlit stick. When the fear push works, Celosia backs over the ledge and crashes into the lower exterior area. That fall breaks the armor on its back and exposes the only Normal major sigil. This is the real damage phase. The stick and fear response are only the setup.
- Ignited the stick at a brazier
- Used the flame to make the colossus retreat instead of attack
- Forced it over the ledge so the back armor shattered on impact
Attack the exposed back sigil
As soon as the armor breaks, switch to the sword and go after the opening. If you have a clean drop, land on or beside its back and start attacking while it is still recovering from the fall. On original PS2 controls, keep R1 held to grip, press Square once to raise and charge the sword, wait for the charge to build, then press Square again to stab. Do not use the bow's hold-and-release rhythm here. The major sigil is on the exposed back and it is the only required sigil on Normal.
If you cannot finish it during the first lower-area opening, do not stay below and trade space with repeated headlong charges. Use the sloped route back into the upper brazier chamber. This is the safer reset. Climb a brazier again and wait for Celosia to rush the pedestal. During the impact pause or just as it passes beneath, drop or jump onto the exposed back from above. This remount is much safer than trying to chase and grab it from ground level.
Once attached, favor secure damage over greed. Celosia bucks violently, so it is often better to take shorter charged stabs during brief lulls than to force a stab while badly off balance. There is no reliable resting point on its body. If your grip is nearly gone, survive long enough to dismount safely or let yourself fall away from the next charge and retreat to the braziers for another clean remount.
- Used the first post-fall stun or the brazier-room remount to reach the back
- Damaged the single Normal major sigil with the verified PS2 stab input
- Reset to the upper chamber instead of fighting long charge strings on the floor
Recovery if the puzzle or mount fails
If no stick drops, the usual cause is a poor ram angle. Climb a brazier again and wait for a direct collision with the pedestal base. A weak side clip often is not enough.
If Celosia stops backing away, check the flame first. An extinguished stick will not scare it. Relight it, keep a safer gap, and walk it backward instead of lunging into its face.
If you fall after the armor breaks, protect yourself before worrying about damage. Roll clear, retreat up the path into the brazier room, and use the next ram on a brazier for the safer remount. If your grip gauge is low, recover only on a genuinely broad standing surface such as the top of a brazier. Hanging from the side or clinging to a narrow edge does not count as a proper rest.
- Know how to repeat the brazier ram until the stick drops
- Know to relight the stick instead of forcing an extinguished push
- Know to retreat to the braziers after a fall or near-empty grip gauge
Before you move on
- You rode to the northern sinkhole, descended on the east side, and entered the upper brazier chamber inside the temple.
- You made a brazier ram drop the stick, lit it, and forced the colossus backward over the chamber ledge to break its back armor.
- The single Normal back sigil disappeared and the post-battle return sequence began.
Pelagia: steer the lake giant
In the original North American PlayStation 2 release, the twelfth colossus waits in the northeastern flooded basin past the forest and waterfall route. This is a control-and-positioning fight. You are not trying to damage the head. First get onto the back from behind, climb to the crown, and use the toothlike stones there to steer the colossus toward one of the round roofed structures. Jump onto the roof, hide behind its central cover from the horn shots, then wait for the colossus to rear up against the platform so you can jump to the underside and stab the single major belly sigil.
Ride from the Shrine of Worship to the sealed basin
Leave the Shrine of Worship and confirm the general northeast line only when you are in good daylight. Ride Agro out across the eastern side of the central field and take the route that leads toward the forested side of the map rather than the desert or canyon approaches.
Use the long bridge approach into the woods, then stay on the path through the trees until the route bends toward the waterfall side. At the falls, dismount at the stone steps and climb the narrow path that wraps around the pillar beside the blocked rocks. This path leads to a quiet lake behind the obstruction.
Go through the two huge arches beyond that lake and swim into the enclosed flooded arena. Step onto one of the small round islands inside to trigger the battle if the colossus has not surfaced already.
- Reached the northeastern route through the forest.
- Used the waterfall path and the ledge around the pillar beside the blocked rocks.
- Passed through the giant arches into the basin and triggered the fight from the small islands.
Open the battle safely and board from the rear
As soon as the colossus rises, expect the horn projectiles. When the horns begin to charge, dive under the surface instead of trying to outswim the shots on top of the water. Stay submerged only long enough to let the volley pass, because your air and grip share the same meter.
Do not challenge the face. Circle wide through the water and work toward the tail end. The colossus will keep turning to watch you, so keep curving around its flank until the rear gives you an opening.
Climb the fur trail at the back and work upward toward the head. If the shaking starts, move to a broad stone or grassy section when you can and stand there to refill grip. Hanging from fur or a narrow edge does not restore it.
- Dove under the horn volley instead of staying on the surface.
- Circled behind the colossus rather than swimming at its face.
- Climbed up from the rear and recovered grip only on broad standing surfaces.
Steer the crown to an intact roof
At the crown you will find three toothlike stone rows. These are steering controls, not damage sigils. Striking a side row turns the colossus, while striking the middle row urges it forward.
Pick the nearest intact round roof and line up a square approach. Small course corrections work better than wild swings, because the body keeps drifting in the water. If you are too far off to land cleanly, stay on the crown and set up another pass instead of gambling on a bad leap.
When the crown comes close enough to the roof edge, jump onto the roof. If you miss the distance entirely and fall back into the basin, dive through the next horn volley and start the boarding loop again from the rear.
- Used the crown stones only for steering.
- Aimed for an intact roof with a straighter approach.
- Jumped only when the roof edge was clearly reachable.
Use the roof as cover and expose the real weak point
As soon as you land, get behind the central stone cover. This protects you from the horn fire while the colossus closes in. Do not stand exposed on the roof waiting for the damage window.
Stay hidden until the colossus presses in against the structure and rears up. When it braces itself there, the underside rises into range below the roof edge. The glowing belly mark is the only major sigil in this fight.
Move out only after the body is fully committed. Jump from the roof edge to the furry belly area and climb directly onto the sigil. The crown stones are not weak points, so do not waste time returning to the head looking for damage there.
- Used the central cover to block horn shots.
- Waited for the rear-up animation against the roof.
- Jumped to the exposed underside and identified the single belly sigil.
Damage the belly sigil and repeat the cycle if needed
Hold on tightly and use charged stabs. On original PS2 controls, keep R1 held to grip, press Square once to raise and charge the sword, wait for the charge to build, then press Square again to stab. Strong charged hits are safer here than hurried weak pokes because the opening is limited.
You may not finish the whole fight in one platform cycle. When the colossus drops away or submerges, release in time and swim clear instead of getting dragged awkwardly under the body. If the roof is damaged or destroyed, that is normal. Re-board the colossus and steer it to another intact structure.
If you lose track of the cycle, reset it the simple way: dive under the next horn volley, circle to the tail, climb back to the crown, steer to a fresh roof, hide behind the center cover, and wait for the rear-up again.
- Used the original PS2 tap-then-tap charged stab while gripping.
- Released and swam clear when the damage window ended.
- Repeated the steering and roof cycle with another intact platform when necessary.
Recovery if the puzzle will not line up
If the roof jump never looks right, the problem is usually alignment. Stop forcing diagonal leaps. Turn with shorter side-stone corrections and bring the colossus in more squarely before using the middle stone again.
If a roof collapses or becomes unsafe, do not linger there. Dive to avoid the next horn volley, then either use the remaining cover briefly or return to the rear boarding route and set up another structure.
If your grip is nearly empty on the climb, retreat to a truly broad patch on the back or crown and stand still for a moment. If you are still hanging, shimmying, or clinging to fur, the meter will keep draining rather than refilling.
- Realigned bad approaches instead of forcing jumps.
- Switched to another structure after a damaged platform.
- Recovered grip by standing on a broad surface, not by hanging.
Before you move on
- You reached the northeastern flooded basin by riding through the forest route and using the waterfall-side path into the arched enclosure.
- You boarded the colossus from behind, climbed to the crown, and used the toothlike stones to steer it toward a round roofed platform.
- You hid behind the central cover, waited for the rear-up against the structure, and jumped to the exposed underside.
- The single major belly sigil disappeared, the colossus health bar emptied, and the battle ended.
Phalanx: the desert flight
This is the thirteenth colossus, commonly called Phalanx by players, in the original North American PlayStation 2 release on Normal. The fight is a mounted chase that turns into short attack windows on three separate back sigils. Think of each successful boarding as one chance to remove some or all of the remaining sigils, not as a fight that must be finished in a single perfect ride.
Ride to the southwestern desert trigger point
From the Shrine of Worship, move out into open daylight and raise the sword only when the sun is visible so the beam can point the way. The destination is in the southwestern desert. Ride Agro across the open grasslands toward the wooded side of the map, then continue through the forest route that leads toward the desert sector.
As the trees thin, follow the high ground past the shallow lake and onto the natural rock bridge. Continue through the tunnel beyond it until the landscape opens into broad sand. Once you are in the desert, ride toward the small circular ruin made of standing stones in the open sand. Enter the center of that ring to trigger the battle. Bring Agro all the way in, because both the setup and the safest remounts depend on horseback speed.
- Use the forest route, the shallow lake, the natural rock bridge, and the tunnel as route confirmation.
- Ignore outer dunes and isolated stone scraps; the battle starts at the circular ring of standing stones.
- Keep Agro close when you enter the center of the ruin.
Burst all three pale air sacs before trying to board
When the fight begins, stay mounted and ride out into open sand away from the stone ring so you have room to steer. Phalanx circles overhead with three pale air sacs hanging beneath its body, spaced front, middle, and rear. These are the trigger targets that bring it low enough to mount. They are not the main sigils.
Use long, straight horseback lines and aim slightly ahead of each moving sac. A clean hit makes a sac shrivel and darken. Keep circling and shooting until all three have been punctured. Do not force the jump early. While even one sac is still intact, Phalanx usually stays too high for a safe mount.
- Destroy the front, middle, and rear underside sacs before attempting the leap.
- Use open desert for cleaner bow lines and fewer steering problems.
- Treat the shriveled look of each sac as your confirmation that the hit counted.
Match a low fin from horseback and climb onto the body
After the three sacs are down, one of Phalanx's long side fins will sink low enough to skim the sand. Ride parallel to that fin, not straight at it. Give Agro room for a straight run, pull alongside the ridged portion, and jump only when the fin is nearly level with your path and slightly ahead of Wander. A rushed jump from behind is the common miss here.
As soon as you grab the ridges, keep R1 held. Phalanx will rise and bank. During that violent lift, do not waste grip trying to sprint up the fin. Hold on through the climb and move only when the fin settles closer to level. Then work inward from the fin onto the furry top of the body.
- Approach from the side on a parallel run.
- Grab the ridged fin and survive the first lift before worrying about damage.
- Transfer to the body only after the motion calms enough for controlled movement.
Attack the three back sigils behind the flaps
The major sigils are on Phalanx's back, hidden behind three flaps: rear, middle, and front. Once you are on top, the safest first target is usually the rear flap because it is often nearest and easiest to reach without crossing too much moving body. Advance only when Phalanx is comparatively level. If it rolls or lurches, stop moving, grip, or crouch and wait.
Drop into the hollow behind the flap only when it is open and the body is stable enough to attack. On original PS2 controls, charged stabs while mounted use the same grip button you are already holding: keep R1 held, press Square once to raise and charge the sword, wait for the charge to build, then press Square again to stab. Do not mash weak hits if you have a clean charged opening. When that sigil fades, climb back onto the fur before the next strong movement.
From the rear, work forward to the middle flap and then the front flap near the head as openings allow. These hollows are attack windows, not permanent safe rooms. If a flap folds shut over you or the whole body starts pitching into a more aggressive descent, retreat to the fur immediately. You may remove two sigils in one boarding if Phalanx stays calm, but do not depend on all three in one pass.
- Treat the rear, middle, and front back patches as three separate major sigils.
- Move between flaps only during calmer, level stretches.
- Back out to the fur as soon as a flap closes or the flight turns violent.
Read the reset cues and repeat only the unfinished parts
When Phalanx begins a clear nose-down dive toward the sand, the current riding phase is ending. If a sigil is not one charged stab from disappearing, do not overstay the dive. Get out of the hollow, cling to a safer patch of fur, and be ready for the reset.
After Phalanx disappears into the sand and emerges again, the underside sacs must be shot again before another reliable low-fin mount. Repeat the same loop: open desert, three sacs, low fin, climb, then head directly for whichever of the rear, middle, or front back sigils still remains. Use the visible sigils and the colossus health bar as your progress check, not a guessed stab count.
- Use the nose-down sand dive as the signal that the boarding phase is ending.
- Expect to repeat the air-sac setup after a full submergence.
- On the next ride, go straight to the remaining flap instead of retracing cleared sigils.
Recovery if you miss the trigger, fall, or drain your grip
If your arrows keep missing the sacs, the problem is usually your line, not just your aim. Pull away from the stone ring, give Agro a longer straight run, and shoot slightly ahead of the target. If Phalanx passes at a bad angle, stay mounted and wait for the next clean approach instead of wasting shots in a sharp turn.
If you miss the fin jump or get thrown from the body, call Agro and look at what phase Phalanx is in. If it is still making low passes with a fin near the sand, you can try another side-by-side leap immediately. If it has already dived under the desert, prepare to shoot the three sacs again after it resurfaces.
If your grip gauge is close to empty while you are on top, stop on a truly broad standing patch where Wander is planted with both feet. Grip recovers there. Hanging from a narrow ridge or lip still drains it. If you are stuck between flaps on a bad slope with almost no grip left, it is safer to drop and restart the cycle than to force one more stab high in the air.
- Reset your bow line in open sand after repeated misses.
- Re-board on another low-fin pass if Phalanx has not submerged yet.
- Recover grip only on a broad standing surface, not while dangling from an edge.
Before you move on
- You reached the correct arena by riding into the center of the circular standing-stone ruin in the southwestern desert.
- You burst all three pale underside air sacs from horseback and used a low sand-skimming fin to board the colossus.
- You attacked the three major back sigils hidden behind the rear, middle, and front flaps.
- After the third back sigil vanished, the fight ended and the normal post-colossus return sequence began.
Cenobia: the ruined city
This fourteenth fight in the original PlayStation 2 release is a route puzzle first and a damage phase second. Ride to the far northwest ruins, stay on the elevated path, and make Cenobia knock down a chain of pillars to create bridges. After the wall breaks, climb back to the upper entrance side and bait the final support collapse onto the colossus to crack its armor. Once the single Normal major sigil is exposed on its back, use solid ruins to force safe stuns before mounting and finishing the fight.
Ride to the far northwest ruined city
From the Shrine of Worship, ride west across the long bridge into the large plain, then keep angling northwest toward the mountain wall. Follow the long ravine that leads into the far northwest corner. When you reach a straight approach lined with rows of stone pillars, stay on that road until it ends at a cave.
Ride into the cave until Agro stops at the water. Dismount, swim across to the far side, and continue through the passage until you emerge above the abandoned city. Drop to the grassy floor, pass through the thin archway ahead, then climb the pillar on the left side of the path and pull up onto the raised walkway. Run up the stairs to the top to trigger the battle.
- You reached the far northwest ruins by following the ravine and the pillar-lined road.
- You crossed the cave water on foot because Agro will not continue there.
- You entered the arena from an elevated walkway, with a fallen entrance column immediately to your left.
Take the high route immediately
The moment control returns, turn left and climb onto the fallen entrance column. Jump from it to the nearby ledge, continue to the higher ledge ahead, then drop to the lower ledge on the right and jump across to the first tall standing pillar. Climb its small ledges to the top. Do not stay on street level unless you are recovering, because Cenobia's charge strings are much harder to read down there.
At each standing pillar, wait for a straight charge. When the impact comes, crouch and hold on so you are not thrown off. After the first hit, Cenobia usually circles instead of finishing the job immediately. If that happens, shoot an arrow to keep its attention and line it up again. A second solid ram topples the pillar and turns it into your next bridge.
- You used the fallen column on the left as the opening route marker.
- You stayed above Cenobia instead of trying to fight it early.
- You held on through the rams and used arrows only to keep Cenobia lined up for the next hit.
Follow the pillar chain around the city
Cross each fallen pillar and follow the only upper path it opens. The sequence loops around the ruins one landmark at a time: bridge across, climb the next standing pillar, bait two rams, then use that new bridge to reach the next section. One stretch leads to a larger square structure in the middle area. Use its ledges, move around its right side, and jump to the next pillar behind it.
Keep repeating the same pattern until the last pillar beside the weak outer wall falls and smashes that wall open. Cross the fallen pillar to the breach, drop near the broken corner, and look to the right side of the shattered wall. A climbable pillar there leads back up to the upper entrance-side structure. That climb is the reset point if you lose your bearings after the wall breaks.
- Every advance came from a pillar Cenobia knocked down.
- You used the larger square structure as the middle-route landmark.
- You recognized the broken wall as the sign that the platforming chain is nearly done.
Break the armor with the final collapse
After climbing up by the broken wall, pull yourself onto the upper path and move toward the middle of the high platform. A support rises up through the floor here. Stay above it and get Cenobia's attention. When it charges the support, the upper section collapses onto the colossus and cracks away the armor on its back.
Wait for the rubble and shaking to finish before dropping into phase two. On Normal, the only major sigil in this fight is now exposed on Cenobia's back. This collapse is only the setup. The sigil will not stay available long if you rush without creating a stun first.
- You baited the charge at the upper support, not at random rubble.
- The collapse struck Cenobia and removed the back armor.
- You confirmed the exposed back sigil before starting the damage phase.
Stun Cenobia safely and finish the exposed back sigil
Use broad fallen pillars or heavy intact stone blocks as your protection. Stand on or beside one so Cenobia commits to a straight charge, then sidestep. A clean collision with solid ruins stuns it briefly. Ground-level charge chains are the real danger here, so do not chase it in open space and do not try to jump on from the front.
As soon as it is stunned, run in from the side or rear and jump onto its back. Grip with R1 immediately. The single Normal major sigil is on the exposed back. For strong damage on original PS2 controls, keep R1 held, press Square once to raise and charge the sword, wait for the charge to build, then press Square again to stab. If Cenobia starts bucking hard before you are centered over the sigil, stop attacking and just hold on until the movement settles or you are thrown clear.
If you are thrown off, roll away, use another solid ruin or a trench to reset, and repeat the same collision setup. One safe stun with one or two good stabs is better than forcing extra swings and taking a full charge in return. Keep repeating until the sigil disappears and the health bar empties.
- You used a wall or pillar collision to create the mount, rather than a head-on leap.
- You attacked only the exposed back sigil on Normal.
- You used the original PS2 two-press charged stab correctly while gripping with R1.
Recovery if the puzzle seems stuck
If you fall during the platforming half, do not restart. Return to the fallen entrance column on the left side of the arena and climb back onto the upper route from the last landmark you can still reach. A pillar that survives one ram is not bugged; Cenobia usually needs to be lined up for another straight hit, and an arrow helps refresh its attention.
If the wall is already broken but you do not know where to go, head to the breach and climb the pillar on the right side of the shattered wall to regain the upper entrance-side path. If the final support collapse misses, stay above and lure Cenobia back under that support instead of trying to finish the fight with the armor still intact.
If your grip gauge is low, stand fully on a broad flat surface and wait for it to refill before the next jump. Hanging from an edge or balancing on a narrow lip still drains grip. In phase two, if Cenobia keeps pinning you with repeated charges, dive into a trench or get behind a heavy block, let the line reset, then bait a fresh stun instead of panicking into the open.
- You know the entrance-side fallen column is the main reset landmark.
- You know the right side of the broken wall is the climb back to the upper route.
- You restore grip only while truly standing on a broad surface, not while clinging to edges.
Before you move on
- You reached the fourteenth colossus by riding northwest through the ravine, following the pillar-lined road, and crossing the cave water on foot.
- You stayed on the elevated route and toppled the full pillar chain until the outer wall broke.
- You climbed back to the upper structure and made the final support collapse onto Cenobia to break its armor.
- You exposed the single Normal major sigil on the back, stunned Cenobia with solid ruins, mounted safely, and emptied its health bar.
References for this chapter
- Shadow of the Colossus (2005) - MobyGames
- Shadow of the Colossus - Guide and Walkthrough - PlayStation 2 - By T_Hayes - GameFAQs
- Shadow of the Colossus/Cenobia - Colossus 14 — StrategyWiki | Strategy guide and game reference wiki
- Shadow of the Colossus Walkthrough - GameSpot
- Shadow of the Colossus - Guide and Walkthrough - PlayStation 2 - By Xiamut - GameFAQs
Argus: the fortress guardian
The fifteenth colossus, commonly called Argus by players, waits in the far northeastern ruined fortress. On Normal in the original PlayStation 2 release, the important route is arena setup in order: tilt the floor slab, break the gallery wall, use the upper bridge to mount, clear the head sigil, stab the small wound on the right sword arm to force the weapon drop, then finish the final major sigil in the right palm.
Ride from the Shrine of Worship to the northeastern fortress
Leave the Shrine of Worship on the northeast side and ride toward the open grassland that leads to the giant entrance bridge on the south side of the Forbidden Land. Before you commit to that bridge, turn right and follow the mountain wall instead. Stay on the outer rising path and keep to the high route rather than dropping into the forest and waterfall basin used for the twelfth arena.
As the road climbs into the northeastern highlands, the destination comes into view as a large stone fortress with broken galleries, a roofed side passage, and a long bridge high over the arena floor. Ride through the entrance and dismount once you reach the central ground level. Keep Agro out of the middle and do the fight on foot from here.
- You reached a walled ruin with high walkways and a long bridge suspended over the arena.
- You started the fight from inside the arena, not by trying to scale the outside walls.
Tilt the slab to reach the first ledge
Look along either side wall of the arena for a low ledge that is still just out of Wander's normal jump height. Directly below it is a rectangular floor slab. Stand on or right in front of that slab and get Argus to approach. If needed, shoot an arrow or move in the open so it commits to attacking you.
Wait for a true stomp. Dodge late so the foot lands on the slab instead of empty floor. A correct stomp kicks the slab upward into a usable ramp. Climb the raised slab immediately and pull yourself onto the side ledge. If the slab only twitches or the foot misses it, drop back down, return to the same slab, and bait another stomp there.
- The rectangular slab is raised high enough to act as a step.
- You have reached the first side ledge above the arena floor.
Break the blocked gallery wall
Run along the side ledge into the roofed gallery. Soon intact masonry blocks the climb to the next level. Show yourself long enough for Argus to switch from stomping to a sword swing, then retreat along the ledge so the blade strikes wall height near the blockage.
When the hit lands in the right place, the wall collapses into broken stone. Use the rubble as stairs and continue to the higher gallery. Keep climbing until you can reach the long upper bridge. If Argus breaks the wrong section, stay on the ledge and bait another swing from roughly the same position instead of resetting the whole arena.
- A collapsed wall now gives you climbable rubble.
- You can continue up toward the overhead bridge.
Use the upper bridge to mount Argus safely
Step onto the upper bridge, but stop near the intact end. Do not stand in the middle. Face Argus and draw a sword strike into the bridge section ahead of you. As soon as the attack starts, retreat toward the solid part so you are not carried down with the debris.
After the bridge segment collapses, wait for Argus to move beneath the broken edge. When its upper back and head come close enough, jump down onto the fur on the upper back or crown area. If the camera crowds against the masonry, use L2 to center behind Wander and L1 to keep the colossus in view.
- You triggered the bridge collapse without falling with it.
- You mounted from the broken bridge edge instead of trying to climb Argus from the ground.
Clear the head sigil, then force the sword drop
Climb to the head first. This is the main damage phase while the route is still simple. For original PS2 charged stabs, keep R1 held to grip, press Square once to raise and charge the sword, wait for the charge to build, then press Square again to drive the stab in. Do not rush big stabs during heavy shaking. When Argus starts whipping its head hard, back off to a broad shoulder shelf or the upper back and stand there to refill grip before returning to the crown.
Once the head sigil disappears, move down Argus's right arm. Right and left here always mean the colossus's own sides. This right arm is the one that was carrying the sword. On the back of that arm is a smaller glowing wound. It is a trigger wound, not a major sigil. Stab it until Argus drops the weapon, then get back to the arena floor on the colossus's right side. Do not waste time searching the chest on Normal; that extra chest target belongs to Hard mode, not this route.
- The head sigil is gone before you begin the final phase.
- Argus has dropped its sword after you stabbed the small wound on its right arm.
Bait the empty-hand smash and finish the right palm
Stay near Argus's right side, the former sword side, but not directly in front of its feet. Circle until it commits to slamming the empty hand down within reach. A light arrow can keep its attention, but your goal is the hand attack, not another stomp.
As soon as the right hand lands, sprint for the palm and grab high on the hairy section, ideally closer to the wrist than the fingertips. Hang on through the lift. Once the motion settles, the final Normal major sigil is visible in the right palm. Use charged stabs during the calmest pause. If the hand starts moving violently, stop charging and hold on. Continue until the sigil disappears and the remaining health is gone.
- You mounted the right palm, which is the same arm that formerly held the sword.
- The battle ends after the right-palm sigil is destroyed.
Recovery if the puzzle stops working
If the first step never appears, the stomp is missing the slab. Stand closer to the rectangular tile and dodge later. If the gallery wall does not break, remain on that ledge and bait a sword swing into the blocked wall at your height. If you fall after that point, redo the arena in order: slab first, broken gallery wall second, upper bridge third.
If you miss the jump from the broken bridge, heal on the arena floor and rebuild the route. If grip runs low on Argus, move to a genuinely broad standing place such as the shoulders or upper back and stand there to recover. Hanging from fur or clinging to a narrow edge still drains grip. If the final palm chance will not appear, make sure the sword has already been dropped, then stay on Argus's right side and wait specifically for the empty-hand slam instead of hovering in front of it.
- You know the reset order: slab, wall break, bridge, head, sword drop, palm.
- You know grip recovery requires a real standing surface, not just hanging still.
Before you move on
- You rode from the Shrine of Worship to the far northeastern fortress using the outer mountain-wall route into the high ruins.
- You advanced through the arena in the required order: tilted slab, broken gallery wall, then broken upper bridge.
- You destroyed the head sigil and used the small wound on Argus's right sword arm only to make it drop the weapon.
- You returned to the ground, baited the empty-hand slam on Argus's right side, mounted the right palm, and finished the final Normal sigil there.
References for this chapter
- Larger Than Life, Shadow of the Colossus Provides an Emotional Artistic Adventure Available Exclusively for PlayStation®2
- Shadow of the Colossus - Guide and Walkthrough - PlayStation 2 - By GhostOfLegault
- Shadow of the Colossus - Guide and Walkthrough - PlayStation 2 - By nemes1ss - GameFAQs
- Shadow of the Colossus/Argus - Colossus 15 — StrategyWiki | Strategy guide and game reference wiki
- Shadow of the Colossus/Controls — StrategyWiki | Strategy guide and game reference wiki
Malus: the final climb
Open the far southern seal, survive the collapsing approach, then use Malus's trigger wounds in order: lower back, upper left arm, back of the right hand, left shoulder, and finally the single major sigil on the crown. In this chapter, every left and right callout means Malus's own side, not Wander's view.
Open the southern seal and reach Malus's outer approach
From the Shrine of Worship, ride Agro toward the far southern end of the map. Stay on the broad route leading to the huge sealed gate framed by a ring of standing stones. This is the same enormous barrier the sword beam has been pointing toward after the earlier colossi.
Stop on the round stone disc in front of the gate. Equip the sword and raise it in open light so the reflected beam focuses into the center of the seal. When the gate opens, ride through and continue along the raised route until the collapse sequence interrupts the ride.
Once the path breaks, do not try to jump the missing spans on foot. Take the surviving climb instead: scale the wall directly ahead, cross the remaining stone blocks, work up the ivy-covered wall, pass through the arch and tunnel, then continue up the stairs and broken ledges until you reach the long exposed approach below Malus. Keep Agro out of danger before committing to the climb on foot.
- Use the sword light on the gate seal itself.
- After the collapse, follow the intact climb through the ruins instead of improvising across the gap.
Cross the bombardment zone with walls and tunnels
Malus begins firing explosive volleys down the approach. Treat this section as a covered advance, not a race. Move from one intact wall or fallen stone barrier to the next only after a volley lands. If you run while a new shot is already incoming, the blast can knock you off the route or leave you open to a follow-up hit.
The safe line alternates between short stretches of open ground and underground tunnel mouths cut into the approach. Use the first large piece of cover, then the first tunnel, then the next set of low walls, then the next tunnel. When the route bends around the mountain, stay tucked behind rock or masonry until a shot lands, then sprint the next exposed stretch.
At the final tunnel near Malus's feet, emerge and climb the masonry path wrapping up his body. The key idea is patience: wait out each volley, then take one clean advance. If you get clipped, recover behind the nearest intact cover before trying to gain distance.
- Advance after an impact, not while a fresh volley is in the air.
- Use tunnels as full reset points if the timing goes bad.
Climb to the lower-back wound and trigger the first hand
Follow the stone path upward until it becomes a vertical climb into Malus's skirt and lower back. Save grip wherever you can. A broad standing band restores grip, but hanging from a narrow lip still drains it, even if Wander looks briefly stable.
The glowing mark on the lower back is a trigger wound, not the finishing sigil. Keep R1 held to grip, press Square once to raise and charge the sword, wait for the charge to build, then press Square again to stab. After the hit, Malus reaches back with his own left hand.
Do not jump too early. Wait until that left hand comes in close enough to the back to give you a short, reliable transfer. Jump, grip the fur, and hold through the movement. When the hand settles flat enough to stand safely, refill grip before climbing higher.
- Refill grip before stabbing the lower-back wound if your gauge is low.
- Jump to Malus's left hand only when it has actually reached the back.
Use the left arm wound to call the right hand
From the left hand, move up the forearm during a calmer motion and climb toward the upper left arm. There is another glowing wound there. Use the same original PS2 stab method while gripping with R1: Square once to charge, Square again to plunge.
This upper left arm wound is another route trigger. A successful stab makes Malus bring his own right hand into range. Shift your position on the left arm so the jump will be short and direct when the right hand comes close. Do not guess from the camera alone; wait until the hand is truly alongside you.
If the arm is shaking too hard for a safe jump, keep holding on and wait out the movement. Losing a few seconds is much better than falling all the way back to the lower body.
- The left-arm wound changes Malus's pose; it is not a major health sigil.
- Only transfer when the right hand is close enough for a clean grab.
Stab the back of the right hand, then shoot the left shoulder
After landing on Malus's right hand, stay in a gripping position and climb around onto the back of that hand rather than trying to stand immediately. This is the missing step many players skip. When you are secure on the back of the hand, stab it with the sword. This hand stab is an unmarked reaction trigger, not an extra major sigil.
That stab makes Malus inspect the hand and hold it flatter for a short time. Use that pause to stand on the broadest part of the hand, recover grip, and switch safely to the bow. Aim at Malus's own left shoulder. If you need help reading the target, briefly line yourself up first, then fire from the steadier part of the pause rather than the start of the motion.
A successful shoulder shot makes the right hand rise toward Malus's left shoulder. The moment the hand lifts, put the bow away, grip again, and prepare to jump. Transfer to the shoulder fur or adjoining stone only when the gap is short. From there, climb around the shoulder and up the neck toward the crown.
- Climb onto the back of the right hand and stab it before trying to aim the bow.
- Shoot Malus's own left shoulder from the flattened right hand.
Finish on the crown and recover if anything goes wrong
At the top, the crown carries the single major health-draining sigil on Normal. Rest on any genuinely broad shoulder or upper-head surface before the final climb if your grip is low. Once you reach the crown, favor safe attacks over greedy ones. Hold R1 to grip, press Square once to charge, then press Square again to stab when the shaking eases. Watch for the sigil to fade and the health bar to empty rather than trying to count hits.
If you fall during the outer approach, restart from the last wall or tunnel you safely reached and retime the next dash after a blast lands. If you miss the jump to the left hand or to the right hand, the clean reset is to reclimb from the lower-back route and trigger the pose change again.
If the shoulder shot fails, do not just wait on the moving hand and hope for a good angle. Grip the right hand, climb back onto its rear surface, stab the back of the hand again to trigger the inspection pause, stand to recover grip, switch to the bow, and retry the shot at Malus's left shoulder. If you are thrown from the crown, repeat the shoulder climb and use smaller, safer stabs for the finish.
- The crown is the only major damage sigil in this fight on PS2 Normal.
- A missed shoulder shot is reset by repeating the right-hand back stab trigger.
Before you move on
- You opened the far southern gate with the sword's reflected light and followed the collapsing route and cliff climb to Malus's outer approach.
- You crossed the exposed approach by advancing from wall to wall and through the underground tunnels instead of sprinting the whole field.
- You stabbed the lower-back trigger wound, transferred to Malus's left hand, climbed and stabbed the upper left arm wound, transferred to the right hand, then stabbed the back of that right hand to create the stable aiming pause.
- From the flattened right hand, you shot Malus's own left shoulder, transferred to that shoulder, climbed to the crown, removed the single major sigil there, and emptied Malus's health bar to begin the ending sequence.
References for this chapter
Complete the ending and preserve your clear
After the sixteenth colossus falls, the last job is not another puzzle fight. Finish the scripted shrine finale, sit through the credits, and make a deliberate completed-game save. On the original North American PlayStation 2 release, that clear file is what preserves your run and opens the real replay features.
Make your last optional backup before Malus, not after
If you want one save that remains permanently parked before the ending, create it before you open the southern seal or before the final climb to Malus. After the last colossus dies, the game does not return you to ordinary exploration on that same run.
For the actual clear, do not reset once Malus is defeated. Keep going even when the game starts taking control away in longer scenes. From this point on, your objective is simple: reach the post-credits save prompt and write completed data to the memory card.
- Optional: keep a separate pre-Malus save if you want a file before the ending.
- Required: continue after Malus instead of resetting during the finale.
During the shrine finale, follow the sequence instead of hunting for a secret route
Once the game returns to the Shrine of Worship, treat the rest of the ending as a guided finale, not as a hidden challenge room. You may regain control for short stretches, but you are not looking for a way to reverse the outcome, escape the shrine, or trigger a different victory.
When the dark force begins dragging you toward the central pool, resist only enough to keep your bearings if you want, then accept that the pull is unavoidable. There is no practical reward for trying to overpower it forever. Keep moving when movement is allowed, keep the camera oriented, and let the sequence play forward.
If you are briefly able to walk or stagger during the shrine scenes, do not panic and mash random buttons. Stay upright, face the open path, and continue until the next scene takes over. The ending advances through its own set pieces; your main responsibility is simply not to interrupt it yourself by quitting or resetting.
- Do not waste time trying to beat the pull into the pool.
- Move only as needed when control returns, then let the scripted sequence continue.
Spoiler boundary: practical instructions end here
If you only wanted playable directions, you can stop reading after this paragraph. The remaining steps are about protecting your completed data, not about solving another encounter.
The one rule that matters from here on is straightforward: stay through the credits and save when the game asks.
- Story-sensitive players can stop here and just remember to save after the credits.
Stay for the credits and make the completed-game save deliberately
Do not turn off the console when the final scenes end. Let the credits finish. On this PS2 release, your clear is not safely preserved until you reach the save prompt that follows the ending.
When the game offers to save, read the slot carefully. If your memory card has space, the safest approach is to write the completed data to a different slot from any pre-Malus backup. That gives you one file for replay features and another file that still sits before the finale.
If you overwrite your only late-game file, the game is still cleared and usable, but you will no longer have an easy manual return point before Malus. That is a convenience issue, not a failed ending. The important thing is that you accept the prompt and confirm the completed file actually writes successfully.
- Watch the credits through to the save prompt.
- Accept the completed-game save.
- Use a separate slot if you want to preserve a pre-ending backup as well.
What a cleared PS2 file actually changes
Loading a cleared Normal file does not place you in an empty post-ending world and it does not reveal a seventeenth colossus. Instead, the game begins again from the start at the Shrine of Worship on that completed line of play, with your accumulated health and grip retained for that difficulty line.
That cleared Normal file is also the file you use for Normal Time Attack. After loading it, stand before a defeated colossus statue in the Shrine of Worship and kneel in prayer to start the corresponding trial. Separately, clearing the game once unlocks Hard as a difficulty choice on the main menu.
Hard Time Attack is not granted just because you finished Normal or finished Normal Time Attack. To access Hard Time Attack, you need a completed Hard save and then load that Hard clear. Keep that distinction in mind so you do not accidentally overwrite your Normal clear while setting up a Hard run.
- Expect a restarted cycle with retained health and grip, not free roam after the ending.
- Use the cleared Normal file for Normal Time Attack at the shrine statues.
- Start Hard from the main menu, and remember Hard Time Attack needs a Hard clear.
Final preservation check
After saving, load the completed file once to confirm it appears and opens correctly. If you want to continue building health and grip on that line, keep using that cleared file. If you want to begin Hard, back out and start a separate Hard game deliberately instead of assuming Continue will change the difficulty for you.
Your first clear is safely preserved when four things are true: Malus is beaten, the ending and credits have finished, the completed save has been written, and you have verified that the file loads. Once that is done, the playable ending is complete and your postgame options are secure.
- Reload the completed file once as a safety check.
- Use Continue for the cleared line you just made.
- Use a separate Hard file if Hard mode is your next objective.
Before you move on
- You defeated the sixteenth colossus and continued through the shrine finale instead of resetting.
- You watched through the credits and accepted the completed-game save prompt.
- You reloaded the completed file successfully from the memory card.
- You understand that the cleared file restarts the adventure with retained health and grip on that line and opens replay features rather than a new colossus.
References for this chapter
- Larger Than Life, Shadow of the Colossus Provides an Emotional Artistic Adventure Available Exclusively for PlayStation®2
- Shadow of the Colossus - Guide and Walkthrough - PlayStation 2 - By GhostOfLegault
- Shadow of the Colossus - Guide and Walkthrough - PlayStation 2 - By Xiamut - GameFAQs
- Why can't I start hard time attack? - Shadow of the Colossus Q&A for PlayStation 2
Hard mode, Time Attack and optional exploration
On the original North American PlayStation 2 release, the postgame branches into three practical paths. First, save a completed regular file and use it for Normal Time Attack and free exploration. Second, unlock Hard mode from the title screen, then finish a Hard playthrough on a separate save if you want Hard Time Attack. Third, decide whether your next goal is equipment, long-term health and grip growth, or optional exploration such as the Secret Garden. Reminiscence is its own replay feature and should not be confused with the timed statue challenges.
Preserve your completed files before you start chasing extras
After the ending, accept the clear-data save. That completed file is the one you use for Normal Time Attack and for continued postgame exploration. If you want a tidy file setup, keep that finished Normal save instead of overwriting it immediately with experiments or a separate Hard run.
Finishing the game once also unlocks Hard mode on the title screen. Start Hard from there if that is your next goal, but treat it as a separate branch. Hard Time Attack is not something you open from a merely started Hard file. Finish the Hard playthrough, save that clear data too, and then load the completed Hard file when you want the Hard statue trials.
A simple setup is one cleared Normal save and one cleared Hard save. That prevents the common mistake of loading the wrong file, walking up to a statue, and wondering why the wrong version of Time Attack is available.
- Keep at least one completed Normal save.
- Create a separate completed Hard save before you begin Hard Time Attack.
- Use the cleared file that matches the difficulty of the trials you want to run.
Enter Time Attack from the Shrine of Worship, not from the field
Time Attack on PS2 starts at the broken colossus statues inside the Shrine of Worship. Walk to the statue for the colossus you want, stand at its base, and kneel with Circle on the original PS2 controls. That launches the timed version of that specific fight.
This is different from praying at the small save shrines in the field, and different from revisiting a fallen colossus body for Reminiscence. Inside Time Attack, your normal exploration upgrades and unlocked tools do not turn the trial into a free win. Treat it as a separate challenge mode built around the base fight.
Every two successful clears in one Time Attack set unlock another reward for normal play. After earning one, go to the rear pool in the shrine, stand over the glow, and collect the item there before expecting it to appear in your equipment list.
- Kneel at a Shrine of Worship statue with Circle on PS2.
- Use statues for Time Attack, not field save shrines.
- Check the rear pool after 2, 4, 6, 8, 10, 12, 14, and 16 clears in that difficulty.
Use the verified reward ladders to pick a real target
Normal Time Attack rewards arrive in this order: 2 clears gives Whistling Arrow, 4 gives Cloak of Force, 6 gives Mask of Strength, 8 gives Lizard Detection Stone, 10 gives Fruit Tree Map, 12 gives Mask of Power, 14 gives Cloak of Deception, and 16 gives Flash Arrow. If your main goal is exploration rather than combat, the Normal ladder becomes especially useful at 8 and 10 clears because it gives you the two tracking tools.
Hard Time Attack rewards arrive in this order: 2 clears gives Harpoon of Thunder, 4 gives Sword of the Sun, 6 gives Fruit Tree Map, 8 gives Shaman's Cloak, 10 gives Lizard Detection Stone, 12 gives Shaman's Mask, 14 gives Cloth of Desperation, and 16 gives Queen's Sword. The early practical checkpoint here is 4 clears for Sword of the Sun, while the late attraction is usually Queen's Sword at the end of the full ladder.
Because rewards come every two victories, you do not need to commit to all 16 trials at once. Decide whether you want tracking tools, safer defense gear, the dark-area utility of Sword of the Sun, or the full completion route. That gives you a manageable postgame objective instead of a vague plan to do everything.
- Normal 8 clears unlocks Lizard Detection Stone.
- Normal 10 clears unlocks Fruit Tree Map.
- Hard 4 clears unlocks Sword of the Sun.
- Hard 16 clears unlocks Queen's Sword.
Keep Reminiscence separate from Time Attack and from a new full run
Reminiscence is the replay option tied to a colossus corpse in the field after that colossus has been defeated. Ride back to the remains, kneel there, and you can refight that encounter as a replay. Use this when you want to practice a puzzle, a climb, or a sigil route without caring about the Time Attack clock.
Time Attack is the statue challenge in the shrine and is the only route that pays out the bonus equipment ladder. Ordinary cleared-file play is something else again: load the completed save, travel the world normally, and keep exploring, hunting fruit, hunting white-tailed lizards, or revisiting areas you skipped before.
If you only want practice, use Reminiscence. If you want unlockable equipment, use the shrine statues. If you want gradual character growth or sightseeing, just keep traveling on a cleared file.
- Corpse replay in the field means Reminiscence.
- Shrine statue challenge means Time Attack.
- Free travel on a cleared file is the route for exploration and stat growth.
Choose an exploration goal that pays off outside the timer modes
White-tailed lizards raise grip stamina and fruit raises maximum health. Neither is required for a first Normal clear, so do not turn them into mandatory grinding, but both are worthwhile long-term goals once you already know the map and want easier repeat runs. The Lizard Detection Stone and Fruit Tree Map are the most helpful tools for cleaning these up efficiently.
The Secret Garden behind the Shrine of Worship is an optional climbing goal for a much later file with a substantially larger grip bar. Treat it as a test of long-term stamina growth, not as something you are expected to reach right after the credits. If you run out of grip on the ascent, back out and return after more lizard upgrades.
The garden is also a curiosity rather than a required power stop. Its existence matters as an exploration objective, but it should not derail your main postgame plans unless you specifically want the climb.
- Grip growth comes from white-tailed lizards.
- Health growth comes from fruit.
- Leave the Secret Garden for a stronger file with much more stamina.
- Use the map tools to turn cleanup into directed exploration.
Treat cosmetic Agro colors as optional bonuses, not route-critical rewards
The useful postgame rewards are the Time Attack items listed above. Separate from those, PS2 references consistently show the title-screen button behavior for Agro color swaps: hold Square while starting or loading for the brown coat option, and hold Circle for the white coat option once that cosmetic has been unlocked on your game data.
Because those horse-color bonuses do not affect combat, exploration, or completion, do not build your postgame route around them. Finish the practical equipment and file-management goals first, then test the cosmetic options afterward if you care about them.
That keeps the chapter focused on what actually changes your runs: the correct save flow, the statue trials, the item ladders, and long-term health and grip growth.
- Prioritize item rewards and file setup before cosmetic extras.
- Brown color uses Square at the title screen once available.
- White color uses Circle at the title screen once available.
Before you move on
- You have a completed Normal save reserved for Normal Time Attack and continued exploration.
- You know Hard mode is chosen from the title screen and Hard Time Attack is used from a completed Hard save.
- You can state the PS2 reward order for both Time Attack ladders from 2 clears through 16 clears.
- You can tell the difference between shrine-statue Time Attack, field-corpse Reminiscence, and ordinary cleared-file roaming.
- You have picked a specific next objective: utility rewards, a full Hard clear, health and grip growth, or the Secret Garden climb.
References for this chapter
- Shadow of the Colossus - Guide and Walkthrough - PlayStation 2 - By Xiamut - GameFAQs
- Shadow of the Colossus Cheats, Codes, and Secrets for PlayStation 2 - GameFAQs
- Shadow of the Colossus/Extras — StrategyWiki | Strategy guide and game reference wiki
- Shadow of the Colossus/Controls — StrategyWiki | Strategy guide and game reference wiki
When the puzzle will not trigger
Use this chapter when a colossus is still alive but the intended setup has stalled, or when you reached the correct body part and the next phase still will not open. These fixes are for the original North American PlayStation 2 release on a first Normal clear, using the original controls and intended puzzle flow. Most apparent failures in Shadow of the Colossus are not true softlocks. Usually the colossus is missing one exact condition: the right place, the right line of sight, the right attack angle, or the right trigger stab. Restore that condition cleanly and the fight resumes without restarting the whole game.
Reset your footing, camera, and attack input first
Before you assume a battle is broken, check where Wander is standing. Grip only refills when he is upright on a genuinely broad surface such as open ground, a wide roof, a broad shell plate, a large shoulder shelf, or a flat section of a colossus where both feet can settle. If he is still clinging to fur, hanging from stone, or balancing on a narrow lip, the gauge continues to drain.
If you lose orientation after a knockdown or fall, tap L2 to center the camera behind Wander before you sprint back into position. Use L1 when you want the camera to follow the colossus so you can read the next slam, kneel, reach, or search animation. On original PS2 controls, do not swap those functions.
When a small trigger wound is involved, use a proper charged stab instead of a string of weak pokes. Keep R1 held to grip, press Square once to raise and charge the sword, wait for the power to build, then press Square again to stab. This matters on wounds that cause a kneel, break equipment, disable a hazard, or open the next transfer.
- Refill grip only on a truly broad standing surface.
- Use L2 to reset your approach and L1 to read the colossus animation.
- Use a full charged stab on trigger wounds when the battle expects one.
Phaedra, Gaius, and Basaran: restore the intended setup
If Phaedra will not kneel, the usual cause is that it still has line of sight to you or it is investigating the wrong opening. Let it see you at one burial mound entrance, drop into that same opening, move through the underground passage, and come out of a different exit without showing yourself. Stay hidden instead of climbing back onto the mound. If Phaedra keeps patrolling upright, go back through the tunnel and repeat the bait so the last clear thing it saw was Wander disappearing into the opening you want inspected.
If Gaius will not break the wrist guard, the problem is almost always location. The guard-break strike must hit the circular metal plate in the arena. That is a different step from the later sword-climb attack. Stand on or right beside the plate, watch with L1, and bait the overhead slam there. If the blow lands on ordinary stone, reset to the plate immediately. After the guard is gone, move off the plate and bait a separate strike onto normal ground so the blade stays low enough to run up.
If Basaran will not expose its feet, you are trying to shoot too early or from a bad angle. Keep moving on Agro and draw the tortoise over an active geyser so the body is lifted first. The exposed foot targets only become available when the geyser raises the shell and tips the body. If Basaran plants beside the vent instead of over it, ride away, open the distance, and guide it back across the geyser on a straighter line.
- For Phaedra, hide after changing exits and let it inspect the opening where it last saw you vanish.
- For Gaius, use the metal plate for the guard break and ordinary ground for the later sword climb.
- For Basaran, wait for the geyser lift before firing at the supporting feet.
Celosia and Cenobia: recreate space or rejoin the route
If Celosia's stick is dark, lost, or getting you chain-hit, slow the fight back down. Make sure the dropped stick is in your hands, take it back to a brazier, and relight it before you pressure the beast again. The common cause of failure is crowding Celosia at point-blank range. Use the brazier base and nearby stone for breathing room, hold the flame toward it, and advance only when you have a lane to retreat through. If the charge chain starts again, disengage, relight if needed, and restart the fear push instead of scrambling with an unlit branch.
If Cenobia's route feels broken after a fall, do not stay on the floor and duel it in the open. The puzzle route is cumulative. A pillar that already fell remains part of the path to the next ruin. Climb back to the last safe elevated structure you can still reach, use the fallen pillar as your bridge, and continue upward from there. If the wall-breaking pillar has already collapsed, run across it, use the climbable pillar on the broken wall, and regain the upper entrance-side structure for the final trap. Use corners, trenches, and solid ruins only long enough to break charge pressure and climb again.
- Relight Celosia's stick whenever the flame goes out.
- Make space before advancing with fire instead of forcing the push at melee range.
- For Cenobia, resume the elevated structure chain from the last reachable high point.
Argus and Malus: wait for the correct phase, then trigger it cleanly
If Argus's right hand stays closed, you are still one phase early. The right-palm sigil is on the colossus's former sword hand, but that phase does not work until the sword has been dropped. After the head sigil, move to the right arm, stab the small wound near the elbow with charged hits, and make Argus release the sword. Drop back to the ground, keep mid-range in front of him, and wait for the hand-smash attack. Approach only after the right hand has struck the ground and opened. A hovering hand or incomplete swing does not give a safe palm mount.
If Malus will not give you a stable shoulder-shot window, the problem is usually that you are waiting on the moving hand instead of triggering its inspection reaction. Remember that left and right here are Malus's own sides. After the lower-back wound and then the wound on Malus's own left arm, wait for Malus's own right hand to reach across. Jump to that hand, grip securely, and climb around onto the back of the hand while holding R1. Then use the original PS2 charged stab sequence on the back of that hand. This is the hidden reaction trigger for the next step, not an extra major sigil. Malus will inspect the wounded hand and hold it flatter for a short window.
Once that hand has flattened, stand on the broad back of the hand to refill grip, switch to the bow only while stable, and shoot Malus's own left shoulder. Grip again as the reach begins, ride the motion in, and transfer to the shoulder. If the shoulder shot misses or the aiming window closes, do not guess with an empty gauge. Re-grip, return to a safe position on the back of the right hand, stab the hand again to trigger another inspection pause, and retry the shoulder shot. If you are thrown off the hand entirely, recover by climbing back through the confirmed route from the lower back to the left-arm wound and repeat the transfer cleanly.
- Argus must be disarmed before the right-palm phase can work.
- Only mount Argus's right hand after the planted fist strike opens it.
- On Malus, stab the back of the right hand to create the flatter aiming pause before the shoulder shot.
- If the Malus shoulder shot fails, repeat the hand-stab trigger instead of waiting on the moving hand.
Use the matching recovery loop, not a restart
Most stalled fights in this game recover faster if you rewind one clean step instead of restarting from the title screen. Hide again for Phaedra, return to the metal plate for Gaius, remount Agro and line Basaran up with a live geyser, relight Celosia's stick, climb back into Cenobia's ruin route from above, return Argus to the disarm phase, or rebuild Malus from the last confirmed wound and hand trigger.
If you are unsure whether the puzzle failed or your position failed, compare what the colossus is doing now against the expected animation. A working setup always produces a readable cue: Phaedra lowers to inspect, Gaius slams the plate, Basaran rises on the geyser, Celosia recoils from fire, Cenobia keeps collapsing the route in sequence, Argus drops the sword, and Malus inspects the stabbed hand before the shoulder shot.
Leave speedrun launches, odd shortcuts, and version-mix habits outside the main guide. On the original PS2 Normal route, every required trigger can be reproduced consistently if you restore the right condition, keep your controls straight, and attempt the next transfer from full grip instead of panic-jumping.
- Reset to the last confirmed working phase instead of roaming randomly.
- Look for the animation cue that proves the setup is correct.
- Use the intended PS2 puzzle loop rather than a glitch, shortcut, or remake-era habit.
Before you move on
- You can identify the likely cause and next action for Phaedra, Gaius, Basaran, Celosia, Cenobia, Argus, and Malus without restarting the entire game.
- You know that grip only refills on a broad standing surface, not while hanging from fur, stone, or a narrow lip.
- You can restore each stalled battle to its intended trigger animation instead of improvising a random climb.
- You can perform the original PS2 control sequence correctly: R1 grip, L1 view or follow the colossus, L2 center the camera behind Wander, and the two-press charged stab.
- You can recover the Malus shoulder-shot step by transferring to Malus's own right hand, stabbing the back of that hand to force the flatter inspection pause, then shooting Malus's own left shoulder and repeating that hand-stab trigger if the shot fails.
References for this chapter
- SHADOW OF THE COLOSSUS - (NTSC-U)
- Shadow of the Colossus/Controls — StrategyWiki | Strategy guide and game reference wiki
- Shadow of the Colossus - Guide and Walkthrough - PlayStation 2 - By T_Hayes - GameFAQs
- Shadow of the Colossus Walkthrough - GameSpot
- Shadow of the Colossus/Cenobia - Colossus 14 — StrategyWiki | Strategy guide and game reference wiki
Finishing up
Defeat all sixteen colossi and continue through the final sequence at the Shrine of Worship.
Watch the ending and preserve the cleared save.
Use the postgame chapter to understand Time Attack and later difficulty goals.
Keep your separate pre-ending save if you want to revisit the world before starting another run.
Choose your next gameScreenshots & video
Game imagery for reference. Follow the written chapters above for the route and strategies.
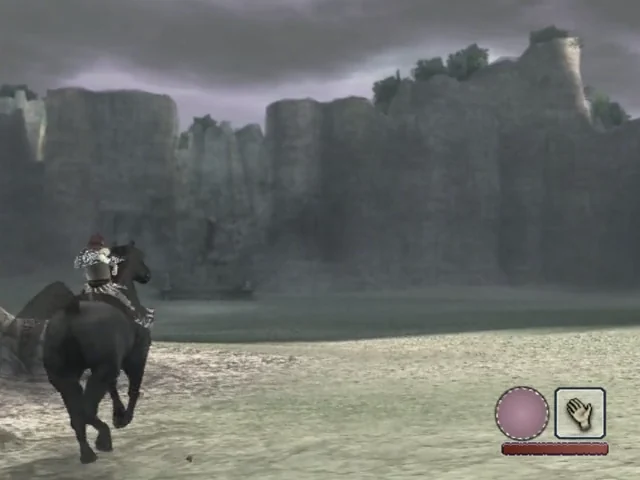
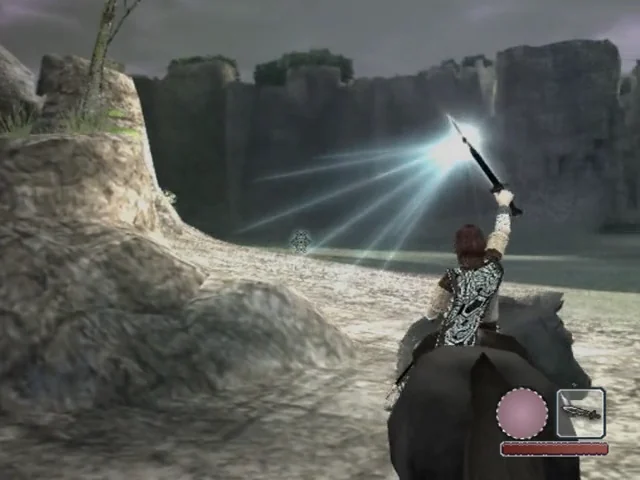
Sources & references
Our original guide draws on the references below. Check the edition at the top of this page before following controls or unlock requirements.
- WARNING: READ BEFORE USING YOUR PLAYSTATION®2 COMPUTER ENTERTAINMENT SYSTEM.
- Shadow of the Colossus (USA) | Datassette
- Shadow of the Colossus - Guide and Walkthrough - PlayStation 2 - By A_I_e_x - GameFAQs
- Shadow of the Colossus/Controls — StrategyWiki | Strategy guide and game reference wiki
- SHADOW OF THE COLOSSUS - (NTSC-U)
- Shadow of the Colossus/Valus - Colossus 1 — StrategyWiki
- FAQ/Walkthrough
- Shadow of the Colossus - Guide and Walkthrough - PlayStation 2 - By nemes1ss - GameFAQs
- Shadow of the Colossus/Quadratus - Colossus 2 — StrategyWiki
- Shadow of the Colossus Walkthrough - GameSpot
- Larger Than Life, Shadow of the Colossus Provides an Emotional Artistic Adventure Available Exclusively for PlayStation®2
- Shadow of the Colossus/Gaius - Colossus 3 — StrategyWiki
- Shadow of the Colossus - Guide and Walkthrough - PlayStation 2 - By selmiak
- Shadow of the Colossus - Guide and Walkthrough - PlayStation 2 - By Xiamut - GameFAQs
- Shadow of the Colossus/Phaedra - Colossus 4 — StrategyWiki | Strategy guide and game reference wiki
- Shadow of the Colossus - Guide and Walkthrough - PlayStation 2 - By T_Hayes - GameFAQs
- Shadow of the Colossus/Barba - Colossus 6 — StrategyWiki
- Shadow of the Colossus/Hydrus - Colossus 7 — StrategyWiki | Strategy guide and game reference wiki
- Shadow of the Colossus - Guide and Walkthrough - PlayStation 2 - By GhostOfLegault
- Shadow of the Colossus/Kuromori - Colossus 8 — StrategyWiki | Strategy guide and game reference wiki
- Shadow of the Colossus/Basaran - Colossus 9 — StrategyWiki | Strategy guide and game reference wiki
- Shadow of the Colossus – Release Details
- Shadow of the Colossus/Dirge - Colossus 10 — StrategyWiki | Strategy guide and game reference wiki
- Shadow of the Colossus - Guide and Walkthrough - PlayStation 2 - By ZenithWillRule - GameFAQs
- Shadow of the Colossus/Celosia - Colossus 11 — StrategyWiki | Strategy guide and game reference wiki
- Eleventh Colossus | Team Ico Wiki | Fandom
- Shadow of the Colossus/Pelagia - Colossus 12 — StrategyWiki
- Shadow of the Colossus - Guide and Walkthrough - PlayStation 2 - By Crazyreyn
- Shadow of the Colossus/Phalanx - Colossus 13 — StrategyWiki
- Shadow of the Colossus (2005) - MobyGames
- Shadow of the Colossus/Cenobia - Colossus 14 — StrategyWiki | Strategy guide and game reference wiki
- Shadow of the Colossus/Argus - Colossus 15 — StrategyWiki | Strategy guide and game reference wiki
- Shadow of the Colossus/Malus - The Final Colossus — StrategyWiki
- Why can't I start hard time attack? - Shadow of the Colossus Q&A for PlayStation 2
- Shadow of the Colossus Cheats, Codes, and Secrets for PlayStation 2 - GameFAQs
- Shadow of the Colossus/Extras — StrategyWiki | Strategy guide and game reference wiki
About the game & collecting notes
- Platform
- PlayStation 2
- Developer
- Sony Computer Entertainment Japan
- Publisher
- Sony Computer Entertainment
- Release Date
- 2005-10-18
- Region
- North America
- Genre
- Action-adventure
- Content Rating
- ESRB T
- Players
- 1
Shadow of the Colossus is a single-player action-adventure game originally released for PlayStation 2. Sony’s North American launch announcement is dated October 18, 2005 and identifies Sony Computer Entertainment Japan as its creator.
The game centers on traversing a large landscape and confronting sixteen colossi, with exploration, puzzle solving, and action intertwined. This is a factual reference entry, not a scored review.
This page concerns the original PS2 release. Later editions on other hardware should be compared as distinct releases when collecting. Check the platform, region, package contents, and disc condition before using another listing as a comparison.
Collector notes
Distinguish the PS2 original from later remastered and rebuilt versions. Keep the region and packaging edition in the inventory.Darryl Polo
Darryl Polo loves tinkering with emulation and revisiting retro games. He enjoys exploring how old favorites play on different setups and sharing what he learns along the way. At Joking Joystick, he writes about the games, hardware, and small discoveries that keep the hobby fun.
Our editorial standardsFound a step that needs another look? Help us improve this guide.