Metroid Prime 2: Echoes — Complete Campaign Walkthrough (Nintendo GameCube, USA)
A practical, step-by-step campaign walkthrough for the original North American Nintendo GameCube release of Metroid Prime 2: Echoes (USA). You’ll restore the energy held by the Agon Wastes, Torvus Bog and Sanctuary Fortress controllers, receive the Light Suit, recover nine player-collected Sky Temple Keys, reach Sky Temple, defeat Emperor Ing and the final Dark Samus encounter, and confirm the ending with a clear completion checklist.

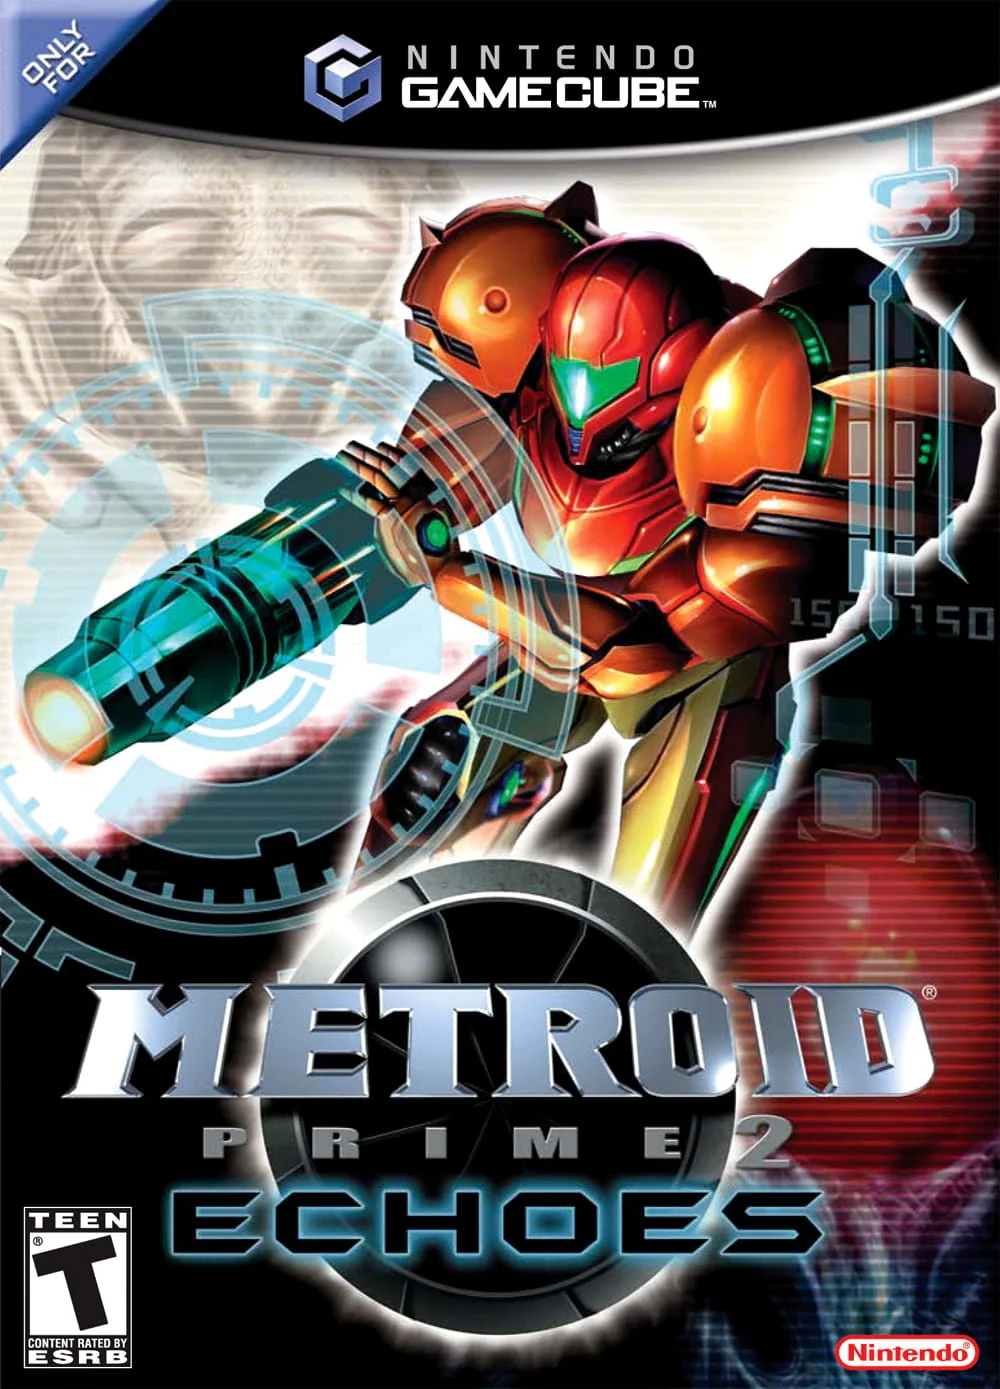
Find a copy
Metroid Prime 2: Echoes Nintendo GameCube
We may earn a commission if you buy through these links, at no extra cost to you. As an Amazon Associate I earn from qualifying purchases.
Opens retailer search results. Check the model, edition, seller, availability and current price before buying.
Before you begin
You are Samus Aran dropped into a mirrored planet where every region has a Light Aether and a hostile Dark Aether twin.
This walkthrough takes you from your first touchdown zones through the Sky Temple finale, teaching how to swap between worlds, establish safe zones, recover regional energy, find critical visors and suit upgrades, and overcome every campaign obstacle needed to reach the true ending.
Follow the chapter order for a clear, low-backtrack route.
If you need to detour for optional scans or extras, the chapters label those as optional.
Save often at Save Stations in Light Aether and whenever you open a Light beacon in Dark Aether to create safe zones.
Use the included sources for control references and boss specifics if you want page-level verification.
Set yourself up for the run
Play the original North American Nintendo GameCube release or a verified equivalent.
Use a Memory Card in Slot A with at least three free blocks when creating a new file.
Learn the original GameCube controls from the manual: L for lock-on, strafing, scanning and Grapple Beam use; R for manual look and Spider Ball activation; the Control Pad for visor changes; the C-Stick for beam selection; Z for the map; Start/Pause for the Data Network.
Use Save Stations or the Gunship to record progress. Save Stations also restore Energy; Map Stations download map data; Ammo Stations restore ammunition but do not save.
Learn the Light Aether and Dark Aether relationship. Dark Aether damages Samus outside protected areas, so plan crossings around Light Crystals, Light Beacons, Lightbringers and portals.
The campaign visors are Combat, Scan, Dark and Echo. Do not expect a Thermal Visor in the original release.
Scan new enemies, devices and bosses before defeating them when Logbook completion matters.
Track required progression separately from optional expansions: obtain the missing movement tools and beams, restore the three regional energy sources, collect nine Sky Temple Keys, then complete the Sky Temple finale.
Save before guardian and temple fights, and keep a pre-finale save because the post-credits save does not create a free-roaming post-game state.
Getting Ready: Controls, HUD and Save Basics
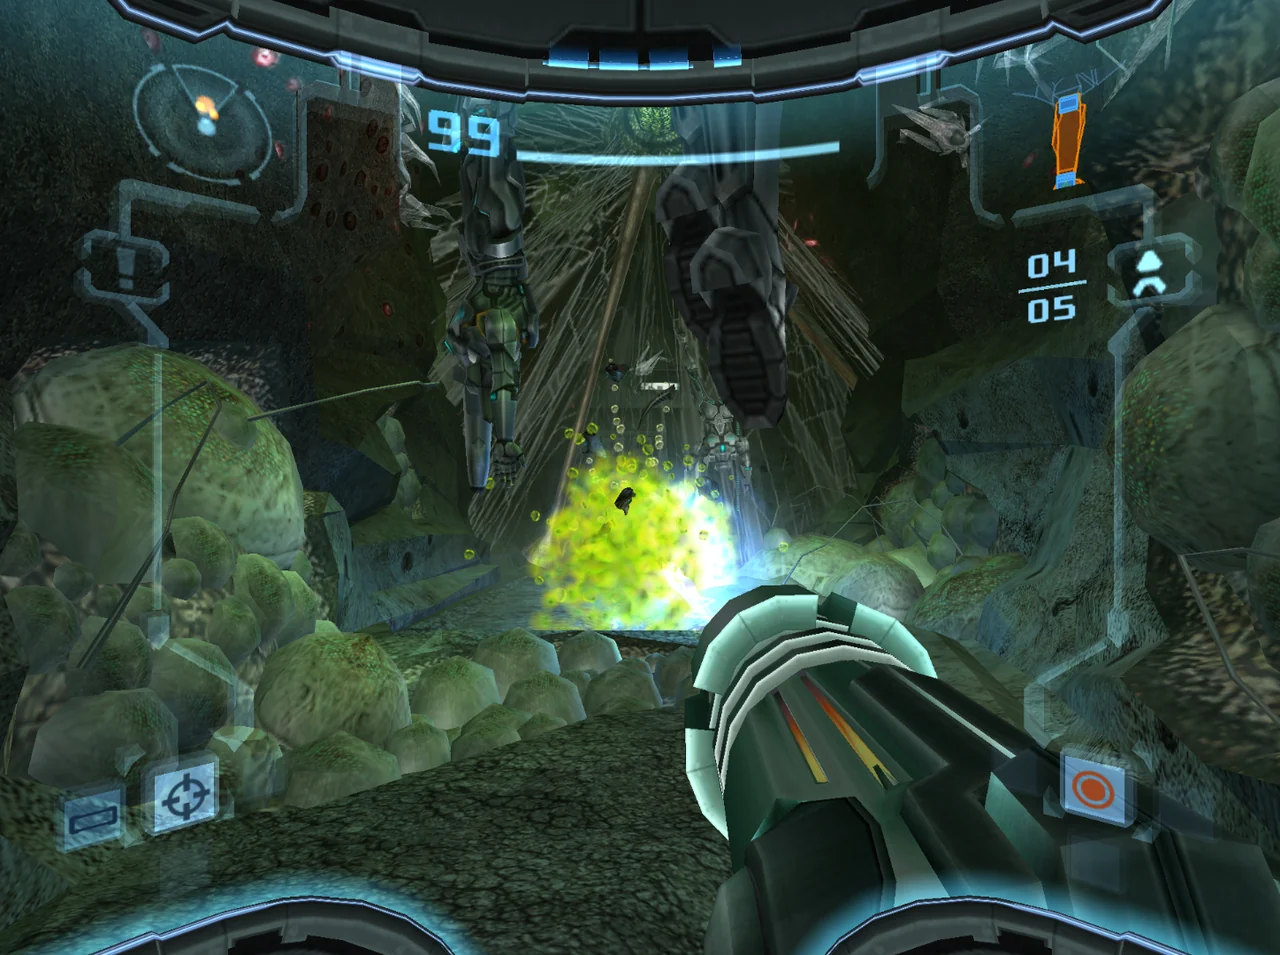
Metroid Prime 2: Echoes on the original North American GameCube release uses the controller layout documented in its GameCube instruction manual. Learn the lock-on and manual-look controls before leaving the opening area, then use the visor and beam shortcuts to react quickly during exploration. The HUD reports Energy, radar, threat level, missiles, beam ammunition, the active visor, the equipped beam, and the targeting reticule. Z opens the regional map, while Start/Pause opens the Data Network screens for Inventory, Logbook, and Options. Save Stations record progress to a Memory Card in Slot A and refill Energy when you accept the save prompt.
Prepare the original GameCube save file
Before selecting a new file, insert a Memory Card into Slot A and make sure it has at least three free blocks. This is the requirement stated in the original instruction manual for creating a Metroid Prime 2: Echoes file. The game provides three single-player file slots; select one marked New, then choose the desired difficulty if the file offers that choice.
Do not treat a pause, scan, map download, or equipment pickup as a saved checkpoint. Those actions affect the current run but do not write the game file. A Save Station or the Gunship is the reliable point at which progress is recorded. If you are beginning a long session, create the file and save at the first available station before continuing far from the landing area.
- Use a Memory Card in Slot A.
- Verify at least three free blocks before creating a file.
- Remember that pausing and scanning do not save the game.
Learn the standard movement and combat controls
Use the Control Stick to move forward, move backward, and turn left or right. Hold L to lock onto a nearby target. While locked on, left and right on the Control Stick strafe around the target, and holding L without an enemy selected lets you strafe normally. In the Scan Visor, hold L while aiming at a scannable object to analyze it. After obtaining the Grapple Beam, L also attaches Samus to valid grapple points.
Hold R lightly and use the Control Stick to look around without moving Samus. Clicking R brings up the targeting reticule for manual aiming. In Morph Ball mode, R activates Spider Ball when that ability has been acquired. Press A to fire the current beam, or hold and release A for a charged shot. Press B to jump; after the Space Jump Boots, press B again in the air for the second jump. X enters or exits Morph Ball mode, and Y fires missiles or places a Power Bomb while morphed.
- Practice locking on with L and strafing around a target.
- Use R plus the Control Stick for manual looking and aiming.
- Test A for beam fire, B for jumping, X for Morph Ball, and Y for missiles.
Switch visors and beam weapons without opening the menu
The Control Pad selects visors. Up selects the Combat Visor, Left selects the Scan Visor, Right selects the Dark Visor, and Down selects the Echo Visor after it is acquired. The Scan Visor is used to examine creatures and mechanisms, activate scan panels, and identify important objects. The Dark Visor reveals certain cloaked enemies and objects. The Echo Visor displays sound-based objects and opens Echo Doors.
The C-Stick selects beam weapons. Up selects the Power Beam, Right the Dark Beam, Left the Light Beam, and Down the Annihilator Beam once those weapons have been obtained. The Dark Beam and Light Beam each use their own ammunition reserves. The Annihilator Beam uses both Light and Dark Ammo, so check the lower-right HUD before using it repeatedly. If an ammo-based beam is empty, the game still permits its charged-shot behavior, but do not assume that every target accepts every beam.
- Use the Combat Visor for ordinary navigation.
- Use Scan, Dark, or Echo Visor when the environment or an objective calls for it.
- Check the active beam and both special-ammo gauges before a beam-sensitive encounter.
Read the Combat Visor HUD
The Energy Reserve appears across the top of the display. The long bar shows the remaining energy in the active Energy Tank, while the squares above it represent reserve Energy Tanks. The mini-radar is in the upper-left corner; orange dots indicate nearby enemies, and the cone shows Samus’s forward direction. A small local map appears in the upper-right corner.
The Threat Assessment meter is on the left side and rises near damaging environmental hazards such as lava or acid. The Missile Reserve count is on the right side, with the Light Ammo and Dark Ammo gauges below it. The lower-left display shows the visor selection, and the lower-right display shows the equipped beam. The central targeting reticule indicates where Samus is aiming and changes when a target can be locked on or scanned.
- Check Energy before crossing hazardous rooms or entering a boss arena.
- Use the radar to notice enemies outside the center of the screen.
- Watch Threat Assessment, missiles, and special ammo before committing to a dangerous route.
Open the map and Data Network
Press Z during gameplay to pause and open the detailed map. The current room is centered, and visited rooms are shown according to the map data available. Use the Control Stick to rotate the three-dimensional map, L and R to zoom, and the C-Stick to select another room. Press X to switch between the Light Aether and Dark Aether views. Press A to zoom out to the world map and select another region. Press Z or B to return to gameplay.
Press Start/Pause to open the Data Network. From there, use the Control Stick and A Button to select Inventory, Logbook, or Options. Scanned creatures, mechanisms, lore entries, and other research are stored in the Logbook. Use Inventory to confirm newly obtained weapons and movement abilities. The Options screens include display, sound, visor, and control settings; changing them does not replace a save.
- Use Z whenever room connections or world versions become confusing.
- Use X on the map to compare Light Aether and Dark Aether layouts.
- Review new scans in the Logbook and newly obtained abilities in Inventory.
Save at stations and recover after failure
Save Stations are circular platforms with an overhead apparatus. Step onto one and accept the prompt to save. A successful save refills Samus’s Energy, and Save Stations are marked with an S on the map. They can occur in both Light and Dark Aether, so use one whenever the route offers it rather than assuming you must return to the Light World.
Ammo Stations are different: they refill missiles, Light Ammo, Dark Ammo, and Power Bombs but do not create a save. Map Stations download regional map data and do not save progress. If Samus dies, the game returns her to the most recent saved position, so save after major upgrades, before difficult boss attempts, and after completing a substantial objective. Confirm that the save operation finishes before switching off the console.
- Distinguish Save, Map, and Ammo Stations by function.
- Save after major upgrades and before difficult encounters.
- After a death, use the restored save position to resupply and retry rather than repeating unnecessary exploration.
Before you move on
- You can identify L, R, the Control Stick, C-Stick, A, B, X, Y, Z, the Control Pad, and Start/Pause according to the original GameCube layout.
- You can read Energy, reserve Energy Tanks, radar, local map, Threat Assessment, missiles, Light Ammo, Dark Ammo, visor selection, beam selection, and the targeting reticule.
- You have created or loaded a file using a Memory Card in Slot A with sufficient free space.
- You can open the detailed regional map with Z, switch Light and Dark Aether map views with X, and return to gameplay.
- You can open the Data Network with Start/Pause and review Inventory, Logbook, and Options.
- You have used a Save Station successfully and understand how to recover from a death using the latest saved position.
Two Worlds — How Light and Dark Aether Work
Light Aether and Dark Aether are overlapping versions of the same locations, but their rooms, hazards, enemies, platforms, doors, and mechanisms can differ substantially. Dark Aether is dangerous outside protected areas, so every crossing should be planned around Light Crystals, temporary Light Beacons, Lightbringers, and portals. Use the map to compare corresponding rooms, activate protection before fighting, and inspect the matching world after operating a cross-world mechanism. The safest route is usually a short chain from permanent Safe Zone to temporary Safe Zone to the next crystal, door, or portal, with a known retreat path back to Light Aether.
1. Treat each Light and Dark room as one connected puzzle
Many locations on Aether have a Light Aether version and a Dark Aether counterpart. The rooms share recognizable landmarks, but they are not interchangeable copies. A bridge can be rotated in one world and appear rotated in the other, a gate can lower in both versions after one Bomb Slot is activated, and a platform or lift can be usable only after you manipulate its counterpart.
When a route appears blocked, first compare the room in the other dimension before assuming that you lack an upgrade. Look for the nearest Light Portal or Dark Portal, then examine the corresponding landmark after crossing. World changes are commonly local: after activating a Bomb Slot, lift crystal, bridge control, or gate, check nearby doors, ledges, and vertical routes in the matching room before leaving the area.
- Identify the room landmark that links the two dimensions.
- Record which gate, bridge, platform, lift, or door changes after an action.
- Check the corresponding room before searching an entirely different region.
2. Use permanent Light Crystals as staging points
Light Crystals are the main permanent sources of protection in Dark Aether. A functioning crystal produces a Safe Zone. While inside it, Samus is protected from the damaging atmosphere and Energy gradually recovers. Ing generally cannot enter the protected area, although enemies outside it can still attack into the zone.
A crystal can be nullified by dark energy. It appears shrouded and no longer produces a Safe Zone. Fire the Power Beam or Light Beam at a nullified crystal to restore it. If enemies are nearby, clear only the space needed to reach the crystal, restore it immediately, and fight from the light. Do not spend time scanning, changing equipment, or planning a long route in exposed Dark Aether when a crystal is available nearby.
- Find and restore the nearest crystal as soon as you enter a new Dark Aether section.
- Confirm that the Safe Zone is active before beginning a fight or puzzle.
- Use the zone to recover Energy before attempting the next exposed passage.
3. Activate Light Beacons for short crossings
Light Beacons are floating light sources placed through Dark Aether. Shoot a functioning beacon with the Power Beam to create a temporary Safe Zone. The protection does not last indefinitely; the beacon flashes as it nears expiration. Aim at the beacon and identify the next refuge before firing, then move directly from the new zone toward the next crystal, beacon, door, or portal.
If a beacon has been nullified by dark energy, restore it with the Power Beam or Light Beam before relying on it. A Light Beam shot against an active Light Crystal or Light Beacon creates an Energized Crystal or Energized Beacon. The energized zone lasts longer than the ordinary temporary version and destroys creatures that touch it, making it useful when Ing or other Dark Aether enemies are crowding the route. This is a defensive tool, not a replacement for planning the crossing.
- Line up the destination before activating a temporary beacon.
- Move immediately when the zone appears and retreat if it begins flashing before you reach safety.
- Use the Light Beam to energize a source when enemies are pressing against the protected area.
4. Follow Lightbringers when no fixed refuge is nearby
Some Dark Aether rooms contain Lightbringers: small moving creatures whose carried crystals create a moving Safe Zone. They are important route markers in exposed passages where the next stationary crystal is too far away to reach safely on foot. Wait for the Lightbringer to approach, then follow behind it while staying within its illuminated area. Continue until you reach the next permanent Safe Zone or the room exit.
Do not chase a Lightbringer from the front or sprint ahead of its protection. If you lose the moving light, stop and let it return rather than crossing the remaining distance unprotected. Lightbringers may appear during or after a required enemy encounter, so finish the fight from the nearby fixed Safe Zone before beginning the escort-like crossing.
- Scan or identify the Lightbringer without leaving the nearby refuge.
- Stay behind its moving light until the next permanent Safe Zone is reached.
- If separated, wait for it instead of attempting the entire path exposed.
5. Respect Dark Aether’s atmosphere and local enemies
Outside a Safe Zone, Dark Aether’s atmosphere continuously drains Samus’s Energy. The damage is environmental, so standing still to read the map, scan scenery, or search for a door is especially costly. Plan the route from refuge to refuge and use the map only while protected. The Dark Suit later improves resistance, but it does not remove the need to use crystals, beacons, portals, and other safe routes intelligently.
Dark Aether also has enemy forms that are absent from the same Light Aether rooms or behave differently there. Inglets can move as dark puddles before solidifying, Warrior Ing can attack from the edge of a Safe Zone, and other creatures may nullify a crystal or beacon. Fight from protected ground whenever possible. If an enemy is not blocking a required door, portal, or mechanism, bypass it rather than spending Energy and ammunition in the open.
- Never pause in exposed atmosphere to study the map or organize your equipment.
- Use the edge of a Safe Zone as a fallback position during combat.
- Decide whether an enemy blocks progress before committing to the fight.
6. Plan the entry, objective, and exit before crossing
Before entering Dark Aether, identify the entry portal, the immediate permanent Safe Zone, the next temporary refuge, and the intended exit portal. Some routes do not return through the portal used to enter. A later Light Portal may be in another room, behind a gate, or beyond a required boss or mechanism, so do not assume that turning around will always provide an escape.
Save at a nearby Light Aether Save Station and enter with enough Energy and ammunition to reach the next permanent refuge. If a fight goes badly, retreat through the last known crystal, beacon, Lightbringer route, or portal instead of pushing forward with critical Energy. Once back in Light Aether, save, recover, and re-enter with a shorter objective such as activating one mechanism or reaching one portal.
- Know both the intended objective and the route out before crossing.
- Save and recover in Light Aether whenever a station is available near the portal.
- If lost, retrace the refuge chain rather than advancing into unknown atmosphere.
Before you move on
- You can distinguish a functioning Light Crystal, a temporary Light Beacon, a nullified source, and an energized source.
- You can cross an exposed Dark Aether room by moving from permanent or temporary Safe Zone to the next refuge without stopping in the atmosphere.
- You can follow a Lightbringer to bridge a gap between fixed Safe Zones.
- You check the matching Light or Dark room after activating a Bomb Slot, lift crystal, bridge, gate, or other world-linked mechanism.
- You know the intended exit portal before beginning a Dark Aether objective and can retreat to Light Aether to save and recover supplies.
Agon Wastes (Light Aether) — First Exploration and Key Upgrades
Enter Agon Wastes from Temple Grounds and follow the mining route through Plaza Access, Mining Plaza and Mining Station A. The Missile Launcher is already available from the preceding Temple Grounds route, so use it on the red blast shield and the two weakened pillars blocking the upper path. Cross Temple Access and defeat the Alpha Sandigger followed by the Bomb Guardian in Agon Temple to recover Morph Ball Bombs. Use the bombs in Controller Access to reach the Agon Energy Controller, which grants amber translator access and records the next Dark Agon objective. Afterward, use the amber door in Mining Station A, then cross Portal Access A and complete the Portal Terminal lens puzzle. The chapter ends when the Dark Aether portal is activated and entered; the Agon regional-energy recovery continues in Dark Agon.
Enter Agon Wastes and reach Mining Plaza
From Temple Grounds, take the elevator in Transport to Agon Wastes. Before descending, you can shoot the webbing near the elevator to collect an optional Missile Expansion. This is not required for the route. After arriving in Agon Wastes, leave Transport to Temple Grounds and pass through Plaza Access, defeating or bypassing the small creatures in the corridor until you reach Mining Plaza.
Mining Plaza is the first large Light Aether landmark in the region. Sandiggers move below the platforms; target the glowing sections of their heads if you fight them. Cross to the far platform and destroy the red blast shield with a missile. This opens the route to Save Station A. Save there before continuing. The Morph Ball tunnel behind the station leads to a scan opportunity and does not advance the main route.
- Enter Agon Wastes from Temple Grounds.
- Pass through Plaza Access into Mining Plaza.
- Use Save Station A before entering the mining complex.
Cross Mining Plaza and enter Mining Station A
Return to Mining Plaza and climb the ledges on the east side. Follow the outer path south and west until you reach the first cracked pillar. Fire a missile at the weak point near its base; the pillar falls and forms a bridge. Cross the new route, deal with the Sandbats if necessary, and use a missile on the second cracked pillar to reach the higher northern side.
Do not spend time trying to open the inactive structures on the upper platform. From the elevated route, cross back toward the central high ground and use the eastern door into Mining Station Access. Roll through the short corridor and enter Mining Station A.
Three Pirate Troopers attack in the main chamber. Charged Power Beam shots are sufficient, so conserve missiles for environmental targets. Once the room is safe, climb the southern ledges, cross the central platforms and reach the translator door on the upper route. Follow the ledges around the sandfalls to the east side, where a fallen pillar creates access to the red blast shield leading to Temple Access.
- Topple both weakened pillars in Mining Plaza with missiles.
- Defeat the Pirate Troopers in Mining Station A.
- Use the fallen pillar and red blast shield to enter Temple Access.
Defeat the Alpha Sandigger and Bomb Guardian
Proceed through Temple Access and watch the ceiling for Shriekbats. Enter Agon Temple and drop into the central arena. The first phase is the Alpha Sandigger. Treat it like the Sandiggers in Mining Plaza: keep moving around the arena and fire at its exposed head sections. Scan it before defeating it if you want the creature entry, because the possession transition follows immediately.
After the Alpha Sandigger is damaged, the Ing takes control and the Bomb Guardian appears. Its tail is the vulnerable target. Fire at the tail until the Guardian is stunned and its head glows, then hit the head with a charged Power Beam shot. Missiles can help track the moving tail, but do not empty your reserve if your aim is steady with the Power Beam.
Keep circling rather than standing against the arena wall. The Guardian lays bombs behind itself and can spit several bombs forward, so move away from newly placed explosives before lining up the next tail shot. Repeat the tail-stun and charged-shot pattern until the boss falls. Collect Morph Ball Bombs from the arena afterward.
- Enter the Agon Temple arena.
- Defeat the Alpha Sandigger and Bomb Guardian.
- Collect Morph Ball Bombs after the fight.
Use Morph Ball Bombs to reach the Agon Energy Controller
The arena exit is now open through the north wall. Bomb the weakened section and enter Controller Access. Roll into the Morph Ball slot in the Luminoth mechanism, place a bomb to activate it, and continue through the opened passage. The camera angle changes while the mechanism operates, so follow the newly available path rather than trying to return through the sealed arena entrance.
In the Agon Energy Controller chamber, go behind the controller and examine the Luminoth hologram. This records the need for three keys to open the Dark Agon Temple and grants permission to read amber translator markings. The amber upgrade is the required progression reward from this Light Aether visit. It does not recover Agon’s regional energy; that objective happens after you continue through Dark Agon and reclaim energy there.
Read the nearby amber lore if desired, then return south through Controller Access and Agon Temple toward Mining Station A. You do not need to clear every newly visible side path before opening the portal route.
- Use Morph Ball Bombs in Controller Access.
- Reach the Agon Energy Controller.
- Receive amber translator access and the Dark Agon Temple objective information.
Collect optional nearby supplies
In Mining Station A, use the newly readable amber door on the upper route to enter Sand Cache. The Missile Expansion inside is optional but convenient, since it is directly on the return path from the controller. Leave Sand Cache and return to Mining Station A.
Mining Station Access contains an optional Energy Tank reached by bombing the breakable section in the corridor and using the Orb Cannon revealed below. If you can complete the cannon route safely, collect it before moving on; otherwise, it can be collected later. Portal Access A also contains an optional Missile Expansion behind a fallen Luminoth. The cannon route or a careful Morph Ball approach can reach it.
These supplies improve survivability and ammunition but are not prerequisites for the portal. Optional scan targets during this visit include Sandiggers, Pirate Troopers, Brizgees, Shriekbats and the Bomb Guardian. Scan them when convenient, but do not delay the required route for a complete log.
- Optionally collect the Sand Cache Missile Expansion.
- Optionally collect the Mining Station Access Energy Tank.
- Optionally collect the Portal Access A Missile Expansion and nearby creature scans.
Solve Portal Terminal and enter Dark Aether
From Mining Station A, take the lower exit to Portal Access A. Use the Morph Ball launcher and tunnel to cross the room. Continue into Portal Terminal and defeat the Pirate Troopers and Dark Pirate Troopers occupying the chamber.
Find the Bomb Slot near the portal apparatus and activate it. This starts the nearby conveyor mechanism. Roll into the Morph Ball track, bomb the barrier when you reach it, and enter the alcove beyond. Defeat or avoid the War Wasps, then use the newly positioned platform to cross to the opposite side. Repeat the conveyor and barrier process there. The final section requires navigating around Pillbugs while the machinery brings the last solar lens into alignment.
When all three lenses are aligned, scan the portal console. The portal activates and the game sends Samus through to Dark Agon. Save at Save Station A before beginning this sequence if you have not saved recently. Entering the portal is the endpoint of this chapter. The Agon regional-energy recovery continues in Dark Agon, where you will pursue the Dark Beam, Space Jump Boots, Dark Agon Temple keys, Amorbis and the energy transfer.
- Reach Portal Access A from Mining Station A.
- Defeat the Pirate and Dark Pirate Troopers in Portal Terminal.
- Activate the Bomb Slot and complete the conveyor, barrier and solar-lens puzzle.
- Scan the portal console and enter Dark Agon.
Before you move on
- Agon Wastes was entered from Temple Grounds.
- Mining Plaza and Mining Station A were crossed using the Missile Launcher on the required shields and weakened pillars.
- The Alpha Sandigger and Bomb Guardian were defeated in Agon Temple.
- Morph Ball Bombs were collected.
- The Agon Energy Controller was reached and amber translator access was granted.
- The optional supply rooms were either collected or deliberately skipped without blocking progress.
- Portal Access A and Portal Terminal were reached.
- The Portal Terminal conveyor, barrier and solar-lens mechanisms were completed.
- The portal console was scanned and Samus entered Dark Agon.
- The next chapter begins with Agon’s regional-energy objective still unfinished in Dark Agon.
References for this chapter
Agon Wastes (Dark Aether) — Surviving the Mirror and Bosses
Return from Dark Agon to Light Aether, cross the Pirate base, defeat the first Dark Samus encounter in Main Reactor, and collect the Dark Beam from Storage D. Re-enter Dark Agon through the Command Center route, defeat the Jump Guardian in Judgment Pit, and recover the Space Jump Boots. Collect the three Dark Agon Temple Keys in the verified locations: Key 1 in Trial Tunnel, Key 2 in Doomed Entry, and Key 3 in Battleground. Use the Light Beam from Ing Cache 1 to finish the Battleground route, open Dark Agon Temple, defeat Amorbis with Light Beam attacks and Morph Ball Bombs, and collect the Dark Suit. Finally, absorb Agon’s energy from the Dark Aether controller and deposit it at the matching Light Aether controller. Echo Visor and Dark Visor are later upgrades and are not obtained in Dark Agon.
Return to Light Aether and collect the Dark Beam
Chapter 03 leaves Samus in Dark Agon. Use the available portal to return to Light Aether, then follow the Pirate-base route through Command Center and its connected security rooms. Your target is Main Reactor, where the first Dark Samus encounter occurs.
Keep moving around Main Reactor rather than standing in the open. Dark Samus gives attack openings after completing a firing sequence or settling into a stationary position. Fire during those openings, then resume circling the arena. After the encounter, leave Main Reactor and follow the accessible route to Storage D. Collect the Dark Beam there.
The Dark Beam is obtained in Light Aether, not Dark Aether. It opens Dark Doors and activates dark crystals and dark lift mechanisms. Its ammunition is separate from the Power Beam reserve, so switch weapons when required instead of spending Dark Ammo unnecessarily.
- Return from Dark Agon to Light Aether.
- Reach Main Reactor through the Pirate base.
- Defeat the first Dark Samus encounter.
- Enter Storage D and collect the Dark Beam.
Re-enter Dark Agon and defeat the Jump Guardian
Return through the Command Center route to the Dark Agon portal. In Doomed Entry, use the Dark Beam on the dark lift mechanism and continue toward Judgment Pit. Keep Light Beacons energized as you cross Dark Aether, and use Save Stations before entering the guardian route when available.
The Jump Guardian has two important attacks. Its ranged barrage can be blocked by positioning behind the central crystal inside the protected area. When it leaps and lands, jump over the shockwave or move beyond its landing radius. The guardian cannot be damaged during portions of its leap and jump preparation, so wait for it to settle before firing.
Use missiles or charged shots during its exposed ground phases, then return to a defensive position. If the fight becomes unsafe, remain near the crystal’s protection and wait for the next opening rather than chasing the guardian across the arena.
Defeating the Jump Guardian awards the Space Jump Boots. This is the double-jump upgrade needed for the remaining Dark Agon platforms. It is distinct from the Dark Suit, which is awarded later by Amorbis.
- Reach Judgment Pit.
- Save before the guardian fight if possible.
- Defeat the Jump Guardian.
- Collect the Space Jump Boots.
Collect Dark Agon Temple Key 1 in Trial Tunnel
With the Space Jump Boots, climb out of Judgment Pit and use the upper route toward Dark Agon Temple. Enter the temple approach and follow the outer path to the left, using Light Beacons for protection while crossing exposed rooms.
Look for the blue door leading to Trial Tunnel. The room is small, and the Dark Agon Temple Key is immediately available inside. Collect it and return to Dark Agon Temple. This is Dark Agon Temple Key 1, despite the fact that the physical collection order can vary.
Do not attempt to enter the temple arena yet. The temple requires all three keys, so leave the gate unopened and continue to the Doomed Entry and Battleground routes.
- Reach the Dark Agon Temple approach.
- Follow the left-side outer path.
- Enter Trial Tunnel.
- Collect Dark Agon Temple Key 1.
- Return to the temple approach without entering the locked arena.
Collect Dark Agon Temple Key 2 in Doomed Entry
Return to Light Aether through the portal route and then use the Command Center portal to reach Doomed Entry in Dark Aether. The key is on an elevated ledge near the nullified crystal and lift mechanism.
Near the crystal, locate the Luminoth sculpture on the stone platform. Fire a missile at the sculpture or obstruction covering the mechanism, then use the Dark Beam on the dark switch behind it. The platform lowers, allowing you to jump onto it and use the Space Jump Boots to reach the upper ledge.
Collect Dark Agon Temple Key 2. The key is visible during the early return to Dark Agon, but the Dark Beam and Space Jump Boots are required to reach it by the normal route.
- Return to Doomed Entry after obtaining the Dark Beam and Space Jump Boots.
- Expose the lift mechanism near the nullified crystal.
- Lower the platform with the Dark Beam.
- Use the Space Jump Boots to reach the upper ledge.
- Collect Dark Agon Temple Key 2.
Reach Ing Cache 1 and collect the Light Beam
From Doomed Entry, continue through the route toward Oasis Access, Hall of Stairs, Phazon Site, and Watering Hole. Energize Beacons as you go so each exposed crossing has a protected position.
In Feeding Pit, use the Dark Beam on the dark lift crystals to lower the platforms. Cross them and enter the Dark Door leading to Ing Cache 1. Collect the Light Beam inside.
Use the Light Beam on the exit door. It energizes Light Beacons and Light Crystals, opens Light Doors, and is required for the route to Battleground. Its ammunition is separate from Dark Ammo, so select it deliberately and replenish from defeated enemies when possible.
- Follow the Doomed Entry route toward Feeding Pit.
- Lower the Feeding Pit platforms with the Dark Beam.
- Enter Ing Cache 1.
- Collect the Light Beam.
- Use the Light Beam to leave the cache.
Collect Dark Agon Temple Key 3 in Battleground
After obtaining the Light Beam, energize the nearby Beacon and return toward Doomed Entry. From the area behind the Key 2 platform, enter Double Path and take the upper route toward Battleground.
When you enter Battleground, the key is taken and several Warrior Ing attack. Energize the Beacons around the room and use their protected areas to control the fight. Light Beam shots are effective, but allowing an Ing to enter an energized field can also damage it. Keep moving between safe positions instead of remaining in the center while several enemies are active.
The Ing Webtrap that seals the exit appears during this encounter and can be scanned once if you are pursuing a complete logbook. It is not required for campaign completion. After all Warrior Ing are defeated, collect Dark Agon Temple Key 3.
Leave through the lower route. Darkling Tentacles obstruct the return passage in Double Path; shoot them with the Power Beam to make them retract long enough to pass.
- Use the Light Beam to return to Doomed Entry.
- Enter Double Path and take the upper route.
- Reach Battleground.
- Defeat the Warrior Ing group.
- Collect Dark Agon Temple Key 3.
- Clear the Darkling Tentacles with Power Beam shots.
Open Dark Agon Temple and defeat Amorbis
Return to the Dark Agon Temple with all three keys: Key 1 from Trial Tunnel, Key 2 from Doomed Entry, and Key 3 from Battleground. Insert them at the temple locks, save nearby if possible, and refill in the protected area before entering the arena.
Amorbis attacks by burrowing through the arena and diving back into the ground. Track the worms with the radar and avoid their impact landings. When a worm exposes its head, damage it with the Light Beam. After enough damage, it attaches to the central Dark Sphere and exposes its mouth.
Switch to Morph Ball form and let the vacuum pull Samus toward the exposed mouth. Drop a Morph Ball Bomb inside to damage the boss. The fight progresses through groups of one, two, and three worms. Move between active Safe Zones whenever a worm disrupts your protection, and use pickups between attack cycles rather than crossing the arena without cover.
Repeat the Light Beam damage and Morph Ball Bomb sequence for each exposed worm. After the final successful bomb attack, collect the Dark Suit. Amorbis awards the Dark Suit; it does not award the Space Jump Boots, which came from the Jump Guardian.
- Insert Dark Agon Temple Keys 1, 2, and 3.
- Save and refill before the arena if possible.
- Damage exposed Amorbis heads with the Light Beam.
- Use Morph Ball Bombs inside the exposed mouths.
- Defeat Amorbis.
- Collect the Dark Suit.
Recover Agon’s energy and complete the regional transfer
After collecting the Dark Suit, leave the arena through the temple route and enter the Dark Agon Energy Controller area. At the controller interface, use the Energy Transfer Module to absorb the stored energy. This completes the recovery step in Dark Aether, but the regional objective is not complete until the energy reaches the Light Aether controller.
Return through the portal to Light Aether and follow the Agon route to the Light Agon Energy Controller. Enter its controller access area and use the interface to deposit the recovered energy. Confirm the transfer before leaving.
The chapter is complete when the Dark Beam and Light Beam are collected, the Jump Guardian and Amorbis are defeated, the Space Jump Boots and Dark Suit are in Samus’s inventory, all three Dark Agon Temple Keys have been used, and Agon’s energy has been deposited in Light Aether. Echo Visor and Dark Visor are obtained later in the campaign.
- Absorb energy from the Dark Agon Energy Controller.
- Return to Light Aether.
- Reach the Light Agon Energy Controller.
- Deposit Agon’s recovered energy.
- Confirm the Space Jump Boots and Dark Suit are obtained.
- Confirm the route onward toward Torvus Bog is available.
Before you move on
- Dark Beam collected in Storage D.
- Light Beam collected in Ing Cache 1.
- Jump Guardian defeated in Judgment Pit.
- Space Jump Boots in Samus’s inventory.
- Dark Agon Temple Key 1 collected in Trial Tunnel.
- Dark Agon Temple Key 2 collected in Doomed Entry.
- Dark Agon Temple Key 3 collected in Battleground.
- All three keys inserted at Dark Agon Temple.
- Amorbis defeated.
- Dark Suit in Samus’s inventory.
- Energy absorbed from the Dark Agon Energy Controller.
- Energy deposited at the Light Agon Energy Controller.
- Route toward Torvus Bog available.
References for this chapter
- Metroid Prime 2: Echoes Guide and Walkthrough — DeuceExDefcon, GameFAQs
- Metroid Prime 2: Echoes — Guide and Walkthrough, GameFAQs, final boss route
- Metroid Prime 2: Echoes Walkthrough — Dark Temple Keys, Omega Metroid
- Metroid Prime 2: Echoes Walkthrough, GameSpot
- Metroid Prime 2: Echoes — Dark Suit, StrategyWiki
- Metroid Prime 2: Echoes — Official Instruction Manual
Torvus Bog (Light Aether) — Traversal, Water Hazards and Major Upgrades
Light Torvus Bog’s required route runs from Torvus Temple through Hydrodynamo Station to the Gravity Boost in Main Hydrochamber. Before the upgrade, deep water restricts movement, so use platforms, elevated walkways and doors as route markers instead of attempting jumps that require underwater mobility. Open the Hydrodynamo locks by working between Light and Dark Aether, then descend for Gravity Boost and defeat Alpha Blogg. After the boss, use the new underwater movement to climb back through Hydrodynamo Shaft and activate the Catacombs mechanism that opens the portal toward Dark Torvus. This chapter ends before the Dark Torvus temple-key sequence; no Dark Torvus key is required for the Light-world objectives here.
Enter Light Torvus Bog and establish landmarks
Take the elevator from Temple Grounds into Torvus Bog and follow the connected paths toward Torvus Grove. The Grove’s large tree, waterfalls, elevated walkways and colored doors make it the region’s most useful reference point. Several ledges and side passages are inaccessible until Samus has later upgrades, so do not spend time forcing every jump during this visit.
Continue through the Bog to Torvus Temple. Use the temple and its elevator connections as route anchors. The required water objective begins in the temple’s lower section, where the alternate green hatch leads to Underground Transport and then Hydrodynamo Station. Scan aquatic enemies, Luminoth machinery and lore if desired, but optional expansions can wait until Gravity Boost makes the submerged routes easier.
- Reach Torvus Grove and identify its tree, waterfalls and raised walkways.
- Enter Torvus Temple through the normal Light-Aether route.
- Locate the lower green hatch leading toward Underground Transport.
- Use the nearest available Save Station before beginning the Hydrodynamo sequence.
Reach Hydrodynamo Station and manage the early water rooms
Enter Hydrodynamo Station and move carefully around the flooded lower chamber. Before Gravity Boost, Samus is slow and limited in deep water, so begin from solid platforms and keep the next ledge or door visible. Bloggs can knock Samus away from safe footing; defeat them from a platform when practical rather than chasing them through the pool.
Scan the red access module beneath the platform near the purple door, then use the Morph Ball launcher in the central area to reach the upper section. A Save Station is available along this route. Continue through the connected rooms and follow the station machinery toward the first accessible lock. If a ledge seems impossible, look for a portal, launcher or nearby platform instead of repeatedly attempting the jump; the intended route does not require normal underwater movement yet.
- Scan the first accessible Hydrodynamo red access module.
- Use the central Morph Ball launcher to reach the upper station route.
- Avoid prolonged fights in deep water when a platform provides a safer position.
- Save before committing to the Light/Dark puzzle sequence.
Complete the three Hydrodynamo locks
Continue through the station until the route sends you through a portal into the Dark Aether version of the lower area. In the mirrored chamber, defeat or bypass the Dark Pirate Commandos and reach the device projecting the Luminoth laser. Stand beneath it and operate the spinner until the laser points toward the opposite wall. This changes the corresponding Light-Aether machinery and creates the route to the final lock.
Return through the portal to Light Aether. Use the newly aligned route and the Kinetic Cannon to reach the remaining station section. Scan the final red access module. When all three locks have been released, the central mechanism rises and opens the path down into Hydrodynamo Shaft. Return to the Save Station before descending if your Energy or ammunition is low; after the final lock, the upper route is less convenient to revisit.
- Reach the Dark-Aether mirrored machinery chamber.
- Operate the spinner beneath the Luminoth laser.
- Return to Light Aether and use the Kinetic Cannon route.
- Scan the final red access module.
- Confirm that the central Hydrodynamo mechanism has opened the lower passage.
- Save before descending toward Main Hydrochamber.
Collect Gravity Boost in Main Hydrochamber
Drop through Hydrodynamo Shaft, using the lower creatures as an opportunity to recover Energy or ammunition if needed. At the bottom, enter Main Hydrochamber and take the lower door into Hydrochamber Storage. The Gravity Boost is inside. It removes the severe underwater movement restriction, improves underwater visibility and permits an additional upward burst after a Space Jump while submerged. The upgrade is required for the return climb and for later Torvus routes.
Scan Alpha Blogg through the viewing barrier in Hydrodynamo Shaft if you want its creature entry before the fight. After collecting Gravity Boost, prepare for the boss encounter in Main Hydrochamber rather than trying to leave immediately; the boss appears as Samus exits the upgrade room.
- Descend through Hydrodynamo Shaft to Main Hydrochamber.
- Enter Hydrochamber Storage and collect Gravity Boost.
- Scan Alpha Blogg before the fight if you want its logbook entry.
- Confirm that underwater movement and upward boosting now work.
Defeat Alpha Blogg safely
Alpha Blogg’s vulnerable target is its mouth. Keep space between Samus and the creature, watch for the water projectile, and sidestep rather than backing into the arena wall. It commonly follows the projectile with a charge. Dodge the charge so Alpha Blogg reaches or passes the wall, then fire when its mouth opens. Charged shots are useful for consistent damage; missiles or a Super Missile can shorten the fight, but do not spend ammunition carelessly if your reserves are low.
If the creature closes distance, prioritize surviving the charge over forcing a shot. The arena’s water movement is manageable after Gravity Boost, so use the underwater burst to reposition and keep the boss in view. Once Alpha Blogg is defeated, the machinery changes and the upward route becomes usable. Climb through the room using the slowed turbine and the underwater upward boost, then return to Hydrodynamo Shaft and save at the station area.
- Avoid the water projectile and the follow-up charge.
- Fire at Alpha Blogg only when its mouth is open.
- Use charged shots or missiles during reliable openings.
- Climb out through the changed turbine route after victory.
- Save in the upper Hydrodynamo area after the fight.
Open the Catacombs portal and prepare for Dark Torvus
From the lower Hydrodynamo Shaft area, use Gravity Boost to reach the higher ledge and portal that was inaccessible before the upgrade. This begins the Dark Torvus transition, but the Light Torvus chapter does not require collecting or assigning a temple key here. If you enter Dark Aether while damaged, return through the portal and restore supplies before continuing the next chapter. Do not confuse this route with the later Power Bomb detour.
Return to Light Aether and travel to the Catacombs. Enter the water and locate the Morph Ball slot that was previously out of reach. Activate it to lower the gate above and expose the portal. The newly opened portal is the required continuation toward Dark Torvus and the Grapple Beam sequence; the Grapple Beam itself is not obtained in Light Torvus.
After the required portal is open, optional underwater tube puzzles can be revisited for expansions. These use Morph Ball bomb jumps and airflow changes, but they are not prerequisites for Gravity Boost, Alpha Blogg or the Dark Torvus transition. Restock at a Light-Aether Save Station before entering the portal.
- Use Gravity Boost to reach the upper Hydrodynamo portal route.
- Return safely to Light Aether if supplies are low.
- Travel to the Catacombs.
- Activate the previously unreachable underwater Morph Ball slot.
- Confirm that the Catacombs portal is exposed.
- Restore Energy and ammunition before entering Dark Torvus.
Before you move on
- Gravity Boost has been collected from Hydrochamber Storage.
- Alpha Blogg has been defeated in Main Hydrochamber.
- Samus can climb out of the flooded Hydrodynamo route using the underwater upward boost.
- All three Hydrodynamo Station locks have been released.
- The upper Hydrodynamo route has been reached after the boss.
- The Catacombs underwater Morph Ball slot has been activated.
- The portal toward Dark Torvus is exposed.
- A Light-Aether Save Station has been used before the transition.
- No Dark Torvus temple key is being counted as a Light Torvus objective.
References for this chapter
Torvus Bog (Dark Aether) — Safe Zones, Bosses and Hidden Paths
Complete Dark Torvus in linked visits. First defeat the Boost Guardian, recover the Boost Ball and claim Dark Torvus Temple Key 1. Use the already-completed Gravity Boost route to collect Key 2, then make the required Seeker Launcher detour through the Dark Forgotten Bridge route and the Hall of Honored Dead. With the Seeker Launcher, reach the Grapple Guardian, recover the Grapple Beam, claim Key 3 and open the Dark Torvus Temple. Defeat Chykka through its larva, adult and Dark forms, obtain the Dark Visor, reclaim Dark Torvus energy and deposit it at the Light Torvus Energy Controller. Light Beacons create temporary Safe Zones; Save Stations are the only permanent save points. Retreat through a Light Portal to resupply whenever your Energy, missiles or beam ammunition are too low.
Defeat the Boost Guardian and collect Dark Torvus Temple Key 1
Enter Dark Torvus through the portal opened during the Torvus progression. Follow Gloom Vista, Polluted Mire and Dark Falls toward Dark Forgotten Bridge. Use the Save Station in Dark Falls before crossing the bridge and entering Dark Arena Tunnel. The tunnel leads to Dark Torvus Arena, where a Light Beacon provides the safest immediate Energy refill before the fight.
Enter the circular arena to face the Boost Guardian. In its solid Ing form, use charged Light Beam shots or Super Missiles. When it changes into a fast rolling form, stay mobile and watch its path rather than chasing it. If it crashes into one of the arena pillars, it becomes vulnerable to Morph Ball Bombs while it trails through the room in liquid form. Inglets can provide recovery and beam ammunition; use the Dark Beam against them when you need Light ammunition.
After the guardian is defeated, collect the Boost Ball. Return to the half-pipe in Dark Torvus Arena and repeatedly boost up the wall beneath the visible key. Charge another boost as you descend and release it at the bottom of the half-pipe to gain enough height. Collect Dark Torvus Temple Key 1, then use the Save Station in Dark Falls and return through the Light Portal.
- Refill in the Dark Torvus Arena Safe Zone before entering the boss room.
- Use charged Light Beam shots or Super Missiles in the guardian’s solid form.
- Use Morph Ball Bombs when the guardian becomes vulnerable in liquid form.
- Collect the Boost Ball and Dark Torvus Temple Key 1 before leaving.
Use the completed Gravity Boost route to obtain Dark Torvus Temple Key 2
The Gravity Boost and Alpha Blogg objectives are already complete. Do not repeat them. Return to the lower Torvus route and travel to Hydrodynamo Shaft. Use Gravity Boost to reach the elevated cylindrical ledge near the Main Hydrochamber route, then enter the Dark Portal.
The portal leads to Undertemple Access in Dark Torvus. Dark Torvus Temple Key 2 is waiting on the ledge immediately beyond the portal. Collect it, then return through the same portal instead of attempting to push farther through the lower Dark Torvus route. Use the Light Aether side to recover Energy and ammunition before the next detour.
- Begin from the completed Gravity Boost and Alpha Blogg route.
- Reach the portal in Hydrodynamo Shaft with Gravity Boost.
- Collect Dark Torvus Temple Key 2 in Undertemple Access.
- Return to Light Aether if supplies are low.
Take the Dark Forgotten Bridge route to the Seeker Launcher
From Light Aether, return to Temple Grounds and travel to Meeting Grounds. Use the large half-pipe to enter the Morph Ball tunnel leading through Service Access and Path of Honor. This route emerges in the Hall of Honored Dead, the room directly beneath the Great Temple. The Seeker Launcher is enclosed in the energy cage at the center.
Solve the four-spinner lock by working from the inner ring outward. Use the red Spinner to align the innermost ring, then the yellow Spinner for the next ring, the blue Spinner for the third ring and the purple Spinner for the outer rings. Each Spinner affects two adjacent rings, so changing a later Spinner should not require restarting the earlier aligned rings if you work in that order. When all five rings glow correctly, the cage opens and you can collect the Seeker Launcher.
Use the Seeker Launcher on the five purple targets surrounding the Purple Blast Shield to leave the Hall of Honored Dead. Continue through Path of Honor and Service Access, then return to Torvus Bog. This detour is required progression, not an optional upgrade: the launcher is needed for the remaining Dark Torvus key route and the Chykka encounter.
- Reach Hall of Honored Dead through the Meeting Grounds half-pipe route.
- Align the five rings with the red, yellow, blue and purple Spinners.
- Collect the Seeker Launcher from the opened central cage.
- Use a five-target Seeker volley to open the Purple Blast Shield.
Reach the Grapple Guardian and recover the Grapple Beam
Return through the Dark Forgotten Bridge portal and follow the newly opened route through Brooding Ground to Venomous Pond. From there, use the lower Dark Torvus route toward Portal Chamber and Poisoned Bog, then continue through the portal and Crypt to the lower Undertemple Shaft. In the shaft, use the Save Station at the top if needed. Drop to the central cage, activate the Bomb Slot and rotate the cage until the walkway connects to the door leading to Sacrificial Chamber.
Use the Ingsphere Caches in the connecting tunnel to refill Energy, missiles and Light ammunition. Cross the Venom Weed quickly and enter the upper Sacrificial Chamber to fight the Grapple Guardian, an Ing-possessed Grenchler. Keep your distance from its charges and bites. If its Grapple Beam catches Samus, shoot its eye to break free.
The guardian’s normal damage point is the rear shell. During its Grapple Beam attack, position it so the beam catches one of the bright power generators. It will become fixed to the generator, letting you move behind it and attack the shell with the Light Beam or missiles. After the shell breaks, the rear is protected by Grapple energy. Shoot the eye to stun the guardian, then use the brief opening to damage its exposed body. Repeat the eye-stun and rear-attack cycle until it is defeated. Collect the Grapple Beam and use the Grapple Point above the room to leave.
- Use the Bomb Slot in Undertemple Shaft to connect the guardian route.
- Refill at the Ingsphere Caches before entering Sacrificial Chamber.
- Shoot the eye to escape or stun the Grapple Guardian.
- Use a generator to hold it in place, then attack the exposed rear shell.
- Collect the Grapple Beam.
Collect Dark Torvus Temple Key 3 and defeat Chykka
Return to Venomous Pond through the Light Portal route. Use the Morph Ball tunnel on the ledge near the Light Crystal to reach the ledge opposite the visible key. Grapple across the hook in the center of the room and collect Dark Torvus Temple Key 3. Save at the nearby station, use the Ammo Station in Dark Torvus Temple access, and confirm that all three keys are in the inventory before entering the temple.
Place the three keys in the temple mechanism and ride the rising platform into the arena. Use the Seeker Launcher to target all four cocoon supports at once. During the larva phase, watch the radar for Chykka’s reappearance, jump over its acid splash and fire Light Beam or Power Beam shots at its exposed belly. Destroy Dark Shredders with the Dark Beam when you need Light ammunition.
The adult Chykka is vulnerable to Dark Beam or Power Beam fire for staggering. When it turns and exposes the four red wing targets, use Grapple Points to reach a safe attack position, charge the Seeker Launcher and hit all four targets together. Repeat the stun and four-target sequence until the adult falls into the toxic water.
Dark Chykka’s enlarged eggsac is the weak point. Use the Light Beam against it and destroy Chyklings when you need ammunition or Energy. The fight alternates between adult and Dark forms before the final Dark Chykka phase. After the boss dies, collect the Dark Visor and use it to reveal the invisible platforms leading to the Dark Torvus Energy Controller.
Reclaim the energy at the Dark Torvus Energy Controller, then return to Light Aether through the portal at Dark Forgotten Bridge. Travel to the Light Torvus Energy Controller and deposit the recovered energy. Only this completed transfer finishes the Torvus regional objective.
- Collect Dark Torvus Temple Key 3 with the Grapple Beam.
- Enter the temple with Keys 1, 2 and 3.
- Destroy all four cocoon supports with the Seeker Launcher.
- Defeat Chykka Larva, adult Chykka and Dark Chykka.
- Collect the Dark Visor and use it to reach the Dark Torvus Energy Controller.
- Deposit the recovered energy at the Light Torvus Energy Controller.
Before you move on
- Boost Guardian is defeated and Boost Ball is recovered.
- Dark Torvus Temple Keys 1, 2 and 3 are in the inventory.
- Seeker Launcher is recovered from Hall of Honored Dead.
- Grapple Guardian is defeated and Grapple Beam is recovered.
- Chykka is defeated through its required forms.
- Dark Visor is collected and used to reach the Dark Torvus Energy Controller.
- Dark Torvus energy is reclaimed and deposited at the Light Torvus Energy Controller.
- Samus has returned to Light Aether and can proceed toward Sanctuary Fortress.
Sanctuary Fortress (Light Aether) — Luminoth Zones and Temple Access
Make the first Sanctuary Fortress visit, defeat the Spider Guardian in Dynamo Works, and collect Spider Ball. The destroyed bridge then forces a retreat through Temple Grounds and Torvus Bog. Use the Spider Ball track in Main Hydrochamber to enter Dark Torvus’s Undertemple, defeat the Power Bomb Guardian, and claim the Power Bomb upgrade. Return through Torvus and Temple Grounds to Sanctuary Entrance, use a Power Bomb to reach the control panel, activate the Morph Ball cannon, and operate the fortress turret to clear the cracked obstructions around the entrance. Stop there: the next chapter begins with the reopened Sanctuary Fortress route and the later Dark Samus encounter.
Enter Sanctuary Fortress and establish the first route
From Temple Grounds, use the transport leading to Sanctuary Fortress. Proceed through Fortress Transport Access and enter Sanctuary Entrance. The first visit introduces the fortress’s elevated bridges, turrets, rotating machinery and Morph Ball passages. Clear hostile machines before crossing narrow platforms, but do not waste time testing doors that clearly require a later beam, visor or explosive upgrade.
Continue toward the interior rooms until the route brings you to the large machinery complex. The nearby Save Station is a useful recovery point for the return trip, but the first mandatory objective is deeper inside the fortress. The Sanctuary Energy Controller and the later Ing Hive route are not part of this visit. Your immediate target is Dynamo Works and the Spider Guardian.
- Reach Sanctuary Entrance from Temple Grounds.
- Locate the nearby Save Station before entering the longer machinery route.
- Treat sealed Power Bomb doors and inaccessible high ledges as later objectives.
Reach Dynamo Works and defeat the Spider Guardian
Follow the accessible Light Aether route through the fortress machinery until you enter Dynamo Works. The Spider Guardian fight takes place across several Morph Ball rooms rather than in a single conventional arena. Scan the guardian before damaging it if you want its creature entry; the battle is still completable without making optional scans.
The guardian follows the Spider Ball track around each room. Use Morph Ball bombs to stun it as it approaches, then move ahead of it and activate the exposed Bomb Slot before it recovers. In the early rooms, concentrate on staying ahead of the guardian instead of trying to damage it repeatedly. The final room contains multiple Bomb Slots, so use the track network and short bomb jumps to reach each one while avoiding the guardian’s contact damage and electrical aura. If you miss a timing, retreat along the track, wait for a safe opening and stun it again rather than forcing a jump.
After the final electrical gate is triggered, follow the passage and collect Spider Ball. This ability lets Samus attach to the marked wall and ceiling tracks found throughout the fortress. Use the newly opened track immediately to leave the guardian’s area and return toward the main fortress route. Spider Ball is the required reward here; do not confuse it with the Power Bomb obtained later in Dark Torvus.
- Enter Dynamo Works.
- Defeat the Spider Guardian by using bombs to create stun windows and activating the Bomb Slots.
- Collect Spider Ball.
- Use the nearby Spider Ball route to leave the guardian area.
Leave the Fortress and reach Dark Torvus’s Undertemple
Continue toward Sanctuary Entrance. During this return, the fortress bridge is destroyed, but the nearby Spider Ball track and Boost Ball jump allow you to cross the gap. Follow the exit route to Temple Grounds. The game now requires a detour to Torvus Bog before the Fortress entrance can be reopened.
Travel through Temple Grounds and Torvus Bog to the Main Hydrochamber, the room used for the Alpha Blogg battle. From the Main Hydrochamber, look for the elevated Spider Ball track on the back wall. Follow it to the Dark Aether portal. Save before entering if possible, because the portal leads directly to the Power Bomb Guardian encounter in Dark Torvus’s Undertemple.
In Dark Aether, enter the Undertemple and scan the Power Bomb Guardian before beginning the fight if you want its logbook entry. The guardian cannot be defeated by ordinary beam fire. Its four Bomb Slots are distributed around the upper Spider Ball track network, and each must be activated with a Morph Ball bomb.
- Cross the damaged Sanctuary Fortress bridge using Spider Ball and Boost Ball.
- Return through Temple Grounds and Torvus Bog to Main Hydrochamber.
- Use the elevated Spider Ball track to enter Dark Torvus’s Undertemple.
- Save before the Power Bomb Guardian if a Save Station is available.
Defeat the Power Bomb Guardian and collect the upgrade
Use the Spider Ball tracks in the Undertemple to reach the four Bomb Slots. The guardian launches explosive attacks from the central structure and may summon smaller enemies, so avoid moving while an incoming blast is about to cross your track. If you are knocked off, recover on the lower track and wait for the guardian’s attack to pass before climbing again.
The rear Bomb Slots are harder to reach and are useful targets to activate early, but there is no requirement to follow a particular order. Use bomb jumps to move between separated track sections, and use the Control Stick to brake or reposition before jumping. The guardian’s own explosives can push Samus off the track, so patience is safer than rushing toward the next slot. Once all four slots have been activated, the central bridge collapses onto the guardian.
After the fight, follow the Spider Ball track to the top of the collapsed bridge and collect the Power Bomb upgrade. This is the permanent Power Bomb ability, not a capacity expansion. In Morph Ball form, it lets Samus place Power Bombs and open yellow blast doors or destroy Denzium barriers. The route back requires careful ammunition management because the original GameCube campaign provides limited Power Bomb ammunition at this stage.
- Activate all four Bomb Slots in the Undertemple.
- Defeat the Power Bomb Guardian.
- Collect the Power Bomb upgrade from the top of the collapsed bridge.
- Do not confuse this upgrade with optional Power Bomb expansions.
Return to Sanctuary Entrance and activate the turret route
Leave the Undertemple through the Dark Aether route and return to Light Aether in Torvus Bog. Follow the facility back toward Main Hydrochamber and the Torvus exit. If your energy or ammunition is low, use available Light Aether enemies and Save Stations to recover before continuing the long return through Torvus and Temple Grounds.
At Sanctuary Entrance, approach the area beside the main fortress entrance where the newly available Power Bomb route is located. Use a Power Bomb on the cracked glass or barrier, then drop through and use another Power Bomb on the small device inside the half-pipe area. This drains the water and exposes the Boost Ball and Spider Ball route needed to reach the control mechanism.
Follow the exposed Spider Ball track and use the nearby Morph Ball cannon. The cannon launches Samus to the central tower. Climb the tower and enter the turret at its top. Fire on the cracked structures around the entrance, including the obstructions across the bridge and the damaged surfaces beside the fortress doorway. Clear every required cracked obstruction before leaving; this activates the route that will be used for the next Sanctuary Fortress progression.
- Return from Undertemple to Light Aether and travel back through Torvus and Temple Grounds.
- Use Power Bombs to open the cracked entrance route and drain the half-pipe area.
- Activate the Morph Ball cannon.
- Use the central turret to destroy the cracked structures around Sanctuary Entrance.
End the chapter at the reopened Fortress entrance
After the turret work is complete, return to the fortress entrance and confirm that the newly opened passage can be reached from the bridge and entrance machinery. Save at the Light Aether station before proceeding farther if you have not already done so.
Stop the chapter here. The reopened route leads to the later Dark Samus encounter, Echo Visor, Screw Attack, Ing Hive Temple Keys and Quadraxis progression, but none of those objectives belongs to this chapter. The next section should begin from this activated entrance route, with Spider Ball and Power Bombs already in Samus’s inventory.
- The entrance turret route is active.
- The cracked bridge and entrance obstructions have been destroyed.
- Spider Ball and Power Bombs are in the inventory.
- A Light Aether save is available before beginning the next Sanctuary Fortress section.
Before you move on
- The Spider Guardian in Dynamo Works is defeated.
- Spider Ball is collected and usable on the fortress tracks.
- The Power Bomb Guardian in Dark Torvus’s Undertemple is defeated.
- The permanent Power Bomb upgrade is collected.
- The Sanctuary Entrance Power Bomb route is opened, the Morph Ball cannon is activated and the entrance turret has destroyed the required cracked structures.
- The player can save in Light Aether and resume from the reopened Sanctuary Fortress route without having started the later Dark Samus and Ing Hive objectives.
References for this chapter
Sanctuary Fortress (Dark Aether / The Hive) — Infiltrate the Ing Hive
Begin after the Power Bomb entrance machinery has reopened Sanctuary Fortress. Reach Aerie through the newly accessible Fortress route, defeat the second Dark Samus encounter and collect the Echo Visor. Use the Echo Visor to clear the sonic locks, then solve the cross-world Vault machinery in Sanctuary Fortress to obtain the Screw Attack. With Screw Attack available, defeat the Caretaker Class Drone, collect the three Ing Hive Temple Keys from Culling Chamber, Aerial Training Site and Hive Gyro Chamber, and open Hive Temple. Defeat Quadraxis to obtain the Annihilator Beam. Use it to reach the Hive Energy Controller, reclaim Sanctuary Fortress’s energy and deposit it at the Light Aether controller. This restores the regional energy but does not open Sky Temple Gateway.
Enter the reopened Sanctuary Fortress route
Begin on the Light Aether side after the Power Bomb entrance machinery has been restored. From Transport to Torvus Bog, pass through Torvus Transport Access into Main Research. Defeat the Quads only if they obstruct the route. The required exit is the eastern Spider Ball track; nearby Missile expansions are optional.
Continue through Transit Station and Hive Portal Chamber. Use a Power Bomb on the damaged wall to reveal the portal, cross into Dark Aether and defeat the Dark Ingsmasher with Light Beam fire. Follow the Morph Ball tunnel and portal sequence to the elevated Spider Ball route. The Power Bomb Expansion in this section is optional; leave through the eastern Yellow Blast Shield door.
Proceed through Reactor Core to Sanctuary Entrance. Use the Power Bomb-cleared machinery, Orb Cannon and Vigilance Turret route to reach the upper path. Continue toward Main Gyro Chamber. There, use a Power Bomb to expose the first Bomb Slot, operate the ring machinery and use the Spider Ball track to reach the next Yellow Blast Shield. The resulting path leads to Checkpoint Station and the Aerie encounter.
- The Power Bomb entrance route is already open.
- Main Research, Transit Station and Reactor Core have been passed.
- You have reached the Checkpoint Station approach.
- Spider Ball and Power Bombs are available.
Defeat Dark Samus and obtain the Echo Visor
At Checkpoint Station, open the moving doors and follow the elevator route into Aerie. Dark Samus attacks in the elevator and upper Aerie sections. Keep moving around the arena, avoid firing during her invulnerable transitions and punish her after a completed attack. Her Boost Ball charge is especially dangerous in the confined elevator area.
When Dark Samus activates her stealth effect, switch to the Dark Visor to keep her visible. Missiles or Super Missiles are effective during clear openings, but do not spend ammunition recklessly because Quadraxis follows later. Dodge the beam, missile and close-range attacks rather than trying to trade damage.
After the fight, follow the ledge outside Aerie to the Dark portal. In Hive Summit, use the Spider Ball track and Spinner to align the route, then cross to the portal back to Light Aether. Collect the Echo Visor from the ledge in Aerie. Use it to reveal and destroy the three sonic emitters holding the elevator.
Return through Aerie Access to Checkpoint Station. The small sonic-emitting drone sealing the route is visible through the Echo Visor; destroy it. Continue to Main Research and use the Echo Visor on the sonic emitters there. These locks must be cleared before the route through the Vault can be completed. The Dark Samus encounter and Echo Visor order is fixed in the original GameCube campaign.
- The second Dark Samus encounter in Aerie is defeated.
- The Echo Visor is collected.
- The Aerie elevator sonic emitters are destroyed.
- The Checkpoint Station sonic drone is destroyed.
- The required Main Research sonic locks are cleared.
Solve the Sanctuary Fortress Vault and obtain Screw Attack
From Main Research, return through the Fortress route toward Reactor Core and Transit Station, then continue through the connected portal path to Grand Abyss. Enter the Vault and pass the imprisoned Screw Attack item for now; the cage cannot yet be opened. Drop to the lower section and activate the Bomb Slot behind the cage to start the Vault’s laser puzzle.
Use the portal route between Light and Dark Aether to reach the four Spinner platforms around the Vault. Dark Aether provides the necessary access to the opposite side of the room, while the Light Aether platforms contain the Spinners. Defeat or avoid the Rezbits while working, because their electrical interference can knock Samus from the narrow platforms.
Operate all four Spinners so the laser platforms are aligned with the central machinery. The exact visual arrangement is more reliable than trying to memorize a directional sequence: each platform must lock into the position that lets its laser pass through the Vault mechanism. Once all four are aligned, return through the portals to the Bomb Slot behind the cage and activate it again.
The cage opens and Screw Attack is awarded. Use the new horizontal Screw Attack jumps to leave the Vault and cross Grand Abyss. On the GameCube controls, continue pressing the jump attack button after the Space Jump, spacing the presses so Samus glides across the gap instead of losing height immediately. Screw Attack is primarily a traversal tool here; it is now required for later Hive routes and the Aerial Training Site key. The Vault’s four-Spinner and portal procedure is documented in multiple original-release walkthroughs.
- The Vault’s four laser platforms are aligned.
- The Bomb Slot behind the Screw Attack cage has been activated a second time.
- Screw Attack is in the inventory.
- You have crossed Grand Abyss using Screw Attack.
Defeat the Caretaker Class Drone
Return to Main Research and take the Dark portal into the Ing Hive. Continue to Staging Area, defeat the Hunter Ing if they obstruct the console and use the Echo Visor to destroy the room’s sonic emitters. Activate the console behind the opened barrier to change the floor arrangement, then roll under the central structure and use the portal back to Main Research.
In Main Research, use the Spider Ball track and Bomb Jump route to reach the upper rail system. The Caretaker Class Drone attacks while Samus is confined to the rails. Its arms sweep across the tracks, and falling to the electrified floor causes heavy damage, so remain attached whenever possible.
Boost through the red sensors when they lower into reach. After the exposed sensors are destroyed, the central sensor appears briefly; hit it with a Boost before it retracts. The fight moves through successive rail levels, with less room to recover on the higher sections. Wait for the arms to clear the track instead of forcing a Boost through them.
After the Caretaker is destroyed, leave by the upper route and continue toward Central Area Transport West. Use a Save Station or nearby ammunition source before beginning the key collection if your supplies are low.
- The Staging Area console is activated.
- The Caretaker Class Drone is defeated on the Main Research rails.
- The route beyond Main Research is open.
- You have recovered supplies before the Ing Hive key hunt.
Collect the first Ing Hive Temple Key in Culling Chamber
Follow Central Area Transport West and the connected portal route into the Ing Hive. Enter Culling Chamber and use the red Spider Ball track to reach the enclosed key area. Bomb obstructions from the track, then roll through the opening and collect the Ing Hive Temple Key in the chamber.
Return through the portal route after taking the key. Nearby expansion paths are optional. The room name is the useful landmark because walkthroughs may describe the key’s inventory number differently.
- The Culling Chamber Ing Hive Temple Key is collected.
- You have returned to the main portal route.
Collect the second and third Ing Hive Temple Keys
From the Staging Area side, use the upper route to Central Hive West Transport. In the vertical passage, use Screw Attack and the wall-jump surfaces to climb into Aerial Training Site. Follow the wall-jump route to the key and collect the Ing Hive Temple Key there. The nearby Missile Expansion is optional.
Return to Watch Station and continue to Dynamo Works. Take the Dark portal into Hive Dynamo Works, then use the Echo Visor to disable the sonic emitters in Hive Dynamo Access. Enter Hive Gyro Chamber and use the nearby Save Station and Ammo Station before continuing.
Attach to the large magnetic sphere and ride it upward. At the top, follow the Spider Ball track to the ring structure, then Boost from the track into the chamber containing the third Ing Hive Temple Key. If you miss the landing, return to the lower platform and climb the sphere again; do not attempt to recover from the Dark Aether floor.
The Aerial Training Site route specifically requires Screw Attack, so do not attempt this key sequence before completing the Vault.
- The Aerial Training Site Ing Hive Temple Key is collected.
- The Hive Gyro Chamber Ing Hive Temple Key is collected.
- All three Ing Hive Temple Keys are in the inventory.
- The nearby Save Station and Ammo Station have been used if needed.
Open Hive Temple and defeat Quadraxis
From Hive Gyro Chamber, take the upper route to Hive Temple Access and deposit all three Ing Hive Temple Keys. Enter Hive Temple and descend to the Quadraxis arena. There is no ordinary Light Aether Safe Zone inside the arena, so enter with a comfortable Energy reserve and enough missiles for repeated vulnerable windows. Quadraxis also produces recovery pickups during the encounter.
In the opening phase, target the glowing knee joints when they become vulnerable. Bomb or Boost the glowing modules at the feet when safe, especially if you need to remove the shockwave threat or collect recovery items. Stay near one leg when possible, watch for stomps and shockwaves, and avoid standing beneath the machine during its larger attacks.
When the head separates, switch to the Echo Visor and locate the sonic transmitter on the main body. Damage it to interrupt the link and expose the head’s antenna targets. Use the Echo Visor to identify the active antenna and destroy it, repeating the body-link and head-antenna process until all three head antennas are gone. Dark Quad enemies appear during this phase; defeat them when they interfere or when you need ammunition.
In the final phase, stagger the exposed head with a strong shot, then use the Spider Ball tracks on the legs to gain height. Boost from the track onto the stunned head and roll into one of its two Bomb Slots. Drop a Bomb, disengage when the head recovers and repeat for the second slot. Quadraxis collapses and leaves the Annihilator Beam. The Echo Visor transmitter sequence and two-slot final phase are supported by original-release boss references.
- The four knee-joint targets are destroyed.
- The body transmitter and all three head antennas are destroyed.
- Quadraxis is defeated.
- The Annihilator Beam is collected.
Reclaim Sanctuary energy and deposit it in Light Aether
After collecting the Annihilator Beam, leave Hive Temple through the newly accessible route and use the Annihilator Beam on the Annihilator Door leading to Hive Controller Access. Continue to the Hive Energy Controller and activate it to reclaim Sanctuary Fortress’s stolen energy. Quadraxis’s defeat alone does not restore the region; the controller interaction is required.
Return through Hive Temple Access and Hive Gyro Chamber. Use the nearby Save Station or Ammo Station if necessary, then travel through Hive Dynamo Works to the portal back to Light Aether.
In Light Aether, reach Watch Station and take the southeast route into Sentinel’s Path. Defeat the Mekenobites if they block the corridor. Use the Echo Visor and Annihilator Beam on the Echo Key system and activate the keys in this order: right, right, left, right. Continue to Sanctuary Energy Controller and deposit the recovered energy.
The Sanctuary Fortress energy objective is complete after the deposit. This does not open Sky Temple Gateway, award the Light Suit or complete the Sky Temple Key hunt; those are later campaign objectives.
- The Annihilator Door is opened.
- Energy is reclaimed at Hive Energy Controller.
- You have returned to Light Aether.
- The Sentinel’s Path Echo Key sequence is completed: right, right, left, right.
- Energy is deposited at Sanctuary Energy Controller.
- Sky Temple Gateway is still a later objective.
Before you move on
- The chapter began after the reopened Power Bomb entrance route.
- Second Dark Samus was defeated in Aerie.
- Echo Visor was acquired and used on the required sonic locks.
- The Sanctuary Fortress Vault was solved.
- Screw Attack was acquired before the Screw Attack-dependent Hive routes.
- Caretaker Class Drone was defeated.
- Ing Hive Temple Keys were collected from Culling Chamber, Aerial Training Site and Hive Gyro Chamber.
- Hive Temple was opened with all three keys.
- Quadraxis was defeated.
- Annihilator Beam was acquired.
- Sanctuary energy was reclaimed at Hive Energy Controller.
- The energy was deposited at the Light Sanctuary Energy Controller.
- Sky Temple Gateway was not incorrectly claimed as open.
- No Light of Aether piece was incorrectly assigned to this chapter.
References for this chapter
- Metroid Prime 2: Echoes — Guide and Walkthrough by CyricZ
- Metroid Prime 2: Echoes — Guide and Walkthrough, GameFAQs, GameCube version
- Metroid Prime 2: Echoes Walkthrough, GameSpot
- Metroid Prime 2: Echoes — Quadraxis Guide by BakonBitz
- Metroid Prime 2: Echoes — Guide and Walkthrough, GameFAQs, Quadraxis and final sequence sections
- Metroid Prime 2: Echoes — Official Instruction Manual
Visors, Beams and Movement Toolbox — Where to Get and How to Use Them
The original North American Nintendo GameCube release uses four campaign visors: Combat, Scan, Dark and Echo. Samus begins with Combat and Scan, receives Dark Visor after defeating Chykka in Dark Torvus Temple, and obtains Echo Visor in Sanctuary Fortress’s Aerie route after the second Dark Samus encounter. The campaign beams are Power, Dark, Light and Annihilator. Power Beam has no ammunition cost; Dark and Light Beam ammunition occupy separate reserves, and Annihilator Beam consumes both types. Required movement upgrades arrive in a fixed broad sequence: Space Jump Boots and the Agon beams, Boost Ball and Gravity Boost in Torvus, Grapple Beam and Dark Visor during the remainder of the Torvus sequence, then Spider Ball in Sanctuary Fortress, followed by Power Bombs, Echo Visor, Screw Attack and Annihilator Beam. Use the obstacle in front of you to identify which upgrade or visor is missing, and use Scan Visor whenever a device or enemy description provides a progression clue.
Use the original GameCube control layout
The original GameCube control scheme is fixed. Move with the Control Stick and hold L to lock onto a target. Press A to fire the selected beam, or to place a Morph Ball Bomb when Samus is rolled up. Press B to jump; after collecting the Space Jump Boots, press B again during the jump for the second jump. Press Y to fire missiles, including Power Bombs while in Morph Ball mode. Press X to switch between normal and Morph Ball modes. These controls are documented for the GameCube release and are not the pointer controls used by the Wii versions.
Use the C Stick to select beam weapons: up selects Power Beam, right selects Dark Beam, left selects Light Beam, and down selects Annihilator Beam after it is acquired. Use the Control Pad to select visors: Up selects Combat Visor, Left selects Scan Visor, Right selects Dark Visor and Down selects Echo Visor. Press Z to open the map. Press Start to pause and access the Logbook and equipment displays. Hold R to look around; in Morph Ball mode, hold R to activate Spider Ball after that upgrade is obtained. Press L while facing a valid grapple point to use the Grapple Beam.
The Combat Visor HUD shows Samus’s Energy, missile count, radar, map information, current visor and current beam. After Dark and Light Beams are acquired, their ammunition reserves are displayed as part of the weapon information. Before entering a colored-beam door or a guardian arena, check the selected beam and its available ammunition rather than assuming the Power Beam is active.
- Use the D-pad for visor selection and the C Stick for beam selection.
- Use Z for the map, X for Morph Ball, A for firing or Bombs, B for jumping, Y for missiles, L for lock-on or Grapple Beam, and R for Spider Ball in Morph Ball mode.
- Confirm the selected beam and ammunition before a colored-beam door or major fight.
Use the four visors in campaign order
Combat Visor is Samus’s default view and is used for ordinary exploration and combat. Scan Visor is available from the beginning. Use it on Luminoth machinery, translator doors, terminals, enemies, guardians and bosses. Some devices activate when scanned, and mission-critical scan targets are identified differently from optional logbook entries. Scanning enemies can reveal vulnerabilities, but Scan Visor prevents weapon fire until you return to Combat Visor.
Dark Visor is not found in Agon Wastes. Continue through the Torvus sequence until you reach Dark Torvus Temple. Defeat Chykka, then collect Dark Visor after the battle. It detects interdimensional objects that are normally unseen and highlights many creatures for targeting. Use it when a platform, enemy or object is absent from the normal visible spectrum, when an Ing disappears, or when a Flying Ing Cache is not visible in Combat Visor.
Echo Visor is obtained later in Sanctuary Fortress. First complete the Spider Guardian sequence, travel through Dark Torvus to defeat Power Bomb Guardian, and use the resulting Power Bombs on the yellow blast shield in Main Gyro Chamber. Follow the portal route through the Aerie. The second Dark Samus battle occurs during this progression; after that encounter, continue through the Aerie/Hive Summit route and collect Echo Visor. The guide and official-player-guide material describe this visor as the tool for detecting sound-based objects, hidden enemies and sonic security systems.
Echo Visor is intentionally difficult to use for ordinary navigation: much of the room is obscured, while sonic activity becomes visible through the visor’s detection effect. Switch back to Combat Visor after solving a sonic device. Do not look for a Thermal Visor in this game. The original GameCube campaign has Combat, Scan, Dark and Echo Visors only.
- Combat and Scan Visors are available from the start.
- Dark Visor comes from Chykka in Dark Torvus Temple.
- Echo Visor comes from the Sanctuary Fortress Aerie/Hive Summit progression after the second Dark Samus battle.
- Thermal Visor is not part of the original Echoes campaign.
Collect the four beams and manage ammunition
Power Beam is the starting weapon and has no beam-ammunition reserve. Dark Beam is obtained in Agon Wastes at Storage D after the first Dark Samus battle. Light Beam is obtained later in Dark Agon Wastes during the route through the Feeding Pit. Their doors, objects and enemy interactions are color-specific, so use the beam indicated by the door or by the scan description instead of spending special ammunition indiscriminately.
Dark and Light Beams use separate ammunition reserves. The game supplies opportunities to replenish one reserve while using the opposite beam against suitable targets, so conserve special ammunition when the Power Beam is sufficient. When a reserve is empty, the corresponding beam can still produce a normal charged shot according to the weapon rules, but charged special effects require ammunition. The manual describes Dark and Light Beam charge effects and their ammunition costs; do not assume every charged shot is free.
Annihilator Beam is awarded after Quadraxis in Ing Hive Temple. It fires combined light-and-dark energy, can seek targets and is effective against both light and dark enemies. Normal shots use both ammunition types, while its charged Disruptor blast consumes five Dark Ammo and five Light Ammo. It is also important for late sonic-powered devices, especially when paired with Echo Visor. It does not eliminate the need for Dark or Light Beam, because some doors and mechanisms still require a specific beam.
- Power Beam has no beam-ammunition cost.
- Dark and Light ammunition are separate reserves; conserve them for colored doors, mechanisms and resistant enemies.
- Annihilator Beam comes from Quadraxis and uses both Dark and Light ammunition.
Recover the early movement upgrades
The required movement sequence begins with Space Jump Boots in Dark Agon Wastes’ Judgment Pit. Defeat Jump Guardian to obtain them. Press B to jump and press B again during the jump to use the second jump. The Boots are needed for the normal route through early Agon ledges and later temple approaches. If a ledge was unreachable during the opening exploration, return after this fight rather than attempting an undocumented shortcut.
During the Torvus sequence, defeat Boost Guardian in Dark Torvus Arena to obtain Boost Ball. In Morph Ball mode, hold B to charge and release it to launch Samus. Use half-pipes, boost-sensitive tracks and sloped launch points to reach elevated ledges or cross gaps. Boost Ball remains useful later with Spider Ball tracks.
Obtain Gravity Boost in Torvus Bog’s Hydrochamber Storage. After collecting it, follow the required underwater route and defeat Alpha Blogg. Gravity Boost allows Samus to propel herself through underwater spaces and is required for the deeper Torvus progression.
Continue through the Dark Torvus route to Sacrificial Chamber and defeat Grapple Guardian for Grapple Beam. Face a valid grapple point and hold L to attach. Swing across gaps, then release toward the next platform. This is still part of the Torvus progression. Spider Ball is not part of this sequence: it is obtained later in Sanctuary Fortress from Spider Guardian.
- Defeat Jump Guardian for Space Jump Boots.
- Defeat Boost Guardian for Boost Ball.
- Obtain Gravity Boost in Hydrochamber Storage and continue through Alpha Blogg’s route.
- Defeat Grapple Guardian for Grapple Beam.
- Finish the Torvus sequence with Chykka and Dark Visor before treating Spider Ball as the next major movement upgrade.
Finish the Sanctuary movement sequence
After the Torvus progression, enter Sanctuary Fortress and defeat Spider Guardian in Dynamo Works to obtain Spider Ball. Enter Morph Ball mode and hold R to attach to magnetic Spider Ball tracks. Bomb Slots on those tracks alter machinery or open routes, and Boost Ball launches can transfer Samus between separated rails. Spider Ball is required for the Sanctuary Fortress machinery and later Hive routes; it is not obtained in Torvus.
Travel to Dark Torvus’s Undertemple and defeat Power Bomb Guardian to obtain Power Bombs. Use them on yellow blast shields and Denzium structures. In particular, use a Power Bomb on the yellow blast shield in Main Gyro Chamber to open the Aerie route leading to the second Dark Samus encounter and Echo Visor.
After collecting Echo Visor, reach Sanctuary Fortress’s Vault for Screw Attack. The Vault requires cross-world manipulation of its laser assemblies and Spinner mechanisms. Screw Attack is performed after a Space Jump by pressing B repeatedly, and the Control Stick steers Samus during the attack. Facing and touching a wall while performing it can produce a wall jump, which is needed for later vertical routes.
Annihilator Beam comes only after the Ing Hive Temple sequence and Quadraxis. Keep Echo Visor, Screw Attack and Annihilator Beam distinct: Echo Visor comes from the Aerie/Hive Summit route, Screw Attack comes from Sanctuary Fortress Vault, and Annihilator Beam is a Quadraxis reward.
- Spider Ball comes from Spider Guardian in Sanctuary Fortress’s Dynamo Works.
- Power Bombs come from Power Bomb Guardian in Dark Torvus’s Undertemple.
- Echo Visor is obtained before Screw Attack.
- Screw Attack comes from Sanctuary Fortress Vault.
- Annihilator Beam comes from Quadraxis in Ing Hive Temple.
Identify the missing tool when progress stops
Use the obstacle as your checklist. Black doors require Dark Beam, white doors require Light Beam, and some late sonic security systems require Echo Visor together with Annihilator Beam. A target or platform that disappears from normal view calls for Dark Visor. Magnetic rails require Spider Ball, underwater routes require Gravity Boost, large suspended gaps may require Grapple Beam or Space Jump Boots, and marked wall routes may require Screw Attack.
The broad normal sequence is Space Jump Boots and the Agon beams, then Boost Ball and Gravity Boost in Torvus, followed by Grapple Beam and Dark Visor during the remainder of the Torvus sequence. Spider Ball begins the Sanctuary Fortress movement section; Power Bombs open the Aerie route, Echo Visor follows the second Dark Samus encounter, Screw Attack comes from the Vault, and Annihilator Beam follows Quadraxis. If a device does not respond, scan it, check the map for another colored door, and mark the blocked route for a return visit after the next major upgrade.
- Match the obstacle or scan description to the required visor, beam or movement upgrade.
- Use the map to mark unreachable doors, ledges and portals for later return visits.
- Before the Sky Temple approach, confirm that Dark Visor, Echo Visor, Screw Attack and Annihilator Beam have all been collected.
- Remember that Spider Ball belongs to the Sanctuary Fortress progression, not the Torvus progression.
Before you move on
- Combat, Scan, Dark and Echo Visors are available.
- Power, Dark, Light and Annihilator Beams are available.
- Space Jump Boots, Boost Ball, Gravity Boost, Grapple Beam, Spider Ball, Power Bombs and Screw Attack are collected.
- You can identify whether a blocked route requires a colored beam, Dark Visor, Echo Visor, Grapple Beam, Spider Ball or Screw Attack.
- Quadraxis has been defeated and Annihilator Beam has been collected from Ing Hive Temple.
- Spider Ball is correctly confirmed as a Sanctuary Fortress upgrade rather than a Torvus upgrade.
Key Boss Strategies — Quadraxis, Emperor Ing and Major Guardians
The original Nintendo GameCube release of Metroid Prime 2: Echoes uses bosses as both combat tests and progression puzzles. Prepare at the nearest Save Station, refill Energy and beam ammunition when the route allows, and scan new forms before attacking if you want a complete Log Book. Quadraxis requires a fixed sequence through its feet, knees, body antenna, head receivers and final bomb slots. Emperor Ing changes from tentacle defense to a Spider Ball chrysalis and then a polarity-based mutated form. After the three regional Dark Aether energy controllers have been reclaimed and their Light Aether counterparts restored, and after the nine player Sky Temple Keys have been returned, the final Sky Temple route becomes available. Emperor Ing is followed immediately by the collapsing Dark Aether escape and the final Dark Samus encounter, so preserve resources and avoid risky shortcuts.
Prepare before entering a major arena
Save at the nearest available Save Station and refill Energy, missiles and beam ammunition wherever the surrounding route permits. Do not assume that the arena itself contains a Save Station, Light Beacon or reliable resupply. Quadraxis can provide recovery pickups from disabled components and summoned enemies, while Emperor Ing can produce enemies that drop health and ammunition, but enter both fights with a reserve rather than planning around luck.
Use the Scan Visor whenever a boss changes form or exposes a detachable component. Several endgame Log Book entries are separate scans, including Quadraxis forms, Emperor Ing forms and Dark Samus 3 and 4. Keep the Echo Visor ready for sonic transmissions and cloaked targets, but return to the Combat or Scan Visor when Echo information is no longer needed.
- Save before the boss door.
- Refill Energy and ammunition when the route allows.
- Scan every new boss form before destroying it.
- Keep Charge Combos and Super Missiles for confirmed openings.
Know the regional guardians and their required rewards
The major progression guardians are encountered before the endgame. Bomb Guardian in Agon Wastes awards Morph Ball Bombs; Jump Guardian in Dark Agon awards Space Jump Boots; Amorbis awards the Dark Suit. Boost Guardian in Dark Torvus awards Boost Ball; Grapple Guardian awards Grapple Beam; Chykka guards the Torvus energy-controller progression. Spider Guardian in Sanctuary Fortress awards Spider Ball, and Power Bomb Guardian in Dark Torvus awards Power Bombs. These rewards are not interchangeable, so if a later route appears impossible, check whether the required guardian ability has actually been obtained.
For Amorbis, fight from the Light Beacon safe zones, use the Light Beam against exposed vulnerable portions and return to protection after each opening. Against Boost Guardian, stay mobile and punish it after its rushes. Spider Guardian is solved by bombing the marked track sections and using the active conduits; patience is safer than forcing a pass. Chykka requires tracking its changing forms and using Grapple Beam opportunities while circling the arena. If a guardian attempt goes badly, retreat through the available world transition and resupply in Light Aether before returning.
- Confirm the guardian reward required by the next route.
- Use Light Beacon protection during Dark Aether fights.
- Leave and resupply rather than repeatedly entering with depleted resources.
- Treat Spider Guardian as a positioning puzzle, not a damage race.
Disable Quadraxis’s feet and knees
Quadraxis is fought in Hive Temple in the Ing Hive after the Sanctuary Fortress progression. Scan the complete machine immediately. Begin in Morph Ball form and bomb or Boost through the red-glowing foot sensors. Destroying these devices removes the foot-based shockwave threat and can create recovery pickups. When Quadraxis stomps, jump the shockwaves or move away; when its vortex attack begins, use Boost Ball to escape the pull instead of trying to remain underneath the machine.
After the foot sensors are disabled, target the knee couplings. Only the flashing blue knee is vulnerable at a given moment, so wait for the active target and use Super Missiles or another strong attack rather than wasting shots on a dark coupling. Quadraxis continues using projectiles, targeting attacks and physical movement during this phase. Strafe around the legs, break the active knee when the opening appears, and collect dropped supplies before the next section. Once all four knees are destroyed, the head separates from the damaged body.
- Scan the complete Quadraxis before attacking.
- Destroy the four foot sensors first.
- Attack only the flashing blue knee coupling.
- Collect pickups after disabling each major section.
Use the Echo Visor to break Quadraxis’s control link
Scan the damaged body and floating Shielded Head Module after the head separates. The head cannot be damaged while its shield is active. Switch to the Echo Visor and locate the transmission antenna on the damaged body. Hit that antenna with a powerful attack such as a Super Missile or Sunburst to interrupt the signal and stun the head.
While the head is stunned, target and destroy one of the three sonic receivers around its hull. The head will recover after each receiver, so repeat the body-antenna and stunned-head sequence until all three receivers are destroyed. Dark Quad enemies may appear; defeat them if they obstruct movement or if you need recovery pickups, but the antenna and receivers are the progression targets.
In the final phase, scan the Final Head Module and stun it with a charged Light Beam shot. Use the Spider Ball tracks along Quadraxis’s body to intercept the floating head, Boost from the track onto its magnetized surface and place a Morph Ball Bomb in an exposed bomb slot. Repeat the stun, interception and bombing sequence for the remaining weak point. Quadraxis then awards the Annihilator Beam.
- Find the body antenna with the Echo Visor.
- Destroy all three head receivers during separate stun windows.
- Use Spider Ball tracks to reach the final head.
- Bomb the exposed head weak points after stunning it.
Enter the final Sky Temple sequence with the correct prerequisite
Emperor Ing is not reached by collecting three regional Light of Aether pieces. First reclaim the energy from the Dark Aether controllers in Agon Wastes, Torvus Bog and Sanctuary Fortress, then deposit each recovered energy core at its corresponding Light Aether controller. After the nine player Sky Temple Keys have been recovered from their Flying Ing Caches and returned at the Sky Temple Gateway, the transport route to Sky Temple becomes available. Save at the final Light Aether opportunity and restock before entering.
Inside Sky Temple, proceed through the final controller route to Sanctum. The Sky Temple Energy Controller is the immediate objective, but Emperor Ing takes the energy before Samus can claim it. Scan the Emperor Ing Body, Head and Eye during the first form if Log Book completion matters.
- Three regional Dark Aether energy cores have been reclaimed.
- Each core has been deposited at its matching Light Aether controller.
- Nine player Sky Temple Keys have been returned.
- Save and restock before entering the final stronghold.
Defeat Emperor Ing’s first form and chrysalis
In the opening form, use uncharged Light Beam shots to retract each tentacle. Avoid the tentacle lashes, dark-energy attacks, portal strikes and the central hazard. When the tentacles withdraw, the eye becomes exposed between the shielded sections. Aim through that opening and damage the eye with Light-based attacks. Continue circling rather than standing directly in front of the eye, especially when it prepares its beam. Later rounds add more tentacles and a sweeping attack; Space Jump over the sweep and repeat the same pattern.
When Emperor Ing seals itself in the chrysalis, scan the shell and immediately Morph. Use Spider Ball to attach to its magnetic surface. The chrysalis has multiple yellow weak spots, and Morph Ball Bombs are required; Power Bombs do not damage these spots. Work on lower weak spots first because poisonous gas rises as the battle continues. Inglets can knock Samus into the gas, but bombing them can provide recovery pickups. When purple bubbles appear at a weak spot, place the required Bombs and move away from the emerging tentacle. Destroy every weak spot to break the chrysalis.
- Retract tentacles with uncharged Light Beam shots.
- Aim through the eye’s shielded opening.
- Use Spider Ball on the chrysalis.
- Use Morph Ball Bombs, not Power Bombs, on its weak spots.
Break the mutated Emperor Ing’s heart barrier
Scan Mutated Emperor Ing and lock onto the glowing heart inside its mouth. At the beginning of each cycle, the heart is protected by an orange or red barrier. Fire a Super Missile to break that barrier, then watch the heart’s color. A purple heart is vulnerable to Light Beam damage; a white heart is vulnerable to Dark Beam damage. Uncharged Annihilator Beam shots are a practical alternative because they combine both polarities, although they consume both beam-ammunition reserves.
Keep moving around the arena and wait for safe damage windows. Sidestep charges and swipes, jump over the shockwave after its leap and avoid the horn projectiles. If the heart is difficult to hit from the front, fire at the rear opening when Emperor Ing turns away. When Nightbarbs or luminous swarms appear, clear them if they block your lock-on; their drops can restore ammunition. Continue breaking the barrier and matching the heart’s polarity until the Emperor falls and the Sky Temple energy is released.
- Break the orange barrier with a Super Missile.
- Use Light attacks on the purple heart.
- Use Dark attacks on the white heart.
- Use Annihilator Beam when its shared ammunition is worth the cost.
- Farm summoned enemies for recovery only when the arena is safe.
Escape Dark Aether and defeat Dark Samus 3 and 4
Emperor Ing’s defeat starts the Dark Aether collapse and an eight-minute escape. A platform rises in Sanctum; climb it, Screw Attack to the exit and descend through Sanctum Access. Use the Sky Temple Energy Controller route and the Light portal to return toward Sky Temple Gateway. The Save Station in the controller room is inactive, although the post-Emperor sequence restores Energy; lost ammunition is not automatically restored. Use available Ing caches quickly if beam ammunition is low.
Dark Samus appears at Sky Temple Gateway. Scan her as Dark Samus 3. Keep moving, jump the Phazon wave and attack when she becomes vulnerable. When she cloaks, use the Echo Visor to track her; the Dark Visor is not the dependable solution for this encounter. When she turns bright blue and moves to the center, scan again for Dark Samus 4.
In the final form, Dark Samus surrounds herself with a Phazon sphere. Keep the Charge Beam ready, absorb the falling Phazon particles and return the charged Phazon at her while maintaining the lock-on. Dodge Phazon missiles by moving laterally or forward, then repeat the absorption and return-fire cycle. The final cinematic follows the last hit.
- Use the revealed Sanctum platform and Screw Attack escape route.
- Reach the Sky Temple Gateway through the Light portal.
- Scan Dark Samus 3 and Dark Samus 4 if desired.
- Track cloaked Dark Samus with the Echo Visor.
- Absorb and return Phazon during Dark Samus 4.
Before you move on
- Quadraxis is defeated in Hive Temple and the Annihilator Beam is collected.
- Energy has been reclaimed from the Agon Wastes, Torvus Bog and Sanctuary Fortress Dark Aether controllers and deposited at their Light Aether counterparts.
- Nine player Sky Temple Keys have been returned and the Sky Temple route has opened.
- Emperor Ing’s opening form, chrysalis and mutated form are defeated.
- Samus reaches the Sky Temple Gateway through the collapsing Dark Aether escape.
- Dark Samus 3 and Dark Samus 4 are defeated.
- The ending cinematic begins; keep the pre-Sky-Temple save because the final sequence does not provide a normal save between its major fights.
References for this chapter
- Metroid Prime 2: Echoes — Guide and Walkthrough, GameFAQs, GameCube version
- Metroid Prime 2: Echoes — Guide and Walkthrough, GameFAQs, Quadraxis and final sequence sections
- Metroid Prime 2: Echoes: How To Defeat Quadraxis, Nintendo Life
- Metroid Prime 2: Echoes: How To Defeat Emperor Ing
- Metroid Prime 2: Echoes — Official Instruction Manual
Sky Temple Approach — Assembling the Light of Aether and Opening the Gates
After reclaiming the stolen energy from the Dark Aether controllers in Agon Wastes, Torvus Bog and Sanctuary Fortress, return to the Great Temple and receive the Light Suit from U-Mos. The suit allows safe travel through Dark Aether’s toxic water and lets Samus ride the light beams linking the regional controllers. The final route requires nine Sky Temple Keys carried by Flying Ing Caches: two in Dark Agon Wastes, two in Dark Torvus Bog, two in the Ing Hive and three in Sky Temple Grounds. A-Kul’s key is already returned, so these nine keys complete the ten-key gateway array. Use the Dark Visor to reveal every cache, and bring the Light Suit, Seeker Launcher, Gravity Boost, Power Bombs, Spider Ball, Boost Ball and Screw Attack for the required routes. Save and refill at Landing Site before returning through Hall of Eyes. After depositing all nine keys at Sky Temple Gateway, ride the light beam to Sky Temple and use the Save Station in the Sky Temple Energy Controller room before continuing toward Emperor Ing.
1. Complete the three regional energy-controller transfers and receive the Light Suit
Do not begin the final key hunt until the Agon Wastes, Torvus Bog and Sanctuary Fortress energy objectives are complete. In each region, reclaim the energy from the Dark Aether controller and deposit it at the corresponding Light Aether controller. These are three regional energy transfers, not three separate Light of Aether pieces.
After the Sanctuary Fortress transfer, return to the Great Temple and enter the Main Energy Controller. U-Mos recognizes that all three outer regions have been restored and gives Samus the Light Suit. This suit prevents the normal environmental damage from Dark Aether and allows Samus to enter the poisonous Dark Aether water used in several Sky Temple Key routes. It also enables travel along the light beams inside the regional Energy Controllers.
Before leaving the Great Temple, confirm that you have the Dark Visor. You will need it to see every Flying Ing Cache. The later routes also require the Seeker Missile Launcher, Gravity Boost, Power Bombs, Spider Ball, Boost Ball and Screw Attack.
- Agon Wastes energy reclaimed and deposited.
- Torvus Bog energy reclaimed and deposited.
- Sanctuary Fortress energy reclaimed and deposited.
- Light Suit received from U-Mos.
- Dark Visor and required movement upgrades available.
2. Find Sky Temple Gateway and read the Keybearer clues
From the Great Temple, travel down to Temple Grounds and reach Hall of Eyes. Use its dark portal to enter Sky Temple Grounds, then follow the route through the dark structures until you reach Sky Temple Gateway. The gateway is the destination where the recovered keys will be installed; it also provides the clues that identify the rooms associated with the fallen Keybearers.
Scan the clue pillars before activating the gateway if you are pursuing Logbook completion. Their references correspond to the Light Aether rooms where the Keybearers died, while each Flying Ing Cache is located in the matching Dark Aether room. You do not have to collect the keys in the clue order.
A-Kul’s key has already been returned to the gateway. You therefore need nine more keys, not ten. The nine locations are Battleground and Dark Oasis in Dark Agon Wastes; Poisoned Bog and Dungeon in Dark Torvus Bog; Hive Entrance and Hive Dynamo Works in the Ing Hive; and Ing Reliquary, Defiled Shrine and Accursed Lake in Sky Temple Grounds.
- Sky Temple Gateway reached.
- Gateway clues scanned if desired.
- Nine remaining keys identified as the required total.
- Dark Visor ready for cache encounters.
3. Collect the two Dark Agon Wastes keys
Use the light-beam transport from a restored Energy Controller or the normal regional route to return to Agon Wastes, then enter Dark Aether and reach Battleground. Enter Battleground from the upper, dark door of Judgment Pit. This matters because the upper ledge is the starting point for the invisible-platform route; dropping to the lower floor forces you to make the climb again.
Defeat or bypass the Warrior Ing below without falling from the upper ledge. Activate the Dark Visor to reveal the invisible platforms over the chamber. Cross them carefully to the far ledge and destroy the Flying Ing Cache to obtain the first Dark Agon key. If you fall, return to the upper Judgment Pit entrance and repeat the crossing.
For the second key, reach Dark Oasis, the Dark Aether counterpart of Main Reactor. In the center of the room, use a Power Bomb on the weak Denzium obstruction to expose the dark-water pool. The Light Suit is required before entering this toxic water. Drop into the pool, use the Dark Visor to locate the Flying Ing Cache and destroy it to claim the second Agon key.
- Battleground key collected from the upper entrance route.
- Dark Oasis obstruction destroyed with a Power Bomb.
- Dark Oasis key collected from the dark-water pool.
- Light Suit, Dark Visor and Power Bombs confirmed.
4. Collect the two Dark Torvus Bog keys
Return to Light Aether and use the appropriate portal to reach Poisoned Bog, the Dark Aether counterpart of Torvus Lagoon. Gravity Boost is required for the submerged passage. With the Light Suit equipped, enter the toxic water and follow the underwater route beneath the room. Use the Dark Visor to reveal the Flying Ing Cache, destroy it and collect the key.
For Dungeon, return to Light Aether and reach the Catacombs. The required portal is in the Catacombs, because Dungeon cannot be reached by simply entering Dark Aether from the upper Torvus route. In Dungeon, drop through the grate into the toxic water. The Light Suit is required for this route.
Watchdrones block the underwater passage. Fire the Light Beam at the nearby Light Beacons to activate them; the beacons force the Watchdrones away and open the passage. Repeat this as you move through the underwater network. At the end, switch to the Dark Visor, destroy the Flying Ing Cache and take the second Torvus key.
- Gravity Boost available before entering Poisoned Bog.
- Light Suit used for both toxic-water routes.
- Poisoned Bog key collected.
- Light Beam used to activate the Dungeon Light Beacons.
- Dungeon key collected.
5. Collect the two Ing Hive keys
For the Hive Entrance key, enter the Dark Aether counterpart of Sanctuary Entrance. The Light Suit is required because the route crosses hazardous Dark Aether conditions. From the north side of the room, use Screw Attack to cross to the southern side. Ride the vertical light beam to the upper ledge, then Screw Attack back across to the elevated platform containing the Flying Ing Cache. Reveal and destroy the cache with the Dark Visor, then collect the key.
For Hive Dynamo Works, return to the Light Aether side of Sanctuary Fortress and enter the Dynamo Works section associated with the Spider Guardian arena. Follow the Morph Ball tunnels to the chamber where Spider Ball was obtained. Use a Power Bomb on the yellow blast shield to expose the dark portal, then enter Dark Aether.
In the dark half, follow the wall track into the pit and use Spider Ball to reach the magnetic pods. Boost from the red launch points on one pod to the next, then transfer to the far wall track. Follow it to the ledge with the Flying Ing Cache. Destroy the cache and take the second Ing Hive key.
- Hive Entrance key collected.
- Screw Attack and Light Suit used for the Hive Entrance route.
- Power Bomb used to open the Dynamo Works portal.
- Spider Ball and Boost Ball pod crossing completed.
- Hive Dynamo Works key collected.
6. Collect the three Sky Temple Grounds keys
For the Ing Reliquary key, use the dark portal in Sacred Path and follow the connected Sky Temple Grounds rooms to Ing Reliquary. The route is mostly a direct traversal through the area. Deal with the Ingstorm or move past it, then activate the Dark Visor and destroy the Flying Ing Cache in the storage area.
For the Defiled Shrine key, return to Light Aether and use the dark portal in Hall of Eyes. Follow the Sky Temple Grounds route toward the Dark Aether counterpart of Landing Site. Warrior Ing occupy the room, so clear enough space to move safely or pass them. The cache is near the location corresponding to Samus’s ship. Reveal and destroy it with the Dark Visor.
For the Accursed Lake key, return to Light Aether and use the portal in Temple Assembly Site. Follow the dark route through the purple Seeker Missile door toward Lake Access. The Seeker Missile Launcher is required to open this entrance. In Accursed Lake, the Light Suit is required for entering and navigating the Dark Water route; do not attempt this key with only the Dark Suit. Use the Dark Visor to locate the Flying Ing Cache over the lake, destroy it, then jump from the nearby ledge to collect the key it releases.
- Ing Reliquary key collected.
- Defiled Shrine key collected.
- Seeker Missile Launcher used to open the Accursed Lake route.
- Light Suit equipped before entering Accursed Lake’s Dark Water.
- Accursed Lake key collected.
7. Return to Landing Site for the final preparation
After collecting all nine keys, use the nearest portal to return to Light Aether. Travel back through the regional routes and Temple Grounds to Landing Site. Your ship functions as both a Save Station and an ammunition resupply point, so save here before beginning the gateway approach.
The ship restores health and replenishes missiles, beam ammunition, bombs and Power Bombs. Use the Power Beam against ordinary enemies during the return trip where practical so that your special ammunition remains available for the final sequence. If one key is missing, check the regional groups rather than returning to the gateway: Dark Agon has two, Dark Torvus has two, the Ing Hive has two and Sky Temple Grounds has three.
The final boss route does not provide an ordinary opportunity to return to the ship after the gateway is opened. Treat this Landing Site save and refill as your main preparation point.
- All nine Flying Ing Caches destroyed.
- Two Dark Agon keys collected.
- Two Dark Torvus keys collected.
- Two Ing Hive keys collected.
- Three Sky Temple Grounds keys collected.
- Landing Site save and resupply completed.
8. Deposit the keys and enter Sky Temple
From Landing Site, travel through Meeting Grounds and return to Hall of Eyes. Use the dark portal for the final Sky Temple Grounds approach, then follow the established route to Sky Temple Gateway. Step into the swirling red energy at the center of the gateway. The nine keys in your possession move into the empty columns around the room, while A-Kul’s key already occupies the tenth position.
When all ten positions are filled, the circular array lowers and a light beam rises from the center. Step into the beam to reach Sky Temple. The arrival room at the Sky Temple Energy Controller is inverted, so the door and walkways are positioned unusually high. Jump onto the circular platforms and reach the upper walkway.
Use the Save Station in the Sky Temple Energy Controller room before continuing. Ingworm Caches in the same area can replenish weapon ammunition if needed. Once you leave this room and continue toward Sanctum, the Emperor Ing sequence begins; the Emperor Ing fight, Dark Aether escape and final Dark Samus encounter are covered in the next chapter.
- All nine recovered keys deposited at Sky Temple Gateway.
- A-Kul’s key plus the nine recovered keys complete the ten-key array.
- Light beam to Sky Temple activated.
- Sky Temple entered.
- Save Station in the Sky Temple Energy Controller room used.
Before you move on
- Agon Wastes, Torvus Bog and Sanctuary Fortress energy-controller transfers are complete.
- U-Mos has awarded the Light Suit.
- Two Dark Agon, two Dark Torvus, two Ing Hive and three Sky Temple Grounds keys are collected.
- All nine player-collected keys have been deposited at Sky Temple Gateway.
- A-Kul’s key and the nine recovered keys have completed the ten-key gateway array.
- The light beam has transported Samus into Sky Temple.
- The Save Station in the Sky Temple Energy Controller room has been used before the final route.
Sky Temple Finale — Emperor Ing Fight and the True Final Encounter
After restoring the Agon Wastes, Torvus Bog and Sanctuary Fortress energy controllers, receiving the Light Suit and returning all nine player-recovered Sky Temple Keys, enter the Sky Temple and save before the final portal route. Emperor Ing has three phases: retract its attacking tentacles and strike the eye through the rotating shield, destroy all eleven Chrysalis weak points with Morph Ball Bombs while using Spider Ball tracks, then break the mutated form’s orange heart shield with a Super Missile and attack the exposed purple or white heart with the correct beam. Absorb the final planetary energy after the victory to begin the eight-minute Dark Aether escape. Reach Sky Temple Gateway without stopping for a save, then defeat the final Dark Samus encounter. Use the Echo Visor when she cloaks, and absorb the Phazon particles released during her central sphere phase with a charged Power Beam before firing the blue Phazon shot back. The campaign is complete only after Dark Samus, the escape sequence and the ending scenes have all been finished.
Confirm the prerequisites and save before Sanctum
Do not enter the final portal until the Agon Wastes, Torvus Bog and Sanctuary Fortress regional energy transfers are complete, the Light Suit has been received, and the Sky Temple gateway has been opened with the nine player-recovered Sky Temple Keys. A-Kul’s key is already accounted for at the gateway, so this chapter begins with the final Sky Temple route available.
Use the last Light Aether Save Station on the approach to the Sky Temple portal and refill before entering. Keep missiles, Light Beam ammunition, Dark Beam ammunition, Power Bombs and several energy reserves available. No particular reserve count is mandatory, but the first Emperor Ing phase rewards accurate Super Missile use and the final Dark Samus fight requires a charged Power Beam for Phazon absorption.
If you are completing the Logbook, scan the Emperor Ing forms as they appear. The final Dark Samus encounters also provide their last scan opportunities, so use the Scan Visor before beginning damage whenever the boss changes form.
- Three regional energy transfers are complete.
- The Light Suit has been received.
- All nine player Sky Temple Keys have been returned.
- The Sky Temple route is open.
- Samus is saved and resupplied before the final portal.
Defeat Emperor Ing’s head and eye
In Sanctum, Emperor Ing surrounds the final planetary energy with a large head, body and several attacking tentacles. Lock on to the tentacles and shoot them until they retract. Stay mobile around the arena, jump over sweeping tentacles and move away from ground strikes rather than standing below the head. The tentacles provide the main attacks during this phase, so clearing them creates the safe damage window.
When the tentacles retract, the Emperor Ing Eye appears behind a rotating shield. The eye is protected except for the opening in the shield. Wait for the opening to line up, then fire through it. A Super Missile is the most useful way to inflict substantial damage, but only fire when the opening is aligned. The eye can launch a powerful tracking beam that damages and disrupts Samus, so keep strafing and jump or sidestep rather than trying to trade hits.
The head returns after the eye sequence and generates another tentacle cycle. Repeat the pattern: retract the tentacles, avoid the sweep and slam attacks, wait for the shield opening and strike the eye. Later cycles can add more tentacles or additional sweeping attacks, so do not rush beneath the boss. Continue until the head is defeated and it seals itself inside the Chrysalis.
- Retract the attacking tentacles.
- Jump over sweeping tentacle attacks.
- Shoot the eye only through the rotating shield opening.
- Use Super Missiles when the eye opening is aligned.
- Repeat the cycle until the Chrysalis appears.
Destroy the Chrysalis and all eleven weak points
When Emperor Ing becomes the Chrysalis, poisonous gas begins filling the lower part of Sanctum. Enter Morph Ball mode and use the Spider Ball tracks on the Chrysalis to move across its shell. The shell has eleven glowing weak points. Every one must be destroyed with Morph Ball Bombs; Power Bombs are not the required weapon for these targets.
Approach a glowing weak point and place Morph Ball Bombs on it, then roll away as the tentacle emerges from the opening. The tentacle can knock Samus from the shell, so do not remain over the target while it is reacting. If the weak point survives, return along the Spider Ball track after the tentacle withdraws and repeat the bombing attack.
Small Inglets travel across the shell and can knock Samus away. Destroy them when they threaten your position or when you need energy and ammunition recovery, then resume the Spider Ball route. If the poisonous gas rises, stay on the upper shell and keep moving along the tracks. Continue until all eleven weak points have been destroyed and the Chrysalis breaks apart.
- Use Spider Ball tracks instead of fighting from the floor.
- Destroy all eleven weak points with Morph Ball Bombs.
- Roll away when a tentacle emerges.
- Defeat Inglets when recovery supplies are needed.
- Finish every weak point before leaving the Chrysalis phase.
Break the orange shield and damage Mutated Emperor Ing
The final Emperor Ing form is a large, four-legged creature with a glowing heart inside the front opening. The heart begins behind an orange shield and cannot be damaged normally. Lock on to the opening and break the orange shield with a Super Missile. Do not treat this opening state as a neutral heart that can be damaged freely; the Super Missile is the required setup for the vulnerable color phases.
After the shield breaks, the heart is exposed in either purple or white. A purple heart is vulnerable to the Light Beam. A white heart is vulnerable to the Dark Beam. Fire the matching beam during the exposed window, then return to movement as the boss changes state or closes its opening. The Annihilator Beam can damage either color and is a useful flexible alternative, but it consumes both beam-ammunition types and should be used with attention to your reserves.
Mutated Emperor Ing charges, slashes at close range, leaps and creates a ground shock wave, and fires energy attacks through rifts. Strafe away from charges, jump over the landing shock wave and use the Morph Ball to escape if you are underneath its legs. Nightbarbs or other small enemies may appear; destroy them when they interfere with movement or when you need recovery drops. Repeat the Super Missile shield break and correct-beam attacks until the boss collapses.
When Emperor Ing is defeated, the final planetary energy is exposed. Approach it and absorb it with the Energy Transfer Module. This immediately destabilizes Dark Aether and begins the timed escape.
- Break the orange heart shield with a Super Missile.
- Use the Light Beam against a purple heart.
- Use the Dark Beam against a white heart.
- Use Annihilator Beam only as the flexible ammunition-costing alternative.
- Avoid charges, slashes, rifts and landing shock waves.
- Absorb the final planetary energy after the victory.
Escape the collapsing Dark Aether
Absorbing the final energy starts an eight-minute escape countdown. Platforms rise in Sanctum, revealing the route upward. Follow the platforms immediately, use Screw Attack where required, continue through the Wall Jump section and take the Light portal toward Sky Temple Gateway. Do not detour for optional items, exploration or a Save Station; the final sequence does not provide an ordinary save break.
If Samus dies after Emperor Ing has been defeated, accept the restart option if you want to keep the victory for the current attempt. The restart returns to Sanctum as the escape begins, allowing you to retry the escape and Dark Samus without refighting Emperor Ing. If you decline the restart or exit the file, the next load returns to the last ordinary Save Station and the Emperor Ing battle must be repeated.
- Follow the platforms that rise after the energy transfer.
- Use Screw Attack and the Wall Jump route.
- Take the Light portal to Sky Temple Gateway.
- Do not search for a save point during the countdown.
- Accept the restart option after death if you want to retain the Emperor Ing victory.
Defeat the final Dark Samus encounter
At Sky Temple Gateway, Phazon blocks the portal back to Aether and Dark Samus appears. The escape timer continues, so begin the fight immediately. Scan Dark Samus at the start if you need the Dark Samus 3 Logbook entry. During the opening portion, she rises and fires a large tracking Phazon beam. Keep moving and dodge when it follows your position; she cannot be damaged during this airborne attack.
After several Phazon attacks, Dark Samus drops to the arena floor and cloaks. Switch to the Echo Visor to reveal her, lock on and fire while she is visible through the visor. The Annihilator Beam is effective if ammunition remains, followed by the Light Beam, missiles or the Power Beam. Dark Samus may jump rapidly and break your lock-on. When shots begin bouncing away, she is visible again or temporarily invulnerable; return to the Combat Visor and prepare for the next airborne attack.
Later, Dark Samus rises at the center inside a blue Phazon sphere. Scan this form for the Dark Samus 4 entry if desired. Ordinary weapons cannot damage her in this state. Charge the Power Beam and watch for the sphere to expand before Dark Samus contracts and fires. Dodge the main Phazon attack, then lock on to the released Phazon particles and allow the charged beam to absorb them. The beam turns blue when it has absorbed Phazon. Once the reticle returns to Dark Samus, fire the blue Phazon charge into her.
Dark Samus alternates between the central sphere phase and ground-level movement. During ground movement, use the Echo Visor when she cloaks and attack only while she is exposed. During the central phase, avoid the Phazon blast, absorb the released particles and fire the resulting Phazon shot back. Continue until the final blow lands before the timer expires.
- Dodge the tracking Phazon beam.
- Use Echo Visor when Dark Samus cloaks.
- Attack only during her vulnerable ground-level windows.
- Scan the central blue form if Logbook completion matters.
- Absorb released Phazon particles with a charged Power Beam.
- Fire the blue Phazon charge back at Dark Samus.
- Defeat her before the escape countdown ends.
View the ending and preserve the completed GameCube file
Dark Samus is the required encounter after Emperor Ing. Defeating Emperor Ing alone does not complete the campaign. Allow the post-battle escape scenes, the concluding story sequence and the credits to play without quitting the file during the final sequence.
After the ending flow returns to the GameCube file-selection screen, retain the completed save rather than deleting or overwriting it. The campaign completion check is the full sequence: the three regional energy transfers, Light Suit, Sky Temple access, Emperor Ing’s three phases, final planetary energy transfer, eight-minute escape, final Dark Samus battle and ending scenes.
- The three regional energy objectives were completed.
- The Sky Temple was entered.
- Emperor Ing’s head, Chrysalis and mutated form were defeated.
- The final planetary energy was absorbed.
- The Dark Aether escape was completed.
- Dark Samus was defeated after Emperor Ing.
- The ending scenes and credits were viewed.
- The completed GameCube save file was preserved.
Before you move on
- Agon Wastes, Torvus Bog and Sanctuary Fortress regional energy transfers are complete.
- The Light Suit was received.
- All nine player-recovered Sky Temple Keys were returned and the Sky Temple route opened.
- The Sky Temple was entered.
- Emperor Ing’s head, Chrysalis and mutated forms were defeated.
- The final planetary energy was absorbed.
- The eight-minute Dark Aether escape was completed.
- Dark Samus was defeated after Emperor Ing.
- The ending scenes and credits were viewed.
- The completed Nintendo GameCube save file was retained.
References for this chapter
- Metroid Prime 2: Echoes — Guide and Walkthrough, GameFAQs, final boss route
- Metroid Prime 2: Echoes — Guide and Walkthrough, GameFAQs, GameCube version
- Metroid Prime 2: Echoes: How To Defeat Emperor Ing
- Metroid Prime 2: Echoes/Sky Temple, StrategyWiki
- Metroid Prime 2: Echoes — Official Instruction Manual
Optional Completion: Scans, Extras, and Multiplayer Notes
Optional completion is separate from reaching the ending in the original GameCube release. The campaign requires neither a complete Logbook nor every expansion. Scans unlock menu galleries, while item collection controls the ending variations: 75 percent or more produces an additional Samus scene, and 100 percent adds a further post-credits scene. Keep scans and items on separate checklists. Scan bosses, changing boss forms, and one-time creatures before defeating them, then use a regional item checklist for cleanup after acquiring the required mobility upgrades. The GameCube version also includes separate split-screen multiplayer with Deathmatch and Bounty Mode. Multiplayer does not advance the story, but single-player progress unlocks additional arenas and soundtracks.
1. Choose a completion target before starting
A normal story clear does not require a full Logbook or every expansion. Optional completion has three distinct parts: Logbook scans, item collection, and exploration of optional rooms and encounters. Treat these as separate goals because the game tracks them differently.
Scan percentage unlocks galleries. Item percentage affects the campaign’s ending scenes. Collecting at least 75 percent of the items adds a Samus epilogue scene, while collecting 100 percent adds another scene after the credits. Neither scan percentage nor multiplayer participation is required to reach the ending.
- Decide whether you are pursuing story completion, item completion, scan completion, or all three.
- Keep separate records for Logbook entries and expansions.
- Prioritize items if your goal is the additional ending footage.
2. Protect one-time scans during the campaign
Use the Scan Visor whenever you meet a boss or a creature with a health bar. Boss entries are especially important because the boss usually cannot be scanned again after the arena is cleared. If a boss changes form, produces a separate creature, or exposes a new scannable component, scan the new target as well.
The Dark Missile Trooper in Hive Chamber A is an optional one-time encounter. It is not needed for the story route, but it has its own Logbook entry and is worth scanning before defeating it if you want a complete file. Other confirmed limited-chance entries include certain unusual creatures and boss-related forms listed in a dedicated missable-scan checklist.
Save before a major boss whenever a Save Station is available. After the fight, open the Logbook and confirm the expected entries before moving on. If a required one-time scan is missing and you are pursuing 100 percent scans, reload the earlier save rather than assuming the target will return.
- Scan every mandatory boss before dealing the final blow.
- Rescan when a boss changes form or a new combat creature appears.
- Scan the optional Dark Missile Trooper in Hive Chamber A before defeating it.
- Compare limited-chance entries against a dedicated GameCube scan checklist.
3. Understand the four scan-gallery milestones
The original GameCube release unlocks the Promotional Gallery at 40 percent of Logbook scans, the Character Gallery at 60 percent, the Creature Gallery at 80 percent, and the Boss Gallery at 100 percent. These are menu extras; they do not open doors, provide equipment, or alter the required route to the Sky Temple.
Completing the game on Normal unlocks the Rough Sketch Gallery and Hard mode. Completing the game on Hard unlocks the Storyboard Gallery. These difficulty-based rewards are separate from the scan milestones, so a player can unlock the galleries in different orders depending on whether they prioritize scanning or replaying the campaign.
- Check the Logbook percentage when pursuing gallery milestones.
- Remember that the Boss Gallery requires 100 percent scans, not 100 percent items.
- Complete Normal before attempting the Hard-mode gallery goal.
4. Track items by room for a reliable cleanup pass
Mark every Missile Expansion, Energy Tank, beam-ammo expansion, and Power Bomb expansion when you collect it, recording both the region and room name. A room-by-room list is more reliable than trying to remember which ledges or tunnels you passed earlier.
When you acquire a new beam, visor, or movement ability, revisit rooms containing a visible but inaccessible container. Pay particular attention to blocked Spider Ball tracks, dark-world ledges, bombable barriers, Power Bomb barriers, and platforms that were previously outside Samus’s reach. Items can generally be collected later, so missed expansions are a cleanup problem rather than a permanent failure.
Use a trusted checklist that identifies prerequisites. This prevents unnecessary backtracking and helps distinguish an unexplored room from one that was visited but still contains a blocked item route.
- Record the room name for each expansion.
- Revisit blocked paths after major mobility and weapon upgrades.
- Use item percentage and a room-by-room list together rather than relying on the map alone.
5. Explore optional combat and alternate-world content
Optional exploration includes side rooms, alternate Light Aether and Dark Aether routes, hidden platforms, and combat encounters that are not required to assemble the Light of Aether. The Dark Missile Trooper is the clearest optional boss-style encounter and is located in Hive Chamber A. Defeating it is not necessary for the campaign, but its scan and reward make the detour worthwhile for completion players.
Do not assume every enemy in an optional room is unique. Scan unusual targets first, then consult a checklist to determine whether the entry is limited, repeatable, or merely a normal creature entry. Search both versions of rooms after receiving tools that reveal hidden paths, because some optional scans and expansions are placed in one world while the route to them is prepared in the other.
- Search optional side chambers in both worlds.
- Scan the Dark Missile Trooper before fighting it if pursuing the Logbook.
- Record whether a missed objective is a scan, item, or optional encounter.
6. Use multiplayer as a separate GameCube feature
The original GameCube release includes split-screen multiplayer for two to four players. It is separate from the single-player adventure: multiplayer does not use the campaign route, does not collect Light of Aether energy, and does not change the story save.
Deathmatch is the elimination-focused mode. Bounty Mode uses Bounty Coins: players begin with coins, lose them when defeated, and compete to collect the most within the selected time or coin limit. The mode therefore rewards both defeating opponents and securing the coins they drop.
Single-player progress unlocks additional multiplayer content, including arenas and soundtracks, as story milestones are completed. These rewards are optional and have no effect on item percentage, Logbook percentage, or the ending scenes.
- Connect two to four GameCube controllers before entering multiplayer.
- Choose Deathmatch for elimination matches or Bounty Mode for coin-based matches.
- Treat multiplayer unlocks as separate extras rather than campaign objectives.
7. Perform final cleanup before the last sequence
Before entering the final route, compare your Logbook against a GameCube scan checklist and compare your item percentage against a room-by-room expansion list. Resolve missing boss scans and other limited-chance entries before continuing if a complete Logbook matters to you. Ordinary missed scans and all missed items should be pursued according to the checklist’s prerequisite notes.
Keep a separate pre-finale save when possible. It gives you a convenient point for cleanup and lets you preserve a file with access to the world before committing to the final battles. If your priority is only the ending, skip optional cleanup and proceed once the mandatory Sky Temple route is available.
- Confirm scan milestones against the Logbook rather than item percentage.
- Confirm item percentage against a regional expansion checklist.
- Keep a pre-finale save if you want to continue optional exploration.
- Do not mistake gallery progress for story progress.
Before you move on
- For ordinary story completion, confirm that Sky Temple has been opened and the final encounters and ending sequence have been completed.
- For enhanced ending footage, confirm at least 75 percent item collection; for the final post-credits item reward, confirm 100 percent item collection.
- For scan completion, verify the Logbook percentage and limited-chance entries against a GameCube-specific scan checklist, including boss forms and the Dark Missile Trooper.
- For gallery completion, confirm Promotional at 40 percent, Character at 60 percent, Creature at 80 percent, and Boss at 100 percent scans.
- For difficulty galleries, complete Normal for Rough Sketch and Hard for Storyboard.
- For multiplayer extras, confirm that Deathmatch and Bounty Mode are available and check which arenas and soundtracks were unlocked by single-player progress.
References for this chapter
- Metroid Prime 2: Echoes — Official Instruction Manual
- Metroid Prime 2: Echoes Logbook Guide
- Metroid Prime 2: Echoes Secrets and Unlockables
- Metroid Prime 2: Echoes Game Endings
- Metroid Prime 2: Echoes 100% Scans/Items Walkthrough
- Metroid Prime 2: Echoes Limited Chance Scan Guide
- Metroid Prime 2: Echoes Enemy/Boss FAQ
- Metroid Prime 2: Echoes 100% Completion Guide
Completion Checklist, Recovery from Failure and Post-Game Options
Complete the original North American Nintendo GameCube campaign by restoring the Agon Wastes, Torvus Bog and Sanctuary Fortress energy controllers, receiving the Light Suit, returning nine player-collected Sky Temple Keys, defeating Emperor Ing, escaping collapsing Dark Aether and defeating the final Dark Samus encounter. Save at the Sky Temple Energy Controller before entering Sanctum, because no ordinary Save Station separates Emperor Ing from Dark Samus. After the ending and credits, accept the save prompt to preserve completion-related unlocks. The completed file returns Samus to the last ordinary save before the finale rather than creating a free-roaming post-game state, so retain that pre-finale save for exploration, scans, expansions and repeated boss attempts.
1. Confirm the required campaign milestones before entering Sky Temple
Before committing to the finale, verify that energy has been reclaimed from the Dark Aether controllers in Agon Wastes, Torvus Bog and Sanctuary Fortress and deposited at their corresponding Light Aether controllers. These are regional energy transfers, not three separate collectible pieces of the Light of Aether. Once all three transfers are complete, return to the Main Energy Controller in the Great Temple and receive the Light Suit.
The Light Suit protects Samus from Dark Aether’s atmosphere and dark water and enables the late-game Energy Transport routes between the restored regions. Use those routes to shorten resupply trips and to reach the Sky Temple approach without making unnecessary hazardous crossings.
Collect nine Sky Temple Keys from Flying Ing Caches before opening the gateway. A-Kul’s key is already represented at the gateway, so nine additional keys must be found by the player; do not search for a tenth player-collected key. If optional scans or expansions remain, keep an ordinary save before returning the keys, because the Sky Temple Gateway changes after the array is completed.
After all nine keys are returned, enter the central gateway route and ride the Energy Transport to Sky Temple. In the Sky Temple Energy Controller room, reach and use the Save Station before entering Sanctum Access. This is the final ordinary save opportunity before the Emperor Ing sequence. The room’s Ingworm Caches can help restore Dark and Light Beam ammunition, but they do not replace the value of entering the battle with full energy and a stocked missile supply.
- Agon Wastes energy has been reclaimed and deposited.
- Torvus Bog energy has been reclaimed and deposited.
- Sanctuary Fortress energy has been reclaimed and deposited.
- The Light Suit has been received at the Main Energy Controller.
- Nine player Sky Temple Keys have been collected and returned.
- An ordinary pre-finale save is available if optional exploration remains.
- The Sky Temple Energy Controller Save Station has been used.
2. Recover from Dark Aether navigation mistakes and failed attempts
If you become stranded in Dark Aether before obtaining the Light Suit, stop crossing exposed terrain without a route back. Return to the latest activated Light Beacon and use its Safe Zone to stabilize Samus. From there, locate the portal to Light Aether before attempting another detour. The Dark Suit reduces environmental damage but does not remove it; the Light Suit is the upgrade that eliminates the atmospheric hazard.
When a passage appears blocked, compare the room with its Light Aether counterpart. A platform, device or route may exist only in one version of the room. Return through a portal, manipulate the corresponding room in Light Aether, then cross back. Treat Light Beacons as protection and navigation landmarks, not as Save Stations. If you die, reload the latest memory-card save rather than repeatedly retracing a long Dark Aether route with depleted energy or ammunition.
Once the three regional transfers are complete, use the Energy Transport network to shorten recovery trips. Travel to a restored Light Aether region, use a Save Station or the Gunship area to stabilize your supplies, then approach the required encounter again. This is safer than relying on an exposed Dark Aether route as the only way back to a boss arena.
If you die during the final Dark Samus encounter, the game returns you to the last ordinary save before the finale. There is no normal save break after Emperor Ing, so you must repeat Emperor Ing, the escape and the Dark Samus fight. Preserve the pre-finale save rather than overwriting it with an unnecessary exploratory save elsewhere.
- A Light Beacon and Safe Zone are available before each hazardous Dark Aether crossing.
- The nearest return portal has been identified before leaving safety.
- A Light Aether Save Station or restored Energy Controller is available for recovery.
- The pre-finale save has not been overwritten before attempting the final sequence.
3. Defeat Emperor Ing and preserve enough resources for the escape
From the Sky Temple Energy Controller Save Station, cross to Sanctum Access. Use the Screw Attack surfaces to climb the vertical route and enter Sanctum. At the start of the battle, scan Emperor Ing Head and Emperor Ing Body if you want those logbook entries. Scan the eye when it becomes available during the first phase.
The opening form deploys tentacles. Target them with Light Beam fire until they retract. Avoid the lashes, dark-energy bursts and ground attacks, and keep moving around the arena rather than standing directly in front of the creature. After the tentacles retract, attack the exposed eye through the opening in the shield. A Super Missile can deal heavy damage when the opening is aligned; the Annihilator Beam is also useful for repeated attacks. If the battle returns to the tentacle phase, repeat the same process instead of chasing the body.
When the Chrysalis appears, scan it if desired, switch to Morph Ball mode and use Spider Ball movement across the magnetic shell. Destroy all eleven yellow weak points with Morph Ball Bombs. Power Bombs do not replace this requirement. Poison gas rises as the shell is damaged, so move deliberately and prioritize accessible lower weak points. Inglets and shell enemies may provide recovery drops; use them when necessary instead of taking avoidable damage.
The Mutated Emperor Ing appears after the Chrysalis is destroyed. Scan it if desired. Use a Super Missile to break the orange protection, then attack the exposed heart according to its color: use the Light Beam against a purple heart and the Dark Beam against a white heart. The Annihilator Beam can damage either polarity and is a practical choice if its ammunition is available. Move away from charges, rear-leg scraping attacks and large area attacks. Defeat summoned creatures for recovery drops when ammunition or energy becomes low. Defeating this form begins the collapse of Dark Aether.
- The Emperor Ing Head and Body have been scanned if desired.
- The tentacles have been retracted with Light Beam fire.
- The Emperor Ing Eye has been damaged through the shield opening.
- All eleven Chrysalis weak points have been destroyed with Morph Ball Bombs.
- The Mutated Emperor Ing has been defeated.
4. Complete the Dark Aether escape and defeat final Dark Samus
After Emperor Ing falls, the remaining energy is absorbed and Dark Aether begins to collapse. An eight-minute escape countdown starts. Follow the platforms revealed in Sanctum, use Screw Attack to reach the exit and continue through the Wall Jump route. Take the Light Warp toward the Sky Temple Gateway. Do not stop for optional enemies, scans or collectibles during this section; the objective is to follow the revealed route and reach the gateway before time expires.
A Phazon wall blocks the route back to Aether, and Dark Samus begins the final encounter. There is no ordinary Save Station between Emperor Ing and this battle. If Samus dies, reload the pre-finale save and repeat the sequence from Emperor Ing.
Scan Dark Samus 3 at the beginning if you want the logbook entry. During the visible phase, attack while moving around the arena and avoid the Phazon beam, scattershot attacks and missiles. When Dark Samus cloaks, switch to the Echo Visor. Use it to track her position and continue attacking; do not rely on the Dark Visor for this phase. Scan Dark Samus 4 when the later form becomes available if you want that entry.
During the bright-blue phase, absorb the Phazon particles she releases with a charged Beam shot. When the charge becomes a blue Phazon-enhanced projectile, fire it back into her shield. Sidestep the Phazon missiles, move away from the large beam and avoid firing the stored shot while the shield is absent. Repeat the visible-form attacks and the Echo Visor tracking sequence until Dark Samus is defeated. The following cutscene completes the return to Light Aether.
- The eight-minute escape has been completed.
- Dark Samus 3 has been scanned if desired.
- The Echo Visor has been used to track cloaked Dark Samus.
- Dark Samus 4 has been scanned if desired.
- The final Dark Samus encounter has been defeated.
5. View the ending, save completion data and preserve the file
After Dark Samus is defeated, allow the return sequence, ending scene and credits to finish. When the game asks whether to save, accept if you want completion-related unlocks recorded on the memory card. Normal Mode completion unlocks Hard Mode for a new single-player file, and campaign completion contributes to bonus gallery unlocks. Scan and item progress affect other bonus material and should be checked separately if pursuing a high-percentage file.
The post-credits save does not create a new free-roaming post-game world state. Loading that file returns Samus to the last ordinary save before the finale. This makes the Sky Temple Energy Controller save especially valuable: it remains the practical starting point for another final-boss attempt and for returning to Aether to collect missed expansions or complete scans.
The campaign is complete only after the final Dark Samus encounter and the ending scene, not after Emperor Ing alone. If you want additional ending material or gallery rewards, load the pre-finale file, complete the remaining scans or items, then replay the final sequence. Keep the completed result and the pre-finale exploration result as separate memory-card files when possible.
- The ending scene has been viewed after defeating Dark Samus.
- The credits have finished.
- The post-credits save has been accepted if completion unlocks are wanted.
- A completed result remains on the GameCube memory card.
- The pre-finale ordinary save remains available for cleanup or repeated attempts.
6. Continue with optional goals or begin a new file
The main ending does not require every expansion or every scan. Item collection percentage affects supplementary ending material, while the Log Book tracks scans separately. Use a checklist made for the original GameCube release when checking one-time scans, items and boss entries. Do not substitute Wii, Trilogy or later-version advice for GameCube save behavior or controls.
If a final boss scan was missed, load the pre-finale save and replay the entire final sequence. Emperor Ing and the final Dark Samus encounters occur after the last ordinary save, so missed entries cannot be recovered by loading a save created between those fights.
After completing Normal Mode, start a new file and select Hard Mode. The original GameCube release does not provide a New Game Plus campaign that carries completed inventory into a new story. Keep the completed result and the pre-finale exploration result separately when possible. The main menu’s multiple single-player files make it practical to preserve a completion record while retaining a file for scans, item collection, speedrun routing or boss practice.
- The completed result remains on a GameCube memory-card file.
- Hard Mode is available for a new file after Normal Mode completion.
- Optional scans and items are checked against an original GameCube reference.
- No New Game Plus inventory transfer has been assumed.
- A pre-finale file is retained for exploration and practice.
Before you move on
- Agon Wastes energy has been reclaimed and deposited.
- Torvus Bog energy has been reclaimed and deposited.
- Sanctuary Fortress energy has been reclaimed and deposited.
- The Light Suit has been received at the Main Energy Controller.
- Nine player Sky Temple Keys have been returned at the Sky Temple Gateway.
- The Sky Temple Energy Controller Save Station has been used before entering Sanctum.
- Emperor Ing has been defeated.
- The eight-minute Dark Aether escape has been completed.
- The final Dark Samus encounter has been defeated.
- The ending scene and credits have been viewed.
- The post-credits save prompt has been accepted if completion unlocks are wanted.
- A completed result remains on the memory card.
- Hard Mode is available for a new file after Normal Mode completion.
- A pre-finale save is retained for optional cleanup or practice.
References for this chapter
- Metroid Prime 2: Echoes — Guide and Walkthrough, GameFAQs, GameCube version
- Metroid Prime 2: Echoes — Guide and Walkthrough, GameFAQs, final boss route
- Metroid Prime 2: Echoes Walkthrough, GameSpot
- Metroid Prime 2: Echoes — Official Instruction Manual
- Metroid Prime 2: Echoes/Sky Temple, StrategyWiki
- Metroid Prime 2: Echoes Bosses Guide, Metroid Recon
Finishing up
The Agon Wastes, Torvus Bog and Sanctuary Fortress regional energy objectives have been completed and the Light Suit has been obtained.
All nine player-collected Sky Temple Keys have been recovered and deposited at Sky Temple Gateway; A-Kul's key is already accounted for by the game.
The Sky Temple has been entered and the final Sanctum Save Station has been used.
Emperor Ing has been defeated, the eight-minute escape has been completed, and the final Dark Samus encounter has been defeated.
The ending scene and credits have been viewed.
The post-credits save prompt has been accepted if completion-related unlocks should be recorded. Retain a separate pre-finale save for optional exploration, scans, item cleanup or boss practice; loading the completed file returns to the last ordinary pre-finale save rather than creating a post-ending exploration state.
Choose your next gameScreenshots & video
Game imagery for reference. Follow the written chapters above for the route and strategies.
Sources & references
Our original guide draws on the references below. Check the edition at the top of this page before following controls or unlock requirements.
- Metroid Prime 2: Echoes — Official Instruction Manual
- Metroid Prime 2: Echoes — Guide and Walkthrough, GameFAQs, final boss route
- Metroid Prime 2: Echoes — Guide and Walkthrough by CyricZ
- Metroid Prime 2: Echoes Guide and Walkthrough — DeuceExDefcon, GameFAQs
- Metroid Prime 2: Echoes — Chapter 9: Unlocking the Dark Agon Temple
- Metroid Prime 2: Echoes Walkthrough, GameSpot
- Metroid Prime 2: Echoes: Agon Wastes, Nintendo Life
- Metroid Prime 2: Echoes Walkthrough — Dark Temple Keys, Omega Metroid
- Metroid Prime 2: Echoes — Dark Suit, StrategyWiki
- Metroid Prime 2: Echoes Guide and Walkthrough — deathxcold, GameFAQs
- Metroid Prime 2: Echoes: Torvus Bog — Nintendo Life
- Metroid Prime 2: Echoes Official Nintendo Player’s Guide
- Metroid Prime 2: Echoes: Sanctuary Fortress
- Metroid Prime 2: Echoes — Guide and Walkthrough, GameFAQs, Quadraxis and final sequence sections
- Metroid Prime 2: Echoes — Guide and Walkthrough, GameFAQs, GameCube version
- Metroid Prime 2: Echoes — Quadraxis Guide by BakonBitz
- Metroid Prime 2: Echoes: How To Defeat Quadraxis, Nintendo Life
- Metroid Prime 2: Echoes: How To Defeat Emperor Ing
- Metroid Prime 2: Echoes: Sky Temple
- Metroid Prime 2: Echoes/Sky Temple, StrategyWiki
- Metroid Prime 2: Echoes Logbook Guide
- Metroid Prime 2: Echoes Secrets and Unlockables
- Metroid Prime 2: Echoes Game Endings
- Metroid Prime 2: Echoes 100% Scans/Items Walkthrough
- Metroid Prime 2: Echoes Limited Chance Scan Guide
- Metroid Prime 2: Echoes Enemy/Boss FAQ
- Metroid Prime 2: Echoes 100% Completion Guide
- Metroid Prime 2: Echoes Bosses Guide, Metroid Recon
About the game & collecting notes
- Platform
- Nintendo GameCube
A practical, step-by-step campaign walkthrough for the original North American Nintendo GameCube release of Metroid Prime 2: Echoes (USA). You’ll restore the energy held by the Agon Wastes, Torvus Bog and Sanctuary Fortress controllers, receive the Light Suit, recover nine player-collected Sky Temple Keys, reach Sky Temple, defeat Emperor Ing and the final Dark Samus encounter, and confirm the ending with a clear completion checklist.
Darryl Polo
Darryl Polo loves tinkering with emulation and revisiting retro games. He enjoys exploring how old favorites play on different setups and sharing what he learns along the way. At Joking Joystick, he writes about the games, hardware, and small discoveries that keep the hobby fun.
Our editorial standardsFound a step that needs another look? Help us improve this guide.