Metal Gear Solid 3: Snake Eater — PlayStation 2 (North America, original 2004) Complete Walkthrough
A step-by-step walkthrough for the original PlayStation 2 release of Metal Gear Solid 3: Snake Eater (North America, 2004). This guide covers every required objective in Virtuous Mission and Operation Snake Eater, practical survival and stealth techniques for the PS2 edition, reliable boss strategies, optional side content, and clear completion checks to reach the canonical ending.

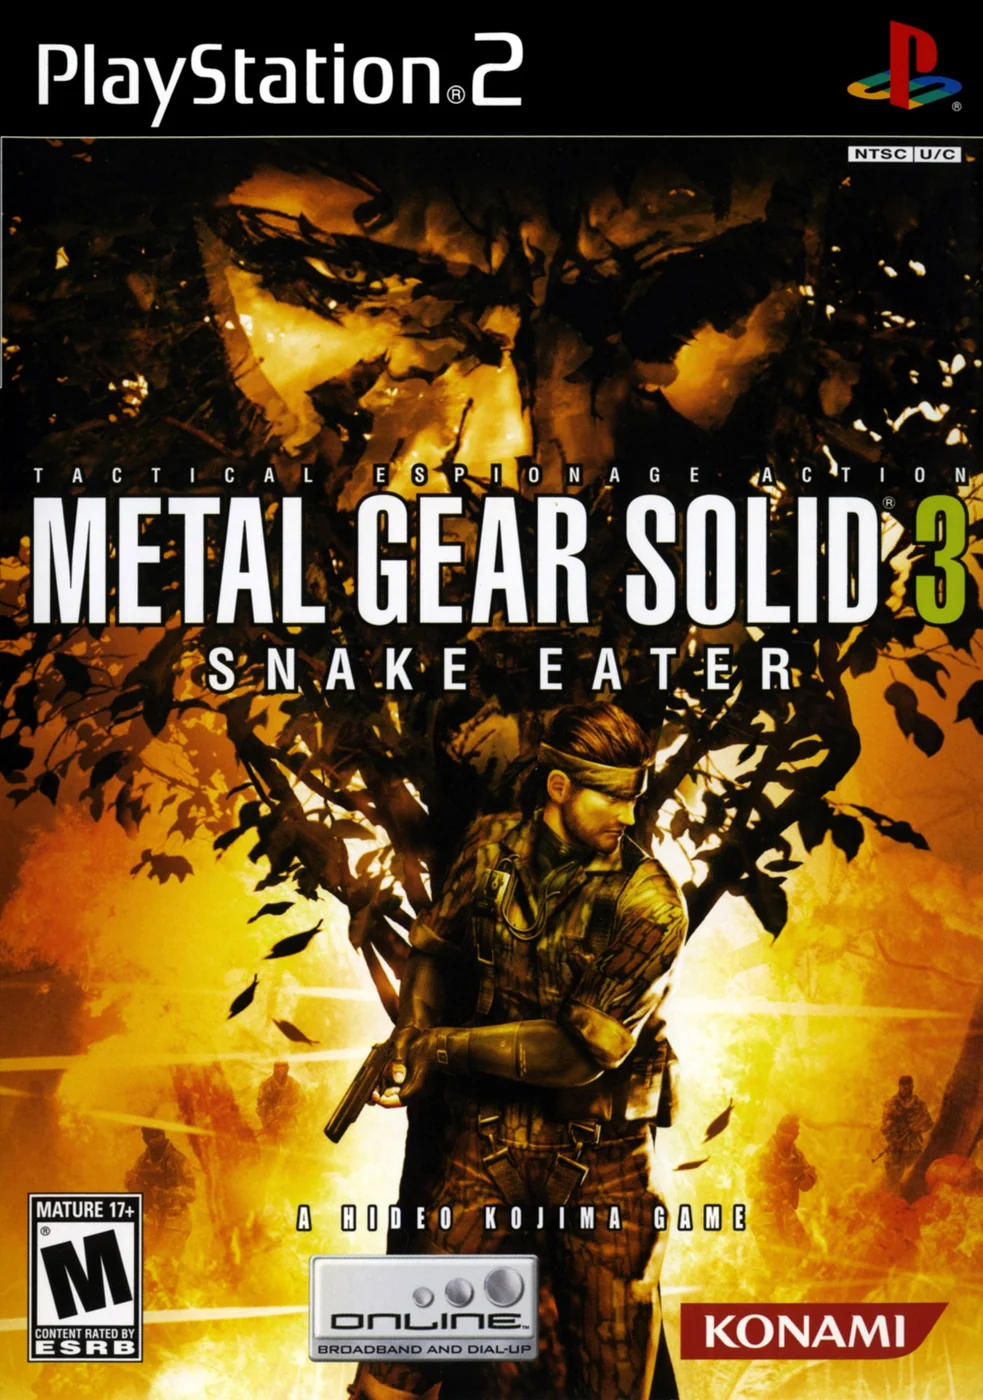
Find a copy
Metal Gear Solid 3: Snake Eater PlayStation 2
We may earn a commission if you buy through these links, at no extra cost to you. As an Amazon Associate I earn from qualifying purchases.
Opens retailer search results. Check the model, edition, seller, availability and current price before buying.
Before you begin
This walkthrough is written specifically for the original North American PlayStation 2 release of Metal Gear Solid 3: Snake Eater (released November 17, 2004).
It stays faithful to the PS2 edition’s mechanics and item availability and avoids features added in later re-releases (Subsistence, HD ports or remakes).
Follow the route and checkpoints here to progress through Virtuous Mission and Operation Snake Eater, survive the jungle, and reach the canonical ending.
You will get practical, action-oriented directions: where to go, which items and camo to prioritise for each encounter, how to approach every major boss, how to recover from discovery or a failed attempt, and exactly what conditions constitute completion.
Use multiple save slots during tricky segments, and read the Preparation checklist before starting if you want a smoother run.
Set yourself up for the run
Check memory card space and leave at least three free PS2 save slots for multiple checkpoint saves before boss fights and critical choices.
Familiarize yourself with the default DualShock 2 control layout in the PS2 OPTIONS menu and confirm button assignments before play (aiming, sprint/crawl toggles and weapon/item access).
Carry a basic survival kit from the start: healing items (first aid), food that restores stamina and health, basic camouflage (face paint), and a reliable short-range weapon.
Learn to use the item/weapon wheel quickly.
Save in multiple slots every time you reach a new area or just before a known boss; PS2 save reliability and long boss encounters make slot rotation important.
Plan for stealth-first play: stay concealed, learn enemy sightlines and use downed-guard takedowns (CQC) where appropriate.
Avoid rushing into open firefights unless you have a clear plan.
Prepare one save slot specifically for experimentation (for example trying system-clock tactics or alternate boss methods) so you can restore a safe run if an experiment backfires.
How this guide treats the PS2 edition — controls, saving and basic systems
This chapter establishes the controls and survival routines for the original North American PlayStation 2 release of Metal Gear Solid 3: Snake Eater. It covers the fixed-style Normal camera, the Survival Viewer, Codec saves, camouflage, stamina, food and wound treatment without importing Subsistence, HD, Master Collection or remake features.
1. Confirm the correct PS2 edition
Use the original North American PlayStation 2 release titled Metal Gear Solid 3: Snake Eater. The disc, case or title screen should identify Snake Eater, not Metal Gear Solid 3: Subsistence. Subsistence is a later expanded PS2 release with a freely controlled third-person camera and other additions. Those features are outside this guide.
At the title screen, open OPTIONS before beginning. Check the controller configuration, vibration setting, language and difficulty. Vibration is optional, so disable it if your controller behaves unreliably, but keep the setting consistent while learning the game. The original release uses the traditional Normal camera as its main viewpoint. The right analog stick can move or pan the camera, and R3 can lock the current camera angle, but the original game does not provide Subsistence’s free 360-degree third-person camera.
If you are playing through a modern display adapter or a replacement controller, verify that pressure-sensitive inputs still register correctly. The original control design uses analog pressure for several actions, especially weapon handling and CQC. If your setup does not reproduce those inputs reliably, use the in-game control explanations and practice in a safe area before starting a serious infiltration.
- Confirm the title is the original Snake Eater release, not Subsistence or a later port.
- Check controller layout, vibration and difficulty in OPTIONS.
- Remember that right analog camera movement is present, but free third-person camera rotation is not.
2. Learn the PS2 inventory controls
Hold L2 to open the Item window and hold R2 to open the Weapon window. While holding the relevant button, use the directional buttons to move through the available selection, then release the button to equip the highlighted choice. Tapping L2 or R2 can quickly equip or put away the selected item or weapon, depending on the current control setting.
Use the Item window for field equipment such as rations, binoculars, medical supplies and other usable tools. Use the Weapon window for firearms, grenades, the knife and other offensive equipment. Camouflage is not changed from either quick-selection window; it is managed through the Survival Viewer.
Square uses the equipped weapon. With firearms, pressure affects how Snake handles or fires the weapon; with the knife, it performs knife attacks. L1 assists with aiming or locking onto a nearby target, while R1 enters first-person view. Circle is used for punches and CQC, Triangle performs contextual actions such as opening, climbing or hanging, and X changes Snake’s stance or makes him crouch and crawl.
Practice selecting the Mk22 or another non-critical weapon, aiming with L1, entering first-person view with R1 and cancelling the action before approaching a guard. The PS2 layout rewards deliberate, light button pressure rather than treating every face-button press as an immediate attack.
- Use L2 for items and R2 for weapons.
- Use Start for the Survival Viewer rather than trying to change camouflage through the quick-select windows.
- Remember Square for weapons, Circle for CQC, Triangle for actions and X for stance changes.
- Test pressure-sensitive aiming and firing before relying on it near an enemy.
3. Save through the Codec and rotate your memory-card files
Press Select to open the Codec/Radio screen, then contact the save option through the radio menu. The save function is available through the support team rather than from a conventional pause-menu save command. Make a manual save after a major objective, before entering a boss arena and before committing to a long infiltration with a specialized loadout.
Use at least three rotating save files on the memory card. Keep one file as your current progress, one from before the latest dangerous area and one conservative recovery file from before a boss, major story transition or equipment decision. Rotate them instead of overwriting the same file every time. This gives you a way to recover if you reach a setpiece with poor health, inadequate ammunition or an inconvenient camouflage choice.
A save is not a replacement for learning the recovery routine. If you are detected, break line of sight, hide, treat injuries and wait for the alert state to settle before continuing when possible. If the approach has gone badly, reload the earlier recovery file rather than repeatedly forcing the same failed attempt. Preserve a file before optional exploration so that a failed experiment does not cost required progress.
- Open the Codec with Select and use the radio save option.
- Rotate three memory-card files instead of overwriting one slot.
- Keep a conservative save before every major boss or forced transition.
- Use reloads to restore a good approach, not as a substitute for treating injuries.
4. Change camouflage in the Survival Viewer
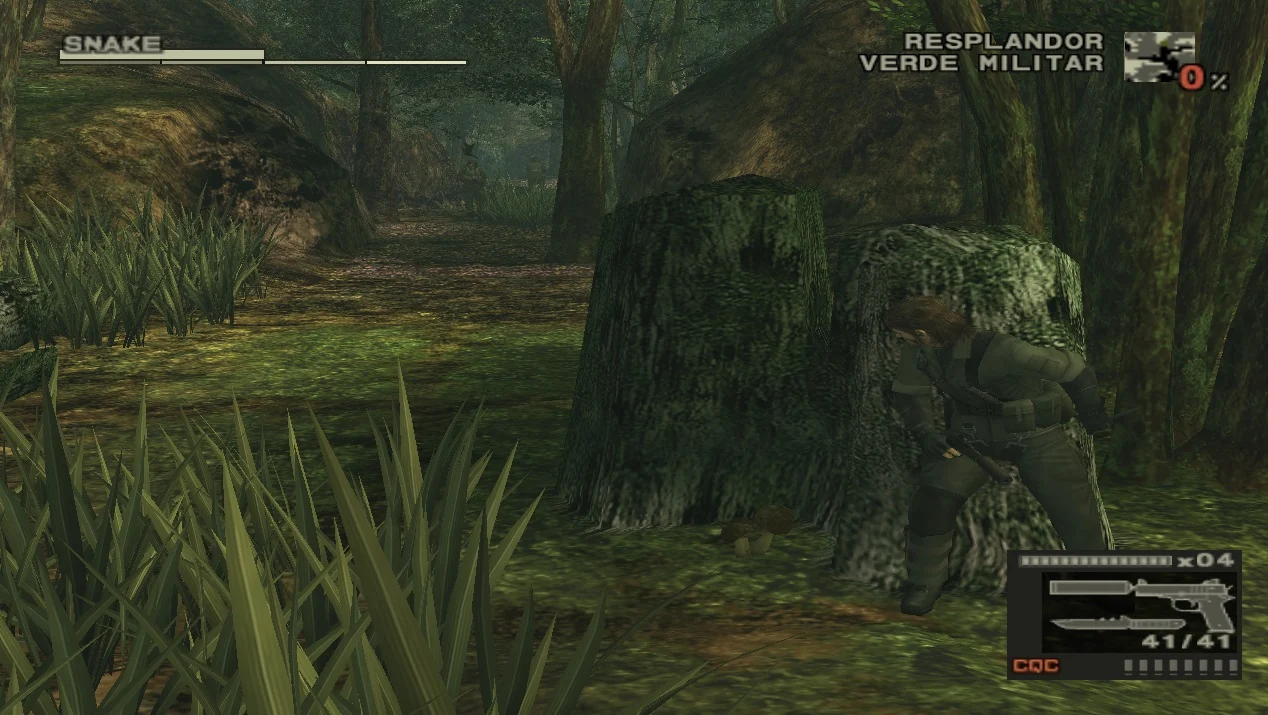
Press Start to open the Survival Viewer, then choose Camouflage. Uniform and Face are separate choices, so set both when the environment changes. Use a vegetation-oriented combination in forest and grass, an earth or rock pattern against bare ground, and a facility-suitable pattern inside enemy structures. The exact best choice depends on the surface immediately around Snake, so inspect the area rather than relying only on the region name.
The Camo Index in the upper-right corner shows how well Snake blends into the current surroundings. A higher index generally makes him harder for enemies to see, but it does not make him invisible. Standing in open ground, moving quickly, creating noise or remaining in an enemy’s direct view can still cause detection even with an appropriate pattern.
Change camouflage before crossing into a new type of terrain. The Survival Viewer pauses normal gameplay, but do not wait until a guard is already within striking distance. Change uniform and face paint while hidden behind foliage, a wall or another safe obstruction, then resume with the correct stance and movement speed.
- Open Start, choose Camouflage and set both Uniform and Face.
- Compare the Camo Index after moving between vegetation, earth, water and facilities.
- Use camouflage with cover and quiet movement; it does not cancel enemy awareness.
5. Maintain stamina, food and medical treatment
Stamina decreases while Snake runs, stalks, fights, hangs from ledges or remains underwater. As stamina falls, aiming becomes less steady and recovery from damage and wounds becomes slower. Low stamina also shortens the time Snake can remain underwater or hang from an edge because those gauges draw from his stamina condition.
Open the Survival Viewer and choose Food when stamina is low enough to affect movement or aim. Food items include rations, plants and animals found or captured during the mission. Keep a reserve for long stretches away from supply points, but do not fill the backpack with every animal you encounter. Perishable food can spoil, so use older food first and keep reliable rations for emergency recovery.
Food restores stamina; it is not a substitute for treating a serious wound. After taking a bullet, cut, burn, fracture or illness, open the Cure section of the Survival Viewer and apply the required treatment. Once the injury is addressed, Snake’s health can recover naturally when he is safe, and adequate stamina improves the recovery process. Crouching can also help stop active bleeding, but severe injuries still need the appropriate Cure procedure.
After combat, move behind cover, check the health and stamina gauges, treat any red injury indicators and eat only as much as necessary. Do not enter the next area while bleeding, starving or carrying a loadout that leaves no medical reserve.
- Eat food to restore stamina when performance begins to suffer.
- Keep emergency rations and basic medical supplies available.
- Treat the specific injury in Cure before relying on natural health recovery.
- Check oxygen and grip risks before swimming or hanging from ledges.
Before you move on
- The title screen or disc identifies the original Metal Gear Solid 3: Snake Eater PS2 release.
- You can open the Item window with L2, the Weapon window with R2, the Survival Viewer with Start and the Codec with Select.
- You can change both Uniform and Face camouflage and interpret the Camo Index without expecting free third-person camera control.
- You can explain that food restores stamina, while Cure treats specific injuries and health recovers separately.
- You have three usable save files, including a conservative recovery file before the next major objective.
References for this chapter
- Metal Gear Solid 3: Snake Eater — Guide and Walkthrough, PlayStation 2
- Metal Gear Solid 3: Snake Eater - Guide and Walkthrough - PlayStation 2 - By DarkSun
- Metal Gear Solid 3: Snake Eater — Guide and Walkthrough, PlayStation 2, by z_ShadowMan_z
- Metal Gear Solid 3: Snake Eater — Guide and Walkthrough, PlayStation 2, by Element50, GameFAQs
Mission overview: Virtuous Mission and Operation Snake Eater — goals and repeatable areas
The original North American PlayStation 2 release divides the campaign into Virtuous Mission, the short prologue, and Operation Snake Eater, the main campaign. The early Dremuchij areas are reused, but the second visit changes the circumstances, enemy presence, available equipment and optional pickups. The mandatory story route is separate from Kerotan frogs, animals, camouflage, side weapons and non-lethal boss rewards. Optional objectives can improve supplies, special-rank attempts or later encounters, but none is required to reach The Boss or watch the canonical ending.
1. Complete Virtuous Mission as the prologue
Virtuous Mission begins in Dremuchij South. Snake has only limited equipment, so first move through the starting area and recover the backpack hanging from the tree. Reach it by climbing the nearby tree, walking out along the branch and using the action button to take the pack. This restores access to Snake’s camouflage and equipment.
Continue north through Dremuchij Swampland. Cross the swamp carefully, watching for crocodiles and deep mud, then leave through the northern passage into Dremuchij North. Move through the jungle toward Dolinovodno and cross the rope bridge. Rassvet, the abandoned factory, is north of the bridge.
At Rassvet, search the factory and reach the room where Sokolov is being held. Approaching the required story location triggers the escape sequence and the events involving The Boss, Volgin and the Cobra Unit. After the resulting scenes, Snake is returned to Dolinovodno, where the Cure screen teaches the injury-treatment system. Once those scenes and the operation briefing are complete, Virtuous Mission is over.
Optional prologue tasks must be finished before approaching Sokolov. Kerotan frogs, food, ammunition and other pickups are bonuses; they are not needed to trigger the extraction sequence or begin the next mission.
- Recover the backpack in Dremuchij South.
- Cross Dremuchij Swampland and Dremuchij North.
- Cross the Dolinovodno rope bridge and reach Rassvet.
- Find Sokolov and complete the forced escape and extraction events.
- Finish any prologue-only optional searches before entering Sokolov’s room.
2. Start Operation Snake Eater and follow the actual opening route
Operation Snake Eater begins in Dremuchij East at night. This area has no mandatory fight. Collect food or medicinal plants if needed, then follow the available path north into Dremuchij North. Dremuchij East is not part of the Virtuous Mission route; it is the separate opening area of the main operation.
In Dremuchij North, continue toward the crashed drone. The Boss appears and destroys Snake’s M1911A1, leaving him temporarily without a firearm. Soldiers then investigate the crash site and create a dangerous caution period. Remain prone in grass or move carefully away from the patrols. You may wait for the alert state to subside, or move south through the available route if you need to evade the soldiers.
The practical story route therefore begins Dremuchij East, continues to Dremuchij North, and then proceeds toward Dolinovodno and Rassvet. However, the most useful optional sweep takes place before leaving this early region: from Dremuchij North, travel south through Dremuchij Swampland to Dremuchij South, then return north through Swampland and Dremuchij North. This is the safe way to collect the second-visit supplies and collectibles without treating the areas as permanently closed.
At Dolinovodno, deal with the bridge guard or slip past him using the vegetation and bridge structure. Continue north to Rassvet. The abandoned factory contains the story equipment and weapons needed for the next part of the mission, including the Mk22 and other useful supplies. The required story sequence in Rassvet leads to the next operation areas after Snake and EVA leave the early jungle.
- Begin Operation Snake Eater in Dremuchij East.
- Proceed north to Dremuchij North and survive the Boss encounter and resulting caution state.
- Use the optional southbound detour through Dremuchij Swampland to Dremuchij South if collecting supplies or second-visit items.
- Return north through Swampland and Dremuchij North.
- Cross Dolinovodno and reach Rassvet.
3. Use the early backtracking window correctly
After the Boss destroys Snake’s pistol, do not expect to collect every optional target immediately. Many second-visit Kerotans and useful pickups require a firearm, while some areas are easier to search after the story equipment is restored at Rassvet. For a normal completion run, advance to Rassvet first, obtain the available weapons and equipment, then return south if you want to search the early maps.
The optional sweep should be treated as a loop rather than a new mandatory story route. From Rassvet, return across Dolinovodno to Dremuchij North, enter Dremuchij Swampland, continue into Dremuchij South, and then reverse direction. Search Dremuchij South for food, medical plants, grenades and the second-visit Kerotan. In the Swampland, avoid crocodiles and mud while checking the island and banks for optional targets. Back in Dremuchij North, use cover near the crashed drone and patrol routes before continuing north again.
Once you have returned to Dremuchij North and crossed Dolinovodno, proceed to Rassvet and complete the required story scenes. After leaving Rassvet with EVA, assume the early Dremuchij loop is no longer a convenient free-travel area. Keep a save before optional detours so a failed search or alert does not force you to repeat mandatory scenes.
- Do not attempt difficult firearm-based collectibles before recovering a weapon.
- Search Dremuchij South and Dremuchij Swampland during the deliberate backtracking loop.
- Return through Dremuchij North instead of assuming the southern areas remain open indefinitely.
- Leave the early region only after collecting the optional items you actually want.
4. Separate mandatory progress from optional content
The mandatory campaign requires Snake to recover Sokolov, follow the route through the jungle and military facilities, survive the required Cobra Unit encounters, destroy the Shagohod, defeat Volgin and reach the final confrontation with The Boss. Ordinary guards do not all need to be defeated. Evading them often saves ammunition, food and medical supplies.
Kerotan frogs, animals, food, ammunition, camouflage pieces, film-related items, side weapons and special boss rewards are optional. Non-lethal boss victories may provide special equipment, but lethal victories still allow the story to continue. Do not risk a mandatory objective solely to obtain an optional reward unless you are deliberately pursuing a completionist or no-kill run.
The same named area can contain different items or collectibles on different visits. A Kerotan or pickup found during Virtuous Mission should not be assumed to be the same target encountered during Operation Snake Eater. Check the mission context before searching, and save before any optional detour that requires a difficult shot, exposed movement or a return through the swamp.
- Treat the story objectives as the only requirements for the ending.
- Do not confuse prologue pickups with Operation Snake Eater pickups.
- Use non-lethal boss victories for optional rewards only when the attempt is reliable.
- Save before difficult collectible searches or long backtracking detours.
5. Recognize the access cutoffs
The first cutoff occurs in Virtuous Mission when the approach to Sokolov advances into the forced escape and extraction sequence. After that point, the earlier prologue areas cannot be freely revisited. Finish any prologue-only collectible or supply search before entering the decisive story room.
The second cutoff is the early Operation Snake Eater region. The game allows a useful return through Dremuchij South, Dremuchij Swampland and Dremuchij North before the campaign moves on through Dolinovodno and Rassvet. Use that window for optional supplies and collectibles, but do not confuse it with a separate required mission order.
For a first playthrough, prioritize the required path over a complete map clear. Keep enough food and medical items for the next section, avoid unnecessary alerts and advance once the optional rewards you want have been secured.
- Finish desired Virtuous Mission tasks before approaching Sokolov.
- Reach Rassvet and recover the main-operation equipment before intensive optional searching.
- Complete the early Dremuchij backtracking loop before committing to the route beyond Rassvet.
- Advance after the mandatory story scenes rather than attempting to clear every guard or pickup.
Before you move on
- Virtuous Mission has ended after the Sokolov extraction failure, injury treatment and operation transition.
- Operation Snake Eater has begun in Dremuchij East and progressed through the early Dremuchij areas, Dolinovodno and Rassvet.
- The main campaign has continued through its required facilities, bosses, Shagohod sequence and final confrontation.
- The Boss has been defeated and the canonical ending sequence and credits have played.
- The completed campaign save has been preserved separately from experimental or challenge-run saves.
References for this chapter
Early stealth: insertion, first skirmishes and rescuing Sokolov
The Virtuous Mission is a short tutorial in the original PlayStation 2 release. Snake must recover his equipment, cross the first jungle areas, pass the Dolinovodno rope bridge, and reach Sokolov in the abandoned factory at Rassvet. Stealth is safer than open combat, but the route is forgiving: use vegetation and terrain to separate guards, neutralize only isolated soldiers, and retreat when an alert makes the current path unsafe.
1. Recover the backpack in Dremuchij South
After the opening HALO jump and codec calls, Snake begins in Dremuchij South without his backpack. From the starting position, move toward the northwest or northeast side of the area. If you take the northwest route, crawl under the fallen log. The eastern route leads around the ledge to the same northern section.
Climb the tree marked by vines, move along the branch, and collect the backpack when the action prompt appears. Snake receives the equipment needed for the rest of the mission, including the MK22 tranquilizer pistol. Before leaving, search the nearby area for MK22 ammunition, Life Medicine, snakes, mushrooms, and other food if you want extra stamina supplies. Exit through the northern passage to Dremuchij Swampland.
- Retrieve the backpack before attempting to continue north.
- Keep the MK22 equipped when a quiet ranged takedown is safer than CQC.
- Use the starting area to collect nearby food and medical supplies if needed.
2. Cross Dremuchij Swampland
The swamp leads north, but Snake moves more slowly in deep mud and crocodiles are concealed in the brush. Stay on firmer ground and use the edges of the area rather than cutting directly through suspicious reeds. Do not linger beside vegetation that may conceal a crocodile; if one attacks, create distance instead of trying to fight it unless you deliberately want its meat.
Several useful supplies are available here, including MK22 ammunition, a suppressor, a grenade, and Bug Juice. Collect them only when the route is safe. Move carefully and leave through the northern exit. This section has no normal guard patrol, so it is a good place to gather food and learn the Survival Viewer without pressure.
- Use firm ground and avoid hidden crocodiles.
- Collect the MK22 suppressor if you want a quieter approach in the next area.
- Exit through the northern passage into Dremuchij North.
3. Move through Dremuchij North
Dremuchij North contains the first regular enemy patrols. Equip Woodland camouflage or another pattern that matches the vegetation, then crawl or crouch through grass and use trees, rocks, and the central stump to break sightlines. Watch the patrol before moving; guards circle their routes, so waiting for one to turn away is usually safer than rushing.
The eastern fork contains the SVD sniper rifle. It is optional and not required to reach Sokolov, but it is a useful pickup for later portions of the game. If you enter the fork, remain low and return to the main intersection after collecting it.
For a quiet takedown, approach an isolated soldier from behind and press Circle to initiate CQC. You can restrain, interrogate, throw, or choke the guard depending on the follow-up input. If another patrol is close, do not grab the first soldier until the area is clear. The MK22 is preferable when you can obtain a clean shot without a nearby guard seeing the muzzle flash or falling body.
- Use Woodland camouflage and stay in vegetation.
- Treat the SVD as optional; the story does not require it.
- Only use CQC when the target is separated from nearby patrols.
4. Pass the Dolinovodno rope bridge
Enter Dolinovodno from the south and observe the sentry near the bridge before crossing. The safest general options are to wait for him to move away, use the suppressed MK22, or shoot the hornet nest above the patrol area so the insects scatter the soldiers. The hornet method is noisy and situational, but it can clear the bridge long enough to cross.
If you use CQC, approach from the brush or the ledge and drag the unconscious guard away from the path before proceeding. Cross the bridge while crouched or walking. Under the bridge is an optional alcove reached by dropping from the bridge, grabbing the branch, and moving along the ledge. It contains useful supplies, including XM16E1 ammunition and Pentazemin. Do not attempt the alcove while a guard is watching your position; simply continue north if the route is unsafe.
- Watch the bridge guard before exposing Snake on the span.
- Use the hornet nest, a tranquilizer shot, or a rear CQC takedown.
- Treat the under-bridge alcove as optional and do not risk an alert for it.
5. Enter Rassvet and reach Sokolov
Rassvet is the abandoned factory north of Dolinovodno. Approach through the outer grass and use the brick walls and building corners to avoid the courtyard patrols. If a guard is alone, use the MK22 or rear CQC. If two patrols overlap, remain hidden until they separate rather than starting a fight in the open.
Inside the factory, the required destination is Sokolov’s room in the northeast section. The M37 shotgun in the southwest corner, XM16E1 ammunition, a suppressor, Life Medicine, and the mousetrap beneath the building are optional. Collect them before entering Sokolov’s room if you want them, because approaching Sokolov begins the next mandatory sequence and ends the mission’s free exploration.
Do not enter Sokolov’s room while Snake is in an active Alert phase. If guards have seen you, retreat into cover and wait until the situation falls back to a less dangerous search state. Then enter the northern room to trigger the conversation and cutscenes.
- Reach the northeast room where Sokolov is being held.
- Collect optional Rassvet supplies before approaching him.
- Ensure the area is no longer in an active Alert phase before entering the room.
6. Finish the Virtuous Mission and use Cure
After the Sokolov and Ocelot scenes, Snake must leave Rassvet and return south toward Dolinovodno. The Ocelot encounter is mandatory; do not kill Ocelot. Once the cutscene at the bridge ends, Snake is left seriously injured at the riverbank.
Open the Survival Viewer and select Cure. Treat the listed injuries with the appropriate supplies. Broken bones require splints and bandages; cuts require the relevant disinfectant, styptic, suture, and bandage treatment shown by the Cure menu. The recovery sequence follows when the injuries have been treated.
If an alert occurs before the Rassvet scene, break line of sight immediately. Hide in grass, behind a wall, or inside the previous area, then wait for the search to pass. If Snake dies or the approach becomes messy, reload a manual save from before the swamp, bridge, or factory rather than repeatedly forcing the same failed route. Rotate at least two save slots and keep one older recovery save before entering Rassvet.
- Leave Rassvet after the Ocelot cutscene and return toward the bridge.
- Complete the Cure treatment after Snake is injured.
- Save after recovery and confirm that the game transitions toward Operation Snake Eater.
Before you move on
- Snake reaches Sokolov’s room in the northeast section of the Rassvet factory and the mandatory conversation begins.
- The Ocelot unit sequence plays, followed by Snake’s return toward Dolinovodno and the bridge confrontation.
- Snake reaches the riverbank, completes the Cure procedure, and is extracted for the transition into Operation Snake Eater.
Survival systems in the jungle: food, camouflage and the environment
In the original North American PlayStation 2 release of Metal Gear Solid 3: Snake Eater, survival management is built around three separate concerns: stamina, camouflage, and injuries. Food restores stamina, but it does not replace medical treatment. Camouflage works best when the uniform and face paint match the current terrain, while crawling, staying still, and using natural cover reduce the chance of detection. The Survival Viewer is your main field-management menu, so use it regularly from a secure position rather than waiting until Snake is exhausted or badly injured.
1. Check stamina before difficult movement
Watch the smaller gauge beneath Snake’s Life Gauge. Running, fighting, swimming, climbing, hanging, and carrying equipment gradually reduce stamina. When stamina becomes low, Snake’s aim becomes less steady, life recovery slows, and physical actions become less forgiving. A low gauge can also reduce the time available for swimming or hanging from a ledge.
Open the Survival Viewer and use the Food option before a long swim, climb, crawl, or exposed approach. Do not wait until Snake is nearly exhausted. Resting can recover stamina gradually, but eating is the reliable way to restore it during an active mission section.
Keep stamina separate from health in your planning. If Snake has a full Life Gauge but a depleted stamina gauge, he still needs food. If he has a wound or poisoning, food alone will not treat it.
- Check stamina after combat, extended crawling, swimming, or climbing.
- Eat before a traversal section with little cover or few supplies.
- Do not mistake a full Life Gauge for adequate stamina.
2. Carry a practical food reserve
Collect edible plants and animals while moving through jungle areas, and search safe bodies or storage locations for prepared food. You do not need to hunt every creature. Prioritize food when Snake is already low on stamina, when the next route includes water or climbing, or when you are approaching a long area without a safe pause.
Ordinary carried food can spoil over time. Use older perishable items before newer ones and inspect their condition in the Food menu. Spoiled or rotten food can cause a stomach problem, so do not eat it casually. It may still have situational value as a thrown distraction or against certain enemies, but otherwise dispose of it to free inventory space.
Animals captured alive do not spoil. They can be kept as a dependable reserve, although they still occupy food capacity and may not provide the same stamina recovery as more valuable provisions. Keep a mixture of immediately usable food and at least one reserve rather than filling every slot with items you intend to use at once.
- Use perishable food before it deteriorates.
- Keep at least one dependable reserve when the next area is long or isolated.
- Do not eat spoiled or rotten food unless you deliberately accept its side effect or are using it as a tactic.
3. Match the uniform to the terrain
Open the Survival Viewer, choose Camouflage, and select Uniform to change Snake’s clothing. The camo index appears in the upper-right during normal play. It indicates how effectively the current combination blends into the location; a higher value is generally better.
Change uniforms when the surroundings change substantially. Green or leafy patterns suit dense vegetation and grass, while darker or more specialized patterns are more useful in shadowed, muddy, rocky, or indoor areas. The game’s camouflage list shows how effective a choice is for the current location, so compare the available options instead of relying only on the name of the uniform.
Camouflage is assistance, not invisibility. Running across an open clearing, standing upright in a guard’s view, or moving noisily close to a patrol can reveal Snake even when the index is favorable. After changing clothing, lower Snake’s profile and use the terrain to make the camouflage matter.
- Compare the available uniforms whenever you enter a different environment.
- Prefer the option with the strongest current camo value rather than keeping one outfit equipped everywhere.
- Treat a high camo index as a reason to move carefully, not as permission to cross open ground.
4. Apply face paint as well as the uniform
Face paint is changed separately from the uniform. In the Camouflage menu, select Face and choose a pattern that fits the same surroundings. This matters when Snake’s head is visible above grass, while aiming, or when he is moving through sparse cover.
Change the face paint at the same time as the uniform whenever the landscape changes. A suitable uniform paired with an unsuitable face pattern can reduce the benefit of the overall camouflage combination. If the game presents a mask or special face option, treat it as a separate choice and use the value shown for the current area.
Make equipment changes from behind a tree, rock, embankment, or dense vegetation. The Survival Viewer is for managing Snake, not for solving an active detection problem. If a patrol is already close, first break line of sight and then adjust the equipment.
- Choose both a matching uniform and face paint.
- Change camouflage from cover.
- Recheck the combination after entering caves, buildings, swamps, rocky routes, or unusually sparse ground.
5. Use posture, foliage, and terrain breaks
Crawl through tall grass and low vegetation when patrols are nearby. Crouch or lie prone before crossing a guard’s expected sightline, and remain still when a search begins. Staying low improves concealment, while running and faster movement reduce the benefit of the camo index.
Use trees, fallen logs, rocks, slopes, and raised banks to break the enemy’s view before moving to the next patch of cover. The original PS2 camera gives you a limited view, so rotate carefully and check likely patrol angles before leaving concealment. Do not assume that foliage blocks every direction simply because it looks dense from Snake’s current position.
Water can provide an alternate route, but it is not automatically safe. Swimming and wading consume stamina, and open water may leave Snake visible from the bank. Enter water when it avoids a patrol or shortens an exposed crossing, then leave before stamina becomes critical. Hug the shoreline or nearby cover when possible instead of taking a broad, exposed route through the center.
- Lower Snake’s profile before crossing a sightline.
- Stop moving inside cover when a guard begins searching.
- Use water for a clear tactical reason and monitor the stamina cost.
- Avoid silhouetting Snake on ridges or in open clearings.
6. Treat injuries separately from hunger
After combat, open the Survival Viewer and inspect Cure as well as Food. Gunshot wounds, cuts, burns, poison, and other conditions require the appropriate medicinal or surgical treatment. Food restores stamina; it does not close wounds or restore the maximum portion of the Life Gauge lost through an untreated serious injury.
Treat significant injuries soon after reaching cover. Leaving a serious wound untreated can reduce Snake’s maximum Life Gauge and slow recovery. Poisoning or sickness from dangerous food also belongs in the Cure menu rather than being solved by eating another ration.
Once Snake is treated, refill stamina and review the equipment you are carrying. Heavy unused weapons and items increase stamina consumption, so return equipment you do not need for the next section to the backpack. Save after stabilizing Snake before a difficult transition when a manual save is available.
- Use Cure for wounds, poison, and other ailments.
- Restore stamina with Food after medical treatment.
- Return unnecessary heavy equipment to the backpack.
- Save after preparing Snake for a dangerous route or scripted event.
Before you move on
- Snake enters each new environment with a uniform and face paint suited to the current terrain.
- The camo index has been checked after major environmental changes.
- Stamina is restored before major swims, climbs, long crawls, and exposed approaches.
- Perishable food is used before spoiling, while a practical reserve is retained for isolated sections.
- Wounds and poisoning are treated through Cure rather than being mistaken for hunger.
- The current jungle section can be crossed by combining low movement, foliage, terrain breaks, and controlled water use instead of relying on open-ground dashes.
References for this chapter
- Metal Gear Solid 3: Snake Eater — Camouflage reference
- Metal Gear Solid 3: Snake Eater — Food, StrategyWiki
- Metal Gear Solid 3: Snake Eater — Guide and Walkthrough, PlayStation 2
- Metal Gear Solid 3: Snake Eater — Guide and Walkthrough, PlayStation 2, Tarrun
- METAL GEAR SOLID 3: Snake Eater — Online Manual, Survival Viewer and Camouflage
First major encounter: The Pain — recognition, counters and recovery
The Pain is the first Cobra Unit boss, fought in the large pool chamber at the northern end of Chyornaya Peschera Cave during Operation Snake Eater. He remains on a rock across the water from Snake’s starting position and attacks by shaping hornets into a shield, grenade, machine gun, and projectile swarms. The safest PS2 strategy is to use the water to evade attacks, wait for the hornet shield to clear, and fire from the bank or a small island. A smoke grenade can force the shield away temporarily. The encounter is mandatory, while the Hornet Stripe uniform is an optional reward for a stamina-only victory.
Reach the boss chamber and prepare your equipment
Proceed north through Chyornaya Peschera Cave after crossing the earlier branch areas. The cave divides near the beginning. Take the narrow right-hand route if you want the M37 shotgun, then use the crawlspaces to collect the Snow uniform and any ammunition or food you need before entering the large northern chamber. These pickups are optional, but the shotgun and extra ammunition make the fight more forgiving.
Equip a dependable firearm before entering the pool arena. The AK-47 is suitable for a direct lethal fight, while the M37 can remove the hornet shield at close-to-medium range when The Pain is exposed. For a non-lethal run, equip the Mk22 and use it for the entire damage phase. Carry a ration or another healing item, and keep at least one smoke grenade if you want to create additional openings. The smoke grenade is useful but not mandatory; careful evasion and patience are enough to win.
- Load your primary firearm before entering the arena.
- Bring a healing item and enough ammunition for repeated short attacks.
- Equip the Mk22 instead of lethal weapons if you want the Hornet Stripe reward.
Establish the arena’s safe position
The fight begins with Snake on one side of the pool and The Pain standing on a rock across from him. Do not treat the rock as a platform you must climb or assault directly. The battle is fought across the water, and The Pain normally stays in his position while directing the hornets.
Use the water as your main defensive tool. When an attack approaches, dive and swim away from your current position, then surface only after the attack has passed. Moving to the opposite side of the pool prevents you from being trapped near the blast or projectile path. Keep Snake’s stamina high enough for repeated dives and swimming; eat the fish or other food in the arena if stamina becomes a problem.
- Keep the pool between Snake and The Pain during dangerous attacks.
- Dive and swim rather than standing on an exposed rock.
- Eat available fish or carried food if stamina begins to fall.
Counter the hornet grenade and Tommy-gun attacks
When The Pain calls out a grenade, a cluster of hornets carries the explosive toward Snake. Watch its approach and move away from the blast area by diving into the water. If you have a clear shot, shooting the carried grenade can make it fall into the pool, but swimming away is the safer response when your aim is uncertain.
For the hornet-made Tommy gun, dive underwater and swim toward the opposite side of the chamber. Do not remain on the same small rock and attempt to trade fire. The projectiles are most dangerous when Snake stays exposed, while the water gives you time to reposition and wait for the attack to end.
- Dive away from the carried grenade instead of waiting beside it.
- Go underwater when the Tommy-gun attack begins.
- Surface only after the attack has stopped or moved past Snake.
Break the hornet shield and damage The Pain
The Pain frequently covers his body with a dense hornet shield. While the shield is active, ordinary shots do not damage him. Wait for the hornets to move away, or throw a smoke grenade at his position to disperse the shield temporarily. As soon as his body is exposed, use first-person aim and fire a short controlled burst with the AK-47 or another reliable weapon. With the Mk22, aim for the exposed body and continue reducing stamina rather than switching to lethal ammunition.
After firing, return to the water before The Pain resumes an attack. Do not empty a magazine while standing still. The fight is safer when treated as a repeated cycle: evade, wait for exposure, fire briefly, and dive away. If The Pain creates a duplicate or confusing swarm image later in the encounter, do not rush toward it. Shoot the apparent target only when you have a clear view, then retreat if the effect makes the real position uncertain.
- Do not waste ammunition against a fully covered target.
- Use smoke grenades to create an extra opening when needed.
- Fire only during the brief period when The Pain’s body is exposed.
Treat bullet-bee wounds and finish the encounter
After The Pain has lost roughly half of his life or stamina, he removes his mask and launches stronger bullet-bee attacks. The projectiles leave visible trails. Dive underwater as soon as they approach. If one strikes Snake and remains embedded, open the Cure menu and use the knife to remove it. Then apply the appropriate wound treatment, such as disinfectant, styptic, suture kit, or bandage, rather than continuing to fight with the injury untreated.
Continue alternating between underwater evasion and short attacks against the exposed boss. If health becomes low, swim to the far side of the chamber before healing. Reloading or using medical items while a swarm or projectile is reaching Snake is likely to cause another hit. The post-battle scene confirms that The Pain has been defeated, after which the northern cave route becomes available.
- Use the Cure menu to remove an embedded bullet bee with the knife.
- Heal only after reaching a safe side of the pool.
- Continue north after the post-battle scene instead of searching for another exit.
Claim the optional Hornet Stripe reward
For the optional Hornet Stripe uniform, defeat The Pain by reducing his stamina with the Mk22 rather than his life with lethal weapons. The uniform is not required for story progression. After the fight, move around the right side of the chamber and follow the ledge overlooking the arena. Perform a running roll from the ledge to reach the raised area where the uniform can be collected.
If you are completing the campaign rather than pursuing a non-lethal or completionist run, leave the uniform and continue north. Do not restart the encounter merely because you did not obtain it; it has no requirement for the ending.
- Use only the Mk22 for the stamina-only victory.
- Collect the Hornet Stripe uniform from the ledge after the battle if desired.
- Treat the uniform as optional and continue north if it is not needed.
Recover after a failed attempt
The practical recovery point is the manual save made before entering the boss chamber. If Snake dies or the encounter becomes unrecoverable, reload that save rather than repeatedly trying to rescue a nearly depleted health bar. Before retrying, verify that the Mk22 or primary firearm is equipped, ammunition is available, and at least one healing item is ready.
On the next attempt, spend less time attacking and more time underwater. The most common failure is remaining on a small rock while The Pain performs the Tommy-gun or bullet-bee attack. A second common mistake is firing into the hornet shield. Move away, wait for an opening, and resume the same evade-expose-fire cycle. The arena does not require a special capture procedure; a failed attempt is handled by reloading and re-entering the boss fight.
- Reload the pre-battle manual save after death or a failed attempt.
- Begin the retry with the water as your first defensive option.
- Reserve enough ammunition and healing for the second half of the fight.
Before you move on
- The post-battle scene plays and The Pain no longer attacks from the pool chamber.
- The northern route through Chyornaya Peschera Cave is open for continued progression.
- If pursuing the optional reward, the Hornet Stripe uniform has been collected from the ledge after a Mk22 stamina victory.
- Snake has been healed and has enough ammunition and food to continue toward Chyornaya Peschera Cave Entrance and Ponizovje.
Tactical moments: The Fear, The Fury and theatre-style boss encounters
This chapter is a split reference for two nonconsecutive Cobra Unit encounters in the original North American PlayStation 2 release of Metal Gear Solid 3: Snake Eater. Consult The Fear after completing the Graniny Gorki Lab sequence and before c06 and c07 cover the Sokrovenno route and The End. Much later, after c11 covers The Sorrow, the waterfall recovery and Snake’s return to the field, consult The Fury before resuming c08’s return-to-Groznyj-Grad phase and before c09 covers Volgin and the Shagohod. Both bosses are mandatory for story progress, while their special camouflage rewards require stamina victories. These directions assume the original Snake Eater presentation with its fixed camera and original controls, not Subsistence or later ports.
Route marker: consult The Fear after Graniny Gorki Lab and before c06/c07
Use this section immediately after Snake meets Granin in Graniny Gorki Lab and leaves the building. Return through the front entrance to Graniny Gorki South. The Fear encounter begins there. Do not jump ahead to the Sokrovenno material until this fight is complete and Snake has returned through the warehouse route.
The correct handoff is: Graniny Gorki Lab, Graniny Gorki South and The Fear, then Ponizovje Warehouse, followed by the route toward Svyatogornyj and Sokrovenno. The End is later than The Fear, so keep the two sniper-related references separate. Make a manual save before re-entering Graniny Gorki South and preserve it in a rotating slot until the boss result and the next area are secure.
Before starting, check Snake’s condition in the Cure menu. Carry the Mk22 if you want the optional Spider camouflage, Thermal Goggles for tracking, a lethal firearm if you prefer the faster ordinary victory, and enough medicine to treat poison, bleeding and burns.
- Leave Graniny Gorki Lab after the Granin sequence.
- Save before returning to Graniny Gorki South.
- Prepare Thermal Goggles and choose lethal or non-lethal equipment.
- Remember that The Fear comes before Sokrovenno and The End.
- After victory, return through Ponizovje Warehouse before continuing toward Svyatogornyj.
The Fear: cure the opening bolt and find his camouflage
The Fear opens the encounter by firing a venom-coated crossbow bolt. Enter the Cure menu immediately. Use the knife to remove the bolt, apply the displayed wound treatments and use Serum to remove the poison. Treat the injury before searching for the boss; otherwise poison and bleeding can continue draining Snake while he is exposed.
Equip the Thermal Goggles and scan the branches, trunks and brush. The Fear’s optical camouflage makes him difficult to see normally, but the goggles reveal him much more clearly and also help expose traps scattered around Graniny Gorki South. Use the original game’s first-person aiming view to check elevated branches without running blindly through the arena.
The Fear commonly moves between trees, pauses on branches and stops to fire crossbow bolts. Those pauses are your safest attack opportunities. Fire while he is stationary, then shift behind cover or change your position. If you hear him moving at ground level, prepare for a close attack and use a diving roll to avoid being caught in front of him.
Do not chase him continuously. The arena contains traps and open sightlines, and losing track of The Fear gives him time to fire again. A patient loop of scan, short attack and relocation is safer than spraying ammunition into empty foliage.
- Remove the bolt with the knife.
- Use Serum for the poison and treat the wound.
- Equip Thermal Goggles.
- Watch branches, pauses and crossbow firing animations.
- Use movement and cover after each attack.
The Fear: lethal and non-lethal victory methods
For normal story progress, use an accurate firearm and attack when The Fear pauses on a branch or lands nearby. The XM16E1, AK-47 or another dependable weapon can finish the fight, while a close-range weapon is useful when he lands near Snake. Conserve ammunition by avoiding blind fire through the trees.
For the optional Spider camouflage, reduce The Fear’s stamina instead of his life. The Mk22 is the most direct method: fire only when he is visible, then relocate and repeat. The Fear’s stamina also drains naturally while he remains camouflaged. When he becomes hungry, he may shoot fruit from the trees and stop to eat, creating another opening.
Food can manipulate this behavior. Ordinary food can bait him into a predictable position. Rotten food makes him lose stamina when he eats it and is useful for a stamina victory. Poisonous food or poisonous wildlife can damage his life, so avoid those if you are trying to preserve a non-lethal result. These food tactics are optional; you do not need them to complete the boss fight.
A stamina victory awards Spider camouflage in the arena after the battle. A lethal victory still advances the campaign normally. Spider camouflage can be useful for stealth, but it consumes stamina while worn, so it is not automatically the best uniform for every later region.
- Use a lethal firearm for the simplest story completion.
- Use the Mk22 for the non-lethal route.
- Use rotten food for stamina loss, not poisonous food, when pursuing Spider camouflage.
- Confirm that the stamina gauge, rather than the life gauge, was depleted for the optional reward.
The Fear: exit and failure recovery
After the post-battle sequence, search the arena for the Spider uniform if you earned the stamina victory, then leave through the southern exit and return into Ponizovje Warehouse. From there, follow the established route onward toward Svyatogornyj and Sokrovenno. Do not overwrite the pre-fight save until the warehouse route has loaded and the story has advanced.
If Snake dies, reload the pre-fight slot and begin by treating the bolt correctly. If a non-lethal attempt becomes unsafe, reload that slot and switch to a lethal weapon. Once Snake has returned through the warehouse and the next route is available, make a new rotating save before continuing.
The next relevant reference is c06/c07 for Svyatogornyj, Sokrovenno and The End. Do not proceed to the Fury section here; The Fury occurs much later after The Sorrow and the waterfall equipment recovery.
- The Fear’s life or stamina gauge reaches zero.
- The post-battle scene finishes.
- Snake exits south into Ponizovje Warehouse.
- A new save is made after the route has advanced.
- Continue to c06/c07, not to the Fury section.
Route marker: after c11’s waterfall recovery, consult The Fury before c08 and c09
Use this section only after c11 has covered the prison escape, The Sorrow’s river sequence, Tikhogornyj and the waterfall recovery. Snake must have recovered his equipment and received the C3 charges. The next mandatory route is through the Groznyj Grad Underground Tunnel, where The Fury blocks the way back to the fortress.
The handoff is explicit: finish c11’s waterfall recovery, save before entering the Groznyj Grad Underground Tunnel, complete The Fury, then resume c08’s return-to-Groznyj-Grad instructions for the fortress approach and C3 placement. Only after that return phase should c09 handle Volgin and the Shagohod. Do not place The Fury after The Fear or after Volgin.
Before entering the tunnel, restore health and stamina, inspect the Cure menu and carry the Mk22 for a non-lethal attempt or a reliable firearm for ordinary progress. Bring ointment, bandages and other burn treatment. Smoke grenades may obscure sightlines during a reposition, but they do not make Snake safe from the flamethrower.
- Complete The Sorrow and use the Revival Pill.
- Recover Snake’s equipment at the waterfall.
- Receive the C3 charges.
- Save before entering the Groznyj Grad Underground Tunnel.
- After The Fury, resume c08 before beginning c09.
The Fury: use the tunnel lanes and avoid the flame sweeps
The Fury’s arena consists of long tunnel lanes connected by side passages. He uses a flamethrower, rocket-assisted movement and sudden charges. Fire can remain on the ground after he passes, so do not assume that a lane is safe merely because the boss has moved away.
Choose one end of a lane as your firing position and keep a side passage or adjacent lane in mind as the retreat route. When The Fury appears, attack briefly from distance, then relocate before he completes another flame sweep. Do not remain in the same lane while he is preparing to fire. His movement and jetpack sounds are useful warnings in the dark tunnel.
After a charge or flamethrower pass ends, cross through a side passage and attack from a new angle. Night Vision or Thermal Goggles can improve visibility, but they do not replace movement. Advance gradually rather than pursuing him through burning corridors.
Explosive barrels can inflict heavy damage when The Fury is close. Shoot one only when you have already identified a retreat route, because the blast can injure Snake as well. If Snake catches fire, roll immediately to extinguish it, then use the Cure menu to treat the resulting burn before continuing. The southern drop is not a dependable escape route: The Fury can recover from being knocked down there, so use the connected lanes and passages instead.
- Fire from a lane end and relocate after each attack.
- Use side passages to break the flamethrower’s line.
- Wait for ground flames to subside before crossing.
- Roll immediately if Snake catches fire.
- Use explosive barrels only when a retreat path is clear.
The Fury: lethal and non-lethal approaches
For ordinary story completion, use a firearm from the end of a tunnel lane. Fire after a flamethrower sweep or rocket charge, then move to another lane. If The Fury disappears around a bend, listen for the jetpack and flame sounds instead of rushing forward into a fresh attack.
For the optional Fire camouflage, use the Mk22 or another non-lethal weapon and reduce The Fury’s stamina to zero. Fire several controlled shots during his recovery or movement, then retreat through a side passage before he fills the lane with fire. A close CQC approach is possible but riskier because the surrounding ground may ignite before Snake can disengage.
A stamina victory makes the Fire uniform available after the encounter, near the route out of the tunnel. A lethal victory does not block story progress and is the safer fallback if the arena becomes unmanageable. No-kill players should reload the pre-tunnel save if a lethal shot is fired accidentally rather than risking the entire run.
- Choose Mk22 for the non-lethal route or a firearm for standard progress.
- Attack after a flame sweep or rocket charge.
- Defeat The Fury by emptying either the life or stamina gauge.
- Collect Fire camouflage only after a stamina victory.
- Reload the pre-tunnel save if preserving a no-kill run.
The Fury: leave the tunnel and hand control back to c08
After the fight, follow the tunnel north. Collect the scattered medical supplies and the Fire uniform if the stamina victory earned it, then climb the northern ladder. Snake returns toward Groznyj Grad, and the next mandatory phase is the fortress return covered in c08.
Treat burns and restore Snake before entering the fortress. Make a new rotating save after the tunnel exit or once the next area has loaded, while retaining the pre-Fury save until you are certain the escape route is secure. Continue with c08’s instructions for entering Groznyj Grad, planting C3 on the four Shagohod fuel tanks and beginning the Volgin sequence. c09 follows only after that fortress preparation.
If Snake dies, reload the pre-tunnel save. If the fight appears to restart, return to a lane end, wait for the remaining fire to clear and resume the attack-relocate pattern. Do not treat The Fury as an optional encounter: the tunnel must be cleared before the return to Groznyj Grad can continue.
- The Fury’s life or stamina gauge reaches zero.
- Snake exits through the northern tunnel route.
- A new save is made before resuming the fortress approach.
- Resume c08’s Groznyj-Grad return instructions.
- Proceed to c09 only after the C3 placement phase leads into Volgin.
Before you move on
- The Fear: after Graniny Gorki Lab, The Fear’s life or stamina gauge is empty, the post-battle scene has played and Snake exits through Graniny Gorki South into Ponizovje Warehouse.
- The Fear handoff: Snake continues toward Svyatogornyj and Sokrovenno, where c06/c07 handle The End; the Fury section is not used yet.
- The Fury: after c11’s waterfall equipment recovery and receipt of the C3 charges, Snake enters the Groznyj Grad Underground Tunnel and empties The Fury’s life or stamina gauge.
- The Fury handoff: Snake exits north from the tunnel and resumes c08’s return-to-Groznyj-Grad route before c09 begins the Volgin and Shagohod material.
- For a no-kill run, confirm that each boss was defeated by stamina depletion rather than life damage and retain the pre-boss saves until the next major progression point is secure.
- The campaign is not considered complete from this chapter alone; these fights are intermediate mandatory encounters, not the final ending.
References for this chapter
- Metal Gear Solid 3: Snake Eater — Guide and Walkthrough, PlayStation 2
- Metal Gear Solid 3: Snake Eater Walkthrough
- Metal Gear Solid 3: Snake Eater - Guide and Walkthrough - PlayStation 2 - By DarkSun
- Metal Gear Solid 3: Snake Eater — Guide and Walkthrough, PlayStation 2 — El_Greco
- Metal Gear Solid 3: Snake Eater Walkthrough sample pages
Correct route to Sokrovenno and preparation for The End
In the original PlayStation 2 release, The End is fought before Krasnogorje. Finish the Svyatogornyj sections, enter Sokrovenno, prepare the Mk22 and available tracking equipment, then use cover, camouflage and careful relocation to win the sniper duel. Afterward, leave through Sokrovenno North and continue into Krasnogorje Tunnel.
1. Save in Svyatogornyj before entering Sokrovenno
After the events at the laboratory, return through Svyatogornyj West and make a manual save before entering Sokrovenno South. Keep an earlier save as a fallback rather than overwriting your only slot. The upcoming fight is a large roaming encounter, so a separate pre-boss file is more useful than relying on a save made after entering the forest.
Before leaving Svyatogornyj, treat untreated wounds, refill stamina with food, and organize the Survival Viewer so the Mk22, medical items and camouflage can be selected quickly. The directional microphone and thermal goggles are valuable but not mandatory. If you lack one of them, the duel remains completable through patient observation, the map and sound cues.
- Save in Svyatogornyj West before entering Sokrovenno South.
- Carry the Mk22 and enough tranquilizer ammunition for repeated engagements.
- Treat wounds and restore stamina before the forest battle.
- Keep a separate fallback save instead of overwriting the only pre-boss file.
2. Enter Sokrovenno South and collect the missing long-range option
Enter Sokrovenno South from Svyatogornyj West. The End’s arena consists of Sokrovenno South, Sokrovenno North and Sokrovenno West. If you already collected the SVD earlier, keep it available for distant shots. If you missed it, the rifle can still be obtained in the small ammunition storage area west of the first clearing in Sokrovenno South. This is an optional aid, not a story requirement.
At the start of the battle, crawl toward the northern part of Sokrovenno South and use the thermal goggles briefly to search the elevated firing positions. The End begins in one of the northern positions in this area. Do not sprint across the clearing. Stay low, use vegetation and terrain for concealment, and pause whenever you hear movement or breathing.
- Use woodland or other forest-appropriate camouflage before crossing the arena.
- Retrieve the SVD from the Sokrovenno South ammunition storage if it was missed earlier.
- Do not treat the SVD, thermal goggles or microphone as mandatory story items.
3. Track The End without exposing yourself
The End changes positions between the three Sokrovenno sections. Crawl through grass and use the forest floor, rocks and raised ground as concealment. Thermal goggles can reveal heat signatures and footprints, but use them in short checks so you can continue reading the terrain and preserve stamina. The directional microphone can pick up breathing, movement and occasional snoring when The End is resting.
Watch for the glint from his scope when he is aiming from a distant position. Muddy ground may preserve footprints that lead toward his current hiding place. If he fires first, immediately crawl behind cover and use the Survival Viewer map. After a shot, the map can indicate the area from which he is attacking; use that information to approach from another direction rather than charging toward the muzzle flash.
When you obtain a clear view, use the Mk22 for a non-lethal run. Fire from cover, then relocate because The End can answer from range or move to another firing point. If a tranquilizer dart hits Snake, enter the Cure menu and remove it. Leaving the dart in place continues to drain stamina and can lead to capture.
- Crawl except when closing on The End from behind.
- Use thermal goggles, the microphone, footprints and scope glints as combined clues.
- Relocate after every shot rather than remaining in the firing position.
- Remove enemy tranquilizer darts through the Cure menu.
4. Use the forest routes to close in from behind
If The End leaves your section, follow the connecting paths into Sokrovenno North or Sokrovenno West and search the adjacent area rather than repeatedly scanning the same clearing. Approach the suspected position from a side or rear route. When close enough, hold him up with a weapon and keep your aim on him as he reacts. A successful hold-up can provide The End’s Moss camouflage; this is optional and not needed to continue the story.
For the most reliable non-lethal completion, continue using Mk22 shots until his stamina is depleted. Defeating him by draining stamina awards the Mosin Nagant, his tranquilizer rifle. The Moss camouflage and Mosin Nagant are separate optional rewards, so choose whether you want the safer ranged fight or the closer hold-up attempt. Do not risk the only save for the camouflage if completing the campaign is the priority.
- Use Sokrovenno’s connecting paths to flank instead of crossing open ground.
- Hold The End up from behind only when the approach is secure.
- Use the Mk22 to drain stamina for the Mosin Nagant reward.
- Treat Moss camouflage as optional.
5. Leave Sokrovenno and begin the actual Krasnogorje section
After defeating The End, move to Sokrovenno North and take the passage in the northeast corner. This leads to Krasnogorje Tunnel, where Snake climbs the long ladder into the mountain areas. Krasnogorje is the next campaign section, not the approach to The End.
Once in Krasnogorje Mountain Base, switch to terrain-appropriate camouflage and work along the edges or through trenches while avoiding exposed crossings. The later mountain route contains ammunition, medical supplies and the RPG-7, with the RPG-7 located in a shack at Krasnogorje Mountainside. Those supplies are useful for the campaign’s later vehicle encounters, but they are not preparation for the sniper duel and should not be presented as such.
- Exit through Sokrovenno North after the boss encounter.
- Enter Krasnogorje Tunnel only after The End is defeated or otherwise bypassed.
- Treat the RPG-7 as a later Krasnogorje pickup, not a prerequisite for The End.
- Maintain a separate save after the sniper battle before continuing uphill.
Before you move on
- The End has been defeated or the encounter has been bypassed through a documented alternate method.
- The optional reward has been collected if desired: Moss camouflage from a successful hold-up or the Mosin Nagant from a stamina defeat.
- Snake has exited through the northeastern passage of Sokrovenno North.
- Krasnogorje Tunnel has been entered after the sniper sequence, confirming the campaign has advanced to the mountain section.
The End sniper duel — routes, detection cues and winning approaches
The End’s required battle takes place across the connected Sokrovenno South, Sokrovenno North and Sokrovenno West areas in the original North American PlayStation 2 release. The safest normal method is to locate him with cover, the directional microphone, Thermal Goggles and scope glare, then drain his stamina with the Mk22. Holding him up provides the Moss camouflage, while a stamina victory provides the Mosin-Nagant. The battle can also be bypassed through an earlier warehouse snipe or the original PS2 system-clock exploit, but both shortcuts sacrifice the normal duel rewards.
Prepare at the start of Sokrovenno
After the cutscene at Ponizovje Warehouse, The End is transported into the Sokrovenno region and the sniper battle begins in Sokrovenno South. Save before entering the boss area if possible. Use a separate slot from your ordinary progress save so you can retry the encounter without losing earlier pickups.
Equip the Mk22 if you want the Mosin-Nagant. Bring tranquilizer ammunition, rations or captured food for stamina recovery, and medical supplies. Thermal Goggles and the directional microphone are strongly recommended but are not mandatory. Use woodland camouflage and matching face paint, then change equipment through the original PS2 Survival Viewer rather than expecting later port shortcuts or a free camera.
The objective is not simply to damage The End’s health. A lethal weapon can end the fight, but it forfeits the Mosin-Nagant reward. For the optional Moss camouflage, plan to hold him up during the duel before finishing the encounter.
- Save before entering Sokrovenno South.
- Equip the Mk22, food and medical supplies.
- Use woodland camouflage and prepare the Thermal Goggles and directional microphone if available.
- Keep a separate recovery save before experimenting with shortcuts.
Learn the three-area layout
The battle spans three connected locations: Sokrovenno South, Sokrovenno North and Sokrovenno West. The End relocates between firing positions, so remaining in one area and repeatedly checking the same ridge is usually ineffective. Search the area where you last detected him, then use the connecting paths to check the other sections.
Move along the edges of the terrain, behind rocks, trees, banks and thick vegetation. Avoid crossing a clearing in a straight line after being fired upon. If you are hit, break line of sight immediately, crawl behind cover and restore stamina before continuing. His tranquilizer shots can make Snake lose consciousness if stamina is allowed to collapse, so eating is part of the fight rather than a delay to ignore.
Sokrovenno South is the opening search area. The North and West sections provide additional firing lanes and hiding places. The End may move after being hit or after detecting Snake, so treat each successful shot as a reason to relocate rather than standing still for a second attempt.
- Search South first, then use the paths to North and West.
- Use rocks, trees and banks as hard cover.
- Restore stamina after a hit before resuming the search.
- Do not assume his next shot will come from the previous position.
Find The End without exposing Snake
The directional microphone can reveal breathing, movement or speech when The End is close. Sweep it from behind cover rather than standing in the open. Thermal Goggles are useful for following footprints and spotting a warm body through vegetation, especially after he has moved away from a firing position. Use them briefly and return to normal vision when scanning for terrain hazards or scope glare.
When you suspect a nest, enter first-person view from cover and look for the bright reflection from his scope. The glint is a positional clue, not an invitation to remain exposed. Aim, fire, and immediately move sideways or retreat behind another obstacle. If you fire an unsuppressed weapon as a deliberate distraction, be ready for an immediate countershot and use the noise only when you already have a safe retreat route.
The End’s parrot is optional. If it is visible or audible, inspect the nearby vegetation and elevated cover rather than chasing the bird across open ground. Capturing it can remove a distraction and lets you carry it as an item, but the reliable search tools remain the microphone, Thermal Goggles, footprints and scope glare.
- Use the microphone from concealment.
- Follow footprints only while the route remains covered.
- Check for scope glare from first-person view behind protection.
- Treat the parrot as a nearby-location clue, not a guaranteed tracking command.
Hold him up for the Moss camouflage
A stealthier route is to circle behind The End when he is prone or moving between positions. Approach slowly with the Mk22 or another firearm ready. Aim at his head from behind and hold him up. Keep the weapon trained on him while he reacts; do not immediately fire.
The End can be made to surrender the Moss camouflage during the hold-up sequence. This reward is separate from the Mosin-Nagant. If you want the camouflage, watch for the item being dropped before resuming the fight, then collect it. His stun response gives you time to move away, but turn aside or take cover if a stun grenade is thrown.
After collecting the camouflage, continue the encounter with tranquilizer attacks. A hold-up alone does not complete the boss battle, and killing him with lethal damage will not provide the Mosin-Nagant.
- Approach The End from behind while concealed.
- Hold him up and keep the weapon trained on him until he yields the Moss camouflage.
- Collect the camouflage before continuing.
- Do not confuse the camouflage reward with the rifle reward.
Defeat The End non-lethally and collect the rifle
Use the Mk22 from cover whenever The End exposes himself. A headshot drains stamina quickly, while body shots require more patience. After every shot, change position because he can answer from another angle or relocate. If he disappears, stop chasing, restore Snake’s stamina and begin another microphone-and-thermal search.
The non-lethal victory condition is depletion of The End’s stamina rather than his health. When the fight ends, check Sokrovenno North for the Mosin-Nagant, which is placed near Snake after the battle. It is a tranquilizer sniper rifle and is an optional reward, not a requirement for story progression. It is particularly useful for later non-lethal boss encounters and long-range tranq attacks.
Save after the victory once the next story transition is available. Keep the pre-fight save if you want to replay the duel for the other reward or practice a faster route.
- Use the Mk22 and aim for stamina damage.
- Relocate after each shot.
- Search Sokrovenno North for the Mosin-Nagant after the battle.
- Save after the story resumes.
Optional shortcuts on the original PS2 release
The normal battle can be bypassed earlier at Ponizovje Warehouse. During the sequence in which The End is present in his wheelchair, use the SVD if you collected it and shoot him before the Sokrovenno battle begins. The game then replaces the ordinary sniper duel with a different encounter involving the Ocelot Unit. This route is lethal and does not provide the normal Moss camouflage or Mosin-Nagant rewards.
The original PS2 version also supports a system-clock shortcut. Save during the boss battle, exit the game, advance the PlayStation 2 date by about a week, and reload the save. The End can die of old age, causing the game to bypass the normal fight. This is an exploit, not the intended tactic, and it sacrifices the ordinary rewards. Preserve an untouched save on another slot before changing the date, then restore the correct system date after testing.
If the shortcut produces an unexpected result, restore the untouched pre-fight save and fight The End normally. Do not overwrite the only copy of your progress while testing the clock method.
- Use the warehouse snipe only if you accept the altered follow-up and lost rewards.
- For the clock exploit, save first and preserve an untouched backup slot.
- Restore the original PS2 date after experimenting.
- Reload the normal pre-fight save if the shortcut does not behave as expected.
Before you move on
- The End has been defeated or bypassed and the story proceeds beyond the Sokrovenno sequence.
- For the normal non-lethal route, the Mosin-Nagant has been collected in Sokrovenno North after the stamina victory.
- If desired, the Moss camouflage has been collected during a hold-up before finishing the duel.
- A post-battle save exists, and the pre-fight recovery save remains available if the encounter needs to be replayed.
References for this chapter
- Metal Gear Solid 3: Snake Eater — Guide and Walkthrough, PlayStation 2, Tarrun
- Metal Gear Solid 3: Snake Eater - Guide and Walkthrough - PlayStation 2 - By DarkSun
- Metal Gear Solid 3: Snake Eater — Guide and Walkthrough, PlayStation 2
- Metal Gear Solid 3: Snake Eater — Boss Guide, PlayStation 2
- Sokrovenno — Metal Gear Wiki
- The End — Metal Gear Wiki
Groznyj Grad infiltration: moving past checkpoints and handling the Cobras
Groznyj Grad is completed in two separate visits. During the first visit, enter the Weapons Lab East Wing, use the Scientist uniform to locate Major Raikov, take his Officer uniform and Mask, and pass through the Main Wing and West Wing Corridor to trigger Snake’s capture. Escape the prison and reach the sewers, then continue to the The Sorrow and river sequence chapter. Much later, after recovering Snake’s equipment and receiving the C3 charges behind the Tikhogornyj waterfall, do not return directly to the fuel tanks. First cross the mountain route, enter the Groznyj Grad Underground Tunnel, and complete The Fury. Only after that encounter can Snake re-enter Groznyj Grad, return to the Weapons Lab Main Wing, and plant C3 on all four Shagohod fuel tanks.
1. First visit: prepare before entering Groznyj Grad
Make a manual save before entering the fortress and keep it separate from your ordinary rotating saves. Carry the Mk22 or another quiet weapon, a lethal weapon for emergencies, healing supplies, food, and a few grenades. The exterior consists of several courtyard areas, while the laboratory has narrow corridors and personnel who react differently to disguises.
Do not plan to clear the fortress by force. Follow walls, vehicles, tanks, and crates to break sightlines. If a guard discovers you, retreat around a building and wait for the alert to settle instead of beginning a prolonged firefight. A body left near a doorway or patrol route can create a later alert.
- Save before entering the first Groznyj Grad courtyard.
- Carry a quiet weapon, a lethal option, medical supplies, food, and emergency explosives.
- Keep a separate recovery save before entering the Weapons Lab.
2. Cross the exterior and reach the Weapons Lab East Wing
Move through the northwest, northeast, southwest, and southeast sections by staying near the building walls. Use armored vehicles and crates as cover rather than crossing the open centers of the courtyards. The original PS2 release uses the fixed camera, so stop at corners and check the next section before exposing Snake.
The intended entrance to the Weapons Lab is in the northeast portion of the fortress. Crawl or walk along the building and use the nearby vehicles to conceal your approach. Once inside, equip the Scientist uniform and remove Snake’s face paint. The uniform helps against ordinary soldiers, but scientists can recognize Snake, so avoid standing directly in front of laboratory staff.
- Use the perimeter and vehicles as cover.
- Check the far side of crawlspaces before entering them.
- Reach the Weapons Lab East Wing without starting a prolonged firefight.
- Equip the Scientist uniform and remove face paint.
3. Find Raikov and obtain the disguise
Search the East Wing for Major Raikov. He has blonde hair and wears a military officer’s uniform. Follow him until he moves upstairs near the locker room. Approach from behind and knock him out with the Cigarette Gas-Spray, Mk22, or another suitable non-lethal method. If you kill him, make certain the body cannot be discovered.
Drag Raikov to the lockers on the upper floor. The game conceals his body and makes the Officer uniform available. Equip both the Officer uniform and the Mask; wearing only one of them is not sufficient for the Raikov impersonation.
- Locate Raikov in the East Wing.
- Knock him out or kill him only when the body can be secured.
- Hide him in the upper-floor locker room.
- Equip both the Officer uniform and the Mask.
4. Cross the laboratory and trigger the capture
As Raikov, Snake can pass through the fortress and the Weapons Lab. When soldiers stop to salute, press Triangle to return the salute. You may collect optional supplies before continuing, including the Scorpion and ammunition in the East Wing. These pickups are useful but are not required for story progression.
Return to the locker room and use the southwest door. Cross the long Weapons Lab Main Wing corridor. The Shagohod hangar cannot yet be entered, so continue through the Main Wing to the West Wing Corridor. Approach the two guards at the end of the corridor. They allow Raikov to pass, beginning the mandatory Sokolov scene and Snake’s capture.
After the torture scenes, accept the save prompt. The first Groznyj Grad phase is now an escape mission, not an objective to plant explosives.
- Return soldiers’ salutes with Triangle.
- Collect the Scorpion and other optional supplies if desired.
- Cross the Main Wing without trying to enter the Shagohod hangar.
- Approach the West Wing guards to trigger the capture sequence.
- Save after the torture scene.
5. Escape the prison and finish the first Groznyj Grad phase
In the cell, pick up the Fork and open the Cure menu. Remove the bullet to obtain the Fake Death Pill. Removing the transmitter prevents the later tracking complication, although leaving it in place is not a progression blocker. Eating the rat restores stamina.
There are several escape methods. Enter the radio frequency if you learned it during the earlier scenes, use the Fake Death Pill and revive when the guard investigates, crawl under the bed and leave when the guard opens the cell, or make Snake vomit so the guard checks on him. Feeding the guard the food he throws into the cell can reveal the radio information and provide the gas-spray cigarettes, but it takes longer.
After escaping, Snake has no weapons, camouflage, knife, or normal CQC. Crawl whenever possible. Move through the southeast courtyard, pass under the truck, continue through the southwest section, and reach the northwest area. Use the tanks, walls, pipes, and cardboard box to break sightlines. Crawl beneath the pipes and enter the sewer entrance.
The Groznyj Grad Sewers lead into the mandatory The Sorrow river sequence. Do not attempt to return to the Weapons Lab at this point. Continue with c11 for the river, Revival Pill, Tikhogornyj, and waterfall equipment recovery.
- Take the Fork and manage Snake’s injuries in the Cure menu.
- Choose one of the prison escape methods.
- Remember that Snake cannot use normal CQC without his knife.
- Crawl through the southeast, southwest, and northwest areas.
- Enter the sewers and continue to c11.
6. Second visit begins after the waterfall recovery
After completing The Sorrow and the river sequence, follow Tikhogornyj to the waterfall. Enter the passage behind it and complete the cutscene. Snake recovers his equipment and receives the C3 charges needed to destroy the Shagohod. Collect the ammunition and suppressors in the passage if you need them.
Do not climb out and go straight to the four fuel tanks. The route now continues through the mountain areas. Leave the waterfall passage, cross the Krasnogorje route, and enter the Groznyj Grad Underground Tunnel through the red door. Stock up on ammunition near the tunnel entrance, then proceed to the lower arena and complete The Fury encounter. Use c10’s Fury section for the boss tactics and optional stamina-kill reward.
The tunnel and The Fury are mandatory route steps between the waterfall and the fortress return. After The Fury, the passage behind Snake is blocked, so continue forward through the mountain route until you re-enter Groznyj Grad Northwest.
- Recover Snake’s equipment and C3 behind the Tikhogornyj waterfall.
- Follow the mountain route rather than returning directly to the fortress fuel tanks.
- Enter the Groznyj Grad Underground Tunnel.
- Complete or bypass The Fury according to the c10 instructions.
- Proceed forward until Groznyj Grad Northwest is reached again.
7. Return to Groznyj Grad and plant all four C3 charges
Security has changed on the return visit. Move along the southern wall of Groznyj Grad Northwest and return to the Weapons Lab. The Officer uniform no longer works because the fortress knows Raikov is dead. The Scientist uniform remains useful against ordinary soldiers, and the East Wing lockers now contain the Sneaking uniform and Maintenance uniform. Take the Sneaking uniform for general stealth, or use the Maintenance uniform in the Main Wing while avoiding actual maintenance workers, who can recognize Snake.
Enter the Weapons Lab Main Wing. The four fuel tanks are positioned in the northwest area near the stairs, the northwest corner near the trucks, the northeast corner, and the southern section up the ramp. Lean against each tank and plant one C3 charge. Snake must not be seen during the planting animation. Guards discovering Snake elsewhere may create an alert, but avoid combat because gunfire can strike a tank and detonate it prematurely.
Eva contacts Snake after the second charge. Use this pause to confirm your equipment and collect supplies if needed. Save before beginning the placement sequence if the game permits a manual save at your current point, and make sure any desired optional items have been collected before planting the final charge.
Planting the fourth charge begins the cutscene leading to the Volgin confrontation. The fortress section is then complete and the next chapter should cover Volgin and the Shagohod.
- Re-enter Groznyj Grad only after completing The Fury.
- Do not rely on the Officer disguise during the return visit.
- Take the Sneaking or Maintenance uniform if useful.
- Plant C3 on the northwest stair-side tank.
- Plant C3 on the northwest tank near the trucks.
- Plant C3 on the northeast tank.
- Plant C3 on the southern tank up the ramp.
- Avoid being seen during each planting animation and avoid gunfire near the tanks.
- Plant the fourth charge to begin the Volgin sequence.
Before you move on
- Snake entered the Weapons Lab East Wing in the Scientist uniform.
- Snake found Raikov, secured his body in the locker, and obtained the Officer uniform and Mask.
- Snake crossed the Main Wing and West Wing Corridor and triggered the Sokolov capture sequence.
- Snake escaped the prison, entered the sewer, and continued to the The Sorrow and river sequence.
- Snake reached Tikhogornyj Behind Waterfall and recovered his equipment and C3 charges.
- Snake crossed the mountain route, entered the Groznyj Grad Underground Tunnel, and completed The Fury.
- Snake returned to the Weapons Lab Main Wing and planted C3 on all four fuel tanks.
- The cutscene after the fourth charge began and the Volgin confrontation became active.
References for this chapter
The Sorrow and the river sequence: story-driven sections and mandatory flows
The Sorrow is a mandatory story sequence after the Groznyj Grad sewers, not a conventional boss fight. Move north through the river, avoid the spirits and The Sorrow’s energy attacks, reach his body if you want the optional Spirit camouflage, and use the Revival Pill when Snake apparently dies. After the revival, travel through Tikhogornyj to the waterfall. Eva restores Snake’s equipment and gives him the C3 charges, but the next objective is not the fuel-tank operation yet: the mandatory route continues through the Groznyj Grad Underground Tunnel and The Fury. After defeating or bypassing The Fury, return to the fortress and follow the later Groznyj Grad instructions for planting the four C3 charges.
1. Create a recovery save before the sewer sequence
The Sorrow follows the Groznyj Grad sewer escape. Make a manual save before entering the sewer route, preferably in a separate recovery slot. This protects your progress if you dislike the river sequence or need to repeat the approach after a failed escape. The river is affected by your earlier kills, so a lethal playthrough can produce more apparitions and a longer traversal than a mostly non-lethal run.
Do not spend time searching for optional rewards once the sewer cutscenes begin. The story will temporarily give Snake access to his equipment during The Sorrow sequence, but ordinary weapons are not needed to complete the encounter. Keep food and medical items available if possible because ghost contact and The Sorrow’s attacks can reduce Snake’s health during the crossing.
- Save before entering the Groznyj Grad sewers.
- Use a separate recovery slot instead of overwriting your only recent save.
- Treat the river as a mandatory story passage, not an optional boss challenge.
2. Travel north through the river
When control returns, move forward and follow The Sorrow’s figure toward the far end of the river. Your objective is to keep progressing north. Ghosts representing soldiers and other enemies killed earlier will approach Snake. Contact with them drains health, so steer around them rather than trying to eliminate them permanently.
The Sorrow periodically launches a blue energy attack down the river. Watch for the attack cue and move sideways as it is released. Avoid moving too early because the blast can track Snake’s movement and knock him down, leaving him exposed to nearby spirits. If a ghost blocks your path, a weapon can create temporary space, but fighting is not required and usually makes the passage harder.
The river becomes more hazardous when Snake has accumulated many kills. Use the open sections to change sides early, and keep moving through narrow sections instead of waiting for an apparition to pass. If Snake is knocked down, recover immediately and continue toward the end rather than turning back.
- Follow The Sorrow toward the end of the river.
- Avoid ghost contact instead of trying to clear the area.
- Move sideways when The Sorrow fires his energy attack.
- Use weapons only as an emergency spacing measure.
3. Reach The Sorrow’s body for the Spirit camouflage
Continue until you reach The Sorrow’s body at the end of the river. Walk into the body to trigger the scripted death. This is the required route for obtaining the optional Spirit camouflage. The camouflage is not necessary for the main story, but it is a useful reward for later stealth sections.
Snake can also die earlier by drowning and still advance the story with the Revival Pill, but that shortcut skips the Spirit camouflage reward. Use the shortcut only if you are deliberately sacrificing the optional uniform to avoid the longer river traversal.
- Reach The Sorrow’s body if you want the Spirit camouflage.
- Accept that an early drowning shortcut forfeits that reward.
- Do not mistake the scripted death for a failed attempt.
4. Use the Revival Pill on the apparent Game Over screen
After Snake reaches The Sorrow’s body, the game presents an apparent death or Game Over state. This is the intended transition. On the original PS2 control layout, hold L2 to open the item selection while Snake is apparently dead. Highlight Revival Pill and press Circle to use it.
The same procedure applies if you chose the drowning shortcut. Do not select Continue or Exit as your solution. The Revival Pill is the item that ends the sequence and returns the game to ordinary story progression. After the revival scene, let the follow-up calls and cutscenes finish before trying to move through the next area.
- Wait for the apparent death screen.
- Hold L2 to open the item selection.
- Highlight Revival Pill.
- Press Circle to use it.
- Allow the revival and follow-up calls to complete.
5. Cross Tikhogornyj and enter the waterfall passage
After the calls, Snake resumes in Tikhogornyj. From the starting area, go east across the stream, travel north around the large hill, then head west and cross the fallen log. Continue north along the stream into the next section. Follow the stream toward the waterfall and use the banks and ledges to avoid unnecessary exposure.
If Snake left the transmitter in place during the earlier prison escape, Ocelot Unit soldiers can be present. You do not need to defeat them; keep moving toward the waterfall and use cover when necessary. If the transmitter was removed, the route is generally quieter.
Go behind the waterfall to trigger Eva’s scene. She restores Snake’s confiscated weapons, camouflage and equipment, and supplies the C3 charges needed for the later Shagohod operation. If Snake reached The Sorrow’s body, the Spirit camouflage becomes available with the returned equipment. Behind the waterfall, collect useful ammunition and suppressors if your inventory has room, then continue north through the passage and take the door and ladder leading back toward Groznyj Grad.
- Cross the stream, hill route and fallen log in Tikhogornyj.
- Follow the stream north to the waterfall.
- Enter the passage behind the waterfall.
- Wait for Eva to return Snake’s equipment and provide the C3.
6. Continue through the Underground Tunnel and The Fury
The waterfall does not lead directly to the four-tank C3 placement objective. After leaving the waterfall passage and returning toward the fortress, the next mandatory route passes through Groznyj Grad and into the Groznyj Grad Underground Tunnel. This tunnel contains the required encounter with The Fury.
Before entering, restore a practical camouflage set, confirm that you have a firearm and healing supplies, and save if the game offers the opportunity. The Fury uses a flamethrower across the tunnel lanes, and flames can remain on the floor and walls after an attack. Move between lanes, use the tunnel structure as cover, and attack only when The Fury is exposed. If Snake is burned, treat the injury promptly with the appropriate medical item.
Once The Fury is defeated or the encounter has been completed, climb out of the tunnel and hand off to the later Groznyj Grad return instructions. The next chapter should explain re-entering the fortress, using the available disguises and routes, and planting C3 on all four fuel tanks. Do not treat the fuel tanks as completed merely because Eva supplied the explosives.
- Save and re-check equipment before entering the Underground Tunnel.
- Reach the Groznyj Grad Underground Tunnel after the waterfall sequence.
- Complete The Fury encounter before attempting the second fortress operation.
- After The Fury, continue to the return-visit and four-tank C3 instructions.
Before you move on
- Snake has traveled north through The Sorrow’s river and reached the skeleton, or has deliberately used the drowning shortcut.
- The apparent death screen has appeared and the Revival Pill has been used through the L2 item selection.
- The revival scene and follow-up calls have completed.
- Snake has crossed Tikhogornyj and entered the passage behind the waterfall.
- Eva has restored Snake’s equipment and supplied the C3 charges.
- The Spirit camouflage is present if Snake reached The Sorrow’s body.
- Snake has left the waterfall route and is prepared to enter the Groznyj Grad Underground Tunnel.
- The Fury encounter is the next mandatory set piece before the later return to Groznyj Grad and the four-tank C3 placement.
References for this chapter
Facing Colonel Volgin and the Shagohod: strategies for vehicle and boss phases
The Groznyj Grad climax begins after Snake plants the fourth and final C3 charge in the Weapons Lab Main Wing. It continues through Volgin’s hand-to-hand battle, the motorcycle escape, the bridge-bomb sequence, the Shagohod fight, and the final confrontation with Volgin riding the machine. Before returning to the Weapons Lab, make sure you collected the optional RPG-7 from the armory at Krasnogorje Mountainside. Preserve a save before planting the final charge, because the connected boss and escape sequence offers few convenient manual-save opportunities.
Collect the RPG-7 and make the final preparation
The RPG-7 is not obtained in Groznyj Grad. During the earlier Krasnogorje Mountainside section, search the armory among the buildings and anti-aircraft positions. The launcher is inside the armory, and this is the recommended time to acquire it. Verify that it is in Snake’s inventory before leaving the mountain route. The weapon is especially useful against the Shagohod’s treads and during the later motorcycle escape.
After returning through Tikhogornyj and recovering Snake’s equipment and the C3 charges, move through Groznyj Grad toward the Weapons Lab Main Wing. You must plant C3 on all four fuel tanks. Before planting the final charge, collect any ammunition, food, medical supplies, suppressors or uniforms you still want from accessible rooms. Planting the last charge starts the Volgin sequence and removes the normal opportunity to prepare in the complex.
Make a manual save in a separate slot before planting the final C3. Keep this file untouched as your recovery point. Carry the RPG-7, a reliable firearm or sniper rifle, the Mk22 if you are attempting a non-lethal run, healing items and, if available, Chaff Grenades for the later missile attacks. The final sequence is long enough that a failed attempt can otherwise force you to repeat several stages.
- Collect and verify the RPG-7 in the Krasnogorje Mountainside armory before leaving that area.
- Gather supplies before planting the fourth C3 charge.
- Save in a separate slot immediately before planting the final charge.
- Keep the pre-C3 save until the campaign is finished.
Defeat Volgin in the Weapons Lab hangar
Volgin’s body is electrically charged. Contact with him can injure Snake, and if Snake is electrocuted while a weapon is equipped, ammunition in the loaded magazine can be lost. Keep weapons holstered while circling him unless you are taking a deliberate shot. His electrical barrier also repels frontal bullets, so firing at him from the front is unreliable.
At the start, wait for Volgin to complete a punch, kick or other close-range attack. While his charge is down, approach and use CQC. A throw places him on the floor and creates the safest opening for a kick or a short weapon attack. If you are fighting lethally, use the same opening with a firearm. For a non-lethal result, follow throws with the Mk22 or another stamina-damaging option, then holster the weapon and retreat.
Volgin also presents openings from behind. When he announces a major attack, fires bullets from his hand or turns toward the nearby control panel to draw electrical energy, move around him rather than challenging the attack head-on. A shot from behind can connect when frontal shots are repelled. During the later part of the fight, he can send bullets outward in a spread; lie flat to avoid them. Lines of electricity can travel across the floor, so use a diving roll to cross them when necessary.
Russian Glow Caps can distract Volgin and absorb an electrical attack, but they are optional. The Raikov mask can briefly distract him at the beginning of the fight if you still have it. If your stamina becomes low or Snake vomits after an attack, eat a food item before continuing. Depleting Volgin’s stamina instead of his life is optional and awards the Cold War uniform; it is not required for story completion.
- Keep weapons holstered while evading Volgin’s electrical attacks.
- Use CQC after Volgin’s charge drops following an attack.
- Shoot from behind or after throwing him to the floor.
- Lie flat against the outward bullet spread and roll over floor electricity.
- Use the pre-C3 save if the hangar fight repeatedly fails.
Escape Groznyj Grad and handle the bridge sequence
After Volgin is defeated, the C3 destroys the hangar, but the Shagohod survives. Eva carries Snake away on her motorcycle. During the first motorcycle sections, focus on the guards, motorcycles and other obstacles rather than trying to damage the Shagohod itself. The vehicle cannot be directly damaged during the early pursuit sections.
The RPG-7 is useful against pursuing motorcycles and for clearing obstacles during the escape, but do not spend time trying to destroy the Shagohod before the bridge sequence. The chase provides fixed movement and firing opportunities, so concentrate on targets Eva brings into view and follow her warnings about hazards.
At the bridge, the game equips the SVD and asks Snake to destroy the planted explosives. Shoot the bombs as they become available, but do not destroy the final bomb until Eva gives the signal. Firing the last bomb too early causes failure. Once the bridge sequence is completed correctly, the direct Shagohod boss phase begins.
- Do not waste time trying to destroy the Shagohod during the early motorcycle chase.
- Use the RPG-7 against pursuing vehicles or clearly presented obstacles.
- Use the SVD for the bridge explosives.
- Destroy the final bridge bomb only after Eva’s instruction.
Disable the Shagohod in the arena
When the direct Shagohod battle starts, equip the RPG-7. Eva controls the motorcycle, so Snake’s task is aiming and firing. Target one of the machine’s treads rather than its armored central body. A successful tread hit slows or stops the vehicle and gives Eva time to circle behind it.
As Eva reaches the rear, look for the exposed weak point on the upper rear section, often described as the rear of the Shagohod’s head. Fire the RPG-7 into that damaged area. Once the vehicle starts moving again, return your aim to a tread and repeat the sequence: tread shot, wait for Eva to obtain the rear angle, then weak-point shot. Tactical reloads let Snake reload more quickly between rockets, but prioritize a clear target over firing into the armor.
The fixed PS2 presentation can show the tread or rear weak point only briefly. Do not fire as soon as the machine enters view. Let Eva complete enough of her turn for the target to be exposed. If a rocket misses, keep the motorcycle moving and wait for the next angle rather than wasting every remaining shot. The normal story sequence supplies opportunities to continue, and Eva can provide ammunition during the later fight if Snake runs low.
When the Shagohod’s gauge is depleted, the battle changes. Volgin powers the vehicle again, Snake leaves the motorcycle and Eva acts as a decoy. The direct target is now Volgin, not the Shagohod’s armor.
- Use the RPG-7 against a tread first.
- Wait for Eva to circle behind the machine.
- Fire at the exposed rear weak point.
- Repeat tread and weak-point attacks until the vehicle phase ends.
- Keep moving after a missed rocket and wait for another clear angle.
Defeat Volgin while he rides the Shagohod
In the final phase, Volgin remains protected from frontal attacks by his electrical charge. While Eva distracts him, shoot a tread with the RPG-7 to interrupt the machine briefly, then switch to an accurate weapon and attack Volgin from behind. A sniper rifle is effective when the rear of his head or body is exposed, but another accurate firearm can also work. For a non-lethal run, use a stamina-damaging weapon and continue aiming for his back.
After Snake damages him, Volgin may turn the Shagohod toward Snake. Run laterally to avoid the red machine-gun fire and missiles. Chaff Grenades can interfere with missile targeting, and missiles can also be shot down if you have a clear opportunity. If Volgin begins a crushing charge, move underneath and between the treads or run to the side, depending on your position; do not remain in front of the machine.
The arena contains fixed turrets around the perimeter. They are a legitimate alternative to the RPG pattern, especially when Volgin is far away or Eva has drawn his attention. A turret can damage Volgin’s barrier and health, but Volgin may eventually attack or destroy the position, so leave before the Shagohod reaches you. The safer general pattern is still tread shot, rear attack on Volgin, lateral retreat, then another tread shot when the vehicle resumes pursuit.
Continue until Volgin’s life or stamina gauge is depleted. The destruction sequence and the following escape scenes then play automatically. There is no separate story objective hidden inside the arena after Volgin is defeated.
- Shoot a tread to create a brief opening.
- Attack Volgin from behind, not through his frontal electrical barrier.
- Run sideways from machine-gun fire and missiles.
- Use Chaff Grenades or shoot missiles when practical.
- Leave a turret before the Shagohod reaches or destroys it.
- Continue until Volgin’s gauge reaches zero.
Recover from failure and confirm progress
If Snake dies during Volgin’s hangar fight, the motorcycle escape or either Shagohod phase, reload the manual save made before the final C3. Repeating the whole sequence is safer than overwriting the recovery file with a poor attempt. Before replaying, confirm that the RPG-7 is present and review the specific failure: ammunition loss from an electrical hit, a frontal shot against Volgin, a missed tread, premature bridge-bomb destruction or standing still during a missile attack.
There is normally no convenient manual save between every linked combat transition, so do not assume the game has preserved a separate checkpoint after each phase. After the Shagohod and Volgin sequence concludes and the game reaches a normal saving opportunity, create a new save while retaining the pre-C3 file. This gives you a later recovery point for the remaining escape and endgame sections without sacrificing the earlier backup.
Completion of this chapter is confirmed when the Shagohod has been disabled, Volgin has been defeated in the final arena phase, the destruction and escape cutscenes have played, and gameplay advances beyond the Lazorevo escape sequence. The final story conclusion still requires continuing through the remaining escape, Eva escort, The Boss confrontation and ending sequence.
- Reload the pre-C3 save after a failed attempt.
- Correct the cause of failure before repeating the sequence.
- Do not overwrite the recovery save during practice.
- Make a new save at the next ordinary save opportunity after the sequence.
- Confirm that the game advances beyond the Volgin and Shagohod escape set piece.
Before you move on
- The final C3 charge has been planted and the Volgin hangar fight has been completed.
- The early motorcycle escape and bridge-bomb sequence have been cleared without prematurely destroying the final bomb.
- The Shagohod has been stopped with tread attacks and damaged through its exposed rear weak point.
- Volgin has been defeated during the final Shagohod phase, either lethally or through stamina damage.
- The destruction and escape scenes play and the game advances beyond the Volgin and Shagohod set piece.
- A later save is created while the untouched pre-C3 recovery save is retained.
Key items, weapons and useful pickups — where to find them (PS2 edition)
The original North American PlayStation 2 release does not require most powerful weapons for story completion. A reliable campaign loadout is the Mk22 for silent non-lethal takedowns, a suppressed handgun or rifle for emergencies, one long-range rifle when the area justifies it, and the RPG-7 before the Shagohod sequence. Heavy weapons reduce stamina while carried, so keep them in the backpack until they are needed. Optional weapons can make particular encounters easier, but none of the ordinary pickups listed here is required to reach the ending.
1. Build a practical baseline loadout at Rassvet
After meeting EVA in Rassvet, Snake receives the Mk22 and M1911A1. The Mk22 should remain your default weapon for ordinary guards, because it supports quiet, non-lethal progress and can be used alongside CQC. Keep a suppressor attached when you have one with remaining durability, and remove it after it is exhausted rather than carrying the expectation that it will continue to silence shots.
The M1911A1 is the backup for situations where you need lethal stopping power or where a close-range fight has already become noisy. Keep binoculars, medical treatment and food accessible in the item window. Do not fill every weapon slot immediately: a silent pistol, the Mk22, one rifle and later the RPG-7 are generally more useful than several loud automatic weapons carried at once.
- Keep the Mk22 supplied with tranquilizer ammunition.
- Carry the M1911A1 as a lethal backup.
- Use suppressors while they are still functional.
- Leave room for a rifle or heavy weapon before major setpieces.
2. Take the AK-47 before leaving Bolshaya Past Base
If you did not collect the AK-47 during the Virtuous Mission at Rassvet, the later pickup is in the small weapons building at the top-right of Bolshaya Past Base. Search this building before advancing through the crevice route. The weapon is optional, but this is the convenient recovery opportunity identified for the campaign route.
The AK-47 is useful when an alert has already begun or when you want a dependable automatic weapon for a forced firefight. It is too heavy for routine stealth travel to be your only equipped weapon, so leave it in the backpack while crawling, climbing or crossing long outdoor areas. Switch to it only when the situation actually rewards sustained fire.
- Search the top-right weapons building in Bolshaya Past Base.
- Collect the AK-47 before proceeding toward the crevice.
- Carry it as an emergency automatic weapon rather than a permanent stealth tool.
3. Collect the M37 in Chyornaya Peschera Cave
During Operation Snake Eater, enter Chyornaya Peschera Cave and take the right-hand route from the cave entrance. Continue beyond the first tunnel; the M37 is located in the area reached along that branch. It is optional and is most valuable in cramped spaces where a close-range blast can knock enemies away or end a lethal encounter quickly.
The shotgun is loud and comparatively heavy. Keep it for cave exploration or a run that expects close combat, then stow it before returning to long outdoor stealth sections. Do not sacrifice the Mk22, healing supplies or food merely to keep extra shotgun ammunition.
- Take the right-hand cave route.
- Continue past the first tunnel and inspect the next area for the M37.
- Stow the shotgun when the next section favors stealth or long-range observation.
4. Secure an SVD for distant targets
The SVD is available during the Virtuous Mission in Dremuchij North. When the route presents a path branching to the right, follow it to the end and collect the rifle from the ground. If you do not take it there, the main Operation Snake Eater opportunity is in Ponizovje West, inside the small weapons building at the top of the area. If that opportunity was also missed, another SVD is available later in the small weapons building at Sokrovenno South.
The SVD is useful for scouting exposed routes, dealing with distant guards and making some optional targets easier. It is not a replacement for the Mk22: the rifle is loud unless you have a suitable suppressor, and its weight makes it wasteful to carry through every confined area. Equip it when the sightline matters, then return to a lighter weapon.
- Check Dremuchij North during the prologue if you want the earliest SVD.
- Otherwise search the weapons building in Ponizovje West.
- Use Sokrovenno South as the later fallback location.
- Keep a quiet close-range weapon alongside the SVD.
5. Pick up the XM16E1 and M63 only if they suit your run
The XM16E1 can be taken during the Virtuous Mission in Dolinovodno by crossing the bridge and following the narrow path that curves underneath it. During Operation Snake Eater, the replacement location is in the Graniny Gorki Lab Exterior, Inside Walls area, in the small weapons building north of the entrance point. Its firing-mode options and suppressor compatibility make it a flexible emergency rifle, but it is not essential.
The M63 is in Svyatogornyj East, inside the top-left room of the cabin. Reach the room by climbing over the crates. If it was missed, the alternate location is a small weapons building in Groznyj Grad North West. The M63 is powerful for open combat, but its weight and noise work against a low-alert route. Take it when you specifically want sustained fire; otherwise leave the slot open for a sniper rifle, explosives or medical supplies.
- Use the Dolinovodno route for the early XM16E1.
- Search the northern small weapons building in Graniny Gorki Lab Exterior if needed.
- Find the M63 in the cabin’s top-left room at Svyatogornyj East.
- Do not carry either automatic weapon merely because the slot is available.
6. Defeat The End non-lethally for the Mosin Nagant
The Mosin Nagant is an optional tranquilizer sniper rifle awarded after defeating The End by draining his stamina. It is not obtained from an ordinary field pickup. Use the Mk22 or other stamina-damaging non-lethal methods throughout the duel, then collect the rifle after the battle when the route opens. A lethal victory still completes the story but does not provide this reward.
The Mosin Nagant is valuable for a non-lethal run and for long-range stamina damage later. It is bolt-action, loud and heavy, so do not leave it equipped while moving through ordinary patrol areas. Carry it when you are preparing for an open boss arena or a deliberate tranquilizer approach, and pair it with the Mk22 or a suppressed sidearm for close encounters.
- Choose stamina depletion rather than a lethal defeat if you want the weapon.
- Confirm the Mosin Nagant appears after The End’s battle.
- Carry tranquilizer ammunition and a lighter backup weapon.
- Stow the rifle when its range is not useful.
7. Collect the RPG-7 before the Shagohod sequence
In Krasnogorje Mountainside, follow the mountain route until you reach the area with the huts and anti-aircraft positions. Before taking the exit leading to the mountaintop, search the small weapons building near that exit. The RPG-7 is inside. Collect it before advancing into the mountaintop sequence and keep its rockets available for the later vehicle confrontation.
The RPG-7 is not a general-purpose stealth weapon. Its weight drains stamina while carried, and firing it can create immediate danger in a guarded area. Leave it in the backpack while moving and equip it only when preparing to attack the Shagohod or another large target. Do not discard healing items, the Mk22 or your close-range weapon just to carry excessive rocket ammunition.
- Search the small weapons building near the Krasnogorje Mountainside exit to the mountaintop.
- Confirm the RPG-7 is in the weapon window before continuing.
- Carry available rockets without sacrificing essential medical or silent equipment.
- Keep the launcher stowed until the vehicle fight requires it.
Before you move on
- Before leaving Bolshaya Past Base, decide whether you want the AK-47 and search the top-right weapons building if it was missed earlier.
- Before entering the main Chyornaya Peschera route, take the right branch after the first tunnel if you want the optional M37.
- Before the Krasnogorje mountaintop sequence, confirm that the RPG-7 is visible in the weapon window and that rockets are available.
- Before and during The End’s battle, decide whether you want the Mosin Nagant; only a stamina-depletion victory awards it.
- Before a major setpiece, keep one silent weapon, one close-range backup, medical treatment and food. Carry a sniper rifle or heavy weapon only when its immediate purpose justifies the stamina and inventory cost.
- For a normal story run, the minimum practical weapon plan is the Mk22, a handgun or CQC backup, and the RPG-7 before the Shagohod battle. The AK-47, M37, SVD, XM16E1, M63 and Mosin Nagant are optional improvements rather than completion requirements.
The Boss: final confrontation — approach, phases, and endgame
The final confrontation takes place at Rokovoj Bereg immediately after the escape through Zaozyorje. Snake must defeat The Boss within the arena’s ten-minute limit, then complete the mandatory Patriot sequence, the final Ocelot duel, and the ending. The Boss can be defeated lethally with ordinary damage or non-lethally by draining her stamina. Both routes complete the campaign, but the non-lethal route awards The Boss’s camouflage. The original North American PlayStation 2 release uses the fixed Snake Eater camera, so this chapter avoids Subsistence and later-port camera advice.
Save and prepare in Zaozyorje North
After escorting Eva through Zaozyorje South, continue into Zaozyorje North. Clear or bypass the guards, then leave through the northeastern exit. The transition into Rokovoj Bereg begins a cutscene, and when control returns, the final boss battle has started. Save in Zaozyorje North before taking that exit if you want a conservative retry point. Keep a separate earlier save so a failed attempt does not force you to replay the escape sequence.
Equip a dependable weapon and make sure Snake has healing items. For a lethal victory, use a firearm you can aim reliably. For a non-lethal victory, carry the Mk22 or Mosin-Nagant with enough ammunition. The Mosin-Nagant is especially useful if you prefer to remain at range. Snow camouflage and Snow face paint can help Snake blend into the white flowers, but they are not required; cover, listening, and relocation matter more than chasing a perfect camouflage value.
- Save in Zaozyorje North before entering Rokovoj Bereg.
- Carry healing items and enough ammunition for several attempts.
- Use the Mk22 or Mosin-Nagant if you want the non-lethal reward.
Recognize the arena and the timer
Rokovoj Bereg is a broad white-flower field surrounded by trees and low cover. The Boss moves between the trees, fires the Patriot, disappears into the flowers, and closes in for CQC. You have ten minutes to finish the fight. Do not remain hidden for the entire encounter: use concealment to locate her, but attack whenever you have a clear opportunity and keep moving before she returns fire.
The original PS2 version does not have Subsistence’s free third-person camera. Use the right analog stick to adjust the fixed viewpoint, hold R1 for first-person aiming, and use L2 or R2 to peek around cover when appropriate. The field contains useful food, including the special white snakes near logs, but stopping to search for them is optional and costs time. Heal before Snake’s health becomes critical rather than waiting until he is nearly incapacitated.
- Keep the ten-minute limit in mind from the start.
- Use trees and the field edge to break The Boss’s firing line.
- Do not waste time searching for optional food unless Snake actually needs it.
Recommended method: counter her CQC and attack the opening
The most consistent PS2 method is to let The Boss approach and counter her CQC. When she grabs Snake, press Circle at the moment she begins the grab. A successful counter twists her wrist and briefly stuns her. Circle is the PS2 CQC button; do not substitute Square, which is the weapon button. If the timing is missed, Snake is thrown and may suffer heavy damage or a broken bone, so practice the timing from the recovery save rather than repeatedly forcing the exchange while injured.
After a successful counter, hold Circle near The Boss and use the left analog stick to grab her. Throw her to the ground, then use a short punch-and-kick sequence or fire a few rounds while she is recovering. Do not stay beside her after the attack. Move behind a tree or around the edge of the field while she stands and fires the Patriot. When she begins another approach, repeat the counter, throw, attack, and retreat cycle.
The Boss may sidestep before committing to a grab. Do not press Circle simply because she is nearby; wait for the actual grab animation and Snake’s reaction. If a counter fails, roll away, use cover, heal if needed, and return to the same pattern on her next approach.
- Press Circle when The Boss begins to grab Snake.
- Grab and throw her after a successful counter.
- Attack briefly, then retreat behind cover before she recovers.
- Heal and reset the pattern after a failed counter.
Ranged and non-lethal alternatives
If close-range CQC is unreliable, use the field’s trees as alternating firing positions. Crouch or crawl in the flowers, use the thermal goggles to find her when she moves behind cover, and fire when her body or head is exposed. After every shot or short burst, change position or stand and move behind a tree; remaining prone in the same place allows her to close in and shoot Snake at close range.
For the non-lethal route, use the Mk22 or Mosin-Nagant and target The Boss when she pauses near a tree or searches the field. The Mosin-Nagant is a particularly strong option because it can drain stamina from a distance. Empty magazines can also be thrown to make noise and reveal her position, but this is optional and should not replace attacking when she is already visible. Stamina depletion, rather than ordinary health damage, is what produces the non-lethal result and awards The Boss camouflage after the battle.
- Use thermal goggles to help locate her through the flowers.
- Move after firing instead of waiting for her counterattack.
- Use tranquilizer ammunition throughout if you want the non-lethal reward.
- Do not assume a lethal weapon will produce the camouflage reward.
Complete the Patriot sequence
When The Boss’s health or stamina bar is fully depleted, the active fight ends and a mandatory cutscene begins. Snake receives The Boss’s Patriot. When control returns during the concluding exchange, equip or aim the Patriot as directed by the game and fire at The Boss. This shot is required to advance the story. It is not an optional alternate ending and cannot be replaced by avoiding her.
Do not quit immediately after the boss bar disappears. The following scene is part of the required campaign completion, and the final battle is not fully concluded until the Patriot sequence has played through.
- Deplete the health bar for a lethal victory or stamina bar for a non-lethal victory.
- Let the post-battle cutscene finish.
- Use the Patriot to complete the required final shot.
Finish the Ocelot duel and watch the ending
After the final cutscenes, Snake faces Ocelot aboard the WIG. This short Russian-roulette sequence is mandatory. Choose one of the two revolvers, aim, and follow the duel through to its conclusion. If you want the Single Action Army available in a later playthrough on the same difficulty, choose the revolver on Snake’s right. This choice affects a bonus weapon and the duel’s presentation, not whether the main story is completed.
Allow the cemetery sequence, the remaining story scenes, the closing reveal, and the credits to play. The canonical ending is reached by defeating The Boss, completing the Patriot shot, surviving the Ocelot sequence, and watching the closing material. Lethal and non-lethal victories lead to the same required story conclusion, although non-lethal boss victories and other performance factors affect rewards and results.
- Complete the mandatory Ocelot duel.
- Choose the right-hand revolver only if you want the later Single Action Army unlock.
- Watch the cemetery scene and closing story sequence.
- Let the credits and results flow finish.
Create and verify the completed save
After the ending and results sequence, accept the option to save the completed mission data. Use a separate memory-card slot from the Zaozyorje recovery save. Keep the pre-battle file if you want to practice The Boss, while the completed file preserves the campaign result and any applicable post-game unlocks.
The completion check is simple: The Boss is defeated, the Patriot shot has occurred, the Ocelot duel has finished, the cemetery and closing scenes have played, the credits or results sequence has completed, and a clear-data save exists afterward. If any of those steps is missing, reload the recovery save and continue rather than starting a new campaign.
- Save completed mission data after the credits or results sequence.
- Keep a separate pre-battle recovery save.
- Confirm that the cemetery scene, ending, credits, and clear save all exist.
Before you move on
- The Boss’s health or stamina bar is completely depleted within the ten-minute fight.
- The mandatory Patriot sequence has completed and Snake has fired the final shot.
- The final Ocelot duel aboard the WIG has finished.
- The cemetery scene, closing story scenes, and credits or results sequence have played.
- A completed mission-data save has been created in a separate slot from the pre-battle recovery save.
References for this chapter
- Metal Gear Solid 3: Snake Eater — Guide and Walkthrough, PlayStation 2
- Metal Gear Solid 3: Snake Eater — Boss Guide, PlayStation 2
- Metal Gear Solid 3: Snake Eater — Guide and Walkthrough, PlayStation 2 — El_Greco
- Metal Gear Solid 3: Snake Eater — Gun FAQ, PlayStation 2
- Metal Gear Solid 3: Snake Eater/Bosses — StrategyWiki
Recovery from failure: common soft-locks, saves and re-entry points
The original North American PlayStation 2 release relies on manual saves rather than modern encounter checkpoints. A disciplined memory-card routine lets you retry bosses, captures, escapes and long infiltrations without sacrificing all of your progress. Most apparent stalls are missed interactions or temporary equipment loss, not permanent story locks.
1. Build a three-file rotation on the memory card
The game saves to PlayStation 2 memory-card files through the radio save function or the save prompt provided by the current sequence. The game does not give you a modern rotating checkpoint system, so create your own protection by maintaining three separate files. Use one as the working file, one as the recovery file from the previous safe position, and one as a milestone file kept before a boss, major infiltration or scripted transition.
Do not overwrite all three files at once. A practical routine is to save the newest progress in the working file, move the previous working file into the recovery role, and leave the milestone file untouched until the next major section is secure. Keep the files clearly identifiable by their area and progress rather than relying only on memory.
- Working file: newest progress and current equipment.
- Recovery file: the last position outside the immediate danger.
- Milestone file: an untouched boss, infiltration or pre-capture position.
2. Save before a danger sequence or equipment transition
Save before entering a boss arena, beginning a chase, starting a scripted infiltration, planting explosives, or crossing a doorway that leads directly into a cutscene. This matters particularly around Groznyj Grad, where the weapons-lab infiltration, Volgin confrontation, torture sequence, prison escape and later fortress return alter Snake's available equipment and route.
Before saving, check ammunition, medical supplies, stamina-related food, camouflage and the weapons needed for the next objective. A save made immediately after a mistake can be less useful than the earlier file outside the arena. Keep the older file until you have confirmed that the new section is stable and that important optional pickups are still accessible.
- Save outside every major boss arena.
- Save before capture, torture, prison escape and vehicle sequences.
- Keep one older file until the new section is safely established.
3. Recover after death or a failed boss attempt
After Snake dies, reload the latest manual save from the Load Game menu instead of repeatedly continuing from a compromised position. If the save is inside a difficult encounter, use the recovery file outside the encounter and approach again. Change one practical factor before retrying: restore injuries, replenish stamina, change camouflage, equip a more suitable weapon, or remove unnecessary equipment from the active inventory.
For a long fight, use the working file for experiments and preserve the recovery file. Once a tactic succeeds and you reach the next safe area, create a new working save. If several attempts fail, return to the recovery file rather than overwriting it with another attempt that begins under poor conditions.
- Reload the pre-encounter file after a death.
- Change equipment or preparation before repeating the fight.
- Never overwrite the only file outside the danger area while testing.
4. Treat Groznyj Grad capture as normal story progression
Snake's capture after the Volgin and Sokolov sequence is required campaign progression, not a permanent game over. In the torture room and prison cell, Snake temporarily loses his normal weapons and equipment. This is intentional. Pick up the fork in the cell and use the Cure menu to remove the transmitter and the Fake Death Pill when the game permits it. The prison section then provides several escape routes, so a missing weapon at this point is not evidence of corrupted save data.
If you saved before the capture, you can load that file to repeat the fortress approach with your original equipment. If you continue from the prison, complete the escape and rendezvous with EVA to recover your equipment. Saving while Snake is held in the prison and then loading that prison save can trigger the original PS2 Guy Savage nightmare sequence. This is an optional diversion and is not required to escape, continue the operation or reach the ending.
- Do not interpret temporary inventory loss as a corrupted save.
- Use the prison route to continue the story, or load a pre-capture file to retry the fortress.
- Treat Guy Savage as an optional PS2 prison-save event, not a required objective.
5. Re-enter areas without losing optional pickups
Loading an earlier file returns the game to that file's state. Any food, weapon, camouflage, captured boss reward or other pickup obtained after that save must be obtained again. When an optional item changes your preferred strategy, save after securing it, but keep the previous file until you have confirmed that the item is recorded and the surrounding route remains usable.
Some locations are revisited during Operation Snake Eater, but access depends on the current story position. Do not assume that every earlier room remains available after a fortress transition, chase or explosive sequence. Before beginning a major point-of-no-return section, finish the optional collection you actually intend to keep, then save in the last safe area. If a missed item is no longer reachable, use the milestone file rather than repeatedly searching the new route.
- Save after valuable optional pickups.
- Finish desired exploration before major fortress transitions.
- Use an earlier milestone file if an item is no longer accessible.
6. Diagnose an apparent soft-lock before abandoning the run
First confirm that the game is truly stuck. Recheck the current objective, nearby doors, crawlspaces, ladders, explosives and bodies. Some progress events require approaching a particular doorway, using an item from the Cure or Survival Viewer menus, waiting for a radio call, or completing a short scripted exchange. Contact the relevant radio support character if the current objective is unclear, then reload the current file once.
If the same problem remains, load the recovery file. If that file works, the newest save may have been made during an awkward transition or after an unintended choice. If both current and recovery files fail in the same way, load the untouched milestone file and reproduce the section. Do not overwrite all files during this test. If several healthy files fail to load, freeze, or display broader memory-card symptoms, preserve the remaining data and investigate the memory card, disc or console rather than assuming a gameplay solution exists.
- Verify the objective and inspect every nearby interaction point.
- Test the current file, then the recovery file, then the milestone file.
- Preserve healthy data before investigating possible hardware or disc faults.
Before you move on
- Three separate memory-card files exist and you can identify the working, recovery and milestone files.
- After a death or failed boss attempt, you can reload a position outside the immediate danger without replaying the entire operation.
- After Groznyj Grad capture, you can continue through the prison escape or load a pre-capture file without mistaking temporary equipment loss for corruption.
- If progression appears blocked, you can test the current, recovery and milestone files without overwriting the remaining evidence.
- A completed campaign save and at least one earlier recovery file remain preserved after reaching the ending.
References for this chapter
Optional completion: collectibles, Kerotan frogs and boss rewards
The original North American PlayStation 2 release contains optional Kerotan frogs, animal captures, hidden equipment, alternate camouflage and rewards for defeating certain bosses without killing them. None of these objectives is required to defeat The Boss or watch the canonical ending. The most reliable completionist plan is to keep a written area checklist, make saves before one-way transitions and collect boss rewards during a run planned around non-lethal victories. Do not mix this checklist with features from Subsistence, HD ports or Metal Gear Solid Delta.
1. Keep the original PS2 checklist separate from later releases
The 2004 Snake Eater campaign includes 64 Kerotan frogs, optional animals and plants, hidden weapons, special camouflage and stamina-based boss rewards. These extras support later playthroughs, stealth runs and collection goals, but they do not change the story route. The required campaign still ends after the Shagohod sequence, the final confrontation with The Boss and the ending credits.
Do not add 8mm film reels or Gako ducks to an original PS2 checklist. Those collectibles are associated with later material, especially Metal Gear Solid Delta, and are not objectives on the North American Snake Eater disc. Likewise, do not treat later release features such as expanded presentation modes or port-specific additions as part of this campaign.
- Use a Snake Eater PS2 Kerotan and boss-reward list.
- Ignore 8mm film-reel and Gako-duck lists.
- Treat every optional reward as separate from the required ending.
2. Start tracking Kerotans during Virtuous Mission
There are 64 Kerotan frogs, and the frog reward requires shooting all 64 during one playthrough. Begin in Virtuous Mission and check Dremuchij South, Dremuchij Swampland, Dremuchij North, Dolinovodno and Rassvet. Look on raised ground, bridge supports, hollow logs, ruined walls and positions that are easier to see from first-person view than from the normal fixed camera.
The opening areas are important because later story progression controls when they can be revisited. Rassvet is a practical early save point: check the frog before advancing the Sokolov sequence, then record every frog by exact area name and mission phase. Some areas return during Operation Snake Eater, but a missed frog should never be assumed to remain safely available for the rest of the campaign.
- Check every reachable frog before advancing the Rassvet story sequence.
- Record missed frogs by exact map name and mission phase.
- Keep a save before the Rassvet sequence if this is your first collection attempt.
3. Use the natural return route during Operation Snake Eater
At the start of Operation Snake Eater, sweep Dremuchij East and Dremuchij North, then take the available detours through Dremuchij Swampland and Dremuchij South before continuing through Dolinovodno to Rassvet. This is the safest time to recover frogs and supplies in the opening jungle because the route deliberately brings Snake back through areas connected to the prologue.
After Rassvet, continue the checklist in campaign order through Chyornaya Peschera, Ponizovje, the Graniny Gorki complex, Svyatogornyj and Sokrovenno. Search side rooms, alternate paths and elevated platforms before entering a boss arena or triggering a cutscene that changes the objective. The frog in Bolshaya Past Crevice must be checked during Ocelot’s encounter, while frogs in later chase and boss sections may require deliberate aiming during the active sequence.
Before leaving a region, compare the map name against your written list. Make a manual save before a boss, facility transition or chase. If a frog is missed, reload the earlier save rather than expecting the game to repair a collection total through unrelated older saves.
- Sweep returning Dremuchij areas before continuing north from Rassvet.
- Search side rooms and alternate paths before boss transitions.
- Check boss arenas, chase sections and elevated structures before committing to the next objective.
- Use a separate save before every significant one-way transition.
4. Prioritize non-lethal boss rewards
The Pain, The Fear and The Fury each provide special camouflage when their stamina is depleted instead of their life. Use the Mk22, Mosin-Nagant or another verified non-lethal method, and monitor the stamina gauge. The rewards are Hornet’s Stripe from The Pain, Spider camouflage from The Fear and Fire camouflage from The Fury. These items are optional and are not needed to complete the story.
The End’s rewards use different conditions. Depleting The End’s stamina gives the Mosin-Nagant, which is placed in the area after the battle and is useful for later stamina damage. It does not give Moss camouflage. To obtain Moss camouflage, sneak close behind The End, hold him up with a suitable weapon and keep the weapon trained on him during the shakedown. He refuses the first attempts and relinquishes the camouflage after the required repeated threats. Make a save before the duel if either reward matters.
The Boss provides Snake camouflage when her stamina is completely depleted. This requires a non-lethal final battle and is optional; a normal lethal victory still completes the game. If a boss’s life gauge is emptied accidentally, reload the pre-boss save rather than expecting the reward to appear later.
- Carry a tranquilizer weapon and sufficient ammunition before optional non-lethal boss attempts.
- Watch stamina rather than life when seeking boss camouflage.
- Keep separate saves before The End and The Boss.
- Confirm the intended reward before leaving the encounter area.
5. Manage animals, food and hidden equipment sensibly
Animal captures are optional and mainly provide food or stamina support. Capture unusual animals when the route is safe, but do not spend scarce ammunition or trigger an alert for an ordinary food item. Unique camouflage and weapons are more valuable to a completionist run than a full supply of common animals.
The PS2 inventory has limited space. Before a major set piece, preserve a non-lethal weapon, healing supplies, a dependable lethal weapon and the ammunition required for the next mandatory encounter. Stow or discard duplicate food and redundant ammunition when you need room for a special weapon such as the Mosin-Nagant or RPG-7.
Search balconies, storage rooms, cave branches, laboratories and alternate paths before story events close them. High-value optional equipment includes the Thermal Goggles and SVD in the early jungle route, the RPG-7 in the Krasnogorje mountain section and the Mosin-Nagant after a stamina victory over The End. These items are useful, but none is required for the canonical ending.
- Prioritize unique camouflage and weapons over common food.
- Keep lethal and non-lethal options available before every boss.
- Do not enter a set piece with inventory slots filled by low-value duplicates.
- Save before dangerous detours for optional equipment.
6. Complete the 64-frog objective and verify the reward
Kerotans appear in ordinary maps, facilities, boss arenas, motorcycle chase sections and the final wilderness route. Check above doorways, on rafters, behind rocks, across water gaps, on towers and near the position where Snake stands after a cutscene. Some are distant enough that a sniper rifle or careful first-person positioning is helpful.
When all 64 frogs have been shot in the same campaign, finish the game. The original PS2 reward is Stealth camouflage for a subsequent playthrough. Keep the completed save in its own memory-card slot. If the reward does not appear, compare your written list against the earliest save made before the suspected omission; shooting frogs across separate campaigns or unrelated save files does not provide a reliable single-playthrough total.
The Kerotan reward does not alter the canonical ending. It is an optional post-game advantage, like the special boss camouflage and The End’s weapons. A run can therefore be complete without any frogs, animals or boss rewards, provided the story objectives are finished.
- Track all 64 frogs in one campaign.
- Finish the story after confirming the final recorded frog.
- Verify Stealth camouflage after completing the campaign.
- Preserve the completed collection save separately from experimental runs.
Before you move on
- The Shagohod and The Boss have been defeated, the full ending sequence has played and the credits have appeared.
- All 64 Kerotans were shot during the same campaign if Stealth camouflage was the goal.
- Stealth camouflage is available after completing the campaign, or an earlier save exists for investigating a suspected missed frog.
- Each planned non-lethal boss reward has been confirmed before leaving its encounter.
- The End’s intended reward has been verified separately: Mosin-Nagant for stamina depletion or Moss camouflage for the close-range hold-up method.
- The completed save is preserved separately from collection experiments and challenge-run saves.
References for this chapter
Endgame checklist, ranks and what to do after finishing the PS2 campaign
Complete The Boss encounter, allow the original North American PlayStation 2 version to reach its results screen, save the clear data, and preserve separate files for a normal replay and later rank attempts. The game’s codename is awarded for the entire run, so a first completion and a FOXHOUND attempt should be treated as different goals.
Finish The Boss and complete the ending sequence
After The Boss is defeated, continue through the mandatory post-battle events. The fight is followed by the flower-field conclusion, the escape and extraction sequence, the remaining story scenes, and the credits. Do not reset the PlayStation 2 when control or a save prompt appears during this closing section.
The campaign is not fully documented by the victory over The Boss alone. Let the ending progress to the results screen, where the game displays the run’s performance information and codename. The results screen is the practical confirmation that Operation Snake Eater has finished.
If you want to preserve optional rewards, do not skip the end-of-game processing. Depending on what you obtained during the run, the completed data can carry forward earned equipment or camouflage into a later playthrough. The original PS2 game does not use trophies, achievements, or a modern completion percentage.
- The Boss has been defeated.
- The escape and final story scenes have played.
- The credits and results screen have appeared.
Save clear data without sacrificing the pre-final save
When the game asks whether to save after the ending and results processing, select a different memory-card slot from the file you used before The Boss. Wait until the memory-card activity finishes before turning off the console.
Keep the pre-final-battle file. It is the best starting point for practising The Boss, checking the final sequence again, or testing whether a missed optional reward can be obtained without replaying the whole campaign. Keep the completed clear-data file separately; loading it is intended to begin another campaign while preserving eligible carried-over rewards.
After returning to the title screen, verify that both files remain visible. Start the new game from the completed data only after confirming that the original pre-Boss recovery file is still present. If the clear file is absent, reload the pre-final save, finish the ending again, and use another empty slot rather than overwriting existing data.
- A clear-data save exists on the North American PS2 memory card.
- The pre-The Boss save remains available.
- The clear file can be selected for a new playthrough.
Read the results screen correctly
The codename evaluates the whole campaign. The results information records factors such as play time, saves, alert phases, human kills, continues, serious injuries, total damage, Life Medicine use, and other run statistics. A normal first clear can therefore finish the story successfully while receiving an ordinary codename.
For a practical second run, choose one goal rather than trying to achieve everything immediately. A no-kill run means using the Mk22, CQC, holds, stun weapons, stamina damage, and other non-lethal options whenever the encounter permits them. Bosses and scripted sections require particular care because a lethal weapon can invalidate an otherwise clean attempt.
Do not treat FOXHOUND as a normal completion requirement. The original-PS2 FOXHOUND reference requires a restrictive run on Extreme, including no special items, zero alerts, zero kills, no continues, no Life Medicine, limited damage, a short overall play time, and a restricted number of saves. The exact limits should be checked against the PS2-specific ranking reference before starting the attempt.
- The final codename has been recorded.
- Any alerts, kills, continues, or Life Medicine use are known before planning a challenge run.
- FOXHOUND is treated as a separate objective rather than required story progress.
Build a reliable replay and rank-training plan
Use the preserved pre-Boss save to practise The Boss, then keep additional practice files before Volgin, the Shagohod phases, The Fury, The End, and The Pain. These encounters are useful checkpoints because they combine unusual boss rules with long approaches or escape sequences.
For a safer progression, first complete the story normally, then attempt a no-kill run on a familiar difficulty. After that, practise avoiding alerts and reducing continues. Only then attempt FOXHOUND on Extreme, where a single accidental alert, kill, continue, or prohibited item can force a reload from an earlier save.
For a strict run, reload instead of continuing after death or accepting an unwanted alert. Avoid relying on later HD, Master Collection, or remake advice unless the instruction is confirmed to apply to the original PS2 release. The original edition’s fixed camera and original save behavior remain the relevant reference points.
- Difficult bosses have dedicated practice saves.
- The next full run has one clear restriction.
- Challenge attempts are kept separate from the completed campaign.
Archive the completed campaign
Maintain at least three rotating files: a completed clear-data file, a current working file, and a recovery file from before the latest dangerous section. On original hardware, preserve the memory card or use a trustworthy memory-card backup method if available.
Write down the slot location and completion date. Keep experimental files for missed collectibles, alternate boss rewards, and rank attempts separate from the clear file. This prevents a new run from erasing the only completed campaign or the best practice point for the finale.
The archive is complete when you can identify the clear-data file, the pre-The Boss recovery file, and the next-run file without guessing. The campaign completion check is the results screen plus the retained clear-data save, not an achievement notification.
- The completed clear-data file is preserved.
- The pre-The Boss recovery file is preserved.
- Challenge and experimental saves are stored separately.
Before you move on
- The Boss is defeated and the complete ending reaches the results screen.
- A separate clear-data save is present on the North American PlayStation 2 memory card.
- The pre-The Boss recovery file remains intact.
- The final codename and key run statistics have been recorded.
- A next objective has been selected: ordinary replay, no-kill practice, no-alert practice, or a FOXHOUND attempt.
References for this chapter
Finishing up
Complete Virtuous Mission and Operation Snake Eater in the original North American PlayStation 2 release, defeat The Boss, complete the mandatory Patriot and Ocelot sequences, watch the ending through the results screen, and create a clear-data save. Optional Kerotan frogs, boss rewards, hidden weapons, camouflage and rank challenges are outside the required story completion.
Choose your next gameScreenshots & video
Game imagery for reference. Follow the written chapters above for the route and strategies.
Sources & references
Our original guide draws on the references below. Check the edition at the top of this page before following controls or unlock requirements.
- Metal Gear Solid 3: Snake Eater — Guide and Walkthrough, PlayStation 2
- Metal Gear Solid 3: Snake Eater - Guide and Walkthrough - PlayStation 2 - By DarkSun
- Metal Gear Solid 3: Snake Eater — Guide and Walkthrough, PlayStation 2, by z_ShadowMan_z
- Metal Gear Solid 3: Snake Eater — Guide and Walkthrough, PlayStation 2, by Element50, GameFAQs
- Metal Gear Solid 3: Snake Eater Walkthrough
- Metal Gear Solid 3: Snake Eater — Guide and Walkthrough, PlayStation 2, by GhostOfLegault, GameFAQs
- Full FAQ/Walkthrough for Metal Gear Solid 3: Snake Eater
- Metal Gear Solid 3: Snake Eater/Virtuous Mission
- Metal Gear Solid 3: Snake Eater — Camouflage reference
- Metal Gear Solid 3: Snake Eater — Food, StrategyWiki
- Metal Gear Solid 3: Snake Eater — Guide and Walkthrough, PlayStation 2, Tarrun
- METAL GEAR SOLID 3: Snake Eater — Online Manual, Survival Viewer and Camouflage
- Metal Gear Solid 3: Snake Eater — Guide and Walkthrough, PlayStation 2 — El_Greco
- Metal Gear Solid 3: Snake Eater Walkthrough sample pages
- Metal Gear Solid 3: Snake Eater — Boss Guide, PlayStation 2
- Sokrovenno — Metal Gear Wiki
- The End — Metal Gear Wiki
- Metal Gear Solid 3: Snake Eater FAQ/Walkthrough v0.84, Neoseeker Walkthroughs
- Metal Gear Solid 3: Snake Eater – Guide and Walkthrough – PlayStation 2 – By A_I_e_x
- Metal Gear Solid 3: Snake Eater - Weapons FAQ - PlayStation 2
- Metal Gear Solid 3: Snake Eater — Gun FAQ, PlayStation 2
- Metal Gear Solid 3: Snake Eater/Bosses — StrategyWiki
- Konami Metal Gear Solid 3: Snake Eater PlayStation 2 Instruction Manual
- Metal Gear Solid 3: Snake Eater — Secrets — StrategyWiki
- Metal Gear Solid 3: Snake Eater — Foxhound Rank Walkthrough, PlayStation 2
- Metal Gear Solid 3 Walkthrough: Kerotan Frogs — Metal Gear Wiki
- Metal Gear Solid 3: Snake Eater — Codename Ranking FAQ
- Metal Gear Solid 3: Snake Eater — Weapons reference
- Metal Gear Solid 3: Snake Eater — overview and release history
About the game & collecting notes
- Platform
- PlayStation 2
A step-by-step walkthrough for the original PlayStation 2 release of Metal Gear Solid 3: Snake Eater (North America, 2004). This guide covers every required objective in Virtuous Mission and Operation Snake Eater, practical survival and stealth techniques for the PS2 edition, reliable boss strategies, optional side content, and clear completion checks to reach the canonical ending.
Darryl Polo
Darryl Polo loves tinkering with emulation and revisiting retro games. He enjoys exploring how old favorites play on different setups and sharing what he learns along the way. At Joking Joystick, he writes about the games, hardware, and small discoveries that keep the hobby fun.
Our editorial standardsFound a step that needs another look? Help us improve this guide.