Metal Gear Solid 2: Sons of Liberty — PlayStation 2 (USA) Complete Walkthrough
Step-by-step guide for the original North American PlayStation 2 release of Metal Gear Solid 2: Sons of Liberty. Covers the Tanker prologue, the Big Shell / Plant chapters, Arsenal Gear, every required boss encounter and the canonical ending. Practical objectives, room-by-room goals, failure recovery and final completion checks for the PS2 (USA) edition.

Find a copy
Metal Gear Solid 2: Sons of Liberty PlayStation 2
We may earn a commission if you buy through these links, at no extra cost to you. As an Amazon Associate I earn from qualifying purchases.
Opens retailer search results. Check the model, edition, seller, availability and current price before buying.
Before you begin
This guide targets the original North American PlayStation 2 release of Metal Gear Solid 2: Sons of Liberty from 2001.
It covers the required Tanker and Plant campaign in playable order, from Snake's tanker infiltration through Raiden's final battle with Solidus at Federal Hall.
Follow the objectives, room names and recovery instructions in order. Optional dog tags, ranks and earned equipment are separated from the required story route.
The guide does not include VR Missions, Snake Tales, Skateboarding or other Substance-only bonus modes.
Set yourself up for the run
Play the original North American PlayStation 2 release of Sons of Liberty, not Substance, an HD release or the Master Collection version.
Use Nodes for manual saves and keep a separate save before major boss or timed sequences when the game permits it.
Normal is a suitable first-playthrough difficulty. Higher difficulties alter patrols, resources, bomb layouts and boss requirements.
Answer required Codec calls and follow the active objective; optional dog tags and equipment are outside the main completion route.
Do not assume mechanics, bonus modes or item placements from Substance or later releases apply to this edition.
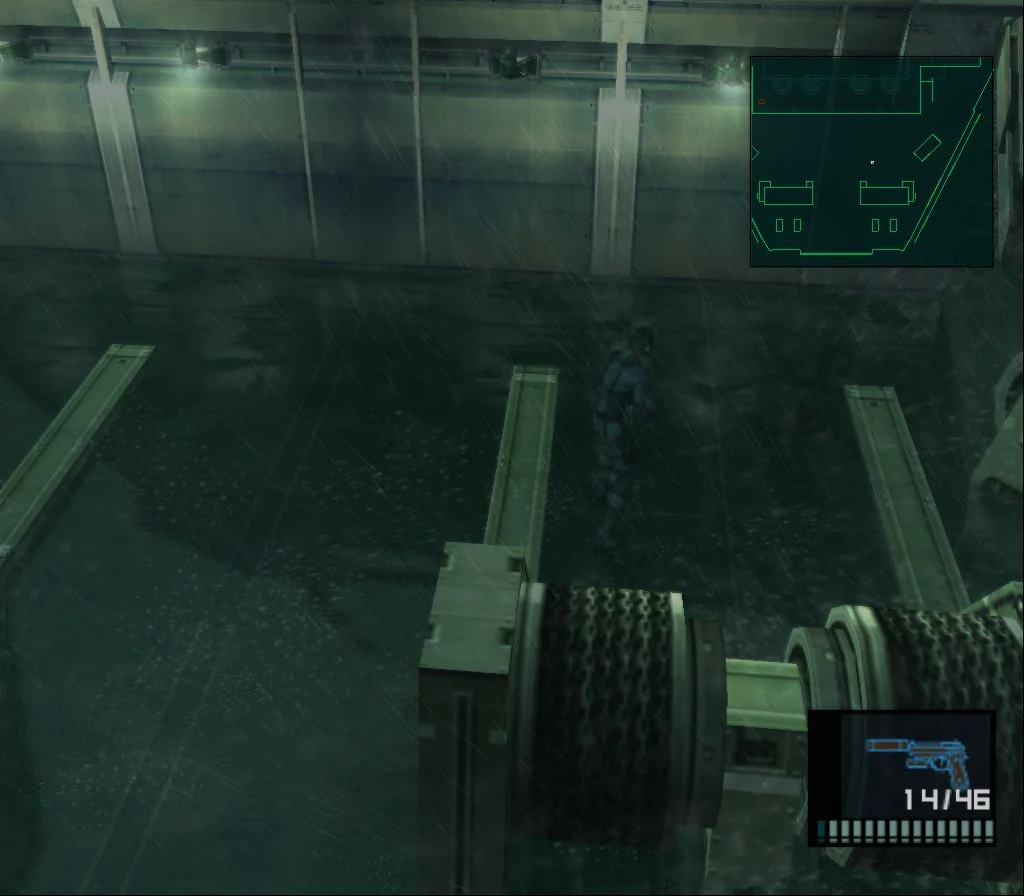
Tanker — Boarding and Initial Infiltration
Solid Snake infiltrates the U.S.S. Discovery to confirm that the Marines are transporting a new Metal Gear model. Follow the tanker’s crew-quarter route to the bridge, defeat Olga with the M9, return through the Engine Room and Deck-2, pass through the Marine holds without killing or alerting the formation, photograph Metal Gear RAY from the required views, and submit the images at the Hold No. 3 computer. This chapter is complete when Otacon accepts the photographs; the later tanker takeover and destruction belong to the next transition.
Board the tanker and reach the crew-quarter route
After the opening scene, Snake begins on the Aft Deck with the AP Sensor, M9 and Camera. Watch the guards and binocular patrols before crossing open sections. Use the ship’s raised structures and side cover to break their sightlines rather than sprinting across the center of the deck.
The first usable hatch depends on difficulty. On Very Easy, Easy and Normal, the east hatch leads into the crew-quarter route. On Hard and higher, use the west hatch, which leads through Deck-A Crew’s Quarters; continue through the accessible door and return toward the lounge route. Do not rely on the original draft’s fixed lower-port-side instruction, because the available opening and efficient route change with difficulty. Follow the room name shown on the screen and proceed toward Deck-B Crew’s Quarters.
- Start from the Aft Deck with the M9 and Camera.
- Check the difficulty-specific hatch route before entering.
- Reach the crew-quarter interior without causing an unnecessary alert.
- Use lockers, corners and raised structures as cover.
Cross Deck-B, Deck-C and Deck-D to reach the bridge
From the crew-quarter entrance, follow the connected interior route through Deck-B Crew’s Quarters, Deck-C Crew’s Quarters and Deck-D Crew’s Quarters. Use the stairs indicated by the room layout rather than entering the Engine Room early. The practical progression is upward through the crew areas until you reach Deck-E Bridge. Established route references list the sequence as Aft Deck, Deck-B, Deck-C, Deck-D and Deck-E Bridge.
Deck-D contains the Semtex and infrared-beam trap. Do not cross the beams. If you need to inspect the trap, use the Thermal Goggles when they are available later; for this first pass, stay clear of the wired section and continue up the stairs. On Deck-E Bridge, the story scene identifies the tanker’s destination. Use the hatch leading to the Navigational Deck to begin Olga’s encounter.
- Pass through Deck-B Crew’s Quarters.
- Continue through Deck-C Crew’s Quarters.
- Cross Deck-D without touching the infrared beams.
- Reach Deck-E Bridge and proceed to the Navigational Deck.
Defeat Olga with the M9
Olga must be incapacitated nonlethally. Fire M9 darts until her stun gauge is empty; do not drain her life gauge with the USP. Use the stacked crates and nearby structures as cover, expose yourself only long enough to aim, and retreat after each shot. When she announces a grenade, move away from the indicated area before resuming the fight.
The movable light and tarp can obstruct your aim. Change position if the light exposes Snake or Olga disappears behind the tarp. The encounter ends when Olga falls unconscious. The USP becomes available afterward, along with the equipment needed to handle the Engine Room trap. Save after the scene if you want a reliable restart point.
- Use the M9 throughout the Olga encounter.
- Shoot from cover instead of standing in the open.
- Move away when Olga throws a grenade.
- Finish by emptying the stun gauge.
- Obtain the USP after the battle.
Return through the crew areas and disable the Engine Room trap
Retrace the crew-quarter route to Deck-A Crew’s Lounge, then take the stairs down to the Engine Room. Move carefully between the machinery levels and avoid entering with an active alert if possible. The progression route continues through the Engine Room toward the northwest hatch and then to Deck-2, Port.
In the Engine Room, reach the section where Semtex charges are protected by infrared beams. Equip the Thermal Goggles to see the beams clearly. Three green laser-control boxes must be destroyed with the USP. Aim in first person and fire only when each box is lined up; hitting the explosives or touching a beam causes failure. Once all three boxes are destroyed, the beams disappear and the route to Deck-2, Port opens.
- Return to Deck-A Crew’s Lounge after Olga.
- Enter the Engine Room.
- Equip the Thermal Goggles before approaching the trap.
- Destroy all three green control boxes with the USP.
- Use the opened route to reach Deck-2, Port.
Cross Deck-2 and complete the forced firefight
Deck-2, Port contains patrols and a long exposed passage. Move from cover to cover and collect supplies only when the guards’ sightlines are clear. Continue through the east hatch to Deck-2, Starboard. The route then leads to a mandatory firefight rather than directly into the Marine presentation.
When control returns after the scene, use the USP and the surrounding corners, walls and crates to defeat the attacking soldiers. Watch for grenades and reload behind cover. After the firefight, proceed through the northwest exit into Hold No. 1. This is the point where the objective changes from ordinary infiltration to a failure-sensitive Marine stealth section.
- Cross Deck-2, Port without wasting time in exposed areas.
- Reach Deck-2, Starboard.
- Complete the mandatory firefight.
- Enter Hold No. 1 through the northwest route.
Move through Holds No. 1 and No. 2 without harming the Marines
Do not kill or alert the Marines and never fire at Commandant Scott Dolph. In Hold No. 1, descend from the entry balcony and use the projector layout to stay out of the formation’s view. Crawl under the projector when necessary, or use the lower route if the projector’s sweep blocks the crossing. Wait whenever the Marines shift their attention or begin a false-alarm response.
In Hold No. 2, the projector causes the Marines to alternate their attention between sides. The normal route is along the right side, but the left side can also be used if the nearby soldiers are facing away. Move slowly across metal flooring, use the large obstructions as cover and avoid bumping the formation. Projector avoidance can be handled by crawling underneath, changing the projector’s display from its control, or using a carefully timed close pass.
Continue into Hold No. 3. If the formation becomes alerted or the presentation fails, reload the latest save rather than trying to force the sequence under an active alarm.
- Do not kill or alert any Marine.
- Avoid crossing the projector beam while exposed.
- Use the lower route or cover when the formation turns.
- Do not shoot Commandant Dolph.
- Enter Hold No. 3 while the presentation remains active.
Take the four required photographs of Metal Gear RAY
In Hold No. 3, remain behind cover and keep the Commandant and Marines unharmed. The required photograph set is four views: RAY from the front, RAY from the front-left, RAY from the front-right and the MARINES lettering on RAY. Konami’s original MGS2 reference specifically identifies these four subjects.
Move around the platforms and crates until RAY fills enough of the frame to be recognizable without being cropped. For the lettering shot, center the MARINES marking and include enough of RAY’s body to show that the marking belongs to the machine. The logo can be photographed from the same general area used for the front-right view if the metal box and angle provide a clear line of sight.
Optional pictures of the Marines, Dolph, Ocelot, posters or other tanker details can produce extra Codec reactions, but they are not needed for story progression. Retake a view if the later review rejects it.
- Take a front photograph of RAY.
- Take a front-left photograph of RAY.
- Take a front-right photograph of RAY.
- Take a photograph clearly showing the MARINES lettering.
- Keep the Marines and Commandant unharmed.
- Retake any unclear image before using the computer.
Submit the photographs and finish the chapter
Return to the Hold No. 3 computer at the side of the presentation area. Stand at the workstation and press the Action button, Triangle on the original PlayStation 2 control layout. Otacon checks the images in the Camera. The established walkthrough route ends at this computer after the four RAY photographs are taken.
Wait for the review to finish. If Otacon rejects one of the required views, leave the computer, retake that image and activate the workstation again. The Tanker infiltration chapter is complete as soon as Otacon accepts the four required photographs. Do not add the subsequent Ocelot takeover, RAY escape or tanker destruction to this chapter’s completion condition; those scenes are the scripted handoff to the next chapter.
- Reach the Hold No. 3 computer after taking the four required views.
- Press Triangle at the workstation.
- Wait for Otacon to review the Camera.
- Retake and resubmit any rejected photograph.
- Stop the chapter checklist when Otacon accepts all four images.
Before you move on
- Snake has boarded the tanker and entered the interior through the appropriate difficulty-specific hatch route.
- Snake has passed through Deck-B, Deck-C and Deck-D Crew’s Quarters and reached Deck-E Bridge.
- Olga has been tranquilized with the M9 and the USP has been obtained.
- Snake has returned through the Engine Room and destroyed all three laser-control boxes.
- Snake has crossed Deck-2 and completed the mandatory firefight.
- Snake has entered Holds No. 1 and No. 2 without killing or alerting the Marines.
- The Camera contains front, front-left, front-right and MARINES-lettering photographs of Metal Gear RAY.
- Snake has activated the Hold No. 3 computer with Triangle.
- Otacon has accepted all four photographs. This acceptance, not the later tanker takeover or destruction, completes the Tanker infiltration chapter.
References for this chapter
- METAL GEAR SOLID2 -SONS OF LIBERTY- official archive: secrets and completion changes
- Metal Gear Solid 2: Sons of Liberty — Dog Tag Walkthrough, Tanker Chapter — PlayStation 2
- Metal Gear Solid 2: Sons of Liberty/Tanker — SDA Knowledge Base
- Metal Gear Solid 2: Sons of Liberty - Guide and Walkthrough, PlayStation 2 - By Lightopia
Tanker — RAY Confrontation and Evacuation
After the Hold No. 3 workstation accepts the four required photographs, the Tanker chapter leaves normal exploration behind. The remaining events are a fixed story sequence involving Commander Scott Dolph, Revolver Ocelot, Sergei Gurlukovich, Metal Gear RAY, and the destruction of the tanker. There is no playable Metal Gear RAY boss fight and no timed escape route to complete. Allow the scenes to run until the game hands control to Raiden at the Plant’s Deep Sea Dock.
1. Remain in Hold No. 3 while the takeover begins
Once the workstation has accepted the photographs, the Tanker objective is complete. Control does not return for another navigation task. The Marines’ presentation continues, and Commander Scott Dolph finishes addressing the assembled personnel while Snake observes from concealment.
Do not search for another terminal, an exit door, or a route back through Hold No. 2. The game is now moving into its closing Tanker sequence. Any apparent pause between the workstation interaction and the next event is part of the transition into the cutscenes, not a request to perform another objective.
- The Hold No. 3 workstation has accepted the photographs.
- Dolph’s speech continues after the upload.
- No additional Tanker objective appears on the mission route.
2. Watch Ocelot’s betrayal and seizure of RAY
Revolver Ocelot appears during the Marines’ presentation and turns the situation against both the Marine leadership and the Russian force. His betrayal results in the deaths of Commander Dolph and Sergei Gurlukovich, after which Ocelot reaches Metal Gear RAY and takes control of it.
This is a cinematic event. Snake cannot damage RAY, interrupt Ocelot, or change the outcome through weapon use. The game does not provide a RAY health bar, an arena, or a combat interface for this part of the original Sons of Liberty Tanker chapter. Keep watching the sequence rather than attempting to equip a weapon or move toward the machine.
- Ocelot’s betrayal plays without player intervention.
- Dolph and Gurlukovich are removed from the scene by the scripted event.
- Ocelot reaches and takes control of Metal Gear RAY.
- No playable RAY battle begins.
3. Allow the tanker to flood and break apart
After Ocelot takes RAY, the tanker is sabotaged. Water enters the hold and the ship begins to suffer catastrophic damage while Snake remains caught inside the collapsing structure. These events are presented through cutscenes and fixed transitions rather than a free-roaming evacuation.
There is no timed backtrack from Hold No. 3 to the boarding point, no alternate escape door to locate, and no underwater section in which you must guide Snake out of the sinking ship. Do not mistake the flooding, falling debris, or sudden changes of viewpoint for a failed stealth sequence. Let the story scenes continue.
If you are defeated earlier in the Tanker chapter, reload the most recent save and replay the photography approach. After the workstation has accepted the images, however, there is no combat or escape failure to recover from. The only practical recovery option during this closing sequence is to reload an earlier save if you want to view the events again.
- The tanker begins flooding and breaking apart.
- No timed evacuation prompt appears.
- Do not attempt to retrace the route through the holds.
- Reload only if you need to replay the preceding section or view the scenes again.
4. Confirm Snake’s fall and the end of the Tanker prologue
As the tanker collapses, Snake confronts the consequences of Ocelot’s escape. The ship’s destruction throws Snake into the Hudson River. His fall is part of the intended story conclusion and is not a game-over state or a prompt to swim toward a rescue point.
The original PlayStation 2 release does not continue with a playable Snake escape from the sinking tanker. The sequence ends through cinematic presentation, including the destruction of the ship and the loss of RAY from the Tanker setting. Wait until the game has finished these scenes before attempting to save or advance.
- Snake falls into the Hudson River as part of the story.
- The Tanker is destroyed without a player-controlled evacuation.
- The sequence does not transition into a Snake-versus-RAY fight.
5. Continue into the Plant chapter as Raiden
After the Tanker prologue concludes, the game shifts to the Big Shell incident and introduces Raiden as the playable character. The next playable location is the Plant’s Deep Sea Dock, where Raiden begins the main Plant operation.
When control is handed to Raiden, the Tanker chapter is finished. The change of character is intentional: Snake’s Tanker inventory and route are not carried into Raiden’s opening as a shared playable sequence. Treat the Deep Sea Dock as the beginning of the next chapter, not as another Tanker area to revisit.
Make a new save at the first available opportunity after Raiden becomes controllable. Keeping a separate Plant save is useful because the Tanker prologue and the Plant campaign are distinct progression sections.
- The Tanker destruction scenes have completed.
- The game introduces Raiden and the Plant operation.
- Control transfers to Raiden at the Plant’s Deep Sea Dock.
- A new Plant progression save can be created.
Before you move on
- The Hold No. 3 upload has already been accepted before this chapter begins.
- Dolph’s final speech and Ocelot’s betrayal have played.
- Ocelot has taken control of Metal Gear RAY.
- The tanker has flooded and been destroyed through the scripted sequence.
- Snake has fallen into the Hudson River.
- The game has transferred control to Raiden at the Plant’s Deep Sea Dock.
- The next available save belongs to the Plant chapter rather than the completed Tanker objective.
References for this chapter
- METAL GEAR SOLID2 -SONS OF LIBERTY- — Konami Official Tanker Story
- Metal Gear Solid 2: Sons of Liberty - Guide and Walkthrough - PlayStation 2 - By Yushiro
- Metal Gear Solid 2: Sons of Liberty — Game Script, Tanker, PlayStation 2, GameFAQs
- Metal Gear Solid 2: Sons of Liberty Guide and Walkthrough, Part 2
Big Shell — Arrival, Orientation and Strut A Access
The Plant chapter begins with Raiden infiltrating Strut A, Deep Sea Dock. Before confronting the terrorists, restore the local map at the first node, collect useful equipment, cross the FA Connecting Bridge, obtain the M9 tranquilizer pistol in Strut F Warehouse, and return to Strut A. The next required destination is Strut B, where Raiden meets the SEAL lieutenant later identified as Iroquois Pliskin and receives the SOCOM.
1. Leave the Deep Sea Dock and activate the first node
After the opening Plant cutscenes and Codec conversations with Campbell and Rose, Raiden begins in Strut A, Deep Sea Dock. Move north through the watertight doors. In the starting water area, dive beneath the surface and collect the Thermal Goggles if you want the optional early equipment. This pickup is useful but not mandatory, and it is not permanently missable because another pair appears later in the Plant chapter.
Use the nearby railing to reach the Shaver. Hang from the rail near the diving equipment and move along it to the small alcove. The Shaver is optional; if you collect it, it affects later character interactions and appearance details. Return to the main route and crawl through the ventilation opening for the Ration located inside the shaft.
Continue through the next door. You will see a guard retreat and then reach a room containing unconscious soldiers and an elevator. The wall-mounted computer in the northeast corner is the node. Stand in front of it and press the action button to register Raiden and download the area information. This restores the radar and map functions for the opening area.
- Answer the opening Codec calls.
- Collect the Thermal Goggles if desired.
- Use the railing to obtain the optional Shaver.
- Crawl through the ventilation shaft for the Ration.
- Register at the node in the room beside the elevator.
2. Ride to the Strut A roof and enter the Pump Room
After activating the node, guards in the room will begin to recover. Do not remain exposed. Hide behind the crates and wait for the elevator to arrive, then slip past the guards and enter it. A Codec conversation occurs during the ride, and Raiden reaches the roof of Strut A, also identified as the Pump Facility route.
Search the rooftop for the Bandage and Chaff Grenade before continuing. These pickups are optional, but the Chaff Grenade is useful against Cypher surveillance systems. Do not assume it is the only Chaff Grenade available; additional grenades can be found elsewhere. On the west side of the rooftop, look for the gap in the grated fence. Crouch and crawl through it to descend toward the Pump Room.
In Strut A Pump Room, avoid or quietly subdue the guard. The node is in the northeast corner of the small central cubicle. Activate it to download the local map. This node is useful for confirming the two exits and the nearby connecting bridges. Do not take the door leading toward Strut B yet. The first objective is to obtain a tranquilizer weapon in Strut F.
- Ride the elevator without starting a prolonged alert.
- Collect the rooftop Bandage and Chaff Grenade if desired.
- Crawl through the gap in the west fence.
- Activate the node in the northeast corner of the Pump Room.
- Leave through the Pump Room door leading to the weapon route.
3. Cross FA Connecting Bridge and reach Strut F Warehouse
The correct bridge for the first weapon detour is FA Connecting Bridge. It connects Strut A to Strut F; it is not the AB Connecting Bridge used later to reach Strut B. A Codec conversation explains Cyphers as the surveillance threat on the bridge.
Cross when the Cypher moves away or drops to the lower part of its patrol. Stay low and use the bridge structure for concealment. If you have a Chaff Grenade, use it only when necessary; waiting for a safe patrol window is also possible. Avoid firing at the Cypher with the M9 because the tranquilizer pistol cannot destroy it.
Enter Strut F Warehouse. The initial route places Raiden on the upper level. Find the accessible room that does not require a keycard; it contains the M9 tranquilizer pistol and ammunition. This is the first firearm available during the Plant opening. The M9 lets you quietly put ordinary guards to sleep, but it does not solve the Cypher problem and should not be treated as a weapon for open combat.
If you want the local map and additional supplies, descend to the bottom level and use the node in the southern part of the warehouse. The map is not a separate story objective, but it makes the return route and the two Strut A exits much easier to identify. Pick up nearby ammunition or rations only if the patrol timing allows it.
- Confirm the area name is FA Connecting Bridge before crossing.
- Avoid the Cypher by timing the patrol or using Chaff.
- Enter Strut F Warehouse.
- Obtain the M9 and its ammunition from the accessible upper-level room.
- Use the lower-level node if you want the warehouse map.
4. Return to Strut A and open the route to Strut B
Return through the same FA Connecting Bridge to Strut A. The Cypher is still present, so use the same timing method on the way back. After entering the Pump Room, take the opposite door from the one used for the Strut F detour. This leads to AB Connecting Bridge.
AB Connecting Bridge is a separate location from FA Connecting Bridge. A guard patrols the walkway, and another guard watches from the far side. Use the M9 on an isolated guard if necessary, then cross when the second patrol is looking away. The objective is to reach Strut B Transformer Room, not to continue toward Strut F.
Entering Strut B triggers an extended scripted sequence involving the SEAL team, Fortune, Vamp and the unconscious President Johnson. This is the first major Plant story briefing and changes the operation from basic orientation to the rescue mission. When control returns to Raiden, Pliskin provides the SOCOM. A node near the stairs can then be activated to download the Strut B map. The M9 remains useful for stealth, while the SOCOM gives Raiden a conventional firearm for later threats.
- Return across FA Connecting Bridge.
- Use the opposite Pump Room door after returning to Strut A.
- Cross AB Connecting Bridge toward Strut B.
- Enter Strut B Transformer Room and allow the scripted sequence to finish.
- Activate the Strut B node after Pliskin gives Raiden the SOCOM.
Before you move on
- Raiden has registered at the first node in Strut A Deep Sea Dock and restored the radar and map functions.
- Raiden has reached the Strut A rooftop, passed through the Pump Room and activated its node.
- Raiden has crossed FA Connecting Bridge and obtained the M9 from Strut F Warehouse.
- Raiden has returned to Strut A, crossed AB Connecting Bridge and entered Strut B Transformer Room.
- The scripted Strut B encounter has completed, Pliskin has given Raiden the SOCOM, and the next objective points toward Strut C and the bomb-disposal operation.
References for this chapter
- Metal Gear Solid 2: Sons of Liberty - Guide and Walkthrough, PlayStation 2 - By Lightopia
- Metal Gear Solid 2: Sons of Liberty — Guide and Walkthrough — Adrenaline_SL
- Metal Gear Solid 2: Sons of Liberty — Spoiler-Free Walkthrough by Nemesis
- Metal Gear Solid 2: Sons of Liberty — Guide and Walkthrough, GheddonLN, PlayStation 2
Shell 1 Bomb Operation — Sensor A, Sensor B and the Timed Deep Sea Dock Run
After meeting Peter Stillman in Strut C Dining Hall, Raiden must neutralize every scent-marked C4 in Shell 1. Stillman provides the Level 1 Card, Sensor A and Coolant Spray. Sensor A displays a green detection cloud for odor-marked bombs, while Sensor B later identifies the scentless final bomb through proximity beeps. Bomb locations and the active countdown vary with difficulty, so use the map and Sensor A to check every marked area rather than relying on a fixed bomb count. After all Shell 1 bombs are frozen, collect Sensor B from Stillman's pantry in Strut C, then take the direct route to the bottom of Strut A. Defuse the final bomb and allow Fortune's scripted encounter to begin. Fatman's boss battle is not part of this chapter.
Meet Stillman and begin the Shell 1 sweep
From Strut A, cross the AB Connecting Bridge into Strut B, then use the BC Connecting Bridge to reach Strut C Dining Hall. Follow the dining-hall route to the kitchen and meeting area, where Raiden finds Peter Stillman with Pliskin. Register with the Node in Strut C before starting the bomb sweep so the map is available when you need to check for an uncleared bomb.
Stillman gives Raiden the Level 1 Card, Sensor A and Coolant Spray. Equip Sensor A from the Items menu. When the radar is functioning, the sensor shows a green cloud around an odor-marked C4. The cloud indicates the general area, not necessarily the exact object, so search floors, ceilings, hatches and nearby equipment in first-person view.
The first required bomb is in the women's bathroom. Enter the restroom on the dining-hall side, stand near the sink and look upward. The C4 is on an outcropping above the sink. Aim the Coolant Spray at it and hold the spray control until the game confirms that it has been frozen. The men's bathroom contains optional supplies and is not required for progression.
- Meet Peter Stillman in Strut C Dining Hall.
- Receive the Level 1 Card, Sensor A and Coolant Spray.
- Register at the Strut C Node.
- Freeze the C4 above the women's bathroom sink.
Clear Strut D and Strut E
Leave Strut C through the CD Connecting Bridge and enter Strut D Sediment Pool. The open layout gives the guards long sightlines, and a reporting guard can summon reinforcements. Stay low, use the structures as cover and move directly toward the lower-level maintenance hatches indicated by Sensor A.
On the lower level, open the maintenance hatch identified by the sensor. On the lower difficulties, the required bomb is the leftmost hatch location. Hard adds another hatch bomb, and Extreme adds further devices, including a northern hatch position and a bomb above the lower-level door leading toward the DE Connecting Bridge. Do not leave Strut D until Sensor A and the map show that every bomb marker in the area has been cleared.
Cross to Strut E through the DE Connecting Bridge. Enter the Parcel Room and take the eastern stairs to the heliport. On all difficulties, a bomb is placed near the back wheels of the Harrier. Approach from the north side of the cockpit, use first-person view to inspect the ground in front of the rear tires, and spray the small C4.
Hard and Extreme add another Strut E bomb attached to a package on a conveyor belt in the Parcel Room. If a bomb marker remains on Strut E after the Harrier bomb is frozen, return to the conveyor belts and inspect the moving package with Sensor A. Do not assume the Parcel Room is always clear just because the Harrier bomb has been handled.
- Enter Strut D Sediment Pool through the CD Connecting Bridge.
- Search every marked Strut D maintenance hatch for the selected difficulty.
- Reach the Strut E Heliport through the Parcel Room.
- Freeze the C4 near the Harrier's rear wheels.
- On Hard or Extreme, clear the additional conveyor-belt package bomb if present.
Freeze the Strut F bomb
From the Strut E Parcel Room, use the EF Connecting Bridge to reach Strut F Warehouse. Sensor A leads to a C4 on the lower floor inside a ring of stacked boxes. The bomb cannot be reached conveniently from the floor.
Move to the upper level and approach the railing above the box enclosure. Hang from the railing, drop onto the stacked boxes and move into the enclosure. Equip the Coolant Spray and freeze the C4. Avoid lingering in the open lower floor, especially if the reporting guard is active.
After the bomb is confirmed safe, leave Strut F through the FA Connecting Bridge. The AKS-74u and the BDU are later rewards after Fatman's battle, so do not divert into the Level 2 weapon rooms during this operation unless you are deliberately collecting optional equipment.
- Enter Strut F Warehouse through the EF Connecting Bridge.
- Reach the upper railing above the lower-floor box enclosure.
- Drop onto the stacked boxes.
- Freeze the Strut F C4 and leave through the FA Connecting Bridge.
Clear Strut A and Strut B
Enter Strut A Pump Room from the FA Connecting Bridge. Pass the office area and use the Level 1 door into the pipe room. The bomb is inside the pipe maze. Take the small stairs on the southeast side, crawl beneath the pipes and work around the large red pipe until Sensor A leads you to the open space containing the C4. Spray it from close range and wait for the confirmation.
On Hard and Extreme, check the Strut A roof as well. The extra bomb is on a tank outside the southern fence. If the Strut A map still shows a bomb marker after the Pump Room bomb is frozen, go upstairs to the roof and inspect the tank area with Sensor A before returning to the interior route.
Cross the AB Connecting Bridge into Strut B Transformer Room. Enter the large eastern room and search the transformer panels. The C4 is behind an electrical panel or door; close or move the panel as necessary to expose it, then freeze the bomb. This completes the main Shell 1 sweep only when every bomb marker for the chosen difficulty has disappeared. The exact number of bombs is not universal across difficulties.
- Freeze the Strut A Pump Room bomb inside the pipe maze.
- On Hard or Extreme, check the Strut A roof tank for the additional bomb.
- Cross to Strut B Transformer Room.
- Expose and freeze the C4 behind the electrical panel.
- Confirm that no Shell 1 bomb markers remain for the selected difficulty.
Collect Sensor B and start the timed return
Once the final scent-marked Shell 1 bomb has been frozen, Stillman contacts Raiden and directs him back to Strut C. Return across the AB and BC Connecting Bridges to the dining hall. Enter the kitchen and open the pantry where Stillman had been hiding. Sensor B is inside.
Collect Sensor B and allow the Codec exchange to finish. The active on-screen countdown begins after this required progression. Its duration varies by difficulty, so do not treat the normal-difficulty value as universal. Ignore optional ammunition and avoid detours.
Use the direct route back to Strut A: leave Strut C by the BC Connecting Bridge, pass through Strut B Transformer Room, cross the AB Connecting Bridge and enter Strut A. Go through the Pump Room, climb to the roof and use the elevator to reach the Deep Sea Dock. If the timer expires, reload a save or checkpoint and repeat the run; the bomb operation does not advance until the final C4 is frozen.
- Return to Strut C after all scent-marked Shell 1 bombs are cleared.
- Enter Stillman's former pantry in the kitchen.
- Collect Sensor B.
- Wait for the Codec progression that starts the active countdown.
- Take the direct BC, Strut B, AB and Strut A route to the elevator.
Find and freeze the scentless Deep Sea Dock bomb
Equip Sensor B after reaching the main floor of Strut A Deep Sea Dock. Unlike Sensor A, it does not display a radar cloud. Listen for its beeps and move methodically: as Raiden approaches the scentless C4, the beeps become faster. Search the lower dock and the room where Raiden began the Plant infiltration.
On Very Easy through Normal, reach the lower catwalk south of the water and look beneath the suspended mini-submarine. Crouch and use first-person view to aim the Coolant Spray at the C4 under the sub. On Hard, the bomb remains on the sub but must be approached from the fenced-in area near the deep-sea suits; use the steps between the suits to obtain a clear view of the device.
On Extreme, follow Sensor B toward the western wall opposite the suspended submarine and inspect the wall rather than assuming the bomb is under the sub. Keep moving only in short increments when the beeps are close, because the sound is the primary locator.
After spraying the bomb, wait for the Codec report and proceed toward the elevator. Fortune's appearance follows as a scripted encounter. She cannot be defeated here; hide behind the available crates, keep moving when her electrical attacks destroy cover or ignite the floor, and wait for the sequence to end. The next chapter covers the timed run to Strut E and Fatman's battle.
- Equip Sensor B in Strut A Deep Sea Dock.
- Use proximity beeps to locate the scentless C4.
- On Very Easy through Normal, spray the bomb beneath the suspended mini-submarine.
- On Hard, approach the sub bomb through the fenced deep-sea-suit area.
- On Extreme, search the western wall opposite the submarine.
- Freeze the bomb and allow Fortune's scripted sequence to begin.
Before you move on
- Raiden has received the Level 1 Card, Sensor A and Coolant Spray from Peter Stillman.
- Every Shell 1 scent-marked C4 for the chosen difficulty has been frozen, including any additional Strut A, Strut D, or Strut E bombs.
- Sensor B has been collected from Stillman's former pantry in Strut C Dining Hall.
- The active countdown has begun after the Sensor B Codec progression.
- Raiden has reached Strut A Deep Sea Dock before the countdown expires.
- The scentless Deep Sea Dock C4 has been frozen with Sensor B and Coolant Spray.
- The post-bomb Codec report and Fortune transition have begun.
- Fatman has not yet been fought; that battle belongs to the following chapter.
Fortune Transition and Route to the Strut E Heliport
After the Deep Sea Dock bomb has been frozen, Fortune’s encounter plays as a scripted survival sequence rather than a conventional boss fight. Hide behind the available crates or other cover until the scene involving Fortune and Vamp ends, then take the elevator. Control returns to Raiden on Strut A Roof, where Campbell reports that Fatman has planted a C4 on the Strut E Heliport. The game displays a countdown that varies by difficulty. Follow the direct route through Strut A Pump Room, the FA Connecting Bridge, Strut F Warehouse, the EF Connecting Bridge and Strut E Parcel Room. Reach the Heliport and freeze the live C4 with Coolant Spray before the displayed timer expires. Fatman’s introduction begins after the bomb is neutralized.
Survive Fortune’s scripted encounter
When the Deep Sea Dock sequence gives you control during Fortune’s appearance, do not try to defeat her. Her railgun shots are not handled like ordinary gunfire, and this encounter is designed to end through scripted events. Move behind crates, barrels or other solid cover and remain protected while the scene develops.
The Vamp appearance and Fortune’s eventual transition are part of the same mandatory sequence. You do not need to pursue Vamp, damage Fortune or search the room for another route. Wait until the game resumes the normal transition and directs Raiden toward the elevator.
After the elevator sequence, control returns on Strut A Roof. This is the beginning of the timed run to Strut E. If you are preparing for the next chapter, avoid wasting ammunition or healing items during Fortune’s encounter because no standard boss victory is required here.
- Use cover during Fortune’s encounter.
- Do not attack Fortune as if she were a normal boss.
- Wait through the Vamp intervention and scripted transition.
- Take the elevator when the sequence permits it.
- Regain control on Strut A Roof.
Begin on Strut A Roof and read the countdown
Once Raiden is back on Strut A Roof, listen to the Codec report and read the timer displayed by the game. The countdown is difficulty-specific, so use the on-screen value rather than assuming a universal number. The objective is to reach the Strut E Heliport and neutralize the bomb before that timer reaches zero.
The roof route contains Claymore mines near the access gates. If you have the Mine Detector, equip it and identify the mines before moving. Crawl over detected mines to avoid detonating them and collect them if you want to clear the path. If you lack the detector, move cautiously near the gates instead of sprinting directly through the minefield.
Descend from the roof into Strut A. Do not return to the Deep Sea Dock, repeat the Sensor B search or revisit the earlier bomb locations. Those objectives belong to the preceding chapter.
- Confirm that the timed run has started.
- Use the displayed difficulty-specific countdown.
- Check the Strut A Roof gates for Claymores.
- Use the Mine Detector if available.
- Descend into Strut A without returning to the Deep Sea Dock.
Cross Strut A Pump Room and the FA Connecting Bridge
In Strut A Pump Room, take the door on the right side of the room, using the route that leads to the FA Connecting Bridge. This is the direct path toward Strut E. Do not take the AB Connecting Bridge or detour back through the earlier Shell 1 areas.
A guard may obstruct the room or the approach to the exit. If one blocks the doorway, use a quick nonlethal takedown, the M9 or another available stun option. If the route is open, simply pass through; clearing every guard is unnecessary and costs valuable time.
On the FA Connecting Bridge, watch the Cypher and any nearby soldier patrols. Use cover and timing to cross. A Chaff Grenade can help interfere with electronic surveillance if you have one, but it is not necessary to search for new equipment during this run. Continue directly into Strut F Warehouse.
- Leave Strut A Pump Room through the right-side route.
- Avoid the AB Connecting Bridge detour.
- Neutralize only enemies that block the exit.
- Cross the FA Connecting Bridge while watching the Cypher.
- Enter Strut F Warehouse.
Move through Strut F Warehouse
Inside Strut F Warehouse, keep moving toward the exit leading to the EF Connecting Bridge. Use the left-side approach around the nearby guard positions when possible. The warehouse contains optional items and alternate paths, but none is required for the timed Heliport objective.
If a guard detects Raiden, prioritize the exit instead of beginning a prolonged firefight. Use a stun weapon or evasive movement if an enemy physically prevents you from reaching the door. The goal is to preserve time for the bridge crossing and the final approach through Strut E.
Leave through the north-side route toward the EF Connecting Bridge. Do not enter Shell 1 Core, search the parcel conveyor or stop for unrelated equipment. Those areas are not part of this timed transition.
- Use the direct warehouse route.
- Favor the left-side approach around guards.
- Avoid optional searches and extended combat.
- Reach the north-side exit.
- Continue to the EF Connecting Bridge.
Cross the EF Connecting Bridge and enter Strut E Parcel Room
Cross the EF Connecting Bridge toward Strut E. Watch for surveillance and any mines that may still be present from earlier movement through the area. If you have the Mine Detector, use it while crossing; otherwise, move along the safest visible route and do not stop unnecessarily.
The bridge can be crossed without eliminating every enemy. If a guard or Cypher turns toward Raiden, keep moving toward Strut E when possible. Only stop to stun or evade an enemy when remaining in place would prevent access to the next door.
Enter Strut E Parcel Room and take the direct stairs toward the upper level. Guards may patrol near the room and staircase. Neutralize a guard only if necessary, then continue upward. Ignore the parcel conveyor, side rooms and optional pickups because they do not advance this objective.
- Cross the EF Connecting Bridge.
- Avoid unnecessary bridge combat.
- Enter Strut E Parcel Room.
- Use the direct stairs toward the upper level.
- Skip the conveyor and optional side rooms.
Reach the Heliport and freeze the C4
Continue up from Strut E Parcel Room until you reach the Strut E Heliport. The roof has guards and large crates that can break their sightlines. Use the crates or perimeter for brief concealment, but do not wait longer than necessary because the displayed countdown remains active.
The live C4 is on the Heliport. Equip the Coolant Spray and approach the bomb until the game allows Raiden to use it. The objective is not complete merely because Raiden reaches the roof; the bomb must be sprayed before the timer expires.
After the C4 is frozen, the timed sequence ends and the next cutscenes begin. Fatman’s introduction follows, establishing the Heliport boss encounter. Do not leave the roof or continue toward the Core after freezing the bomb. Wait for the scene to begin and then continue with the Fatman chapter.
- Reach Strut E Heliport before the displayed timer expires.
- Use crates or the perimeter to avoid unnecessary detection.
- Equip Coolant Spray.
- Freeze the live Heliport C4.
- Wait for Fatman’s introduction.
Recover from a failed timed run
If the countdown reaches zero, the timed objective fails. Reload the most recent save before the Fortune sequence or before the return to Strut A Roof, depending on where you saved. A save that places Raiden on or near Strut A Roof is the most convenient retry point because it avoids repeating the earlier bomb operation.
On the retry, follow the direct sequence without collecting optional items: Strut A Roof, Strut A Pump Room, FA Connecting Bridge, Strut F Warehouse, EF Connecting Bridge, Strut E Parcel Room and Strut E Heliport. Use the timer displayed by the game as the authority for the current difficulty.
Do not attempt to clear every guard. Stun or evade only enemies that block a door, staircase or bridge crossing. Once on the Heliport, use the Coolant Spray immediately on the live C4. The retry succeeds when the Fatman introduction begins.
- Reload a save from before the failed timed run.
- Repeat the direct route through A, FA, F, EF and E.
- Skip optional rooms and equipment.
- Use the displayed countdown rather than a fixed assumed time.
- Freeze the Heliport C4 and wait for Fatman’s introduction.
Before you move on
- Fortune’s scripted encounter ended without requiring a conventional boss defeat.
- The Vamp intervention and elevator transition completed.
- Control returned to Raiden on Strut A Roof.
- The displayed difficulty-specific countdown became active.
- Raiden entered Strut A Pump Room.
- Raiden used the route to the FA Connecting Bridge.
- Raiden crossed the FA Connecting Bridge and entered Strut F Warehouse.
- Raiden left Strut F through the route to the EF Connecting Bridge.
- Raiden crossed into Strut E Parcel Room.
- Raiden climbed to the Strut E Heliport before the countdown expired.
- Raiden used Coolant Spray on the live Heliport C4.
- Fatman’s introduction began, confirming the transition to the next chapter.
References for this chapter
Strut E Heliport — Fatman and the Post-Boss Rewards
Control returns to Raiden on the Strut E Heliport after the initial heliport C4 has already been frozen and Fatman’s introduction has begun. Equip Sensor A and use it to track the additional C4 charges Fatman plants during the battle. Fatman’s suit protects his body, so create knockdown openings and shoot his exposed head. When he is defeated, move his body to reveal the final C4 underneath it and freeze that device. The post-battle sequence awards the Level 2 security card, BDU and cell phone. Then return through the EF Connecting Bridge to Strut F Warehouse, open the Level 2 room and collect the AKS-74u for the Shell 1 Core disguise route.
Equip Sensor A and begin the bomb cycle
The chapter begins with Raiden already on the Strut E Heliport. The C4 associated with the heliport approach has been dealt with during the preceding sequence, and Fatman’s encounter is now active. Do not backtrack to repeat that earlier disposal step.
Equip Sensor A immediately. It is tuned to the distinctive signature of Fatman’s C4 and marks the approximate location of each newly planted charge on the radar. Keep the sensor available whenever Fatman stops to plant explosives or the battle shifts away from direct attacks.
The sensor identifies the general area rather than placing a large marker directly over the device. Use the radar cloud to decide which part of the heliport to search, then inspect the nearby containers, platforms and low spaces. Fatman can place charges beside or beneath objects, so do not assume that a visible open route leads directly to the bomb.
- Control has returned on Strut E Heliport after the earlier heliport C4 was frozen.
- Sensor A is equipped.
- Fatman’s newly planted C4 charges are now the active objective.
Locate and freeze every C4 Fatman plants
When Sensor A indicates a charge, stop pursuing Fatman and move to the marked area. The Coolant Spray is the item that freezes the bomb; Sensor A only locates it. Switch to the spray once you are close enough to interact with the device, then hold the spray on the C4 until it is fully neutralized.
Raiden moves more slowly while the Coolant Spray is equipped. For that reason, use Sensor A to narrow the search first, then equip the spray at the last practical moment. If Fatman is nearby, use cargo containers and other cover to create enough space to work safely.
The number and placement of planted charges vary with difficulty. Do not follow a fixed count or memorized route. Continue checking Sensor A after every successful disposal because Fatman resumes the encounter by planting more explosives. A charge left active will eventually detonate and end the fight, even if Fatman’s life gauge is nearly empty.
Once a bomb is frozen, switch back to Sensor A or a firearm and relocate. The safest rhythm is to handle the current bomb first, create distance from Fatman, then return to the boss only after the radar shows no immediate unhandled charge.
- Sensor A has been used to locate every active Fatman C4.
- Each charge has been completely frozen with the Coolant Spray.
- No active bomb has been ignored while attacking Fatman.
- The route is being adapted to the selected difficulty rather than a fixed bomb count.
Knock Fatman down and attack his exposed head
Fatman’s bomb-disposal suit makes ordinary body shots ineffective. Use the SOCOM or another available firearm to force a knockdown, then aim at his exposed head while he is down or recovering. The M9 can serve the same purpose if you are attempting a nonlethal result, but the vulnerable target remains his head rather than the armored torso.
His roller-skating movement makes close pursuit dangerous. Keep enough distance to avoid being run over, and use the open heliport or containers to control the angle of approach. Do not waste ammunition firing continuously into his protected body or chasing him when Sensor A indicates that he has planted another charge.
After each successful bomb disposal, wait for a safe opening and knock Fatman down again. Damage his head during the recovery window, then return to Sensor A as soon as another bombing cycle begins. Repeat this pattern until his health is depleted. Bomb disposal remains the priority; defeating Fatman does not matter if an active C4 detonates first.
- Fatman has been knocked down during a safe attack opportunity.
- Damage has been directed at his exposed head.
- Bomb disposal has taken priority over prolonged attacks.
- Fatman’s health has been depleted.
Move Fatman’s body and freeze the final C4
Defeating Fatman does not finish the bomb operation. Remain on the heliport and approach his body. Use the grab-and-drag action to move him away from the position where he fell. This reveals one final C4 hidden beneath the body.
Equip the Coolant Spray and freeze the exposed device completely. The final bomb is a separate objective and is not automatically neutralized when Fatman dies. Do not leave the heliport or assume the battle is complete until the spray has finished its effect on this C4.
Searching Fatman’s body for a dog tag is optional and has no bearing on the main campaign. Skip it if you are conserving time or are not pursuing collectibles. After the last C4 is frozen, allow the Codec conversations and the following cutscene to play without attempting to return through the bridge immediately.
- Fatman’s body has been moved.
- The hidden C4 beneath him has been exposed.
- The final C4 has been completely frozen.
- The post-battle Codec and cutscene sequence has started.
Receive the post-battle rewards
Remain on the heliport through the post-battle sequence. Raiden receives three important items: the Level 2 security card, the BDU uniform and the cell phone. These are awarded by the story sequence rather than collected from separate heliport locations.
The Level 2 card opens the next secured rooms. The BDU is required for the disguise route into Shell 1 Core, but the disguise is not sufficient by itself: Raiden must also carry the AKS-74u. The cell phone supports later communications and is delivered during this same progression sequence.
If any of these items is not yet listed in the inventory, the cutscene sequence has not finished. Wait until control returns and the rewards are confirmed before leaving the heliport.
- The Level 2 security card has been received.
- The BDU uniform has been received.
- The cell phone has been received.
- Control has returned after the post-battle sequence.
Return through the bridge and collect the AKS-74u
Leave Strut E Heliport and cross the EF Connecting Bridge toward Strut F Warehouse. This is no longer the timed run used to reach the heliport, so move carefully and avoid unnecessary alerts. Use the map to confirm that you are entering Strut F rather than returning toward Strut E Parcel Room or the Shell 1 Core.
Inside Strut F Warehouse, descend to the lower level and use the Level 2 card on the appropriate secured room. The AKS-74u is in the Level 2 room on the lower level of the warehouse. Other weapons and ammunition in the warehouse are useful but optional for the immediate objective.
Collect the AKS-74u before attempting the Shell 1 Core infiltration. The next route requires Raiden to wear the BDU and carry the AKS-74u so the enemy disguise is accepted inside the Core. Once both items are secured, proceed toward Shell 1 Core and follow the next chapter’s disguise and hostage-room instructions.
- Raiden has left the heliport after the final C4 was frozen and the rewards were delivered.
- The EF Connecting Bridge has been crossed toward Strut F.
- Strut F Warehouse has been reached.
- The Level 2 room on the warehouse’s lower level has been opened.
- The AKS-74u has been collected.
- The BDU and AKS-74u are ready for the Shell 1 Core route.
Before you move on
- The chapter began with Fatman’s introduction already in progress on Strut E Heliport.
- Sensor A was equipped and used to locate every C4 Fatman planted during the battle.
- Every active planted C4 was frozen before detonation.
- Fatman was defeated by creating knockdown openings and damaging his exposed head.
- Fatman’s body was moved and the final C4 beneath it was frozen.
- The Level 2 security card, BDU uniform and cell phone were received.
- Raiden returned through the EF Connecting Bridge to Strut F Warehouse.
- The Level 2 room on the lower level of Strut F Warehouse was opened.
- The AKS-74u was collected for the Shell 1 Core disguise route.
References for this chapter
- Metal Gear Solid 2: Sons of Liberty - Guide and Walkthrough - PlayStation 2 - By Yushiro
- Metal Gear Solid 2: Sons of Liberty — Spoiler-Free Walkthrough by Nemesis
- Metal Gear Solid 2: Sons of Liberty - Guide and Walkthrough, PlayStation 2 - By Lightopia
- Metal Gear Solid 2: Sons of Liberty — Weapons FAQ
Shell 1 Core — AKS-74u Disguise, Ames and the Directional Microphone
After Fatman, return to Strut F Warehouse to complete Raiden’s disguise, then enter Shell 1 Core and locate Ames in the B1 hostage hall. The required order is to collect the AKS-74u, equip it with the BDU, pass the Core elevator security check, collect the Directional Microphone from B2, use a live guard at the B1 retinal scanner, identify Ames by his pacemaker, and survive the short Ocelot sequence. Ames gives Raiden the Level 3 security card and directs him toward Shell 2. The chapter ends after Raiden leaves Shell 1 Core and reaches the route toward the Shell 1-2 Connecting Bridge.
1. Return to Strut F Warehouse after Fatman
After the post-Fatman Codec calls and story scenes finish, leave Strut E and return across the EF Connecting Bridge toward Strut F Warehouse. The next required item is the AKS-74u. The BDU awarded after Fatman is not enough to pass the Shell 1 Core elevator inspection by itself; Raiden must also carry the weapon that matches the disguise.
Enter Strut F Warehouse and descend to the lower floor. Use the Level 2 security card on the Level 2 door in the northern portion of the lower floor. The AKS-74u is inside this room. Collect the weapon and its ammunition, then equip both the BDU and the AKS-74u before approaching the Shell 1 Core elevator.
The uniform works as a disguise only while Raiden behaves like a soldier. Do not run directly into guards, collide with them, aim at them, or continue carrying an obviously unsuitable weapon. If a guard becomes suspicious, break line of sight and restore the disguise before continuing. The upper-floor weapons in Strut F are optional for this objective; the AKS-74u is the required pickup.
- The post-Fatman Level 2 security card is in the inventory.
- The BDU is equipped.
- The AKS-74u is equipped.
- The AKS-74u ammunition has been collected from the lower Strut F Warehouse room.
2. Pass the Shell 1 Core elevator inspection
Leave Strut F and return to the Shell 1 Core entrance. At the elevator, keep the BDU and AKS-74u equipped. Call the elevator and allow the camera to inspect Raiden. With the correct uniform and weapon, the inspection permits access instead of raising an alarm.
Ride the elevator to B2 first. Do not go directly to B1, because the Directional Microphone needed to identify Ames is on B2. Once the elevator doors open, move around the corridor and enter the large B2 computer room. Keep the disguise equipped while passing the soldiers in this area; avoid bumping into them in the narrow passages.
Activate the Node in the computer room if you need the radar and map information. The Node is optional for the story, but it makes the guard patrols easier to read. The Directional Microphone is in the computer-room area near the lockers and equipment, on the side of the room away from the elevator. Pick it up before leaving B2.
- The elevator inspection has accepted the BDU and AKS-74u.
- Raiden has reached Shell 1 Core B2.
- The Directional Microphone has been collected.
- The B2 Node has been activated if radar assistance is needed.
3. Prepare the B1 retinal scanner
Return to the elevator and go to B1. On B1, enter the small room beside the elevator and activate its Node. The door leading to the hostage hall is controlled by a retinal scanner, and Raiden is not authorized to open it himself.
A soldier patrols the corridor outside. Do not kill him. Wait until he is isolated, then approach from behind with the weapon unequipped and grab him in a chokehold. If he struggles, apply enough pressure to keep him under control without rendering him unconscious. Drag his face to the retinal scanner. The game will use the guard’s living, open eye to unlock the door.
If you accidentally knock the guard out or kill him before using the scanner, the intended access method may fail and reinforcements can make the area harder to control. Reload a save if the scanner will not accept the guard. Once the door opens, leave the guard behind and enter the B1 hostage hall.
- The B1 Node has been activated.
- The retinal-scanner guard is still alive and conscious.
- The guard’s eye has opened the hostage-hall door.
- Raiden has entered the B1 hostage hall.
4. Identify Ames with the Directional Microphone
The hostage hall contains Ames and other hostages, with a guard watching the area. Do not shoot, tranquilize or knock out the hall guard. His behavior is part of the sequence, and attacking him can bring an immediate response. Use the walls, crates and the hostages’ positions to stay outside his direct view while searching.
Equip the Directional Microphone and aim it at the hostages one at a time. Listen for the heartbeat pattern. Ames has a pacemaker, so his heartbeat includes a distinct electronic pulse rather than only the ordinary rhythm heard from the other hostages. Move the microphone carefully until the electronic signal is clear.
Do not rely on a fixed hostage position. The surrounding hostage arrangement can vary between playthrough conditions, so the pacemaker sound is the dependable identification method for the original game. Keep the guard from seeing Raiden openly using the microphone. If a hostage reacts negatively, stop calling out repeatedly and reposition before trying another target.
When the microphone identifies the correct heartbeat, face Ames and press the Action button to call to him. A long story sequence begins. Ames explains that President Johnson is being held in Shell 2’s Core and gives Raiden the Level 3 security card. Do not leave the hall before this conversation finishes.
- The Directional Microphone is equipped.
- Ames has been identified by the pacemaker’s electronic pulse.
- Raiden has called out to the correct hostage.
- Ames has awarded the Level 3 security card.
- The conversation has revealed the Shell 2 Core objective.
5. Handle Ocelot’s ten-second inspection
After the Ames conversation, the microphone remains pointed toward the nearby discussion involving Ocelot and the other terrorists. Let the scene continue until Ocelot approaches the hostage room. A short timed prompt then begins, giving Raiden approximately ten seconds to equip the AKS-74u.
Immediately switch from the Directional Microphone to the AKS-74u. Do not run, turn away, or attempt to leave the room during this interval. Raiden must remain where he is while Ocelot approaches. Moving away can cause the sequence to fail, so the correct response is to change equipment and stand still.
The following cutscene removes Raiden’s disguise and places him back in the corridor outside the hostage room. The guards will now treat him as an intruder. This is scripted progression, not a sign that the earlier disguise route was performed incorrectly.
- The Ocelot sequence has begun.
- The AKS-74u is equipped during the short timer.
- Raiden has remained stationary while Ocelot approaches.
- The cutscene has returned Raiden to the B1 corridor.
6. Leave Shell 1 Core and continue toward Shell 2
Once control returns in the B1 corridor, move toward the elevator. Avoid unnecessary combat; the guards are now hostile, and the objective is to escape rather than clear the Core. If a guard blocks the elevator, use the side room and corners to break his line of sight, then call the lift when the route is open.
Ride the elevator to 1F. Exit the Core and return to the EF Connecting Bridge. The bridge sequence changes as Raiden crosses it, so stay on the solid central route and do not step onto unstable panels near the damaged sections. Cross toward Strut F Warehouse.
At Strut F, the Level 3 card now opens additional rooms on the upper floor. The PSG1 and other weapons there are useful for later progression, but they are not needed to complete the Ames objective itself. Collecting them is optional unless the next section of the campaign requires the sniper rifle and the game’s Codec directs Raiden back for it.
The immediate story route continues from Strut F toward the Shell 1-2 Connecting Bridge. Follow the Codec instructions, cross that bridge when prompted, and proceed toward Shell 2. The chapter is complete when Raiden has escaped the Shell 1 Core, obtained the Level 3 card from Ames, and the next objective has moved to Shell 2.
- Raiden has returned to Shell 1 Core 1F.
- The Core has been exited through the EF Connecting Bridge.
- Raiden has reached Strut F Warehouse.
- The Level 3 card is available for later doors.
- The Codec has advanced the objective toward Shell 2.
Before you move on
- The BDU and AKS-74u have passed the Shell 1 Core elevator inspection.
- Raiden has reached B2 and collected the Directional Microphone.
- The B1 retinal scanner has been opened with a living guard.
- Ames has been identified and contacted.
- Ames has awarded the Level 3 security card and revealed the Shell 2 objective.
- The Ocelot ten-second sequence has been completed without moving away.
- Raiden has escaped through 1F and reached Strut F on the route toward the Shell 1-2 Connecting Bridge.
References for this chapter
- Metal Gear Solid 2: Sons of Liberty FAQ/Walkthrough v1.8 — Neoseeker Walkthroughs
- Metal Gear Solid 2: Sons of Liberty - Guide and Walkthrough - PlayStation 2 - By Yushiro
- Metal Gear Solid 2: Sons of Liberty - Guide and Walkthrough, PlayStation 2 - By Lightopia
- Metal Gear Solid 2: Sons of Liberty — Guide and Walkthrough by black_hole_sun
- METAL GEAR SOLID2 -SONS OF LIBERTY- official archive: secrets and completion changes
Shell 2 Core and Emma — MO Disc, Escort and GW Virus Upload
After the Ames hostage-room sequence, return through Strut F Warehouse to collect the PSG1 and PSG1-T using the Level 3 card. Continue through Strut E Parcel Room and Strut D Sediment Pool to reach the Shell 1-2 Connecting Bridge. Disable the Semtex control units, receive the Stinger from Pliskin and defeat Harrier II. The bridge is damaged during the battle, so follow the surviving route through the pipe, hanging sections and Strut L Perimeter before entering Shell 2 Core. Retrieve the Nikita, disable the President's control panels, meet President Johnson and defeat Vamp in the Air Purification Room. Rescue Emma from the flooded filtration chambers, escort her through Shell 2 Core and Strut L, protect her across the oil fence, then defeat the returning Vamp hostage encounter. Finally, deliver the MO Disc to Shell 1 Core B2 within the displayed difficulty-specific timer and complete the mandatory computer and GW virus sequence.
1. Return from Ames and collect the PSG1 weapons
After the Ames and hostage-room sequence, leave Shell 1 Core through the route indicated by the Codec. Cross the EF Connecting Bridge and continue through Strut E rather than heading directly toward the Shell 1-2 bridge. The Level 3 card now permits access to the locked rooms in Strut F Warehouse.
Enter Strut F Warehouse and open the Level 3 doors. One room contains the PSG1. In the same area, look for the duct on the right side of the PSG1 room and crawl through it to obtain the PSG1-T. Collect ammunition if it is safely available; both rifles are needed later for the oil-fence sequence, although the lethal PSG1 is also useful for precision shots on the connecting bridge.
Leave Strut F through its upper route and return toward Strut D. Use the northern Level 3 door on the second floor of Strut D to reach the Shell 1-2 Connecting Bridge approach. Do not try to enter Shell 2 before completing this route. The bridge remains sealed by Semtex control units and laser barriers.
- Leave the Shell 1 Core hostage area.
- Use the Level 3 card in Strut F Warehouse.
- Collect the PSG1.
- Crawl through the duct to collect the PSG1-T.
- Return through Strut D toward the Shell 1-2 Connecting Bridge.
2. Disable the Shell 1-2 Connecting Bridge Semtex controls
Enter the Shell 1-2 Connecting Bridge from Strut D's Sediment Pool. Pliskin contacts Raiden and explains that the Semtex charges are controlled by remote units distributed across the bridge. The number and placement of active units depend on difficulty, so search the entire bridge instead of relying on a fixed count.
Use the PSG1 for distant boxes and the SOCOM for close targets that require a first-person angle. Search above the Strut D entrance, around the laser fence, beside the Strut G entrance, on the tanks and walls, near the seagulls, behind the Sons of Liberty flag and on the lower level. Some difficulties place a control unit on or near a Cypher. Shoot the green control box only; destroying the explosive device or the Cypher can cause a failure.
The lowest control unit is difficult to see from the normal stance. Use first-person view from the appropriate balcony and raise Raiden onto his tiptoes while aiming. When every active control unit has been destroyed, cross the laser fence. A cutscene brings Pliskin and the Kasatka to the bridge, and Pliskin gives Raiden the Stinger and missile ammunition.
- Search the bridge for every active control unit on the current difficulty.
- Use the PSG1 for distant boxes and the SOCOM for close or low targets.
- Do not shoot the Semtex charges themselves.
- Do not destroy explosive Cyphers when only their control boxes are required.
- Cross the laser fence and receive the Stinger from Pliskin.
3. Defeat Harrier II
Harrier II fights Raiden on the Shell 1-2 Connecting Bridge. Do not fire at the Kasatka carrying Snake and Otacon. Equip the Stinger, lock onto the Harrier during an opening and fire, then immediately move behind a central pillar, railing or another solid obstruction.
The upper and lower bridge levels are both important. Drop to the lower level when the Harrier uses cluster bombs or makes a low attack pass. Machine-gun fire can be avoided by moving behind the central supports, while missile barrages require immediate movement behind solid cover. Keep relocating after each shot rather than remaining exposed to preserve the lock.
The Harrier damages and destroys sections of the bridge as the fight progresses. This destruction is scripted. Continue using the remaining cover and lower route until the Harrier is defeated. Afterward, allow the cutscenes involving Solidus, Vamp, Metal Gear RAY and Fortune to finish. Do not assume that the next playable objective is already inside Shell 2; the damaged-bridge traversal still has to be completed.
- Use the Stinger against Harrier II.
- Never target the Kasatka carrying Snake and Otacon.
- Use the lower level during cluster-bomb attacks.
- Move between pillars and railings after each missile shot.
- Allow the post-battle cutscenes to finish.
4. Cross the damaged bridge and pass Strut L Perimeter
When control returns after the Harrier sequence, use the Coolant Spray on the fire blocking the surviving route. Proceed through the wreckage instead of turning back toward the intact bridge. The damaged section contains gaps and unstable panels, and the safe route uses the remaining pipe and railings.
Follow the pipe carefully, keeping Raiden centered so he does not slip. Continue to the walkway and use the Action button to climb onto the raised section. Some floor panels fall when stepped on, so keep moving and avoid stopping on damaged surfaces. Where the walkway is broken, flatten against the wall and sidestep across the narrow ledge. At the next obstruction, crouch while staying against the wall and move underneath it.
After dropping to the lower walkway, pass the Cyphers and continue to the ladder for Strut L Perimeter. On the perimeter, crawl beneath the windows while guards look outward. Move quickly because some panels collapse behind or beneath Raiden. At the large gap, flatten against the wall, crouch under the projecting structure and continue around the bend. Drop to the lower walkway when the upper route ends.
Use the lower route to collect AKS-74U ammunition if desired, then move north and return up the stairs. Check the remaining Cyphers from first-person view before stepping onto the KL Connecting Bridge. Cross the bridge, clear or evade the gun Cyphers and enter Shell 2 Core. This damaged-bridge and Strut L route is mandatory; Shell 2 is not reached directly from the Harrier arena.
- Use Coolant Spray on the post-Harrier fire.
- Cross the wreckage using the pipe and remaining walkways.
- Use hanging, wall-flattening and crouching routes at the gaps.
- Pass the Strut L Perimeter guards and collapsing panels.
- Clear or evade the Cyphers on the KL Connecting Bridge.
- Enter Shell 2 Core.
5. Retrieve the Nikita and reach President Johnson
Inside Shell 2 Core, follow the route to the flooded lower level and retrieve the Nikita. Use the illuminated air-rest points during the underwater sections. Return to the Shell 2 Core 1F Air Purification Room and locate the vent route leading toward the President's alcove.
Guide a Nikita missile through the duct and destroy the blue control panels or electrical units protecting the President. Do not detonate the missile on President Johnson. Once the electrical floor is disabled, enter the President's room and complete the required conversation and struggle. Johnson gives Raiden the Level 4 card and the MO Disc. Both are required for the following objectives.
- Enter Shell 2 Core after the damaged-bridge route.
- Retrieve the Nikita from the flooded lower level.
- Guide the Nikita through the vent.
- Disable the President's electrical control units without hitting him.
- Receive the Level 4 card and MO Disc from President Johnson.
6. Defeat the first Vamp encounter
The first Shell 2 Core Vamp encounter takes place in the 1F Air Purification Room after the President sequence. It is separate from the later oil-fence hostage sequence. Vamp moves between the walkways and the water, throws knives and can use the light to pin Raiden's shadow.
Destroy the overhead lights if Vamp begins using the shadow-pinning attack. Keep Raiden on the walkways and shoot Vamp when he surfaces, lands or pauses after an attack. Do not chase him into the water. Maintain distance during his rapid movement and knife throws, then resume accurate fire during the next opening.
Defeat Vamp and allow the required Codec calls and scenes to finish. When control returns, use the Level 4 route to Shell 2 Core B1 and begin Emma's rescue.
- Trigger the mandatory Air Purification Room Vamp encounter.
- Destroy the overhead lights if the shadow attack becomes a problem.
- Attack Vamp during his landing and emergence openings.
- Defeat Vamp and proceed to Shell 2 Core B1.
7. Rescue Emma from the flooded filtration chambers
Use the Level 4 route in Shell 2 Core B1 to enter the flooded filtration chambers. Follow the marked corridors and use the illuminated air pockets before the oxygen gauge becomes critical. Underwater mines may be present, so use the Mine Detector when available and avoid suspicious objects rather than swimming directly through them.
Reach the chamber where Emma is hiding and trigger the rescue scene. Swim back through the filtration route, pausing at air pockets whenever necessary. When Raiden and Emma reach the elevator, hold the Action button to take her hand. Raiden cannot use a weapon while escorting her, so clear enemies and inspect the next room before bringing Emma forward.
Return to Shell 2 Core 1F. Sea lice and insects block the route near the elevator; use the Coolant Spray to clear them. Move Emma into the Air Purification Room and continue toward the KL Connecting Bridge.
- Reach Emma through the Level 4 filtration route.
- Use the air pockets to restore oxygen.
- Avoid underwater mines and filtration hazards.
- Take Emma's hand only after the route is clear.
- Use Coolant Spray on the insects blocking the elevator route.
8. Escort Emma through Shell 2 Core, the KL Bridge and Strut L
Leave Emma in a safe position while clearing guards in the Air Purification Room. Once the room is safe, take her hand and move toward the KL Connecting Bridge. Deal with the guard and Cyphers before bringing Emma into the exposed bridge section.
A fire blocks the route to Strut L. Extinguish it with the Coolant Spray, then escort Emma to the Level 5 door. Emma provides the Level 5 card, so she must be present when the door is opened. In Strut L's Sewage Treatment Facility, leave Emma near the entrance, defeat the two guards and then bring her south to the floor hatch.
Open the hatch and descend with Emma to the oil-fence area. Do not begin the descent while guards can still attack her from the treatment facility catwalks.
- Clear the Air Purification Room before moving Emma.
- Deal with the KL Bridge guard and Cyphers.
- Extinguish the KL Bridge fire with Coolant Spray.
- Use Emma's Level 5 card to enter Strut L.
- Reach the Strut L Oil Fence with Emma alive.
9. Protect Emma across the Strut L oil fence
The oil-fence pontoons are too narrow for Raiden and Emma to cross together. Equip the PSG1 or PSG1-T and Thermal Goggles before Emma starts moving. Thermal Goggles reveal Claymore mines and make distant guards and Cyphers easier to identify.
Clear mines from the pontoon Emma is approaching before she reaches them. Eliminate guards on the towers and platforms, then destroy or disable Cyphers that threaten her route. The PSG1-T is useful for non-lethal guards, but it cannot destroy every obstacle, so switch to the PSG1 when a Cypher or Claymore must be removed. If ammunition becomes low, check the nearby supply points on the tower.
When Snake calls to say he has found a sniper position, contact him to request assistance. Continue watching the areas outside his line of fire. Prioritize the platform Emma is approaching rather than distant optional targets. If she is spotted, additional enemies can attack her and quickly cause a failure.
- Equip Thermal Goggles before Emma begins crossing.
- Use the PSG1 or PSG1-T to cover her route.
- Remove Claymores before Emma reaches them.
- Protect her from guards and Cyphers.
- Call Snake for sniper support when the option appears.
10. Defeat the returning Vamp hostage encounter
After Emma has crossed much of the oil fence, Vamp appears and takes her hostage. This is not the earlier Air Purification Room boss fight. Raiden must shoot Vamp while avoiding Emma.
Use the PSG1 or PSG1-T and wait until Vamp's head is clearly separated from Emma. Fire controlled shots at his head and stop shooting whenever he moves behind her. A missed shot is safer than a rushed shot through Emma. Continue until the scene ends and Vamp is defeated. Emma is wounded, and Snake rescues her.
After the cutscene, control returns in Strut E Parcel Room. This is the point at which the MO Disc delivery timer begins.
- Trigger the oil-fence hostage sequence.
- Aim at Vamp's head rather than his body or Emma.
- Avoid shooting Emma.
- Allow Snake's rescue scene to finish.
- Regain control in Strut E Parcel Room.
11. Deliver the MO Disc to Shell 1 Core B2
When control returns in Strut E Parcel Room, move immediately toward the EF Connecting Bridge. Do not detour to the Heliport or explore optional rooms. The objective is to deliver the MO Disc to the Shell 1 Core B2 Computer Room before the displayed difficulty-specific timer expires.
Cross the EF Connecting Bridge and deal with the replanted Cyphers. The left-side route contains missing and unstable floor panels. Use the remaining platforms, wall-hanging route and forward flip or torso-axial jump when the gap requires it. Keep moving if a panel begins to fall. Chaff or a suppressed weapon can help against Cyphers, but do not spend time fighting enemies that can be bypassed.
Enter Shell 1 Core 1F. Claymores and sea lice are present on the route to the elevator, so use care while maintaining forward progress. Take the elevator to B2 and enter the Computer Room. The timer objective is complete only when Raiden reaches the required terminal area and the story sequence begins.
- Start from Strut E Parcel Room after the returning Vamp scene.
- Cross the EF Connecting Bridge without taking optional detours.
- Use the platforms, hanging route and forward flip where the gaps require them.
- Avoid Claymores and sea lice in Shell 1 Core 1F.
- Reach Shell 1 Core B2 before the displayed timer expires.
- Reach the Computer Room with the MO Disc.
12. Complete the GW computer sequence and virus upload
At Shell 1 Core B2, follow the Computer Room prompts and required Codec conversations. The terminal interaction is mandatory. Raiden delivers the MO Disc, and the ensuing scenes explain the connection between the disc, Emma's work and the GW system.
Do not leave the room or treat the terminal as optional after reaching B2. Continue through the dialogue and cutscenes until the upload sequence concludes. The game then begins the transition toward Arsenal Gear. This is the completion point for the chapter; later Arsenal Gear objectives belong to the next chapter.
- Complete the required B2 Computer Room interaction.
- Allow the MO Disc and GW-related scenes to finish.
- Complete the virus upload sequence.
- Allow the Arsenal Gear transition to begin.
Before you move on
- The PSG1 and PSG1-T have been collected from Strut F Warehouse after Ames.
- Raiden has crossed the Shell 1-2 Connecting Bridge approach from Strut D Sediment Pool.
- All active Semtex control units for the current difficulty have been destroyed.
- Pliskin has handed Raiden the Stinger and Harrier II has been defeated.
- The damaged bridge has been crossed using the surviving pipe, hanging route and platforms.
- Raiden has passed Strut L Perimeter and entered Shell 2 Core.
- President Johnson has given Raiden the Level 4 card and MO Disc.
- The first Vamp encounter in Shell 2 Core's Air Purification Room has been completed.
- Emma has been rescued from the flooded filtration chambers.
- Emma has been escorted through Shell 2 Core, the KL Connecting Bridge and Strut L.
- Emma has crossed the oil fence and the returning Vamp hostage sequence has ended without her being killed.
- Control has returned in Strut E Parcel Room and the MO Disc timer has begun.
- Raiden has crossed the EF Connecting Bridge and reached Shell 1 Core B2 before the displayed timer expires.
- The required Computer Room interaction and GW virus upload have finished.
- The game has advanced into the Arsenal Gear transition.
References for this chapter
- Metal Gear Solid 2: Sons of Liberty - Guide and Walkthrough - PlayStation 2 - By Yushiro
- Metal Gear Solid 2: Sons of Liberty — Guide and Walkthrough, GheddonLN, PlayStation 2
- Metal Gear Solid 2: Sons of Liberty — Guide and Walkthrough, Conquerer, PlayStation 2
- Metal Gear Solid 2: Sons of Liberty — Guide and Walkthrough — YSF, Part 1 of 2
Arsenal Gear — Stomach, Jejunum and Ascending Colon
This chapter covers Arsenal Gear's opening sequence after the Shell 1 Core elevator. The route is linear once the Node is activated: endure Solidus's torture scene in Stomach, log into the Arsenal Gear Node, cross the two-level Jejunum hangar while unarmed, then wait in Ascending Colon for the required Codec and story events. Snake eventually arrives, restores Raiden's equipment and provides the H.F. Blade. The chapter ends when the Ascending Colon sequence is complete and control is ready to pass into the following Arsenal Gear combat section. The Tengu battle in Ileum is not part of this chapter.
1. Survive the Stomach torture sequence and activate the Node
After the Shell 1 Core elevator and the following cutscenes, control returns in Arsenal Gear, Stomach. Solidus restrains Raiden with the mechanical tentacles. Rapidly press the Action button to resist the choke hold until the sequence ends. The opening damage is scripted, so do not waste healing items trying to avoid it.
Continue through the Codec calls and cutscenes. Olga eventually punches Raiden, causing another unavoidable loss of health. When control returns after the story sequence, leave the torture-room area through the eastern door. The nearby locker contains Medicine. Pick it up if you want an additional recovery item for the next stealth section; it is not required to activate the Node or leave Stomach.
After leaving the torture room, enter the adjoining area and use the Node terminal. This login is the required progression trigger for Arsenal Gear. The Node does not grant a higher security-card level, and the Level 1 through Level 5 cards used in the Big Shell do not open a separate route through Stomach or the following Arsenal areas. Once the Node sequence has finished, use the door to the right of the terminal to enter Arsenal Gear, Jejunum.
Save after the cutscenes if you want a safe retry point. The next room is a lengthy unarmed stealth passage, so entering Jejunum with full health and Medicine available is useful, but optional items are not worth triggering an alert.
- Complete the scripted choke-hold sequence by rapidly pressing the Action button.
- Wait through the Codec and Olga scenes.
- Leave the torture room through the eastern door.
- Take the Medicine from the nearby locker if desired.
- Log into the Arsenal Gear Node.
- Enter Jejunum through the door to the right of the Node.
2. Cross Jejunum without weapons
Jejunum is the final stealth section before the game's major Arsenal Gear combat encounters. Raiden is unarmed here. He cannot use firearms or normal attacks, and he cannot hang over the railings. A forward flip can knock down an enemy at close range, but avoiding contact is safer than trying to use it as a combat method.
The inactive Metal Gear RAY units on either side of the passage are landmarks, not objectives. Do not search them for a card or control item. Your goal is the northeast exit on the upper level, which leads to Ascending Colon.
At the start, watch the nearby Tengu patrol moving toward Raiden. Wait until it turns and walks north, then run to the staircase on the east side and climb to the upper level. Stay close to walls and cover rather than crossing the open floor while a guard is looking toward you.
At the top of the stairs, use the corner as cover and wait for the nearby guard to turn north. Cross the upper catwalk to the opposite side when his back is turned. Move north toward the support column with the surveillance camera. Keep the column between Raiden and the patrol while the guard moves south and then returns north. When the patrol has moved away and the eastern guard is walking south, cross the next catwalk toward the east side.
Continue north, watching for the gap in the upper floor. Flip across it rather than running directly over the opening. Ahead are another camera and a guard. Wait until the guard patrols east, then move north and crouch behind the waist-high crate. Remain there until the guard turns south and looks away from the exit. Run east through the northeast doorway into Ascending Colon.
If an alert begins, do not stop to fight. Use crates, pillars and the room's vertical layout to break the guards' line of sight, then continue toward the northeast exit. The exact patrol timing can vary by difficulty, so the reliable landmarks are the east staircase, upper catwalk, camera support column, floor gap, waist-high crate and northeast exit.
- Answer the first Colonel call when it occurs; later calls are optional.
- Wait for the first patrol to turn north before using the east staircase.
- Stay on the upper level and use corners, pillars and crates as cover.
- Cross the floor gap with a flip.
- Reach the upper-level northeast exit into Ascending Colon.
- Do not search Jejunum for a new security card or attempt to activate the inactive RAY units.
3. Wait in Ascending Colon for Snake and the H.F. Blade
Ascending Colon is a long passageway with little immediate interaction. Enter the area and walk through it while the Colonel's abnormal Codec calls continue. The first Colonel call connected with the Arsenal transition is required; after that, additional calls can be answered or ignored. They are not separate objectives and do not replace the need to wait for the story event.
A Ration is available at the southern end of the passage. Pick it up if you need recovery, then continue moving through the corridor. If nothing appears to happen, walk back and forth through the passage rather than standing at the entrance. The next progression event eventually begins when Rose contacts Raiden.
After the Rose call, allow the cutscene sequence to play. Snake arrives in Ascending Colon and explains the immediate danger inside Arsenal Gear. When control returns, Raiden receives his equipment back and obtains the H.F. Blade. The weapon is a required progression item for the later Arsenal Gear encounters, not an optional reward.
Use the practice opportunity immediately. Equip the H.F. Blade and follow the on-screen prompts until the practice sequence is complete. Test the basic slash, defensive guard and movement before leaving the room. There is no need to explore a hidden Arsenal sector or find another terminal during this sequence.
When the practice and follow-up story events finish, the Ascending Colon objective is complete. The next section is Ileum, where the game changes from unarmed stealth to a combat sequence alongside Snake. Stop this chapter at that transition; the Ileum Tengu battle belongs in the following chapter.
- Continue moving through Ascending Colon while the Codec events occur.
- Take the southern Ration if recovery is needed.
- Wait for Rose's call and Snake's arrival.
- Receive Raiden's restored equipment.
- Obtain the H.F. Blade.
- Complete the practice prompts before advancing to the next Arsenal section.
Before you move on
- The Stomach torture sequence has finished and Raiden has left the torture-room area.
- The Medicine has been collected if desired, and Raiden has logged into the Arsenal Gear Node.
- Raiden has entered Jejunum and reached Ascending Colon through the upper-level northeast exit.
- Raiden has crossed Jejunum without needing a weapon or security card.
- The required Ascending Colon Codec and story events have completed.
- Snake has arrived and restored Raiden's equipment.
- Raiden has received the H.F. Blade and completed its practice sequence.
- The next route toward Ileum is available, with no Ileum combat included in this chapter.
References for this chapter
Arsenal Gear — Ileum Tengu Assault
Raiden and Solid Snake enter Arsenal Gear’s Ileum, a long combat passage occupied by Arsenal Tengu commandos. The encounter is mandatory and ends only when Raiden and Snake fight through to the far exit. Raiden is the playable character; Snake fights alongside him with his M4 and can eliminate many enemies, but Snake’s health must be protected because his death causes a game over. Sword-equipped Tengus can block ordinary gunfire, so the H.F. Blade is the safest primary weapon for enemies on Raiden’s level. P90-equipped Tengus and elevated gunmen should be handled quickly, with Snake providing useful covering fire.
Enter Ileum with Raiden and Snake
After the preceding Arsenal Gear events, control returns to Raiden as he enters the Ileum area with Solid Snake. This is not a stealth section and there is no item, terminal or keycard objective inside the combat passage. The route is forward through the Arsenal interior, ending at the door on the opposite side of the area.
Before moving ahead, equip the H.F. Blade if it is not already active. Keep a firearm available for enemies positioned on upper walkways, because the blade is most useful against Tengus fighting on Raiden’s level. Snake will advance and fire automatically as the battle develops, so stay near enough to support him without standing directly in his line of fire.
- Confirm that Raiden, not Snake, is under player control.
- Equip the H.F. Blade before the first Tengu wave reaches you.
- Keep a firearm available for elevated enemies.
- Do not search the room for a required pickup or terminal.
Advance through the first Tengu waves
Move forward through the passage to trigger the next groups of Tengus. The encounter is built as a series of advancing waves rather than a single enclosed boss arena. Enemies can appear from the lower floor, catwalks, railings and side positions, so check above and behind Raiden whenever the immediate area appears clear.
Snake is a strong combat partner and can remove several enemies with his M4. Let him contribute instead of rushing far ahead alone. Some waves are triggered by advancing toward the next section, so if no enemies are visible, move forward until the passage opens into the next combat space. The objective is to clear the route, not to search every corner.
- Move toward the far end of the passage to trigger progression.
- Watch lower floors, catwalks and railings for incoming Tengus.
- Stay close enough to support Snake.
- Advance after each wave is under control.
Use the H.F. Blade against sword Tengus
Sword-wielding Tengus are the immediate priority when they reach Raiden’s level. Their armor and defensive sword work make ordinary gunfire unreliable, while the H.F. Blade can both attack and block their strikes. Keep the blade ready and use short attacks rather than standing still in the center of a group.
The blade has lethal and nonlethal attack options. If you are preserving a no-kill run, use the blunt side of the weapon rather than a killing thrust. If no such restriction matters, use the attack that ends the threat fastest, but avoid swinging into Snake’s position. When several sword Tengus close in, block until one commits to an attack, then counter and reposition toward open floor.
- Use the H.F. Blade against sword-equipped Tengus on the lower level.
- Block when surrounded instead of trading repeated hits.
- Avoid striking Snake while he is moving through the same space.
- Use blunt strikes if maintaining a no-kill objective.
Eliminate P90 Tengus and upper-level gunmen
P90-equipped Tengus are more vulnerable to firearms and can inflict heavy damage if ignored. Prioritize a gunman when one has a clear line to Raiden or Snake, then return to sword Tengus that are closing from the floor. Snake’s M4 is effective against enemies in the open, so use your own gun mainly to remove threats that he cannot immediately reach.
Enemies on elevated catwalks may be outside the H.F. Blade’s range. Aim upward with a firearm and shoot them when they expose themselves, or let Snake deal with them while you keep the lower level clear. Do not remain under a railing or walkway longer than necessary, because attacks can come from above while another Tengu engages Raiden at close range.
- Prioritize P90 users when they have a clear firing lane.
- Use a firearm against Tengus on upper walkways.
- Let Snake handle some distant targets while you protect the lower floor.
- Keep moving away from concentrated fire.
Protect Snake while crossing the passage
Snake’s survival is part of the encounter. Watch his health as well as Raiden’s, especially when several Tengus surround him or when gunmen are firing from elevated positions. If Snake is being overwhelmed, move toward the attackers and draw their attention with the H.F. Blade. Do not shoot through Snake to reach a target.
Snake may move ahead or stop to fire depending on the current wave. Follow his general position, but do not stand directly in front of him because his M4 fire can hit Raiden. If you need ammunition, Snake can provide support during the battle, and some combat waves give enough room to recover without forcing a dangerous detour. Heal Raiden after a knockdown or serious hit rather than trying to finish the wave while critically injured.
- Monitor Snake’s health throughout the assault.
- Intervene when multiple Tengus surround him.
- Avoid crossing in front of Snake’s M4 fire.
- Heal after major damage before pushing into the next wave.
Reach the far Ileum exit
Continue advancing whenever the current group is defeated or pushed back. The combat sequence does not require clearing every enemy before each movement, but do not run so far ahead that Snake is left fighting alone. When the final section is secure, move with Snake to the door at the opposite end of the Ileum passage.
The chapter objective is complete when the game allows the pair to leave Ileum and the transition into Arsenal Gear’s Sigmoid Colon begins. There is no separate RAY encounter in Ileum, no virus terminal and no new clearance item to collect here. If the door does not open, remain in the current combat area and defeat the active Tengu wave; the route advances through the fight rather than through an optional interaction.
- Keep moving toward the opposite end of Ileum.
- Do not leave Snake behind during the final push.
- Defeat any active wave blocking the exit.
- Enter the far door and confirm the transition to Sigmoid Colon.
Before you move on
- Raiden has fought through the Arsenal Gear Ileum passage.
- The sword-equipped and gun-equipped Tengu waves blocking the route have been dealt with.
- Snake is still alive when the assault ends.
- Raiden and Snake have reached the door at the far end of Ileum.
- The game has transitioned into Arsenal Gear’s Sigmoid Colon sequence.
- No Metal Gear RAY count, AI-failure event or post-RAY objective was required for this chapter.
References for this chapter
Arsenal Gear — Sigmoid Colon and the Second Tengu Assault
This chapter begins after the first Tengu assault in Ileum, when Raiden and Snake enter Arsenal Gear’s Sigmoid Colon. The area is a circular combat arena rather than a stealth section. A second group of Tengu Commandos attacks from multiple directions, and the game briefly displays a false Game Over message while the fight is still active. Continue fighting through the display; it is part of the scripted sequence, not a failure. After the assault, Fortune enters and occupies Snake while Raiden climbs the ladder to the next area. The chapter ends when Raiden reaches the Rectum entrance. The Solidus speech and Metal Gear RAY battle belong to the following chapter.
1. Enter Sigmoid Colon and collect the ration
After clearing the Ileum battle, follow the opened route into Arsenal Gear Sigmoid Colon. The entrance leads into a short front room. Collect the ration at the southern end before passing through the doorway into the circular arena. This is the only necessary pickup in the area, and taking it before the fight gives you a recovery item without requiring you to cross the combat zone later.
Once you enter the circular room, the second Tengu assault begins. There is no keycard, terminal or alternate stealth route to find here. The objective is to survive the combat gate until the scripted event interrupts it. Save before entering Arsenal Gear or before the earlier Ileum sequence if you want a recovery point; the Sigmoid Colon itself is not a normal exploration area with a new save station.
- Enter Arsenal Gear Sigmoid Colon after completing Ileum.
- Take the ration in the front room.
- Enter the circular arena to trigger the second Tengu assault.
2. Hold the outer perimeter during the Tengu attack
Tengu Commandos enter from several directions, so do not stand in the center of the arena. Move around the outer ring and keep the wall or edge of the platform behind you whenever possible. This narrows the directions from which enemies can surround Raiden and gives Snake clearer firing lanes. A specialist walkthrough also recommends staying near Snake when Raiden is bleeding, because Snake’s position is safer than the exposed middle of the arena.
Use the HF Blade as the main weapon against Tengus who close in. Its guard can block incoming fire, and the blade is especially useful once several commandos enter melee range. Hold the guard button while facing an attacker, then counter when the immediate pressure eases. If you prefer to preserve a low kill count, use the nonlethal side of the blade where appropriate, but do not let the fight stall while trying to incapacitate every enemy.
Snake fights beside Raiden and provides covering fire. Avoid crossing directly in front of him, since the arena has little cover and you can interfere with his shots. If you need to recover, move toward Snake, crouch when safe and use a ration before Raiden’s life reaches a critical level. Keep moving between attacks rather than repeatedly locking yourself into long blade swings while several gunmen are still active.
- Stay near the outer edge instead of the center.
- Use the HF Blade for Tengus who reach melee range.
- Guard against gunfire and avoid being surrounded.
- Move toward Snake if bleeding or in immediate danger.
- Use a ration when necessary and keep Snake’s firing lane clear.
3. Continue through the mock Game Over display
During the battle, the screen may display a Game Over-style message marked “FISSION MAILED.” Do not reload your save, press a reset command or assume the combat has ended. The display is a scripted Arsenal Gear effect, and gameplay continues in the small active area of the screen. Keep controlling Raiden and continue attacking the Tengus until the display disappears and the normal view returns.
Treat the false Game Over as a distraction rather than a new mechanic. Your health and the combat state still matter, so continue using the perimeter, guard with the HF Blade and move away from grenades or clustered attackers. If Raiden actually dies, the ordinary failure screen appears and you must reload the latest save or restart from the available checkpoint. The “FISSION MAILED” presentation itself is not a death and does not require a special button sequence.
- Keep playing when “FISSION MAILED” appears.
- Do not treat the mock display as a real Game Over.
- Continue fighting until the display clears and the combat resumes normally.
- Reload only if Raiden genuinely dies.
4. Finish the combat gate and wait for Fortune’s entrance
Continue defeating or incapacitating the Tengu Commandos. Exact enemy numbers are not needed for progression; the arena ends through a scripted transition after enough of the assault has been cleared. Do not search for a door or ladder while the combat is still active. The game will provide the next opening automatically.
When Fortune enters, do not treat her appearance as a second boss fight. This is a scripted interruption. Snake keeps Fortune occupied while Raiden receives the route forward. Maintain awareness until control and the camera shift toward the ladder; the objective is no longer to defeat Fortune or damage her. Her late Arsenal appearance is part of the story transition and cannot be resolved by normal combat tactics.
- Complete the Tengu combat gate.
- Do not look for an alternate exit before the transition occurs.
- When Fortune appears, stop trying to fight her as a normal boss.
- Wait for the scripted opening toward the ladder.
5. Climb to the Rectum entrance and stop before the RAY battle
After Fortune enters and Snake engages her, move to the ladder at the edge of the arena. Climb it when the route becomes available. This is the required exit from Sigmoid Colon; there is no additional item or clearance step to perform in the room. The next area is Arsenal Gear Rectum.
End this chapter once Raiden has reached the Rectum entrance and the next transition begins. Do not include Solidus’s explanation of the S3 Plan or instructions for fighting Metal Gear RAY here. Those events occur after the Sigmoid Colon sequence and belong to the following chapter. If you are preparing for the next section, confirm that the Stinger and sufficient ammunition were retained before entering Rectum, but do not begin the RAY battle as part of this chapter.
- Climb the ladder after Fortune enters.
- Reach Arsenal Gear Rectum.
- Stop at the Rectum entrance before Solidus’s speech and the RAY battle.
- Reserve the next chapter for the Metal Gear RAY encounter.
Before you move on
- Raiden has entered Arsenal Gear Sigmoid Colon after the Ileum battle.
- The ration in the Sigmoid Colon entrance room has been collected or deliberately left behind.
- The second Tengu assault has been completed.
- The “FISSION MAILED” mock Game Over display has appeared and been ignored without reloading.
- Fortune has entered the arena and the scripted transition has begun.
- Raiden has climbed the ladder out of Sigmoid Colon.
- Raiden has reached the Arsenal Gear Rectum entrance.
- The chapter ends before Solidus’s Rectum speech and before the Metal Gear RAY battle.
References for this chapter
- Metal Gear Solid 2: Sons of Liberty — Guide and Walkthrough, European PlayStation 2 edition — AstroBlue
- Metal Gear Solid 2: Sons of Liberty - Guide and Walkthrough - PlayStation 2 - By Yushiro
- Metal Gear Solid 2: Sons of Liberty - Guide and Walkthrough, PlayStation 2 - By El_Greco
- Metal Gear Solid 2 FAQ/Walkthrough — Neoseeker Walkthroughs
- Metal Gear Solid 2: Sons of Liberty — Arsenal Gear and New York: Eliminate Solidus — StrategyWiki
Arsenal Gear Rectum — Metal Gear RAY Horde
After the Sigmoid Colon sequence, Raiden enters the Rectum arena alone. Solidus speaks while Raiden can move around the platform and collect available Stinger missiles and recovery items. When the battle begins, the Stinger is the effective weapon. Each RAY has two vulnerable knees and an exposed mouth. Shoot a knee to make the RAY open its mouth, then immediately fire a Stinger missile into the mouth for greatly increased damage. Keep moving, manage the RAYs outside the platform, and concentrate on the active RAY when one jumps into the arena. The number of RAYs that must be destroyed depends on the selected difficulty, so continue until the game triggers the battle-ending sequence rather than relying on an unverified fixed count.
1. Enter the Rectum arena as Raiden
The playable character for this battle is Raiden. After the scenes in Arsenal Gear, Rectum, control returns to him on a large hexagonal platform surrounded by open space. Solidus continues speaking while Raiden is free to move. Do not attack immediately. Walk around the perimeter and collect the Stinger missile ammunition and any Rations that are present.
Equip the Stinger before the combat begins. If your health is already low, use a Ration before the RAYs arrive. This is also the safest time to familiarize yourself with the platform edges and the open central area. Avoid standing near the outer boundary once the fight starts, because the RAYs can force you toward the edge with gunfire and missile attacks.
You can call Otacon over the Codec before or during the encounter for information about the RAYs. If you die, reload the save immediately before Rectum, collect the available supplies again, and begin with the Stinger equipped. There is no alternate stealth route or weapon-based shortcut that bypasses this battle.
- Confirm that Raiden is under player control.
- Collect the Stinger ammunition around the arena.
- Collect available Rations before the fight begins.
- Equip the Stinger and save or preserve the pre-battle checkpoint if available.
2. Use the knee-to-mouth Stinger attack
Lock onto a RAY with the Stinger and aim at either knee joint. A knee hit does not deal the main damage by itself, but it makes the RAY stagger and open its mouth. As soon as the mouth opens, fire another Stinger missile into it. The mouth shot causes substantially more damage than repeatedly firing at the head while it is closed.
The Stinger can detect the RAY's knees and head as targeting points. If the mouth closes before you fire, resume moving and wait for another opening instead of wasting missiles on poorly aimed shots. On a lower difficulty, direct head shots can still help finish a damaged RAY, but the knee-to-mouth sequence is the reliable method across the battle.
Do not remain still while waiting for a lock. Move in a wide circle around the arena, stop only long enough to fire, and then resume moving. The outside RAYs usually attack from beyond the platform, so keep checking the radar and camera rather than focusing exclusively on the target in front of you.
- Lock onto a RAY with the Stinger.
- Shoot a knee joint to force the mouth open.
- Fire the next missile into the open mouth.
- Keep moving between attacks.
- Use direct head shots only when a safe finishing opportunity is available.
3. Handle the RAYs outside the platform
At the beginning, several RAYs remain beyond the central platform. Their aerial rockets are aimed at Raiden's position when they launch. When you hear the warning beeps, run away from the spot where you were standing when the rockets were fired. Do not wait for the projectiles to descend directly above you. Continuous movement is usually enough to avoid this attack.
The outside RAYs can also kneel and sweep the platform with machine-gun fire. Run laterally across the arena and do not try to challenge the entire group at once. If a gunfire burst is crossing your path, change direction or move behind the attacking RAY's line of fire. The outer units are dangerous mainly because they create distractions while you are trying to target the active RAY.
Damage the outside RAYs when you have a clear lock, but do not spend so long lining up a shot that you stop watching the arena. The battle advances when the required RAYs are destroyed, not when every visible unit has been damaged equally. If a RAY begins moving toward the platform, prepare for the close-range phase rather than continuing to stare at a distant target.
- Run away from the position marked when aerial rockets launch.
- Move sideways to avoid sweeping machine-gun fire.
- Keep the radar and surrounding RAYs in view.
- Do not stop moving for a low-probability shot.
- Prepare for a RAY to jump onto the central platform.
4. Defeat the active RAY on the platform
When a RAY jumps onto the platform, make it the immediate priority. The outer RAYs generally continue to provide pressure with rockets, but the platform RAY is the unit that can attack Raiden at close range. Use the same knee-to-mouth combination: lock onto a knee, fire, wait for the mouth to open, and fire again.
Stay away from the RAY's feet. A stomp can damage Raiden even when he is not directly underneath the machine, and a direct hit is especially dangerous on higher difficulties. If the RAY stops and crouches to launch missiles from its knees, run sideways and perform a quick evasive roll or cartwheel as the missiles approach. Do not stand still in front of the machine waiting for the lock to return.
The RAY may also fire its machine gun while on the platform. Keep circling and use the open space instead of hugging the arena edge. After the active RAY is destroyed, another outer RAY takes its place and the cycle continues. Repeat the process until the game ends the encounter for the selected difficulty.
- Prioritize the RAY standing on the central platform.
- Avoid the stomp by staying clear of its feet and attack radius.
- Evade knee-launched missiles with sideways movement and a timed roll or cartwheel.
- Use the knee-to-mouth attack until the active RAY is destroyed.
- Repeat when another RAY enters the platform.
5. Recover from failure and finish the encounter
If Raiden dies, reload the Rectum checkpoint rather than trying to conserve supplies from the failed attempt. On the next attempt, collect the arena ammunition before the fight, begin moving as soon as the RAYs become active, and use Rations before health reaches a critical level. Running out of missiles is usually a sign that too many direct shots were fired without using the mouth vulnerability.
Do not assume the battle is complete when the first group of RAYs has been destroyed. The required number changes with difficulty, and the game does not require the same number on every setting. Continue defeating the active units until the combat music and gameplay stop and the scripted sequence begins.
After the final required RAY is destroyed, allow the cutscenes to play. The story continues through the Olga, Solidus, Fortune, and Ocelot events. A later button-press sequence requires repeated Triangle presses to help Raiden recover his oxygen; follow the on-screen prompt rather than skipping or resetting the scene. The next playable area is Federal Hall, where the Solidus confrontation begins.
- Reload the Rectum checkpoint after a death or failed attempt.
- Collect replacement Stinger ammunition before restarting the battle.
- Continue until the scripted post-battle scenes begin.
- Complete the required Triangle button sequence during the aftermath.
- Confirm that the story has advanced to Federal Hall.
Before you move on
- Raiden has entered the Arsenal Gear Rectum arena.
- The Stinger and available arena supplies have been collected.
- RAYs have been damaged with knee shots followed by missiles into their exposed mouths.
- Platform RAYs have been defeated while the outer units' rockets and gunfire were avoided.
- The difficulty-specific RAY requirement has been completed and the battle-ending cutscene has started.
- The post-RAY story scenes and oxygen button sequence have been completed.
- Control or the story transition has reached Federal Hall for the Solidus chapter.
References for this chapter
- Metal Gear Solid 2: Sons of Liberty - Guide and Walkthrough, PlayStation 2 - By Lightopia
- Metal Gear Solid 2: Sons of Liberty - Guide and Walkthrough - PlayStation 2 - By Yushiro
- Metal Gear Solid 2: Sons of Liberty - Guide and Walkthrough, PlayStation 2 - By El_Greco
- Metal Gear Solid 2: Sons of Liberty — Guide and Walkthrough — Adrenaline_SL
Post-RAY Sequence — Olga, Fortune, Ocelot and the Federal Hall Transition
This chapter begins immediately after Raiden has defeated the required Metal Gear RAY units in Arsenal Gear’s Rectum. The RAY battle, its difficulty-specific requirements and its recovery procedure belong to the preceding chapter and are not repeated here. From this point forward, the game moves through mandatory story scenes involving Olga, Solidus, Fortune, Ocelot, Liquid Snake and Solid Snake. There is no return to Stomach, Jejunum, Ascending Colon or Ileum, and Fortune’s late appearance is not a second playable boss fight. Continue through the automatic scenes until Raiden and Solidus reach the roof of Federal Hall and player control returns. The following Solidus battle belongs to the next chapter.
Begin with the automatic post-RAY scenes
After the Rectum encounter has ended and its victory sequence has begun, the game leaves normal exploration. Raiden is not given another Arsenal Gear route to follow, and there is no door, terminal or elevator to locate. Allow the opening post-RAY scenes to play without attempting to backtrack through the earlier Arsenal Gear areas.
The story resumes with the captured characters and Solidus. Solidus explains more of his plan while the game moves through fixed scenes rather than interactive objectives. If the game pauses for an ordinary confirmation prompt, continue normally; otherwise, leave the controls alone and allow the dialogue and cinematics to advance.
Do not reload merely because Raiden is not immediately controllable. The change from gameplay to extended cutscene is intentional. The previous chapter is complete once the RAY battle has ended, and this chapter starts with the story sequence that follows it.
- Confirm that the Rectum RAY battle has already been completed.
- Do not search the Stomach, Jejunum, Ascending Colon or Ileum areas.
- Allow the opening post-RAY scenes to continue.
- Treat this section as mandatory story progression, not a new exploration segment.
Follow Olga’s final scene
Olga appears during the post-RAY sequence and explains why she cooperated with Solidus. Her concern for her child is part of the information revealed in this scene, and the game presents the conversation through cutscenes rather than a playable encounter.
Solidus kills Olga during the fixed sequence. This outcome cannot be changed by selecting a different weapon, attacking a character or choosing an alternate response. Raiden is not given control to rescue her, and there is no optional battle or stealth route that alters the event.
Once Olga’s scene ends, continue watching the following dialogue. The game does not return Raiden to the Arsenal Gear map, so do not attempt to resume the earlier route.
- Watch Olga’s explanation of her forced cooperation.
- Allow Solidus’s scripted killing of Olga to occur.
- Do not search for an alternate Olga outcome.
- Remain in the cutscene sequence until the next confrontation begins.
Allow the Fortune and Ocelot confrontation
The next major scene centers on Fortune and Ocelot. Fortune’s late appearance is scripted and is not a second playable Fortune fight. There is no aim-and-dodge encounter, ammunition requirement or arena objective for Raiden in this section.
Ocelot explains that Fortune’s apparent protection is not simply supernatural luck, then shoots her. Fortune’s final action prevents the immediate attack from killing the people gathered nearby. Her death is fixed story progression and cannot be prevented through gameplay.
Continue through the scene as Ocelot turns against the group and prepares to use Metal Gear RAY. Solid Snake is present during the confrontation, but the player does not receive control of Snake for a separate battle. Raiden also does not return to combat between these events.
- Allow Ocelot’s confrontation with Fortune to play.
- Do not attempt to fight Fortune again.
- Watch the explanation of Fortune’s apparent protection.
- Allow Ocelot to reach and take control of Metal Gear RAY.
Watch Liquid Snake take over Ocelot
When Ocelot attempts to use Metal Gear RAY, Liquid Snake takes control of Ocelot’s body. This is a cinematic revelation, not a boss encounter. There is no target to select, weapon to equip or movement route that changes the outcome.
Liquid-Ocelot announces his intention to pursue the Patriots and escapes in Metal Gear RAY. Solid Snake breaks free and pursues him, but the pursuit is shown through the continuing story sequence. It is not a playable Snake section and does not require Raiden to chase RAY through Arsenal Gear.
If you are retrying the chapter after a death in the earlier RAY battle, reload the preceding checkpoint and complete that battle first. The post-RAY scenes begin only after the required Rectum encounter has been cleared.
- Allow Liquid Snake to take control of Ocelot.
- Watch Liquid-Ocelot escape in Metal Gear RAY.
- Allow Solid Snake’s pursuit to begin.
- Do not search for a playable Ocelot or Snake battle.
Complete the transition to Federal Hall
The remaining sequence shows Arsenal Gear moving toward Manhattan and carries Raiden and Solidus into the final location. This is presented through cutscenes. You do not steer Arsenal Gear, select a destination or search the facility for a final control terminal.
The destruction and sudden change of location are scripted transitions, not failed objectives. Continue until Raiden and Solidus reach the roof of Federal Hall. There is no playable Manhattan traversal between Arsenal Gear and Federal Hall.
Wait through the final dialogue and Codec material until normal control returns to Raiden on the Federal Hall rooftop. Stop at that point. The next chapter begins with the playable Solidus battle, so this chapter should not include blade tactics, boss attacks or Federal Hall combat instructions.
- Allow Arsenal Gear’s transition toward Manhattan to finish.
- Confirm that Raiden and Solidus have reached Federal Hall.
- Wait until player control returns on the rooftop.
- Begin the Solidus chapter only after this point.
Before you move on
- The required Metal Gear RAY battle in Rectum has already been completed in the preceding chapter.
- The automatic post-RAY Arsenal Gear scenes have played, including Olga’s confession and scripted death.
- Ocelot has confronted and shot Fortune, and Fortune’s scripted final scene has finished.
- Liquid Snake has taken control of Ocelot and escaped in Metal Gear RAY.
- Arsenal Gear’s transition toward Manhattan has completed.
- Raiden and Solidus have reached the Federal Hall rooftop.
- Player control has returned to Raiden, ready for the separate Solidus battle chapter.
References for this chapter
Federal Hall — Solidus Snake
After Arsenal Gear crashes into Federal Hall and the final story scenes conclude, Raiden faces Solidus Snake on the damaged rooftop. The H.F. Blade is the only weapon available for the duel. Solidus blocks frontal attacks, uses missile launchers and grab attacks while his mechanical arms remain attached, then removes those arms at half health and relies on faster fire-trailing dashes. Survive the interactive sequence before the roof, defend with L1, evade with running rolls and cartwheels, and attack Solidus from the side or rear after his recoveries. Defeating him starts the final aftermath; allow the story to continue into the ending chapter.
Reach the rooftop and prepare for the duel
Federal Hall begins with extended cutscenes and an interactive struggle before the playable boss fight. Follow the on-screen action prompts throughout the sequence. The struggle includes an oxygen gauge, so respond promptly when the game asks for input. If Raiden fails the event, the sequence can end in a Game Over; retry it rather than assuming the scene will advance automatically.
When control returns on the Federal Hall roof, Solidus has taken Raiden's firearms and other weapons. Solidus throws the H.F. Blade to Raiden, and it is the required weapon for this fight. Raiden still has access to items carried into the sequence, including the Body Armor and any remaining Rations. Equip Body Armor before closing with Solidus if it is available. A Ration may be present on the roof depending on difficulty, so do not rely on finding one during the duel.
Use the Codec before attacking if you want Otacon's advice. The central controls for the original PlayStation 2 release are the right analog stick for blade attacks, L1 for guarding with the blade, and the normal movement controls for running, rolling and cartwheeling. Press Square while the blade is equipped to switch between lethal and non-lethal modes. Either mode is sufficient to defeat Solidus and advance the story; the choice matters only for kill-count or personal completion goals.
- Survive the pre-battle interactive struggle.
- Wait for Solidus to throw the H.F. Blade to Raiden.
- Equip Body Armor if it remains available.
- Check the roof for a Ration without depending on it.
- Choose lethal or non-lethal blade mode if a kill-count goal matters.
- Contact Otacon before starting the attack pattern if desired.
Use defense and positioning during the mechanical-arm phase
Do not attack Solidus directly from the front as a default tactic. He commonly blocks frontal blade swings and can immediately answer with a damaging counter. Keep moving around the roof, hold L1 when he approaches with a sword attack, and wait for him to finish an attack before striking. When an opening appears, use the right analog stick to deliver a short attack sequence, then disengage instead of continuing into his guard.
The safest openings come after Solidus commits to an attack, stumbles, or finishes a rush. A running roll or cartwheel can carry Raiden past Solidus and place him at the side or rear. Turn toward Solidus as soon as the evasion ends and use the blade while Solidus is recovering. The thrust, performed by pushing the right analog stick forward, can help when Solidus is blocking ordinary swings because it reaches farther and may disrupt his stance. Do not treat any single attack as a guaranteed knockdown; attack only while Solidus is visibly recovering or exposed.
Solidus's mechanical arms can glow green before he launches missiles or attempts a grab. When the arms turn green, move away from his front rather than walking into range. If he reaches Raiden with the grab, follow the on-screen struggle instructions: use the action input and directional movement as prompted to maintain the oxygen gauge and break free. A failed escape causes heavy damage, so do not wait beside him when the arms signal the attack.
When Solidus fires missiles, run in a broad arc in one direction. Continuous movement is more dependable than standing still and trying to guard every projectile. Keep the camera on Solidus while circling, but avoid getting trapped against the roof edge. Federal Hall has exposed sides, and falling from the roof can cost the attempt even if Raiden has otherwise survived the attack.
- Avoid repeated frontal blade attacks.
- Hold L1 to defend against close sword attacks.
- Use running rolls and cartwheels to reach Solidus's side or rear.
- Use the thrust when ordinary swings are being blocked.
- Move away when the mechanical arms glow green.
- Escape grabs by following the action and directional prompts.
- Run in an arc to avoid missiles.
- Stay away from the exposed roof edges.
Handle the wall jump, rushes and fire trails
Solidus can jump against the neighboring wall and return to the roof. Do not stand beneath the landing point. As he leaves the arena, move sideways or use a cartwheel to clear the area, then turn toward him after he lands. If he immediately rushes, guard or roll through the attack instead of trying to interrupt it from the front.
The fire-trailing dash is one of Solidus's most dangerous attacks. He uses his powered suit to cross the roof at high speed, leaving burning lines behind him. Do not cross an active fire trail simply to pursue him. Move through clear roof space, keep Solidus in view and wait for the dash to finish. A running roll toward or across his approach can make him miss and may place Raiden beside or behind him for a counter.
If Raiden catches fire, use repeated running rolls to extinguish the flames. Do not stop to attack while burning. The life loss can become severe, particularly if Solidus follows with another rush. Use a Ration only after reaching a safe section of the roof or after Solidus has moved away; consuming one while standing in a fire path can leave Raiden vulnerable during the recovery animation.
The first half of the fight is a patient exchange: block or evade, wait for Solidus's recovery, land a few blade strikes and retreat. Solidus's health gradually falls through these openings. Rushing him continuously is less reliable than allowing him to create the opportunity himself.
- Clear the wall-jump landing area.
- Do not cross active fire trails.
- Roll through or away from the fire dash.
- Use running rolls to extinguish Raiden if he catches fire.
- Heal only from a safe position.
- Repeat defense, recovery punishments and retreat.
Continue after Solidus removes the mechanical arms
At approximately half health, Solidus removes the long mechanical arms. The fight does not end at this point. He becomes faster and relies more heavily on rapid fire-trailing dashes and close rushes. The roof also becomes harder to read because burning paths can divide the available space.
Keep Solidus in view and preserve a clear route around the roof. When the camera closes in and Solidus begins a direct rush, use a running roll in his direction or across his approach. This can make the attack miss or cause Solidus to pass close enough for a counter. If he rushes beyond Raiden, turn immediately and strike from the rear only when the blade can connect safely.
Avoid attacking in the middle of a fire dash. Wait until Solidus has completed the movement and is recovering. If he staggers or falls, move in for a limited number of blade attacks, then retreat before he recovers. A short punish-and-reset rhythm is safer than trying to empty the remaining health in one combination.
Continue using the open portions of the roof. Do not let Solidus herd Raiden toward an edge, and do not run through a burning line to reach him. If the roof becomes divided by several fire trails, circle through the nearest clear route and wait for the flames to stop obstructing the path. The battle ends when Solidus's health bar is depleted; no firearm, Stinger, grenade or separate finishing item is required.
- Expect greater speed after the arms detach.
- Keep a clear route around the roof.
- Roll through direct rushes when the attack begins.
- Strike only after a completed dash or visible stagger.
- Never cross fire trails to force an attack.
- Drain the entire Solidus health bar with the H.F. Blade.
Allow the defeat sequence to begin
When Solidus's health is empty, the Federal Hall duel is complete. The game moves into the immediate aftermath automatically after the final successful attack. Do not quit when control disappears or when another long cutscene begins. The remaining story scenes are required for the campaign ending.
If the duel is lost, reload the latest save available before Federal Hall. Depending on the save history and difficulty, this may require replaying some of the preceding Arsenal Gear material; do not assume that every version provides a separate Federal Hall restart point.
This chapter is complete once Solidus has been defeated and the Federal Hall aftermath has started. The next chapter covers the remaining ending scenes and the route to the end credits.
- Solidus's health bar is empty.
- The Federal Hall aftermath begins without quitting.
- Any required save prompt is handled normally.
- The game proceeds to the ending sequence covered in the next chapter.
Before you move on
- The pre-rooftop interactive struggle has been survived.
- Raiden has received the H.F. Blade.
- The mechanical-arm phase has been cleared.
- The faster fire-dash phase has been cleared.
- Solidus's health bar has been fully depleted.
- The Federal Hall aftermath and final story scenes have begun.
- The game has transitioned to the ending chapter and is proceeding toward the end credits.
References for this chapter
- Metal Gear Solid 2: Sons of Liberty - Guide and Walkthrough - PlayStation 2 - By Yushiro
- Metal Gear Solid 2: Sons of Liberty - Guide and Walkthrough - PlayStation 2 - By Nexxt
- Metal Gear Solid 2: Sons of Liberty - Guide and Walkthrough - PlayStation 2 - By AVexer
- Metal Gear Solid 2: Sons of Liberty Walkthrough - Federal Hall
- Metal Gear Solid 2: Sons of Liberty/Weapons — StrategyWiki
Ending Sequence and Main-Campaign Completion
This chapter begins after Raiden has defeated Solidus Snake on the Federal Hall rooftop. From this point onward, the game proceeds through mandatory aftermath scenes, final conversations and the closing credits. There is no additional playable battle, exploration route, equipment requirement or alternate mission objective needed to complete the original North American PlayStation 2 campaign.
Remain in the Federal Hall sequence after Solidus falls
After the Federal Hall duel ends, the game removes control from Raiden and begins the aftermath automatically. Do not reset the console, reload an earlier save or quit to the title screen when the fight concludes. The transition out of the duel is part of the main story sequence, not a checkpoint leading to another combat objective.
The Federal Hall aftermath shows the immediate result of Solidus's defeat and continues the story from the rooftop encounter. No further weapon selection, item collection or movement input is required to advance. If the screen remains in a cinematic or dialogue presentation, allow it to continue rather than treating the loss of direct control as a game freeze.
- Solidus has been defeated.
- Control has been removed after the duel.
- The Federal Hall aftermath has begun.
- No additional combat objective is being requested.
Allow the final story scenes and conversations to play
Continue through the remaining cinematic scenes and Codec conversations. These scenes resolve the Plant operation, explain the consequences of the Arsenal Gear incident and complete the immediate character and mission handoffs. The game may alternate between rendered cutscenes, dialogue screens and Codec-style exchanges; all of these are part of the required ending presentation.
There is no route to retrace through Arsenal Gear and no second Federal Hall objective after the Solidus battle. Do not search for Snake, a new access card or another terminal. The main campaign has already reached its final playable encounter, so the correct action is simply to let the sequence proceed.
- Remain in the post-battle sequence.
- Allow the required cutscenes to finish.
- Allow the final Codec conversations to finish.
- Do not return to Arsenal Gear or search for another objective.
Do not mistake optional content for a campaign requirement
The ending sequence does not require a Clear Code, complete dog-tag collection, special rank, bonus equipment or access to any additional mode. Those are separate completion goals that can be pursued after finishing the story, but they do not prevent the original Sons of Liberty campaign from being complete.
Likewise, content associated with Substance or later releases is outside this chapter's requirement. The assigned goal is the main story of the original North American PlayStation 2 release. Once the game has moved into its closing presentation, no bonus mission or post-campaign challenge must be started before the campaign counts as finished.
- Do not enter a Clear Code as part of the story completion check.
- Do not begin a dog-tag or rank objective before declaring the campaign complete.
- Do not substitute Substance bonus modes for the original story ending.
Confirm completion when the end credits appear
Continue watching until the end credits appear. The appearance of the credits is the concrete completion point for this chapter and for the main-campaign goal. At that point, Raiden has completed the story route through the Plant, Arsenal Gear, Federal Hall and Solidus encounter, and the game has presented the ending that follows the final battle.
After the credits begin, you may leave the ending, return to the title screen or preserve the save data according to your own plans. If you want to retain campaign progress for optional goals, avoid overwriting the relevant save before confirming that the credits have appeared. No additional story boss follows the Federal Hall battle for this completion target.
- The Federal Hall aftermath has played.
- The final story scenes and conversations have played.
- The end credits have appeared.
- The original main campaign can now be marked complete.
Before you move on
- Solidus Snake has already been defeated in the Federal Hall battle.
- The Federal Hall aftermath has played without resetting or quitting.
- The remaining story scenes and Codec conversations have finished or are proceeding to the closing presentation.
- The end credits have appeared.
- No Clear Code, dog-tag collection, rank, VR Mission, Snake Tale or other bonus-mode objective was required.
Optional Goals — Dog Tags, Rewards and Ranks
The original North American PlayStation 2 campaign is complete when Solidus has been defeated and the full ending sequence and credits have finished. Dog tags, chapter rewards and a Big Boss-rank attempt are separate optional goals. A Clear Code, website registration, Substance bonus mode or later-release challenge is not required to complete the story campaign on the original Sons of Liberty disc.
Finish and preserve the campaign clear
After defeating Solidus at Federal Hall, allow the remaining story scenes, aftermath sequence and credits to play without resetting or quitting. The main-campaign objective is satisfied when the Solidus confrontation is over, the complete ending has played and the credits have finished. You do not need to enter a Clear Code, submit statistics to a website or unlock a bonus mode to reach the canon ending.
The original release can present completion information after the credits, including a Clear Code used historically with the former online Mission Records service. Record that information only if you want an archival record. It is not a gameplay requirement, and the closure of the old external service does not affect completion of the story.
Keep the completed Tanker/Plant save if the game offers a post-clear save opportunity. If your copy does not create a distinct cleared file, preserve the existing campaign file and record any statistics before beginning a new run. The title screen provides optional confirmation: after a Tanker/Plant clear, Metal Gear RAY appears in the background and the title-screen character changes from Snake to Raiden. These changes are secondary checks, not prerequisites.
- Solidus has been defeated.
- All final story scenes have played.
- The credits have finished.
- The cleared campaign data has been preserved if possible.
- No Clear Code or online registration has been treated as a completion requirement.
Collect dog tags and claim the original-release rewards
Dog tags are optional collectibles obtained by holding up enemy soldiers. Approach a guard without entering an alert, aim a weapon at him from a safe position and maintain the hold-up until he surrenders. Killing or tranquilizing a guard does not award that guard's tag automatically. Use a list explicitly marked for the North American original PlayStation 2 release rather than borrowing a PAL, Japanese, Substance or HD list.
The original-release dog-tag reference lists 361 tags across the Tanker and Plant chapters and the available difficulties. Tanker and Plant totals are tracked separately and accumulate across difficulty runs. The documented reward thresholds are 46 Tanker tags for the infinite-ammunition bandanna, 76 Tanker tags for the Tanker stealth apparatus, 73 Plant tags for the infinite-ammunition wig, 121 Plant tags for the Plant stealth apparatus, 170 Plant tags for the red or orange grip wig and 218 Plant tags for the blue oxygen wig.
These rewards are optional and become available for later play after the required totals are reached. They are not necessary for the first campaign clear. Use the Dog Tag Viewer from the Special menu to check registered tags. On the first playthrough it shows locations already discovered; after another campaign it can provide broader location information. Track the chapter, difficulty and guard location for every missing tag so a missed hold-up is not mistaken for an edition difference.
- Use a North American original-release dog-tag list.
- Hold up guards and make them surrender.
- Track Tanker and Plant totals separately.
- Check the Dog Tag Viewer after collecting tags.
- Begin a later campaign to use earned rewards.
Attempt Big Boss rank as a separate challenge
Big Boss rank is optional and is not required for the canon ending. The documented challenge is a combined Tanker/Plant campaign on Extreme. The core requirements are a completion time under three hours, no more than three alerts, no caution states, zero kills, zero continues, zero rations, no more than eight saves, radar disabled and special items disabled.
The damage requirement is also mandatory: keep total damage under ten full life bars, or under the game's documented equivalent damage total for the original Extreme campaign. Treat this as a qualification limit, not merely a safety recommendation. Boss damage, failed stealth sections and careless exposure can consume the allowance quickly, so practice difficult encounters before beginning the serious attempt.
The three unavoidable alert events must be planned around rather than treated as ordinary stealth mistakes. Practice the Tanker alert sequence, Fatman, Vamp, the Harrier, the Metal Gear RAY battle, both Tengu assaults and Solidus before starting the attempt. Save only at deliberate points and count every save. If an invalid condition occurs, reload from before that condition when possible; otherwise restart the attempt rather than assuming the final result will still qualify.
Older guides disagree about additional limits involving mechanical destruction and some exact statistical presentations. Do not treat a disputed camera, machine or mechanical-destruction threshold as a confirmed original-release requirement. For a safer run, minimize unnecessary destruction, avoid needless shots and keep fired ammunition comfortably below the commonly cited ceiling, but judge the attempt primarily by the documented requirements and the final completion statistics.
Do not equip the bandanna, stealth apparatus or wigs during the attempt. Dog-tag collection is not required for Big Boss rank, so pursue tags and reward items in separate runs. Preserve the final campaign result and inspect the completion statistics after the ending rather than judging success from a mid-game checkpoint.
- The run covers Tanker and Plant on Extreme.
- The final time is under three hours.
- Alerts remain at three or fewer.
- No caution states occur.
- No enemies are killed.
- No continues are used.
- No rations are used.
- No more than eight saves are made.
- Total damage remains under ten full life bars or the documented equivalent.
- Radar remains disabled.
- Special items remain unused.
- Dog tags are treated as a separate objective.
Keep Substance-only content outside this edition checklist
The original North American Sons of Liberty disc should be judged by its Tanker/Plant story campaign, optional dog tags, earned chapter equipment, difficulty replays and rank attempts. Do not require Substance's VR Missions, Alternative Missions, Snake Tales or Skateboarding content when checking SLUS-20144.
Use this order for an exact-edition completion record: finish the Tanker/Plant story, preserve the cleared data, optionally record the displayed completion information, collect dog tags with a North American original-release list, claim chapter-specific rewards and attempt Big Boss rank only if desired. This keeps mandatory story completion separate from optional collection and challenge goals.
- The story clear is recorded independently from optional goals.
- No Substance-only mode is counted as required.
- Dog-tag rewards and Big Boss rank are tracked as separate challenges.
- No later compilation, remake or HD-edition requirement has been added.
Before you move on
- Solidus has been defeated.
- The complete ending sequence has played.
- The credits have finished.
- The cleared campaign data has been preserved if possible.
- Optional dog-tag progress uses the North American original-release list and separate Tanker and Plant totals.
- Optional rewards are checked on a later campaign.
- Any Big Boss attempt is evaluated separately on Extreme with the documented time, alert, caution, kill, continue, ration, save, damage, radar and special-item restrictions.
- No Clear Code, website submission or Substance-only mode is required.
References for this chapter
- METAL GEAR SOLID2 -SONS OF LIBERTY- official archive: secrets and completion changes
- Metal Gear Solid 2: Sons of Liberty Dog Tags FAQ — North American PlayStation 2 version
- Metal Gear Solid 2: Sons of Liberty Big Boss Rank Guide
- Metal Gear Solid 2: Sons of Liberty Guide and Walkthrough, Part 2
- Metal Gear Solid 2: Sons of Liberty Big Boss requirements reference
Finishing up
The main campaign is complete when Solidus has been defeated at Federal Hall, the ending scenes have played and the end credits appear.
The required route includes the Tanker prologue and the Plant campaign. A previously cleared game may offer a Plant-start option, but that shortcut is not part of a first complete run.
Dog tags, earned special equipment, ranks and other challenge goals are optional and are not required for the canonical ending.
Do not count VR Missions, Mission mode, Snake Tales or Skateboarding as completion requirements for the original Sons of Liberty disc.
Choose your next gameScreenshots & video
Game imagery for reference. Follow the written chapters above for the route and strategies.
Sources & references
Our original guide draws on the references below. Check the edition at the top of this page before following controls or unlock requirements.
- METAL GEAR SOLID2 -SONS OF LIBERTY- official archive: secrets and completion changes
- Metal Gear Solid 2: Sons of Liberty — Dog Tag Walkthrough, Tanker Chapter — PlayStation 2
- Metal Gear Solid 2: Sons of Liberty/Tanker — SDA Knowledge Base
- Metal Gear Solid 2: Sons of Liberty - Guide and Walkthrough, PlayStation 2 - By Lightopia
- METAL GEAR SOLID2 -SONS OF LIBERTY- — Konami Official Tanker Story
- Metal Gear Solid 2: Sons of Liberty - Guide and Walkthrough - PlayStation 2 - By Yushiro
- Metal Gear Solid 2: Sons of Liberty — Game Script, Tanker, PlayStation 2, GameFAQs
- Metal Gear Solid 2: Sons of Liberty Guide and Walkthrough, Part 2
- Metal Gear Solid 2: Sons of Liberty — Guide and Walkthrough — Adrenaline_SL
- Metal Gear Solid 2: Sons of Liberty — Spoiler-Free Walkthrough by Nemesis
- Metal Gear Solid 2: Sons of Liberty — Guide and Walkthrough, GheddonLN, PlayStation 2
- Metal Gear Solid 2: Sons of Liberty — Official walkthrough reference PDF
- Metal Gear Solid 2: Sons of Liberty - Guide and Walkthrough - PlayStation 2 - By ThyDarkAvatar
- Metal Gear Solid 2: Sons of Liberty — Weapons FAQ
- Metal Gear Solid 2: Sons of Liberty FAQ/Walkthrough v1.8 — Neoseeker Walkthroughs
- Metal Gear Solid 2: Sons of Liberty — Guide and Walkthrough by black_hole_sun
- Metal Gear Solid 2: Sons of Liberty — Guide and Walkthrough, Conquerer, PlayStation 2
- Metal Gear Solid 2: Sons of Liberty — Guide and Walkthrough — YSF, Part 1 of 2
- Metal Gear Solid 2: Sons of Liberty — Guide and Walkthrough — El_Greco
- Metal Gear Solid 2 Walkthrough/Plant Chapter Walkthrough
- Metal Gear Solid 2: Sons of Liberty - Guide and Walkthrough, PlayStation 2 - By El_Greco
- Metal Gear Solid 2: Sons of Liberty Walkthrough - Federal Hall
- Metal Gear Solid 2: Sons of Liberty — Online Manual
- Metal Gear Solid 2: Sons of Liberty — Guide and Walkthrough, European PlayStation 2 edition — AstroBlue
- Metal Gear Solid 2 FAQ/Walkthrough — Neoseeker Walkthroughs
- Metal Gear Solid 2: Sons of Liberty — Arsenal Gear and New York: Eliminate Solidus — StrategyWiki
- Metal Gear Solid 2: Sons of Liberty — Guide and Walkthrough — Orca782
- Metal Gear Solid 2: Sons of Liberty - Guide and Walkthrough - PlayStation 2 - By Nexxt
- Metal Gear Solid 2: Sons of Liberty - Guide and Walkthrough - PlayStation 2 - By AVexer
- Metal Gear Solid 2: Sons of Liberty/Weapons — StrategyWiki
- The Document of Metal Gear Solid 2 - Plant Chapter Script - PlayStation 2 - By alchemist
- Metal Gear Solid 2: Sons of Liberty Dog Tags FAQ — North American PlayStation 2 version
- Metal Gear Solid 2: Sons of Liberty Big Boss Rank Guide
- Metal Gear Solid 2: Sons of Liberty Big Boss requirements reference
About the game & collecting notes
- Platform
- PlayStation 2
Step-by-step guide for the original North American PlayStation 2 release of Metal Gear Solid 2: Sons of Liberty. Covers the Tanker prologue, the Big Shell / Plant chapters, Arsenal Gear, every required boss encounter and the canonical ending. Practical objectives, room-by-room goals, failure recovery and final completion checks for the PS2 (USA) edition.
Darryl Polo
Darryl Polo loves tinkering with emulation and revisiting retro games. He enjoys exploring how old favorites play on different setups and sharing what he learns along the way. At Joking Joystick, he writes about the games, hardware, and small discoveries that keep the hobby fun.
Our editorial standardsFound a step that needs another look? Help us improve this guide.