Mario Kart: Double Dash!! Strategy Guide: Cups, Tracks, and Unlocks
Learn the original GameCube racer's two-character system, build a useful kart pairing, and work through its Grand Prix cups and unlocks. This guide covers starts, drifting, special items, every course, Battle mode, cooperative play, and the habits that make a difficult championship more consistent from one race to the next.

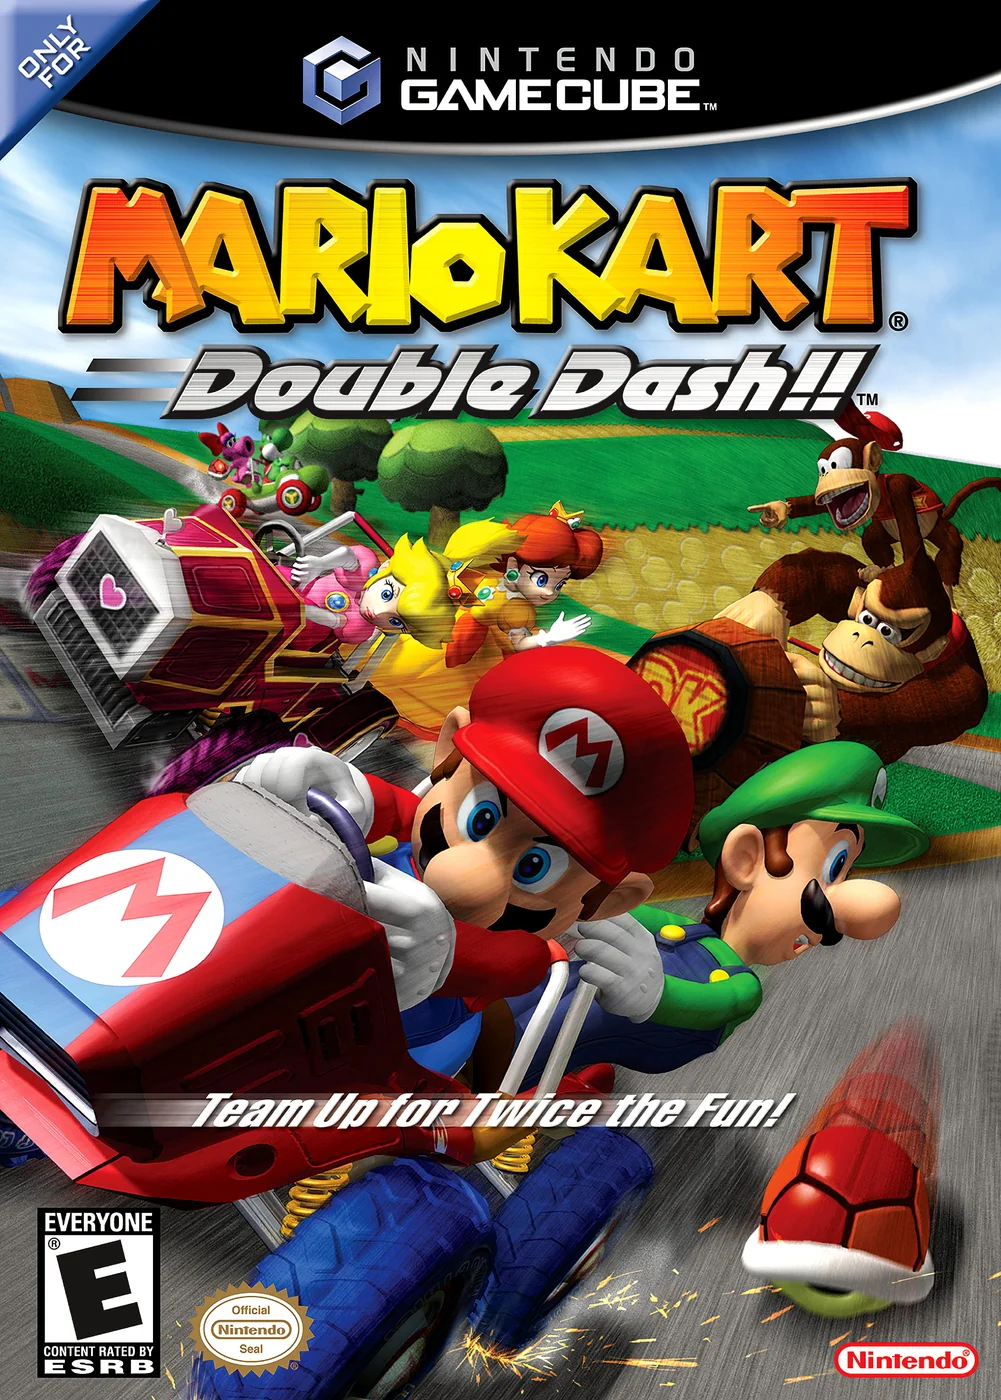
Find a copy
Mario Kart: Double Dash!! Nintendo GameCube
We may earn a commission if you buy through these links, at no extra cost to you. As an Amazon Associate I earn from qualifying purchases.
Opens retailer search results. Check the model, edition, seller, availability and current price before buying.
Before you begin
Double Dash asks you to manage two racers, one kart, and a changing item situation throughout every race. A good pairing helps, but reliable starts, controlled drifting, and sensible lines matter more than choosing a supposedly unbeatable team. This guide builds those skills before taking you through the tracks and championship rewards.
The goal is a complete understanding of the original GameCube game: finish the Grand Prix progression, identify the rewards you still need, and use the same driving fundamentals in Time Trials, Battle mode, or cooperative races. Track chapters separate dependable racing lines from riskier opportunities that may cost more time than they save.
Set yourself up for the run
Choose a pairing and kart you can control comfortably, then change one part at a time while comparing results.
Practice Rocket Starts and drifting on a familiar course before using them in a full cup.
Learn how swapping the front and rear racers affects driving duties and item use.
Treat special items as tactical options and pay attention to the road before using them.
Use Time Trials to practice corners without the interruptions of a Grand Prix field.
Check the unlock chapter against your completed cups so you know which championship to attempt next.
Build a route to every cup
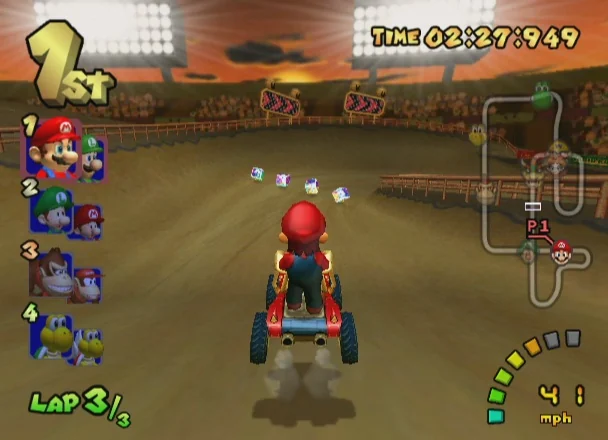
Start Mario Kart: Double Dash!! as a points-and-unlocks game, not a four-race perfection test. You control one two-seat kart, choose a pair that determines your item access and kart class options, and climb a specific Grand Prix ladder. Learn with a balanced medium team, use 50cc and Time Trial to clean up weak tracks, then target the unlock chain in order: 100cc Star Cup for Special Cup, 100cc Special Cup for Toad, Toadette, and the Toad Kart, 150cc Special Cup for All Cup Tour, and 150cc All Cup Tour for Mirror Mode. Save the remaining lower-cc cleanup and Mirror golds for full completion after the route is open.
Understand what one kart and two characters actually changes
Every kart in this game is a two-seater. The front character drives and the rear character handles items. You can switch their positions during the race, so your pair is not just cosmetic. Swapping changes who is ready to pull that character's special item the next time you break an item box.
Characters and karts are split into light, medium, and heavy classes. In practice, the class of the pair affects which karts the game lets you choose, so check the kart select screen before you confirm your team. If you want to stay in the forgiving middle class while learning, keep both picks out of the heavy group.
Think of team building as two separate decisions. First, pick the special items you want access to. Second, pick how much speed and recovery you can handle. A pair that looks strong on paper can still slow your progress if its kart class punishes every small mistake.
- Front character drives.
- Rear character uses items.
- Swap positions during a race when you want a different character ready for the next item box.
- Confirm the kart class on the selection screen before locking in a mixed team.
Pick a beginner team that forgives mistakes
A medium pair is the safest opening choice for cup progression. Medium karts are the most stable all-around option because they do not lean too far toward either slow top speed or punishing recovery. If you clip a wall, touch grass, or get hit in traffic, they get moving again more comfortably than heavy setups.
A good first recommendation is Peach and Daisy in a medium kart. Their Heart special is useful for surviving the item chaos that decides many early cups, especially when you are still learning lines and do not always leave corners with a clean lead. If you prefer simpler offense, Mario and Luigi are also easy to understand because Fireballs are straightforward to use in traffic.
Move to a heavy setup later, not immediately. A combination such as Bowser and Mario is a practical upgrade path once you are finishing races cleanly. Heavy karts bring strong top speed and enough weight to shove lighter rivals aside, but the trade is weak acceleration after hits and after off-line mistakes. That makes them better for players who already avoid repeated crashes, sand traps, and grass touches.
- Early learning pick: a medium pair such as Peach and Daisy.
- Alternative early pick: Mario and Luigi if you prefer direct attack items.
- Later upgrade: add a heavy racer only after you can finish cups without repeated spinouts or wall scrapes.
- Choose recovery and stability first, then chase raw speed later.
Know which modes matter for unlocks and which do not
Grand Prix is the mode that drives the main game route. You race four tracks in a cup and place by total points, not by whether you won every individual course. This is where the important race unlocks come from, so treat Grand Prix as your main job until the full ladder is open.
Time Trial is your repair shop. Use it to isolate one weak course, practice a safer line, and decide whether a shortcut or mushroom use is worth carrying into Grand Prix. It is especially useful before 150cc and Mirror because it lets you fix one repeated error without risking a full cup. The mode also gives you ghosts and fixed runs to compare against your own pace.
Battle is separate from the race progression. Do not spend time there expecting it to unlock cups. The extra battle arenas are tied to Grand Prix trophies, not to Battle wins, so the fastest route to more content still runs through Grand Prix.
- Grand Prix is the main unlock mode.
- Time Trial is for controlled practice and line testing.
- Battle is separate and does not unlock Special Cup, All Cup Tour, or Mirror by itself.
- If you want more battle arenas, keep winning the relevant Grand Prix cups instead of grinding Battle matches.
Follow the race unlock chain in the right order
Your first real milestone is 100cc Star Cup gold. That unlocks the Special Cup. If 100cc still feels rushed, use 50cc to learn lines first, but do not assume you must clear every 50cc cup before moving on. The key is being ready to win the specific cups that open the next rung.
Once Special Cup is open, win 100cc Special Cup for gold. That unlocks Toad, Toadette, and the Toad Kart. After that, shift attention to 150cc. Gold in 150cc Special Cup unlocks the All Cup Tour.
The All Cup Tour is the long test. It always begins with Luigi Circuit and ends with Rainbow Road, while the fourteen races in between are shuffled. Gold in 150cc All Cup Tour unlocks Mirror Mode. Mirror keeps the normal course order and 150cc speed, but flips each track left to right. For full trophy completion later, you will still want every cup gold in 50cc, 100cc, 150cc, and Mirror, including the easier All Cup Tours.
- 100cc Star Cup gold unlocks Special Cup.
- 100cc Special Cup gold unlocks Toad, Toadette, and the Toad Kart.
- 150cc Special Cup gold unlocks All Cup Tour.
- 150cc All Cup Tour gold unlocks Mirror Mode.
- Leave the full 20-gold cleanup for after the main route is open.
Race the standings and stop restarting too early
Cup points are 10 for first, 8 for second, 6 for third, 4 for fourth, 3 for fifth, 2 for sixth, 1 for seventh, and 0 for eighth. Gold comes from finishing first overall in cup points, so your job is to protect the total across four races.
Use the numbers to calm down after one mistake. A sample comeback is 4th, 1st, 1st, and 2nd. That gives 4 plus 10 plus 10 plus 8 for 32 points. A run like that is still strong enough to win many cups because the rivals usually split points off each other. The lesson is simple: after a bad opener, do not force reckless passes that turn one weak finish into two disasters.
Set a different standard by class. At 50cc and 100cc, aim to learn clean wins. At 150cc and in All Cup Tour, a safe second or third can be the correct result if first place would require a desperate pass through traffic or over a risky shortcut. Pride loses cups faster than patience does.
- Memorize the point spread: 10, 8, 6, 4, 3, 2, 1, 0.
- Judge a cup by total points, not by whether every race was a win.
- After one poor finish, aim for steady podiums instead of restarting on instinct.
- In 150cc and All Cup Tour, protect points when the dangerous pass is not necessary.
Before you move on
- You can explain who drives, who uses items, and why swapping matters before an item box.
- You have chosen one beginner-friendly team and one later heavy-team upgrade path, with a clear reason for each choice.
- You know the main race ladder in order: 100cc Star Cup, 100cc Special Cup, 150cc Special Cup, then 150cc All Cup Tour.
- You understand that Battle is a separate mode and that extra battle arenas come from Grand Prix trophies, not from Battle wins.
- You can track cup progress with the 10, 8, 6, 4, 3, 2, 1, 0 scoring spread and recognize when a safe podium protects gold better than a risky chase for first.
References for this chapter
- MARIO KART - Double Dash!! - マリオカート ダブルダッシュ!! Q&A
- MARIO KART - Double Dash!! - マリオカート ダブルダッシュ!! Karts
- MARIO KART - Double Dash!! - マリオカート ダブルダッシュ!! Modes
- マリオカート ダブルダッシュ!! Grand Prix
- マリオカート ダブルダッシュ!! Time Attack
- Mario Kart: Double Dash!! - Super Mario Wiki, the Mario encyclopedia
- All Cup Tour - Super Mario Wiki, the Mario encyclopedia
Rocket starts, drifts and Mini-Turbos
On the original Nintendo GameCube release, the basic speed routine is simple but strict: launch with A exactly as Lakitu's light turns green, enter corners early enough to hold a stable drift, work the kart until the sparks turn blue, and release the drift when the road opens so the boost becomes exit speed instead of wall contact. This chapter gives you the exact control jobs for solo and co-op play, then turns Luigi Circuit into a repeatable practice room for starts, drifts, and clean releases.
Memorize the controls that matter for speed
Use the original GameCube controller layout from the manual. In single play, A accelerates, B brakes or reverses, the Control Stick steers, L or R held with steering starts a drift, X or Y uses the rear character's item, and Z swaps the front and rear characters. Start or Pause opens the pause menu.
In co-op, the front player handles the kart itself: steering with the Control Stick, drifting with L or R, accelerating with A, and braking with B. The rear player throws or aims with the Control Stick and uses items. X or Y from the front player passes items to the rear player, and both players must press Z at the same time to swap positions. Keep those jobs separate now, because confusion during a drift usually ruins both the line and the boost.
- Single play: A accelerate, B brake or reverse, L or R drift, X or Y use item, Z swap positions
- Co-op front player: steer, accelerate, brake, and drift
- Co-op rear player: handle item throws and item use
- Both players: press Z together if you want to switch roles in co-op
Learn the Rocket Start timing before anything else
The original manual's cue is exact: press A just as Lakitu's start signal turns green. Do not hold A through the whole countdown and do not mash wildly. If you are early, the kart bogs down instead of jumping forward. If you are late, you leave the line normally and give away free track position.
Treat the launch as one clean rhythm. Watch the light, wait through the final moment, and press once on green. Your goal is not a miracle boost every time. Your goal is to know why each attempt failed. Early start means a sluggish launch. Late start means no burst. Once you can identify those two mistakes, you can fix them within a few races.
- Press A exactly as the signal turns green
- If the kart stumbles, you pressed too early
- If the kart rolls away flat, you pressed too late
- Practice a calm single input instead of mashing
Drift first, then build the Mini-Turbo
A good Double Dash drift starts before the corner gets tight. Approach from the outside edge, begin turning in, and then hold L or R to set the kart into a power slide. The first job is to keep the kart balanced on the road. If the drift begins too late, you will run wide before the Mini-Turbo matters.
In single play, the manual describes the charge as a sequence of counters during the drift. While sliding through the turn, push the Control Stick against the turn to make the first counter. After the sparks turn red, work the stick back with the turn and then against it again until the sparks turn blue. Do not thrash the stick. Use deliberate motions while keeping the kart aimed through the bend. When the sparks are blue, release the drift as the corner opens so the boost carries onto the straight.
- Set up wide before the bend
- Start the drift before the apex
- Use controlled counter-steering during the slide
- Release only when blue sparks appear and the exit is opening
Handle co-op drifting and the Double Dash launch as two-player jobs
Co-op uses the same Rocket Start timing but with a stronger result if both players do it together. The manual calls this a Double Dash. Front and rear should both press A just as the signal turns green. If only one player hits the timing, you do not get the stronger shared launch, so count it out for a few races until it becomes automatic.
Co-op Mini-Turbos also split the work. The front player places the kart into the drift. The rear player then performs the counter inputs with the Control Stick to build the charge. When the sparks turn blue, the front player releases the drift. Say the jobs out loud at first: front sets the slide, rear charges, front releases. That one sentence prevents most early co-op mistakes.
- Co-op start: both players press A on green
- Front player starts and holds the drift
- Rear player performs the counter inputs for the Mini-Turbo
- Front player releases when the sparks are blue and the exit is clear
Use Luigi Circuit as your first reliable practice loop
Luigi Circuit is the right place to learn because its broad corners give you room to recover without falling into remake habits or forcing risky angles. Use Time Trials if you want uninterrupted repetition. The goal is not a record. The goal is to repeat the same two or three clean actions every lap.
First, practice the race start on the main straight until you can tell good launches from bad ones without guessing. Then use the first major bend after the line as your opening drift drill. Start from the outside, commit to the slide early, and focus on staying off the grass while you build to blue. Later in the lap, use the long closing turn beside the fenced Chain Chomp area as your second drill. This corner is wide enough to compare a clean no-boost exit, an early release, and a proper blue-spark release over several laps.
If the Chain Chomp side makes you nervous, give that fence extra room. The point of the drill is to build repeatable muscle memory, not to shave every inch from the inside. Once you can launch cleanly and release at least one blue-spark Mini-Turbo on each of those big corners in the same lap, you are ready to take the technique into tighter tracks.
- Repeat starts on the opening straight until the timing feels readable
- Use the first big bend to practice early drift entry
- Use the final long turn to practice blue-spark release timing
- Leave extra margin near the Chain Chomp fence until your exits are stable
Fix mistakes by matching them to what actually went wrong
Most failed drifts come from one of four errors. If you slide off the outside edge, your entry was late or your drift angle was too aggressive for the amount of road left. If your sparks never reach blue, your counter inputs are too small, too slow, or not sustained long enough. If you hit blue but crash on release, you let go while the kart was still cornering hard instead of waiting for the exit. If your Rocket Starts keep failing, stop experimenting and go back to the single green-light cue.
Make only one correction at a time. Do not change start timing, drift point, and counter motion all in the same lap, because then you will not know what improved. On Luigi Circuit, spend a lap fixing the launch, the next lap fixing the first bend, and the next lap fixing the final turn. Double Dash rewards repeatability more than drama.
- Wide exit means drift entry was too late or too sharp
- No blue sparks means weak or mistimed counters
- Wall hit after blue sparks means you released too early in the corner
- Change one habit at a time so you can tell what worked
Before you move on
- You can explain the single-play controls for accelerate, brake, drift, item use, and swapping positions without checking a menu.
- You can get Rocket Starts consistently by pressing A as Lakitu's signal turns green.
- On Luigi Circuit, you can enter the first big bend and the final long turn from the outside, hold a stable drift, and release a blue-spark Mini-Turbo onto the exit.
- In co-op, both players know that the stronger launch requires both A presses on green and that front and rear have different jobs during a Mini-Turbo.
- After a bad lap, you can tell whether the problem was early launch input, late drift entry, weak counter-steer, or a bad release point.
Use two item slots well
In the original Nintendo GameCube release, item management is about setting up the right rider before the box, deciding whether one or two item slots really help your next section, and spending attacks in an order that protects your finish instead of creating extra chaos for yourself. Treat every box as a route decision, not a lottery ticket.
Read the item box row before you reach it
A single Item Box gives an item to the rear rider only. A Double Item Box gives items to both riders, which is strongest when both slots are empty or when the front rider is empty and you want a second option ready for later. If you already have a useful rear item, do not slash across the full road for a double box unless the line stays clean. Missing the box or clipping traffic costs more than the extra roulette helps.
Set your rider order before you touch the box. In solo play, the rear rider is the one who uses items, and that rider is also the one whose special item can appear. If you are mixing characters such as Peach and Bowser, swap before the box when you want Heart instead of Bowser's Shell, or Bowser's Shell instead of Heart. Swapping after the roulette only changes who is currently in back; it does not change the item you already drew.
If you approach a narrow row, enter early and hold a straight kart. This is especially important on traffic tracks and on exits from drifts. A clean single box taken at full speed is usually better than a late swerve for a double box that breaks your line.
- Use single boxes when only the rear slot matters.
- Use double boxes when you can realistically profit from both slots.
- Swap before the box when hunting a different special item.
- Take the box that keeps your kart stable and on line.
Lead play: spend one item, save one answer
When you are leading or sitting just ahead of the main pack, do not empty both slots just because you can. Use one item to cover the next pressure point and keep the other for the next straight, blind bend, or item row. A conservative first place often survives because the driver still has one answer left after the first attack wave.
Backward use should be planned around lane commitment. Move into the lane the pursuer wants, wait until their kart is centered behind you, then release. A backward Green Shell, Red Shell, Banana, or Fake Item from the far edge of the road often misses because the chaser is lining up the middle or the tighter inside. Release on a straight or just after corner exit, when the rival is least able to sidestep without ruining their own speed.
Heart is the clean defensive special for holding a lead. Trigger it before a cramped item row, before a pack closes onto you, or before a section where rivals are likely to fire into your back. Giant Banana is best when you can leave it where the road naturally funnels karts, such as a bridge mouth, tunnel entry, or the outside half of an exit where chasing karts drift wide. Bowser's Shell is strongest on enclosed roads where its rebounds stay in play instead of sailing harmlessly away.
- Keep one item for the next threat instead of spending both at once.
- Release backward throws from the lane a chaser has already committed to.
- Use Heart before pressure arrives, not after you are already spinning.
- Place traps where the course funnels rivals into them.
Mid-pack and final-lap item choices
From the middle of the field, build the pass in two stages. First disrupt the group ahead, then protect the place you gain. If you fire both items before the overtake is complete, you often clear one rival and get knocked right back by the next kart.
Fireballs work best when the road narrows or when several karts are exiting the same corner. Throw them into a lane rivals must keep using, not into open space where the spread can be avoided. Yoshi's Egg and Birdo's Egg are best fired into a cluster or toward a rival on a long enough straight for the egg to chase. Because the egg breaks into three items, it is more valuable in traffic than on empty track.
Bob-ombs are lane-denial tools, not point-blank weapons. Throw them on braking approaches, over crests, or into a bunch where rivals have little time to react. Chain Chomp is your hard recovery tool. Use it after a major mistake or when you have dropped deep enough that raw speed can repay the risk. Avoid triggering it before rails, cliffs, or technical chicanes you were barely controlling at normal pace.
On the last lap, judge every item by cup points. If second or third keeps your gold bid healthy, defend that finish instead of forcing a wild pass in a dangerous section. Mushrooms and Golden Mushroom should pay for something concrete: a verified shortcut, a cleaner exit onto a long straight, or a fast recovery after shallow off-road contact. Do not burn them just to arrive faster at the next pileup.
- Break mid-pack attacks into disrupt first, defend second.
- Aim Fireballs and Eggs at occupied road, not empty road.
- Use Bob-ombs where rivals have little room to dodge.
- Treat Chain Chomp and Golden Mushroom as tools for real gains, not panic buttons.
Know the special items and what they actually do
Mario and Luigi use Fireballs. They split after being thrown and slide ahead, so they are best for clogging an exit or a narrow lane. Peach and Daisy use Heart, which surrounds the kart and can turn incoming items into your own, making it the cleanest defensive special in the game.
Yoshi and Birdo use Eggs. The egg homes in and, after breaking, drops three more items onto the road. Koopa Troopa and Paratroopa use Triple Shells. In Double Dash!! these shells are not an orbiting shield around the kart. You carry three shells and throw them one at a time. That means you should use them in sequence: throw one forward at a rival on a straight, hold the second if the next section is crowded, or fire one backward only when a pursuer is lined up directly behind you. Do not waste all three into bad angles.
Donkey Kong and Diddy Kong use Giant Banana, which is best left on the committed racing line rather than dumped at random. Bowser and Bowser Jr. use Bowser's Shell, a heavy forward shell that rebounds along the course. Wario and Waluigi use Bob-omb, Baby Mario and Baby Luigi use Chain Chomp, and Toad with Toadette use Golden Mushroom for repeated boosts.
King Boo and Petey Piranha do not rely on one fixed special-item family. They can draw from the full pool of special item types, which makes them flexible but less predictable if you want to script your item plan around one specific special.
- Use Heart as your defensive special, not Triple Shells.
- Throw Triple Shells deliberately, one shell at a time.
- Save at least one shell when the next section offers a better angle than the current one.
- Pick Giant Banana, Bowser's Shell, Bob-omb, and Eggs based on road shape and traffic density.
Co-op item discipline
In co-op, the rear player should call the plan the moment the item appears: hold, forward, back, trap, or boost. The driver should then keep one stable lane long enough for the throw to work. Most misses come from the kart twitching across the road just as the rear player commits.
For backward throws, the driver should stop weaving and keep the chasing kart centered. For forward Fireballs, Eggs, Bowser's Shell, or Bob-ombs, the driver should pick the lane with the cleanest release window and avoid cutting directly across the nose of the intended target. If the plan is to hunt a different special at the next box, call the swap before reaching the box, not after the roulette has started.
A useful practice lap is one in which the rear player makes every call but does not release the item. That teaches the driver how long to hold a line for a backward shell, when to open the road for a forward toss, and when changing line for a better item box is worth more than forcing an immediate attack.
- Rear player calls the item plan immediately.
- Driver holds a stable lane until the throw or drop is finished.
- Swap before the next box when the goal is a different special item.
- Practice communication without throwing to clean up timing.
Before you move on
- You can explain the difference between a single Item Box and a Double Item Box and choose between them based on your current slots and road position.
- You know the rear rider is the active item user in solo play and the rider to place in back before a box when you want that character's special item chance.
- You can identify the main special-item families: Fireballs, Heart, Eggs, Triple Shells, Giant Banana, Bowser's Shell, Bob-omb, Chain Chomp, and Golden Mushroom.
- You understand that Triple Shells in the original GameCube game are thrown individually and do not form a passive rotating shield.
- You know that Heart is the dedicated defensive special and should not be treated as the same tactic as Triple Shells.
- You can describe a safe backward release: hold the lane, wait for the chaser to center up, then throw.
- In co-op, the rear player calls hold, forward, back, trap, or boost before the driver changes road position or commits to the next box row.
Luigi Circuit and Peach Beach
These first two Mushroom Cup races are where you bank stable points instead of chasing flashy passes. Luigi Circuit is a clean-driving test with only two major corners, but the faster classes add shared-road danger and optional side routes that can punish late decisions. Peach Beach looks simple until the tide changes and the Cataquacks start flipping karts. Drive these races as controlled point-builders: take the short safe line when traffic is heavy, use item routes only when they solve a real problem, and accept a safe second or third if that preserves cup momentum.
Luigi Circuit: opening straight, first U-turn, and the class difference
From the start line, aim your kart before you worry about passing. Luigi Circuit is basically start straight, first left U-turn, merged middle, second left U-turn, then the line again. The key hazard is the Chain Chomp at the entrance to the first U-turn. Start your left drift as the road begins to bend, not when you are already beside the Chain Chomp. That earlier setup lets you hug the shorter inside line without steering panic.
On 50cc, the two straights are separated by a barrier, so this first race is mainly about smooth cornering. On 100cc, 150cc, and Mirror, that barrier is removed and the middle of the course overlaps, so rival karts and loose items can arrive from the opposite direction. When you exit the first turn on the faster classes, keep a steady lane and look well ahead instead of weaving for every open box.
- Begin your first drift before the first U-turn tightens.
- Stay far enough from the Chain Chomp that it cannot snap at the kart.
- On 100cc and above, treat the merged middle as a hazard zone, not a free straight.
Luigi Circuit: inside line, dash panels, and when to ignore the side routes
The manual description fits the course well: you can cut close on the inside or use the outside line with dash panels. In Grand Prix, the inside line is the default because it is shorter and it keeps your kart settled after contact. Use the outside dash-panel lane only when you enter wide, release your drift as the kart straightens, and can let the boost send you down the straight instead of into more steering.
Above 50cc there are also two optional side routes with Double Item Boxes. The first runs behind the Chain Chomp after the merged middle, and the second appears before the final U-turn. They are useful for recovery from mid-pack, but they are not mandatory race lines. The first one can be blocked by the Chain Chomp, and either route costs you more than it saves if you dive into it late. If you are already running first through third, the safer play is usually the main road and a clean exit.
- Use inside as your standard Grand Prix line.
- Take the outside dash panels only when the kart is nearly straight before the boost carries you away.
- Use the Double Item Box side routes as recovery options, not as every-lap habits.
Luigi Circuit: final U-turn, shared-road traffic, and recovery after a hit
The second U-turn should feel like a copy of the first. Move to your chosen side before the bend, begin the drift early, hold one arc, and release as your nose points at the finish line. If you keep making extra steering corrections in the middle of the turn, you are entering too late or too sharply.
If a shell or bump spins you on the merged section, do not slash diagonally across the course to get positions back immediately. First straighten the kart and accelerate on the nearest safe half of the road. On the faster classes, a panicked cross-course cut can put you directly into an oncoming rival or item. Your recovery goal is simple: survive the next U-turn cleanly, then use the long straight to rebuild speed and draft if needed.
- Set up the final U-turn before you reach the item boxes and lane clutter.
- Release the drift only when the kart is facing down the straight.
- After a spin, point forward first and pass later.
Peach Beach: opening cobblestones, pipe route, and reading the tide correctly
Peach Beach starts on the cobbled road, bends right, then gives you an immediate route choice before the first wide beach section. The main road is the safest Grand Prix line because it keeps the kart settled and sends you onto the beach with full visibility. If you cut left very early, a pipe launches you forward and gives a Double Item Box. Slightly later, another left option reaches a dash-panel ramp with a single Item Box. Both are real alternate routes in the original GameCube version, but neither should be your automatic lap plan when you are already in front.
The important beach rule is that the water pattern is predictable. In the original course, laps 1 and 3 are low tide, while lap 2 is high tide. Darker water is the dangerous deep section and can dump you to Lakitu. Decide your route before you leave the cobblestones: safe main line if you are defending points, item route only if you need recovery tools.
- Choose the main road when protecting a good place.
- Use the early pipe or ramp only when you specifically want items or a recovery route.
- Remember the tide pattern: low on laps 1 and 3, high on lap 2.
Peach Beach: first beach, Cataquacks, and the pink arch drift
After the opening section, the beach splits your thinking. The right shore route is the normal path and the Cataquacks roam there in Grand Prix and VS. On laps 1 and 3, low tide lets you cut straighter across the beach instead of following the full curve. On lap 2, high tide means you should usually stay right on the shore unless a Mushroom gives you a clear shallow landing beyond the deep water. A blind Mushroom into dark water is a race-losing mistake.
Do not try to squeeze beside a charging Cataquack if another kart is already near you. Losing half a second by passing behind it is far better than getting flipped and stripped of items. Once you commit to the section under the pink arch, begin your right drift before you enter the arch, hold a moderate angle, and release when the path opens into the next sandy stretch. That exit speed matters more than forcing a dramatic entry.
- Low tide lets you cut straighter; high tide demands the safer shore unless your Mushroom has a safe destination.
- Pass behind a Cataquack rather than gambling on a tiny gap.
- Start the pink-arch drift before the arch and release onto the opening.
Peach Beach: second beach, narrow return road, and the finish-line item choice
After the arch, you get a smaller beach section with another pair of Cataquacks and then a final right turn back onto cobblestones. Keep the kart composed here. A broad, tidy exit is stronger than one more desperate swerve for items. Begin the last right drift while you still have room on the sand, then straighten early so you hit the cobbled return road already facing forward.
Near the finish line, the moving item boxes slide across the road and the fountain path on the left hides a pair of boxes behind it. That fountain route is not a shortcut. Use it only if you are empty-handed and need one more item roll badly enough to accept the slower re-entry. If you are leading or sitting on a valuable cup result, stay on the direct road, avoid the fountain detour, and save Mushrooms for a high-tide cut or a post-hit recovery rather than the cramped finish section.
- Take the final sandy right turn early enough that the kart is straight on the cobblestones.
- Skip the fountain route when protecting first, second, or third.
- Use Mushrooms on meaningful beach recovery or the high-tide cut, not in the narrow run to the line.
Before you move on
- On Luigi Circuit, you can describe the lap as start straight, first left U-turn, merged middle, second left U-turn, finish, and drive both turns with planned drifts.
- On Luigi Circuit, you know that 50cc keeps the center barrier while 100cc, 150cc, and Mirror remove it and add the optional Double Item Box routes.
- On Peach Beach, you can call the tide before you reach the beach: laps 1 and 3 low, lap 2 high.
- On Peach Beach, you can choose between main road, pipe route, and beach cut for a reason instead of reacting late.
- Across both tracks, you are finishing laps with the kart already straight on the important exits instead of fishtailing for late corrections.
References for this chapter
- Mario Kart: Double Dash!! | Nintendo GameCube | Games | Nintendo UK
- Mario Kart: Double Dash - Nintendo GameCube - Manual - gamesdatabase.org
- Luigi Circuit (Mario Kart: Double Dash!!) - Super Mario Wiki, the Mario encyclopedia
- Peach Beach - Super Mario Wiki, the Mario encyclopedia
- Mario Kart: Double Dash!! - Guide and Walkthrough - GameCube - By TPitch - GameFAQs
Baby Park and Dry Dry Desert
These two Mushroom Cup races ask for opposite habits. Baby Park is seven short laps of traffic and item overlap, so you win it by reading lap count, staying out of clogged apexes, and taking only the passes that protect cup points. Dry Dry Desert rewards the calmer approach: follow the readable road, respect the central pit and tornado, and use mushrooms only when the exit is obvious. If you leave Baby Park with a solid finish, Dry Dry Desert is the place to lock the cup down rather than gamble it away.
Baby Park: race the lap counter as much as the rivals
Baby Park is the third race of Mushroom Cup, and in Double Dash it runs for seven laps. The course is so short that the pack compresses almost immediately, and racers from different positions start sharing the same space well before the finish. Check the lap board every time you cross the line. On this track, knowing whether you are starting lap 3 or lap 6 matters as much as raw speed, because the correct decision changes from climbing through traffic to simply banking points.
Use the opening half lap to sort yourself into a clean lane. If you are already near the front by lap 2, stop forcing every inside opening. If you are still in the middle of the crowd by lap 4 or 5, plan one deliberate pass at the next turn entrance where the field compresses. Baby Park can punish a greedy first-place attempt harder than most tracks, so a stable second or third is often the better cup result.
- Read the lap board every time you cross the line.
- By the middle of the race, decide whether you are defending points or making one needed attack.
- Treat second or third as a success if a risky final-lap dive could drop you into the pack.
Baby Park driving line: drift early, cut late, leave with room
The oval has two tight ends and two very short straights. Do not drive every turn glued to the divider. Start your drift before the end of the straight, let the kart rotate from the outer half of the lane, then cut inward late and release as the nose points down the next straight. This late cut keeps speed better than turning in too soon and scraping the wall.
If the inside lane is full of spinning karts, shells, or bananas, stay one lane wider and prioritize a straight exit. Because the track repeats so quickly, one clean launch out of the corner matters more than one heroic apex. Also watch overhead for the coaster car. It is not constant, but it can clip racers who tunnel on the corner and forget the track hazard above them.
- Begin the drift before the corner tightens.
- Cut inward late instead of pinching the turn from the first moment.
- If the apex is cluttered, hold a wider lane and exit cleanly.
- Glance ahead and up when the coaster is approaching.
Baby Park items: attack at the crowd, defend on the straight
Baby Park is dangerous because items can keep circulating and some projectiles can cross the center divider, so threats do not stay in their own lane. Grab boxes whenever they sit naturally on your line, but use the item with a purpose instead of hoarding it for too long. Moving attacks are strongest as the pack bunches up at turn entry or just as several karts try to accelerate away together. That is where rivals have the fewest escape options.
If you are leading late, use the straight for your backward shot or drop because the rival behind has less time to sidestep. Do not fire blindly in the middle of your own corner and ruin your exit. If you get spun, flattened, or clipped by cross-track traffic, do not yank instantly toward the divider. Straighten the kart, get full acceleration back, and rejoin through the clearer outer half. Your comeback usually comes from one clean turn, the next item pickup, and then a controlled attack on the following end of the oval.
- Use attack items where the field compresses, not in open space.
- Save late-race defense for a rival who is actually on your bumper.
- After a spin, recover to a clear lane before trying to retake the inside.
Dry Dry Desert main route: first bend, Pokeys, pit edge, dune field, last right
Dry Dry Desert is the final Mushroom Cup race, and it rewards readable routing more than bold cuts. From the start, take the opening bend with a shallow line that keeps you on the firmer road instead of dropping deep into the darker sand. The early winding section places Pokeys close to the racing line, so look through the gap between them before you begin your drift. If a Pokey blocks the inside, stay on the open road and accept the wider line rather than brushing the obstacle and losing all momentum.
The middle landmark is the central quicksand pit with the Piranha Plant in the middle and the tornado roaming nearby. Go around this section on the safer outer edge of the road. If the tornado is moving across your approach, slow slightly and pass behind it. Trying to beat it across the nose can launch you and cost the whole race. After that, the course opens into a wider dune field. It looks free, but the safest line is still the readable road between the sand and the Pokeys. Set up early for the last major right-hand turn so you can straighten the kart onto the finish stretch instead of sliding wide into the rough sand.
- Keep the first bend tidy and stay out of the darkest sand.
- Choose visible gaps around Pokeys before you commit to the turn.
- Circle the central pit on the safer outer road.
- Enter the final right turn early enough to leave the corner straight.
Dry Dry Desert mushrooms and safe shortcuts
Use mushrooms here only when you already know where you will rejoin the road. The original GameCube course does let you cut across heavier sand at selected bends, but a shortcut is only worth it when the exit is open and you are not boosting toward a Pokey, the tornado, or the pit. A conservative Grand Prix rule is simple: if you cannot see the full landing area, do not spend the mushroom.
The most reliable use is to trim one obvious section of rough sand and return immediately to the main road. Do not chain a second risky cut just because the first one worked once in Time Trial. Mushroom Cup points are usually decided here by staying on the course, not by inventing extra distance cuts.
- Spend a mushroom only when the full exit back to the road is visible.
- Use one clean cut and return to the normal route.
- Skip any shortcut that aims you toward a hazard or blind landing.
Dry Dry Desert recovery and cup management
If you are bumped into heavy sand, steer back to the nearest firm road before you think about passing anyone. Full acceleration on the proper surface matters more than an immediate attack from the rough. If the tornado lifts you or the pit drags you off line, land, point the kart back toward the broadest section of road, and rebuild on the next easy bend. Do not answer one mistake with a second shortcut attempt.
This is also the race where you should think about Mushroom Cup points. If Baby Park was messy but you still carry a good standing into Dry Dry Desert, drive the safe outer lines, accept a clean second or third, and close the cup. The desert punishes panic more than lack of speed.
- After a hit, recover to firm road first and pass later.
- Do not try an immediate second shortcut to erase a mistake.
- If your cup standing is strong, protect the trophy with a stable finish.
Before you move on
- You can explain Baby Park as seven laps with repeated item overlap, and you are checking lap count and position at every pass of the line.
- You can drive Baby Park by starting drifts early, cutting late, and choosing a wider survival line when the inside is clogged.
- You can describe Dry Dry Desert in order from the opening bend to the Pokeys, the central pit and tornado, the dune field, and the final right turn.
- You are treating mushrooms in Dry Dry Desert as optional safe cuts with visible landings, and your default recovery after a hit is the normal road rather than a desperate second shortcut attempt.
Mushroom Bridge and Mario Circuit
These Flower Cup races look straightforward, but both punish rushed steering. Mushroom Bridge is mainly a traffic-reading test: you gain more from staying visible and stable than from forcing every side path. Mario Circuit is a drift-practice course with real hazards placed where oversteering usually sends you. Treat Mushroom Bridge’s alternates and Mario Circuit’s Chain Chomp cut as optional tools, not mandatory race pace, and you will keep far more cup points.
Mushroom Bridge: use the highway as your default route
At the start, aim for a calm launch and stay on the main road through the opening left bend. The immediate right turn into the Warp Pipe is real and it does lead to a Double Item Box, but it is an item route, not your normal fastest Grand Prix line. Use it only if you deliberately want two items and you are not boxed in by nearby karts.
Once traffic begins to appear, watch farther up the road than you normally would on a simple circuit. Cars, trucks, and buses can all spin you out, and the Bob-omb Cars are the worst contact on the course because a touch turns into an explosion. Mushroom-carrying cars are the exception: a controlled bump can drop a Mushroom onto the road, but do not dart across lanes for it if another vehicle is blocking your view.
- Grand Prix default is the main road, not the opening pipe.
- Look ahead for vehicle gaps instead of staring only at the kart in front of you.
- Treat dropped Mushrooms as bonuses, not something to chase blindly.
Mushroom Bridge: tunnel exit, hill shortcut, and sidewalk temptation
Straighten the kart before the first tunnel narrows your options. A small drift through the curve is fine, but finish it early enough that you can react to traffic inside the tunnel and cleanly set up the exit. When you come out, keep enough speed for the right-side hill shortcut only if you already hold a Mushroom or another speed boost. Without one, the dirt slows you too much and often leaves you rejoining slower than racers who stayed on the pavement.
This section also has narrow side access on the left sidewalk. It exists, but in Grand Prix it is usually a trap unless the road is crowded and you enter it cleanly. The safer habit is to keep a controlled line on the asphalt, pass the hill if the approach is messy, and protect your exit speed for the next traffic group.
- Finish the tunnel pointed straight enough to choose road or shortcut cleanly.
- Take the right dirt hill only with a prepared boost and a clear re-entry.
- Ignore the left sidewalk unless the road is blocked and you can enter it without scraping the fence.
Mushroom Bridge: final bridge, item timing, and recovery after a hit
Near the big bridge, resist the flashy routes unless you are practicing alone. The girders on the sides are narrow and can lead to awkward landings or a fall into the water if you drift onto them at the wrong angle. In a cup race, the roadway below is the point-safe route because you can still keep speed, read traffic, and finish the lap without gambling on a rescue pickup.
Use items where rivals have committed to a lane. A forward shell is strongest when traffic or bridge narrowing limits a target’s escape path. A backward banana or shell works better just before the bridge approach than in the middle of open road, because the chaser has less room to move around it. If you are hit by traffic, do not snap across lanes toward a side route. Hold the kart straight, get back to the main lane, and rebuild speed before the next item set.
- Safe Grand Prix finish is on the bridge road, not the side girders.
- Attack when traffic squeezes rivals into predictable lanes.
- After contact, stabilize first and only then return to racing speed.
Mario Circuit: opening pair of turns and the Chain Chomp bend
Mario Circuit starts beside Peach’s Castle with a short run to a left turn by the MARIO sign. Use that first left to place the kart for the next corner instead of overdriving it. The important turn is the right hairpin that follows. Begin your drift early from the outside, turn in smoothly, and release as soon as you can drive out without clipping the grass on the far edge.
After that hairpin, move left enough to respect the circular bend with the Chain Chomp in the grass. You do not need to hug the hazard to run a good lap. Hold a steady arc around the outside of its reach, charge your drift if the angle allows, then release before the tunnel entry so you do not drag the kart back toward the middle at the last second.
- The first left is a setup corner; the right hairpin is where the lap can unravel.
- Start the right-hairpin drift early rather than rescuing a late turn with panic steering.
- Give the Chain Chomp room and exit the bend cleanly toward the tunnel.
Mario Circuit: tunnel, bridge, plants, Goombas, and final right
The tunnel is smoother than it looks. Use one tidy drift for the stronger part of the S-curve, then let the kart settle before the straight bridge. Past the bridge, drive between the Piranha Plants without crowding either edge, because their snapping attack punishes karts that drift too close while still trying to set up the next corner.
Immediately after the plants, prepare for the left hairpin with an outside entry and a patient inward arc. Do not rush back to full steering lock when the road changes direction again. The following bumpy section with Goombas is where a greedy exit becomes expensive. Leave yourself a broad line, watch for the Goomba that can stray toward the middle, then square up for the final right-hand bend. The last seconds of the lap matter most: pass the final Piranha Plants cleanly, enter that right turn from wide, and drive off it straight toward the line instead of sliding across the downhill approach.
- Settle the kart after the tunnel so the bridge exit is clean.
- Pass between the first plant pair before committing to the left hairpin.
- Protect the final right-hand exit more than you chase a reckless last-corner pass.
Mario Circuit: optional shortcut and failure recovery
The main shortcut here is the grass cut behind the Chain Chomp. It is a real time saver with a Mushroom or other speed boost, but it is best treated as Time Trial play or a late-race gamble when you clearly need the place. In Grand Prix, the paved route is usually stronger because one bad angle into the grass costs more than the shortcut would save.
If you are hit by the Chain Chomp, a Piranha Plant, or a shell in the second half of the lap, do not immediately aim for off-road recovery tricks. Rejoin the pavement, take the next hairpin from the outside, and use the wide sections to regain rhythm. A clean second or third in Flower Cup helps more than a desperate shortcut attempt that turns into another spin.
- Use the Chain Chomp grass cut as an optional boosted shortcut, not your default cup line.
- After a hazard hit, rebuild on pavement and retake the next corner properly.
- Choose steady points over a low-percentage pass if the lap is already messy.
Before you move on
- You can run Mushroom Bridge on the main highway, survive the tunnel and bridge traffic, and save the hill shortcut for laps where you already have a boost.
- You understand that the narrow Mushroom Bridge routes are optional and usually worse than the road in a cup race unless traffic or items clearly justify them.
- You can clear Mario Circuit’s opening left, right hairpin, Chain Chomp bend, tunnel, left hairpin, and final right without touching grass or hazards.
- You know the confirmed major shortcut on Mario Circuit is the boosted grass cut behind the Chain Chomp, and you are treating it as optional instead of mandatory.
- When a race goes wrong on either track, you can recover by returning to the safe line and preserving points rather than compounding the mistake.
References for this chapter
- Mario Kart: Double Dash - Nintendo GameCube - Manual - gamesdatabase.org
- Mushroom Bridge - Super Mario Wiki, the Mario encyclopedia
- Mario Circuit (Mario Kart: Double Dash!!) - Super Mario Wiki, the Mario encyclopedia
- Mario Kart: Double Dash!! Walkthrough - GameSpot
- Mario Kart: Double Dash!! Release Information for GameCube - GameFAQs
Daisy Cruiser and Waluigi Stadium
Flower Cup turns from ordinary circuit driving into moving hazards here. Daisy Cruiser rewards calm route choices through the ship, while Waluigi Stadium rewards squared-up ramp entries, controlled landings, and respect for mud and fire.
Daisy Cruiser: opening deck and pool section
From the line, do not throw the kart across the first right. Take a clean middle entry, let the kart finish the bend, then ease left onto the metal straight where the item boxes slide side to side. If a box drifts away, keep the kart stable and take the next one. Scraping the rail for a bad box costs more than missing it.
At the wide left staircase, set up from mid-track and begin turning before the stairs finish. That lines you up for the right curve around the circular pool. The standard Grand Prix route is the broad outside arc. The original GameCube layout also has a narrow path on the pool's right side. It can save a little time, but only take it when you enter alone and already have the kart settled. If another kart overlaps your flank, abandon that idea and stay on the safer outer route.
If you are hit before the pool, do not try to recover by diving for the narrow side. Recenter, take the outside, and aim to leave the pool section with full traction. Falling into the water is a much bigger loss than giving up one attack chance.
- Stay smooth through the opening right so you reach the sliding item boxes in control.
- Use the wide pool route as the default points-safe line.
- Only try the narrow pool-side path when no rival can squeeze you off it.
Daisy Cruiser: dining room, hole, and cargo-room recovery
After the pool, the long left staircase into the dining room is the section that decides most laps. Start your left drift before the stairs fully tighten, then release so the kart points into the room instead of at a table. Inside, the tables slide across the floor with the ship's motion. Watch the gap between tables first and the item boxes second. Hitting a table almost stops you, so a clean lane matters more than grabbing an item.
The turn sequence after the dining room is a big right followed by a sharp left. Brake early if you exited the room crooked. At the end of that section, the normal route stays left through the upper hall. The hole on the right drops you into the lower cargo room. Treat the upper hall as the planned route in Grand Prix. The cargo room is a real route option in the original course, but it is best used as recovery when contact or a bad exit sends you down there.
If you do fall, do not panic-turn for the wall. Straighten the kart, collect the Double Item Box in the cargo room, and let the cannon send you back through the funnel. That mistake is survivable if you leave with two usable items and a straight re-entry.
- Begin the dining-room left drift before the stairs finish tightening.
- Prioritize the moving table gap over the item box line.
- If dropped into cargo, collect the Double Item Box cleanly and accept the cannon rejoin.
Daisy Cruiser: bow turn and lap finish
Back outside, the bow's long right is the last place to throw away speed. Enter slightly wide, turn in once, and let the kart drift toward the straight on exit instead of pinching the inside wall. In one-screen play, hanging life rings can bump the kart here, but they do not directly drain speed, so the right response is calm steering rather than a violent dodge.
Climb the final staircase with the kart already pointed straight. A mushroom is most useful here after a weak bow exit or after recovering from an item hit on deck. Do not spend that mushroom in the dining room or on the pool approach, where the ship's obstacles punish overcommitment.
A winning Daisy Cruiser lap is boring in the best way: one clean pool line, one correct table gap, the upper hallway unless you were forced below, and a stable bow exit that sets up the next lap's first right-hand bend.
- Take the bow from a slightly wide entry and avoid hugging the inside wall.
- Save recovery mushrooms for open deck space, not cramped indoor turns.
- Cross the line aimed for the next lap's opening right.
Waluigi Stadium: first ramps, fire rings, and the big mud pond
The race starts on a bump, so keep the wheel steady while collecting the opening item boxes. The next right bend leads into the first dash-panel ramp. Your goal is simple: hit the dash panels squarely and go up straight. Do not waggle the kart in the air. The ramp is there to carry you through the fire ring cleanly, and the value comes from landing pointed toward the following right U-turn.
After the first ring, make one controlled right U-turn, reset the kart, and do the same thing for the second dash-panel jump. This whole first half punishes extra steering because the road is already uneven. Small corrections are enough. Large corrections usually create a sideways landing and a dead exit.
Past the second fire ring, the track sweeps left around a large mud pond. Go around the mud by default. Even high-acceleration combinations bog down hard there. Only cut mud with a mushroom when you can see the dry landing area and know you will not bounce into the next left turn.
- Collect the opening item without yanking the kart off the bump line.
- Meet both dash-panel ramps straight and land facing the next corner.
- Treat the big mud pond as out of bounds unless you have a clean mushroom cut.
Waluigi Stadium: Piranha Plant corridor, twisted exit, and final jump
The wide straight after the mud leads into the course's nastiest obstacle read: the mechanical Piranha Plant barriers and the Fire Bars between them. Choose your lane early. If the center is about to close, commit to one side before you reach the first plant. Last-second swerves usually send you into a Fire Bar or into the plant itself. A forward-fired item works well just before this corridor if a rival has no room to dodge. Inside the corridor, survival matters more than aggression.
When you clear the plants, the course bends left and then feeds into a right U-turn with item boxes. Keep the kart off the muddy inside unless you are boosting across it deliberately. From there the road twists toward the final large jump. This is another place where landing angle is everything. Approach the jump from the middle, keep the kart straight on takeoff, and let the dash panels do the work. You do not need flair here; you need a landing that does not bounce you into the wall before the line.
If you miss the final gap and Lakitu lifts you back, forget the places you lost. Rejoin, stay centered for the fire ring ahead, and drive the last section cleanly. One rescue is recoverable in Flower Cup if the rest of the lap stays tidy.
- Pick a plant-corridor lane before the first opening starts closing.
- Avoid muddy inside edges on the late U-turn unless you are boosting through them.
- For the final jump, center first, then worry about the last item box.
Before you move on
- You can run three Daisy Cruiser laps without an avoidable pool fall and without slamming a dining-room table head-on.
- You know that the upper hallway is the normal Daisy Cruiser route and that the cargo room is a recovery route with a Double Item Box and cannon exit.
- You can clear both early Waluigi Stadium fire-ring jumps with straight takeoffs and controlled landings.
- You can identify the large mud pond and late muddy inside edge as boost-only cuts, not default racing lines.
- You can enter the Piranha Plant corridor with a chosen lane instead of reacting at the last moment.
References for this chapter
- Mario Kart: Double Dash!! - Super Mario Wiki, the Mario encyclopedia
- Daisy Cruiser (race course) - Super Mario Wiki, the Mario encyclopedia
- Waluigi Stadium (Mario Kart: Double Dash!!) - Super Mario Wiki, the Mario encyclopedia
- Mario Kart: Double Dash!! Walkthrough - GameSpot
- Mario Kart: Double Dash - Nintendo GameCube - Manual - gamesdatabase.org
Sherbet Land and Mushroom City
Star Cup asks for two different kinds of control. Sherbet Land punishes panic steering on ice, so the fast Grand Prix approach is to accept wider exits and keep the kart settled. Mushroom City punishes indecision, so your safest plan is to recognize the legal roads early, commit to a route through each junction, and leave yourself room to react to traffic instead of forcing last-second lane changes.
Sherbet Land: cross the first rink without fighting the slide
The opening snow section gives you a moment to settle the kart before the ice. Take the first twist cleanly, collect an early item box if one lines up naturally, and point the kart toward the left half of the rink before you begin any real steering input.
Once you reach the ice, drive with one smooth arc instead of several corrections. Skating Shy Guys are the main threat here, but the water opening on the right is what turns one small mistake into a full rescue. If a Shy Guy drifts across your nose, ease off the inside line and pass behind it. A wider path is still faster than spinning and sliding toward the water.
Near the cave mouth, expect two more red Shy Guys to interfere with your entry. Straighten the kart before the tunnel instead of trying to carry a long drift all the way in. You want control more than raw corner speed here.
- Enter the first rink from the left half of the road, not from the right near the water.
- Use one calm arc across the ice instead of repeated snap-steering.
- Straighten before the cave entrance so the red Shy Guys cannot trap you into the wall.
Sherbet Land: cave split, snow S-turn, and final Freezie field
Inside the tunnel, keep your drifts short. The road first bends right, then reaches an ice pillar that splits the lane. The left side has one item box and the right side has two, but the safer choice in Grand Prix is the side that is already open in front of you. Do not force the two-box side if another kart or a loose Banana will make you scrape the pillar.
As you leave the cave, the surface changes back to snow for a left-right S-turn. This is the place to reset your rhythm. Snow gives you more grip than the rink and the final ice section, so use that extra control to place the kart neatly for the next straight instead of over-drifting and entering the last ice field sideways.
The final area is wide but dangerous because the Freezies freeze you on contact and can leave dropped items behind. The main road turns right, then left, then right again before the finish stretch. Stay on the main road in Grand Prix. There is a shortcut behind the ice tower on the left, but it is covered in rough snow, needs a Mushroom, and saves little. If you have a Mushroom, the better use is usually a straight, visible burst through the main lane once you know where the Freezies are.
- Use short cave drifts and choose the open side of the ice pillar.
- Let the snow S-turn settle the kart before the last ice section.
- Treat the left shortcut behind the ice tower as optional, not your default Grand Prix route.
Sherbet Land lap plan and recovery after freezing or water
Lap 1 is your reading lap. Cross the first rink safely, note the cave entry traffic, and identify the Freezie spacing before you spend a speed item. Lap 2 is the best place to push a little harder because you now know where the ice hazards are likely to cost you time. Lap 3 is for points protection. If you are already running near the front, avoid desperate inside lunges between Freezies and take the finish with a clean exit.
If a Freezie freezes you, do not mash the stick the instant control returns. Hold your intended direction, let the kart break free, and then guide it away from the nearest wall. Panic steering usually sends you into a second obstacle. If you fall into the water opening, accept the rescue, land straight, accelerate first, and delay your next drift until the kart is stable again.
- Lap 1: learn the hazard spacing.
- Lap 2: push only where the destination is visible.
- Lap 3: protect second or third if that finish preserves cup points.
- After freezing or a water rescue, rebuild in a straight line before turning hard again.
Mushroom City: opening descent and the first real route choice
At the start, stay on the proper right-hand highway path and follow the long U-turn down into the city. Anything marked against the race direction is a trap, and losing time to Lakitu here is worse than giving up one item box.
After the descent, the lower city splits into two legal roads. For a dependable Grand Prix lap, pick one route early and stick to it instead of crossing late through traffic. The simplest learning route is to stay calm through the first split, take the corners at one clean angle each, and save your attention for the next major junction rather than trying to improvise a shortcut immediately.
If you are comfortable later, the pink side street on the lower level can trim distance, but its sharp bend is easier for lighter, more responsive karts than for a heavy kart that will slam the wall. In Grand Prix, consistency matters more than grabbing every possible shortcut.
- Follow the right-hand highway entry and avoid any off-limits road.
- Make an early decision at the lower split instead of changing lanes at the last moment.
- Ignore the pink shortcut until you can already finish clean laps through normal traffic.
Mushroom City: junction discipline, traffic reading, and the upper highway return
The most important lower-level mistake to avoid is the central left turn that sends you the wrong way. At the big intersection, keep your eyes on the arrows and oncoming vehicles first. You may stay on your current road or switch onto the other legal branch, but do not dive into the Do Not Enter path because it costs far more than one missed pass.
Traffic here is heavier and less forgiving than on Mushroom Bridge. Regular cars, trucks, and buses spin you out. Wiggler Wagons can flip you and leave the rear rider helpless for a moment. Bob-omb Cars are the worst risk, because touching one or blowing it up beside yourself can ruin the whole lap. If a bus is blocking the lane, pass behind it. If a Bomb Car sits near the line you wanted, abandon that line and live for the next corner.
After the lower roads merge, the course climbs back to the upper highway. Take the slight bend neatly, grab the last item boxes if they line up, and then prepare for oncoming traffic. The large gap near the end of the lap is on the right, so shift left early and hold a left-center lane. There is a very narrow shortcut beside that gap, but it runs through slow ground and needs a Mushroom. In Grand Prix, the normal road is the safer scoring choice.
- At the big lower intersection, never take the left wrong-way turn.
- Pass behind blocked traffic instead of forcing a nose-first squeeze.
- Move left early on the upper highway to avoid the large gap on the right.
- Treat the narrow upper-highway shortcut as optional and Mushroom-dependent.
Mushroom City lap plan and collision recovery
Lap 1 should be a memory lap. Use the same legal route all the way through so you learn the order of the junctions and where the upper-highway traffic meets you. Lap 2 is where you can adapt if a lane is blocked, but only switch branches when the signs clearly feed back into the course. Lap 3 is about racing the standings. Pressure a nearby rival by taking a clean inside line into a junction and letting them make the dangerous move.
Do not assume every opening will stay friendly just because it worked on the previous lap. Traffic loops through the city and the upper highway stays active, so leave yourself an escape option. After any collision, steer back toward the middle of your lane, accelerate cleanly, and only then set up the next turn. The second crash after a bad recovery is usually what really loses the race.
- Lap 1: memorize one dependable city route.
- Lap 2: switch branches only when the route is clearly legal and open.
- Lap 3: defend points with clean lines instead of blind lane changes.
- After a hit, recenter and rebuild speed before attacking the next corner.
Before you move on
- You can reach Sherbet Land's cave without falling into the right-side water opening or spinning off a Shy Guy hit.
- You can finish Sherbet Land by using the snow S-turn to settle the kart before the final Freezie section instead of entering it sideways.
- You can explain one full legal route through Mushroom City, including which wrong-way turn to avoid at the big lower intersection.
- After freezing or hitting traffic, you recover by straightening and accelerating first instead of chaining the mistake into a second crash.
References for this chapter
- Mario Kart: Double Dash - Nintendo GameCube - Manual - gamesdatabase.org
- Sherbet Land (Mario Kart: Double Dash!!) - Super Mario Wiki, the Mario encyclopedia
- Mushroom City - Super Mario Wiki, the Mario encyclopedia
- Mario Kart: Double Dash!! Walkthrough - GameSpot
- Mario Kart: Double Dash!! - Guide and Walkthrough - GameCube - By TPitch - GameFAQs
Yoshi Circuit and DK Mountain
The last two races of Star Cup on the original Nintendo GameCube release are the point-protection races. Yoshi Circuit is a long sequence of linked bends around open water and Piranha Plants, and DK Mountain turns one bad downhill decision into a cliff fall or a ruined bridge approach. In Mario Kart: Double Dash!!, cup gold comes from total points across the four races, and the 100cc Star Cup reward is Special Cup, so a controlled second or third here can be worth more than a reckless fight for first.
Check the cup before Yoshi Circuit
Star Cup runs Sherbet Land, Mushroom City, Yoshi Circuit, then DK Mountain, so by the time Yoshi Circuit starts you already have two results banked. If you opened with a win and another podium, protect the overall cup lead instead of forcing every shortcut. The target is the gold trophy for the full 100cc cup, not four separate race wins.
Use the part of your kart pair that you trust most for recovery. Yoshi Circuit punishes late steering because the next bend arrives immediately after the last one. A combination that regains speed cleanly after a brush with a wall or plant is easier to finish with than a faster setup that keeps sliding into the next hazard. This is practical advice rather than a hard rule, but the course layout clearly rewards control.
- Treat Yoshi Circuit as the setup race for the cup finish, not as a must-win sprint.
- If your first two races were strong, accept a safe second or third rather than gambling the whole cup on one shortcut.
- Save early Mushrooms unless the shortcut entry is already straight and clear.
Yoshi Circuit: opening bends, hand cut, and nose tunnel
The lap begins at Yoshi's shoe with a right bend into a left and then the wider section around the hand. Drift the opening right briefly, release, then set a fresh drift for the hand instead of trying to carry one long slide through both changes of direction. That reset matters because a long, stubborn drift sends you wide toward the edge and spoils the line into the next straight.
Your first verified Mushroom shortcut is at the hand. After the first corner and before the course wraps left around the hand, a Mushroom can launch you across the water gap and skip the long outer road. Use it only when the kart is already pointed cleanly toward the grassy arch and you are not recovering from a hit. If your wheels are wobbling, stay on the normal road; a Lakitu rescue erases any shortcut gain.
Through the nose section, the right side is walled, so this is one of the safer places to throw a shell forward or backward. Keep the kart neat through the tunnel exit because the next exposed left and right sequence is where players get dragged toward the water after releasing a drift too late.
- Use separate drifts for the opener and the hand; do not glue the whole section into one long slide.
- Take the hand shortcut only from a straight setup with a live Mushroom.
- If you exit the nose tunnel crooked, give up the attack and re-center before the exposed bends.
Yoshi Circuit: eyes, spines, neck, and final turn
The key mistake on this course is over-drifting through the eyes and spine section. Release early enough that the kart runs mostly straight through the small bends around the flower beds. If you keep charging every tiny angle, you will still be sliding when the neck hairpin arrives, and that is where falls and wall hits begin.
The second verified Mushroom shortcut comes after the nose tunnel. As you follow the bend, part of the left barrier disappears; with good aim and a Mushroom, you can jump off the track and land in the lower tunnel, rejoining near the late hairpin section. This is real and useful for catch-up, but it is the riskier option in Grand Prix because a bad angle drops you away from the racing line instead of saving the lap. Practice it in Time Trials first if you want it in cup play.
At the neck, slow a fraction before the U-turn and take one clean drift. Then stop extending the slide halfway up toward the tail. For the last major right before the line, enter from the left, late-apex the bend, and if you still have a Mushroom, use the verified cut behind the final Piranha Plants to skip part of the corner. If you have been bumped earlier in the lap, ignore the shortcut and drive the full bend normally.
- Release earlier through the eyes and spines than your instincts first suggest.
- Keep the tunnel shortcut optional; it is a comeback tool, not an automatic Grand Prix route.
- The final-corner Mushroom cut is the safest Yoshi Circuit shortcut to use while protecting points.
Yoshi Circuit recovery plan
If you clip a Piranha Plant or get bumped toward open water, steer back to pavement first and accept the lost position. Trying to snap instantly to the inside usually turns one mistake into a fall. The course is long enough that a calm re-entry can still recover to a podium if you keep the next hairpin tidy.
If you lose a Mushroom or spin before the tail section, abandon every shortcut idea for the rest of that lap. Take wide entry, late apex, and straight exits. On 100cc, one stable lap is often enough to hold the points you need for cup gold.
- After a wobble, race the road in front of you instead of forcing the next planned cut.
- A clean fourth is still better than an eighth caused by a second greedy shortcut attempt.
DK Mountain: cannon, downhill, boulders, and hairpins
DK Mountain is the Star Cup finale and the course itself is built around the Barrel Cannon, the downhill volcanic road, boulders near the sharper turns, a ravine section, and a moving suspension bridge. After the cannon fires you to the top, prepare for the landing and keep the kart settled rather than entering an immediate heroic drift on the broken surface.
The first half of the descent is where you win safely or lose everything. The ground is uneven, so make separate controlled turns instead of one long downhill slide. When the boulders start appearing around the tight corners, pick the open lane as early as you can. A late swerve on this track usually sends you into rough ground, a wall, or a fall.
On the zigzag hairpins and ravine approach, brake or lift slightly before the turn if your kart is still bouncing. This is the place to slow enough to stay on the track. The optional ravine Mushroom cut exists, but it should stay optional in a gold-trophy run unless you already know the jump angle and have a clear setup.
- After the cannon, stabilize the landing before thinking about overtakes.
- Break the downhill into short steering inputs; do not ride one drift through multiple hazards.
- Only take the ravine shortcut when you know it, need it, and have room to line it up.
DK Mountain: bridge finish and cup-closing mindset
The last sequence is the real exam: one cliffside turn, the ravine curve, then the moving suspension bridge into the finish. Center the kart before the bridge entrance. If you arrive sideways from an overlong drift, the bridge movement finishes the mistake for you. Defensive item use belongs before the bridge, not on it, because a hit while the floor is shifting is much harder to save.
If a boulder, shell, or bump ruins your line late in the lap, think points immediately. Rejoin, point the kart straight, clear the next corner, and take the bridge cleanly. On this cup, a protected second or third on DK Mountain can be the result that actually unlocks Special Cup, because the reward comes from the Star Cup gold trophy overall.
Once Star Cup ends in gold at 100cc, Special Cup opens. That is the real completion check for this chapter: not whether you won both races, but whether you learned when to stop over-drifting on Yoshi Circuit and when to back off half a beat on DK Mountain so the trophy survives to the results screen.
- Enter the bridge straight, not diagonally.
- Use safe podium logic if the standings favor you.
- Remember the unlock condition: 100cc Star Cup gold opens Special Cup.
Before you move on
- You can name Yoshi Circuit's three practical Mushroom options in the original GameCube layout: the hand cut, the risky tunnel jump after the nose, and the final-corner cut behind the Piranha Plants.
- You know the moment to stop over-drifting on Yoshi Circuit: before the spine section turns into a bad entry for the neck hairpin.
- You can finish DK Mountain by settling the cannon landing, choosing boulder lanes early, slowing enough for the hairpins, and entering the bridge centered.
- You understand that Star Cup gold at 100cc unlocks Special Cup even if Yoshi Circuit or DK Mountain is only a second- or third-place finish.
References for this chapter
- Mario Kart: Double Dash!! - Super Mario Wiki, the Mario encyclopedia
- Yoshi Circuit - Super Mario Wiki, the Mario encyclopedia
- DK Mountain - Super Mario Wiki, the Mario encyclopedia
- Mario Kart: Double Dash!! - FAQ - GameCube - By Crazyreyn - GameFAQs
- Mario Kart: Double Dash!! - Guide and Walkthrough - GameCube - By Kirby021591 - GameFAQs
Wario Colosseum and Dino Dino Jungle
Special Cup opens with two races that punish panic more than they reward greed. On the original Nintendo GameCube layout, Wario Colosseum is a two-lap survival test with a few committed passing zones, while Dino Dino Jungle asks you to read bridges, cave hazards, and dinosaur movement without wasting points. Drive these two with a trophy mindset. A clean second or third is far better than a failed shortcut or a fall into water.
Wario Colosseum: first lap landmarks and the safe race plan
From the line, stay straight through the opening run and do not force an inside dive before the first left curve. The first part of the course is a rhythm test: left bend, dash-panel ramp with an item box ringed by fire, a short twisty section under an overhang, then another boosted ramp with another ringed item box. If the pack is still crowded, protect your lane and take one box cleanly instead of bumping across the road for more.
After the early ramps, use the wide straight to settle the kart before the longer technical section. Crest the hill, turn right cleanly, then prepare for the U-turn and the steep downhill that throws the kart forward. Land straight. The mistake here is steering hard the instant you touch down. Let the kart settle, then guide it into the next right curve and item boxes.
Your lap one goal is simple: stay in the top three without falling. On a two-lap course, one rescue costs more than giving up a single place before a narrow section.
- Take the early ramps straight and centered.
- Land from the downhill launch before asking for a big direction change.
- Measure lap one by survival and position, not by forcing first immediately.
Wario Colosseum: spirals, dome split, and committed turns
The signature danger is the long spiral and the exposed metal road that follows it. Start your drift early, before the curve tightens, and hold a low to middle line. If you drift too late, you climb the outside wall, scrub speed, and open the door for the field. If you feel the kart getting pushed high, widen slightly and keep the wheels planted rather than snapping back down the banking.
Later, inside the big dome, you reach the most important decision point on the track. The center dash-panel jump across the gap is faster, but it is also the place most likely to turn a good cup into a bad one. In Grand Prix, use the outer road by default. Choose the center jump only when you are already lined up, the road ahead is clear, and you do not have shells or rivals pressuring you from the side. This is line commitment: decide early, straighten the kart, and stick to the route you chose.
After the dome, expect the hard left under the overhang before the final approach. Begin turning before you crest into it. If you wait until the bend fills the screen, you arrive late and slide wide.
- Drift into the long spiral early, not at the midpoint.
- Default to the safer outer road in the dome during cup play.
- Start the post-dome left before the crest hides the corner.
Wario Colosseum: passing zones and recovery after mistakes
Pass on the flatter approach roads before hazards, not on the suspended curves or while landing. Good places to attack are the straights before major bends, the run after a clean landing, and the approach to the dome split if the rival ahead is hesitant. Fire shells before the danger, so the target spins in a place where you can still steer around the result. Do not spend a mushroom on a blind correction. Save it for rebuilding speed after a wall scrape or a hit on stable ground.
If you fall, accept the lost places and rebuild the lap in stages. Accelerate straight after Lakitu drops you back in, take the next corner early, and do not chase a desperate pass in the very next bend. One calm sector often recovers more time than two aggressive ones.
- Attack before obstacles, not inside them.
- Use mushrooms for recovery or a fully visible straight line.
- After a fall, restore rhythm first and positions second.
Dino Dino Jungle: opening sector, logs, and the dinosaur crossing
Dino Dino Jungle is easier to read than Wario Colosseum, so use it to steady the cup. Off the line, the jungle path has logs across the road that make the kart hop and reduce your control for a moment. Keep the wheel quiet over them. A straight, tidy path is faster than weaving for every box. Through the early hard turns, prioritize a clean inside arc and stable exits.
Soon the course funnels toward the large blue dinosaur standing in the middle of the track. Watch the feet first. If the center is crowded, go around rather than trying to squeeze under for item boxes. Giving up half a kart length is cheap; getting stomped or bounced sideways into traffic is expensive. Once clear, reset the kart before the crystal cave and bridge approach instead of carrying a wild angle into the next danger zone.
- Drive over the opening logs with minimal steering.
- Treat the dinosaur crossing as a timing check, not a passing zone.
- Exit the crossing pointed cleanly at the cave and bridge approach.
Dino Dino Jungle: first bridge split, cave shortcut, second bridge, and finish
After the short cave, you reach the three-branch bridge over water. For Grand Prix, default to the left-hand lower branch. It is the safer main route. The dash-panel branch is quicker but narrower and harder to rejoin from, so save it for clear traffic or Time Trial practice. Whichever branch you take, center the kart before entry and resist side-swiping for position. A shell or bump here can drop you into the water and erase the whole section.
Inside the cave beyond the bridge, geysers are hazards, not opportunities. Route around active spouts and keep enough room to turn back to the normal line. The optional Mushroom shortcut here is only worth taking when you enter straight and can see the landing. If you are offset, boxed in, or recovering from a hit, ignore it and drive the normal cave route cleanly.
The second bridge is where the dinosaur's head can clip you into a spin, so hold a centered path and avoid using mushrooms unless the whole bridge is open. After that, the last stretch back to the line is rough and includes more geysers. Use red shells on the approach straights before the narrow sections. If you are already sitting on strong points, defend the line and bring the finish home. Starting Special Cup with clean top-three finishes in these two races keeps gold very alive.
- Use the left-hand lower branch as the standard safe bridge route.
- Only take the cave Mushroom shortcut from a straight, visible entry.
- Protect a good position on the final rough run instead of forcing a last-corner gamble.
Before you move on
- You can describe Wario Colosseum from the opening fire-chain ramps to the dome split and know when the safer outer route is the correct Grand Prix choice.
- You know that Wario Colosseum has no hidden shortcut to rely on, only the risky center jump across the dome gap.
- You can identify Dino Dino Jungle's safe default bridge line, read the dinosaur crossing without forcing the center, and avoid active geysers in the cave.
- You treat the cave Mushroom cut as optional, and you are willing to bank strong points with a clean second or third instead of throwing away the cup lead.
References for this chapter
- Mario Kart: Double Dash!! - Super Mario Wiki, the Mario encyclopedia
- Wario Colosseum - Super Mario Wiki, the Mario encyclopedia
- Dino Dino Jungle - Super Mario Wiki, the Mario encyclopedia
- Mario Kart: Double Dash!! Walkthrough - GameSpot
- Mario Kart: Double Dash!! - Guide and Walkthrough - GameCube - By TPitch - GameFAQs
Bowser's Castle and Rainbow Road
This chapter covers the original Nintendo GameCube version of Mario Kart: Double Dash!!. Bowser's Castle and Rainbow Road both reward restraint more than heroics. The clean route is usually the winning route. On both tracks, plan your item use around the dangerous sections, accept a safe second or third when the rival is already making mistakes, and only force a pass when the road gives you room to survive the counterattack.
Bowser's Castle: split entrance and first Thwomp halls
From the dirt start, aim straight over the opening bridge and into Bowser's mouth without fighting for every inch. The first crowding point is the narrow bridge, so let a heavier rival shove someone else off line instead of trying to pass three karts at once. If you take a bump here, hold the stick steady and finish crossing before turning back toward the middle.
The first split is mainly a traffic decision, not a secret faster route. Both sides feed back together and both are dangerous, so choose the lane with fewer karts, loose bananas, or shell clutter in front of you. Under the early Thwomps, stay calm and look for the opening after a block rises. A small steering correction is safer than a committed drift in this room.
When the lanes rejoin, prepare early for the left-angle corner instead of cutting late. If an item hits you in this opening hall, do not mash the stick while the kart is still sliding. Let the kart face forward, accelerate, then take the next turn on a simpler line. Giving up one place here is far better than chaining into a wall or a second Thwomp hit.
- Pick the clearer split lane instead of forcing the inside through traffic.
- Drive under the first Thwomps with controlled steering, not a heavy drift.
- If you are hit before the lava section, recover in a straight line first and rejoin the racing line second.
Bowser's Castle: lava bridge, left spiral, and fire-bar chamber
The grated bridge over lava is the part of the lap where oversteering loses races. Cross it with the kart pointed as straight as possible and leave enough space to sidestep the rising fireballs if one appears in your path. Do not burn a Mushroom here unless the landing area is already clear and straight ahead. A panic boost usually throws you off your next angle.
After the ramp, land pointed for the long climbing left spiral. Start the drift as the curve begins, not after you have already floated wide. Hold the drift, charge the Mini-Turbo, and release only when the spiral starts to open. If the kart is already pushing toward the outer wall, forget the boost and keep the turn alive. On this course, staying on the road is the time save.
The circular chamber with rotating fire bars should be treated as one continuing left arc. Enter from the middle, watch the fire bar sweep, and only tighten inward after it has passed. If the timing looks bad, stay wider for one beat and exit cleanly. This room punishes late corrections more than conservative spacing.
- Take the grated lava bridge with minimal steering input.
- Begin the spiral drift early and release the boost only as the curve unwinds.
- Use the middle-to-inside line through the fire-bar room only when the rotating flame has already cleared.
Bowser's Castle: exterior ramps, statue room, and lap finish
Out on the exterior ramps, keep the kart straight in the air and land already thinking about the next corner. There is no trick system here, so the only goal is alignment. Take the following right-angle turns in separate pieces: brake or lift before entry, point the kart, then accelerate on exit. Trying to carry too much speed through both usually leaves you scraping the wall and losing the next straight as well.
In the Bowser statue section, use the statue itself as your warning. When you see the mouth flash and a fireball leave, make one deliberate lane change rather than a last-second swerve. Leave a little room from the inner wall on the bend beside the statue, because a wall scrape plus a fireball or shell tap can pin you long enough to drop several positions.
If you know the castle shortcut and have the angle practiced, it can save time. In Grand Prix, though, the normal route is often the winning choice when you are already in trophy position. On the final ramp and last left, protect the kart first and attack second. A clean exit onto the line is worth more than a desperate shell trade in the most cramped part of the lap.
- Land the exterior ramps straight so the next corner begins under control.
- Read the Bowser statue fireball early and dodge with one clean move.
- Skip the risky shortcut if second or third already keeps your cup points healthy.
Rainbow Road: opening drop, switchbacks, and climbing helix
The opening dash panel throws you onto a bumpy downhill with limited rail protection, so treat the first few seconds as survival, not as a place to fire hopeful shots. Shells and Yoshi or Birdo Eggs bounce awkwardly on this stretch, so only throw if a target is directly ahead in your lane. Otherwise, hold the item and focus on staying centered over the drop.
After the slight right and straight, brake just enough to clear the sharp switchback pair in one piece. If you enter too fast, abandon the inside and choose the broader recovery arc instead of forcing a snap turn toward the edge. The next boost launches you onward, but do not chase every panel afterward. On Rainbow Road, a skipped strip costs less than a fall.
On the long climbing helix, begin the left drift before the curve wraps fully around you. Counter-steer smoothly to build the Mini-Turbo, but stop chasing the charge if the kart starts pushing outward. This is also a good place to ignore item boxes when your line is already fragile. Road position matters more than one extra weapon on this section.
- Hold items on the opening descent unless the target is close and centered.
- Clear the switchbacks with a safe arc rather than clipping both walls.
- Use only the boost strips that fit your current line on the climbing helix.
Rainbow Road: star shower, launch pipe, final helix, and finish
On the middle straight, stars can fall onto the track and become usable pickups. Take one if it lands naturally in your lane, but do not zigzag across the road for it. Losing the road while chasing a bonus is the exact mistake this course wants from you. If you are already ahead of the main cup rival, protecting the lane is the better play.
Before the launch pipe, decide whether your current item can do real work. If a red shell has a clean lock or a banana can be dropped at an obvious landing point, use it before the pipe entrance rather than carrying it into the next chaotic section. Once you are blasted upward, settle the kart immediately for the long final approach and the sharper downward helix.
The last helix and run to the line are where cup management matters. If first place is within one clean move on the inside, take it. If the pass requires crossing multiple boost strips, exposing yourself to the outside edge, or diving through shell traffic, bank the points instead. A safe second or third can preserve overall gold much better than falling to sixth while forcing one reckless overtake.
If you do fall on either course, use the Lakitu drop as a reset. Accelerate straight, avoid drifting on the first instant after landing, and accept a plain re-entry line for the next corner. Do not try to win the lost time back with an immediate Mushroom unless the road ahead is flat, open, and clearly pointed where you want to go.
- Take falling stars only when they lie naturally on your route.
- Use attack items before the pipe only when the target and lane are clear.
- On the final helix, protect points if the only pass available is high-risk.
- After a Lakitu recovery, drive straight first and rebuild rhythm on the next safe corner.
Before you move on
- You can finish three Bowser's Castle laps without falling into lava and with a repeatable line through the climbing left spiral.
- You know where to back off in Bowser's Castle when traffic fills the split entrance or the statue room.
- You can run Rainbow Road while deliberately skipping unsafe boost strips and still maintain race pace.
- You have a recovery habit after Lakitu drops the kart back on the road: straight acceleration first, then line correction, then item use.
- You can identify at least one situation on each track where preserving second or third is the correct cup-winning choice over a dangerous final pass.
References for this chapter
- Mario Kart: Double Dash - Nintendo GameCube - Manual - gamesdatabase.org
- Mario Kart: Double Dash!! - Super Mario Wiki, the Mario encyclopedia
- Bowser's Castle (Mario Kart: Double Dash!!) - Super Mario Wiki, the Mario encyclopedia
- Rainbow Road (Mario Kart: Double Dash!!) - Super Mario Wiki, the Mario encyclopedia
- Mario Kart: Double Dash!! Walkthrough - GameSpot
- Mario Kart: Double Dash!!/Special Cup - StrategyWiki
Earn Special Cup, Toad and the first rewards
Use 50cc as a practice lane and optional kart farm, then do the real unlocking work in 100cc. The key chain is short: win gold in 100cc Star Cup to open Special Cup, then win gold in 100cc Special Cup to unlock Toad, Toadette, and Toad Kart. Everything else in this chapter is support work to make those two trophies easier.
Separate practice progress from required progress
Treat this stretch of the save as two different jobs. First, you can use 50cc to learn tracks and pick up a few extra karts. Second, you must win the cups that actually unlock the next content. Mixing those together leads to wasted runs on cups that help you drive better but do not open the next gate.
The required chain is exact. Gold in 100cc Star Cup unlocks Special Cup on the Grand Prix menu. Gold in 100cc Special Cup then unlocks Toad, Toadette, and Toad Kart. You do not need every 50cc trophy before attempting this, and you do not need any star rank.
Do not wait to enter 100cc until your garage is full. If you can finish a cup without repeated falls, repeated traffic crashes, or repeated eighth-place spirals after one bad item hit, you are ready to start building toward the real unlocks.
- Required unlock chain: 100cc Star Cup gold, then 100cc Special Cup gold
- Not required: all 50cc cups, all 100cc cups, or any star rank
- 150cc is not locked behind clearing every 50cc or 100cc cup, but this chapter's unlocks specifically come from 100cc gold trophies
Use 50cc for controlled practice and selective kart rewards
50cc is valuable because the track layouts, hazards, and item locations stay the same while the pace stays calm enough for deliberate practice. Use it to clean up one weakness at a time, not to grind every cup by habit.
If you are still learning basic exits and want a comfortable medium-class extra, 50cc Flower Cup is a strong first replay because its gold trophy unlocks Bloom Coach. If you keep missing apexes but recover well from mistakes, medium karts are usually the safest way to stabilize Grand Prix points.
If you prefer light teams for faster acceleration and quick recovery after hits, there are two worthwhile later 50cc rewards. Gold in 50cc Star Cup unlocks Para-Wing, and gold in 50cc Special Cup unlocks Bullet Blaster. These are optional support rewards, not gates. Only chase them if you already know you drive better in light karts.
Do not forget the earliest 50cc kart reward. Gold in 50cc Mushroom Cup unlocks Green Fire. That cup is simple enough that it is a good warm-up if you need a clean run before harder attempts.
- 50cc Mushroom Cup gold: Green Fire
- 50cc Flower Cup gold: Bloom Coach
- 50cc Star Cup gold: Para-Wing
- 50cc Special Cup gold: Bullet Blaster
- Best use of 50cc: targeted practice plus one or two useful kart unlocks, not full mandatory cleanup
Open 100cc with low-risk cups and settle on one reliable setup
When you move to 100cc, stop changing your pair and kart after every frustrating finish. Pick one combination that matches how you actually recover from mistakes. If you value steadier cornering and less panic in traffic, stay with a medium setup. If you lose fewer points by snapping back up to speed after hits, a light setup can work, but only if you already trust it.
Start with 100cc Mushroom Cup and Flower Cup if you want a cleaner lead-in before Star Cup. These cups give useful rewards and let you prove that you can hold a four-race points total together. Gold in 100cc Mushroom Cup unlocks Rattle Buggy. Gold in 100cc Flower Cup unlocks Waluigi Racer.
Use these cups to practice cup management, not just race wins. A safe second place is often better than a reckless first-place chase that turns into sixth after a crash. If you come out of one weak race with eight or six points instead of zero, you keep the whole trophy run alive.
- 100cc Mushroom Cup gold: Rattle Buggy
- 100cc Flower Cup gold: Waluigi Racer
- Settle on one trusted pair and kart before Star Cup attempts
- Judge each race by cup points preserved, not only by whether you won the heat
Win 100cc Star Cup to unlock Special Cup
This is the real gate. Once you can post stable finishes in 100cc, go directly after Star Cup. You are not waiting on every lower-class reward, and you are not hunting a style grade. You need the gold trophy here because that is what opens Special Cup.
Drive Star Cup as a four-race points battle. If one race turns messy, recover the best finish you can instead of forcing passes through traffic or on ice. Second and third still keep you in the running for gold. The cup is lost more often by one desperate collapse than by one disciplined non-win.
Before the last race, think about the standings. If your main rival would need to outplace you by several spots to take the trophy, protect a clean finish. Avoid optional hero lines. Hold the safer route, keep your items for defense or one sure overtake, and bring the cup home.
- Gold in 100cc Star Cup unlocks Special Cup
- You do not need to win all four races individually
- A controlled second or third can still be enough to secure the trophy overall
Take 100cc Special Cup immediately and claim the Toad rewards
Once Special Cup opens, run it while the momentum is there instead of drifting back into lower-speed grinding. These tracks are harsher, so the goal shifts even more toward damage control. Falls and wall hits on the long, dangerous courses cost more than a missed pass on an easier track.
Plan this cup around survival first. If you are in a scoring position late in a race, do not force every opening. Third place with a clean finish is far better than throwing away points while diving for a low-percentage move. The tracks in this cup punish panic more than caution.
Gold in 100cc Special Cup unlocks Toad, Toadette, and Toad Kart. Once those appear, this chapter's main route is done. You can then decide whether to strengthen your kart bench with missed 50cc and 100cc rewards, or move on toward later cup goals with the new light pair available.
- Gold in 100cc Special Cup unlocks Toad
- Gold in 100cc Special Cup unlocks Toadette
- Gold in 100cc Special Cup unlocks Toad Kart
- Do not delay this cup just because some optional 50cc rewards are still missing
Pick replay cups that fix your actual problem
If your issue is basic line control and keeping calm in ordinary corners, replay 50cc Mushroom or 50cc Flower. If your issue is holding pace after item damage, try a light kart route and use 100cc Mushroom Cup to measure whether the extra acceleration suits you. If your issue is surviving longer hazard-heavy tracks without throwing away points, replay 50cc or 100cc Star before returning to Special Cup.
Avoid unfocused grinding. One deliberate practice cup followed by one real 100cc attempt is better than clearing three easy cups in a row just to stay busy. You are trying to remove one failure pattern at a time: bad first turns, traffic collisions, poor recovery after spins, or reckless final-lap passing.
Keep your route short and honest. Practice only until you know what went wrong, then return to the two trophies that matter.
- Replay 50cc Mushroom for simple warm-up and Green Fire if still missing
- Replay 50cc Flower if you want a medium kart reward and calmer mixed-corner practice
- Replay 100cc Mushroom or Flower if you need one more stable kart before Star Cup
- Return to 100cc Star and 100cc Special as soon as your specific mistake pattern improves
Before you move on
- You know the required path: gold in 100cc Star Cup unlocks Special Cup, then gold in 100cc Special Cup unlocks Toad, Toadette, and Toad Kart.
- You understand that all 50cc cups are optional for this chain, and no star rank is required anywhere in it.
- If you chose the early support rewards, your 50cc unlocks can now include Green Fire, Bloom Coach, Para-Wing, and Bullet Blaster.
- If you cleared the early 100cc support cups, your 100cc unlocks can now include Rattle Buggy and Waluigi Racer before or alongside your Star Cup push.
- Special Cup is visible on the Grand Prix menu after your 100cc Star Cup gold trophy, and Toad plus Toadette are available after your 100cc Special Cup gold trophy.
References for this chapter
- Mario Kart: Double Dash!! - Super Mario Wiki, the Mario encyclopedia
- Special Cup - Super Mario Wiki, the Mario encyclopedia
- Mario Kart: Double Dash!! Cheats, Codes, and Secrets for GameCube - GameFAQs
- Mario Kart: Double Dash!! Walkthrough - GameSpot
- Mario Kart: Double Dash - Nintendo GameCube - Manual - gamesdatabase.org
Win 150cc and survive the All Cup Tour
First earn gold in 150cc Special Cup to open the All Cup Tour, then approach the Tour as a 16-race points campaign instead of a streak of must-win races. Luigi Circuit is always race 1 and Rainbow Road is always race 16, while the 14 races between them are shuffled. The safest route to Mirror Mode is steady top-three finishes, fast emotional reset after one bad result, and only spending high-risk items or shortcuts when the standings actually demand it.
Unlock the mode, then bring a dependable 150cc combination
The unlock chain matters. In Mario Kart: Double Dash!! on Nintendo GameCube, gold in 100cc Star Cup unlocks Special Cup. Gold in 150cc Special Cup unlocks the All Cup Tour. Gold in 150cc All Cup Tour unlocks Mirror Mode. Do not plan around 150cc Star Cup as the Mirror requirement, because it is only a separate kart reward on the way to this chapter’s goal.
Use the pair and kart that already give you your most repeatable 150cc finishes. The Tour is long enough that recovery after red shells, lightning, or a fall usually matters more than squeezing out one extra top-speed pass on a straight. A middleweight setup you trust is better than changing to a faster but less familiar build on the run that counts.
- 150cc Special Cup gold is already earned.
- All Cup Tour is selectable from Grand Prix.
- You are using your most reliable 150cc team, not a new experiment.
Understand what the All Cup Tour actually asks from you
This is one Grand Prix made from all 16 original tracks. Luigi Circuit is always first. Rainbow Road is always last. Everything in between is shuffled, so you cannot rely on one memorized order. Plan for the full range instead: traffic courses, technical drift tracks, and edge-heavy danger tracks can appear back to back.
Grand Prix points are 10, 8, 6, 4, 3, 2, 1, 0 from first through eighth. Gold comes from your total after all 16 races, not from winning every race. That means a controlled third is often better than forcing a pass for first and dropping to sixth. After every results screen, check the overall standings before the next race starts. The Tour is too long to drive blind on points.
- Race 1 is Luigi Circuit.
- Race 16 is Rainbow Road.
- You are watching overall standings after every race, not just your latest finish.
Worked situation: protect an early lead without wasting it
Suppose your first four finishes are 1st, 2nd, 2nd, and 3rd. That gives you 32 points. If your closest rival has something like 1st, 4th, 3rd, and 2nd, that rival sits on 28. A four-point lead this early is valuable. On the next tough draw, such as Mushroom City or Wario Colosseum, do not turn the race into an all-or-nothing brawl.
Drive your standard lines, collect item boxes you can reach cleanly, and spend red shells or a special item only when the road ahead is visible. If you pull a mushroom while already running near the front, save it for a verified shortcut you can land safely or for recovery after a hit. An early leader loses far more Tours by chasing flashy wins than by banking another second or third.
- With an early lead, aim for podiums before race wins.
- Save mushrooms for a safe cut or post-hit recovery.
- If first place is chaotic, settle into second or third and wait for a clean last-lap chance.
Worked situation: stop a mid-tour collapse after one bad race
Now imagine race 9 goes wrong. You get bumped around Baby Park or fall on DK Mountain and finish sixth. If you had 64 points and the leader now has 70, you are only six back. That gap can disappear in two good races. Do not try to erase it in the first two corners of the next track.
Your recovery routine should be deliberate. On lap 1 of the next race, take the clean inside line you know you can hold, grab at least one solid item set, and avoid blind attacks. If first gets away, focus on passing damaged or slowed rivals for second or third. The goal is to stop tilt immediately. A sixth followed by two seconds repairs a Tour. A sixth followed by another desperate crash usually ends it.
- After a bad race, your first goal is stability in the next one.
- Secure item control before forcing passes.
- Treat second or third as a successful repair result when rebuilding points.
Worked situation: race 15 and Rainbow Road based on the numbers
The last two races are where the standings should control your risk. If you enter race 15 leading one rival by six points, you do not need to beat that kart at every hazard. If the rival wins race 15 and you finish second, your lead only drops by two points. That means a clean second is often stronger than gambling for first and risking a fourth or a fall.
If you reach Rainbow Road with the overall lead, drive for points first. Stay centered before guardless bends, square up for boost strips, and use items to remove nearby threats instead of firing low-percentage long shots. If you enter the final race trailing by a small amount, then widen your aggression only on visible straights or broad exits. Never make your biggest pass attempt at the outer edge of a drop. One missed attack there costs far more than settling briefly and striking on the next safe section.
- Let the point gap decide your risk on race 15.
- If leading overall, protect the kart and avoid optional danger.
- If trailing overall, attack on safe, visible sections instead of cliff edges or blind entries.
Finish the Tour, then decide what to fix before the rerun
When the 16th results screen ends, first overall in 150cc All Cup Tour gives you the gold trophy and unlocks Mirror Mode. That unlock comes from the Tour itself. It does not come from clearing 150cc Star Cup alone.
If you miss gold, review the pattern of the loss instead of changing everything. Most failed Tour attempts come from one repeating mistake: wasting mushrooms on unsafe shortcuts, turning one bad finish into two more, or overdriving edge tracks late in the run. Fix that leak first. Because the middle 14 races are shuffled, the most reliable improvement is steadier execution, not memorizing one exact route.
- You finished first overall in 150cc All Cup Tour.
- Mirror Mode is now available in Grand Prix.
- If you failed, identify the repeated mistake category before changing team or kart.
Before you move on
- You already earned gold in 150cc Special Cup and can select the All Cup Tour.
- You completed a 16-race Grand Prix with Luigi Circuit first and Rainbow Road last.
- You finished first overall in the 150cc All Cup Tour standings.
- Mirror Mode is now unlocked on the Grand Prix class selection screen.
Adapt to Mirror mode
Mirror mode in Mario Kart: Double Dash!! keeps 150cc speed, the normal lap counts, and the same course order rules. What changes is the layout: every track is reflected left to right, not run backward. The quickest way to earn Mirror golds is to stop trusting old steering memory, rehearse the first sector of the hardest tracks in Time Trial, and protect cup points when a risky shortcut or late pass could cost far more than it gains. Mirror Star Cup gold unlocks Petey Piranha, King Boo, and the Piranha Pipes. Mirror All Cup Tour gold unlocks the Parade Kart.
Reset your eyes before you reset your pace
Drive the first lap of every Mirror race as if the scenery is familiar but the safe side of the road has changed. Fences, item boxes, grass, traffic, and hazards appear in the same sequence as normal, but your turn-in points and exits are reversed. If a corner usually lets you hug one edge, expect the dangerous drop or wall to be on the opposite side now.
The biggest mistake in Mirror is turning toward the place your hands remember instead of the place the road actually goes. On lap 1, leave a little extra room on entry, finish the corner cleanly, and only then start drifting aggressively again. A stable second or third is far better for the cup than a crash caused by forcing normal-mode muscle memory.
- Say the opening turn direction to yourself before the lights go out.
- Use lap 1 to confirm which side now holds the wall, grass, water, or traffic.
- If a corner feels wrong, finish it safely first and regain speed on the next exit.
Use a short Time Trial routine before the hard Mirror cups
Before Mirror Star, Mirror Special, or Mirror All Cup Tour, run two or three Time Trial laps on the track that usually ruins your standings. Lap 1 is for orientation only. Find the first mirrored hairpin, the narrowest exit, and the one place where you normally drift too early. Lap 2 is for one safe racing line. Lap 3, if you need it, should test only one mushroom cut or one shortcut entry angle.
Do not practice for perfection. Practice until the opening sector feels repeatable without traffic. That is enough to stop the early-race mistakes that bury cup runs. Once the first lap is under control, the rest of the race usually settles down.
- Practice the first sector until you can clear it without scraping a wall.
- Choose one planned mushroom use before you enter Grand Prix.
- Stop practicing once your line is repeatable, not flawless.
Relearn Yoshi Circuit and DK Mountain by landmarks, not habit
Mirror Yoshi Circuit punishes over-drifting. The linked bends early in the lap now ask for the opposite steering rhythm, and the last corner is easy to carry too far into the outside edge. On the water shortcut around Yoshi's hand, straighten the kart earlier than instinct says, then spend the mushroom only when the nose already points across the gap. If the angle is off, stay on the asphalt. A failed shortcut here costs much more than a clean normal turn.
The tunnel shortcut after the long curved section also needs a clean mirrored setup. Do not dive at the opening from the middle of a drift. Finish the previous bend, line up the entrance, and commit only if the kart is nearly straight. In Grand Prix, skipping this shortcut is often the right choice because the regular line is much safer under item pressure.
Mirror DK Mountain starts testing you as soon as the barrel cannon spits you out. Let the landing settle before you attack the descent. In the boulder section, avoid sitting in the exact center where a falling rock can box you in. Through the downhill hairpins, begin the turn a touch earlier than your hands expect and release the drift only when the exit is visible. At the suspension bridge, stop trying to pass side by side unless the road is completely clear. Hold a central line, get across, and attack again on solid ground.
- Yoshi Circuit: use the water cut only from a straight approach.
- Yoshi Circuit: treat the tunnel route as optional in Grand Prix.
- DK Mountain: settle the cannon landing before the first downhill bend.
- DK Mountain: bridge survival is worth more than one risky pass.
Treat traffic courses as memory traps
Mirror Mushroom City is dangerous because lane memory fails before the traffic even reaches you. Commit to a route before each divider instead of swerving late. The first big split, the connectors between roads, and the later junctions all feel wrong in Mirror because your usual safe lane has swapped sides. Ignore fancy side roads unless you practiced them. The main route with early lane choice is the better cup line.
If a Bob-omb Car or other traffic blocks your side, lift briefly and pass after it clears. Do not spend a mushroom into traffic you cannot fully see. If you collide, rejoin the safest lane first and worry about passing on the next straight.
Mirror Mushroom Bridge should be handled the same way. Stay on the main roadway unless you specifically practiced an alternate route. The reversed entries to the narrow side paths make them poor Grand Prix choices when you are chasing trophy points rather than a Time Trial.
- Choose your lane before the junction, not inside it.
- Do not burn a mushroom unless the whole opening is visible.
- After a crash, return to the safest lane before racing the pack again.
Race Mirror Grand Prix for cup points, then finish the unlock route
Mirror gold does not require four race wins. At 150cc pace, one reckless shortcut attempt or one bad traffic gamble can turn a strong cup into a fourth-place finish. If a dangerous track is going badly, protect the standings with a careful second or third. Watch the rival who keeps appearing near the front and make sure they do not collect easy wins while you throw points away.
Take Mirror Star Cup first. Gold there unlocks Petey Piranha, King Boo, and the Piranha Pipes. If you continue through Mirror Special Cup for full completion, that gold also unlocks the Boo Pipes. When you tackle Mirror All Cup Tour, remember that Luigi Circuit is always first and Rainbow Road is always last, while the 14 races in between are shuffled. Do not panic after one bad middle race. Recalculate after every event, avoid desperation passes, and enter Rainbow Road knowing whether a safe finish is enough. Mirror All Cup Tour gold unlocks the Parade Kart.
- Protect a points lead instead of forcing every pass.
- Clear Mirror Star Cup before worrying about the longer Mirror All Cup Tour.
- Track the rival with the highest total after each race.
- Go into Rainbow Road with a points plan, not just a speed plan.
Before you move on
- You can explain Mirror mode correctly as left-right reflected courses raced at 150cc pace, not reverse-direction tracks.
- You have a repeatable pre-cup practice routine of two or three Time Trial laps, one safe line, and one planned mushroom use.
- You can name one conservative Mirror adjustment for Yoshi Circuit, DK Mountain, and a traffic course before starting the cup.
- You earned Mirror Star Cup gold and unlocked Petey Piranha, King Boo, and the Piranha Pipes.
- You earned Mirror All Cup Tour gold and unlocked the Parade Kart.
References for this chapter
- Mario Kart: Double Dash - Nintendo GameCube - Manual - gamesdatabase.org
- Mario Kart: Double Dash!! - Super Mario Wiki, the Mario encyclopedia
- Mario Kart: Double Dash!!/Star Cup — StrategyWiki
- Mushroom City - Super Mario Wiki, the Mario encyclopedia
- DK Mountain - Super Mario Wiki, the Mario encyclopedia
- All Cup Tour - Super Mario Wiki, the Mario encyclopedia
Every kart, character and battle-stage unlock
This is the final audit for Mario Kart: Double Dash!! on Nintendo GameCube. Every unlock in this chapter comes from Grand Prix progress in the original game. Battle mode does not unlock its own arenas by being played; the two hidden battle stages come from specific Grand Prix golds. Use this checklist to confirm every kart, character pair, cup, mode, and final presentation reward on a nearly complete save.
Read the file by reward type, not just by cup row
Treat each unlock as one of four categories while you inspect the save file: progression unlocks, kart unlocks, character-pair unlocks, and battle-stage unlocks. That separation prevents the most common mistake, which is remembering that a cup gave a reward but forgetting whether it unlocked a new class option, a kart, a driver pair, or a battle arena.
For this guide, a completed requirement means winning the cup overall and receiving the gold trophy for that engine class. You do not need first place in every individual race if your total points still leave you first in the cup standings. Check the trophy icon on the cup select screen if you are unsure whether a result counted.
Read the game in rows once you start cleanup. The natural audit order is 50cc, then 100cc, then 150cc, then Mirror. Special Cup must exist before you can clear it, All Cup Tour appears only after the 150cc Special Cup reward, and Mirror only appears after the 150cc All Cup Tour reward.
- Use the cup trophy screen as proof, not memory from a single race win.
- Sort missing rewards into progression, kart, character-pair, and battle-stage columns before replaying cups.
- Remember that the save has 20 Grand Prix golds to check in total: 5 cups across 4 classes.
50cc and 100cc matrix
The 50cc row is mostly early kart cleanup. Win overall gold in 50cc Mushroom Cup to unlock Green Fire. Win overall gold in 50cc Flower Cup to unlock Bloom Coach. Win overall gold in 50cc Star Cup to unlock Para-Wing. Win overall gold in 50cc Special Cup to unlock Bullet Blaster. 50cc All Cup Tour has no standalone unlock attached to it.
The 100cc row is where progression opens. Win overall gold in 100cc Mushroom Cup to unlock Rattle Buggy. Win overall gold in 100cc Flower Cup to unlock Waluigi Racer. Win overall gold in 100cc Star Cup to unlock Special Cup itself. Win overall gold in 100cc Special Cup to unlock Toad, Toadette, and Toad Kart together. 100cc All Cup Tour also has no standalone unlock.
If Special Cup is missing, the file cannot advance properly, so stop and clear 100cc Star Cup first. If Toad and Toadette are missing but Special Cup is open, the missing result is specifically 100cc Special Cup gold, not Time Trials, Battle, or another class.
- 50cc Mushroom Cup gold: Green Fire.
- 50cc Flower Cup gold: Bloom Coach.
- 50cc Star Cup gold: Para-Wing.
- 50cc Special Cup gold: Bullet Blaster.
- 50cc All Cup Tour gold: no standalone unlock.
- 100cc Mushroom Cup gold: Rattle Buggy.
- 100cc Flower Cup gold: Waluigi Racer.
- 100cc Star Cup gold: unlock Special Cup.
- 100cc Special Cup gold: Toad, Toadette, and Toad Kart.
- 100cc All Cup Tour gold: no standalone unlock.
150cc matrix and the road into Mirror
The 150cc row mixes unlockable karts, a battle arena, and the final progression gates. Win overall gold in 150cc Mushroom Cup to unlock Luigi's Mansion for Battle mode. Win overall gold in 150cc Flower Cup to unlock Turbo Birdo. Win overall gold in 150cc Star Cup to unlock Barrel Train. Win overall gold in 150cc Special Cup to unlock All Cup Tour.
The next check is the gate to Mirror. Win overall gold in 150cc All Cup Tour to unlock Mirror mode. If Mirror is not selectable, replay that exact event. Do not waste time replaying 150cc Star Cup or farming Battle mode, because neither of those unlock Mirror.
When you review a near-complete file, confirm the order of appearance. First the 150cc Special Cup gold should make All Cup Tour selectable. Then the 150cc All Cup Tour gold should add Mirror to the class select screen.
- 150cc Mushroom Cup gold: Luigi's Mansion battle stage.
- 150cc Flower Cup gold: Turbo Birdo.
- 150cc Star Cup gold: Barrel Train.
- 150cc Special Cup gold: unlock All Cup Tour.
- 150cc All Cup Tour gold: unlock Mirror mode.
Mirror matrix, paired rewards, and the hidden arenas
Mirror is the last row and it contains the most commonly mixed-up rewards. Win overall gold in Mirror Mushroom Cup to unlock Toadette Kart. Win overall gold in Mirror Flower Cup to unlock Tilt-a-Kart for Battle mode. Win overall gold in Mirror Star Cup to unlock Petey Piranha, King Boo, and Piranha Pipes together. Win overall gold in Mirror Special Cup to unlock Boo Pipes. Win overall gold in Mirror All Cup Tour to unlock Parade Kart.
Keep the character-pair rewards separate from their karts. Toad and Toadette arrive together from 100cc Special Cup, along with Toad Kart. Petey Piranha and King Boo arrive together from Mirror Star Cup, along with Petey Piranha's heavy kart, Piranha Pipes. King Boo's own heavy kart, Boo Pipes, is a later reward from Mirror Special Cup.
The battle arenas are also easy to audit once you isolate them. Luigi's Mansion belongs to 150cc Mushroom Cup. Tilt-a-Kart belongs to Mirror Flower Cup. If one arena is still missing, replay that exact cup and class instead of checking Battle settings.
- Mirror Mushroom Cup gold: Toadette Kart.
- Mirror Flower Cup gold: Tilt-a-Kart battle stage.
- Mirror Star Cup gold: Petey Piranha, King Boo, and Piranha Pipes.
- Mirror Special Cup gold: Boo Pipes.
- Mirror All Cup Tour gold: Parade Kart.
Final completion proof and what does not unlock anything by itself
The save is not fully complete just because every character and kart is visible. The final presentation rewards, the alternate title screen and alternate ending screen, require gold trophies across all 20 Grand Prix events: Mushroom, Flower, Star, Special, and All Cup Tour in 50cc, 100cc, 150cc, and Mirror.
That is why the two easier All Cup Tours still matter. 50cc All Cup Tour and 100cc All Cup Tour give no standalone kart, character, cup, or arena, but both are still part of the 20-gold requirement for the alternate title and ending screens. Many nearly finished files are missing only one of those two cups.
Your clean final audit should show this full state at once: Special Cup unlocked, All Cup Tour unlocked, Mirror selectable, both hidden battle stages open, every listed kart and hidden character pair present, and gold trophies on every cup in every class. If one visible reward is still missing, use the matrix above to trace it back to one specific cup instead of replaying random content.
- Full completion requires 20 gold trophies total.
- 50cc All Cup Tour and 100cc All Cup Tour have no standalone unlock, but both still count toward full completion.
- Final presentation change check: alternate title screen and alternate ending screen appear only after the full 20-gold audit is satisfied.
- Hidden battle stages to confirm: Luigi's Mansion and Tilt-a-Kart.
- Hidden character pairs to confirm: Toad and Toadette, then Petey Piranha and King Boo.
- Associated unlock karts to confirm: Green Fire, Bloom Coach, Para-Wing, Bullet Blaster, Rattle Buggy, Waluigi Racer, Toad Kart, Turbo Birdo, Barrel Train, Toadette Kart, Piranha Pipes, Boo Pipes, and Parade Kart.
Before you move on
- You have gold trophies on Mushroom Cup, Flower Cup, Star Cup, Special Cup, and All Cup Tour in 50cc, 100cc, 150cc, and Mirror.
- Special Cup is open from 100cc Star Cup gold, All Cup Tour is open from 150cc Special Cup gold, and Mirror is open from 150cc All Cup Tour gold.
- The save contains both hidden battle arenas: Luigi's Mansion and Tilt-a-Kart.
- The save contains both hidden character-pair rewards: Toad and Toadette, plus Petey Piranha and King Boo.
- The save contains every reward kart tied to cup golds, including Toad Kart, Toadette Kart, Piranha Pipes, Boo Pipes, and Parade Kart.
- After the 20th Grand Prix gold is in place, the alternate title screen and alternate ending screen have appeared.
References for this chapter
- Mario Kart: Double Dash!! - Super Mario Wiki, the Mario encyclopedia
- All Cup Tour - Super Mario Wiki, the Mario encyclopedia
- Mario Kart: Double Dash!! Cheats, Codes, and Secrets for GameCube - GameFAQs
- Mario Kart: Double Dash!! Walkthrough - GameSpot
- Mario Kart: Double Dash!! | Nintendo GameCube | Games | Nintendo UK
Two players, one kart
Same-kart co-op works best when each player owns a different job and sticks to it. In Mario Kart: Double Dash!! on GameCube, the front player drives the kart and decides the line, while the rear player handles item use, item aim, Slide Attacks, and the counter-steering that builds co-op Mini-Turbos. Treat it like a practiced crew, not two people trying to steer the same mistake at once.
Assign jobs before the first countdown
Put the steadier racer in front. The front player handles acceleration, braking, steering, drift entry, and drift release. That player should choose the lane early and commit, because sudden corrections cost more in co-op than they do in solo play.
Put the calmer communicator in back. The rear player watches the next item boxes, calls traffic and hazards, aims throws with the Control Stick, uses items, performs Slide Attacks with L or R, and helps the kart build Mini-Turbos during drifts. If you split the jobs this way from race one, arguments disappear before the hard cups begin.
- Front player owns line choice, brake timing, drift entry, and drift release
- Rear player owns hazard calls, item use, item aim, Slide Attacks, and Mini-Turbo counter-steering
- Pick one default seating order before the race instead of renegotiating every corner
Use a simple callout system and one swap rule
Keep every call short. The driver should say only the corner plan: left long, right tight, no drift, or hold. The rear player should answer with box, danger, or swap information: inside box, outside box, shell back, traffic left, or swap after straight.
Use Z only by agreement. In co-op, both players must press Z at the same time to switch positions, so random mashing will only distract you. Make one hard rule: never call for a swap in the middle of a drift. Save swaps for a straight, a clean recovery after a hit, or a slow section where the driver is not already committed.
Add one recovery word such as steady. When either player says it, the next few seconds are for staying on the road, not forcing a pass or throwing a rushed item.
- Driver calls the corner plan early
- Rear player calls box lane, hazards, and swap timing
- Use one clear swap phrase and one cancel phrase
- Never attempt a seat swap during a drift
Start and drift as a team
For the opening launch, both players press A together as Lakitu's signal turns green. Hitting that timing together gives the stronger co-op start called a Double Dash. If only one player gets it right, do not panic. Take the first corner cleanly and collect the first safe item box instead of turning a small miss into a pileup.
During cornering, the front player begins the drift with L or R and holds the kart on line. The rear player then performs the counter-steering needed to charge the Mini-Turbo. Think of it as a relay: front player starts the slide, rear player works the spark charge, front player releases when the sparks turn blue. If both players try to improvise the same part of the drift, the kart will wobble and lose exit speed.
Because the rear player is busy charging the drift, keep the rear callouts quiet during the charge unless there is immediate danger. Say the warning before the drift starts or after the kart exits it.
- Both players press A together on green for the best co-op launch
- Front player starts and holds the drift
- Rear player performs the counter-steering to build blue sparks
- Front player releases the drift after the charge is complete
Manage items without breaking the racing line
The rear player should use almost every item. If you hit a single Item Box, the rear character gets the item. If you hit a Double Item Box, both riders can receive items, but the front player still cannot fire straight from the front seat in co-op. The front player must pass that item to the rear player with X or Y, so do that on a straight instead of during a corner.
Call each throw before it leaves your hands: forward red, back green, banana center, or hold. That keeps the driver from drifting into the throw lane. Back throws and drops are strongest just after a corner exit or in the middle of a narrow lane where rivals cannot easily sidestep. Forward throws are best on a straight with clear sight, not while the driver is trying to finish a drift.
Use Slide Attacks only when you are already alongside a rival. The rear player presses L or R to shove left or right, disrupt the rival kart, and steal an item if your rear rider is not already carrying one. Do not fish for Slide Attacks in traffic, at tunnel entries, on bridges, or while your own kart is unstable after a hit.
- Rear player uses items and aims throws
- Front player passes front-seat items back after Double Item Boxes
- Announce throws before using them
- Attempt Slide Attacks only when already alongside and settled
Practice one real lap on Luigi Circuit
Luigi Circuit is the best first co-op drill because the bends are readable and the danger points are easy to name. Run one lap with a strict rule set: one seat order, no optional swaps, and no item use except one planned defensive back throw. The goal is a clean routine, not first place.
At the start, call the first bend and commit to one lane for the opening boxes. Through each long corner, let the rear player focus on the Mini-Turbo charge instead of talking over the drift. On the shared-road section, the rear player becomes the spotter and calls traffic early while the driver holds the safer line. If you get bumped or clipped by an item, say steady, return to the racing line, and aim for the next safe box before you think about passing anyone.
Repeat the same lap a second time and add only one extra task: a planned Slide Attack on a straight if a rival is already alongside. If the chance is not clean, skip it. Good co-op teams improve faster by passing on bad opportunities than by forcing them.
- Lap one goal is clean communication, not a win
- Use only one planned defensive item on the practice lap
- Rear player becomes the main traffic spotter in the shared-road section
- After any hit, recover line first and fight for position second
Know where co-op fits among the other modes
Same-kart co-op is not the same thing as ordinary split-screen rivalry. In split-screen Versus or Battle, each player controls a separate kart and races or fights directly against the others. Same-kart co-op is the two-player shared-kart setup, useful for Grand Prix teamwork and route learning.
Time Trial is a solo mode, so use it to teach the front player a clean racing line and repeatable drift points before bringing that knowledge back into co-op races. LAN play is separate again: it uses linked GameCube systems with Broadband Adapters for local multi-console sessions. That is local hardware multiplayer, not modern online matchmaking.
- Same-kart co-op means two players sharing one kart
- Split-screen rivals means each player drives separately
- Time Trial is solo practice
- LAN is local linked-console play, not internet play
Before you move on
- You can explain the verified co-op job split: front player drives and starts drifts, rear player uses items and performs the counter-steering for Mini-Turbos.
- You can perform the Double Dash start by having both players press A together on the green signal.
- Your team can complete a Luigi Circuit practice lap with agreed corner calls, early box calls, no mid-drift swap attempts, and one calm recovery after a hit.
- You can distinguish same-kart co-op, split-screen rivals, Time Trial, and local LAN play without describing LAN as online matchmaking.
Win Balloon Battle, Shine Thief and Bob-omb Blast
Battle mode in Mario Kart: Double Dash!! on Nintendo GameCube is a separate multiplayer mode, not part of the Grand Prix unlock chain except for the two hidden arenas. You begin with four battle stages available: Cookie Land, Block City, Nintendo GameCube and Pipe Plaza. Luigi's Mansion unlocks with a gold trophy in 150cc Mushroom Cup, and Tilt-a-Kart unlocks with a gold trophy in Mirror Flower Cup. Treat battle as short positional fights. Win by choosing routes that keep an item in reserve, forcing the other kart to turn first, and using the arena layout instead of charging straight into the middle every round.
Know what each mode is asking you to do
Balloon Battle is elimination. Each kart starts with three balloons, and you are out when they are gone. You lose balloons from item hits, from falling off the stage, from being rammed by a kart using a Mushroom or Star, or from a Side Attack. If you are down to two balloons or fewer, a Mushroom, Star or Side Attack can steal a balloon from another kart instead of only trading damage.
Shine Thief is possession. The Shine drops into the center, and the countdown starts once somebody picks it up. If you hold it until the timer reaches zero, you win. If you are hit by an item, drive out of the arena, get rammed by a Mushroom or Star user, or get hit by a Side Attack, you lose the Shine. Because all special items are available to every character in this mode, stable handling matters more than building your plan around one pair's signature item.
Bob-omb Blast is points. Only Bob-ombs appear. Hitting an opponent with your blast gives you one point, and being hit by an opponent's blast costs you one point. In a two-player match, first to three points wins. In three- or four-player matches, first to four points wins. Your own Bob-omb explosions do not hurt you, so you can safely trap space in front of yourself without fearing your own blast.
- Balloon Battle is last kart with balloons left.
- Shine Thief is hold the Shine until the timer expires.
- Bob-omb Blast is first to the point target, while avoiding point loss from enemy blasts.
Use the arena that matches the rule set
Cookie Land is best when you want to break line of sight with walls and set up short ambushes. It is strong for Balloon Battle and Shine Thief because rivals must keep choosing around curves instead of seeing you from across the map. In Shine Thief, leave the center and run the outer lanes so chasers must guess your turn.
Block City favors players who can read height and intersections. It is the cleanest beginner choice for Balloon Battle because you can see incoming attacks and cut away early. In Bob-omb Blast, aim at landings, ramps and crossings instead of the kart body. A bomb on the route is harder to dodge than a bomb thrown directly at a turning rival.
Nintendo GameCube is open and flat, so there is almost nowhere to hide. Use it when you want direct pursuit and clean sightlines. Red Shell pressure is stronger here, but so is counterfire, so never spend your last item unless you are sure the hit will connect.
Pipe Plaza is wide, but the warp pipes make pursuit unpredictable. The pipes do not give you items by themselves, so collect item boxes before committing to a chase. This stage is best when you are comfortable predicting exit points. Throw into the space just beyond a pipe mouth or wait there with a backward drop.
- Cookie Land for corner traps and short escapes.
- Block City for visible intersections and landing-zone attacks.
- Nintendo GameCube for direct duels with little cover.
- Pipe Plaza for pipe-exit reads after you have already secured an item box.
Balloon Battle: survive the first exchange, then steal when low
Do not open by driving straight at the nearest kart. Sweep one side of the arena, take an item box, and attack from an angle that leaves you an escape path. In open arenas, fire your shell before the opponent straightens out of a turn. In tight arenas, drop hazards where the rival must hug a wall or doorway.
Your comeback tool is verified and strong: if you are on one or two balloons, a Mushroom, Star or Side Attack can steal a balloon. Save that play for a rival who has just bounced off a wall, landed from a ramp, or committed to a narrow lane. Trying to steal head-on in open space usually gets you hit first.
If you lose a balloon early, slow the pace for one lap around the arena instead of forcing a second fight immediately. Re-arm, watch where the opponent likes to turn, and attack as they exit the next corner.
- Take an item before your first fight.
- Attack after the rival begins turning.
- Look for a Mushroom, Star or Side Attack steal only when you are already down to two balloons or fewer.
Shine Thief: win the pickup battle, then stop revisiting the center
The safest opening is not a blind sprint at the Shine. Angle through a nearby item box first, then cut inward. If another kart grabs the Shine in the opening pileup, punish them as they leave the middle instead of joining the scrum without protection.
Once you have the Shine, your job changes completely. Run to the edge of the arena, keep changing direction, and choose routes with two exits. Cookie Land and Luigi's Mansion reward this because they let you disappear around bends. Block City rewards changing elevation so pursuers must commit before they reach you.
When you are behind, do not chase nose-to-tail. One kart should pressure the current line, while the other cuts off the next doorway, curve or platform. In single-screen free-for-all play, you still want that same idea mentally: force the holder to turn, then hit the route they are forced to take next.
- Enter the Shine fight with an item, not empty-handed.
- After taking the Shine, leave the center immediately.
- Cut off the next route instead of following the holder's tire marks.
Bob-omb Blast: control space and let the blast radius do the work
This mode is won by prediction, not spam. Hold your bombs until the other kart has committed to a lane, landing or exit. Then throw where they must be, not where they are now. Block City intersections, Pipe Plaza exits and Luigi's Mansion hallways are all excellent forced zones.
Because your own Bob-ombs do not hurt you, you can safely wall off a route and drive parallel to the explosion. What still loses points is enemy splash damage, so avoid throwing into a scramble where another player's bomb is already primed beside you.
If you fall behind, stop fishing for miracle long throws. Rebuild with safe boxes, defend open ground until you have enough stock to threaten two routes at once, and then fight near walls or corners where a dodge pushes the opponent into the next trap. Tilt-a-Kart is the least reliable place for this plan, so on that arena play more centrally and wait for the floor to create the mistake.
- Throw onto routes, landings and exits.
- Use your own blast to block space without fearing self-damage.
- When behind, rebuild calmly instead of forcing low-percentage long bombs.
Before you move on
- You can state all three win conditions correctly: last balloons standing, hold the Shine until the timer expires, and reach the Bob-omb point target while avoiding enemy blasts.
- You know the four starting arenas by name: Cookie Land, Block City, Nintendo GameCube and Pipe Plaza.
- You know the unlockable arenas and their gold conditions: Luigi's Mansion from 150cc Mushroom Cup and Tilt-a-Kart from Mirror Flower Cup.
- You can explain the verified contact plays that steal balloons or the Shine: Mushroom rams, Star rams and Side Attacks, along with ordinary item hits and ring-outs.
- You have one practical opening and one comeback plan ready for Balloon Battle, Shine Thief and Bob-omb Blast.
References for this chapter
- Mario Kart: Double Dash!! Instruction Booklet
- Mario Kart: Double Dash!!/Battle mode — StrategyWiki
- Mario Kart: Double Dash!! - Guide and Walkthrough - GameCube - By TPitch - GameFAQs
- Mario Kart: Double Dash!! - Super Mario Wiki, the Mario encyclopedia
- Luigi's Mansion (battle course) - Super Mario Wiki, the Mario encyclopedia
- Tilt-a-Kart - Super Mario Wiki, the Mario encyclopedia
Time Trials and the final completion audit
Use Time Trial in the original Nintendo GameCube release to repair one weakness at a time, then finish with a strict 20-gold audit so you do not leave a lower-cc All Cup Tour unfinished. Time Trial records total time and lap times, lets you race your own Ghost, and starts each attempt with two Mushrooms. That makes it the safest place to prove whether a shortcut, drift release, or safer line is really helping before you risk Grand Prix points.
Build a focused Time Trial session
Choose the one course that most often costs you cup points and stay there for a real practice block. Fifteen to twenty minutes on one track is usually better than jumping between several courses after a single bad run. The goal is to remove one repeated mistake, not to chase a perfect file in one sitting.
Leave the Time Trials Ghost option on if you want the game to record and save ghost data. Finish one clean run first, then use that Ghost as your moving comparison. In Double Dash!! the useful feedback is your total time, your best lap, and the exact part of the course where the Ghost starts pulling away from you.
Set one target before the countdown. Good targets are one start timing, one linked drift section, one traffic read, or one Mushroom cut. Bad targets are trying to fix every corner on the track in the same session.
- Stay on one course for the whole session.
- Keep Ghost recording enabled if you want to compare runs cleanly.
- Choose one practice target before the first attempt.
Read best lap and Ghost pace correctly
Use best lap to separate raw speed from mistake control. If your best lap is already good but your full race time is weak, the real problem is probably a crash, fall, freeze, traffic hit, or one missed hazard read. If both the best lap and the full time are poor, you still need cleaner basic lines.
Watch where the Ghost opens the gap. On Yoshi Circuit that is often a chain of corners where you hold the drift too long and spoil the next entry. On DK Mountain it can be the downhill hairpins where a late correction sends you wide. On Mushroom City it is often one road choice or merge, not the whole lap.
Do not instantly reset after every small error unless you are drilling only the launch. Finish enough runs to confirm whether the same section is costing time every lap. A repeatable loss is the one worth fixing first.
- Use best lap to decide whether the problem is pace or survival.
- Name the exact section where the Ghost gains ground.
- Finish enough runs to confirm a pattern before changing plans.
Test one line or one Mushroom placement at a time
Treat practice like a controlled test. Keep the same team, kart, and general route for several runs, then change only one variable. If you are working on a drift, alter either the turn-in point or the release point, not both together. If you are working on a shortcut, keep the same entry side until you know whether the problem is angle, timing, or exit control.
Spend the two Time Trial Mushrooms with a reason. Use both on the same shortcut for several attempts if you are deciding whether it is safe enough for Grand Prix. If it fails repeatedly in a short set, stop forcing it. A cut that works only on your best attempt is not a reliable cup strategy.
When you find a line that works, repeat it until it feels routine. Routine is what you want. In Grand Prix and especially in All Cup Tour, the pack and items create enough pressure already. Your answer to the track itself should be automatic.
- Change one variable at a time.
- Use both Mushrooms as planned tests, not emergency boosts.
- Keep only lines you can repeat cleanly.
Carry practice back into Grand Prix and All Cup Tour
Before each race, decide whether the track is a hold-points race or a make-up-points race. On a hold-points race, drive the safer line and skip any shortcut you still hit inconsistently. On a make-up-points race, use the one faster option you already proved in Time Trial and avoid stacking extra risks on top of it.
In the 16-race All Cup Tour, do not answer one poor finish with panic. A controlled second or third in the next race often repairs the standings better than one reckless shortcut attempt that turns into another low score.
If a course is dangerous for you every time, set a realistic success condition. On tracks such as Bowser's Castle or Rainbow Road, a no-fall race in the points can be the correct play if it protects the cup.
- Label the race as hold-points or make-up-points before the start.
- Use only practiced fast options under pressure.
- After a bad result, stabilize the tour before gambling again.
Run the final 20-gold audit
Full Grand Prix trophy completion is five gold trophies in 50cc, five in 100cc, five in 150cc, and five in Mirror for 20 total golds. If your goal is a fully cleared racing file, do not stop at Mirror, Parade Kart, or any earlier unlock.
Check the low classes first because they are the easiest to forget. The 50cc and 100cc All Cup Tours do not award a separate kart or character, but they still count toward full gold completion. Do not use any title-screen change, ending presentation change, or other visual bonus as proof that the file is finished. First confirm the full 20-gold checklist manually, including both lower-cc All Cup Tours.
Use a simple audit order so nothing gets missed: finish the full 50cc row, then the full 100cc row, then 150cc, then Mirror. If something seems missing, compare the exact cup and engine class against the unlock chain instead of assuming another mode caused it.
- 50cc gold: Mushroom Cup, Flower Cup, Star Cup, Special Cup, All Cup Tour.
- 100cc gold: Mushroom Cup, Flower Cup, Star Cup, Special Cup, All Cup Tour.
- 150cc gold: Mushroom Cup, Flower Cup, Star Cup, Special Cup, All Cup Tour.
- Mirror gold: Mushroom Cup, Flower Cup, Star Cup, Special Cup, All Cup Tour.
Add optional cleanup goals after the golds
Once the 20 trophies are done, use optional goals that sharpen control instead of inventing a fake percentage bar. A good first target is beating your own Ghost on the three tracks that caused the most trophy losses. Another good target is learning one dependable Mushroom use in each cup, even if you skip the riskier shortcuts.
If you want deeper Time Trial goals, start chasing Staff Ghost access on your weakest tracks. That gives you a stronger benchmark than your first personal Ghost without changing the actual completion rules for the main save.
Battle is separate from the race unlock chain, so treat it as extra mastery. Playing Balloon Battle, Shine Thief, and Bob-omb Blast on every unlocked arena is a clean bonus goal if you want more item and collision practice without risking cup points.
- Beat your own Ghost on your three weakest courses.
- Learn one dependable Mushroom use in each cup.
- Optionally chase Staff Ghost benchmarks on problem tracks.
- Optionally play all three battle types on every unlocked arena.
Troubleshooting table
Most stalled files come from one repeated mechanical error or one missed cup, not from being slow everywhere. Match the symptom to the fix instead of changing everything at once.
- Failed Rocket Start: practice only the launch timing for several attempts until you can boost cleanly without spinning the wheels or crawling off the line.
- Mini-Turbo will not charge: start the drift earlier, hold the slide through the corner, and keep counter-steering instead of straightening too soon. Release only after the blue sparks appear.
- Shortcut keeps failing: keep the same kart and team, approach from one side repeatedly, and test only the entry angle or only the Mushroom timing until the failure point is obvious.
- Poor special-item access in races: check your character pair. If your recovery plan depends on a special item family, you may be using the wrong team for that strategy.
- Special Cup, All Cup Tour, or Mirror still missing: verify the real requirements. Special Cup needs 100cc Star Cup gold, All Cup Tour needs 150cc Special Cup gold, and Mirror needs 150cc All Cup Tour gold.
- Presentation bonus not appearing yet: assume nothing. Recheck the full 20-gold grid first, especially 50cc and 100cc All Cup Tour.
- One course still ruins cups: go back to Time Trial and shrink practice to one corner chain, one traffic merge, or one Mushroom use instead of replaying whole cups blindly.
Before you move on
- You have gold trophies in all five cups of 50cc, 100cc, 150cc, and Mirror for 20 total golds.
- You have checked the lower-cc All Cup Tours and are not mistaking a late-game unlock for full Grand Prix completion.
- You are using Time Trial for one fixed goal at a time, with Ghost comparison or lap-time comparison instead of random repetition.
- You can name one reliable fix for your worst course and have confirmed it in Time Trial before taking it back into Grand Prix.
- Any extra goals you add, such as Staff Ghost chasing or Battle cleanup, are clearly optional and not required for completion.
Finishing up
Work through the Grand Prix rewards for the game's engine classes and Mirror mode.
Check your earned characters, karts, cups, and Battle arenas against the unlock list.
Revisit troublesome tracks in Time Trials until you can repeat the important corners reliably.
Try cooperative play or Battle mode once the main racing controls feel comfortable.
Choose your next gameScreenshots & video
Game imagery for reference. Follow the written chapters above for the route and strategies.
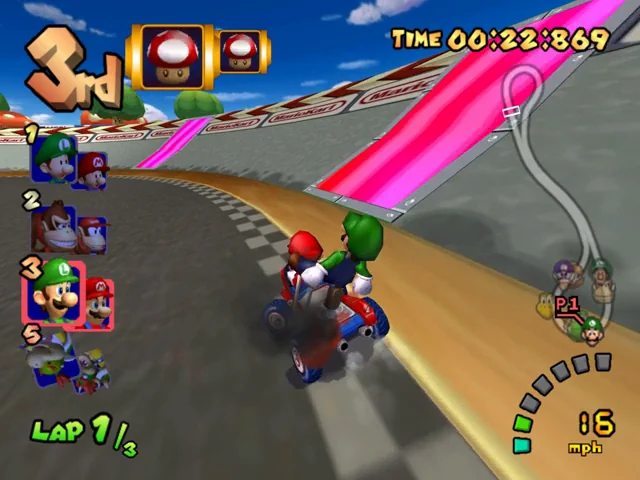
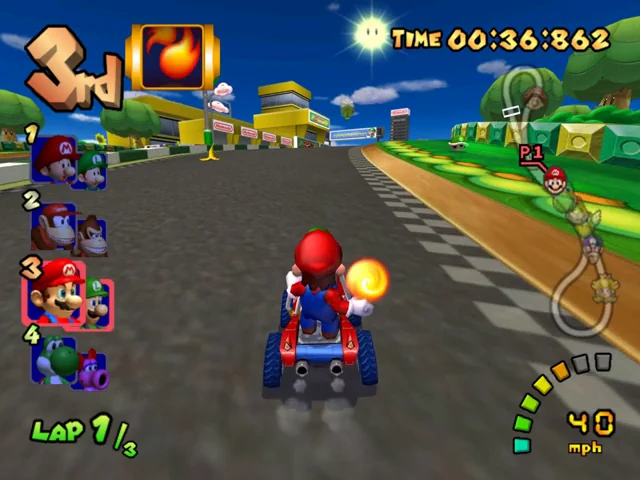
Sources & references
Our original guide draws on the references below. Check the edition at the top of this page before following controls or unlock requirements.
- MARIO KART - Double Dash!! - マリオカート ダブルダッシュ!! Q&A
- MARIO KART - Double Dash!! - マリオカート ダブルダッシュ!! Karts
- MARIO KART - Double Dash!! - マリオカート ダブルダッシュ!! Modes
- マリオカート ダブルダッシュ!! Grand Prix
- マリオカート ダブルダッシュ!! Time Attack
- Mario Kart: Double Dash!! - Super Mario Wiki, the Mario encyclopedia
- All Cup Tour - Super Mario Wiki, the Mario encyclopedia
- Mario Kart: Double Dash!! Instruction Booklet
- Mario Kart: Double Dash!! | Super Mario Wiki
- Rocket Start - Super Mario Wiki, the Mario encyclopedia
- Mario Kart: Double Dash!! FAQ by Egg_Utopia | GameFAQs
- Mario Kart: Double Dash!! | Nintendo GameCube | Games | Nintendo UK
- Mario Kart: Double Dash - Nintendo GameCube - Manual - gamesdatabase.org
- Luigi Circuit (Mario Kart: Double Dash!!) - Super Mario Wiki, the Mario encyclopedia
- Peach Beach - Super Mario Wiki, the Mario encyclopedia
- Mario Kart: Double Dash!! - Guide and Walkthrough - GameCube - By TPitch - GameFAQs
- Baby Park - Super Mario Wiki, the Mario encyclopedia
- Mario Kart: Double Dash!!/Mushroom Cup — StrategyWiki
- Mario Kart: Double Dash!! Walkthrough - GameSpot
- Mushroom Bridge - Super Mario Wiki, the Mario encyclopedia
- Mario Circuit (Mario Kart: Double Dash!!) - Super Mario Wiki, the Mario encyclopedia
- Mario Kart: Double Dash!! Release Information for GameCube - GameFAQs
- Daisy Cruiser (race course) - Super Mario Wiki, the Mario encyclopedia
- Waluigi Stadium (Mario Kart: Double Dash!!) - Super Mario Wiki, the Mario encyclopedia
- Sherbet Land (Mario Kart: Double Dash!!) - Super Mario Wiki, the Mario encyclopedia
- Mushroom City - Super Mario Wiki, the Mario encyclopedia
- Yoshi Circuit - Super Mario Wiki, the Mario encyclopedia
- DK Mountain - Super Mario Wiki, the Mario encyclopedia
- Mario Kart: Double Dash!! - FAQ - GameCube - By Crazyreyn - GameFAQs
- Mario Kart: Double Dash!! - Guide and Walkthrough - GameCube - By Kirby021591 - GameFAQs
- Mario Kart: Double Dash!! - Super Mario Wiki, the Mario encyclopedia
- Wario Colosseum - Super Mario Wiki, the Mario encyclopedia
- Dino Dino Jungle - Super Mario Wiki, the Mario encyclopedia
- Bowser's Castle (Mario Kart: Double Dash!!) - Super Mario Wiki, the Mario encyclopedia
- Rainbow Road (Mario Kart: Double Dash!!) - Super Mario Wiki, the Mario encyclopedia
- Mario Kart: Double Dash!!/Special Cup - StrategyWiki
- Special Cup - Super Mario Wiki, the Mario encyclopedia
- Mario Kart: Double Dash!! Cheats, Codes, and Secrets for GameCube - GameFAQs
- Mario Kart: Double Dash!!/Unlockables — StrategyWiki
- Mario Kart: Double Dash!!/Star Cup — StrategyWiki
- Slide Attack - Super Mario Wiki, the Mario encyclopedia
- Mario Kart: Double Dash!!/Battle mode — StrategyWiki
- Luigi's Mansion (battle course) - Super Mario Wiki, the Mario encyclopedia
- Tilt-a-Kart - Super Mario Wiki, the Mario encyclopedia
- Nintendo GameCube and Game Boy Advance Manuals | Nintendo Support
- Mario Kart Double Dash Instruction Booklet | Manualzz
About the game & collecting notes
- Platform
- Nintendo GameCube
- Developer
- Nintendo
- Publisher
- Nintendo
- Release Date
- 2003-11-14
- Region
- Europe
- Genre
- Racing / kart racing
- Content Rating
- PEGI 3
- Players
- 1–4 on one console; LAN requires additional equipment
Mario Kart: Double Dash!! places two characters in each kart, with the ability to switch their positions. Character combinations and item use are central to its variation on Mario Kart racing.
Nintendo’s European product reference lists November 14, 2003 as the release date. The date and regional rating shown here apply to that release. Nintendo also describes LAN play using multiple GameCube systems, displays, and Broadband Adapters; local multiplayer and LAN configurations should not be confused.
When buying a copy, identify the region, inspect the disc and case, and verify any claimed bonus material against the exact edition. Test controllers and memory hardware as part of a complete setup.
Collector notes
Regional packaging and bundles can differ. Verify any additional disc or insert specifically; do not assume it belongs in every copy.Darryl Polo
Darryl Polo loves tinkering with emulation and revisiting retro games. He enjoys exploring how old favorites play on different setups and sharing what he learns along the way. At Joking Joystick, he writes about the games, hardware, and small discoveries that keep the hobby fun.
Our editorial standardsFound a step that needs another look? Help us improve this guide.