Luigi's Mansion (GameCube, USA) — Complete Campaign Walkthrough
A room-by-room walkthrough for the original North American Nintendo GameCube release of Luigi's Mansion. Follow Luigi from the foyer through all four mansion areas, use the original flashlight, Poltergust 3000, elemental attacks and Game Boy Horror correctly, defeat Chauncey, Bogmire, Boolossus and King Boo, and finish the main story. Optional chapters cover the 50 regular Boos, Hidden Mansion, gold portraits and Rank A treasure planning.

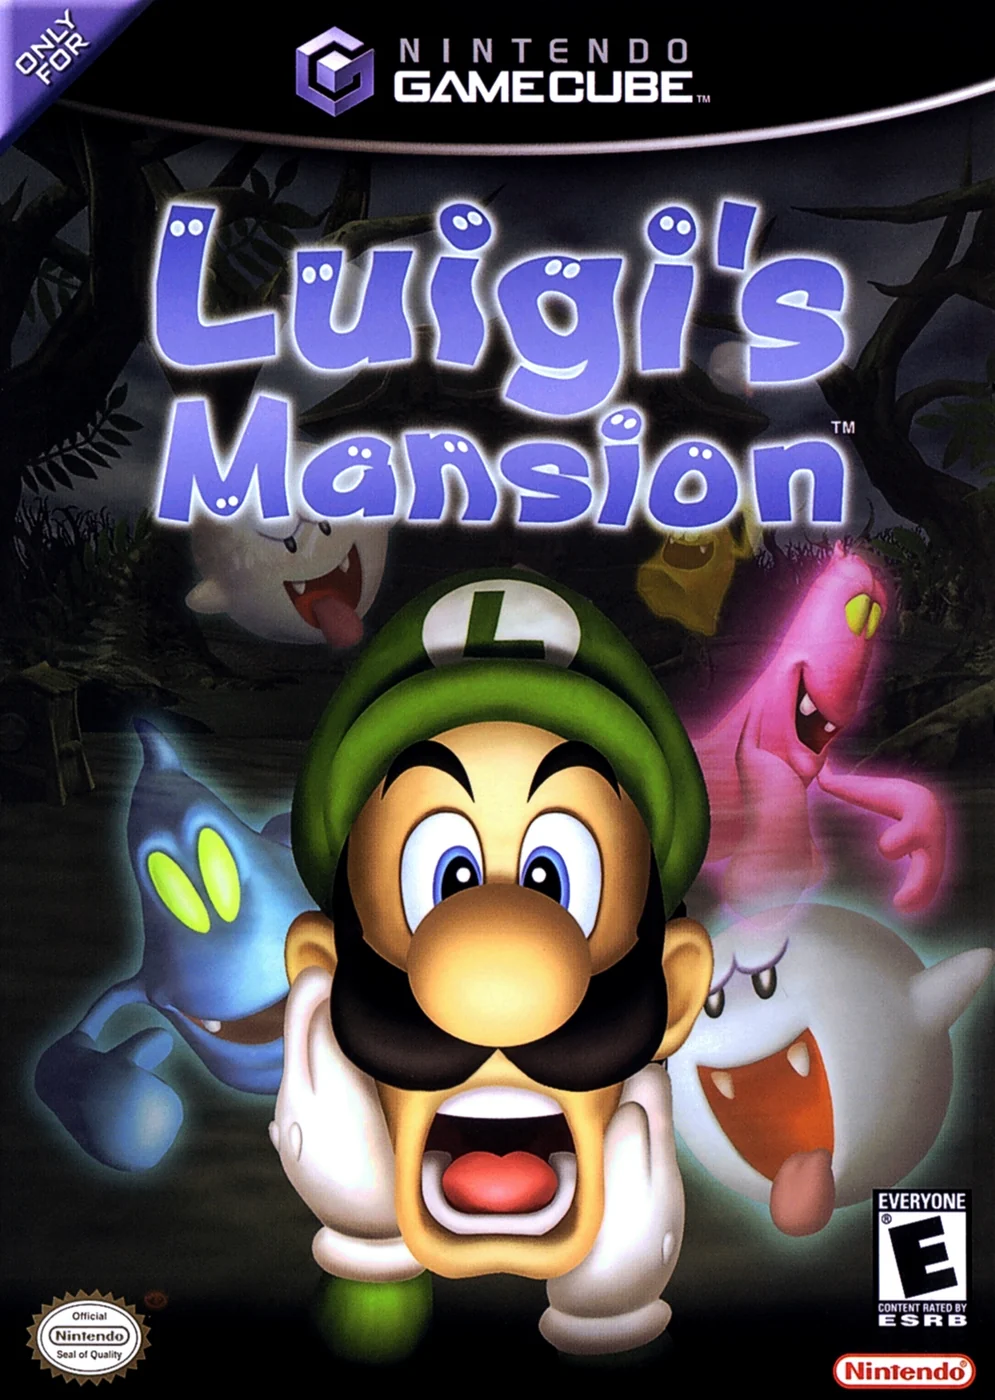
Find a copy
Luigi's Mansion Nintendo GameCube
We may earn a commission if you buy through these links, at no extra cost to you. As an Amazon Associate I earn from qualifying purchases.
Opens retailer search results. Check the model, edition, seller, availability and current price before buying.
Before you begin
You control Luigi, armed with Professor E. Gadd's Poltergust 3000, ordinary flashlight and Game Boy Horror, while searching the haunted mansion for Mario.
This guide covers the original Nintendo GameCube USA release: where to go, which keys and room events are required, how to handle each area boss, and how to recover after failure.
Follow the chapters in order for a direct campaign run. Optional chapters cover all 50 regular Boos, Hidden Mansion, gold portraits and treasure collection.
Save with Toad whenever practical, especially before boss routes and optional collection attempts.
The GameCube version uses the ordinary flashlight for exposing vulnerable ghost hearts. It does not use the Strobulb system from the Nintendo 3DS remake.
The four main progression gates are the area boss victories, 20 captured regular Boos for the Boolossus Balcony, and 40 captured regular Boos for the Secret Altar in the North American GameCube release.
The ending is complete when King Boo is defeated, Mario is restored and the credits reach the final mansion-rank display. Rank A, all 50 Boos, gems and gold portraits are separate optional goals.
Set yourself up for the run
Confirm that the game is the original North American Nintendo GameCube release, not the Nintendo 3DS remake or a PAL edition.
Use the original controls: Control Stick to move, C Stick to aim the flashlight and Poltergust, R for suction, L to expel stored fire, water or ice, A for actions, B to turn the flashlight off, X for Game Boy Horror Search Mode, Y for the map and Z for inventory and collection screens.
The GameCube release has no Strobulb button. Ordinary ghosts are exposed with the flashlight, then captured with the Poltergust 3000.
Keep a Memory Card with available space. Speak with Toad and choose Save at reliable checkpoints.
Use the map after collecting keys and after major story events. Cleared rooms and key markers help identify the next required door.
Treat regular Boo hunting as a separate task: the Boo Radar works in rooms that have been lit, and escaped Boos may need to be pursued or searched for again.
Collect hearts before difficult encounters and save before optional gold-portrait or Rank A attempts.
The laboratory processes major captures and records area results, but it does not replace ordinary Toad saves during exploration.
Core mechanics, controls and gadgets
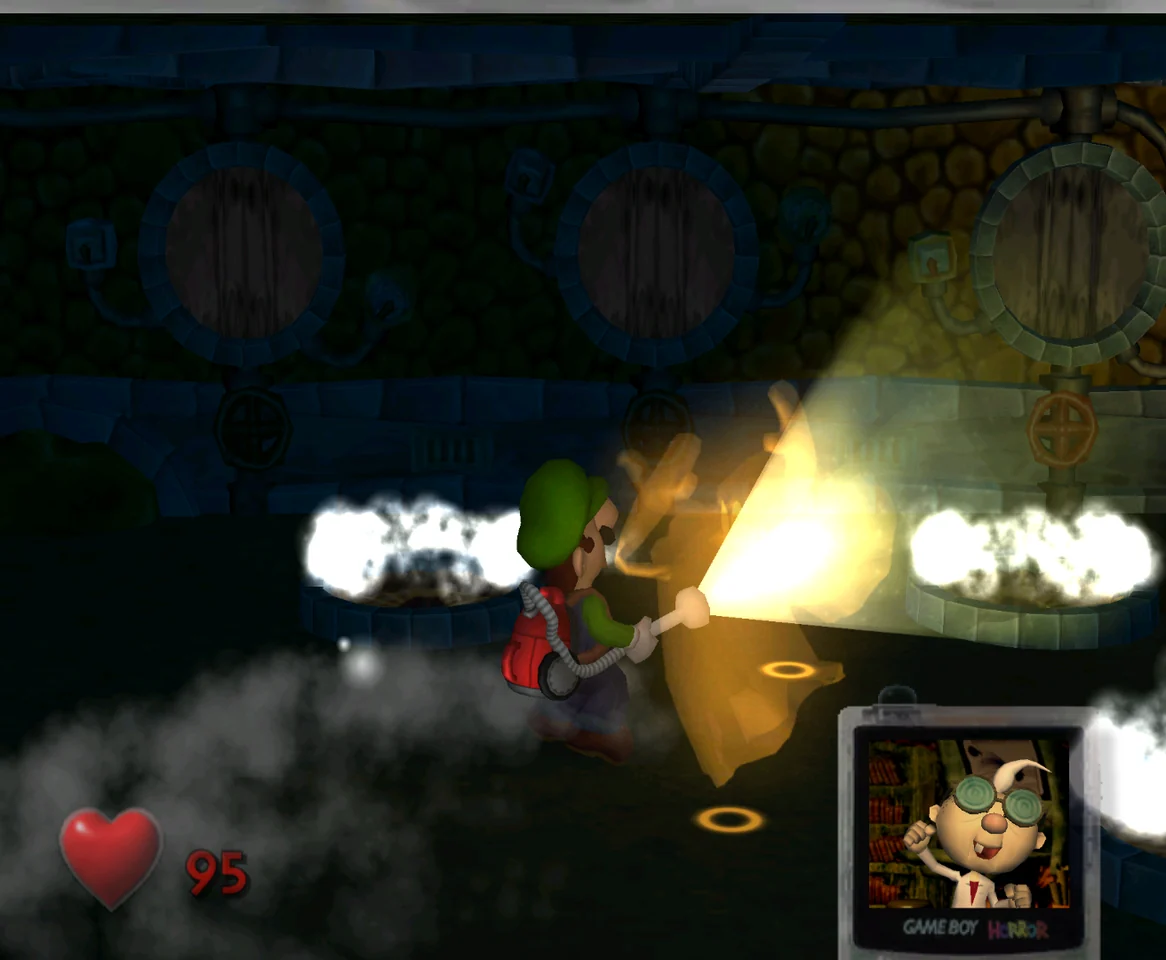
Luigi’s Mansion on the North American Nintendo GameCube uses an ordinary flashlight, the Poltergust 3000, and the Game Boy Horror. The flashlight exposes the hearts of most ghosts, R operates suction, and L expels fire, water, or ice after Luigi has acquired the appropriate elemental medal and collected that element. Learn these tools before pursuing optional Boos or attempting difficult captures.
Learn the original GameCube controls
Move Luigi with the Control Stick. The C Stick changes the direction of both the flashlight and the Poltergust 3000, allowing Luigi to walk one way while aiming the equipment another. Press R to use the Poltergust. Because the GameCube trigger is analog, pressing R farther produces stronger suction. Press L to expel the fire, water, or ice currently stored in the vacuum; L is not a flashlight button.
Press A to interact with doors, furniture, switches, and objects. In a dark room, press B to turn the flashlight off. This lets you approach some ghosts without immediately exposing them and is also useful when you need to control when the light comes on. Press X to enter the Game Boy Horror’s Search Mode, Y to open the floor map, and Z to open the item list. The D-pad changes between available Game Boy Horror display functions when appropriate.
The default control style is suitable for a first playthrough. If you change the control style later, remember that the functions of the buttons remain the important reference: C Stick aiming, R suction, and L elemental discharge.
- Move with the Control Stick.
- Aim the flashlight and vacuum with the C Stick.
- Use R for Poltergust suction.
- Use L only to expel a stored element.
- Use B to turn off the flashlight in dark rooms.
- Use X for Search Mode, Y for the map, and Z for the item list.
Capture ordinary ghosts
Most ordinary ghosts must first be exposed. Aim the flashlight with the C Stick and shine it on the ghost at the right moment. A successful exposure reveals the ghost’s heart. Move close enough for the Poltergust nozzle to connect, then hold R to begin suction. The number beside the heart represents the ghost’s remaining strength; continue pulling until it reaches zero.
When a ghost tries to escape, keep the nozzle pointed at it and counter its movement. Use the Control Stick and C Stick to pull Luigi in the opposite direction from the ghost’s escape. Do not simply hold suction while standing still. If Luigi is dragged too far, the connection breaks and the ghost must be exposed again.
If a ghost breaks free, stop suction immediately and reposition Luigi. Wait for another opening instead of wasting time vacuuming empty air. Some ghosts have special behavior and cannot be captured through the normal flash-and-suction sequence until Luigi performs the required room interaction. Treat the exposed heart as the capture window, not as permission to vacuum every enemy at any time.
- Expose a normal ghost with the ordinary flashlight.
- Begin suction only after its heart appears.
- Counter the ghost’s escape direction while holding R.
- Reposition and try again if the connection breaks.
- Use room-specific interactions when an ordinary flash is not enough.
Use fire, water, and ice correctly
Luigi cannot use elemental attacks immediately. Professor E. Gadd provides the appropriate elemental medal during the campaign, and Luigi must then collect the matching element from a source in the mansion. Once an element is stored, press L to discharge it. The current element and its remaining supply are shown on the screen.
Fire, water, and ice are used for specific environmental obstacles, puzzles, and elemental ghosts. If a puzzle calls for water, do not keep flashing or vacuuming the target; collect water and expel it with L. The same rule applies to fire and ice. Elemental attacks are separate from the flashlight’s ghost-exposure function.
- Acquire the relevant elemental medal first.
- Collect the element from a mansion source.
- Press L to discharge the stored element.
- Use the matching element for the puzzle or enemy instead of treating it as a flashlight attack.
Use Search Mode and the floor map
Press X to enter Search Mode. The Game Boy Horror gives Luigi a first-person view of the surrounding room, allowing him to inspect objects and unusual details. Use the Control Stick to move the search view and press A when you want to examine something. Search furniture, mirrors, paintings, containers, and suspicious areas when a room contains a clue or when the route forward is unclear. Press B or X to return to normal play.
Search Mode is not a general pause screen. Luigi cannot continue ordinary movement or use the Poltergust while viewing the room through the Game Boy Horror. Leave Search Mode before attempting to fight, move through a door, or operate equipment.
Press Y to display the floor map. The map shows the mansion’s rooms and doors on the current floor, and the Control Stick can browse between floors. When Luigi obtains a key, the map helps identify the door it opens. Use it after every key pickup and whenever you are unsure whether the next objective is above, below, or on the opposite side of the mansion.
Press Z to open the item list. This screen records collected valuables and captured ghosts. Use it to confirm progress, but do not confuse the item list with the map or Search Mode.
- Use X and A to inspect objects from Luigi’s first-person view.
- Leave Search Mode before resuming movement or combat.
- Use Y to identify locked doors and key destinations.
- Use Z to review valuables and captured ghosts.
Track regular Boos with the Boo Radar
After the early mansion events release the Boos, regular Boos hide in rooms that have been cleared and lit. Begin a Boo search by revisiting completed rooms rather than searching every dark room. The Boo Radar is the small lamp above the Game Boy Horror display during normal gameplay.
A blue radar indicates that no Boo is currently detected in the room. Yellow indicates that a Boo or Boo-related object is present. Red means Luigi is close to the hiding place. When the radar is red, examine nearby furniture and fixtures with A. The radar can detect Boo-related decoys, including Boo Balls and bombs, so a red signal does not guarantee that the nearest object contains the actual ghost.
When a Boo appears, use the Poltergust directly. Boos do not need to be stunned by the ordinary flashlight first. Keep the nozzle trained on the Boo and pursue it if it moves through the room. If it escapes, check the connected rooms quickly when possible; otherwise return later and perform another radar sweep. Keep a room checklist so an escaped Boo does not lead to repeated random searches.
- Search lit, cleared rooms for regular Boos.
- Use blue, yellow, and red radar states to narrow the search.
- Examine nearby objects when the radar turns red.
- Expect decoys such as Boo Balls or bombs.
- Vacuum a revealed Boo directly without a flashlight stun.
Save with Toad and understand laboratory returns
Toad is the reliable manual-save point. Speak to him and select Save whenever the option appears. Save after clearing a difficult sequence, before entering a boss route, and whenever you pass a Toad after meaningful progress. A laboratory visit after a major boss is useful, but it does not replace saving with Toad during ordinary exploration.
After a major boss capture, Luigi is returned to Professor E. Gadd’s laboratory. The laboratory processes captured portrait ghosts, updates the Gallery, and records collected treasure and ghost progress. Use the laboratory as a post-boss checkpoint and progress review, but do not assume that every action in the mansion has been manually saved merely because Luigi returned there.
If Luigi loses all health, reload the latest Toad save and repeat the shortest route to the failed encounter. Before trying again, collect nearby hearts, confirm the destination on the map, and avoid rechecking rooms that the map already shows as cleared.
- Speak to Toad and choose Save before a boss attempt.
- Use the laboratory to review captured ghosts, portraits, and treasure.
- Do not treat a laboratory return as a substitute for Toad saves.
- Reload the latest manual save after defeat.
Manage health and treasure
Luigi’s health is displayed during play, with a normal maximum of 100. Hearts restore health, so collect them before entering a dangerous room or attempting a difficult capture. When a ghost grabs Luigi, rapidly move the Control Stick and C Stick to break free and regain control.
Coins, bills, gold bars, and jewels are hidden in furniture, containers, fixtures, and other objects. Vacuum suspicious items and collect scattered treasure promptly. Treasure is recorded during laboratory processing and contributes to the game’s final evaluation, making safe-room exploration worthwhile even when it is not required for story progress.
For an efficient first run, use the map to handle required keys and rooms before making broad optional treasure sweeps. Once a room is safe and lit, revisit it for money or Boo hunting. This prevents optional searches from interrupting the route to the next required objective.
- Collect hearts before dangerous encounters.
- Shake free when a ghost grabs Luigi.
- Vacuum furniture and fixtures for treasure.
- Prioritize keys and required rooms before optional collection sweeps.
Before you move on
- You can identify the original GameCube controls: Control Stick for movement, C Stick for aiming, R for suction, L for elemental discharge, A for actions, B for turning off the flashlight, X for Search Mode, Y for the map, and Z for the item list.
- You can capture an ordinary ghost by exposing its heart with the flashlight, holding R, and counter-steering against its escape direction.
- You know that fire, water, and ice require the appropriate medal and a collected elemental supply before L can discharge them.
- You can use Search Mode to inspect objects, the map to find key destinations, and the item list to review valuables and captured ghosts.
- You can interpret blue, yellow, and red Boo Radar states and know that the radar may detect decoys.
- You have manually saved by speaking to Toad and understand that the laboratory is a post-boss processing and review point rather than a replacement for ordinary saves.
References for this chapter
- Luigi’s Mansion Instruction Booklet — controls, flashlight, Poltergust 3000, Game Boy Horror, elements, and saving
- Luigi's Mansion - Guide and Walkthrough - GameCube - By Alxs
- Luigi's Mansion — Guide and Walkthrough, GameFAQs, GameCube, Kodos86
- Luigi’s Mansion — GameFAQs guide and walkthrough by TSawyers
Foyer, Professor E. Gadd and the first steps
Complete the opening sequence, receive the Poltergust 3000 and Game Boy Horror, return to the mansion, help Toad in the Foyer, and establish the first save. Then clear the Parlor, Anteroom and Wardrobe Room, collect both early keys, and use the Balcony Toad as a second checkpoint before beginning the Study route.
Trigger the laboratory sequence
After the opening scenes, Luigi begins in the mansion Foyer without his ghost-catching equipment. Walk up either side of the central staircase and try the doors at the top. They are locked. A short scene follows, and a ghost drops a key at the bottom of the stairs. Go downstairs, pick up the key, then return to the upper landing and use it on the double doors.
Enter the Parlor. Luigi encounters a ghost, and Professor E. Gadd appears to help. The encounter sends Luigi and E. Gadd to the laboratory. This sequence is required; the mansion cannot be explored normally until Luigi receives E. Gadd’s equipment.
- Try the locked doors at the top of the Foyer stairs.
- Return to the bottom of the stairs and collect the dropped key.
- Use the key on the upper double doors.
- Finish the scene that sends Luigi to E. Gadd’s laboratory.
Complete E. Gadd’s training
Speak with E. Gadd and complete the training course. The original Nintendo GameCube release uses a regular flashlight, not the Strobulb from later Luigi’s Mansion games. Aim the flashlight at a ghost and flash it when the ghost is facing Luigi. A successful flash exposes the ghost’s heart and creates the capture opportunity.
Hold R to operate the Poltergust 3000, then pull the Control Stick opposite the direction the ghost is trying to escape. Keep Luigi positioned so the vacuum nozzle stays aimed at the ghost. If the ghost moves behind Luigi, release R, turn to face it, and wait for another flashlight opening instead of continuing to vacuum in the wrong direction.
The controls taught here remain the foundation of the campaign. B turns the flashlight off and on, R starts suction, and L expels whatever elemental power has been collected. Luigi has not collected fire, water or ice yet, so L has no elemental attack available during this opening section. The C Stick aims the flashlight or Poltergust, while the Game Boy Horror provides the map and other search functions.
The Game Boy Horror is not a general pause menu. Use it when you need to inspect the map, search an object or check the mansion’s information. E. Gadd can let you repeat the training later if you need more practice.
- Flash a training ghost with the ordinary flashlight.
- Hold R to vacuum after the heart is exposed.
- Pull opposite the ghost’s escape direction.
- Remember that L expels stored elements and is not the flashlight button.
- Open the Game Boy Horror and check the map before leaving the lab.
Return from the lab
When training is complete, E. Gadd offers access to the Gallery. The Gallery is optional and does not advance Area 1. Visit it if desired, then return to the laboratory and speak with E. Gadd to choose the mansion option.
Luigi returns to the Foyer equipped with the Poltergust 3000, ordinary flashlight and Game Boy Horror. From this point onward, the mansion becomes the main playable area.
- Finish E. Gadd’s training course.
- Visit the Gallery only if desired.
- Return to the lab and choose to go to the mansion.
Help Toad and create the first save
Toad is standing on the left side of the dark Foyer. Speak with him and agree to help find Mario. The Foyer lights come back on after the conversation. Speak with Toad a second time once the conversation has ended; this follow-up interaction provides the Save option.
Save immediately. Toads are manual save points, and this first save prevents the opening sequence from needing to be repeated after a defeat. Later Toads provide additional checkpoints, but the lab’s post-boss return is not a substitute for saving with Toad during normal exploration.
The mirror covering in the Foyer can be removed with the Poltergust. Searching the mirror with the Game Boy Horror can later return Luigi to the Foyer, making it a useful shortcut. This is optional and is not required to open the next room.
- Speak with Toad until the Foyer lights turn on.
- Speak with Toad again and select Save.
- Confirm that the save has completed.
- Remove the Foyer mirror covering if you want the early practice and optional reward.
Collect the upper Foyer treasure
Walk up the central staircase and collect the eight Gold Coins spread across the upper landing. They are directly on the route and are safe to collect before entering the Parlor. Money contributes to the final treasure total, so collect obvious treasure when it does not interrupt progression.
Use the Game Boy Horror map if you need to confirm the room layout. Enter the Parlor through the upper door.
- Collect the eight Gold Coins on the upper Foyer landing.
- Check the map if necessary.
- Enter the Parlor.
Clear the Parlor and Anteroom
In the Parlor, use the Poltergust to extinguish the six candles near the back of the room. The portraits react, and three orange ghosts appear one at a time. Flash each ghost with the ordinary flashlight, then hold R and pull against its escape direction until it is captured. When all three are gone, the room lights up and a chest appears. Open the chest and take the key.
Use the key on the door indicated by the Game Boy Horror map. This leads to the Anteroom. Defeat the ghosts there, including the pink ghosts, which have more health than the first orange ghosts. Keep moving, watch for attacks from behind, and reset Luigi’s position before attempting another flashlight opening. The Anteroom has no progression key; once it is cleared, use the left-hand exit to reach the Wardrobe Room.
- Extinguish all six Parlor candles.
- Capture all three Parlor ghosts.
- Open the chest and take the Parlor key.
- Clear the Anteroom.
- Leave through the Anteroom’s left-hand door.
Clear the Wardrobe Room and reach the Balcony
The Wardrobe Room contains orange and green ghosts, including a green ghost that drops banana peels. Capture every ghost in the room and avoid the peels, since slipping can cost health and money. Check the wardrobes if no further ghosts appear; one of them contains an additional ghost encounter.
After the room is cleared, use the Poltergust to pull the key down from the top of the clothes rack. This is the Wardrobe Room key, and it opens the locked upper-level door in the Foyer. It does not unlock the Balcony door.
Before returning to the Foyer, take the unlocked door on the left side of the Wardrobe Room to reach the Balcony. Speak with Toad there and choose Save. This is the second useful checkpoint for the opening route. After saving, return through the Wardrobe Room, Anteroom and Parlor to the Foyer. Use the Wardrobe Room key on the locked door near the stairs to begin the Study route.
- Capture every ghost in the Wardrobe Room.
- Avoid or vacuum up banana peels.
- Pull the key from the clothes rack.
- Enter the Balcony through the unlocked left-hand door.
- Speak with Toad and save.
- Return to the Foyer and use the Wardrobe Room key on the upper locked door.
Before you move on
- The opening Foyer key has been collected and used on the upper double doors.
- Luigi has completed E. Gadd’s training and returned to the mansion with the Poltergust 3000, ordinary flashlight and Game Boy Horror.
- The Foyer is lit, Toad has been spoken to twice, and a manual save has been completed.
- The eight Gold Coins on the upper Foyer landing have been collected or deliberately left for later.
- The Parlor candles have been extinguished, all three Parlor ghosts have been captured, and the Parlor key has been taken from the chest.
- The Anteroom has been cleared without expecting a key from it.
- The Wardrobe Room has been cleared, the clothes-rack key has been collected, and the Balcony has been visited.
- Toad on the Balcony has been used as a save checkpoint.
- Luigi is ready to return to the Foyer and unlock the door leading toward the Study.
References for this chapter
- Luigi's Mansion - Guide and Walkthrough - GameCube - By Alxs
- Luigi's Mansion Guide and Walkthrough — GameFAQs, Boo capture and radar behavior
- Luigi’s Mansion Guide and Walkthrough — GameFAQs, FAQ 33128
- Luigi's Mansion Guide and Walkthrough — GameFAQs, Storage Room and Boo Radar
- Luigi’s Mansion — Retro Game Walkthroughs
Area 1 — Rooms, keys and the first boss (Chauncey)
Area 1 follows a fixed route through the Parlor, Anteroom, Wardrobe Room, Balcony, Study, Master Bedroom and Nursery. Clear the opening rooms to obtain the Wardrobe Room key, save with Toad on the Balcony, capture Neville and Lydia, then defeat Chauncey in the Nursery. The large chest after the boss contains the key that opens Area 2.
1. Save in the Foyer and clear the Parlor
After returning from Professor E. Gadd’s training, speak with Toad in the Foyer. Answer him so the lights come on, then speak with him again to use the save option. This is the first manual save point of the mansion section.
Go upstairs and enter the double doors at the top of the staircase. This is the Parlor. Six candles are burning along the central counter. Use the Poltergust 3000 to blow out all six candles. Do not use the flashlight for this task.
The portraits will speak and a group of ordinary ghosts will appear. Face each ghost and use the ordinary flashlight when its heart is exposed, then hold the Poltergust stream on it. Clear every ghost. The lights return and a chest appears. Open the chest to obtain the key that opens the Parlor door on the right side.
- Speak with Toad in the Foyer and save.
- Blow out all six Parlor candles with the Poltergust.
- Capture every ghost that appears.
- Open the Parlor chest and take its key.
2. Clear the Anteroom and Wardrobe Room
Use the Parlor key on the door to the right. This leads to the Anteroom. Ghosts appear as soon as you enter, and the doors remain blocked until the room is cleared. Capture all of them with the ordinary flashlight followed by the Poltergust.
The Anteroom contains no progression key. When its ghosts are gone and the lights return, leave through the door on the left wall. This leads directly into the Wardrobe Room.
Defeat the ghosts already present in the Wardrobe Room, then inspect the wardrobes and cabinets to reveal any additional enemies. Some ghosts can leave banana peels behind; avoid stepping on them because they make Luigi slip and can cost health and money. Clear every ghost in the room.
When the Wardrobe Room is cleared, a key appears on top of the clothes rack. Aim the Poltergust upward and vacuum the key down. This is the key needed to reach the next section of the second floor.
- Clear every ghost in the Anteroom.
- Do not search the Anteroom for a progression key.
- Enter the Wardrobe Room through its left-side door.
- Search the wardrobes and capture the additional ghosts.
- Vacuum the key from the top of the clothes rack.
3. Visit Toad on the Balcony and save
Leave the Wardrobe Room through the next door to reach the Balcony. Toad is waiting there. Speak with him to light the area, then use him as a save point. Save here before attempting the portrait ghosts.
Return through the Wardrobe Room, Anteroom and Parlor to the second-floor hallway. Use the Wardrobe Room key on the door that E. Gadd identifies. When you approach the area, E. Gadd warns that the ghosts ahead are harder to expose.
The hallway contains a tempting trail of coins leading toward a false door. Do not open that door. It is not a real room entrance and damages Luigi. Enter the real door directly ahead from the hallway entrance to reach the Study.
- Reach the Balcony.
- Speak with Toad and save.
- Return through the cleared rooms.
- Use the Wardrobe Room key on the second-floor hallway door.
- Ignore the coin-trail false door.
4. Capture Neville in the Study
Neville is sitting in a rocking chair in the Study. He disappears when Luigi looks directly at him, so turn Luigi away and wait for Neville to reappear. When Neville yawns, his heart is exposed briefly.
Turn toward him immediately and shine the ordinary flashlight at him. Once he is stunned, hold the Poltergust on him and keep Luigi positioned so the suction remains attached while Neville pulls away. Neville has 100 HP, so the capture may require more than one opening.
After Neville is captured, a chest appears. Open it to obtain the key for the Master Bedroom. Hearts and pearls can be collected if needed, but they are optional to the required route.
- Turn away from Neville so he reappears.
- Wait for his yawn.
- Use the ordinary flashlight during the yawn.
- Vacuum Neville until he is captured.
- Open the Study chest and take the key.
5. Defeat Lydia in the Master Bedroom
Return to the hallway and use the Study key on the door at the far end. This leads to the Master Bedroom, where Lydia is seated near the dressing area.
Use the Poltergust on the curtains at the window to pull them aside. The resulting draft disturbs Lydia. When she reacts to the breeze and her heart becomes exposed, turn toward her, use the ordinary flashlight and begin vacuuming.
Keep the suction attached while Lydia pulls away. If the connection breaks, reposition Luigi and wait for the next draft reaction rather than trying to vacuum her while her heart is hidden. When Lydia is captured, a chest appears with the key to the Nursery.
- Enter the Master Bedroom with the Study key.
- Pull the curtains away from the window.
- Flash Lydia when the draft exposes her heart.
- Capture Lydia.
- Open the chest and take the Nursery key.
6. Trigger and defeat Chauncey
Use the Nursery key on the nearby door. Before starting the encounter, search the dresser for a large heart if Luigi needs health. Then vacuum the rocking horse until Chauncey appears.
A ball lies near the crib. Vacuum it into the Poltergust, aim at Chauncey and release the vacuum button to fire the ball. This starts the boss battle and shrinks Luigi into the crib arena.
Chauncey has 100 HP. At the beginning of each cycle, he launches two rocking horses. Wait for each horse to commit to its path, then move aside. Afterward, baby balls bounce around the crib. Most leave the arena; when only one remains, vacuum that ball and fire it at Chauncey.
The hit stuns Chauncey and exposes his heart. Hold the Poltergust on him immediately. Pull against his movement while draining his HP, but release and reposition if the suction breaks or Chauncey’s movement would carry Luigi into danger. Repeat the rocking-horse, remaining-ball and suction sequence until his HP reaches zero.
- Vacuum the rocking horse to trigger Chauncey.
- Fire the nearby ball at him before entering the crib battle.
- Dodge the two rocking horses in each cycle.
- Vacuum and fire the single remaining crib ball.
- Vacuum Chauncey only while his heart is exposed.
- Repeat until Chauncey is captured.
7. Collect the Area 2 key and finish Area 1
After Chauncey is captured, Luigi returns to the Nursery. A large golden chest appears. Open it to obtain the key for Area 2.
E. Gadd then contacts Luigi and automatically returns him to the laboratory. The three Area 1 portrait ghosts are processed into paintings, the area’s money is totaled and the laboratory provides an opportunity to save. Save before returning to the mansion.
Back in the Foyer, approach the thorn-covered entrance to Area 2 and use Chauncey’s key. The thorns disappear and the door can be unlocked.
Area 1 is complete when the Parlor, Anteroom, Wardrobe Room, Study, Master Bedroom and Nursery have been cleared, Neville, Lydia and Chauncey have been captured, the large post-boss chest has been opened, the laboratory sequence has finished and the Area 2 entrance is accessible.
- Open the post-Chauncey golden chest.
- Take the Area 2 key.
- Allow the automatic return to E. Gadd’s laboratory.
- Save in the laboratory.
- Return to the mansion and unlock the thorn-covered Area 2 entrance.
Before you move on
- The Parlor, Anteroom and Wardrobe Room are cleared.
- The Wardrobe Room key was vacuumed from the clothes rack.
- Toad on the Balcony was visited and used to save.
- Neville was captured in the Study.
- Lydia was captured in the Master Bedroom.
- Chauncey was triggered through the rocking horse and captured after repeated crib-ball attacks.
- The large post-boss chest was opened and the Area 2 key was collected.
- The laboratory processed the Area 1 portrait ghosts and Luigi returned to the mansion with the Area 2 entrance unlocked.
Area 2 — Clearing the mid-mansion, releasing the Boos
Area 2 begins after Chauncey's defeat and introduces the mansion's Boo hunt, elemental puzzles and more involved portrait-ghost encounters. The required route runs through the Bathroom, Ball Room, Storage Room, Washroom, Fortune-Teller's Room, Mirror Room, Laundry Room, Butler's Room, Conservatory, Kitchen, Boneyard and Graveyard. The Dining Room and Hidden Room are optional for direct story progress, but both are valuable for treasure and portrait completion. Use the GameCube's ordinary flashlight for normal ghost captures; the L button only expels stored Fire or Water Element.
Enter Area 2 and collect the Bathroom key
After Chauncey sends Luigi back to Professor E. Gadd's lab, return to the mansion and approach the large thorn-covered door in the Foyer. Wait for the thorns to withdraw, then unlock the door with the Area 2 key. Follow the hallway to the first-floor Bathroom, using the Game Boy Horror map if the corridors are confusing.
Two grabbing ghosts attack inside. Keep moving so they cannot seize Luigi, turn toward a ghost when its heart is exposed and use the ordinary flashlight to stun it. Immediately hold R to begin suction, then counter its movement with the Control Stick or C Stick until it is captured. When the room is clear, use the Poltergust on the key near the shower curtain. Open the map and identify the locked Ball Room door that matches the key.
- Unlock the thorn-covered Area 2 door.
- Defeat both grabbing ghosts in the Bathroom.
- Vacuum the key near the shower curtain.
Clear the Ball Room and open the Storage Room
Use the Bathroom key on the Ball Room. The Shy Guys here carry masks, so hold R on a mask to pull it away before trying to stun the exposed ghost with the flashlight. If a maskless Shy Guy disappears, it will return wearing its mask; remove the mask again before attempting another capture.
The next encounter is against the Floating Whirlindas. At first they appear as moving points of light. Walk into the sparkling points to make the ghosts materialize. When they bow, turn toward one and use the flashlight, then vacuum it immediately. Capture both to make a chest appear and take the Storage Room key.
Enter the Storage Room and clear its ghosts. Once the lights are on, examine the wall opposite the mirror and press the button hidden against it. The wall slides back, exposing more of the room. Pull the poster marked Danger from the opposite wall with the Poltergust, then press the second button behind it. The floor hatch opens and the mansion's Boos escape. Professor E. Gadd calls Luigi to the lab and explains the Game Boy Horror's Boo Radar.
- Remove each Shy Guy's mask before using the flashlight.
- Make the Floating Whirlindas materialize before stunning them.
- Press both Storage Room buttons and trigger the Boo release.
Capture five Boos and open the Washroom
Return to the mansion after E. Gadd's Boo briefing. Boos hide in rooms that have already been cleared and lit. Use the Game Boy Horror's Boo Radar while searching furniture and other objects. Blue means no Boo is in the room, yellow means a Boo is nearby and red means Luigi is very close. Examine nearby objects with A when the radar turns red.
Boos are not captured with the ordinary flashlight. Keep R held on the Boo and use movement to maintain the suction stream as it tries to escape. If it leaves the room, follow it through the connected halls when possible, then continue searching once the radar detects it again. Capture at least five regular Boos. Additional captures are optional at this point but reduce later backtracking.
After the fifth Boo is captured, the first-floor Washroom beside the Bathroom becomes available. Enter and speak with Toad. Choose the save option before leaving. Then examine the toilet to retrieve the key inside. Check the map to locate the Fortune-Teller's Room door opened by this key.
- Sweep previously cleared rooms with the Boo Radar.
- Capture at least five regular Boos.
- Save with Toad in the Washroom.
- Examine the toilet and take the Fortune-Teller's Room key.
Get Fire Element in the Mirror Room
Enter the Fortune-Teller's Room. Madame Clairvoya is present, but she is not required yet; leave her for the later Mario-item sequence. Use the door on the right to enter the Mirror Room. The exit becomes covered in thorns, trapping Luigi inside.
The ghosts in the Mirror Room are invisible in the normal view, but their reflections appear in the large mirror. Watch the reflection to determine where each ghost is approaching from, turn toward it and use the ordinary flashlight when its heart is exposed. Capture all of them to make a chest appear.
Open the chest to receive the Fire Element Medal. Suck Fire Element from the torch, then press L to expel it onto the candles in the Mirror Room. Lighting the candles removes the thorns from the exit. Return to the Fortune-Teller's Room and light its candles with Fire Element. A key appears on a raised platform; pull it down with R and use the map to locate the Laundry Room door.
- Use the Mirror Room's reflection to locate invisible ghosts.
- Collect the Fire Element Medal.
- Light the Mirror Room candles to remove the thorns.
- Light the Fortune-Teller's Room candles and pull down the revealed key.
Follow Shivers and clear the Hidden Room
Use the new key to enter the Laundry Room. Defeat the ghosts, then examine the washing machine to obtain Mario's Hat. Leave through the correct hallway door; the mansion contains fake doors that are not shown on the map.
In the nearby hallway, find the moving candleholders and use Fire Element on them. Shivers, the candle-carrying butler, appears and runs toward his room. Follow him into the Butler's Room. Wait until he sits on the stool and lowers his head, then use the flashlight and begin suction while his heart is exposed. The chest that appears contains the next progression key.
The Hidden Room is optional but strongly recommended for treasure. In the Butler's Room, use X to enter Search Mode near the toilet-paper stack and examine the mouse hole with A. Return to normal view with B or X, then touch the gust of air to be pulled into the Hidden Room.
Search the chests in the Hidden Room. Some hold treasure and others release Fire Element ghosts. Use Fire Element against those ghosts first to weaken them, then use the ordinary flashlight to expose their hearts and vacuum them. After the room is cleared, collect the treasure chest and search the mouse hole again to return to the Butler's Room.
- Retrieve Mario's Hat from the washing machine.
- Light the hallway candleholders and follow Shivers.
- Capture Shivers while he is seated.
- Use the mouse hole to enter the optional Hidden Room.
- Weaken Hidden Room elemental ghosts with Fire Element before using the flashlight and vacuum.
Capture Melody and pass through the Dining Room
Proceed to the Conservatory after clearing the Butler's Room. Touch the musical instruments other than the piano so they play. Then approach the piano to summon Melody Pianissima.
Melody plays a tune and asks which game or subject it is associated with. The answer depends on the tune she chooses. Select Super Mario Bros. 3 when that option matches the melody; choose Water when the question and answer choices identify the water-related tune. A wrong answer prevents the battle from starting, so listen to the presented choices rather than selecting automatically.
Melody then attacks with flying music sheets. Hold R to vacuum the sheets while keeping Luigi moving to avoid damage. Once the sheets are gone, her heart is exposed. Use the ordinary flashlight and vacuum her. Her chest contains the key that opens the Dining Room.
The Dining Room encounter with Mr. Luggs is optional for the shortest story route, but it provides valuable treasure and portrait progress. Light the table candles with Fire Element to make him appear. Vacuum the food from his plate. When serving ghosts replace it, capture or stun them and continue removing the food. Once the plate is empty, Mr. Luggs throws fireballs. Evade them until he pauses, then stun and vacuum him. You may then continue through the Dining Room toward the Kitchen.
- Activate the Conservatory instruments before approaching the piano.
- Choose Melody's answer according to the tune presented.
- Vacuum the music sheets before stunning Melody.
- Treat Mr. Luggs as optional treasure and portrait progress.
Obtain Water Element and enter the Boneyard
In the Kitchen, use R to open the refrigerator rather than A; opening it normally can make the door strike Luigi. A Fire Element ghost emerges. Use Fire Element against it, then use the ordinary flashlight to expose its heart and capture it. The chest that appears contains the Water Element Medal.
Collect Water Element from the sink. Press L to expel it on the flames blocking the exit to the Boneyard. If you need health before the boss, return through cleared rooms and search for hearts rather than entering the Graveyard while badly injured.
In the Boneyard, use Water Element on Spooky's bowl or spray Spooky directly to provoke him. Keep away from the charging dog until Mr. Bones emerges. Capture Mr. Bones with the ordinary flashlight and Poltergust. A bone drops when he is defeated. Wait for Spooky to start licking it, then flash and vacuum the dog while his heart is exposed.
Use X to enter Search Mode at the doghouse and examine its entrance with A. Return to normal view and approach the resulting gust of air to enter the Graveyard.
- Defeat the refrigerator's Fire Element ghost with Fire Element.
- Collect the Water Element Medal.
- Fill or spray Spooky's bowl with Water Element.
- Capture Mr. Bones, then capture Spooky while he licks the dropped bone.
- Search the doghouse to reach the Graveyard.
Defeat the Graveyard ghosts and Bogmire
Examine one of the central gravestones to summon several Mr. Bones ghosts. Capture all of them with the normal flashlight-and-vacuum method. Other gravestones can provide hearts if Luigi needs recovery. Once the group is defeated, one gravestone begins to glow. Approach it to trigger the Bogmire battle.
Bogmire's purple form is the real boss, while black shadow copies move around the arena. Do not try to vacuum the purple form immediately. First hold R on one of the black copies until a shadow ball forms at the end of the Poltergust. Press L to fire the shadow ball at the purple Bogmire.
The hit covers Bogmire in darkness and creates the capture window. Hold R on the darkened boss and pull against its movement until the suction ends. Bogmire then becomes intangible again, so repeat the sequence: absorb a shadow copy, fire the shadow ball at the purple form, then vacuum while it is covered. Keep moving around the arena to avoid charges and do not remain between the boss and the shadow copies.
When Bogmire is captured, open the chest to obtain the Area 3 key. E. Gadd returns Luigi to the lab, where the captured ghosts are processed and the area's money is totaled. Save before choosing to return to the mansion. The Area 3 key opens the next thorn-covered route near the Area 2 hallway.
- Clear the Graveyard's Mr. Bones encounter.
- Use a black shadow copy to create a shadow ball.
- Fire the shadow ball at the purple Bogmire.
- Vacuum Bogmire only while he is covered in darkness.
- Take the Area 3 key and save at E. Gadd's lab.
Before you move on
- The Storage Room trapdoor has been opened and E. Gadd has explained the Boo Radar.
- At least five regular Boos have been captured and the first-floor Washroom is accessible.
- The Fire Element Medal and Water Element Medal have been obtained.
- Shivers and Melody Pianissima have been captured.
- Spooky has been captured and the doghouse route to the Graveyard has been opened.
- Bogmire has been defeated and the Area 3 key is in Luigi's possession.
- Luigi has returned to E. Gadd's lab and a manual save has been made.
Area 3 — Portrait ghosts, puzzle rooms and the Boolossus setup
Area 3 begins at the thorn-covered door near the Area 2 Bathroom. Mario’s Hat was obtained earlier in Area 2. In this area, collect Mario’s Letter from the Courtyard birdhouse, then recover Mario’s Star, Glove and Shoe. The route passes through the Courtyard, Bottom of the Well, Rec Room, Tea Room, Astral Hall, Observatory, Washroom, Bathroom, Nana’s Room, Billiards Room, Projection Room, Twins’ Room, Fortune-teller’s Room and Safari Room. After showing all five of Mario’s items to Madame Clairvoya, collect the Balcony key, capture at least 20 regular Boos and defeat Boolossus. The Rec Room treadmill key opens a useful shortcut but is optional.
1. Enter Area 3, collect Mario’s Letter and save with Toad
After defeating Bogmire and returning from Professor E. Gadd’s lab, go back through the mansion to the thorn-covered door near the Area 2 Bathroom. Approach it with Bogmire’s key and enter the Courtyard.
Walk right past the well and inspect the birdhouse. It contains Mario’s Letter. Then climb down the nearby well. At the Bottom of the Well, walk right until the scene showing Mario trapped in a painting ends. A ghost appears near the ladder. Capture it with the ordinary flashlight and Poltergust 3000; it has no meaningful resistance. Take the key that appears and climb back up.
Continue right through the Courtyard to the small wooden shack. Open it and speak with Toad. He identifies the five required items as Mario’s Hat, Letter, Star, Glove and Shoe. The Hat was collected earlier in Area 2, and the Letter has just been recovered. The three items still needed are the Star, Glove and Shoe. Speak with Toad again to use the save option. Use the nearby key from the Bottom of the Well to enter the Rec Room.
- Open the thorn-covered Area 3 door with Bogmire’s key.
- Collect Mario’s Letter from the Courtyard birdhouse.
- Defeat the Bottom of the Well ghost and take its key.
- Confirm that Mario’s Hat was obtained in Area 2.
- Speak with Toad and save before proceeding.
2. Defeat Biff Atlas and collect the optional shortcut key
Biff Atlas is lifting weights in the Rec Room. Stand near the punching bag and strike it so the bag hits him. The first hit makes him angry. Hit him two more times; after the third hit he falls over and becomes vulnerable to the ordinary flashlight. Stun him and vacuum him. If he escapes, one later punching-bag hit is enough to knock him down again.
The chest that appears after Biff Atlas is captured contains money, not a progression key. To obtain the optional shortcut key, walk onto the treadmill at the far left of the Rec Room. The key appears after Luigi uses it. This key opens a shortcut between the Area 2 side of the mansion and the Area 3 hallway, but it is not required for the campaign.
Leave through the other Rec Room door. If you collected the treadmill key, use it on the nearby shortcut door. Otherwise, continue to the stairs and go up. A door is blocked by fire. Go to the Kitchen, collect Water Element, and use it on the flames. Enter the Tea Room.
- Use the punching bag to expose Biff Atlas’s heart.
- Take the money chest after capturing Biff Atlas.
- Use the treadmill if you want the optional shortcut key.
- Collect Water Element and extinguish the fire blocking the Tea Room.
3. Collect the Ice Element Medal and recover Mario’s Star
Clear the two ghosts in the Tea Room to light the room. A chest appears on the table, but Luigi cannot reach it from the floor. Use the ceiling panel on the right side, cross the ceiling and drop onto the table. Open the chest to obtain the Ice Element Medal. Leave the room after collecting it.
Return with Fire Element and enter the Astral Hall. Light the candles surrounding the central circle, then step into the circle to begin the encounter. Remove Shyguys’ masks with the Poltergust, expose them with the ordinary flashlight and vacuum them. Capture the remaining ghosts using their normal openings. When the room is clear, the lights come on and the next door opens.
Enter the Observatory and examine the telescope. Luigi is taken outside above the mansion. Vacuum one of the falling stars and fire it at the moon. Repeat until the moon is struck. A path appears; cross it and collect Mario’s Star, then return to the hallway.
- Collect the Ice Element Medal from the Tea Room chest.
- Light the Astral Hall candles with Fire Element.
- Remove Shyguy masks before exposing and capturing them.
- Strike the moon with a vacuumed star and collect Mario’s Star.
4. Clear the Washroom, defeat Miss Petunia and capture Nana
From the hallway, enter the Washroom and collect Water Element from the sink. Examine the toilet to start the elemental ghost encounter. Use Water Element to remove its elemental protection, then vacuum it. The chest contains money.
Refill with Fire Element before returning to the fire-door route. Enter the Bathroom and pull back the curtain with the Poltergust to reveal Miss Petunia. Expel Ice Element at her to freeze and stun her, then vacuum her. The chest contains the Billiards Room Key. Do not spend time searching for a different route key; this is the key required to enter the first-floor Billiards Room.
Enter Nana’s Room from the nearby hallway and examine the yarn basket. Vacuum one yarn ball and fire it at Nana. Repeat until all three yarn balls have hit her. Each hit makes her movement and attacks more troublesome, so keep moving around the room. After the third hit she becomes vulnerable to the ordinary flashlight and Poltergust. If she disappears, leave and re-enter the room to reset the encounter. Capture her and open the chest for the Twins Room Key.
- Clear the Washroom’s Water Element ghost.
- Freeze and capture Miss Petunia with Ice Element.
- Use Miss Petunia’s chest key to enter the Billiards Room later.
- Hit Nana with all three yarn balls.
- Capture Nana and take the Twins Room Key.
5. Use the Billiards Room Key, recover Mario’s Glove and enter the Twins’ Room
Use the Billiards Room Key from Miss Petunia’s chest to enter the first-floor Billiards Room. Slim Bankshot fires pool balls at Luigi. Vacuum a ball and fire it back at Slim. Hit him three times; he then becomes vulnerable. Stun him with the ordinary flashlight and vacuum him.
Enter the Projection Room through the door on the right. Examine the projector to make invisible ghosts appear. Their shadows are visible on the projection screen, so use the shadows to locate them and capture them all. The chest contains Mario’s Glove.
Return to the corridor near Chauncey’s former room and use Nana’s chest key, the Twins Room Key, on the door to the Twins’ Room. Start the model airplanes by vacuuming one and moving so both rotate in the same direction. Leave while the twins hide, then return and vacuum the boxes. Check the boxes that rattle to find both twins.
After both twins are found, they attack using an airplane and a truck. Vacuum each vehicle to expose the twin riding it, then capture that twin. When both are defeated, open the chest for Mario’s Shoe.
- Use Miss Petunia’s Billiards Room Key to enter the first-floor Billiards Room.
- Defeat Slim Bankshot by returning three pool balls.
- Clear the Projection Room and take Mario’s Glove.
- Use Nana’s Twins Room Key to enter the Twins’ Room.
- Find both twins in the rattling boxes and capture them.
- Take Mario’s Shoe from the Twins’ Room chest.
6. Show all five items to Madame Clairvoya and clear the Safari Room
Return to the Fortune-teller’s Room and shine the ordinary flashlight on the crystal ball. Speak with Madame Clairvoya repeatedly. Show her Mario’s Hat, Letter, Star, Glove and Shoe. The Hat is the earlier Area 2 item; the other four have been gathered during this route. After all five readings, she asks to be captured. Stun her with the ordinary flashlight and vacuum her. Take the key from the chest.
Use Madame Clairvoya’s key to reach the third-floor Safari Room. Examine the mounted deer heads with the Poltergust to begin the encounter. The room contains ordinary green ghosts that drop banana peels and elemental ghosts. Capture the ordinary ghosts with the ordinary flashlight. Use the appropriate stored element against each elemental ghost before attempting to vacuum it. Keep moving so banana peels and simultaneous attacks do not trap Luigi.
When every ghost is captured, the room lights and a chest appears. Open it for the Balcony key. A large heart is available in the Safari Room’s leather purse, so restore Luigi’s health if necessary before leaving.
- Show Madame Clairvoya Mario’s Hat, Letter, Star, Glove and Shoe.
- Capture Madame Clairvoya and take her key.
- Trigger the Safari Room encounter by examining the deer heads.
- Use ordinary flashlight tactics for ordinary ghosts and the matching element for elemental ghosts.
- Take the Balcony key from the cleared Safari Room.
7. Reach the Balcony and capture Boolossus
Before attempting the Balcony, check the Boo counter. The North American GameCube release requires at least 20 captured regular Boos to enter. If the counter is lower, search lit rooms with the Game Boy Horror and capture enough Boos to meet the requirement. Save with Toad before taking the boss route.
Use the map to reach the third-floor Balcony and approach the circle of Boos. The Boos combine into Boolossus. Get behind the giant Boo and begin vacuuming while steering it toward the pointed horn of a unicorn statue. The horn bursts Boolossus apart into 15 smaller Boos.
Collect Ice Element from the Balcony’s elemental source. Expel Ice Element at an individual Boo to freeze it, then vacuum the frozen target before it thaws. Release the Poltergust and reposition whenever a Boo escapes the capture window. Avoid corners and keep enough open space to line up the next freeze.
When the remaining Boos regroup into a larger form, repeat the vacuum-and-unicorn procedure to separate them again. Continue freezing and capturing the components until all 15 have been taken. The 15 Boolossus components count toward the game’s 50 regular Boos; they are not an additional group.
After Boolossus is defeated, open the chest to collect the large key that opens Area 4. Professor E. Gadd returns Luigi to the lab for portrait processing and score calculation. Let the processing finish, save there, and choose to return to the mansion when ready.
- Reach at least 20 captured regular Boos before entering the Balcony.
- Save with Toad before the Boolossus attempt.
- Pull Boolossus into a unicorn statue’s horn to split it.
- Freeze separated Boos with Ice Element.
- Capture all 15 Boolossus components.
- Take the large Area 4 key and save after returning to E. Gadd’s lab.
Before you move on
- The thorn-covered Area 3 door is open and the Courtyard, Bottom of the Well and Rec Room sequence is complete.
- Mario’s Letter has been collected from the Courtyard birdhouse.
- Mario’s Hat is already recorded from Area 2; Mario’s Star, Glove and Shoe have been collected in Area 3.
- The Billiards Room was entered with Miss Petunia’s Billiards Room Key.
- The Twins’ Room was entered with Nana’s Twins Room Key.
- Biff Atlas, Miss Petunia, Nana, Slim Bankshot, both twins and Madame Clairvoya have been captured.
- The Tea Room’s Ice Element Medal, Astral Hall encounter and Observatory moon puzzle are complete.
- The Safari Room is cleared and its Balcony key is in the inventory.
- The Boo counter reached at least 20 before entering the Balcony.
- Boolossus has been split and all 15 component Boos have been captured.
- The Area 4 key is in Luigi’s inventory and the game has returned Luigi to E. Gadd’s lab for processing and saving.
Boss tactics: Chauncey, Bogmire and preparation for Boolossus
Chauncey, Bogmire, and Boolossus each require a special setup before the Poltergust 3000 can capture them. Chauncey is stunned by returning a ball, Bogmire is made vulnerable by a shadow projectile, and Boolossus must be split against a unicorn statue before its fifteen component Boos can be frozen and vacuumed. Save with Toad before beginning each boss route, because the original GameCube release has no in-arena retry checkpoint.
Use a staged capture rhythm
These bosses do not follow the ordinary ghost routine. Do not waste time trying to expose them with repeated flashlight flashes. First create the boss's vulnerability with the correct object or elemental attack; only then connect the Poltergust 3000 and pull against the boss's movement.
During every suction window, keep the beam attached and use the Control Stick to pull in the opposite direction from the boss. This drains health more effectively and helps prevent an immediate escape. Stop suction when the boss is attacking, reforming, or otherwise no longer vulnerable. Trying to vacuum through an invulnerable animation only exposes Luigi to damage.
Before committing to a boss attempt, speak with a Toad save point and save. The save records progress outside the arena, but it does not create a checkpoint inside the fight. If Luigi is defeated, reload that save and repeat the shortest route back to the boss.
- Save with Toad before the boss route whenever a save point is available.
- Use the boss-specific vulnerability before attempting suction.
- Pull against the boss's movement instead of holding the Control Stick in one direction.
Chauncey: return the usable ball
Chauncey's fight begins after Luigi is reduced to miniature size inside the crib. Keep moving around the arena and avoid the rocking horses that charge across the enclosure. Do not stand directly in front of the boss while waiting for an opening.
After the rocking-horse attacks, balls fall into the crib. One remains available for Luigi to collect with the Poltergust 3000. Catch that ball, aim toward Chauncey, and release it back at him. The returned ball stuns the baby and creates the capture window.
Move to the stunned Chauncey and hold suction on him. Pull opposite his movement until he breaks free. When the stun ends, stop vacuuming immediately and resume circling the crib. Chauncey will return to his attack pattern, so wait for another usable ball and repeat the process until his health is exhausted.
If Luigi is hit, create space before attempting another ball. The rocking horses and falling projectiles are easier to avoid when Luigi is already moving around the outer part of the crib rather than trapped beside the boss.
- Circle the crib and avoid the rocking horses.
- Collect the ball that remains available after the projectile sequence.
- Return the ball to Chauncey to stun him.
- Vacuum only during the resulting opening.
- Repeat the ball-and-suction cycle until Chauncey is captured.
Bogmire: fire a shadow at the real boss
Bogmire appears in the Graveyard after Luigi investigates the large glowing gravestone. The arena contains black shadow forms and the real purple or pink Bogmire. The shadow forms can hurt Luigi, but they are also the ammunition needed to make Bogmire vulnerable.
Use the Poltergust to absorb one of the black shadows. It becomes a shadow ball at the end of the nozzle. Aim at the real Bogmire and release the ball. A successful hit surrounds him with darkness and leaves him solid long enough for the normal suction process.
Connect the Poltergust while Bogmire is solid and pull against his movement. Drain as much health as possible before he escapes or the vulnerability ends. You will usually need several cycles, so disengage when he becomes intangible and immediately return to absorbing another shadow.
Keep Luigi in an open part of the arena. Avoid letting several shadows surround him, and do not confuse a black shadow with the purple or pink boss. If a shot misses, absorb another shadow and try again rather than attempting to vacuum Bogmire while he is intangible.
- Identify the purple or pink Bogmire instead of targeting a black shadow.
- Absorb a black shadow and fire it at the real boss.
- Vacuum only while Bogmire has been made solid.
- Repeat the shadow-ball and suction cycle until capture.
Boolossus: split the fifteen Boos
Boolossus is fought on the third-floor Balcony. In the North American GameCube release, the Balcony battle is inaccessible until Luigi has captured at least 20 regular Boos. If the Boos repel Luigi back toward the mansion entrance, leave the Balcony and capture more Boos elsewhere before returning.
Approach the ring of Boos on the Balcony to begin the fight. When they combine into Boolossus, use the Poltergust to pull and steer the giant Boo toward one of the frozen unicorn statues. Make Boolossus collide with a statue's horn. The impact splits the giant into fifteen separate Boos.
After the split, collect Ice Element from the frozen statue. In the original GameCube controls, expel the stored element with L and aim the freezing stream at an individual Boo. A frozen Boo can then be captured with the regular Poltergust. Work through the group one at a time and avoid direct contact with the unfrozen Boos.
When enough component Boos have escaped or the group reforms, Boolossus returns in a smaller form. Repeat the pull into a unicorn horn, collect more Ice Element, freeze the separated Boos, and vacuum them. The remaining Boos become more difficult to catch as their number falls, so hold a central position and wait for a Boo to approach rather than chasing it across the entire Balcony.
The fight is complete only when all fifteen component Boos have been captured. They are added to the game's regular Boo total. Afterward, open the reward chest to obtain the key that advances the mansion into Area 4; Professor E. Gadd then calls Luigi back to the laboratory.
- Capture at least 20 regular Boos before entering the Balcony battle.
- Pull Boolossus into a unicorn statue's horn.
- Collect Ice Element after the giant Boo splits.
- Freeze each component Boo, then vacuum it before it recovers.
- Repeat the split-and-freeze cycle until all fifteen Boos are captured.
- Open the reward chest and return to the laboratory when called.
Recover from a failed attempt
If Luigi's health reaches zero, reload the latest Toad save. Progress made during a failed arena attempt is not preserved as an in-fight checkpoint. Saving before the route is therefore the fastest way to avoid replaying unnecessary mansion sections.
After reloading, collect nearby hearts if Luigi begins the route with low health. For Chauncey, concentrate on avoiding the rocking horses and returning the usable ball. For Bogmire, secure a shadow before lining up the shot. For Boolossus, verify the Boo counter and avoid exhausting health while chasing the final component Boos.
A boss does not permanently change after a defeat. Correct the specific mistake that caused the failure: attacking during an invulnerable phase, missing the required projectile, entering the Balcony without enough Boos, or allowing the separated Boolossus components to scatter beyond a safe freezing position.
- Reload the latest Toad save after defeat.
- Restore health before retrying if nearby hearts are available.
- Change the failed timing or positioning rather than repeating the same attack.
- Confirm the Boo requirement before another Boolossus attempt.
Before you move on
- Chauncey has been stunned by a returned ball and captured during the following suction window.
- Bogmire has been made solid with shadow projectiles and captured after the final suction cycle.
- Boolossus has been split against a unicorn statue, all fifteen component Boos have been frozen and vacuumed, and the reward chest has been opened.
- The reward chest provides the key that advances the mansion toward Area 4, and Professor E. Gadd calls Luigi back to the laboratory.
- The Boo counter includes the fifteen Boos captured during the Boolossus battle.
References for this chapter
- Luigi's Mansion - Guide and Walkthrough - GameCube - By Alxs
- Luigi’s Mansion Guide and Walkthrough — GameFAQs, FAQ 33128
- Luigi's Mansion Guide and Walkthrough — GameFAQs, Escaped Boo Recovery and Boss Routes
- Luigi's Mansion Guide and Walkthrough — GameFAQs, Hidden Room and Boo Locations
- Nintendo GameCube Instruction Manuals
Area 4 — Final mansion floors, the path to King Boo
After defeating Boolossus, Area 4 begins with a blackout and ends at the Secret Altar. Take the Area Four Key from the Balcony chest, capture Uncle Grimmly in the Wardrobe Room, restore the mansion’s power, and collect the Cellar Key from the Breaker Room. The Cellar then provides the Clockwork Room Key, but the key does not bypass the Telephone Room: return to the third floor, clear the skeleton ghosts there, and use the room’s north door to enter the Clockwork Room. Defeat the Clockwork Soldiers, take the Armoury Key from the Roof’s left chimney, clear the Armoury for the Pipe Room Key, and continue through the Pipe Room, Cold Storage and Artist’s Studio to obtain the Secret Altar Key. The Sealed Room, Sitting Room and Guest Room are optional branches for treasure, portraits and Boos. In the North American GameCube release, at least 40 regular Boos are required to enter the Secret Altar.
1. Open the Area Four door and trigger the blackout
After Boolossus is defeated, open the large chest on the Balcony and take the Area Four Key. Professor E. Gadd brings Luigi back to the laboratory automatically. Save there, then choose to return to the mansion.
Back in the mansion, return to the Balcony where the Boolossus battle occurred. Use the Area Four Key on the thorn-covered door. Lightning strikes the mansion and the lights go out. Ghosts return throughout the darkened rooms, so avoid unnecessary exploration until the power has been restored.
Follow the available route toward the Wardrobe Room on the second floor. The Telephone Room can be visited during the blackout for instructions and optional treasure, but the immediate required objective is finding Uncle Grimmly.
- Take the Area Four Key from the Balcony chest.
- Save at the laboratory before returning to the mansion.
- Use the key on the Balcony door and begin the blackout sequence.
2. Capture Uncle Grimmly and restore the power
Enter the Wardrobe Room on the second floor. Uncle Grimmly stands near the mirror. Turn Luigi’s ordinary flashlight off and face Grimmly. Wait for him to reveal his heart, then turn around, expose him with the flashlight and use the Poltergust 3000 to capture him. If he moves away, repeat this setup rather than trying to vacuum him while his heart is hidden.
A chest appears after the capture. Open it to obtain the Breaker Room Key. Travel to the basement and unlock the Breaker Room. Pull the large switch on the back wall. The mansion lights return, and a new chest appears containing the Cellar Key.
The Boo in the Breaker Room is optional for story progress, but capture it if you are working toward the 50-Boo goal.
- Capture Uncle Grimmly while his heart is exposed.
- Collect the Breaker Room Key from the new chest.
- Pull the breaker switch and collect the Cellar Key.
3. Clear the Cellar and collect the Clockwork Room Key
The Cellar is across the basement hall from the Breaker Room. Enter it and vacuum away the dirt piles blocking the room. Continue along the cleared path until you can reach the barrels on the far side.
Search the barrels to release the ghosts and capture them. Search the room for any additional ghost encounter that appears, including the Cash Ghost if you want its money. When the required ghosts have been captured, the room lights and a chest appears. Open it to obtain the Clockwork Room Key.
The Cellar’s ceiling pads can shorten later trips through the room. The dirt piles return when you leave, so use the pads when available instead of repeating the entire cleanup. Do not assume the Clockwork Room is now directly accessible from the basement; the key must be taken to the third-floor Telephone Room.
- Remove the Cellar dirt piles.
- Defeat the ghosts released from the barrels and clear the required encounter.
- Take the Clockwork Room Key from the Cellar chest.
- Return upstairs with the key.
4. Use the key in the Telephone Room, then enter the Clockwork Room
Use the mansion map to return to the third-floor hallway and enter the Telephone Room. This room is a required part of the Area 4 route after the Cellar; do not go straight to the Clockwork Room from the basement or treat the Cellar Key as opening that room directly.
Open the large chests in the Telephone Room. Some contain treasure, while two release skeleton ghosts. Expose and capture the skeleton ghosts with the ordinary flashlight and Poltergust 3000. When the room is cleared, its lights return and additional treasure becomes available.
Take the door on the north side of the Telephone Room. The Clockwork Room Key opens this route. Enter the Clockwork Room and prepare for the three Clockwork Soldiers.
- Bring the Clockwork Room Key to the third-floor Telephone Room.
- Capture the skeleton ghosts released from the Telephone Room chests.
- Use the north door to enter the Clockwork Room.
5. Capture the Clockwork Soldiers and reach the Roof
Activate the three clocks around the Clockwork Room. This awakens the three Clockwork Soldiers. Their wind-up keys are their weakness, so aim the Poltergust 3000 at a soldier’s spinning key and pull until the key comes loose.
Once a key is removed, the soldier becomes vulnerable. Expose it with the ordinary flashlight and vacuum it before another soldier interrupts. Work on one soldier at a time and reposition Luigi whenever the other two threaten to hit him.
After all three Clockwork Soldiers have been captured, the central toy house opens. Enter it and ride the lift to the Roof.
- Activate all three clocks.
- Pull the wind-up key from each soldier.
- Capture all three soldiers and use the opened toy-house lift.
6. Clear the Roof and take the Armoury Key
Defeat the masked ghosts on the Roof. Remove their masks with the Poltergust 3000, then expose and capture them with the ordinary flashlight. When the ice-based ghosts appear, collect Fire Element from the roof fire and use it against them.
After the Roof encounter is cleared, climb the ladder at the left chimney. Open the chest at the top and take the Armoury Key. This is the direct key route to the Armoury; the Sealed Room is not required for this key.
The right chimney leads to the Sealed Room. That room is optional and contains treasure, ghosts, a Boo and a key for another optional branch. The Sitting Room and Guest Room are likewise optional for the main story.
- Use Fire Element against the ice-based Roof ghosts.
- Climb the left chimney after the Roof is cleared.
- Take the Armoury Key from the chest.
- Do not confuse the optional right-chimney branch with the required Armoury route.
7. Clear the Armoury and collect the Pipe Room Key
Return from the Roof through the Clockwork Room and Telephone Room to the third-floor Area Four hallway. Use the Armoury Key on the Armoury door.
Search the suits of armour and wooden chests from a safe angle. Some objects release ghosts or hazards, so stand to the side before checking them and be ready to move away from falling weapons. Capture every ghost required in the room. When the lights return, open the appearing chest to obtain the Pipe Room Key.
The Ceramics Studio and its portrait ghost Jarvis are optional. They provide treasure and a portrait opportunity, but they are not needed for the Pipe Room or the final route.
- Use the Armoury Key directly on the Armoury.
- Defeat the ghosts released by the armour and chests.
- Collect the Pipe Room Key from the cleared-room chest.
8. Use the Pipe Room and defeat Sir Weston in Cold Storage
Return to the basement and use the Pipe Room Key on the basement door. Clear the ghosts in the Pipe Room, then collect Ice Element. Fire the ice at the poisonous water to freeze it, walk across the frozen surface and turn the valve to shut off the water.
Reach the chest beyond the valve and take the Cold Storage Key. Enter Cold Storage through the newly accessible route. Collect Fire Element from the fire near the entrance, then move toward the frozen portrait ghost, Sir Weston.
Light the two wood piles beside Sir Weston. He thaws and attacks with falling icicles and other ice hazards. Avoid the warning signs, thaw him with Fire Element when necessary, then expose his heart with the ordinary flashlight and vacuum him. If he escapes, repeat the fire-and-exposure sequence until he is captured.
The chest that appears contains the Artist’s Studio Key. Take it before leaving Cold Storage.
- Freeze the Pipe Room water and turn the valve.
- Take the Cold Storage Key.
- Light Sir Weston’s fires and capture him after his heart is exposed.
- Collect the Artist’s Studio Key.
9. Clear the Artist’s Studio and obtain the Secret Altar Key
Use the Artist’s Studio Key on the third-floor door. Vincent Van Gore animates groups of ghosts from his paintings. The groups emerge in succession, so defeat each group before expecting the next one.
Use the ordinary flashlight to expose vulnerable ghosts and the Poltergust 3000 to capture them. Elemental ghosts require the appropriate stored element. Keep moving away from hazards and finish each group rather than chasing several targets across the room.
After all of the painting groups have been defeated, Van Gore becomes vulnerable. Expose his heart and capture him. The Secret Altar Key appears after the encounter; take it before leaving the studio. The Studio Boo and remaining treasure are optional.
Save with Toad before entering the final basement route if you want the safest retry point.
- Defeat every ghost group created by Van Gore’s paintings.
- Capture Vincent Van Gore after the groups are cleared.
- Take the Secret Altar Key.
10. Meet the Boo requirement and enter the Secret Altar
Carry the Secret Altar Key to the final locked door in the basement. Check the Boo total in the Game Boy Horror before entering. The North American GameCube release requires at least 40 captured regular Boos. If the total is below 40, the route is blocked and Luigi is forced back toward the Foyer.
King Boo is separate from the 50 regular Boos and does not count toward the requirement. The Boos captured as the components of Boolossus do count toward the regular Boo total.
When the counter is at least 40, unlock and enter the Secret Altar. Entering and approaching the far end begins the King Boo sequence, so finish any optional Area 4 treasure, portraits and Boo captures first if you want the cleanest final-route save.
- Have the Secret Altar Key.
- Confirm that the regular Boo counter is at least 40.
- Enter the Secret Altar only when ready to begin the final boss sequence.
Before you move on
- The Area Four blackout has been triggered and Uncle Grimmly has been captured.
- The Breaker Room switch has restored power, and the Cellar has produced the Clockwork Room Key.
- The Clockwork Room Key has been taken to the third-floor Telephone Room, its skeleton ghosts have been captured, and the north door to the Clockwork Room has been opened.
- All three Clockwork Soldiers have been captured, the Roof has been cleared and the Armoury Key has been collected from the left chimney.
- The Armoury has been cleared and the Pipe Room Key is in Luigi’s possession.
- The Pipe Room valve has been turned, Sir Weston has been captured and the Artist’s Studio Key has appeared.
- All Van Gore painting groups have been defeated, Vincent Van Gore has been captured and the Secret Altar Key has been collected.
- The regular Boo counter shows at least 40, the Secret Altar door opens and the King Boo confrontation begins.
Final boss — King Boo: phases and survival
The original North American Nintendo GameCube final battle pits Luigi against King Boo inside a Bowser suit. The ordinary flashlight cannot expose King Boo, and the intact suit cannot be captured directly. Instead, survive Bowser’s attacks, vacuum one of the three black spiked balls he throws, and fire it into his lowered head during the next fire-breathing or suction setup. The head is knocked away, exposing King Boo so the Poltergust 3000 can drain his 500 HP. Repeat the cycle while avoiding the detached head’s ice attacks, then handle the backward-head charge that appears late in the fight.
1. Save before entering the Secret Altar
Before beginning the final sequence, return to the Foyer and save with Toad if you have not saved recently. The Secret Altar leads directly into the King Boo encounter, so the latest completed Toad save is your practical retry point. There is no ordinary checkpoint inside the boss arena that preserves partial damage to King Boo.
The North American GameCube release requires at least 40 captured regular Boos to open the route to the Secret Altar. Optional treasure on the approach can improve the ending rank, but it is not needed for the battle. Enter with full or near-full health and be prepared to repeat the entire fight if Luigi is defeated.
- Save with Toad before approaching the final sequence.
- Confirm that the required Boo total has opened the Secret Altar route.
- Collect nearby optional treasure only if you are pursuing a higher rank.
- Do not expect a save point or checkpoint inside the boss arena.
2. Survive Bowser’s opening attacks
King Boo draws Luigi into the Mario painting, where the battle takes place on a long platform surrounded by fire. Bowser’s suit moves around the arena and attacks through its head. Keep moving and maintain enough distance to react to the suit’s next attack rather than standing directly in front of it.
Bowser can breathe fire, attempt to suck Luigi toward its mouth, and throw three black spiked balls. Fire and suction can damage or reposition Luigi, while the spiked balls create the opening needed to expose King Boo. Watch the suit’s movement and avoid rushing toward a ball while it is still landing or about to explode.
- Keep Luigi moving while Bowser faces him.
- Stay clear of the fire-breathing and suction attacks.
- Wait for all three black spiked balls to land before choosing one.
- Approach a ball only when there is enough space to vacuum it safely.
3. Vacuum and fire a black spiked ball
Move toward one of the black spiked balls and hold the Poltergust 3000’s suction control until the ball is attached to the nozzle. Back away from Bowser while keeping the suit in view. The ball is not the attack by itself; it must be fired into Bowser’s lowered head.
Watch for Bowser to lower its head while preparing to breathe fire or use the suction attack. Release the ball at that moment and aim it at the lowered head. A successful hit knocks the head away from the body and exposes King Boo. Do not hold the ball indefinitely, because it can explode while attached to the Poltergust and injure Luigi.
If the shot misses, retreat from the explosion and wait for another set of three balls. A missed throw does not end the battle, and it does not restore King Boo’s already-drained HP.
- Vacuum one black spiked ball with the Poltergust 3000.
- Create distance from Bowser before firing.
- Wait for the head to lower during the fire or suction setup.
- Fire into the head before the spiked ball explodes.
- If you miss, retreat and wait for the next cycle.
4. Drain King Boo during the exposure window
When the spiked ball hits Bowser’s lowered head, the head separates from the suit and King Boo floats free. Turn toward King Boo immediately and hold suction on him. This is the only damage window: the intact Bowser suit is not the target, and the ordinary flashlight does not expose King Boo.
The detached Bowser head remains active and fires ice at Luigi. Keep moving in a broad circle while maintaining suction whenever the angle is safe. If the head’s ice attack threatens to freeze Luigi or King Boo moves out of reach, stop suction briefly and reposition rather than taking a hit to preserve a few extra seconds.
King Boo eventually returns to the suit, ending the exposure window. Release suction when he is no longer reachable, then repeat the spiked-ball cycle. With 500 HP, King Boo requires several successful exposure-and-suction phases.
- Turn toward King Boo as soon as the head is knocked away.
- Hold suction on King Boo, not on the Bowser suit.
- Keep moving to avoid the detached head’s ice attacks.
- Break contact when King Boo returns to the suit or moves out of range.
- Repeat the process until his HP is depleted.
5. Handle the backward-head phase below 200 HP
After King Boo’s HP falls below 200, the Bowser head can be placed backward when it returns to the body. The suit then charges back and forth across the arena. Do not chase it and do not try to force a spiked-ball throw while the charge is active. Run away from its path and use the open arena to avoid contact.
After the charge, Bowser corrects the head and resumes the normal attack pattern. Wait for another set of three black spiked balls, vacuum one, and fire it into the lowered head during the next fire or suction setup. This is a more dangerous variation of the existing cycle rather than a separate boss with a new counterattack.
- Watch for the backward head after King Boo drops below 200 HP.
- Move away from the charging suit instead of chasing it.
- Wait for Bowser to face normally again.
- Resume the spiked-ball counter once the regular pattern returns.
6. Finish the battle and recover from defeat
Continue alternating between movement, spiked-ball counters and suction until King Boo’s HP reaches zero. Prioritize survival over one extra moment of suction: a missed damage opportunity costs time, but a freezing ice hit, explosion or collision can cost the entire attempt.
If Luigi loses all HP, reload the most recent Toad save and return to the Secret Altar route. There is no in-arena recovery checkpoint and no way to preserve partial damage after a defeat. On the next attempt, keep Bowser at a manageable distance, identify the nearest spiked ball after each throw and fire only when the head lowers.
After the final successful suction phase, allow the capture and ending sequence to play. The battle is complete when the game leaves the arena and proceeds into the rescue and ending scenes.
- Repeat the complete counter-and-suction cycle until King Boo is defeated.
- Reload the latest Toad save after a defeat.
- Do not mistake a missed shot for a failed battle.
- Let the post-battle sequence continue after the final capture.
Before you move on
- King Boo’s 500 HP is fully depleted and the fight ends instead of restarting.
- The game proceeds from the boss arena into the rescue and ending sequence.
- The ending confirms that Mario has been recovered from the painting.
- The credits and final-rank display appear after the clear.
- Remaining regular Boos, gems, treasure and portrait quality are optional for the main campaign and can be pursued in a later run.
- The Hidden Mansion option becomes available after completing the main campaign.
Ending, rank and post-boss checks
Finish the King Boo sequence, confirm Mario’s rescue, record the treasure-based ending rank, preserve the clear file, and access the North American GameCube Hidden Mansion.
1. Finish the King Boo sequence and continue to the laboratory
After King Boo is captured, let the game continue. Luigi briefly returns to the Secret Altar, where the final events are shown and he takes the Mario portrait back to Professor E. Gadd’s laboratory. The disappearance of King Boo from the arena is not the complete ending check by itself; continue through these transitions and cutscenes.
At the laboratory, E. Gadd explains that the mansion has disappeared and begins processing the captured ghosts. Do not reset the console or return to the title screen during this sequence if you are checking the clear in one uninterrupted run.
- King Boo has been captured.
- The Secret Altar scene has finished.
- Luigi has returned to E. Gadd’s laboratory.
2. Confirm Mario’s restoration
Allow the laboratory processing to finish. E. Gadd turns the captured portrait ghosts back into portraits, then totals the treasure gathered during the campaign. Mario is restored from the portrait after this processing, which confirms that the main rescue objective is complete.
You do not need all 50 regular Boos, every gem, every treasure item, or every high-quality portrait frame to rescue Mario. Those are optional completion goals. Defeating King Boo and completing the laboratory sequence is sufficient for the main campaign.
- The captured ghosts have been processed in the laboratory.
- Mario has been restored.
- The game proceeds to the closing credits.
3. Watch the credits and record the final rank
Let the credits continue until the game displays the result for Luigi’s new mansion. The original North American GameCube release uses ranks A through H. The rank is determined by the total value of treasure collected during that campaign, measured in G.
For the USA GameCube release, Rank A requires at least 100,000,000 G. Rank B covers 70,000,000 through 99,999,999 G; Rank C covers 60,000,000 through 69,999,999 G; Rank D covers 50,000,000 through 59,999,999 G; Rank E covers 40,000,000 through 49,999,999 G; Rank F covers 20,000,000 through 39,999,999 G; Rank G covers 5,000,000 through 19,999,999 G; and Rank H is below 5,000,000 G.
Coins, bills, gold bars, gems, diamonds, and pearls are treasure items, so their values contribute when collected. Gems are also an optional collection goal, but any gem you pick up contributes through its treasure value. Boo count and portrait-frame quality are not separate rank requirements. A better portrait capture can produce more valuable pearls, so it may affect the total indirectly through treasure, but the game does not award a separate rank category for portrait quality or Boo completion.
- The credits have reached the mansion result.
- An A–H rank has been displayed.
- The rank and treasure total have been recorded.
4. Preserve the completed result before pursuing more goals
The displayed rank belongs to the campaign that has just ended. Finding additional treasure later does not revise that already-issued result. If you want a better rank, preserve the completed save if possible and plan another campaign focused on treasure collection.
For an A rank, search furniture and room objects, collect gems and pearls, catch money-bearing ghosts, find Golden Mice, inspect hidden rooms, and complete portrait-ghost encounters carefully. Do not assume that capturing all Boos is required for Rank A; it is a separate completion goal, although some Boo-related rewards provide additional treasure when collected.
- The current rank has been noted.
- The completed clear file has been preserved.
- A separate treasure-focused run is planned if necessary.
5. Enter the USA GameCube Hidden Mansion
After the campaign has been completed, return to E. Gadd’s laboratory on the same save file. The laboratory menu now offers the Hidden Mansion in addition to the regular Mansion. Select Hidden Mansion when you are ready to begin the harder replay.
The North American GameCube Hidden Mansion is not the horizontally mirrored layout used by the PAL version. Its principal USA changes include a stronger Poltergust 3000, greater damage when Luigi is hit, shorter ghost-stun periods, and ghosts that resist the vacuum more forcefully. The route and room arrangement remain suitable for using your normal-mansion knowledge, but captures require closer positioning and more careful health management.
The Hidden Mansion is a new playthrough mode, not an in-arena continuation of the final boss battle. Keep the completed normal-mansion result if you want to preserve its rank and collection record before starting the replay.
- The Hidden Mansion option appears in E. Gadd’s laboratory menu.
- The regular Mansion option remains available.
- The normal-mansion clear file is preserved before starting Hidden Mansion.
6. Review Boo and collection progress
Use the laboratory’s collection information to review the regular-Boo total. The complete target is 50 regular Boos. King Boo is the final boss and is not included in that total, so a completed story run can correctly show fewer than 50.
If you are pursuing broader completion, record missing Boos, gems, treasure rooms, portrait ghosts, and frame-quality goals before beginning another run. Revisit the mansion with the Game Boy Horror and a room-by-room checklist rather than assuming the ending rank confirms collection progress. These goals are separate from Mario’s rescue and from the already recorded rank.
- The regular-Boo total has been checked.
- King Boo has been excluded from the 50-Boo total.
- Missing collection and portrait objectives have been recorded.
Before you move on
- King Boo has been defeated and the Secret Altar sequence has finished.
- Mario has been restored in Professor E. Gadd’s laboratory.
- The credits have reached the final A–H mansion rank.
- The rank and treasure total have been recorded.
- The Hidden Mansion option is available in E. Gadd’s laboratory on the completed save file.
- The regular-Boo total has been checked with King Boo excluded from the 50-Boo objective.
References for this chapter
- Luigi’s Mansion – Mansion Differences FAQ
- Luigi's Mansion Guide and Walkthrough — GameFAQs, Escaped Boo Recovery and Boss Routes
- Luigi's Mansion Cheats, Codes, and Secrets for GameCube
- Luigi's Mansion Guide and Walkthrough — GameFAQs, Boo capture and radar behavior
- Luigi’s Mansion Guide and Walkthrough — GameFAQs, FAQ 14725
Optional completion: finding and catching all 50 Boos
The original North American Nintendo GameCube release contains 50 regular Boos, excluding King Boo. Thirty-five named Boos begin in specific mansion rooms, while the other 15 are the smaller Boos that combine to form Boolossus. Capturing all 50 awards a Gold Diamond. Boo hunting is optional for the main campaign, but progression requires 5 Boos to open the first-floor Washroom, 20 to enter the Balcony and fight Boolossus, and 40 to open the Secret Altar route toward King Boo.
1. Release the Boos and learn the radar
The hunt begins in Area 2 after you clear the Storage Room encounter. Use the Game Boy Horror to inspect the room, reveal the hidden switch, remove the covering from the second switch and activate it. The floor opens and the released Boos scatter through the mansion. Professor E. Gadd then explains the Boo Radar at the laboratory.
Return to the mansion and start with the lit rooms already cleared in Area 1. Check the Parlor, Anteroom, Wardrobe Room, Study, Master Bedroom and Nursery. You need only five captures to open the Washroom, but capturing all six immediately gives you a useful lead and reduces later backtracking.
The Boo Radar is the light mounted above the Game Boy Horror display. Blue means no Boo is currently in the room. Yellow means a Boo is present; the flashing becomes faster as Luigi approaches. Red means Luigi is close to the hiding spot. Inspect nearby furniture and objects when the radar reaches red, but remember that the object may produce a Boo Ball or bomb instead of the Boo.
- The Storage Room release event is complete.
- The Parlor, Anteroom, Wardrobe Room, Study, Master Bedroom and Nursery have been checked.
- At least 5 regular Boos have been captured before attempting the first-floor Washroom.
- The Boo total has been verified after each successful capture.
2. Check the 35 named Boo starting rooms
The 35 named Boos have fixed starting rooms, although an uncovered Boo can flee to another accessible room. Use this list as an initial checklist, not as a guarantee that the Boo will still be in its original room after an escape.
Area 1 starting rooms are the Parlor, Anteroom, Wardrobe Room, Study, Master Bedroom and Nursery. Area 2 starting rooms are the Ballroom, Storage Room, Mirror Room, Laundry Room, Butler's Room, Hidden Room, Conservatory, Dining Room and Kitchen.
Area 3 starting rooms are the Rec Room, Tea Room, Nana's Room, Astral Hall, Billiards Room, Projection Room, the Twins' Room, Fortune-teller's Room and Safari Room. Area 4 starting rooms are the Breaker Room, Cellar, Telephone Room, Clockwork Room, Sitting Room, Guest Room, Armory, Ceramics Studio, Pipe Room, Cold Storage and Artist's Studio.
Only search a room once it is lit and its normal ghost encounter has been cleared. The Hidden Room is reached through the mousehole in the Butler's Room. Do not confuse it with the separate rooftop hidden treasure room; they are different locations.
- All 35 named starting rooms are listed on a personal checklist.
- The Butler's Room mousehole and the Hidden Room have been checked.
- Area 4 rooms are checked after the blackout and power restoration.
- Captured, escaped and unchecked rooms are recorded separately.
3. Capture Boos and manage escapes
Boos do not need to be stunned with the ordinary flashlight. Once a Boo is exposed in a lit room, keep the Poltergust 3000 aimed at it and drain its HP. Continue moving and turn with the C Stick or movement controls so the suction stream stays attached. The capture is complete only when the Boo disappears and the counter increases.
A Boo may charge Luigi, create a brief opening for itself and flee through a connected doorway. Pursue it immediately. If you reach the next room quickly, it may still be floating in the open. Otherwise, use the Boo Radar to search the accessible rooms on that floor. A Boo that has fled into a dark room is harder to search for; restore the room's lights before relying on the radar to locate it again.
Do not assume that the first hiding object remains correct after an escape. The Boo may be in another room or another interactive object. If an escaped Boo enters a locked or inconvenient room, finish the nearby progression needed to open that route, search the floor systematically, or reload a save as a recovery measure. Do not count the Boo until the counter rises.
- The Poltergust is used directly on exposed Boos; no flashlight stun is attempted.
- The Boo counter rises after each completed capture.
- Escaped Boos are pursued before the search moves elsewhere.
- Dark rooms containing an escaped Boo are relit before a renewed search.
- A Boo's starting room is not treated as permanently empty after an escape.
4. Capture the 15 Boolossus components
Capture 20 regular Boos to remove the seal blocking the third-floor Balcony. Enter the Balcony and approach the group to begin the Boolossus battle. Boolossus is the combined form of 15 smaller Boos, and those 15 captures count toward the 50-Boo total.
During the battle, guide Boolossus into the horn of the unicorn statue to split it apart. After the split, collect Ice Element and spray the individual Boos to freeze them. Vacuum each frozen Boo before the group can regroup. The remaining Boos can combine again, so repeat the statue collision, freezing and capture sequence until all 15 have been collected.
The battle is complete when every component Boo has been captured. Check the Boo counter afterward; the 15 components are included in the regular total, not added as a separate category.
- At least 20 regular Boos have been captured before entering the Balcony.
- Boolossus has been split against the unicorn statue.
- Ice Element has been used to freeze the separated Boos.
- All 15 Boolossus components are credited to the Boo total.
5. Sweep the mansion after major story events
Continue the Boo hunt as new rooms become available. Area 4 deserves a dedicated pass after the blackout because several rooms remain inaccessible or dark until power is restored. Once the Breaker Room switch restores the lights, revisit the Area 4 starting rooms and any earlier rooms where a Boo escaped.
A reliable sweep begins at the Foyer and follows connected sections of the mansion. In every room, confirm that it is lit, activate the Game Boy Horror, follow the radar's color and flashing speed, and inspect the indicated objects. Record a capture, an escape destination or a confirmed empty result. Include secret rooms reached through mouseholes and other hidden entrances.
If the tally is short, begin with the rooms marked as escape locations, then inspect rooms that were dark during the first pass. The mansion map helps organize the route, but map status alone does not prove that a Boo is absent. A lit room may be empty because its Boo fled elsewhere, while a previously checked room may contain a Boo that returned after an escape.
- Every named starting room has a final result recorded.
- The Hidden Room has been searched.
- Area 4 has been checked after power restoration.
- Escape locations have been searched with the Boo Radar.
- The final sweep does not rely on map color alone.
6. Confirm the 50-Boo reward
The completed total is 35 named Boos plus the 15 Boolossus components. King Boo is the story's final boss and is not part of the 50 regular Boos. When the last regular Boo is captured, the game awards a Gold Diamond.
Verify that the counter reads 50 before entering the final battle if you want the full Boo objective completed on the same file. Save after the reward appears. You may continue the campaign afterward; all 50 captures are optional for story completion, although 40 regular Boos are required to open the Secret Altar route in the North American GameCube release.
- The counter reads 50 regular Boos.
- The Gold Diamond reward has appeared.
- The 15 Boolossus components are included in the total.
- King Boo is counted separately.
- A save is made after the reward appears.
Before you move on
- The Boo counter reads 50/50.
- The Gold Diamond reward has appeared and has been saved.
- All 35 named Boo starting rooms have been checked, including Area 4 after the blackout.
- The Hidden Room has been searched.
- Boolossus has been defeated and all 15 component Boos are credited.
- King Boo is treated as a separate campaign boss.
- The file is ready for the final battle or post-game completion goals.
Hidden Mansion: access and advanced strategies
The Hidden Mansion becomes available after completing the original campaign and loading that cleared GameCube save file again. In the North American release, it is a harder replay of the same mansion rather than the heavily rearranged PAL version. The building keeps its original orientation and route, but Luigi takes more damage, ordinary ghosts can be pulled more efficiently, stun windows are shorter, and poison mushrooms appear more often. Treat the mode as a complete second campaign: repeat the required progression, capture the necessary portrait ghosts, meet the regular Boo gates, defeat the four major bosses, and finish with King Boo.
1. Finish the original campaign and preserve the clear file
Defeat King Boo, allow the ending sequence to finish, and keep the completed game file. When you return to Professor E. Gadd’s laboratory and load that file again, the destination menu will include The Hidden Mansion. The mode is unlocked by clearing the campaign; it is not available on an unfinished file.
If you care about comparing your first rank, portrait quality, or treasure total with the Hidden Mansion result, preserve the original clear file before beginning the second run. This is a precaution for record keeping, not an additional unlock requirement.
- King Boo has been defeated.
- The ending sequence has finished.
- The cleared USA GameCube file remains available.
- A backup or separate file has been made if you want to preserve the original result.
2. Choose The Hidden Mansion at the laboratory
Speak with E. Gadd and select The Hidden Mansion rather than The Mansion. The opening movie and training sequence are skipped, and Luigi begins with the first key. These conveniences shorten the opening only; they do not complete any Area objectives.
From this point, follow the normal USA campaign structure. Clear the four Areas, collect keys in the required order, complete the required portrait-ghost encounters, release and capture the Boos needed for progression, and defeat Chauncey, Bogmire, Boolossus, and King Boo.
- The Hidden Mansion option was selected from E. Gadd’s laboratory.
- The missing introduction and training are expected.
- The first key is already available.
- The campaign route still has to be completed from Area 1 onward.
3. Follow the North American layout
The USA Hidden Mansion is not mirrored. Rooms, stairs, door positions, landmarks, and Luigi’s orientation remain based on the North American mansion. The mirrored layout, different ghost placements, altered boss behavior, and 45-Boo final gate belong to the PAL Hidden Mansion and should not be imported into this version.
The USA mode retains the ordinary campaign’s 40-Boo requirement for access to the final area. King Boo is separate from the 50 regular Boos, so a Hidden Mansion run aimed at full collection should track the Boo total independently from the story clear.
- Use the normal North American map orientation.
- Do not reverse left and right directions.
- Do not use the PAL 45-Boo requirement.
- Track regular Boos separately from King Boo.
4. Adjust ordinary ghost captures
Hidden Mansion stun periods are shorter. Move closer to an ordinary ghost before using the flashlight, then begin suction immediately when its heart is exposed. A long-distance flash is less forgiving because the ghost can recover before the Poltergust reaches it.
The Poltergust is stronger against ordinary ghosts in the USA Hidden Mansion, so exposed hearts can be drained more quickly than in The Mansion. This does not remove the need to face the correct direction, control Luigi’s position, and counter the ghost’s movement. The stronger suction also does not apply to Boos in the same way; Boo encounters remain a separate positioning and timing challenge.
Portrait ghosts follow their own exposure conditions. When a portrait ghost’s heart becomes vulnerable through the required room action, elemental interaction, or behavior cue, vacuum it immediately rather than trying to treat every encounter like a normal ghost stun.
- Approach ordinary ghosts before flashing.
- Start suction as soon as the heart appears.
- Use each portrait ghost’s required exposure method.
- Do not assume stronger suction makes Boos easy to capture.
5. Protect Luigi’s health
Luigi takes double the damage from attacks in the USA Hidden Mansion. Avoid pulling several enemies into one crowded exchange when you can separate them. Use doorways, corners, furniture, and the room’s open space to keep an escape route behind Luigi, then finish one target before turning to the next.
Poison mushrooms are more common in this mode, including appearances connected with furniture and some portrait-ghost encounters. Do not treat a poison mushroom as a healing item. Avoid it, especially when another ghost is active or when the mushroom could force Luigi into a dangerous position.
- Separate groups instead of accepting unnecessary contact hits.
- Keep room to retreat before starting suction.
- Avoid poison mushrooms.
- Search for hearts before difficult encounters when the room allows it.
6. Relearn the boss openings, not the PAL variations
The USA Hidden Mansion keeps the North American boss route and does not use the PAL version’s altered boss behavior. Prepare the same vulnerability sequences used in The Mansion: return the crib ball before Chauncey can be captured, fire an absorbed shadow at Bogmire, split Boolossus and freeze its component Boos with Ice Element, and use Bowser’s black spiked balls against King Boo’s suit.
The increased damage makes failed attempts more expensive, so save with Toad before a boss whenever the route provides that opportunity. Enter with strong health, stop suction when the boss becomes untargetable, and repeat the specific opening rather than trying to brute-force the capture. If Luigi is defeated, reload the latest save; there is no in-arena checkpoint.
- Use USA boss arenas and vulnerability patterns.
- Save before major boss attempts when possible.
- Do not import PAL-only boss changes.
- Retry from the latest save after defeat.
7. Track collection separately from progression
A familiar room route does not mean every optional objective is complete. Keep separate notes for keys, portrait ghosts, gems, furniture treasure, Golden Mice, Speedy Spirits, and Boos. After a room is cleared for story purposes, use the Game Boy Horror to check for Boo signals and revisit the room if a Boo escaped.
The first campaign’s collection totals do not automatically complete the Hidden Mansion run. If your goal is full completion in both modes, perform a fresh sweep of the second mansion and record each optional objective independently. Do not chase a Boo blindly through a hazardous room; control Luigi’s position and re-enter after the Boo relocates if necessary.
- Mark required keys separately from optional treasure.
- Check cleared rooms for Boo signals.
- Revisit rooms when escaped Boos are no longer in their original position.
- Keep original-campaign and Hidden-Mansion totals distinct.
8. Confirm the second clear
Complete the Hidden Mansion campaign by defeating King Boo and allowing the ending sequence to finish. The practical completion check is that the cleared file was loaded, The Hidden Mansion was selected, the USA route was completed without PAL-only changes, all four Areas were cleared again, the required bosses were defeated, and King Boo was captured.
For a two-mode record, retain the original campaign clear separately from the Hidden Mansion result. The Hidden Mansion is a second campaign run with changed difficulty conditions, not a separate story chapter or a replacement for the original clear.
- The cleared USA file was loaded.
- The Hidden Mansion was selected from the laboratory.
- The North American orientation was used.
- All four Areas were completed again.
- The required bosses, including King Boo, were defeated.
- The ending sequence was recorded.
- The original clear was preserved if comparison is important.
Before you move on
- The original USA GameCube campaign was completed and its clear file retained.
- The Hidden Mansion option was selected from Professor E. Gadd’s laboratory.
- The North American mansion orientation was followed.
- Luigi’s increased damage intake was managed throughout the run.
- The stronger ordinary-ghost suction and shorter stun periods were taken into account.
- Poison mushrooms were treated as hazards.
- All four Areas and required progression encounters were completed again.
- The USA boss patterns were used without PAL-specific alterations.
- King Boo was defeated and the ending sequence was recorded.
Portrait ghosts and gold-portrait strategy for A-rank
On the original North American Nintendo GameCube release, ordinary portrait ghosts earn gold frames when Luigi removes at least 90 HP during one uninterrupted Poltergust 3000 pull and collects the large pearl they drop. Chauncey, Bogmire, Boolossus and King Boo use a different rule: finish the battle with Luigi at 90 HP or higher. Rank A is a separate ending result based on the treasure total, requiring at least 100,000,000 G in the USA GameCube version. Gold portraits, Rank A, all 50 regular Boos and complete gem collection are separate goals.
Understand the two portrait-quality systems
For a normal portrait ghost, first solve the room-specific puzzle that exposes its heart. When the ghost becomes vulnerable, flash it with the ordinary GameCube flashlight and immediately connect the Poltergust 3000. Keep the connection intact while steering against the ghost's movement. If you remove at least 90 HP in that single uninterrupted pull, the ghost drops a large pearl and receives a gold frame in the Gallery.
You do not need to remove the final few HP in the same pull. A ghost can be reduced to 10 HP or less, release the connection, and still provide the large pearl needed for gold quality. Capturing the entire ghost from full health in one pull produces the largest possible pearl haul, but it is an efficiency goal rather than the minimum gold-frame requirement. Medium pearls produce silver-quality results, while only small pearls produce bronze-quality results.
Grouped encounters need special attention. The Dancing Whirlindas count as one portrait encounter, and the Clockwork Soldiers and Henry and Orville have a designated member whose performance determines the pearl and frame result. Do not assume every visible ghost must independently be drained from 100 HP.
- Solve the portrait ghost's room condition before attempting the pull.
- Connect the Poltergust immediately after the heart is exposed.
- Maintain one uninterrupted pull until at least 90 HP has been removed.
- Collect the large pearl before leaving the room.
- Treat grouped portrait encounters according to their encounter-specific rules.
Prepare each portrait room
Use the Game Boy Horror to inspect the room and nearby objects before starting. Portrait ghosts are not captured like ordinary wandering ghosts: each requires a setup action. Clear ordinary enemies and remove obvious hazards where possible so a stray attack does not break the connection.
Neville becomes vulnerable after he yawns while Luigi is facing away. Pull the curtain in the Master Bedroom to make Lydia move toward it, then use that movement as the opening to expose her heart. In the Ballroom, defeat the Shy Guys, then stand on the rotating platforms until the Dancing Whirlindas become vulnerable. For Shivers, light his candelabra in the hallway and reach the Butler's Room before he sits down.
These captures are optional for basic campaign completion but important for Gallery quality and treasure. The principal portrait ghosts include Neville, Lydia, the Dancing Whirlindas, Shivers, Melody Pianissima, Mr. Luggs, Spooky, Biff Atlas, Nana, Miss Petunia, Slim Bankshot, Henry and Orville, Madame Clairvoya, Uncle Grimmly, the Clockwork Soldiers, Sue Pea, Jarvis, Sir Weston and Vincent Van Gore.
- Inspect nearby objects with the Game Boy Horror.
- Clear enemies that can interrupt the capture when practical.
- Identify whether the encounter is required progress, optional treasure or a boss.
- Position Luigi with enough room to move against the ghost's pull.
Use controlled suction instead of wide movement
Stand at a workable distance before the heart appears. Once suction begins, hold the Poltergust and steer against the ghost's escape direction. Use small corrections rather than running in broad circles. Large movements can pull the nozzle away from the ghost, while standing still allows the ghost to drag Luigi and break the connection.
Keep environmental hazards between Luigi and the ghost in mind. Poison mushrooms interrupt the attempt and make Luigi vulnerable, so move around them immediately. If the ghost breaks free before the large pearl appears, capture it for progress if necessary. The resulting portrait will be lower quality, but the campaign and treasure route remain intact.
For a gold-frame run, save with Toad before a difficult encounter when possible. A failed gold attempt does not require abandoning the campaign; reload the save and retry the room. The original GameCube release does not provide the Nintendo 3DS remake's later gallery-rematch system, so preserve a suitable save or plan another campaign if you want to improve a result.
- Flash or trigger the vulnerability, then hold suction without delay.
- Steer against the ghost's pull with short directional adjustments.
- Avoid poison mushrooms and room obstacles.
- Reload a pre-encounter save when protecting a gold-frame attempt.
Handle the major named portrait ghosts
Melody Pianissima requires Luigi to activate the instruments, listen to her song and answer her question correctly. She then sends music sheets into the room. Vacuum the sheets to create the capture opening, then begin the uninterrupted pull. Madame Clairvoya must first receive all five of Mario's items. Return those items before trying to expose and drain her heart.
Mr. Luggs becomes vulnerable after Luigi uses Fire Element to light the table candles, vacuums away his food and survives the fireballs until he tires. Spooky requires Luigi to let the dog chase him, defeat the Mr. Bones that appears and use the dropped bone to create Spooky's opening. Biff Atlas must be struck by the punching bags three times before he falls and exposes his heart.
Nana's yarn balls must be knocked from the table, vacuumed and fired back at her three times. Miss Petunia becomes vulnerable after Luigi avoids her water ball and uses Ice Element on her. Slim Bankshot requires three successful billiard-ball hits. Jarvis must be frozen seven times. Sir Weston requires Fire Element to light the nearby wood piles and melt his ice. Vincent Van Gore becomes vulnerable after Luigi defeats the waves of ghosts he creates.
- Melody Pianissima: complete the instrument and music-sheet sequence.
- Madame Clairvoya: return all five requested items.
- Mr. Luggs: light the candles, remove his food and wait for his opening.
- Sir Weston: light the wood piles and melt his ice before suction.
- Do not begin the gold pull while the ghost is protected or attacking.
Use the separate rule for bosses
Chauncey, Bogmire, Boolossus and King Boo do not drop the ordinary portrait pearls that determine frame quality. Their Gallery frame depends on Luigi's health when the battle ends. Finish with at least 90 HP for a gold frame, 50 to 89 HP for silver, or less than 50 HP for bronze.
Chauncey must be made vulnerable by returning the third crib ball before Luigi can vacuum him. Bogmire requires Luigi to absorb a shadow and fire it into the real Bogmire before suction is possible. Boolossus must be split against the unicorn statue; freeze the separated Boos with Ice Element and capture the components. King Boo's final battle uses Bowser's black spiked balls as the counter-projectile: vacuum one and fire it into Bowser's lowered head, then drain King Boo while he is exposed.
Do not confuse the boss health rule with the ordinary ghost pearl rule. For a boss gold frame, the key condition is Luigi's ending health, not a 90-HP Poltergust pull. If Luigi drops below 90 HP, reload the latest save before finishing the battle if the gold portrait matters.
- Save with Toad before a boss attempt when a checkpoint is available.
- Keep Luigi at 90 HP or higher through the battle.
- Use each boss's required vulnerability sequence.
- Reload before the final capture if the health threshold has been missed.
Build the treasure total for Rank A
Rank A is not awarded for gold frames alone. In the USA GameCube release, the ending requires a final treasure total of at least 100,000,000 G. Pearls from portrait ghosts help substantially, but gems, gold bars, money from furniture and special treasure also contribute. A complete Gallery and all 50 regular Boos are not direct substitutes for missing treasure.
Search each available room before moving on. Vacuum pots, vases, cupboards, chandeliers, curtains, shelves and other objects. When a room is dark, check for a Golden Mouse before clearing its ghosts; cheese locations can also trigger one. If Luigi takes damage and treasure spills onto the floor, recover the highest-value items first because dropped treasure can disappear.
Water the Boneyard plant at the appropriate stages. Begin after obtaining the Water Element, return after defeating the second area boss, and return again after defeating the third area boss but before King Boo. The final growth produces valuable treasure, including a large gold diamond. Also search the two secret treasure rooms and collect safe pearls from portrait encounters.
- Carry at least 100,000,000 G into the final clear for Rank A.
- Search furniture and room objects before clearing rooms.
- Check darkened rooms for Golden Mice and hidden cheese.
- Water the Boneyard plant after the required story progress.
- Search both secret treasure rooms.
- Recover dropped treasure immediately after taking damage.
Finish with separate completion checks
After the final battle and ending, record the displayed mansion rank and preserve the completed save. Then inspect the Gallery rather than assuming the ending rank confirms portrait quality. Ordinary target portraits should show gold frames because their large pearls were collected. Boss portraits should show gold frames only when those battles ended with Luigi at 90 HP or higher.
For broader completion, check the Boo counter separately and maintain a separate gem and treasure record. The 50 regular Boos, gold portraits, Rank A and full gem collection overlap in their money benefits but are not one shared counter. If a portrait is bronze or silver, the main campaign is still complete and the treasure total is not automatically invalid. Use another save or replay to pursue the missed portrait without risking a successful Rank A file.
- Gallery: selected ordinary portraits show gold frames.
- Boss portraits: each selected boss ended with Luigi at 90 HP or higher.
- Treasure total: at least 100,000,000 G for USA GameCube Rank A.
- Boo counter: all 50 regular Boos captured if pursuing that goal.
- Gems and portrait results recorded separately.
- Mario rescued and the completed save preserved.
Before you move on
- The Gallery shows gold frames for the selected ordinary portrait ghosts.
- Each selected boss portrait was earned with Luigi finishing at 90 HP or higher.
- The USA GameCube treasure total is at least 100,000,000 G and the ending awards Rank A.
- The Boo counter, gem record and portrait record have been checked independently.
- Mario has been rescued and the completed campaign save has been preserved.
References for this chapter
Troubleshooting, common bugs and recovery tactics
Most apparent Luigi's Mansion problems on the original North American GameCube release are recoverable. A Boo can flee from its starting room, a missed interaction can make a required event seem broken, and a failed boss attempt normally costs only the progress since the latest Toad save. Use the Game Boy Horror methodically, save before resetting the game, and protect a reliable completion file before attempting optional goals.
1. Confirm whether a Boo is actually missing
Check the Boo total at Professor E. Gadd's lab or in the relevant save information before beginning a search. Then revisit rooms that have already been cleared and lit. In a room containing an uncaptured Boo, the Boo Radar on the Game Boy Horror flashes yellow and changes to red when Luigi is close to the hiding place. Search furniture, containers, shelves, curtains, and other nearby objects when the signal turns red.
A Boo does not necessarily remain in the room where you first found it. When it escapes, it can move through connected rooms on the same floor. If you reach the next room quickly, it may still be visible; otherwise, use the radar to locate its new hiding place. Do not mark the original room as permanently empty until the Boo has been captured or you have deliberately reset its position by saving and quitting.
- Confirm the intended Boo total before searching.
- Use the radar in cleared, lit rooms rather than relying on memory.
- Follow an escaping Boo into connected rooms when possible.
- Search the original room again after using the reset method.
2. Sweep optional and easily overlooked rooms
The Hidden Room beside the Butler's Room is one of the most commonly missed locations. Return to the Butler's Room and use the Game Boy Horror's Search Mode on the mouse hole near the rolls of paper. The search activates the opening and pulls Luigi into the Hidden Room. Defeat the bats and the elemental ghosts in the chests; use Fire Element against the ice-based ghosts before exposing and vacuuming them normally. Once the room is cleared, collect its treasure and search for the Boo there.
Also review every accessible late-game location, including the Storage Room, basement rooms, attic side rooms, and rooms reached through the upper-floor and roof routes. Keep the location names separate: the Hidden Room is the optional room accessed from the Butler's Room, while the Secret Altar is part of the final story route. Calling every overlooked location a secret room makes a checklist harder to use.
A practical sweep is to clear ordinary ghosts first, then search for Boos on the same floor. The Boo Radar is most useful after a room has been lit, so do not assume a dark, uncleared room has no Boo simply because the radar is not giving the expected signal.
- Recheck the Butler's Room mouse hole.
- Clear and search the Hidden Room.
- Revisit the Storage Room after its Boo-release sequence.
- Review basement, attic-side, upper-floor, and roof-access rooms.
- Distinguish the Hidden Room from the Secret Altar.
3. Reset an escaped Boo safely
If a Boo has fled through several rooms, entered an inconvenient area, or become difficult to track, return to a Toad and save before leaving the game. On the original GameCube release, saving and quitting causes uncaptured Boos to return to their original rooms when the game is loaded again. Captured Boos remain recorded in the save file.
After reloading, go directly to the Boo's original room and search it with the radar. This is usually faster and safer than chasing a Boo through several rooms while Luigi is already hurt. Do not claim that the reset preserves the Boo's current health; the useful confirmed behavior is the return to its original location.
Resetting is not a substitute for checking the mansion. If the total is still short, the Boo may belong to an optional room you have not entered, or another Boo may have escaped elsewhere. Record each searched room and reset only when you have a dependable save to return to.
- Save with Toad before quitting.
- Record the rooms already checked.
- Reload and search the escaped Boo's original room.
- Verify the Boo total after the capture.
- Never erase a save file while diagnosing a missing Boo.
4. Recover from a failed boss attempt
If Luigi loses all health, load the latest reliable Toad save and take the shortest known route back to the boss. Completed areas do not need to be cleared again merely because the boss attempt failed. Before re-entering the arena, collect nearby heart pickups from cleared rooms if Luigi needs recovery and confirm that the preceding objective was saved.
Change a specific part of the next attempt instead of repeating the same approach. Major bosses have a readable opening: wait for the correct exposure, use the required flashlight or elemental action, then commit to Poltergust suction only while the boss can be captured. If the target becomes invulnerable or begins an attack animation, stop suction and reposition.
For Boo encounters, do not continue a long chase while Luigi is already near defeat. Break off the pursuit, save at the next available Toad, and use the reset method if the Boo has moved somewhere inconvenient. For portrait ghosts, preserve the pre-fight save if you are trying to improve the portrait result.
- Load the latest reliable Toad save.
- Recover health before the retry when practical.
- Identify the boss's vulnerability signal.
- Stop suction during invulnerable phases.
- Change timing or positioning after a failed attempt.
5. Handle a suspected progression problem
If a door, chest, key, or story event does not appear, leave the room and return after clearing every active ghost. Check the map for an uncleared room or locked route connected to the current objective. Then use Search Mode to inspect mirrors, hidden switches, mouse holes, false doors, and other objects that do not stand out during normal movement.
The Storage Room is a frequent source of confusion. After dealing with the room's ghosts, use the mirror to locate the first wall switch and activate it. The room extends, revealing the Danger poster. Vacuum the poster to expose the second switch, then activate that switch. The Boos are released afterward and E. Gadd explains the Boo Radar. Missing either switch can make the room appear to have no remaining objective.
If the event still does not trigger, reload the last known-good Toad save and replay only the short route to the room. Write down the area, room name, objective, save position, and action that preceded the problem before seeking technical help. Specific details are more useful than repeated resets with no record of what changed.
- Exit and re-enter the affected room.
- Clear active ghosts before testing the trigger again.
- Check the map for an uncleared prerequisite.
- Inspect hidden objects with Search Mode.
- Activate both Storage Room switches in order.
- Reload a known-good Toad save if necessary.
6. Protect the save and verify completion
Saving is performed by speaking with Toad and choosing the save command; it is not continuous autosaving. Save after a productive Boo sweep, after a boss return to the lab, and before a difficult encounter. If optional completion matters, keep a dependable save before the final approach so you can verify the Boo total and preserve the state you want to revisit.
If the GameCube reports a memory-card problem, stop before overwriting anything. Check that the card is inserted correctly and has available space, then retry the save. Do not remove the card, power off, or repeatedly reset while data is being written. If the problem persists, preserve the card and record the exact message and save slot rather than deleting files immediately.
A troubleshooting pass is complete when the intended Boo total is recorded, every accessible room on the checklist has been checked, the relevant boss or progression event has completed, and the save file loads without an error. For the full Boo goal, confirm 50 regular Boos separately; King Boo is not included in that total.
- Maintain a reliable Toad save before major attempts.
- Keep a separate clear or near-clear file for optional completion.
- Check memory-card space before assuming progress is lost.
- Confirm the Boo counter after the final planned capture.
- Verify that the file loads and reflects the expected progression.
Before you move on
- The Boo counter matches the intended goal, and every accessible room on the written checklist has been checked with the Game Boy Horror.
- Any escaped Boo has either been captured in its new room or returned to its original room by saving and quitting, then captured there.
- A successful boss retry ends with the expected capture, story event, key, or return to Professor E. Gadd's lab.
- The file loads correctly, the map reflects the expected progression, and the memory card retains the save without an error.
- For full completion, 50 regular Boos are confirmed separately from King Boo before the final confrontation.
References for this chapter
- Luigi's Mansion Guide and Walkthrough — GameFAQs, Boo Radar and Boo Recovery
- Luigi's Mansion Guide and Walkthrough — GameFAQs, Storage Room and Boo Radar
- Luigi's Mansion Guide and Walkthrough — GameFAQs, Hidden Room and Boo Locations
- Luigi's Mansion Guide and Walkthrough — GameFAQs, Escaped Boo Recovery and Boss Routes
- Luigi's Mansion Instruction Manual — Nintendo GameCube manual PDF
Appendix: quick reference — maps, boss tells and checklist
Use this appendix to verify the required route through the original North American Nintendo GameCube release of Luigi’s Mansion. It is a checkpoint list for the campaign, not a replacement for the room-by-room chapters. The first story gate requires 20 captured regular Boos before the Area 3 Balcony encounter with Boolossus. The Secret Altar requires at least 40 captured regular Boos. Boolossus is made from 15 Boos, which count toward the total after they are captured, while King Boo is separate from the 50 regular Boos.
Standard story route and required Boo totals
Defeat Chauncey in Area 1 and Bogmire in Area 2, then continue through Area 3 while collecting regular Boos. Before the Balcony encounter will begin, Luigi must have captured at least 20 Boos. If the door does not open, return to rooms already visited and use the Game Boy Horror’s Boo Radar to locate targets. Escaped Boos can be found again in other rooms, so a missing target is not automatically lost.
Approach the circle of Boos on the Area 3 Balcony to begin the Boolossus battle. Split the giant Boo with the unicorn statue, use Ice Element to freeze the individual Boos, and capture all 15. The chest that appears contains the Area 4 Key. After the laboratory sequence, restore power in Area 4 and follow the required route through the Cellar, Clockwork Room, Roof, Armoury, Pipe Room, Cold Storage and Artist’s Studio until the Secret Altar Key is obtained.
The Secret Altar is a separate 40-Boo gate. It does not require all 50 regular Boos. When the altar door refuses to open, leave the area and perform another Boo sweep rather than searching for a missing key. After entering the altar, approach King Boo to start the final battle.
- Chauncey defeated.
- Bogmire defeated.
- At least 20 regular Boos captured before the Area 3 Balcony.
- Boolossus defeated and all 15 component Boos counted.
- Area 4 power restored.
- Roof route completed and Armoury Key used on the Armoury.
- Pipe Room, Cold Storage and Artist’s Studio completed.
- At least 40 regular Boos captured before entering the Secret Altar.
- King Boo defeated and Mario rescued.
Boss tells and immediate counters
Chauncey: let the nursery’s rocking horses attack, then vacuum one of the bouncing balls and fire it into Chauncey. The hit exposes his heart. Keep the Poltergust 3000 trained on him during the vulnerable phase and continue the pull until the capture attempt ends. If the opening closes, stop suction, avoid the next charge, and repeat the ball counter.
Bogmire: wait for shadow figures to appear and absorb one with the Poltergust. Fire the absorbed shadow into the solid Bogmire, not one of the copies. The impact makes the real boss vulnerable. Vacuum him during that opening, then release and circle the arena when the shadow threat resumes. Repeat the shadow-hit and suction cycle.
Boolossus: collect Ice Element from the unicorn statue area, then influence the bouncing Boolossus toward the statue’s pointed horn. The collision separates it into 15 smaller Boos. Freeze individual Boos and vacuum them while they are immobilized. As the number decreases, the remaining group becomes smaller and faster. Make it hit the horn again whenever it reforms, then continue freezing and capturing until all 15 are secured.
King Boo: this is a 500-HP fight inside the Bowser suit. Keep distance during the fire and suction attacks. When Bowser throws three black spiked balls, vacuum one and hold it at the end of the Poltergust. Wait for Bowser to lower his head before expelling the ball into him. A correct hit knocks the head away and exposes King Boo. Vacuum King Boo while he is outside the suit, moving to avoid the detached head’s ice attacks. King Boo eventually returns to the suit, so repeat the spiked-ball counter. Below 200 HP, Bowser’s head can return backward and charge across the arena; evade that charge, then resume the same pattern. The ice fired by the detached head is not a projectile Luigi can collect or use against Bowser.
- Use the ordinary flashlight to stun regular ghosts and expose vulnerable hearts.
- Do not hold suction during an invulnerable boss phase.
- Chauncey: return a crib ball before suction.
- Bogmire: fire an absorbed shadow at the real boss.
- Boolossus: split it on the unicorn horn, freeze the component Boos and capture all 15.
- King Boo: vacuum and fire a black spiked ball at Bowser’s lowered head.
- Reload the latest Toad save after defeat; there is no in-arena checkpoint.
Room-by-room map sweep
Use the Game Boy Horror map after each major story event and track two separate conditions for every room: required progress completed and Boo checked. A room can provide its key while still containing treasure, a gem, a portrait ghost, or a Boo that becomes available only after a later event.
For Area 1, verify the Foyer, Anteroom, Parlor, Wardrobe Room, Study, Nursery and the connecting halls. For Area 2, check the Conservatory, Rec Room, Bathroom route, Graveyard, Boneyard, Courtyard, Storage Room and rooms opened by the Fire and Water Elements. Revisit the Storage Room after the Boo-release sequence.
For Area 3, sweep the upper-floor halls and portrait-ghost rooms before checking the Balcony as a separate objective. In Area 4, restore power first, then recheck rooms affected by the blackout. Follow the required route through the Cellar, Clockwork Room, Roof, Armoury, Pipe Room, Cold Storage and Artist’s Studio.
The Sealed Room, Sitting Room and Guest Room are optional branches. They contain extra treasure, portrait opportunities and Boos, but they are not prerequisites for obtaining the Armoury Key or completing the required Armoury route. The Roof supplies the Armoury Key directly; do not detour through those optional rooms expecting a required progression key.
- Every accessible room has a progress mark and a separate Boo mark.
- Blackout-affected rooms are checked again after power returns.
- Secret rooms and hidden entrances are searched during the optional collection sweep.
- The Boo total is checked before the Balcony and Secret Altar gates.
- The Roof-to-Armoury route is completed without treating optional branches as mandatory.
Optional 100 percent and Rank A preparation
Capture all 50 regular Boos for the optional Boo goal. The 15 component Boos from Boolossus are included in that total. King Boo is not one of the 50. Use the Boo Radar, room map and repeated checks of furniture, hidden rooms and later-reopened areas rather than relying on memory. If a Boo escapes, search other previously cleared rooms until the counter advances.
Collect treasure and gems throughout the mansion if you are pursuing the best ending rank. In the USA GameCube release, Rank A requires a final money total of at least 100,000,000 G. Break furniture, inspect containers, search hidden rooms and collect visible money before leaving an area. Gold portrait results and gem completion are useful collection goals, but they are not substitutes for the money requirement and should be tracked separately.
- Regular-Boo counter reaches 50.
- King Boo is excluded from the regular-Boo count.
- Desired gems and treasure are collected.
- Portrait ghosts are captured with gold results pursued separately.
- Final money total reaches at least 100,000,000 G for Rank A.
Failure recovery, completion check and Hidden Mansion
Before a boss attempt, save with Toad when the route permits. If Luigi loses all health, reload that save, collect nearby hearts if necessary, and repeat only the shortest route to the encounter. Change the approach when retrying: create the boss’s opening first, then use suction only during the vulnerable window.
For campaign completion, defeat Chauncey, Bogmire, Boolossus and King Boo, then watch the ending sequence through the rescue confirmation and credits. Record the displayed rank and final Boo total. Preserve the completed file before beginning a collection or Hidden Mansion run.
After the first completed clear, the GameCube version makes Hidden Mansion available through Professor E. Gadd’s laboratory selection. Choose it only after preserving the original clear file. The USA Hidden Mansion is a harder version with altered challenge conditions; do not apply PAL or Nintendo 3DS mechanics, mirrored-layout assumptions or remake controls to the North American original.
- Mario’s rescue is shown and the ending sequence is complete.
- The final mansion rank is recorded.
- The regular-Boo total is recorded separately from King Boo.
- The completed save is preserved.
- Hidden Mansion is selected from the laboratory only after the first clear.
Before you move on
- Standard completion: Chauncey, Bogmire, Boolossus and King Boo are defeated, and the ending confirms Mario’s rescue.
- Story-gate completion: Luigi enters the Secret Altar after reaching at least 40 captured regular Boos.
- Optional Boo completion: the counter reaches 50 regular Boos, excluding King Boo.
- Collection completion: chosen gems, treasure and portrait results are recorded.
- Rank completion: the final money total reaches at least 100,000,000 G for Rank A in the USA GameCube release.
- Postgame completion: the finished file is preserved and the Hidden Mansion option is available after restarting from the clear.
References for this chapter
- Luigi’s Mansion Instruction Booklet, Nintendo GameCube
- Luigi’s Mansion Guide and Walkthrough — GameFAQs, FAQ 14725
- Luigi’s Mansion Guide and Walkthrough — GameFAQs, FAQ 33128
- Luigi’s Mansion — StrategyWiki Controls
- Luigi’s Mansion — StrategyWiki The Hidden Mansion
- Luigi’s Mansion Area 4 — StrategyWiki
Finishing up
The main campaign is complete when King Boo is defeated, the Secret Altar sequence finishes, Mario is restored in Professor E. Gadd's laboratory, and the credits reach the final A-H mansion-rank display.
The required story route is to clear Areas 1 through 4, defeat Chauncey, Bogmire, Boolossus and King Boo, and meet the North American GameCube Boo gates of 20 Boos for the Boolossus Balcony and 40 Boos for the Secret Altar.
The Sealed Room, Sitting Room and Guest Room are optional collection and portrait branches unless a specific optional goal requires them; they are not required to obtain the Armoury Key or finish the main route.
The final mansion rank is based on the total treasure collected during that campaign. Portrait quality, Boo count and gem collection are separate objectives, although their associated treasure can increase the total.
For the optional full Boo goal, capture all 50 regular Boos; the 15 component Boos from Boolossus count toward that total, while King Boo is separate.
Hidden Mansion becomes available from the cleared game file after the first campaign. Treat it as a separate replay and do not import PAL or Nintendo 3DS mechanics into the USA version.
Choose your next gameScreenshots & video
Game imagery for reference. Follow the written chapters above for the route and strategies.
Sources & references
Our original guide draws on the references below. Check the edition at the top of this page before following controls or unlock requirements.
- Luigi’s Mansion Instruction Booklet — controls, flashlight, Poltergust 3000, Game Boy Horror, elements, and saving
- Luigi's Mansion - Guide and Walkthrough - GameCube - By Alxs
- Luigi's Mansion — Guide and Walkthrough, GameFAQs, GameCube, Kodos86
- Luigi’s Mansion — GameFAQs guide and walkthrough by TSawyers
- Luigi's Mansion Guide and Walkthrough — GameFAQs, Boo capture and radar behavior
- Luigi’s Mansion Guide and Walkthrough — GameFAQs, FAQ 33128
- Luigi's Mansion Guide and Walkthrough — GameFAQs, Storage Room and Boo Radar
- Luigi’s Mansion — Retro Game Walkthroughs
- Luigi’s Mansion Guide and Walkthrough — GameFAQs, FAQ 14725
- Luigi's Mansion/Area 1 — StrategyWiki
- Area 1 Guide — Luigi's Mansion | Ludo
- Area 2 Guide — Luigi's Mansion, Ludo
- Luigi’s Mansion — Guide and Walkthrough by nm14, GameCube version
- Luigi’s Mansion Area 3 — StrategyWiki
- Luigi's Mansion Guide and Walkthrough — GameFAQs, Escaped Boo Recovery and Boss Routes
- Luigi's Mansion Guide and Walkthrough — GameFAQs, Hidden Room and Boo Locations
- Nintendo GameCube Instruction Manuals
- Luigi’s Mansion Area 4 — StrategyWiki
- Luigi’s Mansion — Portrait Ghosts FAQ by JStock, GameFAQs
- Luigi’s Mansion – Mansion Differences FAQ
- Luigi's Mansion Cheats, Codes, and Secrets for GameCube
- List of Boos in Luigi's Mansion — Super Mario Wiki
- Luigi’s Mansion — StrategyWiki The Hidden Mansion
- Luigi's Mansion – Perfect Score Guide – GameCube – By SIMSteven
- Luigi's Mansion Guide and Walkthrough — GameFAQs, Boo Radar and Boo Recovery
- Luigi's Mansion/Gameplay – StrategyWiki
- Luigi's Mansion – Nintendo GameCube Manual
- Luigi's Mansion Instruction Manual — Nintendo GameCube manual PDF
- Luigi’s Mansion Instruction Booklet, Nintendo GameCube
- Luigi’s Mansion — StrategyWiki Controls
About the game & collecting notes
- Platform
- Nintendo GameCube
A room-by-room walkthrough for the original North American Nintendo GameCube release of Luigi's Mansion. Follow Luigi from the foyer through all four mansion areas, use the original flashlight, Poltergust 3000, elemental attacks and Game Boy Horror correctly, defeat Chauncey, Bogmire, Boolossus and King Boo, and finish the main story. Optional chapters cover the 50 regular Boos, Hidden Mansion, gold portraits and Rank A treasure planning.
Darryl Polo
Darryl Polo loves tinkering with emulation and revisiting retro games. He enjoys exploring how old favorites play on different setups and sharing what he learns along the way. At Joking Joystick, he writes about the games, hardware, and small discoveries that keep the hobby fun.
Our editorial standardsFound a step that needs another look? Help us improve this guide.