Klonoa 2: Lunatea's Veil — PlayStation 2 (North American original) — Campaign Walkthrough
Complete Klonoa 2's main campaign from the Sea of Tears to the Terminus of Tears, covering every required Vision and boss, the Momett House unlocks, and optional 100% objectives (Dream Stones and Momett Dolls).

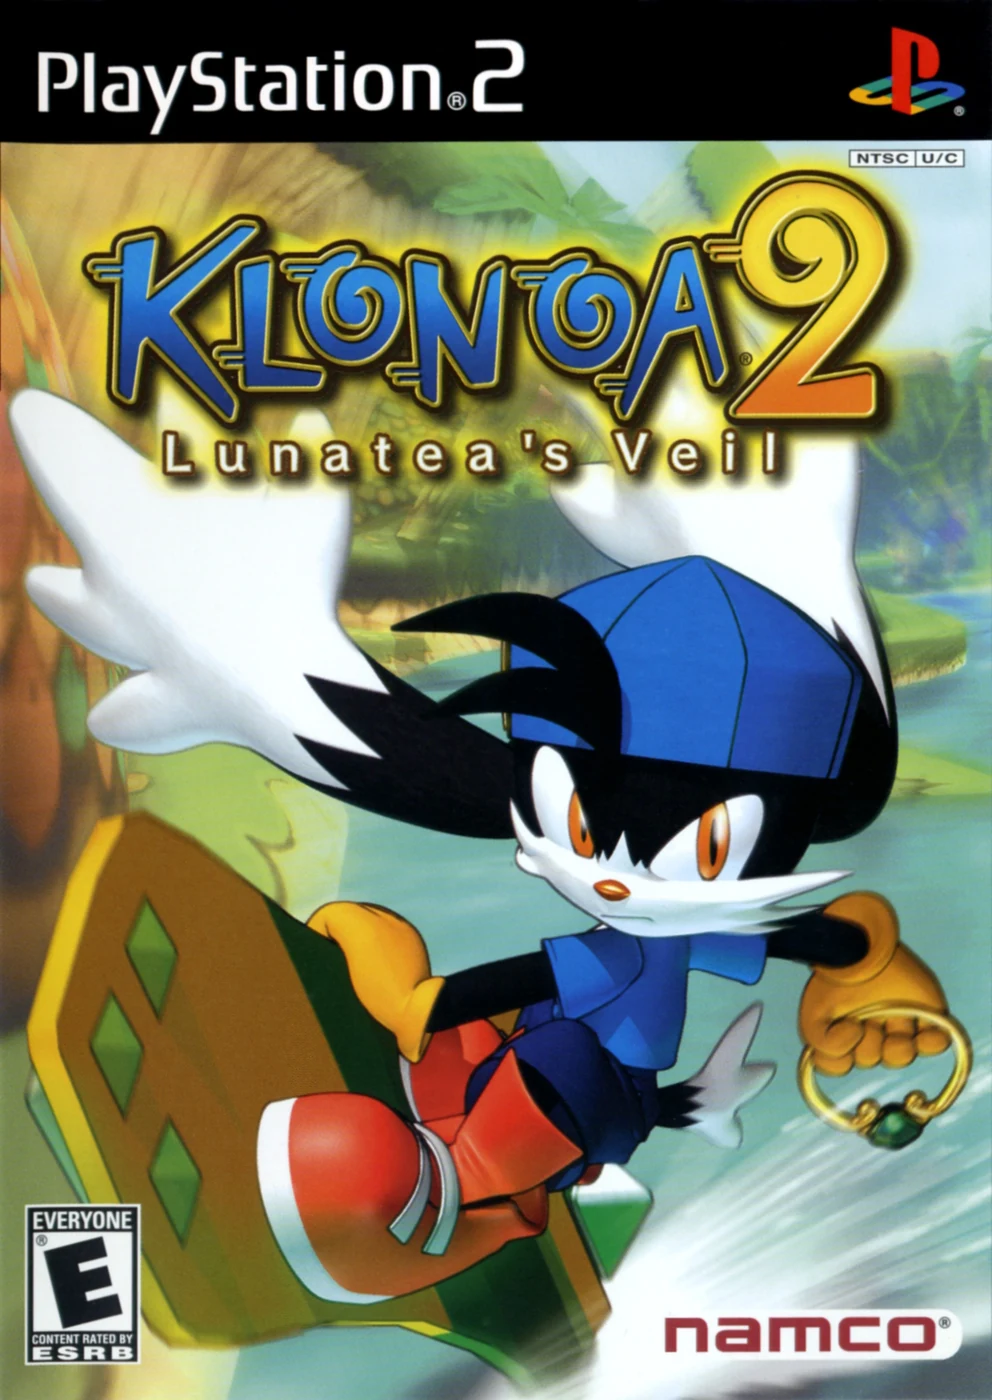
Find a copy
Klonoa 2: Lunatea's Veil PlayStation 2
We may earn a commission if you buy through these links, at no extra cost to you. As an Amazon Associate I earn from qualifying purchases.
Opens retailer search results. Check the model, edition, seller, availability and current price before buying.
Before you begin
This walkthrough is written for the original North American PlayStation 2 release of Klonoa 2: Lunatea’s Veil.
The PS2 edition shipped in North America in mid-2001 (Japan released earlier in March 2001); this guide follows the PS2 original’s campaign structure and mechanics documented in the official manual and contemporary walkthroughs.
You will be guided world-by-world with concrete objectives: where to go on each world map, how to beat each vision and boss, prerequisites for unlocking the Momett House and Scrapbook content, and stepwise advice for optional 100% completion (collecting Dream Stones and Momett Dolls).
Set yourself up for the run
Reserve space on an 8MB PS2 memory card — the game uses approximately 370KB per save (one save file per region slot).
Save often after clearing Visions.
Familiarize yourself with core controls: jump/hover, Wind Bullet capture and throw, back/foreground targeting, and Popka 2P boost mechanics.
The official manual documents capture/throw and double-jump/hover basics you’ll rely on.
Decide whether to use Popka 2P support during Visions; Popka can give a midair boost but is optional.
Practice timing for the Popka jump on hazard or platform sections.
Plan for Dream Stones: collecting 100 Dream Stones grants an extra life and reaching at least 150 Dream Stones in an individual Vision unlocks a Scrapbook picture.
Treat Dream Stones as separate survival and optional Scrapbook objectives.
Keep multiple save files for tricky sections.
When attempting high Dream Stone totals, use Memory Clocks to practice without replaying the whole Vision after a failed section.
If possible, have a second controller ready for Popka Mode and test the controls before precision platforming.
Expect replay: some Visions are unlocked through paired routes or later map events; use the World Map to revisit cleared areas when necessary.
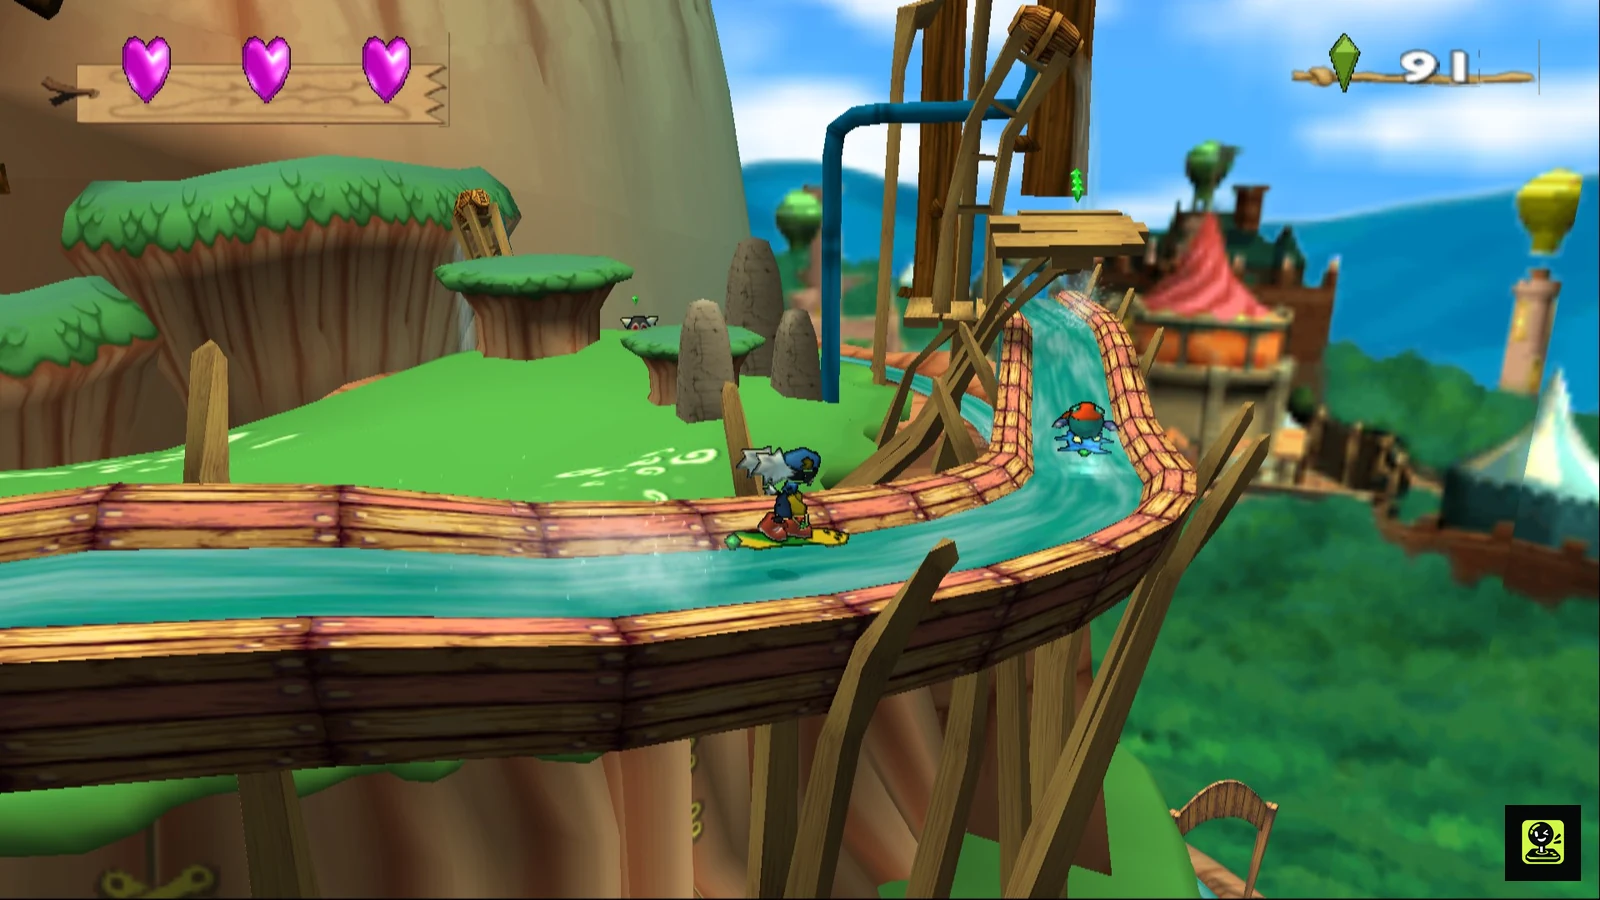
Preparation and Core Mechanics: Controls, Popka, Saves, and Dream Stones
The original North American PlayStation 2 release of Klonoa 2: Lunatea’s Veil is built around hovering, capturing enemies with the Wind Bullet, and using captured enemies for attacks, switches, platforms, and extra height. Learn the normal controls first: the campaign is designed to be completed with controller 1 alone. Memory Clocks are in-level restart points, not memory-card saves. When Klonoa loses a life, the game returns him to the latest activated clock and restores the items and Dream Stone total recorded there, making clocks useful for practicing difficult collection sections. Dream Stones increase lives and can unlock Scrapbook pictures at 150 or more in a Vision. Each ordinary Vision also contains six star-shaped Stars, referred to in the original manual as Momett Doll Bells; collecting all six and clearing that Vision awards one Momett Doll. These are separate from the story’s Harmony Bells and from Dream Stone totals.
1. Prepare the original PS2 save
Use the original North American PlayStation 2 release, identified by serial SLUS-20151, rather than Klonoa Phantasy Reverie Series. The original manual states that the game uses approximately 370 KB on a PlayStation 2 memory card. Insert a working memory card before creating the campaign file and leave sufficient free space for the save. If the card is nearly full, remove or copy unrelated data before starting.
The game creates a file region on the memory card. A card can hold multiple game names and saves within its available space, but this title saves through memory-card slot 1. Campaign progress, cleared Visions, collected Stars, Momett Dolls, Dream Stone records, and unlocked extras are stored on the memory card. Save after clearing a Vision or from the World Map, and do not switch off the console while the save is being written.
- Confirm that a working PlayStation 2 memory card is inserted in slot 1.
- Make sure the card has at least the game’s required free space available.
- Create or select the intended campaign file before beginning the first Vision.
2. Learn the standard controls
Move Klonoa with the D-pad or left analog stick. Left and Right move along the current route. Up makes Klonoa face away from the screen and is also used to enter doorways. Down makes him face toward the screen. Press X or Triangle to jump. Continue holding the jump button while falling to flap Klonoa’s ears and hover briefly. In normal circumstances he can flap once during a jump, so use the hover to correct a landing or extend a jump rather than expecting unlimited air time.
Circle and Square fire the Wind Bullet during normal play. L1 and L2 perform Klonoa’s action poses and do not provide a general progression ability. R1 displays the status information, including remaining lives and Momett Doll progress. Start pauses the Vision. The original game does not use vibration, and analog mode must be enabled if you want to control Klonoa with the left analog stick rather than the D-pad.
- Test a normal jump and hold the button while falling to hover.
- Use Up and Down to practice changing Klonoa’s facing direction.
- Enter a doorway with Up and check the R1 status display.
3. Capture, carry, and throw enemies
Aim the Wind Bullet at a capturable enemy and press Circle or Square. A direct hit inflates the enemy and lets Klonoa carry it. Press the Wind Bullet button again to throw the captured enemy. Throws defeat enemies, activate switches, break marked obstacles, open some containers, and damage bosses. Use the directional buttons while firing to aim into the foreground or background; a target can be close on screen but still be in the wrong depth lane.
Not every enemy can be captured. A Giant Moo is stunned by the Wind Bullet and can be used as a temporary platform, but it cannot be carried. An Armored Moo must have its armor destroyed by another thrown enemy before it can be captured. Other hazards, including Spikers and Digons, require avoidance or the stage’s intended movement mechanic. Watch each enemy before committing to a jump, because special enemies such as Kitons, Jetimos, Boomies, and flying Moos provide movement or puzzle functions rather than serving as ordinary ammunition.
- Capture an ordinary Moo, carry it, and throw it at a safe target.
- Practice aiming a throw into both the foreground and background lanes.
- Stun a Giant Moo and use it as a platform instead of trying to capture it.
4. Perform the enemy-assisted double-jump
Capture an enemy, jump, and press the jump button again while Klonoa is already airborne. He kicks the held enemy beneath himself and gains an extra burst of height. This is the standard double-jump technique for reaching high ledges, Stars, Dream Stones, and alternate routes. It can also strike an enemy beneath Klonoa. The second jump can be performed while rising or falling, but it must occur after the initial jump has left the ground.
A captured enemy changes the available movement option. Kitons let Klonoa fly for a short period when the jump button is tapped, while Jetimos launch him upward and must be used with attention to ceilings and landing space. Keep the captured enemy until the route is complete if it is the only tool that reaches the next platform. Throwing it away too early can make a collectible or required ledge unreachable.
- Capture a Moo and perform the second jump after leaving the ground.
- Use the technique to reach a safe ledge before attempting optional collectibles.
- Leave overhead room when using a Kiton or Jetimo.
5. Activate Memory Clocks before difficult sections
Break the bubble around a Memory Clock to activate it. If Klonoa loses a life afterward, the Vision restarts at that clock and restores the items acquired up to that point. Community Dream Stone documentation also confirms that the Dream Stone total reverts to the amount held when the clock was activated. This makes a clock valuable before a one-way slide, hoverboard run, boarding sequence, or Mirror Spirit collection route.
Use the clock as a practice marker. If a missed Dream Stone cannot be recovered, dying deliberately in a safe situation can return Klonoa to the earlier total for another attempt, but it costs a life. A memory-card save is different: it preserves campaign progress from the World Map or after a cleared Vision and does not function as an in-level rewind.
- Activate a Memory Clock before a demanding one-way section.
- Note which collectibles are before and after the clock.
- Do not mistake the restart point for a permanent memory-card save.
6. Manage Dream Stones and the Mirror Spirit
Green Dream Stones add one to the Vision total. Blue Dream Stones add five. Collecting 100 Dream Stones increases the remaining-life count by one, and a 1-UP Coin also grants a life. A Vision record of 150 or more Dream Stones unlocks an additional Scrapbook picture at Momett House when the game records the result.
The blue multiplier creature is called a Mirror Spirit in the original manual and is often called the Dream Stone Fairy in walkthroughs. While its effect lasts, collected Dream Stones count twice. Before breaking its bubble, position Klonoa near the intended collection line and identify the nearby stones. Once activated, move through the route immediately. Activate a Memory Clock before the sequence when possible, because a failed attempt can then be repeated without replaying the whole Vision.
- Use blue Dream Stones as five-point opportunities when planning for an extra life.
- Plan the route before releasing a Mirror Spirit.
- Remember that Dream Stone totals and six-Star collection are separate records.
7. Use Popka only when needed
Connect a second controller to the PS2’s controller 2 port. During a Vision, press Start on controller 2 to activate Popka; press Start again to dismiss him. Popka follows Klonoa and cannot be moved directly. Press Square on controller 2 to request a Support Jump. Popka becomes dizzy briefly after assisting, so the boost cannot be used continuously.
The campaign and ordinary collectible routes are designed to be completed without Popka. Learn the normal timing first, then enable him when a player needs assistance with a difficult jump or when you are practicing a route. Popka can make some jumps easier and can help with certain Dream Stone runs, but his Support Jump changes the timing of precision sections. Time Attack records are disregarded when a Support Jump is used during the attempt, so disable Popka for Boss Time Attack and Tower Time Attack score runs.
- Connect controller 2 before testing Popka.
- Use Start on controller 2 to summon or dismiss him.
- Use Square on controller 2 for the Support Jump.
- Do not use a Support Jump during a Time Attack attempt whose score you want recorded.
Before you move on
- You can jump, hover briefly, face both depth directions, and enter a doorway without confusing Up with ordinary route movement.
- You can capture, carry, and throw an ordinary Moo, then perform an enemy-assisted double-jump while airborne.
- You can identify a Giant Moo as a stunned platform and know that some hazards must be avoided rather than attacked.
- You have activated a Memory Clock and understand that a life loss restores the checkpoint position and the items and Dream Stone total recorded there.
- You understand that 100 Dream Stones grants an extra life, while 150 or more in a Vision unlocks a Scrapbook picture.
- You can distinguish the six star-shaped Stars from Dream Stones, Momett Dolls, and the story’s Harmony Bells.
- You can summon Popka with controller 2 and perform a Support Jump with Square, while still being able to complete normal routes with controller 1 alone.
References for this chapter
- Klonoa 2: Lunatea's Veil — Official PlayStation 2 Manual
- Klonoa 2: Lunatea's Veil — Guide and Walkthrough — PlayStation 2
- Klonoa 2: Lunatea's Veil — Secrets Guide — PlayStation 2
- Klonoa 2: Lunatea's Veil — Dream Stone FAQ — PlayStation 2
- Klonoa 2: Lunatea's Veil — North American PS2 release record, SLUS-20151
- Klonoa 2: Lunatea’s Veil — Official Namco Momett Doll Information
Prologue and World 1 — Sea of Tears
Sea of Tears ~ The Encounter is the opening Vision and teaches every movement tool needed for the campaign. Begin with the beach section, then continue through the village, caves, mountain, and storm-battered bridges until the mechanical dragon Boss Point appears. Use the Wind Bullet to capture Moos, throw them at enemies, eggs, boxes, and switches, or use a captured enemy for a double-jump. Press jump again while falling to hover briefly, but remember that Klonoa cannot hover while holding an enemy. Activate each Memory Clock before a difficult section. If Klonoa loses a life, he returns to the latest activated clock and items collected after that clock revert. Dream Stones are optional for story progress: 100 cumulative Dream Stones grant an extra life, while 150 or more in a Vision unlocks its Scrapbook picture. The Encounter has 135 ordinary Dream Stones and can reach 153 with Fairy-doubled stones. Six optional Stars are separate from Dream Stones; collecting all six and clearing the Vision awards its Momett Doll.
1. Clear the beach opening and learn Klonoa’s basic movement
After the opening scenes, Klonoa begins on the beach section of Sea of Tears ~ The Encounter. Move right through this short training route and use it to practice the controls before attempting a collectible run. The directional controls move Klonoa along the current path; pressing up or down changes whether he faces toward the background or foreground when a throw must travel between planes.
Press the jump button to leap across the first gaps. While Klonoa is descending, press jump again to flap his ears and hover briefly. The hover is limited and can be used only once during a normal jump, so use it to correct a landing or extend a jump rather than waiting until the last instant. Klonoa cannot flap while holding an enemy.
Approach a Moo and fire the Wind Bullet when you are close enough. A direct hit inflates and captures it. Press the attack button again to throw the captured enemy. Throw Moos into ordinary enemies, eggs, X-marked boxes, and switches. If an object is positioned behind or in front of Klonoa’s route, hold the appropriate directional input while firing or throwing to target that depth plane.
- Reach the end of the beach training section.
- Capture and throw a Moo.
- Use a second jump press while falling to hover.
- Practice a throw toward the background or foreground.
2. Use Moos to reach the first upper paths
Continue into the next sections of the same Vision rather than looking for a separate training-stage exit. When a ledge is too high for a normal jump, capture a Moo, jump while holding it, then press jump again in midair. Klonoa kicks the enemy downward and gains extra height. This enemy-assisted double-jump is required for several upper ledges and is also the safest way to collect elevated Dream Stones and Stars.
Keep a captured Moo until you have checked the next platform. The same enemy may be needed to break an overhead box, hit an egg, or attack something in the background. When a blue whirlwind appears, enter it from below and steer toward the next platform. Do not jump blindly into a whirlwind if an enemy is still needed for the landing.
The first sections contain optional Dream Stones and Stars, but none are required to open the route. If a collectible causes a fall, continue from the last safe platform unless you are deliberately pursuing a perfect run.
- Perform an enemy-assisted double-jump.
- Use a blue whirlwind to reach an upper route.
- Check overhead boxes and eggs before leaving an area.
- Continue forward after a missed optional collectible.
3. Activate Memory Clocks before difficult sections
When you reach the first Memory Clock, activate it before attempting the more careful jumps ahead. The clock becomes the latest restart point. If Klonoa loses a life afterward, the game returns him to that location, while Dream Stones, Hearts, and other items collected after the clock revert to their earlier state.
This behavior makes the clock useful for practice. Attempt the nearby route, note which jump or throw failed, then repeat from the clock. Do not assume that a post-clock Dream Stone remains permanently collected after a death. If the attempt is no longer capable of reaching your target, choose Retry from the pause menu to restart the Vision instead of carrying a failed run to the end.
The game can also save after clearing a Vision or from the World Map. A Memory Clock is a temporary in-Vision restart point, not a memory-card save.
- Activate the first Memory Clock.
- Understand that post-clock items revert after death.
- Use the clock to practice a difficult section.
- Use Retry when the entire collectible attempt needs to be reset.
4. Handle the cave and mountain sections
In the village and cave portions, watch for large background openings with glowing eyes. These cave enemies cannot be safely ignored at close range. Throw a Moo toward the opening first; while the cave creature is occupied eating it, move past the danger. Keep another Moo available if the route immediately presents an egg, box, or high ledge.
As the path climbs, use spring pads and enemy-assisted double-jumps to reach the upper ledges. If a route appears to end at a pendulum, move to the side platform and throw a Moo into the pendulum so it swings into the matching pillar. Repeat the setup for the other pillar if necessary. Once the obstruction is broken, return to the main route and continue right.
Search around the entrance and behind obvious platforms for Stars and Dream Stones, but do not confuse these optional items with the story objective. The route remains open even if the six Stars are not collected.
- Distract cave creatures with a thrown Moo.
- Use spring pads and double-jumps to climb.
- Use the pendulum to break the blocking pillars.
- Return to the main route after optional exploration.
5. Slow the bird sequence and prepare the Fairy route
During the bird-riding section, use the direction that slows the bird when a line of Dream Stones approaches. Staying at full speed can carry Klonoa past stones or into a poor landing. The bird sequence is still optional for story completion, so prioritize staying mounted and reaching the far side safely.
The Encounter has 135 ordinary Dream Stones. Its maximum can reach 153 because certain stones count for double value while the Dream Stone Fairy is active. If you want the 150-Dream-Stone Scrapbook threshold, return to the earlier area and bring a Jumping Moo into the Fairy section before collecting the nearby stones that would otherwise be lost.
Release the Fairy from its bubble only after reaching the intended starting position. Then move quickly across the bridge, collect the Fairy-doubled line, and use the waiting Moo for the elevated group if the timing allows. If the Fairy effect expires or the approach is spoiled, restart from the Memory Clock or use Retry. The Fairy route is never required to defeat the boss.
- Slow the bird before difficult Dream Stone rows.
- Bring a Jumping Moo if pursuing 150 Dream Stones.
- Avoid collecting the Fairy-section stones before releasing the Fairy.
- Restart the attempt if the Fairy timing is lost.
6. Finish the Vision and enter the Boss Point
The final area contains a downhill slide with optional Dream Stones placed at different heights. Stay near the center, jump for raised stones when the landing remains safe, and avoid sacrificing the exit for a single collectible. Reaching the end clears The Encounter even if Dream Stones or Stars were missed.
After the results screen, return to the World Map. The first story route continues through the available point leading to the mechanical dragon. Save from the World Map before entering if you want the progress written to the memory card. Clearing a Vision and clearing its Boss Point are separate records, so do not stop after the Vision results screen.
- Reach the end of the final slide.
- Confirm The Encounter is cleared.
- Return to the World Map.
- Save before entering the Boss Point.
7. Defeat the mechanical dragon
The mechanical dragon’s vulnerable target is the yellow mark on its rear. Capture a Moo, circle behind the boss, and throw the Moo directly at that target. Keep moving around the outer part of the arena because the dragon launches spiked-ball hazards. Do not wait directly in front of it; reposition behind it when the opening appears.
The first phase takes four successful hits. After the fourth hit, the dragon begins spinning with metal parts extending into the track. Stay clear of the rotating body, wait for a safe opening, capture another Moo, and repeat the rear-target attack four more times. The complete fight therefore requires eight successful hits.
If Klonoa is struck, retreat and look for a fresh Moo rather than forcing a throw through the spinning hazard. After the eighth hit, let the victory scene play, return to the World Map, and save. The next story route opens after the post-boss conversation and the following map sequence.
- Hit the yellow rear target four times.
- Avoid the spinning metal-hazard phase.
- Hit the rear target four additional times.
- Watch the post-boss story scene.
- Save from the World Map.
- Verify that the next route has opened.
Before you move on
- The beach opening and all required sections of Sea of Tears ~ The Encounter are complete.
- The Encounter appears cleared on the World Map.
- The mechanical dragon Boss Point is cleared.
- The post-boss story scene has played.
- The next campaign route is available on the World Map.
- The game has been saved from the World Map if progress needs to be recorded.
- Optional: the cumulative Dream Stone total has reached another 100-stone life threshold.
- Optional: The Encounter has at least 150 Dream Stones if its Scrapbook picture is being pursued.
- Optional: all six Stars were collected before clearing The Encounter and the corresponding Momett Doll appears in the Status screen.
World 2 — Baguji’s Island and La-Lakoosha
Baguji’s Island is a short story interlude, not a conventional playable Vision. Speak with Baguji, then select La-Lakoosha from the World Map. The Vision teaches Ow-Gow distraction, enemy-assisted double-jumps, bounce-pad routes, foreground targeting, and the pendulum mechanism that opens the upper path. Reach the High Priestess to complete the required objective. The six Stars are optional collectibles; collect all six during the same Vision and then clear La-Lakoosha to earn its Momett Doll. Dream Stones are also optional and can be pursued during a later replay, especially when working toward Scrapbook records.
1. Complete Baguji’s Island
After the opening Sea of Tears events, the World Map takes Klonoa to Baguji’s Island. Walk to Baguji and continue the conversation until the scene ends. There is no conventional platforming Vision or collectible route on this visit.
Return to the World Map and select La-Lakoosha. The required progression is not complete after merely visiting Baguji: Klonoa must travel through La-Lakoosha and meet the High Priestess at the top of the settlement.
- Finish Baguji’s conversation.
- Return to the World Map.
- Select La-Lakoosha.
2. Reach the first lower route after the cannon
Follow the opening path and enter the cannon. After it launches Klonoa across the canyon, look below the next main platform for a breakable block. Capture the nearby Moo, jump, and use the enemy-assisted second jump to break the block.
Collect the items inside if the landing is safe. An egg appears after the block is broken; strike it to obtain Star 1. Return to the main route afterward. Before climbing further, avoid throwing away every nearby enemy, because La-Lakoosha repeatedly uses captured enemies to reach ledges above normal jump height.
- Use the Moo to break the lower block.
- Strike the egg that appears after breaking it.
- Collect Star 1 if pursuing the Momett Doll.
3. Climb the first cave and collect the upper Stars
In the first cave, use the Moos around the triangular ledges to climb to the highest ledge. Capture one enemy, jump, and use the extra jump to reach the next level; repeat with the second Moo when necessary. At the top, face toward the screen and pop the bubble containing Star 2.
Continue to the series of bounce pads. Take the first pad to the upper ledge, then move left to the next pad. Capture the jumping Moo as you rise and use it for the extra jump to reach Star 3.
For Star 4, capture a Moo before using the bounce pad. From the upper ledge, double-jump toward the Whirlwinds and reach the ledge above the Star. Drop into the chamber, bounce from the pad, and use the captured enemy to reach the Star. If Klonoa misses a ledge, return to the nearest safe platform rather than throwing the only enemy into the distance.
- Reach the top of the triangular ledges.
- Pop the bubble containing Star 2.
- Use the jumping Moo to reach Star 3.
- Drop into the chamber and use the bounce pad for Star 4.
4. Distract the Ow-Gows and preserve useful enemies
Ow-Gows cannot be defeated by a normal attack. Capture another enemy and throw it in front of an Ow-Gow. The Ow-Gow pauses to eat the thrown enemy, creating a brief opening to pass. Move through while it is occupied, then capture another enemy if one is available.
Do not spend the only enemy near a tall ledge merely to distract an Ow-Gow. When the route offers multiple enemies, use one as bait and keep another for an enemy-assisted jump or a nearby mechanism. If an Ow-Gow is positioned in a narrow passage, wait for it to commit to eating before crossing.
- Distract each Ow-Gow with a thrown enemy.
- Pass while the Ow-Gow is occupied.
- Keep an enemy available for the next elevated route when possible.
5. Collect the final two Stars in the pendulum area
The route eventually reaches a large circular area with a pendulum and blocked stone gates. Before opening the gates, explore the left side. Jump onto the floating leaves and hover across to collect Star 5.
Return to the central area and take the right-hand route through the bounce-pad section. When you reach the platform immediately after the pad, jump onto it. An egg appears nearby. Capture the flying Moo and throw it at the egg to reveal Star 6.
These six Stars are the optional Momett Doll objective for La-Lakoosha. The Star display tracks the pieces collected during the Vision, so confirm that all six have been obtained before finishing if you want the doll.
- Use the floating leaves to reach Star 5.
- Reach the platform after the right-side bounce pad.
- Throw the flying Moo at the revealed egg.
- Confirm that all six Stars are collected.
6. Open the upper route and meet the High Priestess
At the center of the pendulum area, capture an enemy and throw it at the pendulum. The pendulum swings into the stone gates and opens the route to the right. Throwing directly at the gates does not solve this obstacle.
Continue through the opened passage and follow the upper route to the High Priestess. Complete the scene with her; this is the required story objective for La-Lakoosha. The story Bell of Tranquility belongs to the following Claire Moa Temple sequence and is not one of La-Lakoosha’s six optional Stars.
- Throw a captured enemy at the pendulum.
- Wait for the pendulum to strike the stone gates.
- Travel through the opened right-hand route.
- Reach and speak with the High Priestess.
7. Clear the Vision and handle missed collectibles
After the High Priestess scene, complete the exit and return to the World Map. La-Lakoosha is cleared when the Vision result is recorded. If all six Stars were collected during that run, the La-Lakoosha Momett Doll is awarded after the Vision is cleared.
If a Star or Dream Stone was missed, replay La-Lakoosha from the World Map. A normal clear is the priority on the first attempt; use a later replay for the lower block, cave ledges, floating leaves, and pendulum-area egg. Dream Stones are separate from Stars and do not replace the six-Star requirement for the Momett Doll.
- Finish the High Priestess sequence and exit the Vision.
- Confirm that La-Lakoosha is marked cleared.
- Verify the Momett Doll was awarded after collecting all six Stars.
- Replay the Vision for missed Dream Stones or Stars.
Before you move on
- Baguji’s conversation has finished.
- La-Lakoosha was selected from the World Map.
- The High Priestess scene played at the top of La-Lakoosha.
- La-Lakoosha is marked cleared after leaving the Vision.
- All six La-Lakoosha Stars were collected in one run if pursuing the Momett Doll.
- The La-Lakoosha Momett Doll appears in the collection after the cleared Vision result.
- Any missed Dream Stones or Stars were recovered through replay.
World 3 — Claire Moa Temple and Joilant Plaza
Clear Claire Moa Temple, defeat Folgaran, and ring the Bell of Tranquility to open Joilant Plaza. Tat then divides the story route between Jungle Slider and Joilant Fun Park; both Visions are required, but you may complete them in either order. Catch Tat in the Vision containing the Element, then return to Joilant Plaza for the two-phase Leptio battle. Defeating Leptio and completing the Bell of Joy scene opens Volk Hall and unlocks Momett House south of Joilant’s central plaza. Momett House initially provides Boss Time Attack and the Scrapbook. Six Stars in a Vision are an optional Momett Doll objective, while Dream Stone totals are tracked separately; reaching at least 150 Dream Stones in a qualifying Vision unlocks an additional Scrapbook picture.
1. Clear Claire Moa Temple and reach Folgaran
Select Claire Moa Temple from the stage map. Follow the normal route using the Wind Bullet, captured enemies, hovering, and enemy-assisted double-jumps. Capture Moos whenever a switch, breakable object, gap, or raised platform requires one. You can throw a captured Moo at a target or release it beneath Klonoa during a jump to gain extra height.
Watch the stage’s foreground and background lanes. Some enemies and switches appear offset from Klonoa’s current path, so adjust his position before firing instead of jumping directly toward the target. The six Stars and Dream Stones are optional during this first clear; missing them does not prevent the boss or the next story area.
Continue along the forward route until the stage changes to the boss arena. Leorina and Tat are waiting there with Folgaran the Armor Beast.
- Reach the Folgaran arena.
- Use captured Moos for required switches and elevated routes.
- Ignore risky collectible detours if you only want campaign progress.
2. Defeat Folgaran the Armor Beast
Folgaran’s vulnerable point is the exhaust system on his back. During the first phase, he rears up and sends Spikers around the floor. Jump over the Spikers while watching for the exhaust to face you, then capture a Moo and throw it into the exposed exhaust.
After the hit, Folgaran spins. Throw another Moo at the exposed target to interrupt the spin. Keep moving while waiting for the next opening, because the Spikers remain active around the arena and can damage Klonoa if you stand still.
After the first form is defeated, Folgaran lowers his claws and replaces the Spiker pattern with sweeping claw attacks. Jump over the claws, capture the Moos moving through the arena, and throw them at the exhaust whenever it turns toward Klonoa. The front armor and claws are not the target.
When Folgaran falls, approach the Bell of Tranquility and fire an Air Bullet at it. The bell awards the Element, the story returns Klonoa’s group to Baguji’s Island, and Joilant Plaza becomes available.
- Attack only Folgaran’s rear exhaust system.
- Use a second Moo to stop the first-phase spin.
- Jump over the three-claw attacks in the second phase.
- Ring the Bell of Tranquility after the fight.
3. Enter Joilant Plaza and choose the first Vision
Select Joilant Plaza from Baguji’s Island. Tat steals the Element from Lolo and splits into black and white forms. The two forms flee to different sides of the park: one goes to Jungle Slider and the other goes to Joilant Fun Park.
You may choose either Vision first. The Vision completed first will not contain the Element; the other Vision will contain it. Both Visions are required before the Leptio battle, so do not return to the plaza after only one clear expecting the boss to start.
Optional Stars and Dream Stones can be collected during these clears, but a missed item does not invalidate the stage. Cleared Visions can be replayed from the stage map.
- Open Joilant Plaza after Folgaran’s defeat.
- Choose either Jungle Slider or Joilant Fun Park first.
- Plan to clear the other Vision before returning for Leptio.
4. Clear Jungle Slider and catch Tat when necessary
Jungle Slider is a Float Board Vision. On the first attempt, follow Tat’s route for one circuit so you can learn the turns, ramps, and hazards. Do not stay directly behind Tat for the entire chase; use the route ahead of him to cut across his line and close the distance.
At the major choice between the upper ramp and the lower river route, take the ramp if you want the elevated line and its optional rewards. Maintain enough speed to clear ramps and gaps, but slow the board before hazards rather than making a last-second correction.
When you are close enough to Tat, repeatedly fire Air Bullets with Square or Circle. The chase ends when Tat is caught. If Jungle Slider was completed before Joilant Fun Park, this stage’s Tat does not have the Element; in that case, finish the Vision and proceed to Joilant Fun Park for the actual capture.
- Learn the Float Board route before prioritizing the chase.
- Use the upper ramp at the major split when practical.
- Fire Air Bullets as soon as Klonoa is close to Tat.
- Do not restart a successful clear because a Star or Dream Stone was missed.
5. Clear Joilant Fun Park’s required puzzles
Joilant Fun Park introduces the Kiton, which lets Klonoa fly for a limited time after capture. From the Swingship, take the left platform and enter the tent. Capture the regular Moo, use it for the first double-jump, then capture the jumping Moo and use it to reach the platform with the green switch.
The Haunted House contains three timed switch rooms. In the first room, hit the two switches on the far side, enter the Whirlwind, and hit the switch near the side where Klonoa entered. In the second room, double-jump to the Kiton ledge, fly the Kiton to the upper ledge and activate that switch, drop down to activate the second, then throw the Kiton at the third.
In the third room, hit the Giant Moo with an Air Bullet, activate the ground switch, and jump on the stunned Giant Moo. Ride the Whirlwind to the right ledge, activate the second switch, and throw the flying Moo at the third switch. If the timer expires, repeat the room and prioritize the switches over nearby collectibles.
Finish the remaining route. If this is the Vision containing the Element, close the distance to Tat and fire Air Bullets to catch him. Otherwise, complete the stage and return to Joilant Plaza after both Visions are marked clear.
- Use the two Moos to reach the tent’s green switch.
- Complete all three Haunted House switch rooms before the timers expire.
- Use the Kiton for the elevated switches and flying routes.
- Finish both Jungle Slider and Joilant Fun Park.
6. Defeat Leptio the Flower Clown
After both Joilant Visions are complete and Tat has been caught, return to Joilant Plaza. The explosion triggers the Leptio the Flower Clown battle.
Leptio begins by splitting into four copies. Throw a Moo at one copy to reveal the genuine Leptio, then hit the revealed target with another Moo. Leptio rolls across the arena and knocks over the false copies. Continue throwing Moos at him as he rolls; each successful hit makes his movement faster, so keep a usable Moo nearby and avoid crossing the arena unnecessarily.
In the second form, Leptio enters a spiked cylinder. Hit the cylinder with a Moo to make it roll, then move to the opposite side of the arena so the inner Leptio becomes visible. Throw another Moo at the exposed target. Repeat this sequence three times, taking care not to touch the spiked casing while repositioning.
After the final hit, allow the victory scene to finish. Klonoa rings the Bell of Joy and receives another Element. Returning to Baguji’s Island opens Volk Hall as the next required campaign destination.
- Reveal the genuine Leptio during the four-copy phase.
- Keep throwing Moos while Leptio rolls, avoiding his path.
- Attack the inner target after the spiked cylinder rolls into position.
- Complete three successful cylinder-phase hits.
- Wait for the Bell of Joy scene and Volk Hall unlock.
7. Enter Momett House and check the optional records
After Leptio is defeated, Momett House appears south of Joilant’s central plaza on the stage-select map. It is marked with Momett’s mustache. This is the correct point to begin using the house; it is not available before the Joilant boss.
Momett House initially provides two options: Boss Time Attack and the Scrapbook. Boss Time Attack begins with the bosses already defeated in the main story, with additional entries becoming available as more story bosses are cleared. The Scrapbook begins with one picture.
Dream Stone totals are recorded separately for each Vision. Reaching at least 150 Dream Stones in a qualifying Vision unlocks an additional Scrapbook picture. The current best total is retained on the status summary, so a later replay can improve a previous result without needing to beat the earlier score during the same attempt.
Stars are a different optional objective. Collect all six Stars in a Vision and then clear that Vision to earn its Momett Doll. The Bell of Tranquility after Folgaran and the Bell of Joy after Leptio are story objects, not substitutes for the six Stars. Neither the six-Star requirement nor a 150-Dream-Stone total is needed to open Volk Hall.
Use the stage-select map and status screen to review progress. Replay Claire Moa Temple, Jungle Slider, or Joilant Fun Park later for missed Stars, Dream Stones, or the six-Star Momett Doll requirement. When ready to continue the campaign, return to Baguji’s Island and select Volk Hall.
- Momett House is visible south of Joilant’s central plaza after Leptio’s defeat.
- Boss Time Attack and the Scrapbook are available inside.
- Dream Stone records and six-Star records remain separate objectives.
- Volk Hall is available as the next required campaign destination.
Before you move on
- Claire Moa Temple is cleared and Folgaran the Armor Beast is defeated.
- The Bell of Tranquility has been rung and Joilant Plaza is open.
- Jungle Slider and Joilant Fun Park are both marked clear.
- Tat has been caught in the Vision containing the Element.
- Leptio the Flower Clown is defeated and the Bell of Joy scene has finished.
- Momett House is visible south of Joilant’s central plaza and opens when entered.
- Boss Time Attack and the Scrapbook are available in Momett House.
- Volk Hall is available as the next required campaign destination.
World 4 — Jungle Slider and Joliant Fun Park
After Folgaran, Joliant Plaza opens Jungle Slider and Joliant Fun Park. Tat splits into black and white forms, with the Element assigned to whichever Vision you complete second, so either stage may be played first. Clear both Visions, catch the Element-carrying Tat, and return to Joliant Plaza for the two-phase Leptio fight. The six Stars in each Vision are optional and separate from Dream Stones. Learn each route on a safe clear, then replay the stages for Stars or a 150-Dream-Stone Scrapbook result.
1. Open both Joliant Visions
At Joliant Plaza, Tat steals the Element and divides into black and white forms. The black Tat enters Jungle Slider, while the white Tat enters Joliant Fun Park. The game does not require a fixed order. Enter either available Vision, clear it, then return to the plaza and complete the other. The Tat in the second stage is the one carrying the Element.
For the campaign, prioritize reaching the exit and catching Tat. Missing a Star or Dream Stone does not invalidate the clear. You can replay either Vision from the World Map, so do not risk a completed run by restarting for one missed collectible. The six Stars are optional stage objectives, while the Element and Leptio encounter are required progress.
- Both Joliant Visions are available from the World Map.
- One Vision is cleared before entering the other.
- You know that the second Tat carries the Element.
- Optional Stars and Dream Stones are being treated separately from story progress.
2. Clear Jungle Slider safely
Jungle Slider is a hoverboard Vision. Klonoa follows the water course automatically, while you steer, jump, hover, and control speed. On the original PS2 controls, pushing toward the back of the course accelerates and pushing toward the front slows the board, depending on Klonoa's facing direction. Practice the course before attempting a full Dream Stone run, because missed items cannot be collected by backtracking on the board route.
At the first major choice, take the upper ramp instead of dropping into the river. Hit the pink Bouncer and hover toward the first Star. After the Digon section, enter the Whirlwind for the second Star. After the large fall, use both pink Bouncers; the third Star is on this route beside a Heart. Brake before Digons, narrow ramps, and slide entrances rather than making a last-second turn.
Keep the board centered before every jump. If you land at an angle, correct the board before the next ramp instead of holding a sharp direction through the whole descent. A Memory Clock or checkpoint is useful for practicing a difficult section, but do not confuse checkpoint practice with permanent Dream Stone saving; a failed attempt restores the stage's collectible state to the relevant checkpoint behavior.
- Take the upper ramp at the first route split.
- Use the Whirlwind after the Digons for Star 2.
- Hit both pink Bouncers after the large fall for Star 3.
- Brake before Digons and narrow ramps.
- Use checkpoints to practice before attempting a full Dream Stone run.
3. Use Moo Boarders for Jungle Slider Stars
When the Moo Boarders appear, capture one whenever a raised route or ring sequence is ahead. During the chase, the second ring contains Star 4 and the fourth ring contains Star 5. Line up with the ring before jumping; the extra jump from the captured Moo is more reliable than trying to reach the higher route with a normal jump. Avoid aggressive steering while airborne, because drifting away from the ring can leave you too low for the next landing.
After the cactus sections, use the Moo Boarder route that leads across the middle vines. Slow down before the landing, then resume speed once Klonoa is stable. The boarder route also carries Dream Stones, so it is worth learning even if you are not collecting every Star on the first clear.
At the Tat chase, follow the course once if necessary to observe his loop. On the next pass, move toward the point where he will appear instead of following directly behind him. When you are close, fire repeated Air Bullets to catch him. A Moo approaches during this sequence; capture it and double-jump to the Star above the overhang. If Tat escapes, stay on the course and use the next loop rather than restarting immediately.
- Capture a Moo Boarder before the raised ring routes.
- Collect Star 4 at the second ring.
- Collect Star 5 at the fourth ring.
- Intercept Tat from ahead instead of trailing him.
- Use the approaching Moo for Star 6 above the overhang.
4. Complete Joliant Fun Park's opening puzzles
In the shooting gallery near the start, use a nearby Moo to break the eggs in the background. The upper-right egg contains the first Star according to the original stage route. The shot can be retried, so line up the Moo instead of rushing the throw.
After Kiton is introduced, capture it and follow the upward Dream Stone trail while keeping Klonoa over solid ground. Fly high enough to reach the bubble containing Star 2, then throw Kiton into it. At the swinging ship, carry a Moo to the right and throw it into the blocking box. Follow the opened route upward for Star 3.
Inside the tent, capture the regular Moo and use it to double-jump to the first wooden platform. From there, capture the jumping Moo and use its additional height to reach the green switch. Continue to the Jetimo. After the launch, control Klonoa during the descent and drop toward the shorter tower to collect Star 4 before continuing.
- Break the upper-right shooting-gallery egg for Star 1.
- Use Kiton to reach Star 2.
- Use a Moo to destroy the block beside the swinging ship.
- Activate the tent's green switch.
- Drop to the shorter tower after the Jetimo for Star 4.
5. Solve the Haunted House switch rooms
The Haunted House has three timed switch puzzles. In the first room, hit the two switches on the far side, jump into the Whirlwind, and strike the switch near the entrance side before the opening closes. Move directly through the opened route once all three switches register.
For the second puzzle, double-jump to the ledge holding Kiton. Fly Kiton to the upper switch, drop down to hit the second switch, then throw Kiton at the third. For the third puzzle, hit the Giant Moo with an Air Bullet, activate the ground switch, and use the Moo as a platform. Ride the Whirlwind to the right ledge, hit the second switch, then throw the flying Moo at the third switch.
The fifth Star is on a moving drum above the blue fire. Ride the drum across the gap and hit the Star as it becomes reachable. After the third switch puzzle, enter the swamp area, capture Kiton, and fly straight upward until Klonoa is level with the Star hanging over the water. Throw Kiton to collect Star 6. Finish the Vision, then replay for any missed Stars or Dream Stones.
- Complete all three timed switch puzzles in order.
- Use the moving drum to reach Star 5.
- Use Kiton in the swamp for Star 6.
- Finish the Vision before beginning a collection replay.
6. Catch Tat and defeat Leptio
Once both Visions are cleared and the Element-carrying Tat has been caught, the explosion at Joliant Plaza triggers the Leptio the Flower Clown fight. In the first phase, Leptio creates four copies. Hit one copy with a Moo to reveal the real Leptio, then hit the revealed target with another Moo. He rolls around the arena and knocks over the other copies. Keep moving, avoid his path, and continue using Moos whenever he becomes vulnerable; his rolling speed increases as the phase continues.
In the second phase, Leptio enters a spiked cylindrical casing. Hit the casing with a Moo so it rolls away, then run to the opposite side of the arena. From there, Leptio is visible inside the casing. Throw another Moo at him while the opening is exposed. Repeat the casing-and-opposite-side sequence until the phase ends; the established route uses three successful hits.
After the victory, Klonoa rings the Bell of Joy and receives the next Element. Return to Baguji's Island and confirm that Volk Hall has opened. That map change, rather than a Dream Stone or Star total, is the completion marker for this chapter.
- Reveal the true Leptio among the four copies.
- Use Moos to damage Leptio during the rolling phase.
- Attack Leptio inside the casing from the opposite side.
- Ring the Bell of Joy after the fight.
- Confirm that Volk Hall is open at Baguji's Island.
Before you move on
- Jungle Slider is marked cleared on the World Map.
- Joliant Fun Park is marked cleared on the World Map.
- The Element-carrying Tat has been caught.
- Leptio the Flower Clown has been defeated.
- The Bell of Joy has been rung.
- Volk Hall is open on Baguji's Island.
- Optional check: each Vision's results show the desired six-Star total.
- Optional check: a qualifying Vision with at least 150 Dream Stones has unlocked its Scrapbook picture at Momett House.
References for this chapter
World 5 — Volk Hall and Volk City
After defeating Leptio the Flower Clown in Joliant Plaza, return to Baguji’s Island and enter Volk Hall. Leorina has armed two reactors, so you must clear both Volk City and Underground Factory before the Volk Hall boss becomes available. The two reactor Visions can be completed in either order. Volk City emphasizes slides, Jetimo lifts, launchers, missile timing, foreground targeting, and a short background detour. Underground Factory introduces pink and maroon Boomies, conveyors, cannons, Giant Moo platforms, and the Pop-Up Tat mini-boss. After both reactor Visions are cleared, defeat Mobile Tank Biskarsh in Volk Hall. Six Stars are optional collectibles; collecting all six in a Vision and then clearing it awards that Vision’s Momett Doll. Dream Stones are a separate objective, and 150 in a qualifying Vision unlocks its Scrapbook picture.
1. Enter Volk Hall and choose a reactor route
Once Joliant Plaza and Leptio are complete, return to Baguji’s Island. The route to Volk Hall is now open. At Volk Hall, Leorina’s two reactors create two required Visions: Volk City and Underground Factory.
Enter either Vision first. Clearing one does not finish the chapter; you must clear both reactor routes before the Volk Hall boss appears. Treat the six Stars in each Vision and the Dream Stone total as optional cleanup. If a difficult collectible attempt costs a life, finish the Vision and replay it from the World Map later.
- Volk Hall is open from Baguji’s Island.
- Volk City and Underground Factory are available.
- Both reactor Visions are required before the boss fight.
2. Clear Volk City’s opening route
Begin with the circular slide. The first Star is above the slide, so jump and hover toward it instead of remaining on the lowest line. Missing it does not affect the route.
After the Jetimo carries Klonoa into the city, an Armored Moo and a regular Moo appear near a wrecked vehicle. Capture one and throw it toward the screen to reach the second Star in the foreground. This is a depth-targeting throw, not a normal horizontal throw.
Continue across the rooftops. The third Star is positioned between two FlacKannons firing missiles. Watch the firing rhythm, wait for a gap, and use the nearby Moo or platforms to reach the Star without jumping into the projectile path.
- Search above the opening slide for Star 1.
- Use a foreground throw near the first Jetimo for Star 2.
- Cross the missile gap between the FlacKannons for Star 3.
3. Use the Erbil detour and second Jetimo
In the underground section, reach the first Erbil and continue until the next Jetimo. Before boarding, capture the Erbil and return toward the nearby blocks to the left and above the route. Break through them to reach the fourth Star and its alternate path.
On the following Jetimo ascent, move as far right as the route allows. During the descent, the fifth Star appears near the path. Set Klonoa’s position before dropping and pop the bubble as you pass. This collectible is easy to miss, so replay the Vision rather than taking unnecessary damage to force it.
After the Jetimo reaches the rooftops, use the launchers in sequence. At the third launcher in the second group, face toward the screen and fire an Air Bullet at the bubble containing the sixth Star. The bubble is offset from the launcher’s normal travel line.
- Use the Erbil to break the elevated blocks for Star 4.
- Move right during the underground Jetimo descent for Star 5.
- Face the screen at the third launcher in the second rooftop group for Star 6.
4. Attempt Volk City’s Dream Stone Fairy sections
For the Scrapbook objective, aim for at least 150 Dream Stones in Volk City. The Dream Stone FAQ lists 135 standard stones and 15 additional stones tied to Dream Stone Fairy timing. The exact maximum has been disputed because some players report reaching stones beyond the documented route, so concentrate on reaching the 150 threshold rather than assuming a fixed higher total.
During the first Fairy sequence, break the Fairy’s bubble while sliding. Move through the timed Dream Stones, then clear the Armored Moos without losing the route’s momentum. The Fairy’s multiplier window is temporary, so avoid unnecessary detours once it begins.
The second Fairy sequence is reached through the optional background section in Area 1. Do not stay only on the obvious foreground route. Enter the background path, break the Fairy’s bubble, use the springboards, descend to the lower blue whirlwind, and climb through the remaining timed stones. If a Fairy section fails early, retry the Vision instead of carrying an incomplete total through the entire level.
- Enter Volk City’s background section during the first area.
- Complete both Dream Stone Fairy sequences for the 150 target.
- Replay the Vision after an early Fairy failure.
5. Solve Underground Factory’s Boomie and Giant Moo puzzle
Underground Factory introduces pink and maroon Boomies. Pink Boomies detonate sooner; maroon Boomies provide more time. Use the maroon Boomie for the required gorge puzzle after the long line of Boomies.
When you see the Giant Moo on the opposite side of the gorge, return to the maroon Boomie near the preceding line. Throw it across the gap, then use the cannon to cross. Hit the Giant Moo with an Air Bullet, capture or stun it as needed, and pick up the Boomie.
Jump onto the Giant Moo and double-jump to the upper ledge where the route continues. The surrounding conveyor, spring, and moving-platform areas also contain Stars and Dream Stones. Search above and below the main lane, but do not abandon the required Boomie setup merely to chase an optional item.
- Choose the maroon Boomie for the gorge puzzle.
- Cross with the cannon and hit the Giant Moo with an Air Bullet.
- Use the Giant Moo to double-jump to the upper ledge.
6. Defeat Pop-Up Tat
Pop-Up Tat is the Underground Factory mini-boss. Several heads rise from separate holes, and some charge glowing projectiles before attacking. Capture the available Moos and throw them at exposed heads; ordinary jumps are not the intended damage method.
Use both horizontal and foreground throws when a head is offset in depth. Charging heads are easier to read because their attack preparation gives you time to line up the throw. Continue attacking exposed heads until Pop-Up Tat is defeated, then complete the remaining factory route.
- Use captured Moos as the damage source.
- Adjust throws for foreground and background offsets.
- Defeat Pop-Up Tat before leaving the factory route.
7. Return to Volk Hall and defeat Mobile Tank Biskarsh
After both reactor Visions are cleared, return to Volk Hall for Mobile Tank Biskarsh. The tank’s vulnerable point is its top. Capture a Moo, reach a Bouncer, and double-jump so the Moo strikes the tank from above. Avoid standing underneath it while it jumps. If you delay too long, it launches homing missiles, so use each available opening.
Biskarsh then changes into a wheeled form and rolls from the upper stairs toward Klonoa. Capture the Flying Moo that appears, use the Bouncer, and line up another attack from above. If the throw misses, retreat from the rolling path and wait for the next safe setup.
Repeat the Flying Moo attack when the boss returns to the wheel phase. The final successful hit clears Volk Hall and opens Volkan Inferno as the next campaign destination.
- Attack Biskarsh from above in the first phase.
- Use a Moo and Bouncer before the transformation.
- Use the Flying Moo and Bouncer during the wheel phase.
- Confirm that Volkan Inferno opens after victory.
Before you move on
- Volk City is marked cleared on the World Map.
- Underground Factory is marked cleared on the World Map.
- Pop-Up Tat has been defeated in Underground Factory.
- Mobile Tank Biskarsh has been defeated in Volk Hall.
- Volkan Inferno is available as the next story destination.
- Any Vision with all six Stars was cleared afterward, awarding its Momett Doll.
- Volk City reaches at least 150 Dream Stones if its Scrapbook picture is being pursued.
References for this chapter
World 6 — Volkan Inferno and Ishara's Ark
After defeating Mobile Tank Biskarsh in Volk Hall, enter Volkan Inferno and complete its pursuit, slide, rooftop, cannon, tornado and smokestack sections. Keep moving during each chase, because the pursuing machine can catch Klonoa if he stops or spends too long hovering. Six optional Stars are placed along the route and can be collected during later replays. Ishara's Ark follows as a long traversal Vision. Its required objective is to activate three engines by turning each nearby Likuri red and throwing it through the engine's red opening. The Ark then begins crossing the Lake of Isolation. Follow the return route after the third engine to finish the Vision and open the route toward Mountains of Mira-Mira. Dream Stones, Stars and the 150-Dream-Stone Scrapbook target are optional and do not block campaign progress.
1. Enter Volkan Inferno after Biskarsh
Once Mobile Tank Biskarsh has been defeated, select Volkan Inferno from the newly opened route. This Vision is a forward-moving escape sequence rather than a normal exploration stage. A pursuing machine follows Klonoa through several sections, and being overtaken causes an immediate failure.
Move decisively, but do not panic. Short pauses are safe in the designated breaks between chase segments. Avoid unnecessary hovering because it costs time and can let the pursuer close the distance. On a first clear, prioritize reaching the end of the Vision over collecting every Dream Stone or Star.
- Begin this chapter with Biskarsh already defeated.
- Enter Volkan Inferno from the campaign map.
- Keep optional collection separate from the first completion attempt.
2. Cross the burning slide and first chase
The opening route leads onto a drum and then down a ramp covered with blue fire. Stay aligned with the route and prepare for the landing at the bottom. The first optional Star is at the end of this burning ramp; collect it only if you can land safely without losing momentum.
The next pursuit runs through the damaged city toward the park area. Follow the ledges and use the green balloon and nearby Whirlwinds to gain height when the route rises. The second Star is in the air beside a ledge during this chase. If the pursuer is close, pass the Star and return for it on a replay rather than risking an immediate defeat.
- Survive the blue-fire ramp.
- Use the balloon and Whirlwinds to maintain the route.
- Treat the first two Stars as optional objectives.
3. Clear the park, rooftops and cannon route
At the park, use the Whirlwind to reach the next section and continue forward. The third Star is positioned to the left of the Whirlwind. In the rooftop section, use the springs and platforms in sequence rather than making long blind jumps. The fourth Star is just before the first cannon that launches Klonoa across the gap.
After the cannon sequence, continue across the elevated route and use each launch point as soon as the path is safe. The level is designed around maintaining forward progress, so do not wait in exposed areas for the pursuer to catch up. If a jump fails, use the next attempt to learn the platform spacing instead of trying to force the same late jump.
- Collect the park Star only when the Whirlwind approach is stable.
- Reach the first rooftop cannon.
- Continue promptly through the elevated chase route.
4. Cross the smokestacks and finish Volkan Inferno
The smokestack section requires controlled jumps between columns. The fifth Star is beside a shorter smokestack. It is safer to hit it with an Air Bullet during the jump than to alter your landing path, because the pursuer allows little time for correction.
Near the damaged statue, the machine moves back and forth while the route uses two Whirlwinds. The sixth Star is between those Whirlwinds. Use the first Whirlwind to gain height, strike the Star if the timing is clear, then continue through the second. Reach the final exit to mark Volkan Inferno complete. The clear is sufficient to advance; missed Stars and Dream Stones can be recovered by replaying the Vision.
- Use Air Bullet timing for the smokestack Star.
- Pass the statue and two-Whirlwind section.
- Confirm Volkan Inferno is marked clear before entering Ishara's Ark.
5. Begin Ishara's Ark and understand the engine objective
Ishara's Ark is a long Vision that revisits areas after each engine is activated. The required rule is the same for all three engines: take the nearby Likuri through the local color-changing targets until it becomes red, then throw the red Likuri away from the screen through the engine's red opening.
The route can appear to backtrack, but this is intentional. After collecting the Key and activating an engine, return through the opened route rather than searching for a new exit. Keep track of the last engine area completed, because later sections reuse earlier platforms and landmarks.
- Carry the Likuri through the required color-changing enemies.
- Send the red Likuri through the red opening of each engine.
- Expect to revisit earlier areas after each activation.
6. Activate the first engine
At the first engine, go to the far side and take the Likuri. Use the Spindles to reach the upper ledge while carrying the Likuri through the first color change. Continue to the second Spindle and land on the same upper route. From there, throw the Likuri at the Flying Moo so the final color change turns it red.
Once the Likuri is red, throw it away from the screen through the first engine's red opening. Do not leave the area until the engine has visibly activated. The route then sends you back through earlier sections toward the next engine area.
- Reach the upper ledge with the Likuri.
- Use the Flying Moo for the final color change.
- Throw the red Likuri through Engine 1.
7. Activate the second engine
For the second engine, take the Likuri from the middle ledge. Time the throw so it passes underneath the Spiker and strikes the Moo on the ledge across the gap. Drop to the bottom area, then double-jump to the next ledge and hit the lower Moo with the Likuri.
Use the final nearby Moo to complete the color change. When the Likuri is red, throw it through the second engine's red opening. The Jetimo route follows. During this section, the third optional Star is reached by going right after the Jetimo launch, using the spring and grabbing the Flying Moo, then throwing it at the egg.
- Throw the Likuri beneath the Spiker.
- Use the lower ledge and final Moo to turn it red.
- Activate Engine 2.
- Optional: use the Jetimo, spring and Flying Moo to reach the third Star.
8. Activate the third engine and escape
At the third engine, throw the Likuri at the first Moo, then immediately use the nearby winged ball to reach the upper ledge before the Likuri returns. Repeat the maneuver against the next Moo. Finish by throwing the Likuri at the Flying Moo, which turns it red. Send the red Likuri through the third engine's opening.
After the third engine activates, do not search for another engine or restart the level. The required route is the return path through the opened areas. The formerly fixed platforms in the later section become moving swing-like ledges, so approach each from a stable landing and wait for a useful swing before jumping. At the end, use the Erbil near the overhead boxes to break through and reach the exit route. The stage is complete once you escape back to the designated earlier area and the Vision records as cleared.
- Use the winged ball to reach the upper ledges during Engine 3.
- Activate the third engine with the red Likuri.
- Cross the moving swing-like platforms after the engine changes the route.
- Return to the required earlier area and finish the Vision.
9. Optional Stars and Dream Stones
Ishara's Ark has six optional Stars. One is reached after the cannon sequence by breaking the crystal with a Likuri, then using a Flying Moo and bouncer to reach the area above the middle Whirlwind. Another is inside the Ark, where a Likuri can be thrown at a Moo and then carried under a low ceiling to strike an egg that a normal Moo cannot reach.
The remaining Stars use the Jetimo and Flying Moo near the second engine, a Boomie route through the spike-shooting hazards after the second engine, an egg beyond the interior elevator, and the Erbil route near the swings after the third engine. Collecting all six and clearing the Vision contributes to the associated Momett Doll; none is required to unlock the next campaign Vision.
Ishara's Ark contains 150 Dream Stones in total, and some require Dream Stone Fairy timing. For a 150-Stone attempt, leave the nearby stones untouched until the Fairy is active, use Flying Moos for the elevated groups, and save the nine-stone vertical line near the end until after the final engine, when the Flying Moo reaches the route. A first clear and a maximum-collection replay should be treated as separate goals.
- Optional: collect all six Stars in Ishara's Ark.
- Optional: replay for the 150-Dream-Stone Scrapbook target.
- Do not mistake Stars or Dream Stones for campaign requirements.
Before you move on
- Volkan Inferno is marked clear on the campaign map.
- Ishara's Ark's first engine is activated with a red Likuri.
- Ishara's Ark's second engine is activated with a red Likuri.
- Ishara's Ark's third engine is activated with a red Likuri.
- The post-third-engine return route is completed and Ishara's Ark is marked clear.
- The campaign map advances toward Mountains of Mira-Mira.
- Optional: all six Stars are recorded for each Vision.
- Optional: Ishara's Ark reaches 150 Dream Stones for its Scrapbook target.
Mid-Late Campaign — Mountains of Mira-Mira & Maze of Memories
Clear Mountains of Mira-Mira, then solve Maze of Memories before entering Indecision Pass to fight Polonte the Hatchling. The mountain Vision combines hoverboard movement, upside-down tunnel navigation, snow platforms, Flying Moos, cannons, railings, and Dream Stone Fairy routes. Maze of Memories uses room-flipping doors, switches, enemy transformations, mirrors, and a final blue-crystal puzzle. The six Stars in each Vision are optional collectibles and are separate from Dream Stones and the story Bells. Mountains of Mira-Mira contains 137 ordinary Dream Stones and can reach 156 with Fairy doubling. Maze of Memories contains 127 ordinary Dream Stones and can reach 150. Neither total is required for campaign progress.
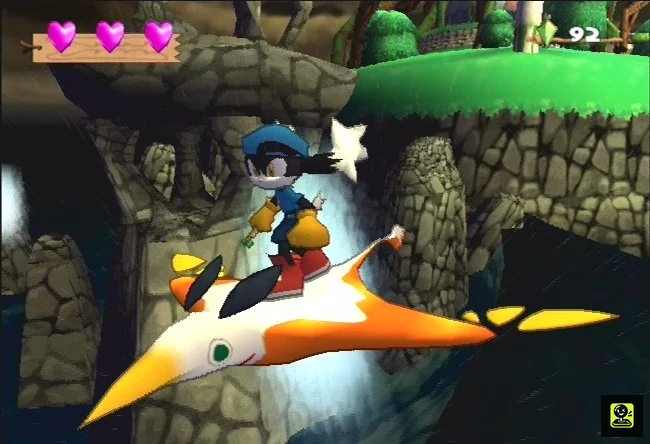
Clear the opening hoverboard route in Mountains of Mira-Mira
Start Mountains of Mira-Mira on the hoverboard and prioritize controlled landings over speed. The opening route uses blue whirlwinds, small Spikers, large Spikers, ramps, and short gaps. The six Stars are optional; reaching the exit is the only requirement for clearing the Vision.
After the first blue whirlwind, jump the Spikers and collect visible Dream Stones when doing so will not endanger the next landing. Capture the Flying Moo before the diagonal Dream Stone line so its extra jump can carry you into the stones. In the snow-dragon tunnel, the camera may make the route appear upside down. Use the platform edges, enemy positions, and Dream Stone lines to judge orientation rather than correcting late in a jump. The Star inside the tunnel is separate from the Dream Stone route.
- Keep the hoverboard aligned through the opening Spiker groups.
- Capture the Flying Moo before the diagonal Dream Stone line if collecting stones.
- Treat the tunnel orientation as a navigation hazard, not as a normal flat corridor.
Use the Memory Clock before the snow-platform section
After leaving the tunnel, activate the Memory Clock before attempting a serious Dream Stone run. If you die after using it, Klonoa returns to that clock and the Vision's Dream Stone total reverts to the amount held when the clock was activated. This lets you retry one-way groups without replaying the entire Vision.
The next area places stones in the snow, on platforms, between snowmen, and above jumps. Move through the groups in order and avoid lingering beneath hazards. When the route requires a jump over the large snowmen, capture a Boarder Moo and use its extra jump to clear the obstacle line. The Star beyond the second snowman group is optional and should be attempted only when the landing is secure.
- Activate the Memory Clock before the long snow-platform sequence.
- Use the clock's Dream Stone reset deliberately if an earlier one-way group was missed.
- Use a Boarder Moo for the large snowman jumps.
Carry the Flying Moo to the cannon
In the next area, collect the initial stones on the right and capture the Flying Moo. Keep it with Klonoa until reaching the cannon. Use the Flying Moo's extra jump to enter the cannon route; discarding it before the cannon prevents access to the following area and forces a retry from the checkpoint or a replay of the Vision.
After the cannon, prepare for the first Dream Stone Fairy. Break the Fairy's bubble only when the nearby route is clear. The wooden ramp contains five Fairy-dependent Dream Stones, followed by groups on the left and around the snowmen. Fairy-doubled stones count twice, which is important for the 150-plus Scrapbook target, but collecting them is not required to advance.
- Preserve the Flying Moo until the cannon entrance.
- Clear the path before activating the Dream Stone Fairy.
- Collect the wooden-ramp stones before continuing through the left and snowman groups.
Finish Mountains of Mira-Mira across the railings
The final area uses railings, snowmen, short jumps, and another Dream Stone Fairy. Transfer between the left and right railings only after confirming the next landing. Collect the Fairy-dependent groups while moving forward rather than stopping in the path of the next hazard. The final central row can help compensate for earlier misses if collected under Fairy influence.
Reach the exit door to clear Mountains of Mira-Mira. The Vision has 137 ordinary Dream Stones, with 13 that must be collected while affected by the Fairy to reach the listed 156 maximum. A result below 150 still clears the stage and preserves campaign progress. The six Stars are a separate optional objective.
- Reach the exit and confirm the Vision clear.
- Aim for at least 150 Dream Stones only if pursuing the Scrapbook reward.
- Do not replay the stage for collectibles unless the optional target is your goal.
Flip the opening rooms in Maze of Memories
At the start of Maze of Memories, capture the first fire Moo and throw it at the Egg. Capture the next fire Moo, use its extra jump to reach the ledge, and hit the switch. The nearby Star and Heart are blocked by spikes in the initial orientation. Enter the door to flip the room, then capture the fire Moo again and double-jump to the previously inaccessible items.
After crossing the flipped room, use a Moo to double-jump over the lower switch and activate the blocks. Capture the fire Moo again for the 1-Up route, wait for it to regenerate if necessary, and take it through the next door. In the following room, activate the switch, grab a Boomie before it begins flashing rapidly, drop it near the switch, and run toward the second block so the explosion removes it before you arrive.
- Use the first door to reverse the room's floor and ceiling.
- Activate the lower switch with a captured Moo.
- Use the Boomie to remove the second block while continuing forward.
Use Erbil, Likuri, and the mirror route
In the Erbil room, take Erbil left for the optional Star and Heart, then wait for it to regenerate before using it to reach the upper ledge. In the next room, carry the Likuri near the switch, throw it at the Moo, and hit the switch while the Likuri is occupied. Use the temporary blocks to reach the upper ledge, then use the whirlwind to reach the opposite side.
Near the mirror, jump over the floor shadow to reveal the hidden Egg containing another optional Star. Continue to the room with two Spikers and a Spindle. Bring an Erbil from the correct orientation and attack the Spindle from the opposite orientation so the attack connects. Defeating the Spindle opens the protected door. In the next room, use the mirror's reflection to locate the hidden Egg and throw the Moo at it.
- Use Erbil for the upper ledge and optional Star route.
- Throw Likuri at the Moo near the switch before activating the switch.
- Reveal the mirror Egg by jumping over its floor shadow.
- Defeat the Spindle before taking the protected door.
Take the purple-side exit and climb the Flying Moo tower
The next room has paired floor sections with red-and-blue sides and green-and-purple sides. Backtracking with Erbil can recover optional Dream Stones, but the required continuation is through the purple-side door. Flip the room as needed and follow the purple route instead of repeatedly entering the other colored branches.
After the door sequence, climb the vertical tower with Flying Moos. Capture one, use its extra jump to reach each ledge, and repeat as the enemies become available. The sixth optional Star is on a left ledge partway up. At the top, continue right, fall through the psychedelic tube, and enter the door at the bottom.
- Use the purple-side door for the required continuation.
- Capture each Flying Moo needed for the tower climb.
- Search the left ledge midway up only if collecting all six Stars.
Solve the four-room crystal puzzle and exit
The final maze room begins with the exit blocked by a blue crystal and a circular junction leading to four enemy rooms. First enter the Boomie room and use the winged balls to reach a Boomie. Carry it to the Erbil room and detonate it beside the rock blocking Erbil. Take Erbil to the Likuri room and use it to destroy the blocks.
Return to the Boomie room for another Boomie, then bring it to the Likuri room. Use the Boomie's double-jump to reach the Likuri. Throw the Likuri at the Boomie to change the Likuri's state. Carry it to the Erbil room and throw it at Erbil to change the Likuri again. Return to the exit crystal and throw the transformed Likuri at it. Once the crystal disperses, enter the exit to clear Maze of Memories.
- Free Erbil with the first Boomie.
- Use Erbil to clear the Likuri-room blocks.
- Transform the Likuri with Boomie, then with Erbil.
- Throw the final transformed Likuri at the blue crystal and enter the exit.
Enter Indecision Pass and defeat Polonte
Polonte is fought in the separate Indecision Pass stage after Maze of Memories. In the first phase, ride through the speed squares to build momentum and ram the giant egg with the hoverboard. Avoid the pink spikes by changing lanes or jumping over them; they damage Klonoa and reduce progress. Repeated successful impacts cause the egg to hatch.
In the second phase, Polonte remains surrounded by speed squares and pink spikes, but direct board impacts no longer damage him. When the small Boarder Moos appear, capture one and throw it at Polonte during an opening. Use the speed squares to close the distance, avoid the spikes, and repeat the capture-and-throw attack until the boss falls.
After the victory, the Old Tree accepts the test and the story proceeds to the Bell of Indecision and the Element progression. Confirm the post-boss scene before leaving the stage.
- Use speed squares before each first-phase collision.
- Avoid pink spikes by changing lanes or jumping.
- Throw the small Boarder Moos at Polonte in the second phase.
- Confirm the post-boss scene and campaign progression.
Before you move on
- Mountains of Mira-Mira is marked clear on the World Map.
- Maze of Memories is marked clear after the blue crystal is dispersed and the exit is entered.
- Indecision Pass has been entered and Polonte the Hatchling has been defeated.
- The post-boss scene has played and the Element progression has continued.
- Optional: Mountains of Mira-Mira reaches 150 or more Dream Stones, or Maze of Memories reaches 150 Dream Stones.
- Optional: all six Stars are collected in either Vision and the Vision is completed so its Momett Doll is recorded.
References for this chapter
Late Campaign — Indecision Pass and Noxious La-Lakoosha
Clear Indecision Pass after Maze of Memories, defeat Polonte the Hatchling, and ring the fourth story bell. Polonte’s first phase is defeated by building hoverboard speed through the square boosts and colliding with the egg while avoiding pink spikes. In the second phase, capture Mini-Boarder Moos and throw them at Polonte during close approaches. After the story returns to Baguji’s Isle and sends Klonoa to La-Lakoosha, complete Noxious La-Lakoosha. Its special hazard is a draining air supply in designated sections; High Priestess statues refill it. The six Stars are optional collectibles and are separate from the story bell. For Scrapbook progress, the level has 142 ordinary Dream Stones, with eight Fairy-dependent stones needed for the normal 150 target.
1. Enter Indecision Pass and reach the bell guardian
Indecision Pass follows Mountains of Mira-Mira and Maze of Memories. Follow the Vision until Klonoa reaches the fourth story bell. The Old Tree blocks the way and begins the test that leads to Polonte the Hatchling. This bell is required campaign progression; it is not one of the six optional Stars tracked for the Vision’s collectible reward.
The boss approach uses a hoverboard. Regulate speed instead of holding maximum acceleration through every section. Pink spikes damage Klonoa and slow the board, while square boosts provide the momentum needed to attack. Learn the safe lane through the hazards before attempting any aggressive collection route.
- Reach the Old Tree and trigger Polonte the Hatchling.
- Treat the fourth bell as story progression.
- Prioritize survival and board control before optional collection.
2. Defeat Polonte’s egg form
Polonte begins as a large egg moving along the hoverboard course. Pass through the square speed boosts, then use the resulting momentum to ram the egg. Three boost squares before the collision are the practical setup for a strong attack, but do not take a damaging line merely to collect every square.
Pink spikes appear around the approach. Steer between them when there is a clear gap, or jump over them when the formation blocks the lane. If you lose speed, stabilize the board and wait for the next safe boost group rather than chasing the egg into a spike. Repeat the approach until the egg hatches and Polonte enters the second phase.
- Use the square boosts to build momentum.
- Avoid or jump over the pink spikes.
- Ram the egg repeatedly until it hatches.
3. Use Mini-Boarder Moos against Polonte’s second form
The second phase keeps the hoverboard course, speed boosts, and pink spikes, but the hazard layouts are less forgiving. Direct board collisions no longer damage Polonte. As you approach the boss, capture a Mini-Boarder Moo and throw it at Polonte. Keep the Moo ready while maintaining enough control to avoid the next spike formation.
A close approach can allow several throws, but survival comes first. After a successful hit, move away from Polonte, jump over the next hazard, and use a later boost group to prepare another pass. Continue capturing and throwing Mini-Boarder Moos until the boss is defeated.
The Old Tree then accepts the test and allows Klonoa to ring the fourth story bell. The group returns to Baguji’s Isle, where the story moves toward La-Lakoosha. Optional Stars and Dream Stones are not needed for this transition.
- Capture Mini-Boarder Moos during the second phase.
- Throw the Mini-Boarder Moos at Polonte instead of colliding with the boss.
- Defeat Polonte and ring the fourth story bell.
- Confirm that the story sends Klonoa toward La-Lakoosha.
4. Manage the air supply in Noxious La-Lakoosha
Noxious La-Lakoosha uses the familiar platforming structure but adds air-draining sections. Small High Priestess statues replenish Klonoa’s air when he approaches them. Treat each statue as a recovery landmark and refill before entering the next platforming or enemy sequence.
The air mechanic does not require a speedrun. Move carefully and retreat to the previous statue after a failed jump or missed capture if the air gauge is low. The statues are positioned so that a short retreat is usually safer than attempting a difficult section while nearly empty. Clearing the Vision does not require collecting every Star or Dream Stone.
- Locate each High Priestess statue before entering an air-draining section.
- Refill the air supply before difficult platforming sequences.
- Return to the previous statue after a failed attempt if necessary.
5. Collect the six optional Stars
At the first disappearing-platform section, climb to the top and jump left for Star 1. After the cannon beyond the Armored Moo, capture a Bugon and use its double-jump to reach Star 2 in the air.
Past the second Ow-Gow, find the pink winged ball, Likuri, and Flying Moo. Throw the Likuri at the Flying Moo, then use the winged ball for a double-jump before the Likuri returns. Use the returning Likuri for the next boost to reach Star 3.
Near the giant High Priestess statue, climb the disappearing platforms and jump left for Star 4. In the Erbil section, use the two Moos above the cage to destroy the blocks trapping the Erbil. Carry the Erbil left and use it to break the block around the Kiton. Capture the Kiton and fly to the ceiling of the open space beside its former cage for Star 5.
Near the end, enter the pendulum area and use the pendulum to destroy the obstructing block. Capture a Bugon and use it to reach Star 6 above the cleared route. These six Stars are the collectible objective for the Vision’s Momett Doll; they are separate from Dream Stone totals and from the fourth story bell.
- Collect Star 1 above the first disappearing platforms.
- Use a Bugon to collect Star 2 after the cannon.
- Use the Likuri and winged ball chain to collect Star 3.
- Collect Star 4 beside the giant High Priestess statue.
- Use the Erbil and Kiton route to collect Star 5.
- Use the pendulum and Bugon to collect Star 6.
6. Attempt the 150-Dream-Stone target after learning the route
Noxious La-Lakoosha contains 142 ordinary Dream Stones. Eight stones must be collected while the Dream Stone Fairy is active to reach the standard 150-Dream-Stone Scrapbook threshold. The documented normal maximum is 154, although an extremely precise route can produce 155 by avoiding additional stones before reaching the Fairy section.
The Fairy route is near the Erbil and Kiton sequence. If pursuing the Scrapbook target, avoid the three stones beside the spring where the Fairy route begins. Use the Erbil to reach the upper section, activate the Dream Stone Fairy, and then use the Kiton to collect the eight Fairy-boosted stones. Afterward, discard the Kiton, drop back to the spring, collect the postponed stones, and take the final reachable stone on the upper-left route.
Use the Memory Clock near this sequence as a practice point when available. The Dream Stone total reverts to the last used Memory Clock after death, so a failed attempt can be repeated without permanently losing the earlier collection route. This objective is optional and should not delay the first campaign-clear attempt.
- Clear the Vision before attempting a full Dream Stone run.
- Avoid the early stones that interfere with the Fairy route when possible.
- Use the Erbil and Kiton to collect the eight Fairy-dependent stones.
- Check the final Dream Stone total on the results screen.
7. Confirm completion and recover from failure
This chapter is complete when Indecision Pass is cleared, Polonte is defeated, the fourth story bell has been rung, and Noxious La-Lakoosha is cleared. Dark Sea of Tears should then be available as the next campaign Vision.
If Polonte defeats Klonoa, practice the spike pattern first and only add more speed squares after the safe lane is consistent. If Noxious La-Lakoosha drains the air, retreat to the previous High Priestess statue and repeat the troublesome enemy or platform setup. A missed Star or Dream Stone does not block the story; replay the Vision from the World Map for optional cleanup.
Use the Vision result screens separately. Six Stars award the Vision’s Momett Doll, while 150 or more Dream Stones contribute to Scrapbook progress. The fourth bell is story progression and must not be counted as one of the optional Stars.
- Indecision Pass is marked cleared.
- Polonte the Hatchling is defeated.
- The fourth story bell has been rung.
- Noxious La-Lakoosha is marked cleared.
- Dark Sea of Tears is available on the World Map.
- Optional: all six Stars and the desired Dream Stone total are recorded.
Before you move on
- Indecision Pass is cleared after Polonte the Hatchling is defeated and the fourth story bell is rung.
- Noxious La-Lakoosha is cleared and Dark Sea of Tears becomes available.
- No optional Star or Dream Stone collection is required for campaign progression.
- Collect all six Noxious La-Lakoosha Stars for that Vision’s Momett Doll objective.
- For Scrapbook progress, confirm that the Vision reaches at least 150 Dream Stones, including the Fairy-boosted stones.
Approach to Finale — Dark and Empty Sea of Tears, Then Embryo Compass
Dark Sea of Tears is a light-management Vision. Strike each Flolo to illuminate Klonoa, then move quickly toward the next Flolo before the light fades and dark motes begin attacking. Dream Stones remain visible in the darkness and can be used as route markers. For the 150-Dream-Stone Scrapbook target, carry a Moo to the Fairy bubble so the Flying Moo sequence can begin immediately. Empty Sea of Tears is a hoverboard Vision with sudden drops, falling paths, whirlwinds, Spikers, and boarding-Moo routes. Learn the route before attempting a complete Dream Stone run, and use Memory Clocks to retry difficult sections. Six Stars are optional and are separate from Dream Stones. After Empty Sea of Tears, enter Embryo Compass and defeat Cursed Leorina through her running, platform, and faster black-form phases.
1. Clear Dark Sea of Tears by moving between Flolo lights
Enter Dark Sea of Tears from the world map and strike the first Flolo to illuminate the area. The light lasts for a limited period and does not simply remain active for the entire Vision. When it fades, dark motes attack Klonoa and cost health, so do not stop in the darkness to search for a missed item. Move from one Flolo to the next as directly as the platforms allow.
The Dream Stones remain visibly lit even when the surrounding stage is dark. Use them as route markers: if you can see a cluster ahead, it usually indicates the next platforming objective or enemy group. For a first clear, prioritize the next Flolo, stable ground, and the stage exit. Capture ordinary Moos for throws and double-jumps, and use Flying Moos or Shield Jumping Moos when the route presents an elevated platform.
There are six optional Stars. Star 1 is after the first Spiker, inside the cave with the moving egg; throw the nearby Moo at the egg. In the first ice cave, use the drums and Flying Moo after the cannon to throw an enemy at the egg for Star 2. Past the two Flackannons, double-jump with the Fire Moo for Star 3. At the ship on the water, carry the Moo right until the Star appears, then use it to reach the Star. In the second ice cave, break the block below Klonoa to reach the alternate route and the egg containing Star 5. Star 6 is above the rotating Spiker chain; use the Kiton before the chain and make sure Klonoa can hover back to solid ground after collecting it.
- Strike each Flolo and move toward the next light source before the illumination fades.
- Use lit Dream Stones as landmarks in the dark.
- Collect six Stars separately from the Dream Stone objective.
- Prioritize a safe clear before attempting a 150-Dream-Stone run.
2. Set up the Dark Sea of Tears Dream Stone Fairy route
The PS2 Dream Stone list records 139 ordinary Dream Stones in Dark Sea of Tears, with 11 stones intended to be collected while the Dream Stone Fairy is active for the 150-point Scrapbook requirement. Before reaching the Fairy bubble, preserve a normal Moo and carry it forward if the route permits. The setup is much more reliable when you do not need to search for a replacement enemy after breaking the bubble.
Use the Moo to break the Dream Stone Fairy bubble, then immediately capture the Flying Moo. Use the Flying Moo to double-jump through the five Dream Stones above the rotating drum. Continue right and capture the next Flying Moo for the following group of six stones. The Fairy timer is short, so avoid detours and do not spend the carried Moo on an earlier optional jump unless you have already decided to abandon the full Fairy attempt.
After the Fairy section, continue collecting the ordinary route stones. The final slide contains a one-way group of 12 Dream Stones. Begin the descent only when you are prepared to collect it, then use controlled movement and hovering to stay aligned with the stone arcs. If a collection attempt fails, use the next Memory Clock as a recovery point, or intentionally lose the life before advancing beyond the checkpoint when the game allows it. This restores the recorded Dream Stone total at that Memory Clock instead of forcing a complete replay.
- Bring a Moo to the Dream Stone Fairy bubble.
- Use the first Flying Moo for the five stones above the rotating drum.
- Use the next Flying Moo for the six-stone group to the right.
- Treat the final 12-stone slide as a one-way collection section.
- Use Memory Clock reversion when practicing failed collection attempts.
3. Ride Empty Sea of Tears and separate the Star route from the Dream Stone route
Empty Sea of Tears is a hoverboard Vision across the drained seabed. Enemies can approach from behind, and sections of the path can drop away without much warning. Slow down before a sudden descent, a narrow landing, or a broken-path transition; accelerate again when the route becomes a long unobstructed straightaway. Holding back decelerates the board when Klonoa is traveling away from the screen.
The early Dream Stone groups often sit above or beside the obvious route. Capture a boarding Moo when one is available and preserve it until the elevated stones are visible. During the long falling-path sections, follow the visible line of stones rather than automatically staying on the lowest surviving piece of ground. Near the bone-path and whirlwind sections, maintain enough speed to pass through the intended route, but avoid entering a Spiker's path at full speed.
The six Stars are optional. Star 1 appears after the first sand whirlpool; carry a boarding Moo until the high Star comes into view. Stars 2 and 3 are in the area where Klonoa travels away from the screen: use a Flying Moo to reach the upper ledges for Star 2, then collect Star 3 from a remaining piece of path as sections fall away. Star 4 is reached by entering both whirlwinds on the bone path. Star 5 is past the bone path beside the fast rotating Spiker, and Star 6 is in the nearby falling-path section. Do not confuse these six Stars with Dream Stone totals or Fairy-doubled stones.
- Slow before drops and falling-path transitions.
- Use boarding Moos for elevated Dream Stone groups.
- Collect the six Stars as a separate objective.
- Learn the hoverboard route before attempting a full collectible run.
4. Execute the Empty Sea of Tears Fairy section
When the Dream Stone Fairy bubble appears, maintain forward motion through it. The recommended line carries Klonoa to three Dream Stones on the next ledge and then to a lone stone beyond the Spiker. Do not brake unnecessarily during this sequence; the route is built around continuing board momentum and dropping onto the nearby platforms.
After the lone stone, return to the main route and capture a boarding Moo. Use its double-jump to reach the next six-stone arc. The Dream Stone FAQ lists 140 ordinary stones in this Vision and identifies 10 stones that must be collected under Fairy influence for the 150-point Scrapbook target. It also reports an uncertain maximum above 150, so judge the result by the in-game total rather than relying on an assumed perfect maximum.
If you miss a late stone, avoid ringing the next Memory Clock when possible. Losing a life before that checkpoint can return Klonoa to the previous recorded total, allowing another attempt at the Fairy section without replaying the entire Vision. Once the desired total is secured, finish the hoverboard route normally and verify the result screen.
- Keep moving through the Fairy bubble.
- Collect the three ledge stones and the lone stone beyond the Spiker.
- Use a boarding Moo for the following six-stone arc.
- Use Memory Clock reversion for failed Dream Stone attempts.
- Check the in-game result instead of relying on the disputed maximum.
5. Enter Embryo Compass and defeat Cursed Leorina's first form
Clearing Empty Sea of Tears opens Embryo Compass on Ishras Ark. This is the Cursed Leorina boss Vision. The first phase takes place on the circular arena. Leorina runs around while an energy ball threatens the arena, jumps toward Klonoa to land on him, or hovers while preparing a powerful attack.
When Leorina runs or lands, capture an Erbil and use it to electrify Klonoa. Jump into the weak point on her underbelly when she passes or finishes her landing. Move away from her landing point rather than trying to stand underneath the descent. When she hovers, two Erbils appear vertically. Capture the lower Erbil, double-jump upward, quickly capture the second Erbil, and use it to reach the underside. Repeat these responses until she falls from the platform.
- Avoid the energy ball while waiting for an Erbil opening.
- Use Erbils against Leorina's underbelly during her running and landing attacks.
- Use the lower and upper Erbils in sequence during the hover attack.
- Do not remain beneath Leorina's landing point.
6. Complete the platform phase and defeat the faster black form
In the next phase, Leorina moves underneath the circular platform while the energy ball is below the arena. Capture a Moo and throw it into a glowing floor section while Leorina is directly beneath that section. The correct timing depresses the floor and damages her. A missed throw does not advance the fight, so wait for her movement to line up rather than throwing as soon as the Moo is captured.
After roughly half of this phase, Leorina changes to a black form and returns to the earlier jump-and-land pattern. Erbils can again be used against her abdomen. Because this form moves faster, begin the double-jump slightly earlier than in the first phase. When she hovers, repeat the two-Erbil vertical attack. Continue until the final hit, then remain in the arena through the battle-ending scene.
- Throw a Moo into a glowing floor section only when Leorina is underneath it.
- Repeat the floor attack until Leorina changes form.
- Use Erbils against the abdomen in the black form.
- Jump earlier against the faster attacks.
- Wait for the post-battle scene and world-map update.
Before you move on
- Dark Sea of Tears is marked cleared on the world map.
- Empty Sea of Tears is marked cleared on the world map.
- The desired Dark Sea of Tears Dream Stone total is recorded.
- The desired Empty Sea of Tears Dream Stone total is recorded.
- Any six-Star objectives for both Visions are checked separately.
- Cursed Leorina has been defeated through the black-form phase.
- The Embryo Compass scene has finished and the next Ishras Ark route is available.
Final Approach — The Ark Revisited and Kingdom of Sorrow
Clear Embryo Compass before entering The Ark Revisited. This Ark stage requires you to shut down three engines with timed Boomies, then escape through the interior route; destroying the third engine does not finish the Vision by itself. The six optional Stars use Kitons, Spikers, conveyor belts, cannons, Boomies and Erbils, but none is needed for campaign progress. Kingdom of Sorrow follows as the last ordinary platforming Vision before The Forgotten Path. Its required route uses Jetimos, Kitons, disappearing platforms, Spikers and blue fire beams. Collecting all six Stars in either Vision is optional and can be done on replay. Clearing Kingdom of Sorrow opens The Forgotten Path, not the final boss directly.
1. Confirm the route into The Ark Revisited
On the World Map, clear Dark Sea of Tears, Empty Sea of Tears and Embryo Compass in that order. Embryo Compass is the final Vision in this approach sequence; The Ark Revisited becomes available after it. Do not enter The Ark Revisited immediately after Empty Sea of Tears.
For the first clear, prioritize reaching the goal over collecting every Star or Dream Stone. Both Visions contain long sections with one-way launches, moving platforms and hazardous drops. If you miss an optional item, finish the stage and replay it from the World Map instead of risking a life during the required route.
- Dark Sea of Tears is cleared.
- Empty Sea of Tears is cleared.
- Embryo Compass is cleared.
- The Ark Revisited is available on the World Map.
2. Cross the opening machinery and reach the first Stars
Proceed through the opening machinery until you reach the pair of Kitons and the rotating mechanism. The first Star is beside this mechanism. Ride the moving platform and line up Klonoa with the opening before jumping and hovering toward it.
Use the same rotating mechanism to reach the higher platform with Spikers for the second Star. Move only when the Spikers leave a safe gap. For campaign progress, continue through the machinery even if you skip both Stars. Kitons provide controlled temporary flight, while ordinary captured enemies are mainly useful for double-jumps and clearing nearby obstacles.
- The opening Kiton section is crossed.
- The rotating mechanism is used to reach the upper platform.
- The first two Stars are collected only if the route is safe.
3. Cross the conveyor, key and cannon sections
Continue past the swinging platforms until you reach the conveyor-belt area. The third Star is inside a nearby Ngapoko egg. Use an available enemy to break the egg, then return to the conveyor route. Do not drop into the machinery while trying to reach the background egg.
The fourth Star is above the next key. Obtain the key and stabilize Klonoa on the nearby platform before attempting the upward jump. After the plane ride, take the following cannon. The fifth Star is suspended among Flying Moos. Aim Klonoa before the launch and treat the Flying Moos as landmarks; if the Star is missed, concentrate on landing safely and continue.
- The conveyor section is crossed.
- The next key is obtained.
- The cannon after the plane ride is completed.
- The third, fourth and fifth Stars are optional cleanup targets.
4. Use the Boomie and Erbil to reach the high route
After the next cannon, capture a Boomie and use it to destroy the boulder blocking the path. Near the exit door, look above the boxes for an Erbil. The sixth Star is inside the highest box area, but reaching it requires both enemy types.
Throw the Boomie beneath the Spiker and use the opening to gain height. Then capture or reach the Erbil and use its high-jump effect to break through the upper boxes. The precise setup can take more than one attempt, so return for another Boomie rather than forcing a jump from a poor position. Popka’s support feature can help with extra height when available, but the route is possible in one-player mode.
For the required route, continue into the Ark and use Boomies to disable all three engines. Each engine must be shut down before the timer pressure becomes decisive, so keep moving after throwing the Boomie and avoid unnecessary detours.
- The boulder is destroyed with a Boomie.
- The upper box route is opened if collecting the sixth Star.
- All three Ark engines are disabled.
- The escape route remains to be completed.
5. Complete the Ark escape
After the third engine is disabled, do not quit or assume the Vision is complete. The required route sends Klonoa back through the Ark. Follow the platforms and machinery back toward Area 11, using the available enemies for double-jumps and avoiding attempts to recover missed optional Stars.
The Ark Revisited clears only after the escape route is completed and the Vision-complete result appears. If Klonoa dies after the engines are disabled, use the checkpoint and repeat the escape rather than restarting the entire Vision. Dream Stone collection can be handled separately; the Dream Stone guide lists a maximum of 155 for this Vision, but that total is not required for the story route.
- The third engine has been disabled.
- Klonoa has returned through the escape route toward Area 11.
- The Vision-complete result appears.
- The Ark Revisited is marked clear on the World Map.
6. Enter Kingdom of Sorrow and collect its first two Stars if desired
Select Kingdom of Sorrow from the newly opened route. After the first Jetimo ride, enter the interior and break the nearby Ngapoko egg for the first Star. Continue to the first locked door and the room containing Spikers. Capture the Kiton in this room and ride upward to the platform holding the second Star.
For progress, use Jetimos and Flying Moos to cross gaps, but aim for solid ground before their movement effect ends. Around groups of Spikers, wait for a safe opening instead of carrying an unnecessary enemy through the hazard. The key route and locked door matter for completion; the Stars do not.
- The first Jetimo ride is complete.
- The first Star’s Ngapoko egg is broken if collecting it.
- The Kiton is used to reach the second Star if collecting it.
- The locked-door route is open.
7. Cross the disappearing platforms and fire beams
After the second Star, pass through the small tornadoes and look above the series of disappearing platforms for the third Star. Wait for the platforms to appear before committing to a jump. In the red-crystal section, the fourth Star is on a larger disappearing platform after a Spiker; approach only when the platform is fully present.
Continue indoors until you find the Ngapoko egg containing the fifth Star. Use the nearby Slazza to break it. Then cross the outside section with the blue fire beams. The sixth Star is indoors after this section, surrounded by large Spikers. Use the nearby Kiton to rise to it instead of attempting a direct jump through the hazard.
For a first clear, skip any Star that costs a life. Kingdom of Sorrow is completed by following the main route to the exit, not by collecting all six Stars.
- The third Star is collected above the disappearing platforms if desired.
- The fourth Star is collected after the red-crystal Spiker section if desired.
- The fifth Star’s Ngapoko egg is broken with a Slazza if desired.
- The blue fire-beam section is crossed.
- The sixth Star is reached with the Kiton if desired.
- Kingdom of Sorrow is cleared.
8. Confirm the next required Vision
After Kingdom of Sorrow, check the World Map for The Forgotten Path. This is the next required Vision and the final hoverboard stage before Terminus of Tears. Kingdom of Sorrow does not lead directly to the ending boss.
Replay The Ark Revisited or Kingdom of Sorrow later for missed Stars and Dream Stones. Six Stars in a Vision are the optional Momett Doll objective, while Dream Stone totals are tracked separately. The Dream Stone guide lists a maximum of 155 for The Ark Revisited and 153 for Kingdom of Sorrow; neither total is required to open The Forgotten Path.
- The Ark Revisited is marked clear.
- Kingdom of Sorrow is marked clear.
- The Forgotten Path is available.
- Missed Stars and Dream Stones have been left for replay rather than delaying campaign progress.
Before you move on
- The World Map marks The Ark Revisited as cleared.
- All three Ark engines were disabled and the escape route was completed.
- The World Map marks Kingdom of Sorrow as cleared.
- The Forgotten Path is available as the next required Vision.
- For optional progress, the Star counters for The Ark Revisited and Kingdom of Sorrow show six collected pieces each.
- For optional progress, the Vision records show the desired Dream Stone totals for these two stages.
References for this chapter
- Klonoa 2: Lunatea's Veil — Guide and Walkthrough — PlayStation 2
- Klonoa 2: Lunatea's Veil — Dream Stone FAQ — PlayStation 2
- Klonoa 2: Lunatea’s Veil — All Momett Doll Bells, The Ark Revisited
- Klonoa 2: Lunatea’s Veil — All Momett Doll Bells, Kingdom Of Sorrow
- Klonoa 2: Lunatea's Veil — North American PS2 release record, SLUS-20151
Final Sequence — The Forgotten Path and Terminus of Tears
The Forgotten Path is the final ordinary Vision before the ending battle. It is a narrow hoverboard stage with three areas, several tube and ramp sections, a giant Spiker, and an optional cannon branch. Reach the exit first; the level’s 150 Dream Stones and six Stars can be collected on later replays. Terminus of Tears contains the three-stage King of Sorrow battle. The opening and closing stages use the hoverboard and bombs, while the middle stage requires stopping the King’s spikes and throwing them at four outer balls. Prioritize safe positioning, controlled steering, and attack openings over risky speed. After the final targets are destroyed, allow the complete ending sequence to play before confirming the campaign clear.
1. Enter The Forgotten Path and make a safe first clear
After completing Kingdom of Sorrow, select The Forgotten Path from the World Map. This is the last regular Vision before Terminus of Tears and uses the hoverboard for most of its route. The story requirement is only to reach the exit, so do not treat the level’s 150 Dream Stones or six Stars as mandatory for opening the final battle.
The stage has no Dream Stone Fairy. Its narrow paths, looping sections, jumps, and tube transitions leave little room for recovery, so a first attempt should focus on survival. If you lose a life while pursuing a difficult Star or Dream Stone, abandon that attempt and finish the Vision instead. You can replay it from the World Map after the ending.
- Select The Forgotten Path after Kingdom of Sorrow.
- Prioritize reaching the exit over collecting every item.
- Remember that the Vision has six optional Stars and 150 Dream Stones.
2. Handle the opening route and first raised ledge
Use small steering corrections on the opening hoverboard path. Avoid holding a direction through turns or ramps, because the board can drift too far toward the edge before the next landing. The first Star is positioned just before the first pink ramp. Collect it only when Klonoa is already centered for the ramp; missing it does not affect progress.
When the first flying Moo appears, line Klonoa up beneath it and capture it with the Wind Bullet. Use the captured Moo for a double-jump to the raised ledge containing the second Star. The Moo-assisted jump is optional, so a missed capture should not become a forced restart. Continue forward if the jump no longer looks safe.
- Use brief steering inputs instead of constant directional holds.
- Pass the first pink ramp safely before attempting a risky correction.
- Capture the first flying Moo from below if attempting the raised ledge.
- Use the Moo to reach the second Star only when properly aligned.
3. Cross the sideways tube and the giant Spiker section
The route enters a tube where Klonoa travels sideways. Treat the tube as a new orientation rather than continuing the steering rhythm from the previous section. Make gradual inputs and avoid reacting too sharply to the camera angle. The third and fourth Stars are located in this tube section and are optional.
When Klonoa returns to the main path, the fifth Star is positioned behind or around a giant Spiker. Approach from the side with the clearest landing space, pass the hazard without steering directly through it, and re-center immediately afterward. A stable exit from the Spiker section is more important than preserving a failed collectible attempt.
- Adjust steering for the tube’s sideways travel.
- Attempt the third and fourth Stars only if the tube alignment is stable.
- Pass the giant Spiker with a clear landing line.
- Re-center Klonoa after leaving the tube.
4. Use the left ramp and cannon for the sixth Star
Later on the main route, look for a pink ramp branching to the left. Taking it begins a chain of ramps that leads to a cannon. The cannon launches Klonoa toward a higher path where the sixth Star can be reached. The branch is optional for the campaign, but it is required for a six-Star clear of this Vision.
Do not try to correct repeatedly while airborne. Enter the ramp sequence with a controlled line, follow the branch into the cannon, and concentrate on the landing after the launch. If the approach becomes unstable, continue along the safe route and finish The Forgotten Path. A later replay is preferable to losing the entire Vision for one Star.
- Take the left pink ramp when pursuing all six Stars.
- Follow the ramp chain to the cannon.
- Prioritize the post-cannon landing over the collectible.
- Finish the Vision before attempting another full collection run.
5. Attack the King of Sorrow during the first hoverboard phase
Terminus of Tears begins with Klonoa on a hoverboard inside a tube. The King of Sorrow circles the route while placing spikes and bombs. Capture the bombs with the Wind Bullet and throw them at the King. Spikes are hazards in this phase, so do not chase a bomb through a dangerous line if waiting for the next opening is safer.
The hoverboard section becomes faster after successful hits. Keep Klonoa in a controllable lane, collect a bomb only when the path is clear, and accept a missed attack rather than colliding with a spike. After enough successful bomb hits, the King leaves the tube and the grounded phase begins.
- Capture bombs and throw them at the King.
- Avoid spikes while moving toward each bomb.
- Expect the route to accelerate after successful hits.
- Use survival and positioning as the priority when an attack opening is poor.
6. Stop the spikes and destroy the four outer balls
The second phase takes place on solid ground without the hoverboard. The King is enclosed in a central sphere, with spikes extending from its sides. Four balls surround the outside of the arena. Fire a Wind Bullet at the pointed end of an extending spike to stop it, then capture the spike from its non-spiked end.
Throw the captured spike at one of the outer balls. Each ball requires two successful spike hits before disappearing. After an impact, the damaged ball emits lasers, so move away from its firing line before setting up the next attack. Work around the arena rather than standing directly in front of the central sphere, and use the open space to avoid the King’s extending spikes.
Repeat the process until all four outer balls are destroyed. The goal is not to damage the central sphere directly; the outer targets must be removed first.
- Stop an extending spike by striking its pointed end with a Wind Bullet.
- Capture the stopped spike from its safe, non-spiked end.
- Hit each of the four outer balls twice.
- Move away from a ball after it fires lasers.
- Destroy all four outer balls to begin the final phase.
7. Complete the final hoverboard phase and confirm the ending
The third phase returns to the hoverboard-and-tube pattern from the opening phase. The King again places spikes and bombs around the route, but only two targets remain. Capture bombs and throw them at the targets while avoiding spikes. Do not use the grounded phase’s spike-throw method here; the final phase is a shortened repeat of the opening bomb encounter.
The route becomes more demanding as the battle continues, so maintain a controlled line and avoid unnecessary attacks. After both remaining targets are destroyed, the King of Sorrow is defeated. Let the post-battle scenes and ending cutscene play completely instead of quitting immediately after the final hit.
The campaign completion check is the defeated King of Sorrow, the played ending sequence, and the cleared final route or post-clear World Map state. Optional cleanup can then be handled through Vision replays: collect all six Stars in The Forgotten Path if desired, and pursue its 150 Dream Stone record separately from Star collection.
- Return to the bomb-throwing hoverboard strategy.
- Destroy both final targets.
- Allow the complete ending sequence to play.
- Confirm the final route is marked cleared.
- Treat Stars and Dream Stones as separate optional replay objectives.
Before you move on
- The Forgotten Path has been completed and is recorded as cleared on the World Map.
- The King of Sorrow has been defeated through the opening hoverboard phase, grounded four-ball phase, and final two-target hoverboard phase.
- The ending cutscene has played fully after the final battle.
- The final route or post-clear World Map state confirms campaign completion.
- For optional cleanup, The Forgotten Path shows all six Stars collected if that goal is being pursued.
- Dream Stone totals are checked separately from Star progress, with 150 Dream Stones as the optional full-record target for this Vision.
Bosses — General Patterns and Recovery Strategies
The original North American PlayStation 2 version builds every boss around capture, throwing, double-jumps, boarding, and special enemy effects. Each required encounter exposes a specific target: Folgaran’s exhaust, Leptio’s real body and casing opening, Biskarsh’s top, Polonte’s egg or body, Cursed Leorina’s underside and weakened floor sections, and the King of Sorrow’s Bombs and outer spheres. Watch one attack cycle before committing, preserve a safe landing route after every throw, and use Memory Clocks in long Visions to practice the approach. Optional Stars, Dream Stones, and Momett Dolls are separate from story Bells and are not required to defeat these bosses.
Prepare before entering a boss encounter
Preserve health through the final section of the Vision when possible. If you are attempting a Dream Stone or six-Star run, consider treating the first attempt as practice instead of risking health for an optional pickup immediately before the boss. Identify the enemies that provide ammunition and note where they respawn. Many arenas also use depth or multiple lanes, so face the correct plane before releasing a captured enemy.
Use the Wind Bullet to capture enemies, stop special objects, or trigger the opening required by the arena. A captured enemy can also provide Klonoa’s double-jump when he jumps while holding it. Do not throw as soon as an enemy is captured unless the boss is exposed; wait until Klonoa is aligned with the target and has room to land safely.
Story Bells are progression objects. For example, Folgaran is followed by the Bell of Tranquility, while Leptio is followed by the Bell of Joy. These are not the six optional Stars scattered through a Vision. Collecting all six Stars and clearing that Vision awards its Momett Doll, but neither the Stars nor the Doll is needed to win the boss fight.
- Preserve health before the arena whenever practical.
- Locate the ammunition enemy or object before attacking.
- Keep a clear landing area after every throw.
- Do not confuse story Bells with optional Stars.
Defeat Folgaran the Armor Beast in Claire Moa Temple
Folgaran’s vulnerable point is the exhaust system on his back. In the first form, Spikers circle the arena after Folgaran rears back. Jump over the Spikers while watching for the exhaust to open, then throw a Moo into it. Folgaran spins after the hit; throw another Moo to interrupt that spin before he can resume the cycle.
After the first form ends, Folgaran lowers his claws and replaces the Spiker pattern with swinging claw hazards. Flying Moos now appear. Capture one, use the extra height from its jump, and throw the Moo into the same exhaust target. Stay mobile rather than standing below the claws. Repeat the aerial exhaust hit until the Armor Beast is defeated.
When the fight ends, move to the Bell of Tranquility and fire an Air Bullet at it. This Bell is the required story objective after Folgaran; it is unrelated to the six Stars used for the Claire Moa Temple Momett Doll.
- Aim at the exhaust system rather than Folgaran’s head or claws.
- Jump over the first-form Spikers.
- Use flying Moos and aerial positioning in the second form.
- Ring the Bell of Tranquility after the battle.
Defeat Leptio the Flower Clown in Joliant Plaza
Leptio begins by splitting into four figures. Hit one clone with a Moo to reveal the real Leptio, then hit the revealed figure with another Moo. He begins rolling around the arena. Keep throwing Moos at him when he reaches a safe firing position; each successful hit makes his movement faster, so stand on an open stretch and avoid trapping yourself beside a wall or hazard.
In the second form, Leptio hides inside a spiked cylindrical casing. Hit the casing with a Moo to start it rolling, then move to the opposite side of the arena. When the casing exposes Leptio, throw another Moo at his body. Repeat the casing-then-exposed-body sequence until the form is defeated.
Afterward, Leptio’s story progression opens Momett House on the stage-select map. The House is optional for the campaign ending. Its extras do not replace the required Bell of Joy progression.
- Use a Moo to identify the real clone.
- Attack the rolling Leptio from an open stretch.
- Hit the casing first in the second form.
- Throw at Leptio when the casing exposes him.
Defeat Mobile Tank Biskarsh in Volk Hall
Biskarsh can be damaged only on the top of the tank. Capture a Moo, step onto a Bouncer, and double-jump so the Moo strikes the top. Avoid remaining directly beneath Biskarsh while it jumps. If the fight takes too long, homing missiles appear, so prioritize a clean aerial attack rather than waiting for a perfect position.
When Biskarsh changes to its wheel form, it moves to the top of the Hall stairs and rolls toward Klonoa. Capture the flying Moo that appears, reach a Bouncer, and line up the double-jump before releasing the throw. A miss usually leaves Klonoa in the tank’s path. After a successful hit, avoid the movement and missile pattern, then attack again when Biskarsh returns to its vulnerable rolling cycle.
- Use a Moo, Bouncer, and double-jump to reach the tank’s top.
- Avoid standing directly underneath Biskarsh.
- Attack promptly when homing missiles begin.
- Repeat the aerial hit after the wheel-form cycle returns.
Defeat Polonte the Hatchling in Indecision Pass
The first phase takes place on a hoverboard. Polonte launches speed squares and pink spikes. Ride through the speed squares to build enough momentum for a direct collision with the egg. Avoid the pink spikes by steering between them or jumping over them; touching one costs speed and can prevent the impact. A practical approach is to take several speed squares in a row, then hold a straight line toward the egg.
After enough direct hits, the egg hatches. The second phase keeps the hoverboard route but uses more awkwardly placed speed squares and spikes. When Klonoa draws close, capture a mini-Boarder Moo and throw it at Polonte. Prioritize the safe line through the course over optional Dream Stones or Stars, because missing the board route can cost the attack opening.
- Collect speed squares before attempting a direct egg hit.
- Steer between or jump over pink spikes.
- Use the hoverboard to strike the first form.
- Throw mini-Boarder Moos at the hatched Polonte.
Defeat Cursed Leorina at the Embryo Compass
Cursed Leorina’s first phase has three main attacks: a moving energy ball while she runs, a jump aimed at Klonoa, and a hovering attack that prepares a stronger strike. Her weak point is the underside of her body. Capture an Erbil to electrify Klonoa, then jump into the underside while Leorina is running or descending from a jump.
When Leorina hovers, two Erbils appear at different heights. Capture the first Erbil and immediately use its jump to reach and capture the second. Use the second electrified jump to hit Leorina’s underside. The opening is brief, so do not pause between the two captures. Several successful attacks force her from the first platform section.
The second phase places Leorina beneath a circular platform. Capture a Moo and time the double-jump so the Moo strikes one of the depressed floor sections while Leorina passes underneath. After roughly half of this phase, she changes color and resumes faster jumping attacks. Erbils can be used again; begin the electrified jump earlier than before and retreat after the hit.
- Use Erbils against Leorina’s underside.
- Chain the two airborne Erbil captures during the hover attack.
- Time Moo throws for the depressed floor sections.
- Begin the later Erbil jump earlier because Leorina is faster.
Defeat the King of Sorrow at the Terminus of Tears
The opening phase is a hoverboard chase through a tube. The King circles ahead while placing spikes and Bombs. Capture a Bomb and throw it at the King, but take the first safe Bomb rather than steering into a spike while searching for a better one. Each successful hit increases the chase speed, so use a wide, clean line and treat survival as more important than optional pickups.
The second phase takes place on solid ground. The King is inside a central sphere, with spikes extending from its sides, and four outer balls surround it. Fire the Wind Bullet at the pointed end of a spike to stop it. Then capture the non-spiky end and throw the spike at an outer ball. Each outer ball takes two hits. Move away after each throw because the remaining balls can fire lasers. Repeat until all four outer balls disappear.
The final phase returns to the tube chase. Use the same Bomb strategy as the opening phase, but only two targets remain. Avoid the spikes, take safe Bombs, and complete the final attacks. The Terminus of Tears is not cleared merely by reaching the arena; the King must be defeated through all three phases and the ending sequence must begin.
- Capture and throw Bombs during both tube phases.
- Avoid spikes as the chase speed increases.
- Stop ground-phase spikes by shooting their pointed ends.
- Capture the safe end of each stopped spike.
- Hit each of the four ground-phase outer balls twice.
- Complete the final two-target tube phase.
Recover from a failed attempt
If a long Vision contains a Memory Clock before the boss, break the clock before practicing the final approach. When Klonoa dies, he returns to the last Memory Clock used. The Dream Stone total reverts to the amount recorded at that clock, including the level total, so a missed Dream Stone can sometimes be retried by deliberately dying before reaching the next checkpoint. This is useful for boarding routes and long approaches, but it does not permanently bank every item collected after the clock.
Separate boss practice from optional collection. First clear the boss with a safe route and preserved health. Then replay the Vision for Stars or Dream Stones. Collecting 100 Dream Stones grants an extra life, while collecting all six Stars and clearing a collectible Vision grants its Momett Doll. Neither reward is a boss prerequisite.
If repeated deaths leave you short on lives, replay an easier cleared Vision and collect Dream Stones before returning to the boss. Do not rely on a six-Star run while still learning the attack cycle; optional pickups can be pursued after the story route is secure.
- Use a Memory Clock before a long boss approach when available.
- Remember that death reverts Dream Stone totals to the last clock.
- Practice the boss separately from optional collection.
- Use Dream Stones for extra lives when retries are running low.
Confirm the campaign boss clear
The required boss route covered here is Folgaran the Armor Beast, Leptio the Flower Clown, Mobile Tank Biskarsh, Polonte the Hatchling, Cursed Leorina, and the King of Sorrow. Each fight must reach its conclusion and return control to the story or stage-select progression. The six optional Stars in a Vision are not substitutes for story Bells, and a Momett Doll is not required to advance the campaign.
At the end, confirm that the King of Sorrow’s opening chase, ground phase, and final chase have all been completed. Let the ending sequence play instead of resetting immediately after the final hit. The ending is the campaign completion marker; Momett House, Scrapbook pictures, Boss Time Attack, the Chamber o’ Fun, the Chamber o’ Horrors, and other rewards are optional post-clear content.
- All six assigned campaign bosses are defeated.
- The required story Bells have been rung after their encounters.
- The King of Sorrow’s three phases are complete.
- The ending sequence has played.
- Optional Stars, Dream Stones, Momett Dolls, and bonus modes remain separate completion goals.
Before you move on
- Folgaran the Armor Beast, Leptio the Flower Clown, Mobile Tank Biskarsh, Polonte the Hatchling, Cursed Leorina, and the King of Sorrow are cleared.
- The King of Sorrow’s opening hoverboard phase, ground phase with four outer balls, and final two-target phase are complete.
- The ending sequence has played after the King of Sorrow battle.
- Optional records are tracked separately: 100 Dream Stones grants an extra life, six Stars in a cleared collectible Vision grant that Vision’s Momett Doll, and 150 or more Dream Stones in a qualifying level unlocks a Scrapbook picture.
- Momett House and Boss Time Attack are bonus content and are not required for the campaign ending.
References for this chapter
- Klonoa 2: Lunatea's Veil — Guide and Walkthrough — PlayStation 2
- Klonoa 2: Lunatea's Veil — Dream Stone FAQ — PlayStation 2
- Klonoa 2: Lunatea's Veil — Secrets Guide — PlayStation 2
- Klonoa 2: Lunatea’s Veil original PlayStation 2 all-bosses gameplay reference
- Klonoa 2: Lunatea's Veil — North American PS2 release record, SLUS-20151
Optional Completion — Momett House, Scrapbook, Stars, and 150 Dream Stone Targets
After clearing Joliant Plaza and defeating Leptio the Flower Clown, the Momett House appears on the Joilant stage-select map. Use it to inspect the Scrapbook, Momett Doll Case, bonus stages, and music rewards. A Scrapbook picture is earned by clearing an eligible Vision with at least 150 Dream Stones; the original PS2 game starts with one picture and has 18 additional pictures to unlock, for 19 total. Dream Stone Fairy sections are essential in stages whose ordinary total is below 150. Each of the 16 ordinary collectible Visions contains six Stars. Collect all six Stars in a Vision and then clear it to receive that Vision’s Momett Doll. Stars, Dream Stones, and story progression are separate objectives, so replay difficult Visions instead of forcing every task into one attempt.
Unlock the Momett House and establish your tracking routine
Clear Joliant Plaza and defeat Leptio the Flower Clown. Return to the Joilant stage-select map and enter the Momett House when its marker becomes available. The house is the central checkpoint for optional completion: use the Scrapbook to track qualifying Dream Stone clears and the Momett Doll Case to track Star rewards.
The original PS2 Scrapbook begins with one picture. Each eligible Vision that is cleared with at least 150 Dream Stones adds another picture, regardless of the order in which you complete the Visions. The complete Scrapbook contains 19 pictures total: the initial picture plus 18 earned pictures. The 18 qualifying stages consist of the 16 ordinary collectible Visions and the two bonus stages.
Before attempting cleanup, open the Status or Vision record screen and note the individual Dream Stone total for the stage you are about to replay. A high cumulative total across the entire game is not enough; the 150-Dream-Stone condition is evaluated separately for each Vision.
- Clear Joliant Plaza.
- Defeat Leptio the Flower Clown.
- Enter the Momett House from the Joilant stage-select map.
- Confirm the initial Scrapbook picture and the Momett Doll Case.
- Use individual Vision records rather than a cumulative Dream Stone total.
Collect all six Stars in each ordinary collectible Vision
The six collectibles in a collectible Vision are Stars. Collecting all six Stars is only half of the requirement: you must also finish the Vision for the Momett Doll reward to register. If you collect the sixth Star and then lose your last life before the goal, replay the stage and complete it again rather than assuming the doll has been awarded.
There are 16 Momett Dolls in the original PS2 game, corresponding to the 16 ordinary collectible Visions. The two bonus stages are not additional ordinary doll stages. For each Vision, use a separate six-item checklist and record Stars as you pass them. Search the full route, including upper and lower paths, background and foreground lanes, breakable objects, and areas opened by captured enemies.
Several Stars require a particular enemy ability rather than a straightforward jump. A Moo can provide a double-jump, a Kiton can carry Klonoa upward, and other captured enemies can break barriers, activate mechanisms, or open alternate routes. If a Star is visible but unreachable, continue looking for the enemy, switch, springboard, or foreground/background path that makes the intended route possible. Do not confuse the six Stars with Dream Stones or with story Bells.
- Locate all six Stars in the current ordinary Vision.
- Use captured enemies and alternate depth paths when a Star is not directly reachable.
- Reach the Vision goal after collecting the sixth Star.
- Confirm the new Momett Doll in the Momett Doll Case.
- Repeat until all 16 Momett Dolls are displayed.
Plan a 150-Dream-Stone run around Dream Stone Fairy sections
A Scrapbook reward requires at least 150 Dream Stones in one cleared Vision. Start with a route-learning run, then consult the level-specific Dream Stone list for every ordinary green stone, blue five-value stone, and Fairy-dependent group. Blue Dream Stones are worth five, while ordinary green Dream Stones are worth one.
The Dream Stone Fairy appears in certain bubbles. Break the bubble only when Klonoa is positioned to collect the following group immediately. While the Fairy is active, green Dream Stones count twice, but the effect lasts only a short time. In stages whose normal total is under 150, these doubled stones are mandatory rather than merely helpful. Prepare the needed enemy, springboard, boarding line, or background route before releasing the Fairy.
Boarding, sliding, and automatic-scrolling sections deserve separate practice because a missed stone may be impossible to recover after the route moves on. Follow the listed ramp or jump line and avoid unnecessary attacks that change Klonoa’s position. Some Visions have a small surplus above 150, while others reach exactly 150 or depend on nearly every Fairy stone, so do not assume that one missed group can always be replaced.
- Track the Dream Stone total for the current Vision.
- Mark every Fairy-dependent group before the final attempt.
- Collect blue five-value stones whenever the route requires them.
- Use the level-specific route for boarding and slide sections.
- Clear the Vision after reaching at least 150 Dream Stones.
Use Memory Clocks to rehearse one-way sections
Touch a Memory Clock before a difficult optional sequence whenever possible. If Klonoa dies, he returns to the most recently used Memory Clock, and the Vision’s Dream Stone total reverts to the amount recorded there. This lets you retry a Fairy window, boarding line, slide, conveyor route, or enemy-assisted jump without replaying the entire opening section.
If you miss a Dream Stone in a one-way area and cannot return to it, do not finish the Vision with an incomplete total if you are pursuing the Scrapbook. Deliberately spend a life, return to the Memory Clock, and repeat the sequence. Recreate the setup before activating the Fairy: place the required enemy, align Klonoa with the first stone, and confirm whether the next group is in the foreground or background.
The Dream Stone FAQ documents a useful retry setup at 99 Dream Stones when a Memory Clock is nearby. The next stone grants an extra life, and a death can return you to the same 99-stone checkpoint for another attempt, provided the route supplies the necessary stone before failure. Use this only where the stage layout makes it practical; it is not required for ordinary completion.
- Touch the Memory Clock before the risky route.
- If a one-way Dream Stone is missed, die and return to the clock.
- Confirm that the Dream Stone total has reverted.
- Repeat the Fairy, boarding, or slide sequence until the required total is reachable.
Unlock both bonus stages and verify the finished optional file
Collecting eight Momett Dolls unlocks Chamber o' Fun at the Momett House. Clear Chamber o' Fun to unlock its Hurdy Gurdy reward group, tracks 00 through 27. Collecting all 16 Momett Dolls unlocks Chamber o' Horrors. Clearing Chamber o' Horrors unlocks the remaining Hurdy Gurdy tracks, numbered 28 through 54. These stages are optional and are not required to view the main campaign ending.
The two bonus stages also count among the 18 stages that can produce Scrapbook pictures, so a full Scrapbook requires qualifying Dream Stone clears in both bonus stages as well as the 16 ordinary Visions. Use Memory Clocks and stage replays for their Dream Stone routes just as you do in ordinary Visions.
The optional file is complete when the Scrapbook shows all 19 pictures, the Momett Doll Case displays all 16 dolls, Chamber o' Fun has been cleared, Chamber o' Horrors has been cleared, and both Hurdy Gurdy track groups are available. Check the individual Vision records to confirm the 150-Dream-Stone results rather than relying only on the total number of stones collected during the campaign.
- Scrapbook shows all 19 pictures.
- Momett Doll Case displays all 16 dolls.
- Chamber o' Fun is unlocked and cleared.
- Chamber o' Horrors is unlocked and cleared.
- Hurdy Gurdy tracks 00 through 54 are available.
- Individual Vision records show the qualifying 150-Dream-Stone clears.
Before you move on
- Momett House is available after Joliant Plaza and Leptio the Flower Clown are cleared.
- Scrapbook contains 19 pictures: one initial picture and 18 earned through qualifying 150-Dream-Stone clears.
- All 16 ordinary collectible Visions have been cleared with their six Stars collected.
- Momett Doll Case displays all 16 Momett Dolls.
- Chamber o' Fun has been unlocked and cleared.
- Chamber o' Horrors has been unlocked and cleared.
- Hurdy Gurdy tracks 00 through 54 are available.
- Status and Vision records confirm the individual Dream Stone results rather than only a cumulative total.
References for this chapter
- Klonoa 2: Lunatea's Veil — Guide and Walkthrough — PlayStation 2
- Klonoa 2: Lunatea's Veil — Dream Stone FAQ — PlayStation 2
- Klonoa 2: Lunatea's Veil — Secrets Guide — PlayStation 2
- Klonoa 2: Lunatea's Veil — North American PS2 release record, SLUS-20151
- Klonoa 2: Lunatea's Veil — Official Namco Momett House information
Postgame — Replay, Score, and Extra Content
After the ending, use the stage-select map to replay cleared Visions and improve separate Dream Stone and Star records. Reaching 150 Dream Stones in each of the 16 ordinary Visions and the two bonus stages unlocks all 19 Scrapbook pictures. Collecting all six Stars in each ordinary collectible Vision awards one of 16 Momett Dolls. Eight Dolls unlock Chamber o' Fun; clearing it unlocks the first 27 Hurdy Gurdy tracks. All 16 Dolls unlock Chamber o' Horrors; clearing it unlocks the remaining 27 tracks. Momett House also provides Boss Time Attack and the Scrapbook. There is no additional story campaign after the King of Sorrow and ending sequence.
1. Return to the stage-select map and choose a cleared Vision
Once the ending sequence has played, continue from the game's stage-select map. Move the cursor to any previously cleared Vision and select it to replay that stage. Replaying is the normal way to improve Dream Stone totals, recover missed Stars, and earn Momett Dolls that were not awarded during the first clear.
Use the map's status displays as your progress record. The Vision summary shows the best Dream Stone total saved for each stage, while the Momett Doll display shows which ordinary Visions have produced Dolls. These are separate records: a high Dream Stone score does not mean that all six Stars were collected, and collecting all six Stars does not require reaching 150 Dream Stones.
- Return to the stage-select map after the ending.
- Select cleared Visions directly for replay.
- Check Dream Stone totals and Momett Doll progress separately.
2. Improve Dream Stone totals to complete the Scrapbook
Replay each qualifying Vision and search beyond the obvious route. Check upper platforms, lower gaps, foreground and background paths, areas opened by captured enemies, and branches reached with enemy-assisted double jumps. In a Vision with a Dream Stone Fairy, plan the nearby collection route before breaking the Fairy's container. Dream Stones gathered while the Fairy's effect is active count for double value, so a missed Fairy window can prevent a 150-point result even when most stones were collected.
A qualifying Vision needs a recorded total of at least 150 Dream Stones to unlock its Scrapbook picture. The game provides one Scrapbook picture at the start and 18 additional pictures for the 18 qualifying stages: the 16 ordinary collectible Visions plus Chamber o' Fun and Chamber o' Horrors. The order does not matter. If a run finishes below 150, replay the same Vision and beat its saved total; the best result is retained.
Use checkpoints to practice difficult sections instead of repeatedly attempting a full perfect run. When a Fairy window, boarding sequence, or high-risk enemy jump is the reason a run falls short, concentrate on that section first, then make a final run that combines the improved technique with the earlier collection route.
- Use Dream Stone Fairy windows deliberately.
- Reach at least 150 Dream Stones in all 16 ordinary Visions.
- Reach at least 150 Dream Stones in both bonus stages for all 19 Scrapbook pictures.
3. Collect the six Stars in every collectible Vision
Each ordinary collectible Vision contains six Stars. Collecting all six in one Vision and then completing that Vision awards its Momett Doll. The Stars are the Doll objective; they are not interchangeable with Dream Stones and are not replaced by the 150-Dream-Stone requirement.
There are 16 Momett Dolls in total. If a Vision still lacks a Doll, replay it and deliberately search for the missing Stars, including Stars placed on alternate routes or behind enemy-powered platforming. Finish the Vision after collecting the sixth Star so the Doll can be awarded and recorded. Check the Doll display in Momett House or the stage-select interface before moving on.
- Find all six Stars in every ordinary collectible Vision.
- Finish each Vision after collecting its sixth Star.
- Confirm that all 16 Momett Dolls are displayed.
4. Use Momett House for the Scrapbook and Boss Time Attack
Momett House becomes available after clearing Joliant Plaza and defeating Leptio, the Flower Clown. Enter it from the stage-select area once it is open. Its postgame functions include the Scrapbook, which displays the pictures earned from 150-Dream-Stone Vision clears, and Boss Time Attack, which lets you challenge bosses already defeated in the story.
Boss Time Attack is separate from campaign completion and from the Doll and Scrapbook objectives. Use it to improve individual boss records or complete the available time-attack list. A boss becomes available for replay after its story battle has been cleared; the mode is not a replacement for the original campaign fight.
- Enter Momett House after the Leptio progression trigger.
- Review the Scrapbook after qualifying Vision clears.
- Use Boss Time Attack for separate boss records.
5. Unlock and clear Chamber o' Fun
After all eight required Momett Dolls have been collected, return to the stage-select map and select Chamber o' Fun when it appears. This is a bonus Vision, not a story prerequisite. Treat it as a full stage run: finish the course, then replay it later if its Dream Stone total is below 150 or if you want to improve its record.
Clearing Chamber o' Fun unlocks the first 27 tracks in the Hurdy Gurdy. Visit the music feature in Momett House after clearing the Chamber and confirm that the first group of tracks is available. Chamber o' Fun also counts as one of the 18 qualifying stages for the complete 19-picture Scrapbook.
- Collect at least eight Momett Dolls.
- Clear Chamber o' Fun.
- Confirm the first 27 Hurdy Gurdy tracks are available.
- Earn 150 Dream Stones in Chamber o' Fun if completing the Scrapbook.
6. Unlock and clear Chamber o' Horrors
Collect all 16 Momett Dolls to make Chamber o' Horrors available. Select it from the stage-select map and clear the bonus Vision. Like Chamber o' Fun, it is optional for the story but required for the complete bonus-content checklist.
After Chamber o' Horrors is cleared, the remaining 27 Hurdy Gurdy tracks become available. Chamber o' Horrors is also the final qualifying stage for Scrapbook progress, so earn at least 150 Dream Stones there if you want all 19 pictures. Its Doll threshold is based on the 16 ordinary Momett Dolls, not on Dream Stone totals.
- Collect all 16 Momett Dolls.
- Clear Chamber o' Horrors.
- Confirm the remaining 27 Hurdy Gurdy tracks are available.
- Earn 150 Dream Stones in Chamber o' Horrors for the final Scrapbook picture.
7. Confirm the completed postgame state
For campaign completion, confirm that the King of Sorrow has been defeated and that the ending sequence at the end of Terminus of Tears has played. No further story campaign is added after that sequence.
For the optional completion target, confirm all 16 Momett Dolls, a cleared Chamber o' Fun, a cleared Chamber o' Horrors, all 19 Scrapbook pictures, and the complete Hurdy Gurdy track selection. The stage-select records should show at least 150 Dream Stones in all 18 qualifying stages. Boss Time Attack records are an additional score objective rather than a requirement for the story ending.
- King of Sorrow defeated and ending viewed.
- All 16 Momett Dolls displayed.
- Chamber o' Fun cleared.
- Chamber o' Horrors cleared.
- All 19 Scrapbook pictures displayed.
- All Hurdy Gurdy tracks unlocked.
- At least 150 Dream Stones recorded in all 18 qualifying stages.
Before you move on
- Campaign clear: King of Sorrow is defeated and the Terminus of Tears ending sequence has played.
- Replay check: cleared Visions can be selected again from the stage-select map.
- Dream Stone check: the best-record summary shows at least 150 Dream Stones in all 16 ordinary Visions and both bonus Chambers.
- Star check: all six Stars have been collected in every ordinary collectible Vision.
- Doll check: all 16 Momett Dolls are displayed.
- Bonus-stage check: Chamber o' Fun and Chamber o' Horrors are both cleared.
- Scrapbook check: all 19 pictures are displayed.
- Music check: the full Hurdy Gurdy selection is available, with the first 27 tracks from Chamber o' Fun and the remaining 27 from Chamber o' Horrors.
- Boss check: Boss Time Attack has been reviewed and any desired records have been completed.
Troubleshooting and Recovery — Save Strategy, Performance Tips, and Common Traps
The original North American PlayStation 2 release stores campaign progress on a PlayStation 2 Memory Card. The game uses 370KB of space, saves only through Memory Card slot 1, and writes to the file loaded when you started. Permanent saves are made after clearing a Vision or by choosing Save from the World Map; Memory Clocks are in-level recovery points, not substitutes for saving. Touch every clock before a difficult section. If Klonoa loses a life, the Vision restarts at the last used Memory Clock and items collected after that clock are restored to their earlier state, including Dream Stones. This makes deliberate recovery deaths useful when a Dream Stone Fairy route, boarding section, slide, or moving-platform sequence goes wrong. If all lives are lost, choose Continue to restart the current Vision; the manual states that Continue can be used without limit. Save at the World Map before shutting down or beginning a risky replay.
Prepare the PS2 save setup before playing
Use a functioning PlayStation 2 Memory Card with free space before launching Klonoa 2. The North American manual states that the game requires 370KB on an 8MB PlayStation 2 Memory Card. It also specifies that only Memory Card slot 1 is used for saves. Insert the card into slot 1 before starting the game and confirm that the console can read it.
The game creates a file region the first time you play. A single card can hold multiple named regions and saves, but the game cannot create multiple file regions for Klonoa 2 on that same card. Keep the card inserted during normal play and avoid interrupting an actual save operation. If the card is crowded, free space before beginning a long campaign rather than waiting until a Vision clear triggers the save screen.
- Insert the Memory Card in slot 1, not slot 2.
- Confirm that at least 370KB is available.
- Load the intended Klonoa 2 file before continuing.
- Do not remove the card or interrupt power while saving.
Make permanent saves at the correct times
Clearing a Vision brings up the Confirm Save Screen. Select Yes and choose the loaded save file. The manual also allows saving from the World Map. Use that option after a boss sequence, after opening a new route, or before starting a difficult collectible replay. A Memory Clock does not write campaign progress to the Memory Card; it only determines where Klonoa resumes after losing a life during the current Vision.
The game saves only to the file that was originally loaded at the start of the session. Do not expect to switch to a different file from inside the save screen. After a major clear, remain in the game long enough to reach the confirmation screen and finish the save before turning off the console.
- After clearing a Vision, accept the Confirm Save Screen.
- From the World Map, choose Save before ending a session.
- Confirm that the intended loaded file is being updated.
- Treat every Memory Clock as a checkpoint, not a permanent save.
Activate Memory Clocks before difficult sections
Touch every Memory Clock you encounter. Once activated, it becomes the restart point for the current Vision if Klonoa loses a life. This is especially valuable before a long slide, hoverboard or boarding route, flying sequence, Dream Stone Fairy section, or moving-platform puzzle. Stop briefly at the clock and make sure Klonoa has actually touched it instead of merely passing nearby.
Use the latest clock as the start line for practice. If the next section contains a risky shortcut, an enemy needed for a double-jump, or a one-way boarding route, activate the clock before attempting it. A slightly slower approach that secures the checkpoint is safer than reaching the same area quickly and then having to replay the entire preceding section.
- Touch each Memory Clock deliberately.
- Activate the clock before collecting or attempting the next risky group of items.
- Use the latest checkpoint as the beginning of a practice segment.
Recover missed Dream Stones without replaying the whole Vision
If a Dream Stone is missed and cannot be reached by backtracking, allow Klonoa to lose a life before touching another Memory Clock. The manual explains that Klonoa restarts at the clock and that items obtained since reaching it are recovered. The Dream Stone FAQ confirms that the level total returns to the amount recorded at that Memory Clock.
This is useful in boarding, slide, and Fairy-timed sections. Activate the clock, enter the section, and attempt the route. If the collectible sequence fails, use a safe fall or another unavoidable hazard to lose the life, then retry from the clock. Do not activate a later clock until the section is complete, because the later clock becomes the new recovery point and the earlier setup is no longer available.
A Dream Stone Fairy doubles the value of green Dream Stones for a short period. If a missed Fairy-timed group is required for a 150-Dream-Stone Scrapbook target, reset to the previous clock and repeat the setup rather than accepting a failed total. The FAQ also documents a retry method in which 99 Dream Stones are recorded at a clock; collecting one more after restarting grants an extra life, allowing another attempt if the section can be reached and the needed stone collected again.
- Use a deliberate recovery death only after activating the desired clock.
- Verify that the Dream Stone total returns to the checkpoint value.
- Do not touch a later clock before fixing the missed section.
- For 150-stone goals, repeat failed Fairy-timed routes from the earlier checkpoint.
Handle a full game over correctly
If Klonoa loses all remaining lives during a Vision, choose Continue rather than Quit. The manual states that Continue restarts that Vision and can be used an unlimited number of times. This is different from turning off the console: a Continue preserves the current session’s ability to retry, but it does not create a permanent Memory Card save.
After returning to the Vision, use the activated Memory Clock and the restored item state to practice the troublesome section. If the attempt has become inefficient or you want to preserve the last confirmed campaign state, finish the Vision or return to the World Map, save, and then begin a fresh replay.
- Choose Continue after losing all lives if you want to keep retrying the Vision.
- Choose Quit only when you intend to leave the current Vision.
- Save from the World Map or after clearing a Vision before shutting down.
Avoid common gameplay and hardware traps
On narrow slides and hoverboard routes, use the directional controls to reduce speed when the path tightens; holding forward through every hazard makes correction harder. On ordinary platforming routes, capture an enemy before jumping toward a gap if that enemy is needed for a double-jump, flight, or a throw into the background or foreground. A missed depth target can waste a life even when Klonoa is horizontally aligned.
Do not assume that Dream Stones collected after the last Memory Clock are safe after death. They can be restored to the checkpoint state. Likewise, do not shut down after a boss or Vision clear until the save prompt has been completed. For repeated failures, save the campaign first, replay the Vision from the World Map, and practice one checkpoint segment at a time.
- Reduce speed before narrow slide and hoverboard hazards.
- Keep required enemies available before attempting height changes.
- Aim carefully at background and foreground targets.
- Complete a permanent save before ending the session.
Before you move on
- The intended Klonoa 2 file is present on the PlayStation 2 Memory Card in slot 1.
- After clearing a Vision, the Confirm Save Screen has been accepted and the correct loaded file selected.
- Reloading the file from the title screen shows the latest confirmed Vision or World Map progress.
- Every difficult collectible or movement section has a deliberately activated Memory Clock before the attempt begins.
- After a recovery death, Klonoa returns to the expected clock and Dream Stone total.
- If all lives are lost, Continue successfully restarts the current Vision instead of ending the attempt.
- The campaign is permanently saved before beginning another replay, boss attempt, or optional Dream Stone run.
Final Completion Checklist
Confirm campaign completion by clearing Terminus of Tears, defeating the three-phase King of Sorrow encounter, and allowing the ending sequence to play. The story route does not require Dream Stones, Stars, Momett Dolls, or Scrapbook pictures. For optional completion, use the Status Screen to review each Vision’s records, collect all six Stars in each collectible ordinary Vision to earn its Momett Doll, and reach at least 150 Dream Stones in each qualifying Vision to unlock its Scrapbook picture. The original PlayStation 2 game contains 16 ordinary Momett Dolls. Eight dolls unlock Chamber o' Fun, while all 16 unlock Chamber o' Horrors. The two bonus stages also have Dream Stone records and contribute Scrapbook unlocks.
1. Confirm the main story clear at Terminus of Tears
Return to the World Map after finishing the final area and check that the required story route has been completed. The decisive campaign check is not merely reaching Terminus of Tears: enter the Vision, finish its traversal, defeat the King of Sorrow, and let the post-battle scenes continue. Optional Dream Stones and Stars do not block the ending.
Terminus of Tears contains a three-phase boss sequence. In the first phase, stay on the Hoverboard, avoid the spikes and bombs, and throw the bombs into the King of Sorrow when they can be safely collected. The second phase places the King inside a central sphere. Stop a side spike with a Wind Bullet, pick it up from its safe end, and throw it at each of the four outer targets twice while avoiding the emitted lasers. The final phase returns to the Hoverboard format and requires the same general attack method against two remaining targets.
If you lose the fight, continue from the latest available checkpoint or restart the final attempt with the lives already earned during the campaign. Do not reset immediately after the victory animation: allow the full ending sequence to play, then return to the map or Status Screen to review the completed game state.
- Terminus of Tears has been completed.
- The King of Sorrow has been defeated through all three phases.
- The complete ending sequence has played.
- No unfinished story objective remains in the final route.
2. Review the Status Screen and Vision records
On the World Map, open the Status or Vision summary screen using the game’s displayed map command. Review the stages individually rather than relying on a combined Dream Stone total. The game records the best Dream Stone result for each Vision, along with the Star and Momett Doll progress associated with that stage.
A cleared Vision can still be incomplete for optional purposes. Finishing a stage awards story progress, but it does not award its Momett Doll unless all six Stars in that Vision were collected before the stage was cleared. Likewise, reaching 150 Dream Stones in one Vision does not compensate for a different Vision that remains below 150.
Make a written list of stages with missing Stars, missing dolls, or Dream Stone totals below 150. Replaying only those stages is more efficient than repeating the whole campaign. The World Map and Status Screen are the authoritative in-game checks for which ordinary Visions still need cleanup.
- Every required story Vision has a clear result.
- Dream Stone totals have been checked separately for each Vision.
- Any Vision missing one or more Stars is listed for replay.
- Any Vision below 150 Dream Stones is listed for replay.
3. Complete the 16 Momett Dolls through Star collection
Each ordinary collectible Vision contains six Stars. Collect all six in a single Vision and then complete that Vision to receive its Momett Doll. Finding only five Stars, collecting the Stars across multiple attempts without clearing the stage, or clearing the stage before completing the six-Star set does not award the doll for that Vision.
There are 16 Momett Dolls in the original PlayStation 2 release. Use the doll display and the Vision summary to identify missing dolls. The six-Star objective is separate from the Dream Stone objective: a stage can have all 150 or more Dream Stones and still lack its Momett Doll if one Star was missed.
After collecting eight Momett Dolls, visit Momett House and enter Chamber o' Fun. After all 16 dolls are collected, Chamber o' Horrors becomes available. These bonus stages are optional for the story ending, but they are required if the goal is to complete the game’s main extra-content progression. Enter Momett House again after earning rewards if a new feature does not appear immediately; the game may require separate visits to register separate unlocks.
- The Momett Doll display has been inspected.
- All 16 Momett Dolls are present for complete Star collection.
- Chamber o' Fun is unlocked at eight dolls.
- Chamber o' Horrors is unlocked at all 16 dolls.
4. Verify per-Vision Scrapbook progress
Enter Momett House and open the Scrapbook. A qualifying Vision unlocks a Scrapbook picture when its individual result reaches 150 or more Dream Stones. The requirement is per Vision, not a game-wide total. Green Dream Stones normally count as one, blue Dream Stones count as five, and Dream Stone Fairy effects double the value of stones collected while the effect lasts.
The original game begins with one Scrapbook picture and unlocks additional pictures as qualifying Vision records are earned. The two bonus stages are included in the Scrapbook progression, so a complete optional target covers the 16 ordinary Visions plus Chamber o' Fun and Chamber o' Horrors. Check the Scrapbook itself rather than assuming that a high overall total proves every entry is unlocked.
For difficult cleanup runs, use Memory Clocks as practice points. If a later segment contains a missed Dream Stone that cannot be revisited, dying returns Klonoa to the last used Memory Clock and reverts the stage’s Dream Stone total to that checkpoint’s value. This is especially useful in Hoverboard and Fairy-timed sections, but it costs a life, so begin with enough lives for repeated attempts.
- The Scrapbook has been opened at Momett House.
- Every intended ordinary Vision has reached at least 150 Dream Stones.
- Chamber o' Fun and Chamber o' Horrors have been checked for their own Dream Stone records.
- All intended Scrapbook pictures are unlocked.
5. Final sign-off for the chosen completion goal
For campaign completion, the required proof is simple: Terminus of Tears is cleared, the King of Sorrow is defeated, and the ending has played. No specific Dream Stone total, Star total, Momett Doll count, or bonus-stage clear is needed to view the canonical ending.
For the game’s optional completion target, verify all three records together: the Status Screen shows 150 or more Dream Stones in every intended Vision, the Momett Doll display contains all 16 dolls, and both Chamber o' Fun and Chamber o' Horrors have been cleared. Then open the Scrapbook and confirm that no intended picture remains locked.
The final verification order should be World Map first, Status Screen second, Momett Doll display third, and Scrapbook last. This order separates story progress, per-Vision records, Star-based dolls, and Dream Stone rewards, preventing one completion track from being mistaken for another.
- Story completion is confirmed by the defeated King of Sorrow and the played ending.
- All 16 Momett Dolls are displayed for optional full collection.
- Every intended Vision has a per-Vision result of at least 150 Dream Stones.
- Chamber o' Fun and Chamber o' Horrors are cleared if pursuing all bonus content.
- The Scrapbook contains all intended unlocked pictures.
Before you move on
- Campaign clear: Terminus of Tears is complete, the King of Sorrow is defeated, and the ending sequence has played.
- Vision records: every intended ordinary Vision and bonus-stage record has been reviewed individually.
- Dream Stone target: every intended Vision has reached at least 150 Dream Stones.
- Star target: all six Stars have been collected in each ordinary collectible Vision and all 16 Momett Dolls are displayed.
- Bonus target: Chamber o' Fun and Chamber o' Horrors have been cleared.
- Scrapbook target: all intended pictures are unlocked and visible in Momett House.
Finishing up
You have reached the canonical ending when all required Visions are cleared through Terminus of Tears, the King of Sorrow is defeated, and the ending cutscene has played.
Verify the story clear on the World Map or post-clear state rather than relying only on reaching Terminus of Tears.
Optional 100%: reach at least 150 Dream Stones in every qualifying Vision to unlock all Scrapbook pictures at Momett House.
Use the Status Screen to check each Vision’s six-Star progress and Momett Doll result.
Collecting all six Stars in a Vision and clearing that Vision awards its Momett Doll.
Collecting all 16 Momett Dolls and clearing Chamber o' Fun and Chamber o' Horrors are optional bonus goals, not requirements for the story ending.
Use the final save and Status Screen to confirm which Visions, Dream Stone totals, Stars, Momett Dolls, and bonus stages are complete.
Choose your next gameScreenshots & video
Game imagery for reference. Follow the written chapters above for the route and strategies.
Sources & references
Our original guide draws on the references below. Check the edition at the top of this page before following controls or unlock requirements.
- Klonoa 2: Lunatea's Veil — Official PlayStation 2 Manual
- Klonoa 2: Lunatea's Veil — Guide and Walkthrough — PlayStation 2
- Klonoa 2: Lunatea's Veil — Secrets Guide — PlayStation 2
- Klonoa 2: Lunatea's Veil — Dream Stone FAQ — PlayStation 2
- Klonoa 2: Lunatea's Veil — North American PS2 release record, SLUS-20151
- Klonoa 2: Lunatea’s Veil — Official Namco Momett Doll Information
- Klonoa 2: Lunatea's Veil — Guide and Walkthrough — PlayStation 2 — Mr_Bump
- Klonoa 2: Lunatea’s Veil — All Momett Doll Bells, La-Lakoosha Locations Guide
- Klonoa 2 — Lunatea's Veil — USA Manual
- Klonoa 2: Lunatea's Veil — Momett Doll Locations
- Klonoa 2: Lunatea’s Veil — StrategyWiki Table of Contents
- Maze of Memories — Klonoa Wiki
- Embryo Compass — Klonoa Wiki
- Klonoa 2: Lunatea’s Veil — All Momett Doll Bells, The Ark Revisited
- Klonoa 2: Lunatea’s Veil — All Momett Doll Bells, Kingdom Of Sorrow
- Klonoa 2: Lunatea's Veil — Vision 6-2: The Kingdom of Sorrow — Quesada's Swan
- Longplay of Klonoa 2: Lunatea's Veil — NTSC PlayStation 2
- Klonoa 2: Lunatea’s Veil original PlayStation 2 all-bosses gameplay reference
- Klonoa 2: Lunatea's Veil — Official Namco Momett House information
- Klonoa 2: Lunatea's Veil Cheats and Secrets — PlayStation 2
- Klonoa 2: Lunatea's Veil — FAQ
About the game & collecting notes
- Platform
- PlayStation 2
Complete Klonoa 2's main campaign from the Sea of Tears to the Terminus of Tears, covering every required Vision and boss, the Momett House unlocks, and optional 100% objectives (Dream Stones and Momett Dolls).
Darryl Polo
Darryl Polo loves tinkering with emulation and revisiting retro games. He enjoys exploring how old favorites play on different setups and sharing what he learns along the way. At Joking Joystick, he writes about the games, hardware, and small discoveries that keep the hobby fun.
Our editorial standardsFound a step that needs another look? Help us improve this guide.