Kingdom Hearts II (PS2, USA) — Complete Campaign Walkthrough
Complete walkthrough for the original North American PlayStation 2 release of Kingdom Hearts II. It covers Roxas’s six-day prologue, Sora’s awakening and Mysterious Tower sequence, the early Olympus Coliseum/Disney Castle/Timeless River progression, every required story world and revisit needed to reach The World That Never Was, the Xemnas ending sequence, and clearly labeled optional worlds, revisits, synthesis, forms, Coliseum content, and Sephiroth cleanup. Final Mix additions are excluded.

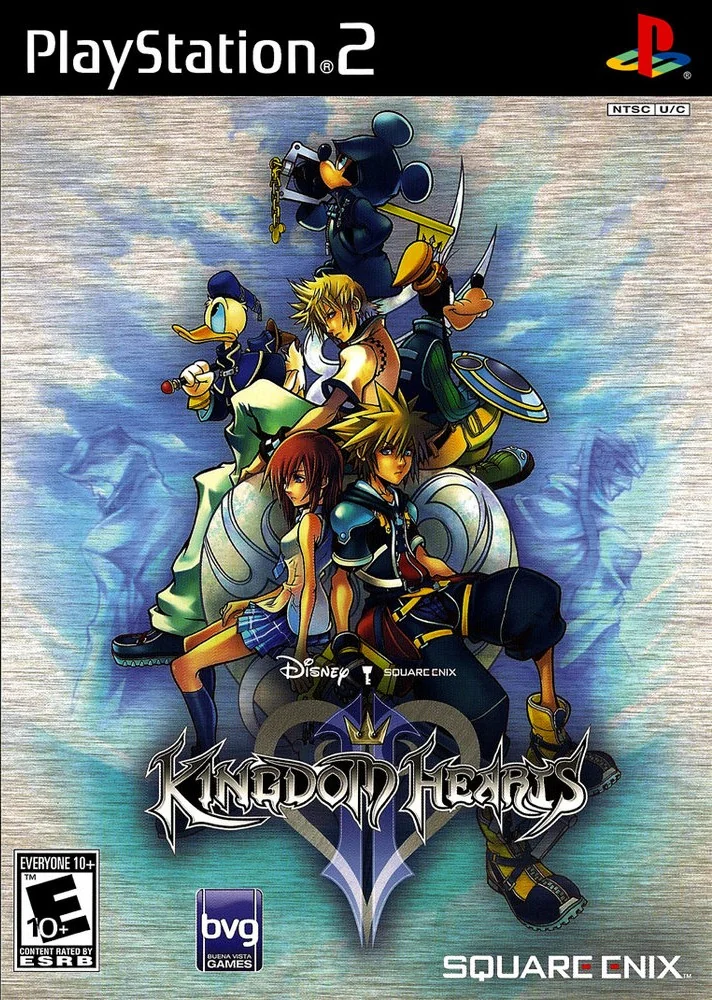
Find a copy
Kingdom Hearts II PlayStation 2
We may earn a commission if you buy through these links, at no extra cost to you. As an Amazon Associate I earn from qualifying purchases.
Opens retailer search results. Check the model, edition, seller, availability and current price before buying.
Before you begin
This guide is organized by story phase, but Kingdom Hearts II unlocks several visits in waves. Follow the active World Map or Jiminy’s Journal marker rather than forcing a later visit early. Complete the first-visit sections for The Land of Dragons, Beast’s Castle, Port Royal, Agrabah, and Halloween Town before relying on the revisit chapters. The automatic Hollow Bastion and 100 Acre Wood interlude occurs after the required early-world trigger, and Chapter 05 should be started only when its Twilight Town marker is available.
For the original North American PlayStation 2 ending route, complete the required late progression through the second episodes of The Land of Dragons, Beast’s Castle, Port Royal, Agrabah, and Halloween Town, following the World Map’s actual unlock order. Olympus Coliseum II, both Pride Lands episodes, Atlantica, the second Space Paranoids episode, Coliseum cups, synthesis, Journal work, and Sephiroth are optional for reaching the normal ending.
Before entering the continuous final sequence, preserve the Altar of Naught save made after the first Xemnas encounter and before entering the large Kingdom Hearts door.
Set yourself up for the run
Choose your difficulty: Standard is recommended for a first playthrough.
Proud is available for players seeking a stiffer challenge; do not change difficulty mid‑save.
(Difficulty details vary by version—this guide targets the original PS2 release.)
Familiarize yourself with controls and the command menu (attack, magic, items, Reaction commands, shortcut bar).
The official manual lists how Drive Forms and commands function—review it before big battles.
Save often and keep multiple save files.
Before any Major Plot Point (especially entering The World That Never Was) make a separate backup save so you can return for unfinished optional tasks.
Carry a steady stock of Curatives and Elixirs for late bosses.
Synthesis improves your access to important consumables and equipment; learn the basic ingredient drops for the items you need.
Use party management deliberately: summon and party members change available Reaction commands and Drive Form availability.
Check party members’ levels when preparing for boss fights.
Practice Drive Forms as soon as they unlock.
Each Form has a different playstyle; level them to gain the Form Ability they grant at level 3.
Drive Form leveling changes how you approach boss phases.
Gummi Ship basics: complete the early Gummi segments to unlock reliable routes.
You do not need to fully master every Gummi Mission to finish the main story, but basic navigation and avoids will save time.
Prioritize key abilities: Dodge Roll, Second Chance, MP Haste and Combo Plus are high‑value for prolonged boss encounters.
Use available AP to equip these where possible.
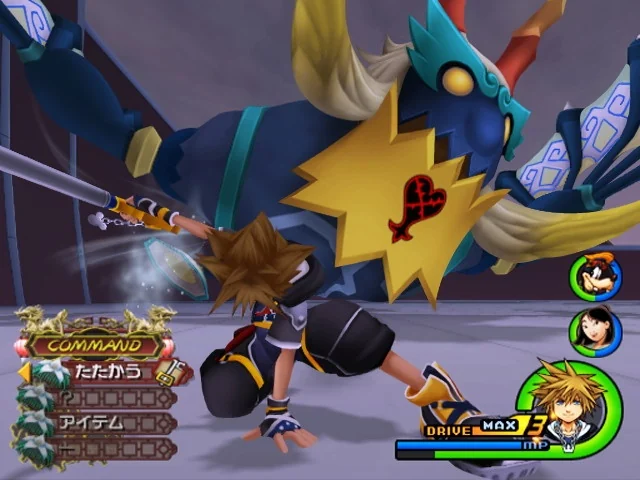
Prologue: Roxas and Twilight Town — six-day route to Sora’s awakening
Roxas’s prologue is a linear six-day introduction in Twilight Town, not a repeatable mission system with selectable time limits. The required route teaches movement and Reaction Commands, resolves the stolen-photograph incident, completes the job sequence, clears the Station of Awakening, finishes the Struggle tournament, investigates the Seven Wonders, and ends with the Mansion basement battle against Axel. Optional jobs, treasure chests, and extra experience are useful but unnecessary. Two early choices affect Sora: the first-day Struggle weapon gives a permanent Strength, Defense, or Magic increase, while the weapon selected at the Station of Awakening changes the order in which Sora learns certain abilities. Roxas’s level, statistics, abilities, and equipment carry into Sora, but temporary Struggle weapons and the dual Keyblades used during the Axel battle are not permanent gear. Save at available Save Points and verify Sora’s status after the handoff.
Day One: investigate the theft and defeat the Dusk
After the opening scenes, visit the Armor Shop, Accessory Shop, and Candy Shop with Hayner, Pence, and Olette. At the Candy Shop, lock on to the cat to continue. Follow the group to the Sandlot and select a Struggle weapon before the practice fight with Seifer. The Struggle Sword raises Strength, the Struggle Hammer raises Defense, and the Struggle Wand raises Magic. This is a permanent stat increase, so choose according to the attribute you want Sora to receive.
Follow the white creature through the Woods to the Old Mansion. During the first Dusk encounter, normal attacks with the practice weapon do not damage it. Keep moving and use Reversal when the Reaction Command appears. After the scripted Keyblade transformation, use Reversal to create an opening and attack the Dusk until it is defeated. This ends the first day; there is no need to farm experience or repeat the encounter.
- Choose the Struggle weapon deliberately.
- Use Reversal against the first Dusk before the Keyblade appears.
- Defeat the Dusk after receiving the Keyblade.
- Follow the scenes that end Day One.
Day Two: complete jobs for the AP bonus
Save at the Save Point when Roxas begins the second day. Travel to Market Street or Tram Common and use one of the six available jobs: Mail Delivery, Cargo Climb, Grandstander, Poster Duty, Bumble-Buster, or Junk Sweep. You only need to earn enough to continue the story, but earning 650 to 1049 munny grants 1 AP and earning 1050 to 1850 grants 2 AP. The job earnings are a progress measure for the trip and are not ordinary munny that you keep for later shopping.
When the game signals that you have earned enough, meet Hayner at the Station Plaza and allow the train and Munny Pouch scenes to play. Save again if the Save Point is available. Do not spend the entire prologue repeating jobs; the AP bonus is the meaningful long-term reward.
- Save before starting the job sequence.
- Earn at least 650 munny if you want the first AP bonus.
- Earn at least 1050 munny for the maximum AP bonus.
- Meet Hayner at the Station Plaza to advance.
Day Three: choose the Station of Awakening weapon and defeat Twilight Thorn
Follow the letter and travel toward the station. After the time-freeze scenes, return to the Sandlot and face the mysterious enemies with the practice weapon. Dodge and use the available Reaction Commands until Roxas is taken to the Station of Awakening. Choose the staff, sword, or shield there. This second weapon choice does not give a simple permanent weapon; it determines the order in which Sora receives some level-based abilities. Choose consistently with your preferred emphasis: magic, offense, or defense.
After the choice, defeat the surrounding Dusks, open the tutorial chest, save, and enter the next door. In the Twilight Thorn battle, use Reaction Commands when Roxas is grabbed or thrown, then attack the exposed head when the boss is vulnerable. Jump over the broad arm sweep, use the prompted aerial reactions during the electrical attacks, and keep away from the Creepers released around the arena. Defeating Twilight Thorn advances the story and awards a permanent HP bonus.
- Make the Station of Awakening weapon choice.
- Defeat the Dusks after the choice.
- Use Reaction Commands throughout Twilight Thorn’s scripted attacks.
- Defeat Twilight Thorn and continue to Day Four.
Day Four: win the Struggle tournament and defeat the first Axel
Enter the Struggle tournament and fight Hayner, then Vivi, followed by the final match against Setzer. Struggle is decided by orb totals rather than HP: attack opponents to knock their orbs loose, collect the dropped orbs, and avoid taking unnecessary hits. A short combo after an opponent lands is a reliable opening. Once the tournament sequence reaches the Nobodies, defeat the Dusks before Axel appears.
Against this first Axel encounter, equip Guard if it is available and block his direct approaches. When Axel crouches, prepare for a fast flaming rush; jump or guard instead of standing in front of him. Keep attacking after his failed approach, then complete the Setzer match and let the reward and story scenes play. The tournament is required for progression; optional attempts to improve job scores are not.
- Complete every required Struggle match.
- Collect orbs instead of focusing only on damage.
- Defeat the Dusks after the tournament.
- Defeat Axel and finish the Setzer sequence.
Day Five: investigate the Seven Wonders
Travel to Sunset Station and meet Pence to receive the map of the Seven Wonders. Follow the markers through Sunset Terrace, the Tram Common, and Sunset Hill. Examine each indicated phenomenon and complete the short encounter or Reaction Command attached to it. The sequence is linear once you follow Pence’s clues, and the final investigation leads you to the Old Mansion.
The Old Mansion visit on Day Five is primarily a story sequence. Watch the scenes involving the room, the photographs, and Roxas’s connection to Sora, then return to town when directed. Save before starting the final day if the Save Point is available. Do not treat the Seven Wonders as a free-roaming collectible system; completing the story investigations is what matters for awakening Sora.
- Meet Pence at Sunset Station.
- Investigate all required Seven Wonders locations.
- Complete the Old Mansion story scene.
- Save before the final day when possible.
Day Six: reach the Mansion basement and defeat Axel
Roxas begins the final day unable to interact normally with his friends. Leave the Usual Spot and face Axel’s Nobodies. The first group can be cleared normally; the scene advances after the encounter or when Roxas is badly injured, so do not waste healing items trying to force extra rewards. Continue through Tram Common and the Woods, defeating the required Dusk, Assassin, and Creeper groups until the Old Mansion opens.
Inside the Mansion, clear the Foyer and search the rooms on the route to Naminé’s room. Collect the Mansion Map and Naminé’s Sketches, then cross the upper floor to the Library. The drawing scene reveals the route to the Basement and Computer Room. Save before entering the newly opened room, equip healing items, and proceed to the final Axel battle.
Axel’s arena can become covered in damaging flames or magma. Keep moving, avoid standing in burning sections, and attack after Axel finishes a rush. When the Reaction Command appears during the appropriate combo, use it to force Axel down and remove the dangerous floor effect. If Roxas’s HP falls quickly, heal immediately; the fight awards an HP bonus when completed. After the battle, continue through the computer-room scenes and allow the Pod Room sequence to finish.
- Clear the Nobodies outside the Mansion.
- Collect Naminé’s Sketches and the Mansion Map.
- Use the Library route to reach the Basement and Computer Room.
- Save before Axel if a Save Point is available.
- Defeat Axel while avoiding the burning floor.
- Finish the Pod Room scenes.
Before and after the handoff to Sora
Before entering the final scripted sequence, check Roxas’s level, abilities, equipment, and available items. Roxas’s level, statistics, learned abilities, and equipment are carried into Sora’s opening. The selected Struggle weapon and Station of Awakening choice therefore matter, but Roxas’s Struggle gear is not permanent equipment, and the dual Keyblades used in the Axel battle are a scripted moveset rather than an item to equip later. Verify Sora’s actual status after awakening instead of assuming every temporary object or reward remains available.
- Check Roxas’s level and abilities.
- Equip or retain useful permanent equipment before the final sequence.
- Do not expect the Struggle weapons or dual Keyblades to remain usable.
- After awakening, open Sora’s status and equipment screens to verify the transfer.
Before you move on
- The Day One Dusk and Day Three Twilight Thorn encounters are complete.
- The Day Two job sequence awarded the desired AP bonus, if pursued.
- The Station of Awakening weapon choice and first-day Struggle weapon choice have been made.
- The Day Four Struggle tournament and first Axel encounter are complete.
- The Seven Wonders and Old Mansion investigation scenes have advanced.
- Roxas defeated Axel in the Mansion basement and reached the Pod Room sequence.
- Control has transferred to Sora, whose status screen confirms the inherited level, abilities, statistics, and equipment.
References for this chapter
Sora awakens — transfer check and route to the Twilight Town hub
Sora awakens in the Old Mansion after Roxas’s prologue has ended. The required route for this chapter is short: inspect Sora’s inherited status, equipment, abilities, and items, leave the mansion, cross The Woods, and reach The Usual Spot. The first reunion scenes introduce Hayner, Pence, and Olette and provide the clue that someone resembling King Mickey has been searching for Sora and his friends. Twilight Thorn has already been defeated by Roxas and does not appear as a Sora battle. This chapter ends at The Usual Spot; the Station Plaza Nobody encounter, Central Station, the train, Yen Sid’s Tower, Drive Forms, and Hollow Bastion belong to the next chapter.
1. Check Sora’s inherited status and equipment
After the awakening scenes finish, control returns to Sora outside the Old Mansion. Open the Status, Items, Equipment, and Abilities menus before leaving. Sora inherits Roxas’s current level and associated statistics, learned abilities, equipment, munny, and available inventory from the prologue. This makes the opening menu check worthwhile, especially if you collected armor, accessories, Potions, Hi-Potions, or other supplies while playing as Roxas.
Equip the strongest armor and accessories that are actually present, then review the Abilities menu. Roxas’s abilities transfer to Sora, but they still require enough AP to remain equipped. If the inherited AP total cannot support everything, prioritize defensive and movement-related abilities over abilities that are less useful for ordinary field enemies. Put Cure or available curatives where they are easy to reach once the spell becomes available later; at this point, simply confirm what Sora has in his inventory.
The temporary Struggle bat from the first-day tournament does not become Sora’s weapon. The Dream Sword, Dream Shield, or Dream Rod selected at the Station of Awakening also determines ability-learning order rather than remaining as a usable weapon. Sora’s normal weapon is the Kingdom Key. Do not expect the prologue’s temporary weapon choices to appear as separate Keyblades in the Equipment menu.
- Open Status, Items, Equipment, and Abilities.
- Confirm Sora’s level, statistics, AP, learned abilities, equipment, munny, and item stock.
- Equip useful inherited armor and accessories.
- Do not search for the Struggle bat or Dream weapon as Sora equipment.
2. Leave the Old Mansion through The Woods
When the menu check is complete, leave the Old Mansion grounds and follow Donald and Goofy toward The Woods. The route is linear for story purposes. You do not need to return to the mansion interior, investigate the basement, or search for the room where Sora was sleeping; those scenes have already served their purpose before control is restored.
The Old Mansion exterior contains optional treasure chests. They can provide useful early supplies, but none is required to trigger the next story scene. Collect them now if you want the items immediately, or continue without them and return during a later Twilight Town visit. The same applies to the optional chests in The Woods. Avoid spending time on a complete treasure sweep if your goal is simply to advance the campaign.
Move through The Woods toward the town exit. Random enemies may be fought for experience and munny, but there is no need to grind here. Sora’s inherited level and abilities are sufficient for the short opening route, and the game’s next required encounter does not begin until after the reunion scenes in The Usual Spot.
- Leave the Old Mansion grounds.
- Travel through The Woods toward Twilight Town.
- Collect optional chests only if you want the early supplies.
- Do not return to the Mansion interior or begin the later Station Plaza route.
3. Reach The Usual Spot
Exit The Woods to trigger the transition to The Usual Spot. Sora, Donald, and Goofy find Hayner, Pence, and Olette there. The three residents initially react as though Sora and his companions have interrupted their meeting place, creating an intentionally awkward introduction after Sora’s long sleep.
Let the conversation continue without leaving the area. Olette’s familiarity with Sora and the group’s resemblance to people from Roxas’s recent memories are part of the required reunion scene. Sora does not understand why the location feels familiar, so do not treat the moment as a side quest or attempt to investigate the area for a hidden trigger.
The group then explains that someone wearing a black coat has been looking for Sora and his friends. Pence adds the identifying detail that the stranger had large, round ears, pointing the party toward King Mickey. This is the immediate objective established by the scene, but the route to Station Plaza is intentionally reserved for the next chapter.
- Reach The Usual Spot from The Woods.
- Complete the meeting with Hayner, Pence, and Olette.
- Hear the clue about the black-coated figure with large, round ears.
- Stop this chapter after the initial reunion scenes.
Before you move on
- Sora is under player control outside the Old Mansion.
- Sora’s inherited level, statistics, AP, abilities, equipment, munny, and item stock have been checked.
- The Old Mansion and The Woods route is complete.
- Sora, Donald, and Goofy have reached The Usual Spot.
- Hayner, Pence, and Olette have completed their initial reunion conversation with Sora.
- The clue about the black-coated figure with large, round ears has been revealed.
- The chapter ends before Station Plaza, Central Station, Yen Sid’s Tower, Drive Forms, or Hollow Bastion.
Twilight Town (Sora) — hub duties, early side content and the first story beats
Sora awakens in the real Twilight Town and reunites with Donald and Goofy. After saving at The Usual Spot, travel through The Woods and Tram Common, then climb through Station Heights to the Sandlot and Station Plaza. The Station Plaza battle is a scripted endurance encounter involving Dusks and Creepers; use Reaction Commands, move constantly and heal when safe. Mickey’s appearance awards the Munny Pouch, Crystal Orb and Secret Ansem’s Report 2. Continue to Central Station, board the train and complete the connected Mysterious Tower sequence. Yen Sid explains the Nobodies, the fairies provide Sora’s new clothes, and Sora receives the Star Seeker Keyblade and access to Valor Form. Only after the Sorcerer’s Loft scenes does the Gummi Ship route to Hollow Bastion become available.
Begin at The Usual Spot and prepare Sora’s party
After the awakening scenes, control returns to Sora at The Usual Spot. Use the Save Point before leaving. Open the equipment and ability menus immediately: Roxas’s level, munny, equipment and learned abilities carry over to Sora, but Donald and Goofy are now the active party members. Equip Sora’s strongest available Keyblade and accessories, then give unused equipment to Donald and Goofy if appropriate.
Place Cure on a shortcut and add an offensive spell such as Fire or Thunder. Check the party item settings as well; Donald and Goofy can consume recovery items during battle, so adjust their settings if you want to conserve supplies. When ready, leave through The Woods rather than trying to reach the station directly from the mansion area.
- Save at The Usual Spot.
- Inspect Sora’s inherited equipment and abilities.
- Set Cure and an offensive spell on shortcuts.
- Review Donald and Goofy’s item settings.
Pass through The Woods and use Tram Common as a supply stop
Travel through The Woods to Tram Common. The Woods and Tram Common contain optional treasure, including recovery items, synthesis materials and an AP Boost. Collect what is convenient, but do not delay the story to open every chest. The rooftop and sloped-roof paths in Tram Common can be awkward while Sora’s movement abilities are still limited, so return later if a chest is not immediately reachable.
The shops in Tram Common and Station Heights can be used for basic supplies and equipment. Munny is limited at this point, so prioritize recovery items and upgrades that replace weaker inherited gear. There is no need to buy every available weapon or accessory before the next story battle; several useful items are available from treasure and later story progress.
- Collect nearby recovery items if needed.
- Buy only supplies or equipment that solve an immediate need.
- Leave difficult rooftop treasure for a later visit if necessary.
Visit the Sandlot, then climb to Station Plaza
From Tram Common, follow the connected routes toward Station Heights and the Sandlot. The Sandlot contains an optional scene involving Seifer and the Struggle promoter, but it is not required for the main campaign. Continue uphill through Station Heights to Station Plaza when you are ready to advance.
Entering Station Plaza starts the required Nobody encounter. Dusks and Creepers arrive in repeated groups, so do not treat the fight as a normal battle in which every enemy must be permanently cleared. Lock on to nearby targets, use full ground combos, then reposition before another group surrounds Sora. When a Reaction Command appears in the command menu, use it to clear space or interrupt the immediate threat.
- Visit the Sandlot only if you want its optional scene.
- Reach Station Plaza through Station Heights.
- Use Reaction Commands when prompted.
- Keep moving instead of attempting to defeat an endless stream of enemies.
Survive the Station Plaza encounter and collect the story rewards
The Station Plaza battle ends through scripted conditions, including the passage of time, Sora taking substantial damage or reaching the required hit total. You do not need to defeat an ordinary finite wave. If HP falls dangerously low, retreat around the plaza and cast Cure during a safe opening. Donald and Goofy can distract enemies while Sora recovers.
When the encounter concludes, Mickey appears and the story awards the Munny Pouch, Crystal Orb and Secret Ansem’s Report 2. Let the complete scene play before leaving the plaza. These rewards are required story progression; the optional chests elsewhere in Twilight Town are not.
- Survive until the Station Plaza scene concludes.
- Confirm receipt of the Munny Pouch, Crystal Orb and Secret Ansem’s Report 2.
- Heal before continuing to Central Station.
Board the train at Central Station
Enter Central Station after the Station Plaza scenes. Three optional chests are available in the station, including a Hi-Potion, Tent and Mythril Shard. Open them if you want extra supplies, then use the Save Point. Speak with Donald when you are ready; the train carries the party to Sunset Station near the Mysterious Tower.
Do not mark the chapter complete when the train departs. The train ride begins the next required sequence, and world travel remains unavailable until Sora finishes the Mysterious Tower visit.
- Collect the Central Station treasure if desired.
- Save before speaking with Donald.
- Board the train and continue to Sunset Station.
Complete the Mysterious Tower sequence and unlock the next landing
At Sunset Station, approach the Mysterious Tower. Several Shadows appear outside; avoid attacking while they flatten into the ground, then strike once they become vulnerable. Enter the tower, use the Save Point inside, and climb through the tower rooms. Continue through the Star Chamber and Moon Chamber until you reach Yen Sid.
After Yen Sid’s scenes, inspect the book as instructed and speak with him again. Proceed to the Wardrobe and talk to the fairies. Sora receives new clothes, the Star Seeker Keyblade and access to Valor Form. Read the on-screen Drive Form explanation before leaving the Wardrobe; Valor Form consumes the Drive Gauge and uses Donald as its partner.
Continue to the Sorcerer’s Loft and let the remaining scenes play. When control returns and the Gummi Ship is available, the first Sora visit to Twilight Town and its connected tutorial sequence are complete. Hollow Bastion is the next required landing.
- Reach Yen Sid after clearing the tower’s Shadow encounters.
- Obtain Star Seeker and Valor Form.
- Finish the Wardrobe and Sorcerer’s Loft scenes.
- Confirm that the Gummi Ship can land at Hollow Bastion.
Before you move on
- Sora has survived the Station Plaza Nobody encounter and received the Munny Pouch, Crystal Orb and Secret Ansem’s Report 2.
- The party has boarded the train from Central Station and reached the Mysterious Tower.
- Sora has met Yen Sid, received the Star Seeker Keyblade and unlocked Valor Form.
- The Sorcerer’s Loft scenes have finished and Hollow Bastion is available as the next Gummi Ship destination.
References for this chapter
Hollow Bastion / Radiant Garden — meet Leon and the Restoration Committee
Sora’s first visit to Hollow Bastion is a short story chapter that establishes Radiant Garden as a recurring hub. Check the Marketplace shops, enter Merlin’s House in the Borough, meet the Restoration Committee, and receive Blizzard before following the newly opened route to the Bailey. The required battle removes Donald and Goofy from the party and has Sora defend the gates alongside Leon against waves of Dusks, Creepers, and Samurai. Protect the gate’s health, use Blizzard against grouped enemies, and respond quickly to the Samurai’s Duel Stance reaction command. Victory grants Fire and Secret Ansem Report 7. After the final scenes, clear Stardust Sweep and Asteroid Sweep to open the next world choices. Great Crest, later Radiant Garden areas, and the computer-room plot are not part of this initial visit in the original PS2 campaign.
Check the Marketplace before entering Merlin’s House
After landing at Hollow Bastion, Sora arrives in the Marketplace. The shops carry useful early-game supplies, but Munny is limited and there is no need to purchase every available upgrade. Buy Potions or Hi-Potions if your stock is low, and replace weak equipment only when the improvement is affordable. Keep several healing items for the Bailey defense.
Move from the Marketplace into the Borough and enter Merlin’s House. A save point is available inside, so save before continuing. Speak with Merlin and watch the scenes involving Leon, Aerith, Cid, and Yuffie. These characters form the Hollow Bastion Restoration Committee and establish the town as the party’s recurring base. The Committee gives Sora a Membership Card and the Blizzard Element, which adds Blizzard to his magic list.
- Save at Merlin’s House.
- Confirm that Blizzard is available in the Magic menu.
- Assign Blizzard to a shortcut if you have an open slot.
- Carry enough healing items for a sustained battle.
Explore only the nearby Borough route, then take the Bailey exit
Before leaving the Borough, open any nearby treasure chests that are directly along the route. The first visit also contains puzzle pieces and ordinary treasure, but none of these are required for story completion. Do not search for Trinity marks; those markings belong to the original Kingdom Hearts and are not a collection system in Kingdom Hearts II.
Follow the available path toward the Bailey. The initial visit does not open the later Great Crest route, Ansem’s Study, or the computer-room sequence. Those areas become relevant during later Radiant Garden story events. Continue through the accessible route until the cutscene at the Bailey begins.
- Reach the Bailey through the currently open path.
- Do not spend time looking for Great Crest.
- Treat treasure chests and puzzle pieces as optional first-visit rewards.
Defend the gates with Leon
The Bailey battle begins after Sora is separated from Donald and Goofy. Leon joins Sora as the guest ally, and the objective is to defeat the attacking Nobodies while keeping the gates from losing all of their health. The enemies include Dusks, Creepers, and Samurai. Creepers and Dusks are the most immediate threats to the gates because they move quickly; Samurai are slower and often occupy Leon.
Stay near the gate approaches instead of chasing enemies across the entire arena. Lock on to a Creeper or Dusk that is moving toward a gate, close the distance, and finish it before switching targets. Short ground combos are safer than extended attacks when several enemies are surrounding Sora. Let Leon occupy slower enemies while Sora handles the enemies closest to the objective.
Blizzard fires a long-range ice crystal and is useful against enemies lined up in front of Sora or grouped near a gate. The Nobodies drop MP orbs during the fight, giving Sora opportunities to cast again. Use Cure or an item as soon as Sora’s health becomes unsafe rather than trying to finish a combo while surrounded.
Samurai can trigger the Duel Stance reaction command. When Duel Stance appears, select it and then choose The End quickly when it becomes available. Missing the timing allows the Samurai to strike Sora. If the command does not appear, disengage and reposition rather than standing in front of the Samurai’s attack range. The battle ends when the required waves are defeated; leaving the area early is not a way to bypass it.
- Prioritize Creepers and Dusks approaching the gates.
- Keep the gate health bar from being depleted.
- Use Blizzard on grouped or distant enemies.
- Use Duel Stance against Samurai and select The End promptly.
- Heal before Sora reaches critical HP.
Receive Fire and Secret Ansem Report 7
After the gate defense, the game awards the Fire Element, adding Fire to Sora’s magic list. Fire surrounds Sora with close-range rotating flames in this version, so it is more useful when enemies are close than as a long-distance projectile. Assign it to a shortcut if you have room, but keep Blizzard available for enemies positioned farther away.
Watch the following scenes with the Restoration Committee and Organization XIII. When the sequence concludes, Secret Ansem Report 7 is awarded and recorded in the Journal’s Ansem Reports section. This completes the story portion of Hollow Baston’s first visit; there is no required boss fight or Great Crest objective here.
- Confirm Fire appears in Sora’s Magic menu.
- Confirm Secret Ansem Report 7 is recorded in the Journal.
- Watch the post-battle scenes before attempting to leave.
Clear the two newly opened Gummi routes
The party is sent to Interspace after the Hollow Bastion scenes. Two routes become available: Stardust Sweep and Asteroid Sweep. Clear both routes once if you want both adjacent destinations available on the world map. Asteroid Sweep opens the route toward The Land of Dragons, while Stardust Sweep opens the route toward Beast’s Castle.
Gummi missions can be replayed later for higher scores, alternate mission objectives, Gummi blocks, and ship improvements, but those optional results are not needed to complete Hollow Bastion’s story chapter. Once both routes have been cleared, return to the world map and choose either destination. The Land of Dragons has the lower displayed Battle Level and is the gentler next stop, but both worlds are valid required-story destinations.
- Clear Asteroid Sweep.
- Clear Stardust Sweep.
- Verify that The Land of Dragons and Beast’s Castle are available on the world map.
- Save before landing at the next world.
Before you move on
- The Bailey defense has been completed without the gate health bar being depleted.
- Fire is available in Sora’s Magic menu.
- Secret Ansem Report 7 is recorded in the Journal.
- Asteroid Sweep and Stardust Sweep have both been cleared if both next-world destinations are desired.
- The world map allows a landing at The Land of Dragons and Beast’s Castle.
- Great Crest and the later computer-room sequence have not been mistaken for first-visit objectives.
References for this chapter
Early campaign worlds — Land of Dragons, Beast’s Castle, Olympus Coliseum, Disney Castle, and Timeless River
Complete the first episodes of The Land of Dragons, Beast’s Castle, and Olympus Coliseum in the order allowed by the World Map. After the second completed world among those three, the game automatically sends Sora to Hollow Bastion for the mandatory early 100 Acre Wood interruption. Resolve that sequence before continuing to the remaining opening world. After all three opening worlds are complete, follow the Disney Castle and Timeless River story route. Timeless River awards Monochrome and Wisdom Form and opens the Gummi routes toward Atlantica and Port Royal. Coliseum cups are optional and are not required for the normal ending.
Complete The Land of Dragons’ first episode
Land at The Land of Dragons and travel to the Encampment. Complete Shang’s three required morale missions: Surprise Attack, The Ambush, and The Search. The morale gauge decreases while each mission is active, so defeat nearby Heartless and collect the morale orbs they release. Avoid opening optional chests when the gauge is nearly empty; the objective is to keep the gauge alive until the mission ends.
After reporting to Shang, continue through the Checkpoint and Mountain Trail. Use the Rockshatter Reaction Command on the barriers and keep moving while maintaining the morale gauge. At the Village, save before entering the cave. Defeat the Assault Riders and Shadows without letting the Riders corner Sora. Clearing the cave awards Slide Dash and changes Ping into Mulan.
Leave the Village and proceed through the Ridge. Donald and Goofy are unavailable during part of this assault, so keep moving, heal between enemy groups, and defeat only the enemies blocking the route. After the avalanche sequence, return through the Checkpoint to the Palace Gate.
During the Shan-Yu battle, protect the Palace Gate gauge. Defeat nearby Nightwalkers and collect their morale orbs instead of focusing exclusively on the boss. Use Press and then Takedown when those Reaction Commands appear. Retreat from Shan-Yu’s sweeping charge and attack during his recovery. Victory awards Aerial Sweep and the Hidden Dragon Keyblade.
- Finish Surprise Attack, The Ambush, and The Search.
- Complete the Mountain Trail objective and use Rockshatter.
- Clear the Village cave and obtain Slide Dash.
- Defeat Shan-Yu without allowing the Palace Gate gauge to empty.
- Obtain Aerial Sweep and Hidden Dragon.
Complete Beast’s Castle’s first episode
Land at Beast’s Castle and finish the opening battle before saving in the Parlor. Go through the East Wing to Belle’s room to trigger the story scene and obtain the Castle Map. Return to the Entrance Hall, enter the West Hall, and approach the Wardrobe. Choose Push whenever the Reaction Command appears; Waken reverses the Wardrobe’s progress.
Enter the room beyond the Dresser and defeat Thresholder and Possessor. Attack from the side when possible and avoid standing directly in front of Thresholder during its breath attack. Defeating Possessor awards Upper Slash.
Continue to the Dungeon, rescue the servants, collect the Basement Map, and proceed to the Undercroft. During the lantern sequence, use Sprinkle on all three lanterns and use the command to restore Cogsworth. Follow the opened path and defeat the Gargoyles before entering Beast’s Room.
During the Beast battle, attack after his claw swings and use Wake Up when it appears. Complete the scripted Cogsworth encouragement sequence, then save after Beast joins the party. Sora receives an additional armor slot for clearing this part of the episode.
Enter the Ballroom for the connected Shadow Stalker and Dark Thorn fights. Shadow Stalker possesses objects and pillars; attack the exposed target and use Release. When it moves beneath Sora, jump away from the swallowing attack.
Dark Thorn can become invisible and summon Possessors. Use Step Vault to reach the chandelier, then use the follow-up Reaction Command to swing it and expose the boss. Use Slingshot when Dark Thorn throws Sora. Defeating Dark Thorn awards Retaliating Slash and the Cure Element. The Baseball Charm and Summon access do not come from this battle; they belong to the later early Hollow Bastion and 100 Acre Wood interruption.
- Visit Belle’s room and obtain the Castle Map.
- Use Push at the Wardrobe and avoid Waken.
- Defeat Thresholder and Possessor and obtain Upper Slash.
- Complete all three Sprinkle lantern interactions.
- Defeat Beast, then Shadow Stalker and Dark Thorn.
- Confirm Retaliating Slash and Cure.
Resolve the automatic early Hollow Bastion and 100 Acre Wood interlude
After you complete the second world among The Land of Dragons, Beast’s Castle, and Olympus Coliseum, the game automatically sends the party to Hollow Bastion. This is a required story interruption, not the later return involving Demyx, the 1,000 Heartless battle, Ansem’s Study, or Space Paranoids. During this visit, the exit is unavailable, so do not expect to return to the World Map by using the save point.
Follow the opening scenes in Hollow Bastion until Merlin gives Sora the 100 Acre Wood book. Talk to Donald and examine the book. Enter the only available location, Pooh Bear’s House. You may collect the nearby early treasures before greeting Pooh, but no other 100 Acre Wood area is available yet.
After Pooh freezes and Sora is expelled from the book, defeat the Heartless outside Merlin’s House. Use normal combos and Fire against grouped Shadows and Soldiers; the Soldier Reaction Command Cyclone can clear an attacker quickly. Once the fight ends, re-enter the book when the game prompts you.
Return to Pooh Bear’s House and speak with Pooh again. The torn pages have damaged his memories, so this first visit ends without a normal minigame. Leave the book and speak with Merlin. The story grants the Baseball Charm, which enables Summons, and Chicken Little becomes Sora’s first available Summon.
After the tutorial and cutscenes, Sora is returned to the World Map. Continue to the one remaining opening world among The Land of Dragons, Beast’s Castle, and Olympus Coliseum. The early Hollow Bastion sequence is now complete; do not confuse it with the later Hollow Bastion return that contains the Crystal Fissure, the 1,000 Heartless battle, and the first Space Paranoids episode.
- Complete the second of the three opening worlds and accept the automatic Hollow Bastion visit.
- Enter Pooh Bear’s House through Merlin’s book.
- Defeat the Heartless outside Merlin’s House.
- Re-enter the book and speak with Pooh after the interruption.
- Receive the Baseball Charm and Chicken Little.
- Return to the World Map and finish the remaining opening world.
Complete Olympus Coliseum’s first story episode
Enter Olympus Coliseum through the Underworld. During the opening escape, the curse prevents Drive Forms. Follow the Caverns route and defeat the Heartless blocking the way. At the Underworld Entrance, Sora remains with Auron while Donald and Goofy escape. Defeat Cerberus by jumping over its shockwave, moving away from fireballs, and attacking after bites or spins. In the original North American PlayStation 2 release, the Cerberus bonus is Dodge Slash.
Continue through the Underworld Caverns to Demyx’s first encounter. This is a timed objective, not a conventional boss duel: defeat 100 water forms within 80 seconds. Use Fire against groups and grab note-shaped forms with Wild Dance when the Reaction Command appears. The water forms drop HP recovery in the original release, so collect those drops while keeping the timer in view.
After Demyx leaves, obtain the Olympus Stone and use it to remove the curse. Drive Forms become available in the Underworld after this event. Save before entering the next sequence.
At The Lock, protect Megara during the first Pete encounter. Defeat the Hook Bats, keep Pete occupied, and use the rolling-bomb opportunity against him. When Hercules joins the fight, use Pinball against Pete’s shield and survive until the encounter ends. Victory awards Trinity Limit.
Return to the Coliseum and defeat the Hydra. Use Phil One-Two and Urninator to create openings, then use Vanquish on exposed heads. Pegasus Run provides another opportunity to stun it. Victory awards Thunder and the Hero’s Crest Keyblade. Pain and Panic, Cerberus, Titan, and Goddess of Fate Cups are optional challenges and are not required for the main ending.
- Escape the Underworld and defeat Cerberus.
- Defeat 100 water forms within 80 seconds.
- Obtain the Olympus Stone and confirm Drive Forms are available.
- Protect Megara and defeat Pete.
- Defeat the Hydra and obtain Thunder and Hero’s Crest.
- Do not treat any Coliseum cup as required story progress.
Complete Disney Castle’s required transition
Once the opening-world progression sends you to Disney Castle, follow the scenes through the Courtyard and Library. Escort Minnie through the Colonnade to the Audience Chamber. Use Call Over to keep her moving and use Faith when several Heartless surround her. Defeat the Heartless at the Audience Chamber and reach the throne.
After the Disney Castle scenes, the story directs Sora back to Hollow Bastion to speak with Merlin. Return to Merlin’s House and use the newly available white door in the Hall of the Cornerstone. This door leads to Timeless River. The Torn Page in the Disney Castle Library is optional for later 100 Acre Wood progress and is not necessary for the Timeless River route.
- Escort Minnie to the Audience Chamber.
- Clear the Audience Chamber battle.
- Speak with Merlin in Hollow Bastion when directed.
- Enter Timeless River through the white door.
Clear Timeless River and obtain Wisdom Form
Save at the Timeless River Pier and follow the opening scenes. Defeat the first Pete encounter, then return to Cornerstone Hill when the story opens the four windows. Enter and clear Building Site, Lilliput, Scene of the Fire, and Mickey’s House. These four window scenarios are required; collect optional chests only after the active Heartless and environmental hazards are under control.
After all four windows are clear, return to Cornerstone Hill and proceed to the final Pete confrontation. Young Pete assists Sora while the future Pete moves through the window environments. Attack during recovery windows and use About-Face when the Reaction Command appears to redirect him. Use the environmental Reaction Command in the Building Site section when it becomes available.
After Pete is defeated, the story rewards Slapshot, Fantasia and Auto Limit for Donald, Goofy Tornado for Goofy, the Reflect Element, and the associated bonus HP. Sora then receives the Monochrome Keyblade and Wisdom Form when the Timeless River episode is completed.
Return to Disney Castle and save. Two Gummi routes open after Timeless River: Splash Island leads to Atlantica, and Floating Island leads to Port Royal. Clear the desired route from the World Map, then continue with the next chapter’s first-visit Agrabah, Halloween Town, and Port Royal instructions. Atlantica and the Coliseum cups are optional for reaching the normal ending.
- Defeat Pete at the Pier.
- Clear Building Site, Lilliput, Scene of the Fire, and Mickey’s House.
- Defeat the final Pete encounter.
- Confirm Monochrome, Wisdom Form, Reflect, Slapshot, and Goofy Tornado.
- Return to Disney Castle and save.
- Identify Splash Island for Atlantica and Floating Island for Port Royal.
Before you move on
- The Land of Dragons first episode is complete through Shan-Yu, with Slide Dash, Aerial Sweep, and Hidden Dragon obtained.
- Beast’s Castle first episode is complete through Dark Thorn, with Upper Slash, Retaliating Slash, and Cure obtained.
- The automatic early Hollow Bastion visit is complete, including the Heartless battle outside Merlin’s House and the 100 Acre Wood interruption.
- Sora has received the Baseball Charm and Chicken Little, confirming early Summon access.
- Olympus Coliseum first-visit story progress is complete through the Hydra, with Dodge Slash, Trinity Limit, Thunder, and Hero’s Crest obtained.
- Disney Castle’s required Minnie escort and Merlin transition are complete.
- Timeless River is complete through Pete, with Monochrome and Wisdom Form obtained.
- A save exists after returning to Disney Castle.
- The World Map shows the Gummi routes toward Atlantica and Port Royal.
- No Coliseum cup is being treated as a prerequisite for the next chapter or the normal ending.
References for this chapter
- Walkthrough: Kingdom Hearts II/Hollow Bastion — Kingdom Hearts Wiki
- Walkthrough: Kingdom Hearts II/100 Acre Wood
- Walkthrough: Kingdom Hearts II — Beast’s Castle
- Walkthrough: Kingdom Hearts II — Olympus Coliseum
- Game: Timeless River — Kingdom Hearts Wiki
- Timeless River walkthrough — KHGuides
- Kingdom Hearts II — Guide and Walkthrough — PlayStation 2 — SeiferMaster
Agrabah, Halloween Town, and Port Royal — first visits, later returns, and optional tasks
Complete the first visits to Port Royal, Agrabah, and Halloween Town before continuing the midgame route. Port Royal teaches the moonlight rule for Undead Pirates and ends with Barbossa and the Illuminator. Agrabah concludes with Blizzard Lord and Volcanic Lord, followed by Genie Jafar. Halloween Town ends with Oogie Boogie and awards Magnet. These visits provide Follow the Wind, Lamp Charm, Explosion, Wishing Lamp, and Magnet in the original North American PlayStation 2 release. The later Agrabah II and Halloween Town II routes are reserved for Chapter 07. Pride Lands, Atlantica, treasure, synthesis, puzzle pieces, minigames, and Coliseum cups are optional or separately scoped. Olympus Coliseum II is optional original-release story content and is not a substitute for the five required late-world visits.
Complete the first Port Royal visit before returning later
Land at Port Royal and follow the opening scenes with Will Turner, Elizabeth Swann, and Captain Jack Sparrow. Clear the Undead Pirates and Heartless in the town, then proceed to the harbor and board the Interceptor. Speak to Jack and choose the Black Pearl when the game presents the ship-selection prompt.
After arriving at Isla de Muerta, move through the Cave Mouth and meet Will and Elizabeth. When the objective changes to holding off the Undead Pirates while the ship is prepared, survive the timed encounter and return to the ship. The next ship battle is a protection sequence: keep the medallion safe while Undead Pirates attack and cannon fire comes from the Black Pearl. If the medallion is taken, defeat the pirate carrying it and retrieve it before the timer expires. Staying near the rear of the ship keeps Sora in useful moonlight and reduces the danger from the cannons.
When the story returns Sora to the Interceptor, remove all five gunpowder barrels before they explode. Run directly to each barrel and use the displayed action to kick it into the sea. The Heartless can be ignored while the barrels are being cleared unless one is blocking the route. Save at Isla de Muerta before continuing through the Cave Mouth and Rock Face.
- Use moonlit areas to damage Undead Pirates.
- Protect the medallion during the ship battle and retrieve it promptly if it is stolen.
- Kick all five gunpowder barrels into the sea before they explode.
- Save at Isla de Muerta before the final approach.
Defeat the Illuminator and then Barbossa
The first Port Royal boss is Barbossa with the Illuminator. The arena begins in darkness, so search for the Illuminator by watching for its glowing eyes and defeat it first. Once it is destroyed, moonlight returns and Barbossa becomes vulnerable. If another Illuminator appears, stop attacking Barbossa and locate it again before resuming the boss fight.
Use magic when Barbossa is exposed, and stay ready for his pistol, bombs, and forward sword attacks. When he targets Jack, use Twin Counter when it appears, followed by Sonic Dive. Jack is a required party member for this encounter; if Jack is defeated, the battle ends in a game over, so heal him when necessary. Near the end, watch for the additional Reaction Commands that let Sora counter Barbossa’s stronger attack sequence.
Defeating Barbossa awards Aerial Finish, and sealing the world’s Keyhole awards the Follow the Wind Keyblade. This fight is separate from both later Grim Reaper battles in Port Royal II. Do not expect Port Royal II to appear until the first Port Royal episode is finished and the later story flags have been reached.
- Defeat the Illuminator before focusing on Barbossa.
- Use Twin Counter and Sonic Dive when Barbossa targets Jack.
- Keep Jack alive throughout the fight.
- Confirm Follow the Wind after the first Port Royal episode.
Complete Agrabah’s first visit through the Cave of Wonders
Enter Agrabah and clear the opening Heartless encounter, then go to the Peddler’s Shop. Follow the story to the Palace to meet Jasmine. Return to the Peddler’s Shop and continue through the Bazaar, using the Valley of Stone and the Ruins as landmarks on the way to the Cave of Wonders.
In the Cave of Wonders, keep Cure available for ambushes and environmental hazards. Follow the required route through the cave rather than spending time clearing every optional chest. The first major boss sequence is Blizzard Lord and Volcanic Lord. Blizzard Lord throws ice onto the ground and can freeze party members; use Fire to free characters and attack when the boss is exposed. Volcanic Lord leaves flames as it bounces around the arena; use Blizzard and its Reaction Commands when available, then attack during its low passes. When one boss produces healing orbs, keep track of the other boss, which may continue attacking while Sora collects them.
Focus on whichever lord is currently applying the greater pressure. Do not spend a long combo beside elemental hazards, and rescue frozen allies before attempting a Form or Limit sequence. The battle awards Sora the Explosion ability and provides the Lamp Charm, which enables Genie summons.
- Visit the Palace, Peddler’s Shop, Bazaar, and Cave of Wonders in story order.
- Use Fire against Blizzard Lord’s ice effects and Blizzard against Volcanic Lord’s fire effects.
- Free frozen party members before committing to long attacks.
- Confirm Explosion and Lamp Charm after the elemental boss sequence.
Finish Genie Jafar and leave Agrabah complete
After the elemental battle and the following scenes, return through Agrabah as the story directs and enter the next Cave of Wonders area for the Jafar sequence. During the Genie Jafar encounter, prioritize movement and reaching the target safely. Use the displayed Reaction Commands to close distance during the chase, and avoid lingering beneath falling debris or in the path of moving ruins.
When the battle shifts into the hazardous debris sequence, continue moving and use Guard or Reflect if equipped and available. Wait for the arena to return to a normal attack window rather than forcing Sora into danger. Defeat Jafar to finish Agrabah’s first episode.
The original release awards the Wishing Lamp Keyblade after the Jafar sequence. Lamp Charm is the summon item from the earlier elemental battle, while Explosion is the ability reward from Blizzard Lord and Volcanic Lord. Do not begin Agrabah II here; the detailed second visit belongs to Chapter 07 after the late Hollow Bastion progression.
- Complete the Genie Jafar chase and battle.
- Confirm Wishing Lamp after the Jafar episode.
- Leave Agrabah II for Chapter 07.
Follow Zero through Halloween Town and Christmas Town
Enter Halloween Town and follow Zero to Town Square, then continue to Dr. Finkelstein’s Lab. After the laboratory scenes, exit and defeat the Heartless in Town Square. Return through the Graveyard and continue south into the Hinterlands. Follow the route through Yuletide Hill and Candy Cane Lane, where Toy Soldiers appear, then enter Santa’s House and continue along the footprints toward Curly Hill.
Search the immediate path for save points and the required area maps, but do not delay the story to clear every optional chest. Jack joins the party for the early Heartless battles, and the route eventually leads to the Prison Keeper encounter. Keep Cure available because the boss’s attacks can punish Sora while he is trying to reach the airborne target.
- Visit Town Square, Dr. Finkelstein’s Lab, Graveyard, Hinterlands, Yuletide Hill, and Candy Cane Lane.
- Enter Santa’s House and follow the footprints to Curly Hill.
- Save and restock before the Prison Keeper battle.
Defeat Prison Keeper and obtain Magnet from Oogie Boogie
Prison Keeper changes its attack pattern according to whether it has swallowed Lock, Shock, or Barrel. When the boss is near ground level and the displayed Inside Combo Reaction is available, use it to jump inside the boss and deal heavy damage. If it swallows Lock, watch for fireballs; Shock produces a ranged orb attack; Barrel leads to a more aggressive bite sequence. At low health, the boss can use all three styles, so prioritize evasion and attack only after its animation ends.
After Prison Keeper, return through the Hinterlands and go back to Santa’s House. Enter the Toy Factory to reach Oogie Boogie’s conveyor-belt arena. Sora must keep moving up the belt while avoiding explosive dice, the giant fist, lightning, and the spikes at the end. Strike the correct moving gift bags toward Oogie with Fore! whenever the Reaction Command appears. After the direct attack opportunity, use the blue portal’s Move Left, Move Center, or Move Right commands to follow Oogie to the next belt.
Repeat the belt sequence until Oogie is defeated. The belt becomes faster and additional enemies can appear from gift bags, so use Quick Run, jumps, and short attacks instead of standing still. Completing the episode awards Magnet in the original North American PS2 release. Magnet is required for later Atlantica musical progression, but Atlantica itself is optional for reaching the normal ending.
- Use Inside Combo when Prison Keeper is grounded and the Reaction Command appears.
- Use Fore! against the correct moving gift bags in Oogie’s arena.
- Follow Oogie between conveyor belts with the portal movement commands.
- Confirm Magnet after defeating Oogie Boogie.
Keep optional worlds and activities separate
The first Pride Lands episode is optional for reaching the original PS2 ending and is outside this chapter’s detailed route. The second Pride Lands episode and the Groundshaker battle are also optional. Do not treat the brief classification here as a complete Pride Lands walkthrough. Atlantica’s musical episodes, 100 Acre Wood tasks, treasure chests, puzzle pieces, synthesis, and minigames are separate completion goals rather than replacements for required late-world progression.
Coliseum cups are optional challenges. Olympus Coliseum II is also optional story content in the original North American PS2 release. Its route and rewards, including Guardian Soul, do not replace the required second visits to The Land of Dragons, Beast’s Castle, Port Royal, Agrabah, and Halloween Town. Later Space Paranoids content beyond the required first episode is likewise optional for the normal ending.
- Treat the first and second Pride Lands episodes as optional content.
- Treat Atlantica and its musical episodes as optional for the normal ending.
- Keep Coliseum cups separate from Olympus Coliseum II.
- Do not use Olympus Coliseum II, Pride Lands, Atlantica, or later Space Paranoids as substitutes for the five required late visits.
Hand off all late returns to Chapter 07
After the late Hollow Bastion progression, follow the active World Map and Jiminy’s Journal objective rather than assuming one universal order. Chapter 07 provides the detailed second visits for The Land of Dragons, Beast’s Castle, Port Royal, Agrabah, and Halloween Town. The minimum late route requires all five of those second story episodes before the final Twilight Town and The World That Never Was progression can proceed.
Port Royal’s first visit must be complete before Port Royal II appears. The Grim Reaper encounters in Port Royal II are separate from the Barbossa and Illuminator battle covered here. Do not repeat Agrabah II or Halloween Town II in this chapter. Once Chapter 07’s required late returns are complete, continue through the remaining Twilight Town and final-world route. Optional Olympus Coliseum II, Pride Lands, Atlantica, Coliseum, synthesis, and later Space Paranoids work can be completed separately.
- Verify that Port Royal’s first episode is complete before seeking Port Royal II.
- Leave Agrabah II and Halloween Town II for Chapter 07.
- Complete the second visits to Land of Dragons, Beast’s Castle, Port Royal, Agrabah, and Halloween Town before the final route.
- Use the active Journal objective to identify the next required story trigger.
Before you move on
- Follow the Wind is obtained after the first Port Royal visit, and Barbossa is recorded as the boss rather than a Grim Reaper.
- The Port Royal medallion-protection and five-barrel objectives are complete.
- Lamp Charm and Explosion are obtained after the Blizzard Lord and Volcanic Lord sequence in Agrabah.
- Wishing Lamp is obtained after completing the Genie Jafar episode.
- Magnet is obtained after defeating Oogie Boogie in Halloween Town.
- The first visits to Port Royal, Agrabah, and Halloween Town are complete, while their later return routes remain assigned to Chapter 07.
- The player understands that the required late route consists of Land of Dragons II, Beast’s Castle II, Port Royal II, Agrabah II, and Halloween Town II, not Olympus Coliseum II.
References for this chapter
- Kingdom Hearts II — Guide and Walkthrough — PlayStation 2
- Port Royal first visit walkthrough, Kingdom Hearts Wiki
- Halloween Town first visit walkthrough, Kingdom Hearts Wiki
- Kingdom Hearts II — Guide and Walkthrough — PlayStation 2, GameFAQs FAQ 43231
- Walkthrough: Kingdom Hearts II — Port Royal
- Kingdom Hearts II – Guides and FAQs, GameFAQs
Twilight Town second visit — Sandlot, Oathkeeper, and the route to late-game story flags
Return to Twilight Town when its story marker appears on the World Map and in Jiminy’s Journal after the relevant first-visit world progression. This chapter covers only the second Twilight Town episode: the Sandlot Nobody battle, Seifer’s Trophy, the Station Heights route, Station Plaza, and Oathkeeper. Hollow Bastion’s later return, Demyx, the 1,000 Heartless battle, Space Paranoids, and Master Form are not part of this visit. After receiving Oathkeeper, leave Twilight Town and follow the next active Journal objective. The later Hollow Bastion route belongs to Chapter 09.
Check the active Twilight Town objective
Complete the first required episodes in Agrabah, Halloween Town, and Port Royal before using this chapter as your route. Twilight Town’s second visit is not tied to one single universal trigger in every playthrough order; the game opens it after the appropriate story progression and identifies the next destination through the World Map and Jiminy’s Journal.
When Twilight Town is marked as the active objective, land there and save before entering the Sandlot. Restock healing items if needed. Do not travel to Hollow Bastion as part of this chapter, even if other late-world destinations are available.
- The first Agrabah episode is complete.
- The first Halloween Town episode is complete.
- The first Port Royal episode is complete.
- Twilight Town is marked as the active story destination.
- A save exists before the Sandlot battle.
Clear the Sandlot Nobody battle
From Tram Common, enter the Sandlot to find Seifer’s group surrounded by Nobodies. Defeat the initial Dusks, then handle the Berserkers that appear. Berserkers are easier to manage after you interrupt them and make one drop its large weapon.
When a Berserker’s weapon is available, move close and use the displayed Berserk Reaction command to pick it up. Attack nearby enemies with the weapon and continue using the displayed Reaction commands, including Eclipse and Magna Storm, to clear the group quickly. Keep moving around the open Sandlot so several Berserkers cannot attack from different sides at once.
If you lose the weapon or miss a Reaction command, return to normal attacks and wait for another opening. Heal before leaving the area if Sora’s HP is low; there is no need to grind or complete optional Twilight Town activities before proceeding.
- All Sandlot Dusks and Berserkers are defeated.
- A Berserker weapon has been used when available.
- The battle’s following cutscene has played.
- Sora is healed before continuing.
Receive Seifer’s Trophy
After the Sandlot fight and its cutscene, Seifer’s Trophy is awarded automatically. This is a story reward, not a separate item hunt, so do not return to the Struggle arena looking for another requirement.
The party is directed toward Station Plaza to learn more about Kairi. Use the route back through the town rather than searching the inaccessible parts of Twilight Town. The second visit does not reopen the full early-game exploration route.
- Seifer’s Trophy is recorded as obtained.
- The next objective points toward Station Plaza.
- No optional Struggle rematch is being treated as mandatory.
Travel through Station Heights to Station Plaza
From the Sandlot, return toward Market Street and enter Station Heights. Follow the uphill path north to Station Plaza. Watch the story scenes there; they advance the Twilight Town episode and lead to the Keyhole-sealing sequence.
Save before entering Station Plaza if you want a second recovery point. Optional shops and minigames can wait. The required route is the movement from the Sandlot through Station Heights to Station Plaza, followed by the story scenes at the plaza.
- Station Heights has been reached.
- The uphill route to Station Plaza is clear.
- The Station Plaza story scenes have been completed.
Collect and equip Oathkeeper
After the Station Plaza scenes and the Keyhole-sealing sequence, Sora receives the Oathkeeper Keyblade automatically. Open the Equipment menu and confirm that it is in Sora’s Keyblade inventory before leaving the world.
Oathkeeper carries Form Boost, which slows the rate at which the Drive Gauge drains while a Drive Form is active. It is useful for later Form usage, but no Form needs to be activated during this visit. Limit Form is a Final Mix addition and is not an expected unlock in the original North American PlayStation 2 release.
- Oathkeeper appears in Sora’s Keyblade inventory.
- The Form Boost ability is recognized correctly.
- Limit Form has not been treated as an original-PS2 reward.
- The Twilight Town second-visit episode is complete.
Leave Twilight Town and hand off to the late-game route
Once Oathkeeper is confirmed, leave Twilight Town through the active World Map route. Follow Jiminy’s Journal rather than forcing a fixed order if the game displays another destination or an intervening story scene.
The next dedicated chapter covers the later Hollow Bastion return, including Demyx, the Ravine Trail, the Crystal Fissure, the 1,000 Heartless battle, and the first Space Paranoids episode. Do not enter Ansem’s Study, search for Sleeping Lion, or begin the Pit Cell and Energy Core sequence as part of this Twilight Town chapter.
- Oathkeeper has been confirmed after the Station Plaza scenes.
- The World Map is available for the next objective.
- The late Hollow Bastion and first Space Paranoids route has been reserved for Chapter 09.
Before you move on
- The first Agrabah episode is complete.
- The first Halloween Town episode is complete.
- The first Port Royal episode is complete.
- Twilight Town’s second visit was selected because it was the active World Map and Journal objective.
- The Sandlot Nobody battle is complete.
- Seifer’s Trophy has been awarded.
- Sora traveled through Station Heights to Station Plaza.
- The Station Plaza story and Keyhole-sealing scenes are complete.
- Oathkeeper is present in Sora’s Keyblade inventory.
- The later Hollow Bastion and first Space Paranoids route has been left for Chapter 09.
References for this chapter
- Twilight Town second visit walkthrough — Kingdom Hearts Wiki
- Kingdom Hearts II — Guide and Walkthrough — PlayStation 2, GameFAQs FAQ 43231
- Kingdom Hearts II — Guide and Walkthrough — PlayStation 2 — SeiferMaster
- Kingdom Hearts II Official Strategy Guide sample pages
- The Struggle Trophy — Kingdom Hearts Wiki
Radiant Garden late arc — Demyx, the 1,000 Heartless battle, and optional MCP cleanup
Complete the mandatory first Space Paranoids episode through Ansem’s Study before finishing Hollow Bastion’s late Restoration Committee arc. Escape the Pit Cell, restore the Energy Core, return to the Research Lab, receive Master Form from Mickey, complete the required Light Cycle sequence, disable the Dataspace monitors, and defeat Hostile Program to obtain the Photon Debugger. Return to Hollow Bastion afterward, defeat Demyx at the Castle Gate, cross the Ravine Trail, and clear the Sora-only 1,000 Heartless battle in the Great Maw. The normal-ending route then requires second story visits to The Land of Dragons, Beast’s Castle, Port Royal, Agrabah, and Halloween Town. Olympus Coliseum II and Guardian Soul, the later Solar Sailer and MCP episode, Pride Lands, Atlantica, Coliseum Cups, synthesis cleanup, and Sephiroth are optional in the original North American PlayStation 2 release.
Enter the mandatory first Space Paranoids episode
After the late Hollow Bastion scenes begin, follow the route from the Bailey through the Restoration Site, Postern, Corridors, and Ansem’s Study. Examine Ansem’s computer to enter Space Paranoids. This episode is accessed through the computer and is not a Gummi Ship landing.
Sora, Donald, and Goofy are captured and placed in the Pit Cell with Tron. Attack the cell door until the Reaction Command appears, then use it to escape. Move through the Canyon and follow the route to the Energy Core. Open nearby chests if desired, but keep the story objective in view: restore the system by collecting clusters and using the Freeze Reaction Command on the moving red box when the gauge is full.
- Reach Ansem’s Study through the late Hollow Bastion route.
- Enter Space Paranoids through the computer.
- Escape the Pit Cell.
- Reach and restore the Energy Core.
Return to the Research Lab and receive Master Form
After restoring the Energy Core, return to the Pit Cell and use the computer to leave Space Paranoids. Back in Hollow Bastion’s Research Lab, examine the wall behind Ansem’s portrait when prompted. Mickey appears and supplies the password information, then grants Sora Master Form.
Master Form is therefore obtained before the Light Cycle section and before the later Hostile Program battle. Check the Drive menu once control returns. Master Form uses the normal Drive Gauge rules, so do not spend the entire gauge immediately if you want to use it during the upcoming Space Paranoids objectives.
- Return to the Research Lab after the Energy Core sequence.
- Trigger Mickey’s password scene.
- Confirm that Master Form is available.
Complete the required Game Grid Light Cycle sequence
Return to the Pit Cell computer and select the Game Grid. The Light Cycle is a required story sequence. On the original North American PS2 controls, use the left analog stick for movement, L1 or L2 for left turns, and R1 or R2 for right turns. X performs the attack command, Square performs the charge command, and Circle guards.
The opening section requires defeating the pursuing enemies with the available commands. Afterward, a larger enemy breaks through and the objective changes to reaching the exit. Keep moving, avoid solid walls, and use attacks when they help clear a path. Do not treat the Light Cycle as an optional minigame or expect ordinary ground-combat controls.
- Enter the Game Grid from the Pit Cell.
- Use the original PS2 Light Cycle controls.
- Defeat the required pursuing enemies.
- Reach the exit and complete the sequence.
Disable the three Dataspace monitors
After the Light Cycle, move from the Pit Cell through the Canyon and up to the I/O Tower route. Enter the Dataspace and fight the enemies around the active monitors. Defeated enemies release clusters; collect enough to fill the gauge, then approach a monitor and use the Freeze Reaction Command.
All three monitors must be frozen within the displayed time limit. The original PS2 walkthrough route gives a two-minute limit for the monitor sequence. Move directly between targets rather than treating every enemy or item in the room as mandatory. If Sora is surrounded, retreat briefly, heal, and resume the monitor objective.
- Reach the Dataspace through the I/O Tower route.
- Fill the cluster gauge by defeating enemies.
- Freeze all three monitors within the time limit.
- Proceed to the Communications Room and save.
Defeat Hostile Program and obtain Photon Debugger
From the Communications Room, follow the route to the Hostile Program battle. Strike the boss to release Energy Clusters, collect enough to fill the gauge, and use Freeze when the Reaction Command becomes available. Attack while the boss is immobilized, then repeat the cluster-and-Freeze cycle.
Hostile Program uses charges, projectiles, and laser attacks from its body and detached arms. Stay mobile around the room, jump or move away from visible laser lines, and avoid chasing the boss during an active attack. Tron’s Limit can help produce clusters, while Master Form or another available Drive option can be used during a safe opening.
After the victory, leave Space Paranoids through the computer and return to Hollow Bastion. Tron gives Sora the Photon Debugger Keyblade. The battle also provides the original-release progression bonuses associated with this episode, including a Drive Gauge increase and Horizontal Slash.
- Collect Energy Clusters from Hostile Program.
- Use Freeze to create attack openings.
- Avoid the boss’s charges, projectiles, and lasers.
- Defeat Hostile Program.
- Return to Hollow Bastion and obtain Photon Debugger.
Return to the late Hollow Bastion route
After returning from Space Paranoids, continue the Hollow Bastion story through the Restoration Site, Postern, and Bailey. The route leads to the Castle Gate, where Demyx appears. Save and adjust Sora’s equipment before entering the battle. Keep Cure or Cura and healing items available, and equip a current Keyblade and armor set.
The first Space Paranoids episode is now complete, but Hollow Bastion’s late arc is not finished. Continue through Demyx, the Ravine Trail, the Crystal Fissure, and the Great Maw before leaving the world.
- Return from Space Paranoids to Hollow Bastion.
- Follow the Restoration Committee route to the Castle Gate.
- Save and prepare before Demyx.
Defeat Demyx at the Castle Gate
Demyx begins by summoning 50 Water Forms. Destroy all 50 within 40 seconds. Use the Wild Dance Reaction Command whenever it appears because it clears several forms quickly. Broad attacks, Limits, and movement between groups are safer than standing still and striking one target at a time.
Once the timed opening ends, attack Demyx during the gaps between his water trails, falling water, geysers, pillars, and water spheres. When he summons another timed group, destroy 10 Water Forms within 10 seconds. Wild Dance remains the most reliable way to clear this requirement. If the timer expires, the battle is lost, so prioritize the forms over Demyx’s HP whenever the objective appears.
Defeating Demyx gives Sora an additional armor slot and upgrades Blizzard to Blizzara in the original release. Donald receives Blizzard Boost, and Goofy receives an HP increase.
- Defeat 50 Water Forms within 40 seconds.
- Use Wild Dance when available.
- Defeat the later group of 10 Water Forms within 10 seconds.
- Confirm the armor-slot increase and Blizzara upgrade.
Cross the Ravine Trail and prepare for the Great Maw
After the Demyx battle, Goofy is knocked out and leaves the party while Sora continues through the Ravine Trail with temporary assistance from the Restoration Committee characters. Fight through the route and use Reaction Commands when they appear. At the Crystal Fissure, Goofy returns after the story scene.
Goofy surrendered his equipment during the preceding events, so open the menu and restore his abilities, armor, and accessories before continuing. The Crystal Fissure contains useful chests, including the Great Maw Map and other rewards, but clearing every chest is optional. Sora’s Cure magic is upgraded to Cura during this section.
Use the Crystal Fissure save point before entering the Great Maw. The next battle is a solo Sora encounter, and Donald and Goofy are unavailable.
- Reach the Crystal Fissure.
- Re-equip Goofy’s abilities, armor, and accessories.
- Confirm that Sora has Cura.
- Save before entering the Great Maw.
Clear the solo 1,000 Heartless battle
Enter the Great Maw and proceed to the large Heartless formation. After the scene, Sora fights alone and must defeat 1,000 Heartless. A counter tracks the required total. Keep moving around the battlefield instead of remaining in the center of a crowd.
Use Reaction Commands when they provide a safe opening. Rising Sun is useful against Armored Knights, while Snag followed by Sparkle Ray can clear groups of Surveillance Robots. Magic, Limits, and normal combos can also reduce groups quickly. Heal during openings, but do not waste time attempting to preserve the temporary allies from the earlier Ravine Trail because they are not present in this battle.
Once the counter reaches 1,000, the battle ends and Sora receives Guard Break. Continue through the following scenes and leave Hollow Bastion when control returns.
- Fight as Sora alone.
- Use Rising Sun and Snag when appropriate.
- Reach 1,000 defeated Heartless.
- Confirm that Guard Break was awarded.
- Complete the post-battle scenes before leaving.
Complete the five required second visits
After the 1,000 Heartless battle and its scenes, use the World Map and Jiminy’s Journal to identify the active destinations. The normal-ending route requires the second story episodes of The Land of Dragons, Beast’s Castle, Port Royal, Agrabah, and Halloween Town. Chapter 07 contains the detailed routes for those five required visits.
The game may open the destinations in stages and may insert scenes between visits, so follow the active Journal objective rather than forcing a single universal order. Complete each second-visit story episode, return to the World Map, and continue until all five are marked complete.
Olympus Coliseum II is not required for the original North American PS2 ending. Its Hades episode and Guardian Soul Keyblade are optional story content. Coliseum Cups are separate optional challenges and should not be confused with the five required second visits.
- Complete The Land of Dragons II.
- Complete Beast’s Castle II.
- Complete Port Royal II.
- Complete Agrabah II.
- Complete Halloween Town II.
- Do not require Olympus Coliseum II or Guardian Soul for normal-ending progression.
Keep optional content separate
The later Space Paranoids episode begins from Hollow Bastion’s Ansem’s Study after the relevant late-world progression. It uses the Solar Sailer route and leads to Sark and the MCP. This is separate from the mandatory first Space Paranoids episode covered earlier and is optional for the original campaign ending.
The second Pride Lands episode, Atlantica’s musical episodes, Olympus Coliseum II, Coliseum Cups, synthesis cleanup, and Sephiroth are also optional. None replaces one of the five required second visits. After finishing the required worlds, follow the active Journal objective toward late Twilight Town and create a backup save before beginning the final-world progression.
- Keep the Solar Sailer, Sark, and MCP episode optional.
- Do not substitute Olympus Coliseum II for a required world visit.
- Confirm all five required second visits are complete.
- Create a backup save before late Twilight Town and The World That Never Was.
Before you move on
- Master Form is available after Mickey’s Research Lab scene.
- The mandatory first Space Paranoids episode is complete: Pit Cell escape, Energy Core restoration, Light Cycle, Dataspace monitors, and Hostile Program.
- Photon Debugger is in Sora’s Keyblade inventory.
- Demyx is defeated at the Castle Gate, Blizzard has upgraded to Blizzara, and the additional armor slot is available.
- Goofy has rejoined at the Crystal Fissure, his equipment and abilities have been restored, and Sora has Cura.
- The solo Great Maw battle is complete, the counter reached 1,000, and Guard Break was awarded.
- The Land of Dragons, Beast’s Castle, Port Royal, Agrabah, and Halloween Town second story episodes are complete in the Journal.
- Olympus Coliseum II and the later Solar Sailer, Sark, and MCP episode remain identified as optional.
- A backup save exists before late Twilight Town and The World That Never Was progression.
References for this chapter
- Kingdom Hearts II — Guide and Walkthrough — PlayStation 2, GameFAQs FAQ 42267
- Kingdom Hearts II/Hollow Bastion — StrategyWiki
- Kingdom Hearts II/Space Paranoids — StrategyWiki
- Walkthrough: Kingdom Hearts II/Hollow Bastion — Kingdom Hearts Wiki
- Walkthrough: Kingdom Hearts II — Space Paranoids
- Kingdom Hearts II Official Strategy Guide sample pages
Late world route — required second visits, optional Olympus Coliseum and Pride Lands, and Space Paranoids
After the late Hollow Bastion arc and the 1,000 Heartless battle, complete the five required second visits: The Land of Dragons, Beast’s Castle, Port Royal, Agrabah, and Halloween Town. Follow the active World Map markers because the game unlocks these destinations in stages rather than presenting one universal order. Port Royal’s first visit, including Barbossa and Follow the Wind, must already be complete before Port Royal II. Olympus Coliseum II, both Pride Lands episodes, Atlantica, Coliseum Cups, and the later Space Paranoids Solar Sailer, Sark, and MCP episode are optional in the original North American PS2 release. They provide rewards and Journal progress but do not replace any required second visit or block the normal ending. When the five required worlds are complete, follow the new marker through late Twilight Town and onward to The World That Never Was.
Begin the late second-visit route
Return to the World Map after completing the late Hollow Bastion events and the 1,000 Heartless battle. Check the active story markers and complete the five required second visits: The Land of Dragons, Beast’s Castle, Port Royal, Agrabah, and Halloween Town. Their immediate order can vary according to which routes you have already opened, so follow the current marker instead of assuming one rigid sequence.
Port Royal must have its first episode complete before you treat a landing as Port Royal II. The first episode includes the Harbor, Isla de Muerta, Captain Barbossa, and Follow the Wind. If Barbossa is still unresolved, finish that episode first. Save and restock healing items before each major boss; the Moogle shops remain available in several of these worlds.
- The late Hollow Bastion arc and 1,000 Heartless battle are complete.
- Port Royal I, including Barbossa and Follow the Wind, is complete.
- The World Map shows late story markers.
- The five required second visits are tracked separately from optional content.
The Land of Dragons II — Storm Rider
Land at The Land of Dragons and follow the scenes toward the Town Ruins. Investigate the disturbance, defeat the Heartless, and continue through the Mountain Trail to the summit. The story moves forward after the stranger escapes; do not return to the earlier camp areas looking for an additional trigger.
Storm Rider is fought in the summit arena. Keep moving around the dragon rather than standing directly beneath it. Attack after its swoops and aerial passes, and use the displayed Reaction Commands when they appear. Short attack strings are safer than committing to a long ground combo while the boss crosses the arena. Heal after a pass or during a clear opening.
Defeating Storm Rider completes The Land of Dragons II and grants the Thunder Element, upgrading Thunder to Thundara. This is separate from the optional Groundshaker reward in the Pride Lands.
- The Town Ruins investigation is complete.
- Storm Rider is defeated.
- The Thunder Element and Thundara are available.
- The Land of Dragons II is complete.
Beast’s Castle II — Xaldin
Enter Beast’s Castle and follow the opening scenes through the Entrance Hall and Ballroom. Defeat the Dragoons and use the Learn Reaction Command whenever it appears. Learned Jumps are stored in the command menu and are the key to damaging Xaldin later.
Continue through the West Hall to the Beast’s Room. After the story scenes, speak with Beast so he rejoins the party and Sora receives the Rumbling Rose Keyblade. Proceed through the Entrance Hall, defeat the Nobody group, and follow the route toward the Courtyard and Bridge.
Xaldin’s wind barrier makes ordinary attacks unreliable. Watch for Learn during his spear attacks, stock several Jumps, and release them when he is exposed. Guard or use Reflect against his rushes and wind beam, and use Quick Run, Dodge Roll, or Aerial Dodge to escape falling spears and area attacks. Attack during his recovery rather than forcing a combo through the barrier. Victory grants the Reflect Element and upgrades Reflect to Reflera.
- The Ballroom Dragoons are defeated.
- Beast has rejoined the party.
- Rumbling Rose is obtained.
- Xaldin is defeated on the Bridge.
- Reflera is available.
- Beast’s Castle II is complete.
Optional Olympus Coliseum II — Hades and Guardian Soul
Olympus Coliseum II is optional in the original North American PS2 release. It is useful for its story, abilities, and Guardian Soul, but it is not one of the five required second visits and is not required to reach the normal ending.
Enter the Underworld and follow the Hades storyline. Complete the required Hades Cup story rounds, then proceed through the Cave of the Dead to Auron and Hades’s chamber. Save and prepare Cure, defensive abilities, and healing items before the boss.
Hades begins in an invulnerable red state. When Hercules creates Aura Spheres, approach one and use the Aura Sphere Reaction Command to knock it into Hades. The impact turns Hades blue and opens him to normal attacks. Repeat the process whenever he returns to red. Retreat from fire columns and fireball patterns, and heal during safe openings instead of staying close while the arena is hazardous.
Completing this optional story episode grants the Counterguard ability and Guardian Soul Keyblade in the original PS2 release. Titan Cup, Goddess of Fate Cup, and later Coliseum challenges remain separate optional activities.
- Olympus Coliseum II is recorded as optional.
- The Hades story route is complete if attempted.
- Counterguard and Guardian Soul are obtained if this optional episode is completed.
- No Coliseum Cup is being counted as a required second visit.
Port Royal II — first Grim Reaper encounter
Land at Port Royal and travel to the Harbor. This is the second episode, not the Barbossa episode. Follow the opening scenes, board the Black Pearl, and continue through Isla de Muerta and the ship and cave areas as the objective directs.
The first second-visit Grim Reaper battle is a normal boss encounter. Use the available Reaction Commands, avoid standing directly in front of its scythe, and attack after its swings or movement. Jack Sparrow remains available as a party member. Victory grants Summon Boost in the original PS2 release.
- Port Royal I is not being repeated.
- The first second-visit Grim Reaper is defeated.
- Summon Boost is received.
- The Port Royal II route continues.
Port Royal II — medallions, second Grim Reaper, and Magnera
Continue through the Ship Graveyard and recover the stolen medallions. Follow the active objective back toward Port Royal and prepare MP recovery before the next Grim Reaper encounter.
The cursed Grim Reaper cannot be damaged normally while the Aztec chest is missing medallions. Cast Blizzard or Thunder to force medallions out of the boss, collect them, and use the Replace Reaction Command at the chest. Repeat the extraction, collection, and replacement sequence whenever the boss steals them again. Physical combos are ineffective against the cursed form, so concentrate on magic and positioning.
Defeating this second Grim Reaper grants the Magnet Element and upgrades Magnet to Magnera. Magnera is useful for the optional Atlantica episode Ursula’s Revenge, but Atlantica does not replace any required late world.
- The stolen medallions are recovered.
- Blizzard or Thunder is used to extract medallions.
- Replace restores the chest.
- The second Grim Reaper is defeated.
- Magnera is obtained.
- Port Royal II is complete.
Agrabah II — Genie Jafar
When Agrabah’s late marker is active, follow the scenes through the Palace Walls toward the newly opened route to the Sandswept Ruins. Continue through the buried route and the Carpet sequence to the Ruined Chamber. Stay on the marked path and do not search the earlier Cave of Wonders route for a different entrance.
During the Genie Jafar battle, Sora rides Carpet while Iago carries Jafar’s lamp. Follow Iago through the aerial arena and attack when the lamp comes within reach. Prioritize reaching the lamp instead of trying to strike Jafar’s distant body. Avoid falling debris and fire hazards, then continue the pursuit until the lamp is captured and the final scenes play.
Agrabah II is one of the five required late visits. Atlantica, Pride Lands, and Coliseum challenges cannot substitute for it.
- The Sandswept Ruins route is open.
- The Carpet sequence reaches the Ruined Chamber.
- Iago and the lamp are pursued successfully.
- Genie Jafar is defeated.
- Agrabah II is complete.
Halloween Town II — Gift Wrapping and The Experiment
Enter Halloween Town and follow Jack’s investigation into the stolen Christmas presents. Clear Halloween Town Square, then travel through the Graveyard and Hinterlands to Christmas Town. Continue through Candy Cane Lane to Santa’s House and the Wrapping Room.
Complete the Gift Wrapping minigame. The story requirement is a score of at least 100. Press X to throw presents into the boxes and Triangle to reload. Interrupt Lock, Shock, and Barrel when they interfere. A score of 150 or higher is a separate Journal goal and is not needed for the story.
After the scenes, take the Decoy Presents to the designated area and hide with Jack. The thief is The Experiment. Attack exposed body parts after charges or thrown-part sequences, use Reaction Commands when displayed, and avoid standing beneath falling pieces. Victory grants the Decisive Pumpkin Keyblade and Finishing Leap ability in the original PS2 release.
- Halloween Town Square is cleared.
- Gift Wrapping reaches at least 100 points.
- The Decoy Presents are delivered.
- The Experiment is defeated.
- Decisive Pumpkin and Finishing Leap are obtained.
- Halloween Town II is complete.
Optional Pride Lands episodes
Both Pride Lands episodes are optional for reaching the normal ending. They do not replace any of the five required second visits or the optional Olympus Coliseum II episode.
For Pride Lands I, follow the story through the Savannah and Pride Rock, then travel to the Peak and defeat Scar. Lion Sora cannot use Drive Forms or Summons. Keep moving during Scar’s elemental attacks and dark-orb charge, use Simba’s Limit when practical, and use the displayed Counter Reaction Command during the grapple. Victory grants Circle of Life and the Fire Element, upgrading Fire to Fira.
For Pride Lands II, follow the new scenes through the Savannah and Oasis until Groundshaker appears. Circle the arena, evade its charges and shockwaves, and attack after it finishes a charge. Use displayed Reaction Commands and rely on movement, Cure, and Simba’s support because Lion Sora still cannot use Drive Forms or Summons. Groundshaker grants the Thunder Element and upgrades Thunder to Thundaga. This reward is useful for optional Atlantica content.
- Pride Lands I is marked optional if completed.
- Pride Lands II and Groundshaker are marked optional if completed.
- Circle of Life, Fira, and Thundaga are treated as optional rewards.
- Neither Pride Lands episode is substituted for a required second visit.
Optional Atlantica and Coliseum challenges
Atlantica remains separate from the five required second visits. Its later musical episodes use prerequisites such as Magnera, the relevant Drive Gauge level, and Thundaga. Complete it separately for its story scenes and rewards, including Mysterious Abyss, the Blizzard upgrade, and Orichalcum+.
After Olympus Coliseum II, the Titan Cup and later Cups become available as optional challenges. They do not count as completion of the Hades story episode and are not required before late Twilight Town or The World That Never Was.
- Atlantica is tracked as optional.
- The Coliseum Cups are tracked as optional.
- No Cup is mistaken for a required late-world visit.
Optional second Space Paranoids episode
The required first Space Paranoids episode belongs to the earlier Hollow Bastion chapter. It includes the Pit Cell escape, Energy Core, Light Cycle, Dataspace, and Hostile Program. Do not repeat that route here.
The later optional return begins through Ansem’s computer and leads to the Solar Sailer. Follow the Solar Sailer sequence, then defeat Sark and the MCP. These controls and encounters are separate from the Light Cycle and Hostile Program events.
The Solar Sailer, Sark, and MCP episode can remain incomplete without blocking the normal ending. Complete it for optional story scenes, Journal entries, and rewards, but do not treat it as a prerequisite for the five required second visits or as the point of no return.
- The earlier Hostile Program episode is complete.
- The later Solar Sailer return is recognized as separate.
- Sark and MCP are treated as optional encounters.
- The second Space Paranoids episode is not used as a progression gate.
Confirm the handoff to late Twilight Town
After The Land of Dragons II, Beast’s Castle II, Port Royal II, Agrabah II, and Halloween Town II are complete, return to the World Map and follow the newly active story marker. The next progression leads through late Twilight Town and onward to the final-world route.
If the marker does not appear, check the Journal for an unfinished boss or unresolved second-visit scene. Do not assume that Pride Lands, Atlantica, Olympus Coliseum II, a Coliseum Cup, or the later Space Paranoids episode is missing from the required route.
This chapter is complete when the five required second visits show their final story scenes and rewards, and the late Twilight Town marker is active. Keep a backup save before entering the final world.
- The Land of Dragons II and Storm Rider are complete, with Thundara obtained.
- Beast’s Castle II and Xaldin are complete, with Reflera obtained.
- Both Port Royal II Grim Reaper encounters are complete.
- Summon Boost and Magnera are recorded.
- Agrabah II and Genie Jafar are complete.
- Halloween Town II, the 100-point Gift Wrapping requirement, and The Experiment are complete.
- Olympus Coliseum II, Pride Lands, Atlantica, Coliseum Cups, and the later Space Paranoids episode remain separately marked optional.
- The late Twilight Town story marker is active.
Before you move on
- The Land of Dragons II and Storm Rider are complete, with Thundara obtained.
- Beast’s Castle II and Xaldin are complete, with Reflera obtained.
- Port Royal I and Barbossa were completed earlier.
- Both Port Royal II Grim Reaper encounters are complete.
- Summon Boost and Magnera are recorded.
- Agrabah II and Genie Jafar are complete.
- Halloween Town II, the 100-point Gift Wrapping requirement, and The Experiment are complete.
- The five required second visits are complete.
- Olympus Coliseum II is separately marked optional; Guardian Soul and Counterguard are not required completion checks.
- The first and second Pride Lands episodes remain separately marked optional.
- Atlantica and Coliseum Cups remain separately marked optional.
- The later Solar Sailer, Sark, and MCP episode remains separate from Hostile Program.
- The late Twilight Town story marker is active, allowing progression toward The World That Never Was.
References for this chapter
- Walkthrough: Kingdom Hearts II — The Land of Dragons
- Walkthrough: Kingdom Hearts II — Beast’s Castle
- Walkthrough: Kingdom Hearts II — Port Royal
- Walkthrough: Kingdom Hearts II — Agrabah
- Walkthrough: Kingdom Hearts II — Halloween Town
- Walkthrough: Kingdom Hearts II — Olympus Coliseum
- Walkthrough: Kingdom Hearts II — Space Paranoids
- Kingdom Hearts II — Guide and Walkthrough — PlayStation 2
- Kingdom Hearts II — Guide and Walkthrough — PlayStation 2 — GameFAQs
Atlantica and underwater mechanics — what changes and what stays the same
Atlantica is optional for viewing the main Kingdom Hearts II ending, but its five musical episodes provide the Undersea Kingdom Map, Mysterious Abyss Keyblade, Blizzard upgrade, and Orichalcum+. Swim This Way is available by default. To continue through the remaining songs, you must meet both the relevant story progression landmark and the actual ability requirement: Magnet after Oogie Boogie for Part of Your World, Drive Gauge level 5 after the Hostile Program route for Under the Sea, Magnera after the second Grim Reaper battle for Ursula’s Revenge, and Thundaga after Groundshaker for A New Day Is Dawning. Read the on-screen timing gauges rather than ordinary combat prompts. Clear each performance, save after the final scenes, and use the World Map for optional cleanup.
Enter Atlantica and learn the underwater controls
Land at Atlantica when the Splash Island route is available on the World Map. The opening scenes transform Sora, Donald, and Goofy and reteach underwater movement. Follow Flounder through the tutorial before attempting the first musical performance.
In the original North American PlayStation 2 release, the left analog stick controls horizontal movement and the right analog stick changes Sora’s height. Press X to swim faster and Circle to use Dolphin Kick. Move toward characters and landmarks, then stop beside them to talk. Atlantica’s required progression is handled through scenes and musical performances rather than normal Heartless or Nobody battle routes.
After the tutorial, speak with Sebastian and complete the practice input sequence. The timing gauge moves toward its limit; press the displayed button in the yellow area for Excellent, the orange area for Good, and outside the useful timing zones for Bad. If the practice fails, retry it before beginning the first song.
- Complete the swimming tutorial.
- Remember left stick for horizontal movement and right stick for height.
- Use X for faster swimming and Circle for Dolphin Kick.
- Pass Sebastian’s practice sequence.
Complete Swim This Way
Swim This Way is available by default once the opening tutorial is finished. Speak with Sebastian to begin it. The song uses X-button timing prompts. Watch the gauge rather than trying to follow the music by ear, because the visual timing is the reliable indicator for the original PS2 minigame.
Your goal is to finish with at least one note remaining on the music staff. An Excellent adds a note, a Good leaves the total unchanged, and a Bad removes a note. You can hold up to five notes, so do not restart after a single Good; concentrate on avoiding enough Bad results to empty the staff. If the song ends with no note, retry from the pause menu.
After the song clears, the Undersea Kingdom Map is awarded and the story returns you to the World Map. Atlantica will then indicate that Magnet is needed to continue. Defeat Oogie Boogie in Halloween Town to obtain the Magnet Element, then land at Atlantica again. The Halloween Town event is the progression landmark, but Magnet itself is the requirement that allows the next episode to proceed.
- Clear Swim This Way with at least one note remaining.
- Receive the Undersea Kingdom Map.
- Defeat Oogie Boogie in Halloween Town.
- Confirm that Magnet is available before returning for the next episode.
Use Magnet and clear Part of Your World
Return to Atlantica after obtaining Magnet. Speak with Flounder and choose the option that advances the story. Sora uses Magnet to move the obstructing statue, which opens Part of Your World. The song does not unlock from the Halloween Town scene alone; Magnet must be present.
Part of Your World alternates X and Triangle prompts. Press the displayed button when its timing gauge reaches the Excellent zone. The clear requirement is five Excellent results in a row. A Good or Bad interrupts the required streak, so restart if the combo breaks rather than continuing a failed attempt.
After the performance and scenes, the game returns you to the World Map and indicates that the next chapter requires Drive Gauge level 5. The Hostile Program episode in Space Paranoids is the relevant story progression landmark, but defeating Hostile Program does not replace the stated gauge requirement. Check the Drive Gauge before returning to Atlantica; if it is still below 5, raise it through normal Drive Form progression and then land again.
- Return with Magnet equipped as an available spell.
- Move the statue and begin Part of Your World.
- Earn five consecutive Excellent results.
- Confirm Drive Gauge level 5 before attempting the next song.
Meet the Drive Gauge requirement and clear Under the Sea
Complete the first Space Paranoids route through the Hostile Program, then verify that Sora’s Drive Gauge has reached level 5. Return to Atlantica only when both conditions are satisfied. Hostile Program is the progression landmark that normally places this chapter within the campaign route, while Drive Gauge 5 is the actual Atlantica requirement.
Speak with Sebastian to start Under the Sea. The song uses Square prompts, but the image in the timing gauge determines whether you should press it. Press Square when the image shows Ariel. Do not press Square when the image shows Sebastian. The image can change close to the timing window, so watch it until the prompt resolves.
The song’s progress is represented by Ariel’s indicator. Excellent and Good results move the performance toward success, while Bad results reduce progress. Keep the indicator high enough to reach the clear point before the song ends. If the indicator falls short, retry and prioritize correct Ariel prompts over pressing every Square prompt.
- Defeat Hostile Program in Space Paranoids.
- Confirm Drive Gauge level 5 or higher.
- Press Square only when Ariel appears in the timing gauge.
- Raise Ariel’s indicator to the required clear point.
Obtain Magnera and clear Ursula’s Revenge
After Under the Sea, continue the main campaign until the second Grim Reaper battle in Port Royal is complete. That battle provides the Magnera progression needed for Atlantica. The Port Royal story event alone is not enough; return only after Magnera is actually available in Sora’s magic list.
Land at Atlantica and follow the new scenes to begin Ursula’s Revenge. The performance combines ordinary timing prompts with purple gauges that require rapid X-button presses. For normal gauges, press X when the timing ring reaches the effective zone. When the purple rapid-press gauge appears, tap X repeatedly until it disappears.
The clear condition is to reduce Ursula’s gauge to 25 percent or less before the performance ends. This is not a conventional underwater combat battle. If Ursula’s gauge remains above the threshold, retry and focus on the rapid-press sections, which cause the largest reduction. Clearing the episode awards the Mysterious Abyss Keyblade, whose original-release ability is Blizzard Boost.
- Complete the second Grim Reaper battle in Port Royal.
- Confirm that Magnera is available.
- Use timed X presses and rapid X presses during Ursula’s Revenge.
- Reduce Ursula’s gauge to 25 percent or less.
- Receive Mysterious Abyss.
Obtain Thundaga and clear A New Day Is Dawning
Continue the campaign until the Groundshaker episode in the Pride Lands is defeated and Thundaga has been obtained. Groundshaker is the story landmark associated with the final Atlantica requirement, but the song does not unlock from that event alone. Check Sora’s magic list and return only after Thundaga is present.
Speak with Sebastian to begin A New Day Is Dawning. This final performance combines the earlier mechanics: X and Triangle timing prompts, Square prompts that require Ariel rather than Sebastian, and purple gauges that require rapid X presses. Read every displayed prompt and do not press Square automatically when Sebastian appears.
The original North American PS2 clear requirement is a score of at least 30,000 points. Perfect timing is not required. Favor Excellent results, avoid Bad results, and complete the rapid-press sections quickly enough to protect the score. Restart from the pause menu if the final total is too low.
Clearing the song completes Atlantica’s story and awards the Blizzard Element, upgrading Sora’s Blizzard magic to Blizzaga, along with an Orichalcum+. Watch the closing scenes, save afterward, and leave through the World Map.
- Defeat Groundshaker in the Pride Lands.
- Confirm that Thundaga is available.
- Handle X, Triangle, Ariel/Sebastian Square, and rapid X prompts correctly.
- Score at least 30,000 points.
- Receive the Blizzard upgrade and Orichalcum+.
- Watch Atlantica’s closing scenes.
Before you move on
- Swim This Way is cleared with at least one note remaining.
- Magnet has been obtained after the Oogie Boogie progression landmark.
- Part of Your World is cleared with five consecutive Excellent results.
- Drive Gauge level 5 has been confirmed after the Hostile Program route.
- Under the Sea is cleared with Ariel’s indicator reaching the required level.
- Magnera has been obtained after the second Grim Reaper battle in Port Royal.
- Ursula’s Revenge is cleared with Ursula’s gauge at 25 percent or less.
- Thundaga has been obtained after the Groundshaker progression landmark.
- A New Day Is Dawning is cleared with a score of at least 30,000.
- Undersea Kingdom Map, Mysterious Abyss, the Blizzard upgrade, and Orichalcum+ have been received.
- Atlantica’s closing scenes have played and no remaining story objective is listed.
References for this chapter
- Kingdom Hearts II/Atlantica — StrategyWiki
- Kingdom Hearts II — Guide and Walkthrough — PlayStation 2, GameFAQs FAQ 43231
- Kingdom Hearts II - Atlantica
- Walkthrough: Kingdom Hearts II/Atlantica — Kingdom Hearts Wiki
- Swimming — Kingdom Hearts Wiki
- Kingdom Hearts II – Journal Completion Guide – PlayStation 2
Organization XIII story encounters — Xaldin, Xigbar, Luxord, Saïx, and recovery
In the original North American PlayStation 2 release, Roxas faces Axel twice during the prologue, Xaldin is fought in Beast’s Castle, and the final world presents Xigbar, Luxord and Saïx in that order before the Xemnas sequence. This chapter focuses on the Organization XIII encounters not covered in the world-route chapters. Demyx is only cross-referenced because his Olympus Coliseum and Hollow Bastion battles belong in those route chapters. Xaldin’s Learn and Jump commands, Xigbar’s ranged pressure and Warp Snipe, Luxord’s time-gauge games, and Saïx’s berserk weapon are the mechanics that determine these fights. Final Mix Absent Silhouettes, Data Battles and the Final Mix-only Roxas fight are not part of this PS2 campaign.
1. Prepare before the Organization XIII fights
Save at the nearest save point before entering each boss area. Update Sora’s Keyblade, armor and accessories, and check Donald and Goofy’s equipment as well. Put Cure or Curaga on a shortcut and keep several healing items available. Reflect is useful against projectile-heavy attacks, but preserve enough MP to heal after the exchange.
Equip defensive and survival abilities such as Second Chance, Once More and Aerial Recovery when they are available and affordable within your AP total. Drive Forms can help with mobility or aerial damage, but do not activate one merely because the gauge is full. Use a Form when it addresses the current battle’s problem and the required party members are present. Keep a separate save before entering The World That Never Was so failed attempts at Xigbar, Luxord, Saïx or Xemnas do not erase your preparation point.
- Save before each major Organization XIII battle.
- Equip current weapons, armor and accessories.
- Shortcut Cure or Curaga and carry healing items.
- Keep a backup save before entering The World That Never Was.
2. Roxas’s two Axel encounters
Roxas fights Axel twice during the Twilight Town prologue. These are required story battles, not optional rematches, and they occur before Sora awakens. Use short Keyblade strings and retreat after Axel completes a rush or flame attack. Axel is vulnerable during the recovery after his approach, so avoid standing beside him while attempting a long combo.
The second encounter adds greater pressure and a burning arena hazard. Keep moving, avoid the affected ground and attack when Axel has finished his movement. Once the second battle ends, continue through the scripted basement and pod-room events. The original PS2 release does not add a separate playable Roxas-versus-Sora boss fight; the later confrontation is presented through the prologue’s story sequence rather than as a normal rematch.
- Defeat both required Axel encounters as Roxas.
- Attack after Axel’s rushes or flame movements finish.
- Avoid burning ground in the second encounter.
- Continue the prologue after the second battle instead of searching for a rematch.
3. Xaldin at Beast’s Castle
During the Beast’s Castle boss fight, Xaldin’s wind barrier makes ordinary ground combos unreliable. Watch the Reaction Command list and use Learn whenever it appears. Learn stores Xaldin’s lances as Jump commands. Continue collecting Jumps when safe, then spend the stored commands to strike through his defenses and create a real damage opening.
Stay mobile on the bridge. Xaldin can sweep the area with his lances, charge through Sora and attack from the air. If he takes to the air or begins a broad lance attack, prioritize evasion over a forced combo. Guarding a direct approach can create a Learn opportunity, but do not remain in front of him after the command disappears. Heal after creating distance. Beast’s attacks and Limit can help during openings, but the battle is won by repeatedly using Learn and Jump rather than by trading ordinary blows.
- Use Learn when the Reaction Command appears.
- Store and spend Jump commands.
- Keep moving across the bridge and avoid edge traps.
- Heal after disengaging from Xaldin.
4. Demyx: use the dedicated world chapters
Demyx is intentionally not repeated here. The first encounter takes place during the Olympus Coliseum route and centers on clearing his water forms under a time limit. The later Hollow Bastion encounter combines another required water-form section with a direct battle against Demyx. Follow the Olympus Coliseum instructions in the early-world chapter and the Hollow Bastion instructions in the late Radiant Garden chapter.
For this chapter’s progression check, confirm that both Demyx encounters have been completed before continuing through the campaign. Do not treat either fight as a new Organization XIII encounter in the final world, and do not use Final Mix Data Demyx tactics for the original USA PS2 release.
- Complete the Olympus Coliseum Demyx objective in its world chapter.
- Complete the Hollow Bastion Demyx battle in its world chapter.
- Do not search for a Demyx fight in The World That Never Was.
- Do not import Final Mix Data Battle mechanics.
5. Xigbar in The World That Never Was
Xigbar is the first of the three Organization XIII story bosses in the final world. Lock on immediately and watch the direction of his projectiles. Guard or use Reflect against volleys when the timing is clear, then close the distance during his reload or recovery. When Warp Snipe appears, use it to redirect his attack and bring him within reach instead of chasing him through continuous gunfire.
Reposition as soon as a combo ends. Xigbar can change firing angles and pressure Sora from outside normal Keyblade range, so standing still after a successful hit is dangerous. If the arena or camera angle changes, stop attacking and reacquire him before committing to another string. Use a Drive Form only during a safe opening, and retain MP for Cure if Reflect has consumed too much of the gauge.
- Lock on at the start of the battle.
- Use Guard, Reflect and Warp Snipe against ranged attacks.
- Attack during reloads and recovery windows.
- Reposition immediately after each combo.
6. Luxord’s time-gauge battle
Luxord does not use a conventional HP contest. Sora has a time gauge, Luxord has a time gauge, and Luxord’s gauge must reach zero first. Ordinary attacks reduce his time only gradually, so prioritize the games and Reaction Commands that appear during the battle. When Sora is transformed into a card or die, move toward Luxord and attack him to reduce his time while avoiding unnecessary contact with other cards or hazards.
Near the end, Luxord fills the arena with cards and triggers another command challenge. Watch the command window carefully and select the correct prompts instead of continuing a standard combo. The final challenge can decide the battle quickly, so preserve enough HP to survive mistakes and do not assume that a nearly empty Luxord gauge guarantees victory. Sora can still lose when his own time expires or his HP reaches zero.
- Track both HP and the two time gauges.
- Prioritize Luxord’s command games over ordinary combos.
- Attack Luxord while transformed into a card or die when safe.
- Heal before the final command challenge if necessary.
7. Saïx and the berserk weapon
Saïx is the final Organization XIII story boss before the Xemnas sequence. His berserk gauge controls his most aggressive periods. When the gauge is full, he moves rapidly around the arena and performs broad, damaging attacks. Do not chase him through this state. Evade, keep away from the arena boundary and wait for the opening created when his claymore is left on the ground.
Run to the weapon and use the available Reaction Command to take advantage of it. The weapon lets Sora pursue Saïx and creates the main damage opportunity against him. Attack while the opening lasts, then disengage when Saïx recovers the weapon or resumes his berserk movement. Cure after escaping rather than trying to finish a combo while surrounded by his swings.
If Saïx repeatedly corners Sora, favor defensive accessories and movement abilities over small increases to attack power. The objective is to survive each berserk cycle and convert the dropped weapon into damage, not to win by trading normal Keyblade hits.
- Wait out Saïx’s berserk periods.
- Reach the dropped claymore and use its Reaction Command.
- Attack during the weapon-created opening.
- Avoid being trapped against the arena edge.
8. Continue into Xemnas and recover from failure
After Xigbar, Luxord and Saïx, continue through the final-world route toward Xemnas. Xemnas is handled in the dedicated final chapters because his encounter is a linked sequence rather than a single Organization XIII boss fight. Follow the displayed Reaction Commands during the later transitions and Riku-assisted sections instead of forcing ordinary ground combos through scripted phases.
If you are defeated by Xigbar, Luxord or Saïx, reload the pre-final save and change one factor at a time: accessories, shortcuts, defensive abilities or Drive timing. If you fail during the continuous Xemnas sequence, use the protected save returned by the game and prepare again before re-entering. Do not overwrite the backup until the ending cutscenes and credits have played successfully.
- Defeat Xigbar, Luxord and Saïx in that order.
- Continue to the Xemnas chapters after Saïx.
- Use Reaction Commands during the linked final sequence.
- Keep the pre-final save until the ending is confirmed.
Before you move on
- Both scripted Axel encounters during Roxas’s prologue are complete.
- Xaldin is defeated through the Learn and Jump mechanic.
- The Olympus Coliseum and Hollow Bastion Demyx encounters are complete in their dedicated chapters.
- Xigbar, Luxord and Saïx are defeated in that order in The World That Never Was.
- The Xemnas sequence begins after Saïx and is completed in the final chapters.
- The ending cutscenes and credits play, confirming completion of the original PS2 campaign.
- No Final Mix-only Data Rematches, Absent Silhouette battles or Final Mix Roxas boss fight are required.
References for this chapter
- Kingdom Hearts II — Guide and Walkthrough — PlayStation 2, GameFAQs FAQ 43231
- Kingdom Hearts II — Guide and Walkthrough — PlayStation 2
- Kingdom Hearts II — Organization XIII Boss Guide
- Kingdom Hearts II — Guide and Walkthrough — PlayStation 2, GameFAQs FAQ 42267
- Kingdom Hearts II — Twilight Town Roxas walkthrough
Pre-World That Never Was checklist — what to complete and why
Finish the late Twilight Town events and clear the required Assault of the Dreadnought Gummi route before preparing for the final world. The World That Never Was remains partly reversible during its opening exploration, and the Altar of Naught has a save point before the first Xemnas battle. The true point of no return comes later: after defeating that first Xemnas encounter, a door opens at the Altar of Naught. Accepting the prompt to end the story starts the continuous final sequence, so preserve a separate save before opening it. The original North American PlayStation 2 release does not use Final Mix-style clear data; keep this pre-final file for optional activities and retries.
1. Finish the late Twilight Town trigger
After the required late-game worlds and the Assault of the Dreadnought Gummi route are available, land in Twilight Town. Follow the story to the Old Mansion, then continue through the mansion and its computer-room events. The password and the beam sequence are story interactions; advance through them instead of searching Twilight Town for optional tasks first.
Continue through the portal and defeat the Nobody encounters in the altered Twilight Town route. Axel’s appearance and sacrifice follow this battle sequence. When the portal to The World That Never Was opens, enter it to begin the final world’s approach. If the world is not available, return to the Gummi routes and confirm that Assault of the Dreadnought was completed, then revisit Twilight Town.
- Late Twilight Town scenes have been completed.
- Assault of the Dreadnought has been cleared.
- Axel’s final Twilight Town sequence has opened the portal to The World That Never Was.
2. Separate required story progress from optional completion
Jiminy’s Journal is useful for confirming that visited worlds have received their story entries, but a complete Journal is not required for the normal ending. You do not need every chest, minigame, synthesis recipe, Coliseum cup, or enemy record before entering the final world.
Before proceeding, use the World Map to finish any optional activity that you specifically want available from an ordinary pre-final file. Good candidates include desired Coliseum challenges, synthesis work, rare-material farming, missed chests, and minigames. Write down unfinished goals rather than assuming the original PS2 release will create a convenient post-credits clear file.
- Required story entries are present for the worlds you have completed.
- Optional goals have been completed or recorded for later.
- You are not delaying the ending solely because an optional Journal category is incomplete.
3. Upgrade Sora and arrange dependable shortcuts
Visit a Moogle shop or synthesis workshop and review Sora’s Keyblade and accessories. Equip the strongest reliable stat increases available in your inventory, filling every useful accessory slot. Strength, Magic, Defense, and maximum-HP improvements are generally more dependable for the final sequence than leaving slots empty or using equipment whose effect you do not understand.
Set shortcuts for Cure or Curaga, Reflect, and one offensive spell you can use accurately. Carry restorative items for emergencies, especially when MP is unavailable or a battle interrupts your normal healing rhythm. Review Abilities and equip defensive options, movement abilities, and Drive Form abilities that match your normal play style. Do not build the checklist around Final Mix-exclusive equipment or mechanics.
- Sora has a current Keyblade equipped.
- All available accessory slots contain useful equipment.
- Cure or Curaga and Reflect are assigned to shortcuts.
- Sora carries healing items and some MP recovery.
4. Prepare Donald, Goofy, and the normal party setup
Open the party and equipment menus before landing at The World That Never Was. Equip Donald and Goofy with their strongest available weapons and useful accessories. Set their item behavior and Limits to options you already understand; the final approach is a poor time to test unfamiliar commands.
The ending changes party arrangements during scripted sections. Donald and Goofy are relevant for ordinary exploration and some battles, but they will not remain the active party for every encounter. Prepare the normal party without assuming that one setup will control every late fight.
- Donald and Goofy have current weapons and accessories.
- Their item and Limit settings fit your established strategy.
- You understand that the final sequence changes the active party automatically.
5. Stock supplies without treating synthesis as mandatory
Buy or synthesize healing items that you can afford without consuming materials needed for equipment you still intend to make. Elixirs and Megalixirs are useful emergency resources, but they are not required to complete the original story. A supply of ordinary Potions, Ethers, and other familiar recovery items is enough if you are comfortable healing with Cure or Curaga.
Do not postpone the finale because a recipe or rare material is unavailable. The final sequence can be completed with ordinary story equipment and sensible ability choices. Avoid spending rare recovery items on routine Nobody encounters so they remain available for difficult battles.
- A reserve of healing items is in Sora’s inventory.
- You have enough MP recovery for your chosen magic strategy.
- Rare consumables are reserved for difficult encounters.
6. Reach the correct pre-final checkpoint
Land at The World That Never Was and follow the route through the Castle That Never Was. Continue past the opening rooms and the required Organization XIII encounters until you reach the Altar of Naught. Save there before beginning the first Xemnas battle. This save point is the important preparation checkpoint, not the moment when the world first becomes available.
After the first Xemnas encounter, the game provides another save opportunity at the Altar of Naught. At that point, the newly opened door leads into the continuous final route. The original release’s practical point of no return is accepting the prompt at that door, not merely arriving at the Altar or entering the world. If you still want optional work, leave through the save point before opening that door.
- The World That Never Was has been explored to the Altar of Naught.
- A pre-battle save exists before the first Xemnas encounter.
- Optional work is complete or clearly recorded before the irreversible final route.
7. Preserve the final pre-ending file
When you are ready to finish the campaign, keep a separate save at the Altar of Naught after the first Xemnas battle and before accepting the door’s end-of-journey prompt. Use a second memory-card slot if possible rather than overwriting your only campaign file. This preserves access to the world map and gives you a reliable retry point for the final sequence.
Riku joins only during scripted ending sections and is not managed like Donald or Goofy. You cannot prepare him with a normal inventory, spell loadout, or accessory arrangement, so concentrate preparation on Sora and the regular party. After defeating Xemnas and viewing the ending, retain the pre-final file for optional PS2 content and repeat attempts.
- A separate pre-final save is protected from overwriting.
- Sora’s equipment, abilities, shortcuts, and items are ready.
- You are not relying on a Final Mix-style clear save.
- You know that Riku’s ending participation is scripted.
Before you move on
- The late Twilight Town events and Assault of the Dreadnought route are complete.
- The World That Never Was is accessible from the World Map.
- Sora, Donald, and Goofy have current equipment, useful abilities, healing shortcuts, and adequate supplies.
- The route has been followed to the Altar of Naught and a protected save exists before the first Xemnas battle.
- After the first Xemnas battle, a separate save is preserved before accepting the door prompt that begins the continuous final sequence.
- Riku’s scripted participation has not been treated as a normal equipment-preparation task.
References for this chapter
The World That Never Was approach — required route and Organization XIII encounters
Enter The World That Never Was through Alley to Between and follow the linear route through Fragment Crossing, Memory’s Skyscraper, Brink of Despair, and the Castle That Never Was. Save before each required Organization XIII encounter. Defeat Xigbar in Hall of Empty Melodies, Luxord alone in Havoc’s Divide, and Saïx in Addled Impasse; use Chapter 10 for their detailed battle tactics. Riku joins at Naught’s Approach after Saïx. Cross the invisible paths in Ruin and Creation’s Passage to reach the Altar of Naught and make a preparation save. Enter the first doorway and defeat the initial Xemnas encounter using Chapter 13’s instructions. After the battle, use the newly available save point. Only then should you enter the Kingdom Hearts door, which begins the continuous Slicer, Escablade, Sky Scraper, Energy Core, Dragon, Armored Xemnas, and final Xemnas sequence covered in Chapters 13 and 14. This route is for the original North American PlayStation 2 release and excludes Final Mix Roxas, Data Organization XIII, and other later additions.
Prepare at Alley to Between
After the Nobody battle in Betwixt and Between, follow the portal into The World That Never Was. You arrive at Alley to Between with Sora, Donald, and Goofy. Use the save point, restore HP and MP, and check equipment. Put Cure or Curaga on a shortcut and carry enough healing items and Ethers to recover between encounters.
Equip Sora’s strongest practical Keyblade and accessories. Defensive equipment is useful if your level is low because the castle’s Nobodies and Organization XIII encounters punish careless movement. This portion remains normal exploration, so you can still leave through the World Map before the final continuous sequence begins. The original North American PS2 release does not include the Final Mix Roxas battle at Memory’s Skyscraper.
- Save at Alley to Between.
- Set Cure or Curaga on a shortcut.
- Restock healing items and Ethers.
- Check Sora, Donald, and Goofy’s equipment.
- Remember that this is the original USA PS2 route, not Final Mix.
Cross Fragment Crossing and Memory’s Skyscraper
Leave Alley to Between and continue through Fragment Crossing. Shadows and Neoshadows occupy the route, but ordinary enemies are not worth exhausting your MP or Drive Gauge against. Fight only as much as needed to clear the path, or use the area for optional experience if Sora is underprepared.
Continue to Memory’s Skyscraper for the required story scene and battles. Nearby chests contain optional materials and equipment-related rewards; collect them if convenient, but none is required to continue. Proceed from the skyscraper toward Brink of Despair. Do not search for a Roxas rematch here in the original release.
- Follow the forward route through Fragment Crossing.
- Conserve MP and Drive Gauge against ordinary Nobodies.
- Continue through Memory’s Skyscraper after the story scene.
- Skip optional chests if you need to conserve time or resources.
Save at Brink of Despair and enter the castle
Use the save point at Brink of Despair before entering the castle. A Moogle is available, so restock missing Potions, Hi-Potions, or Ethers. The Dark City Map and other nearby chest rewards are optional for the ending.
Enter through Nothing’s Call and continue through Crooked Ascension. Sorcerers use floating cubes and resist magic, so close the distance carefully and favor Guard, physical attacks, and available Reaction Commands. In Crooked Ascension, wait for the room’s movement to settle before advancing rather than rushing into the next platform.
Proceed to Twilight’s View. This area provides another save point and Moogle, making it the correct preparation location immediately before Xigbar.
- Save and restock at Brink of Despair.
- Use close-range timing against Sorcerers.
- Wait for Crooked Ascension to stop moving before advancing.
- Reach Twilight’s View and save.
Defeat Xigbar in Hall of Empty Melodies
Heal at Twilight’s View before entering Hall of Empty Melodies. Xigbar is the first required Organization XIII boss in this route. The battle takes place across a changing arena and uses Reaction Commands during several of his ranged patterns. Follow Chapter 10 for the detailed Break, Warp Snipe, movement, and recovery tactics rather than spending this chapter repeating the boss method.
After Xigbar is defeated, leave the arena and return to Twilight’s View to save. This recovery save is useful because the next castle section leads directly toward Luxord and contains additional Nobody encounters.
- Save at Twilight’s View before Xigbar.
- Defeat Xigbar in Hall of Empty Melodies.
- Use Chapter 10 for detailed Xigbar tactics.
- Return to Twilight’s View and save after victory.
Reach Proof of Existence and defeat Luxord
Proceed through Naught’s Skyway. Continue past the Nobody groups until the story route awards Sora the Oblivion Keyblade and the Castle That Never Was Map. Equip Oblivion if it suits your setup, then continue to Proof of Existence and save before entering Havoc’s Divide.
Luxord is fought alone, without Donald or Goofy. His encounter is governed by time gauges and Reaction Command minigames rather than a normal damage race. Chapter 10 contains the detailed instructions for Begin Game, card identification, and the final commands. Follow those mechanics carefully, then land the required finishing attack once Luxord’s time gauge is depleted.
Return to Proof of Existence and save after the battle.
- Reach Proof of Existence and save.
- Confirm that Sora is alone for Luxord’s encounter.
- Treat the time gauge as the primary objective.
- Use Chapter 10 for the detailed Reaction Command sequence.
- Return to Proof of Existence after victory.
Enter Addled Impasse and defeat Saïx
From Proof of Existence, follow the route to Addled Impasse. Donald and Goofy return for Saïx’s required encounter. Save at Proof of Existence first and make sure Cure or Curaga and healing items are accessible.
Saïx’s fight revolves around his berserk state and the claymore Reaction Commands. Chapter 10 provides the detailed Berserk, Eclipse, and Magna Storm tactics. In this chapter, focus on the route order and resource management: avoid entering the arena with depleted MP, and do not spend every item on the castle Nobodies immediately before the boss.
After Saïx is defeated, return to Proof of Existence and save before continuing north. Xigbar, Luxord, and Saïx are required story encounters, not Data Organization XIII battles.
- Save at Proof of Existence before Saïx.
- Confirm Donald and Goofy have returned.
- Use Chapter 10 for detailed Saïx tactics.
- Defeat Saïx in Addled Impasse.
- Return to Proof of Existence and save.
Meet Riku at Naught’s Approach
From Proof of Existence, proceed north to Naught’s Approach. The required story scene here adds Riku to the party after Saïx’s defeat. Riku does not join at Proof of Existence and is not available during the Saïx encounter.
Once Riku joins, check Sora’s shortcuts and remaining item stock. Riku participates in the remaining approach and in the later continuous final sequence, but this is not a normal equipment-preparation opportunity through Sora’s usual menus. Continue from Naught’s Approach into Ruin and Creation’s Passage.
- Reach Naught’s Approach after defeating Saïx.
- Confirm that Riku has joined the party.
- Check Sora’s healing shortcuts and item stock.
- Continue toward Ruin and Creation’s Passage.
Cross Ruin and Creation’s Passage
Continue into Ruin and Creation’s Passage. The bridges and platforms are initially invisible, so use the area map and move in short, deliberate steps toward the next solid surface. Blind jumps across the void can cost HP or force a recovery attempt.
Side platforms contain optional synthesis materials and AP rewards. Identify the route first, then collect side rewards only if Sora has enough HP and MP to recover from a mistake. Follow the invisible paths to the exit and reach the Altar of Naught.
- Use the map to identify the invisible route.
- Move carefully between platforms.
- Treat side-platform rewards as optional.
- Reach the Altar of Naught.
Save at the Altar and hand off to Chapter 13
At the Altar of Naught, restore HP and MP and make a separate preparation save. Check Sora’s Keyblade, accessories, abilities, shortcuts, and remaining curatives. This is the correct save before the initial Xemnas encounter.
Enter the first doorway only when ready. The first doorway begins the initial Xemnas battle, not the uninterrupted Slicer-through-final-Xemnas sequence. Use Chapter 13 for that first Xemnas encounter and its Reaction Commands. After the battle and its resulting scenes, use the newly available save point before proceeding.
Do not enter the Kingdom Hearts door yet if you still need to prepare. The next door begins the continuous final route, and Chapter 13 continues from that point through Slicer, Escablade, Sky Scraper, and the Energy Core before Chapter 14 handles the remaining Xemnas phases.
- Save at the Altar of Naught before the first doorway.
- Enter the first doorway and defeat the initial Xemnas encounter using Chapter 13.
- Use the newly available save point after the battle.
- Do not confuse the first doorway with the Kingdom Hearts door.
- Preserve a backup before beginning the continuous final route.
Enter the Kingdom Hearts door only after the first Xemnas save
After the initial Xemnas encounter, use the new save point and preserve a backup file. This is the last practical opportunity to stop and return to optional preparation before the continuous ending sequence.
When ready, enter the Kingdom Hearts door. From this point, the game begins the uninterrupted final route covered by Chapters 13 and 14. There are no ordinary returns to the World Map during that sequence, so confirm that healing items, equipment, shortcuts, and Drive resources are ready before proceeding.
- Save after the initial Xemnas encounter.
- Preserve a backup file before entering the Kingdom Hearts door.
- Confirm that healing items and equipment are ready.
- Understand that the Kingdom Hearts door starts the continuous final route.
- Proceed to Chapter 13.
Before you move on
- Sora has traveled from Alley to Between through Fragment Crossing and Memory’s Skyscraper.
- Sora has saved at Brink of Despair and crossed the castle route through Nothing’s Call, Crooked Ascension, and Twilight’s View.
- Xigbar has been defeated in Hall of Empty Melodies.
- Luxord has been defeated alone in Havoc’s Divide using the time-gauge encounter mechanics.
- Saïx has been defeated in Addled Impasse.
- Riku has joined the party at Naught’s Approach.
- Sora has crossed Ruin and Creation’s Passage and reached the Altar of Naught.
- A preparation save exists at the Altar of Naught before the initial Xemnas encounter.
- The initial Xemnas encounter has been completed using Chapter 13’s instructions.
- The newly available save point after the initial Xemnas encounter has been used.
- The player is prepared to enter the Kingdom Hearts door and begin the uninterrupted final sequence covered in Chapters 13 and 14.
Xemnas: first duel and final-route opening through the Energy Core
Defeat the first Xemnas encounter, use the Save Point that appears afterward, and only then enter the Kingdom Hearts door to begin the continuous final route. The opening traversal uses Slicer, Escablade, and Skyscraper. On the Dragon Ship, knock Bomb Bell B Nobodies into the left and right generators, watch the Charge gauge, and use Stunt Dodge for each discharge and explosion. At the Energy Core, attack only while its barrier is down; defeat the Nobodies that appear to remove the barrier, then repeat until Proceed becomes available. This chapter ends at Proceed. Armored Xemnas, the Dragon vehicle, and the final Sora-and-Riku battles belong to the next chapter.
Prepare for the first Xemnas battle
Before entering the upper area of The World That Never Was, equip Sora’s strongest available Keyblade and useful accessories. Put Cure or Curaga on a shortcut. Reflect or Reflega is also useful for defending against close attacks, but it is not required if you are comfortable guarding and moving. Stock healing items and review Donald’s and Goofy’s item settings before proceeding.
The first Xemnas battle is separate from the irreversible final sequence. After the battle and its cutscenes, the game provides a Save Point. Save there before entering the Kingdom Hearts door. From that save, you can still return to the World Map for optional synthesis, Journal work, Coliseum activities, treasure collection, and equipment preparation.
- Equip Sora’s strongest available Keyblade and accessories.
- Set Cure or Curaga to a shortcut.
- Consider setting Reflect or Reflega to a shortcut.
- Prepare healing items before the first Xemnas battle.
- Plan to save after defeating the first Xemnas.
Escape Invitation to Nothingness
Xemnas opens by trapping Sora in Invitation to Nothingness, an energy field that steadily drains HP while Xemnas moves to Memory Skyscraper. Do not remain inside the field trying to win a normal exchange. Run toward the base of the building and activate Facedown when the Reaction Command appears. This breaks the field and starts Sora’s climb after Xemnas.
As Sora climbs, Xemnas drops down to intercept him. Reaction Commands appear during this exchange. Use Clash when it is offered, continue watching the command slot, and respond when it changes to Break Through. When Finish appears, activate it promptly. The commands are successive opportunities, so do not stop after Clash or assume that the first command ends the sequence.
If you miss one of the commands, keep moving and continue the fight rather than restarting. Heal after the draining field ends or during a clear gap in Xemnas’s movement. The required objective is to use Facedown, complete the climb, and return the fight to the arena.
- Run to the base of Memory Skyscraper.
- Use Facedown to escape Invitation to Nothingness.
- Watch for Clash, then Break Through, then Finish.
- Heal after the HP-draining field ends if necessary.
Defeat Xemnas in the first ground battle
Once the fight returns to the arena, avoid chasing Xemnas through every teleport. Stay mobile near the center and wait for him to approach or reappear within reach. His close-range ethereal-blade attacks can interrupt Sora, while his defensive barrier repels attacks and prevents useful damage. Do not attack into the barrier; circle away and wait for Xemnas to become vulnerable again.
Guard or use Reflect and Reflega when his blade attacks reach Sora. After a successful defense, use a short combo and disengage instead of committing to a long string while Xemnas is moving. When he disappears or surrounds himself with darkness, keep moving and prepare for his next approach. Cure during a safe opening, such as after a defensive exchange or while Xemnas is repositioning.
A Drive Form is not required for this battle. Preserve the Drive Gauge if you depend on Forms for later recovery or combat. When Xemnas is defeated, Sora receives an MP Boost and the story continues through its post-battle scenes. Use the Save Point that appears before doing anything else.
- Stay mobile and avoid chasing every teleport.
- Use Guard, Reflect, or Reflega against close blade attacks.
- Do not attack Xemnas while his barrier is active.
- Punish openings with short combos.
- Confirm the MP Boost and save after the battle.
Enter the final route with Slicer, Escablade, and Skyscraper
When optional preparation is complete, approach the Kingdom Hearts door and activate it. This begins the continuous final route. Sora is immediately confronted by rising and moving buildings. Continue forward and use Slicer when the Reaction Command appears. The objective is traversal, not clearing every ordinary enemy in the area.
Proceed into the next section as the platforms rise. Use Escablade for the first major obstacle, then activate Skyscraper whenever the flying structures approach. More than one Skyscraper command can appear in succession, so keep watching the Reaction Command slot instead of assuming the first activation completes the route.
These sections are scripted movement challenges. Keep moving, use the commands promptly, and avoid spending Drive Forms merely to shorten the chase. Preserve HP, MP, and Drive resources for the Dragon Ship and Energy Core stages.
- Enter the Kingdom Hearts door only after saving and finishing desired optional preparation.
- Use Slicer on the first building obstacle.
- Use Escablade for the next major obstacle.
- Use Skyscraper for the successive flying structures.
- Conserve Drive Gauge, HP, and MP.
Destroy both Dragon Ship generators
At the Dragon Ship, Bomb Bell B Nobodies appear around the two generators. Attack them so their bodies are knocked into the active generator. Focus on positioning: ordinary strikes should send the enemies toward the cylinder rather than away from the machinery. Magnet or Magnega can help gather enemies if available, but direct attacks are enough when you stay near the active generator.
The HUD shows the left-cylinder HP, right-cylinder HP, and a central Charge gauge. As Bomb Bell B Nobodies strike a generator, its HP gauge decreases and the Charge gauge rises. When the Charge gauge nears full, the generator is preparing its large discharge. Activate Stunt Dodge immediately to move away from the blast and avoid the damage.
When a generator’s HP reaches zero, it explodes. Use Stunt Dodge again when the Reaction Command appears; remaining on the destroyed cylinder can be fatal. After the escape, move to the other generator and repeat the process. Both generator gauges must be depleted before the route continues to the Energy Core.
- Knock Bomb Bell B Nobodies into the active generator.
- Monitor both cylinder gauges and the central Charge gauge.
- Use Stunt Dodge for each generator discharge.
- Use Stunt Dodge when a destroyed generator explodes.
- Deplete both generator gauges.
Destroy the Energy Core and use Proceed
After the generators are destroyed, Sora reaches the Dragon Ship’s Energy Core. Attack the core while its barrier is down, but stop attacking when the barrier rises. The ship’s claws and other attacks can interrupt Sora, so use short attack strings and reposition rather than staying beneath a dangerous attack.
When the barrier is active, Nobodies appear around the core. Defeat the summoned Nobodies to remove the barrier. Once the core is exposed again, return to it and deal damage. Repeat the pattern of core damage, barrier, Nobody waves, and renewed core damage until the Energy Core’s HP is depleted.
When the Proceed Reaction Command appears, activate it. Proceed advances the story into the next section, beginning with Armored Xemnas. It does not complete the game and does not include the later Dragon vehicle or final Sora-and-Riku encounters; those belong in the following chapter.
- Attack the Energy Core only while its barrier is down.
- Defeat the Nobodies that appear while the barrier is active.
- Repeat the exposure and damage cycle until the core is destroyed.
- Activate Proceed when it appears.
- End this chapter before Armored Xemnas begins.
Before you move on
- Invitation to Nothingness has been broken with Facedown.
- The reaction-command sequence has advanced through Clash, Break Through, and Finish, or the encounter has otherwise progressed to the ground battle.
- The first Xemnas has been defeated and Sora has received the MP Boost.
- The post-battle Save Point has been used before entering the Kingdom Hearts door.
- Slicer, Escablade, and Skyscraper have cleared the opening building route.
- Both Dragon Ship generator gauges have been depleted with Bomb Bell B Nobodies and Stunt Dodge.
- The Energy Core has been exposed by defeating the summoned Nobodies, destroyed, and followed by the Proceed Reaction Command.
References for this chapter
Xemnas: Armored Xemnas, Dragon vehicle battle, and final Sora-and-Riku duel
After ch13’s Proceed command, the remaining sequence contains four linked encounters: the first Armored Xemnas battle, the Dragon vehicle battle, a second Armored Xemnas battle, and the final Sora-and-Riku confrontation. Armored Xemnas allows normal combat and limited Drive Form use. The Dragon is fought through vehicle commands: absorb incoming fire with Drain, then use Megalaser against exposed sections. The second armored phase adds aerial movement, knockback, building attacks, laser formations, Riding Shot, and Meteor Rain. The final battle begins with repeated Reversal commands, then shifts to a fast duel involving teleportation, sword attacks, energy barriers, clones, laser formations, and a scripted rescue and finishing exchange. This entire sequence is continuous. In the original North American PlayStation 2 release, defeat sends you back to the protected save before the final sequence, and the game does not create a completed post-ending save.
1. Continue after Proceed and defeat the first Armored Xemnas
This chapter begins immediately after the Proceed Reaction Command covered in the previous chapter. The Energy Core route is complete, so do not backtrack to the generator area or repeat the earlier building and machine encounters. After the cutscene, Sora faces Xemnas in his armored form while Riku is present as his partner.
Armored Xemnas remains in the arena and alternates between direct sword attacks, barriers, and attacks modeled after defeated Organization members. Stay close enough to maintain pressure, but disengage when he raises a barrier or begins a large-area attack. Guard, use Reflect when its timing is comfortable, or jump and Glide away from attacks that cover the space in front of him.
Punish the end of each attack sequence with a short ground or aerial combo. Do not remain beside him after the combo finishes because his close-range strike can launch Sora and waste the opening. Riku’s Session Limit is useful when available, especially if Xemnas is recovering behind a barrier. Drive Forms can still be used during this armored section, but the later vehicle battle does not use normal Drive commands, so avoid spending the gauge without a clear damage advantage.
When this form is defeated, the story immediately transitions to the Dragon vehicle encounter. There is no world-map break or intermediate save.
- Begin after Proceed; do not repeat the Energy Core route.
- Attack Armored Xemnas during recovery windows.
- Use Guard or Reflect against direct attacks and barriers.
- Use Session or a Drive Form only when it creates a safe damage opportunity.
2. Defeat the Dragon with Drain and Megalaser
The Dragon encounter uses a flying vehicle rather than ordinary ground combat. Sora and Riku pursue the Dragon while enemy ships and Bomb Bell-type enemies move around the arena. Use the vehicle’s lock-on and movement controls to keep targets in front of you, but do not chase every object if doing so places the vehicle directly in the Dragon’s attack path.
Use the normal attack command against nearby enemies and exposed Dragon sections when a target reticle appears. The vehicle’s laser is useful against targets that cannot be safely absorbed. The key defensive command is Drain: use it when the Speeder or Spiked Roller fires energy at the vehicle. Drain absorbs the incoming fire and fills the vehicle’s energy gauge.
When the gauge is full, activate the Megalaser Reaction Command. Aim so the Dragon is close and positioned near the center of the vehicle’s forward view. The blast fires forward before dividing toward the sides, so activating it while the Dragon is far away or sweeping past can miss. Continue alternating between Drain, normal attacks, and Megalaser until the Dragon’s exposed sections are destroyed.
The vehicle cannot be treated like a normal party battle. Follow the command prompts, keep moving through missile patterns, and use Drain rather than trying to block or heal through every projectile. When the Dragon sequence ends, a cutscene returns Xemnas to his armored form.
- Use the vehicle controls instead of ground combos.
- Absorb Speeder and Spiked Roller fire with Drain.
- Use normal attacks against nearby enemies and exposed targets.
- Fire Megalaser only when the Dragon is close and aligned with its path.
3. Defeat Armored Xemnas after the Dragon
The next battle is a second Armored Xemnas encounter, separate from the armored battle before the Dragon. Sora and Riku fight together in an open aerial arena. Keep Jump and Glide ready because Xemnas can knock Sora far away from the platform or send him toward the arena’s edge. If Sora begins falling, continue jumping or Glide back toward the battle area rather than accepting the fall.
Attack Xemnas with brief aerial approaches. He can strike Sora from a distance with powerful knockback, fire laser attacks, and use a dangerous close-range attack if Sora stays in front of him too long. Move laterally while approaching, land a short combo, and retreat before the next counterattack. Thundaga or another safe ranged option can help if direct melee approaches are repeatedly punished, but do not sacrifice healing MP if Sora is already low.
When Xemnas knocks Sora away and stationary buildings become available, approach a suitable building and use Riding Shot. Follow it with Meteor Rain when prompted to break through Xemnas’s protection and damage him. After the Reaction Commands, return to the main arena and resume short attacks.
Xemnas can summon groups of laser-producing crystals. Jump, Glide, and change direction rather than standing beneath the formations. If the crystals appear after Xemnas has sent Sora into the void, prioritize survival and return to the arena only when the path is clear. Repeat the arena attacks and building Reaction Commands until this armored form is defeated.
- Treat this as a separate armored battle after the Dragon.
- Use Jump and Glide to avoid falling from the aerial arena.
- Use Riding Shot and Meteor Rain when the building sequence appears.
- Evade laser crystals before attempting another attack.
4. Survive the opening Reversal sequence
The final Xemnas form begins with Sora and Riku under immediate attack. The opening is not a normal combo opportunity. Reversal appears repeatedly as Xemnas attacks, and using it moves Sora around or behind the attack pattern. Follow each Reaction Command promptly until the opening assault ends and the fight returns to the arena floor.
After the scripted descent, lock on to Xemnas and wait for an attack commitment. He teleports frequently, uses sword combinations, creates energy waves and barriers, and can surround the area with damaging attacks. Reversal can help close distance when the command appears, but do not chase every teleport. Let Xemnas finish an attack, then use a short aerial combo or a safe Limit opportunity.
Riku remains with Sora and can provide support, but Sora must still manage his own HP. Heal after an attack cycle or while Xemnas is repositioning. If the Session command becomes available, use it when Xemnas is not already beginning a large attack. Keep enough MP for emergency healing and defensive magic rather than spending everything on damage.
- Use Reversal throughout the opening assault.
- Wait for Xemnas to commit before attacking after a teleport.
- Use short combos instead of extended pursuit.
- Heal during repositioning gaps and preserve MP for emergencies.
5. Handle the laser formations and rescue sequence
As the final battle progresses, Xemnas creates groups of red laser beams that close around Sora and Riku. Jump, Guard, or use a defensive response at the correct moment as the formations converge. Continue moving after the first pattern because later formations can appear while Xemnas is also teleporting or attacking with his weapon. Do not spend all MP before this phase; healing and defensive magic are more valuable than forcing a final combo.
Xemnas can also imprison Sora and drain his HP while Riku is separated. Control changes to Riku for the rescue portion. Move Riku directly toward Sora while using Dark Aura to clear or suppress the attacking clone. Riku’s objective is to reach Sora before the drain defeats him, then activate the Rescue Reaction Command. Failure to reach Sora in time causes a Game Over, so do not stop to fight every enemy in the area.
After the rescue, Xemnas becomes vulnerable again. Return to the standard pattern of waiting through his attack, avoiding the barrier and sword range, and striking during recovery. The final laser patterns become more dangerous as his HP falls, so prioritize survival over maximizing each opening.
- Reserve MP for healing and defensive responses during the laser formations.
- Use movement, Jump, or Guard to survive converging lasers.
- Control Riku during the prison sequence.
- Reach Sora quickly and use Rescue before the HP drain finishes.
6. Complete the finishing commands and verify the campaign ending
Near the end of the final duel, Xemnas begins the large laser attack that leads into the scripted conclusion. Follow the on-screen commands for Sora and Riku instead of attempting to replace the sequence with ordinary attacks. The final exchange requires both characters to survive; if either character’s HP is depleted during this sequence, the battle fails.
When the finishing commands complete, Xemnas is defeated and the game proceeds into the concluding cutscenes. Watch through the ending and credits to verify that the campaign is complete. The game does not return Sora to normal exploration with a newly created clear file in the original North American PlayStation 2 release.
If the sequence is lost at any point, reload the save made before entering the final door and repeat the continuous route. Preserve that save until all optional worlds, Coliseum goals, synthesis, treasures, and other cleanup tasks are finished. Do not overwrite it expecting a post-ending save to appear.
- Follow both characters’ commands during the final laser exchange.
- Keep Sora and Riku alive until the finishing sequence ends.
- Watch the ending and credits.
- Use the pre-final save for any later optional content.
Before you move on
- The first Armored Xemnas battle after Proceed is complete.
- The Dragon vehicle encounter is cleared using Drain and Megalaser.
- The second Armored Xemnas battle, including the aerial arena and Reaction Command sections, is complete.
- The final Sora-and-Riku battle reaches the laser formations, rescue sequence, and finishing commands.
- Xemnas is defeated and the game proceeds through the concluding cutscenes and credits.
- The pre-final save remains available because the original North American PlayStation 2 release does not create a post-ending clear save.
After the final cutscene — immediate post-campaign actions and safe housekeeping
The original North American PlayStation 2 release does not create a post-ending clear save. After defeating Xemnas, allow every closing scene and the complete credit roll to finish until the Battle Report appears with The End displayed. The game then remains on its ending screen rather than offering a normal postgame save. Reset or power off only after confirming that screen, then reload the save made before the continuous final sequence. Keep that pre-final save protected for optional synthesis, Journal, treasure, Drive Form, minigame, Coliseum, Olympus Coliseum II, Paradox Cup, and superboss cleanup. Olympus Coliseum II is optional story content, not required campaign progress. Do not apply Final Mix or HD 2.5 completion rules to the original USA PS2 edition.
1. Watch the complete ending before resetting
After the final Xemnas sequence concludes, leave the game running through all closing scenes and the full credit roll. Do not reset after the first post-battle scene or when the credits initially appear. When the ending material is complete, the Battle Report appears and displays The End. This is the concrete confirmation that the campaign ending has been reached.
Once The End is visible, the original USA PlayStation 2 release does not create a normal post-ending clear save. The game remains on the final screen rather than returning you to a usable postgame file. After confirming the Battle Report, reset or power off the PlayStation 2.
- Xemnas is defeated.
- All ending scenes and the complete credit roll have played.
- The Battle Report is visible with The End displayed.
2. Preserve and reload the pre-final save
The file you need for later play is the save made before beginning the continuous final sequence. The Altar of Naught save point is the practical place to make this backup: save there before approaching the large Kingdom Hearts door and choosing to proceed. Use a separate memory-card slot or another backup if available, and do not overwrite the protected copy while cleaning up.
After resetting, load that pre-final file. You return to the route before the uninterrupted final battles, allowing you to leave The World That Never Was and use the World Map for optional tasks. The ending is not stored as a completed continuation file, so viewing it again after cleanup requires defeating Xemnas again.
- Keep the Altar of Naught or equivalent pre-final save protected.
- Do not search for a new post-ending save slot in the original USA release.
- Record unfinished optional objectives before changing the backup file.
3. Review the Journal and synthesis progress
From the reloaded save, open Jiminy’s Journal and review the categories that match your completion goal. Check story entries, character and enemy records, treasures, minigames, synthesis, and world objectives. These records help identify unfinished optional work, but they are not needed to confirm that the normal campaign ending has been completed.
Open the synthesis menu and compare unfinished recipes with your current materials, accessories, weapons, and restorative items. Make a short route plan before traveling so one visit can cover several missing chests, materials, Trinity Marks, minigames, or Journal entries.
- Review the Journal categories relevant to your target completion level.
- Check recipes and current synthesis materials.
- List missing treasure, minigame, Drive Form, Coliseum, and optional-boss objectives.
4. Separate required progress from optional cleanup
Use the protected pre-final save for original-release cleanup such as synthesis, treasure collection, Drive Form leveling, minigames, and optional superboss preparation. Olympus Coliseum II, including its Hades story route and Guardian Soul reward, is optional story content and is not required to reach the normal ending. The Coliseum Cups and Paradox Cups are also optional challenges, separate from the required campaign route.
Save normally during cleanup, but keep the original backup untouched until the newer file is confirmed safe. Optional content does not replace the campaign completion check: the story is complete once the final scenes, credits, Battle Report, and The End screen have been viewed. If you want the ending to be the last state you see, finish cleanup first, reload the pre-final save, and clear the final sequence again.
- Treat Olympus Coliseum II as optional story content.
- Treat Coliseum Cups and Paradox Cups as optional cleanup.
- Keep a protected backup while making newer cleanup saves.
5. Keep the edition separate from Final Mix
This chapter applies to Kingdom Hearts II for the North American PlayStation 2, not Kingdom Hearts II Final Mix or an HD compilation. Final Mix and later releases add or change content and may use different clear-data behavior. Do not use their extra bosses, expanded encounters, Theater Mode, menu entries, or completion requirements to judge the USA original.
For the original PS2 release, optional post-campaign work begins by reloading the preserved pre-final save. Keep that file until every desired cleanup task is finished, because the game does not provide a new completed save after the Battle Report.
- Confirm that the disc is the original North American PS2 release.
- Ignore Final Mix-only objectives when judging this campaign.
- Retain the pre-final save until all desired cleanup is complete.
Before you move on
- The final Xemnas sequence is complete.
- All ending scenes and the credits have been viewed.
- The Battle Report appears with The End displayed.
- The protected pre-final save remains available.
- Jiminy’s Journal and the synthesis menu have been reviewed for unfinished goals.
- Olympus Coliseum II, Coliseum Cups, Paradox Cups, synthesis, treasure, minigames, Drive Forms, and superbosses are treated as optional original-release cleanup.
Postgame completion: synthesis, Drive Form mastery and 100% journal tasks
The original North American PlayStation 2 release does not create a post-ending clear save after Xemnas. Keep the ordinary save from The World That Never Was before the continuous final sequence and use it for synthesis, Journal cleanup, optional battles, minigames, treasure collection and Drive Form training. The original release includes Valor, Wisdom, Master and Final Forms, but not Limit Form, Cavern of Remembrance, Mushroom XIII or the Final Mix data-battle roster. Treat synthesis, Journal categories, Form levels and Coliseum challenges as separate goals. The five required second world visits belong to the main campaign; Olympus Coliseum II, Guardian Soul, Cups, Paradox Cups and other Coliseum challenges are optional and are not required for the normal ending.
1. Preserve the correct working save
In the original North American PlayStation 2 release, defeating Xemnas does not create a clear save that lets you continue from a post-ending file. Keep the ordinary save made in The World That Never Was before beginning the continuous final sequence. The Altar of Naught save is a practical backup point for replaying the ending, but do not overwrite your only useful file while preparing optional content.
Use the preserved file for synthesis, treasure collection, minigames, optional bosses, Journal work and Drive Form training. If you have already watched the ending, reload the last ordinary save rather than expecting a new endgame slot. After cleanup, return to The World That Never Was and defeat Xemnas again if you want the credits and closing scenes to be the last state viewed.
Open Jiminy’s Journal and record incomplete categories before farming. Check the entries present in this release, including world information, enemy records, minigames, treasures and synthesis-related progress. Story completion alone does not prove that every Journal objective is finished.
- Keep a pre-final The World That Never Was save.
- Do not expect a post-ending clear save in the original PS2 version.
- Record incomplete Journal and synthesis categories before farming.
2. Complete original-edition synthesis
Visit the Moogle shops and review Materials, Recipes and Creations separately. A recipe appearing in the menu is not the same as having crafted the finished item, so confirm each intended creation after synthesizing it. Work through the lists systematically instead of spending rare materials on items you do not intend to make.
Use Energy materials when the recipe permits them to reduce the quantity of other required materials. Serenity materials are used for upgraded versions of some creations. When a material is missing, consult an original-PS2 enemy and synthesis list, identify the correct enemy family, and farm that target in its verified location instead of defeating unrelated enemies.
Equip Lucky Ring accessories and available Lucky Lucky abilities when hunting rare drops. These effects improve the chance that enemies leave items, but they do not change which enemy supplies a particular material. Continue checking Moogle development and recipe progress as you craft; some entries depend on Moogle advancement and recipe development.
Do not use Final Mix or HD 2.5 synthesis tables as substitutes. Those versions add or alter content, and a list that is accurate for them may include materials, recipes, rewards or completion requirements absent from the North American PS2 release.
- Review Materials, Recipes and Creations separately.
- Use Energy materials where permitted to reduce recipe costs.
- Use Serenity materials for eligible upgraded creations.
- Equip Lucky Ring and Lucky Lucky when farming rare materials.
- Confirm each intended creation after crafting it.
- Use a PS2-specific synthesis list.
3. Level Valor Form through successful attacks
Valor Form gains experience from successful attacks while the Form is active. Enter Valor only when Goofy is in the party, then choose an area with several accessible enemies. Keep landing attacks rather than relying on one slow target; groups allow more successful hits before the Form Gauge expires.
Use a low-risk route near a save point. When the Gauge is nearly empty, retreat safely, return to a save point or leave and re-enter the world if necessary, then restore the Gauge before another attempt. Do not waste a full Drive activation on enemies that are difficult to reach or spend most of the encounter invulnerable.
After each level, inspect Sora’s Ability menu. Valor’s Form-level rewards improve High Jump for normal Sora. Equip the growth ability when exploration requires it, but remember that the original release does not contain Limit Form or its Dodge Roll progression.
- Enter Valor with Goofy available.
- Prioritize repeated successful attacks.
- Use a save-point route to restore Drive resources.
- Check Sora’s abilities after each level.
- Do not count Limit Form toward PS2 completion.
4. Level Wisdom Form and Master Form separately
Wisdom Form gains experience by defeating Heartless while Wisdom is active. Timeless River is a practical original-release training area because its rooms contain repeatable Heartless groups and provide a straightforward route back to a save point. Activate Wisdom, clear the Heartless with ranged attacks and magic, then retreat before the Gauge becomes unsafe.
Master Form gains experience from collecting Drive Orbs rather than from ordinary enemy defeats. Small orbs provide one experience point and large orbs provide three. The Land of Dragons is a useful training destination because enemies and destructible objects can provide many orbs. Clear or weaken normal enemies first when that makes the route safer, then activate Master Form and collect the available orbs.
Leave the area or use a safe save-point reset before the Form expires if you need to restore the Gauge. Do not confuse yellow Drive Orbs with ordinary HP or MP drops, and do not count enemies defeated outside the active Form. Check the Form and Sora ability lists after every level to verify that growth abilities have transferred to normal Sora.
- Use Heartless defeats for Wisdom Form experience.
- Use Drive Orbs for Master Form experience.
- Small orbs give one point and large orbs give three.
- Reset through a safe save-point or world-exit route.
- Verify the resulting growth abilities in Sora’s menu.
5. Unlock and level Final Form
Final Form becomes available after the late story scene involving Sora and Roxas. Once you have at least five full Drive Gauges, enter a normal battle with both party members available and activate an ordinary Drive Form. The transformation may randomly become Final Form instead. Once Final Form appears, it is added to the Drive menu for later selection; it is not automatically selectable immediately after the story scene.
Final Form gains experience by defeating Nobodies while Final Form is active. The World That Never Was is a practical training destination because its later areas contain repeated Nobody encounters. Use save points and world exits to restore Drive resources, and retreat whenever HP, MP or the remaining Gauge becomes unsafe. Final Form consumes five Drive Gauges, so prepare a route that includes a safe reset.
Leveling Forms is optional for the normal ending. In the original release, the selectable Forms relevant here are Valor, Wisdom, Master and Final. Anti Form can occur randomly but is not selected or leveled like the other Forms. Limit Form, Two Become One, Cavern of Remembrance and the Final Mix data-battle roster do not belong in this PS2 checklist.
- Reach the Sora-Roxas story scene first.
- Have five full Drive Gauges before attempting the unlock.
- Trigger Final Form during a battle while using another Drive Form.
- Defeat Nobodies to level Final Form.
- Do not count Final Mix Forms or areas.
6. Finish the Journal and separate optional Coliseum work
Return to every world with incomplete Treasure, enemy, mission or minigame entries. Recheck the Moogle lists after obtaining new materials because synthesis progress, recipe development and ordinary treasure collection are separate tasks. Use the Journal as the record for objectives actually present in this release rather than copying a Final Mix completion list.
The second Olympus Coliseum story episode is not required for the original North American PS2 normal ending and is not a prerequisite for the final route. Guardian Soul is its story reward, so neither that Keyblade nor the episode belongs on a mandatory postgame checklist. You may complete Olympus Coliseum II during cleanup if you want its story, reward or Journal entries.
The Coliseum Cups, Paradox Cups and related score or time goals are optional challenges. They do not replace the five required second world visits from the main campaign and are not necessary to reach or finish the normal ending. Treat these challenges as separate goals from synthesis, Journal completion and Drive Form leveling.
Your intended original-edition cleanup is complete when the Journal categories you chose are finished, the desired synthesis creations have been crafted, and Valor, Wisdom, Master and Final Form have reached the levels you want. Keep the pre-final save available. Then return to the final area, defeat Xemnas again and watch the credits and closing scenes to confirm the official campaign ending.
- Clear intended Treasure, enemy, mission and minigame entries.
- Craft the outstanding original-edition synthesis creations.
- Verify Valor, Wisdom, Master and Final Form in the status menu.
- Treat Olympus Coliseum II and Guardian Soul as optional.
- Treat Cups and Paradox Cups as optional challenges.
- Keep the pre-final save available.
- Replay the final sequence and view the ending credits.
Before you move on
- The pre-final The World That Never Was save remains available.
- The Journal categories and entries selected for completion are finished.
- The intended synthesis creations were crafted using PS2-specific requirements.
- Valor, Wisdom, Master and Final Form progress is recorded in the status menu.
- No Final Mix-exclusive Form, boss, area or objective was counted.
- Olympus Coliseum II, Guardian Soul and Coliseum challenges were treated as optional rather than mandatory.
- The final Xemnas sequence, credits and closing scenes have been viewed after cleanup.
References for this chapter
- Kingdom Hearts II – Drive Guide – PlayStation 2
- Kingdom Hearts II – Form Guide – PlayStation 2
- Kingdom Hearts II – Synthesis Guide – PlayStation 2
- Kingdom Hearts II – Journal Completion Guide – PlayStation 2
- Kingdom Hearts II/Synthesis – StrategyWiki
- Kingdom Hearts II PlayStation 2 manual
- Kingdom Hearts II – Item FAQ – PlayStation 2
Finishing up
The campaign is complete when Xemnas is defeated, the full ending and credits finish, and the Battle Report/The End screen appears.
The original North American PS2 release does not create a post-ending clear save. The practical continuing file is the protected save made after the first Xemnas battle and before entering the large Kingdom Hearts door, or an earlier Altar of Naught save if that is the file being preserved.
Optional completion is separate: finish only the original-release Journal, synthesis, Drive Form, Coliseum, minigame, treasure, world-revisit, and Sephiroth goals you specifically want. Olympus Coliseum II, both Pride Lands episodes, Atlantica, and the second Space Paranoids episode are optional for viewing the normal ending.
Choose your next gameScreenshots & video
Game imagery for reference. Follow the written chapters above for the route and strategies.
Sources & references
Our original guide draws on the references below. Check the edition at the top of this page before following controls or unlock requirements.
- Kingdom Hearts II — Twilight Town Roxas walkthrough
- Kingdom Hearts II — Guide and Walkthrough — PlayStation 2, GameFAQs FAQ 43231
- Kingdom Hearts II — Guide and Walkthrough — PlayStation 2, GameFAQs FAQ 42267
- Kingdom Hearts II Official Strategy Guide sample pages
- Kingdom Hearts Wiki — Roxas
- Kingdom Hearts II official manual
- Kingdom Hearts II — Guide and Walkthrough by Spirit_Slash3r
- Kingdom Hearts II — Guide and Walkthrough by Phatalphlaw
- Kingdom Hearts II — Walkthrough: Twilight Town
- Twilight Town first visit walkthrough (Kingdom Hearts II) — Kingdom Hearts Wiki
- Kingdom Hearts II — Guide and Walkthrough — PlayStation 2 — SeiferMaster
- Kingdom Hearts II/Twilight Town (Sora) — StrategyWiki
- Twilight Town Walkthrough — KHGuides
- Hollow Bastion first visit walkthrough (Kingdom Hearts II)
- Walkthrough: Kingdom Hearts II/Hollow Bastion — Kingdom Hearts Wiki
- Kingdom Hearts II/Hollow Bastion — StrategyWiki
- Kingdom Hearts II PlayStation 2 manual
- Walkthrough: Kingdom Hearts II/100 Acre Wood
- Walkthrough: Kingdom Hearts II — Beast’s Castle
- Walkthrough: Kingdom Hearts II — Olympus Coliseum
- Game: Timeless River — Kingdom Hearts Wiki
- Timeless River walkthrough — KHGuides
- Kingdom Hearts II — Guide and Walkthrough — PlayStation 2
- Port Royal first visit walkthrough, Kingdom Hearts Wiki
- Halloween Town first visit walkthrough, Kingdom Hearts Wiki
- Walkthrough: Kingdom Hearts II — Port Royal
- Kingdom Hearts II – Guides and FAQs, GameFAQs
- Twilight Town second visit walkthrough — Kingdom Hearts Wiki
- The Struggle Trophy — Kingdom Hearts Wiki
- Kingdom Hearts II/Space Paranoids — StrategyWiki
- Walkthrough: Kingdom Hearts II — Space Paranoids
- Walkthrough: Kingdom Hearts II — The Land of Dragons
- Walkthrough: Kingdom Hearts II — Agrabah
- Walkthrough: Kingdom Hearts II — Halloween Town
- Kingdom Hearts II — Guide and Walkthrough — PlayStation 2 — GameFAQs
- Kingdom Hearts II/Atlantica — StrategyWiki
- Kingdom Hearts II - Atlantica
- Walkthrough: Kingdom Hearts II/Atlantica — Kingdom Hearts Wiki
- Swimming — Kingdom Hearts Wiki
- Kingdom Hearts II – Journal Completion Guide – PlayStation 2
- Kingdom Hearts II — Organization XIII Boss Guide
- The World That Never Was walkthrough — Kingdom Hearts Wiki
- Kingdom Hearts II — Save Point Locations Guide, PlayStation 2, GameFAQs
- Walkthrough: Kingdom Hearts II/The World That Never Was
- Game:Xemnas — Kingdom Hearts Wiki
- Kingdom Hearts II — Boss Guide — PlayStation 2 — GameFAQs
- How do you save when you complete the game? — Kingdom Hearts II
- Does this game have no clear data to save? — Kingdom Hearts II
- The End — Kingdom Hearts Wiki
- Game Clear Data — Kingdom Hearts Wiki
- Kingdom Hearts II – Drive Guide – PlayStation 2
- Kingdom Hearts II – Form Guide – PlayStation 2
- Kingdom Hearts II – Synthesis Guide – PlayStation 2
- Kingdom Hearts II/Synthesis – StrategyWiki
- Kingdom Hearts II – Item FAQ – PlayStation 2
About the game & collecting notes
- Platform
- PlayStation 2
Complete walkthrough for the original North American PlayStation 2 release of Kingdom Hearts II. It covers Roxas’s six-day prologue, Sora’s awakening and Mysterious Tower sequence, the early Olympus Coliseum/Disney Castle/Timeless River progression, every required story world and revisit needed to reach The World That Never Was, the Xemnas ending sequence, and clearly labeled optional worlds, revisits, synthesis, forms, Coliseum content, and Sephiroth cleanup. Final Mix additions are excluded.
Darryl Polo
Darryl Polo loves tinkering with emulation and revisiting retro games. He enjoys exploring how old favorites play on different setups and sharing what he learns along the way. At Joking Joystick, he writes about the games, hardware, and small discoveries that keep the hobby fun.
Our editorial standardsFound a step that needs another look? Help us improve this guide.