Grand Theft Auto: San Andreas (PlayStation 2, USA v1.03) — Complete Campaign Walkthrough
Step-by-step campaign walkthrough for the original PlayStation 2 release (USA v1.03) of Grand Theft Auto: San Andreas. Follow location-by-location mission routing, safehouse and save advice, core boss tactics, required unlock checks and practical strategies for vehicles, combat and property management to reach the final mission and the canonical ending.


Find a copy
Grand Theft Auto: San Andreas PlayStation 2
We may earn a commission if you buy through these links, at no extra cost to you. As an Amazon Associate I earn from qualifying purchases.
Opens retailer search results. Check the model, edition, seller, availability and current price before buying.
Before you begin
This guide is written for the original PlayStation 2 release of Grand Theft Auto: San Andreas (USA v1.03).
It focuses on the single-player main campaign from the opening missions in Los Santos through the final mission 'End of the Line.' Use the PS2 controller mappings from your game manual and the in-game prompts; later remasters or Definitive Edition builds can differ in controls, mission triggers and some spawn/AI behaviour.
Follow the chapters in sequence for a safe, consistent route through required story missions.
Chapters are grouped by location and mission arc (Los Santos, San Fierro, Las Venturas, return to Los Santos).
Each chapter lists objectives you must complete, practical tactics, how to recover from failure, and optional rewards that are useful but not required for story completion.
Set yourself up for the run
Confirm you are playing the original North American PlayStation 2 release and use the PS2 manual for control references.
Back up existing PS2 memory-card saves before starting a new campaign.
Familiarize yourself with the PS2 button layout for aiming, shooting, sprinting, vehicle controls, weapon selection and aircraft handling.
Practice basic driving and target strafing in a low-risk area near the Grove Street safehouse.
Reserve separate memory-card slots for a current campaign save, a fallback save and major milestone saves.
Save manually at safehouses after successful missions or major purchases; do not rely on modern autosave assumptions.
Early in Los Santos, prioritize stamina, armor, ammunition and basic weapon access while keeping enough cash for required purchases.
Use airports and the game's normal flight system for inter-city travel when available; safehouses do not provide fast travel between one another.
Keep a reliable vehicle available, but judge it by damage, handling and passenger capacity rather than fuel.
Keep at least $80,000 available before the Verdant Meadows purchase and expect mission-specific prerequisites such as lung capacity, flight-school progress, keycards and required story missions.
If a mission has an optional preparation objective, check the mission brief and map markers before starting.
Getting Started: Controls, Saves and Early Stats (PS2)
Set up a reliable memory-card routine, learn the original PlayStation 2 controls, and practise the movement and driving skills needed for the opening Los Santos missions. These directions use the original North American PlayStation 2 control layout, not the later Definitive Edition scheme.
1. Prepare the memory card and start the campaign
Insert a functioning PlayStation 2 memory card into slot 1 before launching Grand Theft Auto: San Andreas. From the title screen, choose New Game and let the opening sequence play until you can control Carl Johnson. When the game asks for a save destination, select a clearly identifiable slot for this campaign and keep another slot free for a backup.
Use separate slots for important milestones instead of overwriting the only current file. A practical routine is to keep one recent working save and one older fallback save. The original PS2 release does not provide a modern automatic checkpoint system that replaces safehouse saving, so mission completion alone is not a reason to stop protecting your file.
- The memory card is detected before starting.
- A dedicated campaign slot has been chosen.
- A second slot remains available as a fallback.
2. Learn the original on-foot controls
Use the left analog stick to move CJ and the right analog stick to control the manual camera when available. Triangle enters vehicles, activates certain objects and performs contextual actions. Circle performs a normal attack and fires a weapon in the appropriate shooting context. Square jumps, climbs or blocks. X is the movement-speed button: hold it to run and tap it to sprint. Repeated tapping is useful when you need a faster burst without continuously holding the button.
L2 cycles to the previous weapon and R2 cycles to the next weapon. R1 targets a nearby enemy or other valid target. L1 fires the equipped weapon in the original control layout and can also center the camera or display the statistics panel in the relevant context. L3 makes CJ crouch, R3 looks behind him, Select changes camera modes, and Start opens the pause menu.
Do not rely on a button list that assigns Square to sprinting, X to jumping, or Circle to the handbrake. Those assignments do not describe the default original PS2 layout. Stand outside the Johnson House and test every control before accepting a mission marker.
- L2 and R2 cycle weapons.
- R1 targets and L1 fires when a firearm is equipped.
- Circle attacks or fires in the applicable context.
- X runs or sprints, Square jumps or blocks, and Triangle enters vehicles.
- L3 crouches and R3 looks behind CJ.
3. Practise a vehicle before starting missions
Approach a usable car and press Triangle to enter it. The left analog stick steers and controls the driving view. X accelerates, Square brakes or reverses, and R1 activates the handbrake. L2 and R2 look left or right when used in the vehicle camera combination described by the game. Circle or L1 operates a vehicle weapon or nitrous when the vehicle supports that function. Triangle exits the vehicle.
Drive around the blocks near Grove Street before taking the first mission. Practise ordinary turns, braking at intersections, reversing out of a narrow space and using the handbrake without spinning into traffic. The original game has no fuel-management system or fuel gauge, so the relevant inspection is the vehicle's damage and handling. Replace a smoking or badly damaged car before a mission involving a long chase or timed drive.
Do not assume that an on-foot weapon control remains unchanged inside a vehicle. Test the vehicle layout separately, particularly the difference between R1 handbrake and the on-foot target function.
- You can enter and exit a vehicle with Triangle.
- You can accelerate, brake, reverse, steer and handbrake without confusion.
- The practice vehicle is not smoking or badly damaged.
- You understand that fuel is not a pre-mission concern in the original PS2 game.
4. Make the first manual save at the Johnson House
After the opening sequence gives you control, return to the Johnson House on Grove Street in Ganton. This is CJ's starting safehouse and is available from the beginning. The house is represented by the safehouse symbol on the map. Enter through the front door and walk to the rotating save icon inside.
Stand in the marker and accept the save command. Choose the dedicated slot, confirm the save, and wait for the game to finish writing before leaving the interior. If you want a separate fallback, repeat the process in another slot rather than overwriting the first file. Saving advances the in-game clock, so the time of day may change after the save; that does not indicate a problem.
- The Johnson House in Ganton is identified.
- CJ reaches the save marker inside the house.
- The game confirms the save before you leave.
- A backup slot is used instead of overwriting the only file.
5. Use a repeatable pre-mission routine
Before entering a colored story marker, open the map and identify the destination and the main roads leading there. Use a waypoint when useful, but still watch the radar because the original PS2 release does not provide the later port's modern route presentation. Check CJ's health and armor, then equip the weapon the mission is likely to require. Cycle back to an unarmed state when you want to avoid firing accidentally.
Inspect the vehicle you plan to use. If it is heavily damaged, replace it before entering the marker. There is no fuel gauge to monitor. Early story missions usually provide mission-specific equipment, so conserve cash rather than buying every weapon immediately. Save after a substantial mission or before an attempt that you expect to repeat.
If a mission fails, return to the Johnson House when practical, save to recover CJ's condition, choose a sound vehicle and retry. Do not change controller settings halfway through an attempt. If you do alter the configuration, test it in free roam first and confirm that aiming, firing, sprinting and driving still feel deliberate.
- The destination and route are checked on the map.
- Health, armor and weapon selection are suitable.
- The chosen vehicle is in usable condition.
- A recent manual save exists before a difficult attempt.
- Any control change has been tested outside a mission.
6. Practise movement and stamina management
Use short running bursts while moving between the safehouse, vehicles and mission markers. Holding X makes CJ run, while repeated taps produce a sprint burst. Avoid draining the stamina bar before a mission begins. The opening missions do not require a long stat-building grind, but learning to release the button and recover before a chase prevents avoidable slowdowns.
Practise jumping low obstacles with Square, crouching with L3 and moving the camera while walking. In a firearm encounter, press R1 to target an enemy, use the left stick to adjust CJ's position, and press L1 or Circle according to the active weapon context to fire. Release the target when you need to move around cover or change direction.
If the camera faces away from the next objective, stop briefly and recenter it before entering a car or crossing a road. Simple camera corrections are safer than making a blind turn into traffic or walking past the mission marker.
- You can run and sprint without confusing X and Square.
- You can jump, crouch and reposition the camera.
- You can target, fire and release a target deliberately.
- You can reach the next marker without beginning the mission exhausted.
Before you move on
- A new campaign is active on a dedicated PlayStation 2 memory-card slot.
- A second slot remains available as a fallback.
- The first successful manual save has been made inside the Johnson House on Grove Street.
- You can identify the original PS2 controls for weapon cycling, targeting, firing, running, sprinting, jumping, attacking, vehicle entry and the handbrake.
- You have driven a practice car around Ganton, tested braking and reversing, and replaced it if badly damaged.
- You can complete the pre-mission routine without checking nonexistent fuel.
- You have tested the controls in free roam and are ready to begin the next Los Santos story marker.
Los Santos: Reclaim Grove Street and Complete the Opening Arc
The opening Los Santos chapter establishes CJ at Grove Street, teaches combat, tagging, drive-bys, gang recruitment and lowrider driving, then ends with The Green Sabre and CJ’s forced move to Angel Pine. Mission markers overlap rather than forming one fixed sequence, so use the route below as a checklist. Cesar Vialpando and Burning Desire are required before Doberman. Cesar Vialpando unlocks High Stakes, Low-Rider, which is required later for Reuniting the Families together with the other listed character missions. Extra territory capture, properties and most side activities can wait. The directions and controls here target the original PlayStation 2 release rather than the Definitive Edition.
Reach Grove Street and establish a save routine
After the opening cutscene, follow the radar to the Johnson house in Ganton. Complete Big Smoke, Sweet & Kendl and Ryder as their markers become available. These missions introduce vehicle entry, navigation, melee combat and the first gang encounters. On the original PS2 layout, Triangle enters vehicles, Circle attacks or fires, X runs when held and sprints when tapped, Square jumps or blocks, R1 targets, and L2 or R2 cycles weapons.
Use the red save marker inside the Johnson house after successful missions. Saving restores CJ’s health and advances time, so keep a separate save before each major progression mission, especially before The Green Sabre. A normal four-door car is useful for missions carrying Sweet, Big Smoke, Ryder or recruited Grove Street members, but no specific personal vehicle is required at this stage.
- Reach the Johnson house and use its save marker.
- Save after successful missions instead of relying on a single autosave or mission restart.
- Use an intact vehicle with enough seats when the mission group requires passengers.
Complete the first Grove Street missions
Complete Tagging Up Turf, Cleaning the Hood, Drive-Thru, Nines and AK’s, Drive-By and Sweet’s Girl. In Tagging Up Turf, spray every marked tag, using walls and corners to limit exposure when Ballas appear. Once a tag is covered, leave the area rather than staying to fight unnecessary enemies.
Cleaning the Hood is safest when you isolate one opponent at a time. During Drive-Thru and Drive-By, keep the car moving and make repeated passes so the passengers can fire. Avoid clipping walls or stopping directly beside enemy vehicles. Nines and AK’s introduces Emmet’s shooting practice; follow the targets and conserve money for ammunition, armor and repairs.
For Sweet’s Girl, bring a durable vehicle to the marked location. Clear the attackers, collect Sweet and his girlfriend, then drive them back to Grove Street. Do not remain in the area to fight every pursuing enemy once the passengers are inside. These missions are part of the established early Los Santos mission route.
- Finish Tagging Up Turf, Cleaning the Hood, Drive-Thru, Nines and AK’s, Drive-By and Sweet’s Girl.
- Keep moving during vehicle-based firefights.
- Save after Sweet’s Girl.
Open and complete Cesar Vialpando
After Sweet’s Girl, go to the C marker at the Johnson house and complete Cesar Vialpando. Drive to the indicated garage, take the provided lowrider or another suitable lowrider, and enter the lowrider challenge. During the hydraulic rhythm sequence, press the displayed directional inputs as they reach the target. Accurate timing matters more than pressing quickly; watch the indicator and avoid random inputs.
Cesar Vialpando is required for this progression route. Its completion unlocks High Stakes, Low-Rider and is one of the prerequisites for Doberman. It also opens lowrider-related garages and activities, but those extra features are not required for the main story.
- Complete the lowrider challenge in Cesar Vialpando.
- Confirm that the Cesar marker for High Stakes, Low-Rider appears afterward.
- Do not leave Cesar Vialpando unfinished while trying to trigger Doberman.
Complete the overlapping character strands
Work through the available Big Smoke missions through Just Business, Ryder missions through Robbing Uncle Sam, OG Loc missions through House Party, and Tenpenny’s C.R.A.S.H. missions through Gray Imports. The order among these strands can vary, so if one marker disappears, check the other character markers rather than repeatedly visiting the same location.
Burning Desire requires CJ to throw Molotov cocktails through the marked windows, then enter the burning house and find the fire extinguisher. Follow the interior route to Denise, extinguish the flames between CJ and the exit, and take her home. Gray Imports is a warehouse assault; use crates, walls and doorways as cover, advance in short movements and pursue the escaping target only after the warehouse threat is under control.
Doberman becomes available after Cesar Vialpando and Burning Desire are complete. High Stakes, Low-Rider is not a prerequisite for Doberman. Instead, High Stakes, Low-Rider is required later for Reuniting the Families.
- Complete Big Smoke through Just Business.
- Complete Ryder through Robbing Uncle Sam.
- Complete OG Loc through House Party.
- Complete Burning Desire and Gray Imports.
- Complete Cesar Vialpando.
- Complete High Stakes, Low-Rider before expecting Reuniting the Families.
Complete Doberman and postpone optional territory wars
Once Cesar Vialpando and Burning Desire are complete, start Doberman at the Ammu-Nation marker. Buy armor and ammunition if needed, then travel to Glen Park. Kill enough Ballas in the marked area to trigger the gang war and survive three waves. Use the park’s walls, nearby buildings and the radar to avoid being surrounded. After the waves, eliminate the remaining marked enemy to finish.
Doberman introduces gang wars, but it does not require High Stakes, Low-Rider. Do not spend time capturing extra neighborhoods before the story demands it. Preserve health, armor and ammunition for the remaining Los Santos missions.
- Complete Cesar Vialpando and Burning Desire before starting Doberman.
- Complete Doberman and survive all three enemy waves in Glen Park.
- Avoid optional territory grinding.
Complete Los Sepulcros and Reuniting the Families
For Los Sepulcros, recruit nearby Grove Street members if CJ’s Respect allows it. Drive to the cemetery before Kane escapes, enter the grounds and move directly toward him. After the firefight, eliminate Kane, enter the marked escape vehicle, use the nearby Pay ’n’ Spray and return to Grove Street. Keep the mission vehicle intact during the escape.
Complete High Stakes, Low-Rider before expecting Reuniting the Families. Reuniting the Families also requires Just Business, Robbing Uncle Sam, House Party, Gray Imports and Los Sepulcros. If the marker is absent, check those completed mission names rather than assuming Doberman or an optional territory war is missing.
Reuniting the Families begins at the Jefferson Motel. Advance through the motel using doorways and walls as cover. Reach Sweet, survive the rooftop police and helicopter sequence, then use the escape vehicle’s mounted weapon to protect the car from pursuing police. Target vehicles that are about to ram or overtake the mission vehicle, and keep the escape route clear rather than chasing distant enemies.
- Complete Los Sepulcros and return through the Pay ’n’ Spray.
- Complete High Stakes, Low-Rider before expecting Reuniting the Families.
- Confirm Just Business, Robbing Uncle Sam, House Party and Gray Imports are complete.
- Keep Sweet and the escape vehicle alive during Reuniting the Families.
- Save before starting The Green Sabre.
Complete The Green Sabre and verify the transition
Before The Green Sabre, save at the Johnson house, restore health and obtain armor and ammunition if available. Keep the pre-mission save if you want to preserve the Los Santos state, because the story transition removes CJ’s weapons and ammunition.
Start the mission at Sweet’s marker and drive to Cesar’s marked location. Enter the indicated vehicle and watch the cutscene. When instructed, drive to the meeting beneath the Mulholland Intersection, park in the red marker and protect Sweet. Use cover where possible, eliminate the Ballas and their reinforcements, and keep Sweet alive until the police arrive.
After the cutscene, CJ is relocated to Angel Pine. Use the nearby trailer safehouse to save immediately. The dependable completion signs are the transition cutscene, CJ’s arrival in Angel Pine, the available countryside mission marker and the loss of his previous weapons and ammunition. The countryside arc is now open; follow its missions to continue toward San Fierro.
- Complete Reuniting the Families before starting The Green Sabre.
- Save before entering The Green Sabre.
- Protect Sweet at the Mulholland Intersection.
- Reach Angel Pine after the transition cutscene.
- Create a post-transition save at the Angel Pine safehouse.
- Confirm that CJ’s previous weapons and ammunition are gone and countryside missions are available.
Before you move on
- Big Smoke’s Los Santos strand is complete through Just Business.
- Ryder’s strand is complete through Robbing Uncle Sam.
- OG Loc’s strand is complete through House Party.
- Tenpenny’s C.R.A.S.H. strand is complete through Gray Imports.
- Cesar Vialpando is complete.
- Burning Desire is complete.
- Doberman is complete.
- High Stakes, Low-Rider is complete.
- Los Sepulcros is complete.
- Reuniting the Families is complete.
- The Green Sabre has ended with Sweet’s arrest and CJ’s relocation to Angel Pine.
- A manual save exists before The Green Sabre and another manual save exists at the Angel Pine safehouse after the transition.
- The countryside mission marker is available, and CJ’s previous weapons and ammunition have been removed.
References for this chapter
- GTATrilogy_GTASA_PS2_Manual_M01 — Official PlayStation 2 manual
- Story Missions Guide - Los Santos
- Grand Theft Auto: San Andreas Story Missions Guide
- High Stakes, Low-Rider - GTA Wiki
- Grand Theft Auto: San Andreas/Missions/Doberman — Wikibooks
- Grand Theft Auto: San Andreas/The Green Sabre - StrategyWiki
Grove Street: Territory, Crews and Early Gang Missions
Complete the required early Grove Street and allied mission strands, unlock Doberman through Cesar Vialpando and Burning Desire, then use Doberman to learn gang warfare. High Stakes, Low-Rider is not required to unlock Doberman, but it is part of the later prerequisite chain for Reuniting the Families. Voluntary territory capture is optional and temporary before The Green Sabre.
Finish the early Grove Street missions and open Cesar's route
Start with Sweet's early missions: Tagging Up Turf, Cleaning the Hood, Drive-Thru and Drive-By. Complete Nines and AK's when it appears so Ammu-Nation access and weapon practice are available. Continue the other visible Los Santos mission strands rather than waiting for one character's missions to provide the entire route.
Complete Cesar Vialpando at Sweet's marker. The mission uses the lowrider hydraulic rhythm challenge; follow the on-screen directional prompts and press when the marker reaches the target area. Keep the lowrider afterward or make sure another usable lowrider is available, because High Stakes, Low-Rider begins from Cesar and requires a lowrider for its race.
High Stakes, Low-Rider is an important later story prerequisite, but it does not unlock Doberman. Treat it as part of the parallel Los Santos progression and complete it before attempting Reuniting the Families.
- Complete Tagging Up Turf, Cleaning the Hood, Drive-Thru and Drive-By.
- Complete Nines and AK's when its mission marker is available.
- Complete Cesar Vialpando.
- Complete High Stakes, Low-Rider before Reuniting the Families.
- Keep a serviceable lowrider for Cesar's race mission.
Complete the parallel prerequisites for the central Los Santos chain
Work through Ryder's Home Invasion, Catalyst and Robbing Uncle Sam; Big Smoke's Wrong Side of the Tracks and Just Business; OG Loc's Life's a Beach, Madd Dogg's Rhymes, Management Issues and House Party; and Tenpenny's Burning Desire and Gray Imports. Some markers appear at different times, so the exact order can vary, but these mission strands collectively provide the gates for the next Sweet missions.
Doberman becomes available after Cesar Vialpando and Burning Desire have been completed. High Stakes, Low-Rider is not the second Doberman prerequisite. If Doberman does not appear immediately after completing Burning Desire, clear any remaining available Los Santos mission marker and answer CJ's phone calls before assuming the save is blocked.
After Doberman, complete Los Sepulcros. Reuniting the Families requires the relevant parallel missions to be complete, including High Stakes, Low-Rider, Gray Imports, House Party, Just Business, Robbing Uncle Sam and Los Sepulcros. Completing the broader early mission list above is the safest way to avoid a missing marker.
- Finish Home Invasion, Catalyst and Robbing Uncle Sam.
- Finish Wrong Side of the Tracks and Just Business.
- Finish Life's a Beach, Madd Dogg's Rhymes, Management Issues and House Party.
- Finish Burning Desire and Gray Imports.
- Complete Cesar Vialpando and High Stakes, Low-Rider.
- Confirm Doberman is available after Cesar Vialpando and Burning Desire.
- Complete Los Sepulcros before Reuniting the Families.
Complete Doberman's scripted Glen Park takeover
Start Doberman at the Ammu-Nation marker in Market. Before entering Glen Park, purchase body armor if available and carry a reliable automatic weapon. Travel to the purple Ballas territory and kill rival gang members inside the marked area to start the scripted turf war.
The battle consists of three Ballas waves. Stay inside or close to the contested territory, use walls and buildings as cover, and move between cover positions rather than standing in the open. Watch the radar for enemies approaching from different directions. If health or armor pickups appear nearby, use them before allowing CJ's health to become critical.
After the waves are defeated, the mission's final target appears. Find and eliminate Little Weasel, then follow the mission's return instructions. Completing Doberman unlocks Ammu-Nation access, makes the Johnson house an asset and enables ordinary turf wars. The scripted takeover is required; voluntary territory capture before this point is not possible.
- Restock weapons and obtain armor before starting Doberman.
- Travel to Glen Park and begin the fight inside the purple Ballas territory.
- Defeat all three Ballas waves.
- Kill Little Weasel after the waves.
- Finish the mission and verify that turf-war colors appear on the map afterward.
Recruit Grove Street members when the situation justifies it
Once CJ has enough respect for gang recruitment, target a Grove Street member with R1. While the member is targeted, press Up on the D-pad to make him follow CJ. Pressing Down instead gives the member a looser follow position. The game indicates recruitment through the member's response; simply standing near a Grove Street pedestrian does not recruit him.
Recruited members are useful for voluntary turf wars and free-roam protection. They are not a substitute for scripted mission companions. Drive-By, Los Sepulcros and other story missions provide their own companions or vehicles, and a recruited follower may not be accepted into a mission's scripted setup.
Use a vehicle with enough seats if transporting recruits. If a follower is killed or left behind, story progress is unaffected. Return to Grove Street later and recruit another member when needed. Do not postpone required missions while trying to assemble a large group.
- Target a Grove Street member with R1.
- Press Up on the D-pad to recruit the targeted member.
- Use Down on the D-pad for the alternate follow position if needed.
- Use recruited members mainly for optional turf wars.
- Rely on the mission's scripted companions during story missions.
Keep voluntary territory wars separate from required story progress
After Doberman, a voluntary turf war normally begins by killing three rival gang members inside a purple Ballas or yellow Vagos territory. The territory flashes, and three enemy waves attack. Remain within the contested area, use cover and defeat each wave to claim the territory for Grove Street. If the war does not start, the kills may have occurred outside the rival gang's actual territory; move farther into the colored area and try again.
These takeovers increase respect and can provide weapon drops, but they are not required for Los Sepulcros, Reuniting the Families or The Green Sabre. For a story-focused run, capture only a convenient territory for practice, then save at the Johnson House and continue the mission markers.
Do not attempt to take over all of Los Santos before The Green Sabre. When that mission forces CJ out of Los Santos, the early territory ownership is lost or reset for the countryside section. Gang warfare becomes available again much later after CJ returns and completes Home Coming.
If CJ fails a voluntary turf war, dies or is arrested, completed story missions remain complete. The individual territory may need to be challenged again. Heal, replace armor, restock ammunition and save before retrying. A territory-attack alert can also be ignored temporarily; entering an optional fight while under-equipped is more dangerous than postponing it.
- Begin voluntary turf wars only after Doberman is complete.
- Start a war by attacking rival gang members within their colored territory.
- Defeat all three waves while staying near the contested zone.
- Save after a successful optional takeover if you want to preserve it temporarily.
- Do not confuse early territory ownership with permanent story progress.
- Expect the early Los Santos territory state to be disrupted by The Green Sabre.
Before you move on
- Tagging Up Turf, Cleaning the Hood, Drive-Thru, Nines and AK's and Drive-By are complete.
- Cesar Vialpando is complete.
- Burning Desire is complete.
- Doberman is available or complete, confirming the correct Cesar Vialpando and Burning Desire gate.
- High Stakes, Low-Rider is complete before Reuniting the Families is attempted.
- Home Invasion, Catalyst, Robbing Uncle Sam, Wrong Side of the Tracks, Just Business, Life's a Beach, Madd Dogg's Rhymes, Management Issues, House Party and Gray Imports are complete.
- Doberman's Glen Park takeover is complete, including the three Ballas waves and Little Weasel.
- Los Sepulcros is complete.
- Reuniting the Families is available or complete after its prerequisite chain is satisfied.
- CJ can target a Grove Street member with R1 and recruit him with Up on the D-pad.
- Optional territory capture has not been confused with required story progress.
- A fresh Johnson House save exists before continuing toward Reuniting the Families and The Green Sabre.
References for this chapter
From Los Santos to the Countryside and the Escape Arc
The Green Sabre removes CJ from Los Santos and begins the countryside chapter. Complete Badlands, Catalina's robbery chain, The Truth's combine mission, Cesar's countryside missions and the two races before burning The Truth's crop field and driving to San Fierro. The robbery missions can be tackled in different marker orders, but several missions and cutscenes must be completed before the next part of the story becomes available.
Complete The Green Sabre and reach Angel Pine
Finish The Green Sabre at the meeting point near the Los Santos storm drain. The mission ends with CJ being taken to Angel Pine in Whetstone. This is the story's temporary relocation point, so do not waste time trying to return to Grove Street and continue the old Los Santos mission chain; those markers are unavailable for the moment.
Once control returns, locate the Angel Pine safehouse and save. Check your health, armor and ammunition before accepting Badlands. San Fierro can be visited after this transition, but the main story does not establish CJ's San Fierro base until the final countryside mission.
- Complete The Green Sabre.
- Reach Angel Pine after the cutscene.
- Save before entering the Badlands marker.
Finish Badlands and photograph the witness
Start Badlands at the C.R.A.S.H. marker in Angel Pine. Take the Sanchez or another dependable vehicle up Mount Chiliad using the marked dirt route. The witness is at a small cabin in the wooded area near the top. Approach from cover and be ready for the FBI protection detail to open fire.
If the witness escapes in his vehicle, pursue him down the mountain rather than abandoning the chase. The mission does not end when he is merely wounded: he must die. Afterward, equip the camera, photograph the corpse and deliver the evidence at the designated drop-off point. Save again after the mission.
- Kill the protected witness.
- Photograph the body with the camera.
- Deliver the evidence and complete Badlands.
Start Catalina's countryside sequence
After Badlands, a question-mark marker introduces Catalina in First Date. First Date is a cutscene mission, not one of the four robberies. It opens the robbery locations around Red County and Flint County. The four actual robbery missions are Tanker Commander, Local Liquor Store, Against All Odds and Small Town Bank.
Tanker Commander is the first practical robbery to complete because its marker is available immediately after First Date. Drive the tanker cab to the gas station, reverse into the trailer until it couples, then deliver the trailer to RS Haul. Use broad turns and moderate speed: losing or destroying the trailer fails the mission. Police pressure is less important than keeping the trailer attached.
- Complete First Date.
- Complete Tanker Commander.
- Keep the tanker connected until the RS Haul delivery.
Complete Body Harvest and King in Exile
After Tanker Commander, answer The Truth's call and start Body Harvest. Before entering the farm, obtain a useful firearm and armor if available. Fight through the farmers, take the combine harvester and drive it back to The Truth's ranch. The combine is slow and difficult to turn, so stay on the farm roads where possible and avoid unnecessary collisions.
Body Harvest unlocks King in Exile for Cesar. Go to the Angel Pine overlook and meet Cesar and Kendl. This is primarily a story and surveillance mission, but it is required: completing it unlocks Catalina's remaining robbery sequence. Save before continuing.
- Deliver the combine harvester in Body Harvest.
- Complete King in Exile at the Angel Pine overlook.
- Confirm Catalina's remaining robbery markers are available.
Clear the remaining Catalina robbery missions
The robbery chain is separated by three short Catalina cutscenes: First Base, Gone Courting and Made in Heaven. Complete each cutscene when its marker appears, then enter the robbery it introduces. The required missions are Local Liquor Store, Against All Odds and Small Town Bank; the order may vary depending on which location you choose, but all three must be completed.
In Local Liquor Store, follow the fleeing riders on the provided quad bike. Stay close enough for Catalina to shoot them, then stop and collect each dropped briefcase before returning to her hideout. In Against All Odds, use the supplied satchel charges on the betting shop door and safe, retreat before detonating, then take the stolen money through the Pay N' Spray and back to Catalina.
Small Town Bank ends with a much more dangerous escape. After the alarm, destroy the three ATMs, follow Catalina through the alley and eliminate police threats without leaving her behind. When she reaches a motorcycle, follow her and rescue her when police surround her. Return with her to the hideout. Save after the robbery chain is complete.
- Complete First Base, Gone Courting and Made in Heaven when they appear.
- Complete Local Liquor Store.
- Complete Against All Odds.
- Complete Small Town Bank.
Win Wu Zi Mu and Farewell, My Love...
After Catalina's robberies are finished, start Wu Zi Mu at Cesar's marker. This is a countryside race, not a free-roam drive. Follow the checkpoint arrows, brake before blind hill crests and avoid aggressive shortcuts that can throw the car off the route. First place is required.
Farewell, My Love... follows after the race and uses the same general course in reverse. Protect the race car from collisions, brake before sharp turns and do not panic if another racer briefly gets ahead. Completing the race awards the Doherty Garage and unlocks The Truth's final countryside mission.
- Win Wu Zi Mu.
- Win Farewell, My Love....
- Confirm that the Doherty Garage has been awarded.
Complete Are You Going to San Fierro?
Begin Are You Going to San Fierro? at The Truth's ranch. After the cutscene, use the flamethrower to destroy every crop patch shown as a red objective dot on the radar. Work systematically across the field and keep moving away from the flames. The objective is timed, so do not stop to fight every enemy.
When all crop markers disappear, The Truth gives CJ a rocket launcher and a police helicopter appears. Destroy the helicopter before entering the van. This helicopter objective is mandatory; burning the crops alone does not complete the mission.
After the helicopter is destroyed, get into The Truth's vehicle and follow the long drive to the abandoned garage in Doherty, San Fierro. Stay on major roads and use the map route rather than making risky rural shortcuts. Park in the red marker to finish the mission. CJ can now save at the Doherty Garage and begin the San Fierro story arc.
- Destroy every marked crop patch within the time limit.
- Destroy the police helicopter with the rocket launcher.
- Drive The Truth's vehicle to the Doherty Garage.
- Save after arriving in San Fierro.
Before you move on
- The Green Sabre is complete and CJ has reached Angel Pine.
- Badlands is complete, including the witness photograph.
- First Date and Tanker Commander are complete.
- Body Harvest and King in Exile are complete.
- First Base, Gone Courting and Made in Heaven have been completed as they appear.
- Local Liquor Store, Against All Odds and Small Town Bank are complete.
- Wu Zi Mu and Farewell, My Love... have both been won.
- Are You Going to San Fierro? is complete, including destruction of the crop field and police helicopter.
- CJ has arrived at the Doherty Garage in San Fierro and can save there.
San Fierro: New Contacts, Driving Tests and The Wheel of Options
After Are You Going to San Fierro?, CJ receives the Doherty garage and begins rebuilding his operations in San Fierro. Complete the garage, Cesar, Loco Syndicate and Woozie missions in a reliable order. The required sequence places The Da Nang Thang before Yay Ka-Boom-Boom. Driving School, Zero’s RC missions and Wang Cars provide optional rewards and practice but are not required for the main story campaign.
Establish the Doherty garage as your San Fierro base
The Doherty garage becomes available through the story transition into San Fierro; you do not need to purchase it. Use the red marker inside the garage to save and use the storage spaces to protect useful vehicles. Keep at least one dependable car nearby, preferably one with enough seats for passenger objectives.
Make a manual save before beginning the San Fierro sequence and save again after major missions. Keep separate saves when possible so a failed mission or damaged vehicle does not force a long replay. Before difficult missions, visit Ammu-Nation if necessary, restore health, and obtain body armor when funds allow.
The garage is a practical base, not a requirement to buy another San Fierro property. Avoid spending early rewards on optional businesses until you can still afford weapons, armor, ammunition and vehicle repairs.
- Save at the Doherty garage before starting the first San Fierro mission.
- Keep a reliable passenger vehicle available for missions involving escorts or multiple characters.
- Use the garage for manual saves and vehicle storage.
Complete Wear Flowers in Your Hair, 555 We Tip and Deconstruction
Start Wear Flowers in Your Hair at the Doherty garage. Follow The Truth’s route, collect Jethro and Dwaine, and return to the garage. Completing this mission establishes the workshop and opens the main San Fierro mission markers.
555 We Tip and Deconstruction can be completed after Wear Flowers in Your Hair. Their order is flexible. In 555 We Tip, collect the valet uniform, wait for the marked blue Merit, drive it to the Doherty garage, plant the evidence, and return the vehicle to the hotel. Protect the Merit from heavy collisions and repair it before the final return if it has taken substantial damage. Destroying the target vehicle fails the mission.
In Deconstruction, enter the construction site and use the bulldozer to destroy the marked portable buildings. Push them carefully rather than making uncontrolled high-speed impacts. After the demolition objective, deal with the foreman and return to the garage. Save after completing both missions.
- Complete Wear Flowers in Your Hair.
- Complete 555 We Tip and Deconstruction in either order.
- Save after the opening garage missions.
Begin the Loco Syndicate investigation
Complete Photo Opportunity from Cesar’s marker. Travel to Angel Pine, reach the overlook and photograph the meeting. Frame each required participant clearly before leaving the area. The mission supplies the camera, so the main risks are arriving late or taking photographs from an unusable angle.
Jizzy follows the investigation. Answer the marked calls and drive to each destination promptly. Avoid unnecessary collisions because several objectives are time-sensitive. After Jizzy, the Loco Syndicate branch continues through T-Bone Mendez and Mike Toreno.
T-Bone Mendez requires pursuing the bikers and recovering the stolen package. Stay close enough to maintain the chase, but use controlled driving instead of repeated ramming. Mike Toreno requires searching for the correct vehicle using the mission’s clues, followed by an ambush. Carry armor and an automatic weapon before starting that mission.
- Complete Photo Opportunity and photograph every required target.
- Complete Jizzy, T-Bone Mendez and Mike Toreno.
- Save before beginning the longer convoy and assault missions.
Advance through Outrider, Snail Trail, Ice Cold Killa and Pier 69
In Outrider, collect the supplied weapons, clear the roadblocks and escort the objective vehicle. Destroy attackers before they surround the convoy, but remain close enough that the protected vehicle does not move outside the mission’s safe range.
Snail Trail requires following the target without alerting him prematurely. Use a stable motorcycle or fast car and leave enough distance to avoid colliding with him. Once the objective changes, complete the attack as directed.
Ice Cold Killa begins at the Pleasure Domes. Carry a firearm for the interior confrontation and pursue Jizzy immediately when he escapes. In Pier 69, use the pier structures and nearby cover during the gunfight. Eliminate the main group before pursuing the fleeing target, then complete the escape objective.
These missions open the remaining Loco Syndicate and Woozie markers. Save before Pier 69 and restock afterward, because the following missions can involve extended combat and vehicle travel.
- Complete Outrider and Snail Trail.
- Complete Ice Cold Killa and Pier 69.
- Enter Pier 69 with armor and adequate ammunition.
Complete the required Woozie sequence before Yay Ka-Boom-Boom
Woozie’s mission branch must be completed before the recommended Yay Ka-Boom-Boom finish. Start with Mountain Cloud Boys, then complete Ran Fa Li and Lure as their markers appear. In Lure, keep the decoy vehicle moving along the marked route so the pursuing Da Nang Boys remain focused on it.
Amphibious Assault requires CJ to have developed Lung Capacity. If Woozie’s mission will not start, swim underwater in safe water, surface before health begins dropping and repeat until the requirement is met. During the mission, approach the target boat underwater, avoid patrols where practical and follow the objective marker once CJ reaches the boat.
The Da Nang Thang follows Amphibious Assault. The opening helicopter section is scripted to end with a crash, after which CJ reaches the freighter with his normal weapons removed. Swim to the marked boarding point, climb onto the ship and use stealth while approaching the first guard. Once a weapon is available, advance through the ship, free the refugees by opening the container and confront the remaining Da Nang Boys and their leader. Return to the refugees and complete the escape objective.
The Da Nang Thang is required for the progression route in this chapter. It also unlocks Yay Ka-Boom-Boom when the other prerequisite, Toreno’s Last Flight, has been completed.
- Complete Mountain Cloud Boys.
- Complete Ran Fa Li and Lure.
- Raise Lung Capacity if Amphibious Assault will not begin.
- Complete Amphibious Assault.
- Complete The Da Nang Thang before starting Yay Ka-Boom-Boom.
Finish Toreno’s Last Flight and Yay Ka-Boom-Boom
Complete Toreno’s Last Flight from its San Fierro marker. Reach the launch area, use the supplied heavy weapon against the helicopter and collect the mission objective after the crash. Use cover against the remaining enemies and save before attempting the mission again if it fails.
Once Toreno’s Last Flight and The Da Nang Thang are complete, begin Yay Ka-Boom-Boom at the Doherty garage. Collect the wired Tampa from the bomb shop and drive it to the Loco Syndicate crack factory. Avoid heavy collisions because destroying the vehicle fails the mission.
At the factory, clear the entrance guards and drive the Tampa to the marked position near the chemical containers. Arm the bomb and leave the blast area immediately. The main gate closes during the escape, so use the available ramp to get over the wall rather than trying to force the gate. After escaping, return to the Doherty garage to finish the mission.
Yay Ka-Boom-Boom opens access to the desert regions and Las Venturas for normal story progression. It is the closing mission of this San Fierro route, but it should not be treated as a substitute for the earlier Woozie branch.
- Complete Toreno’s Last Flight.
- Confirm The Da Nang Thang is complete before starting Yay Ka-Boom-Boom.
- Deliver the wired Tampa without destroying it.
- Escape the factory and return to the Doherty garage.
- Save after Yay Ka-Boom-Boom and confirm the desert route is available.
Keep Driving School, Zero’s RC missions and Wang Cars optional
Driving School in Doherty becomes available after Deconstruction. It is useful practice for later vehicle missions, but passing it is not required for the main story. If you want Wang Cars, earn at least bronze in every Driving School test and complete Yay Ka-Boom-Boom; after the relevant call, purchase the Wang Cars showroom for $50,000.
Wang Cars unlocks optional vehicle missions and is not required to reach End of the Line. Do not buy it if the purchase would leave CJ short of armor, weapons, ammunition or repairs.
Zero’s RC missions are optional and can be postponed. Their completion is not needed for the San Fierro story route described here. Treat their markers separately from the required Woozie, Cesar and garage missions.
- Treat Driving School as optional unless pursuing Wang Cars or extra practice.
- Complete Yay Ka-Boom-Boom and bronze every Driving School test before pursuing Wang Cars.
- Do not spend $50,000 on Wang Cars if required-mission preparation would suffer.
- Leave Zero’s RC missions for later unless pursuing their specific rewards.
Before you move on
- Wear Flowers in Your Hair, 555 We Tip and Deconstruction are complete.
- Photo Opportunity, Jizzy, T-Bone Mendez, Mike Toreno, Outrider, Snail Trail, Ice Cold Killa and Pier 69 are complete.
- Mountain Cloud Boys, Ran Fa Li, Lure, Amphibious Assault and The Da Nang Thang are complete.
- Toreno’s Last Flight and Yay Ka-Boom-Boom are complete.
- The Doherty garage remains available as a save point and vehicle storage location.
- Tierra Robada, Bone County and Las Venturas are accessible for the next story stage.
- A fresh manual save exists at Doherty with money reserved for weapons, armor, ammunition and repairs.
- If Wang Cars is desired, Yay Ka-Boom-Boom is complete, every Driving School test has at least a bronze result, the follow-up call has occurred and the $50,000 purchase is affordable.
San Fierro: Heists, Piloting and Long-Form Setups
Complete the required San Fierro mission strands, destroy the Loco Syndicate operation, finish the Woozie and Triad missions through The Da Nang Thang, and pass Yay Ka-Boom-Boom. Then follow Toreno's desert route through Monster, Highjack, Interdiction and Verdant Meadows. Purchase Verdant Meadows Airstrip and pass every Flight School lesson with at least a bronze medal. After flight school, complete N.O.E., Stowaway, Black Project and Green Goo before treating the chapter as complete. These missions are required for the broader Las Venturas progression and should be finished before Saint Mark's Bistro and the later return-to-Los-Santos endgame route. Zero's RC missions, courier work and the other San Fierro activities are optional for the main story.
Stage from the Doherty garage
Use the Doherty garage as the main San Fierro save and preparation point. Save before each major mission strand, restore health, collect body armor when available and carry an automatic weapon with sufficient ammunition. An assault rifle or submachine gun covers most moving fights, while a sniper rifle is useful for dockside and infiltration sections.
Keep a durable vehicle near the garage before beginning missions that send CJ across the city or into the countryside. If a mission vehicle is destroyed or abandoned, do not assume it will respawn in a useful position; restart the mission or return to a save instead of wasting time searching.
- Save at the Doherty garage before difficult missions.
- Carry armor and an automatic weapon.
- Keep a reliable vehicle nearby.
Finish the Loco Syndicate strand
Complete Photo Opportunity by driving with Cesar to the countryside meeting point and photographing the syndicate members when the group is assembled. Keep the camera centered on the required people until the game registers the photographs, then return to the garage.
Complete Jizzy, T-Bone Mendez and Mike Toreno. In Jizzy, protect the marked woman, eliminate the attackers and pursue the marked target when the objective changes. In T-Bone Mendez, use a vehicle with good acceleration and avoid getting trapped against walls while recovering the stolen packages. In Mike Toreno, search the marked vehicles shown on the radar; inspect the indicated targets rather than wandering through the district.
- Photo Opportunity is complete.
- Jizzy and T-Bone Mendez are complete.
- Mike Toreno is complete and Toreno's location has been established.
Complete Outrider and Snail Trail
In Outrider, collect the supplied sniper rifle and rocket launcher, then move ahead of the protected van. Clear each roadblock before the van reaches it, concentrating on hostile shooters and vehicles. Do not chase a distant enemy so far that the convoy continues without cover. If the van takes heavy damage, restart rather than trying to recover an almost-failed run.
In Snail Trail, follow the journalist without colliding with him or exposing CJ too early. Use parallel streets and maintain enough distance to avoid attracting attention. Once the objective changes, deal with the journalist and informant, then leave the area promptly. If the police begin a prolonged pursuit, use a respray location or a route that breaks line of sight when the mission permits it.
- The Outrider convoy reaches its destination.
- The journalist and informant are dealt with.
- Snail Trail is passed and CJ escapes the police.
Close the Jizzy and Ryder operations
Complete Ice Cold Killa by entering the club, pursuing Jizzy through the building and recovering the phone after eliminating him. Use armor and an automatic weapon because enemies can attack both inside and outside the club.
In Pier 69, use the containers, walls and dock structures as cover while clearing the syndicate forces. When the objective changes, pursue Ryder immediately instead of staying to fight unrelated enemies. Complete Toreno's Last Flight by following the marked helicopter route and using the supplied heat-seeking rocket launcher when the helicopter presents a clear shot. Avoid firing into buildings, terrain or your own vehicle. After the helicopter is destroyed, complete the wanted-level escape and return to the designated location.
- Ice Cold Killa is complete.
- Pier 69 is complete and Ryder is defeated.
- Toreno's Last Flight is passed.
Complete Woozie's Triad missions
Complete Mountain Cloud Boys, Ran Fa Li and Lure while progressing through the other San Fierro strands. Stay close to Woozie during Mountain Cloud Boys and use corners and walls as cover during the ambush. In Ran Fa Li, collect the requested vehicle from the airport area and return it to the garage while avoiding unnecessary collisions. In Lure, keep the bait vehicle moving and follow the route rather than stopping to fight every pursuer.
Amphibious Assault requires an underwater approach. If CJ's lung capacity is low, swim in safe open water before starting and identify places where the route allows him to surface. Follow the objective route without remaining underwater after the breath meter becomes critical.
The Da Nang Thang is a ship assault. Board the vessel, clear the guards, release the refugees and escape using the available boat. This mission is a required prerequisite for Yay-Ka-Boom-Boom.
- Mountain Cloud Boys, Ran Fa Li and Lure are complete.
- Amphibious Assault is complete.
- The Da Nang Thang is complete and the refugees escape.
Pass Yay-Ka-Boom-Boom
Start Yay-Ka-Boom-Boom at the Doherty garage after Toreno's Last Flight and The Da Nang Thang are complete. Collect the explosive car and drive it to the marked crack factory. Clear enough guards to reach the entry point, but keep the car intact because destroying it fails the mission.
Park at the indicated position, arm the bomb and leave immediately. Do not remain inside the factory to fight every guard. The main gate closes after the explosion, so use the ramp and surrounding roadway to escape. Destroy or evade the pursuing vehicle as required, then return to the Doherty garage.
Save after completion. The explosion ends the main San Fierro syndicate operation and can remove related courier opportunities, so this is a useful point for a separate San Fierro completion save.
- The explosive car reaches the factory intact.
- The bomb is armed and CJ escapes before detonation.
- The pursuit and return to Doherty are complete.
Complete Monster, Highjack, Interdiction and Verdant Meadows
Follow Toreno's marker to begin Monster. Drive through every checkpoint in the supplied monster truck, prioritizing controlled turns over risky shortcuts. The mission rewards speed, but missing a checkpoint or rolling the truck is more dangerous than taking a slightly slower line.
In Highjack, ride with Cesar, catch the tanker and match its speed so Cesar can board it. Once the tanker stops, take control and drive it back to the Doherty garage without overturning it. If the tanker becomes badly damaged or stuck, restart promptly.
In Interdiction, drive to the desert drop site, choose the supplied vehicle and collect the rocket launcher. Reach the elevated defense position, shoot down the attacking helicopters and protect the drop operation. Collect the package after the aerial attack and return it to the hideout.
Complete Verdant Meadows by purchasing the abandoned airstrip when the mission directs CJ there. An aircraft does not need to be owned beforehand; the property purchase opens the required Flight School progression.
- Monster, Highjack and Interdiction are complete.
- The Interdiction package reaches the hideout.
- Verdant Meadows Airstrip is purchased.
Pass Learning to Fly with bronze or better
Enter the Flight School marker at Verdant Meadows. Complete all ten lessons with at least a bronze medal in each. Bronze in every lesson is the story requirement; silver and gold medals only provide better optional aircraft rewards and are not needed to unlock the next missions.
Use small control corrections during takeoff, turns and landings. Begin braking early for runway approaches, line up before descending and avoid overcorrecting when the aircraft starts to bank. For helicopter tests, make gradual movements and stabilize before entering a marker. If a lesson fails, repeat it immediately while the route and timing are still familiar.
If the school becomes frustrating, save first and take a break through optional activities, but do not substitute Zero's RC missions for Flight School. Air Raid, Supply Lines and New Model Army are optional San Fierro missions and do not replace the required pilot training.
- Every Flight School lesson has at least a bronze medal.
- The pilot licence and the airstrip mission markers are available.
- Zero's RC missions have not been mistaken for required story progress.
Complete N.O.E. after flight school
Start N.O.E. from the airstrip after passing Flight School. Take the supplied aircraft and fly toward the marked delivery area while staying low enough to avoid the radar detection threshold. Follow the coastline, valleys and open terrain where possible instead of crossing directly over dense settlements or high ground.
Drop the package at the marked destination, then return to Verdant Meadows using the same low-altitude approach. Watch the aircraft's damage and avoid unnecessary turns near trees, towers and hills. If the radar warning rises too far, reduce altitude and use terrain to break exposure; if the plane is already burning, restart rather than attempting a doomed return.
- The delivery is made at the marked location.
- CJ returns to the airstrip without triggering a mission failure.
- N.O.E. is marked passed.
Complete Stowaway without losing the aircraft
Begin Stowaway at Verdant Meadows. Mount the supplied motorcycle and use the ramp to catch the departing cargo plane. Keep the bike centered, avoid the explosive barrels and do not brake on the ramp. If the bike misses the plane or is destroyed, restart the mission; there is no useful recovery once the aircraft has escaped.
After boarding, move through the cargo plane, eliminate the agents and plant the bomb at the marked location. Leave through the rear and use the parachute when instructed. Land safely and complete the escape objective. The mission does not require a perfect landing, but opening the parachute early enough to control the descent prevents an avoidable death.
- CJ boards the cargo plane.
- The bomb is planted.
- CJ escapes and Stowaway is passed.
Infiltrate Area 69 in Black Project
Black Project begins at the desert airstrip and sends CJ to Area 69. Use the supplied sniper rifle to remove nearby guards and watch the towers as well as ground patrols. Thermal goggles help identify targets in dark areas. Move between cover points and avoid crossing open ground while several guards are active.
Reach the blast-door control, enter the base and follow the interior route downward. A scientist supplies the keycard needed to continue; do not kill him before collecting it. Clear the stairs from a distance where possible, collect the jetpack in the lower section and fly out of the base. Return the jetpack to The Truth to complete the mission.
If CJ dies inside Area 69, restart from the beginning and use a slower approach. The mission has no convenient mid-mission recovery, so armor, patience and controlled use of the sniper rifle are more valuable than rushing.
- The Area 69 entrance and blast-door route are cleared.
- The keycard is obtained and the Black Project is collected.
- CJ returns the jetpack to The Truth.
Finish Green Goo and close the desert chain
Start Green Goo after Black Project. Use the jetpack to reach the moving military train and approach from the side rather than directly behind it. Shoot hostile soldiers first when they threaten CJ, then target the marked crates on the train cars. Continue checking the crates until the green goo is found.
Collect the goo and fly back to The Truth. Keep enough height to clear terrain but do not make wide, slow turns while enemies are firing. If CJ falls or the jetpack is destroyed, restart the mission; the objective cannot be completed without recovering the cargo.
Green Goo completes the required post-flight-school desert chain. Save after the mission and confirm that the next Las Venturas story markers and phone calls are available. Finish this chain before beginning Saint Mark's Bistro as part of the main-story route, and do not move into the Las Venturas endgame while leaving any of these four airstrip missions incomplete.
- The green goo is recovered from the train.
- The cargo is returned to The Truth.
- N.O.E., Stowaway, Black Project and Green Goo are all marked passed.
- A manual save exists after Green Goo before continuing through Las Venturas.
Before you move on
- Photo Opportunity, Jizzy, T-Bone Mendez, Mike Toreno and Outrider are complete.
- Snail Trail, Ice Cold Killa, Pier 69 and Toreno's Last Flight are complete.
- Mountain Cloud Boys, Ran Fa Li, Lure, Amphibious Assault and The Da Nang Thang are complete.
- Yay-Ka-Boom-Boom is marked passed and the Doherty garage remains available as a save location.
- Monster, Highjack, Interdiction and Verdant Meadows are complete.
- Verdant Meadows Airstrip has been purchased.
- All Flight School lessons have at least bronze medals.
- N.O.E., Stowaway, Black Project and Green Goo are marked passed.
- A manual save exists after Green Goo before Saint Mark's Bistro and the remaining Las Venturas story missions.
- The next Las Venturas mission markers or required phone calls are available, confirming that the chapter's progression gates have been cleared.
References for this chapter
- GTATrilogy_GTASA_PS2_Manual_M01 — Official PlayStation 2 manual
- Grand Theft Auto: San Andreas Guide and Walkthrough — GameFAQs
- Grand Theft Auto: San Andreas - Guide and Walkthrough - PlayStation 2 - GameFAQs
- Grand Theft Auto: San Andreas - Guide and Walkthrough - PlayStation 2, A_I_e_x
- Yay Ka-Boom-Boom - StrategyWiki
- Stowaway - GTA San Andreas Mission Guide and Walkthrough
- Verdant airstrip unlocks - Grand Theft Auto: San Andreas Q&A
- Learning to Fly - Grand Theft Wiki
- Pilot School - Grand Theft Wiki
- Grand Theft Auto: San Andreas - Featured Guide
Las Venturas: Casino Work and Heist Setup
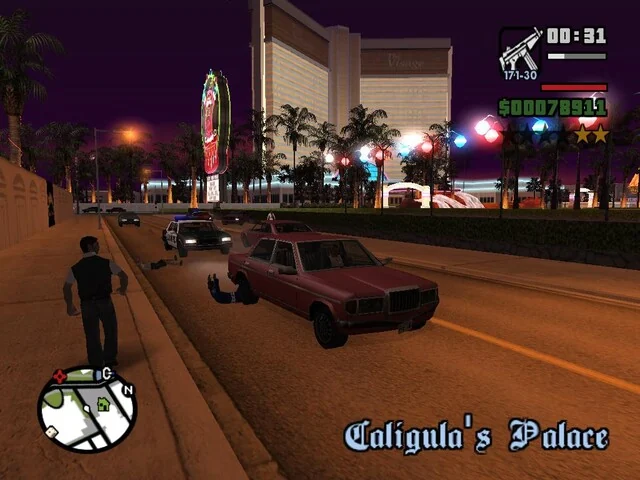
Finish the required desert and airstrip progression, then work through the Las Venturas casino, Mafia, C.R.A.S.H. and Madd Dogg strands. The Caligula's Palace robbery requires five preparation missions and Millie's keycard, but it is optional for reaching End of the Line and required for the official 100 percent statistic. On the original PlayStation 2 release, the heist team and jobs are scripted; there is no modern crew-selection screen.
Finish the desert and airstrip prerequisites
Before diagnosing missing Las Venturas markers, complete Monster, Highjack, Interdiction and Verdant Meadows. Purchase Verdant Meadows Airstrip, complete Learning to Fly, and then finish N.O.E. and Stowaway. The remaining airstrip missions are Black Project and Green Goo. Complete both before treating the desert campaign as finished.
Black Project sends CJ into Area 69 to steal the military jetpack. Follow the marked route into the base, reach the underground facility, take the jetpack and escape through the objective route. Once the alarm is active, do not waste time clearing every soldier; prioritize reaching the extraction point. In Green Goo, use the jetpack to board the moving freight train, search the marked containers for the green goo and return it to Verdant Meadows Airstrip.
These missions are required story progress, not optional flight-school extras. Save after Green Goo so the completed airstrip state is easy to verify before beginning the Las Venturas strands.
- Monster, Highjack, Interdiction and Verdant Meadows are complete.
- Learning to Fly, N.O.E. and Stowaway are complete.
- Black Project and Green Goo are complete.
- Verdant Meadows Airstrip is owned and its story missions are cleared.
Begin the Four Dragons and desert-linked mission strands
At the Four Dragons Casino, complete Fender Ketchup, Explosive Situation and You've Had Your Chips. In Fender Ketchup, keep the passenger alive while filling the scare meter; use controlled turns and avoid unnecessary collisions. In Explosive Situation, travel to Hunter Quarry, take the marked dumper, break open the dynamite crates, collect all four charges and escape through the marked Sanchez route. In You've Had Your Chips, enter the plastics factory and destroy the marked injection-molding machines before returning to the casino.
Complete Don Peyote when its marker is available. Collect Kent Paul and Maccer in the desert, take them to the snake farm, survive the attack and deliver them to Caligula's Palace. This mission introduces the Ken Rosenberg and Caligula's Palace strands, which must be advanced separately from Woozie's casino preparations.
Do not assume that completing only the first Four Dragons missions unlocks the robbery. The heist has its own preparation chain and separate story prerequisites.
- Fender Ketchup is complete.
- All four charges were collected and delivered in Explosive Situation.
- You've Had Your Chips and Don Peyote are complete.
- The Caligula's Palace and Four Dragons mission markers are being checked separately.
Advance the Mafia, C.R.A.S.H. and Madd Dogg missions
Complete Intensive Care and The Meat Business for Ken Rosenberg. In Intensive Care, identify and ram the ambulance carrying Johnny Sindacco until the mobsters abandon it, eliminate the attackers and deliver Johnny to the meat factory. In The Meat Business, enter the factory with armor and a close-range weapon, protect Ken and clear the attackers without allowing him to die.
Complete Misappropriation and High Noon for C.R.A.S.H. Misappropriation requires taking the dossier from the marked federal agent. High Noon is the desert pursuit that follows the confrontation with Frank Tenpenny and Eddie Pulaski; bring armor and a reliable vehicle because the chase can become difficult if CJ takes heavy damage.
Complete Madd Dogg by reaching him before he jumps, positioning the pickup truck beneath him and taking him to the hospital. Complete Freefall when its marker becomes available. Take the appropriate aircraft from the airport, intercept the target plane and land safely after the aerial pursuit. Mission markers can be tackled in more than one available order, but all of these strands must be completed before the later return-to-Los-Santos sequence.
- Intensive Care and The Meat Business are complete.
- Misappropriation and High Noon are complete.
- Madd Dogg and Freefall are complete.
- CJ has access to the airport and has replenished armor and ammunition.
Complete Saint Mark's Bistro
Complete Saint Mark's Bistro for Salvatore Leone. Travel from Las Venturas to Liberty City, clear the restaurant and return to San Andreas. This is a required story mission for the Las Venturas progression, although it is separate from Woozie's five casino-heist preparations.
Make a separate save before starting Saint Mark's Bistro. If the later robbery marker does not appear, verify the desert prerequisites, Saint Mark's Bistro, the five preparations and Millie's keycard rather than repeating unrelated missions. The original PlayStation 2 release does not use a selectable heist crew, so there is no crew-management requirement to troubleshoot.
- Saint Mark's Bistro is complete.
- Black Project and Green Goo were completed earlier.
- A separate save exists before the final casino preparation chain.
Complete the five casino-heist preparations
At the Four Dragons Casino, complete Architectural Espionage, Key to Her Heart, Dam and Blast, Cop Wheels and Up, Up and Away!. These are the five preparation missions associated with Breaking the Bank at Caligula's.
In Architectural Espionage, obtain a camera, enter the planning department, trigger the fire-alarm distraction, photograph the blueprints and escape the police. In Key to Her Heart, follow Millie Perkins, obtain the required disguise and complete the date sequence at her home. Continue dating Millie until CJ receives the casino keycard. The original game also permits an alternative route in which Millie is killed and the keycard is collected from her house after the mission; make a separate save first if you want to preserve the dating route.
In Dam and Blast, fly to the dam, parachute to the marked landing area, move through the facility and plant explosives on all five marked generators. Leave promptly after the final charge. In Cop Wheels, steal all four marked HPV-1000 police motorcycles and deliver them to the waiting Packer. Take the motorcycles one at a time and avoid collisions that can destroy one before delivery.
In Up, Up and Away!, first obtain the required military vehicle and use it to enter KACC Military Fuels Depot. Steal the marked Leviathan, then fly to the Securicar in the depot area. Use the Leviathan's magnet to lift the Securicar and transport it to Verdant Meadows Airstrip. Keep the load stable with small helicopter movements, lower the Securicar into the marked area and land the Leviathan as directed. Do not substitute Cargobob or any remaster-specific vehicle terminology for the Leviathan used by the original game.
- Architectural Espionage is complete.
- Key to Her Heart is complete and Millie's casino keycard has been obtained.
- All five generators were sabotaged in Dam and Blast.
- All four HPV-1000 motorcycles were delivered in Cop Wheels.
- The marked Leviathan was stolen from KACC Military Fuels Depot and used to carry the Securicar to Verdant Meadows Airstrip.
Prepare for and decide on the robbery
The original PlayStation 2 version does not provide a free-form heist-planning screen with selectable drivers, gunmen or hackers. The participants and their roles are scripted. Preparation means completing the required missions, obtaining Millie's keycard, carrying armor and ammunition, and keeping a clean save rather than optimizing a custom crew.
Breaking the Bank at Caligula's becomes available after the relevant Las Venturas prerequisites, the five preparations and the keycard requirement have been satisfied. Before entering the Four Dragons marker, restore health, buy body armor and stock an assault rifle, submachine gun or combat shotgun. The mission supplies its required equipment, including the forklift and escape vehicles.
During the robbery, use the disguise route to enter Caligula's, swipe Millie's card at the staff entrance, throw tear gas through the generator-room vent and use the second swipe-card door. Put on the night-vision goggles when the power is cut, operate the forklift to raise the service-bay shutter and stay with the team while clearing the route to the vault. Follow the timed objective markers and prioritize extraction over unnecessary fights. Protect the forklift, Securicar, motorcycles and the required members of the scripted team.
Breaking the Bank at Caligula's is optional for the main story. CJ can continue to A Home in the Hills, then Vertical Bird, Home Coming and the final Los Santos missions without completing the robbery. It is required for the game's official 100 percent completion statistic, so complete it before leaving the casino arc if pursuing 100 percent.
- All five preparations are complete.
- Millie's casino keycard is in CJ's possession.
- CJ has full or near-full health, body armor and reserve ammunition.
- Breaking the Bank at Caligula's is complete if pursuing official 100 percent completion.
- A separate save exists after the robbery or immediately before continuing the story.
Before you move on
- Monster, Highjack, Interdiction, Verdant Meadows, Learning to Fly, N.O.E., Stowaway, Black Project and Green Goo are complete.
- Fender Ketchup, Explosive Situation, You've Had Your Chips and Don Peyote are complete.
- Intensive Care, The Meat Business, Misappropriation, High Noon, Madd Dogg, Freefall and Saint Mark's Bistro are complete.
- Architectural Espionage, Key to Her Heart, Dam and Blast, Cop Wheels and Up, Up and Away! are complete.
- Millie's casino keycard has been obtained.
- Breaking the Bank at Caligula's is complete if pursuing the official 100 percent checklist.
- The game has returned CJ to free roam and a separate save exists after the casino work.
- A Home in the Hills is available as the next major Las Venturas story gate; after completing it, Vertical Bird becomes available before the return-to-Los-Santos finale.
References for this chapter
- Grand Theft Auto: San Andreas Guide and Walkthrough — GameFAQs
- Story Missions Guide - Las Venturas - GTA-SanAndreas.com
- Rewards & Unlocks Guide, GTA-SanAndreas.com
- Up, Up and Away! - GTA Wiki
- Up, Up and Away! - StrategyWiki
- Breaking the Bank at Caligula's - GTA Wiki
- Grand Theft Auto: San Andreas — Breaking the Bank at Caligula's — StrategyWiki
- Grand Theft Auto: San Andreas - 100% Completion Walkthrough - PlayStation 2
- A Home in the Hills - Grand Theft Wiki
- Vertical Bird - GTA Wiki
- GTATrilogy_GTASA_PS2_Manual_M01 — Official PlayStation 2 manual
Las Venturas: Execute Large-Scale Missions and Secure Payoff
Finish the remaining Las Venturas missions through Saint Mark's Bistro, decide whether to complete the optional Caligula's Palace robbery, then pass A Home in the Hills and Vertical Bird. This route applies to the original North American PlayStation 2 release of Grand Theft Auto: San Andreas and avoids mechanics from later remasters.
Finish the Las Venturas story missions through Saint Mark's Bistro
Work through the available yellow and character markers in Las Venturas rather than waiting for one rigid sequence. The surrounding mission set includes Woozie's Fender Ketchup and Explosive Situation, Ken Rosenberg's Don Peyote, Intensive Care, The Meat Business and Fish in a Barrel, Madd Dogg, and the C.R.A.S.H. missions Misappropriation, Freefall and High Noon. Complete the available markers until Saint Mark's Bistro opens at Caligula's Palace.
For Fender Ketchup, keep the vehicle moving and use sharp turns without destroying the car or killing the man attached to its hood. In Explosive Situation, reach the quarry, recover and defuse the explosives, then use the Sanchez route out when the normal exit is blocked. Don Peyote requires rescuing the stranded men and returning them safely, while Intensive Care is easier if you avoid unnecessary collisions during the ambulance escape.
Freefall is safer when you approach the target aircraft from behind and maintain control during the interception. In Misappropriation, use a dependable automatic weapon and follow the current objective rather than wasting ammunition on an aircraft before the mission requires it. During High Noon, pursue Pulaski after the cemetery confrontation, damage or disable his vehicle, and finish the encounter after he leaves it.
Madd Dogg is one of the more failure-prone missions in this section. Position the pickup truck beneath the mansion roof before Madd Dogg falls, keeping it centered so he lands in the bed. After the rescue, drive smoothly to the hospital. Avoid hard turns, collisions and improvised shortcuts that can injure him or destroy the truck. Save and restock armor and ammunition after completing the mission.
- Complete the available Las Venturas missions through Freefall, High Noon and Madd Dogg.
- Carry body armor and a reliable automatic weapon before major firefights.
- Save after difficult missions, especially Madd Dogg and High Noon.
- Continue until Saint Mark's Bistro is available at Caligula's Palace.
Complete the optional casino preparations only for the full heist route
Breaking the Bank at Caligula's is optional for reaching A Home in the Hills, Vertical Bird, Home Coming and End of the Line. Complete it if you want the heist reward, the associated mission completion, or official 100% completion. The robbery counts toward the game's 100% statistic even though the basic story ending does not require it.
The five preparations are Architectural Espionage, Key to Her Heart, Dam and Blast, Cop Wheels and Up, Up and Away! Architectural Espionage requires obtaining and photographing the casino plans. Key to Her Heart establishes the Millie keycard route; keep Millie alive and continue the dating route if you intend to obtain the keycard normally. The mission can also be handled through the game's alternative keycard method, but do not accidentally remove the keycard opportunity before the robbery.
Dam and Blast places explosives at the dam. Cop Wheels is timed, so collect the marked police motorcycles one at a time and deliver them without unnecessary crashes. In Up, Up and Away!, enter the military area, steal the Leviathan, and use its underside magnet to lift the marked Securicar and carry it to Verdant Meadows. The Leviathan, not a Cargobob, is the original PS2 mission vehicle.
Before starting Breaking the Bank at Caligula's, make sure the five preparations are complete and Millie's keycard is available. Keep a separate save before the preparation chain and another before the robbery so the required story route remains protected if the optional heist must be retried.
- Complete all five preparations only when pursuing the robbery or 100% completion.
- Use the Leviathan in Up, Up and Away! to lift the Securicar to Verdant Meadows.
- Obtain Millie's keycard before beginning the robbery.
- Keep a separate pre-heist manual save.
- Do not treat the robbery as mandatory campaign progress.
Pass Saint Mark's Bistro completely
Start Saint Mark's Bistro at Salvatore Leone's marker in Caligula's Palace once the required Las Venturas story gates are complete. CJ travels to Liberty City for the restaurant assault. Inside the bistro, use doorways, walls and interior corners as cover instead of standing in the center of open rooms. Prioritize enemies with shotguns or automatic weapons, then advance through the restaurant and rear areas until the objective updates.
The mission is not complete when the restaurant firefight ends. Return to the aircraft and fly back to Las Venturas. Approach the airport under control, reduce speed before lining up with the runway and land without damaging the aircraft. Wait for the mission-passed confirmation before leaving or saving. Saint Mark's Bistro is the required Las Venturas endpoint before the return-to-Los-Santos arc; the optional casino robbery is not required between this mission and A Home in the Hills.
- Clear the restaurant and rear areas in Liberty City.
- Return to the aircraft after the firefight.
- Land back at Las Venturas Airport.
- Wait for the mission-passed confirmation before saving.
- Keep the optional robbery separate from the mandatory story route.
Reclaim Madd Dogg's mansion in A Home in the Hills
Start A Home in the Hills from the Four Dragons Casino. CJ and the Triads parachute toward Madd Dogg's mansion in Los Santos. Open the parachute with enough height to steer toward the roof or helipad. If the landing is imperfect, move toward the mansion and join the assault rather than wandering away from the compound.
Clear the rooftop attackers, then enter the mansion and advance room by room. Use walls, doorways and stairwell corners as cover. Collect armor or health pickups only when doing so does not expose CJ to unnecessary fire. The mission requires eliminating Big Poppa after he retreats through the mansion and escapes in a vehicle. Take a suitable chase vehicle, stay close without repeatedly crashing, and finish the pursuit.
Wait for the mission-passed confirmation after Big Poppa is eliminated. Madd Dogg's mansion becomes a usable save location after the mission. Save there, replenish armor and ammunition, and then look for the Toreno marker that starts Vertical Bird.
- Begin with full health, body armor and strong automatic weapons.
- Land near the mansion roof or helipad.
- Clear the mansion using cover and controlled room-to-room movement.
- Finish the Big Poppa pursuit.
- Save at the reclaimed mansion before Vertical Bird.
Complete Vertical Bird and confirm the return-to-Los-Santos gate
Start Vertical Bird at Madd Dogg's mansion. Take the supplied speedboat toward the amphibious assault ship at Easter Basin Naval Station. Stop near the rear opening and swim inside before the access gate closes. CJ receives a knife and silenced pistol for the approach, but stealth is not required for the entire mission; once detected, move decisively toward the objectives.
Reach the control area and disable all SAM sites before taking a Hydra. Destroy the two hangars as required, then board the Hydra. After takeoff, deal with the pursuing Hydras. Keep the aircraft level, use broad turns and avoid abrupt low-altitude corrections while lining up missile attacks.
Fly to the marked area at Sherman Reservoir and destroy every spy boat. Make controlled passes over the water and avoid rocks or steep turns. Once the boats are destroyed, return to Verdant Meadows Airfield, land on the runway and taxi the Hydra into the marked hangar. The mission is not complete merely because CJ steals the aircraft; the spy-boat objective and the final hangar parking must both register.
Wait for the mission-passed confirmation, then save. Vertical Bird awards the Hydra at the airstrip and opens Home Coming at Madd Dogg's mansion. If Home Coming is absent, confirm that every spy boat was destroyed, the Hydra entered the marked hangar and the mission-passed message appeared before leaving the airstrip.
- Reach the assault ship by boat and enter through the rear opening.
- Disable the SAM sites before stealing the Hydra.
- Destroy the pursuing Hydras.
- Destroy all marked spy boats at Sherman Reservoir.
- Land and park the Hydra in the Verdant Meadows hangar.
- Wait for mission completion and save.
- Confirm that Home Coming is available at Madd Dogg's mansion.
Before you move on
- The required Las Venturas missions through Saint Mark's Bistro are complete.
- A Home in the Hills has been passed and Madd Dogg's mansion is reclaimed.
- Vertical Bird has been passed after the SAM sites, pursuing Hydras and spy boats were handled.
- The Hydra has been landed and parked in the Verdant Meadows hangar.
- Home Coming is available at Madd Dogg's mansion.
- If pursuing 100% completion, the five preparations, Millie's keycard and Breaking the Bank at Caligula's are complete.
- A post-Vertical Bird manual save exists, with a separate pre-heist or pre-final-act save retained.
References for this chapter
- Grand Theft Auto: San Andreas Guide and Walkthrough — GameFAQs
- Grand Theft Auto: San Andreas/Vertical Bird — StrategyWiki
- Breaking the Bank at Caligula's - GTA San Andreas Mission Guide & Walkthrough
- Grand Theft Auto: San Andreas/100 percent checklist — StrategyWiki
- GTATrilogy_GTASA_PS2_Manual_M01 — Official PlayStation 2 manual
Return to Los Santos: Rebuilding and Final Alliances
After Vertical Bird, CJ begins the final Los Santos rebuilding arc. Complete Home Coming, Beat Down on B-Dup, Grove 4 Life and Cut Throat Business, then finish Riot and Los Desperados. End of the Line becomes available after Los Desperados and at least 35 percent of Los Santos gang territory is controlled by Grove Street. Capture territory before Riot when possible, because the post-Riot city is more dangerous for free-roaming gang wars. Keep a pre-finale save, replenish CJ’s equipment and protect Sweet, Cesar and the recruited Grove members during the mission-specific firefights.
1. Prepare after Vertical Bird and start Home Coming
Vertical Bird is the final Las Venturas mission before the return to Los Santos. Once it is complete, look for the Home Coming marker at Madd Dogg’s Crib in Mulholland. The police station is not the starting location; it is the first destination inside the mission.
Make a manual save before entering the marker and retain an earlier Las Venturas save until this entire sequence is finished. Refill health, body armour and ammunition. A dependable assault rifle, submachine gun or combat shotgun is useful, but no specific personal vehicle is required to unlock or start these missions.
- Vertical Bird is complete
- Home Coming is available at Madd Dogg’s Crib
- A manual backup save is present
- CJ has full health, body armour and adequate ammunition
- An earlier Las Venturas save has been retained
2. Complete Home Coming and reclaim Ganton
Begin Home Coming at Madd Dogg’s Crib and drive to the Los Santos Police Department in Pershing Square. Collect Sweet, return to Grove Street and follow the mission instructions to remove the drug dealers occupying the neighbourhood.
After the dealers are eliminated, provoke the Ballas in the marked territory. Survive the three attack waves while remaining close enough to support Sweet. Use walls, house corners and parked vehicles as cover, and prioritise enemies carrying automatic weapons. Do not chase distant targets so far that Sweet is left exposed. The mission ends once the territory is reclaimed and the Grove Street conclusion plays.
- Sweet is collected from the police station
- The Grove Street drug dealers are eliminated
- All three Ballas attack waves are defeated
- Ganton is returned to Grove Street control
- The game is saved after Home Coming
3. Finish Beat Down on B-Dup, Grove 4 Life and Cut Throat Business
Home Coming opens the next return missions. Beat Down on B-Dup is the prerequisite for Grove 4 Life, so complete Beat Down first when both markers are present. Cut Throat Business can be completed as its marker becomes available. All three missions must be finished before Riot.
For Beat Down on B-Dup, take Sweet to Glen Park and begin the gang war in the marked area. Survive the three waves, then eliminate the Ballas outside B Dup’s house and enter when the game directs you. Keep Sweet nearby and use cover rather than pursuing enemies into open streets.
Grove 4 Life requires two scripted territory captures in Idlewood. Drive Sweet to the first marked area, start the gang war and survive it. Then move to the second marked Idlewood territory and capture it as well. These captures are mission objectives, not optional free-roaming wars. Return Sweet to Grove Street after both areas are secured.
For Cut Throat Business, take Madd Dogg to the location shown by the radar and follow the pursuit sequence involving OG Loc. Keep the chase vehicle under control, avoid unnecessary collisions and follow the mission route instead of attempting risky shortcuts. The mission ends after Madd Dogg’s stolen material is recovered.
- Beat Down on B-Dup is complete
- Glen Park is Grove Street territory
- Both scripted Idlewood captures in Grove 4 Life are complete
- Grove 4 Life is complete
- Cut Throat Business is complete
- A save exists before Riot
4. Complete Riot and prepare for Los Desperados
Start Riot after Beat Down on B-Dup, Grove 4 Life and Cut Throat Business are complete. The mission is a scripted drive in which CJ takes Sweet back to Grove Street during the unrest. Follow the radar route, keep moving through dangerous streets and avoid needless collisions with burning vehicles or traffic.
Riot does not replace the territory requirement for End of the Line. After the mission, save and restock before Los Desperados. If you have not yet captured at least 35 percent of Los Santos territory, you can complete the required gang wars after Riot, although capturing territory before Riot is generally less troublesome.
- Beat Down on B-Dup, Grove 4 Life and Cut Throat Business are complete
- Sweet reaches Grove Street
- Riot is completed successfully
- A post-Riot save is made
- Health, armour and ammunition are replenished
5. Recruit two Grove members and complete Los Desperados
Start Los Desperados from the available Sweet-area marker after Riot. Before leaving for Unity Station, recruit two Grove Street members. Stand near an eligible Grove member on foot and press Up on the PlayStation 2 directional pad. Repeat for a second member, then enter a vehicle with enough passenger space.
Drive the group to Unity Station and meet Cesar and the Aztecas. Follow the mission group through El Corona rather than advancing alone. The fight moves through several Vagos positions, including areas with heavy weapons. Use walls and building corners for cover, reload before pushing into the next area and target enemies threatening Cesar first.
Cesar can fail the mission if he dies, so do not leave him exposed while chasing distant Vagos. In the later sections, watch for the Vagos using a flamethrower or rocket launcher. Clear the marked groups, stay with the allied characters and continue through the final alley or house area until the completion scene plays.
- Two Grove Street members are recruited before departure
- The recruited members reach Unity Station
- Cesar and the Aztecas reach the mission area
- The marked Vagos positions are cleared
- Cesar survives
- Los Desperados is completed
6. Meet the territory requirement and unlock End of the Line
Los Desperados itself does not require at least 35 percent Los Santos territory control. The threshold applies when the game checks whether End of the Line can begin. If the mission marker does not appear after Los Desperados, start gang wars in Ballas or Vagos territory until the Statistics screen shows at least 35 percent Los Santos territory under Grove Street control.
To start a gang war, attack rival gang members while CJ is on foot inside enemy-controlled territory. Survive the three incoming waves and verify the area changes to Grove Street control on the map. Capture only what is necessary; full control of Los Santos is not required for the story ending. San Fierro and Las Venturas territories do not count toward this specific requirement.
Once Home Coming, Beat Down on B-Dup, Grove 4 Life, Cut Throat Business, Riot and Los Desperados are complete, and the Statistics screen shows at least 35 percent Los Santos territory controlled, save at Sweet’s house. End of the Line then becomes available from Sweet’s marker. Replenish health, armour and ammunition before starting it, and preserve the clean pre-finale save.
- All six return-arc missions are complete
- The Statistics screen shows at least 35 percent Los Santos territory under Grove control
- End of the Line is available at Sweet’s house
- A clean pre-finale manual save exists
- An earlier backup save remains available
- CJ has full health, body armour and sufficient ammunition
Before you move on
- Vertical Bird was completed before the return arc began.
- Home Coming, Beat Down on B-Dup, Grove 4 Life, Cut Throat Business, Riot and Los Desperados are complete.
- Ganton and Glen Park are Grove Street territory, and Grove 4 Life’s two required Idlewood captures were completed.
- The Statistics screen shows at least 35 percent of Los Santos territory controlled by Grove Street.
- End of the Line is available at Sweet’s house.
- A pre-finale manual save and an earlier backup save are both preserved.
- CJ has full health, body armour and sufficient ammunition before beginning the final chapter.
References for this chapter
- Grand Theft Auto: San Andreas - 100% Completion Walkthrough - PlayStation 2
- Grand Theft Auto: San Andreas - Guide and Walkthrough - PlayStation 2 - GameFAQs
- Grand Theft Auto: San Andreas/Grove 4 Life — StrategyWiki
- Grand Theft Auto: San Andreas/Los Desperados — StrategyWiki
- Grand Theft Auto: San Andreas/End Of The Line — StrategyWiki
- GTA San Andreas 100% Completion Guide & Full Checklist
Final Act Missions: Key Boss Fights and 'End of the Line' Prep
The final story route is Riot, Los Desperados, and End of the Line. Prepare a separate pre-finale save, secure health, armor, and ammunition, and expect a dangerous citywide riot, a Vagos assault with Cesar’s group, a territory requirement, a multi-floor attack on Big Smoke’s fortress, a burning-building escape, and the final pursuit of Tenpenny’s fire truck on the original PlayStation 2 release.
Prepare before Riot
Riot begins at Madd Dogg’s mansion after the preceding Las Venturas and Los Santos story requirements are complete. Before entering the red marker, create a manual safehouse save and keep an earlier pre-finale save untouched. Restore health, obtain body armor, and carry a dependable automatic weapon such as an assault rifle or carbine with ample ammunition. A shotgun or another close-range weapon is useful in the fortress later, but do not rely on it as your only firearm.
Riot makes Los Santos unusually dangerous. Pedestrians and gang members may be armed, vehicles can explode, and traffic can block the route. Drive defensively to each objective, avoid stopping beside burning cars, and do not turn the mission into a citywide firefight. Prioritize returning Sweet to Grove Street instead of chasing enemies away from the marked route. Save again after the mission succeeds.
- Create a manual save before Riot.
- Restore health and collect body armor.
- Carry an automatic weapon with sufficient ammunition and a close-range backup.
- Keep a separate save from before the final-act chain.
- Save again after Riot is completed.
Complete Riot without wasting resources
Follow the map markers and keep Sweet with you during the required driving sections. Shoot only immediate threats that block the route or endanger the mission vehicle. Chasing riot enemies down side streets creates unnecessary exposure to exploding traffic, hostile pedestrians, and blocked roads.
When returning toward Grove Street, use open roads and give burning vehicles a wide berth. If the mission vehicle begins smoking, avoid collisions and aggressive shortcuts. The mission is passed by reaching the required destination with Sweet, not by clearing the surrounding streets. After the completion message appears, restock weapons and armor before starting Los Desperados.
- Keep Sweet and the required vehicle safe.
- Avoid unnecessary combat during the riot travel.
- Return to Grove Street without abandoning the objective route.
- Restock and save before Los Desperados.
Recruit support and handle Los Desperados
Los Desperados starts at Sweet’s house. Before leaving for Unity Station, recruit two Grove Street gang members. Choose nearby members carrying firearms so they can contribute during the Vagos fight. At Unity Station, meet Cesar’s Aztecas group and move with Cesar, Gal, Sunny, and Hazer toward the Vagos-controlled area.
Stay near Cesar and the active group while clearing the streets and alleyways. Use walls, corners, and parked vehicles as cover. Prioritize Vagos who are attacking Cesar or blocking the group’s advance, then check side entrances before moving forward. Hazer is scripted to be wounded and removed from the active group during the mission. His injury is part of the mission sequence, not a failure condition, and he is not a character the player must keep alive. Continue with Cesar, Gal, Sunny, and the Grove Street recruits after Hazer is taken out of the action.
The later Vagos wave includes stronger threats, including enemies with heavier weapons. Do not sprint ahead into the next block. Let the group reach the area, use cover to reduce incoming fire, and advance only after the immediate wave is under control. The mission fails if CJ dies, is arrested, or the required mission objective is lost; Hazer’s scripted injury does not by itself fail the mission.
- Recruit two armed Grove Street members.
- Meet Cesar’s group at Unity Station.
- Remain close to Cesar and the active group.
- Use cover in the alleys and around the Vagos-held houses.
- Treat Hazer’s scripted injury as part of the mission, not as a player-protect objective.
- Keep Cesar, Gal, Sunny, and the active mission group moving forward.
- Save after Los Desperados.
Reach the territory requirement
After Los Desperados, End of the Line requires Grove Street to control at least 35 percent of Los Santos gang territory. Check the territory percentage in the statistics screen. The relevant requirement is the current total after Los Desperados, so reaching 35 percent earlier does not guarantee that the final marker will appear if territory has been lost.
If the marker at Sweet’s house is unavailable, enter Ballas- or Vagos-controlled territory and attack opposing gang members until a gang war starts. Survive the three waves while using walls, corners, and buildings as cover. Capture areas near Grove Street first so you have familiar routes and nearby safehouses. Replenish health and armor between wars, then save once the statistics screen shows at least 35 percent.
The riot makes these territory fights more troublesome because traffic, police, armed pedestrians, and exploding vehicles can interfere. Before starting Riot, it is safer to build the territory total as close to or above the requirement as possible, but always verify the percentage again after Los Desperados.
- Check the current Los Santos territory percentage.
- Reach at least 35 percent Grove Street control.
- Survive each three-wave gang war.
- Save after satisfying the requirement.
- Restore health and armor before entering Sweet’s final marker.
Breach Big Smoke’s fortress
Start End of the Line with full health, body armor, and a strong automatic weapon. Drive with Sweet to the marked location in East Los Santos. When instructed, take the nearby SWAT tank and use it to ram through the reinforced entrance. Keep the tank until the breach objective is complete; do not leave it behind or destroy it before entering the fortress.
After entering, move upward through the building floor by floor. Use doorways, stairwell corners, and room entrances as cover. Fire in controlled bursts and let enemies step into your line of fire instead of crossing open rooms unnecessarily. Watch balconies, landings, and side rooms for enemies outside your immediate view. Secure each room before collecting armor or weapon pickups, and preserve armor for the later escape rather than trading damage in the open.
- Drive to Big Smoke’s fortress with Sweet.
- Take the SWAT tank and use it to break through the entrance.
- Keep the tank intact until the breach is complete.
- Clear the fortress methodically from the lower floors toward the fourth floor.
- Collect recovery items only after the immediate room is secure.
Defeat Big Smoke and escape the burning building
Big Smoke’s encounter is a sustained firefight rather than a single quick exchange. Keep cover between CJ and the enemies, fire during openings, and avoid standing in the open to trade damage. When Smoke switches off the lights, move to the indicated lower-window corner and collect the thermal goggles. They reveal heat signatures and allow you to identify enemies during the dark firefight.
After Big Smoke is defeated, Tenpenny causes an explosion and the building begins to burn. Use the night-vision goggles obtained during the scene with Big Smoke for the escape. Thermal goggles and night-vision goggles are separate equipment types: thermal goggles help identify heat sources during the dark firefight, while night vision makes the dim interior visible during the escape.
Follow the route toward the exit instead of searching rooms for extra ammunition. When fire blocks the path, use the fire extinguisher to clear only the flames directly in your way. Move steadily down the building, watch for enemies that have respawned, and avoid spending the armor you need for the final pursuit.
- Use cover during the Big Smoke firefight.
- Collect the thermal goggles at the indicated lower-window corner when the lights go out.
- Defeat Big Smoke before beginning the escape.
- Use the night-vision goggles during the burning-building escape.
- Use the fire extinguisher to clear blocked sections.
- Reach the outside without wasting time on optional pickups.
Rescue Sweet and complete the final pursuit
Outside, follow Tenpenny’s fire truck and stay close enough for the scripted chase to continue. Do not attack or ram the fire truck, because the objective is to keep up and rescue Sweet. When Sweet hangs from the ladder, drive the Feltzer directly beneath him and maintain a steady position until he reaches the car. Avoid sharp swerves, roadside obstacles, and collisions that can destroy the Feltzer.
After Sweet gets into the car and takes control, protect the vehicle during the pursuit. Shoot motorcycles and cars that approach from the rear or sides, but do not waste time eliminating every distant vehicle. Keep moving through open road space and avoid being boxed in by traffic. If the Feltzer is destroyed or Sweet dies, the mission fails. The chase ends when Tenpenny loses control and the final cutscenes begin.
Wait for the ending cutscenes to finish before leaving the mission area. Once free roam returns, create a new manual save in a separate slot while preserving the pre-finale save.
- Stay close to Tenpenny’s fire truck.
- Position the Feltzer beneath Sweet when he is hanging from the ladder.
- Do not attack or ram the fire truck.
- Protect the Feltzer and Sweet through the final pursuit.
- Wait for the final cutscenes to finish.
- Create a post-finale manual save while keeping the pre-finale save.
Before you move on
- Riot is completed and Los Desperados becomes available at Sweet’s house.
- Los Desperados is completed with Cesar, Gal, and Sunny continuing the mission sequence; Hazer’s scripted injury has occurred and is not treated as a failure.
- Grove Street controls at least 35 percent of Los Santos territory and End of the Line becomes available.
- The SWAT tank breaches Big Smoke’s fortress.
- During the dark Big Smoke firefight, the thermal goggles are collected at the indicated lower-window corner.
- Big Smoke is defeated, the night-vision goggles are used for the burning-building escape, and CJ reaches the outside.
- Sweet is rescued from the fire truck and the final chase reaches Tenpenny’s crash and the ending cutscenes.
- A manual save is created after the mission while the pre-finale save remains available.
- The game returns to free roam with the completed main-story state preserved on the original North American PlayStation 2 release.
Money, Properties, Garages and Vehicle Management
For a story-only PlayStation 2 run, properties are convenience tools rather than a required shopping list. Preserve cash for weapons, armour, ammunition, repairs and the $80,000 Verdant Meadows purchase. Use the Johnson House, the Doherty garage and the Verdant Meadows airstrip as your main bases, and buy extra safehouses only when their location or garage solves a practical travel problem.
Keep early Los Santos spending under control
The Johnson House is already available and is sufficient as your primary Los Santos save point during the opening portion of the story. Use it after missions instead of buying every safehouse as soon as its green house icon becomes available. A purchased safehouse gives you another save location, but buying one does not by itself advance the campaign or create a necessary income stream.
Early money is more useful when kept available for Ammu-Nation purchases, body armour, ammunition and replacing damaged transport. You can complete the main story without owning every Los Santos safehouse. Before making a large purchase, save at the Johnson House so you can restore the previous cash position if you decide the property is not helping your route.
- Use the Johnson House as the default Los Santos save point.
- Prioritize weapons, armour and ammunition over decorative or badly located properties.
- Keep a separate save before spending a large amount of cash.
Buy El Corona or Santa Maria Beach only for a real storage need
El Corona costs $10,000 and Santa Maria Beach costs $30,000. Both provide medium garages, making them more useful than the Los Santos safehouses that have no garage. El Corona is the cheaper choice if you want an additional early storage location; Santa Maria Beach is better positioned for beach, airport and southwestern Los Santos travel, but it is not required for story progression.
Do not treat published capacity labels as permission to fill the space aggressively. PS2 references describe garage capacity differently depending on whether they count nominal vehicle slots, practical parking space or unusual storage behavior. Drive a vehicle fully into the garage, allow the door to close, and save at the property before assuming the game has retained it. For ordinary play, keep fewer vehicles than the theoretical maximum and leave room for the game to behave normally.
- Choose El Corona when the $10,000 price matters.
- Choose Santa Maria Beach only when its location or extra storage is useful.
- Let the garage close and save before relying on a stored vehicle.
Store vehicles conservatively on the original PS2 version
Garages on the original PS2 game can suffer from zone and streaming glitches. Vehicles may disappear if the garage refreshes while CJ is saving, if the door opens or closes outside the expected approach, or if too many vehicles are forced into the garage area. The problem is especially relevant when preserving unique, modified or mission-related vehicles.
Use garages for a small working fleet, not as an unlimited collection system. Keep one dependable fast car, one durable four-door vehicle when you expect passengers, and any genuinely difficult-to-replace reward vehicle in a clearly remembered property. Do not stack cars, wedge vehicles through a partially open door or use a garage exploit during a normal story run. If a vehicle is important, make a backup save before replacing another stored vehicle.
- Keep the garage inventory small and purposeful.
- Avoid forcing extra vehicles through a closing or partially open door.
- Make a backup save before replacing a rare or modified vehicle.
Use the San Fierro garage correctly
The Doherty garage is the important San Fierro vehicle base. It is a free story-linked garage associated with the San Fierro arc, while the separately purchasable Doherty apartment is a different property and does not replace the garage for vehicle storage. Once the garage is available, use it for vehicles needed around the workshop and driving missions rather than leaving those vehicles on a public street.
The Hashbury safehouse costs $40,000 and has a larger garage than the small or medium options, while Paradiso costs $20,000 and also provides garage storage. Neither is required to continue the main story. Buy one only if you regularly return to that part of San Fierro or need a second reliable save-and-storage point. Otherwise, the Doherty garage and the existing story save locations are enough.
- Distinguish the Doherty apartment from the free Doherty garage.
- Use Doherty for practical San Fierro vehicle storage.
- Delay Hashbury or Paradiso until their location provides a clear benefit.
Reserve the $80,000 for Verdant Meadows
The one property purchase that matters directly to campaign progression is Verdant Meadows Airstrip. When Mike Toreno gives CJ the Verdant Meadows mission, the abandoned airstrip must be purchased for $80,000. This occurs before the flight-school sequence and before the later desert missions can proceed normally, so do not spend the required money on optional safehouses immediately beforehand.
When you reach the airstrip with enough cash, purchase it at the marked property entrance and save there afterward. The airstrip provides a useful desert base, a save point and aircraft storage facilities for the missions that follow. Complete the flight-school progression as required by the story, then use the airstrip as your central location for desert aviation and later Las Venturas preparation. The airstrip's income-generating asset status comes from later story progress; buying it alone is not a reason to spend money elsewhere first.
- Keep at least $80,000 available before starting the Verdant Meadows purchase.
- Buy the airstrip when Toreno's mission requires it.
- Save at Verdant Meadows after the purchase and after important aircraft progress.
Choose transport for the mission, not for appearance
Before a mission, decide whether CJ needs a fast solo vehicle, a four-door car for passengers, a motorcycle for narrow routes or an aircraft. Four-door vehicles are the safest general choice for crew and escort missions because they provide enough seats without forcing an awkward vehicle change. Motorcycles can be useful for rural routes, but CJ is more exposed to gunfire and falls.
Use Pay 'n' Spray when a public repair and wanted-level reset fits the route, but do not make a long detour during a timed mission. If a vehicle is smoking or close to exploding, leave it before the fire becomes fatal and take a replacement. After the mission, return a valuable vehicle to a garage and save rather than assuming it will remain parked outside.
- Use a four-door vehicle when passengers are part of the objective.
- Repair before a long non-timed journey, not during a critical timer.
- Abandon a burning vehicle early and secure a replacement.
Maintain a final-act property routine
For the main-story goal, keep the Johnson House available in Los Santos, the Doherty garage available in San Fierro and Verdant Meadows available in the desert. Extra properties in Red County, San Fierro or Las Venturas can shorten travel, but they are optional. Do not buy them at the expense of ammunition, armour or the airstrip requirement.
Before each major mission, make a manual save, check CJ's weapons and armour, and select transport suited to the objective. After the mission, save again before beginning unrelated activities. Keep a clean pre-final-act save with cash, weapons and a working vehicle so a garage glitch or failed purchase decision cannot force a long replay.
- Keep a pre-mission and post-mission save.
- Return valuable vehicles to a garage before changing regions.
- Preserve a clean pre-final-act save before beginning the closing mission chain.
Before you move on
- Verdant Meadows Airstrip has been purchased for $80,000 and remains available as a saved desert base.
- The Johnson House is available for Los Santos saving, and the Doherty garage is available for San Fierro vehicle storage.
- Important vehicles are stored conservatively, with no forced garage overflow or reliance on a storage exploit.
- A clean pre-final-act save preserves enough cash, ammunition, armour and transport options for the closing missions.
- No optional property purchase is delaying the main-story route to End of the Line.
References for this chapter
- Grand Theft Auto: San Andreas - Guide and Walkthrough - PlayStation 2 - By War_Doc
- Save Points in GTA San Andreas - Grand Theft Wiki
- Story Missions Guide - Desert - GTA-SanAndreas.com
- Grand Theft Auto: San Andreas - Bulletproof Car Walkthrough - PlayStation 2 - By System_Error
- GTATrilogy_GTASA_PS2_Manual_M01 — Official PlayStation 2 manual
Driving, Flying and Vehicle Combat: Practical Techniques
The original PlayStation 2 version rewards smooth inputs more than maximum speed. Brake before corners, reserve the handbrake for deliberate rotation, protect mission vehicles from unnecessary collisions, and abandon damaged transport only when the objective allows it. Aircraft require small corrections, early alignment, and controlled altitude changes. The procedures below apply to the PS2 USA release and avoid later Definitive Edition control assumptions.
Use a controlled driving rhythm
For ordinary cars, hold X to accelerate, steer with the left analog stick, and use Square to brake or reverse. R1 is the handbrake. Release X before a sharp corner, brake while the car is still straight, steer through the bend, and accelerate once the vehicle points toward the exit. This is safer and usually faster than holding X through every turn.
Use the map before starting a timed drive. Prefer wide roads, highways, and routes with fewer intersections, but do not take a long detour when the timer is tight. Small steering movements are more stable at speed; large corrections can make the car weave into traffic or spin. In pursuits, maintain enough distance to react to civilian vehicles rather than following the target’s exact line.
- Brake before the corner.
- Accelerate after the car is aligned with the exit.
- Use the map to reduce sharp turns and avoid unnecessary traffic.
Corner, reverse, and block safely
A handbrake turn is useful only when a normal turn is too slow or too wide. Release X, tap Square if necessary, hold R1 briefly, and steer into the turn. Release R1 as the car faces the new road, then accelerate. Practise in an empty parking area or open lot before using this technique during a timed mission. Ordinary braking remains the better choice for most city corners.
When reversing, use the camera to check the rear and make short steering inputs. Avoid reversing at full speed near walls, mission markers, or other vehicles. To block an enemy car, place your vehicle diagonally across its expected path. A diagonal block forces it to turn or scrape around you and is less damaging than a head-on collision.
During a pursuit, strike the target’s rear quarter panel if you need to turn it. Repeatedly hitting the centre of the target or its front usually damages your own vehicle and can leave you facing traffic. In convoy or escort missions, stay near the objective vehicle and intercept threats instead of chasing every attacker across the map.
- Use open space for turnarounds when possible.
- Block diagonally rather than meeting an enemy head-on.
- Protect the objective vehicle before pursuing minor enemies.
Manage damage and decide whether to bail out
Continue with a damaged vehicle when it still steers normally, is not smoking heavily, and is close to the destination. Reduce speed and avoid further impacts because one hard collision can turn a recoverable vehicle into a mission failure. If it begins smoking badly, catches fire, loses a wheel, or becomes difficult to control, prepare to exit.
Before abandoning a mission vehicle, confirm the objective. Some missions require a named vehicle or a particular transport, and taking another vehicle can fail the mission. When replacement is allowed, choose a four-door vehicle for passengers, a stable fast car for a timed drive, or a motorcycle only when its manoeuvrability is useful. Move away from a burning vehicle before it explodes, then return to the route or restart from a clean save if the replacement has made the objective impossible.
Repair or replace your transport before beginning a long mission whenever practical. San Andreas does not require routine fuel management for these missions, so focus on vehicle damage, steering response, passenger capacity, and whether the mission marks the vehicle as essential.
- Treat heavy smoke and worsening steering as warnings.
- Check whether the vehicle is mission-critical before switching.
- Restart early if a replacement vehicle makes the objective impossible.
Use vehicle weapons and road geometry
On the original PS2 control layout, vehicle weapons use L1 or Circle, depending on the vehicle and weapon type. The exact available attack is determined by the vehicle. Keep moving during drive-bys and pass the target in a broad curve rather than stopping beside armed enemies. Create distance, turn around, and make another pass when necessary.
Road geometry provides temporary protection after you leave a vehicle. Use a building corner, bridge support, wall, or large structure to break enemy fire. If you must use a vehicle as cover, angle the front away from the enemy and move when the vehicle begins smoking. Do not remain beside a vehicle that is about to explode.
In missions with mounted weapons or rockets, approach from an angle that gives the weapon a clear line of fire. Keep explosive fire away from your own transport, escort target, or objective helicopter. In Interdiction, wait until attacking helicopters are close enough for a reliable rocket hit, then keep moving between shots so the contraband helicopter remains protected.
- Keep moving during drive-bys.
- Use buildings and bridge supports to break line of sight.
- Do not fire explosives beside the vehicle or target you must protect.
Take off and land fixed-wing aircraft
At a runway, hold X for thrust. When the nose begins to rise, pull back gently on the left analog stick. Once airborne, press R3 to raise the landing gear. The left analog stick controls pitch and roll; L2 is rudder left and R2 is rudder right. Use rudder taps for alignment rather than holding a direction until the aircraft swings too far.
For broad turns, combine a slight roll with brief rudder corrections. Establish a steady altitude before entering Flight School coronas. If the aircraft begins climbing or diving unexpectedly, release the directional input and stabilise before making another correction.
For landing, line up with the runway while still at a safe altitude, lower the gear with R3, and descend gradually. Reduce speed with Square while keeping the nose level. Touch down straight and use Square to slow during the rollout. Do not make a sharp turn immediately after touchdown; keep the aircraft aligned until it has slowed.
- Raise the landing gear after takeoff and lower it before landing.
- Use small pitch, roll, and rudder corrections.
- Align with the runway before descending to low altitude.
Handle helicopters and armed aircraft
For helicopters, X increases lift and Square lowers altitude. The left analog stick controls pitch and roll, while L2 and R2 rotate the helicopter left and right. Raise the aircraft first, level it, and then pitch forward gradually. If it drifts, stop adding directional input and stabilise altitude before correcting.
To land on an airstrip or helipad, approach slowly from above, level over the marker, and descend vertically with short Square presses. Use brief X presses if the descent becomes too fast. Straighten before descending; attempting to land while sharply turning often causes a skid or crash.
For armed helicopters and planes, use attack passes instead of hovering in open fire. Approach with the target ahead, fire while crossing it, then climb or turn away before making another pass. In Vertical Bird, destroy pursuing jets or use bridges and terrain to make them crash while chasing you. When attacking the spy ships, stabilise the Hydra, use the target lock, and fire when the target indicator confirms a hit. Land at the abandoned airstrip after the required ships are destroyed.
- Stabilise before changing altitude.
- Use repeated attack passes rather than complex low-level manoeuvres.
- Keep an escape direction available before firing.
Prepare for the story flight missions
At Verdant Meadows, enter the Flight School marker and complete at least a bronze award in each required lesson. Higher medals are optional for the main story, although better performance improves confidence and can provide additional rewards. Practise takeoff, landing, turns, helicopter control, and parachute handling before attempting the later missions.
For N.O.E., take off from the airstrip, raise the landing gear, and remain below the radar limit while passing through the coronas. The visibility bar rises when you stay too high; if it fills, the mission fails. Learn the route in sections, make wide turns before the next corona, and return to the airstrip with enough time to align, lower the gear, and land. Do not descend sharply at the runway.
For Stowaway, use the motorcycle to reach the cargo ramp, avoid falling cargo, and enter the plane before it leaves. Once inside, use melee attacks against the guards so stray gunfire does not ignite the cargo. Take the parachute, place the satchel charge, jump clear, detonate it, and land safely afterward.
For Interdiction, collect the rocket launcher, reach the mountain marker, and protect the contraband helicopter. Let hostile helicopters approach before firing, conserve rockets, collect the dropped package, and return it to the marked garage. For Vertical Bird, infiltrate the ship, deactivate the SAM sites, steal the Hydra, complete the air combat and ship-destruction objectives, and land at the airstrip. If any of these missions fails, restart with a clean vehicle and full health rather than repeating the same damaged setup.
- Earn at least bronze in every required Flight School lesson.
- Practise the N.O.E. route and runway approach separately.
- Use melee inside Stowaway to protect the cargo.
- Protect the objective first in Interdiction and Vertical Bird.
Before you move on
- You can complete a city drive by braking before corners, using a controlled handbrake turn only when needed, and reaching the marker without avoidable collision damage.
- You can identify when a vehicle is becoming unsafe, determine whether the mission vehicle is required, and recover by switching vehicles only when permitted or restarting from a clean save.
- You can activate a vehicle weapon with the original PS2 controls and use road geometry to break enemy fire.
- You can take off, raise the landing gear, pass Flight School coronas, make a controlled turn, lower the gear, and land straight on a runway.
- You can hover and rotate a helicopter, descend over a helipad, and make a safe air-to-ground attack pass.
- You can apply the procedures to Interdiction, N.O.E., Stowaway, and Vertical Bird without relying on Definitive Edition mechanics.
Combat and Weapons: Loadouts, Cover and Health Management
On the original PlayStation 2 release, R1 locks CJ onto a target, Circle fires or attacks, and L1 provides an alternate fire command while targeting. L2 and R2 have two related functions: when CJ is freely selecting weapons on foot, they cycle weapons left and right; while R1 targeting is active, they cycle through valid targets to the left and right. Prepare CJ with health, body armour and suitable weapons before difficult missions, then use cover, target switching and controlled movement instead of standing in the open.
Learn the original PS2 combat controls
Hold R1 to target an enemy. Press Circle to attack or fire, and use the Left Analog Stick to move CJ while he is targeting. L1 can also fire a weapon while CJ is targeting and is useful when you want to keep your right thumb on movement or camera control.
L2 and R2 change function according to the situation. During ordinary on-foot weapon selection, L2 cycles to the weapon on the left and R2 cycles to the weapon on the right. Once CJ is holding R1 and has a valid target, L2 cycles to the target on the left and R2 cycles to the target on the right. If no suitable target is available in that direction, the game may retain the current target rather than switching to an unrelated pedestrian.
Square is used for jumping and climbing, and it blocks punches when CJ is targeting an opponent during melee combat. X runs or sprints, with the available duration affected by CJ’s stamina and carried weapon. Triangle handles contextual actions such as entering a vehicle. Firearms reload through their normal weapon behavior; Square is not the standard reload command on this release.
- Hold R1 and confirm that an enemy becomes CJ’s target.
- While targeting, press L2 or R2 to test left-right target cycling.
- Release R1, then use L2 and R2 to confirm that they cycle weapons when CJ is not targeting.
- Press Circle or L1 to fire, Square to jump or block, X to run and Triangle to enter a vehicle.
Select a practical loadout before the mission marker
Carry one weapon for close encounters and another for open spaces. A shotgun is effective at short range around doorways, alleys, stairwells and vehicles. A submachine gun is more flexible during moving firefights because CJ can keep firing while repositioning. The silenced pistol is useful for controlled shots and quieter engagements, but it is not a replacement for automatic fire against a group.
An AK-47 or M4 is a strong general-purpose choice when enemies are spread across streets, courtyards or rooftops. These weapons work with the normal targeting system. The country rifle and sniper rifle require deliberate manual aiming, so use them when enemies are exposed and CJ has time to establish a firing position. Explosive weapons are best reserved for vehicles, clustered enemies or objectives that specifically justify them. Fire from a safe distance because explosive splash damage can injure or kill CJ.
- Close-range choice: shotgun or submachine gun.
- General firefight choice: AK-47 or M4 when available.
- Distance choice: country rifle or sniper rifle against exposed targets.
- Explosives: use only when the target or mission makes the risk worthwhile.
Use lock-on and target cycling from protected positions
Start a firefight beside a wall, doorway, vehicle or other solid obstruction. Hold R1 to acquire the most dangerous visible opponent, fire a controlled burst, then move sideways or retreat behind cover. If another enemy becomes the greater threat, keep R1 held and tap L2 or R2 to cycle toward that target instead of releasing the lock and searching manually.
Lock-on makes aiming easier, but it does not prevent enemies from flanking CJ or attacking from outside the current target’s firing lane. Keep the camera turned toward the next threat and release R1 when the target is dead, hidden or no longer the priority. Assault rifles and submachine guns are most useful when CJ can fire, move and reacquire targets quickly. Shotguns reward a closer position but punish reckless advances.
For a country rifle or sniper rifle, hold R1 to enter the aiming view, use the analog sticks to place the reticle and use L2 and R2 to zoom. Press L3 to crouch for improved stability. CJ cannot move normally while aiming these rifles, so choose a defensible firing position before raising the scope.
- Begin beside solid cover or at the edge of a doorway.
- Prioritize enemies who can flank CJ or deal immediate damage.
- Use L2 and R2 to switch locked targets when the current opponent is no longer the priority.
- Fire short bursts, move after firing and reacquire targets instead of standing still.
- Use manual scope aiming only from a position that can be defended.
Collect body armour before a major fight
Buy body armour at Ammu-Nation or collect an armour pickup when one is conveniently near the route. Armour is particularly valuable before gang assaults, warehouse interiors, police confrontations, multiple enemy waves and prolonged ambushes. If the pickup is close to the mission start, collect it before entering the marker. Do not cross the entire map for a distant vest when a nearby Ammu-Nation or safer preparation route is available.
Armour reduces the damage CJ takes, but it is not permission to remain exposed. Continue using cover, avoid explosive splash damage and monitor both the armour and health bars. If a failed attempt has consumed most of the vest, replace it before retrying rather than beginning the next attempt with depleted protection.
- Check the armour bar before activating a high-risk mission.
- Use Ammu-Nation or a nearby pickup to replace depleted armour.
- Avoid unnecessary street fights after gearing up so the armour is preserved for the objective.
Restore health, save and restock ammunition
The most dependable preparation point is a safehouse. Enter the property and walk into the floppy-disk save icon. Completing a save restores CJ’s health, removes an active wanted level and creates a fixed retry point. Saving does not replace armour preparation, and it does not automatically refill every weapon or ammunition supply.
Health pickups, restaurants and vending machines can restore health during free roam. After a successful firefight, collect dropped weapons or ammunition only when the area is secure and the mission permits it. Use a pistol or melee attack against isolated low-threat opponents when speed is not required, reserving assault-rifle, sniper and explosive ammunition for dangerous mission sections.
- Heal before activating the mission marker.
- Save at a safehouse after preparation and after completing an important mission.
- Restock ammunition at Ammu-Nation when the next objective involves extended combat.
- Do not enter a difficult mission carrying damage from unrelated free-roam activity.
Survive multi-wave fights and emergency vehicle sections
Before the first shot, identify a retreat route such as a doorway, stairwell, alley or the far side of a solid wall. In a multi-wave encounter, remove enemies who can flank CJ first, then deal with the remaining targets from cover. When a wave pauses, reload through the weapon’s normal behavior, reposition and collect nearby health or armour only if the area is safe and the objective permits movement.
In a vehicle mission, use the vehicle as temporary protection but watch for smoke and flames. A heavily damaged vehicle is no longer dependable cover; leave before it explodes if the mission allows CJ to continue on foot or transfer to another vehicle. Do not abandon a required vehicle or leave the mission area unless the objective permits it, because some missions fail when CJ moves too far from the target or escort.
- Locate cover and an allowed retreat route before engaging.
- Prioritize flankers, drivers and enemies carrying heavy weapons.
- Use pauses between waves to reposition and recover supplies.
- Leave a smoking or burning vehicle before it explodes, provided the mission permits it.
Before you move on
- Before every major combat mission, CJ has full or near-full health, body armour when available, and a close-range weapon plus a general-purpose or distance weapon.
- You can hold R1 to target, press Circle or L1 to fire, use L2 and R2 to cycle locked targets, release R1 and use L2 and R2 to cycle weapons, use Square to block or jump, use X to run and use Triangle for vehicle entry.
- You know whether the selected weapon uses ordinary targeting or manual aiming, and you can operate the sniper scope with R1, L2, R2 and L3.
- After a successful mission, CJ reaches a safehouse or other secure preparation point, restores health, saves the game and replaces ammunition before the next high-risk objective.
References for this chapter
- GTATrilogy_GTASA_PS2_Manual_M01 — Official PlayStation 2 manual
- Grand Theft Auto: San Andreas Guide and Walkthrough — GameFAQs
- Grand Theft Auto: San Andreas Guide and Walkthrough — GameFAQs
- Grand Theft Auto: San Andreas Official Strategy Guide Basics — GTA Wiki
- Grand Theft Auto: San Andreas Controls — StrategyWiki
Important Side Activities that Affect the Campaign
Most side activities are optional for reaching End of the Line in the original North American PlayStation 2 release. Several nevertheless provide permanent benefits that make the campaign safer or more convenient. Prioritize Paramedic if you want extra health, Firefighter for fire immunity, and Pilot School when the story requires it. Treat Taxi Driver, Burglar, Pimping and Vigilante as optional improvements rather than prerequisites for the final mission.
Complete Paramedic level 12 when you want the best early defensive reward
Enter an Ambulance and activate its vehicle mission function. You must collect injured people marked on the radar and return them to the hospital before the timer expires. Each new level adds another patient, and the run must be completed from level 1 through level 12 without abandoning or destroying the Ambulance. If the vehicle is wrecked or CJ leaves it, the current attempt fails and must be restarted.
Los Santos is available immediately, but its traffic, long streets and gang activity make the run less forgiving. After The Green Sabre places CJ in the countryside, Angel Pine is a strong location for another attempt: the town is compact, relatively flat and has a nearby hospital. Keep the Ambulance upright, brake before tight turns, and avoid driving over patients. Completing level 12 raises CJ's maximum health and also pays a substantial cash reward.
- Use an undamaged Ambulance before activating the mission.
- Prefer Angel Pine after The Green Sabre if Los Santos routes are causing failures.
- Complete all twelve levels in one uninterrupted run.
- Save after the reward is awarded and confirm the increased health bar.
Use Firefighter for permanent fire immunity
Enter a Fire Truck and activate Firefighter. Drive to the burning vehicles or people shown on the radar and extinguish every target before the countdown expires. The activity advances through twelve levels, with additional fires and longer routes as the levels rise. Keep the truck moving carefully around buildings, poles and traffic; tipping the vehicle or allowing it to be destroyed ends the run.
Finishing level 12 makes CJ fireproof while on foot. This is optional, but it is especially useful during missions involving burning vehicles, explosions or areas filled with flames. It does not make the Fire Truck invulnerable, and it does not remove the need to control the vehicle safely during the activity.
- Start in an area with broad roads and room to turn.
- Avoid narrow alleys and steep shortcuts that can overturn the Fire Truck.
- Reach level 12 for the permanent fireproof ability.
- Save after completion before returning to the story.
Treat Vigilante as a later armor upgrade
Start Vigilante from a police vehicle, military vehicle or other eligible law-enforcement vehicle by activating its vehicle mission function. Targets appear on the radar, and you must reach and eliminate them before the timer expires. The wanted-level pressure and escalating target groups make this more demanding than Paramedic, especially in an ordinary police car.
Completing level 12 increases CJ's maximum armor capacity to 150. This is useful before the final act, but it is not required for End of the Line. A durable law-enforcement vehicle makes the run more manageable; if an attempt leaves the vehicle heavily damaged, end the session and begin again with a fresh vehicle rather than forcing the damaged one through later levels.
- Attempt Vigilante after CJ has reliable weapons and armor access.
- Use a durable eligible vehicle when possible.
- Complete level 12 for the maximum-armor increase.
- Do not confuse this reward with invulnerability; CJ can still lose health and armor normally.
Build stamina naturally and avoid unnecessary grinding
CJ's stamina improves through running, cycling and swimming. The main story does not require maximum stamina, but a moderate increase makes long chases, escapes and water crossings more forgiving. Sprint between nearby objectives during ordinary travel, cycle when a bicycle is convenient, and swim in safe water away from hostile traffic or deep hazards.
There is no need to stop the campaign for a lengthy training session unless a specific mission is repeatedly exposing a stamina weakness. Save before a deliberate training session so that an accident or wasted detour does not replace a useful campaign save.
- Use running, cycling and swimming during normal travel.
- Practice swimming before missions likely to involve water.
- Stop training once movement is comfortable enough for the next story objective.
Complete the schools only when their rewards or story gates justify them
Driving School is in Doherty, San Fierro. It contains twelve tests and is optional for the main campaign. Bronze or better in every test makes the Super GT available outside the school; silver or better makes the Bullet available; gold in every test makes the Hotknife available. These vehicle rewards and the driving practice can help, but neither the school nor its higher medals is required to reach End of the Line.
Pilot School at Verdant Meadows is different. After the story mission Verdant Meadows, enter the red marker at the airfield control tower and complete all ten flying lessons with at least bronze results. This is the required Learning to Fly progression gate. Bronze in every lesson awards access to the Rustler; all silver results add the Stuntplane, and all gold results add the Hunter. Do not spend time chasing silver or gold if the immediate objective is simply to continue the story.
Boat School at Bayside and Bike School in Blackfield are optional for campaign completion. They are relevant to 100% completion and their vehicle rewards, but they can be postponed.
- Finish Pilot School with bronze or better in all ten lessons when Learning to Fly blocks progress.
- Use Driving School for practice or vehicle rewards, not because the main story requires it.
- Leave higher medal attempts until after the campaign if they are slowing progression.
- Postpone Boat School and Bike School unless pursuing 100% completion.
Use Taxi Driver, Burglar and Pimping as optional money or convenience activities
Taxi Driver begins when CJ enters a Taxi or Cabbie and activates the vehicle mission. Deliver fares safely and keep the vehicle under control; the activity can be done in separate sessions. Completing 50 fares unlocks nitrous and the taxi jump ability for taxis and cabbies throughout San Andreas. The reward is convenient for travel but is not needed for story completion.
Burglar requires the Boxville burglary vehicle and is performed at night. Steal goods from marked homes and return them to the lockup. Accumulating at least $10,000 in stolen goods grants infinite sprint, cycling and swimming stamina, along with an additional cash reward. It is useful but not worth delaying difficult story missions solely to obtain it.
Pimping uses the pimp vehicle to transport prostitutes to clients and protect them from hostile pimps. Completing level 10 gives the maximum session payout and changes the related interaction so prostitutes pay CJ rather than CJ paying them. This is an optional convenience and a 100% completion task, not a story requirement.
- Use Taxi Driver in short sessions while learning city routes.
- Attempt Burglar only when nighttime timing and the Boxville are convenient.
- Complete Pimping level 10 only if its reward or 100% completion matters to you.
- Keep a separate story save before beginning a long optional grind.
Follow a campaign-first priority order
For the smoothest story run, complete Paramedic level 12 in Angel Pine when that area becomes available. Consider Firefighter level 12 next if fire immunity is valuable to you. Complete Pilot School when Learning to Fly requires it, then return to story missions rather than chasing higher medals. Driving School is a useful optional detour for driving practice and vehicle rewards, while Vigilante, Taxi Driver, Burglar and Pimping can wait until CJ has stronger equipment or until you are pursuing 100%.
Ambulance, Firefighter and Taxi missions provide money and useful rewards, but none of them is a prerequisite for End of the Line. Save before each long side-activity attempt and preserve a clean story save so a failed level-12 run does not interrupt campaign progress.
- Separate required story gates from optional permanent rewards.
- Prioritize health, fireproofing and armor over convenience rewards.
- Return to the main story when side activities begin consuming more time than they save.
- Keep at least one save from before each lengthy optional activity.
Before you move on
- CJ has completed Paramedic level 12 if the extra maximum health reward was chosen.
- Firefighter level 12 is complete if CJ's fireproof ability is desired.
- Vigilante level 12 is complete if the increased maximum armor capacity is desired.
- Pilot School has at least bronze results in all ten lessons, allowing Learning to Fly and the connected story progression to continue.
- Any Taxi Driver, Burglar, Pimping, Driving School, Boat School or Bike School work has been kept separate from required story progress.
- The save has returned to the main story route with adequate health, armor, ammunition and money for the next mission.
- A clean save exists before long optional activities, and another save exists after any permanent reward is successfully awarded.
- The campaign can continue toward End of the Line without requiring Ambulance, Firefighter, Taxi Driver, Burglar, Pimping, Driving School, Boat School or Bike School completion.
References for this chapter
Optional Completion: Collectibles, Gangs and 100% Strategy
The original North American PlayStation 2 release uses a defined 100% checklist rather than requiring every activity in San Andreas. For the official statistic, complete the story and asset missions, including the Caligula's Palace robbery chain, purchase all 29 purchasable safehouses and three required assets, collect 100 tags, 50 snapshots, 50 horseshoes, and 50 oysters, finish the required sub-missions and challenges, pass all four schools with bronze or better, learn all three gym fighting styles, complete the four Ammu-Nation challenges, finish Import/Export, stadium events, vehicle challenges, courier work, Trucking, Valet, Quarry, emergency missions, and all 25 race entries. Breaking the Bank at Caligula's is optional for reaching End of the Line, but it is required for the official 100% statistic because it is one of the optional story missions counted by the completion system. The race audit contains 22 ordinary race or checkpoint events plus three story-linked races: Lowrider Race, Wu Zi Mu, and Farewell, My Love.... Rampages, Unique Stunt Jumps, girlfriends, burglary, basketball, maximum territory, maximum personal statistics, gold school medals, and similar activities remain separate goals. The in-game Stats screen is the final authority for the percentage.
Build the checklist and use separate saves
Create a written checklist before beginning cleanup. Mark an objective only after the game confirms it through a completed mission, accepted delivery, successful result screen, medal, reward, or property purchase. Save at a safehouse after manageable groups of collectibles or activities. Keep one normal campaign save and one cleanup save so a failed challenge, lost vehicle, or mistaken purchase does not compromise the main file.
The four collectible categories are 100 gang tags in Los Santos, 50 snapshots in and around San Fierro, 50 horseshoes in Las Venturas, and 50 oysters distributed throughout the state. A practical order is tags during the Los Santos arc, snapshots after San Fierro opens, and horseshoes and oysters after flight, swimming, and long-distance travel are convenient. You can collect oysters earlier, but water travel is safer once CJ has improved swimming ability and dependable transport is available.
- 100 gang tags
- 50 snapshots
- 50 horseshoes
- 50 oysters
- A separate campaign save and cleanup save
- A written list for properties, missions, races, challenges, and collectibles
Purchase every property and complete the three asset sets
Buy all 29 purchasable safehouses: Jefferson, Verdant Bluffs, Verona Beach, Willowfield, Santa Maria Beach, Mulholland, Blueberry, Angel Pine, Palomino Creek, Dillimore, Flint County, Chinatown, Doherty, Paradiso, Hashbury, Vank Hoff in the Park Hotel Suite, Calton Heights, El Quebrados, Tierra Robada, Fort Carson, Creek, Rockshore West, Redsands West, Whitewood Estates, Prickle Pine, Old Venturas Strip Hotel Suite, Pirates in Men's Pants Hotel Suite, Camel's Toe Hotel Suite, and Clown's Pocket Hotel Suite. Automatic save points received through story progress do not replace property purchases for the checklist.
Purchase Zero's RC Shop and complete Air Raid, Supply Lines, and New Model Army. Purchase Wang Cars and complete Zeroing In, Test Drive, Customs Fast Track, and Puncture Wounds. Purchase Verdant Meadows Airstrip and complete N.O.E., Stowaway, Black Project, and Green Goo. These three properties and their asset mission sets count toward official 100% completion. The property list and asset requirement are distinct from automatically unlocked properties.
- All 29 purchasable safehouses owned
- Zero's RC Shop purchased and Air Raid, Supply Lines, and New Model Army completed
- Wang Cars purchased and Zeroing In, Test Drive, Customs Fast Track, and Puncture Wounds completed
- Verdant Meadows Airstrip purchased
- N.O.E., Stowaway, Black Project, and Green Goo completed
Finish the Caligula's Palace robbery chain
Complete Architectural Espionage, Key to Her Heart, Dam and Blast, Cop Wheels, and Up, Up and Away! before attempting Breaking the Bank at Caligula's. Complete Key to Her Heart far enough to obtain Millie's keycard, then begin the robbery from the required casino setup point when the mission becomes available.
The robbery is not needed merely to unlock or reach End of the Line; the final story route can proceed without treating it as a mandatory endgame gate. It is nevertheless required for the official 100% statistic. Record the five preparations, Millie's keycard, and Breaking the Bank at Caligula's as one mandatory 100% group. Enter with full health, body armor, suitable ammunition, and a separate save because the mission combines stealth, timed movement, firefights, explosive equipment, and an escape sequence.
Do not substitute the optional Caligula's Palace route with random casino gambling or unrelated Las Venturas activities. The percentage requirement is the robbery mission itself and its required preparation chain. The wider completion checklist counts all story missions, including optional missions that are not necessary for the basic ending.
- Architectural Espionage
- Key to Her Heart
- Millie's keycard obtained
- Dam and Blast
- Cop Wheels
- Up, Up and Away!
- Breaking the Bank at Caligula's completed
Finish Los Santos, countryside, and vehicle sub-missions
Spray all 100 gang tags and confirm that the Johnson House weapon reward has been awarded. Complete the six ordinary Los Santos races: Little Loop, Backroad Wanderer, City Circuit, Vinewood, Freeway, and Into The Country. Record Lowrider Race separately because it is completed through High Stakes, Low-Rider rather than through the ordinary race marker.
Complete Wu Zi Mu and Farewell, My Love... and record them as the two remaining story-linked race entries. Then finish the six San Fierro races: Dirtbike Danger, Bandito Country, Go-Go Karting, San Fierro Fastlane, San Fierro Hills, and Country Endurance. Complete the four Las Venturas road races at the LVA Freight Depot: SF To LV, Dam Rider, Desert Tricks, and LV Ringroad.
At Las Venturas Airport, complete World War Ace, Barnstorming, Military Service, Chopper Checkpoint, Whirly-Bird Waypoint, and Heli Hell. These are six separate checkpoint challenges. The complete race audit is therefore 22 ordinary race or checkpoint events plus three story-linked races, for 25 named entries total.
Complete Roboi's Food Mart, Hippy Shopper, and Burger Shot courier stages through level 4. Finish all eight Trucking missions, Valet Parking through level 5, Quarry missions 1 through 7, Taxi Driver for 50 fares, Vigilante level 12, Paramedic level 12, Firefighter level 12, Pimping level 10, and Freight Train level 2.
- 100 gang tags
- Little Loop, Backroad Wanderer, City Circuit, Vinewood, Freeway, and Into The Country
- Lowrider Race through High Stakes, Low-Rider
- Wu Zi Mu and Farewell, My Love...
- Dirtbike Danger, Bandito Country, Go-Go Karting, San Fierro Fastlane, San Fierro Hills, and Country Endurance
- SF To LV, Dam Rider, Desert Tricks, and LV Ringroad
- World War Ace, Barnstorming, Military Service, Chopper Checkpoint, Whirly-Bird Waypoint, and Heli Hell
- Roboi's Food Mart, Hippy Shopper, and Burger Shot Courier level 4
- Eight Trucking missions and Valet Parking level 5
- Seven Quarry missions
- Taxi 50; Vigilante 12; Paramedic 12; Firefighter 12; Pimping 10; Freight Train 2
Complete schools, gyms, shooting ranges, and Import/Export
Pass every available test in Driving School, Bike School, Boat School, and Flight School with at least a bronze medal. Gold medals are not necessary for the original PS2 100% statistic. Complete the Los Santos boxing style, San Fierro Kung Fu, and Las Venturas Muay Thai.
At Ammu-Nation shooting ranges, complete all three rounds for the Pistol, Micro SMG, Shotgun, and AK-47 challenges. At Easter Basin Docks, deliver every vehicle in all three Import/Export lists. Wait for the crane to accept each vehicle and confirm that the list advances. If a vehicle is destroyed or lost before acceptance, find another example and verify that the updated list is recorded.
Complete the BMX Challenge, NRG-500 Challenge, and Mount Chiliad challenge set. Finish all three Mount Chiliad courses—Scotch Bonnet, Birdseye Winder, and Cobra Run—but count the set as one vehicle-challenge objective for the percentage checklist.
- Driving, Bike, Boat, and Flight School completed with bronze or better in every available test
- Los Santos boxing, San Fierro Kung Fu, and Las Venturas Muay Thai
- Pistol, Micro SMG, Shotgun, and AK-47 Ammu-Nation challenges
- All three Import/Export lists
- BMX Challenge
- NRG-500 Challenge
- Scotch Bonnet, Birdseye Winder, and Cobra Run
Finish stadium events and the remaining collectibles
Complete all four stadium events: 8-Track, Blood Bowl, Dirt Track, and Kickstart. A successful finish is required; do not assume that merely entering the stadium marker counts. Collect all 50 horseshoes in Las Venturas and all 50 oysters around San Andreas. Save before long water, aircraft, Import/Export, and race sessions, then save again after each manageable regional group.
If the Statistics screen remains below 100 percent, audit the checklist rather than repeating random activities. Recheck the three assets, 29 safehouses, four collectible totals, courier stages, Trucking, Valet, Quarry, emergency missions, schools, gym styles, shooting ranges, Import/Export, stadium events, vehicle challenges, every race entry, and the Caligula's Palace robbery chain.
- 8-Track
- Blood Bowl
- Dirt Track
- Kickstart
- 50 horseshoes
- 50 oysters
- Statistics screen checked after the final cleanup save
Keep non-required activities separate
Rampages, Unique Stunt Jumps, girlfriends, burglary, basketball, pool, arcade games, gambling, maximum territory, maximum personal statistics, maximum weapon skill, gold school medals, and clothing completion are not required for the official 100% statistic. They can be pursued as separate completion goals, but do not use them to repair a missing percentage before auditing the actual checklist.
The Lowrider Challenge is separate from Lowrider Race. Lowrider Race during High Stakes, Low-Rider is required, while the separate Lowrider Challenge is not. The three Mount Chiliad courses are required as one vehicle-challenge set. Breaking the Bank at Caligula's must not be placed in this non-required category: it is optional for reaching End of the Line, but mandatory for official 100% completion.
- Optional activities clearly separated from the official 100% checklist
- Lowrider Challenge not confused with the required Lowrider Race
- Breaking the Bank at Caligula's included in the official 100% checklist
- No missing percentage repaired by counting unrelated activities
Before you move on
- The Statistics screen reads 100.00%.
- The totals show 100 gang tags, 50 snapshots, 50 horseshoes, and 50 oysters.
- All 29 purchasable safehouses are owned.
- Zero's RC Shop, Wang Cars, and Verdant Meadows Airstrip are purchased, with all required asset missions complete.
- Roboi's Food Mart, Hippy Shopper, and Burger Shot courier stages are complete; all eight Trucking missions, Valet level 5, and all seven Quarry missions are complete.
- Taxi 50, Vigilante 12, Paramedic 12, Firefighter 12, Pimping 10, and Freight Train level 2 are complete.
- Driving, Bike, Boat, and Flight School are complete with at least bronze in every available test.
- The Los Santos, San Fierro, and Las Venturas gym styles are learned.
- All four Ammu-Nation challenges are complete: Pistol, Micro SMG, Shotgun, and AK-47.
- All four stadium events are complete: 8-Track, Blood Bowl, Dirt Track, and Kickstart.
- The three vehicle challenges are complete: BMX, NRG-500, and the Mount Chiliad set containing Scotch Bonnet, Birdseye Winder, and Cobra Run.
- All 25 race entries are verified: Little Loop, Backroad Wanderer, City Circuit, Vinewood, Freeway, Into The Country, Lowrider Race, Dirtbike Danger, Bandito Country, Go-Go Karting, San Fierro Fastlane, San Fierro Hills, Country Endurance, SF To LV, Dam Rider, Desert Tricks, LV Ringroad, World War Ace, Barnstorming, Military Service, Chopper Checkpoint, Whirly-Bird Waypoint, Heli Hell, Wu Zi Mu, and Farewell, My Love....
- The race breakdown is recorded as 22 ordinary race or checkpoint events plus three story-linked races.
- All three Import/Export lists are complete.
- Architectural Espionage, Key to Her Heart, Dam and Blast, Cop Wheels, Up, Up and Away!, and Breaking the Bank at Caligula's are complete.
- The required story, asset, and qualifying mission sets are complete, including End of the Line if the campaign ending is also being verified.
- Breaking the Bank at Caligula's is included for 100% completion even though it is not required solely to reach End of the Line.
- Rampages, Unique Stunt Jumps, girlfriends, burglary, basketball, maximum statistics, maximum territory, and gold medals are not needed for the official 100% statistic.
- A fresh manual save exists in a separate memory-card slot while the earlier campaign or cleanup save remains available.
Final Mission Walkthrough and Post-Game Checks ('End of the Line')
Complete Los Desperados, take enough Los Santos territory to trigger Sweet's call, then finish End of the Line on the original North American PlayStation 2 release. The mission requires a long gunfight through Big Smoke's fortress, a timed escape through the fire, and a two-stage pursuit of Tenpenny's fire truck. Preserve both a pre-finale backup and a confirmed post-ending save.
Meet the prerequisites and prepare a fallback save
End of the Line becomes available after completing Los Desperados and taking over at least 35 percent of the gang territory in Los Santos. Check the territory percentage in the pause menu's Stats and Gangs section. When the requirement is met, wait for Sweet's call and then go to the S marker at Sweet's house in Ganton. The final mission is not unlocked by territory alone if Los Desperados is unfinished.
Save at a Los Santos safehouse before entering the marker. Keep this file in a separate slot and do not overwrite it until the ending has been confirmed. Start with full health and body armour, and replenish ammunition for an M4, AK-47, or another reliable automatic weapon. A shotgun is useful in doorways and stairwells, but an assault rifle or submachine gun is the safer primary weapon for the fortress interior. Firefighter, Ambulance, and Vigilante rewards are optional conveniences, not requirements for story completion.
- Los Desperados is complete.
- At least 35 percent of Los Santos gang territory is controlled.
- Sweet's final mission marker is available at the Johnson house.
- A separate pre-finale save is preserved.
- Health, armour, and automatic-weapon ammunition are replenished.
Take the SWAT Tank to Big Smoke's fortress
Start End of the Line at Sweet's house and ride with Sweet toward Big Smoke's crack fortress in East Los Santos. Follow the yellow route and avoid unnecessary fights during the approach. After the cutscene, the fortress entrance is sealed and the SWAT Tank appears as a blue marker nearby.
Deal with the Ballas and police around the tank, then enter it and drive back to the fortress. The tank is required to smash through the reinforced entrance. Do not abandon it before breaking through the wall, and do not let it be destroyed; either failure ends the mission. Once the tank has breached the entrance, drive around the outside section and use its bulk to eliminate the enemies there. When the exterior is clear, leave the tank and enter through the yellow-arrow doorway. This is the correct transition into the fortress interior.
- CJ and Sweet reach the fortress.
- The marked SWAT Tank is captured.
- The SWAT Tank smashes through the sealed entrance.
- The exterior enemies are cleared and CJ enters through the objective doorway.
Clear the three fortress floors
The interior is a linear ascent through three floors, with large rooms, swinging doors, stairwells, catwalks, and several enemy groups. Move from cover to cover instead of crossing open rooms while exposed. At the first large room, use the doorway and nearby boxes as cover, then work across the room toward the stairs. Enemies occupy the floor, pillars, and catwalks, so look upward before moving through the center.
Use the health and armour pickups placed along the route when necessary. On later floors, some doors only open after you follow the catwalk around the room; do not treat those doors as dead ends. Clear each room before climbing, and check side openings for enemies who can fire into the hallway. Near the upper section, health and armour pickups are available before the final approach. Refill there if needed rather than entering Big Smoke's room badly damaged.
When the objective changes to finding Big Smoke, follow the final stairs and enter the marked door. During the boss encounter, use the M4 or another automatic weapon and prioritize Smoke's armed reinforcements when they appear. After the lights go out, collect and activate the thermal goggles in the lit corner near the vending machine. The goggles make Smoke and his men visible in the darkness. Keep moving between cover, fire in controlled bursts, and use the vending machine for recovery if your health is low. The fight ends when Smoke's health is depleted and the cutscene begins.
- All three fortress floors are traversed in order.
- Health and armour pickups are used when needed.
- Thermal goggles are collected after the lights go out.
- Big Smoke is defeated and the Tenpenny cutscene begins.
Escape the burning fortress before the timer expires
After Smoke dies, Tenpenny starts the fire and escapes with the money. CJ receives night-vision goggles and has a seven-minute limit to leave the building. Follow the route back through the fortress rather than searching for a new exit. The enemies and pickups reappear during the escape, so take armour at the tops of staircases when it is safe, but do not spend too long fighting every enemy.
The fire is concentrated on one of the floors. Use the supplied fire extinguisher to clear flames blocking the route. Short bursts are more useful than holding the spray continuously; extinguish only the fire directly across the doorway, catwalk, or stair path, then move forward. Night vision helps locate enemies and the route, but remove it briefly if the flames are difficult to see. On the fire-affected floor, clear enemies on the lower level before crossing the catwalk, then extinguish the flames that block the exit.
If CJ dies or the timer expires, reload the separate pre-finale save or restart the mission and repeat the same route. Reach the outside exit to trigger the fire-truck pursuit.
- The seven-minute escape timer is respected.
- Night vision is used to navigate the dark building.
- Fire blocking the route is extinguished.
- CJ reaches the exterior alive and the fire-truck sequence starts.
Catch Sweet and survive the second chase phase
Tenpenny drives away in a fire truck while Sweet grabs the rear ladder. CJ automatically enters the nearby Feltzer. Follow the truck through Los Santos without ramming it. Maintain a controlled distance, brake before turns, and avoid shortcuts that cause the fire truck to disappear from the route. The objective is to remain in the pursuit, not to destroy Tenpenny's vehicle.
After the chase continues, a police officer climbs onto the ladder and attacks Sweet's fingers. A grip meter appears. Accelerate and steer directly underneath Sweet before the meter empties. When the Feltzer is positioned below him, Sweet drops onto the car. He then takes the wheel while CJ becomes the shooter.
In this second phase, do not try to destroy or overtake the fire truck. Concentrate on the attackers pursuing the Feltzer, including police and hostile rioters, while monitoring the car's damage. Keep firing at vehicles that threaten the Feltzer and avoid wasting time shooting the fire truck itself. The mission completes automatically when Tenpenny loses control on the bridge near Grove Street and the final cutscene begins.
- CJ stays with the fire truck without colliding with Sweet.
- Sweet is caught before his grip meter empties.
- The Feltzer survives the second pursuit phase.
- Tenpenny's bridge crash triggers the ending cutscene.
Confirm the ending and preserve both saves
Watch the post-crash scenes through the return to Grove Street. The story ending is confirmed when the End of the Line mission-passed result has appeared, the ending scenes have finished, and control returns to CJ in post-story Los Santos. Grove Street is restored to the final-story state, and the principal allied characters are present in the ending sequence. Optional missions, activities, collectibles, and territory work can still remain afterward; their markers are not supposed to disappear simply because the main story is complete.
Once free control returns, travel to a safehouse and create a new manual save in a different slot from the pre-finale file. Wait for the save to finish, then load that new file once to verify that it opens in post-story free roam. Keep the earlier pre-End of the Line save until this test succeeds. If possible, retain both saves on the same memory card and make a second physical memory-card backup rather than deleting the only copy.
- The complete ending cutscene sequence has played.
- Control has returned to post-story free roam.
- The finale is recorded as passed in the game's story progress.
- Grove Street and the principal allies are in their post-story state.
- A verified post-ending safehouse save exists.
- The untouched pre-finale save remains available.
Before you move on
- Los Desperados is complete and the final mission has been passed.
- The final cutscenes involving Big Smoke, Tenpenny, Sweet, Grove Street, and Madd Dogg have played.
- CJ has returned to free roam in post-story Los Santos.
- A manual safehouse save made after the ending loads successfully.
- The pre-End of the Line backup remains intact in another save slot or on a second memory card.
- Optional activity markers may remain; their presence does not indicate that the main story failed to complete.
Finishing up
The main story is complete when End of the Line is passed, the final cutscenes finish and control returns to post-story free roam on the PS2 save.
Verify the finale through the passed mission state and the post-ending free-roam state; optional activities and their markers may remain available.
Create and verify a manual safehouse save after End of the Line in a separate slot from the pre-finale backup.
Keep the pre-finale save until the post-ending save has been loaded successfully.
If pursuing 100 percent, use the optional-completion chapter's PS2 checklist; 100 percent is separate from merely finishing the story.
If a physical-disc problem blocks progress, try an earlier manual save and confirm the exact mission prerequisite before treating it as a disc or version issue.
Choose your next gameScreenshots & video
Game imagery for reference. Follow the written chapters above for the route and strategies.
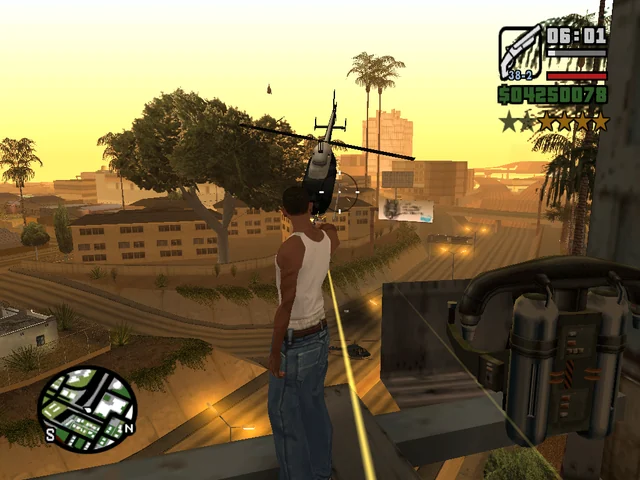
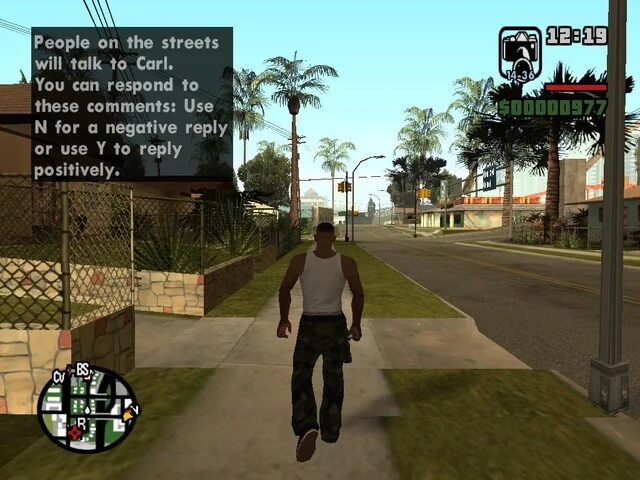
Sources & references
Our original guide draws on the references below. Check the edition at the top of this page before following controls or unlock requirements.
- Grand Theft Auto: San Andreas — Guide and Walkthrough for PlayStation 2, controls and safehouse data
- GTATrilogy_GTASA_PS2_Manual_M01 — Official PlayStation 2 manual
- Grand Theft Auto: San Andreas Controls — StrategyWiki
- Story Missions Guide - Los Santos
- Grand Theft Auto: San Andreas Story Missions Guide
- High Stakes, Low-Rider - GTA Wiki
- Grand Theft Auto: San Andreas/Missions/Doberman — Wikibooks
- Grand Theft Auto: San Andreas/The Green Sabre - StrategyWiki
- Grand Theft Auto: San Andreas Guide and Walkthrough — GameFAQs
- Grand Theft Auto: San Andreas Turf War FAQ — GameFAQs
- Story Missions Guide - Countryside - GTA-SanAndreas.com
- Grand Theft Auto: San Andreas - Guide and Walkthrough - PlayStation 2 - Andrew_Testa
- Grand Theft Auto: San Andreas Guide and Walkthrough — GameFAQs
- GTA San Andreas 100% Checklist PDF
- Story Missions Guide – San Fierro
- Grand Theft Auto: San Andreas – PlayStation 2 Guide and Walkthrough
- Yay Ka-Boom-Boom - StrategyWiki
- The Da Nang Thang – GTA Wiki
- Yay Ka-Boom-Boom – GTA Wiki
- Grand Theft Auto: San Andreas - Guide and Walkthrough - PlayStation 2 - GameFAQs
- Grand Theft Auto: San Andreas - Guide and Walkthrough - PlayStation 2, A_I_e_x
- Stowaway - GTA San Andreas Mission Guide and Walkthrough
- Verdant airstrip unlocks - Grand Theft Auto: San Andreas Q&A
- Learning to Fly - Grand Theft Wiki
- Pilot School - Grand Theft Wiki
- Grand Theft Auto: San Andreas - Featured Guide
- Story Missions Guide - Las Venturas - GTA-SanAndreas.com
- Rewards & Unlocks Guide, GTA-SanAndreas.com
- Up, Up and Away! - GTA Wiki
- Up, Up and Away! - StrategyWiki
- Breaking the Bank at Caligula's - GTA Wiki
- Grand Theft Auto: San Andreas — Breaking the Bank at Caligula's — StrategyWiki
- Grand Theft Auto: San Andreas - 100% Completion Walkthrough - PlayStation 2
- A Home in the Hills - Grand Theft Wiki
- Vertical Bird - GTA Wiki
- Grand Theft Auto: San Andreas/Vertical Bird — StrategyWiki
- Breaking the Bank at Caligula's - GTA San Andreas Mission Guide & Walkthrough
- Grand Theft Auto: San Andreas/100 percent checklist — StrategyWiki
- Grand Theft Auto: San Andreas/Grove 4 Life — StrategyWiki
- Grand Theft Auto: San Andreas/Los Desperados — StrategyWiki
- Grand Theft Auto: San Andreas/End Of The Line — StrategyWiki
- GTA San Andreas 100% Completion Guide & Full Checklist
- Grand Theft Auto: San Andreas Story Missions Guide — Final Missions
- End Of The Line — GTA Base mission guide
- Los Desperados — Grand Theft Wiki
- Grand Theft Auto: San Andreas — Guides and FAQs for PlayStation 2
- Grand Theft Auto: San Andreas - Guide and Walkthrough - PlayStation 2 - By War_Doc
- Save Points in GTA San Andreas - Grand Theft Wiki
- Story Missions Guide - Desert - GTA-SanAndreas.com
- Grand Theft Auto: San Andreas - Bulletproof Car Walkthrough - PlayStation 2 - By System_Error
- Mike Toreno Missions in GTA San Andreas
- Interdiction/Walkthrough — Grand Theft Wiki
- Grand Theft Auto: San Andreas Official Strategy Guide Basics — GTA Wiki
- Paramedic, StrategyWiki
- Firefighter, StrategyWiki
- Taxi Driver, StrategyWiki
- Learning to Fly, StrategyWiki
- Pilot School, GTA Wiki
- Grand Theft Auto: San Andreas Walkthrough, GameSpot
- GTA San Andreas 100% Checklist
- GTA San Andreas 100% Completion Checklist
- Grand Theft Auto: San Andreas Guide and Walkthrough — PlayStation 2, GameFAQs
- End of the Line — Grand Theft Wiki
About the game & collecting notes
- Platform
- PlayStation 2
Step-by-step campaign walkthrough for the original PlayStation 2 release (USA v1.03) of Grand Theft Auto: San Andreas. Follow location-by-location mission routing, safehouse and save advice, core boss tactics, required unlock checks and practical strategies for vehicles, combat and property management to reach the final mission and the canonical ending.
Darryl Polo
Darryl Polo loves tinkering with emulation and revisiting retro games. He enjoys exploring how old favorites play on different setups and sharing what he learns along the way. At Joking Joystick, he writes about the games, hardware, and small discoveries that keep the hobby fun.
Our editorial standardsFound a step that needs another look? Help us improve this guide.