Grand Theft Auto III (PlayStation 2, USA) — Complete Campaign Walkthrough
Step-by-step campaign walkthrough for the original PlayStation 2 (NTSC-U) edition of Grand Theft Auto III, covering the complete named story route, missable missions, side activities and the verified original-game 100% checklist.

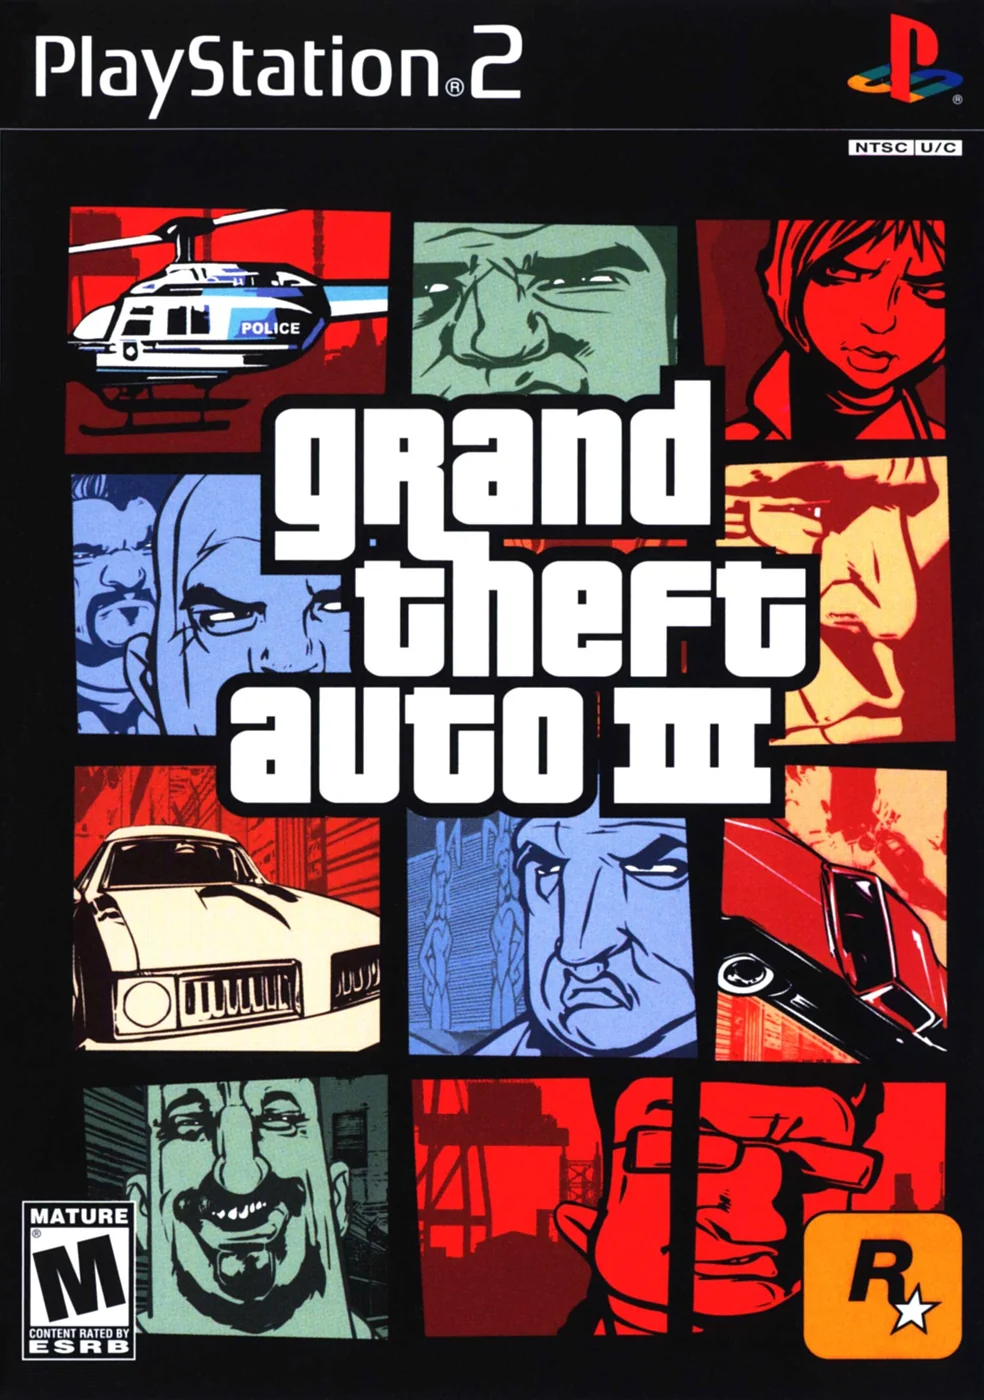
Find a copy
Grand Theft Auto III PlayStation 2
We may earn a commission if you buy through these links, at no extra cost to you. As an Amazon Associate I earn from qualifying purchases.
Opens retailer search results. Check the model, edition, seller, availability and current price before buying.
Before you begin
This guide is written for the original PlayStation 2 release (NTSC-U / USA) of Grand Theft Auto III.
It assumes PS2 DualShock controls and the original in-game mechanics; it does not assume any Definitive Edition, remaster, or later-port control or spawn changes.
Follow the mission order and missable-mission warnings here to avoid locking yourself out of 100% completion.
You will be walked through every island's required story missions in playable order, with specific objectives, landmarks, hazards, and recovery options when a run goes wrong.
Optional sections explain collectibles (hidden packages), Pay Phone and RC/Toyz side missions, and the concrete checklist required if you want to finish the campaign and optionally pursue 100% completion.
Set yourself up for the run
Use multiple save slots early and often.
Keep at least one backup save before major mission clusters that change island access (examples: before 'Last Requests' and before Donald Love missions).
Read the PS2 manual controls for camera, aiming and vehicle handling; get comfortable with vehicle handbrake, two-handed aiming and quick weapon swap.
(Consult the included manual PDF for button mappings.)
Familiarize yourself with safehouse behavior: sleeping saves your game and safehouses are the place where weapon pickups from hidden-package milestones spawn.
Prioritize early missions that unlock islands and safehouses.
Some mission chains become permanently inaccessible if you progress story missions in the wrong order — follow the missable-mission warnings in chapter walkthroughs.
Collect basic weapons and money early.
Use low-risk jobs (rampages, taxi runs, and minor jobs) to build cash and familiarity with vehicle handling before attempting harder timed or escort missions.
Keep a compact set of vehicles you can rely on for chase and escape.
Identify a fast car and a reliably sturdy vehicle to stash or use for mission retries.
If you plan 100% completion, plan hidden packages and Pay Phone missions early: many become far harder or impossible after island access changes or after certain missions are completed.
Getting Started: Controls, HUD, Saves and First Steps
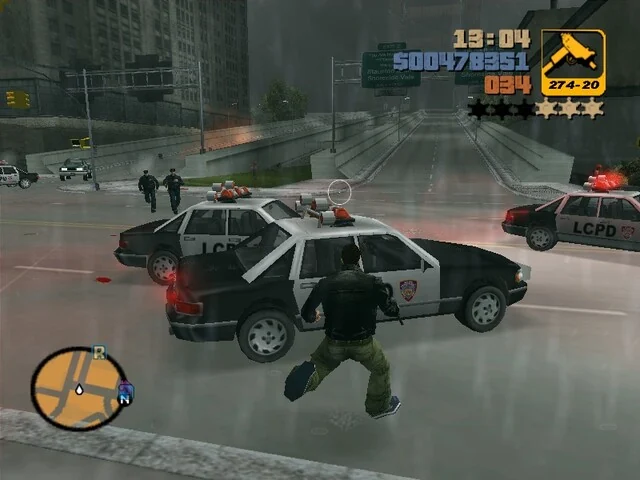
The original North American PlayStation 2 edition opens with Give Me Liberty, a short escape and driving mission that takes Claude and 8-Ball from the destroyed prison convoy on Callahan Bridge to the first Portland hideout. After the hideout scene, the game sends Claude to Luigi’s Sex Club Seven, where Luigi’s Girls starts automatically. Complete both opening missions before relying on manual saves. Then create a protected backup and keep a dependable vehicle available for the first Portland assignments.
Learn the original PS2 controls
Use the left analog stick or D-pad to move Claude on foot and steer vehicles. Press X to run on foot or accelerate a vehicle. Square makes Claude jump on foot and brakes or reverses a vehicle. Triangle enters, hijacks or exits a vehicle. Circle attacks or fires the equipped weapon.
On foot, move the right analog stick to rotate and adjust the ordinary camera or look direction. Press L1 to center the camera behind Claude. Press L2 and R2 to cycle backward and forward through available weapons. R1 locks onto a nearby target when a firearm is equipped. R3 makes Claude look behind him. Select changes the camera mode, and Start opens the pause menu.
In a vehicle, L1 changes radio stations. L2 looks left and R2 looks right for drive-by or side-looking functions. Press L2 and R2 together to look behind the vehicle. R1 operates the handbrake, L3 sounds the horn or siren, and R3 activates a supported vehicle mission such as Taxi, Vigilante or Firefighter work. Select changes the camera mode.
The right analog stick has additional activity-specific uses. During Firefighter missions, use it to aim the fire hose nozzle. In the Rhino, it controls the turret. Do not substitute later weapon-wheel, GPS or Definitive Edition control assumptions for this original PS2 layout.
- Left analog stick or D-pad: move Claude and steer vehicles
- Right analog stick: rotate the ordinary camera or look direction on foot; aim the Firefighter nozzle during Firefighter work
- X: run on foot and accelerate in vehicles
- Square: jump on foot; brake and reverse in vehicles
- Triangle: enter, hijack or exit a vehicle
- Circle: attack or fire
- L1: center the on-foot camera or change radio stations in a vehicle
- L2 and R2: cycle weapons on foot or look left and right in a vehicle
- L2 plus R2: look behind while driving
- L3: sound the horn or siren while driving
- R1: lock onto a target with a firearm or use the vehicle handbrake
- R3: look behind Claude on foot or activate a supported vehicle mission
- Select: change camera mode
- Start: pause the game
Read the radar and protect the Kuruma
The radar in the lower-left corner shows Claude’s position, nearby roads and the current destination marker. During the opening sequence, follow the marked destination and use the road network rather than wandering into optional activities.
The Kuruma is only needed for the opening escape drive, but keep it upright and driveable until the hideout scene. Slow before sharp corners, make broad turns and avoid scraping walls or hitting traffic at speed. There is no reason to stop for fights, weapon pickups or police trouble during this section. If the Kuruma is destroyed or 8-Ball is left behind, restart the mission and repeat the route more carefully.
- The destination marker is visible on the radar
- The Kuruma remains usable
- 8-Ball stays in the vehicle
- No unnecessary wanted-level chase has begun
- The route is followed without abandoning the opening objective
Complete Give Me Liberty from Callahan Bridge
After the opening cutscene, the prison convoy has been attacked on Callahan Bridge. When control begins, move to the nearby Kuruma and press Triangle to take the driver’s seat. 8-Ball remains the passenger, so Claude must drive.
Leave the bridge area and follow the destination marker toward the Portland hideout in the Red Light District. This mission is a driving tutorial rather than a combat assignment. Keep moving, avoid dramatic shortcuts and use the left analog stick for controlled steering.
- Reach the Kuruma near the opening escape area
- Enter the Kuruma with Triangle
- Leave Callahan Bridge
- Keep 8-Ball in the vehicle
- Follow the marker toward the Red Light District hideout
Reach the Portland hideout
Drive into the marked garage or blue destination area at the Portland hideout. The scene changes Claude and 8-Ball out of their prison clothing and establishes the hideout as the first safehouse. Allow the scene to finish before moving on.
Give Me Liberty is complete when the hideout sequence ends. The game does not provide normal manual saving at this point. The garage may be useful for repairing the vehicle, but do not mistake the hideout’s introduction for a completed save opportunity.
- Reach the Portland hideout in the Red Light District
- Allow the clothing-change scene to finish
- Confirm that the hideout has been introduced
- Do not expect a normal save before Luigi’s Girls is complete
Drive to Sex Club Seven and complete Luigi’s Girls
After the hideout scene, 8-Ball directs Claude to Luigi’s Sex Club Seven. Follow the next destination marker through Portland and stop in the marked area outside the club. This is the immediate transition after Give Me Liberty, and Luigi’s Girls begins automatically after the introduction.
Luigi’s Girls sends Claude to collect Misty from the clinic in Portland View. Take any nearby roadworthy car and follow the radar marker to the clinic. Pull up beside Misty’s marker and wait for her to enter the vehicle. Then drive her back to the marked area outside Luigi’s club.
Keep the trip calm and avoid unnecessary collisions, especially near the clinic and police station. Misty must remain in the vehicle until the drop-off is accepted. Wait for the mission-complete confirmation before leaving the area.
- Leave the hideout after the clothing-change scene
- Reach the marked area at Luigi’s Sex Club Seven
- Allow Luigi’s Girls to begin
- Reach the clinic in Portland View
- Pick up Misty
- Return Misty to Luigi’s club
- Receive the mission-complete confirmation
Save at the Portland hideout
Once Luigi’s Girls is complete, return to the Portland hideout shown by the purple house icon on the radar. If you have a vehicle worth keeping, park it in the garage before entering the save point. Walk through the door beside the garage to open the save interface.
Saving advances the in-game clock by six hours. A car stored in the garage is repaired when you return, so the hideout is also a useful recovery point after failed missions or damaged vehicles. Saving is unavailable during an active mission, so finish the current assignment before returning.
Use at least two rotating save files. Keep one file for ordinary progress and another as a protected backup. Before later island-unlocking missions and contact missions with missable assignments, save to a fresh slot rather than overwriting the only earlier file. This gives you a way to restore Portland access if an optional mission is accidentally locked out.
- Luigi’s Girls is complete
- The Portland hideout appears as a purple house icon
- Claude is in free exploration
- The save door beside the garage opens the save interface
- A post-opening save is made successfully
- A separate backup slot preserves the early Portland state
- Any stored vehicle is repaired after returning from the save
Establish a dependable early loadout
For the first Portland assignments, use the hideout as your recovery point. A healthy Kuruma or another stable four-door car is a practical starter vehicle because replacements are common and it handles predictably. Keep an ordinary roadworthy car nearby rather than risking a rare or mission-specific vehicle during routine travel.
The opening objective is not to clear every collectible or side activity. Finish Give Me Liberty and Luigi’s Girls, make a successful save, preserve a backup and become comfortable with the original PS2 camera and targeting controls. Ammu-Nation purchases, hidden-package rewards and optional Portland activities can be handled after this foundation is secure.
- Give Me Liberty is complete
- Luigi’s Girls is complete
- The Portland hideout can save normally
- A reliable starter vehicle is available
- At least two save files preserve early progress
Before you move on
- Give Me Liberty is complete after Claude reaches the Portland hideout and the clothing-change scene has played.
- The hideout has been introduced, but Claude has not incorrectly treated its introduction as a completed save.
- Claude has driven from the hideout to the marked area at Luigi’s Sex Club Seven.
- Luigi’s Girls has been completed and Misty has been returned to Luigi’s club.
- Claude is back in free exploration rather than inside an active mission.
- The Portland hideout appears as the purple house icon and its save door opens normally.
- A save made after Luigi’s Girls can be loaded successfully.
- A separate backup file preserves the early Portland state.
- Claude has access to a reliable replacement vehicle or a vehicle stored in the hideout garage.
- The PS2 mapping is understood: the right analog stick controls the ordinary camera or look direction and the Firefighter nozzle; L1 centers the camera or changes radio stations; L2 and R2 cycle weapons or look left and right; L3 sounds the horn; R1 locks on or handbrakes; R3 looks behind Claude or activates vehicle missions; Select changes the camera mode.
References for this chapter
Portland — Luigi and Early Contacts (Portland Storyline up to Joey and Toni Introductions)
Begin after Luigi’s Girls is complete. Finish Luigi Goterelli’s remaining assignments, open Joey Leone’s garage work, complete The Fuzz Ball before Salvatore’s Last Requests, and clear Marty Chonks’ four unmarked-phone missions. El Burro’s four Hepburn Heights missions are not available yet: they unlock after Joey’s Van Heist and should be completed in Chapter 03 before Last Requests. This chapter therefore completes Luigi’s Portland sequence and Marty Chonks’ chain, while deliberately leaving El Burro’s Turismo, I Scream, You Scream, Trial by Fire and Big'N Veiny for the post-Van-Heist portion of the Portland route.
1. Confirm the starting point and make protected saves
Start this chapter only after Luigi’s Girls has been completed at Sex Club Seven in the Red Light District. Do not replay or recount that opening Luigi mission. The next Luigi assignment is Don’t Spank Ma Bitch Up. Joey Leone’s garage is in Trenton, beside the Bitch’n’ Dog Food factory.
Create a working save and a separate backup before accepting the next mission. Keep the backup untouched until The Fuzz Ball and Marty Chonks’ chain are complete. A controllable sedan is a useful general-purpose vehicle for passenger work and escapes. The Portland safehouse is also a practical reset point: use it to save, recover health and collect any weapon pickups that have already been unlocked by hidden-package milestones.
Do not begin Last Requests while The Fuzz Ball remains unfinished. Also remember that El Burro’s pay phone is not part of this chapter. After Van Heist, El Burro will contact Claude and unlock the Hepburn Heights phone chain for Chapter 03.
- Luigi’s Girls is already complete.
- A primary save and an untouched backup are available.
- The Portland safehouse is available for saving and recovery.
- El Burro’s four missions are reserved for after Van Heist.
2. Complete Don’t Spank Ma Bitch Up
Start the mission at Sex Club Seven. Go to the marked area near Portland Harbor and collect the baseball bat. Use it to eliminate the drug dealer, then take the marked Stallion. The mission requires the vehicle to be resprayed and delivered to Luigi’s lockup.
Drive the Stallion to the Red Light District Pay ’n’ Spray before taking it to the lockup in Portland View. Avoid unnecessary collisions and police attention because a badly damaged or destroyed vehicle can force a restart. You may use another method to eliminate the target, but the bat is the intended and safest low-ammo option at this stage.
After the delivery is accepted and the mission-passed message appears, save. Drive Misty For Me becomes available, and the route to Joey’s garage opens.
- Collect the baseball bat.
- Eliminate the drug dealer.
- Take the marked Stallion.
- Respray the vehicle in the Red Light District.
- Deliver it to Luigi’s lockup.
- Confirm completion before moving on.
3. Complete Drive Misty For Me and activate Joey’s work
Accept Drive Misty For Me from Luigi. Drive to Misty’s pickup point in Hepburn Heights and stop in the marker. Use the horn if necessary to make her enter, then take her to Joey Leone’s garage in Trenton.
Use a vehicle that handles predictably and take the safest route rather than cutting across traffic at high speed. Misty must arrive alive, and running her over or destroying the vehicle fails the mission. Stop inside Joey’s garage marker and wait for the scene and mission-complete message.
This assignment opens Joey’s garage missions, including Mike Lips Last Lunch, and also makes Pump-Action Pimp available from Luigi. It also activates Marty Chonks’ unmarked phone near the Bitch’n’ Dog Food factory. Save after completion.
- Pick up Misty in Hepburn Heights.
- Deliver Misty to Joey’s garage in Trenton.
- Confirm Joey’s mission marker is active.
- Locate Marty Chonks’ unmarked phone near the factory.
- Save before starting the next assignment.
4. Complete Pump-Action Pimp
Start Pump-Action Pimp at Sex Club Seven. Locate the pimp and his Diablo associate, who are travelling in a Diablo Stallion. Attack when the vehicle slows or stops. A controlled ram can expose the occupants, after which a firearm or close-range attack can finish the job.
The pimp carries a shotgun, so do not stand in front of him in the open. Use walls, parked vehicles and the club surroundings as partial cover. If the Diablo Stallion is moving, keep circling it rather than chasing directly behind it. Eliminate both targets and wait for the completion message.
The Fuzz Ball becomes available after Pump-Action Pimp. Complete it before accepting Salvatore’s Last Requests.
- Find the pimp and his associate.
- Use cover or a controlled vehicle attack.
- Eliminate both targets.
- Confirm that The Fuzz Ball is available.
- Save before beginning The Fuzz Ball.
5. Finish The Fuzz Ball before Last Requests
Start The Fuzz Ball at Sex Club Seven. The objective is to take at least four prostitutes to the police ball at Old School Hall in Chinatown within the mission’s five-minute time limit. Four successful deliveries are enough to pass; extra deliveries increase the reward but are not required.
Use a controllable vehicle and slow down well before each marked pickup. Hitting a prostitute fails the mission. A normal sedan is easier to steer through Portland than a large vehicle, especially when turning into the pickup markers or Old School Hall. Pick up a practical group of nearby targets first, then drive directly to the hall once the minimum has been reached.
The mission becomes unavailable on the current save after Last Requests if it was not completed. When the mission-passed message appears, save in a separate slot. This is the main Luigi mission that must be protected before Salvatore’s Portland cutoff.
- Start with a controllable passenger vehicle.
- Pick up the marked prostitutes without striking them.
- Deliver at least four within five minutes.
- Reach Old School Hall and confirm mission completion.
- Create a protected backup before continuing Portland’s storyline.
6. Complete Marty Chonks’ four unmarked-phone missions
Marty Chonks’ phone is outside the Bitch’n’ Dog Food factory in Trenton, close to Joey’s garage. It has no normal map blip and rings only during the daytime, approximately 09:00–19:00. Stand beside the phone during that window. If it does not ring, leave the area, advance the clock and return during the same time range.
The missions unlock in order: The Crook, The Thieves, The Wife and Her Lover. The Crook sends Claude to deal with a bank manager and return evidence to the factory. The Thieves involves two thieves and Marty’s vehicle. The Wife requires taking Mrs. Chonks away and disposing of the vehicle. Her Lover sends Claude after Carl and concludes the chain.
Read each current objective before moving. Several assignments involve a specific vehicle or delivery, so do not abandon the requested vehicle unless the mission explicitly changes the objective. Avoid attracting police attention before reaching the destination, and save after each successful mission. Marty’s missions are optional for ordinary story progression but required for a 100% file.
- Visit the unmarked phone outside the Bitch’n’ Dog Food factory.
- Check it between approximately 09:00 and 19:00.
- Complete The Crook.
- Complete The Thieves.
- Complete The Wife.
- Complete Her Lover.
- Verify all four missions in the progress records.
7. Leave El Burro’s chain for Chapter 03
Do not try to finish Turismo, I Scream, You Scream, Trial by Fire or Big'N Veiny during this chapter. El Burro’s Hepburn Heights phone chain unlocks after Joey’s Van Heist. After completing Van Heist in Chapter 03, answer or visit the Hepburn Heights phone and finish all four missions before Last Requests.
The four titles are Turismo, I Scream, You Scream, Trial by Fire and Big'N Veiny. I Scream, You Scream is one mission title, so this is a four-mission chain rather than five. Keeping the chain in Chapter 03 prevents the guide from claiming that the Portland Pay Phone work is complete too early.
For a 100% run, the correct Portland phone total at the end of this chapter is four Marty Chonks missions. After El Burro’s four missions are completed in Chapter 03, all eight Portland Pay Phone missions will be finished.
- Do not count El Burro’s chain as completed here.
- Complete Van Heist in the next Portland chapter.
- Return to El Burro’s Hepburn Heights phone after Van Heist.
- Finish all four El Burro missions before Last Requests.
- Count four, not eight, Portland Pay Phone missions at this chapter’s completion.
Before you move on
- Luigi’s Girls was completed before this chapter.
- Don’t Spank Ma Bitch Up is complete.
- Drive Misty For Me is complete and Joey’s garage work is active.
- Pump-Action Pimp is complete.
- The Fuzz Ball is complete with at least four prostitutes delivered.
- The Crook is complete.
- The Thieves is complete.
- The Wife is complete.
- Her Lover is complete.
- Marty Chonks’ unmarked phone was used during approximately 09:00–19:00 when necessary.
- Exactly four Portland Pay Phone missions are complete at this point: the Marty Chonks chain.
- El Burro’s four missions are not incorrectly counted as completed.
- Van Heist remains the trigger for El Burro’s chain in Chapter 03.
- A backup save preserves The Fuzz Ball and unfinished Portland content before Last Requests.
- Before accepting Last Requests, return in Chapter 03 to complete Turismo, I Scream, You Scream, Trial by Fire and Big'N Veiny.
- The player can proceed with Joey, Toni and Salvatore’s Portland missions without losing The Fuzz Ball.
References for this chapter
- GTA 3 Missions List: All Story Missions Guide & Phone Missions
- The Fuzz Ball | GTA 3 Mission Guide and Walkthrough
- Don’t Spank Ma Bitch Up | GTA 3 Mission Guide and Walkthrough
- Drive Misty For Me | Grand Theft Wiki
- Marty Chonks | GTA 3 Characters Guide
- Grand Theft Auto III - Missions Guide - PlayStation 2 - By fluxwildlyuncut
- Grand Theft Auto III PlayStation 2 Manual
Portland — Joey, Toni and Salvatore: Complete Portland and Unlock Staunton
Finish Joey’s remaining assignments, complete every Toni and Salvatore mission available in Portland, and clear El Burro’s four-mission Pay Phone chain after Van Heist. For a 100% file, confirm all eight Portland Pay Phone missions across Chapters 02 and 03: Marty Chonks’s four missions and El Burro’s Turismo, I Scream, You Scream, Trial by Fire and Big'N Veiny. Then complete Bomb Da Base: Act I and Act II, make a protected backup, and only afterward start Last Requests. Last Requests opens Staunton Island, but it permanently prevents unfinished Luigi, Joey and Toni missions from being completed on that save.
1. Complete Joey’s remaining missions at the Trenton garage
At Joey Leone’s garage in Trenton, complete Mike Lips Last Lunch, Farewell ‘Chunky’ Lee Chong, Van Heist, Cipriani’s Chauffeur, Dead Skunk in the Trunk and The Getaway. Dead Skunk in the Trunk and The Getaway are especially important for a completion file because they can be lost when the Portland storyline advances.
For Mike Lips Last Lunch, follow the Forelli target and damage the vehicle as required, but avoid unnecessary collisions with police or other traffic. Farewell ‘Chunky’ Lee Chong takes you to Lee Chong’s noodle factory in Chinatown. Approach with a firearm or a sturdy vehicle ready, eliminate the target, and leave before the surrounding gang response traps you.
Van Heist requires a Securicar. Find one, force the driver out by ramming or shooting the vehicle, and deliver it to the marked garage at Portland Harbor. Avoid excessive impacts before delivery. Completing Van Heist is the prerequisite that makes El Burro’s Pay Phone chain available.
Cipriani’s Chauffeur sends Claude through several passenger stops with Toni. Use a sound four-door vehicle, keep police attention low, and do not abandon the car while Toni is aboard. Dead Skunk in the Trunk requires delivering a body to the disposal location; drive directly instead of stopping to fight pursuers.
For The Getaway, use the mission’s provided BF Injection and follow the objective sequence: reach the hideout, sound the horn, collect the robbers at the bank, and return them to the hideout. Keep moving through the escape rather than stopping in the street to exchange fire.
- Mike Lips Last Lunch completed
- Farewell ‘Chunky’ Lee Chong completed
- Van Heist completed
- Cipriani’s Chauffeur completed
- Dead Skunk in the Trunk completed
- The Getaway completed
2. Complete El Burro’s four Pay Phone missions after Van Heist
After Van Heist, go to the Pay Phone in the parking lot at Hepburn Heights. Complete El Burro’s missions in sequence: Turismo, I Scream, You Scream, Trial by Fire and Big'N Veiny. These are optional for story progression but required for 100% completion. Completing them before Last Requests is strongly recommended because Portland becomes much more dangerous after the Leone family turns hostile.
Turismo is a street race around Portland. Bring a fast, controllable vehicle. A Banshee, Sentinel, Cheetah or another strong sports car is preferable. Learn the route before starting if necessary, take corners without oversteering, and use the radar to anticipate the next checkpoint. If the race becomes available after Portland gangs turn hostile, a bulletproof vehicle is much safer than an ordinary sports car.
In I Scream, You Scream, steal the marked ice-cream van and use it to lure gang members to the required locations. Stop in the marked area, activate the van’s trap, and move away before the explosion. Do not park so close that Claude is caught in the blast, and avoid damaging the van during the approach.
Trial by Fire gives Claude a Flamethrower and requires eliminating 25 Triads. Use streets and corners to control the encounter rather than charging into a group. Keep moving after setting an enemy or vehicle alight, and avoid standing beside burning cars. The mission becomes available after I Scream, You Scream.
Big'N Veiny sends Claude to recover stolen magazines. Follow each radar marker and collect every required item before returning to the drop-off. For the full bonus, collect all of the magazines; if one is missed, search the marked area again before leaving. When the four missions are complete, verify that Turismo, I Scream, You Scream, Trial by Fire and Big'N Veiny are all recorded.
Chapter 02 should already have covered Marty Chonks’s four unmarked-phone missions: The Crook, The Thieves, The Wife and Her Lover. Before leaving Portland, confirm those four Marty missions plus these four El Burro missions, for all eight Portland Pay Phone missions.
- Turismo completed
- I Scream, You Scream completed
- Trial by Fire completed
- Big'N Veiny completed
- Marty Chonks’s four missions confirmed from Chapter 02
- All eight Portland Pay Phone missions verified
3. Complete every Toni Cipriani mission
At Momma’s Restaurante in Saint Mark’s, complete Taking Out The Laundry, The Pick-Up, Salvatore’s Called A Meeting, Triads and Tribulations and Blow Fish. Do not stop after the first assignment; all five should be finished before Last Requests.
In Taking Out The Laundry, collect the grenades and destroy the three laundry vans. Throw from a safe distance, move away before detonation, and use a vehicle to block a van only when it is safe to do so. Avoid chasing a moving van into heavy traffic or a gang cluster.
The Pick-Up is an ambush at the payment meeting. Use nearby walls and vehicles as cover when the Triads attack, eliminate the attackers, and return the money to Toni. After this mission, Triad hostility makes Chinatown travel more dangerous, so complete nearby errands before starting another long route.
Salvatore’s Called A Meeting is given through Toni’s contact. Use a reliable four-door vehicle, collect Luigi and Toni at Joey’s garage, and deliver both passengers to Salvatore’s mansion. Avoid police attention and do not wreck or abandon the vehicle.
Triads and Tribulations sends Claude against several marked Triad groups. Use the Leone support when it appears, fight from cover, and clear each objective before moving to the next. Blow Fish requires driving an explosives-filled Trashmaster to the Triad fish factory. Keep the Trashmaster away from concentrated gunfire, take wide turns, and park inside the objective marker without destroying it.
- Taking Out The Laundry completed
- The Pick-Up completed
- Salvatore’s Called A Meeting completed
- Triads and Tribulations completed
- Blow Fish completed
4. Finish Salvatore’s Portland sequence
Complete Chaperone at Salvatore’s club. Pick up Maria and drive her through the required stops. Use a durable four-door vehicle, take broad roads, and avoid collisions that can make Maria leave or destroy the vehicle.
Start Cutting The Grass after Chaperone. Park near Luigi’s club in the required position and wait for Curly Bob to leave. Follow his taxi without tailgating; the spook meter indicates whether Claude is too close. At the harbor, wait for the conversation to finish, then run Curly Bob over or use a drive-by attack. Curly carries a shotgun, so do not approach him on foot at close range.
Bomb Da Base: Act I is the setup mission. Meet 8-Ball at his shop and accept the plan to attack the SPANK freighter. The operation itself is Bomb Da Base: Act II, which begins after the $100,000 funding requirement is met. If necessary, use the Portland jobs and side activities to raise the money before starting the attack.
For Bomb Da Base: Act II, pay the $100,000, then follow 8-Ball to Portland Harbor. Use the supplied sniper rifle and the elevated position to clear Cartel guards around the freighter. Prioritize enemies with a direct line to 8-Ball, use explosive barrels only when 8-Ball is safely away, and avoid rushing onto the exposed dock. Once the planting sequence is complete, retreat as directed and let the freighter detonate. The mission pays $150,000.
- Chaperone completed
- Cutting The Grass completed
- Bomb Da Base: Act I completed
- $100,000 available before Bomb Da Base: Act II
- Bomb Da Base: Act II completed
- The $150,000 reward received
5. Protect the save, then complete Last Requests
Make a separate save at the Portland safehouse after Bomb Da Base: Act II and before accepting Last Requests. Check the mission list rather than relying on the current map markers. Confirm all intended Luigi missions, all six Joey missions, all five Toni missions, Chaperone, Cutting The Grass, both Bomb Da Base missions, all four El Burro missions and the four Marty Chonks missions from Chapter 02.
Start Last Requests at Salvatore’s Gentlemen’s Club in Saint Mark’s. Take the marked Cheetah outside Luigi’s club. When Maria warns Claude that the vehicle is rigged with a bomb, do not continue toward the crusher. Follow the replacement objective to Callahan Point.
Meet Maria and Asuka at Callahan Point, board the Reefer, and follow the navigation marker across the water to Staunton Island. The mission completes when Claude reaches the Staunton destination. It awards $20,000, unlocks Staunton Island and makes the Staunton safehouse available.
After Last Requests, remaining Luigi, Joey and Toni missions are blocked on that save. The Leone family also becomes hostile, making Portland travel and unfinished side work harder. If any required Portland mission or Pay Phone mission was missed, reload the backup rather than continuing the main story.
- A separate backup exists before Last Requests
- All intended Luigi missions are complete
- All six Joey missions are complete
- All five Toni missions are complete
- Chaperone and Cutting The Grass are complete
- Bomb Da Base: Act I and Act II are complete
- All four El Burro missions are complete
- All four Marty Chonks missions from Chapter 02 are confirmed
- All eight Portland Pay Phone missions are verified
- Last Requests completed
- Staunton Island access unlocked
- The Staunton safehouse is usable
Before you move on
- Joey’s six missions are complete: Mike Lips Last Lunch, Farewell ‘Chunky’ Lee Chong, Van Heist, Cipriani’s Chauffeur, Dead Skunk in the Trunk and The Getaway.
- Toni’s five missions are complete: Taking Out The Laundry, The Pick-Up, Salvatore’s Called A Meeting, Triads and Tribulations and Blow Fish.
- Salvatore’s Chaperone and Cutting The Grass are complete.
- Bomb Da Base: Act I and Bomb Da Base: Act II are complete.
- The $150,000 Bomb Da Base: Act II reward was received after paying the $100,000 cost.
- El Burro’s four Pay Phone missions are complete: Turismo, I Scream, You Scream, Trial by Fire and Big'N Veiny.
- Marty Chonks’s four Pay Phone missions from Chapter 02 are complete: The Crook, The Thieves, The Wife and Her Lover.
- All eight Portland Pay Phone missions are verified before Last Requests.
- Last Requests is complete, Staunton Island is accessible, and the Staunton safehouse is available.
- The pre-Last Requests backup remains intact.
References for this chapter
- GTA 3 Missions List: All Story Missions Guide & Phone Missions
- Last Requests | GTA 3 Mission Guide & Walkthrough
- The Getaway — GTA 3 Mission Guide & Walkthrough — GTABase
- Trial By Fire — GTA 3 Mission Guide & Walkthrough — GTABase
- Grand Theft Auto III - Missions Guide - PlayStation 2 - By fluxwildlyuncut
- Grand Theft Auto III PlayStation 2 Manual
Staunton Island — Yakuza and Kenji Kasen Missions
After Last Requests opens Staunton Island, complete Asuka Kasen’s entire mission chain and Kenji Kasen’s five assignments before advancing Donald Love’s storyline. The safe completion order is Sayonara Salvatore, Under Surveillance, Paparazzi Purge, Payday For Ray, Two-Faced Tanner, Kanbu Bust-out, Grand Theft Auto, Deal Steal, Shima and Smack Down. Two-Faced Tanner must be finished before Donald Love’s Grand Theft Aero, while every Kenji mission must be finished before Waka-Gashira Wipeout!, because that mission kills Kenji and removes any unfinished Kenji assignments from the save.
Prepare Staunton Island and start Asuka’s route
Make a separate save at Asuka’s condominium in Newport before accepting Sayonara Salvatore. Keep a fast, durable car nearby and replenish health, armor and automatic-weapon ammunition. The Staunton Ammu-Nation, Newport Pay ’n’ Spray and Asuka’s condominium are useful landmarks for repeated attempts.
Sayonara Salvatore is available after Last Requests. Drive to the Red Light District and stake out Luigi’s club without parking directly in front of the entrance, where the Mafia can spot you. Wait for Salvatore to leave, identify his marked Sentinel, and pursue it immediately. Ram the vehicle, use drive-by fire or shoot the occupants when the opportunity is safe, and do not let Salvatore reach his mansion. The mission pays $25,000 and unlocks Under Surveillance.
- Create a backup save before Sayonara Salvatore.
- Pass Sayonara Salvatore and confirm that Under Surveillance is available.
- Avoid lingering directly outside Luigi’s club during the stakeout.
Under Surveillance
Under Surveillance sends you after three surveillance groups around Staunton Island. The targets are located at the small island in Belleville Park’s lake, beside a black Rumpo in Bedford Point, and on balconies opposite Kenji’s Casino in Torrington. The mission is timed, so use a fast vehicle and plan to deal with each group without returning to Asuka’s condominium between targets.
A sniper rifle makes the distant balcony group safer, but an assault weapon can also work if you use cover and approach from the street. At the lake, shoot from the shore or a nearby elevated position rather than swimming into the group. At the Rumpo, stop far enough away to avoid being trapped by return fire. Finish the balcony targets last if you have a clear route to the casino area. Passing the mission unlocks Paparazzi Purge for Asuka and Kanbu Bust-out for Kenji.
- Eliminate the lake group.
- Eliminate the Rumpo group in Bedford Point.
- Eliminate the balcony group opposite Kenji’s Casino.
- Finish within the mission timer.
Paparazzi Purge
Return to Asuka’s condominium after Under Surveillance. Take the police Predator from the marina and pursue the reporter’s Speeder. The Predator’s mounted guns are the intended weapon, so stay behind or alongside the target and keep firing while turning with the boat. Avoid beaching your own boat on the shoreline, because losing time while repositioning can allow the reporter to escape.
If the reporter reaches land, he leaves the boat and takes a Stallion. Follow the radar marker through the streets and destroy the car or run him down. Do not stop to fight unrelated police or gang members. The mission is complete when the reporter is killed and rewards $10,000. Paparazzi Purge unlocks Payday For Ray.
- Steal the police Predator.
- Destroy the reporter’s boat before he escapes, or pursue him on land if he reaches shore.
- Pass Paparazzi Purge and confirm Payday For Ray is available.
Payday For Ray
Start Payday For Ray from Asuka’s condominium with a fast car already parked outside. You have roughly three and a half minutes to answer four payphones. The route runs through Torrington, West Belleville Park, Liberty Campus and South Belleville Park. Each phone must be reached and answered before the next marker appears, so leave the car positioned for a quick exit and avoid unnecessary collisions.
Use the radar markers and memorize the short approaches to the phones after an initial attempt. Do not waste time stopping to fight police or replacing a damaged vehicle unless it is no longer drivable. Once all four calls are answered, go to the new marker in Belleville Park and enter the public restroom to meet Ray. The mission pays $11,000 and unlocks Two-Faced Tanner.
- Answer the Torrington payphone.
- Answer the West Belleville Park payphone.
- Answer the Liberty Campus payphone.
- Answer the South Belleville Park payphone.
- Reach Ray’s restroom meeting after the phone sequence.
Two-Faced Tanner before Grand Theft Aero
Accept Two-Faced Tanner as soon as it appears at Asuka’s condominium. Drive to Kenji’s Casino in Torrington, enter the marker and wait for Tanner to run to his Esperanto. Follow him as soon as he leaves. When you attack the Esperanto, the original PlayStation 2 mission raises the wanted level to four stars, so begin with a fast vehicle and an Uzi or Micro SMG.
Stay alongside Tanner and use drive-by fire while maintaining forward movement. Ramming him into walls or traffic can slow the pursuit, but do not allow the police to box your vehicle against a curb. If Tanner exits the Esperanto, immediately run him over or shoot him. Losing the wanted level is not necessary before Tanner is eliminated; concentrate on the target, then escape or finish the mission once the objective registers.
Two-Faced Tanner pays $20,000 and is missable. Donald Love’s Grand Theft Aero can remove it from the map, so save in a new slot immediately after passing Tanner and do not start Grand Theft Aero until the mission is confirmed complete.
- Pass Two-Faced Tanner.
- Confirm the mission is recorded before starting Grand Theft Aero.
- Keep the original save until the next missable-content cutoff is safely passed.
Kanbu Bust-out
At Kenji’s Casino, take a police car to 8-Ball’s Bomb Shop in Newport and have it fitted with a bomb. Drive the rigged police car back to the police station and use the marked approach so the vehicle is accepted as an official police vehicle. Park at the indicated position, arm the bomb and move away before it detonates.
After the blast, collect Kanbu and escape in a police vehicle from the station area. Once clear, change to an ordinary car and use a Pay ’n’ Spray if necessary before driving Kanbu to the Hyaku Dojo in Bedford Point. The mission is not complete when Kanbu leaves the station; wait for him to enter the dojo. Passing it unlocks Grand Theft Auto.
- Rig a police car at 8-Ball’s Bomb Shop.
- Use the bomb at the police station.
- Collect Kanbu after the explosion.
- Deliver Kanbu to the Hyaku Dojo in Bedford Point.
Grand Theft Auto
Kenji requires three specific sports cars: a Stinger, an Infernus and a Cheetah. The mission gives you six minutes to deliver all three to the designated garage. Before starting, learn the garage approach and avoid beginning with a damaged vehicle or an unnecessarily slow car.
Take each marked vehicle directly to the garage and avoid jumps, gunfire and sharp curb impacts. The cars must arrive in mint condition, so use the Pay ’n’ Spray when the route and remaining time allow it, and do not substitute another sports car. A practical route is to collect the marked cars in an order that keeps the return trips short, but prioritize a clean delivery over risky shortcuts. The mission ends only after all three cars have been accepted.
- Deliver the Stinger.
- Deliver the Infernus.
- Deliver the Cheetah.
- Complete all three deliveries within six minutes and in mint condition.
Deal Steal
Bring a Yardie Lobo to Kenji’s Casino. If you steal one from a Yardie, leave the area quickly because other Yardies may attack the stolen vehicle. Drive to the meeting point near Carson General Hospital in Rockford and sound the horn or enter the marker to begin the ambush.
The Cartel attacks with Cruisers. Stay in the Lobo or use it as moving cover while eliminating the attackers, then collect the briefcase. The Yakuza contact does not need to survive for the mission to continue; the essential objective is recovering the briefcase and returning it to Kenji’s Casino. Avoid chasing enemies away from the meeting area before the briefcase is secured.
- Bring a Yardie Lobo to the casino.
- Trigger and survive the Cartel ambush.
- Collect the briefcase.
- Return it to Kenji’s Casino.
Shima
Shima sends you to collect three protection payments. Visit the first two marked businesses and take their briefcases. At the third location, Uncle BJ’s Deli in Belleville Park has been robbed, so follow the new marker to Hepburn Heights in Portland.
The Diablos are guarding the missing money in Hepburn Heights. Approach with armor and an automatic weapon, use the vehicle to create distance, and eliminate the gang members before collecting the third briefcase. Return all collected money to Kenji’s Casino. Passing Shima unlocks Smack Down.
- Collect the first protection-money briefcase.
- Collect the second protection-money briefcase.
- Investigate the robbed deli.
- Recover the third briefcase from the Diablos in Hepburn Heights.
- Return to Kenji’s Casino.
Smack Down and the Kenji cutoff
Smack Down requires at least eight Yardie SPANK dealers to be killed before they finish their sales and disappear. Use a fast, sturdy vehicle and follow the radar targets across Staunton. Run over dealers when the road is clear; use drive-by fire for targets near traffic, walls or tight corners. Keep moving, because waiting at one target can cause several others to vanish.
Eight kills are enough to pass, while additional kills increase the reward. Once the mission is complete, save in a separate slot and verify every Kenji mission: Kanbu Bust-out, Grand Theft Auto, Deal Steal, Shima and Smack Down. Do not accept Donald Love’s Waka-Gashira Wipeout! until this list is complete. Waka-Gashira Wipeout! kills Kenji and permanently removes unfinished Kenji missions from that save.
- Kill at least eight Yardie dealers.
- Pass Smack Down before Waka-Gashira Wipeout!.
- Confirm all five Kenji missions are recorded as passed.
- Create a protected save before continuing Donald Love’s storyline.
Before you move on
- Sayonara Salvatore is complete.
- Under Surveillance is complete.
- Paparazzi Purge is complete.
- Payday For Ray is complete.
- Two-Faced Tanner is complete before Grand Theft Aero.
- Kanbu Bust-out is complete.
- Grand Theft Auto is complete with the Stinger, Infernus and Cheetah delivered in mint condition within six minutes.
- Deal Steal is complete.
- Shima is complete.
- Smack Down is complete with at least eight Yardie dealers eliminated.
- A backup save exists after Smack Down and before Waka-Gashira Wipeout!.
- No Kenji mission remains at the Torrington casino marker.
- The save is ready for Chapter 05 with the entire Asuka and Kenji mission lists recorded as passed.
References for this chapter
- Grand Theft Auto III Guide and Walkthrough for PlayStation 2
- Grand Theft Auto III — Guide and Walkthrough — PlayStation 2 — GameFAQs
- GTA 3 Missions List: All Story Missions Guide & Phone Missions
- Sayonara Salvatore — GTA 3 Mission Guide & Walkthrough
- Paparazzi Purge — GTA Wiki
- Under Surveillance — GTA Wiki
- Shima — GTA Wiki
- Smack Down — GTA Wiki
- Grand Theft Auto III PlayStation 2 Manual
Staunton Island — Asuka, Ray Machowski and Donald Love Paths
This chapter begins with Chapter 04 already complete. Before doing anything else, verify that Sayonara Salvatore, Under Surveillance, Paparazzi Purge, Payday for Ray and Two-Faced Tanner are all recorded as passed for Asuka, and that Kanbu Bust-Out, Grand Theft Auto, Deal Steal, Shima and Smack Down are all recorded as passed for Kenji. Do not replay those missions here. The active route starts with Ray Machowski’s five missions through Plaster Blaster, continues through Donald Love’s Liberator, Waka-Gashira Wipeout! and A Drop In The Ocean, then returns to Ray for Marked Man after Shoreside Vale opens. Finish Donald’s remaining missions—Grand Theft Aero, Escort Service, Decoy and Love’s Disappearance—after the missable prerequisites are secured.
Verify the completed Asuka and Kenji prerequisites
Use a backup save or your mission records before accepting a new marker. Chapter 04 must already contain the complete Asuka sequence: Sayonara Salvatore, Under Surveillance, Paparazzi Purge, Payday for Ray and Two-Faced Tanner. Two-Faced Tanner must be complete before Grand Theft Aero, because Grand Theft Aero removes that Asuka mission from the current save.
Also verify all five Kenji Kasen missions: Kanbu Bust-Out, Grand Theft Auto, Deal Steal, Shima and Smack Down. Waka-Gashira Wipeout! kills Kenji and removes unfinished Kenji assignments, so do not begin it while any of those five missions remain incomplete.
Keep a separate save with these prerequisites finished. The mission order in this chapter assumes that none of the Asuka or Kenji work needs to be repeated. If a required mission is missing, reload the earlier Staunton Island save before continuing.
- Sayonara Salvatore is complete.
- Under Surveillance is complete.
- Paparazzi Purge is complete.
- Payday for Ray is complete.
- Two-Faced Tanner is complete.
- Kanbu Bust-Out, Grand Theft Auto, Deal Steal, Shima and Smack Down are complete.
- A backup save preserves the completed Asuka and Kenji prerequisites.
Complete Ray Machowski’s five missions through Plaster Blaster
Start at Ray’s public-restroom marker in Belleville Park. Complete Silence the Sneak, Arms Shortage, Evidence Dash, Gone Fishing and Plaster Blaster in that order. These are the active Ray missions for this chapter; Marked Man is handled later, after Shoreside Vale becomes accessible.
In Silence the Sneak, reach the target quickly and use nearby cover when he begins moving through open streets. Arms Shortage is a useful preparation mission because completing it opens Phil Cassidy’s Army Surplus, giving access to armor and heavier weapons. In Evidence Dash, use a direct route between the marked vehicle, the evidence locations and the disposal point, avoiding unnecessary collisions that waste the timer.
For Gone Fishing, take a stable boat and keep a parallel course with the target. Broad turns are safer than sharp corrections, and firing while your boat is alongside the target reduces missed shots. In Plaster Blaster, follow Leon McAffrey’s ambulance until he abandons it. Then destroy the armored bodycast with a vehicle or explosion; ordinary gunfire and fire are ineffective against it. Do not destroy the ambulance before Leon is forced out.
- Silence the Sneak is passed.
- Arms Shortage is passed and Phil Cassidy’s Army Surplus is available.
- Evidence Dash is passed.
- Gone Fishing is passed.
- Plaster Blaster is passed.
- Marked Man is not incorrectly counted as complete yet.
Complete Liberator
Accept Liberator at Donald Love’s office. Drive to Fort Staunton, steal a Cartel Cruiser and take it to the Colombian compound in Aspatria. Use the cruiser to enter the compound, clear the Cartel guards and locate the Old Oriental Gentleman inside the garages.
Once the rescued passenger is found, get him into the vehicle and leave the compound instead of staying to fight enemies that no longer affect the objective. Return to Love Media to finish the mission. Keep a durable vehicle available for the return trip, since the compound and surrounding streets can produce heavy resistance.
Save after Liberator and before Waka-Gashira Wipeout!. This is a final practical checkpoint for confirming that every Kenji mission was completed before Kenji is removed.
- Liberator is passed.
- The Old Oriental Gentleman reaches Love Media.
- A backup save exists before Waka-Gashira Wipeout!.
Complete Waka-Gashira Wipeout! after the Kenji check
Before entering Donald’s marker, verify once more that Kanbu Bust-Out, Grand Theft Auto, Deal Steal, Shima and Smack Down are all complete. Do not start this mission merely because Kenji’s marker has been visited; every mission in the chain must be passed.
Steal a Cartel Cruiser at Fort Staunton and drive it to the Newport multi-storey car park. Take the cruiser up to the upper level, where Kenji is surrounded by Yakuza protection. Drive into Kenji while disguised as a Colombian, then leave the car park immediately. Avoid an extended gunfight because the mission is designed around the vehicle attack and the escape afterward.
After the completion message appears, save. From this point onward, unfinished Kenji missions cannot be recovered on the current save.
- All five Kenji missions were complete before starting Waka-Gashira Wipeout!.
- A Cartel Cruiser was used for the attack.
- Kenji was eliminated and the mission passed.
- The completed mission was saved.
Complete A Drop In The Ocean and open Shoreside Vale
Start A Drop In The Ocean at Love Media and go to Asuka’s Condo to begin the aircraft drop. Obtain a boat with dependable acceleration and enough room to turn. Follow the plane and collect all six packages as they fall into the water.
Prioritize package collection over fighting police boats. Keep moving, use wide turns and check the water behind the boat after each pickup so a package is not left outside your path. When all six packages are aboard, return them to Love Media.
Completing A Drop In The Ocean opens Shoreside Vale and makes the Wichita Gardens safehouse available. Access through the Lift Bridge or Porter Tunnel is an island-unlock result, not proof that all 100 percent prerequisites were preserved. Keep the earlier backup save.
- The plane was reached and followed.
- All six packages were collected.
- The packages were delivered to Love Media.
- Shoreside Vale access is open.
- A post-unlock save was created.
Complete Marked Man after Shoreside Vale opens
After Plaster Blaster and A Drop In The Ocean are complete, return to Ray’s Belleville Park marker for Marked Man. This is Ray’s sixth mission and must be completed for the full named-story checklist. The Bulletproof Patriot and supplies at Ray’s lockup are rewards; they are useful but do not substitute for passing the mission.
Ray gives Claude a short timed run to Francis International Airport. Start with a fast, controllable vehicle and use the Porter Tunnel rather than waiting for the Lift Bridge. Avoid police fights, detours and vehicle changes that consume the timer. Once Ray reaches the airport, follow the objective to his lockup and collect the Bulletproof Patriot if desired.
Save after the completion message. Marked Man is now recorded as complete, even if you choose not to claim every optional lockup item.
- Plaster Blaster and A Drop In The Ocean were complete before Marked Man began.
- Ray reached Francis International Airport within the mission timer.
- Marked Man is passed.
- Marked Man is recorded as a completed named story mission.
- The lockup reward was collected or intentionally left for later.
Finish Donald Love’s remaining missions
Begin Grand Theft Aero only after Two-Faced Tanner is confirmed complete. Travel to Francis International Airport, take the marked Panlantic vehicle and follow the mission objectives to the Fort Staunton construction site. Recover the package and return it to Love Media. Use cover around the airport and construction site, and avoid careless explosives that might destroy a required vehicle or objective.
In Escort Service, protect the Securicar until it reaches the Pike Creek lockup. Stay close enough to intercept attackers, but do not drive so far ahead that the Securicar is left exposed. Use intersections and narrow approaches to remove pursuers before they can ram the target.
For Decoy, take the marked Securicar from the Pike Creek garage and lead the police away from the warehouse. Leave the garage in the Securicar and keep it moving while monitoring its damage. The mission depends on the decoy vehicle surviving the pursuit; do not abandon it or treat a temporary escape from the police as completion.
Return to Donald’s marker for Love’s Disappearance after Decoy. Enter the marker, follow the scene to its completion and wait for the completion message. This ends Donald Love’s route for this chapter. Bait, Espresso-2-Go!, S.A.M. and Ransom remain for the final story chapter.
- Grand Theft Aero is passed after Two-Faced Tanner.
- Escort Service is passed with the Securicar reaching Pike Creek.
- Decoy is passed with the decoy Securicar surviving the required pursuit.
- Love’s Disappearance is passed.
- Bait remains for the next chapter.
- Espresso-2-Go! remains for the next chapter.
- S.A.M. remains for the next chapter.
- Ransom remains for the next chapter.
Before you move on
- Sayonara Salvatore, Under Surveillance, Paparazzi Purge, Payday for Ray and Two-Faced Tanner were completed in Chapter 04.
- Kanbu Bust-Out, Grand Theft Auto, Deal Steal, Shima and Smack Down were completed in Chapter 04.
- Silence the Sneak, Arms Shortage, Evidence Dash, Gone Fishing and Plaster Blaster are passed.
- Liberator, Waka-Gashira Wipeout! and A Drop In The Ocean are passed.
- Shoreside Vale is open through the repaired Lift Bridge or Porter Tunnel.
- Marked Man is passed after Plaster Blaster and A Drop In The Ocean.
- Grand Theft Aero, Escort Service, Decoy and Love’s Disappearance are passed.
- No unfinished Kenji mission remains in the mission records.
- The complete Asuka prerequisite list is preserved before Grand Theft Aero.
- Bait, Espresso-2-Go!, S.A.M. and Ransom remain for the final story chapter.
- A backup save exists before the final Asuka and Catalina mission sequence.
References for this chapter
- Grand Theft Auto III - Guide and Walkthrough - PlayStation 2
- Grand Theft Auto III — Mission Select Code Guide for PlayStation 2
- Plaster Blaster — GTA 3 Mission Guide and Walkthrough
- A Drop In The Ocean — GTA 3 Mission Guide and Walkthrough
- Marked Man | GTA 3 Mission Guide and Walkthrough
- Grand Theft Aero — GTA 3 Mission Guide and Walkthrough
- Decoy — GTA 3 Mission Guide and Walkthrough
- Love’s Disappearance — GTA 3 Mission Guide and Walkthrough
- GTA 3 Missions List: All Story Missions Guide & Phone Missions
Unlocking and Entering Shoreside Vale — Getting the Final Island Ready
Begin this chapter only after A Drop In The Ocean has been completed in Chapter 05. That mission opens the normal routes into Shoreside Vale and makes the Wichita Gardens safehouse available. Use this chapter to confirm access, preserve backup saves, verify that Portland and Staunton missable content was not lost, complete Marked Man if it remains available, and prepare for the final island missions. Reaching Shoreside Vale alone does not prove that the save still qualifies for 100% completion.
1. Confirm that A Drop In The Ocean opened Shoreside Vale
Load the post-mission save from Chapter 05 and confirm that A Drop In The Ocean is recorded as passed. Do not start or repeat that mission here. Its completion, not Marked Man, is the normal story event that opens Shoreside Vale. The Porter Tunnel connection to the airport area becomes usable, and the Shoreside Lift Bridge is available as another route.
Travel from Staunton Island toward the final island by the Porter Tunnel or the Lift Bridge. If you use the bridge, wait for its normal traffic cycle rather than treating a raised bridge as a failed unlock. The tunnel is usually the safer route because it avoids bridge traffic and gives a direct approach to Francis International Airport and Wichita Gardens.
Entering Shoreside Vale is only an access check. It does not confirm that Portland or Staunton missions were completed in the required order, so perform the separate checklist below before moving on.
- A Drop In The Ocean is recorded as passed.
- The Porter Tunnel or Shoreside Lift Bridge provides normal access to Shoreside Vale.
- The current file is the post-mission Chapter 05 save, not a replay or temporary mission state.
2. Preserve the pre-unlock save and create a Wichita Gardens backup
Keep the separate Chapter 05 save from before the final-island opening. Do not overwrite it. That file is the recovery point if a later checklist review reveals that a Portland or Staunton mission was missed, or if you need to replay the island-unlocking sequence after correcting the order.
Drive into Wichita Gardens and locate the house icon for the Shoreside Vale safehouse. Save in a new slot. The safehouse becomes available after A Drop In The Ocean and provides a convenient starting point for the remaining island missions.
For a 100% attempt, keep at least three useful files: an older general backup, the Chapter 05 pre-unlock file, and the new Wichita Gardens post-unlock file. The original PlayStation 2 release has no mission-replay menu that can restore a mission removed by an unfavorable story order.
- The Chapter 05 pre-unlock backup remains intact.
- The Wichita Gardens safehouse has been reached and saved in a new slot.
- At least one additional recovery file is available.
- The run is not being maintained through one repeatedly overwritten save.
3. Verify all Portland missable missions before continuing
Review the earlier mission records before accepting more final-island work. Before Salvatore's Last Requests, every available mission from Luigi, Joey, and Toni must have been completed. Last Requests permanently prevents any remaining missions from those three contacts from being finished on that save, making this a 100% cutoff rather than merely a recommended order.
For Luigi, confirm the late missions Pump-Action Pimp and The Fuzz Ball. For Joey, confirm Dead Skunk in the Trunk and The Getaway. For Toni, confirm that every Toni marker that appeared before Last Requests was completed, including the available Cipriani mission sequence covered in the Portland chapters. Do not assume Toni is safe simply because Luigi and Joey are complete.
Also verify the Portland Pay Phone chain, including El Burro's missions after Van Heist, if you are pursuing 100%. These phone missions are separate from the named Leone contact missions, but completing them before the Portland cutoff avoids unnecessary travel problems and preserves the intended 100% order.
- Every available Luigi mission was completed before Last Requests.
- Every available Joey mission was completed before Last Requests.
- Every available Toni mission was completed before Last Requests.
- The Portland Pay Phone missions intended for the 100% run were completed before their relevant cutoff.
- Any missing entry has been checked against an earlier backup rather than dismissed.
4. Verify Kenji, Two-Faced Tanner, and Marked Man
Confirm that all five Kenji Kasen missions were completed before Waka-Gashira Wipeout!: Kanbu Bust-out, Grand Theft Auto, Deal Steal, Shima, and Smack Down. Waka-Gashira Wipeout! removes Kenji from the story and prevents unfinished Kenji missions from being completed.
Confirm that Asuka's Two-Faced Tanner was completed before Grand Theft Aero. This mission is a separate Staunton cutoff and is not restored by opening Shoreside Vale.
Marked Man is Ray Machowski's final mission and is required for the complete named-story list and for 100% completion. It becomes available after Plaster Blaster and A Drop In The Ocean. If its marker remains at Ray's Belleville Park contact point, take a fast, controllable vehicle and complete the airport run before declaring the story checklist complete. The original mission uses a three-minute limit and the bridge route is under surveillance, so use the Porter Tunnel from the hospital side of Staunton for the most reliable approach.
After Ray reaches Francis International Airport, return to his Staunton lockup to collect the available supplies. The Bulletproof Patriot is a useful optional reward, but its optional status does not make Marked Man optional. If Marked Man is already recorded as passed, do not repeat it.
- Kenji's five missions were completed before Waka-Gashira Wipeout!.
- Two-Faced Tanner was completed before Grand Theft Aero.
- Marked Man is complete or remains available to complete.
- Marked Man is treated as required; the Bulletproof Patriot is treated as optional.
5. Replenish equipment and prepare a reliable vehicle
Restore health and body armor before starting the next mission. Visit Ammu-Nation as needed, then check the Wichita Gardens safehouse and other earned weapon pickups. Hidden-package weapons and side-activity rewards are preparation benefits, not requirements for opening Shoreside Vale.
Carry a dependable firearm for exposed enemy groups and a close-range weapon for interiors. Keep explosives for situations where the blast will not damage Claude, a protected vehicle, or a friendly character. A sturdy four-door car is suitable for general travel; choose a faster, controllable vehicle if a mission imposes a time limit.
After a failed attempt, rearm and repair before retrying. Return to the safehouse or Ammu-Nation, but do not overwrite the protected pre-unlock file. Store a usable spare vehicle near the safehouse if your current car is badly damaged.
- Health and armor are restored.
- Ammunition is replenished.
- Safehouse weapon pickups have been checked.
- A reliable vehicle is available.
- The protected backup saves remain untouched.
6. Confirm the Chapter 05 results and enter the finale chapter
Grand Theft Aero, Escort Service, Decoy, and Love's Disappearance belong to the preceding Chapter 05 progression. Confirm each is recorded as passed, but do not repeat their boat, package, convoy, or Love Media delivery walkthroughs here. If one is absent, consult the earlier save and chapter rather than assuming that Shoreside access repaired the record.
Once A Drop In The Ocean, all available Luigi, Joey, and Toni missions, the Kenji sequence, Two-Faced Tanner, Marked Man, Grand Theft Aero, Escort Service, Decoy, and Love's Disappearance are verified, continue to Chapter 07. Hidden packages, pay phones, RC challenges, off-road tasks, and vehicle activities remain separate from island access and main-story progression, although many are required for 100% completion.
- A Drop In The Ocean is complete.
- Grand Theft Aero, Escort Service, Decoy, and Love's Disappearance are confirmed from Chapter 05.
- All available Luigi, Joey, and Toni missions were completed before Last Requests.
- Kenji's five missions and Two-Faced Tanner were protected from their cutoffs.
- Marked Man is complete or still available.
- The Wichita Gardens save and earlier backups are protected.
- The save is equipped for the remaining Shoreside Vale missions.
Before you move on
- A Drop In The Ocean is recorded as passed before this chapter begins.
- The Porter Tunnel or Shoreside Lift Bridge provides access to Shoreside Vale.
- The Wichita Gardens safehouse has been reached and used for saving.
- The Chapter 05 pre-unlock backup remains intact.
- A separate post-unlock backup has been created.
- Every available Luigi mission was completed before Last Requests.
- Every available Joey mission was completed before Last Requests.
- Every available Toni mission was completed before Last Requests.
- The Portland Pay Phone work intended for the 100% run was preserved.
- Kanbu Bust-out, Grand Theft Auto, Deal Steal, Shima, and Smack Down were completed before Waka-Gashira Wipeout!.
- Two-Faced Tanner was completed before Grand Theft Aero.
- Marked Man is complete or remains available before the guide claims the complete story checklist.
- Grand Theft Aero, Escort Service, Decoy, and Love's Disappearance are confirmed as complete from Chapter 05.
- Health, armor, ammunition, safehouse weapons, and a dependable vehicle are ready.
- Optional side activities are not being mistaken for requirements to open Shoreside Vale or finish the main story.
References for this chapter
- Grand Theft Auto III - Guide and Walkthrough - PlayStation 2
- Grand Theft Auto III Guide and Walkthrough for PlayStation 2
- Grand Theft Auto III - Missions Guide - PlayStation 2 - By fluxwildlyuncut
- Marked Man | GTA 3 Mission Guide and Walkthrough
- Last Requests | GTA 3 Mission Guide & Walkthrough
- Grand Theft Auto III PlayStation 2 Manual
Shoreside Vale — Final Story Missions and The Exchange
This chapter completes the original North American PlayStation 2 campaign with Bait, Espresso-2-Go!, S.A.M., Ransom, and The Exchange. Before beginning, protect all earlier missable content, especially every available Luigi, Joey, and Toni mission before Last Requests, all five Kenji missions before Waka-Gashira Wipeout!, and Two-Faced Tanner before Grand Theft Aero. Marked Man should also be complete for the full named-story and 100% checklists, although it is not required simply to unlock The Exchange. The original PS2 Statistics screen counts 48 story missions because Give Me Liberty and Luigi’s Girls are paired, as are S.A.M. and Ransom; this guide tracks those as 50 named story entries.
Confirm the final prerequisites
Begin with Shoreside Vale open and Donald Love’s route complete through Love’s Disappearance. Confirm that every available Luigi, Joey, and Toni mission was finished before accepting Last Requests if this is a 100% file. Also verify all five Kenji Kasen missions were completed before Waka-Gashira Wipeout!, and Two-Faced Tanner was completed before Grand Theft Aero.
Check that Marked Man is recorded. It is part of the complete named-story checklist and 100% requirements, and it awards Ray’s Bulletproof Patriot plus access to the Rocket Launcher at Phil’s Army Surplus through Ray’s mission strand. Marked Man is not, by itself, a prerequisite for The Exchange to appear, so do not describe it as an island-access requirement.
Save in a separate slot before starting the final Asuka sequence. Restore health and armor, carry assault-rifle ammunition, and obtain Rocket Launcher ammunition if possible. The Bulletproof Patriot is valuable for the finale, but it is not immune to explosions, rockets, fire, collisions, or being overturned.
- All available Luigi, Joey, and Toni missions were completed before Last Requests.
- All five Kenji missions and Two-Faced Tanner are recorded.
- Donald Love’s route is complete through Love’s Disappearance.
- Marked Man is recorded for the named-story and 100% checklists.
- A backup save, full health, armor, and useful ammunition are ready.
Complete Bait
Start Bait at Asuka’s marker at the Panlantic construction site in Fort Staunton. Claude must act as bait for three Colombian Cartel death squads positioned in Shoreside Vale. The squads are found around Pike Creek, near Cochrane Dam, and in Cedar Grove; the mission’s Yakuza ambush is in Pike Creek.
Drive to the first marked squad and get its attention without destroying the vehicles or allowing the occupants to leave outside the ambush area. Lead the pursuing Cartel car back to the Pike Creek trap. Keep moving until the squad enters far enough for the Yakuza to attack, then stay clear and let the ambush do the work. Killing the squad yourself or causing the occupants to exit in the wrong place can fail the mission.
Repeat the process for the squads near Cochrane Dam and Cedar Grove. Use a durable vehicle, avoid stopping to trade gunfire, and do not arrive so far ahead that the pursuing car loses interest. When all three squads have been eliminated inside the Pike Creek trap, Bait ends and Espresso-2-Go! becomes available.
- The Pike Creek squad was lured into the Yakuza trap.
- The Cochrane Dam squad was lured into the same trap.
- The Cedar Grove squad was lured into the same trap.
- All three squads were destroyed by the ambush.
- Espresso-2-Go! is available.
Complete Espresso-2-Go!
Espresso-2-Go! requires nine coffee stands to be destroyed: two in Portland, five on Staunton Island, and two in Shoreside Vale. The eight-minute timer begins when the first stand is destroyed, so use the untimed opening to drive around and identify the marked stands before attacking one.
A practical route is to begin in Portland, continue through Staunton Island, and finish in Shoreside Vale. Destroy a stand by ramming it with a vehicle or using explosives or the Rocket Launcher. The Bulletproof Patriot is particularly useful because rival gangs will fire on Claude throughout the route, but it can still be damaged by explosions and overturned by heavy impacts.
Expect strong resistance in Saint Mark’s because the Mafia is hostile. Do not linger after destroying the Portland targets. Once every stand is destroyed before the timer expires, Espresso-2-Go! is complete and S.A.M. becomes available at the construction site.
- Two Portland stands are destroyed.
- Five Staunton Island stands are destroyed.
- Two Shoreside Vale stands are destroyed.
- All nine stands are destroyed before the eight-minute timer expires.
- S.A.M. is available.
Complete S.A.M.
Before entering S.A.M., carry full armor, full health, assault-rifle ammunition, and Rocket Launcher ammunition. Take the marked boat from the pier and follow the buoys toward Francis International Airport. Claude cannot swim, so approach the airport ramp carefully and drive the boat onto land before leaving it.
Clear the nearby Cartel guards quickly and reach the runway firing position. Use the Rocket Launcher against the incoming Dodo carrying the SPANK shipment. Park or leave the boat far enough away that the rocket blast cannot destroy it. Once the aircraft crashes, collect all eight packages scattered on the runway.
Return the cargo to the Panlantic construction site. The boat route is usually safer than forcing a drive through the airport and its police presence. If using the Bulletproof Patriot instead, remember that it resists gunfire but is still vulnerable to explosions and rockets. Completing S.A.M. leads directly into the Ransom story entry.
- The marked boat and runway approach are reached.
- The SPANK-carrying Dodo is destroyed.
- All eight packages are collected.
- The SPANK is returned to the construction site.
- S.A.M. displays Mission Complete.
Trigger Ransom and prepare The Exchange
Ransom follows S.A.M. as the next story entry. Go to the nearby construction-site marker after returning the cargo and allow the scene to play. Asuka and Miguel are found dead, Maria has been taken, and Catalina demands $500,000 for her release. Ransom has no separate combat sequence, but it remains a named story entry and is paired with S.A.M. on the original PS2 Statistics counter.
Before entering The Exchange, make sure the save contains at least $500,000. Save again at the Shoreside Vale safehouse, restore health and armor, and create another backup. If using the Bulletproof Patriot, park it outside Catalina’s mansion in Cedar Grove before entering the mission marker. It is useful, not invulnerable.
- Ransom has triggered after S.A.M.
- At least $500,000 is available.
- The Exchange is available at the Cartel mansion.
- A backup save exists before entering the mansion.
- Health and armor are restored.
Escape the mansion and reach Cochrane Dam
Enter The Exchange at Catalina’s mansion in Cedar Grove. After the exchange fails, Claude is stripped of his carried weapons except for a pistol and retains body armor. Kill the guards blocking the exit, collect nearby ammunition if it is directly on the route, and leave rather than attempting to clear the compound.
Take the Cartel Cruiser outside or the Bulletproof Patriot parked nearby. Follow Catalina’s helicopter toward Cochrane Dam. A seven-minute timer governs the chase. Stay on the main road, avoid collisions that can disable the vehicle, and pass the Cartel roadblock at the dam entrance by ramming through or maneuvering around the blocking cars.
- Claude escapes the mansion.
- Catalina’s helicopter is being followed.
- The seven-minute timer is active.
- The roadblock at Cochrane Dam is passed.
Reach Maria and destroy Catalina’s helicopter
Move through the dam using vehicles, concrete structures, and containers as cover. If proceeding on foot, collect the Sniper Rifle near the trees and remove distant Cartel guards before advancing. A Flamethrower-wielding Cartel member waits near the stairs; eliminate him from range, run him over, or pass him quickly before the flames can destroy the vehicle or drain Claude’s health.
On the rooftop and loading area, eliminate the guards near Maria. Pick up the Rocket Launcher near the rooftop edge and wait for Catalina’s helicopter to present a clear target. Do not fire while the helicopter is directly beside Maria or Claude, because the explosion can kill either one and fail the mission.
Destroy the helicopter before the timer expires, then reach Maria while she is alive. The final cutscene follows immediately after the rescue.
- The Flamethrower threat is defeated or bypassed.
- The Cartel guards near Maria are eliminated.
- Catalina’s helicopter is destroyed before the timer expires.
- Maria survives the explosion.
- Claude reaches Maria alive.
Recover from failure and verify completion
The original PS2 version does not provide an in-mission checkpoint for The Exchange. If Claude dies, Maria is killed, the timer expires, or the helicopter escapes, reload the backup made before entering the mansion. Restore health and armor, replace the vehicle, and retry from a clean position.
After reaching Maria, remain through the ending sequence and credits. The Exchange awards $1,000,000 and causes the Rhino Tank to become available at Phil’s Army Surplus. These confirm narrative completion, not 100% completion.
For the named-story checklist, confirm all 50 entries, including Marked Man and Ransom. The original PS2 Statistics screen may show 48 story missions because Give Me Liberty and Luigi’s Girls share one counted entry, while S.A.M. and Ransom share another. Separately verify the 100% categories: hidden packages, all 17 Pay Phone missions, emergency-service requirements, RC Toyz, Off-Road challenges, import/export tasks, rampages, unique jumps, and every other category tracked by the game.
- The Exchange displays Mission Complete.
- The $1,000,000 reward is received.
- The ending sequence and credits appear.
- The Rhino Tank is available at Phil’s Army Surplus.
- All 50 named story entries, including Marked Man and Ransom, are confirmed.
- The PS2 counter is interpreted as 48 counted story missions rather than 50.
- The separate 100% checklist is verified independently.
Before you move on
- All available Luigi, Joey, and Toni missions were completed before Last Requests.
- Donald Love’s path through Love’s Disappearance is complete.
- Marked Man is complete and counted among the 50 named story entries.
- Bait is complete and all three death squads were lured into the Pike Creek trap.
- Espresso-2-Go! is complete and all nine stands were destroyed.
- S.A.M. is complete and all eight packages were delivered.
- Ransom triggered after S.A.M. and is recorded as a named story entry.
- The Exchange began with $500,000 available.
- Catalina’s helicopter was destroyed before the seven-minute timer expired.
- Claude reached Maria alive.
- The ending sequence and credits appeared.
- The $1,000,000 reward was received.
- The Rhino Tank appeared at Phil’s Army Surplus.
- The 50-entry named-story checklist is complete, while the original PS2 counter is understood as 48.
- The separate 100% checklist is completed independently of the ending.
References for this chapter
- Grand Theft Auto III PlayStation 2 Manual
- Bait — GTA Wiki
- Espresso-2-Go! — GTA 3 Mission Guide & Walkthrough
- S.A.M. — GTA 3 Mission Guide & Walkthrough
- The Exchange GTA 3 Mission Guide and Walkthrough
- Grand Theft Auto III Guide and Walkthrough for PlayStation 2
- Grand Theft Auto III — Mission Select Code Guide for PlayStation 2
Weapon and Inventory Management: Best Loadouts for Key Missions
On the original North American PlayStation 2 release of Grand Theft Auto III, the safest weapon plan combines the island gun shops, Phil Cassidy’s Army Surplus, recurring safehouse pickups from hidden packages, fixed mission-area weapons and enemy drops. You do not need to buy every weapon before every assignment. Save before difficult missions, keep armor available, and maintain separate backup saves before major progression points and The Exchange.
Learn the original PS2 weapon and camera controls
On foot, the left analog stick moves Claude and the right analog stick controls the ordinary camera and look direction. The right stick also handles the Firefighter nozzle when Claude is using a fire truck. L1 centers the on-foot camera, while L2 and R2 cycle backward and forward through weapons. R1 locks onto a compatible firearm target. R3 looks behind Claude on foot and toggles an available vehicle sub-mission while driving. Select changes the camera view.
In vehicles, L1 changes radio stations, L2 looks left and R2 looks right. R1 is the handbrake, and R3 looks behind Claude or activates an applicable vehicle activity. The original PS2 targeting system is based on lock-on and context-sensitive aiming rather than the later free-aim scheme. Use the right stick to adjust your view, then use R1 to acquire the enemy you actually want to target. For the sniper rifle and rocket launcher, enter their first-person aiming view before firing.
- Use the right analog stick for normal camera and look control.
- Use the right analog stick for the Firefighter nozzle during Firefighter work.
- Use L1 to center the on-foot camera or change vehicle radio stations.
- Use L2 and R2 to cycle weapons on foot or look left and right in vehicles.
- Use R1 for firearm lock-on and the vehicle handbrake.
- Use R3 to look behind Claude or toggle an available vehicle mission.
- Use Select to change the camera view.
Use the correct weapon source on each island
Ammu-Nation stores do not share one universal inventory. Portland is useful for the pistol and Uzi. Staunton Island provides access to the Uzi, AK-47, sniper rifle and grenades. Check the shop’s actual displayed inventory rather than assuming that every weapon is available from every location.
Complete Ray Machowski’s Arms Shortage to open Phil Cassidy’s Army Surplus in Rockford, Staunton Island. Phil then sells the shotgun, M16 and rocket launcher. His compound also contains useful fixed pickups during and after the mission, but the shop’s permanent availability is the dependable source for those heavy weapons. Fixed pickups, defeated enemies and mission areas can supplement ammunition, especially when you are saving money for The Exchange.
The flamethrower is a separate service-mission reward. For the original PS2 100% target, complete 20 Firefighter missions on Portland, 20 on Staunton Island and 20 on Shoreside Vale. After all three island totals are complete, the flamethrower appears at the safehouses. Do not expect it after completing only one island’s quota.
- Use Portland Ammu-Nation for early pistol and Uzi purchases.
- Use Staunton Ammu-Nation for the AK-47, sniper rifle and grenades when available.
- Complete Arms Shortage before relying on Phil’s shop.
- Use Phil’s Army Surplus for the shotgun, M16 and rocket launcher.
- Treat the flamethrower as a 20-per-island Firefighter reward for the full original-game target.
- Collect enemy drops and fixed mission pickups before spending cash on replacement ammunition.
Build safehouse supplies with hidden packages
Grand Theft Auto III has 100 hidden packages. Each package gives cash, and every tenth package causes a weapon or equipment pickup to appear at the safehouses. The original reward order is 10 packages for the pistol, 20 for the Uzi, 30 for grenades, 40 for the shotgun, 50 for body armor, 60 for Molotov cocktails, 70 for the AK-47, 80 for the sniper rifle, 90 for the M16 and 100 for the rocket launcher. The 100th package also awards a $1,000,000 bonus.
These are recurring pickups, not ammunition placed permanently into Claude’s inventory. Once a milestone is reached, visit a safehouse and collect the item. The pickup can be collected again after it respawns, so package hunting is an effective way to prepare for missions without repeatedly buying expensive ammunition.
The 50-package armor reward is especially helpful for escort and assault missions. The 80- and 90-package rewards provide the sniper rifle and M16 before the final sequence, while the 100-package rocket launcher gives a powerful emergency option. Check the Statistics screen after each route, save after a successful sweep and keep a backup before attempting difficult rooftop or hostile-area packages.
- Confirm the package total in the Statistics screen.
- Visit a safehouse after every tenth package milestone.
- Collect the new pickup before relying on it during a mission.
- Use package rewards to reduce Ammu-Nation and Phil’s-store expenses.
- Keep a backup save before a risky final package route.
Choose weapons by range and terrain
Use the shotgun in doorways, alleys, stairwells and other confined spaces. Its close-range damage is valuable when enemies are forced to approach through one lane, but it is inefficient across open ground. The Uzi is useful while moving and for drive-by attacks. Fire in short bursts when possible because its ammunition is easy to exhaust.
The AK-47 is a dependable medium-range weapon for ordinary gang fights. Use the M16 against larger exposed groups or when sustained fire matters more than conservation. The sniper rifle is best against isolated targets, guards on rooftops and enemies who have not yet noticed Claude. It becomes awkward once enemies reach close range, so switch to the shotgun or a rapid-fire weapon before they surround you.
Grenades and Molotov cocktails are effective against stationary groups, clustered vehicles and enemies gathered around an entrance. In narrow streets, check the throw path first. Walls, parked cars and fuel sources can redirect or amplify the blast, and flames can trap Claude’s escape route. Throw from cover, then move to a position where you can retreat without crossing the impact area.
- Use the shotgun for close-quarters fights.
- Use the Uzi for mobile targets and drive-by attacks.
- Use the AK-47 for medium-range engagements.
- Use the M16 against large exposed groups.
- Use the sniper rifle against distant or isolated enemies.
- Use explosives only when the impact and retreat paths are clear.
Prepare for escorts, timers and assassinations
For escort missions, armor is usually more valuable than carrying maximum ammunition for one weapon. Choose a vehicle with good condition and enough speed to leave ambushes quickly. Keep moving when attackers are active, stop only where the passenger has some protection and eliminate the nearest immediate threats first. If the passenger and vehicle are safe, do not abandon the route to chase a distant enemy.
For timed missions, prepare the vehicle and armor before entering the mission marker. Use a fast car when the objective is mainly travel. Use a heavier or more durable vehicle when enemies will ram, shoot or block the route. Carry a close-range weapon for the destination and a medium-range weapon for the approach. Once the required objective is complete, leave rather than clearing optional enemies and wasting time or ammunition.
Before an assassination, identify the target’s location and your exit route. Park facing away from the combat area when possible. Eliminate the target quickly, then retreat before guards surround Claude. If the mission does not require every guard to die, do not spend ammunition on them after the target is down. Reload or switch weapons behind cover rather than standing in the open.
- Collect armor before escort and passenger-protection missions.
- Test the mission vehicle before activating the timer.
- Use a fast vehicle for travel-only objectives.
- Use a durable vehicle when collisions or attacks are expected.
- Plan the escape route before starting an assassination.
- Reload and change weapons behind cover.
Prepare for The Exchange without wasting your arsenal
Create a separate save before entering The Exchange. The mission requires $500,000 to begin, so confirm the cash requirement before approaching Catalina’s marker in Cedar Grove. Arrive with full health and body armor, and preserve a second save in case the final attempt fails.
The opening cutscene removes Claude’s main arsenal. After the exchange goes wrong, Claude retains a pistol and body armor, so purchasing a complete stock of expensive ammunition immediately beforehand is unnecessary. Use the pistol on the guards near the mansion exit, collect their dropped ammunition and leave through the gate. Do not waste time clearing every Cartel member in the compound.
Use the waiting Patriot if you preserved the Bulletproof Patriot from Marked Man. Drive toward Cochrane Dam, avoid the explosive barrels and keep Cartel members from pulling Claude out of the vehicle. The Patriot resists ordinary gunfire but is not explosion-proof or fireproof. The flamethrower user near the stairs is a serious threat; run him over from a safe angle or eliminate him from distance before he reaches the vehicle.
If you proceed on foot, follow the lower route and collect the sniper rifle in the trees near the dam. Use it to remove distant defenders before advancing. A nearby health pickup can help if the escape from the mansion or the dam approach reduced Claude’s health. Move from cover to cover and avoid standing in the open while the helicopter attacks.
On the rooftop, clear the guards around Maria without shooting her. Collect the rocket launcher near the roof edge. Wait for Catalina’s helicopter to move away from Claude and Maria before firing. A rocket or helicopter explosion too close to them can cause mission failure. If the first shot misses, remain behind cover and wait for another safe opening instead of firing while the helicopter is directly over the group. Destroying the helicopter completes the final objective and leads into the ending sequence and credits.
- Create a backup save before The Exchange.
- Have at least $500,000 before entering the mission marker.
- Arrive with full health and body armor.
- Expect the opening cutscene to remove the main arsenal.
- Use the pistol and enemy drops to escape the mansion.
- Use the Bulletproof Patriot only if it was preserved from Marked Man.
- Avoid explosive barrels and the flamethrower attacker at Cochrane Dam.
- Collect the dam-area sniper rifle when proceeding on foot.
- Protect Maria during the rooftop firefight.
- Collect the rooftop rocket launcher.
- Fire only when Catalina’s helicopter is safely separated from Claude and Maria.
Before you move on
- The Statistics screen reflects the current hidden-package total.
- Every reached tenth-package reward has been collected at a safehouse, including body armor at 50 packages and the rocket launcher at 100.
- You know whether the next mission’s weapon is best obtained from Ammu-Nation, Phil’s Army Surplus, a safehouse, a fixed pickup or an enemy drop.
- Your standard preparation includes body armor, a close-range weapon, a medium-range weapon and a planned retreat route.
- The original PS2 control mapping is understood: the right analog stick controls the normal camera and look direction and the Firefighter nozzle during Firefighter work; L1 centers the on-foot camera or changes vehicle radio stations; L2 and R2 cycle weapons on foot or look left and right in vehicles; R1 locks on or acts as the handbrake; R3 looks behind Claude or toggles applicable vehicle missions; Select changes camera views.
- A separate save exists before The Exchange.
- You understand that The Exchange requires $500,000, removes Claude’s main arsenal after the opening cutscene, begins with a pistol and armor, and provides mission-area weapons for the final assault.
- For the full original PS2 completion target, Firefighter progress is 20 missions on Portland, 20 on Staunton Island and 20 on Shoreside Vale before relying on the flamethrower safehouse reward.
References for this chapter
- Grand Theft Auto III PlayStation 2 Manual
- Grand Theft Auto III Guide and Walkthrough for PlayStation 2
- Grand Theft Auto III Weapons FAQ, PlayStation 2, GameFAQs
- Grand Theft Auto III Hidden Packages, GTA Base
- Grand Theft Auto III Firefighter, GTA Base
- The Exchange GTA 3 Mission Guide and Walkthrough
- Grand Theft Auto III - Guide and Walkthrough - PlayStation 2 - By RARusk
Hidden Packages and Collectibles — Route, Rewards and Practical Tips
The original North American PlayStation 2 release of Grand Theft Auto III contains 100 Hidden Packages: 33 in Portland, 36 in Staunton Island, and 31 in Shoreside Vale. The package numbers below follow one consistent original-PS2 reference list. They are identifiers, not a required collection order. Each package adds money, every tenth package unlocks a weapon or equipment pickup at the hideouts, and package 100 provides the rocket launcher pickup plus a $1,000,000 bonus. Hidden Packages are optional for the story but required for 100% completion.
Prepare the sweep and track the correct totals
Create a separate save before beginning a package sweep, then keep at least one earlier backup. Rooftops, bridge structures, hostile compounds, and long falls can kill Claude or attract police attention. Save at a hideout after each difficult group rather than relying on memory. Use three written counters: Portland 1–33, Staunton Island 34–69, and Shoreside Vale 70–100.
The game displays the combined Hidden Packages total in the Statistics screen. The package numbers are not the order in which the game expects you to collect them, and the original guide groups nearby locations together even when their numbers are separated. Mark each number only after the package disappears and the total increases.
Collect easy street-level packages first. Leave the boat-only, subway, bridge, rooftop, and hostile-area packages for a trip when the necessary island access, vehicle, or mission progress is available. Packages are easier to see at night, but do not attempt a difficult jump while carrying a wanted level or low health.
- Create a backup save before starting.
- Track the three island totals separately as well as the combined Statistics total.
- Treat package numbers as location identifiers, not mandatory physical collection order.
- Save at a hideout after difficult rooftop, bridge, or hostile-area pickups.
Package rewards and thresholds
Every tenth package produces a pickup at the available hideouts. The verified sequence is: 10 handgun, 20 Uzi, 30 grenades, 40 shotgun, 50 body armor, 60 Molotov cocktails, 70 AK-47, 80 sniper rifle, 90 M16, and 100 rocket launcher plus the $1,000,000 completion bonus.
A threshold reward confirms that the combined count crossed that number; it does not identify a missing package. If the counter is 99, compare the written island lists and inspect only the locations that remain unchecked. A weapon pickup can be collected later, so do not assume that failing to notice it means the package did not register.
- 10: handgun.
- 20: Uzi.
- 30: grenades.
- 40: shotgun.
- 50: body armor.
- 60: Molotov cocktails.
- 70: AK-47.
- 80: sniper rifle.
- 90: M16.
- 100: rocket launcher and $1,000,000.
Portland: packages 1–33
Use the following corrected original-PS2 numbering. Package 1 is at the end of the path in Harwood. Package 2 is on the Head Radio roof, reached from the elevated tracks. Package 3 is on the AMCO gas-station roof, and package 4 is inside Easy Credit Autos after breaking through the showroom windows. Package 5 is at Salvatore’s Mansion and package 6 is on the beach ledge below it. Package 7 is behind the Hepburn Heights Towers building, package 8 is in the Hepburn Heights parking lot near El Burro’s phone, and package 9 is among the trees in Hepburn Heights.
Package 10 is in the small parking lot south of the AMCO station. Package 11 is behind the building facing the large potholes in St. Mark’s. Package 12 is in the St. Mark’s park. Packages 13, 14, and 15 are on the roofs around Luigi’s Sex Club 7: next to the club, on the club roof, and on the roof opposite the club. Package 16 is in the Chinatown subway bathrooms. Package 17 is inside Rush Construction Company. Package 18 is in the long St. Mark’s alley, and package 19 is in the Tramp Tunnel.
Package 20 is on the Portland View Supa Save roof, reached from the elevated tracks. Package 21 is in the alley behind Hong Hung Inc. Package 22 is on the Chinatown roof, package 23 is behind Roast Peking Duck, package 24 is inside the Bitch ’N’ Dog Food Factory, and package 25 is on the Liberty Pharmaceuticals roof. Package 26 is on the Portland Docks roof. Package 27 is in a Trenton yard, package 28 is in front of Joey’s Garage, package 29 is inside the Callahan Point Power Plant, and package 30 is on the sawmill roof.
Package 31 is behind Turtle Head Fish Company. Use a Fish Van or Garbage Truck to enter, collect the package quickly, and leave because the Triads in the yard are hostile. Package 32 is at the end of the pier in Atlantic Quays. Package 33 is on the small island south of Portland and requires a boat. The corrected Portland total is 33.
For an efficient route, take the ordinary street-level packages first, then use the elevated tracks for packages 2 and 20 and a suitable vehicle for packages 24, 26, and 31. Package 16 cannot be collected until the Portland mission sequence has opened the subway connection. Package 33 is best collected during a boat trip after Portland travel restrictions have eased. Do not label either of these as package 1; that was the numbering error in the earlier route.
- Portland total: 33.
- Package 16: Chinatown subway bathrooms, after the subway is available.
- Package 31: Turtle Head Fish Company, requiring a Fish Van or Garbage Truck.
- Package 32: Atlantic Quays pier.
- Package 33: small island south of Portland, requiring a boat.
Staunton Island: packages 34–69
The corrected Staunton list begins with package 34 at the Army Surplus store, package 35 at the Coliseum or stadium area, package 36 on top of the hospital, package 37 at the stadium, package 38 beside St. Matthias University, package 39 at the construction site, and package 40 on the small bridge with girders. Package 40 is the difficult bridge-girder pickup; it is not package 66.
Package 41 is inside the Colombian Garage and requires a Colombian Cruiser to open the gate. Package 42 is at the construction site, package 43 is in the connecting alley near 8-Ball’s, package 44 is in a car park, package 45 is in the alley south of the Coliseum, package 46 is reached by jumping from the curving bridge onto a rooftop, package 47 is under a road tunnel, and package 48 is on the Belleville Park basketball court.
Package 49 is on the moving section of the Staunton–Shoreside bridge. This is the lift-bridge package. It requires Shoreside access and an operating bridge: drive onto the movable section, climb onto the vehicle roof and then the central divider, and wait as the bridge rises. Package 50 is under the park bridge. Package 51 is at the end of the south dock, package 52 is in the L-shaped alley near the Callahan Bridge in Newport, package 53 is at the museum, and package 54 is on the pier south of the Callahan Bridge.
Package 55 is behind the Police Station. Use a police car to open the station gate for package 56, which is in the Newport path or parking niche leading toward the station. Package 57 is behind the church, package 58 is at the end of the narrow alley near the Dojo, package 59 is in the underground AMCO parking area, and package 60 is on the AMCO roof. Package 61 is inside the glass-windowed building at Bedford Point, package 62 is in a doorway facing an intersection, package 63 is on a roof in the projects, package 64 is behind rocks near the pier, package 65 is behind a projects building, package 66 is in the underground car park, package 67 is on top of the pedestrian-only walkway, package 68 is behind the star-shaped statue, and package 69 is on top of the casino.
For a practical route, start around the hideout with packages 34–48, saving before package 40. Then collect the dock, museum, AMCO, projects, police-station, church, statue, and casino groups. Leave package 49 until the bridge is operating. The corrected Staunton total is 36, bringing the combined count to 69 when Portland is complete.
- Staunton total: 36.
- Package 40: bridge girders on Staunton Island.
- Package 41: Colombian Garage, requiring a Colombian Cruiser.
- Package 49: operating Staunton–Shoreside lift bridge.
- Package 66: underground car park, not the bridge-girder location.
- Combined total after Portland and Staunton: 69.
Shoreside Vale: packages 70–100
The corrected Shoreside list begins with packages 70 and 71 at the west and east dam areas. Package 72 is on the first dam tower, package 73 is at the Exchange helipad in the lower dam, and package 74 is behind the boulder at the dam corner. Packages 75, 76, and 77 are at the Swank houses, on the rear or front porches. Package 78 is at the Colombian mansion, and package 79 is by the picnic tables.
Package 80 is in the Fudge Packing Factory. Package 81 is in the Cedar Grove underpass. Package 82 is on the Police Station roof. Package 83 is in Pike Creek behind the drums. Package 84 is behind the Shoreside hideout. Packages 85 and 86 are in Wichita Gardens: one at an apartment entrance and one between the apartments. Package 87 is on a blue container in Pike Creek, package 88 is behind the hospital, package 89 is on the roof of the large building with the unusual awning, package 90 is between the Turtle Head Storage buildings, and package 91 is under the broken wooden bridge in Wichita Gardens.
The airport group is packages 92–100. Package 92 is in the airport parking lot by the fire truck. Package 93 is under a plane wing in a hangar, package 94 is on the ground beside the airport dome, package 95 is under a plane, package 96 is in front of the airport near the billboards, package 97 is in the airport subway, package 98 is on the airport helipad, package 99 is on the runway slipway, and package 100 is at the end of the runway.
For an efficient route, start with the airport and collect packages 97, 96, 92–95, and 98–100. Then collect package 91 under the wooden bridge, package 84 behind the hideout, package 79 by the picnic tables, and packages 85–86 in Wichita Gardens. Continue through the Swank houses, dam, Turtle Head Storage, hospital, Police Station, factory, and Pike Creek before taking package 81 in the Cedar Grove underpass. The corrected Shoreside total is 31.
- Shoreside total: 31.
- Airport packages: 92–100, with package 97 in the subway.
- Package 91: under the broken wooden bridge in Wichita Gardens.
- Package 49 remains the Staunton lift-bridge package; do not confuse it with Shoreside locations.
- Package 100: end of the airport runway.
Verify the final count and protect the completed save
Open the Statistics screen and confirm Hidden Packages reads 100. Reconcile the written counters as Portland 33, Staunton Island 36, and Shoreside Vale 31. Confirm that the 90-package M16 reward has already appeared and that reaching 100 provides the rocket launcher pickup and the separate $1,000,000 bonus.
If the total is 99, compare island totals first. A Portland shortfall should direct you to packages 16, 31, 32, and 33, along with any unchecked rooftop or industrial locations. A Staunton shortfall should direct you first to package 40 on the bridge girders, package 41 in the Colombian Garage, package 49 on the operating lift bridge, package 55 or 56 around the Police Station, and package 66 in the underground car park. A Shoreside shortfall should direct you first to airport packages 92–100, the wooden-bridge package 91, the dam group 70–74, and the final Cedar Grove underpass package 81.
If a package is no longer visible, confirm that you are using the save whose Statistics total includes it; collected packages do not reappear on that save. If the count did not change, check the exact landmark again and reload the last confirmed backup rather than overwriting it. After package 100 registers and the final rewards appear, save in a new protected slot.
- Statistics reads Hidden Packages: 100.
- Island totals reconcile to 33 Portland, 36 Staunton Island, and 31 Shoreside Vale.
- The ten reward thresholds have been accounted for.
- The rocket launcher pickup and separate $1,000,000 bonus have appeared.
- A new protected save has been created after package 100.
Before you move on
- The Statistics screen reads Hidden Packages: 100.
- The checklist uses one consistent numbering system: Portland 1–33, Staunton Island 34–69, Shoreside Vale 70–100.
- The island totals are 33, 36, and 31 respectively.
- The rocket launcher is available at the hideouts and the separate $1,000,000 bonus has been received.
- A new protected save exists after confirming the final total.
Pay Phones, RC Toyz, Off-Road and Other Side Activities
Grand Theft Auto III contains 17 Pay Phone missions, four RC Toyz challenges and four off-road checkpoint challenges. These activities are optional for reaching The Exchange, but they count toward 100% completion on the original North American PlayStation 2 release. Complete the Portland phone work and other vulnerable side activities before Salvatore’s mission Last Requests whenever practical. Last Requests is the relevant Portland cutoff: after it, Mafia hostility makes several Portland activities much harder, while Sayonara Salvatore is a later Staunton Island mission and is not the cutoff. Keep a separate save before D-Ice’s Uzi Money because the original PS2 release can carry Purple Nines state into a later New Game started from an affected save block.
Complete all 17 Pay Phone missions
The Pay Phone total is 17: four missions from Marty Chonks in Portland, four from El Burro in Portland, four from King Courtney on Staunton Island and five from D-Ice in Shoreside Vale. None is required to unlock The Exchange, but all 17 are required for the Pay Phone portion of a 100% run.
Marty Chonks uses the unmarked phone outside the Bitchin’ Dog Food factory in Trenton, near Joey’s garage. His missions are The Crook, The Thieves, The Wife and Her Lover. The phone normally rings during the daytime, approximately 09:00 to 19:00, although The Crook may be available outside that usual window. If the phone is silent, leave the area, advance the game clock and return. Because the phone has no normal map marker, check this location deliberately.
El Burro’s marked Hepburn Heights phone gives Turismo, I Scream, You Scream, Trial by Fire and Big ’N Veiny. This is four missions because I Scream, You Scream is one title. Complete El Burro’s chain before Last Requests if possible. The missions remain manageable later, but Portland traffic and hostile Mafia gunmen can make the timed driving and vehicle work considerably more dangerous.
King Courtney’s Staunton Island phone gives Bling-Bling Scramble, Uzi Rider, Gangcar Round-Up and Kingdom Come. Complete the chain before the finale, preferably during the Staunton portion of the story. Uzi Rider turns the Diablos hostile, so finish any Diablo-related optional work you still want to do before accepting it.
D-Ice’s phone is in Wichita Gardens, Shoreside Vale. Complete Uzi Money, Toyminator, Rigged to Blow, Bullion Run and Rumble in that order. These missions are not needed to open Shoreside Vale or begin The Exchange, but they are required for the 17-mission Pay Phone total. Save before Uzi Money and retain that backup until every D-Ice mission is confirmed complete.
- Complete Marty Chonks: The Crook, The Thieves, The Wife and Her Lover.
- Complete El Burro’s four missions: Turismo, I Scream, You Scream, Trial by Fire and Big ’N Veiny.
- Complete King Courtney’s four missions: Bling-Bling Scramble, Uzi Rider, Gangcar Round-Up and Kingdom Come.
- Complete D-Ice’s five missions: Uzi Money, Toyminator, Rigged to Blow, Bullion Run and Rumble.
- Confirm 17 completed Pay Phone missions in total.
Protect the D-Ice sequence from the Purple Nines problem
Before starting Uzi Money, create a separate save in another slot. The mission requires Claude to drive through Wichita Gardens and eliminate Purple Nines gang members with the vehicle’s Uzi. If the Purple Nines are absent when the mission begins, stop testing the mission and reload the untouched backup rather than overwriting it.
The original PS2 release has a known Purple Nines carryover problem. After D-Ice’s missions have been completed and saved, a later New Game started from that GTA III save block can behave as though the Purple Nines have already been eliminated. Uzi Money then lacks its required targets, preventing the later D-Ice missions and blocking 100% completion for that run.
For the current playthrough, complete Uzi Money, Toyminator, Rigged to Blow, Bullion Run and Rumble in sequence. Keep the pre-Uzi Money save until the Pay Phone total and the rest of the completion checklist have been checked. If you plan another PS2 playthrough, use a clean save block or separate memory card rather than assuming that deleting one visible save slot removes the carried-over state.
- Create a separate save before activating Uzi Money.
- Confirm that Purple Nines members appear in Wichita Gardens before overwriting the backup.
- Complete all five D-Ice missions in order.
- Keep the pre-Uzi Money save until the final completion check.
- Do not begin another New Game from an affected post-D-Ice save block.
Use practical tactics for Pay Phone objectives
Start difficult phone missions with full health, armor and a suitable vehicle. Use a fast car for Turismo and other timed travel. Use a durable vehicle for gang-car work and missions where collisions or gunfire matter more than top speed. Repair or replace the vehicle before answering the phone when the route allows.
For races, learn the route during the first attempt and avoid shortcuts that send the car over stairs, curbs or tight alleys. For target and chase missions, approach from the side or rear and keep moving. Walls, junctions and narrow streets can restrict a target’s escape route, but stopping directly in front of an enemy exposes Claude to concentrated fire.
For Uzi Money, keep the vehicle moving through Wichita Gardens and use controlled drive-bys rather than stopping beside targets. Watch for hostile Rumpo XLs and avoid allowing the vehicle to catch fire while turning back for isolated targets. In Rigged to Blow, protect the mission vehicle from hard impacts and use broad turns. In Bullion Run, choose a route with space to recover from traffic instead of forcing narrow shortcuts. For Rumble, arrive with armor and a reliable firearm, then keep the fight away from unnecessary police attention.
If a phone does not answer, confirm that Claude is not already inside another mission and that the contact’s prerequisites have been completed. For Marty Chonks, check the unmarked Trenton phone and the usual daytime availability window.
- Use a fast vehicle for races and a durable vehicle for combat-heavy objectives.
- Carry armor and full health before difficult calls.
- Keep moving during drive-by missions.
- Check mission status, location and time of day when a phone is silent.
Complete the four RC Toyz challenges
RC Toyz challenges begin when Claude enters a parked TOYZ van. Portland has Diablo Destruction and Mafia Massacre. The Diablo Destruction van is in Hepburn Heights near the apartment complex and park by Rothwell Station; its targets are Diablo Stallions. The Mafia Massacre van is in an alley in Saint Mark’s near Momma’s Restaurante; its targets are Mafia Sentinels.
Staunton Island has Casino Calamity. Enter the TOYZ van opposite Kenji’s Casino in Torrington and attack Yakuza Stingers. Shoreside Vale has Rumpo Rampage. Enter the van near the Wichita Gardens hideout and attack Hoods Rumpo XLs.
Each challenge gives a limited time to destroy marked gang vehicles. The game registers the challenge when its objective is successfully completed; do not confuse a high score or replay result with the initial completion. The RC vehicle is small and vulnerable, so use corners, parked cars and building edges to limit incoming fire. Attack targets when they are close, then retreat before the remote vehicle is destroyed.
The four RC Toyz challenges are separate from Rampages, Pay Phone missions, emergency-service missions and off-road checkpoint challenges. They are not time-sensitive and can be completed after the story, but finishing them during the relevant island section makes their locations easier to reach.
- Complete Diablo Destruction in Portland.
- Complete Mafia Massacre in Portland.
- Complete Casino Calamity in Staunton Island.
- Complete Rumpo Rampage in Shoreside Vale.
- Confirm all four RC Toyz challenges are complete.
Finish the four off-road checkpoint challenges
Patriot Playground begins with the parked Patriot at the Supa Save in Portland View. Drive through the checkpoints around Portland Beach and the nearby terrain. The Patriot is heavy and stable, but moderate speed is safer than attacking every turn at maximum speed. Use the extra time from each checkpoint to set up the next turn.
A Ride in the Park begins with the Landstalker beside the cabin in Belleville Park on Staunton Island. Brake before tight turns and line up the checkpoints carefully. The Landstalker can climb curbs and slopes, but abrupt steering can roll it, so controlled contact along the park boundary is safer than a wide detour.
Multistorey Mayhem begins with a normal Stallion at the Newport multistorey car park. On the original PS2 version there is no blue marker outside the entrance. Bring the Stallion to the entrance, exit the vehicle, then re-enter it to trigger the challenge. A normal Stallion is required; do not use a Diablo Stallion. Once the timer begins, collect the checkpoints floor by floor, brake before pillars and preserve control rather than taking every corner at maximum speed.
Gripped! begins with the parked Patriot in the park near Wichita Gardens in Shoreside Vale. Follow the steep route near the observatory. Keep enough speed to climb slopes, but slow before crests so the Patriot does not launch into a wall or miss the next checkpoint. If the vehicle becomes trapped or badly damaged, restart rather than spending the remaining time on an unsafe recovery.
These four challenges are optional for the story but required for 100% completion. They remain available after the main storyline, so a failed attempt does not permanently remove them.
- Complete Patriot Playground with the required Patriot.
- Complete A Ride in the Park with the Landstalker.
- Complete Multistorey Mayhem with a normal Stallion at the Newport car-park entrance.
- Complete Gripped! with the required Patriot.
- Confirm all four off-road challenges are complete.
Use a safe completion order
During the Portland section, complete Marty Chonks, El Burro, Diablo Destruction, Mafia Massacre and Patriot Playground before Last Requests whenever practical. Last Requests is the key cutoff for preserving an easy Portland sweep. After that mission, Mafia hostility makes travel and several side activities more dangerous. Do not describe Sayonara Salvatore as the cutoff: it is a later Staunton Island story mission.
After Staunton Island opens, complete King Courtney’s four missions, Casino Calamity, A Ride in the Park and Multistorey Mayhem before the finale if convenient. Keep these activities on a separate checklist from Rampages, emergency-service work, hidden packages, Unique Stunt Jumps and vehicle lists.
After Shoreside Vale opens, make a clean backup before D-Ice’s first mission. Complete the five D-Ice missions in order, then finish Rumpo Rampage and Gripped!. Do not begin a separate New Game from the same PS2 save block after D-Ice’s final mission unless you have confirmed that the Purple Nines appear in the new run.
The game’s broad statistics can confirm overall progress, but they may not identify which named phone mission or challenge was missed. Use the written names in this chapter alongside the completion information. Save the verified run in a new slot while preserving the pre-Uzi Money backup.
- Portland Pay Phone missions and early activities are complete before Last Requests whenever possible.
- Staunton Pay Phone missions, RC Toyz and off-road challenges are complete before the finale.
- A clean pre-Uzi Money backup remains untouched.
- All five D-Ice missions are complete in order.
- Shoreside Vale’s RC Toyz and off-road challenges are complete.
- The written checklist confirms 17 Pay Phone missions, four RC Toyz challenges and four off-road challenges.
Before you move on
- The written checklist contains all 17 Pay Phone missions, with The Wife and Her Lover recorded as separate Marty Chonks missions.
- The El Burro list contains Turismo, I Scream, You Scream, Trial by Fire and Big ’N Veiny, representing four missions.
- All four King Courtney missions are complete.
- All five D-Ice missions are complete in order.
- The game’s overall completion information and the written list confirm the Pay Phone work is finished.
- Diablo Destruction, Mafia Massacre, Casino Calamity and Rumpo Rampage are complete.
- Patriot Playground, A Ride in the Park, Multistorey Mayhem and Gripped! are complete.
- The pre-Uzi Money backup remains available in a separate save slot.
- The completed run has been saved separately from the backup.
- If another playthrough is planned, it will not be started from an affected post-D-Ice PS2 save block.
References for this chapter
- Grand Theft Auto III PlayStation 2 Manual
- Grand Theft Auto III Guide and Walkthrough for PlayStation 2
- GTA 3 Missions List: All Story Missions Guide & Phone Missions
- RC Toyz Missions | GTA 3 Side Missions Guide
- GTA III Checkpoint Challenges
- Grand Theft Auto III Off-Road Missions FAQ for PlayStation 2
- Grand Theft Auto III - Purple Nines Glitch FAQ - PlayStation 2 - By gtafreak420
- Grand Theft Auto III/Uzi Money
- Multistorey Mayhem | GTA 3 Side Mission Guide
- GTA III - 100% Completion Checklist
Vehicle Strategies: Heist Cars, Chases and Mission-Specific Vehicles
Vehicle choice matters more than maximum speed in Grand Theft Auto III on the original PlayStation 2 release. Use heavy vehicles to absorb impacts and block attackers, controllable cars for chauffeur work, and fast vehicles only when the mission allows a vehicle change. Named mission vehicles and Import-Export targets take priority over personal transport. The Portland Docks garage, Portland emergency crane, and Pike Creek garage are separate objectives, so track their lists independently and save before rare recoveries.
Choose and prepare a support vehicle
For ordinary travel, use a four-door sedan or another vehicle with predictable steering, adequate acceleration, and enough weight to survive traffic collisions. A controllable car is usually more useful than the fastest sports car because Liberty City's corners, curbs, alleys, and traffic punish excessive speed.
For escort and convoy work, choose a heavy vehicle when possible. A Patriot, Enforcer, police car, or similar vehicle can push hostile cars away and is less likely to spin after contact. Weight reduces the effect of collisions, but it does not make the support vehicle invulnerable.
Use a Banshee, Cheetah, Turismo, Infernus, or another fast car for long cross-island travel only when the mission does not require a particular vehicle. Repair a personal vehicle at a Pay 'n' Spray before a difficult attempt, and keep a second save if the vehicle is rare or specially equipped.
During an active mission, do not assume that Pay 'n' Spray, a garage, or a replacement vehicle will preserve progress. If the objective names a vehicle, passenger, or cargo target, treat that object as mission-critical until the game confirms completion.
- Repair or replace a badly damaged personal vehicle before activating the mission.
- Use a heavy vehicle for convoy protection and hostile-car interception.
- Keep a separate save before attempting a rare vehicle recovery.
- Do not switch away from a named mission vehicle unless the objective clearly permits it.
Manage damage and recover from a bad attempt
Watch for smoke, worsening steering, repeated engine fires, and severe collision damage. In free roam, repair the vehicle before continuing. During a mission, move the required vehicle away from traffic, fire, explosive objects, and steep slopes whenever the objective gives you a safe pause.
If the required vehicle is burning, missing, or close to exploding, restart rather than experimenting with a last-second vehicle change. A failed mission can normally be replayed from its contact, while a destroyed rare vehicle may require another search or a reload of an older save.
When a chase becomes dangerous, use broad roads and predictable turns instead of shortcuts across stairs, railway tracks, or cramped alleys. If the mission target is not being timed, create distance, remove immediate threats, then return by the safest route. Protecting the cargo or passenger is more important than maintaining maximum speed.
After completing a difficult delivery, save immediately. A successful hand-in is not protected against every later mistake until the result has been written to a save file.
- Keep required vehicles away from fire, traffic, and explosive scenery.
- Restart when a required vehicle is about to explode or has disappeared.
- Use broad roads during chases and avoid risky shortcuts.
- Save after every rare or difficult delivery.
Complete Van Heist and deliver the listed Securicar
Van Heist becomes available from Joey Leone after Farewell 'Chunky' Lee Chong. Start at Joey's garage in Trenton and take a sturdy vehicle to the marked Securicar. Damage the Securicar until its driver abandons it; do not destroy the van with gunfire or uncontrolled impacts.
Use controlled front or side impacts. Avoid pinning the Securicar against a wall, pushing it into water, or striking it so violently that it catches fire. If police pressure becomes excessive while the van is still intact, create a short gap and return as soon as the route is clear.
When the driver exits, take the Securicar and follow the radar to Joey's Portland docks lock-up. Enter the marked destination to finish Van Heist. This mission and Import-Export are separate objectives, but the Securicar is also one of the 16 vehicles required by the Portland Docks civilian list. If you want to use the mission vehicle for Import-Export, deliver it to the Portland Docks garage after the mission and confirm that Securicar is checked off the wall list.
If you do not use the Van Heist vehicle, look for Securicars in later traffic, especially around Staunton Island and the routes between Portland and Staunton. Do not treat another Securicar as an optional replacement for the list: only one Securicar delivery is required, and it must register at the Portland Docks garage.
- Start Van Heist with a heavy ramming vehicle.
- Damage the Securicar until the driver leaves.
- Deliver it to Joey's Portland docks lock-up.
- Deliver one Securicar to the Portland Docks Import-Export garage and verify that the list updates.
Protect the Securicar in Escort Service
Escort Service is a Donald Love mission that sends a Securicar toward Pike Creek in Shoreside Vale. Bring an Enforcer, Patriot, or another heavy vehicle. Stay close enough to intercept attackers, but do not ram the protected Securicar or block its route.
Cartel Cruisers attack along the route. Eliminate vehicles actively firing on the Securicar before pursuing attackers that have already separated from the convoy. Side impacts are useful for turning hostile cars away, but recover your position beside or slightly ahead of the target immediately afterward.
Pay special attention near the tunnel and at the Shoreside Vale exit. The tunnel limits turning space, while the exit and Pike Creek approach can expose the convoy to additional gunfire. Clear immediate threats, then return to the Securicar rather than chasing a distant attacker.
If your support vehicle is destroyed, take a replacement only when the route is safe and return immediately. Falling behind briefly is less dangerous than leaving the Securicar unattended while it remains under fire.
- Bring a heavy support vehicle.
- Prioritize enemies attacking the Securicar.
- Clear the tunnel, tunnel exit, and Pike Creek approach.
- Return to the convoy after any vehicle replacement.
Complete the Portland Docks civilian list
Enter Portland Harbor through the main dock gates. Drive to the far end, turn left, then left again. The Import-Export garage is the building with large blue doors and a vehicle list beside the entrance. The authoritative civilian list is Securicar, Moonbeam, Coach, Flatbed, Linerunner, Trashmaster, Patriot, Mr. Whoopee, Blista, Mule, Yankee, Bobcat, Dodo, Bus, Rumpo, and Pony.
Deliver vehicles one at a time. Drive the requested vehicle directly into the open garage, stop inside, and exit through the main door. The garage rejects vehicles that are not on the list or have already been delivered. A vehicle can be badly damaged and still register, but do not risk an exploding vehicle during a cross-island trip.
Common acquisitions include the Mule near the harbor, the Yankee near the docks, the Bobcat around Portland Beach or Portland traffic, the Pony near the car crusher, the Rumpo near 8-Ball's shop or the sawmill, and the Coach at the Trenton bus depot. Traffic is often the practical source for Flatbed, Trashmaster, Bus, and other commercial vehicles.
Mr. Whoopee is difficult to find. During Portland Firefighter missions, if an ice-cream truck appears as a burning vehicle, extinguish it, abandon the emergency-service attempt if necessary, and take the Mr. Whoopee to the garage. The Dodo is at Francis International Airport in Shoreside Vale; driving it carefully over the bridges is safer than relying on difficult original-game flight handling.
The completed Portland civilian list awards the completion bonus and produces 16 vehicle pickups at the location. Do not leave until the wall list visibly shows every vehicle as delivered.
- Deliver exactly the 16 listed Portland civilian vehicles.
- Use the wall list beside the blue garage doors to track progress.
- Treat Mr. Whoopee, Securicar, Blista, and Dodo as likely late or difficult targets.
- Confirm the final list entry before leaving the docks.
Complete the Portland emergency-vehicle crane
The emergency crane is east of the Import-Export garage. Enter through the main dock gates, continue toward the far end, turn left, then bear right to the ground marked with diagonal yellow stripes. Park the vehicle fully inside the striped area and exit so the magnet can lift it onto the ship.
The authoritative crane list is Police Car, Ambulance, Fire Truck, Barracks OL, FBI Car, Enforcer, and Rhino. There is no in-game checklist, so keep your own written record. The crane pays for each accepted emergency vehicle and awards a full-list bonus plus seven vehicle pickups after all seven have registered.
Police Cars, Ambulances, and Fire Trucks can be taken from their ordinary stations on any island. The Enforcer is available in the rear yard of the Staunton Island police station; use a police car to reach the yard without creating a major wanted-level problem. The Barracks OL is parked at Phil Cassidy's Army Surplus area on Staunton Island, which is safer than trying to obtain one during a six-star response.
The FBI Car requires a five-star wanted level. Save first, generate the wanted level near a defensible position, and take the vehicle only when you have a clear route back to Portland. Avoid fighting beside the crane until the FBI Car is secured, then deliver it immediately.
The Rhino is reliably available at Phil Cassidy's Army Surplus after completing The Exchange. Because the fixed spawn is safer than stealing a tank during a six-star pursuit, finish the story, save, collect the Rhino, and drive it carefully to the Portland crane.
Remain near the docks until the crane has finished processing the vehicle and the acceptance message appears. The registration is the important checkpoint; do not assume that merely parking in the striped area completes the entry.
- Deliver Police Car, Ambulance, Fire Truck, Barracks OL, FBI Car, Enforcer, and Rhino.
- Use a written checklist because the crane has no visible list.
- Save before attempting the FBI Car or any high-wanted-level recovery.
- Obtain the fixed-spawn Rhino after The Exchange when possible.
- Wait for the crane to finish and confirm the vehicle has registered.
Complete the Pike Creek civilian list
The Pike Creek garage is in the northeast part of the section containing the hospital and police station. Its authoritative list is Sentinel, Cheetah, Banshee, Stinger, Infernus, Esperanto, Kuruma, Stretch, Perennial, Landstalker, Manana, Idaho, Stallion, Taxi, Cabbie, and BF Injection.
Drive each requested vehicle into the garage, stop inside, exit through the main door, and confirm that the wall list marks it off. The garage rejects vehicles that are not on the list or have already been delivered.
The Multistory Car Park in Newport and the Francis International Airport parking area are useful places to search for common cars such as Sentinel, Taxi, Cabbie, Stallion, Cheetah, Infernus, Manana, and Idaho. The Cartel Mansion area can provide a Cheetah or Stinger, while ordinary traffic supplies Kuruma, Banshee, Esperanto, Perennial, Stretch, Landstalker, and other entries.
The BF Injection is the main timing concern. After the Portland Mafia storyline has advanced, return to the area beside Misty's apartment in Hepburn Heights during the evening and check the parking area. If it is absent, drive away far enough to refresh the area, then return later. Deliver it as soon as it appears rather than risking a long free-roam trip.
The completed Pike Creek list awards the completion bonus and creates 16 vehicle pickups at the garage. The activity remains available after the story, so do not risk a rare vehicle during a dangerous mission merely because the garage is nearby.
- Deliver exactly the 16 listed Pike Creek vehicles.
- Use Newport, the airport, and Cedar Grove or the mansion district as search areas for common vehicles.
- Search for the BF Injection beside Misty's apartment during evening hours after the Portland Mafia storyline.
- Confirm each delivery on the wall list before leaving.
Use a final delivery procedure
Before taking a rare vehicle, save in a separate slot and make sure the destination is accessible. Plan the route first, especially for the Dodo, Rhino, FBI Car, Barracks OL, and Securicar.
Do not provoke a wanted level while transporting a fragile vehicle. If police attention begins, keep moving toward the destination and use broad roads rather than stopping to fight. A damaged vehicle can still register, but an exploding or abandoned vehicle is lost.
For either garage, the delivery is complete when the vehicle has been accepted inside and the wall list updates. For the crane, wait for the vehicle to be lifted and for the acceptance message to appear. After the last vehicle in a list registers, save and inspect the location for the free vehicle pickup icons.
Keep three separate notes: Portland Docks civilian list, Portland emergency crane list, and Pike Creek civilian list. Import-Export is optional for story progression but required for the original PS2 100% checklist.
- Save before every rare vehicle search or cross-island delivery.
- Use the correct destination for each of the three lists.
- Wait for garage registration or crane acceptance to finish.
- Save after each completed list and verify the vehicle pickup icons appear.
- Record Import-Export separately from story completion.
Before you move on
- Van Heist is marked complete after the Securicar reaches Joey's Portland docks lock-up.
- Escort Service is marked complete after the protected Securicar reaches the Pike Creek destination.
- The Portland Docks civilian wall list shows Securicar, Moonbeam, Coach, Flatbed, Linerunner, Trashmaster, Patriot, Mr. Whoopee, Blista, Mule, Yankee, Bobcat, Dodo, Bus, Rumpo, and Pony as delivered.
- The Portland emergency crane has processed Police Car, Ambulance, Fire Truck, Barracks OL, FBI Car, Enforcer, and Rhino.
- The Pike Creek wall list shows Sentinel, Cheetah, Banshee, Stinger, Infernus, Esperanto, Kuruma, Stretch, Perennial, Landstalker, Manana, Idaho, Stallion, Taxi, Cabbie, and BF Injection as delivered.
- The final emergency vehicle has been lifted and accepted by the crane before leaving the docks.
- The completion bonus and free vehicle pickup icons appear at each completed list location.
- A backup save exists before rare Securicar, Dodo, FBI Car, Barracks OL, and Rhino attempts.
- Import-Export is recorded separately from story completion because it is optional for the campaign but required for 100% completion.
References for this chapter
- Grand Theft Auto III – Import/Export Garage and EV Crane FAQ – PlayStation 2
- Grand Theft Auto III Guide and Walkthrough for PlayStation 2
- Grand Theft Auto III - 100% Completion FAQ - PlayStation 2 - By InsideOutBoy
- GTA 3 Import/Export Mission Guide: All Cars List & Locations
- Grand Theft Auto III PlayStation 2 Manual
Combat and Boss Tactics: Clearing Enemy Clusters and Protecting NPCs
Grand Theft Auto III on the original North American PlayStation 2 is won by controlling the fight rather than charging into it. Use cover, target the most dangerous enemy first, keep escorts moving along an open route and retreat before Claude is surrounded. Most difficult encounters are fortified gang positions, vehicle ambushes or protection missions rather than formal boss arenas. The final mission, The Exchange, combines a weapon reset, a timed drive to Cochrane Dam, Cartel defenses, Maria’s protection and Catalina’s helicopter.
Prepare Claude and use the original PS2 controls correctly
Begin a difficult mission with full health and armor whenever preparation is possible. Carry an automatic weapon for groups, a shotgun for enemies who close the distance and a long-range weapon for exposed gunmen. The Uzi is particularly useful against moving targets and during drive-bys. The AK-47 and M16 are stronger against stationary enemies, but are easier to control from stable ground. Keep grenades and rockets away from allies, protected vehicles and narrow spaces.
On the original DualShock 2 layout, the left analog stick moves Claude. The right analog stick controls the ordinary camera or look direction during normal play and controls the Firefighter nozzle when that activity is active. L1 centers the camera on foot and changes radio stations in vehicles. L2 and R2 cycle weapons on foot; in vehicles they look left and right for drive-by aiming. R1 locks onto a firearm target on foot and operates the handbrake in a vehicle. L3 sounds the horn. R3 looks behind Claude on foot and toggles the active vehicle sub-mission while driving. Select changes the camera view. These directions apply to the original PS2 control scheme, not later remapped versions.
- Health and armor are restored before a high-risk mission
- An automatic weapon and close-range backup are available
- A long-range weapon is carried when the mission provides a useful firing position
- A backup save exists before starting the mission
Clear fortified areas from the outside inward
Stop at the edge of a hostile area instead of running directly into its center. Use corners, walls, containers, doorways and parked vehicles to expose one attacker at a time. Lock onto the nearest visible threat, fire a short burst and step back behind cover before other enemies can surround Claude. Repeat this rhythm during reloads and weapon changes.
Remove shotgun users and enemies already moving around your cover first. Their close-range damage is more dangerous than a distant pistol user. Next, eliminate gunmen on raised platforms or across open roads, because their shots are difficult to interrupt once Claude advances. If a sniper rifle or another long-range weapon is available nearby, use it before entering the main group.
Explosives are useful against clustered enemies, roadblocks and hostile vehicles, but check the surroundings before throwing or firing. A blast can injure an escorted NPC, Maria or a required mission vehicle. A smoking vehicle is also a delayed hazard, so move away before it catches fire. Advance only after the nearest firing positions are quiet.
- The engagement begins from the edge of the hostile area
- Shotgun users and flanking enemies are removed early
- Claude retreats behind cover between attacks
- Explosives are kept away from allies and mission vehicles
Handle vehicle ambushes and Escort Service
Escort Service is a Donald Love mission on Staunton Island. Claude must protect the Oriental Gentleman while he drives a Securicar toward the AMCO building in Pike Creek. Stay close enough to intercept Colombian Cartel attackers, but do not ram, overtake or stop directly in front of the Securicar. Blocking its path can leave it stalled during an ambush.
Drive slightly ahead or alongside the convoy. Meet attacking Cartel vehicles before they reach the Securicar, then return to the convoy once the immediate threat is gone. Use drive-by fire while moving: hold L2 or R2 to aim toward the corresponding side and press Circle to fire. Short bursts while passing are safer than stopping in the road. If an attacker tries to ram the Securicar, strike its side or attack while it is turning.
Do not chase a fleeing enemy so far that the Securicar is left alone. The protected vehicle’s condition is the real failure concern, not the number of attackers Claude personally eliminates. Clear intersections and obvious choke points before the convoy reaches them. If the Securicar is badly damaged and another collision is likely, restarting is usually safer than trying to finish with no margin.
- The Securicar’s route remains open
- Claude intercepts attackers without blocking the convoy
- Drive-by attacks are made while moving
- The convoy is not abandoned to chase a distant enemy
Protect stationary and walking NPCs
When an NPC is stationary, defeat enemies closest to that character before pursuing attackers farther away. Keep Claude between the NPC and the main firing line, but not so close that a shotgun blast, burning vehicle or explosion can damage both of you. In a narrow passage, enter first, draw enemy attention and retreat to a corner. This creates a choke point where enemies approach one or two at a time.
When the NPC begins moving, follow immediately and clear the next section before allowing the character to advance. Do not stop to collect dropped weapons or money while the route remains dangerous. If an ally follows Claude, avoid moving so far ahead that the ally enters an uncleared intersection alone. Sweep behind parked cars, around corners and across the next crossing before continuing.
If an NPC becomes stuck behind Claude or a vehicle, move into a safe open space rather than reversing into the character. Keep explosive barrels, burning vehicles and enemy cars away from the protected target. The safest position is usually close enough to attract enemy fire but far enough away that a missed shot cannot strike both characters.
- Nearby threats are cleared before the NPC advances
- Claude uses corners and doorways as choke points
- The protected character is not abandoned during a pursuit
- Pickups are collected only after the route is secure
Deal with named targets and close-range threats
GTA III rarely presents a conventional boss arena. Named targets are usually protected by guards, equipped with a dangerous weapon or tied to a mission-specific failure condition. Identify that threat before engaging instead of treating every target as an ordinary gunfight.
In Cutting the Grass, go to Luigi’s club and wait for Curly Bob to leave in a taxi. Follow without getting close enough to fill the spookometer. At Portland Harbor, wait for the meeting scene to finish. Curly Bob then becomes vulnerable, and running him over is safer than stopping beside him for a shotgun duel. Leave the area after the objective is complete.
Against enemies carrying rockets or flamethrowers, keep moving laterally and place a solid structure between Claude and the attack. Against a target protected by gang members, remove bodyguards from cover before approaching. If the objective is one elimination, do not remain in the area fighting every reinforcement after the target is down.
- The target’s weapon and surrounding hazards are identified
- Curly Bob is followed without filling the spookometer
- Curly Bob is attacked with a vehicle after the harbor meeting
- Rocket and flamethrower users are engaged from distance
Complete The Exchange at Cochrane Dam
The Exchange begins at Catalina’s mansion in Cedar Grove. During the mansion sequence, Claude’s carried weapons are taken away. When control returns, take the pistol from the Cartel member Claude knocks down, defeat the nearby guards and escape through the mansion grounds. Do not waste time searching for your old arsenal; it is unavailable at this stage.
After the mansion escape, a seven-minute timer appears. Drive directly toward Cochrane Dam and follow the objective route. The Bulletproof Patriot from Marked Man is useful if it was preserved, but it is not required and can still be destroyed by fire, explosions or concentrated attacks. A normal fast vehicle is sufficient if driven carefully. Taking a lengthy safehouse detour while the timer is active is risky; use the direct route unless you already know that a short weapon pickup detour will not cost the required time.
At the dam, use the approaches, walls and containers as cover. Clear Cartel blockades and exposed gunmen before advancing. A sniper rifle is valuable against enemies on elevated positions. Watch for the flamethrower near the stairs and eliminate that attacker from a distance or run the enemy over before proceeding. Do not drive directly through every group if Claude can dismount and fight from protected ground.
Continue toward the upper area where Maria is held. Defeat the guards around her without using rockets or grenades close to her position. Pick up the rocket launcher placed in the dam area when the route reaches it. When Catalina’s helicopter becomes vulnerable, fire with a clear line of sight and avoid shooting while the helicopter is positioned directly over Maria. More than one rocket may be needed, so do not waste shots against scenery or distant targets.
After the helicopter is destroyed, clear immediate threats and approach Maria to complete the mission. Claude’s death, Maria’s death or the timer expiring fails the attempt. If the timer is nearly gone before the helicopter is destroyed, reload the prepared save rather than attempting to recover from a bad approach.
- The pistol is collected during the mansion escape
- The seven-minute timer is treated as the post-mansion dam timer
- The direct route to Cochrane Dam is used unless a short detour is clearly safe
- Cartel blockades are attacked without lingering near explosive hazards
- The flamethrower enemy near the stairs is defeated from a safe position
- The guards near Maria are cleared before approaching her
- The rocket launcher is collected in the dam area
- Catalina’s helicopter is destroyed before the timer expires
- Claude reaches Maria after the dam area is secure
Recover when an engagement is going badly
When Claude’s health drops quickly, stop firing and break line of sight. Run around a building, through an alley or behind a solid structure, then return to the prepared vehicle. If no active timer is running and the mission permits unrestricted movement, a nearby health or armor pickup may allow a safer re-entry. Do not assume that entering a safehouse preserves mission progress; if the objective does not explicitly allow the detour, restarting is safer.
After a failure, restore armor and ammunition from the nearest safehouse or Ammu-Nation before trying again. Keep separate saves before island-unlocking missions, difficult story missions and any point where optional content can become unavailable. Restart an escort mission as soon as the protected vehicle is critically damaged. In The Exchange, reload if the pursuit timer expires, Claude dies, Maria is killed or the approach has consumed so much time that the helicopter encounter has no margin.
- Line of sight is broken before attempting recovery
- A safehouse detour is taken only when the mission permits it
- Ammunition and armor are restored before retrying
- A damaged escort or failed timed run is restarted promptly
Before you move on
- You can clear a fortified group by using cover, target priority and controlled retreats.
- You can complete Escort Service without blocking or abandoning the Securicar.
- You can protect a stationary or walking NPC by clearing the next area before allowing movement.
- You can follow Curly Bob without filling the spookometer and eliminate him after the harbor meeting.
- You can begin The Exchange with a prepared vehicle or a direct route to Cochrane Dam.
- You can correctly use the original PS2 controls: the right analog controls the ordinary camera or look direction and the Firefighter nozzle when applicable; L1 centers the camera on foot and changes radio stations in vehicles; L2 and R2 cycle weapons on foot and look left or right in vehicles; R1 locks on or operates the handbrake; R3 looks behind Claude on foot and toggles vehicle missions.
- You understand that The Exchange’s seven-minute timer begins after the mansion escape sequence.
- You can cross the dam, defeat the Cartel guards, protect Maria, destroy Catalina’s helicopter and reach Maria before the timer expires.
- You know when to break line of sight, when a permitted recovery is possible and when reloading a prepared save is safer.
References for this chapter
- Grand Theft Auto III PlayStation 2 Manual
- Grand Theft Auto III Guide and Walkthrough for PlayStation 2
- Grand Theft Auto III Guide and Walkthrough for PlayStation 2
- Grand Theft Auto III Guide and Walkthrough for PlayStation 2
- Escort Service GTA 3 Mission Guide and Walkthrough
- The Exchange GTA 3 Mission Guide and Walkthrough
- Grand Theft Auto III Cutting the Grass Strategy Guide
Dealing With Wanted Levels, Police Encounters and Heat Management
Grand Theft Auto III on the original North American PlayStation 2 release uses a six-level wanted system. The response escalates from ordinary police pursuit to helicopters, SWAT Enforcers, FBI vehicles, and the military. Most free-roam pursuits are best handled by breaking line of sight, reaching Pay ’n’ Spray, collecting police-bribe pickups, or saving and reloading at a safehouse. Vigilante and Firefighter are separate from ordinary wanted-level recovery: for the original PS2 100% checklist, complete 20 Vigilante missions and 20 Firefighter missions on Portland, 20 of each on Staunton Island, and 20 of each on Shoreside Vale. The Vigilante milestones at 10 and 20 targets on an island also unlock optional permanent police-bribe pickups at the hideouts.
Understand the six wanted levels
The wanted meter rises when Claude commits crimes in view of law enforcement, attacks officers, destroys police vehicles, or causes additional damage while escaping. At one star, nearby police attempt to stop Claude and arrest him if he remains exposed. At two stars, the pursuit becomes more persistent and police roadblocks become a greater concern. At these early levels, stop creating extra trouble and move toward cover, a Pay ’n’ Spray, or a planned escape route instead of fighting every pursuing cruiser.
At three stars, a police helicopter joins the response. Four stars adds SWAT Enforcers and heavier roadblocks. At five stars, FBI vehicles join the pursuit. Six stars brings military soldiers, Barracks OL trucks, and Rhino tanks. These stages describe the original PS2-era game and should not be mixed with later remaster behavior.
- At one or two stars, prioritize breaking contact over shooting police.
- Expect the helicopter from three stars onward.
- Treat four stars as a major escalation because SWAT roadblocks are difficult to pass safely.
- At five and six stars, plan for armed roadblocks, FBI vehicles, soldiers, or tanks.
Break visual contact through cover
When a chase begins, leave the main road and make several turns through alleys, parking areas, service lanes, ramps, and covered passages. A vehicle with predictable steering and good acceleration is usually more useful than one with only a high top speed. Police cars are most dangerous when they have a clear approach and can repeatedly ram Claude.
Do not immediately return to the place where police last saw Claude. Continue around buildings or through a different street while the search remains active. At three stars or higher, use bridges, elevated roads, underpasses, tunnels, and structures that interrupt the helicopter’s view. Keep moving whenever the helicopter is tracking Claude; stopping in an open intersection lets air and ground units attack together.
If the vehicle begins smoking, leave it before the engine catches fire. Move away from the wreck and take another vehicle only after the immediate pursuit is no longer concentrated on Claude. A damaged car can fail during a collision or roadblock and leave him exposed on foot.
- Use multiple turns instead of driving in a straight line.
- Stay behind buildings or under cover after police lose sight of Claude.
- Use bridges, underpasses, and tunnels to interfere with helicopter tracking.
- Abandon a smoking vehicle before it becomes an additional hazard.
Use Pay ’n’ Spray correctly
Pay ’n’ Spray is the standard free-roam escape method when Claude can reach the garage in a suitable vehicle. Enter cleanly and remain inside until the respray finishes. Use a civilian vehicle whenever possible; a normal law-enforcement or military vehicle should not be treated as a dependable choice for this plan.
Approach from an alley or side street when police are close behind. If officers block the entrance, turn away rather than stopping in front of the garage and allowing the vehicle to be boxed in. Once the respray is complete, leave by a different street instead of driving directly toward the last known police position.
Memorize at least one Pay ’n’ Spray route on every unlocked island. For one or two stars, breaking line of sight may be faster than using the garage. At higher levels, approach with a route already planned because a pursuing cruiser can pin Claude against the entrance or force him into heavier traffic.
- Use a civilian vehicle whenever possible.
- Approach from a side street when the pursuit is close.
- Leave the garage through a route that avoids the last known police position.
- Do not assume a heavy police or military vehicle will provide a safe respray option.
Collect and use police-bribe pickups
A police bribe is the floating star-marked pickup placed around Liberty City. Collecting one reduces the wanted level by one star immediately. Fixed bribes are useful when Pay ’n’ Spray is inaccessible, when Claude is on foot, or when a mission vehicle cannot safely reach a garage.
Vigilante work adds permanent police-bribe pickups at the hideouts. On each island, reaching 10 cumulative Vigilante targets adds one hideout bribe, and reaching 20 adds a second. These are optional reward thresholds, but the underlying Vigilante progress is not optional for a 100% run. The original PS2 checklist requires 20 Vigilante missions or targets on Portland, 20 on Staunton Island, and 20 on Shoreside Vale, for 60 overall. The same island-by-island distinction applies to Firefighter: complete 20 fires on each island, for 60 overall.
A bribe lowers the wanted level by one star; it does not automatically clear a six-star pursuit. Save hideout bribes for situations where the route to Pay ’n’ Spray is blocked or where a mission-related escape leaves Claude exposed. The rewards are available at the hideouts after the relevant island threshold is reached.
- Use a fixed bribe when Pay ’n’ Spray is inaccessible or unsafe.
- Remember that each bribe removes one wanted star.
- For 100%, complete 20 Vigilante missions or targets on each island.
- For 100%, complete 20 Firefighter missions on each island.
- Treat the 10- and 20-target hideout bribes as rewards attached to the required island progress, not as substitutes for it.
Use safehouses as recovery points
A safehouse is useful for saving, collecting permanent weapon or police-bribe pickups, and changing vehicles. Simply reaching the garage or entering the building should not be treated as an instant wanted-level reset during an active chase. Police may still be outside, and an exposed approach can leave Claude under fire.
In free roam, reach the safehouse, save the game, and reload that save when a dependable reset is more important than speed. This removes the active wanted level through the normal save-and-reload process. Saving is unavailable during an active mission, so this is a free-roam recovery method rather than a way to cancel scripted pursuit.
After a mission attempt fails or ends, return to a safehouse, refill armor and weapons, replace the damaged vehicle, and save a fresh attempt. Do not carry an unresolved wanted level into mission preparation unless the mission itself requires it.
- Use the hideout for saving, resupplying, and changing vehicles.
- Do not assume touching the safehouse marker instantly removes stars.
- Save and reload in free roam when a clean reset is more valuable than speed.
- Re-equip after a failed attempt before starting the mission again.
Handle helicopters, SWAT, FBI, and the military
When the helicopter appears at three stars, avoid broad avenues and open plazas. Travel beneath elevated roads, alongside buildings, or through tunnels where it cannot maintain a clear attack angle. Keep changing direction instead of circling in one exposed area.
At four stars, SWAT Enforcers serve as both pursuit vehicles and roadblocks. Turn before a blockade closes completely, use the road edge, or cut through a side route rather than braking directly in front of the van. At five stars, FBI cars add fast, armed pursuit. If Claude’s vehicle is boxed in, exit on the side farthest from the nearest officer and run toward a wall, alley, building, or other cover.
At six stars, soldiers and Rhino tanks can destroy an ordinary vehicle quickly. Fighting the entire response is rarely worthwhile in free roam. Use tunnels, ramps, covered routes, police bribes, or a save-and-reload reset. During a mission, a wanted level may be scripted and cannot be removed until the objective or destination is completed; focus on survival and avoid unnecessary collisions and explosions.
- Use covered routes when the helicopter begins tracking Claude.
- Turn before SWAT roadblocks fully close the road.
- Do not stop in the open while FBI vehicles are approaching.
- At six stars, prioritize escape, bribes, or a reload over fighting every pursuer.
Before you move on
- You can escape a one- or two-star pursuit by breaking line of sight and reaching Pay ’n’ Spray in a suitable vehicle.
- You know that the police helicopter begins at three stars, SWAT joins at four, FBI vehicles appear at five, and the military response begins at six.
- You have identified at least one alley, tunnel, underpass, or covered route on each unlocked island.
- You understand that each police-bribe pickup removes one wanted star.
- If pursuing 100% completion, you have completed 20 Vigilante missions or targets on Portland, 20 on Staunton Island, and 20 on Shoreside Vale.
- If pursuing 100% completion, you have completed 20 Firefighter missions on Portland, 20 on Staunton Island, and 20 on Shoreside Vale.
- If you want every optional hideout bribe, you have separately reached the 10- and 20-target Vigilante thresholds on Portland, Staunton Island, and Shoreside Vale.
- You can distinguish ordinary free-roam heat, handled with evasion, Pay ’n’ Spray, bribes, or save-and-reload, from scripted mission pursuit that must be survived until the objective is complete.
Fail Recovery, Save Management and Replay Tactics
The original PlayStation 2 version of Grand Theft Auto III has no mid-mission checkpoint or mission-select screen. A failed mission returns Claude to free roam, so preparation and save discipline are essential. Use separate memory-card slots for normal progress, difficult mission preparation and protection against missable-content lockouts. After a failure, restore health, armor, weapons and a dependable vehicle before trying again. For a 100% run, never overwrite the backup made before a mission that can permanently remove another assignment.
Build a rotating save system
Use at least three save slots on the PlayStation 2 memory card. Keep one current slot for routine progress, one backup slot from before the latest difficult mission cluster and one protected milestone slot that you overwrite only when you are certain no optional or missable content can be lost. Use more slots if the memory card has room.
Save at a hideout after completing a useful group of missions, after collecting a significant batch of packages and before beginning a difficult assignment. Saving is unavailable while a mission is active. At a hideout, park in the garage and enter the save point beside it. The save also repairs the stored vehicle, making the hideout a useful reset point between attempts.
Do not treat a failed attempt as progress that can be resumed. Once Claude dies, is arrested or the mission fails, the assignment must be started again from its marker. Record the mission name associated with each protected file outside the game so that an old save is not accidentally overwritten.
- Current slot: normal progress and recent equipment.
- Backup slot: before the latest difficult or story-changing mission.
- Protected slot: before a missable mission trigger or major island progression point.
- The purpose of every protected save is recorded outside the game.
Protect the Portland lockout point
Before accepting Salvatore Leone's Last Requests, finish every available mission from Luigi Goterelli, Joey Leone and Toni Cipriani that you want counted toward 100% completion. Completing Last Requests changes the Portland mission structure and can permanently remove unfinished assignments from those contacts. This includes Toni's remaining Portland work, not only the Luigi and Joey markers.
A safe order is to clear Luigi's available missions, then Joey's, then Toni's, while checking that no earlier contact has a remaining marker before moving on. Toni's relevant Portland assignments include The Pick-Up, Salvatore's Called a Meeting, Chaperone, Triads and Tribulations, Blow Fish and Cutting the Grass. Do not accept Last Requests simply because it is the only marker you have noticed; inspect the map and contact locations first.
When the Luigi, Joey and Toni markers are clear, save in a new protected slot. Keep that slot until you have confirmed that the intended Portland mission entries are present in the statistics and checklist. Missing these missions does not prevent the story from reaching The Exchange, but the resulting file cannot be treated as a guaranteed 100% run.
- Finish all available Luigi missions before Last Requests.
- Finish all available Joey missions before Last Requests.
- Finish all available Toni missions before Last Requests.
- Create a protected save immediately before accepting Last Requests.
- Do not overwrite that save until Portland progress has been checked.
Protect Kenji and Asuka missions on Staunton Island
Before starting Donald Love's Waka-Gashira Wipeout!, finish every available Kenji Kasen mission. The assignment removes Kenji from the active mission structure, so any remaining Kenji work is lost afterward. Save in a separate slot before entering Donald Love's marker, even if no other mission appears urgent.
Complete Asuka Kasen's Two-Faced Tanner before Donald Love's Grand Theft Aero. Grand Theft Aero removes that Asuka mission from normal progression if it has not already been completed. When several Staunton contacts are active, clear Kenji first, complete Two-Faced Tanner, then create a fresh backup before advancing Donald Love's chain.
If a required marker vanishes before its assignments are complete, stop using the current file for a 100% attempt and load the protected save from before the triggering mission. Do not assume that a disappearing contact will return after another island is opened.
- All available Kenji missions completed before Waka-Gashira Wipeout!.
- Two-Faced Tanner completed before Grand Theft Aero.
- Protected saves made before both trigger missions.
- Mission totals compared with the intended checklist after each milestone.
Recover from death, arrest or ordinary mission failure
After a failed attempt, return to a hideout or another controlled location before preparing again. Death and arrest can remove carried weapons and reduce cash, while a damaged vehicle can make a second attempt fail for the same reason. Restore health, collect available hideout weapon pickups, buy the ammunition needed for the next plan and obtain armor before combat-heavy assignments.
If the failure was caused by a missed turn, poor approach, destroyed vehicle or exposed escort target, keep the current save and change that part of the plan. If the attempt was lost because you were under-equipped, rearm before returning to the mission marker. Do not repeatedly retry while low on health or ammunition; every attempt begins with the preparation you bring to the marker.
- Health restored before retrying.
- Armor replaced for missions with sustained gunfire.
- Lost weapons and ammunition replaced where necessary.
- Damaged or wanted vehicles discarded before collecting the mission vehicle.
- The cause of the previous failure identified and addressed.
Use hideouts, Ammu-Nation and vehicle staging efficiently
Hideout weapon pickups earned through hidden-package milestones can reduce the cost and travel time of repeated retries. Check the pickups available at the local hideout before buying ammunition. Ammu-Nation is useful when a required weapon or ammunition type is unavailable at the house, but avoid spending money on a full stockpile when the next mission can be handled with the weapons already available.
Keep a reliable vehicle near the hideout and use a separate disposable vehicle for supply trips. If the mission requires a particular vehicle, prepare it after rearming and leave it in a safe location. Do not use the mission vehicle for a long detour through hostile territory or a police chase before activating the marker.
For chase and escape missions, identify the route before starting. Note nearby alleys, bridges, tunnels, garages and island connections. A prepared route and an undamaged vehicle are often more valuable than carrying every available weapon.
- Hideout pickups checked before buying supplies.
- A reliable non-mission vehicle available for errands.
- Mission-specific vehicle protected from unnecessary damage.
- Escape route identified before activating the assignment.
Decide when to reload a protected backup
Keep retrying from the current preparation save when the problem is mechanical and correctable: a missed turn, destroyed vehicle, low health, failed escort or avoidable wanted-level escalation. Change the approach before trying again rather than repeating the same route.
Stop and load the protected backup if a required contact disappears, a named character is killed before their assignments are complete or a lockout mission was started too early. For a 100% attempt, do not continue several hours past a suspected lockout and hope the missing mission returns. The original game provides no mission-history option that can restore an assignment lost through story progression.
If no suitable backup exists, the file may still be usable for story completion and free roam, but it cannot be treated as a guaranteed 100% run. Start a new run only after recording which lockout caused the problem so the corrected order can be followed.
- Ordinary failure: re-equip and retry from the current preparation save.
- Possible lockout: stop advancing and inspect the protected save.
- Confirmed missing mission: restore the save from before its trigger.
- No valid backup: continue for story completion or begin a separate 100% file.
Create an endgame recovery ladder
Before entering the final Shoreside Vale mission sequence, create a protected save with full health, armor, useful ammunition and a reliable vehicle nearby. Keep another save from before the late mission cluster if you still want to complete side activities without replaying the final campaign section.
After completing each difficult late mission, save in a different slot rather than immediately overwriting the pre-mission file. This creates a recovery ladder: one file before the assignment, one file after success and one current file for free roam. Retain the pre-mission file until the mission has counted correctly and the next contact markers appear as expected.
The Exchange can be attempted again by reloading a save from before it, but there is no checkpoint inside the mission. If repeated attempts fail, return to the pre-finale file, restore armor and ammunition, choose a dependable vehicle and retry from a prepared state instead of relying on the failed attempt's aftermath.
- Protected pre-finale save retained.
- Separate post-mission save created after major late missions.
- Armor, ammunition and vehicle prepared before retrying The Exchange.
- Earlier backup preserved until final progress is confirmed.
Before you move on
- At least three separate save slots are maintained: current, backup and protected milestone.
- A protected save exists before Last Requests, Waka-Gashira Wipeout! and Grand Theft Aero when pursuing 100%.
- All available Luigi, Joey and Toni missions were completed before Last Requests.
- All available Kenji missions were completed before Waka-Gashira Wipeout!.
- Two-Faced Tanner was completed before Grand Theft Aero.
- The player can restore health, armor, weapons, ammunition and a reliable vehicle before each retry.
- The cause of each failed attempt is changed before another attempt is made.
- The pre-finale save remains available until The Exchange and the resulting progress have been confirmed.
- No required mission has disappeared from the map without restoring a save from before its lockout trigger.
References for this chapter
100% Completion Checklist: Named Story Entries, Statistics Count, Order, Missables and Final Sweep
A completed ending is not automatically a 100% file in the original North American PlayStation 2 release of Grand Theft Auto III. For a complete file, verify all 50 named story entries, while remembering that the original PS2 Statistics screen counts only 48 story missions. Give Me Liberty and Luigi’s Girls share one counted entry, and S.A.M. and Ransom share another. The 17 Pay Phone missions are a separate category. The full checklist also includes the vehicle sub-missions, import/export and emergency-vehicle lists, four RC Toyz challenges, four Off-Road challenges, 100 Hidden Packages, 20 Rampages and 20 Unique Stunt Jumps.
Protect the file before every cutoff
Keep at least three rotating saves: a current file, a backup before the latest mission group and a protected save before a known cutoff. Do not rely on one memory-card slot for a 100% attempt. Preserve an early Portland save in case a mission is lost or the Purple Nines problem prevents later progress.
Before accepting Salvatore’s Last Requests, complete every available Luigi, Joey and Toni mission. This includes Luigi’s Girls, Don’t Spank Ma Bitch Up, Drive Misty for Me, Pump-Action Pimp and The Fuzz Ball; Joey’s Mike Lips Last Lunch, Farewell ‘Chunky’ Lee Chong, Van Heist, Cipriani’s Chauffeur, Dead Skunk in the Trunk and The Getaway; and Toni’s Taking Out the Laundry, The Pick-Up and Salvatore’s Called a Meeting. Do not leave any of these contacts unfinished when Last Requests is accepted.
Finish Portland’s eight Pay Phone missions before leaving the island whenever practical, preferably before Sayonara Salvatore. The phone work is not part of the named story list, but later hostility makes Portland travel and some objectives more troublesome. Before Donald Love’s Waka-Gashira Wipeout!, complete all five Kenji Kasen missions. Complete Two-Faced Tanner before Grand Theft Aero. Complete Marked Man when Ray offers it; its Bulletproof Patriot reward is optional, but the mission itself must be recorded for the named-story checklist.
Keep a clean save before starting D-Ice’s chain. After completing The Rumble, the Purple Nines may no longer appear correctly for Uzi Money on some original-game files. If Uzi Money cannot find its required targets, stop overwriting the affected save and restore the protected backup.
- Keep three or more separate saves.
- Finish all available Luigi, Joey and Toni missions before Last Requests.
- Finish Portland’s Pay Phone missions before Sayonara Salvatore whenever possible.
- Finish all five Kenji missions before Waka-Gashira Wipeout!.
- Finish Two-Faced Tanner before Grand Theft Aero.
- Complete Marked Man and record it separately from the optional Bulletproof Patriot reward.
- Keep a clean pre-D-Ice save on a PS2 100% attempt.
Verify all 50 named story entries
Use a written title-by-title list. The original PS2 Statistics screen is not a reliable title list because it combines two pairs. A complete named checklist contains 50 entries, while the story statistic records 48 counted missions.
Portland’s 22 named entries are: Give Me Liberty; Luigi’s Girls; Don’t Spank Ma Bitch Up; Drive Misty for Me; Pump-Action Pimp; The Fuzz Ball; Mike Lips Last Lunch; Farewell ‘Chunky’ Lee Chong; Van Heist; Cipriani’s Chauffeur; Dead Skunk in the Trunk; The Getaway; Taking Out the Laundry; The Pick-Up; Salvatore’s Called a Meeting; Chaperone; Triads and Tribulations; Blow Fish; Cutting the Grass; Bomb Da Base: Act I; Bomb Da Base: Act II; and Last Requests.
The remaining 28 named entries are: Sayonara Salvatore; Under Surveillance; Paparazzi Purge; Payday for Ray; Two-Faced Tanner; Kanbu Bust-Out; Grand Theft Auto; Deal Steal; Shima; Smack Down; Silence the Sneak; Arms Shortage; Evidence Dash; Gone Fishing; Plaster Blaster; Liberator; Waka-Gashira Wipeout!; A Drop in the Ocean; Marked Man; Grand Theft Aero; Escort Service; Decoy; Love’s Disappearance; Bait; Espresso-2-Go!; S.A.M.; Ransom; and The Exchange. The Exchange is the final story mission, but it is not the only Shoreside Vale-related entry in the complete list.
Treat the order safeguards as requirements for a 100% save: complete all available Portland contacts before Last Requests, all five Kenji missions before Waka-Gashira Wipeout!, and Two-Faced Tanner before Grand Theft Aero. Marked Man is not optional merely because its vehicle reward is optional.
- All 22 Portland names are checked manually.
- Asuka’s five entries are checked: Sayonara Salvatore, Under Surveillance, Paparazzi Purge, Payday for Ray and Two-Faced Tanner.
- All five Kenji entries are checked before Waka-Gashira Wipeout!.
- Ray Machowski’s six entries are checked, including Marked Man.
- Donald Love’s seven entries are checked: Liberator, Waka-Gashira Wipeout!, A Drop in the Ocean, Grand Theft Aero, Escort Service, Decoy and Love’s Disappearance.
- Bait, Espresso-2-Go!, S.A.M., Ransom and The Exchange are checked.
- The original PS2 story statistic shows 48 counted missions, not 50.
- The 50-name list and the 48-count statistic are treated as separate checks.
Complete the separate 17-mission Pay Phone checklist
Pay Phone missions are optional for story progression but required for 100%. They are not additional named story entries. Portland has eight, Staunton Island has four and Shoreside Vale has five.
Marty Chonks gives The Crook, The Thieves, The Wife and Her Lover from the unmarked phone beside Joey’s garage in Trenton. El Burro gives Turismo, I Scream, You Scream, Trial by Fire and Big’n Veiny; his phone becomes available after Van Heist. King Courtney gives Bling-Bling Scramble, Uzi Rider, Gangcar Round-Up and Kingdom Come. D-Ice gives Uzi Money, Toyminator, Rigged to Blow, Bullion Run and Rumble.
Complete the Portland chains before the island becomes difficult to traverse, then finish King Courtney’s missions on Staunton Island and D-Ice’s missions on Shoreside Vale. Count all 17 only in the Pay Phone category.
- Marty Chonks: The Crook, The Thieves, The Wife and Her Lover.
- El Burro: Turismo, I Scream, You Scream, Trial by Fire and Big’n Veiny.
- King Courtney: Bling-Bling Scramble, Uzi Rider, Gangcar Round-Up and Kingdom Come.
- D-Ice: Uzi Money, Toyminator, Rigged to Blow, Bullion Run and Rumble.
- All 17 Pay Phone missions are recorded separately from the 50 named story titles.
Finish vehicle sub-missions and emergency-service totals
Complete Taxi Driver for 100 fares. Complete Paramedic through Level 12 in one continuous run; partial ambulance attempts do not combine into the required result. For Firefighter, extinguish 20 fires on Portland, 20 on Staunton Island and 20 on Shoreside Vale. For Vigilante, eliminate 20 criminals on each island, for 60 total.
The 10- and 20-criminal Vigilante thresholds unlock police-bribe icons at the relevant hideouts. Those rewards are separate from the 100% requirement: the file still needs 20 Vigilante completions on each island. Track the islands separately rather than relying on a combined total.
- Taxi Driver: 100 fares.
- Paramedic: Level 12 in one continuous run.
- Firefighter: 20 Portland, 20 Staunton Island and 20 Shoreside Vale.
- Vigilante: 20 Portland, 20 Staunton Island and 20 Shoreside Vale.
- Hideout police bribes are treated as rewards, not substitutes for the island totals.
Register all required vehicle lists
Complete the Portland civilian Import/Export list at the Portland Docks garage, the Portland emergency-vehicle crane list and the Pike Creek civilian list in Shoreside Vale. Wait for each vehicle to register before leaving the submission point.
The three required lists contain 16 Portland civilian vehicles, seven emergency vehicles and 16 Shoreside Vale civilian vehicles, for 39 listed deliveries. The Portland civilian list includes the Securicar, Moonbeam, Coach, Flatbed, Linerunner, Trashmaster, Patriot, Mr. Whoopee, Blista, Mule, Yankee, Bobcat, Dodo, Bus, Rumpo and Pony. The emergency list includes the Police Car, Ambulance, Fire Truck, Enforcer, FBI Car, Barracks and Rhino. The Pike Creek list includes Sentinel, Cheetah, Banshee, Idaho, Infernus, Taxi, Kuruma, Stretch, Perennial, Stinger, Manana, Landstalker, Stallion, BF Injection, Cabbie and Esperanto.
There is no separate Staunton Import/Export garage. Do not confuse optional extra vehicle deliveries with the three required lists.
- Portland civilian garage: 16 registered.
- Portland emergency crane: seven registered.
- Shoreside Vale Pike Creek garage: 16 registered, including Esperanto.
- Bus is included in the Portland civilian list.
- All 39 listed deliveries are registered.
Complete RC, Off-Road and collectible objectives
Complete Diablo Destruction and Mafia Massacre in Portland, Casino Calamity on Staunton Island and Rumpo Rampage in Shoreside Vale. Activate each from its TOYZ van and finish the destruction objective; merely entering a van does not register success.
Complete Patriot Playground, A Ride in the Park, Multistorey Mayhem and Gripped! with their required vehicles. Collect all 100 Hidden Packages, complete all 20 Rampages and register all 20 Unique Stunt Jumps. A Rampage pickup is not complete until its timed objective is won, and an ordinary jump does not count unless the game registers it as a Unique Stunt Jump.
Use a location checklist for packages, Rampages and jumps, then compare it with the Statistics screen. If the percentage is short, check the named list and the 17 Pay Phone list before repeating random activities.
- Four RC Toyz challenges complete.
- Four Off-Road challenges complete.
- 100 Hidden Packages collected.
- 20 Rampages completed.
- 20 Unique Stunt Jumps registered.
Perform the final sweep after The Exchange
After completing The Exchange and reaching the ending sequence, create a separate post-completion save. Check the Statistics screen, but do not use it as a substitute for the named list. Confirm the story statistic shows 48 counted missions, then manually verify all 50 titles, including both Give Me Liberty and Luigi’s Girls, plus both S.A.M. and Ransom.
Confirm Asuka’s complete five-mission sequence, every Kenji mission before Waka-Gashira Wipeout!, all six Ray Machowski missions including Marked Man, all seven Donald Love missions and The Exchange. Then verify the separate 17 Pay Phone missions, the emergency-service totals, all three vehicle lists, four RC challenges, four Off-Road challenges, 100 Hidden Packages, 20 Rampages and 20 Unique Stunt Jumps.
If the percentage is below 100%, isolate the missing category before replaying anything. Common omissions include Marked Man, Marty Chonks’ unmarked phone missions, one D-Ice assignment, the Portland emergency crane, Esperanto at Pike Creek, an unregistered Unique Stunt Jump or emergency-service progress completed on the wrong island. If Uzi Money cannot find Purple Nines, restore the protected save instead of overwriting it.
- Statistics reaches 100%.
- The story statistic shows 48 counted missions.
- All 50 named story titles are manually verified.
- Give Me Liberty and Luigi’s Girls are both verified despite sharing one statistic entry.
- S.A.M. and Ransom are both verified despite sharing one statistic entry.
- All available Luigi, Joey and Toni missions were completed before Last Requests.
- Asuka’s five missions are verified.
- All five Kenji missions are verified before Waka-Gashira Wipeout!.
- All six Ray Machowski missions, including Marked Man, are verified.
- All seven Donald Love missions are verified.
- The Exchange is verified as complete.
- All 17 Pay Phone missions are verified separately.
- Taxi Driver shows 100 fares.
- Paramedic Level 12 is complete in one continuous run.
- Firefighter and Vigilante each show 20 completed on Portland, Staunton Island and Shoreside Vale.
- All three vehicle lists are complete.
- All four RC challenges and four Off-Road challenges are complete.
- All 100 Hidden Packages, 20 Rampages and 20 Unique Stunt Jumps are recorded.
- A separate post-completion save exists.
Before you move on
- The final Statistics screen reaches 100%.
- The original PS2 story statistic shows 48 counted missions.
- All 50 named story entries are manually verified.
- Give Me Liberty, Luigi’s Girls, S.A.M. and Ransom are all individually checked despite the two paired statistic entries.
- All available Luigi, Joey and Toni missions were completed before Last Requests.
- Asuka’s complete five-mission sequence is verified.
- All five Kenji missions are verified before Waka-Gashira Wipeout!.
- All six Ray Machowski missions, including Marked Man, are verified.
- Every Donald Love mission is verified.
- The Exchange is complete.
- The separate 17-mission Pay Phone checklist is complete.
- Taxi Driver shows 100 fares.
- Paramedic Level 12 is complete in one continuous run.
- Firefighter shows 20 completed on Portland, Staunton Island and Shoreside Vale.
- Vigilante shows 20 completed on Portland, Staunton Island and Shoreside Vale.
- The Portland civilian garage contains all 16 required vehicles.
- The Portland emergency crane contains all seven required vehicles.
- The Shoreside Vale Pike Creek garage contains all 16 required vehicles, including Esperanto.
- All four RC Toyz challenges and four Off-Road challenges are complete.
- All 100 Hidden Packages, 20 Rampages and 20 Unique Stunt Jumps are recorded separately from the story and Pay Phone lists.Verdict: this chapter can be followed to verify the original PS2 100% requirements without mixing the 50 named entries with the 48 counted story statistic.
References for this chapter
- Grand Theft Auto III - 100% Completion FAQ - PlayStation 2 - By InsideOutBoy
- GTA III - 100% Completion Checklist
- GTA 3 Missions List: All Story Missions Guide & Phone Missions
- Grand Theft Auto III/100 percent completion
- Grand Theft Auto III PlayStation 2 Manual
- Grand Theft Auto III - Guide and Walkthrough - PlayStation 2
After the Credits: Optional Post-Game Activities and Best Practices
After The Exchange ends and the credits finish, the original North American PlayStation 2 release returns Claude to ordinary free-roam. The three islands remain available for unfinished collectibles, vehicle work, emergency-service missions and other side activities. Completing The Exchange does not create a mission-replay menu, restore missions lost through an earlier story cutoff, or repair the original PS2 Purple Nines save-state problem. Use the completed file as a cleanup base only after checking every missable story entry and the D-Ice chain.
Create a protected post-finale save
Allow The Exchange to finish completely, including the ending sequence, then wait until Claude is controllable again. Travel to a hideout and save in a new slot reserved for post-game cleanup. Keep the save from before The Exchange unchanged. It remains useful if a final statistic, side mission or activity was not recorded as expected.
For a 100% run, maintain at least one older backup from before the important mission-order cutoffs. The original PS2 game has no modern mission-replay screen. If a required mission disappeared because another mission was completed first, free-roam after the credits cannot restore it. A backup is the normal recovery method; without one, begin a separate run rather than overwriting the finished file.
Before calling the story checklist complete, verify Marked Man, all other required named entries, all five Kenji Kasen missions, Two-Faced Tanner, and the Portland contact missions. For a safe 100% route, all available Luigi, Joey and Toni Cipriani missions should have been completed before accepting Last Requests. If a Luigi, Joey or Toni entry is missing after that cutoff, load a pre-Last-Requests backup. Also verify that Kenji's missions were completed before Waka-Gashira Wipeout! and Two-Faced Tanner before Grand Theft Aero.
- The Exchange is complete and the ending sequence has played.
- A new post-finale save exists in a separate slot.
- The pre-finale save remains intact.
- Marked Man is complete.
- All available Luigi missions were completed before Last Requests.
- All available Joey missions were completed before Last Requests.
- All available Toni Cipriani missions were completed before Last Requests.
- All five Kenji Kasen missions were completed before Waka-Gashira Wipeout!.
- Two-Faced Tanner was completed before Grand Theft Aero.
Read the story counter correctly
The named-story checklist contains 50 entries, but the original PS2 Statistics screen counts 48 story missions. This is not a contradiction. Give Me Liberty and Luigi's Girls are treated as one paired entry by the Statistics counter, and S.A.M. and Ransom are treated as another paired entry. Keep both systems in the written checklist: verify all 50 named entries individually, then expect the Statistics screen to report 48 counted missions.
The story check must include Marked Man even though its Bulletproof Patriot reward is optional. It must also include the full Asuka sequence: Sayonara Salvatore, Under Surveillance, Paparazzi Purge, Payday for Ray and Two-Faced Tanner. Verify the five Kenji missions separately rather than assuming that Waka-Gashira Wipeout! proves the earlier Kenji work was completed.
Keep the 17 Pay Phone missions in a separate category. The Pay Phone total is not part of the 50 named story entries and is not explained by the 48 counted story missions. The 17 missions are Marty Chonks's four, El Burro's four, King Courtney's four and D-Ice's five.
- Named story entries: 50 individually verified.
- Original PS2 Statistics story counter: 48 counted missions expected.
- Give Me Liberty and Luigi's Girls pairing understood.
- S.A.M. and Ransom pairing understood.
- Marked Man verified.
- All available Luigi, Joey and Toni missions verified before Last Requests.
- All 17 Pay Phone missions verified separately.
Check D-Ice and the Purple Nines before cleanup
Verify all five D-Ice missions: Uzi Money, Toyminator, Rigged to Blow, Bullion Run and Rumble. These missions belong to the 17-mission Pay Phone requirement and are not optional if the goal is 100%.
The original PS2 Purple Nines problem concerns the Wichita Gardens gang population. Uzi Money requires Purple Nines targets to appear. After Rumble, the normal game state removes the Purple Nines from the streets. A related save-state problem can also affect a later game started through the pause-menu New Game option after D-Ice's chain has been completed and saved.
If the current file has incomplete D-Ice progress, check whether Purple Nines are still present before committing to the remaining chain. If Uzi Money cannot be completed because the required targets do not appear, do not expect The Exchange, a reload or ordinary free-roam to repair the situation. Restore a save from before the affected state when possible. If no usable backup exists, preserve the current file for free-roam and begin a separate clean run with rotating saves. Do not overwrite a clean early-game save.
For future runs, keep a clean save made before the D-Ice chain is completed. Avoid using the pause-menu New Game option from a save block that has already recorded the affected D-Ice state. Starting from a genuinely clean early-game save is the safest way to preserve the original PS2 gang state for another 100% attempt.
- Uzi Money is complete.
- Toyminator is complete.
- Rigged to Blow is complete.
- Bullion Run is complete.
- Rumble is complete.
- Purple Nines were available when Uzi Money was attempted.
- A pre-D-Ice backup is preserved.
- A clean early-game save is preserved for any future run.
Finish the remaining 100% activities
Use the Statistics screen together with a written checklist. Complete all 100 Hidden Packages, all 20 Rampages and all 20 Unique Stunt Jumps. For jumps, look for the Unique Stunt Bonus confirmation rather than assuming that a successful landing registered. For vehicle lists, confirm that each vehicle was accepted by the correct destination.
Complete the Portland Industrial Import/Export list, the Portland Emergency Vehicle Crane list and the Shoreside Vale Suburban Import/Export list. Complete all four RC Toyz missions: Rumpo Rampage, Casino Calamity, Mafia Massacre and Diablo Destruction. Complete all four vehicle checkpoint challenges: Gripped!, Multistorey Mayhem, A Ride in the Park and Patriot Playground.
Complete Paramedic Level 12 and 100 Taxi fares. Record emergency-service work by island. The original PS2 100% requirement is 20 Firefighter fires on Portland, 20 on Staunton Island and 20 on Shoreside Vale, for 60 total. Vigilante requires 20 criminals on each island as well, also 60 total. Progress on one island does not replace a missing threshold on another.
The Vigilante milestones have a separate reward function. Ten completed Vigilante targets on an island unlock one hideout police bribe there, and twenty unlock the second. Those six bribes are useful optional rewards, but they are not a substitute for the 20-per-island completion requirement.
- Hidden Packages: 100.
- Rampages: 20.
- Unique Stunt Jumps: 20, each confirmed.
- Portland Industrial Import/Export: complete.
- Portland Emergency Vehicle Crane list: complete.
- Shoreside Vale Suburban Import/Export list: complete.
- RC Toyz: all four missions.
- Vehicle checkpoint challenges: all four missions.
- Paramedic: Level 12.
- Taxi: 100 fares.
- Firefighter: 20 Portland, 20 Staunton Island, 20 Shoreside Vale.
- Vigilante: 20 Portland, 20 Staunton Island, 20 Shoreside Vale.
Recover safely when something is missing
If the Statistics screen is short, keep the post-finale save untouched. Compare each category with the written checklist, return to the relevant island and repeat only activities that lack confirmed registration. Save the correction in another slot before changing the main backup.
If a story entry is missing, free-roam cannot recreate it. Load the earliest backup that still contains the mission and continue from there. Use a pre-Last-Requests save for missing Luigi, Joey or Toni content. Use a pre-Waka-Gashira Wipeout! save for missing Kenji missions, a pre-Grand Theft Aero save for Two-Faced Tanner, and a pre-D-Ice save when Purple Nines or D-Ice progress is compromised.
Most ordinary cleanup remains available after the credits, including packages, Rampages, Unique Stunt Jumps, Import/Export work, Taxi fares, Paramedic, Firefighter, Vigilante, RC Toyz and vehicle checkpoint challenges. The relevant exceptions are missions lost through earlier story order and the Purple Nines/D-Ice save-state problem. Preserve the finished file even if it cannot reach 100%; it remains useful for free-roam and for checking what remains.
- Keep the completed post-finale save unchanged.
- Use Statistics to identify the missing category.
- Confirm successful registration before replacing any backup.
- Use a pre-Last-Requests save for missing Luigi, Joey or Toni content.
- Use a pre-Waka-Gashira Wipeout! save for missing Kenji content.
- Use a pre-Grand Theft Aero save for missing Two-Faced Tanner.
- Use a pre-D-Ice save for Purple Nines or D-Ice problems.
- Start a separate clean run if no recovery save remains.
- Do not confuse the 48-entry Statistics counter with the 50-entry named-story checklist.
- Call the file 100% complete only when the full activity checklist and intended Statistics result are satisfied.
Before you move on
- The Exchange is complete and the ending sequence has played.
- A separate post-finale save loads into ordinary free-roam.
- All 50 named story entries are individually verified.
- The original PS2 Statistics screen shows 48 counted story missions.
- Marked Man is complete.
- All available Luigi, Joey and Toni missions were completed before Last Requests.
- The Kenji-before-Waka-Gashira Wipeout! order is satisfied.
- Two-Faced Tanner was completed before Grand Theft Aero.
- All 17 Pay Phone missions are complete: four Marty Chonks, four El Burro, four King Courtney and five D-Ice.
- All five D-Ice missions are complete.
- Uzi Money was completed while Purple Nines targets were available.
- No unresolved Purple Nines problem can block Pay Phone completion.
- Hidden Packages total 100.
- Rampages total 20.
- Unique Stunt Jumps total 20 with confirmation messages.
- The Portland Industrial Import/Export list is complete.
- The Portland Emergency Vehicle Crane list is complete.
- The Shoreside Vale Suburban Import/Export list is complete.
- All four RC Toyz missions are complete.
- All four vehicle checkpoint challenges are complete4? No, all four vehicle checkpoint challenges are complete.
References for this chapter
- Grand Theft Auto III - Purple Nines Glitch FAQ - PlayStation 2 - By gtafreak420
- Grand Theft Auto III - Guide and Walkthrough - PlayStation 2 - By RARusk
- Grand Theft Auto III - 100% Completion FAQ - PlayStation 2 - By InsideOutBoy
- 100% Completion in GTA III
- Grand Theft Auto III/100 percent completion
- Grand Theft Auto III/Uzi Money
- Grand Theft Auto III PlayStation 2 Manual
Finishing up
Main story complete: Finish every required named story entry from Give Me Liberty through The Exchange, including Marked Man, Donald Love's Escort Service, Decoy and Love's Disappearance, then complete The Exchange on Shoreside Vale and reach the ending sequence and credits. For the original PS2 Statistics screen, remember that the 50 named entries are recorded as 48 counted story missions because Give Me Liberty and Luigi's Girls are paired, and S.A.M. and Ransom are paired.
Optional 100% completion: Complete all 50 named story entries and all 17 Pay Phone missions; all four RC Toyz missions; all four Off-Road challenges; Paramedic Level 12; 100 Taxi fares; 20 Firefighter missions on Portland, 20 on Staunton Island and 20 on Shoreside Vale; 20 Vigilante missions on Portland, 20 on Staunton Island and 20 on Shoreside Vale; all three Import/Export lists; all 100 Hidden Packages; all 20 Rampages; and all 20 Unique Stunt Jumps. Verify the named mission list separately from the original PS2 Missions Passed counter, which should reflect 48 counted story missions, and verify every listed category in the Statistics screen.
Missable-content protection: Complete all available Luigi, Joey and Toni missions before Last Requests; all Kenji missions before Waka-Gashira Wipeout!; and Two-Faced Tanner before Grand Theft Aero. Preserve backup saves before each cutoff.
All three island safehouses may be used for post-story preparation and package rewards. Safehouse weapon milestones are optional rewards, while the island-specific Vigilante bribe thresholds are part of the required 20-per-island Vigilante progress for the original PS2 100% checklist.
Choose your next gameScreenshots & video
Game imagery for reference. Follow the written chapters above for the route and strategies.
Sources & references
Our original guide draws on the references below. Check the edition at the top of this page before following controls or unlock requirements.
- Grand Theft Auto III PlayStation 2 Manual
- Grand Theft Auto 3: GTA 3 PC & PS2 - How do I save my game?
- Grand Theft Auto III - Guide and Walkthrough - PlayStation 2 - By RARusk
- Grand Theft Auto III Guide and Walkthrough for PlayStation 2
- GTA III - Give Me Liberty - Story Mission Guide
- GTA 3 Missions List: All Story Missions Guide & Phone Missions
- The Fuzz Ball | GTA 3 Mission Guide and Walkthrough
- Don’t Spank Ma Bitch Up | GTA 3 Mission Guide and Walkthrough
- Drive Misty For Me | Grand Theft Wiki
- Marty Chonks | GTA 3 Characters Guide
- Grand Theft Auto III - Missions Guide - PlayStation 2 - By fluxwildlyuncut
- Last Requests | GTA 3 Mission Guide & Walkthrough
- The Getaway — GTA 3 Mission Guide & Walkthrough — GTABase
- Trial By Fire — GTA 3 Mission Guide & Walkthrough — GTABase
- Grand Theft Auto III — Guide and Walkthrough — PlayStation 2 — GameFAQs
- Sayonara Salvatore — GTA 3 Mission Guide & Walkthrough
- Paparazzi Purge — GTA Wiki
- Under Surveillance — GTA Wiki
- Shima — GTA Wiki
- Smack Down — GTA Wiki
- Grand Theft Auto III - Guide and Walkthrough - PlayStation 2
- Grand Theft Auto III — Mission Select Code Guide for PlayStation 2
- Plaster Blaster — GTA 3 Mission Guide and Walkthrough
- A Drop In The Ocean — GTA 3 Mission Guide and Walkthrough
- Marked Man | GTA 3 Mission Guide and Walkthrough
- Grand Theft Aero — GTA 3 Mission Guide and Walkthrough
- Decoy — GTA 3 Mission Guide and Walkthrough
- Love’s Disappearance — GTA 3 Mission Guide and Walkthrough
- Grand Theft Auto III - Guide and Walkthrough - PlayStation 2
- Grand Theft Auto III PlayStation 2 Manual
- Bait — GTA Wiki
- Espresso-2-Go! — GTA 3 Mission Guide & Walkthrough
- S.A.M. — GTA 3 Mission Guide & Walkthrough
- The Exchange GTA 3 Mission Guide and Walkthrough
- Grand Theft Auto III Guide and Walkthrough for PlayStation 2
- Grand Theft Auto III Guide and Walkthrough for PlayStation 2
- Grand Theft Auto III Weapons FAQ, PlayStation 2, GameFAQs
- Grand Theft Auto III Hidden Packages, GTA Base
- Grand Theft Auto III Firefighter, GTA Base
- Grand Theft Auto III - Guide and Walkthrough - PlayStation 2 - By RARusk
- Grand Theft Auto III – Hidden Packages FAQ (PS2), by inoble
- Grand Theft Auto 3 – Featured Guide: Hidden Packages
- RC Toyz Missions | GTA 3 Side Missions Guide
- GTA III Checkpoint Challenges
- Grand Theft Auto III Off-Road Missions FAQ for PlayStation 2
- Grand Theft Auto III - Purple Nines Glitch FAQ - PlayStation 2 - By gtafreak420
- Grand Theft Auto III/Uzi Money
- Multistorey Mayhem | GTA 3 Side Mission Guide
- GTA III - 100% Completion Checklist
- Grand Theft Auto III – Import/Export Garage and EV Crane FAQ – PlayStation 2
- Grand Theft Auto III - 100% Completion FAQ - PlayStation 2 - By InsideOutBoy
- GTA 3 Import/Export Mission Guide: All Cars List & Locations
- Escort Service GTA 3 Mission Guide and Walkthrough
- Grand Theft Auto III Cutting the Grass Strategy Guide
- Vigilante | GTA 3 Side Missions Guide
- Grand Theft Auto III/100 percent completion
- 100% Completion in GTA III
- Police Bribe - Grand Theft Wiki
- What happened to Joey's missions? - Grand Theft Auto III
About the game & collecting notes
- Platform
- PlayStation 2
Step-by-step campaign walkthrough for the original PlayStation 2 (NTSC-U) edition of Grand Theft Auto III, covering the complete named story route, missable missions, side activities and the verified original-game 100% checklist.
Darryl Polo
Darryl Polo loves tinkering with emulation and revisiting retro games. He enjoys exploring how old favorites play on different setups and sharing what he learns along the way. At Joking Joystick, he writes about the games, hardware, and small discoveries that keep the hobby fun.
Our editorial standardsFound a step that needs another look? Help us improve this guide.