God of War Walkthrough: The Complete PS2 Campaign
Follow Kratos from the Aegean Sea to his final battle with Ares in the original PlayStation 2 game. This walkthrough explains the combat encounters, temple puzzles, dangerous climbs, and boss fights along the main story, with upgrade advice and recovery tips for the sections most likely to interrupt your run.

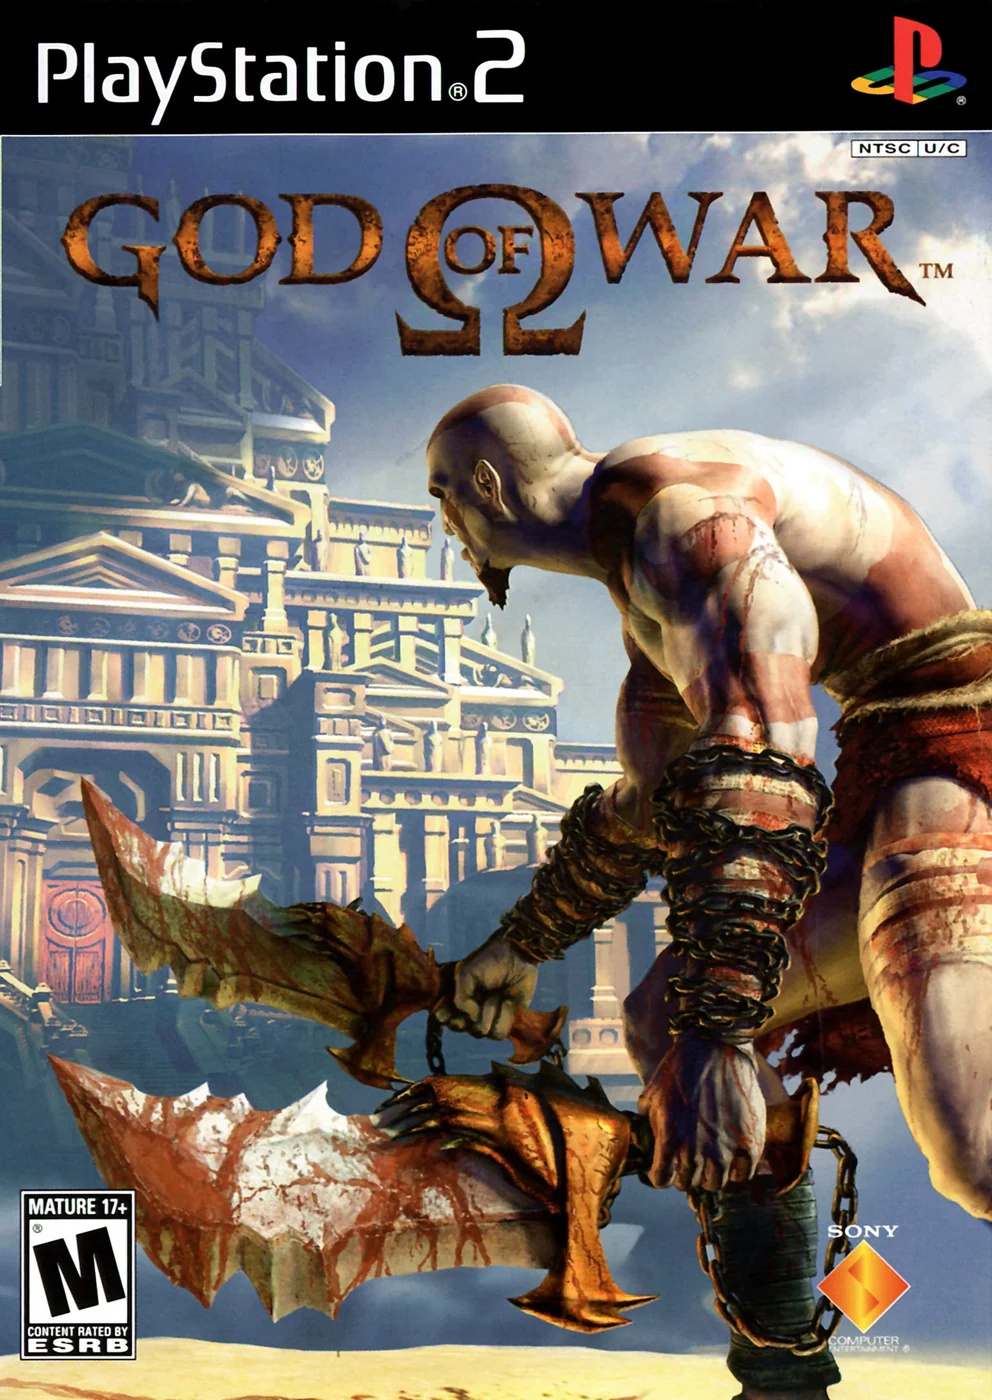
Find a copy
God of War PlayStation 2
We may earn a commission if you buy through these links, at no extra cost to you. As an Amazon Associate I earn from qualifying purchases.
Opens retailer search results. Check the model, edition, seller, availability and current price before buying.
Before you begin
Kratos's journey takes you from burning ships and the streets of Athens into Pandora's Temple, the Underworld, and a final confrontation with Ares. The chapters below follow that main campaign in order, using the original PlayStation 2 version and its controls.
Keep the chapter list open while you play and jump to the room or boss where you need help. Nearby health and magic upgrades are useful, but collecting every optional chest is not required for the ending. Save regularly and keep a second slot before major transitions so you can return to an earlier checkpoint if you need to reconsider your upgrades.
Set yourself up for the run
Start with the original PS2 control layout and check the on-screen button prompts during grabs, mechanisms, and finishing moves.
Invest early red orbs in the Blades of Chaos so your regular attacks remain dependable when magic runs low.
Practice blocking and short evasive moves before committing to longer attack strings in crowded rooms.
Break safe containers for resources and use health or magic chests when their contents will help you.
Clear enemies before working a crank, moving a block, or attempting a narrow platforming route whenever the room allows it.
Use several save slots, especially around Pandora's Temple and the later campaign transitions.
The Aegean Sea
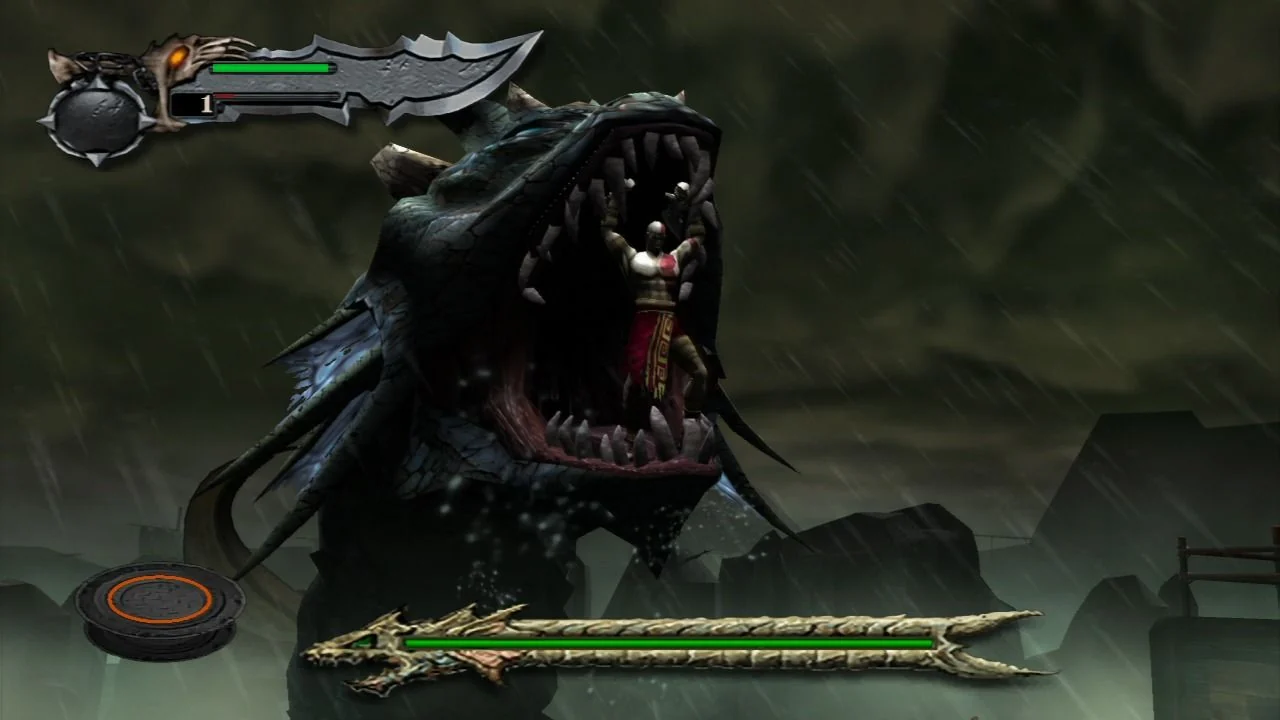
The opening stage is a straight push through two ships, but the storm, narrow walkways, and repeated Hydra attacks can make it feel more confusing than it is. Use this chapter to learn the basics that matter for the whole campaign: hit groups with broad blade swings, block obvious frontal attacks, grab enemies only when the crowd is under control, and save your dodge for escaping pressure instead of wandering in circles. Your goal is to force a route from the first ship to a second one, earn Poseidon's Rage, kill the Hydra, take the Captain's Key, and finally unlock the captain's quarters path to leave the sea behind.
Clear the bow and learn the basic combat rhythm
You begin on the front deck with basic undead soldiers swarming in. Square gives you quick blade attacks that are safe for opening groups, while Triangle adds slower heavier hits that interrupt better and reach a little deeper into a pack. Circle is your grab. Use it after you have made space, not while three other enemies are already swinging into your back. Jump is mainly an escape or reposition tool in this opening fight, and blocking is worth practicing immediately because these first enemies telegraph clean frontal strikes.
Do not chase single targets to the railings. Hold the center of the bow, swing through several enemies at once, and turn to meet anything that tries to flank. If pressure closes in from both sides, use your evasive movement to break out, then reset in open space and attack again. Once the deck is clear, go to the chain-locked floor grate and force it open to drop below deck.
- Use Square for quick crowd hits.
- Mix Triangle in when you need a heavier interruption.
- Use Circle only when a grab will not leave you exposed.
- Practice blocking instead of trying to win every exchange by attacking first.
Push through the lower cabins and beat the first Hydra Spawn
Open the nearby health chest only if you actually need it, then break the obvious containers and go down the corridor to the right. Smash through the wooden blockage and keep following the only real forward path through the sleeping quarters. This part can feel maze-like on a first visit, but it is mostly a line. If a room does not give you a new opening, beam, stair, or exterior exit, you are usually just turning back.
In the larger chamber, the first Hydra Spawn erupts ahead of you. This fight is easiest if you respect its reach and fight from the room entrance rather than crowding its mouth. Let it lunge, block or avoid the bite, then step in with a short combo and get back out. Do not stay planted for a full greedy string. When the finisher prompt appears, complete it to drive the creature off. Afterward, cross the beams carefully, exit through the opening, ignore the useless prisoner, climb the stairs, and break through the next barrier to get outside again.
- Move forward through the cabins instead of backtracking through old rooms.
- Fight the first Spawn in short punish windows after its bite.
- Use beams, stair climbs, and exterior exits as proof you are on the correct route.
Handle the second Spawn, then reach the adjacent ship
On the next deck, clear the harpies and any nearby enemies before worrying about anything else. Harpies are less dangerous than being distracted by them while a larger threat arrives. Soon another Hydra Spawn crashes through the deck. This version is more active, so keep your spacing cleaner. Watch for its repeated head slams, its swipe, and the grab attempt that leads to a mash-out if it catches you. Punish only after its attack cycle finishes, especially after the slam sequence.
When it falls, open the side doors for supplies if you need them, then drop through the hole into the water and swim along the route to the climbable netting. Fight your way across the next stretch, then walk the narrow beams with patience. One branch leads to a small reward, but the main route is the path to the next ship. Do not rush the crossing. A fall here is an instant loss, and the area is teaching you that footing can be as dangerous as the enemies.
- Clear harpies and nearby pressure before focusing on the Spawn.
- Punish the second Spawn after its committed attack patterns, not during them.
- Swim the water route and cross the beams carefully to reach the second ship.
Solve the archer route, find the locked captain's door, and earn Poseidon's Rage
On the next ship, save at the glowing point and only spend the health chest if you need it. Drop to the lower section and use the large cover pieces against the archers. The small crate on the right has to reach the far side so you can jump up to the archers' platform. Do not slowly shove it in open fire. Move it from cover to cover, using stronger kicks to send it farther when needed, then climb up and eliminate the archers.
Follow the hallway outside and inspect the captain's quarters door with the wheel. It is locked for now, and this is important because it tells you where the Captain's Key will be used later. Turn away from the locked door, climb the ladder, and keep going up the netting. You can fight on the climb or jump upward aggressively when you have room. At the top, cross the beam for a chest if you want it, return to the center, and slide down the long rope.
Three barricades wait at the bottom. The middle one hides the mandatory path to Poseidon. The left and right side rewards are optional, with the right side offering an early Gorgon Eye on the main line if you want it. Go through the center opening, watch the scene, and receive Poseidon's Rage. This is your first magic. Treat it as an emergency crowd clearer for tight swarms, not something to hoard forever. Kill the enemies that appear, move through the next doorway, save again, and refill from the nearby health and magic chests before the boss sequence.
- Move the crate under the archers instead of tanking arrow fire.
- Check the locked captain's quarters door so you know where to return later.
- Break the center barricade to meet Poseidon and obtain Poseidon's Rage.
- Save and restock before climbing to the Hydra battle.
Pin the two lower Hydra Spawn before climbing to the main head
The final battle starts in the lower arena with two Hydra Spawn attacking one at a time from opposite sides. Focus on a single target until it collapses. Do not spread damage around just because both enemies are present. The arena becomes safer the moment one Spawn is permanently pinned.
Each side has a stack of crates leading to a hanging anchor device. After you drop a Spawn, scramble up the nearest crates and leap onto the anchor to drive it down into the creature. Repeat the same process on the second Spawn. Short, controlled combos are better than long commitments here because random bites can still clip you on the way out. This is also the last calm point before the upper platform, so if you came in hurt, that earlier restock before climbing mattered.
- Fight one Spawn at a time.
- Use the crate stack and anchor on the side of the downed Spawn.
- Do not try to finish both enemies evenly.
Kill the main Hydra, take the Captain's Key, and unlock the exit
Once both lower Spawn are pinned, climb the ropes to the upper platform for the real Hydra. The safest loop is simple: stand where the head will commit, bait the bite, step away, then rush in while its jaws are stuck in the deck. Land your hits and get ready to retreat again. The Hydra can also roar and blast Kratos back onto the ropes. If that happens, do not panic. Wait out the danger, climb back up, and reset the same pattern instead of forcing a rushed re-entry.
After enough damage, the finisher prompt appears. Mash through it to slam the Hydra's head into the mast in the center of the platform. Keep repeating the bite punish into finisher cycle. The mast eventually breaks into a deadly spike, and the next successful slam impales the Hydra and ends the fight.
Now enter the Hydra's mouth and move through the throat to the trapped captain. Interact with him to take the Captain's Key. After the scene, head back out. You can climb the crates on the right for the newly accessible treasure if you want it, then save again if needed. Drop back to the lower level and return to the locked captain's quarters door you found earlier. You do not need to stop and duel every enemy on the way back. Open the door with the key, follow the captain's route through the interior, and continue until the departure scene triggers. That cutscene is the true end of The Aegean Sea.
- Bait the bite and punish while the jaws are lodged in the platform.
- Use each finisher to drive the Hydra into the mast until the impalement kill occurs.
- Go inside the mouth and claim the Captain's Key.
- Backtrack to the locked captain's quarters door and open it to leave the chapter.
Before you move on
- You have moved from the ship's bow through the lower cabins, exterior decks, beam crossings, and the adjacent ship without losing the route.
- Poseidon's Rage has been acquired from Poseidon before the Hydra finale.
- The two lower Hydra Spawn have been pinned, the main Hydra has been impaled on the mast, and the Captain's Key has been taken from inside the Hydra's mouth.
- You have returned to the captain's quarters door, unlocked it with the Captain's Key, and triggered the scene that ends The Aegean Sea.
Gates of Athens
This chapter begins as Kratos leaves the Hydra behind and enters the original 2005 North American PlayStation 2 release's first Athens battlefield. The spaces are broader than the ship, but the route is still directed and you can save a lot of health by reading each arena before charging ahead. Your goals here are to reach the city interior cleanly, use Poseidon's Rage when crowds start to pin you in narrow footing, defeat Medusa to gain Medusa's Gaze in this chapter, learn its correct original PS2 controls, and follow the full post-Medusa route all the way to the Oracle's image and the bridge into Road to Athens.
Leave the harbor like a corridor, not a hub
After Athena's scene, clear the dock enemies before you start testing ladders or ledges. This early Athens section feels larger than the ship, but it is not built for free wandering. Each fight room feeds into one forward route, with a few fast pickups tucked just off that line.
As you move away from the harbor, check the broken wall opening near the water. Swim through the short side passage for an easy Phoenix Feather, then come right back to the main walkway. This is worth taking because it is close, safe once the dock is cleared, and gives you permanent value without costing much time.
Use the nearby lift to go up. From here on, stop treating magic as something you can never spend. If a group of lesser enemies is keeping you from reading the arena or is setting up heavier attackers behind them, one cast of Poseidon's Rage is usually a better trade than eating several hits while stubbornly saving a full magic bar.
- Clear the dock before experimenting with ladders and side openings.
- Take the short swim detour for the Phoenix Feather, then return immediately.
- Ride the lift upward and start using Poseidon's Rage to break swarms when space gets cramped.
Control the early Athens fights before you climb higher
The next combat spaces introduce the chapter's rhythm: wider rooms than the ship, but awkward footing and mixed pressure. Fight minotaurs and other melee enemies with short strings instead of long flashy commitments. You want room to sidestep or roll, especially near edges, stairs, and scaffolding where a bad dodge can make a simple fight messy.
In the heavier arena beyond, keep the larger brute enemies in front of you. Let a big swing or charge finish, punish briefly, then move again. If lesser enemies are clipping you from the side while you focus on the heavy target, clear the pack first with blades or Poseidon's Rage so the arena stops feeling crowded.
When the barrier clears, break obvious containers and use nearby recovery only if you need it. This chapter rewards conserving free healing before known trouble spots, especially before the Medusa room and the longer climb that follows it.
- Favor short punish strings over long combos in cramped spaces.
- Keep larger enemies centered instead of fighting from a wall or corner.
- Take easy red orb pickups, but save healing and magic chests when possible.
Read the pillar room correctly and prepare for Medusa
The next interior room can waste time if you search it like a maze. The key is that the wooden supports under some pillars are breakable. Smash the weak supports first so the room turns into a climb instead of a dead-end puzzle box.
Start your ascent from the lower safe side rather than attempting blind long jumps from the floor. There are optional rewards on or near the climb line, including a useful pickup if you choose to reach for it, but do not keep recrossing the room just to break every object. This chapter is still about pushing inland efficiently.
Once you reach Aphrodite's chamber, sweep the breakables around the edges and think before stepping into the glowing center. That trigger starts the required Medusa fight, so go in with enough space, enough health, and preferably enough magic left to avoid a sloppy reset afterward.
- Break pillar supports to open the intended route upward.
- Climb methodically instead of trying long guesses from the floor.
- Enter Aphrodite's chamber ready, because the glow starts the mandatory boss fight.
Defeat Medusa and learn Medusa's Gaze with the correct PS2 controls
Medusa is the required fight here, and the danger is her petrifying beam more than her raw durability. Stay grounded and react to the beam with evasive movement instead of jumping around wildly. If Kratos is turned to stone, break free immediately, because a follow-up hit while petrified can kill you outright.
Attack in short bursts, then reset your spacing. Medusa is easier when you stay disciplined and do not stand still long enough to be punished by the next gaze. When the finishing prompt appears, complete it to end the fight and trigger Aphrodite's reward.
Kratos receives Medusa's Gaze here in Gates of Athens, before Road to Athens and not in the sewers. For the original PlayStation 2 release, select Medusa's Gaze, hold L2 to aim, and hold Square to keep the beam on an enemy until it turns fully to stone. Then release the spell and rush in with melee attacks to shatter the target before it breaks free. Do not use Circle for this basic beam tutorial. The immediate follow-up enemies are there to force this lesson, so focus on freezing one target cleanly instead of spraying magic in panic.
- Dodge the beam with grounded evasive movement and break free fast if petrified.
- Finish Medusa to gain Medusa's Gaze in this chapter.
- Use the tutorial correctly: hold L2, hold Square until full petrification, then shatter with melee.
Use the first crossbow, then follow the full mandatory climb beyond it
After the tutorial fight, go through the newly opened path, clear the next enemies, and climb the ladder. Save here if needed. The giant crossbow room is not the end of the chapter. Rotate the device with the nearby lever, then fire it to break the route door ahead. If you want the easy nearby detour first, the side ladder and lower passage lead to a Gorgon Eye and a shortcut gate, but return to the main line immediately afterward.
Beyond the broken route door, take the upward ladder and climb the wall on the right, moving across its gaps until you can descend onto the ledge behind the large statue. Stand in position and tap R2 repeatedly to topple the statue. Drop back down and use the fallen head as a stepping stone to reach the next ladder and rooftop path.
Clear the enemies on the way up. On the rooftop stretch, expect gorgons and minotaurs in tight spaces. Remove ranged or disruptive enemies first if they interfere with climbing or footing. When you reach the area with weak pillars, break them to create the way up to the higher roof.
- Rotate and fire the first crossbow to break the mandatory route door.
- Climb the right-hand wall path and topple the large statue with repeated R2.
- Use the fallen head to continue upward and break the weak rooftop pillars to climb higher.
Fire the second crossbow, open the shortcut gate, and return to the first machine
On the upper roof, clear the fight before touching the second crossbow. Fire it to send a rope across the gap. Cross that rope carefully. Enemies can attack while you are on it, so do not rush blindly. If something gets in your face, stop long enough to knock it away, then continue. Losing control on the rope costs more health than taking an extra second to stabilize.
Once across, enter the opposite building and open the connecting metal gate from this side. This creates the sightline you still need. Drop back through the now-open connection and return to the first crossbow room.
Use the first crossbow again, this time firing through the opened line to destroy the remaining wooden door deeper in the hall. Go through, kill the minotaurs beyond, then follow the corridor out to the bridge. At the marked center, the Oracle of Athens appears as an image and directs Kratos onward. Let the scene finish, then cross fully into Road to Athens.
- Fire the second crossbow to create the rope and cross it under pressure.
- Open the metal gate from the far side, then return to the first crossbow.
- Destroy the remaining wooden door, clear the minotaurs, and reach the Oracle bridge into Road to Athens.
Before you move on
- You cleared the harbor route, took the short swim detour for the Phoenix Feather, and moved inland by lift.
- You survived the early Athens arenas by controlling space and using Poseidon's Rage when crowds became the real threat.
- You defeated Medusa in Aphrodite's chamber, received Medusa's Gaze there, and completed the petrify-and-shatter tutorial with the original PS2 controls.
- You broke the first route door with the crossbow, toppled the giant statue, climbed through the rooftop fights, used the second crossbow to make the rope, opened the metal gate from the far side, returned to fire the first crossbow again, cleared the minotaurs beyond the last wooden door, and reached the Oracle's image on the bridge to Road to Athens.
References for this chapter
- God of War Release Information for PlayStation 2 - GameFAQs
- GOD OF WAR - (NTSC-U)
- God of War - Guide and Walkthrough - PlayStation 2 - By A_I_e_x - GameFAQs
- God of War - Guide and Walkthrough - PlayStation 2 - By jarrodlover - GameFAQs
- God of War - Guide and Walkthrough - PlayStation 2 - By ZenithWillRule - GameFAQs
- God of War - FAQ/Hints and Tips - PlayStation 2 - By keltin_2002 - GameFAQs
- God of War Walkthrough - GameSpot
Road to Athens
Road to Athens is a mostly linear push from the bridge outside the Oracle route into the wider combat spaces of the city center. The game tries to distract you with breakable doors, rooftops, and constant attacks, but the real path is easy to read once you know its landmarks. First comes the balcony where Kratos sees Ares ravaging the city. Next is the sealed minotaur-switch room that proves Medusa's Gaze is a progression tool, not just a combat spell. After that, the chapter becomes one long damaged street full of archers, gorgons, and minotaurs, ending at a broken barricade and a two-rope swing across a gap. The water fountain and broad staircase beyond that gap are your final visual confirmation that Athens Town Square is close. Fight in controlled pockets, loot only the worthwhile houses and rooftops, and avoid spending recovery chests unless your condition is already poor. If you stay disciplined here, you enter the next arena with enough health, magic, and red orbs to keep momentum instead of playing catch-up.
Use the balcony and blocked street to orient yourself
After crossing the bridge from the previous section, step onto the overlook and watch the scene of Ares tearing into Athens. When control returns, do not waste time searching for another route across the balcony. The game is funneling you down from the overlook and into the city streets.
Follow the open descent and remember the first big landmark of the chapter: the direct way forward is blocked. That is intentional. If the obvious street exit is closed, turn to the only usable side route instead of circling the overlook. This keeps you from second-guessing the path before the chapter has even started.
Treat this opening as your reset point. If you saved nearby and have full resources, great. If not, the important thing is to begin the street section with a clear plan: solve the next room first, then start checking houses once the road opens up.
- Use the overlook and the blocked straight path as proof you are on the correct route.
- Head down into the side passage instead of searching the balcony for a hidden exit.
- Start the chapter with the next puzzle room in mind rather than chasing breakables immediately.
Escape the sealed switch room with Medusa's Gaze
The next enclosed room is not just another fight. Once the way shuts behind you, the goal is to open the opposite gate by turning a minotaur to stone while it stands on the floor switch. If you spend all your magic trying to blast through the first wave, you make the room harder than it needs to be.
The safest method is to thin the room normally first. Deal with the early pressure, keep the center floor plate in view, and save enough magic to cast Medusa's Gaze on demand. When only one minotaur is left or a fresh single minotaur is easier to control, stand so the switch sits between Kratos and the enemy. Bait the charge or walk-up, freeze the minotaur on the plate, and sprint for the newly opened gate at once.
Move fast once the enemy is petrified. Do not stop to finish the statue or grab random pickups first. If you hesitate, the effect wears off and the gate closes again. Use the room's magic chest only if you need another attempt, and use the health on the far side only when your bar justifies it. This room is the chapter's best reminder that recovery chests are more valuable as insurance than as automatic pickups.
- Preserve enough magic to cast Medusa's Gaze when the minotaur is positioned correctly.
- Lure the minotaur onto the floor switch before activating the spell.
- Run through the opened gate immediately instead of lingering in the room.
Clear the road in short pockets before opening houses
Once outside, the chapter turns into a long war-damaged road lined with houses, small interiors, and rooftop ledges. The temptation is to break every door on sight. Do not do that while enemies are active. Clear the current stretch of road first, then dip into the nearest worthwhile room. Fighting inside a doorway while archers are still shooting from the street is the easiest way to lose health for no reward.
Archers are the first target whenever you can reach them safely. Their damage is not the real problem; the problem is getting clipped while a stronger enemy is already forcing your timing. If a gorgon is also present, strafe and keep moving until you can cut down the ranged pressure. Once the arrows stop, the rest of the fight becomes much easier to read.
Minotaurs are the enemies most likely to pin Kratos against rubble, house frames, or corners. Back into open road and make them finish their swings in space. Do not brawl in cramped interiors unless the street is already under control. If smaller shield-bearing undead or basic soldiers are mixed into a pack, use wide blade strings to keep them from body-blocking you while you reposition for the larger target.
If a room or bend in the road has not been fully cleared, assume the game can still punish you for fiddling with objects. Kill first, loot second. That rhythm is what keeps Road to Athens from feeling chaotic.
- Finish the current enemy pack before checking nearby doors or climbing onto roofs.
- Take out archers early so heavier enemies cannot trap you during chip fire.
- Pull minotaurs into the open road instead of fighting them in doorframes or corners.
Take the best roadside rewards and skip empty detours
Not every breakable house matters, but several of the best upgrades in this chapter sit almost directly on the main road. Early on, a left-side house with a lit window is worth breaking open because it holds a Phoenix Feather. Later, when the road curves and Ares becomes visible again in the distance, look to the right for a reachable rooftop. Climb up for a Gorgon Eye, then cross to the next roof to remove an archer and collect the nearby reward before dropping back to the street.
Near the end of the road, a larger white building on the left is the most valuable detour in the chapter. Go inside for two major permanent-upgrade pickups together: a Gorgon Eye and a Phoenix Feather. This is the kind of side stop you should take every time because it costs little and pays off immediately.
Everything else should be judged by resource discipline. Open red orb chests whenever you find them because they are permanent progress toward upgrades. Leave health and magic chests closed if your condition is still good. You are heading toward a bigger arena soon, and unused recovery is more useful than perfect looting.
- Check the lit left-side house for the early Phoenix Feather.
- Use the right-side rooftop around the Ares sightline to grab the Gorgon Eye and remove the archer.
- Enter the larger white building near the end for the paired Gorgon Eye and Phoenix Feather.
- Prioritize red orb chests and save recovery chests for real need.
Break through the barricade and cross the rope gap cleanly
At the end of the street, kill the last threats nearby and smash the wooden barricade. If the road appears to stop at a gap, you have reached the correct exit. Look overhead for the hanging ropes. This is the chapter's final traversal check.
Grab the first rope, build a full swing, and transfer to the second. From the second rope, you can angle into a side alcove for an extra red orb chest before making the final landing. Only do that if you already feel comfortable with the swing. Otherwise, prioritize the far street and keep the run clean.
Release near the high point of the swing. Letting go too early just drops Kratos short and forces another attempt. Once you land, do not assume the chapter is over. Re-center the camera space mentally, break the nearby containers, and look for the next clear landmark instead of searching the walls.
- Break the barricade to reveal the mandatory rope crossing.
- Transfer from the first rope to the second before dropping to the far street.
- Take the side alcove chest only if you can do it without repeated misses.
- Land on the far road and keep moving toward the next obvious landmark.
Follow the fountain and grand stairs into Athens Town Square
After the rope section, the remaining route is short. Round the corner and watch for the water fountain and the broad staircase ahead. Those features confirm that the long road segment is ending and the city center is close.
Break pots and containers for quick red orbs, but keep your priorities straight. If a health or magic chest remains behind you and you do not need it, leave it. The wider plaza ahead is where recovery becomes more valuable. This chapter is not about squeezing every last orb from the environment; it is about arriving prepared for the first major square battle.
Climb the stairs and treat the visual shift seriously. The narrow, house-lined road gives way to a much more open public space. That change in scale is your signal that Road to Athens is complete and that the next chapter will lock you into tougher arena combat.
- Use the water fountain and grand staircase as the final route marker.
- Keep recovery chests in reserve unless your health or magic is already low.
- Enter the larger plaza knowing a tougher encounter is immediately ahead.
Before you move on
- You left the overlook, followed the only usable descent, and solved the sealed room by petrifying a minotaur on the floor switch.
- You cleared the long damaged road without getting lost in unnecessary interiors or side edges.
- You passed the chapter's main landmarks in order: balcony view of Ares, Medusa switch room, house-lined war road, broken barricade, rope crossing, water fountain, and grand staircase.
- You collected the most practical main-route rewards, especially the rooftop and left-building permanent upgrades, without draining your health and magic recklessly.
- You climbed into Athens Town Square with workable resources and are ready for the next lock-in battle.
References for this chapter
- Rave Reviews Nationwide Spark High Anticipation for God of War as the 2005 Must-Have Game on PlayStation 2
- God of War Release Information for PlayStation 2 - GameFAQs
- God of War Walkthrough - GameSpot
- God of War - Guide and Walkthrough - PlayStation 2 - By Andrew_Testa - GameFAQs
- God of War (2005) - MobyGames
Athens Town Square
Athens Town Square is a short chapter, but it is one of the first places in the original PlayStation 2 release where the game tests whether you can stay calm inside a sealed combat space and then remember the route back through it. Clear the plaza, enter the ornate building beyond it, chase the fleeing woman to the upper ledges, recover her key after she falls, and then fight your way back to the locked trapdoor that leads into Rooftops of Athens. The square is not the end of the Athens stretch. Treat it as a checkpoint-heavy transition from street fighting into tighter indoor battles and more dangerous climbing ahead.
Approach the plaza carefully and take the easy supplies before the arena closes
As you climb the stairs toward the town square, check the left side before fully committing to the open plaza. There are quick red-orb pickups on this approach that cost almost no time and do not send you off the route. Take them now, because once you step into the square far enough, the game turns the area into a lock-in fight and stops being about sightseeing.
The moment the way shuts behind you, stop looking for alternate exits. This arena only opens after the enemy wave is finished. Fight in the open middle as much as possible. The walls and corners make the early Athens enemies more dangerous than they look, because a bad dodge can slide Kratos into a second hit instead of out of the first one.
- Check the left side of the stairs for the two easy red-orb chests before entering the middle of the square.
- Expect the path behind you to close once the encounter starts.
- Use the center of the plaza as your working space instead of backing into walls.
Clear the sealed square by controlling space, not by chasing single targets
A Cyclops leads the square fight, with smaller enemies adding pressure around it. Do not stand in front of the big enemy waiting to trade blows. Circle just outside its swings, step in from the side after a committed attack, and use blade strings that can also clip the lesser enemies if they crowd in. If you tunnel on the Cyclops and ignore the pack, the smaller hits will interrupt you and create the panic-rolling loop that drains your health.
Avoid long, wild evasive rolls across the whole arena. Short repositioning is better here. What matters is keeping a little empty floor around Kratos so the Cyclops cannot trap you during recovery. Once the arena is clear, smash the nearby containers for extra red orbs, then move through the upper-left passage leading out of the plaza. That corridor is the required route, not an optional side room.
- Let the Cyclops finish attacks before punishing from the side.
- Use wide attacks when enemies bunch together.
- Leave through the upper-left passage after the square is cleared.
Enter the ornate rooms, stock up on the main path, and follow the woman upward
The passage from the square leads into a large ornate chamber. Break the decorative wall panels and containers in here before you leave. This room contains useful pickups directly on the route, so it is worth a brief sweep, but do not turn it into a full treasure hunt. After that, climb the stairs and continue after the fleeing woman.
At the first broken gap, remember the layout. If you drop down near this area later, there are breakables and a recovery chest below, plus a ladder back up, so this is a safe place to stabilize if the square fight went badly. Cross the gap, keep climbing, and follow the woman to the higher balcony. She will run ahead again and then fall from the ledge. When the scene ends, use the save point nearby before moving on. There is also an easy Phoenix Feather on the adjacent balcony, so grab it if you want the upgrade progress with almost no risk.
- Break the obvious wall panels and containers in the ornate chamber for route-friendly loot.
- Cross the broken gap and keep following the woman up the stairs.
- Use the save point after she falls, then take the nearby Phoenix Feather if desired.
Drop to the body, take the key, and retrace the route the game expects
Now drop down to the lower level where the woman landed and recover the key from her body. This is the mandatory progression item for the trapdoor near the upper save point. The game does not open a new path from the corpse itself. You must go back the way you came.
Turn around and re-enter the ornate interior. New enemies appear on the return trip. In the narrower room, shielded undead are the main slowdown. Do not slap uselessly into their guard. Finish attack strings with stronger hits to break their defense, then keep moving so they do not pin you in the doorway. Climb back upstairs and prepare for the next dangerous room: two Gorgons with archers above. The real threat here is getting caught standing still in front of the petrifying beam while arrows interrupt you. Keep shifting sideways, punish a missed beam, and remove the archers as soon as you get the opening.
After that fight, pass through the next chamber, clear the enemies before stopping for breakables, and return to the familiar broken-balcony route. Climb the stairs again until you reach the same upper save point area where the woman fell. If your health or magic is shaky, save again and refill from the nearby chest before you touch the trapdoor. This is the best moment to reset because the next chapter starts mixing traversal mistakes with enemy pressure.
- Take the key from the woman’s body.
- Go back through the same interior route instead of searching the lower courtyard for an exit.
- Beat the shielded undead, then the Gorgons and archers, and return to the upper save point.
Unlock the trapdoor, open the gate below, and move into Rooftops of Athens
From the upper save point, move to the right side and make the jump to the ledge beyond it. In the back corner is the locked trapdoor. Use the key there, then open the hatch and drop down. This confirms that you have completed the required Town Square key sequence correctly.
Once below, keep moving through the short tunnel and open the large gate at the far end. Do not loop back into the plaza unless you deliberately want leftover breakables. The route ahead is now linear and leads directly out toward Rooftops of Athens. Save again if the point is available before you head outside, because the next section shifts away from flat arena control and into ladders, ledges, archers, and footing hazards.
- Jump right from the upper save point area to reach the trapdoor ledge.
- Use the key on the hatch and drop through.
- Open the gate at the end of the passage and continue onward to Rooftops of Athens.
Before you move on
- You cleared the sealed Athens Town Square encounter and entered the ornate passage beyond the plaza.
- You chased the woman to the upper ledges, used the save point after her fall, dropped to her body, and collected the key.
- You fought back through the interior return route, including shielded undead and the Gorgon room, and made it back to the upper save point area.
- You unlocked the trapdoor on the right-side ledge, dropped through, opened the gate below, and advanced into the route for Rooftops of Athens.
Rooftops of Athens
In the original 2005 North American PlayStation 2 release, Rooftops of Athens is a real progression chapter, not a quick bridge between combat arenas. You climb alternating ivy walls, fight through enclosed roof rooms, work around archers who can interrupt jumps and ledge movement, solve the rooftop ballista puzzle to obtain Zeus' Fury, and then use that magic twice for mandatory progress before the route feeds directly into the Temple of the Oracle approach.
Climb out of the square and treat the ivy wall as the first obstacle
After leaving Athens Town Square through the opened route, follow the short tunnel until you come back outside and reach the first ivy wall. Climb up until Kratos can go no higher, then jump backward to the ivy on the opposite wall. Repeat the same pattern again, then once more, until you can jump to the ledge with two chests. This climb is the chapter's first reminder that footing matters as much as combat. If you rush the backward jumps, you lose health and time before the real enemy pressure begins.
Go into the next room and break the containers, then trigger the wraith fight. These enemies burrow and strike from below, so do not flail at empty ground when one disappears. Hold your guard for the pop-up attack, then counter with quick blade strings once it resurfaces. Search the room only after it is clear. A breakable boarded section in this first room hides an optional Gorgon Eye, but the main route continues up the wooden staircase after the fight.
- Use backward jumps between ivy walls until you reach the first ledge with chests.
- Clear the first wraith room before hunting for breakable side boards.
- Take the wooden staircase upward to stay on the mandatory route.
Clear the first roof battles, then work through the broken bridge detour
At the top of the stairs, kill the archers on the steps first so they cannot interrupt you while you reposition. On the next roof, expect more wraiths and a Cyclops. Fight near the middle instead of near the edges. The Cyclops is dangerous because the roof is cluttered and the camera can tempt you into backing toward a drop or into stray hits from smaller enemies. Use a nearby health chest only if you actually need it, because this chapter gives you several recovery points if you stay composed.
When this roof is secure, go back down and take the passage onward. At the broken bridge, do not waste time staring across the gap. Double jump to the lower platform, then jump again to the ivy-covered pillar. Rotate around the right side of the pillar while the archers shoot, climb down, move left, and jump to the nearby platform. Go through the breakable door, kill the wraiths in the hall, then remove the archers on the balcony before pressing farther. On the left side of that balcony, use R2 to lower the wooden ramp. Return to the ivy pillar, rotate right, jump to the next pillar, and then to the far ledge. This is the correct route cue through a section that can look more open than it really is.
- Kill archers before taking longer actions such as climbing, balancing, or turning corners on exposed roofs.
- Use the broken bridge drop and ivy pillar path to reach the side hall and lower the wooden ramp.
- Return from the balcony to the pillar route and jump across to the far ledge.
Solve the rooftop ballista puzzle exactly
On the far ledge, leap over the next broken bridge, turn left, and find the large mounted crossbow. This ballista is required. Push it into the adjacent room, place it on the circular floor plate, and use the lever in the alcove. The first use turns the weapon and drops a ladder. Climb the ladder if you want the chest above, then come back down.
Now push the ballista off the plate and use the lever a second time so it rotates again. After that, push it back onto the plate and pull the lever a third time. The goal is to have the ballista facing the wooden door at the back of the larger chamber. Once it is lined up, fire it through that door to blast open the route to Zeus' chamber. If it is facing the wrong direction, do not hunt for another mechanism. The puzzle is only about moving the crossbow on and off the plate to control the turns.
- Push the ballista into the side room and onto the floor plate.
- Use the lever, move the ballista off the plate, use the lever again, then return it to the plate and use the lever a third time.
- Fire the ballista through the wooden door to open the way to Zeus' Fury.
Take Zeus' Fury and use it immediately to open the next route
Follow the opened hall into the blue aura and receive Zeus' Fury. There is a magic chest nearby, so this is the moment to top off if you spent too much during the roof fights. In this chapter, Zeus' Fury is not a bonus tool to save for later. The game expects you to use it right away because normal melee cannot safely remove every threat on the next rooftops.
Exit forward and begin crossing the broken bridge outside the chamber. Archers on top of the temple control the route from a distance. Use Zeus' Fury to kill them before you commit to more exposed movement. Their death opens the passage on the right side across the bridge. Go through that opening and keep any side pickups secondary to the fact that the newly opened path is your mandatory progress marker. Once you understand that Zeus' Fury clears distant blockers, the rest of the chapter reads much more clearly.
- Collect Zeus' Fury from the blue aura chamber.
- Use Zeus' Fury on the temple archers before pressing on.
- Take the newly opened passage on the right side of the bridge.
Cross the last rooftops and kill the distant soldier to raise the bridge
Return across the bridge, save if you want, and climb the ladder to the next roof. Expect a Minotaur and harpies. Again, center your fighting. Harpies are annoying here because they can drag your attention toward ledges, but the Minotaur is the real reason to keep the battle in a safe area. Afterward, continue across the next roofs. Optional ladders, ropes, and side chests exist, but do not confuse those with the main line. The important cue is that the path keeps sending you upward and leftward across connected roofs until you reach a ramp facing a distant lever station.
When you reach the roof with the ramp and see the soldier across the gap, do not overthink the problem. Run up the ramp and hit the distant soldier with Zeus' Fury. That is the intended solution, and it raises the bridge so you can continue. If your bolt hits scenery, adjust your angle and throw again instead of assuming you missed a hidden switch. Once the bridge is fully up, cross it calmly. Break the pots and use the obvious chests ahead, because the Oracle section begins immediately after this rooftop run and you want stable health and magic for the next chapter's rescue and puzzle pressure.
- Use the post-Zeus save and ladder as the start of the final rooftop stretch.
- Keep moving across the connected roofs until you reach the ramp with a clear line toward the distant soldier.
- Kill the soldier with Zeus' Fury to raise the bridge, then cross into the Temple of the Oracle approach.
Before you move on
- You climbed the ivy walls with backward jumps, cleared the first roof fights, and used the broken bridge and ivy pillar detour to stay on the main route.
- You solved the ballista puzzle by rotating the weapon into position and firing it through the wooden door to reach Zeus' Fury.
- You used Zeus' Fury to kill the temple archers and later the distant soldier who raises the bridge.
- You crossed the raised bridge and entered the Temple of the Oracle approach with the Rooftops of Athens chapter finished.
References for this chapter
Temple of the Oracle
Reach the temple, survive the forced fights outside and inside, solve the statue rooms instead of wasting health on endless harpy pressure, then rescue the Oracle before the hanging line snaps. Her warning is the reason the story leaves upper Athens and turns toward Pandora's Box, so treat this chapter as the handoff into the next act. Once the rescue scene ends, take the reopened exterior route across the sword bridge and down into the Sewers of Athens.
Break through the temple approach and clear the entrance fight first
After the rooftop route and bridge sequence, follow the stairs toward the temple district. The game is no longer hiding the path. You are moving into a damaged sacred area with a very narrow route, so do not stop to smash every background object unless it is directly in your way or sitting beside a chest on the main line. The important thing is to keep forward progress and arrive at the next arena with as much health and magic as possible.
Cross the bridge into the open approach and the exits seal. Stay focused on survival until the barrier drops. Harpies mix with gorgons here, so the danger comes from trying to chase one enemy while another hits you from above or from the side. Use broad blade swings to catch multiple targets and throw Zeus' Fury at harpies that refuse to stay within reach. If a fiery target appears under Kratos, move or block immediately instead of finishing your combo.
When the arena opens again, climb the stairs toward the temple entrance. This is a good place to save and refill if your last stretch went badly. The ledges and chests around the entrance can help, but they are not the objective. Once you are stable, go inside and be ready for a room where solving the mechanism matters more than winning a long brawl.
- Clear the exterior lock-in battle before trying to route ahead.
- Use ranged attacks on distant harpies instead of jumping recklessly after them.
- Save and restock at the temple entrance if needed before going inside.
Seal the harpy holes with the statues
The first interior room teaches the chapter's real rule: if the pressure never ends, look for what is creating it. Harpies pour from the two large wall openings in the upper chamber, and trying to kill them forever only burns health and magic. Open the nearby gate on the left so you have room to move, but do not run onward yet. The immediate problem is in this chamber.
Go to the back of the room and pull out the two large movable statues. Each one must be dragged in front of one wall opening, with the shield side covering the gap. Place the right statue at the right opening and the left statue at the left opening. Once both holes are blocked, the stream stops and the remaining enemies become a normal cleanup instead of an endless drain.
Only after the room settles should you check the nearby ledges or hidden chests if you want them. The required route is upstairs through the gate you opened earlier. This is the pattern to remember for the whole temple district: clear the lock-in condition, then loot if it is convenient, then move on.
- Pull both statues free from the back wall.
- Cover both harpy holes completely before worrying about cleanup.
- Leave optional pickups for after the spawn pressure is gone.
Cross the upper beams and reach the rescue courtyard
Go through the opened gate and climb the stairs above the harpy room. You now need to cross the beam network to the far side. The hazard here is mostly your footing and the camera, not enemy complexity. Walk the turns cleanly, keep your line centered, and do not panic-jump at corners. If a section crumbles, stop and read the next safe angle instead of rushing the recovery.
There is a useful side ledge with a breakable window along the beam route, but the main goal is simply to reach the opposite side without giving away health to a fall. When you arrive, save again if you want a cleaner retry point before the next sequence. Then follow the long hallway, kill the weak enemies quickly, and continue outside.
The courtyard scene with the Oracle hanging from a rope is the chapter's real puzzle. Do not sprint straight to the vines. The game gives you time to build the route first. Use that calm setup period well, because the later timed section becomes much easier when the statue position is already correct.
- Cross the beams slowly and deliberately.
- Use the hall to regroup and clear minor enemies before the courtyard.
- Treat the courtyard setup as untimed until the rescue sequence actually begins.
Use the lift to build the two-statue stack
From the courtyard start, move to Kratos' left and pull the first large statue onto the circular lift beside it. This lowers the platform. Climb back up and push the second statue onto the lowered lift so it lands on top of the first one. Stand on the lift if needed to work the height, then drag the completed two-statue stack into the lower courtyard. This stacked column is the only practical way to reach the ivy route.
Now move the double-height stack to the left side of the pillared central structure, between that structure and the fountain side of the area. The jump line matters. If the stack sits too far out, too far back, or at a crooked angle, you will lose time correcting your jump after the countdown begins. Test the alignment from the central structure before you commit. You want a simple path: central structure, top of the stacked statues, then the ivy on the wall.
Ignore any temptation to improvise with single-statue jumps. This puzzle is specifically built around the stacked pair. Once the stack is lined up, climb onto the pillared structure, jump to the top of the statues, and jump again to the ivy. As you advance along the ivy, a cutscene triggers and the rescue timer starts. That means all of the real preparation should already be done before you touch the climb.
- Put one statue on the lift and the second on top of it.
- Drag the finished stack to the left of the pillared structure near the ivy wall.
- Make sure the jump line is clean before starting the climb.
Rescue the Oracle, then take the sewers route
Once the countdown starts, smooth movement matters more than panic speed. Move across the ivy toward the spinning gears and wait for a safe opening instead of jumping into them early. This obstacle wastes more runs than the later beam sections because players hurry here and get knocked back. After the gears, keep climbing quickly. Use faster movement on the wall where possible rather than inching along every surface.
At the top, jump to the rope, swing across, land on the far platform, and cross the beams without overcorrecting. A clean straight run is faster than frantic dodging. After the beams, use the next ropes to reach the large statue platform and run to the Oracle's hanging line to trigger the rescue scene. If you fail, fix the setup or the gear timing on the next attempt. Most losses come from crooked statue placement or hesitation at the gears, not from the final sprint itself.
Listen to the Oracle after the rescue. This is the chapter's story payoff. She points Kratos toward Pandora's Box as the power needed to kill Ares, which is why the game now sends you away from upper Athens and toward the desert. When control returns, go through the newly opened passage and follow the hall back outside to the save point. You can take the short side detour behind the save only if you want the nearby pickup, but the required route is the long sword-shaped bridge ahead.
Cross that bridge, descend the spiral staircase inside, and keep going down until you reach the lower ledge into the underground passage. Drop into the opening to enter the Sewers of Athens. If you are wondering whether you missed another objective in the temple, you did not. Once the Oracle is saved and you have taken this bridge-and-stairs route downward, you are leaving the area correctly.
- Wait out the spinning gears and then keep the rest of the route fluid.
- Reach the Oracle's line to trigger the rescue scene.
- Return through the opened hall, save outside, cross the sword bridge, and descend into the sewers.
Before you move on
- You survived the exterior temple approach fight and entered the Temple of the Oracle.
- You blocked both harpy wall openings with the two large statues and crossed the upper beam route.
- You used the lift to stack the statues, moved the stack beside the pillared structure, climbed the ivy, and rescued the Oracle before she fell.
- You heard the Oracle's Pandora's Box warning, returned through the opened hall, crossed the sword-shaped bridge, descended the spiral staircase, and dropped into the Sewers of Athens.
Sewers of Athens
After leaving the Oracle's rescue route, the Sewers of Athens serve as a short but punishing bridge chapter between upper Athens and the desert beyond. Do not treat it like a maze and do not wait for a boss reward that never comes. The correct path is mostly forward through the sewer channel, then upward through a ladder and spiral stair climb that loops you back to the mountain road where you first saw Ares attacking the city. The challenge here is attrition. You fight in narrow lanes, get harassed by archers on higher ledges, and can lose a surprising amount of health by trying to climb before the floor is stable. Use Medusa's Gaze only when a slow heavy enemy is close enough to punish cleanly, keep ranged attackers from shooting freely above you, and leave with enough health and magic to start the Desert of Lost Souls in control instead of already recovering.
Enter the sewer and read the route correctly
Once you leave the Oracle area through the doorway north of her platform, make your way to the save point, cross the long bridge formed by the statue's sword, and descend the large spiral staircase into the flooded lower passage. Open the chest at the bottom if you need it, then hop the low barrier to enter the sewers proper. This is the start of the chapter. If you are still looking for a temple puzzle or another Oracle interaction, you have gone too far in your expectations. From here on, the game wants a straight push through enemy pockets and back up to the road above Athens.
The easiest way to stay oriented is to keep the sewer flow and the rising ledges in mind. You are not choosing between meaningful branches. You are moving forward through a channel, climbing where the path rises, dropping when the route bends back down, and eventually taking a ladder and spiral stairs back out. The danger comes from trying to move too fast in cramped ground. Breakables and side chests are useful, but do not let them trick you into circling. Move ahead, clear the active threat around you, then look for the next climb point.
- Cross the sword bridge and descend the big spiral staircase from the Oracle side.
- Open the lower passage chest only if you need the recovery before the sewer fights.
- Treat the sewer as a forward-and-up route, not a branching maze.
Clear the opening tunnel before you chase the archers
At the entrance, use the two nearby replenishment chests only if your bars actually need help. Then advance into the first stretch and fight the ground enemies in the tunnel before you get greedy about the raised ledge. The room is wide enough for clean dodges, so use that space now while you still have it. Pull melee enemies toward you and away from archer support whenever possible. Once the floor is calmer, double jump to the ledge where the archers were firing from and remove them. That ledge also gives you a little breathing room and an optional red-orb chest at the left end.
When you drop back down and continue, the route bends toward a metal barrier. Jump onto it and move over instead of searching for a switch. This is the game's pattern for the chapter: fight, advance, climb, repeat. If you leave archers alive behind you, every later exchange becomes messier than it needs to be. Take the extra few seconds to wipe out shooters on reachable ledges before returning to the main floor.
- Use the entrance chests sparingly so you keep emergency recovery available.
- Beat the first ground wave before climbing to the archers' ledge.
- After the ledge is safe, continue forward and vault the first metal barrier.
Use Medusa's Gaze to shorten the heavy fights, not to replace your whole game plan
Beyond the barrier, the tighter sewer corridor introduces the slower heavy enemies that make Medusa's Gaze valuable. This is where the spell starts earning its keep in practical play, but only if you cast with purpose. Wait for a Minotaur or other heavy target to commit and close the distance, freeze that one enemy, shatter it quickly, and then return to normal blade pressure. That removes the most dangerous body from the lane without draining your entire magic bar. If you try to petrify every target in the room, you will run dry and still have to solve the archers and spacing problems the hard way.
Keep fighting with the corridor in mind. Back up enough to make the heavies approach in a line instead of surrounding you. If you get pinned near a wall or at the lip of a drop, disengage immediately rather than forcing one more combo. This part of the sewer is less about stylish offense and more about staying centered. There is recovery nearby, including a replenishment chest on the right and more resources ahead, so stabilize the room first and then refill if necessary. After that, continue along the channel, open the chests on the way only as needed, and jump up at the end for the largest fight in the chapter.
- Save Medusa's Gaze for slow heavy enemies that you can shatter safely.
- Fight from the middle of the lane whenever possible instead of backing into edges.
- Refill after the pressure drops, not while an active wave is still swinging at you.
Finish the large gauntlet room and climb out in stages
The big sewer gauntlet is where most careless runs go wrong. You enter with enough room to think, then the game starts stacking enemies by type and by elevation. Handle the first heavy attackers on the main floor before you worry about every archer above. If Cyclops join the fight, give them more respect than the earlier Minotaurs. Their long swings cover more ground, so do not stand at the end of your own combo hoping they will stagger. Sidestep the big commitment, punish, and move again. Once a safe opening appears, climb to the archer ledge on the right and clear it. Then return to whatever is still active below, or continue to the next upper ledge when the floor is finally under control.
The key is to treat the area as a series of cleared pockets, not a panic sprint to the ladder. After the right-side shooters are dead, advance to the next curve, remove the next archer position, and collect the nearby red-orb chest if you want it. Then follow the channel to another metal barrier, jump onto it, and climb the ladder just beyond. There is a chest by the ladder if you need a last refill before the exit. From there, go up the spiral stairs and pull the lever at the top. The new stair section that unfolds is your confirmation that the sewer route is complete and that you are about to reconnect with the mountain overlook above the city.
- Do not rush the ladder while heavy enemies or archers still control the room.
- Clear the right-side archer ledge as soon as the ground fight gives you a safe opening.
- After the final barrier and ladder, pull the upper lever to reveal the return stairs.
Return to the overlook and take the newly opened path to the desert
Climb the revealed stairs and you will emerge at the familiar road above Athens, the same broad overlook where you first saw Ares in the distance. This is the chapter's payoff. The sewers are not a dead-end dungeon; they are a loop that repositions you on the mountain path and unlocks the next leg of the story. Head back up to the save point and use it. Then take the right-hand route this time. The left path was your earlier route toward the city, but now the right path is the one that matters.
Follow that mountain road downhill until you reach the enormous doorway that is now open. Before crossing the threshold, collect the nearby resources. There is a useful chest off to the right near the doorway and another replenishment chest close to the entrance, so this is a good place to leave yourself topped off. Try not to enter the Desert of Lost Souls with an empty magic bar. You do not need to hoard full magic forever, but having enough left for a controlled answer to an ugly fight is better than arriving drained because you turned every sewer brute into stone just because you could. Step through the large door when you are ready. That handoff marks the end of the Sewers of Athens chapter and the start of the desert approach to Pandora's Temple.
- Use the save point once you return to the Athens overlook.
- Take the right-hand mountain path, not the earlier city route.
- Restock near the now-open great door before entering the Desert of Lost Souls.
Before you move on
- You entered the Sewers of Athens from the lower passage beyond the sword bridge after the Oracle sequence.
- You followed the sewer forward through its ledges, barriers, and enemy waves without treating it like a maze or expecting a boss reward there.
- You used the ladder, climbed the spiral stairs, and pulled the lever that opens the return staircase back to the mountain road.
- You returned to the overlook where Ares is visible, saved, and took the newly important right-hand path.
- You reached the now-open great door and entered the route to the Desert of Lost Souls with health restored and at least some magic still available.
References for this chapter
- God of War — StrategyWiki
- God of War/Temple of the Oracle — StrategyWiki
- God of War/Sewers of Athens — StrategyWiki
- God of War - Guide and Walkthrough - PlayStation 2 - By A_I_e_x - GameFAQs
- God of War - Guide and Walkthrough - PlayStation 2 - By jarrodlover - GameFAQs
- God of War Walkthrough - GameSpot
Desert of Lost Souls
The Desert of Lost Souls looks open, but the original PlayStation 2 campaign treats it as a fixed progression test. Your job is not to map every patch of sand. You must track down and kill three roaming sirens by following their song, use the doorway their deaths unlock, clear the conveyor-and-block room inside the ruins, sound the first horn to carve a safe path through the storm, survive the second horn's siren ambush, and sound that horn after the fight to summon Cronos. Use the entrance statue, the desert edge, the raised central ruins, and the large doorway on the far side as your anchors so you never drift in circles.
Read the desert before you start running
When Kratos enters the desert, treat the place like a navigation puzzle instead of a full exploration zone. The sandstorm cuts visibility, but the game gives you enough structure to stay oriented. Keep four reference points in mind: the entrance statue behind you, the outer wall of the desert, the raised ruins near the middle, and the large temple-like doorway on the far side that will eventually open.
The sirens are the only real objective out in the sand. Athena's hint matters here: use the singing as your guide. If the song grows louder, you are closing in. If it fades, stop committing to that line and turn back before you waste more time. The best recovery method when you feel lost is to run back until you can identify the entrance statue again, then begin a fresh sweep from a known point instead of guessing in the storm.
- Use the entrance statue as your reset point whenever you lose direction.
- Keep the desert wall and the central raised ruins in mind as landmarks.
- Let the sirens' song decide your direction; louder means you are closer.
Hunt the three sirens without wandering aimlessly
A reliable way to start is to work the perimeter instead of cutting blind through the middle. Make your first serious check near the large doorway on the far side of the desert, because one siren patrols that end of the area and the singing is easy to read there. There is a recovery chest near that doorway, so this is also a good place to steady yourself if the search or the first fight goes badly.
After the first kill, use the raised central ruins as your pivot for the remaining two. Circle outward from that landmark rather than running in huge straight lines. The other sirens roam in their own sections of the desert instead of standing in one fixed square, so sound matters more than exact coordinates. If the song weakens as you move, reverse course and sweep the other side of the central ruins. This keeps the search controlled and prevents long empty laps.
Do not waste all your magic on the first isolated target. The later sirens can bring minotaurs into the fight, and that support pressure is what usually drains health. Focus on the siren first whenever possible, because leaving her free lets her keep sliding away and peppering you from range while the heavier enemies close in. Zeus' Fury is useful if a siren keeps backing off, but ordinary blade pressure works fine if you stay on her and take the Circle finish when it appears.
The desert phase is complete only when all three sirens are dead. Their deaths unlock the far-side doorway. That opening is your confirmation that you can stop searching the sand and move on.
- Check the far-side doorway area first, then pivot off the central ruins for the remaining sirens.
- Use the song to correct your line instead of trusting memory in the storm.
- Prioritize the siren over her support so you do not get pinned by ranged pressure.
- Do not leave the desert until the newly opened doorway confirms all three kills.
Solve the conveyor room by extracting the block and climbing out
Go through the newly opened doorway, save, and refill before going downstairs. The next room looks more dangerous than it really is. The moving belt and crusher at the far end can hurt you badly, but the puzzle is not about defeating the machine in a direct slugging match.
Drop down and move under the upper ledge to the wall door. Use R2 there to open it and pull the stone block out. Undead enemies appear once you start working the room, so kill them before you commit to pushing. Trying to drag the block while enemies poke at you is the easiest way to get carried into the deadly end of the belt.
With the room clear enough to work, push or kick the block all the way to the left wall. That is the important placement. Once it is flush to the left side, climb onto the block and jump to the upper ledge. You can damage the exposed gear if you want breathing room, but that is not the required solution and it is easy to lose health by getting greedy near it. The safe answer is block placement, climb, and leave.
Go through the door at the top and follow the passage to the stairs and the first horn.
- Open the wall door and pull out the hidden stone block first.
- Kill the undead before you start pushing the block into position.
- Shove the block to the left wall, climb it, and jump back to the upper ledge.
Use the first horn and stay on the route it creates
At the first horn, press R2 to sound it. This is a mandatory progression trigger. The blast opens a visible path through the storm. Once that route appears, follow it directly. There is no reason to resume free roaming in the sand at this point.
This chapter does not give you a new weapon or spell. The real reward here is access to Pandora's Temple, so resource discipline still matters. If you have been leaning on Poseidon's Rage or Zeus' Fury to stabilize the siren hunts, now is the time to start thinking about what you want left for the next forced fight rather than blowing everything on minor threats beside the path.
- Sound the first horn to reveal the safe route through the storm.
- Stay on the created path instead of re-entering the open desert.
- Preserve health, magic, and Rage because another siren fight is next.
Clear the second horn ambush before you try to move on
When you approach the second horn, the game turns the path into an arena. The horn disappears and three sirens attack immediately. More sirens follow after the first group, so treat this as a wave fight rather than a quick duel.
Fight for space near the middle instead of chasing one siren all the way to the edge. Sirens become much more dangerous when they can fan out and hit you from multiple angles. Wide Blade of Chaos strings are safer than tunnel-visioning on single heavy hits, because clipping several enemies at once interrupts their rhythm and helps prevent off-screen harassment.
This is one of the best places in the chapter to spend magic on purpose. If two or more sirens bunch up, Poseidon's Rage can buy breathing room and hit the group at once. Rage of the Gods is also a sensible use here if the room starts slipping away from you. Do not force Circle grabs when another siren is already winding up behind you, but do take them when the opening is clean because the finishers help end the wave faster and can return useful orbs.
Stay patient until the entire ambush is over. The room is not finished when the first set drops. Keep the center, punish clusters, and wait for the horn to reappear.
- Expect the horn to vanish and the fight to begin as soon as you approach.
- Hold the middle and use broad attacks so the sirens cannot spread you out.
- Spend magic here if needed; this is the chapter's main crowd-control check.
- Do not relax until the horn returns after the final wave.
Summon Cronos and set up the temple approach
Once the last siren wave is dead, the horn appears again. Sound it with R2 to trigger the arrival of Cronos and make Pandora's Temple reachable. This is the chapter's real endpoint: the desert is not conquered by finding a secret exit on foot, but by using both horns in order after the siren gates are cleared.
When control returns, save immediately. Then cross the bridge toward Pandora's Temple. There are recovery chests near the main entrance, so use them as needed but do not treat this like downtime. The next chapter begins with the temple's entrance sequence and its first opening mechanism. Your immediate goal on arrival is simply to be stocked, saved, and ready to start working the exterior approach instead of stumbling into the temple hurt and empty.
- Sound the reappeared horn after the ambush to summon Cronos.
- Save as soon as the scene ends.
- Cross to Pandora's Temple ready to begin its entrance sequence.
Before you move on
- All three roaming sirens in the desert are dead and the far-side doorway has opened.
- You entered the ruins, cleared the conveyor room, moved the stone block to the left side, and climbed out to reach the first horn.
- You sounded the first horn and followed the created path to the second horn.
- You survived the second-horn siren ambush, waited for the horn to reappear, and sounded it to summon Cronos.
- You saved after the cutscene and crossed to Pandora's Temple ready to begin the entrance chapter.
References for this chapter
Pandora's Temple Entrance and Central Hub
Pandora's Temple changes the game from city combat into careful dungeon progress. Your goal here is not to solve the whole temple at once. You need to break into the temple, survive the first trap corridors, reach the Rings of Pandora, make the outer ring functional, and rotate it until the route to Artemis opens. Once you claim the Blade of Artemis and save again, you are properly set up for the Challenge of Atlas.
1. Breach the temple and clear the entry fights
After Cronos brings you to the temple approach, cross the long bridge and look for the left-hand path at the closed entrance. Follow it underneath and around to the far side, grab the rock handle, and pull until the temporary stairway rises. Climb it immediately before it retracts. At the top, speak to the man tending the pyre so the harpies open the gate.
Drop back to the entrance area and be ready for armored cyclopes. Do not stand directly in front of them trading heavy hits. Attack after their forward commitment, then roll clear and reset your spacing. Once the group is dead, the barrier drops and you can go up the stairs.
At the top of the steps, open the obvious chests, then turn the crank to open the temple door. Inside, clear the first indoor fight instead of sprinting past enemies. The room is still simple compared with what comes next, but this is the point where the game starts mixing combat with observation. Read the pedestal book if you want the flavor text, then interact with the half-circle doorway ahead to open the route into the Rings of Pandora.
- Pull the stair-forming handle and climb before it retracts.
- Defeat the armored cyclopes to remove the entrance barrier.
- Turn the entrance crank, enter the foyer, and open the half-circle doorway.
2. Treat the first circular hall as a hub, not a straight corridor
Once inside the Rings of Pandora, stop and look around before moving. This is a circular hub with multiple exits that will be rotated and revisited throughout the temple. Right now you are working only with the outer ring. Do not waste time trying to force the center or assuming every visible mechanism matters immediately.
Walk either direction around the outer circle until you find the only accessible side passage. The corridor leading to it contains spike clamp traps. This is your first real lesson in Pandora's Temple: watch a full trap cycle before moving. These traps punish panic more than hesitation. Move from safe patch to safe patch, and if you get clipped once, stop and reset instead of rolling forward into the next hit.
The room at the end is your first safe anchor in the temple. It contains a save point and later serves as an easy landmark whenever the circular architecture starts to blur together. Learn its position now so you can always reorient yourself by thinking in terms of the save room, the spike corridor, and the outer-ring crank.
- Find the single open side passage on the outer ring.
- Cross the spike corridor by timing the trap cycle instead of rushing.
- Use the save point so a bad trap run does not cost you the whole entry sequence.
3. Open the first ring mechanism in the Temple of the Crystal Eye room
After saving, clear the room before touching any mechanism. Archers attack from the back, and the shallow water in the chamber makes sloppy fighting worse because it slows your repositioning and leaves you open to arrows. Close the distance on the archers first. If lesser undead join in, use wide chain swings to keep them from pinning you in the water while you finish the ranged enemies.
When the room is safe, check the alcove and pull the lever there. This is the action that makes the hub operational. The lever lowers a crank back in the circular corridor outside. Two small handles also emerge from the sculpture in this save room, but you do not need those yet. Ignore them for now instead of overthinking the puzzle.
Before leaving, break the easy containers and decide whether to touch the nearby refill chest. If your health and magic are already comfortable, preserve free recovery for later. Pandora's Temple is long, and the game often places refill points where it expects you to make a real attempt at the next section.
- Kill the archers before examining the lever alcove.
- Pull the lever in the save room to lower the outer-ring crank.
- Leave the newly emerged small handles alone for now.
4. Rotate the outer ring and read what each alignment means
Go back through the spike corridor to the circular hall and find the lowered crank. This turns the outer ring and changes which doorway lines up with the accessible path. Think of it as selecting the next route, not solving a one-and-done puzzle. If you rotate too far, simply keep turning until the opening comes back around.
The first fresh alignment can reveal the door that uses Muse Keys. That reward is optional and cannot be completed yet unless you already have both keys from later temple branches. A first-time player should note the door and move on. Do not let it distract you into thinking you have missed required progress.
Turn the crank again to line up the mandatory passage. The important habit here is to use fixed landmarks so you never feel lost in the circle. Remember where the spike corridor sits relative to the save room and crank. Once you can identify those three points, the Rings of Pandora stop being confusing and start functioning like a reliable center for the whole temple.
- Use the lowered crank to rotate the outer ring.
- Recognize the Muse door as optional, not the main story route.
- Keep turning until the Artemis passage lines up.
5. Claim the Blade of Artemis and test the PS2 switch input
Follow the newly aligned hall to the glowing point ahead and approach it to receive the Blade of Artemis. This is mandatory progress in the original PlayStation 2 release, and the game expects you to use the new weapon soon. Do not leave the hall wondering whether this is a bonus room. If you have the blade, you are on the correct route.
On PS2, switch between the Blades of Chaos and the Blade of Artemis by pressing L1 and R1 together. Learn that input immediately in a safe space. The Blade of Artemis hits harder and has excellent single-target power, but it is slower and less forgiving when surrounded. That makes it a complement to your chains, not a permanent replacement for them.
If enemies appear on the next stretch, use them as a quick practice round. Try a few grounded Artemis swings so you understand the reach and recovery, then swap back if the room gets crowded. The chapter objective is not to master advanced Artemis combos. It is to know when you have the correct required weapon and how to change back and forth without fumbling in a live fight.
- Approach the glowing reward point and obtain the Blade of Artemis.
- Practice the PS2 weapon switch so you can swap on command.
- Treat Artemis as a heavier option, not a universal answer to every encounter.
6. Save again and face the correct first major wing
Continue through the opening beyond Artemis and you will feed directly into the Challenge of Atlas. Save at the light before stepping into the first locked battle room. This is a good refill point to actually use if your resources are low, because Atlas is the temple's first long self-contained branch and immediately tests both combat control and puzzle reading.
This is also the moment to lock in the temple's overall logic. The Rings of Pandora are the center. Side actions in connected rooms activate or alter machinery in the hub. Major branches reward key items or progress pieces that must be brought back to the central structure. If you understand that loop now, the rest of Pandora's Temple becomes much easier to follow.
End the chapter once you are standing at the start of Challenge of Atlas with the Blade of Artemis in hand, the outer ring crank unlocked, and the optional Muse route clearly separated from the mandatory path. That means the central hub is working exactly as it should for the original PS2 campaign.
- Walk through the Artemis hall into the Atlas entrance.
- Save and refill before the first Atlas lock-in fight if needed.
- Confirm that the ring hub is operating and Atlas is your next required destination.
Before you move on
- You opened Pandora's Temple, cleared the foyer, and entered the Rings of Pandora.
- You found the Temple of the Crystal Eye save room, beat the archers, and pulled the alcove lever that lowers the first ring crank.
- You returned to the circular hall and used the crank to rotate the outer ring until the Artemis route appeared.
- You recognized the Muse door as optional, obtained the Blade of Artemis, and reached the entrance to Challenge of Atlas with a fresh save.
References for this chapter
- Rave Reviews Nationwide Spark High Anticipation for God of War as the 2005 Must-Have Game on PlayStation 2
- God of War Walkthrough - GameSpot
- God of War - Guide and Walkthrough - PlayStation 2 - By Shotgunnova - GameFAQs
- God of War - FAQ/Hints and Tips - PlayStation 2 - By keltin_2002 - GameFAQs
- God of War/Rings of Pandora — StrategyWiki
- God of War (2005) - MobyGames
Challenge of Atlas
This wing begins from the Rings of Pandora after you have already made the hub operational and claimed the Blade of Artemis. The required route is not one long straight hallway. First you open the lower branch and take the Shield of Hades, then you return to solve the timed cart setup that leads to the Shield of Zeus. With both shields placed in the warrior door, the back half of the wing opens into a harsher trap sequence and a forced battle for the Handle of Atlas. That handle is only half the job. You must then return to the Atlas statue room, raise the stone sphere, use the upper lever to smash open the sealed exit, take the first Architect's Son's Head from the coffin outside, and use it at the skull door in the Rings. After that, continue through the inner ring, ride the giant moving roller to the ladder, save, and follow the hall back outside to the bridge that begins the Challenge of Poseidon.
Enter the Atlas wing and open the first descent
From the Rings of Pandora, head into the Atlas route beyond the Blade of Artemis area and use the nearby save point before committing. The opening room is a lock-in fight, so treat it like a combat space first and a navigation space second. Clear the undead and gorgons before you start climbing around the room. If you try to rush ladders or narrow walkways while Medusa-type enemies are active, you can get frozen or knocked off and lose more health than the fight itself would normally cost.
When the room is safe, use the broken staircase on the upper right to reach the catwalk. Deal with archers before you linger on the beams. Follow the rear path and pull the lever there. This lowers the hanging weight and opens the descent to the first shield branch. That lever is the key landmark for this room. If you have not pulled it yet, you are not ready to solve the lower route correctly.
- Use the save point before entering deeper into Atlas.
- Clear the opening arena before worrying about ladders and beams.
- Climb the upper-right stairs and pull the rear catwalk lever to lower the weight.
Take the Shield of Hades and survive the moving-wall kill room
Drop to the lower path and use the rope route to reach the south side chamber. Enemies can interfere while you cross, so keep your attacks simple and fast rather than trying to finish long combos over a pit. The important thing is to avoid getting stalled on the rope. Once you reach the far side, open the nearby health and magic chests if you need them before taking the blue item, because collecting the Shield of Hades starts the next mandatory trap fight immediately.
As soon as you grab the Shield of Hades, a spiked wall begins closing in while enemies keep appearing. This room ends only when the wave is dead, not when you endure it for long enough. Fight aggressively and stay focused on killing speed. Shielded undead are the main obstruction, so break their guard quickly with heavy enders and wide crowd attacks. If several enemies bunch up, spend magic here instead of hoarding it for later. Once the barrier drops, get out immediately and recover at the chests if the room cost too much health or magic.
- Cross the rope route to the lower branch.
- Open the nearby recovery chests before taking the shield if necessary.
- Collect the Shield of Hades and kill the wave fast enough to escape the closing wall.
Use the timed cart switch to reach the Shield of Zeus
Backtrack from the Hades branch and move into the cart room. Do not start pushing the cart while enemies are still alive. Clear the gorgon and the ranged pressure first so you can line up the puzzle without interruptions. The cart is not the goal by itself. Its only purpose is to trigger the floor switch long enough for you to reach the rotating doorway before it closes again.
Position the cart so you can kick or shove it cleanly onto the switch, then move at once through the newly opened route. Inside, clear the next enemy group, climb the ladder on the right, and cross the overhead girder to the far side to claim the Shield of Zeus. Do not waste time hunting for an alternate exit after taking it. Drop back down and return to the warrior-carved door that accepts both shields. Insert the Shield of Hades and Shield of Zeus there to open the required route deeper into the challenge.
- Clear the cart room before solving the timed switch.
- Send the cart onto the pressure plate and pass through the rotating doorway quickly.
- Climb to the upper girder and collect the Shield of Zeus.
- Place both shields in the warrior door.
Push through the trap halls and win the Handle of Atlas battle
Beyond the shield door, the challenge shifts from route reading to trap discipline. Move slowly through the saws, conveyor sections, and spike lanes. This part punishes panic more than it punishes low damage output. Wait for clean openings and cross one hazard at a time. If harpies show up near a dangerous floor, stabilize your footing before you chase them. It is better to take a short delay than to get clipped into a trap and lose a large chunk of health.
Eventually you reach the forced battle for the Handle of Atlas. This is the wing's harshest combat room, and the floor will not remain safe forever. Use your magic and strongest area attacks here rather than saving them for an imaginary worse room later. Break shielded enemies early, keep sirens in front of you when possible, and avoid being driven to the room edges. The instant the barrier falls, run to the pedestal and take the Handle of Atlas. That pickup stops the trap pressure and opens your way out.
- Treat the post-shield corridor as a trap run, not a speed test.
- Conserve health in the saw and spike sections by moving one safe lane at a time.
- Use strong crowd control in the forced battle and claim the Handle of Atlas as soon as the barrier drops.
Return to the Atlas statue and open the coffin path
Now backtrack to the giant Atlas statue chamber. If enemies are present when you return, kill them before touching mechanisms. The room's important device is the handle point that raises the large stone ball above Atlas. Use the Handle of Atlas there. This does not finish the puzzle by itself. Raising the stone ball only prepares the next step.
After the stone ball is in place, go upstairs and reach the upper lever on the central beam or girder. Pulling that lever drops the ball and smashes open the blocked exit. That newly opened path leads outside to the coffin you need. Ignore the optional Muse Key behind the statue unless you specifically want it. It is not required for story completion. Open the coffin beyond the smashed wall and take the first Architect's Son's Head. That head is the mandatory reward that proves the Atlas wing is truly complete.
- Return to the Atlas statue chamber after getting the handle.
- Use the Handle of Atlas to raise the stone ball.
- Climb to the upper lever and drop the ball to smash open the exit.
- Open the outside coffin and take the first Architect's Son's Head.
Use the skull door, cross the inner ring, and stop at Poseidon's bridge
Carry the first Architect's Son's Head back to the Rings of Pandora and place it into the skull-marked door. Do not end the chapter mentally here. There is still a short but required transition before the next wing. Move through the opened route into the inner ring and keep going until you reach the giant moving roller cylinder with the ladder above it.
Ride or stand on the moving roller until you are in position to jump to the ladder. Once you make it, climb up. The ladder then lowers, and the roller drops away so this obstacle no longer matters. At the top you reach an alcove with chests and a save point. Restock, save, and continue down the next hallway. This hall leads back outside. Follow it to the bridge-like stretch ahead. That bridge is the real handoff point. Crossing into the next arena starts the Challenge of Poseidon, so this chapter should end with you saved, stocked, and standing at that bridge.
- Insert the first Architect's Son's Head into the skull door at the Rings.
- Enter the inner ring and use the moving roller to reach the ladder.
- Climb to the top, use the save point, and restock from the nearby chests.
- Follow the hall outside and stop at the bridge to the Challenge of Poseidon.
Before you move on
- You entered the Atlas route from the Rings of Pandora after obtaining the Blade of Artemis.
- You lowered the weight from the opening catwalk, reached the lower branch, and collected the Shield of Hades.
- You survived the moving-wall enemy room and then solved the timed cart setup to claim the Shield of Zeus.
- You placed both shields in the warrior door and reached the forced battle that awards the Handle of Atlas.
- You returned to the Atlas statue chamber, raised the stone ball, pulled the upper lever, and opened the outside coffin path.
- You collected the first Architect's Son's Head and inserted it into the skull door at the Rings of Pandora.
- You crossed the inner ring's moving roller obstacle, climbed the ladder, used the save point, and reached the bridge that begins the Challenge of Poseidon.
References for this chapter
- Discover God of War | PlayStation
- God of War - Guide and Walkthrough - PlayStation 2 - By Andrew_Testa - GameFAQs
- God of War - Guide and Walkthrough - PlayStation 2 - By Shotgunnova - GameFAQs
- God of War - Guide and Walkthrough - PlayStation 2 - By ZenithWillRule - GameFAQs
- God of War - Guide and Walkthrough - PlayStation 2 - By SayainPrince - GameFAQs
- God of War (PS2) Guide – RetroMaggedon Gaming
- God of War/Challenge of Atlas — StrategyWiki
Challenge of Poseidon
Challenge of Poseidon in the original 2005 North American PlayStation 2 release begins from the upper Rings route after the Atlas wing. This chapter is a cleaner, more movement-focused temple branch than Atlas, but it still opens with several dangerous combat arenas before the actual water puzzles begin. Follow the bridge from the post-Atlas save point, survive the Cerberus ambush, clear the approach through archers and cyclops, finish the USA version's caged-soldier sacrifice, claim Poseidon's Trident, and then work through the underwater barriers and Amphitrite chamber to return to the Rings of Pandora with permanent underwater breathing unlocked.
Leave the Atlas side and enter Poseidon's route
From the save point reached after the rolling cylinder and ladder sequence, go down the hall and cross the bridge into the next challenge. The first arena is mandatory and starts with a full Cerberus plus smaller pups. Do not tunnel on the large one first. Kill the small dogs as quickly as possible so they do not grow into more full-size Cerberuses. This is a good place to spend magic because there is recovery shortly afterward and the fight becomes much harder if the pack develops.
Once the barrier drops, refill only if you actually need it and keep moving. The next outdoor stretch is still part of the approach to Poseidon's chamber, so do not expect the sacrificial puzzle immediately. You will fight two heavy enemies and then archers farther ahead. Use cover when arrows start flying, close on the archers first, and avoid getting boxed in while chasing a single target. After another wave with archers and hounds, the path finally opens into the next mechanism room.
- Start from the post-Atlas save point and cross the bridge into Poseidon's challenge.
- Kill Cerberus pups before they mature into larger threats.
- Prioritize archers on the approach so their pressure does not ruin the heavier fights.
Pass the spinning gate room and climb to the sacrifice area
In the circular room, pull the lever to rotate the floor and open the way onward. The red orb chests here are a trap if you linger recklessly, so treat the opened route as the priority and get through the gate instead of gambling for extras. After the room stops, continue forward and deal with the next enemies before climbing. This section is easier if you clear each small platform or ledge before trying to rush the next jump or grab.
At the cliffside climb, look for the horizontal handholds and work your way up rather than searching for a hidden doorway. Keep left on the mandatory route after any small side reward. When the path widens again, finish the fight there, open recovery chests if you need them, and save at the next point. That save is the anchor before the actual caged-sacrifice puzzle, so use it if the opening battles cost you health or magic.
- Use the lever room to advance, not to overcommit to trap chests.
- Follow the climbing ledges upward until the path opens into the saved checkpoint area.
- Save before entering the hanging-cage section.
Complete the North American caged-soldier sacrifice
The next chamber has hanging cages and a lever socket with no handle. Ignore the cages at first, drop to the lower path, and run up the sloped route into the side room to collect the missing handle. Bring it back to the lever under the cages and operate it to lower one cage. In the original North American PS2 release, this cage holds a soldier. That is the correct version detail for this chapter.
Push the lowered cage off the ledge and start working it uphill. Do not try to force it from bottom to top in one shove. The slope and enemy waves are designed to punish that. Use the rocky outcrops as stopping points, clear each spawn, then resume pushing. If you chase enemies too far downhill, you lose ground for no benefit. Once the cage reaches the upper room, push it onto the square floor switch between the furnaces and pull the nearby lever to complete the sacrifice and open the torchlit route ahead. This is the cleanest place to top off resources before the swimming section if you took real damage.
- Fetch the missing handle before touching the cages.
- Move the soldier cage uphill in stages, using the rocks as brakes.
- Set the cage on the switch and pull the lever to open Poseidon's inner path.
Take Poseidon's Trident and finish the first flooded loop
Follow the opened corridor into Poseidon's chamber and cross the bridge to claim Poseidon's Trident. This is the required reward of the wing and permanently lets Kratos stay underwater. Save here before diving. If you want the easy optional pickup in this room, the water-side ladder leads to a Phoenix Feather chest, but the main route is the dive beside the bridge through the obvious submerged opening.
Swim through the tunnel, using the underwater dash to break cracked barriers when the path is blocked. Surface in the side room, kill the dog pack, open the far door, and pull the lever inside. That lever changes the earlier chamber, so this room is not a dead end. Swim back to Poseidon's chamber, defeat the enemies waiting there, and then climb the newly raised steps or pedestal route behind the statue. Follow the circular upper path to the next flooded section and dive again. Poseidon's branch now shifts fully into timing and route-reading rather than long ground fights.
- Claim Poseidon's Trident before attempting the deeper water route.
- Use the underwater dash against cracked barriers.
- Pull the side-room lever and return to the main chamber to use the newly raised route.
Read the underwater traps instead of panicking through them
The first submerged intersections can feel confusing if you move before orienting yourself. Stop briefly at each fork, face the room, and decide your line before committing. The main danger here is not running out of air anymore, but losing time by doubling back into the same junction or drifting into a trap while turning around. Optional alcoves exist, but keep the story route first and only detour if you immediately recognize a safe reward opening.
Soon you reach the closing barricade trap with moving walls and safe pockets. Commit to each burst. Charge the swim dash fully, cross to a shelter, wait for the next opening, then burst again. If you creep forward without a plan, the barricades catch you in the middle. After getting through, surface, clear the room, and pull the lever there. That action reopens a sealed Poseidon mural passage farther back along the underwater route. Do not assume the challenge is finished after this fight. Backtrack through the water to the newly opened passage and continue deeper.
- Pause at forks long enough to choose the route instead of swimming blind.
- Use full dash bursts between safe pockets in the barricade trap.
- Pull the lever past the trap and backtrack to the reopened mural passage.
Clear the crusher corridor and escape Amphitrite's chamber
Past the reopened route, continue into the deeper water hazard section. The next big obstacle is the corridor swept by a moving crusher wall. Wait for its pass, then move from one recessed safe spot to the next rather than trying to outrun the entire corridor in one panic sprint. Dash only when you need the extra distance. If you get clipped, reset your rhythm at the nearest shelter instead of flailing forward and taking another hit.
Drop through the opening at the end to reach Amphitrite's chamber. Kill the enemies here first so the puzzle does not become a scramble. Pull the chamber lever to raise the temporary stone platforms. Their real purpose is to reveal the route out, not to reward you with a normal upper doorway. Use the raised structures to get your bearings, then return to the water and head for the hollow opening beneath the far end pedestal or pillar indicated by the chamber's clue. Enter that underwater opening while the platforms are up and it will carry you down into the exit passage. Follow that tunnel until you emerge back on the temple route leading toward the Rings of Pandora. At that point, Challenge of Poseidon is complete and its progression reward is secured for the rest of the campaign.
- Use the crusher corridor's recesses as shelters instead of forcing a full-length swim.
- Clear Amphitrite's chamber before working the lever.
- Raise the platforms, then use the hidden underwater opening beneath the far end structure to exit back toward the Rings.
Before you move on
- You started from the post-Atlas save route, crossed the bridge, and cleared the mandatory Cerberus opening plus the approach fights that lead to the cage puzzle.
- The North American PS2 caged-soldier sacrifice is complete and the inner corridor to Poseidon's chamber is open.
- Kratos has claimed Poseidon's Trident and can remain underwater indefinitely.
- You completed the first flooded lever loop, reopened the later mural passage, survived the main underwater trap corridors, solved Amphitrite's chamber, and returned to the route leading back toward the Rings of Pandora.
References for this chapter
- God of War (2005 video game)
- God of War - Guide and Walkthrough - PlayStation 2 - By ZenithWillRule - GameFAQs
- God of War Walkthrough - GameSpot
- God of War - Puzzle Solutions - PlayStation 2 - By VampireHorde - GameFAQs
- God of War - Guide and Walkthrough - PlayStation 2 - By Shotgunnova - GameFAQs
- God of War (USA) | Datassette
Challenge of Hades
The Challenge of Hades is the roughest of Pandora's Temple's three major wings because it chains together sacrifice fights, trap rooms, maze cleanup, and a boss that cannot be finished by normal damage alone. Enter it stocked, keep enough magic in reserve to stabilize the centaur room or the boss, and do not assume a shut gate means a puzzle reset. Most stalls here come from missed enemy groups, skipping the underwater lever beneath the statue, or missing the correct door in the fireball hall. Finish this wing by taking the second Architect's Son's Head, claiming Army of Hades, and using the central Rings of Pandora machinery to open the climb to the upper temple.
Enter the Hades wing ready for a long linked section
Return to the Rings of Pandora and dive into the large central pool now that you can swim underwater. At the bottom, use the tunnel in the floor to reach the Hades route. When you surface, you enter a small hall with a giant door and lever. Ignore that lever for the moment. Break through the wall opposite your entry point to reach the nearby save and the recovery chests, then continue into the main Hades chamber.
This whole wing works better if you think of it as one long attrition test. Save a workable amount of magic for emergency control instead of blowing everything in the first big room. Medusa's Gaze and Poseidon's Rage are both valuable here because the opening enemies block well and crowd each other around the objective.
- Use the underwater tunnel from the Rings of Pandora pool to reach Hades.
- Break the wall for the save and refill before accepting the challenge.
- Keep enough magic for either the sacrifice room or the boss.
Finish both blood-sacrifice circles correctly
Climb to the challenge door in the main chamber and accept it when you are ready. Centaurs appear and a blue sacrifice circle lights on the floor. The important rule is simple: weakening enemies anywhere is fine, but the kill only counts if the centaur dies while standing inside the marked circle.
Do not chase every centaur across the room. Instead, damage one until it is close to death, reposition toward the circle, then finish it there. Magic is useful because it bypasses their blocking and helps pin them in place. Watch the circle itself for confirmation as its flames light. When the first circle is complete, a second circle appears elsewhere in the room. Repeat the same controlled method until the full sacrifice requirement is met and the way forward opens.
- Finish centaurs inside the active circle, not outside it.
- Use short strings and repositioning instead of cornering yourself against a wall.
- Treat the second circle exactly like the first and wait for the door to open fully.
Clear Hades' Maze completely before trying to force progress
Past the sacrifice chamber, loot the recovery area and force open the next heavy door. This begins Hades' Maze. The maze is less about solving directions and more about clearing every mandatory fight. Move room by room and assume each branch matters until it is visibly empty.
Early on, you deal with lava gaps, spear traps, and a platform lever that raises you toward an upper ledge. Use that lift to reach the higher section with a locked door, a trapped chamber, and a wall bearing Hades' symbol and glowing eyes. Push that wall section into the next room to trigger another fight, then clear the enemies there, including the archers on the ledge, before opening the nearby locked door and taking the health pickup.
The room with the giant crushing mallet is the usual sticking point. Jump onto the moving block only when it rises high enough, cross toward the far door, and kill the enemies that spawn there. Then watch the mallet pattern. On the wider pullback, slip into the small side space behind its path and kill the hidden enemies there too. If a gate still refuses to change, you missed a branch or a surviving enemy group somewhere in the maze.
- Clear every branch before assuming the route is blocked by a puzzle.
- Kill the ledge archers after pushing the Hades wall section.
- Do not leave the crushing-mallet room until you have checked the hidden side pocket for the final enemies.
Raise and aim the Hades statue, then survive the fireball hall
Once the maze is clear, step on the floor switch that raises the huge Hades statue from the central pool. Drop back down and dive into that pool. Pull the underwater lever at the bottom first. This sends light through the statue but does not finish the puzzle by itself.
Climb the ladder on the statue and use the lever on its back or shoulders to rotate the head until the beam points toward the stairway and corridor ahead. That lights the route and triggers the rolling fireballs. In the hallway, use calm sidesteps and short bursts of movement instead of panic rolling across lanes. At the far end is a small alcove with supplies and the clue for the exit door.
After checking that alcove, work back through the doors on the side of the corridor. The correct continuation is the third door on the left when counting from the hint chamber. Wait for a safe opening in the fireballs, open that door, and continue through the now-correct route.
- Pull the underwater lever before trying to rotate the statue head.
- Aim the beam down the stairway to activate the corridor.
- Use the third door on the left from the hint alcove to leave the fireball hall.
Defeat the armored Minotaur and collect Hades' reward
The last stretch leads into the wing's boss, the giant armored Minotaur often called Pandora's Guardian. This fight is about earning stun windows and using the room mechanism, not simply hacking through armor. Stay mobile, fight in the open lower space if the upper platform feels cramped, and avoid overcommitting when it starts its heavy slams or flame attacks.
Damage the boss until the Circle prompt appears, then complete the grab sequence to leave it stunned. The moment it is vulnerable, run to the rear lever and fire the flaming bolt into it. You need to repeat this cycle more than once. As its armor breaks, its attacks grow more dangerous, so save enough health and magic to survive the later part of the fight. If you need space, pulling the lever early can force it to jump back and reset your footing, but do not waste your best opening once a proper stun is earned.
After the boss falls, open the coffin and take the second Architect's Son's Head. Move on to receive Army of Hades, your final magic. This spell is best treated as a crowd-clearing panic button for packed encounters rather than something to spend on a lone survivor.
- Wait for the stun prompt, then use the rear lever immediately.
- Expect the armored Minotaur to become more aggressive as its armor breaks.
- Leave with both the second Architect's Son's Head and Army of Hades.
Use the second head and align the Rings of Pandora
Swim back through the tunnel to the Rings of Pandora. Near the water, find the underwater skull door and place the second Architect's Son's Head there. When the water drains and the mechanism unlocks, do not wander off into optional temple cleanup yet. Use the opening to finish the required central puzzle.
First rotate the outer ring until the spike-lined hallway is in position. Next, use the crank in the second ring to line that section up with the outer ring. Finally, enter the Architect statue in the innermost section and rotate it so the final passage and light line up with the first two sections. When the three parts match, run the connected path to the crystal-eyed statue at the end.
Grab the handles on that statue and force the eye pieces together. This raises the larger Architect statue. Return to its base and pull the lever there to open the upper-temple route. That completes the Challenge of Hades and leads directly into the climb that begins the Cliffs of Madness.
- Insert the second head into the underwater skull door before touching the ring puzzle.
- Align outer ring, second ring, and the Architect statue in that order.
- Push the crystal eyes together, then pull the base lever to confirm the upper route is open.
Before you move on
- You entered the Hades wing from the Rings of Pandora pool, finished both blood-sacrifice circles, and opened the way into Hades' Maze.
- You cleared every required enemy group in the maze, raised the Hades statue, powered its light from the underwater lever, and passed the fireball hallway through the correct exit door.
- You defeated the armored Minotaur by using the stun-and-lever bolt sequence, then collected the second Architect's Son's Head and Army of Hades.
- Back in the Rings of Pandora, you used the underwater skull door, aligned the outer ring, inner mechanism, and Architect statue, pushed the crystal eyes together, and pulled the base lever that opens the route to the upper temple.
Cliffs of Madness
The Cliffs of Madness begin after the Rings of Pandora raise Kratos to Pandora's Temple exterior. This section is not a detour and it is not just a climbing set piece. You must survive the exposed cliff route, collect the Necklace of Hera and the Necklace of Aphrodite, return both to the statue monument, and use the moving ledges that appear to reach the outer approach to the Architect's Tomb. Treat the monument as your hub, archers as your top priority, and the Aphrodite spike room as the chapter's one true execution test.
Fight up to the exterior save point and learn the layout
From the entrance, push up the first slope and clear the undead instead of sprinting past them. If you spend magic here, use the nearby blue chest rather than entering the longer climb half-empty. Continue right, jump the gap to the next ledge, and kill the archers as soon as you land so they do not tag you during the next jumps.
Advance across the next ledges, then move left toward the wooden outcropping with the hanging rope. Harpies gather here, but the real danger is letting them interrupt you near the edge. Clear the flock before you start crossing. Once you are on the rope, keep moving calmly; this early traverse is more about committing than fighting.
On the far side, round the corner, defeat the mixed group near the crank, and turn it to raise the platform. Ride up and save. This save point marks the chapter's first real reset. Near it, the route splits. The ladder path is the cleaner first choice and leads toward Hera. The right-hand path connects back later, but taking Hera first makes the chapter easier to read because it unlocks the access needed for Aphrodite.
- Reach the exterior save point with as much health as possible.
- Kill archers before attempting narrow jumps or climbs.
- Take the ladder route first to begin the Hera side.
Climb to the monument and drop into Hera's branch
Go up the ladder route and keep following the cliffside climbs and cave passages upward. A cave entrance marked with a Minotaur head is one of the key landmarks on this side of the temple. Keep pressing upward until you reach the large monument with two empty necklace slots. This monument is the center of the entire chapter. You will return here twice, and you are not done until both slots are filled.
Just beyond the monument is a ladder leading down. Take it, continue along the outer wall, and use the long rope to descend into the Hera side cave. Do not rush the combat room inside. Clear the enemies first so you can work the puzzle without being knocked off a block or juggled while turning pieces.
- Use the monument as your navigation anchor.
- Take the ladder below the monument to reach Hera's cave.
- Finish the enemy wave before touching the puzzle blocks.
Solve Hera's wall puzzle and create the Aphrodite access route
The Hera room is a fitting puzzle built around several large stone pieces and a rotating plate. The small block near the front does not belong in the finished wall, so drag it out of your way first. Then use the circular turntable and crank to rotate the larger pieces until they match the missing wall pattern. Push each finished piece fully into place. If the gate does not react, one block is usually slightly crooked or not pressed flush enough against the opening.
When the pattern is correct, the barrier lowers and you can claim the Necklace of Hera. As you leave the cave, a save point becomes available outside. Use it. Then climb the ladder on your right, continue along the upper cliff, and pull the lever on the ledge ahead. This step is mandatory. The cutscene shows a block and rope dropping into position elsewhere on the cliffs, and that new setup is what opens the Aphrodite branch.
Backtrack to the monument and place Hera's Necklace right away. Inserting it now confirms you are on the proper route and keeps the hub easy to read when you return with the second necklace.
- Move the useless small block out of the puzzle space.
- Rotate and press the remaining blocks flush to open the gate.
- Pull the upper lever after taking Hera's Necklace.
- Place Hera's Necklace in the monument before leaving for Aphrodite.
Use the dropped rope to beat Aphrodite's spike room
Return toward the Minotaur-head cave landmark near the earlier split. To the left of that entrance is the new block-and-rope access created by the lever. Climb up, save again if needed, and enter the trapped chamber for Aphrodite's Necklace.
Pull the lever inside to open the gate and start the spike timer. This is not a room for careful, slow pushing. Drag the block clear immediately, get behind it, and kick it down the chamber in long bursts. Chase after it while it slides, straighten it only when necessary, and kick again. The fewer corrections you make, the safer the attempt becomes.
Once the block is close enough to the far ledge, jump onto it and then up before the floor spikes fully rise. If you miss the timing, reload mentally from the save and try again with a cleaner line, not with more hesitation. At the top, the nearby chest is optional. The mandatory route is to climb the ivy and cross to Aphrodite's Necklace. Taking it drops the trap and opens the way back out.
- Use the block-and-rope route left of the Minotaur-head entrance.
- Kick the block quickly instead of inching it forward.
- Jump from the block to the ledge before the spikes kill you.
- Climb to claim Aphrodite's Necklace and exit.
Return both necklaces and cross to the Architect's Tomb approach
Carry Aphrodite's Necklace back to the monument and place it in the second slot. With both necklaces installed, the mechanism ahead activates and the stone ledges begin moving. This is the chapter's true success condition. The necklaces are required keys, not optional rewards.
Take the moving ledges one jump at a time. Wait for a stable alignment, then jump decisively. Do not mash or short-hop while a platform is still drifting away. There is far less enemy pressure here than earlier, so patience is stronger than speed.
After the crossing, continue along the newly opened upper route toward the outer area in front of the Architect's Tomb. You are done with Cliffs of Madness when you have left the necklace hub behind and reached the tomb approach beyond the moving ledges. The front-door mechanism and the tomb's sawblade entrance sequence belong to the next chapter, so stop here stocked, saved, and ready.
- Place Aphrodite's Necklace in the monument.
- Cross the moving ledges slowly and cleanly.
- Finish at the Architect's Tomb outer approach, not back on the lower cliffs.
Before you move on
- You reached the monument with two empty slots and used it as the chapter hub.
- You obtained the Necklace of Hera, pulled the mandatory lever afterward, and placed Hera's Necklace in the monument.
- You used the dropped block-and-rope access to clear the timed spike room and obtain the Necklace of Aphrodite.
- You returned Aphrodite's Necklace to the monument, activated the moving ledges, and crossed them toward the Architect's Tomb approach.
Architect's Tomb and Pandora's Box
Once Hera's Necklace and Aphrodite's Necklace are both set in place, Pandora's Temple stops branching and starts testing execution. The path to the Architect's Tomb is short, but every room can punish impatience. Your job here is to reach the upper route, solve the tomb door with the crane, the cracked floor, and the pressure plates, take the Architect's Wife's head to open the next lock, survive the conveyor-belt battle, and finally reveal and move Pandora's Box. Save and refill whenever the game offers it, because the reward sequence does not end the temple safely.
Ride the upper route from the necklace statues to the tomb entrance
After placing both necklaces in their statues, the expanding platforms between them become your way forward. Wait for each platform to extend fully before you jump. Do not mash jumps here. Ride the moving path upward, collect yourself on each safe spot, and keep to the right when the route opens.
A story scene plays at the top. When control returns, follow the only forward path, jump the rubble, swing across the ropes, climb the wall, and use the lift at the far side. The corridor beyond is quiet on purpose. Take the save point before the tomb itself. The next room begins with moving platforms split by spinning saw blades, and that obstacle is the checkpoint between the timed switch and the tomb door later.
- Place both necklaces and use the newly active moving platforms to climb higher.
- Take the elevator path and save before entering the sawblade platform room.
Cross the sawblade platforms and clear the crane yard first
Enter the tomb approach and cross the moving platforms one jump at a time. Think of it as platform, blade, platform, blade all the way across. Land cleanly, stop, then make the next jump. On the far side, do not worry about the pressure plate near the save side yet. That timed plate is for the final step of opening the tomb, not the first.
Once across, lift the gate on the right and follow the tunnel into the outdoor yard above the tomb entrance. Clear the fight before trying the puzzle. Cyclopes can throw you around the ledges, and Cerberus pups only become more annoying if you let them grow. Remove the smaller threats quickly, then punish the heavier enemy when you have space. If later reinforcements appear while you are moving the statue, deal with them before forcing the puzzle piece any farther.
- Cross the first sawblade stretch carefully without rushing the jumps.
- Open the right-side gate and clear the yard so the puzzle work is not interrupted.
Open two of the tomb locks with the crane weight and the statue
Look for the crane controls on the middle ladder route. Turn the crane until the hanging stone block is directly over the cracked section of floor below. The shadow on the ground is the easiest way to judge its position. Run out along the crane arm and pull the lever at the end to drop the weight and smash the floor.
Raise the block again and rotate the crane so the weight hangs over the exposed surface switch nearby. Drop it there and leave it in place. That holds one part of the tomb door open. Now return to ground level and find the movable statue. Push or kick it to the hole you just made and drop it in. Go down after it and pull the statue onto the lower pressure plate. With the crane weight on the upper switch and the statue on the lower switch, two of the three door requirements are already solved and will stay solved if you have to retry the timed part.
- Use the crane once to break the cracked floor.
- Reposition the hanging block onto the upper switch and leave it there.
- Push the movable statue into the hole and onto the lower switch.
Trigger the timed plate and get inside the Architect's Tomb
Climb back out and return across the sawblade platforms to the side with the save point. The final pressure plate is here, before the moving-platform section. Step on it only when you are ready to move immediately. As soon as the gate opens, turn around and recross the sawblade platforms toward the tomb entrance.
Use the same rhythm that got you across the first time, just without hesitation. Panic is what makes players miss these jumps. If the gate closes before you reach it, nothing important resets. The weight remains on its switch and the statue remains on its switch, so all you need to do is step on the timed plate again and make another run.
Once inside, go to the seated corpse at the table and take the Architect's Wife's head. Use it in the skull lock ahead to open the route onward. Follow the short passage to the next save point and nearby chests. Use them now. This is the cleanest refill before the last major combat trap of the temple.
- Activate the timed plate on the save side only after the other two switches are set.
- Recross the sawblade platforms and enter the tomb before the gate shuts.
- Take the Architect's Wife's head and use it in the skull lock.
- Save and refill before continuing beyond the tomb proper.
Survive the conveyor-belt gauntlet without getting pinned by the room
Go down the spiral stairs into the conveyor-belt chamber. The floor movement is the real hazard here. The enemies matter, but the room kills players who commit to long attacks and get dragged into the gears or crushed at the edges. Fight in short bursts, move, then fight again.
Deal with archers as soon as you can safely reach them, because getting staggered while the belt is carrying you is how you lose control of the room. After that, clean up the harpies and any remaining enemies while staying near the middle whenever possible. Wide, quick attacks are safer than showy strings. If you jump to a side perch for an archer, do the job and get back down instead of lingering there.
When the barrier drops, move into the next chamber and continue forward instead of searching for a hidden alternate route. The temple is linear now. Keep your resources in reserve if possible, because the next interaction leads directly into the reward sequence.
- Enter the conveyor room ready to keep moving, not to stand and trade.
- Kill ranged enemies first so the belts do not carry you into danger during hit stun.
- Clear the whole chamber before advancing; the room does not end early.
Reveal Pandora's Box and be ready for the immediate reversal
Beyond the conveyor fight, continue into the chamber ahead and interact with the mechanism that lowers Pandora's Box into view. Do not leave before using the lever or examining the box. This is the payoff for the entire Pandora's Temple climb.
After the reveal scene, control returns with Pandora's Box ready to move. Push it along the required path toward the temple exit. There is no optional cleanup loop here and no relaxed victory walk. Once you start hauling the box out, the game is preparing a sudden transition. Treat this as the end of the temple objective, not the end of the level.
If you arrived low on health or magic, that is exactly why the previous save and refill mattered. The next chapter begins immediately after this reversal, so your real completion check for this area is not just seeing the box. It is revealing it, regaining control, and moving it far enough to trigger the next sequence.
- Use the final mechanism beyond the conveyor room to reveal Pandora's Box.
- Regain control and push the box toward the exit.
- Expect the next playable section to begin abruptly after the box-moving sequence.
Before you move on
- Both necklaces have already opened the upper route, and you have reached the Architect's Tomb save point beyond the rope swings, wall climb, and elevator.
- The front door to the tomb has been opened by the three required actions: crane weight on one switch, statue on the lower switch, and a successful timed run from the final pressure plate across the sawblade platforms.
- The Architect's Wife's head has been collected from the tomb interior and used in the skull lock to open the path forward.
- The conveyor-belt enemy room has been fully cleared, and the chamber beyond it has been used to reveal Pandora's Box.
- You have regained control after the reveal and pushed Pandora's Box far enough to trigger the sequence that ends the Pandora's Temple run and hands off to the next chapter.
Hades and the Return to Athens
Ares does not end your run by killing Kratos outside Pandora's Temple. The original PlayStation 2 campaign sends you through the Path of Hades, a short but punishing escape full of balance hazards, archers, and two notorious rotating spike columns. Once you climb back out, Athens is not open for exploration. The game pushes you straight through the wrecked Temple of the Oracle and into the last save point before Ares.
1. Reorient yourself in the Path of Hades
After the scene, walk up the giant backbone in front of you. There is a save point here and a health chest on the right. Use the save immediately. If your health is still healthy, leave the chest alone until you know whether you need it more later.
From the save point, start the opening platform chain. The first small fork is only for red orb pickups. You can jump north for one orb chest, then head right for another, then take the left route onward to the first large platform. Do not treat these branches as different routes through Hades. They fold back into the same main line.
The enemies on the first big platforms are Hell soldiers. Clear each ledge before moving again. The danger here is not their damage by itself. It is getting clipped while you are trying to jump or line up a balance section. Use simple, fast blade attacks and keep the ledge clean before the next leap.
- Use the first save point in Hades.
- Treat the early side branches as optional orb detours, not alternate progression routes.
- Clear each platform fully before jumping onward.
2. Cross the rotating bladed beams in controlled sections
The first real obstacle is the long horizontal beam with spinning blades. Step onto it only when the nearest blade has just passed. Face along the beam and move in short bursts. If you panic and hold forward, one hit can throw you off and waste the whole attempt.
There are optional orb chests on side platforms during this section. One sits off the second platform to the right of the first beam, and another waits near the far end where an archer appears. Take them only if the beam is quiet and you are comfortable with the timing. Progress matters more than red orbs here.
After the far end, take the beam to the right and follow it down for another optional chest, then return to the original beam and find the beam on the left. At the end of that left beam, jump across to the beam on the right and move to the pair of chests at the end. Harpies attack in this stretch. Stop and kill them before you try to continue, because they can knock you off the next beam if you ignore them.
From that point, jump to the ledge on the right and continue across the next beam to solid ground. A save point sits on the left and a recovery chest sits on the right. Use the save. If the beam section cost you too much health, refill now rather than gambling on a perfect next room.
- Cross each bladed beam in short bursts instead of one sprint.
- Ignore optional orb chests if enemies are pressuring you.
- Kill harpies before you attempt the next balance section.
- Use the second save point before the archers and climbing gauntlet.
3. Advance through the platform and ledge gauntlet
After the second save point, jump across the moving platforms while distant archers fire at you. You can answer with Zeus' Fury if you want to thin them out, but the safer universal rule is to center Kratos before every jump. Do not leap from the edge of a platform while still adjusting the camera.
When you reach the enemy ledges, the game locks you in until each wave is dead. Expect archers mixed with heavier enemies on the way up. Kill the archers first whenever you can reach them cleanly. Against the larger foes, wide Blades of Chaos swings are safer than standing still and trading hits. If you catch a heavy enemy near an edge, the blades can shove it backward and save time.
When the barrier finally drops, take a breath before touching the wall ahead. This is the first of the two rotating spike columns. If you charge into it while frustrated from the archers, you will throw away the whole climb.
- Center every jump during the archer platform section.
- Prioritize archers before heavier enemies on the ledges.
- Reset mentally before starting the first vertical spike climb.
4. Climb both rotating spike columns patiently
For the first rotating spike column, climb in short bursts. Watch the spike pattern, move up to the next safe gap, stop, then rotate around the surface if the path above is blocked. Do not mash straight upward. Near the top, be ready to jump and grab the lip as soon as the opening lines up. Hesitating at the top gets Kratos clipped more often than the middle of the climb.
On the platform above, clear the enemies, open the nearby orb chest if you want it, and move right to the second column. The second climb uses the same method. Short burst upward, pause in safe spaces, then rotate around the cylinder whenever the spikes stack badly in front of you.
Once you reach the top of the second column, use the save point and refill from the nearby health and magic chests as needed. This is the best recovery point in the whole Underworld escape. Take it seriously, because the next fight is short but can still punish sloppy play.
- Climb each column a little at a time.
- Rotate around the column instead of forcing a bad upward lane.
- Commit to the final top grab as soon as the gap appears.
- Use the save and refill after the second column.
5. Finish the last Hades battle and take the rope out
Cross the last set of small platforms. There is an optional chest off to the right, but the main route leads left to a large combat platform. Here the game keeps spawning enemies while platforms rise into place. Stay in the middle where you can see incoming attacks and avoid getting knocked off the edges.
This is a good place to spend your remaining magic. You are almost out of Hades, and there is no reward for dying with a full meter. Use broad crowd control to keep the pressure down and keep moving until the enemy stream finally ends and the route is fully raised.
When the fight finishes, collect health or magic from the nearby chests if you need them, hop across the newly raised platforms, and head to the end of the path. A rope drops down. Climb it to leave the Underworld. This is the actual exit from the Path of Hades.
- Stay central during the final rising-platform fight.
- Spend magic here instead of hoarding it.
- Cross the raised platforms and climb the rope to return to Athens.
6. Push through the ruined Temple of the Oracle to Ares
Back on the surface, save immediately. You are not free-roaming Athens now. The game funnels you through the Temple of the Oracle one last time. Enter the temple, clear the first enemies in the main room, and go up the stairs.
At the next stretch, kill the gorgons and archers, then continue forward across the stone bridge. On the far side, use the chest if you need health or magic. Keep moving into the following hall, kill the Minotaur and archers there, and walk to the end.
At the end of that hall, drop down to the lower area and cross to the far side for another save point. Use it. Then head through the next hallway. This final corridor gives you two red orb chests first, then health and magic chests closer to the end. Open what you need, and spend your red orbs before advancing, because there is no reason to carry unspent upgrades into the final battle.
When you walk forward out of that last hall, the next scene begins the Ares confrontation. That is the handoff to the finale. Stop here only long enough to save, refill, and buy the upgrades you still want.
- Save as soon as you return to the Temple of the Oracle.
- Follow the fixed route: main room, stairs, bridge, Minotaur hall, drop to lower area, final save.
- Open the last health and magic chests before the trigger point.
- Spend red orbs before stepping into the Ares scene.
Before you move on
- You escaped the Path of Hades by clearing the opening platforms, surviving the rotating bladed beams, and climbing both rotating spike columns.
- You won the final rising-platform fight in Hades and climbed the rope back to the surface.
- You pushed through the ruined Temple of the Oracle, reached the lower save point near the old Oracle rescue area, and opened the final chest corridor.
- The next step ahead is the Ares cutscene and final battle setup, not another exploration chapter.
References for this chapter
- Rave Reviews Nationwide Spark High Anticipation for God of War as the 2005 Must-Have Game on PlayStation 2
- God of War Release Information for PlayStation 2 - GameFAQs
- God of War - Guide and Walkthrough - PlayStation 2 - By jarrodlover - GameFAQs
- God of War - Guide and Walkthrough - PlayStation 2 - By ZenithWillRule - GameFAQs
- God of War - Guide and Walkthrough - PlayStation 2 - By A_I_e_x - GameFAQs
- God of War Walkthrough Chapter 5
Ares Final Battle and Ending
The original 2005 North American PlayStation 2 release ends with a three-part finale, and the hardest mistake is treating the first win as the whole boss. You first fight Ares with your normal arsenal, then defend Kratos' wife and daughter from endless Kratos copies while healing them with your own life, and only after that do you enter the last duel with the Blade of the Gods after Ares strips away your normal weapons and magic. Plan your nerves around all three phases. Once Ares finally falls, keep moving through the short Mount Olympus finish until Kratos reaches the throne sequence, because that is the real end of the main story.
1. Enter the arena ready to spend everything in the first phase
Use the last save and refill chests before stepping into the final confrontation. Fill both health and magic. This is not the place to arrive half stocked because the opening fight is the only part of the finale where your regular magic, Rage of the Gods, Blades of Chaos, and Blade of Artemis all still matter.
Do not save your magic for some imagined later damage race. The later sword duel removes your normal magic and weapons, so any full meter you die with here is wasted. If Poseidon's Rage, Army of Hades, or another comfortable spell gives you a safe burst of damage or breathing room, use it.
Treat the first phase as a controlled boss fight, not a brawl. Stand at a distance where you can read Ares clearly, but not so far that you invite free ranged pressure. Mid-range is the safest starting position because you can block, single-roll through a committed swing, and step back in for a short punish.
- Save and fill both meters before approaching Ares.
- Plan to spend normal magic in phase one.
- Fight from readable mid-range instead of hugging him or running to the edge.
2. Beat Ares phase one with short punish windows and clean defense
Ares hits hard enough that one greedy combo can erase the progress from several good exchanges. Let him begin the action. Many of his attacks are safer to block than to panic-roll, and one calm dodge is better than three rushed evasions that carry you into the next swing.
After you block or avoid a committed sequence, answer with a short combo and leave. If you like the Blade of Artemis, bring it out only for obvious openings when you know he has finished a swing. If you trust the Blades of Chaos more, stay with fast grounded attacks and break off early rather than trying to force a long launcher string.
When his health gets low, stay alert instead of celebrating. He becomes more dangerous near the end of the round and can punish sloppy play with heavy knockback and shockwaves. If he launches his meteor pattern, focus on movement and survival first, then resume attacking when the arena settles. When the finishing prompt appears over him, complete it immediately to close the phase cleanly.
- Block first and punish second.
- Use short attack bursts, then disengage.
- Respect his low-health pressure and finish the prompt cleanly.
3. In the family defense phase, protect space instead of chasing kills
The second phase is where many runs collapse because the objective changes. You are no longer trying to burn down a boss life bar. You must keep Kratos' wife and daughter alive while waves of Kratos copies pour in. Stay near the family. If you run to the far edges to finish single enemies, the next group reaches them before you return.
Use wide, fast attacks that clear the area immediately around the family. Knock enemies away, interrupt them, and reset near the center. This phase is about peeling attackers off your family, not proving you can win duels at the walls. If a clone slips behind you and starts striking them, drop your combo and turn back at once.
Watch the family health bar constantly. When there is a brief safe opening, move beside them and press Circle to transfer part of Kratos' health into them. Do not try to heal them while several copies are already winding up attacks on top of you. First make space, then heal. As the platform shrinks, that order becomes more important than ever.
Save Rage of the Gods for the late portion when the arena is smaller and the pressure stacks faster. Stronger clones appear later, including Blade of Artemis users and ranged threats off the main platform. Do not get baited into long chases after distant attackers. Hold the center, clear the immediate danger, and keep your family topped up whenever you earn a lull.
- Stay close to the family and defend the center.
- Use wide attacks for space control instead of long pursuit combos.
- Heal the family only after you create a safe opening.
- Save emergency burst tools for the shrinking end of the phase.
4. Reset your mindset for the Blade of the Gods duel
After the family survives, Ares changes the rules again. He strips away Kratos' normal weapons and magic, and the last fight begins with the Blade of the Gods. Do not carry clone-phase panic into this duel. Slow down on purpose the instant control returns.
This final phase works like a shifting balance. You and Ares share a single tug-of-war style health gauge. When you hit him, the balance moves your way and you recover. When he hits you, the balance swings back in his favor. Because of that, one bad exchange matters more here than in a normal boss fight.
Fight patiently. Block his strings, wait for him to finish, and answer with measured hits. If Ares begins blocking your offense, back off immediately and reset instead of stubbornly swinging into his guard. The safest route is to win a series of clean exchanges, not to rush for a dramatic finish. Your goal is to keep moving the life balance toward Kratos a little at a time until Ares has nothing left.
- Expect to lose normal weapons and magic at the start of the duel.
- Read the shared health balance and value clean hits highly.
- If Ares blocks, disengage and restart the exchange.
5. Follow the ending route all the way to the throne
Defeating the last duel ends the combat, but not the chapter. Watch the ending scenes after Ares falls and stay with the sequence. The story continues through Kratos' final reckoning and Athena's intervention.
When control returns, move through the doorway ahead and run straight up the stairs of Mount Olympus. Do not treat this as optional epilogue space. Keep climbing until you reach the hall at the top and continue inside. This final walk is short, but it is the last required movement before the game resolves.
The campaign is complete only when Kratos reaches the throne sequence on Olympus and the closing scenes finish. Winning the first round against Ares is not enough. Surviving the family defense is not enough. Even winning the Blade of the Gods duel is only the last battle. The main story ends when Kratos takes the throne.
- Stay through the post-battle scenes.
- When control returns, go through the doorway and climb Mount Olympus.
- Count the story complete only after the throne sequence finishes.
6. If you fail, fix the phase that beat you
If phase one keeps ending your run, the usual problem is overcommitting. Shorten your punishes, block more often, and cash in more magic instead of dying with resources unused.
If the family phase is the wall, stop chasing the edges. Most losses there come from abandoning the center or trying to heal the family before the area is safe. Defend close, clear space, then heal.
If the Blade of the Gods duel is the problem, remember that the fight rewards patience more than aggression. You are not restarting phase two with a different skin. You are entering a new rule set built around blocks, resets, and winning the health tug-of-war one clean exchange at a time.
- Phase one problem: spend more resources and shorten combos.
- Family phase problem: stay central and heal only in safe gaps.
- Final duel problem: slow down and respect the shared health mechanic.
Before you move on
- You defeated Ares in all three required stages: the normal arsenal fight, the family defense against Kratos copies, and the Blade of the Gods duel.
- You used Circle beside the family to transfer Kratos' health to them during the defense phase when needed.
- You continued through the post-battle sequence and climbed the short Mount Olympus route when control returned.
- Kratos reached the throne sequence on Olympus, which marks main story completion for the original 2005 North American PlayStation 2 release.
References for this chapter
- Rave Reviews Nationwide Spark High Anticipation for God of War as the 2005 Must-Have Game on PlayStation 2
- God of War - Guide and Walkthrough - PlayStation 2 - By Andrew_Testa - GameFAQs
- God of War - Guide and Walkthrough - PlayStation 2 - By Shotgunnova - GameFAQs
- God of War - No Upgrade Walkthrough - PlayStation 2 - By XWingMitch0 - GameFAQs
- God of War (PS2) Guide
Finishing up
Finish the Ares confrontation and continue through the concluding scenes to Kratos's throne.
Preserve your cleared save before starting another run.
Treat Challenge of the Gods and other unlocked extras as optional goals after the main campaign.
Revisit the relevant combat or puzzle chapter if you want to improve a difficult section on a later playthrough.
Choose your next gameScreenshots & video
Game imagery for reference. Follow the written chapters above for the route and strategies.
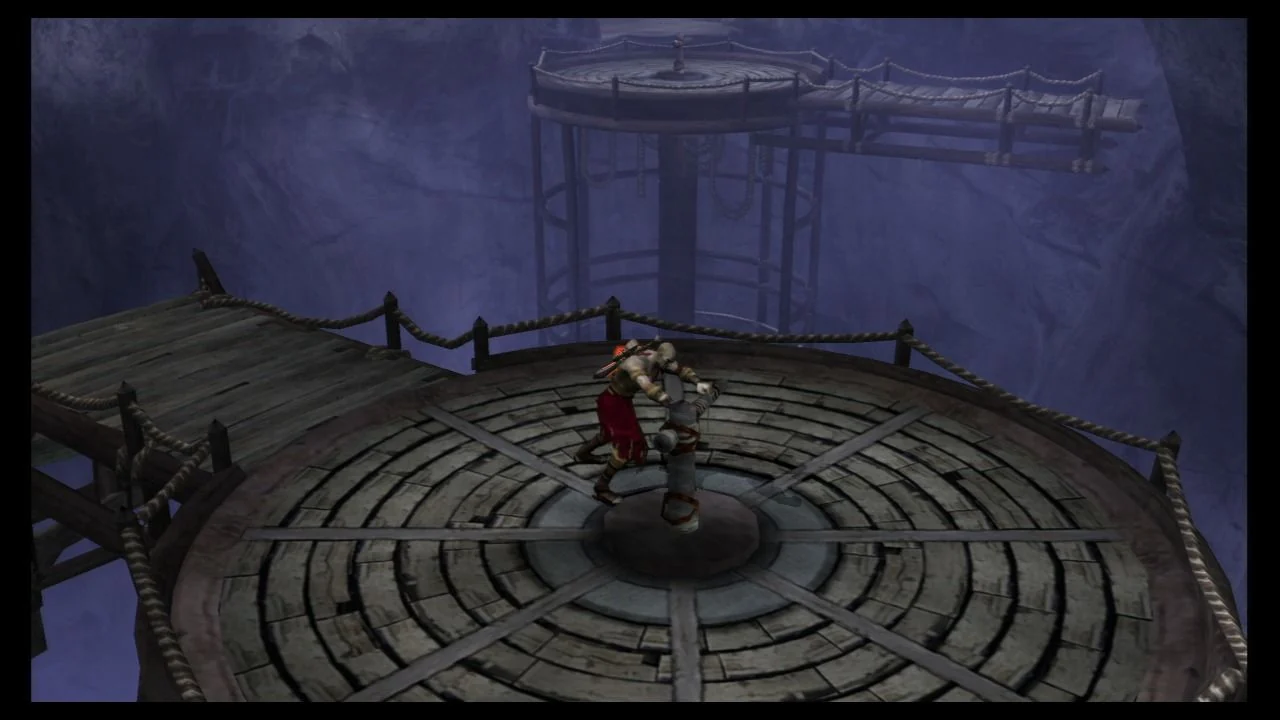
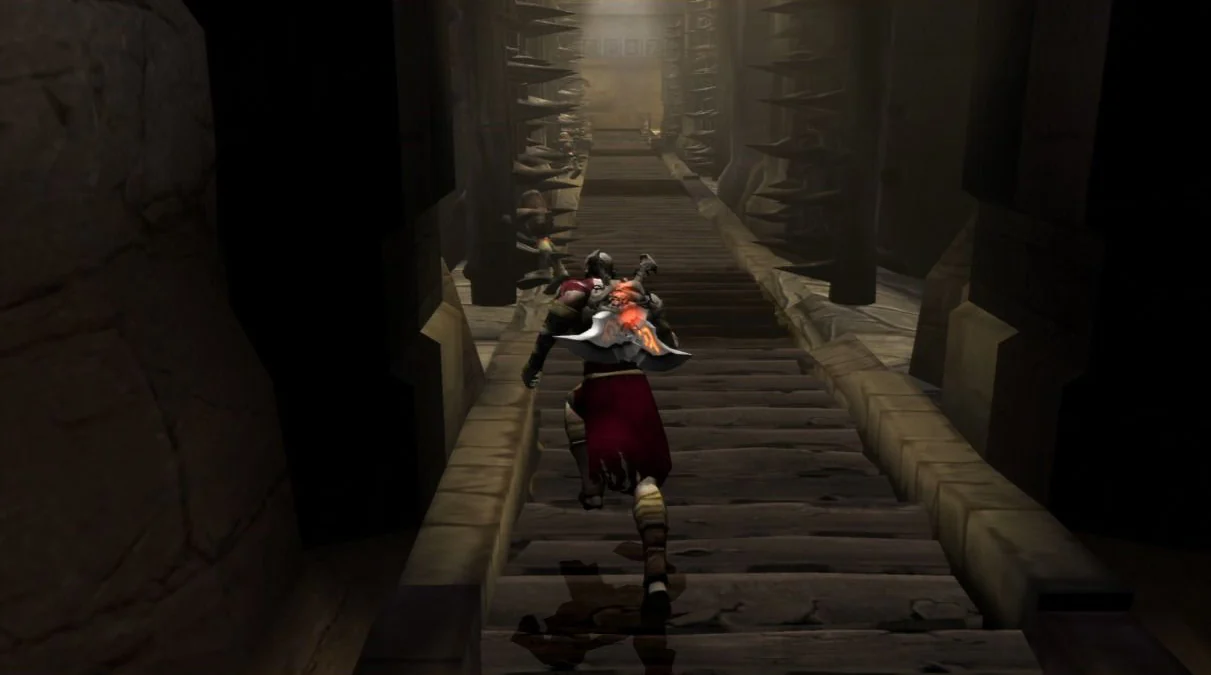
Sources & references
Our original guide draws on the references below. Check the edition at the top of this page before following controls or unlock requirements.
- God of War/Aegean Sea — StrategyWiki
- God of War Walkthrough - GameSpot
- God of War - Guide and Walkthrough - PlayStation 2 - By jarrodlover - GameFAQs
- God of War (2005) - MobyGames
- God of War Release Information for PlayStation 2 - GameFAQs
- GOD OF WAR - (NTSC-U)
- God of War - Guide and Walkthrough - PlayStation 2 - By A_I_e_x - GameFAQs
- God of War - Guide and Walkthrough - PlayStation 2 - By ZenithWillRule - GameFAQs
- God of War - FAQ/Hints and Tips - PlayStation 2 - By keltin_2002 - GameFAQs
- Rave Reviews Nationwide Spark High Anticipation for God of War as the 2005 Must-Have Game on PlayStation 2
- God of War - Guide and Walkthrough - PlayStation 2 - By Andrew_Testa - GameFAQs
- God of War Collection Walkthrough - GameSpot
- God of War - Guide and Walkthrough - PlayStation 2 - By VampireHorde - GameFAQs
- God of War/Athens Town Square — StrategyWiki
- God of War (PS2) Guide
- God of War - Puzzle Solutions - PlayStation 2 - By VampireHorde - GameFAQs
- God of War/Temple of the Oracle — StrategyWiki
- God of War — StrategyWiki
- God of War/Sewers of Athens — StrategyWiki
- God of War Releases - MobyGames
- God of War/Desert of Lost Souls — StrategyWiki | Strategy guide and game reference wiki
- God of War - Official Strategy Guide | PDF | Leisure | Unrest
- God of War - Guide and Walkthrough - PlayStation 2 - By Shotgunnova - GameFAQs
- God of War/Rings of Pandora — StrategyWiki
- Discover God of War | PlayStation
- God of War - Guide and Walkthrough - PlayStation 2 - By SayainPrince - GameFAQs
- God of War (PS2) Guide – RetroMaggedon Gaming
- God of War/Challenge of Atlas — StrategyWiki
- God of War (2005 video game)
- God of War (USA) | Datassette
- God of War – Guide and Walkthrough - PlayStation 2 - By DragonicFlare - GameFAQs
- God of War Walkthrough Chapter 4
- God of War/Architect's Tomb — StrategyWiki
- God of War Walkthrough Chapter 5
- God of War - No Upgrade Walkthrough - PlayStation 2 - By XWingMitch0 - GameFAQs
About the game & collecting notes
- Platform
- PlayStation 2
Follow Kratos from the Aegean Sea to his final battle with Ares in the original PlayStation 2 game. This walkthrough explains the combat encounters, temple puzzles, dangerous climbs, and boss fights along the main story, with upgrade advice and recovery tips for the sections most likely to interrupt your run.
Darryl Polo
Darryl Polo loves tinkering with emulation and revisiting retro games. He enjoys exploring how old favorites play on different setups and sharing what he learns along the way. At Joking Joystick, he writes about the games, hardware, and small discoveries that keep the hobby fun.
Our editorial standardsFound a step that needs another look? Help us improve this guide.