God of War II — Complete PS2 (USA) Campaign Walkthrough
Detailed, ordered walkthrough for God of War II on the original North American PlayStation 2 release. Covers the complete single-player campaign from Rhodes through the Lair of the Titan, Steeds of Time, Temple of Lahkesis, Bog of the Forgotten, Temple of Euryale, Destiny’s Atrium, Hall of Atropos, Atlas, Palace of the Fates, Phoenix Chamber, Temple of the Fates, Loom Chamber, Summit of Sacrifice and the final Great War and Mount Olympus cinematics. Required progression, boss phases, puzzle routes, save points, recovery advice and optional content are clearly separated.

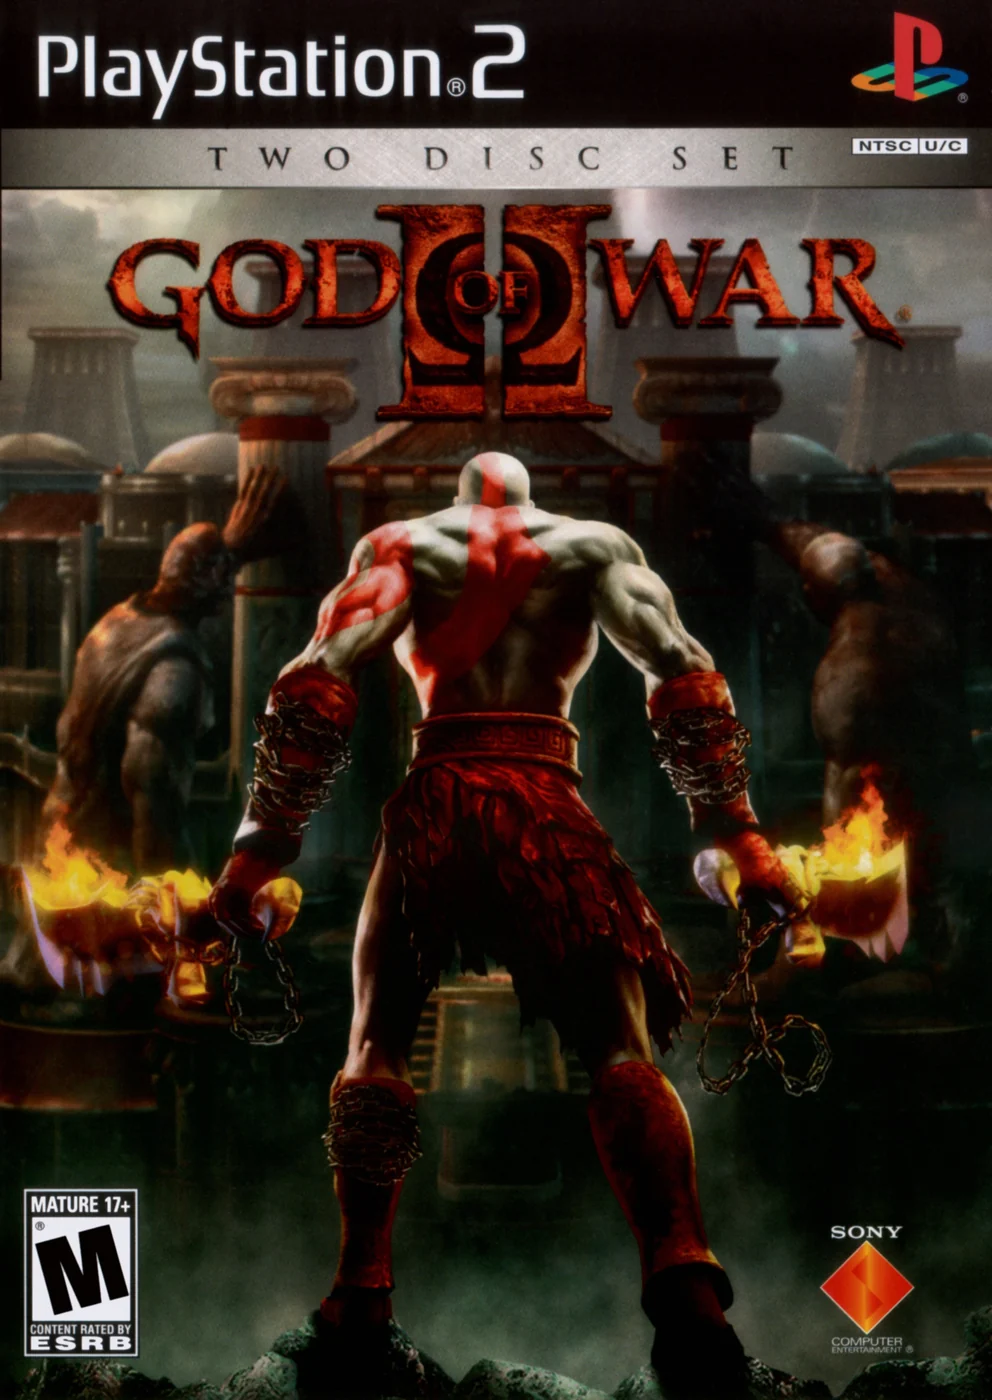
Find a copy
God of War II PlayStation 2
We may earn a commission if you buy through these links, at no extra cost to you. As an Amazon Associate I earn from qualifying purchases.
Opens retailer search results. Check the model, edition, seller, availability and current price before buying.
Before you begin
You are about to play God of War II on the original North American PlayStation 2 release.
This walkthrough follows the mandatory campaign in order: Rhodes, the Lair of the Titan, the Steeds and Temple of Lahkesis, the Bog and Temple of Euryale, Destiny’s Atrium and the Hall of Atropos, Atlas, the Palace of the Fates, the Phoenix Chamber, the Temple of the Fates, the Loom Chamber, the Summit of Sacrifice and the ending transition.
Use the chapter completion checks to confirm that each required ability, boss, puzzle and checkpoint has been completed before moving on.
Optional Gorgon Eyes, Phoenix Feathers, Urns, red-orb chests and hidden rooms are clearly separated from mandatory progression.
The final campaign check is the Great War and Mount Olympus ending cinematics followed by the credits.
Set yourself up for the run
Learn the default PS2 actions used throughout the guide: Square and Triangle attacks, Circle grabs and finishers, L1 guard, right-stick dodge, R1 interaction, L2 magic, D-pad magic selection, Start inventory and Select pause/checkpoint options.
Save at every marked altar before a boss, long puzzle, timed traversal or one-way set piece.
Prioritize Athena’s Blades and one dependable crowd-control or ranged magic instead of spreading red orbs across every ability.
The Amulet of the Fates is a relic activated near its valid Fate markers; it is not a magic spell. It slows time for specific puzzles and timed routes but does not make Kratos invulnerable.
Follow the on-screen PS2 button prompts exactly during action sequences. Do not substitute A/X terminology for the displayed Circle, Square, Triangle, L1, R1 or analog-stick inputs.
Treat collectibles and post-game rewards as optional unless a chapter explicitly identifies an item as required for progression.
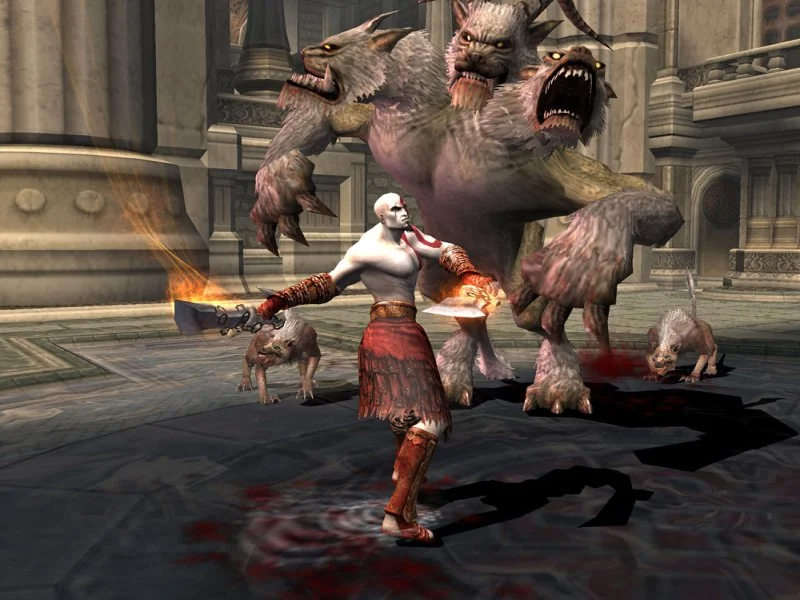
Controls, Combat Basics and Early Upgrades
The North American PlayStation 2 release of God of War II uses a simple control layout, but early progress depends on combining Athena’s Blades with guarding, rolling, grabs and deliberate repositioning. Start opens the inventory and upgrade screens, while Select pauses the game and provides options or a checkpoint restart. R2 toggles the currently selected subweapon rather than freely cycling every weapon. After the opening betrayal weakens Kratos, build Athena’s Blades first, then improve Typhon’s Bane once the bow is obtained in the Lair of the Titan. Rage of the Titans is a toggleable combat state, not complete invulnerability, and becomes available after freeing Prometheus.
Learn the default PlayStation 2 controls
Move Kratos with the left analog stick. Press X to jump, Square for a light attack, Triangle for a heavy attack and Circle to grab. Hold L1 to guard. Push the right analog stick in a direction to roll. Press R1 when an environmental action, chest, lever or other interaction prompt appears. Press L2 to use the selected magic ability, and use the D-pad to select magic.
R2 toggles the currently selected subweapon after subweapons become available. It does not function as a general-purpose cycle through every weapon in Kratos’s inventory. Use the Start button to open the inventory, upgrades, move lists and status screens; use Select to pause, change options, restart from the latest checkpoint or quit. Press L3 and R3 together to activate or deactivate Rage of the Titans after it has been obtained.
- Identify Square, Triangle, Circle, L1, L2, R1, R2 and both analog-stick clicks.
- Use Start for upgrades and Select for the pause and options menu.
- Test the right-stick roll in several directions before the first large combat sequence.
Use Athena’s Blades as the foundation of your offense
Athena’s Blades are Kratos’s primary weapon during the opening and remain useful throughout the campaign. Square provides quick light attacks, while Triangle produces heavier attacks with different reach and launch properties. Begin with a short Square string, add Triangle when an enemy is staggered or grouped, then stop attacking and reposition rather than completing a long combo in the middle of a crowd.
Circle is the grab command. Against suitable enemies, a grab can remove a target from the group, throw it into other enemies or begin a prompted takedown. Stronger enemies may resist ordinary grabs, and repeated Circle presses against them leave Kratos exposed. When a finisher prompt appears, follow the displayed button or rapid-tapping instruction instead of assuming every enemy uses the same takedown.
- Open fights with short blade strings rather than standing still and mashing.
- Use grabs to remove weak enemies or create space.
- Reposition whenever enemies begin approaching from outside the camera view.
Guard predictable attacks and roll through dangerous ones
Hold L1 against standard melee attacks and many straightforward projectiles. The Golden Fleece is acquired later and expands Kratos’s defensive options, but the opening sections rely on ordinary guarding, movement and the right-stick roll. Some heavy, special or unblockable attacks can break through a guard or punish a stationary Kratos, so do not treat L1 as a universal answer.
The roll has a brief invulnerable portion during the evasive movement. Use it to pass through a clearly telegraphed strike, escape a corner or move behind an enemy. Roll once with purpose, then answer with a short attack string while the enemy recovers. Repeated panic-rolling can place Kratos at the edge of an arena or directly into another attack.
- Block routine attacks and roll when an enemy produces a large or unmistakable wind-up.
- Leave open floor behind Kratos before starting a combo.
- After a successful roll, punish recovery with a controlled attack instead of a lengthy sequence.
Acquire and use Typhon’s Bane efficiently
The opening Rhodes sequence temporarily gives Kratos powers that do not represent his normal early-game loadout. After Zeus’s betrayal, Kratos loses much of his strength and must rebuild it. During the Lair of the Titan, climb to Typhon’s position, use R1 at the required interaction and obtain Typhon’s Bane. Hold L2 to draw the bow, then press Square for its normal wind projectile. Its automatic targeting is useful against distant enemies, archers and targets that cannot be reached safely with the blades.
Select Typhon’s Bane with the D-pad before using it. The bow can be fired while airborne, but Kratos descends slowly and remains vulnerable, so use aerial shots only when the situation permits. At higher upgrade levels, Triangle and Circle provide additional bow techniques; do not assume those attacks are available before the relevant Typhon’s Bane upgrade.
- Select Typhon’s Bane with the D-pad after obtaining it.
- Hold L2 before pressing the attack button to fire the bow.
- Use the bow first against distant or inaccessible threats rather than emptying it into weak nearby enemies.
Spend early red orbs with a focused priority
Use the Start inventory screen to spend red orbs. Athena’s Blades should receive the first major investment because they are used in almost every combat area and their upgrades unlock stronger techniques. Once the blades are in a comfortable state, invest in Typhon’s Bane when its ranged damage or utility becomes important. Avoid scattering small purchases across every newly acquired weapon and spell; a focused blade-and-bow plan is more reliable than having several underpowered abilities.
Break containers and destructible scenery during safe exploration for additional red orbs, but do not delay progress indefinitely to farm. Check the upgrade screen at save points and keep a reserve if you are close to a meaningful weapon or magic level. Health and magic extensions come from optional collectibles, so early red-orb spending cannot replace careful exploration or defensive play.
- Prioritize Athena’s Blades before spreading orbs across multiple abilities.
- Invest in Typhon’s Bane after obtaining it if ranged threats are causing difficulty.
- Review upgrades at save points and avoid spending blindly on every available option.
Activate Rage of the Titans at the right moment
After freeing Prometheus in the Lair of the Titan, Kratos obtains Rage of the Titans. Press L3 and R3 together to activate it once the rage meter has enough charge, and press them again to deactivate it. The ability can be toggled before the meter is completely full. It strengthens Kratos’s attacks and makes him resistant to interruption from many normal attacks, but he is not invincible: special attacks, grabs, environmental hazards and some enemy behaviors can still hurt him.
Use Rage to break through a dangerous group, damage a heavy target or destroy objects that require its enhanced power. Do not activate it merely to finish the last weak enemy in a room. Yellow orbs and combat refill the meter, so turn Rage off when the immediate danger has passed if doing so preserves charge for the next encounter.
- Wait until Rage of the Titans is actually acquired before attempting L3 plus R3.
- Use it for groups, heavy enemies, required destruction or emergency recovery.
- Continue watching enemy attacks while Rage is active because damage is still possible.
Before you move on
- You can identify the default functions of Square, Triangle, Circle, L1, L2, R1, R2, the right-stick roll and the L3-plus-R3 input.
- You know that Start opens the inventory and upgrade screens while Select opens the pause and options menu.
- Athena’s Blades have received the first focused upgrade rather than red orbs being scattered across several abilities.
- You can defeat a basic enemy group with a short light-heavy string, a grab or throw, a guard and a deliberate dodge.
- After obtaining Typhon’s Bane, you can select it with the D-pad, hold L2 and fire without exhausting the entire magic meter.
- After freeing Prometheus, you can activate and deactivate Rage of the Titans and understand that it reduces interruption without making Kratos invulnerable.
Rhodes — Opening, Colossus and the Betrayal
Kratos begins the North American PlayStation 2 campaign in Rhodes with the Blades of Athena and a fully powered Poseidon’s Rage, although Zeus’s plan soon strips away his godly strength. Fight through the opening rooms, use the Colossus’s exposed hand and the first ballista to reach its face, then survive the Bathhouse and Palace routes before returning to the statue for the extended final encounter. The Colossus battle is not one repeated catapult phase: the first encounter uses the ballista, the later encounters use grapple points, stunned arms, the severed hand and the Blade of Olympus. Save at the Bathhouse and Eastern Ramparts points, and use the Palace checkpoint before the pedestal puzzle. After destroying the Colossus from within, approach the Blade of Olympus for the scripted Zeus betrayal. The chapter is complete once the Hades escape and Pegasus transition begin.
1. Clear the opening chamber and reach the first Colossus arena
Defeat the soldiers in the sealed starting chamber, then approach the door and press R1. Rapidly tap Circle when prompted to force it open. Continue through the next group of soldiers until the Colossus punches through the surrounding walls. Move through the opening created by its hand, break the nearby crates for red orbs, open the green chest if you need health, and climb the ladder.
On the balcony, jump down to the lower platform rather than waiting for the Colossus to strike. Keep the soldiers under control while watching the statue’s arm. Roll away as the arm descends for a slam, and stay toward the safer lower side of the arena when it throws soldiers or pounds the ground. Attack the exposed hand or arm with short combos, then retreat before the next strike. Poseidon’s Rage is useful if the soldiers surround you, but ordinary enemies can be handled with the Blades so you retain magic for the extended set piece.
- Open the starting door with R1 and the Circle prompt.
- Break crates for red orbs and open the early green chest if needed.
- Reach the lower platform beneath the balcony.
2. Use the ballista to remove the Colossus’s first eye
Continue attacking the Colossus’s exposed hand until it recoils and its eyes close briefly. This stun is the signal to use the ballista. Climb to the raised platform on the left, stand behind the machine and press R1 to launch its stone at the statue’s head. After the impact, interact with the ballista again and rapidly tap Circle to build tension and launch Kratos.
During the face sequence, follow each displayed button prompt. The original PS2 version uses a short fixed prompt sequence here, but watch the screen rather than relying on memory. A successful sequence removes the Colossus’s right eye. A failed prompt throws Kratos back to the platform and requires another stun before the ballista can be used again. Do not attempt to launch yourself before the Colossus is stunned; the statue can catch Kratos and slam him down.
- Stun the Colossus before operating the ballista.
- Fire the stone at its head, then launch Kratos with Circle.
- Complete the face prompts and remove the right eye.
3. Cross the Bathhouse and save before the next set piece
After the eye sequence, Kratos is thrown into the Rhodes Bathhouse and lands underwater. Surface and climb out to the upper room. The nearby partitions and furnishings can be broken for extra red orbs; the optional room with the bathhouse attendants is not required. Return to the water and swim through the large pipe. Use the underwater dash charge to break through the gate, then swim into the open chamber on the other side.
Swim toward the right ledge, climb the ladder and activate the lever. Hold R1 to activate the first grip holder, then jump to it and hold R1 to swing. Release at the correct moment to jump to the next ledge. Continue upward, open the door and enter the exterior route. A save point is located near the lever area; use it before proceeding. Defeat the soldiers above, climb the ladder and rapidly tap Circle when the Colossus’s foot blocks the passage. Continue to the blue chest and climb the wall to reach the rooftops.
- Use the underwater pipe and dash charge to leave the Bathhouse.
- Activate the lever and swing across the grip holders.
- Save near the Bathhouse lever before climbing toward the rooftops.
4. Defeat the Colossus on the rooftops and escape to the Palace
Jump down from the rooftop balcony to begin the second Colossus encounter. Attack from one balcony, then use the grip holder to swing to the opposite balcony when the statue begins a wide slam or pound. Alternate sides rather than standing beneath the Colossus’s arm. Strike during its recovery, then retreat before the next swipe. After it recoils several times, a Circle prompt appears at its arm. Reach the arm quickly and complete the displayed prompts.
Kratos returns to the balcony after the first sequence. Damage the Colossus again until the next prompt appears, then repeat the arm sequence. The statue eventually grabs Kratos and tries to crush him; alternate L1 and R1 rapidly when instructed. This ends the rooftop battle and sends Kratos toward the Palace of Rhodes. The catapult is not used in this encounter, so do not wait for another ballista opportunity.
- Use the grip holder to alternate between balconies.
- Reach the stunned arm when the Circle prompt appears.
- Alternate L1 and R1 during the crushing escape sequence.
5. Solve the Palace of Rhodes pedestal puzzle and reach the ramparts
In the Palace, open the blue chest if necessary and enter the hall. Ignore the archers visible behind the first gate; turn right twice to reach the combat room, then use the nearby save point. During the fight, roll toward the archers first and eliminate them before clearing the melee soldiers.
The first gate is controlled by two floor switches. Drag the statue pedestal onto the near switch, then perform a light charged kick to move it onto the adjacent switch. Roll under the raised gate and drag the pedestal onto the second switch so the next door remains open. The optional Urn of Gaia is in the right-hand hall: move the pedestal there, kick it beneath the elevated statue, break the statue and use the pedestal to reach the three chests. Return the pedestal to the switch route afterward.
Clear the final soldiers, killing the archers before the melee group, then use the elevator lever. When the Colossus appears through the upper window, attack its eye to trigger the transition to the Eastern Ramparts. Climb the wall, clear the upper enemies, open the double doors and pass through the room with the green chest. Drop to the lower area, kill the archers on the upper perch, then cross the wooden bars and use the save point before descending into the next Colossus phase.
- Save before the Palace pedestal puzzle.
- Use the pedestal to hold both switches in sequence.
- Reach and use the Eastern Ramparts save point.
6. Finish the Colossus and survive the betrayal
In the Eastern Ramparts arena, the Colossus repeatedly pounds the floor while Kratos approaches the Blade of Olympus. The statue’s severed left hand lies on the platform. Approach it and press R1 to throw it at the Colossus for an immediate stun. Use that free stun carefully, because it is especially valuable after magic is depleted. Reach the Blade and hold R1 to drain the required power into it when the game prompts you.
For the next waves, attack the Colossus directly with the Blade of Olympus and Blades as available. Roll away from arm swipes and jump over shockwaves. When the statue recoils, return to the Blade and hold R1 again. After the final drain, the Blade becomes Kratos’s weapon. Attack the exposed forearm, avoid the electrical attacks and press Circle when the prompt appears to enter the Colossus.
Inside the statue, climb the scaffoldings and wooden walls, defeat the soldiers and avoid falling debris and blue energy rods. At each central platform, destroy the chains and press R1 to drain the energy. Use the zipline and wall routes to climb higher. A side wall near the blue bars leads to an optional Gorgon’s Eye chest; collect it only if the route is safe. Continue to the pendulum mechanism, lower it with the lever, strike it to start its swing, then raise it again. Ride the zipline and pass each eye only while the pendulum blocks its energy beam. Destroy the final chains, drain the last energy and exit through the Colossus’s mouth.
In the Palace of Rhodes, approach the Blade of Olympus. Zeus takes it and initiates a scripted confrontation; this is not a normal fight that can be won through damage. Follow the on-screen Circle prompt during the struggle. After the cutscene, climb out through Hades, use the green energy from the protruding arms to restore health, and save when the point appears. Speak to the surviving soldier to trigger the Pegasus arrival. Mount the Pegasus and begin the next chapter.
- Use the severed hand for the first rampart stun and drain power into the Blade.
- Complete the interior chain, energy-drain and pendulum sequence.
- Approach the Blade of Olympus and complete the scripted Zeus prompt.
- Reach Hades, save, speak to the soldier and mount the Pegasus.
Before you move on
- The Colossus has been destroyed from within and Kratos has exited through its mouth.
- Kratos has approached the Blade of Olympus and the Zeus betrayal cutscene has played.
- Kratos has reached Hades, saved at the available point and triggered the Pegasus arrival.
- Kratos has mounted the Pegasus and the game has advanced beyond Rhodes toward the Lair of the Titan.
References for this chapter
Lair of the Titan — Early Exploration and Puzzles
After Pegasus is trapped beneath the Titan’s hand, Kratos crosses the first cavern, reaches the snowy ledge and encounters Prometheus. The route then leads through Typhon’s Cavern, where Kratos obtains Typhon’s Bane and uses it to open the return path. Freeing Prometheus grants Rage of the Titans, which is required to move the Titan’s fingers and release Pegasus. The chapter’s main challenges are wall and ceiling traversal, grapple swings, chain crossings, Typhon’s wind, and several optional chest routes. The Amulet of the Fates and its time-slowing mechanic are not available here, so do not search for a Fate statue in this area. Save at the marked points before entering Typhon’s Cavern, after returning from it, and before the final Hand Cavern traversal.
1. Leave Pegasus and cross the first cavern
When the Titan’s hand traps Pegasus, jump down to the lower route and defeat the Harpies. Continue toward the camera from the health chest to find a lower ledge with an unmarked chest and a red-orb chest. Return to the upper route and attack the Titan’s obstructing finger to open the way forward.
Follow the wall route, defeating Sentries as they appear. Kratos can climb across the ceiling after reaching the upper section; continue right, descend the next wall and return to solid ground. Move forward until you reach the save point. This is the first important checkpoint for the area. Save before continuing into the next combat section.
- Leave Pegasus beneath the Titan’s hand.
- Collect or deliberately skip the lower Gorgon Eye and red-orb chest.
- Open the route by attacking the obstructing finger.
- Use the save point after the first cavern traversal.
2. Cross the snowy ledge and meet Prometheus
Defeat the Harpies and Minotaur outside, then destroy the wooden structures so the Archers cannot keep attacking from cover. Climb the ledges on the side of the rock wall, shimmy across the narrow section and jump to the upper area. Health and red-orb chests are available before the chain crossing.
Slide down the chain and walk along the Titan’s arm to see Prometheus. Attack the chain in front of him to trigger the scene, but do not expect to free him yet. After the scene, take the nearby chain down and continue along the lower route. Climb the rough wall, defeat the Sentries and reach the lower save point. The Gorgon Eye beside this route is optional.
- Defeat the outdoor Harpies, Minotaur and Archers.
- Cross the snowy ledges and slide down the chain.
- Trigger Prometheus’s scene.
- Save after descending from the Prometheus approach.
3. Enter Typhon’s Cavern and open the barred chest
From the lower snowy area, climb the rough wall and enter Typhon’s Cavern. Follow the tunnel past the health and red-orb chests, then grapple from the stalactite to the opposite platform. A chest is visible behind bars. Move along the side route, slide across the chain that leads back toward the entrance, and immediately grapple back to the barred chest while the bars are open. This optional chest contains a Phoenix Feather.
Continue through the cavern and defeat the Gorgons and Harpies. Roll away when a Gorgon begins its stone gaze; if Kratos is caught, shake the left analog stick to recover. Break the shimmering rock structure to reveal the next passage, then save at the checkpoint near the green and red chests.
- Grapple across the cavern gap.
- Use the return chain to open the barred chest temporarily.
- Defeat the Gorgon and Harpy ambush.
- Save before approaching Typhon’s wind section.
4. Survive Typhon’s wind and obtain Typhon’s Bane
Advance toward Typhon’s head. When Typhon inhales, move left and shelter behind the rock pillars and smaller stones. Harpies attack during the crossing, so defeat only those that threaten your position while watching for the next breath. Do not run through the open ledges while Typhon is exhaling; the wind can knock Kratos into the pit.
At the large rock platform, attack the shimmering rock, then grab it and complete the lifting prompts to form a bridge. Cross when Typhon stops blowing and press R1 at the far end to obtain Typhon’s Bane. Aim with L2 and fire with Square to blind Typhon. Afterward, cross back as the bridge collapses and defeat the Sentries. Use Typhon’s Bane to eliminate the distant Archers.
- Use the rock pillars and small stones as wind shelters.
- Create the bridge from the shimmering rock.
- Obtain Typhon’s Bane.
- Blind Typhon and defeat the Sentries and Archers on the return route.
5. Complete the bonfire chest route and return outside
After the bridge collapses, take the path partly hidden by the camera toward the bonfire. Sentries continue to appear here. Grab each Sentry and throw it into the fire; the fire is automatically targeted during the grab sequence. Throw five Sentries into the bonfire to melt the ice covering four nearby chests. Three contain red orbs and one contains a Phoenix Feather. These rewards are optional.
Return to the previous platform and shoot the cage covering the grapple point on the stalactites. Defeat or shoot the Archers, grapple across the revealed points and break the rocks for red orbs. Save at the nearby point, then backtrack through the cavern and exit to the snowy ledge.
- Throw five Sentries into the bonfire.
- Open the four melted chests if desired.
- Shoot the grapple-point cage and cross the stalactites.
- Save before leaving Typhon’s Cavern.
6. Use Typhon’s Bane, free Prometheus and release Pegasus
Outside the cavern, climb down toward the broken bridge. Shoot the cage covering the grapple point, swing across and collect the optional Gorgon Eye and red-orb chest. Return to the upper route, shoot the cage above the wooden platform and climb the rope it releases. Use the ledges and chain to reach the Titan’s hand, then shoot the chain holding Prometheus until he falls.
Prometheus’s release grants Rage of the Titans. Defeat the Minotaurs and Sentries, then return to the upper platform and descend the separate vertical chain beside the crossing chain. Jump into the hidden alcove for three chests, including a Gorgon Eye. Continue along the rough wall to another optional alcove containing red orbs and a Phoenix Feather.
Return to the main platform and cross the chain while defeating Sentries. Open the yellow chest to refill Rage of the Titans, activate it and destroy the marked door. Continue through the Hand Cavern, grapple across the gap and save before returning to Pegasus. At the trapped hand, activate Rage of the Titans and attack each finger until it retracts. If Rage runs out, attack the fingers normally to rebuild the meter. Once the hand releases Pegasus, press R1 beside him to begin the next flight sequence.
- Use Typhon’s Bane to open the broken-bridge route.
- Free Prometheus with repeated bow shots.
- Defeat the enemies after receiving Rage of the Titans.
- Check the hidden chain alcove and optional Phoenix Feather alcove.
- Destroy the marked door with Rage of the Titans.
- Save before the final finger sequence.
- Attack every finger until Pegasus is released.
Before you move on
- Typhon’s Bane has been obtained and used to blind Typhon.
- The return route through Typhon’s Cavern has been opened with the bow, and a save has been made afterward.
- Prometheus has been freed and Rage of the Titans is available.
- The marked Hand Cavern door has been destroyed.
- The final Hand Cavern save point has been reached.
- Rage of the Titans has been used to retract the Titan’s fingers and free Pegasus.
- Pressing R1 beside Pegasus begins the flight to the Island of Creation.
The Steeds of Time — New Abilities and Hazard Navigation
After Theseus falls, take the Horse Keeper’s Key through the opened route and obtain Cronos’ Rage. Save before the four-steed mechanism, then unlock the colored blinders in this order: red, green, yellow, then blue. The red and green routes are direct climbs. Once those two blinders are released, use the Harpy grapple routes to reach the distant yellow and blue blinders. Climb handholds by jumping repeatedly, wait until each Harpy is moving toward the destination, and ignore enemies that do not block the route. After all four blinders are open, activate the central mechanism and complete the prompted left-stick sequence to move the Island of Creation beside the Temple of Lahkesis. Clear the returning Undead Legionnaires and Minotaurs, cross the chain, break the blocking rock, and save before continuing toward the Divine Pools. The Amulet of the Fates is obtained later in the Temple of Lahkesis and is not used here.
Take the Horse Keeper’s Key and obtain Cronos’ Rage
After defeating Theseus, collect the Horse Keeper’s Key and follow the opened route through the structure. Use the available rope and upper walkways to return toward the earlier steed area, then unlock the doors that require the key.
Enter the chamber beyond the locked doors and place the Horse Keeper’s Key into the emblem at the rear pedestal. The scene grants Cronos’ Rage, an electrical magic attack that damages and stuns nearby enemies. Use it on the Undead Legionnaires that appear after the power is obtained; this encounter is also a safe place to test the spell.
Leave through the exit, climb the ladder, and follow the upper walkway toward the save point. Cronos’ Rage is useful in the combat after the puzzle, but it is not needed to open the colored blinders.
- Collect the Horse Keeper’s Key after Theseus.
- Unlock the key-operated route.
- Place the key in the rear pedestal.
- Obtain Cronos’ Rage.
- Defeat the introductory Undead Legionnaires.
Save before the four-steed mechanism
Use the save altar on the upper walkway before starting the timed blinder sequence. Nearby health, magic, red-orb, and other optional chests can be opened if needed, but none is required for the story route.
Continue to the central platform with the four colored controls. Identify the direct climbable walls on the red and green sides before pulling a lever. Each lever temporarily opens the matching blinder, so the safest approach is to know the destination before activating it.
Do not search for the Amulet of the Fates. It is acquired later in the Temple of Lahkesis. This section uses the Horse Keeper’s Key, handholds, grapples, and double jumps rather than time-slowing.
- Save at the altar before touching the colored controls.
- Locate the red-side and green-side climb routes.
- Identify the Harpy grapple routes that appear after the first two blinders open.
- Keep the Amulet of the Fates out of this section.
Open the red and green blinders first
Activate the red control first and complete the on-screen left-stick rotation. Immediately move to the right-hand route, cross to the red steed, and climb the wall by tapping X repeatedly instead of relying on the slower normal climb. Reach the opened red device and press R1 to insert the Horse Keeper’s Key before the opening closes.
Return to the central platform and activate the green control. Move to the left-hand route, climb the wall quickly, and reach the green device. Press R1 to place the key and release the Harpy held there.
Do not stop to fight every Harpy. Defeat only enemies that prevent Kratos from climbing, grappling, or landing. If either blinder closes, return to its matching control and repeat that route. Releasing the red and green blinders creates the two Harpy grapple routes needed for the distant mechanisms.
- Red control activated first.
- Red blinder opened with the Horse Keeper’s Key.
- Green control activated second.
- Green blinder opened with the Horse Keeper’s Key.
- Both Harpy grapple routes are now available.
Use the Harpies to open the yellow and blue blinders
Return to the controls and activate the yellow lever. Take the green-side route used for the earlier green blinder, but continue beyond the released green device. At the end of the walkway, jump toward the Harpy carrying the grapple point and press R1 when it is positioned for a swing toward the distant yellow steed.
Swing across, release at a useful height, and use the handholds and double jump to reach the yellow device. Insert the Horse Keeper’s Key before the temporary opening closes. If the Harpy is moving away from the yellow steed, wait on the ledge for a favorable pass rather than jumping early.
Return to the central controls and activate the blue lever last. Use the red-side route, climb the first right-hand steed, and move to the released Harpy grapple point. Swing across to the distant blue steed, then jump up its handholds and place the key in the blue device.
Harpies may attack during both crossings. Ignore them unless they interrupt the climb or make the landing unsafe. If a blinder closes, reactivate its matching lever and repeat the crossing.
- Yellow control activated after red and green.
- Yellow blinder reached through the green-side Harpy route.
- Yellow blinder opened with the key.
- Blue control activated after yellow.
- Blue blinder reached through the red-side Harpy route.
- All four blinders are open.
Activate the central mechanism and move the Island of Creation
Once the red, green, yellow, and blue blinders are all open, return to the central platform. Press R1 at the large central latch to raise the mechanism between the steeds.
Interact with the raised mechanism and complete the left-stick sequence shown on screen. Follow each direction deliberately; a mistake makes the sequence restart. Successful completion causes the Steeds of Time to pull the Island of Creation beside the Temple of Lahkesis.
The Amulet of the Fates is not involved in this sequence. The required progression event is the completed left-stick prompt and the resulting movement of the island.
- Red, green, yellow, and blue blinders are open.
- The central latch has been activated.
- The left-stick prompt sequence has been completed.
- The Island of Creation has moved beside the Temple of Lahkesis.
Clear the return battle and reach the next save point
Follow the route away from the steed mechanism. Undead Legionnaires and Minotaurs attack on the return path. Use Cronos’ Rage to stun groups and create room, then concentrate on enemies blocking the exit. When a Minotaur exposes a Circle prompt, complete the finisher rather than allowing it to keep pressuring Kratos.
Continue along the large chain after the battle. At the far side, follow the handhold route and smash the rock blocking the path. Reach the save altar beyond it and save. This checkpoint prevents the completed steed puzzle and return battle from needing to be repeated after a later death.
Optional chests and power-ups around the nearby ledges can restore resources or provide upgrades, but they are not required. From the altar, continue toward the Temple of Lahkesis and the Divine Pools. The Amulet of the Fates becomes available later in that temple.
- Defeat the returning Undead Legionnaires and Minotaurs.
- Cross the large chain.
- Break the blocking rock on the handhold route.
- Reach and use the save altar beyond the rock.
- Continue toward the Temple of Lahkesis and Divine Pools.
Before you move on
- Cronos’ Rage is available in Kratos’ magic selection.
- The red, green, yellow, and blue blinders have been opened with the Horse Keeper’s Key.
- The central latch has raised the mechanism.
- The on-screen left-stick sequence has been completed.
- The Steeds of Time have pulled the Island of Creation beside the Temple of Lahkesis.
- The returning Undead Legionnaires and Minotaurs have been defeated.
- The large chain has been crossed and the blocking rock has been smashed.
- The save altar beyond the rock has been reached.
- Kratos has continued toward the Temple of Lahkesis and Divine Pools.
The Temple of Lahkesis — Divine Pools, the Amulet of the Fates and the Garden
After completing the Steeds of Time, return along the chain to the Temple of Lahkesis. Cross the Divine Pools, enter the statue building and pull the plant-covered platform south to uncover an underwater passage. Follow the passage to Lahkesis’s statue, remove its arm and obtain the Amulet of the Fates. The Amulet slows time when used near a Fate statue with a glowing green stone. Use it first to cross the rising pillars from the lower pressure plate, then again to reach Lahkesis’s lowered hands from the upper pressure plate. Break the statue’s head, exit through the broken window and defeat the Wraiths and Nymphs in the Garden of Lahkesis. Save there before continuing across the bridge into Destiny’s Atrium. Fight the first Atrium enemies and follow the route only as far as the first Atrium save point; the later statue-and-laser mechanism belongs to the next chapter.
1. Return from the Steeds of Time and cross the Divine Pools
Follow the chain away from the Steeds of Time until you reach the climbable wall leading toward the Temple of Lahkesis. Destroy the obstructing section of wall, climb to the walkway and use the save point before the Divine Pools. This is the safest place to record progress before the statue-room sequence.
Continue across the Divine Pools and upper walkways. Fire Nymphs attack around the narrow platforms, so fight from a broad ledge whenever possible. Block or evade their projectiles, and avoid standing near an edge when a Nymph is close to death because its fiery burst can damage Kratos. Look around the Divine Pools for optional red-orb and upgrade chests, then enter the building containing the large Lahkesis statue.
- Save before entering the Divine Pools.
- Cross the pools without allowing Fire Nymphs to surround Kratos.
- Enter the statue building after checking the nearby optional chests.
2. Find the underwater passage and obtain the Amulet
In the statue room, step on the entrance pressure switch to lower Lahkesis’s hands, then drop to the lower floor. Do not try to reach the hands yet; the required route begins at the movable platform in the central pool.
Move behind the plant-covered platform and grab the handle on its south side. Pull it completely south. A short scene shows that the platform had covered an underwater opening. Dive into the passage, descend and hold R1 to perform the charged dash through the underwater obstruction. Continue until the tunnel rises, surface and climb out.
Follow the passage to Lahkesis’s statue. Press R1 when the prompt appears to remove the statue’s arm and receive the Amulet of the Fates. Return through the same underwater passage to the main statue room.
- Pull the plant-covered platform all the way south.
- Use a charged R1 dash to break through the underwater barrier.
- Remove Lahkesis’s arm and obtain the Amulet of the Fates.
3. Use the first pressure plate to cross the rising pillars
The Amulet functions at a Fate statue whose central stone is glowing green. Stand close enough for the statue to respond, then hold L1 and press R1 together. The surrounding world slows while Kratos continues moving normally; the yellow Amulet meter shows the remaining duration.
After returning to the main room, stand on the floor pressure plate that raises the pillars. Keep Kratos on the plate until the pillars reach their full height. While still on the plate, activate the Amulet and cross the raised route to the upper promenade. Leaving the plate makes the pillars descend, so if the timer expires, return to the plate and repeat rather than attempting the jump while the pillars are falling.
The lower alcove reached earlier contains optional chests with a Gorgon Eye and a Phoenix Feather. A separate optional chest can be reached from the raised-pillar route by breaking the upper portion of the wall insignia from the appropriate pillar. None of these items is required for progress.
- Use the Amulet only near the green-glowing Fate statue.
- Remain on the pillar pressure plate until the pillars finish rising.
- Repeat the sequence if the Amulet expires before Kratos reaches the upper walkway.
4. Lower the hands and destroy the statue’s head
On the upper promenade, locate the second pressure plate. Stand on it until Lahkesis’s hands descend to their lowest position. Activate the Amulet while the plate remains depressed, then move north and double-jump onto the hands before the time effect ends. Do not jump early: hands that are still descending can make Kratos miss the landing.
A cutscene places Kratos at the statue’s chin. Attack the head with normal combos until it breaks through the window and opens the exit. Afterward, search the upper walkways if you want the optional Phoenix Feather and red-orb chest, then drop through the broken window behind the statue to reach the garden.
- Use the second pressure plate for the hand sequence.
- Wait until the hands reach their lowest position.
- Break the statue’s head and leave through the broken window.
5. Clear the Garden of Lahkesis and save
The garden begins with Wraiths of Athens. Block while they burrow or spin, then punish them when they surface. Launch attacks, aerial grabs and short combos are safer than long grounded strings. The Amulet can slow the fight if the Wraiths are overwhelming, but it is not required for the encounter.
Additional enemies, including Nymphs and flying attackers, appear as the fight continues. Prioritize enemies that can immobilize Kratos or interrupt jumps, and keep moving toward open ground instead of fighting against a wall. Continue until the enemy waves stop, then attack the talking statue head to clear the route.
Cross the bridge and follow the balconies toward Destiny’s Atrium. The Garden of Lahkesis contains a save point before this continuation; use it after the combat is over. In Destiny’s Atrium, drop to the lower area and defeat the first Cyclops and Boars. Follow the accessible walkway afterward until you reach the first Atrium save point. Stop there; the later Atrium beam-and-statue puzzle is outside this chapter.
- Defeat the Wraith and Nymph ambushes in the garden.
- Destroy the talking statue head after the enemy waves end.
- Save in the Garden, then reach and use the first save point in Destiny’s Atrium.
Before you move on
- The Amulet of the Fates appears among Kratos’s relics after he removes Lahkesis’s arm.
- Kratos has crossed the raised pillars using the first pressure plate and the Amulet.
- Kratos has reached Lahkesis’s hands using the second pressure plate and destroyed the statue’s head.
- The Garden of Lahkesis ambush is cleared and the talking statue head has been destroyed.
- Kratos has saved in the Garden and reached the first save point in Destiny’s Atrium without beginning the later beam-and-statue puzzle.
References for this chapter
- God of War II - Guide and Walkthrough - PlayStation 2 - By Berserker
- God of War II Guide and Walkthrough - PlayStation 2 - GameFAQs
- God of War II Guide — The Temple of Lahkesis Walkthrough
- God of War II - Chest Guide - PlayStation 2 - By Mookiethebold
- God of War II - Guide and Walkthrough - PlayStation 2 - By YuGiOhFm2002 - GameFAQs
Temple of Lahkesis II and Destiny's Atrium (Part 1)
Begin at the Destiny's Atrium save point after the Temple of Lahkesis return route. Cross the bridge, descend to the courtyard and defeat the hogs and Cyclopes before solving the giant statue-head barrier. Use the nearby lever and raised platform to move the right-hand shield statue, then place both statues so their shields intercept the green eye beams. When the barrier-opening scene plays, return to the save point. The fire-spitting face route is not required yet because it needs a later ability. Optional chests can be collected if convenient, but they are not needed for story progress.
1. Leave the Atrium save point and enter the courtyard
Load or make the save at the Destiny's Atrium checkpoint reached after the preceding Temple of Lahkesis section. Cross the bridge and inspect the upper ledges if you want nearby red-orb or health supplies. The main route leads to a ladder or drop beside the large stone statue head.
Descend to the courtyard below. Approaching the center starts the encounter, so open any immediately accessible chest before triggering it if Kratos needs health or magic. Do not go into the side passage beside the fire-spitting face: that route is not part of this objective and requires a later item.
- Start from the Destiny's Atrium save point.
- Cross the bridge and descend beside the large statue head.
- Ignore the fire-spitting face route for now.
2. Defeat the hogs before concentrating on the Cyclopes
The first wave contains a Cyclops accompanied by hogs. Prioritize the hogs whenever they are close enough to grab. Weakening and grabbing them removes the smaller threats quickly and gives you more room to avoid the Cyclops's swings.
Keep moving around the courtyard instead of fighting with your back against the barrier. Use the right analog roll to escape a charge or club attack, and block when a Cyclops is within striking distance. After the first Cyclops is defeated, two additional Cyclopes enter the fight. Separate them by circling the arena and attack only after one has completed a swing or charge.
Rage of the Titans or a crowd-control spell is useful if both Cyclopes trap Kratos near a wall, but do not spend every resource on the hogs. If the fight goes badly, reload the Atrium save rather than entering the puzzle section with low health or no magic.
- Grab or kill the hogs before they surround Kratos.
- Defeat the first Cyclops.
- Defeat the two Cyclopes that appear afterward.
- Use the Atrium checkpoint to retry if resources are too low.
3. Move the first shield statue into position
After the courtyard is clear, climb one of the ladders near the large statue head to reach the upper balcony. Two movable shield statues are positioned on opposite sides of the area. Start with the statue on the left side of the balcony. Pull it out of its alcove and move it onto the central bridge or marked position so its shield catches one of the green eye beams.
Check the camera angle after releasing the statue. The shield must sit directly in the beam's path; placing it nearby is not enough. When positioned correctly, the beam is redirected and one side of the barrier is disabled.
- Climb to the upper balcony after the battle.
- Pull out the left-side shield statue.
- Place it so its shield intercepts one green eye beam.
4. Use the lever to place the second statue
Go to the opposite side of the balcony and locate the lever beside the second statue. Activate it to lower the nearby section of platform. Pull the statue onto the lowered platform, then operate the lever again to raise it to balcony level.
Once the statue is raised, jump onto the balcony beside it and kick it across the walkway toward the central bridge. Use the environment-interaction prompt when required to kick it; dragging it from the lower area will not place it correctly. Move the statue into the remaining beam path, adjusting it until its shield reflects or blocks the second green ray.
When both statues are correctly aligned, a cutscene shows the force barrier dropping. If nothing happens, check that each statue is fully in a beam and not slightly offset. Reloading the previous checkpoint is safer than wandering into the locked side routes.
- Lower the platform with the lever.
- Drag the second statue onto it and raise the platform.
- Jump up and kick the statue toward the central bridge.
- Place it in the remaining green beam.
- Wait for the barrier-opening cutscene.
5. Save and stop at the chapter checkpoint
After the cutscene, return to the save point on the Atrium side and save again. This is the reliable recovery point for the next chapter. The opened route leads onward toward the Bog of the Forgotten and later returns to this area with additional equipment.
You may inspect nearby optional chests before leaving, but do not treat the fire-spitting face as a failed puzzle. It is intentionally inaccessible during this visit and is handled after Kratos obtains the required later ability. Preserve any remaining magic if the next chapter begins with combat.
- Confirm that the green barrier has disappeared.
- Return to the Atrium save point.
- Save after solving the two-statue barrier.
- Leave the fire-spitting face route for the later return.
Before you move on
- The hogs and all three Cyclopes are defeated.
- The left shield statue is positioned in one green eye beam.
- The right shield statue has been raised with the lever and kicked into the other beam.
- The barrier-opening cutscene has played.
- Kratos has returned to the Destiny's Atrium save point and saved after the puzzle.
The Bog of the Forgotten — Platforming and Ambushes
The Bog of the Forgotten is completed in several linked sections. Defeat the Barbarian King to obtain the Barbarian Hammer, then follow the outer bog route to the Temple of Euryale approach. Search the body near the bog to obtain Euryale’s Key and use it on the Gorgon-faced gate leading into the Ruins of the Forgotten. Inside the ruins, stop Beast Lords from summoning or riding Cyclops Berserkers, cross the swamp using grapple points, complete the connected-waterway body puzzle and destroy the conveyor machinery. Defeat Dark Cerberus to obtain the Golden Fleece, reflect the fireballs that seal the exit and use the Fleece against the Gorgon beams on the way out. Optional conveyor-area chests contain useful permanent upgrades, but none is required. Save at the altar after leaving the Cerberus area. The next chapter begins at the entrance to the Temple of Euryale.
Defeat the Barbarian King and obtain the Barbarian Hammer
Follow the route from Destiny’s Atrium toward the forest entrance and approach the chests at the end of the path. A cutscene interrupts the route and the Barbarian King drags Kratos through the bog. Complete the displayed button prompts during this sequence so the fight begins with Kratos recovered and positioned in the arena.
During the mounted phase, stay in the open area and avoid the horse’s charges rather than chasing the Barbarian around the arena. His arrows and hammer swings are easier to evade while moving laterally. Attack after a charge or hammer swing has finished, then retreat before the next pass. When the takedown prompt appears, complete it to remove the horse and begin the ground phase.
On foot, watch for the hammer shockwave and the outward-moving souls. Roll through or away from the shockwave, then punish the Barbarian during his recovery. Summoned enemies can be grabbed for quick damage and recovery orbs. When the Barbarian enters his enlarged phase, continue using short attacks and avoid staying in front of the hammer. Complete the final action sequence to defeat him and receive the Barbarian Hammer.
The Hammer is slower than the Blades of Athena and prevents normal rolling while equipped, so return to the Blades for mobile combat unless a heavy strike is useful. After the short group encounter that follows, grapple from the hanging branch and continue toward the Temple of Euryale approach.
- Complete the opening button-prompt sequence.
- Defeat the Barbarian King’s mounted phase.
- Finish the ground and enlarged phases.
- Complete the final action sequence.
- Obtain the Barbarian Hammer.
Find Euryale’s Key and open the ruins
Continue along the path, defeating the boars and other enemies until you reach the Temple of Euryale approach. Save at the point on the right side and refill at the nearby green chest if needed. The Gorgon-faced entrance cannot yet be opened, so use the small jumping route near the save point to cross the broken platforms.
At the far side, approach the mangled soldier’s body near the bog and search it to obtain Euryale’s Key. Beast Lords and other enemies attack immediately afterward. Keep the fight away from the bog edge and interrupt Beast Lords before they can complete a summon. Use grabs and short Blade attacks instead of spending all available magic on ordinary enemies.
Return to the Gorgon-faced gate and use Euryale’s Key. The opened passage leads into the Ruins of the Forgotten. This is the required route; the Temple of Euryale itself remains inaccessible until after the Golden Fleece is obtained.
- Save at the Temple of Euryale approach.
- Search the body near the bog.
- Obtain Euryale’s Key.
- Use the key on the Gorgon-faced gate.
- Enter the Ruins of the Forgotten.
Stop the Beast Lords and reach the swamp crossing
The first major ruin battle contains Beast Lords and Cyclops Berserkers. Target the Beast Lords first because their horns summon additional enemies. If a Beast Lord mounts a Cyclops, grab the rider when the opening appears and pull him down. Continue attacking the Beast Lord so he cannot remount, then handle the Cyclops after the summoner is gone.
After the battle, pull the block away from the doorway and position it beside the broken pillars to continue. In the next passage, use the lower block as a step before destroying it if you want the optional chest above. Jump from the lower block and strike the suspended block to drop the chest, then clear the remaining obstruction.
At the next intersection, the side route contains a Sentry encounter and chests. Clear it if you want the rewards, then return to the main path and drop into the pit. Fight the enemies at the bottom before breaking the central rock column. The exposed grapple point begins the swamp crossing.
- Interrupt Beast Lords before their summons complete.
- Pull mounted Beast Lords off Cyclops Berserkers.
- Use the lower block as a step before destroying it if pursuing the optional chest.
- Clear the Sentry side route if desired.
- Break the central rock column and expose the grapple point.
Cross the swamp and complete the body-and-waterway puzzle
Use the grapple point to swing across the first gap. On the circular swing, wait until Kratos is traveling toward the far platform before jumping. Continue through the next grapple points, climb the ladder on the right and cross the vine. Move quickly across exposed platforms while ranged enemies attack from the surrounding pillars. Block incoming fireballs when necessary and use aerial grabs or brief ranged attacks to avoid being pinned.
In the circular waterway room, stand on the central pressure switch and use Typhon’s Bane on the vines behind the right-side chest to reveal the grapple point and optional chests. For the required puzzle, operate the rear switch to open the water channels, then place the body in the right-hand channel. Follow the connected route to the left side, wait for the body to float through and pull it onto the left pressure switch.
Return to the central pressure switch and stand on it. The middle gate opens only while the switch is held, so move through immediately. Do not leave the body on the wrong switch or the gate will not remain open long enough to cross. Save at the altar beyond the gate before continuing.
- Cross the grapple route without falling into the swamp.
- Use Typhon’s Bane to reveal the optional grapple route if desired.
- Open the water channels with the rear switch.
- Move the body from the right channel to the left pressure switch.
- Hold the central switch and pass through the middle gate.
- Save at the altar beyond the puzzle.
Stop the conveyor machinery and defeat Dark Cerberus
Continue until you reach the injured soldier beside the conveyor belt and grinder. Place the body on the belt and allow the machinery to carry it into the grinder. When the machinery has finished, attack the exposed gears to disable the conveyor mechanism. Before opening the next gate, follow the nearby side path for the optional chests, including the documented Phoenix Feather chest. Return to the conveyor area and use the replenishing chests before the fight.
Dark Cerberus attacks with fast claw strikes, charges and long-range fireballs. Keep moving, block attacks that can be guarded and avoid committing to long Blade combos because the boss rarely staggers. When it prepares the fireball attack, create distance and be ready to block or roll. Attack after a committed claw or charge, then reset your position. When the action prompt appears, activate it to complete the takedown.
After the battle, Kratos receives the Golden Fleece. Pull the switch on the right side of the arena to activate the fireball-spitting head in the wall. Stand in the dark central area and tap L1 just before a fireball reaches Kratos. A successful reflection sends the fireball into the wall head and opens the exit. Repeat as needed rather than rushing the timing.
Use the Golden Fleece against the Gorgon beams outside. Reflect a beam back toward its source when the prompt appears, then complete the follow-up action to petrify the Gorgons and clear the route. Continue across the climbable wall and return to the Temple of Euryale approach. Save at the altar after leaving the ruins. Optional conveyor-area beams can also be reflected to reveal chests containing upgrade items, including a Phoenix Feather, a Gorgon Eye and the Urn of the Gorgons. These rewards are not required for campaign progress.
- Place the soldier on the conveyor belt.
- Destroy the exposed conveyor gears.
- Use the replenishing chests before opening the gate if necessary.
- Defeat Dark Cerberus.
- Obtain the Golden Fleece.
- Reflect the arena fireballs into the wall head.
- Use the Golden Fleece to defeat or bypass the Gorgon-beam hazards.
- Save at the altar after leaving the ruins.
Before you move on
- The Barbarian King is defeated and the Barbarian Hammer is in the inventory.
- Euryale’s Key has been taken from the body near the bog.
- The Gorgon-faced gate has been opened.
- The Ruins of the Forgotten have been crossed.
- The waterway body puzzle is complete.
- The conveyor machinery has been destroyed.
- Dark Cerberus is defeated and the Golden Fleece has been obtained.
- The fireball reflection has opened the Cerberus exit.
- The Gorgon-beam hazards on the route back have been cleared or bypassed.
- The game has been saved at the altar after leaving the ruins, with the Temple of Euryale entrance ready for the next chapter.
Temple of Euryale — Part 1: Gorgon Tricks and Heavy Enemies
Begin at the Temple of Euryale entrance after obtaining the Golden Fleece in the preceding chapter. Reflect the Gorgon-face beam into the sealed wall, break through and clear the first Cursed Legionnaire rooms before descending to the Hades Minotaur battle. Use Golden Fleece counters, aerial grabs and short Blade of Athena strings to prevent the Legionnaires from surrounding you. After both Minotaurs are defeated, follow the opened route to the first lift. Lower it only far enough to reach the lower floor, defeat the Hades Nymphs, reveal the optional Phoenix Feather and adjust the lift for the hidden chest if desired. Then use the eastern lift shaft’s wall ledges to reach the upper overlook, defeat the Legionnaire commander and save before the ceiling-blade section. This chapter ends at that save point; the deeper temple traps and Euryale route follow next.
1. Reflect the Gorgon beam and enter the temple
Start from the save point at the Temple of Euryale entrance, after returning from the River of the Forgotten with the Golden Fleece. Approach the stone wall bearing Euryale’s likeness and wait for the Gorgon stare beam. Tap L1 immediately before the beam reaches Kratos, then follow the on-screen Circle prompt to reflect it. The beam turns the wall into breakable stone.
Break the wall with normal attacks and collect the red orbs if you want them. Go down the stairs and lift the door at the bottom. Move north into the next room, where several Cursed Legionnaires are still petrified. Attack the stone figures immediately; breaking them before they animate turns the first group into easy red-orb rewards and avoids a larger fight.
Continue to the right. Three more petrified Cursed Legionnaires and additional enemies appear. Break the nearest statues first, then keep moving around the open side of the room rather than allowing the group to pin Kratos against the walls. A green chest is available if health is already low.
- Reach the temple entrance with the Golden Fleece.
- Reflect the Gorgon beam with L1 and the prompted Circle input.
- Break the sealed wall.
- Destroy the first petrified Cursed Legionnaires before they animate.
2. Clear the lower Cursed Legionnaire and Hades Minotaur room
Descend the ladder. A short scene shows the exit sealed by a force field, and more petrified Legionnaires occupy the lower chamber. As soon as control returns, break any statues that have not yet moved, then concentrate on the active enemies.
The first Hades Minotaur enters with the Legionnaires. Keep the fight in the broad center of the room, using a full roll to escape its heavy swings and ground pound. Golden Fleece is especially useful when a Legionnaire’s weapon flashes before its lunging attack: block at the impact and counter immediately. If a Legionnaire displays the Circle prompt, grab it and throw it into the Minotaur to damage both enemies and create space.
Aerial grabs are a safe way to remove individual Legionnaires because Kratos is protected during much of the grab animation. Use short Blade of Athena strings instead of long attacks while the Minotaur is active. After enough enemies are defeated, a second Hades Minotaur joins the battle. Finish the first one with its Circle takedown as soon as the prompt appears, then repeat the same approach on the second. Follow the required face-button prompts and rotate the analog stick as shown to complete each execution.
When the room is clear, the force field disappears. Use the combined green-and-blue chest on the east side if needed, then leave through the opened exit.
- Break the remaining petrified Legionnaires quickly.
- Use Golden Fleece against Legionnaire lunges.
- Keep the Hades Minotaurs away from the walls and corners.
- Defeat both Minotaurs and complete their takedown prompts.
- Leave through the deactivated force field.
3. Lower the first lift and clear the Hades Nymphs
Open the red-orb chest ahead, then turn left toward the lift. A fleeing enemy has taken the crank. Step onto the lift and rotate the crank clockwise to descend, but do not lower it completely. Stop when there is just enough room for Kratos to jump down to the lower floor.
Three Hades Nymphs attack below. Defeat them before exploring the room. Once they are gone, face the circular seal on the north wall. Break it with a strong ground string such as Square, Square, Triangle, or use an aerial L1 attack. The opening reveals an optional chest containing a Phoenix Feather.
Return west toward the first lift without stepping onto it immediately. A small alcove is hidden inside the lift structure. If the lift is too low to reach the alcove, climb back onto it and raise or lower it slightly until the opening lines up with Kratos. Enter the nook for the optional red-orb chest. This detour is not required for story progress, so skip it if the fight or lift positioning has already cost too much health.
- Stop the first lift with enough space to jump down.
- Defeat all three Hades Nymphs.
- Break the north-wall seal and take the optional Phoenix Feather if desired.
- Adjust the first lift to reach its interior alcove only if pursuing the optional chest.
4. Use the eastern lift shaft to reach the upper overlook
After the lower room is safe, move to the eastern lift. Face the wall inside the shaft and look for the shallow ledge above Kratos. Double-jump to grab it, pull up, then repeat the process on each higher ledge. Continue climbing until Kratos can double-jump out of the shaft.
The upper area contains a Legionnaire commander, sometimes identified in walkthroughs as a Legionnaire Captain. Keep blocking when it raises its weapon and avoid standing directly in front of its long counterattack. A controlled launcher followed by an L1 aerial attack is safer than trying to trade ground blows. If the Circle prompt appears, complete the brief takedown sequence to impale the commander on its own weapon.
A green chest is north of the commander. Use it before saving if necessary, but do not proceed into the ceiling-blade route yet. The commander’s defeat is the required combat check for this chapter.
- Climb the eastern shaft using the wall ledges.
- Defeat the Legionnaire commander.
- Use the nearby green chest if required.
- Do not enter the ceiling-blade route before saving.
5. Save at the upper overlook and stop before the blades
From the commander’s arena, head north to the save altar at the upper overlook. Save immediately. A blue chest is available along the approach, and another route leads toward the ceiling where the next chapter’s blade hazard begins.
If you are retrying this section, reload this save rather than repeating the Gorgon reflection and Minotaur room. Before advancing, make sure Kratos has enough health for the one-hit ceiling blades and enough magic for the combat that follows. The blades kill on contact, so the next chapter should begin with deliberate movement rather than a rushed jump.
- Reach the upper-overlook save altar.
- Save after defeating the Legionnaire commander.
- Confirm that the temple entrance, Minotaur room and lift section are complete.
- Begin the next chapter from this save before entering the ceiling-blade route.
Before you move on
- The Gorgon stare beam has been reflected into the temple entrance wall.
- The first Cursed Legionnaire rooms are cleared.
- Both Hades Minotaurs in the lower chamber are defeated and the force field is gone.
- The first lift has been lowered and the Hades Nymph room is cleared.
- The eastern lift shaft has been climbed.
- The Legionnaire commander is defeated.
- The upper-overlook save altar is available before the ceiling-blade section.
References for this chapter
- God of War II Guide and Walkthrough - PlayStation 2 - GameFAQs
- God of War II - Guide and Walkthrough - PlayStation 2 - By Berserker
- God of War II — Guide and Walkthrough by zukowskc
- God of War II Guide — The Temple of Euryale Walkthrough
- God of War II - Chest Guide - PlayStation 2 - By Mookiethebold
The Ruins of the Forgotten and Temple of Euryale — Part 2
Begin at the upper-overlook save after the preceding chapter’s return to the Temple of Euryale. Cross the ceiling saw-blade section carefully, then retract the crusher and use the tunnel switch to open the exit before the stone mechanism closes. Save before examining the book, which triggers Euryale’s battle. Defend against her gaze and tail attacks, double-jump over the pillar shockwave, damage each pillar from below and complete both pull-down prompts. Finish the ground phase to obtain the Head of Euryale, then petrify and shatter the enemies blocking the exit. Continue through Euryale’s Atrium, raise the required pillars, cross the timed underwater gates, survive the Stone Crusher and pass through the Catacombs of the Fallen. Pull the final staircase lever to return to Destiny’s Atrium and save before continuing toward the Hall of Atropos.
Start at the upper-overlook save and cross the ceiling saws
Load the save at the upper overlook and continue along the route into the trap section. Climb onto the ceiling and move across the hanging surfaces toward the far side. The saw blades travel through fixed paths, so do not hold forward continuously; stop on each safe section and wait for the next blade to pass before advancing.
Near the final group, use the triangular gap between the moving blades as a temporary safe position. Move only after the blade nearest the next handhold has cleared. If Kratos dies, the checkpoint returns him near the saw-blade section and the nearby switch, so repeat the crossing rather than trying to rush the entire sequence. Check side ledges for visible health, magic or red-orb chests only when the blades are clear; none of these pickups is required for story progress.
- Begin from the upper-overlook save.
- Use the safe gaps between blade paths instead of rushing.
- Reach the ledge beyond the ceiling saws.
Retract the crusher and open the exit
Drop to the lower platform beneath the saws and find the lever under the stone serpent head. Turn it to retract the spiked crusher. Enter the passage immediately and roll through the narrow section toward the switch at the right-hand end.
Pull the switch to reposition the outer stone sections, then continue to the far side of the passage. At the exit gate, interact with the mechanism as soon as it becomes available and complete the required button prompt. The opening is temporary, so move through without stopping to fight unless an enemy physically blocks the route. If the crusher catches Kratos, the checkpoint places him back near the ledge below the saws.
- Turn the lever beneath the serpent head.
- Pull the switch inside the crusher passage.
- Open the exit gate before the crusher closes.
- Use the checkpoint to retry if crushed.
Save before the book and begin Euryale’s fight
After escaping the crusher, drop into the lower chamber and follow the path to the save point. Save before approaching the book. When ready, examine it to trigger the cutscene and begin the Euryale encounter.
Keep the Blades of Athena equipped for reliable short combos. Preserve some magic and Rage of the Titans for the final ground phase rather than spending everything at the start. During the opening phase, roll away from Euryale’s gaze, or tap L1 with the Golden Fleece when the reflection timing is clear. Her tail swings and tail-combo ending are safer to avoid with a roll than to challenge at close range.
- Reach the save point before the book chamber.
- Save before examining the book.
- Keep a reserve of magic or Rage for the final phase.
Break Euryale’s two pillars
When Euryale coils around a pillar, attack the pillar’s base from the ground. Kratos does not need to climb the pillar or jump to strike her. Watch for the gaze shockwave, the projectile gaze attack and the body-slam landing. Roll away from the launch, then double-jump over the shockwave that spreads across the floor; a single jump may leave Kratos petrified or damaged.
After the landing shockwave passes, stand between Euryale and the pillar and attack during her recovery. Short combos are safer than long strings. Continue until the Circle prompt appears, then complete the required analog-stick motion to pull Euryale and the pillar down. She moves to the other pillar; repeat the same process, using the arena edges only as temporary escape space and avoiding corners where the tail can limit movement.
- Attack the pillar bases from below.
- Double-jump over each full-floor shockwave.
- Punish Euryale after the body slam.
- Complete both pillar pull-down sequences.
Finish Euryale and obtain the Head of Euryale
After both pillars are destroyed, Euryale returns to the ground. Stay mobile and attack after her fist pounds, tail swings or gaze attacks finish. Use the Golden Fleece when you can clearly read the gaze, but rolling is safer if the reflection angle is uncertain. Rage of the Titans and area magic are most useful here because they shorten the final phase and interrupt pressure without requiring a long exposed combo.
When the Circle prompt appears above Euryale, complete the on-screen sequence, including the required rapid analog motion. Kratos receives the Head of Euryale. This weapon turns weakened enemies to stone; use it with L2, then destroy petrified targets before they recover.
- Survive the final ground phase.
- Use magic or Rage only after the pillar phases are complete if possible.
- Complete the final action prompt.
- Obtain the Head of Euryale.
Petrify the exit enemies and return toward Destiny’s Atrium
Enemies appear in the chamber after the boss. Equip the Head of Euryale with L2 and hold its attack on a target until the enemy turns to stone, then shatter it with a normal attack. Repeat for every enemy blocking the doorway. Do not leave a petrified enemy unattended long enough to recover; if the group surrounds Kratos, create distance first and freeze the closest threat.
Pass through the opened exit and save. Continue into Euryale’s Atrium, where the route uses raised stone pillars, underwater passages and timed gates. Turn the visible cranks to raise the pillars, use nearby levers to open or hold the gates, and activate the Amulet of the Fates when a timed swim or climb requires extra time. If a gate closes, return to the previous pillar rather than forcing the passage; the layout provides a route back to reset the sequence.
Proceed through the corridor and Stone Crusher section beyond the atrium. Defeat the hounds that enter the rising lift, then repeatedly press the required prompt when the floor and ceiling close together. Leave through the opening as soon as it is large enough. Continue through the Catacombs of the Fallen, cross the enemy sections and climb the spiral staircase. Pull the lever near the top to lower the final stair section and return to Destiny’s Atrium. Save there before taking the next route toward the Hall of Atropos.
- Petrify and shatter every enemy blocking the exit.
- Save immediately after leaving Euryale’s arena.
- Raise the atrium pillars and use the underwater levers.
- Escape the Stone Crusher lift.
- Pull the staircase lever and return to Destiny’s Atrium.
- Save before continuing toward the Hall of Atropos.
Before you move on
- The upper-overlook saw-blade section is complete.
- The crusher lever, tunnel switch and exit gate have been cleared.
- Euryale has been triggered from the book and defeated through both pillar phases and the final ground phase.
- The Head of Euryale has been collected.
- The enemies blocking the boss-room exit have been petrified and shattered.
- A save has been made after leaving Euryale’s arena.
- The Euryale’s Atrium pillar and underwater-gate route is complete.
- The Stone Crusher and Catacombs of the Fallen have been crossed.
- The staircase lever has returned Kratos to Destiny’s Atrium, where the next save is available.
Destiny's Atrium — Part 2 and The Hall of Atropos
Begin at the Destiny’s Atrium save with the route already open and the Golden Fleece in your possession. Reflect the fireball into the stone face, cross the exterior platforms, and reach the Courtyard of Atropos. Defeat the High Priests and their summoned Minotaurs, solve the two-statue lift, and move the large block to open the upper route. Use the Amulet of the Fates to cross the moving vines and reach Perseus. Defeat Perseus through his invisible, armed, and wall-side phases to obtain the Shield of Perseus. Return the shield to the courtyard statue, raise the bridge to block one Gorgon beam, and reflect the other with the Golden Fleece. The opened path leads to the Lowlands Entrance, where Kratos obtains the Spear of Destiny. Optional chests and power-ups can be collected along the way but are not required for story progression.
1. Break the fireball wall
Start at the Destiny’s Atrium save point reached at the end of the previous chapter. Follow the already-open route to the fireball-spitting structure. Stand on the marked spot in the projectile’s path and press the Golden Fleece button as the fireball reaches Kratos. The reflected projectile destroys the stone face and opens the passage.
Move through the opening, shimmy along the right side, and descend into the exterior route. Save again if the nearby point is available before committing to the platform sequence. The destroyed wall is the required entrance to this section; do not search for another route around it.
- The Destiny’s Atrium save has been used.
- The Golden Fleece has reflected the fireball.
- The stone face and its passage are open.
2. Cross the exterior platforms
Defeat the archers and the large soldier on the exterior platforms. Typhon’s Bane is useful for distant targets, but do not spend all of your magic before the courtyard fights. At the next grapple point, land on the intermediate ledge rather than swinging directly onward. Climb the wall to reach the optional chests, then return to the grapple route and cross to the far side.
Defeat or bypass the remaining soldiers and climb the ladder into the Courtyard of Atropos. If you take damage during the crossing, use the courtyard save point before entering the next combat room.
- The exterior platform route has been crossed.
- The optional wall-climb chests have been collected or skipped.
- The ladder to the Courtyard of Atropos has been reached.
3. Clear the courtyard and defeat the High Priests
Defeat the Shadow Wraiths in the courtyard, then activate the save point. The courtyard mechanism cannot be completed yet, so enter the large hall and turn into the adjacent combat room.
Target the High Priests first. Their green projectiles can be blocked, but eliminating the casters prevents continued pressure and further summons. Use area magic or Rage of the Titans if the Minotaurs surround you, then finish the summoned enemies. Keep moving around the room instead of fighting with your back against a wall.
- The courtyard Shadow Wraiths are defeated.
- The courtyard save point has been used.
- Both High Priests and their summoned Minotaurs are defeated.
4. Solve the two-statue lift puzzle
Place one statue on the lift platform. Put the second statue to the right of the lift, close enough to move immediately. Operate the mechanism to raise the platform, then release it so it begins descending. During the descent, drag or kick the second statue underneath the platform. Use the statue as a step and jump to the upper level.
Open any optional chests, then descend through the stairs into the Satyr room. Block or counter the Satyrs and defeat them before continuing toward the large movable block.
- One statue is on the lift platform.
- The second statue is beneath the descending platform.
- The upper level and Satyr room are cleared.
5. Move the block to the upper balcony
Pull the large block backward first and use it to reach the optional chest above the doorway. Drop back down and push or kick the block forward through the opening. Position it beneath the broken ladder on the nearby pillar, climb onto it, and reach the upper balcony.
Defeat the Harpies, then enter the room beside the large statue head. Eliminate the soldiers and Berserkers with guarded counterattacks and short combos rather than attacking continuously into their heavier strikes. Use the save point after leaving the room.
- The block has been pulled backward and moved through the opening.
- The broken-ladder route to the upper balcony is accessible.
- The Harpies, soldiers, and Berserkers are defeated.
- The next save point has been used.
6. Cross the moving vines with the Amulet of the Fates
Follow the ledges to the circular pressure stone. Step on it to extend the vines, activate the Amulet of the Fates, and cross to the central platform while time is slowed. From there, reach the left-hand ledge and defeat the enemies around its pressure stone.
Activate that stone and repeat the process for the next vine section. Continue to the final platform, trigger its route, and use the Amulet again to reach the doorway. An optional power-up chest is located on a small ledge near the central platform; collect it only if you are prepared to repeat the vine crossing.
- The first pressure stone has extended the vines.
- The central platform and left-hand ledge have been reached.
- The final vine route has been crossed.
- The optional chest has been collected or skipped.
7. Defeat Perseus and obtain the Shield of Perseus
Perseus begins invisible. Watch his footprints in the water and his moving shadow, block his attacks, and counter with brief heavy-combo strings. When the Circle prompt appears, complete the sequence to destroy his helmet and make him visible.
He then uses a sword, shield, and sling. Block or deflect the sling projectile and attack after his recovery. When his sunlight attack blinds Kratos, follow the on-screen analog-stick instruction. Complete the next grab sequence to destroy Perseus’s sword.
During the final phase, keep Perseus near the rear wall without chasing blindly across the arena. Dodge his attack, punish the recovery, and complete the Circle prompt when he is positioned against the wall. Finish every following command to defeat him and receive the Shield of Perseus.
- Perseus’s helmet has been destroyed.
- Perseus’s sword has been destroyed.
- The wall-side grab sequence is complete.
- The Shield of Perseus has been obtained.
8. Open the route to the Lowlands Entrance
Return to the Courtyard of Atropos and reach the upper balcony. Install the Shield of Perseus in the statue, pull the statue free, and kick it down into the lower courtyard. Place it in the square recess on the wooden bridge.
Turn the courtyard mechanism to raise the bridge and block one Gorgon beam. Climb the nearby ladder immediately and use the Golden Fleece to reflect the other beam. When both Gorgon eyes have been neutralized, the route onward opens. Save before continuing.
Enter the Lowlands Entrance and follow the path past the archers and water. At the raised area above the broken bridge, activate the lever to open the lower gate. Enter the small chamber and pull the weapon from the dead Dark Raven to obtain the Spear of Destiny. The later Lowlands crossing belongs to the next chapter.
- The Shield of Perseus is installed in the courtyard statue.
- The bridge blocks one Gorgon beam.
- The second beam has been reflected with the Golden Fleece.
- The Gorgon mechanism is destroyed.
- The Spear of Destiny has been obtained in the Lowlands Entrance.
Before you move on
- The Destiny’s Atrium save has been reached and used with the route already open.
- The fireball wall and exterior platform route are complete.
- The Courtyard of Atropos Wraiths, High Priests, Minotaurs, Satyrs, Harpies, soldiers, and Berserkers have been cleared.
- The two-statue lift, block route, and moving-vine Amulet sequence are complete.
- Perseus has been defeated in all three phases.
- The Shield of Perseus has been installed in the courtyard statue.
- Both Gorgon beams have been neutralized and the route beyond the courtyard is open.
- Kratos has entered the Lowlands Entrance and obtained the Spear of Destiny.
Crossing the Lowlands and The Great Chasm
Begin immediately after Chapter 10 at the Lowlands Entrance, with Kratos carrying the Spear of Destiny. Clear the Lowlands combat areas, save before the long grapple crossing, and move through the collapsing structures by waiting for platforms and obstacles to align. Continue across the Great Chasm until the scripted Icarus encounter begins. Follow the analog-stick, attack and Circle prompts to defeat Icarus and obtain the Icarus Wings. After landing on Atlas’s face, save at the altar on the left, climb over Atlas’s nose and brow, and use double jumps followed by a held second X press to glide between the separated ledges and hanging platforms. End at the small opening into Atlas’s interior; the interior enemies, bone puzzle and Atlas Quake belong to Chapter 12.
Begin at the Lowlands Entrance and secure the recovery point
This chapter starts immediately after the preceding Hall of Atropos section. Kratos is already at the Lowlands Entrance and has the Spear of Destiny. Do not backtrack to the Bog of the Forgotten or search for another spear pickup; the required weapon acquisition has already occurred.
Advance through the Lowlands combat rooms and defeat the enemies blocking the route. Keep moving around the outside of each arena so heavy enemies cannot pin Kratos against a wall. Use broad Blade of Athena attacks to control groups, and spend magic or Rage of the Titans when several enemies converge rather than allowing the arena to become crowded.
Before beginning the extended grapple route, open nearby health or magic chests as needed and activate the save altar. This is the important recovery point for the crossing. If a later traversal attempt fails, reload this save instead of replaying the preceding combat.
- Start at the Lowlands Entrance after Chapter 10.
- Confirm that Kratos is carrying the Spear of Destiny.
- Clear the Lowlands combat rooms.
- Activate the save altar before the grapple crossing.
Cross the Lowlands grapple route
Follow the visible grapple points in sequence. Hold R1 while swinging, then press R1 again when the next grapple point becomes available. Use the camera to identify the next target before releasing. Releasing too early shortens the swing and can leave Kratos below the next point.
Several transitions require a double jump after releasing a grapple. Do not jump automatically at every platform edge; first check whether the route continues to another grapple point or a solid landing surface. If Kratos falls, reload the Lowlands save and repeat the crossing with slower, deliberate releases.
- Hold R1 through each swing.
- Identify the next grapple point before releasing.
- Use double jumps only when the next landing or grapple requires them.
- Reload the Lowlands save after a failed crossing.
Time the collapsing structures and falling platforms
Some sections place rotating or collapsing structures between Kratos and the next landing. Remain attached until the obstruction has moved clear of the intended landing line. Release during the open part of the swing, then double-jump toward the opposite walkway.
Allow falling platforms to descend into a usable position before leaving them. Continue through the next grapple points and ride the dropping structures long enough to reach the next target. The correct timing comes from watching the movement of the structures, not from rapidly pressing the jump button.
If Kratos strikes a pillar or misses a platform, return to the save altar and try again. A cautious crossing is faster than repeatedly attempting to recover from a poor swing.
- Wait for rotating obstacles to clear.
- Let falling platforms reach their usable positions.
- Release grapples only when the landing route is open.
- Return to the pre-crossing save after repeated failures.
Cross the Great Chasm and defeat Icarus
Follow the route beyond the grapple section and use the save altar before the Great Chasm crossing. Continue across the bridge toward the far side. Approaching the end triggers the Icarus sequence, which is a prompted struggle rather than ordinary free combat.
Follow each displayed analog-stick direction or rotation. When Kratos gains control, use the prompted attack buttons to strike Icarus. If Icarus reverses the position, complete the next stick prompt to escape and regain the advantage. Watch the prompt area rather than holding a normal attack string.
When Kratos begins pulling at Icarus’s wings, rapidly press Circle as instructed. Completing the sequence removes the wings and awards the Icarus Wings. If a prompt is missed, continue responding to the next displayed instruction instead of trying to use regular combat controls.
- Save before the Great Chasm crossing.
- Complete every analog-stick prompt.
- Use the displayed attack inputs during the struggle.
- Rapidly press Circle when Kratos tears away the wings.
- Confirm that the Icarus Wings have been obtained.
Save on Atlas’s face and reach the interior entrance
After the Icarus sequence, Kratos lands on Atlas’s face. Move left along the ledge to find the green chest and save altar, then save before beginning the climb. Return toward Atlas’s nose and climb the handholds up the nose and brow ridge until you reach the upper ledges.
For each long gap, press X for the first jump, press X again for the double jump, then hold X during the second jump to glide with the Icarus Wings. Use the same technique to cross the separated ledges and reach the hanging platforms. Harpies can attack during this route; defeat them from stable ground before attempting the next glide whenever possible.
Continue across the hanging platforms and follow the route toward the lower platform near the red river. From there, double-jump and glide through the small opening leading into Atlas. Stop at that entrance. The enemies, vines, bone manipulation and optional interior chests are part of Chapter 12, not this chapter.
- Save at the altar on Atlas’s face.
- Climb from Atlas’s nose to the brow and upper ledges.
- Double-jump before holding X to glide.
- Defeat Harpies from stable platforms when possible.
- Reach the small opening into Atlas’s interior.
- Do not begin the Atlas interior puzzle yet.
Before you move on
- The chapter began at the Lowlands Entrance immediately after Chapter 10.
- Kratos retained the Spear of Destiny without repeating its acquisition.
- The Lowlands combat route and grapple crossing are complete.
- Kratos crossed the Great Chasm and completed the Icarus struggle.
- The Icarus Wings have been obtained.
- Kratos saved on Atlas’s face and crossed the nose, brow, ledges and hanging platforms.
- Kratos reached the small opening into Atlas’s interior.
- The next objective begins inside Atlas; Atlas Quake has not yet been obtained.
References for this chapter
Atlas — Meeting the Titan and New Magic
After entering Atlas through the opening reached from the Great Chasm, Kratos must cross the Titan’s interior, defeat the Rock Minotaur, and climb to Atlas’s imprisoned hand. The route combines Icarus Wings gliding, movable-bone and boulder puzzles, lava crossings, grapple points, and dangerous falling-rock climbs. Destroy Atlas’s chain and complete the two scripted struggles to receive Atlas Quake. Use the spell in the following Fates Guardsmen tutorial, then save in the Great Chasm and glide north to the Palace of the Fates. Optional Phoenix Feathers, an Urn of Prometheus, and red-orb chests are useful but not required for story progress.
1. Start inside Atlas and complete the bone route
From the opening inside Atlas, clear the Satyr and Harpies, then approach the blocked passage covered by red growths. Attack the growths until they retract. Grab the exposed vertebra and pull it from the opening. Push it against the left wall, climb onto it, and jump to the upper ledge. The nearby optional chests include a Phoenix Feather; collect it if you can do so without taking unnecessary damage.
Return to the bone and pull it back toward the original opening. It will not pass completely through, but its new position creates the step needed for the main route. Climb over it, use the green chest if required, and continue through the tunnel. Do not leave the bone trapped against the wrong side of the room; if necessary, pull from the opposite side to reposition it.
- Defeat the Satyr and Harpies.
- Retract the red growths and remove the vertebra.
- Use the bone for the optional upper ledge, then reposition it for the main route.
- Continue through the opening into the lava-side interior.
2. Defeat the Rock Minotaur and reach the next save point
Glide to the platform beside the boulder pile to trigger the Rock Minotaur. Use short attack strings and roll away whenever it begins pounding the ground or spinning. Stay near open space rather than getting pinned against the edge. Magic is appropriate if the Minotaur interrupts repeated attacks, but preserve enough resources for the next traversal section.
After sufficient damage, the platform begins to sink. Stop attacking and jump immediately to the climbable wall. While hanging there, move laterally to avoid the rocks thrown by the Minotaur. When the platform rises again, return and finish the encounter. Push the remaining rock fragment to the high ledge so it becomes a step. From the upper route, collect the optional chests if desired, then follow the platforms to the save point and save before continuing.
- Roll away from ground pounds and spinning attacks.
- Jump to the wall as soon as the platform sinks.
- Dodge thrown rocks by moving sideways.
- Use the remaining rock fragment to reach the upper ledge.
- Save before the lava traversal.
3. Cross the lava, vents, and stalactite passages
At the lava-side save point, strike the red appendages on the wall to release a floating rock. Jump and glide onto it, then destroy the obstruction along its route. At the far side, grapple across and enter the cave. Break the large rock over the air vent, then use the updraft: jump above the vent and glide from the height it provides to reach the next cave.
Clear the enemies and destroy the openings that continue producing them. Follow the handholds and ceiling route through the interior. Break obstructing stalactites rather than trying to force past them. One side route, opened by destroying a stalactite, leads to optional chests including the Urn of Prometheus. Return to the main path afterward.
Continue to the room with the handle and circular platforms. Turn the handle clockwise as far as it goes, then move quickly across the platforms while their positions are favorable. Grab the zip-line attached to the chain and ride it to the ledge leading to Ascension of Atlas.
- Release and ride the floating rock.
- Use the grapple point and air vent to reach the cave route.
- Destroy enemy-producing openings and obstructing stalactites.
- Check the optional Urn of Prometheus route if desired.
- Turn the handle fully clockwise and use the zip-line.
4. Solve the two-boulder puzzle
Save at the start of Ascension of Atlas. Climb the wall beside the chests, cross the upper handholds, and follow the grapple route to the boulder chamber. Move the boulder at the upper side of the area across the lower floor and push it up the ramp. Leave it on the level ground at the top; do not let it roll over the far edge.
Return for the second boulder and move it beneath the first. Push the upper boulder onto the lower one to form a stack. Pull the stack across the chamber, then move the top boulder farther toward the high ledge. Climb onto the boulder and double-jump to the ledge. A nearby handhold route leads to an optional red-orb chest; return to the main ledge afterward and continue.
- Save before entering the boulder chamber.
- Place the first boulder on the upper level without pushing it over the edge.
- Position the second boulder beneath it.
- Stack the boulders and move the upper one into position as a step.
- Return to the main route after the optional chest.
5. Cross the falling-rock climbs and free Atlas
Beyond the green chest, climb the long handhold section where boulders fall down the two opposing faces. Do not climb blindly. Watch the impact pattern, move to the safer face, and jump across when the next section is clear. Between the two climbs, descend through the central channel and shift left to avoid the falling rocks. Contact with the larger boulders can kill Kratos, so controlled movement is safer than holding one direction continuously.
At the top, descend the next handhold section as directed by the camera. When the large group of rocks falls near the bottom, jump left out of their path, then begin the second alternating-wall climb. At the summit, attack Atlas’s chain until it breaks. Atlas then initiates a scripted struggle. Follow the on-screen prompts during both parts of the sequence; complete the alternating shoulder-button inputs rather than attacking freely. Atlas releases Kratos and grants Atlas Quake.
- Watch the falling-rock pattern before moving.
- Use side-to-side jumps between the two climbing faces.
- Move left during the major rock fall in the central descent.
- Destroy Atlas’s chain.
- Complete both scripted struggle sequences.
6. Learn Atlas Quake and return to the Palace route
After Atlas grants the spell, Fates Guardsmen appear for a practice battle with unlimited magic. Press L2 to cast Atlas Quake and defeat every wave. Use it when several enemies are grouped or when a heavy enemy needs to be staggered. Outside this tutorial, the spell consumes magic, so do not treat repeated casting as free. Keep Kratos away from ledges and other hazards while casting.
A cutscene returns Kratos to the Great Chasm. Save at the altar when control resumes. Jump and glide north across the platforms. Use the climbable wall on the taller platform to reach the upper route, and collect the nearby red-orb or green-orb chests only if the jumps are safe or the resources are needed. Continue across the remaining platforms until Kratos reaches the Palace of the Fates. Atlas’s direct assistance ends with the chasm crossing; Atlas Quake is the lasting gameplay reward.
- Defeat every Fates Guardsman with Atlas Quake.
- Remember that Atlas Quake consumes magic outside the tutorial.
- Save immediately after returning to the Great Chasm.
- Glide north across the chasm and reach the Palace of the Fates.
Before you move on
- Kratos has completed the vertebra route inside Atlas.
- The Rock Minotaur is defeated and the lava, vent, grapple, and stalactite sections are cleared.
- The two-boulder puzzle and both falling-rock climbs are complete.
- Atlas’s chain is destroyed and both scripted struggle sequences are cleared.
- Atlas Quake is available and the Fates Guardsmen tutorial is finished.
- Kratos has saved in the Great Chasm and reached the route to the Palace of the Fates.
The Palace of the Fates and the Auditorium of Lahkesis
Enter the Palace of the Fates by pulling the lever beneath the ramp, then control the Beast Lords before they can summon additional Cyclopes. Rotate the palace room with its linked handles and wait until both the upper opening and the block alcove are available before pulling the block free. This stops the spikes and opens the side alcoves, including the Crank Handle. Use it to shut off the flame jets, activate the Amulet of the Fates and glide across. After saving, lower the vent gate and ride the steam upward to clear it. In the Auditorium of Lahkesis, move the translator’s block onto the pressure button, escort the translator through several enemy waves and protect him from summoners and ranged magic. Force him to read the book, take the Key of the Ram, then survive the closing-gate corridor by defeating every Sentry. Reaching the stairs into the Garden of the Gods completes this chapter’s required route. The Palace itself has no mirror-setting sequence; those mechanics belong to later areas.
Open the Palace entrance and control the Beast Lords
Approach the ramp at the Palace of the Fates and move to the lever in the recess beneath its right side. Pull it to remove the ramp and start the encounter. Several Beast Lords, a Cyclops and Fiends enter the area.
Grab the nearest Beast Lord immediately and keep repeating the grab attack so he cannot sound his horn. If another Beast Lord mounts the Cyclops, approach the pair, grab him and rotate the Left Analog Stick as prompted to dismount him. Continue prioritizing Beast Lords; the grab animation protects Kratos from incoming Fiend projectiles. Once the Beast Lords stop appearing, defeat the Cyclops, then clear the remaining Fiends. The barrier disappears when the room is cleared.
- Pull the lever beneath the right side of the ramp.
- Prioritize Beast Lords before the Cyclops and Fiends.
- Dismount any Beast Lord who reaches the Cyclops.
- Wait for the barrier to disappear before continuing.
Rotate the Palace room and collect the Crank Handle
At the doorway, pull the first handle toward the left wall. Release it when it reaches the end, move behind the next handle and push that one left. Repeat this handoff until the palace rotates far enough to expose the entrance. Climb the ramp and pull the lever in the circular room to start the rotating spike room.
The floor spikes rise in sections, so watch the floor beneath Kratos and roll or double-jump and glide to another section when the spikes begin to emerge. Nymph webbing can hold Kratos in place, so eliminate Nymphs with Typhon’s Bane or an aerial Cyclone of Chaos before they trap you.
Do not enter the chest alcoves yet. Wait until the upper doorway and the doorway containing the large movable block are both open at the same time. Run to the block, pull it out of the alcove and use it to jam the mechanism. The room stops rotating and the alcoves become safe to enter. Collect the Crank Handle from the body in the lower-left alcove, then take any optional chests before using the exit.
- Move each handle fully left before switching to the next.
- Use rolls or Icarus Wings to leave a section where spikes are emerging.
- Wait for both required openings before pulling out the block.
- Collect the Crank Handle from the lower-left alcove.
Cross the flame route and pass the steam gate
Leave the rotating room by the left staircase and enter the outside area. Turn right, climb the ladder and attach the Crank Handle to the bar with R1. Turn the handle clockwise until the flame jets below stop. Release the handle, face the nearby Fate statue and activate the Amulet of the Fates. Glide to the platform while the flames are disabled. The chest in the small alcove is optional and may contain a Phoenix Feather or red orbs depending on your prior upgrades.
Continue through the doorway and use the save altar. Climb the ledges to the end of the hall and pull the lever there. This lowers the gate beside the steam vent only temporarily. Run back to the vent, double-jump, open the Icarus Wings and let the steam lift Kratos high enough to glide over the gate before it returns to its original position. Defeat the Hounds and Undead Legionnaire beyond the gate, then enter the Zeus-marked door.
- Attach the Crank Handle and turn it clockwise until the flames stop.
- Activate the Amulet only after releasing the crank.
- Save at the altar before attempting the vent sequence.
- Pull the gate lever, return immediately to the vent and glide over the gate.
Move the block and begin the translator escort
Inside the Zeus-marked room, destroy the scaffolding on the left to release a small block. Push it outside and along the right-hand walkway toward the translator’s chamber. A charged kick can move the block farther than ordinary pushing.
The translator is sitting on a pressure button. Pick him up and set him down beside the button, then push the block onto the button so the gate stays open. Pick up the translator and carry him down the walkway. When the first enemies appear, put him down near the doorway and clear the group before carrying him farther. A second wave appears around the middle circle and includes demonoids; backtrack slightly, set the translator down and use grabs, Cyclone of Chaos or Atlas Quake to keep the enemies away from him.
- Break the scaffolding and release the block.
- Move the translator off the pressure button temporarily.
- Place the block on the button to hold the gate open.
- Set the translator down whenever a new enemy wave appears.
Defend the translator and obtain the Key of the Ram
Carry the translator toward the podium and prepare for the final defense. Large groups attack near the book, including summoners who repeatedly create lesser enemies. Focus on the summoners first. Grab them when possible, then return to the translator and use Cyclone of Chaos to control the surrounding soldiers. Atlas Quake is useful for pushing crowds away without striking the translator.
Magicians or summoners that attack from a distance are the most dangerous threats to the translator. Kill or grab them quickly with Typhon’s Bane, Atlas Quake or a close-range takedown. After the waves are defeated, approach the translator at the book and press R1. Complete each Circle-button prompt when he resists. The scene ends with the book read and the nearby door unlocked. Enter that door and press R1 to take the Key of the Ram.
- Keep the translator near a wall or doorway while clearing each wave.
- Prioritize summoners and other ranged attackers.
- Use area attacks beside the translator rather than directly on him.
- Complete all Circle prompts and collect the Key of the Ram.
Unlock the Ram door and clear the closing gates
Open the first ram-head door and follow the corridors back toward the East Auditorium. At the next ram-head door, use the Key of the Ram. Open the nearby green-and-blue orb chest if you need health or magic, then enter the corridor on the right.
Two spiked gates begin closing from both sides. Sentries appear inside the corridor, and the gates will not retract until every Sentry has been defeated. Use Cyclone of Chaos with Athena’s Blades to hit several enemies while staying mobile. If the gates approach dangerously close, use Atlas Quake to stagger the group and create space. Rage of the Titans is also a valid emergency option if the crowd overwhelms you; do not waste time on long normal combos.
When the final Sentry falls, the gates retract. Continue through the corridor and climb the stairs into the Garden of the Gods. A save altar is available farther into the garden after the ledge route, so use it once you have safely crossed the entrance area.
- Use the Key of the Ram at the second ram-head door.
- Refill health or magic before entering the trap if necessary.
- Defeat every Sentry; do not attempt to outrun the closing gates.
- Climb the stairs into the Garden of the Gods and save at the next altar.
Before you move on
- The Palace rotating room has stopped and the Crank Handle has been collected from the lower-left alcove.
- The flame route and steam-vent gate have been crossed, and the save altar beyond them has been reached.
- The translator has completed the book sequence and the Key of the Ram is in Kratos’s possession.
- The second ram-head door is unlocked and the closing-gate Sentries are defeated.
- Kratos has climbed the stairs into the Garden of the Gods; the next section begins with the garden route and its save altar.
Garden of the Gods and Auditorium of Atropos
After leaving the Palace of the Fates, Kratos passes through the Garden of the Gods and the Auditorium of Atropos. This route requires opening a concealed ledge path, burning three weakened enemies with fire jets, solving an underwater and mirror-based ice-room puzzle, rescuing a translator through a distorted mirror, and descending into the Underground. Preserve the Amulet of the Fates for the translator rescue and the timed mechanisms afterward. The chapter ends at the Phoenix Chamber entrance, where a save point appears after the underground traversal.
Open the Garden route and save before the sacrifice chamber
At the top of the stairs in the Garden of the Gods, open the chest on the right for an optional Phoenix Feather. Destroy the cracked wall nearby, then sidestep along the wall and drop to the lower floor. Enter the doorway, climb the ladder, and collect the optional Gorgon Eye before returning to the narrow ledge.
Continue along the ledge to the save point and save. Enter the doorway beside it, drop into the next room, and read the wall if you want the puzzle clue. This is the Sacrifice to the Fates room.
- Break the cracked wall in the Garden.
- Collect the optional Phoenix Feather and Gorgon Eye if desired.
- Save before entering the Sacrifice to the Fates room.
Complete the fire-jet sacrifice
Weaken the enemies that appear until a Circle prompt allows you to grab or finish one. Position a weakened enemy near one of the fire jets along the wall. Use the lever on the opposite side of the room to activate that jet and burn the enemy. Repeat this process for three enemies. Ordinary defeat does not advance the objective; each required enemy must be burned by the fire mechanism.
When the progress bar fills, the wall lowers. Enter the revealed room, dive into the pool, and swim through the underwater passage. Follow the tunnel past the spike traps, then surface and continue into the next chamber.
- Weaken enemies instead of killing them normally.
- Place each weakened enemy beside a fire jet.
- Use the opposite lever to ignite the correct jet.
- Burn three enemies and enter the opened passage.
Solve the ice-room mirror puzzle
In the large ice-covered room, climb either wall at the northeast or northwest side and reach the ceiling. Destroy the large ice stalactite on the southern edge so light enters the room. Drop into the central pit and pull the lever on the eastern side of the statue. The statue fires into the western wall, opening a recess containing a movable mirror.
Pull the mirror out and position it beneath the newly exposed light beam so the reflected beam reaches the western side of the circular pit. Then set the three handles on the eastern side: turn the northern handle north, the middle handle west, and the southern handle south. These settings open the route around the statue.
- Destroy the southern ceiling stalactite.
- Use the statue to open the western recess.
- Move the mirror into the light beam.
- Set the three handles north, west, and south.
Use the statue to open the exit and reach the Auditorium
Drop into the circular pit and use the handle at the front of the statue to face it southwest. Pull the rear lever to fire the statue and melt the ice blocking the newly opened route. Collect the optional Phoenix Feather, then turn the statue north and fire it again to melt the ice covering the exit door. Open the door and continue through the route until you reach the West Auditorium.
A Fate Statue is near the hallway entrance. Break the pots blocking the distorted wall, then push or pull the statue to the large gate. Pull the lever beside the gate and position the statue near the gate so it holds the route open. Enter the next room.
- Face the statue southwest for the first firing.
- Collect the optional Phoenix Feather.
- Face the statue north and melt the exit.
- Move the Fate Statue to the large gate before entering the Auditorium.
Rescue the translator and collect the timed health upgrade
In the Auditorium of Atropos, walk through the distorted mirror on the left and immediately activate the Amulet of the Fates with L1 and R1. Run to the translator before he jumps and grab him with R1. If he escapes, walk through the mirror again to reset the scene, then repeat the time-slow attempt.
Carry the translator to the book and force him to read it. Before following the newly revealed doorway, return through the distorted mirror and activate the Amulet again. Sprint back to the hallway where the Fate Statue originally stood. The distorted wall now contains a health-increase chest. This chest is optional; the translator and book are required.
- Use the left distorted mirror.
- Activate time-slow before running to the translator.
- Grab the translator and bring him to the book.
- Reset through the mirror if he jumps.
- Return through the mirror for the optional health chest.
Take the Warrior's Skull and descend into the Underground
After the translator sequence, follow the revealed route and take the Warrior's Skull. Use it on the large door. Turn the first handle clockwise, glide to the raised lever, and activate it. Return to the handle, turn it clockwise again, then climb across the ceiling and destroy the shiny pillar blocking the passage. Enter the next doorway, turn the final handle clockwise, and glide to the large platform.
Defeat the spawned enemies and complete their Circle prompts when they are weakened. Use the Warrior's Skull on the next large door, then save in the room beyond. At the lift, push the metal poles around the central chain repeatedly to descend. Kill skeletons that stop the lift and continue operating it. At the bottom, open the gate quickly before the descending mechanism crushes Kratos.
- Obtain and use the Warrior's Skull.
- Turn the handles clockwise in both mechanism rooms.
- Destroy the shiny pillar from the ceiling route.
- Finish the spawned enemies with the prompted takedowns.
- Save before operating the underground lift.
Cross the Underground and reach the Phoenix Chamber save point
After the lift reaches the bottom, climb the stairs and cross the rope until an archer cuts it. Grab the narrow ledge below the archers, shimmy right, and climb near the broken ladder. Clear the enemies, return to the platform below, and climb the wall on the left. Follow the ceiling around the pillar and collect the optional chest if desired.
Continue to the ledge with the enemy group and chests. At the right edge, look for the glowing wall symbol beside the updraft. Shoot it with Typhon's Bane to open a secret alcove containing a Phoenix Feather and a magic increase. Use the updraft to glide through the circular room, follow the corridor, and read the book at the bottom of the stairs. Jump to the far-right ledge and save at the Phoenix Chamber entrance.
- Use the narrow ledge after the rope is cut.
- Shoot the glowing wall symbol with Typhon's Bane.
- Collect the optional Phoenix Feather and magic increase.
- Read the book before entering the Phoenix Chamber.
- Save at the Phoenix Chamber entrance.
Before you move on
- Three weakened enemies have been burned by the fire jets and the Garden wall has opened.
- The ice-room mirror and statue puzzle is complete and Kratos has entered the Auditorium of Atropos.
- The translator has been grabbed and forced to read the book.
- The Warrior's Skull door has been opened and the underground lift sequence has been completed.
- The underground glowing-wall alcove has been passed, the book before the Phoenix Chamber has been read, and the Phoenix Chamber entrance save point is available.
The Phoenix Chamber — Puzzle Sequence and Boss Lead-In
Work through the Phoenix Chamber’s spike mechanism, obtain the Hail of Boreas, escort a movable statue through the flame-wall room, and release the Phoenix. The essential sequence is built around two Amulet of the Fates crossings, the statue-and-pressure-plate puzzle, the Phoenix ashes, and the Boreas relief. After blowing the horn, continue through the lift-and-pillar route, defeat the Kraken, then complete the Phoenix flight to reach the Temple of the Fates. Optional chests can improve health, magic, or red-orb reserves, but they are not required. Save whenever a save point is available and preserve magic for the Legionnaires, Harpies, and Kraken.
1. Save before the spike room
Read the book in the chamber, then cross from the save-point platform to the left platform using the Icarus Wings. Defeat the Skeletons and the Hades Legionnaire in the corridor. Return to the save point and save before entering the room with the rising floor spikes.
The hidden stairway behind the central pillars leads to an optional red-orb chest. The corridor beyond the spike room also contains optional chests, including a possible Gorgon Eye. Do not delay the main route for these rewards if your health or magic is low.
- Save before entering the spike room.
- Defeat or bypass the corridor enemies before starting the timed puzzle.
- Treat all chests in this section as optional.
2. Reveal the Fate statue and obtain the Hail of Boreas
Pull the lever to retract the spikes, then immediately run to the back-left wall and destroy the stone pillars. This reveals a Fate statue and two red-orb chests. Hades Legionnaires appear when the obstruction is broken. Retreat toward the lever and use the spike cycle to damage or kill them instead of committing to a prolonged fight on the hazard floor.
When the room is safe, pull the lever again to lower the spikes. Activate the Amulet of the Fates and cross to the hanging soldier at the handle. Examine the body to obtain the Hail of Boreas, then return to the lever. If you want the two red-orb chests, make separate trips; opening a chest ends the time-slow effect, so trying to open both during one crossing is unsafe.
- Break the pillars to reveal the Fate statue.
- Use the spikes against the Hades Legionnaires when possible.
- Obtain the Hail of Boreas from the hanging soldier.
- Use separate time-slow crossings for optional chests.
3. Open the timed gate
Pull the spike lever to lower the floor. Activate the Amulet, run to the nearby handle, and turn it clockwise through one complete rotation. This opens the gate in the right-hand passage. Release the handle, activate the Amulet again, and sprint toward the gate.
Two gaps interrupt the route. Jump across them and glide if needed, then pass through the gate before normal time resumes. If the crossing fails, retreat to the lever rather than attempting to cross while the spikes are active. Continue down the corridor after the gate and use the green and blue chests at the far end if you need recovery.
- Lower the spikes before approaching the handle.
- Turn the handle one complete clockwise rotation.
- Use the Amulet again after releasing the handle.
- Jump or glide over both gaps before entering the gate.
4. Cross the flame-wall room with the statue
After the corridor, enter the large room and take the movable statue beside the entrance. Push it toward the right side and remain behind it whenever the flame wall advances. The statue provides a protected area behind its rear surface, but the protection is limited; do not stand beside it or remain in the side alcoves while the flames are moving.
Hades Legionnaires and Harpies attack during this process. Use the Head of Euryale on Harpies when practical, and use magic for crowd control rather than trying to win a long exchange beside the flame wall. Optional side rooms contain replenishment and upgrade chests. Move the statue beside a doorway before opening it so its rear protection covers Kratos.
- Push the statue toward the right side of the room.
- Stay behind the statue during every flame-wall pass.
- Use magic or petrification to control enemies.
- Open side-room chests only when the statue shields the doorway.
5. Set the pressure plates and reach the Phoenix ashes
Push the statue toward the back, then move it around the raised central section until it is positioned near the lever. Pull the lever to lower the central block. Continue pushing the statue to the rear of the room and place it on the left pressure plate. Position it slightly beyond the plate if necessary so the next flame wave nudges it into place rather than away from it.
Wait for a flame wall to pass, then stand on the right pressure plate. This lowers the grapple point. Immediately jump and swing to the upper ledge containing the urn. If the statue slips off the plate, return it to the left plate and repeat the timing; do not attempt the grapple until the point is visibly lowered.
- Lower the central block with the lever.
- Place the statue on the left pressure plate.
- Stand on the right pressure plate after a flame-wall pass.
- Grapple to the ledge with the urn.
6. Send the Phoenix ashes into the lava
Push the urn forward and off its starting pressure point so the pedestal lowers. Continue pushing it along the path to the right until it drops into the groove. Go to the rear lever. The route seals and Skeletons and Hades Minotaurs appear, so fight them before using the lever. Atlas Quake, Cronos’s Rage, or the Head of Euryale can clear the group while preserving health.
After the enemies are defeated, pull the lever to move the ashes into the fire. A cutscene follows. Use the updraft near the central staircase to reach the upper stairway. A save point is available on the nearby ledge; use it before continuing. The upper staircase also has optional red-orb and Phoenix Feather chests.
- Push the urn into the groove.
- Defeat the Skeletons and Hades Minotaurs.
- Pull the lever to move the ashes into the fire.
- Save after the cutscene if the save point is available.
7. Use Boreas, sound the horn, and continue to the Kraken
Climb the upper staircase and pull the lever to raise the platform back toward the Palace of the Fates. Turn around and use the Hail of Boreas on the face relief to open the door. Follow the bloody corridor, collect the nearby optional Gorgon Eye if desired, then climb the chain and save beside the health and magic chests.
Blow the horn facing the Phoenix. After the cutscene, drop to the courtyard and use the newly available circular platforms to reach the door above the broken ladder. Inside, pull the lever, climb the wall and ceiling, and destroy both shiny chains. Pull the movable pillar from its recess, then operate the lift again. Place the pillar partly on the lift so it stops halfway, ride the lift, pull the pillar free, and use the raised position to destroy the chain above the gate. Turn the handle at the end of the passage counter-clockwise until it stops, then turn the next handle clockwise to open the route.
Weaken the mysterious warrior and complete the interaction prompt. The Kraken encounter follows. Complete the on-screen Rage of the Titans prompt to escape its grasp, attack the exposed tentacle, and place the nearby corpse on the floor button. Use the updraft to reach and attack the Kraken’s head. Repeat the tentacle-and-corpse setup whenever the Kraken removes the body. When a tentacle becomes caught in the vent, climb it, destroy its rocky shell, and complete the interaction prompt. Do this for both tentacles. Finally, damage both tentacles until the Kraken is barely holding on, then pull the lever in front of its face to finish the fight.
- Use the Hail of Boreas on the wall relief.
- Save beside the health and magic chests before blowing the horn.
- Complete the lift-and-pillar puzzle after the horn cutscene.
- Defeat the Kraken by using the corpse, vent, exposed head, and tentacle shells.
- Pull the final lever after both tentacles are weakened.
8. Ride the Phoenix to the Temple of the Fates
After the Kraken is defeated, approach the Phoenix. Optional chests beside it contain a Phoenix Feather and a Gorgon Eye or their red-orb substitutes if the relevant meter has already been expanded. Collect them only if the route is safe and your resources are stable.
Interact with the Phoenix and follow the displayed analog-stick and button prompts during the flight. Successful completion transitions Kratos to the Temple of the Fates. Save at the first available point there and refill from nearby chests before proceeding into the next chapter’s Fate-related puzzles and confrontations.
- Reach the Phoenix after defeating the Kraken.
- Complete every displayed flight prompt.
- Arrive at the Temple of the Fates.
- Save and replenish before leaving the opening Temple area.
Before you move on
- The Hail of Boreas is in Kratos’s inventory.
- The timed gate beyond the spike room has been crossed.
- The movable statue has activated the pressure-plate route and Kratos has reached the urn.
- The Phoenix ashes have been moved into the fire.
- The Boreas relief has opened and the horn has been sounded.
- The lift-and-pillar route has been completed.
- The Kraken has been defeated and Kratos has reached the Phoenix.
- The Phoenix flight prompts have been completed and Kratos has arrived at the Temple of the Fates.
- A save has been made at or after the Temple entrance before continuing.
References for this chapter
Temple of the Fates — Final Approach
Break the time-distorting crystal, align the submerged mechanism, overlap the Cronos and Zeus bell sounds, and turn the knocker against Lahkesis’s stone face. After the passage opens, complete three connected Fate encounters: defeat Lahkesis, defend the Sword of Destiny while Atropos attacks from the past, then defeat both sisters in the throne room. In the final battle, damage Lahkesis until she falls, slow time, attack Atropos through the active side mirror, and destroy that mirror before repeating the process on the opposite side. Once both side mirrors are gone, defeat Lahkesis beside the remaining front mirror, complete the takedown prompts, and shatter the mirror. The newly opened route leads through the Inner Sanctum and into the Loom Chamber.
1. Break the crystal and align the bell mechanism
Enter the time-distorted chamber and use the grapple point to reach the crystal above the large Lahkesis face. Attack the crystal until it breaks. Normal time resumes, allowing the Amulet of the Fates to function normally again.
Save at the nearby save point before working on the mechanism. Drop into the water around the central platform and locate the blue submerged section. Rotate or push it until the blue piece lines up with the groove in the circular hub. Use the underwater switch to raise and lock the piece into position. The central platform and its bell knocker can now be rotated.
- Destroy the time-distorting crystal.
- Save before starting the bell puzzle.
- Seat the blue submerged section in the hub groove.
- Use the underwater switch to lock the mechanism.
2. Overlap the Cronos and Zeus bells, then open the face
Rotate the platform until the Cronos-faced bell on the right is reachable. Ring it with the displayed interaction, using L1 and R1 together when prompted. Immediately activate the Amulet of the Fates with L1 and R1 so the bell sound remains suspended while Kratos moves.
While time is slowed, return to the central platform and use the knocker to strike the Zeus-faced bell. The two sounds must overlap. When the statue face cracks, go back to the lower mechanism and rotate the knocker toward Lahkesis’s stone face. Strike the cracked face to destroy it and reveal the passage. Collect nearby recovery chests if needed, then proceed through the opening.
- Ring the Cronos bell first.
- Slow time immediately after the Cronos bell sounds.
- Strike the Zeus bell with the central knocker before the sounds separate.
- Rotate the knocker toward Lahkesis’s face.
- Destroy the cracked face to open the passage.
3. Defeat Lahkesis at the throne
Follow the opened route to the throne arena and save if the available save point is still before the encounter. Lahkesis attacks from the air and uses green energy shots, sweeping attacks and close-range strikes. Keep moving around the arena, roll away from projectiles, and deflect shots with the Golden Fleece when the timing is comfortable.
Use short Blade of Athena combinations rather than staying underneath her for a long string. Typhon’s Bane can pressure her while she is airborne, and Cronos’ Rage or another reliable area attack is useful when she stays within range. When she is weakened, approach only when the Circle prompt appears and complete the required takedown sequence. The fight advances into the Sword of Destiny sequence after the cutscene.
- Keep moving instead of standing beneath Lahkesis.
- Deflect or roll through her green projectiles.
- Use ranged magic when she remains airborne.
- Complete the Circle prompt and every displayed button input.
4. Defend the Sword of Destiny against Atropos
After Lahkesis is defeated, Kratos reaches the earlier battle between the original Kratos and Ares. Atropos attacks through the large mirror and tries to interfere with the Sword of Destiny. Move to the sword when the game directs you, then strike or interact with the sword to keep Atropos from breaking the sequence.
Watch Atropos’s mirror position rather than chasing her around the arena. Deflect her green shots when possible and roll away from attacks that cannot be reflected. Continue following the on-screen interaction prompts until Kratos forces the sword through Atropos. A cutscene returns Kratos to the Temple of the Fates, beginning the combined Lahkesis-and-Atropos battle.
- Reach the Sword of Destiny when the sequence begins.
- Interrupt Atropos’s attempts to damage the sword.
- Deflect or evade her ranged attacks.
- Complete the required prompts until Atropos is forced back through the mirror.
5. Damage Lahkesis, then destroy the first two side mirrors
In the throne room, focus on Lahkesis first. Atropos enters from the misty mirror on either the left or right and fires green bolts or sweeps a beam across the floor. Roll or grapple over the beam, but do not let Atropos distract you from weakening Lahkesis. Cronos’ Rage is effective for maintaining pressure, while Typhon’s Bane can briefly interrupt Atropos if she becomes difficult to ignore.
When Lahkesis falls and the Fury orb appears above her, activate the Amulet of the Fates immediately. While time is slowed, identify the side mirror from which Atropos is emerging and rush to it. Attack Atropos until she recoils and the mirror cracks. Keep attacking the cracked mirror after normal time resumes; it must be shattered before it repairs itself. Return to Lahkesis and repeat the same process at the opposite side mirror. Each side mirror requires a separate Lahkesis stun, time-slow activation, Atropos assault and final mirror break.
- Prioritize Lahkesis over Atropos.
- Use the Amulet as soon as Lahkesis falls.
- Attack the active side mirror’s Atropos during the time-slow window.
- Shatter the cracked mirror before it reforms.
- Repeat the complete sequence for the opposite side mirror.
6. Finish Lahkesis at the front mirror
After both side mirrors are destroyed, Lahkesis moves in front of the remaining central mirror and protects it. Atropos no longer attacks from the side mirrors. Lahkesis adds an energy-pillar attack that spreads across the arena; move through the gap between the pillars or use the grapple points to escape. Roll away from the electrical energy surrounding her and deflect her projectiles when possible.
Attack from mid-range with Cronos’ Rage, Typhon’s Bane or Atlas Quake, then close in during recovery windows. If magic is depleted, use short Blade of Athena attacks and retreat whenever she raises her weapon or begins the pillar pattern. When Lahkesis falls, approach and press Circle, then complete every button prompt. The sisters will be trapped behind the remaining mirror. Attack the mirror until it shatters and the exit opens.
- Avoid the energy pillars by moving through their gaps.
- Keep away from Lahkesis’s electrical ground effect.
- Use magic or Rage for safe mid-range damage.
- Complete the final Circle prompt and all displayed inputs.
- Shatter the remaining mirror after the sisters are trapped.
7. Cross the Inner Sanctum and reach the Loom Chamber
Step through the opening created by the shattered throne-room mirror. In the Inner Sanctum, climb the handholds to the ceiling and drop onto the balcony. Continue toward the broken wall and smash through it to enter the long enemy gauntlet. Several groups block the route in sequence, so conserve health and magic between fights rather than spending everything on the first group.
Keep advancing until you reach the green recovery chest and the next save point. After the final guardians are defeated, hit the door mechanisms on the sides to raise the figure’s hands, then rotate the gears on both sides to release the locks. Grab the center of the door to open it. Follow the passage beyond it; Gaia’s guidance confirms that the Loom Chamber is ahead. Save before beginning its pendulum, Clotho and thread puzzles, which belong to the next chapter.
- Enter the Inner Sanctum through the destroyed central mirror.
- Climb to the ceiling and drop onto the balcony.
- Break through the wall into the enemy gauntlet.
- Use the recovery chest and save point when reached.
- Raise the door hands, rotate both gears, and open the unlocked door.
- Confirm that the route into the Loom Chamber is available.
Before you move on
- The crystal above Lahkesis’s face is destroyed.
- The Cronos and Zeus bells have sounded together.
- The knocker has destroyed Lahkesis’s stone face.
- Lahkesis has been defeated in the throne encounter.
- Atropos has been stopped during the Sword of Destiny sequence.
- Both side mirrors in the final rematch are permanently destroyed.
- Lahkesis has been defeated beside the remaining front mirror.
- The final mirror has been shattered after the takedown prompts.
- Kratos has crossed into the Inner Sanctum and opened the route toward the Loom Chamber.
References for this chapter
- God of War II Walkthrough - GameSpot
- God of War II - Guide and Walkthrough - PlayStation 2 - By Berserker
- God of War II - Guide and Walkthrough - PlayStation 2 - By ZenithWillRule
- God of War II Guide — The Temple of the Fates Walkthrough, SuperCheats
- God of War II - Guide and Walkthrough - PlayStation 2 - By YuGiOhFm2002 - GameFAQs
- God of War II FAQ/Walkthrough — The Summit of Sacrifice
The Loom Chamber — Part 1: Clotho and Puzzle Mirrors
Save before entering the Loom Chamber, then climb through Clotho’s machinery by stunning her arms before turning handles, pulling levers or moving the blade mechanisms. Trap one arm in the floor opening, pin the others with the hanging blades and climb to the upper platform. There, clear the skeletons and hanging bodies, align the swinging blade and drive it through Clotho’s head during the action sequence. Afterward, take either exit, ride the lift, swim through the gated passage and save beside the large mirror. Raise the fate threads, choose the thread immediately to the right of the switch that raised the pendulum, and pull it while checking the mirror for Kratos’s history. When the rewind stops, a 30-second timer begins. Slow time immediately, raise the lift, swim through the passage and jump into the mirror. This completes the first Loom Chamber section and sends Kratos to the Summit of Sacrifice.
1. Enter the Loom Chamber and reach the first machinery level
Use the save point before opening the large Loom Chamber door. Attack the hands covering the entrance, then turn the two exposed wheels to open the way. Proceed past the swinging blades and take the stairs on the left. Clotho’s arms can be stunned by attacking them repeatedly; use that opening to operate nearby machinery safely.
Stun the first arm near the stairs, then climb to the upper route and use the handle associated with that mechanism. Cross the ceiling or wall route toward the next section. If Clotho grabs Kratos during the traverse, shake the left analog stick to break free. Destroy the skeletons blocking the bars, drop down and operate the next handle so the route farther upward opens.
- Save before opening the Loom Chamber entrance.
- Attack the hands covering the door and turn both wheels.
- Stun arms before operating nearby handles or levers.
- Shake the left analog stick if Clotho grabs Kratos.
2. Immobilize Clotho’s three arms
At the next level, reach the lever beside the moving arm and pull it to open the floor trap. Attack the arm until it is stunned and drops into the opening, then pull the lever again to close the trap and hold it there. Move to the next lever and use it to pin another arm with the hanging mechanism.
For the last arm, grab the movable mechanism near the trapped hand and rotate it counter-clockwise until it is positioned correctly beneath the metal supports. Stand on the mechanism’s button to bring the blade into position. Stun the remaining arm, move the mechanism until the blade is directly over the hand, then stun the arm again so the blade catches it. Climb the rope that appears after all three arms are immobilized.
- Open and close the floor trap around the first arm.
- Use the second lever to pin another arm.
- Rotate the movable blade mechanism counter-clockwise first.
- Place the blade over the final arm before stunning it again.
- Climb the newly available rope.
3. Defeat Clotho on the upper platform
On the upper platform, move to the right and climb the wall. Destroy the two skeletons and clear the hanging bodies connected to the machinery. These bodies can also provide health when Clotho smashes them, so use the nearby mechanisms to bring one within reach if you need recovery.
Stun Clotho’s active arms before crossing the platform. Move the rotating mechanism until it lines up with the chain and the metal plate in the floor. Pull the central lever to raise the large swinging blade. Stun the arms again, then use the blade’s handle to rotate it so its cutting edge faces Clotho. Move behind it and pull it toward her. Complete every on-screen button and analog-stick prompt to drive the blade through Clotho’s head.
Clotho cannot be defeated by ordinary attacks alone. Treat her arms as the immediate targets, attack only during openings and move away before a swipe or grab can connect. The Amulet of the Fates can slow time during this battle if you need a safer crossing between mechanisms.
- Destroy the two skeletons on the upper route.
- Clear the hanging bodies before attempting the blade setup.
- Raise the large swinging blade with the central lever.
- Turn the blade toward Clotho and pull it into position.
- Complete the entire action sequence.
4. Reach and save beside the fate mirror
After Clotho dies, use either door beside her body and pull the lift switch at the back of the corridor. Jump into the pool, swim under the first gate, surface and use the platform if needed, then continue beneath the next gate. Follow the corridor around the corner to the save point beside the large mirror.
Save here before touching the thread mechanism. This checkpoint separates the Clotho machinery sequence from the timed return to the mirror, so a failed attempt will not require repeating the boss puzzle.
- Leave through either door beside Clotho’s body.
- Pull the lift switch.
- Swim under both gates and follow the corridor.
- Save beside the large mirror.
5. Select Kratos’s thread and rewind fate
Pull the switch beside the mirror to raise and align the fate threads. Return to the lower platform and inspect the threads rather than choosing by an assumed count. The correct thread is immediately to the right of the switch that was used to raise the pendulum. Pull it repeatedly with the Circle button until it stops.
Use the mirror behind the threads to confirm the choice. The correct thread cycles through scenes from Kratos’s journey and rewinds toward the moment immediately before Zeus stabbed him. A wrong choice breaks the mirror, but the mirror reforms, allowing another attempt. When the correct thread reaches its stopping point, the timed return begins with 30 seconds displayed.
- Raise the fate threads with the switch beside the mirror.
- Choose the thread immediately to the right of the pendulum-raising switch.
- Pull the thread completely with Circle.
- Confirm Kratos’s journey appears in the mirror.
- Wait for the 30-second timer to begin.
6. Complete the timed route into the mirror
The instant the rewind stops, run to the right and activate the Amulet of the Fates to slow time. Take the direct route through the right doorway to the lift. Pull the lift switch; time resumes while the platform rises, so do not stop to explore or collect optional items.
When the lift reaches the top, swim through the water passage and continue to the switch in front of the mirror. Activate it if necessary, then jump into the mirror before the timer expires. Entering the mirror triggers the transition to the Summit of Sacrifice and confirms that this first Loom Chamber section is complete.
If the timer expires, return to the thread and repeat the rewind. The correct route is the same: choose Kratos’s thread, run right, slow time, raise the lift, swim through the passage and enter the mirror. Do not confuse this sequence with the later Loom Chamber return after the Zeus encounter.
- Run right as soon as the rewind stops.
- Slow time with the Amulet before leaving the chamber.
- Raise the lift immediately.
- Swim through the water passage.
- Enter the mirror before the 30-second timer expires.
- Confirm the transition to the Summit of Sacrifice.
Before you move on
- Clotho has been defeated by driving the swinging blade through her head.
- Kratos has taken the lift and crossed the gated water passage.
- The save point beside the large mirror has been used.
- The fate threads have been raised.
- The thread immediately right of the pendulum switch has been pulled until the rewind stops.
- The 30-second timed route has been completed.
- Kratos has entered the mirror and the Summit of Sacrifice transition has begun.
The Summit of Sacrifice — Zeus Confrontation Sequence
The Summit of Sacrifice is the final Zeus battle in the original PlayStation 2 campaign, but it is not the end of the game. The encounter begins with giant Zeus and three Sirens. Weaken each Siren until the Circle prompt appears, execute her, then attack Zeus’s exposed hand after her scream staggers him. Once Zeus returns to normal size, fight through two Blade of Olympus phases. Each time Zeus steals the blade, weaken him with Athena’s Blades, complete the Circle struggle, and topple the marked pillar with R1. The second pillar leads to Zeus’s final giant-form sequence and its required button prompts. After the concluding cutscene, Kratos returns to the Loom Chamber. Stop there; Chapter 19 handles the second thread operation and the final mirror route.
1. Defeat the three Sirens and expose Zeus’s hand
The battle opens with Zeus in giant form and three Sirens around the arena. Do not try to damage Zeus directly yet. Use Atlas Quake or another wide-area magic attack to weaken the Sirens while keeping enough room to see Zeus’s attacks. His thunderbolts cannot be blocked, so roll or jump away from their impact points. When Zeus raises both arms and prepares the arena tremor, double-jump and glide until the shaking ends.
Keep attacking one Siren until the Circle prompt appears above her. Move to that Siren and press Circle to perform the execution. This execution is required; ordinary attacks will not advance the phase. Her scream staggers Zeus and causes him to bring a hand down onto the platform. Run to the exposed hand and attack it with the Blade of Olympus or Atlas Quake before he pulls it away. Repeat the process for all three Sirens. After enough exposed-hand damage, a Circle prompt appears at Zeus’s hand; use it to force him down to Kratos’s size.
- Use wide-area magic to weaken the Sirens.
- Execute each Siren only when the Circle prompt appears.
- Attack Zeus’s exposed hand after each Siren’s scream.
- Double-jump and glide over the giant Zeus tremor.
- Use the hand prompt when it appears to begin the normal-sized phase.
2. Fight normal-sized Zeus while carrying the Blade of Olympus
When Zeus becomes normal-sized, Kratos still has the Blade of Olympus. Stay near enough to punish his recovery animations, but do not remain in front of him through a complete punch string. The opening portions of his close-range attacks can be blocked, while the final ground-pound portion should be avoided with a roll or jump. When Zeus throws lightning, use the Golden Fleece to deflect it if the timing is comfortable; successful deflections damage him and can produce useful orbs.
Rage of the Titans is effective during this phase, and Atlas Quake or another available magic attack can add damage. Do not cast so recklessly that you miss Zeus’s charge or lightning tells. Continue attacking after his recoveries until he releases several orbs and forcibly removes the Blade of Olympus. This theft is scripted progression, not a sign that the fight has been failed.
- Punish Zeus after his attacks finish.
- Block only the safe portions of his punch sequence.
- Roll or jump away from the final ground pound.
- Deflect lightning with the Golden Fleece when possible.
- Expect Zeus to steal the Blade after enough damage.
3. Recover the Blade and topple the first marked pillar
After Zeus takes the Blade, Kratos uses Athena’s Blades. The Rage of the Titans meter should be restored, so activate Rage and attack in short, controlled strings. Zeus may surround himself with damaging electrical energy; stop attacking while that protection is active and circle away from him. Roll through charges and lightning attacks instead of trying to trade blows.
After enough damage, a Circle prompt appears over Zeus. Press Circle and complete the rapid Circle-button struggle to take the Blade of Olympus back. The action sequence throws Zeus toward one group of pillars. Follow the camera direction immediately, locate the glowing interaction point beside Zeus, and press R1 to topple the marked pillar. Only the highlighted interaction point advances the fight.
- Use Athena’s Blades after the first theft.
- Activate Rage of the Titans when it is restored.
- Avoid Zeus while his electrical protection is active.
- Complete the Circle struggle.
- Follow the camera and topple the first glowing pillar with R1.
4. Repeat the fight and topple the second marked pillar
The battle resumes after the first pillar, and Zeus eventually steals the Blade of Olympus again. Repeat the defensive pattern: attack after his recovery, use Rage or magic to interrupt him when safe, and roll away from his sword waves, charges, and lightning. When electrical spheres surround him, do not continue striking into them; wait for a safer opening.
When the next Circle prompt appears, press Circle and complete the rapid-input struggle. Zeus is thrown toward the other pillar group. Run there immediately, identify the second glowing interaction point, and press R1. The two pillar takedowns are separate progression events, so returning to the first pillar will not help. The second pillar leads directly into Zeus’s final giant-form sequence.
- Repeat the defensive attack pattern after the second theft.
- Do not attack through Zeus’s electrical protection.
- Complete the second Circle struggle.
- Run to the opposite pillar group.
- Press R1 at the second glowing interaction point.
5. Complete Zeus’s final giant-form quick-time sequence
Zeus becomes giant again and electrifies the platform. A scripted action sequence begins. The opening Circle struggle is designed to proceed in Zeus’s favor, so losing that initial exchange is expected and does not indicate a malfunction. Continue responding once the remaining prompts appear.
Follow every displayed input exactly, including rapid button presses and the later defensive response. A missed input kills Kratos and restarts this final sequence, so do not guess a button before it appears. Completing the sequence lets Kratos turn the attack around, recover control of the Blade of Olympus, and defeat Zeus. Wait for the full cutscene to finish before moving on.
- Expect Zeus to win the opening scripted struggle.
- Follow each displayed quick-time prompt.
- Complete the rapid button presses without guessing.
- Restart calmly if an input is missed.
- Wait for the post-battle cutscene to finish.
6. Return to the Loom Chamber
After Zeus is defeated, the concluding cutscene plays and Kratos returns through the mirror to the Loom Chamber as it begins to collapse. This return marks the end of this chapter’s playable objective. Do not begin the thread operation here; the next chapter covers the collapsing chamber, the second use of Kratos’s thread, and the route back to the final mirror.
If you have a save point available in the Loom Chamber, use it before continuing, but do not search the chamber for optional rewards during the collapse. Proceed to Chapter 19 for the final time-travel sequence and the route that triggers the campaign’s ending cutscenes.
- Zeus has been defeated.
- The final giant-form quick-time sequence has ended.
- The concluding cutscene has played.
- Kratos has returned to the collapsing Loom Chamber.
- Stop this chapter before pulling the second thread.
Before you move on
- All three opening Sirens have been executed and Zeus has been reduced from giant form.
- Zeus has stolen the Blade of Olympus twice, and both marked pillars have been toppled.
- The final giant-form lightning sequence and its required quick-time prompts have been completed.
- The post-battle cutscene has played and Zeus has been defeated.
- Kratos has returned through the mirror to the collapsing Loom Chamber.
- No second thread, timer, Amulet route, or upper-mirror traversal is required for completion of this chapter.
The Loom Chamber — Part 2: Back in Time and the Final Mirror
After the Zeus encounter, Kratos returns to the collapsing Loom Chamber. Save at the nearby point if needed, then return to the lower thread platform. If the strands are not visible, operate the lever beside the large mirror to reveal them. Pull the same Kratos-associated thread used during the first Loom sequence: the strand to the right of the middle lever that raised the pendulum. Finish the interaction to start a 30-second timer. Immediately slow time with the Amulet of the Fates, take the right-hand route to the lift, operate the lift switch, ride upward, swim through the upper pool and reach the switch before the large mirror. Enter the mirror before the timer expires. This successful traversal triggers the Great War transition; the subsequent ending cinematics and credits occur after this chapter’s final action.
Save and return to the thread platform
Following the Zeus encounter and its concluding action sequence, Kratos arrives back in the Loom Chamber while the room begins to collapse. A save point is available near the large mirror. Use it before attempting the timed route so a failed attempt does not require replaying the Zeus sequence.
Go down to the lower area where the fate threads and their controls are located. The chamber should already be in the configuration created during the earlier Loom sequence. Do not explore the collapsing room or search for optional items; the only required objective is to pull Kratos’s thread and return to the upper mirror.
- Use the Loom Chamber save point if desired.
- Descend to the lower thread platform.
- Ignore optional exploration during the collapse.
Reveal the strands if they are not visible
Look toward the large mirror and check whether the hanging fate strands are exposed. If they are hidden, operate the lever positioned beside the mirror once. This is the thread-reveal control used before the first Loom traversal, not a new mirror-setting puzzle.
Once the strands are visible, return to the lower platform. Use the middle lever that previously raised the large pendulum as your landmark. The required strand is the Kratos-associated thread immediately to the right of that lever when facing the lever from the thread platform. This is the same thread used during the first trip through the Loom.
- Check whether the fate strands are exposed.
- Operate the mirror-side reveal lever only if the strands are hidden.
- Identify the middle pendulum lever.
- Locate the thread immediately to its right.
Pull Kratos’s thread and start the 30-second timer
Interact with the identified thread and continue the prompted interaction until Kratos finishes pulling it. The timer does not begin until the thread has been pulled completely. Pulling another strand can shatter the mirror and force you to repeat the setup, so use the pendulum lever as the landmark rather than guessing from the staircase or room entrance.
As soon as the 30-second countdown appears, stop checking the threads and begin the return route. The Amulet of the Fates is needed to create enough time for the lift and upper-pool route.
- Interact with the Kratos-associated thread.
- Complete the full pull instead of releasing early.
- Confirm that the 30-second timer appears.
- Do not pull a different strand.
Use the Amulet and take the lift route
Activate the Amulet of the Fates immediately after the timer begins. Move through the right-hand doorway and follow the direct path to the lift. Do not detour or wait for the chamber’s scenery to settle; the countdown is active and the route is designed around immediate time-slow use.
Operate the lift switch as soon as you reach it. The timed state resumes when the lift mechanism is activated, so pull the switch promptly and ride the lift to the upper level. Continue moving as soon as Kratos reaches the top.
- Activate the Amulet immediately after the timer starts.
- Use the right-hand doorway.
- Reach and operate the lift switch promptly.
- Ride the lift to the upper level.
Cross the upper pool and enter the final mirror
At the top of the lift, enter the upper pool and swim through the passage. Continue through the water until you can surface on the far side, then leave the pool and follow the corridor toward the switch in front of the large mirror.
Reach the mirror-side switch and complete the approach without stopping. Jump into the large mirror before the 30-second timer expires. Entering it successfully triggers the Great War transition and ends this timed Loom return. The later story cinematics and credits follow from that transition, but they are not part of the mirror traversal itself.
If the timer expires or Kratos misses the mirror, reload the Loom Chamber save and repeat the same sequence: reveal the strands if necessary, pull the same thread, activate the Amulet immediately, take the right doorway, operate the lift, cross the pool and enter the mirror.
- Swim through the upper pool after the lift reaches the top.
- Surface on the far side and leave the water.
- Reach the switch in front of the large mirror.
- Enter the mirror before the timer expires.
- Confirm that the Great War transition begins.
Before you move on
- The Loom Chamber save point has been used if a retry point was needed.
- The fate strands are visible, either already exposed or revealed with the mirror-side lever.
- The Kratos-associated thread immediately to the right of the middle pendulum lever is pulled completely.
- The 30-second timer appears.
- The Amulet is activated immediately, followed by the right-doorway, lift and upper-pool route.
- Kratos reaches the switch in front of the large mirror and enters the mirror before the timer expires.
- The Great War transition begins.
- The later ending cinematics and credits are left to the following story sequence rather than being claimed as completed here.
References for this chapter
Return to Olympus — Aftermath and Campaign Ending
After Kratos enters the final mirror in the Loom Chamber, God of War II leaves playable progression behind and resolves the campaign through connected story cinematics. Kratos reaches the Great War, meets Gaia, and uses the Loom to bring the surviving Titans into his present. The game then cuts to Mount Olympus, where the Titans begin their assault and Kratos declares war on the gods. The original North American PlayStation 2 campaign ends on this cliffhanger; there is no second mandatory Zeus battle or playable Titan assault after it. Let the cinematics continue until the credits appear, then preserve the completed save and inspect the post-game menu. Challenge of the Titans is separate from the story campaign. Bonus Play is offered only for eligible sword-marked difficulties and lower eligible difficulties; God Mode itself cannot be selected for Bonus Play.
1. Watch the Great War sequence after entering the final mirror
Once Kratos successfully enters the final mirror at the end of the Loom Chamber, the game transitions automatically into the Great War sequence. No route-finding, combat, object interaction or timed input is required after the mirror transition succeeds. The scene establishes the historical conflict in which Zeus defeated the Titans and shows Kratos reaching the moment he needs to alter.
Continue watching the sequence rather than reloading an earlier save. This portion is a non-playable story cinematic. There is no enemy encounter or additional puzzle objective to complete before the next transition.
- The final mirror entry has succeeded.
- The Great War cinematic has begun.
- No further combat or puzzle objective appears after the transition.
2. Follow Gaia’s return to the present
During the Great War sequence, Kratos meets Gaia and explains his plan to oppose Zeus with the Titans’ help. The Loom then carries Kratos and the surviving Titans forward from the ancient battlefield into Kratos’s present time.
This remains a cinematic sequence rather than a playable area. Do not search for a save point, combat arena or exploration path after Gaia appears. The required story progress is the completed time-travel transition and the confirmation that the Titans have reached the present.
- Kratos has met Gaia during the Great War.
- The Loom’s time-travel transition has finished.
- The surviving Titans have returned to the present.
3. Let the Mount Olympus assault scenes play
The game cuts to Mount Olympus as Zeus and the Olympian gods prepare for the Titans’ arrival. Kratos climbs with the Titans toward Olympus, and the final scenes establish the beginning of the assault rather than depicting its full resolution.
Allow the entire sequence to continue. In the original PlayStation 2 campaign, there is no additional playable Olympus chapter after these scenes. Do not look for another staircase, arena, mandatory Zeus encounter or Titan-control section once the assault reaches its final confrontation setup.
- The Mount Olympus scenes have started.
- The Titans’ assault has reached the final confrontation setup.
- No additional playable Olympus objective is presented.
4. Confirm the cliffhanger and ending credits
Kratos announces the coming destruction of Olympus, and the game ends with the war still about to begin. This is the canonical story ending for the original North American PlayStation 2 release. The main campaign does not continue into a second mandatory Zeus battle, a playable Titan assault or another story chapter after the Titans reach Olympus.
Remain at the ending until the credits appear. The Mount Olympus image and final declaration show that the story has reached its endpoint, but the credits provide the clearest completion confirmation. When the game returns to the menu, keep the completed memory-card save instead of overwriting it immediately.
- Kratos’s final Mount Olympus declaration has played.
- The cliffhanger sequence has finished.
- The ending credits have appeared.
- No second Zeus battle is expected or required.
5. Check the post-clear menu state
After the credits, return to the main menu and inspect the available modes using the completed save. Challenge of the Titans should be available as a separate seven-challenge mode after the campaign clear. It is post-game content and is not required for the story ending.
To check Bonus Play, choose New Game and inspect the difficulty list for sword-marked options. Bonus Play is offered on an eligible cleared difficulty and on eligible lower difficulties. Do not assume that every cleared setting is available: God Mode itself cannot be selected for Bonus Play, even after completing the campaign on God Mode. Select only a sword-marked eligible difficulty if you want to start with the applicable carried-over power-ups and unlockables.
Difficulty-specific costumes, urn effects, Challenge of the Titans rankings and other bonuses can have separate requirements. Their absence does not invalidate the campaign clear. Preserve the completed save after verifying the available options.
- Challenge of the Titans is available after returning to the menu.
- New Game shows at least one eligible sword-marked difficulty for Bonus Play, if the clear qualifies.
- God Mode is not expected to offer Bonus Play as its own selected difficulty.
- The completed save remains stored on the memory card.
- No further mandatory campaign chapter is required.
Before you move on
- The Great War cinematic has played after the successful final mirror entry.
- Kratos has met Gaia and the surviving Titans have returned to the present.
- The Mount Olympus assault cinematics have played.
- The final cliffhanger declaration has finished and the ending credits have appeared.
- Challenge of the Titans is available after returning to the menu.
- New Game shows an eligible sword-marked difficulty for Bonus Play when the cleared file qualifies; the cleared God Mode setting itself is not selectable for Bonus Play.
- No second mandatory Zeus battle or additional campaign chapter remains.
Post-Game Notes: Save Files, Unlocks and Difficulty Rewards
After the final credits, preserve the completed save before beginning another campaign. A first clear unlocks Challenge of the Titans, Titan difficulty, Bonus Play eligibility on appropriate cleared or lower difficulties, the Blade of Olympus for Bonus Play, the Cod of War and Hydra Armor costumes, and the High-Resolution and Story Format movie galleries. God Mode cannot be used for Bonus Play; Titan Mode must first be completed before it becomes an eligible Bonus Play setting. God-mode and Titan-mode clears add their own costumes, while Challenge of the Titans ranks award Urns and God Armor. The Arena of the Fates requires an overall Titan rank in the seven challenges. The original PlayStation 2 release has no conventional chapter-select cleanup mode, so replay the story through New Game and Bonus Play while keeping the cleared file on a separate memory-card slot.
1. Confirm the campaign clear and protect the completed save
Allow the final story scenes and credits to play through. The main campaign is complete once the ending has been shown and the game reaches its post-clear state. If the game performs save activity after the ending, wait until it finishes before switching off the PlayStation 2.
Keep the completed file in its own memory-card slot. Use another slot for a replay, a Bonus Play campaign or a higher-difficulty attempt. Load the completed file once before replacing anything and verify that it returns to the finished game rather than an earlier checkpoint.
- The ending scenes and credits have appeared.
- The completed file remains on its original memory-card slot.
- The completed file loads successfully after the ending.
2. Check first-clear unlocks in Treasures
Completing the campaign on any difficulty unlocks Challenge of the Titans and the Titan difficulty setting. The same first clear unlocks the High-Resolution and Story Format movie galleries, along with the Cod of War and Hydra Armor costumes.
The Blade of Olympus becomes available for an eligible Bonus Play campaign after the story has been completed. These are optional rewards and do not change the campaign ending. Open Treasures from the main menu and confirm the entries before beginning another run.
- Challenge of the Titans is listed in Treasures.
- Titan is available as a selectable difficulty for a new campaign.
- The Cod of War, Hydra Armor and movie galleries are visible.
- The Blade of Olympus is available when starting eligible Bonus Play.
3. Start Bonus Play on an eligible difficulty
Choose New Game and inspect the difficulty list. Bonus Play is offered for a difficulty that has been cleared and for eligible lower difficulties. The game marks eligible entries with the Bonus Play sword icon. Select the marked difficulty and accept Bonus Play when prompted to carry the previous run’s weapons, magic and other eligible progress into the new campaign.
God Mode is excluded from Bonus Play. Titan Mode is not eligible until Titan has itself been completed; an ordinary first clear unlocks Titan as a difficulty but does not let you bypass that difficulty with a Bonus Play file. After completing Titan, use Bonus Play on Titan or an eligible lower setting. Store the replay separately from the original clear.
- The chosen difficulty has the Bonus Play sword marker.
- The Bonus Play confirmation appears before the new campaign begins.
- God Mode has not been selected for Bonus Play.
- The replay is stored in a different memory-card slot.
4. Track difficulty-specific costumes
A God Mode clear unlocks Dark Odyssey. A Titan Mode clear unlocks Athena and Hercules. These rewards are separate from the first-clear Cod of War and Hydra Armor, so do not expect every costume after one ordinary completion.
General Kratos has a separate requirement: collect 20 Cyclops eyes through context-sensitive kills. Challenge of the Titans can help with this objective because its first trial provides additional Cyclops opportunities. Costumes are used in Bonus Play and are not required for the story ending.
- Dark Odyssey is expected after a God Mode clear.
- Athena and Hercules are expected after a Titan Mode clear.
- General Kratos is being pursued through the 20-eye requirement, not ordinary campaign completion.
5. Use Challenge of the Titans rewards
Complete all seven Challenge of the Titans trials to establish an overall rank. An overall Mortal rank awards the Urn of the Fates, while an overall Spartan rank awards the Urn of Poseidon. These Urns can be activated during an eligible Bonus Play campaign from the pause menu’s status pages.
An overall God rank unlocks the God Armor costume. An overall Titan rank unlocks Arena of the Fates, a separate combat-customization mode where enemies and battle conditions can be configured. If a reward does not appear, check the displayed overall rank and replay weaker trials; individual trial results contribute to the final rating.
- All seven trials have been completed when pursuing Challenge rewards.
- The displayed overall rank has been recorded.
- The relevant Urn, God Armor or Arena of the Fates entry appears after its requirement is met.
6. Replay the original PS2 campaign safely
The original North American PlayStation 2 release does not provide a conventional chapter-select menu for jumping directly to completed areas. To replay the story, start another New Game, choosing ordinary progression or an eligible Bonus Play setting. Keep separate files for the first clear, a normal replay and a Titan attempt.
Before deleting any file, load the completed save and inspect Treasures for the expected difficulty, movies, costumes, Challenge of the Titans progress and Arena entry. If a reward is missing, verify its requirement and allow the game to finish saving before replacing the file.
- The original clear remains preserved.
- Replay campaigns use separate memory-card slots.
- Treasures has been checked before any save is deleted.
- The desired post-game reward is visible before the completed file is retired.
Before you move on
- The completed campaign save loads successfully.
- Challenge of the Titans and Titan difficulty are available after the first clear.
- The High-Resolution and Story Format galleries and first-clear rewards are visible in Treasures.
- Bonus Play is offered on a cleared difficulty or an eligible lower sword-marked difficulty.
- God Mode is not being treated as a Bonus Play option.
- Any pursued God Mode, Titan Mode, Cyclops-eye or Challenge of the Titans reward is visible before the completed save is retired.
Optional Completion: Collectibles, Hidden Chests and Secret Rooms
Optional exploration in the original North American PlayStation 2 release improves Kratos through red orbs, Gorgon Eyes, Phoenix Feathers, three special gift chests, and four story-campaign Urns of Power. None is required to reach the ending. Gorgon Eyes and Phoenix Feathers expand the health and magic meters after each group of six, while the four Urns provide special powers for Bonus Play. Search cracked walls, destructible scenery, isolated ledges, high platforms, underwater branches, grapple routes, and time-slow paths. Prioritize permanent health and magic upgrades, then collect Urns when their routes are safe. Two additional Urns are tied to Challenge of the Titans and are not hidden in the ordinary campaign.
Prioritize permanent upgrades before ordinary treasure
Open health, magic, and Rage chests that are directly on the route, but do not spend most of your resources reaching a minor red-orb chest. Red orbs should first fund the weapons and magic attacks you use regularly. Improving the Blades of Athena and one dependable area-control spell is generally more useful than scattering early purchases across every secondary technique.
Gorgon Eyes increase Kratos’s maximum health, and Phoenix Feathers increase his maximum magic. The normal collectible sets contain 18 of each, with every six collected raising the corresponding meter. If you miss one, later eligible grey chests can provide the missed item instead, so a failed early sweep does not automatically make maximum meters impossible. One-time rooms and risky side paths can still become unavailable, so take a safe upgrade when it is in front of you.
- Take a Gorgon Eye or Phoenix Feather when the chest is safely reachable.
- Favor health upgrades if ordinary combat or boss mistakes are causing deaths.
- Favor magic upgrades if your strategy relies on Atlas Quake, the Head of Euryale, or another area attack.
- Keep enough red orbs for core weapon and magic upgrades.
Search each room before crossing a one-way transition
After clearing enemies, check the room perimeter before using the obvious exit. Strike cracked stone, wooden barriers, suspicious statues, stacked objects, and scenery that differs from the surrounding wall. Inspect behind pillars, waterfalls, statues, and raised platforms. In rooms with climbing surfaces, check both the upper landing and any space hidden on the camera-facing side before moving forward.
Look upward whenever the main route crosses a large gap. Optional chests often sit on ledges reached by grapple points, updrafts, climbable ceilings, Icarus’ Wings, or a side jump from a moving platform. Typhon’s Bane can activate distant targets and switches, so test a visible mechanism with the bow before deciding that it is only background scenery.
- Clear the nearby encounter before attempting an optional jump.
- Inspect high ledges, wall recesses, and the far side of large structures.
- Test suspicious distant targets with Typhon’s Bane.
- Save before a difficult optional traversal when a save point is nearby.
Return only when a named ability makes the route possible
Do not force a visible chest behind a timed gate, reflected attack, petrified obstruction, or traversal route that clearly requires a later ability. The Amulet of the Fates enables time manipulation; the Golden Fleece reflects certain attacks; Typhon’s Bane activates distant targets; and the Head of Euryale petrifies enemies and other valid targets. Mark the landmark mentally and continue with the required route if the chest cannot yet be reached.
The four story Urns are useful backtracking targets. Urn of Gaia is in the City of Rhodes, in the area with the bird-marked block and two gates. Urn of the Gorgons is in the Bog of the Forgotten on the conveyor route lined with Gorgon attacks; return after obtaining the Golden Fleece and reflect the attacks to reveal the chest. Urn of Prometheus is in Atlas, in the ceiling section with stalactites; destroy the appropriate obstruction and follow the revealed passage. Urn of Olympus is near the Spear of Destiny route; manipulate the nearby Fate statue, cross the water, and use the Amulet of the Fates to reach the timed gate.
- Do not force a chest that requires a later ability.
- Remember the Bog of the Forgotten chest for the Golden Fleece backtrack.
- Inspect the stalactite ceiling section while progressing through Atlas.
- Treat the Urn of Olympus route near the Spear of Destiny as an optional detour.
Understand what the Urns actually do
The four story Urns are bonus-play rewards rather than required campaign equipment. Urn of Gaia increases red-orb income, Urn of the Gorgons gives weapon attacks a chance to petrify enemies, Urn of Prometheus provides unlimited Rage of the Titans, and Urn of Olympus provides unlimited magic. Their effects are selected for a Bonus Play game after the Urns have been collected; they do not permanently grant those powers during the current first playthrough.
Two additional Urns are connected to Challenge of the Titans rather than ordinary story exploration. Do not keep searching the campaign route for six hidden Urns. If the goal is only the ending, all Urns are optional. If the goal is a stronger replay, collect the four campaign Urns and then complete the required Challenge of the Titans objectives for the remaining rewards.
- Record the Urns by name instead of treating every grey chest as an Urn.
- Do not expect an Urn’s special Bonus Play effect during the current first run.
- Leave the Challenge of the Titans Urns for the post-campaign bonus objectives.
Use a controlled exploration sweep
At each save point, clear the immediately preceding room and its connected branches before advancing. Open nearby grey chests, test cracked walls, inspect elevated routes, and check time-slow interactions that visibly lead toward a side path. Save again after a successful difficult jump. This limits the amount of combat and platforming that must be repeated if an optional attempt fails.
Do not assume the entire game remains freely revisitable. Arenas, set pieces, and one-way traversal sections can close behind Kratos. If a side route costs nearly all your health, magic, or Rage immediately before a required fight, leave it and continue. A missed red-orb chest is less important than entering the next mandatory encounter with a strong resource reserve.
- Sweep areas near save points instead of wandering deeply into unknown territory.
- Search before crossing a one-way door, major set piece, or long traversal section.
- Keep a stable save before a risky optional route.
- Do not sacrifice preparation for a required boss to obtain a small orb cache.
Prepare for the late campaign without chasing perfection
Before the Temple of the Fates and final boss sequence, collect nearby permanent health or magic upgrades that can be reached without a long detour. Expanded meters make the Sisters of Fate and Zeus more forgiving, but neither encounter requires every chest or Urn. Spend remaining red orbs on dependable damage, crowd control, and a magic attack you can use without leaving Kratos exposed.
If you repeatedly fail a late encounter, check the latest safe branches for a missed permanent upgrade before restarting the entire campaign. If the route is no longer accessible, continue with the current save; the ending does not depend on optional completion. Pursue a full chest sweep on another run only if you want maximum meters, all four campaign Urns, or a stronger Bonus Play file.
- Secure reachable health and magic upgrades before the final approach.
- Keep magic and Rage available for the next required boss.
- Treat complete chest collection as a replay objective, not an ending requirement.
Before you move on
- You have collected the reachable Gorgon Eyes and Phoenix Feathers that appeared on your route, especially before the Temple of the Fates and final boss sequence.
- You have checked suspicious walls, destructible scenery, high ledges, grapple points, updrafts, distant targets, and time-based branches near save points.
- You know the four campaign Urns by name and location: Gaia in Rhodes, the Gorgons in the Bog of the Forgotten, Prometheus in Atlas, and Olympus near the Spear of Destiny route.
- You understand that two other Urns require Challenge of the Titans rather than ordinary campaign exploration.
- Your save retains enough health, magic, Rage, and red orbs for the next mandatory encounter.
- You have reached the ending without treating optional collectibles as required story objectives.
Boss Strategy Appendix — Sisters of Fate, Atlas Sequences and Zeus
The late-game encounters are objective-driven fights rather than ordinary health-bar battles. Lahkesis requires reflected attacks, safe movement during her aerial electrical phase and a grapple finisher. The first Atropos encounter is a timed defense of the Sword of Destiny. In the rematch, damage Lahkesis until the Amulet of the Fates can expose Atropos in each side mirror, then destroy both mirrors before finishing Lahkesis. Atlas is a traversal and endurance sequence that awards Atlas Quake. Clotho’s fight requires three arm traps, a movable blade mechanism and a finishing prompt. Zeus has a giant-hand phase, normal-size combat, two Blade of Olympus theft sequences and a final quick-time struggle. After Zeus, rewind the fate thread again, cross the mirror and confirm the concluding Olympus scenes and credits.
Prepare before the major encounters
Prioritize upgrades for Athena’s Blades and the magic you use reliably. Cronos’ Rage is useful for crowd control and for damaging exposed bosses while Kratos remains mobile. Typhon’s Bane helps against distant or airborne targets, while Atlas Quake is valuable against groups and later large enemies. Rage of the Titans is best preserved for a forced damage window or a dangerous late phase rather than spent on ordinary enemies immediately before a boss.
Use the nearest save point before each major encounter. Enter with health and magic restored when possible, but do not waste every spell on the approach. If a failed attempt reaches a later phase, identify the failure specifically: missed reflection, standing inside a telegraphed attack, poor target priority or spending magic before the boss becomes vulnerable.
- Upgrade dependable weapon damage first.
- Keep Cronos’ Rage or another reliable crowd-control option available.
- Save before each major encounter.
- Preserve magic and Rage for required vulnerability phases.
Defeat Lahkesis and survive the first Atropos sword fight
In the first Lahkesis encounter, block or roll through her close-range staff attacks and projectiles. Reflect her green energy bolts with the Golden Fleece when the timing is comfortable; reflected bolts deal heavy damage and can stagger her. When she creates a large green explosive effect, move away instead of trying to continue a combo. During her aerial phase, avoid the electrified floor by using the grapple points around the arena. Attack with Cronos’ Rage or Typhon’s Bane while she is airborne, then use normal weapon attacks when she is knocked down. When the grapple prompt appears, reach a grapple point, double-jump and glide to her to complete the phase.
The following fight is separate: Kratos battles Atropos on the Sword of Destiny. The sword is the objective that must be protected. Clear nearby soldiers when they interfere, but keep your attention on Atropos. From a distance, reflect her energy shots from the lower edge of the sword or use Typhon’s Bane. When she approaches and electrifies the sword, attack her with magic or close-range strikes. When the Circle prompt appears, complete the displayed input to finish the encounter before the sword is destroyed.
- Reflect Lahkesis’s green bolts when safe.
- Use grapple points during the electrified-floor phase.
- Do not confuse the sword fight with the later rematch.
- Protect the Sword of Destiny from Atropos’s lightning.
- Complete the Atropos finisher as soon as the prompt appears.
Win the Lahkesis and Atropos rematch
Focus on Lahkesis while Atropos attacks from the side mirrors. Avoid Atropos’s green projectiles and jump or grapple over her sweeping beam. Roll away from Lahkesis’s attacks and strike after her recovery. When Lahkesis takes enough damage, she becomes stunned and exposes a Fury orb. Activate the Amulet of the Fates immediately, then reach the active side mirror while time is slowed.
Attack Atropos inside the slowed-time window until she retreats into the mirror, then destroy that mirror. Repeat the same procedure at the opposite side mirror. The required objective is to break both side mirrors; ordinary damage against Atropos outside the mirror sequence does not replace this step.
After both side mirrors are destroyed, Lahkesis moves to the remaining front mirror and uses broad energy attacks. Keep moving, use grapple points to avoid the energy pillars when necessary, and attack during her recovery. When the finishing prompt appears, complete all displayed inputs and destroy the remaining mirror. Save at the next opportunity before continuing toward the Inner Chamber.
- Damage Lahkesis until the Fury orb appears.
- Use the Amulet only for the mirror vulnerability window.
- Destroy both side mirrors.
- Finish Lahkesis at the remaining front mirror.
- Save after the sisters’ rematch.
Complete Atlas’s sequence and obtain Atlas Quake
The Atlas section is a traversal and endurance sequence, not a conventional boss duel. Clear enemies before beginning a difficult climb whenever the platform gives you room to fight safely. During the handhold sections, watch the falling rocks and move between safe handholds instead of lingering beneath a falling projectile. In the descending grapple section, hold the grapple input and shift away from falling debris before continuing.
At the summit, attack the chain binding Atlas. When Atlas tries to crush Kratos with his fingers, alternate the indicated L1 and R1 inputs to force the fingers apart. After the scene, Kratos receives Atlas Quake. A large group of Undead Legionnaires appears, and the game provides an opportunity to test the new spell. Use it to stagger and clear the group rather than trying to conserve magic during this tutorial-like sequence.
If an enemy interrupts a climb, land on a stable surface before attacking. Do not attempt grabs or heavy attacks while hanging from a narrow route or jumping across a gap.
- Clear enemies before precision climbs when possible.
- Move between handholds to avoid falling rocks.
- Break the chain binding Atlas.
- Complete the alternating L1 and R1 struggle.
- Use Atlas Quake on the spawned Legionnaires.
Defeat Clotho with the arena machinery
Clotho’s encounter requires environmental actions. First, stun the arm near the green floor switch, open the hatch beneath it and activate the switch again to trap the arm. For the second arm, damage it until it falls, then climb to the upper switch and release the spike so it pins the arm. For the third arm, move the rotating platform beneath the winch, use the pressure plate to lift the container into position, then move the platform and spike beside the arm. Damage the arm so it impales itself.
During the main battle, block Clotho’s ground pounds with the Golden Fleece and double-jump over arm swipes. If health is low, use the hanging bodies and nearby fate mechanisms that can provide recovery when activated. Clear skeletons from the gears so the machinery can move. Use Atlas Quake to remove enemies or obstructions when the platform route is blocked.
Move the rotating handle so the loading platform lines up with the central chain and metal plate. Activate the switch to raise the large blade. Stun Clotho, rotate the blade toward her, pull it into position and complete the prompt to finish the fight. Save after leaving the arena.
- Trap the first arm in the floor hatch.
- Pin the second arm with the overhead spike.
- Use the platform, pressure plate, winch and spike for the third arm.
- Clear skeletons and obstructions from the machinery.
- Align the large blade and complete the finishing prompt.
Rewind the thread and defeat Zeus
After saving following Clotho, return to the thread area and locate Kratos’s fate thread near Clotho’s rightmost hand. Pull it until the rewind stops. A 30-second timer begins. Activate the Amulet of the Fates, take the direct route through the machinery and water passage, and jump through the mirror before time expires. Do not detour for optional chests during this sequence.
Zeus first appears as a giant and attacks with his hand while summoning Sirens. Prioritize the Sirens with Cronos’ Rage, Atlas Quake or weapon attacks until the finishing prompt appears. Completing a Siren finisher damages Zeus and creates a chance to attack his grounded fist. Repeat until the prompt appears over the hand, then complete it to advance.
During the normal-size Zeus phase, reflect his lightning bolts with the Golden Fleece when possible. His charge and shockwave attacks can be avoided by rolling or running laterally. If reflection timing is unreliable, Atlas Quake and Rage of the Titans provide safer damage windows. After he takes the Blade of Olympus, dodge his sword combo, overhead beam and delayed lightning strike. Attack only after his recovery and avoid long committed combos.
When Zeus staggers, complete the prompt and mash the required button to take the Blade back. Pick up the nearby pillar and ram it into him. Zeus then repeats his lightning-based phase. After the second Blade theft, activate Rage of the Titans; ordinary attacks damage Kratos against Zeus’s shield, while Rage attacks break it and return Rage orbs. Complete the next prompt and pillar interaction. The final struggle is a mandatory quick-time sequence. Follow every displayed input, including the final rapid-button prompt, or Kratos dies and the sequence restarts.
- Find the fate thread near Clotho’s rightmost hand.
- Reach the mirror within the 30-second rewind timer.
- Use Siren finishers to expose Zeus’s hand.
- Reflect lightning or use Atlas Quake for safer openings.
- Recover the Blade of Olympus and use the indicated pillar.
- Use Rage of the Titans against Zeus’s shield.
- Complete every final quick-time prompt.
Finish the campaign after Zeus
Zeus’s defeat is not the final gameplay checkpoint. After the confrontation, Kratos returns to Clotho’s lair. Pull the fate thread again to rewind to the critical moment, activate the Amulet when leaving the platform and return to the mirror through the direct route. Jump through the mirror to trigger the time-travel sequence that brings the Titans forward.
Continue through the resulting Olympus assault cinematics. The main campaign is complete when the final story scenes finish and the credits begin or conclude. Do not treat Challenge of the Titans, Bonus Play, urn effects or collectible cleanup as required for the primary story ending.
- Rewind the fate thread after Zeus’s defeat.
- Reach and cross the final mirror.
- See the Titans’ arrival and the concluding Olympus scenes.
- Confirm that the credits have been reached.
Before you move on
- The first Lahkesis encounter is complete.
- Atropos is defeated on the Sword of Destiny without allowing it to be destroyed.
- Both side mirrors are destroyed in the Lahkesis-and-Atropos rematch, followed by the finishing sequence.
- Atlas grants Atlas Quake and the spawned Legionnaire sequence is cleared.
- All three of Clotho’s arms are trapped, the blade is aligned and the finishing sequence is complete.
- The first fate-thread rewind reaches the mirror within the timer.
- Zeus’s giant-hand phase, normal-size phase, Blade thefts, pillar interactions and final quick-time struggle are complete.
- The second fate-thread rewind is performed after Zeus.
- The final mirror is crossed and the concluding Olympus scenes and credits are reached.
References for this chapter
Troubleshooting, Recovery from Failure and Save Hygiene
When the same section keeps defeating you, identify whether the problem is combat pressure, a specific attack, a traversal mistake, depleted resources, or unreliable hardware. Adjust one factor at a time: improve a focused weapon or magic upgrade, change your positioning, preserve magic for the dangerous wave, or practice the attack’s warning and recovery window. God of War II on the original PlayStation 2 uses marked save points and memory-card saves, so maintain separate recovery files instead of trusting one constantly overwritten file. A stable backup before a boss, long puzzle, or timed route can save substantial replay time.
1. Diagnose the failure before repeating the section
After two or three deaths in the same area, stop repeating the attempt unchanged. Identify the event that actually ends the run: being surrounded, taking one telegraphed heavy hit, missing a grapple or jump, failing an action prompt, or entering the encounter with too little health or magic. Combat pressure calls for better crowd control and positioning; one predictable strike calls for watching its wind-up and rolling or blocking at the correct moment; a traversal death calls for slowing down and checking the next landing or grapple point before committing.
If the failure is an action prompt, replay the approach while watching for the on-screen instruction instead of attacking through the sequence. If inputs feel late or inconsistent, test the controller outside the dangerous attempt. Confirm that movement returns to neutral and that the face buttons, shoulder buttons, Start, and analog sticks register separately.
- Name the exact attack, hazard, or input that caused the death.
- Spend one attempt observing the dangerous pattern instead of forcing damage.
- Test the controller before changing your upgrade plan.
2. Rebalance upgrades and preserve resources
Use red orbs according to the problem in front of you rather than buying every available option. Keep the Blades of Athena competitive so ordinary enemies do not consume all of your health, then improve a magic attack that reliably controls groups or damages the enemy type causing trouble. The manual confirms that weapons and magic are upgraded from the Power Up menu with collected red orbs; the walkthrough evidence also shows weapon upgrades being planned around major save points rather than purchased randomly.
Do not spend all available magic before a boss, timed traversal, or multi-wave room. Open reachable red, green, blue, and yellow chests before committing to the next major sequence, and leave a reserve when the route makes a difficult encounter likely. If you missed nearby optional red-orb chests, collect those first. Repeating a previously cleared, low-risk encounter can also rebuild resources, but do not treat an unfinished hazard room as a safe farming route.
- Prioritize one dependable weapon path and one useful crowd-control spell.
- Keep magic available for the hardest wave or boss phase.
- Collect safe nearby resources before entering a one-way sequence.
3. Use save points as deliberate recovery markers
Approach every marked save point after clearing a major combat room, puzzle, boss, or traversal section. The game’s guides identify these points throughout the named areas, and the save-file information can help identify the subsection where the file was created. If a death returns you with poor health or depleted magic, decide whether the checkpoint is still workable. If not, load the last manual save and replay the route while spending less magic on ordinary enemies.
When recovering red orbs, use cleared sections you can complete consistently. Fight with normal attacks where possible, use grabs or environmental hazards to reduce risk, and avoid spending Rage or magic merely to finish enemies that are already under control. Save again when you reach the next stable point rather than carrying a fragile attempt through several unsaved rooms.
- Save after a successful major milestone.
- Reload the previous manual save when a checkpoint leaves you under-resourced.
- Use only cleared, repeatable encounters for recovery.
4. Verify the original PS2 hardware and memory card
For the North American PlayStation 2 release, the manual instructs players to insert an 8MB PlayStation 2 memory card into memory-card slot 1 to save settings and progress. Confirm that the card is firmly inserted, has available space, and appears when the game presents its save or load screen. Do not remove the card or switch off the console while saving.
If the game freezes during saving, refuses to recognize the card, or repeatedly fails to load a file, stop overwriting the active progression file. Power down normally when possible, reseat the card, and test a known-good official or licensed card. If the problem persists, preserve the last file that still loads instead of risking it with repeated save attempts.
- Use a recognized 8MB PlayStation 2 memory card in slot 1.
- Check that the card appears before starting a long session.
- Never interrupt an active save operation.
5. Maintain a current file and a fallback file
Keep two manual saves whenever the card has room. Use one as the current progression file and the other as a stable fallback from before the latest boss, long puzzle, or timed route. Rotate them rather than overwriting the same file every time. This protects you from both a bad resource state and a file that becomes unreadable.
After creating an important save, return to the load screen or otherwise confirm that the file is listed before continuing. Load-test the fallback file before deleting older saves. A file farther ahead is not automatically the safer file: keep the earlier save until the new one has been verified and the next section is secure.
- Keep a current save and an earlier stable backup.
- Confirm important files appear in the load list.
- Do not delete the backup until the newer progression file has been tested.
Before you move on
- You can reload a recent save and reach the current area without relying on an unverified file.
- Your primary weapon and preferred crowd-control magic are strong enough that ordinary enemies do not consume all health or magic.
- A second save preserves a stable milestone before the current difficult section.
- The controller registers movement, attacks, grabs, blocking, dodging, and menu inputs consistently.
- The PlayStation 2 recognizes the memory card and successfully lists and loads the tested save files.
Finishing up
You reach the Summit of Sacrifice, complete the Zeus confrontation sequence and return to the Loom Chamber.
You pull Kratos’s fate thread and use the Loom to travel back to the Great War, then enter the final mirror to trigger the concluding story cinematics.
All mandatory bosses, including the Sisters of Fate encounters and the Summit of Sacrifice sequence, are defeated.
The Great War and Mount Olympus ending cinematics play through to the ending credits.
You can confirm completion when the final cliffhanger scenes have finished and the credits have appeared; Challenge of the Titans and Bonus Play are optional post-game content.
Choose your next gameScreenshots & video
Game imagery for reference. Follow the written chapters above for the route and strategies.
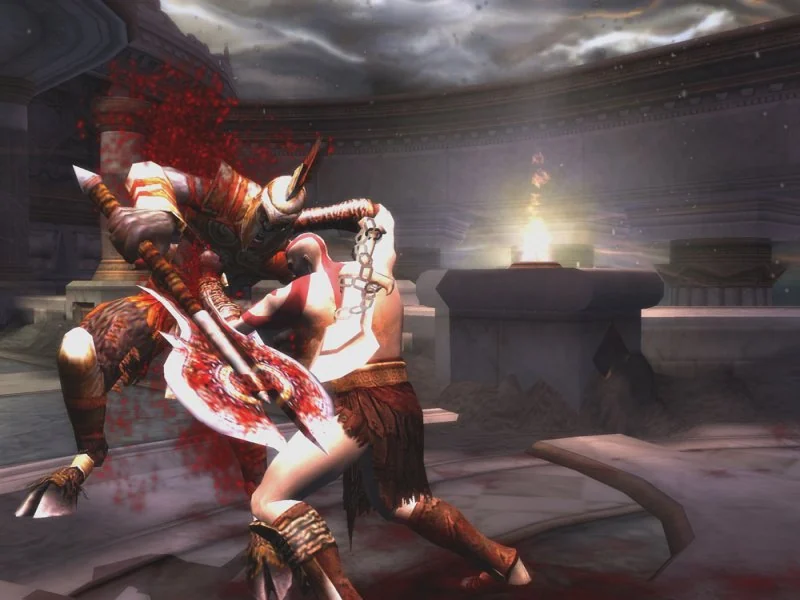
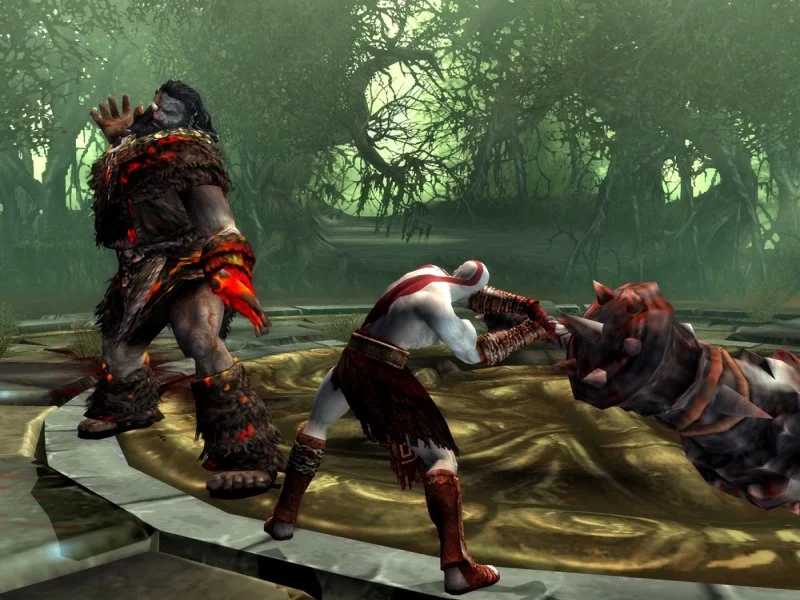
Sources & references
Our original guide draws on the references below. Check the edition at the top of this page before following controls or unlock requirements.
- God of War II - Guide and Walkthrough - PlayStation 2 - By Berserker
- God of War II - Combat FAQ - PlayStation 2 - By Robyrt
- God of War II Guide and Walkthrough - PlayStation 2 - GameFAQs
- God of War II Walkthrough - GameSpot
- God of War II - Guide and Walkthrough - PlayStation 2 - By VampireHorde
- God of War II - Guide and Walkthrough - PlayStation 2 - By ZenithWillRule
- God of War II Guide — Lair of the Titan Walkthrough, SuperCheats
- God of War II Guide — The Steeds of Time Walkthrough — Super Cheats
- God of War 2 Guide — Getting to the Temple of Lahkesis and the Steeds of Time — Altered Gamer
- God of War II Guide — The Temple of Lahkesis Walkthrough
- God of War II - Chest Guide - PlayStation 2 - By Mookiethebold
- God of War II - Guide and Walkthrough - PlayStation 2 - By YuGiOhFm2002 - GameFAQs
- God of War 2: Destiny's Atrium - part 1
- God of War II Guide - The Bog of the Forgotten Walkthrough
- God of War II — Guide and Walkthrough by zukowskc
- God of War II Guide — The Temple of Euryale Walkthrough
- God of War 2: Temple of Euryale - Part 2
- Temple of Euryale | God of War Wiki
- God of War II Guide - Atlas Walkthrough
- God of War II FAQ/Walkthrough - GameRevolution
- God of War II Guide - The Palace of the Fates Walkthrough - SuperCheats
- God of War II — Puzzle FAQ — PlayStation 2 — WallStreetWolf
- God of War II - Game Script - PlayStation 2 - By SamuraiX-
- God of War II strategy guide: Page 20
- God of War II Guide - The Phoenix Chamber Walkthrough
- God of War 2: The Phoenix Chamber
- God of War II Guide — The Temple of the Fates Walkthrough, SuperCheats
- God of War II FAQ/Walkthrough — The Summit of Sacrifice
- God of War 2: The Loom Chamber — Part 1 — GamePressure
- God of War II Guide - The Summit of Sacrifice Walkthrough
- God of War II Cheats, Codes, and Secrets for PlayStation 2
- God of War II PS2 Cheats
- God of War II — Urn Location FAQ — PlayStation 2 — GameFAQs
- God of War II — Gorgon Eye/Phoenix Feather Locations — PlayStation 2 — GameFAQs
- God of War II User Manual
About the game & collecting notes
- Platform
- PlayStation 2
Detailed, ordered walkthrough for God of War II on the original North American PlayStation 2 release. Covers the complete single-player campaign from Rhodes through the Lair of the Titan, Steeds of Time, Temple of Lahkesis, Bog of the Forgotten, Temple of Euryale, Destiny’s Atrium, Hall of Atropos, Atlas, Palace of the Fates, Phoenix Chamber, Temple of the Fates, Loom Chamber, Summit of Sacrifice and the final Great War and Mount Olympus cinematics. Required progression, boss phases, puzzle routes, save points, recovery advice and optional content are clearly separated.
Darryl Polo
Darryl Polo loves tinkering with emulation and revisiting retro games. He enjoys exploring how old favorites play on different setups and sharing what he learns along the way. At Joking Joystick, he writes about the games, hardware, and small discoveries that keep the hobby fun.
Our editorial standardsFound a step that needs another look? Help us improve this guide.