ESPN NFL 2K5 Strategy Guide: PS2 Controls and Franchise Progression
Build a dependable offense and defense in the original PlayStation 2 edition of ESPN NFL 2K5. This guide explains controls, play selection, special teams, and a complete Franchise routine from roster setup through the regular season, playoffs, and offseason, with practical fixes for turnovers, sacks, defensive breakdowns, and costly roster decisions.

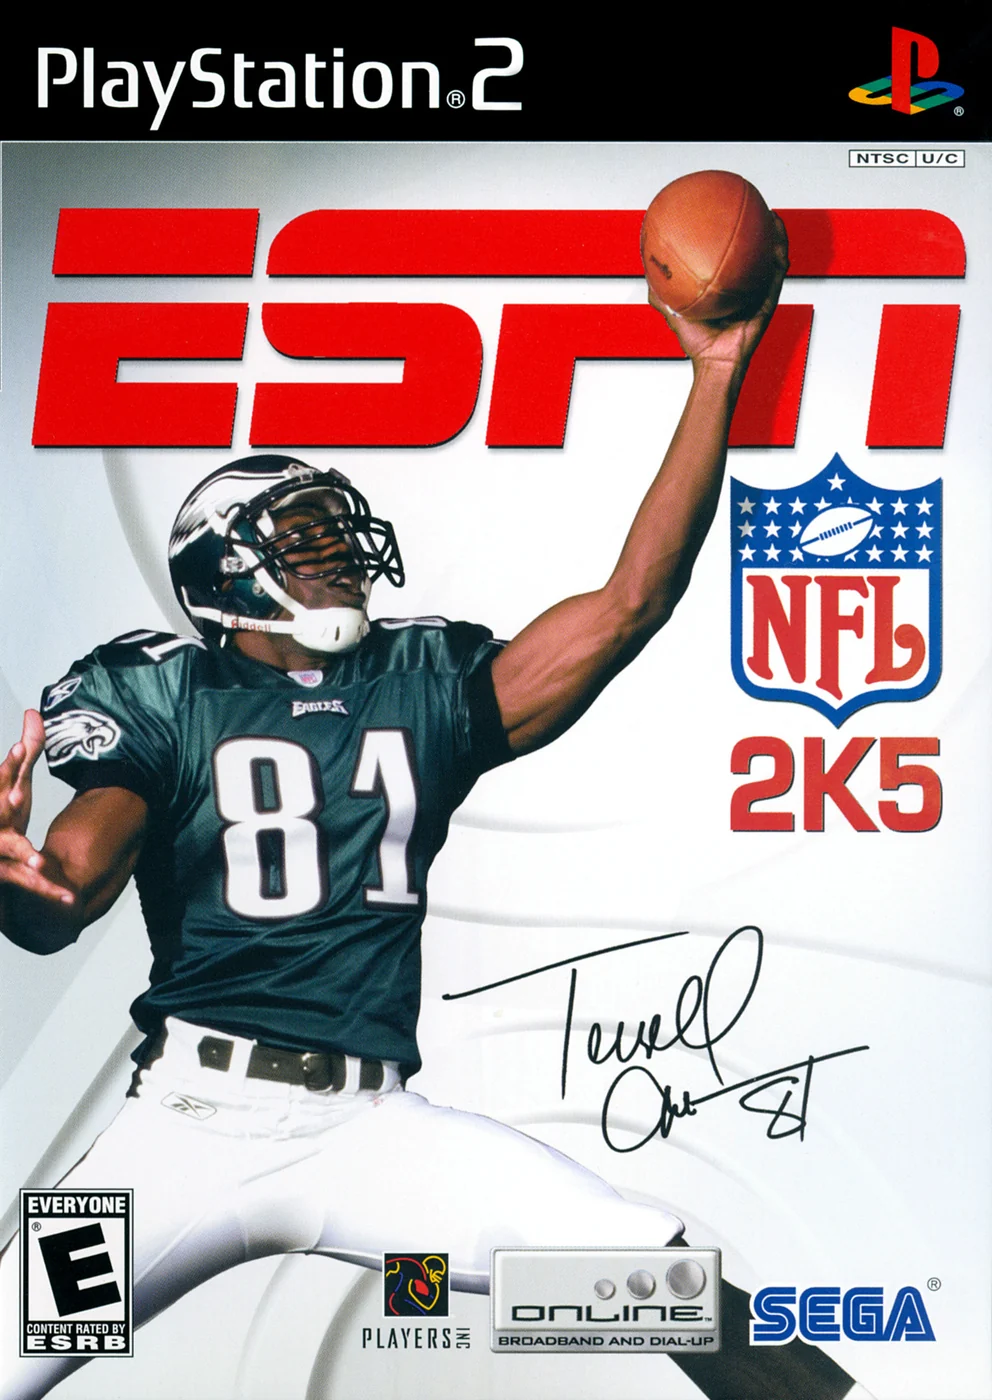
Find a copy
ESPN NFL 2K5 PlayStation 2
We may earn a commission if you buy through these links, at no extra cost to you. As an Amazon Associate I earn from qualifying purchases.
Opens retailer search results. Check the model, edition, seller, availability and current price before buying.
Before you begin
Winning consistently in NFL 2K5 starts with a small set of plays you understand. You need to recognize what the defense is showing, protect the ball, and choose a defensive response that fits the situation. This guide uses the original PlayStation 2 controls and offline modes to build those habits before moving into Franchise management.
The Franchise chapters follow a full season's workflow and the transition into the next year. They cover preparation, lineup decisions, game management, playoff adjustments, contracts, scouting, and the draft. Results still depend on your team and execution, so use the troubleshooting advice to diagnose the mistakes behind a loss instead of changing every setting at once.
Set yourself up for the run
Keep the default PS2 controls while learning, or check your chosen alternate layout before applying button-specific advice.
Practice a small play list with inside and outside runs, short and intermediate passes, a safe coverage, and a pressure call.
Use consistent quarter length and difficulty so you can compare your decisions across games.
Review your team's depth chart and strengths before building a game plan.
Keep manual saves before advancing a Franchise week or entering a major offseason phase.
Choose whether to use the optional Weekly Prep feature when setting up your Franchise routine.
Track interceptions, sacks, third-down results, red-zone scoring, and big plays allowed to identify what needs practice.
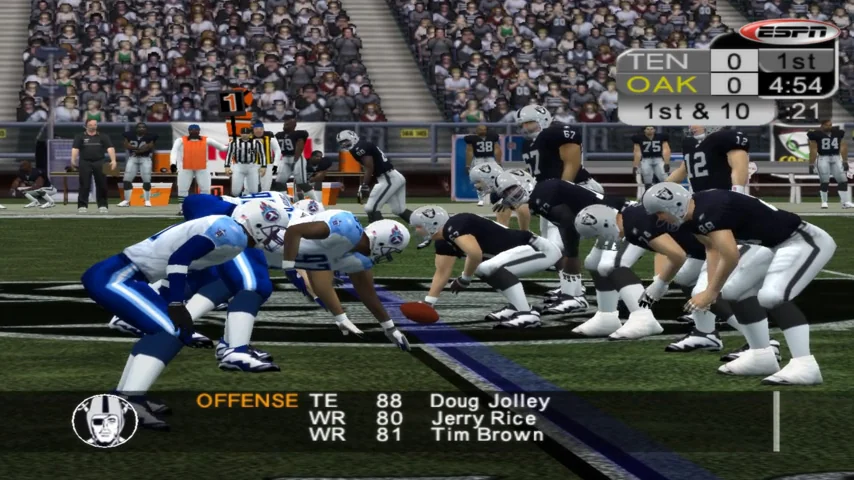
Set up a game you can learn from
Begin in the original PlayStation 2 edition with a stable offline setup, not a pile of changing options. Quick Game is your fastest route to live snaps, Practice is where you repeat inputs without season pressure, Franchise is the long-term team mode, and VIP records exist as their own saveable profile data for tendencies and statistics. The PS2 manual also points you to an in-game Reference Guide with Play Terms, Play Art, Jargon, and Tips, which is useful when a football term or route name slows you down.
Start with offline modes that teach one skill at a time
Use Quick Game first. It is the shortest path from team select to kickoff, so it is the best place to learn huddles, play calling, punts, and red-zone decisions without also managing contracts or a weekly calendar. The enhanced PS2 manual describes Quick Game as a straightforward pick-up game mode, while the printed manual separates longer management work into Franchise and VIP into its own menu family.
Use Practice before your first serious full game. The PS2 material verifies Basic Training and Scrimmage as practice tools, with Scrimmage letting you work one-on-one moves, offense-only reps, full scrimmage, or kickoff work. That makes Practice the right place to repeat a handoff, a short pass, or a defensive tackle until your fingers stop hesitating.
Leave Franchise for after you can finish a full game cleanly. Franchise is the season-long mode for controlling a team through games and personnel decisions, so it teaches best once the on-field basics are already comfortable. VIP should be treated as separate profile support: the PS2 manual notes that you can create, load, edit, save, and delete VIP records and review related statistics there.
- Quick Game for early live matches.
- Practice for repetition before results matter.
- Franchise after you can play a complete game without menu confusion.
- Use VIP as profile and tendency support, not as your main learning mode.
Lock one control layout before you build muscle memory
The safest starting point is the default PS2 layout printed in the manual. On offense before the snap, X snaps the ball, Circle gives a hard count, Triangle opens the audible menu, R1 shows fatigue, and L1 shows routes. After the snap, the receiver buttons are X, Circle, Square, Triangle, and L1; R2 throws the ball away, L2 pump fakes, and holding R1 sends the quarterback into scramble control.
If you prefer a different controller configuration, choose it now and stop changing. The chapter goal is not to prove one layout superior. It is to prevent you from relearning simple tasks like the snap, audible, throwaway, and player switch every session. Pick a scheme once, then keep it through several practice sessions and early Quick Games so your mistakes come from football reads, not from uncertain fingers.
Make a memory card save once your baseline feels right. That way you can experiment later without losing the learning setup that already works for you. The important part is consistency: same controls, same difficulty, same approximate game length, and the same team long enough to notice real improvement.
- Use the printed default PS2 controls unless you deliberately commit to another setup.
- Do not change layout after one bad drive.
- Save a baseline before larger experiments.
Choose a learning difficulty and keep your tests fair
Rookie is the cleanest starting point if you are new to football games. Pro is reasonable if you already understand coverages, clock use, and when not to force throws. Either can work, but do not jump back and forth every game or you will never know whether the improvement came from better decisions or easier resistance.
Change one setting at a time. If passing feels rough, do not also cut quarter length, switch controls, and pick a different team in the same sitting. Hold everything else steady, then test the single change.
Keep quarter length consistent across your first several games. A shorter game is fine for learning, but use the same length repeatedly so your first downs, turnovers, punts, and scoring chances are comparable from one session to the next.
- Rookie for brand-new players.
- Pro if basic football structure already makes sense.
- One setting change at a time.
- Keep quarter length fixed for fair comparison.
Pick a team with obvious strengths, not a puzzle roster
Choose a team that tells you how it wants to play. A strong beginner team usually gives you at least one clear advantage: a dependable starting quarterback, a featured runner, a solid line, or a defense that can survive a few mistakes. In the original 2004-era environment, teams such as the Colts, Chiefs, or Ravens work as examples of those different identities: pass-first stability, run-first efficiency, or defense-led field-position football.
If you want to learn passing rhythm, pick a roster with a top quarterback and a clear primary target. If you want to learn down-and-distance discipline, pick a team with a featured runner and call more normal first- and second-down runs. If you want to learn punting, tackling, and protecting a lead, pick a defense-oriented team and accept lower-risk offense.
Before you commit to a Franchise file, open the depth chart and ask three simple questions: who is my safest quarterback, who gets my early carries, and which unit keeps me in games when I make a mistake. If you can answer those quickly, the roster is good enough for learning.
- Pick a team for one obvious strength.
- Do not start your first long save with a roster that forces constant low-percentage throws.
- Check quarterback, running back, and defense before beginning Franchise.
Learn only the football basics you need right now
Your offense gets four downs to gain 10 yards. Reach the line to gain and you earn a new first down. If you fail on fourth down, the opponent usually takes possession at that spot, which is why a punt is often the correct beginner decision.
Scoring is simple at first: touchdowns are worth six, a successful extra point adds one, and field goals add three. Punts matter because field position matters. A stalled drive near midfield is annoying; a turnover deep in your own territory is often game-changing.
Watch down, distance, field position, score, and time before every snap. That is enough football to begin. If you are ahead, staying in bounds and avoiding giveaways protects the clock. If you are behind, you need yards plus enough time left to use them. Do not drown in terminology before you can run an ordinary drive.
- Know four downs and 10 yards.
- Respect punts and field position.
- Understand touchdowns, extra points, and field goals.
- Notice the clock before every snap.
Build a repeatable first-session routine
A strong opening routine is short: spend a few minutes in Practice, then play one full Quick Game with the same team and settings. Afterward, ask what actually failed. Did you forget the snap button, throw late, ignore fourth-down risk, or keep passing when a run would have shortened the game.
Once you can finish a complete match without losing track of controls or basic football context, then begin Franchise. That is the point where the longer mode becomes useful instead of distracting. You are not trying to dominate yet. You are trying to create a setup that teaches the same lesson every time you sit down.
- Practice, then one Quick Game.
- Reuse the same team and rules for several sessions.
- Promote yourself to Franchise only after one controlled full game.
Before you move on
- You can explain what Quick Game, Practice, Franchise, and VIP each do in your offline routine.
- You have one locked control layout and have stopped changing it mid-learning block.
- You have chosen one team for a clear reason such as passing stability, a strong run game, or defense-led football.
- You can identify down, distance, basic scoring, field-position risk, and when a punt is smarter than forcing fourth down.
Build a compact practice playbook
Before Franchise, train on the original PlayStation 2 version until one small package feels natural. Practice mode on PS2 is split into Basic Training, Scrimmage, and Situation. Use Basic Training to learn buttons, Scrimmage to repeat the same football actions until the reason for failure becomes obvious, and leave Situation for later comeback and clock drills. Stay on the default PS2 layout for this chapter. The goal is not to memorize the whole playbook. It is to make one inside run, one outside run, one quick pass, one intermediate pass, one cautious deep throw, one base coverage, and one pressure call repeatable enough that you can carry them into a real game.
Start in Practice and use the right mode for the job
Open Practice and begin with Basic Training. The PS2 manual describes it as custom drills for the basic control fundamentals, and it also notes that pressing X on the first drill will cycle you through the set automatically. If you need to leave a drill, pause and return through Tutorial Menu instead of fighting the same rep with bad habits.
After one pass through Basic Training, move to Scrimmage. Scrimmage is the workhorse mode for this chapter because it lets you choose a Practice Type, set the ball spot, set yards to go, and control whether the CPU repeats calls or varies them. The PS2 Scrimmage options include Special Move, Offense Only, Full Scrimmage, and Kickoff. Use Special Move for one on one move timing, Offense Only for your six offensive calls, Full Scrimmage for defense and real reads, and Kickoff only long enough to learn the kick meter and aiming.
Do not ignore the extra Scrimmage settings. If you want clean repetition, leave Offensive AI Playcalling or Defensive AI Playcalling off so you can see the same concept again. Power Pocket is available as a practice aid for pass protection. Use it only for a short passing block if pressure is stopping you from learning route timing at all, then turn it back off so your pocket habits stay realistic.
- Run the full Basic Training sequence once.
- Use Scrimmage, not a live exhibition, for your repeated reps.
- Choose Special Move, Offense Only, Full Scrimmage, or Kickoff on purpose instead of bouncing around randomly.
- Use Power Pocket only as a temporary learning aid.
Lock in the default PS2 controls
Do not change between default and alternate layouts while you are learning. The game offers alternate controller setups, but your first objective is muscle memory. Stay with the default PS2 scheme until you can call a play, identify your receiver icons, and tackle without hesitating.
Use this as your grouped control reference. Pre snap offense: left stick or D pad up and down selects a player, left and right sends that player in motion, X hurries to the line and snaps, Circle hard counts, Triangle opens or dismisses the audible menu, hold R1 to view fatigue, hold L1 to view routes, Select calls timeout, and the right stick plus a receiver button assigns a hot route. Quarterback passing: left stick moves the quarterback, X Circle Square Triangle and L1 throw to those receivers, R2 throws the ball away, L2 pump fakes, and hold R1 to scramble. The manual also notes that holding a pass button produces a bullet pass while tapping it produces a lob.
Ballcarrier controls: left stick moves the runner, tap X for burst and hold X to charge a move, Circle spins, Square dives or gives the quarterback hook slide, Triangle shoulder charges, R2 jukes right, L2 jukes left, R1 stiff arms right, and L1 stiff arms left. Non ballcarrier offense: left stick moves the player, tap X for burst and hold X to charge, Circle switches player, Square dives or chop blocks, Triangle waves for the pass, and the shoulder buttons handle jukes by context.
Defense needs one extra warning. Before the snap, X switches players and Circle switches back to the previous defender. After the snap, Circle becomes the normal switch-player button. Post snap defense also uses Square for a diving tackle, Triangle to jump or raise hands, R1 for a swim move or interception attempt in the pass path, and L1 for a club move or a pass block in the pass path. If you mix up the pre snap and post snap switch buttons, you will create your own missed angles.
- Memorize receiver icons before you try hot routes or audibles.
- Use tap versus hold on the pass buttons to feel lob and bullet trajectories.
- Treat pre snap defender switching and post snap defender switching as different contexts.
- Practice Square as a late, committed tackle input, not your default answer on every play.
Build a six play offensive package
In Offense Only Scrimmage, pick six calls and keep them for the whole session. Use one inside run, one outside run, one quick pass, one intermediate route concept, one cautious deep attempt, and one short yardage answer. You are not proving how much of the playbook you know. You are building a compact package that teaches timing, patience, and reads.
For the run pair, choose one call that hits inside quickly and one that stresses the edge. Follow the intended gap first. On the inside run, do not hold X behind the line. Let the blocker engage, then burst through daylight. On the outside run, press the path of the play and turn up only after the edge tells you where the crease is. Save charged moves for a defender who is actually closing on you.
For the pass trio, use one quick throw, one intermediate concept, and one safe deep look. Hold L1 before the snap to view routes and connect the play art to the name. The PS2 manual explains the naming help: 50 means a five step drop, 90 means a three step drop, PA is play action, and RO is a rollout. That gives you a built in timing clue. If you call a 90 concept, plant and throw quickly. If you call a 50 concept, expect a slightly longer drop. On the deep shot, throw only if protection holds and the receiver has real space. Otherwise check down or reset the rep.
- Inside run for patience through the designed hole.
- Outside run for edge reading and controlled acceleration.
- Quick pass for one read and immediate release.
- Intermediate concept for route-break timing.
- Cautious deep throw only when the pocket and leverage agree.
- Short yardage call you trust on third and short.
Add one base coverage and one pressure call on defense
Move to Full Scrimmage and limit yourself to two defensive calls at first. Start with one base zone from a standard front, then add one simple pressure call. A zone shell teaches landmarks and discipline. A modest blitz teaches what you are giving up when you send extra rushers.
Control a role you can honor. A defensive lineman is a good beginner choice because you can rush, contain, and learn pursuit without vacating a coverage zone. If you control a linebacker or defensive back, commit to the assignment shown by the play art instead of chasing the first route that crosses your screen.
Practice player switching on purpose. Before the snap, get lined up with X and Circle correctly. After the snap, switch with Circle only when the new defender already has a usable angle. If you switch too early and immediately dive with Square, you will blame the play call for a mistake caused by your own input timing.
- Use one base zone as your default learning call.
- Use one controlled pressure call, not an all out gamble.
- Control a lineman or a simple underneath zone defender.
- Switch late enough that the new defender can actually finish the play.
Use the in game manual and track why reps fail
When a route name or concept is unclear, leave the field and open Extras, then Game Manual, then Reference Guide. The PS2 guide divides Reference Guide into Play Terms, Play Art, Jargon, and Tips. Use Play Terms and Play Art constantly in this chapter. If you do not know what a slant, speed out, curl, or blitz is supposed to look like, you are not really practicing football yet. You are only guessing with buttons.
Finish by charting a short sample. Run eight to ten reps of each offensive call and several reps of each defensive call. After every bad rep, tag the cause with one label. On offense use bad read, bad timing, or bad execution. On defense use wrong gap, poor pursuit angle, or mistimed tackle input. That simple log matters more than total yards in Practice. If one play fails for several unrelated reasons, shelve it for now and replace it with something simpler. Keep the package stable until the mistakes become predictable.
- Check Play Terms when a route family is unfamiliar.
- Check Play Art before you repeat a confusing play.
- Log the reason for every failed rep in one short label.
- Cut plays that create confusion instead of teaching a repeatable habit.
Before you move on
- You can explain the difference between Basic Training, Scrimmage, and Situation, and you know that this chapter mainly uses Basic Training and Scrimmage.
- You can name the default PS2 pass icons and the key actions tied to R2, L2, R1, Circle, Square, and Triangle on offense and defense.
- You have a written six play offensive package and a two call defensive package that you can repeat on command.
- After a practice block, you can label a failure as bad read, bad timing, bad execution, wrong gap, poor pursuit angle, or mistimed tackle input instead of calling it random.
- You can open the in game Reference Guide and use Play Terms or Play Art to check a route or concept before returning to the field.
References for this chapter
Read the defense before the snap
In ESPN NFL 2K5 on PlayStation 2, the best pre-snap habit is not guessing the entire defense. It is trimming the play down to one likely answer and one safe backup. Before every snap, count the box, find the deep safeties, check the corners, decide whether pressure is likely, then name your first read and your checkdown. If the defense only forces one change, make one change. Do not rebuild the whole play at the line.
Start with the situation, then count the box
Look at the scoreboard strip before you look at the secondary. Third-and-3 at midfield, second-and-10 from your own 8, and first-and-goal from the 6 are three different problems even if the defense lines up similarly. Your pre-snap read should always begin with the yards needed, where the ball sits, and whether a turnover would be disastrous.
Then count the defenders close enough to affect the run immediately. You do not need a perfect clinic count. Just decide whether the defense looks light, balanced, or crowded near the line. A crowded front on a short-yardage down warns you that inside space will close quickly. A lighter box tells you the original run or short pass may already be fine. This first glance keeps you from audibling out of good plays for no reason.
- Say the down and distance to yourself first.
- Judge the front as light, balanced, or crowded.
- Ask whether your original call still fits the field position and clock.
Find deep help and corner leverage
Next, lift your eyes to the safeties. If one safety is deep, the defense may be stronger in the middle after the snap but thinner somewhere underneath or outside. If two safeties are deep, do not talk yourself into a blind vertical shot just because a receiver looks fast. Two-deep structure usually means you should be ready to work shorter space unless the matchup is clearly favorable and protection is stable.
Now study the corner aligned over your intended receiver. If he is playing off, a stop, hitch-style throw, or quick out becomes more attractive, especially when you only need modest yardage. If he is tight and square at the line, expect contact on timing routes and be ready to move to an inside-breaking route or your outlet. This is where down and distance matters again. On third-and-4, a corner giving cushion is often an invitation to take the easy yards instead of chasing a bigger play.
Hold L1 before the snap when you need to confirm who is actually running the route you want to read first. That keeps you from calling a change based on memory and then discovering the concept was different from what you thought.
- Count one deep safety or two.
- Check whether your outside target is pressed or cushioned.
- Use route view before changing the play if you are unsure who owns the first window.
Use motion as a clue, then recheck after the snap
If you want one extra piece of information, select an eligible player with up or down, then send him across with left or right. Motion is useful because it can reveal whether a defender travels with him or the defense bumps across zones. If one defender follows him all the way, man coverage is more likely. If the defense slides and passes him across, zone is more likely.
Do not treat that as proof. ESPN NFL 2K5 still gives the defense room to rotate, disguise, and change the picture after the ball is snapped. Motion should answer one question, not start a panic. Use it when you already care about a slant, a shallow crossing route, or a quick outside throw. After the snap, take one short look at the safeties again before you release the ball on anything intermediate or deep.
- Motion only when you want one answer.
- Watch for a travel defender versus a zone bump.
- Recheck the safeties immediately after the snap on longer throws.
Choose the primary read, the checkdown, and the pressure answer
Before snapping, say the order of the play in your head. Example: stop route first, back in the flat second, scramble lane or throwaway if edge pressure wins. That simple order is what prevents sacks and late interceptions. Your first read should match the leverage you just saw. Off coverage makes a quick stop or out attractive. Tight press with inside help may push you toward another receiver or the back underneath.
You also need a pressure answer before the ball is live. If the defense crowds the line and you suspect heat, your first answer should get out quickly. Do not wait until the rush appears to invent a plan. The plan should already be there. If you are not comfortable with the original call, bring up the audible menu with Triangle, cycle with left or right, and confirm the new audible with X, Circle, or Square. A good beginner audible is changing out of a slow-developing deep concept into a quicker pass or safer run when the defense has clearly loaded the line.
For a smaller adjustment, use a hot route instead of a full audible. Move the right analog stick toward the route you want, then press the intended receiver button. A reliable example is changing a wideout to a stop route when the corner is playing soft and you only need a few yards. If you believe a back or tight end must stay in to help, click and hold R3 and press that player's button to assign pass block. Only do that when you understand you are removing that player from the route concept.
- Name the first read before the snap.
- Name the checkdown before the snap.
- Have one answer ready for pressure: quick throw, scramble lane, or throwaway.
- If you audible or hot-route, change one thing for one reason.
Snap on time and play the picture you created
Once you have the box count, safety count, leverage read, and one clear answer, stop adjusting. Many bad plays in this game start with correct information and end with a delay because the player keeps searching for a perfect call. Snap while the defense still shows the picture you read.
Your first two post-snap beats should be simple. Confirm the safeties, then confirm whether the primary receiver actually got the release and space you expected. If yes, throw on time. If not, move immediately to the checkdown or safe answer you named earlier. The purpose of pre-snap reading in NFL 2K5 is not to be psychic. It is to make the first second after the snap slower and cleaner for you.
- Do not keep changing things once the read is good enough.
- Confirm the safeties first after the snap on pass plays.
- If the first window is gone, take the checkdown quickly instead of forcing it.
Before you move on
- You can follow a fixed routine: situation, box count, safeties, corner leverage, primary read, checkdown, snap.
- You know that motion is evidence, not certainty, and you still verify the coverage after the snap.
- You can explain when a soft corner makes a quick stop or out more attractive than a deeper throw.
- You can use Triangle for audibles and the right analog stick plus receiver button for hot routes on PS2.
- You can choose one pressure answer before the snap instead of panicking once the rush appears.
Run behind your blockers
Treat every called run as a designed path, not a sprint to open grass. In ESPN NFL 2K5 on PlayStation 2, the handoff or toss is automatic, so the important decision starts after the exchange: stay on the play’s track, let the first key block happen, then accelerate through the lane that actually opens. If you learn one inside run, one outside run, and one counter, you can stay ahead of the chains, shorten third down, and protect a lead without relying on risky throws.
Start with the run’s original aiming point
On a handoff or toss, do not jerk the runner sideways as soon as he gets the ball. The play was called to hit a specific gap or edge. On an inside run, press the lane between the center and guard or between the guard and tackle first. On an outside run, hold the wider path long enough for the tight end, fullback, or pulling blocker to reach the force defender.
Make one read at the line instead of trying to see every defender. Pick the first lead block or double-team at the point of attack. If that blocker seals the defender inside, take the outside shoulder and get north-south. If he washes the defender outward, cut just inside him. When you improvise before that block develops, you often run straight into the defender the play was designed to remove.
- Press the designed gap first
- Read one key block at the point of attack
- Make one committed cut and get vertical
Use X for timing, not panic
The manual-authoritative control here matters. Tap X for a speed burst after daylight appears. That is your acceleration button when you have cleared the line or when one cut has put a defender on the wrong shoulder. If you tap it too early in the backfield, you tighten your path and arrive at the hole before your blockers are ready.
Hold X to charge up power for a move when contact is about to happen. Think of it as preparing for a collision with a linebacker or safety, not as a permanent sprint state. Early runs become much steadier when you stop trying to run full speed through your own linemen.
- Do not burst into the back of your blockers
- Burst after the crease opens
- Charge a move only when contact is closing
Build one dependable inside run
Your first reliable call should be a plain inside handoff such as a dive or iso-style run from a basic set. Aim straight at the intended interior gap and stay tight to the block. If the defensive tackle is moved sideways and the linebacker hesitates, burst through immediately and accept the solid gain. Four safe yards on first down is a success because it creates a manageable second down and keeps the whole playbook open.
Only cut back when the backside is truly clean. A real cutback is not a bounce for style points. It happens when the defense has flowed too hard to the original side and open space appears behind the line. Plant once, cut once, and get upfield. If the backside is only half-open, take the modest gain and finish forward.
- Use the interior run to stay on schedule
- Cut back only if the backside lane is clearly there
- Take the certain yards instead of hunting a home run
Use edge runs to punish bad leverage
For a toss, sweep, or off-tackle run, stay on the outside track until the edge defender declares his angle. If he squares up inside your path, use R2 or L2 to juke away from that leverage. If a defender overruns the lane in space, Circle for a spin is the cleaner answer. If a corner or safety meets you high near the sideline and you still have momentum, use R1 or L1 for the stiff-arm on the correct side to keep moving upfield.
Triangle shoulder charge is the finish-through-contact tool when you need the last yard against a smaller defender or want to fall through a hit. Square dive is better saved for clear conversion moments, a goal-line reach, or a clean lane where you simply need the spot. In normal traffic, stay on your feet and keep possession first.
- Juke away from a defender’s leverage
- Spin when a defender overruns in space
- Stiff-arm when you have room and momentum
- Shoulder charge to finish a short conversion
Let counters fool the defense before you accelerate
A counter works because the defense reacts to the first step of the play. After the automatic handoff, stay patient while the pull block forms. Do not mash X while your own blocker is still crossing in front of you. Follow the false action, wait for the puller to connect, then plant and hit the lane behind him.
This is also the run where beginners force the ball outside too often. The best counter gain is usually the crease that opens after the second step of the design, not a race to the sideline. If the linebackers overpursue the fake, punish the interior lane. If the edge is truly cleaner after the block lands, take it, but do not abandon the design before the defense has been stretched.
- Let the pull block clear first
- Hit the counter lane after one firm plant
- Prefer the crease over an unnecessary bounce
Use rushing to control the game, not just chase highlights
A practical run game keeps you ahead of the chains. On first down, a positive inside run turns the next play into a short pass, another run, or a manageable third down. On second-and-short, an outside run can move the sticks while keeping the clock moving. When you have a late lead, repeated secure runs force the defense to tackle correctly and make every timeout matter.
Protect the ball and the drive. Do not treat every crowded run as a chance to reverse field. Avoid careless laterals and avoid desperation dives into heavy contact. If the defense has already limited the play, finish forward, accept the field position, and move to the next snap. Over a full game and over a franchise season, steady four-yard runs are more valuable than the occasional reckless gamble.
- Run to create shorter third downs
- Use the ground game to protect a lead
- Finish secure gains instead of forcing hero plays
Before you move on
- You can name one inside run, one outside run, and one counter from your playbook that you trust in normal game situations.
- You routinely follow the intended path of the run first, then burst only after the lane appears.
- You choose juke, spin, stiff-arm, or shoulder charge based on defender angle instead of pressing them at random.
- In a full game, your rushing calls help create manageable down-and-distance and help you protect a lead late.
Pass on rhythm
Learn one repeatable passing routine for ESPN NFL 2K5 on PlayStation 2: read the play name, match it to the quarterback drop, throw on time from a stable pocket, and treat the checkdown or throwaway as a successful outcome when the first window is covered.
Match the play name to the quarterback drop
Before you snap the ball, read the first tag in the play name. In the PS2 manual, 50 means a 5-step drop, 90 means a 3-step drop, PA means play action, RO means rollout, and PA-RO combines the fake with a rollout. The second part of the play name identifies the primary receiver and route family, so the name itself already tells you where the concept wants to start.
That matters because your feet and the route timing have to stay connected. On a 90 pass, expect the first break quickly and be ready to throw almost as soon as the short drop settles. On a 50 pass, let the deeper drop finish, hitch only if the pocket stays clean, and throw from balance instead of bailing backward. On RO and PA-RO calls, follow the designed movement instead of drifting into a different launch point.
For practice, keep your menu simple. Use route types you can recognize immediately in the play art and the play name: slant, out, speed out, corner, stop, flat, and basic tight end sit-down routes. Name one primary target and one underneath outlet before every snap so you are deciding with purpose instead of staring at the whole field after the ball is live.
- 50: deeper drop, patient feet, throw after the route develops
- 90: quick set, quick read, ball out on time
- PA or RO: respect the called action instead of improvising instantly
- Always identify the outlet before the snap
Use the default PS2 passing controls cleanly
On the default PS2 setup, the passing buttons are X, Circle, Square, Triangle, and L1 for the five eligible receivers shown by the game. R2 throws the ball away, L2 is the standard pump fake, and holding R1 puts the quarterback into scramble control. The manual also notes that a specific receiver pump fake can be done by double-tapping that receiver's button.
Pass strength changes with how long you hold the receiver button. The manual's passing tip says to hold the button for a bullet pass when you need the ball there quickly, and tap it for a lob when you need touch or a throw over a defender. Use that rule conservatively at first: quick in-breaking routes and firm sideline throws usually want more pace, while a simple flat, seam window over a linebacker, or a receiver settling in space often benefits from touch.
Do not hold R1 just because the rush starts to appear. Scramble mode changes the play from a timing pass into an improvised one, and most early mistakes come from leaving the pocket before the first read has even reached its break. Stay on the called drop unless pressure truly destroys the pocket or a clean running lane opens in front of you.
- Hit the correct receiver icon, not the nearest face button in panic
- Tap for touch, hold for pace
- Use L2 for a pump fake only when you have a reason
- Save R1 scramble for broken pockets or obvious running space
Drill one primary read and one checkdown
Your first practice concept should be small enough to solve in two decisions. Pick a pass with one quick primary route and one safe outlet underneath, such as a slant or speed out paired with a halfback in the flat or a tight end releasing short. That matches the manual's play-name logic and keeps your eyes disciplined.
At the snap, watch the primary receiver's break, not the entire secondary. If the route wins cleanly at the break, deliver the ball immediately. If the defender is already sitting in that lane or driving downhill before the receiver turns, come off it at once and hit the outlet. A four-yard gain on first down is a good rep if you threw on rhythm and avoided a risky late ball.
Judge each rep by cause. If the receiver looked open but the ball arrived late, your timing was wrong. If you never should have thrown it, the read was wrong. If the route opened but the pass sailed because you were drifting backward, the execution was wrong. That simple diagnosis will improve your passing faster than changing playbooks every few minutes.
- Primary first, outlet second
- Throw on the cut, not after the defender recovers
- Take the back or tight end when the first lane is muddy
- Label every bad rep as read, timing, or execution
Use the safe answer when the play is not there
On a 90 concept, do not add extra hitches waiting for a route that was designed to open fast. If the first read is covered, get to the outlet immediately. On a 50 concept, you have a little more time, but the answer is still small pocket movement, then a throw on schedule. Step up or slide just enough to reset your base. Do not retreat ten yards and expect the route timing to survive.
If both targets are covered, the manual's advice is clear: throw the ball away instead of taking the sack, but make sure you are outside your offensive tackles when you press R2 or you can be called for intentional grounding. If a lane opens before you commit to the throwaway, then scramble for modest yardage and get down safely rather than forcing a cross-body pass.
Maximum Passing is an optional layer, not a fix for bad reads. The manual says to enable it with SELECT from the Team Select or Choose Sides screens, then lead the receiver with the left analog stick or directional button while passing. It is pressure-sensitive, so practice it separately. First prove you can complete the basic concept on rhythm. Then repeat the same concept with small directional leads to move the catch point away from the nearest defender. If your results get worse, turn it back off and return to ordinary timing throws.
- 3-step pass: fast answer, no extra panic movement
- 5-step pass: finish the drop, then move slightly if needed
- R2 throwaway only after escaping the tackle box
- Practice Maximum Passing separately from basic rhythm passing
Before you move on
- You can explain what 50, 90, PA, RO, and PA-RO mean before the snap.
- You can name a primary read and an underneath outlet before calling for the ball.
- You can complete a short timing throw and, on the next rep, take the checkdown from the same concept without panicking.
- When both reads are covered, you are choosing the safe answer: outlet, legal throwaway, or modest scramble yardage.
- You can turn Maximum Passing on and off deliberately and understand that it is for ball placement, not for rescuing a bad read.
Attack man and zone coverage
On PlayStation 2 in ESPN NFL 2K5, good passing against coverage starts with a small plan, not a full defensive diagnosis. Use the pre-snap shell to guess whether your route should win by separation or by finding open space, then confirm it after the snap. Your job is to throw on time, move calmly from the first read to the second, and treat the back or tight end underneath as a real answer instead of a failure.
Start with the shell, then shrink the problem
Before the snap, find the safeties first. One deep safety can leave more grass outside or down the seam, while two deep safeties usually mean the defense is trying to keep a lid on vertical throws. Then check the corners. Tight corners lined up close to the receivers can hint at man ideas. Softer corners with more cushion can hint at zone. Treat both as clues, not proof, because the defense can rotate after the snap.
Now decide what kind of play you are really calling. Against a man look, you want a route that wins with leverage and separation. Against a zone look, you want a concept that stretches one defender and forces him to leave somebody open. Do not stand at the line trying to solve every possibility. Pick a primary idea, identify the safe outlet, and snap the ball.
- Count one-high or two-high safeties.
- Check whether the corners are tight, inside, outside, or soft.
- Decide whether the play should beat the defense with separation, open space, or a quick underneath gain.
Against man, throw to the break that beats leverage
Man coverage is easiest to attack when you notice where the defender is shaded. If the defender is cheating inside, an out-breaking route has a better chance to separate. If he is shaded outside, slants, ins, and crossing routes make him chase back across the receiver. That is why simple man-beaters for a beginner are slants, shallow crosses, and quick outs used for the right reason rather than at random.
Release the ball as the receiver makes his break. If you wait until the route looks obviously open, the defender often has time to recover. A shorter button press gives you touch. A longer press drives the ball faster into a tight window. If the first break does not win on schedule, come off it immediately and take the back or tight end underneath.
If the rush gets there before the route breaks, your first answer is the quick outlet. Your second answer is a controlled scramble lane if the middle or edge truly opens. Only use R2 to throw the ball away after you have escaped outside the offensive tackles and you are still behind the line of scrimmage. If you are trapped inside the pocket and cannot reach a legal spot, taking the sack can be smarter than forcing a turnover or drawing intentional grounding.
- Inside leverage by the defender favors out-breaking routes.
- Outside leverage favors slants, ins, and crosses.
- If the first break is covered, get to the underneath option on time.
- Do not deliberately use R2 from inside the tackle box.
Against zone, key one defender and throw where he is not
Zone coverage punishes quarterbacks who stare at the whole defense. Pick one underneath defender on the side of your concept before the snap. Usually that is the outside curl-flat defender or an inside hook defender. Watch his first movement. If he widens toward the flat, throw behind him. If he sinks under the deeper route, take the flat or short hook immediately.
Your best beginner zone answer is a simple high-low. Look for play art that stacks a short flat route under a deeper sideline route such as an out or corner on the same side. Many 2K5 playbooks include bunch, trips, doubles, and gun sets that can show this shape, but the exact formation depends on the team book you selected. The play art is what matters. One defender cannot hold both levels forever.
If the outside defender stays wide and the deeper help stays on top, do not wait for a busted coverage that never comes. Reset inside and take the running back, the tight end settling short, or another modest gain. Against zone, the safe completion on first or second down is valuable because it keeps you ahead of the chains.
- Choose one curl-flat or hook defender before the snap.
- Throw to the route level that defender vacates.
- If both levels stay capped, check down right away.
Take vertical shots only when the structure supports them
A deep shot needs three green lights. First, the safety structure must leave a lane. Second, your receiver must have the matchup or leverage to threaten it. Third, the protection must survive long enough for the route to develop. If any one of those pieces is missing, the throw is a gamble instead of a read.
One-high structure can make an outside vertical, post, or deep corner more reasonable if the middle safety is shaded away from your target. Two deep safeties usually tell you to work shorter unless the coverage busts after the snap. If you use Maximum Passing, treat it as a finishing tool that leads a correct throw into open field, not as a fix for a bad decision.
Name the bailout before the ball is snapped. On a deep concept, that bailout is often the back in the flat, the tight end underneath, or a shallow route crossing beneath the coverage. If the corner stays on top and the safety stays over the lane, cancel the shot and take the smaller gain.
- No vertical throw without lane, matchup, and protection.
- One-high can invite a shot; two-high usually asks for patience.
- Identify the bailout receiver before the snap.
Move from first read to second read without panicking
Keep your early progression compact. Read the primary on time. If it is covered, hitch once and move to the second read on the same concept side. If that window also closes, the next answer is the checkdown, a legal throwaway from outside the tackles, or a scramble lane that is genuinely open. What you should not do is drift backward and fling the ball late across the field.
A good practice routine is to pair one man-beater and one zone beater from your normal mini-playbook. Run the man concept until you can explain which leverage you wanted. Then run the zone concept until you can name which defender you were reading. After each rep, label the result honestly: correct read, late throw, bad leverage guess, safety rotation, pressure, or panic. That turns coverage recognition into a repeatable habit instead of a guess.
- Primary read on time.
- One calm hitch to the second read.
- Then checkdown, legal throwaway, or scramble only if it is really there.
Before you move on
- You can explain before the snap whether your pass is trying to win with separation against man or with spacing against zone.
- Against man coverage, you are choosing slants, crosses, and outs based on leverage and leaving the route on time when it does not separate.
- Against zone coverage, you are keying one curl-flat or hook defender and throwing to the level he abandons.
- You only attack deep when the safety look, matchup, and protection all support it, and you can name your bailout before the snap.
- When pressure arrives early, you now choose between the quick outlet, a real scramble lane, a legal throwaway from outside the tackles, or simply accepting the sack instead of forcing a turnover.
Handle blitzes and protect the ball
Pressure punishes hesitation more than it punishes bad ratings. In ESPN NFL 2K5 on PlayStation 2, the clean answer to blitzes is to decide before the snap where the fast ball goes, keep the quarterback in a usable pocket, and accept that some plays should end with an incompletion instead of a sack or interception. This chapter gives you a small routine you can repeat in Quick Game, Practice, and Franchise: identify the likely rush side, keep one quick answer and one outlet in mind, make only one helpful adjustment, and leave the play alive only as long as the pocket still matches the route timing.
Read the rush before the snap
Start with the side-to-side count, not with the safeties. Look at each edge and ask which side has more immediate threats than you have blockers. A linebacker walked up outside the tackle, a defensive back tight to the slot, or a crowded side with several defenders near the line should tell you the ball cannot wait for a slow-developing route unless you deliberately protect it.
Now pick two answers before you snap the ball. First, name a quick throw that can beat pressure: a stop, out, slant, flat release, or short tight end route. Second, name the checkdown if the first window disappears. If you cannot say both out loud to yourself, you are still treating the play like a hope throw instead of a read.
Do not try to diagnose the entire coverage shell here. For this chapter, the goal is simpler: identify where heat is most likely to arrive and make sure the play has a short answer tied to that look.
- Count edge threats on both sides.
- Mark one likely pressure side.
- Choose one immediate throw.
- Choose one checkdown before the snap.
Use one real adjustment, not five random ones
The PS2 version gives you three practical pre-snap tools that matter here. You can hot route a receiver by moving the right analog stick in the route direction and pressing that receiver's button. You can hot block an eligible receiver by clicking and holding R3 and pressing that receiver's button. You can also open the audible menu with Triangle and switch to a safer call if the original play is wrong for the front you see.
Against a likely overload, the best beginner adjustment is usually one of two things. Either convert one route into a faster answer, or keep an eligible receiver in to block and trust the remaining routes. Do not both hot route half the formation and audible at the same time unless you already know exactly where the ball is going.
A good example is a long pass concept facing edge pressure from your right. Keep the back or tight end home if you can spare that route, then make the opposite-side receiver your quick throw. If the defense backs off at the snap, you still have a sound pass play. If the rush comes, the ball leaves on time.
- Use hot routes to shorten one route when needed.
- Use hot block only when losing that route still leaves a safe throw.
- Audible only when the original play no longer fits the front.
Move inside the pocket, not away from it
Take the designed drop and let the first read declare itself. If the rush starts to arc around both tackles, step up. If the middle closes, slide one lane left or right. These are small movements, not sprint escapes. Your goal is to preserve the route timing and throw from balanced feet.
The common beginner mistake is drifting backward because it feels safe for one extra second. In practice it widens the edge rush, stretches every throw, and turns a normal pressure into a sack or a late pass. If you move, move with purpose: climb, slide, reset, throw.
Treat the pocket like a box with a front door and side doors. Step through the front door first if it is open. Use a side door only if interior pressure shuts that path. Do not run out the back of the box unless the play is already broken.
- Climb against edge rush.
- Slide only a lane or two, not fifteen yards.
- Reset your feet before throwing.
- Never make backward drift your default answer.
Scramble with R1 only when the pocket is truly dead
Holding R1 turns the play from quarterback timing into runner survival. Use it only when a clear lane opens or protection has already failed. If you scramble too early, you erase the reason you called the pass in the first place and often drag pursuit toward the sideline where the throw becomes harder.
Once you do commit to the scramble, simplify the decision. Take the yards in front of you, get out of bounds if needed, or prepare to kill the play. Do not roll twenty yards and throw back across the field because the route art looked promising two seconds ago.
Think of R1 as an emergency brake release, not a normal passing mechanic. If you are pressing it on clean pockets, the problem is not your line. The problem is that you are abandoning the read too fast.
- Scramble only after a real lane appears or protection collapses.
- Take modest yards instead of hunting a miracle.
- Do not throw cross-body after a long rollout.
Use R2 to save the down, but respect the grounding risk
The manual's guidance is clear: R2 throws the ball away, and the safe warning is to get outside your offensive tackles first or you may be called for intentional grounding. In play terms, that means R2 is not something to mash while still boxed in behind the line and panicking.
If the rush wins cleanly and no receiver is open, break wide enough first, then discard the play. If you cannot escape wide enough, cover the ball mentally and accept that the sack may already be the least damaging outcome. A five-yard loss is still better than forcing the ball into a defender for a turnover.
Your best result against pressure is often an incompletion. ESPN NFL 2K5 rewards restraint more than heroics here.
- Use R2 only as a deliberate throwaway.
- Work outside the tackles before relying on it.
- Prefer a dead play to a reckless turnover.
Take control of the receiver only at the catch point
After the pass is released, Circle switches you to the target. Use that for the last adjustment only. If the ball is led slightly upfield or toward open grass, take over and use small movement or X burst to meet it.
Do not switch early and drag the receiver across the route on a hard turn. That turns a clean throw into a collision, a breakup, or an interception. Let the route do most of the work, then make the final correction only if the ball location demands it.
If the throw is already chest-high and on line, trust the animation. Manual control is for finishing the catch point, not rewriting the play after the ball is already in the air.
- Switch with Circle after release, not before.
- Use only slight steering at the catch point.
- Use X burst to close on a led ball.
- Avoid sharp cuts that pull the receiver off the pass path.
Grade each turnover by cause
Do not call a bad drive unlucky until you can name the mistake. Late throw means the read was there and you missed the timing. Unseen safety means you stared down one side and never checked the deep help. Cross-body attempt means you scrambled into a throw your quarterback should not make. Drifting too deep means you helped the pass rush more than the defense did. Ignored checkdown means you rejected the safe gain. Forced scramble means you panicked out of a usable pocket.
This review matters because it tells you what to change next series. If sacks come from edge heat, shorten the concept or hot block an eligible receiver. If interceptions come on the move, stop turning every broken play into a freelance throw. If checkdowns stay open all day, start taking them until the defense comes up.
Ball security in this game is mostly disciplined sequencing: read, hitch, throw; or read, escape, discard. Problems start when you blend those stages together.
- Late throw.
- Unseen safety.
- Cross-body pass.
- Drifted too deep.
- Ignored checkdown.
- Forced scramble from a pocket that still worked.
Before you move on
- Before the snap, you can identify a likely pressure side and pair it with one quick throw and one checkdown.
- You can use one verified PS2 protection answer when needed: a hot route, a hot block, or an audible.
- On passing downs, you are climbing or sliding inside the pocket more often than bailing straight backward.
- You know when R1 is a purposeful scramble and when R2 is the better answer to kill the play.
- After a game, you can explain each sack or interception with a specific cause and a specific correction for the next game.
Convert scoring chances and manage the clock
Inside the 20, ESPN NFL 2K5 stops rewarding lazy deep shots and starts rewarding timing, leverage, and score awareness. Use a smaller menu of plays, know when three points are enough, and treat the clock as part of every call. This chapter gives you a repeatable red-zone plan for the PlayStation 2 version and a late-half routine you can practice until it becomes automatic.
Understand what changes inside the 20
The red zone is tighter because the back line of the end zone removes vertical space. Defenders do not need to honor a full deep field, so safeties can sit shorter and underneath defenders can crowd slants, posts, and late throws. That is why a play that felt open at midfield can feel covered near the goal line.
Your first adjustment is to shorten the play. Inside runs, quick flats, curls, short outs, tight end hooks, and quick play-action reads become more valuable because they open earlier and ask less from pass protection. If the defense leaves a light box, take the run. If it crowds the line, throw on rhythm to a short route that breaks quickly.
Do not backpedal waiting for a miracle window. In this game, drifting backward near the goal line shrinks your angle, delays the throw, and often turns a manageable down into a sack. Plant, read one defender, and take the gain the defense gives you.
- Expect shorter throwing windows than at midfield.
- Favor compact routes and inside runs over long-developing concepts.
- If the defense plays light in the box, run first and make it prove it can stop it.
Use one dependable goal-line sequence
Build a simple sequence and repeat it until you trust it. On first down inside the 10, check the box count. If the front is light or balanced, call an inside run and follow the designed gap. Let the block form before you tap for burst. A gain of 3 or 4 yards is a win because it keeps the full playbook alive.
On second down, use a short high-low to one side. Read the flat defender only. If he widens with the back or flat route, hit the curl, stop, or short route settling behind him. If he sits under the curl, throw immediately to the flat and take the yards. The mistake is waiting for both routes to look perfect. Choose off one defender and throw on time.
On third down, match the call to the distance. Third-and-1 or third-and-2 still favors a run, fullback dive, or quick tight end release. Third-and-5 is different: now you need a route that reaches the sticks or goal line fast. If the first look is covered, check down quickly and prepare for the next decision instead of forcing a pass into a crowd.
- First down: test the run when the front allows it.
- Second down: read one underneath defender, not the whole field.
- Third down: let the distance decide the call, not panic.
Know when three points are enough
Fourth-down decisions should start with score, time, distance, and field position together. Fourth-and-goal from the 1 while trailing late is a very different decision from fourth-and-7 at the 12 in the second quarter. Short distance and late deficits push you toward aggression. Longer distance and earlier game states usually push you toward the kick.
Inside the red zone, accept the field goal when it gives you the lead, ties the game with meaningful time left, or keeps the game on schedule. If you are down four or more late, a field goal may change the margin but not the real problem. In that case, treat the drive as a touchdown drive from the moment you cross the 20.
Outside the red zone, remember that failed fourth downs can hand away field position. If you are tied or ahead near midfield, punting can still be the correct long-game choice. The beginner filter is simple: take the points when they solve the score problem, and go for it only when the score or clock says the kick is not enough.
- Ask what the score will require after this decision.
- Short yardage plus a late deficit favors going for it.
- If the kick does not meaningfully improve your path to winning, stay aggressive.
Run the final two minutes with confirmed PS2 tools
The official PlayStation 2 manual states that both teams begin each half with three timeouts. Spend them with purpose. When trailing, combine boundary throws and timeouts so one in-bounds gain does not drain the drive. When leading, stay in bounds and force the opponent to spend its own timeouts.
After a play ends, Triangle triggers hurry-up offense and automatically brings up the audible menu for the last play. Use this when the same personnel grouping is acceptable and you need the next snap fast. Square hurries to spike the ball. Spike only when it preserves a real extra play. Do not burn a down on a spike when a sideline throw, timeout, or immediate hurry-up snap would be better.
When protecting a lead, the clock is part of your offense. Keep the ball on the ground, stay in bounds, and use a kneel call when the remaining opponent timeouts and the play clock say the game is over. If a kneel will not finish it, choose the safest in-bounds run you trust and secure the ball before thinking about extra yards.
- Trailing: use sideline throws, hurry-up, and timeouts together.
- Spike only when it saves a valuable final snap.
- Leading: stay in bounds, secure the ball, and let the clock win for you.
Practice two real game states
Scenario 1: You trail 17-13 with 1:18 left in the fourth quarter, ball on the opponent 12, no timeouts. First-and-10. You need a touchdown, so do not waste a down on a conservative kick setup. Open with a quick boundary read or a fast flat-curl concept. If the pass is completed in bounds for a short gain, hit Triangle immediately for hurry-up and snap again. If the clock falls under roughly 0:20 after an in-bounds tackle and you are not organized, use Square to spike only if it guarantees one final controlled play. On fourth-and-2 or less near the goal line, go for the touchdown because a field goal still loses.
Scenario 2: You lead 20-16 with 2:24 left in the fourth quarter, ball on your own 38, opponent has two timeouts. It is second-and-6. Your objective is not yardage for its own sake. Run the ball, stay in bounds, and make the defense spend a timeout or more clock. If third down is still manageable, run again unless the defense has sold out so hard that a simple safe pass is clearly cleaner. One first down can shift the ending from a punt battle to a kneel sequence. Even if you fail to convert, forcing timeout use and draining seconds improves your field-position fight.
If you want to rehearse these situations instead of waiting for them to happen in Franchise, use the game's Situation mode. The official manual describes it as a way to build a custom score and time scenario and play the rest of the contest, which makes it the cleanest way to drill red-zone and two-minute decisions.
- When down four, think touchdown from the start of the series.
- When ahead, measure success by time burned and timeouts forced.
- Count remaining snaps and timeout pressure, not just remaining yards.
Before you move on
- You can explain why red-zone passing windows shrink and why compact routes and inside runs gain value near the goal line.
- You can choose between field goal and fourth-down aggression based on score, distance, field position, and time instead of one blanket rule.
- You know the PS2 late-play tools for this edition: Triangle for hurry-up after the play, Square to hurry and spike, and three timeouts per half.
- You can play through the two sample scenarios and state the possession goal before each snap.
Match defensive personnel to the offense
In the original PlayStation 2 edition of ESPN NFL 2K5, good defense starts before the snap. First choose who is on the field, then choose how the front is aligned, then choose the coverage or pressure behind it. If you match personnel to the offense and control a defender whose job you can actually keep, you will stop more drives than you will by hunting sacks with the wrong package.
Read the call in three layers
Treat every defensive play as three separate decisions. The first layer is personnel. That answers which kinds of defenders come onto the field. The second layer is the front. That changes where the linemen and box defenders are aligned and which run gaps or rush lanes are strongest. The third layer is coverage or pressure. That decides whether the secondary and linebackers are playing bump, man, zone, or blitz responsibilities.
The manual’s basic personnel packages are straightforward. Goalline uses 5 linemen, 3 linebackers, and 3 defensive backs. A 4-3 uses 4 linemen, 3 linebackers, and 4 defensive backs. Nickel uses 4 linemen, 2 linebackers, and 5 defensive backs. Dime uses 4 linemen, 1 linebacker, and 6 defensive backs. Prevent is the lightest look, with 3 linemen, 1 linebacker, and 7 defensive backs for extreme passing situations.
Some playbooks start from different team identities such as 3-4, 46, or Bear, so do not assume every team’s base screen looks the same. What matters is reading the bodies on the field first. After that, check the front and only then worry about coverage.
- Personnel is who plays.
- Front is where the front seven align.
- Coverage or pressure is what the back seven and extra rushers do after the snap.
Choose the package from the offense, not from panic
Start by counting the offense’s real threats. If the offense comes out with two backs or a tight end and can still hand off, a base front or Nickel is usually safer than jumping straight to Dime. Nickel still gives you five defensive backs for pass support, but it keeps two linebackers on the field so a draw, inside zone, or play-action checkdown does not automatically hit a light box.
Use your base look when the offense can honestly run or pass. Early downs against ordinary two-receiver sets are where 4-3 or your team’s base package earns its keep. Goal line is for short-yardage power football, quarterback sneaks, and snaps close to the end zone. It is not an every-down answer just because you are worried about the run.
Save Dime for clear passing situations. Six defensive backs help against spread formations and multiple route breaks beyond the sticks, but the tradeoff is obvious: only one linebacker remains, so misdirection runs and underneath catch-and-run plays become more dangerous. Prevent should be even rarer. It is a last-ditch answer for very long yardage or late-game protection against a huge gain, not a normal third-down call.
- Base for balanced offense and normal downs.
- Nickel for likely pass without fully conceding the run.
- Dime for true passing situations and wider sets.
- Goalline for short-yardage and goal-line snaps.
- Prevent only for obvious deep-pass protection.
Control a player whose assignment you can keep
Before the snap, hold L1 to view defensive assignments. Use that every time until the play art becomes second nature. This is the easiest way to stop sabotaging a correct call. If your player has outside contain, a hook zone, a flat, a deep half, or man coverage, your first job is to preserve that responsibility long enough for the play to declare itself.
If you are still learning, switch to a defensive lineman before the snap. The PS2 manual allows quick switching by holding X or Circle and pressing the left stick or directional button toward the defender you want. A lineman is a practical training role because you can attack one blocker, push the pocket, or hold a gap without vacating the secondary. Even an average rush helps the coverage if you stay disciplined.
If you want more involvement, use a linebacker with a simple zone landmark or a deep safety whose rule is easy to remember. Do not user-chase a receiver across the field unless you are confident in man coverage. Most beginner busts happen because the user abandons the exact zone or edge the called defense needed him to protect.
- Hold L1 to confirm the assignment before the snap.
- Use pre-snap switching to get onto a lineman or simple zone defender.
- Do not freelance out of contain, curl, flat, hook, or deep-half duties.
Use fronts and shifts to solve one specific problem
Once the right personnel is on the field, adjust the front only if the formation gives you a reason. The manual points to fronts such as All In to tighten the middle and Fan to open space for a linebacker rush. Those front choices matter because they change gap strength and rush paths before coverage is even considered.
Your quickest pre-snap changes are the line and linebacker shifts. Move the right stick right or left to shift the defensive line, up to spread it, or down to pinch it in. Hold L2 and use the right stick to shift the linebackers right, left, wider, or tighter inside. Pinching helps against interior runs and sneaks, but it can soften the edge. Spreading the front helps contain outside runs and can create wider rush angles, but it may leave the middle less crowded.
Make one clean adjustment at a time. If the offense is in I-formation on third-and-1, pinching the front makes sense. If the offense shows three wideouts and you fear a speed sweep or rollout, collapsing everyone inside just because the distance is short can hand away the edge.
- Pinch when the offense threatens the middle.
- Spread when outside leverage matters more.
- Shift linebackers only when you can explain which gap or flank needs help.
Blitz and individual adjustments carry a real cost
Hot Blitz is available on PS2 by pressing Square while controlling a defender before the snap. That sends him through the nearest gap ahead of him. It is useful when you want one extra body attacking a specific lane, but it is not free pressure. If that defender was responsible for coverage or force support, you have just removed him from that job.
The manual also gives individual linebacker and defensive back adjustments. Hold L2 for linebackers or R2 for defensive backs, then press the icon over the player you want. From there you can back him off, tighten him up, shade his technique, assign a quarterback spy, give him a blitz, give him a delayed blitz, or double-team one of the eligible receivers. In Nickel and Dime, remember that the extra defensive backs are handled through those individual icons rather than by pretending they are linebackers.
Use these tools to answer one repeated problem. Press a corner tighter if the offense keeps stealing quick timing throws. Back him off if you are getting beaten over the top. Add a spy if the quarterback keeps escaping. Double a star receiver on a key down. What you should not do is stack random changes and then wonder which zone, pursuit lane, or matchup you abandoned.
- Square on the selected defender gives him a Hot Blitz.
- L2 adjusts linebackers, R2 adjusts defensive backs.
- Every blitz or double team weakens help somewhere else.
- Fix one repeated offensive success with one deliberate adjustment.
Before you move on
- You can explain the difference between personnel, front, and coverage before choosing a defensive play.
- You can identify when base, Nickel, Dime, Goalline, and Prevent are appropriate without using long-yardage as your only rule.
- You can hold L1, read your assignment, and finish a series without repeatedly vacating your own zone or edge.
- You can switch to a manageable defender before the snap and keep that role through the play.
- You can make one shift, Hot Blitz, or individual adjustment and state what run fit or coverage help became weaker because of it.
Stop the run with pursuit and tackling
Good run defense in ESPN NFL 2K5 is less about guessing the exact play and more about keeping the shape of the defense intact. Choose a package that can still survive a handoff, keep one defender outside to force the run back in, fit the nearest open lane with your inside help, and make the runner earn every cut. If you stop diving at the first shadow, switch players later, and pursue where the back is headed instead of where he is standing, you will give up fewer broken runs immediately.
Start with a package that can still handle the run
Before the snap, think about personnel first. The PS2 manual’s defensive package summary treats Goalline as 5 linemen, 3 linebackers, and 3 defensive backs, 4-3 as the balanced front, Nickel as 4 linemen, 2 linebackers, and 5 defensive backs, and Dime as 4 linemen, 1 linebacker, and 6 defensive backs. For this chapter, the lesson is simple: if the offense can reasonably hand the ball off, do not live in Nickel or Dime just because the last play was a pass.
Use 4-3 or your team’s normal balanced front on most first downs and mixed situations. Save Goalline for very short yardage, goal-line defense, or obvious power looks. Nickel is acceptable when the offense spreads out and you still want enough front to survive a draw, but it is not your default answer to every second-and-long. Dime is for clear passing situations and becomes fragile against handoffs and delay runs.
If you are new to user defense, pick a call with a normal front and a simple coverage behind it. That lets you learn pursuit and gap control without also learning a risky pressure package at the same time.
- Base downs: use a balanced front, usually 4-3.
- Goal-line or very short yardage: Goalline is appropriate.
- Avoid living in Nickel or Dime when a run is still likely.
Keep contain outside and fit the nearest lane inside
Run defense falls apart when two or three second-level defenders chase the same crease. If you are controlling an outside linebacker, strong safety near the box, or a corner involved in force support, your first job is to keep the outside shoulder free and make the runner cut back inside. Do not shoot underneath the blocker unless the play is already collapsing. If you lose the edge, the back reaches daylight before your pursuit arrives.
If you are controlling an inside linebacker or a box defender, work inside-out. Shuffle toward the likely point of attack, stay square as long as possible, and fill the first open interior lane once the handoff declares itself. Against dives and iso runs, meet the back near the line instead of sprinting past the fullback. Against off-tackle and toss looks, widen with patience and keep leverage rather than cutting straight at the runner’s current spot.
When you guess wrong, recover to the nearest lane still open. Do not drag the backside linebacker all the way across the formation unless the front side is already sealed. The cutback is where long runs often begin.
- Outside defender: hold the edge and force the ball inward.
- Inside defender: fill the first open lane, then tackle inside-out.
- Backside help: protect the cutback before chasing the front-side fake.
Pursue to the runner’s destination and tackle from balance
On sweeps, tosses, and bounce-outs, aim for the landmark the runner wants, not the spot where he currently stands. If he is headed toward the numbers, flatten your path toward the numbers. If he plants and cuts back, stop flying to the sideline and come back down the line under control. This one change eliminates many missed angles.
Use secure contact before risky diving. After the snap, Circle switches players and Square is the diving tackle, but Square should be your recovery tool, not your first answer. Close the space, square your body, and make the runner slow his feet. Dive only when the back is already slipping past your hip, reaching the sideline, or stretching for the goal line. Constant early dives create whiffs and leave no second tackler at the point of contact.
When you get the wrap-up and the tackle struggle starts, keep working it. In this game’s Maximum Tackle system, the red-cursor fight can extend the play if you relax. Hammer X to finish the stop and deny the extra yard that turns second-and-8 into second-and-4.
- Take angles to where the back is going, not where he is now.
- Use Square late as an emergency finish, not as your default tackle.
- When the wrap-up struggle appears, hammer X to complete the tackle.
Switch players later and settle your feet first
Early switching is a major cause of missed run fits. If you change defenders too soon, the newly selected player may turn the wrong way, lose momentum, or overrun the lane before you can steady him. Let the first defender continue his assignment until the next clean tackler actually has a line to the ball.
When you do switch, do it with a reason. Switch to the defender who is already in the runner’s path, tap your movement to settle the angle, and then close. The mistake to avoid is switch, sprint, dive. The better sequence is switch, square up, then tackle. That half-second of control is usually the difference between a two-yard gain and a broken run.
If you are still building confidence, user a defensive lineman or a simple box linebacker on early downs. A lineman teaches block-shedding timing, while a linebacker teaches lane fit. Both are easier learning roles than freelancing with a deep safety.
- Switch only when the new defender has a real path to the ball.
- Stabilize your angle before attacking the tackle.
- Beginner option: control a lineman or box linebacker on run downs.
Use Full Scrimmage to isolate one run problem at a time
Go into Practice, choose Scrimmage, then use Full Scrimmage so both sides are active. Turn Offensive AI Playcalling off when you want to see the same run repeatedly. Start with first-and-10 from midfield so you have room to study pursuit without a goal-line pileup.
Run three small tests. First, repeat an inside handoff five times and check whether your user defender left his fit too early. Second, repeat an off-tackle run and watch whether the edge player got sealed inside. Third, repeat a toss or bounce-out and see whether your linebackers overran the front side and opened the cutback lane.
After each rep, use replay and look at the line of scrimmage first, not the highlight finish. Ask which defender lost contain, which defender filled the wrong lane, whether a blocker reached your chest before you used a shed move, and whether the tackle failed because you dove too soon. Fix only one error on the next snap. That gives you a repeatable drill instead of random trial and error.
- Use Scrimmage and Full Scrimmage for run-defense reps.
- Turn Offensive AI Playcalling off to repeat the same run.
- Review contain, lane fit, block shedding, and tackle timing after each rep.
Before you move on
- You can explain before the snap which defender is forcing the run outside-in and which defender is responsible for the inside fit.
- On tosses and sweeps, you now pursue toward the runner’s landmark instead of chasing from directly behind.
- You use Square mainly as an emergency diving tackle, and you respond to the wrap-up struggle by hammering X to finish the stop.
- In replay, you can tell whether a bad run came from overpursuit, a missed gap, poor block shedding, or a mistimed tackle attempt.
Defend the pass without abandoning your zone
Good pass defense in ESPN NFL 2K5 on PlayStation 2 starts with honoring the call, keeping the ball in front of you, and using the correct manual-backed button at the catch point. Man coverage means one defender follows one receiver. Zone coverage means you protect the area drawn in the play art and pass routes into the next zone instead of chasing them forever. After the snap on default PS2 controls, Circle switches player, Triangle is Defend Pass, R1 attempts an interception only when you are actually in the ball’s path, and L1 is the block-pass play when you are in position but do not own the angle for a clean pick. Force the offense to finish long drives with short gains instead of giving up one cheap explosive play.
Start with the call and a controllable assignment
Before the snap, decide whether your job is man or zone. In man, stay with your assigned receiver through his break. In zone, get to your landmark first, face the quarterback, and react only after a route enters your area. Keep formation and coverage separate in your head. Nickel and Dime only tell you how many defensive backs are on the field. They do not automatically tell you whether the coverage is man or zone.
If you are still learning, user-control a defensive lineman, an underneath zone linebacker, or a simple hook or curl defender. Those roles let you help without wrecking the entire back end. Controlling a corner in tight man or freelancing with the deep safety too early is how beginners create touchdowns. On passing downs, think about the first-down marker before the snap. A four-yard checkdown on third-and-eight is survivable. A nine-yard completion is not.
- Confirm man or zone before the snap.
- Choose a user assignment you can actually keep.
- On third down, line your thinking up with the sticks first.
Keep deep-safety discipline and make the offense throw short
The deepest defender is your emergency brake. In a one-high look, stay deeper than the deepest threat until the quarterback commits. Do not drive on the first shallow crosser you see unless the throw is already leaving his hand and you know help remains behind you. In a two-deep shell, protect the seam and sideline on your half first, then rally down to shorter throws.
This game rewards patience on defense. Zone is safer only if somebody actually stays where the coverage expects him to be. If you drag a safety down into the flat with no reason, you turn a modest completion into a vertical shot over your head. Give up the short throw, switch deliberately with Circle if needed, and tackle the catch before it becomes a chain-moving run after catch.
- Stay deeper than the deepest route in your area.
- Do not abandon the post or seam for bait throws.
- Accept short completions when the alternative is a free deep ball.
Pass crossing routes from zone to zone
Crossing routes beat defenders who panic and chase. In man coverage, stay attached to the receiver's near hip and expect traffic. Do not cut wildly across his face at the first stem. If you get rubbed by another route, recover underneath and inside, then tackle through the catch point. Your recovery goal is to prevent yards after catch, not to sprint past the route and miss entirely.
In zone coverage, carry the crosser only through your own space. Once he exits it, look for the next threat entering your window and trust the next defender to pick him up. A good beginner example is third-and-5 against a pair of shallow crossers. User the middle hook or hook-curl area, settle near the first-down line between the hashes, and make the quarterback throw around you. If the ball comes directly over your lane, use Triangle to contest it. If you are squarely underneath the throw and truly in the path, R1 is the interception chance. If you are arriving from the side or slightly behind, L1 is the safer breakup.
- Man: trail under control and finish the tackle if you lose half a step.
- Zone: carry the route only until it leaves your area.
- Middle-window user defenders should protect the marker, not hunt every crosser.
Defend sideline outs by protecting the throwing lane
Sideline outs and speed outs punish defenders who open too early or drift without purpose. In man, stay balanced through the release and break when the receiver plants. Do not lunge at the stem and give away the boundary. In zone, sink to the sideline window at the sticks, keep your shoulders toward the quarterback, and drive on the throw rather than following the receiver's chest all the way outside.
A useful passing-down picture is third-and-6 with the offense attacking the boundary. If your zone drops short of the first-down line, widen and settle where the throw has to travel. Make the quarterback fit the ball over you or outside you. If you arrive level with the catch point, Triangle or L1 is usually the high-percentage choice. Save R1 for the rare case where you have clean inside position and the ball is coming directly to your frame. Missing that gamble on the sideline can turn a simple conversion into extra yardage.
- Play the lane to the boundary, not just the receiver's body.
- Break on the receiver's cut, not on the initial release.
- Choose a breakup when a failed pick would hand over more yards.
Play vertical shots from top down
When you recognize a go route or seam shot, think body position before highlight play. Stay on top of the route. If you are even, stay even and keep the receiver from stacking you. If you are slightly beaten, run to the upfield shoulder and make the quarterback complete a perfect throw. Do not undercut a vertical route unless you know help remains behind you.
Your recovery rule is simple. Find the receiver first, then the ball, then decide whether you are tackling, breaking up, or intercepting. Triangle is the general Defend Pass button. R1 is only for the ball-path play. L1 is the smarter answer when you can get through the hands but do not own the route. If you are usering a lineman and still engaged, remember the shoulder buttons are tied up with line moves until you are free, so do not expect a miracle pass play from the line. If the receiver wins cleanly early, turn and chase the tackle immediately. Make the offense snap the next play.
- Stay on top of vertical threats.
- Do not undercut without over-the-top help.
- If beaten early, recover to the tackle instead of chasing a desperate pick.
Use a repeatable passing-down routine
On any obvious pass down, run the same mental script. Check the yardage needed. Confirm your coverage. Move your user defender to his landmark. Read the quarterback only after your own job is secure. As the throw begins, pick one of three outcomes: immediate tackle, pass breakup, or interception. That routine keeps you from abandoning your zone just because one route flashes open for an instant.
After any completion, diagnose the real cause. Did the route beat the coverage, or did you leave your assignment? Most big mistakes in NFL 2K5 come from vacating a hook zone, dragging a deep safety downhill, or pressing R1 from a bad angle because the ball looked tempting. Responsibility football is the repeatable answer. If the CPU strings together short completions, tighten the next call around the sticks and tackle cleanly. Do not answer one six-yard gain by gambling away a 40-yard touchdown.
- Know the yardage, coverage, and user landmark before the snap.
- Decide tackle, breakup, or interception based on position, not impulse.
- Review explosive plays by asking whether the call failed or the user abandoned it.
Before you move on
- You can say whether your current call is man or zone before the ball is snapped.
- Against crossing routes, you either stay attached in man or hand the route off correctly in zone.
- On outs and deep balls, you choose between tackle, breakup, and interception based on angle and catch-point position.
- Across a full game, you can reduce explosive pass plays even when the offense still completes a few short throws.
Create pressure without exposing the whole field
Treat pressure as a small rotation, not a sack hunt. In ESPN NFL 2K5 on PlayStation 2, the safest way to hurry the quarterback is still a four-man rush, because seven defenders remain available for coverage or run support. Before you add a fifth rusher, decide what the offense has been hurting you with, which gap you want to attack, and which part of your coverage will lose help when that extra defender goes. If you keep that trade in mind, your defense stays understandable from snap to snap and your halftime changes stay repeatable.
Build one base rush and one pressure changeup
Start with a normal four-man rush from your base package or Nickel. That should be your default on first down, second-and-medium, and any stretch where the offense can still run or pass. Four-man pressure keeps the back end intact and gives you cleaner information about whether the offense is beating your front or your coverage.
Do not think of pressure as blitz or no blitz. The manual-backed front choices already let you change how the rush arrives without sending extra bodies. If the offense is trying to hammer the middle, use a tighter front such as All In. If you want to help a linebacker come clean, use Fan to open the line a little. Those are lower-risk ways to change the rush picture while still keeping seven defenders off the line.
Pick only one selective blitz as your changeup from the same personnel group. A Nickel blitz paired with your normal Nickel call is easier to manage than jumping between Nickel, Dime, and Goal Line just to chase one sack.
- Base call: four-man rush from your normal front or Nickel
- Rush variation: change the front before you change the number of rushers
- One pressure changeup: keep it in the same personnel family so the look stays familiar
Know exactly what a manual pressure call gives up
On PS2, you can adjust linebackers and defensive backs before the snap. Hold L2 for linebackers or R2 for defensive backs, choose the player by his icon, then use the assignment commands. L2 assigns a blitz, R2 assigns a delayed blitz, and pressing Square while controlling a defender gives him a Hot Blitz that sends him through the nearest gap ahead of him.
Use those tools only when you can say what disappears. If you blitz a linebacker who was part of underneath help, that short middle or hook support gets thinner. If you blitz a defensive back from the edge, the flat or outside support on that side may weaken. In man coverage, the risk is even simpler: the blitzer is no longer covering the receiver he was responsible for unless another defender is already helping there.
A delayed blitz is the safer manual pressure tool when you suspect play action, a screen, or a quarterback who likes to leave the pocket late. A Hot Blitz is the sharper gamble. Because it attacks the nearest gap ahead, line up the defender on the side you actually want stressed before you send him.
- Use L2 linebacker adjustment and R2 defensive-back adjustment deliberately
- Blitz only after identifying the coverage help that will be thinner
- Prefer delayed blitz when you need a safer answer to play action or scramble timing
Win the rush with the right lineman move
If you user-control a lineman, do not mash every button. After the snap, R1 is swim move when you are engaged with a blocker and also serves as the interception button if you are in the passing lane. L1 is the club move when engaged and the pass-block action in the throwing lane. L2 is the rip move, and R2 spins you off the blocker.
Use the move that matches the block. If you have a shoulder free and want to slip around the blocker, try swim or club. If you are fighting through the blocker's arm and need to knife through tighter contact, use rip. If the blocker has you squared up and you need to disengage across his frame, use the spin off. Then recover your lane immediately. A pressure move that opens a giant running seam is still a defensive loss.
If your first move stalls, do not drift wildly upfield. Stay under control and squeeze the pocket. The goal is to shorten the quarterback's clock, not to create a lane for a draw or scramble.
- Pick one line move that matches the engagement
- Recover contain after the move instead of chasing too far behind the play
- Pressure that keeps the pocket crowded is often better than a reckless rush angle
Fix repeated offensive answers with one adjustment
When the offense keeps beating you, change one thing tied to that problem. If sideline outs are moving the chains, stop sending edge pressure from that side or switch to a call with stronger outside support. If the quarterback keeps dumping the ball short on third-and-long because your four-man rush is late, either add one rusher or choose a coverage with tighter underneath help. Do not change formation, shell, and blitz tendency all at once.
If the offense starts punishing your pressure with inside runs, pull back to your steadier four-man call on early downs. Make the offense prove it can finish longer drives instead of giving it free second-and-short situations. If a back or tight end is hurting you as the easy answer to your blitz, pressure less often from the side that is vacating that space or use delayed pressure so you do not lose the lane immediately.
Your rule is simple: one observed problem, one specific fix, then watch the next series for confirmation.
- Repeated outs: reduce that edge pressure or strengthen outside help
- Repeated checkdowns: add one rusher or tighten underneath coverage
- Repeated inside runs: return to four-man pressure on early downs
Use halftime as a pressure audit
At halftime, ignore ideas about a hidden perfect AI counter. Review outcomes you can actually see. Check which rushing lanes are getting opened, how often the opponent converts third down, whether sideline completions or deep shots are the bigger problem, how many sacks or hurried throws you created, and how many tackles you missed after the catch.
If you are affecting the quarterback but still giving up easy completions, your coverage support needs work more than your pressure count does. If coverage is holding but the quarterback has too much time, increase pressure slightly with one selective blitz or a more aggressive front on obvious passing downs. If both phases are failing, simplify back to your safest four-man rush and rally to the ball.
The best defensive adjustment in this game is usually the smallest one you can repeat for the rest of the half.
- Review rushing lanes allowed, third downs, sideline throws, deep shots, sacks, and missed tackles
- Change one category first so you can tell whether the fix worked
- If the picture is messy, reset to your base four-man call and rebuild from there
Before you move on
- You can explain why your base four-man rush is safer than your pressure changeup.
- You know how to assign a linebacker or defensive back to blitz, delayed blitz, or Hot Blitz on the PS2 control scheme.
- You can name the coverage help you are sacrificing before you send an extra rusher.
- You can react to repeated outs, checkdowns, or inside runs with one targeted defensive change instead of a full reset.
- At halftime, you review rushing lanes, third downs, completions allowed, sacks created, and missed tackles before choosing your next adjustment.
Win field position on special teams
Special teams in ESPN NFL 2K5 on PlayStation 2 is not just a kicking mini-game. It is your steady source of hidden yards, safer possessions, and shorter fields over a full season. Learn the original PS2 inputs first, separate kickoff practice from field-goal and punt practice, and make return decisions with field position in mind instead of chasing one big play every time.
Lock in the original PS2 special-teams controls
Use the PlayStation 2 controls for this edition, not Xbox labels from old guides. On the kicking team, aim the kick arrow with the left analog stick or directional button. Press X once to start the kick meter, then press X a second time to set the kick. Keep that same two-press rhythm for kickoffs, punts, field goals, and extra-point style kicks.
On punt returns, press Triangle before the catch if you want a fair catch. That is the safe answer when the coverage team is already arriving and your returner would be hit immediately.
On kick returns fielded in the end zone, use R3 to down the ball for the safe result on the USA PS2 booklet layout. Do not guess here in a real game. If you decide before the catch that the return is not worth it, commit to the down immediately instead of drifting forward and losing the touchback field position.
- Aim kicks with the left stick or directional button.
- Press X once to start the meter.
- Press X again to set the kick.
- Press Triangle before a punt catch to fair catch.
- Press R3 after an end-zone catch when you want to down the ball there.
Practice the right action in the right mode
Do not stay in Practice Type Kickoff and expect it to teach you everything. In Scrimmage, set Practice Type to Kickoff only when you want to rehearse kickoffs, kickoff coverage, kick returns, and punt-return decisions. Use it to learn when your returner has space, when the coverage is too tight, and how directional kicking changes the lane structure.
For field goals and punts, use Situation mode instead. Set possession to your team, make the current down fourth down, choose a suitable line of scrimmage, set yards to go, and then enter the situation. At play call, choose the normal field-goal or punt play you want to test. Repeat this from several field positions so you learn your kicker's routine range, your borderline range, and the distance where a punt is the better call.
This is also the cleanest way to test wind. Try the same approximate kick distance with and against the wind. Then test from both hash marks so you learn whether you are more comfortable aiming from the left or right side. For punts, do not practice only maximum distance. Practice aiming toward a sideline so you can reduce return space when field position matters more than raw hang time or yards.
- Use Kickoff practice only for kickoff and return rehearsal.
- Use Situation mode for field goals and punts.
- Set possession, fourth down, line of scrimmage, and yards to go before the rep.
- Test several distances instead of one favorite spot.
- Practice both straight and directional punts.
Choose the safe special-teams answer during games
Treat every fourth down as a field-position question first. If the kick is inside the range you already proved in practice, the wind is manageable, and a miss will not hand the opponent a short field at the worst possible time, take the field goal. If the attempt sits at the edge of your comfort or the miss consequence is severe, punt and make the offense earn the next drive the long way.
When punting from deep in your own territory, distance matters because you need room to breathe. Around midfield, placement matters more. A slightly shorter punt angled away from the dangerous return lane is often better than a booming middle-ball that gives the returner space to build momentum.
On returns, think in expected value. A kickoff caught deep in the end zone usually does not need a heroic return. Down it and start clean. A punt with defenders already in your face is a fair catch, not a challenge. When you do return, get north-south quickly. Make one decisive cut and stop drifting sideways into pursuit.
- Attempt field goals from practiced range, not hopeful range.
- Let wind and miss consequence change the fourth-down choice.
- Prioritize placement on midfield punts.
- Take fair catches when the coverage wins early.
- Use touchbacks to protect possession and field position.
Keep fakes and onsides as true emergency tools
Onside kicks, fake punts, and fake field goals should stay rare. They belong to specific game states, usually when you are running out of possessions, trailing late, or need one swing to stay alive. If a normal kick still leaves you a reasonable path to win, the normal kick is usually the correct play.
The downside is larger than the upside looks in the moment. A failed onside kick hands over field position immediately. A failed fake can erase a strong defensive effort by giving the opponent the ball already near scoring range. Over a franchise season, reckless special teams decisions cost more games than they steal.
Measure special teams by hidden yards. A smart touchback, one fair catch instead of a risky return, and two punts that pin the opponent longer than a miss would have are the sort of plays that make offense and defense easier for the next drive. That is how special teams helps you win consistently, not just dramatically.
- Save onsides for low-possession comeback situations.
- Call fakes only when you accept the short-field risk.
- Track hidden yards over the season.
- Value clean possession over highlight returns.
Before you move on
- You can state the PS2 special-teams inputs correctly: aim with the left stick or directional button, press X to start the meter, press X again to kick, press Triangle before a punt catch to fair catch, and press R3 to down an end-zone return on the USA PS2 control layout.
- You have used Kickoff practice only for kickoff and return rehearsal.
- You have used Situation mode with possession, fourth down, line of scrimmage, and yards to go set manually to test normal field-goal and punt plays.
- You know your kicker's routine range, your borderline range, and at least one dependable directional punt.
- In a full game, you can explain why you chose field goal, punt, fair catch, or touchback based on score, wind, field position, and return risk.
Start a franchise around your team's strengths
Open Franchise by deciding how much control you want to keep, then shape the team around what the roster already does well. On PlayStation 2, the setup flow gives you real long-term switches for fantasy drafting, league customization, preseason participation, trading limits, owner firing, rookie editing, and several assistant-coach automation tasks. Make those choices first, then inspect your depth chart, contracts, injuries, and package players before you touch free agency or trades. Finish by building a small custom playbook from existing team books or the default book, and save a clean baseline before your first major advance.
Set the franchise workload before you pick favorites
Treat the Franchise options screen as a commitment screen, not a curiosity screen. The PS2 manual lists First Person Football, Fantasy Draft Roster, Customize League, Preseason Games, Trade Deadline, Owner Firing, Edit Rookies, Auto Draft Players, Auto Sign Draft Picks, Auto Re-sign Players, Auto Sign And Cut, and Auto Update Depth Chart. Those choices decide whether you are mainly playing games or also acting as a hands-on general manager.
For a first serious franchise, keep Fantasy Draft Roster off unless you specifically want every roster rebuilt from scratch. Leaving it off makes the league easier to learn because each team keeps its original 2004-era identity. Keep Customize League off unless you intentionally want to move teams between conferences or divisions; the manual notes that if it is on, that screen appears before Team Select. Trade Deadline on gives you a more normal season rhythm. Owner Firing off is the safer learning choice if you do not want the save to end because you are still learning contracts and depth management.
Preseason Games is the most useful early switch. The manual describes this as the five-week preseason at the start of each year. In practice, that means extra evaluation games before Week 1. Turn it on if you want to test backups, package substitutions, and your core plays without treating every snap like standings math.
- Leave Fantasy Draft Roster off for a roster-faithful first franchise unless you intentionally want a full redraft.
- Leave Customize League off unless you already know you want a custom divisional setup.
- Use Preseason Games on if you want evaluation games before the regular season.
- Turn Owner Firing off if you want a lower-risk learning save.
Choose a team by usable strengths, then write a plan in one sentence
At Team Select, the game lets you choose how many teams you want to own and operate. For this guide, control one team. Pick a roster with a clear strength instead of chasing a vague all-around rebuild. A stable quarterback, competent line, trustworthy runner, or strong base defense is enough. You do not need the most talented roster in the league; you need one whose strengths tell you how to call games.
Write one offensive sentence and one defensive sentence before you leave this screen. Examples: protect the quarterback and lean on short passes; run first and shorten games; rely on the front four and avoid coverage busts. Those short notes matter later when you start cutting fringe players, changing substitutions, or adding plays. If a move does not support those two sentences, do not make it yet.
If you do choose Fantasy Draft Roster on, stop thinking in terms of real-life team identity and judge only the players actually drafted onto your new team. The rest of this chapter still applies, but your depth chart review becomes even more important because the roster will no longer match the logo.
- Control one team for a cleaner first franchise.
- Choose a roster with one or two obvious strengths instead of a total rebuild.
- Write one offensive identity sentence and one defensive identity sentence.
Audit the roster before you trade, sign, or simulate anything
Your next job is to find out who really plays, who is expensive, and where one injury would hurt you. Use Depth Chart to confirm starters, then check Substitutions because package football can expose weaknesses you miss on the main lineup. The PS2 manual states that substitutions can be managed by Formation or by Package, so your third receiver, nickel corner, pass-catching back, and reserve linemen matter immediately even if they are not headline starters.
Check injuries and auto-sub behavior early. If a weak reserve is entering too often, fix the order now rather than blaming playcalling later. Then move to contracts and team needs. Franchise in this edition expects you to think about salary, years remaining, and roster balance. An expensive reserve, an aging starter on an expiring deal, or a thin position such as tackle, corner, or linebacker should influence your first season more than a luxury signing at a position where you already have depth.
Leave this review with three notes: two needs, one surplus position, and one package problem. A package problem might be a backup corner forced onto the field in Nickel, a weak tight end in short-yardage sets, or a backup halfback taking too many snaps because of fatigue settings. Those notes are more useful than browsing free agents at random.
- Confirm starters on offense, defense, and special teams.
- Check package players, not just the top line of the depth chart.
- Write down two positions of need, one surplus position, and one package problem.
- Review injuries and substitutions before judging the roster.
Use automation only where you truly want to surrender control
The assistant-coach settings are not harmless convenience toggles. Auto Draft Players gives away the draft. Auto Sign Draft Picks and Auto Re-sign Players give away contract leverage and long-term cap planning. Auto Sign And Cut hands over free-agent churn and payroll trimming. Auto Update Depth Chart is the lightest automation because it mostly protects you from lineup neglect after injuries or rating changes.
A strong beginner setup is to keep drafting, rookie signings, veteran re-signings, and sign-and-cut work on User. Consider automating only depth-chart upkeep if menu maintenance slows you down. That balance keeps the franchise yours while reducing the chance that you forget to replace an injured starter. Re-check the lineup after every injury, signing, or cut anyway, because a legal depth chart is not always the same thing as a lineup that fits your plan.
This is also where you should decide how much weekly work you want later. Trade Deadline on means midseason deals still stop at the normal point. Injuries and the salary cap are not throwaway details in this mode; they are part of the ongoing workload you are accepting. If you later use Weekly Prep, that adds another layer of coach-side management between games, so start with only as much manual control as you can consistently maintain.
- Keep draft and contract decisions on User if you want a true franchise run.
- Use Auto Update Depth Chart only if you want light automation.
- Inspect the lineup after every injury or roster move.
- Be honest about how much weekly management you will actually maintain.
Build a small playbook that matches personnel, then save a clean baseline
Playbook Manager is for collecting existing plays, not drawing new ones. The PS2 manual says you can create a custom playbook for your franchise from your favorite plays across team books, and that the basic plays needed to play a game are automatically added if you leave them out. Start from Create Default Book if you want a neutral base, or Create Book from Team if another club already runs something close to your roster’s strengths.
Keep the first version small. On offense, add a few inside runs, one outside run family, one or two safe play-action calls, a short passing package, and only a small handful of intermediate or deep passes you truly expect to call. On defense, keep one base package, one obvious passing-down package, and one goal-line answer. The point is not to own every play; the point is to know why each play is in the book and which players it helps.
After that, use Manage Audibles and Manage Substitutions so the custom book and your personnel agree with each other. If a formation depends on a third wide receiver or Nickel corner you do not trust, either fix the substitution order or remove your dependence on that package for now. Then save the playbook itself and make a separate franchise save before the first major advance. That gives you a stable opening point with the correct options, roster plan, and book already in place.
- Start from Create Default Book or Create Book from Team.
- Keep the opening playbook narrow enough that every play has a purpose.
- Match audibles and substitutions to the personnel you actually trust.
- Save the playbook and then create a separate franchise baseline save before advancing.
Before you move on
- You started a PlayStation 2 Franchise with deliberate setup choices instead of defaulting through the menu.
- You selected one team to control and wrote down one offensive and one defensive identity for that roster.
- You reviewed depth chart, substitutions, injuries, contracts, and team needs before making major roster moves.
- Your automation choices match the amount of front-office work you actually want to handle.
- You built or confirmed a playbook that fits your personnel, saved it, and created a manual franchise baseline before the first major advance.
References for this chapter
- Games PS2 ESPN NFL 2K5 : User Guide
- Games PS2 ESPN NFL 2K5 : User Guide : Page 27
- Games PS2 ESPN NFL 2K5 : User Guide : Page 28
- Games PS2 ESPN NFL 2K5 : User Guide : Page 20
- Games PS2 ESPN NFL 2K5 : User Guide : Page 51
- Games PS2 ESPN NFL 2K5 : User Guide : Page 52
- Games PS2 ESPN NFL 2K5 : User Guide : Page 58
Scout and prepare for the next opponent
Treat every franchise week as the same loop: find one thing you want to attack, find one thing you must stop, set only the work that supports those priorities, review the Saturday results, then enter Sunday with a clean depth chart and a short plan for your first few series. Weekly Preparation is strongest when you use it to sharpen a weekly identity, not when you try to improve every player group at once.
Open Scouting first and leave with two priorities
Start the week in Weekly Preparation and enter Scouting before you assign any exercise. Use Opponent Match-Up to compare team statistics and overall positional ratings. Use Primetime Performers to identify the opponent's main passing and rushing threats on offense and the defenders most likely to disrupt your plan. Use Injury Reports to see whether either side is missing a starter or carrying a weakened unit.
Do not leave Scouting with vague goals. Write down one offensive target and one defensive priority. A good offensive target is something you can call repeatedly, such as testing a weak secondary with short rhythm throws or leaning on your running game if the opponent's front looks soft. A good defensive priority is something you can coach around all week, such as containing a featured back, protecting against a top wide receiver, or forcing a shaky quarterback to sustain long drives.
If the opponent is healthy and balanced, choose the area where your roster is most dependable. If your team already wins with ball control, keep the offensive target tied to efficient runs and safe throws. If your defense is your strength, prepare to win field position and force punts instead of chasing splash plays every series.
- Read Opponent Match-Up for team strengths and weak spots
- Check Primetime Performers for the opponent's lead passer, runner, and impact defenders
- Check Injury Reports before assigning any work
- Write down one offensive target and one defensive priority
Use Monday for coaches only
Monday is not a normal training day. In the PS2 manual, Monday is a player day off, and only coaches can receive assignments. Use that restriction to organize the week instead of rushing past it.
On Monday, assign only coach activities and use them to set the week's tone. Press Conference, Team Meeting, Coaches Films, and Give Day Off are the coach-side options. This is the best day to decide whether the coming game should lean on your run package, quick passing, safer coverage, or a more aggressive pressure plan. It is also the right moment to note any starter whose injury or poor form means a backup may need a larger role on Sunday.
Do not waste Monday trying to solve everything. All you need is a clear weekly identity and a note of which position groups need the most attention from Tuesday forward.
- Assign only coach activities on Monday
- Confirm your one offensive and one defensive priority
- Flag any starter who may need reduced work or a backup plan
Build a conservative Tuesday through Friday schedule
From Tuesday through Friday, add player exercises carefully. Players can receive Practice Schedule, Film Room, Player Conditioning, or Give Day Off assignments. Every exercise spends part of the 60-hour daily limit, so a bloated schedule can become unfocused fast.
A safe approach is to make the early week about recognition, the middle of the week about football work, and the late week about trimming excess load. If your offensive target is passing rhythm, focus first on quarterback and receivers, then give your line enough work to support the same plan. If your defensive priority is stopping the run, make sure defensive linemen and linebackers are the main groups receiving attention. Do not scatter hours across every position just because the slots are available.
Use Give Day Off when a position is already nicked up, when a veteran group does not need more volume, or when you simply need to keep the rest of the roster from getting squeezed out of the 60-hour cap. Weekly Preparation works better as a controlled nudge than as an all-out rebuild every seven days.
- Tuesday: start with film or planning for the units tied to your priorities
- Wednesday: place your heaviest football work on the most important positions
- Thursday: reinforce the weak spot you expect the opponent to test
- Friday: reduce load with lighter work or Give Day Off where needed
Use Toggle Regiment to keep a core routine
After you assign an exercise, open it again and use Toggle Regiment deliberately. A checked box means that exercise is retained from week to week. An unchecked box means the exercise is used once and then discarded after preparation is completed. Either way, the current week's exercise still counts and still spends hours from that day's 60-hour limit.
Checked exercises are best for the parts of your routine that rarely change. If you almost always want quarterback film work or a stable preparation block for your core defensive unit, keep those checked. Leave matchup-specific work unchecked. Extra cornerback attention before a pass-heavy opponent or extra front-seven work before a power-running team should usually be temporary.
This keeps your franchise manageable. You are not rebuilding the entire week every time. You are carrying a small base plan and swapping only the pieces that answer this week's opponent.
- Check only the exercises you want to carry into future weeks
- Leave opponent-specific work unchecked
- Edit the existing regiment instead of rebuilding everything from scratch
Judge the week on Saturday, not on guesswork
When you proceed with Weekly Preparation, Saturday becomes available from the Weekly Preparation screen. Open Team Results to see overall team ratings by positions. Open Player Results to review before-and-after changes for individual players, using L1 and R1 to move through positions.
Use these screens to compare styles of preparation over several weeks. A light, balanced week often spreads small help across more groups and is easier to repeat over a full season. A heavier week aimed at only a few positions can sharpen a specific matchup, but it may leave the rest of the roster unchanged. Neither approach is automatically correct. The right answer is the one that supports Sunday's plan without creating a larger roster problem later.
If Saturday shows improvement in the units tied to your two priorities, stay the course. If the gains landed in the wrong places, or a thin position still looks vulnerable, trim or redirect next week's assignments instead of doubling down blindly.
- Check Team Results for group-level movement
- Check Player Results for before-and-after changes
- Note whether a light or narrow-focus week fit your roster better
- Carry the successful parts of the plan into the next opponent
If Weekly Prep is disabled, keep the same habit anyway
If you started your franchise with Weekly Preparation turned off, you lose the exercise-management layer, but you do not lose the weekly routine. Begin each game week by reviewing your opponent's strengths, your own injuries, and your depth chart before you advance.
Use the available franchise tools to set the same two priorities you would have chosen inside Weekly Prep. Review the opponent's season tendencies, check your Injury Report, then clean up the Depth Chart so the players you trust most are actually placed where your plan needs them. If you expect to attack on the ground, make sure your best runner and blocking personnel are featured. If you expect a pass-heavy game, confirm your coverage personnel, rush rotation, and specialist roles before kickoff.
Finish the week by checking substitutions, confirming any injured starter's replacement, and entering Sunday with one clear offensive plan and one clear defensive plan. Even without Weekly Prep, disciplined scouting and roster maintenance still win more games than random play-calling.
- Review opponent information before every game even without training screens
- Check injuries and depth chart every week
- Confirm specialists and backups before Sunday
- Enter each game with one offensive and one defensive focus
Before you move on
- You can start each franchise week by using Scouting to name one offensive target and one defensive priority.
- You understand that Monday is a player day off and only coaches receive assignments there.
- You can assign player work from Tuesday through Friday without blowing the 60-hour daily limit on every group.
- You know what Toggle Regiment does and can decide which exercises should repeat and which should stay matchup-specific.
- You can read Saturday Team Results and Player Results, then adjust the next week instead of guessing.
- If Weekly Prep is off, you can still prepare through opponent review, injuries, depth chart management, and a clear Sunday plan.
Turn a season into a championship attempt
Treat Franchise as a repeatable season-management loop, not a rush to the standings. In ESPN NFL 2K5 on PlayStation 2, the Coach’s Desk gives you the tools to move from one week to the next in order: Schedule / Playoff Schedule, Weekly Schedule, Weekly Preparation, Gameplan, Depth Chart, Team Standings, Statistics, Injury Report, and, beginning in Week 11, Playoff Picture. If you keep that loop stable, your offense and defense improve through cleaner decisions, healthier lineups, and better situational football instead of random menu hopping.
Run the same weekly loop every time
Start each franchise week at the Coach’s Desk and follow the same order. First check the upcoming matchup, then open Injury Report and Depth Chart, then adjust Gameplan, then decide whether you want to use Weekly Preparation, and only after that should you move to Weekly Schedule or Team Schedule to play or simulate. This prevents the common mistake of entering Sunday with a tired starter, a hurt backup pressed into action, or an outdated lineup.
Use Weekly Schedule when you want to see the whole league’s slate. Place a check mark only on the game or games you intend to control. In this edition, the check mark means you wish to play that game. Press START only after you know whether you are playing or simulating, because that same schedule flow advances the week.
If you do not want a full manual game, you still have a controlled middle option. GameCast Live lets you simulate play by play, alter game plan items, and jump into the game if the score, injuries, or momentum turn against you. Use that option when you want season continuity without fully hand-playing every week.
- Scout the opponent before touching the schedule
- Check Injury Report and Depth Chart every week
- Adjust Gameplan to the matchup, then choose Weekly Preparation or skip it by choice
- Mark played games deliberately on Weekly Schedule
- After the result, review stats and save before advancing
Protect your roster over the full season
A franchise falls apart when the same stars are asked to solve every week while fatigue and minor injuries pile up. If your lead back is dinged up, reduce his volume and let the second halfback handle some early-down work. If your pass rush fades late, rotate defensive linemen instead of pretending the starter can play every snap at full strength. If your secondary has one weak spot, protect that player with safer coverages rather than leaving him isolated all afternoon.
Weekly Preparation should support the players who matter most to this week’s plan, not exhaust the whole roster. Monday is a players’ day off in this mode, so only coaches can receive assignments then. On later days, keep workloads realistic when your starters are already carrying fatigue. A modest gain across a healthy roster is better than squeezing a small ratings bump out of one position and losing depth for the next month.
Keep at least one trusted backup ready at quarterback, halfback, middle linebacker, and defensive back. Those positions change games fastest when an injury hits or a starter has to come out.
- Reduce touches for hurt skill players
- Rotate linemen and other high-snap defenders
- Use Weekly Preparation conservatively when fatigue is rising
- Know your first backup plan at quarterback, halfback, linebacker, and in the secondary
Judge progress with season stats that actually matter
Do not let total yardage hide bad football. A team can outgain the opponent and still lose because it failed on third down, gave the ball away, took drive-killing sacks, or settled for too many field goals in the red zone. After every game, review the statistics screens with one question in mind: did your style win the important downs and possessions.
On offense, focus on third-down percentage, turnover count, sacks taken, rushing consistency, and red-zone finish rate. On defense, focus on takeaways, third-down stops, sacks created, rushing lanes allowed, and explosive completions surrendered. These numbers tell you whether your system is stable enough for December and January.
If one category breaks for two straight weeks, fix that before changing everything else. Repeated sacks mean shorter drops and more runs. Repeated third-and-medium failures on defense mean a coverage or pressure timing problem. Repeated red-zone stalls mean your compact play package needs work.
- Third-down offense and defense
- Turnover margin
- Red-zone touchdown rate
- Sacks taken and sacks created
- Explosive plays allowed
Read the standings with the original playoff format in mind
This game reflects the 2004-era NFL season structure, so plan around a 16-game regular season and a 12-team postseason. Each conference sends six teams: four division winners and two wild cards. The top two seeds in each conference earn first-round byes, which makes the division race more important than just scraping into the field.
Use Team Standings for the weekly win-loss picture. Beginning in Week 11, switch in Playoff Picture regularly, because that screen specifically shows the teams competing for or headed to the postseason. That is the fastest way to tell whether you are controlling your division, sitting in wild-card position, or one loss from falling out.
Do not import modern assumptions about 17-game schedules or larger playoff fields. Let the game’s own Team Standings, Playoff Picture, and Schedule / Playoff Schedule screens tell you where you stand.
- Treat the division race as the cleanest path
- Aim for a top-two seed if your record supports it
- Use Playoff Picture from Week 11 onward
- Rely on the in-game schedule and standings screens, not modern NFL formats
Handle playoff games like elimination football
Start postseason games with a calmer script than you would use in September. On offense, open with your safest four to six calls: one inside run, one outside run, one quick pass, one intermediate concept, and one reliable third-down answer. The goal of the first quarter is field position, rhythm, and protection of the ball. Do not begin with low-percentage deep shots unless the coverage gift is obvious.
If the opponent creates early pressure, answer it immediately with quicker throws, more checkdowns, and runs that keep second down manageable. If your protection starts cracking, stop drifting backward and stop calling long-developing concepts until the rush cools down. On defense, begin with calls you can execute cleanly, usually base or nickel with disciplined coverage behind the rush, then expand into selective pressure after you learn how the opponent wants to move the ball.
At halftime, change one offensive problem and one defensive problem only. Examples: add more inside runs if edge pursuit is flying too wide, shift safety help toward the receiver who keeps winning outside, or call fewer risky throws if sacks and pressure are climbing. Late in the fourth quarter, possession becomes the whole game. When leading, stay in bounds, protect the ball, and force the opponent to spend timeouts. When trailing, save timeouts, avoid sacks, and take the field goal if it still preserves a realistic final possession.
A Super Bowl run is the objective, not a promise. The point of this season loop is to give you better control over weekly outcomes until your franchise is good enough to survive elimination games.
- Script a safe opening sequence
- Answer pressure with quicker decisions, not panic
- Make one targeted halftime fix on each side of the ball
- Use clock and timeout discipline as the game tightens
Before you move on
- You can move through a franchise week in a stable order: scout, inspect injuries and depth, prepare, play or simulate by choice, review, and save.
- You judge progress with third downs, turnovers, sacks, red-zone finish rate, rushing consistency, and explosive plays allowed rather than yards alone.
- You understand the original franchise race: 16 regular-season games, six playoff teams per conference, and Playoff Picture usage from Week 11 onward.
- You have a postseason routine with a scripted opening, a pressure response, a halftime adjustment method, and a late-game clock plan.
Handle contracts, scouting, the draft and next preseason
Treat the offseason as a controlled rebuild, not a shopping spree. On PlayStation 2, Franchise moves through a fixed order: Retirement Period, Re-Signing Period, Free Agency, NFL Combine, NFL Draft, and Rookie Signings. Work from the Off-Season Schedule on the Coach's Desk, solve your biggest starting holes first, preserve cap room and depth, scout broadly before locking onto prospects, and do not advance into preseason with unsigned draft picks.
Work from the Off-Season Schedule and sort the roster before spending anything
From the Coach's Desk, open Off-Season Schedule and handle the current top task first. The game lays out the offseason in a fixed sequence, and following that order keeps you from making a flashy move before you know what your real losses are.
Before you offer a contract or chase a free agent, open your depth chart, Team Needs, and player cards. Sort the roster into three groups: core starters you want back, replaceable veterans, and depth pieces you can survive without. This stops you from overpaying for a familiar name when your bigger problem is that you only have one dependable tackle, one playable corner outside your starters, or no trustworthy backup behind an injury-prone position.
When you judge a player, compare role, age, position importance, and cost together. A solid quarterback, offensive lineman, pass rusher, or corner usually affects more snaps than a situational backup. Keep enough budget for rookies and emergency in-season moves instead of emptying the cap on the first negotiation window.
- Open Off-Season Schedule from the Coach's Desk
- Tag each expiring player as core starter, replaceable veteran, or depth
- Reserve room for draft picks and later signings before making major offers
Use Retirement Period and Re-Signing Period to protect the spine of the team
Retirement Period is your last chance to keep a veteran from leaving. Do not try to save every aging player. If an older starter is still one of your best options at a premium spot and you do not have a replacement ready, a short offer can make sense. If the player is already slipping and you have a younger option or a realistic draft path, let the roster turn over.
In Re-Signing Period, start with players you already know can function in your system. Re-signing a competent starter is often safer than entering Free Agency with three open holes and limited leverage. Protect the positions that hold the whole offense or defense together: tackles, interior line stability, corners, edge pressure, quarterback, and any linebacker or safety who keeps your coverage organized.
Think in units instead of isolated stars. Losing one guard is bad. Losing one guard while your swing tackle is weak means the whole line is unstable. The same applies to cornerback, linebacker depth, and backfield rotation. Keep enough playable bodies that one injury does not force a panic signing in September.
- Make short, practical decisions on aging veterans
- Re-sign reliable starters before optional role players
- Count how many playable options remain at each position after every deal
Attack Free Agency with a short target list and a spending limit
After re-signing comes Free Agency, and the manual frames it as the 45 days leading up to the NFL Draft. Use that window to patch real needs, not to chase every big overall rating. Start with the positions your Team Needs screen and your depth chart both identify as weak.
Set one starter goal and one depth goal. For example, if your line has one obvious hole, fix that before bidding on a luxury receiver. If your secondary is thin, one steady corner or safety may help more than one expensive splash signing at a position you already handle well.
Watch the market instead of bidding emotionally. If another team drives the price beyond the player's role in your plan, back out. A functional roster with cap flexibility is better than one headline move plus three unresolved weaknesses. If you do explore trades during the offseason window, do not burn multiple future assets unless the incoming player clearly solves a premium-position problem for several seasons.
- Fill one starting need and one depth need before hunting luxuries
- Use Team Needs to keep bidding disciplined
- Keep future picks unless the trade fixes a major long-term hole
Use all four combine days efficiently instead of guessing on one favorite prospect
The NFL Combine gives you four scouting days, so do not spend day one like it is the final round. Begin with the Rookie Report and Team Needs, then spread one-hour Basic Reports across many prospects at your weakest positions. That gives you a real board instead of one dream target.
After at least one combine day has elapsed, check the Big Board and narrow your list. On days two and three, upgrade the most promising players with In-Depth Reports or Full Reports where needed. The report costs matter: Basic costs 1 hour, In-Depth costs 2 hours, and Full costs 3 hours. Use the Scouting Manager before the day ends so you can reassign hours if you overcommitted to one position too early.
Day four is different because there is no tomorrow. If a prospect is new to you on the last day, spend enough time to get more than a surface read. The goal is not to know every rookie. The goal is to know enough prospects at your actual needs that the draft cannot trap you into a blind reach.
- Day 1: basic one-hour looks at many realistic targets
- Days 2 and 3: deepen reports on the best fits
- Day 4: spend remaining hours on players you might actually draft
Draft for immediate role, positional value, and roster balance
When the draft begins, use all four information sources the room gives you: Draft Candidates, Team Needs, Combine Targets, and Suggested Picks. Suggested Picks can help, but they are not your orders. Make the final call based on whether the player can help your roster soon and whether that position is hard to fill elsewhere.
If two prospects are close, break the tie with playing time and scarcity. A starter-quality lineman, corner, pass rusher, or quarterback usually changes your franchise more than a backup skill player. Also check what you already solved in Free Agency. If you signed a one-year veteran bridge at one spot, you can draft another position without creating a hole for Week 1.
Do not force a hero trade unless the value is obvious. Trading several future assets for one pick can leave next year's roster thin when contracts expire or veterans decline. Build a stable two-deep first. The clean draft is often the one that turns two weak position groups into two manageable ones.
- Use Team Needs and Combine Targets every round
- Prefer prospects who can join the two-deep quickly
- Avoid trading away next year's flexibility for a non-essential move
Finish with Rookie Signings, then reset the roster for Year 2
After the draft, go directly to Rookie Signings and finish your negotiations before you advance. This is the part you cannot treat casually. The manual warns that if your draft picks enter preseason without contracts, they become free agents. Do not assume you can clean this up later.
Once the rookie deals are done, rebuild the actual football team. Open the depth chart and place the new players where they can contribute now. A rookie corner might become your nickel back immediately. A young guard may need to jump an aging veteran. A drafted linebacker may belong on special teams from day one even if he is not ready to start.
End the offseason with a playbook and substitution review. If the new roster is stronger in power running, heavier personnel, or pass rush depth, adjust your play selections and packages to match. Then create a fresh save before preseason or Week 1. That save is your clean checkpoint in case you want to revisit contracts, depth chart choices, or draft outcomes without replaying the entire previous season.
- Sign every rookie you intend to keep before advancing
- Update depth chart, backups, and special teams roles
- Review playbook fit and make a fresh save for the new season
Before you move on
- You moved through the offseason in this order: Retirement Period, Re-Signing Period, Free Agency, NFL Combine, NFL Draft, and Rookie Signings.
- You identified core starters, replaceable veterans, and depth before committing major money.
- You used the four-day combine to scout broadly first, then narrowed to realistic draft targets.
- Your draft addressed actual team needs instead of only chasing the highest name on the board.
- Every rookie you want to keep is under contract before preseason begins.
- Your depth chart, playbook, and save file are updated for the next season.
Fix recurring mistakes and explore optional challenges
Finish the guide by turning bad habits into specific corrections. On PlayStation 2, ESPN NFL 2K5 gives you enough review tools to do that without guessing: Replay for the exact play, VIP records for your broader habits, and optional side modes such as The Crib and ESPN 25th Anniversary when you want short focused sessions instead of another full franchise week. Use this chapter after any loss, any sloppy win, and at the end of your first season so you can carry a stable routine into the next year rather than starting over.
Start every postgame review the same way
After the game, do not change difficulty, quarter length, or control setup before you study what happened. Go into Replay from the pause structure or save key plays if you need a longer look later. Review the drives that swung field position, turnovers, third down, red-zone efficiency, and the final two possessions of each half.
Then open your VIP records from the Features area and use the Viewer or Statbook screens as a tendency check. The point is not to let the game think for you. The value is seeing patterns in your own play: forcing the same receiver, scrambling out of clean pockets, calling the same pressure over and over, or biting on the same route family on defense.
Write down only one offensive habit and one defensive habit to fix before the next game. If you try to repair every weakness in one sitting, you usually erase the timing and confidence you already built.
- Review scoring drives, turnovers, third downs, and late-half possessions first.
- Use VIP records to confirm habits across several games, not to predict the future.
- Leave the review screen with one offensive fix and one defensive fix only.
Turn symptoms into causes and drills
Sacks. Cause: drifting backward, waiting too long on a covered first read, or refusing the checkdown. Drill: run a quick pass and an intermediate pass ten times each. On every rep, either throw on rhythm, hit the underneath option, take a real scramble lane, or throw the ball away. Count a rep as failed if you keep fading deeper in the pocket.
Interceptions. Cause: late throws, cross-body throws, staring down one target, or missing a safety rotation. Drill: call one concept with a clear primary and one safe outlet. The ball must come out on time to the first read, or go safely to the checkdown. If both are covered, end the rep with a throwaway or modest scramble rather than a hero attempt.
Weak inside running. Cause: bursting too early, abandoning the designed gap, or bouncing outside into pursuit. Drill: repeat one inside handoff and judge success by clean four to six yard gains. Let the double team form, press the original lane first, and cut only when a backside crease is truly there.
Missed tackles. Cause: switching players too early, taking flat pursuit angles, or diving from too far away. Drill: call a base defense against inside run, off-tackle, and toss. Switch deliberately, settle your feet, then make secure contact before using risky dives.
Deep completions allowed. Cause: safety overcommitment, over-blitzing, or abandoning underneath handoffs too early. Drill: sit in one base coverage for several reps and keep your deepest defender deeper than the deepest route until the quarterback commits.
Blown leads. Cause: clock mismanagement, low-percentage passes with the lead, panic blitzing, or giving away sideline access on defense. Drill: create a short mental script for the fourth quarter: safe run, high-percentage pass, punt if necessary, then defend the boundary and first-down marker.
- Match every symptom with one cause you can actually observe on film.
- Attach every cause to a drill you can repeat in practice immediately.
- Do not move on until you know whether the mistake was read, timing, or execution.
Run a short correction session, then stop
Take your compact package into Practice. Offense should stay small: one inside run, one outside run, one quick pass, one intermediate concept, and one cautious deep attempt. Defense should stay small too: one base call and one pressure call. You are not searching for a miracle play here. You are rebuilding clean decisions with plays you can carry straight back into Franchise or Quick Game.
Track each failure honestly. If the right receiver came open and the throw was late, that is timing. If you threw to the wrong man, that is a read problem. If you drifted backward, sprinted into the line, switched defenders wildly, or pressed tackle too early, that is execution. The cure is different for each category, so name it correctly.
Stop practice after you produce several clean reps in a row. Long frustrated sessions usually turn into button mashing and teach the wrong lesson.
- Practice only the package you already intend to use in real games.
- Label every failed rep as read, timing, or execution.
- End the session once consistency returns.
Use optional modes for short focused work
The Crib is optional. It is a reward and unlock space, not a requirement for winning the Super Bowl in Franchise. Use Crib Credits, catalogs, the trophy room, and milestone tracking if you enjoy them, but keep them separate from your season plan. If you want to understand which settings count toward certain rewards, check Milestone Info instead of assuming every mode qualifies the same way.
ESPN 25th Anniversary is also optional. Treat each challenge as its own football problem. Read the scenario objective, score, time, and field position before the snap, then play that exact situation instead of treating it like a normal full game. One challenge may ask for a comeback drive, another for a defensive stand, and another for a clock-sensitive finish. That makes the mode useful for practicing urgency and decision-making in short bursts.
If your weakness is late-game composure, use one or two of these short challenges, then go back to Franchise and apply the same correction in your next real week. Do not let side content replace the main season loop.
- Treat The Crib as optional progression and collection content.
- Read every 25th Anniversary objective before the first snap.
- Return to Franchise once the specific situation practice is done.
Close the guide with a practical self-check
Choose your next step based on the problem you found. If controls still feel shaky, stay in Quick Game or Practice until your basic offense and defense hold up for a full game. If your play on the field is sound but roster management still feels messy, continue Franchise and keep repeating the same weekly rhythm: scout, manage depth chart and injuries, prepare, play or intentionally simulate, review, and save.
If you have already reached the postseason, keep the save going through the playoffs and the following offseason even if you fall short of a title. A clean review cycle after a loss teaches more than another restart. The goal of this guide is not a fake ending or a guaranteed championship. The goal is a repeatable football routine that lets you continue the franchise confidently in the original PS2 edition.
- Stay in Practice or Quick Game if execution is the main issue.
- Stay in Franchise if weekly management is the main issue.
- Do not restart a save just because the first championship attempt failed.
Before you move on
- You have one locked control scheme and are no longer relearning buttons from game to game.
- You have one dependable offensive package with at least one safe run, one quick pass, and one intermediate answer.
- You have one dependable defensive package with a base call and a selective pressure call you understand.
- You have at least one controlled full-game win built on ball security, field position, and a clear plan.
- You can review a loss with Replay and VIP records, name the real problem, and run a short drill that targets it.
- You have completed the full franchise loop through a season, a playoff attempt, and the following offseason.
- You can continue the franchise without needing a reset or a fictional final ending.
Finishing up
Play a full game with a deliberate offense, defense, and special-teams plan.
Use a repeatable Franchise routine from roster review and preparation through postgame diagnosis and saving.
Reach the playoffs and make a Super Bowl push with adjustments suited to each opponent.
Complete the offseason decisions, draft, and rookie contracts before moving into the next preseason.
Explore VIP tendencies, Crib rewards, and 25th Anniversary scenarios as optional follow-up goals.
Choose your next gameScreenshots & video
Game imagery for reference. Follow the written chapters above for the route and strategies.
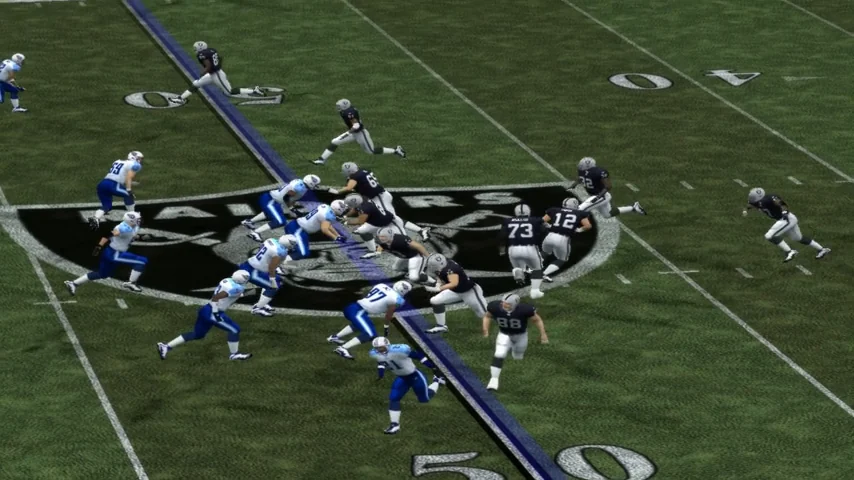
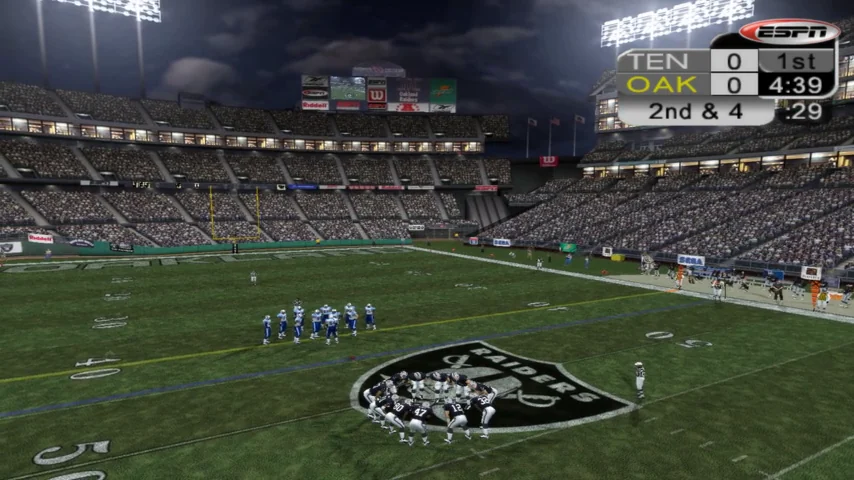
Sources & references
Our original guide draws on the references below. Check the edition at the top of this page before following controls or unlock requirements.
- Games PS2 ESPN NFL 2K5 : User Guide
- ESPN NFL 2K5 (USA) Manual PDF - Video Game Manual
- NFL 2K5 Playstation 2 Enhanced Online Manual | Manualzz
- ENHANCED ONLINE MANUAL Playstation 2 Version
- Games PS2 ESPN NFL 2K5 User Manual - ManualMachine.com
- ESPN NFL 2K5 Release Information for PlayStation 2 - GameFAQs
- ESPN NFL 2K5 (2004) - MobyGames
- ESPN NFL 2K5 Review - GameSpot
- ESPN NFL 2K5 - Strategy Guide - PlayStation 2 - By antseezee - GameFAQs
- ESPN NFL 2K5 - Playbook FAQ - PlayStation 2 - By wingnut6 - GameFAQs
- ESPN NFL 2K5 FAQs, Walkthroughs, and Guides for PlayStation 2 - GameFAQs
- ESPN NFL 2K5 ships - GameSpot
- ESPN NFL 2K5 - Sony Playstation 2 - Manual - gamesdatabase.org
- ESPN NFL 2K5 - FAQ - PlayStation 2 - By dragoncheese - GameFAQs
- Games PS2 ESPN NFL 2K5 : User Guide : Page 27
- Games PS2 ESPN NFL 2K5 : User Guide : Page 28
- Games PS2 ESPN NFL 2K5 : User Guide : Page 20
- Games PS2 ESPN NFL 2K5 : User Guide : Page 51
- Games PS2 ESPN NFL 2K5 : User Guide : Page 52
- Games PS2 ESPN NFL 2K5 : User Guide : Page 58
- ESPN NFL 2K5 Releases - MobyGames
- 2004 NFL Playoff Standings | Pro-Football-Reference.com
About the game & collecting notes
- Platform
- PlayStation 2
- Developer
- Visual Concepts
- Publisher
- ESPN Videogames / Global Star Software
- Region
- North America (PlayStation 2 reference)
- Genre
- Sports / American football
- Content Rating
- ESRB E
ESPN NFL 2K5 is an American football game developed by Visual Concepts for PlayStation 2 and Xbox. Take-Two and ESPN Videogames’ July 15, 2004 announcement identifies both platforms and describes retail availability for the weekend of July 23. This record leaves the exact date unset rather than converting that announcement into a more precise claim.
The announcement highlights the V.I.P. opponent-profile system and the game’s virtual Crib features. These are historical product features; original online-service availability should not be inferred today.
This entry is centered on the PlayStation 2 edition. When collecting, match the platform, region, disc, case artwork, and manual. A physical inspection and playback test are more useful than assuming every similarly titled sports game is the same release.
Collector notes
Confirm that the listing is ESPN NFL 2K5, not another yearly ESPN football title. Compare platform and region before evaluating condition or pricing.Darryl Polo
Darryl Polo loves tinkering with emulation and revisiting retro games. He enjoys exploring how old favorites play on different setups and sharing what he learns along the way. At Joking Joystick, he writes about the games, hardware, and small discoveries that keep the hobby fun.
Our editorial standardsFound a step that needs another look? Help us improve this guide.