Conker's Bad Fur Day (Nintendo 64, USA) — Complete Campaign Walkthrough
Step-by-step walkthrough for the original North American Nintendo 64 release of Conker’s Bad Fur Day. The ordered campaign route is Hungover, Windy, Barn Boys, the required later Windy objectives, Bat’s Tower, Sloprano, Uga Buga, the return through Windy into Spooky, It’s War, Heist, and the separate Vault and Heinrich ending sequence. Optional cash, Tail Thingys, side errands and multiplayer are clearly separated from mandatory progression.

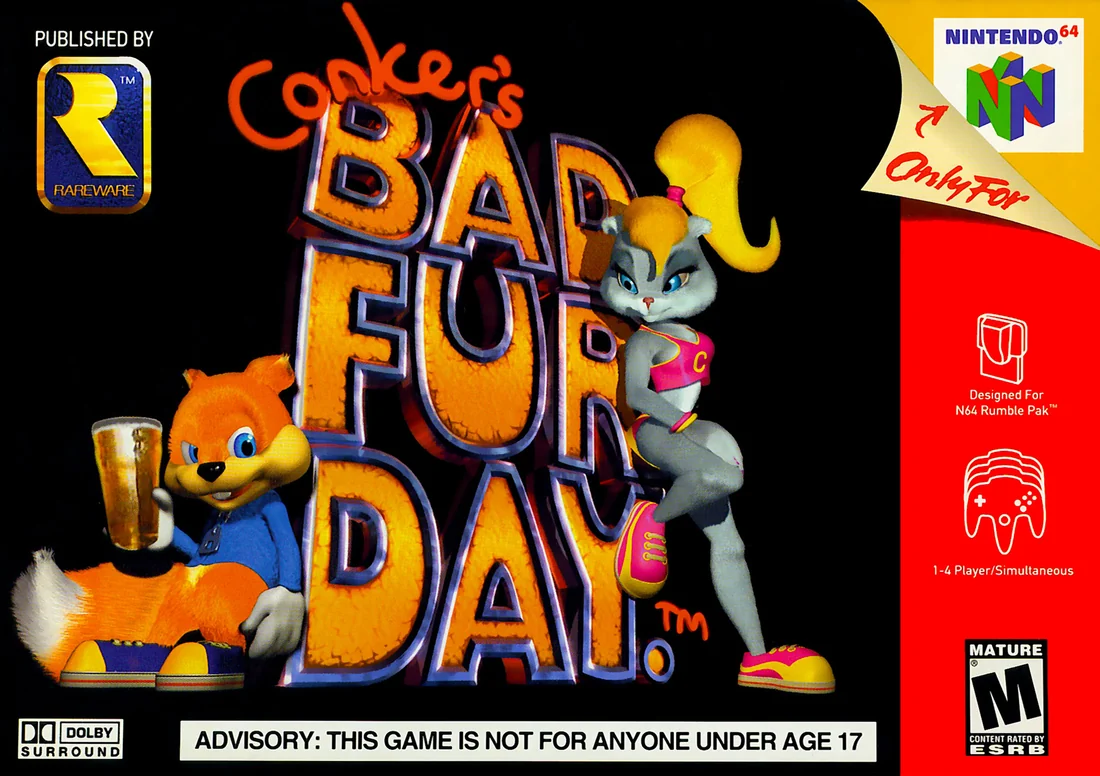
Find a copy
Conker's Bad Fur Day Nintendo 64
We may earn a commission if you buy through these links, at no extra cost to you. As an Amazon Associate I earn from qualifying purchases.
Opens retailer search results. Check the model, edition, seller, availability and current price before buying.
Before you begin
This walkthrough is written for the original Nintendo 64 edition of Conker’s Bad Fur Day (USA release, March 5, 2001).
It describes the single-player campaign from the opening Hungover area through the Vault final sequence and ending, using the original N64 control layout and save behaviour.
It does not assume features or mechanic changes introduced in the Xbox remake, Conker: Live & Reloaded, or later re-releases.
Conker frequently uses context-sensitive zones to grant temporary actions or items, including the Alka-Seltzer hangover cure, weapons and environmental tools.
Many later stages shift from platforming to shooter-style encounters. Follow each chapter’s required objective order and use the recovery guidance when a sequence is interrupted.
Set yourself up for the run
Use a Nintendo 64 controller and confirm that the cartridge or flashcart can retain the game’s cartridge save data. Do not assume a Controller Pak is required for the original cartridge.
Know the basic N64 functions before starting: Control Stick movement, A jump, Z crouch or fire an equipped weapon, R aiming where applicable, C buttons for camera and strafing functions, and B for basic attacks and context-sensitive actions when the lightbulb prompt appears.
The game’s Context-Sensitive system is local and temporary. Stand on the marked B zone, wait for the lightbulb prompt and then press B. If the prompt is absent, search the immediate area for the prerequisite NPC conversation, switch, carried object or preceding objective.
Treat the campaign as a sequence of local objectives with returns to Windy between major chapters. Do not assume that entering one named area permanently completes every nearby Windy route.
Use the game’s actual save interface at a stable opportunity and verify the selected save slot before ending a session. Do not describe the game as having universal modern checkpoints or automatic saves unless a specific edition-specific source confirms that behavior.
Health is represented by chocolate pieces, while Squirrel Tails provide death recovery. Preserve both before long platforming, underwater, vehicle or boss sections.
The original N64 route must not be supplemented with Xbox Live & Reloaded controls, weapons, enemy behavior or progression requirements.
Preparation and Early Systems (Hungover start)
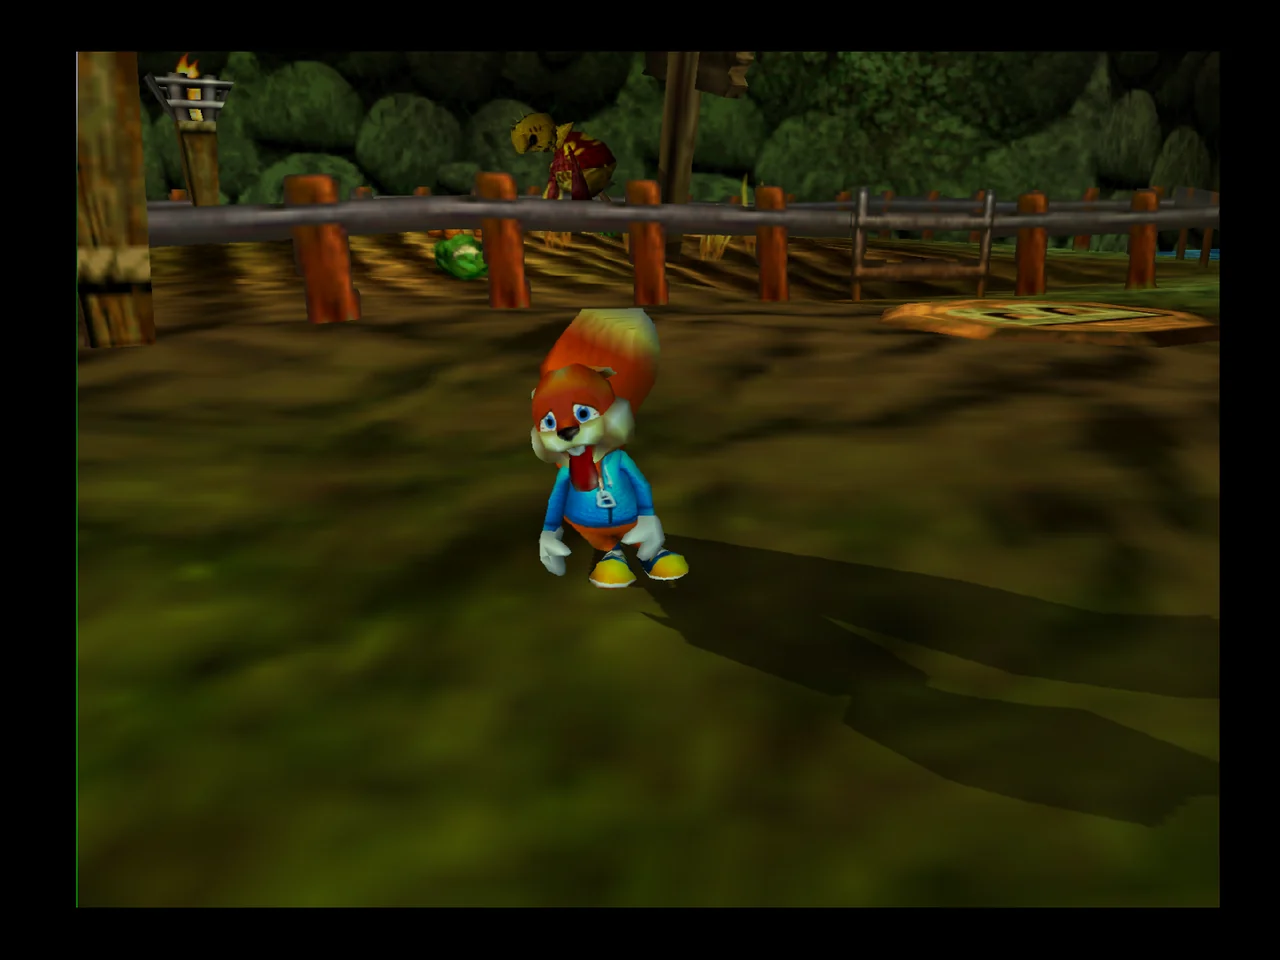
Hungover is the opening tutorial chapter in the original Nintendo 64 release. It teaches movement, Context-Sensitive pads, the frying pan, high jumps, and the Helicoptery Tail. Complete it by curing Conker’s hangover, obtaining the frying pan, removing the gargoyle and boulder from the bridge, and entering Windy. No cash threshold is required in Hungover.
1. Reach Birdy and learn the context system
At the start, Conker is drunk and hungover. His movement is intentionally slow, and his jump is weak. Walk around the outside of the fenced farm patch until you find the opening, then enter and speak with Birdy the scarecrow in the center.
Birdy introduces Context-Sensitive pads. They are marked with a large B symbol. Stand on the symbol and wait for the lightbulb to appear above Conker, accompanied by the prompt sound. Press B only while that prompt is active. B is not restricted to one function: it activates context actions when a prompt is present and later controls the frying pan or other temporary weapons.
- Enter the farm patch through the opening in the fence.
- Speak with Birdy.
- Stand on the B pad behind him.
- Wait for the lightbulb before pressing B.
2. Complete Birdy’s demonstrations and cure the hangover
Use the pad behind Birdy once. Conker produces a beer and Birdy drinks it, then opens the gate from the fenced patch. You can activate the same pad twice more to see the helium and second-beer demonstrations. These are optional tutorial scenes and are not required for progress.
Leave through the gate and stand on the next Context-Sensitive pad outside the patch. When the lightbulb appears, press B. Conker uses Alka-Seltzer and the hangover ends. This restores his normal movement speed and jump height; it is not a general healing or stamina item. The game supplies context items according to the situation, so you do not carry Alka-Seltzer as a freely selected inventory item.
After the cure, test a normal jump before continuing. If you have already watched a cutscene, L can skip it on later attempts, although some scenes cannot be skipped.
- Birdy has opened the fenced-patch gate.
- The outside pad has produced Alka-Seltzer.
- Conker is no longer staggering.
- Normal running and jumping are available.
3. Cross the training route and open the key room
Go to the water and swim toward the grassy ledge at the top of the waterfall. Hungover is a safe tutorial area, so falling during this section does not inflict normal damage. Follow the path across the log and the other gaps.
Use the Helicoptery Tail by jumping with A and pressing A again while airborne. It lets Conker hover briefly and soften or extend a jump, but it is not unlimited flight. For vertical reaches, hold Z and press A to perform a high jump.
At the top of the route, ignore the bridge for now. High-jump to the handle near the bridge to open the nearby door, then return across the gaps and enter it. The door closes behind Conker, so the key must be dealt with inside the room.
- Swim to the waterfall ledge.
- Cross the log and gap sequence.
- Use high jumps for the vertical reach.
- Use the handle to open the key-room door.
4. Obtain the frying pan and use it on the key
Inside the room, a key moves around the floor. Chase it until the tutorial activates the frying-pan move. Press B near the key to swing the pan and stun it. Conker briefly stops when he swings, so move close before attacking rather than trying to hit the key from a distance.
Once the key is stunned, walk into it to pick it up. Carry it to the door to unlock the exit. If the key begins moving again, pursue it and strike it once more. The frying pan is now Conker’s basic close-range attack and is also used to stun certain movable objects later in the game.
- The frying-pan move has been introduced.
- The moving key has been stunned.
- Conker has picked up the key.
- The key has opened the room’s exit.
5. Remove the gargoyle and clear the way into Windy
Leave the key room and retrace the training route across the gaps to the bridge. Speak with the gargoyle blocking the crossing. Approach when prompted and press B to strike it with the frying pan. The gargoyle falls from the bridge, but its fall causes a large boulder to land across the exit.
High-jump onto the boulder, then use the Helicoptery Tail to reach the wooden ledge on the right. Stand on the Context-Sensitive pad and wait for the lightbulb. Press B to obtain the dynamite and plunger. Conker uses it automatically to destroy the boulder.
Hover back toward the cleared bridge and pass through the opening. The next area is Windy, the game’s main overworld hub. Hungover is complete once Conker has entered Windy; there is no cash payment or cash threshold to satisfy before this transition.
- The gargoyle has fallen from the bridge.
- The boulder is blocking the exit.
- The dynamite pad has been activated.
- The boulder has been destroyed.
- Conker has entered Windy.
Before you move on
- Alka-Seltzer has cured Conker’s hangover.
- Conker can run, jump, high-jump, and use the Helicoptery Tail normally.
- The frying pan is available through B when no other context action overrides it.
- The moving key has opened its room’s exit.
- The gargoyle and boulder no longer block the bridge.
- Conker is standing in Windy and can inspect its signs, paths, and blocked later routes.
The Bridge and Windy Levels (Windy / Bridge approach)
Windy is the campaign hub and must be revisited several times. On the first visit, complete Mrs. Bee’s hive rescue and Birdy’s catapult lesson, defeat the four dung beetles, and open the route into Barn Boys. Stop there: complete the entire Barn Boys chapter before returning to this chapter at the Poo Cabin subsection. After Barn Boys, the cow, sewage and Great Balls of Poo objectives open Bat’s Tower and Sloprano. Follow the required order into Bat’s Tower first, then enter Sloprano. After Uga Buga, return to Windy, complete Wasps’ Revenge and pay Mr. Barrel at least $2,110 to open Spooky. After Spooky and It’s War, return to the changed Windy area and use the destroyed windmill to enter Heist. Extra cash, Tail Thingys and multiplayer activities are optional, although optional cash can help meet Mr. Barrel’s payment.
1. First Windy visit: rescue Mrs. Bee
After Hungover, follow the downhill route into Windy and find Mrs. Bee near the signpost. Speak to her on the path marked Nice to begin the first hive objective. This rescue is required progression, not an optional errand.
Return to the signpost and take the Nasty route uphill toward the wasp nest. Pick up the hive and immediately run back along the main path. The wasps pursue you, so do not stop to fight. Keep away from the sticky honey patches and retrieve the hive if Conker is hit and drops it.
Bring the hive back to Mrs. Bee. The pursuing wasps are removed after the scene, and the resulting cash helps with later Windy gates. Do not leave Windy for Barn Boys until the hive has been returned.
- Speak to Mrs. Bee on the Nice path.
- Carry the hive from the wasp nest back to Mrs. Bee.
- Finish the scene and receive the cash reward.
2. Birdy’s lesson and the Barn Boys entrance
Cross the stone bridge near Mrs. Bee and approach Birdy’s context pad. Stand on the marked pad until the B prompt appears, then activate it. Birdy’s lesson requires the $10 interaction and teaches Conker the catapult. The payment functions as a progression trigger rather than a permanent outfit or disguise purchase.
Use the catapult to aim at the four red dung beetles on the hill beyond the bridge. Keep your distance and deal with them one at a time. The beetles require repeated hits, so continue firing until all four are defeated.
When the four beetles are gone, the door at the top of the hill opens. Follow the upper route and take the branch leading into the farm. This is the entrance to Barn Boys. The opening Windy route requires no outfit or disguise.
- Complete Birdy’s $10 lesson.
- Obtain and use the catapult.
- Defeat all four red dung beetles.
- Enter the opened upper door and follow the route into Barn Boys.
3. Continuity break: complete Barn Boys before resuming Windy
Stop the Windy chapter here. Do not continue into the Poo Cabin, Poo Mountain or either later route until Barn Boys is complete.
Play through the entire Barn Boys chapter, including its required farm objectives and the route back to the overworld. Once Barn Boys is finished, return to Windy and resume at the Poo Cabin subsection below.
If the Poo Cabin is not yet available after returning, finish any remaining Barn Boys objective and collect the required cash. The later Windy sequence becomes available after the Barn Boys transition and the game’s money/time progression has advanced.
- Barn Boys is fully complete.
- Conker has returned to Windy.
- Resume at the Poo Cabin, not at the opening Mrs. Bee route.
4. Poo Cabin: reach the cow area
After Barn Boys, return to the smelly, poo-filled section of Windy. Enter the Poo Cabin and speak to the dung beetle. He explains that Conker must fill the underground area using the cows before a poo ball can be provided.
Stand on the trapdoor inside the cabin and activate the anvil context action. Conker drops into the cylindrical sewage chamber. Use the ropes and ledges to reach the opening near the drain, then follow the route out to the outdoor cow area. If you hear cash below the trapdoor, leave it for later; it cannot be collected until the sewage section has been filled and underwater swimming is available.
- Return to Windy after completing Barn Boys.
- Enter the Poo Cabin.
- Use the trapdoor context action.
- Reach the outdoor cow area.
5. Process the cows and learn underwater swimming
In the cow area, climb the nearby Prune Juice structure and operate the spigot so the trough fills. The bull is the tool for the cow objective: lure or ride it into the required targets, then line it up with each cow so the cow is sent to drink the prune juice. Repeat the environmental sequence until all three cows have completed their turns.
Use the ramps and platforms rather than standing in the runoff. If the bull’s charge is aimed at Conker, jump over it and reset your position before trying again. The exact order of the cow interactions is less important than completing all three and returning to the sewage route.
When the sewage chamber is full, return inside and reach the context pad near the ropes. Activate it to obtain the Confidence Pills. Conker can now dive and swim underwater. Watch his air supply: surface or use air bubbles before his health begins to drain.
Swim back through the chamber and collect the previously inaccessible cash if desired. A Tail Thingy is also available in this route. Both rewards are optional. Continue through the lower opening to return to the Poo Cabin.
- Open the Prune Juice spigot.
- Complete the environmental cow objective for all three cows.
- Activate the Confidence Pills context pad.
- Return through the sewage route and exit the cabin.
6. Great Balls of Poo: open the later routes
A large poo ball is available outside the cabin. Push it around the cabin and up the slope toward Poo Mountain. Dung beetles emerge from openings in the slope; wait until they retreat before continuing so they cannot interrupt the push or knock the ball away.
At the top, Conker adds TNT to the ball. Push it over the ledge onto the large dung beetle. This completes the first poo-ball objective.
Use the next ball on the route beside the boarded entrance. Push it around the mountain and up to the hole at the summit. The ball passes through the mountain and breaks open the boarded entrance at its base. This is the future Sloprano entrance. It is now open, but do not enter Sloprano yet.
Use another ball on the route marked by the No Poo Balls sign near the bank ladder. Push it over the edge so it strikes the armored guard below. Drop down, find the switch behind the guard and activate the anvil action. This opens the drain and removes the guards from the pool. Swim through the opened doorway to enter Bat’s Tower.
The three poo-ball objectives are required for the later campaign route. Complete Bat’s Tower first. After finishing that chapter and returning to Windy, enter Sloprano through the opened mountain entrance. Cash near the mountain summit, cash in the wasp nest and Tail Thingys are optional.
- Destroy the large dung beetle with the TNT-filled poo ball.
- Open the boarded Sloprano entrance with the summit ball.
- Drain the pool and open the Bat’s Tower route.
- Complete Bat’s Tower before entering Sloprano.
- Return to Windy and enter Sloprano through Poo Mountain.
7. Post-Uga Buga return: Wasps’ Revenge and Mr. Barrel
After defeating Uga Buga, return to Windy through the established overworld route. Speak to Mrs. Bee again. Her hive has been stolen a second time, and Wasps’ Revenge is now required story progression.
Enter the wasp nest and follow the honey path to the machine-gun hive. Use the radar to watch for wasps emerging from the honeycombs and clear the attacking waves. Take your time and keep the hive pointed toward the incoming openings.
When the nest is clear, carry the hive back to Mrs. Bee. As in the first rescue, avoid honey patches and retrieve the hive if Conker is hit. Completing this task is mandatory. The $400 reward is useful but optional, as are the extra cash and Tail Thingys around the nest.
After the hive scene, climb the windmill path toward Mr. Barrel. Avoid the worm hazards by jumping over their emerging positions and pause when necessary. Mr. Barrel requires at least $2,110. Optional cash from Windy and earlier chapters can help reach that amount, but it cannot replace the Wasps’ Revenge transition.
Pay Mr. Barrel, mount him and ride down the hill. He breaks through the boarded passage near Mrs. Bee. Conker wakes at night, and the Spooky entrance becomes available.
- Return to Windy after Uga Buga.
- Speak to Mrs. Bee and complete Wasps’ Revenge.
- Have at least $2,110 for Mr. Barrel.
- Pay Mr. Barrel and complete the downhill ride.
- Confirm that the boarded Spooky passage has been broken.
8. Post-Spooky and It’s War return: enter Heist
Complete Spooky and follow its required return route. Then complete the full It’s War chapter in the original N64 order, including the military vehicle sections, submarine section, Experiment sequence and self-destruct escape. It’s War does not branch directly to the Vault or Heist.
After the escape, follow the exit route back to Windy. The windmill is now destroyed, changing the hub state. Do not search for the earlier intact windmill entrance.
Climb toward the ruined windmill and follow the opening through the remains. The route leads into the Feral Reserve Bank setup. The Berri scene supplies the bank outfit used for Heist. This is separate from the opening Windy route, which requires no disguise.
- Complete Spooky.
- Complete the entire It’s War sequence and escape the self-destructing area.
- Return to Windy and confirm that the windmill is destroyed.
- Use the opening through the windmill ruins.
- Complete the Berri setup and enter Heist.
Before you move on
- The first Mrs. Bee hive has been returned.
- Birdy’s catapult lesson is complete.
- All four opening dung beetles are defeated and the Barn Boys door is open.
- Barn Boys is fully complete.
- The player has returned to Windy and resumed at Poo Cabin.
- All three cows have been processed and underwater swimming has been learned.
- The first poo ball destroyed the large dung beetle.
- The summit poo ball opened the Sloprano entrance.
- The third poo ball drained the pool and opened Bat’s Tower.
- Bat’s Tower was completed before entering Sloprano.
- After Uga Buga, Wasps’ Revenge was completed.
- Mr. Barrel received at least $2,110 and broke the boarded Spooky passage.
- Spooky and It’s War were completed.
- Windy shows the destroyed windmill, and the opening in its remains leads into the Heist setup with Berri.
References for this chapter
- Conker's Bad Fur Day (USA) Nintendo 64 Instruction Manual
- Conker’s Bad Fur Day - Guide and Walkthrough by CyricZ, Nintendo 64, GameFAQs
- Conker’s Bad Fur Day - Guide and Walkthrough by Nemesis, Nintendo 64, GameFAQs
- Conker’s Bad Fur Day - Guide and Walkthrough by Nexxt, Nintendo 64, GameFAQs
- Conker’s Bad Fur Day - Guide and Walkthrough - Nintendo 64 - By bananagirl
Barn Boys and Farming Area
Barn Boys is a required chain of farm tasks in the original Nintendo 64 version. Complete Marvin, Mad Pitchfork, Sunny Days, Barry + Co, Buff You, Haybot Wars, Frying Tonight, and Slam Dunk. The required chapter route ends after the Slam Dunk gate opens and you leave through the lower passage. Optional cash, chocolate, and a Tail-Thingy can be collected along the way, but no disguise or Sloprano-specific item is obtained here.
Open the cheese route and remove Marvin
Cross the water from the Barn Boys entrance and take the route on the right to find Jack beneath Marvin. Speak to Jack, then return to the fork and take the path toward the cheese field. Move beneath the jumping metal blocks when they are raised or have just landed; rushing into them costs health and can knock Conker back toward the entrance.
Find Burt at the gate near the cheese. Speak to him after Jack has given you his name, and Burt will allow access to the cheese. Strike a cheese piece with the frying pan, pick it up, and carry it back to Marvin. The cheese can escape if you stop for too long, so take the shortest route and use the pauses in the metal-block pattern. Repeat the delivery until Marvin has eaten three pieces. Marvin then disappears and the large block obstructing Jack is removed.
Use the newly available blocks and Jack as stepping points to reach the gutters and barn roof. The roof contains chocolate and optional cash. Pull the switch on the roof to open the barn door, then drop to the circular platform and enter the barn.
- Speak to Jack and then Burt.
- Deliver three cheese pieces to Marvin.
- Reach the roof and pull the barn switch.
- Confirm that Marvin is gone and the barn entrance is open.
Defeat Franky in Mad Pitchfork
Inside the barn, approach the paint pot and brush to start the Franky encounter. Franky attacks with a straight charge. Do not fight him by trading pan swings. Stand so a haystack is directly behind Conker and Franky is lined up on the other side. When Franky charges, jump and hover over him so he strikes the haystack.
Repeat the setup until the haystacks have been destroyed. Keep moving around the room so Franky does not pin Conker against a wall. Chocolate near the entrance can restore health if a charge connects. After the haystacks are gone, go to the switch in the corner opposite the entrance and pull it. This releases the King Bee and opens the route outside.
The roof cash and the chocolate around the barn are optional. The switch and the resulting King Bee scene are the required progression.
- Use haystacks as shields against Franky's charges.
- Avoid cornering yourself in the barn.
- Pull the switch opposite the entrance after the haystacks are destroyed.
- Follow the King Bee outside.
Collect all five bee groups in Sunny Days
Talk to the King Bee near the bouncing wooden crate, then follow the narrow path to the sunflower. Return to the circular platform and speak to the first group of tickly bees. Each group follows Conker, so lead it all the way to the sunflower before collecting the next group. The objective requires five groups in total.
The first group is near the circular platform. The second is reached by following the path toward the sunflower and then swimming back through the water toward the beginning of the area. The third is on the rocks around the cheese field near Burt. The fourth is on the barn roof near the switch and the earlier cash. For the fifth, return to the roof, climb the ladder beyond the higher roof section, and circle the giant bucket.
After all five groups have been brought to the sunflower, return to the flower and let the pollination scene finish. The sunflower then acts as a bounce route. Bounce repeatedly and use a tail-spin or hover to enter the alcove for optional cash. Return to the circular platform and use the bouncing wooden crate to reach the opening in the barn wall.
- Visit the sunflower before gathering the groups.
- Lead five separate bee groups to the sunflower.
- Wait for the pollination scene to finish.
- Use the bouncing sunflower and crate to reach the barn opening.
Cross the barn rafters in Barry + Co
Enter through the opening near the bouncing crate. The route consists of narrow beams and ledges with bats attacking from the sides. Move slowly and use high jumps and hovering rather than attempting long blind leaps. When the light-bulb prompt appears and a bat squeaks, press B to equip the flamethrower. Burn the bats when they approach; the context action is intended for these encounters.
After the bats are cleared, use the next context pad to obtain knives. Aim at the rope holding Franky and press Z to throw a knife. Cutting the rope drops Franky to the lower barn area. Put the knives away with the context action, then tail-spin or carefully descend to join him.
- Cross the beams without rushing.
- Use the flamethrower prompt when the bats squeak.
- Equip the knives at the next context pad.
- Cut Franky's rope and descend to him.
Defeat the haystack in Buff You
After rejoining Franky, mount him and approach the giant haystack. Circle around it until Conker is behind the target. Press B to make Franky stab with his pitchfork. A frontal attack fails and knocks Conker off, so wait for the haystack to turn or finish an attack before committing.
Repeat the rear attack until the haystack reveals its mechanical Haybot form. Continue looking for rear openings and remount Franky if Conker is thrown off. After the required third successful stab, the Haybot breaks the floor and drops Conker and Franky into the lower chamber.
- Stay behind the giant haystack before pressing B.
- Remount Franky after being knocked off.
- Complete three successful rear stabs.
- Allow the floor-break sequence to move you into Haybot Wars.
Finish Haybot Wars and escape through Frying Tonight
The Haybot now uses homing missiles. Use the large tanks and pipes as cover, then jump or move aside as a missile reaches your position. Find the leaking pipe and lure the Haybot into the water. The water disrupts it and makes it retreat to the center, where its red Do Not Push button becomes vulnerable from behind.
When the Haybot spins, approach only when its back faces Conker. Jump and press B at the prompt to damage it. Repeat the lure, cover, and rear-button sequence until the Haybot is destroyed. The number of missiles increases during the fight, so use the tanks rather than remaining in the open. Chocolate is available behind the pipes and tanks.
The room floods after the fight. Immediately head toward the exit signs and climb the ladder. At the first context pad, equip the knives and cut the nearby wires. Swim to the next ladder and repeat at the second pad, cutting the remaining wires that block the exit. Electrical wires are hazards while swimming, so do not touch them. When the water rises enough, leave through the upper exit.
Outside, jump onto the stone tablet held by the reading monkey. The tablet launches Conker upward. Use a tail-spin and hover to reach the upper ledge if collecting the optional cash, then leave through the barn exit.
- Use tanks and pipes to avoid the homing missiles.
- Lure the Haybot into leaking water.
- Strike the rear Do Not Push button three times.
- Cut the wires at both flooded-room context pads.
- Exit through the upper opening after the water rises.
Complete Slam Dunk and open the lower passage
From the barn exterior, climb the long ladder and continue upward past the platforms and wasps. Do not rush the wasp ladders: wait for a wasp to pass, then climb during the safe gap. At the top, reach the diving board and jump toward the chocolate pieces. When the light-bulb prompt appears, press B to turn Conker into an anvil.
The anvil action drops Conker into the bucket and activates the context pad below. This opens the gate in the green river near the sunflower. Climb out of the bucket, use the ladder down to ground level, and return to the river. Swim to the opened gate and enter the tunnel. The Tail-Thingy and cash inside are optional rewards.
The required completion condition is the opened river gate and the ability to leave through the lower passage beyond it. Barn Boys then returns you to the Windy-area route. Bullfish's Revenge is not part of this chapter; it is a later Bat's Tower objective. Likewise, no mafia disguise is required or awarded in Barn Boys.
- Climb the exterior ladders past the wasps.
- Jump from the diving board and activate the anvil prompt.
- Confirm that the river gate has opened.
- Enter the lower passage and leave Barn Boys toward Windy.
Before you move on
- Marvin has disappeared after three cheese deliveries.
- The barn roof switch has opened the barn.
- Franky has been freed from the rope and has helped defeat the giant haystack Haybot.
- All five bee groups have been delivered to the sunflower.
- The Haybot Wars robot has been destroyed.
- The flooded chamber has been exited after both wire-cutting sections.
- The Slam Dunk anvil action has opened the river gate.
- Conker has entered the lower passage and returned to the Windy-area route.
Bat’s Tower and Early Shooter Sections
Bat’s Tower is a multi-part chapter, not just the exterior climb. Enter through the underwater passage, pull the tower switch, recover all three female cogs, lead the Catfish to their safe, solve the OPEN slingshot target, cross Clang’s underwater tunnels, extinguish the Fire Imps, defeat the boiler called the Big Big Guy, then survive Bullfish’s Revenge. Completing the final escape opens the route onward to Sloprano.
Enter Bat’s Tower and reach the cog room
At the river entrance, speak with Mrs. Catfish and the other Catfish. Their problem is the aggressive Bullfish, also called the dogfish in some walkthrough descriptions, blocking the route to their safe. Swim along the river, keep away from the fish’s bite range, and enter the underwater opening in the green-water section. Follow the passage until Conker surfaces inside the tower complex.
Leave the water and speak to the two-sided cog in the machinery room. The immediate objective is to retrieve three missing female cogs. Use the rising platform near the machinery to begin the climb. This is the required route; do not try to solve the Bullfish encounter by attacking it directly.
- Speak with Mrs. Catfish before entering the underwater passage.
- Swim through the low opening beneath the Bullfish’s route.
- Surface in the tower and speak with the two-sided cog.
- Stand on the nearby rising platform.
Climb the tower and pull the underwater gate switch
Ride the platform upward, then follow the ledge to the narrow wooden beam. The bats are handled with a context action rather than a normal ranged weapon. When a bat’s squeak signals its approach and the lightbulb prompt appears above Conker, press B to use the flamethrower. Wait on a wider ledge if necessary; crossing while a bat is still approaching is the main cause of falls.
Continue from beam to ledge, jump to each rope, and climb to the next beam. The higher beams are narrower, so use short movements and keep Conker aligned with the beam instead of making broad camera corrections. There is no required R-aim strafing sequence here, and attempting to treat the bats like ordinary gun targets wastes health and risks a fall.
Near the top, the route reaches a short beam and a rope leading to the upper exterior platforms. Cross the platforms carefully and avoid the spike mines. Reach the projecting ledge, jump to the wall switch and pull it down. This opens the submerged gate near the machinery room. The cash on the upper exterior route is optional and should only be attempted after the switch is active.
- Use the flamethrower only when the bat’s context prompt appears.
- Cross each beam slowly and climb every rope in sequence.
- Avoid the spike mines on the upper exterior platforms.
- Pull the switch at the top of the tower.
Recover the three female cogs
Return to the lower machinery area and swim through the gate that opened beneath the water. Two armored enemies patrol the underwater passage. Avoid them rather than trying to fight while swimming. Surface in the circular room beyond the passage, where the first female cog moves around; the other two are farther through the adjoining circular hall.
Approach one cog at a time and strike it with the frying pan. When it is stunned, pick it up and carry it back through the underwater passage to the main cog room. Repeat for all three. Keep the cog away from ledges and corners while carrying it, and use the broadest part of the route rather than forcing it through an enemy cluster. If a cog or enemy blocks the passage, leave the subroom and re-enter to restore a workable position; do not assume the chapter is permanently stuck.
After all three female cogs are mounted beside the main machinery, step onto the large central stone wheel. Run in the direction indicated by the wheel’s arrow until the mechanism activates. The machinery raises the water level and pulls the Bullfish’s chain shorter. This is the progression event that lets the Catfish approach their safe.
- Swim through the newly opened underwater gate.
- Find all three female cogs in the circular rooms.
- Stun and carry each cog back separately.
- Run on the central stone wheel until the machinery activates.
Lead the Catfish to the safe and open the money room
Return to the Catfish and speak to them after the mechanism has activated. Lead them through the Bullfish’s water toward the safe. Keep moving around the fish and the floating mines; do not stop directly in front of the Bullfish. The Catfish follow the route and enter the combination when they reach the safe.
Enter the safe after it opens. The money immediately runs away and the nearby context pad supplies Conker’s slingshot. Use the slingshot on the rotating letter target in the order O, P, E, N. The central floor opens once the word is completed, allowing Conker to drop into the next underwater section.
- Confirm the Catfish have followed Conker to the safe.
- Avoid the Bullfish and floating mines while leading them.
- Collect the slingshot from the context pad.
- Shoot O, then P, then E, then N.
Cross Clang’s Lair using the miner’s light
Use the floating context pad in the water to obtain the miner’s hat and flashlight. Descend through the underwater passage, stopping at the side air vents whenever Conker needs air. Follow the green-lit tube at the bottom, surface in the next chamber and use the context pad there to recharge the light.
Re-enter the water through the blue-lit route and reach the next surface chamber. Pull the large wall lever to open the underwater gate. Take the green-lit tube nearest the surface, then continue through the yellow-lit tubes. Recharge the miner’s light at the next context pad before making the final underwater ascent.
Clang creatures patrol the tunnels and can bite Conker. The light briefly blinds them, but it is not a weapon that clears the area permanently. Use it to create a short opening, then swim past. Keep to the side of the tunnel and use every air vent rather than attempting one uninterrupted ascent. At the red-lit upper chamber, enter the large opening to begin Pisstastic.
- Collect the miner’s hat and flashlight.
- Recharge the light at each available context pad.
- Use side air vents during the long underwater climbs.
- Pull the wall lever and follow the colored tube route.
Extinguish the Fire Imps and defeat the Big Big Guy
In Pisstastic, use the context pad beside the beer keg to make Conker drunk. While the effect lasts, press B near the Fire Imps to urinate on and extinguish them. Move between targets instead of standing over one Imp for too long, because they can run beneath Conker and cause damage. Continue until the required Fire Imps have been dealt with and the two remaining Imps jump into the boiler.
The boiler, the Big Big Guy, is defeated through the room’s overhead levers and waste vents. Lure the boiler toward a corner lever, then use the nearby high-jump context action to pull that lever. Waste drops onto the boiler, stunning it and sending it toward the room’s center. While it is stunned, approach the brass-ball area and use the context prompt to strike it. Repeat the lever-and-stun sequence around the room until the boiler’s brass balls are knocked loose and the boiler is destroyed.
After the fight, push one brass ball onto the floor switch near the beer keg to open the exit tunnel. Push the other brass ball into the tunnel to remove the remaining Fire Imp, then follow the tunnel to collect the cash. Return through the safe and swim back toward the Catfish.
- Use the beer context pad before trying to extinguish Fire Imps.
- Avoid staying directly beneath an Imp.
- Lure the boiler to each corner lever.
- Use the stunned boiler’s context attack and repeat until it is destroyed.
- Use the brass balls to open and clear the exit tunnel.
Survive Bullfish’s Revenge and finish the chapter
When Conker returns, the Catfish argue over the reward and begin swimming away. The Bullfish breaks free. Immediately swim after the Catfish and keep moving through the same river route used earlier. The goal is escape, not combat. Use the Catfish as moving distractions and stay away from the fish’s mouth and the outer walls where a collision can trap Conker.
Reach the wooden dock and continue along it. The chase ends when the Bullfish crashes into the stone wall. The nearby fish body acts as a spring: jump on it to reach the upper alcove and collect the optional cash. The chapter is complete once the escape cutscene has finished and control returns with the route onward available.
- Start moving as soon as the Bullfish breaks free.
- Swim the river without stopping to attack.
- Reach the wooden dock and survive the chase.
- Use the crashed Bullfish as a spring only after the escape is complete.
- Confirm that the next route toward Sloprano is available.
Before you move on
- The top switch has been pulled and the underwater cog gate is open.
- All three female cogs have been returned to the main machinery.
- The central wheel has activated and the Bullfish’s chain has been shortened.
- The Catfish have opened their safe.
- The slingshot has opened the floor by spelling OPEN.
- Conker has crossed Clang’s Lair, extinguished the Fire Imps and defeated the Big Big Guy.
- The final Bullfish chase has ended at the wooden dock, and the route toward Sloprano is available.
Sloprano / Mafia Sequence
Sloprano is entered from Poo Mountain only after the required Windy and Poo Cabin objectives have been completed. Return to Windy after Barn Boys, finish the dung-beetle and cow-related task in Poo Cabin, obtain the poo balls, and use one to open the Sloprano entrance inside Poo Mountain. In Sloprano, feed six kernels of sweet corn to the Great Mighty Poo, defeat him with toilet paper, cross the U-Bend, pay the temporary $1,000 toll, and smash the idol three times. The toll is not a disguise purchase: after the guard dialogue, Conker gets the money back. The idol transition places you in Uga Buga; after completing that chapter, you must return through Windy before the Spooky entrance becomes available.
Complete the Windy prerequisites before entering Sloprano
Do not try to enter Sloprano immediately after Barn Boys. Return to Windy and go to Poo Cabin, where the dung beetle needs the farm’s cows to produce the material required for his poo balls. Complete that Poo Cabin objective, then collect a poo ball and carry or roll it along the Windy route to Poo Mountain. Use it at the mountain entrance to open the passage into Sloprano. Poo balls are tied to this access route and are not a permanent inventory item for use throughout the game.
Cash found around Windy and Poo Mountain is useful but generally optional. The important financial requirement comes later at the guard toll, so collect accessible money if your total is low before committing to the U-Bend route. Do not confuse the cash objective with a disguise purchase; the original Nintendo 64 sequence has no permanent Sloprano disguise requirement.
- Return to Windy after the Barn Boys objectives.
- Complete the Poo Cabin dung-beetle and cow objective.
- Obtain a poo ball and use it to open the Sloprano entrance in Poo Mountain.
Feed the first three kernels
Inside Sloprano, listen to the dung beetle and follow the circular walkway to the first sweet-corn kernel. Strike the kernel with the frying pan, then carry it to the nearby ledge overlooking the central pool. From the correct ledge, Conker throws the kernel into the muck automatically. The large hand in the pool can knock Conker away, so wait for it to withdraw before crossing the exposed path.
Continue around the walkway while watching for falling globs. Their shadows show where they are about to land. Cross the gap with a running jump or a tailspin, then reach the section containing two more kernels. Knock each one down, carry it around the central hand and throw it from the nearby ledge. Wait through the hand’s attack cycle instead of trying to cross while it is rising.
- Deliver the first kernel from the opening walkway.
- Cross the first gap without being struck by the falling muck.
- Deliver the next two kernels.
Reach and deliver the final three kernels
After the two-kernel section, follow the route upward toward the fork. Take the right-hand path. The left-hand route leads toward cash that is not accessible during this objective, so taking it only wastes time. The final area contains three kernels. Repeat the same process: knock each kernel down, carry it around the hand, and throw it from the ledge above the central pool.
When all six kernels have entered the muck, the Great Mighty Poo rises and the Sweet Melody boss sequence begins. If a kernel is struck or Conker is knocked down, return to its position and repeat the carry-and-throw action; the objective is not complete until all six have been delivered.
- Take the right fork after the two-kernel section.
- Deliver all three kernels in the final area.
- Wait for the Great Mighty Poo to emerge.
Defeat the Great Mighty Poo
When the boss begins singing, move to the nearby context-sensitive pad and press B to obtain toilet paper. The Great Mighty Poo can be damaged only while he opens his mouth to sing. Keep moving around the arena to avoid the thrown poo balls, then press Z to throw toilet paper into his mouth during the singing opening.
The first pad requires one successful hit. The boss then covers that location, so move to the next pad and land two hits. After that position is covered, cross to the final pad and land three more hits. The openings become less forgiving, so face the boss before throwing and avoid standing still while waiting for the next verse. The boss’s projectiles can be difficult to read if Conker is stationary; keep circling and use the arena’s space.
- Land one toilet-paper hit from the first pad.
- Land two hits from the second pad.
- Land three hits from the final pad.
Flush the boss and leave the poo chamber
The final successful sequence produces a high note that shatters the glass blocking the flusher. Cross the newly opened route, collect the nearby cash if desired, and pull the flusher. The cash is optional, but taking it can help if you need to meet the later toll. After the flush, return to the central opening and descend by the small platforms. Do not drop blindly through the hole; use the platforms to reach the exit safely.
A cutscene follows in which Berri is kidnapped. When control returns, take the Tail-Thingy and chocolate in the surrounding area if you want the extra health reserve. These items are optional and the Tail-Thingy reappears after a death, so do not treat it as a progression requirement.
- Reach the broken-glass alcove.
- Pull the flusher after collecting optional cash if desired.
- Descend through the central opening and trigger the Berri cutscene.
Cross the U-Bend Blues section
Enter the water in the next room and swim through the tunnel containing three rotating blades. Blade contact is fatal. Stay low, use the air pockets near the sides, and wait for each blade to pass before moving through the next opening. Do not try to swim continuously through the whole tunnel. If Conker dies, reclaim the nearby Tail-Thingy before trying again if you want the extra health buffer.
Surface at the end of the blade tunnel and enter the next passage. Climb the rope, then watch the floor blades before jumping toward the ladder. Time the jump so Conker lands on or reaches the ladder rather than dropping onto the spinning blades. Climb out, follow the upper route and cross the bridge to the guards.
- Pass all three underwater blades.
- Use the air pockets to recover breath between attempts.
- Climb from the rope to the ladder and cross the bridge.
Pay the temporary toll and enter Uga Buga
The guards demand $1,000. Complete the entire dialogue and hand over the money. One guard realizes that Conker is a squirrel, but Conker convinces him that he is an elephant. The passage trigger occurs only after this exchange. The payment is temporary: before Conker leaves, he whistles and the guards return the money. It is not a disguise purchase, and there is no permanent disguise to retain.
If you do not have enough cash, leave the area and collect accessible Windy or chapter cash before returning. Do not attack the guards or expect a stealth bypass. Once the dialogue is complete, cross the bridge and enter the chamber with the dinosaur hazards. Follow the outer route around the stone structure, enter the lower doorway, circle the next level and climb to the top.
At the idol, stand on the face-like statue and press B when the context prompt appears to perform the anvil attack. Repeat the attack three times. The idol collapses and the transition into Uga Buga begins. Complete Uga Buga before attempting to enter Spooky; after the Uga Buga objectives, return to Windy and use the newly opened route for the next required chapter.
- Pay the guards $1,000 and finish the dialogue.
- Confirm that Conker receives the money back.
- Reach the idol and perform the anvil attack three times.
- Confirm the transition into Uga Buga, then return to Windy after completing that chapter before entering Spooky.
Before you move on
- The Poo Cabin and poo-ball objectives have opened the Sloprano entrance.
- All six sweet-corn kernels have been delivered.
- The Great Mighty Poo has been defeated with the one-hit, two-hit and three-hit toilet-paper sequence.
- The flusher has been pulled and Conker has crossed the three-blade U-Bend route.
- The guards have accepted the $1,000 toll, completed their dialogue and returned the money.
- The idol has been smashed three times and the Uga Buga transition has started.
- After finishing Uga Buga, Conker has returned to Windy for the later Spooky progression.
References for this chapter
- Conker’s Bad Fur Day - Guide and Walkthrough by Nemesis, Nintendo 64, GameFAQs
- Conker's Bad Fur Day - Guide and Walkthrough by KrocTheDoc, Nintendo 64
- Conker's Bad Fur Day - Walkthrough by Outlaw, Nintendo 64
- Conker's Bad Fur Day - Walkthrough by Jon_, Nintendo 64
- Conker's Bad Fur Day - Walkthrough by Dennis Wentworth
- Conker's Bad Fur Day (USA) Nintendo 64 Instruction Manual
Uga-Buga Caveman Area (Uga-Buga)
Uga-Buga is a required Nintendo 64 campaign chapter with two connected halves. First, open the dinosaur temple, hatch and sacrifice the baby raptor, collect the caveman headdress, and use the disguised followers to enter Rock Solid. Then free Berri, carry the bomb into the temple, reclaim Conker's stolen money in the hoverboard race, and use Fangy to defeat Buga the Knut. After the boss, return through Sloprano and Poo Cabin to Windy. The next required Windy progression is Wasps' Revenge followed by paying Mr. Barrel at least $2,110; completing that sequence opens the nighttime route into Spooky.
1. Open the temple and reach Sacrifice
From the Uga-Buga entrance, circle around the dinosaur temple and use the upper doorway to reach its top level. Collect the cash if desired, then step onto the nearby monk tablet to launch Conker onto the idol's head. When the lightbulb prompt appears, press B to perform the anvil attack. Repeat until the statue drops and opens the passage beneath it. This connects the entrance side with the caveman worship area.
Return to the worship room and use the doorway on the right side of the idol to enter the egg chamber. Use the monk tablet beside the egg to reach its top, then press B when the context prompt appears to hatch the baby raptor.
- The statue has been knocked down and the lower passage is open.
- The right-hand doorway from the idol room leads to the egg chamber.
- The baby raptor has hatched.
2. Lead the raptor back and activate the sacrifice
The baby raptor follows only while Conker stays reasonably close. Take it around the thin outside path in the egg chamber rather than trying to force it through the blocked entrance. Let it eat nearby cavemen, but do not run far ahead. If it stops, turn around and bring it back into range.
Enter the worship room and stand on the Context Sensitive pad to draw the slingshot. Shoot the switch on the right side of the main entrance to raise the sacrifice platform. After the raptor has eaten enough nearby cavemen, guide it onto the platform marked with its footprints. Return to the pad and shoot the switch on the left side. The presser drops, the raptor is sacrificed, and the dinosaur idol opens its mouth.
- The raptor has followed Conker through the outside route.
- The right switch has raised the sacrifice platform.
- The raptor is standing on the marked platform.
- The presser has activated and the idol's mouth is open.
3. Cross Phlegm and obtain the headdress
After the sacrifice, use the monk's tablet to reach the top of the dinosaur idol. Optional cash and a Tail-Thingy are on the back. Return to the nostrils and wait for the smoke to stop. Step into a nostril and press B to use the pepper shaker, then repeat on the other side. The idol sneezes and dries its tongue.
Climb the tongue while avoiding the swinging uvula. Continue through the throat, waiting for the moving tonsils to clear, until you reach the unconscious caveman. Conker automatically takes the headdress. Return through the throat and out of the idol's mouth. The headdress is required for Worship.
- Both nostrils have been treated with pepper.
- The tongue is dry and climbable.
- Conker has obtained the caveman headdress.
4. Use the followers to enter Rock Solid
The cavemen in the worship area now follow Conker because of the headdress. Lead all four up the slope toward the Rock Monsters. Keep the group together at the bottom of the slope before moving uphill; followers left behind may fail to participate.
Hit each Rock Monster with the frying pan. The disguised followers attack and destroy it. Repeat for every Rock Monster in the approach area, then speak to the bouncer at the Rock Solid entrance. Wearing the headdress alone is not enough; the Rock Monsters must be cleared.
- All four followers have reached the Rock Monsters.
- The Rock Monsters have been defeated by the followers.
- The Rock Solid bouncer has allowed Conker inside.
5. Free Berri in Rock Solid
Inside the club, roll the unconscious Rock Monster from behind the bar up the slope and onto the button near the entrance. This holds the lower door open. Reach the upper balcony and activate the next button to open the remaining routes.
Use the keg's Context Sensitive pad to make Conker drunk. His urine stream pushes the Rock Monsters; hold Z to extend the stream. Push the first monster through the opening, then sober up and recover health at the first-aid item on the central plateau. Roll the monster along the balcony and onto its button, waiting for the dancing Rock Women to move into their alcoves so they do not knock it away.
Repeat the keg-and-push process for the remaining monsters. Send them through the opened routes so they land on Berri's cage. The second monster breaks the cage. Enter the former cage and collect the cash if desired, then try to leave. The bouncer takes Conker to the boss, beginning Bomb Run.
- The entrance button is held down by a Rock Monster.
- The balcony button has opened the remaining routes.
- The required Rock Monsters have been pushed onto Berri's cage.
- Berri's cage is broken.
6. Complete Bomb Run and Mugged
The mafia boss gives Conker a bomb and orders him to place it in the egg chamber. Return immediately toward the dinosaur temple. On the temple slope, use the safe drop rather than falling from full height. Enter the idol's mouth when the uvula opens. While carrying the bomb, jumping is unavailable, so use the left interior route and wait for each moving uvula to clear. Reach the far side and drop the bomb into the egg chamber.
The explosion raises the lava and reveals a stepping-stone route. Cross the stones and use the exit door. Outside, the cavemen steal Conker's money and challenge him to a hoverboard race. Accelerate, brake, steer, jump with A, and swing the frying pan with B. Catch and hit all three thieves. Slow down before the brontosaurus crosses the route; a collision can kill Conker.
After the final thief is defeated, follow the altered route at the gate and make the required jump from the stone ramp into the cave. Collect the recovered cash. The race and recovered cash are mandatory because they lead into the arena.
- The bomb has been delivered to the egg chamber.
- The lava route and exit door are open.
- All three remaining thieves have been hit.
- The recovered cash has been collected and the arena route is open.
7. Ride Fangy and defeat Buga the Knut
Enter the arena and approach the drawbridge. Lure Fangy to the central Context Sensitive pad and press B to hypnotize him. Climb onto his back. Fangy can ram cavemen into the lava or pick them up; when one is in his mouth, press B to swallow it. Clear the initial cavemen, the club-wielding infantry, and the spear-throwing waves. Move away from groups before swallowing so the remaining enemies cannot knock Conker off.
When Buga enters, jump over his shockwave when he stomps. When he raises his weapon for a downward strike, avoid the impact and use Fangy to attack Buga's crotch. Buga's rear becomes exposed. Circle behind him and press B when the lightbulb prompt appears. Fangy bites him. Repeat the opening and rear bite three times. If Conker is knocked off, lure Fangy back to the pad and hypnotize him again before remounting.
- Fangy has been hypnotized and mounted.
- The caveman and infantry waves are defeated.
- Buga has been bitten from behind three times.
- Buga has fled the arena.
8. Return through Sloprano and complete the required Windy transition
After Buga leaves, use the rock near Jugga to reach the wooden ledge and enter the doorway. Speak to Jugga and wait for her scene to finish. Leave through the nearby door, take the right-hand path, and enter the light-door. Follow the route to the edge and jump into the water. Exit through the sewage area and use the route back to Sloprano, then enter the dark hole to return to Poo Cabin.
From Poo Cabin, return to Windy and speak to Mrs. Bee. Wasps' Revenge is required progression, not an optional side task. Enter the wasp nest, use the turret to destroy the wasp waves, take the hive, and carry it back while avoiding the sticky honey. Return the hive to Mrs. Bee and complete her dialogue. The $400 reward is incidental route money; it does not make the task optional.
After Wasps' Revenge is complete, climb the windmill hill while avoiding the popping worms and speak to Mr. Barrel at the top. Conker needs at least $2,110. Optional cash collected elsewhere can help reach that threshold, but it cannot replace Wasps' Revenge. Pay Mr. Barrel, ride him down the hill, and steer him into the blocked passage at the end of the stream. The impact knocks Conker out and changes the area to nighttime. Enter the newly opened route to begin Spooky.
- Jugga's scene has played.
- Conker has returned through the sewage route and Poo Cabin.
- Wasps' Revenge has been completed and the hive has been returned to Mrs. Bee.
- At least $2,110 has been paid to Mr. Barrel.
- Mr. Barrel has opened the nighttime route into Spooky.
Before you move on
- The dinosaur idol has been opened, the baby raptor has been sacrificed, and Conker has obtained the caveman headdress.
- The followers have defeated the Rock Monsters and Berri's cage has been broken in Rock Solid.
- The bomb has been delivered to the egg chamber and the lava route has been crossed.
- All three Mugged thieves have been defeated and the recovered cash has been collected.
- Fangy has defeated the caveman waves and bitten Buga three times.
- Jugga's scene has played and Conker has exited through the elevated route toward Sloprano and Poo Cabin.
- Conker has returned to Windy, completed Wasps' Revenge, returned the hive to Mrs. Bee, paid Mr. Barrel at least $2,110, and opened the nighttime route into Spooky.
References for this chapter
- Conker’s Bad Fur Day - Guide and Walkthrough by CyricZ, Nintendo 64, GameFAQs
- Conker’s Bad Fur Day - Guide and Walkthrough by Nemesis, Nintendo 64, GameFAQs
- Conker's Bad Fur Day - Guide and Walkthrough - Nintendo 64 - By GavLuvsGA
- Conker's Bad Fur Day - Guide and Walkthrough by KrocTheDoc, Nintendo 64
- Conker's Bad Fur Day (USA) Nintendo 64 Instruction Manual
Spooky / Horror Parody Areas
Spooky becomes available after the completed Uga Buga route, the return to Windy, the required Wasps’ Revenge objective, and Mr. Barrel’s $2,110 payment. Inside Spooky, follow the fixed sequence: open the cemetery, receive the shotgun, defeat twelve zombies, enter Count Batula’s mansion, deliver seven villagers, return three keys in order, and escape on Mr. Barrel. The chapter then sends Conker back through the earlier route toward Windy and It’s War. It does not lead directly to Heist or the Vault.
Prerequisite: return to Windy and open Spooky
After finishing Uga Buga, return to Windy and speak with Mrs. Bee at the second hive objective. Enter the wasp nest, use the turret to destroy the attacking wasps, then take the hive and carry it back to Mrs. Bee. Use the radar and red attack indicators to turn toward incoming wasps. The hive return is required progression; the $400 reward is optional as a reward, although it helps with the later payment.
After Wasps’ Revenge, collect enough available cash to meet Mr. Barrel’s $2,110 requirement. Pay him near the windmill, then ride the barrel down the winding route. Keep the barrel centered with broad Control Stick corrections and avoid abrupt turns near the lower bends. The ride breaks through the blocked passage and opens the route into Spooky.
Optional cash and Tail Thingys are not substitutes for either Wasps’ Revenge or the Mr. Barrel transition. If you do not have enough money, remain in Windy and collect nearby cash before trying to pay him again.
- Complete Uga Buga and return to Windy.
- Finish the second Wasps’ Revenge objective and return the hive.
- Have at least $2,110.
- Pay Mr. Barrel and ride through the blocked passage into Spooky.
Open the cemetery and receive the shotgun
At the start of Spooky, follow the stream to the lake and swim across to Gregg. Speak with him, then return toward the lake and use the underwater passage near the entrance. Follow it to the lever and activate it. The lever opens the cemetery route.
Return to Gregg after opening the gate. He gives Conker the shotgun and explains the required zombie-killing objective. Enter the cemetery and fight from around tombstones or other solid cover. Hold R to aim, use the C buttons to adjust your position, and fire with Z. Aim for direct headshots and defeat twelve zombies. When the required number is defeated, use the opened exit rather than spending time fighting unnecessary enemies.
- Speak with Gregg.
- Activate the underwater lever.
- Receive the shotgun.
- Defeat twelve cemetery zombies with headshots.
- Leave through the opened cemetery exit.
Reach Count Batula’s mansion
Follow the uphill route from the cemetery toward the mansion. Watch the ground for the disturbance that signals a skeleton worm. Let each hazard surface, then jump over it instead of rushing across a narrow ledge. A fall makes you repeat part of the approach.
Enter the mansion to begin Count Batula’s sequence. Remember the main hall, library, Grinder Room, Dining Room, garden, and front door; these landmarks define the later key route.
- Cross the skeleton-worm path safely.
- Enter the mansion.
- Identify the library, Grinder Room, Dining Room, garden, and front door.
Deliver seven villagers to the grinder
After the mansion cutscene, Conker is transformed into a bat. Search the mansion and garden for villagers. The bat radar helps identify nearby targets. Fly above a villager and drop guano to stun the target, then descend and pick the villager up. Carry the villager to the Grinder Room and fly over the grinder to drop the villager inside.
Repeat the process until seven villagers have been delivered. Take wide approaches while carrying one and avoid unnecessary collisions with hazards or other villagers. After the seventh delivery, Count Batula falls into the grinder and the mansion changes to its zombie-filled state. This delivery objective is required story progression.
- Locate villagers using the bat radar.
- Stun them with guano.
- Carry seven villagers to the Grinder Room.
- Drop all seven into the grinder.
- Wait for the mansion’s zombie transition.
Return the first key: library crossbow route
Begin in the mansion’s main hall and follow the hallway toward the library, clearing zombies as needed. In the library, climb the stairs around the bookcases and jump onto the central bookcase with the context pad. Press B when the lightbulb prompt appears to equip the crossbow.
Four bats attack from the library’s corners. Use the crossbow to clear all four before continuing. Hold Z for the laser sight, aim with the Control Stick, and release Z to fire. Once the bats are gone, return to the walkway and continue upward through the Grinder Room. Move around the broken floor along the room’s edge until you reach the upper Dining Room rafters.
Deal with the zombies near the Dining Room entrance, then follow the rafters to the second context pad. Press B to equip the crossbow again and shoot the three bats blocking the far plank. Cross the cleared plank, follow the rafters to the rear platform, and collect the first key.
Carry the key back through the Dining Room rafters, around the Grinder Room’s broken floor, down through the library, along the hallway, and to the mansion front door. Avoid falling or taking hits; if the key is dropped, return to its platform and collect it again. Insert it at the front door to raise the route toward the garden.
- Equip the crossbow at the library context pad.
- Defeat all four library bats.
- Cross the Grinder Room route to the Dining Room rafters.
- Use the second context pad to equip the crossbow.
- Defeat the three bats blocking the far plank.
- Collect the Dining Room attic key.
- Return it to the front door.
Return the second and third keys
After the first key is inserted, use the new route toward the garden. Cross the Dining Room bridge and enter the garden maze. Clear the zombies from a safe position, take the second key, and return it across the bridge to the mansion front door. Inserting the second key raises the ladder in the Grinder Room.
For the third key, return to the Grinder Room and climb the raised ladder. Follow the upper platforms, using high jumps and tailspins where the gaps require them, until you reach the large lever. Pull it to activate the upper route. Return to the ladder area, take the opposite platform route, and use the grinder machinery and small platforms to reach the third key. Carry it back to the front door and insert it to open the mansion exit.
The mansion is a combat and platforming sequence. There is no stealth, noise-lure, patrol-reset, alarm-reset, or purchased-disguise system in the original Nintendo 64 version.
- Collect and return the garden key.
- Confirm that the Grinder Room ladder rises.
- Pull the upper Grinder Room lever.
- Reach and collect the third key.
- Return the third key to the front door.
- Open the mansion exit.
Escape on Mr. Barrel and return toward It’s War
After the third key opens the front door, find Mr. Barrel beside the exit and accept the ride. Steer down the winding path with gradual corrections. Continue through the front gate, drop into the water with the barrel, and ride upstream through the area near Gregg’s opening route.
Enter the cave passage and follow the return route through the earlier areas toward Windy. Cash encountered on this trip is optional. The meaningful progression is leaving Spooky, returning through the early route, and reaching the entrance for It’s War.
Spooky is not complete at the mansion door alone: the Mr. Barrel escape and return route must be finished. It’s War, the later destroyed-windmill transition, Heist, and the separate Vault sequence remain after this chapter.
- Find Mr. Barrel beside the mansion exit.
- Ride through the winding path and front gate.
- Drop into the water and ride upstream.
- Enter the cave passage.
- Return through the earlier route to Windy.
- Reach the It’s War entrance.
Before you move on
- Uga Buga was completed and Conker returned to Windy.
- The second Wasps’ Revenge objective was completed and the hive was returned to Mrs. Bee.
- At least $2,110 was paid to Mr. Barrel.
- The barrel ride broke through the blocked passage into Spooky.
- Gregg’s lever opened the cemetery gate.
- The shotgun was obtained and twelve cemetery zombies were defeated with headshots.
- Seven villagers were delivered to Count Batula’s grinder.
- The library crossbow pad was used and four bats were defeated.
- The Dining Room rafters were reached and the second crossbow pad was used to defeat three bats.
- The Dining Room attic key was collected and returned to the mansion front door.
- The garden key was collected and returned, raising the Grinder Room ladder.
- The upper Grinder Room lever was pulled.
- The third key was collected and returned to open the mansion exit.
- Mr. Barrel carried Conker through the mansion escape and water route.
- Conker returned through the early route to Windy and reached the It’s War entrance.
References for this chapter
- Conker’s Bad Fur Day - Guide and Walkthrough by CyricZ, Nintendo 64, GameFAQs
- Conker's Bad Fur Day - Walkthrough by Outlaw, Nintendo 64
- Conker's Bad Fur Day - Guide and Walkthrough - Nintendo 64 - By Rolent_X
- Conker's Bad Fur Day - Guide and Walkthrough by KrocTheDoc, Nintendo 64
- Conker's Bad Fur Day (USA) Nintendo 64 Instruction Manual
It’s War / Total War
It’s War is the mandatory eighth chapter of the original North American Nintendo 64 release. Enter it from Windy through the newly opened barbed-wire entrance, restore power, clear the harbor with two TNT carriers, survive the beach assault, fight through the Tediz base, rescue Rodent, operate the Class 22 tank, destroy the tower, clear the submarine stations, defeat the Experiment, and escape the self-destruct sequence. The escape returns Conker to Windy. Heist begins only after you inspect the ruined windmill and enter the passage beneath its remains; It’s War does not open a direct route to the Vault.
Enter the war zone and restore the power
After the sergeant’s briefing and the newsreel, return to Windy and take the Naughty path. Continue to the entrance blocked by barbed wire, hop over the wire, and enter the base. The crashed aircraft is not the first objective.
Drop into the water and locate the electric eel and the three semicircular rings on the harbor floor. The eel follows Conker. Lead it through all three rings in sequence. When the circuit is complete, the eel is destroyed and power returns. A B context pad appears, and nearby chocolate can restore health before the next objective.
- Cross the barbed-wire entrance from Windy.
- Lead the electric eel through all three floor rings.
- Confirm that power returns and the B pad appears.
Use two TNT carriers to destroy the crashed aircraft
Move the steel crate along its groove so it blocks the bottom of the muddy ramp. Go to the men’s bathroom at the top of the ramp and press B on the door. A purple TNT carrier comes out. Push him down the ramp; the crate prevents him from sliding into the harbor.
Take one carrier around each side of the crashed aircraft. The left route contains bouncing explosive boxes and rising-and-falling steel crates. Wait for a bouncing box to move away, then push the carrier forward. At a rising crate, begin moving when it drops and pass as it rises. The right route contains fixed spider mines that surface as you approach. Scout their positions and weave from side to side rather than pushing directly behind the carrier.
Leave the carrier beside the aircraft, return to the central B pad, and use the supplied slingshot to ignite him. If a carrier is lost, return to the bathroom for another. Repeat on the opposite route. When both explosions destroy the aircraft, go down to the water and speak with the sergeant.
- Place the steel crate before bringing out the first TNT carrier.
- Deliver one carrier to each side of the aircraft.
- Ignite both carriers from the central B pad.
- Speak to the sergeant after the aircraft is destroyed.
Survive the beach assault and collect the machine guns
During the beach crossing, move from one metal X-shaped barrier to the next rather than running across the open sand. Wait behind each barrier while the Tediz fire, then advance when the firing slackens. Continue around the fence and across the successive gaps until you reach the door and the surviving squirrel.
Press B at the equipment point to receive the two machine pistols. Take nearby chocolate if needed. Hold R for aiming mode, use the Control Stick to aim, press Z to fire, and press A to reload. Shoot the lock on the door and enter the facility.
- Use the metal barriers as cover across the beach.
- Collect the machine pistols at the squirrel’s position.
- Destroy the door lock and enter.
Clear Sole Survivor and the Tediz corridors
In the first room, use aiming mode and strafe with the C buttons while firing. Headshots defeat Tediz quickly, although body shots also work. After the first group is defeated, the door opens.
The corridors alternate between Tediz ambushes and laser traps. Put the guns away when you need to jump, hover, or crawl. Crawl beneath low laser rows, jump and hover through higher openings, and use boxes as platforms where necessary. Tediz often appear immediately after a laser section, so re-equip the guns as soon as you are clear.
At the flamethrower robots, wait for a pause in the flames and pass them instead of trying to fight them. Continue through the later laser groups and ceiling hatches until the elevator cutscene. Afterward, cross the next laser section, clear the ambushes, and enter the Casualty Department.
- Strafe while firing in first-person aiming mode.
- Reload after each firefight.
- Use crawling, jumping, hovering, and boxes to pass the laser traps.
- Re-equip the guns immediately after each laser section.
Defend the casualty department and survive the turret waves
In the casualty room, stay near the entrance and shoot the Tediz doctors as they approach around the tables. Additional enemies emerge from ceiling grates, followed by a larger doctor. Clear the room, then go to the squirrel and pull the requested switch.
Outside, use cover while the large Tediz gunman fires. Wait for a reload, move to the B pad, and collect the bazooka. Aim with R and fire with Z. After defeating the gunman, enter the mounted turret. Tediz attack from both doors in waves. Prioritize enemies close to the turret and fire throughout each wave. Leave only during a lull if you need chocolate. When the waves end, leave through the opened door.
- Clear the casualty room’s doctor waves.
- Collect the bazooka from the B pad.
- Defeat the large gunman during reload pauses.
- Survive the turret waves from both doors.
Rescue Rodent and open the large door
When Rodent is threatened, use the opening shot to eliminate the most dangerous member of the firing squad. Keep moving and strafe because the remaining Tediz carry stronger weapons and grenades.
Follow Rodent through the trench. Bombs are telegraphed by their shadows, so move away from each shadow. When a spider mine charges, stand behind Rodent; his protective suit absorbs the impact. At the dock, turn right and board the small purple raft at the B pad. The bazooka equips automatically. Shoot all four glowing lights around the large door’s lock. If Tediz kill you afterward, the opened door remains available, so return through the route and continue.
- Defeat the firing squad before following Rodent.
- Use bomb shadows to avoid the air strikes.
- Stand behind Rodent when spider mines charge.
- Destroy all four lock lights with the raft’s bazooka.
Chemical Warfare and the Class 22 tank
Enter the next area and climb into the Class 22 tank. On the original N64 controls, the Control Stick drives and pivots the tank, A exits, Z fires, the Left and Right C buttons rotate the turret independently, R enters aiming mode, and C Up or C Down adjusts the aiming zoom.
Aim at the small radiation-marked door beside the main door and destroy it. Exit the tank and enter the corridor. Each waste pool has a spider mine on the far side. Jump over a pool, then immediately jump back so the mine follows Conker and runs into the waste. Repeat for the remaining pools.
At the end, use the B context action to pull the lever. Waste begins rising immediately. Retrace the corridor without lingering. At the exit, use a high jump if convenient rather than losing time on the ladder, then return to the tank and drive through the opened route.
- Destroy the radiation-marked door with the tank.
- Use the waste pools to dispose of their spider mines.
- Pull the lever and escape before the corridor fills.
- Re-enter the tank and continue to the tower.
Lower the bridges and destroy the tower
The tower’s rotating gun makes the area dangerous outside the tank. Drive to a bridge support and fire on Tediz when possible. Where a bridge is raised, wait until the gun’s light is facing away, exit the tank, reach the high end, and press B on the context pad to perform the Anvil action that lowers the bridge.
Return to the tank immediately, crush nearby Tediz, and cross the lowered bridge. Circle the tower and repeat the bridge operation wherever necessary. Do not remain exposed on an isolated platform after lowering a bridge.
Once access around the tower is open, use tank fire to destroy all four tower supports. The tower collapses and creates a hole in the center. Exit the tank and drop through the hole.
- Lower every required bridge with the Anvil context action.
- Use the tower’s light as the cue for leaving the tank.
- Destroy all four tower supports.
- Drop through the hole after the tower collapses.
Destroy the submarine groups
In the underground lake, find the crying little girl on the central platform. The surrounding piers provide B pads and covered chocolate pickups. Work around the piers in order, using the bazooka to destroy every submarine assigned to each station.
Missiles target the place where Conker stood when the submarine launched them. Wait for a launch, step away from the firing position, and let the missile land before returning to the B pad. You can shoot missiles down, but moving away from the launch position is safer. Clear the first pier, then the next two piers under heavier simultaneous fire.
After all submarine stations are clear, return to the girl. The Experiment appears and the boss encounter begins immediately.
- Clear the submarine station nearest the entrance.
- Clear the remaining two stations in sequence.
- Move away when missiles launch instead of treating the B pads as permanent cover.
- Return to the girl after every station is clear.
Defeat the Experiment and escape the self-destruct
Run to the Class 22 tank as soon as the Experiment appears and drive behind one of the stone carvings for cover. Keep the turret aimed toward the Experiment while keeping the tank positioned for a sideways retreat.
During the first phase, wait for the miniguns to pause or reload. Drive out briefly, destroy one weapon, and retreat behind the carving. Repeat for the second weapon. When the Experiment charges, use aiming mode to shoot the little girl from its hand. While the body bends to retrieve her, fire into the exposed opening on its back, then return to cover.
The Magneto Laser phase tracks slowly rather than pausing normally. Let the beam aim toward one side of the carving, drive out from the opposite side, and destroy one laser arm. Repeat for the other arm. Knock the girl down again and shoot the exposed rear opening.
During the missile phase, wait for a volley to finish or for the launchers to pause, then destroy them. Repeat the girl-and-rear-opening attack. When the Experiment is defeated, mines destroy the tank and the self-destruct countdown begins.
Drop through the nearby hole and retrace the Sole Survivor corridor, now filled with lasers. Put away the bazooka whenever a crawl, jump, or hover is required, then re-equip it for Tediz ambushes. In the final room, clear the enemies blocking the exit without firing so close that the bazooka damages Conker.
On the beach, do not waste time defeating every Tediz. Use barriers as cover, eliminate bazooka carriers that block the route, and zigzag while jumping toward the far transition point. Reaching that transition completes It’s War and returns Conker to Windy.
- Use the stone carvings as tank cover.
- Destroy the Experiment’s weapons before targeting the girl and rear opening.
- Remove both Magneto Laser arms, then repeat the rear-opening attack.
- Destroy the missile launchers and complete the final rear-opening hit.
- Escape the facility during the self-destruct countdown.
- Cross the beach and reach the transition out of It’s War.
Return to Windy and enter Heist
After the escape cutscene, Conker returns to Windy. Do not search for a direct Vault entrance from the war zone. Look around the overworld: the windmill has been destroyed, and its remains now expose the route to the next chapter.
Follow the damaged path toward the ruined windmill. Continue up to the ruins and speak with Rodent when the scene occurs. Enter the opening beneath the wreckage and follow the passage through the previously inaccessible route. This brings Conker to the Feral Reserve Bank, where the Boss offers the bank job and Berri returns for the outfit scene.
Once the outfit scene is complete, entering the bank begins Heist. The Vault and Heinrich sequence are later sections of the campaign, not part of the It’s War completion trigger.
- Confirm that Conker has returned to Windy.
- Inspect the destroyed windmill and find the opening beneath its ruins.
- Follow the ruined windmill passage to the Feral Reserve Bank.
- Complete the outfit scene and enter Heist.
Before you move on
- The power station has been restored and both TNT carriers have destroyed the crashed aircraft.
- The beach assault, Tediz corridors, casualty department, turret defense, and Rodent rescue are complete.
- The large door is open, the Class 22 tank route is cleared, and the tower has collapsed after all four supports were destroyed.
- Every submarine station has been cleared and the Experiment has been defeated.
- The tank has been destroyed, the self-destruct escape has been completed, and Conker reaches the beach transition.
- The game returns Conker to Windy, the windmill is destroyed, and the passage beneath the ruins leads to the Feral Reserve Bank.
- The outfit scene has completed and Heist has begun. The Vault and Heinrich sequence remain later campaign sections.
References for this chapter
- Conker’s Bad Fur Day - Guide and Walkthrough by CyricZ, Nintendo 64, GameFAQs
- Conker's Bad Fur Day - Walkthrough by Jon_, Nintendo 64
- Conker’s Bad Fur Day - Guide and Walkthrough by Nemesis, Nintendo 64, GameFAQs
- Conker's Bad Fur Day - Guide and Walkthrough - Nintendo 64 - By Rolent_X
- Conker's Bad Fur Day (USA) Nintendo 64 Instruction Manual
- It's War | Conker Wiki
Heist / Bank Sequence
After completing It’s War, return to Windy and enter the ruined windmill. The wreckage now provides the route to the Feral Reserve Bank. Heist is a fixed combat sequence rather than a stealth mission: the alarm is scripted, Berri handles the laser barriers, and Conker advances from one guarded pillar position to the next using the B Pads for slow-motion shooting. After the elevator ride, collect three cash bundles in the Vault to trigger the story scene. Stop this chapter after that cutscene; the airlock, space suit and Heinrich encounter belong to the separate Vault approach and final-boss chapters.
Return to Windy and enter the ruined windmill
Complete the full It’s War sequence, including the Experiment and the escape from the war zone. When control returns to Conker in Windy, the windmill is destroyed. Go to the fallen structure and speak with Rodent near the wreckage.
Enter the accessible opening in the ruined windmill and follow the passage downward. Continue through the lower route until you reach the Feral Reserve Bank. This is the required transition into Heist; there is no alternate bank entrance that bypasses the windmill route.
Don Weaso and Berri are waiting outside the bank. A story scene provides Conker and Berri with their black robbery outfits. The clothes are not an item to find, buy or equip, and there is no separate disguise objective in the original Nintendo 64 release. When control returns, enter through the revolving door.
- Complete It’s War, including the Experiment and escape.
- Return to Windy and locate the collapsed windmill.
- Follow the passage through the wreckage to the bank.
- Watch the outfit scene with Berri and Don Weaso.
- Enter the Feral Reserve Bank.
Use the first pillar and B Pad
The bank alarm begins as part of the opening sequence. Do not search for a stealth route, an alarm-reset switch or a way to prevent the alarm. After the scene, move to the nearest pillar and stay close to its cover.
Each security position uses a pillar with a context-sensitive B Pad. Wait behind the pillar while the bank guards fire. When the guards pause and regroup, press B. Conker performs the slow-motion leap associated with the pad.
During the leap, use the Control Stick to move the aiming reticle over the exposed guards and press Z to fire. The slow-motion move creates the intended shooting opportunity, but it does not make Conker completely safe. Activate it from cover, aim quickly and return behind the pillar when the maneuver ends.
Defeat the guards attacking the position. Additional guards arrive after the first group is removed, so do not advance as soon as the room appears quiet. Wait until the position is fully cleared. Berri then crosses or reaches the security mechanism and disables the laser barrier, opening the next section.
- Take cover beside the first pillar.
- Wait for the guards to pause and regroup.
- Press B at the pillar’s context pad.
- Aim with the Control Stick and fire with Z.
- Clear every guard assigned to the position.
- Wait for Berri to disable the laser barrier.
Advance through the successive pillar positions
Move forward only after Berri has shut off the active laser field. The next sections repeat the same basic pattern: reach the next pillar, remain behind cover while the guards fire, wait for the regroup cue, then press B and shoot during Conker’s slow-motion movement.
The groups become more difficult as you advance. Later positions place more guards in the encounter and expose Conker to heavier fire. Keep the camera pointed toward the active group before pressing B so that the reticle can be moved across the guards immediately. Berri draws some attention and handles the laser progression, but she cannot prevent Conker from taking damage.
The pillars can be damaged by sustained gunfire. If the cover begins breaking apart, do not remain behind it waiting for perfect safety. Use the next regroup opportunity, activate the B Pad and eliminate the guards quickly. Ordinary shooting from the open floor is possible but is much less reliable because the guards are accurate and Conker is exposed.
After each position is cleared, wait for Berri’s action and confirmation that the laser route has opened. Do not attempt to cross an active barrier or look for a side passage around the security layout. The bank’s security sequence is linear.
- Advance only after each laser barrier is disabled.
- Repeat the pillar, regroup, B Pad and slow-motion shooting method.
- Aim toward the guards before activating the pad.
- Leave damaged cover during the next safe opening.
- Do not cross active lasers or search for an alternate route.
Reach the elevator
Continue through every successive pillar position until the final guard group has been defeated. The last position gives Conker less room for error because concentrated fire can damage the pillar rapidly. Activate the B Pad as soon as the guards regroup and use the slow-motion window to remove them before the cover is destroyed.
When the final security area is cleared, Berri disables the remaining laser barrier. Walk through the opened route and enter the elevator. Conker and Berri automatically ride to the bank’s upper level.
If Conker dies during this section, be prepared to repeat the bank firefight. Reduce the length of the retry by moving directly to the next pillar after each barrier opens, keeping Conker behind cover at the start of every new position and avoiding unnecessary exploration.
- Clear the final pillar position.
- Allow Berri to disable the last laser barrier.
- Walk through the opened route.
- Enter the elevator and reach the upper level.
Follow Berri into the Vault
The upper level contains another complex laser arrangement. This is not a second stealth challenge. Berri handles the security system, so follow the available route and wait for her to disable the lasers. There is no vault code, purchased disguise, intimidation item or manual alarm bypass to use here.
Proceed through the opened passage into the Vault. The cash bundles move around the room. Equip the frying pan and strike a bundle when it comes within reach. After it is stunned, collect it before moving on to another bundle.
Collect three cash bundles. Three are required to trigger the next story transition; additional moving cash in the room is not needed for the campaign. Once the third required bundle has been collected, the game begins the cutscene involving Conker, Berri, the Panther King, Don Weaso and the Professor.
Let the entire scene finish. This cutscene marks the end of the Heist chapter. Do not pull the airlock lever, enter the yellow space suit or begin the Heinrich fight as part of this chapter. Those actions occur after the Vault scene and should be covered in the separate Vault approach and final-boss chapters.
- Follow Berri through the upper laser area.
- Enter the Vault.
- Use the frying pan to stun moving cash bundles.
- Collect three bundles.
- Allow the Vault cutscene to finish.
- Continue with the separate Vault approach chapter.
Before you move on
- It’s War has been completed, including the Experiment and escape.
- Windy is in its destroyed-windmill state.
- Conker has entered the Feral Reserve Bank through the windmill wreckage.
- The story-provided black outfit scene has played.
- Every successive pillar security position has been cleared.
- Berri has disabled the laser barrier after each required guard encounter.
- Conker has reached and ridden the elevator to the upper level.
- Berri has disabled the upper laser arrangement.
- Conker has entered the Vault.
- Three moving cash bundles have been stunned and collected.
- The Vault cutscene has finished.
- The guide stops before the airlock, space suit and Heinrich sequence.
References for this chapter
- Conker’s Bad Fur Day - Guide and Walkthrough by CyricZ, Nintendo 64, GameFAQs
- Conker's Bad Fur Day - Guide and Walkthrough by KrocTheDoc, Nintendo 64
- Conker's Bad Fur Day - Guide and Walkthrough - Nintendo 64 - By GavLuvsGA
- Conker's Bad Fur Day - Guide and Walkthrough - Nintendo 64 - By Rolent_X
- Conker's Bad Fur Day (USA) Nintendo 64 Instruction Manual
Approach to the Vault and Panther King Area
This chapter starts after Heist’s three required Vault cash bundles and the resulting Panther King and Heinrich cutscenes. The remaining route is linear: regain control inside the Vault, activate the airlock by jumping onto its switch, move clear of the suction and enter the nearby battle suit. The Heinrich fight itself belongs to the separate final-boss chapter, but this section establishes the original Nintendo 64 suit controls and the correct throw input.
1. Regain control after the Heist Vault sequence
Do not repeat the bank entrance, guard pillars, laser positions or three cash bundles here. Those objectives belong to Heist. After the final required bundle, the game moves through the Vault story scenes involving the Panther King and Heinrich, then returns control to Conker inside the Vault.
The room is now the final battle setup area, not another overworld location. There is no vault code, second bank route, cash requirement, disguise purchase or path back to Windy. Let the cutscene finish fully and wait until normal movement returns before approaching the equipment in the room.
- Complete Heist’s three required Vault cash-bundle objectives first.
- Allow the Panther King and Heinrich story scenes to finish.
- Begin this chapter only after control returns inside the Vault.
- Do not search the bank for additional cash or an alternate exit.
2. Activate the airlock switch
Move to the large platform below the Panther King’s position. The required switch is located on this platform. Activate it by jumping onto the switch. Do not press B to operate it, and do not wait for a conventional lightbulb Context Zone prompt before performing this action.
Once the switch has been triggered, the airlock opens and produces a strong suction effect. Move away from the opening immediately. Remaining beside the vortex can pull Conker toward the airlock and cause a death, so treat the switch activation and the retreat as one continuous action.
- Locate the platform beneath the Panther King’s position.
- Jump onto the airlock switch to activate it.
- Move clear of the opening as soon as the suction begins.
- Do not use B as the switch input.
3. Enter the battle suit
The opened airlock allows the nearby battle-suit hatch to become usable. Cross the room while staying away from the suction and enter the suit alcove. The game supplies the equipment needed for the final encounter; there is no ordinary ammunition, healing-stockpile or weapon-selection objective to complete first.
If the suit hatch does not seem usable, do not look for a hidden gate or another route. First confirm that the preceding scene has ended, that Conker has jumped onto the switch and that he has moved away from the vortex. Then approach the nearby hatch again and allow the suit-transition scene to complete.
- Reach the nearby battle-suit hatch after activating the airlock.
- Avoid standing beside the suction vortex.
- Enter the suit alcove.
- Wait until Conker is fully equipped before attempting to fight Heinrich.
4. Use the original Nintendo 64 battle-suit controls
Use the Control Stick to move Conker around the Vault arena. Press A to jump or use the suit’s boosters. Press B to punch. Press Z to raise the suit’s shield and block. These are the controls needed for the original Nintendo 64 encounter; do not substitute controls or mechanics from Conker: Live & Reloaded.
Heinrich uses a tail sweep and a forward bite or lunge. Jump with A to clear the tail sweep. When he commits to a forward attack, use Z to block or reposition out of his line. After an opening, close in and punch with B until Heinrich falls. Keep the camera oriented so that both Heinrich and the airlock remain easy to track.
- Control Stick: move.
- A: jump or use the battle-suit boosters.
- B: punch and, after the tail grab, release or throw Heinrich.
- Z: block with the suit shield.
5. Set up the later Heinrich throws
When Heinrich is knocked down, circle behind him and approach the point where the tail joins his body. The grab point is near the base of the tail, not at its loose end. Once Conker has picked him up, rotate the Control Stick in a slow circular motion. Gradually increase the rotation until Heinrich is lifted clear enough that his claws no longer scrape along the floor.
Turn Conker so Heinrich is aimed at the open airlock. When the alignment is correct, press B to release or throw him. A is not the throw button; A remains the jump or booster control. Heinrich returns after the first and second throws, and the later attempts are more difficult because he attacks and avoids punches more effectively.
The complete defensive cycle, three successful airlock throws, the apparent freeze, programmer intervention, sword sequence and throne-room conclusion are covered in final-boss. This chapter ends once the suit is entered and the player is ready to begin that encounter.
- Punch Heinrich with B after a safe opening.
- Approach the tail near its connection to Heinrich’s body.
- Rotate the Control Stick to swing and lift him.
- Aim Heinrich at the airlock.
- Press B to release or throw him.
- Repeat the three-throw fight in the final-boss chapter.
Before you move on
- Heist’s three required Vault cash bundles and the resulting story cutscene are complete.
- Control has returned to Conker inside the Vault.
- The platform switch below the Panther King’s position has been activated by jumping onto it.
- The airlock is open and Conker has moved away from the suction.
- Conker has entered the nearby battle-suit alcove.
- The original N64 controls are established: Control Stick to move, A to jump or boost, B to punch or release or throw a grabbed Heinrich, and Z to block.
- The player is ready to begin final-boss for Heinrich’s three airlock throws and the canonical ending.
References for this chapter
- Conker’s Bad Fur Day - Guide and Walkthrough by CyricZ, Nintendo 64, GameFAQs
- Conker's Bad Fur Day - Guide and Walkthrough - Nintendo 64 - By Rolent_X
- Conker’s Bad Fur Day - Guide and Walkthrough by Nexxt, Nintendo 64, GameFAQs
- Boss FAQ – Guide for Conker’s Bad Fur Day on Nintendo 64
- Conker's Bad Fur Day (USA) Nintendo 64 Instruction Manual
Final Boss / Vault Sequence (endgame)
After the Heist security route, collect the three required cash bundles in the Vault and watch the resulting cutscene. The final sequence begins in the Vault: activate the airlock by jumping onto its switch, enter the battle suit and defeat Heinrich by throwing him through the airlock three times. After the scripted apparent freeze, select the katana in the programmer weapon sequence, then proceed to the Panther King’s throne room for the closing sword scene.
Begin after the Heist Vault sequence
Start this chapter only after the Heist security route is complete and Conker has collected the three required cash bundles in the Vault. The cutscene that follows moves the story into the final encounter, so the bank guards, pillars, lasers and cash bundles do not need to be repeated here.
When control returns in the Vault, locate the switch below the Panther King’s position. Jump onto the switch to activate it. This opens the airlock and exposes the nearby battle-suit hatch. Do not press B as though the switch were an ordinary Context Zone.
Move away from the airlock as soon as it opens. The vortex can pull Conker into space. Approach the nearby hatch from the safe side of the room and enter the battle suit. There is no ordinary ammunition, healing-stockpile or alternate-gate objective before Heinrich.
- The Heist security route is complete.
- Three Vault cash bundles have been collected.
- The Vault cutscene has finished.
- The airlock switch has been activated by jumping onto it.
- Conker has entered the battle suit.
Use the original N64 battle-suit controls
While wearing the suit, use the Control Stick to move. Press A to jump or activate the suit’s boosters; holding A provides additional hover time. Press B to punch. Hold Z to block. These controls apply to the Heinrich encounter and are separate from Conker’s ordinary weapons and earlier Context actions.
Heinrich’s main attacks are a sweeping tail spin and a forward bite or headbutt. When he begins the tail sweep, tap A and jump over it. Avoid holding the button unnecessarily near the airlock. When Heinrich leans back and lunges, hold Z to block the attack.
After a successful jump or block, move in and punch with B. Continue the attack until Conker lands the heavy uppercut that knocks Heinrich down. Do not try to damage Heinrich with guns, ammunition, the frying pan or other ordinary weapons.
- A is used for the suit jump or boost.
- B is used to punch.
- Z is used to block.
- The tail sweep is cleared with a jump.
- The bite or headbutt is blocked.
Grab Heinrich and complete one airlock throw
Once the uppercut knocks Heinrich down, move around behind him and approach the tail close to where it joins his body. The correct grab point is near the tail base, not the tip. If the grab does not register, reposition behind him instead of repeatedly attacking the body.
Rotate the Control Stick in a slow, steady circle. Gradually increase the rotation speed until Heinrich’s claws leave the floor. Keep the circle controlled; frantic changes of direction make the throw harder to aim.
Continue rotating until Heinrich is aimed toward the open airlock. When the direction is correct and he is suspended, press B to release or throw him. A is the jump or boost button, not the throw button. Heinrich returns after the first throw, so this completes only one phase of the encounter.
- Heinrich has been knocked down with B punches.
- The tail has been grabbed near its base.
- The Control Stick has been rotated gradually.
- Heinrich is aimed at the airlock.
- B has released him into the airlock.
Repeat the cycle two more times
Heinrich returns after the first throw. Use the same repeatable cycle: jump over the tail sweep with A, block the bite with Z, punch with B until the uppercut, move behind him, grab near the tail base, rotate the Control Stick and aim him toward the airlock before pressing B.
The second and third phases are more evasive and aggressive. Do not chase Heinrich continuously around the room. Stay positioned where you can see him, wait for an attack, respond to its telegraph and counter only after the attack has ended. Blocking the bite is particularly useful because it creates a predictable opening.
After the third successful throw, do not expect an ordinary defeat animation or a fourth suit phase. The apparent freeze that follows is scripted. Leave the console running and wait for the ending sequence to continue.
- The first throw is complete.
- The second throw is complete.
- The third throw is complete.
- No ordinary weapon or ammunition has been used against Heinrich.
- The scripted freeze has been allowed to continue.
Select the katana and finish the ending
After the apparent freeze, Conker leaves the suit and the programmer command-line sequence begins. When the weapon-selection scene appears, select the katana. Do not describe this as a choice between a katana and a sabre; the required original N64 action is to select the katana.
The programmers then transport Conker to the Panther King’s throne room. Heinrich becomes active again there, and the selected katana is used for the brief finishing sequence. This is not another extended battle-suit phase and does not require ammunition management or another tail-throw cycle.
Allow the throne-room scene, coronation, final dialogue and credits-related sequence to finish. The campaign’s canonical ending is reached after Heinrich is defeated in the throne room and the closing scenes play.
- The programmer sequence has appeared.
- The katana has been selected.
- Conker has been transported to the Panther King’s throne room.
- Heinrich has been defeated there.
- The coronation and closing scenes have finished.
Failure recovery
If Conker dies during the suit encounter, reload the available saved state or restart state. If the restart places him back in the Vault before the battle suit, jump onto the airlock switch again, move clear of the vortex and re-enter the suit hatch.
On the rematch, do not alter the required method. Jump over the tail sweep with A, block the bite with Z, punch with B until the uppercut, grab the tail near its base, rotate the Control Stick gradually and press B when Heinrich is aimed at the airlock.
If the screen appears to freeze immediately after the third throw, do not reset the game. Wait for the programmer sequence, select the katana, allow the throne-room scene to occur and finish the remaining ending scenes.
- The saved or restart state has been loaded after death.
- The airlock switch has been reactivated if necessary.
- The battle suit has been entered before retrying Heinrich.
- B is used for each airlock throw.
- The programmer and throne-room sequences have been allowed to finish.
Before you move on
- The Heist route and three required Vault cash bundles were completed.
- The airlock was opened by jumping onto its switch.
- Conker entered the original Nintendo 64 battle suit.
- Heinrich was thrown through the airlock three times using B after each successful tail grab.
- The scripted apparent freeze occurred.
- The programmer weapon sequence appeared and the katana was selected.
- Heinrich was defeated in the Panther King’s throne room.
- The coronation, ending scenes and credits-related sequence finished.
References for this chapter
- Conker's Bad Fur Day - Walkthrough by Jon_, Nintendo 64
- Conker's Bad Fur Day - Guide and Walkthrough - Nintendo 64 - By GavLuvsGA
- Conker’s Bad Fur Day - Guide and Walkthrough by CyricZ, Nintendo 64, GameFAQs
- Conker's Bad Fur Day (USA) Nintendo 64 Instruction Manual
- Conker's Bad Fur Day Controls, StrategyWiki
Key Mid-Game Bosses: Tactical Reference
This section is an optional tactical reference for mandatory encounters already covered in the ordered Nintendo 64 campaign route. It does not add a second progression path, require the player to repeat any fight, or advance the overworld by itself. Consult the relevant entry when preparing for or retrying Haybot, the Big Big Guy, the Great Mighty Poo, Buga the Knut, Count Batula’s required objective, or the Experiment. The encounters appear in campaign order: Haybot, the Big Big Guy, the Great Mighty Poo, Buga the Knut, Count Batula, and the Experiment. Count Batula is a required transformation and delivery task rather than a standard boss duel. The Experiment is part of It’s War, not Spooky.
Haybot: use Franky, pipes and the exposed rear button
The first Haybot phase takes place outside the barn. Ride Franky and circle the haystack until you can reach its rear. Use Franky’s pitchfork attack from behind when the context action becomes available. Avoid attacking from the front, because Haybot can knock Conker off Franky and force a remount. Continue the rear attacks until the floor gives way and the fight moves into the sewer room.
In the sewer, stay mounted and use the large pipes as cover. Haybot’s missiles damage the pipes when they strike them. Move behind a pipe, wait for the missile to approach, then step aside so the missile hits the obstruction. The broken pipe releases water, and Haybot will be shocked when it follows the water toward the electrical cables. While Haybot is spinning in the center of the room, move to its rear and use the red Do Not Push button when the context action appears.
Repeat the pipe, water, electrical shock and rear-button sequence with the available pipes. Ordinary attacks do not replace this method. After the final successful button attack, leave the flooded room promptly. The rising water turns the aftermath into a separate platforming hazard: climb the ladder route, use the knife context action on the dangling wires, and move to higher platforms as the water rises. Falling back into the water or touching the live wires is the main danger after the fight itself is over.
- Attack the haystack from behind while riding Franky.
- Use a pipe to stop each missile and create the water hazard.
- Press the rear button only while Haybot is shocked and spinning.
- Treat the rising-water escape as a separate danger after the victory sequence.
The Big Big Guy: extinguish the Fire Imps and use the corner switches
At the end of Bat’s Tower, use the beer context pad to control the stream and extinguish the Fire Imps before concentrating on the boiler. Keep Conker moving while drunk, because the movement is deliberately unstable. If the effect ends or Conker becomes hungover, restore the required condition before returning to the arena rather than attempting to fight the boiler directly.
Once the boiler is active, lure it toward one of the corner grates. Move onto the nearby overhead switch and activate it when the boss is positioned over the grate. The waste released by the switch stuns the Big Big Guy. Only approach during this stun, then use the context attack at its exposed front. Its flame attack makes an unstunned frontal approach unsafe.
Each corner position is used as part of the encounter. Repeat the lure, switch and stun response until the boss collapses. The brass balls afterward are part of the required exit puzzle, not additional boss damage: place one on the nearby floor switch, then roll the other through the opened route so it destroys the obstruction. Do not spend time trying to damage the defeated boiler with normal attacks.
- Extinguish the Fire Imps before starting the boiler encounter.
- Lure the boiler over a corner grate.
- Activate the overhead switch and attack only during the stun.
- Use the brass balls to open the exit after the boss collapses.
The Great Mighty Poo: feed the corn and follow the toilet-paper sequence
In Poo Mountain, complete the sweet-corn objective before expecting the Great Mighty Poo to appear. During the encounter, remain on the outer route and watch the thrown projectiles. When the boss sings and opens its mouth, use the nearby B pad to equip toilet paper, then throw the paper into the open mouth. The singing animation is the reliable attack opportunity; ordinary melee attacks do not finish the fight.
The toilet-paper pads form a progression. Complete the first required throw group, then move to the next pad and repeat the process for the next group. The final group requires the same singing-and-open-mouth response. If a throw misses, return to the appropriate pad instead of attempting to improvise a close-range attack while projectiles are active.
After the required throws, the encounter changes to its finishing objective. Use the opened route to reach the flusher and pull it. Cash in the area is not part of the boss defeat unless a separate story gate requires it in the ordered campaign route.
- Complete the sweet-corn objective before fighting.
- Equip toilet paper at the B pads during the singing sequence.
- Throw only when the mouth is open.
- Pull the flusher after the required paper sequence.
Buga the Knut: use Fangy for the front-and-rear bite sequence
Fangy handles the combat in the Uga Buga encounter. During the preliminary caveman groups, keep moving and bite isolated targets rather than entering the center of a spear formation. Separating enemies reduces the chance of being interrupted by several attacks at once.
When Buga appears, keep enough distance to see his jump and jump over the shockwave. Wait for the front-facing context opportunity and use Fangy’s bite from the front. This triggers Buga’s defensive reaction and exposes the next required position. Circle behind him and use the rear context action when it appears. Attacking the rear before completing the front response does not advance the encounter.
Repeat the front bite followed by the rear bite for the required cycles. If Conker is knocked away from Fangy, remount rather than trying to finish the sequence with the frying pan. Health items around the area can support a retry, but the encounter is solved by the prompted Fangy attacks, not ordinary damage.
- Thin the cavemen from the edge of each group.
- Jump over Buga’s shockwave.
- Complete the front bite before moving behind him.
- Use the rear bite only when the context prompt appears.
Count Batula: complete the mandatory transformation objective
Count Batula is a required Spooky objective, but it is not a conventional boss fight. After the transformation, fly through the mansion and grounds and drop guano on the villagers. Confirm that a target has been incapacitated before descending to pick it up. Carry the incapacitated villager to the grinder and continue until the required delivery sequence is complete.
Use the larger rooms to line up guano drops and gain altitude when spear-carrying villagers close in. The task is not advanced by simply flying into enemies or carrying an unaffected villager. Once the delivery objective is complete, proceed through the required mansion escape.
During the escape, use the shotgun against zombie heads and use elevated objects when you need a safer firing position. Use the crossbow context pad in the library and handle the bats blocking the route. Recover the key, operate the required lever, then return through the opened route and use Mr. Barrel to leave the area. This escape is part of the mandatory Spooky sequence, even though Count Batula himself is not fought through a normal health bar.
- Confirm each guano hit before carrying a villager.
- Deliver the affected villagers to the grinder.
- Use the crossbow for the library bat obstruction.
- Complete the key, lever and Mr. Barrel escape route.
The Experiment: use the tank, cover and exposed weak point
The Experiment follows the Little Girl submarine objective in It’s War. Before the encounter, use the bazooka context pad to destroy the submarine groups around the piers. At each position, wait for the firing cycle and destroy the exposed submarines before returning to the Little Girl. The later positions contain more simultaneous threats, so use the surrounding structures as cover and avoid standing where a missile was launched.
When the Experiment emerges, run to the tank immediately. Drive into a stone shelter or similar solid cover and rotate the turret toward the enemy. During the short pauses while the miniguns reload, move out briefly and fire at the weapons, then retreat behind cover. Destroy both miniguns before committing to the next part of the phase.
When the Experiment charges, use the tank’s aiming mode to shoot the Little Girl puppet from its hand. The creature will chase the puppet, exposing the hatch on its back. Fire into that opening, then return to cover. The next weapon phase uses Magneto Lasers. Draw the laser aim toward one side of the shelter, move out from the opposite side, and destroy the laser weapons. Repeat the puppet shot and exposed-back attack.
The final weapon phase uses tracking rockets. Prioritize the launchers, then repeat the puppet and back-weak-point sequence. The encounter ends by triggering the base’s self-destruct sequence. The timed escape that follows is still part of the required It’s War objective: follow the route out, use available cover, and avoid bomb shadows and spider mines. Do not treat the self-destruct as a direct branch to the Vault; the ordered route returns to Windy before the later Heist progression.
- Destroy each submarine group before approaching the Little Girl.
- Enter the tank immediately when the Experiment appears.
- Use cover while destroying the miniguns, lasers and rocket launchers.
- Shoot the Little Girl puppet to expose the rear hatch.
- Complete the self-destruct escape as part of It’s War.
Before you move on
- Use this section only as a tactical reference for encounters already reached through the ordered campaign chapters.
- For Haybot, confirm that the sewer fight and rising-water escape have been completed.
- For the Big Big Guy, confirm that the boiler has collapsed and the brass-ball exit has been opened.
- For the Great Mighty Poo, confirm that the flusher has been pulled and the route onward is available.
- For Buga, confirm that the required front-and-rear Fangy bite sequence has finished.
- For Count Batula, confirm that the delivery objective and mansion escape are complete.
- For the Experiment, confirm that the tank phases and timed self-destruct escape are complete.
- This reference section does not itself advance the overworld, unlock Heist, or replace the ordered route’s progression checks.
References for this chapter
- Conker's Bad Fur Day - Walkthrough by Jon_, Nintendo 64
- Conker’s Bad Fur Day - Guide and Walkthrough - Nintendo 64 - By Pelord
- Conker’s Bad Fur Day - Guide and Walkthrough - Nintendo 64 - By bananagirl
- Conker's Bad Fur Day - Guide and Walkthrough by KrocTheDoc, Nintendo 64
- Conker's Bad Fur Day (USA) Nintendo 64 Instruction Manual
Recovery, Common Failures and Retry Strategies
In the original North American Nintendo 64 release, losing a life and reaching Game Over use the same local restart position for the sequence where Conker died. Game Over does not send you to a manually selected chapter state or provide a shortcut past an unfinished objective. After returning, inspect the immediate area, identify the interaction that was interrupted, and repeat that local section before retracing the wider route.
Identify the restart state before moving
When Conker dies from a fall, drowning, machinery, enemies, a vehicle sequence or a boss attack, stop at the restart position and examine the nearby room. The game may place him at the start of the current local sequence rather than beside the exact hazard that caused the death. Look for the nearest Context Sensitive pad, switch, NPC, key, gate, vehicle or weapon pickup.
If the last Squirrel Tail is consumed and Game Over appears, Conker returns to that same kind of local restart position used after losing a life. Treat the restart as a repeat attempt at the current sequence, not as a return to the last manually saved chapter. If a multistep process was interrupted, assume that its local actions must be performed again until the transition clearly completes.
- Determine whether Conker lost one life or reached Game Over.
- Inspect the immediate restart area before retracing the level.
- Repeat any interrupted pad, dialogue, delivery, switch or vehicle action.
- Do not assume that Game Over recorded an unfinished transition.
Stabilize Conker before retrying
Move onto safe ground before testing the failed route. Recenter the camera with the C Buttons so the next landing area, ledge or platform is visible. For rotating machinery, moving platforms, fire, swinging logs and other repeating hazards, watch a complete cycle from the restart point before committing to the jump.
Restore chocolate or another available recovery item only after the immediate danger is under control. In underwater sections, locate the nearest air supply and confirm that the pad supplying the required diving action is active. If the local sequence restarted, reactivate the pad before entering the water again.
Do not spend the remaining Squirrel Tails on blind experimentation. Use the restart to observe the hazard, then make one deliberate attempt. Tails provide extra lives during the current run; they do not replace the need to complete and save the campaign normally.
- Center the camera before blind jumps.
- Watch a full hazard cycle instead of rushing from the restart point.
- Restore health, air access or the required Context Sensitive action.
- Avoid wasting the final available Tail on an untested approach.
Recover Hungover, Windy and Barn Boys transitions
In Hungover and the first Windy visit, repeat the interaction that was interrupted and allow its animation to finish. If Mrs. Bee’s hive task reset, retrieve the hive again and avoid unnecessary contact with sticky honey. If Birdy, the dung beetle or another early NPC did not complete the objective, return to that character and finish the dialogue rather than searching for a later gate.
Barn Boys uses its own local restart positions for the farm sequence. If Conker dies during Marvin, Mad Pitchfork, Sunny Days, Barry + Co, Buff You, Haybot Wars, Frying Tonight or Slam Dunk, repeat the unfinished action from the restarted farm section. Check the nearby switches, crate lifts and Context Sensitive pads before crossing the barn again. Do not assume that a death in Barn Boys advances the later Windy objectives.
After Barn Boys, Windy has another required progression visit. If Poo Cabin, the sewage route or a Great Balls of Poo objective was interrupted, return to the associated pad and perform it again. The first Windy visit does not complete these later tasks.
After Uga Buga, verify the required return progression. If Spooky has not opened, return to Mrs. Bee and complete Wasps’ Revenge again: enter the nest, use the hive turret to clear the wasp waves, carry the hive out and deliver it. Then climb to Mr. Barrel and pay at least $2,110. Optional cash can help reach that amount, but it cannot replace Wasps’ Revenge or the required story transition.
If the barrel ride fails, return to the windmill route, confirm the payment interaction and begin the ride again. Wait for the passage to open and the nighttime transition to finish before entering Spooky.
- Repeat only the unfinished local Windy or Barn Boys objective.
- After Uga Buga, complete Wasps’ Revenge before paying Mr. Barrel.
- Bring at least $2,110 for the Mr. Barrel transition.
- Allow the barrel ride and chapter transition to finish completely.
Recover from Sloprano, Uga Buga and Spooky
If Conker dies while collecting the six sweet-corn kernels, fighting the Great Mighty Poo or crossing the U-Bend, inspect the restarted room for the relevant pad and item interaction. Repeat the unfinished kernel delivery, toilet-paper action or flush-handle sequence. The $1,000 guard payment is temporary story access, not a permanent disguise purchase; repeat the dialogue if the transition did not complete.
In Uga Buga, repeat the environmental objective immediately preceding the blocked route. Wait for swinging logs, cave hazards and enemy formations to reset before crossing. If a required item or trigger appears absent, leave through the normal exit and re-enter from the overworld. Do not attempt to repair the route with unrelated cash or optional pickups.
In Spooky, clear the immediate cemetery, mansion or escape section again from its local restart position. Use tombstones, corners and room geometry to control zombie encounters. If a key, lever or door appears not to have registered, inspect the associated interaction again and return through the ordinary route if necessary. Optional cash and Tail Thingys do not prove that the mansion sequence has advanced.
- Reactivate a required pad after a local restart.
- Repeat unfinished dialogue and environmental actions.
- Use normal exits and overworld re-entry when a trigger appears absent.
- Keep optional pickups separate from required story progress.
Recover from It’s War and Heist
A failed tank, submarine or Experiment sequence normally requires repeating that local vehicle or combat objective from its assigned restart position. Recheck the vehicle controls, weak-point target or nearby weapon pickup before attempting the section again. During the Experiment, maintain room to maneuver, expose the weak point with the tank and avoid rushing the follow-up escape.
After the self-destruct escape, complete the return to Windy and confirm that the windmill is destroyed. It’s War does not lead directly to the Vault. The required route continues through the ruined windmill into Heist.
Heist is a linear security sequence. If Conker dies at a guard or laser position, restore the relevant weapon and B-pad slow-motion action, then repeat the affected position. The alarm is scripted. There is no stealth bypass, alarm reset, vault code or purchased disguise that changes the original N64 route.
After Berri disables the upper laser route, collect the three required cash bundles and let the Vault cutscene finish. If Conker dies afterward, identify whether the restart is in the bank, the Vault approach or the Heinrich encounter before retracing anything.
- Repeat only the failed tank, submarine or Experiment objective.
- Confirm the destroyed windmill before entering Heist.
- Treat the bank security route as linear and the alarm as scripted.
- Separate the three cash bundles from the later Vault and Heinrich sequences.
Retry the Vault and Heinrich safely
After Heist’s three cash bundles and the resulting cutscene, control resumes in the Vault. Run to the switch below the Panther King’s position and jump onto it. This activates the airlock and opens the nearby suit hatch. Move clear of the suction before entering the battle suit. Do not treat the switch as a normal B-button Context Sensitive pad.
The original N64 suit controls are Control Stick to move, A to jump or boost, B to punch, and Z to block. Heinrich uses a tail sweep and a forward bite. Jump or boost with A over the tail sweep. Hold Z to block the bite. When Heinrich is vulnerable, use B to punch until he falls.
Move behind the stunned Heinrich and grab near the base of his tail. Rotate the Control Stick to spin him, then aim him at the open airlock. When the throw is lined up, press B to release or throw him. A is not the throw button; A remains the jump or boost control. Heinrich returns after the first and second throws, with later phases becoming more aggressive and better at avoiding punches. Use the same defensive cycle instead of chasing him recklessly.
If Conker dies during Heinrich, the restart remains tied to the local final sequence. Inspect the immediate area first. If the restart is before the airlock or suit setup, repeat the jump onto the switch and enter the suit again. If control resumes in the suit, begin with Heinrich’s current encounter instead of replaying the bank. Do not assume that Game Over sends Conker back to the last saved chapter or requires the entire campaign to be replayed.
The final sequence is complete after the third successful B-button airlock throw, the apparent freeze and programmer intervention, the sword sequence and the closing throne-room scene have all played.
- Jump onto the Vault switch to activate the airlock.
- Move clear of the suction and enter the suit hatch.
- Use A to jump or boost over Heinrich’s tail sweep.
- Use Z to block Heinrich’s bite.
- Use B to punch and B to release or throw him after the tail grab and spin.
- If a final-sequence restart occurs, repeat only the local airlock, suit or Heinrich section shown.
- Complete three successful airlock throws and wait through the full ending sequence.
Repair an apparently blocked route
Inspect the immediate room before assuming the save or level state is broken. Look for the nearest lightbulb prompt, Context Sensitive pad, switch, key, NPC, gate or item-delivery point. Many progression events require Conker to complete an interaction and allow its dialogue, animation, explosion, door movement, vehicle movement or chapter transition to finish.
If the route remains blocked, leave through the intended exit and return normally from the overworld. Repeat the required interaction and wait for every scripted event to finish before moving away. In Windy, this may mean repeating Wasps’ Revenge before paying Mr. Barrel. In the postwar route, it means confirming the destroyed windmill before entering Heist. In the Vault, it means jumping onto the airlock switch rather than pressing B beside it.
This normal local retry and overworld re-entry method is the safe console-compatible response to an apparently unsolved area. Do not use cartridge lifting, memory editing, save manipulation or unsupported emulator-only state changes as a supposed soft-lock fix.
- Inspect all local interactions before abandoning the room.
- Exit and re-enter through the normal route.
- Allow scripted events to finish before leaving.
- Use ordinary gameplay retries rather than cartridge or save-data manipulation.
Before you move on
- The player can distinguish losing a life from Game Over while understanding that both return Conker to the same local restart position for the current sequence.
- The player can inspect that restart position and identify the local objective that must be repeated in Hungover, Windy, Barn Boys, Sloprano, Uga Buga, Spooky, It’s War, Heist, the Vault approach or Heinrich.
- The player can return to and reactivate a missing Context Sensitive action.
- After Uga Buga, the player can redo Wasps’ Revenge before paying Mr. Barrel at least $2,110.
- The player understands that optional money cannot replace a required story transition.
- The player can distinguish the destroyed-windmill transition, Heist cash collection, Vault approach and Heinrich fight.
- The player can jump onto the Vault switch, enter the suit, jump or boost with A, block with Z, punch with B and throw Heinrich with B after the tail grab and spin.
- The player can complete three successful Heinrich airlock throws and wait through the programmer intervention, sword sequence and throne-room conclusion.
- The player can repair an apparently blocked route through normal local checks and overworld re-entry without external save or cartridge manipulation.
- The canonical ending has played after the final Heinrich sequence.
Optional Objectives, Collectibles and 100%-style Completion
The original North American Nintendo 64 campaign does not display a complete single-player percentage checklist. Track four separate categories instead: required story objectives, cash pickups, Tail Thingys and multiplayer activities. Several cash rewards are earned during mandatory missions, but the money itself is optional unless it is needed for the later Mr. Barrel gate. The first Mrs. Bee rescue, Poo Cabin and Great Balls of Poo, Bat’s Tower access, Wasps’ Revenge and Mr. Barrel are campaign progression, not side content. The three moving money bags in the Heist Vault are also mandatory because collecting them triggers the transition into the final Vault sequence; any additional Vault cash is optional.
Separate required missions from optional rewards
The first Mrs. Bee rescue is required during the opening Windy route. Follow the Naughty path to the hive, carry it back to Mrs. Bee and continue toward Barn Boys. The mission is mandatory, while its $100 reward is simply cash earned during story progression.
After Uga Buga, return to Windy and complete Wasps’ Revenge. Enter the wasp hive, use the hive-mounted machine gun to clear the attacking wasps, carry the hive back and collect Mrs. Bee’s $400 reward. The mission opens the route to Mr. Barrel, so do not mark it as optional merely because its reward is optional.
Before using Mr. Barrel, gather enough money to meet the required $2,110 payment. Optional pickups can help reach that amount, but extra cash cannot replace Wasps’ Revenge or any other required story transition.
- The first Mrs. Bee hive rescue is complete.
- The first Mrs. Bee reward is recorded as $100.
- Wasps’ Revenge is complete after Uga Buga.
- The second Mrs. Bee reward is recorded as $400.
- Mr. Barrel has received $2,110 and opened the Spooky route.
Log the early Windy and Poo Mountain pickups
During Sewage Sucks, fill the sewage area and swim back toward the original entrance. Surface near the beam and collect the cash in the alcove. Record this sewage pickup as $100. The sewage objective is required for Windy progression, but the cash is not.
After the Poo Cabin objectives, push the required poo balls through Great Balls of Poo. When the route to the top of Poo Mountain is open, use the high jump to reach the summit cash, worth $100. The three poo-ball objectives remain mandatory because they open the later Bat’s Tower and Sloprano routes.
During the second Mrs. Bee sequence, the holes in the side of the wasp hive lead to an optional $100 pickup. Collect it before entering the hive if convenient, but do not confuse it with the $400 reward received after returning the hive.
- The sewage alcove is recorded as $100.
- The Poo Mountain summit is recorded as $100.
- The three Great Balls of Poo objectives are complete if pursuing the main story.
- The wasp-nest holes are recorded as an optional $100 pickup.
Sweep Barn Boys after completing the farm sequence
Barn Boys contains four optional cash pickups attached to required farm objectives. After the early barn route is open, climb to the barn roof and collect $100. After escaping Haybot, use the stone-flipping monk and upper route to reach another $100.
After completing Sunny Days, bounce from the sunflower’s stigmas to reach the elevated $100 pickup. After Slam Dunk opens the gate in the green water around the barn, swim through the tunnel for another $100 and record the nearby Tail Thingy separately.
The cheese-corral boulder, chocolate, Tail Thingys and other side pickups are optional. They do not alter the required Marvin, Mad Pitchfork, Sunny Days, Barry + Co, Buff You, Haybot Wars, Frying Tonight and Slam Dunk sequence. If a jump fails, return to a safe platform before crossing the barn again while damaged.
- The Barn Boys roof pickup is recorded as $100.
- The post-Haybot pickup is recorded as $100.
- The Sunny Days alcove pickup is recorded as $100.
- The Slam Dunk tunnel pickup is recorded as $100.
- Barn Boys Tail Thingys and chocolate are tracked separately.
Search Bat’s Tower and Sloprano
At the top of Bat’s Tower, follow the final ledges and hover across the gap to reach the optional $100 pickup. The waterfall behind the catfish contains a Tail Thingy; it is separate from the tower cash and should be logged independently.
After the catfish and Bullfish objectives, the catfish sequence includes an optional $10 amount in the catfish safe. The alcove above the Bullfish’s resting place contains $300 after the dogfish crashes into the wall and can be used as a spring. These rewards do not replace the required tower progression.
After defeating the Great Mighty Poo and flushing it away, collect the $100 cash near the drain before leaving the area. This pickup is separate from the Sloprano Tail Thingy near the drain. The temporary $1,000 payment made to the guard later in Sloprano is story access money, not a collectible and not a permanent disguise purchase.
In U-Bend Blues, after the Great Mighty Poo has been flushed, follow the descending platforms to the underwater route. After the cutscene, swim through the spinning blades and exit through the lower passage. The U-Bend contains an additional $100 pickup. Record it separately from the drain-area cash and from the Tail Thingy. The blades are lethal, so collect the money only when you are prepared to complete the passage or repeat the route after a death.
- The top of Bat’s Tower is recorded as $100.
- The catfish safe is recorded as $10.
- The Bullfish resting-place alcove is recorded as $300.
- The Great Mighty Poo post-flush cash is recorded as $100.
- The U-Bend Blues pickup is recorded as $100.
- The Bat’s Tower waterfall and Sloprano drain Tail Thingys are tracked separately.
- The temporary $1,000 Sloprano payment is excluded from collectible cash.
Record Uga Buga rewards without guessing disputed totals
Uga Buga has several optional rewards spread across Drunken Gits, Phlegm, Rock Solid, Mugged and Buga the Knut. Record the entry pickup as $100. The dinosaur idol route contains another $100, and the back of the dinosaur or Dragon God provides the area’s Tail Thingy route.
After freeing Berri in Rock Solid, check her former cage for $100. After completing the Mugged race, record the reward at the finish as $100. After defeating Buga the Knut, check the exit ledge before taking the route back toward the storm drain for another $100.
The Dragon God Tail Thingy and the cash beside it should be logged separately. These rewards are optional and do not replace the required caveman objectives, the Buga encounter or the return to Windy. Once back in Windy, complete Wasps’ Revenge before paying Mr. Barrel.
- The Uga Buga entry pickup is recorded as $100.
- The dinosaur idol pickup is recorded as $100.
- Berri’s former Rock Solid cage is recorded as $100.
- The Mugged reward is recorded as $100.
- The post-Buga exit pickup is recorded as $100.
- The Dragon God Tail Thingy is checked separately.
Check the Spooky return route and later chapters
After completing Spooky’s cemetery, mansion and Mr. Barrel escape objectives, follow the return route across the lake toward the waterfall near Hungover. The small land area at the end of the route contains an optional $100 pickup. It is not required for entering It’s War.
Spooky has no Tail Thingys in the original Nintendo 64 campaign. It’s War also has no Tail Thingys, and Heist has no Tail Thingys. Do not import collectible locations from Conker: Live & Reloaded or another release.
Heist includes additional cash in the Vault area, but distinguish it from the three required moving money bags. The three required bags must be knocked down with the frying pan and collected; once all three have been collected, the game triggers the story cutscene and advances into the final Vault sequence. Any further cash that remains available in the Vault is optional and is not needed to begin or finish the Heinrich encounter.
- The Spooky return-route pickup is recorded as $100.
- Spooky is marked as having no Tail Thingys.
- It’s War is marked as having no Tail Thingys.
- The three required Heist Vault money bags have been knocked down and collected.
- Any additional Vault cash is treated as optional.
- Heist Tail Thingys are not imported from another edition.
Treat multiplayer as a separate goal
Open Multiplayer from the original N64 title menu or pub menu and record it independently from the story save. The original release provides seven multiplayer types: Beach, Raptor, Heist, Deathmatch, War, Tank and Race.
Playing or winning multiplayer matches does not unlock single-player chapters, add campaign cash, alter the Vault sequence or substitute for any required objective. Do not use class, unlock or mode requirements from Conker: Live & Reloaded when tracking the Nintendo 64 version.
- The original N64 Multiplayer menu has been opened.
- Beach, Raptor, Heist, Deathmatch, War, Tank and Race are logged separately if desired.
- No multiplayer result is counted as a single-player story flag.
Confirm completion with separate records
For campaign completion, confirm that the Vault sequence reaches the canonical ending. For an optional sweep, keep four records: required story objectives, cash locations, Tail Thingys and multiplayer activities. This prevents mandatory payments from being mistaken for collectible cash and prevents rewards from being mistaken for story requirements.
The corrected cash log is: first Mrs. Bee reward $100; sewage alcove $100; wasp-nest holes $100; Poo Mountain summit $100; Barn Boys roof $100; post-Haybot pickup $100; Sunny Days alcove $100; Slam Dunk tunnel $100; top of Bat’s Tower $100; catfish safe $10; Bullfish resting-place alcove $300; Great Mighty Poo post-flush cash $100; U-Bend Blues pickup $100; Uga Buga entry $100; dinosaur idol $100; Berri’s former Rock Solid cage $100; Mugged reward $100; post-Buga exit $100; second Mrs. Bee reward $400; and Spooky return-route pickup $100.
The $1,000 Sloprano guard payment is temporary story access money, while the $2,110 Mr. Barrel payment is a required gate. Neither should be logged as a permanent disguise purchase or ordinary collectible. In Heist, the three moving money bags in the Vault are required progression items; any additional Vault cash is optional and should be recorded separately rather than counted as part of the three-bag transition.
The final completion record must show the first Mrs. Bee rescue, Barn Boys, the later Windy objectives, Wasps’ Revenge, Mr. Barrel, Spooky, It’s War, Heist, the three required Vault money bags and the canonical Vault ending.
- The canonical Vault ending has played.
- The first Mrs. Bee sequence is complete.
- Wasps’ Revenge has been completed after Uga Buga.
- Mr. Barrel has received $2,110.
- The corrected cash locations are logged separately from mandatory story payments.
- The $400 second Mrs. Bee reward is identified as a reward from a required task.
- The U-Bend Blues $100 pickup is recorded.
- The temporary $1,000 Sloprano payment is excluded from collectible totals.
- The three required moving Vault money bags are recorded separately from additional optional Vault cash.
- Tail Thingys are tracked separately from cash.
- Spooky, It’s War and Heist are marked as having no Tail Thingys.
- Multiplayer progress is recorded independently.
Before you move on
- The Vault ending has played.
- The first Mrs. Bee sequence is complete.
- Wasps’ Revenge has been completed after Uga Buga.
- Mr. Barrel has received $2,110 and opened Spooky.
- The corrected cash locations are logged separately from mandatory story payments.
- The $400 second Mrs. Bee reward is identified as a reward from a required task.
- The U-Bend Blues $100 pickup is recorded separately.
- The temporary $1,000 Sloprano payment is excluded from collectible totals.
- The three required moving Vault money bags have been knocked down and collected.
- Any additional Vault cash is tracked separately as optional.
- Tail Thingys are tracked as extra-life pickups, not as an assumed percentage counter.
- Spooky, It’s War and Heist are marked as having no Tail Thingys.
- Multiplayer modes are treated as a separate local-play objective.
References for this chapter
Appendix: References, Manuals and Further Reading
These references support the North American Nintendo 64 version of Conker's Bad Fur Day. Use the manual for controller terminology and basic systems, then use Nintendo 64 walkthroughs to verify the route, prerequisites, boss actions and save-related details. The campaign order must remain separate from Conker: Live & Reloaded. In particular, Windy is revisited several times, Heist ends with the bank cash collection, and The Vault contains the airlock, space suit and final Heinrich encounter.
Use the original Nintendo 64 manual for controls and systems
Begin with the North American Nintendo 64 instruction manual. It is the appropriate reference for the original controller layout, Rumble Pak information, interface terminology and the distinction between single-player and multiplayer. For this release, the Control Stick moves Conker, A jumps, Z crouches or fires an equipped weapon, R enters aiming mode, B performs the basic attack and activates context zones, and the C Buttons handle camera movement and strafing functions. The manual should be preferred over an Xbox manual whenever button names or basic actions are being checked.
The manual is not a complete route guide. During play, context pads and other context locations are recognized when the lightbulb prompt appears; standing on a pad without a prompt generally means that a prerequisite has not yet been satisfied. The B button activates the available context action. The written walkthrough should therefore explain the objective that makes a pad usable instead of telling the player to activate every pad immediately.
- Confirm that the manual is for Conker's Bad Fur Day on Nintendo 64, USA.
- Use N64 button names: A, B, Z, R, L and the C Buttons.
- Use the manual for controls, context terminology and hardware notes.
- Do not use Live & Reloaded controls to explain the original cartridge.
Cross-check the campaign route with Nintendo 64 walkthroughs
The KrocTheDoc FAQ and other GameFAQs walkthroughs provide the most useful route checks for the original release. They identify Hungover as the training section, followed by the first Windy objectives, Barn Boys, the later Windy objectives around Poo Cabin and Great Balls of Poo, Bat’s Tower, Sloprano and Uga Buga. Great Balls of Poo is a progression objective: its completed route opens the later Bat’s Tower and Sloprano access. Do not list Bat’s Tower immediately after Barn Boys while omitting this Windy return.
The same references support the later transitions. After Uga Buga, return through Windy, complete the required Wasps’ Revenge progression and meet Mr. Barrel’s cash requirement before entering Spooky. After Spooky and It’s War, return to the destroyed windmill and use that altered Windy state to enter Heist. This is not a direct branch from It’s War to the Vault.
For the ending, treat the bank, The Vault and the final boss as separate stages. Heist contains the linear security sequence and the required cash bundles. The Vault begins with the airlock and space-suit setup, then leads into the Heinrich or Xenomorph fight. The final encounter requires repeated knockdowns, grabbing the tail and throwing the enemy through the airlock three times before the ending cutscene begins.
- Verify the order Hungover, Windy, Barn Boys, later Windy objectives, Bat’s Tower, Sloprano and Uga Buga.
- Verify the Windy return, Wasps’ Revenge and Mr. Barrel requirement before Spooky.
- Verify the destroyed-windmill transition before Heist.
- Keep Heist, The Vault and the final boss as separate progression stages.
- Check any disputed route detail against more than one N64 walkthrough.
Use visual guides and boss demonstrations by edition
Video footage is useful for recognizing rooms, camera positioning, platform routes and boss arenas, but confirm that the recording shows the Nintendo 64 campaign. A full-game N64 walkthrough can supplement written directions, while a speedrunning archive can help identify the Vault layout and final-boss sequence. Do not copy timing assumptions from a different version, emulator setup or altered control scheme.
For the final boss, the useful N64 demonstrations show the same broad sequence described by the written references: enter the space suit, evade the tail attack, punch until Heinrich is stunned, grab the tail, spin him and throw him into the airlock. Later phases become less forgiving, so use the footage to learn positioning rather than to claim a fixed frame window.
- Confirm that a video identifies Nintendo 64 or visibly matches the original mechanics.
- Use footage for room recognition, positioning and attack identification.
- Do not import Xbox aiming, movement or weapon behavior.
- Avoid unsupported frame-perfect timing claims.
Check saving and edition boundaries
The original North American cartridge uses internal EEPROM save memory rather than requiring a Controller Pak for ordinary campaign saves. A genuine cartridge should therefore retain its own save data, but reproduction cartridges, replacement hardware and damaged save chips may behave differently. If saving fails, treat that as a hardware or cartridge issue rather than changing the progression guide.
Conker: Live & Reloaded is an Xbox remake with different controls and other presentation or gameplay changes, so its guide material is not a substitute for the N64 route. Rare Replay presents the N64 campaign but surrounds it with a later platform interface. This appendix preserves the original N64 button names, chapter order, context actions and ending sequence. Legitimate manuals, archival scans, established walkthroughs and ordinary video-hosting pages are sufficient; ROM, torrent and unauthorized-download sources are neither needed nor recommended.
- Test saving on an authentic cartridge before beginning a long session.
- Do not assume reproduction hardware has identical save behavior.
- Keep Live & Reloaded mechanics out of the N64 guide.
- Use legitimate manuals, archival references and walkthrough pages only.
Before you move on
- The reference set includes the North American Nintendo 64 instruction manual.
- At least two Nintendo 64 walkthrough references are available for chapter order and prerequisites.
- The reference set includes a controls source using original N64 terminology.
- The route records the Windy return before Bat’s Tower and Sloprano, the Windy transition before Spooky, and the destroyed-windmill route into Heist.
- Heist ends after the bank cash collection, with The Vault and the final boss documented separately.
- The final-boss references confirm the airlock, space suit, repeated stun-and-tail-throw sequence and canonical ending cutscene.
- Saving guidance distinguishes authentic cartridge behavior from reproduction hardware.
- The appendix recommends visual references without directing the player to unauthorized downloads.
References for this chapter
- Conker's Bad Fur Day (USA) Nintendo 64 Instruction Manual
- Conker's Bad Fur Day: The Official Nintendo Player's Guide
- Conker's Bad Fur Day - Guide and Walkthrough by KrocTheDoc, Nintendo 64
- Conker's Bad Fur Day - Walkthrough by Outlaw, Nintendo 64
- Conker's Bad Fur Day - Walkthrough by Jon_, Nintendo 64
- Conker's Bad Fur Day Controls, StrategyWiki
- Conker's Bad Fur Day Walkthrough, StrategyWiki
- Conker's Bad Fur Day Full Game Walkthrough, Nintendo 64 video
- Conker's Bad Fur Day Speed Demos Archive
- Conker's Bad Fur Day Nintendo 64 cartridge and save information
Finishing up
The player has followed the mandatory route through Hungover, Windy, Barn Boys, the required Windy return objectives, Bat’s Tower, Sloprano, Uga Buga, the Windy transition into Spooky, Spooky, It’s War, Heist, the Vault and Heinrich’s final sequence.
The ending is complete only after the third airlock throw, the scripted apparent freeze, the programmer intervention, the sword sequence, the throne-room conclusion and the closing scenes or credits sequence.
Optional cash, Tail Thingys, side errands and multiplayer activities are either completed and logged or explicitly left unfinished; none is silently treated as mandatory campaign progress.
A saved file can be reloaded through the original N64 save interface and used to reproduce the final route without relying on remake-only mechanics.
Choose your next gameScreenshots & video
Game imagery for reference. Follow the written chapters above for the route and strategies.
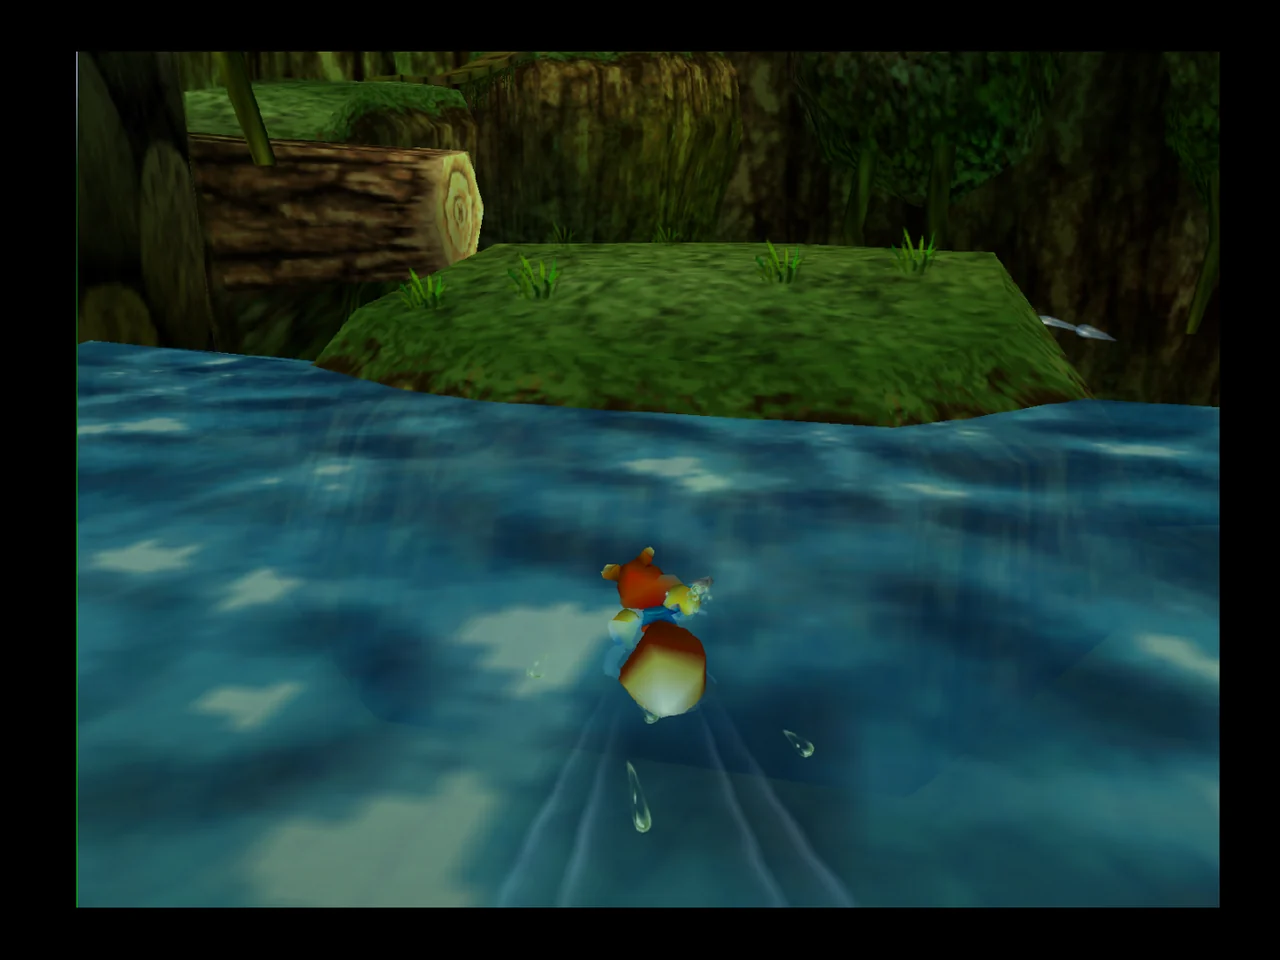
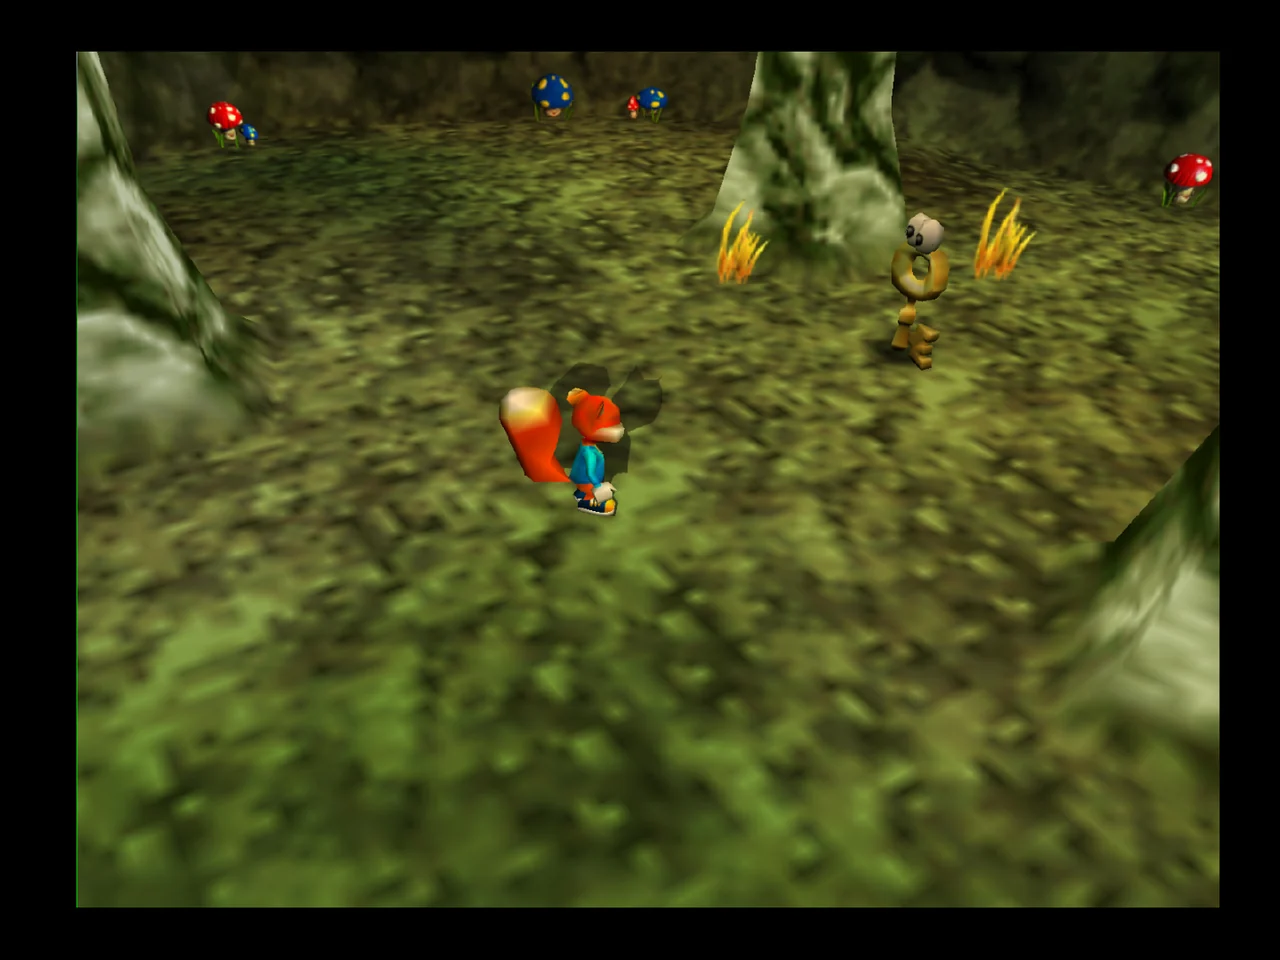
Sources & references
Our original guide draws on the references below. Check the edition at the top of this page before following controls or unlock requirements.
- Conker's Bad Fur Day (USA) Nintendo 64 Instruction Manual
- Conker's Bad Fur Day - Guide and Walkthrough by KrocTheDoc, Nintendo 64
- Conker’s Bad Fur Day – Guide and Walkthrough by kisasohma11, Nintendo 64
- Conker’s Bad Fur Day – Hungover Strategy Guide
- Conker’s Bad Fur Day - Guide and Walkthrough by CyricZ, Nintendo 64, GameFAQs
- Conker’s Bad Fur Day - Guide and Walkthrough by Nemesis, Nintendo 64, GameFAQs
- Conker’s Bad Fur Day - Guide and Walkthrough by Nexxt, Nintendo 64, GameFAQs
- Conker’s Bad Fur Day - Guide and Walkthrough - Nintendo 64 - By bananagirl
- Conker's Bad Fur Day - Walkthrough by Jon_, Nintendo 64
- Conker's Bad Fur Day - Walkthrough by Outlaw, Nintendo 64
- Conker's Bad Fur Day - Walkthrough by Dennis Wentworth
- Conker's Bad Fur Day - Guide and Walkthrough - Nintendo 64 - By GavLuvsGA
- Conker's Bad Fur Day - Guide and Walkthrough - Nintendo 64 - By Rolent_X
- It's War | Conker Wiki
- Boss FAQ – Guide for Conker’s Bad Fur Day on Nintendo 64
- Conker's Bad Fur Day Controls, StrategyWiki
- Conker’s Bad Fur Day - Guide and Walkthrough - Nintendo 64 - By Pelord
- Conker’s Bad Fur Day Hands-On – GameSpot
- Conker's Bad Fur Day: The Official Nintendo Player's Guide
- Conker's Bad Fur Day Walkthrough, StrategyWiki
- Conker's Bad Fur Day Full Game Walkthrough, Nintendo 64 video
- Conker's Bad Fur Day Speed Demos Archive
- Conker's Bad Fur Day Nintendo 64 cartridge and save information
About the game & collecting notes
- Platform
- Nintendo 64
Step-by-step walkthrough for the original North American Nintendo 64 release of Conker’s Bad Fur Day. The ordered campaign route is Hungover, Windy, Barn Boys, the required later Windy objectives, Bat’s Tower, Sloprano, Uga Buga, the return through Windy into Spooky, It’s War, Heist, and the separate Vault and Heinrich ending sequence. Optional cash, Tail Thingys, side errands and multiplayer are clearly separated from mandatory progression.
Darryl Polo
Darryl Polo loves tinkering with emulation and revisiting retro games. He enjoys exploring how old favorites play on different setups and sharing what he learns along the way. At Joking Joystick, he writes about the games, hardware, and small discoveries that keep the hobby fun.
Our editorial standardsFound a step that needs another look? Help us improve this guide.