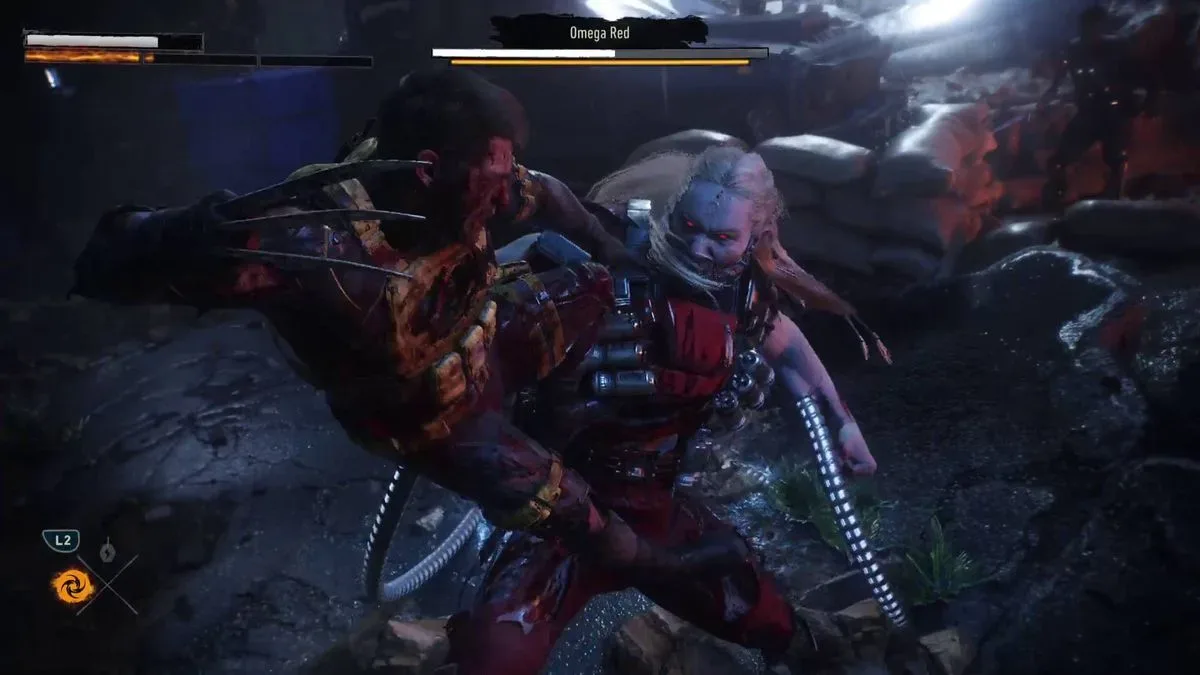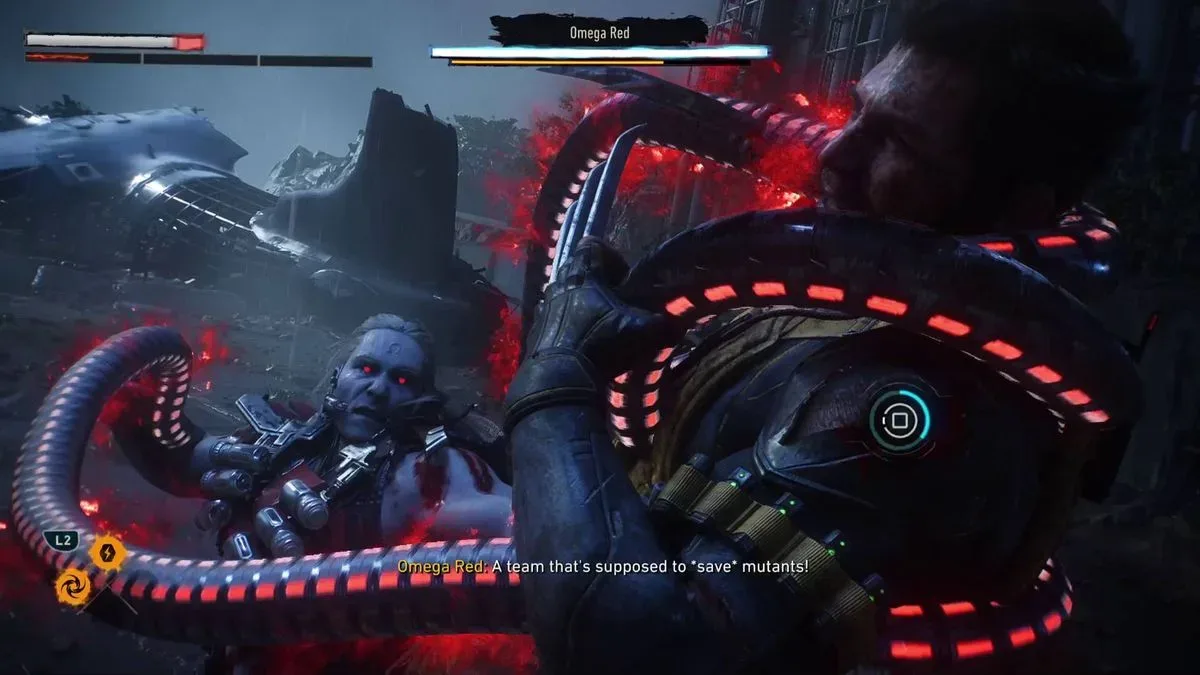
Omega Red, also known as Arkady Rossovich, is Marvel’s Wolverine’s first proper boss encounter—and it makes a sharp point of changing the rules. Earlier Trask soldiers and Reavers can be overwhelmed with messy offense. This fight is built to punish that instinct. The reliable path is reactive: recognize the attack, use the correct defensive answer, create a stagger opportunity, then spend that opening on damage.
That makes the fight less about unbroken aggression and more about discipline. A parry is not merely defensive here; it helps set up the vulnerability that Wolverine needs. A dodge is not a retreat either. It is the required response to attacks that cannot be parried, and it positions Wolverine to counterattack safely. Once the rhythm clicks, Omega Red becomes a clearer test of combat fundamentals rather than an endurance brawl.
Omega Red fight essentials
- Prioritize parries and dodges over constant attacks. Omega Red takes the most meaningful damage when he is staggered.
- In the first phase, learn the three-hit sequence. Parry the first two strikes and dodge the third.
- Dodge thrown objects. When Omega Red leaps up and hurls debris, do not try to parry it.
- Break his tendril shield with a held Square kick. Follow immediately with fast attacks or the Square, Square, Square, Triangle combo ender.
- Be especially cautious in phase 2. The grab can damage Wolverine and restore Omega Red’s health if the quick-time event drags on.
- After he leaps away, wait. He can answer an immediate pursuit with the dangerous grab, so evade his next move first and only then close in.
Phase 1: Treat the hangar as a timing lesson
The first part of the battle takes place in a hangar, where Omega Red’s move list is relatively contained. That is useful because this phase offers room to stop guessing and start identifying exactly which defensive tool a situation calls for.
The three-hit combo: parry twice, dodge once
Omega Red’s standard three-hit attack is the most important pattern to learn. The first two hits can be parried. The third cannot, so it must be dodged. Trying to apply one answer to the entire string is where a run can unravel: continuing to parry into the final attack leaves Wolverine exposed, while dodging all three gives up the opportunity to build toward a stagger.
The practical sequence is straightforward: hold your ground long enough to parry strikes one and two, then dodge the final blow. Resist the urge to turn every successful parry into an instant flurry. The objective is to finish the defensive exchange cleanly, then capitalize when the boss is actually vulnerable.
Parry, in this context, means timing a defensive response against a parryable incoming hit. Dodge means avoiding an attack outright, and it is mandatory against moves marked as unblockable. Omega Red is effectively asking players to distinguish between these two systems rather than treating defense as a single button solution.
Leaps and thrown objects: move instead of meeting force with force
Omega Red can leap into the air and throw objects toward Wolverine. These projectiles need to be dodged. They are not an invitation to attempt a parry or keep swinging through the danger. Create space with the dodge, let the projectile threat pass, and reset your focus on Omega Red’s next grounded action.
This is a small but important fight-management habit. It prevents a player from confusing every visible attack with a possible parry window. In this boss battle, reading the move matters as much as reacting quickly.
Related coverage includes Marvel's Wolverine: How to Beat Omega Red.
How to break Omega Red’s tendril guard
Omega Red uses his metal tendrils defensively, forming a shield that blocks the ordinary pressure Wolverine might otherwise apply. This is a specific guard-break moment. Hold Square to kick through the tendrils and break his protection.
The kick creates a short window to attack, so be ready before committing to it. Fast Square attacks can exploit the opening, while the Square, Square, Square, Triangle combo ender is another stated high-damage option. Either way, the key is speed: this is a brief reward for correctly identifying the shield and answering it with the dedicated kick.
Guard break is the useful term for this exchange. Rather than trying to chip through a protected enemy, Wolverine uses an action designed to remove the defense and earn a direct offensive opportunity. The tendril shield should therefore change your decision from “keep attacking” to “hold Square, break guard, then attack.”
Techniques that help the fight
Several Wolverine Techniques have clear value against Omega Red. They are not a substitute for handling his patterns, but they fit the boss’s stagger-focused structure particularly well.
- Stagger Leap: Its charged leap rapidly closes distance and deals substantial stagger damage. It is especially useful when Omega Red has left range and Wolverine has safely avoided the next incoming attack.
- Healing Strike: This Technique deals high damage while restoring a small amount of health, giving it obvious value in a fight where a few failed reads can be costly.
- Knee Breaker: This Special Technique inflicts major stagger damage and can interrupt unblockable attacks. That makes it valuable not only against Omega Red but also as a broadly helpful boss-fight tool.
Stagger is the fight’s central offensive payoff. It is the state in which Omega Red is opened up for the heaviest damage. The purpose of well-timed defense, technique use and guard breaking is not simply survival; together, they drive toward those high-value moments.
There is also a positioning lesson attached to Stagger Leap. A gap-closing move looks tempting whenever Omega Red moves away, but that impulse becomes risky in the second phase. Use the leap to punish after an attack has been avoided—not as an automatic response to every retreat.
Phase 2: The grab changes the risk calculation
Omega Red gains a brutal grab in phase 2. If it connects, the encounter shifts into a button-mashing quick-time event. Get through that event as quickly as possible. The longer Wolverine remains caught, the more damage he takes and the more health Omega Red recovers.
This is why phase 2 can feel so punishing even when a player has established a comfortable lead. The grab threatens two resources at once: Wolverine loses health while Omega Red regains it. A single lengthy capture can erase a meaningful portion of progress, so avoiding the move is much better than treating the quick-time event as a routine escape.
Recognize the post-leap trap
Omega Red has a reliable setup for the grab: after leaping away from Wolverine, he may prepare to launch his tendrils, accompanied by a red circular unblockable indicator. That visual warning matters. The correct response is to wait for his follow-up attack, dodge it appropriately, and then use a charged leap to regain ground.
The unsafe response is immediate pursuit. Leaping at Omega Red the moment he repositions can put Wolverine directly into the grab. The safer rhythm is deliberately slower:
- Omega Red leaps away.
- Do not immediately leap after him.
- Watch for the red circular unblockable indicator and his tendril attack.
- Dodge the attack.
- Use a charged Stagger Leap to close the distance after the danger has passed.
That pause is the heart of the encounter. Omega Red wants the player to chase. Refusing to chase blindly turns his repositioning from a panic moment into another readable part of the pattern.
A reliable game plan from start to finish
Start the hangar phase conservatively. Let Omega Red show the three-hit combo and practice the parry-parry-dodge response. Dodge his airborne thrown objects. When the tendril shield appears, hold Square to kick through it, then make the most of the limited attack window.
Build your offense around stagger rather than trying to maintain constant contact. Stagger Leap can contribute damage while closing distance, Healing Strike offers damage with a slight heal, and Knee Breaker is a powerful stagger tool that can also interrupt unblockable actions. The timing of these Techniques matters more than simply firing them whenever they are ready.
When phase 2 begins, elevate the grab to the top of the priority list. If Omega Red leaps away, assume an immediate charge could be punished. Watch, dodge the indicated unblockable tendril attack, then counter-close with the charged leap. If the grab does connect, complete the button-mashing event as fast as possible to limit damage and prevent further health recovery.
Defeating Omega Red effectively closes out the tutorial missions. The game then begins surfacing additional activities and systems, including whiskey bottles in many missions, suit crafting in the following mission, puzzles such as the Shiro lock code, and Easter eggs throughout levels. For the broader Marvel angle around the game, see this look at Marvel’s Wolverine and its X-Men implications.
For this particular boss, though, the takeaway is simple: do not try to out-swing Omega Red. Parry what can be parried, dodge what cannot, break the tendril guard with the held Square kick, and make your committed offense count when stagger creates the opening.