Minor location and progression spoilers follow.
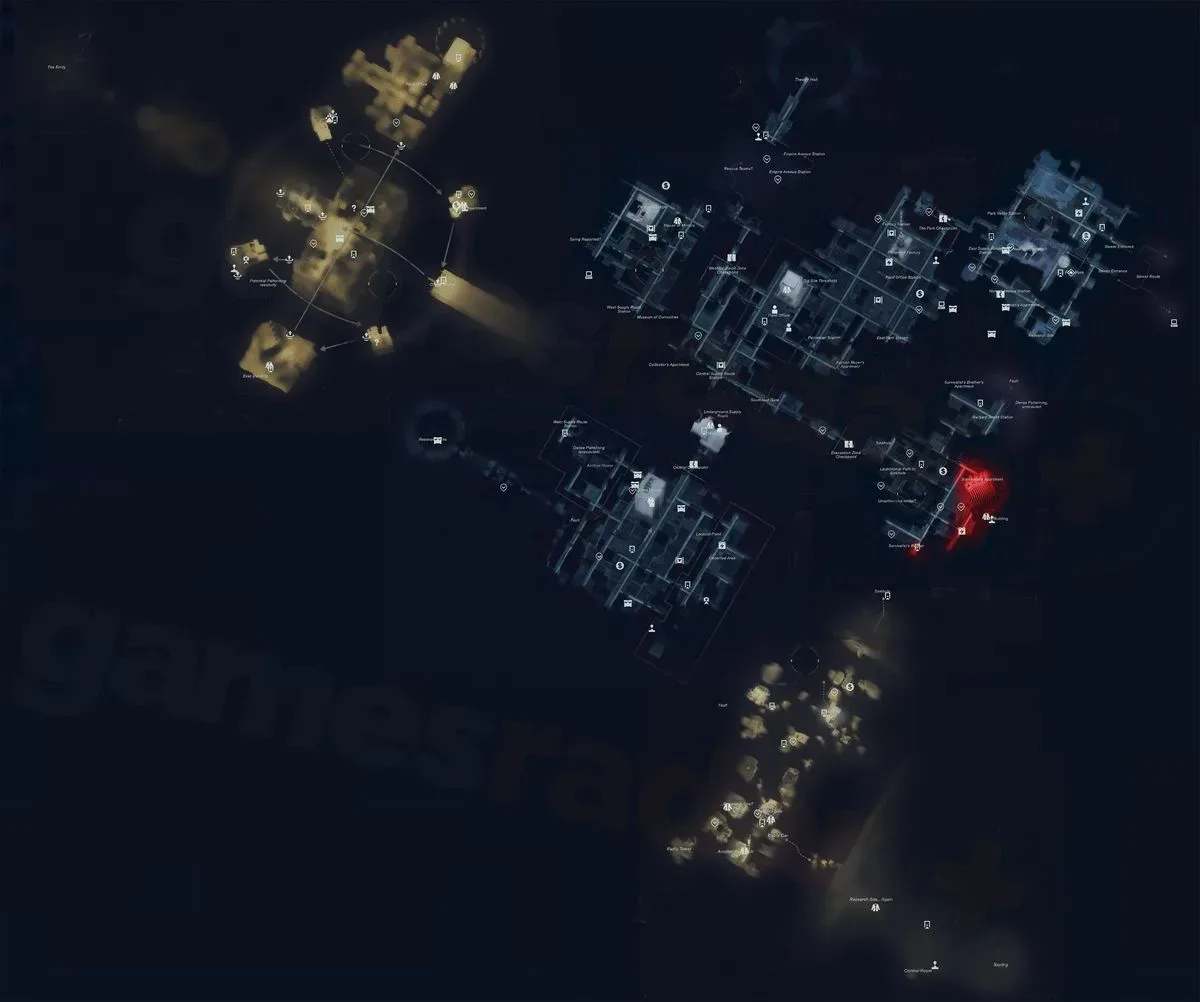
Control Resonant’s New York is not presented as an ordinary city map with every street open from the first hour. Its recognizable urban foundation has been reshaped by extra-dimensional forces, and the result is a seven-zone structure with distinct enemy pressures, traversal hazards and visual rules. Some regions become available early, while others are held back for story progression and certain side-quest requirements.
The most useful rule on entering any new zone is simple: find its Map Kit and complete the nearby Sensor activation sequence before wandering too far. Doing so turns an initially unclear space into something far more navigable on the minimap. That matters especially in a game world built around fractured geometry, subterranean passages and gravity that cannot always be trusted to behave like gravity.
How many main map zones are in Control Resonant?
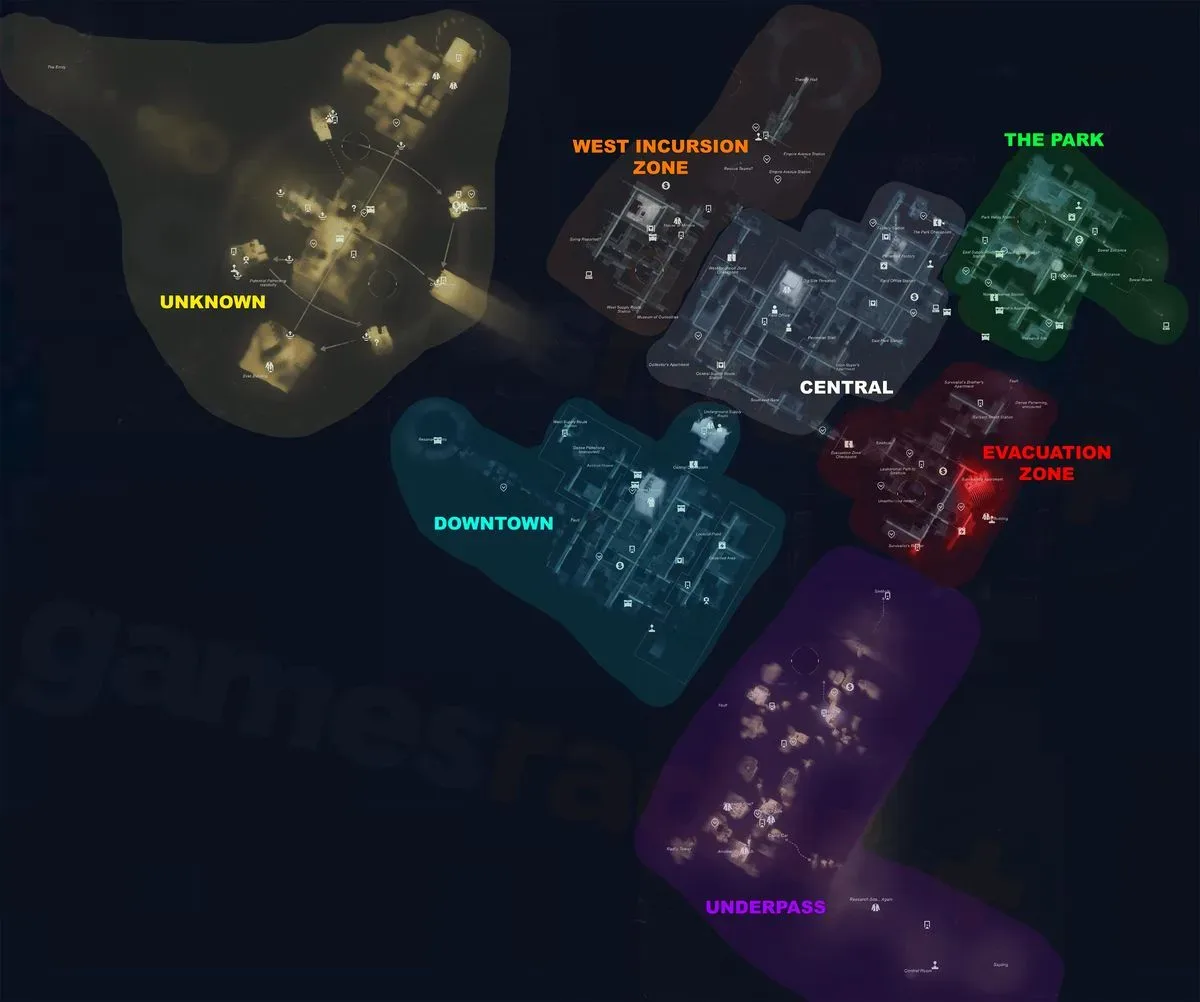
There are seven main zones:
- Downtown
- Central
- Evacuation Zone
- West Incursion Zone
- The Park
- Underpass
- Unknown
The Gap hub area and The Oldest House are not counted among those seven. The Oldest House is nevertheless important to the broader layout, as it sits in Downtown and connects to the subterranean Underpass.
Not every place in the game has a conventional map, either. Interior dungeon spaces such as the Patterned Factory are deliberately unmapped, so players must explore them without the usual cartographic assistance. In practical terms, map-revealing tasks apply to the named outdoor or district-scale zones, not necessarily every enclosed anomaly or mission location.
Control Resonant zone unlock order
The main route begins in Downtown and proceeds to Central. From Central, the Evacuation Zone, West Incursion Zone and The Park can be approached in the player’s preferred order. Underpass opens later through the story, followed by Unknown as the final area.
- Downtown — starting zone
- Central — connective district and branching point
- Evacuation Zone, West Incursion Zone or The Park — available in flexible order
- Underpass — story unlock
- Unknown — final area
This means the middle section is not a strict three-zone line. Once Central is reached, players have some agency over which of the available branches to investigate first. It also means an inaccessible route on the wider city map is not automatically a navigation failure: it may simply be reserved for later plot progression or a required side quest.
Related coverage includes Control Resonant Map Guide: All Seven Zones and How to Reveal Them.
All seven zones explained
Downtown
Downtown is the starting region and the location of The Oldest House. It establishes the game’s baseline conflict through general Hiss encounters, with relatively few wildcard elements compared with the stranger regions that follow. As the opening district, it is the clearest early reference point for the altered city before the map begins leaning harder into specialized anomalies.
Its importance is structural as well as narrative. Downtown anchors The Oldest House in the city-level map, while later progression makes the relationship between this opening area and the subterranean world below more significant.
Central
Central is the key linking zone. It contains both Hiss and Mold enemies, alongside the FBC field office, and functions as the main junction for several subsequent destinations. Because it feeds the three flexible mid-game branches, revealing Central’s map early is especially useful: it helps establish where the available routes split and makes return trips easier to interpret.
The mixed enemy presence also distinguishes Central from districts with a more singular identity. Rather than being defined by one overwhelming hazard, it is a connective space where the game’s major threats overlap.
Evacuation Zone
The Evacuation Zone is marked by a heavy Hiss presence and a Sinkhole anomaly descending into the Earth. The name and its core features make its role clear: this is a district shaped by both hostile occupation and a major environmental rupture. Players arriving from Central should expect the Hiss to be the dominant combat concern, while the Sinkhole signals that the terrain itself is part of the area’s identity.
“Anomaly” here refers to one of the world’s reality-defying phenomena rather than a standard piece of city infrastructure. The Sinkhole is therefore more than scenery; it is a defining spatial feature of the zone.
West Incursion Zone
The West Incursion Zone is built around extreme anomalous gravity and fractured space. City structures fold and bend in differing directions, creating a district where ordinary expectations of orientation may be unreliable. This is a useful example of why revealing the local map is worth prioritizing: a map cannot remove the hazard, but it gives players a stable reference while the visible environment is designed to disorient.
Anomalous gravity means gravity behaving outside normal physical rules. In this zone, that distortion is tied to the wider problem of fractured space—the city’s layout is no longer consistently arranged in the familiar, flat logic of streets and buildings.
The Park
The Park is overtaken by the Mold and connects to sewer networks. Its principal identity is therefore biological corruption rather than the Hiss-heavy pressure found in the Evacuation Zone. The sewer links also make the district an important part of the city’s below-ground geography, even before the later story transition into Underpass.
Players choosing their mid-game order can treat The Park as the Mold-focused branch from Central. It is one of the clearest examples of the game assigning regions an environmental and enemy-theme combination, helping make each available route feel materially different even within the same transformed New York.
Underpass
Underpass is a subterranean realm beneath the city that connects back toward The Oldest House. It opens as part of the story rather than through the earlier Central branching choice. Abyssal drops and distorted time define the area, shifting the danger away from surface-level city navigation and toward a deeper, less stable space.
Distorted time is the zone’s stated temporal irregularity: time itself is affected, not merely the architecture or gravity. Alongside the drops into the abyss, it reinforces Underpass as a late-game environment where the game’s spatial distortions become more severe. Players should not expect it to operate like a simple underground shortcut, even though it connects geographically to The Oldest House.
Unknown
Unknown is the final area. It is a patterned, fractured piece of city suspended in the sky, with islands orbiting one another and heavily distorted gravity. Unlike districts associated primarily with a particular threat, all enemy types appear here. That makes it the broadest combat destination in the seven-zone lineup as well as the most extreme expression of the game’s altered urban geography.
The designation “Unknown” fits an area that abandons ordinary city logic: floating sections, orbital movement and powerful gravity distortion all separate it from Downtown’s comparatively grounded opening. Since it comes after Underpass in the story sequence, players should read it as a late-game destination rather than an early mystery to force access to.
How to reveal a zone map
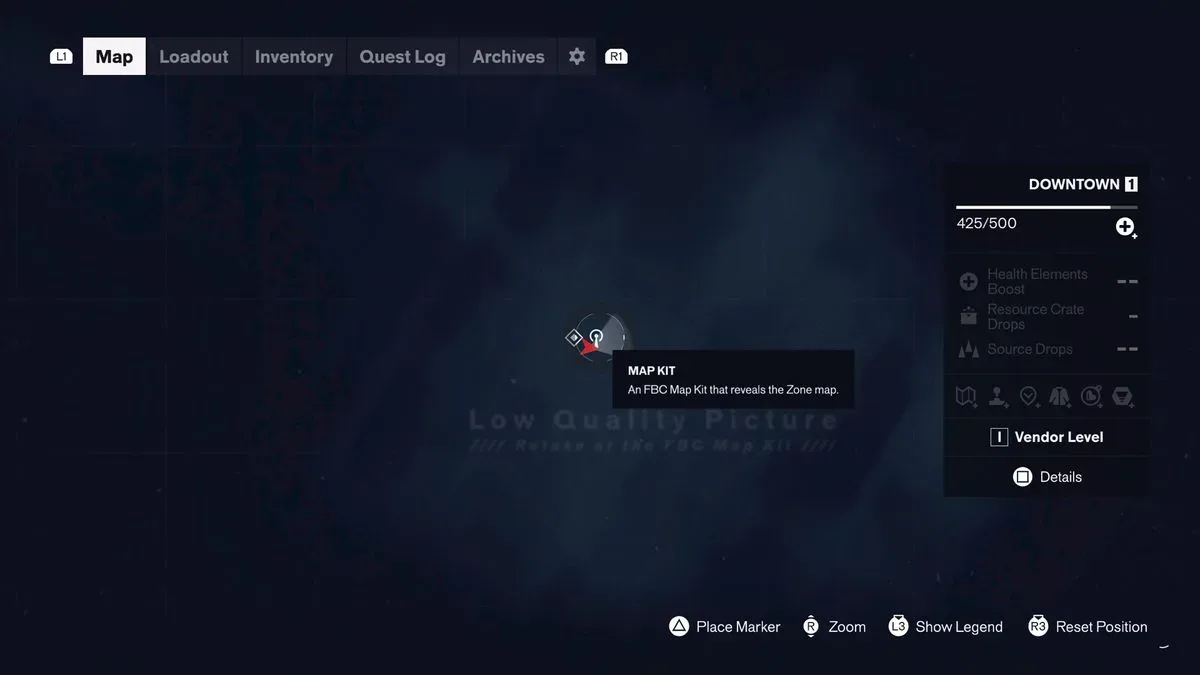
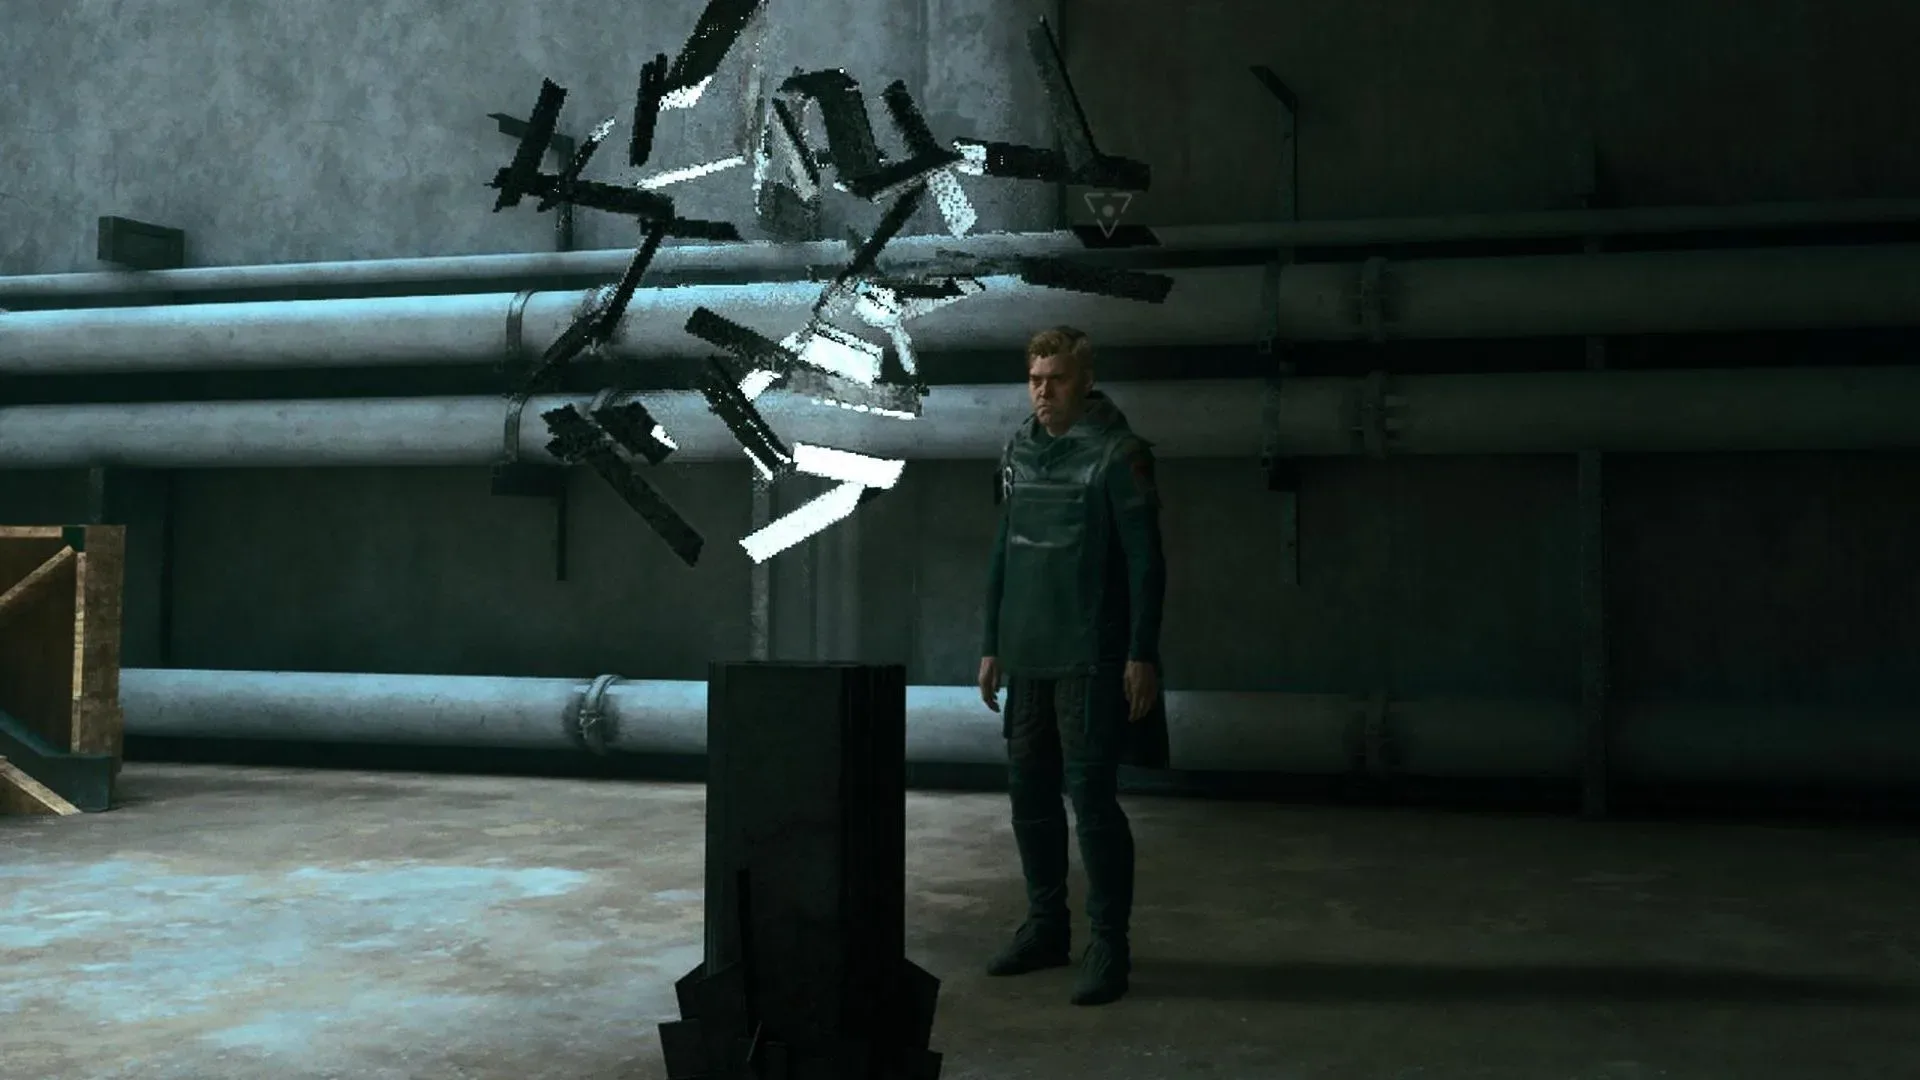
Each new zone has a Map Kit, a small radar-pylon device. It is the initial point of contact for revealing that district’s map. The process is consistent across the mapped zones:
- Locate the Map Kit radar pylon in the new zone.
- Pull its lever.
- Check the minimap for three nearby Sensors, shown with broadcasting-signal icons.
- Use the red lights visible in the world to help spot those Sensors at a distance.
- Approach each Sensor and hold L1/LB to trigger it.
- Return to the original pylon and pull its lever again.
- The local area is revealed on the map.
The distinction between the two devices is worth keeping straight. The Map Kit is the central pylon that begins and completes the routine. The three Sensors are the nearby radar dishes activated after the first lever pull. You need all three Sensors before the pylon can reveal the area.
Red lights provide the most useful visual clue when the minimap alone is not enough. The signal-style icons tell you that Sensors are in the vicinity, while the lights help convert that information into a route through the physical space. This is particularly valuable in districts where distorted perspective, deep verticality or folding city blocks can make a nearby objective feel harder to place.
Best way to approach a newly unlocked area
Start with the pylon rather than treating map discovery as a cleanup task. The game specifically surfaces the Map Kit on arrival, and completing the Sensor circuit provides orientation before a player commits to detours. In Central, this has the added benefit of clarifying the routes toward the three mid-game zones. In West Incursion Zone and Underpass, it can be especially helpful because those areas are characterized by altered spatial rules.
It is also sensible to separate two kinds of uncertainty. If a location lies inside a mapped zone, the Map Kit sequence is the relevant solution. If you are inside an unmapped dungeon such as the Patterned Factory, there may be no district map to reveal at all; exploration there is intentionally more direct and blind. Similarly, if a whole region remains unavailable, continue the plot and check side-quest progress rather than searching endlessly for an unmarked entrance.
For navigation questions tied to the city’s visual mysteries, see our guide to Control Resonant’s changing symbols and light pillars. Those phenomena are separate from the three-Sensor map-reveal routine, so it is useful not to confuse a world clue with a zone-mapping objective.
Quick reference: what each district is for
- Downtown: opening area, The Oldest House and general Hiss encounters.
- Central: FBC field office, Hiss and Mold, and the main route junction.
- Evacuation Zone: concentrated Hiss activity and the Sinkhole anomaly.
- West Incursion Zone: fractured space and extreme gravity.
- The Park: Mold-controlled terrain with sewer connections.
- Underpass: story-gated subterranean region, abyssal drops and distorted time.
- Unknown: final floating city fragment, extreme gravity distortion and every enemy type.
The full structure is therefore less about checking off seven equally available neighborhoods and more about learning the city in layers. Downtown and Central establish the network; the three optional-order branches let players choose a direction; Underpass and Unknown bring the narrative route into its later, more overtly reality-bending stages. Whenever a fresh zone opens, activate its Map Kit, find all three red-lit Sensors, and return to the pylon before pushing deeper in.