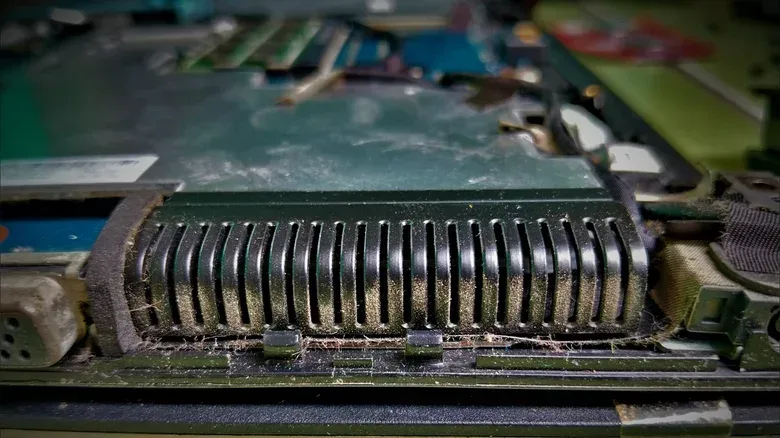
A gaming laptop has the unenviable job of moving heat out of a very small space while its CPU and GPU are working hard. The fan, vents and heat sink make that possible—but they also make excellent dust traps. Over time, buildup around those parts can choke the path air is supposed to take through the chassis.
The practical consequence is not merely a grubby vent. Restricted airflow can contribute to thermal throttling, the protective behavior in which a processor reduces performance to help control its temperature. For PC players, that can mean a machine that is trying to preserve itself rather than delivering all the performance its hardware could otherwise offer.
The good news is that routine cleaning does not automatically mean stripping a laptop down to its circuit boards. In many cases, a careful external clean is the sensible first move. The important word is careful: too much air pressure, a fan spun recklessly by a sustained blast, or the wrong cleaning product can turn a straightforward maintenance task into an avoidable repair problem.
Here is a sensible escalation path: begin at the vents, use tools suited to electronics, and only consider opening the chassis when the obstruction appears to be deeper inside—and when the service documentation for the exact model shows that doing so does not involve a risky cooling-system disassembly.
Why a little dust can affect a lot of gaming performance
Laptop cooling is a route, not a single component. The machine pulls air in through intake vents, moves it with one or more fans, sends it across a heat sink or vapor chamber arrangement, and pushes warmed air out through exhaust vents. Dust can interrupt that route at several points.
It may settle at an easily visible grille. It may accumulate on a fan. Or it may collect in the closely spaced fins where air is forced through the heat sink before reaching an exhaust. That last location matters because a fan can look relatively clean while the system remains obstructed farther along the airflow path.
Thermal throttling is worth separating from a fault diagnosis. It is a temperature-control measure: the processor lowers its own performance to keep temperatures in check. Dust is not the only possible reason a laptop may run hot or throttle, but blocked airflow is a straightforward maintenance issue worth addressing before assuming a more complex hardware cause.
Maintenance intervals depend on the environment. Lenovo recommends fan cleaning every three to six months, with the condition of the surrounding space helping determine where within that range a laptop belongs. A system used in a dustier area may need attention sooner than one kept in a cleaner setup.
Related coverage includes How to Clean a Laptop Fan Without Causing Damage.
For an older machine being repurposed for a permanent task, airflow upkeep is especially relevant. An old laptop used as a home assistant hub may spend long periods running, so its vents should not be treated as an afterthought.
The low-risk cleaning routine: start outside the laptop
Before handling vents or tools, shut the laptop down completely. Disconnect its power cable, peripherals and other attached cables. If the laptop has an external battery that is designed to be easily removed, remove it as well.
Next, identify where air enters and exits. Check the base and sides, then look around the display hinge. Not every laptop presents each vent as an obvious, front-facing grille; some exhaust openings are positioned near the hinge. Identifying both intake and exhaust locations helps avoid cleaning only the most visible portion of the cooling route.
Use the right tools, and keep them at the surface
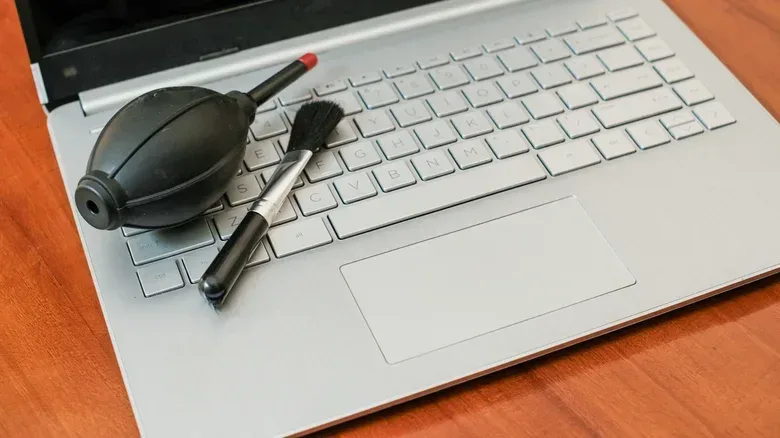
Clear accessible loose dust from the exterior with a lint-free cloth or an ESD-safe brush. “ESD-safe” refers to tools intended to reduce electrostatic-discharge risk around electronic components. Do not push implements far into a grille in an attempt to excavate it. The goal at this point is to remove what is reachable without poking into the cooling assembly.
Electronics-safe compressed air can then be used through the vents. Keep the can upright and use short bursts, not a prolonged blast. Keep the nozzle some distance from the vent; there is no universal correct nozzle distance because laptop vent and fan layouts vary by model.
A high-pressure air compressor is not a substitute for a controlled electronics-cleaning approach. Excessive pressure can damage fan blades. Likewise, continuous blasting can force a fan to spin much faster than intended. Short pulses reduce that risk while still helping dislodge loose debris.
- Power off the laptop and unplug everything connected to it.
- Remove an easily removable external battery, if present.
- Locate intake and exhaust vents on the bottom, sides and hinge area.
- Wipe or brush loose external dust with a lint-free cloth or ESD-safe brush.
- Use brief bursts of electronics-safe compressed air while holding the can upright.
- Do not insert tools deep into the grille, use extreme pressure or repeatedly blast the fan.
If compressed air is not the preferred option, a hand-powered bulb blower, non-static cloth or ESD-safe brush can be appropriate alternatives for the accessible areas. Each is a better fit for dust removal than improvised chemical treatment.
What not to put in a laptop vent
Lubricants are not a general dust-removal solution. Standard WD-40 Multi-Use Product is made to lubricate, displace moisture and help protect against corrosion. Those functions do not solve a blocked airflow path inside a laptop. Do not treat a noisy, hot or dusty machine as though its fan simply needs a spray lubricant through the vent.
The same principle applies more broadly: a vent is not an invitation to send products, tools or heavy airflow into unknown areas of the chassis. The external pass should be conservative. If it fixes the visible dust problem, that is an excellent outcome. If it does not, the next decision is not “apply more force”; it is whether the laptop’s specific internal design makes a deeper clean reasonably accessible.
When opening the bottom cover is reasonable—and when it is not
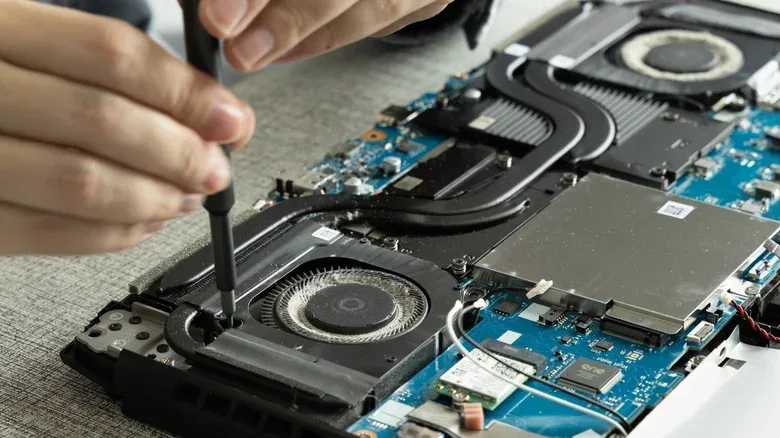
If airflow still appears blocked after an exterior clean, or dust is visibly packed inside, removing the bottom panel can offer better access. Yet this is where a generic guide becomes much less useful. Different laptops put very different amounts of hardware between the bottom cover and the fan.
Some machines expose a fan that can be removed independently. Others use two fans alongside a shared heat sink or vapor chamber. A heat sink is the structure that transfers heat away from chips and into fins that airflow can cool. A vapor chamber is another cooling component that can be part of the same broader thermal assembly. In either arrangement, cleaning only the most convenient fan may achieve very little if the companion fan, exhaust path or heat-sink fins remain clogged.
That is why the exact service manual matters. It tells an owner whether the bottom cover reveals the target component or merely begins a much larger disassembly. It can also identify connectors, screw types and warnings that are easy to miss when following broad laptop-cleaning advice.
Alienware m16 examples show how wide the gap can be
On Dell’s Alienware m16 R2, the left and right fans have separate connections. Removing the complete cooling assembly involves six standard screws and six captive heat-sink screws. Dell describes that procedure as intended for authorized service technicians, an important warning for anyone who assumes that visible screws mean the cooling system is ready for a casual home teardown.
The Alienware m16 R1 is a more dramatic example of the same principle. Accessing its fan and heat-sink assembly requires removal of SSDs, the wireless card, top heat sink, a small fan, rear I/O cover and battery, followed by nine system-board removal steps. The cooling assembly itself uses eight captive screws. This is not routine vent maintenance with an extra screwdriver step; it is a substantially involved component-access procedure.
These examples do not mean every gaming laptop is difficult to service. They show why the model number is the boundary between a useful plan and guesswork. A laptop owner should look up documentation for the precise model before removing a panel, then stop if the procedure leads toward the main cooling assembly without clear preparation for that job.
The thermal-material boundary: know when to stop
The key dividing line is the cooling assembly. If reaching the fan requires lifting a heat sink or vapor chamber away from the CPU or GPU, the task may involve thermal interface material. This is the material between a chip and its cooler that helps heat transfer from one to the other. Depending on the laptop, it can include thermal paste, thermal pads or other materials.
Once that interface is disturbed, the project is no longer only about removing dust. It may require handling or replacing thermal material properly before the system is put back together. That is a separate maintenance operation with model-specific requirements.
Dell’s caution regarding its Element 31 thermal material underlines why generic cleaning habits can become hazardous here. The company warns against using an alcohol wipe on it: doing so can dissolve the grease into conductive metal particles, potentially leading to an electrical short. Even a substance commonly associated with electronics cleaning is therefore not universally safe when it contacts a particular thermal material.
If getting to the fan means separating the CPU or GPU from its heat sink or vapor chamber, pause and treat it as thermal-service work rather than ordinary dusting.
That pause is not a defeat. It is sound maintenance judgment. A clean vent and a working laptop are better outcomes than an aggressively pursued deep clean that turns into damaged fan blades, misplaced screws, a disconnected component or a disturbed thermal interface.
A practical decision checklist for PC players
- Start with symptoms you can see: check whether dust is present at vents and whether airflow appears restricted.
- Perform the powered-down exterior clean: use a lint-free cloth, ESD-safe brush, bulb blower or brief compressed-air bursts as appropriate.
- Inspect the result: if the obvious loose dust has cleared, reassembly may not be necessary because there was no disassembly.
- Check the exact model’s service manual before opening anything: do not rely on another laptop’s layout, even within the same brand or product family.
- Map the path to the fans: if a panel provides direct access, the job may remain manageable; if it demands removal of storage, battery, board-level components or the thermal assembly, recognize the increase in complexity.
- Do not disturb thermal materials casually: model-specific warnings and materials can make ordinary-looking cleaning steps unsafe.
For most people, the best first response to a dusty gaming laptop is uncomplicated: power down, disconnect it, identify every vent and carefully remove loose dust without forcing the fan or flooding the chassis with pressure. Only deeper, persistent blockage justifies considering an internal clean—and only the machine’s own service procedure can say whether that is a simple next step or technician territory.