An old MacBook does not have to remain a dusty emergency browser or a drawer-bound relic with a dramatic sticker collection. If it still runs reliably, it can take on a useful second job as a home NAS: a network-attached storage server that makes files, backups, or a personal media library available to other devices on the same network.
That description sounds more intimidating than it needs to be. A NAS is, at its simplest, storage connected to a network rather than directly to one computer. A retired MacBook can provide that connection, while its screen, keyboard, and battery make the initial setup considerably less fussy than starting with a purpose-built box. The right approach depends on the job. For straightforward shared folders, macOS already includes what is needed. For films, music, and shows, media-server software can organize a library for streaming. For people who want a more configurable, browser-managed server, Linux opens a different and more demanding path.
There is one important framing point before any settings are changed: an old laptop is not automatically a safe place for the only copy of important data. Older Macs can have limited internal capacity, and all drives can fail. External storage should therefore be part of the plan, particularly where backups or irreplaceable files are involved.
Start by choosing the MacBook’s actual role
“NAS” covers several distinct uses, and picking one early prevents an old MacBook from being loaded with services it does not need. The three most practical roles are file sharing, media serving, and storage or backup.
- File sharing: A shared location for documents, downloads, photos, projects, or other files that household devices need to reach.
- Media library: A central place for video, music, or other media, often presented through software built for browsing and playback.
- Storage and backup: Network-accessible capacity for keeping copies of files and organizing longer-term storage.
These roles can overlap, but their priorities differ. A file-share setup mainly needs clear folder permissions and dependable network access. A media machine benefits from a stable connection and enough performance for the way media is delivered. A backup-focused setup needs careful storage planning because a shared drive is valuable only if it does not become a single point of failure.
That distinction also helps set sensible expectations for older hardware. An aging MacBook can be perfectly adequate as a place to keep and share files without being equally suited to demanding video conversion. In other words, the machine may be slow by current laptop standards while still being useful as a quiet, always-available network utility.
Prepare the machine for a long-running job
A server is expected to remain reachable, so preparation matters more than it would for a laptop used occasionally on the sofa. A clean beginning is sensible: erase the Mac, reset it to factory settings, and update it to the most stable version of macOS that the hardware can run. This is less about chasing novelty than establishing a predictable base for whichever route follows.
Use a wired Ethernet connection to the router where possible. Wi-Fi can be convenient, but Ethernet is presented here as the faster and more stable option. That matters for large file transfers and for media playback, and it removes one more variable when another device cannot find the server.
The MacBook must also stay awake. A computer that sleeps is not much of a server; it is more of a treasure chest whose map disappears every few minutes. The free Amphetamine app can be used to prevent sleep. The practical aim is simple: devices should be able to connect when they need to, without someone opening the lid or nudging the trackpad.
Some Intel Macs with HDMI output may also benefit from a headless HDMI plug. This small adapter makes the computer believe that a display is attached, which can activate the GPU for better video performance. It is not a universal requirement for basic shared folders. Its relevance is strongest when the MacBook is being used without a display and is expected to handle video duties.
The simple route: macOS file sharing
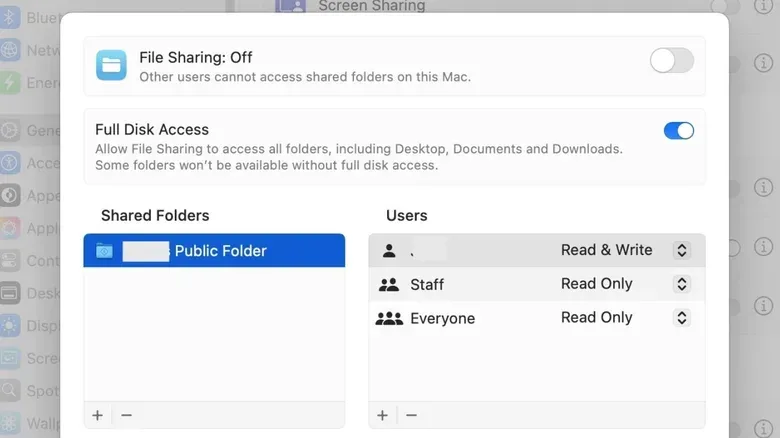
For many homes, the built-in macOS option is the whole project. In macOS Sharing settings, enable File Sharing and choose the folders to make available. This turns the Mac into a destination that other devices on the local network can browse.
The key decision is not merely which folders are visible, but who can use them and what each person can do. macOS allows user access privileges to be assigned. That means the server can be arranged around real needs: a folder intended for everyone, another intended for a specific user, or a place where some people can view files while others can make changes. Taking a moment to set these deliberately is more useful than sharing an entire drive simply because it is easy.
The setup is not limited to Apple hardware. Shared files can be made available to Windows and Android devices as well. An external drive can be shared, which is especially helpful given the storage limitations and age-related drive concerns that often apply to a repurposed MacBook. Rather than treating the laptop’s internal drive as the central archive, the Mac can act as the network-facing host for external storage.
Connections use the IP address provided by the Mac. In Finder, users can navigate to the shared files once connected. An IP address is a network identifier: in this case, it tells another device which machine on the home network is offering the folders. It is the essential address to note during setup, particularly if the server will run without a monitor after the initial configuration.
This route has an obvious advantage: it keeps macOS in place and avoids replacing the operating system. For a household that mainly wants an accessible folder from multiple computers and devices, it is the least disruptive answer and the one with the fewest moving parts.
Using the MacBook as a personal media server
File sharing exposes files. A media server goes further by organizing them into a viewing interface designed for playback. Older Macs can run Plex, Kodi, and Infuse. Plex is a prominent option because it combines a relatively approachable setup with a polished interface for browsing a library.
Plex requires an account and Plex Media Server. Its setup wizard is used to point the server toward the locations where media is stored across the network. Plex can then retrieve relevant artwork and information and display the collection in a browser-style interface built around the user’s own material.
For a gaming room, living-room screen, or a household with files spread across multiple drives, that organization can be the bigger benefit than raw storage itself. A library is easier to use when people can browse titles instead of opening a generic folder and trying to remember whether the file they want lives in “Media_Final_Actually_Final.” Home streaming is free, while remote streaming is available for a fee.
There is a hardware caveat worth understanding: transcoding. This is the process of converting video into a different format or quality while it is being streamed, often because the receiving device cannot play the original file as-is or because a different bitrate is required. It can be computationally demanding. Older Macs with limited RAM may stutter when transcoding 4K video.
For that reason, setting Plex to stream in Original quality can be the more realistic choice on modest hardware. In practical terms, this asks the server to send the media without requiring it to work through an intensive conversion step. It will not turn every combination of file and playback device into a perfect match, but it directly addresses the reported limitation: avoid making an old system transcode demanding 4K footage when it does not have the memory headroom for it.
Users looking at Apple-adjacent home setups may also find our look at iPhone settings that make Google Maps easier to use in Apple CarPlay useful for another example of tailoring devices to the screens and systems already at home.
The advanced route: replace macOS with Linux
For people who want more than a shared-folder machine, an old Mac can be converted into a more sophisticated NAS by using Linux and open-source software. This is not simply an alternate app installation. Replacing macOS with Linux changes the character of the machine: it becomes a headless system, meaning it runs without a directly attached display and is managed remotely through a web browser.
That model can be appealing because it supports web-based dashboards and a broader server-oriented toolset. It also asks more of the user and of the hardware. Older Macs with low memory may struggle, so installing a heavyweight stack merely because it has a handsome dashboard is not automatically an upgrade.
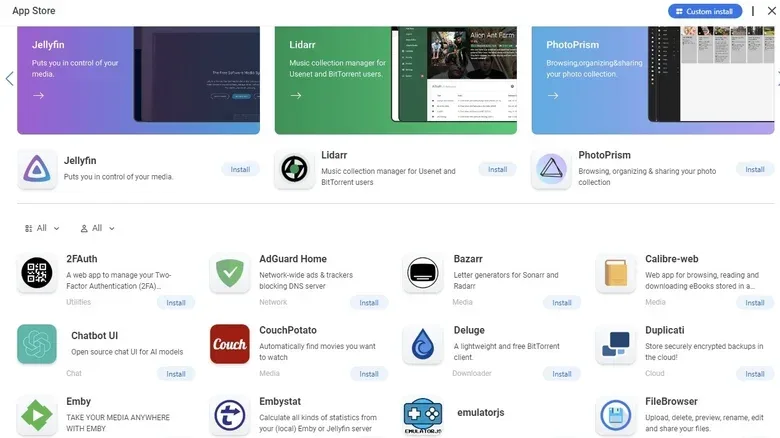
One accessible direction for Intel and Apple Silicon Macs is Debian combined with CasaOS or Umbrel. Debian is the underlying Linux operating system in this approach, while CasaOS and Umbrel can add resources and web-oriented management layers intended to make the setup more approachable. M-series Macs can also run Debian in a virtual machine rather than fully replacing macOS.
A virtual machine is software that lets one operating system run inside another. That option preserves macOS while allowing Debian to be used, but it is a different proposition from giving the Mac entirely to a dedicated NAS role. The supplied options make clear that people should weigh convenience against purpose: preserving macOS may suit experimentation, while replacing it aligns with a permanent headless server setup.
Users comfortable at the command line can run Docker directly on Debian to install and manage applications. Docker is a method of deploying applications in isolated containers, rather than treating every service as a completely manual, system-wide installation. The payoff is potentially more effective application management; the trade-off is that it assumes comfort with command-line administration.
Apps that broaden a Linux NAS
A Linux-based setup can add services beyond plain file storage. Nextcloud can turn the Mac into an online file-storage system. Jellyfin is a free, open-source alternative to Plex. These are meaningful options, but they should follow rather than precede the basic decisions about storage, networking, and whether the old hardware has sufficient memory.
The central choice is therefore not “macOS or Linux” in the abstract. It is whether the goal is simple reliable sharing, polished personal-media browsing, or a more customizable browser-managed server. macOS file sharing is the practical low-friction route. Plex, Kodi, or Infuse add a media-focused layer. Debian with tools such as CasaOS, Umbrel, Docker, Nextcloud, or Jellyfin can extend the project for people ready to administer it.
What a sensible old-Mac NAS setup prioritizes
The most useful version of this project is likely to be restrained. Connect the MacBook to the router by Ethernet, ensure it will not sleep, use external drives for the data that matters, and choose the software layer that matches the intended use. Do not assume a worn laptop must handle every server task at once, and do not mistake a shared drive for a complete backup strategy simply because it lives on the network.
For basic access to files across Mac, Windows, and Android devices, the built-in sharing controls may be all that is needed. For a personal video library, a media server makes the collection easier to browse, while Original quality is a practical setting when older hardware would struggle with 4K transcoding. For the technically curious, Linux can give the MacBook a dedicated second life with remotely managed tools—provided the trade-off of leaving macOS behind is acceptable.
That is a genuinely solid encore for an aging laptop: not a performance miracle, but a focused home utility that can keep useful storage and media accessible long after it stopped being anyone’s daily computer.