The Legend of Zelda: Skyward Sword (Wii, [SOUE01]) — Complete Campaign Walkthrough
A start-to-finish walkthrough for the original Nintendo Wii release SOUE01/RVL-SOUE. Follow the corrected story route from Skyloft and the Sealed Grounds through Faron, Eldin, Lanayru, all required Silent Realms, the seven main dungeons, the Imprisoned encounters, the Song of the Hero, Sky Keep, Ghirahim, Demise, and the ending. Optional collectibles and postgame challenges are separated from mandatory progression.

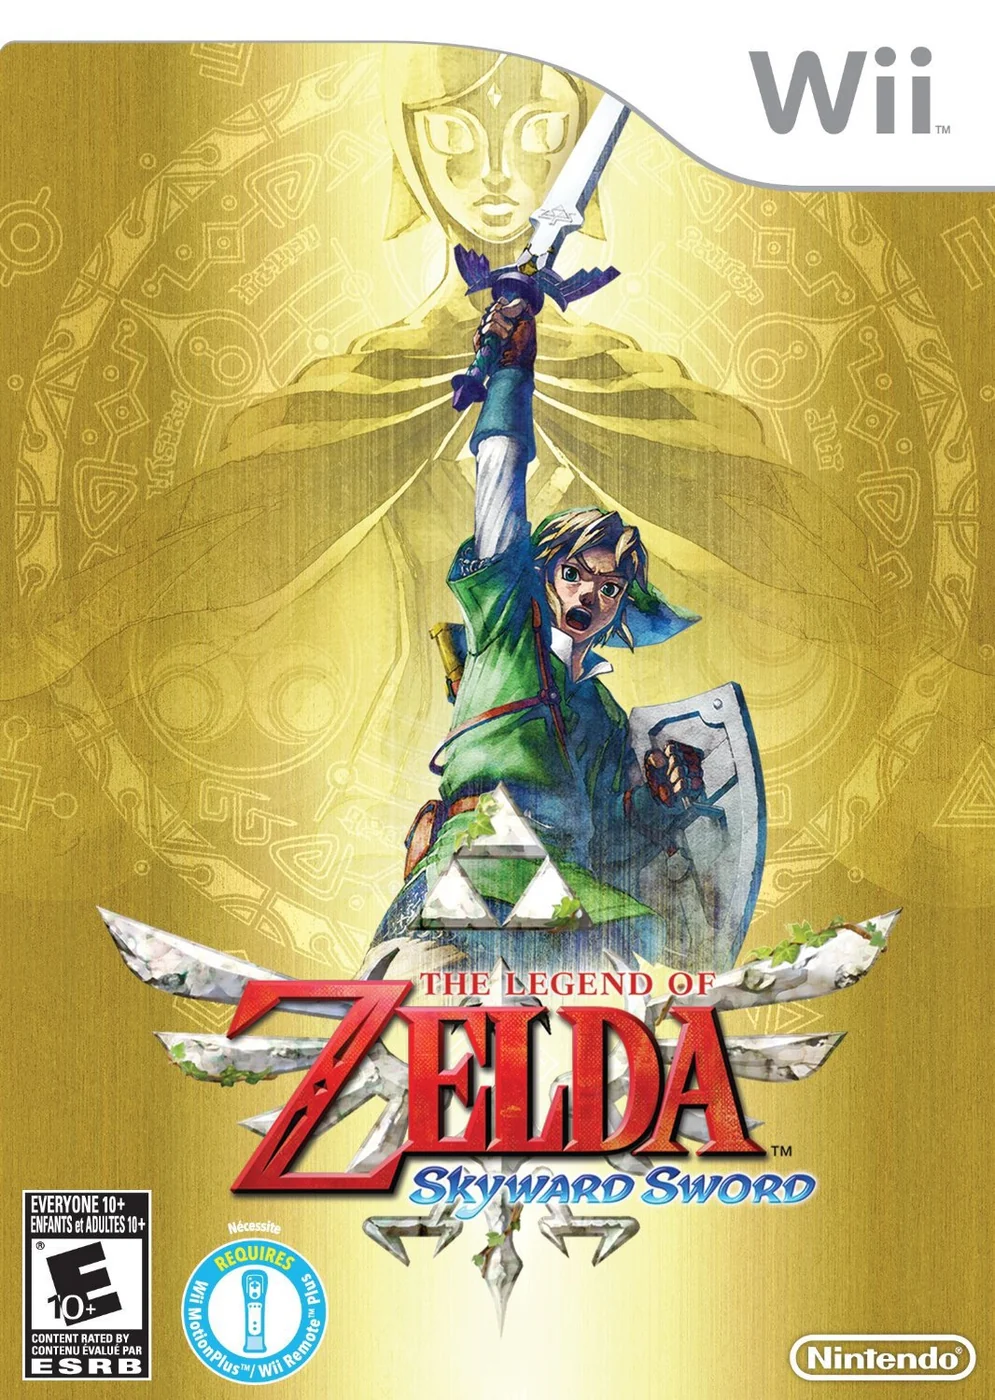
Find a copy
The Legend of Zelda: Skyward Sword Wii
We may earn a commission if you buy through these links, at no extra cost to you. As an Amazon Associate I earn from qualifying purchases.
Opens retailer search results. Check the model, edition, seller, availability and current price before buying.
Before you begin
This walkthrough is for the original Nintendo Wii release identified as SOUE01/RVL-SOUE, using Wii MotionPlus or Wii Remote Plus with a Nunchuk.
It does not use Nintendo Switch HD controls, quality-of-life features, or edition-specific route assumptions.
Follow the chapters in the corrected order. The route includes the opening Sealed Grounds and Faron objectives, every required Silent Realm, each dungeon and major boss, the Imprisoned encounters at their story windows, the Song of the Hero sequence, Sky Keep, and the final battle.
Optional collectibles, Gratitude Crystal rewards, Goddess Cubes, Heart Pieces, the Lightning Round, and the Hylian Shield are marked separately so they cannot be mistaken for campaign requirements.
Save at Bird Statues before major transitions and keep a separate normal-mode save before beginning Hero Mode.
Set yourself up for the run
Verify you have a Wii Remote with Wii MotionPlus functionality (either the MotionPlus accessory attached or a Wii Remote Plus) and a working Nunchuk.
The original game requires MotionPlus/Nunchuk to play.
Calibrate the Wii Remote and MotionPlus before each session.
Recalibrate if motions feel laggy, and keep the sensor bar visible and unobstructed.
Clear a safe play area with room to swing the Wii Remote freely.
Secure wrist strap and maintain a stable stance for precise sword strokes.
Familiarize yourself with basic inputs: sword swings via MotionPlus, A button for dash/interaction, Z on the Nunchuk to lock on (Z-targeting), and item-swapping gestures described in the manual and Iwata Asks documentation.
Stock up on rupees and basic supplies early (buy arrows, bombs and bottles when available).
Use early Gratitude Crystal and side-quest rewards to expand wallet and pouch capacity.
Keep a notepad or checklist of Goddess Cubes, Gratitude Crystals and Heart Pieces as you explore Skyloft and surface regions; the Silent Realms and some late-game content require prior completion of specific quests.
If using an older Wii with drifty sensors, test motion responsiveness in a safe area and re-center the remote before boss fights or delicate platforming sequences.

Controls, MotionPlus Calibration and Save Basics
This chapter applies to the original Wii release of The Legend of Zelda: Skyward Sword, including the North American RVL-SOUE edition. It uses a Wii Remote Plus, or an original Wii Remote with the Wii MotionPlus accessory attached, together with a Nunchuk. The Wii version does not provide the Nintendo Switch HD edition’s button-only sword controls. Establish safe hardware setup, learn the motion commands in a low-risk area, and create a reliable Bird Statue save routine before attempting difficult combat.
1. Assemble the Wii controller safely
Use a Wii Remote Plus or connect a genuine Wii MotionPlus accessory to an original Wii Remote. Connect the Nunchuk to the bottom of the MotionPlus-equipped remote before launching the game. The game is designed around this combination; a standard Wii Remote without MotionPlus is not an equivalent substitute.
Put the Wii Remote inside its protective jacket when using the separate MotionPlus accessory, attach the wrist strap, and tighten the strap lock around your wrist. Leave clear space around your arms and keep at least a comfortable distance from the television. Sword swings, shield bashes, item aiming, and Loftwing movements all involve physical motion, so do not begin a boss attempt with a loose strap, low batteries, or a connector that can shift during play.
- Wii Remote Plus or Wii Remote with Wii MotionPlus attached
- Nunchuk connected firmly
- Wrist strap and Wii Remote jacket secured
- Fresh or fully charged batteries
- Clear space for motion controls
2. Recalibrate MotionPlus before relying on sword accuracy
If Link’s sword direction, item pointer, or other motion response begins drifting, pause in a safe place. While the game is running, place the Wii Remote flat on a level horizontal surface with its buttons facing downward. Leave it still for about 10 seconds, then pick it up and test the response. This is Nintendo’s recalibration procedure for Wii Remote Plus and also applies to a Wii Remote using the separate MotionPlus attachment.
Recalibrate when several swings register at the wrong angle, the pointer moves without matching your hand, or the sword no longer seems aligned with the remote. Recalibrate before a dungeon boss rather than trying to compensate for bad tracking in the arena. If the problem returns immediately, reseat the MotionPlus accessory, check the batteries, inspect the Nunchuk connection, and test the remote in a safe area. Recalibration cannot repair a failing accessory or damaged remote.
- Remote responds correctly after lying still for 10 seconds
- Sword direction matches the physical remote movement
- Pointer remains stable when the remote is held still
- Hardware connections are secure before a boss attempt
3. Practice sword direction and the stop technique
Swing the Wii Remote in the direction you want Link’s sword to travel. Horizontal, vertical, diagonal, and thrusting motions are distinct. Enemies often guard one side of their body, so watch the guard and strike through the open side instead of repeatedly shaking the remote. Use compact wrist movements and return the remote to a neutral position before choosing the next attack.
MotionPlus also lets you stop the sword during a motion. Begin the intended swing, then halt the Wii Remote instead of completing a large follow-through. This can help you hold the blade in position, change the rhythm of an attack, or avoid committing to an uncontrolled second swing. It is not a separate button command; the result depends on deliberately stopping the remote and keeping your movement controlled.
Hold Z on the Nunchuk near an enemy, character, or object of interest to target it and center the camera behind Link. In a one-on-one fight, Z-targeting keeps Link facing the opponent and makes guarded openings easier to read. Release Z when you need to reposition freely or inspect a wider area.
- Perform a controlled horizontal strike
- Perform a vertical and diagonal strike
- Practice a thrust without a wide arm swing
- Target an enemy with Z and release Z to regain a wider view
- Practice beginning and stopping a sword motion deliberately
4. Combine movement, dash, camera and shield controls
Move Link with the Nunchuk Control Stick. While moving, hold A to dash. Dash is used to run up steep slopes and ledges and to cover ground quickly. Link automatically jumps across small gaps and toward certain edges or obstacles, so do not look for a separate jump button. While dashing, shake the Nunchuk forward to perform a forward roll; use this in open space rather than beside a drop.
Shake the Nunchuk forward while not dashing to raise the equipped shield. Shake it again just before an incoming attack lands to perform a Shield Bash and deflect the blow. A mistimed bash can damage the shield or leave Link exposed, so practice against slow enemies before using it on a boss.
Press and hold C to look around in first-person view, then point the Wii Remote to inspect the surroundings. Use C when you need to check a ledge, overhead route, or nearby object without changing Link’s position. Z is the targeting and camera-centering command; C is the deliberate look-around command. Press A near a prompt to talk, examine, pick up, put away, or perform another context-sensitive action.
- Hold A while moving to dash
- Shake the Nunchuk while dashing to roll
- Raise the shield and practice a timed Shield Bash
- Hold C and point the Wii Remote to look around
- Use A when an interaction prompt appears
5. Select items without interrupting the action
Hold B to open the adventure-item selection display. Move the Wii Remote toward the desired item without needing to point at the television, then release B to equip it. Tap B after an item is equipped to draw or use that selected item, depending on the item and situation. This is the fastest way to prepare the Beetle, bombs, slingshot, bow, or another tool without opening a separate inventory screen.
Use the Minus Button to equip or manage pouch items such as potions and medals. Put a recovery potion in an accessible pouch slot before entering an unfamiliar dungeon section or boss room. Do not spend healing automatically after every minor hit; preserve it for a long route, a failed defensive sequence, or a boss attempt where no nearby recovery is available.
The Wii Remote D-pad provides additional shortcuts. Down calls Fi for guidance. Plus opens the map, and the other commands shown by the on-screen interface handle gear or pouch access. If you forget a command, press 2 to view the game’s help instructions for the current situation.
- Hold B and select a specific adventure item
- Release B to equip the selected item
- Use Minus to manage pouch equipment
- Carry at least one recovery item before a difficult section
- Use Down to call Fi when the objective is unclear
6. Save at Bird Statues and recover methodically
Bird Statues are the original Wii edition’s manual save points. Approach a Bird Statue and examine it, then choose the save option from the menu. Save after entering a new region, reaching a useful shortcut, obtaining an important item, or before a difficult combat sequence. The game manual identifies Bird Statues as the places where progress is saved.
Goddess Cubes are not save points. Activate a Goddess Cube by charging the sword and releasing a Skyward Strike against it; the linked Goddess Chest then appears in the sky. Do not assume that activating a cube protects your progress. Visit a Bird Statue and use its save menu when you want the action recorded.
The Wii version should be treated as a manual-save game. Before a boss, refill health if possible, arrange the pouch, confirm the selected adventure item, and save at the nearest Bird Statue. After a death, reload the most recent manual save rather than assuming every action since the last statue was preserved. If a fight felt inaccurate, recalibrate before retrying. If the problem was resource loss rather than controls, repeat the approach conservatively and save again before entering the arena.
- Save through the Examine menu at a Bird Statue
- Do not treat Goddess Cubes as save points
- Save after major items, shortcuts, and regional transitions
- Check health, pouch items, batteries, and calibration before a boss
- After death, reload from the most recent deliberate save
Before you move on
- You can perform controlled horizontal, vertical, diagonal, and thrusting sword attacks and deliberately stop a sword motion.
- You can hold Z to target an enemy, hold C to inspect the surroundings, use A to interact or dash while moving, and perform a timed Nunchuk Shield Bash.
- You can hold B, select an adventure item by moving the Wii Remote, and release B to equip it.
- You have recalibrated the Wii Remote by placing it buttons-down on a flat surface for about 10 seconds.
- You have examined a Bird Statue, used its save menu, and confirmed that Goddess Cubes are progression objects rather than save points.
Skyloft: Starting Village, Loftwing and Early Quests
Complete the original Wii opening in Skyloft: help Fledge and Instructor Horwell, meet Zelda and Gaepora, borrow the practice sword, rescue the Crimson Loftwing, win the Wing Ceremony, obtain the Sailcloth and Goddess Sword, receive the Adventure Pouch and Wooden Shield, collect the first two bottles, and descend to the Sealed Temple. Pumpkin Landing and the first Lumpy Pumpkin chore are optional. This chapter ends after Link speaks with the Old Woman in the Sealed Temple; the next chapter begins with the Sealed Grounds and Faron Woods route.
1. Finish the first Skyloft errands
After the opening scene, open the cabinet in Link’s room for five rupees, then leave the room and speak with Fledge near the kitchen. Pick up the barrel and carry it toward the older woman in the kitchen. Set it down before the green Stamina Gauge empties; if the gauge is nearly depleted, stop and wait for it to refill. Return to Fledge after delivering the barrel to receive 20 rupees.
Go outside through the large double doors and follow the route toward Instructor Horwell. Use the wooden boxes and ledges to reach him, then cross the gap with the automatic jump. Horwell tells Link that Mia has climbed onto the academy roof. Follow the ledge, drop onto the awning when Link’s shadow is over it, jump across to the next awning, and climb the vines. Push the crate into position, climb onto the roof, pick up Mia, and return to Horwell near the bell to complete the rescue.
Continue north to the Goddess Statue and speak with Zelda and Headmaster Gaepora. After the conversation, go to the south end of Skyloft and approach the stone tower where Groose and his friends have been causing trouble. The story then directs Link to the Sparring Hall north of the academy.
- Collect the five rupees from Link’s cabinet.
- Deliver the barrel to the kitchen and collect Fledge’s 20-rupee reward.
- Return Mia to Instructor Horwell.
- Speak with Zelda and Headmaster Gaepora at the Goddess Statue.
2. Borrow the practice sword and rescue the Crimson Loftwing
Enter the Sparring Hall and speak with Pipit and Fledge. Go through the door behind them and speak with Eagus, the Knight Commander. Take the practice sword from the rack at the back of the room. Eagus then demonstrates the basic sword directions. Cut each practice log across its marked weak point: use the matching directional slash for the shaped openings and a forward thrust for the log with the circular hole. The hanging log is for dodging practice and cannot be destroyed.
After the logs, follow Eagus’s instructions for the spin attack and Fatal Blow. These tutorials are required before leaving the hall. When the scene outside begins, follow the map marker toward the Crimson Loftwing. The path crosses the eastern waterway and enters Waterfall Cave. Defeat or avoid the Keese and Green Chuchus, dash across the gaps, and climb the vines near the pond when necessary. A Bird Statue waits just outside the cave exit, so activate it before continuing.
Follow the path beyond the Bird Statue until the Crimson Loftwing is shown behind heavy wooden boards. The boards are too thick for the sword. Move the nearby barrels if they block your position, then cut every rope attached to the boards with the correct sword direction. Once all of the ropes are severed, the Loftwing is free and the game begins the flying tutorial.
- Take the practice sword from Eagus.
- Break the practice logs, complete the spin attack, and perform the Fatal Blow.
- Reach the Bird Statue outside Waterfall Cave.
- Cut all ropes holding the Crimson Loftwing’s boards in place.
3. Complete the flight tutorial and Wing Ceremony
During the initial flight lesson, follow Zelda’s instructions for steering, changing direction, gaining altitude, diving, slowing down, charging, and jumping from the Loftwing. The original Wii release requires Wii MotionPlus through either a Wii Remote Plus or a Wii Remote with the MotionPlus accessory. Keep the sensor bar unobstructed and hold the remote in a neutral position when the game asks for it. If the bird drifts or the remote does not respond consistently, pause the attempt and recalibrate before starting the ceremony again.
For the Wing Ceremony, dive from the starting ledge and whistle for the Crimson Loftwing. Chase the golden Loftwing carrying the Bird Statuette. Stay close enough to charge when Link is aligned behind it, then use the indicated grab action when the target is within range. Groose’s interference causes the chase to restart with thrown eggs in the route, so keep moving rather than hovering beside the target. Catch the Bird Statuette to win.
After the race, Zelda gives Link the Sailcloth. For the landing demonstration, position Link over the marked circle while falling and deploy the Sailcloth when prompted. If Link lands outside the circle, the demonstration can be retried. The Sailcloth is required for safe landings on the surface.
- Complete the Loftwing flight tutorial.
- Catch the Bird Statuette during the Wing Ceremony.
- Receive the Sailcloth from Zelda.
- Land inside the marked circle during the demonstration.
4. Obtain the Goddess Sword and essential equipment
After the ceremony, return to Link’s room and sleep when the story directs you to do so. Leave the academy and follow the floating figure toward the Goddess Statue. The route passes a Remlit, Keese, Green Chuchus, a steep slope, ledges, and vines. Enter the chamber inside the statue and approach the sword pedestal. Follow the on-screen motion instructions to draw the Goddess Sword, then hold the Wii Remote upright and still to charge it.
Fi gives Link the Emerald Tablet during the following scene. Stand before the crest behind Fi, raise the sword until it charges, and release the Skyward Strike into the crest. Examine the newly opened pedestal and place the Emerald Tablet inside. This creates the green column of light used to reach the surface.
Leave the chamber and speak with Fledge in the academy hallway to receive the Adventure Pouch. Go through the lower double doors and speak with Professor Owlan to receive the free Wooden Shield. Equip it immediately from the pouch. The shield can block early attacks, but it has durability and can be damaged by strong impacts or fire.
Enter the Bazaar and speak with Luv at the Potion Shop. She gives Link the first Empty Bottle. You may buy or fill a Red Potion, but no potion purchase is mandatory for the story. Peatrice’s Item Check counter can store pouch items if the pouch becomes full. In the original Wii interface, press 1 to adjust the display style if the on-screen Wii Remote diagram is distracting; this changes the interface presentation, not the control scheme.
- Draw the Goddess Sword.
- Place the Emerald Tablet in the Goddess Statue pedestal.
- Receive the Adventure Pouch from Fledge.
- Receive and equip the Wooden Shield from Professor Owlan.
- Collect the first Empty Bottle from Luv.
5. Optional preparation at Pumpkin Landing
Before descending, you may fly to Pumpkin Landing, the pumpkin-shaped island east of the green light. Land at the island, enter the Lumpy Pumpkin, and roll into the railing nearest the chandelier until it breaks. Go downstairs and collect the Piece of Heart from the fallen chandelier. This is optional and does not affect the Wing Ceremony, the Goddess Sword, or the surface route.
Speak with Pumm behind the counter after breaking the chandelier. His first task is to deliver hot pumpkin soup to Eagus in the Sparring Hall. Use an Empty Bottle to carry the soup, return to Skyloft, and deliver it before it cools. This chore is optional and can be postponed. The later Kukiel and Batreaux Gratitude Crystal quest is not available as an opening task, so do not wait for it or treat it as a prerequisite here.
You can also use this time to check the Bazaar, repair the Wooden Shield through Gondo if necessary, and buy a Red Potion. Keep at least one usable bottle available if you intend to complete Pumm’s chore. Goddess Cubes and Gratitude Crystals are optional collection goals and do not need to be pursued before the first descent.
- Optionally collect the Lumpy Pumpkin Piece of Heart.
- Optionally deliver hot pumpkin soup to Eagus.
- Check the Wooden Shield and buy a potion only if desired.
- Do not delay the story for Kukiel, Batreaux, Goddess Cubes, or Gratitude Crystals.
6. Descend to the Sealed Temple
When the Goddess Sword, Adventure Pouch, Wooden Shield, and first Empty Bottle are ready, travel south toward the tower where Groose confronted Link. Dash from the ledge and whistle for the Crimson Loftwing. Fly to the green column of light and dive through the opening. The first landing area is the Sealed Grounds.
Use the Sailcloth during the fall to land safely on the upper ledge. Follow the path and defeat the Deku Babas by striking toward the side of the mouth that is open. Continue until the route descends into the large circular pit. Jump down through the pit and use the Sailcloth to land at the bottom rather than taking unnecessary damage from the drop.
Approach the central sealing stone and perform a Skyward Strike. Raise the Goddess Sword, hold it still until it charges, and swing toward the stone. Air vents then open around the pit. Walk into one of the vents to be lifted back to the upper level. Fi teaches the dowsing function here; select Zelda as the target and follow the indicator toward the sealed door.
The door opens as Link approaches. Enter the Sealed Temple and activate the Bird Statue on the left to save. On the east side of the stairs, open the chest to receive the second Empty Bottle containing a Revitalizing Potion. If you want an emergency revive, break the jars on the opposite side and capture the fairy with an empty bottle after using or storing another pouch item.
Climb the stairs and speak with the Old Woman. She explains that Zelda went toward Faron Woods and allows Link to place a beacon on the map. Place it at the marked location if desired, then leave through the eastern door. Do not continue into the Gorko rescue or Faron Woods route in this chapter; that is the starting point for the next chapter.
- Dive through the green column and land in the Sealed Grounds.
- Purify the central sealing stone with a Skyward Strike.
- Use the air vents to return to the upper level.
- Enter the Sealed Temple and activate its Bird Statue.
- Open the chest for the second Empty Bottle and Revitalizing Potion.
- Speak with the Old Woman and receive the Faron Woods objective.
Before you move on
- The Wing Ceremony is complete and Link has the Sailcloth.
- The Crimson Loftwing can be summoned for sky travel.
- The Goddess Sword has been drawn and the Emerald Tablet has been placed.
- Link has received the Adventure Pouch and Wooden Shield.
- The first Empty Bottle has been collected from Luv.
- Link has descended to the Sealed Grounds and purified the central sealing stone.
- Link has entered the Sealed Temple, activated its Bird Statue, and collected the second Empty Bottle with the Revitalizing Potion.
- Link has spoken with the Old Woman and received the direction toward Faron Woods.
- The next required objective is the Gorko rescue and Faron Woods route, not Skyview Temple.
References for this chapter
- Starting the Game – The Legend of Zelda: Skyward Sword Walkthrough
- The Wing Ceremony – The Legend of Zelda: Skyward Sword Walkthrough
- Sealed Grounds – The Legend of Zelda: Skyward Sword Walkthrough
- The Legend of Zelda: Skyward Sword Owner’s Manual
- The Legend of Zelda: Skyward Sword - Guide and Walkthrough - Wii
Faron Region and Skyview Temple
Complete the opening Faron route, rescue the missing Kikwis, receive the Slingshot, enter Skyview Temple, obtain the Beetle, defeat Ghirahim, claim the Ruby Tablet, and return it to the Statue of the Goddess. The chapter ends when the red beam to Eldin Volcano opens. Goddess Cubes, rupees, treasure, and Heart Pieces encountered along the way are optional unless specifically needed for your own preparation.
Pass through the Sealed Grounds and reach Faron Woods
From the Sealed Temple, descend through the Sealed Grounds and follow the surface route into Faron Woods. Cut through the vegetation blocking the path, then continue until you meet Machi and the Kikwi Elder, Bucha. Speak with Bucha to activate the search for the three missing Kikwis. Fi can provide Dowsing guidance if you lose track of the search area.
Search the forest paths for Lopsa, Erla, and Oolo. Their hiding places are spread across the main woods rather than concentrated beside Bucha, so check raised roots, narrow ledges, and areas concealed by vegetation. Use the sword to clear foliage and defeat nearby Bokoblins before attempting tight jumps or rope crossings. When all three Kikwis have been found, return to Bucha. He rewards Link with the Slingshot, which is required to reach the temple approach.
- Speak with Bucha after meeting the Kikwis.
- Find Lopsa, Erla, and Oolo.
- Return to Bucha and receive the Slingshot.
Open the Deep Woods route and enter Skyview Temple
Follow the path toward the Deep Woods. Use the Slingshot to stun Deku Babas when their mouths are difficult to approach, and use it to hit distant targets and switches. When the route reaches gaps and elevated paths, use the ropes and vines rather than trying to force a blocked ground route.
At the temple approach, look above the main entrance for the red crystal switch mounted on the structure. Shoot this switch with the Slingshot to open the entrance. The nearby crystals and visible treasure are not substitutes for this switch. Save at the Bird Statue before entering, then check your shield and carry at least one recovery item if available.
- Use the Slingshot on the overhead red crystal switch.
- Enter Skyview Temple.
- Save at the Bird Statue before beginning the dungeon.
Get the dungeon map and first Small Key
Inside Skyview Temple, move through the opening room and activate the crystal switches needed to open the first gates. Defeat or bypass the nearby enemies, then climb the vines after clearing any Walltulas from them. Open the large chest to obtain the Dungeon Map; it is optional for the final objective but makes the central-room routes much easier to track.
Continue to the first eye door. Stand where the eye can see Link, draw the sword, and slowly move the sword tip in a circular motion. The eye becomes dizzy and drops, opening the way. In the next section, use the switches that control the temple's water level to expose the required passages. At the door guarded by two eyes, stand far enough back for both to watch Link and rotate the sword tip in a circle until both eyes are defeated. Open the chest for the first Small Key.
Return to the central room and use the Small Key on the locked northern door. If the eye does not react, Link is usually standing outside its viewing angle or the sword is being waved too quickly; reposition first, then make a controlled circle.
- Collect the Dungeon Map if desired.
- Defeat the first eye mechanism.
- Use the water-control switches to open the route.
- Defeat both eyes guarding the Small Key.
- Use the Small Key on the northern door.
Defeat Stalfos and obtain the Beetle
Proceed into the large chamber beyond the northern door and shoot the crystal switch above the central structure. Enter the opened room to face Stalfos. Its paired swords cover two directions at once, so attack from the uncovered side rather than striking repeatedly into its guard. Watch the angle of the swords, shift your own blade to the open direction, and make a single deliberate slash. A Shield Bash can interrupt an attack if your timing is reliable, but it is safer to step away when Stalfos commits to a forward swing.
After Stalfos falls, open the central chest to obtain the Beetle. The room's exit closes, so do not assume the dungeon has trapped you permanently. Launch the Beetle through the opening in the wall, guide it through the spiderwebs, then turn it toward the crystal switch outside the room. Hitting that switch reopens the exit. If the Beetle collides with the wall, recall it and launch again from a position that gives it a clear line through the opening.
- Defeat Stalfos by striking its unguarded direction.
- Open the chest and collect the Beetle.
- Fly the Beetle through the wall opening.
- Hit the crystal switch outside to reopen the exit.
Use the Beetle to reach the Golden Carving
Use the Beetle in the central chamber and adjoining rooms to hit switches that Link cannot reach directly. Send it through wall openings and webs, and use it to activate elevated crystals before crossing to the newly opened side routes. Follow the dungeon map if you collected it; the intended route repeatedly returns to the central room after each switch sequence.
In the room with the next eye door, position Link so all of the eyes can see him at the same time. Rotate the sword tip until the eyes become dizzy and fall. Open the chest beyond them to obtain the second Small Key. Return to the central room and use that key on the remaining locked route. Cross the ropes and vines, cutting any obstructing webbing, until you reach the large chest containing the Golden Carving. Insert the Golden Carving into the boss door to open the way to Skyview Spring.
Use the Bird Statue near the boss approach to save. Refill your hearts from pots or a recovery item before entering the arena. If sword motions begin registering in the wrong direction, pause and recalibrate the Wii Remote with MotionPlus on a stable, level surface before continuing.
- Activate the required remote switches with the Beetle.
- Defeat the next group of eye mechanisms.
- Collect the second Small Key.
- Use it to reach the rope-and-vine route.
- Obtain the Golden Carving and open the boss door.
- Save and recover before entering the boss arena.
Defeat Ghirahim
During the opening phase, Ghirahim raises a hand to catch Link's sword. Hold the sword in one direction to draw his hand toward that line, then change direction and slash from an uncovered angle. The goal is not to swing rapidly; make him commit his hand position, then attack from the opposite direction. If he catches the blade, stop attacking and create distance before trying again.
When Ghirahim draws his own sword, watch the angle of his blade and attack from a direction his guard does not cover. Evade when he closes in, then punish the opening after his attack finishes. Keep Link near the arena's center so sudden repositioning does not push him against the walls. Pots around the arena can restore hearts, but use them only when needed so you do not lose track of Ghirahim's position.
After the battle, collect the Heart Container and continue into Skyview Spring. Stand before the crest and raise the Goddess Sword until it is charged, then perform a Skyward Strike at the crest. The resulting scene awards the Ruby Tablet.
- Draw Ghirahim's hand toward one direction and slash from another.
- Avoid striking into his sword guard during the second phase.
- Collect the Heart Container.
- Perform a Skyward Strike at the Skyview Spring crest.
- Receive the Ruby Tablet.
Return to Skyloft and open the Eldin route
Leave Skyview Spring and use the nearby Bird Statue to return to the sky. Fly to Skyloft and enter the Statue of the Goddess. Place the Ruby Tablet into the empty receptacle beside the existing tablet. The red beam beneath the clouds then becomes available, opening the route to Eldin Volcano.
Save after the tablet is placed. The required endpoint for this chapter is the visible opening of the red Eldin beam, not completion of any later surface area. Optional Goddess Cubes, chests, rupees, and Heart Pieces can be collected when their required equipment becomes available, but they are not needed to complete this chapter.
- Return to Skyloft through a Bird Statue.
- Place the Ruby Tablet in the Statue of the Goddess.
- Confirm that the red beam to Eldin Volcano is visible.
- Save at the chapter endpoint.
Before you move on
- All three missing Kikwis have been found.
- Bucha has given Link the Slingshot.
- The overhead crystal switch has opened Skyview Temple.
- The Dungeon Map has been collected or deliberately skipped.
- The first Small Key has been obtained and used.
- Stalfos has been defeated and the Beetle collected.
- The second Small Key and Golden Carving have been obtained.
- Ghirahim has been defeated.
- The Heart Container has been collected.
- The Ruby Tablet has been received from Skyview Spring and placed in the Statue of the Goddess.
- The red beam to Eldin Volcano is visible from the sky.
- The game has been saved at the chapter endpoint.
References for this chapter
- Skyward Sword Walkthrough - Skyview Temple
- Skyview Temple - The Legend of Zelda: Skyward Sword Walkthrough
- Chapter 3: Skyview Temple - Zelda Universe
- The Legend of Zelda: Skyward Sword - Guide and Walkthrough - Wii
- Skyward Sword Walkthrough - Faron Woods
- The Legend of Zelda: Skyward Sword Wii Instruction Booklet
Eldin Volcano and the Earth Temple (Scaldera)
Complete the first Eldin Volcano visit, obtain the Digging Mitts, assemble the five-part Earth Temple key, recover Ledd’s Bomb Bag, defeat Scaldera, and install the Amber Tablet beneath the Goddess Statue. Din’s Silent Realm is a later objective and is only referenced here as a future prerequisite for the Fire Sanctuary route.
Prepare for the first Eldin Volcano visit
Before descending through the red beam, save at the Volcano Entry Bird Statue and check your shield, bombs, Slingshot ammunition, and healing supplies. A wooden shield can catch fire in Eldin Volcano, so an Iron Shield is useful if you have purchased one. Bombs and Bomb Flowers are needed for blocked tunnels, Pyrups, boulders, and several Earth Temple puzzles.
Eldin’s hazards include lava, falling boulders, magma vents, fire-based enemies, and steep slopes that drain stamina. Cross dangerous areas in short bursts, stop on level ground to refill stamina, and activate Bird Statues whenever you pass them. A newly activated statue gives you a dependable return point after a death or failed platforming attempt.
- Save at the Volcano Entry Bird Statue.
- Bring a usable shield, bombs, and healing supplies.
- Activate Bird Statues as you advance through Eldin Volcano.
Reach the Mogmas and obtain the Digging Mitts
Follow the main path past the Red Chuchus and Fire Keese until you meet Cobal and Ledd. Continue through the area where the magma rises and falls, then speak with Kortz to learn how Bomb Flowers can be placed, rolled, or thrown. Use them to clear the large rock formations and continue toward the underground route.
After passing the next Mogmas, defeat or bypass the Pyrups with carefully rolled or thrown Bomb Flowers. Use the weak bridge and the nearby bomb to clear the boulder blocking the lava flow. Follow the newly opened route through the underground passage, then defeat the Red Bokoblins and Bokoblin Leaders in the area where Tygo is waiting.
Return to Tygo after the enemies are defeated. He gives Link the Digging Mitts. Use them on the nearby soft-soil patch to create an air geyser. The Digging Mitts are required for the five Earth Temple key pieces, so do not attempt to reach the temple entrance without them.
- Speak with Cobal, Ledd, and Kortz.
- Use Bomb Flowers to clear the underground route.
- Defeat the Bokoblin group for Tygo.
- Receive the Digging Mitts.
- Use the nearby soft soil to open the air geyser.
Climb to the Earth Temple entrance
From the Digging Mitts area, follow the upper route through the Pyrups and bombable walls. Exit the underground section and continue toward the higher volcano paths. Use Bomb Flowers to destroy the boulder near the route and cross the broken bridge with the help of the nearby character.
On the upper climb, use the Slingshot against Bokoblins carrying rocks when they are positioned above you. Their dropped rocks can clear enemies or hazards on the slope. Knock down the watchtower with a Bomb Flower, use it as a bridge, and continue past the remaining Bokoblins until you reach the Earth Temple entrance.
Activate the Bird Statue outside the temple and speak with the nearby Mogma. Fi registers the broken temple key as a Dowsing target. The key has five pieces, and all five are required before the temple door can open.
- Reach the upper volcano route.
- Knock down the watchtower to make a bridge.
- Activate the Bird Statue outside the temple.
- Speak with the Mogma and register the five key pieces as a Dowsing target.
Collect the five Earth Temple key pieces
Use Dowsing to locate the first piece in the soft soil just to the left of the temple entrance. For the second piece, follow the Bomb Flowers to the nearby hill and throw a Bomb Flower down at the watchtower. After the tower falls, dig at the soft-soil patch below it.
The third piece is near the temple entrance, behind a boulder along the hill. Roll a Bomb Flower down the slope so it destroys the boulder, then dig in the exposed soft soil. These first three pieces are reached from the area immediately around the temple entrance.
For the fourth piece, take the route to the right of the temple and cross the fallen tower. Defeat or avoid the Fire Keese and Chuchus, then use the ledge, vines, and floor switch to extend the bridge. The direct route is too hot, so slide down the right-hand path and use the air geysers to reach the higher ledge. Dig at the soft-soil patch there.
For the fifth piece, slide to the bottom of the route and find the Bomb Flower near the lava-filled cavern. Throw it at the boulder outside the cavern to drain the lava. Return inside, roll another Bomb Flower across the flowing sand, and destroy the larger boulder. Dig in the soft soil beyond it to obtain the final piece.
Return to the temple entrance after all five pieces are collected and use the reassembled key. Save at the Bird Statue before entering.
- Dig up the first key piece beside the temple entrance.
- Knock down the watchtower and dig up the second piece.
- Bomb the boulder near the entrance and collect the third piece.
- Use the bridge, slide, and air geysers to reach the fourth piece.
- Drain the lava, destroy the inner boulder, and collect the fifth piece.
- Unlock the Earth Temple with the completed key.
Optional Goddess Cubes before entering
The Eldin route contains optional Goddess Cubes near the temple approach and slide areas. If you activate one, perform a Skyward Strike while standing in front of it. Its linked chest appears in the sky and can be collected later.
These cubes and chests are not substitutes for the five key pieces and are not required for the Earth Temple, Scaldera, the Amber Tablet, or the Lanayru beam. Activate them only if the route is safe, then return to the temple entrance and save.
- Activate any reachable Goddess Cubes only if desired.
- Treat their sky chests as optional rewards.
- Save before entering the dungeon.
Enter the Earth Temple and obtain Ledd’s Bomb Bag
Cross the floating rocks over the lava and use the rising platforms to reach the first interior chamber. Cut the two accessible gear ropes with the sword, then send the Beetle through the opening to cut the third rope beside the door. Continue through the opened passage and defeat the Lizalfos by attacking around its arm guard or using Shield Bashes to interrupt its attacks.
In the lava chamber, use the Beetle to trigger the Bomb Flowers on the fallen statue. This releases the large stone eyeball. Jump onto it and steer it by moving Link; small inputs are easier to control, and stopping recenters Link on the ball.
Ride the eyeball to the eastern side of the chamber and speak with Ledd. Crawl through the opening beneath the nearby gate, defeat the Bokoblin, and use the route above the fence to reach the bombable passage. Roll a Bomb Flower through the small opening to destroy the rocks, then enter the cleared room and defeat both Lizalfos.
Open the chest to obtain the Bomb Bag and return to Ledd. He gives Link the bag and five bombs. Bomb Flowers can also be placed into the Bomb Bag by picking one up and using the pouch command, allowing you to refill when necessary.
- Cut all three gear ropes to open the first door.
- Use the Beetle to trigger the Bomb Flowers and release the stone eyeball.
- Reach Ledd on the eastern side of the lava chamber.
- Destroy the rocks through the small opening.
- Defeat both Lizalfos and open the Bomb Bag chest.
- Return to Ledd and receive the Bomb Bag and five bombs.
Get the dungeon map and Dragon Sculpture
Ride the stone eyeball back to the central platform. Take the western route, bomb the cracked stone, defeat the enemies, and open the chest containing the dungeon map. Return to the lava chamber and ride the eyeball under the bridge to the northern mechanism. Roll into the round switch on the bridge to raise part of it.
Take the eastern route and bomb the cracked walls. Refill your Bomb Bag from the Bomb Flowers if needed, then send the Beetle through the passage above the red gate and cut both gear ropes. Activate the Bird Statue beyond the gate before continuing.
Wait for the northern lava spout to stop, cross the narrow lava bridge, and raise the second section of the bridge by rolling into the round switch. Cross the completed bridge and enter the northern route. On the boulder slope, run through the gaps and stop on flat ledges to restore stamina. Crawl through the opening, dig the air geyser, and ride it to the upper ledge.
From above, throw a bomb at the marked section of the slope so it destroys the rocks in the wall. Return to the slope, use the cleared opening, and continue to the Dragon Sculpture. When the large boulder begins rolling from the dragon’s mouth, sprint down the slope, use the side stairs to avoid it, and wait for it to block the lava spout. Place the Dragon Sculpture in the boss door, rotating it until its shape matches the lock.
- Collect the dungeon map.
- Raise both sections of the bridge with the stone-eyeball switches.
- Cut the red-gate ropes with the Beetle.
- Activate the Bird Statue beyond the gate.
- Clear the boulder slope and obtain the Dragon Sculpture.
- Use the rolling boulder to block the lava spout.
- Fit the Dragon Sculpture into the boss door.
Defeat Scaldera
Scaldera fights on a narrow uphill slope. Bombs and recovery hearts are available near the upper portion, so refill before beginning if necessary. When Scaldera climbs normally, keep space and watch its mouth. When its body flares and it runs, dash uphill and move aside rather than trying to fight while it is charging.
When Scaldera opens its mouth and inhales, throw a bomb so it is pulled inside. The explosion stuns the boss and exposes its eye. Move in and slash the eye repeatedly, then retreat before Scaldera recovers.
If the bomb detonates too early, Scaldera rolls back down the slope. Follow it and wait for the next inhaling animation. If you delay too long, it spits large fireballs; sidestep them and prepare for another opening. During the faster phase, Scaldera may leave a gap beneath its body while running. Move underneath it, avoid the Bomb Flowers along the slope, and wait for it to roll back down before repeating the bomb-to-mouth and sword-to-eye pattern.
Do not chase dropped hearts while Scaldera is moving. Stay near the side of the slope when it rolls downward, and use the upper area to recover between attempts. After the boss is defeated, collect the Heart Container.
- Use the upper slope to refill bombs and hearts before the battle.
- Throw a bomb into Scaldera’s mouth during the inhaling animation.
- Strike the exposed eye after each successful stun.
- Sidestep fireballs and avoid the Bomb Flowers during charges.
- Run beneath Scaldera during the later fast phase when necessary.
- Defeat Scaldera and collect the Heart Container.
Obtain the Amber Tablet and open the Lanayru route
After collecting the Heart Container, refill your Bomb Bag and continue up the slope through the door marked by the glowing crest. Follow the story sequence in the Earth Spring, then perform a Skyward Strike on the crest when prompted. Link receives the Amber Tablet.
Use the Bird Statue outside the temple to save, return to Skyloft, and enter the chamber beneath the Goddess Statue. Place the Amber Tablet beside the earlier tablets. A yellow beam then appears, opening the route to Lanayru Desert.
This completes the required Eldin Volcano and Earth Temple chapter. The next main objective is Lanayru Desert; any optional Goddess Chests, treasure, shield upgrades, wallet upgrades, or heart pieces can be handled separately.
- Enter the Earth Spring after defeating Scaldera.
- Perform the Skyward Strike at the crest.
- Receive the Amber Tablet.
- Save at the Bird Statue outside the temple.
- Install the Amber Tablet beneath the Goddess Statue.
- Confirm that the yellow beam to Lanayru Desert is available.
Future progression note: Din’s Silent Realm
Din’s Silent Realm is not available during this first Eldin Volcano visit. Continue through the later campaign chapters, including the Sandship, then visit the Isle of Songs and obtain Din’s Power. Only after that event can the Eldin trial be opened on a later return.
The trial and its Fireshield Earrings belong to the later Volcano Summit and Fire Sanctuary progression covered in ch09. They are not part of this chapter’s completion requirements.
- Do not search for Din’s Silent Realm during the first Eldin visit.
- Complete the Sandship and Isle of Songs events later.
- Use ch09 for Din’s Power, Din’s Silent Realm, and the Fireshield Earrings.
Before you move on
- The Digging Mitts were obtained from Tygo.
- All five Earth Temple key pieces were dug up.
- The Earth Temple door was unlocked.
- Ledd’s Bomb Bag was recovered and returned to him.
- The dungeon map and Dragon Sculpture were obtained.
- The Dragon Sculpture was placed in the boss door.
- Scaldera was defeated and the Heart Container was collected.
- The Amber Spring crest was struck with a Skyward Strike.
- The Amber Tablet was received and installed beneath the Goddess Statue.
- The yellow beam to Lanayru Desert is available.
- No Din’s Power, Din’s Silent Realm, or Fireshield Earrings objective is required for this chapter.
- Any Eldin Goddess Cubes or other treasure were handled separately as optional content.
Lanayru Region and the Mining Facility (Moldarach encounters)
Complete the first Lanayru visit, activate the three remote power nodes, raise the Lanayru Mining Facility, clear the dungeon and defeat Thousand-Year Arachnid Moldarach. Follow the underground route to the Temple of Time, receive the Goddess’s Harp from Zelda, return to the Sealed Grounds and learn the Ballad of the Goddess from the Old Woman. The first Imprisoned battle then takes place in the Sealed Grounds. End after restoring the seal with the required Skyward Strike and confirming the next objective: powering up the Goddess Sword with the three Sacred Flames. The second Imprisoned, Sacred Water, Ancient Cistern and the Clawshots are later objectives.
Reach Lanayru Desert and activate the three remote power nodes
Enter Lanayru Mine through the yellow surface beam and follow the mine-cart route into Lanayru Desert. Use the Hook Beetle to strike Timeshift Stones, restore the old machinery and push inactive mine carts into the blue time-shift field before riding them. When the robot updates your map, the gray routes shown beneath the sinksand are solid paths. Use beacons at their junctions so you can cross the desert without wasting stamina on unsafe sand.
At the large inactive generator, bomb the nearby rock piles to expose its Timeshift Stone. Activate the field, defeat the nearby Technoblins and speak with the robot. Fi then enables Dowsing for the three remote generator nodes. Follow the Dowsing signal and the gray paths on the map. Each node requires you to restore a local time field, open the route with a bomb or other nearby mechanism, use an Ampilus egg to operate the gate and insert the Goddess Sword into the generator.
Activate all three remote nodes before returning to the central generator. The remote mechanisms reveal the symbols and positions needed for the final arrangement. Insert the sword into the central generator and set the dials in order: water three positions to the left, fire four positions to the right and thunder in the center. Press each dial into place. The Lanayru Mining Facility rises from the sand. Use the nearby Bird Statue before entering.
- Reach Lanayru Desert through Lanayru Mine.
- Use the map’s gray routes to cross the sinksand safely.
- Activate all three remote power nodes.
- Set the central generator to water left three, fire right four and thunder centered.
- Raise the Lanayru Mining Facility and save before entry.
Enter the Lanayru Mining Facility and obtain the Gust Bellows
Save at the Bird Statue just inside the facility. In the opening rooms, use Bomb Flowers with the basket statues to create temporary platforms and clear the route. Move through the active time fields carefully; objects outside a field can revert to their ruined state. Use mine carts, safe map paths and restored machinery rather than trying to cross every sand patch directly.
Advance through the early machinery rooms until you reach the chest containing the Gust Bellows. This is the dungeon’s required item. Return through the facility using it to clear sand piles, uncover floor switches, expose buried Timeshift Stones, move vane platforms and reveal pinwheels. Whenever a platform seems inactive, check whether it has moved outside the blue time field or whether another crystal or switch must be activated.
Sentrobes are safer to handle with a Shield Bash that reflects their projectiles, followed by sword strikes against the smaller orbs. For Beamos, expose and destroy the eye after dismantling the protective section. The Bellows is a progression tool throughout this dungeon, not merely an optional item.
- Save at the facility entrance Bird Statue.
- Collect the Gust Bellows.
- Use basket statues, mine carts and Timeshift Stones to cross the opening rooms.
- Clear sand to reveal switches, tracks and mechanisms.
- Defeat Sentrobes with reflected projectiles when possible.
Complete the dungeon route and obtain the Ancient Circuit
Continue through the large machinery rooms, using the Gust Bellows on vane platforms and wall pinwheels. Follow the dungeon map and the visible remains of old pathways to avoid sinksand. On conveyor-belt sections, conserve stamina and move during safe gaps in the wind rather than sprinting continuously.
In the Armos room, activate the Timeshift Stone and use the Gust Bellows on the rotating mechanism above the enemy. The airflow opens the Armos’s central compartment. Strike the exposed crystals, including the crystal that requires a sword thrust. Defeat the Armos enemies and open the chest in the final room to obtain the Ancient Circuit.
Use the Ancient Circuit at the locked boss entrance. Before inserting it, save at the Bird Statue near the northern side of the facility. Complete the final mine-cart and vane-platform crossing, use the wall switch if you need to bring the cart into position, then fit the Ancient Circuit into the door mechanism.
- Finish the Armos mechanism sequence.
- Obtain the dungeon map during the required route.
- Collect the Ancient Circuit.
- Complete the final cart and vane-platform crossing.
- Save before opening Moldarach’s boss door.
Defeat Thousand-Year Arachnid Moldarach
Lock on to Moldarach with Z. In the first phase, attack the eyes in its two front claws only when the pincers open toward you. Match the Wii Remote swing to the exposed eye’s direction so the strike is not deflected. If an eye turns red, jump or move away immediately because the claw is preparing a swipe. Keep repositioning instead of standing between both claws.
After both claws are destroyed, Moldarach exposes the central eye in its body. Thrust into this eye with the sword. After several hits, it burrows under the sand. Equip the Gust Bellows, watch for the disturbance moving beneath the surface and blow away the sand directly over Moldarach until it emerges. Be ready for its tail attack and any Arachas it produces while buried.
Repeat the expose-and-thrust sequence until Moldarach is defeated. Collect the Heart Container before leaving. The Gust Bellows is required to reveal the boss after it burrows, so do not attempt to finish the second phase with sword attacks alone.
- Lock on to both claw eyes.
- Attack only when a claw eye is exposed.
- Retreat when an eye turns red.
- Destroy both claws.
- Thrust into the exposed central eye.
- Use the Gust Bellows to uncover Moldarach after it burrows.
- Collect the Heart Container.
Follow the underground route to the Temple of Time and receive the Goddess’s Harp
After Moldarach, leave through the opened exit and activate the overhead Timeshift Stone with the Hook Beetle. Ride the restored mine cart through the underground passage. The route emerges in the Temple of Time area. Use the Bird Statue there if you want a save point before approaching the story scene.
Continue toward Zelda and Impa. Ghirahim interrupts the meeting, and Zelda and Impa pass through the Gate of Time. Zelda gives Link the Goddess’s Harp. Once control returns, the story directs you back to the old woman in the Sealed Grounds. This is not the end of the chapter; the harp tutorial and first Imprisoned battle are required progression here.
- Activate the overhead Timeshift Stone after Moldarach.
- Ride the restored mine cart through the underground passage.
- Reach the Temple of Time story scene.
- Receive the Goddess’s Harp from Zelda.
- Confirm that the next destination is the old woman in the Sealed Grounds.
Return to the Sealed Grounds and learn the Ballad of the Goddess
Use a Bird Statue to return to the Sealed Grounds. Enter the Sealed Temple and speak with the Old Woman and Groose. When prompted, take out the Goddess’s Harp with Up on the Wii Remote Control Pad. Hold A and move the Wii Remote back and forth in time with the Old Woman’s demonstration. During the follow-up lesson, match the motion to the moving circle of light; additional lights indicate that the rhythm is correct.
Completing the tutorial teaches the Ballad of the Goddess and causes the dormant Gate of Time to appear in the temple. Save at the Bird Statue before leaving through the main door. The Old Woman then tells Link to descend to the bottom of the Sealed Grounds because the seal is failing again.
- Return to the Sealed Grounds.
- Enter the Sealed Temple.
- Take out the Goddess’s Harp with the Wii Remote Control Pad.
- Complete the rhythm tutorial with the A button held.
- Learn the Ballad of the Goddess.
- Confirm that the Gate of Time appears.
- Save before descending into the Sealed Grounds.
Defeat the first Imprisoned encounter and restore the seal
Exit the Sealed Temple through the main door and descend to the bottom of the spiral pit. The first Imprisoned battle begins when the sealing spike is broken. The creature advances up the spiral toward the temple, so attack its toes before it reaches the top. Each foot has four toes. Slash the exposed toes repeatedly while staying clear of its feet and the red shockwave produced by its stomps. If the shockwave is about to reach you, move away rather than forcing another strike.
When all eight toes have been destroyed, the Imprisoned falls backward. Run around to its head and attack the sealing spike from below with upward sword strikes. Three successful strikes drive the spike into the creature. It then rises and moves farther up the spiral. Use an air vent to reach a higher ledge and get ahead of it before beginning the next toe phase.
Repeat the toe-destruction and sealing-spike sequence for three total rounds, for nine successful strikes against the spike. During the final round, the Imprisoned produces stronger red shockwaves with its stomps, so attack conservatively and retreat before each footfall. A shortcut is available by using an air vent to jump onto the creature’s head and strike the spike from above, but this is riskier because Link can be shaken off.
After the ninth spike strike, jump or run back to the bottom of the pit. Raise the Goddess Sword and perform the required Skyward Strike into the sealing spike. Follow the on-screen sword-direction prompt to complete the sealing action. The seal is restored, and the Old Woman explains that Link must obtain the three Sacred Flames to strengthen the sword before the Gate of Time can be used.
- Reach the bottom of the Sealed Grounds after the harp lesson.
- Destroy all eight toes during each phase.
- Avoid the Imprisoned’s foot shockwaves.
- Strike the sealing spike three times after each fall.
- Complete three rounds and land nine spike strikes.
- Return to the bottom of the pit.
- Perform the required Skyward Strike.
- Follow the displayed sword-direction prompt and restore the seal.
Leave the chapter at the Sacred Flame handoff
After the first Imprisoned is sealed, return to the Sealed Temple and speak with the Old Woman and Groose. The new objective is to find the three Sacred Flames that will power up the Goddess Sword. Before leaving the area, speak with Gorko near the Blessed Butterflies and play the Goddess’s Harp when prompted. This creates the Goddess Wall sequence and confirms the next story handoff.
Use the Bird Statue to return to Skyloft and speak with Gaepora in the Knight Academy when the game directs you to investigate the lyrics of the Ballad of the Goddess. The later Sacred Flame route begins after this handoff. Do not count the second Imprisoned as completed here; it occurs much later, after the Sandship, Din’s Silent Realm, Fire Sanctuary and Din’s Flame.
- Hear the Sacred Flame objective from the Old Woman.
- Complete Gorko’s Blessed Butterfly harp interaction if prompted.
- Return to Skyloft by Bird Statue.
- Speak with Gaepora about the Ballad of the Goddess.
- Leave the next chapter with the Sacred Flame route active.
Before you move on
- All three Lanayru Desert remote power nodes are active.
- The central generator has raised the Lanayru Mining Facility.
- The Gust Bellows, dungeon map and Ancient Circuit are in the inventory.
- Moldarach is defeated and the Heart Container has been collected.
- The overhead Timeshift Stone has been activated after the boss.
- The mine cart has carried Link through the underground passage to the Temple of Time area.
- The Zelda and Impa scene has played.
- Zelda has given Link the Goddess’s Harp.
- The Old Woman’s harp tutorial has been completed.
- The Ballad of the Goddess has been learned.
- The first Imprisoned has been defeated.
- The sealing spike has received nine successful strikes across the three phases.
- The final Skyward Strike and displayed sword-direction sealing action have been completed.
- The Old Woman has assigned the three Sacred Flames as the next major objective.
- Gorko’s Blessed Butterfly harp interaction and the return-to-Skyloft handoff are available.
- The second Imprisoned battle has not been counted as completed in this chapter.
- Sacred Water, Ancient Cistern, Farore’s Sacred Flame, Nayru’s Wisdom, Nayru’s Silent Realm and the Clawshots remain for later chapters.
- Optional Goddess Cubes, Goddess Chests, Heart Pieces and Gratitude Crystals are not required for this progression check.
Ancient Cistern and the Koloktos Encounter
Begin after the first Imprisoned has been sealed and Link has returned to the regular game. Complete Farore’s Courage at the Isle of Songs, enter Farore’s Silent Realm in Faron Woods and obtain the Water Dragon’s Scale. Use it to reach the Water Dragon, collect Sacred Water from Skyview Temple and open Ancient Cistern. Defeat the Stalmaster and Koloktos, claim Farore’s Sacred Flame, learn Nayru’s Wisdom at the Isle of Songs, complete Nayru’s Silent Realm in Lanayru Desert and obtain the Clawshots. The chapter ends when the Clawshots open the route toward the Lanayru Sand Sea. The second Imprisoned is not part of this chapter.
Begin after the first Imprisoned and learn Farore’s Courage
Start this chapter only after the first Imprisoned encounter has been defeated, the sealing spike has been restored and Link has completed the resulting story scene. Do not return to the Sealed Grounds for another Imprisoned battle here; that later encounter belongs to the Fire Sanctuary and post-Din’s-Flame sequence.
In Skyloft, follow the current story objective involving the windmill and Light Tower. Complete the required windmill alignment, then play the Goddess’s Harp at the Light Tower as directed. This opens the route through the Thunderhead. Fly through the opening and land at the Isle of Songs.
Enter the central tower and approach the altar. Raise the Goddess Sword and perform a Skyward Strike on the crest. Fi teaches Farore’s Courage and identifies the Faron trial. Before leaving for the surface, make sure one Bottle is empty because Sacred Water will be needed shortly.
- The first Imprisoned has already been sealed.
- The Light Tower and windmill events are complete.
- The Thunderhead is accessible.
- Farore’s Courage has been learned at the Isle of Songs.
- At least one Bottle is empty.
Complete Farore’s Silent Realm and obtain the Water Dragon’s Scale
Fly to Faron Woods and land near the Viewing Platform. Use Dowsing if necessary to find the sparkling area surrounded by butterflies. Play the Goddess’s Harp there and strum in time with the pulsing ring. When the trial symbol appears, stand on it and thrust the sword downward to enter Farore’s Silent Realm.
The trial requires all 15 Tears of Farore. Leave the initial protective circle only after checking the nearby route. Light Fruits create temporary safe zones, while Watchers, Guardians and Waking Water can expose Link and start the pursuit. Plan each run from one safe zone to the next rather than crossing large open areas without a destination. If a Guardian’s light catches Link, keep moving toward the nearest Light Fruit or previously activated safe ground; being struck by a Guardian ends the trial.
Use the terrain to shorten return trips. In the Great Tree section, watch the ropes, ledges and Waking Water around the trees. After collecting the fifteenth Tear, the trial is not finished until Link returns to the entrance’s protective circle. Push down the nearby log if you need a shortcut, then enter the circle. The reward is the Water Dragon’s Scale, which allows underwater swimming.
- Enter Farore’s Silent Realm from the Faron Woods Viewing Platform.
- Collect all 15 Tears of Farore.
- Use Light Fruits and protective circles to manage Guardian pursuit.
- Return to the entrance circle after the last Tear.
- Receive the Water Dragon’s Scale.
Use the Water Dragon’s Scale to reach Lake Floria
After leaving the Silent Realm, save at the nearby Bird Statue. Speak with the Kikwi Elder if you need the story direction, then go to the pool around the Great Tree. Dive into the underwater opening and swim through the passage. Surface in the larger chamber and follow the ledges, hanging platforms and Gust Bellows sections until the route leads to Lake Floria.
Continue through the underwater passage. Use spin attacks to break wooden barriers and clear Froaks when they block the way. Some gates require swimming below them and performing a spin attack while rising, allowing Link to leap over the obstruction. Follow the aquatic creatures through the tunnels until you reach the Water Dragon’s chamber.
Speak with Faron, the Water Dragon. She is recovering inside the basin and needs fresh Sacred Water. After the conversation, Fi makes Sacred Water a Dowsing option. The required source is the Skyview Spring inside the completed Skyview Temple.
- Dive through the Great Tree’s underwater opening.
- Reach Lake Floria.
- Enter the Water Dragon’s chamber.
- Speak with Faron.
- Receive the Sacred Water objective.
Collect Sacred Water from Skyview Temple
Leave the Water Dragon’s chamber and enter the Skyview Temple entrance. The dungeon does not need to be completed again. Follow the already-open route toward the Skyview Spring at the rear of the temple. Defeat the Stalfos guarding the final approach by attacking an uncovered side of its crossed blades. A shield bash can create an opening, but do not attack directly into its guard.
At the spring, use the empty Bottle to collect Sacred Water. Return through the temple and fly or travel back to the Water Dragon’s chamber at Lake Floria. Speak with Faron and pour the Sacred Water into her basin. She recovers and removes the waterfall, revealing the entrance to Ancient Cistern.
Save at the Bird Statue before entering the dungeon. The Ancient Cistern route now provides the required progression; Goddess Cubes, optional chests, rupees and Pieces of Heart can be ignored until a later cleanup trip.
- Re-enter the completed Skyview Temple.
- Reach the Skyview Spring.
- Defeat the Stalfos guarding the spring.
- Fill an empty Bottle with Sacred Water.
- Deliver the water to Faron.
- Enter Ancient Cistern after the waterfall is removed.
- Save before beginning the dungeon.
Open Ancient Cistern and defeat the Stalmaster
In the upper Ancient Cistern chamber, inspect the markings around the central statue. The four-part sequence is Top, Bottom, Left, Right. The markings identify which crystal to strike first, second, third and fourth. Follow that order at the locked gemstone panel to open the door and obtain the Small Key.
Use the Small Key on the locked door leading onward. Follow the water, lily pads and underwater passage until you return to the main structure. At the south side of the central room, use the lily pads to reach the locked door and drop into the Stalmaster’s chamber.
The Stalmaster initially guards two directions, then draws two additional blades and guards three or four directions. Attack only an uncovered angle. When all four blades cover the obvious sides, a forward thrust can reach the opening. Jump backward when it begins a multi-hit attack, since retreating with normal movement may not create enough distance. After the Stalmaster falls, enter the unlocked room and open the chest to obtain the Whip.
- Read the central statue’s four markings.
- Strike the gemstone panel Top, Bottom, Left, then Right.
- Use the Small Key to continue.
- Reach the Stalmaster’s chamber.
- Defeat the Stalmaster by attacking uncovered directions.
- Collect the Whip from the unlocked chest.
Use the Whip to reach the Blessed Idol
Return to the room where the Stalmaster was defeated and use the Whip on the wind-up key. The resulting water geyser provides access to the upper route. Use the Whip on bars, levers, vines, lily pads and additional wind-up keys as the dungeon requires. Flip the upside-down lily pad, pull the nearby lever and stop the water where necessary so Link can swim through the lower passage.
Use the Whip through grates when a lever is out of reach. Continue through the rotating-cylinder and vine sections, changing the direction of the moving platforms with the large levers. A whirlpool leads to a lower area where the Beetle can remove Skulltulas and a Small Key can be pulled from an enemy with the Whip. Use that key to reconnect with the main route.
In the lower underground section, use the Beetle to activate the switch behind the eye mechanism and stop the flowing liquid. Bomb the obstructing boulder, operate the rotating platforms and climb the rope. At the upper end, extend the ramp and activate the wind-up key. Open the chest to receive the Blessed Idol.
Taking the Blessed Idol summons Cursed Bokoblins and starts the descending-platform escape. Do not stop to defeat every enemy. Run up the ramp, use the opened route and let the platform fall so the next door becomes accessible. Ride the water geysers upward and place the Blessed Idol in the matching lock at the top of the central structure.
- Activate the first water geyser with the Whip.
- Flip the lily pad and stop the water.
- Use the Whip on grates, bars, levers and wind-up keys.
- Use the lower whirlpool and recover the Small Key.
- Reach the underground rotating-platform section.
- Collect the Blessed Idol.
- Escape immediately when the platform begins descending.
- Place the Blessed Idol in the upper lock.
Raise the structure and defeat Koloktos
After placing the Blessed Idol, climb through the opened upper route and activate all four wind-up keys with the Whip. The central structure rises. Collect nearby recovery hearts and save at the Bird Statue before entering the boss chamber.
During Koloktos’s stationary phase, keep moving to avoid the returning axe blades. Wait for an arm to strike and become embedded in the floor, then latch onto it with the Whip and pull it free. Remove enough arms to expose the red core in the chest. Run in with the sword, strike the core, and retreat before the arms reset. Do not attempt to pull an arm while it is still moving.
After enough damage, Koloktos stands and chases Link with giant swords. Evade the arm attacks and use the Whip on an embedded sword-bearing arm. Pick up the giant sword and use horizontal swings to cut the legs. When Koloktos falls, use the giant sword to break open the chest covering and attack the exposed red core. In the final phase, repeat the same process while avoiding the summoned Cursed Bokoblins. Defeat only those that obstruct a Whip pull or create an immediate danger.
Collect the Heart Container after the victory. Leave the chamber and perform a Skyward Strike on the Goddess crest. Farore’s Sacred Flame upgrades the Goddess Sword to the Goddess Longsword.
- Activate all four upper wind-up keys.
- Save before entering Koloktos’s room.
- Pull embedded arms with the Whip during the stationary phase.
- Attack the exposed red core with the ordinary sword.
- Pull out an embedded giant sword during the walking phase.
- Cut the legs with horizontal swings.
- Break the chest covering and attack the core.
- Defeat Koloktos and collect the Heart Container.
- Receive Farore’s Sacred Flame and the Goddess Longsword.
Learn Nayru’s Wisdom and complete Nayru’s Silent Realm
Return to the sky and fly to the Isle of Songs. Enter the central tower, approach the altar and perform a Skyward Strike on the crest. Fi teaches Nayru’s Wisdom and points Link toward Lanayru Desert.
Land at the North Desert Bird Statue. The trial entrance is near the northern structure with the electricity dial, in the area marked by Blessed Butterflies. Play the Goddess’s Harp and match the pulsing ring, then thrust the sword into the revealed symbol to enter Nayru’s Silent Realm.
Collect every Sacred Tear while moving between Light Fruit safe zones. At the start, the nearest Tear may be beyond a Guardian, so run past it toward the stairs and the Mining Facility approach rather than waiting in the entrance circle. The generator area, northern paths and ledges around the desert form the main route. Watch for Watchers and exposed sand; if the alarm begins, use the warning period to reach a Light Fruit or protective circle.
After the final Tear, return to the entrance circle to complete the trial. The reward is the Clawshots. Test them on the nearby wall targets, then use them to cross the previously inaccessible Lanayru paths and reach the route toward the Lanayru Sand Sea.
- Return to the Isle of Songs after receiving Farore’s Sacred Flame.
- Learn Nayru’s Wisdom with a Skyward Strike.
- Enter Nayru’s Silent Realm from the North Desert Bird Statue area.
- Collect every required Sacred Tear.
- Return to the entrance circle.
- Receive the Clawshots.
- Use the Clawshots to open the route toward the Lanayru Sand Sea.
Before you move on
- The first Imprisoned was completed before this chapter began.
- Farore’s Courage was learned at the Isle of Songs.
- Farore’s Silent Realm was completed and all 15 Tears were collected.
- The Water Dragon’s Scale was obtained.
- The Water Dragon was reached through the underwater Faron and Lake Floria route.
- Sacred Water was collected from Skyview Spring.
- Sacred Water was delivered to Faron.
- The Ancient Cistern entrance was opened.
- The Stalmaster was defeated.
- The Whip was collected.
- The Blessed Idol was placed in the upper statue lock.
- Koloktos was defeated and the Heart Container was collected.
- Farore’s Sacred Flame upgraded the Goddess Sword to the Goddess Longsword.
- Nayru’s Wisdom was learned at the Isle of Songs.
- Nayru’s Silent Realm was completed.
- The Clawshots were obtained.
- The Clawshots opened the route toward the Lanayru Sand Sea.
- No Imprisoned encounter was completed during this chapter.
References for this chapter
- Farore’s Silent Realm - The Legend of Zelda: Skyward Sword Walkthrough
- Nayru’s Silent Realm - The Legend of Zelda: Skyward Sword Walkthrough
- Skyward Sword Walkthrough – Ancient Cistern
- The Legend of Zelda: Skyward Sword - Guide and Walkthrough - Wii, Final Battle
- The Legend of Zelda: Skyward Sword - Guide and Walkthrough - Wii
Desert, Sandship and the Sandship Battles (Scervo & Tentalus)
After locating the invisible Sandship in the Lanayru Sand Sea, board it without the Bow. The dungeon begins with exploration, sand-clearing and a Small Key puzzle. Scervo is the miniboss and awards the Bow. Use it to activate the Sandship’s Timeshift machinery, traverse the masts, operate both generators, rescue the crew, claim the Squid Carving from the Captain’s Cabin, and reach the engine room. Survive the sinking-ship escape, defeat Tentalus, and use the Goddess Crest to obtain Nayru’s Flame.
Find and board the invisible Sandship
After the Lanayru Sand Sea story directs you to find the Sandship, activate Dowsing and follow the indicator across the sea. Fire the Skipper’s cannon in the direction shown by the indicator. After the ship has been struck enough times, it becomes visible and Link automatically boards it.
Do not bring or search for the Bow before boarding. The Bow is the Sandship’s dungeon item and is awarded only after the Scervo miniboss fight. Enter the western door on the deck, descend the stairs, defeat the Thunder Keese, and use a Bomb on the Electro Spume before running across the sinksand. Continue down the corridor and stairs, defeat the Aracha, and use the Bird Statue in the lower section to save and recover at the nearby stool.
The dungeon requires the Clawshots, Gust Bellows and Whip from earlier progression, but the Bow is obtained inside this dungeon. The Clawshots are needed to cross the gap after Scervo and reach later deck routes; the Gust Bellows clears sand and can assist against Scervo; the Whip is needed in the machinery sections.
- Use Dowsing to track the invisible Sandship.
- Fire the cannon until the vessel becomes visible and board it.
- Do not require the Bow before entering the dungeon.
- Save at the Bird Statue below deck after crossing the sinksand.
Get the Small Key
From the lower Bird Statue, proceed through the hallway toward the room with more Aracha. Defeat the enemies, then use the Gust Bellows to clear the sand from the floor. Four symbols reveal the clue for the gem locks in the preceding room. Read the symbols by their number of red marks; their lights establish the order Bottom, Top, Bottom, Right.
Return to the locked door in the previous room and strike its four locks in that order. Open the chest inside to receive a Small Key. Save before using it on the locked door near the Bird Statue. That door leads to the narrow gangplank where Scervo waits.
- Clear the sand until all four symbols are visible.
- Use the lock order Bottom, Top, Bottom, Right.
- Collect the Small Key.
- Save before opening the miniboss door.
Defeat Scervo and obtain the Bow
Scervo fights on a narrow plank. Lock on with Z and attack the side not covered by his sword and shield. Use controlled sword gestures rather than repeated swings. If Scervo blocks an attack, stop attacking and retreat because he immediately counters. A well-timed Shield Bash against his committed attack stuns him and creates the safest opening for several strikes. The Gust Bellows can push him backward, but it is a supporting tactic rather than a replacement for correct sword direction.
Drive Scervo toward the end of the plank. The usable space shortens as the spike advances. During the later phases he loses his electrical sword and then his arm, leaving the hook as his main weapon. The reduced space makes reckless attacks dangerous, so use single strikes, Shield Bashes and retreats. If the Wii Remote begins registering sword directions incorrectly, pause and recalibrate before retrying rather than compensating with random swings.
When Scervo is defeated, cross the gap with the Clawshots and open the chest for the Bow. This is the first point in the dungeon where the Bow is available.
- Strike only at Scervo’s exposed side.
- Shield Bash his attacks and punish the stun.
- Retreat whenever he blocks a swing.
- Collect the Bow after the fight.
Activate the Timeshift machinery and optional deck reward
Return to the main deck and use the Bow on the blue target near the central mast. This exposes the Timeshift Stone; shoot the Stone to send the Sandship into its past state. Defeat or bypass the Bokoblins, prioritizing archers on the masts.
Use the Bow on the blue targets that move the zipline handles into position. Ride the ziplines upward, defeat the Bokoblins on the higher platforms, and use the Goddess Sword on the sword-slot switch. Turn the Wii Remote in the indicated direction and press A to operate the switch, opening the gate around the Timeshift Stone.
On the eastern side of the deck, shoot the blue target and ride the zipline. Drop to the Clawshot targets below and follow them to the lower eastern deck. The chest there contains an optional Piece of Heart. Clawshot back to the main deck afterward. Lower the small raft with the blue switch near the eastern route; it is required for the second generator path later.
- Shoot the mast target and then the Timeshift Stone.
- Use the mast ziplines and operate the Goddess Sword switch.
- Collect the eastern Piece of Heart only if desired.
- Lower the small raft for the later generator route.
Activate both generators
Enter through the western interior route and descend beneath the deck. In the northwest room, aim the Bow through the ceiling opening and shoot the Timeshift Stone. This restores the useful present-state machinery. Open the chest in the nearby room for the Dungeon Map and pull the lever to open the passage.
Proceed through the machinery rooms. Shoot blue switches through propeller gaps, move the steel block onto its floor switch, and use the Whip on overhead bars when the route requires it. Reach the first generator and insert the sword into its slot. Turn the Wii Remote in the direction shown by the mechanism, then press A to activate it.
For the second generator, use the raft route opened earlier. Move the raft with its blue switch, reach the window route, and shoot the Timeshift Stone through the available opening. Pull the nearby lever, then operate the second generator with the same sword-slot procedure. The active generators raise the machinery needed to reach the brig and engine-room route.
- Shoot the Timeshift Stone through the ceiling opening.
- Collect the Dungeon Map.
- Activate the first generator with the sword-slot control.
- Use the raft and window route to reach the second generator.
- Activate the second generator.
Rescue the crew and obtain the Squid Carving
Cross the powered machinery using the Whip on the overhead bars. Pull shortcut levers whenever they are available. Continue until you reach the brig and free the imprisoned robot crew. One of the rescued crew members gives Link a Small Key for the Captain’s Cabin.
Return to the upper deck and use that Small Key on the Captain’s Cabin door at the eastern side of the ship. Open the large chest inside to receive the Squid Carving, the dungeon’s boss key. This item, not the crew’s Small Key, opens the route to the engine room.
Carry the Squid Carving to the locked engine-room door. Insert it into the lock to open the way. Save at the Bird Statue before proceeding through the final machinery section.
- Use the Whip to cross the engine-room machinery.
- Rescue the imprisoned crew.
- Receive the Captain’s Cabin Small Key.
- Open the Captain’s Cabin chest and collect the Squid Carving.
- Use the Squid Carving to open the engine-room door.
Survive the sinking-ship escape
Continue through the engine-room machinery, using switches, levers and Whip points to advance. When you reach the final door and enter, Tentalus begins attacking the Sandship before the main boss arena is prepared. Do not remain below deck trying to fight; immediately retreat toward the upper deck.
Use horizontal Skyward Strikes to cut tentacles that block the corridors. Keep moving upward, jump the gaps when required, and avoid the rolling barrels. The flooded and collapsing lower sections are not safe recovery areas. Reach the damaged upper deck to begin the main battle.
- Open the engine-room route with the Squid Carving.
- Run upward as soon as Tentalus attacks the ship.
- Cut blocking tentacles with horizontal Skyward Strikes.
- Avoid barrels and reach the upper deck.
Defeat Tentalus and obtain Nayru’s Flame
During the first phase, tentacles rise through the deck. Keep moving around the broad central area, charge a Skyward Strike while running, and use horizontal swings to cut the tentacles from a distance. If one grabs Link, shake the Wii Remote and Nunchuk to escape. After enough tentacles are removed, Tentalus rises from the water.
Watch for the splash that marks Tentalus’s emergence. Draw the Bow and shoot the exposed eye promptly. A successful arrow shot stuns the boss and drops its head to deck level. Run in and slash the eye, or cut away the smaller head tentacles first and then attack the eye. Repeat the tentacle-clearing and eye-shot cycle. The tentacles appear more quickly as the battle progresses, so keep moving and prepare the next Skyward Strike before approaching.
When Tentalus begins destroying the lower deck, use the fallen box to climb to the upper deck while avoiding rolling barrels. In the final phase, the head tentacles have teeth and lunge across the platform. Cut them with deliberate sword swings or Shield Bashes when they attack. When the opening appears, shoot the eye, approach during the stun, and strike it repeatedly. Tentacles can drop hearts and arrows, so collect them when doing so does not expose Link to a lunge.
After Tentalus falls, collect the Heart Container and Skyward Strike the Goddess Crest. The cutscene grants Nayru’s Flame and upgrades the Goddess Longsword into the Goddess White Sword. This completes the Sandship’s required progression.
- Cut deck tentacles with horizontal Skyward Strikes.
- Shoot Tentalus’s eye with the Bow.
- Use the fallen box to reach the upper deck.
- Defeat the toothed head tentacles in the final phase.
- Collect the Heart Container.
- Skyward Strike the Goddess Crest and receive Nayru’s Flame.
Before you move on
- The invisible Sandship has been located and boarded without requiring the Bow beforehand.
- Scervo has been defeated and the Bow is in the inventory.
- The Sandship’s Timeshift machinery has been activated.
- Both generators are running.
- The imprisoned crew has been rescued and the Captain’s Cabin Small Key obtained.
- The Squid Carving has been collected from the Captain’s Cabin and used to open the engine room.
- The sinking-ship escape has been completed.
- Tentalus has been defeated and the Heart Container collected.
- Nayru’s Flame has been obtained from the Goddess Crest, and the sword is now the Goddess White Sword.
- The optional eastern Piece of Heart is in the inventory only if that separate reward was collected.
Fire Sanctuary, Platforming & Ghirahim Rematch
After completing the Sandship and obtaining Nayru’s Flame, return to the Isle of Songs to learn Din’s Power. Use it to enter Din’s Silent Realm in Eldin Volcano and collect all 15 Tears of Din. The resulting Fireshield Earrings open the hot upper route to Volcano Summit. Quench the two smaller frog barriers with bottled water, then borrow the Water Dragon’s Basin from Faron at Lake Floria. Escort Scrapper through Eldin Volcano so he can extinguish the large frog barrier automatically and open the Fire Sanctuary. Inside, obtain the Mogma Mitts, free the trapped Mogmas, solve the statue-lighting puzzle, defeat Ghirahim’s rematch, claim Din’s Flame, and transform the Goddess Sword into the Master Sword. This chapter ends when Fi directs Link back to the Sealed Grounds for the second Imprisoned encounter; do not treat the Gate of Time sequence as completed here.
Learn Din’s Power and complete Din’s Silent Realm
After receiving Nayru’s Flame from the Sandship, return to the Isle of Songs. Stand before the altar and perform a Skyward Strike to learn Din’s Power. Fly to Eldin Volcano and land at the Volcano Ascent Bird Statue. Save before entering the trial area.
Look for the Blessed Butterflies near the trial entrance and play the Goddess Harp to reveal the gate. Enter Din’s Silent Realm and collect all 15 Tears of Din. Use Light Fruits to reveal nearby tears and watch for Waking Water, which temporarily activates the Guardians. Plan each route before taking a tear, and leave a safe retreat path whenever possible.
The trial is complete when all 15 Tears of Din have been collected and Link returns to the entrance. The reward is the Fireshield Earrings. Equip them before attempting the upper Volcano Summit route; this item is a required story reward, not an optional accessory.
- Return to the Isle of Songs after obtaining Nayru’s Flame.
- Learn Din’s Power with a Skyward Strike.
- Enter Din’s Silent Realm from the Volcano Ascent area.
- Collect all 15 Tears of Din.
- Return to the entrance and receive the Fireshield Earrings.
Reach Volcano Summit and quench the small frog barriers
Return to Eldin Volcano with the Fireshield Earrings equipped. Follow the newly accessible hot route toward Volcano Summit. The earrings protect Link from the area’s extreme heat, but they do not prevent damage from enemies, lava, falling, or other hazards.
Carry an Empty Bottle and fill it at an available water source in the summit route. Use the bottled water on the first small frog statue blocking the path. Refill the bottle and quench the second small frog statue. These barriers are handled with ordinary bottled water before the Water Dragon’s Basin is obtained.
Save at the Volcano Summit Bird Statue whenever you pass it. Defeat Fire Keese and Red ChuChus before crossing narrow platforms, and scout lava routes instead of rushing across them. The objective is to open the route toward the large frog barrier, not to enter the Fire Sanctuary yet.
- Equip the Fireshield Earrings.
- Carry an Empty Bottle.
- Quench both small frog statues with bottled water.
- Save at the Volcano Summit Bird Statue.
- Confirm that the route toward the large frog barrier is open.
Borrow the Water Dragon’s Basin
After reaching the summit route, return to the sky and fly to Faron Woods. Enter Lake Floria through the water route and land at the Floria Waterfall Bird Statue. Enter the Water Dragon’s chamber and speak with Faron. She lends Link the Water Dragon’s Basin, which is the large container required for the final frog barrier.
Scrapper takes the Basin and attempts to return to Eldin Volcano, but he is forced down into the lower volcano area. Fly back to Eldin Volcano and land at the lower route. Save before beginning the escort. The Basin is not found inside the summit and cannot be substituted with an ordinary Bottle for the large barrier.
- Complete Din’s Silent Realm first.
- Reach Faron through Lake Floria.
- Receive the Water Dragon’s Basin.
- Return to Eldin Volcano.
- Locate Scrapper in the lower route and save before escorting him.
Escort Scrapper to the large frog barrier
Advance ahead of Scrapper and clear enemies before he reaches them. Prioritize Bokoblin archers because they can attack Scrapper from a distance. Use the Bow when it is safer than approaching, and eliminate Red ChuChus and other enemies that can block or delay the escort.
Defeat the Moblins along the rising route. A shield bash can expose a Moblin’s opening, while Bombs or carefully timed sword attacks can deal with wooden shields. Continue through the huts and across the bridge only after clearing nearby archers. In the upper hot chamber, save at the Bird Statue and defeat both Lizalfos before moving into the final section.
In the final room, defeat the Fire Keese and Red ChuChus, then shoot the Cursed Spumes in the magma before crossing the moving lava platforms. Follow the northern route to the large frog statue. Scrapper automatically pours the Water Dragon’s Basin into the statue, extinguishing the wall of fire and opening the Fire Sanctuary entrance. This automatic scene is the required trigger; do not attempt to use a separate Bottle on the large statue.
- Save before beginning the escort.
- Clear archers before they can target Scrapper.
- Defeat the Moblins and open the bridge route.
- Defeat both Lizalfos in the upper chamber.
- Confirm that Scrapper automatically empties the Basin into the large frog statue.
- Save at the Bird Statue before entering the dungeon.
Enter the Fire Sanctuary and obtain the first Small Key
Save at the entrance Bird Statue. The opening room contains a magma crossing with Water Fruits hanging above it. Use the Hook Beetle or another suitable ranged method to strike a Water Fruit and create a temporary water platform. Cross promptly because the platform does not remain safe indefinitely. Use the Bow against distant Bokoblins when needed.
At the next crossing, drop another Water Fruit and ride across. Defeat the Blue Bokoblin in the following room; the bars open after it is defeated. Open the blue chest to obtain the first Small Key, then return to the locked door on the earlier route.
In the room beyond the locked door, thrust the Wii Remote forward to attach a Water Fruit to the sword. Carry it around the obstruction and swing deliberately to throw it into the frog statue. This removes the internal fire wall. Defeat the Green Bokoblin and Dark Keese, save at the Bird Statue, and continue toward the Magmanos room.
- Use Water Fruits to create temporary magma platforms.
- Defeat the Blue Bokoblin.
- Take the first Small Key from the blue chest.
- Open the earlier locked door.
- Attach and throw a Water Fruit into the internal frog statue.
Defeat the Magmanos pair and obtain the Mogma Mitts
The Magmanos room locks when Link enters. Use the stone platforms to reach a Water Fruit, then return to the lower floor. When a Magmanos rises, throw the Water Fruit at its hand to solidify it. Slash the exposed hand until it breaks, then repeat the process for the second Magmanos. Both enemies must be defeated before the lava drains and the exit opens.
Proceed through the southwest passage and defeat the two Dark Lizalfos. Reach the upper route and pull the lever that frees Silva. Speak with Silva to receive the Mogma Mitts. These replace the earlier Digging Mitts and allow Link to use the dungeon’s deeper underground routes.
While burrowing, use the Wii Remote motion to claw through soft rock and roll underground Bombs toward blocked passages or boulders. After sending a Bomb toward its target, retreat through the glowing exit light. Remaining near the blast can injure Link and can force a failed attempt.
- Solidify each Magmanos with a Water Fruit.
- Destroy both Magmanos’ hands.
- Defeat the Dark Lizalfos after the lava drains.
- Pull the lever and free Silva.
- Collect the Mogma Mitts.
Free Bronzi and collect the Dungeon Map
Use the Mogma Mitts at the soft-soil patch near the reinforced window. Burrow through the tunnel, claw away soft rocks, and roll an underground Bomb into the boulder. Resurface at the light and clear magma ash with the Gust Bellows when necessary. Continue through the opened route and defeat the Blue Bokoblin.
Cross the broken bridge with the Clawshots after dealing with the distant archer. Bronzi is trapped above the floor in the next section. Enter the nearby underground passage and activate the blue switches so the gates remain open. If the arrangement resets, return through the light and repeat the route while checking the gate positions from the surface.
Once Bronzi is free, pull the lever and speak with him to receive the Dungeon Map. A nearby concealed route leads to optional treasure. Do not mistake that side path for the required route to the Mysterious Crystals.
- Use underground Bombs only when the exit light is available.
- Cross the broken bridge with the Clawshots.
- Open the gates and free Bronzi.
- Collect the Dungeon Map.
- Keep optional treasure separate from the required route.
Obtain the Mysterious Crystals
Continue through the concealed soil route and defeat the Moldorm by striking its orange tail from behind. Avoid its head and attack only as it passes. After it is defeated, open the chest for a Small Key and return to the main route. Use the key on the locked door.
Proceed through the lava rooms, using Water Fruits for temporary platforms and underground Bombs to alter the route. Eventually reach the room containing five winged statues and read the tablet. The statues must be activated in ascending order of their wing counts: bottom-left, middle, top-right, bottom-right, then top.
Burrow underground and step on the corresponding switches in that order. Use the Bomb to clear the boulder, but do not activate the nearby switch too early. When all five statues are lit, another underground Moldorm appears and the exit closes. Strike its tail three times, then return through the light and resurface.
Open the chest beyond the gate to obtain the Mysterious Crystals, the Fire Sanctuary’s boss key. Use the floor switch on the western route to reopen the passage to the central Bird Statue and save before entering the boss room.
- Defeat the first Moldorm by attacking its tail.
- Use the Small Key on the main locked door.
- Activate the statue switches in ascending wing order.
- Defeat the second Moldorm.
- Collect the Mysterious Crystals.
- Save at the central Bird Statue.
Defeat Ghirahim’s rematch
Place the Mysterious Crystals into the northern boss door. In the first phase, Ghirahim walks around the room with a glowing red hand and floating red daggers. Avoid predictable repeated swings. Hold the sword toward one side to draw his hand away, then strike from the opposite side. If the hand catches the blade, move the sword upward to break free.
When Ghirahim sends daggers toward Link, shield-bash or evade them instead of attacking blindly. During the two-sword phase, target him and watch which side his blades protect. Strike the exposed angle, then stop attacking if his guard changes. A poorly directed follow-up can be blocked and countered.
Ghirahim can summon dagger formations around Link. Use a standard spin attack or a vertical spin attack when the formation requires it. When he jumps for a landing attack, sprint away from his position and attack only after he lands and an opening is visible. Keep sword motions short and deliberate, especially on the original Wii MotionPlus controls. If sword directions begin registering incorrectly, pause and recalibrate before continuing.
- Draw the red hand away from the intended strike.
- Break free with an upward sword motion if grabbed.
- Shield-bash or evade incoming daggers.
- Strike the unguarded side during the two-sword phase.
- Use spin attacks against surrounding dagger formations.
- Recalibrate MotionPlus if sword directions become unreliable.
Claim Din’s Flame and transform the sword
After Ghirahim is defeated, collect the Heart Container and enter the door across the arena. Approach the altar and perform a Skyward Strike against the crest. The scene awards Din’s Flame and transforms the Goddess Sword into the Master Sword.
Save after the transformation. At this point, the Fire Sanctuary portion is complete: the Mogma Mitts are collected, Silva and Bronzi have been freed, the Dungeon Map and Mysterious Crystals are in Link’s inventory, Ghirahim’s rematch is defeated, Din’s Flame has been received, and the Goddess Sword has visibly become the Master Sword.
Fi’s next story direction sends Link back toward the Sealed Grounds. The next required event is the second Imprisoned encounter. The Gate of Time sequence follows that encounter and should not be treated as this chapter’s immediate completed objective.
- Collect the Heart Container.
- Strike the altar crest with a Skyward Strike.
- Receive Din’s Flame.
- Confirm that the Goddess Sword has become the Master Sword.
- Save after the transformation.
- Return toward the Sealed Grounds for the second Imprisoned encounter.
Optional rewards and recovery
The fourth Empty Bottle is optional. After obtaining the Mogma Mitts, explore the appropriate side route in the earlier sanctuary area to reach the blue chest containing it. The Fire Sanctuary Piece of Heart is also optional and is obtained through a later underground Mogma chase. Neither reward is required for the Mysterious Crystals, Ghirahim, Din’s Flame, or the Master Sword.
If the Scrapper escort fails, reload the latest save and move ahead of him, prioritizing archers and Lizalfos. If a Water Fruit puzzle does not respond, attach the fruit with a sword thrust before swinging to throw it. If an underground switch puzzle resets, return through the glowing exit light and repeat the route while tracking which surface gates remain open.
Save before the escort, before the boss door, and after the Master Sword transformation. Missing an optional chest does not block the campaign, and the Fire Sanctuary remains revisitable.
- Treat the fourth Empty Bottle as optional.
- Treat the Fire Sanctuary Piece of Heart as optional.
- Reload after a failed Scrapper escort.
- Use a sword thrust to attach Water Fruits.
- Retreat through the glowing light after placing underground Bombs.
- Save after the Master Sword transformation.
Before you move on
- Din’s Power was learned at the Isle of Songs.
- Din’s Silent Realm was completed and all 15 Tears of Din were collected.
- The Fireshield Earrings were received.
- Both small Volcano Summit frog barriers were quenched with bottled water.
- Faron lent Link the Water Dragon’s Basin at Lake Floria.
- Scrapper carried the Basin through Eldin Volcano.
- The large frog barrier was extinguished automatically by Scrapper.
- The Mogma Mitts are in Link’s item collection.
- Silva and Bronzi were freed.
- The Dungeon Map and Mysterious Crystals were collected.
- The Mysterious Crystals opened the northern boss door.
- Ghirahim’s rematch was defeated and the Heart Container was collected.
- Din’s Flame was obtained from the altar crest.
- The Goddess Sword visibly transformed into the Master Sword.
- A save was made after the transformation.
- Fi’s next objective points Link toward the Sealed Grounds and the second Imprisoned encounter, not directly to a completed Gate of Time sequence.
Thunderhead, Levias, Bilocyte and the Late Imprisoned Trigger
After Fire Sanctuary, Din’s Flame transforms the Goddess Sword into the Master Sword. Return to the Sealed Temple, where the attempt to activate the Gate of Time is interrupted by the second Imprisoned encounter. Defeat it with sword strikes, air vents and Groose’s Groosenator, then complete the sealing ritual. Activate the Gate of Time, travel to the past, witness Zelda’s sealing scene and receive the sword’s completed form. In the present, begin the Triforce investigation, complete Owlan’s Spiral Charge training, deliver pumpkin soup to Levias, defeat Bilocyte, and return for the third Imprisoned battle. After the third sealing, use Groose’s launcher to enter flooded Faron and begin the separate Song of the Hero route.
Return to the Sealed Grounds after Fire Sanctuary
Finish Fire Sanctuary, defeat Ghirahim’s rematch and obtain Din’s Flame. At the altar, Din’s Flame changes the Goddess Sword into the Master Sword. This is the sword available for the second Imprisoned encounter; the later past-Zelda sequence gives it its completed form. Save at the Volcano Summit Bird Statue, then return to the sky and dive through the green beam to Faron. Land at the Sealed Grounds or Behind the Temple Bird Statue.
Enter the Sealed Temple and approach the Gate of Time. Speak with the Old Woman and Groose, then stand on the pedestal and begin charging a Skyward Strike. The rumbling that interrupts the attempt is the required trigger for the second Imprisoned battle. Save at the Bird Statue inside the temple before exiting through the southern door. The Gate of Time is not activated yet.
- Fire Sanctuary is complete.
- Din’s Flame has changed the Goddess Sword into the Master Sword.
- The Sealed Temple Gate of Time activation attempt has been interrupted.
- A save has been made inside the Sealed Temple.
Defeat the second Imprisoned
Drop into the sealing pit. This version has grown arms and moves faster than the first encounter. It still has two feet with four toes each, and each step creates a damaging shockwave. Stay near the creature’s sides rather than directly in front of a foot, watch the landing animation, and move away before the shockwave reaches Link.
Cut the toes from one foot at a time. Three toes are at the front and one is behind each foot. Removing all four toes from one foot slows the Imprisoned, giving you time to catch up and attack the other foot. Do not wait for Groose to do all the work: the Groosenator is mainly needed when the creature climbs or crawls, while Link must normally remove toes with the Master Sword.
When the Imprisoned begins climbing the wall, switch to the Groosenator when Groose calls for you. On the original Wii, press Up on the Wii Remote to take control of the launcher, move it along the track with the Control Stick, aim with the Wii Remote and fire the giant Bomb Flower with A. A successful hit knocks the creature from the wall and stuns it. Missing shots lets it gain ground quickly, so wait until the target is clearly in the launcher’s path.
After removing the toes, use the nearby air vent to reach the higher ledge. Run down the slope and jump toward the exposed sealing spike. The creature’s arms restrict the direct route, so approach from the side or use the vent again if Link lands on the wrong level. Strike the spike three times with upward sword swings.
The Imprisoned rises and repeats the sequence. It may climb again, or lie on its belly and crawl rapidly up the path. When it crawls, use an air vent to get above it and wait for it to stand before attacking. Use the Groosenator to interrupt another climb. Repeat the approach until the spike has received three sets of three hits, for nine successful strikes in total. After the final set, drop to the bottom of the pit, charge the Master Sword and perform a Skyward Strike on the sealing spike. Follow the sword pattern shown on screen to finish the sealing ritual.
- One foot’s toes have been removed to slow the boss.
- The Groosenator has knocked the Imprisoned from a climb at least when required.
- The crawling phase has been handled with an air vent and a safe wait for it to stand.
- The sealing spike has been struck three times in each of three damage rounds.
- The final Skyward Strike and displayed sealing pattern have been completed.
Activate the Gate of Time and complete the past sequence
Use the air vents to leave the pit and return to the Sealed Temple. Speak with the Old Woman and Groose again, stand on the pedestal and charge a Skyward Strike. Aim the released beam at the Gate of Time to open it. Walk through the gate into the past.
In the Temple of Hylia, speak with Impa, then go up the steps and speak with Zelda. Watch the story sequence explaining Zelda’s identity and her role in the seal. Zelda blesses the Master Sword, giving it its completed form. Speak with Impa afterward and return through the Gate of Time. Save at the Bird Statue in the past before leaving if you want an additional recovery point.
Back in the present, speak with the Old Woman and Groose, then leave the Sealed Temple and return to Skyloft. Do not treat the earlier, interrupted activation attempt as the Gate of Time sequence; the gate only becomes usable after the second Imprisoned has been sealed.
- The second Imprisoned has been fully sealed.
- The Gate of Time has been opened with a Skyward Strike.
- Link has met Zelda and Impa in the past.
- The completed form of the Master Sword has been obtained.
- Link has returned to the present.
Begin the Triforce investigation and learn Spiral Charge
Return to Skyloft and enter the Knight Academy. Go upstairs and speak with Headmaster Gaepora about the Triforce. His conversation points Link toward Levias in the Thunderhead and the staff member who can help him reach the sky spirit.
Speak with Instructor Owlan in the academy. Follow the resulting Loftwing training sequence outside. The objective is to destroy 10 targets within 120 seconds. Fly normally to line up each target, then press A while close enough to perform the Spiral Charge. There are more targets than required, so prioritize clear targets along the route instead of attempting difficult angles.
If the Wii Remote Plus or MotionPlus stops registering the charge reliably, pause and recalibrate before repeating the course. Completing the 10-target trial unlocks the Spiral Charge for the Levias encounter and directs Link to the Lumpy Pumpkin.
- Gaepora has been asked about the Triforce.
- Owlan’s Loftwing training has begun.
- At least 10 targets have been destroyed within two minutes.
- The Spiral Charge training has been completed.
Deliver pumpkin soup to Levias
Fly to Pumpkin Landing and enter the Lumpy Pumpkin. Speak with the owner behind the counter and ask about Levias. The owner prepares the special pumpkin soup, and Scrapper carries the large container. Save at the Bird Statue outside if desired, then fly into the Thunderhead.
Locate the island with the permanent rainbow and land there with Scrapper. The delivery scene begins the Levias encounter. If nothing happens, return to the Lumpy Pumpkin and confirm that the soup conversation occurred after completing Owlan’s training. Thunderhead collectibles are not required for this trigger.
- Owlan’s training is complete.
- The pumpkin soup has been requested from the Lumpy Pumpkin owner.
- Scrapper is carrying the soup.
- Link has landed on the rainbow island in the Thunderhead.
Defeat Levias and Bilocyte
Jump from the rainbow island, call the Loftwing and approach Levias from the side. Four tentacles with eyes extend from its body. Line up each eye and press A near the target to use the Spiral Charge. Avoid the tail and reposition after every charge; Levias moves at a similar speed to the Loftwing, so charging from too far away can miss.
Destroy all four eyes. When Bilocyte emerges from Levias’s head, fly above the flat portion of Levias’s back and dive onto it without opening the Sailcloth. Approach Bilocyte to start the ground phase.
Bilocyte spits green projectiles. First reflect the projectiles into the two side fins: swing left or right according to the fin’s position. Once both fins are removed, reflect a projectile into the eye. A vertical sword swing sends a centered projectile straight back. Bilocyte later moves its head after firing, so adjust the return angle to its new position. The first successful eye hits create openings for direct sword attacks; later, continue using reflected projectiles until the parasite is defeated.
Speak with Levias after the battle. He explains that the Song of the Hero has four portions: one from Levias and one from each dragon. The dragon portions are the next regional objectives, but the third Imprisoned must be defeated before beginning that separate route.
- All four Levias eyes have been destroyed with Spiral Charges.
- Link has landed on Levias’s back without using the Sailcloth.
- Both Bilocyte fins have been removed.
- Bilocyte has been defeated.
- Levias has explained the four-part Song of the Hero.
Return for the third Imprisoned encounter
After speaking with Levias, return to the Sealed Grounds and enter the Sealed Temple. Speak with the Old Woman if the event does not begin immediately, then leave for the sealing pit. This is the third required Imprisoned encounter and occurs after Levias and Bilocyte, not immediately after the Gate of Time sequence.
Save inside the temple before entering the pit. The third Imprisoned moves faster, keeps its arms and produces red shockwaves whenever its feet land. Use Groose’s launcher early rather than chasing the creature through repeated shockwaves.
- Levias and Bilocyte have been defeated.
- Link has returned to the Sealed Grounds.
- The third Imprisoned event has started.
- A recent save exists before the battle.
Use the Groosenator and complete the third sealing
Take control of the Groosenator when Groose is ready and fire a giant Bomb Flower to stagger the Imprisoned. Switch back to Link, move to one foot and cut its toes. Removing one foot’s toes slows the creature. Keep clear of the red shockwaves from each landing and use another launcher shot when the boss begins climbing or gains too much distance.
After the Imprisoned falls, use an air vent to reach the upper path and run toward its head. Drop to the sealing spike and strike it three times. When the creature rises, use the Groosenator to knock it down again, then repeat the air-vent route and deliver another three strikes. During the later crawling or climbing phase, use the upper track and launcher to interrupt its movement rather than trying to follow on foot.
For the final phase, reach the upper Groosenator position and aim at the Imprisoned’s head. Fire to launch Link onto the creature. Strike the sealing spike three more times after landing. Return to the bottom of the pit, charge the completed Master Sword and perform the final Skyward Strike. Follow the displayed sword pattern to finish the sealing action. The story portion is incomplete until this last sealing ritual succeeds.
- The Groosenator has staggered the third Imprisoned.
- The boss has been slowed by removing toes from one foot.
- The first head sequence has received three spike strikes.
- The second head sequence has received three spike strikes.
- Link has been launched onto the head for the final three strikes.
- The final Skyward Strike and displayed sealing pattern have succeeded.
Enter flooded Faron and hand off to the song quest
After the third sealing, return to the Sealed Temple and speak with the Old Woman and Groose. The story reveals that Faron Woods has flooded. Use Groose’s launcher to send Link into flooded Faron; the normal surface route is not the correct entry for this event.
This completes the chapter handoff. The separate dragon-song chapter covers flooded Faron and its Tadtones, the Eldin portion, the Lanayru portion, Levias’s final verse after all three regional portions, and the final Skyloft Silent Realm. For the original Wii release, complete Faron or Eldin before Lanayru. If Lanayru is completed first, do not speak with Golo at the Lanayru Mine entrance until the other two portions are complete, because Nintendo documented that sequence as a progression issue.
- The third Imprisoned has been sealed completely.
- The Old Woman and Groose have completed their post-battle dialogue.
- The Groosenator has launched Link into flooded Faron.
- The next chapter can begin with the regional Song of the Hero objectives.
- Lanayru has not been followed by the prohibited early Golo conversation.
Before you move on
- Fire Sanctuary and Din’s Flame are complete.
- The second Imprisoned has been defeated with the Master Sword, Groosenator and air-vent routes.
- The second sealing ritual has ended with a Skyward Strike and displayed sword pattern.
- The Gate of Time has been activated after the second Imprisoned battle.
- Link has traveled to the past, witnessed Zelda’s sealing scene and obtained the completed Master Sword.
- Gaepora’s Triforce conversation is complete.
- Owlan’s Spiral Charge training has destroyed 10 targets within 120 seconds.
- Pumpkin soup has been delivered to the rainbow island in the Thunderhead.
- All four Levias eyes have been destroyed and Bilocyte has been defeated.
- Levias has explained the four-part Song of the Hero.
- The third Imprisoned has been defeated using the Groosenator, head strikes and the final Skyward Strike.
- Groose’s launcher has sent Link into flooded Faron for the separate dragon-song chapter.
References for this chapter
- The Legend of Zelda: Skyward Sword - Guide and Walkthrough - Wii
- Return to the Sealed Grounds II — Legend of Zelda: Skyward Sword Guide
- Gate of Time - The Legend of Zelda: Skyward Sword Walkthrough
- Skyward Sword Walkthrough - Thunderhead - Zelda Dungeon
- Skyward Sword - The Imprisoned Part 2 Boss Guide
Gathering the Songs and Dragon Encounters (Song of the Hero)
After defeating Bilocyte and beginning the Song of the Hero quest, collect the three regional song portions in the safe original-Wii order: Faron Woods, Eldin Volcano, then Lanayru Gorge. Do not complete Lanayru first and then speak to Golo before the other two songs are secured, because Nintendo documented that sequence as game-breaking on the Wii release. After all three dragons have taught their parts, return to Levias, open the final Goddess’s Silent Realm near the Light Tower in Skyloft, earn the Stone of Trials, and place it in the matching bird statue near the Waterfall Cave to open the route to Sky Keep.
Collect Farore’s Courage in flooded Faron Woods
After the late-game Sealed Grounds events and the conversation with Levias, land at Faron Woods. The entire forest is flooded. Speak with the Kikwi Elder if you need the immediate objective, then swim to the Great Tree’s lower entrance. Follow the underwater passage into the tree, swim upward through its interior, and surface in the Water Dragon’s chamber. Speak with Faron to begin the Tadtone trial.
Fi adds Tadtones to the dowsing targets after the trial begins. Search the flooded woods methodically rather than crossing the whole area at random. Groups may follow fish, circle pools, hide under overturned lily pads, occupy tree hollows, or sit behind destructible obstacles. Use the Water Dragon’s Scale for swimming and water dashes, watch the air gauge, and use blue air bubbles whenever a route keeps Link underwater. Avoid purple poison bubbles and large fish while moving between groups.
The Tadtone objective is complete only after every group has been collected and the musical sequence plays. Return to the Great Tree, swim back up to Faron’s chamber, and speak with her again. She teaches Farore’s Courage and drains Faron Woods. The forest returning to its normal layout is the practical confirmation that this song portion is finished.
- Enter the Great Tree through its lower underwater passage.
- Speak with Faron and accept the Tadtone trial.
- Collect every Tadtone group in flooded Faron Woods.
- Return to Faron and receive Farore’s Courage.
- Confirm that the flood has been removed before leaving.
Complete the Eldin Volcano capture sequence
Fly to Eldin Volcano after finishing Faron. The volcano erupts as Link arrives, and the forced landing begins a mandatory capture sequence. Link loses his sword, Adventure Pouch, and equipment; this is intended progression. Break pots for emergency hearts, then approach the barrel so Plats appears and returns the Mogma Mitts.
Use the Mogma Mitts to burrow out of the first cell. Move through the Bokoblin base by staying out of the searchlights when possible. Plats identifies the contents of some chests, but the base does not need to be restarted from the beginning if Link is caught. A detection normally costs health and relocates Link nearby.
Recover the stolen tools in stages. The Gust Bellows clears ash and opens routes, the Clawshots restore access across Peahats and ledges, and a later chest restores the Adventure Pouch and remaining equipment. Continue exploring after each recovery instead of returning to the volcano entrance prematurely.
Near the final bridge, cut the accessible rope with the sword. Use the Hook Beetle to cut the two side ropes, then cross into the Fire Dragon’s chamber and speak with Eldin. Eldin teaches his portion of the Song of the Hero and the volcano returns to normal. Save at the nearby Bird Statue before beginning Lanayru.
- Recover the Mogma Mitts from Plats.
- Escape the Bokoblin base without treating detection as a full reset.
- Recover the Gust Bellows, Clawshots, Adventure Pouch, and remaining equipment.
- Lower the final bridge by cutting all three ropes.
- Speak with Eldin and receive his song portion.
- Save before entering the Lanayru sequence.
Avoid the original Wii Song of the Hero progression lock
For the original Wii edition, complete Faron Woods or Eldin Volcano before visiting Lanayru for its song. The safest complete order is Faron, Eldin, then Lanayru. Nintendo documented a progression-breaking sequence in which Link obtains the Thunder Dragon’s song first and then speaks with Golo at the Lanayru Mine before the other two song events are complete. In that state, the Faron and Eldin cutscenes may fail to trigger.
If Lanayru was completed first but Golo has not yet been spoken to afterward, leave the area and finish Faron and Eldin before returning to him. If the lock has already occurred and the save was made after the affected sequence, use an earlier save if available. Nintendo also released a Wii Save Data Update Channel intended to repair affected data; that historical repair option is separate from normal gameplay progression.
- Finish Faron or Eldin before starting Lanayru.
- Do not obtain the Lanayru song first on the original Wii release.
- If Lanayru was completed first, do not speak with Golo until Faron and Eldin are complete.
- Keep an earlier save available before beginning this chapter.
Reach Lanayru Gorge and revive the Thunder Dragon
Fly to the Lanayru Mine Entry Bird Statue. Use the Clawshots to reach the nearby targets and follow the narrow route to the crawlspace. Bomb the rocks blocking the passage and enter Lanayru Gorge. Golo’s presence is associated with this route, but the critical Wii warning concerns speaking with him after completing Lanayru first; with Faron and Eldin already complete, proceed through the passage normally rather than repeatedly revisiting his dialogue.
At the gorge, return to the nearby Bird Statue and use the Hook Beetle to carry a bomb to the boulder blocking the route. Cross the gap, send the Beetle to retrieve the Small Key from the distant pillar, unlock the door, and cross the Peahat gap with the Clawshots. Reach the mine cart carrying the Timeshift Stone and strike it to activate the ancient zone.
Follow the cart through the gorge. Operate floor switches, climb vines, use the Whip on levers and swing points, avoid spike traps, and use the Beetle to drop a bomb on the final rock pile blocking the rail. When the cart reaches its destination, the Timeshift zone expands and Lanayru becomes active. Speak with the sick Thunder Dragon. He cannot yet teach the song and instead asks for the Life Tree Fruit.
- Reach Lanayru Gorge through the Lanayru Mine Entry passage.
- Bomb the crawlspace entrance and obtain the Small Key.
- Activate the Timeshift Stone in the mine cart.
- Escort the cart through the switch, lever, vine, and hazard sections.
- Speak with Lanayru and receive the Life Tree objective.
Plant the Life Tree Seedling and receive Nayru’s Wisdom
Follow Lanayru’s instructions to the Life Tree Seedling on the far side of the gorge. Use the nearby Timeshift Stone and robots to reach the seedling, then dig it up. Take it to the present-day Sealed Grounds and enter the Sealed Temple. Plant the seedling in the soft soil near Groose. Fi explains that it would take too long to grow in the present, so dig it up again and carry it through the Gate of Time.
In the past Sealed Temple, plant the seedling in the prepared soil near Impa. Return through the Gate of Time to the present. The mature Life Tree is now in the Sealed Grounds. Use the Hook Beetle to knock down the fruit, pick up the Life Tree Fruit, and carry it back to Lanayru Gorge.
Give the fruit to Lanayru. He recovers and teaches Nayru’s Wisdom, the Lanayru portion of the Song of the Hero. The Thunder Dragon’s Lightning Round becomes available after this recovery, but it is optional and does not replace the required song conversation.
- Retrieve the Life Tree Seedling from Lanayru Gorge.
- Plant it temporarily in the present Sealed Grounds, then dig it up.
- Carry it through the Gate of Time and plant it in the past Sealed Temple.
- Return to the present, knock down the Life Tree Fruit, and collect it.
- Deliver the fruit to Lanayru and receive Nayru’s Wisdom.
- Leave the Lightning Round for optional completion.
Return to Levias for the final verse
After receiving all three regional portions, fly into the Thunderhead and land on Levias’s back. Speak with him to trigger the full Song of the Hero sequence. Levias teaches the final verse, completing the song in Link’s inventory and enabling Fi to identify the final trial gate in Skyloft. Bilocyte must already have been defeated from the earlier Thunderhead storyline; that boss is not part of this final Levias conversation.
If Levias does not advance the scene, verify the three regional completion states rather than repeating the Bilocyte battle. Faron must have drained the forest after the Tadtone collection, Eldin must have taught his portion after the equipment-recovery sequence, and Lanayru must have been cured with the Life Tree Fruit.
- Have Farore’s Courage, Eldin’s song portion, and Nayru’s Wisdom.
- Confirm Bilocyte was defeated earlier.
- Speak with Levias in the Thunderhead.
- Wait for the final verse and full-song scene to finish.
Open and complete the final Goddess’s Silent Realm
Fly to Skyloft and use dowsing to locate the trial gate near the Light Tower. Stand on the pulsing harp mark, equip the Goddess’s Harp, and strum in time with the ring. When Fi finishes opening the gate, raise the Wii Remote to charge the sword and thrust into the trial symbol. This begins the fourth and final Goddess’s Silent Realm.
Collect all 15 Sacred Tears. Light Fruits reveal nearby tear locations and Stamina Fruits support dashes across slopes and gaps. Flying Sky Watchers alert the Guardians if their light catches Link; Earth Watchers and Waking Water can also trigger danger. Move from one safe Light Fruit zone to the next, and plan a route that avoids crossing active patrols. If Link is exposed, run to the nearest safe zone instead of pursuing the next tear while the Guardians are active.
The trial is complete only after all 15 Tears of Hylia have been collected and Link returns to the starting point. The reward is the Stone of Trials. Playing the song at the gate does not award it by itself.
- Locate the trial gate near Skyloft’s Light Tower.
- Play the complete Song of the Hero with the harp.
- Enter the Goddess’s Silent Realm.
- Collect all 15 Sacred Tears and return to the starting point.
- Receive the Stone of Trials.
Place the Stone of Trials and open Sky Keep
After leaving the Silent Realm, travel to the northeast side of Skyloft near the entrance to Waterfall Cave. Cross the platforms above the water and look for the old one-eyed bird statue with one red eye. Examine it and place the Stone of Trials in its matching socket.
The statue aligns with the Goddess Statue and fires a projectile into the island. The lower portion of the Goddess Statue’s island breaks away, revealing the final dungeon route. New Clawshot targets appear around the exposed structure. Clawshot across them and enter Sky Keep. At the entrance, use the Bird Statue and open the dungeon map chest before proceeding.
- Carry the Stone of Trials to northeast Skyloft.
- Find the one-eyed bird statue near Waterfall Cave.
- Insert the Stone of Trials.
- Cross the newly revealed Clawshot route.
- Enter Sky Keep and confirm the dungeon map is available.
Before you move on
- Faron Woods has been drained and Faron has taught Farore’s Courage.
- Eldin’s capture sequence is complete and Eldin has taught his song portion.
- Lanayru has been cured with the Life Tree Fruit and has taught Nayru’s Wisdom.
- Levias has taught the final verse of the Song of the Hero.
- The Goddess’s Silent Realm in Skyloft has been completed and the Stone of Trials is in the inventory.
- The Stone has been placed in the one-eyed bird statue near Waterfall Cave.
- The exposed route to Sky Keep is visible and Link has entered the dungeon.
References for this chapter
- The Legend of Zelda: Skyward Sword – Song of the Hero Quest Issue
- Skyward Sword Walkthrough - Song of the Hero
- The Legend of Zelda: Skyward Sword - Guide and Walkthrough - Wii, Final Battle
- Skyward Sword walkthrough – Song of the Hero – The Water Dragon in Faron and Fire Dragon in Eldin
- Stone of Trials - Zelda Wiki
Imprisoned Encounters: Reference, Variants and Recovery
The Imprisoned appears three times during the original Wii campaign, but the battles are separated by dungeons, Silent Realms, Sacred Flames and major story scenes. Use this chapter as a tactical reference and story-window checklist, not as a chronological instruction to fight all three encounters consecutively. The first encounter uses the Goddess Sword. After the three Sacred Flames, Din’s Flame changes that blade into the Master Sword before the second encounter. The second Imprisoned battle therefore uses the Master Sword. After that battle, Link activates the Gate of Time and completes the past-Zelda sequence, where Zelda’s blessing produces the completed or True Master Sword used in the third encounter.
Story-window reference
First encounter: complete Lanayru Desert, Lanayru Mining Facility and the Temple of Time sequence. Zelda gives Link the Goddess Harp during that story section. Return to the Sealed Temple, follow the scene with the Old Woman and Impa, and complete the Old Woman’s harp tutorial. Play the Ballad of the Goddess so the Gate of Time appears. When the Sealed Grounds shake, leave the temple and descend to the bottom of the spiral pit. The Imprisoned awakens there. Link has the Goddess Sword, and Groose has not yet installed the Groosenator for this battle. After the fight and the required Sealed Temple follow-up, Farore’s Silent Realm becomes available in Faron Woods. It is not available during the opening Faron route or the first Eldin visit.
Second encounter: complete the Sandship, Nayru’s Silent Realm, Din’s Silent Realm, Fire Sanctuary and the fight with Ghirahim. In Fire Sanctuary, obtain Din’s Flame and strike the altar emblem to transform the Goddess Sword into the Master Sword. Return to the Sealed Grounds when the story directs you there. The attempt to activate the Gate of Time is interrupted, and the Imprisoned breaks free again. Descend to the bottom of the Sealed Grounds for the second battle. Link uses the newly forged Master Sword in this encounter. Zelda’s later blessing in the past has not happened yet, so do not call this weapon the completed or True Master Sword. After the second battle and its sealing action, activate the Gate of Time and complete the past-Zelda sequence; that is when the sword becomes the completed or True Master Sword.
Third encounter: defeat Levias and Bilocyte, then receive Levias’s portion of the Song of the Hero. Return to the Sealed Grounds when the late-story trigger sends Link there. The Imprisoned now moves faster, emits dangerous red electrical shockwaves, gains an airborne phase and eventually requires Groose to launch Link from the Groosenator. This encounter uses the completed or True Master Sword obtained after the Gate of Time and past-Zelda sequence. Its conclusion sends Link into the late Faron and Song of the Hero progression.
- First fight: after Lanayru Mining Facility, Temple of Time, Goddess Harp and the Old Woman’s harp tutorial.
- First fight: before Farore’s Silent Realm.
- First fight: Goddess Sword, with no Groosenator.
- Second fight: after Sandship, Din’s Silent Realm, Fire Sanctuary and Din’s Flame.
- Second fight: Master Sword created by Din’s Flame.
- Second fight: before the Gate of Time and past-Zelda sequence.
- Past-Zelda sequence: produces the completed or True Master Sword.
- Third fight: after Levias and Bilocyte, before the regional Song of the Hero portions are complete.
- Third fight: completed or True Master Sword.
- All three Imprisoned battles are mandatory story encounters, not Silent Realm challenges.
Preparation for any encounter
Save at a Bird Statue in or near the Sealed Grounds before starting the descent whenever the statue is available. On the original Wii version, use a Wii Remote with MotionPlus or a Wii Remote Plus and a Nunchuk. Secure the wrist strap. If sword directions or Skyward Strikes begin registering incorrectly, set the remote in a neutral position and recalibrate before retrying. Do not substitute Switch HD button controls for the Wii control scheme.
Carry healing supplies and check the shield’s condition before entering the arena. No Goddess Cube, Gratitude Crystal, Heart Piece, Lightning Round reward or Hylian Shield is required. The sword depends on the story window: use the Goddess Sword during the first encounter, the Master Sword during the second, and the completed or True Master Sword during the third.
The arena is a spiral pit with air geysers linking its levels. These geysers are useful for changing elevation, catching up with the boss and reaching the exposed head after the Imprisoned falls. Keep stamina available for dashes and avoid spending it all before a climb or chase. When possible, fight from the side or behind a foot rather than directly in front of it, because each step produces a damaging shockwave.
- Save at a nearby Bird Statue.
- Confirm MotionPlus tracking before descending.
- Bring healing items and a usable shield.
- Use the Goddess Sword for the first encounter.
- Use the Master Sword forged with Din’s Flame for the second encounter.
- Use the completed or True Master Sword for the third encounter.
- Keep optional equipment and collectibles separate from required progress.
- Use air geysers to change elevation and recover position.
First encounter: toes and direct sealing-spike strikes
The first Imprisoned begins at the bottom of the Sealed Grounds and moves up the spiral toward the temple. Each foot has four glowing toes. Cut the toes with controlled sword swings, concentrating on one foot at a time. Destroying all four toes on a foot slows the boss and makes the next approach safer. Avoid standing in front of a foot as it lands, because the impact creates a shockwave.
When the toes have been removed and the Imprisoned falls backward, run around to the head. Use upward Goddess Sword strikes against the exposed sealing spike. Three successful strikes complete one damage cycle. When the boss rises, its toes return, so repeat the toe-and-spike pattern until the combat portion is complete. Air geysers can help Link reach the head, but cutting the toes first is the most dependable method for a newcomer.
After the combat damage is finished, return to the bottom of the Sealed Grounds. Charge the Goddess Sword and perform a Skyward Strike on the sealing spike, then follow the directional sword motions shown on screen. This sealing action is separate from the preceding combat cycles. After the seal is restored, return to the Sealed Temple and allow the dialogue to finish. The game then opens the route to Farore’s Silent Realm. Do not search for the Goddess Harp before this fight; Link already received it during the Temple of Time sequence.
- Reach this battle only after the Goddess Harp and Old Woman’s harp tutorial.
- Cut the glowing toes rather than attacking the body.
- Work on one foot at a time.
- Use upward Goddess Sword strikes on the exposed spike.
- Repeat the toe-and-spike cycle until the combat portion ends.
- Return to the bottom for the separate sealing Skyward Strike.
- Continue through the Sealed Temple dialogue to unlock Farore’s Silent Realm.
Second encounter: arms, climbing, shockwaves and the Groosenator
The second Imprisoned retains the toe weakness but now has arms and moves more quickly. Link has the Master Sword at this point because Din’s Flame upgraded the Goddess Sword in Fire Sanctuary. Zelda’s past blessing has not yet occurred. The battle therefore uses the Master Sword, not the Goddess Sword and not yet the completed or True Master Sword.
The Imprisoned’s footsteps still create damaging shockwaves. When it starts climbing the arena wall or advancing rapidly, press Up on the Wii Remote D-pad to switch to Groose’s Groosenator. Move the launcher along its track with the Nunchuk Control Stick, aim with the Wii Remote and press A to fire the Bomb Flower when the target is aligned.
A direct bomb hit knocks the Imprisoned down or interrupts its advance. Switch back to Link immediately and remove toes from one foot, or use the opening to reach the head. If the boss falls backward, use an air geyser to reach the appropriate ledge, move down toward the head and strike the sealing spike from above. Three upward Master Sword strikes complete that damage cycle.
Use the Groosenator whenever the boss begins climbing or becomes too far ahead for a safe foot attack. Do not remain beneath an active foot while waiting for the launcher. After the required head-strike groups are complete, descend to the bottom, charge the Master Sword and perform the Skyward Strike and displayed directional motions to restore the seal.
The story continues only after the seal is restored. Return to the Sealed Temple and complete the Gate of Time and past-Zelda sequence. Zelda’s blessing then completes the sword’s awakening, producing the completed or True Master Sword. That is the weapon used in the third Imprisoned encounter.
- Reach this encounter only after Fire Sanctuary and Din’s Flame.
- Expect arms, climbing and stronger shockwaves.
- Use the Master Sword forged by Din’s Flame.
- Press Up on the Wii Remote D-pad to enter the Groosenator.
- Move the launcher with the Nunchuk Control Stick.
- Aim with the Wii Remote and press A to fire.
- Use bombs to interrupt climbing or create a safe opening.
- Use the Master Sword for both combat and sealing.
- Complete the Gate of Time sequence only after the seal is restored.
Third encounter: speed, red shockwaves, airborne movement and the final Link launch
The third encounter begins after the Levias and Bilocyte events. By this point, Link has completed the Gate of Time and past-Zelda sequence, so he carries the completed or True Master Sword. The Imprisoned still has arms, moves faster than before and produces powerful shockwaves, including red electrical effects. Switch to the Groosenator early instead of trying to chase both feet through repeated impacts.
Press Up on the Wii Remote D-pad to enter the Groosenator. Move it with the Nunchuk Control Stick, aim with the Wii Remote and press A to launch a giant Bomb Flower. While the boss is stunned, switch back to Link and remove toes from one foot or use the opening to reach the head. Use an air geyser to reach the correct ledge, approach from above and deliver three upward strikes with the completed or True Master Sword to the sealing spike.
The Imprisoned then develops a halo and begins floating upward. Return to the Groosenator and hit it with another giant bomb. The direct hit brings it down, allowing Link to reach the head and deliver the second group of three sword strikes. Do not try to stand beneath the airborne boss while the shockwaves are active; wait for Groose to provide the opening.
After the second head attack, access to Groose’s giant Bomb Flower supply is blocked. This is the intended next phase, not a malfunction. Use the air geysers to climb to the upper level, reach Groose on the wooden track and interact with the Groosenator. Link is loaded into the launcher. Aim at the Imprisoned’s head and fire. After landing, attack the sealing spike three times with the completed or True Master Sword.
Return to the bottom of the Sealed Grounds and perform the final Master Sword Skyward Strike on the spike, followed by the displayed directional sealing motions. Re-enter the Sealed Temple and allow the Old Woman and Groose dialogue to play. The story then proceeds toward the regional Song of the Hero objectives.
- Reach this encounter only after Levias and Bilocyte.
- Use the completed or True Master Sword.
- Watch for ordinary and red electrical shockwaves.
- Use the Groosenator to stun the boss before approaching the head.
- Bomb the airborne phase to bring it down.
- When the bomb supply is blocked, climb to Groose rather than waiting.
- Launch Link at the head from the Groosenator.
- Complete the final sword strikes and sealing Skyward Strike.
Failure recovery and progression checks
After a defeat, reload the nearest save and recalibrate if sword gestures or Skyward Strikes registered incorrectly. Heal from a clear ledge or another safe section of the spiral, not beside an active foot. If Link misses a jump, use an air geyser to regain the correct elevation rather than forcing a direct approach through the boss’s feet.
If the second or third encounter appears stalled, check whether the boss is climbing, crawling or airborne, then press Up on the Wii Remote D-pad to enter the Groosenator. Move the launcher with the Nunchuk Control Stick, aim with the Wii Remote and press A to fire. Remember that the third battle’s blocked bomb supply is a scripted transition: climb to Groose and use the catapult to launch Link.
After every victory, complete the seal at the bottom before leaving the Sealed Grounds. The first sealing action uses the Goddess Sword. The second uses the Master Sword forged with Din’s Flame. The third uses the completed or True Master Sword. Then return to the Sealed Temple and allow the required dialogue to play.
If the expected scene does not occur, verify the story window. The first encounter requires the Goddess Harp, the Old Woman’s harp tutorial and the Ballad of the Goddess; it is followed by Farore’s Silent Realm. The second requires Fire Sanctuary and Din’s Flame and occurs before the Gate of Time sequence. The third requires Levias and Bilocyte and occurs after the completed or True Master Sword is available. Re-enter the Sealed Temple and speak with the Old Woman and Groose after completing the relevant battle if the next objective does not appear.
- Reload the nearest save after death.
- Recalibrate before retrying unreliable sword gestures.
- Heal from a safe ledge.
- Wait for the Groosenator to recover after firing.
- Complete the correct sword’s sealing action at the bottom.
- Allow the relevant Sealed Temple dialogue to play.
- Check the exact story prerequisites if progression does not trigger.
Before you move on
- The first encounter has been defeated after the Lanayru Mining Facility and Temple of Time sequence, including the Goddess Harp and Old Woman’s harp tutorial.
- Farore’s Silent Realm is available after the first encounter and was not treated as an opening-area objective.
- The first encounter used the Goddess Sword and did not require a Groosenator.
- The second encounter has been defeated after Fire Sanctuary and Din’s Flame and before the Gate of Time sequence.
- The second encounter used the Master Sword created by Din’s Flame.
- The Master Sword was not incorrectly treated as unavailable during the second encounter.
- The completed or True Master Sword was obtained through the Gate of Time and past-Zelda sequence after the second encounter.
- The third encounter has been defeated after Levias and Bilocyte, including the final Groosenator launch carrying Link to the Imprisoned’s head.
- Each battle’s final Skyward Strike and directional sealing sequence has been completed with the sword available at that story point.
- The relevant Sealed Temple dialogue has played after each battle.
- The campaign has advanced beyond the Sealed Grounds toward Farore’s Silent Realm, the Sacred Flame and Gate of Time progression, or the Song of the Hero objectives as appropriate.
- No optional completion goal, including Goddess Cubes, Gratitude Crystals, Heart Pieces, Lightning Round or Hylian Shield, has been treated as required.
References for this chapter
Final Approach: Preparing for Sky Keep
Sky Keep is the final dungeon of the original Wii campaign. Do not enter until the three regional portions of the Song of the Hero are complete, Levias has supplied the song’s final portion, and the fourth Silent Realm in Skyloft has been cleared. The Stone of Trials opens the route beneath the Statue of the Goddess. Optional upgrades can improve survivability, but no collectible goal or Hylian Shield purchase is required for entry.
Verify the Song of the Hero prerequisites
Before making the final approach, confirm that the Faron, Eldin, and Lanayru portions of the Song of the Hero have all been awarded. These are mandatory story rewards from the three dragon objectives, not optional songs or collectible bonuses. If one dragon’s scene or reward was interrupted, return to that region and finish the conversation sequence before continuing.
Fly into the Thunderhead and speak with Levias after all three portions are complete. Levias provides the final part of the song. The three regional rewards alone do not open Sky Keep, so check the harp’s available songs before leaving the Thunderhead. If the expected conversation does not occur, revisit the most recently completed dragon area, confirm that its objective and reward were fully resolved, and then return to Levias.
This chapter does not repeat the dragon routes. Use the completed objectives from the Song of the Hero chapter as the progress record, then continue only after Levias has finished his scene.
- The Faron song portion has been received.
- The Eldin song portion has been received.
- The Lanayru song portion has been received.
- Levias has provided the final part of the Song of the Hero.
- The complete song is available through the Goddess Harp.
Confirm the fourth Silent Realm is complete
Return to Skyloft after learning the complete song. The final Trial Gate is in the plaza near the Light Tower. Play the Goddess Harp near the butterflies at the marked location, then raise the sword and thrust it into the Trial Gate when prompted. This is the Skyloft Silent Realm, not one of the earlier surface trials.
The required result is completion of the trial and receipt of the Stone of Trials. The trial requires all 15 Sacred Tears to be collected during one successful attempt before Link returns to the starting point. Its full Tear route belongs in the earlier Song of the Hero chapter; here, use the reward as a simple gate check.
If the gate is not present, do not search the Sealed Grounds, Faron Woods, or a surface dungeon. First confirm that Levias taught the final song and that the harp was played at the butterflies near the Light Tower.
- The complete Song of the Hero has been learned.
- The Skyloft Trial Gate has been opened near the Light Tower.
- The Skyloft Silent Realm has been cleared.
- All 15 Sacred Tears were collected in the successful attempt.
- The Stone of Trials was awarded.
Activate the bird statue during the daytime
After receiving the Stone of Trials, travel to the bird statue near the stepping stones on the north side of Skyloft’s eastern lake, beside the route leading to Waterfall Cave. This statue has one empty eye socket. It is separate from the Trial Gate and from the ordinary Bird Statues used for saving and travel.
Approach the statue during the daytime. At night it turns toward the opposite direction, so the empty socket cannot be used normally. If necessary, sleep in a bed until daytime, then return to the statue and examine it. Insert the Stone of Trials into the empty eye socket.
The statue turns, opens its beak, and fires a projectile at the island beneath the Statue of the Goddess. The impact reveals the structure containing Sky Keep and creates a chain of Clawshot targets across the gap. This scene is the actual opening of the dungeon route; the Silent Realm reward by itself does not place Link inside Sky Keep.
- The Stone of Trials has been awarded.
- The one-eyed bird statue beside the Waterfall Cave route has been located.
- It is daytime when the statue is examined.
- The Stone of Trials has been inserted.
- The island beneath the Statue of the Goddess has opened and Clawshot targets are visible.
Cross to Sky Keep and make the first save
Equip the Clawshots and follow the targets across the newly opened gap. Aim at each target in sequence and release onto the ledges or the exposed structure when the route allows. If a grab is missed, use the available ledge or restart the approach rather than attempting an uncontrolled fall.
Enter the exposed building beneath the Statue of the Goddess. A Bird Statue is available in the opening room; save there before moving deeper into the dungeon. This is the important Sky Keep recovery point, so use it immediately even if Link is at full health.
Open the blue chest in the entrance area to obtain the Sky Keep Dungeon Map. The map shows the dungeon’s detached-room structure and is needed for understanding the room-control puzzle. After collecting it, continue to the control panel rather than searching for a conventional linear corridor.
- The Clawshot crossing has been completed.
- The Sky Keep entrance has been reached.
- The entrance Bird Statue has been used for a save.
- The Dungeon Map has been collected.
- The room-control panel is accessible.
Prepare equipment without confusing optional goals with requirements
The Master Sword is the required story weapon for this stage, and the Clawshots are required for the entrance crossing. No additional sword upgrade, medal, Heart Piece, Goddess Cube, Gratitude Crystal, or shield upgrade is needed to unlock Sky Keep.
Before committing to the dungeon, use Skyloft’s Bazaar if Link needs potion refills, shield repair, bombs, arrows, or other supplies. A healing potion or fairy is sensible preparation, but there is no mandatory inventory quota. A serviceable shield is useful for blocking and shield bashes, although the dungeon entrance does not require the Hylian Shield.
Keep the Clawshots and Beetle available in the Adventure Pouch. The Clawshots are essential for traversal, while the Beetle remains useful for remote switches and item interaction. Bombs and arrows are convenient for several dungeon obstacles and enemies, but they are supplies rather than entry conditions.
Because this is the original Wii release, check the Wii Remote Plus or Wii Remote with MotionPlus before entering. Recalibrate if sword directions, thrusts, shield bashes, or Skyward Strikes have begun registering incorrectly. Secure the wrist strap and confirm that the Nunchuk connection is stable. Do not treat unreliable motion tracking as a Sky Keep puzzle or combat mechanic.
- The Master Sword is equipped and functional.
- The Clawshots are available.
- The shield is not badly damaged, if one is being used.
- Healing supplies are stocked if desired.
- Bombs and arrows are available if desired.
- The Beetle can be selected from the Adventure Pouch.
- MotionPlus tracking and Nunchuk inputs respond correctly.
Start Sky Keep only after the gate checks pass
Sky Keep can be entered as soon as the completed Song of the Hero, the cleared Goddess’s Silent Realm, and the activated bird statue are confirmed. The dungeon map and entrance save should also be completed before beginning its room arrangement puzzles.
Do not delay entry because of the 80 Gratitude Crystals, 27 Goddess Cubes, 24 Pieces of Heart, medals, extra bottles, shield upgrades, or Hylian Shield. Those are separate completion goals. They may make the final campaign safer or provide additional rewards, but none is a prerequisite for Sky Keep access.
Once ready, use the control panel to begin arranging the detached themed rooms. From this point onward, follow the Sky Keep interior chapter for the room order, Triforce objectives, dungeon hazards, and final-boss preparation. If supplies run low, leave through a Bird Statue after saving and restock in Skyloft rather than entering the dungeon with an unreliable shield or empty healing supply.
- The Song of the Hero is complete.
- The fourth Silent Realm is complete.
- The Stone of Trials has been used at the bird statue.
- The Clawshot route has been crossed.
- The entrance save has been made.
- The Dungeon Map has been collected.
- Optional completion rewards have not been mistaken for prerequisites.
Before you move on
- The Faron, Eldin, and Lanayru Song of the Hero portions are complete.
- Levias has supplied the final part of the song.
- The Goddess’s Silent Realm in Skyloft has been cleared with all 15 Sacred Tears collected.
- The Stone of Trials was awarded and inserted into the one-eyed bird statue near Waterfall Cave.
- The projectile has opened the route beneath the Statue of the Goddess.
- The Clawshot targets have been crossed.
- The Sky Keep entrance Bird Statue has been used.
- The Sky Keep Dungeon Map has been collected.
- The room-control panel is ready for the interior walkthrough.
References for this chapter
- The Legend of Zelda: Skyward Sword - Guide and Walkthrough - Wii
- The Legend of Zelda: Skyward Sword - Guide and Walkthrough - Wii, Final Battle
- Goddess's Silent Realm - The Legend of Zelda: Skyward Sword Walkthrough
- Sky Keep - The Legend of Zelda: Skyward Sword Walkthrough
- Stone of Trials - Zelda Wiki
- The Legend of Zelda: Skyward Sword Owner’s Manual
Sky Keep Interior: Puzzle Flow, Treasure and Boss Prep
Sky Keep is an eight-room sliding dungeon built around control panels. Collect the Dungeon Map, open shortcuts after solving each themed room, clear Skyview and Lanayru, cross the Earth section, defeat Dreadfuse, and collect the Triforce pieces in the required order: Courage, Power, then Wisdom. The room-position directions below refer to the board as it appears immediately before each slide, so inspect the visible panel after every move.
Enter Sky Keep and solve the opening panel
After completing the fourth Silent Realm, place the Stone of Trials into the matching eye-shaped slot near the Statue of the Goddess in Skyloft. Follow the revealed Clawshot targets into Sky Keep. Walk forward and open the chest for the Dungeon Map. It shows the eight movable rooms, the Triforce rooms, and the control-panel locations.
At the first control panel, slide the room currently at middle-right down into bottom-right. Then slide the room currently at center right into middle-right. These are board positions, not permanent room identities. Confirm that the eastern doorway is connected before leaving the panel. If a room does not move, make sure Link is standing in the panel’s central operating area rather than inside the room being moved.
- Stone of Trials used at the Skyloft statue.
- Dungeon Map collected.
- Opening slides completed: middle-right down, then center right.
Clear the Skyview-themed room
Enter the eastern room and move south to the Deku Babas. Send the Beetle across the gap to cut the rope, then use the Whip to swing across. Defeat the Skulltula and use the Clawshots on the vine-covered rotating cylinders. From the cylinders, Clawshot into the fish-shaped opening.
A rope ahead is blocked by Pyrups. Send the Beetle to the bomb flowers below the second rotating cylinder and drop bombs onto the Pyrups. Swing across, then use the Gust Bellows to move the suspended platforms to the northern side. Pull the lever near the far end to open the shortcut gate before entering the northern doorway. This shortcut is important because later routes pass back through the Skyview room.
- Rope route opened with the Beetle and Whip.
- Pyrups removed with bomb flowers.
- Skyview shortcut lever pulled.
Solve the Lanayru Mining Facility room
In the next room, pick up the Timeshift Orb on the western side. Carry it east past the Technoblins and Sentrobe, then leave it beside the closed gate. Climb the ladder, pull the handle, return to the orb, and carry it onto the floor switch. Throw it onto the conveyor belt, climb up, and use the next floor switch so you can retrieve it from the far side.
Carry the orb west to the magnetic platform. Place it on the platform, step off, and use the Gust Bellows to move the platform south along its rail. Activate the floor switch to raise the gate, then continue blowing the platform until it reaches the end. Shoot the blue target revealed across the room with the Bow and retrieve the orb.
Pull the southwest handle to open the shortcut. Put the orb on the conveyor and move north. Defeat the Beamos while the Timeshift field makes them active. Use the Whip to reverse the conveyor, then shoot all five blue targets as the orb passes them. The opened gate leads to the next control panel.
- Timeshift Orb carried through the conveyor sequence.
- Magnetic platform moved and blue target struck.
- Southwest shortcut opened.
- All five conveyor targets destroyed.
Use the seven-slide Lanayru transition
At this panel, use the following current-position sequence. Move the room at top-middle down into center. Move the room at top-left right into top-middle. Move the room at middle-left up into top-left. Move the room at bottom-left up into middle-left. Move the room at bottom-middle left into bottom-left. Move the room at center down into bottom-middle. Finally, move the room at middle-left right into center.
Check the board after each slide. The labels describe where the selected room is at that moment; they are not fixed identities. When the seventh move is complete, leave the panel and backtrack through the Skyview shortcut. The newly connected route leads to the Earth Temple-themed room.
- Seven slides completed in the listed current-position order.
- Earth Temple room reachable through the Skyview shortcut.
Clear the Earth Temple room
Enter the crawlspace on the left. Turn left underground to restock bombs, then roll a bomb back toward the entrance to open the alternate passage. Crawl through, defeat the Red Chuchu, and burrow at the dig spot. Underground, activate the red switch that moves the gate, then return to the entrance light and crawl back through the opened route.
Defeat the Dark Lizalfos. At the western end, bomb the nearby statue so it falls into the lava and reveals a diamond switch, but do not activate that switch yet. Stand on the small stone platform and roll a bomb along the curved ramp into the distant statue. Follow the ramp to the newly exposed switch, again leaving it unused for the moment.
Climb the vines and use the Beetle to cut the thin trees around the bomb flower. Use the bomb flower to expose the third statue, then bomb that statue to reveal its diamond switch. Return to the lower area and activate the diamond switches in the required sequence: first the switch near the bottom of the curved ramp, then the upper switch, then the final switch behind the trees. Cross the opened route and burrow again.
Underground, punch the bomb flower right to destroy one boulder. Let it respawn, then punch it left and upward to clear the second obstruction. Reach the northern side of the two-way switch and punch it. Leave through the upper route, enter the nearby dig spot, and defeat both Moldorms by striking each exposed tail three times. Exit through the upper-right light, pull the nearby handle, and continue north.
- Red underground switch activated.
- All three diamond switches activated in sequence.
- Two Moldorms defeated.
- Shortcut handle pulled before Dreadfuse.
Defeat Dreadfuse and obtain the Small Key
Dreadfuse is a Scervo replica fought on a narrow platform. Lock on and attack the side not covered by his guard. Use controlled horizontal or diagonal sword strikes rather than swinging repeatedly into the blocking weapon. When he is staggered, continue pushing him backward until he falls from the platform. His blocking weapon can become electrified, so do not treat every guarded opening as safe for a shield bash.
The wooden spikes close in behind Link as the fight continues, reducing the available space. Keep the battle moving toward Dreadfuse and avoid being trapped against the rear spikes. After the victory, Clawshot across the gap and open the chest for the Small Key. Unlock the nearby door to reach the control panel used for the Triforce rooms.
- Dreadfuse defeated.
- Small Key collected.
- Locked Triforce-route door opened.
Collect the Triforce of Courage
At the control panel after Dreadfuse, rotate the peripheral rooms counterclockwise. Begin by moving the room currently at top-left down, then continue the counterclockwise rotation until the green Courage room is immediately west of Link’s current room and its doorway is visibly connected. Do not rely on a fixed room-number sequence; stop by the green Triforce landmark and the open western doorway.
Use the Small Key on the locked door. In the first combat room, defeat the two Metal Shield Moblins by jumping behind them and striking their exposed backs. In the next room, eliminate the elevated Bokoblin archers with the Bow when possible, then defeat the blue Bokoblin and the Stalfos. In the final chamber, clear the Cursed Bokoblins before fighting the Stalmaster.
Thrust the sword into the Farore emblem and collect the Triforce of Courage. Pull the nearby lever to open the shortcut, then return through the opened route to the same control-panel room.
- Green Courage room positioned immediately west.
- Small Key used.
- Courage combat rooms cleared.
- Triforce of Courage collected.
- Shortcut lever pulled and original panel reached again.
Collect the Triforce of Power
At the same panel, rotate the rooms counterclockwise until the red Power room is immediately west of Link and the western doorway is connected. Enter the Fire Sanctuary-themed room. Before touching the first water bulb, send the Beetle ahead and strike the distant diamond switch so the lava flows into the route.
Knock down the water bulb and ride the resulting rock platform along the lava. Defeat Fire Keese and use the next diamond switch to open the adjoining lava channel. Create and ride the following water-bulb platforms, using projectiles on the visible plants to form additional platforms. At the lava geyser, ride the raised rock platform, change the lava flow with the Beetle, and use the grating route to pass the Cursed Spumes.
Clawshot to the final target and thrust the sword into the Din emblem. Collect the Triforce of Power. Pull the nearby lever, climb the vines, and use the opened shortcut to return to the control-panel area.
- Red Power room positioned immediately west.
- Lava routes and water-bulb platforms completed.
- Triforce of Power collected.
- Power-room shortcut opened.
Arrange and collect the Triforce of Wisdom
After returning from the Power room, use the control panel in the central area. The room presently to the right of Link’s position has doors above and to the right and contains another control panel. Rotate the rooms until this control-panel room is immediately west of Link. Follow the connected western hallway into it.
At that second panel, rotate the rooms until the final Triforce room is immediately to the right and its doorway is connected. Enter the Wisdom room. This chamber uses a Lanayru, Pirate Stronghold, and Sandship-style Timeshift puzzle.
Defeat the Electro Spume, then pick up the Timeshift Orb on the eastern side. Use it to activate the room’s machinery and defeat the Technoblins and Sentrobe. Carry the orb to the northern wall so the pillars rise and the upper gate is available. Leave it there, cross the room, and shoot the blue target through the small opening to raise the nearby gate.
Carry the orb through the opened gate and defeat the Deku Babas. When the sand pillar rises and blocks the passage, move the orb backward until the pillar disappears, then continue without the orb. Stand on the floor switch and shoot the blue target through the fan. Take the orb to the eastern end beneath the Triforce location, leaving it so the nearby pillars remain raised. Cross the sand, jump across the pillars, and Clawshot to the target. Thrust the sword into the Nayru emblem and collect the Triforce of Wisdom.
- Second control-panel room moved immediately west of Link.
- Final Wisdom room moved immediately right of the second panel.
- Timeshift Orb puzzle completed.
- Triforce of Wisdom collected.
- Triforce cutscene begins.
Before you move on
- The Dungeon Map is in the Adventure Pouch and Dreadfuse has been defeated.
- The Small Key has opened the Triforce-route door.
- The Triforce of Courage, Triforce of Power, and Triforce of Wisdom have been collected in that order.
- The Triforce cutscene has played and the Statue of the Goddess has fallen toward the Sealed Grounds.
- Before entering the Gate of Time for the final sequence, restock potions, arrows, bombs, and shield durability if needed; Sky Keep itself has no conventional dungeon boss after the Triforce collection.
References for this chapter
Final Battle Sequence: Demise and Ending Strategy
Complete the final descent at the Sealed Grounds, defeat the last battle with Ghirahim, save before entering Demise’s arena, then win Demise’s direct sword duel and lightning phase. Remain through the ending scenes and credits to confirm completion of the original Wii campaign.
Finish the descent and prepare before Demise
After the story sends Link back to the Sealed Grounds, descend the spiral path toward the bottom of the pit. The route is blocked by successive enemy groups, including Bokoblins, archers, Stalfos and shielded enemies. Keep advancing rather than trying to clear every enemy from a distance. Use the surrounding walls and bends as cover from archers, defeat leaders quickly so they cannot summon more Bokoblins, and use short sword exchanges instead of exposing Link to several attackers at once.
At the bottom, clear the final Bokoblin group. A cutscene follows, and Ghirahim begins the last battle above the pit. After Ghirahim is defeated, another scene introduces Demise. Do not enter the dark pool immediately. A Bird Statue is available near the arena, so save there before starting Demise. From this area you can return through the available route to restore hearts, refill potions and repair or replace a damaged shield. The seedling area in the Temple of Hylia also provides a place to restore health. When you are ready, return to the pit and confirm entry into the darkness. The Demise battle then begins without a normal opportunity to leave and restock.
Save at the Bird Statue after Ghirahim, not merely before the enemy descent. If Link dies to Demise, reload this post-Ghirahim save and repeat only the Demise battle. Keep the best shield available if you have one, but the Hylian Shield is optional and is not required to defeat Demise. Use a separate normal-mode save slot if you intend to begin Hero Mode after seeing the ending.
- Reach the bottom of the Sealed Grounds pit.
- Defeat the final enemy wave before Ghirahim.
- Defeat final Ghirahim.
- Save at the Bird Statue after the Ghirahim battle.
- Restore health, refill potions and repair equipment before entering the dark pool.
- Do not enter Demise’s arena until the preparation is complete.
Defeat final Ghirahim on the descending platforms
The first part of the final Ghirahim battle takes place on elevated platforms. Ghirahim initially cannot be damaged in the usual sense. Your objective is to push him backward with sword strikes until he reaches the platform edge. He occasionally punches or kicks, so step or jump backward when he closes in. Keep Z-targeting active so Link stays oriented toward him.
When Ghirahim is knocked from one platform to the lower platform, follow him immediately. Jump down while still targeting him, then perform the Fatal Blow on the lower platform. This Fatal Blow is required to damage him and advance the fight; do not remain on the upper platform waiting for him to climb back. After the attack connects, resume pushing him toward the next edge.
Repeat this sequence on every descending platform: strike to drive him backward, follow after he falls, then perform the Fatal Blow before continuing. Later in the platform section, Ghirahim’s hands glow and extend beside him. Do not cut through the glowing hands. Adjust the direction of each sword swing so the blade contacts Ghirahim without striking the hands. If you hit the hands, Link is damaged and briefly stunned, which can cost the position needed to push Ghirahim over the edge.
The platform section ends when both characters reach ground level. The required progression check is that every lower-platform knockdown has been followed by a successful Fatal Blow and the ground arena has opened for the sword phase.
- Keep Ghirahim targeted while pushing him backward.
- Knock him from the current platform to the next lower platform.
- Follow him after every fall.
- Perform a Fatal Blow on each lower platform to deal damage.
- Angle sword swings around the glowing hands in the later platform section.
- Reach the ground arena.
Open the ground sword phase and strike Ghirahim’s chest
On the ground, Ghirahim draws a sword and guards his glowing chest. Running directly at him and swinging into his guard is ineffective. Use one of two reliable openings. If he approaches with a sword attack, time a shield bash to stun him. Alternatively, keep your distance until he launches the large disc-like beam, then strike the beam with Link’s sword to send it back. Continue the beam exchange if Ghirahim returns it; when the beam hits him, he is stunned.
Run in as soon as either opening succeeds. Target Ghirahim and use forward thrusts into the glowing spot in his chest. Ordinary slashes are not the dependable damage method in this phase. After the thrusts, retreat before he recovers or prepares another sword attack. If he sends several red daggers instead of the large beam, block them with the shield and wait for a safer opening rather than forcing a close-range attack.
Repeat the shield-bash or reflected-beam opening, followed by chest thrusts, until Ghirahim changes weapons. This phase is complete when he produces the oversized sword.
- Do not rely on ordinary slashes against Ghirahim’s guarded chest.
- Use a shield bash when his sword attack arrives.
- Reflect the large beam if you prefer a distance-based opening.
- Run in while he is stunned.
- Thrust directly into the glowing chest.
- Block red dagger projectiles instead of attacking through them.
Break the oversized sword and finish Ghirahim
Ghirahim’s oversized sword functions as both weapon and shield. Move into sword range and attack the large blade repeatedly. Your strikes damage the weapon rather than immediately damaging Ghirahim. Maintain a steady series of correctly directed swings so a gap opens before he can retreat. When an opening appears in the oversized sword, direct Link’s next strike through that opening toward the weapon’s exposed section.
If the sequence is too slow, Ghirahim jumps away and restores the sword. Do not chase blindly after the regeneration; reset your distance, wait for his next approach and begin cutting the weapon again. Once the oversized sword breaks, the glowing chest is exposed. Close in and use forward thrusts to damage him. Repeat the sword-breaking sequence and the chest thrusts until Ghirahim is defeated.
A cutscene follows in which Zelda’s energy is used to bring Demise into his humanoid form. Demise then challenges Link in a separate arena. After the scene, return to the Bird Statue and save if you have not already done so. Use the route back to the Temple of Hylia for healing and supplies before entering the dark pool.
- Attack the oversized sword continuously enough to damage it.
- Cut through an opening in the sword before it regenerates.
- Repeat the process if Ghirahim restores the weapon.
- Thrust into the exposed chest after the sword breaks.
- Confirm that Ghirahim is defeated before preparing for Demise.
Demise phase one: controlled sword duel
Demise’s first combat phase is a close-range sword duel. Skyward Strikes are not available as the main attack in this phase, so keep the Master Sword lowered and fight directly. Stay close enough to read his body and sword position. Demise blocks the first part of an attack string, but a correctly directed follow-up from an unguarded side can connect. Alternate the direction of your slashes instead of repeating one swing into his guard.
After Link lands a hit, expect Demise to counterattack. Use a shield bash as his sword or punch arrives, or jump backward while maintaining the target lock if the bash timing is not secure. A successful shield bash creates another short opening for sword strikes. If Demise begins a long rush from a distance, move laterally or backflip out of its path. Do not drink a potion while he is already within striking range; create distance first, then heal.
Continue the attack, counter and retreat cycle until Demise is knocked backward and the arena fills with storm clouds. This transition begins the lightning phase. There is no separate environmental instant-death pattern to exploit in this duel; the main dangers are Demise’s charge, close-range counters and contact with his electrified sword later.
- Keep close enough to read Demise’s attacks.
- Use changing sword directions against his guard.
- Shield-bash or evade his counterattacks.
- Avoid the long-distance charge by moving sideways or backflipping.
- Heal only after creating space.
- Continue until the storm begins.
Demise phase two: lightning and Skyward Strikes
When lightning fills the arena, raise the Wii Remote with the Master Sword pointed upward to charge a Skyward Strike. Release it at Demise as soon as the sword is charged and you have a clear line. A successful Skyward Strike stuns him and opens time for Link to run in and deliver several sword strikes.
Demise can charge his own sword and release a dark Skyward Strike-like projectile. If both attacks are charged at the same time, the beams can cancel, so do not release your attack into his already launched beam without reading the exchange. Sidestep his projectile or counter it with your own charged strike when the timing is favorable. If Demise’s sword is electrified, do not strike the sword directly. Use shield bashes against his incoming sword attacks and wait for the next lightning opening.
After enough successful lightning strikes and follow-up sword attacks, Demise falls. The first knockdown in this phase is not the successful finishing opportunity. Use the time to charge another Skyward Strike or reposition safely. When he rises, repeat the lightning charge, stun and sword-combo cycle. A later knockdown provides the real Fatal Blow opportunity; move close immediately, confirm the prompt and perform the Fatal Blow before Demise recovers. If the attempt is missed, retreat from his counterattack and continue the cycle. The successful Fatal Blow ends the battle.
- Raise the Wii Remote only after lightning begins.
- Release a charged Skyward Strike at Demise quickly.
- Use the strike to stun him, then follow with sword attacks.
- Do not attack his electrified sword directly.
- Avoid or counter his dark projectile.
- Do not treat the first lightning-phase knockdown as the finish.
- Perform the Fatal Blow during a later successful opening.
Recover after a failed attempt and verify the ending
If Link dies during Demise, reload the Bird Statue save made after Ghirahim. Refill health and potions before entering the dark pool again. If sword gestures become unreliable, pause the attempt and recalibrate the Wii Remote with MotionPlus. Confirm that the MotionPlus accessory or Wii Remote Plus is firmly connected, the batteries are adequate and the controller is held in a neutral position before resuming. Do not continue a close-range duel while the sword is registering at the wrong angle.
After the successful Fatal Blow, let the story continue through the scenes involving Demise, Zelda, Groose, Impa, Fi and the Master Sword. The game then presents the return to the Sealed Temple and the final epilogue scenes. Allow the credits to appear and finish before treating the campaign as complete. The ending presentation includes the characters returning to the surface-era setting and the concluding scenes at Skyloft.
The original Wii version offers the option to save for Hero Mode after the ending. Hero Mode is not required for the campaign completion described here. Preserve the completed normal-mode file in its own save slot before making that choice if you want to retain access to the standard campaign state.
- Reload the post-Ghirahim save after death.
- Restore hearts and refill bottles before retrying.
- Recalibrate MotionPlus if sword directions drift.
- Defeat Demise with the successful Fatal Blow.
- Watch the post-battle story scenes.
- Confirm that the credits appear.
- Keep the normal-mode save before beginning Hero Mode.
Before you move on
- The Sealed Grounds enemy descent is complete.
- The final Ghirahim platform section is complete, including the required Fatal Blow after each lower-platform knockdown.
- The final Ghirahim ground sword phase is complete, including the oversized-sword break and chest thrusts.
- A Bird Statue save was made after Ghirahim before entering Demise’s dark pool.
- Demise’s direct sword-duel phase is defeated.
- Demise’s lightning phase is defeated with a successful Fatal Blow.
- The post-battle story scenes and epilogue play.
- The ending credits appear.
- The normal-mode save is preserved before any Hero Mode decision.
Postgame and Optional Completion: Cubes, Crystals and Heart Pieces
The original Wii campaign has three major optional collection goals: 27 Goddess Cubes with 27 linked Goddess Chests, 80 Gratitude Crystals, and 24 Pieces of Heart. The Thunder Dragon’s Lightning Round provides one Piece of Heart after four consecutive Boss Rush victories and the Hylian Shield after eight. Batreaux’s Gratitude Crystal rewards include wallets, a Piece of Heart, the Cursed Medal, rupees, and the Tycoon Wallet. These activities are separate from defeating Demise, but optional cleanup should preferably be completed before entering the final Gate of Time sequence. Before beginning the final battle, preserve a save file that can be loaded again after the ending if you still need to collect ordinary optional rewards.
1. Set up an optional-completion checklist
Use a written checklist with separate entries for every Goddess Cube, every Goddess Chest, every Gratitude Crystal, and every Piece of Heart. Activating a Goddess Cube only creates its linked chest in the sky; it does not collect the reward. Mark the cube and its chest independently.
The practical cleanup order is Faron, Eldin, Lanayru, Lanayru Gorge, the Thunderhead, and then Skyloft and its side-quest locations. Make the major sweep after obtaining the Clawshots and Mogma Mitts and after the Volcano Summit and Thunderhead become accessible. This avoids repeated trips to locations that require late equipment.
Keep a shield, healing potions, ammunition, and enough rupees for side activities. The Wii release uses Wii Remote sword gestures and ordinary Loftwing travel. Do not apply the Switch HD release’s button controls, autosave behavior, or other convenience features to this version.
- A written list tracks 27 cubes, 27 chests, 80 crystals, and 24 Pieces of Heart.
- The Clawshots and Mogma Mitts are available.
- Volcano Summit, Lanayru Gorge, and the Thunderhead can be revisited.
- Optional cleanup is being performed on the original Wii campaign file.
2. Unlock the Thunder Dragon’s Lightning Round
Complete Lanayru’s portion of the Song of the Hero, including the Thunder Dragon’s recovery and the conversation in which he gives Link his song segment. Return to Lanayru Gorge and speak with the Thunder Dragon again. His challenge does not require defeating Demise first.
The Lightning Round offers Boss Rush and Silent Realm replay. Boss Rush lets you replay previously defeated bosses in succession. Silent Realm replay is useful for practice and challenge rewards, but it is not required for the 27-cube, 80-crystal, or 24-Piece-of-Heart totals.
Save at the nearby Bird Statue before starting a serious Boss Rush attempt. Repair or replace the shield first. The challenge does not function like ordinary exploration, so treat health, shield durability, and available recovery as limited resources. The Wii Boss Rush reference confirms that the current shield and True Master Sword remain available, while the challenge restricts ordinary item access.
- Lanayru’s Song of the Hero portion is complete.
- The Thunder Dragon offers Boss Rush and Silent Realm replay.
- A save exists before the attempt.
- The shield is repaired or replaced and healing resources are ready.
3. Claim the four-win Piece of Heart and eight-win Hylian Shield
Choose the first Boss Rush opponent yourself. Later opponents are selected by the Thunder Dragon, so do not prepare for a fixed order after the opening fight. Win four consecutive battles and stop when the reward prompt offers the Piece of Heart. The reward is not automatically combined with later prizes.
For the Hylian Shield, complete eight consecutive victories and stop at the eight-win reward prompt. The Hylian Shield is obtained from this Boss Rush reward, not purchased from a shop. It is indestructible and provides protection against fire, electricity, and curse effects. If the Adventure Pouch is full, the shield is sent to Item Check instead of being lost.
Rewards are based on the streak in that particular attempt. Reaching eight victories does not also award the four-win Piece of Heart if it has not already been claimed. Plan on separate runs if necessary: stop at four for the Piece of Heart, then begin another attempt and stop at eight for the shield. Longer streak rewards are optional.
If a run fails, reload the save made before the challenge. Do not treat a failed streak as progress. For safer attempts, avoid trading damage for speed, use shield defense when appropriate, and heal whenever the challenge permits recovery before the next battle.
- The four-win Boss Rush reward was stopped at and the Piece of Heart was collected.
- The eight-win reward was stopped at and the Hylian Shield was collected.
- The shield is visible in the Adventure Pouch or Item Check.
- Additional rupees and treasure from longer streaks are treated as optional.
4. Complete Batreaux’s Gratitude Crystal rewards
Collect Gratitude Crystals from nighttime locations around Skyloft and from the associated side quests. Sleep until night when searching for loose crystals. Quest rewards generally arrive in groups of five and become available after specific story progress or after equipment such as the Gust Bellows and Clawshots has been obtained.
Return to Batreaux beneath the large Goddess Statue whenever a threshold is reached. The original Wii campaign has 80 Gratitude Crystals. The rewards are five for the Medium Wallet, ten for a Piece of Heart, 30 for the Big Wallet and Cursed Medal, 40 for a Gold Rupee, 50 for the Giant Wallet, 70 for two Gold Rupees, and 80 for the Tycoon Wallet.
At the 30-crystal threshold, check the separate chest beside Batreaux for the Cursed Medal. Do not assume that receiving the threshold dialogue alone opened that chest. At 80 crystals, speak with Batreaux again and confirm that the Tycoon Wallet was awarded. The final threshold also changes nighttime Skyloft behavior, including the disappearance of monsters and the change in Remlit behavior.
- All 80 Gratitude Crystals are recorded as collected.
- The ten-crystal Piece of Heart was claimed.
- The separate Cursed Medal chest was opened.
- Batreaux awarded the Tycoon Wallet at 80 crystals.
5. Activate all 27 Goddess Cubes and open their chests
The Wii edition has 27 Goddess Cubes, with nine associated with each of the three main provinces. Charge the sword and perform a Skyward Strike against each cube. A successful activation creates one Goddess Chest in the sky and marks its location on the sky map.
Sweep early Faron cubes first, then Eldin and Lanayru. Return later for cubes that require the Water Dragon’s Scale, Clawshots, Mogma Mitts, access to Volcano Summit, or access to the Thunderhead. Open a newly revealed chest whenever the route makes that convenient, but keep the cube and chest entries separate on the checklist.
The Goddess Chest rewards include seven Pieces of Heart, pouch and ammunition upgrades, an Empty Bottle, rupees, and medals. The exact reward must be collected from the chest; activating the cube alone does not complete that optional objective.
If a cube was missed near a dungeon approach or surface route, revisit the region after obtaining the required equipment. Surface areas remain available for cleanup, so there is no need to restart the campaign.
- All 27 Goddess Cubes were struck with Skyward Strikes.
- All 27 corresponding Goddess Chests were opened.
- The seven Heart Pieces from Goddess Chests are included in the Piece-of-Heart tally.
- Late-equipment regions were revisited.
6. Collect all 24 Pieces of Heart
The original Wii campaign contains 24 Pieces of Heart. Four pieces combine into one Heart Container at a Goddess Statue. The pieces come from Goddess Chests, Skyloft activities, side quests, minigames, dungeon areas, the Sandship, late surface routes, Batreaux’s ten-crystal reward, and the Thunder Dragon’s four-win Boss Rush reward.
During the final sweep, check the four-win Lightning Round reward, Batreaux’s ten-crystal reward, every Goddess Chest, Pumpkin Landing activities, Fledge’s training, the Bamboo Island sword-cutting game, Skyloft minigames, the Sandship, and areas opened by the Clawshots or Mogma Mitts. Use a Wii-specific numbered Heart Piece list rather than estimating from the number of completed cubes.
Do not count a piece until it has entered the inventory. A piece still waiting in a Goddess Chest, a minigame prize not yet claimed, or a Lightning Round reward left unclaimed at the Boss Rush prompt is not collected. Convert groups of four at a Goddess Statue so the resulting Heart Containers are reflected in Link’s health total.
- All 24 Pieces of Heart are recorded as collected.
- The four-win Lightning Round Piece of Heart is included.
- Batreaux’s ten-crystal Piece of Heart is included.
- Every set of four pieces was converted into a Heart Container.
7. Finish cleanup before the final sequence and preserve the ending save
When possible, complete the optional sweep before entering the final Gate of Time sequence. Confirm the 27 cubes, 27 chests, 80 crystals, 24 Pieces of Heart, the Hylian Shield, the Tycoon Wallet, and the required Batreaux rewards before committing to the late final sequence.
Before entering the final battle, make or preserve a separate save that still allows ordinary exploration. The original Wii release does not provide a normal post-credits free-roam save for continuing optional cleanup. After the ending and credits, load the preserved pre-final-battle save if optional work remains. Do not rely on a post-credits or postgame save to continue ordinary collection activities.
The final checklist should show 27 activated Goddess Cubes, 27 opened Goddess Chests, 80 Gratitude Crystals, and 24 Pieces of Heart. Remaining Lightning Round rupees, rare treasures, and Silent Realm replay prizes are optional and do not affect these totals.
- Optional cleanup was preferably completed before the final Gate of Time sequence.
- A pre-final-battle save was preserved before entering the ending sequence.
- If the ending was already viewed, the preserved pre-final-battle save is used for further cleanup.
- No tracked optional reward remains unclaimed.
Before you move on
- Batreaux awarded the Tycoon Wallet at 80 Gratitude Crystals.
- The inventory or Item Check contains the Hylian Shield.
- The four-win Lightning Round Piece of Heart is in the inventory or accounted for in the heart total.
- The checklist records 27 activated Goddess Cubes and 27 opened Goddess Chests.
- The checklist records all 80 Gratitude Crystals and all 24 Pieces of Heart.
- A pre-final-battle save was preserved before entering the ending sequence.
- Optional longer Boss Rush and Silent Realm replay prizes were either claimed or deliberately skipped.
References for this chapter
- The Legend of Zelda: Skyward Sword - 100% Guide - Wii - By SonicRecords
- The Legend of Zelda: Skyward Sword - Guide and Walkthrough - Wii
- The Legend of Zelda: Skyward Sword - Goddess Cube/Chest FAQ - Wii
- The Legend of Zelda: Skyward Sword - Boss Rush Mode Guide - Wii - By Aegis_Runestone
- Gratitude Crystal Locations and Rewards - The Legend of Zelda: Skyward Sword Walkthrough
- Thunder Dragon's Song - The Legend of Zelda: Skyward Sword Walkthrough
- Thunder Dragon's Lightning Round - Zelda Dungeon Wiki
- The Legend of Zelda: Skyward Sword - Wii Save Files
- About to fight the final boss, endgame questions - The Legend of Zelda: Skyward Sword Wii
Completion Checklist, Troubleshooting and Recovery
Use this final checklist to verify that the original Wii campaign has reached its true ending, open Sky Keep without overlooking a prerequisite, protect the correct save point, and recover from controller drift or a progression trigger that appears not to have fired.
1. Confirm the Song of the Hero prerequisites
Before looking for Sky Keep, confirm that the three regional dragon sections are complete. Faron, Eldin, and Lanayru each provide one part of the Song of the Hero. After all three sections are finished, return to Levias in the Thunderhead and speak with him to receive the final part. The three regional encounters and Levias’s concluding conversation are required story progress.
Fly back to Skyloft and go to the Plaza, where the trial gate is located. Play the Goddess Harp when the nearby butterflies gather, then raise the sword at the trial symbol to enter the Goddess’s Silent Realm. Collect every Sacred Tear and return to the trial entrance without being caught. Completing this final Silent Realm awards the Stone of Trials, which is the item needed to reveal Sky Keep.
- The Faron, Eldin, and Lanayru dragon objectives are complete.
- Levias has supplied the final part of the Song of the Hero.
- The Skyloft Goddess’s Silent Realm has been entered and cleared.
- The Stone of Trials has been received.
2. Open Sky Keep at the correct statue
Travel to the northeast side of Skyloft and follow the route toward Waterfall Cave. Near the stepping stones and the eastern lake is a stone Loftwing statue with one empty eye socket. Examine it during the daytime and place the Stone of Trials into the missing eye. The statue rotates and fires its cannon at the island beneath the Statue of the Goddess, exposing the structure that contains Sky Keep.
After the scene, use the Clawshots on the floating targets. Follow the targets across the gap and release onto the ledge leading to the newly exposed entrance. If the statue does not accept the Stone, check that it is daytime and that the final Silent Realm has actually been completed; repeatedly visiting the trial gate will not substitute for either requirement.
- The Stone of Trials has been inserted into the Loftwing statue’s missing eye.
- The cannon scene beneath the Statue of the Goddess has played.
- The Clawshot route to the exposed building is visible.
- The Sky Keep entrance has been reached.
3. Save and prepare before the endgame run
Use the Bird Statue near the beginning of Sky Keep before rearranging the dungeon rooms. Open the first chest to obtain the dungeon map, then use the room-control panel to slide the themed rooms into the connections required by the dungeon layout. If a doorway seems absent, inspect the panel rather than searching for a nonexistent key; Sky Keep’s central puzzle is based on changing room positions.
Carry a usable shield, healing potions, and enough ammunition for bombs and arrows. Repair or replace a damaged shield before the final approach. The dungeon contains its own hazards and combat, but the most important preparation is made before leaving Sky Keep for the final story sequence. After collecting the Triforce, return through the story route and save at a Bird Statue before committing to the final battle. Do not rely on the earlier Sky Keep save as your only recovery point.
- A save exists near the start of Sky Keep.
- The shield is usable and healing supplies are available.
- The dungeon map has been collected.
- A second save is made at the final pre-battle opportunity after the Triforce sequence.
4. Recalibrate the Wii controller before changing tactics
If sword swings consistently register in the wrong direction, stop the encounter and recalibrate the Wii Remote Plus or Wii MotionPlus accessory. Place the remote face down on a level, horizontal surface with its buttons facing downward and leave it still for several seconds. Pick it up only after the recalibration period, then test controlled horizontal, vertical, and diagonal swings away from danger.
If the problem remains, replace or recharge the batteries, check that the MotionPlus accessory is fully seated, confirm that the Nunchuk plug is secure, and make sure the sensor bar is positioned correctly. Test another compatible Wii Remote Plus or MotionPlus unit if possible. Drift affecting several games or controllers is more likely to be a hardware or connection problem than a missing story trigger. Recalibrate before retrying Ghirahim or Demise instead of compensating with faster swings.
- The remote has been placed flat and still for recalibration.
- The batteries and MotionPlus connection have been checked.
- The Nunchuk connection and sensor bar have been checked.
- Sword tracking has been tested before re-entering a boss fight.
5. Repair a progression problem systematically
If Sky Keep has not appeared, return to Levias and confirm that all three dragon sections were completed and acknowledged. If one song part is missing, revisit the corresponding regional objective and speak with the dragon again. Then return to Levias before checking the Skyloft trial gate.
If a Goddess Cube reward seems absent, revisit the exact cube location and strike it with a Skyward Strike again. Then travel to the matching sky island and check the Goddess Chest. Cube activation and chest collection are separate actions, so opening one does not prove that every cube has been activated.
If a Skyloft character does not advance a quest, leave the area, save at a Bird Statue, and return after completing the latest assigned main objective. Speak directly with the required NPC. Fi’s optional guidance is useful, but it is not a replacement for the event conversation that advances a quest.
- Levias has acknowledged all three regional song parts.
- The missing Goddess Cube has been reactivated if necessary.
- The corresponding Goddess Chest has been checked.
- Skyloft dialogue has been repeated after saving and re-entering the area.
6. Complete the final sequence and handle the save correctly
After the Triforce sequence, continue through the final story route. The endgame encounter includes the Bokoblin horde, the last battle with Ghirahim, and then Demise. In Demise’s lightning phase, raise the sword to draw lightning into it and send the charged strike at him. When he is stunned, close in for deliberate sword attacks and use the fatal blow when the prompt appears. Avoid attacking while his blade is electrified, and heal during a genuine opening rather than at point-blank range.
The campaign is complete when Demise is defeated and the ending scenes and credits have played. On the original Wii release, the normal save is not converted into a free-roaming postgame state. After the ending, returning to the title screen leaves the campaign at its last saved point, normally before the final battle, so you can continue optional quests by loading that file and avoiding the final-battle transition until ready.
If you want to start Hero Mode while keeping the completed normal campaign file, first copy the save data through Wii Data Management if the game and console allow the transfer, or preserve a separate save slot before the final battle. Wii save data must be restored to system memory before the game can use it, and an SD-card copy is not a second simultaneously active file. Starting Hero Mode on the same file can replace the normal file.
- The Triforce sequence is complete.
- The Bokoblin horde has been defeated.
- The final Ghirahim battle is complete.
- Demise has been defeated.
- The ending scenes and credits have played.
- The normal save has been preserved before starting Hero Mode or making further changes.
Before you move on
- The complete Song of the Hero was assembled through the three dragons and Levias.
- The Goddess’s Silent Realm in Skyloft was cleared and the Stone of Trials was obtained.
- The Stone of Trials opened the Loftwing statue route to Sky Keep.
- The Triforce was recovered in Sky Keep.
- The final Bokoblin horde, Ghirahim battle, and Demise battle were completed.
- The ending scenes and credits were viewed.
- The normal Wii save was retained at its final pre-battle state, or a separate backup was made before starting Hero Mode.
References for this chapter
- The Legend of Zelda: Skyward Sword Owner’s Manual
- The Legend of Zelda: Skyward Sword - Guide and Walkthrough - Wii
- Skyward Sword Walkthrough - Song of the Hero
- Sky Keep - The Legend of Zelda: Skyward Sword Walkthrough
- How to Recalibrate the Wii Remote Plus on Wii
- How to Move Data From the Wii to an SD Card
- How to Copy Save Data to the Wii from an SD Card
- The Legend of Zelda: Skyward Sword - Guide and Walkthrough - Wii, Final Battle
Finishing up
The first three required Silent Realms and the final Goddess's Silent Realm have been completed at their story windows.
The three dragon-song portions, Levias's final verse, Sky Keep, the Triforce sequence, the final Ghirahim battle, and Demise have been completed.
The ending scenes and credits have played.
Optional completion is tracked separately through 80 Gratitude Crystals, 27 Goddess Cubes and linked chests, 24 Pieces of Heart, the four-win Lightning Round reward, and the eight-win Hylian Shield reward.
Choose your next gameScreenshots & video
Game imagery for reference. Follow the written chapters above for the route and strategies.

Sources & references
Our original guide draws on the references below. Check the edition at the top of this page before following controls or unlock requirements.
- How to Recalibrate the Wii Remote Plus on Wii
- The Legend of Zelda: Skyward Sword Owner’s Manual
- Nintendo The Legend of Zelda: Skyward Sword Owner's Manual
- Iwata Asks: Wii MotionPlus Inspires New Controls
- The Legend of Zelda: Skyward Sword Controls
- Starting the Game – The Legend of Zelda: Skyward Sword Walkthrough
- The Wing Ceremony – The Legend of Zelda: Skyward Sword Walkthrough
- Sealed Grounds – The Legend of Zelda: Skyward Sword Walkthrough
- The Legend of Zelda: Skyward Sword - Guide and Walkthrough - Wii
- Skyward Sword Walkthrough - Skyview Temple
- Skyview Temple - The Legend of Zelda: Skyward Sword Walkthrough
- Chapter 3: Skyview Temple - Zelda Universe
- Skyward Sword Walkthrough - Faron Woods
- The Legend of Zelda: Skyward Sword Wii Instruction Booklet
- Skyward Sword Walkthrough – Eldin Volcano
- Earth Temple – The Legend of Zelda: Skyward Sword Walkthrough
- Skyward Sword Text Dump – Eldin Volcano and Earth Temple dialogue
- Skyward Sword Walkthrough – Lanayru Desert
- Skyward Sword Walkthrough – Isle of Songs
- Sealed Grounds – Zelda Dungeon Wiki
- The Imprisoned – Zelda Dungeon Wiki
- Farore’s Silent Realm - The Legend of Zelda: Skyward Sword Walkthrough
- Nayru’s Silent Realm - The Legend of Zelda: Skyward Sword Walkthrough
- Skyward Sword Walkthrough – Ancient Cistern
- The Legend of Zelda: Skyward Sword - Guide and Walkthrough - Wii, Final Battle
- Thonky: Sandship Walkthrough
- Zelda Universe: Chapter 12, The Sandship
- Zelda Dungeon: Skyward Sword Walkthrough – Sandship
- The Legend of Zelda: Skyward Sword Walkthrough: Din's Silent Realm
- The Legend of Zelda: Skyward Sword Walkthrough: Fire Sanctuary
- Skyward Sword Walkthrough - Fire Sanctuary
- Chapter 14: The Fire Sanctuary
- Return to the Sealed Grounds II — Legend of Zelda: Skyward Sword Guide
- Gate of Time - The Legend of Zelda: Skyward Sword Walkthrough
- Skyward Sword Walkthrough - Thunderhead - Zelda Dungeon
- Skyward Sword - The Imprisoned Part 2 Boss Guide
- The Legend of Zelda: Skyward Sword – Song of the Hero Quest Issue
- Skyward Sword Walkthrough - Song of the Hero
- Skyward Sword walkthrough – Song of the Hero – The Water Dragon in Faron and Fire Dragon in Eldin
- Stone of Trials - Zelda Wiki
- Chapter 15: Sacred Grounds Revisited - Zelda Universe
- Timeline - Skyward Sword Walkthrough
- Goddess's Silent Realm - The Legend of Zelda: Skyward Sword Walkthrough
- Sky Keep - The Legend of Zelda: Skyward Sword Walkthrough
- The Legend of Zelda: Skyward Sword Wii Walkthrough
- Skyward Sword Walkthrough - Sky Keep
- Skyward Sword Walkthrough - Final Showdown
- The Legend of Zelda: Skyward Sword - 100% Guide - Wii - By SonicRecords
- The Legend of Zelda: Skyward Sword - Goddess Cube/Chest FAQ - Wii
- The Legend of Zelda: Skyward Sword - Boss Rush Mode Guide - Wii - By Aegis_Runestone
- Gratitude Crystal Locations and Rewards - The Legend of Zelda: Skyward Sword Walkthrough
- Thunder Dragon's Song - The Legend of Zelda: Skyward Sword Walkthrough
- Thunder Dragon's Lightning Round - Zelda Dungeon Wiki
- The Legend of Zelda: Skyward Sword - Wii Save Files
- About to fight the final boss, endgame questions - The Legend of Zelda: Skyward Sword Wii
- How to Move Data From the Wii to an SD Card
- How to Copy Save Data to the Wii from an SD Card
About the game & collecting notes
- Platform
- Wii
A start-to-finish walkthrough for the original Nintendo Wii release SOUE01/RVL-SOUE. Follow the corrected story route from Skyloft and the Sealed Grounds through Faron, Eldin, Lanayru, all required Silent Realms, the seven main dungeons, the Imprisoned encounters, the Song of the Hero, Sky Keep, Ghirahim, Demise, and the ending. Optional collectibles and postgame challenges are separated from mandatory progression.
Darryl Polo
Darryl Polo loves tinkering with emulation and revisiting retro games. He enjoys exploring how old favorites play on different setups and sharing what he learns along the way. At Joking Joystick, he writes about the games, hardware, and small discoveries that keep the hobby fun.
Our editorial standardsFound a step that needs another look? Help us improve this guide.