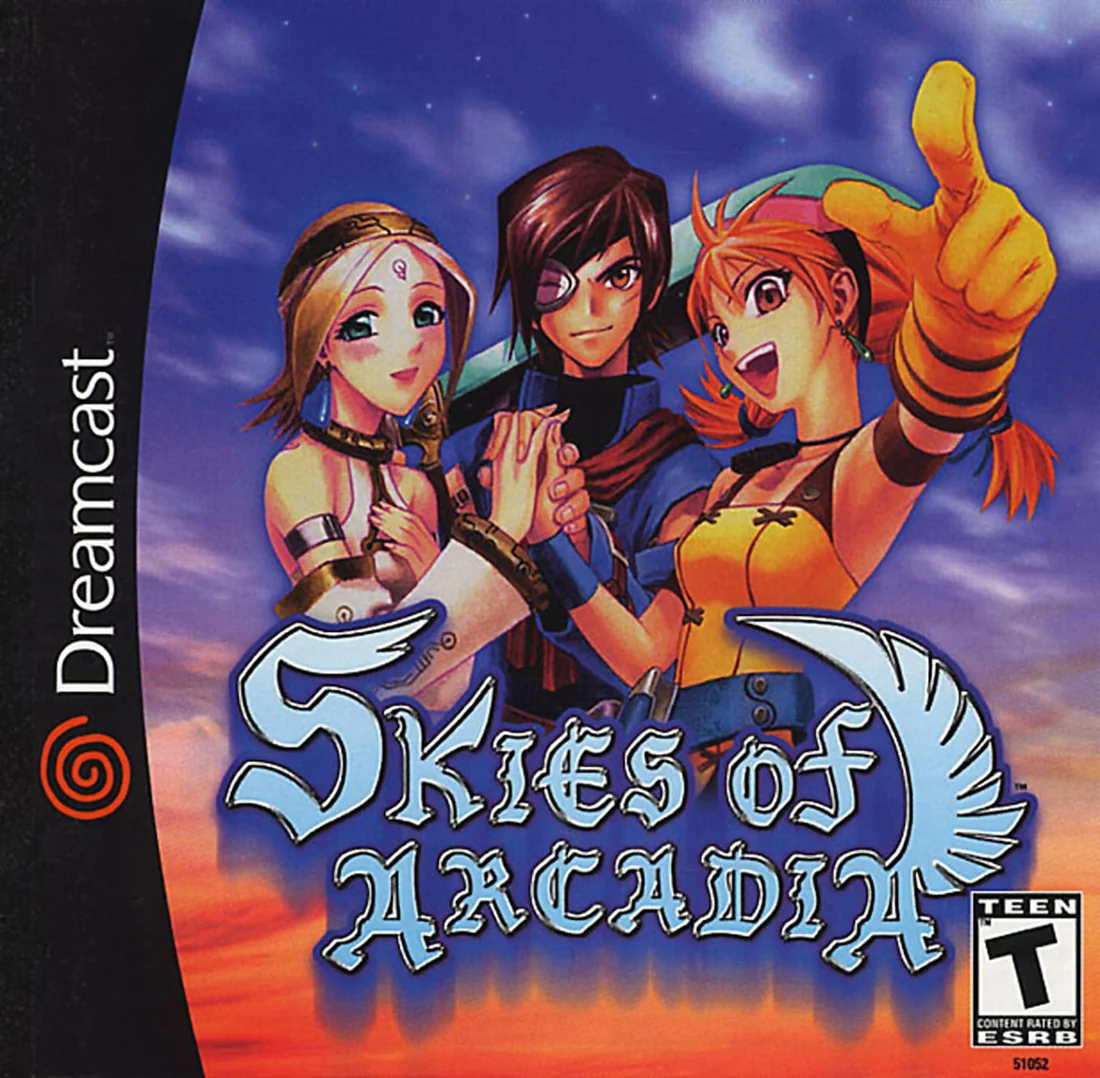
Skies of Arcadia (Dreamcast, North America) — Complete Campaign Walkthrough (Original Dreamcast release, USA Disc 1)
Step-by-step campaign coverage for the original Dreamcast release of Skies of Arcadia (North American two-disc edition).

Find a copy
Skies of Arcadia Dreamcast
We may earn a commission if you buy through these links, at no extra cost to you. As an Amazon Associate I earn from qualifying purchases.
Opens retailer search results. Check the model, edition, seller, availability and current price before buying.
Before you begin
This guide covers the original North American two-disc Sega Dreamcast release of Skies of Arcadia.
Follow the chapters in order. Required story progression is separated from optional crew, discoveries, wanted battles, giant monsters, and VMU content.
Use the Disc 1 transition save and the final pre-boss save as protected recovery files. Do not expect a post-credits free-roam save on the original Dreamcast release.
Set yourself up for the run
Begin on Disc 1 and keep a consistent campaign save on a known VMU and slot.
Reserve 27 blocks for a normal save file; allow additional space if installing the save icon. Pinta’s Quest requires a separate 83-block VMU executable and is optional.
Prepare both discs and a reliable swap procedure before reaching the in-game Disc 1 transition prompt.
Keep separate backup saves before the disc swap and before the final boss sequence.
Treat VMU downloads, Pinta’s Quest, discoveries, optional crew, wanted battles, and giant monsters as optional content rather than story prerequisites.
Quick Start, Saves, Controls and VMU Setup
Set up a dependable save for the North American two-disc Dreamcast release, learn the original controller layout, and prepare optional Pinta’s Quest support without importing GameCube or Legends assumptions.
Start Disc 1 and choose a consistent save location
Insert Disc 1 for a new game. The Dreamcast release is a two-disc game, and the instruction manual directs a first-time player to begin with Disc 1. At the title screen, press Start, choose New Game, and begin the opening sequence. Do not expect an automatic save after the title screen or after the first scene.
When the game first gives you a usable save point, make the campaign save on one clearly identified VMU and in one clearly identified slot. In villages and dungeons, approach the blue save point and press A to open the Save screen. During normal travel in the sky, press Start and select Save. The Status Menu opened with X is for character, ship, item, equipment, journal, crew, and related information; it is not the normal field-save command.
Use a second slot or second VMU for temporary backups if available. Keep the primary file in the same location throughout Disc 1. Before a later disc change, the game itself will take you to a save screen, so using a known slot now makes that procedure easier to follow.
- Start a new campaign from Disc 1.
- Make the first save at the first available blue save point or from the sky Start menu.
- Record the VMU socket and save-slot number used for the main file.
- Never remove the VMU or disconnect the controller while data is saving or loading.
Reserve VMU space for the campaign save
The North American Dreamcast manual specifies 27 blocks for each Skies of Arcadia save file. A new file may also ask whether to install the game’s VMU icon; the manual states that saving this icon requires two additional free blocks. Leave at least 29 free blocks before making the first save if you want the icon, rather than relying on a nearly full card.
Check free space from the Dreamcast system file manager with the game turned off. If the VMU contains valuable files, copy or preserve them before deleting anything. Delete files only through the Dreamcast file manager, never during a save operation. If you do not have room for optional content, prioritize the campaign save and use another VMU for Pinta’s Quest.
The separate Pinta Quest executable requires 83 blocks. That is in addition to the space needed by the campaign save. A standard 200-block VMU can normally hold both if other files have not consumed the card, but verify the actual free space rather than assuming it.
- Leave at least 29 free blocks for a new save and its optional icon data.
- Leave an additional 83 blocks if you intend to download Pinta Quest to the same VMU.
- Use a separate VMU if preserving older saves is more important than convenience.
Unlock and dispatch Pinta’s Quest
Pinta’s Quest is optional Dreamcast VMU content and is not required to finish the main story. It does not appear simply because the Status Menu is available. Progress until you reach Sailors’ Island and find Pinta in the appropriate shop area. After Pinta has been found, the Status Menu gains a Pinta Quest entry.
Press X outside battle to open the Status Menu. Use the page-change command shown on screen, or L and R where supported, to reach Pinta Quest. If the selected VMU has no Pinta Quest executable, choose Dispatch and select the VMU socket where the 83-block file should be written. The manual states that only one VMU executable can be installed on a VMU, so an existing executable may prevent the download.
To use the mini-game, start the VMU application from the Dreamcast VMU interface. Its available map areas expand as the corresponding areas are explored in the main game. When you want to collect its results, insert the VMU containing Pinta Quest into the controller, open the in-game Pinta Quest menu, and choose Return. The game calculates Pinta’s gains and transfers eligible gold and items to the main save. Treat the feature as optional support; it does not replace normal story progress or saving.
- Reach Sailors’ Island and find Pinta before looking for the Pinta Quest menu.
- Reserve 83 free blocks before choosing Dispatch.
- Use Return from the in-game Pinta Quest menu to transfer results back to the main game.
- Keep the main save safe even if you decide not to use the mini-game.
Learn the Dreamcast controls
On foot, use the Analog Thumb Pad or D-pad to move and change the camera angle when in first-person view. Press A to inspect, talk, confirm selections, or advance dialogue. Press B to cancel. Press X to open or close the Status Menu. Press Y to change viewpoint when that option is available. L and R rotate the camera during the normal viewpoint. Start shows or hides the mini-map in field areas.
In the sky, the Analog Thumb Pad moves the ship, the D-pad changes the camera angle, L descends, and R ascends. Press A when the name of a known island, village, or building appears to land or enter. Start opens the ship menu, including the map, bridge access, and Save command. X opens the Status Menu. The manual does not assign Y to normal ship travel.
In normal battles, A confirms commands and B cancels. X displays party status and item or magic descriptions where supported. Y changes the equipped weapon’s Moon Stone color during command selection. Start can cancel a Super Move animation if pressed during the permitted early part of the animation; it is not a pause button or an auto-save command.
- Practice X for the Status Menu and Start for the sky menu.
- Use L to descend and R to ascend in the ship.
- Use A to interact and B to cancel.
- Do not treat Start as an automatic save outside the sky menu.
Review party information, crew, and Blue Rogues
Open the Status Menu with X while outside battle and outside an event. Select a character to inspect HP, MP, equipment, magic, Super Moves, detailed parameters, and current title. Use L and R to move between character status screens. Newly recruited characters may not be the active party immediately, and the original Dreamcast game does not provide a universal early-game party-formation screen. Party switching is allowed only at specific story or dungeon mechanisms, so follow the prompt or visible party-switch marker when one appears.
Once Vyse owns a ship, Change Crew appears on the Status Menu. Select an occupation, then choose the crew member assigned to that position. The manual states that one crew member can be active in each occupation, with another available on standby where applicable. Crew assignments affect ship parameters and determine which Crew commands can be used during ship battles.
Do not look for Blue Rogues as a separate top-level Status Menu category. Inspect Vyse’s Super Move list for character special attacks, and use the ship-battle Crew command for active crew abilities. Crew recruitment and assignment support the ship system and can affect crew-based combat options, but they are not the same screen as party status. Check both areas after obtaining the Delphinus and after recruiting new crew.
- Inspect each character through the Status Menu before entering a dungeon.
- Use Change Crew only after the ship system is available.
- Check Vyse’s Super Move list for available character specials.
- Use the ship-battle Crew command for active crew abilities.
- Expect party switching only when a story or dungeon prompt permits it.
Before you move on
- A Disc 1 save exists on a known VMU and slot, and the file can be loaded from the title-screen Continue option.
- You can identify the correct field-saving method: a blue save point in villages and dungeons, or Start followed by Save during normal sky travel.
- You can open the Status Menu with X and inspect character status, equipment, magic, Super Moves, journal, and ship information when available.
- After the Delphinus is obtained, Change Crew is visible and you can identify active and standby crew positions.
- After finding Pinta at Sailors’ Island, the Pinta Quest entry can dispatch an 83-block VMU executable or return an existing Pinta Quest file.
- You have either confirmed sufficient VMU space for the save and optional icon, or deliberately chosen to postpone Pinta’s Quest while protecting the main campaign file.
Opening Sequence, Pirate Isle and the Little Jack
Complete the Dreamcast opening through Fina’s rescue, Pirate Isle, Shrine Island, the destruction of the Albatross, Drachma’s Little Jack work task and the required Sailors’ Island scenes. This chapter ends after the passport route to Valua has been arranged, while Vyse, Aika and Drachma are still using the Little Jack. Valua, the Valuan Catacombs, Nasr, Maramba, Daccat’s Island, the Grand Fortress and the Delphinus belong to later chapters.
Rescue Fina from the Valuan battleship
The game begins aboard a Valuan battleship with Vyse and Aika leading the raid. Follow the linear interior route, defeat the soldiers and guards, and continue toward the lower engine-room section. These fights introduce normal attacks, Guard, magic and item use. Keep both characters healthy because the first boss arrives before you have access to a full party.
After the scenes involving Alfonso, follow the exterior path and descend to the lower area. Enter the door and fight Antonio. His Thunder of Fury can inflict heavy damage on one character, so heal with Sacri or a Sacri Crystal when necessary. Normal attacks are reliable; use Cutlass Fury if Vyse has enough Spirit Points and the party is not in danger of being knocked out.
After Antonio is defeated, the rescued girl introduces herself as Fina. Continue through the Albatross scenes, speak with Dyne and report to Briggs at the helm. Once control moves to the world map, use the map and save interface to become familiar with navigation. Create a save before entering Pirate Isle so the opening section has a reliable recovery point.
- Antonio has been defeated.
- Fina has been rescued from the Valuan ship.
- Briggs has transferred control of the Albatross to Vyse.
- A separate save exists before entering Pirate Isle.
Complete the required Pirate Isle scenes
Fly to Pirate Isle and enter the hidden underground port. Go to Dyne’s office and finish the required conversation before spending time on optional activities. When control returns to Vyse and Aika, move through the village and follow the instructions that lead to Vyse’s house, the lookout and the following family scenes.
The dojo, children’s hide-and-seek game, early chests, handkerchief scene and first Moonberry are optional. The children’s game can reveal a hidden passage in Dyne’s office, but neither that passage nor its reward is needed to continue. Collect them now only if you want to; otherwise proceed with the story scenes.
After the house and lookout events, speak with Dyne. He gives Vyse the Purple Moon Stone. This is an early Moon Stone key item and should not be confused with the Raw Moon Stone obtained from Shrine Island or the Silver Moon Stone introduced much later. Leave through the upper dock and take the small wooden airship north to Shrine Island. Fina remains part of the story sequence here, but this chapter does not make her a permanent active party member.
- Dyne’s office and village story scenes are complete.
- The Purple Moon Stone is in the inventory.
- The Shrine Island route has opened.
- Optional Pirate Isle activities have not been mistaken for story requirements.
Clear Shrine Island and defeat the Sentinel
Enter Shrine Island and follow the available route until the first Moon Stone chamber. Continue through the shrine, go outside when the path requires it and activate the crystal device. Re-enter through the opened structure and follow the circular walkways, using the switches and ring mechanisms to open the route deeper into the shrine.
Treasure chests and a Moonberry are optional. Continue through the doors, ladders and raised paths until you reach the lower save point. Heal and save before entering the final chamber. The required objective is to reach the Sentinel, not to collect every item in the shrine.
The Sentinel uses Target Search before its powerful Blaster attack. When it identifies a target, have Vyse and Aika Guard on the following turn whenever possible. Aika can Focus when she is safe, but healing takes priority. Use Sacri or Sacri Crystals to prevent either character from remaining at low HP, and reserve Vyse’s Spirit Points for Cutlass Fury when the boss is vulnerable.
Defeating the Sentinel awards the Raw Moon Stone and triggers the return to Pirate Isle. The Raw Moon Stone is the required reward from this dungeon. It does not permanently add Fina to the active party and does not provide the Delphinus.
- The required Shrine Island switches and mechanisms have been activated.
- The pre-boss save point has been used.
- The Sentinel has been defeated.
- The Raw Moon Stone has been received.
Board the Little Jack and complete Drachma’s work task
Return to Pirate Isle and go to Dyne’s office in the underground base. Complete the attack sequence and choose the response that commits Vyse and Aika to trying to save everyone. After the following scenes, return to the airship and speak with Lindsi. Agree to help when the game asks for Vyse’s promise.
Fly toward Shrine Island as instructed. The interception and retreat sequence leads to the same forced result: the Albatross is destroyed, and Vyse and Aika awaken aboard Drachma’s ship, the Little Jack.
Drachma requires them to work before he will carry them onward. Go to the storage area and move all three supply boxes to the upper bridge area, one at a time. This is mandatory; moving only two boxes does not complete the task. After the third box is delivered, Drachma accepts Vyse as the Little Jack’s helmsman, joins the party and makes the Blue Moon Stone available for use.
- The Pirate Isle attack sequence has occurred.
- Vyse and Aika are aboard the Little Jack.
- All three supply boxes have been moved to the bridge.
- Drachma has joined the party.
- Vyse has received control of the Little Jack.
Reach Sailors’ Island and arrange the Valua route
Pilot the Little Jack through the rock passage toward Sailors’ Island. During the required travel scenes, Doc provides the Moon Lens. It allows Moonfish collection, but Moonfish hunting is optional and can wait. Dock at Sailors’ Island and follow the town scenes rather than leaving immediately.
Drachma leaves the active party and waits at the tavern while Vyse and Aika handle the town events. Visit the Sailors’ Guild and speak with the Guildmaster when prompted. The shops are worth checking before departure: healing supplies are useful, and the weapon shop can provide upgrades for Vyse, Aika and Drachma.
Optional Sailors’ Island rewards include the Repair Kit chest behind the welcome sign near Lawrence, 200 Gold upstairs in the inn, and the Note in a Bottle at the top of the lighthouse. To obtain the note, climb the lighthouse and inspect the balloon near the upper window. Pinta in the item or weapon shop can unlock Pinta’s Quest for a Dreamcast VMU, but that minigame is not required for the story.
Speak with the ship-parts merchant to learn that Valua sells the Harpoon Cannon. Return to Drachma at the tavern and complete the required conversation about the cannon. The dialogue choice that reveals the Harpoon Cannon is the important trigger; the purpose is to convince Drachma to take Vyse and Aika toward Valua.
After Drachma agrees, go back to the Sailors’ Guild and speak with the Guildmaster about entering Valua without a passport. The Guildmaster directs the party to the Nasr merchant. Speak with that merchant and accept the arrangement to escort him safely toward Nasr in exchange for his Valuan passport. Equip the party, restock healing items and buy useful Little Jack supplies if affordable. The next story movement is the Little Jack’s departure from Sailors’ Island for the escort route and Valua. Do not continue through the escort battle, Valua or the Delphinus in this chapter.
- The Little Jack has reached Sailors’ Island.
- Drachma is waiting at the tavern for the mandatory conversation.
- The Harpoon Cannon information has been obtained from the ship-parts merchant.
- The Harpoon Cannon discussion with Drachma is complete.
- The Sailors’ Guild passport conversation has been triggered.
- The Nasr merchant’s escort arrangement has been accepted so the passport route can proceed.
- The Note in a Bottle, Pinta’s Quest and equipment upgrades remain optional.
- A separate save exists before departing Sailors’ Island for the Valua-bound route.
Before you move on
- Antonio and the Sentinel have been defeated.
- The Raw Moon Stone is in the inventory.
- The Little Jack is under Vyse’s control.
- All three Little Jack supply boxes were delivered.
- Drachma has joined the party.
- Sailors’ Island has been reached.
- The Harpoon Cannon conversation with Drachma is complete.
- The Sailors’ Guild passport progression and Nasr merchant escort arrangement have been triggered.
- A separate save exists before the Little Jack departs Sailors’ Island.
- The Delphinus has not yet been obtained; it is intentionally outside this chapter’s endpoint.
References for this chapter
Disc 1 Dungeons: Clearing the Required Early Dungeons
This chapter begins at the Valuan Catacombs and follows the complete required early-dungeon route of the original North American Dreamcast release: rescue Fina, clear the Temple of Pyrynn for the Red Moon Crystal, rescue Isapa from Moon Stone Mountain, then open Rixis and complete the Green Gigas sequence. The Little Jack task, Shrine Island, Pirate Isle and the Delphinus are covered elsewhere. Optional treasure, Chams, Moonberries and Zivilyn Bane fights are not needed to advance the story.
Valuan Catacombs: rescue Fina
Begin this chapter after the earlier Little Jack and Sailors’ Island material has delivered Vyse, Aika and Drachma to Valua. In Valua’s Lower City, rest at the inn, save to the same working file and stock Sacri or Sacres healing, Curia Crystals, Magic Droplets and revival items before entering the sewer route to the Catacombs. The story requires the city events involving Marco, the rooftop pursuit and the passage into the sewer; do not leave Valua before those scenes are complete.
Follow the sewer passages to the first save point. Side rooms contain useful supplies, but the Pyri Box, Curia Crystals, Heavy Armor and Assassin Blade are optional pickups. Enemies that cast Eterni can defeat a character immediately, so eliminate them quickly or keep revival items ready. If you enter the boss area without enough healing, return to Lower City before crossing the final approach.
Bleigock is the first required Catacombs boss. Poisonous Bile can poison characters, so use Curia or a Curia Crystal immediately rather than allowing poisoned characters to continue taking damage. Frost Breath affects the party, making it safer to keep everyone near full health. Use Drachma’s reliable physical damage and Vyse’s strongest available attacks while Aika focuses on healing or Spirit Point generation. After the battle, return to the nearby save point and save again; Executioner follows shortly afterward.
Continue through the passage behind Marco to meet Captain Dyne. When the game asks what to do, choose the rescue option for Fina. The nearby Magic Droplet and Sacri Crystal are optional but worth taking if you have room. Follow the escape route through Upper City, reach the rail-car section and defeat the required guards. After the escape scene and the Little Jack’s intervention, Fina joins the party. This is the completion point for the Catacombs and the signal to continue toward Maramba and the Temple of Pyrynn.
- Start at the Valuan Catacombs rather than repeating the Little Jack opening.
- Save and replenish healing and status-recovery supplies in Valua’s Lower City.
- Defeat Bleigock and cure poison promptly.
- Save before the Executioner encounter.
- Defeat Executioner and both Spell Wardens.
- Choose to rescue Fina after speaking with Dyne.
- Complete the rail-car escape and confirm that Fina joins the party.
Temple of Pyrynn: recover the Red Moon Crystal
Travel through Maramba’s required story events involving Bellena and obtain the means to continue. Before departing, buy healing supplies and Curia Crystals. From Maramba, fly east to the Temple of Pyrynn. The temple is the large pyramid; use the normal entrance rather than treating nearby exterior features as separate story locations.
Inside, cross the first large room by riding the barrel and follow the walkway to the boulder corridor. When a boulder begins moving, run through the passage and use the alcoves if you need to avoid the next roll. In the first three-barrel puzzle, move the two side barrels into their corresponding openings, then place the lower barrel into the remaining opening. The route opens when all three positions are correct.
Continue through the boulder and lava sections. Treasure chests and the Temple’s Zivilyn Bane fight are optional. The required route proceeds to the final barrel puzzle. Move the barrels in this order: upper-right, lower-right, upper-left, lower-left, then the red barrel. Once the lava begins flowing, return to the entrance of that room and activate the water switch. The cooled lava forms the bridge to the boss route.
Save and heal before opening the final door. Rokwyrm uses Volcanic Blast against the whole party and Cinder Storm can petrify a character. Keep HP high, cure petrification with Curia Crystals and use ice-element attacks or your strongest dependable physical and special attacks. After Rokwyrm is defeated, cross its petrified body and take the Red Moon Crystal.
Leave through the indicated exit and complete the required ship sequence involving Recumen and Lynx. The ship-battle commands vary with the story prompts, but keep Spirit Points available, guard when a heavy attack is signaled and use the Harpoon Cannon when the command becomes available. Finish the scripted encounters and confirm that the Little Jack has been upgraded to cross the South Ocean.
- Complete Maramba’s required Bellena events.
- Stock Curia Crystals and healing items.
- Solve both required barrel puzzles.
- Activate the water switch after releasing the lava.
- Defeat Rokwyrm and obtain the Red Moon Crystal.
- Complete the Recumen and Lynx ship events.
- Confirm that the Little Jack can cross the South Ocean.
Moon Stone Mountain: rescue Isapa
Cross the South Ocean and reach Horteka in Ixa’Taka. The village initially restricts access. Speak with the elder to learn about King Ixa’Taka’s hideout. Then reach the shipwreck area in Horteka and speak with Hans aboard the wreck; Hans provides the Moon Stone Fuel needed for the Little Jack. Complete both interactions before leaving the village.
Travel north to the King’s Hideout. Before entering the mountain, complete the required confrontation with De Loco’s Chameleon. After the scene with King Ixa’Taka, the story directs you to Moon Stone Mountain, southwest of Horteka near the reef. Save outside the mountain because the entrance becomes blocked after the alarm sequence and the party must finish the interior route before leaving.
In the mining sections, cross the floor panels marked with X. The O panels are trapdoors that send the party back through the mine-cart area. The central shaft contains several large trapdoors. Use the route that drops through the right-hand safe passage, then take the middle safe drop among the remaining choices. If you fall into a mine cart, retrace the route and repeat the X-panel and trapdoor instructions rather than assuming the story has reset.
Continue through the catwalks and security areas until you reach Isapa. Side rooms contain equipment and supplies, but the De Loco Mail, 3-inch Blaster, De Loco Drill and stat-boosting items are not required to finish the dungeon. After freeing Isapa, use the elevator, heal and save before Antonio 2. His Thunder of Fury deals heavy damage, so keep the party above lethal range and have Fina heal whenever necessary. Defeat Antonio 2, follow the exit route and return to the King’s Hideout.
- Speak with the elder in Horteka.
- Speak with Hans at the shipwreck and receive Moon Stone Fuel.
- Complete the required Chameleon encounter before entering Moon Stone Mountain.
- Save before the alarm sequence blocks the entrance.
- Use the X-panel route instead of the O-panel mine-cart traps.
- Use the safe central-shaft trapdoor route.
- Rescue Isapa and defeat Antonio 2.
- Return to the King’s Hideout.
Rixis and the Green Gigas sequence
At the King’s Hideout, speak with Isapa to receive the clue about the great bird and the kneeling golden man. Leave the hideout and search the plateau near it to discover the Golden Man and receive the Golden Man’s Eye. Then search the nearby Ixa’Takan sky around the lake area to discover the Great Bird and receive the Great Bird’s Eye. These discoveries are mandatory; Rixis cannot be opened before both have been found.
Follow the direction indicated by the Great Bird toward the northwestern mountain area. Locate the small stone structure marking the Gates of Rixis. Insert the Golden Man’s Eye into the left statue and the Great Bird’s Eye into the right statue. The gate opens when both eyes are placed correctly. The Cham near the entrance is optional.
Inside Rixis, follow the ghost through the ruined city instead of attempting to clear every side path before progressing. The mist and broken platforms make the route difficult to read, but the required path continues upward through stairs, ledges and moving platforms. In the moving-platform area, ride the platforms to each available landing and continue toward the upper route. Optional chests and the second Zivilyn Bane fight can be skipped.
Save before the final stairs. Rik’talish can inflict confusion and sleep and also uses a damaging area attack. Cure confusion or sleep immediately with Curia or Curia Crystals. Vyse and Drachma should provide the main physical damage while Fina or Aika preserves turns and Spirit Points for recovery. After Rik’talish is defeated, save again before the consecutive ship encounters.
Complete the Chameleon rematch, then fight Grendel, the Green Gigas. Build Spirit Points, guard or repair when the incoming damage is severe and follow the battle prompts until the Harpoon Cannon becomes available. Use the harpoon at the required opportunity to knock Grendel into the chasm. Return to the King’s Hideout after the battle. The story awards the Green Moon Crystal there and opens the route toward the next Disc 1 events in Valua.
- Receive Isapa’s clue at the King’s Hideout.
- Discover the Golden Man and obtain the Golden Man’s Eye.
- Discover the Great Bird and obtain the Great Bird’s Eye.
- Place the Golden Man’s Eye in the left statue.
- Place the Great Bird’s Eye in the right statue.
- Defeat Rik’talish.
- Defeat the Chameleon rematch.
- Use the required harpoon opportunity to defeat Grendel.
- Return to the King’s Hideout and receive the Green Moon Crystal.
Before you move on
- Fina has been rescued and is present in the party.
- Rokwyrm has been defeated and the Red Moon Crystal is in the story inventory.
- The Recumen and Lynx ship events are complete.
- The Little Jack can cross the South Ocean.
- Hans has provided Moon Stone Fuel in Horteka.
- Isapa has been rescued from Moon Stone Mountain.
- Antonio 2 has been defeated.
- The Golden Man’s Eye and Great Bird’s Eye have been obtained.
- The Gates of Rixis have opened.
- Rik’talish and the Chameleon rematch have been defeated.
- Grendel, the Green Gigas, has been defeated with the harpoon sequence.
- The Green Moon Crystal has been awarded at the King’s Hideout.
- The next story route leads back toward Valua and the remaining Disc 1 campaign.
References for this chapter
- Skies of Arcadia — Guide and Walkthrough — Dreamcast — Arrawnt
- Skies of Arcadia — Guide and Walkthrough — Dreamcast — Shotgunnova
- Skies of Arcadia – Boss Guide – Dreamcast – By Jaksiel
- Skies of Arcadia — Guide and Walkthrough — Dreamcast — By MCella
- Skies of Arcadia - Guide and Walkthrough - Dreamcast - By GheddonLN
- Skies of Arcadia — Dreamcast Manual
Exploration and the Sky Map — Finding Required Islands
Use this chapter as a non-progressive navigation reference for the original Dreamcast release. The required early route through Sailors’ Island, the Stone Reef, Maramba, the Temple of Pyrynn, South Ocean, Ixa’taka and Horteka is completed in ch05. Do not repeat those story scenes here or treat them as new objectives. Instead, use the regional descriptions below to recognize locations, plan ship movement, prepare for dungeon travel and avoid detours into optional exploration. The Little Jack is the relevant ship for this portion of the campaign; the Delphinus belongs to later progression.
How to read the sky map
Open the map whenever a cutscene, conversation or ship transition identifies a new region. Use it to confirm your position and the broad relationship between ports, reefs, sky rifts and large landmasses, but do not assume that every optional island or discovery is marked as a story destination. The map is most useful for preventing backtracking: identify the next named region first, then use visible terrain and navigable openings to reach it.
Story progression is normally communicated through dialogue and scenes rather than through a permanent quest marker. If a town, dungeon or island has already been cleared in ch05, its later appearance on the map is only a landmark. Do not re-enter it expecting a second required event unless a later chapter explicitly sends the party there.
- Open the map after major story scenes.
- Use named regions and visible landmarks together.
- Treat optional islands and discoveries as separate from the main route.
- Do not repeat an early dungeon because it remains visible on the map.
Central Sky reference: Sailors’ Island and the Stone Reef
Sailors’ Island is the principal early supply stop around the Little Jack route. When using it as a reference point, remember that it provides an inn, item services, ship-parts services and access to the sailors’ information network. It is a practical place to save, restore the party, repair the ship and replace consumables before a long flight. The original Dreamcast walkthroughs identify the Stone Reef route from Sailors’ Island toward the Nasr region; follow the navigable opening rather than searching for an unmarked warp or fast-travel command.
The Stone Reef is a travel barrier and a visual navigation landmark, not a separate story chapter in this reference. If the Little Jack cannot pass a reef during the early campaign, confirm that the required ship upgrade and related story event were completed in the ordered walkthrough. Do not substitute later Delphinus abilities or GameCube Legends mechanics.
- Use Sailors’ Island for saving, restocking and repairs.
- Recognize the Stone Reef as the route barrier toward Nasr.
- Confirm the Little Jack has the required story-related capability before attempting a crossing.
- Do not expect early fast travel or automatic routing.
Nasr reference: Maramba and the Temple of Pyrynn
Maramba is the desert port and the clearest landmark for the Nasr region. Its tall, fiery architecture and desert surroundings distinguish it from the greener Ixa’taka area. In the completed early route, Maramba functions as the shopping, healing and repair stop before the Temple of Pyrynn. If you are checking a saved game or orienting yourself after a battle, use Maramba’s port as the reference point for the temple’s position rather than treating the town scenes as unfinished.
The Temple of Pyrynn is visible in the desert region and is a required dungeon, not an optional discovery. Its interior route, Red Moon Crystal sequence and associated battles belong to ch05. This chapter only records its navigational relationship to Maramba. Before entering any major dungeon in this region, reserve money for party healing, status recovery and Little Jack repairs. Exact quantities depend on encounter frequency and equipment, so carry a comfortable supply rather than relying on a fixed number.
- Use Maramba as the Nasr-region resupply landmark.
- Treat the Temple of Pyrynn as required progression already handled in ch05.
- Restock party recovery items before a dungeon run.
- Repair the Little Jack before leaving the region.
South Ocean and Ixa’taka reference
South Ocean is identified by its large whirlwinds and difficult headwind. The Little Jack takes longer to cross there, and repeated encounters can leave the ship damaged. If you are consulting the map during this passage, keep the ship pointed toward the far side after each battle instead of drifting into optional areas. Repair before entering the region and use ship-repair items between encounters when necessary. The objective is simply to cross the ocean and reach Ixa’taka; there is no need to clear every nearby island.
Ixa’taka changes the visual language of the route from desert to jungle. Once the region has been reached, use the large wooded islands and Horteka’s distinctive settlement as orientation points. Horteka is the required town landmark for the next section of the main route, but its elder, Hans and Moon Stone Fuel scenes are already covered in ch05. This chapter does not require repeating them or declaring the campaign complete at Horteka.
- Repair before entering South Ocean.
- Expect a slow crossing and frequent encounters.
- Keep a steady course after battles.
- Use the jungle-covered islands to distinguish Ixa’taka from Nasr.
- Treat Horteka as a navigation landmark after its ch05 scenes are complete.
What to postpone while following the map
Do not spend the early campaign searching every remote island, discovery, wanted ship or optional crew member. These activities can be pursued separately when a later chapter identifies them, but they are not prerequisites for reaching the next required story location. Optional exploration is especially inefficient before the party has the ship abilities and regional access needed to reach later sky layers.
Pinta’s Quest and other VMU-related material are Dreamcast-specific optional content. Keep those activities separate from the map route and from the story completion check. Likewise, do not use a GameCube Legends guide to infer a Dreamcast-only route, encounter expectation or reward.
- Prioritize named story destinations over remote exploration.
- Postpone discoveries, wanted ships and optional crew unless pursuing side content.
- Keep VMU activities separate from campaign navigation.
- Use Dreamcast references for this two-disc release.
Before you move on
- Ch05 has already completed the required early route through Sailors’ Island, the Stone Reef, Maramba, the Temple of Pyrynn, South Ocean, Ixa’taka and Horteka.
- The player can identify Sailors’ Island as the early supply and repair stop.
- The player can recognize the Stone Reef as the barrier toward the Nasr region.
- The player can identify Maramba and the Temple of Pyrynn as Nasr landmarks without replaying their story scenes.
- The player knows that South Ocean is a headwind-heavy passage requiring ship repairs and a steady course.
- The player can use Ixa’taka’s jungle terrain and Horteka as regional orientation points.
- Optional discoveries, wanted ships, crew, VMU content and remote islands have not been mistaken for required progression.
- The player is ready to continue with the next ordered chapter rather than treating this reference as a second completion state.
References for this chapter
Mid-Game Story: Empire Confrontations and the Moon Stones
Begin after the Green Moon Crystal has been awarded following the Green Gigas sequence. This chapter covers the mandatory route through the North Ocean, Maw of Tartas, the Valuan Gunboat, the deserted-island survival events, Nasrad, Daccat’s Island, the Grand Fortress and the Fortress Gate. It ends after the Delphinus is secured, Vyse becomes captain and Marco joins the crew. Optional discoveries, chams, treasure, wanted enemies and extra crew are not required for the main story.
Reach the Maw of Tartas
Confirm that the Green Moon Crystal is in the story inventory, then leave Ixa’taka and travel north toward Valuan airspace. A mandatory party battle against Gordo the Round and three Mad Chefs occurs in the North Ocean. Defeat the Mad Chefs first so their fire magic does not accumulate damage while Gordo remains alive. After they fall, concentrate on Gordo and heal whenever the party is weakened.
Continue through Valuan airspace toward the large circular stone formation called the Maw of Tartas. Land and approach the central seal to trigger the scene with the Valuan soldiers. Defeat the four Valuan Enforcers, then answer Drachma with the response equivalent to We understand, we’ll go with you. The three Choms around the Maw are optional and can be ignored if you are following the story route only.
- The Green Moon Crystal was obtained before entering this chapter.
- Gordo and the three Mad Chefs were defeated in party combat.
- The four Valuan Enforcers at the Maw were defeated.
- The party agreed to accompany Drachma.
Follow Rhaknam and defeat the Valuan Gunboat
Return to the Little Jack and go to the deck when instructed. After the shipboard scene, sail east until the Rhaknam sequence begins and the Valuan Gunboat appears. This is a normal ship battle, not an automatic cutscene victory.
Use the opening rounds to guard, focus and preserve the Little Jack while building enough Spirit Points for the Harpoon Cannon. After the second round, select the aggressive battle option when it becomes available and fire the Harpoon Cannon. The gunboat cannot survive that attack. If the cannon command is not yet available, continue defending and focusing rather than wasting turns on ordinary attacks.
After the battle, go below deck and pass through the lower-level double doors to the lifeboat area. The Little Jack is lost during the following attack, and the party separation is scripted. Do not treat the loss of the ship or the separation as a failure state.
- The Rhaknam scene and Valuan Gunboat battle occurred.
- The Little Jack survived until the Harpoon Cannon was available.
- The Valuan Gunboat was finished with the Harpoon Cannon.
- The lifeboat escape and scripted party separation are complete.
Complete the first deserted-island visit
Control changes to Vyse on the deserted island. Examine the skeleton near the northeastern cave, then enter the cave and inspect its paths. The Moonberry and gold inside are optional. Continue to the southern tip of the island to trigger the required overview scene, then return to the northeastern cave and rest.
The game next switches to Aika and Fina, who are taken to Nasrad. Visit the weapon shop and speak with the old merchant to receive the Abirik Cham, then stay at the inn. These scenes are required because the story will return Vyse to the island for the survival tasks.
- Vyse examined the skeleton and triggered the island overview scene.
- Vyse rested in the northeastern cave.
- Aika and Fina reached Nasrad.
- The weapon-shop conversation and overnight stay are complete.
Finish the survival tasks and reach Nasrad
When control returns to Vyse on the island, wander through the forest and defeat fifteen enemies. The hunting sequence ends after Vyse has collected fifteen portions of Grapor meat. After the next scene, search the island for five pieces of firewood. They are scattered through the forest, so rotate the camera if an item is hidden behind scenery.
The following task requires five Moon Stones. Search three locations in the forest, one beside the signal fire at the southern tip and one just outside the northeastern cave. Once all five are collected, Vyse repairs the lifeboat. Gilder then arrives and allows Vyse to take control of the Claudia. Sail toward Nasrad as instructed. The later interruption and transfer to the smaller emergency vessel are scripted; continue to Nasrad and enter the city.
As Aika and Fina, visit the tavern to receive the payment and supplies, then return toward the inn. The injured man Pedro gives them the map required for Daccat’s Island. When control changes to Vyse, go to the palace and choose the response equivalent to We have important information. This completes the Nasultan scene and opens the route to Daccat’s Island.
- Vyse defeated fifteen enemies during the hunting task.
- Five pieces of firewood were collected.
- Five Moon Stones were collected.
- Vyse reached the Claudia and was directed toward Nasrad.
- Pedro gave the map.
- The Nasultan palace conversation was completed.
Reach and clear Daccat’s Island
Take the route toward Crescent Isle and continue north into the nearby island cluster. Daccat’s Island is the largest island in that group. Both story groups must reach the island: Aika and Fina arrive first, then Vyse and Gilder follow. At each entrance, step on the floor plate and examine the wall or door as directed to begin the dungeon.
Daccat’s Island alternates between the Aika and Fina group and the Vyse and Gilder group. The party-switching devices are rotating holograms marked by crossed cutlass and boomerang symbols. Whenever one group reaches a mechanism that cannot be used from its side, locate the nearest switching device and continue with the other group. Levers, handles, platforms and gates are linked across the two routes, so do not repeatedly force a blocked path with the wrong party.
Heal at the save point before the final exchange. The chest guarded by Zivilyn Bane is optional, as are the dungeon’s other treasure items. At the boss, Sinistra and Destra should be defeated one at a time. Use Vyse’s strongest available special attack after increasing his power when possible, and have the support characters heal or defend. Their combined attacks are much more dangerous while both heads remain alive. After the victory, examine the large treasure chest to trigger the story, then use the emergency exit and return to Nasrad.
- Both parties reached Daccat’s Island.
- The cutlass-and-boomerang devices were used to switch groups.
- The linked mechanisms opened the route to the final area.
- Sinistra and Destra were defeated.
- The chest scene and return route to Nasrad are complete.
Surrender and escape the Grand Fortress
Enter Nasrad’s central area to trigger the Armada attack. When Ramirez confronts the party, choose Surrender. Fighting is not a winning story route, and the party will be taken prisoner regardless of the battle outcome.
Inside the Grand Fortress, wait in the cell until Gilder opens it. Defeat the two officers outside, then use the elevator to reach Prisoner Block 200 and proceed to Aika’s cell. Vigoro blocks the route. Defeat him to receive the Cannon Room Key. His Charm attack can confuse Aika, so use a Curia item if necessary and equip Aika before continuing.
Use the elevator to reach the Fortress Cannon Room. Follow the cannon route and the exterior platforms until you reach the guarded room holding Fina. Defeat the officers, obtain the Harbor Key and rescue Fina. Equip her immediately, then return to the lift and descend toward the harbor.
Cross the searchlight area. Being spotted causes extra battles, but it does not block completion. Heal at the save point before the Dralkor Tank. Its Wheel Blast can severely damage multiple characters, so have Aika and Fina guard or focus while Vyse and Gilder attack and handle emergency healing. After the tank falls, choose the response equivalent to Let’s take our chances and hop on. When Enrique asks to come with you, choose Of course you can come with us. Enrique joins the party and the Delphinus becomes available.
- Surrender was selected at Nasrad.
- Vigoro was defeated and the Cannon Room Key was obtained.
- The Harbor Key was obtained and Fina was rescued.
- The Dralkor Tank was defeated.
- Enrique joined the escape party.
Break through the Fortress Gate and secure the Delphinus
The Delphinus must break through the Fortress Gate before leaving Valuan territory. Treat this as a required ship battle. Defend and focus during the opening round, then use the Moon Stone Cannon when the command becomes available. The cannon ends the encounter; ordinary cannon fire is not the intended finishing method.
After the escape, choose the response equivalent to I’ll do it! when the captain decision appears. Once normal control returns aboard the Delphinus, inspect both side compartments on the bridge. One contains an optional item and the other contains Marco, who automatically joins the crew. Do not rely on a fixed left-or-right instruction; check both compartments until the Marco scene triggers.
Speak with Gilder after inspecting the ship and follow the scene directing the Delphinus toward Crescent Isle. Make a fresh save when control returns. The chapter is complete when Vyse is captain, Enrique is present as the continuing story party member, Marco is listed in the Delphinus crew roster and the Delphinus is ready for the Crescent Isle route. Lawrence, Polly, Pinta and other crew members are optional at this point and are not required to finish this chapter.
- The Fortress Gate was destroyed with the Moon Stone Cannon.
- Vyse chose to become captain.
- Both bridge side compartments were inspected.
- Marco automatically joined the Delphinus crew.
- A fresh save was made with the Delphinus ready for the next chapter.
Before you move on
- The Green Moon Crystal was obtained before this chapter.
- The Maw of Tartas and Rhaknam sequence is complete.
- The Valuan Gunboat was defeated with the Harpoon Cannon.
- Vyse completed the fifteen-enemy, firewood and Moon-Stone island tasks.
- Vyse reached the Claudia and the party completed the Nasrad scenes.
- Pedro’s map and the Nasultan palace scene are complete.
- Daccat’s Island and the Sinistra and Destra battle are complete.
- Ramirez captured the party after the Surrender choice.
- Vigoro, the fortress officers and the Dralkor Tank were defeated.
- Fina was rescued and Enrique joined the escape.
- The Fortress Gate was destroyed with the Moon Stone Cannon.
- Vyse is captain of the Delphinus, Marco is in the crew roster and a fresh save is ready for the next chapter.
Early Crew Recruitment and Ship Basics
Begin this chapter after the Delphinus acquisition sequence is already complete. Vyse is captain, Marco is in the crew roster, Gilder has left, and Enrique has joined before the trip to Crescent Isle. Your required objective is to reach Crescent Isle, pay for the Delphinus improvements and base construction, choose a base flag, and verify the crew-management system. Polly, Lawrence and Pinta can be recruited as optional early crew, but none is required for the original Dreamcast campaign.
Start from the established Delphinus checkpoint
Do not repeat the captain-selection scene, the search for Marco, or the conversation that removes Gilder and adds Enrique. Those events belong to the preceding progression. At this chapter’s starting point, the Delphinus is already under Vyse’s command, Marco is already listed as a Sailor, Gilder has departed, and Enrique is available as the story-linked playable character.
Use the active party menu for playable characters and the Change Crew menu for ship personnel. Enrique belongs to the adventuring party system during this portion of the story; he is not an optional sailor whom you need to assign to a Delphinus job.
- Confirm that Vyse is already captain of the Delphinus.
- Confirm that Marco is present in the crew roster.
- Confirm that Gilder has left and Enrique is available.
- Do not replay the earlier ship-acquisition scenes.
Optional stop at Sailors’ Island
If you want the early optional crew before continuing, fly to Sailors’ Island and recruit Polly, Lawrence and Pinta. Their recruitment is not required to unlock Crescent Isle or finish the main story, so you can postpone any of them without creating a progression problem.
Polly is in the Sailors’ Island tavern and joins as a Cook. Her Crew command restores one ally’s MP for a Spirit Point cost. Lawrence is near the Sailors’ Guild; pay him 10,000 gold to recruit him as a Helmsman. His active assignment raises the Delphinus’s Quick value. Pinta is in the weapon merchant’s shop near the lighthouse and joins as a Delegate. His Crew command protects the ship from cannon fire for one round.
Lawrence’s payment is optional, but do not spend the money if doing so would leave you unable to buy healing items, repairs or ship supplies. You can return to Sailors’ Island later. Pinta’s Delegate ability is unrelated to Pinta’s Quest, the separate Dreamcast VMU feature.
- Recruit Polly only if you want an early Cook.
- Pay Lawrence 10,000 gold only if you can afford it.
- Recruit Pinta from the Sailors’ Island weapon shop if desired.
- Keep Pinta’s crew role separate from Pinta’s Quest.
- Remember that all three recruits are optional.
Travel to Crescent Isle
Leave Sailors’ Island, or depart directly if you skipped the optional recruits, and fly the Delphinus to Crescent Isle. Follow the landing scenes and speak with Brabham and Izmael. This is the required base-establishment checkpoint for the chapter.
The Crescent Isle work requires 100,000 gold in total. Brabham handles the Delphinus ship work for 75,000 gold, while Izmael handles the 25,000-gold base construction. Both payments are required to advance this section. If you lack the money, raise funds through ordinary exploration, selling unneeded valuables or discoveries, and then return to Crescent Isle.
Do not treat the payment as an optional upgrade. The story will not continue through this base-establishment sequence until the required work has been funded. Save before paying if you want a recovery point, especially if your reserve is low.
- Reach Crescent Isle with the Delphinus.
- Speak with Brabham and Izmael.
- Pay Brabham’s 75,000-gold ship-work fee.
- Pay Izmael’s 25,000-gold base-construction fee.
- Confirm that the base and ship improvements are completed.
Choose the base flag and inspect the new facilities
After the payments and construction scenes, choose the flag for the Crescent Isle base when the game prompts you. The choice does not determine the ending or branch the main story. Choose whichever design you prefer; the flag can be changed later by examining the flag on the Delphinus bridge.
Walk through the completed base and check the available rooms, shops and crew areas. Brabham and Izmael are now part of the required crew structure. Brabham serves as the Engineer and improves the ship’s defensive capability when active. Izmael serves as the Builder and improves the Moon Stone Cannon when active. Their story availability should not be confused with the optional Sailors’ Island recruits.
Use the elevator to reach the meeting room when the story directs you there. The next objective will be revealed through the base scenes. Do not leave Crescent Isle assuming that every shop or remodeling option is required; the main requirement here is completing the construction handoff and advancing the meeting-room dialogue.
- Select a base flag.
- Remember that the flag choice is cosmetic rather than a story branch.
- Confirm that Brabham and Izmael are available as required crew.
- Visit the meeting room after the base scenes direct you there.
- Save after the construction sequence.
Open Change Crew and understand active assignments
While outside battle, press X to open the Status Menu, then choose Change Crews. The Dreamcast manual identifies this menu as the place to change crew members. Crew jobs are separate from the normal party formation and equipment screens.
The crew list contains jobs such as Sailor, Helmsman, Cook, Engineer, Builder and Delegate. More than one person may be available for a job, but the active assignment is the one that supplies the displayed passive benefit or Crew command. The remaining members are on standby and do not provide that job’s active effect. Change assignments whenever a ship battle or route makes another ability more useful.
A useful early arrangement is Marco as Sailor, Lawrence as Helmsman if recruited, Polly as Cook if recruited, and Pinta as Delegate if recruited. Once Brabham and Izmael join, review the Engineer and Builder positions as well. This is a convenience setup, not a mandatory formation. You can continue the story with missing optional recruits.
- Open the Status Menu with X.
- Select Change Crews.
- Verify Marco’s Sailor assignment.
- Review the active Helmsman, Cook, Engineer, Builder and Delegate positions.
- Keep standby crew distinct from active crew.
- Save after checking the roster.
Prepare for departure from Crescent Isle
Before leaving, make sure the Delphinus’s displayed equipment, supplies and active crew are in order. Buy or restock ordinary healing items before the next dungeon route, and use the ship’s facilities if you need to recover. Crew abilities are tactical conveniences; they do not replace normal item use or party preparation.
The party menu remains the place to arrange Vyse, Aika, Fina, Enrique and other playable characters for ground battles. The Change Crew menu affects ship assignments and ship-battle support. Do not move story-linked playable characters into crew positions or assume that an optional crew member must be placed in a particular slot for the story to trigger.
The chapter is complete after Crescent Isle has been established, both required payments have been made, the flag has been selected, the meeting-room objective has been revealed, and a save exists. Continue with Enrique still available as the story-linked party member. Polly, Lawrence and Pinta can be recruited now or left for a later return.
- Complete the Crescent Isle construction handoff.
- Choose and confirm the base flag.
- Open Change Crews and review active assignments.
- Restock supplies if necessary.
- Create a recovery save after the Crescent Isle scenes.
- Continue without treating optional crew as story requirements.
Before you move on
- Vyse is already confirmed as Delphinus captain at the chapter start.
- Marco is already listed as a Sailor.
- Gilder has already left the party.
- Enrique is already available before the Crescent Isle trip.
- The Delphinus has reached Crescent Isle.
- Brabham’s 75,000-gold ship-work payment is complete.
- Izmael’s 25,000-gold base-construction payment is complete.
- The Crescent Isle base scenes have finished.
- A base flag has been selected.
- Brabham and Izmael are available in the required crew structure.
- The Change Crews screen has been opened from the Status Menu.
- Active and standby crew assignments have been checked.
- Polly, Lawrence and Pinta have been identified as optional recruits.
- Lawrence’s 10,000-gold requirement is understood.
- Pinta’s crew role has not been confused with Pinta’s Quest.
- A save exists after the Crescent Isle construction and crew-management checkpoint.
Airship Battles and Boarding — Tactical Overview
This chapter covers the original two-disc Sega Dreamcast release of Skies of Arcadia. Ordinary ship encounters are resolved through the Ship Battle menu and Battle Grid, not through a reusable boarding command. You assign one action to each available party member, place those actions on selected rounds, and manage Spirit, cannons, torpedoes, magic, Guard, items, repairs and Crew commands. Boarding is a story-scripted transition. The Tenkou battle is followed by the Jao and Mao deck fight, while defeating Galcian’s Hydra leads directly into the damaged ship as a dungeon. These sequences should not be treated as evidence that ordinary weakened Valuan or Armada ships can be boarded at the player’s discretion.
Prepare the Delphinus before a fixed ship battle
Before approaching a named story encounter, open the Status Menu and review the Delphinus’s current HP, installed ship parts, available weapons and assigned crew. The Dreamcast manual explains that crew members can improve ship performance and provide Crew commands during ship battles. Make sure the assignments you want are active before entering the encounter, because the battle itself is not the place to reorganize the ship’s roster.
Restore the Delphinus before departure. Resting at an inn restores the party’s HP and MP and restores the ship’s HP to its current maximum. Carry recovery items for situations in which the battle does not offer enough time to recover. Save before approaching a fixed encounter. The Dreamcast release allows saving anywhere while traveling through the skies by opening the menu with Start and selecting Save, but village, dungeon and ship-dungeon progress must be saved at save points.
Check the party members available for the coming event. Ship battles divide each turn into a number of action rounds based on the number of characters who can act. More available characters normally means more commands to distribute across the Battle Grid, but it does not remove the need to defend or repair the Delphinus.
- Restore the Delphinus before a named or difficult encounter.
- Review ship parts, weapons and active crew assignments.
- Carry ship and party recovery items.
- Create a pre-battle save before approaching a fixed encounter.
Read the Battle Grid before assigning commands
At the beginning of a ship-battle turn, select one command for each character. After selecting a command, place it on one of the available rounds shown on the Battle Grid. The grid shows the current turn and the next turn, allowing you to arrange actions around incoming danger and favorable firing opportunities.
The grid’s color indicates the relative danger or opportunity for that round. Green is the safest general condition, yellow is more dangerous and red is the most dangerous. A Chance indicator identifies a favorable attack opportunity. A separate icon identifies rounds in which the S-Cannon can be fired, if the ship is equipped with one. Use these indicators to decide whether to attack, build Spirit, guard or repair rather than entering commands without checking the upcoming rounds.
Guard reduces the damage taken from enemy attacks. It does not carry over automatically to the next turn, so assign it again when the following grid requires protection. Focus restores Spirit, while normal attacks and most offensive ship commands consume Spirit. A dangerous red round is often better used for Guard, an item or a suitable Crew command than for a poorly timed attack.
Some bombardments include a strategic message choice. Read the available responses carefully. The manual states that these choices can change the flow of the battle, including the timing of danger and favorable opportunities.
- Inspect both the current and next turns before confirming commands.
- Use green rounds for preparation or routine attacks when possible.
- Treat yellow and red rounds as warnings to defend or recover.
- Use Chance and S-Cannon indicators deliberately.
- Read strategic message choices instead of selecting automatically.
Practice the cannon, torpedo and Spirit cycle
Use an ordinary sky encounter or a weak fixed battle to practice the basic cycle. During a safe round, assign Focus to one or more characters to build Spirit. When a favorable attack round appears, spend that Spirit on the strongest available weapon that can reach the target at the selected time.
The Dreamcast manual distinguishes three artillery types. A main cannon fires and hits on the same round, but normally consumes more Spirit. A torpedo lets you designate both its firing round and its later impact round, which makes it useful when the best attack window is not immediate. A secondary cannon can fire across continuous rounds, but the extra shots require additional Spirit.
Main and secondary cannons can fail if the Delphinus does not have a proper angle on the enemy ship. Cannon accuracy can also produce a miss. If a shot fails, reassess the enemy’s position, the weapon’s accuracy and the next available round instead of assuming that the command was entered incorrectly.
Complete at least one ordinary encounter using Focus, a timed cannon or torpedo attack, and a defensive or recovery command. This is a practice exercise for Battle Grid timing only. Do not search the encounter for a boarding option; ordinary Valuan and Armada ships do not provide a player-selected boarding command.
- Use Focus during safe rounds to build Spirit.
- Learn the difference between immediate main-cannon fire, delayed torpedoes and continuing secondary fire.
- Reserve Spirit for a strong attack or special-cannon opportunity.
- Recheck angle and accuracy when a shot misses.
- Use ordinary encounters to practice timing, not boarding.
Use magic and Crew commands efficiently
Ship magic requires the Magic Cannon. Once it is installed, select Magic and choose the desired spell in the same general manner as normal battle magic. The spell is fired as a magical cannon shot, so it can still miss. Each use consumes MP as well as the required Spirit.
Crew commands become available after Vyse becomes captain of his own ship. Select Crew, choose an available crew member and review the displayed effect and Spirit cost. Depending on the crew member, a command may restore ship HP, restore Spirit or improve another part of the battle. The useful command depends on the current grid, the Delphinus’s condition and the Spirit needed for the next attack.
Do not spend every Crew command immediately. A repair used while the ship is nearly full may provide little value, while waiting until the Delphinus is almost destroyed can leave too little time to recover. Alternate Focus, attacks, Guard, items, repairs and other support according to the coming rounds.
- Confirm that the Magic Cannon is installed before planning offensive ship magic.
- Read the effect and Spirit cost of each available Crew command.
- Repair before the Delphinus reaches a critical condition.
- Keep enough Spirit for the next major attack when the grid permits it.
Resolve the scripted Tenkou boarding event
When the story sends the Delphinus into the Tenkou encounter, complete the ship battle through the Battle Grid. Use Focus during safe rounds, schedule torpedoes for useful later impacts and protect the Delphinus during dangerous rounds. The Tenkou ship can create awkward firing conditions, so do not waste attacks merely because a command is available.
After the Tenkou ship battle, the story continues aboard the Delphinus. Go to the deck when instructed. Jao and Mao then confront the party and present the choice between surrender and fighting. Choose Fight to continue the required story battle against them. This is a scripted deck encounter that follows the Tenkou ship battle; it is not a command that can be selected against ordinary ships.
- Enter the Tenkou battle with a restored Delphinus and a recent save.
- Watch the Battle Grid instead of firing on every available round.
- Go to the Delphinus deck after the ship battle when the story instructs you to do so.
- Choose Fight to continue the Jao and Mao sequence.
Defeat the Hydra and enter the damaged ship
The Hydra is a longer and more demanding fixed ship battle. Enter with the Delphinus restored, useful crew assignments active and enough recovery items for a prolonged encounter. Use Guard during the strongest incoming rounds, repair before ship HP becomes critical and use the S-Cannon when a valid S-Cannon round appears. Preserve enough Spirit to respond to the next dangerous sequence rather than spending everything on minor attacks.
Do not rely on Yellow-element damage against the Hydra. The Dreamcast battle mechanics reference identifies the Hydra as immune to Yellow damage, while other elemental attacks function normally rather than receiving that complete immunity. Choose another useful attack color and continue to prioritize Battle Grid timing over repeated low-value shots.
Defeating the Hydra does not end the sequence. The party automatically boards the damaged vessel and proceeds through its interior toward Galcian. Treat the boarded Hydra as a dungeon phase, not as a new ship-combat command. Use the available recovery opportunity with Enrique near the entrance, save when the game provides the save point and search the interior carefully before continuing. If the ship battle fails, reload the pre-battle save and change the timing of Focus, Guard, repairs, Crew commands and cannon fire rather than repeating the same command order.
- Enter the Hydra battle with full practical preparation.
- Guard during the strongest incoming rounds and repair before critical ship HP.
- Avoid Yellow-element attacks against the Hydra.
- After victory, continue into the damaged Hydra as the next dungeon.
- Use recovery and the available save point before pursuing Galcian.
Before you move on
- You can identify the Dreamcast Battle Grid’s green, yellow, red, Chance and S-Cannon indicators.
- You have completed an ordinary ship encounter using Focus, timed cannon or torpedo fire and at least one defensive or recovery command.
- You have reviewed Delphinus HP, equipment, supplies and active crew before a fixed encounter.
- You understand that ordinary ship encounters do not provide a player-selected boarding command.
- You know that the Tenkou ship battle leads to the scripted Delphinus deck fight with Jao and Mao.
- You know that defeating the Hydra leads automatically into the boarded-vessel dungeon and the route toward Galcian.
- You can preserve Spirit for a favorable attack or S-Cannon round instead of attacking without regard to the grid.
- You can reload the pre-battle save and change timing, crew, equipment or recovery choices after a failed fixed battle.
References for this chapter
Ending Disc 1 and Preparing for Disc Swap
Disc 1 concludes after the Yafutoma rescue, the recovery of the Blue Moon Crystal, the retaking of the Delphinus, and the defeat of Muraji, Draco, and Bluheim. Daigo then gives Vyse the Book on Polarity, Moegi joins the crew, and the Delphinus presents the route choice that leads into Disc 2. Choose the eastward continuation, save at the dedicated disc-change prompt, and keep that transition file until Disc 2 has loaded successfully.
Clear Mount Kazai and defeat Tortigar
After the Yafutoma story sends you to Mount Kazai, enter the mountain through the ship-parts merchant’s route and follow the underwater passages. Use the blue crystal switches to change the water level, returning through the central rooms when a newly flooded or drained passage becomes accessible. Continue through the lower route until the final elevator and save point. The dungeon includes underwater travel and enemies capable of inflicting Stone, so carry Stone-recovery items and restore HP and SP before the boss.
Tortigar uses Steelskin to negate damage for a turn and can recover with Sacrulen. Do not spend your strongest attacks while Steelskin is active. Use those turns to heal, defend, restore SP, or prepare a special attack. When the protection ends, concentrate your damage and cure Stone immediately if it affects a key attacker. Defeat Tortigar, then pass through the opened route to collect the Blue Moon Crystal.
- Mount Kazai’s water-switch route is complete.
- The save point before the final elevator has been used.
- Tortigar is defeated.
- The Blue Moon Crystal is in the inventory.
Return to Yafutoma and survive the attack
After collecting the crystal, leave Mount Kazai and use the ship-parts merchant’s return route to reach Yafutoma. Report to Lord Mikado and complete the palace scenes. When the party is sent toward the port, choose “Wait and see what happens” when the first response is presented. During the following emergency sequence, choose “Run and hide” when that response appears.
When control returns after the Valuan attack, do not try to manage the Delphinus through the ordinary ship menus. Follow the escape route through the guest house’s hidden passage. Explore the dead-end section to collect the four Sacrulen Crystals, then take the elevator at the far end to reach the route toward Tenkou Island. The crystals are useful recovery supplies but are not required for the disc transition.
- The Blue Moon Crystal handover scene is complete.
- “Wait and see what happens” was selected at the port.
- “Run and hide” was selected during the escape sequence.
- The hidden passage and elevator route are open.
- The four Sacrulen Crystals have been collected if desired.
Climb Tenkou Island and trigger the rescue operation
The escape elevator leads to Exile Island, identified in the story as Tenkou Island. Climb the long stairway toward the shrine. Use the save point near the lower section before committing to the ascent, and heal between battles. The Tenkou enemies are mainly physical attackers, so defensive skills and reliable healing are more useful than attempting to conserve every recovery item.
A Cham on the circular platform partway up is optional. Continue to the shrine at the top and answer Daigo’s request with “Of course!” After the scene, descend to the port. Save again if necessary, then inspect the Yafutoman vessel below as directed. This begins the operation to retake the Delphinus.
- The shrine scene with Daigo is complete.
- The “Of course!” response has been selected.
- The party has returned to the Tenkou Island port.
- Inspecting the Yafutoman vessel has started the Delphinus operation.
Retake the Delphinus and defeat Muraji
Boarding the Delphinus begins with a fight against four Yafutoman Soldiers. Defeat them and move through the ship toward the bridge. Four Red Guards block the next section; defeat them, then continue through the now-available route. Locked doors do not need to be opened for this sequence.
Muraji fights with three Soldiers and can summon additional Soldiers. Use an area attack to reduce the Soldiers quickly, then focus on Muraji. He can cast Increm and other support magic, so remove his enhancement with Weak or Lunar Winds when available. Keep HP high because the following ship battles begin without a normal return to town. If SP is available, use efficient party attacks rather than spending everything on a single target while the Soldiers remain active.
- The first four Soldiers are defeated.
- The four Red Guards are defeated.
- Muraji and his Soldiers are defeated.
- The party and ship retain enough resources for the immediate battles.
Defeat Draco and Bluheim
The Draco is fought as a ship battle. Each round presents attack opportunities and a dangerous opportunity for the Draco Cannon. Fire the Moon Stone Cannon during a suitable opening, then use the other opportunity to defend or repair when the battle interface indicates that the Draco Cannon is imminent. Keep the Delphinus’s HP stable with repair items rather than waiting until the ship is nearly destroyed. Torpedoes provide dependable damage when the cannon is unavailable.
Bluheim, the Blue Gigas, follows immediately. It has a large amount of HP and can evade ordinary attacks, so prioritize accurate attack opportunities and use the Moon Stone Cannon when the command window allows it. Repair early if the Delphinus has taken damage from the Draco. When Bluheim prepares a major maneuver such as Blue Winds, follow the defensive or evasive response shown by the battle interface instead of committing automatically to a normal attack. Continue alternating safe cannon attacks, torpedoes, defense, and repairs until Bluheim falls.
- The Draco is defeated.
- Bluheim is defeated.
- The post-battle story sequence begins.
- The party is not returned to ordinary sky travel before the Yafutoma aftermath.
Receive the Book on Polarity and finish Disc 1
After Bluheim’s defeat, the story returns to Yafutoma. Complete the scenes with Daigo and Lord Mikado. Daigo gives Vyse the Book on Polarity, which is required later to reach higher altitudes. Moegi then joins the crew automatically as the new Delegate. Confirm both facts in the key-item inventory and crew roster before leaving the palace area.
Return to the Delphinus and complete the bridge conversation. The game offers “Let’s go back through the Dark Rift” and “Let’s try heading east.” Select “Let’s try heading east.” This is the intended continuation for the Disc 2 route toward Crescent Isle. Disc 1 does not take you to Crescent Isle itself; the eastward travel and base-development sequence occur after the disc change.
- The Book on Polarity is in the key-item inventory.
- Moegi is listed in the crew roster.
- The Delphinus bridge scene is complete.
- “Let’s try heading east” has been selected.
- The game has reached the disc-change prompt.
Save and change to Disc 2
When the game reaches the disc-change prompt, follow the displayed instruction to open the Save Screen. Save to the same clearly labeled memory-card slot used for this campaign, and make a second backup in another slot if sufficient VMU space is available. Wait for the save to finish before changing discs. Do not power off or remove Disc 1 early.
After the game instructs you to change discs, replace Disc 1 with Disc 2 on original Dreamcast hardware and continue using the displayed command. On an emulator, use its disc-swap function at this prompt rather than starting Disc 2 as an unrelated new game. Keep the Disc 1 transition save until Disc 2 has verified it and displayed the opening playable state. The verified file carries the story progress, inventory, party state, and crew state into the next chapter.
- The transition save was created from the in-game disc-change screen.
- The eastward route was selected before saving.
- Disc 1 was changed only after the game requested it.
- Disc 2 verified the transition save.
- The Disc 2 opening state appears with the Disc 1 progress intact.
Before you move on
- Tortigar, Muraji, Draco, and Bluheim are defeated.
- The Blue Moon Crystal has been recovered and returned through the Yafutoma story.
- The Book on Polarity is in the key-item inventory.
- Moegi is present in the crew roster.
- The Delphinus bridge route choice is complete, with “Let’s try heading east” selected.
- The dedicated in-game disc-change save has finished successfully.
- Disc 2 has verified the save and begun with the Disc 1 story progress preserved.
References for this chapter
- Skies of Arcadia — Dreamcast Manual
- Skies of Arcadia — Guide and Walkthrough — Dreamcast — Shotgunnova
- Skies of Arcadia - Guide and Walkthrough - Dreamcast - By MetroidMoo
- Skies of Arcadia — Guide and Walkthrough — Dreamcast — Arrawnt
- Skies of Arcadia Guide and Walkthrough — Ins1ghtful — GameFAQs
- Skies of Arcadia Battle Mechanics Guide
Disc 2: Reorientation and New Objectives
Disc 2 continues from the Disc 1 save made after Bluheim and the Yafutoma events. The eastward return route was already selected before the disc swap, so do not make that choice again. After Disc 2 verifies the campaign data, fly through the opening in the large stone reef, return to Crescent Isle, deliver the Book of Polarity, receive the frozen-continent objective, and travel through the lower sky-rift route to the Ruins of Ice and Glacia. Defeat Veltarn and complete the Drachma and Rhaknam story scene to obtain the Purple Moon Crystal.
Load the Disc 1 handoff save
When the Bluheim sequence and the Yafutoma scenes finish, Disc 1 provides the save prompt. Save the campaign, then insert Disc 2 and load that same file. The Dreamcast manual explains that Disc 2 verifies the existing save data before continuing, so do not start a new game or load an unrelated file.
The eastward route decision was made on Disc 1 before the save. Disc 2 does not present that choice again. After verification, control returns to the Delphinus near Yafutoma, with the Blue Moon Crystal, Book of Polarity and previous story progress carried over. Moegi is also in the crew as a delegate.
- Save when Disc 1 provides the transition prompt.
- Insert Disc 2 and load the same campaign file.
- Do not select a route option again on Disc 2.
- Confirm that the campaign resumes with the Delphinus near Yafutoma.
- Keep the Disc 1 handoff save available as a backup.
Fly through the stone-reef opening to Crescent Isle
From Yafutoma, fly southeast and look for the opening in the large stone reef. The reef itself is impassable; line up with the visible passage and fly through it into Ixa’taka airspace. Continue across the South Ocean, using the known airspace around Maramba and Nasrad to keep your bearings, then continue toward Crescent Isle.
Do not stop to clear optional ship encounters on this trip unless you specifically want the battle. Escaping preserves healing items and Spirit Points for the required dungeon sequence. Land at Crescent Isle and allow the arrival scenes to finish. The World Is Round discovery is awarded automatically during this return; it is not a separate search objective or an optional discovery hunt.
- Leave Yafutoma after Disc 2 verifies the save.
- Find the opening in the large stone reef.
- Pass through the reef into Ixa’taka airspace.
- Cross the South Ocean and continue past the Maramba and Nasrad areas.
- Land at Crescent Isle.
- Wait for the World Is Round scene to complete.
Deliver the Book of Polarity and receive the frozen-continent objective
After the Crescent Isle arrival sequence, the Book of Polarity is handed over during the story scene. Brabham and Izmael join the crew, and the base begins preparing the Delphinus for its later altitude improvement. This is an automatic progression event, not a separate construction or fundraising quest.
Use the elevator to reach the meeting room after the arrival and Book of Polarity scenes have ended. The meeting establishes the next required objective: find the frozen continent and obtain the Purple Moon Crystal. Additional base remodeling, shop improvements and optional crew recruitment are not needed to unlock this route.
If the meeting does not occur, leave the base area and re-enter after confirming that every arrival scene has finished. Do not repeat the earlier Crescent Isle establishment sequence.
- Confirm that the Book of Polarity was handed over.
- Confirm that Brabham and Izmael joined the crew.
- Use the elevator to reach the meeting room.
- Confirm that the frozen continent and Purple Moon Crystal are the active objectives.
- Leave optional remodeling and recruitment for later.
Prepare before leaving Crescent Isle
Save at the island, restore the party and repair the Delphinus before departing. Refill ordinary healing supplies, revival items and status cures, then equip current weapons and armor where practical. The Ruins of Ice and Glacia contain stronger encounters than the preceding route, so avoid leaving with a damaged party or ship.
Optional VMU content, discoveries, Belle and a complete crew roster are not requirements for the Purple Moon Crystal route. The important requirements are the carried-over story data, the Book of Polarity handoff and the meeting-room scene.
- Save at Crescent Isle.
- Restore party health and Spirit Points.
- Repair the Delphinus.
- Carry healing, revival and status-recovery items.
- Update equipment where practical.
- Leave optional VMU and crew content unfinished if necessary.
Reach the Lands of Ice through the lower sky rift
Leave Crescent Isle and travel toward the Esperanza side of the map. Use the world map to identify the sky rift and approach its lower, navigable portion. The Delphinus must pass through the opening; the surrounding cloud and reef formations cannot be crossed directly.
After the transition, search the Lands of Ice for the aurora. The aurora marks the region of the required entrance. Near it, look for the opening in the ice that leads down into the Ruins of Ice. A large flying monster may appear in this area, but it is an optional ship encounter and does not block the dungeon.
Enter the ice opening to begin the mandatory route toward Glacia.
- Depart from Crescent Isle after saving and healing.
- Approach the lower portion of the sky rift shown on the map.
- Confirm that the Lands of Ice loads after the crossing.
- Use the aurora as the main landmark.
- Avoid the optional flying monster unless you deliberately want the battle.
- Enter the Ruins of Ice through the opening in the ice.
Answer the Ruins of Ice guardian questions
Proceed through the Ruins of Ice and examine each guardian crystal. The answers must be given in order. At the first guardian, choose The power of ice. At the second guardian, choose Maybe two. At the third guardian, choose Will and spirit.
The correct answers open the sliding and passage routes through the dungeon. If an answer is entered incorrectly, speak with the guardian again and select the correct response; the route is not permanently lost. Continue through the final opened passage to reach Glacia, then restore the party before exploring farther.
- First guardian: choose The power of ice.
- Second guardian: choose Maybe two.
- Third guardian: choose Will and spirit.
- Continue through the opened passage into Glacia.
- Heal before proceeding through the city.
Cross Glacia and defeat Veltarn
In Glacia, take the first elevator and follow the main path through the platforms and exterior walkways. At the early split, one branch leads to the Windsong Orb after a Zivilyn Bane fight, while another leads to the Ice Splitter. These side rewards are useful but are not separate story requirements. Continue through the connected platforms and stairways until you reach the save point before Veltarn.
Save before entering the circular platform. Veltarn uses heavy Purple-element attacks, including Avalauncher, and Death Laser can inflict instant death. Keep the party healed, revive fallen members immediately and consider protection against instant death if you have suitable accessories. Red-element attacks and strong special moves are effective, while Quika can help the party act before the boss’s next assault. Use healing items when preserving Spirit Points is more valuable than spending a turn on recovery magic.
After Veltarn falls, continue across the remaining platform and collect the nearby Moonberry if desired. Enter the large doors and complete the Drachma and Rhaknam story scene. When the scene ends, the Purple Moon Crystal is obtained and the game sends the party back toward Crescent Isle. This chapter ends after the crystal is received; the following return and post-Glacia objectives belong to the next chapter.
- Reach the Glacia save point before Veltarn.
- Save immediately before the boss platform.
- Maintain healing and revival coverage throughout the fight.
- Prepare for Avalauncher and the instant-death risk from Death Laser.
- Use Red-element attacks and strong special moves when available.
- Defeat Veltarn.
- Complete the Drachma and Rhaknam scene.
- Receive the Purple Moon Crystal.
Before you move on
- Disc 2 verified and loaded the Disc 1 campaign save.
- The party resumed near Yafutoma with the Blue Moon Crystal and Book of Polarity carried over.
- The already-selected eastward route was continued through the stone-reef opening.
- The party returned to Crescent Isle and received the World Is Round discovery.
- The Book of Polarity handoff scene completed.
- Brabham and Izmael joined the crew.
- The meeting-room scene identified the frozen continent and Purple Moon Crystal objective.
- The party saved, healed and repaired the Delphinus before departure.
- The lower section of the sky rift led to the Lands of Ice.
- The party entered the Ruins of Ice.
- All three guardian questions were answered correctly.
- The party reached Glacia and saved before Veltarn.
- Veltarn was defeated.
- The Drachma and Rhaknam scene completed.
- The Purple Moon Crystal was received.
References for this chapter
- Skies of Arcadia — Dreamcast Manual
- Skies of Arcadia — Guide and Walkthrough — Dreamcast — Arrawnt
- Skies of Arcadia — Guide and Walkthrough — Dreamcast — Shotgunnova
- Skies of Arcadia - Guide and Walkthrough - Dreamcast - By GheddonLN
- Skies of Arcadia - Guide and Walkthrough - Dreamcast - By MetroidMoo
Late-Game Dungeons and Optional High-Reward Quests
After the Lands of Ice and Purple Moon Crystal events, return to Crescent Isle and follow the Yellow Moon Crystal route into the Maw of Tartas. Defeat Yeligar, investigate Dangral Island, examine the Ship Schematics, and return to Crescent Isle for the Delphinus modification. That modification opens the lower-sky Vortex, where you must recover Fina’s Silvite craft and defeat De Loco’s Chameleon. After the Vortex and Sailors’ Island scenes, return to Crescent Isle and stop when the Great Silver Shrine becomes the next objective. Discoveries, optional crew, giant monsters, wanted battles and Pinta’s Quest are not required for the original Dreamcast ending.
Prepare for the Maw of Tartas
Return to Crescent Isle after completing the Lands of Ice and Purple Moon Crystal sequence. Enter the meeting room and finish the required conversations identifying the Yellow Moon Crystal as the next objective. Heal the party, restock revival and status-recovery items, repair the Delphinus if necessary, and save before leaving.
The Maw of Tartas is a lower-sky route beneath the Valuan continent. Travel toward the Valuan area, descend beneath the cloud layer and look for the dancing-light landmark. Follow the nearby opening into the canyon and enter the Maw with the Delphinus. This is an airship dungeon, not a party dungeon reached on foot.
- Complete the Crescent Isle meeting-room scenes.
- Confirm that the Yellow Moon Crystal objective is active.
- Repair the Delphinus and stock recovery supplies.
- Save before entering the Maw of Tartas.
Cross the Maw of Tartas and defeat Yeligar
Inside the Maw, follow the passages toward the central route and the save point. Side branches contain optional rewards, including a Dexus Seed and a Moonberry. Take them if you want them, but neither is required to awaken the Yellow Gigas.
Continue through the main route and enter the final chamber. Raise the Delphinus there to trigger Yeligar, the Yellow Gigas. This is an airship battle, so ship condition and cannon equipment matter more than the active party’s normal equipment.
Use the Delphinus’s strongest reliable cannon attacks and torpedoes. Build Spirit when an attack window is poor, then spend it on a powerful cannon action when possible. Repair before the hull becomes critical rather than waiting for a perfect offensive turn. Defeat Yeligar to obtain the Yellow Moon Crystal.
Leave the Maw and return to Crescent Isle. Complete the resulting story scenes, then prepare to travel to Dangral Island.
- Reach the Maw’s save point.
- Collect or skip the optional Dexus Seed and Moonberry.
- Awaken Yeligar in the final chamber.
- Defeat Yeligar with the Delphinus.
- Confirm that the Yellow Moon Crystal has been obtained.
- Return to Crescent Isle and finish the follow-up scenes.
Investigate the first Dangral Island facility
Travel to Dangral Island in the lower sky and save after landing. This is the first Dangral investigation. Do not confuse it with the later return to Dangral, which contains the elevator, Vigoro and Eliminator sequence and belongs to the final approach.
Enter the facility and descend the ladder. Continue past the spinning fan to the first fork. Take the northern passage, then take the northern passage again at the next division. Enter the room and activate the power switch. Return to the fan and cross after it has stopped. Descend the ladder at the far end and continue through the bronze door.
In the next section, use the eastern door from the hallway. Side rooms contain optional rewards, including the Imperial Blade, a Moonberry, two Sacrum Crystals and 4,000 gold. Elite Guard encounters in those rooms are optional. After exploring or ignoring them, return to the main route and use the southwest double doors. Continue through the next section and enter the door across the hall.
- Land at Dangral Island and save.
- Activate the facility’s power switch.
- Cross the stopped fan.
- Collect or skip the Imperial Blade, Moonberry, Sacrum Crystals and 4,000 gold.
- Treat the Elite Guard rooms as optional.
- Reach the area containing the Ship Schematics.
Examine the Ship Schematics and return to Crescent Isle
Follow the walkway to the schematic display and examine the Ship Schematics when prompted. This interaction is required. It provides the information needed to modify the Delphinus for travel through the deep lower sky. A nearby Moonfish is optional and does not replace the schematic event.
Retrace the route out of the facility. Galcian appears during the departure sequence, and the scene is scripted rather than a normal battle that you must win. Allow the scene to finish, leave Dangral and return to the Delphinus.
Back at Crescent Isle, speak with Brabham and complete the required conversations that begin the Delphinus modification. Wait for the story sequence to finish, then speak with him again if the game requires the final handoff. Save before departing for the Vortex.
- Examine the Ship Schematics.
- Complete Galcian’s scripted Dangral departure scene.
- Leave Dangral Island.
- Return to Crescent Isle.
- Speak with Brabham and trigger the Delphinus modification.
- Save before entering the Vortex route.
Enter the Vortex and recover Fina’s Silvite craft
After the Delphinus modification, travel to the Vortex in the lower sky near the Shrine Island area. Follow the story’s destination guidance and descend fully before entering. The Vortex is easy to miss if the Delphinus remains too high, so search the lower-sky area rather than skimming the upper cloud layer.
Inside the Vortex, use B to scan the surrounding search panels. The scan reveals information about the panels around the Delphinus. Move to the panel you want to investigate and press A to lower the recovery crane onto that selected panel.
Incorrect panels can trigger optional Raja ship battles. These encounters are not a failure state and do not permanently consume the story objective. Continue scanning and lowering the crane until you recover the required target: Fina’s Silvite craft. The Vortex also contains Velorium pieces, which are optional for the immediate story but useful for later equipment work. You may collect them while searching, but they are not needed to advance.
Recovering Fina’s craft triggers De Loco’s attack in the Chameleon. The first Chameleon encounter is a direct ship battle. Use reliable cannon attacks and torpedoes, repair when necessary, and adapt if a weapon or command is unavailable during the encounter. After the first battle, De Loco uses the harpoon cannon and a second Chameleon battle begins. Continue with regular cannon fire and torpedoes; do not plan on using the Moon Stone Cannon in this second encounter. Defeat the Chameleon to complete the required Vortex sequence.
- Enter the lower-sky Vortex near the Shrine Island area.
- Use B to scan the surrounding search panels.
- Use A to lower the crane onto the selected panel.
- Treat Raja battles from incorrect panels as optional encounters rather than a permanent failure.
- Recover Fina’s Silvite craft.
- Collect or skip the optional Velorium pieces.
- Defeat both Chameleon battles.
Complete the Sailors’ Island transition and return to Crescent Isle
After the Chameleon sequence, travel to Sailors’ Island as directed. The route leads to a ship battle against Baltor’s Blackbeard II. Repair first if the Delphinus suffered heavy damage during the Vortex. Use concentrated cannon attacks and do not let the hull remain in critical condition.
Dock at Sailors’ Island and complete the required scene. Enrique leaves the active party at this point. Make any available equipment adjustments before boarding the Delphinus; the story then returns the group to Crescent Isle.
At Crescent Isle, complete the farewell-party scenes. The Valuan attack interrupts the event. Exit the meeting area and resolve the attackers that appear during the assault. Ramirez then confronts the group and takes the Moon Crystals in a scripted sequence. This confrontation is not a conventional boss battle that must be defeated here.
Follow Fina into the next story setup and finish the Crescent Isle aftermath. The Great Silver Shrine becomes the next destination. Stop at that handoff. Do not enter the shrine in this chapter. The shrine route, Silver Moon Crystal events, later Dangral elevator sequence, fleet assault, Hydra, Galcian, Gadianos and Soltis belong to the final-approach chapters.
- Defeat Blackbeard II near Sailors’ Island.
- Dock and complete Enrique’s departure scene.
- Return to Crescent Isle.
- Resolve the Valuan attack and Ramirez’s scripted confrontation.
- Finish the Crescent Isle aftermath.
- Confirm that the Great Silver Shrine is the next destination.
- Stop before entering the Great Silver Shrine.
Optional Dreamcast exploration and Pinta’s Quest
Discoveries, Moonfish, optional crew, giant-monster ship battles and additional equipment can be pursued around this point, but none is required for the Dreamcast story ending. Repair the Delphinus and keep a separate save before attempting difficult optional ship battles or recruitment tasks.
Pinta’s Quest is Dreamcast VMU content, not a main-story requirement. The North American Dreamcast manual states that the VMU executable requires 83 free blocks. After reaching Sailors’ Island and completing the required interaction with Pinta, use the Status Menu to download or send Pinta’s Quest to a compatible VMU. The map available to Pinta expands as the corresponding main-game save progresses, and items found there can be transferred into the main game.
Keep Pinta’s Quest rewards separate from the campaign completion check. Do not use GameCube Legends additions, later optional bosses, or Legends-specific reward structures as requirements for the original Dreamcast release.
- Treat discoveries, Moonfish, optional crew and giant monsters as nonessential.
- Reserve 83 free VMU blocks only if using Pinta’s Quest.
- Access Pinta’s Quest through the Status Menu after the required Pinta interaction.
- Keep VMU rewards separate from required story progress.
- Do not add Legends-only content to the Dreamcast completion checklist.
Before you move on
- Yeligar was defeated in the Maw of Tartas and the Yellow Moon Crystal was obtained.
- The party returned to Crescent Isle and received the Dangral Island objective.
- The Dangral power switch was activated and the stopped fan was crossed.
- The Ship Schematics were examined.
- Galcian’s scripted Dangral departure scene was completed.
- The Delphinus modification was completed at Crescent Isle.
- The lower-sky Vortex was entered near the Shrine Island area.
- B was used to scan Vortex panels and A was used to lower the crane.
- Fina’s Silvite craft was recovered.
- Any Raja battles caused by incorrect panels were treated as optional encounters.
- Both Chameleon battles were defeated.
- Blackbeard II was defeated near Sailors’ Island.
- Enrique’s departure and the return to Crescent Isle were completed.
- The Crescent Isle attack and Ramirez’s scripted confrontation were resolved.
- The Great Silver Shrine was established as the next destination, but the shrine itself was not entered.
- The chapter stops before the later Dangral elevator sequence, fleet assault, Hydra, Galcian, Gadianos and Soltis.
- Optional discoveries, crew, giant monsters and Pinta’s Quest were treated as nonessential.
References for this chapter
- Skies of Arcadia — Guide and Walkthrough — Dreamcast — Arrawnt
- Skies of Arcadia — Guide and Walkthrough — Dreamcast — Shotgunnova
- Skies of Arcadia - Guide and Walkthrough - Dreamcast - By GheddonLN
- Skies of Arcadia — Sega Dreamcast North American Manual
- Skies of Arcadia — Pinta’s Quest VMU FAQ — Dreamcast
Tactical Final Approach: Valuan Heartland and Gigas Arrest
Begin this chapter only after completing the first Dangral Island investigation, the required Vortex sequence, and the resulting Crescent Isle scenes. Return to Crescent Isle, follow Fina to the Great Silver Shrine, witness the Silver Moon Crystal revelation and Galcian and Ramirez’s attack, then return to Dangral Island. Defeat Vigoro and the Eliminator, escape the collapsing facility, complete the final Crescent Isle preparations, break through the Valuan fleet, defeat Galcian aboard the Hydra, resolve the Gadianos approach battle and enter Soltis. This chapter ends at the final Soltis save point before the consecutive Ramirez, Zelos and fused Ramirez battles.
Confirm the correct opening state
Do not enter the Great Silver Shrine immediately after the first Dangral investigation. First complete the Vortex sequence covered in the preceding chapter, including the scenes involving Fina’s Silvite craft and the required return to Crescent Isle. The Crescent Isle recovery and meeting-room scenes must be complete before Fina’s ship is available for the shrine route.
When control returns after those scenes, heal the party, repair and resupply the Delphinus, and check equipment for Vyse, Aika, Fina and Gilder. Gilder is available again for this section. Optional discoveries, wanted battles, crew recruitment and VMU material are not prerequisites.
- First Dangral investigation completed.
- Required Vortex sequence completed.
- Fina’s Silvite-craft scenes completed.
- Resulting Crescent Isle scenes completed.
- Gilder available.
- Party and Delphinus prepared.
Travel to the Great Silver Shrine
Speak with Fina at the meeting area and complete her conversation about consulting the Silvite elders. After the required Crescent Isle scenes, go to Fina’s ship near the flagpole and board it. The ship automatically carries the party to the Great Silver Shrine, so no manual sky-route search is needed.
The shrine exterior uses reversed gravity. Enter through the large central portal. The interior has no random encounters, but the walkways can be confusing because Vyse can travel on surfaces that appear to be ceilings or undersides. The two Silver Armor chests and two Moonberry chests are optional rewards; reaching the Chamber of Elders is the required objective.
- Fina’s meeting-area conversation completed.
- Fina’s ship boarded near the flagpole.
- Great Silver Shrine entered.
- Optional armor and Moonberries collected or intentionally skipped.
- No required battle missed.
Cross the gravity-flipped shrine
At the opening section, proceed straight toward the first large junction and follow the route to the first Silver Armor chest if you want the optional equipment. Return to the junction and take the branching route for the first Moonberry. Continue through the passage until you reach the lift.
After riding the lift, follow the path to the next Moonberry. Return to the nearby division and take the side route toward the second Silver Armor chest. From there, use the remaining passage to reach the Chamber of Elders. If the layout becomes disorienting, use the visible changes in the walkway surface and the central lift as landmarks rather than trying to navigate by the camera alone.
- First major junction passed.
- Shrine lift used.
- Second shrine section crossed.
- Chamber of Elders reached.
- Optional treasure collected only if desired.
Witness the Silver Moon Crystal event
Speak with the Silvite elders and complete the mandatory conversation. The scenes explain the ancient Silvites, Zelos, Soltis and the purpose of the Moon Crystals. Continue through every dialogue prompt until Galcian and Ramirez arrive.
The party does not fight Elder Prime in a normal boss battle. Galcian and Ramirez attack the shrine, Elder Prime is killed during the story scene, and Ramirez extracts the Silver Moon Crystal. This completes the final crystal-related event needed for the late-game assault; there is no separate Silver Crystal chest to collect.
After the scene, accept the elder’s offer to return the party to the entrance. Leave the shrine and board Fina’s ship. The party returns to Crescent Isle, where the next required destination is Dangral Island.
- Elder dialogue completed.
- Zelos and Soltis revelation witnessed.
- Galcian and Ramirez arrive.
- Elder Prime’s story death witnessed.
- Silver Moon Crystal taken by Ramirez.
- Party returned to Crescent Isle.
Return to Dangral Island and defeat Vigoro
From Crescent Isle, board the Delphinus and fly to Dangral Island. Use the facility entrance and route from the earlier investigation, passing through the air duct and fan section until you reach the large elevator leading downward. Save and heal before activating it.
Vigoro attacks during the descent. His cannon attacks can inflict heavy damage to one character or damage the whole party, so keep recovery actions available and do not spend all Spirit Points before the battle. Use strong physical attacks and special moves when the party is healthy. After the fight, continue through the lower facility and activate the next elevator.
- Delphinus flown to Dangral Island.
- Lower facility route reached.
- Save made before the elevator.
- Vigoro defeated.
- Recovery supplies still available.
Defeat the Eliminator and escape Dangral
Continue through the lower facility until Galcian and Ramirez send the Eliminator against the party. The machine uses Target Search before a major follow-up attack. When Target Search appears, have the party guard or otherwise prepare for the next turn, then heal immediately afterward. Its Laser Blast can inflict Stone, so keep status recovery and revival items ready.
Use yellow-aligned attacks and reliable special moves rather than gambling on a long setup. After the Eliminator is defeated, backtrack toward the elevator. Dangral begins collapsing. Run along the rail when control returns and keep moving toward the exit; do not stop for optional treasure. The party is returned automatically to the Delphinus.
- Eliminator encountered.
- Target Search recognized.
- Stone recovery available.
- Eliminator defeated.
- Collapse escape completed.
- Party returned to the Delphinus.
Complete the final Crescent Isle preparations
Attempt to approach Soltis after leaving Dangral. A barrier blocks the route and the story sends the party back to Crescent Isle. Follow the base scenes and complete the gathering of allies for the final assault.
During the nighttime sequence, speak with Fina near the flagpole and Aika near the meeting room when the game directs you to do so. Finish the conversations, then board the Delphinus for the assault. Before departing, upgrade equipment at Ryu-Kan’s shop if needed and stock healing, revival, status-recovery and ship-repair items. Save on Crescent Isle.
- Soltis barrier scene triggered.
- Crescent Isle final-assault gathering completed.
- Fina’s nighttime scene completed.
- Aika’s nighttime scene completed.
- Equipment and supplies checked.
- Crescent Isle recovery save created.
Break through the fleet and defeat the Hydra
The final assault proceeds through the Valuan Mage Ship, Galcian’s Elite and Galcian’s Sky Fortress, the Hydra. Use the Battle Grid to select favorable attack turns and repair the Delphinus when incoming damage is expected. The Mage Ship is the least dangerous encounter; conserve enough resources for the Elite and Hydra.
During the Hydra battle, follow the target prompts presented by the game and use ship repairs rather than attacking through a clearly dangerous turn. Increm and strong cannon or torpedo attacks are useful when the Battle Grid allows them. After the Hydra is defeated, board it and proceed through its bridges, ladders, poles and exterior walkways. The X Cannon, Moonberry, Sacrulen Crystals and Magic Dews are optional. Reach the interior save point and restore HP and SP before continuing.
- Valuan Mage Ship defeated.
- Galcian’s Elite defeated.
- Hydra defeated.
- Hydra boarded.
- Optional Hydra treasure collected or skipped.
- Hydra save point reached.
Defeat Galcian aboard the Hydra
Continue through the Hydra until Galcian confronts the party. He can use Terminal, remove beneficial effects with Neglora and cast powerful Eterni magic. Use a defensive magic-blocking plan such as Aura of Denial or Delta Shield when available, but treat Terminal separately: recover immediately and revive fallen characters rather than assuming the defensive spell prevents it.
Build Spirit Points safely, maintain healing and use strong special attacks when the party is protected. After Galcian falls, return to the Delphinus. The game allows you to select the fourth active party member from Enrique, Gilder or Drachma. This selection affects tactics but is not a missing story prerequisite; choose according to your preferred healing, defensive or physical-damage plan.
- Galcian defeated aboard the Hydra.
- Party returned to the Delphinus.
- Fourth active party member selected.
- Final party equipment checked.
Resolve Gadianos and reach the Soltis save point
Fly toward Shrine Island for the final approach. Gadianos attacks as a separate ship battle before the party lands. Use a strong opening cannon and torpedo sequence because Gadianos can retreat. Defeating it is recommended if you want its Complete Kit, Sparkling Deck and Moon Gun, but an escape does not prevent the main story from continuing.
After the encounter is resolved, land at Shrine Island and enter through the lower-level door. Follow the Soltis route through its branching rooms and transporters. Optional treasure and wanted encounters can be skipped. Continue through the tower until you reach the final save point.
Heal and create a protected save at Soltis. Do not overwrite it. The next section begins the consecutive Ramirez, Silver Gigas Zelos and fused Ramirez battles, and there is no ordinary save between those encounters. The Soltis save is the practical retry point.
- Gadianos approach battle resolved.
- Gadianos defeated if its optional equipment is desired.
- Shrine Island entered through the lower door.
- Soltis route completed.
- Final Soltis save point reached.
- Protected retry save preserved before Ramirez.
Before you move on
- The first Dangral investigation is complete.
- The required Vortex sequence and resulting Crescent Isle scenes are complete.
- The Great Silver Shrine has been entered and crossed.
- The Silvite elders’ history and Zelos revelation have been witnessed.
- Galcian and Ramirez have attacked the shrine.
- Elder Prime has died in the story scene and Ramirez has taken the Silver Moon Crystal.
- Vigoro and the Eliminator are defeated.
- The Dangral collapse escape has returned the party to the Delphinus.
- The final Crescent Isle assault preparations are complete.
- The Valuan Mage Ship, Galcian’s Elite and Hydra are defeated.
- Galcian is defeated aboard the Hydra.
- A fourth party member has been selected from Enrique, Gilder or Drachma.
- The Gadianos approach battle has been resolved.
- The party has entered Soltis and reached the final save point before Ramirez.
- The campaign is ready for the Ramirez, Silver Gigas Zelos and fused Ramirez sequence.
References for this chapter
- Skies of Arcadia — Guide and Walkthrough — Dreamcast — Arrawnt
- Skies of Arcadia — Guide and Walkthrough — Dreamcast — Shotgunnova
- Skies of Arcadia Guide and Walkthrough — Ins1ghtful — GameFAQs
- Skies of Arcadia - Guide and Walkthrough - Dreamcast - By MetroidMoo
- Skies of Arcadia - Game Script - Dreamcast - By metal_cherry
- Skies of Arcadia — Sega Dreamcast North American Manual
Key Boss Patterns and Recovery Tactics (Late Game)
The late-game boss chain begins with Galcian aboard the Hydra, continues with Ramirez in Soltis, changes to a Delphinus battle against the Silver Gigas Zelos, and ends with Ramirez fused with Zelos. Galcian is not part of the final three-battle sequence: defeat him first, then enter Soltis and fight Ramirez, Zelos and the fused Ramirez without a normal save between those encounters. The last save point before Ramirez is therefore the important recovery file. Build the party around anti-magic protection, reliable healing, revival items and careful Spirit Point spending. During the ship battle, treat red battle-grid turns as warnings to Guard rather than opportunities for reckless attacks.
Prepare before Galcian and the Soltis sequence
Save at the final save point before entering the last Soltis route. This save is the retry point for the entire linked endgame chain. There is a save point inside the Hydra before Galcian, but after the party proceeds into Soltis, the game does not provide an ordinary save between the party battle against Ramirez, the Delphinus battle against Zelos and the final fused Ramirez battle.
Carry Sacrum or equivalent party-healing items, Sacrulen Crystals for severe single-target damage, and Riselem Crystals for unconscious allies. Keep ship recovery items such as Complete Kits available for the Zelos battle. Refill the Delphinus before leaving Crescent Isle or another available port, and check its weapons, armor and crew assignments before committing to the final route.
Use the strongest equipment already available in the original Dreamcast release. Prioritize survivability over a minor attack increase. If you have equipment that protects against instant death, Weak or other late-game conditions, equip it before entering the final dungeon. Do not delay the story searching for a specific optional item: the required plan is protection, healing, revival and enough damage to maintain pressure.
- Create a separate save at the last Soltis save point.
- Carry party-healing, single-target healing and revival items.
- Refill ship HP and stock Complete Kits before the final route.
- Check the fourth party member before entering the final dungeon.
- Keep enough Spirit Points for protection and emergency S-Moves.
Choose the fourth party member deliberately
Vyse, Aika and Fina are the core of the final party. Vyse supplies dependable physical damage and Pirates’ Wrath. Aika provides Delta Shield, the most direct answer to dangerous enemy magic when she has enough Spirit to use it. Fina handles recovery, Lunar Winds and emergency support.
The fourth position can be changed aboard the Delphinus before entering Soltis. Gilder is a strong defensive choice because Aura of Denial can suppress enemy magic and related effects. Enrique can contribute Justice Shield when physical damage is the immediate danger. Drachma is a damage-focused alternative, but he does not provide the same broad defensive coverage. Select the character whose learned S-Moves and equipment are already developed; do not assume that one choice is mandatory for the story to continue.
The selected fourth member remains relevant through the party battles, so avoid entering the final dungeon with an unprepared substitute. If Gilder is in the party, Aura of Denial is usually the simplest defensive pattern. If he is absent, Aika should reserve Spirit for Delta Shield instead of spending every turn on offense.
- Keep Vyse, Aika and Fina unless there is a specific reason to change the core.
- Use Gilder for broad magic protection, Enrique for physical mitigation or Drachma for damage.
- Confirm the fourth member before leaving the Delphinus.
- Check that the chosen member has usable equipment and learned S-Moves.
Control Spirit Points instead of spending them automatically
Spirit Points are shared across the party. Normal battles restore some Spirit each turn, while Focus provides additional Spirit. The Dreamcast manual also distinguishes ship battles: ship commands such as attacks, magic, Super Cannons and crew abilities consume Spirit, while Guard, Focus and Items do not. Use that distinction to preserve a defensive option for the next turn.
Do not have every character Focus while the boss can use a large attack. A safer pattern is to let one character Focus while another Guards, heals or maintains Delta Shield. Once the party has enough Spirit, use Vyse’s Increm and Pirates’ Wrath during a safe damage window. If a defensive S-Move is needed on the next turn, do not spend the entire gauge on an early attack.
Aura of Valor can accelerate the opening offensive sequence, but it is not a substitute for healing or protection. Save enough Spirit to respond after a party-wide attack, a death from a single-target attack or a status-removing move.
- Focus with only one or two characters when the boss is threatening.
- Keep Spirit available for Delta Shield, Aura of Denial or Justice Shield.
- Use Items instead of unnecessary magic when preserving Spirit matters.
- Attack after protection is active rather than opening with a full offensive spend.
Defeat Galcian aboard the Hydra
Galcian is the first late-game party boss and must be defeated before the Soltis sequence. His Eterni-class magic can weaken the whole party, while Terminal deals heavy damage to one character. Neglora removes positive status effects, so do not rebuild every buff immediately after it lands.
Use Gilder’s Aura of Denial each round when Gilder is present. If Gilder is not in the party, use Aika’s Delta Shield against the expected magic. Have Fina heal with items or magic when the party is stable, and use a Sacrulen Crystal after Terminal if the target survives. If Terminal knocks a character unconscious, use Riselem immediately rather than trying to continue with a reduced party.
Vyse should use Increm when the party is protected, then attack with Pirates’ Wrath. Do not spend multiple turns maintaining minor buffs if Galcian is repeatedly removing them. The practical goal is to keep one defensive S-Move active, keep everyone above the range where a second hit can finish them, and continue dealing reliable damage.
- Maintain Aura of Denial or Delta Shield against Eterni magic.
- Heal the target of Terminal immediately.
- Use Riselem when Terminal causes unconsciousness.
- Apply Increm to Vyse only after survival is secure.
- Continue until Galcian is defeated and the story moves to Soltis.
Defeat the first Ramirez encounter
The first Ramirez battle occurs after the party reaches the final Soltis save point. Ramirez uses Eterni magic, Silver Tundra against one character, Silver Eclipse against the party and Lunar Blessing to regenerate health. Destruction also removes positive status effects.
Use Aura of Denial or Delta Shield to suppress the dangerous magic. If Silver Eclipse lands, restore the entire party before trying to attack again. Silver Tundra can leave one character near defeat or unconscious, so use Sacrulen or Riselem rather than relying on a slow recovery cycle.
When Ramirez casts Lunar Blessing, remove the beneficial effect with Fina’s Lunar Winds. Do not allow the regeneration to remain active while Vyse spends turns building an attack. After protection is active, use Increm and a suitable Pirates’ Wrath. If Destruction removes the buff, restore Increm only when the party is healthy and the next defensive turn is covered.
- Block or suppress Eterni magic.
- Recover immediately after Silver Eclipse.
- Use Sacrulen or Riselem after Silver Tundra.
- Remove Lunar Blessing with Lunar Winds.
- Reapply Increm only when it is safe.
Survive the Delphinus battle against Zelos
After Ramirez falls, the game changes to a ship battle against the Silver Gigas Zelos. Use ship Items and Guard instead of waiting until the Delphinus is nearly destroyed. Focus can rebuild Spirit, while offensive commands should be reserved for safe battle-grid turns.
Maintain distance when it gives the Delphinus a safer turn to build Spirit, then attack from the front when the battle grid permits. Use the Moon Stone Cannon during an appropriate cannon opportunity. Guard on red turns unless the ship has enough HP to survive the indicated attack and the offensive action is essential.
Zelos changes form during the battle and begins using Judgement. Treat the transformed phase as the main danger: heal before a predicted Judgement, Guard when the grid warns of a severe attack, and use Complete Kits after taking heavy damage. The battle is approaching its conclusion when Zelos’s claws begin breaking away, but continue following the battle commands until the scripted victory occurs.
- Use Complete Kits before the Delphinus reaches critical HP.
- Build Spirit during safer turns.
- Use the Moon Stone Cannon during a safe opportunity.
- Guard on red battle-grid turns.
- Heal and prepare for Judgement after Zelos changes form.
- Continue until the claws break away and the battle ends.
Defeat Ramirez fused with Zelos
The final party battle is against Ramirez empowered by Zelos. He uses Silver Binds, Drilnos and Eterni magic, and he can use Silver Nightmare. Silver Nightmare controls one party member for one round and forces that character to use their strongest available S-Move against the party. This is not merely a command redirection: the controlled character attacks your own party, and Vyse’s Pirates’ Wrath can cause severe damage.
Keep Aura of Denial or Delta Shield active whenever the boss is expected to use magic. Silver Nightmare takes priority over normal planning because the forced S-Move cannot be safely cancelled after the effect begins. Before the boss’s turn, keep the party healthy and avoid assuming that the character targeted by Silver Nightmare will perform a harmless action. If Vyse is controlled, immediately recover from Pirates’ Wrath with party healing and revival items as needed.
Use Increm and Pirates’ Wrath during safe turns, but do not spend all Spirit before the next defensive action. If Destruction removes positive effects, restore only the protection or attack boost that directly improves survival or damage. Revive unconscious characters immediately with Riselem so the next Silver Nightmare cannot exploit an already weakened party.
- Maintain Aura of Denial or Delta Shield.
- Expect Silver Nightmare to force the controlled character’s strongest S-Move.
- Keep the party near full health before the boss acts.
- Recover quickly if Vyse uses Pirates’ Wrath against the party.
- Revive fallen characters with Riselem.
- Rebuild only the most useful buffs after Destruction.
- Continue until the story advances into the ending sequence.
Before you move on
- Galcian has been defeated aboard the Hydra.
- The party has defeated the first Ramirez after dealing with Lunar Blessing.
- The Delphinus has defeated Zelos, including the transformed phase and Judgement attacks.
- The fused Ramirez has been defeated after surviving Silver Binds, Drilnos, Eterni magic and Silver Nightmare.
- The game proceeds into the Dreamcast ending sequence.
- The last Soltis save remains available as the practical retry file for the linked endgame battles.
Final Boss: The Climactic Confrontation and Multi-Phase Fight
The original Sega Dreamcast release ends with three consecutive battles: the winnable Ramirez encounter inside Soltis, the Silver Gigas Zelos ship battle, and Ramirez fused with Zelos. The game does not provide a normal save between these fights. Prepare at the final Soltis save point, preserve that file, and treat every resource used in the first two battles as part of one continuous gauntlet.
1. Prepare at the final Soltis save point
Continue through Soltis until you reach the large teleporter and the save point beyond it. Save in a separate protected slot before opening the final door. This is the practical retry point for the entire ending gauntlet because the game proceeds from Ramirez to Zelos and then to the fused Ramirez without an ordinary save menu between battles.
Restore the party and refill your supplies before entering. Carry party-wide healing, single-target healing, revival items, and status-recovery items. Sacrum-class healing is useful after damage to the whole party, while stronger single-target recovery and Riselem Crystals help answer a badly injured or defeated character. Keep Fina ready to cast Lunar Winds, which removes Ramirez’s Lunar Blessing and other enemy positive effects; use Curia or appropriate recovery items for conditions affecting your own party.
A dependable party is Vyse, Aika, Fina and Gilder. Vyse provides Pirate’s Wrath, Aika can use Delta Shield, Fina handles healing and Lunar Winds, and Gilder can maintain Aura of Denial. Enrique is also viable when his equipment and abilities are stronger in your file; Justice Shield gives him a defensive role. Enter with at least one reliable barrier user, a healer, and enough Spirit to use important Super Moves.
Equip the strongest armor, weapons and accessories available in the original Dreamcast campaign. A weapon color that gives Vyse an advantage against Ramirez can improve damage, but survival and reliable healing matter more than forcing an elemental setup. Do not rely on equipment, bosses or balance changes introduced in Skies of Arcadia: Legends.
- Save at the Soltis point before the final door.
- Restore HP, MP and Spirit.
- Bring healing, revival and status-recovery items.
- Confirm Fina can use Lunar Winds.
- Confirm Aika, Gilder or Enrique can provide a defensive shield.
2. Defeat the winnable Ramirez
The earlier Ramirez encounters are scripted to overwhelm the party. The Ramirez beyond the final Soltis door is the actual winnable ground battle. Defeat him while preserving as much party health, healing stock and Spirit as possible for the battles that follow.
Ramirez can use Silver Eclipse against the party, Silver Tundra against one character, Destruction to remove beneficial effects, Lunar Blessing to restore his health, and powerful Eterni-class magic. Open with Delta Shield, Aura of Denial or Justice Shield, then refresh the protection when it expires or after Destruction removes it.
Cast Lunar Winds promptly when Lunar Blessing appears. This prevents the regeneration from extending the fight. Fina should heal immediately after a party-wide attack and revive fallen members with Riselem rather than trying to continue with an incomplete party. If Fina is incapacitated, use items first and restore her as soon as it is safe.
Vyse should build Spirit and use Pirate’s Wrath when enough Spirit is available. Aika, Gilder or Enrique should prioritize the defensive Super Move, healing items or Spirit Focus instead of attacking whenever the party is exposed. Reapply attack boosts after Destruction, but do not spend so much Spirit on buffs that the party loses its defensive option.
- Maintain a magic barrier against Ramirez’s strongest spells.
- Remove Lunar Blessing with Lunar Winds.
- Heal immediately after Silver Eclipse or Silver Tundra.
- Revive fallen characters promptly.
- Finish with the party and resources ready for ship combat.
3. Destroy the Silver Gigas Zelos
After Ramirez falls, the Delphinus immediately engages Zelos. This is the second battle in the sequence, and there is no normal opportunity to save. Read the forecast before selecting each action. Use attack opportunities when the forecast permits a safe shot, and guard, retreat or use a defensive command when the forecast marks a devastating attack.
Zelos begins as a large silver sphere and later grows six claws. It uses powerful Moon attacks and high-level magic; the clawed phase adds especially dangerous attacks such as Judgment and Moon Lament. Do not fire blindly during a marked danger turn. If the forecast indicates Judgment or another major attack, prioritize guarding or moving away, then repair the Delphinus before returning to offense.
Sylenis is valuable if available because it can suppress Zelos’s spellcasting. Reapply it when the effect ends. If Zelos uses Drilnos to weaken the ship, use Incremus or the appropriate ship-support command available in your setup. Use the Delphinus’s strongest cannons, torpedoes and Moon Stone Cannon during safe firing windows, especially when the ship is positioned for a direct center shot.
Urala’s crew command restores Spirit; it does not repair ship HP. Kirala’s command handles ship repair, so use Kirala when damage becomes dangerous. Blue Rogues is a separate ground-battle Captain Move and requires a completely full Spirit gauge. It summons active crew members to damage the enemy and heal the party, then empties the gauge, so reserve it for the fused Ramirez fight or use it only when its emergency recovery is worth losing all current Spirit.
Continue attacking through Zelos’s transformations. When the claws begin breaking away, follow the forecast carefully and maintain ship HP until the battle concludes. Zelos awards the Captain’s Stripe, but the game continues directly into the final ground fight, so there is no useful post-battle equipment or save-management break.
- Read the forecast every turn.
- Use Sylenis to suppress Zelos’s magic when possible.
- Counter Drilnos with Incremus or an appropriate ship-support option.
- Guard or retreat during Judgment and other marked danger turns.
- Use Kirala for repairs and Urala for Spirit recovery.
4. Defeat Ramirez fused with Zelos
The final ground battle begins immediately after the Delphinus battle. The fused Ramirez uses Silver Binds, Drilnos, Eterni-class magic and Silver Nightmare. Silver Nightmare controls one party member for one round and makes that character use a powerful Super Move against the party. If it controls Vyse, Pirate’s Wrath can cause severe friendly damage; other characters can also use dangerous attacks while controlled.
Keep Aura of Denial, Justice Shield or Delta Shield active whenever possible. Choose one barrier plan and have that character protect the party consistently. Reapply the barrier after it expires or after enemy effects remove it. The defensive move takes priority over ordinary attacks when a dangerous spell is expected.
Use Pirate’s Wrath as Vyse’s main damage option after building enough Spirit. Fina should heal, revive and remove enemy benefits with Lunar Winds. Use Curia items or other status recovery for party ailments rather than wasting Lunar Winds on the wrong target. The fourth character should maintain the barrier, use recovery items while Fina is occupied, or attack only when the party is stable.
When Silver Nightmare controls a character, treat that turn as a survival problem. Heal the damage caused by the stolen action, revive anyone defeated, and restore the defensive routine. Blue Rogues can be a strong emergency option here because it attacks and heals at once, but use it only with a full Spirit gauge and remember that it leaves the gauge empty afterward. Keep enough healing and defensive capacity to survive the remaining turns.
- Keep a defensive Super Move active.
- Use Pirate’s Wrath for Vyse’s main damage.
- Use Fina for healing, revival and Lunar Winds.
- Expect Silver Nightmare to force a controlled character’s Super Move.
- Use Blue Rogues only when its full-gauge cost is acceptable.
5. Recover from failure and confirm completion
If any battle defeats the party or destroys the Delphinus, reload the protected Soltis save. You must repeat the entire sequence, so adjust the phase where the failure occurred rather than spending every item and Spirit point in the opening Ramirez fight.
If Ramirez wins, improve barrier timing, remove Lunar Blessing sooner and preserve more healing items. If Zelos wins, guard earlier on marked danger turns, maintain Sylenis, use repairs before the Delphinus reaches critical HP and avoid sacrificing ship health for an unsafe attack. If fused Ramirez wins, replace unnecessary offensive equipment with stronger defensive or status-protection options and reserve Spirit for the barrier and emergency recovery.
There is no ordinary save between the three battles. After fused Ramirez is defeated, allow the ending scenes and credits to play. The original Dreamcast campaign is complete when the final fused Ramirez victory has occurred and the ending and credits begin.
- Reload the protected Soltis save after a failed phase.
- Change tactics according to the phase that caused the defeat.
- Do not overwrite the reliable retry file before the ending is secured.
- Allow the final cutscenes and credits to begin.
Before you move on
- The final winnable Ramirez battle is defeated.
- The Delphinus defeats the Silver Gigas Zelos through its clawed phases.
- Ramirez fused with Zelos is defeated.
- The original Dreamcast ending scenes and credits begin.
- The campaign is complete without requiring Legends-only content.
References for this chapter
- Skies of Arcadia — Guide and Walkthrough — Dreamcast — Arrawnt
- Skies of Arcadia — Ship Battles FAQ — Dreamcast
- Skies of Arcadia — Battle Mechanics Guide — Dreamcast
- Skies of Arcadia Guide and Walkthrough — Ins1ghtful — GameFAQs
- Skies of Arcadia — Guide and Walkthrough — Dreamcast — Shotgunnova
- Skies of Arcadia — Crew reference
- Skies of Arcadia — Dreamcast Manual
Post-Final Cutscene, Credits and Immediate Post-Game Tasks
The original North American Dreamcast campaign ends through one connected sequence: the first Ramirez battle, the Delphinus battle against the Silver Gigas Zelos, and the final battle against Ramirez empowered by Zelos. There is no normal save opportunity between these encounters and no completed-game save that opens a new free-roaming post-game state. Make the final Soltis save before entering the last door, complete all three confrontations, watch the ending and credits, then reload that pre-final save if you want to continue optional exploration or manage Dreamcast VMU content.
Make the final Soltis continuation save
Continue through Soltis Tower until the route brings you to the last save point. The final approach uses transporters and short side rooms before reaching a path with a Moonberry and the final save point. Save there before entering the door that begins the ending sequence. The last save point is the practical recovery file for the entire finale.
Lord Zivilyn Bane is an optional Wanted List objective in this area, not a requirement for the story ending. If you are pursuing that objective, complete it before the final door and return to the save point afterward. Do not enter the final door until the party is healed, useful status-recovery items are stocked, and the Delphinus has enough health and repair supplies for the ship battle that follows.
Use a separate save file if you still want to pursue discoveries, Wanted enemies, crew recruitment, treasure or other optional tasks. The final door starts a sequence with no ordinary save between its battles, so this backup is more valuable than any reward obtained inside the finale.
- Reach the last Soltis Tower save point.
- Heal the party and prepare recovery items.
- Repair the Delphinus and carry Complete Kits if available.
- Save before the final door.
- Treat Lord Zivilyn Bane as optional unless you are completing the Wanted List.
Defeat the first Ramirez encounter
Enter the final door when you are ready. The first winnable character battle is against Ramirez. He can use Destruction to remove positive status effects, Silver Eclipse against the whole party, Silver Tundra against one character, and Lunar Blessing to restore health over time.
Use Aika’s Delta Shield or Gilder’s Aura of Denial to reduce the danger from Ramirez’s high-level magic. Destruction can remove your buffs, so avoid spending several turns establishing enhancements immediately before an expected status-clearing attack. When Ramirez uses Lunar Blessing, remove it with Fina’s Lunar Winds or another suitable effect-removal option.
Vyse should normally be the main damage dealer. Build Spirit with the other characters while they guard, heal, revive or support him, then use Pirate’s Wrath when the party can survive the turn. A yellow weapon attribute is useful while attacking, but do not rely on a buff remaining in place after Destruction. Silver Eclipse may leave the whole party in critical condition; keep Sacrum Crystals, Sacrulen Crystals and Riselem Crystals ready rather than trying to finish the battle with weakened or unconscious characters.
When Ramirez falls, do not expect a return to the world map or a save prompt. The game proceeds directly to the Silver Gigas ship battle.
- Defeat the winnable first Ramirez battle.
- Use Delta Shield or Aura of Denial against dangerous magic.
- Remove Lunar Blessing when it appears.
- Keep the entire party recoverable before delivering the final attack.
Defeat the Silver Gigas Zelos
The Delphinus immediately confronts the Silver Gigas, Zelos. This is the second required encounter, and the party’s condition and ship preparation from the Soltis save carry directly into it. There is no normal save between Ramirez and Zelos.
At the beginning, choose to maintain distance if you need time to build Spirit Points. Sylenis can be used early to hinder Zelos’s magic, and Incremus is useful when you need a stronger offensive and defensive cycle. Continue firing ordinary cannons and torpedoes while watching the Battle Grid. Use the Moon Stone Cannon whenever the battle presents a valid firing opportunity rather than saving every shot for an ideal turn that may never arrive.
Defend during red warning turns when Zelos is preparing a major attack. After Zelos changes form, Judgement becomes especially dangerous and can inflict enormous damage if the Delphinus does not guard. When the battle presents a choice involving distance or closing in, choose the safer option if the ship has taken heavy damage; closing in can provide additional Moon Stone Cannon opportunities, but survival takes priority.
Use Complete Kits when the Delphinus needs emergency repairs. Keep attacking during safe turns and do not allow the ship to enter a later phase already damaged beyond recovery. Zelos yields the Captain’s Stripe when defeated, but that reward is not needed to finish the story and cannot be used to create a normal post-credits continuation file.
- Defeat the Silver Gigas Zelos with the Delphinus.
- Build Spirit while maintaining a safe distance when necessary.
- Fire the Moon Stone Cannon during an available opportunity.
- Guard during red warning turns, especially after Zelos changes form.
- Repair the Delphinus with Complete Kits when necessary.
Defeat Ramirez empowered by Zelos
After the ship victory and the following scenes, the final character battle begins against Ramirez empowered by Zelos. This is a separate battle from the first Ramirez encounter, so the story is not complete when the first Ramirez falls or when Zelos is destroyed.
Use Delta Shield or Aura of Denial to protect against the enemy’s Yellow and Silver magic. If the party becomes Weakened, remove the effect promptly with Lunar Cleansing. Vyse can continue building Spirit and attacking with Pirate’s Wrath, while the other characters guard, heal, revive and maintain defensive support. Aura of Valor is an appropriate high-impact resource if you saved one for this battle.
Silver Binds is a powerful single-target attack. Keeping Fina on guard or assigning her a defensive role can reduce the chance that one unlucky hit destroys the party’s recovery plan. Keep more than one character capable of using Riselem Crystals so that Silver Nightmare cannot leave the party unable to revive someone.
Silver Nightmare controls one party member for one turn and forces that character to use a strong special move against the party. The result can be especially dangerous if Vyse is controlled and uses Pirate’s Wrath, so maintain enough health to survive an unexpected party-wide attack. Heal immediately after the effect resolves and revive anyone who is knocked unconscious. Continue applying reliable damage rather than allowing the fight to drag on while the party’s resources are depleted.
- Defeat the final empowered Ramirez.
- Remove Weakened status promptly.
- Keep multiple characters ready to revive allies.
- Prepare for Silver Nightmare to force a controlled character’s special move against the party.
- Use Aura of Valor or other high-value resources if the fight becomes unstable.
Watch the ending and credits
Once the empowered Ramirez battle is defeated, allow the scripted scenes and credits to play. Completing the ending sequence after all three required confrontations confirms completion of the original Dreamcast main story and resolves the Valuan and Gigas plot.
The Dreamcast release does not provide a normal completed-game save that returns you to a new explorable world after the credits. Do not reset expecting the game to mark a separate post-game state, and do not assume that the Captain’s Stripe obtained from Zelos can be carried into a newly created endgame file. The practical continuation file remains the save made before the final Soltis door.
If the game returns to the title screen after the ending presentation, load the pre-final Soltis save. That file places you before the final sequence, allowing you to leave Soltis Tower and resume optional exploration from the late-game world state that existed before entering the final door.
- Defeat all three required final encounters.
- Watch the ending scenes and credits to completion.
- Do not expect a completed-game free-roam save.
- Keep the pre-final Soltis save available.
Resume optional content from the pre-final save
To continue after viewing the ending, reload the Disc 2 save made at the final Soltis save point. Complete the route back out of Soltis Tower, then use the Delphinus to revisit areas and pursue unfinished optional objectives. You are returning to the pre-finale state, not loading a new post-game version of Crescent Isle.
Optional work may include discoveries, Wanted enemies, crew recruitment, treasure, optional ship encounters and other late-game exploration. None of these activities is required to establish main-story completion, and the absence of a post-credits save does not mean that the ending failed to register. If you want to see the ending again, return to the final door and repeat the connected sequence from the same save.
Maintain a backup of this file if you are preserving a completed campaign. A separate late-game exploration save and a separate final-door save are safer than overwriting the only file before repeatedly attempting the finale.
- Reload the pre-final Disc 2 Soltis save.
- Leave Soltis Tower and return to the explorable world.
- Pursue optional discoveries, Wanted enemies or crew separately from the story check.
- Repeat the final sequence only if you want to view the ending again.
Handle Pinta Quest and VMU content separately
Pinta Quest is Dreamcast VMU content and is not part of the main-story completion requirement. The Dreamcast manual states that Pinta Quest requires 83 blocks of free memory and that the executable is downloaded to a VMU through the game’s Status Menu. Only one VMU executable can occupy a VMU, so use a VMU with adequate free space if you want to preserve the minigame.
When a Pinta Quest file is present, connect that VMU to the controller being used for the main game, open the Status Menu, select Pinta Quest and choose Return. The game calculates Pinta’s accumulated experience, adds collected gold to Vyse’s total and transfers eligible collected items into the main save. This transfer is independent of the ending and does not replace the ordinary Disc 2 save.
Keep the Pinta Quest VMU file backed up separately from the campaign save. Pinta’s rewards, Dreamcast downloads, optional crew, discoveries and Wanted List progress should be recorded as optional completion goals. They are not evidence that the original Dreamcast story remains unfinished.
Do not import expectations from Skies of Arcadia: Legends. The GameCube release contains changes and additional post-game material, but those additions are not required for the original two-disc Dreamcast ending.
- Reserve 83 free VMU blocks before downloading Pinta Quest.
- Use Status Menu, Pinta Quest and Return to transfer rewards.
- Back up the VMU file separately from the Disc 2 campaign save.
- Keep VMU and optional-content progress separate from the story completion check.
- Do not require Legends-only content for Dreamcast completion.
Before you move on
- The first winnable Ramirez battle has been defeated.
- The Delphinus has defeated the Silver Gigas Zelos.
- Ramirez empowered by Zelos has been defeated.
- The ending scenes and credits have played to completion.
- The pre-final Soltis save still loads and is retained for optional continuation.
- Any Pinta Quest file or transferred VMU reward has been checked separately from the story-ending sequence.
- Legends-only quests, bosses and rewards have not been used as requirements for Dreamcast completion.
References for this chapter
- Skies of Arcadia — Sega Dreamcast North American Manual
- Skies of Arcadia — Guide and Walkthrough — Dreamcast — Arrawnt
- Skies of Arcadia Guide and Walkthrough — Ins1ghtful — GameFAQs
- Skies of Arcadia — Guide and Walkthrough — Dreamcast — By MCella
- Zelos — Skies of Arcadia Wiki
- Skies of Arcadia — Guide and Walkthrough — Dreamcast — Shotgunnova
Optional Completion: Dreamcast VMU Content and Late Collectibles
The original North American Dreamcast release includes optional VMU content, historical website downloads, discoveries, recruitable crew, wanted battles and giant-monster ship encounters. None of these activities is required to defeat the Valuan threat, complete the Gigas sequence or reach the ending. Use a separate Disc 2 save before the final approach for optional exploration, because the Dreamcast release returns you to the last practical save rather than creating a normal post-credits free-roam file. Pinta's Quest is the main Dreamcast-exclusive feature: it runs as a VMU executable, expands as the corresponding story save opens more of Arcadia, and can return gold and items to the main game.
Find Pinta and download Pinta's Quest
Reach Sailors' Island during the normal story and enter the item shop or armory area where Pinta is found. Speak with him. After Pinta has been introduced, open the Status Menu by pressing X outside battle. Select Pinta Quest, then choose the controller expansion socket containing the VMU you want to use. The manual describes this as the download location for the VMU mini-game.
The Pinta Quest executable requires 83 free VMU blocks. A VMU that already contains another executable game cannot receive Pinta Quest until that executable is removed or moved elsewhere. Do not delete an existing VMU game without backing it up first. Keep ordinary Skies of Arcadia save files on a different VMU when possible; the main save and the executable are separate files, but both still require available VMU space.
- Find Pinta on Sailors' Island.
- Open the Status Menu with X.
- Select Pinta Quest and the correct expansion socket.
- Provide at least 83 free VMU blocks.
- Back up another VMU executable before removing it.
Dispatch Pinta and explore the VMU map
With no Pinta Quest executable present, the Status Menu shows Dispatch. Select it to write the mini-game to the VMU. Remove the VMU only after the Dreamcast finishes writing the file. Start Pinta Quest from the VMU and use the map areas that are available.
Pinta's accessible map expands as Vyse's main-game travel area expands. The manual states that only areas already explored by Vyse can be selected, and that stronger enemies appear farther into the available map. Good items are more likely near the map's outer areas, but those expeditions are more dangerous. If a region is unavailable, continue the main story and dispatch Pinta again later rather than treating the missing region as a fault.
Pinta Quest contains several short obstacle games. In a headwind, press A and B repeatedly to advance. In a ship battle, press A when the sight lines up with the enemy ship. In a storm, use the directional controls to avoid flying rocks. Failed obstacle games reduce the expedition's results, and damage to Pinta's ship can reduce gold through repair costs.
- Dispatch Pinta only after the VMU file has been selected.
- Select only regions already opened in the main save.
- Use A and B during headwind sections.
- Fire when the sight matches an enemy ship.
- Dodge storm obstacles with the directional controls.
Return Pinta and collect the results
When you want to collect the expedition's results, insert the Pinta Quest VMU into the expansion socket of the controller being used for the main game. Load the relevant Skies of Arcadia save, press X to open the Status Menu, select Pinta Quest, choose the VMU containing the executable and select Return. The manual states that Return calculates Pinta's experience, adds collected gold to Vyse's total and adds collected items to the main inventory. The VMU file is then rewritten for another expedition.
Pinta Quest displays collected item quality as ranks from A through C rather than always showing the normal item name. Higher Pinta levels improve the chance of finding more useful items. The VMU FAQ also reports that the result is determined inside Pinta Quest, so removing the VMU after viewing the result does not reroll the rewards. Make a backup save before Return if the expedition produced valuable equipment or consumables.
Pinta Quest does not provide Chams. Collect Chams through the main Dreamcast game and any separate verified Dreamcast download instead. Do not leave Pinta exploring while expecting its rewards to appear automatically; you must use Return from the Status Menu.
- Back up the main save before a valuable Return.
- Select Return from the Status Menu.
- Confirm that gold increased.
- Check the ordinary inventory for transferred items.
- Keep the VMU executable if you want to dispatch Pinta again.
- Collect Chams through the main game, not Pinta Quest.
Treat Dreamcast website downloads as optional preservation content
The North American manual documents a Homepage option that connects to the Skies of Arcadia official website through the Dreamcast browser. It describes obtaining downloadable items and storing files on a VMU. This is separate from Pinta Quest: Pinta is written from the Status Menu, while website content uses the browser and its VMU file functions.
The historical online route should not be treated as a current requirement. If the original service is unavailable, continue without it. For legitimate hardware preservation or compatible emulation, use only a verified North American Dreamcast-compatible file, back up the VMU first and follow the game's own import prompt. Do not mix files from Skies of Arcadia Legends, another region or a different edition with the USA two-disc save. Contemporary Dreamcast references identify website downloads as a separate source of optional items, including content unavailable through Pinta Quest, but they are not needed for the ending.
- Use Homepage only as optional Dreamcast content.
- Back up the VMU before importing a file.
- Use a verified North American Dreamcast-compatible file.
- Keep website downloads separate from Legends data.
- Do not make website access part of the main-story completion requirement.
Sweep optional discoveries and crew after major ship upgrades
Use the pre-final Disc 2 save for the optional map sweep. After the Delphinus gains the travel abilities needed to cross previously impassable sky hazards, revisit earlier regions and search for discoveries that were inaccessible before. Report each discovery to the Sailors' Guild or other appropriate collector after finding it; locating a discovery is not the same as completing its reward cycle.
Check towns after major story events for optional crew. Examples documented for the Dreamcast release include Polly, Lawrence, Pinta, Pow, Khazim, Osman, Domingo, Tikatika, Kirala, Urala, Hans, Belle, Kalifa, Don and Ilchymis. Their requirements vary: some require a payment, a discovery, a weapon, a magic spell, a rank or a later story state. Use a Dreamcast-specific checklist rather than a Legends checklist. Optional crew can improve ship statistics, provide commands or unlock services, but no optional recruit is required to reach the ending.
- Return to previously blocked sky regions after Delphinus upgrades.
- Report discoveries after locating them.
- Recheck towns after major story events.
- Verify each recruit's Dreamcast-specific prerequisite.
- Keep optional crew separate from mandatory story joins.
Attempt wanted battles and giant-monster encounters only if desired
Wanted battles and giant-monster ship encounters are optional challenges. They award money, equipment, titles or other rewards, but they do not replace the mandatory story Gigas battles. The Dreamcast walkthroughs place the giant-monster encounters at different points after the Delphinus receives the necessary travel capabilities; use the individual encounter's availability and location rather than assuming every target is available immediately. Obispo, for example, is found west of the Giant Squid Nest after the relevant Delphinus progression.
Save before each difficult optional fight. For character bounties, bring healing, revival and status-recovery items. For ship encounters, repair the Delphinus, confirm the active crew and keep enough resources for a failed attempt. If an encounter defeats you, reload the separate pre-battle save and return later with stronger equipment or a better crew arrangement. Do not add Legends-only bounty or character content to the Dreamcast completion list.
- Use a separate save before difficult optional encounters.
- Repair and upgrade the Delphinus before ship battles.
- Bring healing and status recovery for character bounties.
- Record completed targets separately from the main story.
- Exclude Legends-only content.
Preserve the correct saves
Keep three distinct recovery files: a Disc 1 save before the disc swap, a general Disc 2 save outside the final approach and a final-area save before the last sequence. The final dungeon is treated as one-time-only by Dreamcast walkthrough references, and the game does not provide a normal post-credits free-roam continuation. After watching the ending, return to the pre-final save when you want to continue optional exploration.
For hardware, copy Disc 1 and Disc 2 saves to separate VMUs or another verified backup device. Preserve the Pinta Quest executable independently from the main save, along with any verified Dreamcast download files. For emulation, export the VMU or memory-card data only after closing the game cleanly. Label each backup as North American Dreamcast data, identify the disc and record the backup date. Keep one untouched story backup and one working copy for optional-boss attempts.
- Preserve a Disc 1 pre-swap save.
- Preserve a general Disc 2 exploration save.
- Preserve a final-area pre-boss save.
- Archive Pinta Quest separately.
- Label all files as North American Dreamcast data.
- Use the pre-final save for post-ending optional exploration.
Before you move on
- Pinta Quest has been downloaded from the Status Menu, dispatched from a VMU and returned successfully, with its gold or items visible in the main game.
- Any desired website download has been imported only from a verified North American Dreamcast-compatible source.
- Desired discoveries have been reported, not merely located.
- Desired optional crew, wanted targets and giant-monster encounters have been recorded separately from story completion.
- A Disc 1 pre-swap save, a general Disc 2 save and a final-area pre-boss save are stored in separate labeled backups.
- Pinta Quest, downloads, discoveries, crew, wanted battles and giant-monster encounters remain optional and are not required for the Dreamcast ending.
References for this chapter
Completion Checklist and Save Packaging
For the original North American Sega Dreamcast release, record the campaign as complete after defeating the final story sequence and viewing the ending. Do not expect a normal post-credits free-roam save. Preserve the untouched save point immediately before the final battle as the primary retry and continuation file, then archive any earlier Disc 1 and Disc 2 checkpoints, Pinta’s Quest data, and Dreamcast downloadable extras as separate files.
Preserve the final save point before the last battle
Reach the final save point inside the final area before entering the doorway or trigger that starts the concluding battle sequence. Create a dedicated native save in a slot that you will not overwrite. Record it in your notes as FINAL-PRE-BOSS; the game’s save screen does not need to support custom labels because the label is for your archive notes.
This file is the essential recovery point for the original Dreamcast campaign. The final area contains a save point before the last battle, and Dreamcast save listings identify comparable files as being at the last save point or immediately before the final fight. Keep a second copy if your hardware or emulator supports native VMU or memory-card duplication.
Before leaving this save untouched, check equipment, healing items, character readiness, and the Delphinus configuration. You can use this file to retry the ending, adjust the party or equipment, and resume optional exploration before the finale. Do not overwrite it with a post-battle state or use it as the only working copy while testing optional content.
- A native save exists at the final save point before the last battle.
- The save slot is recorded as FINAL-PRE-BOSS in an external note.
- An independent backup exists if the hardware or emulator permits one.
- The party, equipment, supplies, and ship are ready for the final sequence.
Finish the campaign and record completion manually
Load FINAL-PRE-BOSS, enter the final sequence, defeat the required story battles, and allow the ending scenes and credits to finish. The main-story completion condition is the defeat of the final story encounter and viewing of the original Dreamcast ending. Discoveries, optional crew, Wanted List targets, giant monsters, Pinta’s Quest progress, and downloadable extras are not required for this result.
Do not plan around a post-credits save. The practical continuation file is FINAL-PRE-BOSS, not a newly created endgame world. After the ending, reload the preserved pre-final save if you want to continue optional exploration or view the ending again. You will return to the state before the final approach and must replay the final sequence to reach the ending again.
Record the completion separately from the game’s native save data. Write down the date completed, the save slot used for FINAL-PRE-BOSS, the platform, the North American region, and the fact that the final battle and credits were completed. A photograph or capture of the ending may supplement this record, but it is not a replacement for the native save file.
- The final story battle has been defeated.
- The original Dreamcast ending and credits have been viewed.
- Completion is recorded in an external note with the completion date.
- FINAL-PRE-BOSS remains available for retrying the ending and continuing optional play.
- No post-credits save is being treated as necessary or guaranteed.
Archive the Disc 1 and Disc 2 campaign lineage
Preserve the campaign as one continuous save lineage rather than treating the two discs as separate games. If you made a save immediately before changing discs, label the copy DC-USA-D1-BEFORE-SWAP. Keep a stable early Disc 2 checkpoint as DC-USA-D2-FIRST-SAVE when available, and retain FINAL-PRE-BOSS as the primary late-game recovery file.
The Disc 1 transition backup is optional if it was not created during the playthrough. Do not restart the campaign merely to manufacture one. The essential archive is a working native campaign save plus an independent backup. On original hardware, copy the save to another VMU or compatible Dreamcast memory-card device when possible. On emulation, export the actual VMU or memory-card file; an emulator save state should not be the only preservation copy.
Use descriptive archive names that include the game, platform, region, edition, and checkpoint. For example, use folders such as Skies_of_Arcadia_DC_USA/Main_Save, Skies_of_Arcadia_DC_USA/Disc_Checkpoints, and Skies_of_Arcadia_DC_USA/VMU. Keep Dreamcast files separate from Skies of Arcadia: Legends files.
- Any existing Disc 1 pre-swap checkpoint is preserved.
- Any available early Disc 2 checkpoint is preserved.
- FINAL-PRE-BOSS is backed up outside the active working file.
- A native VMU or memory-card file is retained rather than relying only on save states.
- The archive identifies the North American original Dreamcast release.
Store Pinta’s Quest and downloaded content separately
The Dreamcast manual places Pinta Quest in the Status Menu. From normal gameplay, open the Status Menu, select Pinta Quest, and choose the VMU containing the minigame data. Pinta’s Quest is companion VMU content, not a requirement for finishing the main story. Keep its file in a separate VMU folder and note whether it is unused, active, or completed.
If you used Dreamcast downloadable content, archive each item separately from the campaign save and Pinta’s Quest data. Examples include files associated with optional ship battles, islands, weapons, or other promotional downloads, but record only content you actually possess. Do not assume that a minigame file, downloadable item, and ordinary campaign save can be restored interchangeably.
Before deleting or reorganizing anything, preserve the complete original VMU or memory-card image. This gives you a recovery copy if a restoration attempt damages a file or if the emulator stores VMU data differently from the main save.
- Pinta’s Quest data is archived separately from the campaign save.
- Any downloaded Dreamcast extras are identified by their actual names and status.
- The original VMU or memory-card image is backed up before cleanup.
- No Legends-only save, reward, boss, or mechanic is included in the Dreamcast archive.
Mark optional goals and close the archive
Create a plain-text archive note containing: Sega Dreamcast, North American original release, two-disc version, completion date, save-slot descriptions, hardware or emulator used, and whether Pinta’s Quest or downloads were used. This prevents later confusion with the GameCube release, which is a separate edition with additional content and other differences.
If you continue from FINAL-PRE-BOSS, list unfinished optional goals separately. These may include Discoveries, missed crew members, captain-rank improvements, Wanted List targets, giant-monster encounters, treasure, downloadable rewards, and Pinta’s Quest objectives. Their omission does not invalidate the main-story completion record.
Mark the campaign COMPLETE when the final story sequence and ending are finished. Mark later exploration OPTIONAL. The correct Dreamcast archive does not need a post-credits save because the preserved pre-final save is the file used to continue playing before repeating the finale.
- The archive identifies the North American Sega Dreamcast edition.
- The ending completion date and FINAL-PRE-BOSS slot are recorded.
- Disc checkpoints, campaign data, Pinta’s Quest, and downloads are separated.
- Unfinished goals are marked optional.
- Legends content is excluded from the Dreamcast completion record.
Before you move on
- The final story battle has been defeated.
- The complete original Dreamcast ending and credits have been viewed.
- An untouched FINAL-PRE-BOSS save is preserved for retries and optional exploration.
- Any available Disc 1 and Disc 2 checkpoints are labeled and archived.
- At least one native campaign save backup exists outside the active working file.
- Pinta’s Quest and other VMU files are archived separately.
- The archive note identifies the North American original Dreamcast release.
- No post-credits save is claimed or required.
- Any unfinished discoveries, crew, Wanted List targets, giant monsters, downloads, or VMU objectives are explicitly marked optional.
References for this chapter
Finishing up
You have cleared the required story route from Disc 1 through Disc 2, defeated Galcian, Ramirez, Zelos, and the fused final Ramirez sequence, and watched the original Dreamcast ending and credits.
You have preserved the last normal save before the final sequence as the continuation and retry file. The Dreamcast release does not create a normal post-credits completed-game save.
Optional Pinta’s Quest, Dreamcast downloads, discoveries, crew, wanted battles, and giant-monster encounters are outside the main-story completion requirement and may be tracked separately.
Choose your next gameScreenshots & video
Game imagery for reference. Follow the written chapters above for the route and strategies.
Sources & references
Our original guide draws on the references below. Check the edition at the top of this page before following controls or unlock requirements.
- Skies of Arcadia — Sega Dreamcast North American Manual
- Skies of Arcadia — Guide and Walkthrough — Dreamcast — Shotgunnova
- Skies of Arcadia - Guide and Walkthrough - Dreamcast - By GheddonLN
- Skies of Arcadia — Pinta’s Quest VMU FAQ — Dreamcast
- Skies of Arcadia - Game Script - Dreamcast - By metal_cherry
- Skies of Arcadia/To Valua — StrategyWiki
- Skies of Arcadia - Guide and Walkthrough - Dreamcast - By MetroidMoo
- Skies of Arcadia — Guide and Walkthrough — Dreamcast — Arrawnt
- Skies of Arcadia – Boss Guide – Dreamcast – By Jaksiel
- Skies of Arcadia — Guide and Walkthrough — Dreamcast — By MCella
- Skies of Arcadia — Dreamcast Manual
- Skies of Arcadia Guide and Walkthrough — Ins1ghtful — GameFAQs
- Skies of Arcadia — Crew reference
- Skies of Arcadia FAQ/Walkthrough — Neoseeker
- Skies of Arcadia — Battle Mechanics Guide — Dreamcast
- Skies of Arcadia – Hydra Tactics FAQ – Dreamcast
- Skies of Arcadia Battle Mechanics Guide
- Skies of Arcadia — Ship Battles FAQ — Dreamcast
- Zelos — Skies of Arcadia Wiki
- Skies of Arcadia 100% Completion Guide — GameFAQs
- Skies of Arcadia Dreamcast Save Game Files
About the game & collecting notes
- Platform
- Dreamcast
Step-by-step campaign coverage for the original Dreamcast release of Skies of Arcadia (North American two-disc edition).
Darryl Polo
Darryl Polo loves tinkering with emulation and revisiting retro games. He enjoys exploring how old favorites play on different setups and sharing what he learns along the way. At Joking Joystick, he writes about the games, hardware, and small discoveries that keep the hobby fun.
Our editorial standardsFound a step that needs another look? Help us improve this guide.