Shenmue (USA, Sega Dreamcast) — Complete Campaign Walkthrough
Step-by-step coverage of the original North American Sega Dreamcast release of Shenmue from the Hazuki Residence through the Hong Kong departure. The route follows the actual sequence: Yokosuka investigation and Disc 1 bus transition, Disc 2 Old Warehouse and Asia Travel events, Disc 3 harbor employment and Mad Angels investigation, the 70-Man Battle, final Chai encounter, credits and post-credits Cleared File. Optional activities, recovery methods and save-transfer cautions are separated from required story progress.


Find a copy
Shenmue Dreamcast
We may earn a commission if you buy through these links, at no extra cost to you. As an Amazon Associate I earn from qualifying purchases.
Opens retailer search results. Check the model, edition, seller, availability and current price before buying.
Before you begin
You are Ryo Hazuki, investigating your father's murder in Yokosuka before following Lan Di's trail to Hong Kong.
Follow the chapters in order. The guide separates the three gameplay discs and identifies required story gates, time windows, fights, QTEs, money requirements, save points and recovery routes.
Optional arcade, collection and training content can be skipped. The required completion check is the normal ending followed by a successful post-credits Cleared File save; optional notebook entries do not invalidate completion.
Set yourself up for the run
Use a VMU with sufficient free space for Shenmue's normal game files and preserve at least one earlier recovery save when possible.
Make normal saves at Ryo's bedroom save point before major fights, timed events and disc transitions. Treat Resume as a temporary interruption save, not as the only backup.
Follow the on-screen disc-change and save prompts. Do not remove the VMU, open the lid or power off during saving, loading or active transitions.
Keep ordinary cash available for required purchases and travel events. The final boat fare is supplied through the story's Fuku-san and Asia Travel sequence; repeated forklift grinding is not required to finance the entire fare.
Use the notebook to identify the current named lead and check NPC schedules before assuming that a story event was missed.
For carryover, preserve the post-credits Cleared File separately from the ordinary pre-ending save and verify the target Shenmue II edition's compatibility before attempting import.
Boot, Saves and Disc Notes — First Time Setup
Prepare the original North American Dreamcast release of Shenmue with a usable VMU, create a normal game file in Ryo’s bedroom, learn the notebook and Resume functions, and handle the multi-disc structure without interrupting saves or loading. This chapter ends when Disc 1 boots, the opening sequence is complete, Ryo is controllable, and at least one verified save exists.
1. Prepare the VMU and controller
Insert the VMU you will use for Shenmue into Expansion Socket 1 of the controller connected to Dreamcast Control Port A. Before starting the game, check the Dreamcast system screen and make sure the VMU has at least 80 free blocks. Shenmue uses a large save file for this original Dreamcast release, so a nearly full VMU can leave you unable to create a normal game file when you reach the save point.
If you have a second VMU, reserve it for a backup copy. Do not delete unrelated files until you have confirmed that they are no longer needed. If only one VMU is available, use separate Shenmue file slots and keep at least one earlier save instead of overwriting every file with the newest progress.
- A VMU is inserted in the controller’s first expansion socket.
- The controller is connected to Control Port A before powering on.
- At least 80 VMU blocks are free.
- A second VMU is available for backup, or a plan is in place to preserve multiple file slots.
2. Start Disc 1 and finish the opening sequence
Insert Disc 1 of the original three-disc Shenmue game and select New Game from the title screen. Let the opening sequence play without opening the disc lid or attempting to change discs. The game then places Ryo in his bedroom at the Hazuki Residence, where you receive control.
Before leaving, use the room to learn the basic interaction system. Approach the desk and examine the Shenmue tape, then inspect the desk drawers to collect the cassette player, the Sha Hua tape and the photograph of Ryo’s friends. These items are not needed to create the first save, but they provide safe practice with the game’s zoom and examine actions.
- Disc 1 is inserted before selecting New Game.
- The opening sequence has ended normally.
- Ryo is controllable in his bedroom.
- The desk and drawers can be examined with the interaction button.
3. Create a normal game file in Ryo’s bedroom
Use the save point in Ryo’s bedroom. When Ryo enters the room, the room menu appears automatically; select Save with the D-pad. You can also stand in front of the bed and press the interaction button to display the menu manually. Choose an empty game-file slot for this first save.
A normal game file records your current progress, location and in-game time. The Dreamcast version allows up to three game files on one memory card, so use the slots deliberately: keep this first file as an untouched opening backup, then use another slot for active progress when possible.
Wait until the save operation has fully completed before turning off the Dreamcast, removing the VMU, disconnecting the controller or opening the disc lid. Interrupting a save or load can damage the file or leave it unusable.
- The Save menu was opened in Ryo’s bedroom.
- The first Shenmue game file was written to an empty slot.
- The save completed before any hardware or disc handling.
- At least one unused file slot remains for a later checkpoint.
4. Read the notebook and learn the two save functions
Open Ryo’s notebook from the System Menu or by pressing the notebook button during play. Information Ryo hears or experiences is logged there automatically. The notebook includes daily notes, important names, telephone numbers and clues, so consult it whenever you are unsure which lead or previous conversation you are meant to follow. It is a record of investigation information, not a replacement for saving.
The System Menu also contains Resume. Resume is a temporary interruption feature: select Resume, confirm the prompt, and wait for the message stating that the game save is complete before powering down or resetting. Only one Resume File exists, and continuing from it consumes that temporary file. Use Resume for a short interruption, but use the bedroom Save command for lasting progress.
- The notebook has been opened and its current notes have been read.
- You know how to return to the notebook during normal play.
- You understand that Resume is temporary and separate from a normal game file.
- The normal game file remains available after closing the menu.
5. Keep Disc 1 inserted during the opening investigation
Remain on Disc 1 while investigating the Hazuki Residence and Yokosuka. Do not swap discs simply because you enter another neighborhood, open the notebook, or reach a loading transition. The original game handles disc progression through its own story prompts.
When a disc change becomes necessary, follow the instruction displayed on screen. Finish the current scene or transition, wait for the game to request the next disc, and only then open the lid and replace the disc. At the end of Disc 1, the game provides the opportunity to save the progress needed to begin Disc 2; the same principle applies when Disc 2 ends and Disc 3 is required. Loading the appropriate saved Start File on the next disc is part of the original Dreamcast continuation process.
- Disc 1 remains in the console during the initial investigation.
- No disc is removed during a cutscene, saving operation or loading operation.
- Disc changes will be made only after an explicit on-screen request.
- You know that the end-of-disc save is required to begin the following disc.
6. Make and verify a separate backup
After the first normal save completes, return to the Dreamcast file-management screen if you have a second VMU and copy the Shenmue game file to that separate device. Treat the original and backup as independent copies: do not erase the first copy until the second one is visibly present and readable.
If you cannot copy the file immediately, keep the first game file untouched and use a second slot for active play once you return to the bedroom. Before major story transitions, save again in a different slot rather than overwriting every available copy. Never remove a VMU while the console is reading or writing data.
- The first game file is visible in the load list.
- A separate VMU backup exists, or the original file has been preserved in an unused slot.
- The backup or preserved file has not been overwritten during the same session.
- You are ready to begin the Hazuki Residence investigation on Disc 1.
Before you move on
- Disc 1 boots and the opening sequence finishes without interruption.
- Ryo is controllable in his bedroom at the Hazuki Residence.
- The Shenmue tape, cassette player, Sha Hua tape and friends photograph can be examined or collected from the bedroom area.
- A normal Shenmue game file created at the bedroom Save Point appears in the load list.
- The VMU has at least 80 free blocks available before the main investigation begins.
- The notebook has been opened and its current notes can be read.
- Resume has been distinguished from the permanent game-file save.
- A backup exists on a second VMU, or an untouched early save slot has been preserved.
- Disc 1 remains inserted until the game itself requests the next disc.
Hazuki Residence — Opening Investigation
Complete the required opening tasks inside the Hazuki Residence, collect the useful starting items, obtain the Mysterious Key, speak with Fuku-san in the dojo, and leave through the front gate for the investigation in Yamanose. Most room searches are optional for immediate story progress, but the Mysterious Key is important later and should be collected now.
1. Search Ryo’s room
After the opening cutscene, Ryo starts in his bedroom. Before leaving, use Search Mode to inspect the desk and its storage. Take the Shenmue cassette from the desktop, then open the desk drawers to collect the cassette player, the Sha Hua cassette and the photo of friends.
These items are not all required to leave the residence, but they are permanent inventory items and are easiest to collect at the start. The cassette player and tapes are optional entertainment rather than progression tools. When you finish, approach the bedroom door to trigger Ine-san’s conversation.
- Shenmue cassette collected from the desk.
- Cassette player, Sha Hua cassette and photo of friends collected from the drawers.
- Ine-san’s conversation has triggered before Ryo leaves the bedroom.
2. Finish Ine-san’s opening conversation
Ine-san stops Ryo in the hall and gives him the first daily allowance of 500 yen. This first payment is handed over during the conversation; do not search the shoe cabinet expecting the opening payment to be waiting there. Ine-san explains that future daily allowances will be placed on the shoe cabinet near the telephone.
She also tells Ryo to visit Fuku-san, who is training in the dojo. Let the conversation finish completely, then continue exploring the house. The notebook records the allowance information and the instruction to speak with Fuku-san, so open it if you want to verify the current objective.
- Ine-san has handed over the first 500 yen.
- The information about future payments on the shoe cabinet is understood.
- The notebook contains the instruction to visit Fuku-san.
3. Search Fuku-san’s room and the living room
From the hall, enter Fuku-san’s room. It is the room across from the corridor leading toward the outside, rather than a distant end room. Inspect the desk and collect the Shadow Reaper move scroll. Reading or examining the scroll adds the move to Ryo’s available techniques for later practice.
Next, inspect the living room. The cabinet beneath the television contains a Sega Saturn, while a drawer in the larger cabinet contains C-size batteries. The Saturn and batteries are optional at this stage, but the batteries may be useful for later equipment. The kitchen has no required opening item, although examining the table can trigger a short family memory.
- Shadow Reaper scroll collected from Fuku-san’s room.
- Sega Saturn examined beneath the living-room television.
- C-size batteries collected from the living-room cabinet.
4. Search Iwao’s room and collect the Mysterious Key
Continue down the hall to Iwao Hazuki’s room. Examine the letter on the desk. Ryo reads it automatically, and this is the required examination connected to the opening investigation.
After reading the letter, open the desk drawer and inspect the small case inside. Take the Mysterious Key. This key is needed later to open the long box in the dojo and should not be skipped, even though it has no immediate use during the first visit.
Enter the adjoining altar room and inspect the area around the shrine. You can pray there if you wish. Collect the box of matches and candles from the nearby storage. Then go through the rear door of the altar room and open the basket to obtain the Twin Blades move scroll. The move scrolls are optional for completing the immediate investigation, but collecting them now avoids having to retrace the residence later.
- Iwao’s letter has been examined.
- Mysterious Key collected from the case in Iwao’s desk drawer.
- Box of matches and candles collected from the altar room.
- Twin Blades scroll collected from the basket behind the altar room.
5. Enter the yard and visit the dojo
Leave the house through the main entrance and enter the yard. Walk toward the large cherry tree near the dojo. Approaching it triggers a short memory scene involving Ryo and his father. The scene is not a separate objective, but the tree is a useful landmark for finding the dojo.
Enter the dojo and speak with Fuku-san. Allow the conversation to finish without leaving early. Ryo states that he intends to learn more about the men in black, and the notebook updates with the first outside-investigation objective: ask people whether they saw men wearing black on the day of the murder.
You may inspect the dojo’s wall scrolls or practice moves after the conversation. The long rectangular box is also in the dojo. With the Mysterious Key already collected, you can open it and obtain the katana, but this is not necessary for the opening investigation and does not let Ryo carry the sword outside. If you examine the box without the key, the game only records that it is locked and that a key is needed.
- Cherry-tree memory scene triggered or the tree has been examined.
- Fuku-san’s dojo conversation has completed.
- The notebook now directs Ryo to ask about men in black.
- The Mysterious Key is in the inventory before attempting to open the dojo box.
6. Confirm the opening objective and leave for Yamanose
Open the notebook after speaking with Fuku-san and confirm that the residence portion has moved on to the outside investigation. There is no separate mandatory map-marker puzzle inside the Hazuki Residence. The correct progression is to leave through the front gate and follow the road into Yamanose.
If you did not collect an item during the house search, you can return later; most household objects are optional. Do not wait for another cutscene at the shoe cabinet. Future daily allowances are placed there, but the first 500 yen came directly from Ine-san.
Exit through the front gate. Ryo enters Yamanose, where the next investigation leads begin. The residence chapter is complete once Ryo can leave freely and the notebook points toward asking people about the black car and the men in black.
- Notebook checked after the Fuku-san conversation.
- No required conversation remains inside the house or dojo.
- Ryo has left through the front gate and entered Yamanose.
- The next objective concerns outside witnesses and the black car investigation.
Before you move on
- Ine-san has spoken to Ryo and handed over the first 500 yen.
- Ryo’s room items have been collected, including the Shenmue cassette, cassette player, Sha Hua cassette and photo of friends.
- Iwao’s letter has been examined and the Mysterious Key has been collected from the desk drawer.
- Shadow Reaper has been collected from Fuku-san’s room and Twin Blades has been collected from the altar-room basket, if pursuing the optional opening items.
- Fuku-san has been spoken to in the dojo and the notebook now directs Ryo to ask about men in black.
- Ryo can leave through the Hazuki Residence front gate and enter Yamanose for the next chapter.
Dobuita Street — Talk to Locals and Track Lan Di's Men
After the early Chinese and sailor investigations point Ryo toward Charlie, complete the Dreamcast Charlie route through Heartbeats Bar, Knocking Motorcycle Shop, Jupiter's Jackets, Nagai Industries and the nighttime ambush. Visit the tattoo parlor in Okayama Heights and defeat Charlie’s knife attack. On the following day, complete the dojo and Ine-san scenes, rescue Gao Wen from Charlie’s gang, and follow the resulting lead to Russiya China Shop. This chapter ends when you arrive at the shop with the Chinese letter. Do not perform Xia-san’s translation or begin the phone and password investigation until the next chapter.
1. Complete the opening Dobuita information chain
After the investigation sends Ryo into Dobuita, speak with Nozomi near Aida Florist and then visit Tom's Hot Dog Stand across from the Global Travel Agency. Ask about the suspicious men and Lan Di. Check the Global Travel Agency, then go to Ajiichi Chinese Restaurant and ask about the Three Blades and the Chinese connection.
Continue through the local information chain by visiting Mary's Patches & Embroidery and Liu Barber and Hair Salon. The available dialogue directs Ryo toward Liu Senior in Suzume Park. Find Liu Senior on the bench near You Arcade and ask about Lan Di. His information changes the search toward sailors who spend time in Dobuita's bars.
Some conversations depend on business hours or on completing an earlier conversation. If a clerk gives only general dialogue, check the notebook, leave the shop and return during its active period rather than assuming the story is stuck. The sailor investigation is the required route; sailor conversations, arcade games and unrelated street encounters are optional unless they directly add the next notebook lead.
- Nozomi and Tom have been questioned.
- The Global Travel Agency and Ajiichi Chinese Restaurant have been checked.
- Mary's Patches & Embroidery and Liu Barber and Hair Salon have advanced the Chinese information chain.
- Liu Senior has been questioned in Suzume Park.
- The notebook points Ryo toward sailors and the Dobuita bars.
2. Search the bars and identify Charlie
Visit Bar Yokosuka when the sailors are present in the evening. Speak with Saijo-san and the sailors or bar staff until Ryo receives the lead toward MJQ Jazz Bar and Heartbeats Bar. If the required people are absent, leave and return later in the evening or sleep and try the next day.
MJQ Jazz Bar contains an optional billiards interaction. The men near the pool table may ask Ryo to make a shot or buy drinks. This is not the only way to complete the main route, so a failed shot or declined drink should not make the campaign unwinnable. Continue to Heartbeats Bar once the nighttime event is available.
Heartbeats Bar is reached down the narrow stairway opposite the Knocking Motorcycle Shop. A short QTE occurs before entering, followed by the bar confrontation. Use the on-screen Dreamcast prompts and complete the fight. Afterward, question the bartender. The resulting information identifies Charlie as a tattooed biker associated with the sailor lead and sends Ryo to the motorcycle and jacket shops.
- The sailor lead has been obtained at Bar Yokosuka.
- MJQ Jazz Bar has been checked, whether or not the optional billiards event was completed.
- The approach QTE and Heartbeats Bar fight have been cleared.
- The bartender’s information identifies Charlie.
3. Follow Charlie through the motorcycle and jacket shops
Go to Knocking Motorcycle Shop near Heartbeats Bar. Speak with Ono-san, who is normally outside working on the motorcycles, and ask about Charlie. He points Ryo toward Tsuruoka-san at Jupiter's Jackets. Speak with Tsuruoka-san until the notebook records that Charlie visits the jacket shop area at night, around 7:00 PM.
Nagai Industries can provide an alternate or supporting version of the jacket-shop lead. The building is on the street near Liu Barber and Hair Salon. Speak with the men inside if the notebook still lacks the required Charlie information. Kurita Military Surplus and other nearby contacts can also help establish the tattoo-parlor route later, but do not replace the required Charlie investigation.
When the notebook indicates that Charlie’s gang is active at night, remain in Dobuita and head toward the You Arcade or the streets around Jupiter's Jackets after the evening time window begins. The event is triggered by entering the appropriate area, not by waiting inside an unrelated business. If nothing happens, recheck the dialogue at Ono-san and Tsuruoka-san, then return after nightfall.
- Ono-san has been questioned about Charlie.
- Tsuruoka-san has provided the nighttime jacket-shop lead.
- Nagai Industries has been checked if the notebook requires additional confirmation.
- The notebook indicates that the next Charlie event occurs after nightfall.
4. Survive the nighttime ambush
After the Charlie lead is complete, approach the You Arcade or the nearby jacket-shop streets at night. One of Charlie’s associates approaches Ryo and offers to take him to Charlie. Follow the scene to the empty parking lot, where the meeting becomes an ambush.
This mandatory Free Battle places Ryo against several attackers. Do not remain in the center of the group. Move toward the edge of the lot, guard while creating space, and attack only after one enemy separates from the others. Short attack strings and throws used when an attacker is isolated are safer than repeated long combinations in the middle of the group. If Ryo is knocked down, regain distance before attacking again.
After winning, question the defeated gang members. Their information points Ryo toward the tattoo parlor. If the notebook does not immediately name the destination, speak with the available Charlie-related contacts, especially Kurita-san or the people around the motorcycle and jacket shops. The required destination is the tattoo parlor in Okayama Heights, across from Bar Yokosuka.
- The nighttime approach near You Arcade has occurred.
- The parking-lot ambush has been won.
- The defeated attackers have provided the tattoo-parlor lead.
- Okayama Heights is identified as the next destination.
5. Enter the tattoo parlor and defeat Charlie’s attack
Go to Okayama Heights, the apartment building directly across from Bar Yokosuka. Take the stairs to the second floor and enter the room marked by the tattoo-related sign or poster. The first visit establishes the location and results in Ryo being told to return when Charlie is available.
Leave the area and advance to the following day. The tattoo-parlor scene becomes available during its afternoon business period, from approximately 2:00 PM onward. Use the morning for training, the arcade or other optional activities, then return to the same second-floor room after the shop is open.
When Ryo enters, the men from the earlier ambush leave and the tattoo artist directs him toward the curtained rear area. Press A to open the curtain when prompted. On the original North American Dreamcast release, the following QTE is Left, then A. Watch the prompt symbols rather than relying on memory if using a replacement controller or display setup.
Winning the QTE allows Ryo to confront Charlie and completes the tattoo-parlor portion of the route. A Nozomi scene may occur as Ryo leaves Okayama Heights. It is a transition after the confrontation, not a separate investigation branch. There is no need to wait at You Arcade for a supposed required meeting; continue by returning home and sleeping for the next morning’s automatic story scenes.
- The tattoo parlor has been visited once to establish the lead.
- Ryo has returned after the following day’s afternoon opening.
- The tattoo-parlor QTE has been completed with Left, then A.
- Charlie has been confronted.
- Ryo has returned home or is ready to trigger the next morning’s story sequence.
6. Complete the dojo and Ine-san scenes
On the morning after the tattoo-parlor confrontation, the game sends Ryo to the dojo for a scene with Fuku-san. Complete the practice match. This is a story event, but it is also a safe opportunity to refresh your understanding of guarding, spacing and basic Free Battle movement.
After the dojo scene, continue through the residence sequence. Ine-san gives Ryo a Chinese letter associated with his father’s investigation. Keep the letter as the active story item. The chapter is not ready to move to the phone or password investigation; first follow the Gao Wen event that occurs when Ryo leaves the residence and reaches Sakuragaoka.
If the automatic morning scenes do not appear, return to the Hazuki Residence, check that the previous tattoo-parlor scene was completed, and sleep until the next scheduled morning. Do not restart the entire game because an optional event or side conversation was missed.
- The automatic dojo scene with Fuku-san has played.
- The practice match has been completed.
- Ine-san has given Ryo the Chinese letter.
- The notebook treats the letter as the current investigation item.
7. Rescue Gao Wen and follow the Russiya China Shop lead
Enter Sakuragaoka after receiving the letter. Ryo encounters Gao Wen and Charlie’s associates near the construction-site area. Follow the event into the mandatory Free Battle. Several gang members are present, but the fight can be handled by moving onto the wider street and avoiding the tightest part of the construction area.
Use guarding and lateral movement to avoid being interrupted by multiple attackers. Concentrate on one opponent at a time, then reposition before the remaining enemies surround Ryo. After the fight, complete the prompted QTE that sends the soccer ball back toward Charlie’s group. On the original Dreamcast controller, press A when the prompt appears.
After the rescue, move back toward Dobuita and locate Gao Wen near the You Arcade area. Speak with him about the Chinese letter. He explains that his grandmother, Xia-san, can read it and identifies Russiya China Shop as the destination. If Gao Wen is not immediately visible, search the streets around You Arcade and the nearby Dobuita shops during the afternoon. Kurita-san or another available contact can also help point Ryo toward the shop if the notebook requires an additional conversation.
Russiya China Shop is down the street from Funny Bear Burgers and is marked by its prominent shop sign. Enter with the letter in Ryo’s possession. Stop after arriving and initiating the shop conversation. Xia-san’s translation, the reversed-character explanation, the phone number and the Father's Heaven/Nine Dragons/Mother's Earth/Comrades password chain belong to the next chapter.
- Gao Wen’s Sakuragaoka event has occurred.
- The gang Free Battle has been won.
- The soccer-ball QTE has been completed.
- Gao Wen has explained that his grandmother can read the letter.
- Russiya China Shop has been located and entered with the Chinese letter.
- Xia-san’s translation and the public-phone investigation have not yet been completed.
Before you move on
- Nozomi and Tom have supplied the opening Dobuita leads.
- The Global Travel Agency, Ajiichi Chinese Restaurant, Mary's Patches & Embroidery and Liu Barber and Hair Salon have advanced the Chinese information chain.
- Liu Senior has been questioned in Suzume Park.
- The sailor route through Bar Yokosuka, MJQ Jazz Bar and Heartbeats Bar has been completed.
- The notebook identifies Charlie.
- Ono-san at Knocking Motorcycle Shop and Tsuruoka-san at Jupiter's Jackets have been questioned.
- Nagai Industries or the supporting Charlie contacts have supplied any missing jacket-shop information.
- The nighttime ambush near You Arcade has been completed.
- The tattoo parlor in Okayama Heights has been visited and Charlie’s Dreamcast QTE has been cleared with Left, then A.
- The following-morning dojo scene and practice match have occurred.
- Ine-san has given Ryo the Chinese letter.
- Gao Wen has been rescued, and the soccer-ball QTE has been completed.
- Gao Wen has identified Xia-san or Russiya China Shop as the source of translation help.
- Ryo has reached Russiya China Shop with the Chinese letter.
- Xia-san has not yet translated the letter; the phone, password and Master Chen investigation begin in chapter 4.
References for this chapter
- GameSpot Game Guide: Shenmue
- Shenmue — Guide and Walkthrough — Dreamcast — AmericanArsenal
- Shenmue — Guide and Walkthrough — Dreamcast — Crazyreyn
- Shenmue Guide and Walkthrough — Dreamcast, Saving, Resume and Cleared File
- Shenmue — Notebook Guide — Dreamcast — By fvector
- Shenmue Guide and Walkthrough — Dreamcast — GameFAQs, GheddonLN
Telephone Leads, Pawn Shops and Information Chaining
Begin this chapter after Chapter 3 has produced the Chinese-letter lead and sent Ryo to Russiya China Shop. This chapter owns the translation by Xia-san, the call to Master Chen’s warehouse number, the password exchange, the telephone-directory lookup and the final confirmation that Amihama is reached by bus. It ends with Ryo still in Dobuita, immediately before the bus ride that closes Disc 1.
1. Take the Chinese letter to Xia-san
Go to Russiya China Shop in southeastern Dobuita after the earlier investigation has directed Ryo there. Speak with Xia-san and show her the Chinese letter. This is the required translation scene for this chapter; browsing the shop, buying merchandise or visiting a pawn shop does not replace it.
Let the entire conversation finish. Xia-san explains that the letter warns Ryo about people seeking the mirror and tells him to seek the aid of Master Chen. She also gives Ryo the telephone number 0468-61-5647 and the four password phrases used to identify him during the call.
The four phrases are Father’s Heaven, Nine Dragons, Mother’s Earth and Comrades. Open the notebook after the scene if you need to review them. This translation is the progression trigger for the telephone investigation, so do not leave Russiya China Shop assuming that the earlier Chinese-letter lead was already enough.
- The Chinese letter has been obtained and brought to Russiya China Shop.
- Xia-san has completed the translation scene.
- The notebook records Master Chen and the number 0468-61-5647.
- The notebook records Father’s Heaven, Nine Dragons, Mother’s Earth and Comrades.
2. Understand the two password pairs
The phrases are matched in two pairs: Father’s Heaven with Nine Dragons, and Mother’s Earth with Comrades. When the person on the telephone says one phrase, choose its partner from the response choices.
If the caller says Father’s Heaven, select Nine Dragons. If the caller says Nine Dragons, select Father’s Heaven. If the caller says Mother’s Earth, select Comrades. If the caller says Comrades, select Mother’s Earth.
The order is not guaranteed. The caller may begin with either pair and may present the phrases in a different sequence on another attempt. Read the phrase currently spoken and select its matching partner rather than memorizing a fixed button position.
- Father’s Heaven is paired with Nine Dragons.
- Nine Dragons is paired with Father’s Heaven.
- Mother’s Earth is paired with Comrades.
- Comrades is paired with Mother’s Earth.
3. Call the warehouse number from Hirata Tobacco Shop
Go to Hirata Tobacco Shop at the northeast end of Dobuita. The shop has a public telephone and a telephone directory nearby. The call costs 10 yen, so make sure Ryo has enough money before using the phone.
The translated number is written as 0468-61-5647, but the Dreamcast telephone interface uses the local portion after the area code. Enter 61-5647 when prompted. If your notebook displays the complete number, use it to verify the digits before entering the local number in the telephone screen.
The person who answers is associated with Warehouse No. 8. Complete both password prompts by matching each phrase to its partner. After the second correct response, the caller tells Ryo about Warehouse No. 8 and ends the call. The call is not complete merely because the number connects; wait until the Warehouse No. 8 information has been delivered.
- Ryo has reached the telephone at Hirata Tobacco Shop.
- The call fee of 10 yen is available.
- The local number 61-5647 has been entered.
- Both password responses have been accepted.
- The caller has identified Warehouse No. 8.
4. Recover from a failed password attempt
A wrong response, a delayed response or an incorrect selection causes the call to end. This is recoverable and does not permanently block the story. Use the same telephone to call again and repeat the exchange.
Check the phrase currently spoken during each attempt. For example, Comrades requires Mother’s Earth, while Mother’s Earth requires Comrades. Do not choose based on where the answer appeared on the previous attempt, because the response layout and order can vary.
After a successful call, confirm the new Warehouse No. 8 entry in the notebook before moving on. If the entry is absent, the exchange was not completed and the call must be repeated.
- A failed call has been treated as a temporary setback.
- The password response is chosen by phrase pairing.
- The notebook confirms the successful Warehouse No. 8 lead.
5. Use the directory to identify Amihama
After the successful call, examine the telephone directory beside the phone at Hirata Tobacco Shop. The directory lookup identifies Warehouse No. 8 as being in Amihama. This is the clue that moves the investigation from Dobuita to the harbor area.
Speak with Hirata-san in the shop after the call and directory interaction. Ask about the location and listen through the conversation. She explains that Amihama is the harbor and confirms that Ryo can reach it by bus. This shop conversation is the required local confirmation; a visit to a pawn shop or a trip to Yokosuka Bar is not a substitute.
The directory and Hirata-san’s explanation establish the route but do not yet complete the bus transition. Check the notebook to make sure Amihama or the harbor destination has been added before leaving the shop.
- The successful Warehouse No. 8 call is complete.
- The directory beside the telephone has been examined.
- The directory identifies Amihama.
- Hirata-san confirms that Amihama is the harbor and that the bus is the way to reach it.
6. Prepare the Disc 1 bus departure
Once the telephone, directory and Hirata-san conversation are complete, you can leave the shop and continue toward the bus route. If you want to see the extra phone-related scene at home, return to the Hazuki Residence and examine the phone when it rings; this is optional and does not replace the required investigation steps.
On the following morning, speak with Tom at Tom’s Hot Dog Cart if the bus objective has not yet been made explicit. Tom confirms that Ryo should take the bus to New Yokosuka Harbor and points him toward the bus stop behind the tobacco shop area.
Do not board the bus as part of this chapter. Stop after the route has been confirmed and make a manual save if you want a recovery point. The next chapter handles the final approach to the bus stop, the fare and the Disc 1 transition. Before swapping discs, the game will require the appropriate Disc 1 save used to begin Disc 2.
- The directory has identified Amihama.
- Hirata-san has confirmed the harbor and bus route.
- Tom has confirmed the bus destination if the morning route prompt is required.
- Ryo remains in Dobuita and has not boarded the bus.
- A recovery save has been made before the Disc 1 departure sequence if desired.
Before you move on
- The Chinese-letter lead has been completed.
- Xia-san has translated the letter at Russiya China Shop.
- The notebook contains Master Chen’s name, the telephone number and all four password phrases.
- The call from Hirata Tobacco Shop has been completed successfully.
- Both password responses matched the phrases spoken by the caller.
- The caller identified Warehouse No. 8.
- The directory beside the telephone identified Amihama.
- Hirata-san confirmed that Amihama is the harbor and that the bus is the route there.
- Tom has confirmed the bus destination if the morning trigger was required.
- Ryo has not yet boarded the bus or triggered the Disc 1 transition.
Training, Dojos and Combat Basics
Combat training is optional for most of Shenmue’s early investigation, but it makes later Free Battles much safer. Learn Pit Blow from Fuku-san, practise in the available empty areas, improve moves through the bedroom Training option, and use guard and evasive movement rather than attacking continuously. No single named move is required to complete the story, so treat Pit Blow as a strong early preparation tool rather than a progression lock.
1. Read the Martial Art Moves Scroll
Open the System Menu and select Martial Art Moves Scroll. It lists the moves Ryo currently knows, their commands, demonstrations and proficiency bars. The bar is divided into Learning, Moderate and Advanced grades. A move that has not reached the Learning level is not yet available in Free Battle, while increasing proficiency improves the move’s attacking power and overall effectiveness.
Select a move and press X to display its explanation and command information. Use the L Trigger to switch between the command description and move-name display. Use the R Trigger to enlarge or reduce the move image, and rotate the demonstration with the Analog Thumb Pad. From the scroll, select a learned move and press A to preset it; Ryo can then execute that move by pressing the R Trigger during Free Battle. The preset shortcut does not work while practising, because R Trigger opens the Moves Scroll in practice mode.
- Open the Martial Art Moves Scroll.
- Check the command and proficiency bar for the move you want to practise.
- Preset one reliable learned move with A if you want a quick Free Battle attack.
2. Learn Pit Blow from Fuku-san
During the opening investigation, return to the Hazuki Residence dojo and speak with Fuku-san when the lesson is available. He teaches Pit Blow early in the game. Follow his demonstration and enter the directional and button command during the practice exchange. The Dreamcast VMU briefly displays the command as a hint after a correct performance, so watch the VMU if you need help reproducing the input.
When Ryo can perform the move consistently enough, the lesson ends and Pit Blow is added to the Martial Art Moves Scroll. Verify that it appears before leaving the dojo. Pit Blow is a useful early learned move and fulfils the chapter’s preparation goal, but it is not a mandatory key that later story fights require. Shenmue allows those encounters to be completed with Ryo’s starting moves, other learned techniques, throws and defensive play.
- Visit the Hazuki dojo during the early investigation.
- Complete Fuku-san’s Pit Blow demonstration and practice input.
- Confirm that Pit Blow appears in the Moves Scroll.
3. Practise and spar at the Hazuki dojo
The dojo at the rear of the Hazuki Residence is the safest regular practice area. Enter it and accept the practice Action Selector when it appears. During practice, enter commands manually; the R Trigger preset is unavailable because it opens the Moves Scroll. Repeatedly use the move you want to improve rather than merely watching its demonstration.
Fuku-san may also be available for sparring. Sparring uses the same controls as Free Battle and raises the proficiency of moves Ryo uses during the exchange. Begin with short hand and leg attacks, then practise Pit Blow and a throw when you are comfortable. If Fuku-san blocks or recovers, stop attacking, guard, reposition and wait for an opening. The purpose is to build input familiarity and proficiency, not to win by holding down attack buttons.
- Practise manually in the dojo.
- Spar with Fuku-san whenever the sparring interaction is available.
- Use several different move types, including at least one throw.
4. Use the other Yokosuka practice areas
Ryo can also practise alone in Sakura Park in Sakuragaoka, the empty parking lot in Dobuita, Suzume Park in Dobuita, and Warehouse No. 4 in the harbor. Enter the area during free time and accept the practice prompt when it appears. These locations improve move proficiency but do not advance the investigation, so leave if a story appointment or time-sensitive conversation is approaching.
A practice Action Selector may be absent when people occupy the area. Sakura Park is especially dependent on being clear of other characters. If no practice option appears, do not assume the location is broken: wait for a quieter period, sleep and return later, or use the dojo or another open area. Warehouse No. 4 is available as a useful harbor practice location after that district becomes part of the story.
- Try Sakura Park when it is unoccupied.
- Use the Dobuita parking lot or Suzume Park as nearby alternatives.
- Practise at Warehouse No. 4 after reaching the harbor.
5. Set the nightly Training method
At Ryo’s bedroom save point, choose Training before selecting Sleep. On the Dreamcast version, Training and Sleep are available after 8:00 p.m. The Training menu offers All Moves, Hand Moves, Leg Moves and Throw Moves. All Moves raises the categories in an average spread; selecting a specific category lets you focus on that type, and then select one move for focused training.
Use All Moves while learning the combat system. When you have a dependable technique, select its category and focus on that move for several nights. A throw is useful for creating space, but continue improving basic hand and leg attacks because they are quick and easier to use when several opponents are close. After setting the method, select Sleep to end the day and replenish Ryo’s energy. If the game automatically returns Ryo to the save point late at night, use the bedroom menu before sleeping when you want to change the training method.
- Reach the bedroom save point after 8:00 p.m.
- Choose All Moves or a specific move category.
- Select a particular move for focused training when appropriate.
- Choose Sleep so the training method is applied and Ryo’s energy is restored.
6. Use guard, evasion and recovery in Free Battle
In Free Battle, X performs hand moves, A performs leg moves and B performs throws. The D-Pad supplies movement and command inputs. Y is Guard. Pressing Y with a direction can make Ryo evade or roll away depending on the situation, so use it to avoid attacks rather than trading blows with every opponent. Directional commands may need to be reversed when Ryo and the opponent face the opposite way from the orientation shown in a move demonstration.
Against multiple enemies, keep moving so that one opponent is directly in front of Ryo instead of allowing the group to surround him. Attack the nearest target, then reposition. A throw can create space when Ryo is close enough, but it is not guaranteed to connect against every opponent or situation. Guard when an enemy begins a combination and use a directional guard input to escape when the group closes in.
Ryo loses a Free Battle when his power gauge reaches zero and he is knocked down. If you are defeated, reload the latest save or resume from the game’s available restart point; the loss does not permanently block the story. Before a known confrontation, save in Ryo’s bedroom, practise the move commands briefly, and enter the fight with a full energy gauge. If Ryo is knocked down during a battle, regain control and create distance before attempting another attack instead of immediately repeating the same input.
- Use Y to guard incoming attacks.
- Use Y plus a direction to evade or roll when surrounded.
- Use X for hand moves, A for leg moves and B for throws.
- Reposition after attacking a group rather than standing between enemies.
- Save before a scheduled confrontation and reload after a defeat if necessary.
Before you move on
- Pit Blow appears in the Martial Art Moves Scroll after Fuku-san’s lesson.
- At least one learned move has been practised until its proficiency bar advances from its starting state.
- Ryo has used the bedroom Training option and then selected Sleep.
- You can manually perform at least one hand or leg move and one throw during Free Battle.
- You can use Y to guard and Y plus a direction to evade or reposition.
- A current save exists before the next major story confrontation.
Amihama Trip and Disc One Close
Finish the original Dreamcast Disc 1 by using the Amihama and Warehouse No. 8 leads already recorded in Ryo’s notebook, paying the 160-yen bus fare, boarding at the stop near Hirata Tobacco Shop, and creating the required Start File. Preserve that file before loading Disc 2, which begins the New Yokosuka Harbor investigation.
Begin with the completed Amihama lead
This chapter starts after the Warehouse No. 8 investigation has already established that the number is associated with Amihama. The relevant notebook entries should identify Warehouse No. 8 as being in New Yokosuka Harbor and instruct Ryo to go there by bus. You do not need to repeat the phone call, password exchange, telephone-directory lookup or earlier conversations.
Check the notebook before leaving Dobuita. If it does not contain the Amihama and bus instructions, the preceding investigation is not complete and the bus transition may not activate. In that case, reload a save from before the lead was completed and finish the missing investigation steps in the earlier chapter rather than waiting at the stop indefinitely.
Once the correct entries are present, the remaining Disc 1 objective is simple: obtain the fare, reach the bus stop near the tobacco shop and board the bus. The bus ride is the story transition into New Yokosuka Harbor and concludes Disc 1 on the original Dreamcast release.
- The notebook already records that Area Code 61 is for Amihama.
- The notebook says Warehouse No. 8 is in New Yokosuka Harbor.
- The notebook says to go by bus.
- No earlier phone, password or directory investigation needs to be repeated.
Keep 160 yen available
Before waiting for the bus, make sure Ryo has at least 160 yen. The fare is charged when he boards, and the bus trip cannot proceed normally without enough money. The fare is the only required purchase for this transition, so avoid spending money on optional items if your balance is close to the required amount.
There is no requirement to complete optional training, arcade games, capsule-toy collecting, shopping or side events before leaving Yokosuka. Those activities can be postponed. If you want to finish any of them before the harbor sequence, make a normal save at the Hazuki Residence first so that you can return to a safe point without repeating the investigation.
The game’s time system does not make the bus stop permanently missable. If the active objective appears late in the day, return to the Hazuki Residence and sleep. Go back to Dobuita the next morning and wait at the same stop. Sleeping is preferable to wandering after shops and contacts have closed, especially if you have already completed the required notebook entries.
- Ryo has 160 yen or more.
- No optional purchase is needed before boarding.
- A recent normal save exists if you want to preserve optional Disc 1 progress.
- If necessary, Ryo has slept and is approaching the stop during the next day.
Find the Amihama bus stop
Go to Hirata Tobacco Shop at the end of Dobuita. The stop is not inside the shop. From the tobacco-shop area, move toward the main road and take the turn that leads to the larger road beside Dobuita. Look for the bus-stop sign near the intersection. The timetable at the stop can be examined, but you do not need to memorize a specific departure time.
Stand at the marked stop and wait. The bus arrives according to the normal schedule, so do not leave simply because it is not immediately visible. When the bus pulls in, face it and use the Dreamcast action button when the boarding prompt appears.
If no boarding prompt appears, do not assume that the stop is broken. First recheck the notebook. The correct objective must say that Warehouse No. 8 is in New Yokosuka Harbor and that Ryo should go by bus. If those entries are missing, return to the investigation route instead of repeatedly waiting. If the entries are present, remain at the stop until the next bus arrives.
- Ryo is standing at the bus stop near Hirata Tobacco Shop.
- The timetable can be examined if needed.
- The notebook contains the completed Amihama travel objective.
- The bus has arrived and the boarding prompt is available.
Board the bus and finish Disc 1
Press the action button to board when the bus arrives. Ryo pays the 160-yen fare automatically and begins the trip to Amihama. This is not ordinary free movement between areas; boarding is the required story action that closes Disc 1.
Let the travel scene and transition play without interrupting the console. Do not remove the VMU, reset the Dreamcast, open the lid, or attempt to change discs during the boarding sequence, loading screen or any saving prompt. The game will present the Disc 1 handoff after the bus sequence has finished.
The transition does not require you to navigate the harbor before changing discs. New Yokosuka Harbor is the opening location for the next disc, not an area that must be explored while Disc 1 is still inserted. Wait for the game to reach its save instruction before touching the disc or powering down.
- The bus ride has started.
- The 160-yen fare has been paid.
- The Disc 1 transition or save instruction has appeared.
- No disc or VMU change has been made during the sequence.
Accept the Disc 1 Start File save
When the game asks you to save at the end of Disc 1, accept the instruction and choose a VMU slot with enough free space. This creates the Start File used to begin Disc 2. Wait for the save confirmation and for the writing process to finish completely before doing anything else.
The Start File is different from simply relying on an earlier normal save at the Hazuki Residence. A normal save from before the bus ride may force you to repeat the final Disc 1 objective. The handoff file records the completed bus transition and is the file Disc 2 expects when you choose to continue the campaign.
Use a distinct slot if possible. Keep the original Start File intact until Disc 2 has loaded successfully. If your VMU has limited free space, make room before beginning this sequence rather than deleting the handoff file after it has been created. The game’s manual explains that saved data is loaded from the corresponding disc, so the next step is to boot Disc 2 and load this file there.
- The end-of-disc save prompt was accepted.
- The game created a Start File.
- The save operation completed without interruption.
- The original Start File remains available on the VMU.
Back up the handoff and load Disc 2
After the Start File has finished saving, make a separate backup if your setup supports one. On original hardware, this can mean copying the VMU file to another VMU with compatible file-management hardware or using a verified Dreamcast save-transfer method. The game itself does not create a second safety copy automatically. Do not erase the original until the backup has been checked.
Once the file is protected, follow the game’s disc-change instruction. On a standard Dreamcast, return to the system menu as directed, replace Disc 1 with Disc 2, boot the game and choose Load and Start. Select the Start File created at the end of Disc 1. Do not choose New Game, and do not use an unrelated normal save when the Start File is available.
A successful continuation begins Disc 2’s opening sequence in New Yokosuka Harbor. Ryo has arrived from Dobuita and the harbor investigation begins, leading into the encounter involving Goro and the search for Warehouse No. 8. If Disc 2 starts the opening Yokosuka investigation instead, stop before saving over anything and reload the preserved Start File. The problem is usually that the wrong file was selected or that the handoff save was not completed.
- A second copy of the Start File has been verified when possible.
- The original Start File has not been overwritten.
- Disc 2 has been inserted only after the save finished.
- Load and Start was selected instead of New Game.
- Ryo begins in New Yokosuka Harbor.
Before you move on
- The notebook already shows the Amihama and New Yokosuka Harbor bus objective.
- Ryo has at least 160 yen before boarding.
- Ryo boards the bus near Hirata Tobacco Shop.
- The Disc 1 transition appears.
- A Start File is saved successfully.
- The Start File is preserved in a separate backup when the hardware or setup allows it.
- Disc 2 loads that Start File through Load and Start.
- Ryo appears in New Yokosuka Harbor and the harbor investigation begins instead of restarting Dobuita.
Disc Two — New Yokosuka Harbor Deeper Investigation
Disc Two begins at New Yokosuka Harbor. Ryo first investigates the newer Warehouse No. 8, then completes the daytime harbor leads that make the Old Warehouse District infiltration available after dark. After meeting Master Chen and Gui Zhang, he returns to the Hazuki Residence, obtains the Sword Handguard, opens the hidden dojo route and recovers the Phoenix Mirror. The chapter ends after Ryo shows the mirror to Master Chen and the notebook advances to the travel-agency investigation. The later fare-raising, Asia Travel scam, Jimmy sequence and Disc 3 harbor employment do not belong here.
Complete the opening harbor investigation
After the Disc 2 opening scene, move up from the harbor entrance toward the vending-machine area. The opening confrontation with Nagashima and Goro uses a displayed QTE. Follow the prompt shown on the screen; this scene is the required start of the harbor investigation.
Go to Hisaka at the Hokuhoku Lunch Box stand and speak with her. Then head toward the nearby newer Warehouse No. 8 and try its main entrance. The guard refuses access. Walk around to the rear, where the game directs Ryo toward the stacked crates and open upper window.
Use the crate-climbing interaction to reach the window and enter the building. Proceed into the interior room or office area until the required conversation occurs. This is not the Old Warehouse No. 8 where Master Chen is waiting. The purpose of the visit is to establish that another Warehouse No. 8 exists in the Old Warehouse District.
- Complete the opening Goro and Nagashima QTE.
- Speak with Hisaka at Hokuhoku Lunch Box.
- Attempt to enter the newer harbor Warehouse No. 8.
- Reach the rear window using the stacked crates.
- Hear the conversation identifying the Old Warehouse District warehouse.
Clear the daytime harbor leads before infiltrating
Leave the newer warehouse and speak with Hisaka again at the lunch-box stand. Continue up the harbor route and talk to Tom near his hot-dog stall. Try to enter the Old Warehouse District entrance beside that area. Ryo will indicate that the gate should be approached at night; do not repeatedly force the gate during the day.
Return toward Hisaka to trigger the next daytime scene. Continue to Warehouse No. 13 for the required harbor event, then buy the coffee requested by the sequence from the nearby vending machine. Proceed toward Warehouse No. 17 and complete the resulting scene and QTE involving Mai’s friends. These events are part of the route that opens the nighttime investigation; they are not optional harbor sightseeing.
Return to Hisaka after the Warehouse No. 17 event and finish her conversation. Once the daytime leads are complete, wait until evening. You can return home or use harmless optional activities to advance the clock, but avoid spending time on unrelated fights if you are trying to reach the story trigger efficiently.
- Speak with Hisaka after leaving the newer Warehouse No. 8.
- Talk to Tom near the harbor hot-dog stall.
- Attempt the Old Warehouse District entrance during the day.
- Complete the Warehouse No. 13 event.
- Buy the required coffee from the nearby vending machine.
- Complete the Warehouse No. 17 scene and Mai-related QTE.
- Return to Hisaka and finish the daytime harbor dialogue.
Enter the Old Warehouse District after dark
After the story has advanced the clock to evening, return to the Old Warehouse District entrance. The gate is partly open at night. Enter and complete the short flashlight QTE when the light is knocked loose. Press the displayed direction promptly; the exact prompt is the one shown by your Dreamcast game.
The flashlight is required for the dark route. If you did not collect the residence flashlight earlier, check the Hazuki Residence storage area around the desk or telephone and take it; Tomato Convenience Store also sells a replacement flashlight. C-size batteries can be purchased at Tomato if the light needs them. Do not treat the lightbulb as a substitute for the flashlight during the corridor entry.
The homeless man’s coffee interaction and map rewards are optional. They can make the patrol section easier, but they are not required to trigger the Master Chen meeting. If you are caught, the stealth section restarts. This is a recoverable failure, not a permanent story block. Reload a recent save if you want to preserve the day’s progress, or retry the infiltration and move between cover without crossing directly in front of a guard.
- Return to the Old Warehouse District after nightfall.
- Complete the flashlight QTE.
- Carry a working flashlight into the dark route.
- Use the homeless man’s help only if desired.
- Retry or reload calmly if a guard catches Ryo.
Reach Old Warehouse No. 8 and meet Master Chen
Follow the patrol route through the district toward the warehouse numbered 8. Use the building numbers and the available cover rather than relying on a single turn sequence; the guards’ positions make a hurried straight-line approach unsafe. Old Warehouse No. 8 is reached through the route across the district, and the relevant entrance is on the right side of the building.
Inside, go upstairs and examine the whiteboard or the indicated office area. Then inspect the white porcelain plate in the open cabinet. This triggers the meeting with Master Chen and Gui Zhang. Let the conversation finish before leaving. Master Chen explains the Phoenix Mirror lead and directs Ryo back toward the Hazuki Residence.
The game returns Ryo home automatically after this meeting. Save in Ryo’s room before advancing. This is a useful recovery point because the next sequence contains the residence investigation and another return to the harbor.
- Reach Old Warehouse No. 8 without being caught.
- Enter through the correct warehouse entrance.
- Go upstairs and examine the indicated office area.
- Inspect the white porcelain plate.
- Complete the first Master Chen and Gui Zhang meeting.
- Save after Ryo returns home.
Obtain the Sword Handguard and open the hidden route
At the Hazuki Residence, follow the required conversations with Ine-san and Fuku-san. Leave for Dobuita and visit Bunkado Antiques when the notebook directs you there. Speak with the shopkeeper and obtain the Sword Handguard. This is a story item, not an optional antique purchase.
Return home and make sure you have the Mysterious Key from the drawer in Iwao’s room. In the dojo, use the key on the long wooden box to obtain the katana. Remove the appropriate wall scroll and place the katana into the matching slot. Examine the other scroll and use the Sword Handguard in its matching indentation. The concealed passage beneath the dojo opens after the pieces are placed correctly.
A Gui Zhang Free Battle can occur during the surrounding story transition. Guard, use short attacks and recover after knockdowns instead of attacking continuously. No particular learned move is required to advance, and losing a move-practice session does not invalidate the story route.
- Complete the required Ine-san and Fuku-san conversations.
- Visit Bunkado Antiques.
- Obtain the Sword Handguard.
- Retrieve the Mysterious Key from Iwao’s room.
- Use the key on the long dojo box.
- Place the katana and Sword Handguard into the dojo wall mechanism.
- Complete the Gui Zhang battle if it triggers.
Search the hidden basement for the Phoenix Mirror
Enter the concealed passage and use the flashlight to cross the dark corridor. In the basement room, look up at the ceiling and examine the light fixture. You may install the lightbulb bought at Tomato Convenience Store and switch it on, or illuminate the room with the candles and matches found during the investigation. The bulb is convenient but is not the only valid way to light the room.
Search the room for the required clues. Examine the book to obtain the white leaf, inspect the cabinet and mirror, and investigate the floor scratches beside the moved shelf. Pull the shelf away from the wall when the A-button interaction appears. Examine the discolored section that it reveals.
The axe is near the entrance of the basement room, not inside the wall or as part of the hidden compartment. Pick it up, carry it to the discolored wall and use it there. Ryo breaks through the wall and recovers the Phoenix Mirror. The photograph, fighting scroll and white leaf are useful discoveries, but collecting every optional basement item is not required for completion.
- Enter the basement with a working flashlight.
- Light the room with the bulb or with candles and matches.
- Examine the book, mirror, shelf scratches and discolored wall.
- Move the suspicious shelf.
- Pick up the axe near the basement-room entrance.
- Use the axe on the weakened wall.
- Recover the Phoenix Mirror.
Report the mirror and begin the travel-agency lead
After the Phoenix Mirror is recovered, follow the notebook’s investigation prompts before calling Master Chen. The game may direct Ryo to speak with Yamagishi in Sakuragaoka, Xia-san at Russiya China Shop and the antique-shop owner at Bunkado. These conversations explain the mirror and complete the information chain needed for the call.
Use a telephone to call Warehouse No. 8 at 0468-61-5647. When the password exchange begins, answer Father’s Heaven with Nine Dragons and Mother’s Earth with Comrades. The prompts appear in the game; select the matching responses rather than guessing. Then take the bus to New Yokosuka Harbor and return to the Old Warehouse District. The guard now allows Ryo through because the appointment has been arranged.
Enter Old Warehouse No. 8 and complete the second meeting with Master Chen and Gui Zhang. Chai attempts to take the Phoenix Mirror during the scene. Complete the displayed QTE; on the original Dreamcast route, the required response is the direction shown by the game. Ryo then returns home automatically. Save and sleep when appropriate.
On the following morning, speak with Fuku-san and follow the new Hong Kong objective. Visit Global Travel Agency first. Receive its Hong Kong fare information and follow the referral to Asia Travel Company for the cheaper boat-related option. These agencies are not interchangeable in this sequence: Global Travel is the first stop, and Asia Travel follows it. Stop after the notebook advances toward arranging passage. Do not begin the later money-raising, Jimmy or Disc 3 harbor-work chapters here.
- Complete the required mirror-information conversations.
- Call Warehouse No. 8 at 0468-61-5647.
- Answer Father’s Heaven with Nine Dragons.
- Answer Mother’s Earth with Comrades.
- Return to Old Warehouse No. 8 after calling.
- Complete the second Master Chen and Gui Zhang meeting.
- Pass the mirror-theft QTE.
- Speak with Fuku-san on the following morning.
- Visit Global Travel Agency first.
- Follow its referral to Asia Travel Company.
- Confirm that the notebook now advances toward Hong Kong passage.
Before you move on
- Ryo has completed the opening harbor QTE and learned about the Old Warehouse District from the newer Warehouse No. 8.
- The required Hisaka, Tom, Warehouse No. 13, coffee, Warehouse No. 17 and Mai-related daytime harbor events are complete.
- Ryo has entered the Old Warehouse District after dark and completed the first Master Chen and Gui Zhang meeting in Old Warehouse No. 8.
- Ryo has obtained the Sword Handguard from Bunkado Antiques and used the Mysterious Key to open the dojo box.
- The hidden passage is open, the basement is illuminated, the shelf has been moved, the axe has been used and the Phoenix Mirror has been recovered.
- Ryo has called Master Chen with the correct password responses and completed the second meeting, including the mirror-theft QTE.
- After the following morning’s Fuku-san conversation, Ryo has visited Global Travel Agency first and followed its referral to Asia Travel Company.
- The notebook now points toward arranging passage to Hong Kong, while the later fare-raising, Jimmy and Disc 3 harbor-work events have not yet begun.
References for this chapter
Asia Travel and Hong Kong Fare — Disc Two
This chapter covers the original North American Sega Dreamcast travel investigation after the Old Warehouse and Phoenix Mirror events. Ryo confirms the cost of flying to Hong Kong, receives Fuku-san’s savings, learns that boat travel is cheaper, obtains Global Travel’s referral to Asia Travel Company and pays 69,000 yen for boat passage. The chapter ends when the clerk tells Ryo to return in three or four hours. The later missing-ticket scene, Chai confrontation and Jimmy chase are not part of this chapter. Disc Three begins only after Jimmy’s confession sends Ryo to New Yokosuka Harbor.
1. Begin after the Phoenix Mirror investigation
Do not start this route during the opening Yokosuka investigation. First complete the Old Warehouse investigation, recover the Phoenix Mirror and finish the associated conversations with Master Chen, Gui Zhang and the Dobuita contacts. Ryo’s notebook should then direct him toward finding a way to Hong Kong.
This is a Disc Two sequence. Do not change to Disc Three or expect harbor employment yet. The Jimmy chase that follows the ticket problem is still part of the Disc Two travel arc; New Yokosuka Harbor and the Alpha Trading job come later.
- The Old Warehouse and Phoenix Mirror investigation is complete.
- The notebook directs Ryo to investigate travel to Hong Kong.
- The game has not yet redirected Ryo to New Yokosuka Harbor.
2. Check Global Travel Agency
Go to Global Travel Agency in Dobuita. It is opposite Tom’s Hot Dog truck. Speak with the clerk and ask about travel to Hong Kong. Ryo receives a flier or fare information for a regular flight. The exact fare presentation is not important for progression; it is far beyond the money Ryo currently has and establishes that flying is not practical.
This conversation is a required lead even though Ryo cannot buy the flight. The flier is not a ticket, and Ryo has not booked passage. Leave the agency after the conversation and follow the notebook’s next instruction rather than trying to purchase the displayed flight.
If Asia Travel is available as the next notebook lead, you may inspect it during this investigation. Its early conversation can show a cheaper flight flier, but that price is still too high. The objective is to discover a boat route, not to buy either flight.
- Global Travel has provided the Hong Kong flight information.
- Ryo has not mistaken the flier for a purchased ticket.
- The notebook has advanced beyond the initial flight-price investigation.
3. Collect Fuku-san’s savings
Return to Hazuki Residence and speak with Fuku-san in his room. When Ryo explains that he needs to reach Hong Kong, Fuku-san breaks open his piggy bank and gives Ryo his savings.
Treat this money as reserved travel funds. Do not spend it on capsule toys, food, arcade games or optional purchases while this objective is active. The later boat fare is 69,000 yen, so unnecessary spending can leave you short and force you to reload or delay the sequence.
After the conversation, check the notebook. The next lead should involve finding a cheaper alternative to flying, normally through Nozomi and the travel-agency conversations.
- Fuku-san has given Ryo the piggy-bank savings.
- The money remains available for the travel objective.
- The notebook now points toward cheaper transportation.
4. Obtain the boat-travel lead
Go to Aida Flower Shop in Dobuita and speak with Nozomi. She explains that boat travel is cheaper than flying because a member of her family uses boats rather than planes. This establishes the cheaper route Ryo needs.
Some Dreamcast walkthrough routes also use the Ajiichi waiter near the vending machines by Nagai Industries as a supporting boat-travel conversation. If Nozomi’s conversation does not advance the notebook, visit that Ajiichi contact and complete the conversation he offers. Then follow any resulting lead, including the conversation at Funny Bear if the notebook sends you there.
The important requirement is not a particular optional dialogue order. Ryo must have the notebook lead that tells him to ask Global Travel about a boat ticket before the final Asia Travel purchase becomes available.
- Ryo has learned that a boat is cheaper than flying.
- Nozomi has been checked first, or the notebook has directed you to the Ajiichi contact.
- The notebook directs Ryo back to Global Travel about boat passage.
5. Ask Global Travel about a boat ticket
Return to Global Travel Agency and ask about traveling to Hong Kong by boat. The clerk explains that Global Travel does not sell boat tickets. Continue the conversation until the clerk gives Ryo the name or location of Asia Travel Company.
This referral is the progression trigger for the boat purchase. Visiting Asia Travel before receiving the referral may only produce the earlier flight-flier conversation, so use the Global Travel referral and the notebook entry as confirmation that the correct step has been reached.
Asia Travel Company is in Dobuita near Aida Flower Shop and Funny Bear. If the agency is closed, advance to the next suitable business period. Do not spend the reserved money while waiting.
- Global Travel has confirmed that it does not sell boat tickets.
- The clerk has referred Ryo to Asia Travel Company.
- The notebook directs Ryo to Asia Travel for the cheaper passage.
6. Purchase the boat passage at Asia Travel
Enter Asia Travel Company and ask about boat passage to Hong Kong. The clerk presents a boat fare of 69,000 yen. Select the option to accept the fare and pay it.
The transaction is successful when the money is deducted and the clerk tells Ryo to return in approximately three or four hours. Ryo does not receive the usable ticket immediately. The notebook should record the purchase, and the clerk’s waiting instruction confirms that the scene has advanced correctly.
Keep the remaining money untouched. You can pass time with low-risk activities such as training, walking or arcade play, but do not leave the chapter expecting to collect the ticket immediately. If the agency will be closed when the waiting period ends, follow the game’s schedule and return during the next available period.
- Asia Travel has displayed the 69,000-yen boat fare.
- Ryo has paid 69,000 yen.
- The notebook records the boat-ticket purchase.
- The clerk has instructed Ryo to return after three or four hours.
7. Stop before the ticket problem and Jimmy sequence
Once the payment scene and waiting instruction are complete, this chapter is finished. Make a manual save if a convenient save point is available, while keeping a separate earlier save if possible.
Do not include the later return to Asia Travel in this chapter. When Ryo comes back after the waiting period, the original clerk is gone and the ticket problem leads to a confrontation, a phone call and then the Jimmy meeting. The Chai encounter and the long Jimmy chase remain Disc Two events, but they belong to the following travel-complications chapter.
After Jimmy finally confesses, the story redirects Ryo to New Yokosuka Harbor. That redirection marks the approach to Disc Three content, including Alpha Trading and the harbor investigation.
- The 69,000-yen purchase is complete.
- The chapter ends before the missing-ticket scene.
- The next chapter begins with the later ticket failure, Chai or Jimmy sequence rather than the early fare investigation.
Before you move on
- The Old Warehouse and Phoenix Mirror investigation is complete.
- Global Travel has provided the regular Hong Kong flight information.
- Asia Travel’s initial flight information has been investigated if the notebook requests it.
- Fuku-san has given Ryo his savings.
- Ryo has learned through Nozomi or the notebook’s alternate supporting contact that boat travel is cheaper.
- Ryo has returned to Global Travel and received the referral to Asia Travel.
- Asia Travel has charged Ryo 69,000 yen for boat passage.
- The clerk has instructed Ryo to return after three or four hours.
- The notebook records the boat purchase and no unresolved pre-purchase travel objective remains.
- The next active objective concerns collecting the ticket or handling the later Asia Travel complication, not obtaining the fare.
Scams, Jimmy and Travel Complications
Complete the Asia Travel scam, survive or recover from the Chai Free Battle, catch Jimmy in Dobuita, and finish Disc 2. This sequence begins after Ryo pays 69,000 yen for the Hong Kong boat ticket and is told to return in three or four hours. It ends after the Jimmy chase, when Disc 3 loads and Jimmy explains Chai’s connection to the Mad Angels and the harbor.
Return to Asia Travel after the ticket waiting period
After paying 69,000 yen at Asia Travel Company, leave the agency and let three or four in-game hours pass. The notebook tells you when the ticket should be ready. If you bought the ticket late enough that the agency will close before the waiting period ends, go home, sleep, and return the following day during the agency’s available period.
Asia Travel Company is opposite Aida Florist in Dobuita. When you return, the woman who accepted Ryo’s money is gone. A man is behind the counter with companions nearby, and he claims not to know the woman or the ticket. Ryo confronts him about the scam, and the encounter automatically leads to a fight with the men in the office. You do not need to win this battle manually; the story handles the confrontation.
After the fight, the man says that someone from Asia Travel will contact Ryo the next day. The 69,000 yen is not refunded, and no usable Hong Kong ticket is recovered at this point. Leave Dobuita and return home. If you arrive home after the appropriate evening trigger, complete any available required household scene, then sleep to advance the story.
- The three- or four-hour waiting period has passed, or you have continued to the next day.
- The original Asia Travel clerk has disappeared.
- The replacement clerk has denied knowledge of the purchase.
- The office confrontation has finished.
- Ryo has been told that Asia Travel will contact him the next day.
Answer the morning call and go to You Arcade
The following morning, Ryo receives a call from Jimmy of Asia Travel. The notebook records Jimmy’s instruction to meet at You Arcade around noon. Travel to You Arcade in Dobuita and enter at the appointment time. The exact moment is not as strict as the notebook wording suggests, but do not replace this story visit with another activity if the call has just occurred.
Jimmy does not provide the promised ticket. Chai appears instead, takes the Hong Kong ticket, and eats it. The ticket is destroyed, so there is no later item retrieval or refund route. A Free Battle with Chai begins immediately.
The Chai battle is optional for completion in the narrow sense that the story advances whether Ryo wins or loses, but winning changes the immediate follow-up. Chai is fast and dangerous in the cramped arcade. Guard often, avoid long stationary combinations, and attack briefly after Chai finishes an approach or leaves himself open. Short attacks and low strikes are safer than repeatedly attempting throws or extended strings. If Ryo is knocked down, regain control and spacing before attacking again.
- The morning call from Jimmy has occurred.
- The notebook directs Ryo to You Arcade.
- Chai has taken and eaten the Hong Kong ticket.
- The Chai Free Battle has started.
Recover correctly after the Chai battle
If Ryo defeats Chai, Chai escapes and the game provides the next lead toward Asia Travel. Follow the resulting direction and return to Asia Travel Company when the event is available. The purpose of this visit is to confront Jimmy, not to purchase another ticket. If the next scene does not trigger immediately, check the notebook and speak with the nearby contact indicated by the current lead before returning to the agency.
If Chai defeats Ryo, Fuku-san intervenes and carries Ryo back to the Hazuki Residence. This is not a permanent failure and does not require a restart. Ryo loses the rest of the day recovering. Sleep and continue into the following day. The notebook will direct you toward Asia Travel, and Harasaki at Aida Florist is the reliable next-day contact for the information that Chai went there. Speak with her, then go to Asia Travel Company.
The Hong Kong fare remains lost in either outcome. Do not spend time searching the agency for the original clerk, a hidden refund, or a replacement boat ticket. The required objective is to expose the connection between Jimmy, Chai, and the Mad Angels.
- The Chai battle has concluded.
- If Ryo lost, Fuku-san has taken him home and the recovery scene has played.
- If Ryo lost, the next day has begun and Harasaki has supplied the Asia Travel lead.
- Ryo is following the current notebook instruction toward Asia Travel.
Enter Asia Travel and start the Jimmy chase
After the Chai sequence, enter Asia Travel Company after 10 a.m. The storefront sign can still appear closed even when the story event is ready, so use the time requirement and notebook lead rather than relying only on the sign. If you lost to Chai, make sure you have first advanced to the next day and spoken with Harasaki.
Jimmy attempts to mislead Ryo with an offer involving a free ticket to the Philippines. This is not a valid Hong Kong booking and does not restore the 69,000 yen. When Ryo presses him for information, Jimmy runs through Dobuita and the long Quick Timer Event begins.
Do not use a memorized button list for this chase. Watch the prompt displayed on screen and press the corresponding Dreamcast direction or A button as it appears. The sequence can vary slightly after a missed prompt, and some later inputs may be omitted or changed. Keep your hand ready over the D-pad and A button, but never press a remembered input in place of the prompt currently shown.
A first failed attempt can be retried. A second failure causes Game Over and returns you to the main menu, so make a recent save before entering Asia Travel for the chase whenever possible. If the game over occurs, reload that save and repeat the required Chai or Asia Travel setup. Successfully following the prompts lets Ryo catch Jimmy and completes Disc 2.
- Asia Travel is entered after the required lead and time window.
- Jimmy’s Philippines offer has been identified as a deception rather than a Hong Kong ticket.
- The Dobuita chase has begun.
- Every QTE input has been taken from the current on-screen prompt.
- Jimmy has been caught.
Change to Disc 3 and obtain the harbor objective
When the Dreamcast displays the disc-change prompt, stop and replace Disc 2 with Disc 3. Do not swap discs during an unrelated cutscene, loading screen, or save operation. Continue the game after the prompt; the next scene resumes the confrontation with Jimmy inside Asia Travel.
Jimmy explains that he no longer has the Hong Kong ticket and again refers to the Philippines as a possible alternative. Ryo rejects that solution and forces Jimmy to identify Chai’s connection. Jimmy names Chai as a Mad Angels associate and explains that the Mad Angels are connected to the Chi You Men. This information replaces the lost-ticket investigation with a new method of pursuing Lan Di’s organization.
After the confession, the notebook points Ryo toward New Yokosuka Harbor. Follow that objective rather than trying to purchase another ticket from Asia Travel. The next chapter begins with Ryo entering the harbor investigation and seeking work connected to the Mad Angels. There is no legitimate Hong Kong booking to complete in this chapter.
- Disc 3 has loaded after the successful Jimmy chase.
- Jimmy’s Philippines offer has been rejected as an invalid solution.
- Jimmy has identified Chai’s connection to the Mad Angels.
- The Chi You Men connection has been explained.
- The notebook’s next objective directs Ryo to New Yokosuka Harbor.
Before you move on
- The Asia Travel clerk has taken 69,000 yen without delivering the Hong Kong boat ticket.
- The replacement clerk has denied responsibility and promised contact from Asia Travel.
- Jimmy’s next-morning call has directed Ryo to You Arcade.
- Chai has eaten the ticket and the Free Battle has concluded.
- Ryo has followed the correct post-battle lead to Asia Travel.
- The extended Jimmy chase has been completed using the on-screen prompts.
- Disc 2 has ended and Disc 3 has loaded.
- Jimmy has explained Chai’s Mad Angels connection and the Chi You Men link.
- The notebook’s next required objective directs Ryo to New Yokosuka Harbor.
New Yokosuka Harbor — Jobs, Harassment and Wages
Begin this chapter only after the Asia Travel and Jimmy sequence has already resolved the earlier travel investigation and sent Ryo toward New Yokosuka Harbor. The 69,000-yen Asia Travel purchase occurs before this Disc 3 employment arc; Alpha Trading wages cannot be used to fund that earlier fare. At the harbor, follow the job lead from Warehouse No. 18 to Goro near Warehouse No. 12, meet Goro and Mai outside Warehouse No. 1, and report to Yada-san at Alpha Trading. Mark then teaches Ryo to operate a forklift. Complete the first workday and protect Mark during the mandatory lunch attack. On the second workday, follow the assigned route toward Warehouse No. 3 so the ambush triggers, defeat both enemy groups, and question the survivor. After the shift, go behind Warehouse No. 17 and defeat the separate five-enemy group attacking Mark. Then speak with the homeless man and complete the follow-up conversation that identifies the Mad Angels’ nighttime motorcycle gathering. This homeless-man information chain is required for the main route; the move lesson itself is optional if the game allows the story to advance without learning it. Only after this sequence can the third workday begin normally.
Reach the harbor and arrange the Alpha Trading job
Take the bus to New Yokosuka Harbor after the earlier Asia Travel and Jimmy events have directed Ryo there. At the harbor entrance, ask about employment. A worker or guard points Ryo toward the foreman inside Warehouse No. 18.
Enter Warehouse No. 18 and speak with the foreman. He explains that the harbor is not currently hiring but says that another young man was looking for work near Warehouse No. 12. Leave the building and follow the numbered warehouse markings and arrows toward Warehouse No. 12 in the northeast part of the harbor.
Approach the freight and crate area near Warehouse No. 12 around noon. Goro appears and agrees to help Ryo find work. He tells Ryo to meet him the following day at noon outside the large blue door of Warehouse No. 1. The rest of the day is not needed for the main route; you may return home, explore or train in an available harbor practice area.
On the following day, wait outside Warehouse No. 1 around noon. Goro arrives with Mai and directs Ryo to the Alpha Trading Office. Go there in time to speak with Yada-san at approximately 2:00 PM. The office is on the long harbor stretch near the water; harbor maps and nearby workers can help if you lose the route.
Yada-san assigns Ryo to forklift work and introduces him to Mark Kimberly. Mark begins the forklift instruction immediately. If Goro is absent, verify that the Warehouse No. 18 foreman conversation occurred and that the notebook contains the Warehouse No. 12 or Warehouse No. 1 lead. Sleeping until the next day is more reliable than wandering while waiting for a timed scene.
- Ask harbor workers or guards about employment.
- Speak with the foreman inside Warehouse No. 18.
- Follow the warehouse markings to the area near Warehouse No. 12.
- Meet Goro near Warehouse No. 12 around noon.
- Meet Goro and Mai outside Warehouse No. 1 around noon the next day.
- Report to Yada-san at Alpha Trading around 2:00 PM.
- Begin Mark’s forklift instruction.
Finish Mark’s tutorial and learn the harbor work routine
Mark demonstrates the Dreamcast forklift controls. Use the analog stick or D-pad to steer, the Right Trigger to move forward, the Left Trigger to reverse, and A to raise or lower the forks. B changes the camera view, X displays the route map, and Y opens the system menu. Follow Mark’s example: approach a crate, slide the forks underneath it, raise the load, carry it to the destination warehouse and lower it inside the marked white squares.
Complete the tutorial deliveries and continue working until the end of the shift. The training crates pay money, but the exact total is not important for story progress. The ordinary wage is calculated per crate, with quota performance affecting later pay. Do not confuse this optional income with the earlier Asia Travel fare, which was handled before Ryo reached Disc 3’s harbor job.
The harbor schedule normally begins each workday with a forklift race. Follow the race sequence and then read Mark’s work map for the day’s assignment. Winning the race, achieving a particular placing and receiving the corresponding forklift capsule are optional. Losing does not block the investigation, provided the race sequence and workday continue.
Study the work map before driving. The route matters for story triggers, especially on the second workday. Use the map with X if you are unsure where the destination warehouse lies, and avoid taking an alternate route that bypasses the marked approach to Warehouse No. 3.
- Complete Mark’s steering, acceleration, reversing and fork exercises.
- Move the training crates into the marked delivery area.
- Finish the tutorial shift.
- Follow each scheduled forklift race sequence.
- Read the work map before beginning each assignment.
- Treat race results, rankings and capsule rewards as optional.
Complete the first official workday and protect Mark
After the scheduled race, read the work map and deliver the first official assignment toward Warehouse No. 18. The route begins near the Old Warehouse District and runs toward the warehouse beside the Harbor Lounge and Tomato Mart. The listed quota is ten crates. Meeting the quota improves the wage, but perfect delivery is not required for the story.
At the lunch break, a mandatory scene begins in which two Mad Angels attack Mark. Enter the Free Battle and defeat both enemies. Keep the opponents in front of Ryo, guard when they close together and reposition after knocking one down. Avoid letting both attackers surround Ryo. If he is knocked down, create space before resuming short attacks or throws.
After the lunch battle, use the remaining break for optional information or activities, then return to the forklift when the afternoon shift resumes. Continue taking crates to the assigned destination until the workday ends and collect the pay from Alpha Trading.
A separate confrontation involving veteran workers may occur around Warehouse No. 18 after Ryo has delivered some crates. Treat that encounter as optional and missable rather than as a required replacement for the lunch rescue. Optional conversations with Goro, the homeless man or Gui Zhang can provide information or training, but none substitutes for protecting Mark during the scheduled lunch event.
- Complete the first scheduled forklift race.
- Deliver the first workday crates toward Warehouse No. 18.
- Defeat both Mad Angels attacking Mark at lunch.
- Return to work after the lunch break.
- Finish the shift and collect the wages.
- Do not treat the optional veteran-worker confrontation as the main progression fight.
Complete the second workday, clear both ambush groups and rescue Mark
Begin the next scheduled day with the forklift race, then read the work map. The assignment sends Ryo toward Warehouse No. 3. Follow the marked route and approach the destination through the intended path near the harbor junction. Taking a shortcut or approaching from the wrong side can bypass the afternoon story trigger and cause the workday to repeat.
During the afternoon shift, the Warehouse No. 3 ambush begins in stages. The first group attacks inside the warehouse area. Defeat all five enemies. A second group then enters the fight; defeat all four of those enemies as well. Do not leave after the first battle. The complete ambush requires both groups to be cleared.
Use defensive movement rather than button-mashing. Keep moving so the attackers cannot surround Ryo, guard during the opening rush, and use short attacks or throws against isolated enemies. After both groups are defeated, question the surviving Mad Angel when the scene allows it. His information directs Ryo toward the area behind Warehouse No. 17.
Finish the work period and collect the day’s wages. After work, go to the area behind Warehouse No. 17. A separate scene occurs there: five Mad Angels are beating Mark. Enter the Free Battle and defeat all five enemies. This is not the same fight as the Warehouse No. 3 ambush, so clearing the first battle does not complete the second-workday investigation.
Watch Mark’s explanation after the Warehouse No. 17 rescue. He discusses his brother, the Mad Angels and the information connected to the Chi You Men. Do not end the chapter at this scene. The homeless-man follow-up is still required before the next workday can proceed correctly.
- Complete the second scheduled forklift race.
- Follow the work map toward Warehouse No. 3 using the intended approach.
- Defeat the first group of five Mad Angels.
- Defeat the second group of four Mad Angels.
- Question the surviving gang member.
- Finish the work shift and collect the pay.
- Go behind Warehouse No. 17 after work.
- Defeat the separate group of five Mad Angels attacking Mark.
- Watch Mark’s explanation after the rescue.
Speak with the homeless man and unlock the third workday
After rescuing Mark at Warehouse No. 17, find the homeless man in his harbor area, near the approach to Warehouse No. 18. Speak with him about the Mad Angels. He can offer a move lesson, often identified as Shadow Blade or Shadow Step depending on the guide’s naming convention.
The move lesson is optional when the game permits Ryo to continue without learning it. You do not need to master or use that move for story completion. If the homeless man presents the lesson and you accept it, follow the displayed Dreamcast prompts; do not rely on a fixed move input if the game’s prompt differs. What is required is completing the conversation chain: after the lesson offer or move discussion, speak with the homeless man again and exhaust the follow-up dialogue.
The second conversation supplies the main-route information that the Mad Angels use motorcycles at night and gather near the harbor cafeteria or nearby meeting point. This information advances the notebook and prepares the nighttime motorcycle investigation. Merely rescuing Mark is not enough, and merely learning the move is not enough if the follow-up conversation has not occurred.
Once the homeless man has delivered the nighttime motorcycle lead, return home and sleep when the game permits. The third workday should begin on the following morning with its own forklift race and assignment. If the game repeats the second-day schedule, check that both Warehouse No. 3 groups were defeated, the survivor was questioned, Mark was rescued behind Warehouse No. 17 and both homeless-man conversations were completed.
Make a VMU save after the Mark rescue and homeless-man information chain if possible. This preserves a clean recovery point before the third workday and prevents a failed route or missed trigger from forcing a longer repeat.
- Visit the homeless man after the Warehouse No. 17 rescue.
- Hear the discussion about the Mad Angels.
- Accept or bypass the optional move lesson according to the available dialogue.
- Speak with the homeless man again after the lesson offer or move discussion.
- Obtain the information about nighttime motorcycle gatherings near the harbor cafeteria.
- Confirm the notebook has advanced beyond the Mark rescue.
- Sleep and verify that the third workday begins the next morning.
- Save after the complete second-workday chain.
Use wages wisely and recover from failure
Forklift wages are support income, not a progression currency. Ryo may spend them on food, capsule toys, arcade activities and other diversions without preventing the harbor story from continuing. Quota bonuses and later raises improve the amount earned, but no exact wage total is required for this chapter.
Race victories, race placing and forklift capsule rewards are optional. Complete the race sequence and follow Mark’s work map, but do not restart the game because Ryo finishes in a poor position. Efficient driving helps preserve time for the assigned route, while the map helps prevent a route error that can suppress the Warehouse No. 3 ambush.
If Ryo loses a required Free Battle, use the retry option when one is offered. If no retry appears, reload the latest VMU save. A save made after the Mark rescue and homeless-man conversations is especially useful because it protects the completed second-workday chain.
If the Warehouse No. 3 ambush does not trigger, confirm that the second-day race occurred, the correct work map is active, the afternoon shift has begun and Ryo is approaching Warehouse No. 3 along the intended route rather than bypassing the trigger. If the Warehouse No. 17 scene is absent, confirm that both Warehouse No. 3 battle groups were cleared and that the survivor was questioned.
If the third workday fails to begin, do not assume Alpha Trading is broken. Recheck the required order: Warehouse No. 3 first group, Warehouse No. 3 second group, survivor interrogation, end-of-shift payment, Warehouse No. 17 rescue, Mark’s explanation, homeless-man conversation, and the second homeless-man follow-up about the nighttime motorcycle gathering.
- Keep Alpha Trading wages as optional support money.
- Do not restart because optional spending reduced Ryo’s cash.
- Use a retry or recent VMU save after a failed mandatory fight.
- Follow the marked Warehouse No. 3 route instead of taking a shortcut.
- Confirm both Warehouse No. 3 groups were defeated.
- Confirm the Warehouse No. 17 five-enemy rescue was completed.
- Confirm both homeless-man conversations were completed.
- Save before beginning the third workday.
Before you move on
- Ryo has completed the harbor employment chain through the Warehouse No. 18 foreman, Goro near Warehouse No. 12, the Warehouse No. 1 meeting, Alpha Trading, Yada-san and Mark’s forklift tutorial.
- The first official workday is complete, including the mandatory lunch battle in which Ryo protects Mark.
- The second workday assignment toward Warehouse No. 3 was followed through the intended route.
- Both Warehouse No. 3 ambush groups were defeated: the first group of five and the second group of four.
- The surviving Mad Angel was questioned and provided the Warehouse No. 17 lead.
- The work shift ended and Ryo received the second-day pay.
- Ryo went behind Warehouse No. 17 and defeated the separate five-enemy group attacking Mark.
- Mark’s post-rescue explanation about his brother, the Mad Angels and the Chi You Men played.
- Ryo spoke with the homeless man after the rescue and completed the follow-up dialogue identifying the nighttime motorcycle gathering near the harbor cafeteria.
- The optional move lesson was not mistaken for a story requirement; learning the move is helpful but not required where the game permits progression without it.
- The third workday begins normally after sleeping, confirming that the complete second-workday chain has been registered.
- Race victories, exact placing, capsule rewards, quota bonuses and the optional veteran-worker confrontation remain correctly treated as nonessential.
- A manual VMU save has been made after the Warehouse No. 17 rescue and homeless-man follow-up before continuing into the third-workday harbor investigation.
Money and Time Management — Best Ways to Raise Fare
Shenmue’s money management has two separate chronological phases. During the early Yokosuka investigation, Ryo receives a daily allowance from Ine-san at the Hazuki Residence. That allowance covers ordinary spending, but the campaign does not require an early Dobuita part-time job. The 69,000-yen Hong Kong boat purchase is resolved before the Disc 3 harbor employment sequence through the travel-agency investigation, Fuku-san’s savings and the cheaper boat route. Do not expect forklift work to finance that fare. Alpha Trading is later Disc 3 content. Its wages, quota raises and scheduled forklift races provide optional support money after the travel complications have advanced and Ryo reaches New Yokosuka Harbor.
Use the early daily allowance carefully
At the beginning of the Dreamcast campaign, collect Ryo’s daily allowance from Ine-san at the Hazuki Residence whenever it is available. This is the normal early-game income source during the Yokosuka investigation. Food, arcade games, raffle tickets, cassette tapes, capsule toys and similar purchases are optional, so postpone them if you want to preserve a larger cash reserve.
There is no mandatory ordinary part-time job in Dobuita that must be completed before the travel-agency events. If the notebook directs Ryo toward the travel agencies, Fuku-san or Nozomi, follow those leads instead of searching for an early job. A low balance before the travel chapter is not automatically a progression problem because the story supplies the intended money through its own events.
Spend only when it supports your current plan. Training and practical purchases can be useful, but optional entertainment should wait if you want to avoid reducing your reserve. Continue checking the notebook after conversations because advancing the correct lead is more important than maximizing optional income.
- Collect the allowance at the Hazuki Residence when available.
- Reserve money for useful purchases and training.
- Do not search for a mandatory pre-harbor Dobuita job.
- Postpone optional entertainment spending when you want to preserve cash.
Resolve the 69,000-yen boat fare before the harbor job
When the notebook sends Ryo back to the Hazuki Residence during the Hong Kong travel investigation, enter Fuku-san’s room and speak with him. He gives Ryo his savings, bringing the available money close to the amount needed for the cheaper travel option. Follow the resulting lead to Aida Florist and speak with Nozomi.
Return to Global Travel Agency when the investigation directs you there. The agency does not sell the required boat ticket, but its dialogue points Ryo toward Asia Travel Company. Follow the directions to the Asia Travel Company office. The clerk offers the boat passage for 69,000 yen. Purchase it when the story presents the offer, then follow the instruction to return after the stated waiting period. The original Dreamcast guides record the boat fare and the later collection instruction.
The later disappearance of the clerk and the failed ticket handoff are scripted travel complications. Do not treat them as a request to replace the fare through forklift work. Wait through the instructed period, return to Asia Travel Company and follow the resulting Jimmy and notebook leads. Alpha Trading is not available at this point, and grinding later harbor wages is not the intended way to recover the fare.
- Speak with Fuku-san when the notebook sends Ryo home.
- Talk to Nozomi at Aida Florist during the fare investigation.
- Visit Global Travel Agency and follow its boat-ticket lead.
- Purchase the boat ticket at Asia Travel Company for the displayed 69,000-yen fare.
- Follow the Jimmy and notebook events after the scripted ticket complication.
Reach Alpha Trading only after the travel sequence advances
Alpha Trading is later Disc 3 content, not an early source of Hong Kong money. After the travel-agency and Jimmy events have advanced the story and Ryo reaches New Yokosuka Harbor, meet Goro near Warehouse No. 1 at the scheduled time. Mai’s arrangement leads to a meeting with Yada-san at the Alpha Trading Office. Enter the office during the appointment window and speak with Yada-san to begin the job. The harbor route guides place the meeting at approximately 2:00 PM.
Yada-san introduces Mark Kimbely, who teaches Ryo to operate the forklift. During the tutorial, use the directional controls to steer, the Right Trigger to move forward, the Left Trigger to reverse and A to raise or lower the forks. Use the fork to slide under a crate, lift it, drive to the destination and place it inside the marked delivery area. Press X to display the route map during the work assignment. These are the original Dreamcast controls, not controls from a later remaster.
Take time during the tutorial to learn the forklift’s turning radius. Begin steering before a corner, and reverse to reposition if the forklift becomes wedged against a wall, crate or vehicle. The job is optional support content and should not be confused with the earlier travel-fare sequence.
- Reach New Yokosuka Harbor after the travel story has advanced.
- Meet Goro near Warehouse No. 1 at the scheduled time.
- Speak with Yada-san in the Alpha Trading Office.
- Complete Mark’s forklift tutorial.
- Use X for the work map and A for the fork.
- Place each crate inside the marked delivery area.
Understand the 300-yen starting wage and quota raises
On the original Dreamcast release, Alpha Trading starts at 300 yen per delivered crate. Meeting or exceeding the applicable quota grants a 50-yen-per-crate raise for the next assignment. The raise is optional support income rather than a campaign requirement. Missing a quota does not require restarting the story; it simply prevents the next raise and leaves you with less money from that workday.
A later rate of 400 yen per crate is possible after enough successful quota raises, but it is not the starting rate. Do not plan the first shift around 400 yen. Use the wage shown by the current harbor assignment and treat any raise as a bonus for the next assignment.
Do not use eight crates as a universal quota. The first workday requires 10 crates. The second, third and fourth workdays each require 8 crates. The fifth workday again requires 10 crates. Check the route map and the quota displayed for the current assignment. The route and quota change between workdays, so plan around the current map rather than relying on the previous day’s number.
A forklift race is scheduled before each workday during the harbor employment arc. Complete the race sequence so the workday can proceed, but winning is optional. The placement determines the capsule-toy reward, and losing does not stop the job, remove the workday or block the investigation. The race is therefore a scheduled activity with an optional performance reward, not a required money-making challenge.
The workday includes a two-hour lunch break and ends at 5:00 PM. Follow the assigned route, deliver crates carefully and return to the scheduled harbor events. Study the map before driving, approach loads squarely and avoid unnecessary detours. If you collide with an obstacle, reverse far enough to straighten the forklift before continuing instead of repeatedly pressing forward.
- Remember the corrected 300-yen starting rate per crate.
- Meet 10 crates on the first workday.
- Meet 8 crates on the second, third and fourth workdays.
- Meet 10 crates on the fifth workday.
- Meeting quota grants a 50-yen-per-crate raise for the next assignment.
- Treat each morning forklift race as scheduled, but winning and the placement capsule as optional.
- Finish the shift at 5:00 PM and collect the day’s pay.
Protect required harbor scenes while earning
The harbor job is tied to the Mad Angels investigation. Scenes can occur during lunch, after the afternoon work period and after the 5:00 PM payout. When a cutscene, confrontation or fight begins, complete it before pursuing extra deliveries, training or entertainment. The investigation has priority over maximizing the day’s paycheck.
A dependable routine is to attend the scheduled morning forklift race, complete the assigned deliveries, attend the lunch event, return for the afternoon work period, collect the payout and then follow the evening notebook instruction. Do not leave the harbor simply because you have met the quota. Some story scenes require Ryo to remain on the harbor schedule until the appropriate time.
Once the notebook advances beyond the relevant employment beats, extra shifts are optional. You may continue working for spending money or capsule rewards if the current schedule permits, but stop when the next story lead requires attention. Alpha Trading is a support activity after the travel sequence, not an alternate route through it.
- Attend the scheduled morning race before each workday.
- Attend every required lunch, afternoon and evening harbor scene.
- Return to work after the lunch break.
- Collect the payout before following the evening lead.
- Do not abandon the harbor to chase optional income during a required scene.
- Stop taking extra shifts when the notebook advances the investigation.
Recover from low cash, a poor shift or a missed event
A lost forklift race or missed quota is not a story failure. Continue to the next scheduled scene and use later workdays for optional money if necessary. There is no reason to restart the campaign solely because a delivery route went badly.
If a harbor NPC is absent, check the notebook and the in-game time before assuming the event is broken. Use the normal sleep and schedule system to advance to the next day when appropriate. Keep a manual save at the Hazuki Residence or before a major harbor day whenever possible, especially if you plan to spend the evening on optional activities.
Reload after a genuine Game Over or failed required fight, not after an imperfect wage. If the Asia Travel Company clerk disappears after taking the fare, follow the next story instruction and do not attempt to repair the situation by earning forklift money. The pre-Disc 3 travel funding and the later Disc 3 Alpha Trading wages are separate systems.
- Reload for a genuine combat or progression setback.
- Advance time normally when a scheduled NPC is unavailable.
- Keep a safe save before important harbor days when possible.
- Use later harbor shifts only for optional funds.
- Never grind Alpha Trading wages to replace the scripted Asia Travel fare.
Before you move on
- The player knows that early income comes from the Hazuki Residence allowance.
- The player understands that the 69,000-yen boat fare is an earlier travel-story event, separate from harbor employment.
- Fuku-san’s savings, Nozomi’s advice and the Asia Travel Company purchase are in the correct sequence.
- Alpha Trading is identified as later Disc 3 support content rather than a prerequisite for travel.
- The player can operate the original Dreamcast forklift using steering, Right Trigger, Left Trigger, A and X controls.
- The player understands the corrected 300-yen starting wage per crate.
- The player knows that the first and fifth workdays use a 10-crate quota.
- The player knows that the second, third and fourth workdays use an 8-crate quota.
- The player understands that meeting quota adds a 50-yen-per-crate raise for the next assignment.
- The player understands that 400 yen per crate is a later raised rate, not the starting rate.
- The player knows that a forklift race is scheduled before each workday.
- The player knows that winning the race and receiving a placement capsule are optional.
- The player can preserve required harbor scenes while still earning optional money.
- A poor quota or race result does not cause an unnecessary restart.
- The player knows to follow the notebook after the scripted Asia Travel Company complication.
References for this chapter
- GameSpot Game Guide: Shenmue
- Shenmue Guide and Walkthrough — Dreamcast, Final Day and Ending
- Shenmue Guide and Walkthrough — Dreamcast, Saving, Resume and Cleared File
- Shenmue — Guide and Walkthrough — Dreamcast — Adrenaline_SL
- Shenmue — Guide and Walkthrough — Dreamcast — AmericanArsenal
- Shenmue — Guide and Walkthrough — Dreamcast — Shotgunnova
Key Confrontations — Mad Angels and Organized Opposition
This harbor sequence begins after the second workday, when Ryo has rescued Mark at Warehouse No. 17. The required motorcycle lead does not come from workers near Hokuhoku Lunches or from a Warehouse No. 8 guard. Instead, Ryo must complete the Warehouse No. 17 rescue, speak with Mark, then return to the homeless man and finish the follow-up conversation about the Mad Angels’ nighttime motorcycle gathering. The next scheduled workdays lead through Nozomi’s photograph, the motorcycle chase, Charlie, Goro’s trap, Mark’s Long Zha information, Tony and Smith, the automatic Master Chen transition, Nozomi’s kidnapping, Terry, Gui Zhang and the 70-Man Battle. The chapter ends only after Pedro and Terry have been dealt with and the notebook records that Chai took Lan Di to the ship and Lan Di has gone to Hong Kong.
Complete the Warehouse No. 17 rescue and the homeless-man follow-up
Finish the second-workday forklift assignment and the Warehouse No. 3 ambush if those events have not already occurred. After work ends, go toward Warehouse No. 17 and intervene when the Mad Angels attack Mark. This is a required Free Battle. Defeat the attackers, then let Mark explain that he is investigating the Mad Angels because of what happened to his brother and the information his brother may have leaked.
After Mark’s scene, visit the homeless man again. He may teach an optional move before giving the next story clue, depending on which earlier lessons were completed. The move itself is not required. Speak with him again after the lesson or dialogue checkpoint until he explains that the Mad Angels use motorcycles at night and gather near the area outside the harbor cafeteria. That conversation, not a pair of harbor workers or a Warehouse No. 8 guard, supplies the required nighttime lead.
Return home after the conversation, save in Ryo’s room, and sleep. The next morning begins the third scheduled forklift workday. If the homeless man does not advance the conversation, do not restart the game or search for invented alternate witnesses; review whether the Warehouse No. 17 rescue and Mark’s explanation actually finished, then revisit him.
- The Warehouse No. 17 rescue Free Battle is complete.
- Mark has explained the Mad Angels and his brother’s situation.
- The homeless man’s follow-up conversation identifies the nighttime motorcycle gathering.
- No worker or Warehouse No. 8 guard conversation is being treated as mandatory.
- Ryo has returned home, saved and slept for the third workday.
Third workday: Warehouse No. 18, Nozomi’s photograph and the motorcycle chase
Complete the morning forklift race, then read the work map. On this workday, deliver the assigned crates to Warehouse No. 18. Continue working through the morning quota and return from lunch on time; optional training, arcade visits and extra conversations can wait.
During lunch, Eri stages the photograph of Ryo and Nozomi. Allow the scene to finish and choose either photograph. The choice changes the selected picture but does not block the harbor investigation. Resume the afternoon shift and finish the workday normally.
After 7:00 PM, go to the harbor area outside the cafeteria and toward the plaza near Warehouse No. 18. The motorcycle event is tied to the homeless-man lead and the evening harbor gathering; it is not a Harbor Lounge-only requirement. If nothing happens, confirm that the second-workday rescue and homeless-man follow-up were completed, then approach the cafeteria-side plaza again after nightfall.
The Mad Angels motorcycle event begins with a sequence of displayed Dreamcast QTE prompts. Enter the command shown on screen rather than relying on a memorized string. The chase leads to the Warehouse No. 17 loading area. After the ride, defeat the first Mad Angels group in Free Battle, then fight Charlie in the separate confrontation. Guard when several enemies close in, keep moving away from walls and use short attacks after their combinations end. Once Charlie is defeated, interrogate him and let the notebook update before returning home and sleeping.
- The third forklift race and Warehouse No. 18 route are complete.
- Eri’s photograph scene with Nozomi has finished.
- The evening motorcycle QTE has been cleared using the displayed prompts.
- The Mad Angels group has been defeated.
- Charlie has been defeated and interrogated.
- The notebook has advanced before Ryo sleeps.
Fourth workday: Goro’s trap and Mark’s Long Zha information
Complete the fourth morning race and follow the day’s work map. The assignment again involves moving crates toward Warehouse No. 18. During the afternoon work period, pass the area around Warehouse No. 12 so the scheduled Goro event can occur. The Mad Angels use Goro to lure Ryo toward Warehouse No. 1, where the confrontation becomes a long QTE sequence.
Watch the original Dreamcast screen carefully and press each displayed command as it appears. Do not use a fixed memorized sequence: guides disagree about how the full prompt string should be represented, and the game expects the player to respond to the live display. If the sequence fails, repeat the event from its restart point and follow every prompt again.
Finish the workday and collect the pay. Speak with Mark afterward about the information he has overheard concerning Long Zha and the connection between the Mad Angels and the Chi You Men. Complete the subsequent required follow-up conversation identified by the notebook; depending on the guide route, this may involve another harbor worker or the homeless man. The purpose is to advance the investigation toward Tony and Smith, not to learn an optional combat move.
Return home, save and sleep. Do not combine this day’s Goro trap and Mark conversations with the next day’s Goro-and-Mai scene or Tony-and-Smith chase.
- The fourth workday route is complete.
- Goro’s trap near the Warehouse No. 12 route has occurred.
- The displayed Goro-trap QTE has been cleared.
- Mark’s Long Zha information has been obtained.
- The required follow-up conversation has advanced the Tony-and-Smith lead.
- Ryo has saved before beginning the fifth workday.
Fifth workday: Goro and Mai, Tony and Smith, and Master Chen
Complete the fifth scheduled forklift race and follow the double-delivery work map. This day uses the harbor entrance, Warehouse No. 8 and Warehouse No. 18 routes. Work through the morning and allow the Goro-and-Mai scene to occur during the lunch period. The scene is required for the day’s progression but does not require a special response from the player.
Resume work after lunch. During the afternoon, Tony and Smith appear and flee through the harbor. Chase them through the displayed QTE sequence. When the route gives Ryo a choice of targets, pursue one of the fleeing men and complete the chase. Question the sailor afterward to obtain information about Terry and the Mad Angels’ organization.
Let the automatic scenes continue after the sailor questioning. Yada-san handles the workday result, and the story transitions to Master Chen and Gui Zhang. Do not leave the harbor to search for another trigger once the sailor has been questioned. Allow the Master Chen and Gui Zhang scenes to finish, then check the notebook for the Terry lead.
Sleep after the automatic sequence. The overnight scene reveals that Nozomi has been kidnapped by Chai and gives Ryo a limited-time rescue objective.
- The fifth-workday forklift route is complete.
- The Goro-and-Mai scene has played.
- Tony and Smith have been chased.
- A sailor has been caught and questioned about Terry.
- The automatic Master Chen and Gui Zhang transition has finished.
- The notebook directs Ryo toward Terry and the rescue sequence.
Nozomi’s rescue and the two harbor battles
After the overnight phone call or notification, follow the rescue objective immediately. Go to the Knocking Motorcycle Shop and speak with Ono-san. He explains that his motorcycle cannot be used and directs Ryo to Naoyuki Ito in Sakuragaoka.
Find the Ito residence near Yamagishi-san’s house. The motorcycle outside is the identifying landmark. Interact with the entrance and allow Naoyuki to lend Ryo the motorcycle. Ride to the harbor through the Hang-On-style motorcycle sequence. Use the displayed controls, slow before sharp turns and avoid unnecessary contact with the barriers. If the ride fails, reload the latest home save and repeat it; do not attempt to walk to the harbor as a substitute.
On arrival, fight the first Mad Angels group in Free Battle. After that group is defeated, a second group attacks inside the harbor area. Clear the second battle separately. Terry then appears with Nozomi and demands that Ryo fight Gui Zhang in exchange for her release. Accept the condition and let the scene finish. Ryo returns home with Nozomi, saves if the game permits it, and sleeps before the next day.
- Ono-san has directed Ryo to Naoyuki Ito.
- Naoyuki has lent Ryo the motorcycle.
- The timed ride to the harbor has succeeded.
- Both successive Mad Angels rescue battles have been cleared.
- Terry’s condition involving Gui Zhang has been accepted.
- Nozomi has been released and the return-home sequence has finished.
Tom’s farewell, Gui Zhang and the 70-Man Battle
On the following day, allow the automatic Alpha Trading dismissal to occur. After leaving the office, remain in the harbor and follow the notebook until the meeting with Tom. At approximately midday, visit Tom’s hot-dog stand. Tom teaches Ryo Tornado Kick and explains that he is leaving for the United States. The move is useful, but the lesson is not a separate combat requirement; allow the farewell scene to finish.
At the appointed nighttime meeting, follow the harbor route to Gui Zhang. Fight Gui Zhang when the Free Battle begins, but do not worry about winning or losing through ordinary damage. The encounter ends through scripted events. When Terry attacks with the pipe, respond to the displayed Dreamcast QTE. After the interruption, Ryo and Gui Zhang enter the mandatory 70-Man Battle.
The 70-Man Battle is separate from the earlier Nozomi-rescue groups. Defeat the ordinary Mad Angels while keeping enough space to avoid being surrounded. Damage dealt during the battle helps Ryo recover, so eliminate isolated enemies efficiently and retreat briefly when several enemies converge. Three tougher opponents appear during the sequence; treat each as a separate mini-boss and use lateral movement, guard and low-risk attacks instead of trading blows in a corner. Continue until the game confirms that the full 70-Man Battle is complete.
- Alpha Trading has dismissed Ryo.
- Tom’s farewell and Tornado Kick lesson are complete.
- The Gui Zhang confrontation has reached its scripted interruption.
- The displayed Terry pipe QTE has been cleared.
- The separate 70-Man Battle has been completed.
Pedro, Terry and the Lan Di update
After the 70-Man Battle, continue immediately. Pedro and additional Mad Angels appear. Defeat the accompanying enemies, then confront Pedro as his own fight. Pedro is a heavy opponent with strong throws, close-range attacks and a dangerous dropkick. Keep open space, avoid standing directly in front of him for long periods and punish his recovery after a missed attack. Do not count Pedro as one of the 70 opponents.
Once Pedro and the remaining attackers are defeated, Terry is cornered. Complete the concluding Terry QTE by following the displayed Dreamcast prompt. Gui Zhang then subdues Terry, allowing Ryo to question him. Terry explains that Chai took Lan Di to the ship and that Lan Di has already left for Hong Kong.
Let the final Gui Zhang conversation finish and check the notebook. This chapter is complete only when the notebook records the Lan Di-to-Hong Kong information. Do not move directly into the final Chai and departure route until this entry is present. Save at home when the game next permits it so the completed harbor investigation is protected.
- Pedro has been defeated after the 70-Man Battle.
- Pedro was handled as a separate confrontation.
- The final Terry QTE has been completed using the displayed prompt.
- Terry has been interrogated.
- The notebook states that Chai took Lan Di to the ship.
- The notebook states that Lan Di has gone to Hong Kong.
- The Gui Zhang closing conversation has finished.
Before you move on
- The second-workday Warehouse No. 17 rescue is complete.
- Mark’s explanation and the homeless-man follow-up identifying the nighttime motorcycle gathering are complete.
- No worker or Warehouse No. 8 guard conversation is required for completion.
- The third workday includes the Warehouse No. 18 route, Nozomi’s photograph, the evening motorcycle QTE, the Mad Angels battle and Charlie interrogation.
- The fourth-workday Goro trap QTE was cleared using the displayed prompts, and Mark’s Long Zha information was obtained.
- The fifth-workday Goro-and-Mai scene, Tony-and-Smith chase, sailor questioning and automatic Master Chen transition are complete.
- Ono-san directed Ryo to Naoyuki Ito, the motorcycle was borrowed and the harbor ride succeeded.
- Both successive Nozomi-rescue battle groups were defeated and Terry’s Gui Zhang condition was accepted.
- Tom’s farewell, Alpha Trading dismissal and Tornado Kick lesson are complete.
- The Gui Zhang confrontation reached its scripted interruption and the 70-Man Battle was cleared.
- Pedro was defeated separately, Terry was confronted and the final Terry QTE was completed.
- Terry was interrogated and the notebook records that Chai took Lan Di to the ship and Lan Di went to Hong Kong.
- The final Chai encounter, ship departure and ending belong to the following chapters.
The Final In-Game Day — Timing the Departure
Begin this chapter only after the harbor finale has been completed through the Gui Zhang confrontation, the 70-Man Battle, the brief Terry QTE, Terry’s interrogation and the concluding discussion with Gui Zhang. The game then returns Ryo to the Hazuki Residence. Save in Ryo’s room, sleep, watch the farewell scenes and follow the automatic route through Dobuita to New Yokosuka Harbor. The Swallow Flip lesson, final Chai confrontation, last QTE, credits and Cleared File save occur afterward.
1. Confirm the harbor prerequisite
Do not start this chapter while the Gui Zhang confrontation, the 70-Man Battle or the Terry confrontation is still active. The required preceding sequence includes the free battle with Gui Zhang, the QTE during Terry’s attempted attack, the 70-Man Battle against the Mad Angels, the later Terry confrontation and the interrogation that follows.
The reliable progression check is the notebook update stating that the Terry confrontation has been completed and that Lan Di has gone to Hong Kong. The exact English wording can vary slightly by guide transcription, but the entry should clearly report both facts. Terry must have been questioned about Lan Di, not merely encountered during the earlier harbor events.
Allow the concluding discussion with Gui Zhang at the harbor to finish before expecting the game to send Ryo home. The GameSpot Dreamcast guide places this conversation after the interrogation and identifies it as the final harbor event before Ryo returns to the Hazuki Residence.
- The Gui Zhang confrontation is complete.
- The 70-Man Battle is complete.
- The Terry QTE has been cleared.
- The Terry confrontation and interrogation are complete.
- The notebook reports that Lan Di has gone to Hong Kong.
- The concluding Gui Zhang harbor discussion has finished.
2. Let the game return Ryo to the Hazuki Residence
Remain in control until the post-battle scenes and the harbor discussion have fully ended. The Terry interrogation is not, by itself, the final trigger. Ryo must also complete the concluding exchange with Gui Zhang.
After the discussion, the game returns Ryo to the Hazuki Residence automatically. The documented sequence places his arrival at approximately 5:21 a.m. This unusual early-morning time is normal and is not a sign that the progression has failed.
Do not change discs, reset the Dreamcast or interrupt the transition while the scene is moving Ryo home. When control returns, go directly to Ryo’s bedroom. There is no additional Asia Travel visit, fare payment, money requirement or mandatory investigation conversation between this return and the final sleep command.
- The final Gui Zhang harbor discussion played to completion.
- Ryo was returned to the Hazuki Residence automatically.
- The early-morning return occurred without an interruption.
- No Asia Travel or money objective is active.
3. Create a regular recovery save
Enter Ryo’s bedroom and use the normal full-save option before sleeping. Ryo’s room is the regular save location used throughout the campaign. Make this a separate save from your earlier campaign file whenever the VMU has room.
Keep the post-harbor save until the ending has been completed. It is the best recovery point for replaying the final morning and final battles without repeating the 70-Man Battle or Terry interrogation. Do not rely on the temporary Resume or quick-save function as your only backup; the Dreamcast guide material distinguishes the regular game save from the temporary save system.
Wait for the VMU writing process to finish before removing the VMU, disconnecting the controller or powering down the console. If you have a second VMU or a verified backup method, copy the completed campaign file after confirming that the save appears in the load list.
- A regular save was made in Ryo’s bedroom after the harbor discussion.
- The save is separate from the only earlier campaign file when possible.
- The VMU writing process finished completely.
- The post-harbor recovery save remains available.
4. Sleep and trigger the departure morning
After saving, choose the sleep command in Ryo’s room. This advances the game to the final departure morning. The documented sequence has Ryo wake at approximately 8:30 a.m. with his bags packed. The farewell route then begins automatically.
Do not train, earn money, revisit Asia Travel, search for a new item or complete optional conversations at this point. Those requirements belong to earlier parts of the investigation. Once the post-harbor save exists, sleeping is the correct action.
Let the Hazuki Residence scenes play without trying to leave the house. Ryo says goodbye to Fuku-san and Ine-san, and both characters provide a parting gift during the farewell. There is no free-roaming investigation segment in which you must locate either character.
- The post-harbor recovery save is complete.
- Ryo selected Sleep in his bedroom.
- Ryo woke at approximately 8:30 a.m. with his bags packed.
- The farewell scenes with Fuku-san and Ine-san began.
5. Follow the automatic route to the harbor
After the household farewell, Ryo leaves the Hazuki Residence and the game presents an automatic walk through Yokosuka, including the route through Dobuita. This is a directed departure transition rather than a normal day of exploration. Let the scene continue until Ryo reaches New Yokosuka Harbor.
Do not divert to the arcade, shops, dojo, capsule machines or optional side activities. No NPC schedule needs to be solved during this walk. If the departure does not begin after sleeping, reload the post-harbor save and check the notebook for the Lan Di update and the completed Gui Zhang discussion. Repeatedly sleeping will not repair an incomplete harbor trigger.
Arrival at New Yokosuka Harbor is the completion point for this chapter, not the end of Shenmue. Master Chen then teaches Ryo the Swallow Flip before the final Chai confrontation. The Dreamcast guide lists the move as a technique learned at the harbor immediately before Ryo leaves for Hong Kong.
- Ryo left the Hazuki Residence during the final morning.
- The automatic route through Dobuita played.
- Optional exploration was not attempted during the transition.
- Ryo reached New Yokosuka Harbor.
- Master Chen and the Swallow Flip sequence are ready to begin.
6. Avoid the earlier calendar bad-ending condition
The original Dreamcast campaign has an alternate bad ending if the calendar reaches April 15, 1987 before the normal story is completed. This condition is not created by an action during the final departure morning. It is normally associated with repeatedly failing the Old Warehouse infiltration sequence on Disc 2, which advances the game by additional days.
If the calendar has already reached April 15, 1987 or the bad-ending sequence has begun, reload a campaign save from before the deadline. A post-harbor save is useful only if its date is still before April 15, 1987. Do not overwrite that recovery file while investigating the problem.
Once Ryo has reached New Yokosuka Harbor on the normal route, the calendar deadline is no longer the practical concern for this playthrough. Keep the recovery save until the Swallow Flip lesson, final Chai confrontation, final QTE, credits and post-credits Cleared File save are all complete.
- The campaign date was still before April 15, 1987 when the final sequence began.
- The Old Warehouse infiltration was not deliberately failed repeatedly during the normal route.
- If the bad ending appeared, an earlier pre-deadline save was loaded.
- The post-harbor recovery save remains available until the game is cleared.
Before you move on
- The Gui Zhang confrontation, 70-Man Battle, Terry QTE and Terry interrogation were completed before this chapter began.
- The notebook confirms that the Terry confrontation is complete and Lan Di has gone to Hong Kong.
- The concluding Gui Zhang harbor discussion finished.
- Ryo returned automatically to the Hazuki Residence.
- A regular recovery save exists in Ryo’s bedroom after the harbor finale.
- Ryo slept and woke for the final departure morning.
- The farewell scenes with Fuku-san and Ine-san played.
- The automatic route through Dobuita completed.
- Ryo reached New Yokosuka Harbor.
- Master Chen’s Swallow Flip sequence is ready to begin.
- The final Chai confrontation, final QTE, credits and Cleared File process have not yet been counted as completed.
Boarding the Ship and the Ending Sequence
Complete Shenmue’s final harbor sequence on the original North American Dreamcast release. The 70-Man Battle, Terry confrontation and preceding harbor investigation must already be finished. From Ryo’s arrival on the final departure day, learn the Swallow Flip, defeat Chai, complete the final QTE, receive Master Chen’s Hong Kong introduction and watch the ship leave Yokosuka. Allow the credits to finish until the post-credits Cleared File prompt appears. Do not reset or power down before that prompt. Detailed save selection, verification and VMU backup procedures are covered in chapter ch15.
Arrive at the final harbor sequence
This chapter starts after the required harbor investigation, the Gui Zhang confrontation, the Terry scene and the 70-Man Battle have been completed. Those events are prerequisites for the ending route and are not repeated here. After the required sleep and final-day transition, Ryo leaves the Hazuki Residence with his belongings.
The farewell scenes with Fuku-san and Ine-san play as part of the departure sequence. Continue through the automatic travel scenes as Ryo passes through Dobuita and heads to New Yokosuka Harbor. There is no remaining investigation objective to pursue during this section, and ordinary town exploration is not required.
When the harbor scenes begin, remain in the sequence. Do not try to return to Dobuita, visit the arcade or interrupt the event to pursue optional activities. The game is moving toward the final lesson and Chai encounter.
- The 70-Man Battle and Terry confrontation are already complete.
- Ryo has completed the required sleep transition into the final day.
- Ryo has left the Hazuki Residence with his belongings.
- The automatic farewell and travel scenes have brought Ryo to New Yokosuka Harbor.
Learn the Swallow Flip from Master Chen
At the harbor, Ryo meets Master Chen and Gui Zhang. Master Chen gives Ryo the final martial-arts lesson, the Swallow Flip, before Ryo leaves for Hong Kong. Follow the original Dreamcast prompts exactly as they appear on screen.
The lesson uses a short sequence of movement and attack inputs. Do not substitute a command remembered from a remake, remaster or another regional control layout. Complete each displayed step, including the footwork and the follow-up attack, then finish the brief practice exchange with Gui Zhang.
This lesson is required for the ending route. It is not an optional move demonstration that can be abandoned and revisited later. Once the practice sequence ends, the discussion continues and Chai appears.
- Master Chen has started the Swallow Flip lesson.
- Every displayed Dreamcast input has been performed in order.
- The practice exchange with Gui Zhang has ended.
- The conversation has advanced to Chai’s appearance.
Defeat Chai in the final Free Battle
Chai attacks immediately after the farewell lesson. This is a required Free Battle and the last ordinary fight in Shenmue’s story. He is fast and can punish repeated attacks at close range, so avoid standing directly in front of him while attempting long combinations.
Circle around him and use the open harbor space to create room. Guard or evade when he commits to an attack, then answer with a short reliable strike, throw or move that you already know how to perform. Defensive movement is safer than trading attacks when Ryo’s health is low.
If Ryo is knocked down, recover and move away before attacking again. Do not rush after Chai blindly; wait for an opening and keep enough distance to see his approach. The battle ends when Chai’s health is depleted, but the encounter is not finished at that point.
A cutscene follows the Free Battle. Continue watching instead of assuming that the victory has completed the final event. Chai makes one last attack, which triggers the concluding QTE.
- Chai’s final Free Battle has begun.
- Chai’s health has been depleted.
- The post-battle cutscene has played.
- Chai has made his final attack and the QTE prompts are appearing.
Complete the final Chai QTE
For the original North American Dreamcast Dreamcast release, the final Chai QTE is Down, A, A, B. Press each input when its prompt appears. Do not enter the next command early, and do not use a sequence from a later HD release or a different control arrangement.
If an input is missed, the final exchange must be attempted again. Watch the prompt timing through the last B input. A successful sequence sends Chai into the water and clears the final required combat event.
After the QTE succeeds, allow the following scenes to play without resetting. The game now moves directly into the Hong Kong story handoff and departure.
- Down has been entered when prompted.
- The first A has been entered when prompted.
- The second A has been entered when prompted.
- B has been entered when prompted.
- Chai has fallen into the water.
Receive the Hong Kong introduction
Ryo returns to Master Chen and Gui Zhang after Chai is defeated. Gui Zhang is injured and cannot immediately accompany Ryo, although he indicates that he will follow later. Let the entire conversation play without skipping the transition.
Master Chen explains that he does not know Yuanda Zhu’s current location and gives Ryo an introduction to Tao Li Shao, a martial-arts master in Hong Kong. This is the final story lead in Shenmue and the handoff to the next game.
The original Dreamcast Shenmue campaign does not continue into a playable Hong Kong area after this scene. Hong Kong is Ryo’s destination and the setting for the continuation, not another explorable chapter in this game.
- The conversation about Gui Zhang’s injury has finished.
- Master Chen has introduced Tao Li Shao as Ryo’s Hong Kong contact.
- The Hong Kong story handoff is complete.
- The game has moved to the ship-departure scenes.
Watch Ryo leave Yokosuka
Continue through the automatic departure sequence. Ryo boards the ship, and the closing scenes show him leaving Yokosuka while reflecting on the events of the game, including Nozomi.
There is no additional route choice or final investigation task after Ryo boards. Do not wait for control to return so that you can search the harbor. The campaign’s playable story is complete when the ship departs.
Allow the full ending sequence to continue into the staff roll. Keep the Dreamcast powered on and leave the VMU connected while the game transitions from the ending to the post-credits save prompt.
- Ryo has boarded the ship.
- The ship has departed Yokosuka.
- The closing departure scenes have finished.
- The staff roll has begun.
Finish the credits and reach the Cleared File prompt
Allow the complete credits sequence to finish. The completed-game save prompt appears after the credits rather than during the harbor departure. Do not reset the Dreamcast, remove the VMU or power down while the credits are still running.
When the post-credits Cleared File prompt appears, stop at that point if you are following the chapter order. The next chapter covers selecting a destination slot, confirming the save, checking that the file is readable and creating an additional backup when suitable hardware or a compatible utility is available.
The Cleared File is used by Disc 3 to unlock the original game’s 70 Person Free Battle Time Attack Mode. Compatible Shenmue II editions can also use a Shenmue Cleared File for supported carryover information, but import behavior depends on the target edition and region. Confirm compatibility before attempting to transfer the file.
- The entire staff roll has finished.
- The post-credits Cleared File prompt is visible.
- The VMU remains connected and powered.
- The game is ready for the save and verification procedure in chapter ch15.
Before you move on
- The 70-Man Battle and Terry confrontation were completed before entering this chapter.
- Ryo reached the final harbor on the departure day.
- The Swallow Flip lesson was completed using the displayed Dreamcast prompts.
- Chai was defeated in the final Free Battle.
- The final QTE Down, A, A, B succeeded.
- Master Chen gave Ryo the Hong Kong introduction to Tao Li Shao.
- Ryo boarded the ship and it departed Yokosuka.
- The complete credits finished.
- The post-credits Cleared File prompt is visible.
- The game is ready for Cleared File saving and verification in chapter ch15.
References for this chapter
Creating a Cleared File and Carryover Notes
The original North American Dreamcast edition creates a separate Cleared File after the ending staff roll. This file is the completion record used by Disc 3's 70 Person Free Battle Time Attack Mode and is also the file that compatible Dreamcast editions of Shenmue II can examine during a new-game setup. Preserve the ordinary pre-finale save, complete the post-credits save, verify the bonus mode, and keep an independent backup before testing any import or regional conversion.
1. Complete the ending and wait for the save prompt
Finish the final harbor sequence, including the last confrontation with Chai and the required Quick Timer Event. Continue through Ryo's departure for Hong Kong and allow the staff roll to run to completion. The Cleared File prompt appears after the staff roll; it is not created merely by making a normal save before the final sequence.
When the completion save prompt appears, follow the on-screen instructions and wait until the Dreamcast has finished writing the file. Do not reset the console, remove the VMU, or interrupt the confirmation process while the save is being written. Keep the VMU connected until the operation has clearly finished.
A normal progress file and a Cleared File serve different purposes. The ordinary file lets you resume the campaign through the standard Load and Start command. The Cleared File records that the campaign was completed and is used by the post-game 70 Person Free Battle Time Attack Mode.
- The final Chai sequence is complete.
- Ryo's departure scene has played.
- The staff roll has finished.
- The post-credits completion save prompt has been accepted.
- The console has finished writing before being reset or powered off.
2. Preserve the ordinary pre-finale save
Before starting the final sequence, keep a normal save from the last safe opportunity if your VMU has room. This is useful if the post-credits save is interrupted or if you need to replay the ending. Do not overwrite that file immediately after completing the game simply because the Cleared File exists.
The Cleared File should be treated as a separate completion record rather than as a replacement for every ordinary save. Shenmue's save screen can contain several file types, and the Cleared File is not intended to be resumed as though it were an ordinary story save.
If the VMU is full, make room before beginning the final sequence. Do not delete the only pre-finale save after the ending in the hope that the Cleared File can replace it. Keeping both files gives you a recovery point and a completed record.
- At least one ordinary pre-finale save remains available when possible.
- The Cleared File and ordinary progress file are not confused with one another.
- There is enough VMU space before beginning the ending sequence.
3. Verify the Cleared File through Disc 3
After the save completes, return to the title screen through the game's normal menu flow and insert Disc 3. From the title screen, choose Options. A completed game adds the 70 Person Free Battle Time Attack Mode entry, which appears as the additional bottom option described by the Dreamcast walkthrough documentation.
Select the 70 Person Free Battle Time Attack Mode. When the game asks for the data source, choose the Cleared File. If the file is accepted, the mode loads the completion data and allows the timed battle to begin. This is the most useful in-game confirmation that the post-credits completion file was registered correctly.
Do not use ordinary Load and Start as the verification method. The Cleared File is not a normal story resume file, and the standard load route is not the correct way to test it. If the 70 Person option is absent, or the mode cannot find the completion data, do not overwrite the preserved ordinary save. Recheck that the staff roll was allowed to finish and that the completion prompt was confirmed, then replay the final sequence from the ordinary save.
- Disc 3 is inserted.
- Options contains 70 Person Free Battle Time Attack Mode.
- The mode accepts the Cleared File as its data source.
- The preserved ordinary save has not been overwritten while troubleshooting.
4. Make a separate backup when the hardware supports it
The safest arrangement is to keep the original Cleared File untouched and create a second copy on another VMU or through a verified Dreamcast save-management device. The exact copy method depends on the hardware being used. If the Dreamcast file manager or backup equipment cannot copy the file reliably, do not experiment with the only original.
After making a duplicate, inspect the destination VMU or backup image and confirm that the file is actually present. A backup that was never checked should not be treated as reliable. Keep the original and duplicate physically separate so that a damaged VMU, accidental formatting, or failed write does not destroy both copies.
Label the storage clearly, for example Shenmue USA Cleared File. Keep the original USA file available even if you later convert a copy for another region. Never perform a destructive conversion on the only copy.
- The original Cleared File remains unchanged.
- A second VMU or verified external backup exists if the available hardware supports one.
- The duplicate has been checked after creation.
- The original and backup are stored separately.
5. Check the exact Shenmue II edition before importing
The North American Dreamcast received Shenmue, but Shenmue II was not released commercially for the Dreamcast in North America. The Dreamcast sequel was released in Japan and Europe, while North America received Shenmue II on Xbox. As a result, a USA Shenmue Cleared File does not have an automatic same-region Dreamcast sequel waiting for it.
For a compatible Dreamcast Shenmue II release, place the VMU containing the Cleared File in Expansion Socket 1 of the controller connected to Control Port A before powering on the console. At the Shenmue II title screen, choose New Game. The game then asks whether to start from a Cleared Game File of Shenmue I. Select the affirmative response and follow the confirmation prompts.
The Shenmue II manual states that data such as game time, Ryo's money, items, and martial-arts moves can be carried over, while also warning that some possessions may not transfer. Treat the target release's own behavior as authoritative rather than assuming every item or optional record will appear.
A Japanese or European Dreamcast Shenmue II disc may not directly recognize a North American Shenmue save because regional save identifiers can differ. If a conversion is required, first archive the original USA Cleared File and work only from a duplicate. A region-conversion procedure is a technical workaround, not a standard feature of the North American Shenmue release.
- The target Shenmue II platform and region are identified.
- The Cleared File is in Expansion Socket 1 before Shenmue II starts.
- The controller is connected to Control Port A for the import attempt.
- New Game is selected.
- Shenmue II explicitly detects and accepts the Cleared Game File.
- The original USA file is preserved before any conversion attempt.
6. Treat later versions as separate save systems
A Dreamcast VMU file should not be assumed to work with the PC, PlayStation, Xbox, or later Shenmue I and II releases. Those versions may use different save formats or provide a separate starting-data system. Check the target edition's documented import behavior before beginning a new game.
Even when a Dreamcast Shenmue II import succeeds, the sequel determines which data it reads. Do not promise that every capsule toy, photograph, cassette, optional item, or other side-content record will transfer. The reliable completion check is the explicit acceptance message from the target game and the resulting starting data it displays or uses.
Once the import is confirmed, keep the original Shenmue USA Cleared File archived. Do not erase it merely because Shenmue II has accepted a copy.
- The target platform's save-import method has been checked separately.
- The original Dreamcast file has not been overwritten.
- The import is confirmed by Shenmue II before another save is created over the working file.
Before you move on
- The final departure scene and staff roll have finished.
- The post-credits Cleared File prompt was accepted.
- The save operation completed without interruption.
- Disc 3's Options menu displays 70 Person Free Battle Time Attack Mode.
- The mode accepts the Cleared File.
- The original Cleared File remains preserved on a VMU.
- A checked duplicate or external backup exists when supported by the available hardware.
- The target Shenmue II region and platform have been verified before attempting import.
- Any import is confirmed by Shenmue II before the working save is overwritten.
References for this chapter
Optional Activities — Arcades, Collections and Minigames
Shenmue’s optional activities add practice, collectibles, music and extra rewards without being necessary for the main investigation or the ending. The safest rule is simple: check the notebook first, finish any nearby story appointment, and spend only money that is not needed for food, supplies or travel. You Arcade, capsule machines, store lotteries, martial-arts practice, jukeboxes, the Slot House and forklift-race rewards can all be postponed. A story-focused player may skip nearly all of them and still complete the game normally.
1. Play the optional games at You Arcade
You Arcade is in Dobuita. Its Dreamcast activities include Darts, Excite QTE 2, QTE Title, Hang-On and Space Harrier. Each play costs money, so treat the arcade as a controlled way to use spare yen rather than as a substitute for earning or saving. The arcade’s Start-button help screens explain the controls for the individual games.
Excite QTE 2 and QTE Title are useful reaction practice for the game’s Quick Timer Events. Hang-On is especially relevant because the game later includes a motorcycle sequence on Disc 3. Space Harrier and Darts are independent diversions. Performing well in arcade games can also produce collectible miniature prizes, but those rewards are optional and are not needed to unlock the story ending.
Visit after checking the notebook and confirming that no named character is waiting elsewhere. Arcade play is a good way to fill a short waiting period, but do not remain inside if an NPC must be met at a particular time.
- Check the notebook before entering You Arcade.
- Use Excite QTE 2 or QTE Title for low-risk QTE practice.
- Use Hang-On for motorcycle-control practice before Disc 3.
- Leave enough money for required purchases and travel.
2. Buy capsule toys only with genuinely spare money
Capsule machines provide random figures and other collectible items. Documented Dreamcast locations include machines outside Abe Store, outside You Arcade and in harbor-area convenience locations such as the Harbor Lounge or Tomato store areas. The exact machine series varies by location, so examine the machine and the resulting item rather than assuming every machine contains the same figures.
Capsule toys are recorded in the game’s collectible menu and have no required role in the investigation. Duplicate results are normal. Do not spend the daily allowance or job earnings on repeated capsule attempts when the story is approaching a travel or purchase requirement. If your goal is simply to finish Shenmue, buying a few figures is enough to sample the feature; a complete collection is a separate replay objective.
Some collectible rewards are not obtained from ordinary capsule machines. Arcade performance, Slot House results, store lotteries and other optional activities can provide special items or certificates. Treat those as completion goals, not as missing story prerequisites.
- Identify the machine series before spending money.
- Expect random results and duplicates.
- Keep required funds separate from collection spending.
- Use the collectible menu to review what you already own.
3. Use store purchases to enter the optional lotteries
Tomato Convenience Store and other convenience-store locations offer optional store lotteries. In the Dreamcast game, eligible purchases automatically create chances in the store contest; this is not a separate activity in which Ryo buys a standalone raffle ticket. Prizes can include extra figures, cassette tapes, the radio and games for the Sega Saturn in Ryo’s room, depending on the contest and result.
The lotteries are chance-based. Buy ordinary supplies or cassette tapes only when you would have bought them anyway, then accept the lottery opportunity as a bonus. Do not repeatedly purchase unwanted goods merely to chase a rare prize during a story-focused run. If you want to collect everything, record the prize results and return to the stores naturally rather than sacrificing travel money.
- Make sure the purchase itself is affordable and useful.
- Treat the lottery chance as an incidental bonus.
- Do not confuse a lottery entry with a required story item.
- Postpone repeated attempts until a collection-focused replay.
4. Collect music, cassette tapes and jukebox tracks
Ryo begins with a cassette player and tapes in his room. Additional cassette tapes can be bought from the Dobuita and harbor-area stores or obtained through optional store-lottery results. The available stock can change with the date and location, so check again when you are already passing through a store.
Jukeboxes are another optional diversion. They are available in locations including Tomato Convenience Store, You Arcade, bars and the Alpha Trading Office. Paying to select a song does not advance the investigation by itself. Use jukeboxes when waiting for a shop or appointment, and leave immediately if the notebook points you to a time-sensitive meeting.
- Check Ryo’s room for the cassette player and starting tapes.
- Look for new tapes during ordinary store visits.
- Use jukeboxes only during spare time.
- Do not spend collection money needed for the active objective.
5. Train martial-arts moves and distinguish practice from required battles
Ryo can practice or spar at suitable locations such as the Hazuki dojo, parks and other open areas. When a location is available, the practice prompt appears; if people are occupying the area, wait for them to leave or use another practice spot. Practicing raises move proficiency, and learned moves become available for Free Battle once they reach the required learning level.
The bedroom Save Point menu also includes Training after 8:00 p.m. You can use it to set the type of move that receives daily practice, including all moves, throws, hand moves or leg moves. This is optional preparation rather than a mandatory daily chore. Practice defense, spacing and reliable moves instead of exhausting the day on repeated attacks.
Do not mistake optional practice or ordinary Free Battles for the story’s 70-Man Battle. The 70-Man Battle is a required Disc 3 confrontation. After completing the game, the timed version can be replayed as an additional challenge. Skipping optional training does not remove the required battle, but entering it with stronger move proficiency can make it more manageable.
- Practice when the active story objective allows free time.
- Use the bedroom Training menu after 8:00 p.m. if desired.
- Confirm that a move has reached the learning level before relying on it.
- Remember that the 70-Man Battle is a required story sequence, not optional content.
6. Treat forklift races as story work with optional performance rewards
On Disc 3, Ryo’s harbor job begins each workday with a forklift race. The race is part of the job sequence, so it cannot be treated as completely optional once the story has placed Ryo in that employment. Mark provides a miniature forklift reward associated with the result or placing, making better performance valuable for collectors but not necessary for reaching the ending.
For a normal completion, concentrate on finishing the race and then completing the assigned crate deliveries. If you are pursuing optional rewards, practice the course and try to improve your placing on later workdays. Do not let repeated attempts interfere with the required harbor investigation or the day’s scheduled scenes.
- Complete each required workday and delivery assignment.
- Treat the miniature forklift as an optional collection reward.
- Prioritize story conversations after work if the notebook identifies one.
- Do not replay or optimize races at the expense of the main route.
7. Choose a side-content pace that fits the story
For the fastest route to the ending, check the notebook, follow the named lead, and use only nearby diversions while waiting for a shop or character. You can skip capsule toys, arcade games, store lotteries, jukeboxes and collection hunting entirely. None of those omissions blocks the harbor departure or the ending sequence.
For a fuller playthrough, buy occasional capsule toys, check store lotteries during normal shopping, collect tapes, train selected moves and play the arcade when Ryo has uncommitted time. Keep the main save protected by using one of the Dreamcast’s available save files for experiments when practical. Saving before optional spending is useful, but it is not a substitute for keeping required funds and story progress under control.
The correct completion standard for this chapter is not a finished collection. It is a smoothly advancing notebook and an intact story route. Optional goals are successful when they enrich the run without causing a missed appointment, an avoidable shortage of money or a delayed mandatory confrontation.
- Decide whether the run is story-focused or collection-focused.
- Check the notebook before every extended side activity.
- Keep travel and required-purchase money untouched.
- Use a separate save file for experimental spending when practical.
- Return to the main objective when the next appointment becomes available.
Before you move on
- The notebook continues to advance even if arcade games, capsule toys, lotteries, jukeboxes and optional training have been skipped.
- You Arcade, the Slot House and the store lotteries have been treated as optional diversions rather than progression requirements.
- Any capsule figures, tapes, arcade prizes or lottery items you wanted are present in the relevant collection or inventory menus.
- The required Disc 3 70-Man Battle has not been confused with optional Free Battle practice.
- Forklift work and its required deliveries remain complete while any miniature forklift reward is treated as an optional bonus.
- Your story save still has enough money and time for the active investigation and later travel requirements.
Recovery and Retry — Game Over, Missed Leads and Re-approach
On the original North American Sega Dreamcast release of Shenmue, most apparent setbacks do not require restarting the campaign. Use permanent game files at the Save Point in Ryo’s bedroom, use the notebook to identify the next confirmed lead, and advance the date when a scheduled character is absent. The You Arcade fight with Chai is a special case: winning is optional, and losing advances the story after Fuku-san rescues Ryo. A shortage of money must be handled according to the current story phase. The 69,000-yen Asia Travel ticket and its scripted loss occur before Disc 3, while Alpha Trading wages are available only later at the harbor and cannot repair that earlier event.
Identify the setback before taking action
First determine whether the game actually displayed Game Over. If it did, return to the title screen and load a permanent Shenmue game file saved to the VMU. Do not assume that a failed fight, a forced trip home or the end of a story day is a Game Over. Shenmue often uses those outcomes to move the plot forward. After Ryo is taken home, wakes on the next day or receives a new notebook entry, continue from that result unless the game explicitly prevents further progress.
When the next objective is unclear, open the notebook and read the newest written entries. The notebook records useful information from conversations and can identify a person, business, district or destination. Go first to the last NPC who supplied a confirmed lead, then visit the location named in the newest entry. Avoid restarting simply because an expected scene did not occur on the first visit; many conversations depend on the correct date, time or preceding dialogue chain. The Dreamcast manual describes investigation and conversation as the normal method of advancing the storyline, while the notebook remains a persistent record of useful information.
- Confirm whether the screen said Game Over.
- Read the newest notebook entry before repeating old errands.
- Distinguish a failed event from a scene that intentionally advances the date.
- Return to the last confirmed contact before searching unrelated areas.
Use permanent saves for recovery
The reliable recovery point is a regular game file made at the Save Point in Ryo’s bedroom at the Hazuki Residence. When Ryo enters his room, the save menu appears automatically. You can also stand in front of the bed and open the menu manually. The original Dreamcast release allows three game files on one VMU, so use separate positions for the current checkpoint, the previous confirmed objective and a longer-term backup when possible.
Resume is not a replacement for those files. Open the System Menu and choose Resume when you need to stop temporarily at your current position. Only one Resume file exists, and the manual states that it is erased when Continue loads it. Use Resume to pause a session, not as the only protection against a Game Over or a bad decision. During any save or load, do not power off the Dreamcast, remove the VMU or disconnect the controller holding it.
If you have only one VMU, rotate the three permanent game-file positions instead of overwriting the same file every time. Preserve the pre-event file until the next objective is visible in the notebook and the story has clearly advanced. If you have compatible backup hardware, copy the VMU data before a disc transition, a difficult sequence or the ending.
- Load a permanent VMU game file after Game Over.
- Keep one pre-event file until the next story beat is confirmed.
- Treat Resume as temporary and expect it to disappear after Continue.
- Never interrupt power, VMU contact or controller connection during saving or loading.
Recover from failed fights and QTEs
For a mandatory fight or QTE that produces Game Over or leaves the story unable to continue, reload the permanent save made before the event. If the game instead shows a follow-up cutscene, sends Ryo home or adds a notebook entry, follow that route first. Do not reload merely because the result was not the one you expected.
The You Arcade fight with Chai is the important exception. After the Asia Travel sequence, Chai appears at You Arcade and takes the Hong Kong ticket before challenging Ryo. Winning the Free Battle is optional. If Ryo defeats Chai, the immediate investigation continues at the arcade. If Chai defeats Ryo, Fuku-san intervenes and takes Ryo home for the rest of the day; the next day’s notebook directs Ryo back toward Asia Travel. The loss route therefore costs time but does not corrupt the save, block the campaign or require a restart.
For later required harbor confrontations, save at the Hazuki Residence before beginning a story day or a major trigger whenever the game permits. In battle, favor guarding, sidestepping, short attacks and recovery over repeated long combinations. If a defeat results in Game Over, reload the pre-event permanent file rather than relying on a consumed Resume file.
- Reload only when the event genuinely blocks progress or causes Game Over.
- Accept either outcome of the You Arcade Chai fight.
- After a successful mandatory encounter, save again at the next safe opportunity.
- Use defensive play and preserve health before linked fights or QTEs.
Re-trigger a missed conversation
A missing NPC is usually a schedule or prerequisite problem, not a permanent story miss. Read the notebook for the person’s name and area, then return during the time window suggested by the preceding conversation. If the NPC is not present, go back to the Hazuki Residence and sleep to advance the in-game date. Revisit the same location on the next suitable day instead of spending the entire day searching every district.
If the expected line still does not trigger, repeat the immediate dialogue chain. Speak with the last named contact, leave the area, advance time if necessary and return. This is especially important during the travel investigation, where Ryo must follow the sequence of leads through the travel agencies and named contacts before the cheaper boat option appears. Entering an agency too early may produce only ordinary dialogue or a flyer; that does not mean the route has been permanently lost.
When a conversation succeeds, confirm that the notebook has gained a new name, place or objective before overwriting the older recovery file. This gives you a concrete sign that the chain advanced.
- Check the NPC’s schedule and location before restarting.
- Sleep at the Hazuki Residence to move to the next date.
- Repeat the immediately preceding conversation chain when needed.
- Confirm a new notebook entry before discarding the older checkpoint.
Handle money shortages in the correct story phase
Do not use Alpha Trading as a general solution for the Hong Kong fare. The Asia Travel ticket is purchased before Disc 3, after Ryo follows the travel-investigation chain through the Global Travel Agency, Asia Travel, Fuku-san, Nozomi and the other named contacts. The boat ticket costs 69,000 yen in the covered North American Dreamcast route. After Ryo pays, the ticket is taken during the scripted meeting with Chai, and the story proceeds into Disc 3. Alpha Trading does not exist as an earlier recovery option and later forklift wages cannot refund the lost ticket or reopen that purchase.
If you are short of money before the scripted purchase, follow the notebook chain and preserve the daily allowance instead of spending on capsule toys, food beyond ordinary needs, scrolls or arcade play. The fare is tied to story progression and the game’s assistance scenes, not to an optional Disc 3 job. If the travel sequence has already advanced to the Chai meeting, do not keep saving for another ticket; proceed to Asia Travel after the loss and follow the new notebook objective.
Once Disc 3 begins, Alpha Trading forklift work is valid optional income for purchases, training support and other spending. It is also useful if you have spent heavily after arriving at the harbor. It is not a repair method for the pre-Disc 3 Asia Travel scam and should not be presented as a prerequisite for reaching Hong Kong.
- Determine whether the shortage occurs before or after the Asia Travel purchase.
- Before the purchase, follow the required dialogue chain and protect the daily allowance.
- After Chai takes the ticket, continue the scripted Disc 3 route instead of trying to buy it again.
- Use Alpha Trading later only for optional spending and support.
Maintain a repeatable recovery routine
Save before a high-risk fight, warehouse investigation, chase or timed meeting whenever you can safely return to the Hazuki Residence. Save again after a major lead is recorded or a story day concludes. Keep the older file until the notebook clearly shows the next objective. This prevents a missed schedule or failed QTE from forcing a long replay.
A dependable three-file rotation is: current position, previous confirmed objective and older backup. If a day’s event goes wrong, load the previous confirmed objective, sleep or revisit the required contact, and then save into the current-position slot only after progression is confirmed. Before changing discs or entering the final sequence, make a separate VMU or hardware backup if your equipment supports one. This uses the Dreamcast edition’s actual save tools rather than modern rewind, autosave or quick-save features.
- Save before major fights, chases and timed events.
- Keep an older file until the next notebook objective appears.
- Rotate the three permanent game-file positions when possible.
- Back up the VMU before disc transitions and the ending sequence.
Before you move on
- A Game Over can be recovered by loading a permanent VMU game file saved at Ryo’s bedroom Save Point.
- A missing lead has been checked against the notebook, the named contact, the relevant area and the likely schedule window.
- The player understands that either outcome of the You Arcade Chai fight can continue the main campaign.
- The player does not expect Alpha Trading wages to repair the earlier Asia Travel fare or scripted ticket loss.
- The current story-phase money problem has been handled without spending the remaining funds on optional activities.
- A current permanent save and an earlier recovery save are available before the next major story event.
- Resume is being used only as a temporary continuation save, not as the campaign’s sole backup.
References for this chapter
Final Checklist, Completion Check and Next Steps
Finish the original North American Sega Dreamcast campaign by completing the final harbor events, Ryo’s departure for Hong Kong, and the entire staff roll. Then create the post-credits Cleared File, preserve the ordinary Game File when possible, and verify the completed data before shutting down. Optional notebook entries, collectibles, arcade activities and side scenes do not affect campaign completion.
1. Finish the actual ending sequence
Do not treat the end of the 70-Man Battle, the first Terry confrontation or the final Chai fight as the completion point. Continue through the remaining required scenes after the final harbor confrontations. The game must proceed through the final Chai battle and its concluding QTE, then show Ryo leaving Yokosuka and beginning his journey toward Hong Kong.
For the North American Dreamcast release, the final Chai QTE is Down, A, A, B. Follow the button prompts displayed by your game if your setup presents them differently, but do not stop after winning the preceding free battle. The departure scenes and staff roll are still required.
Allow the staff roll to run to completion. The Cleared File prompt follows the staff roll, so resetting immediately after the ship or departure scenes can leave you without the completion record even though the story ending appeared.
- The final Chai free battle is complete.
- The concluding Chai QTE is complete.
- Ryo’s departure from Yokosuka has been shown.
- The Hong Kong-bound ending scenes have finished.
- The complete staff roll has played until the game presents the cleared-data save instruction.
2. Save the Cleared File after the staff roll
When the post-credits save instruction appears, select an available VMU location and complete the save. The Cleared File is a special completion record created after finishing the campaign; it is not the same thing as an ordinary Game File made in Ryo’s bedroom and it is not the temporary Resume File.
Keep the Dreamcast powered on and leave the VMU in the controller while the save is being written. Do not remove the VMU, disconnect the controller, reset the console or switch off the system until the game has confirmed that saving is finished. If the VMU reports an error, treat the file as unverified and use your pre-ending Game File to replay the final sequence rather than assuming that completion was recorded.
The Cleared File is not normally resumed through the ordinary Load and Start route. Its main original-Dreamcast use is through Disc 3. With Disc 3 inserted, reach the title screen, open Options, and confirm that the 70 Person Free Battle Time Attack option is available. Select that mode and choose the Cleared File when the game asks for the completed data.
- The post-staff-roll Cleared File prompt appeared.
- A VMU destination was selected successfully.
- The save completed without an error message.
- The Dreamcast was not reset or powered off during the save.
- Disc 3’s Options menu recognizes the completed data or presents the Cleared File as an available choice.
3. Keep the ordinary Game File
Before the final sequence, keep at least one ordinary Game File in a separate slot whenever possible. The normal Game File is the replay and recovery point for the last day; it is distinct from the Cleared File and should not be overwritten merely because the ending has been completed.
If you have not yet made a final backup and still have access to the pre-ending save, preserve it before experimenting with transfers or additional saves. A cleared save proves that the campaign was completed, but the ordinary file lets you replay the ending and inspect the final-day events without repeating the whole investigation.
A Start File is also different from both of these. Start Files are used at disc transitions to begin the next disc’s opening sequence. They are progression files associated with changing discs, not proof that the entire campaign was cleared. Resume is temporary: the Dreamcast manual states that continuing from a Resume File consumes that temporary data, so Resume should never be your only recovery copy.
- An ordinary pre-ending Game File remains on the VMU when possible.
- The Cleared File is stored separately or clearly identified.
- The Cleared File was not mistaken for a Start File or Resume File.
- The only ordinary recovery save was not overwritten during post-ending testing.
4. Decide completion without emptying the notebook
Completion is established by the ending, the finished staff roll and the successful Cleared File save. The notebook does not need to become empty, and it does not need to contain no residual objectives. Optional conversations, collectible notes, arcade information, capsule-toy records, kitten events and other side material can remain.
Do not restart the campaign because the notebook still contains optional or residual information. Likewise, you do not need every character entry, every move, every arcade result or every collection item unless you have chosen a separate completion goal. Those activities are independent of reaching the normal ending.
If a mandatory event had truly been missed, the game would not have allowed the final sequence to proceed. Therefore, use the ending and the Cleared File as the decisive checks rather than trying to interpret every remaining notebook page.
- The ending and complete staff roll have played.
- The Cleared File was successfully created.
- Any remaining notebook entries have been classified as optional or residual.
- Optional activities are not being used as a completion requirement.
5. Preserve and test backups safely
If you own a second physical VMU and have suitable Dreamcast file-management hardware or software, copy the Cleared File only after the primary save is confirmed. Keep the first copy untouched and verify that the duplicate appears in the destination VMU’s file list. This backup is recommended for aging VMU hardware but is not required to finish Shenmue.
Do not experiment with conversion tools, regional transfers or import tests using the only copy. Label the original North American Cleared File and use the duplicate for any compatibility test. Never remove a VMU during an active save or load operation.
The Dreamcast manual lists three ordinary Game File slots on a VMU and separately describes Resume behavior. Treat the VMU file listing as the practical preservation check: the original Game File and the Cleared File should be visibly distinguishable, and both should remain available before you begin another game.
- The primary Cleared File remains untouched.
- A duplicate exists only if the hardware and transfer method support a verified copy.
- The duplicate, not the original, is used for experiments.
- Both the ordinary Game File and Cleared File can still be located.
6. Check Shenmue II compatibility by exact edition
Identify the sequel’s exact platform and region before attempting an import. There was no North American retail Dreamcast release of Shenmue II. The North American sequel release was on the original Xbox, and an Xbox save system cannot directly read a Dreamcast VMU Cleared File.
The Japanese and European Dreamcast releases do support starting from a Shenmue I Cleared File, but regional compatibility matters. Established Shenmue II references document that a North American Shenmue Cleared File is not directly compatible with the European Dreamcast sequel without additional conversion or compatibility handling. Do not assume that inserting the VMU will work simply because both games are Dreamcast releases.
The later Shenmue I & II collection uses its own save system and import procedure. If you are playing that collection, follow its in-game import instructions rather than attempting to transfer a physical VMU file. Only proceed when the target edition itself detects the completed data. Preserve the original North American Cleared File even after a successful import test.
- The target Shenmue II platform is identified.
- The target region and edition are identified.
- The target edition’s own import instructions have been checked.
- The original North American Cleared File remains preserved.
- The sequel detects the save before beginning the new game.
Before you move on
- The final Chai encounter and concluding QTE are complete.
- Ryo’s departure for Hong Kong has been shown.
- The entire staff roll has finished.
- The post-credits Cleared File prompt was completed successfully.
- The Cleared File remains visible on the VMU or is recognized by Disc 3’s 70 Person Free Battle Time Attack option.
- The ordinary pre-ending Game File remains available when possible.
- Any remaining notebook entries are understood to be optional or residual rather than a completion failure.
- Optional activities have not been mistaken for required campaign objectives.
- The exact Shenmue II platform and region have been identified before any import attempt.
- The original North American Cleared File has been preserved while any compatibility test uses a duplicate.
References for this chapter
- Shenmue Dreamcast Manual
- Shenmue Guide and Walkthrough — Dreamcast, Saving, Resume and Cleared File
- Shenmue Guide and Walkthrough — Dreamcast, Final Day and Ending
- Shenmue II Dreamcast Manual — Cleared Game File Import
- Shenmue II — Hardcore Gaming 101, Dreamcast Regional Releases and Save Compatibility
- Shenmue — US-to-UK Save Conversion FAQ
Finishing up
The normal ending has played: the final harbor events are complete, the final Chai QTE has succeeded, Ryo boards the ship for Hong Kong and the credits finish.
The post-credits save prompt has created a visible Cleared File on the VMU.
The ordinary pre-ending save remains available when possible, and a second verified VMU or external backup exists if the hardware supports it.
Optional collectibles, arcade records and residual notebook notes are not required for this completion check.
Choose your next gameScreenshots & video
Game imagery for reference. Follow the written chapters above for the route and strategies.
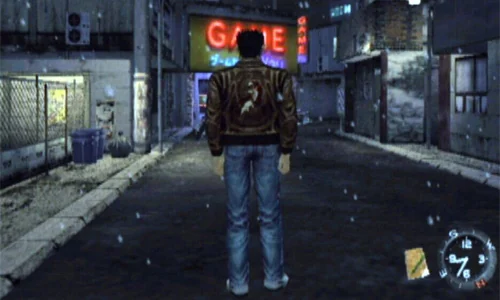
Sources & references
Our original guide draws on the references below. Check the edition at the top of this page before following controls or unlock requirements.
- Shenmue Dreamcast Manual
- Shenmue — Guide and Walkthrough — Dreamcast — Crazyreyn
- Shenmue Guide and Walkthrough — Dreamcast, Saving, Resume and Cleared File
- GameSpot Game Guide: Shenmue
- Shenmue — Guide and Walkthrough — Dreamcast — AmericanArsenal
- Shenmue — The Phoenix Mirror — StrategyWiki
- Shenmue — Notebook Guide — Dreamcast — By fvector
- Shenmue Guide and Walkthrough — Dreamcast — GameFAQs, GheddonLN
- Shenmue - Passport/Information FAQ - Dreamcast - By falsehead
- Shenmue Guide and Walkthrough — Dreamcast, Final Day and Ending
- Shenmue — Guide and Walkthrough — Dreamcast — CChan
- Shenmue/Ticket to Hong Kong — StrategyWiki
- Shenmue — Guide and Walkthrough — Dreamcast — Adrenaline_SL
- Shenmue — Guide and Walkthrough — Dreamcast — Shotgunnova
- Shenmue — Secrets Guide — Dreamcast — By JMcKenzie
- Shenmue II Dreamcast Manual — Cleared Game File Import
- Shenmue II Release Information for Dreamcast
- Sega Dreamcast Info: Shenmue II North American Dreamcast Release History
- Shenmue FAQ/Walkthrough — Neoseeker Walkthroughs
- Shenmue II — Hardcore Gaming 101, Dreamcast Regional Releases and Save Compatibility
- Shenmue — US-to-UK Save Conversion FAQ
About the game & collecting notes
- Platform
- Dreamcast
Step-by-step coverage of the original North American Sega Dreamcast release of Shenmue from the Hazuki Residence through the Hong Kong departure. The route follows the actual sequence: Yokosuka investigation and Disc 1 bus transition, Disc 2 Old Warehouse and Asia Travel events, Disc 3 harbor employment and Mad Angels investigation, the 70-Man Battle, final Chai encounter, credits and post-credits Cleared File. Optional activities, recovery methods and save-transfer cautions are separated from required story progress.
Darryl Polo
Darryl Polo loves tinkering with emulation and revisiting retro games. He enjoys exploring how old favorites play on different setups and sharing what he learns along the way. At Joking Joystick, he writes about the games, hardware, and small discoveries that keep the hobby fun.
Our editorial standardsFound a step that needs another look? Help us improve this guide.