Resident Evil 4 — Complete Walkthrough (Nintendo GameCube, North American original two-disc release)
A step-by-step campaign walkthrough for the original North American Nintendo GameCube release of Resident Evil 4. Follow Leon from the Village and lake through the Church, Castle and Island, then complete the final facility, Saddler battle, jet-ski escape and ending. The route keeps the original GameCube controls, encounters, two-disc structure and edition-specific bonus modes in scope, while separating required story progress from optional treasures, Merchant upgrades and post-game challenges.

Find a copy
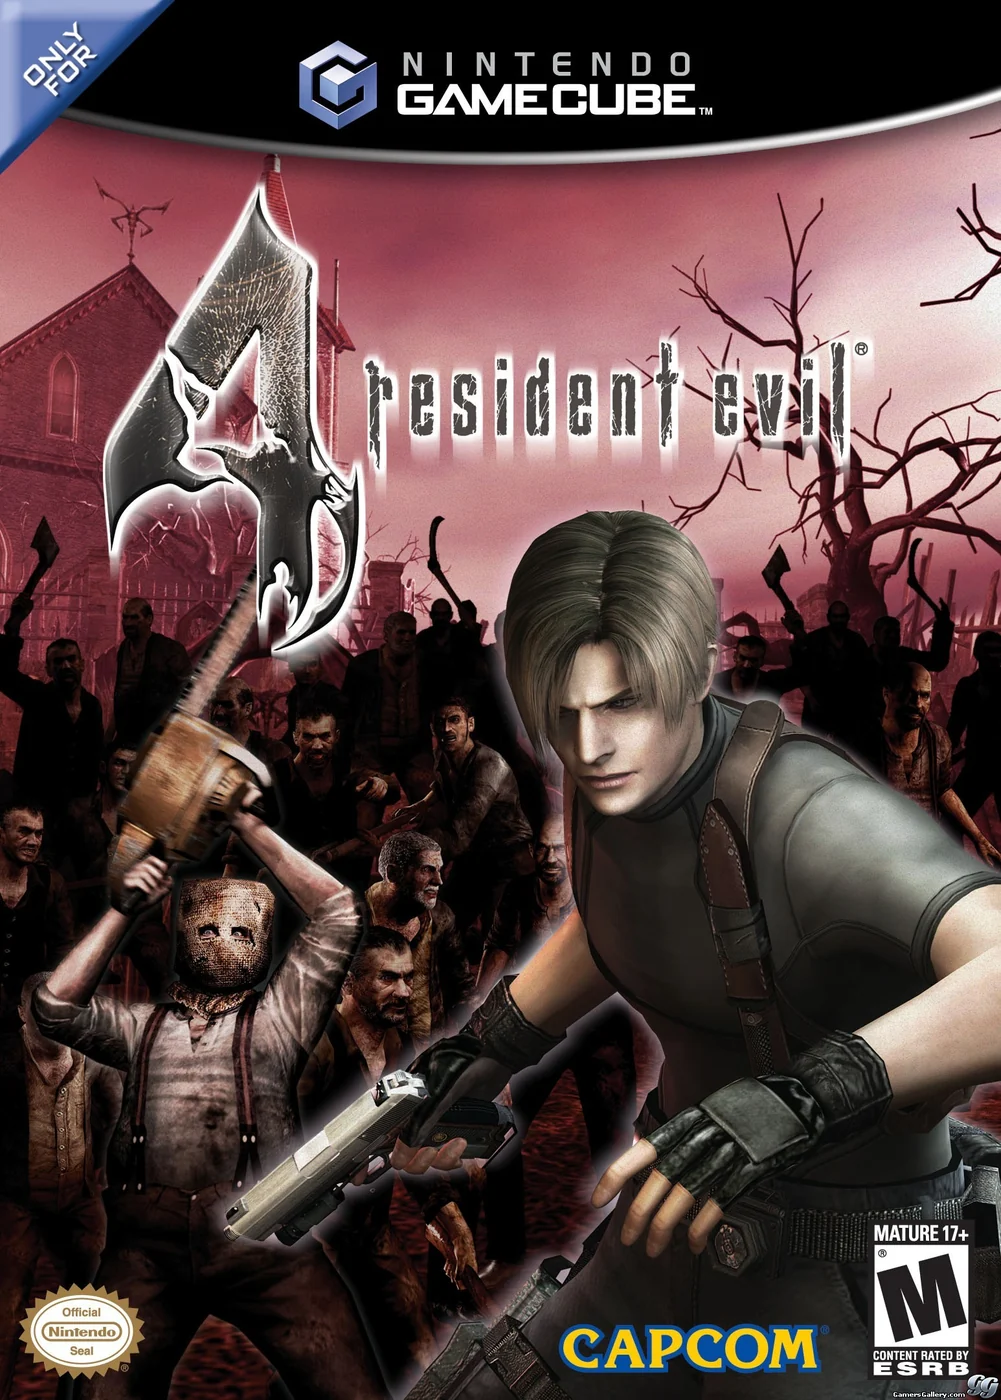
Resident Evil 4 Nintendo GameCube
We may earn a commission if you buy through these links, at no extra cost to you. As an Amazon Associate I earn from qualifying purchases.
Opens retailer search results. Check the model, edition, seller, availability and current price before buying.
Before you begin
You control Leon S.
Kennedy on a rescue mission in an unfamiliar European area infected by Las Plagas.
This guide keeps the original GameCube edition’s layout, encounters and extras in mind — it shows where to move, when to conserve ammo, how to use the Merchant, what treasures to prioritise and how to handle every major boss encounter without importing mechanics from later ports or remakes.
Follow the chapters in order.
Each chapter has a short objective list, concrete step instructions and recovery actions for common mistakes.
If you are playing on a higher difficulty, treat ammo and healing items as precious: avoid wasteful aimed shots, rely on knees/limbs shots for groups, and use environmental hazards when possible.
Set yourself up for the run
Hardware and saves: Use a GameCube controller and compatible Memory Card with sufficient free blocks. The original release uses two discs; save when prompted before changing discs and before powering off.
Controls: Use the original fixed-position movement and laser-sight aiming. Do not import remake, Wii motion-control or later-port mechanics.
Inventory basics: Keep a dependable handgun, a shotgun, a long-range rifle when available, healing items and free Attache Case space. The Merchant sells weapons, ammunition, upgrades and case expansions.
Save strategy: Maintain a normal progress file and a separate recovery file before bosses, timed sequences, disc changes and risky treasure detours.
Treasure strategy: Check whether an item can be combined before selling it, but treat treasure collection as optional unless it is needed for cash or case space.
Post-game scope: Clearing the story unlocks the relevant GameCube bonus content. Professional, special weapons, costumes and Mercenaries ratings can be pursued afterward; do not refer to S+ runs because that is not an original GameCube campaign objective.
Controls, HUD and Merchant — what you need before starting
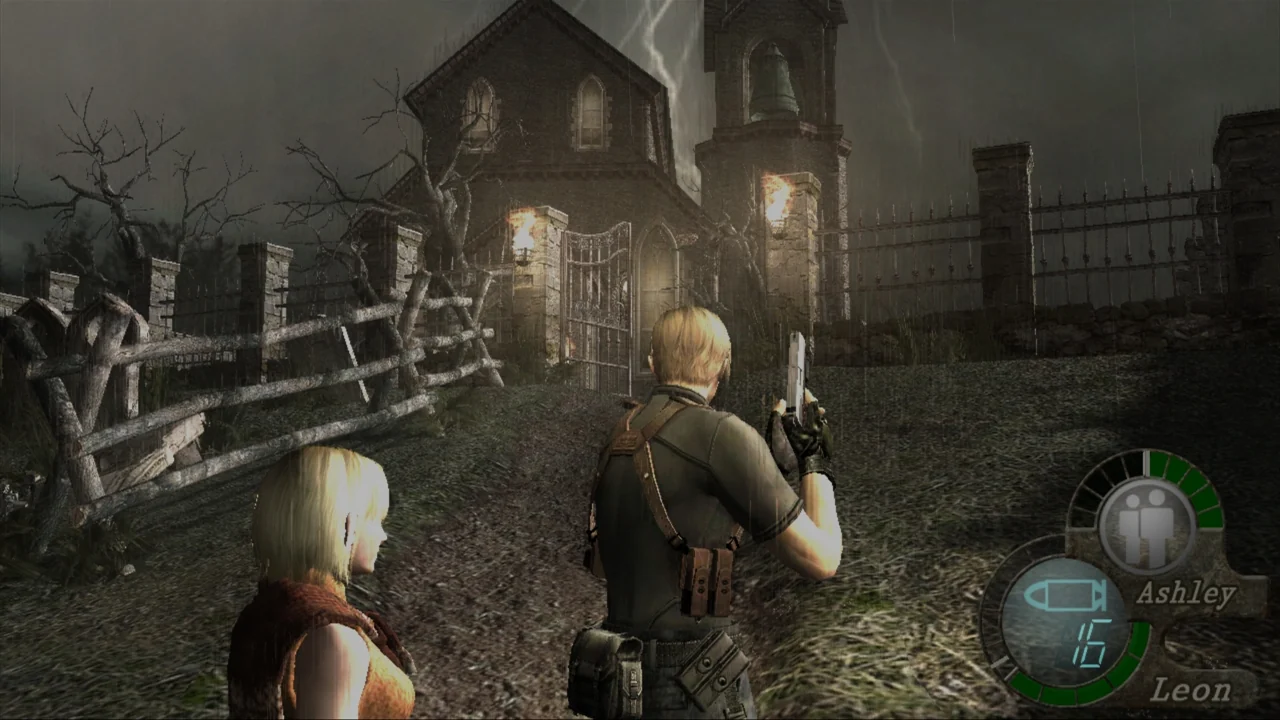
The North American Nintendo GameCube release uses fixed-position movement and laser-sight aiming. Learn the default controller layout, use the HUD and Status screen to manage Leon’s equipment, and treat typewriters as deliberate recovery points. The Merchant sells weapons, parts, ammunition and case expansions, while Tune Up improves weapons you already own. Early money is best concentrated on a dependable handgun, a shotgun and enough healing and ammunition space to handle the next section.
Prepare the console, controller and Memory Card
Insert Resident Evil 4 Disc 1 into the GameCube and connect the controller to Socket 1. Insert a compatible Memory Card into Slot A or Slot B before starting. The official manual states that each saved game requires at least nine free blocks, so check the card before beginning rather than waiting until the first typewriter.
The GameCube release uses two discs. Disc 1 starts the campaign. When the game prompts you to change discs, insert Disc 2 and save before switching off the console. If you turn the power off without saving after progressing onto Disc 2, your usable progress will only extend to the end of Disc 1.
The default controls can be changed from Controller Setup in the Option screen. Before leaving the title screen, check the camera direction setting, rumble setting, knife type and screen brightness. These options alter handling or visibility but do not provide modern free-aim controls.
- Controller connected to Socket 1.
- Memory Card inserted in Slot A or B.
- At least nine free blocks available.
- Disc 1 inserted to begin the campaign.
- Controller Setup and brightness checked.
Learn movement, aiming, firing and emergency turns
Use the Control Stick or Control Pad to move forward and backward and to turn left or right. Hold R to ready the equipped weapon, then use the Control Stick or Control Pad to aim the laser sight. Press A while holding R to fire or perform the weapon’s attack. Press B while holding R to reload.
Hold L to switch to the knife regardless of the weapon currently equipped, then press A while holding L to slash. The C Stick changes the camera view; it does not give Leon modern right-stick aiming. Aim with R and the movement control instead.
Hold B while moving forward to run. Press B with the Control Stick held down to perform the 180-degree turn. You can also press B while moving backward to turn completely around. Practice this turn before the first village fight, because it is the quickest way to face an enemy approaching from behind.
When an Action Button prompt appears, press A to perform the displayed interaction. Depending on the situation, this can open a door, climb, jump, kick, dodge or trigger another context-sensitive action. Do not assume every prompt is an attack prompt; read the on-screen instruction before pressing it.
- R plus Control Stick or Control Pad aims.
- R plus A fires.
- R plus B reloads.
- L plus A uses the knife.
- B plus forward runs.
- B plus down performs the 180-degree turn.
- C Stick changes the camera view.
- A performs the displayed Action Button command.
Read the HUD and use the Status screen
The game screen shows Leon’s Health, Remaining Ammo, Attache Case, the name of the selected item and currency. Once Ashley joins Leon, her Health is also displayed. If Remaining Ammo reads EMPTY, open the Status screen and reload if spare ammunition is in the case; if no ammunition is available, switch weapons instead of standing still with an empty weapon.
Press Y to open the Status screen. Use it to organize the Attache Case, equip weapons, use recovery items and combine herbs or other compatible items. Highlight an item and press A to display its available commands, then choose EQUIP, USE or another listed action.
The Attache Case has Temporary Space for items when there is not enough room to place everything normally. Treat this as a short-term buffer, not permanent storage. After a fight or Merchant visit, reorganize weapons, ammunition and healing items so critical supplies are not buried or left in temporary space.
Press Z while on the Status screen to open the map. Selecting a marked item can show its location on the map. Use this when returning through an area for a key item or when checking whether a destination remains ahead.
- Identify Health, Remaining Ammo, currency and the selected item name.
- Check Ashley’s Health when she is accompanying Leon.
- Use Y for inventory, equipment, healing and combinations.
- Use Temporary Space only until the case can be reorganized.
- Use Z on the Status screen to open the map.
Use the Merchant without weakening the loadout
The Merchant’s Buy menu sells weapons, weapon parts, ammunition and Attache Case expansions. Tune Up improves statistics on weapons you already own, including firepower and other listed attributes. Sell converts jewels and other treasures into pesetas. Make room in the Attache Case before shopping, because insufficient space can prevent a purchase.
For a first campaign, avoid buying every weapon that becomes available. Keep a dependable handgun for ordinary targets and a shotgun for groups, close threats and emergency stagger attacks. A sensible early priority is a handgun firepower or capacity improvement when affordable, followed by a shotgun capacity upgrade before a section where close-range fighting is likely. These are recommendations, not mandatory purchases; preserve enough money for ammunition and healing needs.
Capacity upgrades can be especially useful when the weapon’s magazine is nearly empty because the larger capacity gives immediate ammunition room. Do not buy an upgrade solely for the refill if doing so leaves the case without space for shells, handgun rounds or a healing item.
Before selling a treasure, check whether it can be combined with another item. The manual specifically notes that related treasure combinations may produce more money than selling the pieces separately. Sell ordinary valuables when you need cash or case space, but do not discard key items or combine objects merely to clear space without checking their commands.
- Make case space before visiting the Merchant.
- Use Buy for weapons, parts, ammunition and case expansions.
- Use Tune Up for weapons already owned.
- Use Sell for jewels and treasures.
- Check combination options before selling treasure components.
- Keep money available for ammunition and the next useful upgrade.
Create two useful save entries
Typewriters are the campaign’s manual save points. Save whenever you reach a new major area, complete a difficult encounter or finish a treasure sweep. Maintain one entry for ordinary chapter progress and another immediately before a boss, timed sequence, disc change or risky optional detour.
Use the recovery entry to test a Merchant purchase or a difficult route without sacrificing your main progress. If the purchase leaves you short on ammunition or case space, reload and choose a different upgrade or sell a different treasure. After a successful boss or set piece, save again so a later mistake does not force a long replay.
The Option screen also provides Retry or Load, but those choices do not replace deliberate Memory Card saves. Confirm that the typewriter has finished saving and that the new entry appears in Load Game before turning off the console. Do not overwrite both recent entries at once when experimenting with equipment.
- Progress entry: current route and chapter advancement.
- Recovery entry: before bosses, timed scenes, disc changes and risky detours.
- Save after major victories and difficult transitions.
- Confirm the entry appears in Load Game before ending the session.
Before you move on
- You can aim, fire, reload, use the knife and perform the 180-degree turn without consulting the controls.
- You understand that the C Stick changes the camera view rather than providing free aiming.
- You can identify Leon’s Health, Remaining Ammo, currency, selected item and Attache Case on the HUD.
- You can open the Status screen with Y, the map with Z and the Action Button prompt with A.
- You have separate progress and recovery save entries on the Memory Card.
- You know the Merchant’s Buy, Tune Up and Sell functions and have a handgun-and-shotgun priority for early spending.
Chapter 1: The Village — first contact and survival basics
Complete Chapters 1-1 and 1-2 by surviving the opening village siege, crossing the Farm and Valley, finding the first Merchant, assembling the two Emblem halves, and reaching Chief Mendez’s House. Solve the globe puzzle, take the Insignia Key, and begin Chapter 1-3. Continue through the village tunnel and cemetery far enough to establish the route toward the lake. Optional treasures, Blue Medallions, the dog rescue and the Green Catseye are not required for story progress. Cutscenes can be skipped without preventing progression.
Leave the first house and clear the forest path
Walk toward the first house and enter after the opening scene. Defeat the Ganado inside with the handgun, aiming for the head when practical. Search both floors for ammunition, then leave through the window. When a staggered enemy produces an action prompt, use the kick to conserve ammunition.
During the outdoor attack, keep Leon beside a fence, wall or doorway so enemies cannot surround him. Escape immediately if grabbed. Search the nearby cabin for supplies before continuing. The dog caught in the bear trap can be rescued as an optional action; freeing it helps during a later boss encounter but is not required for chapter progress.
- Search both floors of the first house.
- Collect the nearby handgun ammunition and supplies.
- Free the trapped dog only if you want its later assistance.
- Keep a wall, fence or doorway behind Leon during the first outdoor fight.
Cross the explosive traps and enter the village
Continue along the path until the warning signs and wire traps appear. Walk through the visible gaps or shoot the explosive panels from a safe distance. Search the next shack for supplies, then cross the bridge and enter the next cabin before opening the village gate.
Inside the cabin, search for supplies and use the typewriter if you want an early save. Enter the village through the large gate. Do not spend ammunition trying to clear every Ganado before reaching the two-story house; the coming siege is based on survival and movement rather than total elimination.
- Cross the forest traps safely.
- Search the shack and cabin for ammunition and healing items.
- Save before opening the village gate if desired.
- Keep at least one escape route available inside the village.
Collect the shotgun and survive the village siege
Prioritize the two-story house near the south side of the village. Its upper floor contains the shotgun, a hand grenade and shotgun shells. Push the shelf against the window, take the supplies, then leave through the upper window and use the action prompt to knock down the ladder.
The required objective is to survive until the church bell rings, not to defeat every villager. Move between the upper walkway, rooftops, the barn and nearby buildings so enemies cannot surround Leon. Use handgun shots to stagger isolated Ganados and follow with kicks. Reserve shotgun shells for groups blocking a doorway, the Chainsaw Man, or an emergency escape.
Ganados can climb through windows and use ladders, so relocate after firing. Use grenades when a narrow room becomes crowded. Heal only after creating distance. Continue moving through the village until the bell rings and the attack ends.
- Take the shotgun, grenade and shotgun shells.
- Knock down the ladder after leaving through the upper window.
- Use the shotgun for groups rather than distant single targets.
- Continue moving until the church bell rings.
Search the quiet village and cross the Farm
After the bell, return through the village to collect supplies that were unsafe to reach during the siege. Check containers, rooftops and the shotgun house. Optional treasures such as the Spinel on the roof are not needed for progress. Follow the route toward the Farm and save at the typewriter in the Farm shed.
At the Farm, use the fences and barn entrances to limit attack directions. If collecting the Pearl Pendant, lower the well cover before shooting the hanging treasure so it does not fall into the water. The Blue Medallions, Beerstein and other Farm treasures are optional. Leave through the route that leads onward; the other gate is locked.
- Collect useful supplies after the bell.
- Save at the Farm shed.
- Lower the well cover before shooting the Pearl Pendant.
- Treat Blue Medallions and the Beerstein as optional.
Complete the boulder route and reach the Valley
When the boulder sequence begins, press the displayed action button repeatedly and be ready for the follow-up button combination. Continue through the tunnel and shoot the hanging gems if you want optional Spinels.
The Valley contains dynamite throwers, bear traps and explosive wires. Stay toward the left side while moving past the first dynamite cabin. Shoot exposed enemies from a distance when possible, disarm visible bear traps by shooting their centers, and avoid the explosive wire inside the small shack.
At the final house, kick the door open, collect supplies and save at the typewriter. Shoot visible explosives from a safe distance, push the shelf aside and examine the large cabinet to trigger the transition into Chapter 1-2.
- Complete both parts of the boulder action sequence.
- Stay left around the first dynamite area.
- Disarm traps before walking through the Valley.
- Examine the large cabinet to trigger Chapter 1-2.
Find the first Merchant and prepare for the Valley
Chapter 1-2 begins with a prompted dodge during the opening scene. When control returns, collect the ammunition on the shelf and save at the typewriter before leaving the house. Walk around behind the house to find the first Merchant.
The Merchant offers weapons, upgrades, ammunition and healing items. A handgun damage or capacity upgrade is a practical early purchase. A shotgun capacity upgrade is also useful if you rely on the shotgun for crowd control. The rifle and scope are optional at this stage. Do not spend all your money if doing so leaves Leon without healing items or ammunition; no purchase is required for progression.
- Complete the opening dodge prompt.
- Save inside the Valley house.
- Walk behind the house to find the first Merchant.
- Leave enough money or inventory space for emergency supplies.
Collect both Emblem halves and unlock the Valley exit
Leave through the main gate near the Merchant and clear the Valley combat area. Use the house on the lower route for ammunition, then climb to its roof and take the Emblem Right Half from the chest. Continue around the upper path, watching for dynamite throwers, and search nearby platforms for supplies.
Cross the bridge toward the opposite high ground and take the Emblem Left Half from the second chest. Combine the two halves in the inventory to create the Hexagonal Emblem. Use the completed emblem on the locked gate. In the following corridor, eliminate or pass the Ganados before moving through the large door.
- Take the Emblem Right Half from the first chest.
- Take the Emblem Left Half from the second chest.
- Combine both halves into the Hexagonal Emblem.
- Use the completed emblem on the locked gate.
Cross the refinery and reach Chief Mendez’s House
Proceed through the refinery and use cover when approaching the Ganados behind the barricade. Dynamite throwers can injure their own group, so shoot exposed attackers from a protected position. Shoot floor traps before entering the furnace area, then collect supplies if your inventory has space.
In the water-room section, use the shotgun to break the boards blocking the Elegant Mask if you want the optional treasure. Continue through the hallway and ladders. Fish in the lower water area can provide recovery items, but underwater bear traps remain dangerous. Climb out and follow the path toward Chief Mendez’s House.
Shoot the explosive trap and bear trap near the approach before climbing to the rear entrance. There is no need to defeat every enemy in the route if you can move past them safely.
- Use cover against the refinery barricade.
- Shoot traps before crossing the furnace area.
- Search the water room only if it is safe.
- Disarm the traps outside Chief Mendez’s House.
Solve the globe puzzle and take the Insignia Key
At the rear entrance of Chief Mendez’s House, approach the globe puzzle. Rotate the globe upward once, then rotate it left once. This is the default original GameCube solution from the puzzle’s starting position and opens the concealed passage.
Inside the bedroom, collect the Chief’s Note, ammunition and pesetas if desired. Take the Insignia Key from the small case. Leave through the bedroom door to trigger the Chapter 1-2 ending scene. Follow any displayed dodge prompt, then save when control returns.
- Open the globe puzzle door with upward once, then left once.
- Take the Insignia Key from the case.
- Collect the Chief’s Note if desired.
- Complete the transition scene before continuing.
Begin Chapter 1-3 and return toward the village
At the front of the house, search nearby rooms for the Green Herb, incendiary grenade and other supplies. The door beside Leon can trigger an optional scene if revisited, but it is not required. Leave through the kitchen and prepare for the Chainsaw Man and Ganados outside. Use the shotgun or a grenade to create space, then follow the path back toward the village.
Clear the village approach and use the Insignia Key on the large-symbol door near the tower. Enter the tunnel, collect supplies and descend through the trap door. The tunnel leads to another Merchant and a typewriter. Resupply or save if necessary, then climb the ladder and continue toward the cemetery.
- Collect useful supplies inside the house.
- Treat the optional return scene as nonessential.
- Use the Insignia Key on the large-symbol door.
- Reach the tunnel Merchant and typewriter.
Cross the cemetery and establish the lake route
In the cemetery, clear the Ganados and inspect the church door. It is locked at this point, so continue around the church rather than searching for a key. On the right side, follow the path to the graveyard dial puzzle. The three larger twin gravestones indicate the symbols required for the optional Green Catseye.
To solve the dial quickly from its starting position, rotate by 3 three times, rotate by 4 three times, then rotate by 3 once: 3, 3, 3, 4, 4, 4, 3. Take the Green Catseye and combine it with the Beerstein later if desired. This reward is optional and has no effect on the required story route.
Continue beyond the cemetery and cross the wooden walkways. Watch for Ganados, dynamite and gaps. Pass the small huts and proceed through the door at the far end. This establishes the forward route toward the lake; the next chapter covers the lake and Del Lago sequence.
- Confirm that the early church door is locked.
- Solve the optional cemetery dial with 3, 3, 3, 4, 4, 4, 3 if collecting the Green Catseye.
- Cross the wooden walkways safely.
- Reach the door leading onward toward the lake.
Before you move on
- The opening village siege has ended with the church bell.
- The shotgun, grenade and nearby shells have been collected or intentionally left behind.
- The Farm and Valley routes have been completed, including the boulder sequence.
- A save exists at the Chapter 1-2 Valley house typewriter.
- The first Merchant has been found behind the Valley house.
- Both Emblem halves have been combined and used to open the Valley gate.
- The Insignia Key has been taken from Chief Mendez’s House.
- Chapter 1-3 has begun, the Insignia door and tunnel have been passed, and Leon has reached the cemetery route leading toward the lake.
- The Green Catseye has been collected only if the optional cemetery puzzle was completed.
- No Merchant purchase is required for completion, provided the story route and required key items are complete.
References for this chapter
- CAPCOM Online Manuals — Resident Evil 4, GameCube English Manual
- Resident Evil 4 — GameCube English Manual PDF
- Resident Evil 4 — GameCube Guide and Walkthrough by Berserker, GameFAQs
- Resident Evil 4 — Guide and Walkthrough — GameCube — GameFAQs
- Resident Evil 4 — Puzzle Solutions — GameCube — By AngelIz831
The Lake and Del Lago — the water arena and large aquatic threats
Follow the route from the village-side paths to the lake, clear only the combat needed to reach the boat, and save in the lakeside shack before sailing. Del Lago is fought entirely with the boat’s harpoons, which are unlimited. Steer around floating stumps while the creature drags the boat, then throw harpoons whenever its body is visible. During its direct charge, aim at the exposed front and mouth. If Leon is knocked into the water, complete the on-screen recovery input immediately. After the creature is defeated, finish the underwater escape prompt and recover in the east-side cabin. The lake remains available for optional exploration, including fish, supplies, and the Merchant’s cave. The waterfall, Round Insignia, and return to the Church are covered in the next chapter.
Reach the west side of the lake
Continue through the village-side route until you reach the swamp and the lakeside settlement. Ganados occupy the paths, shacks, and wooden walkways, with traps and dynamite making careless advances dangerous. Use the handgun against isolated enemies and reserve the shotgun for groups that close in on narrow paths or doorways. You do not need to defeat every enemy before moving forward; clear the immediate route, collect safe supplies, and preserve a retreat path.
When the large boulder blocks the route, run as directed and complete the displayed dodge prompt. Continue through the passage, disarm visible traps, and move through the settlement toward the boat-side shacks. Keep Leon moving when dynamite is in play rather than trying to trade shots in the open.
- Carry at least one healing item before boarding the boat.
- Disarm traps before searching the shacks.
- Reload the handgun and shotgun before entering the boat area.
Search the lakeside shacks and save
Search the buildings near the lake before starting the boss sequence. The area contains ordinary ammunition, herbs, money, and breakable-container drops. A shack near the boat route contains a typewriter and is the best place to make a dedicated recovery save. A treasure hanging above the approach can also be shot down if you want to collect it before sailing.
Combine herbs when necessary to create inventory space, but do not spend heavily on equipment solely for Del Lago. Leon cannot use the handgun, shotgun, rifle, or grenades during the boss encounter. Those weapons and their ammunition matter only for the Ganados before and after the fight.
- Make inventory space for supplies found after the boss.
- Save at the lakeside typewriter if you want a separate Del Lago retry point.
- Do not waste shotgun shells on distant enemies that can be bypassed or handled with the handgun.
Board the boat and use the harpoons
Board the boat at the end of the lakeside route. After the introductory scene, Leon is equipped with an unlimited supply of boat harpoons. Aim with the displayed control and throw when Del Lago is clearly visible. Do not attempt to open the inventory or switch to one of Leon’s normal firearms; they are not available during this encounter.
At the beginning of the fight, Del Lago pulls the boat around the lake. Keep steering while watching the water ahead. Floating stumps and logs can damage the boat, so make broad, controlled corrections rather than waiting until an obstacle is directly in front of you. Attack only after the boat has a clear line toward the creature.
- Use the boat’s harpoons, not Leon’s regular weapons.
- Keep the boat moving around floating obstacles.
- Do not hold the attack input while ignoring the boat’s direction.
Attack when Del Lago surfaces
When Del Lago swims ahead of the boat and exposes its head or upper body, throw one or more harpoons into the visible target. Accurate throws are more important than rapid attacks against empty water. After each throw, return your attention to steering because the creature may dive or drag the boat toward another obstacle.
Del Lago can also disappear beneath the water and reappear at a distant side of the lake. Watch the on-screen directional indicators to locate it. When the creature begins a direct charge with its mouth open, aim at the exposed front and throw a harpoon to interrupt the attack. If it resurfaces at a distance, wait until the target is properly aligned before throwing.
The encounter alternates between steering and attack opportunities. Treat obstacle avoidance as the priority. The harpoons do not need to be conserved, so take safe shots whenever Del Lago is exposed.
- Aim at Del Lago’s visible head or upper body.
- Use the directional indicators when it disappears underwater.
- Interrupt the open-mouth charge with a well-timed harpoon.
Recover if Leon is thrown into the lake
A successful attack sequence can knock Leon from the boat. Follow the on-screen recovery prompt immediately to swim back and climb aboard. Do not delay to look for items or attempt to manage equipment. Remaining in the water leaves Leon vulnerable and can turn a recoverable mistake into a death.
Once Leon is back on the boat, resume the same pattern of steering around obstacles and throwing harpoons during clear openings. If the attempt fails, reload the save in the lakeside shack. On the retry, concentrate on avoiding collisions first; the unlimited harpoons remove any reason to rush attacks.
- Complete the recovery input as soon as it appears.
- Do not pause for inventory management during the active fight.
- Reload the lakeside save if Leon dies or the boat takes excessive damage.
Finish Del Lago and escape underwater
Continue striking Del Lago until the creature is defeated. The battle is not completely finished when it sinks. The harpoon rope catches Leon, pulling him underwater, and the game presents a repeated-input escape prompt. Continue responding until Leon cuts himself free and the scene ends.
If you miss the underwater input, reload the pre-boss save and repeat the encounter. The safest approach remains controlled steering followed by deliberate harpoon throws; there is no advantage to wasting time trying to hit Del Lago while it is submerged or outside the aiming line.
- Confirm Del Lago has been defeated.
- Complete the entire underwater escape prompt.
- Do not leave the game before control returns after the escape scene.
Recover in the east-side cabin
After the escape, Leon wakes in the cabin on the east side of the lake. Search the room for the available file, ammunition, healing or utility items, and the breakable container. A typewriter is available if you want to preserve the completed Del Lago fight before continuing.
Exit the cabin and return to the dock. The lake route remains open for optional travel, so you are not forced directly into the next story objective. Keep the cabin save as a useful recovery point if you intend to explore or restock before moving on.
- Search the east-side cabin before leaving.
- Use the cabin typewriter if you want a new recovery save.
- Confirm Leon is back at the dock before choosing the next destination.
Visit the lake Merchant if needed
Use the boat to travel to the Merchant’s cave, marked by blue lights. The cave contains the Merchant, breakable containers, and optional supplies. Sell surplus treasure, restock ammunition, and inspect available upgrades before returning to the east-side dock. The Merchant’s cave is optional for minimum story progress but useful if Leon is low on healing items or ammunition.
Fish in the lake only if additional healing is necessary. Optional lake exploration should not replace the main objective of preserving supplies and reaching the next story route. Do not continue into the waterfall area as part of this chapter; the waterfall mechanism, Round Insignia, and return to the Church are handled in the next chapter.
- Visit the Merchant if ammunition or healing is low.
- Sell surplus treasure only after making enough inventory space for supplies.
- Return to the east-side route when ready to continue the campaign.
Before you move on
- Del Lago is defeated with the boat’s harpoons.
- Leon completes the underwater escape prompt and the post-battle scene ends.
- Leon reaches the east-side lakeside cabin and can use its supplies and typewriter.
- The boat is available for optional travel to the lake Merchant’s cave.
- The chapter ends before the waterfall route, Round Insignia, and return to the Church.
Chapter 2-1: The Waterfall, Church Puzzle and Ashley Rescue
After defeating Del Lago, Leon returns across the lake to obtain the Round Insignia and open the church. Follow the waterfall route, disable the water flow, collect the insignia, and backtrack to the church entrance. Inside, climb to the upper level, operate the stained-glass mechanism, and align the red, green, and blue lights to open the barrier. The original GameCube puzzle solution from the default starting position is red twice, green three times, then blue once. Enter the newly opened room, rescue Ashley, collect the nearby supplies, and return to the church floor. The chapter ends when Leon catches Ashley after the ladder descent, making Chapter 2-2 available. The cemetery dial puzzle and extra treasures are optional and are not required for story progress.
1. Leave the post-Del Lago cabin and reach the lake boat
After the Del Lago battle, Leon wakes in a cabin on the eastern side of the lake. Search the room for supplies and read the note if desired. Use the typewriter before leaving if you want a recovery save; GameCube saves require a Memory Card and are made at typewriters.
Return to the nearby dock and board the boat. Steer across the lake toward the blue light. This leads to the familiar Merchant cave. The Merchant stop is optional, but it is a useful place to sell treasure, buy ammunition, adjust equipment, and save before the waterfall route.
Leave the cave through the opposite passage and follow the path toward the waterfall. Ganados occupy the approach and may include enemies capable of producing Plaga parasites. Use the handgun for isolated targets and the shotgun when enemies close in. Avoid spending all of your healing items here; the route has several opportunities to create distance and retreat.
- Post-Del Lago cabin searched.
- Optional lake Merchant visit completed if supplies or a save are needed.
- Boat taken to the waterfall route.
- At least one healing item retained for the church approach.
2. Cross the waterfall route and obtain the Round Insignia
Proceed through the area until you reach the water crossing with suspended wooden crates. Shoot the chains holding the crates so they fall into position and form a usable series of platforms. Cross carefully rather than trying to fight every enemy at close range. If Ganados approach from behind, retreat to the previous bank so they must jump across or expose themselves while climbing.
On the far side, climb the ladder and operate the mechanism that stops the waterfall. Once the water flow is interrupted, return toward the waterfall and use the newly opened passage behind it. Search the route for ammunition and treasure only when the nearby enemies are under control.
Enter the passage and collect the Round Insignia at the end. This is the required story item for the church. You do not need to continue through the alternate doors after taking it. Backtrack along the route, cross the lake again, and return to the church area.
- Suspended crates used to cross the water.
- Waterfall mechanism activated.
- Round Insignia collected.
- Return route to the church identified before leaving the waterfall area.
3. Reach and open the church
Follow the path back through the lake area and toward the church. Colmillos may appear near the church approach. Keep moving, use the shotgun when they close the distance, and avoid being trapped against the church wall. The small cemetery puzzle behind the church can be completed for an optional treasure, but it does not provide the item needed to enter the church.
Approach the church’s locked front door and use the Round Insignia. The door opens into the chapel. Search the lower floor for ammunition and healing supplies, then climb the ladder on the left side of the main entrance. You may save before solving the puzzle if the nearby typewriter is available in your route.
At the upper level, jump across the hanging chandelier to reach the control panel beside the stained-glass window. Ashley is behind the barrier, so this puzzle is required for the main route.
- Church reached without confusing the optional cemetery puzzle with the story objective.
- Round Insignia used on the church door.
- Upper-level stained-glass control panel reached.
- Ammunition and healing inventory checked before solving.
4. Solve the stained-glass puzzle and rescue Ashley
The church mechanism has separate red, green, and blue controls. From the untouched default position in the original GameCube release, rotate the red light twice, the green light three times, and the blue light once. The colors should combine into the Las Plagas insignia and open the barrier. If the controls were already turned, use the visible design to restore the same completed pattern rather than repeating the sequence blindly.
Enter the room beyond the opened barrier and approach Ashley. Collect the supplies in the room, then return to the chapel’s lower level with her. Give Ashley a wait command while collecting nearby items or positioning Leon for the descent; she can be captured if left in an exposed area during an enemy sequence.
Use the ladder near the main entrance and jump down. A context prompt appears as Ashley follows. Catch her, then move to the center of the church. The story transition triggers after the reunion, and Chapter 2-2 becomes available.
- Red light rotated twice, green three times, and blue once from the default position.
- Church barrier opened.
- Ashley found and brought back toward the chapel floor.
- Ashley caught safely after the ladder descent.
- Chapter 2-2 transition triggered.
Before you move on
- Leon has returned from the waterfall with the Round Insignia.
- The church entrance has been opened with the Round Insignia.
- The three stained-glass lights have been aligned and the interior barrier has opened.
- Ashley has been found, escorted back to the main church floor, and caught after the ladder descent.
- The game has transitioned to Chapter 2-2 or made the Chapter 2-2 save available at the church.
References for this chapter
Village at Night and the First Large Enemy
Chapter 2-2 begins after Leon rescues Ashley from the Church. Return through the cavern and village with Ashley, then survive the second cabin defense alongside Luis. Chapter 2-3 starts at the nearby cabin and offers two valid routes: the left Camp route with Ganados and two Bella Sisters, or the right El Gigante route. Both paths converge at the gondola area. Leon then defeats Bitores Méndez, takes the False Eye, returns to Ashley, opens the village exit and survives the truck pursuit and gatehouse sequence that lead to the Castle. This chapter covers the required route in the original North American GameCube release, including reliable saves and recovery points.
1. Leave the Church and return through the village route
At the beginning of Chapter 2-2, collect the items around the Church and leave with Ashley. Use the X Button to switch Ashley between Wait and Follow me! on the default GameCube controls. Keep her following while moving through the exterior path, and use Wait when you need to search a room or clear enemies before bringing her forward.
The official controls use the R Button to ready and aim a weapon, R plus A to fire or attack, and R plus B to reload. Hold L and press A to use the knife. Press B with the Control Stick toward the rear to perform the 180-degree turn. Use that turn when Ganados approach from behind instead of trying to rotate manually in a narrow passage.
Follow the familiar route through the cavern toward the village. Do not linger in open ground while enemies remain active. Shoot a leg or head to stagger a Ganado, then either pass the enemy or use the action-button kick when the prompt appears. Use the shotgun only when a group closes around Leon or Ashley.
- Ashley is set to Follow me! before leaving the Church.
- The handgun and shotgun are reloaded.
- At least one healing item is available before the cabin defense.
2. Cross the cavern and reach the second cabin defense
Clear only the enemies that block the path through the cavern and village. When Ashley is threatened, deal with the nearest attacker first. Back into doorways, corners or narrow lanes so Ganados cannot surround both characters at once. Check crates and barrels after the immediate threat is gone, but do not stop to search while villagers are still entering the area.
Continue through the village and toward the farm-side section. Enter the door that was previously inaccessible, then follow the route to the cabin area. A Merchant is nearby, and the cabin contains a typewriter. Use the Merchant if you need ammunition or a basic upgrade, then save before crossing the bridge and triggering the attack.
Inside the cabin, place Ashley in a defensible position and use the doorways and stairs as funnels. Luis assists during this sequence, but Leon must stop enemies who reach Ashley or begin climbing into the room. Handgun leg shots and kicks conserve ammunition against isolated Ganados. Use the shotgun when several enemies enter together, when a window attack compresses the room, or when Ashley is in immediate danger.
The defense ends when the bell rings and the villagers withdraw. You do not need to defeat every enemy after the signal. Collect safe drops, reload and return to the typewriter before proceeding.
- The second cabin has been reached without leaving Ashley behind.
- The cabin defense has ended with the bell signal.
- A save is available before Chapter 2-3 and its route choice.
3. Save at the Chapter 2-3 route split
Chapter 2-3 begins in the cabin after the Luis defense. Search both floors and the area around the building for items, then enter the small shack near the Merchant to read the Two Routes file if desired. The typewriter is in the cabin behind the Merchant, making this the best retry point for either branch.
Use the mechanism near the two large gates to choose a route. The left gate leads to the Camp and the two Bella Sisters. The right gate leads to another El Gigante encounter. Both routes provide a key and return to the same area near the gondola, so the choice is not permanent story branching.
Before leaving, organize the Attache Case so Leon has healing, a loaded close-range weapon and free space for a key and boss rewards. Do not spend all shotgun ammunition at the Merchant if you plan to fight El Gigante or the Bella Sisters normally.
- The route-split typewriter save has been made.
- Ashley commands are understood before entering the branch.
- Leon has healing, ammunition and inventory space.
4. Clear either the Camp or El Gigante route
Left route: enter the Camp and clear the initial Ganados while moving through the upper level. Use X to order Ashley into the hiding container near the entrance before dropping into the main arena. Knock down ladders when possible so enemies must spend time climbing. After the Bella Sisters appear, keep moving around the upper platforms, control the Ganados first when they threaten to surround Leon, and use shotgun blasts or explosives when a Sister reaches the same platform. Defeat both Sisters, collect the Camp Key and use it on the central exit door. The Red Gem and other drops are optional rewards, not required for story progress.
Right route: advance until El Gigante drops into the path. Ashley points out the support holding a boulder above the route; shoot it to drop the boulder and cause an opening. Keep circling in the available space rather than backing directly into a wall. Shoot the legs or body until the giant drops to one knee and the parasite emerges from its back. Approach only when the area is clear and use the action prompt to climb up and attack the parasite, or damage the exposed parasite with firearms from a safe angle. Repeat the stagger cycle until El Gigante is defeated, then take the Old Key and use it on the gate at the end of the route.
If a branch becomes overwhelming, reload the cabin save and choose the other route. The Camp requires more crowd control and the Bella Sisters can kill Leon quickly at close range; El Gigante demands movement and careful timing but gives more open space for circling.
- The left route has produced the Camp Key, or the right route has produced the Old Key.
- The chosen branch is cleared and its exit door is open.
- Optional treasure has been collected only after the route is safe.
5. Rejoin the routes and cross the gondola
After either branch, continue to the shared area. Use the Merchant and the typewriter in the nearby cabin before moving on. Follow the path toward the gondola station and pass the locked door that cannot yet be opened. Search the control room for supplies, then board the gondola.
During the ride, enemies may board from adjacent platforms. Fire at them before they reach Leon, and avoid wasting time trying to fight enemies that have already fallen away. When the gondola reaches the far side, collect the items in the control area and descend through the route toward the next Merchant and typewriter.
Save before entering the structure where Bitores Méndez is waiting. This is a separate boss retry point from the Chapter 2-3 route split.
- Both route branches have converged.
- The gondola crossing is complete.
- Leon has saved before entering the Méndez area.
6. Defeat Bitores Méndez and take the False Eye
Enter the structure and respond to the action prompt during the initial attack. After Méndez mutates, move to the upper level when possible. The higher position gives Leon more room to see the hanging body sections and react to charges. Keep moving between attacks rather than standing beneath him.
Shoot the exposed body sections when they swing into view. Explosive barrels in the room can damage Méndez, but do not approach them while the boss is close enough to trap Leon. When a section moves across the platform, fire controlled bursts and reposition before the next attack. If Leon is knocked down, use the recovery prompt immediately and avoid remaining in the boss’s path.
After Méndez is defeated, collect the False Eye from the remains. Search the room for safe supplies, then leave through the exit and reunite with Ashley. Return to the gondola station, save at the typewriter and ride back to the village-side station. The False Eye is required to open the retinal-scanner gate.
- Bitores Méndez has been defeated.
- The False Eye is in Leon’s inventory.
- Leon and Ashley have reunited and returned to the village-side gondola station.
7. Open the village exit and reach the Castle approach
From the village-side station, follow the path back to the locked retinal-scanner door. Use the False Eye on the door and proceed through the narrow route beyond it. Clear the Ganados blocking the path, then continue toward the vehicle section.
When the truck begins moving toward Leon and Ashley, shoot the vehicle before it reaches them. Continue through the area after the crash and follow the route to the Castle approach. A large group pursues Leon and Ashley, so keep moving toward the gatehouse rather than stopping to fight every enemy. Use the 180-degree turn to check the rear, and use the shotgun only when enemies block the route or corner Ashley.
At the gatehouse, follow the available path upward and operate the mechanism that raises the drawbridge. The pair then enter the Castle area, marking the end of this chapter’s village escape sequence. Make a fresh save as soon as the next typewriter becomes available.
- The retinal gate has been opened with the False Eye.
- The truck ambush has been survived.
- Leon and Ashley have crossed into the Castle approach and the next chapter is available.
Before you move on
- The Chapter 2-2 night return and Luis cabin defense are complete.
- Chapter 2-3 has begun and the cabin typewriter save is available.
- Either the Camp and Bella Sisters route has been cleared with the Camp Key, or the El Gigante route has been cleared with the Old Key.
- The two branches have converged and the gondola crossing is complete.
- Bitores Méndez has been defeated and the False Eye has been collected.
- The retinal gate and truck pursuit are complete.
- Leon and Ashley have reached the Castle approach and the next chapter is available.
References for this chapter
- Resident Evil 4 — GameCube English Manual PDF
- CAPCOM Online Manuals — Resident Evil 4, GameCube English Manual
- Resident Evil 4 — Guide and Walkthrough — GameCube — ChandooG, GameFAQs
- Resident Evil 4 — Guide and Walkthrough — GameCube — GameFAQs
- Resident Evil 4 — Guide and Walkthrough — GameCube — Osafune2
- Resident Evil 4 Chapter 2-3 — Resident Evil Wiki
Chapter 3-1: Castle Arrival and Castle Gate
Chapter 3-1 begins at the castle entrance after the village escape. Save and resupply at the opening Merchant, then enter the catapult courtyard with Ashley. Use the first safe room and explosive barrels to work through the artillery section, raise the cannon and fire it at the castle wall. After passing through the opening, complete the platinum-and-gold sword display puzzle, survive the monk ambushes and collect the Castle Gate Key. Return to the gate near the Luis scene, unlock it and continue into the Main Hall. After Salazar’s introduction, collect the nearby Green Gem and save at the typewriter. This chapter does not include the later prison, Garrador, waterwheel or battlement sections.
1. Save, resupply and enter the castle
At the beginning of Chapter 3-1, search the starting area for containers and the chest behind the Merchant’s hut before spending money. Use the typewriter beside the Merchant to create a chapter-start save. Sell valuables only when you need room or money, then make sure your case has handgun ammunition, a close-range weapon and at least one healing item. A rifle or another long-range weapon is useful against distant monks and catapult operators, but it is not mandatory for progression.
Enter the castle through the red door with Ashley. After the opening scene, leave Ashley at the first safe stopping point while Leon moves forward and draws the initial monks away from her. Deal with the nearby enemies, then proceed toward the spiral staircase. Do not let Ashley wander into the open artillery area before Leon has established the safer room near the cannon.
- Save at the typewriter beside the opening Merchant.
- Search the starting area before leaving.
- Keep Ashley at the first safe position during the initial approach.
2. Reach the cannon room and secure Ashley
Move through the first section while watching for incoming catapult fire. Run between impacts rather than trying to fight every monk in the open. Climb the spiral staircase when the route is clear, then use the covered paths to reach the room containing the cannon. This room is the temporary safe position for Ashley.
Once Leon is inside, call Ashley over and command her to wait beside the cannon. She is safer here while Leon disables the artillery. Before leaving her, check that she is not standing in the doorway or in the path Leon must use to return. The goal is to keep her away from catapult impacts and from the monks that enter through the courtyard.
- Reach the room containing the cannon.
- Bring Ashley into the room only after Leon has reached it.
- Command Ashley to wait beside the cannon.
3. Disable the catapults
Leave Ashley beside the cannon and return through the courtyard using the covered route. The first artillery positions can be destroyed by shooting nearby explosive barrels. Use those barrels whenever they are safely visible; they save ammunition and can eliminate the operator with the catapult.
After dealing with the nearer positions, continue toward the upper route. One later catapult also has an explosive barrel, while the final firing position may require Leon to shoot the operator directly from cover. A rifle makes this easier, but handgun fire from a protected angle can work if necessary. Do not remain exposed after firing: wait for a catapult shot to land, move to the next shelter and attack from there.
When Leon climbs toward the upper section, monks can enter from behind and move toward Ashley. If this trigger occurs, turn back immediately and intercept them before they reach the cannon room. The safest approach is to clear the attackers near the entrance, then resume the upper route once Ashley is no longer threatened.
- Use explosive barrels against catapult positions when possible.
- Attack the final operator from cover if no barrel is available.
- Return toward Ashley if monks enter from the courtyard behind Leon.
4. Raise and fire the cannon
After the catapults are disabled, reach the crank beside the cannon shaft. Operate it repeatedly until the cannon rises into firing position. Some monks may still approach during this action, so stop turning if necessary, create space with the shotgun or another close-range weapon, and then resume the crank.
When the cannon is fully raised, interact with it and fire at the castle wall blocking the route ahead. The cannon destroys the wall and creates the passage through the Castle Gates area. It does not open the later inner castle gate; that gate requires the Castle Gate Key obtained after the sword-room and monk encounters.
Before leaving, search the nearby area for supplies and the chest on the southern side if you need the extra treasure. Then bring Ashley through the hole in the wall and use the Merchant beyond it if you need to reload, heal or reorganize before entering the sword room.
- Operate the crank until the cannon is raised.
- Fire the cannon at the blocked castle wall.
- Bring Ashley through the opening after the area is safe.
5. Solve the platinum-and-gold sword display
Enter the next room and take the Platinum Sword from the lower wall display. Keep Ashley in the lower room or at the nearby safe position while Leon goes upstairs. Draw the monks toward the stairs so they approach through a narrow route, then eliminate them before allowing Ashley to follow. If monks appear behind Leon, turn and deal with them immediately; avoid letting them grab Ashley in the confined room.
On the upper floor, take the Gold Sword from its display. Place the Platinum Sword in the upper display where the Gold Sword was located. Return downstairs and place the Gold Sword in the lower display where the Platinum Sword originally rested. The door opens when the swords are swapped correctly.
A red-robed monk is present during this sequence. Shoot him from the stairs or another protected position rather than chasing him through the room. Once the room is clear, collect his dropped money and bring Ashley through the newly opened red door.
- Take the Platinum Sword from the lower display.
- Place Platinum upstairs and Gold downstairs.
- Clear the monk ambush before moving Ashley onward.
6. Collect the Castle Gate Key and unlock the inner gate
Continue through the rooms after the sword puzzle until the scene with Luis ends. Move Ashley back toward the gate area and tell her to wait while Leon clears the next room. Use the doorway as a choke point. Deal with the crossbow monk above the route before pushing forward, then use a shotgun or another powerful weapon against shield-bearing monks instead of repeatedly firing a handgun at their shields.
Proceed into the room containing the Castle Gate Key. Open the chest and take the key. This immediately triggers an ambush. Shoot the nearby explosive barrel when several monks are close, then retreat through the previous doorway if the group becomes too dense. The doorway provides a controlled funnel, allowing Leon to finish the remaining enemies without being surrounded.
After the ambush is defeated, return to Ashley and take her to the gate near the area where Leon met Luis. Use the Castle Gate Key to open it. Walk into the castle Main Hall and watch Salazar’s introduction. After the scene, search the hall for the Green Gem and nearby breakable containers, then use the typewriter in the Main Hall to save. The later prison and Garrador route begins after this save and belongs to the next section of the game.
- Collect the Castle Gate Key from the chest.
- Use the explosive barrel during the key-room ambush if practical.
- Return to the Luis-area gate and unlock it.
- Watch Salazar’s scene and save at the Main Hall typewriter.
Before you move on
- The catapult courtyard has been crossed and the cannon has destroyed the castle wall.
- Ashley has been escorted through the cannon opening and the sword-room route is open.
- The Platinum Sword and Gold Sword have been swapped into their correct displays.
- The Castle Gate Key has been collected and the resulting monk ambush has been defeated.
- The inner castle gate has been unlocked, Salazar’s introduction has played and Leon has reached the Main Hall typewriter.
- Leon has a usable close-range weapon, a long-range option if available, healing supplies and enough inventory space for the prison section.
References for this chapter
Chapter 3-1 — Prison, Water Hall and the Chapter 3-2 transition
Continue from the Castle entrance after the opening approach and cannon sequence. This chapter covers the Prison Key, the first Garrador encounter, the Prison Hall and the Water Hall escort with Ashley. The Garrador can be defeated for its money reward, but the required progression is pulling the switch inside its cell to extinguish the fire-breathing horse traps. In the Water Hall, hold a defensible corner, keep Ashley behind Leon and clear the first wave before solving the two-switch section. Turn the crank, then use the piggyback command at the far painting while protecting Ashley from the upper walkways. Catch her when she reaches the opposite side, cross the raised platforms and leave through the north doors. The Merchant, shooting range and typewriter are immediately beyond this section. The chapter ends when Leon and Ashley move north and the transition scene begins. The sewer, Gallery, courtyard and lava room are not part of this Chapter 3-1 route: the sewer, Gallery and courtyard belong to Chapter 3-2, while the lava room appears later in Chapter 4-1.
1. Take the Prison Key and open the dungeon
After the Castle approach sequence, tell Ashley to wait near the locked gate before moving through the room. Search the nearby containers if you need supplies, then examine the portrait beside the two fire-breathing horse statues to collect the Prison Key. Return to the locked prison door near Ashley and use the key.
Before entering the dungeon, reload your preferred weapons. A rifle is useful for the Garrador, while a shotgun gives Leon space if the creature closes in. Break the cell door to trigger the encounter. The Garrador is blind and reacts to sound, so walk instead of running when possible. You can shoot one of the bells on either side of the room to make it charge into the wall; while its claw is stuck, circle behind it and fire at the exposed Plaga on its back. After each attack, relocate because it will strike toward the noise. If ammunition is low, it is possible to avoid fighting by moving quietly, but the required cell switch is still inside the prison.
- Collect the Prison Key from the portrait beside the fire traps.
- Use the Prison Key on the nearby dungeon door.
- Defeat the Garrador or quietly avoid it.
- Pull the switch inside the prison cell to extinguish the fire-breathing horse traps.
2. Cross the Prison Hall and enter the Water Hall
After using the cell switch, call Ashley to follow and return up the stairs. On the way back, several Zealots attack in the Prison Hall. Keep Ashley behind Leon and use the hanging lantern or nearby explosive hazards when they give you a safe opening. Deal with the dynamite carrier before allowing the group to surround Ashley, then pass through the double doors beyond the pillars.
The Water Hall begins immediately afterward. Do not stand in the middle of the room. Move to one of the corners and keep Ashley behind Leon so approaching Zealots reach Leon first. Shielded enemies can be staggered with the shotgun, while a rifle or handgun is useful for crossbow users on the high platforms. Clear the enemies around the entrance and walkways before moving Ashley deeper into the room. If the first wave becomes disorganized, retreat to the original corner instead of running through the center.
- Keep Ashley behind Leon in the Prison Hall.
- Defeat the Zealots blocking the Water Hall entrance.
- Use a corner as a defensive position.
- Prioritize crossbow users and shielded Zealots before advancing.
3. Activate the Water Hall switches and operate the crank
Move down either side of the Water Hall and enter the smaller room in the middle. There are two pressure switches, one for Leon and one for Ashley. Place Ashley on one switch, order her to wait, then stand on the other. This causes the crank mechanism to rise outside, but additional Zealots enter the surrounding walkways.
Do not leave Ashley unattended in the switch room while enemies are still active. Return to a corner with Ashley behind Leon and clear the Zealots that approach from the side doors and upper openings. When the room is safe enough to move, go to the raised crank and turn it. Leon can operate it more quickly than Ashley. The rotating stairs and platforms will then provide the route to the upper part of the hall.
Reload before starting the next movement section. The encounter continues until Ashley reaches the far side, so use short, controlled rifle shots against distant enemies and the shotgun only when a group reaches close range.
- Place Ashley on one pressure switch and Leon on the other.
- Command Ashley to wait while the mechanism rises.
- Clear the Zealots around the crank and walkways.
- Turn the crank to activate the rotating stairs and platforms.
4. Piggyback Ashley across the raised platforms
After the crank has changed the room, move north with Ashley until she indicates the painting or wall mechanism. Use the piggyback command to lift her to the upper level. Leon must remain below and protect her while she operates the levers. Cultists attack from the upper side doors, so aim at them before they can reach Ashley. The rifle is effective for distant targets; switch to the shotgun when an enemy reaches Leon’s position.
Ashley moves from one mechanism to the next, and platforms rise from the water as each lever is completed. Pause between shots to confirm that Leon is safe and that Ashley is not being grabbed. When she reaches the opposite painting, move to the prompt and catch her. Cross the newly raised platforms with Ashley and go through the north doors. Do not jump into the water or linger on a platform while enemies are still firing from above.
- Use the piggyback command at the marked painting.
- Protect Ashley while she operates each lever.
- Catch Ashley when she reaches the opposite painting.
- Cross the raised platforms and exit through the north doors.
5. Resupply and trigger the Chapter 3-2 transition
The room beyond the Water Hall contains the next Merchant, a typewriter and the optional shooting range. Break the containers and collect supplies before spending money. If your shotgun or rifle is low on ammunition, use the Merchant to restore a practical reserve rather than buying optional equipment. The shooting range is not required for story progress and can be skipped.
Save at the typewriter, then move north through the hall with Ashley. Continue forward until the scene begins. This scene marks the end of Chapter 3-1. Stop this chapter here. The following chapter starts with the sewer route and later covers the invisible Novistadors, the Gallery mechanism and the courtyard maze. The lava-room route is much later and should not be entered into this Chapter 3-1 guide.
- Visit the Merchant if supplies or upgrades are needed.
- Save at the typewriter beside the Merchant.
- Skip or use the optional shooting range.
- Move north with Ashley until the Chapter 3-1 ending scene begins.
Before you move on
- The Prison Key has been collected and used on the dungeon door.
- The Garrador encounter is complete or has been bypassed quietly.
- The switch inside the Garrador’s cell has been pulled and the fire traps are disabled.
- The Prison Hall enemies have been cleared and Ashley has entered the Water Hall.
- Both Water Hall pressure switches have been activated.
- The crank has been turned and Ashley has completed the piggyback lever sequence.
- Ashley has been caught at the opposite painting and Leon has crossed the raised platforms.
- The Merchant and typewriter beyond the Water Hall have been reached.
- The Chapter 3-1 ending scene has triggered, confirming the transition toward Chapter 3-2.
- No sewer, Gallery, courtyard, lava-room, Grail or Clock Tower objective has been treated as part of this chapter.
References for this chapter
- CAPCOM Online Manuals — Resident Evil 4, GameCube English Manual
- Resident Evil 4 — GameCube English Manual PDF
- Resident Evil 4 — GameCube Guide and Walkthrough by A_I_e_x
- Resident Evil 4 — GameCube Guide and Walkthrough by Berserker, GameFAQs
- Resident Evil 4 — Guide and Walkthrough, GameCube — adam3k3
Castle Route — Chapter 3-2 through the Verdugo approach
Continue after Chapter 3-1 through the sewer, Courtyard and Gallery. Drain the sewer, cross the hedge maze, defeat the red-robed cult leader and use the Gallery Key. Solve the original GameCube Gallery portrait puzzle with 1, 3, 2, 4, then confirm if prompted, survive the ambush and take the Goat Ornament. In Chapter 3-3, ring the dining-hall bell, shoot the bottle shown in the painting and escape the Garrador cage. During Chapter 3-4, free Ashley by shooting her three restraints, guide her through the lantern, crank and crawl-space route, solve the Stone Tablet sliding puzzle, collect the Salazar Family Insignia and Serpent Ornament, and escape the armor suits. After reuniting with Leon, backtrack through the Second Castle Exterior for the Lion Ornament, install all three beast ornaments, collect both Grails, cross the Ballroom and activate the Clock Tower. End at the Merchant and typewriter immediately before Verdugo.
Chapter 3-2: Drain the sewer and cross the Courtyard
Leave the room where Leon is separated from Ashley and enter the sewer passage. Cloaked Novistadors can be difficult to see, so watch for movement distortion and listen for their attacks. Follow the passage to the red control valve and operate it to drain the lower section. Return to the drained area and drop down into the newly accessible route.
Continue through the mechanical trap corridor and back into the Castle. The Prison Key, prison Garrador and fire-trap lever were completed in Chapter 3-1 and are not part of this route. Use the Merchant and typewriter before entering the Courtyard if you need to reorganize your case or save.
Cross the hedge maze toward the far exit. Colmillos can attack from the foliage, so keep moving through the open paths and avoid stopping at blind corners. The Moonstone pieces and garden valuables are optional. The required objective is reaching the door on the opposite side of the maze.
- Operate the sewer drainage valve.
- Drop into the drained passage.
- Pass the mechanical trap corridor.
- Cross the Courtyard hedge maze.
- Reach the far exit and save before the Gallery.
Chapter 3-2: Defeat the red-robed cult leader
Enter the Gallery approach and locate the red-robed cult leader. Attack from a position that gives you room to retreat, and eliminate him before the surrounding Zealots can overwhelm the area. Collect the Gallery Key after the fight.
Use the Gallery Key on the locked door. Before interacting with the portrait mechanism, reload and check your ammunition if the preceding battle left you low. Opening the puzzle route leads into another enemy encounter, so keep a shotgun or other reliable close-range weapon ready.
- Defeat the red-robed cult leader.
- Collect the Gallery Key.
- Open the Gallery door.
- Check ammunition and healing items before solving the portrait puzzle.
Chapter 3-2: Solve the original GameCube Gallery puzzle
The Gallery portrait mechanism has four numbered switches. Press them in this order: 1, 3, 2, 4. If the game displays a confirmation prompt, choose OK or Confirm. This opens the route deeper into the Gallery.
Move immediately toward defensible positions after the mechanism opens. Zealots, crossbow users and rocket-launcher enemies can enter the room. Use walls and doorways for cover, avoid standing in the open while rockets are fired and deal with the ranged attackers first when they have a clear shot.
Operate the required switches in the side areas to open the path to the chest. The Goat Ornament is inside and is required later at the Castle entrance relief. Collect it, then leave through the newly opened route toward Chapter 3-3. Optional valuables can be collected after the immediate ambush is under control.
- Press the Gallery switches 1, 3, 2, 4.
- Choose OK or Confirm if prompted.
- Survive the Gallery ambush.
- Operate the required side-room switches.
- Collect the Goat Ornament.
- Reach the Chapter 3-3 transition.
Chapter 3-3: Dining hall and cage ambush
Use the Merchant and typewriter at the start of the chapter if you need supplies. Enter the dining hall and ring the bell at the far end. The painting changes; shoot the wine bottle shown in it to open the adjacent route.
Continue into the next room and approach the central cage. Leon is trapped with a Garrador and several cultists. Break the cage lock when possible, prioritize enemies who can attack from range and keep moving around the enclosure so the Garrador cannot pin you against a wall.
After escaping, use sound to control the Garrador. Its blindness makes gunfire and movement important: fire from a safe angle, move aside when it charges and attack the exposed Plaga on its back. You do not need to defeat every enemy before leaving. Follow the upper route to the next Merchant and typewriter. The Hourglass with Gold Decor is optional; save before entering Chapter 3-4.
- Ring the dining-hall bell.
- Shoot the bottle shown in the painting.
- Escape the cage.
- Keep an exit route open around the Garrador.
- Reach the next Merchant and typewriter.
- Save before Chapter 3-4.
Chapter 3-4: Free Ashley and defend her
Leon begins on the upper level while Ashley is held to the wall by three restraints. Shoot all three restraints without hitting Ashley. A rifle gives a clear sightline, but any accurate firearm can complete the objective.
Once Ashley is free, enemies enter the lower floor. Protect her while she moves toward the key. Prioritize the red-robed Zealot and any enemy attempting to carry Ashley. Keep her within view and shoot a carrier immediately. When the room is safe enough, Ashley takes the key and leaves, changing control to her.
- Shoot all three restraints.
- Protect Ashley from the lower-floor Zealots.
- Prioritize the red-robed Zealot and any carrier.
- Allow Ashley to take the key and leave.
- Save after control changes to Ashley.
Chapter 3-4: Guide Ashley through the lantern and crank route
Ashley cannot use Leon's firearms. She can throw blue lanterns at the dangerous Zealots, but the flame can also injure her, so throw from a safe distance. Enemies can also be bypassed while you operate the cranks and use the crawl spaces.
Operate the first crank, crawl beneath tables when enemies approach and use the other cranks to raise the barred passages. The goal is to move through the connected rooms rather than defeat every enemy. Search the route for useful items only after the immediate path is open.
In the darker storage section, use the switches and push the bookcase aside to reveal the final switch. Examine the fireplace to take the Stone Tablet, then activate the remaining switch so the route to the sliding puzzle opens.
- Use blue lanterns without standing in the flame.
- Operate the required crank mechanisms.
- Use crawl-space routes to avoid enemies.
- Take the Stone Tablet from the fireplace.
- Open the route to the sliding puzzle.
Chapter 3-4: Solve the Stone Tablet sliding puzzle
Number the nine puzzle positions from left to right and top to bottom: 1 is upper-left, 2 upper-center, 3 upper-right, 4 middle-left, 5 center, 6 middle-right, 7 lower-left, 8 lower-center and 9 lower-right.
Starting from the untouched arrangement, move the tile currently occupying each indicated position into the empty space in this order: 6, 3, 2, 5, 4, 7, 8, 9, 6, 5, 2, 1, 4, 7, 8, 5, 6, 9. These numbers identify the tile position to move, not its destination. After the eighteenth move, insert the Stone Tablet when prompted.
If you have already disturbed the board and the sequence no longer works, reload the Ashley save before applying the sequence. In the opened room, examine the statue to obtain the Salazar Family Insignia. The statue then reveals the Serpent Ornament in the chest.
- Number the board row by row from 1 through 9.
- Move 6, 3, 2, 5, 4, 7, 8, 9, 6, 5, 2, 1, 4, 7, 8, 5, 6, 9.
- Insert the Stone Tablet after move 18.
- Collect the Salazar Family Insignia.
- Collect the Serpent Ornament.
Chapter 3-4: Escape the armor suits and reunite with Leon
The armor suits activate after the Insignia and Serpent Ornament are collected. Ashley has no weapon, so run through the rooms instead of trying to fight. Keep moving around tables and through doorways, and use the on-screen action prompts when the suits attack.
Reach the Salazar Family Room and place the Salazar Family Insignia into the circular mechanism. Turn the mechanism to raise the wall and reveal the ladder. Climb down, follow the corridor and open the far door to reunite Ashley with Leon.
- Escape the awakened armor suits.
- Place the Salazar Family Insignia in the mechanism.
- Turn the mechanism and use the revealed ladder.
- Reach the far door and reunite with Leon.
Chapter 4-1: Backtrack for the Lion Ornament
At the start of Chapter 4-1, combine Ashley's items into Leon's inventory and save if necessary. Backtrack through the Castle to the Second Castle Exterior. At the high window, use Ashley's piggyback command so she can unlock the previously inaccessible door. The side room and Broken Butterfly are optional.
Continue to the wheel-platform and lava section. Use cover and the platforms to avoid the mechanical dragons' fire. Defeat the Zealots operating them, then shoot the required chains on the final metal dragon so you can cross to the chest. Take the Lion Ornament.
Return to Ashley by the wheel-platform and save at the nearby typewriter. Travel back toward the Castle entrance and install the Lion, Goat and Serpent Ornaments in the relief. This opens the sealed wall.
- Use Ashley's piggyback command at the Second Castle Exterior.
- Cross the wheel-platform and lava section.
- Defeat the dragon operators.
- Collect the Lion Ornament.
- Install all three beast ornaments in the Castle relief.
Chapter 4-1: Obtain the King's and Queen's Grails
Use the Merchant and typewriter before entering the Grail rooms. In the King's chamber, leave Ashley outside, take the King's Grail and survive the awakened armor suits. A Flash Grenade is useful when Plagas emerge, but movement and keeping an escape lane are the priorities.
In the Queen's chamber, place the movable knight statues on two pressure plates, leave Ashley on a third and stand Leon on the fourth. Enter the opened corridor and shoot the four glowing targets in the falling-ceiling trap. When Ashley is caught by the drill machine, shoot both cultists operating it. Take the Queen's Grail from the chest and break the lock on the exit.
Return to the central hall. Place the King's Grail in the King statue's hands and the Queen's Grail in the Queen statue's hands. Both Grails are required to open the next route.
- Collect the King's Grail.
- Keep Ashley outside the King's chamber.
- Occupy all four pressure plates.
- Shoot the four falling-ceiling targets.
- Defeat both drill operators.
- Collect the Queen's Grail.
- Place both Grails in their matching statues.
Chapter 4-1: Cross the Ballroom and activate the Clock Tower
Continue toward the Ballroom. When Ashley is carried away, clear the immediate enemies, operate the bridge lever and shoot the bridge chains so the bridge lowers completely. Cross to the far side and reach the Merchant and typewriter. The Novistador hive and its treasure are optional.
Follow the route to the Clock Tower and take cover from the catapults outside. Inside, shoot the wooden obstructions blocking the gears. Two are accessible before climbing, and the remaining obstruction is higher in the tower. Remove all three, then activate the upper mechanism.
Descend through the opened tower route and cross the exterior bridge. During the later Garrador encounters, use sound and the bells to redirect them, keep a retreat path open and avoid being trapped between the two enemies. Continue through the service-tunnel approach, using the on-screen action prompts during sudden attacks.
- Operate the Ballroom bridge lever.
- Shoot the bridge chains.
- Reach the Merchant and typewriter beyond the Ballroom.
- Remove the three Clock Tower gear obstructions.
- Activate the Clock Tower mechanism.
- Cross the opened tower route and continue toward Verdugo.
Stop before Verdugo
Reach the Merchant and typewriter immediately before the Verdugo encounter. Save, reorganize Leon's case and confirm that healing items and a dependable close-range weapon are available.
End this chapter at that save point. Do not activate the elevator sequence, use the liquid-nitrogen showers or begin the Verdugo encounter. Verdugo, the elevator, Chapter 4-2, the mine-cart route, Ramon Salazar and the Island belong to later chapters.
- Complete the Clock Tower route.
- Pass the service-tunnel approach.
- Reach the pre-Verdugo Merchant and typewriter.
- Save before entering the encounter.
- Do not start the Verdugo fight.
Before you move on
- Chapter 3-2 is complete when Leon has drained the sewer, crossed the Courtyard and collected the Goat Ornament after solving the Gallery sequence.
- Chapter 3-3 is complete when Leon has rung the dining-hall bell, shot the bottle, escaped the cage and saved at the next typewriter.
- Chapter 3-4 is complete when Ashley has completed the crank-and-lantern route, inserted the Stone Tablet after the 18-move sequence, collected the Salazar Family Insignia and Serpent Ornament, used the Insignia in the Salazar Family Room and reunited with Leon.
- The Chapter 4-1 backtrack is complete when Ashley has opened the Second Castle Exterior room and Leon has collected the Lion Ornament.
- The entrance route is complete when the Lion, Goat and Serpent Ornaments have been installed in the Castle relief.
- The Grail route is complete when Leon has collected both Grails and placed them in the matching statues.
- The Ballroom route is complete when the bridge has been lowered and Leon has reached the Merchant and typewriter beyond it.
- This chapter is complete when Leon has activated the Clock Tower route, crossed the service-tunnel approach and saved at the Merchant and typewriter immediately before Verdugo.
- Do not count Verdugo's defeat, the elevator, Chapter 4-2, the mine carts, Ramon Salazar or the Island transition as part of this chapter.
References for this chapter
- CAPCOM Online Manuals — Resident Evil 4, GameCube English Manual
- Resident Evil 4 — GameCube English Manual PDF
- Resident Evil 4 — Puzzle Solutions — GameCube — By AngelIz831
- Resident Evil 4 — Guide and Walkthrough — GameCube — ChandooG, GameFAQs
- Resident Evil 4 — Guide and Walkthrough — GameCube — GameFAQs
Castle Route — Verdugo through Ramon Salazar
Begin in the Chapter 4-1 service tunnel and activate the elevator. Verdugo must be evaded until the lift arrives, but defeating him after freezing him with liquid-nitrogen tanks is optional and rewards the Crown Jewel. In Chapter 4-2, restore power to the mine cart, collect dynamite, open the boulder route, defeat the two El Gigantes, and activate both Novistador-cave switches. Cross the opened compactor tunnel and use the lift; the Royal Insignia on the far pedestal is an optional treasure that can be combined with the Crown and Crown Jewel. Chapter 4-3 covers the ruins, Key to the Mine, collapsing ceiling and mine-cart ride. Take the Stone of Sacrifice and use it on the Lion door. In Chapter 4-4, restore the bridge beneath Salazar’s statue, survive the statue chase and tower ascent, then expose Ramon Salazar by shooting the central eye and damage him while the shell is open. Save at the Castle dock, board Ada’s boat and begin the Island transition.
1. Activate the Verdugo elevator
Move through the Chapter 4-1 service tunnel and search the connected rooms for supplies before activating the power. The power switch is near the far end of the route. When you are ready, use it to begin the elevator sequence, then operate the control beside the shutters to open the passage.
Verdugo attacks from the floor, walls and ceiling while Leon waits for the elevator. Keep moving through the connected rooms instead of holding one doorway. Liquid-nitrogen tanks are positioned along the route, including the elevator area and side passages. When Verdugo blocks your path, lure him directly beneath a tank and knock it over as he enters the spray. The freezing effect gives you time to pass.
The required objective is to survive until the elevator arrives. Follow every displayed dodge prompt, especially when Verdugo attacks from the side or ceiling. If Leon is grabbed or knocked down, recover immediately and continue toward the elevator route rather than attempting to clear the entire area.
Defeating Verdugo is optional. Freeze him beneath a liquid-nitrogen tank, then use a high-damage weapon during the frozen opening. Repeat with additional tanks if necessary. If he dies, collect the Crown Jewel and return to the elevator room. If you only evade him, enter the elevator as soon as it arrives. The Crown Jewel is optional and is not a required key or progression item.
- Activate the service-tunnel power switch.
- Use liquid-nitrogen tanks to create openings if Verdugo blocks the route.
- Survive until the elevator arrives, or defeat Verdugo optionally.
- Collect the Crown Jewel only if Verdugo was defeated.
- Enter the elevator.
2. Complete Chapter 4-2’s mine and compactor route
After the elevator ride, save at the typewriter and visit the Merchant. Enter the mining area and move to the overhead mine-cart controls. Pull the first lever to lower the cart partway, then go up the nearby stairs and operate the circuit breaker to restore power. Return to the first lever and use it again.
Enemies, including a chainsaw Ganado, appear around the track. Create space before operating the mechanism a second time. When the cart reaches the lower position, take the dynamite from it and place the explosive against the boulder beside the first lever. Move well away before it detonates, then pass through the opened route.
The next room contains two El Gigantes and a central lava trap. The trapdoor can remove one giant instantly: use the ladder and zipline to reach the lever, then wait until one giant stands over the opening before activating it. Do not approach the lava while the giant is struggling, because Leon can be grabbed and killed. Defeat the remaining giant by attacking until its Plaga emerges, then climb onto its back for the prompted knife attack or continue damaging the parasite from a safe position. Both giants must be defeated before the sealed exit opens.
Continue into the Novistador cave. Examine the first pedestal, then take the upper path and enter the side tunnels containing the two light-switch blocks. Activate both switches. Their combined light opens the sealed southern route. Cross the bridge, operate the gate switch and enter the compactor tunnel.
Move under the first compactor when it rises, climb to the raised section, then drop and pass beneath the next moving compactor. Pull the lever on the wall to hold the middle compactor in its raised position. Wait for the final compactor to rise, then move through the remaining gap and follow the tunnel to the lift. Use the lift to leave Chapter 4-2.
The Royal Insignia is on the far pedestal beyond the compactor route. It is an optional treasure, not the chapter objective. Take it only if you want to combine it with the Crown and Crown Jewel for the Salazar Family Crown. Leaving it behind does not block Chapter 4-3 or any later story event.
- Save and resupply before entering the mine.
- Restore power to the mine cart and collect the dynamite.
- Use the dynamite on the blocking boulder.
- Defeat both El Gigantes and open the exit.
- Activate both Novistador-cave light switches.
- Cross the compactor tunnel and use the lift.
- Take the Royal Insignia only if you want the optional treasure combination.
3. Complete Chapter 4-3’s ruins and mine cart
Chapter 4-3 begins outside the castle ruins. Save at the Merchant’s typewriter, then follow the route toward the bonfire and nearby building. Clear or bypass the Ganados and operate the crank to reveal the ladder leading underground.
The ruins contain bear traps, Ganados and chainsaw enemies. Use the upper building to reach the Key to the Mine, then return to the locked mine door and use the key. Optional items in the ruins can be collected if the area is safe, but they are not needed for progression.
In the next room, the spiked ceiling begins descending. Shoot all four red lights in the ceiling mechanism before it reaches Leon. After the trap stops, parasites emerge from the floor; clear them before searching the room or continuing.
Reach the mine-cart area and enter the cart. Move to the middle cart and shoot the lever to start the ride. Ganados board during the trip, and a chainsaw enemy appears when the cart pauses. Use the shotgun to control close threats and shoot the lever again when the route requires it. During the descent, watch for overhead obstacles and answer every displayed dodge prompt.
At the final jump, follow the GameCube prompts shown on screen, then complete the climb prompt to pull Leon to safety. Enter the next room and take the Stone of Sacrifice from the central pedestal. The stone is the required item for the Lion door.
- Operate the crank near the ruins bonfire.
- Take the Key to the Mine.
- Use the key on the mine door.
- Shoot all four ceiling lights.
- Start and survive the mine-cart ride.
- Answer the final jump and climb prompts.
- Take the Stone of Sacrifice.
4. Use the Stone of Sacrifice
After taking the Stone of Sacrifice, follow the opened tunnel and climb the ladder back to the ruins route. Locate the Lion door and place the Stone of Sacrifice into it. This is the required action that opens the way forward.
Enter the passage beyond the door and use the elevator to begin Chapter 4-4. The Staff of Royalty, optional treasure and any remaining mine-area pickups are not required for the transition.
- Take the Stone of Sacrifice.
- Return to the Lion door.
- Use the stone on the door.
- Operate the elevator into Chapter 4-4.
5. Restore the statue bridge and cross the tower
At the start of Chapter 4-4, save at the typewriter and collect nearby supplies. Continue into the large room containing Salazar’s statue. When a Zealot lowers the bridge, return to the entrance side and climb the ladder.
Use the statue’s moving hands and the surrounding levers to restore the bridge. Ride the left hand upward, reach the upper lever and activate it. Return to the central platform, use the next lever to move the opposite hand, then ride that hand to the far side and operate the lower control. The controls raise the separated bridge sections and open the route onward.
Cross the restored bridge and begin the statue chase. Run forward and follow every displayed dodge prompt for the falling obstacles. After the cutscene, quickly shoot the lock on the exit door with the handgun or shotgun, then kick the door open. Continue across the next bridge, answer the jump prompt and complete the climb prompt.
In the tower, avoid the rolling barrels by using the side walkway and clear the Zealots on the upper levels. Operate the barrel mechanism against enemies below when useful. At the elevator, push the crates away and activate the lift. During the ascent, prioritize crossbow users and nearby red-robed Zealots; keep Leon’s back toward a corner when enemies jump onto the platform.
After reaching the upper walkway, use the next lift and climb to the Merchant and typewriter. Save here and resupply before entering the ceremony room. This is the final reliable preparation point before Ramon Salazar.
- Operate the statue-room levers.
- Restore the bridge route.
- Survive the statue chase and break the exit lock.
- Climb the tower and defend the elevator.
- Reach the upper Merchant and typewriter.
- Save and resupply before Salazar.
6. Defeat Ramon Salazar and reach the Island
Enter the ceremony room after saving. Salazar’s mutation attacks with a central tentacle and two side tentacles. Stay on the upper walkway when possible, but be ready to drop to the lower floor if the central tentacle opens its jaws for a swallowing attack. Move laterally for overhead strikes and follow every displayed dodge prompt when a tentacle grabs or sweeps at Leon.
Shoot the large eye on the central tentacle. When the eye is damaged enough, the shell opens and Ramon Salazar is exposed inside. Use your strongest available weapon during this opening, such as a magnum, upgraded shotgun or Rocket Launcher. When the shell closes, shoot the central eye again to expose him. Do not waste ammunition firing at the closed shell.
If Leon falls to the lower floor, use the ladder to return to the upper walkway when the attack pattern gives you an opening. Avoid searching for supplies while the boss is active unless you are in immediate need. After Salazar dies, collect the boss reward and remaining items, then leave through the opened route.
Follow the Castle path to the dock. A Merchant and typewriter are available there, allowing you to save and resupply before departing. Continue to the dock and board Ada’s boat. The boat scene and loading transition into the Island mark the end of this chapter; the Island facilities belong to the next chapter.
- Shoot the central tentacle’s eye.
- Damage Ramon Salazar while the shell is open.
- Use the ladder if Leon falls to the lower floor.
- Collect the boss reward after the fight.
- Save and resupply at the Castle dock.
- Board Ada’s boat and begin the Island transition.
Before you move on
- The Verdugo elevator has been activated and used.
- Chapter 4-2’s mine, dynamite route, two El Gigantes, Novistador switches, compactor tunnel and lift are complete.
- The Stone of Sacrifice has been taken and used on the Lion door.
- The Chapter 4-4 statue bridge, chase and tower routes are complete.
- Ramon Salazar has been defeated.
- Leon has saved or resupplied at the Castle dock and boarded Ada’s boat.
- The Island transition has begun.
- The optional Royal Insignia has been collected only if the player chose to complete the Salazar Family Crown treasure.
Island Arrival — new enemy variants and resource gating
Chapter 5-1 carries Leon from the Island Shore to the entrance of the Island facility. Search the dead-end shoreline branch first, then destroy the camp searchlight before crossing the gap. Use walls, buildings and doorways to control the military camp, especially during the chaingun soldier encounter. After opening the camp gate with the two reflectors, follow the tunnel and complete the displayed GameCube button prompt during the boulder event. Continue through the Path to the Facility, using the rifle for distant crossbow and rocket-launcher soldiers and the shotgun for close groups. The route ends at the Merchant and typewriter outside the facility. Save there, reorganize your inventory and enter the facility only when ready for the next chapter section.
Search the Island Shore and approach the camp
Follow the opening shoreline path, drop from the ledge and jump the first gap. At the branch, take the left-hand route first. This path ends at climbable rocks and several breakable crates; search them before returning to the branch. An Emerald can be found in one of the crates on this detour. The branch is optional for story progress, but taking it now avoids passing through the camp and then backtracking for supplies.
Return to the branch and take the route toward the beachhead. Before crossing the next gap, aim toward the large searchlight above the military camp and destroy it. The light does not need to be handled through a special interaction; shooting it removes the camp’s detection advantage. Cross the gap after the light is gone and prepare for soldiers to appear from the buildings and elevated positions.
Island soldiers are more dangerous than most earlier human enemies because they use firearms, shields, armor and faster close-range attacks. Do not sprint through the camp while reloading. Use walls, corners and doorways to break lines of fire, and collect dropped ammunition or pesetas only after checking that nearby enemies are no longer covering the pickup.
- Take the left shoreline branch before entering the camp.
- Search the crates at the end of the branch.
- Destroy the searchlight before crossing into the military camp.
- Reload the handgun and shotgun before approaching the camp buildings.
Clear the military camp and defeat the chaingun soldier
Advance through the camp using solid cover rather than standing in the central firing lanes. When the chaingun soldier appears, stay behind a wall or building corner while he fires. Peek out during the pauses in his attack and use concentrated shotgun, rifle or magnum fire. The shotgun is useful when he approaches a corner; a magnum is more ammunition-efficient if you have one, but do not waste shots while he is protected by cover.
The chaingun soldier can be staggered, but do not treat him like an ordinary soldier who can be quickly knocked down and knifed. His weapon gives him strong pressure at range, and remaining in the open after a hit is dangerous. Retreat around cover whenever he begins sustained fire, then re-engage from a different angle if necessary.
After he is defeated, search the platform and nearby buildings for ammunition, money and healing items. More soldiers can enter from the surrounding doors, including enemies with crossbows and stun rods. If enemies climb toward Leon on a ladder, the knife can conserve ammunition, but check for crossbow bolts and soldiers approaching from another direction before committing to the ladder position.
When the camp is sufficiently clear, go toward the locked northeast door and examine the orange sensor beside it. This activates the harmless laser beam used for the reflector puzzle.
- Fight the chaingun soldier from solid cover.
- Do not remain in the open during sustained chaingun fire.
- Search the upper platform after the soldier is defeated.
- Watch for crossbow and stun-rod soldiers before using a ladder or doorway.
Solve the laser-reflector puzzle and leave the camp
After activating the orange sensor, follow the laser beam to the reflector on the northwest building. Climb to the reflector and rotate it until the beam is directed toward the second reflector on the east-side building. The beam’s path shows whether the alignment is correct, so adjust the reflector until it clearly reaches the next building rather than trying to guess from the ground.
Climb to the second reflector and rotate it toward the orange sensor beside the northeast door. When the beam reaches the sensor, the door opens. Go through immediately and collect the supplies behind the sandbags or in nearby containers before continuing into the tunnel.
The reflector controls use the GameCube controller and do not require any motion-control input. If enemies remain alive in the camp, avoid lingering in the open while adjusting the devices. You can use the building walls and the ladder routes to reduce exposure, then return to the reflector once the immediate area is safe.
- Activate the orange sensor at the locked door.
- Direct the first reflector toward the second building.
- Direct the second reflector toward the orange sensor.
- Enter through the opened door and proceed into the tunnel.
Cross the tunnel and reach the Path to the Facility
Follow the tunnel and prepare for the boulder event near its far end. When the action prompt appears, press the GameCube button or button combination shown on screen immediately. The input is a quick-time event, so do not substitute Wii motion instructions or wait for Leon to move automatically. After the boulder sequence, continue through the passage and climb the ladder on the right.
In the next outdoor section, search the area behind Leon and around the side paths for supplies before advancing. Crossbow soldiers and close-range troops appear ahead. Use the rifle for distant enemies when the sightline is clear, but switch to the shotgun when soldiers reach the path or begin climbing toward Leon. Flash Grenades are useful if several enemies group together or a Plaga mutation appears, but keep at least one healing item available for the remaining route.
An optional cave contains additional supplies and a Golden Lynx. If you collect the Golden Lynx, keep it in the case because it can later be combined with matching stones for increased value. Do not delay the main route during a dangerous encounter solely to collect a low-value item; return only when the path is secure and inventory space is available.
Continue toward the upper path and prioritize the rocket-launcher soldier and enemies carrying dynamite. Keep cover between Leon and the rocket launcher, and shoot explosive enemies only when the blast will not trap or injure Leon. At the upper route, shoot the wagon so it rolls downhill through the enemy group. Search the cleared side path, then press the orange button at the top to open the route toward the facility.
- Complete the boulder prompt with the displayed GameCube input.
- Use the rifle for distant crossbow or rocket-launcher soldiers.
- Use the shotgun when soldiers enter close range.
- Keep the Golden Lynx if you collect it.
- Use the wagon and orange button to clear and open the upper route.
Resupply at the Merchant and stop at the facility entrance
Follow the opened route to the Merchant and typewriter outside the Island facility. This is the preparation point for the next section. Save before entering the facility, then reorganize the case so ammunition and healing items are immediately accessible. Sell low-value treasure only if the inventory is full or you need money for an essential upgrade; avoid selling a combinable treasure such as the Golden Lynx unless you have decided not to pursue its later combination.
A rifle or semi-auto rifle is helpful for elevated soldiers and long sightlines, while the shotgun remains the safer weapon for close corridors. Keep enough handgun ammunition for ordinary soldiers, at least one healing item, and a flash grenade if available. Review the rifle’s ammunition before moving on because the facility route contains enemies that are inefficient to fight with low-damage body shots.
Use the typewriter to create a clear recovery point. The chapter’s assigned route ends here: Leon has reached the facility entrance and is prepared to enter it. Do not continue through the front hall, kitchen, Monitor Room, autopsy area or waste-disposal route in this chapter; those objectives belong to the following facility section.
- Reach the Merchant and typewriter outside the facility.
- Save before entering the facility.
- Reorganize the case and confirm healing items are available.
- Keep an appropriate balance of handgun, shotgun and rifle ammunition.
- Stop at the facility entrance before beginning the interior route.
Before you move on
- Leon has crossed from the Island Shore into the military camp.
- The camp searchlight has been destroyed.
- The chaingun soldier has been defeated or bypassed safely after the required camp route is opened.
- The two laser reflectors have been aligned and the northeast door has opened.
- Leon has completed the boulder prompt using the GameCube controller.
- The Path to the Facility has been cleared, including the upper-route button.
- Leon has reached the Merchant and typewriter immediately outside the Island facility.
- A save exists at or near the facility entrance, with the next interior section ready to begin.
References for this chapter
- Resident Evil 4 — GameCube English Manual PDF
- Resident Evil 4 — GameCube Guide and Walkthrough by Berserker, GameFAQs
- Resident Evil 4 — Guide and Walkthrough — GameCube — ChandooG, GameFAQs
- Resident Evil 4 — Guide and Walkthrough — GameCube — RE4FREAK, GameFAQs
- Resident Evil 4 Walkthrough — GameSpot
- Resident Evil 4 Chapter 5-1 — StrategyWiki
- Resident Evil 4 Entrance Path — Evil Resource
Research Facility — Regenerators and precise targeting
This chapter begins after Leon enters the Island facility interior in Chapter 5-1. Locate Ashley through the security monitors, solve the Operating Room color panel, and take the Freezer Card Key. Rewrite it into the Waste Disposal Card Key, shut down the cryogenic unit and collect the Infrared Scope. Use the scope with a rifle to destroy the parasites inside Regenerators. Cross Waste Disposal, operate the crane, pass through the Holding Area and X-Ray route, then defeat the Iron Maiden in the Experiment Room. Take the Storage Room Card Key back to Ashley’s locked cell and rescue her. The chapter ends when the rescue scene finishes and Chapter 5-2 begins.
Enter the facility and locate Ashley
This chapter starts inside the Island facility after the outdoor approach. Follow the interior corridor, dealing with Soldier Ganados and electric-baton soldiers as they appear. Use doorways and corners to avoid being surrounded, and check side rooms for ammunition before moving deeper into the complex.
Continue through the facility until Leon reaches the security-monitor area. The monitors show Ashley confined in a cell. After the scene, use the nearby route toward the Operating Room. Ashley’s cell cannot be opened yet, so do not waste ammunition or time trying to force the door.
A typewriter is available before the deeper laboratory route. Save here if you have limited healing items or rifle ammunition. Keep enough inventory space for the Freezer Card Key, Waste Disposal Card Key, Infrared Scope and Storage Room Card Key.
- Facility interior entered after the Island approach.
- Ashley located through the security monitors.
- Typewriter used if needed.
- Operating Room route identified.
Solve the Operating Room panel
Reach the Operating Room and examine the colored-arrow panel beside the locked door. Rotate the blue control once, the green control twice and the red control three times. The order can be performed as separate color adjustments; the required totals are blue one, green two and red three.
Enter the unlocked room and take the Freezer Card Key from the body. Collect nearby ammunition only if your inventory has room. Taking the key activates a Regenerator in the surrounding route.
The Regenerator appears before the Infrared Scope is available. Do not stand in the corridor and empty handgun or shotgun ammunition into it. Fire a short burst at a leg only if you need space, then retreat around a corner and continue toward the Freezer. Ordinary shots can stagger it, but they do not efficiently destroy the internal parasites.
- Operating Room panel opened.
- Blue rotated once, green twice and red three times.
- Freezer Card Key collected.
- First Regenerator bypassed or briefly stunned.
Rewrite the card and collect the Infrared Scope
Use the Freezer Card Key at the Freezer entrance. Search the room for the available rifle ammunition and herb, then enter the small control room. Use the card-rewriting machine to convert the Freezer Card Key into the Waste Disposal Card Key.
Operate the cryogenic device in the control room to shut down the refrigeration system. Return to the previously frozen storage compartment and open it to obtain the Infrared Scope. Combine the scope with a rifle from the inventory screen before continuing.
Taking the scope activates the Freezer security lock and wakes a Regenerator. Aim through the infrared view to reveal the bright parasite nodes inside its body. Destroy every visible node with deliberate rifle shots. Keep moving around the aisle so the creature cannot pin Leon against a wall. The exit becomes available after the Regenerator is cleared; do not rely on simply waiting for the lock to release.
- Freezer Card Key rewritten as Waste Disposal Card Key.
- Cryogenic device shut down.
- Infrared Scope collected and attached to a rifle.
- Freezer Regenerator defeated.
- Freezer exit unlocked.
Cross the Regenerator corridor and use Waste Disposal
Leave the Freezer and follow the laboratory corridor toward the door marked with the flammable-liquid warning. Additional Regenerators can occupy this route. Use the Infrared Scope to identify their parasites, maintain distance and retreat toward cleared rooms if one begins a lunge.
When a parasite is hidden on a Regenerator’s back, shoot a leg to knock the creature down, then aim at the exposed rear parasite. Avoid spraying the torso without thermal targets; this wastes ammunition and gives the creature time to recover.
Use the Waste Disposal Card Key at the marked door. In the disposal control room, operate the crane over the dumping area to remove Ganados blocking the route. The crane is safer when used from the control panel, but watch for survivors and crossbow fire after the machine finishes moving. Collect the available supplies only after the room is secure.
- Regenerator corridor cleared or safely crossed.
- Rear parasites handled by forcing a knockdown when necessary.
- Waste Disposal Card Key used.
- Waste Disposal crane operated.
- Dumping area route opened.
Reach the Holding Area and X-Ray route
Continue through Waste Disposal and enter the Holding Area. Leon can see Ashley’s cell from this section, but the door remains locked. Defeat the nearby soldiers, using the shotgun at close doorways and the rifle for enemies across the room. Keep Ashley’s cell in mind as a landmark, but do not return to it yet.
Take the required route onward through the office and adjoining laboratory passages. Search the area around the typewriter and shelves for ammunition and herbs, then save if necessary. The next encounter requires the Infrared Scope and benefits from a full retreat path.
Proceed through the X-Ray section and into the laboratory. Listen for the Iron Maiden’s breathing and avoid standing directly in front of it at close range. Do not use explosives at Leon’s feet or back into a dead end. The required route ends in the Experiment Room, where the Iron Maiden appears.
- Holding Area reached.
- Ashley’s locked cell confirmed as unavailable.
- X-Ray route followed.
- Laboratory and Experiment Room reached.
- Rifle with Infrared Scope ready.
Defeat the Iron Maiden
The Iron Maiden is a Regenerator variant covered in spikes. Fight from the greatest practical distance and use the Infrared Scope to locate its internal parasites. Destroy the visible front parasites first while keeping room to retreat.
The Iron Maiden also has a parasite on its back. If it remains hidden, shoot the creature in the leg to knock it down, circle around it and fire at the exposed rear parasite. Continue targeting parasites until they are destroyed, then finish the creature with further firearm damage if necessary. A nearby explosive barrel can help damage it, but do not depend on the explosion to replace parasite-targeting shots.
When the Iron Maiden dies, take the Storage Room Card Key from its body. Search the laboratory for optional ammunition or herbs only if doing so will not leave you short on healing or rifle rounds for the return trip.
- Iron Maiden forced into a safe firing position.
- All visible parasites destroyed.
- Rear parasite exposed and destroyed if necessary.
- Storage Room Card Key collected.
Return to Ashley and end Chapter 5-1
Retrace the cleared route to the Holding Area. Soldiers may still be present or may reappear, so keep Ashley’s cell behind Leon rather than allowing enemies to crowd around the doorway. Use the Storage Room Card Key on the locked cell door.
Enter the cell and approach Ashley to trigger the rescue scene. This is the required story objective; optional laboratory pickups do not extend the chapter. When the scene finishes, the game advances from Chapter 5-1 to Chapter 5-2.
Save after the transition at the next available typewriter. If you plan to revisit the chapter for treasure or supplies, keep a separate cleared save rather than overwriting the file used before the Iron Maiden.
- Storage Room Card Key used on Ashley’s cell.
- Ashley rescue scene triggered and completed.
- Chapter 5-2 transition reached.
- Progress saved after the transition.
Before you move on
- The facility interior was entered after the Island approach.
- Ashley was located through the security monitors.
- The Operating Room panel was solved with blue once, green twice and red three times.
- The Freezer Card Key was collected.
- The card was rewritten as the Waste Disposal Card Key.
- The cryogenic device was shut down.
- The Infrared Scope was collected and attached to a rifle.
- The Freezer Regenerator was defeated.
- The Waste Disposal crane route was completed.
- The Holding Area and X-Ray route were crossed.
- The Iron Maiden in the Experiment Room was defeated.
- The Storage Room Card Key was collected.
- Ashley’s cell was opened and the rescue scene played.
- Chapter 5-2 began and the new progress was saved.
References for this chapter
Chapter 5-2 — Waste Disposal, Wrecking Ball and Bulldozer Escape
Chapter 5-2 begins after Leon finds Ashley in the Island facility. Leave the Storage Room, clear the security-room ambush and enter Waste Disposal. Use the gates to control the spiky Regenerators, protect Ashley in the dumpsters, and push the large container into the water to make a bridge. Continue through the processing area, defend Ashley while she operates the wrecking ball, then pass the Regenerator corridor and shutter puzzle. Save and resupply at the Merchant before opening the double-lever door. Protect Ashley during both bulldozer rides, activate the lift between them, and reach the post-crash Merchant and typewriter. Take the optional Green Stone of Judgement if desired, save, then open the next door. When the GameCube prompts for Disc 2, remove Disc 1, insert Disc 2, save the new progress when prompted, and continue into Chapter 5-3. The Chapter 5-1 card-key route, Infrared Scope acquisition and Chapter 5-3 gameplay are outside this chapter.
1. Leave the Storage Room and reopen Waste Disposal
After Ashley has been rescued, collect the supplies and memo in the Storage Room. Put Ashley in the rear corner, then step outside and draw the soldiers toward the doorway. Use the shotgun against enemies that crowd the entrance and the handgun or rifle for targets at range. Keep Ashley behind Leon rather than allowing her to stand in the open.
Enter the next area to trigger the security-room ambush. Tell Ashley to wait near the entrance, clear the soldiers, then operate the security switch. Additional enemies arrive after the switch is used, so turn back and meet them from the room instead of letting them surround Ashley. Once the ambush is clear, go through the reopened route to Waste Disposal. Leon and Ashley automatically drop into the disposal pit.
- Begin after Ashley has been found in Chapter 5-1.
- Collect the Storage Room supplies.
- Keep Ashley near the rear entrance during the first fight.
- Operate the security switch and enter Waste Disposal.
2. Cross the disposal pit
After landing, take Ashley with you and operate the nearby switch. This activates the spiky Regenerator in the pit. Use the gates to control its approach: open the next gate, pass through, then use the second switch to close the gate between Leon and the creature. The gates provide space while you either shoot the parasite nodes with the rifle and Infrared Scope or avoid a prolonged fight.
Push the large container into the water with Ashley’s help. This creates the bridge to the far side. A second Regenerator appears during this section. Use the gates and surrounding barriers to keep it away from Ashley, then either destroy its visible parasite nodes or move past it once the route is safe. Push the remaining obstruction aside and enter the green door. Killing every enemy is optional if you can cross without putting Ashley at risk.
- Operate the disposal switches in sequence.
- Use the gates to separate Leon and Ashley from the first Regenerator.
- Push the large container into the water.
- Protect Ashley while crossing the new bridge.
- Reach the green exit door.
3. Reach the wrecking ball and destroy the wall
Continue through the processing area and clear the soldiers blocking the route. Enemies can attack from multiple levels, so use the platforms and doorways rather than standing in the exposed center. Shotgun blasts are effective when soldiers reach the platform; grenades and explosive barrels are useful only when Ashley is safely out of the blast area.
Drop to the lower level and move to the wrecking-ball controls. Place Ashley at the controls and stay close enough to intercept soldiers before they reach her. Keep the main approach in view, retreat around the room when necessary, and continue protecting Ashley until the wrecking ball has destroyed the damaged wall. Once the opening is complete, leave through it; clearing every remaining soldier is not required.
- Cross the processing area.
- Reach the lower level and place Ashley at the wrecking-ball controls.
- Stop soldiers from reaching Ashley.
- Wait until the damaged wall is destroyed.
- Exit through the new opening.
4. Clear the Regenerator corridor and shutter
Follow the new passage and activate the switch ahead. A Regenerator attacks from the corridor. If you have the rifle and Infrared Scope, create distance and target its parasite nodes. If you are bypassing it, keep moving and avoid allowing it to block the doorway. Continue with Ashley behind Leon and deal with the next Regenerator in the same way, using corners and doorways to maintain space.
Enter the side room and press the red switch. This raises the shutter only partway. Have Ashley crawl underneath it and operate the mechanism from the opposite side. Wait for the shutter to open fully, reunite with Ashley and enter the red door. Do not leave Ashley in the corridor while Leon fights the Regenerators; she can be grabbed if the enemies reach her.
- Activate the first corridor switch.
- Handle or bypass the first Regenerator.
- Use the side-room red switch.
- Send Ashley beneath the partially raised shutter.
- Reunite with Ashley and enter the red door.
5. Save and prepare for the bulldozer
The room beyond the red door contains a Merchant and typewriter. Save before continuing. Sell valuables only when necessary for space or ammunition money, and keep a workable balance of handgun, shotgun and rifle ammunition. A shotgun is especially useful during the bulldozer rides, while rifle or handgun ammunition can deal with distant soldiers.
At the double-lever door, tell Ashley to stand at the left lever and move Leon to the right lever. Start the mechanism and press the action button when the middle indicator light is active. The door opens when both levers are operated at the correct point. Collect the supplies in the tunnel before Ashley boards the bulldozer.
- Save at the typewriter.
- Resupply essential ammunition and healing items.
- Place Ashley at the left lever.
- Operate Leon’s lever when the center light appears.
- Collect tunnel supplies before boarding.
6. Survive the first bulldozer ride
Ashley drives while Leon defends the rear of the bulldozer. Face backward and watch for soldiers climbing onto the platform. Use the handgun against isolated targets and the shotgun when several enemies reach the vehicle together. Stop enemies before they pass Leon and reach Ashley.
A truck follows the bulldozer. Shoot its engine area when it appears to slow it temporarily. The truck returns once, so damage it again when it reappears. The vehicle eventually stops at the lift area; preventing the scripted crash permanently is not the objective.
- Face the rear during the ride.
- Stop soldiers before they reach Ashley.
- Use the shotgun for groups on the platform.
- Shoot the pursuing truck’s engine when it appears.
- Survive until the bulldozer reaches the lift.
7. Activate the lift and survive the second ride
Leave the bulldozer and climb to the upper walkway. Enemies attack Ashley while Leon is away, so clear the threats nearest the vehicle before using the lift lever. If a crossbow user has a clear line toward Ashley or the lever, eliminate that enemy first. Operate the lever, then return to Ashley and protect her until the lift finishes.
Board the bulldozer again for the second ride. Soldiers drop from the overhead platforms and attack from behind. Keep the shotgun ready for close groups and shoot distant enemies before they land when possible. Damage the second pursuing truck at its engine, then continue defending Ashley until the bulldozer crashes into the building.
- Leave the bulldozer and reach the upper walkway.
- Protect Ashley while approaching the lift lever.
- Operate the lift lever.
- Return to Ashley before the lift finishes.
- Survive the second ride and scripted crash.
8. Save after the crash and complete the disc transition
Leave the wrecked bulldozer and enter the adjoining room. Search containers and shelves for supplies if your inventory has room. The post-crash area contains another Merchant and typewriter. The Green Stone of Judgement is an optional treasure near this preparation area; take it if you want it, but it is not required to advance.
Use the typewriter and adjust your inventory before opening the next door. Opening that door triggers the end-of-disc transition. When the GameCube displays the Disc 2 prompt, remove Disc 1 and insert Disc 2. Follow the on-screen instructions to continue, then save the new progress when the game prompts you. Do not turn off the console before saving the Disc 2 position, or the manual warns that progress may remain saved only through the end of Disc 1. Continue into Chapter 5-3 only after the disc change and save are complete.
- Reach the post-crash Merchant and typewriter.
- Take the optional Green Stone of Judgement if desired.
- Save before opening the transition door.
- Open the door and wait for the Disc 2 prompt.
- Remove Disc 1 and insert Disc 2.
- Save the Disc 2 progress when prompted.
- Continue into Chapter 5-3 only after the save is complete.
Before you move on
- Leon and Ashley have left the Storage Room after Ashley’s rescue.
- The Surveillance Room security switch has reopened the Waste Disposal route.
- The disposal pit has been crossed using the gates and the container bridge.
- The wrecking ball has destroyed the damaged wall while Ashley was protected.
- The Regenerator corridor and shutter sequence are complete.
- The double-lever door has opened.
- Leon and Ashley have survived both bulldozer rides and the lift section.
- The post-crash Merchant and typewriter have been reached.
- The optional Green Stone of Judgement has been collected only if desired.
- The post-crash save has been completed.
- The transition door has been opened and the GameCube Disc 2 prompt has appeared.
- Disc 1 has been replaced with Disc 2.
- The new Disc 2 progress has been saved.
- Chapter 5-3 has begun without including its gameplay in this chapter.
Chapter 5-3: Laser Hall, U-3, Krauser and the Ruins Escape
Chapter 5-3 begins with the island-facility route, the prompted Krauser knife sequence and the laser hallway. Use the throne-room elevator, save at the cavern Merchant, then clear all three suspended containers by shooting green lights, pressing emergency buttons and reaching each red exit before the drop. Defeat U-3 in the cave, collect its 50,000-peseta reward and follow the lift, ladders, camp and tent descent to the next Merchant and typewriter. From there, enter the ruins, survive Krauser’s attacks while opening the timed gate, collect the Panther and Eagle pieces, then defeat Krauser’s mutated form under a three-minute escape timer. Take the Serpent piece, place all three Holy Beast pieces in the exit door and continue into Chapter 5-4. The original GameCube campaign uses two discs; save after the Disc 1-to-Disc 2 transition when prompted.
1. Clear the opening facility and survive the first Krauser encounter
Begin in the Chapter 5-3 facility after the Chapter 5-2 transition. Search the opening altar and adjoining rooms for supplies, then follow the stairs and corridors toward the elevator. Clear soldiers before descending, collect nearby ammunition and activate the lift once your weapons are ready.
The elevator leads to a scripted knife confrontation with Jack Krauser. This is not the later playable boss battle. Watch the action prompts and respond immediately to every displayed command. If Leon dies, reload and retry while concentrating on the prompt area rather than attempting to fight normally. After the sequence ends, continue through the door toward the laser hallway.
- Clear the starting facility route.
- Collect nearby ammunition before using the elevator.
- Survive every prompt in the first Krauser sequence.
- Continue through the door after Krauser withdraws.
2. Cross the laser hallway and save before U-3’s containers
The laser hallway contains fixed beam patterns and prompted dodges. Move through the first openings without touching the beams, then respond to the displayed dodge commands when the later barriers close in. At the end of the passage, operate the switch and clear the final accelerating laser sequence before entering the unlocked room.
Use the elevator behind Saddler’s throne, then follow the cave path to the Merchant and typewriter. This is the essential preparation point before the suspended-container section. Save here, organize the Attache Case, reload your primary weapons and keep healing items available. The next route is a timed escape sequence rather than the main U-3 boss arena.
- Pass the fixed laser barriers.
- Complete all displayed dodge prompts.
- Operate the hallway switch.
- Use the throne-room elevator.
- Save at the cavern Merchant and typewriter.
3. Escape all three suspended containers
Leave the save area and continue until U-3 attacks and Leon is dropped into the first suspended container. Prioritize movement over combat. Shoot the green lights that control the gates, press both emergency buttons in the required route and head for the red exit door as soon as the drop countdown begins. Use a shotgun blast or accurate shots only to make U-3 retreat when it blocks the path.
Repeat the same objective order in the second container: open the necessary green-light gates, press both emergency buttons and reach the next red door before the container falls. In the third container, use the central crate route and shoot the green light visible through the bars before pressing the final button. When the last countdown begins, take the central route to the exit gate and complete the prompted hook jump.
Do not stop to clear every item during the countdown. Supplies can be collected along the route when safe, but the required objectives are the green lights, emergency buttons and red doors. U-3 is not defeated during this section; the required arena battle occurs after the container escape.
- Open the gates with the green lights.
- Press both emergency buttons in each container.
- Reach every red exit door before the drop.
- Complete the final hook jump.
- Enter the deeper cave after the containers.
4. Defeat U-3 in the cave arena
Continue through the cave until U-3 returns for the required boss fight. Use the explosive barrels near the rock and tunnel entrances to create damage opportunities, but stand clear of each blast. Operate the nearby tunnel-gate levers to control distance and avoid allowing U-3 to pin Leon against a wall.
When U-3’s head is exposed, use strong, accurate attacks rather than wasting ammunition on its protected body. A magnum is efficient if you have saved ammunition, while the rifle, TMP or shotgun can also finish the fight with disciplined aim. Keep moving after each attack and respond to the displayed prompt when U-3 burrows underground.
After the creature is defeated, collect the 50,000 pesetas from its body. Open the gate and follow the lift and ladder route upward. If resources are too low, reload the cavern typewriter save and change your opening weapon choice or barrel timing.
- Use the explosive barrels safely.
- Control the arena with the tunnel gates.
- Target U-3’s exposed head.
- Respond to the underground attack prompt.
- Defeat U-3 and collect the 50,000 pesetas.
5. Cross the camp and descend through the tent
After the U-3 arena, use the lift, climb the ladders and enter the military camp. From the raised approach, shoot the explosive barrels around the tents to weaken the soldiers below, then clear anyone still blocking the route. Search the camp for ammunition and healing items if your inventory has space.
Enter the tent and drop through the hole inside. Follow the underground passage to the next Merchant and typewriter. Use this preparation point before the ruins: sell surplus treasure only when necessary, restore your ammunition balance and save. The nearby shooting gallery is optional and is not needed for story progression.
- Reach the military camp after U-3.
- Use the explosive barrels to reduce the soldier group.
- Enter the tent and drop through its hole.
- Reach and use the tunnel Merchant and typewriter.
- Resupply and save before entering the ruins.
6. Enter the ruins and open the timed gate
Leave the Merchant tunnel, climb out through the ruins route and move toward the first building. Krauser appears soon after Leon enters the area. This first ruins confrontation is not the final battle, so use the TMP or shotgun to stagger him and force him to withdraw. Dodge his knife attacks and explosive arrows, and use walls or building corners for cover when he fires from above.
Continue through the opened gate and cross the bridge toward the ruined buildings. Krauser will reappear several times. Search the buildings for supplies, but do not linger when he is firing from a rooftop. Follow the route through the buildings and ladders until you reach the first tower area.
Operate the timer-controlled gate mechanism inside the tower building. Krauser attacks while the mechanism runs, so keep moving around the room, use the stairs and break line of sight when necessary. Once the gate opens, pass through promptly. The timer here controls the gate; it is separate from the three-minute escape timer used during the final Krauser battle.
- Force Krauser to withdraw from the first ruins encounter.
- Cross the bridge and use the ruined buildings as cover.
- Operate the timer-controlled gate.
- Pass through the opened gate without backtracking.
7. Collect the Panther and Eagle pieces
Continue through the ruins, dealing with Krauser’s attacks and the small mechanical enemies. Follow the route to the raised platform and climb toward the first tower. At the top of the first tower, collect the Piece of the Holy Beast, Panther. Krauser attacks again after this pickup, so retreat into the surrounding structures or use the ladder and walls to create a safer firing angle.
Advance through the next gate and ruined section. Use the available ladders and platforms to climb the second tower. Search the upper area for optional ammunition and healing items before taking the Piece of the Holy Beast, Eagle. Picking up the Eagle piece triggers the final Krauser battle, so reload the weapon you intend to use and make sure Leon has enough health before taking it.
The Panther and Eagle pieces are required story items. Do not leave the ruins after collecting only one of them; the exit remains sealed until the third piece is obtained from Krauser.
- Collect the Piece of the Holy Beast, Panther.
- Reach the second tower.
- Collect the Piece of the Holy Beast, Eagle.
- Prepare weapons and healing before taking the Eagle piece.
8. Defeat mutated Krauser under the escape timer
After the Eagle pickup, Krauser mutates and begins the final fight. A three-minute timer starts for the battle and escape, so avoid unnecessary exploration. His mutated arm blocks attacks against much of his upper body. Shoot the exposed legs or knees to stagger him, then immediately target the opened head and chest while he is vulnerable.
The knife is highly effective at close range, but it requires careful positioning and prompt dodges. Firearms are safer for a first clear: use a magnum, rifle or TMP to force the leg stagger, then concentrate damage on the exposed upper body. Watch for his lunges, sweeping attacks and prompted dodges. If Leon is knocked from a platform, respond to the recovery prompt immediately.
When Krauser is defeated, collect the Piece of the Holy Beast, Serpent from the arena. Do not assume the fight ends the sequence: the escape timer continues while Leon exits the ruins. Move directly toward the lower route and avoid detours for optional items until the exit door is open.
- Watch the three-minute escape timer.
- Stagger Krauser through his exposed legs or knees.
- Attack his head and chest during the opening.
- Respond to recovery and dodge prompts.
- Defeat Krauser and collect the Serpent piece.
9. Place the three pieces and enter Chapter 5-4
Return down the route from the final tower and follow the opened passage toward the sealed exit. The door has three slots. Place the Piece of the Holy Beast, Panther, the Piece of the Holy Beast, Eagle and the Piece of the Holy Beast, Serpent into the matching door mechanism.
Collect nearby ammunition only if it is directly on the route and safe to take. Once all three pieces are installed, operate the door and pass through. This completes the required Chapter 5-3 progression and begins the Chapter 5-4 Military Camp section.
At the Chapter 5-4 transition, use the next available typewriter when practical and preserve the cleared Chapter 5-3 save at the Merchant before the ruins. The original GameCube version may prompt for the second disc during the campaign; follow the prompt and save after changing discs so progress is not lost.
- Carry all three Holy Beast pieces to the exit door.
- Place Panther, Eagle and Serpent in the door.
- Open the ruins exit.
- Enter Chapter 5-4.
- Save after the disc-change prompt if it appears.
Before you move on
- The opening Chapter 5-3 facility route is cleared.
- Leon has survived the prompted Krauser knife sequence.
- The laser hallway and throne-room elevator route are complete.
- Leon has saved at the cavern typewriter before the containers.
- All three suspended containers have been escaped using their green lights, emergency buttons and red doors.
- U-3 has been defeated in the cave arena.
- The 50,000-peseta reward has been collected.
- Leon has crossed the camp and descended through the tent.
- Leon has reached and used the post-U-3 Merchant and typewriter.
- The timed ruins gate has been opened.
- The Panther and Eagle Holy Beast pieces have been collected.
- The final mutated Krauser fight has been completed within the escape sequence.
- The Serpent Holy Beast piece has been collected.
- All three Holy Beast pieces have been placed in the exit door.
- Leon has passed through the ruins exit and entered Chapter 5-4.
- Any GameCube disc-change prompt has been completed and the progress has been saved.
References for this chapter
Chapter 5-4 — Military Camp and Final Facility Approach; no separate ship chapter
The original North American Nintendo GameCube campaign has no separate playable ship chapter in Leon’s story. Chapter 5-4 begins in the Northern Camp, where Mike’s helicopter supports Leon against fortified machine-gun positions. Cross the camp, operate the gate switches, and continue through the Northern Ruins to the Island Prison. In the Prison Yard, activate the emergency-locking device, recover the Emergency Lock Card Key from the soldier who takes it, use the card reader in the upper northwest room, and operate both emergency-lock switches. The opened route leads to Ashley. After reuniting with her, use the nearby Merchant, clear the next rooms, and enter the operating room. Leon and Ashley watch the parasite-removal scene there. Only after that scene does Chapter 5-4 end and the Final Chapter begin.
Save at the Northern Camp and prepare for the assault
Chapter 5-4 starts after the Chapter 5-3 ruins route. An explosion blocks the way back, so collect the Green Herb near the opening typewriter and save if you want a reliable restart point. The GameCube release uses typewriters as save points and spans two discs; this section is on Disc 2.
Keep a close-range weapon ready for commandos who reach cover, along with a rifle or magnum for distant targets and heavily armed enemies. Leave some Attache Case space for ammunition, herbs, grenades, money, and the Emergency Lock Card Key. The first Merchant does not appear immediately, so begin with a dependable combat loadout and at least one healing item.
- Save at the opening typewriter if desired.
- Leave room for supplies and the Emergency Lock Card Key.
- Carry weapons suited to both close and distant enemies.
Use Mike’s helicopter to cross the first camp
Walk up the trench until the radio scene introduces Mike. Continue toward the first machine-gun position, then take cover in the tent on the left. Wait for Mike’s missile strike before crossing. His helicopter destroys fortified positions, but ordinary commandos may remain, so check the area before advancing.
The route divides into upper and lower paths. The upper path is quicker but exposes you to soldiers and a rocket-using commando. The lower path contains additional supplies and gives you more cover. Whichever route you use, do not cross open ground while an active machine gun is firing. Use tents, walls, sandbags, and the tunnel to break line of sight.
Continue until you reach the locked gate. Shoot its padlock, pass through, and climb the ladder through the tunnel. Enter the building, operate the button beside the door, and advance until J.J. appears with his Gatling gun. Retreat into the building or another solid cover position, eliminate the nearby soldiers, then defeat J.J. before operating the route onward.
- Take cover during the first helicopter strike.
- Choose the upper or lower route according to your supplies and health.
- Shoot the gate padlock and operate the building button.
- Defeat J.J. from cover before continuing.
Open the second gate with the two switches
Beyond the first gate, the camp contains several defensive positions and two elevated switches. Move from cover to cover and let Mike destroy machine-gun nests whenever possible. Wait for the firing to stop before climbing toward a switch; commandos can still enter after a turret is destroyed.
Reach the first elevated platform and operate its switch. Use the tunnel, ladders, and building corners to reach the opposite platform, then operate the second switch. Shielded soldiers and other commandos may enter while you work. If the center becomes crowded, retreat to the tunnel rather than fighting in the open.
After both switches are activated, pass through the opened gate. Mike leaves soon afterward. Collect useful drops only when the area is safe, then continue through the single-door route toward the Northern Ruins. There is no ship section between the camp and these island facilities; the campaign proceeds directly through the military complex.
- Use Mike’s support against the machine-gun positions.
- Operate both elevated switches.
- Pass through the opened gate after both switches are active.
- Do not search for a separate playable ship route.
Pass through the Northern Ruins and handle the Regenerator
Continue through the ruins and drop into the next area. Search the ledges and containers for supplies; the Northern Ruins also contain the Pearl Pendant if you are collecting normal story-route treasures. After the scene involving Ada, enter the room with the typewriter and containers. Save here if you want another recovery point.
A Regenerator appears in the adjoining route. If you still have the rifle’s infrared scope, equip it and use the scope to identify the parasite bodies before firing. Aim at the visible parasites rather than repeatedly shooting the torso with a handgun. Back away between shots and avoid letting the Regenerator trap you in the narrow hallway.
You may bypass the enemy if you can maintain a safe route, but do not allow it to cut off the staircase. Climb the broken staircase on the south side of the area and continue toward the Prison Yard.
- Use the typewriter before the Regenerator section if desired.
- Use the infrared scope to locate parasite targets.
- Keep the staircase and retreat route open.
Clear the Prison Yard and recover the Emergency Lock Card Key
Enter the Prison Yard carefully. Crossbow commandos cover the edges, and more soldiers arrive as you move deeper into the area. Use explosive barrels to thin groups, then retreat behind buildings or corners when J.J. takes position above the yard. These covered positions give you time to reload without remaining exposed to the Gatling gun.
When the initial group is manageable, enter the small control room in the southwest corner and activate the emergency-locking device. The Emergency Lock Card Key is released elsewhere, and a commando takes it. Hold the control-room doorway or another defensible entrance while the enemies rush toward you. Shotgun blasts and flash grenades are effective when several enemies reveal Plagas. Defeat the soldier carrying the key and collect it from the drop.
Take the key through the northwest route to the highest room in that corner. Insert it into the card reader. Return down one level and operate the two emergency-lock switches in the separate guard rooms. Both switches are required to open the central route. If the yard becomes crowded, retreat down a ladder and use the explosive barrels instead of fighting in the center.
- Use cover and explosive barrels in the Prison Yard.
- Activate the emergency-locking device in the southwest control room.
- Recover the Emergency Lock Card Key from the soldier who takes it.
- Use the card reader in the highest northwest room.
- Operate both emergency-lock switches.
Reunite with Ashley, then complete the surgery-room transition
After both emergency locks are released, return to the opened central route. Two armored commandos guard the approach. Use a shotgun at close range or attack around their shields rather than wasting rifle ammunition on the shield face. Continue through the doors to reunite with Ashley.
A Merchant is available after the reunion. Sell unneeded treasures, clear case space, and upgrade the weapons you expect to use in the Final Chapter. Check nearby containers and the former holding-room route for ammunition, herbs, and other supplies before leaving the area.
Return to the access corridor and enter the operating room. Leon and Ashley watch the parasite-removal scene inside. This scene occurs while Chapter 5-4 is still in progress. The chapter ends only after the scene finishes, at which point the game transitions to the Final Chapter. Do not treat entering the operating room as an immediate chapter change, and do not look for a ship chapter before it.
- Defeat the armored commandos and reunite with Ashley.
- Use the nearby Merchant for final Chapter 5-4 resupply.
- Search the nearby rooms for remaining ammunition and healing items.
- Enter the operating room.
- Watch the parasite-removal scene.
- Confirm that the Final Chapter begins only after the scene ends.
Before you move on
- The Northern Camp has been crossed and Mike’s helicopter support has ended.
- The Northern Ruins and Island Prison route has been completed.
- The Emergency Lock Card Key has been recovered from the Prison Yard.
- The card key has been used at the upper northwest card reader.
- Both emergency-lock switches have been operated and the central route has opened.
- Leon has reunited with Ashley.
- The operating room has been entered and the parasite-removal scene has finished.
- The game has transitioned from Chapter 5-4 to the Final Chapter.
- No separate playable ship chapter was required or encountered.
Final Boss — Saddler and the Jet-Ski Key
Begin the Final Chapter at the last Merchant and typewriter. Resupply, heal, reorganize the Attache Case and leave room for Ada’s Special Rocket Launcher before entering the construction arena. Saddler’s leg eyes are the reliable stagger points: shoot an exposed eye, approach the fallen body and use the A-button action to attack the central eye. Explosive barrels and the steel-girder controls on the side platforms provide additional knockdown opportunities. After enough central-eye damage, Ada throws one Special Rocket Launcher onto an upper platform. Fire it at Saddler during a safe opening. If the shot misses, repeat the ordinary knockdown and central-eye cycle with your remaining weapons. Once Saddler is defeated, collect the Jet-Ski Key and return to the elevator. Stop here; Ashley’s reunion, the jet-ski tunnel and the ending belong to the next chapter.
Prepare at the final Merchant and typewriter
At the beginning of the Final Chapter, follow the short route from the starting area to the final Merchant and typewriter. This is your last normal shopping point before the Saddler arena. Sell unnecessary treasure, combine items where useful, heal, check your ammunition and save before taking the elevator toward the construction site.
Bring one weapon that can place accurate shots on Saddler’s leg eyes and one stronger weapon for the central-eye opening. A shotgun is practical for close-range eye shots, while a magnum, rifle or upgraded handgun can deal damage to the central eye after Saddler falls. Keep enough open space in the Attache Case for Ada’s Special Rocket Launcher; the launcher occupies a large rectangular section and cannot be collected if the case has no suitable room.
Keep a separate save at the typewriter if possible. If the arena attempt goes badly or the Special Rocket Launcher shot misses, this file lets you retry with a different loadout.
- Use the final Merchant and typewriter.
- Heal and balance handgun, shotgun and stronger ammunition.
- Leave sufficient Attache Case space for the Special Rocket Launcher.
- Save before entering the construction arena.
Enter the construction arena and identify the hazards
Ride the elevator to start the Saddler encounter. Move away from his starting position and use the connected platforms to maintain room for repositioning. Saddler can sweep with his limbs, stomp, jump between platforms, throw metal debris and grab Leon with the central appendage. Do not remain in the open while aiming if he is closing the distance.
The arena has explosive barrels and side-platform controls that send steel girders into Saddler. These hazards create knockdowns without requiring you to shoot a leg eye. Lure Saddler close enough before using either one. If he is too far away, wait rather than activating the hazard early, because the opportunity may not be immediately reusable.
The platforms are linked by moving or unstable bridges. Cross when a route is available, and respond to the on-screen action prompt if a bridge collapses or Leon hangs from the edge. Reposition across the arena instead of trying to trade damage in a narrow crossing.
- Move away from Saddler’s starting position.
- Locate the explosive barrels and side-platform girder controls.
- Use a hazard only when Saddler is within its effective range.
- Keep a retreat route across the platforms.
- Respond to bridge action prompts immediately.
Shoot the exposed leg eyes to force a knockdown
Saddler’s leg appendages are protected until an eye opens. Wait for an eye to become visible, then fire at it. A successful hit makes Saddler collapse and exposes the large central eye. You do not need to destroy every appendage permanently; the immediate objective is to create safe knockdowns while preserving enough ammunition for the rest of the fight.
Use the explosive barrels or steel-girder controls when Saddler is positioned beside them. Grenades and Mine Thrower explosives can also provide a knockdown if you brought them, but do not cross an exposed platform merely to reach a hazard while Saddler is attacking. A controlled retreat followed by a leg-eye shot is safer than forcing an environmental attack.
When Saddler falls, approach from a clear direction. Avoid standing directly under him longer than necessary, because he can recover into limb strikes, a stomp or a grab. The arena’s side platforms are useful for breaking line of sight while he regains his footing.
- Wait for a leg eye to open.
- Shoot the visible eye to knock Saddler down.
- Use barrels, girders, grenades or mines when they provide a safer opening.
- Approach only after confirming a clear route.
- Retreat as Saddler begins to recover.
Attack the central eye during each opening
When Saddler collapses, move toward the exposed central eye and press A when the action prompt appears. Leon climbs onto Saddler and performs the close-range knife attack. This is a dependable damage method and conserves ammunition. If the approach is unsafe or the prompt is unavailable, aim at the exposed central eye and fire a powerful weapon instead.
After the attack, withdraw before Saddler fully recovers. Do not remain underneath him to force extra hits; the recovery animation can lead directly into a limb strike or central-arm grab. Reset your position on a wider platform, wait for another leg eye or use a nearby hazard, then repeat the sequence.
Minor flying enemies are not the main objective. Eliminate them only if they block your view, interrupt an approach or create an immediate danger while you are crossing a bridge. Otherwise, concentrate ammunition and attention on Saddler.
- Press A for the close-range central-eye attack when the prompt appears.
- Use a strong weapon on the central eye when a safe knife approach is unavailable.
- Retreat before Saddler recovers.
- Repeat the leg-eye, knockdown and central-eye cycle.
- Kill minor enemies only when they interfere with the boss fight.
Collect and fire Ada’s Special Rocket Launcher
After enough damage has been dealt to Saddler’s central eye, a cutscene occurs and Ada throws one Special Rocket Launcher onto an upper platform. Wait for a safe opening, cross the available bridge and pick up the launcher. The item uses substantial Attache Case space, so preparation at the final Merchant is important.
Create another knockdown before firing. Shoot an exposed leg eye, use a girder control or barrel, or use a grenade or Mine Thrower explosive if one is available. When Saddler is down and the central eye is exposed, aim at Saddler’s body and fire the Special Rocket Launcher. The shot begins the defeat sequence when it connects.
Ada supplies this launcher once. If the shot misses, do not search the arena for a replacement. Return to the normal pattern of leg-eye knockdowns followed by central-eye attacks. Ordinary weapons can finish the encounter, although the retry may require careful ammunition management.
- Wait for Ada’s launcher cutscene.
- Cross safely to the upper platform and collect the single Special Rocket Launcher.
- Create a central-eye opening before firing.
- Aim at Saddler before pulling the trigger.
- If the shot misses, resume the normal stagger cycle.
Receive the Jet-Ski Key and reach the chapter boundary
After Saddler’s defeat scene, Leon receives the Jet-Ski Key. Pick it up and return to the elevator. You may collect the money dropped in the arena if the route is safe, but there is no reason to remain in the construction site once the key has been obtained.
Ride the elevator down and stop when Leon reaches the departure route. Do not continue this chapter into the lower tunnel, Ashley’s catch prompt or the jet-ski sequence. Those events are covered in the next chapter, which begins with the key already received and the elevator departure underway.
- Saddler’s defeat scene has played.
- Leon has received the Jet-Ski Key.
- Return to the elevator.
- Stop before the Ashley reunion and jet-ski escape.
Before you move on
- Saddler’s defeat scene has played.
- Leon has received the Jet-Ski Key.
- Leon has returned to the elevator.
- The guide has stopped before Ashley’s catch, jet-ski operation and ending sequence.
References for this chapter
- CAPCOM Online Manuals — Resident Evil 4, GameCube English Manual
- Resident Evil 4 — GameCube English Manual PDF
- Resident Evil 4 — Guide and Walkthrough by Emperor-Justinian-I
- Resident Evil 4 — Guide and Walkthrough — GameCube — GameFAQs
- Resident Evil 4 — Guide and Walkthrough — GameCube — RE4FREAK, GameFAQs
- Resident Evil 4 Walkthrough — GameSpot
Escape, Cutscene and Ending — confirming completion
Begin after Ada has handed Leon the Jet-Ski Key and Leon has left the Saddler arena by elevator. Follow the collapsing lower tunnel, catch Ashley at the drop, unlock the jet ski and pilot it through the fixed escape course. On the original North American GameCube release, hold the Control Stick forward to accelerate, steer with left or right movement, and use L and R together when the course presents a suitable slope for the jet-ski spin. Avoid debris, gates, rockfalls and tunnel walls by making early, controlled corrections. Continue until Leon and Ashley reach daylight, then let the ending and credits finish. Save the resulting cleared data without deleting the pre-Saddler file. Return to the title screen and verify that Assignment Ada and The Mercenaries are available. Separate Ways is not part of this GameCube completion check.
1. Start at the elevator and reach the lower tunnel
This chapter begins only after Saddler has been defeated, Ada has handed Leon the Jet-Ski Key, and Leon has departed the arena by elevator. Do not return to the boss arena or repeat the final-battle preparation here. The key is already in Leon’s inventory and the route ahead is the required escape sequence.
When Leon reaches the collapsing facility, run forward immediately. Follow the open passage through the lower section, using the doors, drops, ladders and unobstructed corridors as they appear. The escape path is linear, so do not spend time searching earlier Island rooms for treasure or ammunition. Falling debris and the collapsing structure provide the pressure; the correct response is to keep moving toward the tunnel rather than wait in an unsafe area.
At the lower-tunnel approach, continue to the drop where Ashley is stranded below. Move to the edge and use the displayed action prompt to catch her. If the prompt does not appear, reposition Leon directly over the drop instead of jumping blindly. Once Ashley is caught, continue forward together toward the jet ski.
The Jet-Ski Key is used when Leon examines the vehicle. It does not need to be selected from the inventory manually. Before boarding, heal if Leon is in critical condition, but do not attempt to explore the escape route for supplies. A failed escape requires reloading the most recent saved chapter or final-battle file.
- Saddler has already been defeated before this chapter begins.
- Ada has handed Leon the Jet-Ski Key.
- Leon has left the boss arena by elevator.
- Leon has reached the lower tunnel and caught Ashley.
- Leon and Ashley are standing at the jet ski.
2. Use the original GameCube jet-ski controls
Board the jet ski and hold the Control Stick forward to accelerate. Move the Control Stick left or right to steer. The course is a fixed tunnel escape rather than a free-roaming area, so maintain forward speed while making measured steering adjustments for the next obstacle.
Begin turns before a bend reaches the jet ski. Small, early corrections are safer than holding a direction until Leon is beside the wall and then making a sharp counter-steer. In straight sections, keep the jet ski near the middle of the passage unless the next gate or debris clearly requires a different line.
The jet ski can encounter falling rocks, broken structures, narrow gates, tunnel walls and changes in elevation. Watch the route ahead rather than the water immediately around the vehicle. When the passage widens, use that space to realign before the next turn. If Leon clips an obstacle, correct gradually; overcorrecting can send the jet ski into another wall.
When the jet ski runs up a suitable slope, pressing L and R together performs the original GameCube spin. This input is useful on the sloped sections where the game presents the maneuver, but it is not necessary to search for hidden routes or perform spins throughout the course. Keep accelerating after the slope and resume normal steering.
- The Control Stick is held forward for acceleration.
- Left and right Control Stick movement is being used for steering.
- Turns are started early with small corrections.
- L and R are used together on the applicable sloped sections.
- Leon and Ashley remain together in the jet ski.
3. Survive the tunnel and reach daylight
Keep moving through the entire escape course. The first sections require steering around the gates and debris, followed by larger drops and slopes. The route continues forward even when the tunnel briefly opens or the camera angle changes, so do not turn around or search for a side passage.
Use the wider sections to center the jet ski before narrow openings. If a gate appears offset, steer toward the open side early and then straighten the Control Stick as soon as the vehicle clears it. Falling rocks and collapsing sections should be treated as moving hazards: stay on the open line and avoid last-second swings across the tunnel.
There is no combat encounter or optional exploration objective during the jet-ski sequence. The practical goal is simply to keep the vehicle intact until the final opening. Reaching the end triggers the escape scene in which Leon and Ashley emerge from the tunnel into daylight.
If the jet ski is destroyed, reload the preserved final-chapter or pre-Saddler save and repeat the escape. Because this section is short and fixed, changing the line through the first failed obstacle is usually more useful than attempting random steering changes throughout the whole course.
- All gates, debris and rockfalls have been cleared.
- The jet ski has not been destroyed.
- Leon and Ashley have reached the final opening.
- The escape scene has carried them into daylight.
4. Finish the ending and save cleared data
After Leon and Ashley reach daylight, allow the remaining story scenes to play. The campaign completion sequence includes the escape transition and the ending presentation; do not power off immediately after the jet ski leaves the tunnel. The story objective is complete only after this ending flow has finished.
Let the credits continue until the game presents its post-clear save flow. Save the completed run to a Memory Card slot. The GameCube manual identifies the Memory Card as the required storage device for saved progress, and a cleared file is needed for the normal replay and post-game state.
Preserve the pre-Saddler save separately when possible. The final-chapter file gives you a recovery point if you want to replay the ending, while the cleared data records the completed campaign and supports the post-game menus and replay state. Do not overwrite or delete the cleared file while checking the unlocks.
The original GameCube campaign spans two discs. If your session required the Disc 1-to-Disc 2 change earlier in the run, that does not create a separate playable ship chapter. This final escape remains the campaign’s last playable route.
- The daylight escape scene has finished.
- The ending and credits have been allowed to proceed.
- Cleared campaign data has been saved to the Memory Card.
- A separate pre-Saddler save remains available when possible.
- The cleared file has not been deleted or overwritten accidentally.
5. Verify the two GameCube bonus modes
Return to the title screen after the cleared-data save is complete and inspect the available bonus or Extras entries. On the original North American GameCube release, completing the main story unlocks Assignment Ada and The Mercenaries.
Confirm Assignment Ada by name. It is Ada Wong’s standalone scenario on the Island, centered on collecting Las Plagas samples. Confirm The Mercenaries separately; it is the timed combat mode using Resident Evil 4 locations and playable characters. You do not need to begin either mode for this chapter’s completion check.
Do not look for Separate Ways on this original GameCube edition. That expanded Ada scenario was added to later versions and is outside the stated campaign goal. Professional difficulty, bonus weapons, treasure completion, Mercenaries ratings and the Chicago Typewriter are optional follow-up goals rather than requirements for the main story clear.
If one of the two required entries is not visible, first confirm that the credits and cleared-data save were completed. Reload the cleared file or return to the title screen again, but keep the cleared save intact while checking the menu.
- Assignment Ada appears in the GameCube bonus or Extras menu.
- The Mercenaries appears in the GameCube bonus or Extras menu.
- The cleared campaign save remains on the Memory Card.
- Separate Ways has not been treated as a GameCube requirement.
Before you move on
- Leon began this chapter after receiving the Jet-Ski Key and leaving the Saddler arena by elevator.
- Ashley was caught in the lower tunnel.
- Leon and Ashley completed the original GameCube jet-ski escape.
- The jet ski reached daylight and the ending sequence finished.
- The credits and post-clear save flow were completed.
- Cleared campaign data was preserved on the Memory Card.
- Assignment Ada appears in the bonus or Extras menu.
- The Mercenaries appears in the bonus or Extras menu.
References for this chapter
Post-Game: Extras, Assignment Ada, The Mercenaries and common unlocks
After the original North American Nintendo GameCube campaign is complete, save the cleared game after the jet-ski escape, ending transition and credits. Return to the title screen and confirm that Extras lists Assignment Ada and The Mercenaries. Assignment Ada requires collecting five Plaga samples and completing the rendezvous sequence; on this GameCube release, finishing it unlocks the Chicago Typewriter for purchase in the cleared main game. The Mercenaries has four stages and five playable characters. Four stars on the appropriate stage unlocks Ada, Krauser, HUNK or Wesker, while five stars with every character on every stage unlocks the Handcannon. A Normal campaign clear unlocks Professional. The Infinite Rocket Launcher and Matilda are also optional cleared-game rewards. Movie Browser availability is not part of this guide’s completion check.
Save the cleared campaign and verify the required bonus modes
Finish the final boss, complete the jet-ski escape, watch the ending transition and allow the credits sequence to finish. When prompted to save the completed game, use a Memory Card slot that you will preserve. This cleared file is the important record of campaign completion and is also the file used for cleared-game weapon purchases.
Return to the title screen and open Extras. Confirm that Assignment Ada and The Mercenaries are listed. These are the two GameCube bonus modes required for this chapter’s post-game verification. Do not treat optional menu entries, including any Movie Browser availability, as part of the required completion check.
If the modes do not appear, make sure you did not quit immediately after the boss. Reload the most recent pre-finale save, complete the escape and ending again, save when prompted, then return to the title screen. Keep the cleared file instead of overwriting it with a new campaign.
Completing the main game on Normal unlocks Professional on this original release. Check the difficulty selection after returning to the title screen. Professional is an optional challenge and does not replace the requirement to preserve the cleared campaign save.
- The final boss is defeated.
- The jet-ski escape and ending sequence are complete.
- The credits have finished.
- A cleared campaign file is saved on the Memory Card.
- Extras lists Assignment Ada and The Mercenaries.
- Professional is available after a Normal-difficulty clear.
Complete Assignment Ada and unlock the GameCube Chicago Typewriter
Start Assignment Ada from Extras. It uses a separate equipment set, so Leon’s campaign inventory and stored ammunition do not carry into the scenario. The objective is to collect five Plaga samples and reach the extraction rendezvous. The samples are placed along the island route and can be tracked using the scenario’s map markers.
Advance through the island facilities, opening the required doors and defeating only the enemies that prevent progress or make the route unsafe. Search nearby rooms for ammunition, healing items and grenades when the route permits. Save stronger resources for crowded corridors, the required boss encounter and the final approach. If a failed attempt leaves you short on health or ammunition, reload and change how you spend supplies rather than repeatedly forcing the same route.
Collect all five samples, then continue past the fifth pickup. The fifth sample completes the collection objective but does not finish Assignment Ada. Follow the remaining route to the rendezvous point and allow the extraction sequence and scenario ending to play completely.
After the ending, return to the title screen and load the cleared main-game file. Visit the Merchant during a cleared-game replay and check the special-weapon stock. On the original GameCube release, completing Assignment Ada unlocks the Chicago Typewriter for the main game. It is a Merchant purchase, not an automatic addition to Leon’s inventory.
- All five Plaga samples are collected.
- The route after the fifth sample is completed.
- The extraction rendezvous is reached.
- The Assignment Ada ending has played.
- The Chicago Typewriter is available from the cleared-game Merchant.
Unlock the four additional Mercenaries characters
Open The Mercenaries from Extras. The GameCube version uses four stages: Village, Castle, Commando Base and Waterworld. Leon is available at the start. Each stage supplies its own fixed character equipment; campaign weapons, upgrades and stored ammunition do not carry into the mode.
Earn four stars or more on Village to unlock Ada. Earn four stars or more on Castle to unlock Krauser. Earn four stars or more on Commando Base to unlock HUNK. Earn four stars or more on Waterworld to unlock Wesker. The result must be earned on the named stage; a high rating on a different stage does not substitute for it.
At the beginning of each attempt, collect accessible time bonuses and plan a route through the enemy groups. Preserve an escape path instead of standing in a corner only to protect a combo. Leon and Ada can handle mixed groups with firearms and grenades. Krauser is effective against clustered enemies when his mutation can be used safely. HUNK benefits from close-range executions when the surrounding group is controlled. Wesker can manage longer lanes with his rifle and powerful close-range attacks.
After each qualifying result, leave the mode or check the character selection screen to confirm the new character. Four-star unlocks are separate from the Handcannon requirement, so unlocking all five characters does not by itself grant the weapon.
- Ada is unlocked from a four-star Village result.
- Krauser is unlocked from a four-star Castle result.
- HUNK is unlocked from a four-star Commando Base result.
- Wesker is unlocked from a four-star Waterworld result.
- All five Mercenaries characters are selectable.
Earn the Handcannon through five-star Mercenaries results
The GameCube Handcannon requirement is five stars on all four Mercenaries stages with all five playable characters. That means Village, Castle, Commando Base and Waterworld must each show a five-star result for Leon, Ada, Krauser, HUNK and Wesker.
Learn each stage’s time-bonus locations and enemy entrances before concentrating on score. Build a kill chain while moving toward the next group, but abandon a risky combo if it leaves the character surrounded or without a retreat. Restart attempts that lose the combo early or consume too much health before the major enemy waves.
Character loadouts change the safest approach. Use Krauser’s mutation to remove dangerous clusters when the attack will not leave him exposed. Use HUNK’s close-range attacks only when nearby threats are controlled. Use Wesker’s rifle to thin distant targets and his stronger attacks for emergencies. Leon and Ada should reserve grenades for dense groups or dangerous special enemies rather than spending them on isolated targets.
Once every character has five stars on every stage, return to the title screen and load a cleared main-game file. Check the Merchant’s special-weapon stock. The Handcannon becomes available for purchase in the cleared main game; it is not placed directly into the Attache Case.
- Leon has five stars on all four stages.
- Ada has five stars on all four stages.
- Krauser has five stars on all four stages.
- HUNK has five stars on all four stages.
- Wesker has five stars on all four stages.
- The Handcannon appears in the cleared-game Merchant stock.
Check the remaining optional campaign rewards
The main campaign clear unlocks the Infinite Rocket Launcher and Matilda for a cleared-game replay. Load the cleared file or begin the replay associated with it, then check the Merchant’s special-weapon stock. These weapons are optional and are not needed for the story completion check.
The Chicago Typewriter is tied to completing Assignment Ada on this GameCube edition. The Handcannon is tied to five-star results for every character on every Mercenaries stage. Professional is tied to completing the main campaign on Normal. Treat these as separate goals; completing one does not complete the others.
Keep the cleared Memory Card file before beginning a Professional run or a new replay. If you need to test an unlock, use a separate save slot whenever possible. This prevents a failed optional attempt from removing the campaign-clear record.
The Movie Browser, if available in the version being used, is optional and is not required for this chapter. Do not use its presence or absence as evidence that the main campaign clear failed. The required verification remains the saved cleared campaign plus Assignment Ada and The Mercenaries in Extras.
- The Infinite Rocket Launcher is available from the cleared-game Merchant.
- Matilda is available from the cleared-game Merchant.
- Professional is available after the Normal clear.
- The Chicago Typewriter is available after Assignment Ada.
- The Handcannon is available after the full five-star Mercenaries requirement.
- The cleared campaign save remains preserved.
- Movie Browser status is not being counted as a completion requirement.
Before you move on
- The final boss, jet-ski escape, ending transition and credits are complete.
- The cleared main-game file remains on the Memory Card.
- Extras lists Assignment Ada and The Mercenaries.
- Professional is available after a Normal-difficulty clear.
- Assignment Ada is complete, including all five samples, extraction and its ending sequence.
- The Chicago Typewriter appears in the cleared-game Merchant stock.
- All four Mercenaries stages are available.
- Ada, Krauser, HUNK and Wesker are unlocked by their corresponding four-star results.
- If pursuing the Handcannon, every character has five stars on Village, Castle, Commando Base and Waterworld.
- The Handcannon appears in the cleared-game Merchant stock after the required results.
- The Infinite Rocket Launcher and Matilda are available after the main-game clear.
- Movie Browser status is not being used as a requirement for GameCube campaign completion.
References for this chapter
- CAPCOM Online Manuals — Resident Evil 4, GameCube English Manual
- Resident Evil 4 — GameCube English Manual PDF
- Resident Evil 4 — Cheats, Codes, and Secrets for GameCube — GameFAQs
- Resident Evil 4 — HandCannon Guide — GameCube — GameFAQs
- Resident Evil 4 — Guide and Walkthrough — GameCube — GameFAQs
- Resident Evil 4 — Assignment Ada FAQ — GameCube — GameFAQs
- Resident Evil 4 — GameCube Guide and Walkthrough by A_I_e_x
Treasure map, merchant routes and efficient cash farming
Treat treasure as optional income that supports weapons, ammunition and healing. Buy the Village, Castle and Island treasure maps when the purchase will not leave you short on combat supplies; the maps mark important treasures but do not make every Spinel or cash pickup visible. Preserve valuables with sockets until their matching pieces are available, especially the Beerstein and its Green, Red and Yellow Catseyes, plus Elegant Masks and compatible gems. Sell standalone items such as the Elegant Chessboard, Gold Bangles, Elegant Perfume Bottles and Velvet Blues whenever their fixed value or the inventory space is more useful. Search only after combat is controlled and before a one-way transition. At each Merchant, sell completed combinations first, review supplies, buy one practical upgrade or the ammunition needed for the next required encounter, then save. No treasure is required for the story, and no treasure is required for a later Merchant upgrade chain.
1. Buy regional maps without sacrificing survival supplies
The Merchant offers separate treasure maps for the Village, Castle and Island. Buy the current region’s map when you can still afford ammunition, healing and the next weapon or upgrade your route requires. A map is a planning aid, not a requirement, and it does not display every loose Spinel, crow reward or ordinary cash pickup.
Use the map after clearing the current room or encounter. Check marked rooms before activating lifts, gates, boats or other transitions that can make backtracking dangerous. If a marker lies inside an active siege, a boss arena or a timed sequence, leave it until the area is safe or skip it entirely. Treasure should fund the run rather than force a risky detour.
- Buy a regional map only after protecting combat funds.
- Check nearby markers after enemies are defeated.
- Skip treasure that requires unsafe backtracking or interrupts a timed sequence.
2. Build the Beerstein combination from the Village route
Collect the Beerstein at the Farm. From the large barn, climb to the upper floor, exit through the window, drop to the enclosed lower section and break the wooden box. Keep the Beerstein in the Treasure screen instead of selling it immediately.
The Red Catseye is in the Village section near the house where Luis is held. After the area around the house is safe, look in the tree beside the approach and shoot down the bird’s nest. The Green Catseye comes from the puzzle mechanism behind the Church during Chapter 1-3. The Yellow Catseye is in Chapter 2-3 on the right-hand El Gigante route: after passing through the lift section, follow that route to the chest at the end and open it. Combine all three Catseyes with the Beerstein when the case has room.
Check item names carefully. Green Catseye, Red Catseye and Yellow Catseye belong with the Beerstein. Green Eye, Red Eye and Blue Eye are dropped by Novistadores and belong with the Butterfly Lamp instead. Do not sell one of the Beerstein Catseyes merely because its individual value looks useful.
- Take the Beerstein from the Farm barn route.
- Get the Red Catseye from the Village bird’s nest near Luis’s house.
- Solve the Church puzzle for the Green Catseye.
- Take the right-hand El Gigante route in Chapter 2-3 and open the chest at the end of the lift route for the Yellow Catseye.
- Do not confuse Catseyes with Novistador Eyes.
3. Preserve Elegant Masks and their compatible gems
The early Elegant Mask is in the Chapter 1-2 facility. After passing the room with the bear traps, destroy the boards blocking the nearby window, climb through and take the mask. Examine it in the Treasure screen: its three sockets are intended for Red Gem, Green Gem and Purple Gem pieces.
The Green Gem is obtained in the Lake Cave area during Chapter 2-1. Chapter 2-3 provides the other early mask gems: the Purple Gem is on the right, El Gigante route, on top of the hanging bucket near the shed with the Old Key; the Red Gem is on the left, Ganado route, after using the Camp Key and following the side path through the boarded window.
Combine gems with an Elegant Mask when practical, preferably completing the three-gem arrangement before selling. This is a value decision, not a progression requirement. If ammunition, healing or case space is urgently needed, selling an incomplete mask is acceptable; no story door, key or Merchant upgrade depends on retaining it.
- Collect the early Elegant Mask through the Chapter 1-2 facility window.
- Keep Green Gem, Purple Gem and Red Gem items for an Elegant Mask.
- Confirm each item’s description before combining.
- Sell a completed mask when the money is more useful than the stored treasure.
4. Sweep Village valuables only after the route is secure
Search the Farm, the Chapter 1-1 early-house route, the Church area and Chapter 2-3 side paths after the immediate enemies are defeated. Check bird nests, hanging containers, wells, cabinets, small rooms and visible dead ends. For wells, shoot the support holding the lid before shooting the hanging treasure so it does not become a lower-value dirty version.
Take the Red Catseye before leaving the early Village route if you want the full Beerstein combination. During Chapter 1-3, solve the Church puzzle for the Green Catseye. In Chapter 2-3, take the right-hand El Gigante route and collect the Yellow Catseye from the chest at the end of the lift route. Use a safe Merchant visit to combine or sell the completed Beerstein.
Do not search during the opening village siege, a chase, the boulder route or a boss sequence. Clear the threat first, establish an escape path and then inspect the room. A low-value Spinel is never worth spending a healing item or risking a failed checkpoint.
- Search nests, wells, containers and side rooms after combat.
- Collect the Red Catseye near the Village house where Luis is held.
- Use the Church puzzle to obtain the Green Catseye.
- Take the Chapter 2-3 right-hand El Gigante route for the Yellow Catseye chest.
- Avoid treasure detours during active encounters.
5. Sell Castle valuables according to their actual combination status
The Castle contains both socketed valuables and fixed-value jewelry. The Elegant Chessboard in the Weapon Exhibition Room is standalone and has no chess-piece combination, so sell it whenever the cash or inventory space is useful. Gold Bangles, the Elegant Perfume Bottle, Velvet Blues and similar items are also safe to sell once collected because they do not require a later component.
Continue checking the Treasure screen for descriptions that mention sockets or a matching object. The Castle’s major combination pieces include the Butterfly Lamp with Novistador Eyes and the Salazar Family Crown with its associated pieces. Keep those components until the combination is complete if your case space and combat budget allow it.
Search balconies, upper walkways, ceilings, fountains, side rooms and normal route branches after clearing cultists, knights or Novistadores. Before using a lift, opening a major gate or entering a one-way set piece, inspect the current room and nearby upper levels. Save before an optional Novistador or knight sweep if failure would cost more than the treasure is worth.
- Sell the Elegant Chessboard when its fixed value or space matters.
- Keep only items whose descriptions confirm a combination.
- Check upper walkways and side rooms before major transitions.
- Save before dangerous optional Castle treasure sweeps.
6. Prioritize large combination pieces and safe Island valuables
On the Island, prioritize high-value combination pieces and large valuables that sit beside the required route. The Salazar Family Crown is assembled from its Crown, Crown Jewel and Royal Insignia components; the Crown Jewel comes from defeating Verdugo, while the Royal Insignia is found in the Novistador cave route. Verdugo’s fight is optional, so the crown combination is optional as well.
The Golden Lynx is found in the Chapter 5-1 cave section, in a chest reached by clearing the obstruction with the explosive barrel. It accepts the Red Stone of Faith, Green Stone of Judgment and Blue Stone of Treason. Preserve the statue and matching stones when practical, but do not cross Regenerator, Iron Maiden or heavy military positions solely to complete a low-priority sweep.
At the last convenient Merchant before the final facility, sell completed combinations first, then standalone valuables that no longer justify their space. Spend the proceeds on ammunition, healing and upgrades for weapons already in your loadout. Capacity upgrades are most useful when they immediately prevent wasted ammunition pickups; otherwise favor damage or the ammunition needed for the next required encounter.
- Prioritize the Salazar Family Crown and Golden Lynx only when their routes are safe.
- Treat Verdugo’s Crown Jewel and all treasure combinations as optional.
- Do not cross dangerous Island areas only for a small-value pickup.
- Leave the Merchant with ammunition, healing and open case space.
7. Use the same sell, buy and save routine at every Merchant
At each Merchant, first sell completed combinations and confirmed standalone valuables. Next review ammunition, healing and grenades, then buy the single most useful upgrade or the ammunition required for the next mandatory encounter. Keep at least one open case slot before entering a treasure-heavy room so key items and drops do not force an unwanted discard.
Use the typewriter beside the Merchant when available. Maintain one ordinary progress save and another before a boss approach or optional treasure sweep. If a purchase leaves you short on shells, rifle rounds or healing, reload the Merchant save and change the order of purchases rather than repeatedly attempting the next fight under-equipped.
Combine herbs when doing so saves space, but do not discard a practical healing option simply to carry a low-value treasure. Treasure collection is successful when it improves the run’s resources without causing dangerous backtracking, not when every marked item is collected.
- Sell before buying so the full cash total is available.
- Keep one case slot open before treasure-heavy rooms.
- Save after a profitable Merchant visit.
- Keep separate progress and boss or treasure saves.
- Reload and change purchases if the next required encounter is under-supplied.
Before you move on
- The Village, Castle and Island maps have been checked where affordable, while recognizing that maps do not show every loose cash or Spinel pickup.
- The Beerstein has been combined with the Green, Red and Yellow Catseyes, unless an emergency sale was necessary.
- The Yellow Catseye was collected from the chest at the end of the Chapter 2-3 right-hand El Gigante lift route, if the full Beerstein route was attempted.
- The Elegant Mask and compatible gems have been combined before sale when practical.
- The Elegant Chessboard and other standalone valuables have been sold when their cash or inventory space was more useful.
- At least one Merchant visit followed the order of selling, reviewing supplies, buying and saving.
- Before the final facility, the case has open space and the remaining cash, ammunition and healing support the mandatory encounters.
Failure recovery: save reloads, reapproach and checkpoint use
Resident Evil 4 on Nintendo GameCube saves at typewriters to a GameCube Memory Card. Each saved game requires at least 9 free blocks, so confirm there is room before beginning a long campaign. Use one file for ordinary chapter progress and another for dangerous detours, boss preparation or treasure backtracking. After Leon dies, Continue lets you resume the same game, but it is not a replacement for a dependable typewriter save. If the failed attempt began with poor health, the wrong ammunition or a cramped inventory, choose Retry or Load from the pause screen and return to an earlier save. Change the approach before trying again: reorganize the Attache Case, combine herbs, sell or store excess treasure, preserve a healing item, and use chokepoints, grenades or environmental traps to control enemy groups. Keep an older recovery file until the next area has been safely cleared.
1. Create a main save and a recovery save
Use every safe typewriter that is close to a major transition. The GameCube manual confirms that typewriters are the campaign’s save points and that a Nintendo GameCube Memory Card must be inserted in Slot A or B. Each Resident Evil 4 saved game requires at least 9 free blocks, so check the card before starting a run and do not remove it while the game is saving or loading.
Use one save slot for your normal chapter progress. Use a second slot before a boss, a large ambush, a timed event, or a treasure detour whose route you have not confirmed. This is a practical file-management strategy: the game will not create these backup categories for you. Keep the older file until the next section has been tested, because a successful boss kill can still leave you badly hurt or short on ammunition.
- Confirm at least 9 free Memory Card blocks before saving.
- Keep one current progress file and one older recovery file.
- Save before bosses, large ambushes, timed events and uncertain treasure detours.
- Never remove the Memory Card during saving or loading.
2. Choose Continue, Retry or Load for the correct situation
When Leon’s Health Meter reaches zero, the Game Over screen offers Continue. Use Continue when you want to repeat the same short sequence immediately and your preparation is still sound. It is useful for learning an ambush or practicing a boss opening, but it does not fix a weak inventory, poor health or an unsuitable weapon plan.
If the attempt was already compromised, press START/PAUSE and choose Retry or Load from the Option screen. Load the pre-boss file when you need to change your weapon arrangement, Merchant purchases or healing plan. Load the ordinary progress file when a failed detour has consumed health, ammunition or inventory space. The GameCube manual also confirms that saved data can be loaded from Load Game on the main menu.
- Use Continue for a quick practice attempt.
- Use Retry or Load when the problem began before the current encounter.
- After loading, check health, ammunition, grenades and case space before leaving the save area.
3. Rebuild the setup before repeating a boss
If the same boss attempt fails twice, change the preparation rather than repeating the identical fight. Open the Attache Case and place the weapon, healing item and grenade you expect to use where they can be reached quickly. Combine herbs when doing so will free a slot or increase maximum health. Sell excess treasure at the Merchant if the case is blocking ammunition pickups, but do not sell a key item or an object that the game identifies as usable for combining.
Buy ammunition only after deciding which weapon will handle the encounter. Spending all available money on an upgrade can leave you unable to replace the rounds that actually create the boss’s stagger windows. Preserve at least one healing item for the later part of a multi-stage fight. If the arena has a doorway, ladder, narrow passage, explosive barrel or other usable feature, plan the retreat before triggering the encounter.
- Change at least one weapon, item or positioning decision after repeated failures.
- Keep a healing item for the later phase of a long encounter.
- Do not spend all cash on upgrades if essential ammunition cannot then be purchased.
- Identify the retreat route before activating the fight.
4. Break large ambushes into controlled groups
Before opening a door or crossing an obvious trigger point, identify the route back to a doorway, ladder, narrow passage or other position that prevents enemies from surrounding Leon. Trigger the encounter, retreat to that position and deal with the first group before advancing. Do not run deeper into the area merely because the nearest enemy has been staggered; check whether another wave is approaching.
Use handgun shots to the head or legs to create openings, then use Leon’s prompted context attack or knife when the enemy is safely staggered. The official manual specifically notes that leg and foot shots make enemies fall more easily and that a well-timed action-button kick can hit nearby enemies. Use grenades when several enemies are compressed together or when the blast creates enough space to reach safety. If an explosive barrel or trap is present, lure enemies toward it and activate it from a position where Leon will not be caught in the blast.
- Locate the retreat line before triggering the encounter.
- Control the first enemy group before drawing additional enemies.
- Use grenades to break surrounding pressure or damage groups.
- Activate traps from a safe angle rather than standing beside them.
5. Recover missed treasure without losing story progress
When you notice a missed treasure, first determine whether the route is still open from the current typewriter. Some areas remain accessible for a while, while timed sequences, boss victories and one-way transitions can close access. Make a separate save before backtracking whenever the route is uncertain. If the return trip goes badly, reload that detour file instead of sacrificing the main chapter save.
Do not make a treasure recovery run during an active chase, timed escape or dangerous room. A low-value treasure is not worth losing healing items, ammunition or a reliable story position. If returning requires a long and risky route, continue the campaign and treat the item as optional. The main completion goal does not require every treasure.
- Confirm that the route remains open before leaving the current area.
- Save separately before uncertain backtracking.
- Abandon a detour that costs more health or ammunition than the item is worth.
- Keep the main chapter file untouched until the recovery run is complete.
6. Secure the next stable save after recovery
After clearing the encounter that caused repeated failures, use the next available typewriter and create a new main progress save. Keep the older pre-encounter file until the following area has been tested. This protects the run if the victory leaves Leon with minimal health, if a later transition proves difficult, or if you accidentally sell an item that would have been useful for the next section.
If you stop playing, return to a dependable saved position before turning off the GameCube. After restarting, load the intended file from the main menu and confirm the chapter, time and rank shown on the save list. Do not delete the older file merely because the latest save is newer; retain it until the new area has a safe typewriter and a workable supply position.
- Save at the next typewriter after overcoming the problem encounter.
- Retain the previous recovery file until the following section is stable.
- Confirm the intended save entry after restarting the console.
- Delete or overwrite older files only after the new progress file has been tested.
Before you move on
- At least 9 free Memory Card blocks were available before the campaign save was created.
- The memory card contains one current chapter file and one older recovery file.
- A failed boss attempt can be retried with a changed loadout, route or resource plan.
- Missed treasure is either recovered through a separate save or deliberately abandoned without endangering story progress.
- The next stable typewriter save has been created after clearing the problem encounter.
- The player can distinguish Continue after Game Over from Retry or Load on the pause screen.
References for this chapter
Final Checklist — confirmation steps for a complete GameCube run
Use this checklist only after the original North American Nintendo GameCube campaign is already complete. Confirm that Saddler was defeated, Ada handed Leon the Jet-Ski Key, the elevator departure occurred, Ashley was caught, the jet-ski escape reached daylight, the ending and credits finished, and the cleared-game data was saved. Confirm that the campaign continued from Disc 1 to Disc 2 when prompted. Then return to the title screen or bonus menu and verify that Assignment Ada and The Mercenaries are both visible and selectable. Professional difficulty, New Game+, special weapons, costumes, treasure completion and Mercenaries ratings are optional post-game goals, not requirements for this completion check. Separate Ways is not part of the original North American GameCube release.
1. Confirm the final story sequence is already complete
Do not use this chapter to replay or relearn the final battle or escape. The required story states should already be finished before you begin the checklist: Osmund Saddler has been defeated, Ada has handed Leon the Jet-Ski Key, Leon has taken the elevator away from the arena, Ashley has been caught after the drop, and the jet-ski has reached the end of the underground route.
If any of those states is missing, return to the appropriate final-story chapter rather than marking the campaign complete. Saddler’s defeat by itself is not enough. The campaign remains unfinished until the Jet-Ski Key handoff, elevator departure and escape sequence have also occurred.
The GameCube release is a two-disc campaign. Confirm that the game prompted you to replace Disc 1 with Disc 2 and that you continued playing from Disc 2. Disc 1 is only the starting disc, so possession of a Disc 1 save or reaching the disc-change prompt does not prove that the story was completed.
- Saddler has been defeated.
- Ada has handed Leon the Jet-Ski Key.
- Leon has departed the arena by elevator.
- Ashley has been caught after the final drop.
- The jet-ski escape has reached its endpoint.
- Disc 2 was inserted and used to finish the campaign.
2. Confirm the ending, credits and cleared-game save
Allow the ending transition and credits to finish before switching off the console. The completion state should be recorded only after the game presents its post-ending save opportunity. Save that completed data to a Nintendo GameCube Memory Card with enough free space, and do not remove the card or interrupt the console while the save is in progress.
Return to the load screen and verify that the completed file is still present. Keep this file separate from any pre-Saddler save whenever possible. The cleared file is the reusable record for a completed campaign and should be preserved before starting a fresh run, loading another file over it or changing your save arrangement.
If the ending was watched but no completed data was saved, do not treat the run as fully verified. Reload the latest available final-section save and finish the ending and save sequence again. A file that only reaches the final arena, or a file saved before the jet-ski escape, is not the completed-game file required here.
- The ending transition has finished.
- The credits have finished or reached their completion point.
- The post-ending save opportunity has been accepted.
- A completed-game file is present on the Memory Card.
- The completed file has not been overwritten by a new run.
3. Verify Assignment Ada and The Mercenaries
Return to the title screen after confirming the completed save. Open the bonus or Extras selection available in the North American GameCube release and check that Assignment Ada is listed. Select it far enough to confirm that the mode is available, then return to the menu without beginning an optional playthrough if you are only checking availability.
Check the same menu for The Mercenaries and confirm that it is listed and selectable. The required verification is access to the mode, not completion of its stages, character unlocks or rating goals. Mercenaries ratings and the Handcannon are separate optional objectives.
If either mode is absent, first confirm that you saved the completed campaign rather than merely saving before the final escape. Next, confirm that the menu is reading the same Memory Card containing the clear data and that the game is the original North American GameCube edition. Do not delete the clear file while troubleshooting.
- Assignment Ada is visible in the title screen or bonus menu.
- Assignment Ada can be selected.
- The Mercenaries is visible in the title screen or bonus menu.
- The Mercenaries can be selected.
- The verified clear file remains preserved.
4. Separate required completion from optional post-game goals
The main-story completion requirement ends with the finished campaign, ending transition, credits and saved cleared data. The two post-game menu checks are complete when Assignment Ada and The Mercenaries are visible and selectable. No ranking, treasure or bonus-weapon requirement needs to be added to this checklist.
Professional difficulty and New Game+ are optional follow-up goals. The same applies to the Infinite Rocket Launcher, Matilda, Chicago Typewriter, Handcannon, alternate costumes, complete treasure collection and Mercenaries ratings. Pursue those only after preserving the cleared file.
Assignment Ada is the relevant Ada scenario for this original GameCube edition. Separate Ways belongs to later releases and is not an expected menu item or a requirement for the original North American GameCube campaign. Do not use its absence as evidence that the campaign clear failed.
- Professional is treated as optional.
- New Game+ is treated as optional.
- Bonus weapons and costumes are treated as optional.
- Treasure completion and Mercenaries ratings are treated as optional.
- Separate Ways is not expected or required.
- The cleared campaign file remains available for later goals.
Before you move on
- Saddler has been defeated.
- Ada has handed Leon the Jet-Ski Key.
- The elevator departure has occurred.
- Ashley has been caught after the final drop.
- The underground jet-ski escape has finished.
- The ending transition and credits have finished.
- A cleared-game save exists on the Nintendo GameCube Memory Card.
- The campaign continued through the Disc 1-to-Disc 2 transition.
- Assignment Ada is visible and selectable.
- The Mercenaries is visible and selectable.
- The cleared save has been preserved before optional post-game play.
- Professional, New Game+, bonus weapons, costumes, treasure completion and Mercenaries ratings remain optional.
- Separate Ways has not been treated as a requirement.
References for this chapter
- CAPCOM Online Manuals — Resident Evil 4, GameCube English Manual
- Resident Evil 4 — GameCube English Manual PDF
- Resident Evil 4 — Cheats, Codes, and Secrets for GameCube — GameFAQs
- Resident Evil 4 — Guide and Walkthrough — GameCube — ChandooG, GameFAQs
- Resident Evil 4 — Guide and Walkthrough — GameCube — RE4FREAK, GameFAQs
Finishing up
Defeat Osmund Saddler, complete the jet-ski escape and allow the ending/results transition to finish.
Preserve a completed-game save in a separate slot when possible.
Return to the title screen and verify that Assignment Ada and The Mercenaries are listed.
Treat Professional, bonus weapons, costumes, treasure combinations and Mercenaries ratings as optional post-game goals. Do not use S+ as a GameCube completion requirement.
Choose your next gameScreenshots & video
Game imagery for reference. Follow the written chapters above for the route and strategies.
Sources & references
Our original guide draws on the references below. Check the edition at the top of this page before following controls or unlock requirements.
- CAPCOM Online Manuals — Resident Evil 4, GameCube English Manual
- Resident Evil 4 — GameCube English Manual PDF
- Resident Evil 4 — Guide and Walkthrough — GameCube — RE4FREAK, GameFAQs
- Resident Evil 4 — GameCube Guide and Walkthrough by Berserker, GameFAQs
- Resident Evil 4 — Guide and Walkthrough — GameCube — GameFAQs
- Resident Evil 4 — Puzzle Solutions — GameCube — By AngelIz831
- Resident Evil 4 — Guide and Walkthrough, GameCube — adam3k3
- Resident Evil 4 — Chapter 2-1 StrategyWiki reference
- Resident Evil 4 — Guide and Walkthrough — GameCube — ChandooG, GameFAQs
- Resident Evil 4 — Guide and Walkthrough — GameCube — Osafune2
- Resident Evil 4 Chapter 2-3 — Resident Evil Wiki
- Resident Evil 4 — Guide and Walkthrough by Emperor-Justinian-I
- Resident Evil 4 — Chapter 3-1 — StrategyWiki
- Resident Evil 4 — GameCube Guide and Walkthrough by A_I_e_x
- Resident Evil 4 Walkthrough — GameSpot
- Resident Evil 4 Chapter 5-1 — StrategyWiki
- Resident Evil 4 Entrance Path — Evil Resource
- Resident Evil 4 Spoiler-Free Walkthrough — GameCube — Mr_Xenomorph
- Resident Evil 4 Chapter 5-3 Strategy Guide
- Resident Evil 4/Chapter 5-4 — StrategyWiki
- Resident Evil 4 — Cheats, Codes, and Secrets for GameCube — GameFAQs
- The Evil Details — Nintendo UK
- Resident Evil 4 — HandCannon Guide — GameCube — GameFAQs
- Resident Evil 4 — Assignment Ada FAQ — GameCube — GameFAQs
- Resident Evil 4 - Treasure FAQ - GameCube - By 0Aced0
- Resident Evil 4 (GameCube) Treasure Guide
- Resident Evil 4/Chapter 2-3 — StrategyWiki
- Beerstein? — Resident Evil 4 Q&A for GameCube
- Resident Evil 4 — GameCube Guide and Walkthrough by ChrisNelson1984
About the game & collecting notes
- Platform
- Nintendo GameCube
A step-by-step campaign walkthrough for the original North American Nintendo GameCube release of Resident Evil 4. Follow Leon from the Village and lake through the Church, Castle and Island, then complete the final facility, Saddler battle, jet-ski escape and ending. The route keeps the original GameCube controls, encounters, two-disc structure and edition-specific bonus modes in scope, while separating required story progress from optional treasures, Merchant upgrades and post-game challenges.
Darryl Polo
Darryl Polo loves tinkering with emulation and revisiting retro games. He enjoys exploring how old favorites play on different setups and sharing what he learns along the way. At Joking Joystick, he writes about the games, hardware, and small discoveries that keep the hobby fun.
Our editorial standardsFound a step that needs another look? Help us improve this guide.