Paper Mario: The Thousand-Year Door (Nintendo GameCube, USA) — Complete Campaign Walkthrough
Step-by-step campaign walkthrough for the original Nintendo GameCube edition of Paper Mario: The Thousand-Year Door (USA). Covers the main story from arrival in Rogueport through every chapter, partner recruitment, dungeon routes, boss strategies, and the final Shadow Queen encounter. Includes preparation, postgame checkpoints and practical completion checks to confirm you reached the true ending.

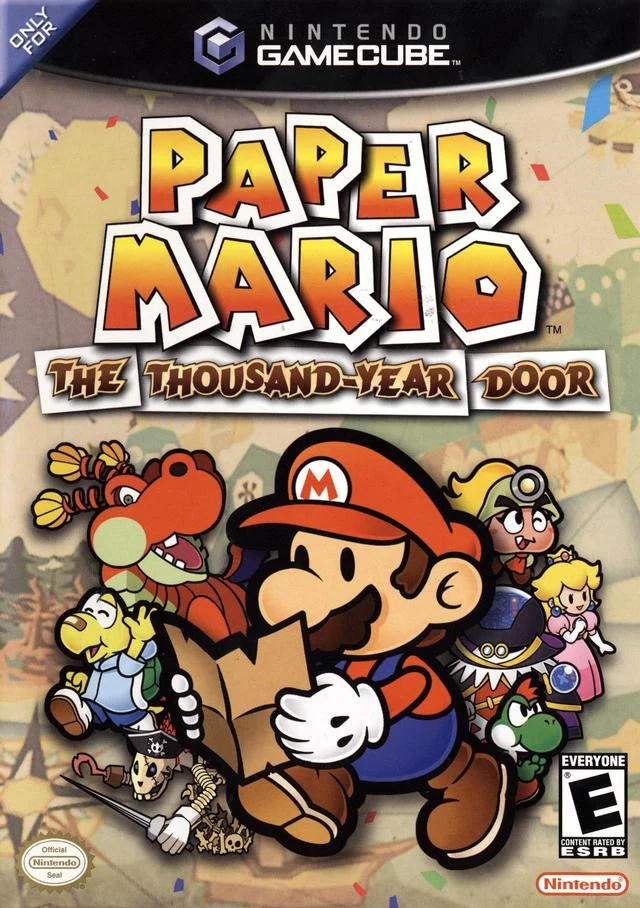
Find a copy
Paper Mario: The Thousand-Year Door Nintendo GameCube
We may earn a commission if you buy through these links, at no extra cost to you. As an Amazon Associate I earn from qualifying purchases.
Opens retailer search results. Check the model, edition, seller, availability and current price before buying.
Before you begin
You start in Rogueport with a treasure map and one immediate objective: find the seven Crystal Stars so the Thousand‑Year Door can be opened.
This guide assumes you will progress through the game’s intended chapter order, recruit partners as you meet them, use field abilities to revisit earlier areas, and finish at the Palace of Shadow where the final confrontation occurs.
Follow each chapter in order and treat Rogueport as your hub.
I will tell you which partner abilities and badges are necessary to solve obstacles, which dungeons hold Crystal Stars, how to approach major boss fights, and how to recover if you fail.
Where progression choices exist I mark required steps versus optional extras so you can finish the main story efficiently.
Set yourself up for the run
Read the GameCube manual’s basic controls and battle inputs before starting; you will use timed action commands throughout.
Manuals and official documentation clarify the original controller buttons and battle system.
Get comfortable with badge management: equip offense and defense badges fitted to your playstyle and the partners you favor.
Some dungeon bosses reward different approaches, including boosted damage, defense, status protection, or FP conservation.
The required story partners are Goombella, Koops, Madame Flurrie, Yoshi, Vivian, and Admiral Bobbery. Ms. Mowz is an optional partner; Bombette is not part of this game’s roster.
Each partner has a unique field and battle ability you will need for some obstacles or tactical situations. Learn their field uses as you recruit them.
Stock up on HP and FP recovery items before major dungeons. Stronger recovery items are especially useful before the Palace of Shadow.
The game’s save points and recovery opportunities vary by dungeon. Use available Recovery Blocks and prepare supplies before long final sections.
Use the Trouble Center and side requests for optional coins, items, badges, and cards. They are not required for the main ending.
Save often, especially before mandatory boss fights and before entering long dungeons.
Use separate save files before difficult bosses and before entering long dungeons so you can reload without replaying many rooms.
Collect Shine Sprites and upgrade partners when convenient. Partner upgrades improve combat utility but are not required for every story checkpoint.
Prioritize partners whose special attacks help with high-defense enemies, multiple targets, or dangerous status effects.
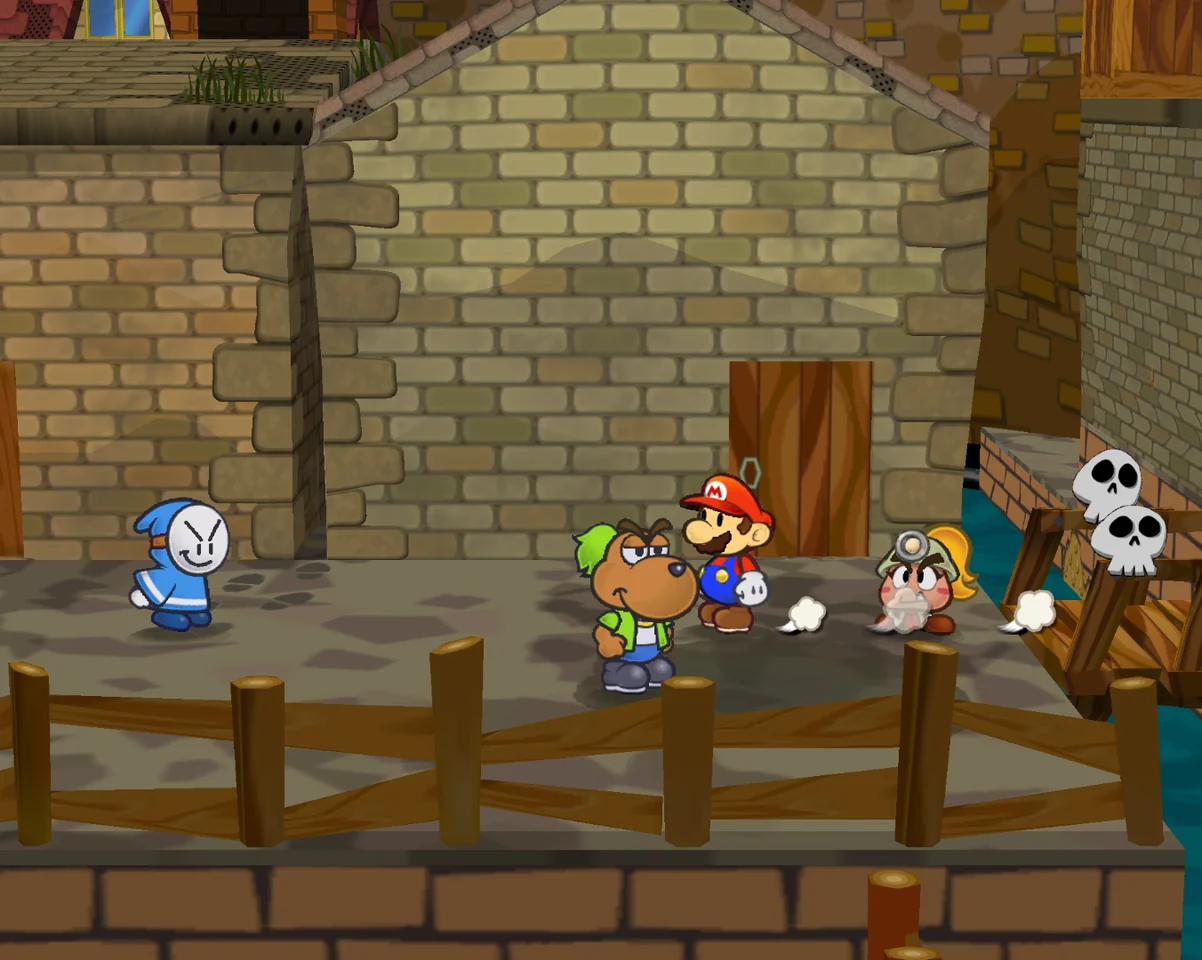
Prologue — A Rogue’s Welcome
Arrive in Rogueport, rescue Goombella from Lord Crump’s X-Nauts, and take her to Professor Frankly in East Rogueport. Frankly explains that Peach’s treasure map points to seven Crystal Stars and leads Mario and Goombella into the Rogueport Sewers. Follow the required underground route, obtain the Black Key, open the cursed chest to learn Plane Mode, and reach the Thousand-Year Door. After the map reveals Petal Meadows, return to Rogueport’s services, then cross the Sewers, defeat the Blooper and use the newly revealed platforms to reach the pipe leading to Petal Meadows. The first partner is Goombella; Koops and the rest of the roster are recruited later.
1. Enter Rogueport and complete the opening battle
After the boat arrives, walk north from the harbor into Rogueport. A Save Block is positioned near the left side of the opening area; use it before continuing. This records your progress before the first required battle and establishes Rogueport Square as the town’s main return point.
Continue north until Lord Crump is confronting Goombella. Approach the scene to begin the battle. Mario has only Jump and Hammer at this point. Use Jump on enemies without a spiked or otherwise unsafe top, and use Hammer when Jump is unsuitable. Press A during attacks and defenses to practice the original GameCube action commands. After the battle, follow Goombella through the escape sequence and speak with her when the scene ends. She joins Mario as the first partner.
- Save at the Rogueport Square Save Block.
- Trigger and win the Lord Crump battle.
- Speak with Goombella after the X-Nauts leave.
- Confirm that Goombella has joined the party.
2. Find Professor Frankly in East Rogueport
Goombella shows Mario a picture of Professor Frankly. From Rogueport Square, take the eastern route. Look for the house marked with the professor’s sign and enter it. Frankly is the required NPC for the opening investigation; do not try to reach the Sewers alone before this conversation.
Speak with Frankly and allow the entire explanation to play out. He identifies the map as a guide to seven Crystal Stars and explains that the stars are connected to the Thousand-Year Door and the legendary treasure beneath Rogueport. Frankly then takes Mario and Goombella toward the Sewer entrance and offers the early action-command explanation. You may accept the tutorial even if you already understand timed attacks; it does not alter progression.
- Reach the eastern district with Goombella following.
- Enter Professor Frankly’s house.
- Hear the explanation of the Crystal Stars and Thousand-Year Door.
- Follow Frankly toward the Sewer entrance.
3. Follow the required route through the Rogueport Sewers
Enter the Rogueport Sewers with Frankly and Goombella. On the first underground level, head east until a group of Goombas blocks the route. Defeat them, then continue to the moving platform and use it to reach the pipe on the left. Enter that pipe to descend to the next level.
On the lower level, proceed right, then take the stairs down and move left through the corridor. Break the large blocks with Mario’s Hammer to expose the next pipe. Descend again. This section contains enemies and item blocks, but clearing every optional side path is unnecessary for the story.
On the third underground level, move toward the blue switch and strike it with the Hammer. The switch reveals stairs. Before leaving, check behind the large yellow block for an optional Star Piece, then go up the revealed stairs and enter the door. This room contains a black chest that cannot be opened until you find its key.
- Defeat the mandatory Goomba group.
- Use the moving platform and left-side pipe to descend.
- Break the large blocks to reveal the next pipe.
- Strike the blue switch to reveal the stairs.
- Enter the room containing the black chest.
4. Get the Black Key and learn Plane Mode
Leave the black-chest room and return to the preceding room. Stay near the wall and drop onto the lower platform on the left. Follow this platform to the Black Key, then return to the chest and use the key on it.
The chest is a trap, but opening it grants Mario a required paper ability rather than causing a permanent penalty. After the scene, Mario can use Plane Mode. On the GameCube controller, press Y while standing on a marked airplane panel to fold into a paper airplane. During flight, steer across the gap and land on the higher platform to the left.
Use the airplane panel outside the chest room to reach the elevated route. Continue through the entrance at the far side. This is the mandatory path to the chamber containing the Thousand-Year Door; without Plane Mode, the route cannot be completed.
- Collect the Black Key from the lower platform.
- Use the key on the black chest.
- Obtain Plane Mode.
- Use the airplane panel to cross to the upper-left route.
- Enter the Thousand-Year Door chamber.
5. Activate the Thousand-Year Door and return to Frankly
Approach the large Thousand-Year Door. When the game places Mario and Goombella near the circular pedestal, step onto the pedestal to trigger the map scene. The magical map reveals the first Crystal Star destination and Mario receives the Sweet Treat Special Move during the resulting explanation.
After the scene, the game returns Mario and Goombella to Professor Frankly’s house. Speak with Frankly again. He identifies Petal Meadows as the location associated with the first Crystal Star and explains that Princess Peach also visited him and headed in that direction. Frankly then explains Star Power, Special Moves, the audience and badge equipment. He gives Mario the Power Smash Badge, which can be equipped from the Badges menu if Mario has enough BP.
- Step onto the Thousand-Year Door pedestal.
- Watch the map reveal the first destination.
- Return to Professor Frankly’s house.
- Learn that Petal Meadows is the next main objective.
- Receive the Power Smash Badge and the Sweet Treat explanation.
6. Use Rogueport’s services before leaving
Save again at the block in Rogueport Square. The Inn is in the square and restores Mario and his partner for a fee, making it the simplest early recovery location. The item shop is also in Rogueport; check your inventory and buy only affordable recovery supplies. Coins are useful for later purchases, so do not spend the entire starting reserve.
The Trouble Center is an optional sidequest hub in Rogueport. Its requests are not required for the Thousand-Year Door, the first Crystal Star or access to Petal Meadows. You may inspect it to learn where requests are posted, but postpone most troubles if you want a direct first playthrough. Dazzle, found in the Sewers, trades Star Pieces for badges; this is optional, although an early badge can be useful if you have collected Star Pieces.
Do not mistake optional Rogueport exploration for the exit route. Zess T.’s contact-lens event, rooftops, hidden Star Pieces and other errands can be handled separately. The mandatory objective is to reach the western Sewer passage and unlock the Petal Meadows exit.
- Save in Rogueport Square.
- Locate the Inn and item shop.
- Identify the Trouble Center as optional content.
- Check badges and inventory without exhausting your coins.
7. Defeat the Blooper and take the Petal Meadows pipe
Return to the Rogueport Sewers and travel to the area west of the Thousand-Year Door route. Use the airplane panel to cross into the passage leading toward a pipe and a tentacle lying on the ground. Strike the tentacle with the Hammer to begin the Blooper fight.
The Blooper battle has two tentacles protecting the main body. Defeat the tentacles first, then concentrate attacks on Blooper. Use Goombella’s Tattle at the start if you want its HP recorded and visible. Power Smash is a useful way to spend FP for extra damage, but conserve enough resources to finish the battle safely. Guarding and timed attacks matter more than grinding; recover with items if necessary rather than repeatedly taking unblocked hits.
After Blooper is defeated, platforms appear across the water. Cross them and enter the pipe on the far side. This pipe leads to Petal Meadows and marks the end of the prologue. The next required route is Petal Meadows toward Petalburg, where Chapter 1 begins.
- Reach the Blooper encounter in the western Sewers.
- Defeat both tentacles and then Blooper.
- Use the platforms that appear after victory.
- Enter the pipe to Petal Meadows.
- Begin Chapter 1: Castle and Dragon.
Before you move on
- Goombella has joined Mario after the opening Lord Crump encounter.
- Professor Frankly has explained the seven Crystal Stars and the Thousand-Year Door.
- Mario has entered the Rogueport Sewers with Frankly’s guidance.
- The Black Key has been collected and used on the cursed chest.
- Plane Mode has been obtained and used to reach the Thousand-Year Door chamber.
- The Thousand-Year Door pedestal scene has revealed Petal Meadows.
- Frankly has explained Special Moves and given the Power Smash Badge.
- The Blooper and both tentacles have been defeated.
- The platforms after the Blooper fight are available and Mario has entered the pipe to Petal Meadows.
- Mario is ready to proceed through Petal Meadows toward Petalburg and Chapter 1.
References for this chapter
- Paper Mario: The Thousand-Year Door GameCube manual
- Paper Mario: The Thousand-Year Door — Prologue: A Rogue’s Welcome, StrategyWiki
- Paper Mario: The Thousand-Year Door — Prologue Walkthrough, NintendoCastle
- Paper Mario: The Thousand-Year Door — Guide and Walkthrough — GameCube — DarthMarth
- Paper Mario: The Thousand-Year Door — Guide and Walkthrough — GameCube — KeyBlade999
Chapter 1 — Castle and Dragon: Petal Meadows & Petalburg routes
Cross Petal Meadows, reach Petalburg, and speak with Mayor Kroop to learn how to reach Hooktail’s Castle. Clear the Bald Cleft and Bristle obstacles outside Shhwonk Fortress, pass the Thwomp quiz, retrieve the Moon Stone and Sun Stone, and defeat the Gold Fuzzy. Koops then joins Mario on the west side of Petalburg. Use Koops to place both stones and activate the two switches at once, opening the pipe to Hooktail Castle. This section ends at the castle entrance; its interior route and the Hooktail battle belong to the next chapter section.
1. Cross Petal Meadows and repair the river bridge
After the prologue sends Mario through the pipe from Rogueport Sewers, continue right through Petal Meadows. Hooktail flies toward the distant castle during the opening scene. The route is mostly linear, so fight or avoid the early Goombas and keep moving toward the river.
Near the river, search the large clump of grass for a concealed pipe. Enter it to reach the background layer, then walk to the blue switch and hit it with Mario’s hammer. The bridge extends across the river. A Star Piece is available farther right in the background, but it is optional and does not affect chapter progress.
Return through the pipe, cross the repaired bridge, and continue right into Petalburg. A local Koopa points you toward Mayor Kroop. Before leaving town, you may use the inn to restore HP and FP, buy basic items from the shop, and save if needed.
- Find the hidden pipe beside the river.
- Hit the background blue switch with the hammer.
- Cross the repaired bridge and enter Petalburg.
2. Speak with Mayor Kroop and clear the fortress approach
Continue through Petalburg until you reach the pink-roofed house on the right side of town. Speak with Mayor Kroop. His conversation explains that the path to Hooktail Castle requires two stones hidden in Shhwonk Fortress. Finish the conversation before leaving; the fortress route is the required next objective.
Exit Petalburg through the east gate. Koops briefly appears on the path but does not join yet. Continue toward Shhwonk Fortress. You will encounter Bald Clefts mounted on pillars. Hit them with the hammer to start the encounters, then use a POW Block to defeat them; ordinary early attacks will not reliably damage their rocky defense. Search nearby grass and containers for a POW Block if you need one.
Further along, Bristles block another gate. Like the Bald Clefts, they are effectively immune to your normal early attacks, so use POW Blocks to clear them. Once the gate opens, continue through the grassy path. An Inn Coupon can be found in the area, and a paid Heart Block near the fortress entrance restores your party if you need recovery.
Save at the block outside Shhwonk Fortress before entering. If you have spent your POW Blocks on earlier obstacles, check the route and nearby grass for another before committing to the Bristle encounter.
- Speak with Mayor Kroop before entering the fortress route.
- Defeat the Bald Clefts with POW Blocks.
- Use POW Blocks to clear the Bristles.
- Save outside Shhwonk Fortress.
3. Pass the Shhwonk Fortress quiz and retrieve both stones
Inside the fortress, approach the Thwomp statue. This is a quiz rather than a conventional boss fight. You can receive up to seven questions, and the quiz ends when you answer five correctly. The known answers are: Sun and Moon Stones for what is hidden in the fortress; 12 coins for one Mushroom plus one Fire Flower at the Petalburg shop; Kroop as Petalburg’s mayor; Hooktail Castle as the Crystal Star’s location; going through a pipe to travel from Rogueport to Petal Meadows; Koopa Troopas for the characters found in Petalburg; and Question Seven for the question-number prompt.
After passing, take the pipe down to the fortress sublevel. The Multibounce badge is in the first area and is optional. Equip it only if you have enough Badge Points and want a cheap way to hit multiple grounded enemies.
Take the left passage first and follow it to the Moon Stone. Picking it up starts a mandatory fight against four Fuzzies. Guard their HP-draining attacks with the A button just before damage is dealt. If one Fuzzy is holding a Fire Flower, defeat that one early so it cannot use the item against you. Collect the Mushroom in the room if you need recovery, then return to the central room.
Take the right passage next and follow it to the Sun Stone. Another four-Fuzzy battle begins when you collect it. Use the same approach, then take the Fire Flower in the room if you want an optional battle item and return to the central room.
- Answer five quiz questions correctly.
- Collect the Moon Stone from the left passage.
- Survive the mandatory Fuzzy battle.
- Collect the Sun Stone from the right passage.
- Return to the central sublevel room.
4. Defeat the Gold Fuzzy and return through Petalburg
A Gold Fuzzy waits in the central room after both stones are collected. The Gold Fuzzy can summon a Fuzzy Horde, which produces several attacks in a turn. Target the Gold Fuzzy rather than spending time eliminating every Fuzzy in the horde. When the Gold Fuzzy is defeated, the horde leaves with it.
Goombella can Tattle the Gold Fuzzy, while Mario’s jump or hammer attacks and Koops’s shell attack provide reliable damage. Guard the horde’s attacks carefully if the battle lasts more than a few turns. A POW Block or Fire Flower can help clear enemies, but do not spend all your FP or items on the horde when the Gold Fuzzy is still alive.
Leave the sublevel through the pipe and retrace the route to Petalburg. You do not need to defeat every optional enemy on the return trip. Continue through town and exit from the west side, toward Rogueport. Koops stops Mario outside town and finally asks to join the party. Accept his request. After the brief scene with Koopie Koo, Koops becomes Mario’s permanent partner and can be selected in the field and in battle.
- Defeat the Gold Fuzzy first.
- Leave Shhwonk Fortress through the sublevel pipe.
- Return through Petalburg and exit west.
- Accept Koops’s request to join.
5. Use Koops to open the pipe to Hooktail Castle
With Koops active, continue left through Petal Meadows. The stone structure with two empty sockets is the route to Hooktail Castle. Place the Sun Stone and Moon Stone into their matching pedestals. A nearby optional block can be reached with Koops and contains the Happy Heart badge; collect it only if you want the extra badge.
Two blue switches appear on opposite sides of the structure. Koops must remain pressed against one switch while Mario reaches the other. Stand near the first switch, hold the partner command button to send Koops’s shell toward it, and continue holding the command so Koops stays in position. Walk Mario to the second switch, then release the command and hit the second switch with the hammer. The two switches must be active at the same time.
If Koops returns too soon, recall him and try again from a position closer to the second switch. When the timing succeeds, the central structure collapses and reveals the pipe to Hooktail Castle. Enter the pipe and cross to the castle entrance. Save at the block before going farther. The next section begins inside Hooktail Castle, where you will obtain the cricket-sound badge and complete the dungeon route.
- Place the Sun Stone and Moon Stone in the matching pedestals.
- Keep Koops holding one blue switch.
- Hit the second blue switch with Mario’s hammer at the same time.
- Enter the revealed pipe to Hooktail Castle.
- Save at the castle entrance.
Before you move on
- The Petal Meadows river bridge has been repaired.
- Mayor Kroop has directed Mario to Shhwonk Fortress.
- The Bald Cleft and Bristle obstacles have been cleared.
- The Thwomp quiz has been passed.
- Both the Moon Stone and Sun Stone have been recovered.
- The Gold Fuzzy has been defeated.
- Koops has joined Mario.
- The two blue switches have opened the pipe to Hooktail Castle.
- Mario has entered Hooktail Castle and saved at its entrance.
References for this chapter
- Paper Mario: The Thousand-Year Door — Guide and Walkthrough, TheSoundDefense
- Paper Mario: The Thousand-Year Door — Guide and Walkthrough — GameCube — DarthMarth
- Chapter 1: Castle and Dragon — Paper Mario: The Thousand-Year Door Walkthrough
- Paper Mario: The Thousand-Year Door Walkthrough — GameSpot
- Paper Mario: The Thousand-Year Door GameCube manual
Chapter 1 — Hooktail Castle: dungeon route, boss prep and victory
Hooktail Castle is the first major dungeon in the original North American Nintendo GameCube release. Enter from the pipe opened after placing the Sun and Moon Stones, then save before exploring the exterior. Koops can retrieve an optional HP Plus badge before Mario uses the spring, Recovery Block, and airplane panel to reach the castle entrance. Inside, collect Power Bounce, defeat Red Bones, solve the purple-and-yellow block room, and take the first Castle Key. The next section is mandatory: use the red switch and a narrow gate to reach the Black Chest, escape its spike-and-closing-ceiling trap, and receive Paper Mode. Paper Mode lets Mario enter the jail cell containing Attack FX R, the original version's cricket badge. Retrieve a second Castle Key, use Koops with the green and yellow blocks, cross the airplane-panel gap, and climb to the summit. Save and heal before Hooktail. Her first phase has 20 HP; after her false surrender, she restores 10 HP by eating audience members. Attack FX R lowers her attack and defense, while guarding, Power Smash, Power Bounce, Shell Toss, and healing make the fight manageable. After victory, receive the first Crystal Star and Earth Tremor, then complete the interlude and activate the Thousand-Year Door to begin Chapter 2.
1. Enter Hooktail Castle and collect the optional HP Plus badge
Enter the pipe in the Petal Meadows area after placing the Sun Stone and Moon Stone in the stone formation and activating both switches with Koops. The pipe leads to Hooktail Castle. Activate the Save Block immediately inside the castle approach.
Go through the nearby door and follow the exterior path until the bridge breaks. Drop down to the lower stone platforms, cross to the far-right platform, and use Koops's shell to retrieve the HP Plus badge. This badge is optional and is not needed to open the castle, but it increases Mario's maximum HP and is useful for the upcoming dungeon and boss.
Return to the room with the Save Block. Use the spring to reach the upper ledge, then strike the Recovery Block if Mario or Koops needs HP or FP. Leave through the right-hand door and stand on the airplane panel. Fly across the gap to the castle entrance and enter the main building.
- Activate the Save Block at the castle entrance.
- Retrieve HP Plus with Koops if you want the optional HP increase.
- Use the Recovery Block before entering the main castle.
2. Collect Power Bounce and defeat Red Bones
Follow the first interior corridor to the right, fighting or avoiding the early Koopa and Paratroopa formations as necessary. Open the red item block to obtain Power Bounce. It is optional, but it is one of Mario's strongest early attacks if you can perform its repeated action commands consistently.
Continue into the next room. Koops examines a Dull Bones that resembles his father and reads the letter beside it. After the scene, examine the differently colored pile of bones near the far door. Dull Bones will flood the room. Hammer the loose bones while moving back toward the colored pile, then touch the Red Bones to begin the required battle.
Red Bones appears with four Dull Bones. Use Koops's Power Shell to damage the group and remove the ordinary Dull Bones, then use Mario's hammer or Power Smash and Koops's Shell Toss against Red Bones. Red Bones can revive or create more Dull Bones, so eliminate the small enemies whenever they begin rebuilding the formation. Tattle Red Bones here if you want the original GameCube Tattle Log entry; this is a convenient early opportunity.
- Collect Power Bounce if you can spare the BP.
- Examine the unusual bone pile to trigger the event.
- Clear the Dull Bones before concentrating on Red Bones.
- Use Power Shell for group damage.
3. Solve the block room and obtain the first Castle Key
Enter the room beyond the Red Bones battle. Collect the Shine Sprite along the route, then climb the stairs and drop to the lower ledge near the locked door. Hit the purple switch with Mario's hammer to make a purple block appear.
Use Koops to hold the nearby block in position while Mario climbs onto the raised blocks. Cross to the yellow block and break it with the hammer. Repeat the block movement as needed to reach the Star Piece locations, which are optional. The mandatory objective is to expose the route to the red switch.
With the large yellow block raised, position Koops so his shell can hit the red switch from a distance. The staircase will rotate to the opposite side. Climb the new staircase and use Koops to retrieve the Castle Key from the ledge. Hit the red switch again to return the staircase to its useful position, then climb back up and unlock the door on the right.
Save in the next room before continuing. Use Koops to activate the red switch while Mario runs through the opened gate. Enter the following room and approach the Black Chest. This chest is required, not optional.
- Use the purple and yellow blocks to reach the switch area.
- Rotate the staircase with Koops's shell.
- Take the Castle Key and unlock the right-hand door.
- Save before entering the Black Chest section.
4. Obtain Paper Mode and Attack FX R
Talk to the Black Chest, then enter the adjoining trap room. Walk across the safe-looking floor to the chest in the center and take the Black Key. Opening it changes the floor into spikes and starts a closing-ceiling trap, so immediately retrace the safe route and leave the room. If you memorized the path before opening the chest, the escape is straightforward; a few wrong turns are survivable if you keep moving.
Open the Black Chest after escaping. The curse inside grants Mario Paper Mode, allowing him to turn sideways and slip through narrow gaps. Hold the GameCube controller's R button to use the ability in the field.
Return through the nearby gap and slide through the leftmost jail cell. Open the chest inside to obtain Attack FX R. In the original GameCube release, this badge changes Mario's attack sounds to cricket chirps and costs 0 BP. Equip it before the boss. Its sound is Hooktail's weakness, and successful attacks reduce Hooktail's attack and defense, making the encounter substantially safer.
Return through the rooms toward the Red Bones area. Use Paper Mode to pass through the barred opening that cannot be crossed normally, then collect the second Castle Key from the cell. Do not try to reach the summit without this key; it opens the next mandatory door.
- Take the Black Key from the trap-room chest.
- Escape before the spikes and ceiling trap finish the sequence.
- Open the Black Chest to receive Paper Mode.
- Use Paper Mode to reach Attack FX R and the second Castle Key.
- Equip Attack FX R before Hooktail.
5. Cross the upper castle and reach the summit
Return to the room with the large green block and green switch. Hold Koops's shell near the switch, stand on the green block, and release the shell so the block lifts Mario to the upper level. Unlock the door at the top of the stairs with the Castle Key.
Use the Recovery Block in this section if needed, then hit the blue switch to extend the path. In the following room, use Koops to hit the next switch and jump through the open window onto the exterior ledge. Walk right for an optional Star Piece, then return left and use the next window to re-enter the castle.
Continue upward, using Koops to activate the green switch while Mario stands on the green block. The left-hand door leads to a room where Ms. Mowz appears; her scene is optional for the main route. Open the chests there for useful supplies, including a Mushroom and Honey Syrup, and collect the Shine Sprite if desired.
Return to the locked route and use the Castle Key obtained in the upper section. In the next room, activate the yellow switch and use Koops to hold it while Mario rides the raised block. Follow the beam to the left, enter Paper Mode to pass through the narrow opening, and stand on the airplane panel. Fly to the right-hand door.
In the next room, go down the stairs and activate the yellow switch. Repeat the switch operation when necessary so the large block changes position, then use Koops to retrieve the Castle Key from the right-side ledge. Return to the upper stairs, collect the optional Shine Sprite, and unlock the final door. Cross the bridge and follow the winding exterior tower path to the highest room.
- Use the green switch and block to reach the upper level.
- Cross the window ledges and return through the castle doors.
- Use Paper Mode and the airplane panel in the yellow-switch section.
- Retrieve the next Castle Key and unlock the summit route.
- Save and heal at the summit before entering Hooktail's room.
6. Defeat Hooktail
Hooktail has 20 HP at the beginning of the fight, 5 attack, and 1 defense. Her main attacks are a stomp directed at the front party member and fiery breath that can damage both Mario and his partner. Guard or Superguard whenever you can, and replace Koops if he is close to being defeated. Koops is a practical partner because Shell Toss is reliable against Hooktail's grounded body.
Keep Attack FX R equipped. Mario's successful hammer and jump attacks produce cricket sounds, lowering Hooktail's attack and defense. Power Smash is a safe hammer option when you can perform its action command; Power Bounce can deal heavy damage but consumes FP and becomes risky if your timing is inconsistent. Koops can use Shell Toss for steady damage, while Goombella can Tattle and use Headbonk if you prefer her.
After Hooktail's initial HP is depleted, she attempts to persuade Mario to forgive her. Choose the refusal or non-forgiving response each time. Accepting her offers is a trap and allows her to attack while Mario's guard is down. Once the sequence ends, Hooktail eats audience members and restores 10 HP, so plan for a second phase rather than assuming the battle is over.
Continue using reliable attacks and heal with an item, Sweet Treat, or another available recovery option when necessary. Do not spend all FP on Power Bounce if Mario or Koops is already in danger. If you lose, reload the save made at the summit and repeat only the final approach; the dungeon does not need to be solved again.
- Keep Attack FX R equipped throughout the fight.
- Use guarding against the stomp and fire attacks.
- Reject Hooktail's forgiveness offers.
- Expect 10 HP to be restored after the audience sequence.
- Use healing before Mario or Koops reaches critical HP.
7. Claim the Crystal Star and begin Chapter 2
After Hooktail is defeated, she spits out Koops's father, who gives Mario the first Crystal Star. The victory sequence also grants the Earth Tremor Special Move. This completes the Hooktail Castle objective.
Finish the Peach and Bowser interlude scenes. When control returns to Mario, the story places him at Petalburg. Leave Petalburg and travel back toward Rogueport, reading the incoming email on the way if desired.
Enter the Rogueport Sewers and follow the opened route to the room containing the Thousand-Year Door. Use Paper Mode and the airplane panel as necessary to reach the door's central pedestal. Stand on the pedestal and hold up the Crystal Star. The Magical Map will record the next Crystal Star location.
The game returns Mario to Professor Frankly's house in Rogueport. Speak with Frankly to receive the next objective: the Great Boggly Tree in Boggly Woods. After this conversation, return to the Rogueport Sewers and follow Punio through the hidden passage to begin Chapter 2. The chapter cannot advance merely by holding the Crystal Star; the Thousand-Year Door and Professor Frankly scenes are required.
- Receive the first Crystal Star from Koops's father.
- Receive the Earth Tremor Special Move.
- Return through Petalburg and the Rogueport Sewers.
- Place the Crystal Star at the Thousand-Year Door pedestal.
- Speak with Professor Frankly about Boggly Woods.
- Follow Punio into the sewer route to begin Chapter 2.
Before you move on
- Hooktail is defeated and Koops's father has been released.
- The first Crystal Star is obtained.
- Earth Tremor has been added to Mario's Special Moves.
- The post-boss interlude has been completed.
- The Crystal Star has been raised at the Thousand-Year Door pedestal and the next location has appeared on the Magical Map.
- Professor Frankly has identified the Great Boggly Tree as the next destination.
- Punio's sewer passage has been followed, beginning Chapter 2.
References for this chapter
- Paper Mario: The Thousand-Year Door — Guide and Walkthrough, GameCube edition, Pirate’s Grotto and Chapter 5 route
- Paper Mario: The Thousand-Year Door — Guide and Walkthrough, TheSoundDefense
- Paper Mario: The Thousand-Year Door/Chapter 1: Castle and Dragon — StrategyWiki
- Paper Mario: The Thousand-Year Door GameCube manual
Chapter 2 — The Great Boggly Tree: Boggly Woods and boss tasks
Follow Punio through the Rogueport Sewers into Boggly Woods, then find Madame Flurrie and recover her necklace from the Shadow Sirens. Flurrie reveals the Great Tree’s secret entrance. Inside, rescue the Puni Elder, obtain the Puni Orb, and guide the Punies through bubble pits, Pider rooms, Jabbi battles, locked cells, a water-drain puzzle, and the lower tree. You must eventually gather all 101 Punies to reveal the Emerald Star. Lord Crump steals it and starts a five-minute destruction timer, forcing a rapid escape back to the entrance. Defeat Magnus von Grapple, collect the Emerald Star and learn Clock Out, then present the star at the Thousand-Year Door to reveal the route to Glitzville. Optional badges, Star Pieces, Shine Sprites, and Trouble Center requests can wait.
1. Follow Punio from Rogueport into Boggly Woods
After the Chapter 1 interlude, enter the Rogueport Sewers and return to the room where you previously encountered the Puni near the Black Chest. Punio retreats through a small hole. Use Paper Mode to follow him, then speak to him in the next area. He uses a hidden switch to open a secret passage in the wall. Climb the stairs, enter the passage, and go right to the grey stone pipe. Follow Punio through it to begin Chapter 2 and enter Boggly Woods.
Punio follows Mario as a non-combat partner. Save at the nearby Save Block if needed, then travel right through the woods. The Shadow Sirens appear near the start, but they do not fight yet. Continue right, follow Punio down the pipe, and proceed to the Great Tree. When Punio reaches the sealed high-tech door, climb the root and speak with him again. He explains that the entrance is hidden and that Madame Flurrie, who lives nearby, can uncover it.
- Find Punio in the Rogueport Sewers.
- Follow him through the secret tunnel and grey stone pipe.
- Reach the Great Tree and speak with Punio on its root.
- Treat Boggly Woods pickups as optional unless you need supplies.
2. Find Flurrie and recover her necklace
Leave the Great Tree and follow the route toward Flurrie’s house. The approach includes a pipe, a raised Plane Panel, and a background walkway. Hit the nearby ! switch to raise the panel, then use the plane route to reach the ledge and continue to the area with Flurrie’s house. Enter the house. Flurrie is inside but refuses to come out because her necklace is missing.
Leave the house and return toward the place where the Shadow Sirens were standing. A scene begins, followed by a battle against Beldam, Marilyn, and Vivian. Use attacks that can damage several targets when practical, but prioritize blocking their attacks and keeping Mario healed. After the battle, the Sirens leave the necklace behind.
Take the necklace back to Flurrie’s house. After the scene, Flurrie joins the party. Her field ability is a sustained gust of wind that can blow away loose paper, move light objects, reveal hidden doors, and affect enemies. Return to the Great Tree, climb the root again, and use Flurrie’s wind on the paper covering above the sealed door. Punio enters the revealed secret entrance and opens the door below.
- Reach Flurrie’s house through the raised Plane Panel route.
- Defeat the three Shadow Sirens and retrieve the necklace.
- Return the necklace to Flurrie.
- Reveal the Great Tree’s secret entrance with Flurrie’s wind.
3. Rescue the Puni Elder and obtain the Puni Orb
Enter the Great Tree and defeat the two X-Nauts in the entrance room. The surviving Punies explain that their people were captured. Follow the pipes upward through the tree. Continue to the jail room, where the red cell contains the Puni Elder and the blue cell contains Punio’s sister and the remaining Punies. The cells cannot yet be opened.
Go right into the storeroom. Ms. Mowz leaves after hinting that the Crystal Star is deep in the tree. Defeat the X-Naut who wakes up afterward and take the Red Key. A chest in this room contains an Ultra Shroom; it is optional, but a useful boss reserve. Return to the jail room and use the Red Key on the red cell to free the Puni Elder.
Return to the entry room and speak with Puniper. After the Elder persuades him, ten Punies join Mario, giving you eleven. The Elder gives you the Puni Orb. Place it on a pedestal to gather the Punies at that location; remove the orb when you want them to follow Mario again. If Punies are lost, return to the Elder’s room and call them back.
- Defeat the first two X-Nauts inside the tree.
- Reach the jail room and find the Red Key in the storeroom.
- Free the Puni Elder.
- Recruit the first eleven Punies and receive the Puni Orb.
4. Guide the first Puni group through the bubble and Jabbi rooms
Use the Puni Orb on the pedestal in the room above the entry area to reveal a pipe. Remove the orb so the Punies follow, then enter the pipe. In the next room, use the control panel to open the door. Place the orb on the left pedestal and use Flurrie’s wind to blow the Punies into the bubbling liquid. Continue blowing so their bubbles drift across the gap. Remove the orb, cross the platforms, and enter the pipe on the right with the Punies.
In the two-level room, defeat the Piders before they frighten the Punies off the ledges. Koops’s field attack is useful for striking Piders from a safer position. Use Flurrie to blow a heavy object off an airplane panel, then use the revealed plane route if you want the optional elevated items. Continue through the pipes until you reach the room with the Save Block and the hidden shop. Heal or buy supplies there if necessary.
The upper doors lead to Jabbi hives. Enter the room with ten Jabbies first. Mario and his partner cannot defeat the Jabbies directly; lead your Punies into them and use Flurrie’s wind to scatter the Jabbies so the Punies can overwhelm them. Afterward, the Punies destroy the hive. Continue through the opened path and take the Blue Key from the chest.
- Use the Puni Orb and Flurrie to move the first group across the bubble pit.
- Defeat or avoid Piders before they scatter the Punies.
- Use the Save Block and optional shop before the Jabbi encounters.
- Defeat the ten-Jabbi group with the Punies and collect the Blue Key.
5. Free the remaining Punies and open the lower tree
Return to the jail room and use the Blue Key on the blue cell. The remaining Punies join you, bringing the total to 101. Backtrack to the room before the ten-Jabbi hive and enter the other upper door. Lead all 101 Punies against the larger Jabbi group. Use the same method as before: keep the Punies together and use Flurrie’s wind to disrupt the Jabbies. Winning opens the route to the deeper tree.
Use the Puni Orb at the next pedestal to reveal a downward pipe. In the following rooms, use Paper Mode to escape the cage that drops over Mario and the Punies. Then operate the symbol-switch puzzle: activate the switch below, inspect the symbol order, and set the four switches above to match it. The correct arrangement opens the way to the chest containing the Super Boots.
After receiving the Super Boots, Toadette teaches Mario the Spin Jump, which also functions as a ground pound. Use it to break the floor panel in the nearby room, then return through the pipes to the room with the water basin. Take the lower pipe, cross to the right side, stand on the large switch, and hold Koops in place over the smaller switch with his field ability. Step off the large switch so the smaller one rises, then release Koops to strike it. The water drains into the lower room, raising the lily pads and opening the route forward.
- Free the blue-cell Punies and reach a total of 101.
- Defeat the larger Jabbi group with the Punies.
- Escape the cage using Paper Mode.
- Solve the symbol-switch puzzle and obtain the Super Boots.
- Drain the water using Mario and Koops.
6. Gather all Punies and reveal the Emerald Star
After draining the water, return to the trapped-Puni area. Enter the cage in Paper Mode and use a ground pound to break the wooden panel. The Punies will not all follow through the opening automatically, so use the pipes and the Puni Orb to gather them, then use Flurrie’s wind to blow them down into the lower area. Bring the entire group back together before continuing.
Lead the Punies through the raised lily-pad route and down the next pipe. Place the Puni Orb on the final pedestal to activate the large platform elevator. Ride it down to the lowest section of the Great Tree. A Heart Block and Save Block are available here, so restore HP and FP and save before entering the large octagonal chamber.
In the chamber, make sure all 101 Punies are present, then place the Puni Orb on the pedestal. The Emerald Star appears, but Lord Crump immediately steals it and activates a bomb. A five-minute timer begins and continues during battles and dialogue. Remove the Puni Orb and follow Crump’s route upward without stopping for optional items.
- Regroup all 101 Punies after breaking the cage panel.
- Use the drained-water route and the elevator to reach the lowest section.
- Heal and save before the octagonal chamber.
- Gather all 101 Punies and trigger the Emerald Star sequence.
- When the timer starts, ignore optional treasure and begin the escape.
7. Escape the tree and defeat Magnus von Grapple
Follow Crump’s pipe and defeat the X-Nauts in the first escape room. Hit the switch to open the door, then continue upward through the pipes. The timer does not pause during combat, so use reliable attacks and avoid unnecessary battles. Return through the winding-path room and the upper section of the tree until you reach the bubble room.
At the bubble room, place the Puni Orb and use Flurrie’s gust to push the Punies across the gap as before. Cross after them and use the X-Naut door to return to the entry area. The Puni Elder blocks Crump’s escape, causing Crump to stop the timer and enter Magnus von Grapple.
Tattle Magnus von Grapple early. The robot has 30 HP and 1 defense in the original GameCube release. Use strong attacks that can overcome its defense, such as Power Jump or other reliable damage options. Magnus’s stomp attacks are manageable if blocked, but its detachable rocket arms are the major threat. Each arm has only 2 HP but can inflict heavy damage, so destroy them immediately when they detach. Flurrie’s Gale Force can remove them if its action command succeeds; otherwise use direct attacks and do not spend all FP on weaker enemies.
After Magnus von Grapple falls, Lord Crump flees. The Puni Elder awards Mario the Emerald Star, and Mario learns the Clock Out special move. Save after the chapter-ending sequence. The following Peach and Bowser scenes are automatic story interludes, not optional content.
- Escape while the five-minute timer is active.
- Cross the bubble room and return to the tree entrance.
- Tattle Magnus von Grapple.
- Destroy the detachable rocket arms immediately.
- Defeat Magnus von Grapple and receive the Emerald Star and Clock Out.
8. Present the Emerald Star and unlock the next objective
After the interludes finish, return to the Great Tree’s entrance area if you want to collect optional rewards, then leave Boggly Woods through the route back to Rogueport. The central Rogueport pipe gains a warp route to the Great Tree after the chapter, making later visits shorter.
Enter the Rogueport Sewers and travel to the Thousand-Year Door. Present the Emerald Star at the door. The map reveals the next Crystal Star’s location, and Mario is taken to Professor Frankly’s house. Speak with Frankly to learn that the next destination is Glitzville and that Mario needs a blimp ticket from Don Pianta.
Do not spend time searching Boggly Woods for optional Star Pieces, Shine Sprites, badges, or Trouble Center rewards before triggering this sequence unless you specifically want them. Flurrie is now permanently available for backtracking, and the Super Boots also open optional floor panels in Rogueport, the sewers, Petalburg, and Hooktail Castle.
- Leave the Great Tree after the chapter-ending scenes.
- Present the Emerald Star at the Thousand-Year Door.
- Speak with Professor Frankly after the map reveals Glitzville.
- Confirm that the blimp-ticket objective has started.
Before you move on
- Punio’s route from Rogueport to Boggly Woods has been completed.
- Madame Flurrie has joined Mario’s party and her wind field ability works.
- The Puni Elder has been freed with the Red Key.
- The Blue Key has been obtained and the remaining Punies have been rescued, bringing the group to 101.
- The Super Boots have been obtained and the water-drain puzzle has been completed.
- The Emerald Star has appeared, Lord Crump’s timed escape has been completed, and Magnus von Grapple has been defeated.
- The Emerald Star and Clock Out have been awarded.
- The Emerald Star has been presented at the Thousand-Year Door and Professor Frankly has directed Mario toward Glitzville.
References for this chapter
- Paper Mario: The Thousand-Year Door — Guide and Walkthrough — GameCube — DarthMarth
- Paper Mario: The Thousand-Year Door — Chapter 2: The Great Boggly Tree — Nintendo Castle
- Paper Mario: The Thousand-Year Door — Chapter 2: The Great Boggly Tree — StrategyWiki
- Paper Mario: The Thousand-Year Door GameCube manual
Chapter 3 — Of Glitz and Glory: Glitzville and Glitz Pit registration
After completing Don Pianta’s request in Rogueport, take the Blimp Ticket to the Cheep Cheep conductor at the western docks and ride to Glitzville. Search the floating city for optional supplies and collectibles, including the Power Plus P badge, then enter the Glitz Pit and watch Rawk Hawk defend his championship. The Crystal Star appears on his belt, but Mario cannot claim it from the lobby. Speak with the blue security guard near the rear doors after the exhibition match to enter the backstage area. Follow the hallway to Grubba’s office, agree to become a fighter, and let Jolene escort Mario to the minor-league locker room. Save, recover at the bed if necessary, and examine the computer to reserve the first ranked match. This completes the Glitzville setup; the ordered fights, Yoshi’s recruitment, the investigation into the missing fighters, and the Crystal Star confrontation continue in the next section.
1. Finish Rogueport’s departure sequence and board the blimp
Mario must already have the Blimp Ticket before this chapter route can begin. If the ticket is not in the Important Things inventory, return to West Rogueport and finish Don Pianta’s request involving Frankie and Francesca. Once Don Pianta gives permission to use the blimp, go to the Cheep Cheep conductor at the western dock and speak with him.
Show the conductor the Blimp Ticket, enter the boarding area, and walk onto the Cheep Blimp. The vehicle takes Mario directly to Glitzville. There is no destination selection. After arrival, remember the blimp’s location in the central landing area because it is the route back to Rogueport later in the chapter.
Use a Save Block before boarding if you have made substantial progress since the last save. This is also a good point to make room in the inventory and carry at least one Mario-healing item. The Glitz Pit provides recovery opportunities later, but the initial exploration and registration sequence is easier if Mario is not carrying a full inventory or arriving with critically low HP and FP.
- The Blimp Ticket is in the Important Things inventory.
- Don Pianta’s departure scene has been completed.
- Mario has saved before leaving Rogueport and has room for useful items.
2. Search Glitzville before entering the arena
Glitzville’s central square contains the blimp landing point, the Glitz Pit, the juice bar, the hot-dog stand, a shop, and an Inn Coupon. None of the shops or collectible items is required for the chapter’s main progression, so use them as preparation rather than delaying the arena sequence.
For the most useful optional reward, go to the eastern side of the square and climb the nearby crates. Perform a Spin Jump on the large blue switch. The switch raises a staircase beside the juice bar. Climb the stairs and open the chest at the top to obtain the Power Plus P badge. When equipped, it increases the attack power of Mario’s active partner. Its BP cost may compete with defensive badges, so equip it only if your current badge capacity allows it.
While in the area, check behind the telephone booth, behind the plants near the stairs leading toward the Glitz Pit, behind the juice-bar counter, and beneath the floor panel south of the landing pad for optional Star Pieces. The Inn Coupon is near the juice bar. These items are not prerequisites for registration, and missing them will not block any later story event.
The Star Piece beneath the Rawk Hawk poster on top of the juice bar is reachable with Koops in the original GameCube release. Position Koops so his shell can travel beneath the poster and retrieve the item. Do not confuse this optional collectible with the Power Plus P route: the badge comes from the raised staircase and chest, while the Star Piece is under the poster.
- Power Plus P has been collected if you want the optional partner damage increase.
- Mario has purchased or already carries a few healing items.
- Optional Star Pieces and the Inn Coupon have been collected only if convenient.
3. Enter the Glitz Pit and watch the opening exhibition
Enter the large Glitz Pit building from the square. The lobby leads toward the audience area and the arena. Proceed through the public entrance and watch the opening exhibition featuring Rawk Hawk. The match establishes Rawk Hawk as the current champion and shows the championship belt bearing what appears to be a Crystal Star.
When the scene ends, do not try to reach Rawk Hawk directly or attempt to take the Crystal Star from the belt. The belt is a story clue, not an obtainable item at this point. Mario must enter the Glitz Pit as a fighter before the chapter’s investigation can proceed.
After the exhibition, return toward the rear side of the lobby and speak with the blue security guard near the back doors. The guard allows Mario to enter the backstage passage. If the route remains blocked, make sure the complete Rawk Hawk exhibition and the accompanying dialogue about the championship belt have finished; repeatedly checking other doors before that scene will not open the route.
- The Rawk Hawk exhibition has played.
- The Crystal Star has been identified on the champion’s belt.
- The blue security guard near the rear doors has allowed Mario backstage.
4. Follow the backstage route to Grubba’s office
Once backstage, move west through the narrow hallway and use the Save Block. Continue through the passage until you reach the guard stationed at the red door leading to Grubba’s office. Speak with the guard and enter when the route is permitted.
Inside the office, Grubba speaks with Mario about becoming a fighter. Accept the offer to join the Glitz Pit. The game assigns Mario the ring name Great Gonzales and introduces Jolene, who takes responsibility for moving him through the fighter facilities.
Follow Jolene rather than trying to explore locked rooms independently. She shows Mario the champion’s room and then the major-league locker room before returning him to the registration process. When Grubba presents the contract, accept it to complete the fighter registration. Refusing or delaying the agreement does not advance the chapter.
Jolene then escorts Mario to the minor-league locker room. This is the actual starting point for the ordered competition. The chapter does not require a special sidequest, a town contest, or a separate theater puzzle to unlock the arena. The required trigger is the contract and Jolene’s escort.
- Mario has entered Grubba’s office through the backstage hallway.
- The fighter contract has been accepted.
- Mario has been assigned the Great Gonzales name and escorted to the minor-league locker room.
5. Prepare in the minor-league locker room and reserve the first match
When control returns in the minor-league locker room, locate the Save Block and save again. The locker room bed restores Mario and his partner’s HP and FP, making it the safest recovery point before the first match. Use it if either character is damaged or if your FP is low from earlier battles.
The room contains a computer resembling a handheld game system. Examine it and choose the option to reserve a match. This action officially begins the Glitz Pit ranking sequence. Jolene will explain the match rules and the special condition that must be followed in each bout. Read each condition carefully because violating it can cost the match even if all enemies are defeated.
For badges, use a dependable setup rather than filling the available BP with expensive FP attacks. Power Plus P is a strong choice if you have room for it. Defensive badges such as Damage Dodge or Pretty Lucky can help if action commands are unreliable. Jump- or Hammer-focused badges are worthwhile when you know which basic attacks you can execute consistently. Keep at least some FP available for situations where a partner attack is the safest way to reach an enemy.
Koops is useful against grounded enemies and can contribute Shell Toss or defensive support. Goombella provides Tattle information and reliable Headbonk damage. Flurrie can help against groups and enemies that are awkward for direct attacks. No single partner is mandatory for registration, so choose according to the enemies and conditions presented by the first match.
After reserving the match, return to Jolene’s instructions and begin the ordered competition. The next section should cover the ranking matches, the required conditions, the Mystic Egg and Yoshi sequence, the missing-fighter investigation, and the later Crystal Star battle.
- Mario has saved in the minor-league locker room.
- The bed has been used if HP or FP is low.
- The first match has been reserved through the locker-room computer.
- Mario’s badge loadout includes reliable damage and does not spend all available BP on FP-heavy attacks.
Before you move on
- Mario has arrived in Glitzville and saved at the local Save Block.
- The Rawk Hawk exhibition has identified the championship belt and its apparent Crystal Star.
- Mario has entered the backstage hallway through the blue security guard near the lobby’s rear doors.
- Mario has reached Grubba’s office, accepted the fighter contract, and received the Great Gonzales name.
- Jolene has escorted Mario to the minor-league locker room.
- The first ranked match has been reserved through the locker-room computer, allowing the Glitz Pit competition to begin.
References for this chapter
- Paper Mario: The Thousand-Year Door GameCube manual
- Paper Mario: The Thousand-Year Door — Chapter 3 Walkthrough, GameFAQs GameCube guide
- Paper Mario: The Thousand-Year Door — Guide and Walkthrough, GameCube edition, Pirate’s Grotto and Chapter 5 route
- Paper Mario: The Thousand-Year Door Walkthrough — GameSpot
- Paper Mario: The Thousand-Year Door — Chapter 3: Of Glitz and Glory, StrategyWiki
- Paper Mario: The Thousand-Year Door — Chapter 3 Walkthrough
Chapter 3 — The Glitz Pit: competition route, bosses and star claim
Register as the Great Gonzales, obey each terminal restriction, and climb the Glitz Pit rankings. At rank 15, leave the arena to rescue the Mystic Egg from the hot-dog stand. Carry it through the required Iron Cleft match, escape the invincible Iron Clefts, and return to the minor-league locker room so the egg hatches. Name and recruit the baby Yoshi before beginning the X investigation. Use the Super Hammer and Yoshi’s Flutter Jump to uncover the locker-room and storage-room evidence, then escape the trap and defeat Rawk Hawk. Investigate the champion’s ventilation duct and Grubba’s office, defeat Macho Grubba, and receive the Crystal Star. Return to Rogueport, register the Star at the Thousand-Year Door, and only then speak with Professor Frankly.
1. Register as the Great Gonzales
After reaching Glitzville by blimp, enter the large Glitz Pit building and go through the arena doors. Watch Rawk Hawk defend his championship and display the Crystal Star on his belt. Return to the lobby, then speak with the suited guard on the right side of the building. Tell him you want to become a fighter and continue down the back hallway to Mr. Grubba’s office.
Agree to Grubba’s fighter contract. He assigns Mario the stage name Great Gonzales and Jolene takes him to the minor-league locker room. The computer terminal on the wall displays the rankings and lets you schedule matches. The Save Block is outside the locker room, and the bed inside restores HP and FP between fights.
Schedule the opening match against the Goomba Bros. Every match has a restriction displayed by the terminal and repeated before battle. Restrictions can require appeals, forbid jumps, Hammers, items, Star Power, partner attacks, partner switching, or attacking for a number of turns. Some require taking damage or using Star Power. You must win while obeying the displayed condition or the victory will not advance your rank.
- Sign Grubba’s contract and receive the Great Gonzales name.
- Find the locker-room bed and the Save Block outside it.
- Read the terminal restriction before every match and obey it exactly.
2. Climb the minor league and reach rank 15
Continue scheduling the matches in the terminal’s displayed order. The early sequence includes the Goomba Bros., Pokey Triplets, K.P. Koopas, Spike Storm, Dead Bones, the Mind-Bogglers, the Bob-omb Squad, the Hand-it-Overs, and the Punk Rocks. The terminal is the authority for the current opponent and restriction, so check it before each bout rather than relying on memory.
Use the bed after ordinary victories and save outside the room before difficult matches. Tattle unfamiliar enemies when the restriction allows it. Use defense-piercing attacks or damaging items against spiked enemies, armored Clefts, and other foes that punish normal contact. Defeat multiplying or support enemies quickly: remove Green Fuzzies before they multiply, Flower Fuzzies before they drain FP, and dangerous Magikoopas before their support effects accumulate.
At rank 15, King K. tells Mario that Hoggle, the Glitzville hot-dog vendor, has a new menu item involving an exotic egg. This is the required signal to leave the Glitz Pit. Do not continue scheduling the next match immediately. Exit the arena and go to the hot-dog stand in Glitzville’s central plaza.
- Advance to rank 15 through the terminal’s displayed matches.
- Use the locker-room bed and save point between bouts.
- Leave the Glitz Pit when King K. mentions Hoggle’s egg.
3. Rescue the Mystic Egg and carry it into the Iron Cleft match
At Hoggle’s hot-dog stand, the Mystic Egg runs around near the vendor. Hit the egg with Mario’s Hammer to stop it. It jumps onto the roof of the stand, where Mario cannot reach it directly. Go to the roof of the nearby juice bar, use the springboard, and enter the Plane Mode panel on the Rawk Hawk poster. Fly across to the roof of the hot-dog stand and speak to the egg.
After the conversation, Hoggle gives up on using the egg for his hot dog and the Mystic Egg begins following Mario. Return to the Glitz Pit with the egg still accompanying you. Continue the ranking sequence until the terminal schedules the Armored Harriers, also called the Iron Clefts or Iron Adonis Twins, at the tenth-rank match.
The Iron Clefts cannot be damaged by Mario’s attacks, partner attacks, items, or Star Powers. Enter the fight with the Mystic Egg following you, then choose Run on the first turn. Do not waste turns attempting to defeat them. The required outcome is escape, not victory. Return to the minor-league locker room after fleeing.
- Hammer the runaway egg and reach it through the juice bar’s Plane Mode panel.
- Confirm the Mystic Egg is following Mario before returning to the Glitz Pit.
- Run from the Iron Cleft match instead of trying to break their armor.
4. Let the egg hatch and recruit Yoshi
When Mario returns to the minor-league locker room after escaping the Iron Clefts, the Mystic Egg is gone. Wait through the scene as the egg hatches into a baby Yoshi. The new partner explains that he wants to fight alongside Mario and asks for a name. Enter any name to complete the recruitment; this is the required Yoshi partner joining event.
After recruitment, Yoshi becomes available both in battle and on the field. Press X to ride him, which increases Mario’s movement speed. While riding, hold A to perform Yoshi’s Flutter Jump across horizontal gaps. The Flutter Jump does not provide extra vertical height, so use it from a suitable ledge or platform.
Do not begin the evidence investigation until this scene is complete. The later minor-league locker-room documents and storage-room route require both the Super Hammer and Yoshi’s Flutter Jump. Yoshi’s battle skill Gulp is also the reliable way to defeat the Iron Clefts when they appear as ordinary opponents later in the ranking sequence.
- Return to the minor-league locker room after fleeing the Iron Clefts.
- Watch the Mystic Egg hatch.
- Name and recruit the baby Yoshi before continuing the investigation.
5. Enter the major league and follow X’s instructions
After Yoshi joins, continue the ranking sequence. Mario eventually moves into the major league, where Rawk Hawk’s belt is revealed to be a fake. An anonymous character called X begins sending instructions through emails. Follow the messages in order while continuing to schedule and win the required matches.
One early major-league match is against the Poker Faces, a pair of Bristles. Use a ranged or defense-bypassing attack such as Quake Hammer, Earth Tremor, or an appropriate item. Afterward, leave the Glitz Pit and visit the watering hole or juice bar in Glitzville. Speak with the person inside to receive the Super Hammer. This Hammer breaks the large yellow blocks used in the investigation route.
Return to the Glitz Pit and enter the minor-league locker room when X directs you there. Use the Super Hammer on the large yellow block beside the bookcase. Climb the bookcase and use Yoshi’s Flutter Jump to reach the Dubious Documents. Jolene interrupts after the evidence is found, so let the scene play out and continue following X’s messages.
- Advance into the major league and read X’s emails.
- Collect the Super Hammer from the Glitzville watering hole.
- Use Yoshi’s Flutter Jump to reach the Dubious Documents in the minor-league locker room.
6. Investigate the storage room and recover the missing-fighter evidence
Continue the major-league matches. After the Craw Daddy match, X directs Mario to the telephone booth outside the Glitz Pit. Inspect it to obtain the Storage Key, then return inside the arena and enter the storage room beside Grubba’s office. If Jolene and the guard are present, wait for their scene to finish before using the key.
Inside the storage room, use Flurrie’s field wind to blow away the coverings and reveal large yellow blocks. Break the blocks with the Super Hammer. Find the switch on the left side and activate it to open the staircase to the attic. Yoshi’s Flutter Jump lets Mario cross to the upper platforms. The attic route contains the evidence and a crawl space where Mario can overhear Grubba and Jolene discussing the missing fighters.
Later, X directs Mario to remove the Great Gonzales posters in the lobby. Use Flurrie’s wind on the posters and find the second Storage Key behind the upper-left poster. Use it on the second-floor storage-room door. Flutter across the upper area, break the yellow block with the Super Hammer, and inspect the flattened bodies of Bandy Andy and King K. The warning about the empty arena leads to the final Rawk Hawk match.
- Take the Storage Key from the Glitzville telephone booth.
- Use Flurrie, the Super Hammer, and Yoshi’s Flutter Jump in the storage room.
- Inspect the second-floor evidence before scheduling the final Rawk Hawk match.
7. Escape the trap and defeat Rawk Hawk
Schedule the final major-league match against Rawk Hawk. Instead of being sent to the arena, Mario is locked inside a minor-league locker room. Use Flurrie to blow down the Peach poster on the right wall. Enter the passage behind it, continue into the next room, and use the bathroom toilet to travel through the pipes back to the normal major-league locker room.
Heal before entering the arena. Rawk Hawk has 40 HP and low defense, but his attacks are strong. Tattle him if you want the information recorded, then use reliable single-target attacks. When he hangs from the rafters, Mario’s normal Jump and Hammer attacks cannot reach him. Use a partner attack that can strike elevated targets, such as Flurrie’s Body Slam, and guard the objects he drops from above.
Defeating Rawk Hawk awards the Champ’s Belt and makes Mario the new champion. It does not award the Crystal Star and does not finish the chapter. Jolene takes Mario to the champion’s locker room, where the next investigation begins.
- Escape through the Peach poster and bathroom toilet.
- Heal before entering the Rawk Hawk battle.
- Use an elevated-target partner attack when Rawk Hawk hangs from the rafters.
8. Use the ventilation duct to expose Grubba
In the champion’s locker room, use the bed to restore HP, FP, and Star Power. A voice can be heard from the ventilation duct on the right side of the room. Jump onto the presents on the left, ride up to the higher ledge, and use Yoshi’s Flutter Jump to reach the vent. Strike it with the Super Hammer and enter the duct.
Follow the duct until Mario can overhear Grubba discussing the missing fighters and the machine beneath the arena. Break through into Grubba’s office. Inspect the office carefully: the left desk drawer contains the document that identifies the Crystal Star’s location and explains that Grubba has been draining fighters’ energy to preserve his youth.
Grubba catches Mario reading the evidence and runs toward the arena. Follow him through the hallway and enter the empty ring. Step into the center of the arena to trigger the machine reveal and the Macho Grubba battle.
- Rest in the champion’s locker room before entering the duct.
- Reach the vent with Yoshi’s Flutter Jump and the Super Hammer.
- Inspect Grubba’s left desk drawer and follow him to the arena.
9. Defeat Macho Grubba and obtain the Crystal Star
Macho Grubba has 60 HP, 4 Attack, and 0 Defense. His danger comes from temporary enhancements that can increase his speed, attack, defense, or evasion and can allow multiple actions in a turn. Keep Mario’s HP high enough to survive consecutive attacks and reserve FP for reliable damage or emergency recovery.
Use attacks appropriate to his current enhancement. Defense-piercing attacks remain useful if his Defense rises, while Shell Shield from Koops can reduce the danger when his Attack increases. Yoshi’s Gulp is also a dependable option because it ignores ordinary Defense. Sweet Treat, healing items, and Star Power are available in this unrestricted battle, so do not save every resource for a later tournament match.
After Macho Grubba is defeated, Jolene reveals that she was X and that Prince Mush was her missing brother. The drained fighters return, Jolene takes control of the Glitz Pit, and she gives Mario the real Crystal Star. Mario also learns the special move Power Lift during the post-battle sequence. Wait for the complete scene before leaving Glitzville.
- Keep recovery available for Macho Grubba’s enhanced turns.
- Use defense-piercing attacks when his Defense rises and defensive protection when his Attack rises.
- Confirm that Jolene awards the Crystal Star and that Power Lift is learned.
10. Register the Crystal Star and receive the next destination
After the post-battle scenes, leave the Glitz Pit and speak with the Cheep Cheep conductor in Glitzville’s central plaza to return to Rogueport. Enter the Rogueport Sewers and reach the Thousand-Year Door. Use the newly obtained Crystal Star at the door’s pedestal. The door points toward the next Crystal Star’s region.
Only after registering the Crystal Star should you visit Professor Frankly. Speak with him at his house to receive the explanation and directions for the next chapter, which leads toward Twilight Town through the western sewer route. If Frankly does not provide the next destination, confirm that the Crystal Star was actually registered at the door and that all post-battle scenes have finished.
Glitz Pit rematches, optional Trouble Center requests, Star Pieces, Shine Sprites, and additional badges are not required to advance beyond Chapter 3.
- Return from Glitzville to Rogueport by blimp.
- Register the Crystal Star at the Thousand-Year Door.
- Speak with Professor Frankly afterward and receive the next destination.
Before you move on
- Mario has become the Great Gonzales and advanced through the Glitz Pit rankings.
- The Mystic Egg was rescued from Hoggle’s hot-dog stand.
- Mario escaped the required Iron Cleft match and returned to the minor-league locker room.
- The egg hatched, the baby Yoshi was named, and Yoshi joined the party before the evidence investigation.
- The Super Hammer and Yoshi’s Flutter Jump were used to investigate the locker room and storage room.
- Rawk Hawk was defeated and Mario received the Champ’s Belt.
- Mario reached Grubba’s office through the champion’s ventilation duct.
- Macho Grubba was defeated, Jolene awarded the Crystal Star, and Power Lift was learned.
- The Crystal Star was registered at the Thousand-Year Door.
- Professor Frankly was spoken to afterward and provided the next chapter destination.
Chapter 4 — For Pigs the Bell Tolls: Twilight Town, Vivian and Creepy Steeple
Unlock the Twilight Town route from Rogueport by finding Darkly, then investigate the curse that turns residents into pigs whenever the steeple bell rings. Follow Twilight Trail and Twilight Forest to Creepy Steeple, open the mansion’s route with Tube Mode and Flurrie, and defeat the ghost responsible. The first Doopliss battle is scripted: after it, he steals Mario’s body and name. Return to Twilight Town, recover Vivian’s lost Superbombomb, and recruit her. Use Veil to listen to the birds and the parrot beneath Creepy Steeple, collect the Letter P, and learn the name Doopliss. After entering that name on Twilight Trail, chase him back to the steeple and defeat him while his copies of Mario’s partners fight for him. The Ruby Star is obtained after the rematch, Vivian joins permanently, and the chapter ends after the following story scenes.
Unlock the Twilight Town route in Rogueport
Go to the western side of Rogueport’s underground area and inspect the brown pipe. At first, the pipe refuses to take you to Twilight Town. This is not a glitch and does not require a new partner. Return to Professor Frankly’s house and speak with him to learn that a Twilighter named Darkly can authorize the route.
Find Darkly behind the concealed wall near Merlon’s house. He is the Twilighter with yellow eyes. Speak with him, then return to the western underground area and use the same brown pipe again. It now leads to Twilight Town. Before leaving, save, restore at the inn if necessary, and carry several HP or FP recovery items. The first trip through Twilight Trail and Twilight Forest contains enemies with higher defense than those in earlier chapters.
In Twilight Town, speak with the residents and Mayor Dour. Watch the bell ring and observe the curse transform another resident into a pig. Mayor Dour explains that the source is Creepy Steeple, the haunted structure beyond the forest. Do not spend time trying to solve optional requests before establishing this objective.
- Speak with Professor Frankly.
- Find and speak with Darkly behind the wall near Merlon’s house.
- Use the western Rogueport pipe to reach Twilight Town.
- Speak with Mayor Dour and witness the pig curse.
Cross Twilight Trail and open Creepy Steeple
Leave Twilight Town through the western exit and follow Twilight Trail. At the fallen tree, use Tube Mode to roll underneath it. In the next section, use Flurrie to blow away the haystack blocking the route; this reveals a pipe leading into the background. Continue through the woods and use Flurrie again where the path is hidden by a tree, then clear the boards covering the lower passage. Push the large background rock so the matching foreground rock moves, then drop through the newly exposed opening and continue toward Creepy Steeple.
Hyper Clefts have high defense and can charge dangerous attacks. Use Earth Tremor, Quake Hammer, POW items or another attack that ignores or bypasses defense instead of repeatedly using weak physical hits. Crazee Dayzees can put Mario to sleep, so block their song or avoid unnecessary fights. Vivian is not available yet, so do not plan this first trip around Veil.
At Creepy Steeple, the front gate is not opened by striking the lock. Enter Tube Mode near the old well and roll through the hole in the fence. Open the gate from inside, then enter the main hall. Use Tube Mode to enter the small opening on the north side and collect the optional items if desired. Return to the hall, push the Crystal Star statue aside, and drop into the hidden basement. Use Flurrie on the discolored wall, then enter the room beside the springboard and open the strange cube to release the Boos. Agree to leave them alone when asked. This unlocks the side doors and allows the route upward.
Take the lower side door from the main hall, follow the exterior walkway and hit the red switches as encountered. On the second-floor walkway, cross the gap with a jump or Yoshi. At the wider gap, use Koops to send the Steeple Key across and retrieve it. Return through the stair hall, hit the second switch twice, and go back when the stairs have moved. Climb the relocated stairs, cross the upper walkway, and use the Steeple Key on the locked door. Heal at the Heart Block if needed, climb the spiral staircase and use the springboard to reach the bell room.
- Use Tube Mode beneath the fallen tree and through the Creepy Steeple fence.
- Use Flurrie to clear the haystack, tree obstruction and hidden basement wall.
- Release the Boos and unlock the mansion’s side doors.
- Hit the required red switches and use Koops to carry the Steeple Key across the gap.
- Reach the bell room at the top of the steeple.
Defeat the first Doopliss encounter and lose Mario’s identity
In the bell room, confront the ghost responsible for turning Twilight Town’s residents into pigs. This is the first Doopliss encounter. Attack normally, but do not expect a permanent victory: the battle is scripted to end with Doopliss taking Mario’s body, name and partners. After the scene, control returns to the shadow version of Mario inside Creepy Steeple.
Save at the block in the steeple, then leave and travel back through Twilight Trail toward Twilight Town. Mario has no partners during this return trip, so avoid battles where possible and run from dangerous encounters rather than spending items. Do not attempt to return to Rogueport; the chapter requires you to meet Vivian in Twilight Town first.
On Twilight Town’s first screen, find Vivian searching the bushes for the Superbombomb. Search the bushes to recover it and give it to her. The bomb is broken, but returning it convinces Vivian that Shadow Mario is not working with her sisters. Explain what happened, and she agrees to help recover Mario’s name. Vivian now joins the party. Her field skill, Veil, hides Mario and Vivian in the shadows, allowing them to avoid enemies and pass hazards while concealed.
- Complete the first Doopliss battle and allow the scripted body theft to occur.
- Return to Twilight Town without trying to win the forced follow-up encounter.
- Find Vivian’s Superbombomb in the bushes.
- Recruit Vivian and gain access to Veil.
Learn Doopliss’s name beneath Creepy Steeple
After Vivian joins, leave Twilight Town through the eastern side and use Veil when the black birds in the trees offer a dialogue prompt. The useful birds are in the southeastern part of town near the gate. Listen to them while hidden. They reveal that the person who knows the ghost’s name is locked beneath Creepy Steeple.
Travel through Twilight Trail and Twilight Forest again. When the fake Mario appears near the shed, enter any name available and choose Run Away. This encounter cannot be completed until you obtain the missing Letter P. Continue to Creepy Steeple, save outside and drop through the old well.
The underground passage contains Buzzy Beetles and Spike Tops. Buzzy Beetles can be flipped and then defeated before they stand again; for Spike Tops and other armored enemies, use Quake Hammer, Earth Tremor, POW items or Piercing Blow rather than relying on ordinary jumps. Vivian’s Veil is also useful for passing clusters without taking contact damage.
In the underground passage, collect the Tornado Jump badge, then push the door-shaped barrier up the slope. Activate Veil and remain hidden while the barrier slides over Mario and Vivian. Continue through the small Tube Mode passage and drop into the lower room. Roll through the next opening on the left to reach the parrot’s treasure room. Open the chests and boxes before leaving. The room contains the Power Plus badge, Mr. Softener, the Steeple Key and the Letter P. Use Veil beside the parrot; it reveals that the ghost’s name is Doopliss. Use the Steeple Key to leave and return to Twilight Town.
- Use Veil to listen to the correct birds in southeastern Twilight Town.
- Run from the fake Mario encounter on the first return trip.
- Use defense-piercing or defense-bypassing attacks against armored enemies underground.
- Push the barrier and pass beneath it with Veil.
- Collect the Letter P and learn the name Doopliss from the parrot.
Enter the name and defeat Doopliss permanently
Return to Twilight Trail and approach the shed. Doopliss appears again and challenges Mario to identify him. The Letter P has restored the missing character, so enter Doopliss exactly as the name. The game accepts the name and Doopliss flees toward Creepy Steeple. Follow the same route through Twilight Trail and Twilight Forest; this is the final required trip through the area for the chapter.
Use the Save Block outside Creepy Steeple and heal before entering the upper rooms. Return to the bell-room lounge where the first battle occurred. Doopliss has copied Mario and persuaded the other partners to fight on his side. Focus attacks on Doopliss rather than defeating the partner copies. If a copied partner is defeated, Doopliss can replace it, so spreading damage across them wastes turns.
Doopliss has 40 HP and uses attacks based on Mario’s abilities. Vivian does not participate immediately because she has just realized that Shadow Mario is the real Mario. Survive the opening turns with Guard, defensive badges, healing items or Veil when a dangerous attack is coming. Vivian eventually joins the battle. Once she is active, use Shade Fist for direct damage and Fiery Jinx when several enemies are present or defense is making ordinary attacks inefficient. Power Lift and Star Power are valuable if FP and Star Power are available, but do not spend every resource before confirming that Mario can survive the next turn.
After Doopliss is defeated, Mario’s body, name and partners are restored. The Ruby Star appears as the chapter reward. Vivian becomes a permanent partner, and the game proceeds through its post-chapter scenes.
- Enter Doopliss after recovering the Letter P.
- Save and heal before re-entering the bell-room lounge.
- Attack Doopliss instead of wasting turns on replaceable partner copies.
- Use Vivian’s Veil defensively until she joins the battle.
- Defeat Doopliss and obtain the Ruby Star.
Finish the chapter and confirm progression
Watch the post-battle scenes, including the Peach and TEC interlude. The chapter is not complete merely because the boss falls; allow the game to finish the sequence that follows the Ruby Star acquisition. Vivian remains available on the partner wheel after this point.
Return to Twilight Town when control returns to Mario. The curse has ended, and the transformed residents are restored. You may speak with Mayor Dour and the townspeople, but the main progression is confirmed when the story moves Mario back toward Rogueport and the next Crystal Star location is revealed at the Thousand-Year Door.
Back in Rogueport, use the newly available progression route and prepare for Chapter 5. Optional rewards in Creepy Steeple, including badges, Shine Sprites, Star Pieces and the Atomic Boo battle, are not required for the chapter’s Crystal Star or the ending.
- The Ruby Star has been added to the Crystal Star collection.
- Vivian is permanently available as a partner.
- Doopliss has been defeated in the final bell-room battle.
- Twilight Town’s residents have returned from pig form.
- The post-chapter scenes have finished and the next Crystal Star objective is active.
Before you move on
- The Ruby Star, which is Chapter 4’s Crystal Star, is in the collection and the total is four.
- Vivian is permanently selectable as Mario’s partner.
- The final Doopliss battle in the bell-room lounge is complete.
- Mario’s normal body, name and original partners have been restored.
- Twilight Town is no longer under the pig curse.
- The post-chapter scenes have played and the game has directed Mario toward the next Crystal Star.
References for this chapter
- Paper Mario: The Thousand-Year Door — Chapter 4: For Pigs the Bell Tolls, StrategyWiki
- Paper Mario: The Thousand-Year Door — Guide and Walkthrough — GameCube — DarthMarth
- Paper Mario: The Thousand-Year Door Walkthrough — GameSpot
- Paper Mario: The Thousand-Year Door: All Bosses, Strategies, How To Beat, Nintendo Life
- Paper Mario: The Thousand-Year Door GameCube manual
Chapter 5 — The Key to Pirates: Keelhaul Key approaches and shipboard puzzles
After the Thousand-Year Door points Mario toward Keelhaul Key, meet Flavio at the Rogueport Inn and agree to help him sail there. Find Admiral Bobbery in his East Rogueport home, learn why he refuses to return to the sea, and deliver Scarlette’s Old Letter so he agrees to serve as navigator. Finish all desired Rogueport shopping, upgrades, Trouble Center work, and item preparation before boarding Flavio’s ship, because the original GameCube release locks the normal return route until Chapter 5’s conclusion. After the shipwreck, reach the camp on Keelhaul Key, defeat the Embers attacking the stranded crew, rescue Bobbery from a tree, and collect a Coconut from the background area. Trade the Coconut to Flavio for Chuckola Cola, bring it to Bobbery, then strike him with Mario’s hammer when he appears to die. Bobbery wakes and permanently joins the party. Stop here: the next objective is returning to Flavio to begin the Skull Gem and Pirate’s Grotto sequence.
1. Begin the Keelhaul Key expedition and recruit Bobbery in Rogueport
After the previous chapter’s return to Rogueport, visit Professor Frankly and then go to the lower level of the Rogueport Inn. Speak with Flavio, the red-clothed pirate sitting near the tables. Respond through his conversation until he agrees to take Mario to Keelhaul Key. Follow Flavio to the harbor and board his ship. Flavio explains that the expedition still needs a navigator, and Pa-Patch identifies Admiral Bobbery as the sailor who can guide the voyage.
Leave the harbor and travel to East Rogueport. Use Yoshi’s Flutter Jump to cross the gap near the bridge, climb across the rooftops, and reach the roof above Bobbery’s locked house. Use Tube Mode to enter through the chimney. Speak with the mustached Bob-omb inside. He denies being Bobbery, but the conversation confirms that this is the person you are looking for.
Return to the inn and speak with Podley, the bartender. He confirms that the Bob-omb in the house is Admiral Bobbery. Go back to Bobbery’s house and speak with him again. Bobbery admits his identity but refuses to sail. Return to Podley once more and ask about Bobbery’s past. Podley explains Bobbery’s history with his wife, Scarlette, and gives Mario the Old Letter she left behind.
Take the Old Letter back to Bobbery. He reads it privately in Scarlette’s room and regains the will to sail. Bobbery then leaves for the harbor. Before boarding the ship, finish any business in Rogueport that you want to complete. Buy healing items, check your badges, upgrade partners if desired, save your game, and leave useful supplies or coins available. In the original GameCube release, boarding Flavio’s ship begins the isolated Chapter 5 sequence and prevents the normal return to Rogueport until the chapter is finished.
Return to the harbor, speak with Flavio aboard the ship, and choose the option confirming that you are ready to depart. The voyage proceeds through story scenes and ends with a pirate-ghost attack. Mario and the crew are shipwrecked on Keelhaul Key.
- Flavio has agreed to take Mario to Keelhaul Key.
- Bobbery has been identified in East Rogueport.
- Podley has given Mario the Old Letter.
- Bobbery has read Scarlette’s letter and gone to the harbor.
- All desired Rogueport preparation is complete before departure.
- Mario has reached Keelhaul Key after the shipwreck.
2. Reach the camp and defeat the first Embers
When Mario arrives on Keelhaul Key, follow the opening path toward the settlement made from the wrecked ship. Optional exploration in the starting area can wait; the required route leads east toward Flavio and Pa-Patch. A group of pirate ghosts, the fire-based enemies called Embers, attacks them. Defeat the Embers to continue.
Avoid ordinary jump attacks against Embers because their flames can burn Mario or a partner on contact. Koops’s Shell Toss and Yoshi’s Gulp are safer choices, and Mario’s Hammer is also useful when the timing and position are safe. If you have the Ice Power badge, it can help against fire enemies, but it is not required for progression.
After the battle, explore the camp before entering the jungle. The camp has an inn, an item shop, a recovery option, and a Save Block. Heal and save here. Restock on HP and FP recovery if your inventory is low, because the path to Bobbery includes several enemy groups and platforming sections. The camp is also the place where Flavio will later exchange a Coconut for Chuckola Cola.
- The three Embers attacking Flavio and Pa-Patch are defeated.
- You have located the Keelhaul Key camp.
- You have healed, saved, and restocked before entering the jungle.
3. Follow the jungle route and rescue Bobbery from the tree
Leave the camp by taking the eastern jungle path. Continue through the enemy-filled screens and use the visible platforms and stairs to climb upward. When the route reaches large gaps, switch to Yoshi and use Flutter Jump to cross them. Some hidden blocks and optional items are along the route, but they are not needed to rescue Bobbery.
Eventually Mario reaches the missing crew members on a bridge. Embers attack the group, and Bobbery stays behind to hold them off while the other sailors escape. After the scene sends Mario back toward the previous area, return to the bridge and follow the route forward again. Cross the bridge, using Paper Mode at the narrow opening beneath the bridge when necessary. This leads to the area where Bobbery is trapped.
When you hear Bobbery calling for help, continue into the next area. Several Embers have chased him into a tree. Defeat the enemies without using unsafe contact attacks. Koops’s Shell Toss, Yoshi’s Gulp, and carefully timed Hammer attacks are reliable options. Once the Embers are gone, strike the tall tree with Mario’s Hammer.
Bobbery falls from the tree and asks for Chuckola Cola as his final request. The scene makes it appear that he has died, but this is not the point at which he joins the party. Leave the area only after the request has finished, then begin the return trip to the camp.
- The stranded sailors have been encountered on the bridge.
- The remaining crew members have escaped while Bobbery holds off the Embers.
- Bobbery has been found in the tree.
- The Embers around Bobbery have been defeated.
- Bobbery has requested Chuckola Cola.
4. Collect a Coconut and trade it for Chuckola Cola
From Bobbery’s tree, return west across the bridge and descend to the lower part of the previous area. Look for the pipe near the bridge route that leads to the background. Use Yoshi’s Flutter Jump where needed to reach it, then enter the pipe.
In the background, walk to the large coconut tree and strike it with Mario’s Hammer. The tree provides Coconuts; take at least one. This is the required trade item, so do not spend or discard your only Coconut before returning to Flavio. You may collect more than one if you want a spare, but only one is needed for the story.
Exit the background and return to the Keelhaul Key camp. Speak with Flavio and continue the conversation until he asks for an island item in exchange for his bottle of Chuckola Cola. Choose the Coconut from the inventory. Flavio gives Mario the Chuckola Cola. If you present another item, the exchange will not produce the required drink, so confirm that Coconut is selected.
With Chuckola Cola in hand, leave the camp and retrace the jungle route to Bobbery’s tree. You can use the shortcuts and spring platforms you activated on the way through, but no new partner ability is required for this return trip. Keep the drink in your inventory until you reach Bobbery.
- The background pipe has been used to reach the coconut tree.
- At least one Coconut has been collected.
- Flavio has accepted a Coconut.
- Chuckola Cola is in Mario’s inventory.
- You are back on the route to Bobbery’s tree.
5. Revive Bobbery and finish this chapter segment
Return to Bobbery at the tree and give him the Chuckola Cola. Bobbery drinks it, says his farewells, and appears to die. Wait for the scene to finish. When control returns and Bobbery begins snoring, stand next to him and strike him with Mario’s Hammer.
Bobbery wakes up and the recruitment scene begins. Allow the dialogue to finish completely. Once the scene ends, Admiral Bobbery is permanently added to Mario’s party and can be selected as an active partner. His Bomb ability will be required for the next section of Chapter 5, but do not continue to the Skull Rock puzzle in this chapter segment.
The correct stopping point is immediately after Bobbery has joined. Mario is now ready to return to the camp and speak with Flavio. That conversation begins the next section, where Flavio accompanies Mario to Skull Rock and provides the Skull Gem. Save at the camp before proceeding if you want a recovery point, but the Skull Gem, Pirate’s Grotto, Boat Mode, Gate Handle, trapped Toads, Cortez, and the Sapphire Star belong to the following chapter section and are not part of this chapter.
- Chuckola Cola has been given to Bobbery.
- Bobbery has been struck with Mario’s Hammer after the apparent death scene.
- The recruitment dialogue has finished.
- Admiral Bobbery is permanently listed as a party member.
- Mario is ready to return to Flavio for the Skull Gem sequence.
Before you move on
- Admiral Bobbery was recruited in Rogueport as Flavio’s navigator.
- Mario reached Keelhaul Key and defeated the initial Ember encounter.
- The missing crew was found and Bobbery was rescued from the tree.
- A Coconut was collected from the background tree.
- Flavio exchanged the Coconut for Chuckola Cola.
- Bobbery drank the Chuckola Cola, was awakened with Mario’s Hammer, and permanently joined the party.
- Mario is positioned to return to Flavio for the next objective: obtaining the Skull Gem.
References for this chapter
Chapter 5 — Pirate’s Grotto, Cortez and Lord Crump
With Admiral Bobbery already recruited, get Flavio’s Skull Gem and use it with the Skull Face to open Pirate’s Grotto. Work through the grotto’s spike corridors, Bobbery switches, Koops platform puzzle, Black Key chest, Boat Mode route, Gate Handle mechanism, floodgate, wave room, and Toad rescue sequence. Save and recover before entering Cortez’s room. Cortez has three forms and can restore his health by consuming part of the audience, so preserve FP and recovery items for his weapon phase. After claiming the Sapphire Star, escape through the cracked wall, return to Flavio, use Cortez’s ship, and defeat Lord Crump on Keelhaul Key. Let the Peach and Bowser interludes finish, return to Rogueport, register the Sapphire Star at the Thousand-Year Door, and then speak with Professor Frankly about the Excess Express and Poshley Heights.
Get the Skull Gem and open Pirate’s Grotto
This section begins after Admiral Bobbery has joined and been revived. Return to the Skull Rock area on Keelhaul Key with Flavio. Examine the Skull Face first, then speak with Flavio and choose the response asking for the Skull Gem. Examine the Skull Face again and place the Skull Gem in it.
The nearby red and blue faces now become active. Ground-pound the red face three times, then strike the blue face with the Hammer four times. A small platform appears above the skull entrance. Throw Bobbery onto that platform so he can blast open the larger cave entrance. Enter Pirate’s Grotto.
Use the Save Block immediately inside. Keep Bobbery available for the required switches and cracked walls. Yoshi, Vivian, Koops, and Mario’s Tube and Boat transformations are also required during the route.
- Bobbery is already in the party.
- Flavio has lent Mario the Skull Gem.
- The red face has been ground-pounded three times.
- The blue face has been hammered four times.
- Bobbery has opened the Pirate’s Grotto entrance.
Cross the opening rooms and activate the first Bobbery switch
From the first Save Block, continue east. In the next room, go down the stairs, drop through the first pit, move west, drop through the second pit, and continue east. At the sunken pirate ship, use Yoshi’s Flutter Jump to cross to the platform on the far side.
Proceed north and east to the first spike corridor. Switch to Vivian. When the spikes retract, run forward, then use Vivian’s Veil to hide underground while the spikes rise. Repeat this short run-and-hide pattern until you reach the next room.
Cross the bridge and continue through the Bill Blaster area. Bobbery’s Bomb Squad can help damage a Blaster while Mario focuses on action commands and defense, but fighting is optional if you can move through safely. Continue over the bridges and use Yoshi to cross the final gap. Ignore the large Bomb-omb and enter the following area.
Use the Save Block on the raised platform. From there, go northeast and north across the water to the ledge holding a switch. Throw Bobbery onto the ledge and detonate him. The explosion activates the switch and opens the door.
- Yoshi has crossed the sunken ship gap.
- The first spike corridor has been passed with Vivian.
- The Bill Blaster section has been cleared or bypassed.
- The first required Bobbery switch has opened the door.
Solve the Koops platform puzzle and obtain the Grotto Key
Go through the opened door and continue west, across the water, and down the stairs. In the room with the moving wooden platform, ride the platform until it reaches the left side. Use Koops to send his shell toward the switch and hold it there.
While the shell remains held against the switch, move to the lower wooden platform. Release Koops’s shell when the platforms are positioned correctly. The switch raises the platform carrying Mario. Ride it upward, jump to the next platform, and take the Grotto Key.
Return to the room with the earlier Save Block, cross the water, drop down the ledges, and unlock the door to the east. Continue south through the next room and enter the second spike corridor.
Transform into Tube Mario and roll beneath the spikes. Stop at the safe gaps when the lower spikes descend; rolling continuously through the entire corridor will cause damage. After exiting, continue south, jump across the barrels and boat, and cross the broken bridge.
On the far side of the bridge, throw Bobbery at the cracked wall to open the next passage. Move through the Bill Blaster rooms and continue west across the small bridges, then go north into the room with the black chest.
- The Koops moving-platform puzzle is complete.
- The Grotto Key is in Mario’s inventory.
- The locked door east of the first Save Block is open.
- The second spike corridor has been crossed in Tube Mode.
- Bobbery has opened the cracked wall beyond the broken bridge.
Use the Black Key, Boat Mode, and Gate Handle
Examine the black chest in the north room. A blue Ember appears. Defeat it to obtain the Black Key, then use that key on the chest. Mario receives the paper-boat ability. Use the nearby Boat Panels to begin the water route.
Leave the chest room and use the Boat Panel across the small bridges. Sail east, then change back to normal form at the next Boat Panel and follow the stairs back toward the second spike corridor. Cross the spikes again in Tube Mode, then return to the room with the earlier Save Block.
From the upper route, enter the room with the Boat Panel and sail south over the waterfall. Continue west and southwest through the water passages. In the next Boat Panel room, change back to normal form, jump west onto the ship, and climb to its upper section to take the Gate Handle.
Carry the Gate Handle back through the grotto. Use the spike corridor and bridge route to reach the nearby mechanism, then select the Gate Handle at the mechanism. The floodgate rises.
Return to the Boat Panel above the waterfall. Sail over the waterfall again and continue through the passage that was blocked by the raised floodgate.
- The blue Ember has been defeated.
- The Black Key has opened the black chest.
- Mario has obtained Boat Mode.
- The Gate Handle has been collected.
- The Gate Handle has been inserted into the mechanism.
- The floodgate is raised.
Rescue the stranded Toads
Continue through the opened route until you reach the room with rolling waves. Move east while watching their height. When a wave drops, move to the upper route; when a wave rises, move to the lower route. If a wave hits Mario, the room resets, so advance one safe section at a time.
Enter the following room to trigger the scene with the stranded Toads. Move southeast and continue east to the Boat Panel. Change back to normal form, enter the pipe, and travel through the background. Use the tilting boat and narrow platforms to reach the pipe on the far side, then return to the foreground and use the Airplane Panel.
Fly to the pipe on the opposite ledge and enter it. Hit the switch in the background to create two barrels in the water. Return to the Airplane Panel, fly past the first pipe, and land at the second pipe. Hit that switch to create two more barrels.
The additional barrels create a crossing for the Toads. Return to the boat and use the pipe to reunite with the rescued group. Continue east into the next room. Save at the bridge, then jump onto the blue boat and use the Recovery Block to restore Mario and the active partner. Enter the door to the east when ready.
- The wave room has been crossed without being hit.
- Both background switches have been activated.
- The stranded Toads have crossed safely.
- Mario has saved and fully recovered before Cortez.
Defeat Cortez and claim the Sapphire Star
Enter Cortez’s room and use Tattle if you want his information recorded. Cortez has three forms, each with 20 HP, and his total endurance is increased because he restores health once by consuming part of the audience. The battle is won by defeating each form, not by destroying the treasure or treating his weapons as the main target.
In the first form, attack Cortez’s main body or bone pile with dependable single-target attacks. Vivian is a strong partner because Fiery Jinx can damage the boss without relying on a normal jump or Hammer attack. Keep Mario’s HP high and avoid spending all FP immediately.
In the second form, Cortez can charge his attack and use a damaging bone attack against both characters. Defend against the charged attack when possible and continue targeting Cortez. Heal before moving into the final form if Mario or the partner is low on HP.
The final form leaves Cortez’s head accompanied by four floating weapons. The weapons act as separate targets and can create several attacks in one round. Flurrie’s Gale Force is a useful way to remove them, while a multi-target special move or attack can also help. If you cannot clear every weapon, prioritize survival and continue damaging Cortez rather than repeatedly wasting turns on replacements.
Cortez eventually consumes part of the audience and restores his health. Treat this as a planned second endurance check: use the Recovery Block before the battle, carry HP and FP recovery items, and reserve enough FP for the final form. After Cortez is defeated, choose the response showing that Mario wants the Crystal Star rather than the pirate treasure. Cortez awards the Sapphire Star, and Mario learns Sweet Feast.
- All three Cortez forms have been defeated.
- The four floating weapons have been removed or managed safely.
- Cortez’s audience-healing event has been overcome.
- The Sapphire Star is in Mario’s Crystal Star collection.
- Sweet Feast has been learned.
Escape Pirate’s Grotto and start the Lord Crump sequence
After the battle, Cortez throws Mario out of the ship. Move south and use Yoshi’s Flutter Jump to cross the ledges and reach the bridge. Save and use the Recovery Block again before continuing west.
In the next room, jump onto the platform with the rescued Toads, then cross to the platform on the east side. Throw Bobbery at the cracked wall and detonate him. The Toads leave through the opening; follow them out of the grotto.
Back at the Keelhaul Key camp, walk south past the rescued group. Flavio triggers the scene revealing that the pirate sailor was Lord Crump. When the scene ends, return north into Pirate’s Grotto and retrace the route to Cortez’s room. You do not need to repeat the dungeon puzzles; the path back to the ship is now available.
In Cortez’s room, the story scene causes Cortez to lend Mario his ship. Exit the ship to begin the escape sequence and return to Keelhaul Key. The next battle takes place there, not in Cortez’s boss room.
- The post-Cortez cracked wall has been opened.
- Mario and the rescued Toads have exited Pirate’s Grotto.
- Lord Crump’s disguise has been revealed.
- Cortez has lent Mario his ship.
Defeat Lord Crump and complete the interludes
After the ship returns Mario to Keelhaul Key, Lord Crump attacks with X-Naut troops. Focus on Crump rather than repeatedly clearing ordinary X-Nauts. Use area attacks when they damage Crump and the surrounding group at the same time, but do not spend several turns eliminating minions that Crump can replace.
Crump has 30 HP in this battle. After his first HP total is depleted, his troops restore him and he begins using a larger formation. The large formation can be ignored: continue attacking Crump directly. The troops disappear when Crump is defeated.
Lord Crump retreats after the battle. The game then switches to the Peach sequence at the X-Naut Fortress and the Bowser sequence. Follow the prompted rooms and dialogue until both interludes finish. These scenes are mandatory chapter progression and do not require a separate player choice that changes the campaign route.
- Lord Crump has been defeated on Keelhaul Key.
- The replacement X-Naut groups have been ignored or controlled while Crump was targeted.
- The Peach interlude has finished.
- The Bowser interlude has finished.
Register the Sapphire Star and receive the Excess Express objective
After the interludes, the story returns to Keelhaul Key. A scene with Cortez, Flavio, and the survivors establishes that Cortez’s ship can be used for travel. Follow the automatic return to Rogueport and wait until Mario regains control in town.
Save if needed, then enter the Rogueport Sewers and return to the room containing the Thousand-Year Door. Stand on the central pedestal and register the newly obtained Sapphire Star. The map records the next Crystal Star location, and the story moves Mario to Professor Frankly’s house.
Only after the Sapphire Star has been registered should you proceed with Frankly’s explanation. He identifies the next destination as Poshley Heights and explains that Mario must use the Excess Express. This completes the required Chapter 5 handoff.
Optional Chapter 5 rewards, Trouble Center requests, the Up Arrow, and further Keelhaul Key errands can be completed later. They are not required for the Sapphire Star or the next chapter.
- Mario has returned to Rogueport after the interludes.
- The Sapphire Star has been registered at the Thousand-Year Door.
- The next Crystal Star location has appeared on the map.
- Professor Frankly has explained the Poshley Heights and Excess Express objective.
Before you move on
- Bobbery was already recruited before this section began.
- Pirate’s Grotto was opened using Flavio’s Skull Gem and Bobbery’s explosion.
- The Grotto Key, Boat Mode, and Gate Handle objectives were completed.
- The floodgate was raised and the stranded Toads were rescued.
- Cortez was defeated and awarded the Sapphire Star.
- Mario escaped Pirate’s Grotto and defeated Lord Crump on Keelhaul Key.
- The Peach and Bowser interludes concluded.
- The Sapphire Star was registered at the Thousand-Year Door.
- Professor Frankly explained the Excess Express and Poshley Heights route.
References for this chapter
- Paper Mario: The Thousand-Year Door — Guide and Walkthrough, GameCube edition, Pirate’s Grotto and Chapter 5 route
- Paper Mario: The Thousand-Year Door — Guide and Walkthrough — GameCube — DarthMarth
- Chapter 5: The Key to Pirates — Paper Mario: The Thousand-Year Door Walkthrough
- Paper Mario: The Thousand-Year Door — Guide and Walkthrough — GameCube — KeyBlade999
- Paper Mario: The Thousand-Year Door GameCube manual
Chapter 6 — Three Days of Excess: train mysteries, Riverside Station, and Poshley Sanctum
Chapter 6 begins after Chapter 5, when Don Pianta gives Mario a train ticket to Poshley Heights. The Excess Express investigation has a fixed order rather than branching festival or contest choices: solve the blanket mystery on the first night, identify the thief on the second day, repair Riverside Station, then survive the Smorg attack on the third morning. Vivian is required to reveal Ghost T. and expose the disguised Doopliss, while the Ultra Boots obtained in Riverside Station unlock the station’s upper route and several later secrets. Smorg is a required boss but does not award the chapter’s Crystal Star. After the train reaches Poshley Heights, enter Poshley Sanctum, solve its spring-jump and airplane-panel puzzles, and collect the real Garnet Star. Return to Rogueport, deliver the star at the Thousand-Year Door, and follow Professor Frankly’s instructions toward Chapter 7.
1. Obtain the train ticket and board the Excess Express
After completing Chapter 5, return to Don Pianta’s office in West Rogueport. Follow the required conversation involving Frankie and Francesca. When the reunion sequence is complete, Don Pianta gives Mario a train ticket. Leave the office and go to the Rogueport Station in the western part of town, beside the route used for Glitzville. Show the ticket to the conductor and board the Excess Express.
Mario begins in Cabin 005. Before leaving, read the threatening note on the floor. This starts the train investigation. You may collect the optional item in the cabin and other train collectibles, but none is required for the chapter. Leave the cabin and speak with the conductor near the baggage car. Continue talking to train staff and passengers as new incidents occur; Chapter 6 advances through specific conversations rather than through a selectable contest or branching story choice.
Visit Chef Shimi in the dining car when the kitchen disturbance is reported. The missing cooking pot and the suspicious activity aboard the train establish the first investigation. If a passenger or staff member gives Mario a small personal request, complete it only if you want its optional reward. The required route is to keep checking the conductor and the relevant cabins until the missing blanket mystery becomes active.
- Complete Don Pianta’s required reunion sequence.
- Receive the train ticket from Don Pianta.
- Board the Excess Express at Rogueport Station.
- Read the threatening note in Cabin 005.
- Speak with the conductor and investigate the kitchen disturbance.
2. Solve the first-night blanket mystery without reading the diary
When the conductor reports that a blanket is missing, speak with the suspicious passenger in Cabin 003. The conversation points Mario toward Cabin 004. Go there and use Vivian’s Veil ability to hide in the shadows. This reveals Ghost T., the stowaway hiding in the apparently empty cabin.
Ghost T. agrees to return the blanket in exchange for his Ragged Diary, which is stored in the baggage car. Return to the conductor and request access to the baggage car. Walk through the cargo area and use Mario’s Paper Mode to pass through the narrow opening between the stacked crates. Follow the passage to the chest containing the Ragged Diary.
Do not select or read the Ragged Diary in the original GameCube release. Reading it through all of the warnings causes an immediate Game Over. Take the diary directly back to Cabin 004 and place it in the drawer as requested. Ghost T. then gives Mario the blanket. Return the blanket to the conductor. Once the conductor accepts it, return to Cabin 005 and sleep to advance to the second day.
- Speak with the passenger in Cabin 003 when the blanket mystery begins.
- Use Vivian’s Veil in Cabin 004 to reveal Ghost T.
- Obtain access to the baggage car from the conductor.
- Use Paper Mode to reach the Ragged Diary.
- Return the diary without reading it.
- Give the blanket to the conductor and sleep in Cabin 005.
3. Identify the thief and expose Doopliss’s Zip Toad disguise
On the second morning, go to Cabin 006 and speak with Pennington. A businessman has lost a briefcase containing Nitro Honey Syrup, and other passengers have lost the Shell Earrings and Gold Ring needed for the plan. Speak with the affected passengers so Pennington’s investigation is active.
Travel to Cabin 001 and pick up the Vital Paper on the floor. Return it to Pennington in Cabin 006. He identifies it as evidence connected to the businessman’s stolen briefcase and directs Mario to investigate Zip Toad, who is associated with Cabin 005.
Return to Mario’s cabin. A second document is inside. Use Vivian’s Veil to enter the shadows and wait for Zip Toad to emerge from beneath the bed. Leave the shadows and strike him with Mario’s hammer when he jumps around the room. This reveals that Zip Toad is actually Doopliss in disguise.
The game then returns Mario to Pennington’s cabin. Pennington confronts the disguised thief, who gives back the Briefcase, Shell Earrings, and Gold Ring. Return the recovered belongings when prompted. The train proceeds to Riverside Station after this investigation is resolved. Do not try to end the day by sleeping before giving the Vital Paper to Pennington and completing the Cabin 005 encounter; the investigation must be finished first.
- Speak with Pennington in Cabin 006.
- Speak with the passengers whose valuables were stolen.
- Take the Vital Paper from Cabin 001 to Pennington.
- Use Vivian to reveal Zip Toad under the bed in Cabin 005.
- Hit the disguised Doopliss with the hammer.
- Recover the Briefcase, Shell Earrings, and Gold Ring.
4. Enter Riverside Station and collect the Station Key
When the Excess Express stops at Riverside Station, leave through the front car and go down the outdoor stairs. Speak with the blue Toad near the drawbridge. He explains that the drawbridge has been raised and gives Mario the Entrance Key to the station building.
Go up the stairs behind the train and unlock the station entrance. In the first interior area, move to the right. In the next room, turn into Tube Mode and roll beneath the grate to reach the blue switch. Hit the switch to create a staircase, then climb to the upper machinery area.
Cross the rotating gears by waiting for their platforms to line up before jumping. Continue across the machinery room and use Yoshi’s Flutter Jump where the path requires extra horizontal distance. Reach the Station Key on the upper route. Pick it up, then return toward the lower rooms and use it on the locked door.
Inside the lower section, optional badges and collectibles can be collected if desired. The required route continues through the room where paper panels conceal a door. Use Flurrie to blow away the loose panels at the dead end and reveal the entrance. Follow the passage into the office area.
- Speak with the blue Toad outside Riverside Station.
- Use the Entrance Key to enter the station.
- Use Tube Mode to reach and activate the first blue switch.
- Cross the machinery-room gears.
- Use Yoshi’s Flutter Jump where necessary.
- Obtain the Station Key and open the locked door.
- Use Flurrie to reveal the hidden door.
5. Obtain the Ultra Boots and lower the drawbridge
In the office section, defeat the Goombas to reveal three numbered boxes. Strike each box with Mario’s hammer the number of times shown on it. When all three are solved, press the red switch to create the staircase. Continue upward and enter the next room, where a large chest contains the Ultra Boots.
Equip the Ultra Boots immediately. They increase Mario’s jump power and unlock the Spring Jump: hold the jump button and rotate the control stick as instructed by the game. Use the Spring Jump to grab the overhead pipe and cross to the other side. Then use Paper Mode to pass through the narrow grate.
Return to the office area and use Yoshi’s Flutter Jump to reach the box beneath the pipe. Spring Jump to the pipe and enter the enclosed section. From there, perform another Spring Jump beneath the elevated platform to knock down the Elevator Key. Pick it up, use the pipe to leave the enclosure, and backtrack to the station’s first interior room.
Before using the elevator, check the area to its left. Spring Jump beneath the platform to knock down the optional Close Call P Badge if you want it. Then enter the elevator and descend to the control room. Defeat or clear the group of fuzzy Smorg creatures, pull the lever, and hit the blue switch on the staircase that appears. This lowers the drawbridge.
Use the Heart Block and Save Block outside the station if you need recovery. Return to the train and speak with the blue Toad to board. The chapter does not enter the Smorg boss immediately; sleep in Cabin 005 after the station sequence to begin the third day.
- Solve the three numbered hammer boxes.
- Open the large chest and obtain the Ultra Boots.
- Use Spring Jump to cross the upper office route.
- Knock down and collect the Elevator Key.
- Use the elevator to reach the control room.
- Clear the fuzzy enemies and activate the drawbridge controls.
- Save and heal, return to the train, and sleep in Cabin 005.
6. Survive the third-day train attack and defeat Smorg
On the third morning, go to the engineer’s car at the front of the train and speak with the engineer. The Smorg creatures attack shortly afterward. Travel to the baggage car at the rear, defeating the creatures blocking the route. Use Mario’s hammer to free the conductor and the waitress.
After rescuing them, use a Spring Jump to reach the red pipe and exit onto the train roof. Move right across the roof, clearing the Smorgs with Mario’s hammer or Flurrie’s field ability. At the front of the train, the remaining creatures combine and take the passengers hostage. This begins the Smorg boss battle.
Smorg has a central body protected by tentacles. The tentacles must be defeated before the body can take meaningful damage. Prioritize the appendages instead of spreading damage across targets. Multi-target attacks, Bobbery’s explosive attacks, and partners who can reliably reach the current target are useful. Vivian can remain equipped for field utility, but she is not required as the primary battle partner.
After the tentacles are removed, attack the exposed body during the damage window. When the appendages regenerate as a claw, destroy the claw quickly because it can strike both Mario and his partner for heavy damage. Guard or Superguard attacks when reliable, but heal before Mario reaches critical HP. Reserve enough FP and Star Power for the complete fight rather than spending everything on optional station battles.
Defeating Smorg allows the Excess Express to continue to Poshley Heights. Smorg does not award the Garnet Star. The passengers thank Mario, and the train arrives in Poshley Heights after the victory sequence.
- Speak with the engineer on the third morning.
- Rescue the conductor and waitress in the baggage car.
- Use the red pipe to reach the train roof.
- Clear the Smorgs on the roof.
- Defeat Smorg’s tentacles before attacking its body.
- Destroy the regenerated claw quickly.
- Arrive at Poshley Heights.
7. Enter Poshley Sanctum and collect the real Garnet Star
After leaving the train in Poshley Heights, travel east through town to the large Poshley Sanctum building. The Sanctum’s manager is Pennington, who appears after the arrival sequence. Enter the Sanctum to trigger the confrontation involving Doopliss and the Shadow Sirens. The visible Crystal Star is a decoy; the real star is hidden deeper in the building.
In the first Sanctum room, use Spring Jumps on the star-shaped platforms to reach the elevated ledges. Use the airplane panel when the route requires Mario to glide across the room. Continue upward until you can reach the blue switch on the high ledge. Activate it to lift the curtain and reveal a green pipe.
Enter the green pipe to reach the hidden interior of Poshley Sanctum. Dark Boos appear in this section, so use attacks that can safely hit them and avoid relying on contact attacks when they are airborne or concealed. Continue using the star platforms and Spring Jump routes to reach the upper ledges. Use the airplane panel to cross to the left side when required.
Follow the upper route until you reach the Crystal Star. Collecting it teaches Mario the Showstopper special move and completes the chapter’s required star objective. Exit the hidden Sanctum area and speak with Pennington to finish the immediate Poshley Heights sequence. The Garnet Star is the sixth Crystal Star, not a reward received directly from Smorg.
- Travel east through Poshley Heights to Poshley Sanctum.
- Trigger the Sanctum story sequence.
- Use Spring Jump and the airplane panel to reach the blue switch.
- Enter the green pipe behind the lifted curtain.
- Cross the hidden Sanctum and collect the real Garnet Star.
- Learn Showstopper and speak with Pennington afterward.
8. Return to Rogueport and unlock the Chapter 7 route
After the Poshley Sanctum sequence and the associated Peach and Bowser scenes, return to Rogueport. Take the Crystal Star to the Thousand-Year Door in the Rogueport Sewers. The star-reading sequence reveals that the next Crystal Star is on the moon, but Professor Frankly needs time to research how Mario can reach it.
The immediate required progression is to speak with Professor Frankly after delivering the Garnet Star, then wait for the next objective to become available. Chapter 6 also unlocks access to the Poshley Heights warp pipe in the Rogueport Sewers. The Ultra Boots allow Mario to obtain the Ultra Hammer from the large chest near Rogueport’s inn; the Ultra Hammer is required to break the large gray block hiding the route toward Fahr Outpost.
When Frankly tells Mario to find Fahr Outpost, enter the Rogueport Sewers and locate the large gray block that blocks the blue warp pipe. Use the Ultra Hammer to destroy it, then take the pipe to Fahr Outpost. This begins the approach to Chapter 7. Optional Trouble Center requests, train errands, restaurant recipes, and collectible cleanup can be completed before or after this route and are not required to claim the Garnet Star.
- Deliver the Garnet Star at the Thousand-Year Door.
- Speak with Professor Frankly.
- Obtain the Ultra Hammer after the chapter’s Rogueport return.
- Wait for Frankly’s moon-related research objective.
- Break the gray block in the Rogueport Sewers.
- Take the blue pipe to Fahr Outpost.
Before you move on
- The real Garnet Star, the sixth Crystal Star, is in Mario’s Star inventory.
- Smorg has been defeated and the Excess Express has reached Poshley Heights.
- Mario has obtained the Ultra Boots from Riverside Station.
- Mario has entered the real Poshley Sanctum and learned Showstopper.
- The Garnet Star has been delivered at the Thousand-Year Door.
- Professor Frankly has explained that the next Crystal Star is on the moon.
- The Ultra Hammer has been obtained and the Fahr Outpost route has been opened.
References for this chapter
- Chapter 6: Three Days of Excess Walkthrough
- Paper Mario: The Thousand-Year Door Walkthrough — GameSpot
- Paper Mario: The Thousand-Year Door — Guide and Walkthrough — GameCube — DarthMarth
- Paper Mario: The Thousand-Year Door — Guide and Walkthrough, GameCube, Nintendo_Girl21
- Excess Express — Paper Mario: The Thousand-Year Door reference
- Paper Mario: The Thousand-Year Door GameCube manual
Chapter 7 — Mario Shoots the Moon: Fahr Outpost, General White, and the Moon
After the Chapter 6 events, return to Professor Frankly and let him identify the seventh Crystal Star's location. Obtain the Ultra Hammer if you have not already done so, then use it in the Rogueport Sewers to open the blue pipe leading to Fahr Outpost. With Bobbery active, question the green Bob-omb mayor to learn that Goldbob and General White must authorize the cannon. Visit Goldbob in Poshley Heights, then follow General White's trail through Petalburg, Keelhaul Key, Glitzville, the Great Boggly Tree, and Twilight Town. Return to Fahr Outpost, wake General White, and launch to the Moon. Cross the lunar ring, manage Moon Clefts and Z-Yux groups, and bomb the cracked rock near the large crater to reveal the pipe into the X-Naut Fortress. This section ends at the fortress entrance; the fortress puzzles, Magnus von Grapple 2.0, and the seventh Crystal Star are handled in the next step.
1. Trigger the Moon objective and open the Fahr Outpost route
After Chapter 6, go to the Thousand-Year Door and inspect it to learn where the final Crystal Star is located. Return to Professor Frankly's house and speak with him again after he has finished researching the destination. He explains that the seventh Crystal Star is on the Moon and points you toward Fahr Outpost.
You need the Ultra Hammer to open the route. If you have not collected it yet, go to Rogueport Plaza and use the Spring Jump on the large chest beside the bar. After obtaining the hammer, enter the Rogueport Sewers through the grate in West Rogueport. Have Yoshi carry Mario across the gap to the east, then use the Ultra Hammer on the large gray block in the doorway near the route to Twilight Town. Enter the blue pipe behind the destroyed block.
The snowy path is linear. Travel east through the first two screens, then continue past the Ice Puffs and Frost Piranhas. They can inflict freezing effects, so avoid unnecessary battles if your resources are low. Continue east until the route reaches Fahr Outpost.
- Professor Frankly has identified the Moon as the location of the seventh Crystal Star.
- The Ultra Hammer is available.
- The blue pipe in West Rogueport has been opened.
- Mario has reached Fahr Outpost.
2. Speak with the mayor and obtain Goldbob's authorization
In Fahr Outpost, enter the main town area and speak with the green Bob-omb near the small cannon monument. The Bob-ombs initially deny that the town has a usable cannon. Make Bobbery your active partner and speak with the green Bob-omb again. Bobbery's involvement makes the mayor explain that the cannon can launch Mario to the Moon, but Goldbob and General White must approve its use.
Return to the Rogueport Sewers and use the warp room's Poshley Heights pipe. The warp room is reached by heading toward the Thousand-Year Door from the sewer entrance and taking the side doorway rather than descending through the normal route. If the Poshley Heights pipe is not active, hit the blue switches in this room to activate the destination pipe.
In Poshley Heights, find Goldbob near the train station. Speak with him and agree to give him every coin when he asks how much you are willing to pay. Confirm the choice through the repeated questions. This is not a permanent loss: Goldbob returns your coins and gives you his approval for the cannon.
- The Fahr Outpost mayor has named Goldbob and General White as the required approvals.
- Bobbery is the active partner when the mayor is questioned.
- Goldbob has returned Mario's coins and granted permission to use the cannon.
3. Follow General White's trail in the required order
Use the sewer warp room to reach Petalburg. General White is gone, but the Koopa near the village's west entrance tells you that White left for a southern island. After receiving this clue, return to the warp room and take the Keelhaul Key pipe.
At Keelhaul Key, speak with Pa-Patch, the large Bob-omb pirate in the camp area. He says General White has gone to Glitzville. Return to Rogueport by Cortez's ship or the normal route, then use the blimp to reach Glitzville. There is no sewer warp pipe to Glitzville in the original GameCube release.
In Glitzville, enter the juice bar and speak with the attendant. The attendant says General White went to the Great Boggly Tree. Return to Rogueport, use the sewer warp room to reach the Great Tree, and speak with the first Puni immediately inside the entrance. The Puni says White went somewhere dark.
Use the normal sewer pipe to Twilight Town. Speak with the Twilighter standing outside the inn, near the item shop side of town. The Twilighter confirms that General White passed through but only adds that he looked tired. At this point the trail is complete. Return to Fahr Outpost through the blue pipe in West Rogueport.
- The Petalburg Koopa has directed Mario to Keelhaul Key.
- Pa-Patch has directed Mario to Glitzville.
- The Glitzville juice-bar attendant has directed Mario to the Great Boggly Tree.
- The first Puni in the Great Tree has directed Mario to Twilight Town.
- The Twilighter outside the Twilight Town inn has been questioned.
4. Wake General White and launch Big Bob
When you return to Fahr Outpost after visiting all five locations, speak with the green mayor near the cannon again. General White appears in the background and enters the house just west of the item shop. Follow him inside.
General White is asleep on the bed. Try speaking to him, then repeatedly jump on him while standing beside the bed. Continue jumping until he wakes; leaving after only a few jumps does not complete the event. After he wakes, speak with him and then go back outside to speak with the mayor.
Follow the mayor toward the west side of town. The Bob-ombs lead Mario through the cannon-control sequence, and the cannon launches Mario and the active party to the Moon. Before starting the launch, use the Fahr Outpost Inn or a Heart Block to restore HP and FP if necessary. The regular item shop can also provide basic recovery supplies. None of the optional items around the snowy route or the town is required for the launch.
- General White has appeared in the house west of the item shop.
- General White has been awakened by repeated jumps.
- The mayor has started the cannon sequence.
- Mario has landed on the Moon.
5. Cross the lunar ring and handle its new enemies
A Save Block is available in the Moon landing area. Use it before exploring. The Moon has low gravity: Mario jumps higher but moves slowly. Yoshi can restore normal travel speed, so switch to Yoshi while crossing long stretches if you want to reduce the travel time.
The Moon's surface forms a broad ring. You can travel in either direction from the landing point, and both routes eventually reach the X-Naut Fortress side of the Moon. The cracked rocks along the optional branches contain battle items, but searching every rock is not required. Prioritize reaching the fortress rather than spending resources on optional pickups.
Moon Clefts have very high defense. Use piercing attacks such as Power Smash, use a strong Star Power attack, or have Bobbery bomb them to flip them onto their backs and remove their defensive advantage temporarily. Avoid treating them like ordinary Clefts; weak jump and hammer attacks can waste FP and turns.
Near the fortress side, the enemies change to Z-Yux units. Z-Yux can produce Mini-Z-Yux, and the smaller enemies can quickly fill the field. Use an attack that hits multiple targets, such as Multibounce or Fiery Jinx, to remove the Mini-Z-Yux before concentrating on the main Z-Yux. Flurrie's Gale Force can also remove vulnerable enemies when it succeeds. If a status effect or freeze becomes a problem, use an appropriate recovery item or an equipped protection badge rather than allowing the party to enter the fortress with weakened HP or FP.
- The Moon landing Save Block has been used.
- Mario has crossed the lunar ring in either direction.
- Moon Clefts are being handled with piercing attacks or Bobbery's bomb.
- Mini-Z-Yux units are being removed before they overwhelm the battle.
6. Reveal the fortress pipe and secure the dungeon entrance
Continue through the lunar screens until the X-Naut Fortress is visible in the background and Z-Yux enemies are present. In this area, locate the cracked rock near the large crater. Bomb it with Bobbery to expose the green pipe leading into the background. The pipe is the required route into the fortress; the other cracked rocks only provide optional items.
Enter the pipe, move right through the background route, and enter the X-Naut Fortress. The first interior area leads through a conveyor-belt passage to a battle with Elite X-Nauts. Defeat them, then use the Recovery Block and Save Block in the following room. This is the practical end point of the Fahr Outpost and Moon approach section.
The seventh Crystal Star is not awarded on the Moon's surface or at the entrance. It is obtained after progressing through the X-Naut Fortress, solving its elevator, card-key, floor-panel, vent, gear, and power puzzles, and defeating Magnus von Grapple 2.0. Enter the fortress with Bobbery available for switches and explosive obstacles, Koops available for the Cog retrieval, and enough HP and FP recovery for the dungeon route.
- The cracked rock near the large crater has been bombed.
- The green pipe to the background has been entered.
- Mario has reached the X-Naut Fortress.
- The Elite X-Nauts have been defeated and the nearby Recovery and Save Blocks are available.
- You are ready to begin the separate fortress route that leads to Magnus von Grapple 2.0 and the seventh Crystal Star.
Before you move on
- Professor Frankly has confirmed that the seventh Crystal Star is on the Moon.
- Goldbob has granted cannon permission and Mario's coins have been returned.
- General White has been found and awakened in Fahr Outpost.
- The cannon has launched Mario to the Moon.
- Mario has crossed the Moon and exposed the green pipe near the large crater with Bobbery.
- Mario has entered the X-Naut Fortress and saved after the opening Elite X-Naut battle.
- The next required objective is the X-Naut Fortress route leading to Magnus von Grapple 2.0 and the seventh Crystal Star.
References for this chapter
- Paper Mario: The Thousand-Year Door — Guide and Walkthrough — GameCube — AmericanArsenal
- Paper Mario: The Thousand-Year Door — Guide and Walkthrough — GameCube — DarthMarth
- Chapter 7: Mario Shoots the Moon — Paper Mario: The Thousand-Year Door Walkthrough
- Paper Mario: The Thousand-Year Door Walkthrough — GameSpot
Chapter 7 — X-Naut Fortress: dungeon route, Magnus von Grapple 2.0, and recovery
After landing on the Moon, enter the X-Naut Fortress through the green pipe behind the cracked rock near the large crater. The original GameCube route begins with a single Elite X-Naut; recover at the nearby Recovery Block and save before crossing the first electric-floor room for the blue Elevator Key. The fortress then requires several Card Keys, the blue and red Elevator Keys, the cog-powered crane, the code 014029, and the switch order Left, Right, Middle. Use the Sublevel Two teleporter when you need Rogueport access, but save manually before the final staircase. Magnus von Grapple 2.0 has 70 HP, 6 Attack, and 2 Defense. Destroy the X-Punches quickly, guard the rapid audience attack, and preserve FP for multi-target attacks. After the battle, collect the seventh Crystal Star, visit TEC on Sublevel Four, use the Sublevel Two teleporter, and speak with Professor Frankly in the Rogueport Sewers.
Enter the fortress and secure the blue Elevator Key
On the Moon, continue around the cratered surface until you reach the area with the Z-Yux enemies. The required route is toward the large crater. Bomb the cracked rock on the left side of the crater to reveal a green pipe, enter it, and follow the path to the right into the fortress.
In the first fortress encounter, defeat the single Elite X-Naut blocking the route. Immediately use the nearby Recovery Block, then use the Save Block before continuing. This is the correct original GameCube opening sequence; do not expect two Elite X-Nauts in this encounter.
Continue right past the elevator and enter the electric-floor room. When you enter, the safe tile pattern flashes briefly. Memorize it and cross only those tiles to reach the chest containing the blue Elevator Key. If you need another look, leave and re-enter the room, but the pattern may change. Once the chest is opened, the floor becomes safe. Use the blue key at the elevator and descend to Sublevel Two.
- Bomb the cracked rock beside the large Moon crater.
- Defeat the single Elite X-Naut.
- Use the Recovery Block and Save Block.
- Cross the electric floor and collect the blue Elevator Key.
Collect the first Card Keys and record the fortress clues
On Sublevel Two, use the left-side electric-floor room. Its safe route is shown on the wall. Follow that pattern to the chest and collect the first Card Key, then leave the room.
The door beside the save area leads to a teleporter connected to the Rogueport Sewers. Use it if you need to heal, restock, or prepare equipment. Progress is not a substitute for saving, so return to the fortress and save manually whenever appropriate.
Continue through the Sublevel Two rooms and read the two notes. One gives the security code 014029; the other gives the crane-control order Left, Right, Middle. Proceed to Grodus’s chamber, defeat the X-Yux and its Mini X-Yux, then enter the room behind the throne. Take the Card Key from the computer in Grodus’s office.
- Obtain the first Card Key from the Sublevel Two electric-floor room.
- Record 014029.
- Record Left, Right, Middle.
- Take the Card Key from Grodus’s computer room.
Operate the crane and obtain the red Elevator Key
Return to Sublevel One using the elevator. Enter the far-left room and place the Cog into the crane machine. Press the controls in the order Left, Right, Middle. The crane can collect optional rewards such as the Star Piece and Feeling Fine badges; none is required for completion of the fortress.
Leave the crane room and enter the code-locked room at the far right of the Sublevel One hallway. Enter 014029 at the panel and speak with the Thwomp to begin the quiz. The answers are Elevator Key, Koopie Koo, 6 feet, Hooktail’s belly, and Prince Mush. Correct answers avoid the battle with two X-Yux. If you answer incorrectly, defeat the enemies and continue; the route remains available.
Take the red Elevator Key from the chest. This key opens the other elevator needed for the remaining Card Keys.
- Insert the Cog into the crane.
- Press Left, Right, Middle.
- Enter 014029.
- Answer the five quiz questions correctly when possible.
- Collect the red Elevator Key.
Collect the remaining Card Keys
Use the red Elevator Key at the Sublevel Two elevator and go to Sublevel Four if you want to inspect Peach’s former room. The bathroom encounter is optional in the original GameCube release and is not a required Card Key source. TEC’s room remains locked at this point.
Return to the elevator and go to Sublevel Three. Enter the electric-floor room on the left. The moving safe blocks form a linked route. Wait until the chain of three blocks lines up with the isolated block, jump onto the safe route, and follow it to the chest containing another Card Key.
Leave the room and enter the rightmost door in the Sublevel Three hallway. Insert the three Card Keys into the three slots; their order does not matter. This opens the machinery section.
- Use the red Elevator Key.
- Do not treat the Sublevel Four bathroom encounter as required progress.
- Obtain the Card Key from the Sublevel Three moving-block room.
- Insert all three Card Keys into the gate.
Cross the machinery and obtain the final Card Key
Defeat the X-Naut beyond the Card Key gate. Throw Admiral Bobbery over the barrier so he can activate the blue switch. Use Paper Mode to pass through the grate, then use Vivian’s Veil to move beneath the obstruction. Ride the lift and take the left-side green pipe into the background.
Cross the moving platforms and gears toward the right. An Ultra Shroom is available but optional. Use the tall pipe on the right to reach the airplane panel, fly across to the left, and collect the final Card Key. Use the Heart Block if you need to restore HP and FP.
Return through the background route. This time, take the central tall pipe rather than continuing to the far-right pipe. Reach the blue switch on the right to create the staircase. Use the nearby Save Block before climbing. Heal, restock, and confirm that Mario has enough HP, FP, and usable recovery items before inserting the final Card Key at the boss door.
- Use Bobbery to activate the blue switch.
- Use Paper Mode and Vivian’s Veil to cross the machinery.
- Use the airplane panel to reach the final Card Key.
- Use the Heart Block if necessary.
- Save before the final staircase.
Defeat Magnus von Grapple 2.0
Magnus von Grapple 2.0 has 70 HP, 6 Attack, and 2 Defense. Tattle at the start if you want the bestiary entry. Its immediate support targets are the two X-Punches that detach from the body. Each X-Punch has 5 HP and 9 Attack, so destroy them quickly whenever they appear. Leaving them active can produce a combined turn in which the fists and Magnus both attack.
Use multi-target attacks to damage the X-Punches while also hurting Magnus. Bobbery’s Bomb-ombast, Vivian’s Fiery Jinx, Art Attack, Earth Tremor, multi-target items, and other attacks that can reach several targets are useful options. Goombella can contribute with Multibonk against the main body, while Mario can use Power Smash, Power Bounce, or another reliable attack that fits the badges and FP available in your file.
Magnus’s regular attacks include a diving drill and a flying disk that can hit Mario and his partner. Later, it uses a rapid audience attack by inhaling audience members and firing them back. Guard each incoming projectile when possible. If the timing is unreliable, heal before Mario reaches critical HP rather than attempting to endure the entire sequence. Power Lift is useful before the dangerous portion because its Attack boost shortens the fight and its Defense boost reduces the risk from missed guards.
Keep FP available for the X-Punch waves and the rapid-fire phase. Switch partners if the active partner is near defeat, and use the Heart Block before the boss if you did not already recover there. After Magnus is defeated, Lord Crump retreats and the final Crystal Star appears.
- Defeat the X-Punches as soon as they detach.
- Preserve FP for multi-target attacks.
- Guard the audience projectiles when possible.
- Use Power Lift or healing before Magnus’s later attacks.
- Continue attacking Magnus after the support targets are removed.
Collect the seventh Crystal Star and escape the fortress
Collect the seventh Crystal Star in the arena after the battle. Mario’s Star Power is upgraded and he learns Supernova. After the story sequence, control returns to Mario inside the fortress.
Most of the fortress is no longer available as a normal route. Take the elevator to Sublevel Four and enter TEC’s room, which is now unlocked. TEC explains that Princess Peach has been taken to the Palace of Shadow and activates the teleporter with its remaining power.
Return to Sublevel Two and enter the teleporter room beside the save area. Use the active teleporter to return to the Rogueport Sewers. The original GameCube release does not provide a direct retry point after a game over, so the Save Block before the final staircase is the practical recovery point. If Magnus defeats you, reload that save, use the Heart Block, repeat the machinery route, and re-enter the boss room.
- Collect the seventh Crystal Star.
- Confirm that Supernova has been learned.
- Visit TEC on Sublevel Four.
- Use the Sublevel Two teleporter.
- Reload the final-staircase save if necessary.
Advance the story toward Chapter 8
Exit the teleporter room in the Rogueport Sewers and speak with Professor Frankly when he approaches. He confirms that Grodus has taken Princess Peach through the Thousand-Year Door and directs Mario toward the final chapter.
Chapter 7 is complete at this point. Restocking, partner upgrades, Trouble Center requests, and the Pit of 100 Trials are optional. When ready, meet Professor Frankly at the Thousand-Year Door to begin the Chapter 8 route covered in the next chapter. Do not treat the Palace of Shadow as entered until the Thousand-Year Door opening sequence has occurred.
- Speak with Professor Frankly in the Rogueport Sewers.
- Verify that the story is directing Mario to the Thousand-Year Door.
- Treat sidequests and the Pit of 100 Trials as optional.
- Hand off to the Thousand-Year Door route without entering the Palace early.
Before you move on
- The single opening Elite X-Naut has been defeated and the fortress route has continued past the blue Elevator Key.
- Magnus von Grapple 2.0 has been defeated and Lord Crump has retreated.
- The seventh Crystal Star has been collected.
- Supernova has been learned.
- TEC’s Sublevel Four scene has occurred.
- The teleporter has returned Mario to the Rogueport Sewers.
- Professor Frankly has been spoken to, advancing the story toward the Thousand-Year Door and Chapter 8.
References for this chapter
- Chapter 7: Mario Shoots the Moon — Paper Mario: The Thousand-Year Door Walkthrough
- Paper Mario: The Thousand-Year Door — Guide and Walkthrough, GameCube, Nintendo_Girl21
- Paper Mario: The Thousand-Year Door Walkthrough — GameSpot
- Magnus von Grapple 2.0 — Super Mario Wiki
- Paper Mario: The Thousand-Year Door GameCube manual
Chapter 8 — The Thousand-Year Door: Final preparation and the road to the Palace of Shadow
After defeating the X-Naut Fortress boss and taking the seventh Crystal Star, return through TEC’s teleporter to the Rogueport Sewers. Speak with Professor Frankly, follow him to the Thousand-Year Door, and stand on the pedestal so the complete set of seven Crystal Stars opens the sealed entrance. Before crossing, return to Rogueport if you need healing items, badges, partner upgrades, or a final save. The original GameCube release does not provide the remake’s convenient Palace shortcut before the final battle, so prepare for a long dungeon route. This chapter ends with Mario at the open Thousand-Year Door, immediately before entering the Palace of Shadow.
Finish the X-Naut Fortress sequence and use TEC’s return teleporter
After defeating Magnus von Grapple 2.0 and taking the seventh Crystal Star, continue through the remaining X-Naut Fortress route rather than trying to leave through the normal entrance. Use the fortress elevators to reach Sublevel 4, then go east to TEC’s room. The door is now accessible, and TEC explains that Grodus has taken Princess Peach through the Thousand-Year Door to the Palace of Shadow.
TEC diverts his remaining power to activate the teleporter on Sublevel 2. Leave TEC’s room, return to the elevator, and travel back to Sublevel 2. Go to the teleporter room, activate the machine, and step into the portal. This returns Mario and his partners to the Rogueport Sewers. The teleporter is a story-required escape route from the fortress, not a general fast-travel station that was available earlier in the game.
- The seventh Crystal Star has been obtained.
- TEC has explained that Peach was taken to the Palace of Shadow.
- Mario has used the Sublevel 2 teleporter and returned to the Rogueport Sewers.
Meet Professor Frankly and open the Thousand-Year Door
Leave the teleporter room. Professor Frankly is waiting in the Rogueport Sewers and asks what happened at the fortress. Finish this conversation, then follow Frankly through the Sewers toward the room containing the Thousand-Year Door. The final RDM message also arrives during this sequence, confirming that the story is moving into its last route.
At the Thousand-Year Door, walk onto the central pedestal when Frankly indicates that it is time to proceed. The game automatically recognizes that Mario has collected all seven Crystal Stars. Their power activates the door during the story scene; there is no manual seven-Star insertion puzzle and no separate item-by-item placement step.
The door opens to reveal the route into the Palace of Shadow. Stop here if you are following this chapter’s handoff. Do not cross the threshold yet. The dungeon entrance remains available while you return to Rogueport for final preparation.
- Professor Frankly has met Mario after the teleporter return.
- You have followed Frankly to the Thousand-Year Door.
- Mario has stood on the pedestal.
- The seven-Star scene has played and the Thousand-Year Door is open.
Return to Rogueport for final supplies and optional preparation
Before entering the Palace, leave the Thousand-Year Door room and return to Rogueport through the Sewers. The Palace of Shadow has no ordinary shop, so buy and organize recovery items now. Carry a useful mixture of HP and FP recovery instead of relying on only one resource. Ultra Shrooms, Jammin’ Jellies, Maple Syrups, Life Shrooms, and other strong items are possible choices, but the best loadout depends on Mario’s level, badges, FP costs, and ability to perform action commands.
Keep enough FP for both Mario and partner attacks. If your strategy depends on powerful special moves, do not spend all of your FP on routine enemies before the later boss sequence. Life Shrooms are valuable insurance against a failed guard, a missed action command, or an attack that deals more damage than expected. Regular Mushrooms, Syrups, and other lower-cost items can preserve premium healing for the final battles.
Use the inn if Mario or the active partner needs recovery. Visit the item shop, Dazzle, Merlon, and the Trouble Center if you want to complete optional business. None of the remaining Trouble Center requests or Pit of 100 Trials rewards is required to open the Thousand-Year Door or complete the Palace route. Optional errands should not replace stocking the items needed for the final dungeon.
- Mario has both HP and FP recovery.
- The inventory contains at least one strong emergency recovery item or Life Shroom if available.
- You have removed low-value items that would crowd out final-dungeon supplies.
- Any optional shopping or Trouble Center work you want to finish is complete.
Adjust badges and partner upgrades
Visit Merlon before returning to the door and set a badge loadout that matches the attacks you can perform consistently. Damage badges can shorten ordinary battles, defensive badges can reduce the cost of mistakes, and defense-piercing attacks are useful against armored enemies. Do not equip more BP-expensive badges than Mario can support, and account for FP costs when building around special moves.
There is no single mandatory partner or mandatory partner rank for Palace access. Upgrade the partners you actually use if you have enough Shine Sprites, prioritizing reliable single-target damage, multi-target attacks, defense-piercing attacks, or support abilities. A practical rotation is safer than forcing one partner into every encounter. The Palace route uses field abilities learned earlier in the campaign; it does not require a newly recruited partner at this point.
If a partner’s field ability will help with a dungeon obstacle, remember that partner switching is available throughout the route. For battles, choose the partner whose attack best matches the enemy group rather than treating the final dungeon as a test of one fixed setup.
- The badge loadout fits Mario’s available BP.
- Your setup includes a reliable single-target option.
- You have a plan for groups of enemies or high-defense targets.
- Any affordable partner upgrades you wanted have been purchased.
Make the final save and stop at the open doorway
Return to the Thousand-Year Door room after shopping and preparation. Save at the available Save Block before committing to the final route. In the original Nintendo GameCube release, do not plan on the remake’s later convenience warp connecting the final-battle area to the Palace entrance. A failed attempt can therefore require substantial backtracking, depending on the location of your last save.
Check Mario’s HP, FP, Star Power, badge setup, partner choice, and inventory one last time. If you are carrying a valuable item for a specific boss strategy, place it where it can be reached quickly during battle. Ordinary enemies are less important than arriving at the later encounters with enough FP and recovery to continue.
The chapter is complete when Mario has recovered the seventh Crystal Star, used TEC’s teleporter, spoken with Professor Frankly, stood on the pedestal, and opened the Thousand-Year Door. The final position for this chapter is Mario at the open doorway with a recent save and a stocked setup. Entering the Palace of Shadow begins the next chapter section.
- The final pre-Palace dialogue has finished.
- The Thousand-Year Door is open.
- Mario has made a recent save before entering.
- HP and FP recovery, badges, and partner choices are ready.
- Mario is standing at the open doorway immediately before entering the Palace of Shadow.
Before you move on
- The seventh Crystal Star has been recovered from the X-Naut Fortress.
- TEC has explained Peach’s location and activated the return teleporter.
- Mario has returned to the Rogueport Sewers through the Sublevel 2 teleporter.
- Professor Frankly has led Mario to the Thousand-Year Door.
- Mario has stood on the pedestal and the seven Crystal Stars have opened the door.
- Final shopping, recovery, badge adjustment, and optional partner upgrades are complete.
- Mario has saved and is positioned at the open Thousand-Year Door immediately before entering the Palace of Shadow.
References for this chapter
- Paper Mario: The Thousand-Year Door — Guide and Walkthrough, GameCube, Nintendo_Girl21
- Paper Mario: The Thousand-Year Door — Guide and Walkthrough, TheSoundDefense
- Paper Mario: The Thousand-Year Door Walkthrough — RPGClassics Shrine
- Paper Mario: The Thousand-Year Door — Guide and Walkthrough — GameCube — KeyBlade999
- Paper Mario: The Thousand-Year Door — Guide and Walkthrough — GameCube — DarthMarth
- Warp pipe in Palace of Shadow — GameCube and Nintendo Switch comparison discussion
Chapter 8 — Palace of Shadow: final dungeon routing and Shadow Queen fight
Begin at the already-open Thousand-Year Door in the Rogueport Sewers and enter the Palace of Shadow. Follow the opening halls to Dark Bones, collect the first Palace Key, defeat Gloomtail for the Star Key, and solve the tower rooms to obtain all eight additional Palace Keys. Use the star-map mechanism to open the route to the Shadow Sirens rematch, then complete the catacomb puzzles and reach the final Save and Recovery Blocks. Defeat Grodus, Bowser and Kammy Koopa before confronting the Shadow Queen. Refuse her offer, survive the invulnerable phase by continuing the required attacks while guarding and healing, then use Vivian’s Veil against the charged Shadow Wave during the vulnerable phase. Defeat the Shadow Queen and watch the post-battle story and credits. The Pit of 100 Trials, Trouble Center requests and full collection completion are optional.
Enter the Palace and cross the opening halls
Start at the already-open Thousand-Year Door in the Rogueport Sewers. Step onto the pedestal and enter the Palace of Shadow. Restore Mario and select the partner you want before proceeding. The first section contains several enemy groups, traps and long corridors, so use the Save Block whenever you reach it and avoid spending rare recovery items unnecessarily.
Move right through the entrance area and descend the long staircase. A Stopwatch is available on the lower side of the starting balcony if you want it. Continue through the B. Bill Blaster and Phantom Ember rooms, then descend again and enter the room with the spike floor. Move carefully instead of rushing across the spikes.
Use the Save Block before the rotating-flame passage. Jump through the flames and use Tube Mode when the ceiling becomes too low for normal movement. Continue into the room where a skeleton lies beside a locked door. Examine the skeleton to start the Dark Bones encounter.
- Enter through the already-open Thousand-Year Door.
- Save before the spike and flame sections.
- Use Tube Mode in the low flame passage.
- Examine the skeleton to trigger Dark Bones.
Obtain the first Palace Key and defeat Gloomtail
After examining the skeleton, fight through the Dry Bones group and locate Dark Bones among them. Clear the ordinary Dry Bones first when possible, then concentrate on Dark Bones. Area attacks help because the Dry Bones can recover if left active. Defeating Dark Bones produces the first Palace Key; use it on the eastern locked door.
Continue through the Bombshell Bill and Phantom Ember rooms. Eventually you will reach a looping hall with four doors. Only the door beside the lit torch is correct. In the original North American GameCube release, the required six-door sequence is lower-right, lower-right, upper-right, lower-right, upper-right, lower-right. An unlit door returns you to the previous room, so restart the sequence from the beginning if you lose track.
The correct route leads to the underground city. Use its Save Block and Recovery Block before proceeding. Travel east through the Chain Chomp and Dark Wizzerd corridors and use the Save Block at the far end before entering Gloomtail’s room.
Gloomtail has 80 HP, 8 Attack and 2 Defense. His bite, stomp and poison breath are manageable if Mario and the partner are kept healthy, but his charged Mega Breath is much more dangerous. Use strong attacks such as Power Bounce, Spring Jump, Power Smash, Multibonk or Bobbery’s attacks. Piercing attacks reduce the value of his Defense. When Gloomtail charges Mega Breath, switch to Vivian and use Veil to hide Mario and the partner from the attack. After the battle, open the chest and collect the Star Key.
- Defeat the Dry Bones group and Dark Bones.
- Use the six-door sequence: lower-right, lower-right, upper-right, lower-right, upper-right, lower-right.
- Restart the torch sequence after choosing an unlit door.
- Use the underground city’s Save and Recovery Blocks.
- Use Vivian’s Veil against charged Mega Breath.
- Take the Star Key after defeating Gloomtail.
Open the tower and collect all eight Palace Keys
Return to the underground city after Gloomtail. Use Bobbery on the stone Chain Chomp statues at both sides of the area to reveal pipes. Enter each pipe and strike the blue switch inside. The switches create Boat Panels in the central area, allowing Mario to sail into the tower.
The tower contains eight puzzle rooms, each holding one Palace Key. In the lower-left room, strike the left red block three times and the right red block twice. The connected upper-left rooms require breaking gray blocks from both sides so the switches and chests become reachable. In the lower-right room, use the appropriate field ability to clear the hidden obstruction and reveal the key. In the upper-right room, walk through the eastern wall to reach the hidden switch and chest.
One room contains four Bones enemies. Defeat Dull Bones, Red Bones, Dry Bones and Dark Bones in that order to activate the required switch. In another puzzle room, use Vivian to reveal the hidden blue switch. In the remaining upper-right room, throw Bobbery at the eastern wall to open the passage to its Palace Key.
When all eight tower keys are collected, return to the top floor and place the Star Key from Gloomtail into the central pedestal. Eight surrounding pillars appear. Place one Palace Key into each pillar. The star-map mechanism opens the next route. Sail back to the underground city and use the Save and Recovery Blocks before heading east.
- Use Bobbery at both Chain Chomp statues.
- Collect all eight tower Palace Keys.
- Defeat the four Bones in Dull, Red, Dry, Dark order.
- Place the Star Key in the central pedestal.
- Place all eight Palace Keys into the surrounding pillars.
Defeat the Shadow Sirens rematch
After the star-map mechanism opens the route, return through the underground city and head east. The mandatory battle is against Beldam, Marilyn and Doopliss. Save and recover before entering. Bobbery’s Bob-ombast and Vivian’s Fiery Jinx are useful for damaging more than one target, while Mario’s strongest reliable attacks help finish individual enemies.
Marilyn applies the greatest direct attack pressure and can raise her attack power. Beldam can inflict status effects, alter stats and support the group. Defeat Marilyn or Beldam first so that the support and damage pressure do not continue together. Doopliss is much easier once the other two are gone.
After the rematch, enter the eastern doorway near the area where Gloomtail was fought. A staircase now leads into the Palace catacombs. Use Spring Jump on the block at the bottom, move east and have Flurrie clear the false wall. Use Yoshi to cross the resulting gap to the western ledge.
- Save and recover before the rematch.
- Use Bobbery or Vivian for multi-target damage.
- Remove Marilyn or Beldam before finishing Doopliss.
- Use Flurrie and Yoshi to enter the catacomb route.
Complete the catacomb puzzles and reach the final Palace Key
In the next room, use Koops’s shell to hit the red switch while Mario climbs the stairs. Cross the temporary ledge before the switch deactivates. Continue through the lower path and take the optional Repel Cape only if you want it.
Use the nearby switch room to open the eastern path. Ride the purple platform from the pit and use Yoshi’s Flutter Jump to reach the ledge above the switch. Continue through the pipe-and-pole room, using Spring Jump to reach the horizontal poles.
In the following room, throw Bobbery into the pit to create a temporary platform. Cross it and inspect the star-shaped mural near the Chain Chomp. Remember the pattern before moving on. At the wooden rotating-platform mechanism, use Yoshi to reach the ledge containing another Palace Key, then unlock the nearby door by the Save Block.
The next puzzle has seven red blocks. Count from right to left and activate the second, fourth, fifth and seventh blocks, matching the mural. This activates the rotating-platform route. Continue beyond it, use Flurrie to clear the large obstruction, break the gray block with the Ultra Hammer and Ground Pound through the weak floor.
Cross the narrow ledge and use the Airplane Panel. In the next room, hit the red switch, mount Yoshi and cross the retracting platform to the chest containing the final Palace Key. Use the Airplane Panel to reach the locked door.
- Use Koops to hold the red switch while crossing.
- Use Yoshi for the purple platform and rotating-platform sections.
- Memorize the star mural before the seven-block puzzle.
- Activate blocks two, four, five and seven from right to left.
- Collect the final Palace Key from the retracting-platform room.
Reach the final recovery point and defeat Grodus
Inside the locked-door section, use the Save Block and Recovery Block. Nearby chests contain useful recovery items, including an Ultra Shroom and Jammin’ Jelly if you have room. This is the last dependable preparation point before the consecutive Grodus, Bowser and Kammy Koopa battles.
Grodus begins surrounded by Grodus X enemies. The Grodus X enemies raise his Defense, and four active Grodus X enemies create a shield that prevents ordinary attacks from damaging him. Use Vivian’s Fiery Jinx, Flurrie’s Gale Force or another multi-target attack to remove them. When the Grodus X enemies regenerate, clear them again before attacking Grodus directly.
Once Grodus is exposed, use strong moves such as Power Bounce, Spring Jump or another dependable high-damage attack. Do not spend every healing item or all of your FP and Star Power unless necessary. Bowser and Kammy Koopa follow immediately without a Save Block or Recovery Block between the battles.
- Save and fully recover before entering Grodus’s room.
- Remove Grodus X enemies before attacking Grodus.
- Clear regenerated Grodus X enemies when they restore the shield.
- Preserve recovery and attack resources for Bowser and Kammy Koopa.
Defeat Bowser and Kammy Koopa
Kammy should be the first target. She can heal Bowser, electrify a character, increase defense, enlarge a combatant and make one opponent temporarily invisible. Use attacks that can reach her while Bowser occupies the front position. Bobbery’s Bob-ombast, Mario’s Art Attack and strong jumping attacks are useful choices.
Kammy may heal when her HP becomes low, so maintain pressure instead of leaving her unattended. Feeling Fine badges help against status effects, but continue guarding Bowser’s bite, fire breath and ground slam. After Kammy is defeated, concentrate on Bowser with Mario’s strongest dependable attack and any partner move that consistently connects.
After the battle, follow Grodus through the hidden passage behind the throne. Take any nearby recovery items, then use the Save Block and Recovery Block before opening the final door. Re-equip Vivian if you want Veil immediately available for the Shadow Queen.
- Target Kammy before Bowser.
- Prevent Kammy from repeatedly healing Bowser.
- Guard against Bowser’s bite, fire breath and ground slam.
- Save and recover before the final door.
- Keep Vivian available for Veil.
Survive the Shadow Queen and view the ending
When the Shadow Queen offers Mario service, choose to refuse. Accepting the offer causes a Game Over. The first phase is the Shadow Queen’s possessed vessel form. Use strong single-target attacks such as Power Bounce, Spring Jump or Power Smash, supported by a partner’s strongest reliable attack. Keep enough healing and FP for the later phases.
After her HP is reduced far enough, the Shadow Queen transforms and becomes invulnerable. Attacks cannot reduce her HP during this phase, but the battle must still advance through the required turns. Make an offensive attempt when necessary, then prioritize guarding, status recovery and healing. Vivian’s Veil can protect against individual attacks, but do not spend the entire phase hiding instead of making the required offensive attempts.
The transformed phase includes powerful hand strikes, poison, stat increases and an attack that drags one character underground for repeated hits. Continue defending and healing until the audience sequence occurs. Mario and the active partner are then restored, and HP, FP and Star Power are replenished for the vulnerable phase.
The Shadow Queen becomes vulnerable with 150 HP and 1 Defense. Use Power Lift if enough Star Power is available, then attack with Mario’s strongest reliable moves. Vivian’s Fiery Jinx damages the Queen and the Shadow Hands. When the Queen charges Shadow Wave, switch to Vivian and use Veil to protect Mario and the partner. Destroy the Shadow Hands when they are dealing repeated damage or restoring the Queen’s HP. Bobbery supplies strong area damage if Vivian is unavailable, while Koops’s Shell Slam can strike the hands and the Queen together.
Use Ultra Shrooms, Jammin’ Jellies and Life Shrooms before a likely lethal turn rather than waiting until Mario is nearly defeated. The fight ends when the Shadow Queen’s HP is depleted during the vulnerable phase. Let the story scenes and credits play. The main ending does not require the Pit of 100 Trials, Trouble Center completion, remaining partner upgrades or full Star Piece and Shine Sprite collection.
- Refuse the Shadow Queen’s offer.
- Make the required offensive attempts during the invulnerable phase.
- Guard, heal and recover until the audience sequence occurs.
- Use the restored HP, FP and Star Power in the vulnerable phase.
- Use Vivian’s Veil against charged Shadow Wave.
- Destroy Shadow Hands when they threaten damage or healing.
- Watch the post-battle story and credits.
Recover from failure and verify completion
If Mario loses to the Shadow Queen in the original GameCube release, reload the most recent save. The Save Block immediately before the final room makes repeated attempts practical. Unlike the later remake, the original release does not provide the same convenient post-attempt shortcut pipe, so leaving to restock in Rogueport requires retracing the Palace route from the final preparation area.
For another attempt, restore Mario and the active partner at the final Recovery Block and save. Check that Vivian is available for Veil and that you have enough HP and FP recovery for the consecutive Grodus, Bowser and Kammy Koopa sequence as well as the Shadow Queen. Optional Palace items are not worth risking the final attempt if your inventory is already prepared.
The chapter is complete when Mario has entered the Palace of Shadow, defeated Dark Bones, obtained the first Palace Key, defeated Gloomtail, collected and placed the Star Key and eight Palace Keys, defeated the Shadow Sirens rematch, reached the final Save and Recovery Blocks, defeated Grodus, Bowser and Kammy Koopa, refused the Shadow Queen’s offer, defeated the Shadow Queen and watched the ending sequence through the credits. The Pit of 100 Trials, Trouble Center requests, Star Pieces, Shine Sprites, remaining upgrades and other collection goals are separate optional objectives.
- Reload the final Save Block after a failed attempt.
- Retrace the Palace if Rogueport supplies are required.
- Keep Vivian ready for Veil.
- Confirm the required Palace bosses were defeated.
- Confirm the Shadow Queen was defeated.
- Confirm the post-battle story and credits played.
- Keep optional postgame completion separate from the main ending.
Before you move on
- The Palace of Shadow was entered through the already-open Thousand-Year Door.
- The first Palace Key was obtained after the Dark Bones encounter.
- The six torch-door transitions were completed in this order: lower-right, lower-right, upper-right, lower-right, upper-right, lower-right.
- Gloomtail was defeated and the Star Key was collected.
- All eight tower Palace Keys were collected and placed after the Star Key activated the mechanism.
- The Shadow Sirens rematch was defeated.
- The catacomb route was completed and the final Save and Recovery Blocks were reached.
- Grodus, Bowser and Kammy Koopa were defeated.
- The Shadow Queen’s servant offer was refused.
- The transformed invulnerable phase was survived with offensive attempts, guarding and recovery.
- The Shadow Queen was defeated in her vulnerable final phase.
- The post-battle story sequence and credits played.
- The Pit of 100 Trials, Trouble Center requests, Star Pieces and Shine Sprites remain optional postgame objectives.
References for this chapter
- Paper Mario: The Thousand-Year Door — Guide and Walkthrough — GameCube — AmericanArsenal
- Paper Mario: The Thousand-Year Door — Guide and Walkthrough — GameCube — noz3r0
- Paper Mario: The Thousand-Year Door — Guide and Walkthrough — GameCube — DarthMarth
- Paper Mario: The Thousand-Year Door Walkthrough — GameSpot
- Chapter 8: The Thousand-Year Door — Paper Mario TTYD Walkthrough
- Paper Mario: The Thousand-Year Door — Guide and Walkthrough — GameCube — KeyBlade999
Postgame — Pit of 100 Trials, Trouble Center, and completion checks
The original Nintendo GameCube release does not create a permanently cleared world after the ending. After the final scenes, continue from the resulting Rogueport state and save before beginning optional activities. The seven Crystal Stars, Palace of Shadow, Shadow Queen, and viewed ending satisfy the main completion goal. The Pit of 100 Trials, Trouble Center, partner upgrades, recipes, badges, Star Pieces, and Shine Sprites are optional. The Pit contains 100 consecutive battle floors, milestone rewards, and Bonetail on floor 100. Trouble Center requests unlock throughout the story and usually require returning to the original requester after completing the errand.
1. Return to Rogueport and secure your postgame file
After defeating the Shadow Queen and watching the ending sequence, continue from the resulting Rogueport state. The original GameCube version is not designed as a new-game-plus mode: the story is complete, but the world remains available for optional errands, collection work, and the Pit of 100 Trials. Save in Rogueport before beginning a long challenge or spending valuable supplies.
Use the inn to restore Mario, the partners, and Star Power. Check the item shop, badge shop, storage, and nearby vendors before leaving. Keep several HP and FP recovery items available, and leave inventory space for Pit rewards and Trouble Center objectives. Do not sell every recovery item simply because the final boss is finished; the Pit has no ordinary inn between its battle floors.
- Continue from the Rogueport state after viewing the ending.
- Save before entering the Pit or accepting a lengthy errand.
- Restore HP, FP, and Star Power and make room in the inventory.
2. Reach the Pit of 100 Trials through the Rogueport Sewers
Use the eastern Rogueport entrance by entering the warp pipe near Professor Frankly’s house. In the sewer room, go to the fenced pipe on the right and use Paper Mode to slip through the grate. Continue through the sewer route until you reach the room with the stairs and spring. Use the spring to reach the upper platform, then use Airplane Mode to cross to the left platform.
Enter the room on the left, pass through the next fence in Paper Mode, and use the spring to reach the higher ledge. Cross left with Airplane Mode, pass through the final fence, and enter the room on the left. This is the Pit entrance. The spring and Airplane Panel in the room containing the Thousand-Year Door are not the Pit entrance; that route reaches an optional Shine Sprite.
There is also a western sewer approach. From western Rogueport, enter the sewer through the grate near the Pianta Parlor, cross the moving platforms, and descend through the pipe beneath them. In the lower room, have Flurrie blow away the loose paper panel to reveal the hidden pipe leading to the Pit entrance.
- Use the eastern or western Rogueport sewer route.
- Do not confuse the Thousand-Year Door room’s optional Shine Sprite route with the Pit entrance.
- Confirm that you have reached the spear-lined Pit entrance room.
3. Understand the Pit’s floors, exits, and rewards
The Pit contains 100 battle floors. Defeat the enemy group on each floor, then use the exit or staircase that appears to continue downward. There is no normal inn or chapter-style healing stop inside the run, so manage HP, FP, Star Power, and items across many consecutive encounters. Milestone floors provide reward chests and an exit route; use those points to decide whether to continue or return to Rogueport and prepare again.
The original GameCube rewards are Sleepy Stomp on floor 10, Fire Drive on floor 20, Zap Tap on floor 30, Pity Flower on floor 40, Strange Sack on floor 50, Double Dip on floor 60, Double Dip P on floor 70, Bump Attack on floor 80, and Lucky Day on floor 90. Floor 100 is different: defeat Bonetail, then claim the Return Postage badge from the reward chest.
Build a routine around reliable damage, enemy defenses, and partner switching rather than using the same attack against every group. Use Action Commands consistently, save powerful attacks for dangerous enemy combinations, and use recovery items before a bad situation becomes unrecoverable. Strange Sack at floor 50 is especially useful on later attempts because it increases the number of items Mario can carry.
- Know the ten-floor reward schedule before beginning a serious run.
- Treat floor 100 as a Bonetail boss battle, not merely another enemy group.
- Claim Return Postage only after defeating Bonetail and opening the final reward chest.
4. Prepare for Bonetail and recover from a failed run
Bonetail is the Pit’s final boss and should be approached as a full boss encounter, not as a routine floor. Bring dependable HP and FP recovery, use a partner who can contribute consistent damage or defensive support, and reserve Star Power for moments when healing or a strong attack is more valuable than a weak normal turn. Avoid spending your last recovery items on minor enemies immediately before floor 100.
If Mario loses, the run is over and you must begin another descent. There is no chapter-style checkpoint that places you directly at floor 100. The practical recovery plan is to use the milestone exits when available, record which rewards have already been collected, restock in Rogueport, and attempt the Pit again with a more conservative item plan. The mandatory story ending does not depend on clearing the Pit.
- Carry recovery items for both the late floors and Bonetail.
- Do not enter floor 100 with depleted HP, FP, or partners.
- Plan for a complete reattempt if a run ends in a game over.
5. Work through the Trouble Center in batches
The Trouble Center is in eastern Rogueport. Early in the game, a guard blocks the approach; pay the required fee or defeat him to gain access. Examine the bulletin board to accept requests, then follow the stated instructions and return to the original requester after completing the task. The reward is often not given at the destination where the objective occurs.
New requests appear as the story advances, including after the Prologue and later chapters. Verified GameCube requests include Need a key!, Safe delivery…, Price adjustment, Find this guy!, Hit me, please!, and I’m hungry! after the Prologue. Later requests include Mayor Kroop’s Listen to me!, Plenn T.’s Order me an item!, the Puni Elder’s Emergency shroom!, Pine T. Jr.’s Help my Daddy, Jolene’s Help wanted!, and Zess T.’s Seeking legendary book!. The exact list should be checked from the board because requests unlock in story-based batches.
Pine T. Jr.’s request sends Mario into the Pit to reach his father on floor 18. After speaking with the father, return to the surface and report back to Pine T. Jr. for the Silver Card. Jolene’s Help wanted! requires collecting the Battle Trunks around Glitzville and completing the return trip to Jolene. Zess T.’s cookbook request takes Mario to the Creepy Steeple and rewards a cooking ingredient after the book is returned.
There is no single final reward for clearing every Trouble Center request. Complete them for their individual coins, items, badges, cards, and optional character rewards. If an errand requires a key item or food, do not accept several inventory-heavy requests at once.
- Check the bulletin board after major story milestones.
- Return to the original requester for the reward.
- Complete Pine T. Jr.’s floor-18 objective if you want the Silver Card.
- Do not mistake Trouble Center completion for a requirement to finish the main ending.
6. Clean up partners, badges, recipes, and collectibles
Use remaining Shine Sprites at the Rogueport upgrade shop to raise partner ranks. Stronger partners make the Pit safer, but partner upgrades are optional and are not required to view the ending. Ms. Mowz, optional badges, recipes, Star Pieces, and Shine Sprites likewise belong to collection goals rather than the mandatory story route.
For efficient cleanup, finish Rogueport errands first, then group requests by destination. Revisit Petal Meadows and Petalburg, the Great Tree, Glitzville, Twilight Town, Keelhaul Key, the Excess Express route, and Fahr Outpost as needed. Keep a written list of missing Star Pieces, Shine Sprites, badges, recipes, and troubles so an unfinished optional item is not mistaken for a missing story objective.
- Upgrade partners that you plan to use in the Pit.
- Separate mandatory story progress from optional collection totals.
- Group errands by destination to reduce repeated travel.
7. Confirm the correct completion target
For the assigned campaign goal, verify that Mario obtained all seven Crystal Stars, completed the Palace of Shadow, defeated the Shadow Queen, and viewed the ending sequence. No Pit clear, Trouble Center sweep, recipe total, badge collection, Star Piece total, Shine Sprite total, or optional partner is required for that result.
For broader postgame completion, additionally mark every Trouble Center request complete, clear all 100 Pit floors, defeat Bonetail, and collect Return Postage. Then finish the partner upgrades and collection categories you personally want. Keep the categories separate: a file can have the true ending while still lacking optional badges, recipes, collectibles, or Trouble Center rewards.
- Seven Crystal Stars obtained.
- Palace of Shadow completed.
- Shadow Queen defeated.
- Ending sequence viewed.
- Trouble Center cleared if side-quest completion is desired.
- Bonetail defeated and Return Postage collected if Pit completion is desired.
- Remaining collectibles are completed or deliberately recorded as optional unfinished goals.
Before you move on
- The completed GameCube file returns to Rogueport after the ending sequence.
- All seven Crystal Stars are recorded as obtained.
- The Palace of Shadow is completed.
- The Shadow Queen is defeated and the ending has been viewed.
- The Trouble Center is cleared if side-quest completion is the goal.
- The Pit is cleared through floor 100, Bonetail is defeated, and Return Postage is collected if challenge completion is the goal.
- Remaining Star Pieces, Shine Sprites, badges, recipes, and partner upgrades are either complete or intentionally left as optional goals.
References for this chapter
Finishing up
You have collected all seven Crystal Stars and used them to access the Thousand-Year Door sequence.
You have completed the Palace of Shadow and defeated the final boss, the Shadow Queen, then viewed the game’s closing cutscenes.
You have recruited all six required story partners during their primary chapter sequences. Ms. Mowz and other optional content are not required for the main ending.
You can return to Rogueport after the ending and pursue optional postgame content such as the Pit of 100 Trials, Trouble Center requests, partner upgrades, recipes, badges, Star Pieces, and Shine Sprites. Track optional collection progress by checking the relevant locations, vendors, and inventory rather than relying on an in-game collection menu.
Choose your next gameScreenshots & video
Game imagery for reference. Follow the written chapters above for the route and strategies.
Sources & references
Our original guide draws on the references below. Check the edition at the top of this page before following controls or unlock requirements.
- Paper Mario: The Thousand-Year Door GameCube manual
- Paper Mario: The Thousand-Year Door — Prologue: A Rogue’s Welcome, StrategyWiki
- Paper Mario: The Thousand-Year Door — Prologue Walkthrough, NintendoCastle
- Paper Mario: The Thousand-Year Door — Guide and Walkthrough — GameCube — DarthMarth
- Paper Mario: The Thousand-Year Door — Guide and Walkthrough — GameCube — KeyBlade999
- Paper Mario: The Thousand-Year Door — Guide and Walkthrough, TheSoundDefense
- Chapter 1: Castle and Dragon — Paper Mario: The Thousand-Year Door Walkthrough
- Paper Mario: The Thousand-Year Door Walkthrough — GameSpot
- Paper Mario: The Thousand-Year Door — Guide and Walkthrough, GameCube edition, Pirate’s Grotto and Chapter 5 route
- Paper Mario: The Thousand-Year Door/Chapter 1: Castle and Dragon — StrategyWiki
- Paper Mario: The Thousand-Year Door — Chapter 2: The Great Boggly Tree — Nintendo Castle
- Paper Mario: The Thousand-Year Door — Chapter 2: The Great Boggly Tree — StrategyWiki
- Paper Mario: The Thousand-Year Door — Chapter 3 Walkthrough, GameFAQs GameCube guide
- Paper Mario: The Thousand-Year Door — Chapter 3: Of Glitz and Glory, StrategyWiki
- Paper Mario: The Thousand-Year Door — Chapter 3 Walkthrough
- Paper Mario: The Thousand-Year Door — Glitz Pit Guide, GameCube
- Paper Mario: The Thousand-Year Door — Chapter 4: For Pigs the Bell Tolls, StrategyWiki
- Paper Mario: The Thousand-Year Door: All Bosses, Strategies, How To Beat, Nintendo Life
- Chapter 5: The Key to Pirates — Paper Mario: The Thousand-Year Door Walkthrough
- Chapter 6: Three Days of Excess Walkthrough
- Paper Mario: The Thousand-Year Door — Guide and Walkthrough, GameCube, Nintendo_Girl21
- Excess Express — Paper Mario: The Thousand-Year Door reference
- Paper Mario: The Thousand-Year Door — Guide and Walkthrough — GameCube — AmericanArsenal
- Chapter 7: Mario Shoots the Moon — Paper Mario: The Thousand-Year Door Walkthrough
- Magnus von Grapple 2.0 — Super Mario Wiki
- Paper Mario: The Thousand-Year Door Walkthrough — RPGClassics Shrine
- Warp pipe in Palace of Shadow — GameCube and Nintendo Switch comparison discussion
- Paper Mario: The Thousand-Year Door — Guide and Walkthrough — GameCube — noz3r0
- Chapter 8: The Thousand-Year Door — Paper Mario TTYD Walkthrough
- Pit of 100 Trials Guide and Rewards — GameCube reference
- Pit of 100 Trials Guide — GameCube
- Pit of 100 Trials Guide — Nintendo Life
- Trouble Center FAQ — GameCube
- Trouble Center Guide — Nintendo Life
- Trouble Center — StrategyWiki
About the game & collecting notes
- Platform
- Nintendo GameCube
Step-by-step campaign walkthrough for the original Nintendo GameCube edition of Paper Mario: The Thousand-Year Door (USA). Covers the main story from arrival in Rogueport through every chapter, partner recruitment, dungeon routes, boss strategies, and the final Shadow Queen encounter. Includes preparation, postgame checkpoints and practical completion checks to confirm you reached the true ending.
Darryl Polo
Darryl Polo loves tinkering with emulation and revisiting retro games. He enjoys exploring how old favorites play on different setups and sharing what he learns along the way. At Joking Joystick, he writes about the games, hardware, and small discoveries that keep the hobby fun.
Our editorial standardsFound a step that needs another look? Help us improve this guide.