Metroid Prime (Nintendo GameCube, USA) — Complete Campaign Walkthrough
Step-by-step campaign walkthrough for the original North American GameCube release of Metroid Prime. Designed for a newcomer to reach the canonical ending without relying on remaster mechanics, this guide covers area routes, required upgrades, boss strategies, key visor/beam uses, backtrack routing, save recovery and optional completion goals.

Find a copy
Metroid Prime Nintendo GameCube
We may earn a commission if you buy through these links, at no extra cost to you. As an Amazon Associate I earn from qualifying purchases.
Opens retailer search results. Check the model, edition, seller, availability and current price before buying.
Before you begin
This walkthrough is written for the original Nintendo GameCube (USA / NTSC-U) edition of Metroid Prime and follows the intended progression used in that release.
It does not assume remaster-specific controls, HUD tweaks, or quality-of-life changes introduced in later re-releases.
Follow the chapters in order for a straightforward playthrough to the canonical ending.
Each major area includes what to look for, the upgrades that gate progress, how to reach and beat mandatory bosses, and practical recovery advice when you die or miss an item.
Optional completion guidance explains how to clean up missed upgrades and scans after reaching the story ending.
Set yourself up for the run
Use the original GameCube controls: A fires the Arm Cannon and activates Charge Beam shots; B jumps; X changes between Combat and Morph Ball form; Y fires Missiles; L locks on or downloads a scan; R enables manual aiming while held with the Control Stick; the C Stick selects beam weapons; and the Control Pad selects visors.
Use the in-game Options menu if a different permitted control setting is selected, but do not apply Wii Trilogy or Remastered dual-stick, pointer or gyro instructions.
Use the Scan Visor frequently. Red scans are critical or progression-related, while orange scans are other Log Book entries. Scan one-time bosses, creatures and temporary objects before defeating or removing them.
Save at Save Stations and the gunship before difficult encounters or long backtracks. Death reloads the last recorded save.
Track required upgrades, the eleven regional Chozo Artifacts, Artifact of Truth, optional expansions and Log Book entries separately. Artifact of Truth is located in the Artifact Temple courtyard and may be collected on an earlier visit after obtaining the Missile Launcher. The eleven regional Artifacts must be collected before the final seal can be opened; all twelve are installed during the final Temple sequence. Missed one-time scans may require another playthrough.
Expect deliberate backtracking through the elevator network. When a new beam, visor, suit or movement ability is obtained, revisit only the blocked routes that match that upgrade instead of attempting a full undirected sweep.
Start, Controls & HUD — Frigate Orpheon Opening
The original North American Nintendo GameCube edition begins aboard the Space Pirate frigate Orpheon in orbit above Tallon IV. Complete this opening sequence to learn the original controller layout, download the frigate map, use the first Save Station, defeat the Parasite Queen and escape to Tallon Overworld. These directions apply to the original GameCube control scheme, not Metroid Prime Remastered or the Wii Trilogy versions.
Begin aboard the Frigate Orpheon
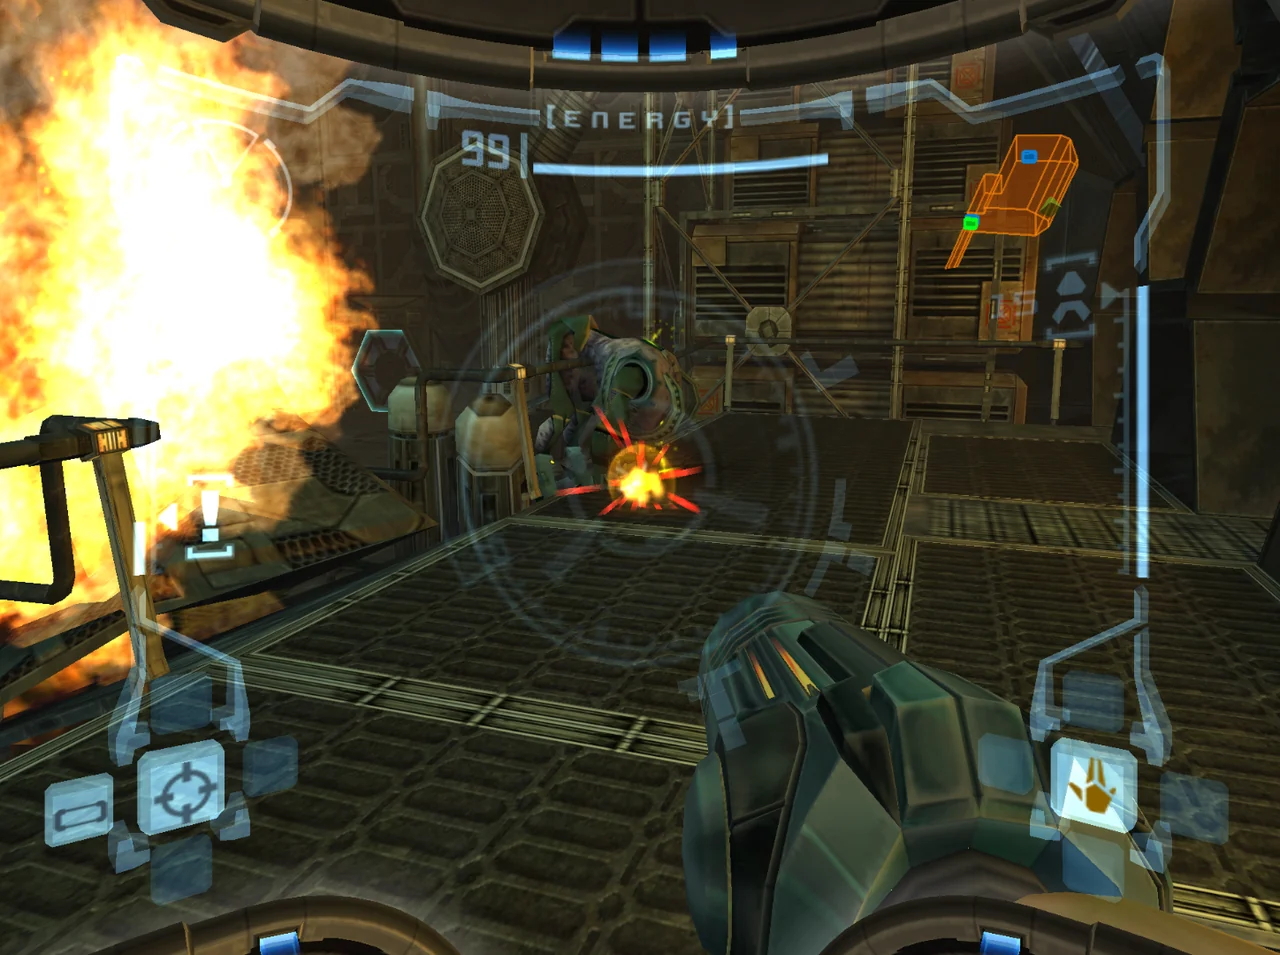
After the opening cutscene, Samus docks with the Frigate Orpheon. Move through the exterior docking area and open the first door. When a blue console or holographic device blocks progress, switch to the Scan Visor with Left on the Control Pad. Place the scan reticle over the target and hold L to lock onto it and download the information. Some consoles must be scanned before their associated mechanism can be used, while other scans provide Log Book information or identify enemies and environmental hazards.
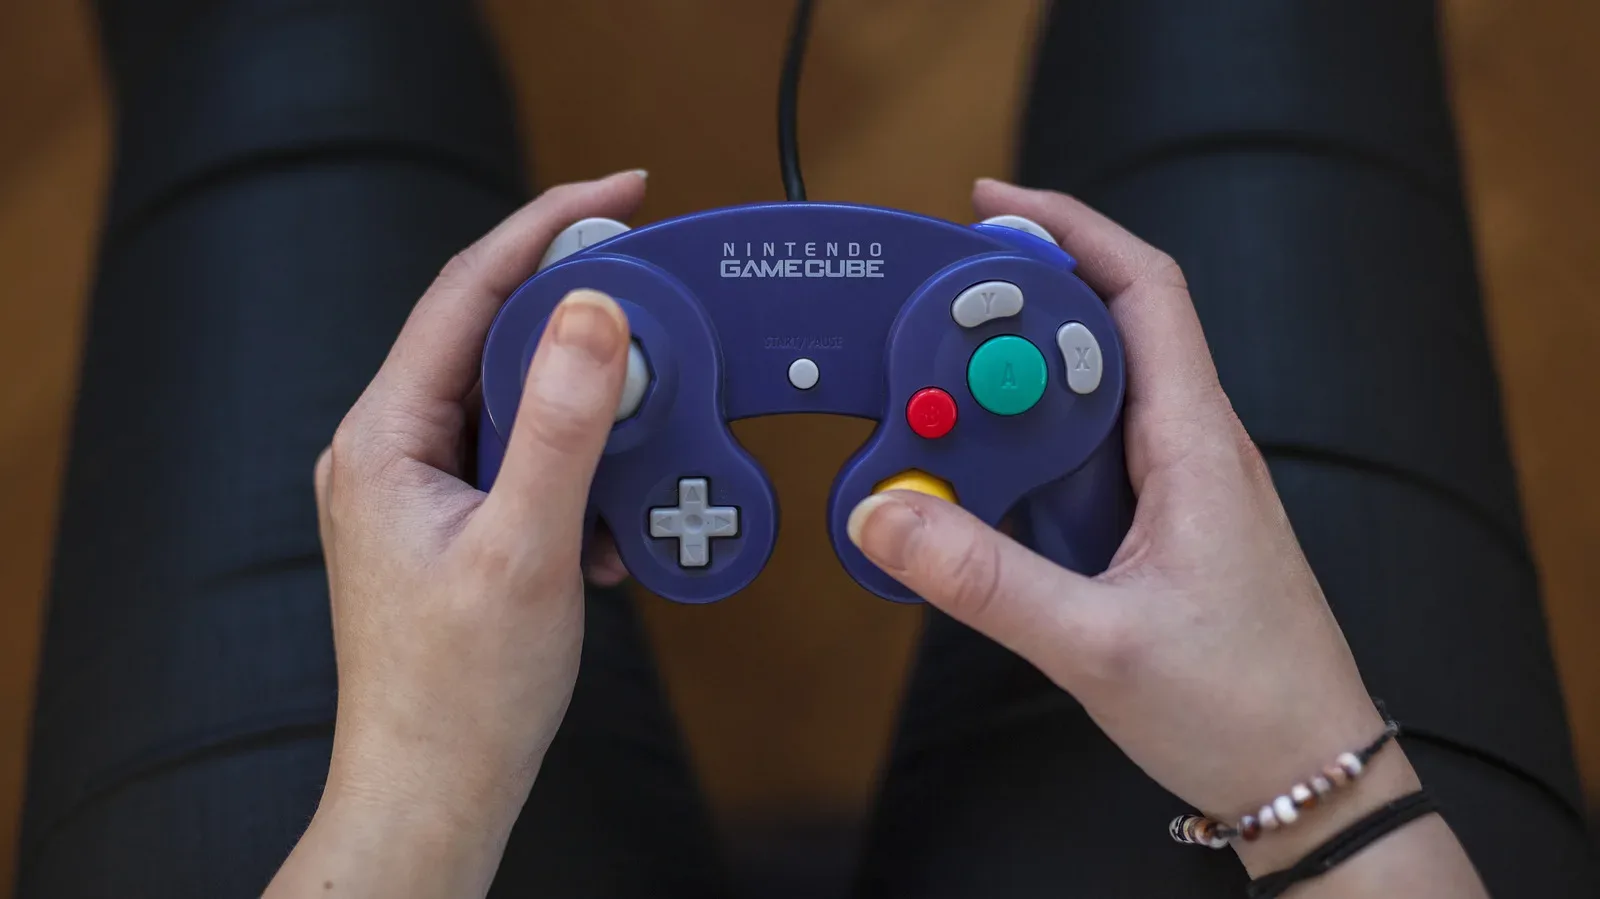
The original GameCube controls use the left Control Stick for movement. A fires the Arm Cannon, B jumps, Y fires Missiles, and X switches between normal and Morph Ball modes. L locks onto enemies and scan targets. When no target is selected, holding L allows Samus to strafe; when an enemy is locked on, the Control Stick circles around that target. R enables manual looking and aiming with the Control Stick. The C Stick selects beam weapons, and the four directions on the Control Pad select visors. Start/Pause opens the inventory and databanks; press Z during play to open the map.
- Test movement, jumping, firing and Morph Ball transformation.
- Use Left on the Control Pad to enter the Scan Visor.
- Use L for lock-on, scanning and strafing.
- Use Z for the map and Start/Pause for inventory and Log Book screens.
Scan important targets before they disappear
The Scan Visor places an orange or red symbol over objects that can be scanned. Hold L while the target is locked to complete the download. Scan creatures before defeating them when possible, especially enemies that appear only during this opening sequence. Scan unfamiliar consoles, terminals, pickups and environmental objects if you are pursuing a complete original Log Book.
The Parasites in the Emergency Evacuation Area can scatter when Samus approaches. Move slowly and scan them from a distance before circling the room. If they escape, additional opportunities exist later during the frigate escape, but scanning the first group is safer. The wounded Space Pirates in this area do not provide the same kind of important creature entries, so prioritize the Parasites and any visible research targets.
- Scan the first Parasites before approaching their feeding area.
- Scan new enemy types before defeating them when practical.
- Do not assume a scan remains available after a room changes or a device is activated.
Cross the Air Lock and Emergency Evacuation Area
Continue through the damaged corridors until you reach the Air Lock. Scan the control panel to repressurize the room, then open the far door to enter the Emergency Evacuation Area. Move around the large dead creature and inspect the bodies and nearby Parasites from a safe distance. Scan the Parasites before they scatter.
A weakened Space Pirate near the exit will fire at Samus. Lock on with L, circle it with the Control Stick and fire while moving. Jump while locked on to perform a sideways dash and avoid incoming shots. Once the room is clear, use the door on the opposite side to continue.
- Repressurize the Air Lock by scanning its control panel.
- Scan the Parasites before moving close enough to scatter them.
- Practice lock-on strafing and sideways dashes against the wounded Pirate.
Clear the rubble and download the frigate map
In Deck Alpha Umbilical Hall, hold A to charge the Arm Cannon and release the shot against the rubble blocking the passage. Continue into the Map Facility. A short scene shows Parasites moving into a small Morph Ball-sized opening. Press X to enter Morph Ball form, roll through the tunnel and reach the Map Station.
Scan the Map Station before stepping into its hologram. After you scan it, enter the hologram to download the Frigate Orpheon map. Once the map has been downloaded, that station is no longer available as an unscanned Map Station target. Roll back through the tunnel and use the other door to proceed.
- Destroy the rubble with a charged Arm Cannon shot.
- Roll through the small opening to reach the Map Station.
- Scan the Map Station before downloading the map.
- Confirm that the Frigate Orpheon map appears on the map screen.
Descend to Deck Beta and pass the electrical hazard
Scan the blue console in the next room to activate the elevator. Step into the central hologram and ride down to Deck Beta. In Deck Beta Conduit Hall, enter Morph Ball form and wait for the electrical current to stop arcing across the low passage. Roll through only during the safe interval; rushing into the current can cost a large portion of Samus's starting energy.
Continue into Biotech Research Area 1. Defeat the weakened Space Pirates with charged Arm Cannon shots while circling and jumping around their fire. Inspect nearby terminals and containment equipment with the Scan Visor if you are working toward full Log Book completion, then continue through the research area.
- Wait for the electrical current to stop before entering the low passage.
- Use charged shots and movement against the weakened Pirates.
- Scan research terminals before leaving if optional Log Book completion matters.
Defeat the Auto Turrets and reach the first Save Station
The next corridor contains an Auto Defense Turret. Scan it before destroying it if you want its creature entry, then use a Missile to take it out. Retreat around a corner if the turret begins tracking Samus. Continue through Biohazard Containment and use the blue consoles to operate the lift to the upper walkway.
In the Cargo Freight Lift to Deck Gamma, destroy the turret as soon as it activates, scan the console and ride the lift down. Defeat the Pirate at the bottom, scan the nearby console and roll into the Morph Ball hologram to open the large sealed door. Two Auto Turrets guard the next room. Destroy both while strafing, then take the blue door on the left to reach the Save Station.
Scan the Save Station, enter it and save. Save Stations restore Samus's energy and provide the checkpoint for the remainder of the frigate tutorial. If your energy or missiles are low, use the station before starting the Parasite Queen encounter.
- Scan the Auto Defense Turret before destroying it if Log Book completion matters.
- Use Missiles efficiently against the turrets.
- Activate the Morph Ball hologram after scanning the Deck Gamma console.
- Enter the blue door on the left after the two turrets and save.
Defeat the Parasite Queen and escape to Tallon Overworld
Leave the Save Station and return to the corridor. Scan the next console and roll into the Morph Ball hologram to open the route to the Reactor Core. Enter the arena and scan the Parasite Queen before attacking. The scan identifies its vulnerable head and improves the lock-on target. The Queen is protected by a partial reactor force field, so fire only through the openings in the field.
Stay locked on and circle the arena. Use sideways dashes or jumps to avoid the Queen's energy attack, then reposition until the force-field gap lines up with the Queen's head. Do not waste shots against the closed field. Continue firing through the openings until the boss falls.
After the Queen is defeated, the frigate begins its evacuation sequence. You have seven minutes to return to the exterior docking area. Follow the newly opened route, use the elevators and marked doors, and ignore optional rooms. Parasites appear again during the escape; scan them immediately if you missed the earlier group, because this is the final reliable opportunity in the opening sequence. Reach the docking area before the timer expires. The frigate is destroyed, Samus crashes onto Tallon IV and control returns at the Tallon Overworld Landing Site.
- Scan the Parasite Queen before attacking if you want its creature entry.
- Fire through the gaps in the reactor force field.
- Use lock-on movement and sideways dashes to avoid the Queen's attack.
- Complete the seven-minute evacuation sequence.
- Confirm that control has transferred to Samus at Tallon Overworld.
Before you move on
- The Frigate Orpheon map has been downloaded at the Map Facility.
- The Map Station was scanned before its hologram was activated, if Log Book completion is a goal.
- The first Save Station has been visited and the game has been saved.
- The Parasite Queen has been scanned if its creature entry is desired.
- The Parasite Queen has been defeated.
- The seven-minute evacuation sequence has been completed.
- Control has transferred to Samus at the Tallon Overworld Landing Site.
- You can identify the original GameCube actions for firing, jumping, locking on, scanning, changing visors, changing beams, opening the map, opening the Log Book and entering Morph Ball form.
References for this chapter
Tallon Overworld — Learning the World and Short Routes
Tallon Overworld is the surface hub for the campaign, but it is not meant to be cleared in one visit. Your first trip should establish the Landing Site, save at the gunship, and reach the Transport to Chozo Ruins West through Tallon Canyon. Later upgrades open the routes to Magmoor Caverns, Phazon Mines and the optional surface expansions. Phendrana Drifts is not reached directly from Tallon Overworld; its normal connections run through Magmoor Caverns.
Save at the Landing Site before exploring
After the opening escape from the Frigate Orpheon, Samus arrives at the Landing Site in Tallon Overworld. The gunship is the prominent structure in the room and functions as a Save Station. Use it immediately. On the original GameCube release, saving requires interacting with a Save Station or the gunship; there is no quick-save function during normal exploration.
Open the map after saving and confirm the room name. The map can show the local region and, after you have visited the relevant stations, the wider world map. When you enter a room containing an elevator, scan or activate the elevator console and note its destination. The destination labels are more useful than trying to memorize the direction of the room, because several Tallon Overworld routes eventually return to the same surface hub.
- Save at the gunship before leaving the Landing Site.
- Open the map and confirm that the Landing Site is recorded.
- Record elevator destinations in a written note if the route is difficult to remember.
Take the first route through Tallon Canyon
Leave the Landing Site through the ordinary forest passage and continue into Tallon Canyon. The immediate required destination is Transport Tunnel A, which leads to the Transport to Chozo Ruins West elevator. This is the intended opening route into the Chozo Ruins and the next major progression area.
Tallon Canyon contains a large half-pipe-shaped depression and several elevated ledges. During the first visit, do not worry about reaching every upper platform. Some ledges and the half-pipe are designed for later movement upgrades. Follow the accessible path to Transport Tunnel A, defeat or avoid the small creatures on the route, and ride the elevator to Chozo Ruins West.
A low opening that Samus cannot enter in upright form is a Morph Ball gate, not a missed switch. Likewise, a blue door that cannot be reached without a jump or a door blocked by a special covering should be noted for later rather than attacked repeatedly.
- From Landing Site, continue through Tallon Canyon.
- Reach Transport Tunnel A.
- Ride Transport to Chozo Ruins West and begin the Chozo Ruins progression route.
- Leave low tunnels and high ledges for later abilities.
Understand the Tallon Overworld connections
Tallon Overworld eventually provides direct routes to Chozo Ruins, Magmoor Caverns and Phazon Mines. These connections are spread across different surface rooms, so the first elevator you use is not the only one that matters. The Chozo Ruins West elevator in Transport Tunnel A is the early route. A later route through the eastern side of the region connects to Magmoor Caverns East, and another surface passage reaches the Phazon Mines through the Phazon Mines East elevator.
Phendrana Drifts does not have a normal direct elevator from Tallon Overworld. The standard route to Phendrana runs through Magmoor Caverns. When you later need to travel there, use the Magmoor transport network rather than searching Tallon Overworld for a nonexistent Phendrana elevator.
The crashed Frigate Orpheon is also in Tallon Overworld, but it is a later destination. Reaching the far side of the Frigate Crash Site requires equipment for the water crossing and leads toward the Phazon Mines approach. Do not treat the visible wreck as part of the opening route.
- Mark the Chozo Ruins West elevator as the first required connection.
- Remember that Phendrana is reached through Magmoor Caverns.
- Leave the Frigate Crash Site for the later Gravity Suit and Phazon Mines sequence.
- Use elevator destination names to distinguish the surface routes.
Scan wildlife and learn the surface hazards
Use the Scan Visor on new creatures and unusual plants before destroying them when practical. Early Tallon Overworld entries commonly include Zoomers, Beetles, Seedlings, Sap Sacs and other surface organisms. Scanning enemies while they are present is easier than trying to reconstruct a complete logbook during cleanup, although ordinary creature scans are not required to finish the main campaign.
The main early hazards are aggressive wildlife, poisonous vegetation, steep drops and awkward jumps. Venom Weed and similar plants can damage Samus when touched, so shoot hazardous growth before rolling or jumping through a narrow passage. Flying enemies are easier to handle with lock-on and strafing; keep moving rather than standing beneath them.
Lava and Phazon are not ordinary environmental shortcuts. If you see a path crossing either hazard, use the danger meter as a warning and leave it alone unless the current equipment clearly supports the crossing. Tallon Overworld later contains routes involving radiation and Phazon, but those are intended for a return visit with the correct tools.
- Scan unfamiliar creatures and plants before defeating them when safe.
- Shoot damaging vegetation in narrow passages.
- Use lock-on and strafing against airborne enemies.
- Do not test lava or Phazon crossings merely because an item is visible beyond them.
Return later for Transport Tunnel B and safe expansions
After advancing through Chozo Ruins and obtaining the required movement abilities, return to Tallon Overworld through the appropriate elevator. Transport Tunnel B is a later surface route near the eastern Magmoor connection. It contains a Missile Expansion beneath the bridge, reachable by dropping below the bridge and jumping back out. This is a useful pickup, but it is not part of the first Landing Site crossing.
Later revisits also open the tall platforms around Tallon Canyon, the underwater Frigate Crash Site route and the surface paths leading toward the Phazon Mines elevator. Combine these trips with required travel instead of making a separate expedition for every visible item. If a route requires Morph Ball, Bombs, Space Jump Boots, the Grapple Beam, the Gravity Suit or a beam door you do not yet possess, leave it and return when that item is obtained.
Use the gunship before a long optional sweep and whenever you have completed a meaningful upgrade segment. If a later surface route places you near another Save Station, use that station rather than crossing the entire region simply to reach the Landing Site.
- Return to Transport Tunnel B only after the opening Chozo Ruins sequence.
- Collect its Missile Expansion when the route is safe.
- Revisit Tallon Canyon and the Frigate Crash Site only with the equipment their obstacles require.
- Save before optional cleanup and after major upgrades.
Before you move on
- You have saved at the Landing Site gunship.
- You can travel from Landing Site through Tallon Canyon and Transport Tunnel A to the Chozo Ruins West elevator.
- You know that Tallon Overworld later connects directly to Magmoor Caverns and Phazon Mines.
- You know that Phendrana Drifts is reached through Magmoor Caverns rather than directly from Tallon Overworld.
- You have scanned safely encountered surface creatures and plants without delaying required progress.
- You have left blocked tunnels, high ledges, the Frigate Crash Site and hazardous crossings for the appropriate later equipment.
- You can identify the Landing Site as the main early return point and use the map to distinguish elevator destinations.
References for this chapter
Chozo Ruins — Ruined Shrine, Flaahgra, and the Morph Ball
Complete the opening Chozo Ruins progression in the original North American Nintendo GameCube release. First defeat Hive Mecha to recover the Missile Launcher. Then use missiles to open the Ruined Shrine route, defeat the Plated Beetle for the Morph Ball, recover Morph Ball Bombs from the Incinerator Drone, obtain the Charge Beam in Watery Hall, defeat Flaahgra in Sunchamber, and claim the Varia Suit. This chapter uses the original GameCube controller layout, not the Wii, Trilogy, or Remastered controls.
Reach Hive Totem and recover the Missile Launcher first
From the Chozo Ruins entrance, proceed through Main Plaza toward the lower route on the far side of the room. Enter Nursery Access, pass through Eyon Tunnel, and continue into Ruined Gallery. Follow the connected rooms through Totem Access until you reach Totem Hive. Do not climb toward the upper Main Plaza routes or attempt the missile-door paths yet; the first required objective is the Hive Mecha encounter.
Scan the Ram War Wasps and Hive Mecha before defeating them if you want the original Log Book entries. The Hive Mecha scan point is below the exposed red target, near the toxic water level, rather than on the red lights that appear during the battle. During the fight, destroy each group of Ram War Wasps as it appears, then fire at the exposed red lights on the Hive Mecha. Repeat this cycle until three openings have been destroyed.
When the Hive Mecha is defeated, collect the Missile Launcher from the pedestal. On the original GameCube controller, press Y to fire Missiles. A missile consumes one round and can destroy missile hatches, certain reinforced obstructions, and enemies resistant to the Power Beam. This is the required early checkpoint for the rest of the chapter: Samus’s inventory must show both the Missile Launcher and a nonzero missile supply before continuing.
Use the newly acquired Missile Launcher on the Blast Shield at the far end of Totem Hive. Continue through Transport Access North and collect the Energy Tank in the straightforward passage if you want the early health increase. Then return through the route toward Ruined Gallery. In Ruined Gallery, use the Missile Launcher on the missile door to download the Chozo Ruins map. Scan the Map Station before activating it if Log Book completion matters.
- Reach Totem Hive through Nursery Access, Eyon Tunnel, Ruined Gallery, and Totem Access.
- Scan Hive Mecha and Ram War Wasps before defeating the encounter if required.
- Defeat three Hive Mecha openings and collect the Missile Launcher.
- Confirm that Missiles fire with Y on the GameCube controller.
- Use the Missile Launcher on the Totem Hive Blast Shield and the Ruined Gallery Map Station door.
Use missiles to reach Ruined Shrine and obtain the Morph Ball
From Ruined Gallery, return to Main Plaza. Open the missile door at ground level, then pass through Ruined Shrine Access. Scarabs occupy the narrow corridor, so fire ahead of them or move through quickly rather than allowing them to surround you.
In Ruined Shrine, cross the low wall and enter the central arena. Clear the ordinary Beetles first, then scan the Plated Beetle before attacking. The Plated Beetle is protected from frontal fire. Lock on, wait for it to charge, tap B while moving sideways to perform a lock-on dash, and fire at its exposed rear. Repeat this maneuver until it is defeated.
Collect the Morph Ball from the center of the room. Press X to switch between normal and Morph Ball modes. The low tunnel is the intended exit because the nearby ledge cannot be climbed with the abilities currently available. Roll through the tunnel and return to Main Plaza.
This is a good point to confirm the order of your inventory. Before entering the next route, you should have the Missile Launcher and Morph Ball. The Morph Ball is required to access the Burn Dome route, while the Missile Launcher is required for the missile doors that made the route available.
- Open the Main Plaza missile door after returning from Hive Totem.
- Defeat and, if desired, scan the Plated Beetle.
- Collect the Morph Ball in Ruined Shrine.
- Use X to enter Morph Ball mode and roll through the low exit tunnel.
Reach Burn Dome and recover Morph Ball Bombs
From Main Plaza, take the upper route toward Gathering Hall. The Gathering Hall Save Station is a useful checkpoint before the Burn Dome encounter. From Gathering Hall, climb the platforms and use the Morph Ball tunnel into Energy Core. Continue through Burn Dome Access to Burn Dome.
Scan the Incinerator Drone as soon as the battle begins. Circle the machine from the outer edge of the room and watch its flame jets. The vulnerable red target appears on top of the drone. Fire at it with the Power Beam, a charged shot if available, or a Missile. After taking damage, the drone ignites a ceiling hive and releases Barbed War Wasps. Scan a Barbed War Wasp before destroying it if you want the one-time entry, then return your attention to the drone.
Jump over low flames, move beneath high flames when safe, and avoid standing directly in front of the rotating emitters. Continue targeting the exposed red point until the Incinerator Drone is destroyed. The fight ends with the Morph Ball Bombs appearing in the room.
Collect the Morph Ball Bombs. Press A while in Morph Ball mode to lay a Bomb; this is separate from the X button, which changes forms. Bombs destroy weak blocks, activate Bomb Slots, damage bomb-sensitive enemies, and can propel Samus upward in a Bomb Jump. An optional missile expansion is available in Burn Dome by bombing the weakened wall near the arena. It is not needed for story progression.
- Save at Gathering Hall before entering Burn Dome if you want a nearby restart point.
- Scan Incinerator Drone and Barbed War Wasp before defeating them if scan completion matters.
- Shoot the exposed red target on top of the Incinerator Drone.
- Collect Morph Ball Bombs with A while in Morph Ball mode.
- Treat the Burn Dome missile expansion as optional.
Obtain the Charge Beam in Watery Hall
Return to Gathering Hall and use the route toward Watery Hall Access. The missile-door sections here are now passable because the Missile Launcher was obtained before this backtrack. Open the required missile hatch, proceed through the connecting passage, and enter Watery Hall.
In Watery Hall, inspect the room with the Scan Visor. Scan the visible Chozo runic symbols and activate the symbols that open the sealed route. Cross the platforms carefully, destroy or avoid Blastcaps, and use the room’s elevated ledges to reach the final symbol. When the runic lock opens, enter the chamber and collect the Charge Beam.
The Charge Beam is required for stronger charged shots and is the appropriate weapon for several upcoming targets. On the GameCube controller, hold A to charge the currently selected beam, then release A to fire. Select the Power Beam or another available beam with the C Stick. Scan the Chozo Lore in and around Watery Hall before leaving if you are tracking the original Log Book.
After collecting the Charge Beam, return toward Gathering Hall and save if your energy is low. Do not leave the ruins for Magmoor Caverns yet. Flaahgra and the Varia Suit are the next required Chozo Ruins objectives.
- Open the Watery Hall missile door only after confirming the Missile Launcher is in the inventory.
- Activate the Watery Hall runic symbols.
- Collect the Charge Beam.
- Use A to charge and fire the beam, and the C Stick to select beam weapons.
Open Sunchamber and prepare for Flaahgra
From Gathering Hall, return toward Main Plaza and take the upper route around the plaza. Use the missile doors and bombable obstructions that lead through Arboretum Access and into Arboretum. The route now works because you have both Missiles and Morph Ball Bombs.
Climb around the large tree in Arboretum. Shoot Reaper Vines when they block a platform or doorway, and bomb the required weak obstruction. Scan the Chozo runic symbols if you want their lore entries. Continue through Sunchamber Lobby and Sunchamber Access, then enter Sunchamber. The door seals when the Flaahgra encounter begins.
Scan Flaahgra immediately. Also scan one Flaahgra Tentacle during the fight if you want the Log Book entry. The toxic water in the arena damages Samus, so remain on the surrounding platforms and avoid dropping into the channels unless you are deliberately entering one after Flaahgra collapses.
Before starting the fight, make sure your inventory contains the Missile Launcher, Morph Ball, Morph Ball Bombs, and Charge Beam. The Varia Suit is not available until after this encounter, so the normal campaign route does not yet permit safe travel through Magmoor Caverns.
- Use the Missile Launcher on Arboretum’s missile obstruction.
- Use Morph Ball Bombs on the required bomb obstruction.
- Scan Flaahgra and a Flaahgra Tentacle if desired.
- Enter Sunchamber with enough energy for a repeated arena fight.
Defeat Flaahgra and collect the Varia Suit
Flaahgra is not defeated by firing repeatedly at its armored body. Lock on to the boss and use charged Power Beam shots or Missiles to stun it when necessary. While Flaahgra is stunned, locate the solar reflector arrays shining into the arena. Shoot the vulnerable red mechanism on the rear of an array to flip that array away from the sunlight.
When every active array for the current stage has been flipped, Flaahgra collapses and the roots withdraw from the Morph Ball tunnels. Immediately switch to Morph Ball mode, roll into one of the open tunnels, and continue to the Bomb Slot at the end. Press A to lay a Morph Ball Bomb in the slot. The explosion damages Flaahgra and begins the next stage.
The stages require progressively more arrays to be disabled. After the first Bomb Slot, two arrays must be turned away; later stages require three and then four. Flaahgra can restore an array if you take too long, so keep it stunned when possible and move directly from the final reflector to an open tunnel. Each completed Bomb Slot is used only once, so choose a tunnel that is accessible from your current position and avoid returning through the toxic water.
After the fourth Bomb Slot explosion, Flaahgra is defeated and the water in the affected Chozo Ruins passages is purified. Enter the chamber beyond the arena and collect the Varia Suit. The suit reduces environmental heat damage enough to permit the normal route into Magmoor Caverns, although direct lava contact and fire attacks can still hurt Samus.
- Stun Flaahgra when needed and flip every active solar reflector array.
- Roll into an open Morph Ball tunnel after each collapse.
- Lay a Bomb in each of the four Bomb Slots.
- Defeat Flaahgra and collect the Varia Suit.
- Confirm that the previously poisonous water has been purified.
Save and finish the Chozo Ruins objective
Leave Sunchamber through the newly opened exit and follow the cleared route back toward a Chozo Ruins Save Station. Save after collecting the Varia Suit so a failed later trip does not require repeating Flaahgra.
The required chapter inventory is now the Missile Launcher, Morph Ball, Morph Ball Bombs, Charge Beam, and Varia Suit. The Burn Dome missile expansion is optional. Other early Chozo Ruins pickups that require Boost Ball, Spider Ball, Space Jump Boots, later beams, or later visors should be marked for future revisits rather than forcing them now.
From the Chozo Ruins transport route, the next campaign objective is to use the Varia Suit to travel through the heated Magmoor Caverns route. Do not attempt to treat the Varia Suit as immunity to lava pools; use the established walkways and avoid prolonged contact with environmental hazards.
- Save after obtaining the Varia Suit.
- Confirm the Missile Launcher checkpoint was completed before all missile-door sections.
- Confirm the inventory contains Missile Launcher, Morph Ball, Morph Ball Bombs, Charge Beam, and Varia Suit.
- Leave optional expansions for a later cleanup pass.
- Use the transport toward Magmoor Caverns to continue the campaign.
Before you move on
- Hive Mecha is defeated and the Missile Launcher is present in the inventory.
- The Ruined Gallery missile door and Main Plaza missile door have been opened.
- The Plated Beetle is defeated and the Morph Ball is collected.
- The Incinerator Drone is defeated and Morph Ball Bombs are collected.
- The Charge Beam has been collected from Watery Hall.
- Flaahgra is defeated through the four Bomb Slot sequence.
- The Varia Suit is present and the Chozo Ruins water has been purified.
- A Save Station has been used after obtaining the Varia Suit.
- The transport route toward Magmoor Caverns is available.
Magmoor Caverns — Heat, Platforms, and the Grapple/Plasma Route
After defeating Flaahgra and collecting the Varia Suit, use Magmoor Caverns as the direct heated route from Chozo Ruins to Phendrana Drifts. The initial crossing requires only the equipment already available: Morph Ball, Morph Ball Bombs, Charge Beam, Missile Launcher and Varia Suit. Follow Burning Trail, Lake Tunnel, Lava Lake, Pit Tunnel, Triclops Pit and Monitor Station, then cross Transport Tunnel A to Transport to Phendrana Drifts North. Grapple Beam, Plasma Beam, Spider Ball and Power Bombs are not required for this first trip. The later Magmoor return is a separate objective after obtaining Grapple Beam in Phazon Mines and Spider Ball in Phendrana Drifts.
Enter Magmoor Caverns and use Save Station Magmoor A
From Chozo Ruins, enter Transport to Magmoor Caverns North after defeating Flaahgra and obtaining the Varia Suit. The Varia Suit protects Samus from the caverns' ambient heat, but it does not make lava safe and does not prevent damage from flame jets, enemies or knockback. Treat every lava crossing as a platforming hazard.
In Transport to Chozo Ruins North, leave through the only exit into Burning Trail. Drop through the large shaft using the platforms and continue toward the lower passage. Shriekbats gather near the bottom. The missile door on the left leads to Save Station Magmoor A. Saving is optional, but it provides the most useful checkpoint before the long first crossing. Refill there if Chozo Ruins left you damaged.
- Have the Varia Suit before entering the heated rooms.
- Activate Transport to Magmoor Caverns North.
- Locate Save Station Magmoor A and save if needed.
- Do not search for Plasma Beam, Grapple Beam or late-game Magmoor upgrades yet.
Cross Burning Trail and Lake Tunnel
Leave the save station and return to Burning Trail. Scan a Grizby if you are pursuing Log Book completion. Its shell resists ordinary beam fire, so use a missile when one blocks the route. Cross the lava pond by jumping between the stable platforms and time the jumps around the flame jets fired from the walls.
Continue through Lake Tunnel over the narrow platforms. Burrowers can emerge near landing areas and knock Samus into the lava. Shoot one when it surfaces directly in your path or wait for it to move away. Do not remain at platform edges while fighting. The objective is to cross the room safely, not to defeat every enemy.
- Scan Grizby before leaving if scan completion matters.
- Use missiles on Grizbys that obstruct the route.
- Wait for flame jets to stop before jumping.
- Watch for Burrowers near the landing points in Lake Tunnel.
Cross Lava Lake and enter Pit Tunnel
Lava Lake contains Magmoors, Puffers and platforms that sink when Samus stands on them. Fight a Magmoor from a stable platform with missiles or charged shots, or pass it if the next landing is clear. Move promptly across the sinking platforms and avoid jumping through the lingering gas cloud after destroying a Puffer.
Near the far side, go behind the crates and place a Morph Ball Bomb beside the weak rock obstruction. This reveals a passage leading onward. Roll through, cross the remaining platforms and use the door to enter Pit Tunnel.
- Use stable platforms when fighting Magmoors.
- Avoid Puffer gas after destroying a Puffer.
- Move quickly across the sinking platforms.
- Bomb the weak obstruction beside the crates.
Pass Pit Tunnel and Triclops Pit
Pit Tunnel is blocked by a central metal structure. At this point Samus cannot jump over it, so roll beneath the floor through the small opening before the metal section. Scan a Triclops before entering the tunnel if you need its creature entry. Triclopses try to grab Morph Ball Samus and carry her toward the entrance. Dropping a bomb in front of one makes it target the bomb instead, which is safer than trying to squeeze past it.
In Triclops Pit, follow the lit platforms toward the exit on the left side. The room's right-side Morph Ball passage leads to Storage Cavern and an optional Missile Expansion. To collect it, drop to the lower metal floor, enter the small opening near the rock, pass the Triclops-filled passage and roll through the rear tunnel to Storage Cavern. Return through the same route afterward. Skip this detour if you are following the required campaign path.
- Use Morph Ball Bombs against Triclopses.
- Scan Triclops before leaving Pit Tunnel if needed.
- Treat the Storage Cavern Missile Expansion as optional.
- Use the lit platforms and left-side exit for the main route.
Cross Monitor Tunnel and climb Monitor Station
Monitor Tunnel contains Puffers and moving platforms. Destroy Puffers that hover over the route, then cross one moving platform at a time. Wait for the next platform to approach rather than jumping early; falling costs energy and sends you back toward the preceding room.
Monitor Station is the last major room of the initial crossing. Four Auto Turrets protect the central structure. Destroy the three visible turrets from the entrance, clear the Puffers around the perimeter and then deal with the fourth turret near the central structure. Use the left-side ledges and floating platform to climb. From the ledge, jump to the elevated glass bridge, enter the upper part of the station and cross the metal bridge to the exit. The upper exit leads toward Transport Tunnel A; do not take the lower route toward Tallon Overworld on this first trip.
- Clear Puffers before committing to the moving platforms.
- Destroy Auto Turrets from cover or a stable platform.
- Use the left ledges, floating platform and glass bridge as landmarks.
- Take the upper exit toward Transport Tunnel A.
Cross Transport Tunnel A and reach Phendrana Drifts
Transport Tunnel A leads to Transport to Phendrana Drifts North. The ordinary lower route is a straightforward Morph Ball passage and requires no Grapple Beam, Plasma Beam, Spider Ball or Power Bomb. Stay on the main route and roll to the transport room.
An optional Energy Tank is hidden above the lava. Reaching it requires multiple double-bomb jumps from weakened metal blocks that collapse after repeated bomb impacts. Skip it during the first crossing unless you are deliberately collecting expansions and are comfortable recovering from a failed jump. If you fall, use a bomb jump to escape only when there is enough room; otherwise reload from Save Station Magmoor A.
At the end of the tunnel, scan the blue transport interface and enter the hologram. Ride the elevator to Phendrana Drifts and leave the transport room through the only exit toward Shoreline Entrance.
- Use the ordinary lower route through Transport Tunnel A.
- Treat the Energy Tank as optional.
- Activate Transport to Phendrana Drifts North by scanning the blue interface.
- Arrive in Phendrana Drifts before beginning the next chapter.
Later return: Grapple Beam, Geothermal Core and Plasma Beam
Do not attempt this section during the first crossing. After obtaining the Grapple Beam in Phazon Mines and the Spider Ball in Phendrana Drifts, return to Magmoor Caverns through the Phendrana-side transport. From Transport to Phendrana Drifts South, pass through Magmoor Workstation and South Core Tunnel to reach Geothermal Core.
In Geothermal Core, use the Grapple Point to reach the central platform, then activate the Spinner to raise the platform sections. Follow the raised route through the room and continue through North Core Tunnel and Twin Fires. Spider Ball traversal is required for the later route through Twin Fires Tunnel. Grapple Points and careful alignment are important: approach the edge, jump deliberately and attach only when Samus has a clear line to the point.
The white door in Geothermal Core leads to Plasma Processing. This chapter follows the launch North American USA 0-00 route and does not use an early-Plasma sequence break. In USA 0-00, the Plasma Processing entrance does not have the later North American Player's Choice lock. Later revisions, including USA 0-02, add a restriction tied to Grapple Beam and may also add obstruction at the entrance. Therefore, do not treat launch-disc access as universal and do not send the player to Plasma Processing during the first Magmoor crossing. In the standard campaign route, obtain Grapple Beam first, return through Geothermal Core, collect Plasma Beam, then continue through Magmoor Workstation.
After collecting Plasma Beam, return to Magmoor Workstation for its later upgrades and routes. The room contains a separate Power Bomb route: use the Thermal Visor to locate the power conduits and Wave Beam to activate them, then follow the cooled passages and Morph Ball route toward the workstation's expansion. Power Bomb access is a later objective and is not part of the first Chozo Ruins-to-Phendrana trip.
- Return only after obtaining Grapple Beam and Spider Ball.
- Use the Grapple Point and Spinner sequence in Geothermal Core.
- Treat Plasma Processing access as revision-dependent.
- For this launch-USA guide, use the standard post-Mines return rather than an early-Plasma sequence break.
- Use Magmoor Workstation for later Power Bomb-related exploration.
Before you move on
- Varia Suit was obtained before entering the heated Magmoor rooms.
- Save Station Magmoor A was located and used if needed.
- Burning Trail, Lake Tunnel, Lava Lake and Pit Tunnel were crossed with the early-game equipment.
- The Triclops Pit route was completed, with the Storage Cavern Missile Expansion treated as optional.
- Monitor Station was reached and its upper exit was used.
- Transport Tunnel A was crossed on the ordinary lower route.
- Transport to Phendrana Drifts North was activated.
- Samus arrived in Phendrana Drifts and is ready to enter Shoreline Entrance.
- No Grapple Beam, Plasma Beam, Spider Ball, Power Bomb, Geothermal Core or Magmoor Workstation objective was imposed on the first crossing.
- On the later return, Grapple Beam and Spider Ball were obtained before the Geothermal Core route.
- Plasma Processing was handled according to the disc revision rather than presented as universal.
- The later Magmoor return was completed through Geothermal Core, Plasma Processing and Magmoor Workstation as required by the standard campaign route.
References for this chapter
Early Backtracks — Using New Tools to Reopen Paths
After defeating Flaahgra, the standard campaign route sends you through Magmoor Caverns to Phendrana Drifts for the Boost Ball. Only after that upgrade can you climb the half-pipe in Tallon Canyon and reach the Space Jump Boots in the Landing Site Alcove. Treat this as a focused progression trip rather than a full cleanup run: collect the Boost Ball, return through the transport network, obtain the boots, then save at the Gunship before continuing.
Leave Chozo Ruins and take the heated route to Phendrana Drifts
Confirm that Flaahgra has been defeated, the Varia Suit is in your inventory, and the water has drained from the Sunchamber route. Return through the opened Chozo Ruins path to the elevator leading to Magmoor Caverns. The exact elevator is reached through the Sun Tower area after the Flaahgra sequence; use the map to identify the active transport node rather than trying to force blocked doors elsewhere in the ruins.
In Magmoor Caverns, follow the established corridor toward the Phendrana transport. Stay on the intended platforms and bridges, and use charged shots or missiles on Magmoor creatures before they can pin you against a wall. You do not need the Grapple Beam, Gravity Suit, Plasma Beam, or Space Jump Boots for this first crossing. Save at the available Magmoor station if your energy is low before taking the elevator to Phendrana Drifts.
- Flaahgra is defeated and the Varia Suit is equipped.
- The transport route from Chozo Ruins through Magmoor Caverns is open.
- You are heading toward Phendrana Drifts to obtain the Boost Ball, not attempting the Tallon Canyon half-pipe yet.
Reach Phendrana Canyon and obtain the Boost Ball
From the Phendrana transport, enter the Phendrana Shorelines and move through the early ice-ruin route. The first visit includes cold-weather hazards, Pulse Bombus, Baby Sheegoths, and Scatter Bombus. You can run past many of these enemies, but clear anything blocking a doorway or narrow platform. A Save Station is available from the Shorelines; use it before entering the deeper canyon if you want a secure restart point.
Continue through the ice ruins to Canyon Entryway and then Phendrana Canyon. Drop to the lower section and locate the control panel that aligns the floating platforms. Activate it, then cross the platforms without stopping for long. They begin to sink, so keep moving toward the structure on the far side. If you fall, return to the panel and reset the crossing.
The Boost Ball is inside the structure at the far end. Collect it, then use the canyon itself to return to the upper route. Enter Morph Ball mode, roll down one side of the icy half-pipe, hold B to charge the Boost Ball, and release while climbing the opposite side. The release must occur during the climb, not after you have already reached the upper curve. Repeat the pass until you reach the ledge leading back toward Canyon Entryway.
- The Phendrana Canyon control panel has been activated.
- The floating platforms have been crossed to the far structure.
- The Boost Ball is in the inventory.
- You can use B in Morph Ball mode to charge and release a Boost Ball burst.
Return through Magmoor Caverns to Tallon Overworld
Backtrack through Phendrana Shorelines and take the same Magmoor elevator. You may see Meta Ridley fly over the Shorelines during this return; this is a story event, not a boss encounter, and it does not change the immediate route.
In Magmoor, return to the transport leading to Tallon Overworld. If you used the Phendrana Save Station, you can safely retrace the corridor from there. Use the Boost Ball to move quickly through open Morph Ball passages, but do not attempt optional lava shortcuts that require later equipment. Once in Tallon Overworld, follow the map toward Tallon Canyon and the route beside Transport Tunnel A.
- You have returned from Phendrana with the Boost Ball.
- The Tallon Overworld transport node is active on your map.
- You have not confused the Meta Ridley flyover with a required boss fight.
Climb the Tallon Canyon half-pipe
In Tallon Canyon, locate the half-pipe near the Transport Tunnel A side of the room. Enter Morph Ball mode and roll from one side to the other. Hold B while descending to charge, then release as you begin climbing the side that leads toward the elevated ledge. The first boost may not provide enough height; keep rolling across the bottom and repeat the charge-and-release cycle.
Do not use ordinary jumps or Bombs as a substitute for the Boost Ball here. Once you reach the ledge, defeat or avoid the nearby Zoomer, cross the bridge, and enter the Morph Ball passage. Bomb the sandstone barriers blocking the way. Continue through the opened passage and the next doors until you reach Gully.
- The Tallon Canyon half-pipe has been climbed with the Boost Ball.
- The bridge beyond the elevated ledge has been crossed.
- The sandstone barriers have been destroyed with Morph Ball Bombs.
- Gully has been entered.
Cross Gully and collect the Space Jump Boots
Gully is short but its vegetation can obscure Zoomers. Use the Combat Visor radar, move through the room carefully, and take the exit leading to Landing Site. When you arrive at Landing Site, remain on the elevated ledge. Do not drop to the Gunship immediately.
Follow the ledge around the room and jump over the gaps. At the far end, enter the blue door behind and to the left of the Gunship. This leads to the Landing Site Alcove. The Space Jump Boots are in the center of the room; collect them before attempting further exploration.
On the original GameCube controls, press B once to jump and press B again while Samus is airborne to perform the second jump. The second press is not a rapid floor-level double tap. Practice the timing in the Alcove, then use the Space Jump to leave the room and return to Landing Site. If you fall from the ledge before entering the Alcove, return to Tallon Canyon, reclimb the half-pipe, and repeat the Gully route.
- You reached Landing Site while staying on the elevated ledge.
- The Space Jump Boots have been collected.
- You have tested the airborne second jump using B.
Collect the optional Landing Site missile expansion and save
After leaving the Alcove, drop to the Gunship area. Walk around behind the ship and look for the small Morph Ball tunnel concealed by Tangle Weeds. Shoot the weeds, enter Morph Ball mode, and roll through the tunnel to collect the missile expansion. This pickup is optional and is not required to open any story route.
Use the Gunship to restore energy and missiles, then save. This creates a dependable checkpoint before the next Chozo Ruins and Magmoor progression. If you skip the missile expansion, you can still complete the campaign normally; confirm only that the missile maximum increases if you choose to collect it.
- The optional missile expansion behind the Gunship has been collected, if desired.
- The Gunship has restored your supplies.
- The file has been saved at the Gunship or a nearby Save Station.
Use the map to choose the next route
Press Z to open the GameCube map. The map shows explored rooms, transport nodes, exits, and colored doors after the relevant map information has been downloaded. Use it to avoid walking between regions unnecessarily. The next practical objective is to return through the transport network and continue the main campaign using the Space Jump Boots to reach previously inaccessible ledges in Chozo Ruins and elsewhere.
Leave half-pipes that require Spider Ball, underwater routes that require Gravity Suit, and beam-colored doors for later. This chapter is complete once the Boost Ball and Space Jump Boots are secured; do not turn the trip into a full expansion or scan cleanup pass.
- The map identifies the Tallon Overworld, Chozo Ruins, Magmoor Caverns, and Phendrana transport nodes.
- The Boost Ball and Space Jump Boots are both visible in the inventory.
- Blocked routes have been recorded for later upgrades rather than repeatedly attempted.
Before you move on
- The Boost Ball has been obtained in Phendrana Canyon.
- The Space Jump Boots have been obtained in the Landing Site Alcove.
- The Tallon Canyon half-pipe, Gully, and Landing Site ledge route can be retraced successfully.
- The optional Landing Site missile expansion has been collected or deliberately skipped.
- The Gunship has been used to restore supplies and save.
- The next route is a return through the transport network toward Chozo Ruins and the campaign’s next major upgrade.
Phendrana Drifts — Wave Beam, Research Facility and Spider Ball
Enter Phendrana Drifts through Magmoor Caverns and complete the region’s first required progression in the original North American GameCube release. Obtain the Wave Beam at Chapel of the Elders, travel through the Pirate research facility to Research Core for the Thermal Visor, restore the facility’s power, return through the complex to activate the Observatory and collect the Super Missile, then defeat Thardus in Quarantine Cave for the Spider Ball. This chapter ends at the Spider Ball checkpoint. The Ice Beam, Gravity Suit, first Power Bomb, X-Ray Visor and Phazon Mines route belong to later chapters.
Enter Phendrana Drifts and save at the Shorelines
From Magmoor Caverns, use the elevator labeled Transport to Phendrana Drifts North. Follow Shoreline Entrance into Phendrana Shorelines, the snowy hub connecting the early Chozo ruins, the Pirate research facility and the later routes through Phendrana.
The cold weather does not continuously drain Samus’s energy in the original GameCube version. The actual dangers are enemy attacks, falls, explosive hazards and the long distances between some safe rooms. Do not waste missiles or health trying to counter cold damage that is not present.
Locate the Save Station near Phendrana Shorelines and use it before beginning the main sequence. If Baby Sheegoths or other enemies have reduced your energy or missile supply, refill before entering the temple and facility routes. Scan unfamiliar creatures, machinery and terminals if you are pursuing Log Book completion.
- Reach Phendrana Shorelines from Magmoor Caverns.
- Save before beginning the temple and research-facility sequence.
- Refill missiles and energy if necessary.
Reach Chapel of the Elders and obtain the Wave Beam
From Phendrana Shorelines, climb through the ice ruins using the Space Jump Boots and Morph Ball Bombs. Look for the high route leading toward the Chozo Ice Temple. The temple’s platforms and broken bridges are ordinary traversal hazards; visual ice does not automatically indicate that a surface is impassable, so use the map and scan readouts when unsure.
Inside the temple, defeat the Baby Sheegoth and climb toward the upper passage. Four Chozo busts stand near the sealed route. Scan them if you want the related research entries. The shaman bust contains the material that can be destroyed with a Missile. Shoot that bust, enter the exposed Morph Ball opening and bomb the slot to open the way to Chapel of the Elders.
The Chapel battle begins with four Baby Sheegoths. Keep moving around the room, bait their charges and attack their exposed undersides after they finish an attack. Charge Beam shots are useful, and the enemies can provide energy and ammunition when defeated.
The Adult Sheegoth appears after the Baby Sheegoths are defeated. Scan it before attacking if you need its Log Book entry. Its back absorbs ordinary Beam fire, so circle around it and use Missiles against the side of its head after it completes a charge, ice-breath attack or snowball attack. Stay mobile instead of standing in front of it. Morph Ball Bombs under its body can work, but they require closer positioning and are riskier.
When the Adult Sheegoth is defeated, collect the Wave Beam from the alcove. It opens purple doors, powers electrical conduits and is effective against electrically based enemies such as Pulse Bombus. Leave the Chapel and return to the Shorelines Save Station before entering the longer Pirate facility route.
- Reach the Chozo Ice Temple with Space Jump Boots and Morph Ball Bombs.
- Destroy the correct Chozo bust with a Missile.
- Use the exposed Morph Ball Slot to open Chapel of the Elders.
- Defeat four Baby Sheegoths and the Adult Sheegoth.
- Collect the Wave Beam and save at Phendrana Shorelines.
Travel through the Pirate research facility to Research Core
From the Shorelines, take the high door leading into the Pirate research facility. Use the Wave Beam on purple doors and destroy electrically based enemies with charged Wave Beam shots when appropriate. Follow the connected laboratory route toward Research Core, defeating the Space Pirates, turrets and other enemies that block the way.
Use cover when fighting Space Pirates and avoid remaining in open firing lanes. A charged Wave Beam shot can stun a Pirate, giving you time to follow with another attack or a Missile. Do not spend missiles on ordinary enemies unless you need to end a dangerous encounter quickly; the Adult Sheegoth is already defeated, but later rooms still reward conserving ammunition.
Research Core is a tall multilevel room. Clear the immediate enemies, then scan the red computer panels positioned on the different levels. Three required terminals must be scanned to deactivate the force fields protecting the Thermal Visor. Work downward through the room, checking each level rather than assuming that one terminal has affected all barriers.
After the third required terminal is scanned, descend to the exposed upgrade and collect the Thermal Visor. The lights fail as soon as the visor is obtained, so equip it immediately. It reveals heat-producing enemies and machinery in the darkened facility.
- Enter the Pirate research facility through its high Shorelines door.
- Use the Wave Beam to open purple doors and fight electrical enemies.
- Reach Research Core.
- Scan all three required computer terminals.
- Collect the Thermal Visor.
Restore power and return through the facility to the Observatory
With the Thermal Visor equipped, retrace your route through Research Core. Shadow Pirates become much easier to track in the dark, but continue moving because their attacks can stagger Samus. Metroids may escape from containment during the return. Use Super Missiles when a quick kill is necessary, or charged Wave Beam attacks and Morph Ball Bombs when you need to conserve missiles.
Near the upper exit of Research Core, use the Thermal Visor to locate the unpowered conduit. Fire the Wave Beam into the conduit to restore power to the door, then leave through Research Core Access. A Sentry Drone blocks the route; charged Wave Beam shots are effective, although its visual interference can make the encounter awkward.
Continue back through the research facility rather than going directly to Quarantine Cave. The restored route leads toward the Observatory. Use the facility’s Save Station if you need to recover before the Observatory mechanism. The Super Missile is not obtained until after the Thermal Visor and the power-restoration step are complete.
- Use the Thermal Visor to navigate the darkened facility.
- Defeat or bypass the escaping Metroids safely.
- Power the Research Core exit conduit with the Wave Beam.
- Pass the Sentry Drone in Research Core Access.
- Return through the facility toward Observatory.
Activate the Observatory and collect the Super Missile
In the Observatory, defeat the Pirates and inspect the active control panel. The room’s projector mechanism requires two Morph Ball Slots followed by four Boost Ball Spinners.
Use the first Morph Ball Slot, then cross the room and activate the second. Once both slots have been used, the four Spinners around the projector become active. Enter Morph Ball form, charge the Boost Ball and use each Spinner. Activate all four to raise the projector and display the star-system hologram.
Climb the platforms around the raised projector to reach the upper node and collect the Super Missile. This is the Charge Combo upgrade, not a normal Missile Expansion. It consumes five missiles when fired and destroys Cordite obstructions, including the seal above the route to Quarantine Cave.
Save at the Observatory station if needed, then return through the facility toward the Ruined Courtyard. Keep the Super Missile available for the Cordite obstruction; do not spend missiles carelessly while crossing the remaining rooms.
- Defeat the Observatory Pirates.
- Activate both Morph Ball Slots.
- Use all four Boost Ball Spinners.
- Climb to the upper projector node.
- Collect the Super Missile.
- Save before leaving the facility if necessary.
Open Quarantine Cave and defeat Thardus
From the research facility, return to Ruined Courtyard. Find the sealed route leading toward Quarantine Cave. The Cordite covering above the door is destroyed with a Super Missile. After the covering is removed, equip the Thermal Visor and fire the Wave Beam at the exposed power conduit to activate the door.
Proceed through Quarantine Access and enter North Quarantine Tunnel in Morph Ball form. Pulse Bombus hazards drop electrical charges into the passage, so keep moving and avoid stopping beneath them. Enter Quarantine Cave with as much energy as possible; the boss encounter begins when you approach the rock formation in the room.
Scan Thardus before attacking if you need the boss entry. Start with the Thermal Visor equipped to identify the current heated weak point. Lock on and attack it with charged shots or Missiles while staying clear of Thardus’s rolling attack, thrown rocks and ice wave. Jump over the ice wave rather than trying to tank it.
The Thermal Visor periodically overloads during the fight. When the display becomes unusable, switch to the Combat Visor; the weak point remains visible there until the visor recovers. Switch back to the Thermal Visor when necessary to locate the next heated target. Destroy thrown rocks when it is safe, since they can restore energy or ammunition.
When Thardus is defeated, collect the Spider Ball. In Morph Ball form, hold R near a magnetic Spider Ball track to attach to it, steer along the track with the Control Stick and release R to drop. Test the ability on the nearby track before leaving the room.
- Destroy the Quarantine Cave Cordite seal with the Super Missile.
- Power the door with the Thermal Visor and Wave Beam.
- Cross North Quarantine Tunnel while avoiding Pulse Bombus hazards.
- Scan and defeat Thardus.
- Switch between Thermal and Combat Visors when the thermal display overloads.
- Collect and test the Spider Ball.
Handoff to the next progression chapter
The Spider Ball is the final required upgrade for this chapter. Leave Quarantine Cave and use the new magnetic-track ability only as needed to reach the next route. The next major objective is the Ice Beam sequence in Chozo Ruins, beginning through Furnace, Crossway, Hall of the Elders and Reflecting Pool.
After the Ice Beam is obtained, return to Phendrana Drifts for the later route through Frozen Pike, Frost Cave, Phendrana’s Edge and Gravity Chamber to obtain the Gravity Suit. The submerged Tallon Overworld and Frigate Crash Site routes come after that return.
Do not mark the first Power Bomb, X-Ray Visor or Phazon Mines progression as complete here. Those objectives require later areas and upgrades.
- Wave Beam is in the inventory.
- Thermal Visor is in the inventory.
- Super Missile is in the inventory.
- Thardus has been defeated.
- Spider Ball has been collected and tested.
- Ice Beam, Gravity Suit, first Power Bomb and X-Ray Visor remain for later chapters.
Before you move on
- Wave Beam is present in the inventory.
- Thermal Visor is present in the inventory.
- Super Missile is present in the inventory.
- The Adult Sheegoth in Chapel of the Elders has been defeated.
- All three Research Core terminals were scanned and the Thermal Visor was collected.
- The Research Core exit conduit was powered with the Wave Beam.
- The Observatory’s two Morph Ball Slots and four Boost Ball Spinners were activated.
- The Super Missile was collected from the Observatory projector.
- Thardus was defeated in Quarantine Cave.
- Spider Ball was collected and tested on a nearby magnetic track.
- The player is ready to begin the Chozo Ruins Ice Beam route.
- Ice Beam, Gravity Suit, first Power Bomb and X-Ray Visor are not counted as completed in this chapter.
References for this chapter
Chozo Ruins Revisited — Advanced Traversal and Artifact Paths
Return to Chozo Ruins after obtaining the Super Missile and Spider Ball. The immediate route leads through Furnace, Hall of the Elders, Reflecting Pool and Antechamber for the Ice Beam. From there, return to Phendrana Drifts and cross Phendrana’s Edge, Hunter Cave and Gravity Chamber to collect the Gravity Suit. The active Chozo Ruins artifact objectives in this chapter are Artifact of Wild in Sunchamber and Artifact of Lifegiver in Tower Chamber. Artifact of World remains unavailable until the Plasma Beam is obtained in the later Phazon Mines sequence; its Hall of the Elders return is handled as a deferred objective in chapter 10.
1. Confirm the inventory and establish the route
Before beginning this revisit, confirm that the Super Missile and Spider Ball are in the inventory. Also confirm the Boost Ball, Space Jump Boots, Wave Beam, Morph Ball Bombs and Varia Suit. The Super Missile is required for the Cordite coverings in Sun Tower, while the Spider Ball is needed for the Furnace and Sun Tower tracks.
On the original GameCube controller, select the Combat Visor and Power Beam, hold the A Button to charge, then press the Y Button to fire a Super Missile. It consumes five missiles. The X-Ray Visor is not required for the Ice Beam, Gravity Suit, Artifact of Wild or Artifact of Lifegiver routes, although it helps track Chozo Ghosts during scan cleanup.
Use this chapter’s practical order: obtain the Ice Beam, travel to Phendrana Drifts for the Gravity Suit, then collect Artifact of Wild and Artifact of Lifegiver. Do not make a Plasma Beam return for Artifact of World during this chapter. That artifact is a later chapter 10 objective.
- Super Missile is present.
- Spider Ball, Boost Ball, Space Jump Boots, Wave Beam and Morph Ball Bombs are present.
- Varia Suit is present before entering heated Chozo Ruins routes.
- The immediate objectives are Ice Beam, Gravity Suit, Artifact of Wild and Artifact of Lifegiver.
- Artifact of World is deferred until after the Plasma Beam is obtained.
2. Reach Hall of the Elders through Furnace
Travel through the Energy Core side of Chozo Ruins to reach Furnace. Enter Morph Ball form and follow the Spider Ball tracks through the room. The route uses temporary platforms, bomb jumps and narrow track sections. Move from one secure surface to the next instead of trying to cross the whole room in one movement. If a platform disappears, wait on a stable ledge for the next usable section.
Continue through Crossway and use the half-pipe to reach the upper passage. The nearby Cordite covering is not needed for the Ice Beam route. Follow Crossway Access West and Elder Hall Access to reach Hall of the Elders. Save before the Ghost encounter if the nearby station is available and your energy or missiles are low.
Chozo Ghosts appear in Hall of the Elders. If Log Book completion matters, scan a Ghost before defeating the final one. They become vulnerable when tangible. Lock on, keep moving around the room and attack with the Power Beam or Super Missile. The Wave Beam, Ice Beam and Plasma Beam are not the effective weapons for this encounter.
After the fight, approach the colored mechanisms connected to the Chozo statue. Fire the Wave Beam at the purple mechanism, then enter the exposed Morph Ball passage and activate its Bomb Slot. This opens the route toward Reflecting Pool. The white mechanism leads to an optional Energy Tank route. The red mechanism belongs to the later Artifact of World route and must be left for the Plasma Beam return in chapter 10.
- Reach Furnace through the Energy Core side of Chozo Ruins.
- Cross the Spider Ball and temporary-platform sections.
- Enter Hall of the Elders through Elder Hall Access.
- Scan a Chozo Ghost before defeating the last one if Log Book completion matters.
- Use the Wave Beam on the purple mechanism.
- Activate the exposed Morph Ball Slot with a Bomb.
3. Drain Reflecting Pool and collect the Ice Beam
Follow the opened passage to Reflecting Pool. Enter Morph Ball form and drop into the water. At the center of the pool, locate the drain hatch and place a Bomb in the Morph Ball Slot. The water drains and exposes the lower half-pipe.
Use the half-pipe to gain height and reach the upper side of the room. Follow the route to Antechamber and collect the Ice Beam. This upgrade opens white doors and is the required weapon for the next stage of Phendrana progression.
Return to Reflecting Pool after collecting the beam. Use the newly accessible white-door route as needed, and take the connected Save Station before beginning the return through Magmoor Caverns. Do not spend time clearing every Chozo Ruins expansion during this pass. Equipment-gated pickups can be marked for cleanup.
The Ice Beam pickup is the first major checkpoint of this chapter. Once it is secured, the next destination is Phendrana Drifts, not the Tower of Light. The Gravity Suit is required before making the underwater crossing for Artifact of Lifegiver.
- Drain Reflecting Pool with a Morph Ball Bomb.
- Reach Antechamber through the opened route.
- Collect the Ice Beam.
- Save at the connected station when practical.
- Prepare to return to Phendrana Drifts.
4. Return to Phendrana’s Edge
Leave Chozo Ruins through the Magmoor Caverns connection and use the normal elevator route to Phendrana Drifts. From the Phendrana transport area, work through the explored ice rooms toward Frozen Pike and the Frost Cave route.
In Frost Cave, fire missiles at the appropriate stalactites to create temporary platforms across the lower ice. Continue through Upper Edge Tunnel into Phendrana’s Edge. Flying Pirates attack in the tall shaft; eliminate them before making the descent so they cannot knock Samus into the water.
At the bottom of Phendrana’s Edge, enter the underwater door and continue through Lower Edge Tunnel. Samus is still slowed by the normal suit, so use short, controlled movements and avoid unnecessary combat. Morph Ball form is required for the narrow passage. Follow the route to Hunter Cave.
- Return to Phendrana Drifts after collecting the Ice Beam.
- Use missiles to create the Frost Cave platforms.
- Reach Phendrana’s Edge through Upper Edge Tunnel.
- Descend to the underwater door.
- Cross Lower Edge Tunnel and reach Hunter Cave.
5. Cross Hunter Cave and collect the Gravity Suit
Hunter Cave contains three stalactites above the water. Fire missiles at them to knock them down. Two create platforms across the water, while the third provides access to the higher route. Jump between the fallen formations and nearby ledges rather than attempting a long underwater jump with the normal suit.
Use the upper ledge and purple door to enter Lake Tunnel, then continue to Gravity Chamber. Aquatic enemies, including Jelzaps and Aqua Reapers, can interrupt the approach. Scan them before defeating them if Log Book completion matters. The Thermal Visor can help when visibility is poor, but the objective is the recessed opening at the far end of the chamber.
Follow the underwater route and collect the Gravity Suit. It restores normal movement and jumping underwater and is required for the Tower of Light crossing. After the pickup, use the raised ice and upper passage to leave Gravity Chamber through Chamber Access and return to Hunter Cave.
Retrace the upper route toward Frozen Pike. You do not need to clear every enemy on the return. The important progression checkpoint is that the Gravity Suit is in the inventory before attempting Tower of Light.
- Knock down the Hunter Cave stalactites with missiles.
- Use the fallen stalactites to reach the upper purple door.
- Enter Lake Tunnel and then Gravity Chamber.
- Scan Jelzaps and Aqua Reapers first if Log Book completion matters.
- Collect the Gravity Suit.
- Leave through the upper route.
6. Collect Artifact of Wild in Sunchamber
Return to Chozo Ruins and travel to Sun Tower. Destroy the four War Wasp Hives with missiles. Two Cordite coverings are mounted on the walls. Fire a Super Missile at each Cordite covering, then scan the Chozo runes revealed behind them. The remaining two runes are positioned on the room’s pillars.
After all four runes have been scanned, enter Morph Ball form and follow the Spider Ball track upward. The climb uses short track sections, bomb jumps and Oculi hazards. Keep Samus aligned with each track and use Bombs only when positioned over the next stable section. If you fall, return to the lower track and restart from a secure ledge.
Continue through Sun Tower Access into Sunchamber, the room where Flaahgra was defeated. Three Chozo Ghosts appear. Scan one before defeating the last Ghost if the Log Book is a goal. They become vulnerable when tangible; lock on and attack with the Power Beam or Super Missile while circling the room. The X-Ray Visor makes them easier to track but is not mandatory.
When all three Ghosts are defeated, jump to the central platform and collect Artifact of Wild. This artifact is optional for immediate story progression but mandatory for the final twelve-artifact route.
- Destroy all four War Wasp Hives.
- Use Super Missiles on both Cordite coverings.
- Scan all four revealed Chozo runes.
- Climb the Sun Tower Spider Ball track.
- Defeat the three Chozo Ghosts in Sunchamber.
- Collect Artifact of Wild.
7. Collect Artifact of Lifegiver in Tower Chamber
With the Gravity Suit obtained, return to Ruined Shrine. Use the Boost Ball half-pipe near the Main Plaza connection to gain height on the correct side. Enter the Spider Ball passage and follow it to the Wave Beam door leading into Tower of Light.
Inside Tower of Light, enter the water and move toward the recessed area opposite the entrance. The Gravity Suit removes the underwater movement penalty, allowing Samus to jump onto the raised ledge that was impractical earlier. Aquatic enemies can knock Samus away, so clear only enemies directly blocking the approach and make deliberate jumps from stable ground.
Reach the far door into Tower Chamber and collect Artifact of Lifegiver. No beam mechanism or additional Bomb Slot is required for the artifact itself; the required action is crossing the underwater section and reaching the chamber. Retrace the route and save when convenient.
Lifegiver is the second active artifact checkpoint in this chapter. It contributes to the late-game artifact requirement but does not open the Artifact Temple by itself.
- Return to Ruined Shrine after obtaining the Gravity Suit.
- Use the Boost Ball half-pipe and Spider Ball route.
- Enter Tower of Light through the Wave Beam door.
- Cross the underwater section with the Gravity Suit.
- Reach Tower Chamber and collect Artifact of Lifegiver.
- Save after leaving the tower when practical.
8. Deferred reference: Artifact of World after the Plasma Beam
Do not perform this return during the present Chozo Ruins route. Artifact of World becomes available only after the later Phazon Mines sequence provides the Plasma Beam. Chapter 7’s completed artifact checkpoints are Artifact of Wild and Artifact of Lifegiver.
After obtaining the Plasma Beam in chapter 9, return to Hall of the Elders. If Chozo Ghosts remain, defeat them before using the statue’s mechanisms. Equip the Plasma Beam and fire at the red mechanism. Roll into the exposed Morph Ball Slot and activate it with a Bomb.
The statue shifts and opens the route toward Elder Chamber. The resulting door is white, so equip the Ice Beam and open it. Enter Elder Chamber and collect Artifact of World. If the red mechanism does not respond during that later visit, confirm that the Plasma Beam is equipped and that the exposed Morph Ball Slot has been activated with a Bomb.
This deferred route is handled as part of the artifact cleanup in chapter 10. Do not list Artifact of World as collected when closing chapter 7 unless the player has intentionally advanced beyond the chapter’s normal stopping point and already completed the later Plasma Beam objective.
- Leave Artifact of World untouched during the normal chapter 7 route.
- Obtain the Plasma Beam in the later Phazon Mines sequence.
- Return to Hall of the Elders during chapter 10 cleanup.
- Use the Plasma Beam on the red mechanism.
- Activate the exposed Morph Ball Slot with a Bomb.
- Open the resulting white door with the Ice Beam.
- Collect Artifact of World in Elder Chamber.
9. Close the chapter and prepare for later cleanup
Confirm that the Ice Beam and Gravity Suit are in the inventory. Confirm that Artifact of Wild and Artifact of Lifegiver are recorded. Save after the final pickup.
Mark Chozo Ruins rooms containing expansions that require the Grapple Beam, Plasma Beam, Power Bombs or X-Ray Visor. These items can be collected during the later cleanup route and are not required to complete this chapter’s active objectives.
Continue the campaign toward the Frigate Crash Site and Phazon Mines. After obtaining the Plasma Beam, return to Hall of the Elders for Artifact of World as described in the deferred reference. Do not travel to the Artifact Temple merely because the two active Chozo Ruins artifacts are complete; the Temple requires all twelve artifacts, including the separate Artifact of Truth and artifacts from other regions.
- Ice Beam is recorded.
- Gravity Suit is recorded.
- Artifact of Wild is recorded.
- Artifact of Lifegiver is recorded.
- Artifact of World is listed only as a future Plasma Beam objective.
- Later equipment-gated expansions are marked for cleanup.
- The player understands that all twelve artifacts are required for the final Artifact Temple sequence.
Before you move on
- The Super Missile was obtained before the Sun Tower route.
- The Ice Beam was collected in Antechamber after draining Reflecting Pool.
- The Hall of the Elders purple mechanism was opened with the Wave Beam and a Morph Ball Bomb.
- The Gravity Suit was collected in Phendrana Drifts after the Phendrana’s Edge, Lower Edge Tunnel, Hunter Cave and Gravity Chamber route.
- Artifact of Wild was collected in Sunchamber after defeating the three Chozo Ghosts.
- Artifact of Lifegiver was collected in Tower Chamber after crossing Tower of Light with the Gravity Suit.
- Artifact of World is recorded only as a future objective until the later Plasma Beam return.
- The inventory confirms the Ice Beam, Gravity Suit, Artifact of Wild and Artifact of Lifegiver.
- Optional Chozo Ruins expansions requiring later equipment are marked for cleanup.
- The player understands that the final Artifact Temple sequence requires all twelve artifacts, including artifacts outside Chozo Ruins.
References for this chapter
- Metroid Prime — Nintendo GameCube Instruction Manual
- Metroid Prime — Guide and Walkthrough — GameCube
- Metroid Prime - Guide and Walkthrough - GameCube - By FalconZero03
- Chapter 13: The Gravity Suit — Metroid Prime Walkthrough
- Chozo Artifacts — Metroid Prime Walkthrough and Guide
- Metroid Prime Walkthrough — GameSpot
Crashed Frigate — Frigate Orpheon and the Phazon Mines Route
After obtaining the Gravity Suit in Phendrana Drifts, return to Tallon Overworld and cross the Frigate Crash Site to the submerged remains of Frigate Orpheon. The wreck is a mostly linear route that teaches you to use the Thermal Visor and Wave Beam together to restore power. It contains an Energy Tank, missile expansions and several important Log Book entries, including the missable Aqua Drone scan. There is no boss in the wreck. The chapter is complete when you reach Transport to Phazon Mines East.
Reach the Frigate Crash Site
Return to Tallon Overworld after collecting the Gravity Suit. From the Landing Site region, follow the established Tallon Overworld route toward the Frigate Crash Site. If you have not used the Gunship recently, save and refill there before leaving. The crash site is the large flooded clearing containing the wreckage of Frigate Orpheon.
The Gravity Suit is required for the underwater crossing. Without it, Samus moves too slowly in the water and cannot reliably reach the frigate entrance. In the exterior clearing, scan creatures before defeating them if you are pursuing Log Book completion. Tallon Crabs and Aqua Sacs are useful entries in this section, while the Aqua Pirate appears after you enter the wreck.
- Confirm that the Gravity Suit is equipped before entering the water.
- Save and refill at the Gunship if necessary.
- Scan unfamiliar creatures in the exterior clearing before destroying them.
Cross the wreckage and enter Frigate Orpheon
Cross the water and use the small Morph Ball passage at the far side of the clearing. Follow the tunnel through the wreckage until you reach the frigate entrance. The route leads into the same ship Samus escaped during the opening sequence, but this visit is flooded and uses a different progression path.
Inside the first submerged sections, use the Gravity Suit to move through the water and climb broken platforms. The ship’s damaged structures can make a missed jump look like a dead end. If you fall, look for lower ledges, floating debris and Morph Ball passages rather than trying to jump directly back to the highest platform. Follow the doors that remain active and use the map to confirm which rooms you have already crossed.
- Use the Morph Ball passage in the Frigate Crash Site.
- Enter the wreck through the Frigate Access Tunnel.
- Use lower ledges and floating debris to recover from missed jumps.
Restore power with the Thermal Visor and Wave Beam
Several doors inside the wreck are disabled. When a door will not open, switch to the Thermal Visor and search the surrounding walls, ceilings and platforms for a glowing power conduit. Lock onto the conduit and shoot it with the Wave Beam. The conduit becomes visible only through the Thermal Visor, and the Wave Beam is the weapon that activates it.
The first power-conduit sequence occurs in the Main Ventilation Shaft. Auto Turrets can cover the room, so destroy them from a safe angle before searching for the conduit. Continue through the ventilation sections and keep checking the Thermal Visor whenever a door appears inactive.
In the Reactor Core, Aqua Pirates guard the route. Scan an Aqua Pirate before defeating it if you want the creature entry. Several conduits are spread around the room rather than grouped beside the exit, so inspect both sides and the upper and lower portions of the chamber. Once all required conduits are energized, the exit door opens.
- Use the Thermal Visor to locate inactive conduits.
- Activate conduits with the Wave Beam, not missiles.
- Scan an Aqua Pirate before eliminating the last one in the room.
Use Reactor Access and collect the Energy Tank
After leaving the Reactor Core, enter Reactor Core Access. The Save Station is immediately useful and should be your checkpoint before the longer interior route. Save here before continuing, especially if underwater enemies or platforming have reduced your energy.
Proceed to Cargo Freight Lift to Deck Gamma. Use a missile on the damaged lift door at the bottom of the shaft to collect the Energy Tank inside the elevator car. This is a worthwhile required-for-item-percentage pickup, but it is not required to reach the Phazon Mines.
The shaft is climbed by jumping across floating wreckage. Aqua Reapers cling to the walls and can interrupt a landing, so destroy or stun them before committing to a difficult jump. While climbing, use the Thermal Visor to locate the power conduits hidden around the shaft. Activate the lower conduit, climb several platforms and look behind Samus for the next one. A final conduit near the upper exit powers the door onward.
- Save in Reactor Core Access.
- Open the Cargo Freight Lift door with a missile.
- Collect the Energy Tank if pursuing item completion.
- Activate every conduit in the lift shaft before attempting to leave.
Scan the Aqua Drone and leave the flooded sections
Continue through Deck Beta Transit Hall to Biohazard Containment. Aqua Drones appear in the water here. Scan one before killing it. This is the most important missable creature scan in the chapter because the encounter is limited and the enemies may disappear after the room is cleared. Keep a safe distance, move laterally to avoid their shots and use charged beam attacks when they expose themselves.
In Biohazard Containment, use the Thermal Visor to find the conduits above and below the waterline. Two are on the upper portion of the room and another is submerged. The underwater missile expansion is optional; a Super Missile is required to break the Cordite covering that conceals it. If you are not carrying the needed weapon, note the room and return during cleanup rather than delaying the main route.
The following rooms contain Aqua Reapers and Aqua Pirates. Avoid allowing the larger enemies to trap you against walls. Lock on, strafe around their attacks and retreat through the previous door if your energy becomes dangerously low. The rooms can be re-entered after resetting, so there is no benefit in forcing a fight from a poor position.
- Scan an Aqua Drone before defeating it.
- Activate the upper and submerged conduits in Biohazard Containment.
- Use a Super Missile for the optional Cordite-covered missile expansion.
- Keep a retreat route open during Aqua Pirate encounters.
Exit through Great Tree Hall
Follow the powered route through Deck Beta Security Hall, Biotech Research Area 1 and the connecting passages. In Biotech Research Area 1, clear the Aqua Pirates and activate the conduits on both the lower and upper levels. Continue through the Connection Elevator to Deck Beta and drop into Hydro Access Tunnel.
Hydro Access Tunnel is a Morph Ball passage with bomb-jump platforms. The Energy Tank at the upper end is optional and requires a controlled series of bomb jumps; collect it only if you are comfortable with the timing. The normal exit is reached by bomb-jumping upward through the course and continuing to Great Tree Hall.
In Great Tree Hall, climb out of the water and take the white door above water level. Cross Transport Tunnel E, avoiding the Phazon deposits, and enter Transport to Phazon Mines East. This elevator marks the intended end of the crashed-frigate route and begins the Phazon Mines chapter.
- Clear the conduits in Biotech Research Area 1.
- Use the Morph Ball route through Hydro Access Tunnel.
- Take the white door above water level in Great Tree Hall.
- Cross Transport Tunnel E without touching the Phazon.
- Use Transport to Phazon Mines East.
Before you move on
- The Gravity Suit was used to cross the Frigate Crash Site and enter Frigate Orpheon.
- The Main Ventilation Shaft and Reactor Core power conduits were activated with the Thermal Visor and Wave Beam.
- The Reactor Core Access Save Station was used.
- The Energy Tank in Cargo Freight Lift to Deck Gamma was collected or marked for later cleanup.
- An Aqua Drone was scanned if Log Book completion is a goal.
- The powered route through Biohazard Containment and Biotech Research Area 1 was completed.
- Great Tree Hall was reached and the white door above the water was used.
- Transport Tunnel E was crossed without touching the Phazon.
- Transport to Phazon Mines East was taken. Meta Ridley is not part of this chapter and should be handled in the later Artifact Temple chapter.
References for this chapter
Phazon Mines — Infection, Elite Pirates and Critical Gating
Complete the Phazon Mines in two main visits. First enter through Transport to Phazon Mines East, disable the Main Quarry force field, reach Central Dynamo, defeat the cloaked Sentry Drone, collect the first Power Bomb and obtain the Grapple Beam from Storage Depot B. Leave the Mines immediately afterward. Use the new shortcut through Tallon Overworld to reach Great Tree Hall and Life Grove, destroy the Bendezium obstruction with a Power Bomb and collect the X-Ray Visor. Return through Magmoor Caverns to Geothermal Core for the Plasma Beam, then open the route to Transport to Phazon Mines West through Magmoor Workstation. Re-enter the Mines, cross the deeper sections with the X-Ray Visor, defeat Omega Pirate, collect the Phazon Suit and return to Phazon Mining Tunnel for Artifact of Newborn. Newborn is the eleventh regional Chozo Artifact; Artifact of Truth is obtained later inside the Artifact Temple.
Initial entry: Frigate Crash Site to Main Quarry
Begin after completing the flooded Frigate Orpheon route and activating the elevator at the Frigate Crash Site. Ride Transport to Phazon Mines East and enter Main Quarry. Plasma Beam and X-Ray Visor are not required for this first descent. The useful equipment checkpoint is Gravity Suit, Thermal Visor, Wave Beam, Ice Beam, Boost Ball, Spider Ball, Super Missile, Space Jump Boots and Morph Ball Bombs.
In Main Quarry, scan and activate the two force-field control panels. The upper walkway contains an optional missile expansion, but it is not needed for progression. Drop to Save Station Mines A and save before advancing. This is the first dependable recovery point inside the facility.
- Enter through Transport to Phazon Mines East.
- Disable the Main Quarry force field with both control panels.
- Save at Save Station Mines A.
- Do not treat X-Ray Visor or Plasma Beam as prerequisites for the first descent.
Mine Security Station and the first trooper groups
Continue through the security passages toward Mine Security Station. Use the Thermal Visor to locate Shadow Pirates in dark areas. When purple Wave Troopers appear, switch to the Wave Beam; unrelated beams are ineffective against their armor. Keep moving while locked on instead of standing in the center of a corridor.
Proceed through Elite Research and use the nearby consoles to lower and reposition the platforms. The Phazon Elite is contained in a tank here. Do not spend the Power Bomb on it yet; the encounter is optional and is not needed to obtain the Grapple Beam or reach Omega Pirate. Follow the route through Research Access and Omega Research toward Central Dynamo.
- Use Thermal Visor against Shadow Pirates.
- Use Wave Beam against Wave Troopers.
- Operate the Elite Research platform controls.
- Leave the Phazon Elite sealed until later, unless completing optional content.
Central Dynamo: cloaked Sentry Drone and first Power Bomb
Enter Central Dynamo and drop into the lower chamber to trigger the cloaked Sentry Drone. This fight occurs before the X-Ray Visor is available, so the drone cannot be tracked with an X-Ray lock-on. Watch for its movement, muzzle flashes and laser fire, then fire toward its position. Regular shots, missiles, charged shots and a well-placed Super Missile can damage it. Keep moving around the room to avoid its attacks and the visual interference it creates.
When the drone is destroyed, the lower Morph Ball route opens. Enter the electrified maze and wait for the barriers to cycle before crossing each section. Bomb the obstructions that block the route and continue toward the center to collect the first Power Bomb. Samus uses a Power Bomb to clear the Dynamo structure as part of the escape. Return through the opened route and save at Save Station Mines B before continuing.
- Defeat the cloaked Sentry Drone without relying on X-Ray Visor.
- Navigate the electrified Morph Ball maze.
- Collect the first Power Bomb.
- Save at Save Station Mines B.
Return route and Grapple Beam
Leave Save Station Mines B and retrace the route toward Omega Research. Ice Troopers can appear during the return, so freeze them with the Ice Beam and finish them with missiles or another safe attack. In Omega Research, an Elite Pirate breaks out of containment. Circle the arena, avoid its close-range strikes and fire when its defenses are exposed. Do not waste shots while it is absorbing energy with its raised arm.
After defeating the Elite Pirate, use the upper route and destroy the Bendezium obstruction with a Power Bomb. The nearby map station is optional but useful. Continue through Ore Processing. Operate the Spinner mechanisms and use the Spider Ball tracks and Morph Ball Bomb slots to rotate the central machinery. Follow the opened route to Storage Depot B and collect the Grapple Beam.
Use the new Grapple Points to retrace the upper route, but do not attempt the final Omega Pirate approach yet. The intended progression is to leave the Mines after obtaining Grapple Beam, collect X-Ray Visor and Plasma Beam outside the facility, then re-enter through Transport to Phazon Mines West.
- Defeat the Elite Pirate in Omega Research.
- Use a Power Bomb on the Bendezium obstruction.
- Solve the Ore Processing Spinner and Spider Ball sequence.
- Collect Grapple Beam in Storage Depot B.
- Leave the Mines after obtaining Grapple Beam.
Post-Grapple route: Great Tree Hall and Life Grove
From the Mines, follow the established route back through Tallon Overworld to Great Tree Hall. Climb the room using the platforms and Spider Ball track around the tree. At the top, enter the Ice Beam door leading to Life Grove Tunnel. In the tunnel, use a Power Bomb on the Bendezium obstruction, then roll through the Morph Ball passage. The half-pipe and missile expansion in this tunnel are optional; continue through the passage to Life Grove.
Drop into Life Grove and collect the X-Ray Visor. Afterward, use the X-Ray Visor to reveal the destructible sections surrounding the room. A Power Bomb opens the surrounding route and allows you to escape. The Artifact of Chozo is also available in Life Grove through the underwater mechanism, but it is optional for the Mines objective and may be collected during this visit if desired.
Return through Life Grove Tunnel and Great Tree Hall. If the upper route is confusing, use the map to confirm that you are returning to the Tallon Overworld side rather than entering another Chozo Ruins branch. X-Ray Visor is now required for the invisible platforms later in the Mines.
- Leave the Mines after collecting Grapple Beam.
- Travel through Tallon Overworld to Great Tree Hall.
- Use a Power Bomb on the Life Grove Tunnel obstruction.
- Collect X-Ray Visor in Life Grove.
- Return to the Tallon Overworld route before heading to Magmoor Caverns.
Magmoor Caverns and Plasma Beam
Travel from Tallon Overworld through Magmoor Caverns to Geothermal Core. The Grapple Beam is needed for the upper crossings, while Boost Ball, Spider Ball and Morph Ball Bombs operate the machinery. Use the Spinners and Morph Ball slots to raise the platforms and open the Spider Ball route through the core. Follow the tracks and platforms to Plasma Processing and collect Plasma Beam.
Retrace the route from Plasma Processing through Geothermal Core. Continue to Magmoor Workstation, where Plasma Beam opens the previously inaccessible red-door route and lets you defeat the Flying Pirates encountered there. Use a Power Bomb on the rubble in Workstation Tunnel, then activate Transport to Phazon Mines West.
Ride the western elevator back into the Mines. Save at the available station before beginning the deeper descent. The required order is now complete: first Mines visit, Power Bomb, Grapple Beam, Great Tree Hall and Life Grove, X-Ray Visor, Plasma Beam in Geothermal Core, Magmoor Workstation and Transport to Phazon Mines West.
- Use Grapple Beam and Spider Ball in Geothermal Core.
- Collect Plasma Beam in Plasma Processing.
- Open the Magmoor Workstation route.
- Use a Power Bomb in Workstation Tunnel.
- Re-enter the Mines through Transport to Phazon Mines West.
Second Mines entry and the X-Ray route
From Transport to Phazon Mines West, proceed through Phazon Processing Center and the upper facility. Match each Beam Trooper with its corresponding beam: Wave Beam for Wave Troopers, Ice Beam for Ice Troopers and Plasma Beam for Plasma Troopers. Thermal Visor remains useful for Shadow Pirates. Scan unfamiliar troopers if you need to confirm their type before committing to an attack.
In Metroid Quarantine A, activate the required terminal and reach the Phazon-filled gap. Equip the X-Ray Visor to reveal the invisible moving platforms over the pit. Jump from the large mushroom to the first platform, cross to the opposite side and use the next visible route toward the elevator. Do not rush these jumps; center Samus before each leap and avoid fighting close to the edge.
Continue through Fungal Hall Access and the Fungal Halls toward Metroid Quarantine B. Save at Save Station Mines C before entering Elite Quarters. The blue-Phazon branch of Phazon Mining Tunnel must still be postponed because the Phazon Suit is required for safe passage.
- Re-enter through Transport to Phazon Mines West.
- Use the matching beam against each Beam Trooper type.
- Cross the invisible platforms in Metroid Quarantine A with X-Ray Visor.
- Reach and use Save Station Mines C.
- Do not enter the blue-Phazon branch yet.
Elite Quarters: defeat Omega Pirate
Before entering Elite Quarters, refill energy and missiles at Save Station Mines C. If Log Book completion matters, scan Omega Pirate during the active battle or immediately as the encounter begins. Scanning the tank area alone does not substitute for the creature entry.
Omega Pirate begins with several exposed armor plates. Circle the arena and attack the visible plates when the boss is not absorbing energy. Super Missiles are effective against the plates. Jump over the ground shockwave and avoid standing in the Phazon patches. Destroying the vulnerable plates causes Omega Pirate to collapse.
When the boss cloaks and summons Beam Troopers, switch to X-Ray Visor to locate it over one of the Phazon pools. Ignore summoned troopers unless they threaten your movement or health. When Omega Pirate becomes visible or begins repairing its armor, lock on and fire a Super Missile at its body. It will relocate and may restore its plates, so repeat the exposed-plate and cloaked phases until the fight ends.
After victory, Samus receives the Phazon Suit. Return to Save Station Mines C and save. If you fail, reload this checkpoint and reserve missiles for Omega Pirate rather than spending them on every summoned trooper.
- Scan Omega Pirate during the battle if Log Book completion matters.
- Destroy the exposed armor plates.
- Jump over the shockwave and avoid Phazon pools.
- Use X-Ray Visor during the cloaked phase.
- Strike the visible or repairing boss with Super Missiles.
- Collect the Phazon Suit and save afterward.
Artifact of Newborn and Mines completion
From Save Station Mines C, return through Metroid Quarantine B and the Fungal Halls to Phazon Mining Tunnel. Enter the blue-Phazon Morph Ball branch that was previously deferred. The Phazon Suit protects Samus from this hazard. Roll through the tunnel, bomb the obstructions and use controlled Bomb jumps where the passage rises. At the end, collect Artifact of Newborn.
Artifact of Newborn is the eleventh regional Chozo Artifact. It is not the twelfth and final total artifact. Artifact of Truth is obtained later inside the Artifact Temple after the eleven regional artifacts have been collected. The Temple sequence then installs all twelve artifacts before opening the Impact Crater route.
After collecting Newborn, return to Save Station Mines C if you want a secure checkpoint, then leave the Mines for artifact cleanup and the final approach. The Phazon Elite and Artifact of Warrior in Elite Research, the Ventilation Shaft Energy Tank and other item expansions are optional. None of them is required for the first Power Bomb, Grapple Beam, Plasma Beam, Omega Pirate, Phazon Suit or Artifact of Newborn.
- Use Phazon Suit to cross the blue-Phazon branch.
- Collect Artifact of Newborn in Phazon Mining Tunnel.
- Count Newborn as the eleventh regional Artifact.
- Confirm all eleven regional Artifacts before entering the Artifact Temple later.
- Remember that Artifact of Truth is collected inside the Temple.
- Treat Phazon Elite, Artifact of Warrior and item expansions as optional.
Before you move on
- Samus entered the Phazon Mines through Transport to Phazon Mines East.
- The Main Quarry force field was disabled with both control panels.
- The first Power Bomb was collected in Central Dynamo.
- Grapple Beam was collected in Storage Depot B.
- Samus left the Mines after obtaining Grapple Beam.
- Samus reached Great Tree Hall and used a Power Bomb to open Life Grove Tunnel.
- X-Ray Visor was collected in Life Grove.
- Samus returned through Magmoor Caverns to Geothermal Core.
- Plasma Beam was collected in Plasma Processing.
- The Magmoor Workstation route was opened with Plasma Beam and a Power Bomb.
- The deeper Mines route was re-entered through Transport to Phazon Mines West.
- The invisible platforms in Metroid Quarantine A were crossed with X-Ray Visor.
- Omega Pirate was defeated and Phazon Suit was collected.
- Artifact of Newborn was collected in Phazon Mining Tunnel after obtaining Phazon Suit.
- Newborn is counted as the eleventh regional Artifact, not the twelfth total Artifact.
- The Omega Pirate scan appears in the Log Book if it was captured during the active battle.
- The Phazon Mines progression is complete enough to leave for regional artifact cleanup and the later Artifact Temple sequence.
References for this chapter
- Metroid Prime — Nintendo GameCube Instruction Manual
- Chapter 15: Mining Operations — Metroid Recon
- Metroid Prime — Guide and Walkthrough, GameFAQs 20259
- Metroid Prime — Guide and Walkthrough — GameCube — GameFAQs
- Metroid Prime — 100% Scan/Item Walkthrough, GameFAQs 36706
- Metroid Prime GameCube Version Differences
Post-Omega Exit, Artifact Verification and the Final Approach
After defeating Omega Pirate, confirm that Artifact of Newborn is already in the Phazon Mines log, leave the Mines through Processing Center, return to Tallon Overworld, complete or verify the remaining regional artifacts, and prepare for the final Temple sequence. Artifact of Truth is separate from the eleven regional artifacts and is found in the Artifact Temple courtyard. Once all twelve artifacts have been collected and installed, defeat Meta Ridley and activate the Crater Entry Point Save Station before entering Impact Crater.
1. Confirm Newborn and leave the Omega Pirate area
After defeating Omega Pirate, collect the Phazon Suit and verify Artifact of Newborn in the Artifact list. Newborn is obtained in Phazon Mining Tunnel during the late Phazon Mines route before the Omega Pirate battle. It is not a second pickup available after the boss, so do not return there looking for another copy.
Leave the Omega Pirate arena and return to Elite Quarters. Take the upper route toward Processing Center Access. This is the intended post-boss exit. Do not attempt to reverse the earlier route through Omega Research and Elite Control as your main way out.
The Phazon Suit protects Samus from blue Phazon encountered in the Mines and certain late-game areas. It does not make the orange Phazon pools in Impact Crater safe, so do not treat it as unlimited Phazon protection.
- Omega Pirate defeated.
- Phazon Suit obtained.
- Artifact of Newborn confirmed in the Artifact list.
- Elite Quarters reached.
- No return trip to Phazon Mining Tunnel attempted.
2. Cross Processing Center and take the surface route
From Elite Quarters, enter Processing Center Access through the red door. The Energy Tank in this area is optional. Collect it if you want the health increase or are pursuing item completion, but it is not needed to open the exit route.
Continue into Phazon Processing Center. Follow the elevated platforms, Spider Ball tracks and Morph Ball passages across the room. Stay above the Phazon and clear enemies only when they block a landing, narrow platform or required mechanism. The Missile Expansion in this section is also optional.
If the route appears to end, inspect the upper ledges and magnetic tracks instead of returning to the Omega Pirate arena. The intended path uses the room's raised traversal route and exits through Transport Access.
Take the elevator from Transport Access to Magmoor Caverns South. This is the normal post-Omega route out of the Mines. It is different from the earlier Power Bomb connection through Maintenance Tunnel.
- Processing Center Access entered from Elite Quarters.
- Optional Energy Tank collected or skipped knowingly.
- Phazon Processing Center crossed using the upper platform and Morph Ball route.
- Optional Missile Expansion collected or left for cleanup.
- Transport Access reached.
3. Reach Magmoor Workstation and save at the Landing Site
From Magmoor Caverns South, follow the established cavern route to Magmoor Workstation. Use the already-open Workstation Tunnel connection toward the elevator. If you cleared that obstruction earlier, do not spend another Power Bomb on it.
Take the elevator from Magmoor Workstation to Tallon Overworld West. Follow the surface route to Landing Site and Samus's gunship. Save at the gunship before beginning artifact cleanup or entering the Artifact Temple. The Landing Site is the correct place to restore supplies and establish a safe restart point.
If all eleven regional artifacts are already present, still save and refill here. A long cleanup detour should not be followed immediately by the final Temple sequence without using the gunship.
- Magmoor Caverns South reached from the Mines.
- Magmoor Workstation reached.
- Tallon Overworld West elevator used.
- Landing Site reached.
- Game saved and supplies restored at the gunship.
4. Verify the eleven regional Chozo Artifacts
Before returning to the Cipher, confirm the following eleven regional artifacts. These are separate from Artifact of Truth, which is found in the Artifact Temple courtyard.
Artifact of Strength is in Warrior Shrine in Magmoor Caverns. Reach the upper structure from Monitor Station and use the Spinner mechanism to open the route.
Artifact of Nature is in Lava Lake in Magmoor Caverns. Use a Super Missile on the weakened stone pillar to expose the artifact passage.
Artifact of Wild is in Sunchamber in Chozo Ruins. Return to the Flaahgra area and defeat the Chozo Ghosts to claim it.
Artifact of Lifegiver is in Tower Chamber beyond Tower of Light in Chozo Ruins. The Gravity Suit is required for the underwater route.
Artifact of Chozo is in Life Grove in Tallon Overworld. Use the Power Bomb route and the Morph Ball mechanism in the lower area.
Artifact of World is in Elder Chamber in Chozo Ruins. In Hall of the Elders, activate the red mechanism with the Plasma Beam, then use the opened Morph Ball route.
Artifact of Elder is in Phendrana Drifts' Control Tower. Enter the small room above the route near Research Lab Aether and melt the frozen window with the Plasma Beam. Through the window, target the exposed fuel cells at the base of the distant tower and fire a Missile. The tower collapses into the room, revealing the Morph Ball opening to the artifact. Do not present the Plasma Beam as a weapon to fire directly at the tower support.
- Strength confirmed.
- Nature confirmed.
- Wild confirmed.
- Lifegiver confirmed.
- Chozo confirmed.
- World confirmed.
- Elder confirmed using the frozen-window and Missile sequence.
5. Complete the remaining regional checks
Artifact of Sun is in Chozo Ice Temple in Phendrana Drifts. Melt the ice around the Chozo statue's hands with the Plasma Beam and follow the opened route.
Artifact of Spirit is in Storage Cave near Phendrana's Edge. Climb the upper ledges with the Grapple Beam, use the X-Ray Visor to identify the concealed wall, and use a Power Bomb to open the artifact chamber.
Artifact of Warrior is in Elite Research in the Phazon Mines. Return to the Phazon Elite containment area, destroy the containment capsule with a Power Bomb, defeat the Phazon Elite and collect the artifact.
Artifact of Newborn is in Phazon Mining Tunnel and should already be present from the sequence before Omega Pirate. If it is listed, do not search for a second copy.
The complete regional list is Strength, Nature, Wild, Lifegiver, Chozo, World, Elder, Sun, Spirit, Warrior and Newborn. If one is missing, use the artifact hints and return to that region before entering the final seal sequence.
- Sun confirmed.
- Spirit confirmed.
- Warrior confirmed.
- Newborn confirmed from the earlier Mines route.
- All eleven regional artifacts present.
- Artifact of Truth still checked separately.
6. Verify Truth and install all twelve artifacts
From Landing Site, take the elevated path through the waterfall area to the Artifact Temple. Artifact of Truth can be collected during an earlier Tallon Overworld visit after obtaining the Missile Launcher, so it may already be in the inventory.
Enter the Artifact Temple and check the courtyard's central area. Artifact of Truth rests there. If it is already recorded, do not search for another copy. If it is missing, collect it now. Do not confuse it with Artifact of Chozo in Life Grove.
With the eleven regional artifacts and Truth all accounted for, approach the central Cipher chamber and place the artifacts into their corresponding positions. The completed installation opens the route to Impact Crater and triggers Meta Ridley's arrival at the Temple.
Save before this sequence, not after it. Once the encounter begins, scan Meta Ridley immediately if Log Book completion matters. Meta Ridley is not fought at Frigate Crash Site; the battle begins at the Artifact Temple after the artifacts have been restored.
- Landing Site save completed before entering the Temple.
- Eleven regional artifacts verified.
- Artifact of Truth verified or collected from the courtyard.
- All twelve artifacts installed.
- Meta Ridley scanned if required.
- Impact Crater route opened.
7. Defeat Meta Ridley and activate the Crater Entry Point station
During Meta Ridley's aerial phase, keep moving laterally and lock on when he comes into a useful firing position. Charge Plasma Beam shots and missiles are effective when he hovers, pauses or exposes his front. Do not waste ammunition on fast flybys when he is difficult to hit.
When he lands, maintain room to react to his charge, tail strike and other close-range attacks. If he rears back before charging, jump or move clear, then turn toward him after the attack finishes. Fire during recovery openings rather than standing beside him and trading damage.
Prioritize survival over rapid damage. Continue circling the arena, avoid remaining directly in front of a charge, and attack the exposed front or mouth when the animation provides a clear target.
After Meta Ridley is defeated, the Chozo spirits open the blue passage into Impact Crater. Enter it and activate the Crater Entry Point Save Station immediately. This station is the intended restart point for the final descent.
The orange Phazon in Impact Crater remains harmful even with the Phazon Suit. Use the intended platforms and Spider Ball routes, and bypass or defeat Fission Metroids only when they prevent progress. Once the save is active, continue into the final Metroid Prime sequence.
- Meta Ridley defeated at the Artifact Temple.
- Blue Impact Crater passage entered.
- Crater Entry Point Save Station activated.
- Orange Phazon avoided.
- Final descent begun from the Crater Entry Point.
Before you move on
- Phazon Suit obtained from Omega Pirate.
- Artifact of Newborn verified as collected before the Omega Pirate battle.
- Processing Center Access and Phazon Processing Center exited successfully.
- Magmoor Workstation reached through the open Workstation Tunnel.
- Landing Site reached through Tallon Overworld.
- Landing Site gunship used to save and refill.
- Strength, Nature, Wild, Lifegiver, Chozo, World, Elder, Sun, Spirit, Warrior and Newborn all confirmed.
- Artifact of Truth verified or collected in the Artifact Temple courtyard.
- All twelve artifacts installed in the Cipher chamber.
- Meta Ridley defeated at the Artifact Temple.
- Impact Crater passage opened.
- Crater Entry Point Save Station activated before the final descent.
References for this chapter
- Metroid Prime — Guide and Walkthrough — GameCube
- Metroid Prime - Guide and Walkthrough - GameCube - By CyricZ
- Metroid Prime - Guide and Walkthrough - GameCube - By FalconZero03
- Metroid Prime — Guide and Walkthrough — GameCube — GameFAQs
- Metroid Prime - Artifact Locations Guide - GameCube - By bluberry
- Artifact Temple — Metroid Wiki
- Artifact of Elder - Metroid Wiki
- Metroid Prime Walkthrough — GameSpot
Metroid Prime — Final Arena, Phase Strategy and Defeat
The original North American GameCube campaign ends with two consecutive battles in the Impact Crater: the armored shell of Metroid Prime, followed immediately by Metroid Prime Core Essence. The shell must be damaged with the beam matching its current color. Core Essence cannot be harmed by ordinary beams, missiles or Beam Combos. During that battle, Core Essence creates a Phazon pool; entering the pool temporarily grants access to the Phazon Beam, which damages Core Essence only while Samus remains in the pool. Save at Crater Entry Point, refill missiles at the Crater Missile Station, scan both forms if Log Book completion matters, and complete the Phazon Beam cycles to trigger the escape sequence and ending.
Save and prepare at Crater Entry Point
After Meta Ridley is defeated, enter the Impact Crater and activate the transport at the Artifact Temple. You arrive in Crater Entry Point. Use the Save Station before continuing. This is the last ordinary Save Station before the final sequence, and there is no save point between the armored Metroid Prime battle and the Core Essence battle.
Proceed through the crater rooms until you reach the Phazon Core. The Crater Missile Station is located near the top of this route. Use it to refill missiles before entering the boss area. It restores missiles, not Power Bombs, so do not treat it as a complete ammunition refill.
Keep Power Bombs available for the Core Essence battle, particularly when Fission Metroids appear. If Log Book completion matters, scan Metroid Prime as soon as the armored creature becomes targetable. Scan Metroid Prime Core Essence immediately after the shell is destroyed; that entry is available only during this final sequence.
- Save at Crater Entry Point.
- Use the Crater Missile Station to refill missiles.
- Do not expect the station to restore Power Bombs.
- Scan the armored shell and Core Essence before defeating them if Log Book completion is a goal.
Match Metroid Prime’s color to the beam
Enter the Phazon Infusion Chamber and lock on to Metroid Prime. The shell changes color during the fight. Yellow armor is vulnerable to the Power Beam, purple armor to the Wave Beam, white armor to the Ice Beam, and red armor to the Plasma Beam. On the original GameCube controller, select beams with the C-Stick: up for Power, right for Wave, down for Ice and left for Plasma.
Keep moving laterally while aiming at Prime’s face. Charged shots from the matching beam are dependable and do not consume missiles. Beam Combos can shorten a phase, but they are optional; save missiles for situations where they provide a clear advantage. A Super Missile is useful against the yellow form, while charged Wave shots, Ice attacks and Plasma shots are effective against their matching forms.
Prime uses missiles, gas-producing projectiles, colored energy attacks and a beam fired from its lower body. Strafe or dash away from direct attacks, and avoid lingering in toxic residue. Purple attacks can interfere with visor functions, and white attacks can freeze Samus. When Prime flashes red and prepares to charge, stop attacking and prepare to evade. After the color changes, immediately select the new matching beam.
- Yellow shell: Power Beam.
- Purple shell: Wave Beam.
- White shell: Ice Beam.
- Red shell: Plasma Beam.
- Aim at Prime’s face while strafing.
- Treat the red flash as a warning to prepare for a charge and color change.
Survive the lower subchambers
Prime retreats through several connected subchambers as its health falls. Follow it through each opening rather than waiting in the previous room. Later subchambers reduce safe space and make color changes more frequent, so identify the new color before committing to another shot.
When Prime flashes red and charges, use Morph Ball form and roll into one of the grooves in the floor where available. Stay in the groove until Prime has passed completely. Exiting too early can expose Samus to its body or rear legs. Once the charge ends, return to the arena edge, identify the current color and resume the attack.
Prime can release slow-moving energy orbs. Destroy them with charged shots before they reach Samus. They may release energy or ammunition, making them useful recovery opportunities. Prime can also use a tractor beam that pulls Samus toward its body. If caught, transform into Morph Ball form and use Boost Ball movement to escape the pull. Prioritize survival over one additional shot, especially in the final subchamber where Prime can change colors rapidly.
- Follow Prime through every retreat.
- Use the floor grooves in Morph Ball form against charges.
- Destroy energy orbs when it is safe to do so.
- Use Morph Ball and Boost Ball to escape the tractor beam.
- Do not attack while Prime is changing color or beginning a charge.
Begin the Core Essence battle
After the armored shell is destroyed, follow the creature into Metroid Prime Lair and scan Metroid Prime Core Essence immediately. This form is immune to the Power, Wave, Ice and Plasma Beams, missiles, Super Missiles and Beam Combos. Do not spend ammunition attempting to damage it with those weapons.
Core Essence sends a ground shockwave across the arena. Jump over each wave and keep moving around the outside of the room. It can destroy rock-like objects, which may release energy pickups. Use the Charge Beam to draw those pickups toward Samus when the route is clear.
After the battle progresses, Core Essence creates a pool of Phazon and temporarily disappears from ordinary view. Enter the pool. While Samus remains inside it, the temporary Phazon state enables the Phazon Beam. Lock on to Core Essence and hold the A Button to fire the Phazon Beam. This temporary access is the only method that damages the boss.
Core Essence shifts between different visibility states. Use the Combat Visor when it is visible normally, the X-Ray Visor when it disappears from the normal spectrum, and the Thermal Visor when it is hidden from both Combat and X-Ray. Switch according to what the current visor shows instead of assuming that one visor remains correct for the entire battle.
- Scan Core Essence immediately after it appears.
- Jump over every shockwave.
- Enter each Phazon pool to obtain temporary Phazon Beam access.
- Hold A to fire the Phazon Beam while standing in the pool.
- Switch between Combat, X-Ray and Thermal Visors to track Core Essence.
Handle summoned Metroids and finish the game
As Core Essence loses health, it begins creating Metroid summons near its Phazon pools. The encounter can include Tallon Metroids, Hunter Metroids and eventually Fission Metroids. Destroy anything that blocks your route to the pool, but do not spend the entire battle clearing enemies if you can safely reach the next Phazon pool.
Charged Plasma Beam shots are effective against Tallon Metroids. Freeze Hunter Metroids with the Ice Beam and finish them with a missile. When Fission Metroids appear, use a Power Bomb in Morph Ball form if several are grouped together. If a Fission Metroid blocks the active pool, a short Phazon Beam burst can destroy it immediately. Avoid wasting the pool’s entire firing window on summons when Core Essence is exposed.
After a pool is exhausted, return to the outer arena, avoid the shockwaves and wait for the next pool. If the Phazon Beam does not fire, break the lock-on, confirm that Samus is standing in the Phazon pool and reacquire Core Essence with the appropriate visor. Repeat the pool entry, visor check and Phazon Beam attack until the boss is destroyed.
The Impact Crater collapses after the final successful attack. Samus escapes through the crater and Artifact Temple, boards the Gunship and leaves Tallon IV. The ending variation depends on file completion, but the collapse, escape sequence and credits confirm completion of the main campaign.
- Use charged Plasma shots against Tallon Metroids.
- Freeze Hunter Metroids with Ice Beam, then finish them with missiles.
- Use Power Bombs or brief Phazon Beam bursts against Fission Metroids.
- Repeat the Phazon pool attack until Core Essence is destroyed.
- Wait for the escape sequence and credits.
Before you move on
- Metroid Prime’s armored shell has been defeated.
- Metroid Prime Core Essence has been scanned if Log Book completion is desired.
- Core Essence has been damaged through the temporary Phazon Beam created by its Phazon pools.
- The Impact Crater collapse and Samus’s escape sequence have played.
- The ending credits begin, confirming completion of the main campaign on the original North American GameCube release.
Pre-Ending Artifact, Item and Scan Cleanup
Use this chapter to finish optional item and scan cleanup before the final Artifact Temple sequence. The original North American GameCube release has three separate completion systems: item percentage changes the ending scenes, the eleven regional Chozo Artifacts are needed to activate the final Temple sequence, and Log Book scans unlock the GameCube image galleries. Artifact of Truth is separate from the regional set. It rests in the Artifact Temple courtyard and can be collected as soon as you first reach the Temple, so it may already be present before the final visit. The final approach uses all twelve Artifacts at the Cipher, then leads to Meta Ridley and the Impact Crater.
Save before cleanup and separate the completion goals
Return to the Landing Site and save at the Gunship before beginning a long cleanup loop. This gives you a reliable recovery point if you make a mistake in a late-game room or decide to attempt the final battles before every optional pickup is confirmed.
Track three goals separately. The Artifact goal is eleven regional Chozo Artifacts plus the separate Artifact of Truth. The item goal includes major upgrades, Missile Expansions, Energy Tanks, Power Bomb Expansions, and beam-combo upgrades. The Log Book goal covers Pirate Data, Chozo Lore, Creatures, Research entries, and Artifacts. A complete Log Book is not required for the best item-based ending, and a 100 percent item file does not prove that every scan was recorded.
For a full item file in the original GameCube release, the practical inventory targets are 14 Energy Tanks, 250 missiles, and 8 Power Bombs, together with every major upgrade and beam combo. Confirm the percentage on the save file rather than relying on the map alone. The map helps locate unexplored rooms and connections, but it is not a complete item counter.
- Save at the Landing Site before the cleanup loop.
- Track Artifacts, items, and Log Book scans as different goals.
- Use the save-file item percentage as the final item check.
- For 100 percent items, confirm 14 Energy Tanks, 250 missiles, and 8 Power Bombs.
Confirm the eleven regional Chozo Artifacts
Before beginning the final Temple run, confirm these eleven regional Artifacts. Artifact of Truth is not part of this pre-Temple regional checklist because it is found in the Artifact Temple courtyard and may already be in your inventory.
In Chozo Ruins, collect Artifact of Wild in Sunchamber after returning to the former Flaahgra arena and defeating the Chozo Ghosts. Collect Artifact of Lifegiver in Tower Chamber by entering the water in Tower of Light and using the Gravity Suit to reach the underwater door. Collect Artifact of World in Elder Chamber: return to Hall of the Elders, use the Plasma Beam to disable the red shield, activate the Morph Ball Slot, and follow the opened route beneath the statue.
In Tallon Overworld, collect Artifact of Chozo in Life Grove. After obtaining the X-Ray Visor and Power Bombs, destroy the obstruction around the chamber, bomb the central plate to raise the pillar, then use the Spinner to rotate the walkway into position beneath the waterfall. The artifact rises with the walkway.
In Magmoor Caverns, collect Artifact of Strength in Warrior Shrine by climbing to the upper Monitor Station route and using the Spinner to extend the bridge. Collect Artifact of Nature in Lava Lake by firing a Super Missile into the thin central pillar on the section nearest the Chozo Ruins elevator.
In Phendrana Drifts, collect Artifact of Sun in Chozo Ice Temple by melting the ice on the Chozo statue with the Plasma Beam and rolling into the statue's opened hands. Collect Artifact of Elder in Control Tower by melting the frozen window above Research Lab Aether, then shooting the distant tower so it collapses into the room. Collect Artifact of Spirit in Storage Cave by climbing Phendrana's Edge, using the X-Ray Visor to locate the hidden entrance, destroying the wall with a Power Bomb, and opening the red door with the Plasma Beam.
In Phazon Mines, collect Artifact of Warrior in Elite Research after releasing and defeating the Phazon Elite. Collect Artifact of Newborn in Phazon Mining Tunnel after obtaining the Phazon Suit and crossing the hazardous Morph Ball route. These eleven regional Artifacts are the required set for the final Temple approach.
- Artifact of Wild: Sunchamber, Chozo Ruins.
- Artifact of Lifegiver: Tower Chamber, Chozo Ruins.
- Artifact of World: Elder Chamber, Chozo Ruins.
- Artifact of Chozo: Life Grove, Tallon Overworld.
- Artifact of Strength: Warrior Shrine, Magmoor Caverns.
- Artifact of Nature: Lava Lake, Magmoor Caverns.
- Artifact of Sun: Chozo Ice Temple, Phendrana Drifts.
- Artifact of Elder: Control Tower, Phendrana Drifts.
- Artifact of Spirit: Storage Cave, Phendrana Drifts.
- Artifact of Warrior: Elite Research, Phazon Mines.
- Artifact of Newborn: Phazon Mining Tunnel, Phazon Mines.
- Artifact of Truth is separate and belongs to the Artifact Temple.
Sweep Chozo Ruins and Tallon Overworld for items
Begin the item sweep in Chozo Ruins. Revisit rooms with Morph Ball tunnels, half-pipes, Spider Ball tracks, colored doors, and Power Bomb barriers. Concentrate on Main Plaza, Ruined Nursery, Training Chamber, Dynamo, Furnace, Watery Hall, Gathering Hall, Life Grove Tunnel, Tower of Light, Hall of the Elders, and the surrounding branches. Use the Boost Ball in half-pipes, the Spider Ball on magnetic tracks, the Super Missile and later beams on their matching barriers, and the X-Ray Visor whenever a platform or doorway is hidden.
In Tallon Overworld, recheck Landing Site Alcove, Transport Tunnel A, Great Tree Hall, Root Cave, Overgrown Cavern, Frigate Crash Site, and Life Grove. Use the Grapple Beam on elevated routes and the X-Ray Visor for invisible platforms. The Missile Expansion behind the Gunship at Landing Site is optional for story progress but required for a complete item file. Life Grove also contains the Artifact of Chozo route, so combine that objective with the Tallon item sweep.
Save at the Gunship after finishing this region. If the percentage has not changed as expected, use the map to identify unexplored doors, but remember that the map cannot confirm every hidden expansion.
- Recheck Chozo Ruins half-pipes, Spider Ball tracks, beam barriers, and Power Bomb rooms.
- Recheck Tallon Overworld invisible platforms and high ledges.
- Collect the Landing Site expansion if pursuing 100 percent items.
- Save after the sweep.
Sweep Magmoor Caverns, Phendrana Drifts, and Phazon Mines
Use Magmoor Caverns as the connector while checking upper ledges and late-game routes. Revisit Monitor Station, Triclops Pit, Geothermal Core, Magmoor Workstation, Fiery Shores, Lava Lake, Warrior Shrine, and Shore Tunnel. Check the Grapple Beam routes, Spinner mechanisms, and Power Bomb barriers. Shore Tunnel contains the Ice Spreader expansion, while Warrior Shrine and the upper Magmoor routes contain additional late-game pickups.
In Phendrana Drifts, recheck Phendrana Shorelines, Ice Ruins West and East, Chozo Ice Temple, Frost Cave, Phendrana's Edge, Frozen Pike, Control Tower, Gravity Chamber, and the Space Pirate research labs. Melt Plasma Beam ice, inspect hidden platforms with the X-Ray Visor, and look above the normal paths for Grapple points. Research Lab Hydra, Research Lab Aether, and the Observatory also contain important Log Book entries, so scan terminals and unusual machinery before leaving.
Finish the item sweep in Phazon Mines after all beams, Power Bombs, and the Phazon Suit are available. Revisit Main Quarry, Mine Security Station, Central Dynamo, Ore Processing, Elite Research, Elite Control, Metroid Quarantine A and B, Fungal Hall, Phazon Processing Center, and Processing Center Access. Check elevated catwalks, beam doors, Power Bomb barriers, and branches that were previously blocked. The Phazon Elite must be defeated for Artifact of Warrior, but ordinary enemies do not need to be refought solely for item percentage.
- Check Magmoor's upper ledges, Grapple routes, and Power Bomb barriers.
- Check Phendrana's ice, research labs, hidden platforms, and artifact rooms.
- Check late Phazon Mines branches after every required upgrade is available.
- Verify the save-file percentage after the complete item sweep.
Collect or verify Artifact of Truth
Artifact of Truth is in the central courtyard of the Artifact Temple in Tallon Overworld. It is available on the first visit, after reaching the Temple from Landing Site through the elevated waterfall route, Temple Hall, and Temple Security Station. You do not need the eleven regional Artifacts to collect it.
If you already entered the Temple earlier and stepped into the blue-lit object beneath the central statue, Artifact of Truth is already recorded in your inventory and Log Book. Do not search for it again or treat it as one of the eleven regional Artifacts. If you skipped it, return to the Temple courtyard now and collect it before the final run. Scan it if pursuing Log Book completion.
Once Truth is present and the eleven regional Artifacts are confirmed, save at the Landing Site Gunship. This is the safest point to preserve access to the world for any remaining item or scan cleanup.
- Artifact of Truth is recorded, either from an earlier Temple visit or this cleanup visit.
- The eleven regional Artifacts are confirmed separately.
- Artifact of Truth is scanned if pursuing Log Book completion.
- Save at the Landing Site before the final approach.
Return all twelve Artifacts and begin the final run
From the Landing Site, take the elevated path behind the waterfall and continue through Temple Hall and Temple Security Station to the Artifact Temple. When all twelve Artifacts are present, return them to the Cipher in the central Temple area. The twelve totems illuminate and the seal begins to open; this is the final Temple sequence, not a separate pickup hunt.
Meta Ridley attacks during the activation sequence. After defeating him, the Temple's defense system and the Chozo spirits create the blue transport into the Impact Crater. Take the transport and save at Crater Entry Point before continuing through the final area.
Do not enter this sequence while planning to return for ordinary item cleanup. The Impact Crater route is the ending approach, and the last practical cleanup opportunity is the pre-Temple world state. If you die, reload the Landing Site or Crater Entry Point save and repeat the approach while conserving energy, missiles, and Power Bombs.
- All eleven regional Artifacts were present before the final Temple return.
- Artifact of Truth was already collected or picked up in the courtyard.
- All twelve Artifacts were returned to the Cipher.
- Meta Ridley was defeated.
- The Impact Crater route opened and Crater Entry Point was saved.
Use item percentage and Log Book percentage correctly
The original GameCube ending variations are based on item percentage, not elapsed time or Log Book percentage. Completing the game with less than 75 percent items gives the shortest ending variation; 75 through 99 percent adds another scene; 100 percent provides the additional post-credit hint about Metroid Prime's fate. If the best item-based ending is your goal, confirm 100 percent before returning the Artifacts to the Cipher.
Log Book completion is independent. The original NTSC categories are Pirate Data, Chozo Lore, Creatures, Research, and Artifacts. Scan red-icon entries whenever they appear, especially bosses, temporary machinery, event objects, and creatures that may not return after scripted progression. Important one-time opportunities include the opening Frigate Orpheon material, Incinerator Drone, Flaahgra-related entries, Thardus, Phazon Elite, Omega Pirate, Meta Ridley, and the final Metroid Prime entries.
Scanning 50 percent of the original NTSC Log Book unlocks Image Gallery I. Scanning 100 percent unlocks Image Gallery II. A missed ordinary creature or terminal can often be found later, but an opening-area scan, boss scan, temporary object, or event-dependent creature may be unavailable after the event. Record the missing entry and plan a second playthrough if a complete Log Book is required.
- Use an original NTSC GameCube Log Book checklist.
- Scan bosses and temporary objects before completing their encounters.
- Confirm Image Gallery I at 50 percent scans.
- Confirm Image Gallery II at 100 percent scans.
- Treat missed one-time scans as a possible second-playthrough issue.
Understand completed-file behavior
After defeating Metroid Prime and viewing the ending, the original GameCube campaign does not create a normal free-roam post-boss world. Preserve the pre-ending Landing Site or Crater Entry Point save so you can reload, continue cleanup, or replay the final approach for a different ending percentage.
A completed file can be used to view the ending again from the last saved position rather than continuing after the destruction of the Artifact Temple. Therefore, finish item and scan cleanup before the final run whenever possible. If you need to collect an ordinary missed expansion afterward, reload the preserved pre-ending save, collect it, save again, and repeat the final sequence.
- Keep a pre-ending save before the Artifact Temple activation.
- Do not expect a free-roam world after the final battle.
- Reload the preserved save for post-ending cleanup or another ending attempt.
Before you move on
- The save file shows 100 percent items if pursuing the best item ending.
- Inventory totals are 14 Energy Tanks, 250 missiles, and 8 Power Bombs, with all major upgrades and beam combos collected.
- All eleven regional Artifacts are present before the final Temple activation.
- Artifact of Truth is recorded from the Artifact Temple courtyard, either on an earlier visit or during cleanup.
- All twelve Artifacts are returned to the Cipher.
- Meta Ridley and both forms of Metroid Prime are defeated.
- The ending has been viewed and the 100 percent post-credit hint appears when the item requirement is met.
- Image Gallery II is available if the original NTSC Log Book is complete.
- Any unavailable one-time scan is marked for a second playthrough rather than mistaken for a missing item.
- The preserved pre-ending save remains available for cleanup or another final run.
Appendix A — Boss and Encounter Reference
These strategies apply to the original North American Nintendo GameCube release of Metroid Prime. They use the original controller’s lock-on, strafe, visor-switching and beam systems, not the Wii, Trilogy or Remastered control schemes. Scan every boss and one-time creature before defeating it if you are pursuing Log Book completion. Parasite Queen, Hive Mecha, Incinerator Drone, Flaahgra, Adult Sheegoth, Thardus, the Chozo Ghosts, Phazon Elite, Omega Pirate, Meta Ridley, Metroid Prime and Metroid Prime Core all have entries that are easiest or only possible to obtain during their encounters. If you die before scanning a one-time enemy, reload from the last save and scan it again before attacking.
Parasite Queen — Reactor Core
Scan Parasite Queen before firing. Lock on to the exposed mouth and circle the reactor platform. A rotating energy shield surrounds the Queen, but it has a moving opening. Follow that opening around the ring instead of trying to jump over the barrier. When the opening lines up with the mouth, fire charged Power Beam shots or missiles, then keep moving to avoid the energy beam.
The shield can rotate more quickly during the battle. Wait for its movement to settle if you lose the opening, then resume circling. Do not stand directly in front of the Queen while trying to line up a shot. After enough damage, Parasite Queen is destroyed and the Frigate Orpheon escape begins immediately.
- Scan Parasite Queen before attacking.
- Follow the rotating shield’s opening.
- Shoot the exposed mouth with charged shots or missiles.
- Begin the escape sequence after victory.
Hive Mecha — Hive Totem
Scan Hive Mecha and the Ram War Wasps before clearing the room. The wasps circle the central platform and then pause before ramming. Track them with the Combat Visor, strafe around the dais and shoot them when they slow down. If several converge, jump or dash sideways rather than backing into the arena wall.
Once the active wasps are cleared, Hive Mecha opens one of its mouths. Lock onto the red interior and fire the Power Beam. The head rotates and releases another group, so repeat the cycle: clear the wasps, wait for a mouth to open, then shoot the red section. After the final mouth is damaged, the machine breaks apart and leaves the Missile Launcher. Collect it before leaving; it is required for the next Chozo Ruins gates.
- Scan Hive Mecha and Ram War Wasps.
- Shoot wasps when they pause before ramming.
- Attack the red mouth opening.
- Collect the Missile Launcher.
Incinerator Drone — Burn Dome
Scan Incinerator Drone and a Barbed War Wasp before finishing the fight. The Drone’s twin flamethrowers rotate around the room. Circle the arena in the same direction as the flames and adjust your position when the arms reverse or tilt upward. When its head rises, target either red weak point and hit it with a charged shot or missile.
After a hit, one flamethrower points into the ceiling nest and releases Barbed War Wasps. Scan a wasp immediately if you need the entry. Their stingers cloud the visor and briefly disrupt lock-on, so keep moving and remove one or two if they block your view, but do not spend the fight chasing every wasp. Return your aim to the Drone’s red weak point whenever the head reappears. Repeat the cycle until the nest is destroyed and the Drone explodes, revealing the Morph Ball Bombs.
- Scan Incinerator Drone and Barbed War Wasps.
- Circle the arena around the rotating flames.
- Shoot the red weak point when the head rises.
- Collect Morph Ball Bombs after victory.
Flaahgra — Sunchamber
Scan Flaahgra and one of its tentacles before attacking. One or more sun reflectors keep the plant active. Lock on and fire charged shots or missiles until Flaahgra is stunned, then move behind the active reflector and shoot its red control point. A missile is sufficient to turn the reflector away.
Flaahgra collapses and exposes a Morph Ball tunnel. Roll through it to the Bomb Slot and plant a Morph Ball Bomb. The first successful slot attack changes the room’s panel arrangement. Each later phase activates another reflector, so repeat the stun, reflector and tunnel sequence three more times. If Flaahgra knocks a reflector back into position, stun it again before approaching. Four Bomb Slot attacks defeat the plant and award the Varia Suit, opening the heated route to Magmoor Caverns.
- Scan Flaahgra and a tentacle.
- Stun the plant before approaching a reflector.
- Turn the active reflector away.
- Use the exposed Bomb Slot.
- Complete four successful slot attacks.
- Collect the Varia Suit.
Adult Sheegoth — Chapel of the Elders
Scan the Adult Sheegoth and a Baby Sheegoth before clearing the room. Eliminate babies when they crowd the arena; their drops can restore health and missiles. The Adult Sheegoth’s armor absorbs ordinary beam fire, so do not waste Power Beam or Wave Beam shots against its back.
Bait an attack such as its charge, ice breath or projectile volley, then move behind or beneath it and drop Morph Ball Bombs. Bomb damage forces the Adult Sheegoth to expose its mouth and vulnerable interior. Lock on to the opening and fire missiles or another strong attack. Repeat the bait-and-bomb cycle while avoiding the charge and freezing breath. Victory awards the Wave Beam.
- Scan the Adult Sheegoth and a Baby Sheegoth.
- Use Morph Ball Bombs against the armored body.
- Attack the exposed mouth or interior with missiles.
- Collect the Wave Beam.
Chozo Ghosts — Sunchamber and Hall of the Elders
In the Sunchamber, scan a Chozo Ghost as soon as it becomes visible. Three Ghosts must be defeated for the Artifact of Wild to appear. The Power Beam and its charge shot are the dependable weapons; the Super Missile also works because it is the Power Beam combo. Other beam types should not be relied on for damage.
Keep a wall or the room’s central structure behind you when possible, then watch the radar as the Ghost phases out. Continue charging the Power Beam while it is invisible and fire when it reappears. Its ectoplasmic shots can scramble the visor and briefly interfere with combat, so keep strafing instead of standing under it. Concentrate on one Ghost at a time. When all three are defeated, jump across the flower and collect the Artifact of Wild; the blocked exit opens afterward.
The Hall of the Elders contains another Ghost encounter. Scan a Ghost before attacking if the entry is still missing, then use charged Power Beam shots or Super Missiles while it is visible. The Ghost encounter is separate from the later Artifact of World mechanism. Return to the Hall after obtaining the Plasma Beam, stand behind the Chozo Elder statue and fire the Plasma Beam at the red mechanism. Enter the revealed Morph Ball slot, follow the lower passage and collect the Artifact of World in the Elder Chamber.
- Scan a Chozo Ghost before defeating it.
- Use the Power Beam, charged shots or Super Missiles.
- Keep moving while the Ghost phases in and out.
- Defeat all three Sunchamber Ghosts.
- Collect Artifact of Wild.
- Return with the Plasma Beam for Artifact of World.
- Activate the red mechanism behind the statue and enter the Morph Ball passage.
Thardus — Quarantine Cave
Scan Thardus immediately. Switch to the Thermal Visor to reveal the active red weak point, lock on and attack with missiles, charged shots or another strong weapon. When the weak point overloads the Thermal Visor, switch to the Combat Visor and continue firing at the same target until it breaks. Switch back to the Thermal Visor when the target relocates.
Thardus rolls across the arena, throws rocks, launches ice attacks and creates ground shockwaves. Use the Morph Ball and Boost Ball to escape a rolling attack. Jump over shockwaves and strafe away from ice projectiles. During the blizzard, the Thermal Visor is especially useful for locating the boss and its weak point. Destroy each exposed rock in sequence until the chest area becomes the final target. Victory awards the Spider Ball.
- Scan Thardus.
- Use the Thermal Visor to locate the red weak point.
- Switch to the Combat Visor when the display overloads.
- Boost away from rolling attacks.
- Destroy the exposed rock targets.
- Collect the Spider Ball.
Elite Pirates and Phazon Elite — Phazon Mines
Elite Pirates are progression-critical enemies in the Mines. Scan one before defeating it if the entry is missing. Keep your distance and target the shoulder cannon with the Thermal Visor when it is firing. The pirate’s charged hand absorbs incoming shots, so stop firing while the hand is raised and wait for the wave-quake attack to finish. Jump over the shockwave, then attack with missiles, Super Missiles or charged beam shots.
The Phazon Elite is a unique one-time encounter in Elite Research. Scan it before breaking the stasis tank, then use a Power Bomb on the tank to release it. The Phazon Elite lacks the regular shoulder cannon but uses the wave-quake and close-range claw attacks. Stay back, jump over each shockwave and fire Super Missiles or the Plasma Beam after its absorption animation ends. Defeating it awards the Artifact of Warrior. This encounter is optional for reaching the ending but required for the regional artifact total.
- Scan an Elite Pirate if its entry is missing.
- Use the Thermal Visor on an Elite Pirate’s cannon.
- Stop firing when an Elite Pirate absorbs energy.
- Scan the Phazon Elite before breaking its tank.
- Use a Power Bomb to release the Phazon Elite.
- Collect Artifact of Warrior after victory.
Cloaked Sentry Drone — Central Dynamo
Scan the Cloaked Sentry Drone if the entry is available in your version and Log Book checklist. Its camouflage prevents normal lock-on, so aim manually when the machine becomes visible and fire while moving through the maze. Charged shots, Super Missiles or the Wavebuster can damage it; the Wavebuster is optional and is not required for this encounter.
Use the electrical firing sound as a warning to change position. Do not remain beside the maze’s electrical hazards. When the Drone is exposed, line up manual shots before it disappears again. Defeating it opens the route to the first Power Bomb, making this a required progression encounter even though it does not use a conventional boss arena.
- Enter Central Dynamo with the Wave Beam.
- Aim manually because the Drone cannot be locked on normally.
- Avoid electrical hazards.
- Collect the first Power Bomb after victory.
Omega Pirate — Elite Quarters
Scan Omega Pirate before attacking. Four Phazon armor plates protect its shoulders and legs. In the standard original North American GameCube route, target each plate and destroy it with missiles or Super Missiles after the Pirate’s absorbing hand lowers. Jump over the wave-quake and use strafing or Boost Ball movement to avoid charges, cannon fire and bombs.
After all four plates are removed, Omega Pirate summons Beam Troopers and cloaks. Switch to the X-Ray Visor to track the invisible body. The Pirate reappears at one of the Phazon pools while restoring its armor. Keep the X-Ray Visor active, lock on and fire a Super Missile at the exposed body. It can move between pools, so listen for the reappearance cue and search the arena quickly. Remove troopers only when they surround you; their drops can restore energy or ammunition. Repeat the armor and cloaking cycles until Omega Pirate falls. Victory awards the Phazon Suit.
- Scan Omega Pirate.
- Destroy all four armor plates with missiles or Super Missiles.
- Use the X-Ray Visor during the cloaking phase.
- Attack the exposed body at a Phazon pool.
- Collect the Phazon Suit.
Meta Ridley — Artifact Temple
Meta Ridley appears after all twelve Chozo Artifacts have been returned to the Artifact Temple. Scan him as soon as the battle begins. In the flying phase, lock on to his chest and use charged Plasma Beam shots or Super Missiles when the chest is presented. Strafe away from the kinetic breath, missile spread and bombing runs. When he flies overhead, use the Boost Ball to circle the arena and avoid the bombs and flame attacks. Destroyed pillars can reveal health and ammunition, so collect those drops during safe intervals.
Meta Ridley’s chest plate is the damage point in both phases. After his wings are destroyed, the grounded phase begins. He charges, sweeps with his tail and uses flame breath. Sidestep when he rears back, then create distance after the charge so the tail does not catch you. When he opens his mouth or prepares an attack, fire the Plasma Beam or another strong weapon. Successful mouth hits make him reel and expose the chest; immediately target the chest during that short opening. Repeat until his health reaches zero.
Victory opens the Impact Crater entrance. The Frigate Crash Site has no Meta Ridley battle and does not lead directly to this encounter.
- Return all twelve Artifacts to the Temple mechanism.
- Scan Meta Ridley.
- Damage the chest during flying attacks.
- Use Boost Ball movement during bombing runs.
- Sidestep grounded charges and jump the tail sweep.
- Shoot the mouth to create a chest opening.
- Enter Impact Crater after victory.
Metroid Prime — Armored Shell
Scan Metroid Prime at the start of the first battle. Its facial color identifies the beam that can damage it: yellow for the Power Beam, purple for the Wave Beam, white for the Ice Beam and red for the Plasma Beam. Use the matching beam or its compatible combo, but check the color before every attack. The sequence is not a single fixed color order across the entire fight.
Keep moving around the subchambers. Jump or dash away from missiles, energy projectiles, beam attacks and shockwaves. Destroy drifting energy orbs only when it is safe; they can restore health or ammunition. When Prime charges across the arena, enter Morph Ball form and use the floor grooves to pass beneath or around it. The battle progresses through deeper subchambers as Prime loses health. Later rooms add more colors, toxic residue, ice attacks, tractor-beam pulls and less predictable charges. Continue matching the beam color until the shell collapses and the Core Essence emerges.
- Scan Metroid Prime’s armored shell.
- Match the current facial color to the correct beam.
- Use Morph Ball grooves to evade charges.
- Collect energy or ammunition drops only when safe.
- Defeat the armored shell and follow it into the final arena.
Metroid Prime Core Essence — Impact Crater
Scan Metroid Prime Core when the second form appears. Ordinary beams and missiles cannot damage Core Essence. It alternates between visible spectrums, so switch among the Combat, Thermal and X-Ray Visors until the Core becomes visible, then lock on and track it.
Core Essence’s major attack is a radial shockwave. Jump over it while maintaining room to maneuver. After an attack cycle, Core Essence creates a blue Phazon pool and disappears. Enter the pool to gain temporary Phazon Beam access. The Phazon Beam is available only during this encounter and only while the temporary Phazon supply lasts. While Samus has access to it, aim at the visible Core and hold the fire button to damage it.
Leave the pool when its supply is depleted and resume visor switching and shockwave evasion. Core Essence creates additional pools as the battle continues and summons Metroids, including stronger varieties later in the fight. Remove a summoned Metroid when it blocks movement or creates immediate danger, then return attention to Core Essence’s next pool. Power Bombs are useful when several Metroids surround Samus, but conserve enough resources to survive the arena and do not fight every creature unnecessarily. Repeat the pool-entry and temporary Phazon Beam cycle until Core Essence is defeated. The ending sequence follows the final victory.
- Scan Metroid Prime Core.
- Use the visor that reveals Core Essence’s current spectrum.
- Jump over radial shockwaves.
- Wait for Core Essence to create a blue Phazon pool.
- Enter the pool to gain temporary Phazon Beam access.
- Use the temporary Phazon Beam to damage Core Essence.
- Use Power Bombs against dangerous groups of summoned Metroids.
- Defeat Core Essence and confirm that the ending sequence begins.
Before you move on
- The required boss rewards have been obtained: Missile Launcher, Morph Ball Bombs, Varia Suit, Wave Beam, Spider Ball and Phazon Suit.
- The Sunchamber Chozo Ghosts have been defeated and Artifact of Wild has been collected if following the regional artifact route.
- The Hall of the Elders Plasma Beam mechanism has been activated and Artifact of World has been collected.
- Artifact of Warrior has been collected after defeating the Phazon Elite if completing the regional artifact requirement.
- All twelve Chozo Artifacts have opened the Temple route.
- Meta Ridley has been scanned and defeated at the Artifact Temple.
- The Impact Crater has been entered and the Crater Entry Point Save Station has been used.
- Metroid Prime’s armored shell and Core Essence have both been defeated.
- The ending sequence has begun. This is the reliable completion check for the original Nintendo GameCube campaign.
- For optional Log Book completion, confirm that the one-time entries for Parasite Queen, Hive Mecha, Ram War Wasps, Incinerator Drone, Barbed War Wasps, Flaahgra, Adult Sheegoth, Chozo Ghost, Thardus, Phazon Elite, Omega Pirate, Meta Ridley, Metroid Prime and Metroid Prime Core were scanned before their encounters ended.
Appendix B — Maps, Scan Tips and Quick Routing
Use the original GameCube map to plan routes between regions, but do not treat map color as proof that a room is fully cleared. Item completion and Log Book completion are separate goals. The USA NTSC inventory displays the item percentage on the save file, but it does not display a scan percentage; compare the Log Book with an original NTSC checklist instead.
Read the original GameCube map correctly
Press Z during play to open the three-dimensional map for the region Samus is currently exploring. The Control Stick rotates the 3-D display, the C Stick moves the map view, and L and R zoom in or out. The map is easiest to read when you first rotate it until the room you need is on top, then zoom out far enough to see its connecting doors and nearby vertical levels.
Before you use a Map Station, the regional map shows only rooms Samus has already explored. After downloading the regional map, explored rooms glow orange and rooms revealed by the download but not yet entered appear without color. Use this distinction to identify branches that still need to be visited, but do not mistake it for an item checklist. A colored room proves that you entered it; it does not prove that you searched every ledge, Morph Ball tunnel, elevated platform, hidden track or side door.
The colored dots and door markers identify exits and the weapon or beam needed to open them. Record a blocked door when you encounter it, then move on if it is not part of the current route. Revisiting the same colored door without a new upgrade wastes time and can lead you away from the intended progression path.
Press A from the regional map to reach the World Map. Use it to decide which region and elevator should be your next destination, but remember that the GameCube version does not provide external fast travel. Samus must still walk through rooms and use the actual elevator network. Tallon Overworld, Chozo Ruins, Magmoor Caverns, Phendrana Drifts and Phazon Mines are linked by in-game transport routes, so plan each trip around a destination elevator and the nearest Save Station rather than crossing the planet without a checkpoint.
- Press Z to open the current regional map.
- Use the Control Stick to rotate, the C Stick to move the view, and L or R to zoom.
- Download each regional map from its Map Station when practical.
- Treat orange rooms as explored, not necessarily completed.
- Use the World Map to select the next region and physical elevator route.
Use Map Stations, Save Stations and the hint system carefully
Scan a Map Station before stepping into its hologram if you are pursuing a complete original NTSC Log Book. The station is a Research entry, and using it can remove the opportunity to scan that station in its unused state. After the scan is registered, download the area map and inspect the newly revealed branches before leaving.
Scan Save Stations before activating them whenever practical. Save immediately afterward, especially before a cleanup route, a long platforming section or a return through a room with dangerous enemies. Save Stations restore Samus's position safely, but they do not replace a written scan checklist or confirm that an area is fully cleared.
The hint system is useful for locating major progression upgrades, but it does not list every Missile Expansion, Energy Tank, Power Bomb expansion or Log Book entry. If the hint points toward a room you have already visited, inspect alternate elevations and exits. Look for Morph Ball passages, half-pipes, Spider Ball tracks, beam-colored doors, grapple points and ledges above the route used during the first visit.
Organize cleanup by region. On a Chozo Ruins visit, combine nearby routes through the Furnace, Sunchamber, Watery Hall, Tower of Light and Hall of the Elders before taking an elevator away. In Phendrana, group the Ice Ruins, Phendrana's Edge and the Space Pirate research facilities. In Tallon Overworld, inspect the Great Tree, Root Cave, Landing Site and Frigate Crash Site routes together when your equipment allows it. This reduces repeated crossings while remaining within the game's normal transport network.
- Scan Map Stations before downloading their maps.
- Scan Save Stations before using them when possible.
- Use hints to find major upgrades, then search the destination room for alternate routes.
- Group optional item and scan work by region.
- Save before each long cleanup loop.
Revisit the common major-item choke points
Chozo Ruins contains several rooms that look complete after the first story pass. Return to the Furnace after gaining the Boost Ball and Spider Ball, then inspect the connected tracks and bomb-jump routes. Recheck the Sunchamber and nearby Chozo Ghost route when the required visor and combat equipment are available. Return to Watery Hall and other submerged passages after obtaining the Gravity Suit; do not attempt to treat early underwater movement as normal traversal.
In Tallon Overworld, revisit the Great Tree and Root Cave after acquiring the movement abilities and visor needed for their hidden branches. Check Landing Site and the routes around the Frigate Crash Site after later upgrades open elevated, underwater or heat-related paths. The Landing Site is also a useful place to refill and save before a long regional cleanup circuit.
Magmoor Caverns is primarily a connector, but its side rooms contain expansions, artifact routes and upgrade-gated paths. Recheck narrow Morph Ball passages, elevated platforms, grapple points and beam-specific doors after the relevant equipment is obtained. Do not enter hazardous heat routes without the protection and movement options required for that section.
In Phendrana Drifts, revisit the Ice Ruins, Phendrana's Edge and the research facilities after obtaining the Thermal Visor, Boost Ball, Spider Ball, Wave Beam and Ice Beam as appropriate. Pay particular attention to rooms with vertical structures or ice-covered surfaces: the main door-to-door route may be complete while an upper platform or alternate visor target remains unvisited.
The Phazon Mines are vertically arranged and easy to under-search. During the final cleanup, inspect upper platforms, side tunnels, security-barrier routes and areas opened by Power Bombs. Save between major sections because the Mines combine long climbs, dangerous Pirate variants and limited recovery opportunities.
- Chozo Ruins: Furnace, Sunchamber, Watery Hall, Tower of Light and Hall of the Elders.
- Tallon Overworld: Great Tree, Root Cave, Landing Site and Frigate Crash Site.
- Magmoor Caverns: side rooms, grapple routes, elevated ledges and artifact paths.
- Phendrana Drifts: Ice Ruins, Phendrana's Edge and research-facility branches.
- Phazon Mines: upper platforms, security barriers and Power Bomb routes.
Group scans by room and protect one-time entries
Press Left on the D-pad to select the Scan Visor. When a scannable object displays an orange or red symbol, lock onto it with L and hold L until the download finishes. Open the inventory with Start/Pause, then use R to view the Log Book. The original GameCube release uses the D-pad for visor selection and the C Stick for beam selection; it does not use the pointer, gyro aiming or Remastered visor controls.
Scan new creatures before defeating them whenever possible. Creature scans can reveal weak points and behavior, while Research, Pirate Data and Chozo Lore entries fill the other Log Book categories. Bosses and special encounter creatures are the highest priority because many have only one practical scan opportunity. Scan Parasite Queen during the opening frigate sequence, then scan Flaahgra, Thardus, Omega Pirate, Meta Ridley and both forms of Metroid Prime when they appear. During the Hive Mecha and Incinerator Drone encounters, also watch for the special wasp entries associated with those fights rather than assuming ordinary wasp scans cover them.
Phendrana's research laboratories are efficient scan rooms. Before advancing a security sequence, inspect terminals, Pirate Data, containment equipment, Metroids and other research subjects in the room. In Chozo Ruins, scan lore tablets, machinery, environmental objects and new fauna before activating or destroying nearby devices. In Phazon Mines, scan new Pirate variants, security systems and research equipment before clearing the room or removing an object that may disappear.
Keep a written list of missing entries and compare it against an original NTSC checklist. The USA GameCube inventory does not show a scan percentage, so there is no in-game scan percentage to use as a final numeric confirmation. The save-file percentage is useful for item completion, but it does not certify Log Book completion. A complete map likewise does not certify either goal.
Use the original NTSC list rather than a PAL, Trilogy or Remastered list. The North American release has differences in Log Book naming, ordering and some data entries. The original NTSC checklist also identifies critical entries that may be lost if Samus defeats a target, activates a device, downloads a map or destroys an object before scanning it.
- Scan bosses and special encounter creatures as soon as each fight begins.
- Scan Map Stations and Save Stations before using them.
- Scan Pirate Data, Chozo Lore, terminals and research equipment before advancing room events.
- Compare the Log Book against an original NTSC checklist.
- Use the save-file percentage for item completion only; do not describe it as scan completion.
- Treat map completion, item completion and Log Book completion as separate tasks.
Before you move on
- Each major region has been downloaded from its Map Station, and colorless revealed rooms or branches have been visited or deliberately marked for later.
- The World Map has been used to identify the physical elevators linking Tallon Overworld, Chozo Ruins, Magmoor Caverns, Phendrana Drifts and Phazon Mines.
- The inventory and save-file percentage have been checked for item completion; remember that this percentage does not measure scans.
- The Log Book has been compared manually against an original NTSC checklist covering Pirate Data, Chozo Lore, Creatures, Research and Artifacts.
- Map Stations, Save Stations, bosses and other one-time targets were scanned before being used, defeated or removed.
- Cleanup trips begin from nearby Save Stations and use only the game's own rooms and elevators.
- If an original NTSC Log Book entry is missing and its target was one-time-only, plan for a second playthrough rather than assuming the completed file can restore it.
References for this chapter
Finishing up
Complete the original North American launch GameCube campaign by collecting the eleven regional Chozo Artifacts, entering the Artifact Temple to obtain the Artifact of Truth, returning all twelve Artifacts to the Cipher, defeating Meta Ridley and both forms of Metroid Prime, and reaching the ending sequence. Optional guidance covers item cleanup and original NTSC Log Book completion before the final run or on a later file.
Choose your next gameScreenshots & video
Game imagery for reference. Follow the written chapters above for the route and strategies.
Sources & references
Our original guide draws on the references below. Check the edition at the top of this page before following controls or unlock requirements.
- Metroid Prime — Nintendo GameCube Instruction Manual
- Nintendo GameCube and Game Boy Advance Manuals — Nintendo Support
- Metroid Prime Walkthrough — Frigate Orpheon
- Metroid Prime — GameCube Guide and Walkthrough
- Chapter 1: Distress (Frigate Orpheon) — Metroid Prime Walkthrough & Guide
- Metroid Prime — Guide and Walkthrough, GameFAQs 20259
- Metroid Prime — 100% Scan/Item Walkthrough, GameFAQs 36706
- Metroid Prime Walkthrough — GameSpot
- List of rooms in Metroid Prime/Tallon Overworld - Wikitroid
- Frigate Crash Site - Metroid Wiki
- Metroid Prime - Guide and Walkthrough - GameCube - By CyricZ
- Metroid Prime — Guide and Walkthrough — GameCube
- Metroid Prime — Guide and Walkthrough — GameCube — GameFAQs
- Plasma beam before spider ball? — Metroid Prime GameFAQs discussion, USA revision behavior
- Metroid Prime — Nintendo GameCube Instruction Manual
- Metroid Prime — Guide and Walkthrough — GameCube — By Thiradell
- Metroid Prime — Guide and Walkthrough — GameCube — By Hyuaki_Hay
- Samus’s upgrades — Power-up locations — Metroid Prime
- Metroid Prime - Guide and Walkthrough - GameCube - By FalconZero03
- Chapter 13: The Gravity Suit — Metroid Prime Walkthrough
- Chozo Artifacts — Metroid Prime Walkthrough and Guide
- Cargo Freight Lift to Deck Gamma — Tallon Overworld — Metroid Wiki
- Metroid Prime 100% Walkthrough — The Crashed Frigate
- Chapter 15: Mining Operations — Metroid Recon
- Metroid Prime GameCube Version Differences
- Metroid Prime - Artifact Locations Guide - GameCube - By bluberry
- Artifact Temple — Metroid Wiki
- Artifact of Elder - Metroid Wiki
- Metroid Prime/Impact Crater — StrategyWiki
- Metroid Prime — Boss Guide — GameCube — GameFAQs
- Log Book Guide for the Original NTSC Version — Metroid Recon
- Metroid Prime Game Endings
- Metroid Prime Secrets and Tips
- Metroid Prime Walkthrough — Artifact Locations
- Metroid Prime — Bosses Guide — Metroid Recon
- Nintendo GameCube and Game Boy Advance Manuals — Nintendo Support
- Brian and Steven's Metroid Prime 100% Checklist
- Metroid Prime — Guide and Walkthrough, GameCube, by NeoChozo
About the game & collecting notes
- Platform
- Nintendo GameCube
Step-by-step campaign walkthrough for the original North American GameCube release of Metroid Prime. Designed for a newcomer to reach the canonical ending without relying on remaster mechanics, this guide covers area routes, required upgrades, boss strategies, key visor/beam uses, backtrack routing, save recovery and optional completion goals.
Darryl Polo
Darryl Polo loves tinkering with emulation and revisiting retro games. He enjoys exploring how old favorites play on different setups and sharing what he learns along the way. At Joking Joystick, he writes about the games, hardware, and small discoveries that keep the hobby fun.
Our editorial standardsFound a step that needs another look? Help us improve this guide.