Kingdom Hearts — Complete Walkthrough (PlayStation 2, North America - 2002)
Step-by-step walkthrough for the original PlayStation 2 release of Kingdom Hearts (North American edition). Covers the main campaign from Destiny Islands through the End of the World, safe progression notes, Gummi Ship basics, Olympus Coliseum optional content, Hollow Bastion strategy and the final Ansem fights, plus guidance for optional bosses and post‑game completion goals.

Find a copy
Kingdom Hearts PlayStation 2
We may earn a commission if you buy through these links, at no extra cost to you. As an Amazon Associate I earn from qualifying purchases.
Opens retailer search results. Check the model, edition, seller, availability and current price before buying.
Before you begin
You are about to play the original North American PlayStation 2 edition of Kingdom Hearts, released on September 17, 2002.
This walkthrough targets the unmodified North American PS2 release and does not assume Kingdom Hearts Final Mix, HD-remaster additions, or remake-only content.
Follow the chapter order for a straightforward main-story route. Optional rewards and detours are identified separately so they do not obscure required progression.
Read each chapter before entering its next story area.
The guide identifies required objectives, hazards, boss methods, recovery points, and concrete completion checks.
Optional advice for Coliseum tournaments, summons, Hundred Acre Wood, Dalmatians, synthesis, Gummi Ship construction, superbosses, and the original secret movie is grouped after the ending route.
Set yourself up for the run
Set difficulty and check options before you start each play session — difficulty changes the toughness of bosses and enemies and affects how much grinding you may need.
Learn the control layout in the Options menu: confirm which button performs Attack, Jump, Dodge/Roll, Magic selection and Item/Summon access so you won’t be fumbling mid‑fight.
Equip and prioritize passive abilities early: at minimum use abilities that improve MP regeneration or item use, and unlock Dodge Roll (defensive ability) as soon as it becomes available.
Manage ability points and equip what fits your playstyle (survivability vs.
offense).
Stock up on restorative items (Potions/Hi‑Potions/Elixirs equivalent) and save at save points frequently.
Keep a small reserve of MP recovery items for magic‑heavy boss encounters.
Practice Gummi Ship basics before long routes: you do not need a perfect ship to continue the story, but basic targets include keeping speed stable, avoiding large incoming obstacles and learning to manage weapon fire.
Save before long Gummi crossings so you can refine your ship if you fail.
Familiarize yourself with Summons: several summons are unlocked through story progression or by obtaining summon gems; they are single‑use in battle and can turn difficult fights into manageable ones if used at the correct moment.
If you plan to pursue optional content (Olympus Coliseum cups or secret bosses), set aside time after key story points — Coliseum cups unlock at specific story beats and will reappear as the plot advances.
When in doubt, level up in the preceding world or replay an easier Coliseum cup to raise Sora’s level and gain better gear.
It’s far faster to correct a level gap this way than to retry difficult boss fights repeatedly.
Destiny Islands & Prologue (first hour)
Complete both Destiny Islands gathering sequences, defeat the two Darkside encounters, then follow Traverse Town’s required opening route through Leon and Guard Armor. The chapter ends when Cid has prepared the Gummi Ship route and Sora can leave for the first destination world. The original North American PlayStation 2 version is being covered here, not Final Mix or an HD remaster.
Dive to the Heart and the first Darkside
Choose the sword, shield, or staff on the stained-glass platforms. This choice changes Sora’s early growth emphasis, but all three choices can complete the game. Continue through the tutorial battles, examine the door, destroy the appearing crate and barrel, and collect the Potion before moving on.
The first Darkside is fought before Sora reaches the actual island. Lock on and attack its arm when it is planted in the ground. You can also reach the head with jumps, but attacking the exposed arm is safer for a first attempt. The battle is mainly teaching target lock, attack range, jumping, and waiting for an enemy recovery window.
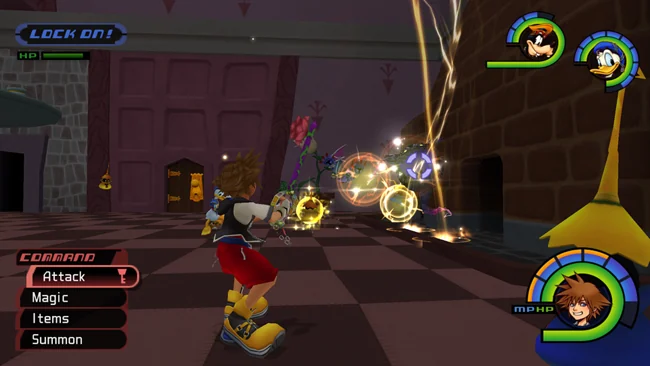
The lower-left command menu contains Attack, Magic, Items, and a context-sensitive fourth command. At this point Magic and Summon are not useful menu options for the story route. Sora’s HP and MP gauges are displayed during play; HP is the health resource, while MP is used for magic and later summon commands. Passive abilities will appear in the status and ability menus after Sora begins acquiring them.
- Choose one of the three starting weapons.
- Defeat the first Darkside by striking its planted arm or exposed head.
- Collect the tutorial Potion and learn the command-menu layout.
Build the raft on Destiny Islands
After waking on Destiny Islands, speak with Kairi beside the dock. She asks for two logs, one cloth, and one rope. Pick up one log on the beach near the southwest side of the island. Find the second log near the tree above the shack, then climb the treehouse and examine the cloth inside. The rope is near Tidus on the western side of the island.
Return to Kairi after collecting the four materials. Tidus, Wakka, Selphie, and Riku can be challenged as optional practice fights. The duels are not required, and losing them does not prevent progress. Riku’s race is also optional; do not spend time grinding for an early advantage.
Save at the island Save Point when convenient. Save Points allow saving and restore Sora’s HP and MP when activated, making them the safest place to recover before continuing the story.
- Collect two logs, one cloth, and one rope.
- Return to Kairi and confirm the raft materials.
- Treat the island duels and Riku’s race as optional practice.
Complete the second gathering sequence and trigger the storm
After the next story scene, speak with Kairi again near the dock. This time collect three mushrooms, drinking water, three fish, one seagull egg, and two coconuts. The mushrooms are found around the island, including the small cave, the area near the watchtower, and the cave near Wakka. Obtain drinking water from the spring near Wakka and catch three fish in the shallow water near Selphie.
Climb through the shack and nearby trees to reach the seagull egg. Strike the palm trees near Kairi with the wooden sword until two coconuts drop. These items are required; the earlier raft materials alone do not finish the tutorial.
When Kairi asks whether to call it a day, choose to continue the story. During the storm, move toward the pier where Riku was previously encountered. The Heartless on the island cannot be defeated before Sora receives the Keyblade, so avoid wasting time attacking them.
- Collect all three mushrooms, drinking water, three fish, the seagull egg, and two coconuts.
- Return to Kairi and choose the option that ends the day.
- Run to the pier after the storm begins and watch Sora obtain the Keyblade.
Defeat the second Darkside and reach Traverse Town
Once Sora has the Keyblade, the Heartless on Destiny Islands can be defeated. The second Darkside is fought on the island. Stay near its hands or feet, attack after a swing finishes, and move away when it raises its arms for the ground shockwave. If it launches dark projectiles, run sideways rather than standing beneath the boss.
Use the Items command for a Potion when HP becomes dangerous. Do not wait until a single hit can defeat Sora. The battle does not require magic, and conserving MP is more important than forcing damage through a risky attack.
After Darkside falls, the island sequence ends and Sora awakens in Traverse Town. This is the point at which the tutorial is complete; there is no reason to return to Destiny Islands for grinding during this chapter.
- Defeat the second Darkside after obtaining the Keyblade.
- Heal through the Items command when necessary.
- Confirm that Sora has arrived in Traverse Town.
Start Traverse Town correctly and reach Leon
Sora first regains control in the First District alley, not inside the hotel. Enter Cid’s Accessory Shop immediately, activate the Save Point, and save. You may also take the nearby chest if you want the early material, but it is optional for story completion.
Go into the Second District and watch the Heartless event. Defeat the Shadows, enter the Gizmo Shop, then visit the Alleyway through the passage near the fountain. Return to the Second District and enter the Hotel. After the next movement of Donald and Goofy, visit the Dalmatians’ House, then return to the First District and speak with Cid in the Accessory Shop.
Leave the shop to trigger the Leon encounter. Winning is optional. If you fight him, avoid trading blows, strike after his attacks finish, and run laterally from his homing fireballs. A victory grants extra experience and leads to an Elixir reward after Guard Armor, but losing does not stop the story.
After the cutscenes, save again and speak with Leon. Open the chest he points out, then talk to him once more and accept the next assignment. Soldiers appear in the Alleyway. You do not need to defeat every Soldier there; proceed to the Third District when ready.
- Save in Cid’s Accessory Shop.
- Visit the Second District, Gizmo Shop, Alleyway, Hotel, Dalmatians’ House, and Cid in that order.
- Resolve the optional Leon duel and then speak with Leon afterward.
- Accept the Soldier objective and proceed toward the Third District.
Defeat Guard Armor and unlock departure
Enter the Third District. A cutscene seals the area and begins the Soldier battle. Defeat the Soldiers to make Guard Armor appear. Guard Armor has five separate attackable sections: two hands, two feet, and the torso. Lock onto one part at a time and keep the other parts in view whenever possible.
Destroy the hands first because they move quickly and are difficult to avoid if left active. Attack the feet next, jumping away when they prepare to stomp. Finish with the torso. If the whole body rises and crashes down, jump or roll away rather than continuing a combo beneath it. When a part is destroyed, collect the dropped HP orbs if you need recovery.
After victory, Sora receives the Brave Warrior reward, and the story provides Fire and the Dodge Roll ability. Open the abilities menu and equip Dodge Roll if Sora has enough AP. Check Donald and Goofy’s equipment and abilities as well, then activate the nearby Save Point before leaving the area.
Speak with Cid in the First District after the Guard Armor scenes. Cid handles the Gummi Ship navigation progression and provides the next travel-related reward. Use the First District’s large southern doors or a Save Point’s world-map option to leave Traverse Town. The next story destinations are now available; choose the first world shown on the map rather than returning to Destiny Islands.
- Defeat all Soldiers and then Guard Armor.
- Break the hands, feet, and torso while avoiding the body slam.
- Equip Dodge Roll after receiving it.
- Speak with Cid after the boss and reach the world map or Gummi Ship departure screen.
Before you move on
- Both Destiny Islands gathering sequences are complete and Sora has defeated the second Darkside.
- Sora has saved in Traverse Town’s First District and completed the Leon and Guard Armor events.
- Guard Armor is defeated, Fire and Dodge Roll have been awarded, and Dodge Roll has been equipped if possible.
- Cid has been consulted after the Guard Armor sequence, and the world map or Gummi Ship departure screen is accessible.
- Sora can select the first destination world without returning to Destiny Islands for further required tasks.
Wonderland — Platforming and environmental puzzles
Wonderland’s main route alternates between the Queen’s Castle, Lotus Forest, Tea Party Garden, and several orientations of the Bizarre Room. Gather at least one piece of evidence, complete the Queen’s trial sequence, light the Bizarre Room lamps, and defeat Trickmaster. The boss victory automatically seals Wonderland’s Keyhole and unlocks the next Gummi Ship route. The original North American PlayStation 2 release does not require every chest, flower reward, or Tea Party Garden prize for story completion.
1. Enter Wonderland and reach the Queen’s trial
After arriving in Wonderland, follow the White Rabbit down the hall and enter the small doorway. In the next room, use the Push command on the bed to reveal the passage, then drink from the blue bottle to shrink Sora. Continue through the newly accessible opening. This leads to the Queen of Hearts’s courtroom, where Alice is accused and Sora volunteers to find evidence.
Use the Save Point near the Queen’s Castle before leaving for the forest. The first required objective is not to find every hidden item; you need at least one evidence box to continue, although collecting all four makes the trial more favorable and grants an early spell reward if you obtain Claw Marks.
- Push the bed before drinking from the bottle.
- Reach the Queen’s Castle and watch the trial scene.
- Save before entering Lotus Forest.
2. Gather the evidence in Lotus Forest and the Bizarre Room
Leave the Queen’s Castle through the nearby passage to Lotus Forest. For the simplest reliable route, first give a Potion to the large yellow flower near the pond. Sora becomes large. Step on the nearby wooden stump to raise the flattened lily pads, then examine the large tree and take its fruit. Eat the fruit to return to normal size.
The Footprints evidence is in the alcove behind the large red flower near the forest entrance. Open the pink box there. From the same general area, use the mushrooms and lily pads to reach the raised platform holding the Antenna evidence. The exact jumping route can be awkward, so line up each jump from the edge of a mushroom or lily pad rather than trying to cross the gaps at full speed.
For Stench, return to the mushroom route and enter the hollow passage in the large tree. This drops Sora onto the stove in the Bizarre Room, where the third pink evidence box is located. Return to Lotus Forest, give the yellow flower another Potion, and use the nearby stump and tree to reopen the raised-pad route. Before eating the tree fruit, strike the large tree once so its orientation exposes the required path. Eat the fruit to shrink, then use the raised lily pads to reach the side entrance into the Bizarre Room. Sora lands near the faucet; carefully jump to the cabinet and open the box containing Claw Marks.
Only one evidence box is required to resume the trial. Collecting all four is recommended because the Queen adds one of her own boxes, making five total, and selecting one of Sora’s boxes is then more likely. If Claw Marks was collected, the Cheshire Cat teaches Sora Blizzard at this point. If not, Blizzard is awarded after Trickmaster is defeated.
- Obtain at least one evidence box before returning to the Queen.
- Recommended: collect Footprints, Antenna, Stench, and Claw Marks.
- Use the Potion flowers, tree fruit, raised stump, mushrooms, and lily pads to alter the route.
- Treat chests, Trinity marks, and flower prizes as optional during the first clear.
3. Complete the trial and defeat the Card Soldiers and Tower
Return to the Queen’s Castle and speak to a card soldier near the trial platform. The Queen combines your evidence with her own, shuffles five boxes, and asks Sora to choose one. The result is random. A Sora evidence box exposes the Heartless as the culprits, while one of the Queen’s boxes may imprison Donald, Goofy, or both in cages for the following fight.
When the battle begins, concentrate on the Crank Tower rather than spending time defeating every card soldier. Circle the tower, jump in to strike its levers, and keep moving to avoid the soldiers’ attacks. If Donald or Goofy was imprisoned, hit the corresponding cage to release that party member. Breaking the tower ends this encounter.
- Choose one of the five evidence boxes.
- Destroy the Crank Tower’s levers.
- Break any party-member cages if necessary.
- Return to Lotus Forest after the courtroom fight.
4. Reach the upside-down Bizarre Room and light both lamps
After the courtroom battle, return through Lotus Forest and follow the Cheshire Cat’s scene. Take the passage at the back of the forest to Tea Party Garden. The house beside the table has a door leading to another Bizarre Room entrance. Enter it; this version of the room is upside down, with the lamps hanging in the center.
Defeat the Heartless that appear, then jump across the room to the two lamps and use the Touch command on each one. Once both lamps are lit, operate the small metal latch on the far wall with the Release command. This opens the route back toward the Queen’s Castle.
Drop down and use the nearby Save Point. This is the correct time to heal, save, and equip Potions or other recovery items. Do not start the boss fight while carrying a damaged party and depleted supplies.
- Enter Tea Party Garden through the rear Lotus Forest passage.
- Enter the house door to reach the upside-down Bizarre Room.
- Defeat the Heartless and touch both lamps.
- Release the metal latch and save at the Queen’s Castle.
5. Start and defeat Trickmaster
From the saved area, enter the Bizarre Room through the normal southern route. Jump onto the central table and speak to the Cheshire Cat. The cat disappears and Trickmaster appears. If the boss does not spawn, confirm that the trial battle is complete, both lamps are lit, and you spoke to the cat from the table in the upright Bizarre Room.
Lock onto Trickmaster’s torso. The boss is difficult to reach from the floor, so jump from the central table or a smaller nearby table and attack during the aerial approach. Use short aerial combos, then land and reposition instead of remaining directly underneath the boss. When Trickmaster’s legs straighten, retreat immediately; this signals a heavy arm swing. Continue circling the room and use the furniture to create attack height.
During the later part of the fight, Trickmaster can light its batons at the stove and launch fireballs. Keep moving around the table or stove to avoid the projectiles. If Blizzard is available, it can be used against the lit batons or the stove area to reduce the danger, but it is not mandatory. Heal with Cure or Potions during a clear recovery window, not while standing beside the boss. When Trickmaster staggers or collapses, close in for several attacks before retreating again.
- Lock onto Trickmaster’s torso.
- Use the table or chairs to reach the boss reliably.
- Retreat when the boss’s legs straighten.
- Avoid or interrupt the lit-baton fireball phase.
- Defeat Trickmaster without spending every recovery item before the final stagger.
6. Confirm the Keyhole seal and leave Wonderland
After Trickmaster is defeated, Sora receives Ifrit’s Horn. If Blizzard was not learned from Claw Marks, it is awarded after the fight. The Doorknob’s following scene confirms that Wonderland’s Keyhole has been sealed, and the party receives the Navi-G Piece.
The story then reveals that Alice has disappeared into the shadows. Return to the Queen’s Castle Save Point, save the game, and choose the option that returns Sora to the Gummi Ship. On the world map, select the newly available route and continue with the next story destination. You can return to Wonderland later for missed chests, flower rewards, Tea Party Garden prizes, and other optional pickups; none is required to seal the Keyhole.
- Trickmaster is defeated.
- Ifrit’s Horn has been received.
- The Doorknob scene confirms Wonderland’s Keyhole is sealed.
- The Navi-G Piece has been received.
- The Queen’s Castle Save Point returns Sora to the Gummi Ship.
- A new route is visible on the world map.
Before you move on
- The Queen’s trial has been completed and the Card Soldiers and Crank Tower have been defeated.
- At least one evidence box was collected before the trial resumed.
- Both lamps in the upside-down Bizarre Room were touched and the metal latch was released.
- Trickmaster was defeated and Ifrit’s Horn was received.
- The Doorknob’s scene confirms that Wonderland’s Keyhole is sealed.
- The Navi-G Piece was received and the Queen’s Castle Save Point can return Sora to the Gummi Ship.
- The next Gummi Ship route is available on the world map.
Deep Jungle — open areas, enemy ambushes and boss tactics
Deep Jungle is a looping world built around the Camp and Jane’s tent. Follow the story from the Tree House to the Camp, collect and examine the six slides, clear the required Heartless encounters, defeat Sabor again, destroy the black fruit holding Jane and Terk, then defeat Clayton and Stealth Sneak. After the battle, climb Waterfall Cavern to the upper cave marked ???, where Sora seals Deep Jungle’s Keyhole and receives the Jungle King Keyblade and a Navi-G Piece.
1. Reach the Camp and use the tent as your navigation anchor
After landing in Deep Jungle, complete the opening scenes and follow Tarzan through the Tree House, Vines, and Climbing Trees. Drop through the vine route until you reach Hippo’s Lagoon, then cross the lagoon and continue to the Camp. Enter Jane’s tent to reunite with Donald and Goofy and trigger the next objective.
The Camp is the most useful landmark in this world. When the routes begin looping, return to the tent and speak with Jane or examine the nearby equipment. Save at the tent before starting the investigation. Before the boss, stock Potions or Hi-Potions and at least one Ether if available; Cure is not awarded until after the Clayton and Stealth Sneak battle.
Deep Jungle’s open routes are easier to read by landmarks than by trying to memorize every turn. Use the Camp, Hippo’s Lagoon, the Tree House, Bamboo Thicket, the Cliff, and the waterfall entrance as your reference points. Some passages only become useful after a cutscene or Heartless group has been cleared.
- Reach the Camp and enter Jane’s tent.
- Save at the tent before beginning the investigation.
- Carry healing items and preserve MP for the required fights.
2. Collect all six slides and examine the projector
Speak with Jane in the tent, then collect the six slides scattered around the Camp. One is on the tent roof, one is beneath the canopy at the edge of the area, one is beside Tarzan’s picture, one is on the stacked boxes in the center, one is on the upper canopy, and one is at the top of the suitcases beside the tent. Jump onto the boxes, suitcases, and canopy rather than searching only at ground level.
Return to the tent after collecting all six slides and examine the projector. The slide scene is a required story event. When you leave the tent, Sabor attacks again. Keep the leopard targeted, stay mobile, and use Dodge Roll when Sabor crouches and leaps from a distance. After the brief combo opportunity, move away before the next pounce or paw swipe.
- All six slides are in the inventory.
- The projector has been examined inside the tent.
- The Sabor encounter after the projector has been completed.
3. Follow the Tree House route and clear the required Heartless groups
After the projector scene, travel from the Camp through Hippo’s Lagoon, Vines, Vines 2, and Climbing Trees to reach the Tree House. Story scenes direct you back toward the Camp and then into Bamboo Thicket. Defeat the required Heartless groups in the Camp, Bamboo Thicket, Climbing Trees, and Tree House areas as the story sends you between them. When progress seems to stop, return to the tent and speak with Jane before retracing the route.
Powerwilds are aggressive at close range, so avoid fighting them against walls or on narrow ledges. Draw groups into wider ground, then use short Keyblade combos and jump attacks. Green Requiems are airborne and can disrupt a fight if left alone; target them with jump attacks or Fire. Thunder can damage clustered enemies, but keep enough MP available for healing or emergency crowd control.
The sequence includes additional Sabor appearances and scenes involving the captured characters. Do not leave Deep Jungle after collecting a few Gummi pieces or defeating one group; continue returning to the tent and following the next story cue until the final Sabor encounter has occurred.
- The required Heartless groups in the Camp, Bamboo Thicket, Climbing Trees, and Tree House have been cleared.
- The story has directed you back to the tent after the Sabor sequence.
- You have returned to the Camp to prepare for the black-fruit objective.
4. Destroy the black fruit in Climbing Trees
After the scene involving Jane and the gunshot, return to Hippo’s Lagoon and climb through Vines and Vines 2 to reach Climbing Trees. In the area, lock onto the large black fruit and attack it. Powerwilds will continue fighting around you, but destroying the fruit is the objective; you do not need to defeat every reinforcement before the scene can continue.
Keep moving around the tree and let Donald, Goofy, or Tarzan draw some of the enemies away. If Sora is surrounded, retreat through the opening or onto a wider platform rather than trading hits beside the fruit. Once the fruit breaks, Jane and the captured gorilla are freed. Follow the vine slide back toward the Camp, save at the tent, and restock before entering the Cliff from Bamboo Thicket.
- The large black fruit has been destroyed.
- Jane and the captured gorilla have been freed.
- You have saved and restocked at the Camp before the boss.
5. Defeat Clayton and Stealth Sneak
Enter the Cliff from Bamboo Thicket to begin the first part of the boss encounter. Clayton fights with his gun and is accompanied by Powerwilds. Keep moving laterally when he raises the gun to aim, then close in for short Keyblade combos. Defeating Clayton begins the second part of the encounter, so do not assume the battle is over when his first health bar is gone.
Stealth Sneak is initially difficult to see. Lock onto it and keep attacking until it becomes visible. When the creature crouches before sliding toward Sora, use Dodge Roll or move away from its path. Its tail swipe is most dangerous at close range, so attack during the recovery after a missed swipe rather than standing beside it continuously. When it rears up and prepares the water-fountain projectile, move laterally out of the shot.
Focus on Stealth Sneak while Clayton is mounted. Once the creature is defeated and Clayton falls, switch to Clayton and finish him with physical attacks or Fire. Clayton’s gunfire is telegraphed by the aiming motion, so continue circling instead of standing directly in front of him. Cure is awarded after the combined battle, so rely on Potions or Hi-Potions during the fight and use Cure only after victory if you need to recover.
- The initial Clayton and Powerwild encounter is complete.
- Stealth Sneak has been defeated.
- Clayton has been defeated after Stealth Sneak falls.
- The Cure spell has been awarded.
6. Climb Waterfall Cavern and seal the Deep Jungle Keyhole
After the boss, a gorilla throws Sora and the party onto the higher ridge. Enter the waterfall opening to begin Waterfall Cavern. The route is a vertical series of ledges, vines, and moss-covered climbing surfaces. Look for the next ledge or vine rather than attempting long blind jumps. The cavern contains optional chests, but the required route continues upward and away from the entrance.
At the upper section, continue until you find the cave entrance marked ???. Enter it to reach the chamber with the tree and butterflies. This is the Cave of Hearts and the location of Deep Jungle’s Keyhole. The story scene seals the Keyhole and produces a Navi-G Piece.
After the scene, Tarzan gives Sora the Jungle King Keyblade, and Sora learns the Red Trinity ability. The game then returns the party to the Gummi Ship automatically. Fly back to Traverse Town and show the new Navi-G Piece to Leon and Cid as the next story step.
- You entered Waterfall Cavern through the waterfall opening after the boss.
- You reached the upper cave marked ??? or the Cave of Hearts.
- The Deep Jungle Keyhole was visibly sealed.
- The Navi-G Piece and Jungle King Keyblade are in the inventory.
- The party has returned to the Gummi Ship.
Before you move on
- The six slides were examined in Jane’s projector.
- The required Sabor and Heartless encounters were completed, and the black fruit was destroyed.
- Clayton and Stealth Sneak were defeated, and Sora received Cure.
- Sora sealed the Keyhole in the Cave of Hearts after climbing Waterfall Cavern.
- The Jungle King Keyblade and Navi-G Piece were received, Red Trinity was learned, and the game returned the party to the Gummi Ship.
- Traverse Town is available as the next destination for the Navi-Gummi progression.
References for this chapter
Traverse Town — Later Return, Hub Systems, and the Town Keyhole
Return to Traverse Town after completing the required early-world objectives, including Deep Jungle. This visit begins in the Secret Waterway and leads through Leon, Earthshine, Cid’s Old Book, Merlin’s house, the Fairy Godmother, and Cid’s Small House. Once Cid gives Sora Warp-G, ring the Gizmo Shop bell three times, defeat Opposite Armor, seal Traverse Town’s Keyhole, learn Aero, and collect Cid’s post-battle Gummi upgrade. The Old Book’s Hundred Acre Wood content and Simba are useful optional rewards, but they are not required to defeat Opposite Armor.
Prepare before returning to Traverse Town
Come back to Traverse Town after the story has advanced through the early worlds and Deep Jungle has been completed. The required trigger for this chapter is not simply entering town: the necessary early-world progress must be in place before Cid will provide the Old Book and the later route can proceed. Save at the First District Accessory Shop as soon as you arrive. Use the Item Shop to replenish Potions, Ethers, or other recovery items, and check Sora’s equipment and ability slots before leaving the district.
This is also a useful point to review the command menu. Attack remains the default Keyblade command, while Magic and Items are selected from the same lower-left command menu. Keep Cure available once it has been learned, but carry Potions as a backup so that you do not spend all MP on minor encounters. If Sora has learned Dodge Roll from the earlier Guard Armor battle, equip it in the Abilities menu. It is not active merely because it has been learned, and it is one of the best early tools for escaping spinning attacks, lunges, and crowded Heartless groups.
- Deep Jungle’s required story has been completed.
- Save at the First District Accessory Shop.
- Restock healing items and equip Dodge Roll if available.
- Check Sora’s weapon, accessories, and ability-point capacity.
Enter the Secret Waterway and speak with Leon
From the First District, go to the Second District and enter the Alleyway. Use the Red Trinity beside the water channel to open the way into the Secret Waterway. Follow the passage to Leon and speak with him. Continue the conversation when prompted; Leon gives Sora the Earthshine item connected to the world that was destroyed. This conversation is the first required step in the later Traverse Town sequence.
After receiving Earthshine, return to the First District and enter Cid’s Accessory Shop. Speak with Cid. He discusses the Gummi Ship and gives Sora the Old Book to deliver to Merlin in the Third District. Do not leave town immediately after receiving it. The next objective is inside Merlin’s hidden house, and the later Warp-G sequence will not be completed until Cid is spoken to again in the Small House.
- The Secret Waterway has been opened with the Red Trinity.
- Leon has been spoken to until Earthshine is received.
- Cid has given Sora the Old Book.
Deliver the Old Book to Merlin
Travel to the Third District. If the direct passage from the First District is not open, reach the area through the Second District. In the Third District, find the wooden door marked with a flame symbol. Cast Fire on the door to open it, then cross the moving stones over the water and enter Merlin’s house.
Speak with Merlin and hand over the Old Book. The Fairy Godmother appears in the same area. Speak with her while Earthshine is in the inventory to convert it into the Simba Summon. Simba is optional for the Traverse Town Keyhole, but it is a permanent useful reward and should be collected if you want the summon. Merlin’s study also provides access to the Old Book itself. Examining it begins the Hundred Acre Wood content, which is optional and can be postponed. If you enter that book, return to Traverse Town and continue the Cid route afterward rather than treating Hundred Acre Wood as the next required story world.
- Merlin has received the Old Book.
- The Fairy Godmother has converted Earthshine into Simba, if desired.
- The Old Book’s Hundred Acre Wood content has been treated as optional.
Visit Cid in the Small House and receive Warp-G
Leave Merlin’s house and move through the Third District toward the Small House near the route between the Third and Second Districts. A story scene may occur while crossing the district; watch it, then enter the Small House and speak with Cid. The conversation completes Cid’s Gummi Ship request and provides Warp-G.
Warp-G allows Sora to travel quickly to worlds that have already been visited instead of flying every previously completed route from the beginning. It does not replace the need to seal worlds or complete required Gummi routes, and it does not make unvisited worlds available by itself. After receiving it, save and restock before beginning the bell sequence. This is the best point to make sure Cure, Dodge Roll, and any preferred offensive abilities are equipped.
- Cid has been found in the Small House.
- Warp-G has been received.
- Sora’s equipment and recovery items are ready for the boss encounter.
Ring the Gizmo Shop bell
Go to the Second District and enter the Gizmo Shop. Clear the Heartless if necessary, then move through the shop toward the upper exterior route. Climb to the roof and use the Red Trinity at the boarded section to reach the bell rope. Pull the rope three times. The bell reveals Traverse Town’s Keyhole at the fountain area.
The bell cannot be used as the opening objective of this visit. If the rope or Red Trinity does not produce the expected result, return to the Secret Waterway and confirm that Leon was spoken to, then check Cid’s Accessory Shop, Merlin’s house, and the Small House in that order. The Old Book delivery and Cid’s Small House conversation are the progression checks that commonly cause the route to appear stalled.
- The Gizmo Shop roof has been reached.
- The Red Trinity has opened the bell route.
- The bell has been pulled three times.
- Traverse Town’s Keyhole is visible at the fountain.
Defeat Opposite Armor and seal Traverse Town’s Keyhole
Save in the First District before approaching the fountain if you want a safe retry point. Approach the revealed Keyhole to begin the boss battle. The encounter starts with Guard Armor’s separated body parts and changes into Opposite Armor after the fight progresses.
Use lock-on to keep track of the active part. The hands and feet create pressure from different angles, while the torso is the main target and later functions as a dangerous cannon. Destroying limbs produces recovery and munny drops, but collect them only after the immediate attack has passed. Dodge Roll through spinning parts, move laterally when the torso fires, and avoid standing directly in front of repeated cannon blasts. Cure before reaching critical HP rather than waiting for the next attack to finish.
Opposite Armor is more durable than the first Guard Armor, but the basic method remains the same: separate the dangerous limbs, evade the torso’s ranged attack, and punish the boss during its recovery. After the boss is defeated, Sora seals Traverse Town’s Keyhole and learns Aero. Aero is a defensive spell that reduces incoming damage while active, so place it in a convenient Magic shortcut or remember its position in the command menu.
- Opposite Armor has been defeated.
- Traverse Town’s Keyhole has been sealed.
- Aero has been learned.
- The party has been healed before leaving the fountain area.
Collect Cid’s post-battle Gummi reward and use the hub
Return to the First District and speak with Cid after the battle. He provides the Comet-G and completes the immediate Gummi Ship upgrade sequence. Save again before leaving town, then use the Gummi Ship route or the newly available Warp-G travel option to continue the story.
Traverse Town remains the main preparation hub. The Accessory Shop provides saving, shopping, and equipment management; Merlin’s house handles magic practice and the Old Book; the Fairy Godmother handles summon items; and the Gummi Ship is managed through Cid and the available Gummi menus. Optional Trinities, synthesis materials, Dalmatians, and Hundred Acre Wood progress can be collected later. Required progression ends with Opposite Armor, Aero, and Cid’s post-battle Gummi reward, so do not delay the next world merely to clear every side activity.
- Cid has provided the Comet-G after Opposite Armor.
- The game has been saved after the boss.
- The player is ready to leave Traverse Town and continue the main route.
Before you move on
- The player has returned to Traverse Town after completing the required early-world progress, including Deep Jungle.
- The Secret Waterway was opened, Leon provided Earthshine, and Cid provided the Old Book.
- Merlin received the Old Book, and the Fairy Godmother converted Earthshine into Simba if the optional summon was wanted.
- Cid was found in the Small House and gave Sora Warp-G.
- The Gizmo Shop roof was reached, the bell was pulled three times, and Traverse Town’s Keyhole was revealed.
- Opposite Armor was defeated, Traverse Town’s Keyhole was sealed, and Aero was learned.
- Cid was visited after the battle and provided the Comet-G.
- The player has saved, restocked, and is ready to continue the main story. Optional Hundred Acre Wood content, Trinities, synthesis, Dalmatians, and additional equipment can be completed later.
Olympus Coliseum — tournaments, cups and optional bosses
Olympus Coliseum begins with the Preliminary Tournament and Cerberus story battles, then becomes a repeatable arena for optional Cups, rewards, Ice Titan, and Sephiroth. Cup availability depends on story progress and world completion. In the original North American PlayStation 2 release, the Phil, Pegasus, and Hercules Cups must be unlocked before the Hades Cup can open, and Hollow Bastion’s Final Keyhole must also be sealed. Platinum Match becomes available at that same late-game point; it does not require winning all four standard Cups. Gold Match is separate and requires winning the Phil, Pegasus, Hercules, and Hades Cups.
1. Complete the opening Coliseum sequence
On the first visit, enter the Coliseum and speak with Phil in the Lobby. Complete his barrel-training exercise to receive the Entry Pass, then enter the Preliminary Tournament. The Preliminaries are part of the opening story sequence and are separate from the later repeatable Phil Cup.
Use the Lobby Save Point before entering the tournament. During the rounds, keep moving so several Heartless cannot surround Sora. Eliminate spellcasting enemies early when they begin filling the arena with projectiles, and use short attack strings against larger enemies that can interrupt extended combos. Heal before reaching critical HP instead of waiting until recovery becomes unsafe.
After the Preliminary sequence, the story leads to Cerberus outside the arena. Lock on to one head and circle around the side. Attack after a lunge finishes, then retreat when Cerberus raises its heads and releases a dark shockwave. Dodge Roll or move behind the beast to avoid the sweep, and use Cure or a Potion during a safe retreat. Defeating Cerberus completes the opening Coliseum event and grants the Hero License.
- Complete Phil’s barrel training.
- Clear the Preliminary Tournament.
- Defeat Cerberus.
- Use the Lobby Save Point before leaving Olympus Coliseum.
2. Unlock and clear the Phil Cup
The Phil Cup opens after the opening Coliseum events are complete and Traverse Town’s Keyhole has been sealed. Return to Olympus Coliseum from the world map and speak with Phil in the Lobby. Winning the Preliminaries alone does not open the repeatable Phil Cup.
The normal Phil Cup uses Sora, Donald, and Goofy. Against groups, use ordinary attacks on isolated targets and Fire, Blizzard, or Thunder when several enemies are clustered or a spellcaster is difficult to approach. Reposition after short combos instead of allowing Sora to be trapped between large enemies.
Winning the normal Phil Cup awards Gravity in the original release. Gravity can be useful against suitable ordinary enemies but is not dependable against major bosses. After the normal Cup is cleared, the Sora-only version becomes available, followed by the timed version after Solo is completed. These variations are optional.
- Defeat Cerberus and obtain the Hero License.
- Seal Traverse Town’s Keyhole.
- Confirm that Phil lists the Phil Cup.
- Clear the normal Phil Cup if pursuing standard Coliseum completion.
- Return to the Lobby after victory.
3. Unlock and clear the Pegasus Cup
The Pegasus Cup opens after Monstro is completed, including the second Parasite Cage encounter. Monstro has no Keyhole, so the world must be finished through its required story events. If the Cup is missing, return to Monstro and check whether the second Parasite Cage battle and the resulting story sequence were completed.
The normal Pegasus Cup ends with Leon and Yuffie. Concentrate on Yuffie first because her shuriken attacks can interrupt Sora while Leon applies close-range pressure. Guarding or deflecting a shuriken can create an opening; otherwise circle the arena and avoid being pinned against a wall. Once Yuffie is defeated, keep moving around Leon and attack after his recovery windows.
Save MP for difficult groups and use Cure between rounds when necessary. Winning the normal Pegasus Cup awards Strike Raid. Solo and Time Trial versions are optional and are unlocked in sequence after the normal Cup.
- Complete Monstro through the second Parasite Cage battle.
- Confirm that the Pegasus Cup is available.
- Clear the normal Pegasus Cup if pursuing standard tournament completion.
- Attempt Solo and Time Trial only after the normal Cup.
4. Unlock and clear the Hercules Cup
The Hercules Cup opens after Halloween Town and Neverland have been completed and their Keyholes sealed. Return to Olympus Coliseum and speak with Phil after both conditions are met. The earlier Cups do not have to be won first, although completing them provides useful practice and rewards.
Against Cloud, move laterally and avoid extending a combo when he begins a lunge or spinning attack. Attack after the animation ends instead of trading hits. Against Hercules, wait for his golden aura to expose him. Pick up a barrel and throw it at him; the impact removes the aura temporarily. Attack during that opening, then repeat the process when the protection returns.
Winning the normal Hercules Cup grants Herc’s Shield and enables the Yellow Trinity ability, Trinity Push. After the first three regular Cups have been won, use the Yellow Trinity in the Lobby to open the chest containing the Olympia Keyblade. These rewards are optional for reaching the ending.
- Seal Halloween Town’s Keyhole.
- Seal Neverland’s Keyhole.
- Confirm that the Hercules Cup is available.
- Use barrels to remove Hercules’s aura.
- Win the first three regular Cups and open the Olympia chest if desired.
5. Unlock and clear the Hades Cup
The Hades Cup becomes available once the Phil, Pegasus, and Hercules Cups have been unlocked and Hollow Bastion’s Final Keyhole has been sealed. The earlier three Cups must be available, but winning them is not required merely to make Hades Cup appear. For practical preparation, however, clearing them first gives Sora experience, rewards, and familiarity with Coliseum combat.
Save in the Lobby before entering. Equip Cure, defensive abilities, and enough Potions, Hi-Potions, and Ethers for a long run. Do not spend MP on every weak group. Use physical attacks against ordinary Heartless, reserve area magic for dangerous clusters, and heal between rounds when the arena is clear. When the game offers a continuation after a checkpoint, use it rather than restarting the entire tournament.
The normal Hades Cup ends with Rock Titan. Winning it grants Trinity Limit and is required for the Gold Match, but it is not required to unlock Platinum Match. Hades Cup completion is also useful for late-game optional content and completion records.
- Unlock Phil, Pegasus, and Hercules Cups.
- Seal Hollow Bastion’s Final Keyhole.
- Save before entering Hades Cup.
- Use continuation checkpoints when offered.
- Defeat Rock Titan and receive Trinity Limit.
- Win Hades Cup before attempting Gold Match.
6. Clear Solo and Timed variations in order
For each standard Cup, the challenge order is normal party version, Sora-only version, and then Time Trial. Speak with Phil after completing each version to select the next one. These variations do not advance the main story.
In the original North American PS2 release, the Phil Cup Solo reward is a Mythril Shard, the Pegasus Cup Solo reward is Mythril, and the Hercules Cup Solo reward is Orichalcum. The Hercules Cup Time Trial awards a Power Up. The Hades Cup Solo awards Save the Queen, while its Time Trial awards Save the King. Final Mix reward tables should not be substituted for these original-release rewards.
For timed runs, remove whole groups quickly and avoid detours. Use magic against suitable targets to shorten encounters, but preserve enough MP for Cure during later rounds. If a time limit causes repeated failures, improve Sora’s equipment and level before trying again; none of these variations is required for the ending.
- Complete a Cup normally before selecting Solo.
- Complete Solo before selecting Time Trial.
- Use the original-release rewards listed above.
- Treat all Solo and Time Trial versions as optional.
7. Check Gold Match and Platinum Match separately
Gold Match against Ice Titan becomes available only after all four regular Cups have been won: Phil, Pegasus, Hercules, and Hades. Merely unlocking Hades Cup is not enough. Return to the Coliseum after winning the fourth Cup and inspect the question-mark entries in Phil’s tournament list.
Ice Titan’s icicles can be guarded and reflected back. Stay near the arena stands for a clearer view of the projectiles, lock on to his head, and avoid the center when ground shockwaves are active. Keep moving when ice falls from above. This is a Sora-only fight, so prepare Cure and recovery items. Gold Match is optional and does not affect the story ending.
In the original North American PS2 release, Platinum Match against Sephiroth becomes available when Hades Cup becomes available. The requirements are that the Phil, Pegasus, and Hercules Cups have been unlocked and Hollow Bastion’s Final Keyhole has been sealed. Winning the Phil, Pegasus, Hercules, and Hades Cups is not required to make Platinum Match appear, although completing them beforehand is useful for experience, equipment, and practice. If the second question-mark entry is missing, verify that all three earlier Cups are listed as available and that Hollow Bastion’s Final Keyhole has been sealed.
Sephiroth is substantially harder than the story bosses and remains optional. Bring strong equipment, Dodge Roll, Second Chance, Cure, and a full supply of high-value healing items. Keep lock-on active, avoid greedy combo extensions, and heal immediately after surviving a major attack. Summons can create temporary safety or damage opportunities, but movement and attack recognition remain essential. If repeated attempts end before you can identify his patterns, leave the Coliseum, raise Sora’s level, improve equipment, and return later. The original North American release does not require Sephiroth for the ending.
- Win Phil, Pegasus, Hercules, and Hades Cups before checking Gold Match.
- Defeat Ice Titan only for optional Gold Match completion.
- Unlock Phil, Pegasus, and Hercules Cups before checking Platinum Match.
- Seal Hollow Bastion’s Final Keyhole before checking Platinum Match.
- Do not treat winning Hades Cup as a Platinum Match requirement.
- Treat Sephiroth as an optional endgame challenge.
Before you move on
- The opening Preliminary Tournament and Cerberus story battle are complete.
- Phil, Pegasus, Hercules, and Hades Cups are listed when their separate story requirements are met.
- The normal Phil, Pegasus, Hercules, and Hades Cups are cleared if pursuing standard tournament completion.
- Olympia has been collected from the Lobby chest after winning the first three Cups, if desired.
- Trinity Limit has been learned from the normal Hades Cup, if pursuing full Coliseum rewards.
- Solo and Time Trial versions have been cleared if pursuing optional Coliseum rewards.
- All four regular Cups have been won before attempting Gold Match.
- Ice Titan has been defeated if optional Gold Match completion is desired.
- Phil, Pegasus, and Hercules Cups are unlocked before checking Platinum Match.
- Hollow Bastion’s Final Keyhole is sealed before checking Platinum Match.
- Sephiroth has been defeated only if pursuing optional superboss completion.
- No Coliseum Cup, Ice Titan victory, or Sephiroth victory is required to reach the main ending.
Agrabah — vertical combat and Jafar-style encounters
Agrabah’s main route moves from the city streets to the desert, the Palace Gates and the Cave of Wonders. Complete the city triggers in order, defeat Pot Centipede and the Cave of Wonders Guardian, use Abu and the cave mechanisms to reach Jafar, then defeat Jafar and Genie Jafar. The world is complete after the Keyhole is sealed, the Magic Carpet escape finishes, and the post-battle scenes award Three Wishes and Genie.
Enter Agrabah and secure the first Save Point
After landing in Agrabah, defeat the Heartless in the Plaza. Enter the Storage room near the Plaza and use its Save Point before exploring the city. This room is a dependable retreat when Bandits or Pot Spiders surround Sora, and it remains useful later when the Green Trinity becomes available.
Return to the Plaza and continue into Main Street. Agrabah’s routes frequently use raised awnings, crates, poles and balconies instead of obvious ground-level doors. If a street appears blocked, look upward for a climbable pole or a stack of crates rather than forcing Sora through a narrow alley.
- Save in Storage before beginning the city sequence.
- Equip Cure and carry Potions, Hi-Potions or Ethers if available.
- Use open spaces to fight Bandits instead of allowing several enemies to pin Sora against a wall.
Free the Magic Carpet and open the first route
From Main Street, climb either pole to reach Aladdin’s House. Move the furniture covering the Magic Carpet and let the Carpet fly away. Then move the nearby stack of drawers and examine the revealed Keyhole. This opens a route elsewhere in Agrabah and is required for the next story trigger.
Leave Aladdin’s House through the front exit, return to the Plaza and enter the Alley. A scene with Jasmine and Jafar leads into a Heartless battle. Defeat every enemy, then climb to the position where Jafar stood and use the Keyhole there to open the new connection.
- Free the Magic Carpet inside Aladdin’s House.
- Activate the Keyhole revealed by moving the drawers.
- Visit the Alley only after completing the Aladdin’s House trigger.
- Defeat the Heartless after Jasmine’s scene and activate the second Keyhole.
Rescue Aladdin and reach the Palace Gates
Return through Main Street to the Plaza and exit into the Desert. The Magic Carpet takes Sora to Aladdin, who is surrounded by Heartless. Defeat the attackers; Aladdin then becomes available as a temporary party member, and Genie appears during the following scenes.
Use the upper awnings and crate route to move back through the city. From Main Street, reach the Bazaar and then the Palace Gates. You may collect the nearby chests if desired, but they are optional. If the route seems blocked, use the newly opened upper exits rather than returning to the original street level.
- Clear the Heartless around Aladdin in the Desert.
- Keep Aladdin in the party when the game requires Abu later in the Cave of Wonders.
- Reach the Palace Gates after returning from the Desert.
- Heal before the cutscene that begins the Pot Centipede fight.
Defeat Pot Centipede and the Cave of Wonders Guardian
At the Palace Gates, defeat Pot Centipede. Its body moves through the arena while Pot Spiders and its antennae create additional threats. Stay near the head when it pauses, attack with the Keyblade, then move away as it starts travelling again. Cure instead of trying to finish the boss while Sora is surrounded.
After Pot Centipede falls, return toward the Cave of Wonders through the Plaza. The Cave of Wonders Guardian rises from the sand. Its two eyes are the targets, but they are not always exposed. Wait for the tiger head to lower or burrow, climb onto the mane when safe, and attack a glowing eye. Aero reduces damage from the Guardian’s projectiles; Cure whenever the Heartless adds or eye attacks leave Sora low on HP.
- Keep Pot Centipede in the widest part of the Palace Gates area.
- Attack the Guardian’s glowing eyes only when they are exposed.
- Use Aero if available and avoid standing in front of the Guardian’s projectiles.
- Enter the Cave of Wonders only after restoring HP and MP.
Navigate the Cave of Wonders and reveal the Keyhole
Enter the Cave of Wonders and move through the Entrance into the Relic Chamber. With Aladdin in the party, call Abu at the monkey statue so he lowers the stairs. Continue through the Silent Chamber and interact with the jewel and nearby mechanisms as the route allows. In the Hidden Room, attack the pillar. This triggers Jafar’s first wish and reveals the world’s Keyhole.
Return through the cave toward the Hall, then drop into the Dark Chamber. Use the Save Point there before proceeding. From the Hall and Bottomless Hall, follow the connected platforms to the Treasure Room. Optional chests and Trinities can wait; the required destination is the Lamp Chamber. Make sure Cure is easy to select and keep several recovery items ready.
- Call Abu in the Relic Chamber to lower the stairs.
- Attack the pillar in the Hidden Room to trigger the Keyhole scene.
- Use the Save Point in the Dark Chamber before the Lamp Chamber.
- Do not leave the cave because of optional treasure if the required route is unclear; return to the Hall and continue toward the Lamp Chamber.
Defeat Jafar in the Lamp Chamber
In the Lamp Chamber, target Jafar himself. He moves around the room while Genie supports him, so approach during the pauses between his attacks and use short ground or aerial combos rather than chasing him through every animation. When Jafar fires a beam or broad attack, move laterally or jump away before re-engaging. Donald, Goofy and Aladdin can draw attention from Sora, creating openings for a few safe strikes.
Conserve MP for Cure. Offensive magic is optional and should be used only when Jafar is at a safe distance or when it prevents Sora from being surrounded. Defeating Jafar changes Fire to Fira and awards Ansem’s Report 1, but the story is not finished yet.
- Lock onto Jafar during the first Lamp Chamber battle.
- Attack during recovery windows instead of pursuing him recklessly.
- Keep enough MP for Cure.
- Confirm that Fira and Ansem’s Report 1 were awarded after victory.
Defeat Genie Jafar and escape Agrabah
After the scene, Jafar transforms and Iago carries the lamp. The lamp is the real target. Lock onto Iago when possible and chase the moving platforms around the chamber. Genie Jafar throws large fireballs and can strike Sora at close range, so avoid standing directly beneath him. When Iago pauses or drops low, attack the lamp repeatedly, then reposition before Genie Jafar’s next attack.
Once the lamp is destroyed, Agrabah’s Keyhole is sealed and the Cave begins to collapse. Ride the Magic Carpet through the escape sequence. Steer around falling rocks, lava bursts and other obstacles; use the available evasive jump or flip when an obstacle fills the route. The escape sequence is the final required action inside the cave.
- Target Iago’s lamp, not Genie Jafar’s body.
- Use Cure during a safe platforming window rather than while standing under Genie Jafar.
- Complete the Magic Carpet escape.
- Watch the return-to-town scenes after the escape.
Collect Agrabah’s rewards and leave
After the post-battle scenes, Aladdin gives Sora the Three Wishes Keyblade, Genie becomes available in the Summon command, and the party gains the ability to activate Green Trinity marks, commonly identified as the Trinity Ladder ability. Return to the Storage room and activate the Green Trinity there for the optional Power Up chest.
Save at the nearby Save Point when you are ready to leave. Agrabah’s next story destinations are not fixed to a single immediate world; the world map will provide the available routes. Monstro, Atlantica and Halloween Town become possible progression choices depending on the route already opened.
- Confirm Three Wishes is in the Keyblade inventory and equip it if useful.
- Confirm Genie appears in the Summon command.
- Activate the Green Trinity in Storage for the optional Power Up.
- Use the Save Point to return to the Gummi Ship.
- Verify that Agrabah’s Keyhole is sealed before leaving.
Before you move on
- Pot Centipede, the Cave of Wonders Guardian, Jafar and Genie Jafar have all been defeated.
- Fira and Ansem’s Report 1 were awarded after the Genie Jafar battle.
- The Agrabah Keyhole is sealed during the collapse sequence.
- The Magic Carpet escape ends and the party returns to Agrabah.
- Three Wishes is received from Aladdin.
- Genie is visible in Sora’s Summon command.
- The Green Trinity activation ability is available, and the Storage Green Trinity can be used for its optional Power Up.
- A Save Point in Agrabah offers access to the Gummi Ship.
Monstro & Atlantica — unusual movement and gimmick fights
Monstro is a short but confusing rescue sequence inside the whale, followed by Atlantica’s underwater world with three-dimensional movement and a two-stage Ursula storyline. In the original North American PlayStation 2 release, Monstro is completed by defeating Parasite Cage twice and being expelled from the whale; there is no Keyhole to seal there. Atlantica is completed after both Ursula battles, the return of the Crystal Trident, and the Keyhole scene in Ariel’s Grotto. These worlds usually follow Agrabah and can be tackled alongside Halloween Town before the story proceeds toward Neverland.
Enter Monstro and follow the correct chamber route
When traveling from Agrabah toward the next worlds, Monstro may intercept and swallow the Gummi Ship. Inside, begin in the Mouth and use the green-lit passages as the main route. The required sequence is Chamber 1, Chamber 2, Chamber 3, back to Chamber 2, Chamber 5, Chamber 6, back to Chamber 5, and then Chamber 4. The repeated return to Chamber 5 is easy to miss; do not enter Chamber 4 immediately after Chamber 6.
Defeat the Heartless in each room before attempting jumps across the ledges. Chamber 4 contains a Save Point and is the correct staging area before the first boss. The rooms contain optional chests and side routes, but none are required for the story. If you become lost, return to the Mouth and retrace the green-lit entrances rather than wandering through every chamber.
- Follow Chamber 1, 2, 3, 2, 5, 6, 5, 4.
- Use the Save Point in Chamber 4 before entering the Bowels.
- Do not look for a Keyhole inside Monstro.
Defeat Parasite Cage in the Bowels
Enter the Bowels from Chamber 4 to begin the first Parasite Cage fight. In the original PS2 version, Riku assists during this encounter. The boss takes effective damage on its front, particularly its face and lower body. Use short aerial Keyblade combos after the arm swings, then move away before the next sweep. Guard can stop the arm attacks if you have learned it; otherwise, attack from the entrance platform and retreat whenever the arms begin moving.
Cure before Sora’s HP becomes critical. Riku can help during this battle, but do not rely on him as your only source of recovery. After Parasite Cage is defeated, Pinocchio is released into the opening below and the water level in the Mouth changes. This is only the first half of Monstro’s required story.
- Attack the face and lower body rather than striking from behind.
- Use brief combos between arm swings.
- Heal before dropping through the opening created after the fight.
Use High Jump and reach the Stomach
After the first battle, return to the Mouth. Geppetto’s ship now contains the shared High Jump ability. Open the chest, equip High Jump, and save at the nearby Save Point. The new water level exposes ledges that allow you to reach the upper passage above the Chamber 1 entrance. Enter the Throat and climb through the vertical room to the Stomach.
Defeat the Heartless on the way up and use the Blue Trinity in the Throat if it is available. High Jump also makes it practical to revisit earlier chambers for missed treasures, but those pickups are optional. Restock Cure and HP recovery items before entering the Stomach, because the second Parasite Cage fight has stronger attacks and damaging floor hazards.
- Collect and equip High Jump from Geppetto’s ship.
- Save in the Mouth before entering the Throat.
- Keep Cure and several HP recovery items available.
Defeat Parasite Cage a second time and leave Monstro
The second Parasite Cage battle takes place in the Stomach and does not include Riku’s assistance. It retains the arm swings from the first fight and adds a dangerous acid attack. When the boss uses its arms to draw acid upward, circle around its rear on the center platform. Moving onto the outer platforms makes the attack harder to avoid. The bright-green acid patches on the floor also damage Sora, so keep moving and do not stand in them.
Continue using short aerial combos after the arm attacks. Striking the head can stagger Parasite Cage and expose the dark material inside its mouth; lock onto that opening and attack while it is vulnerable. When the boss is defeated, Sora learns Stop magic and the party is expelled from Monstro. That forced exit is the completion signal. Monstro has no Keyhole, so there is no separate sealing scene.
- Defeat Parasite Cage in the Stomach.
- Avoid the bright-green acid patches and circle from the center platform during the acid attack.
- Obtain Stop magic and confirm that Monstro expels the party to the Gummi Ship.
Learn Atlantica’s underwater movement
Select Atlantica from the world map once its route is available. Sora, Donald, and Goofy take aquatic forms, and movement becomes fully three-dimensional. On the original North American PS2 control layout, use the Left Analog Stick to steer, Circle to rise, and Square to dive. X performs the normal attack. Make small vertical corrections instead of holding one direction for too long, because Sora can drift past targets or lose the desired depth.
Lock onto enemies before attacking whenever possible. Physical attacks are awkward when enemies are above or below Sora, so use Fire, Blizzard, or Thunder from the command menu when a target is difficult to line up. Swimming past a group and turning back is safer than forcing a long melee exchange in the middle of several enemies.
- Practice rising with Circle and diving with Square in a safe area.
- Use lock-on to keep enemies from passing behind Sora.
- Use magic when the camera or enemy height makes melee attacks unreliable.
Follow Atlantica’s story objectives
After arriving, complete the swimming tutorial by following Flounder. Continue through the Undersea Valley to Triton’s Throne and then visit Ariel’s Grotto when the story points you there. The grotto and the trident symbols on the walls are useful landmarks when the open water begins to feel circular. A fast current blocks some routes; stay close to the indicated wall and follow the available passage rather than trying to swim directly against it.
The story then sends you toward the Sunken Ship. Search inside the ship for the Crystal Trident and return it to Ariel’s Grotto to trigger the next scene. Follow Ariel back toward the palace and speak with King Triton. After the trident is taken, return toward the Sunken Ship and examine the hidden switch near its front; Sebastian opens the route to Ursula’s Lair. The chest below deck is not required to open this path, so missing it does not permanently block progress.
- Visit Triton’s Throne and Ariel’s Grotto when directed.
- Collect the Crystal Trident from the Sunken Ship.
- After speaking with King Triton, use the hidden switch near the front of the Sunken Ship.
Defeat Ursula twice and seal Atlantica’s Keyhole
The first Ursula battle takes place in her lair. Keep moving around the chamber instead of standing directly in front of her, and use magic when she pauses after an attack. Cure early. After that battle, continue the story until Ursula appears in the larger underwater area for the second encounter. Circle around the giant Ursula and attack from the side or rear. Staying in front of her makes it easier to be caught by her charged attacks and spell patterns. Use short attack strings, then swim away before she turns toward Sora.
After the second Ursula battle, return to Triton’s Throne. The king explains that the Crystal Trident can reveal Atlantica’s Keyhole. Follow the scene at Ariel’s Grotto; Sora seals the Keyhole automatically. The story awards the Crabclaw Keyblade and upgrades Thunder to Thundara, while Ansem’s Report 3 is also obtained in the Atlantica sequence. Confirm the world is marked complete before leaving.
- Defeat Ursula in her lair.
- Defeat giant Ursula in the open underwater arena.
- Return to Triton’s Throne and then Ariel’s Grotto for the Keyhole scene.
- Receive Crabclaw and confirm Atlantica is marked complete.
Before you move on
- Parasite Cage has been defeated once in the Bowels and again in the Stomach.
- High Jump has been obtained from Geppetto’s ship and Stop magic has been awarded after the second Parasite Cage battle.
- Monstro has expelled the party to the Gummi Ship and has no remaining main-story objective.
- The Crystal Trident has been recovered and the Sunken Ship switch has opened the path to Ursula’s Lair.
- Both Ursula encounters are complete.
- King Triton’s return scene has played, Sora has sealed Atlantica’s Keyhole in Ariel’s Grotto, Crabclaw has been awarded, and Atlantica is marked complete on the world map.
References for this chapter
- Kingdom Hearts - Guide and Walkthrough - PlayStation 2 - By Fraghappy
- Kingdom Hearts — Guide and Walkthrough, PlayStation 2, by winnie_the_poop
- Kingdom Hearts — Guide and Walkthrough — PlayStation 2 — By sephiroth95 — GameFAQs
- Monstro Walkthrough — KHGuides
- Atlantica — StrategyWiki
- Walkthrough: Kingdom Hearts/Atlantica — Kingdom Hearts Wiki
- Monstro — Kingdom Hearts Wiki
Halloween Town — unique enemy types and puzzle signals
Halloween Town combines narrow combat areas, a short environmental memory puzzle, vertical traversal and two Oogie Boogie encounters. Follow the story through the Research Lab, Graveyard, Boneyard, Moonlight Hill, the Bridge and Oogie's Manor. Save before each major fight, conserve MP for Cure and Fira, and use the temporary Red Trinity in Oogie's Manor before defeating Oogie if you want to collect it in the original North American PlayStation 2 release.
Enter Halloween Town and begin Jack's experiment
Land at Halloween Town and use the Save Point at Guillotine Gate before entering Guillotine Square. Move through the square and follow the opening scenes until Jack Skellington directs the party to Dr. Finkelstein's Research Lab. Jack is available as a party member in this world, while Donald and Goofy can be managed through the usual party menu.
After the laboratory scenes, leave through the Lab Entryway and return toward Guillotine Square. The early Heartless are not individually dangerous, but the area's walls and corners make it easy to be hit from behind. Use short Keyblade combos, keep the camera turned toward the open area and avoid spending MP on every isolated enemy. Keep Cure available for the trip through the Graveyard.
- Use the Save Point at Guillotine Gate.
- Visit Guillotine Square and the Research Lab.
- Keep Cure and at least a few healing items available.
Clear the Graveyard and solve the Boneyard puzzle
When the story sends you after the missing ingredients, enter the Graveyard through the route beside the Lab Entryway. Wight Knights are the important new threat here. Fire magic is effective against them, but normal attacks also work if Sora keeps moving and avoids being pinned against the cemetery walls. Defeat the Heartless blocking the area, then watch the scene with Sally and Zero before returning to the Research Lab.
After the Doctor asks for the final ingredient, return to the Graveyard and examine the coffin at the back. This leads to the Boneyard. Speak with the Mayor and watch the three ghosts emerge from their tombstones. Examine the same tombstones in the order the ghosts appeared. The sequence is randomized, so do not rely on a fixed pattern. If you choose incorrectly, repeat the observation and enter the new order.
When the puzzle is solved, inspect the large pumpkin area and collect the Jack-in-the-Box. Return to the Research Lab and give it to Dr. Finkelstein. The heart is then stolen, and Zero tracks Lock, Shock and Barrel toward the Graveyard.
- Defeat the Heartless in the first Graveyard visit.
- Watch and reproduce the three-ghost tombstone sequence.
- Collect Jack-in-the-Box and return it to the Research Lab.
Follow Zero through Moonlight Hill and the Bridge
After the heart is stolen, leave the Lab and follow Zero back through the Graveyard. Defeat or bypass the Heartless, examine the coffin and enter the Boneyard. Take the door to the right of the pumpkin to reach Moonlight Hill. You do not need to defeat every enemy in this area; clear enough of them to make the route safe, then examine the tombstone at the base of the hill.
Use Fira on the platform near the closed door if you need to return to the Graveyard. The other door is shut at this stage and is not a progression failure. Continue to the Bridge, where another Fira-activated platform provides a return route. Cross the Bridge and avoid the water current below; falling into it sends Sora back toward Guillotine Square. Enter the gate at the far end to reach Oogie's Manor.
Before climbing to the Manor entrance, restore HP and MP at the available Save Point if necessary. The elevated walkways are narrow, and pursuing airborne Heartless too aggressively can send Sora over the edge. If Sora falls, use the water route and bathtub return path to get back to the Manor entrance rather than trying to repeat the entire world.
- Reach Moonlight Hill through the Boneyard.
- Use Fira on the relevant return platforms.
- Cross the Bridge without being carried away by the current.
- Reach Oogie's Manor.
Climb the Manor and complete the temporary Red Trinity
At Oogie's Manor, follow the wooden walkway to the entrance and enter the room with the large lantern platform. In the original North American PlayStation 2 release, activate the Red Trinity in this room before defeating Oogie Boogie. It is a temporary opportunity and should not be postponed if you are pursuing a thorough file.
Cast Fira on the lantern platform to make it rise. Ride it upward, jump onto the wooden scaffold and follow the walkways and stairs to the double doors of the Evil Playroom. You may fight the Heartless for experience, but the required route is the scaffold leading to the room where Lock, Shock and Barrel are waiting. Save at the Save Point after entering the playroom before continuing.
- Use the Red Trinity in the Manor entrance if desired.
- Cast Fira on the lantern platform.
- Reach the Evil Playroom and save.
Defeat Lock, Shock and Barrel
The three children fight together in the Evil Playroom. The room is small, and their jumps and spinning attacks can interrupt long combos. Lock onto one target, use brief attack strings and roll away before the other two close in. Barrel is fast and can be especially disruptive, while Shock has the lowest HP. There is no required defeat order, so prioritize whichever target is currently isolated or threatening Sora.
Use Donald's and Jack's magic to pressure a target while Sora repositions, but do not empty the party's MP. Cure between exchanges rather than waiting until Sora is near defeat. When all three are defeated, strike the lever near the room's exit. This opens the route toward Oogie and leaves a Save Point available before the next boss.
- Defeat Lock, Shock and Barrel.
- Strike the lever after the battle.
- Save and restore the party before entering Oogie's chamber.
Defeat Oogie Boogie on the roulette board
Leave the playroom, follow the return route around the Manor and use the bathtub to reach the lower area. From the Manor entrance, drop onto the stone path below and follow it to the green door beneath the main entrance. Enter to begin the Oogie Boogie battle.
The arena is a roulette board. First survive Oogie's dice-based hazards. Gargoyles can appear and should be destroyed quickly if they surround Sora. A moving razor wheel is best avoided with Dodge Roll or a jump. For the rotating scythes, running beneath them is safer than attempting repeated jumps. When the gun statues raise their weapons, move away from the firing line and keep moving.
After a hazard cycle, several buttons around the roulette board light up. Lock onto Oogie and watch which section he enters. Step on the button corresponding to the section where Oogie is positioned. The fences rise and the platform lifts Sora toward him, creating the main melee opening. Attack with a full combo, then prepare to return to the lower floor when Oogie knocks Sora away. Repeat the hazard and button sequence until he is defeated. Cure during a safe interval, not while dice or the razor wheel are approaching.
- Reach the green door beneath the Manor entrance.
- Survive the roulette hazards.
- Activate the button for Oogie's current section.
- Defeat Oogie Boogie and use the post-battle reward opportunity.
Destroy Oogie's Manor and seal the Keyhole
After the first battle, Oogie fuses with the Manor. Sora returns near the broken Bridge. Drop to the ground and approach the front of the giant Manor, where roots and platforms provide the climbing route. The goal is to destroy all seven dark vulnerable orbs attached to the structure.
Climb from the front roots to the first orb, then move across the boxes, doghouse-like platform and wooden scaffolds. Continue along the descending and ascending ledges, checking around lanterns, blades and protruding structures for the next orbs. One orb is reached from the lower ground by following a long root near the rocks. Do not waste time fighting every Gargoyle; they continually return and are mainly a distraction.
The lanterns swing and release flames, so pause before crossing their path. If a lantern blocks a route, destroy it when safe. Falling is recoverable: return to the ground, find the appropriate root or spiral path and resume the climb. Once the final orb is destroyed, the Manor collapses, Halloween Town's Keyhole is sealed and the game upgrades Gravity to Gravira. Jack then gives Sora the Pumpkinhead Keyblade.
- Destroy all seven dark orbs.
- Avoid or destroy the swinging lantern hazards.
- Watch the Keyhole-sealing scene.
- Receive Pumpkinhead from Jack.
Leave Halloween Town and prepare for the next route
After the story scenes in the Research Lab, check the shelves behind Jack for the Torn Page if you are collecting the world items, then return to Guillotine Gate and use the Save Point. Equip Pumpkinhead if its reach and critical-hit rate suit your build, restock healing items and review Sora's abilities before leaving.
Take the Gummi Ship from the Save Point and inspect the world map. Halloween Town's completion opens the next available story route, but the exact next destination depends on which other worlds have already been completed. Halloween Town does not immediately begin Hollow Bastion; continue through the remaining required worlds and return to Traverse Town for upgrades when needed.
- Seal Halloween Town's Keyhole.
- Receive and equip or store Pumpkinhead.
- Restock before leaving.
- Confirm that the world map shows the next available story destination.
Before you move on
- The Boneyard memory puzzle is solved and Jack-in-the-Box has been delivered to the Research Lab.
- Lock, Shock and Barrel are defeated and the lever has opened the Manor route.
- Oogie Boogie is defeated on the roulette board.
- All seven dark orbs on Oogie's Manor are destroyed.
- The Keyhole-sealing scene has played and Jack has given Sora Pumpkinhead.
- The Save Point at Guillotine Gate allows Gummi Ship travel to the next available story destination.
Neverland — Flying and Boss Arena Strategies
Neverland begins aboard Captain Hook’s ship and ends at the Clock Tower. Escape the Hold, defeat AntiSora, rescue Wendy, defeat Captain Hook, and then correct the single faulty clock face to reveal and seal the world’s Keyhole. The original North American PlayStation 2 release awards Tinker Bell, the Fairy Harp Keyblade, Glide, and a Navi-G piece after this sequence. The story then points you back to Traverse Town before Hollow Bastion.
Escape the Hold and reach the upper cabins
After the Gummi Ship landing and opening scenes, Sora, Donald, and Goofy begin in the Hold of Captain Hook’s ship. Peter Pan joins the group during the escape sequence. Use the Save Point in the starting area before moving on; this is the safest recovery point during the first part of the ship.
Leave the Hold through the available door and clear the Heartless in the connected rooms. Follow the ladders and open passages upward through the ship. Some doors cannot be used until the nearby story event is complete, so do not treat every inaccessible doorway as a puzzle. Your immediate objective is to reach the cabins and continue the search for Wendy.
Neverland allows Sora to fly during its airborne sections, but this is not the same as the permanent Shared Ability Glide. The normal Neverland flight controls are used for the ship battles and the Clock Tower sequence; Glide is awarded later, after the Keyhole is sealed.
- Save in the Hold before exploring.
- Keep Cure available and carry several Potions or Hi-Potions.
- Use Peter Pan as a temporary party member if you want an additional close-range attacker.
Defeat AntiSora in the cabin
AntiSora appears in the ship’s cabin area after the initial exploration. Lock on when possible and keep moving around the room rather than standing still in front of it. AntiSora can fade into the floor, reappear from another angle, and follow its reappearance with a quick Keyblade attack.
The battle may include lesser shadow copies. The genuine AntiSora is the enemy with the substantial health bar. Concentrate on that target instead of wasting the entire fight trying to eliminate every minor copy. If the copies crowd Sora against furniture or a wall, move through the room and create space before attacking again.
Aero reduces damage from mistakes, while Cure should be used before Sora reaches critical HP. When AntiSora disappears into the floor, keep circling the room and wait for it to reappear. Attack after its strike finishes rather than chasing it blindly across the cabin. Defeating AntiSora opens the route toward Wendy and the later deck sequence.
- Target the AntiSora with the real health bar.
- Keep away from corners and narrow spaces.
- Heal before continuing through the cabins.
Reach the deck and begin the Captain Hook encounter
After the AntiSora battle, examine the required mechanism or nearby wall when the game provides the interaction prompt. The route opens toward the remaining ship rooms. Continue through the cabins, view the story scenes involving Wendy and Peter Pan, and clear the Heartless encounter that follows.
Use the ship’s Save Point before entering the boss area if you need to restore HP and MP. Place Cure and Aero where they are easy to select. Stock Ethers if your MP reserve is low, because the ability to fly around the deck makes healing safer but does not replace resource management.
Captain Hook’s battle takes place on the deck. The arena is more open than the cabins, but the camera can swing sharply when Hook moves past Sora. Lock on when it helps maintain contact, then release the lock if the camera begins pulling Sora away from the safest escape route.
- Restore HP and MP before the boss.
- Cast Aero before committing to the fight.
- Carry at least a few healing and MP-recovery items.
Defeat Captain Hook with short attacks and controlled retreats
Captain Hook uses sword slashes and lunging attacks at close range. Approach with a short grounded or aerial combo, then move away after the combo ends instead of remaining beside him for another exchange. Sora can fly during this Neverland battle, so use that movement to cross over Hook’s horizontal attacks and reposition behind or beside him.
Battleships can fire into the arena and interrupt Sora while he is attacking Hook. When their shots make the deck unsafe, defeat the nearby Battleships first, then return to Hook. They are a recurring hazard rather than a separate story objective, so do not abandon the boss indefinitely to chase enemies across the entire deck.
Aero is more valuable here than spending MP on repeated offensive spells. If Sora’s HP drops, fly or run toward the edge of the arena, create distance, and cast Cure. Donald and Goofy may help occupy Hook, but do not rely on them to interrupt every attack. Patient short combos are safer than trying to finish the fight with one long string.
Captain Hook has 900 HP in the original release. Defeating him awards Ars Arcanum and Ansem’s Report 9. A cutscene then carries the group to the Clock Tower.
- Clear Battleships when their fire prevents safe attacks.
- Use the flying movement to evade Hook’s slashes and lunges.
- Keep enough MP for Cure.
- Confirm that Ars Arcanum and Ansem’s Report 9 were awarded.
Talk to Wendy and correct the Clock Tower face
After the Captain Hook scenes, you arrive at the Clock Tower. Find Wendy and speak with her. This conversation starts the required clock sequence. Do not leave the area immediately after arriving; the Keyhole is not revealed merely by defeating Hook.
Fly around the tower and compare the clock faces. In the original North American PlayStation 2 version, one face is fifteen minutes out of alignment while the other faces show midnight. Target the faulty face and strike the end of its minute hand three times, or until it matches the others at 12:00. You do not need to adjust all of the faces.
When the clock is corrected, the Neverland Keyhole appears and the sealing scene begins. If the Keyhole does not appear, return to Wendy’s position, confirm that you spoke with her, and check the faces again rather than continuing to search the ship.
- Speak with Wendy at the Clock Tower.
- Find the single clock face that does not show midnight.
- Hit that face’s minute hand three times until the Keyhole appears.
- Allow Sora to seal the Keyhole.
Collect the rewards and prepare for Hollow Bastion
After the Keyhole is sealed and the story scenes finish, Sora receives the Tinker Bell Summon, the Fairy Harp Keyblade, and the Shared Ability Glide. A Navi-G piece is also awarded. Glide can now be equipped in the Shared Abilities menu and used in suitable areas throughout the game.
Use the Save Point above the Clock Tower before boarding the Gummi Ship. Treasure on Hook’s ship and around the Clock Tower is optional. Collect it now if you want the rewards, but do not confuse optional chests with the Keyhole objective. Some Clock Tower rewards are easier to obtain before moving on, while they are not required to finish Neverland.
Return to Traverse Town after leaving Neverland. Speak with Cid in the First District so he can install the new Navi-G piece. The route toward Hollow Bastion depends on the required navigation pieces and the earlier Traverse Town progression. If Cid does not offer the installation, make sure Traverse Town’s Keyhole progression is complete and that you have returned with the Navi-G piece from Neverland.
The post-world scenes establish that Kairi’s condition and Riku’s actions are connected to Hollow Bastion. Once Cid has installed the navigation upgrade, check the Gummi Ship map and select the newly available route. Hollow Bastion, not another Neverland objective, is the next main-story destination.
- The Neverland Keyhole has been sealed.
- Tinker Bell appears in the Summon list.
- Fairy Harp and Glide have been awarded.
- The Navi-G piece from Neverland is in your inventory or has been installed by Cid.
- The Hollow Bastion route is available from the Gummi Ship map.
Before you move on
- Captain Hook is defeated.
- Ars Arcanum and Ansem’s Report 9 have been awarded.
- Wendy has been spoken to at the Clock Tower.
- The single misaligned clock face has been corrected and the Neverland Keyhole has appeared.
- Sora has sealed the Keyhole.
- Tinker Bell, Fairy Harp, and Glide have been awarded.
- The Neverland Navi-G piece has been obtained.
- Cid has installed the required navigation upgrade, or the Hollow Bastion route is visibly available on the Gummi Ship map.
References for this chapter
- Kingdom Hearts — Guide and Walkthrough, PlayStation 2, by Jet2x5
- Kingdom Hearts — Guide and Walkthrough — GameFAQs
- Kingdom Hearts — Guide and Walkthrough, PlayStation 2, by Terran
- Walkthrough: Kingdom Hearts/Neverland — Kingdom Hearts Wiki
- Kingdom Hearts — Guide and Walkthrough, PlayStation 2, by winnie_the_poop
- Walkthrough: Kingdom Hearts/Traverse Town
Hollow Bastion — first visit: infiltration and story escalation
The first Hollow Bastion visit has three required sections: the initial approach while Sora is carrying the Wooden Sword, the castle route through Riku, the Library and Emblem Piece puzzles, and the boss sequence against Maleficent, Dragon Maleficent, and Riku-Ansem. After the final battle, the story does not send you directly into the second Hollow Bastion visit. You must return to Traverse Town, speak with Cid, retrieve the replacement Navi-Gummi from the Secret Waterway, speak with Kairi to receive Oathkeeper, and return to Cid so he can install the Gummi piece. Only then can you use the newly opened route or warp to begin the return visit.
1. Cross Rising Falls and reach the castle
After arriving at Hollow Bastion, use the Save Point before climbing through Rising Falls. Cast Blizzard on the floating water bubbles when you need temporary platforms. Some bubbles can also carry Sora below the surface, so do not enter one accidentally if you are trying to climb upward. The exterior contains optional treasure, but none of it is required for the story route.
At the upper platform, a cutscene occurs with Beast and Riku. Riku takes the Keyblade, and Donald and Goofy leave with him. Sora is temporarily equipped with the Wooden Sword, which is ineffective against Heartless. Beast joins the party and can defeat the enemies along this section, so avoid spending large numbers of items trying to clear every enemy yourself.
Continue toward the Castle Gates. Examine the red crystal switches to move the platforms and reach the lower route. Follow the Waterway path until you find the gate that blocks the way forward. Stand beside it and use the Call command so Beast breaks it open. Continue through the moving-wall section, activate the available switches, and return to the Castle Gates. The main entrance will now be open.
- Use the first Hollow Bastion Save Point.
- Reach the upper platform and trigger Riku’s Keyblade scene.
- Let Beast join Sora after Donald and Goofy leave.
- Use Call at the Castle Gates obstruction.
- Open the main entrance and enter the Entrance Hall.
2. Defeat Riku and obtain Trinity Detect
The Entrance Hall triggers the first required Riku boss fight. Sora has the Keyblade again, and Donald and Goofy are back in the party. Riku relies on close-range attacks and cannot be damaged by ordinary offensive magic, so keep lock-on active and use short physical combos rather than wasting MP on Fire, Blizzard, or Thunder.
Stay close enough to punish his recovery but do not chase him across the entire room. Guard or Dodge Roll through his approach, then counter with a brief combo. If he throws his weapon, move sideways or guard instead of standing in place. Cast Cure before HP becomes critical because Riku can close the distance quickly.
After winning, Sora learns Trinity Detect. This is the final Trinity ability and allows White Trinity marks to be activated in earlier worlds. Beast rejoins the party after the scene. Use the nearby recovery opportunity before entering the Library and puzzle route.
- Defeat the first Riku boss fight.
- Obtain Trinity Detect.
- Confirm that Beast, Donald, and Goofy are available again.
- Equip your strongest available Keyblade and defensive accessories.
3. Complete the Library and Emblem Piece puzzles
Enter the Library from the Entrance Hall. Several colored books are displaced from the shelves. Pick up each book and return it to the shelf with the matching letter or series. The shelves move when the correct volumes are restored, exposing switches and opening the route to the upper Entrance Hall. The Library books are separate from the four Emblem Pieces, so do not leave after returning only the first volumes.
In the upper Entrance Hall, break the two vases beside the statue to restart the fountain. The fountain produces one Emblem Piece. Cast Fire on the candles around the hall; extinguishing the central flame reveals a second piece. Cast Thunder on the small lightning-marked stone to activate the moving platforms. Use the Red Trinity at the marked statue to make it fall and reveal a third piece.
At the far side of the hall, push the other marked statue onto its floor position. This reveals a chest containing the fourth Emblem Piece. Carry all four pieces to the large Heartless emblem door on the lower Entrance Hall level and examine it to open the route to the Lift Stop.
The Lift Stop contains moving platforms and switches. Activate the controls methodically instead of jumping blindly between platforms. The route eventually leads through the castle toward the Castle Chapel. Optional chests in the Lift Stop, Waterway, Dungeon, and Castle Gates can wait; they are not needed to trigger the bosses.
- Return the displaced Library books to their matching shelves.
- Collect the fountain Emblem Piece.
- Collect the brazier Emblem Piece after using Fire on the candles.
- Collect the Red Trinity statue Emblem Piece.
- Collect the chest Emblem Piece after moving the second statue.
- Open the Heartless emblem door and reach the Lift Stop.
4. Defeat Maleficent and Dragon Maleficent
Use the Lift Stop switches to reach the upper castle route and continue to the Castle Chapel. Save before the boss sequence and restore HP and MP. Cure is more important than spending MP on ordinary Heartless, and healing items provide a backup if Donald is unable to cast.
Maleficent remains airborne and uses projectiles and area attacks. Keep moving around the outer part of the Chapel and attack when she descends within reach. Do not stand directly beneath her for long periods. Lock-on helps track her movement, but release it briefly if the camera makes it difficult to see incoming magic. Defeat her to open the route to the next battle.
Dragon Maleficent occupies much of the following arena. Stay near her side or rear when possible, avoid lingering directly in front of her head, and move away after each short combo. Watch for sweeping body movements, fire attacks, and ground hazards. Dodge Roll is useful for escaping the danger area, but repeated rolling without checking the camera can send Sora into another attack. Cure during recovery windows rather than waiting until HP is nearly empty.
If Sora is defeated, reload the Chapel-area save and repeat the boss sequence. Do not assume Dragon Maleficent ends the visit; another mandatory battle remains.
- Save near the Castle Chapel before starting the boss sequence.
- Defeat Maleficent.
- Defeat Dragon Maleficent.
- Restore HP and MP before leaving the Chapel route.
5. Defeat Riku-Ansem in the Grand Hall
After Dragon Maleficent, follow the opened passage through the castle and continue toward the Grand Hall. Approach the princesses to trigger the next story event. Riku-Ansem is the final required fight of this visit and is considerably more dangerous than the earlier Riku battle.
Use short combos and prioritize survival over constant attacking. Stay near the outer edge of the room when he begins large dark attacks. Guard his direct melee strikes when the timing is clear, then counter once or twice before retreating. When he moves to the center and creates a broad dark-area attack, keep moving around the perimeter and avoid the expanding hazard. Cure early enough to survive the next attack rather than waiting for a critical-health warning.
Use a Summon only when it gives you a safe damage window or helps stabilize the fight. Preserve enough MP for Cure, and use stocked healing items if Donald’s MP is low. After victory, allow the story scenes to continue. Sora is transformed into a Shadow and must return through the castle to the Entrance Hall. Follow the route back rather than trying to explore optional rooms.
At the Entrance Hall, approach Kairi. She recognizes Sora and restores his heart, returning him to normal. The party then leaves Hollow Bastion and is taken back to Traverse Town. This transition is still part of completing the first visit.
- Trigger the Grand Hall event.
- Defeat Riku-Ansem.
- Complete the Shadow Sora return sequence.
- Approach Kairi in the Entrance Hall and return to normal.
- Reach Traverse Town after the departure from Hollow Bastion.
6. Complete the mandatory Traverse Town transition before returning
After Hollow Bastion, the party arrives in Traverse Town and speaks with Leon and the others. Go to the First District and speak with Cid in or beside the Accessory Shop. He explains that the old route to Hollow Bastion is unsafe and directs Sora to retrieve another Navi-Gummi from the Secret Waterway.
Enter the Secret Waterway through the Alleyway. If the entrance is still blocked, use the Red Trinity near the water to open it. Find Kairi near the mural at the end of the passage. Examine the mural, which appears as a sun, to obtain the Navi-Gummi. Do not leave immediately after taking it. Speak with Kairi again to trigger the conversation that awards the Oathkeeper Keyblade.
Return to Cid in the First District and speak with him again. He installs the Navi-Gummi into the Gummi Ship and opens a safer route back to Hollow Bastion. From the World Exit, choose the newly available route. A black warp route may also be available beside Traverse Town; use it for the direct trip if it appears on the World Map.
This is the correct handoff to the next chapter. Do not describe the second Hollow Bastion visit as beginning immediately after Riku-Ansem. The first visit is complete only after the boss, the Shadow Sora sequence, Kairi’s restoration, the Traverse Town return, and the Navi-Gummi installation.
- Speak with Leon and the Traverse Town group after returning.
- Speak with Cid in the First District.
- Retrieve the Navi-Gummi from the Secret Waterway mural.
- Speak with Kairi again and receive Oathkeeper.
- Return to Cid and have the Navi-Gummi installed.
- Use the new route or black warp to travel back toward Hollow Bastion.
Before you move on
- The first Riku boss fight has been cleared and Trinity Detect has been obtained.
- The Heartless emblem door has been opened with all four Emblem Pieces.
- Maleficent and Dragon Maleficent have been defeated.
- Riku-Ansem has been defeated in the Grand Hall.
- The Shadow Sora sequence has been completed and Kairi has restored Sora.
- The party has returned to Traverse Town.
- Cid has directed Sora to the Secret Waterway and the Navi-Gummi has been retrieved from the mural.
- Kairi has awarded Oathkeeper.
- Cid has installed the replacement Navi-Gummi.
- The new Hollow Bastion route or black warp is available on the World Map.
Hollow Bastion — return visit, the Final Keyhole and major encounters
Return to Hollow Bastion through the route from Traverse Town, reunite Beast and Belle in the Library, receive the Divine Rose Keyblade, and follow the castle route through the Chapel and Grand Hall to the Dark Depths. Defeat the Behemoth to complete the story objective: the following cutscene automatically seals Hollow Bastion’s Final Keyhole, and the Princesses of Heart award Firaga. Afterward, return to the Library for Aerith’s reports and Curaga, then decide whether to continue directly to the End of the World or visit Olympus Coliseum. In the original North American PlayStation 2 release, Platinum Match access requires the Phil, Pegasus, and Hercules Cups to be unlocked and Hollow Bastion’s Final Keyhole to be sealed; winning Hades Cup is not required.
Return to Hollow Bastion and start in Rising Falls
After the required Traverse Town events and Cid’s new Navi-Gummi, leave from a Save Point and select Hollow Bastion from the World Map. The return trip uses the newly available route, so you do not need to repeat the ordinary Gummi route from the first visit.
You land at Rising Falls. Beast is waiting near the entrance and rejoins Sora’s party after the opening scene. Use the nearby Save Point before moving on. The castle contains stronger encounters and enemy types from Traverse Town, so do not assume the second visit is a harmless replay.
Equip Cure or Cura, Dodge Roll if available, and defensive accessories. Carry several HP recovery items and at least a few MP recovery items. Aero or Aerora is particularly useful against Behemoth’s physical attacks, while Gravity can damage that boss. Preserve enough MP to heal during the approach and the boss fight.
- Travel to Hollow Bastion through the new World Map route.
- Save at Rising Falls.
- Allow Beast to rejoin the party.
- Restock HP and MP recovery items.
- Equip Cure or Cura and useful defensive abilities.
Visit the Library and reunite Beast and Belle
From Rising Falls, follow the familiar castle route to the Library. The required story scene occurs there: Beast and Belle are reunited. After the scene, speak with Belle again to receive the Divine Rose Keyblade. This weapon is optional for progression, but it is a strong original-release weapon and is worth comparing with your current Keyblade.
Use the Library Save Point before continuing. The machinery route behind the Library’s secret passage can be revisited for an optional chest if the relevant mechanism was activated during the first visit. In the original North American release, that chest contains Thundaga-G. Ramuh Belt belongs to Final Mix and is not part of this version’s reward list.
The Library is the safest recovery point before the final section of the castle. Heal Sora and Beast, review equipped abilities, and make sure the command menu still includes the spells and items you intend to use.
- Reach the Library.
- Watch the Beast and Belle reunion scene.
- Speak with Belle to receive Divine Rose.
- Save and recover in the Library.
- Treat Ramuh Belt as Final Mix-only.
- Collect the optional Thundaga-G chest only if its machinery route was activated.
Pass through the Chapel and Grand Hall
Use the secret passage behind the Library’s Save Point to reach the Lift Stop, then take the available lifts toward the Castle Chapel. This is the chapel where Maleficent was defeated during the first visit.
Enter the Chapel and speak with the Princesses of Heart to advance the story. After the conversation, continue into the Grand Hall. Clear the Heartless in the hall carefully rather than rushing up the stairs, because the upper walkways leave little room to recover if Sora is surrounded.
On the highest upper walkway, open the chest containing the Oblivion Keyblade. Oblivion is optional, so compare its statistics and reach with Divine Rose or your current weapon. Save or heal before entering the large portal leading to the Dark Depths.
- Reach the Castle Chapel through the Lift Stop.
- Speak with the Princesses of Heart.
- Continue into the Grand Hall.
- Open the upper walkway chest for Oblivion.
- Heal before entering the Dark Depths.
Defeat Behemoth in the Dark Depths
Enter the Heartless-emblem portal beyond the Grand Hall to begin the Behemoth battle. The horn between Behemoth’s shoulders is the effective target. Move toward one of its hind legs, jump onto the leg, and then jump onto its back. From there, attack the horn with aerial strikes while staying alert for the boss’s movement.
Behemoth creates shockwaves with its steps and can leap toward Sora. It can also charge its horn and send energy projectiles across the arena, followed by a wide Thunder attack. When the large energy sphere breaks into smaller projectiles, stop attacking and move away until the projectiles pass. If Sora falls from the boss’s back, circle behind Behemoth and use the hind leg to climb again instead of attacking from the front.
Fire, Blizzard, and Thunder are ineffective against this Behemoth. Gravity is the useful offensive spell, although it consumes MP. Aero or Aerora reduces incoming physical damage. Tinker Bell can provide emergency healing and revival if you have unlocked her, but do not rely on the Summon so heavily that you stop watching the incoming attacks.
After Behemoth is defeated, Sora receives the Omega Arts accessory. The story then continues automatically. Do not leave the world to manually inspect the Keyhole: the following cutscene seals Hollow Bastion’s Final Keyhole, and the Princesses of Heart upgrade Fira to Firaga. This automatic sequence is the required completion of Hollow Bastion’s second visit.
- Target Behemoth’s horn between its shoulders.
- Use the hind legs to reach the boss’s back.
- Avoid the step shockwaves and energy projectiles.
- Use Gravity if you need additional damage.
- Use Aero or Aerora for protection.
- Defeat Behemoth and receive Omega Arts.
- Watch the following cutscene until the Final Keyhole is sealed.
- Receive Firaga from the Princesses of Heart.
Return to the Library for Aerith’s rewards
Once the automatic post-Behemoth scenes have finished, leave Hollow Bastion through a Save Point and re-enter, selecting the Library as the landing point. Speak with Aerith near the bookcases. In the original North American release, she provides Ansem’s Reports 2, 4, 6, and 10 when those reports are still missing.
Continue speaking with Aerith through the additional dialogue until Cura is upgraded to Curaga. Curaga is one of the most valuable preparations for the End of the World and the final Ansem encounters. Save after receiving the spell.
These Library rewards are separate from the Firaga reward received immediately after the Final Keyhole is sealed. Do not confuse them with Final Mix additions or with equipment from later releases.
- Re-enter Hollow Bastion and land in the Library.
- Speak with Aerith.
- Receive Ansem’s Reports 2, 4, 6, and 10 if still missing.
- Continue the conversation until Cura becomes Curaga.
- Save after receiving Curaga.
Prepare for the End of the World and check Olympus Coliseum
Hollow Bastion’s sealed Final Keyhole makes the End of the World available from the World Map. Before entering, visit Traverse Town if you need Hi-Potions, Mega-Potions, Ethers, accessories, or equipment. Keep Curaga and Aero available, and save a separate file if you want a convenient point before the final dungeon.
The Hades Cup becomes available after the Phil, Pegasus, and Hercules Cups have been unlocked and Hollow Bastion’s Final Keyhole has been sealed. Hades Cup is optional for the main story and is not required to unlock the Platinum Match in the original North American release.
For Platinum Match access, the requirements are: Phil Cup unlocked, Pegasus Cup unlocked, Hercules Cup unlocked, and Hollow Bastion’s Final Keyhole sealed. The cups do not need to be won for Platinum Match access, and completing Hades Cup is not required. If the match does not appear, verify those four conditions rather than assuming that Behemoth’s defeat alone is enough.
Platinum Match is much harder than the story encounters. Postpone Sephiroth until Sora has strong equipment, dependable Curaga and Aero use, enough recovery items, and sufficient HP to survive rapid attacks. It is optional and has no role in opening the End of the World.
- Confirm that the End of the World is selectable.
- Restock items and equipment before entering the final dungeon.
- Save a separate file before continuing.
- Confirm that Phil Cup is unlocked.
- Confirm that Pegasus Cup is unlocked.
- Confirm that Hercules Cup is unlocked.
- Confirm that Hollow Bastion’s Final Keyhole is sealed.
- Check Platinum Match access only after those four conditions are met.
- Treat Hades Cup victory as optional for Platinum Match access and the main story.
Before you move on
- Beast and Belle have reunited in the Library.
- Divine Rose has been received from Belle.
- The Chapel and Grand Hall route has been completed.
- Behemoth has been defeated and Omega Arts has been awarded.
- The automatic post-Behemoth cutscene has finished.
- Hollow Bastion’s Final Keyhole has been sealed without a manual Keyhole examination.
- Firaga has been received from the Princesses of Heart.
- Aerith has provided Ansem’s Reports 2, 4, 6, and 10 when they were still missing.
- Aerith has upgraded Cura to Curaga.
- The End of the World is selectable from the World Map.
- For Platinum Match access, Phil Cup is unlocked.
- For Platinum Match access, Pegasus Cup is unlocked.
- For Platinum Match access, Hercules Cup is unlocked.
- For Platinum Match access, Hollow Bastion’s Final Keyhole is sealed.
- Hades Cup victory has not been incorrectly treated as a Platinum Match prerequisite.
- No Final Mix-only boss, reward, or item has been treated as required for the original North American PlayStation 2 release.
References for this chapter
- Hollow Bastion second visit walkthrough (Kingdom Hearts) — Kingdom Hearts Wiki
- Kingdom Hearts/Hollow Bastion (2nd Visit) — StrategyWiki
- Kingdom Hearts — Guide and Walkthrough — GameFAQs
- Kingdom Hearts - Missable Guide - PlayStation 2 - By falconesque
- Platinum Match - Kingdom Hearts Wiki
- Kingdom Hearts/Hollow Bastion — Kingdom Hearts Wiki
The End of the World — reaching Ansem and early phase strategy
After Hollow Bastion’s Final Keyhole has been sealed, travel by Gummi Ship to the newly available End of the World. This chapter covers the opening route, World Terminus, Chernabog, Superglide, the route to Final Rest, the first formal Ansem battle, and the following Darkside rematch. Final Rest allows one last return to the Gummi Ship for supplies and optional preparation. The second formal Ansem battle and the World of Chaos sequence begin in ch13.
Enter the End of the World and cross the opening area
Leave Hollow Bastion through the Gummi Ship and select End of the World on the World Map. This destination becomes available after the Hollow Bastion events that seal the Final Keyhole; End of the World is not another Keyhole-sealing objective.
The opening area consists of floating platforms separated by empty space and invisible barriers. Follow the platforms carrying treasure chests toward the large glowing destination ahead. The route is easier to read by watching the next visible platform rather than jumping directly toward the light. You can open the chests for equipment and stat items, but several treasure containers trigger enemy encounters. If your HP or MP is low, skip optional chests and keep moving.
The Heartless here are among the strongest regular enemies in the original game. Invisibles can punish long attack strings with fast blade swings, so use Guard or Dodge Roll when they close in and retaliate after their combo ends. Angel Stars attack from range and can block some approaches with their wings; close the distance after their projectile pattern finishes. If a Behemoth blocks the route, jump onto its back and attack the horn from above. Do not remain beneath it longer than necessary, because its ground attacks cover a wide area.
- Select End of the World from the World Map after Hollow Bastion’s Final Keyhole sequence.
- Follow the floating platforms toward the central light.
- Skip optional chests if they trigger battles you do not need.
- Attack a Behemoth from its back and target its horn.
Cross Giant Crevasse and reach World Terminus
Continue forward until the route opens into Giant Crevasse. Descend through the crystal-filled area, using the platforms and visible paths to work downward. The enemies are optional in several sections, so avoid unnecessary fights if your party needs MP for Chernabog.
At the lower area, follow the bright route toward World Terminus. A Save Point is available before the next major section. Use it before continuing. World Terminus contains colored entrances representing fragments of earlier worlds. These rooms are optional for the main story and can be explored for treasure or experience, but they are not required to reach the ending.
When you are ready, follow the required route onward to the volcanic area. Keep Cure or Curaga available and make sure Aero, Aerora, or Aeroga is equipped if you have learned it. Chernabog is the next required boss, and the fight takes place in the air.
- Descend through Giant Crevasse without spending all recovery items.
- Use the Save Point before entering the volcanic route.
- Treat the World Terminus world fragments as optional side areas.
- Prepare Aero and Cure or Curaga before Chernabog.
Defeat Chernabog and obtain Superglide
Chernabog is fought while Sora is flying around the volcano. Lock on to the boss’s head and attack from behind or from the side whenever possible. Staying directly in front of Chernabog makes it easier to be caught by fire and gust attacks.
Chernabog’s fire breath and volcanic attacks are signaled by its movement and attack animation. When it begins a large fire attack, fly away from the boss and reposition rather than trying to continue a combo. If a gust pushes Sora away, correct your position before attempting another attack. Heal only after creating distance; Cure can be interrupted if used beside the boss during an attack.
Aero reduces incoming damage and is particularly useful during the longer portions of the fight. Summons can also provide temporary safety or damage, but do not use all MP without keeping enough for healing. Continue attacking the head during safe openings until Chernabog is defeated.
Victory grants the shared ability Superglide. Open the ability menu and equip Superglide if it is not already active. The ability improves aerial movement and makes the following descent and platform sections substantially easier. Enter the opening beyond the defeated boss to continue into the lower areas of End of the World.
- Lock on to Chernabog’s head.
- Attack from the side or rear instead of standing directly in front.
- Use Aero and heal only after creating distance.
- Defeat Chernabog and equip Superglide.
Clear the crater route and reach Final Rest
After Chernabog, descend through the crater sections. Use Superglide to cross gaps and reach platforms that would otherwise require difficult jumps. Continue through the connected volcanic and crystal areas until you reach the large chamber containing a sealed passage marked by a Heartless symbol.
The passage opens only after the required Heartless waves in the chamber have been defeated. Focus first on enemies that attack from range or interrupt Sora’s combos. Keep moving around the wider parts of the chamber instead of allowing the group to surround you. If your HP or MP becomes low, retreat toward the entrance and separate enemies before re-engaging.
Once the waves are cleared, the Heartless barrier breaks and the route to Final Rest opens. Final Rest contains the last Save Point before the final sequence. Save here immediately. The Save Point also provides access to the Gummi Ship, so you can return to Traverse Town or another available destination to buy items, change equipment, level up, or complete optional Coliseum content.
When you return, equip your strongest Keyblade and defensive accessories. Place Cure or Curaga where it is easy to select, and carry HP and MP recovery items. Do not examine the door until you are ready to begin the connected story battles. This chapter ends after the first Ansem battle and Darkside; the next formal Ansem battle is covered in ch13.
- Use Superglide to cross the post-Chernabog descent.
- Defeat the required Heartless waves blocking the sealed passage.
- Save at Final Rest.
- Use the Gummi Ship access to restock or complete optional preparation.
- Return to Final Rest before examining the door.
Defeat the first formal Ansem battle
Examine the door at Final Rest when you are ready. Sora arrives in a distorted version of Destiny Islands. Follow the route into the Secret Place for the story scene, then return to the beach and approach Ansem to start the battle.
Lock on to Ansem rather than the Guardian. Ansem usually leaves direct attacks to the Guardian, which can lash out with ranged blades and close-range strikes. When the Guardian spreads out in front of Ansem, frontal attacks are blocked; circle around it and attack Ansem from the side or rear. Short attack strings are safer than committing to a full combo while the Guardian is active.
When Ansem calls Submit, the Guardian can attach itself to Sora. The Attack command changes to Freeze while this effect is active. Select Freeze when it appears rather than continuing to press Attack. Ansem may also surround himself with a damaging barrier. Wait for that protection to disappear before attempting a long attack string.
Use Aero or Aerora to reduce damage and heal before HP becomes critical. If the Guardian’s projectiles approach from the front, Guard can deflect them. The objective is to damage Ansem; attacking the Guardian is not necessary to finish the battle.
- Enter the Secret Place before approaching Ansem on the beach.
- Lock on to Ansem, not the Guardian.
- Circle around the Guardian when it blocks frontal attacks.
- Select Freeze when Submit changes the command.
- Heal before reaching critical HP.
Defeat the Darkside rematch and hand off to ch13
After the first Ansem battle, follow the story route into the crater. Donald and Goofy do not assist during this next solo encounter, so heal before entering and make sure Sora has access to Cure or Curaga.
Darkside uses familiar attacks from the opening of the game, but its size and attack coverage make careless positioning dangerous. Attack a lowered hand when it becomes vulnerable, then move away before the fist slams into the ground. When Darkside launches dark projectiles, keep moving laterally or Guard when the timing is clear. Do not remain directly beneath the boss while waiting for an opening.
The head becomes vulnerable during some attack patterns. Jump and attack when it lowers within reach, then retreat before the next ground attack. Shadows may appear during the battle, but the safest approach is usually to keep Darkside as the main target unless the smaller enemies are interrupting Sora repeatedly.
Once Darkside is defeated, the next formal Ansem battle begins after the following story transition. Stop here and continue with ch13 for Ansem’s second battle, the World of Chaos sequence, the Main Core, and the final Ansem encounter. Do not treat Darkside’s defeat as completion of the entire End of the World finale.
- Heal before entering the Darkside rematch.
- Attack a lowered hand or vulnerable head during recovery windows.
- Move away from ground slams and dark projectiles.
- Defeat Darkside without spending every remaining recovery item.
- Continue to ch13 for the second Ansem battle and World of Chaos.
Before you move on
- End of the World was selected from the World Map after Hollow Bastion’s Final Keyhole sequence.
- The opening platforms and Giant Crevasse route were crossed.
- Chernabog was defeated and Superglide was obtained.
- The Heartless waves blocking the passage to Final Rest were cleared.
- Final Rest was reached and used as a preparation save point.
- The first formal Ansem battle was defeated.
- The Darkside rematch was defeated.
- The player is ready to continue with ch13’s second formal Ansem battle.
References for this chapter
Ansem — second battle, World of Chaos and ending trigger
Chapter 12 ends after the first formal Ansem battle and the Darkside rematch. This chapter begins with the second formal Ansem fight, then moves through the World of Chaos in a fixed recovery sequence. Donald and Goofy are separated from Sora at the start of that sequence, Goofy returns after the Darkball room, and Donald returns after the Face’s mouth. Destroy the Main Core to expose Ansem for the final battle, then let the ending scenes and credits play. The original North American PlayStation 2 release does not create a normal free-roaming post-game save, so preserve the Final Rest save for optional content.
Begin from Final Rest and prepare for the gauntlet
Before examining the door at Final Rest, save your game and make your final preparations. Final Rest is the last save point before the continuous end sequence. Check Sora’s equipment, place Cure or Curaga where it is easy to select, and carry strong HP and MP recovery items. Aeroga is particularly useful because it reduces incoming damage throughout the remaining fights.
Equip the strongest Keyblade and defensive accessories available to you. Give Donald and Goofy useful equipment and items as well, but plan as if Sora must survive alone: the second formal Ansem fight is solo, and party members are removed again when the World of Chaos sequence begins. Do not spend your best recovery items on ordinary enemies immediately before entering the door.
Examine the door to enter Homecoming, then follow the path through the Destiny Islands recreation until the first battle in this chapter begins. The earlier Ansem and Darkside fights have already been completed at this point.
- Save at Final Rest before examining the door.
- Equip Sora’s strongest available Keyblade and defensive accessories.
- Place Cure or Curaga in a convenient command position.
- Carry several high-value HP and MP recovery items.
- Do not spend the strongest items before the boss sequence starts.
Defeat Ansem in the second formal battle
Ansem fights alone against Sora in this battle, with the Dark Figure acting as his shield and attack partner. Cast Aeroga at the start. When the Dark Figure stands in front of Ansem, frontal attacks are blocked; move around the guardian and strike Ansem from the side or rear. Use short combos, then disengage rather than remaining in front of both enemies.
When Ansem says Submit!, the Dark Figure lunges toward Sora. Dodge Roll at the correct moment; Guard does not reliably stop this possession attempt. If the Dark Figure connects, the Attack command may periodically change to Freeze. Use Freeze when it appears to stop the ongoing possession damage, but create distance first if possible because Ansem can surround himself with an energy barrier and charge Sora while the guardian has him restrained. If Sora is possessed, special attacks such as Ragnarok or Ars Arcanum can also shorten the time the guardian remains attached.
Ansem uses fast rushes with a barrier in front of him. Jump, Dodge Roll, Guard, or rely on Aeroga to survive these charges. When Ansem says that his strength returns, the Dark Figure dives into the ground and creates dark pools beneath Sora. Avoid the pools and the shockwave that follows; Ansem is protected during this attack, so concentrate on survival rather than forcing damage. Resume attacking when the guardian returns to Ansem and leaves him exposed.
- Cast Aeroga before committing to the fight.
- Dodge Roll the Guardian’s initial Submit lunge.
- Use Freeze if possession connects and the command appears.
- Attack Ansem from behind or after the guardian returns to him.
- Avoid the dark pools and final shockwave during the strength-return attack.
- Heal Sora personally because this is a solo battle.
Enter the World of Chaos and defeat the first interior group
After the second formal Ansem battle, a cutscene sends Sora into the World of Chaos. Donald and Goofy are removed from the field. Sora first fights Ansem while flying around the outer body of the vessel. Cast Aeroga, approach Ansem, and attack with the Keyblade when his weapon swing ends. Keep moving through the arena so the laser attacks do not line up with Sora’s flight path.
When Ansem withdraws beneath the Heartless emblem, enter the portal that opens. The first interior room is dark and contains Shadows. Defeat the Shadows, then attack the exposed Room Core. The core is the objective that opens the route back to the vessel; do not search for another exit while it remains active.
- Cast Aeroga before the opening World of Chaos fight.
- Keep moving while approaching Ansem in the outer arena.
- Defeat the Shadows in the first dark room.
- Destroy the first Room Core after the Shadows are gone.
Destroy the artillery and recover Goofy
After the first Room Core is destroyed, Sora returns to the vessel’s exterior. Attack the artillery mounted beneath Ansem. Use basic Keyblade strikes and keep moving when the guardian knocks Sora away. Clear the artillery rather than trying to reach Ansem immediately; the next portal does not become usable until this section is completed.
Enter the repaired portal at the top of the vessel. Sora is placed in another dark interior room and Goofy returns to the party. Defeat every Darkball in the room, using lock-on and wide movement to avoid being surrounded. Once the room is clear, destroy the second Room Core. This opens the route to the World of Chaos’s Face.
- Destroy the artillery before entering the next portal.
- Confirm that Goofy has rejoined Sora.
- Clear the Darkballs in the second interior room.
- Destroy the second Room Core after the Darkballs are defeated.
Defeat the Face and recover Donald
The Face is the large lower head section at the front of the World of Chaos. Stay mobile and attack it with the Keyblade while Aeroga is active. Its lightning attack is easier to avoid when Sora approaches from the side instead of hovering directly in front. If the Face shifts into a biting motion, move away and return after the attack finishes. Heal during a clear flight path rather than while directly beneath the target.
After the Face is defeated, fly into its mouth. This is the next portal and leads to another interior room. Donald is trapped inside with Invisibles. Lock on whenever possible, keep moving through the room, and defeat the Invisibles before attacking the third Room Core. Destroying this core frees Donald and removes the barrier protecting the vessel’s center.
- Keep Aeroga active during the Face fight.
- Attack the Face from the side and retreat from its bite.
- Enter the portal inside the Face’s mouth.
- Defeat all Invisibles in the interior room.
- Destroy the third Room Core to recover Donald.
Destroy the Main Core and defeat the final Ansem encounter
Return to the vessel and proceed to the Main Core. Attack nearby artillery or tentacles first if they are interrupting Sora’s approach, then concentrate on the large central core. Keep moving around the structure instead of standing in front of its weapons. Once the Main Core is destroyed, Ansem becomes vulnerable for the final battle and Donald and Goofy are available again.
Cast Aeroga immediately and lock on to Ansem. The final encounter uses the same core patterns as the formal battles: the Dark Figure can protect Ansem, Ansem can rush behind a barrier, and the guardian can attack from the ground or possess Sora. Circle around the guardian and strike after Ansem’s attack animations finish. Avoid committing to a long combo when the guardian is between Sora and Ansem.
Watch for the large sphere-of-light attack in which Ansem draws Sora toward the center before releasing a damaging burst. When the attack begins, fly away at high speed and keep moving through the surrounding beams. Do not try to trade damage during this sequence. Heal with Curaga when Sora’s HP becomes unsafe, and use Elixirs or Megalixirs only when both HP and MP require immediate recovery. Defeat Ansem’s final HP bar to trigger the ending automatically.
- Destroy the Main Core before attacking Ansem’s final form.
- Cast Aeroga at the beginning of the final encounter.
- Attack from the side or rear when the guardian is not shielding Ansem.
- Escape the sphere-of-light pull by flying away quickly.
- Heal before Sora reaches critical HP.
- Defeat Ansem’s final HP bar.
Watch the ending and preserve the pre-ending save
After the final Ansem encounter is defeated, the remaining story scenes play automatically. Let the closing cutscenes continue into the credits. The concrete story completion point is the defeat of Ansem’s final form followed by the ending scenes and credits, not merely reaching the Final Rest save point.
The original North American PlayStation 2 release does not place Sora in a new post-game area after the ending. When the game returns to its title or save-selection flow, load the file saved at Final Rest to continue optional content. That file returns you to the point before the door, allowing you to revisit available worlds, complete the Coliseum, finish the 100 Acre Wood, pursue synthesis goals, and attempt optional bosses available in this edition.
- Ansem’s final form is defeated after the Main Core.
- The closing story scenes play.
- The credits are allowed to finish.
- The Final Rest save remains available for optional content.
Before you move on
- The second formal Ansem battle is defeated after the first Ansem and Darkside encounters from chapter 12.
- The World of Chaos route is cleared in order: opening solo Ansem, Shadows, first Room Core, artillery, Darkballs, second Room Core, Face, Invisibles, third Room Core, and Main Core.
- Donald and Goofy are both restored before the final Ansem encounter.
- Ansem’s final HP bar reaches zero.
- The ending cutscenes and credits are viewed.
- Reloading the Final Rest save returns Sora to the pre-ending point for optional Coliseum, world, summon, synthesis, and edition-appropriate superboss objectives.
- No Final Mix-only boss, weapon, ability, or reward is required for the original North American PlayStation 2 story completion.
References for this chapter
- Walkthrough: Kingdom Hearts/End of the World — Kingdom Hearts Wiki
- End of the World — Kingdom Hearts Wiki
- Game: Ansem, Seeker of Darkness — Kingdom Hearts Wiki
- Kingdom Hearts — Guide and Walkthrough — PlayStation 2 — By sephiroth95 — GameFAQs
- Kingdom Hearts Walkthrough — PlayStation 2 — CheatCodes.com
Post-Game & Secret Ending (optional)
The original North American PlayStation 2 release does not create a cleared save after the final battle. Preserve the Final Rest save in the End of the World, then reload it after viewing the ending to continue optional work. For the normal-difficulty secret movie Another Side, Another Story, seal the eight main-world Keyholes, seal the Olympus Coliseum Keyhole, complete and seal Hundred Acre Wood through its book clasp, finish Monstro, return all 99 Dalmatian puppies, and win the standard full-party Hades Cup. Sephiroth is optional and is not required for the secret movie.
1. Preserve the Final Rest save
Travel through the End of the World until you reach Final Rest. Use the Save Point there before examining the door that begins the final sequence. Keep this file in a separate slot if possible, because the original North American PlayStation 2 release does not normally return you to the world map with a completed post-game save.
When you are ready to finish the story, examine the door, defeat the final sequence, and let the ending scenes and credits play through. After the game reaches its final screen, restart and load the preserved Final Rest file. Sora will be back before the final battles, but this file gives you access to the Coliseum, collections, synthesis, Trinities, Summons, weapons, and other optional activities.
- Save at Final Rest before entering the final door.
- Keep the Final Rest file instead of overwriting it.
- Allow the ending scenes and credits to finish when testing the secret movie.
- Reload the preserved Final Rest file for further optional progress.
2. Seal every required Keyhole
For the original North American release, the eight main-world Keyholes are Traverse Town, Wonderland, Deep Jungle, Agrabah, Atlantica, Halloween Town, Neverland, and Hollow Bastion. Hollow Bastion’s Final Keyhole is the last major story seal and is required before the End of the World becomes available.
Olympus Coliseum also has a Keyhole. It is sealed by completing the Coliseum’s required progression, including the standard Hades Cup victory. Do not treat the Coliseum only as a tournament menu when checking the secret-ending requirements.
Hundred Acre Wood has its own Keyhole in the form of the clasp on Merlin’s book. It is not a conventional dungeon Keyhole, but completing the book’s available story causes the clasp to close and counts as sealing that world. Insert all five Torn Pages as you find them, finish every unlocked episode, and view the final book sequence.
Monstro has no conventional Keyhole. Keep it in a separate completion category, but do not skip it: completing Monstro is necessary for the broader progression checklist and helps open the Pegasus Cup. Check the world map for completion marks and revisit any location that still lacks its seal or completion indication.
- Traverse Town Keyhole sealed.
- Wonderland Keyhole sealed.
- Deep Jungle Keyhole sealed.
- Agrabah Keyhole sealed.
- Atlantica Keyhole sealed.
- Halloween Town Keyhole sealed.
- Neverland Keyhole sealed.
- Hollow Bastion Final Keyhole sealed.
- Olympus Coliseum Keyhole sealed through Coliseum progression.
- Hundred Acre Wood book clasp sealed after completing its available story.
- Monstro completed separately, despite having no conventional Keyhole.
3. Complete Hundred Acre Wood
Return to Merlin’s study in Traverse Town and enter the Old Book. Torn Pages found in chests across the worlds restore the book’s areas in sequence. Insert each page at the book, then enter the newly available area and complete its episode before expecting the next section to open.
The book contains five Torn Page episodes. Complete all five rather than stopping after receiving an early reward. The final available sequence completes the Hundred Acre Wood story and seals the book’s clasp. High scores are not the objective for this secret-ending requirement, although some minigames can provide additional rewards or abilities when their score conditions are met.
If a Torn Page remains in your inventory, return to Merlin’s study and inspect the book again. If an area appears unfinished, enter it and speak with the local characters until its episode concludes. Record the book as sealed only after the final story sequence has played.
- All five Torn Pages have been inserted into Merlin’s book.
- Every available Hundred Acre Wood episode is complete.
- The final book story sequence has been viewed.
- The clasp on the book is closed, confirming that Hundred Acre Wood is sealed.
4. Return all 99 Dalmatian puppies
Find all 99 puppies, arranged as 33 numbered pairs, then return to the Dalmatian House in Traverse Town. Discovering a chest does not finish the task by itself: speak with Pongo and Perdita so the puppies are recorded as returned and the collection rewards are issued.
Many pairs are easier to reach after Sora obtains later movement abilities, including High Jump and Glide. Revisit early worlds after those abilities become available, and keep a list of missing numbers rather than repeatedly searching areas at random. Check elevated platforms, sealed routes, Trinities, and rooms that were inaccessible during the first visit.
Continue until all 99 puppies have been returned and the final collection reward has been received. This requirement does not mean that every chest, Trinity, synthesis item, weapon, or Gummi Ship mission must also be completed.
- All 99 puppies have been found.
- All 99 puppies have been returned to Pongo and Perdita.
- The final full-collection reward has been received.
- No puppy pair remains missing from the collection record.
5. Win the standard Hades Cup
Return to Olympus Coliseum after the story has opened the tournament progression. Complete the prerequisite Coliseum cups as needed to make the Hades Cup available, then enter the normal full-party Hades Cup with Donald and Goofy present. The Hades Cup victory is the Coliseum requirement for the original secret movie.
Stock Cure or Curaga, carry recovery items, and conserve MP during ordinary rounds. Use Guard against predictable projectiles, dodge through large enemy attacks, and avoid spending all your healing resources before the final rounds. If the attempt fails, restock and change equipment before trying again.
Do not substitute a solo cup, time trial, Gold Match, or Platinum Match for the standard Hades Cup. The Hades Cup must be cleared as the regular party tournament. Its completion also seals the Olympus Coliseum Keyhole for the secret-ending checklist.
- Phil Cup has been opened or cleared as required for progression.
- Pegasus Cup has been opened or cleared as required for progression.
- Hercules Cup has been opened or cleared as required for progression.
- The standard full-party Hades Cup has been won.
- Olympus Coliseum is recorded as sealed.
- Solo, time-trial, Gold Match, and Platinum Match results are tracked separately.
6. Replay the ending to test Another Side, Another Story
After every required category is complete, save again at Final Rest. Enter the final door from that file, defeat Ansem, and allow the normal ending scenes and credits to finish without resetting early.
On the original North American release at normal difficulty, the checklist is: every required Keyhole sealed, including the eight main worlds, Olympus Coliseum, and the Hundred Acre Wood book clasp; Monstro completed; all 99 puppies returned; and the standard Hades Cup won. Monstro is tracked separately because it lacks a conventional Keyhole.
Another Side, Another Story appears after the normal ending material when the requirements are satisfied. If it does not appear, reload Final Rest and recheck each category individually. The usual omissions are an unfinished Hundred Acre Wood episode, puppies found but not returned, the Coliseum Keyhole left unsealed, or a Hades Cup result that was actually a different tournament format.
Ultima Weapon, every Ansem Report, complete synthesis, every Trinity, Gold Match, and Platinum Match victories are not required for this original secret-ending checklist.
- All eight main-world Keyholes are sealed.
- Olympus Coliseum is sealed.
- The Hundred Acre Wood book clasp is sealed.
- Monstro is complete.
- All 99 puppies were returned.
- The standard full-party Hades Cup was won.
- The final boss was replayed from the completed Final Rest file.
- The ending and credits were allowed to finish.
- Another Side, Another Story appeared after the ending material.
7. Unlock and challenge the Platinum Match
The Platinum Match is the original-release Olympus Coliseum challenge against Sephiroth. Its access conditions are separate from the secret-ending requirements. Seal Hollow Bastion’s Final Keyhole and unlock the Phil, Pegasus, and Hercules Cups. You do not need to win all four Cups to make the Platinum Match available, and the Hades Cup is not an access prerequisite for this match.
The fight is Sora-only, so prepare a loadout that does not depend on Donald or Goofy’s healing. Equip strong defensive abilities and reliable movement, and carry a large supply of Elixirs or equivalent full-recovery items. Dodge Roll is valuable for escaping line attacks and closing-range punishment, while Second Chance and MP Rage can improve recovery from mistakes.
When Sephiroth uses Heartless Angel, react immediately. The technique removes Sora’s MP and leaves his HP in critical condition, so use a full-recovery item before attempting another attack. Create distance after healing, watch for the next approach, and favor short safe attack windows over long combos that leave Sora exposed.
Sephiroth’s defeat is an optional accomplishment. It is not needed to unlock Another Side, Another Story.
- Hollow Bastion’s Final Keyhole is sealed.
- Phil Cup is unlocked.
- Pegasus Cup is unlocked.
- Hercules Cup is unlocked.
- The Platinum Match is available at Olympus Coliseum.
- Sephiroth’s victory is recorded as optional content.
8. Keep original-release goals separate from Final Mix goals
The original North American disc includes optional Ansem Reports, synthesis, Trinities, Summons, special weapons, Coliseum variations, and Gummi Ship missions. Track these separately unless you have defined a broader personal completion target.
Kingdom Hearts Final Mix was a separate Japanese PlayStation 2 edition with additional enemies, bosses, weapons, abilities, scenes, and report material. Later HD releases also use expanded content and may apply different difficulty or Journal conditions to their secret endings. Do not add Final Mix-exclusive bosses or rewards to an original North American checklist.
The preserved Final Rest save remains the correct base for unfinished optional work. After completing more activities, replay the final sequence from that save if you want to test the original secret movie again.
- Original-release Ansem Reports are tracked separately.
- Final Mix-only content is excluded from the North American PlayStation 2 checklist.
- Synthesis, Trinities, Summons, weapons, and Gummi Ship missions have separate completion records.
- The Final Rest save remains available.
Before you move on
- A Final Rest save was preserved before entering the final door.
- The eight main-world Keyholes are sealed: Traverse Town, Wonderland, Deep Jungle, Agrabah, Atlantica, Halloween Town, Neverland, and Hollow Bastion.
- Olympus Coliseum is sealed through its required progression.
- The Hundred Acre Wood book clasp is closed after all five Torn Page episodes and the final book sequence.
- Monstro is complete through its required story conclusion, including the second Parasite Cage encounter.
- All 99 Dalmatian puppies were returned to Pongo and Perdita.
- The standard full-party Hades Cup was cleared.
- The final boss was replayed from the preserved Final Rest save.
- The normal ending and credits were allowed to finish.
- Another Side, Another Story appeared after the ending material.
- For the optional Platinum Match, Hollow Bastion’s Final Keyhole is sealed and the Phil, Pegasus, and Hercules Cups are unlocked.
- Sephiroth, Ansem Reports, Coliseum variants, synthesis, Trinities, Summons, special weapons, and Gummi Ship missions were verified separately as optional goals.
References for this chapter
Gummi Ship — route basics, practical builds and mission planning
In the original North American PlayStation 2 release of Kingdom Hearts, the Gummi Ship is both the required transport between worlds and an optional construction system. Each newly discovered world must be reached through its connecting Gummi route before normal travel to that destination becomes available. The original release does not contain the formal three-mission-per-route system associated with Final Mix and later versions. For the main story, a basic functioning ship is enough; custom construction is mainly useful when a route is killing you, when you want better weapons or speed, or when you are collecting Gummi blocks and blueprints.
1. Reach new worlds through the required routes
Use the World Map or a Save Point to select an available destination. When a world is newly opened, choose the connecting Gummi route and complete that flight. The route is a forward-moving shooter: steer the ship through the course, fire at enemies and obstacles when useful, and move into dropped items to collect them. You do not need to destroy every target or collect every block to unlock the destination.
If the ship loses all of its Armor, the flight fails and you are returned to the previous destination. Retry the route first if the failure came from one collision or a missed turn. If the same section repeatedly destroys you, return to the Gummi menu and modify the ship before trying again.
Once a route has been cleared, use the World Map to travel between already discovered worlds without treating every return trip as a new story objective. New routes and connections are opened by the story, not by achieving a score or earning a mission rank.
- Confirm that the target world is available on the World Map.
- Fly the connecting route successfully the first time that world is discovered.
- Do not delay the story to destroy every enemy or collect every dropped Gummi.
2. Understand the original construction system
Open the Gummi menu and enter the Garage to inspect the current ship, change its blocks, or select an existing blueprint. A ship must contain a cockpit and at least one engine to be usable. Weapons are optional for basic movement, but adding them makes enemy groups and large obstacles much easier to handle.
The original PS2 version limits ships through computer level, block capacity and construction-area upgrades. It does not use the later Final Mix mission interface or the same presentation of a single cost total for every block. Computer upgrades increase how many blocks and blueprints you can manage, while system upgrades expand the available building area. These upgrades can be purchased through the Gummi-related options in Traverse Town as they become available.
Keep the default Kingdom design or another proven blueprint intact before experimenting. You can create a second design for testing rather than dismantling the only ship that reliably reaches new worlds.
- Keep one cockpit and at least one engine in every usable design.
- Check computer and system limits before assuming a block is missing.
- Preserve a reliable blueprint before making a major rebuild.
3. Assemble a dependable early ship
Start with a compact body, the best engine currently available, and several weapons placed where they have a clear firing path. Body and armor-oriented Gummies increase the ship's ability to withstand damage, while engine Gummies provide propulsion and affect travel speed. Weapon Gummies supply the attacks used against enemies and destructible obstacles. Cockpit Gummies provide the required control center and may affect recovery-related functions depending on the type used.
Do not fill the entire construction area simply because space remains. A large ship can be harder to steer, can use up the available block allowance, and may leave too little room for a useful engine or weapons. Replace weak blocks gradually: install a better engine, test the route, then add or replace weapons and armor based on what actually caused the failure.
Weapon placement matters. Put guns where they can face the forward route and avoid burying them behind unnecessary body blocks. Keep the front and sides reasonably clear so the ship can fire at targets before they reach it.
- Use one good engine before adding decorative blocks.
- Add weapons with unobstructed firing positions.
- Increase body or armor blocks when collisions, rather than enemy damage, are the main problem.
4. Build for survival on difficult routes
If the ship repeatedly loses Armor, remove decorative or redundant pieces and use the available construction space for sturdier body blocks, armor Gummies or recovery equipment. Keep enough weapon power to clear large enemies, but do not turn the ship into a slow mass that cannot avoid obstacles.
During the flight, steer around hazards instead of deliberately absorbing collisions. Stay near the center when enemy formations approach from both sides, then move toward dropped recovery items only when the path is safe. Recovery pickups can restore the ship's condition, but chasing one across an obstacle field is usually worse than continuing without it.
Learn the route in stages. On the first attempt, watch where large obstacles and enemy formations appear. On the next attempt, use that knowledge to brake, shift position or fire earlier. A cleaner flight with the same ship is often more effective than adding many blocks.
- Use armor or body blocks for repeated damage failures.
- Keep weapons strong enough to remove major obstructions.
- Learn the obstacle pattern before rebuilding extensively.
5. Build for speed, weapons or item collection
If the ship survives comfortably but feels slow, reduce unnecessary body blocks and install a stronger engine when one is available. More blocks and heavier construction can make the ship less convenient to handle, so change only one category at a time and test the result on a completed route.
For combat-heavy flights, increase the number or strength of weapon Gummies within the ship's limits. Fire early at large enemies and obstacles instead of waiting until they are directly in front of the ship. For collecting dropped blocks, destroy targets only when you can safely move into the resulting items; a Gummi pickup is never worth sacrificing the entire flight.
Special Gummies can provide functions such as recovery, shields or other support effects, but they are optional for reaching story destinations. Add them after the ship already has the required cockpit, engine and practical weapon coverage.
- Improve speed only after the ship can survive the route.
- Add firepower when targets remain on screen too long.
- Ignore dangerous pickups when collecting them would cause a collision.
6. Separate original-release travel from Final Mix missions
Do not look for formal Mission 1, Mission 2 or Mission 3 objectives in the original North American PS2 release. Final Mix added route-specific Gummi missions with conditions such as score targets, restrictions on weapons or shields, and special rewards. Those objectives should not be treated as requirements for the original version.
The original release still has optional reasons to improve the ship. Enemy ships can drop Gummi blocks and blueprints, and additional Gummies can be found or purchased during the adventure. You may revisit routes to collect materials or test a custom design, but there is no original-release mission-rank checklist that must be completed before the ending.
- Use successful route completion as the original story requirement.
- Do not import Final Mix mission lists or rank conditions into the PS2 guide.
- Treat Gummi collection and blueprint hunting as optional completion goals.
7. Know when to retry, rebuild or continue the story
Retry without rebuilding when the failure came from a single missed turn, an avoidable collision or poor positioning. Rebuild when the same problem happens repeatedly. Frequent collision damage calls for a smaller or tougher design; enemies that survive too long call for stronger weapons; sluggish movement calls for fewer unnecessary blocks or a better engine.
Before testing an experimental design, save or retain the working blueprint and keep enough materials to restore it. Completed routes remain useful practice areas, and returning to them can provide additional blocks without interrupting the next story objective.
For main-story completion, continue flying newly opened routes until the party reaches every required destination, including the route leading to the End of the World. The Gummi Ship portion is complete for the campaign when the required destinations are reachable and the final story route has been cleared; no Gummi mission score or custom-ship perfection is needed to reach the ending.
- Retry execution mistakes before spending time rebuilding.
- Rebuild for a repeated equipment problem, not a single bad flight.
- Keep a dependable design available for the next story route.
- Clear the required route to the End of the World for main-story completion.
Before you move on
- Every newly opened story destination has been reached by successfully flying its connecting Gummi route.
- The ship contains a usable cockpit and engine, with enough practical firepower and durability for the current route.
- A reliable blueprint remains available before optional construction experiments begin.
- Previously cleared routes can be revisited without needing a Final Mix mission rank.
- The End of the World route has been cleared and the final story events can be reached; Gummi Ship missions and exhaustive block collection are not required for the original North American PS2 ending.
Optional Completion Checklist & Closing tactics
For the original North American PlayStation 2 release of Kingdom Hearts, normal story completion ends after Ansem is defeated, the ending scenes are viewed, and the credits are allowed to play. Preserve the save at Final Rest before examining the final door because the original release does not provide a conventional post-game save. Optional completion is best divided into Coliseum Cups, Gold Match, Platinum Match, the six original-release summons, collection goals, Gummi Ship work, and the original secret movie. Platinum Match and Gold Match have different requirements: Platinum Match requires Phil, Pegasus, and Hercules Cups to be unlocked plus Hollow Bastion’s Final Keyhole to be sealed, while Gold Match requires all four standard Cups to be won.
1. Preserve the Final Rest save
Reach Final Rest in the End of the World and save before examining the final door. This is the practical checkpoint for optional cleanup. Complete the final sequence, defeat Ansem, view the ending scenes, and let the credits play for story completion. Reload the preserved Final Rest file when you want to return to Traverse Town, Olympus Coliseum, earlier worlds, or the Gummi Ship.
Keep this file separate from experimental saves whenever possible. Before entering the final sequence, check Sora’s Keyblade, equipped abilities, shortcuts, party settings, and recovery items. The Final Rest checkpoint also lets you verify secret-movie requirements without replaying the entire game.
- A Final Rest save exists before the final door.
- The ending scenes and credits have been viewed.
- The Final Rest file remains available for optional content.
2. Clear the four standard Coliseum Cups
Speak with Phil in the Olympus Coliseum Lobby whenever a tournament is available. The four standard Cups are Phil Cup, Pegasus Cup, Hercules Cup, and Hades Cup. The Preliminary event, solo formats, and time trials are separate challenges.
Monstro must be completed to make the Pegasus Cup available. Neverland’s Keyhole must be sealed for the Hercules Cup to unlock. After the Phil, Pegasus, and Hercules Cups are unlocked, seal Hollow Bastion’s Final Keyhole to open the Hades Cup. Winning the Hades Cup is required for Gold Match and the original secret movie, but winning the earlier Cups is not itself required for the secret movie beyond making Hades available.
- Phil Cup cleared.
- Pegasus Cup cleared.
- Hercules Cup cleared.
- Standard Hades Cup cleared.
- Solo and time-trial formats tracked separately.
3. Check Gold Match and Platinum Match separately
Gold Match becomes available after you win all four standard Cups: Phil, Pegasus, Hercules, and Hades. Return to the Coliseum Lobby and inspect the question-mark entries after the fourth victory. Gold Match is the Ice Titan challenge and is optional for the story and secret movie.
Platinum Match is the English-release Coliseum challenge against Sephiroth. Its requirements are different from Gold Match. Unlock the Phil, Pegasus, and Hercules Cups, then seal Hollow Bastion’s Final Keyhole. Platinum Match becomes available with the later Coliseum challenges; you do not need to win all four standard Cups to unlock or attempt it. Hades Cup victory is therefore a Gold Match requirement, not a Platinum Match requirement.
Prepare Sephiroth as a dedicated superboss. Equip Dodge Roll, Second Chance, Leaf Bracer, and useful defensive or MP-support abilities available in the original release. Put Cure or Curaga on a shortcut and carry recovery items. Use short attack strings, avoid attacking recklessly while he is repositioning, and respond immediately when Heartless Angel is announced. If the fight fails, return to the Coliseum and change abilities, items, or equipment before trying again.
- Phil, Pegasus, and Hercules Cups are unlocked.
- Hollow Bastion’s Final Keyhole is sealed.
- Platinum Match availability is checked without assuming the four standard Cups must be won.
- All four standard Cups are won before checking Gold Match.
- Sephiroth is treated as optional.
4. Activate all six original-release summons
The original North American release has six summons: Simba, Genie, Bambi, Dumbo, Tinker Bell, and Mushu. Simba, Bambi, Dumbo, and Mushu require summon gems to be delivered to the Fairy Godmother in Traverse Town. Genie and Tinker Bell are obtained through story progression.
Earthshine comes from Leon during the later Traverse Town sequence and unlocks Simba. Watergleam is found in a chest in Monstro’s Mouth and unlocks Dumbo. Naturespark is awarded after completing the first Torn Page minigame in Hundred Acre Wood and unlocks Bambi. Fireglow is obtained after defeating Dragon Maleficent and unlocks Mushu. After receiving a gem, visit the Fairy Godmother; carrying the gem alone does not activate the summon.
Summons are optional for the ending, but they can help with crowd control, item farming, healing, and safer damage windows. Confirm each name in Sora’s Summon command after turning in its gem.
- Simba activated from Earthshine.
- Genie obtained through the Agrabah story.
- Bambi activated from Naturespark.
- Dumbo activated from Watergleam.
- Tinker Bell obtained through the Neverland story.
- Mushu activated from Fireglow.
5. Track original-release collection and Gummi Ship goals
Do not import Final Mix or HD-remaster mission lists into the original North American PS2 checklist. A functioning Gummi Ship is sufficient for story travel. Improve the ship only when a route causes repeated failures or when pursuing optional Gummi Ship rewards.
Track Dalmatians, Trinity Marks, treasure chests, Torn Pages, synthesis materials, and Hundred Acre Wood activities separately. Ultima Weapon is an optional synthesis goal. It is not required for Ansem, Gold Match, Platinum Match, the ordinary ending, or the original secret movie.
- Story routes are complete.
- Gummi Ship goals are tracked separately from later-version missions.
- Dalmatians, Trinity Marks, chests, synthesis, and Hundred Acre Wood activities are reviewed.
- Ultima Weapon is treated as optional.
6. Meet the original normal-difficulty secret-movie requirements
For the original North American normal-difficulty secret movie, seal every actual Keyhole: Traverse Town, Wonderland, Deep Jungle, Agrabah, Atlantica, Halloween Town, Neverland, Olympus Coliseum, Hollow Bastion, and the Hundred Acre Wood clasp on Merlin’s book. Monstro has no Keyhole, but its story must be completed because it is needed for Coliseum progression.
Return all 99 Dalmatians and collect their rewards. Win the standard Hades Cup. Gold Match, Platinum Match, Ultima Weapon, solo Cups, time trials, and exhaustive synthesis are not required for this secret movie.
Before examining the final door, recheck this list and preserve the Final Rest save. Complete the ending and allow the credits to play. If the extra movie does not appear, reload the Final Rest file and verify each requirement individually.
- Every Keyhole is sealed, including Olympus Coliseum and Hundred Acre Wood.
- Monstro is completed despite having no Keyhole.
- All 99 Dalmatians are returned and their rewards collected.
- The standard Hades Cup is won.
- The final door is entered from a preserved Final Rest save.
7. Plan a second playthrough
Keep the ending and Final Rest saves, then choose whether the next run is for story speed, collection completion, optional bosses, or a higher difficulty. A focused story run can postpone most Cups and collection tasks. A completion run should track summons, Dalmatians, Torn Pages, Trinity Marks, synthesis materials, Gummi Ship goals, and Coliseum victories as they become available.
For an optional-content route, unlock Phil, Pegasus, and Hercules Cups, seal Hollow Bastion’s Final Keyhole, and check Platinum Match. Separately, win all four standard Cups before checking Gold Match. Preserve the Final Rest file while doing this so the ending checkpoint is not lost.
Choose the difficulty based on the purpose of the replay. Lower difficulty can make collection work faster, while higher difficulty is better for a deliberate challenge. The original release has no universal in-game percentage defining 100 percent, so use an explicit checklist instead of treating every optional reward as mandatory.
- The replay goal and difficulty are chosen in advance.
- The original ending and Final Rest saves are preserved.
- Story completion is separated from Cups, superbosses, summons, synthesis, Gummi Ship work, and collection goals.
Before you move on
- Ansem has been defeated and the ending scenes and credits have been viewed.
- A Final Rest save from before the final door has been preserved.
- Phil, Pegasus, Hercules, and standard Hades Cups are cleared if pursuing full standard Coliseum completion.
- Platinum Match availability has been checked after Phil, Pegasus, and Hercules Cups were unlocked and Hollow Bastion’s Final Keyhole was sealed.
- Gold Match availability has been checked after all four standard Cups were won.
- Simba, Genie, Bambi, Dumbo, Tinker Bell, and Mushu are activated if pursuing the full original-release summon list.
- For the original North American normal-difficulty secret movie, every Keyhole is sealed, including Olympus Coliseum and Hundred Acre Wood; Monstro is completed despite having no Keyhole; all 99 Dalmatians are returned; and the standard Hades Cup is won.
- A separate save or memory-card copy is retained for optional cleanup and a second playthrough.
References for this chapter
Finishing up
You have defeated Ansem, completed the World of Chaos sequence, and watched the ending cutscenes through the credits.
The required world Keyholes and Hollow Bastion’s Final Keyhole have been sealed. End of the World has been reached and its final sequence completed; it does not contain a separate Keyhole to seal.
The original North American PS2 release does not create a normal free-roaming post-game save after the ending. Preserve the Final Rest save before examining the final door, then reload that file for optional cleanup such as Coliseum Cups, summons, Hundred Acre Wood, Dalmatians, synthesis, Gummi Ship collection, and edition-appropriate superbosses.
Optional completion checks are separate from the normal ending: Sephiroth, Ice Titan, solo and time-trial Coliseum challenges, Ultima Weapon, exhaustive Gummi Ship collection, and the secret movie are not required to defeat Ansem or view the normal credits.
Choose your next gameScreenshots & video
Game imagery for reference. Follow the written chapters above for the route and strategies.
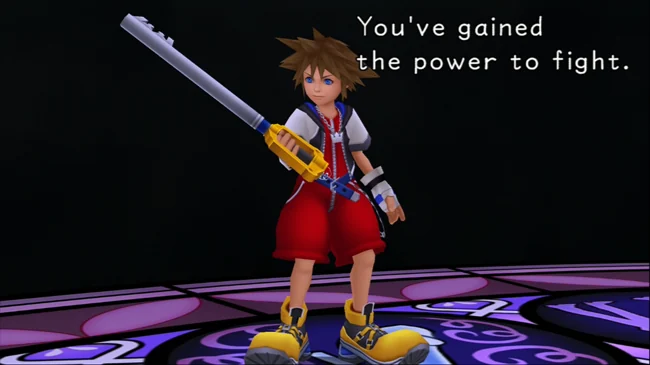
Sources & references
Our original guide draws on the references below. Check the edition at the top of this page before following controls or unlock requirements.
- Kingdom Hearts — Guide and Walkthrough — GameFAQs
- Walkthrough: Kingdom Hearts/Traverse Town
- Traverse Town Walkthrough - KHGuides
- Kingdom Hearts PS2 controls reference
- Kingdom Hearts - Guide and Walkthrough - PlayStation 2 - By Fraghappy
- Kingdom Hearts — Guide and Walkthrough, PlayStation 2, by winnie_the_poop
- Kingdom Hearts — Guide and Walkthrough, PlayStation 2, by Jet2x5
- Alice’s trial - Kingdom Hearts Wiki
- Walkthrough: Kingdom Hearts/Deep Jungle — Kingdom Hearts Wiki
- Kingdom Hearts — Guide and Walkthrough, PlayStation 2 — jcdentondx, GameFAQs
- Walkthrough-Deep Jungle — RPGClassics
- Kingdom Hearts/Deep Jungle — StrategyWiki
- Traverse Town - Kingdom Hearts PS2 Walkthrough
- Kingdom Hearts — Guide and Walkthrough — PlayStation 2 — By sephiroth95 — GameFAQs
- Walkthrough-Traverse Town Again
- Walkthrough: Kingdom Hearts/Olympus Coliseum
- Platinum Match - Kingdom Hearts Wiki
- Kingdom Hearts/Championship Cups — StrategyWiki
- Kingdom Hearts - Missable Guide - PlayStation 2 - By falconesque
- Kingdom Hearts — Coliseum FAQ for PlayStation 2
- Kingdom Hearts - Guide and Walkthrough - PlayStation 2 - By CJayC
- Kingdom Hearts - Guide and Walkthrough - PlayStation 2 - By ElectroSpecter
- Walkthrough: Kingdom Hearts/Agrabah - Kingdom Hearts Wiki
- Agrabah walkthrough - Kingdom Hearts Guides
- Monstro Walkthrough — KHGuides
- Atlantica — StrategyWiki
- Walkthrough: Kingdom Hearts/Atlantica — Kingdom Hearts Wiki
- Monstro — Kingdom Hearts Wiki
- Walkthrough:Kingdom Hearts/Halloween Town - Kingdom Hearts Wiki
- Halloween Town Walkthrough (KH1FM) - KHGuides
- Kingdom Hearts — Guide and Walkthrough, PlayStation 2, by Terran
- Walkthrough: Kingdom Hearts/Neverland — Kingdom Hearts Wiki
- Kingdom Hearts/Hollow Bastion — Kingdom Hearts Wiki
- Hollow Bastion walkthrough (Kingdom Hearts)
- Kingdom Hearts - Guide and Walkthrough - PlayStation 2 - Spirit_Slash3r
- Hollow Bastion second visit walkthrough (Kingdom Hearts) — Kingdom Hearts Wiki
- Kingdom Hearts/Hollow Bastion (2nd Visit) — StrategyWiki
- Walkthrough: Kingdom Hearts/End of the World — Kingdom Hearts Wiki
- End of the World walkthrough - Kingdom Hearts Wiki
- End of the World Walkthrough
- End of the World — Kingdom Hearts Wiki
- Game: Ansem, Seeker of Darkness — Kingdom Hearts Wiki
- Kingdom Hearts Walkthrough — PlayStation 2 — CheatCodes.com
- Kingdom Hearts - Secrets Guide - PlayStation 2 - By jcdentondx
- Kingdom Hearts - 100 Acre Wood FAQ - PlayStation 2 - GameFAQs
- 100 Acre Wood walkthrough - Kingdom Hearts Wiki
- Kingdom Hearts — Gummi Ship FAQ, PlayStation 2, GameFAQs
- Kingdom Hearts/Gummi Ship — StrategyWiki
- Gummi Ship — Kingdom Hearts Wiki
- Gummi Blocks — Kingdom Hearts Wiki
- Kingdom Hearts — Gummi Ship Mission Guide, PlayStation 2, GameFAQs
- Kingdom Hearts — Wikipedia
- Kingdom Hearts - Magic/Summons FAQ - PlayStation 2 - By Varie
- Summon - Kingdom Hearts Wiki
- 100 Acre Wood - Kingdom Hearts Wiki
- Hades Cup - Kingdom Hearts Wiki
About the game & collecting notes
- Platform
- PlayStation 2
Step-by-step walkthrough for the original PlayStation 2 release of Kingdom Hearts (North American edition). Covers the main campaign from Destiny Islands through the End of the World, safe progression notes, Gummi Ship basics, Olympus Coliseum optional content, Hollow Bastion strategy and the final Ansem fights, plus guidance for optional bosses and post‑game completion goals.
Darryl Polo
Darryl Polo loves tinkering with emulation and revisiting retro games. He enjoys exploring how old favorites play on different setups and sharing what he learns along the way. At Joking Joystick, he writes about the games, hardware, and small discoveries that keep the hobby fun.
Our editorial standardsFound a step that needs another look? Help us improve this guide.