Grand Theft Auto: Vice City — Complete PS2 (NTSC-U, v1.40) Campaign Walkthrough
Step-by-step campaign walkthrough for the original PlayStation 2 release of Grand Theft Auto: Vice City (NTSC-U / USA, v1.40).

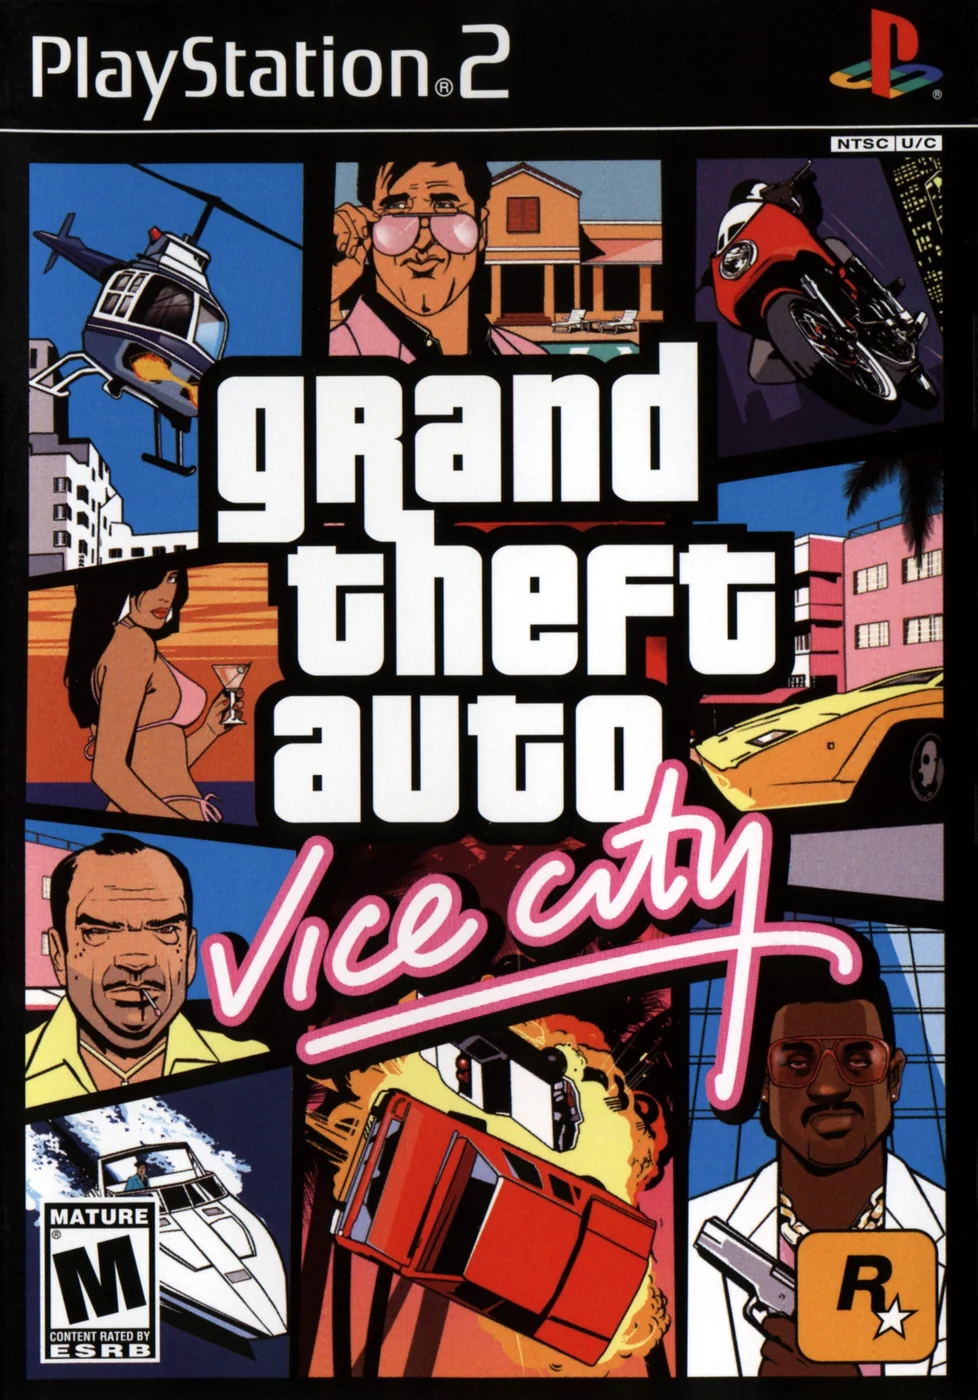
Find a copy
Grand Theft Auto: Vice City PlayStation 2
We may earn a commission if you buy through these links, at no extra cost to you. As an Amazon Associate I earn from qualifying purchases.
Opens retailer search results. Check the model, edition, seller, availability and current price before buying.
Before you begin
You play as Tommy Vercetti, newly released from prison and dropped into Vice City's neon streets.
This walkthrough covers the original North American PlayStation 2 campaign from the opening missions through Keep Your Friends Close..., including the mandatory Cortez, Kent Paul, Diaz, Vercetti Estate and asset progression needed to reach the ending.
Follow the story prerequisites in order: complete the early contact missions, finish the mandatory bridge missions and Death Row, take Diaz's mansion, complete Shakedown, Bar Brawl and Cop Land, then complete Print Works and five other qualifying assets before Cap the Collector.
Optional assets and 100% activities are clearly separated from required campaign progress.
Before each chapter, save, confirm the next available marker or phone call, and prepare the health, armour, weapons and vehicle needed for the stated objective.
Set yourself up for the run
Use multiple save slots, especially before Death Row, Rub Out, Cop Land, long asset chains, Cap the Collector and Keep Your Friends Close....
Complete the mandatory story contacts in the required progression before treating asset purchases as available. Asset properties unlock after Shakedown, not immediately after the Diaz lead-in.
For the ending, complete Print Works and five other qualifying buyable assets. Count the Vercetti Estate separately after Cop Land; the final requirement is seven profitable places total, including the Estate.
Stock automatic weapons, a shotgun or other close-range weapon, body armour and ammunition before mansion assaults and the finale.
Save after every completed asset chain and preserve a separate pre-final save.
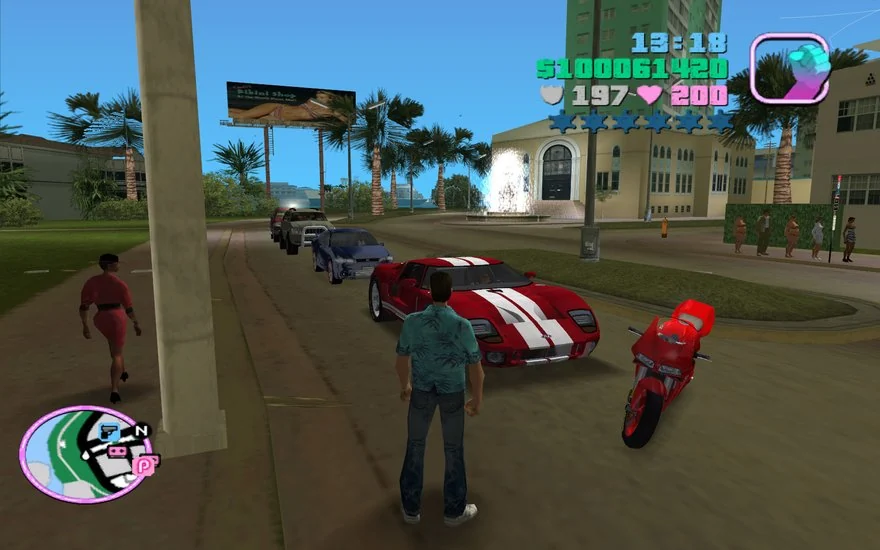
Arrival: Ocean View Hotel to establishing contacts
Complete the opening sequence and Ken Rosenberg’s first four missions: The Party, Back Alley Brawl, Jury Fury and Riot. This chapter establishes Tommy’s first safe location, unlocks the cellphone, introduces the main early contacts and gives you a reliable routine for saving, resupplying and navigating Vice City on the original PlayStation 2 release.
1. Complete In the Beginning... and start An Old Friend
After the opening cutscene, follow the initial instructions until Tommy is free to move around Vice City. An Old Friend is the first playable story mission. Its objective is to reach the Ocean View Hotel in Ocean Beach, enter the building and go upstairs to Tommy’s suite. You do not need to drive from the airport to an exterior hotel marker as a separate objective; the hotel sequence itself is the mission’s destination.
Walk into the Ocean View Hotel and follow the interior route to the stairway. The mission completes after the scene in Tommy’s room. The Ocean View Hotel then serves as Tommy’s first save location. Use the save icon after completing missions or before attempting a mission that you may need to retry. Saving preserves progress, but it is still wise to check Tommy’s health, armour and ammunition before beginning the next objective.
- Finish the opening sequence and reach free-roam.
- Complete An Old Friend by entering the Ocean View Hotel and reaching Tommy’s suite.
- Save at the Ocean View Hotel before starting Ken Rosenberg’s missions.
2. Learn the original PlayStation 2 controls safely
With the default PlayStation 2 layout, the left analog stick controls Tommy on foot and steers vehicles. The right analog stick adjusts the camera. Triangle enters or leaves a vehicle, X accelerates, Square brakes or reverses, Circle performs the current attack, and R1 engages target-locking or aiming when the weapon supports it. L1 centers the camera in the standard control scheme. If the controls have been changed in the options menu, verify the current layout before relying on these buttons.
Use the streets around Ocean Beach and Washington Beach for low-risk practice. Drive at moderate speed, brake before corners and learn how quickly each vehicle turns. On foot, lock onto one nearby enemy only when a mission requires combat, keep moving sideways and use walls, cars or building corners as cover. Avoid deliberately creating a wanted level during practice; police attention can waste health, ammunition and mission time.
- Test movement, camera control, vehicle entry and braking near the hotel.
- Confirm the target and attack buttons before beginning a combat mission.
- Keep a stable four-door vehicle available for transport objectives.
3. Complete The Party from Ken’s office
Ken Rosenberg’s office is marked by an L in Washington Beach. Enter the pink marker to begin The Party. Ken sends Tommy to Colonel Juan Cortez’s yacht, which is in the marina area. Drive there carefully, enter the yacht marker and wait for the scene that introduces Cortez, Mercedes Cortez, Ricardo Diaz and Kent Paul.
After the yacht scene, Mercedes gets into Tommy’s vehicle. Drive her to the Pole Position Club, not the Malibu Club. The destination is on the eastern side of the first island. Follow the radar marker, avoid unnecessary collisions and stop inside the destination marker to finish the mission. A clean, reasonably spacious car makes this trip easier, but there is no special vehicle requirement.
- Start The Party at Ken Rosenberg’s office.
- Reach Colonel Cortez’s yacht and collect Mercedes.
- Deliver Mercedes to the Pole Position Club and complete the mission.
4. Complete Back Alley Brawl and unlock phone calls
Return to Ken’s office and start Back Alley Brawl. First drive to the Malibu Club in Vice Point and enter the building to speak with Kent Paul. Kent directs Tommy to a chef in the alley behind Ocean Drive in Ocean Beach. Follow the yellow radar marker to the alley and defeat Leo Teal. You can use close-range attacks or a vehicle; the mission objective is to eliminate Leo and collect his cellphone.
Once Leo is down, pick up the cellphone. Lance Vance then appears and the mission sends Tommy to a waiting vehicle. Do not waste health fighting every chef who follows you. Get into the vehicle and drive to Ammu-Nation. This visit introduces the gun shop and gives you an opportunity to buy a Colt .45 or an Ingram Mac 10 if you have enough money. After leaving Ammu-Nation, drive back to the Ocean View Hotel and enter the destination marker to finish Back Alley Brawl.
The cellphone obtained during this mission is important. It allows mission-related calls to reach Tommy while he is in free-roam. Calls may arrive while you are driving or walking away from a marker, so do not assume that every new objective begins at a visible pink circle.
- Speak with Kent Paul at the Malibu Club.
- Defeat Leo Teal and collect his cellphone.
- Visit Ammu-Nation when instructed.
- Return to the Ocean View Hotel and complete Back Alley Brawl.
5. Finish Jury Fury without killing either juror
Start Jury Fury from Ken’s office after Back Alley Brawl. The mission requires Tommy to intimidate two jurors by damaging their cars. A hammer appears near Ken’s office after the opening scene; take it and follow the two yellow radar markers.
At each location, attack the marked vehicle until the juror leaves or the intimidation objective registers. Do not kill either juror. At the southern location, strike the juror once if necessary to make him enter his car, then damage the vehicle. At the other location, use the hammer on the marked car and keep attacking until the juror abandons it. Police may become involved, but the wanted level is not the main objective; concentrate on the two marked vehicles and avoid turning the encounter into a prolonged street fight.
You do not need a purchased firearm for Jury Fury. The supplied hammer is sufficient, and using it avoids spending money that may be useful for ammunition or later property purchases.
- Collect the hammer after the opening scene.
- Damage both marked juror vehicles.
- Do not kill either juror.
- Wait for the mission-complete result before leaving the area.
6. Complete Riot at Spand Express
After Jury Fury, start Riot at Ken’s office. Drive to Rafael’s clothes shop and change into the required coveralls. Then follow the radar to the Spand Express shipping yard. Tommy must start a riot by fighting at least four workers. Approach the workers and attack them until the riot begins and the gates open.
Once the yard is accessible, destroy all three marked Spand Express delivery trucks. Use the surrounding walls, parked vehicles and the gate area as cover. Explosive barrels near the trucks can help, but stand clear before shooting them. If you use firearms, watch for workers approaching from behind and do not remain directly beside a truck when it catches fire. Destroy each marked truck and wait for the mission-complete message.
Riot is the end of Ken Rosenberg’s initial four-mission chain. It does not mean that every later contact appears immediately at the same location, so save at the hotel and check the radar, phone and available contact markers afterward rather than assuming a specific Diaz marker must appear at once.
- Change clothes at Rafael’s before going to Spand Express.
- Start the riot by fighting at least four workers.
- Destroy all three marked delivery trucks.
- Save after the mission-complete message.
7. Use a dependable early-game routine
At this point, use the Ocean View Hotel as the base for a simple routine: save after each completed mission, replace heavily damaged vehicles, visit Ammu-Nation when money allows and collect armour before missions involving prolonged gunfire. Story markers are usually pink circles or contact letters. Property icons identify purchasable locations, but buying a property is not required for this chapter. Telephone calls are received while Tommy is in free-roam after the cellphone has been obtained.
The chapter is complete when In the Beginning..., An Old Friend, The Party, Back Alley Brawl, Jury Fury and Riot have all been completed. Tommy should be able to save at the Ocean View Hotel, reach Ken’s office and the Malibu Club without difficulty, use target-locking and basic vehicle controls, and carry at least the early-game pistol or another available weapon. The next stage can then proceed through the other contact missions without needing asset properties or advanced equipment.
- All six opening story objectives are complete, including the introductory sequence.
- The Ocean View Hotel is available as a save location.
- The cellphone has been obtained during Back Alley Brawl.
- Ken’s initial marker has cleared after Riot.
- Tommy has basic weapon access, health or armour preparation and a reliable vehicle routine.
Before you move on
- In the Beginning..., An Old Friend, The Party, Back Alley Brawl, Jury Fury and Riot have all been completed.
- Tommy can save at the Ocean View Hotel and reach Ken Rosenberg’s office in Washington Beach.
- The cellphone from Back Alley Brawl has been collected and phone calls can reach Tommy in free-roam.
- The two jurors survived Jury Fury and all three Spand Express trucks were destroyed in Riot.
- Tommy has basic weapon access, understands the original PS2 movement, camera, aiming and vehicle controls, and is ready for the next contact mission chain.
References for this chapter
- An Old Friend | GTA Vice City Mission Guide & Walkthrough
- The Party | GTA Wiki
- Grand Theft Auto: Vice City - Guide and Walkthrough - PlayStation 2 - By z_ShadowMan_z
- Grand Theft Auto: Vice City - Guide and Walkthrough - PlayStation 2 - By Myke
- Grand Theft Auto: Vice City PlayStation 2 Instruction Manual
- Riot | GTA Wiki
Ken Rosenberg and Ricardo Diaz: building the Diaz lead-in
Riot is already complete before this chapter begins. From here, follow the overlapping Cortez, Diaz and Kent Paul branches in the required order. Complete Treacherous Swine, Mall Shootout, Guardian Angels, The Chase, Phnom Penh ’86, Sir, Yes Sir!, The Fastest Boat, Supply & Demand and Death Row. Sir, Yes Sir! and Supply & Demand are both required before Death Row becomes available, and Death Row must be completed before Rub Out appears at Ricardo Diaz’s mansion. These directions apply to the original North American PlayStation 2 release of Grand Theft Auto: Vice City.
Confirm the prerequisite after Riot
Do not return to Ken Rosenberg’s office to replay The Party, Back Alley Brawl, Jury Fury or Riot. This chapter starts once Riot has displayed its completion message.
Check the map for the C marker at Colonel Cortez’s yacht in the Ocean Bay Marina. The D marker at Diaz’s mansion may also be present, but the Diaz marker does not mean Rub Out is ready. Rub Out requires the full bridge sequence, including Death Row.
Before starting the branch, restore health, obtain body armor if available and carry a machine gun or shotgun. Keep a fast, reasonably durable vehicle nearby for missions that involve police, gang pursuit or protected characters.
- Riot is complete.
- Ken’s opening missions no longer need to be repeated.
- The C marker is available at Cortez’s yacht.
- Health, armor and ammunition have been restored.
- A save has been created before beginning the next mission.
Complete Treacherous Swine
Start Treacherous Swine at Cortez’s yacht. Drive to Gonzalez’s penthouse in Vice Point. When Gonzalez runs, pursue him and kill him with the chainsaw Cortez provides or another suitable weapon. You may also run him over after he leaves the building.
Killing Gonzalez gives Tommy a two-star wanted level. Get into a vehicle and drive to the Pay ’n’ Spray in Vice Point. Enter the garage to remove the wanted level and finish the mission. Returning to the yacht is not the completion condition for this mission.
Mall Shootout becomes available at Cortez’s yacht after Treacherous Swine. The mission also makes the casual outfit available, but the outfit is optional and is not needed for the story route.
- Start Treacherous Swine at the C marker.
- Reach Gonzalez’s penthouse.
- Kill Gonzalez.
- Escape in a vehicle after receiving the wanted level.
- Use the Pay ’n’ Spray in Vice Point.
- Confirm that Mall Shootout is available.
Finish Mall Shootout at North Point Mall
Accept Mall Shootout from Cortez and drive to North Point Mall. Meet the courier at the marked location. After the ambush, the courier flees on a PCJ 600 with the guidance chips.
Follow him out of the mall. A motorcycle is useful because Tommy can fire a submachine gun forward while riding, but you can also ram the courier with a car and run him over after he crashes. Do not waste time fighting every police officer or gang member during the pursuit.
Kill the courier, collect the guidance chips and return them to Cortez’s yacht. The mission gives Tommy a two-star wanted level, so use the nearby Pay ’n’ Spray if the police prevent a clean return. Guardian Angels becomes available after the chips are delivered.
- Reach North Point Mall.
- Meet the courier.
- Pursue the courier on the PCJ 600.
- Kill him and collect the guidance chips.
- Return the chips to Cortez’s yacht.
- Confirm that Guardian Angels is available.
Complete Guardian Angels and protect Diaz
Start Guardian Angels at Cortez’s yacht. Drive to the first floor of the multistory parking garage behind the Ocean View Hotel and collect the Ruger. Lance joins Tommy there. Drive both of them to the meeting location and take position near the marked staircase or nearby ground-level cover.
The Haitian gang attacks after the meeting begins. Diaz and Lance are protected characters, so concentrate on enemies who are shooting at them and avoid firing through Diaz. You do not have to remain fixed at the staircase; ground-level cover can give a clearer angle for auto-aim weapons.
After the main attackers are defeated, one gang member escapes on a Sanchez. Pick up the Uzi and use the other Sanchez to pursue him. Fire forward while riding, or ram the fleeing rider until he falls. Kill the rider and recover Diaz’s briefcase, then return it to Diaz to complete the mission.
The Chase becomes available at Diaz’s mansion. The mission also opens access to the western half of Vice City, allowing travel to the mainland areas needed for the next branches.
- Collect the Ruger from the parking garage.
- Bring Lance to the meeting.
- Protect Diaz and Lance during the ambush.
- Pursue the fleeing Sanchez rider.
- Recover Diaz’s briefcase.
- Return the briefcase to Diaz.
- Confirm that The Chase is available.
Complete The Chase
Start The Chase at Diaz’s mansion. Drive to the thief’s apartment in Vice Point and follow the marked target after the cutscene. The mission first uses an on-foot rooftop pursuit and then changes to a vehicle chase.
Keep the target visible without stopping to fight unrelated enemies. Follow the rooftop route, take the available vehicle when the chase changes, and continue to the thief’s hideout on Prawn Island. The mission ends when Tommy reaches the hideout and the sequence resolves; do not try to kill the thief during the rooftop portion.
Phnom Penh ’86 becomes available from Diaz after The Chase. Prepare armor and an automatic weapon for the building section, but remember that the helicopter phase supplies its own mounted gun.
- Reach the thief’s apartment in Vice Point.
- Follow the thief across the rooftops.
- Continue the vehicle pursuit.
- Reach the hideout on Prawn Island.
- Confirm that Phnom Penh ’86 is available.
Complete Phnom Penh ’86
Accept Phnom Penh ’86 at Diaz’s mansion. Lance flies Tommy over the Prawn Island hideout while Tommy uses the helicopter’s mounted M60. Sweep balconies, windows, rooftops and visible firing positions instead of aiming only at enemies standing in the open.
The helicopter’s mounted weapon has ample ammunition for this phase. Explosive barrels and vehicles near groups of enemies can clear several targets at once, but avoid allowing the helicopter to absorb sustained fire. Use the direction of incoming fire and visible muzzle flashes to locate enemies hidden around the building.
After the helicopter lands, enter the hideout and clear the remaining gang members on foot. Use doorways, walls and corners as cover because Tommy no longer has the helicopter’s protection. Reach the marked money and collect it to complete the mission.
Completing Phnom Penh ’86 opens the mainland route and makes Cortez’s Sir, Yes Sir! and Diaz’s The Fastest Boat available. The tracksuit reward is optional and has no bearing on Rub Out.
- Clear the hideout’s exterior from the helicopter.
- Destroy enemies around balconies, windows and rooftops.
- Land at the marked location.
- Enter the hideout.
- Clear the remaining gang members.
- Collect the stolen money.
- Confirm that Sir, Yes Sir! and The Fastest Boat are available.
Complete Sir, Yes Sir! and steal the Rhino
Start Sir, Yes Sir! at Cortez’s yacht. Follow the military convoy until the Rhino tank becomes the objective. Tommy must take the tank and deliver it to Cortez’s lockup before its self-destruct sequence expires.
Avoid trying to defeat the entire convoy on foot. Get into the tank as soon as the opportunity appears and drive toward the lockup by the safest direct route. The tank can withstand considerable punishment, but collisions and detours cost time.
Enter the lockup garage with the Rhino. Exit the tank and walk away from the garage so the mission can register as complete. Sir, Yes Sir! is one of the two prerequisites for Death Row; it is not sufficient by itself.
- Start Sir, Yes Sir! after Phnom Penh ’86.
- Take the Rhino from the military convoy.
- Deliver the tank to Cortez’s lockup before the timer expires.
- Leave the tank and walk away from the garage.
- Confirm the completion message.
Complete The Fastest Boat and Supply & Demand
Start The Fastest Boat at Diaz’s mansion and drive to the Viceport docks. Fight or bypass the guards, reach the boat held near the crane and take control of it. Keep the boat in open water, use broad turns and avoid scraping docks or shallow shoreline areas while delivering it to Diaz’s marina.
After The Fastest Boat, start Supply & Demand at Diaz’s mansion. Race the other buyers to the offshore yacht and reach it first. On the return trip, Lance drives while Tommy protects the yacht. Shoot attackers who are actively damaging the yacht, especially nearby boats and gunmen, but do not abandon the return route to chase distant targets.
Supply & Demand must produce its completion message and reward before Death Row can appear. Completing only The Fastest Boat is not enough.
- Steal the marked boat in The Fastest Boat.
- Deliver it to Diaz’s marina.
- Reach the offshore yacht first in Supply & Demand.
- Protect the yacht during the return trip.
- Wait for the completion message and reward.
- Confirm that both boat missions are complete.
Complete Death Row at Kent Paul’s marker
Death Row becomes available at Kent Paul’s marker at the Malibu Club only after both Sir, Yes Sir! and Supply & Demand are complete. Before entering the marker, restore health, obtain body armor and carry an auto-aim weapon or automatic weapon. A durable vehicle is strongly preferable for the escape.
Drive to the junkyard in Little Haiti. Break through the entrance barricade, then reach the building in the northwest corner where Lance is being held. Lance’s health drains while he remains captive, so do not explore the yard or fight enemies that are not blocking the rescue.
Clear the guards around the building, enter and rescue Lance. Get into the Sentinel parked beside the building or the Trashmaster in the yard. Take Lance directly to the hospital in Downtown. Gang members in sports cars will pursue and ram the vehicle; maintain forward momentum and avoid stopping to exchange fire.
The mission fails if Lance’s health reaches zero before he reaches the hospital. If the rescue fails, reload the save made before Death Row, improve the approach to the building and use the most durable available vehicle for the hospital run.
- Sir, Yes Sir! is complete.
- Supply & Demand is complete and its reward has been credited.
- Start Death Row at the Malibu Club.
- Reach the Little Haiti junkyard.
- Rescue Lance from the northwest building.
- Drive Lance to the Downtown hospital.
- Confirm the completion message.
- Confirm that Rub Out is now available at Diaz’s mansion.
Before you move on
- Riot was already complete before this chapter began.
- Treacherous Swine, Mall Shootout, Guardian Angels and Sir, Yes Sir! are complete at Cortez’s yacht.
- The Chase, Phnom Penh ’86, The Fastest Boat and Supply & Demand are complete through Diaz’s mansion.
- Supply & Demand’s completion message and reward have appeared.
- Death Row was completed from Kent Paul’s marker at the Malibu Club.
- Lance was delivered alive to the Downtown hospital.
- Rub Out is available at Diaz’s mansion.
- A new save exists before starting Rub Out with full health, body armor and sufficient ammunition.
Rub Out: taking Diaz and consolidating power
Death Row unlocks Rub Out, which transfers Ricardo Diaz’s mansion to Tommy and establishes the Vercetti Estate. The Estate mission chain then continues through Shakedown, Bar Brawl and Cop Land. Complete all four missions in order: Rub Out takes the mansion, Shakedown opens asset purchases, Bar Brawl clears the security opposition, and Cop Land makes the Estate a profitable asset. Rub Out alone does not complete the Estate requirement for the late-game trigger.
Complete Death Row and prepare for Rub Out
Finish Death Row, the Kent Paul mission in which Tommy rescues Lance Vance from the junkyard. After Death Row, the Rub Out marker appears at the bridge leading onto Starfish Island, outside Diaz’s mansion. Make a separate save before entering it so you can retry the assault without repeating the preparation.
Restore Tommy’s health and obtain body armour before starting. Carry an automatic weapon with enough ammunition for the compound and interior firefight. A shotgun is useful for guards at close range, while an M4, SMG or another dependable automatic weapon is better for the garden and main hall. Lance supplies Tommy with an M4 at the start of the assault, so the mission remains possible without buying a complete late-game arsenal.
Rub Out fails if Tommy dies, Lance dies or Tommy is arrested. The practical priority is therefore to move with Lance and remove enemies who have a clear line of fire toward him rather than racing to Diaz alone.
- Complete Death Row.
- Save before entering the Rub Out marker.
- Restore health and obtain body armour.
- Carry an automatic weapon and a close-range backup.
- Keep Lance alive throughout the assault.
Storm Diaz’s mansion through the rear entrance
Enter the Rub Out marker on the Starfish Island bridge and collect the M4 from Lance’s vehicle during the opening scene. Approach the mansion from the garden side and use walls, hedges and the driveway corners as cover. Clear the guards you can see before crossing the open lawn. Lance helps with the shooting, but he can be killed if Tommy leaves him under sustained fire.
Work around the side of the property instead of trying to use the front doors. The usable route is at the rear: continue past the side guards until you reach the large covered entrance beside the swimming pool. Enter there, follow the pool-side passage and move into the mansion. If the front entrance is reached first, turn around and continue around the building rather than wasting time at the locked doors.
Inside, climb the stairs carefully. Guards occupy the stairway, landings and connecting halls. Stop at doorways and corners, aim before exposing Tommy and reload before entering a larger room. Once you reach the main hall, clear the bodyguards before pursuing Diaz into the office area. Diaz has more endurance than a normal guard, so use sustained automatic fire or controlled close-range attacks instead of assuming one burst will finish him.
After Diaz is killed, allow the cutscene and mission-complete result to play. Rub Out pays $50,000 and transfers the mansion to Tommy as the Vercetti Estate. It also unlocks the next Estate mission, Shakedown.
- Collect the M4 supplied by Lance.
- Clear the garden and side approaches before advancing.
- Use the rear covered entrance beside the pool.
- Fight through the stairs and halls one section at a time.
- Kill Diaz and wait for the mission-complete result.
- Confirm the Vercetti Estate is now available as a safehouse.
Run Shakedown to unlock asset purchases
After Rub Out, enter the new V marker at the Vercetti Estate to begin Shakedown. The objective is to intimidate businesses at North Point Mall by smashing their glass storefront displays. The mission has a five-minute limit, so take a fast, controllable vehicle from the Estate and follow the radar to Vice Point.
Enter the mall and destroy every marked display on both floors. A manual-aim automatic weapon makes it easier to target the glass without wasting shots. Follow a simple circuit: clear the lower-floor displays first, use the escalators to reach the upper walkway, then cross the upper level and descend only after the marked windows there are destroyed. The exact path is less important than watching the radar and avoiding unnecessary detours.
The wanted level rises as the windows break. Keep moving and do not leave the mall during the timed sequence, because the route must be completed inside the objective area. If the wanted level becomes troublesome, use a clothing pickup inside the mall when the mission allows it, but do not abandon the window circuit while the timer is running. Finish all marked displays before the timer expires.
Shakedown pays $2,000 and unlocks the buyable properties around Vice City. This is the point at which the asset branches become available. Buying properties is not enough by itself: each selected asset must have its own mission chain completed before it contributes to the final trigger.
- Start Shakedown at the Vercetti Estate after Rub Out.
- Reach North Point Mall before the timer expires.
- Destroy all marked glass displays on both floors.
- Remain inside the mall until the objective is complete.
- Confirm the $2,000 reward.
- Confirm that buyable assets are now available on the map.
Complete Bar Brawl and remove the security opposition
Bar Brawl becomes available at the Vercetti Estate after Shakedown. Take a fast vehicle and follow the radar to the Front Page Bar near the Ocean View Hotel. Two guards protect the entrance. Eliminate both, then enter the marker and speak to the bar owner.
The owner identifies DBP Security as the group behind the protection dispute. A five-minute timer begins, and the DBP location appears on the radar. Drive there immediately. Stop outside the security building, leave enough space to maneuver and use the building frontage or nearby cover when the guards attack. Your accompanying Vercetti men can draw fire, but they are not reliable protection, so clear the attackers yourself with an automatic weapon or explosives if available.
When the building is damaged, two security men escape on PCJ 600 motorcycles. Get back into a durable vehicle and pursue them. Do not focus on the Securicar if it appears; the mission objective is the two motorcycle riders. A light collision can throw a rider from a PCJ, after which you can run him over or finish him with gunfire. Repeat for the second rider and wait for the success screen.
Bar Brawl pays $4,000 and unlocks Cop Land. It is part of the Estate chain and should be completed before attempting the final Estate mission.
- Start Bar Brawl at the Estate.
- Kill the two guards at the Front Page Bar.
- Speak to the bar owner.
- Reach DBP Security before the five-minute timer expires.
- Stop both escaping PCJ riders.
- Confirm the $4,000 reward and Cop Land marker.
Complete Cop Land and make the Estate profitable
Start Cop Land at the Vercetti Estate after Bar Brawl. Tommy and Lance must enter North Point Mall disguised as police officers and detonate the bomb at Tarbrush Café. Drive to the marked lock-up in Vice Point, then attract police attention and lure two officers into the garage. Once both officers enter, the garage closes, the uniforms are taken and the mission provides a police car nearby.
Take the supplied police car to North Point Mall. Keep Tommy and Lance together and approach the mall in the police vehicle. Enter while wearing the police uniform; arriving without it causes the police response to become immediately hostile and prevents the intended setup. Inside the mall, go to Tarbrush Café and activate the bomb. The fuse is short, so move straight back toward the exit after planting it.
The explosion creates a five-star wanted level and the escape is the dangerous part of the mission. Get back to the police car, keep the vehicle upright and avoid sharp collisions that can disable it or strand Lance. Follow the radar back to the Vercetti Estate. Lance must survive the journey, and the mission fails if Tommy dies, is arrested or Lance is killed.
Cop Land pays $10,000 and makes the Vercetti Estate a profitable asset, generating up to $5,000. This is the Estate completion state needed for the broader endgame asset calculation. Rub Out acquired the property, but Cop Land is what activates its income.
- Start Cop Land after completing Bar Brawl.
- Lure two police officers into the marked lock-up.
- Take the police uniforms and use the supplied police car.
- Reach Tarbrush Café in North Point Mall while disguised as police.
- Plant the bomb and escape the mall.
- Return to the Vercetti Estate with Lance alive.
- Confirm the $10,000 reward.
- Confirm the Estate income icon and accumulating asset money.
Verify the complete Estate milestone
The Vercetti Estate sequence is complete only when Rub Out, Shakedown, Bar Brawl and Cop Land have all been cleared. Diaz’s mansion should be Tommy’s safehouse, asset purchases should be available, Cop Land should be marked complete and the Estate should display its income indicator. Save at the mansion after the Cop Land reward appears.
Do not count the Estate merely because it was acquired during Rub Out. For endgame planning, continue with Print Works and enough additional profitable assets. Phil’s Place does not replace a profitable asset in that calculation. When the Estate income is active, use its money and safehouse facilities to fund and stage the remaining asset missions.
- Rub Out is complete and Diaz’s mansion is the Vercetti Estate.
- Shakedown is complete and asset purchases are unlocked.
- Bar Brawl is complete and Cop Land has been cleared.
- Cop Land is complete and the Estate income icon is visible.
- The Estate’s asset money is accumulating.
- A post-Cop Land save loads with the entire Estate chain completed.
Before you move on
- Death Row was completed before Rub Out became available.
- Rub Out is complete, Diaz is dead and the Vercetti Estate is acquired.
- Shakedown is complete and buyable assets are unlocked.
- Bar Brawl is complete and its $4,000 reward was credited.
- Cop Land is complete and its $10,000 reward was credited.
- The Vercetti Estate displays its income icon and begins accumulating money.
- A save made after Cop Land loads with all four Estate missions complete.
- Print Works and the required additional profitable asset chains remain on the later endgame checklist.
References for this chapter
- Rub Out | GTA Vice City Mission Guide and Walkthrough
- Rub Out/Walkthrough - Grand Theft Wiki
- Shakedown | GTA Vice City Mission Guide and Walkthrough
- Bar Brawl | GTA Vice City Mission Guide and Walkthrough
- Grand Theft Auto: Vice City - Guide and Walkthrough - PlayStation 2 - By Azure_Edge
- Cop Land - Grand Theft Wiki
- Vercetti Estate | GTA Vice City Properties and Assets
- Grand Theft Auto: Vice City - Guide and Walkthrough - PlayStation 2 - By z_ShadowMan_z
The Sunshine Autos / Car export path and vehicle-based tasks
After Shakedown, purchase Sunshine Autos in Little Havana for $50,000. Its two separate activities are the Import / Export garage, where you deliver requested vehicles, and the Vice Street Racer marker, which opens six optional checkpoint races. Completing the first six-car list is enough to activate Sunshine Autos as a revenue-producing asset and make it count as one of the additional qualifying businesses needed for the endgame. The remaining three vehicle lists and all six races are optional for the story campaign, but they are required for the full 100% route.
Unlock and purchase Sunshine Autos
Finish Shakedown at the Vercetti Estate before attempting to buy Sunshine Autos. After Shakedown, the purchasable asset markers become available across Vice City. Sunshine Autos is in Little Havana on the Mainland, near the road leading toward Escobar International Airport, and costs $50,000.
Enter the pink purchase marker outside the showroom and confirm the purchase. After ownership is established, go down into the garage area. You will find a vehicle list posted beside the Import / Export delivery garage. A separate pink marker and noticeboard start the Vice Street Racer activity. Do not enter the race marker when you intend to deliver a listed vehicle.
- Complete Shakedown.
- Save or earn at least $50,000.
- Buy Sunshine Autos in Little Havana.
- Locate the Import / Export list and the separate street-race marker.
Read List 1 and identify the six required vehicles
The first list requires six vehicles: Landstalker, Idaho, Esperanto, Stallion, Rancher and Blista Compact. They can be delivered in any order. When you enter a vehicle, check the name displayed on-screen before driving it to Sunshine Autos; the game does not provide a separate wanted-vehicle notification.
The Landstalker has useful fixed locations at the dirt track north of Downtown and near a house on Starfish Island. The Stallion can be found on top of the multistory car park in Ocean Beach, where entering it also starts the Cone Crazy challenge. The other first-list vehicles are generally encountered in traffic, although the Idaho is common around Viceport, Little Havana and Little Haiti, the Esperanto appears around Little Havana and Downtown, the Rancher is common around Vice Point and Starfish Island, and the Blista Compact can appear throughout the city.
These are practical search areas, not guaranteed spawns in every pass. If the required model is absent, leave the district, drive a reasonable distance, and return later. You can also save and reload near a useful search area. The Rancher and Landstalker are different vehicles, and an FBI Rancher is not the ordinary Rancher requested on List 1.
- Landstalker.
- Idaho.
- Esperanto.
- Stallion.
- Rancher.
- Blista Compact.
- Confirm each model by its on-screen vehicle name.
Deliver the vehicles without losing them
Drive each correct vehicle to the delivery garage beside the list. Enter the garage slowly and wait for the list entry to register before leaving. The game removes the completed entry, making the remaining vehicles easier to track. If the garage rejects the vehicle, verify that you are at the Import / Export delivery entrance and that the model exactly matches the list.
Damage does not automatically disqualify a correct vehicle, but heavy collisions create a practical risk: the car can catch fire, be destroyed, or become difficult to control before reaching Sunshine Autos. Avoid gunfire, jumps and unnecessary crashes. A Pay 'n' Spray can remove a wanted level and repair the vehicle when one is conveniently available, but police attention is not part of the objective and should be avoided where possible.
If a correct vehicle is destroyed, the entry remains incomplete and you must find another example. You do not need to deliver the cars in list order, so take advantage of a vehicle whenever traffic or a fixed location provides one.
- Use the exact requested model.
- Drive to the Import / Export delivery garage, not the race marker.
- Wait for the list entry to register.
- Replace any listed vehicle that is destroyed.
- Avoid unnecessary police attention and collisions.
Complete List 1 and make Sunshine Autos count
Once all six List 1 vehicles have been accepted, Sunshine Autos is marked as a completed asset for the campaign. A cash icon appears outside the property, and the business can generate up to $1,500 in revenue. The Deluxo also appears behind the glass on the ground floor of the showroom.
For the endgame, count Sunshine Autos only after the first list is registered and the cash icon or revenue state confirms that the asset is active. Buying the property alone is not enough. In the campaign's asset requirement, Sunshine Autos can serve as one of the five additional qualifying businesses completed alongside the mandatory Print Works and the Vercetti Estate after Cop Land. You do not need to deliver Lists 2, 3 and 4 merely to unlock the final story missions.
- All six List 1 entries are cleared.
- The cash icon appears at Sunshine Autos or the business is visibly generating revenue.
- The Deluxo is present in the showroom.
- Record Sunshine Autos as one completed additional qualifying business only after List 1 finishes.
Use the six street races as an optional activity
Purchasing Sunshine Autos unlocks six Vice Street Racer checkpoint races from the separate marker in the garage area. These races are independent of the Import / Export lists. Winning them is not required to activate the asset, satisfy the Sunshine Autos campaign requirement, or reach Keep Your Friends Close....
For practice and reliable wins, use a fast vehicle with predictable handling rather than one that is difficult to control. Brake before tight turns, approach checkpoints cleanly and avoid taking shortcuts that risk missing a marker. The races can provide useful cash, especially when you need funds for another property, but save before paying an entry fee if your finances are limited.
The six street races belong to the 100% completion route. Treat them as optional during a story-focused campaign and do not mistake a race victory for completion of the Import / Export asset list.
- Start races from the separate Vice Street Racer marker.
- Do not confuse race completion with vehicle-list completion.
- Use a fast, controllable car.
- Complete all six only if pursuing 100% completion.
Finish Lists 2 through 4 only for optional rewards and 100%
List 2 requests the Sabre, Virgo, Sentinel, Stretch, Washington and Admiral. Completing it unlocks the Sabre Turbo and increases the possible Sunshine Autos revenue. List 3 requests the Cheetah, Infernus, Banshee, Phoenix, Comet and Stinger. Its reward is the Sandking, with another revenue increase.
List 4 requests the Voodoo, Cuban Hermes, Caddy, Baggage Handler, Mr. Whoopee and Pizza Boy. Completing it unlocks the Hotring Racer and raises the possible revenue again. Some List 4 vehicles are inconvenient or dependent on other property ownership; for example, the Mr. Whoopee is reliably available after buying Cherry Popper Ice Cream Factory.
All four lists, rather than only the first one, are required for 100% completion. They are not required for the canonical story ending once List 1 has activated Sunshine Autos as a completed qualifying asset. If the immediate objective is reaching the final mission, stop after List 1 and use the saved time and money on Print Works and the other qualifying properties.
- List 2 reward: Sabre Turbo.
- List 3 reward: Sandking.
- List 4 reward: Hotring Racer.
- Complete all four lists only for 100% completion or the additional reward vehicles.
Before you move on
- Shakedown is complete and Sunshine Autos has been purchased in Little Havana for $50,000.
- The first Import / Export list has registered the Landstalker, Idaho, Esperanto, Stallion, Rancher and Blista Compact.
- The Deluxo is visible behind the showroom glass on the ground floor.
- A Sunshine Autos cash icon or active revenue state confirms that the property is complete.
- Sunshine Autos is recorded as one of the five additional qualifying businesses being counted toward the endgame requirement.
- Print Works and the Vercetti Estate requirements are tracked separately.
- The player has not incorrectly treated Lists 2 through 4 or the six street races as mandatory for the story ending.
References for this chapter
- GTA Vice City - Sunshine Autos Import / Export - Side Objective Guide
- GTA Vice City - Asset: Sunshine Autos - Story Mission Guide
- GTA Vice City - Sunshine Autos Street Races - Race Guide
- Grand Theft Auto: Vice City - Checkpoint Race FAQ - PlayStation 2 - By ACarr
- How do you get to final mission? - Grand Theft Auto: Vice City Q&A for PlayStation 2
- Grand Theft Auto: Vice City - PlayStation 2 Instruction Manual
Kaufman Cabs and city-mobility: taxi mission chain
Purchase Kaufman Cabs in Little Haiti for $40,000, then complete V.I.P., Friendly Rivalry and Cabmaggedon. These three missions complete the asset for late-game progression, unlock the Zebra Cab and make the property generate revenue. Kaufman Cabs is optional as a specific choice, but it can serve as one of the completed assets needed before Cap the Collector becomes available. The mission sequence is the same on the original North American PlayStation 2 release.
1. Buy Kaufman Cabs and start the asset chain
Kaufman Cabs is in Little Haiti, on the mainland near the northern part of the district. Enter the property purchase marker outside the taxi company and pay $40,000. After the purchase, the company becomes an owned asset and its mission marker becomes available at the depot.
To begin each company mission, enter a Kaufman Cab at the depot and drive into the mission marker. A Kaufman Cab is normally available near the property. Make a manual save after purchasing the building and again before Cabmaggedon. Carry body armour if available and bring a submachine gun with enough ammunition for drive-by attacks. These preparations are optional, but they make the rival-taxi missions more forgiving.
- Have $40,000 available.
- Purchase Kaufman Cabs in Little Haiti.
- Enter a Kaufman Cab to activate the mission marker.
- Save before beginning the mission chain.
2. Complete V.I.P. on Starfish Island
V.I.P. sends Tommy to collect a fare at the west end of Starfish Island. Leave Kaufman Cabs immediately and use the main road and bridge to reach the island before the pickup timer expires. Follow the radar marker to the passenger's house, enter the pickup circle and sound the horn while facing the approach road. The passenger will not simply ride away with you: a rival taxi arrives and takes him first.
Follow the rival taxi and make it release the passenger. On PlayStation 2, use the drive-by controls with a submachine gun or repeatedly ram the rival vehicle without allowing your own cab to become badly damaged. Once the rival taxi is sufficiently damaged, the passenger exits and enters Tommy's cab. Do not shoot the passenger.
Drive the passenger to the terminal marker at Escobar International Airport. The rival driver may continue attacking during the delivery, so keep moving and avoid unnecessary collisions. Reaching the airport terminal completes the mission and awards $1,000. V.I.P. unlocks Friendly Rivalry.
- Reach the west end of Starfish Island before the pickup timer expires.
- Make the rival taxi surrender the passenger.
- Deliver the passenger to the airport terminal.
- Confirm the mission-passed message and $1,000 reward.
3. Destroy the three marked taxis in Friendly Rivalry
Friendly Rivalry places three rival VC Cabs on the radar. Drive to each marked taxi and destroy it. The mission does not require Tommy to preserve the original Kaufman Cab, so you may switch vehicles if your taxi becomes heavily damaged. You can use drive-by fire, controlled ramming, or another vehicle to push a target into an obstacle or water.
Keep moving while attacking. Rival taxis try to ram Tommy, and stopping beside one leaves him exposed to repeated impacts. Fire at the side or rear of the target, then move away as soon as it begins smoking because the explosion can destroy Tommy's vehicle as well. After each target is eliminated, use the radar to locate the next marked taxi. Ordinary city taxis are not mission targets unless they carry the objective marker.
Destroy all three marked VC Cabs to receive $2,000. Friendly Rivalry unlocks Cabmaggedon.
- Locate each marked VC Cab.
- Destroy all three mission targets.
- Move away from burning vehicles before they explode.
- Confirm Friendly Rivalry is passed and Cabmaggedon is available.
4. Prepare for Cabmaggedon
Cabmaggedon is the final Kaufman Cabs mission. Start with a repaired Kaufman Cab and substantial submachine-gun ammunition. The mission begins by sending Tommy to the docks to pick up Mercedes, but the pickup is an ambush. A gate closes and several rival taxis attack the cab.
The safest objective during the opening phase is survival. Keep driving around the dock area instead of stopping in the middle of the taxi group. Use warehouse columns, corners and open turning space to prevent several taxis from hitting you at once. Fire only when a rival cab blocks your path or is positioned beside you for a clear drive-by attack. You do not need to destroy every ordinary rival taxi.
- Use a repaired Kaufman Cab.
- Carry enough drive-by ammunition.
- Save immediately before starting if possible.
- Plan to survive rather than destroy every taxi.
5. Survive the ambush and destroy the leader
Remain alive until the ambush timer expires. Keep the cab moving in broad circles and avoid getting pinned against the warehouse walls or the closed gate. If several taxis surround you, steer toward open ground instead of stopping to fight. A smoking cab is close to destruction, so reduce collisions and use movement as your main defense.
After the timer ends, the leader cab appears. It is the black-and-white Zebra Cab. Concentrate on this vehicle and attack it with drive-by fire while passing along its side or rear. Ordinary taxis can be ignored once they are no longer blocking your escape. Destroying the leader cab completes the required objective.
If the leader's driver exits after the cab is disabled, keep distance and avoid standing directly beside the wreck. The mission passes after the leader is defeated and awards $5,000. The Zebra Cab becomes available at Kaufman Cabs.
- Survive until the ambush timer ends.
- Identify the leader's Zebra Cab.
- Destroy the leader cab.
- Receive the mission-passed message and $5,000 reward.
6. Confirm Kaufman Cabs as a completed asset
The Kaufman Cabs chain is complete only after V.I.P., Friendly Rivalry and Cabmaggedon have all been passed. The property then generates revenue, reported by established mission references as up to $5,000 per day, and the Zebra Cab is available at the depot. Neither the Zebra Cab nor additional ordinary taxi work is required for the story ending.
For endgame planning, count Kaufman Cabs as one completed optional asset after Cabmaggedon. It does not replace the mandatory Print Works and Vercetti Estate requirements. If you are using Kaufman Cabs toward the asset total, verify that all three mission-passed results occurred rather than treating the purchase itself as completion. Save after the final mission, then continue with the remaining asset and story prerequisites.
- Kaufman Cabs is purchased.
- V.I.P. is passed for $1,000.
- Friendly Rivalry is passed for $2,000.
- Cabmaggedon is passed for $5,000.
- The Zebra Cab is available.
- The property is generating revenue and can be counted as a completed optional asset.
Before you move on
- Kaufman Cabs has been purchased in Little Haiti for $40,000.
- V.I.P., Friendly Rivalry and Cabmaggedon each show a successful mission result.
- The mission rewards of $1,000, $2,000 and $5,000 have been credited.
- The Zebra Cab is available at the Kaufman Cabs depot.
- Kaufman Cabs is generating revenue and is ready to count as one optional completed asset for the late-game progression requirements.
Print Works: required late-game asset and its mission chain
Purchase the Print Works for $70,000 and complete its two missions, Spilling the Beans and Hit the Courier. Finishing both missions turns the property into a completed revenue-generating asset, unlocks Cap the Collector when the wider asset requirements are satisfied, and counts toward the final story sequence in the original North American PlayStation 2 release.
Buy the Print Works and prepare for the asset missions
The Print Works is on the mainland at the boundary between Little Haiti and Little Havana, close to Kaufman Cabs. Its purchase marker is outside the printing-factory building. The property costs $70,000, so earn and save the money before attempting to begin this part of the campaign. The purchase is available after the story reaches the asset stage, following Shakedown.
After buying the property, use the save point nearby before starting either mission. Armour and a reliable automatic weapon make Spilling the Beans safer, but neither mission requires a particular weapon. A shotgun is useful if enemies reach close range, while an SMG or assault weapon helps when crossing exposed sections. The vehicle matters most in Hit the Courier, where a sturdy car gives you more control during the interception.
- Have $70,000 available for the purchase.
- Buy the Print Works at its exterior property marker.
- Save before beginning the first Print Works mission.
- Carry armour and enough ammunition for an interior firefight.
Start Spilling the Beans
Enter the mission marker inside the Print Works to meet Earnest Kelly and begin Spilling the Beans. The first destination is the Malibu Club. Drive there and enter the marked area to speak with Kent Paul. After the conversation, the objective changes to reaching the ship in Vice Port.
Follow the radar marker to the freighter. The ship can be boarded from the dockside gangplank; the north gangplank is the straightforward approach described in the original PlayStation 2 walkthroughs. Once aboard, move toward the rear of the ship and use the stairs and upper walkways to reach the marked shipping officer. Guards occupy the route, but you do not need to clear the entire vessel. Shoot only enemies blocking your progress, keep moving, and use the ship structure for cover.
- Start Spilling the Beans from the Print Works interior marker.
- Visit Kent Paul at the Malibu Club.
- Travel to the marked freighter in Vice Port.
- Reach the shipping officer near the rear and upper section of the vessel.
Collect the information and leave the ship
Enter the marked area near the shipping officer to trigger the conversation. After Tommy obtains the information, the original PS2 mission applies a two-star wanted level. More guards may remain on the ship, so do not linger to fight everyone. Retrace the stairs and gangplank to the dock, or use a safe jump from the ship only if you can reach the ground without losing substantial health.
Once back on the street, drive directly to the Print Works. A Pay ’n’ Spray can remove the wanted level if the route becomes unsafe, but it is not necessary to search for one if you can reach the property quickly. Delivering the information completes Spilling the Beans and unlocks Hit the Courier.
- Trigger the shipping officer conversation.
- Expect a two-star wanted level after receiving the information.
- Leave the ship by the stairs and gangplank or a safe alternate route.
- Return to the Print Works to complete the mission.
- Confirm that Hit the Courier is now available.
Begin Hit the Courier at Vice Port
Start Hit the Courier from the Print Works mission marker. Tommy must take counterfeit printing plates from a courier arriving at the Vice Port docks. Drive to the marked landing area and wait for the helicopter sequence. Several armed female bodyguards protect the operation, including enemies positioned around the dock area and, depending on your approach, elevated positions.
You can attack the guards on foot before the courier leaves, or remain mobile and use your vehicle to create space. Do not let the opening firefight destroy your only usable car. The courier eventually enters a black Sentinel and drives away with an escort. Follow the Sentinel rather than chasing every bodyguard. The mission does not require you to eliminate the entire escort group before pursuing the courier.
- Start Hit the Courier only after Spilling the Beans is complete.
- Reach the marked Vice Port landing area.
- Keep a serviceable vehicle available for the pursuit.
- Identify the courier’s black Sentinel when it leaves the docks.
Force the courier out and recover the plates
Pursue the Sentinel toward the alley near Kaufman Cabs. Use controlled ramming or sideswipes to stop the vehicle. Avoid repeatedly striking the Sentinel at high speed, because destroying it before the courier exits can make the objective fail. If you have a clear shot, damaging its tires can slow the car, but the dependable objective is to force the courier to leave the vehicle.
When the courier is outside, eliminate her and look for the yellow pickup marker representing the counterfeit plates. Collect the plates immediately. If a bodyguard reaches them first, the objective changes to recovering them from that enemy; chase the carrier, eliminate her, and collect the dropped plates. Once Tommy has the plates, ignore remaining escorts unless they block your route and drive back to the Print Works. Enter the delivery marker to finish the mission.
- Stop the courier’s Sentinel without losing your vehicle unnecessarily.
- Eliminate the courier after she exits.
- Collect the yellow-marked counterfeit plates.
- If a bodyguard takes them, eliminate that carrier and collect them again.
- Return the plates to the Print Works.
Verify the completed asset and the next story trigger
Hit the Courier pays its mission reward and completes the Print Works chain. The property then generates revenue, and the business is counted as completed for the asset requirements. Buying the building alone is not enough; both Spilling the Beans and Hit the Courier must be finished.
Print Works is one of the two mandatory business requirements for the late-game sequence, alongside the Vercetti Estate. In addition, complete five other qualifying assets. When those requirements are satisfied, Cap the Collector becomes available at the Print Works. Complete that mission to continue the final story progression toward the ending missions. You do not need to wait for the Print Works cash reserve to reach a particular amount; the completed mission chain and active revenue state are the meaningful checks.
If Cap the Collector does not appear after finishing Print Works, inspect the other businesses you purchased. Look for an uncleared mission marker rather than assuming that purchasing an asset was sufficient. Malibu Club, Film Studio, Kaufman Cabs, Boatyard, Cherry Popper, Sunshine Autos, and Pole Position can contribute when their required mission work is complete, but the exact set you use is your choice as long as the mandatory Print Works and Estate requirements are met.
- Spilling the Beans is complete.
- Hit the Courier is complete.
- The Print Works generates revenue after the second mission.
- The Vercetti Estate chain is complete.
- Five additional qualifying assets are completed.
- Cap the Collector appears at the Print Works when the full requirement is met.
Before you move on
- Earnest Kelly’s Spilling the Beans mission is completed after the shipping information is delivered to Print Works.
- Hit the Courier is completed after the plates are delivered to Print Works.
- The Print Works begins generating revenue, confirming that its two-mission asset chain is finished.
- Cap the Collector becomes available after the Vercetti Estate and five additional qualifying assets are also completed.
- The game then proceeds toward the final story sequence after Cap the Collector and the remaining late-game missions are completed.
References for this chapter
- Grand Theft Auto: Vice City - Guide and Walkthrough - PlayStation 2 - By z_ShadowMan_z
- Grand Theft Auto: Vice City - Guide and Walkthrough - PlayStation 2 - By Azure_Edge
- Hit the Courier | GTA Vice City Mission Guide & Walkthrough
- Print Works | GTA Vice City Properties & Assets
- Print Works
- Grand Theft Auto: Vice City - PlayStation 2 Instruction Manual
Malibu Club and the bank heist chain
Buy the Malibu Club in Vice Point for $120,000 and complete its four missions in order: No Escape?, The Shootist, The Driver and The Job. The chain recruits Cam Jones, Phil Cassidy and Hilary King for the robbery at El Banco Corrupto Grande in Little Havana. Completing The Job pays $50,000, unlocks the Bank Job outfit upstairs and makes the Malibu Club generate revenue. Malibu Club is one of the optional qualifying assets for the endgame. For the original PlayStation 2 release, the final story sequence requires the Vercetti Estate completed through Cop Land, the Print Works completed, and five other completed qualifying assets. Phil’s Place does not count toward that requirement.
Buy the Malibu Club and prepare the mission chain
After completing Shakedown, go to the Malibu Club in Vice Point, near Leaf Links and North Point Mall. Enter the property marker outside and pay $120,000. When the purchase sequence ends, enter the club and use the pink marker across the dance floor to begin its missions.
Complete the missions in this order: No Escape?, The Shootist, The Driver and The Job. The next mission becomes available only after the preceding one is finished. Save at the Malibu Club before each attempt, and arrive with full health, body armor and a useful supply of ammunition. Keep a dependable vehicle nearby for travel, but do not replace a mission vehicle when the objective specifically requires the supplied taxi or race car.
The Malibu Club is not mandatory for the final story if you complete enough other qualifying assets, but it is a reliable choice because its four-mission chain is clearly marked and its completed status is easy to verify from the revenue icon.
- Complete Shakedown before buying the property.
- Have $120,000 available.
- Save at the Malibu Club before each mission.
- Follow the order No Escape?, The Shootist, The Driver and The Job.
Break Cam Jones out in No Escape?
Start No Escape? inside the Malibu Club and drive to the Washington Beach Police Station. Enter without a weapon drawn. Follow the interior route to the locker room and step into the marker to put on the police uniform. Go upstairs, collect the keycard from the office and return downstairs to the cells.
Use the cell marker to release Cam Jones. The escape raises the wanted level to four stars. Leave the station immediately rather than trying to defeat every officer inside. Take a nearby vehicle and use the Pay ’n’ Spray to remove the wanted level. Once the police have been lost, return to the station area, collect Cam and drive him to his Viceport destination.
Reaching Cam’s Viceport business or home completes No Escape? and unlocks The Shootist. Do not drive toward Little Havana for the final drop-off; that is the bank’s later location, not the destination in this mission.
- Enter the station unarmed.
- Collect the keycard before visiting the cells.
- Release Cam and escape quickly.
- Lose the wanted level before collecting Cam for the final drive.
- Deliver Cam to his Viceport destination.
Recruit Phil Cassidy in The Shootist
Begin The Shootist at the Malibu Club and drive to Ammu-Nation in Downtown. Speak to Phil Cassidy to start the shooting contest. The contest has three timed stages, and the combined score must reach at least 60 points.
In the opening stage, distant targets are worth more, so prioritize the high-value target when the reticle is settled. The later stages place targets across windows and street-level openings. Fire deliberately and move from one target to the next instead of holding the trigger continuously. The contest provides the weapon and ammunition, so your normal ammunition stock is not consumed.
When the three stages end, speak to Phil to complete the mission. A score below 60 fails the attempt. Reload the Malibu Club save and try again if necessary. Completion unlocks The Driver.
- Score at least 60 points across all three stages.
- Prioritize high-value distant targets early.
- Conserve shots for the later stages.
- Speak to Phil after the contest ends.
Win The Driver and recruit Hilary King
Start The Driver at the Malibu Club. Tommy drives a Sentinel while Hilary King drives a faster Sabre Turbo. The race gives Tommy a two-star wanted level and places police vehicles along the route. Pass the checkpoints in order and keep Hilary alive until the race is won.
Brake before sharp turns, straighten the Sentinel before accelerating and avoid hitting police vehicles at an angle. The objective is to win the checkpoint race, not to destroy Hilary’s car; weapons do not provide a safe solution. Stay close enough to monitor Hilary and use the route’s police congestion to your advantage, since police cars often slow or obstruct him as well.
If the Sentinel is consistently too slow, stage a fast car such as a Cheetah or Infernus along the route before activating the mission. Leave it positioned where Tommy can reach it, then switch only after the route allows the replacement vehicle to continue through the checkpoints. After Tommy wins and Hilary survives, The Job becomes available.
- Pass every checkpoint in order.
- Keep Hilary alive until the race ends.
- Do not depend on shooting the rival vehicle.
- Brake early and avoid angled collisions with police cars.
- Stage a faster vehicle only if the Sentinel repeatedly fails to keep pace.
Rob El Banco Corrupto Grande in The Job
Save at the Malibu Club, restore health and armor and start The Job. Use the taxi outside the club to drive Cam, Hilary and Phil to the bank in Little Havana. Avoid unnecessary collisions because the taxi is needed for the crew’s escape.
At the bank, go behind the bushes in front of the building. The marker changes Tommy into the bank-job clothing and provides a Colt Python. Enter the bank, pass through the door behind the counter, climb to the upper floors and follow the corridor to the elevator and vault area.
Cam begins working on the vault. At this stage, Cam must survive. If Cam dies before cracking the safe, the mission fails. When Cam tells Tommy that the vault will take hours, go to the manager’s office, threaten the bank manager and escort him back to the vault. The manager provides the information needed for Cam to open it.
After returning toward the lobby, check on Phil when the objective changes. The alarm brings in SWAT, so use doorway cover and the Colt Python’s auto-aim rather than standing in the open. Clear the agents blocking the exit. Hilary’s death during the escape is scripted and does not by itself fail the mission.
Once outside, get into the taxi with the surviving crew. Drive to the Pay ’n’ Spray in Little Haiti, remove the wanted level and continue to Cam’s Viceport home or business. Phil must survive the mission. Cam must already have cracked the vault, but during the later escape he may die without automatically causing mission failure. Protect him if possible, both because it reduces confusion during the escape and because his survival produces preferable later dialogue.
- Use the Malibu taxi for the trip to the bank and escape.
- Collect the bank-job clothes and Colt Python at the exterior marker.
- Keep Cam alive until he cracks the vault.
- Bring the manager to Cam after Cam requests him.
- Check on Phil and clear the SWAT team.
- Do not allow Phil to die.
- Do not treat Hilary’s scripted death as a mission failure.
- Use the Pay ’n’ Spray in Little Haiti.
- Reach Cam’s Viceport destination after losing the wanted level.
Confirm Malibu completion and endgame value
The Job rewards $50,000. After the mission, the Bank Job outfit is available upstairs at the Malibu Club, and the property begins generating revenue up to $10,000 per day. The money icon outside the club confirms that its mission chain is complete and that the property can be counted as one qualifying asset.
The Malibu Club is optional for the final story. To unlock the late missions in the original PlayStation 2 release, complete the Vercetti Estate progress through Cop Land, complete the Print Works missions and complete five additional qualifying assets. The five additional properties can include Malibu Club, Kaufman Cabs, the Boatyard, InterGlobal Films, Sunshine Autos, Cherry Popper’s Ice Cream Factory or the Pole Position Club, subject to each property’s own completion conditions. Phil’s Place does not count.
After the requirement is satisfied, wait for the call that makes Cap the Collector available at the Print Works. Complete Cap the Collector, then return to the Vercetti Estate when Keep Your Friends Close... becomes available. If the call does not arrive, verify revenue icons at the Estate, Print Works and five other completed assets rather than counting properties that were only purchased.
- The Job pays $50,000.
- The Bank Job outfit appears upstairs at the Malibu Club.
- The Malibu Club displays its revenue icon.
- Cam survived until the vault was cracked.
- The Vercetti Estate is complete through Cop Land.
- Print Works and five additional qualifying assets are complete before checking for Cap the Collector.
Before you move on
- No Escape?, The Shootist, The Driver and The Job are completed in order.
- Cam reaches his Viceport destination at the end of No Escape? and The Job.
- Cam survives until the vault is cracked during The Job.
- The Job pays $50,000 and unlocks the Bank Job outfit.
- The Malibu Club shows its revenue icon and can be counted as one completed qualifying asset.
- The Vercetti Estate is complete through Cop Land.
- Print Works and five other qualifying assets are complete before checking for Cap the Collector.
- Cap the Collector becomes available at the Print Works, and completing it unlocks the final mission sequence at the Vercetti Estate.
References for this chapter
- Grand Theft Auto: Vice City - Guide and Walkthrough - PlayStation 2 - By z_ShadowMan_z
- Grand Theft Auto: Vice City - Guide and Walkthrough - PlayStation 2 - By AggroSk8er
- The Job - GTA Wiki
- Assets in Grand Theft Auto: Vice City
- How do you get to final mission? - Grand Theft Auto: Vice City Q&A for PlayStation 2
- Grand Theft Auto: Vice City PlayStation 2 Instruction Manual
Phil Cassidy, weapons and Phil’s Place asset chain
Phil Cassidy’s two missions are optional for reaching the campaign ending, but they are required for 100% completion and unlock heavy weapons for late-game preparation. The prerequisite is the Malibu Club mission chain through The Job. After The Job, Phil’s P marker appears at his scrapyard in Little Haiti. Complete Gun Runner followed by Boomshine Saigon. Phil’s Place then provides remote grenades, a rocket launcher, an M60 and a minigun for purchase. It is a special automatically unlocked location, not a buyable income-producing business, and it does not count toward the six qualifying buyable assets required for the endgame trigger.
Complete The Job before looking for Phil
Buy the Malibu Club and complete its mission chain in order: No Escape?, The Shootist, The Driver and The Job. Phil Cassidy helps Tommy during The Job, and his own mission marker becomes available only after that bank robbery is complete. Do not expect a P marker in Little Haiti earlier in the campaign.
Once The Job is finished, travel to Phil’s scrapyard near the junkyard in Little Haiti. The location is marked with a P on the radar and map. Phil’s missions are separate from the mandatory story route, so you can postpone them while completing other assets, but completing them before the final assault is useful because the heavy weapons make crowded fights easier.
Save before entering Phil’s marker if you want a convenient retry point. Restore health and body armour first. Gun Runner supplies its own Patriot, so there is no need to risk a valuable personal vehicle. Bring an automatic weapon for enemies who leave the trucks, but the Patriot is the central tool for the mission.
- Buy the Malibu Club.
- Complete No Escape?, The Shootist and The Driver.
- Complete The Job.
- Wait for the P marker at Phil’s Place in Little Haiti.
- Save, restore health and armour, and start with a dependable automatic weapon.
Gun Runner: attack all four weapon trucks
Enter Phil’s marker and take the supplied Patriot. The radar shows two groups of two trucks: one group is in the Little Haiti area and the other is in Downtown. Drive to the marked trucks and ram them repeatedly. Their crates can be forced out by the impacts; keep the Patriot moving and use its strength to absorb return fire.
Each truck carries a weapon crate. After the crate is exposed, get out of the Patriot and collect the weapon pickup. One truck in each pair has a gunner on top, and the drivers also need to be killed. The truck drivers are not optional: the mission will not complete until the required gun runners have been eliminated. Keep the Patriot nearby so it can serve as cover and so you can resume ramming quickly.
After the first pair is handled, Faggio-riding gunmen arrive as backup. They are secondary enemies. You can stay in the Patriot and run them over, shoot them when they approach, or drive away while concentrating on the trucks. Killing them gives bonus money, but do not let them draw you away before every weapon pickup and truck crew in the current group is dealt with.
Move to the second pair and repeat the same process: ram both trucks, eliminate the gunners and drivers, and collect both exposed weapon pickups. When all four trucks have been handled, all required weapons have been collected and the gun runners are dead, the mission completes. There is no separate arms dealer chase or final vehicle target in this original PlayStation 2 mission. The reward is $2,000.
- Take Phil’s Patriot.
- Attack both trucks in the first marked group.
- Collect both weapon crates.
- Kill the required gunners and truck drivers.
- Handle the Faggio backup without abandoning the objective.
- Attack the second pair of trucks.
- Collect the remaining weapon crates.
- Confirm that the mission-complete message appears.
Boomshine Saigon: reach the hospital, then the surgeon
Return to Phil’s Place after Gun Runner and start Boomshine Saigon. Phil is injured in an explosion, and Tommy must drive him to medical help. The first destination is the hospital. Leave the scrapyard and take the main avenue rather than attempting risky shortcuts through tight alleys or heavy traffic.
The boomshine effect distorts the screen and makes the Patriot difficult to control. Use small steering inputs, begin turns early and avoid rapid left-right corrections. Brake before corners instead of trying to force the Patriot through them at full speed. Avoid striking pedestrians or other vehicles because collisions can create police attention while Phil’s health is draining.
At the hospital, Phil refuses to enter because the location is too public. The objective changes to taking him to an Army surgeon in Little Havana. Follow the new marker immediately; the hospital is no longer the destination. The route is nearby, so maintain steady speed and favor a clean road over a dangerous shortcut. Reaching the surgeon with Phil alive completes the mission and awards $4,000.
- Start Boomshine Saigon after Gun Runner.
- Drive Phil to the hospital marker.
- Accept the changed objective when Phil refuses the hospital.
- Follow the marker to the Army surgeon in Little Havana.
- Avoid unnecessary collisions and police attention.
- Reach the surgeon alive and wait for the completion confirmation.
Use Phil’s Place correctly for weapons and endgame planning
After Boomshine Saigon, Phil’s Place becomes a heavy-weapons supply point. The available purchases are remote grenades for $1,000, a rocket launcher for $8,000, an M60 for $8,000 and a minigun for $10,000. The listed purchases include ammunition, so check the price and stock before leaving. These weapons are optional for the story ending, but they can make the final mansion defence more manageable.
Phil’s Place is automatically unlocked through the story and is not purchased like the Malibu Club, Print Works or the other businesses. It does not generate daily income and does not provide a save point. Treat the two Phil missions as completed special content rather than as a normal profitable asset.
For the campaign endgame, count Phil’s Place separately. The required property condition is the Vercetti Estate after Cop Land, Print Works, and five other qualifying buyable assets: six qualifying buyable assets in total, with Print Works included among them. Phil’s Place cannot replace one of those five additional assets. Completing Gun Runner and Boomshine Saigon therefore does not by itself advance the asset count for Cap the Collector.
For late-game preparation, buy armour and ammunition before the final missions. The M60 or minigun is useful against groups of attackers, while the rocket launcher is best reserved for vehicles or tightly clustered enemies where there is safe distance from the blast. Save after buying supplies so a failed attempt does not force you to rebuild the loadout.
- Confirm Gun Runner is complete.
- Confirm Boomshine Saigon is complete and the $4,000 reward is credited.
- Verify that the four heavy-weapon categories are available at Phil’s Place.
- Keep Phil’s Place separate from the qualifying buyable-asset count.
- Count Print Works plus five other qualifying buyable assets for the endgame.
- Retain both Phil missions as completed for 100% progress.
Before you move on
- The Malibu Club mission chain through The Job is complete and Phil’s P marker appeared afterward.
- Gun Runner is complete with all four weapon pickups collected and the required truck crews eliminated.
- Boomshine Saigon is complete, Phil reached the Army surgeon, and the $4,000 reward was credited.
- Remote grenades, the rocket launcher, the M60 and the minigun are available at Phil’s Place.
- Phil’s Place is treated as special non-income content, not as a qualifying buyable asset.
- The endgame count is tracked separately: Print Works plus five other qualifying buyable assets, with the Vercetti Estate completed after Cop Land.
- Both Phil missions are recorded as finished for the 100% completion objective.
References for this chapter
- Grand Theft Auto: Vice City - Guide and Walkthrough - PlayStation 2 - By z_ShadowMan_z
- Grand Theft Auto: Vice City - Guide and Walkthrough - PlayStation 2 - By Azure_Edge
- Grand Theft Auto: Vice City - Guide and Walkthrough - PlayStation 2 - By Bilboboy
- Boomshine Saigon | GTA Vice City Mission Guide & Walkthrough
- Phil's Place | GTA Vice City Properties & Assets
- GTA Vice City PS2: 100% Completion
- Grand Theft Auto: Vice City PlayStation 2 Instruction Manual
Viceport Boatyard & water-based objectives
The Boatyard is an optional asset for the main story, but it can count as one of the completed businesses needed for the late-game mission chain. Buy it in Viceport for $10,000 after completing Shakedown, then clear the first Checkpoint Charlie challenge. The original PlayStation 2 release uses 26 water checkpoints and a 2:30 target for the opening version. Completing that first run awards $5,000, activates the Boatyard’s revenue, and is sufficient for the asset’s normal story-purpose. The later versions are optional replay challenges with tougher conditions and shorter target times.
1. Unlock and purchase the Boatyard
Complete Shakedown for the Vercetti Estate before looking for purchasable assets. The Boatyard is in Viceport on the southeast side of the mainland, beside the large dock and shipyard structures. Look for the green property marker at the fenced boat facility and enter it with $10,000 available.
Stand in the marker and use the PlayStation 2 purchase prompt. A short ownership cutscene follows, and the property becomes a save location. After purchase, the Boatyard is represented on the map by an anchor symbol. Vercetti gang members begin appearing around the property, and the two challenge boats are placed at the nearby jetties. Save before attempting the race so repeated failures do not cost unrelated progress.
- Finish Shakedown.
- Have $10,000 available.
- Purchase the property at the Viceport Boatyard.
- Save at the Boatyard before starting the challenge.
2. Start Checkpoint Charlie with the correct boat
Checkpoint Charlie does not begin from a walking mission marker. Enter either of the two boats moored at the Boatyard: the Squalo or the Cuban Jetmax. On the original PS2 release, entering one of these boats starts the challenge immediately after the introductory transition.
The Squalo has stronger speed and acceleration but is less stable and can be more difficult to keep straight. The Cuban Jetmax is slower but steadier through turns. Try both if necessary; the best choice depends on whether you lose more time to poor acceleration or to oversteering and collisions. The first challenge requires 26 checkpoints within 2:30.
- Use the Squalo or Cuban Jetmax at the Boatyard jetties.
- Watch for the timer as soon as the challenge begins.
- Choose stability or speed according to your handling preference.
3. Follow the opening checkpoint route
Accelerate through checkpoints 1 through 3, then prepare for a right turn after checkpoint 4. Take checkpoint 5 near the offshore dock, perform the tight turn around that dock, and head back toward land for checkpoint 6. Continue to checkpoint 7, then line up for the jump over Marina Pier 2 to collect checkpoint 8.
Keep your speed for the next jump at checkpoint 9, then curve slightly left toward checkpoint 10. These jumps are the most obvious early danger: approaching too slowly can leave the boat short of a marker, while approaching at a bad angle can throw it into the dock. If you miss a jump, turn around cleanly and rebuild speed rather than repeatedly striking the structure.
- Turn right after checkpoint 4.
- Use the offshore dock as the turning landmark for checkpoint 6.
- Line up the Marina Pier jumps before accelerating.
- Recover calmly if a jump is missed.
4. Clear the middle canals
After checkpoint 10, continue to checkpoint 11, then turn right toward checkpoint 12 beneath the bridge. Turn right again for checkpoint 13. Checkpoints 14 through 17 run through a narrow canal, so reduce steering corrections and avoid riding the walls. The watercraft loses valuable time when it scrapes along the sides or becomes grounded.
Turn left after checkpoint 17 for checkpoint 18. Make the turn while passing through that marker so the boat does not run aground. The route then enters another canal along Leaf Links. Keep the bow pointed toward the next opening before applying full acceleration; the boat takes time to respond when changing direction.
- Use the bridge as the landmark for checkpoint 12.
- Stay off the canal walls between checkpoints 14 and 17.
- Turn sharply but under control at checkpoint 18.
- Avoid becoming grounded near Leaf Links.
5. Finish around Leaf Links
Make a sharp right after checkpoint 19 and collect checkpoint 20 beneath the bridge leading toward the south island of Leaf Links. Prepare for another right turn at checkpoint 21, then take checkpoint 22 beneath the nearby bridge.
Follow the edge of Leaf Links for checkpoints 23 and 24. Continue under the bridges, turn left through checkpoint 25, and enter the short final canal for checkpoint 26. The challenge ends when the last checkpoint is collected; there is no separate requirement to drive back to the Boatyard. If the timer expires or the boat is destroyed, restart from the save and use the failed run to memorize the next turn rather than attempting an improvised shortcut.
- Use the Leaf Links bridges to orient checkpoints 20 through 22.
- Stay along the edge of Leaf Links for checkpoints 23 and 24.
- Turn left through checkpoint 25.
- Collect checkpoint 26 to finish the first challenge.
6. Confirm the asset is active
A successful first run awards $5,000 and completes the Boatyard asset objective. The property then accumulates revenue up to a maximum of $2,000. Collect the money from the pink cash icon outside the warehouse when it appears. The purchased boats remain available at the jetties for later use.
For the single-player story, one successful Checkpoint Charlie run is enough if you are counting the Boatyard among your completed assets. The additional versions reuse the general course but introduce more demanding target conditions, including reduced visibility and tighter times. They are optional for the canonical ending and should not replace required Print Works, Vercetti Estate, or other asset progress.
- Receive the $5,000 completion reward.
- Verify that the pink cash icon appears at the warehouse.
- Confirm that the Boatyard can accumulate up to $2,000.
- Count the Boatyard as completed only after the first challenge succeeds.
Before you move on
- The Boatyard has been purchased in Viceport for $10,000.
- The first Checkpoint Charlie challenge has been started from the Squalo or Cuban Jetmax.
- All 26 checkpoints have been collected within the original PS2 opening target of 2:30.
- The success result and $5,000 reward have appeared.
- A pink cash icon is available at the property and the Boatyard can accumulate up to $2,000.
- If the Boatyard is being used toward the final story sequence, its completed challenge is recorded alongside the Print Works, Vercetti Estate and other required asset progress.
References for this chapter
- Grand Theft Auto: Vice City - Guide and Walkthrough - PlayStation 2 - By Minesweeper_
- Grand Theft Auto: Vice City - Guide and Walkthrough - PlayStation 2 - By Myke
- GTA Vice City - Asset: The Boatyard - Story Mission Guide
- Grand Theft Auto: Vice City - Guide and Walkthrough - PlayStation 2 - By z_ShadowMan_z
- Boatyard | Rockstar Games' GTA: Vice City Wiki
InterGlobal Films and studio missions
After completing Shakedown, buy InterGlobal Films on Prawn Island for $60,000 and finish Recruitment Drive, Dildo Dodo, Martha’s Mug Shot and G-Spotlight. These missions complete the film studio asset and make it generate revenue. InterGlobal Films is not mandatory by name for the ending, but it can count as one of the five additional completed assets required alongside the Vercetti Estate and Print Works before Cap the Collector becomes available.
Unlock and purchase InterGlobal Films
InterGlobal Films becomes available after the story mission Shakedown. The property is on Prawn Island, beside the road reached from the bridge connecting Vice Point to the island. Follow the road from the bridge, turn at the second intersection, and look for the studio entrance on the right. Purchase the property at the entrance for $60,000.
After buying it, use the black film-camera marker at the studio to start the asset missions. Save before the purchase if you are also close to affording Print Works or another business. Armour and an automatic weapon are useful for Recruitment Drive and Martha’s Mug Shot, while the studio provides the required aircraft and motorcycle for the later missions.
- Complete Shakedown first.
- Have $60,000 available.
- Buy InterGlobal Films on Prawn Island.
- Save and stock armour before starting the first mission.
Recruitment Drive: handle the pimp before collecting both actresses
Start Recruitment Drive at the studio and drive to Candy Suxxx’s location in Downtown. When Candy’s pimp appears, his men attack and the pimp flees in a vehicle. Chase the fleeing pimp and kill him. Do not abandon the chase to collect Candy immediately; the mission requires this confrontation to be resolved first.
Once the pimp is dead, return for Candy and drive her to the Well Stacked Pizza location in Downtown to collect Mercedes Cortez. Keep the vehicle under control during both pickups. Take both women back to InterGlobal Films to complete the mission. A durable four-door vehicle gives you room for the passengers and is safer than using a fast but fragile sports car.
- Reach Candy’s location.
- Chase and eliminate the fleeing pimp.
- Collect Candy after the fight.
- Collect Mercedes at Well Stacked Pizza.
- Return both women to InterGlobal Films.
Dildo Dodo: fly the Skimmer through the promotional checkpoints
After Recruitment Drive, start Dildo Dodo at the studio and take the Skimmer from the water behind the property. Fly through the blue checkpoints in the order shown on the radar, then continue through the remaining route until the promotional flight is complete.
The Skimmer is difficult to recover after a hard landing, so take off over open water and avoid scraping buildings, bridges and shore structures. Use broad turns rather than abrupt steering. If you miss a checkpoint, turn over the water where there is room to realign instead of attempting a tight turn between buildings. The mission includes a fuel limit, so avoid circling unnecessarily and keep moving toward the next marker.
After the final checkpoint, return the Skimmer to the studio area and land on the water without destroying it. Completion also leaves the promotional aircraft available behind the studio for later use.
- Take the Skimmer behind the studio.
- Pass through every required checkpoint in sequence.
- Avoid buildings and bridges.
- Return safely to the studio area before fuel runs out.
Martha’s Mug Shot: photograph Candy and Alex Shrub
Begin Martha’s Mug Shot at the studio. Take the supplied limousine to Candy, then follow her in the studio’s Sparrow helicopter. Keep the target vehicle in sight until it reaches the meeting location associated with Alex Shrub, the politician Candy is meeting.
After the cutscene, land the Sparrow on the nearby ledge or rooftop indicated by the objective. Use the mission camera and photograph Candy and Alex Shrub together. The camera has limited film, and three successful photographs are required, so frame the pair carefully before taking the shots.
The photographs trigger a five-star wanted level. Immediately return to the Sparrow and fly back to InterGlobal Films. Avoid unnecessary combat with the police; the objective is to reach the studio and land in its completion marker. The mission can be completed by landing directly in the marker even while the pursuit is active.
- Follow Candy to the meeting location.
- Land the Sparrow where the target can be photographed.
- Take three valid photographs without wasting the camera’s film.
- Escape the five-star pursuit and land at the studio.
G-Spotlight: reach the rooftop searchlight
G-Spotlight is the fourth and final InterGlobal Films mission. Take the PCJ-600 parked at the studio entrance and ride to the Downtown office building marked on the radar. Enter the building, follow the route to the elevator, and take the elevator to the upper office area.
Ride through the marked window to begin the rooftop course. The game gives you a time limit ending at 7:00 a.m., so do not stop to explore. Approach each ramp squarely, keep the PCJ-600 aligned during the jump, and brake as soon as you land. Small steering corrections are safer than holding a direction throughout the jump.
If Tommy falls from a rooftop, return to the office building and use the elevator to reach the upper section again. The route can then be attempted again while the mission remains active. An optional helicopter method exists for some of the rooftop checkpoints, but the intended PS2 route uses the PCJ-600 and is the safest method for preserving the original mission flow.
At the final rooftop, enter the marker at the spotlight and adjust it as instructed. The mission ends there when the film-studio asset completion message appears; Tommy does not need to drive back to Prawn Island.
- Take the marked PCJ-600.
- Reach the Downtown office and use its elevator.
- Cross the rooftops before 7:00 a.m.
- Recover through the elevator if you fall.
- Adjust the final spotlight to complete the mission.
Verify the completed asset and endgame contribution
After G-Spotlight, InterGlobal Films is complete and begins generating revenue. The property’s mission marker should no longer offer another asset mission, and the film studio’s income pickup becomes available. The four studio missions are Recruitment Drive, Dildo Dodo, Martha’s Mug Shot and G-Spotlight.
InterGlobal Films does not unlock a new story contact. Its value for the main campaign is that it can count as one completed asset toward the late-game requirement. To unlock Cap the Collector, you must also have completed the Vercetti Estate and Print Works, plus five other qualifying assets. Phil’s Place does not count toward that required asset total.
If Cap the Collector has not appeared after completing the studio, check the other properties rather than repeating the film missions. Confirm that each selected business has completed its own mission chain and is generating income. InterGlobal Films alone cannot trigger the finale.
- All four InterGlobal Films missions show as passed.
- The studio generates income and provides its property pickup.
- Count InterGlobal Films as one qualifying additional asset.
- Separately verify the Vercetti Estate and Print Works.
- Complete four more qualifying assets before expecting Cap the Collector.
Before you move on
- Recruitment Drive, Dildo Dodo, Martha’s Mug Shot and G-Spotlight have all been passed.
- The InterGlobal Films asset-completion message has appeared after G-Spotlight.
- The studio’s income pickup is available.
- InterGlobal Films has been recorded as one of the five additional qualifying assets.
- The Vercetti Estate and Print Works are also complete before checking for Cap the Collector.
References for this chapter
- Grand Theft Auto: Vice City - Guide and Walkthrough - PlayStation 2 - By z_ShadowMan_z
- Grand Theft Auto: Vice City - Guide and Walkthrough - PlayStation 2 - By Psy
- Grand Theft Auto: Vice City/Interglobal Films, Inc. - StrategyWiki
- G-Spotlight - GTA Vice City Story Mission Guide
- Assets in Grand Theft Auto: Vice City
Sunshine Autos advanced: full import/export lists and street races
Sunshine Autos in Little Havana provides two separate activities: four six-vehicle import lists and six Vice Street Racer events. For the single-player story and ending prerequisites, completing only the first vehicle list is enough to make Sunshine Autos a completed asset. The remaining three lists and all six races are optional for campaign progression but required for the stated 100 percent completion scope. This chapter applies to the original North American PlayStation 2 release.
Buy Sunshine Autos and prepare the compound
After completing Shakedown for the Vercetti Estate, purchase Sunshine Autos in Little Havana for $50,000. The property is on the Mainland near Escobar International Airport. Buying it opens the showroom save point, the import garage, four small storage garages, a free Pay 'n' Spray, and the Vice Street Racer board.
Use the ramp at the rear of the property to reach the lower compound. The import list is posted beside the import garage. Four storage garages hold two vehicles each, giving you space for up to 16 cars. This is useful because vehicles from later lists can be stored before their list becomes active.
Vice City does not announce that a vehicle is wanted when you enter it. Check the vehicle name displayed on-screen and compare it with the current list. Save before delivering rare or awkward vehicles, particularly Mr. Whoopee, and avoid taking a wanted vehicle into missions or gunfights.
- Shakedown is complete.
- Sunshine Autos is purchased for $50,000.
- The import garage, storage garages, and race board are accessible.
- A separate save exists before rare-vehicle deliveries.
Finish List 1 for campaign credit
List 1 requires the Landstalker, Idaho, Esperanto, Stallion, Rancher, and Blista Compact. The Landstalker has useful parked locations at the dirt track north of Downtown and near a house on northwest Starfish Island. The Stallion is parked on the upper level of the Ocean Beach multistory car park, although entering it starts the Cone Crazy checkpoint activity.
The Rancher and Blista Compact commonly appear in traffic around Vice Point, Starfish Island, Washington Beach, Little Havana, and nearby districts. Idaho and Esperanto are also traffic vehicles, so drive through several districts rather than repeatedly searching one block. If you find a vehicle from a later list, place it in one of the storage garages instead of leaving it on the street.
Deliver each correct vehicle through the import-garage entrance. The vehicle does not need to be immaculate, but do not arrive with it burning or so badly damaged that it can be destroyed before the garage accepts it. Drive slowly over the final ramp and avoid police chases whenever possible.
Once all six List 1 vehicles are accepted, Sunshine Autos becomes a completed, revenue-generating asset and produces up to $1,500. The Deluxo appears in the showroom. This is the only Sunshine Autos list required for the campaign asset tally; Lists 2 through 4 are not needed to unlock the final story missions.
- Landstalker delivered.
- Idaho delivered.
- Esperanto delivered.
- Stallion delivered.
- Rancher delivered.
- Blista Compact delivered.
- The Deluxo appears and Sunshine Autos begins generating revenue.
- Sunshine Autos is being counted as a completed asset for story planning.
Complete Lists 2 and 3
List 2 requires the Sabre, Virgo, Sentinel, Stretch, Washington, and Admiral. A Sentinel is available inside the Sunshine Autos showroom. Stretch and Admiral vehicles can be found around the Vercetti Estate, while the other cars are generally encountered in traffic around Downtown, Vice Point, Starfish Island, and the Mainland. Delivering the six vehicles raises the property revenue to $4,000 and unlocks the Sabre Turbo on the showroom floor.
List 3 requires the Cheetah, Infernus, Banshee, Phoenix, Comet, and Stinger. The Infernus is available near the Vercetti Estate, and the other sports cars are most commonly found around Starfish Island, the Marina, Vice Point, and other affluent areas. The fixed or semi-fixed locations are safer than hunting randomly, but check the displayed vehicle name before taking a car to the garage.
Sports cars accelerate quickly but can spin or catch fire after repeated collisions. Use broad roads for the return trip, keep away from gunfire, and use Sunshine Autos' free Pay 'n' Spray if the car needs repair. Completing List 3 raises revenue to $6,500 and unlocks the Sandking in the showroom.
- List 2: Sabre, Virgo, Sentinel, Stretch, Washington, and Admiral delivered.
- The Sabre Turbo appears.
- List 3: Cheetah, Infernus, Banshee, Phoenix, Comet, and Stinger delivered.
- The Sandking appears.
Complete List 4 and obtain the Hotring Racer
List 4 requires the Voodoo, Cuban Hermes, Caddy, Baggage, Mr. Whoopee, and Pizza Boy. The Voodoo is parked outside Auntie Poulet's house in Little Haiti. Cuban Hermes cars circulate in Little Havana. A Caddy can be found at Leaf Links, a Baggage vehicle is available on the airport grounds, and Pizza Boys are parked outside the pizza restaurants in Vice Point, Little Haiti, and Downtown.
Mr. Whoopee is the most troublesome delivery. The dependable source is the Cherry Popper Ice Cream Factory, which must be purchased before you can take the van from its property. Enter the van and leave without starting the distribution activity if your immediate goal is the import list. Drive straight to Sunshine Autos and avoid explosions, heavy gunfire, and collisions.
After all six List 4 vehicles are accepted, Sunshine Autos produces up to $9,000 and the Hotring Racer appears upstairs in the showroom. The Hotring Racer is a strong choice for the races because of its speed and durability, although a well-controlled Infernus, Cheetah, or Banshee is also suitable.
- Voodoo delivered.
- Cuban Hermes delivered.
- Caddy delivered.
- Baggage delivered.
- Mr. Whoopee delivered.
- Pizza Boy delivered.
- The Hotring Racer appears.
- All 24 import vehicles have been accepted.
Win the six Vice Street Racer events
Enter the pink marker beside the race board to choose an event. The races are separate from the import lists and are not required to make Sunshine Autos profitable or to unlock the ending. They are required for the stated 100 percent completion goal. A race counts when Tommy finishes in first place.
Terminal Velocity takes place around Escobar International Airport. Brake before tight turns around terminal structures and do not cut across barriers. Ocean Drive runs through Washington Beach and Ocean Beach; stay on the broad coastal roads and slow before narrow junctions. Border Run crosses Little Havana and Little Haiti, where a clean line through the main roads is safer than aggressive sidewalk shortcuts.
Capital Cruise and Tour! cover Vice Point and the Beach districts. Use the inside of ordinary corners without climbing high curbs, and straighten the car before bridges and raised junctions. V.C. Endurance is the longest event, crossing most of Vice City through 112 checkpoints. Treat it as a route-management race: avoid crashes, missed checkpoints, and forced U-turns instead of attempting risky shortcuts.
The events have escalating entry fees and prizes: Terminal Velocity costs $100 and pays $400; Ocean Drive costs $500 and pays $2,000; Border Run costs $1,000 and pays $4,000; Capital Cruise costs $2,000 and pays $8,000; Tour! costs $5,000 and pays $20,000; V.C. Endurance costs $10,000 and pays $40,000.
- Terminal Velocity won in first place.
- Ocean Drive won in first place.
- Border Run won in first place.
- Capital Cruise won in first place.
- Tour! won in first place.
- V.C. Endurance won in first place.
Recover from failed deliveries or races
If a wanted vehicle is destroyed, reload the save made before collecting it or search again after the vehicle has respawned. Do not assume that a similar model is acceptable: Sabre, Sabre Turbo, Sentinel, and other related names are distinct vehicles.
If a race is failed, return to the race board and select the same event again. A second-place result is not a win for the 100 percent checklist. Repair the selected car before retrying, and save after each completed list and after difficult races.
For the most reliable race setup, use the Hotring Racer after List 4, or use a repaired Infernus, Cheetah, or Banshee if you have not finished the import lists. Prioritize clean checkpoint collection over contact with rival racers. If the car flips, catches fire, or loses too much speed after a crash, restart rather than trying to recover a doomed run.
- Failed deliveries are retried from a previous save or with a newly located vehicle.
- Failed races are selected again from the race board.
- The chosen race car is repaired before each attempt.
- A save exists after every successful list and difficult race.
Before you move on
- For campaign progression, List 1 is complete, the Deluxo is displayed, Sunshine Autos generates revenue, and the asset can be counted toward the required completed businesses.
- For the stated 100 percent goal, all 24 vehicles from Lists 1 through 4 have been accepted.
- The Deluxo, Sabre Turbo, Sandking, and Hotring Racer have appeared in the showroom after their respective lists.
- Terminal Velocity, Ocean Drive, Border Run, Capital Cruise, Tour!, and V.C. Endurance have each been won in first place.
- A final save confirms the completed import lists and race wins before moving on to other 100 percent objectives.
References for this chapter
- GTA Vice City - Sunshine Autos Import / Export - Side Objective Guide
- GTA Vice City - Sunshine Autos Street Races - Race Guide
- GTA Vice City - Asset: Sunshine Autos - Story Mission Guide
- Grand Theft Auto: Vice City - Guide and Walkthrough - PlayStation 2
- Grand Theft Auto: Vice City PlayStation 2 Instruction Manual
Converging the asset requirements: ensuring the endgame unlock
To unlock the final two missions in the original PlayStation 2 version, complete Cop Land for the Vercetti Estate, complete both Print Works missions, and complete five other qualifying assets. This produces seven completed revenue-generating properties when the Estate is included. Buying a business is not enough: its required activity or mission chain must be finished until the property displays its spinning dollar pickup icon and begins generating daily income.
1. Confirm the Vercetti Estate through Cop Land
Return to the Vercetti Estate on Starfish Island and verify that Cop Land is finished. Cop Land is the Estate's final required mission for story progression. After its completion, the mansion begins generating income, with the dollar pickup appearing outside the property after time has passed.
The Estate is already Tommy's property, so there is no purchase requirement. What matters is the completed protection-racket chain. If Cop Land has not been completed, the Estate does not count toward the final asset total, even though Tommy can use the mansion as a safehouse and mission location.
- Cop Land is complete.
- A spinning dollar pickup icon appears at the Vercetti Estate.
- The Estate generates money when you return after time has passed.
2. Finish both Print Works missions
Go to Print Works in Little Haiti and purchase the property if you have not already done so. Enter the mission marker inside and complete Spilling the Beans. This unlocks Hit the Courier, which is the second and final Print Works asset mission.
Complete Hit the Courier as well. The property purchase and the first mission do not satisfy the requirement by themselves. Once Hit the Courier is finished, leave and return to Print Works. The spinning dollar icon and daily income confirm that the asset has been completed.
Print Works is mandatory for the endgame trigger. It is not interchangeable with another business, so do not count a different property in its place.
- Spilling the Beans is complete.
- Hit the Courier is complete.
- Print Works displays the spinning dollar pickup icon and generates income.
3. Complete five additional qualifying assets
Complete any five of the other qualifying assets: Viceport Boatyard, Sunshine Autos, Cherry Popper Ice Cream Factory, Kaufman Cabs, InterGlobal Film Studios, the Malibu Club, and the Pole Position Club. Phil's Place does not count because it is a weapon supplier rather than one of the required revenue-generating businesses.
The exact completion task depends on the property. For the Boatyard, finish Checkpoint Charlie. For Kaufman Cabs, complete the taxi asset missions through Cabmaggedon. For Cherry Popper, complete the distribution activity by selling the required ice creams. For the Malibu Club, finish its robbery mission chain. For InterGlobal Films, complete the studio missions. For Pole Position Club, spend at least $300 on private dances after purchasing the club.
Sunshine Autos has a specific story-completion threshold: deliver all six vehicles on the first import list. This makes the showroom begin generating income and counts it as a completed asset. The second, third, and fourth lists increase revenue and provide additional rewards, but they are not needed for the final story trigger.
- Five qualifying assets besides the Estate and Print Works are complete.
- Each selected property displays its spinning dollar icon.
- Phil's Place is not being counted as one of the five.
4. Audit completion using the dollar icons
Vice City does not provide a single convenient counter showing how many assets qualify for the endgame. Make a manual list of the completed properties and inspect each business in person. A completed asset displays the spinning dollar pickup icon outside and begins accumulating daily revenue.
Do not rely only on having purchased a property, visited its interior, or started one of its missions. If the property has no dollar icon, treat it as incomplete and check its specific task again. You do not need to collect the money for the property to count; the icon and active revenue state are the useful confirmation.
- The Vercetti Estate is generating income.
- Print Works is generating income.
- Five other qualifying businesses are generating income.
- There are seven completed properties in total when the Estate is included.
5. Wait for the Cap the Collector call and start it at Print Works
After the Estate, Print Works, and five other assets are complete, allow the game to process the requirement. Ken Rosenberg calls Tommy about trouble at Print Works. When the call has finished, go to the Print Works marker in Little Haiti and start Cap the Collector.
Sonny Forelli's men are taxing Tommy's businesses. The mission sends groups of Mafia collectors on motorcycles toward the assets. Follow the radar and intercept each group. A durable vehicle is safer than a fragile fast car: ram the motorcycles, knock the riders down, and run them over or finish them with an automatic weapon. Avoid stopping to fight unrelated gang members or police while the collectors are moving.
The exact businesses visited depend on the qualifying assets you own, so follow the mission radar rather than assuming a fixed route. The mission succeeds after all marked collector groups are eliminated. Its reward is $30,000.
- Ken's call about Print Works has been received.
- Cap the Collector starts at Print Works.
- Every marked collector group is eliminated.
- The mission-complete message and reward appear.
6. Follow the call to the final-story setup
After Cap the Collector, Lance Vance calls Tommy and directs him to the Vercetti Estate. Go inside the mansion and climb to the upstairs mission marker to begin Keep Your Friends Close.... This is the next required story mission; no additional asset purchase is needed after Cap the Collector.
Before entering the Estate marker, save the game in a separate slot. Refill health and body armour, then stock ammunition for the Colt Python or another powerful handgun, an automatic weapon, and a shotgun or other close-range weapon. Keep the pre-mission save available in case the mansion defense fails.
If the call or marker does not appear, leave the Estate, move around the city until the call sequence has finished, and return. If the mission still does not unlock, recount the dollar icons: the usual cause is an unfinished Print Works chain, an incomplete fifth additional asset, or a Sunshine Autos property that has not completed its first import list.
- Cap the Collector is complete.
- Lance's call has been received.
- The Keep Your Friends Close... marker is active inside the Vercetti Estate.
- A separate pre-final-mission save exists.
Before you move on
- Cop Land is complete and the Vercetti Estate displays its income icon.
- Spilling the Beans and Hit the Courier are complete and Print Works displays its income icon.
- Five other qualifying assets display income icons.
- Cap the Collector starts at Print Works and is completed for the $30,000 reward.
- Lance calls after Cap the Collector and the Keep Your Friends Close... marker appears inside the Vercetti Estate.
- The game is saved before entering the final mission marker.
References for this chapter
- Cap The Collector | GTA Vice City Mission Guide & Walkthrough
- GTA Vice City Properties To Buy Guide: All Assets & Safehouses
- Sunshine Autos (Car Showroom) | GTA Vice City Properties & Assets
- GTA Vice City - Asset: Pole Position Club - Story Mission Guide
- Grand Theft Auto: Vice City - Guide and Walkthrough - PlayStation 2 - By Azure_Edge
- Grand Theft Auto: Vice City PlayStation 2 Instruction Manual
Late-game story missions: Cap the Collector, All Hands On Deck and setup for the final assault
Complete the remaining prerequisites for the two final missions, verify seven profitable places, pass Cap the Collector at Print Works, and prepare a protected save for Keep Your Friends Close.... The campaign requires six completed qualifying buyable assets in total, including Print Works, plus the Vercetti Estate after Cop Land. Counted together, that is seven profitable places. All Hands On Deck is optional for the story ending but required for 100% completion.
Complete All Hands On Deck for 100% completion, not for the ending
All Hands On Deck becomes available at Juan Cortez’s yacht in Ocean Bay Marina after Death Row. Enter the mission marker on the yacht to begin. This is an optional story mission: it is not needed to unlock Cap the Collector or Keep Your Friends Close..., but the original PlayStation 2 game requires it for 100% completion.
When Cortez’s yacht starts moving, go to the front and clear the attackers blocking its route. Keep moving with the yacht rather than pursuing enemies far from the boat. When the helicopters appear, shoot them down while keeping your aim and explosions away from Cortez’s vessel. The objective is to defend the yacht until it escapes, not to eliminate every enemy on the shoreline.
A successful completion awards $5,000 and unlocks the Speeder. The reward is optional and has no effect on the final-story trigger. If you are completing only the campaign, you can leave this mission unfinished and proceed with the asset requirements.
- Death Row is complete.
- All Hands On Deck is complete if you are pursuing 100% completion.
- The Cortez yacht has no remaining active mission marker.
Verify the seven profitable places
Complete Cop Land before checking the final requirements. Cop Land makes the Vercetti Estate a profitable place, so the Estate must be included in your count. The Estate is not one of the six buyable assets required in addition to Print Works; it is the separate seventh profitable place created by completing Cop Land.
You must complete six qualifying buyable assets in total, and Print Works must be one of those six. This means Print Works plus five other qualifying buyable assets, followed by the Vercetti Estate after Cop Land. Counted together, the completed requirement is seven profitable places.
The available qualifying choices include Malibu Club, Kaufman Cabs, Sunshine Autos, Pole Position Club, Viceport Boatyard, Cherry Popper Ice Cream Factory, and InterGlobal Studios. Phil’s Place does not count because it is a special weapons location rather than a normal income-generating asset.
Buying a property alone is insufficient. Complete that property’s required mission chain or qualifying activity, then confirm that its income icon is active. Pole Position Club is completed by spending the required money in the private dance room. Sunshine Autos can qualify after completing its first vehicle list; later lists and street races are optional for the story ending. Print Works requires both Spilling the Beans and Hit the Courier.
If the Vercetti Estate, Print Works, and five additional qualifying businesses are all generating income, you have the required seven profitable places. Do not buy another property merely because the final marker has not appeared immediately; first allow the phone-call trigger to occur and recheck whether an asset mission was actually completed.
- Cop Land is complete and the Vercetti Estate generates income.
- Print Works is owned and both Spilling the Beans and Hit the Courier are complete.
- Five additional qualifying buyable assets are complete and generating income.
- Six qualifying buyable assets are complete in total, including Print Works.
- The Vercetti Estate is also profitable, giving seven profitable places altogether.
- Phil’s Place is not being counted.
Start Cap the Collector at Print Works
After Cop Land, Hit the Courier, and the required asset work are complete, Ken Rosenberg calls about trouble at Print Works. The Cap the Collector marker is at Print Works in Little Havana, not at the Vercetti Estate. Enter the marker to start the mission.
The Forelli organization is taxing Tommy’s businesses. Three pairs of Mafia collectors travel on Sanchez motorcycles, with two armed men on each bike. Their exact business targets depend on the qualifying assets you completed, so follow the active radar target instead of assuming a fixed route based on another save file.
Take a durable vehicle to Print Works before starting. A strong car is useful because ramming the motorcycles is safer than trying to maintain a long moving gunfight. Collect the money from your businesses before entering the marker if you want to secure their current income, but collecting it is not required to pass the mission.
- The call about trouble at Print Works has occurred.
- The mission marker is active at Print Works in Little Havana.
- Six qualifying buyable assets, including Print Works, are complete.
- The Vercetti Estate is profitable after Cop Land.
- A durable vehicle is ready nearby.
Intercept all three collector pairs
Drive toward the active red radar blip and cut across the collectors’ path. Approach from the side or head-on, strike the Sanchez, and immediately run over or shoot the riders while they are down. Confirm that both Mafia members are dead before leaving the area.
If you use an SMG from the vehicle, keep the motorcycle in front of you and avoid sharp turns beside walls, water, or dense traffic. If your vehicle becomes badly damaged, switch to another car or use a nearby Pay ’n’ Spray when the route allows it. The collectors are armed, so stopping in the open and fighting on foot creates unnecessary exposure.
After the first pair is eliminated, the next pair becomes active. Repeat the interception method for the second and third motorcycles. The mission is not complete when a collector reaches a business or when one bike is destroyed; every active Mafia collector must be killed. Wait for the mission-passed message before leaving the area.
- Both riders from the first Sanchez are dead.
- Both riders from the second Sanchez are dead.
- Both riders from the third Sanchez are dead.
- The mission-passed message appears.
- Print Works remains an active profitable asset afterward.
Restock and map the Vercetti Estate
After Cap the Collector, visit an Ammu-Nation or Phil’s Place and refill ammunition for an automatic weapon and a shotgun. Enter the finale with full health and body armour. An assault rifle or SMG is useful for the mansion’s longer sightlines, while a shotgun is effective in the office, stairway, and upper rooms. Grenades can help against groups, but do not throw them near Tommy’s own position or friendly members of the Vercetti crew.
Before starting, walk through the Estate and identify the front entrance, office and safe, main staircase, upper rooms, and roof access. During the finale, attackers enter through multiple approaches, so knowing the staircase and office layout prevents wasted time searching for the next objective. A nearby vehicle is optional; the mission takes place primarily inside and around the mansion.
Do not spend all remaining cash on another property unless you discover that one of the supposed six buyable assets is not profitable. The final mission does not require a new vehicle or a particular optional asset once the seven-place condition is satisfied.
- Tommy has full health.
- Body armour is equipped.
- Automatic-weapon and shotgun ammunition are stocked.
- The Estate layout and office location are familiar.
- A usable vehicle is available nearby if repositioning is needed.
Save the setup and begin Keep Your Friends Close...
Make one save at the Vercetti Estate after Cap the Collector, then save the same prepared state in a second slot. Keep both pre-finale saves until the ending is complete. If the finale fails, reload the prepared slot rather than rebuilding the asset and weapon setup.
Keep Your Friends Close... becomes available at the Vercetti Estate after Cap the Collector. Enter the Estate marker when ready. The mission begins with the Forelli attack on Tommy’s safe, then changes objectives to eliminating Lance Vance and finally Sonny Forelli.
During the safe-defense phase, use the office and desk as cover and watch the approaches rather than chasing enemies into the open grounds. When the objective changes, leave the office and pursue Lance through the mansion and up to the roof. After Lance is eliminated, return to the office for the confrontation with Sonny. If Tommy dies, the safe-defense phase fails, or a required character is killed, reload the pre-finale save and repeat with more cover and better ammunition management.
The story is complete when Sonny is defeated, the mission-passed sequence occurs, the ending cutscene plays, and the game returns to a post-mission saveable state. The finale awards $30,000 and leaves Vercetti Family members carrying Uzis. This completion check confirms that the canonical ending has been reached.
- Cap the Collector is passed at Print Works.
- Six qualifying buyable assets, including Print Works, are complete.
- The Vercetti Estate is profitable after Cop Land.
- Seven profitable places are present when the six buyable assets and Vercetti Estate are counted together.
- Two separate pre-finale saves exist.
- Keep Your Friends Close... is available at the Vercetti Estate.
- The finale is passed, the ending cutscene plays, and the post-mission state can be saved.
Before you move on
- All Hands On Deck is complete if the target is 100% completion; it is not required for the campaign ending.
- Cop Land is complete and the Vercetti Estate generates income.
- Six qualifying buyable assets are complete in total, including Print Works.
- The Vercetti Estate is also profitable, making seven profitable places when counted together.
- Cap the Collector is passed at Print Works.
- Keep Your Friends Close... is available and then completed at the Vercetti Estate.
- The final cutscene plays, the post-mission reward is credited, and a completed post-finale save can be made.
- A separate pre-finale backup save remains available.
References for this chapter
- Cap The Collector | GTA Vice City Mission Guide & Walkthrough
- All Hands On Deck! | GTA Vice City Mission Guide & Walkthrough
- Keep Your Friends Close... | GTA Vice City Mission Guide & Walkthrough
- GTA Vice City Missions List: All Story Missions & Assets Guide
- Grand Theft Auto: Vice City - Guide and Walkthrough - PlayStation 2 - By z_ShadowMan_z
- Grand Theft Auto: Vice City - Guide and Walkthrough - PlayStation 2 - By Azure_Edge
- GTA Vice City PS2: 100% Completion
Keep Your Friends Close... — Final mission, mansion defence and ending
Complete the original North American PlayStation 2 finale at the Vercetti Estate on Starfish Island. The mission has three stages: defend Tommy's office safe from the Forelli assault, pursue and kill Lance Vance on the roof, then return inside and eliminate Sonny Forelli. The mission pays $30,000 and completes Vice City's main story.
Confirm the prerequisites and prepare a backup save
Keep Your Friends Close... becomes available only after Cap the Collector is complete and the endgame asset requirement has been met. You need six completed qualifying buyable assets, including Print Works, plus the profitable Vercetti Estate. In practical terms, that means seven profitable places total: the Vercetti Estate after Cop Land, Print Works, and five other qualifying buyable assets. Phil's Place does not count toward the required buyable-asset total.
The final mission marker is at the Vercetti Estate on Starfish Island. If the marker is not offering the mission, do not assume that owning six properties including the Estate is enough. Check that Print Works is complete, that five other qualifying buyable assets have finished their mission chains, and that Cop Land has made the Estate profitable. Cap the Collector must also be finished before the finale can start.
Save at the Estate in a separate slot before entering the marker. Collect available asset income, restore Tommy to full health, and obtain body armor. Carry a reliable automatic weapon, such as the M4 or an SMG, along with a powerful close-range weapon such as the shotgun or Colt Python. Bring enough ammunition for the office defence, rooftop pursuit and final confrontation. A wanted level is unnecessary, so arrive without one.
- Cap the Collector is complete.
- Print Works and five other qualifying buyable assets are complete.
- The Vercetti Estate is profitable after Cop Land.
- Seven profitable places total are active, including the Estate.
- A separate pre-mission save, full health, body armor and sufficient ammunition are ready.
Defend Tommy's office safe
Enter the V marker and let the opening conversation finish. Tommy begins in the office at the top of the main staircase. A Colt Python appears in the office at the start of this phase; pick it up if needed and position Tommy near the safe or behind the desk. The objective is to defend the safe, not to clear every room in the mansion.
Use the Python for accurate single-target shots, or use a shotgun when several Forelli men reach the doorway together. Crouch behind the desk or chair when possible, and watch the entrance and the nearby stairs. Shoot attackers as they approach rather than chasing distant enemies through the lower hall. The Mafia are attempting to steal Tommy's money, and leaving the safe undefended allows the money to drain.
Keep stopping the attackers until the objective changes to killing Lance. Once that message appears, the safe-defence stage is over. Do not leave the office early merely to hunt enemies; the incoming groups continue until the scripted Lance sequence begins, and pursuing them wastes health and ammunition.
- Tommy stays near the office safe and uses the desk or doorway as cover.
- Approaching Forelli men are stopped before they can empty the safe.
- The objective changes from defending the safe to killing Lance.
Pursue Lance through the mansion
When the game instructs Tommy to kill Lance, leave the office and follow the confrontation into the upper hall. Lance appears with Forelli guards and retreats toward the interior staircase leading to the roof. Move immediately after the scene instead of returning to the safe or searching the lower rooms.
Run around the upper balcony and use the mansion's walls and railings to reduce fire from enemies on the ground floor. Shoot enemies that block the route or threaten Tommy at close range, but do not stop to eliminate every Forelli man in the halls. The useful objective is to keep pressure on Lance and reach the rooftop access before Tommy is surrounded.
If Tommy loses armor, use the hallway corners and staircase walls as brief cover while dealing with the nearest threat. Preserve ammunition and health for the rooftop and Sonny's return. Lance's retreat is scripted, so following him quickly is more important than trying to finish every guard during the chase.
- The kill-Lance objective is active before Tommy leaves the office.
- Tommy follows the upper balcony and interior-staircase route toward the roof.
- Only blocking or immediately dangerous enemies are engaged during the pursuit.
Use rooftop cover and kill Lance Vance
On the roof, do not sprint across the open helipad. Take cover behind the rooftop barrels or another solid structure and fire through the gaps. Lance is accompanied by Forelli guards, so eliminate the enemies who can hit Tommy from the flank, then concentrate on Lance. The Colt Python works well for accurate shots, while an automatic weapon is useful when several guards are exposed together.
Keep Tommy crouched or partially concealed whenever possible. Avoid standing beside explosive barrels, and do not remain in the open while reloading. If health falls dangerously low, retreat through the rooftop access instead of trying to win a prolonged exchange. A health pickup is available near the helipad, and the weapons room at the bottom of the interior stairwell provides recovery supplies and ammunition after Lance is dead.
After Lance dies, go down to the bottom of the interior staircase and use the weapons room if Tommy needs health, armor or M16 ammunition. Then return through the hall toward the office. Do not leave the Estate or search the city; Sonny's confrontation is triggered inside the mansion.
- Rooftop barrels or structures are used as cover.
- Lance Vance is killed.
- Tommy uses the weapons room for recovery supplies or M16 ammunition if necessary.
- Tommy returns toward the office after the rooftop fight.
Return inside and kill Sonny Forelli
Walk back toward the office area. Sonny appears at the foot of the main staircase after the required scene, accompanied by additional Forelli men. The final objective is to kill Sonny, and more enemies can continue entering the main hall while the battle lasts.
Move to one of the side balconies or the upper staircase railing and crouch behind the railing. From there, fire down at Sonny with the M4, another automatic weapon, or the most powerful accurate weapon available. The railing provides a better angle and reduces exposure compared with standing in the centre of the hall. Use the shotgun only when a guard closes the distance.
Prioritize Sonny once you have a clear shot. Do not spend the whole phase chasing guards around the mansion, because the battle continues until Sonny is dead. If enemies push the balcony, fall back behind the staircase or another solid interior corner, eliminate the immediate threat, and resume fire on Sonny. The mission ends as soon as Sonny is killed; Tommy does not need to reach another map marker.
- Tommy returns to the office area after killing Lance.
- A staircase railing, side balcony or other solid interior cover is used.
- Sonny Forelli is killed and the concluding cutscene begins.
Verify the ending and preserve the completed save
Let the ending cutscene play after Sonny's death. It shows the aftermath of Lance's betrayal and Sonny's defeat and concludes the main storyline. The mission reward is $30,000. Completing the mission also causes members of the Vercetti gang to carry Uzis, and the Hunter becomes available at the army base; the separate hidden-package condition affects the additional Hunter location.
When control returns, save again in a new slot at the Vercetti Estate or another safehouse. Confirm that the $30,000 has been credited, that free roam has resumed, and that the final mission objective is no longer active. These checks establish that the story completion state has been written to the save.
If Tommy dies, the safe's money reaches zero, or the mission otherwise fails, reload the separate pre-mission save. On the next attempt, remain near the safe until the objective changes, follow Lance without wasting time on distant guards, use rooftop cover, collect recovery supplies from the weapons room, and preserve armor and automatic-weapon ammunition for Sonny. The Hunter, hidden packages and other post-story rewards are optional and are not required to finish the campaign.
- Keep Your Friends Close... ends successfully.
- The final cutscene plays.
- The $30,000 reward is credited.
- Control returns to normal free roam.
- The final mission is no longer active.
- A separate post-mission save preserves the completed storyline state.
Before you move on
- Six qualifying buyable assets, including Print Works, have completed their mission chains.
- The Vercetti Estate is profitable after Cop Land, giving seven profitable places total.
- Cap the Collector has been completed.
- Keep Your Friends Close... has ended successfully.
- The final cutscene showing the aftermath of the betrayal has played.
- The $30,000 reward is present.
- Control has returned to free roam and the final mission is no longer active.
- A post-mission save has been created in a separate slot.
References for this chapter
- Keep Your Friends Close... | GTA Vice City Mission Guide & Walkthrough
- Grand Theft Auto: Vice City - Guide and Walkthrough - PlayStation 2 - By Minesweeper_
- Keep Your Friends Close.../Walkthrough - Grand Theft Wiki
- Assets in Grand Theft Auto: Vice City
- Grand Theft Auto: Vice City PlayStation 2 Instruction Manual
Finishing up
Keep Your Friends Close... has been completed and its ending cutscene has played.
The game has returned to normal free roam after the final mission, and a new post-mission save loads with the storyline complete.
Print Works and five other qualifying buyable assets are completed, while the Vercetti Estate is profitable after Cop Land; together these produce seven completed profitable places.
Cap the Collector has been completed before Keep Your Friends Close....
Optional 100% activities remain outside this campaign completion check.
Choose your next gameScreenshots & video
Game imagery for reference. Follow the written chapters above for the route and strategies.
Sources & references
Our original guide draws on the references below. Check the edition at the top of this page before following controls or unlock requirements.
- An Old Friend | GTA Vice City Mission Guide & Walkthrough
- The Party | GTA Wiki
- Grand Theft Auto: Vice City - Guide and Walkthrough - PlayStation 2 - By z_ShadowMan_z
- Grand Theft Auto: Vice City - Guide and Walkthrough - PlayStation 2 - By Myke
- Grand Theft Auto: Vice City PlayStation 2 Instruction Manual
- Riot | GTA Wiki
- Grand Theft Auto: Vice City Walkthrough — GameSpot
- Treacherous Swine — GTA Vice City Mission Guide & Walkthrough
- Rub Out | GTA Vice City Mission Guide and Walkthrough
- Rub Out/Walkthrough - Grand Theft Wiki
- Shakedown | GTA Vice City Mission Guide and Walkthrough
- Bar Brawl | GTA Vice City Mission Guide and Walkthrough
- Grand Theft Auto: Vice City - Guide and Walkthrough - PlayStation 2 - By Azure_Edge
- Cop Land - Grand Theft Wiki
- Vercetti Estate | GTA Vice City Properties and Assets
- GTA Vice City - Sunshine Autos Import / Export - Side Objective Guide
- GTA Vice City - Asset: Sunshine Autos - Story Mission Guide
- GTA Vice City - Sunshine Autos Street Races - Race Guide
- Grand Theft Auto: Vice City - Checkpoint Race FAQ - PlayStation 2 - By ACarr
- How do you get to final mission? - Grand Theft Auto: Vice City Q&A for PlayStation 2
- Grand Theft Auto: Vice City - PlayStation 2 Instruction Manual
- Grand Theft Auto: Vice City/Kaufman Cabs
- Grand Theft Auto: Vice City - Guide and Walkthrough - PlayStation 2 - By Psy
- Grand Theft Auto: Vice City - Guide and Walkthrough - PlayStation 2
- Hit the Courier | GTA Vice City Mission Guide & Walkthrough
- Print Works | GTA Vice City Properties & Assets
- Print Works
- Grand Theft Auto: Vice City - Guide and Walkthrough - PlayStation 2 - By AggroSk8er
- The Job - GTA Wiki
- Assets in Grand Theft Auto: Vice City
- Grand Theft Auto: Vice City - Guide and Walkthrough - PlayStation 2 - By Bilboboy
- Boomshine Saigon | GTA Vice City Mission Guide & Walkthrough
- Phil's Place | GTA Vice City Properties & Assets
- GTA Vice City PS2: 100% Completion
- Grand Theft Auto: Vice City - Guide and Walkthrough - PlayStation 2 - By Minesweeper_
- GTA Vice City - Asset: The Boatyard - Story Mission Guide
- Boatyard | Rockstar Games' GTA: Vice City Wiki
- Grand Theft Auto: Vice City/Interglobal Films, Inc. - StrategyWiki
- G-Spotlight - GTA Vice City Story Mission Guide
- Cap The Collector | GTA Vice City Mission Guide & Walkthrough
- GTA Vice City Properties To Buy Guide: All Assets & Safehouses
- Sunshine Autos (Car Showroom) | GTA Vice City Properties & Assets
- GTA Vice City - Asset: Pole Position Club - Story Mission Guide
- All Hands On Deck! | GTA Vice City Mission Guide & Walkthrough
- Keep Your Friends Close... | GTA Vice City Mission Guide & Walkthrough
- GTA Vice City Missions List: All Story Missions & Assets Guide
- Keep Your Friends Close.../Walkthrough - Grand Theft Wiki
About the game & collecting notes
- Platform
- PlayStation 2
Step-by-step campaign walkthrough for the original PlayStation 2 release of Grand Theft Auto: Vice City (NTSC-U / USA, v1.40).
Darryl Polo
Darryl Polo loves tinkering with emulation and revisiting retro games. He enjoys exploring how old favorites play on different setups and sharing what he learns along the way. At Joking Joystick, he writes about the games, hardware, and small discoveries that keep the hobby fun.
Our editorial standardsFound a step that needs another look? Help us improve this guide.