Banjo-Kazooie (Nintendo 64, USA Rev A) — Complete Campaign Walkthrough
Step-by-step campaign walkthrough for the original Nintendo 64 release of Banjo-Kazooie (USA Rev A). Covers the hub, each world, required progression to reach and defeat Gruntilda, boss/minichallenge guidance, recovery strategies, and an optional 100% completion checklist (Jiggies, Notes, Jinjos, Mumbo transforms and extra collectibles).

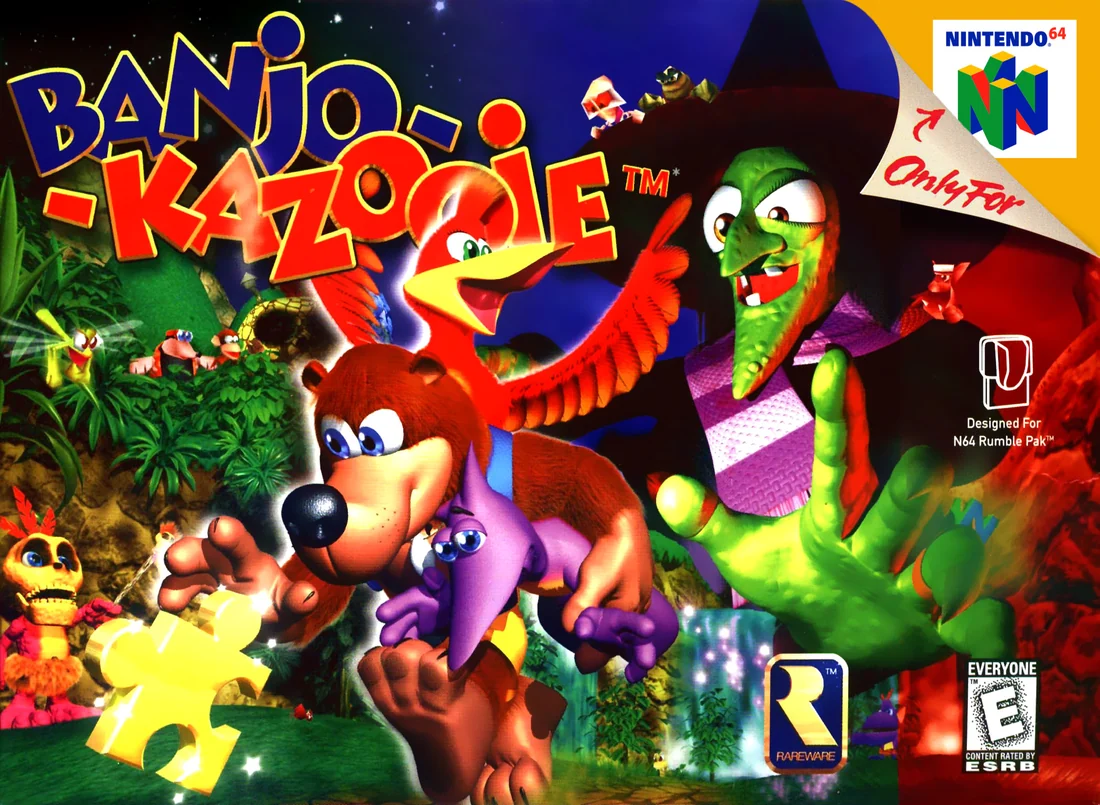
Find a copy
Banjo-Kazooie Nintendo 64
We may earn a commission if you buy through these links, at no extra cost to you. As an Amazon Associate I earn from qualifying purchases.
Opens retailer search results. Check the model, edition, seller, availability and current price before buying.
Before you begin
You are playing the original Nintendo 64 edition identified as the North American USA release.
The game is structured around Gruntilda's Lair and nine playable worlds accessed through picture puzzles.
Jiggies open picture puzzles, while each world's best Musical Note score contributes to the cumulative totals used by Note Doors.
View Totals reports Jiggies, Musical Notes, special honeycomb pieces and time; it does not provide a direct Jinjo checklist.
The walkthrough distinguishes required campaign progress from optional full-completion work.
The proper ending requires all 100 Jiggies. The 900 Notes and other collectibles are separate optional goals.
When a precise number matters, the guide uses the game's visible door requirements and original-edition collectible totals without treating later-port behavior as N64 behavior.
Set yourself up for the run
Confirm that you are playing the original Nintendo 64 release rather than an Xbox, Switch or other modern port if you intend to follow the N64 Note and save behavior.
Back up or note your save slot before attempting difficult sequences or a full-completion run.
Learn the basic controller layout from the instruction booklet and practise the opening moves at Spiral Mountain.
Use View Totals to track Jiggies, Musical Notes, special honeycombs and time. It does not directly list which Jinjos remain.
Treat Jinjo completion as a world objective: rescuing all five Jinjos awards that world's tenth world Jiggy.
Learn each required Bottles move before attempting a route that depends on it.
Obtain the relevant Mumbo transformation before attempting transformation-only objectives; Mumbo's Mountain requires returning for the fifth token after the initial transformation.
For Note Doors, track each world's best Musical Note score and its cumulative total rather than expecting individual Notes to remain permanently removed on the original N64 release.
Expect backtracking. Later moves, transformations, lair switches and water-level changes can unlock earlier objectives.
For a full run, keep a written ledger for Jinjos, Mumbo Tokens, Empty Honeycombs and seasonal Click Clock Wood tasks.
Spiral Mountain, Bottles and the Gruntilda's Lair Hub
Complete Spiral Mountain’s training route, learn the opening moves from Bottles, enter Gruntilda’s Lair, collect the first Jiggy and place it in the Mumbo’s Mountain picture puzzle. Establish an accurate baseline in the original Nintendo 64 View Totals screen before beginning the first world.
Leave Banjo’s house and meet Bottles
Exit Banjo’s house and follow the path into Spiral Mountain. Bottles is in the first molehill just outside the front garden. Stand beside the molehill and press B to begin the first lesson. In this original Nintendo 64 release, Bottles’ lessons permanently make the early techniques available; they are not merely demonstrations that must be repeated every time you enter the area.
Work through the training rather than skipping it. The opening lessons cover the practical abilities used throughout the game: climbing, swimming and diving, the Feathery Flap, the Forward Roll, the Rat-a-tat Rap and the Flap Flip. The manual’s controls are based on the N64 controller: A jumps, B performs attacks or interacts during lessons, Z crouches, the C buttons control the camera, and R centers the camera behind Banjo.
- Speak to Bottles at the molehill outside Banjo’s front garden.
- Complete the available opening lessons instead of declining them.
- Test at least one jump, roll, Rat-a-tat Rap and Flap Flip after learning them.
Visit the remaining Spiral Mountain molehills
Follow the winding yellow path around the lower and middle parts of Spiral Mountain. Additional molehills are placed along the route, so use the terrain itself as your guide rather than trying to climb directly to the summit. Speak to Bottles at each one and finish the lesson before moving on.
Use this section to practice camera control. C Left and C Right rotate the view, C Up changes to Banjo’s-eye view and C Down changes the outside zoom. R recenters the camera behind Banjo. The game’s early platforming is much easier if you reset the camera before a jump instead of relying on a poor side angle.
The training area also contains optional extra honeycomb pieces and other pickups. They are not required to unlock Mumbo’s Mountain. Collect them if you want to extend Banjo’s health later, but do not delay the main route because you are trying to empty every corner of Spiral Mountain immediately.
- Visit the lower and middle Bottles molehills.
- Practice climbing a tree or pole and swimming in the moat or nearby water.
- Use R or the C buttons to establish a clear camera angle before difficult jumps.
Finish the summit lesson and cross into the lair
Continue up the spiral path toward the top of the mountain. Bottles is waiting near the summit for the final check. Speak to him and complete the remaining lesson. When the training sequence is finished, the bridge leading to the giant Gruntilda statue is available.
Cross the bridge and enter through the statue’s mouth. This is the transition from Spiral Mountain into Gruntilda’s Lair. The first Jiggy is not in Spiral Mountain; it is in the opening chamber of the lair. Any optional Spiral Mountain pickups you leave behind can be collected later.
- Complete Bottles’ summit lesson.
- Cross the bridge to the Gruntilda statue.
- Enter Gruntilda’s Lair through the statue’s mouth.
Collect the first Jiggy in Gruntilda’s Lair
After the opening scene, move into the first lair chamber and locate Gruntilda’s large portrait. Look to the left of the portrait for a small stack of rocky platforms. Climb the rocks using the Flap Flip: hold Z to crouch, then press and hold A to spring upward. Adjust Banjo’s direction with the Control Stick while airborne.
At the top of the rock formation, collect the golden Jiggy. This is the first Jiggy of the game and the piece required for the first picture puzzle. Drop back to the main floor and pause immediately so you can confirm that the Jiggy total has increased.
- Find Gruntilda’s portrait in the first lair chamber.
- Climb the rocky platforms on the portrait’s left side.
- Collect the Jiggy at the top and confirm it in View Totals.
Open Mumbo’s Mountain
From the first chamber, return to floor level and take the tunnel to the right of Gruntilda’s portrait. Continue into the next area. The closed Mumbo’s Mountain entrance is on the left, with a jigsaw picture on the right side of the same area.
Walk up to the picture and stand on the Jiggy-shaped floor pad in front of it. Press A to insert the Jiggy. The first picture requires one piece, so the single Jiggy from the lair completes it. The game will show the entrance opening; return to the gray mountain doorway and enter Mumbo’s Mountain when ready.
Jiggies inserted into lair pictures are not being spent like ammunition. They are progress pieces recorded permanently in the save file. Later pictures require more Jiggies, and the required number is shown at each picture.
- Reach the first Mumbo’s Mountain picture puzzle.
- Stand on the floor pad and press A to place one Jiggy.
- Confirm that the Mumbo’s Mountain entrance has opened.
Understand the lair’s progression systems
Gruntilda’s Lair is the game’s hub. Jigsaw pictures unlock world entrances or other routes when filled. Note Doors block deeper portions of the lair and display an exact musical-note requirement. The requirement is based on the combined best note scores recorded for the worlds, not on a separate item that disappears when the door opens.
The original N64 version records your best note score for each world, but individual Notes are not permanently marked as collected. If you die or leave a world before completing its note run, the Notes reappear when you return and must be collected again during a new attempt. A successful 100-Note run preserves that world’s best score for Note Door progress.
Witch Switches are lair mechanisms activated from inside worlds. They create changes elsewhere in the lair, often making a Jiggy appear or opening a route. They are not the same as picture puzzles or Note Doors, so remember which type of barrier you are facing before searching for a solution.
- Read the required number on any Note Door you pass.
- Treat Jiggies as picture-puzzle progress and Notes as cumulative Note Door progress.
- Remember that Witch Switch effects can alter distant parts of Gruntilda’s Lair.
Check the original N64 pause reports
Press START and choose View Totals before entering the first world. Use C Left and C Right to switch between the reports for individual levels and the overall game total. The original manual identifies the report categories as Jiggies, musical notes, special honeycomb pieces and elapsed game time.
At this point, confirm that the overall Jiggy total includes the first lair Jiggy and that the Mumbo’s Mountain entrance is open. The report does not function as a separate Jinjo checklist, so do not expect it to list which Jinjos have been rescued. Jinjos reset when you leave a world in the N64 version, while the Jiggy awarded for rescuing all five in a world remains permanently collected.
Use this baseline throughout the campaign. After a major pickup, pause and compare the displayed level or overall total with the result you expect. This avoids confusing a lair Jiggy with a world Jiggy and prevents wasted searches for a collectible that is already recorded.
- Open START, choose View Totals and inspect the overall report.
- Use C Left and C Right to inspect the Mumbo’s Mountain report page.
- Confirm the first lair Jiggy is recorded and note your starting totals.
Before you move on
- All opening Bottles lessons in Spiral Mountain have been completed, including climbing, swimming or diving, Feathery Flap, Forward Roll, Rat-a-tat Rap and Flap Flip.
- Banjo and Kazooie have crossed the bridge and entered Gruntilda’s Lair.
- The first lair Jiggy has been collected from the rocky platforms beside Gruntilda’s portrait.
- The one-piece Mumbo’s Mountain picture puzzle is complete and its entrance is open.
- View Totals confirms the first Jiggy and provides a reliable baseline for the next chapter.
References for this chapter
Mumbo's Mountain — Your First Full Level and the Termite Return Route
Mumbo's Mountain is the first full world in the original North American Nintendo 64 release of Banjo-Kazooie. Open it by placing the free Jiggy from Gruntilda's Lair into the Mumbo's Mountain picture. The level teaches Egg Firing, Beak Buster and Talon Trot, then uses those moves to guide you through the village, Conga's clearing, the ruins and the termite mound. Mumbo's transformation costs five Mumbo Tokens. All five tokens can be collected while Banjo and Kazooie are still in their normal form, with the fifth inside Ticker's Tower. After collecting it, return to Mumbo's Skull, pay five tokens and become the termite. The termite can climb the steep interior of Ticker's Tower and reach the transformation Jiggy at its summit. A complete world tally is ten Jiggies, five rescued Jinjos, a 100-Note best score and two optional Empty Honeycomb Pieces. The Witch Switch reward is separate and belongs to Gruntilda's Lair.
Open the world and learn the three starting moves
In Gruntilda's Lair, follow the rocky route near the entrance to the free Jiggy. Carry it to the unfinished Mumbo's Mountain picture and place it into the empty space. The nearby level door opens after the picture is completed. Enter the doorway to start the world.
Begin by learning the moves from Bottles rather than trying to clear every collectible immediately. Follow the route toward the village and use his molehills to learn Egg Firing, Beak Buster and Talon Trot. Egg Firing is used against Conga, his switches and Juju. Beak Buster breaks the village huts and activates the Witch Switch. Talon Trot lets Kazooie climb the ordinary steep slopes and reach several upper platforms.
On the Nintendo 64 controller, Egg Firing is performed by holding Z and pressing C-Up for a forward egg or C-Down for a backward egg. Beak Buster uses a jump followed by Z. Talon Trot is activated by holding Z and pressing the appropriate Kazooie move button. Pause after each lesson and confirm the move has been recorded before continuing.
- Place the free Jiggy into the Mumbo's Mountain picture.
- Enter Mumbo's Mountain.
- Learn Egg Firing, Beak Buster and Talon Trot from Bottles.
- Confirm the moves in the pause menu before beginning the upper route.
Collect the early Jinjos, village items and Conga's first Jiggies
From the entrance, rescue the pink Jinjo on the raised platform. Drop behind or beside that platform to collect the first Mumbo Token. Continue across the bridge and rescue the blue Jinjo on the small island in the water. Collect the bridge Notes while you are there, but keep a clear route back to land instead of staying underwater until the air supply is nearly gone.
Enter the village and use Beak Buster on the huts. Each hut must be checked; one contains a Jiggy, one contains an enemy and one contains the green Jinjo. Break the huts, defeat or avoid the enemies and collect the Jiggy and green Jinjo before leaving the village.
Move to Conga's clearing. Shoot the three orange switches around the area with forward eggs. Conga throws oranges from his tree, so circle the clearing rather than standing in front of him. When all three switches have been hit, collect the Jiggy that appears.
Climb Conga's tree, take an orange and carry it to Chimpy, who is waiting on a nearby stump. Feed him the orange to raise a platform and reveal another Jiggy. These objectives are a safe way to practice egg aiming, enemy avoidance and carrying an item through an active hazard area.
- Rescue the pink Jinjo near the entrance.
- Collect the Mumbo Token behind or beside the pink Jinjo platform.
- Rescue the blue Jinjo on the water island.
- Break the village huts and collect their Jiggy.
- Rescue the green Jinjo in the huts.
- Destroy Conga's three orange switches.
- Feed an orange to Chimpy and collect the revealed Jiggy.
Finish the normal-form Jiggies and collect the remaining Jinjos
Defeat Conga by firing three eggs into him while moving around his clearing. His oranges can interrupt a stationary attack, so fire while keeping enough space to retreat. Collect the Jiggy after the third successful hit.
At Juju the Totem Pole, fire eggs into its four mouths as they rotate into view. Once only the final section remains, jump onto the lowered section and use a Flap Flip to reach the Empty Honeycomb Piece above Juju. Then hit the remaining mouth to make Juju disappear and collect the Jiggy it reveals.
Use Talon Trot to climb the slope near the ruins. Collect the Jiggy on the hill and rescue the orange Jinjo near the Stonehenge-like structure. Search behind the ruins for another Mumbo Token, then follow the upper route toward the Conga area and collect the token positioned near that route. A further token is beneath the slope leading toward Mumbo's Skull.
Rescue the yellow Jinjo on the lower hillside. The five Jinjos are pink, blue, green, orange and yellow. The Jinjo Jiggy is awarded only when the fifth color is rescued, so do not expect a reward after the fourth. If the level still shows fewer than ten Jiggies, use the pause totals and revisit the village, Conga's clearing, the ruins, the hill and Mumbo's Skull rather than assuming a Jinjo reward is missing.
Use Beak Buster on the Mumbo's Mountain Witch Switch when you reach it. This makes a Jiggy appear outside the level entrance in Spiral Mountain, inside Gruntilda's Lair. It is not one of Mumbo's Mountain's ten world Jiggies.
- Defeat Conga and collect his Jiggy.
- Complete Juju's four-mouth challenge.
- Collect the Empty Honeycomb Piece above Juju.
- Collect the hill Jiggy near the ruins.
- Rescue the orange and yellow Jinjos.
- Collect the Mumbo Tokens near the ruins, near Conga's route and beneath the Mumbo slope.
- Activate the Mumbo's Mountain Witch Switch.
Enter Ticker's Tower as Banjo and Kazooie to get the fifth token
Before visiting Mumbo, enter Ticker's Tower as ordinary Banjo and Kazooie. The tower is the large termite mound in the upper part of the level. The entrance is accessible without transforming. Inside, defeat or pass the termite enemy, then use jumps and Flap Flips to reach the ledges leading upward. The route is steep, but the purpose of this first visit is only to collect the token; you are not expected to reach the summit yet.
Collect the Mumbo Token inside the tower and leave. This is the fifth and final token in Mumbo's Mountain. The complete token route is: behind the pink Jinjo platform, beneath the slope toward Mumbo's Skull, near the ruins, near the upper route by Conga's area and inside Ticker's Tower. Do not go to Mumbo after collecting only four tokens. Mumbo's Mountain's termite transformation costs five tokens, and Mumbo will not perform it for four.
If you are pursuing the 100-Note best score, collect the remaining safe Notes around the village, slopes and tower during these passes, but do not let a difficult Note line cause unnecessary deaths. The pause totals show the world's best Note score. Individual Notes can reappear after leaving or dying in the original Nintendo 64 release, so a short return trip is available if the best score is still below 100.
- Enter Ticker's Tower as Banjo and Kazooie.
- Reach the interior ledges and collect the fifth Mumbo Token.
- Confirm that five Mumbo Tokens are available before visiting Mumbo.
- Use the pause totals to monitor the 100-Note best score.
Pay five tokens, transform into the termite and finish the tower
Return to Mumbo's Skull after all five tokens have been collected. Stand on the transformation symbol and press B. Mumbo now accepts five tokens and transforms Banjo and Kazooie into the termite. The earlier visit to Ticker's Tower was necessary because the tower contains the fifth token needed to begin this transformation.
Leave Mumbo's Skull and return to Ticker's Tower. Re-enter as the termite and climb the steep interior slopes. The termite can handle the surfaces that are impractical for normal Banjo and Kazooie. Take each jump from a stable ledge, avoid rushing across narrow platforms and use the wider landings to reset your position after a missed attempt.
Continue to the upper grassy section and collect the Notes there. Reach the summit and collect the Jiggy. This is the termite-transformation Jiggy and is the tenth world Jiggy when combined with the nine other challenge rewards and the five-Jinjo reward. The second Empty Honeycomb Piece is on the outer mountain route reached during the termite section; search the accessible mountain ledges before exiting if you are completing the optional health upgrades.
Exit the level through the normal exit after confirming the pause totals. If the Witch Switch Jiggy has not yet been collected, return to the top of the mountain outside the Mumbo's Mountain entrance in Gruntilda's Lair and take it now. The Witch Switch reward remains part of the lair total, not the world total.
- Return to Mumbo with five tokens.
- Transform into the termite.
- Re-enter Ticker's Tower as the termite.
- Climb to the summit and collect the transformation Jiggy.
- Collect the tower and upper-route Notes needed for the 100-Note best score.
- Collect the second Empty Honeycomb Piece on the termite-accessible mountain route.
- Collect the separate Witch Switch Jiggy from Gruntilda's Lair.
Before you move on
- The Mumbo's Mountain picture is open and its entrance remains available in Gruntilda's Lair.
- Bottles has taught Egg Firing, Beak Buster and Talon Trot.
- All five Mumbo Tokens were collected as Banjo and Kazooie, including the token inside Ticker's Tower.
- Mumbo accepted five tokens and performed the termite transformation.
- The level totals show ten Jiggies and a 100-Note best score.
- Pink, blue, green, orange and yellow Jinjos have all been rescued, with the fifth rescue awarding the Jinjo Jiggy.
- Both Empty Honeycomb Pieces have been collected if optional full-level completion is being pursued.
- The Mumbo's Mountain Witch Switch was activated and its separate Jiggy was collected from the mountain outside the level entrance in Gruntilda's Lair.
References for this chapter
Treasure Trove Cove — Water, Chests and Early Platforming
Treasure Trove Cove is the second playable world in the original North American Nintendo 64 release. Its normal world total is ten Jiggies: nine ordinary challenge Jiggies and one reward for rescuing all five Jinjos. It also contains 100 Musical Notes and two optional Empty Honeycombs. The level does not require a Mumbo transformation. You need the moves learned in Spiral Mountain and Mumbo’s Mountain, then learn Shock Jump and Flight from Bottles inside the cove. A Mumbo’s Skull and its tokens are optional and are not prerequisites for the level’s ordinary Jiggies.
Enter the cove and establish safe routes
Open the Treasure Trove Cove picture in Gruntilda’s Lair with two Jiggies, then jump into the large treasure chest to enter. At the starting pier, identify the beach, Nipper’s position, Captain Blubber’s ship, the raised central island, the Shock Spring platforms and the lighthouse route. These landmarks divide the level into manageable sections.
Water is useful but dangerous. Banjo’s air decreases while he is submerged, so begin each dive from a nearby shore or platform and decide where you will surface before entering. Use short dives for the Blue Jinjo beneath the entrance pier and for the ship’s underwater opening. The smaller pools and shorelines are safer than the open sea. Snacker patrols the ocean, so avoid unnecessary crossings and return to land as soon as an objective is complete.
Collect nearby Notes while moving between objectives, but use the pause-menu report to verify the total. Notes, Jinjos and Jiggies may be recollected visually after leaving or dying in the original N64 game, so the report is the reliable completion check.
- Open the two-Jiggy Treasure Trove Cove picture.
- Locate the starting pier, Nipper, the Salty Hippo, Shock Spring platforms and lighthouse.
- Plan a visible resurfacing route before every underwater trip.
Defeat Nipper and collect the first Jiggy
Go around the beach to Nipper, the giant hermit crab. Stay outside the reach of his claws and use the Rat-a-tat Rap when his eyes are exposed. Hit him three times. He retreats into his shell, allowing you to enter and walk to the Jiggy in the center.
The Blue Jinjo is beneath the entrance pier. Dive from the nearest edge, take the Jinjo and return directly to the surface. Do not combine this trip with a long open-water search; the pier is a safer recovery landmark than the ocean.
- Hit Nipper three times with the Rat-a-tat Rap.
- Enter Nipper’s shell and collect its Jiggy.
- Rescue the Blue Jinjo under the entrance pier.
Recover Captain Blubber’s treasure and drain the sandcastle
Visit Captain Blubber on the Salty Hippo. One piece of his treasure is inside the underwater hold, reached through the ship’s open side opening. The other is beneath the trapdoor on the ship’s deck; Beak Buster the trapdoor, enter the opening and collect the second piece. Return both pieces to Blubber for his Jiggy.
Near the ship, climb the crates and drop to the ledge where Leaky the bucket is waiting. Fire two eggs into Leaky from behind. The water around the sandcastle drains. Enter the sandcastle and Beak Buster the letters to spell BANJOKAZOOIE before the timer expires. Defeat the crab inside and take the Jiggy.
These objectives are good early targets because they use moves already learned and keep you close to the beach, ship and crates. If the sandcastle timer is missed, leave and re-enter to restart it.
- Collect both pieces of Captain Blubber’s treasure and return them to him.
- Fire two eggs into Leaky.
- Spell BANJOKAZOOIE and collect the sandcastle Jiggy.
Learn Shock Jump and collect the Cliff Face Jiggy
Climb the stacked crates near the ship and find Bottles. He teaches Kazooie the Shock Jump. Hold A on a green Shock Spring Pad to launch higher than a normal jump. Center Banjo and Kazooie on each pad before committing to the next jump.
From the Shock Spring area, cross the sequence of raised platforms toward the cliff face. Follow the route into the hollow in the cliff and collect the Jiggy there. This is one of the nine ordinary challenge Jiggies and must be counted separately from the Jinjo reward.
The Pink Jinjo is on one of the raised Shock Spring columns. Collect it when the route is safe, but do not mistake it for the Cliff Face Jiggy. If you fall into the water, return to the nearest beach or crate route and repeat the jumps from a centered position.
- Learn Shock Jump from Bottles.
- Cross the Shock Spring platforms toward the cliff face.
- Collect the Jiggy in the cliff-face hollow.
- Rescue the Pink Jinjo from the raised column route.
Learn Flight and reach the elevated chest
Climb the ship’s rigging to the crow’s nest and speak to Bottles again. He teaches Kazooie to fly and activates the Flight Pad on the ship. Collect red feathers before making a long flight. During flight, use the N64 controls taught by Bottles to gain height, steer and perform the Beak Bomb when needed; feathers are consumed by flight-related actions.
Launch from the ship and fly toward the stone archway and the small cave containing the large treasure chest. Enter the chest to collect its Jiggy. This route requires Flight and should not be attempted with ordinary jumps.
The Green Jinjo is on the mast or upper rigging of the Salty Hippo. Collect it after learning Flight. Keep the ship as your return landmark rather than swimming back through the open ocean.
- Learn Flight at the ship’s crow’s nest.
- Fly to the distant cave and collect the Jiggy inside the large chest.
- Rescue the Green Jinjo on the ship’s upper rigging.
Complete the lighthouse, high-pool and treasure-hunt objectives
Use the raised routes and ledges to reach the lighthouse hill. Behind the lighthouse is the Gruntilda Switch. Beak Buster it to launch a Jiggy outside Treasure Trove Cove. This is a separate Gruntilda’s Lair reward, not one of the ten world Jiggies, so leave it for the lair route or collect it when returning through the entrance.
Break the lighthouse door with eggs and enter. Use the Shock Spring Pad inside to reach the top and collect the ordinary lighthouse Jiggy. Do not confuse this Jiggy with the Witch Switch reward.
Climb the route toward the high pool near the raised island. The Jiggy is at the bottom of the pool. Dive from a position with an obvious exit, collect it, and surface immediately. The Orange Jinjo is near this pool.
For the treasure hunt, reach the tall green column marked with a red X. Beak Buster the X, then follow each arrow and ground-pound every successive red X. When the marker changes to a question mark, look toward the indicated small island and reach its final X. Beak Buster that marker, then break open the treasure chest that appears for the Jiggy. The sequence must be completed in order.
- Activate the Witch Switch behind the lighthouse, remembering that its Jiggy is a separate lair reward.
- Break the lighthouse door and collect the ordinary lighthouse-top Jiggy.
- Collect the high-pool Jiggy and the nearby Orange Jinjo.
- Complete the entire red-X treasure hunt and break open the final chest.
Finish the world total and optional collectibles
The remaining ordinary Jiggy is on the elevated route near the starting area. From the entrance, reach the platform with the ladder, then take the side path across the crates and ledges instead of climbing all the way upward. Follow that narrow route to the Jiggy.
The five Jinjos are Blue beneath the entrance pier, Green on the ship’s upper rigging, Pink on the Shock Spring columns, Orange near the high pool and Yellow on a palm tree near the lighthouse. Rescuing all five awards the tenth world Jiggy.
Sweep the beach, Nipper’s shell, ship, sandcastle, crate routes, cliff hollow, elevated cave, lighthouse hill, high pool and treasure-hunt path for Musical Notes. Raise the world’s best total to 100 if pursuing full completion. The two Empty Honeycombs are optional health upgrades; collect them during a final sweep rather than risking an unnecessary open-water detour.
- Collect the elevated side-route Jiggy.
- Rescue all five Jinjos and collect the Jinjo Jiggy.
- Reach 100 Notes for a full world clear.
- Collect both Empty Honeycombs if pursuing optional completion.
- Check the pause-menu report before leaving.
Before you move on
- The Treasure Trove Cove report shows 10 Jiggies.
- The five-Jinjo reward has appeared after rescuing the Blue, Green, Pink, Orange and Yellow Jinjos.
- The Nipper shell, Captain Blubber treasure, sandcastle, Cliff Face hollow, distant chest, elevated side route, high pool, lighthouse top and treasure-hunt chest have all been cleared.
- The world’s best Musical Note total shows 100 if pursuing full completion.
- Both Empty Honeycombs have been collected if pursuing the optional health upgrades.
- The Witch Switch behind the lighthouse has been activated if the separate Gruntilda’s Lair Jiggy is being collected.
- The pause-menu report, rather than visible enemy or item respawns, is the final confirmation before leaving the world.
References for this chapter
Clanker’s Cavern — Machinery, the Whale and Heavy Platforming
Clanker’s Cavern is the third playable world. Its ten Jiggies are divided among machinery challenges, underwater routes, Clanker’s interior, the Wonderwing tutorial and the five Jinjos. The level has no Mumbo transformation, so every required objective is completed with Banjo and Kazooie’s normal moves. The main hazards are limited air, moving machinery, rotating blades and narrow pipes. Raise Clanker before attempting the routes on his back or inside his body, and use the pause menu to verify Jiggies, Jinjos and Notes before leaving.
Clear the entrance area and prepare the water routes
Enter Clanker’s Cavern through its completed picture puzzle in Gruntilda’s Lair. From the entrance pipe, drop into the cavern and use the ladders beside the metal structure marked with the flammable warning. The upper pipes contain early Notes, feathers and a Mumbo Token. Collect these safe items before committing to the deeper water routes.
There is no Mumbo’s Skull and no transformation in this level. The required moves are swimming, Flap Flip, Beak Buster, Talon Trot, egg firing and, later, Wonderwing. Do not spend eggs attacking ordinary Snippets unless necessary. Eggs are most important for opening Clanker’s gold teeth, while health and feather supplies are useful before the blade sections.
If you are pursuing the 100-Note score, begin with the entrance and exit pipes, then take the pipe leading farther into the cavern. The first groups are safe to collect and establish a running total before the oxygen-heavy objectives begin.
- Collect the safe entrance-pipe Notes and supplies.
- Use the ladders beside the flammable warning to reach the upper pipes.
- Do not search for a Mumbo transformation in Clanker’s Cavern.
Raise Clanker and defeat the Mutie-Snippets
Swim toward Clanker and locate the green-lit pipe near his rear. Surface inside the pipe and defeat all four Mutie-Snippets. Stay on the higher ledge when possible and use Beak Buster attacks as they approach. Each defeated enemy leaves health, making this room a useful recovery point. When all four are defeated, reach the Jiggy in the centre by using the horizontal pipe marked with eggs.
Next, follow Clanker’s chain down into the deepest part of the cavern. The large keyhole is at the bottom. Swim completely through the keyhole three times to release Clanker. Gloop’s bubbles restore air during this dive, but do not wait until the meter is empty before using them. After the third pass, Clanker rises and the Jiggy on his back becomes accessible.
While you are at the bottom, rescue the green Jinjo beside the key and chain. This is separate from the Mutie-Snippet Jiggy. Collecting it now prevents another dangerous deep dive later.
- Defeat all four Mutie-Snippets and collect their Jiggy.
- Swim through the bottom keyhole three times.
- Use Gloop’s bubbles when the air meter becomes low.
- Collect the green Jinjo at the bottom of the key trench.
- Climb onto Clanker after he rises and collect the Jiggy on his back.
Complete Clanker’s back, blowhole and gold-tooth objectives
After Clanker rises, climb onto his back using a fin and a Flap Flip. Walk toward the tail and follow its movement instead of trying to jump ahead of it. From the tail, reach the platform with Red Feathers and break the vent grate with Rat-a-Tat-Rap or eggs. The Jiggy is behind the grate. If you fall after opening it, the vent remains open, so return to the platform and collect the Jiggy without repeating the attack.
Return to Clanker’s head and stand on the screw in his blowhole without entering the opening. When the screw launches upward, use it to reach the raised platform. Follow the narrow winding pipe, adjusting the camera before each bend, and use Flap Flip at the end to reach the Jiggy.
For the gold-tooth objective, use the floating platforms near Clanker’s head to line up your shots. Fire five eggs into the tooth that opens the mouth route, then enter the gap and collect the Jiggy inside. The other gold tooth opens a separate passage containing a Mumbo Token. Fire five eggs into that tooth as well if you want the optional token. The two tooth rewards are separate, and opening one does not complete the other.
- Break the tail vent and collect the Jiggy behind it.
- Ride the blowhole screw to the winding pipe and collect its Jiggy.
- Fire five eggs into the correct gold tooth and collect the mouth Jiggy.
- Use the other tooth for the optional Mumbo Token route.
Enter Clanker and learn Wonderwing
Stand on Clanker’s back and wait for the blowhole screw to rise, then enter the opening. The first interior passage contains slowly rotating blades. Watch a complete cycle before crossing. Move through immediately after a blade passes rather than forcing a jump into its path.
Use the Fly Pad in the interior chamber to reach the opposite side. Enter the tunnel marked by a Golden Feather and speak with Bottles. He teaches Wonderwing and supplies Golden Feathers. On the original Nintendo 64 control layout, hold Z and press C-Right to activate Wonderwing.
Wonderwing protects Banjo and Kazooie from damage while it is active, but it does not prevent falling. Activate it just before the rotating blades and release it once you are on stable ground. Cross the faster blade passage to collect the Jiggy at the far end. If you run out of Golden Feathers, leave the hazard route, collect nearby feathers and try again from the nearest safe platform.
- Enter Clanker through the blowhole.
- Learn Wonderwing from Bottles.
- Use Z plus C-Right on the original N64 controls.
- Cross the rotating blades and collect the interior Jiggy.
- Remember that Wonderwing does not prevent falls.
Complete the ring challenge and rescue the purple Jinjo
Return to the main interior water room and find the only green-and-white ring. Passing through it starts the ring challenge and a 48-second timer. Follow the next green-and-white rings in order. Some are underwater, some are above the surface and one requires a jump from the nearby crate. Use short Flap Jumps across the surface where possible, then dive only for the underwater rings.
After the final ring, the water rises and a Jiggy appears on a platform. Collect it, then leave through the side gap from the Jiggy platform. This route leads to a deep pit containing a beehive and the purple Jinjo. The Jinjo is not in the ring room itself; continue through the side route and dive to the bottom. Surface or use available air before the meter becomes critical.
The ring room also contains routes toward the Fly Pad and the second rotating-blade passage. Keep the room’s landmarks in view: the green starting ring, the raised Jiggy platform, the side gap with the beehive and the Fly Pad used to reach Wonderwing’s tunnel.
- Start at the single green-and-white ring.
- Pass every ring within 48 seconds.
- Collect the Jiggy revealed when the water rises.
- Leave through the side gap and dive for the purple Jinjo.
Collect the long-pipe Jiggy and the remaining Jinjos
Return to the cavern and fully refill Banjo’s air before entering the long underwater pipe. When facing Clanker, use the underwater pipe on his right-side route that extends through the cavern. The Jiggy is at the far end. Do not begin with a partially depleted air meter. If the return trip looks unsafe, turn around, surface and make another attempt.
The blue Jinjo is inside an underwater pipe on Clanker’s right side, beside the pipe containing the Mumbo Token. The yellow Jinjo is near the entrance: drop to the ground, climb the ladders by the flammable warning and follow the upper pipe route to the platform with the beehive. The yellow Jinjo is behind that beehive.
The orange Jinjo is reached from Clanker’s left fin. Use the fin to reach the Shock Spring Pad, bounce to the pole, climb to the top and jump left. Beak Buster the metal grate and enter the pipe to rescue the orange Jinjo. Along with the green Jinjo from the key trench and the purple Jinjo from Clanker’s interior, these five rescues produce the tenth Jiggy.
- Refill air before entering the long underwater pipe.
- Collect the long-pipe Jiggy and return safely.
- Rescue the blue Jinjo from the underwater pipe on Clanker’s right.
- Rescue the yellow Jinjo behind the entrance-area beehive.
- Rescue the orange Jinjo through the grated pipe reached from the left fin.
- Confirm that the five Jinjos produce the tenth Jiggy.
Sweep the Notes and activate the Witch Switch
The 100 Notes are arranged in fixed groups. The verified groups are 8 on the entrance and exit pipes, 6 in the pipe leading into the cavern, 8 around the lock and key, 7 in the long underwater pipe, 8 in the Mutie-Snippet room, 2 on the upper ledges, 4 on the pipe to the right of the extra-life platform, 5 on the pipe to the left, 10 on Clanker’s back, 10 on the pipe reached from his tail, 4 on the winding pipe reached by the blowhole screw, 6 in the blowhole approach, 5 in the lower-left interior gap, 3 in the upper interior gap near the beehive, 8 in Clanker’s mouth and 6 in the Wonderwing room. These groups total 100.
A safe route is to collect the entrance pipes, the deep lock-and-key Notes and the long underwater pipe first. Continue through the Mutie-Snippet room, the upper ledges and the fin-side pipes. After Clanker rises, collect the Notes on his back and tail route, then use the blowhole screw for the winding-pipe group. Finish the interior gaps, mouth and Wonderwing room after learning the layout.
The Witch Switch is inside Clanker, reached through the blowhole. Beak Buster it, then exit the level and return to the room with Gruntilda’s floor face. Beak Buster the raised eyes to receive the separate lair Jiggy. This reward is not an eleventh Clanker’s Cavern Jiggy.
- Use the landmark groups to reach exactly 100 Notes.
- Search the deep interior gaps separately from the ring-room route.
- Activate the Witch Switch inside Clanker.
- Collect the separate Witch Switch Jiggy in Gruntilda’s Lair.
- Check the pause-menu totals before leaving.
Before you move on
- Clanker has been raised by passing through the bottom keyhole three times.
- The Mutie-Snippets have been defeated and their Jiggy collected.
- All ten Clanker’s Cavern Jiggies are complete: Mutie-Snippets, Clanker’s back, tail vent, blowhole pipe, gold tooth and mouth, first blade route, ring challenge, Wonderwing blade route, long underwater pipe and five-Jinjo reward.
- All five Jinjos have been rescued: green at the bottom key trench, purple through the deep interior side route, blue in the underwater pipe on Clanker’s right, yellow behind the entrance-area beehive and orange through the grated pipe reached from the left fin.
- Wonderwing has been learned from Bottles.
- The internal Witch Switch has been activated.
- The pause screen shows 100 Notes for Clanker’s Cavern if pursuing the Note goal.
- Optional Mumbo Tokens and Empty Honeycomb Pieces still missing have been recorded before leaving.
- The Witch Switch Jiggy has been counted as a Gruntilda’s Lair Jiggy rather than as an additional Clanker’s Cavern Jiggy.
Bubblegloop Swamp — Salt, Sludge and Patience
Bubblegloop Swamp is built around temporary Wading Boots, dangerous piranha water, narrow timed routes, and a crocodile transformation that opens the final collectibles. Bottles teaches the Wading Boots move near the entrance. Mumbo transforms Banjo and Kazooie into a crocodile for ten Mumbo Tokens; this form is required for Mr. Vile’s challenge and makes the lower swamp routes much safer. The world has ten Jiggies, five Jinjos, and a 100-Note best score. On the original Nintendo 64 release, leaving or dying does not permanently preserve ordinary Note pickups, although the best Note score is retained, so complete the full Note sweep in one successful visit when pursuing the 100-Note goal.
Learn Wading Boots and establish the route
Enter Bubblegloop Swamp through its completed picture in Gruntilda’s Lair. Turn around near the entrance and defeat or bypass the nearby Flibbit to reach Bottles. Speak with him to learn how to use the Wading Boots. When Banjo and Kazooie pick up a pair, Kazooie carries Banjo safely across the piranha-infested shallow water for a limited time. The boots are temporary, so plan the destination before putting them on.
Use the pause screen to check the Bubblegloop Swamp totals before starting. The Jiggy and Jinjo counters record permanent progress, while the Note counter reflects the current attempt. The best Note score is the number that matters for full completion, but the individual Notes will need to be collected again if you leave or die before finishing the sweep.
The important landmarks are the entrance bridge, the raised green path, the floating logs and leaf, the golden Flibbit island, the giant egg, Tanktup, the hut pillars, the giant crocodile head, the maze, and Mumbo’s Hut. Use these landmarks to keep your route organized instead of repeatedly crossing the swamp.
- Learn Wading Boots from Bottles.
- Check the Bubblegloop Swamp counters before beginning.
- Identify the bridge, giant egg, Tanktup, hut pillars, crocodile head, maze, and Mumbo’s Hut.
Collect the first timed Jiggy and the nearby Jinjos
From the entrance, go straight ahead and turn right. Cross the bridge, jump to the log in the piranha water, and continue to the next platform. Beak Bust the Jiggy Switch, then immediately use Talon Trot to climb the angled green wall and reach the Jiggy before the timer expires. Do not stop to fight enemies once the switch is active. If the attempt fails, return to the switch and repeat the route.
The yellow Jinjo is on a pillar beside the entrance bridge. Collect it before or after the timed run. The green Jinjo is along the path leading toward the first Jiggy, so check the side platforms during the approach. These two rescues are separate from the timed Jiggy and must both be counted.
The entrance bridge contains five Notes. The path toward the first Jiggy contains another large Note group, so collect these while practicing the timed route. If you miss a Note during the first attempt, prioritize surviving and return after the Jiggy is secured.
- Beak Bust the entrance Jiggy Switch.
- Reach the timed Jiggy with Talon Trot.
- Rescue the yellow Jinjo by the entrance bridge.
- Rescue the green Jinjo along the first Jiggy route.
- Collect the entrance and first-route Notes when safe.
Complete the Golden Flibbits and giant egg Jiggies
Use the floating leaf and nearby platforms to reach the island with the sawn tree stumps. Defeat every Golden Flibbit on the island; once the group is cleared, the Jiggy appears. Fight from solid ground whenever possible. The swamp water is more dangerous than the frogs, so do not chase an enemy onto a narrow edge.
Ride the floating leaf toward the giant pink egg. Use the Shock Jump Spring to reach the top of the egg and follow the marked attack points. Beak Bust the first mark, drop to the next level and attack it, then continue between the upper and lower marks until the shell breaks and the Jiggy appears. The egg contains the Jiggy, not a separate Banjo Statue.
The giant egg route contains five Notes behind the egg and a Mumbo Token on the nearby pole. Collect them from stable platforms and wait for the leaf to return rather than taking an unplanned jump into the piranha water.
- Defeat all Golden Flibbits for one Jiggy.
- Break every marked section of the giant egg for another Jiggy.
- Collect the Notes behind the egg and the nearby Mumbo Token.
Open Tanktup and complete the Tiptup Choir
Find Tanktup near the central swamp. Beak Bust all four of the giant turtle’s feet. Once every foot has been struck, Tanktup opens his mouth and releases a Jiggy. The four feet are also a useful safe-ground route for collecting the Notes around Tanktup.
Enter Tanktup and speak with Tiptup. The smaller turtles sing in a sequence. Watch the order carefully, then Beak Bust the turtles in that same order. Complete all three sequences to receive the Tiptup Choir Jiggy. If you make a mistake, repeat the sequence rather than leaving the area; the objective is not complete until the reward appears.
Use the Wading Boots near Tanktup to cross behind him and rescue the orange Jinjo. Boots can expire or be knocked away, so begin from the pair nearest the intended route and avoid unnecessary combat while crossing.
- Strike all four of Tanktup’s feet.
- Complete all three Tiptup Choir sequences.
- Rescue the orange Jinjo behind Tanktup.
- Collect the Notes around Tanktup and inside his shell.
Climb the huts and activate the Witch Switch
Go to the group of huts standing on tall pillars. Use the Shock Jump Spring to reach the first hut, then Beak Bust the huts along the upward route to expose the next platforms. Continue until you reach the highest hut and collect its Jiggy.
One hut on this route contains the Bubblegloop Swamp Witch Switch. Activate it while climbing. Its reward is a separate Gruntilda’s Lair Jiggy and is not part of Bubblegloop Swamp’s ten world Jiggies.
The pink Jinjo is underneath the hut pillars. Banjo and Kazooie cannot safely reach it from the normal upper route, so mark its position and return after the crocodile transformation. The hut interiors and nearby pillar bases also contain Notes.
- Reach the highest hut and collect its Jiggy.
- Activate the Witch Switch beneath the hut route.
- Mark the pink Jinjo beneath the huts for the crocodile sweep.
- Collect the hut and pillar Notes.
Finish the swamp maze and Croctus sequence
Near the giant crocodile head, collect the Wading Boots and enter the swamp maze. Follow the safe solid-ground route until you reach the Jiggy Switch at the far end. Beak Bust it, then cross the narrow return route and collect the Jiggy before the short timer expires. The maze contains a large Note group, so collect it while moving through the area and use the available boots rather than taking damage through the water.
Five Croctuses are scattered through the level. When one opens its mouth, fire an egg into it. The Croctuses relocate after being fed, so continue following the sequence. The locations include the start area, the first Jiggy path, the hut route, behind the giant crocodile head, and the area behind Tanktup. Feed all five to receive the Croctus Jiggy.
Keep enough eggs for the Croctus sequence. If you lose track of one, retrace those five landmark areas rather than assuming a missed Croctus has disappeared.
- Cross the swamp maze and collect its timed Jiggy.
- Collect the maze Notes.
- Feed eggs to all five Croctuses.
- Collect the Croctus Jiggy after the fifth successful feeding.
Transform into a crocodile and defeat Mr. Vile
Collect at least ten Mumbo Tokens and enter Mumbo’s Hut. Pay Mumbo to transform Banjo and Kazooie into a crocodile. The crocodile can move through the piranha water without the normal danger, allowing a safer sweep of the lower swamp and access to the areas beneath the hut pillars.
As the crocodile, enter the giant crocodile head through its nose and speak with Mr. Vile. Complete all three eating challenges. The first compares the number of red Yumblies eaten. The second adds yellow Grumblies, which temporarily stop the crocodile when eaten. The final challenge requires eating the food currently shown at the top of the screen while avoiding the other type.
Winning the three Mr. Vile challenges awards the Mr. Vile Jiggy. The crocodile form also makes the remaining Notes and the pink Jinjo much easier to reach. Enter with full or near-full health because losing a challenge costs health and forces another attempt.
- Collect ten Mumbo Tokens.
- Transform into the crocodile.
- Complete all three Mr. Vile eating challenges.
- Collect the Mr. Vile Jiggy and the three Banjo Statues.
Rescue the final Jinjo and complete the Note sweep
While still transformed, return to the hut pillars and move beneath the correct tree to collect the pink Jinjo. The complete Jinjo route is yellow at the entrance bridge, green along the first Jiggy path, orange behind Tanktup, blue on the island near the later Croctus route, and pink beneath the hut pillars. Rescuing all five awards the tenth world Jiggy.
Use crocodile form to revisit the lower swamp, the water behind the blue Jinjo, the giant crocodile head, the maze entrance, the hut bases, and the crocodile interior. The Note groups total 100: the entrance bridge, floating logs, area behind the giant egg, first Jiggy route, Tanktup, hut, pillar base, crocodile head, nearby plant, water behind the blue Jinjo, maze, crocodile interior, and the crocodile-only hut base.
Before exiting, verify ten Bubblegloop Swamp Jiggies, five rescued Jinjos, and a 100-Note best score if pursuing full completion. The ten Jiggies are the first timed entrance Jiggy, Golden Flibbits, giant egg, Tanktup, Tiptup Choir, highest hut, swamp maze, Mr. Vile, Croctus, and five-Jinjo reward. The Witch Switch is tracked separately as a lair reward.
- Rescue the pink Jinjo beneath the hut pillars.
- Confirm all five Jinjo colors are complete.
- Reach a 100-Note best score before leaving if pursuing full completion.
- Verify all ten world Jiggies.
- Check the pause screen immediately before exiting.
Before you move on
- The world Jiggy total is ten: first entrance timed Jiggy, Golden Flibbits, giant egg, Tanktup, Tiptup Choir, highest hut, swamp maze, Mr. Vile, Croctus, and five-Jinjo reward.
- All five Jinjos are rescued: yellow by the entrance bridge, green along the first Jiggy path, orange behind Tanktup, blue on the later island route, and pink beneath the hut pillars.
- The Witch Switch beneath the hut route has been activated, with its reward counted separately as a lair Jiggy.
- The Bubblegloop Swamp best Note score reaches 100 if pursuing full completion.
- The pause screen has been checked before exiting the level.
Freezeezy Peak — Flying, Ice and Snowman Challenges
Freezeezy Peak is the fifth playable world in the original North American Nintendo 64 edition of Banjo-Kazooie. The level combines slippery snow, damaging icy water, flight challenges, Beak Bomb targets, Boggy's sled races and the Walrus transformation. You can collect nine of the world's ten Jiggies on the first visit. The final world Jiggy requires the Turbo Trainers learned from Bottles in Gobi's Valley. The Freezeezy Peak Witch Switch creates a separate Jiggy in Gruntilda's Lair and does not increase the world's ten-Jiggy total.
Rescue the Twinklies and enter the Christmas tree
Enter Freezeezy Peak through its picture in Gruntilda's Lair. Near the level entrance, find the large Christmas tree and the wooden walkway beside it. Use Beak Buster on the wrapped present to release the Twinklies. At least ten must reach the tree. Green Munchers rise from holes in the walkway and eat them, so defeat the Munchers as the Twinklies approach instead of running ahead and leaving them exposed.
When ten Twinklies reach the tree, go behind it and hit the switch with an egg. This starts a second timed sequence. Reach the nearby Flight Pad, take off and fly through the star above the tree three times. The ice inside the tree breaks, allowing you to enter through its lower opening. Climb the internal pole and platforms to the top and collect the Jiggy.
The snow slopes reduce stopping control. Talon Trot is useful for climbing, but release the Control Stick before jumping from narrow ledges. If you fall into the icy water as Banjo and Kazooie, move immediately toward a solid platform or shoreline; the water causes heavy damage.
- Use Beak Buster on the present.
- Escort ten Twinklies to the tree.
- Hit the rear switch and fly through the star three times.
- Climb inside the tree and collect the first Jiggy.
Learn Beak Bomb and activate the Witch Switch
Bottles is in the molehill behind the pile of presents near the main Flight Pad. Speak with him to learn Beak Bomb. While flying, press B to launch Kazooie forward. The move consumes a Red Feather, and striking a wall causes damage, so line up each target before attacking.
Use the Flight Pad to reach the two nearby killer snowmen. Beak Bomb the marked target on each hat. One defeated snowman leaves a Mumbo Token; the other reveals the Freezeezy Peak Witch Switch. Beak Buster the switch to create a Jiggy location in Gruntilda's Lair. That reward is not collectible inside the world yet.
From the Flight Pad, use the nearby ledge route to collect Notes and rescue the blue Jinjo on the snowman's broomstick. Cross the lake by jumping between solid platforms. Normal Banjo and Kazooie should not swim through this water as a shortcut.
- Learn Beak Bomb from Bottles.
- Defeat the two nearby killer snowmen.
- Activate the Freezeezy Peak Witch Switch.
- Rescue the blue Jinjo on the broomstick.
Climb the giant snowman and complete the present objectives
Cross the solid platforms around the lake to reach the giant snowman. Collect the Notes and Mumbo Tokens around its feet, then use Talon Trot to climb the scarf. At the top, rescue the Jinjo on the elevated sled. Near the sled is a Shock Spring Pad. Use it to reach the log route, cross the long log carefully and drop into the small opening to collect the snowman's pipe Jiggy.
Use the upper log route and another Shock Spring Pad to reach the third present. The three presents are located near the Christmas tree, on the small island by the snowman and on the upper log route. After collecting all three, return to the sled at the top of the scarf and ride it down. The sled lands on Boggy, who coughs up a Jiggy.
Return to the polar bear family's igloo at the entrance. Throw the three presents to the cubs to receive another Jiggy. The sled impact and the present delivery are separate rewards, so verify both have been collected.
- Rescue the Jinjo on the elevated sled.
- Collect the snowman's pipe Jiggy.
- Collect all three presents.
- Ride the sled into Boggy.
- Deliver the presents to the three cubs.
Attack the remaining snowmen and the giant snowman's buttons
Return to the main Flight Pad and fly toward the remaining killer snowmen. Beak Bomb the marked targets on their hats. The final snowman in this group makes a Jiggy appear on top of the giant snowman. Land carefully on the hat and collect it. Other defeated snowmen provide optional supplies such as an Empty Honeycomb and Mumbo Tokens.
Next, use the Flight Pad to reach the three large buttons on the front of the giant snowman. Beak Bomb all three. A Jiggy appears at the snowman's base on the central island. Fly down and collect it. Save Red Feathers for marked targets and the buttons rather than spending them on ordinary enemies.
- Defeat the remaining killer snowmen.
- Collect the Jiggy on the giant snowman's hat.
- Beak Bomb all three buttons.
- Collect the Jiggy at the snowman's base.
Become the Walrus and finish the first-visit objectives
Enter Mumbo's Skull with at least fifteen Mumbo Tokens. Before transforming, collect the Notes on the upper shelf and rescue the yellow Jinjo inside the skull near the shelves. Pay Mumbo to become the Walrus. The Walrus can safely enter the icy water and is needed for the sled-race route.
As the Walrus, collect the Notes around the lake and village. Rescue the green Jinjo behind the house with the Flight Pad on its chimney. Then climb the slope near the killer snowmen to find Boggy's race-start area. Start the race and pass every flag in order. Steer through the village turns, jump the house obstacle and avoid falling behind. Missing a flag can invalidate the attempt even if you reach the finish first.
Winning the first Walrus race awards a Jiggy. On the return route, the large walrus stops you and gives you another Jiggy. Follow him into his cave and enter the narrow opening beside the icy pool to collect the second Empty Honeycomb.
Return to Mumbo's Skull and change back into Banjo and Kazooie. Enter Wozza's Cave to rescue the orange Jinjo in the small alcove. The five-Jinjo reward then provides the ninth Freezeezy Peak world Jiggy. Wozza's Cave does not contain an additional ordinary Jiggy.
- Collect the yellow Jinjo in Mumbo's Skull.
- Pay fifteen Mumbo Tokens for the Walrus transformation.
- Rescue the green Jinjo behind the village house.
- Win the first Walrus sled race.
- Collect the large walrus's Jiggy and the second Empty Honeycomb.
- Return as Banjo and Kazooie and rescue the orange Jinjo in Wozza's Cave.
- Collect the five-Jinjo reward Jiggy.
Return after Gobi's Valley for the final world Jiggy
The tenth Freezeezy Peak world Jiggy requires the Turbo Trainers learned from Bottles in Gobi's Valley. Leave the level after the first-visit objectives, then return later as Banjo and Kazooie. Go back to Boggy's race-start area on the slope near the killer snowmen. The Turbo Trainers are available at the start of the rematch.
Put on the Turbo Trainers immediately and follow the same course on foot. Pass every flag and maintain the speed boost through the village section. Winning this rematch awards the tenth and final Freezeezy Peak world Jiggy. This is separate from the first race, which is completed in Walrus form.
- Learn Turbo Trainers in Gobi's Valley.
- Return to Boggy's race-start area.
- Win the Turbo Trainers rematch.
- Confirm ten Freezeezy Peak world Jiggies.
Collect the separate Freezeezy Peak Witch Switch Jiggy in the lair
Return to the Freezeezy Peak section of Gruntilda's Lair after learning Turbo Trainers. In the room near the Freezeezy Peak entrance, use blue eggs to remove the web covering the floor opening. Enter the opening and activate the hidden switch to create a Flight Pad in the central room.
Use the Turbo Trainers near the switch and run to the temporary Flight Pad before it disappears. Fly through the upper passage above the Freezeezy Peak entrance, continue through the icy tunnel and land in the upper alcove containing the Jiggy. Do not touch down before reaching the destination or the flight route will end.
This reward belongs to Gruntilda's Lair. The Freezeezy Peak world tally remains ten Jiggies after it is collected.
- Remove the web with blue eggs.
- Activate the hidden Flight Pad switch.
- Use Turbo Trainers to reach the temporary Flight Pad.
- Fly through the upper passage and collect the separate lair Jiggy.
Before you move on
- The Freezeezy Peak tally shows ten world Jiggies: the Christmas tree, snowman's pipe, Boggy sled impact, present delivery, giant snowman buttons, killer snowman reward, first Walrus race, large walrus reward, five-Jinjo reward and Turbo Trainers rematch.
- All five Jinjos have been rescued: blue on the broomstick, pink on the present pile near Bottles, yellow in Mumbo's Skull, green behind the village house and orange in Wozza's Cave.
- The level's best Note score shows 100 if pursuing full Note completion.
- Both Freezeezy Peak Empty Honeycombs have been collected if pursuing health upgrades.
- The Freezeezy Peak Witch Switch has been activated and its separate Jiggy has been collected from the upper lair alcove.
- The world total remains ten Jiggies; the Witch Switch reward is counted separately among Gruntilda's Lair Jiggies.
Gobi’s Valley — Desert Puzzles and Sphinx Challenges
Enter Gobi’s Valley after opening its nine-Jiggy picture in Gruntilda’s Lair. The Wading Boots are required to cross the lair’s sand outside the entrance, but they are not a Gobi’s Valley collectible. Inside the world, use Jinxy the sphinx as your main landmark, learn Turbo Talon Trot from Bottles, and then use the Running Shoes to open the pyramid sequence. The ten level Jiggies come from Jinxy’s interior, the matching game, freeing Gobi, Trunker’s water, the Running Shoes pyramid, King Sandybutt’s maze, Grabba, Histup, the flying rings, and the five-Jinjo reward.
Enter the valley and establish the safe route
In Gruntilda’s Lair, complete the Gobi’s Valley picture with nine Jiggies. Return to the giant-vase area, break the bricked wall beside the stairs with eggs, collect the Wading Boots, and cross the lair’s quicksand to the level entrance. The boots expire quickly, so plan the route to the entrance before picking them up.
After entering Gobi’s Valley, turn around and rescue the yellow Jinjo near the start and exit pad. This is Jinjo one. Return to solid ground whenever possible; the hot sand damages Banjo and Kazooie, while the narrow ledges around the valley can cause an immediate fall. Jinxy, the large sphinx, is the central landmark for the early route.
- Complete the Gobi’s Valley picture with nine Jiggies.
- Use the Wading Boots in Gruntilda’s Lair to reach the entrance.
- Rescue the yellow Jinjo behind the level entrance.
Learn Turbo Talon Trot and open Jinxy
From the entrance, move up the slopes to find Bottles beside a palm tree. Talk to him to learn Turbo Talon Trot. This move is needed for the steep slopes and later Running Shoes route, so learn it before attempting the major pyramid challenges.
Climb onto Jinxy and use the raised pillars near his face to reach the two nostrils. Fire one egg into each nostril. Both entrances open when the two shots register. Enter Jinxy and feed eggs to the small sphinx statues. Each statue raises the next magic carpet. Move promptly from one carpet to the next, because a carpet can lower if you wait too long. Follow the carpets to the Jiggy at the end. After feeding the first statue, turn right and jump onto the nearby carpet to rescue the orange Jinjo.
- Learn Turbo Talon Trot from Bottles.
- Fire eggs into both of Jinxy’s nostrils.
- Complete the carpet route inside Jinxy.
- Rescue the orange Jinjo inside Jinxy.
Complete the matching pyramid
Find the flat-roofed pyramid beside the deep sandpit. Use Turbo Talon Trot to reach its roof and activate the switch. You have a short period to reach the opened entrance, so identify the doorway before pressing the switch and run directly to it.
Inside, defeat or avoid the Mum-mum, then begin the matching game. Beak Bust a tile to reveal its image; the timer starts when the first tile is opened. Memorize the locations of the matching pairs and reveal both members of each pair. The set includes Banjo, Kazooie, Mumbo, a Yellow Jinjo, a Note, an Egg, a Honeycomb, and a Red Feather. Completing all pairs awards a Jiggy. The green Jinjo is behind this pyramid, so check the rear exterior before leaving.
- Activate the flat-roofed pyramid switch.
- Reach the opened door before the short timer expires.
- Match all eight image pairs.
- Rescue the green Jinjo behind the pyramid.
Free Gobi and water Trunker
Near the matching pyramid, wait for the flying carpet to pass over the deep sandpit and step onto it. The carpet carries you to Gobi, who is tied to a stake. Beak Bust the stake to free him and collect the Jiggy he gives you. This is the third level Jiggy.
Return to the valley entrance. Gobi is now sheltering beneath Trunker, the palm tree. Jump onto Gobi’s back to make him spit water onto Trunker, then use the nearby trees and Feathery Flap to reach the Jiggy on top of the now-watered tree. Do not try to cross the hot sand casually; approach from the nearby solid platforms and use the available ledges.
- Use the flying carpet to reach Gobi.
- Beak Bust the stake and collect Gobi’s Jiggy.
- Make Gobi water Trunker.
- Reach Trunker’s top and collect the Jiggy.
Use the Running Shoes to drain the deep sandpit
Go to the deep sandpit with the central platform and find Bottles’ molehill on the slope. Bottles teaches the Running Shoes here. The shoes are a temporary speed power-up, so first identify the pyramid switch and the trapdoor you must reach.
Collect the Running Shoes near the non-pyramid building, run to the switch, and cross it while wearing the shoes. Banjo and Kazooie cannot Beak Bust the switch while the shoes are active; running over it is the intended action. Sprint up the pyramid and drop through the opened trapdoor before the timer expires. Dive through the interior water chamber and collect the Jiggy. Completing this challenge permanently changes the deep sandpit into a lake.
- Learn the Running Shoes from Bottles.
- Run over the pyramid switch while wearing them.
- Reach the trapdoor before it closes.
- Dive into the pyramid and collect the Jiggy.
- Confirm that the deep sandpit has become a lake.
Clear King Sandybutt’s maze and rescue its Jinjos
After the sandpit becomes a lake, find the stone head near the water. Stand on the platform in front of it and fire three eggs into its mouth each time it appears. Repeat this at its successive locations until the King Sandybutt pyramid rises from the platform.
Enter the pyramid and begin the maze immediately. When the wall closes behind you, run to Banjo’s right and keep moving. At the first corner, head toward the dead end and activate the Witch Switch, then continue in the same general direction until the moving wall sequence ends. The sarcophagus opens automatically and contains the Jiggy.
Rescue the pink Jinjo from an urn beside the sarcophagus before leaving. If you exit first, you must repeat the maze. After the pyramid challenge is complete, dive into the lake around the pyramid to collect the blue Jinjo.
- Feed three eggs to the stone head at each location.
- Complete King Sandybutt’s moving-wall maze.
- Activate the Witch Switch inside the maze.
- Collect the sarcophagus Jiggy.
- Rescue the pink Jinjo before exiting.
- Dive into the new lake for the blue Jinjo.
Complete Grabba, Histup, and the flying rings
Use the Running Shoes from the previous route, or the spare pair near the start, to reach the sandy far corner where Grabba guards a Jiggy. Cross the nearby sand with the Wading Boots if needed, activate the shoes, and run to Grabba’s platform. Take the Jiggy as soon as it appears. The Beak Bomb can also reach this reward, but the Running Shoes are the straightforward method.
Return to Jinxy’s back and use the Flight Pad. Beak Bomb the Kazooie target on the nearby pyramid statue, then land and enter the opened temple. Inside, fire eggs from behind the podium so they strike the rotating pot around the snake basket. After five successful hits, Histup appears. Climb the snake to collect the Jiggy.
Use the Flight Pad again and fly through the golden ring above the ancient statue. Continue through each newly appearing ring. Passing through all five rings awards the final ordinary level Jiggy on Jinxy’s back. Stabilize your height before each approach and use wide turns rather than sharp corrections.
- Take Grabba’s Jiggy from the sandy far corner.
- Beak Bomb the Kazooie target on the pyramid statue.
- Hit the rotating pot five times with eggs.
- Climb Histup and collect the Jiggy.
- Fly through all five golden rings.
Finish the Jinjo set, Notes, and the level check
The five Jinjos are: yellow near the entrance, orange inside Jinxy, green behind the matching pyramid, pink in an urn beside the King Sandybutt sarcophagus, and blue in the lake after the Running Shoes pyramid is completed. Rescuing all five awards the Jinjo-family Jiggy, bringing the valley total to ten.
For 100 percent completion, sweep the solid routes around Jinxy, the pyramid exteriors, the matching-game pyramid, the underwater chamber, King Sandybutt’s lake, the Grabba route, and the flight areas. Use the pause menu to verify the world’s Jiggy, Note, and Jinjo counters before leaving.
When the maze Witch Switch has been activated, leave the level and return to the nearby Gruntilda’s Lair area. Use the Shock Spring Pad to reach the sarcophagus outside the level entrance and collect the Witch Switch Jiggy. This reward is in the lair, not part of Gobi’s Valley’s ten-world-Jiggy total.
- Rescue all five Jinjos and collect the Jinjo-family Jiggy.
- Verify ten Gobi’s Valley Jiggies for full world Jiggy completion.
- Verify 100 Notes if pursuing full completion.
- Use the pause menu to confirm the remaining totals.
- Collect the separate Gruntilda’s Lair Witch Switch Jiggy after exiting.
Before you move on
- The pause menu shows ten Gobi’s Valley Jiggies for complete world Jiggy collection.
- The pause menu shows five rescued Jinjos, and the final rescue has awarded the Jinjo-family Jiggy.
- The Note counter shows 100 if pursuing full completion.
- Jinxy’s interior, the matching pyramid, Gobi’s stake rescue, Trunker, the Running Shoes pyramid, King Sandybutt’s maze, Grabba, Histup, and the five-ring flight challenge are complete.
- The separate lair Witch Switch Jiggy has been collected after leaving the world if pursuing total game completion.
References for this chapter
Mad Monster Mansion — Tricks, Nightmares and Interior Mazes
Mad Monster Mansion is the seventh world of Banjo-Kazooie and contains a mansion, church, graveyard, hedge maze, pond, well, cellar and Tumblar’s shed. Complete the normal Banjo and Kazooie objectives first, then return to Mumbo’s hut for the Pumpkin transformation. The Pumpkin is needed for Loggo’s bathroom route, the well Jiggy and the pipe Jiggy. For the full ten-Jiggy clear, do not overlook Motzand’s organ lesson inside the church or the Witch Switch in the church rafters.
Open the mansion routes and take the cellar Jiggy
Enter Mad Monster Mansion from the graveyard area of Gruntilda’s Lair after completing the ten-Jiggy picture puzzle. Before entering the world, smash the gate beside the entrance if it is still closed. This gate is the practical route between the mansion grounds and the surrounding lair areas, and opening it prevents unnecessary detours later.
At the mansion, circle around the outside and break the accessible window to enter the dining room. Collect the Notes on the chairs, then leave without disturbing the wooden floor around Napper’s table. Napper wakes when the floorboards are touched, so save that objective until you can enter from the roof and move across the furniture.
Find the cellar entrance outside the mansion near the churchyard gate. Break the cracked boards with a Beak Buster, enter the cellar and destroy the appropriate barrels. One barrel contains the cellar Jiggy and another contains the pink Jinjo. Check every barrel carefully, but do not assume that the first barrel you break contains the reward.
- Open the gate beside the level entrance.
- Enter the dining room through the window and collect its Notes.
- Break into the cellar and collect its Jiggy and pink Jinjo.
Reach the roof, bedroom and Napper’s table
Use the drainpipe at the side of the mansion to climb toward the roof. Talon Trot is safer than ordinary running on the sloped roof sections. Follow the roof to the windows and break the glass so the upper rooms are available for later Pumpkin access.
Enter the bedroom and use the Shock Spring Pad to reach the top of the bed. The yellow Jinjo is there. Continue across the roof to the small chimney, where the green Jinjo is waiting. The roof also contains Notes and routes into the dining room, so collect the visible groups while you are already positioned above the mansion.
Use the Shock Spring Pad that drops through the chimney into the dining room. Banjo and Kazooie must cross the chairs and reach the table without touching the floor. Walk into Napper to wake him, then take the Jiggy he was guarding. If you fall, leave through the chimney and repeat the route; trying to recover from the floor only makes the room harder to control.
- Break the upper mansion windows.
- Rescue the yellow bedroom Jinjo.
- Rescue the green chimney Jinjo.
- Reach Napper across the chairs and collect his Jiggy.
Open the church and complete its outdoor Jiggies
Go through the graveyard toward the church. The main church door is initially shut. Near the pond and blue Jinjo is a clock switch. Beak Bust the switch, immediately put on the Running Shoes, and run to the church before the timed opening closes. If you miss the window, return to the switch and try again rather than attacking the locked door.
Around the church are five flower pots. Fire an egg into each pot. When all five have been activated, the flower-pot Jiggy appears. Use short, deliberate egg shots so you do not waste ammunition or accidentally reposition yourself near the gravestones.
For the church-roof Jiggy, climb onto the church exterior and use the available Shock Spring Pad and sloped roof ledges to reach the upper tower area. The narrow roof sections are easier with Talon Trot. Use first-person view with C Up when the camera hides the ledge beneath Banjo’s feet, then return to the normal view before committing to the next jump.
- Activate the clock switch near the pond.
- Use the Running Shoes to enter the church during the timed opening.
- Fire eggs into all five flower pots.
- Collect the church-roof Jiggy.
Solve Tumblar’s letter challenge
Tumblar is inside the shed near the church. Jump onto the rotating glass platform and spell BANJO KAZOOIE by crossing the letters in order. The platform rotates beneath you while a Tee-Hee moves around the area, so plan the next letter before making a turn.
Use small Control Stick movements and stay near the center whenever possible. Do not jump simply because the enemy approaches; allowing the Tee-Hee to pass is usually safer than making a blind leap. Gruntilda spaces and enemy contact cost health, so enter with a few honeycombs remaining.
When the complete name has been entered, Tumblar leaves and the Jiggy becomes available. If you fall, re-enter the shed and restart the challenge. The attempt does not require any Pumpkin ability.
- Enter Tumblar’s shed as Banjo and Kazooie.
- Spell BANJO KAZOOIE on the rotating platform.
- Collect Tumblar’s Jiggy.
Clear the hedge maze and collect the blue Jinjo
The hedge maze is beside the mansion and church. Enter through the opened gate and keep track of the route back to the entrance. The tight camera can make identical hedge corridors look interchangeable, so use landmarks such as the entrance, corners containing Notes and the central turns rather than wandering randomly.
The orange Jinjo is in the hedge maze. Reach the far corner, collect it and then retrace your route. Tee-Hees can push Banjo into dead ends or hazards, so lure them into a wider section before attacking. Press C Up briefly if the camera is pressed against a hedge and you can no longer see the next opening.
The blue Jinjo is in the pond area near the mansion. Use the Shock Spring Pad to reach the raised position where it is located. Avoid the Whipcrack and do not remain in the water longer than necessary. This Jinjo is separate from the hedge-maze rescue and must be counted independently.
- Rescue the orange Jinjo in the hedge maze.
- Collect the hedge-maze Notes while following a route you can retrace.
- Use the Shock Spring Pad to rescue the blue pond Jinjo.
Play Motzand’s organ lesson
Enter the church after opening its timed door. Motzand’s organ lesson is another required Jiggy objective and is easy to overlook because the church also contains the flower pots, Notes and Witch Switch. Find the giant organ and stand in front of its keys.
Motzand plays a sequence of organ notes. Watch and listen to the keys he activates, then repeat the same sequence by striking the corresponding keys with Beak Buster. The sequence must be copied in order; hitting unrelated keys can cause the attempt to fail.
If the sequence is missed, wait for the challenge to reset and try again. Keep Banjo positioned centrally so the camera does not swing behind the organ. Completing the sequence awards the organ Jiggy.
- Enter the church after opening its clock-controlled door.
- Watch Motzand’s complete organ sequence.
- Repeat the keys in the same order.
- Collect the organ Jiggy.
Activate the church Witch Switch
The level’s Witch Switch is in the rafters of the church. Reach the upper interior ledges and use the Flight Pad to fly to the rafters. This requires normal Banjo and Kazooie movement, so do not transform before completing this task.
Ground Pound the Witch Switch to make a Jiggy appear in the eye of the Gruntilda statue in the lair’s cobweb room. The Jiggy is not inside Mad Monster Mansion itself. Leave the world, return to the indicated lair statue and break the eye to collect it. If the eye is difficult to reach, use the route around the statue’s hat and nose, or use the flight route if the relevant lair access is available.
This reward is a lair Jiggy associated with the mansion’s Witch Switch, not one of the ten Jiggies counted inside the world. It is optional for finishing the level but useful for opening later lair puzzles.
- Reach the church rafters.
- Activate the Witch Switch.
- Return to Gruntilda’s Lair and collect the Jiggy from the statue’s eye.
Return as the Pumpkin for Loggo, the well and the pipe
Visit Mumbo’s hut and transform into the Pumpkin. Before doing so, make sure the normal Banjo-and-Kazooie objectives are complete: the roof, Napper, Tumblar, church, Motzand, hedge maze and pond routes are much easier in the standard form.
As the Pumpkin, use the small opening near the churchyard and hedge maze to reach the mansion roof. Enter through a previously broken upper window and jump into Loggo the toilet. Loggo flushes the Pumpkin into a plumbing area. Follow the passage to the Jiggy, then return through the plumbing route and leave the mansion.
The Pumpkin can also enter the well near the mansion. Drop to the bottom and follow the passage to the well Jiggy. Finally, use the Pumpkin route to climb toward the upper mansion area and enter the small pipe near the roof for the last Pumpkin-only Jiggy. These are separate rewards; collecting Loggo’s Jiggy does not also award the well or pipe Jiggy.
- Transform into the Pumpkin at Mumbo’s hut.
- Use Loggo to reach the plumbing-area Jiggy.
- Collect the Jiggy at the bottom of the well.
- Enter the upper pipe as the Pumpkin and collect its Jiggy.
Finish the Jinjo reward and verify the level
The five Mad Monster Mansion Jinjos are the pink Jinjo in the cellar, yellow Jinjo in the bedroom, green Jinjo on the mansion chimney, orange Jinjo in the hedge maze and blue Jinjo in the pond. After the fifth rescue, the Jinjo family reward appears and supplies the tenth in-level Jiggy.
The ten in-level Jiggies are the cellar barrel, Napper, Tumblar, Motzand’s organ, the church roof, the flower pots, Loggo, the well, the upper pipe and the five-Jinjo reward. If your level Jiggy total is short, use this list rather than repeatedly searching the same room.
On the original Nintendo 64 release, Musical Notes are not permanently retained after leaving a world. The level’s Jiggies and Jinjo reward are permanent, while Notes must be recollected if you leave and return. Before exiting, pause to confirm the Jiggy total and use the current run’s Note count only as a temporary progress check.
- All five Jinjos are rescued.
- All ten Mad Monster Mansion Jiggies are collected if seeking a full level clear.
- The church organ and Witch Switch have both been checked separately.
- The pause menu confirms the permanent Jiggy progress before exiting.
Before you move on
- The cellar, mansion roof, dining room, bedroom, church, organ, Tumblar’s shed, hedge maze, pond, well and upper pipe have all been checked.
- The ten in-level Jiggies are complete: cellar, Napper, Tumblar, Motzand, church roof, flower pots, Loggo, well, pipe and Jinjo reward.
- The five Jinjos have been rescued and the Jinjo family has awarded its Jiggy.
- The church Witch Switch has been activated and its separate lair Jiggy has been collected if pursuing broader completion.
- The pause menu confirms the intended Mad Monster Mansion Jiggy total before returning to Gruntilda’s Lair.
Rusty Bucket Bay — Shipboard Hazards and Furnace Puzzles
Rusty Bucket Bay is the eighth playable world in the original North American Nintendo 64 release of Banjo-Kazooie. The polluted harbor surrounds the Rusty Bucket cargo ship, whose decks, cranes, cabins, storage containers and engine room contain ten Jiggies, five Jinjos and 100 Musical Notes. Work from solid platforms, use the ship’s switches before attempting the most dangerous routes, and check the pause totals before leaving.
Enter the harbor and collect the warehouse Jiggy
The level begins beside the entrance pad near the harbor. The oily water damages Banjo, so use walkways, roofs, ladders and ship platforms whenever possible. Swim only when you have already identified the opening or ledge where you will resurface.
Go left from the entrance to the opening marked Toll 2 and fire the required eggs into it. Follow the revealed walkway past the Chompa, then use Talon Trot to cross the roof. At the far side, Beak Buster the skylight to drop into the warehouse. A Jiggy rests on a box inside; use Flap Flip Jump to reach it.
The warehouse can also be entered through its main entrance. If you miss the roof route, return later rather than spending health crossing the oil. The Jiggy remains available until collected.
- Use the harbor walkways instead of crossing oily water without a destination.
- Open the Toll 2 route with the required egg shots.
- Drop through the warehouse skylight and collect the Jiggy on the box.
Raise the ship cage and solve the numbered pads
Leave the warehouse through its lower exit and climb back toward the Toll 2 route. Cross the roofs toward the crane beside the toxic pond. Use the Shock Pad to reach the grated walkway, then Beak Barge the red upward-pointing button on the crane. This raises the suspended cage on the ship deck for a limited time.
Climb the ladder beside the crane, run along the crane arm and drop onto the ship. Reach the raised cage and collect the second Jiggy before it lowers. From the cage, Flap Flip Jump to the higher deck behind it.
The higher deck contains three numbered pads. Strike them with Beak Buster in the sequence 3, 1, 2, 1, 1, 1 to receive the third Jiggy. The sequence is displayed on the ship’s starboard side between the cranes, so you can verify it before committing to the puzzle.
- Activate the crane button only when you are ready to make the timed run.
- Collect the cage Jiggy before the cage descends.
- Enter the numbered-pad sequence 312111 for the third Jiggy.
Reach the Captain’s Quarters and the smokestack Jiggy
Drop to the lower deck and follow the ship’s starboard side toward the bow. Look for the appropriate bow-side porthole set into the ship’s wall. Break it with Rat-a-Tat-Rap and enter the Captain’s Quarters.
Inside, deal with the nearby enemy if it blocks your movement, then locate the small closet door. Break the closet door to open the short route to the Jiggy. Use Flap Flip Jump to reach the Jiggy above the opened closet. This is the Captain’s Quarters reward, not a captain’s mess or galley objective.
Continue along the lower deck and climb the grated walkways and ladders between the smokestacks. Stop on each solid platform before starting the next crossing. Climb to the top of the designated smokestack for another Jiggy; the opposite smokestack contains a Mumbo Token instead. The Shock Pad can help with the nearby elevated route.
- Enter the Captain’s Quarters through the bow-side porthole.
- Break the small closet door and use Flap Flip Jump to collect the fourth Jiggy.
- Cross the smokestack walkways and collect the fifth Jiggy.
Open the cargo hold and defeat Boss Boom Box
From the smokestack area, climb the large boxes near the back of the ship to reach the suspended box and its rope. Cross the crane above the deck, drop to its front and Beak Barge the red downward-pointing button. The TNT box falls, explodes and opens a hole into the cargo hold.
Drop through the hole to fight Boss Boom Box. Wonderwing is the safest method: touch the large box while protected so it splits into two smaller boxes, then repeat the process until the smaller pieces are destroyed. If Golden Feathers are limited, use eggs from the room’s perimeter while continuing to move, or jump on exposed boxes when the height allows it.
Destroy every stage and collect the sixth Jiggy. Use the ladders to leave the hold. If the fight costs too much health, leave, refill at a beehive and return; the TNT opening does not need to be recreated.
- Strike the crane’s downward button to drop the TNT box.
- Defeat every Boss Boom Box stage rather than stopping after the first split.
- Collect the sixth Jiggy before returning to the deck.
Slow the engine room and collect its Jiggy
At the rear of the ship, locate the two vents. When facing toward the front of the ship, enter the right-hand vent; the other vent contains a Grimlet. Defeat the Seaman Grublin inside and Beak Buster the Propeller Switch. This slows the machinery in the engine room and makes the first crossing manageable.
Return to the deck and enter the small Beak Barge door beside the rearmost smokestack. Follow the walkway, defeat or pass the Grille Chompa, and descend the ladders. A beehive at the bottom restores health before the machinery section.
Inside the engine room, wait for the winding platform to complete its rotation, then cross it. Use Flap Flip Jump to reach the first gear, immediately jump to its higher section, and continue across the remaining gears. At the fluctuating propeller, wait until it has finished its fastest rotation and begins slowing, then jump through the opening. Talon Trot can help keep Banjo aligned. Continue straight to the seventh Jiggy.
The engine room also contains a valuable Note group. On the original N64 version, collected Notes and Jinjos return after a life is lost, so collect this group only when you are prepared to finish the section or repeat it after a death.
- Activate the rear vent’s Propeller Switch before entering the engine room.
- Refill health at the beehive before crossing the machinery.
- Collect the seventh Jiggy and any engine-room Notes you can safely secure.
Stop the rear propellers and claim the timed Jiggy
From the first engine-room Jiggy, return to the nearby platform and take the right-hand route. Talon Trot through the next propeller only after it slows, then Beak Buster the Propeller Switch beyond it. Turn back through the propeller, continue forward and cross the next one to reach the second switch. Beak Buster that switch to stop the ship’s rear propellers for 65 seconds.
Take the right-hand path immediately. Some platforms remain vertical when the timer starts, so wait for a full rotation before jumping. Drop down the gears, cross the winding platform after it completes its rotation, climb the ladders and leave the engine room. Ignore optional enemies and pickups during the escape.
At the stern, jump into the water and dive beneath the stopped propellers to collect the eighth Jiggy. Watch your air meter and approach from a direction that gives you a clear return path. If you fail, return to the engine room, reactivate the switches and repeat the route. Learn the escape before starting the timed attempt, because the timer begins only after the second switch.
- Strike both engine-room Propeller Switches before beginning the timed escape.
- Wait for rotating platforms to complete a useful cycle instead of rushing them.
- Dive beneath the rear propellers and collect the eighth Jiggy before 65 seconds expire.
Free Snorkel and rescue the five Jinjos
Swim to the front of the Rusty Bucket and dive beneath the anchor. Follow the anchor chain through the opening, surface inside the passage and take the tunnel on the right. Chompas fill the route, so use Rat-a-Tat-Rap when one blocks your path and avoid unnecessary time in the water.
At the end, Beak Buster the anchor switch. The anchor rises, Snorkel is released and the ninth Jiggy appears outside. Return through the passage and collect it.
Rescue the five Jinjos for the tenth Jiggy. The Pink Jinjo is underwater in the opening beside the large grille and beehive near the entrance. The Yellow Jinjo is on a buoy after the Toll 2 bridge. The Green Jinjo stands on a barrel in the toxic pond. After the Toll 4 bridge, climb onto the blue storage containers and drop through the opening in the second container to find the Blue Jinjo behind boxes. Reach the second crane through the rope route and Toll 8 bridge to find the Orange Jinjo at the end of the path.
- Raise the anchor and collect Snorkel’s Jiggy.
- Plan the Pink Jinjo dive around the available oxygen.
- Rescue all five Jinjos and collect the final Jinjo Jiggy.
Search for Notes and verify the world totals
Before exiting, search the harbor walkways, ship portholes, kitchen, crane arms, storage containers, toxic pond and anchor route for remaining Notes. The engine room contains one of the most dangerous groups, so if you died after collecting it, repeat that section before leaving. Use beehives between long attempts and avoid spending health on enemies in the oil.
Open the pause menu and check Rusty Bucket Bay’s Jiggy, Jinjo and Note totals. A full world clear is ten Jiggies, five Jinjos and 100 Notes. These totals are separate from Gruntilda’s Lair Witch Switch Jiggies and from the cumulative Note total used by Note Doors.
If you are continuing the campaign rather than completing the world, leave once you have the Jiggies required for your next lair puzzle. If you are pursuing full completion, do not rely on memory: confirm the totals before exiting and repeat any missing engine-room or underwater route while the level layout is familiar.
- Confirm ten Jiggies if completing Rusty Bucket Bay fully.
- Confirm five rescued Jinjos and 100 Notes for the world’s complete totals.
- Repeat the engine room after a death if its Notes returned.
- Verify the pause-menu totals before leaving the level.
Before you move on
- Rusty Bucket Bay shows ten Jiggies, five rescued Jinjos and 100 Musical Notes if the world is being completed fully.
- The warehouse, cage, numbered pads, Captain’s Quarters and smokestack Jiggies are collected.
- Boss Boom Box is defeated and its Jiggy is collected.
- The rear vent switch was activated, the first engine-room Jiggy was collected, and both Propeller Switches were used for the timed rear-propeller Jiggy.
- Snorkel has been released, the anchor is raised and Snorkel’s Jiggy is collected.
- The pause menu confirms the intended totals before leaving the level.
Click Clock Wood — Seasonal Doors and Timed Puzzles
Click Clock Wood is the final regular world in the original North American Nintendo 64 release of Banjo-Kazooie. Its four seasonal versions use the same central tree and surrounding landmarks, but actions in Spring affect Summer, Autumn and Winter. Work through the seasons in order: establish the level in Spring, feed Eyrie and advance the plant in Summer, finish the dependent objectives in Autumn, then collect the blue Jinjo and Eyrie’s final reward in Winter. The world contains 10 Jiggies, five Jinjos and 100 Musical Notes. The Notes are distributed as 20 in Spring, 16 in Summer, 48 in Autumn and 16 in Winter. The Witch Switch reward reached from Click Clock Wood is a separate Gruntilda’s Lair Jiggy and does not increase the world total.
Open Spring and learn the layout
Enter the Click Clock Wood area of Gruntilda’s Lair and look for the four seasonal entrances around the central hub. They are marked with a flower for Spring, a sun for Summer, a leaf for Autumn and a snowflake for Winter. Beak Bust the switch beside the Autumn entrance to open the Spring door, then enter Spring.
Use the central lake, Mumbo’s Hut, the beehive, Gnawty’s house, Nabnut’s house, the unfinished treehouse and Eyrie’s nest as navigation landmarks. The same locations appear in several seasons, but their routes and contents change. Keep a written seasonal checklist because the pause menu gives the level total rather than a complete location-by-location Jinjo or Note list.
If you are attempting the 100-Note score, use the verified seasonal targets: 20 Notes in Spring, 16 in Summer, 48 in Autumn and 16 in Winter. On the original Nintendo 64 version, ordinary collected Notes are not permanently retained after leaving or dying, although the best Note score is retained. A complete 100-Note attempt therefore needs to finish with the target score before exiting or losing the run.
- Open Spring with the switch beside the Autumn entrance.
- Identify the tree, Mumbo’s Hut, beehive, Gnawty’s house, Nabnut’s house and Eyrie’s nest.
- Record the Note targets: 20 Spring, 16 Summer, 48 Autumn and 16 Winter.
Spring: plant the seed, hatch Eyrie and collect the first rewards
Near the bull, find the fenced patch containing the planting hole. Fire five Eggs into the hole. This starts the plant sequence; it is not a watering task in Spring. The plant will grow further after Gobi waters it in later seasons.
Climb the tree using the branches and Shock Pads. Near the upper route, break the large pink egg with Beak Buster to hatch Eyrie. Eyrie does not give his Jiggy yet. Hatching him is the required preparation for his Summer and Autumn feeding tasks.
For the first ordinary Jiggy, climb to the upper tree route as Banjo and Kazooie and break open the door to the small treehouse or root-room area. Defeat the Whipcracks inside and collect the Jiggy. This is the Spring treehouse reward.
Return to Mumbo’s Hut and pay 25 Mumbo Tokens for the bee transformation. As the bee, fly to the high platform near the top of the tree and collect the Jiggy above the Snarebear or plant area. While in bee form, enter the Spring beehive and rescue the pink Jinjo. Rescue the green Jinjo on the upper tree route near the Snarebear as well. These two Jinjos count toward the single five-Jinjo Jiggy; they do not award separate Jiggies.
Use the tree route to reach and Beak Bust the Summer switch. Collect the Spring Notes as you pass through the entrance, tree roots, branches and upper routes. The Spring total is 20.
- Fire five Eggs into the Spring planting hole.
- Hatch Eyrie from the large pink egg.
- Collect the Spring treehouse Jiggy.
- Use the 25-token bee transformation to collect the high Spring Jiggy.
- Rescue the green and pink Spring Jinjos.
- Activate the Summer switch and collect 20 Spring Notes.
Summer: feed Eyrie, grow the plant and clear the hive
Enter Summer and gather five caterpillars from the routes around the entrance, lake, tree roots and branches. Take them to Eyrie’s nest and feed him all five. This advances Eyrie’s growth but does not award the final Jiggy yet.
Break the boulder blocking Gnawty’s house with Beak Buster. The reward is collected later in Autumn, after the seasonal route has changed. Continue past the former lake area and activate the Autumn switch in the dry lower route.
Return to the planted area and Beak Bust Gobi’s back once. No separate Gobi’s Valley Honeycomb prerequisite is required for this interaction. Gobi waters the plant, which prepares it for the second watering and its later Jiggy.
Climb toward the unfinished treehouse and collect the Summer treehouse Jiggy from the platforms inside. Near the top of the tree, Beak Bust the panel on the beehive. The Zubbas attack; defeat the swarm with Rat-a-Tat Rap, Wonderwing or another safe attack, then take the Jiggy released inside the hive.
Collect the yellow Jinjo in the grassy area near the Summer entrance. The leaf route near the start can also lead to the Jiggy on the raised ledge. If you do not collect it in Summer, collect it in Autumn and record it as the Autumn ledge Jiggy in your route tally. Finish the 16 Summer Notes before advancing if possible.
- Feed Eyrie five Summer caterpillars.
- Break Gnawty’s boulder and activate the Autumn switch.
- Have Gobi water the plant in Summer.
- Collect the Summer treehouse Jiggy and defeat the Zubbas for the hive Jiggy.
- Rescue the yellow Summer Jinjo.
- Collect the Summer ledge Jiggy if convenient, or reserve it for Autumn.
- Collect 16 Summer Notes.
Autumn: collect the ledge, Gnawty, plant and Nabnut Jiggies
Enter Autumn and collect the Jiggy on the raised leaf ledge near the treehouse route if you did not already take it in Summer. Follow the leaves and narrow platforms carefully; use short controlled jumps rather than sprinting across the ledge. This is the Autumn ledge Jiggy and must be counted separately from the Summer treehouse reward.
Return to the planted area and Beak Bust Gobi again. The plant reaches its final growth stage and produces the plant Jiggy. Use the nearby tree and beehive route to land on the flower and collect it.
Enter Gnawty’s house through the passage opened by breaking the boulder in Summer. Take the Jiggy inside. Then climb to Nabnut’s house and collect six acorns from the house, ramps, window area and nearby platforms. Return the complete set to Nabnut to receive his Jiggy.
Feed Eyrie 10 Autumn caterpillars. They are spread through the lower leaf-covered paths, Mumbo’s Hut, the beehive, Nabnut’s house, the tree branches and Eyrie’s nest. Eyrie’s reward still waits until Winter.
Rescue the orange Jinjo from the leaf pile near the bull. With the green, pink, yellow and orange Jinjos accounted for, activate the Winter switch near the upper tree route. The Autumn Note target is 48, so inspect the tree perimeter, Mumbo’s Hut, beehive, Nabnut’s house, Eyrie’s nest and lower paths before leaving.
- Collect the Autumn ledge Jiggy near the treehouse route.
- Water the plant again and collect its Jiggy.
- Collect Gnawty’s house Jiggy.
- Give Nabnut six acorns and collect his Jiggy.
- Feed Eyrie 10 Autumn caterpillars.
- Rescue the orange Jinjo and activate the Winter switch.
- Collect 48 Autumn Notes.
Winter: rescue the blue Jinjo and claim Eyrie’s Jiggy
Enter Winter only after the Summer and Autumn preparations are complete. Mumbo is absent in Winter, so do not plan to transform here. Use the Flight Pad near the frozen lake to reach the upper tree routes and the roof of Mumbo’s Hut.
Rescue the blue Jinjo on top of Mumbo’s Hut. This is the fifth Click Clock Wood Jinjo after the green and pink Spring Jinjos, yellow Summer Jinjo and orange Autumn Jinjo. The resulting reward is one five-Jinjo Jiggy. The blue Jinjo does not create a separate Winter Jinjo-related Jiggy.
Climb to Eyrie’s nest and speak to the fully grown eagle after completing the five-caterpillar Summer feeding and 10-caterpillar Autumn feeding. Eyrie leaves a Jiggy at the nest. This is the tenth ordinary Click Clock Wood world Jiggy when combined with the Spring treehouse, Spring bee, Summer treehouse, Summer hive, Autumn ledge, Autumn Gnawty, Autumn plant, Autumn Nabnut and five-Jinjo rewards.
Winter contains 16 Notes. It also contains the two optional Empty Honeycomb Pieces: one in the upper window area above Nabnut’s house and one reached through the freezing water near Gnawty’s house. Attempt the cold-water route after the required objectives are secure, because the water drains health quickly.
- Use the Flight Pad to reach Mumbo’s Hut roof.
- Rescue the blue Jinjo and collect the five-Jinjo Jiggy.
- Visit Eyrie’s nest and collect his final Winter Jiggy.
- Collect the two optional Winter Empty Honeycomb Pieces if desired.
- Collect 16 Winter Notes.
Completion order and final verification
The complete ten-Jiggy world tally is: Spring treehouse, Spring bee, Summer treehouse, Summer Zubba hive, Autumn ledge, Autumn Gnawty house, Autumn plant, Autumn Nabnut, the five-Jinjo reward and Eyrie’s Winter reward. The leaf-ledged Jiggy may be collected in Summer or Autumn, but it must appear in this ten-item accounting. The Winter blue Jinjo only supplies the final member needed for the five-Jinjo reward.
The Click Clock Wood Witch Switch is separate. Activate it in Winter if you want the Jiggy that appears back in Gruntilda’s Lair, but do not count that reward as an eleventh Click Clock Wood Jiggy. It belongs to the lair total.
Before leaving, verify 10 Jiggies, five rescued Jinjos and a 100-Note best score in the pause menu. If the Note score is short, revisit each season and compare its target against your written checklist. If a Jiggy is missing, check the Autumn ledge, the Spring bee route, the plant’s second watering, Nabnut’s six acorns and Eyrie’s Winter nest before assuming the game has glitched.
- Verify 10 Click Clock Wood Jiggies.
- Verify five rescued Jinjos and the five-Jinjo reward.
- Verify a 100-Note best score from 20 Spring, 16 Summer, 48 Autumn and 16 Winter.
- Confirm Eyrie was hatched, fed five Summer caterpillars, fed 10 Autumn caterpillars and rewarded you in Winter.
- Confirm the plant was started with five Eggs and watered by Gobi in Summer and Autumn.
- Confirm the Autumn ledge Jiggy was counted separately from the Summer treehouse Jiggy.
- Treat the Click Clock Wood Witch Switch reward as a Gruntilda’s Lair Jiggy.
Before you move on
- The Click Clock Wood pause menu shows 10 Jiggies and five rescued Jinjos.
- The world has a 100-Note best score, with the seasonal distribution checked as 20 Spring, 16 Summer, 48 Autumn and 16 Winter.
- The ten world Jiggies are accounted for: Spring treehouse, Spring bee, Summer treehouse, Summer hive, Autumn ledge, Gnawty, plant, Nabnut, five Jinjos and Eyrie.
- Eyrie was hatched in Spring, fed five caterpillars in Summer, fed 10 caterpillars in Autumn and rewarded Banjo and Kazooie in Winter.
- The plant was started with five Eggs and watered by Gobi in Summer and Autumn.
- Gnawty’s boulder was broken in Summer and his Autumn house Jiggy was collected.
- Nabnut received six acorns and gave up his Jiggy.
- The five Jinjos are accounted for: green and pink in Spring, yellow in Summer, orange in Autumn and blue in Winter.
- Any Jiggy obtained from the Click Clock Wood Witch Switch is recorded separately as a Gruntilda’s Lair reward.
References for this chapter
- Banjo-Kazooie — Click Clock Wood Guide by Ernest_64, GameFAQs
- Banjo-Kazooie — Guide and Walkthrough by DonkeyKongSong
- Banjo-Kazooie — Guide and Walkthrough by marshmallow, GameFAQs
- Banjo-Kazooie — Click Clock Wood Guide, StrategyWiki
- Retro Game Walkthroughs — Banjo Kazooie N64
- Click Clock Wood — Banjo-Kazooie Wiki
- Guide for Banjo-Kazooie — Click Clock Wood, TrueAchievements
Lair Puzzles, Witch Switches and Unlock Order
Gruntilda's Lair is the campaign hub. Picture puzzles consume Jiggies to open the nine playable worlds, while Note Doors check the cumulative best Musical Note Scores recorded across those worlds. These are separate progression systems from the lair's own ten Jiggies. The lair contains one Jiggy available at the beginning and nine more rewards activated by Witch Switches found in the nine worlds. Each playable world separately contains ten world Jiggies, normally nine individual challenges plus one reward for rescuing all five Jinjos. On the original North American Nintendo 64 release, individual Notes and Jinjos return after leaving a world or losing a life, but the best Note Score and collected Jiggies remain recorded.
Collect the first lair Jiggy and open Mumbo's Mountain
After entering Gruntilda's Lair from Spiral Mountain, turn left around Gruntilda's portrait and climb the rocky mound. Use a Flap Flip to reach the top and collect the first lair Jiggy. This is a Gruntilda's Lair collectible, not one of Mumbo's Mountain's ten world Jiggies.
Return to the entrance hall and take the tunnel to the right of Gruntilda's portrait. The incomplete Mumbo's Mountain picture is nearby. Stand on its jigsaw platform and insert 1 Jiggy to complete it. The picture opens the Mumbo's Mountain entrance.
Picture puzzles do not require special Jiggies from particular worlds. Any uncommitted Jiggies can be placed into an available picture, but placing a Jiggy locks it into the puzzle. Read the number on the picture before committing pieces and keep a running total of Jiggies that remain available for later puzzles.
- Collect the initial Jiggy on the rocky mound beside Gruntilda's portrait.
- Complete the Mumbo's Mountain picture with 1 Jiggy.
- Treat the initial lair Jiggy as part of the separate lair total.
- Check the next picture requirement before placing more Jiggies.
Open the early pictures and use the first Note Doors
After Mumbo's Mountain, return to the lair and climb the slope near the entrance with Talon Trot. Bottles explains Note Doors beside the first one. The 50-Note Door opens when the cumulative best Note Score reaches 50. Check the totals screen before making the trip; the door uses the recorded total across completed worlds, not the number of Notes currently held during one visit.
Beyond the 50-Note route, follow the upper path to the Treasure Trove Cove picture and insert 2 Jiggies. The next picture requires 5 Jiggies and opens Clanker's Cavern. After Clanker's Cavern, Beak Bust the pipe switch beside the level area, cross to the raised pipe, and hit the second switch to open the underwater passage to the Bubblegloop Swamp picture. Insert 7 Jiggies there.
The relevant early Note Door thresholds are 50, 180 and 260. After Clanker's Cavern, the 180-Note Door leads toward the upper lair route. The 260-Note Door gives access to the mechanism and passage used to reach Freezeezy Peak. Do not confuse the door number with the Notes collected in the current level; it is cumulative.
- Treasure Trove Cove picture: 2 Jiggies.
- Clanker's Cavern picture: 5 Jiggies.
- Bubblegloop Swamp picture: 7 Jiggies.
- Open the 50-, 180- and 260-Note routes only after checking the cumulative best total.
Reach the middle worlds in the intended order
Use the Bubblegloop Swamp-area machinery and the raised Shock Jump route to reach the Freezeezy Peak picture. The picture requires 8 Jiggies. After opening it, return through the lair and use the 350-Note Door in the large Gruntilda-head area. Stay on the narrow path in the lava chamber and follow it to the Gobi's Valley picture, which requires 9 Jiggies.
The 450-Note Door is used after Freezeezy Peak and before the Mad Monster Mansion route. Beyond it, follow the path and use the available transformation and movement routes to reach the mansion area. The Mad Monster Mansion picture requires 10 Jiggies. These picture requirements are not world-completion requirements: you can advance after earning enough Jiggies from accessible challenges without clearing every earlier world.
When a Witch Switch reward is visible but unreachable, record its location rather than repeatedly attempting an impossible jump. Several lair rewards require a transformation, a flight route or a later lair change. Return after the required move or transformation is available.
- Freezeezy Peak picture: 8 Jiggies.
- Gobi's Valley picture: 9 Jiggies.
- Mad Monster Mansion picture: 10 Jiggies.
- Use the 350- and 450-Note Doors as cumulative-score gates.
- Revisit earlier areas when a move or transformation removes a barrier.
Understand the separate Witch Switch Jiggies
Each of the nine playable worlds contains one Witch Switch. Activate the switch during the normal world exploration, then return to the lair and inspect the changed landmark. The switch creates or reveals one Jiggy somewhere in Gruntilda's Lair. The exact presentation varies: a reward may appear near a world entrance, inside the Gruntilda statue, in the lair floor mosaic, above a route or on a high platform.
These nine Witch Switch rewards are not counted among the ten Jiggies inside the associated world. Every playable world still has its own ten world Jiggies, including the Jiggy awarded for rescuing all five colored Jinjos. The lair total is separate: one initial lair Jiggy plus nine Witch Switch rewards equals ten Gruntilda's Lair Jiggies.
Clanker's Cavern is an especially easy switch reward to misclassify. Its Witch Switch changes the Gruntilda mosaic in the room near the level picture, allowing the eyes to be Beak Busted for a lair Jiggy. Record it under the lair total, not under Clanker's Cavern's ten-world-Jiggy total.
- Activate one Witch Switch in each playable world.
- Return to the lair and identify the landmark changed by that switch.
- Record each reward in the separate Gruntilda's Lair Jiggy total.
- Keep every world's own ten-Jiggy total separate from the nine lair switch rewards.
Open Rusty Bucket Bay and Click Clock Wood
After Mad Monster Mansion, leave the level as the pumpkin and use the lair route leading to the water-level machinery. Complete the required water-level actions, then return to Banjo and Kazooie when the transformation route ends. Follow the raised-water passage to the Rusty Bucket Bay picture and insert 12 Jiggies.
After Rusty Bucket Bay, enter the underwater passage near the water-level machinery and activate the next switch. Return quickly through the timed route, then pass the 640-Note Door. Continue through the upper path, avoid or defeat the Whipcracks, and follow the branches to the Jiggy Switch that makes the Click Clock Wood picture platform appear.
Return through the underwater tunnel near the waterfall and complete the Click Clock Wood picture with 15 Jiggies. Click Clock Wood is the last standard playable world. The 765-Note Door near its lair area opens the passage to Grunty's Furnace Fun.
The 640- and 765-Note requirements are cumulative best-score thresholds. They do not require 640 or 765 Notes to remain permanently removed from individual worlds on the original N64 release.
- Raise the lair water level before attempting the Rusty Bucket Bay route.
- Rusty Bucket Bay picture: 12 Jiggies.
- Open the Click Clock Wood picture switch after passing the 640-Note route.
- Click Clock Wood picture: 15 Jiggies.
- Use the 765-Note Door to reach Grunty's Furnace Fun.
Track totals before the final ascent
The complete Note Door sequence is 50, 180, 260, 350, 450, 640, 765, 810, 828, 846, 864 and 882. The 765-Note Door is the campaign route into Grunty's Furnace Fun. After finishing that challenge, the 810-Note Door leads toward the final Jiggy picture and Dingpot. The 828, 846, 864 and 882 doors provide optional supplies and an additional health-related picture route; they are useful preparation but are distinct from the 810-Note route.
Before spending Jiggies in the final upper-lair picture, check the totals screen and confirm that all required world pictures are complete. If a picture is still locked, verify both its Jiggy requirement and the lair path needed to reach it. If a Note Door remains closed, return to a world with an incomplete best Note Score and collect a safer group of Notes to improve that score.
For campaign progression, the chapter is complete when all nine world entrances are open, the 765-Note route to Grunty's Furnace Fun is accessible, and the upper-lair route can be continued toward the 810-Note Door. For full completion, track 100 Jiggies as 90 world Jiggies plus 10 lair Jiggies. The 900-Note goal is separate and is not required merely to finish the story or obtain the proper ending.
- Confirm all nine world pictures are complete.
- Confirm the cumulative best Note Score against the next visible Note Door.
- Reach Grunty's Furnace Fun through the 765-Note Door.
- Track 90 world Jiggies and 10 lair Jiggies separately.
- For full Jiggy completion, verify a total of 100 Jiggies.
- Treat the 900-Note total as a separate optional objective.
Before you move on
- The Mumbo's Mountain, Treasure Trove Cove, Clanker's Cavern, Bubblegloop Swamp, Freezeezy Peak, Gobi's Valley, Mad Monster Mansion, Rusty Bucket Bay and Click Clock Wood pictures are complete.
- The 765-Note route to Grunty's Furnace Fun is open.
- The cumulative best Note Score has been checked against every Note Door needed for the intended route.
- All nine world Witch Switches have been activated, and their rewards are recorded under the separate lair total.
- The totals distinguish 90 Jiggies from the nine playable worlds and 10 Jiggies from Gruntilda's Lair.
- For optional full Jiggy completion, the totals screen shows 100 Jiggies.
- The 900-Note target is tracked separately and is not treated as a requirement for ordinary campaign completion.
References for this chapter
Inner Lair Challenges and Boss Approaches
Finish the inner sections of Gruntilda’s Lair by opening the 765-Note Door, clearing Grunty’s Furnace Fun, opening the 810-Note Door and completing the mandatory 25-Jiggy picture. Dingpot’s room then provides the launch point for the final battle. Its four supply rooms and the 882-Note health puzzle are optional preparation. In the original North American Nintendo 64 release, the 882-Note puzzle requires four Jiggies and raises the maximum energy capacity to 16 units.
Check your progress before entering the final route
Return to Gruntilda’s Lair after completing the available worlds and inspect the pause menu. Note Doors use your cumulative best Note Scores from the playable worlds, not the number of individual Notes currently carried after entering a level. On the original Nintendo 64 release, individual Notes can reappear after leaving a world or losing a life, while the best score recorded for that world remains available for Note Door checks.
Jiggy progress is a separate requirement. The nine playable worlds each contain ten world Jiggies. The initial lair Jiggy and the nine Jiggies released by Gruntilda’s Lair Witch Switches belong to the lair total instead. Do not add a Witch Switch reward to a world’s ten-Jiggy tally when checking whether you have enough pieces for a picture.
Before spending Jiggies in the late pictures, check unfinished worlds for dependencies. A missing Jiggy may require a Bottles move, a Mumbo transformation, a lair Witch Switch or an event completed during another season of Click Clock Wood. If you are short on Notes, improve the best Note Score in an opened world and leave only after reaching a score you are comfortable keeping.
- Check cumulative best Note Scores in the pause menu.
- Check total Jiggies separately from world-by-world Jiggy counts.
- Record lair Witch Switch Jiggies as lair rewards.
- Identify any remaining move, transformation or event dependency before revisiting a world.
Open the 765-Note Door and enter Grunty’s Furnace Fun
Follow the upper route through Gruntilda’s Lair toward the Click Clock Wood side. The late approach passes a 765-Note Door. The number above the door is the cumulative best Note Score required to open it, so temporary Notes collected during a current level attempt do not replace the recorded totals used for this check.
When your best-score total reaches at least 765, pass through the door and step on the picture pad beyond it. This begins Grunty’s Furnace Fun. The route to this board-game challenge is mandatory; collecting additional Jiggies or Notes does not bypass it.
A lair Witch Switch may release another Jiggy during this approach. Collect it if convenient, but record it as a Gruntilda’s Lair Jiggy rather than a Click Clock Wood or other world Jiggy. If the 765-Note Door remains closed, leave the area and raise one or more world best scores instead of repeatedly attempting the door with temporary Notes.
- Reach a cumulative best Note Score of at least 765.
- Open the 765-Note Door.
- Step on the picture pad beyond the door.
- Keep any lair Witch Switch reward separate from world totals.
Complete Grunty’s Furnace Fun
Furnace Fun is a required board-game challenge suspended over lava. The board combines questions about worlds, characters, moves and events with challenge spaces that require ordinary gameplay skills. Use the knowledge gained during the campaign rather than treating the board as a random guessing exercise.
Brentilda’s information around the lair helps with questions concerning Gruntilda and her plans. For other categories, remember the names of world residents, transformations, moves and major objectives. Joker spaces can protect you from an uncertain question or difficult category, so avoid using them automatically on questions you can answer confidently.
Enter with a full or nearly full energy bar and as many spare lives as practical. Wrong answers and failed challenge spaces can cost energy, and a fall can end the attempt. Move carefully on challenge spaces and use the learned moves and transformations as the board requires them.
You must finish the entire board. Furnace Fun is not complete merely because you have entered it or reached a late section. After clearing the board, the game shows the next story sequence and returns you to the lair route. This is progress toward the final battle, not the battle itself.
- Enter Furnace Fun through the 765-Note route.
- Use Brentilda’s clues for Gruntilda-related questions.
- Reserve Joker spaces for uncertain or dangerous situations.
- Keep enough health and lives to survive challenge spaces.
- Complete the board from start to finish.
Open the 810-Note Door and complete the 25-Jiggy picture
After Furnace Fun, continue through the newly available lair route. You will reach another Note Door marked 810. Open it only when your cumulative best Note Score is at least 810. If the door is closed, return to an opened world and improve its recorded best score.
Beyond the 810-Note Door is the final large picture puzzle. It requires 25 Jiggies. Stand on the picture pad and place Jiggies until every space is filled. Completing this picture opens the route to Dingpot’s room and is mandatory for the final launch.
If you are missing Jiggies, revisit incomplete worlds rather than searching for another switch in the 810 area. Prioritize straightforward rewards, five-Jinjo rewards, transformation-dependent pieces and lair Witch Switch Jiggies that you have already activated. Do not confuse the 25-piece picture with the optional health picture later in Dingpot’s room.
- Reach at least 810 cumulative best Notes.
- Open the 810-Note Door.
- Complete the picture with 25 Jiggies.
- Confirm that the passage to Dingpot’s room is open.
Use Dingpot’s room for optional supplies
Dingpot’s room contains four optional Note Doors. The 828-Note Door opens a large Blue Egg refill, the 846-Note Door opens a Red Feather refill, and the 864-Note Door opens a Gold Feather refill. Walk into the large item behind an opened door to replenish that supply.
These refills are preparation rewards, not mandatory progression. You can launch into the final battle without opening them, but replenishing eggs and feathers makes the attempt more forgiving. If your cumulative Note Score is below one of these thresholds, continue with the supplies already available rather than assuming the final route is blocked.
The 882-Note Door leads to the optional health picture. In the original Nintendo 64 release, the picture requires four Jiggies to complete. The picture has six spaces remaining before completion, which is the source of the easily confused six-Jiggy description, but the number Banjo and Kazooie must contribute is four.
Completing the picture changes the energy display to red and raises the maximum from eight energy units to 16. This upgrade is useful for the final battle but is not required to open Dingpot’s room, complete the mandatory route or launch the confrontation. If you have at least 882 cumulative best Notes and four spare Jiggies, complete the picture before launching.
- Open the 828-Note Door for the Blue Egg refill if available.
- Open the 846-Note Door for the Red Feather refill if available.
- Open the 864-Note Door for the Gold Feather refill if available.
- Open the 882-Note Door if you have 882 cumulative best Notes.
- Complete the health picture with four Jiggies.
- Confirm that the maximum energy capacity has increased to 16 units.
Refill, launch and recover from a failed attempt
Restore your energy before entering Dingpot. Collect the available egg, Red Feather and Gold Feather refills, especially if you opened their optional Note Doors. The final confrontation uses aerial movement and attacks that make these supplies valuable, but none of the optional rooms is required to begin the fight.
The mandatory launch conditions are specific: Grunty’s Furnace Fun must be cleared, the 810-Note Door must be open and the 25-Jiggy picture must be complete. The 828, 846, 864 and 882 Note Doors are optional preparation goals. Once ready, jump into Dingpot in the center of the room. He launches Banjo and Kazooie to the roof for the final confrontation.
If you lose the final battle, the completed mandatory picture, opened Note Doors and collected Jiggies remain saved when the game records the progress. Return to Dingpot’s room, refill supplies again where possible and retry. You should not need to replay Furnace Fun or redo completed world objectives merely because the battle attempt failed. If you are uncertain whether the save recorded, reload the file and verify the pause-menu totals before proceeding.
- Furnace Fun is complete.
- The 810-Note Door is open.
- The 25-Jiggy picture is complete.
- Energy is restored.
- Available egg and feather supplies are replenished.
- Jumping into Dingpot launches the final confrontation.
- After a defeat, verify the save before retrying.
Before you move on
- Grunty’s Furnace Fun has been cleared.
- The cumulative best Note Score is at least 810 and the 810-Note Door is open.
- The mandatory picture has been completed with 25 Jiggies.
- The passage to Dingpot’s room is accessible.
- Optional supply doors have been opened and used if their Note thresholds were met.
- The optional 882-Note health picture has been completed with four Jiggies if the 16-unit energy upgrade is desired.
- Health, eggs and feathers have been replenished as far as available.
- Jumping into Dingpot launches Banjo and Kazooie to the roof for the final confrontation.
References for this chapter
Final Confrontation with Gruntilda and the Proper Ending
Complete Grunty’s Furnace Fun, open the 810-Note Door, fill the 25-Jiggy final picture and prepare Banjo and Kazooie for the original Nintendo 64 final battle. Gruntilda’s fight has five phases: four Rat-a-Tat Rap hits, three successful three-egg battlement attacks, four Beak Bomb hits, four Jinjo statues and the 24-egg Jinjonator sequence. The optional 882-Note health picture requires four Jiggies in the original Nintendo 64 release. Defeating Gruntilda completes the main campaign; collecting all 100 Jiggies before the ending unlocks the expanded ending material. The 900-Note total and other collectibles are separate goals.
Complete Grunty’s Furnace Fun
Raise the cumulative best Musical Note total to at least 765, then return to the upper section of Gruntilda’s Lair and pass through the Note Door marked 765. This route leads to Grunty’s Furnace Fun. The 765-Note Door is the quiz entrance; it is not the later 810-Note Door leading toward the final battle.
Enter the quiz through the Tooty picture pad and complete the board. Questions cover worlds, characters, enemies, moves and events from the adventure. Incorrect answers cost health, while Skull spaces can end the attempt, so refill your energy before beginning. Joker cards can bypass difficult spaces and are most useful for questions whose category or answer you cannot identify confidently.
Winning the quiz is required. Reaching the board and leaving it unfinished does not open the final route. After completing Furnace Fun, follow the return path and activate the cauldron near the top of the passage. This creates a shortcut between the two ends of the Furnace Fun route and makes later returns safer and quicker.
- The cumulative best Note total is at least 765.
- The 765-Note Door is open.
- Grunty’s Furnace Fun has been completed.
- The cauldron shortcut in the Furnace Fun passage has been activated.
Open the final picture and reach Dingpot
Return to the Furnace Fun route after your cumulative best Note total reaches 810. Open the Note Door marked 810. The original Nintendo 64 game uses the cumulative best scores recorded for the worlds, so the current number of Notes carried during one visit is not the relevant check.
Beyond the 810-Note Door, place 25 Jiggies into the final picture. This picture is required to open the passage toward Dingpot. It is separate from the optional four-Jiggy health picture behind the 882-Note Door.
Do not enter Dingpot until you are ready to begin the final sequence. If your Jiggy total is below 100 and you want the expanded ending, leave the lair and revisit worlds before launching the fight. You can still defeat Gruntilda without collecting all 100 Jiggies, but the full-Jiggy ending condition will not be met.
- The cumulative best Note total is at least 810.
- The 25-Jiggy final picture is complete.
- The passage to Dingpot is open.
- The overall Jiggy total is 100 before the battle if the expanded ending is desired.
Refill supplies before the battle
Dingpot’s room contains four optional Note Doors. The 828-Note room provides a large Blue Egg refill, the 846-Note room provides Red Feathers, and the 864-Note room provides Gold Feathers. Open whichever rooms your cumulative Note total permits and collect their supplies before entering Dingpot.
The 882-Note Door leads to a small health picture. In the original Nintendo 64 release, this picture requires four Jiggies. Completing it adds four Honeycombs and raises the maximum health to 16 units. It is useful preparation, but it is not required to open Dingpot, defeat Gruntilda or obtain the full-Jiggy ending.
Enter Dingpot with full health and as many Blue Eggs and Gold Feathers as you can obtain. Eggs are needed during the battlement, Jinjo statue and Jinjonator phases. Gold Feathers are needed for Wonderwing, which is the safest defense against Gruntilda’s white homing attack. Keep the supplies visible in the HUD and avoid spending Gold Feathers casually before the battle begins.
- Health is full before entering Dingpot.
- Blue Eggs and Gold Feathers have been replenished where possible.
- The optional 882-Note health picture has been completed with four Jiggies if desired.
- The Jiggy total is 100 before the battle if the expanded ending is desired.
Phase one: counter the broomstick dives
Jump into Dingpot to reach the castle roof. Gruntilda begins by swooping across the arena on her broomstick. Move continuously and avoid standing directly in her flight path. When she slows or stalls after a pass, close in and use Rat-a-Tat Rap.
Repeat the counter until four Rat-a-Tat Rap hits connect. After each successful hit, Gruntilda launches a normal fireball. Do not remain beside her after landing a hit; retreat or change direction as soon as the attack connects.
After the fourth hit, Gruntilda launches a white homing projectile. Normal running is unreliable against this attack. Activate Wonderwing as the projectile approaches and let it pass without taking damage. A Honeycomb appears afterward; collect it only when the arena is safe, or leave it for a later phase if your health is sufficient.
- Four Rat-a-Tat Rap hits have connected.
- The normal fireballs after the counters have been avoided.
- The first white homing projectile has been blocked with Wonderwing.
Phase two: use the battlements and fire eggs
Gruntilda moves beyond normal attack range and fires fireballs toward the roof. Use the raised battlements to reduce her line of fire. Climb onto a battlement during a pause, fire your volley, then retreat behind cover or move away before the next fireball reaches you.
There are three successful battlement attacks in this phase. Each attack requires three eggs to hit Gruntilda, for 12 eggs total across the three positions. Do not count individual eggs as separate attacks: the phase advances only when the required three-egg volley registers successfully.
If a volley fails, do not keep firing blindly. Reposition Banjo and Kazooie, aim Kazooie’s mouth directly toward Gruntilda and wait for another opening. Use the Blue Egg refill around the roof or the 828-Note supply room if you need more ammunition. After the third successful three-egg attack, Gruntilda launches another white homing projectile. Block it with Wonderwing.
A Flight Pad appears after the phase is complete. Step onto it to begin the aerial battle.
- Three successful battlement attacks have connected.
- Each successful attack used three eggs, for 12 eggs total.
- The battlements were used to limit exposure to fireballs.
- The second white homing projectile has been blocked.
- The Flight Pad has appeared.
Phase three: strike Gruntilda with Beak Bomb
Use the Flight Pad and fly around the tower. Gruntilda circles above the roof and fires when she has a clear line toward Banjo and Kazooie. Maintain enough altitude to clear the tower and begin wide turns rather than chasing directly behind her.
When Gruntilda slows or presents a clear approach, use Beak Bomb to strike her. A successful hit registers when the attack connects with her broomstick. Reacquire her position after each pass and repeat until four Beak Bomb hits have connected.
Avoid hugging the tower walls during the aerial phase. A poor angle can force a low landing or leave you unable to line up the next pass. After the fourth aerial hit, Gruntilda creates an invulnerability shield. Normal attacks cannot damage her while it is active, so stop wasting eggs and feathers and return to the roof for the Jinjo phase.
- The Flight Pad was used to enter the aerial phase.
- Four Beak Bomb hits have connected.
- Attacks have stopped while Gruntilda’s shield is active.
- Banjo and Kazooie are back on the roof.
Phase four: activate the four Jinjo statues
Four Jinjo statues rise around the roof. Each statue has an opening that accepts three eggs. Move close enough to aim into one opening, fire three eggs, then reposition before the next fireball reaches you. Repeat for all four statues.
The statues are the objective during this phase; Gruntilda’s shield prevents ordinary attacks from working. Concentrate on accurate egg placement and use the open roof to avoid fireballs. If an opening appears not to register, move closer and align Kazooie’s mouth directly with the hole before firing again.
Once all four statues are activated, the Jinjos attack Gruntilda and break through her protection. Gruntilda loses her broom and lands on a battlement. After the next white homing projectile, use Wonderwing again. The Jinjonator then rises from the roof.
- All four Jinjo statues have received three eggs each.
- All four Jinjos have attacked Gruntilda.
- Gruntilda’s shield and broom phase has ended.
- The homing projectile before the Jinjonator phase has been blocked.
Phase five: activate the Jinjonator
The Jinjonator has four egg openings around its base. Each opening requires six eggs, for 24 eggs in total. Fire six eggs into one opening until it closes, then move around the statue to the next unfilled opening. Do not continue firing at an opening that has already shut.
Gruntilda continues throwing fireballs during this sequence. Stay close enough to move between openings, but stop firing when a fireball approaches and move first. Resume at the next opening after the attack passes. Repositioning is safer than trying to finish a volley while standing in the projectile’s path.
When all four openings have received six eggs, the Jinjonator activates and attacks Gruntilda. Let the victory sequence continue. If Banjo and Kazooie are defeated before the statue is fully activated, the battle must be repeated from the beginning, so treat every phase as a separate survival task rather than rushing the final openings.
- All four Jinjonator openings have been filled.
- Six eggs have entered each opening.
- The complete 24-egg sequence is finished.
- Gruntilda has been defeated and the victory sequence has begun.
Confirm the ending and completion state
Gruntilda’s defeat completes the main campaign. The battle does not require all 100 Jiggies, all 900 Notes, the 882-Note health upgrade or every optional Mumbo Token and Empty Honeycomb.
The expanded ending material requires the full 100-Jiggy total. The safest method is to verify 100 Jiggies before entering Dingpot, then defeat Gruntilda and allow the ending scenes to play without skipping them. Additional secret-picture material appears after the victory sequence when the full Jiggy condition has been met.
The 900-Note objective is separate. It consists of the nine playable worlds’ 100-Note best scores and is not a substitute for the 100-Jiggy requirement. The 882-Note picture is also separate: it improves maximum health but does not determine whether the final battle opens or whether the expanded ending is available.
The original Nintendo 64 release does not provide a modern percentage-complete screen. Use Gruntilda’s defeat as the campaign completion check, the 100-Jiggy total and additional secret-picture material as the expanded-ending check, and the world Note totals as the separate 900-Note completion check.
- Gruntilda has been defeated through all five phases.
- The Jiggy total was 100 before the ending sequence if the expanded ending was desired.
- The additional secret-picture material appeared after the victory scenes.
- The overall Note total reached 900 only if full Note completion was also being claimed.
Before you move on
- At least 765 cumulative best Notes opened Grunty’s Furnace Fun.
- Grunty’s Furnace Fun was completed before the 810-Note Door was used.
- At least 810 cumulative best Notes opened the route to the 25-Jiggy final picture.
- The 25-Jiggy picture was completed and Dingpot launched Banjo and Kazooie to the roof.
- All five battle phases were completed: four Rat-a-Tat Rap hits, three successful three-egg battlement attacks totaling 12 eggs, four Beak Bombs, four Jinjo statues using three eggs each, and the 24-egg Jinjonator sequence.
- The optional 882-Note health picture was completed with four Jiggies if the health upgrade was desired.
- The overall Jiggy total was 100 before the ending sequence if the expanded ending was desired.
- The additional secret-picture material appeared after the victory sequence.
- The overall Note total reached 900 only if full Note completion was being claimed.
References for this chapter
- Banjo-Kazooie: The Final Battle — StrategyWiki
- Banjo-Kazooie — Guide and Walkthrough by DonkeyKongSong
- Banjo-Kazooie Guide and Walkthrough, Nintendo 64, TrulyDexterous, GameFAQs
- Banjo-Kazooie Walkthrough and FAQ, Joca64, GameFAQs
- Locked Notedoors — Banjo-Kazooie Wiki — Neoseeker
- Banjo-Kazooie — Nintendo 64 Manual
Optional: 100% Completion Strategy and Checklist
For the original North American Nintendo 64 release, use the View Totals screen to track permanent Jiggies, each world's best Musical Note score and Empty Honeycomb progress. Maintain separate written checklists for the five Jinjos and Mumbo Tokens. The nine playable worlds each contain ten Jiggies, a maximum Note score of 100, five Jinjos and two Empty Honeycomb pieces. Gruntilda's Lair contributes a separate ten Jiggies, making 100 Jiggies overall. The nine worlds also contain 900 Musical Notes in total, with 100 associated with each world. On the original N64 version, individual Notes and Jinjos are restored when you die or leave a world, while the best Note score and collected Jiggies remain recorded. The proper ending depends on reaching 100 Jiggies; 900 Notes, all Jinjos, all Empty Honeycombs and every Mumbo Token are separate completion goals.
Set up a completion ledger before entering the worlds
Create one line for each playable world: Mumbo's Mountain, Treasure Trove Cove, Clanker's Cavern, Bubblegloop Swamp, Freezeezy Peak, Gobi's Valley, Mad Monster Mansion, Rusty Bucket Bay and Click Clock Wood. Give each line columns for ten Jiggies, a 100-Note high score, five Jinjos and two Empty Honeycomb pieces.
Track Gruntilda's Lair separately. Its ten Jiggies are not part of any world's ten-piece total: one comes from the opening lair objective and the others come from Witch Switch rewards. Do not add a lair Witch Switch Jiggy to a world column. Spiral Mountain's six Empty Honeycomb pieces also need their own line rather than being added to a world.
The View Totals screen is the authority for Jiggies, Note scores and Empty Honeycomb progress. It does not provide a complete world-by-world Mumbo Token checklist, and it is not a substitute for writing down which Jinjo colors you have rescued. A world showing ten Jiggies confirms that its five-Jinjo reward has been obtained, but a separate Jinjo checklist is still useful while working through the level.
- Mumbo's Mountain: ten Jiggies, 100 Notes, five Jinjos and two Empty Honeycombs.
- Treasure Trove Cove: ten Jiggies, 100 Notes, five Jinjos and two Empty Honeycombs.
- Clanker's Cavern: ten Jiggies, 100 Notes, five Jinjos and two Empty Honeycombs.
- Bubblegloop Swamp: ten Jiggies, 100 Notes, five Jinjos and two Empty Honeycombs.
- Freezeezy Peak: ten Jiggies, 100 Notes, five Jinjos and two Empty Honeycombs.
- Gobi's Valley: ten Jiggies, 100 Notes, five Jinjos and two Empty Honeycombs.
- Mad Monster Mansion: ten Jiggies, 100 Notes, five Jinjos and two Empty Honeycombs.
- Rusty Bucket Bay: ten Jiggies, 100 Notes, five Jinjos and two Empty Honeycombs.
- Click Clock Wood: ten Jiggies, 100 Notes, five Jinjos and two Empty Honeycombs.
- Gruntilda's Lair: ten separate Jiggies.
- Spiral Mountain: six separate Empty Honeycomb checks.
Separate permanent progress from N64 high-score runs
Jiggies and Empty Honeycomb pieces are permanent once collected. Musical Notes work differently in the original N64 edition. During a visit, the counter records the highest Note total reached in that world. If Banjo dies or leaves the level, the individual Notes return to their original positions, but the best score already recorded for that world remains available for Note Door calculations.
Jinjo rescues should be treated with the same caution during a completion sweep. Rescue all five colors in one successful visit if you want to confirm the world-specific Jinjo Jiggy without relying on an uncertain partial state. A death or exit can restore Jinjos that were collected during the failed attempt. The Jiggy itself remains permanent if it was already awarded.
A safe routine is to collect permanent Jiggies and Empty Honeycombs first, then save and begin a dedicated Note-and-Jinjo attempt. If the attempt fails, do not assume the visible Note total or four rescued Jinjos will carry over. Re-enter the world and begin that temporary sweep again, using the previously collected Jiggies as route landmarks.
- Use View Totals to confirm permanent Jiggies and the world's best Note score.
- Do not count a temporary Note total as a completed 100-Note score until the high score is recorded.
- Complete a five-Jinjo rescue sweep without dying or leaving the world.
- After a failed sweep, recollect the Notes and any Jinjos needed for that attempt.
Collect permanent objectives before the dangerous Note sweep
Enter each world first to learn its layout, obtain the required Bottles moves and transformations, and collect the Jiggies and Empty Honeycomb pieces that can be reached safely. This prevents a difficult Note run from being interrupted by a missing ability or an unexplored route.
Collect Jinjos during this stage only when doing so does not create unnecessary risk. For the final five-Jinjo attempt, use a written color checklist and route through the world in a consistent order. In levels with water, moving machinery or timed hazards, identify a safe recovery point before taking a risky Jinjo or Note group.
For the 100-Note run, divide the route into recognizable landmarks: entrance area, central structure, interior rooms, high platforms and final dangerous section. A specialist Note route can be followed by landmark totals rather than by trying to remember every individual pickup. The complete score must reach 100 during that successful visit, and the View Totals screen should confirm the result before leaving.
- Learn every Bottles move needed for the intended route.
- Purchase the local transformation before attempting transformation-only collectibles.
- Collect both world Empty Honeycombs before the high-score attempt when practical.
- Write a landmark route for all 100 Notes and a color route for all five Jinjos.
- Confirm the completed Note score before exiting the world.
Track Mumbo Tokens as an optional resource
Mumbo Tokens pay for transformations, so collect enough for the required form before attempting gated objectives. The important transformation sequence for exhaustive world exploration includes the termite in Mumbo's Mountain, the crocodile in Bubblegloop Swamp, the walrus in Freezeezy Peak, the pumpkin in Mad Monster Mansion and the bee in Click Clock Wood.
Keep Mumbo Tokens in a separate ledger organized by world and landmark. Record a token as soon as it is collected and note whether it was reached as Banjo and Kazooie or in a transformation. This is more reliable than trying to infer a missing token from the general pause screen.
Do not make the campaign, the 100-Jiggy total or the proper ending depend on an asserted grand Mumbo Token count. Token collection is optional, and the guide should use an unchecked-location ledger rather than a disputed exact total. If every listed token location in your chosen original-N64 reference has been marked, treat the token sweep as complete for your purposes without using the token count as a required game-wide total.
- Maintain a separate Mumbo Token list for every world.
- Buy the five world transformations before the final optional sweep.
- Use landmarks and location descriptions rather than an asserted grand total.
- Treat exhaustive token collection as optional and separate from the proper ending.
Handle Click Clock Wood as one seasonal dependency chain
Click Clock Wood should be planned across Spring, Summer, Autumn and Winter rather than searched randomly. Begin in Spring and complete the setup actions that affect the tree, flower and central routes. Move to Summer to revisit the changed locations and complete growth- or feeding-related objectives. Use Autumn for the later tree, nest and character rewards, then reserve Winter for the frozen routes, high branches and winter-only interiors.
Write the season beside every Jiggy, Jinjo, Empty Honeycomb and Mumbo Token entry. A collectible that is visible in one season may require a different season's setup before it can be taken. The two world Empty Honeycombs are both winter objectives, but they belong in the Click Clock Wood line, not in a separate seasonal total.
For a 100-Note attempt, choose a complete season-by-season order before starting. If you die or leave the level, the individual Notes return, so restart the route rather than assuming earlier seasonal pickups remain removed. Use safe platforms and full routes between seasons, since a missed landing can invalidate the attempt.
- Spring: complete setup actions and record its permanent rewards.
- Summer: revisit locations altered by Spring and complete the growth-related objectives.
- Autumn: complete the seasonal character, tree and ledge objectives.
- Winter: check the frozen pond, high branches, tree house and winter-only interiors.
- Record the season for every unresolved collectible.
Use a targeted final sweep
After the campaign route is complete, begin the optional sweep with the worlds most likely to hide multi-step objectives: Click Clock Wood, Rusty Bucket Bay and Mad Monster Mansion. Then check Gobi's Valley, Freezeezy Peak and Bubblegloop Swamp, followed by Clanker's Cavern, Treasure Trove Cove and Mumbo's Mountain. This is only a practical search order; use View Totals to decide whether a revisit is necessary.
Enter a world with one written objective, such as a missing Jiggy, the second Empty Honeycomb or the remaining blue Jinjo. Complete that objective before starting another search. Return to a safe area and check the pause screen so the ledger and the game agree. If the displayed total does not change, recheck the objective's prerequisite instead of assuming the collectible was removed permanently.
For standard completion, verify 100 Jiggies and the nine world Note scores of 100. For exhaustive world completion, also verify five Jinjos and two Empty Honeycombs in every playable world, plus the six Spiral Mountain pieces. Mumbo Tokens remain a separate optional ledger.
- The game-wide Jiggy total is 100: ten in each playable world and ten in Gruntilda's Lair.
- All nine world Note scores are 100, producing 900 recorded Notes overall.
- Every playable world has five Jinjos accounted for through its rescue checklist or tenth Jiggy.
- Every playable world has two Empty Honeycomb pieces accounted for.
- Spiral Mountain's six Empty Honeycomb pieces are checked separately.
- Every optional Mumbo Token location in the chosen ledger is marked.
Before you move on
- Standard campaign completion: Gruntilda is defeated after the required lair route and final Note Door progression are opened.
- Proper-ending completion: the Jiggy total reaches 100 before completing the final ending sequence, with ten Jiggies in each of the nine worlds and ten separate lair Jiggies.
- Optional Note completion: every playable world shows a best score of 100, for 900 Notes overall.
- Full world collectible completion: every playable world has ten Jiggies, five Jinjos and two Empty Honeycomb pieces accounted for.
- Game-wide Empty Honeycomb check: six Spiral Mountain pieces plus two in each of the nine playable worlds, for 24 pieces tracked separately from health capacity.
- Optional Mumbo Token completion: every location in the world-by-world ledger is marked; no disputed grand total is used as the standard completion test.
Troubleshooting, Recovery and Safe Retry Practices
Use View Totals, move and transformation checks, deliberate save management and full-cycle retries to diagnose missing Jiggies and recover safely in the original North American Nintendo 64 release of Banjo-Kazooie. Most apparent progression problems are caused by a missing prerequisite, an incomplete event or a failed collectible run rather than a permanently lost Jiggy.
Verify the problem before assuming a Jiggy is glitched
Pause the game and choose View Totals. The report lists the Jiggies, Musical Notes and special honeycomb pieces recorded for each level. Use the C Left and C Right Buttons to move between level reports, then press B to return to the pause menu. Treat this report as the authority instead of relying on memory, a partially completed room or an object that appears to be missing.
If the current world is short of Jiggies, make a written list of the objectives you have completed and the ones still suspected to be unfinished. Check whether the missing Jiggy belongs to a move challenge, a Mumbo transformation, a switch event, a race, a timed sequence, a Jinjo reward or an area opened by a separate action. A blocked grate, inactive switch or unreachable ledge usually indicates a prerequisite. Do not repeatedly attempt a dangerous jump simply because the reward is visible.
When a Jiggy has already been registered in View Totals, stop searching for another copy. Some reward objects disappear after collection, and a challenge may not remain visually obvious after its Jiggy has been claimed. If the total is not registered, identify the objective that awards it and repeat that objective normally. Save and quit after confirmed progress, then reload and verify the same total again.
- Open View Totals and inspect the report for the correct world.
- Record which Jiggies and objective types have already been completed.
- Use the registered total, not memory or visual guesses, to decide whether a Jiggy is missing.
Check moves, transformations and lair dependencies
Compare the obstacle with Banjo and Kazooie's learned move list. Common blockers include Talon Trot, Shock Spring Jump, flight, underwater access, a beak technique, Wonderwing or a transformation obtained from Mumbo. If the route requires an ability you do not yet have, leave the attempt rather than spending lives on an intended late-game path.
Return to Gruntilda's Lair and inspect the doors and puzzle rooms you have opened. A world may be accessible while one of its objectives still depends on a move taught elsewhere, a lair switch or an event that raises water, opens a gate or changes a route. For a 100 percent run, write down the world total before leaving and compare it when you return.
Remember that rescuing all five Jinjos in a world awards a Jiggy. If a level is one Jiggy short and its ordinary challenges appear complete, audit the Jinjo locations before assuming that a hidden puzzle is broken. This is especially useful when the pause report confirms that several individual rewards have already been claimed.
- Confirm the required move or transformation before retrying an unreachable route.
- Inspect Gruntilda's Lair for unopened doors, switches and puzzle dependencies.
- Check the five-Jinjo reward when a world is nearly complete.
Retry machinery and timed platforming methodically
For a rotating platform, propeller, fan, blade or timed switch, watch one complete cycle from a safe ledge before moving. Identify the opening, the landing platform and the next safe position. Starting halfway through a cycle often makes a successful crossing impossible, so waiting is safer than trying to improvise.
Rusty Bucket Bay's Engine Room is the clearest example. Reach the nearby switch that slows the machinery before attempting the dangerous crossings. After entering the machinery, wait for the spinning walkway to reach a favorable position, cross from stable ground and use the slower blade intervals to pass through. If a propeller sequence is mistimed, return to the controlling switch and activate it again when the route is ready for a fresh attempt. Do not remain in the water or on a narrow walkway while waiting for the hazard to become favorable.
If Banjo is left on an awkward edge after a miss, retreat to a broad platform. Recenter the camera, refill health or air where possible and begin again from a stable position. Practice one section at a time rather than repeatedly committing to the entire route.
- Observe a full hazard cycle before moving.
- Use the controlling switch to establish a favorable timing window.
- Restart from a broad, stable platform whenever possible.
Save confirmed progress without destroying the backup
The original N64 pause menu includes Save And Quit Game. Use it after collecting a Jiggy, finishing a difficult event or reaching a reliable stopping point. Before a particularly risky sequence, save to another available file slot instead of overwriting the only copy of the run. Record the slot, current world and latest confirmed totals in a notebook or text file.
Saving preserves the state at the time of the save; it is not an automatic checkpoint before every jump. If you die after the last save, reload and repeat the route from that saved state. In the original N64 version, ordinary Musical Notes are a special concern: dying or leaving before completing the level's full Note total can require recollecting Notes that were gathered during the unfinished run. Do not assume the later Xbox 360 or other modern releases use the same behavior.
Never remove the Game Pak, reset the console or interrupt power while saving. Manual hardware modifications and unverified accessories add unnecessary risk to the save data. Let the save-and-quit process finish before switching off the console.
- Save after confirmed progress rather than after an unverified attempt.
- Use another file slot for a second safety copy when available.
- Do not interrupt power or remove the cartridge during saving.
Recover from a failed or suspect save
If the file loads but a Jiggy appears absent, open View Totals and compare the relevant report with your written record. If the reward is registered, continue from the recorded state. If it is not registered, repeat the prerequisite event and claim the Jiggy again. Save and reload afterward to confirm that the total remains correct.
If a save file will not load, stop saving over that slot. Power the original console down normally, reseat the Game Pak and try the file once more. If another file slot works, continue from that slot and preserve it. Do not repeatedly overwrite a file that is already behaving abnormally.
On an emulator or a modern rerelease, keep a separate backup of the version's normal save data before troubleshooting. Save states can help practice a difficult crossing, but they are not evidence that the original N64 edition permanently recorded the same progress. Match backups and save states to the exact version being played. If reloading and re-entering the level do not resolve a progression block, restore the last known-good backup instead of forcing the game with an unverified code or glitch.
- Stop overwriting a save file that fails to load.
- Maintain a separate backup before experimenting with emulator or rerelease features.
- Restore a known-good save rather than relying on an unverified workaround.
Before you move on
- View Totals registers the disputed Jiggy in the correct world report.
- The required move, transformation, switch event or prerequisite has been identified and completed.
- A save-and-quit followed by a reload preserves the confirmed Jiggy total.
- For a 100 percent run, the relevant world totals and the latest known-good save slot are recorded.
- Before the final campaign attempt, all required lair thresholds are confirmed from a known-good save rather than from memory.
Finishing up
Gruntilda has been defeated and the final victory sequence has completed.
The required picture puzzles, Note Doors, Grunty's Furnace Fun challenge and final 25-Jiggy picture were completed before the battle.
For the proper ending, the overall Jiggy total reached 100 before the final ending sequence. This does not require 900 Notes or every optional collectible.
For separate full completion, the nine world Note scores total 900 and the optional Jinjo, Empty Honeycomb and Mumbo Token objectives have been checked.
Any missing move, transformation or Witch Switch dependency has been resolved through the relevant world and lair route.
View Totals and the world-specific checklists confirm that no required campaign objective remains uncompleted.
Choose your next gameScreenshots & video
Game imagery for reference. Follow the written chapters above for the route and strategies.
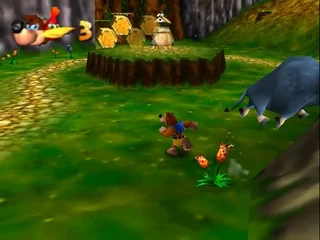
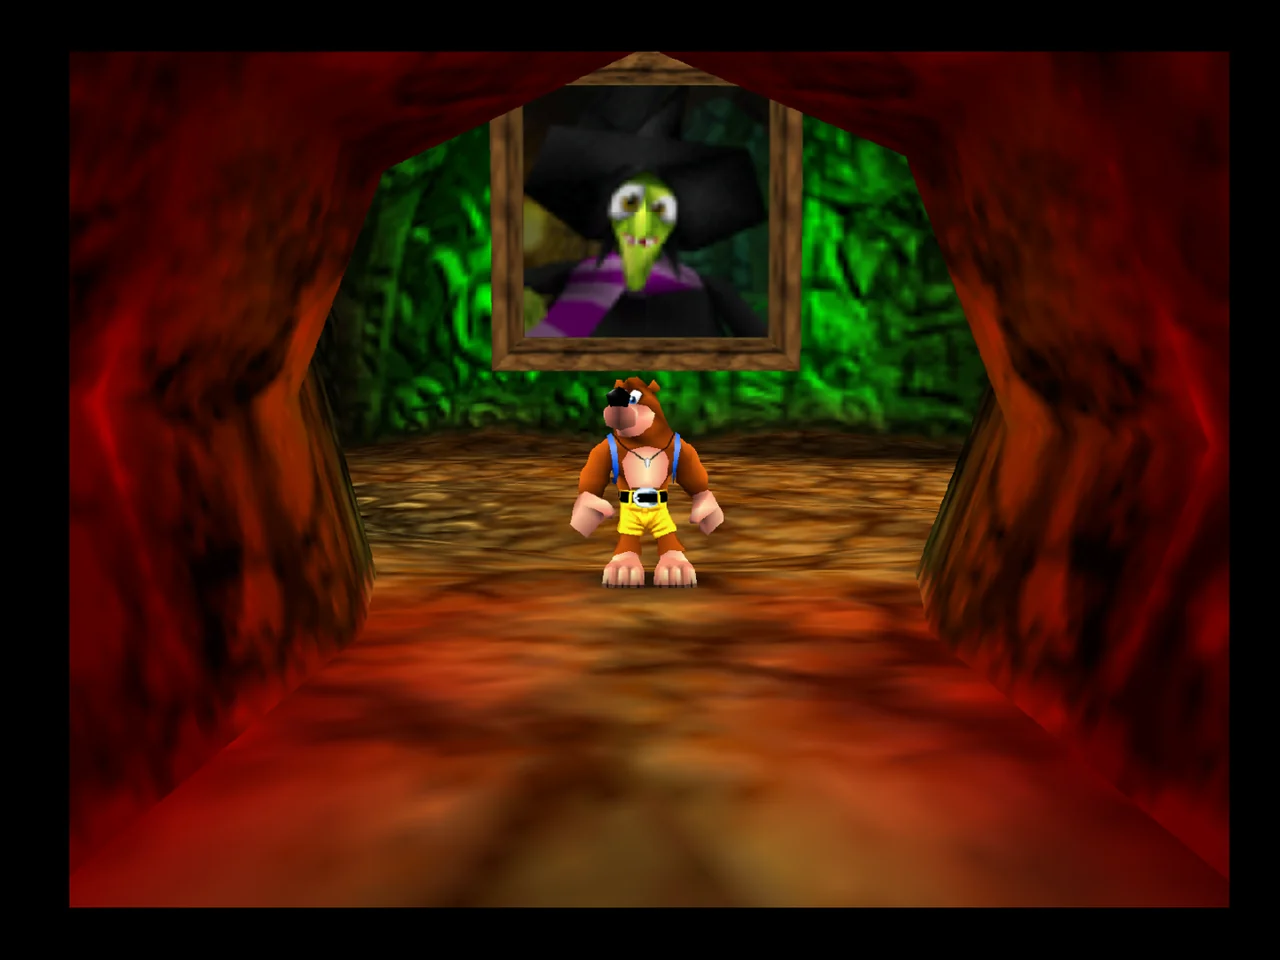
Sources & references
Our original guide draws on the references below. Check the edition at the top of this page before following controls or unlock requirements.
- Banjo-Kazooie USA Nintendo 64 Instruction Booklet
- Nintendo 64 Instruction Manuals: Banjo-Kazooie
- Banjo-Kazooie Guide and Walkthrough, Nintendo 64, TrulyDexterous, GameFAQs
- Banjo-Kazooie Guide and Walkthrough, Nintendo 64, me_frog, GameFAQs
- Rare Gamer Banjo-Kazooie Complete Walkthrough
- Banjo-Kazooie — Guide and Walkthrough — Nintendo 64 — GavLuvsGA
- Mumbo's Mountain — Banjo-Kazooie Wiki
- Banjo-Kazooie Walkthrough and FAQ, Joca64, GameFAQs
- Banjo-Kazooie — Guide and Walkthrough by namod65, Nintendo 64, GameFAQs
- Banjo-Kazooie/Treasure Trove Cove — StrategyWiki
- Banjo-Kazooie — Guide and Walkthrough by DonkeyKongSong
- Clanker’s Cavern — StrategyWiki
- Bubblegloop Swamp — Banjo-Kazooie Wiki
- Banjo-Kazooie — Nintendo 64 Instruction Manual PDF
- Banjo-Kazooie — Freezeezy Peak, StrategyWiki
- Freezeezy Peak — Banjo-Kazooie Series Wiki
- Retro Game Walkthroughs — Banjo Kazooie N64
- Banjo-Kazooie/Mad Monster Mansion — StrategyWiki
- Banjo-Kazooie — Nintendo 64 Manual
- Rusty Bucket Bay — Banjo-Kazooie Wiki
- Engine Room — Banjo-Kazooie Wiki
- Banjo-Kazooie — Click Clock Wood Guide by Ernest_64, GameFAQs
- Banjo-Kazooie — Guide and Walkthrough by marshmallow, GameFAQs
- Banjo-Kazooie — Click Clock Wood Guide, StrategyWiki
- Click Clock Wood — Banjo-Kazooie Wiki
- Guide for Banjo-Kazooie — Click Clock Wood, TrueAchievements
- Locked Notedoors — Banjo-Kazooie Wiki — Neoseeker
- Gruntilda's Lair — StrategyWiki
- Gruntilda's Lair — RareWiki
- Banjo-Kazooie Guide and Walkthrough — Nintendo 64 — King_Kool
- Honeycomb Puzzle — Banjo-Kazooie Wiki
- Red Honeycomb Energy — Banjo-Kazooie Wiki
- Banjo-Kazooie: The Final Battle — StrategyWiki
- Banjo-Kazooie, Wikipedia
About the game & collecting notes
- Platform
- Nintendo 64
Step-by-step campaign walkthrough for the original Nintendo 64 release of Banjo-Kazooie (USA Rev A). Covers the hub, each world, required progression to reach and defeat Gruntilda, boss/minichallenge guidance, recovery strategies, and an optional 100% completion checklist (Jiggies, Notes, Jinjos, Mumbo transforms and extra collectibles).
Darryl Polo
Darryl Polo loves tinkering with emulation and revisiting retro games. He enjoys exploring how old favorites play on different setups and sharing what he learns along the way. At Joking Joystick, he writes about the games, hardware, and small discoveries that keep the hobby fun.
Our editorial standardsFound a step that needs another look? Help us improve this guide.