The Adventures of Bayou Billy — NES (North American original) Campaign Walkthrough
Complete, stage-by-stage walkthrough for the original North American NES release of The Adventures of Bayou Billy. Covers controls, Training Mode, brawling, driving and shooting stages, weapon and survival-item use, the Game A/Game B shooting choice, resource management, continues, and the complete nine-stage route to the North American ending. Training rewards are optional and do not create a separate North American ending condition; Japanese Mad City ending rules are excluded.

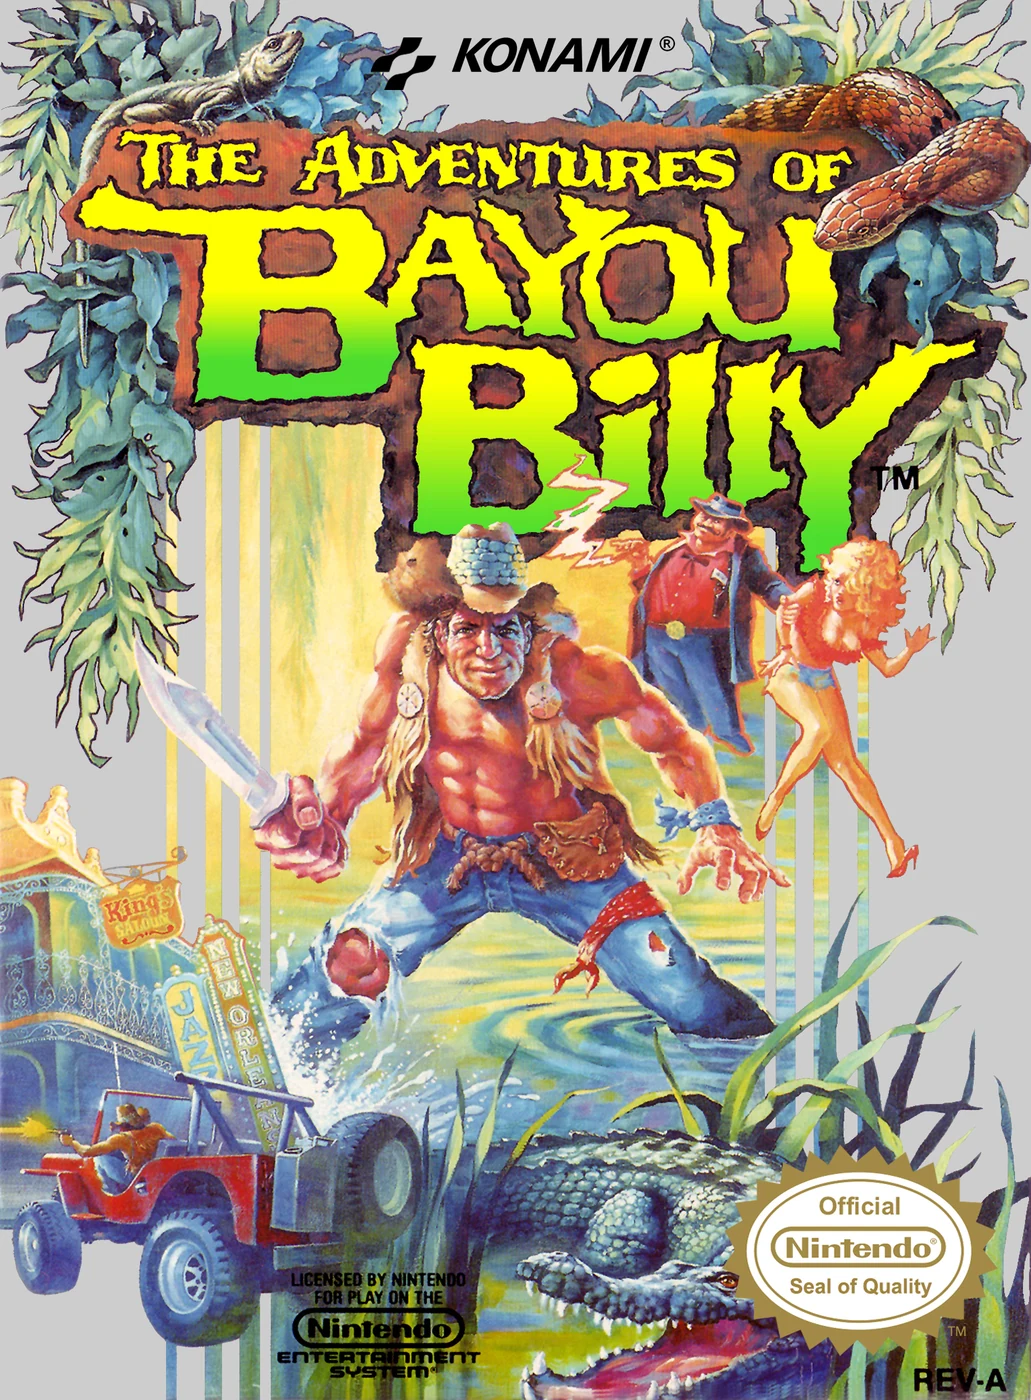
Find a copy
The Adventures of Bayou Billy Nintendo Entertainment System
We may earn a commission if you buy through these links, at no extra cost to you. As an Amazon Associate I earn from qualifying purchases.
Opens retailer search results. Check the model, edition, seller, availability and current price before buying.
Before you begin
This guide is written for the original North American NES release of The Adventures of Bayou Billy (NES-MU-USA).
Expect three distinct play styles: side-scrolling brawling, behind-the-vehicle driving, and first-person gun stages.
The USA release was altered from Japan's Mad City and is generally more difficult; this guide covers only the North American stage order and mechanics.
Use Training Mode to familiarise yourself with each gameplay type, then follow the nine campaign stages in order.
Game A uses the NES Gun System and Game B uses the controller reticle for both shooting stages. The North American release has one ending; Japanese Mad City alternate-ending conditions do not apply.
Set yourself up for the run
Read the control functions for brawling, shooting and driving before beginning the campaign.
Choose Game A for the NES Gun System or Game B for controller aiming before starting Stage 1; the choice applies to both Stage 2 and Stage 7.
Use Training Mode to learn street fighting, gun shooting and car driving if needed. Training rewards are optional and do not affect the North American ending.
Keep track of health, bullets, Hourglasses, First Aid, Bullet Proof Vests, Gasoline Cans, weapons and continues.
Remember the North American shooting reserves: Game A begins with 50 bullets and Game B begins with 100.
Practice, Modes and Controls
Set up the original North American NES campaign before beginning Stage 1. From the title screen, choose Game A or Game B with Select and confirm with Start. Game A uses the NES Gun System during the shooting stages; Game B uses the controller to move the gun sight and fire. This choice applies to both Stage 2 and Stage 7, so select the method you will use for the entire campaign. Training Mode contains separate street-fighting, gun-shooting, and car-driving exercises. Completing practice can provide optional powerups for the main game, but those rewards do not alter ending eligibility in the North American release. The U.S. cartridge has one ending. Use Training to learn the controls if needed, then begin the nine-stage campaign with the equipment and control method you prefer.
Choose Game A or Game B before starting the campaign
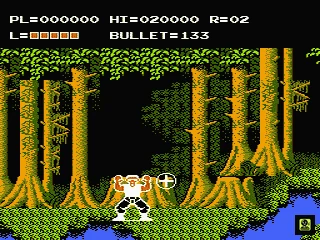
At the title screen, use Select to move the cursor to Game A or Game B, then press Start to confirm. Game A selects the NES Gun System for the shooting portions. Game B selects controller aiming, in which the Control Pad moves the on-screen gun sight and the A Button fires. If you do not have a usable NES Zapper, choose Game B before beginning the story.
Treat this as a campaign-wide choice. It determines the shooting method in Stage 2, Deep in the heart of the Dixie Swamp, and Stage 7, Gordon’s Gateway. The game does not provide a normal mid-campaign option to convert a run from Game A to Game B, so do not choose Game A expecting to change methods when the second shooting stage arrives.
- Choose Game A if you will use the NES Gun System.
- Choose Game B if you will aim with the controller.
- Confirm the choice before starting Stage 1.
- Remember that the choice governs both Stage 2 and Stage 7.
Open Training Mode and identify its three exercises
From the title screen, move the cursor to Training Mode and press Start. Training provides three separate exercises: street fighting, gun shooting, and car driving. Street-fighting practice lets you rehearse Billy’s movement, kicks, punches, weapons, gun mode, and jump-kick. Gun-shooting practice lets you test the shooting method associated with your selected Game A or Game B setting. Car-driving practice covers speed control, horizontal positioning, dynamite, and the vehicle’s forward weapon.
The opening menu also includes a Game Sound Effects option. That option is for listening to the game’s music and effects; it is not part of campaign progression. Select it only if you want to hear the audio, and return to the main choices when you are ready to practice or begin the story.
- Street-fighting practice covers on-foot combat.
- Gun-shooting practice uses the selected Zapper or controller method.
- Car-driving practice covers speed, movement, dynamite, and firing.
- Do not confuse Game Sound Effects with a playable campaign mode.
Use Training rewards as optional assistance
Completing a Training exercise can award a powerup that may be used in the main game. These rewards are optional assistance rather than a requirement for completing the campaign. They also do not prevent or change the North American ending. If you want the extra help, complete the relevant practice exercise and use the awarded powerup when the game makes it available.
The warning sometimes attached to Training rewards belongs to information about the Japanese version, Mad City, where ending conditions differ. Do not import that restriction into this North American walkthrough. On the U.S. NES release, you may practice, accept a Training reward, or skip Training entirely; the ending is determined by completing the campaign and its final sequence, not by avoiding a practice reward.
- Training is optional for a normal campaign clear.
- Training rewards may be used if you want their assistance.
- Training rewards do not remove ending eligibility in the North American release.
- Do not apply Japanese Mad City ending rules to this cartridge.
Learn the car-driving controls
During a driving stage, press Up on the Control Pad to increase speed and Down to decrease speed. Press Left or Right to move the car horizontally across the roadway. Press A to toss dynamite at the Gangster King’s attacking aircraft. Press B to blast enemy limousines and other obstacles in front of the car.
Practice each action separately before combining them. Use Up and Down to adjust pace, Left and Right to line up with the road, B for limousines and road hazards, and A for aircraft. The driving exercises prepare you for Stage 4 and Stage 5, which occur back to back. You need to adjust speed and position without losing track of which button handles each attack.
- Up increases speed.
- Down decreases speed.
- Left and Right move the car horizontally.
- A throws dynamite at attacking aircraft.
- B fires at limousines and other road obstacles.
Learn the street-fighting controls
In street and swamp fighting, Left and Right move Billy forward or backward, while Up and Down move him vertically on the screen. Press A to kick. Press B to punch or activate the weapon Billy is carrying, including the whip, knife, or other available weapon. Press A and B together to perform a jump-kick.
Press Select to switch to gun mode when the game allows Billy to use his gun. The gun is then operated with B. Practice lining Billy up with an enemy before attacking instead of charging directly into a group. The jump-kick is useful for entering or leaving a crowded fight while dealing damage, but it does not eliminate the need to manage spacing.
- Left and Right move forward and backward.
- Up and Down move vertically on the playfield.
- A kicks.
- B punches or uses the current weapon.
- A+B performs a jump-kick.
- Select enters gun mode when gun use is available.
Learn shooting with the selected game mode
In Game A, connect and test the NES Gun System during gun-shooting practice. The manual assigns the Gun System to Game A, so verify that the accessory and television setup register shots before starting the campaign. The shooting sections are Stage 2 and Stage 7, and both use the Game A method selected at the title screen.
In Game B, use the Control Pad to move the on-screen gun sight. Make short horizontal and vertical corrections to place the sight over an enemy, then press A to fire. Practice stopping the sight on targets instead of sweeping past them. This same controller method returns in both shooting stages, so the timing learned in Training carries directly into the campaign.
- Game A uses the NES Gun System.
- Game B uses the Control Pad to move the gun sight.
- Game B fires with A after the sight is aligned.
- The selected method remains relevant in Stage 2 and Stage 7.
Complete the setup check and begin Stage 1
Before selecting the story, confirm that your Game A or Game B choice matches the equipment you will use later. Confirm that you can perform the three brawling actions, operate the car, and aim in the chosen shooting mode without guessing. If you completed Training, decide whether you want to use its optional reward; either choice is valid on the North American cartridge.
When ready, start the main game and proceed to Stage 1, Bayou’s Backyard. Keep the same Game selection throughout the run. The nine-stage campaign alternates among brawling, shooting, and driving, so the choice made at the title screen affects later stages even though the opening stage is a brawl.
- The selected game mode matches your available equipment.
- You know the brawling, driving, and shooting controls.
- You have decided whether to use an optional Training reward.
- You understand that Training rewards do not affect North American ending eligibility.
- You are ready to start Stage 1.
Before you move on
- Game A or Game B was selected at the title screen before starting the campaign.
- Training Mode was identified as containing street-fighting, gun-shooting, and car-driving exercises.
- Driving controls are understood: Up and Down change speed, Left and Right move the car, A throws dynamite, and B fires.
- Brawling controls are understood: A kicks, B punches or uses the current weapon, A+B jump-kicks, and Select enters gun mode when available.
- The selected shooting method is understood for both Stage 2 and Stage 7.
- Any Training reward has been treated as optional, with no false restriction placed on North American ending eligibility.
Resource Management & Weapons
The North American NES release lets Billy carry one close weapon at a time, while the Magnum remains available as long as ammunition lasts. Keep a melee weapon that suits the next encounter, collect health and defensive items only when the surrounding enemies are controlled, and preserve bullets for Stages 2 and 7. Raw Meat and First Aid restore the Life Line; the Bullet Proof Vest reduces incoming damage; Stars clear enemies from the screen; Hourglasses temporarily stop ammunition from diminishing; Bullets restore ammunition; and Gasoline Cans add time during driving stages. Shooting ammunition depends on the title-screen choice: Game A starts each shooting stage with 50 bullets for the NES Gun System, Game B starts with 100 bullets for controller aiming, and American bullet pickups add 40 bullets. The manual allows up to five continues, activated during the 9-to-0 countdown and restarting the stage where Billy died. Training rewards are optional and do not block the North American ending.
Carry one melee weapon deliberately
Certain defeated enemies drop the Foot Long Blade, Ugly Stick, Whipper Snapper, or Magnum. Billy can carry only one close weapon at a time. Picking up another melee weapon replaces the one currently held, so do not walk over every drop automatically. First create space around the item, then decide whether the replacement will make the next encounter safer.
Prefer a weapon with useful reach when enemies are numerous or when approaching them directly is dangerous. The Whipper Snapper is especially valuable for controlling distance in later brawling sections, but the Foot Long Blade and Ugly Stick remain practical when they are already in hand. A weapon pickup inside an active group is not worth taking damage merely to improve the loadout. Defeat or separate the nearest attackers before collecting it.
- Carry one melee weapon on purpose instead of replacing it automatically.
- Clear nearby enemies before collecting a weapon.
- Keep a long-reach weapon when it is making the current fight safer.
Use the Magnum without draining the shooting stages
The gun is the exception to the one-weapon rule. It remains available while Billy has bullets; press Select to enter gun mode and B to fire. In brawling stages, use it for a gunman, a dangerous armored opponent, or an enemy that cannot be approached safely. Routine enemies should normally be handled with melee attacks so that ammunition remains available for the dedicated shooting stages.
The title-screen choice changes the starting ammunition in both shooting stages. Game A uses the NES Gun System and begins each shooting stage with 50 bullets. Game B uses the controller reticle and begins each shooting stage with 100 bullets. In the North American release, a bullet pickup adds 40 bullets in either mode. Therefore, Game A demands particularly careful aim, while Game B gives a larger starting reserve but still punishes careless firing.
A bullet pickup is useful only if you can reach it safely. Let the nearest attackers finish or move away, then collect the item. Do not spend several bullets on a harmless target simply because it is on screen; the boss encounter at the end of each shooting stage is the point at which a depleted reserve becomes most dangerous.
- Save Magnum ammunition for ranged threats and emergencies.
- Remember that Game A starts with 50 bullets and Game B with 100.
- Remember that each American bullet pickup adds 40 bullets.
- Choose the same mode you intend to use in both shooting stages.
Take healing after controlling the area
Raw Meat and First Aid Boxes restore Billy’s Life Line. Their value is greatest before a difficult fight, but collecting one while enemies are still surrounding it can cost more health than it restores. Move away from the group, defeat the closest attacker, or use a weapon to create a safe opening before returning to the item.
Use a recovery pickup when Billy has taken meaningful damage and another demanding section is ahead. If the Life Line is nearly full and the item is trapped among enemies, leave it temporarily rather than forcing a dangerous approach. Recheck the area after the active enemies have been defeated or separated. A safe recovery item is more valuable than a risky score opportunity.
- Control nearby enemies before collecting Raw Meat or First Aid.
- Use healing before the next hard section when health is low.
- Do not lose a life trying to collect a surrounded recovery item.
Use the Bullet Proof Vest and Star before the screen collapses
The Bullet Proof Vest partially reduces damage from enemies and is especially useful where gunfire or several simultaneous attacks are difficult to avoid. Take it before entering a high-contact section when possible rather than waiting for a perfect emergency. It is a defensive resource, not a reason to stand in attacks that could have been avoided.
A Star removes all enemies currently on screen. Save it for a crowded encounter, a blocked retreat, or a moment when ranged enemies are attacking from several directions. Do not spend it on an isolated harmless opponent, but do not hold it so long that a dangerous screen becomes unmanageable. Stars found during the campaign are ordinary stage pickups and are separate from any optional Training reward.
- Collect the Vest before a section with heavy contact or gunfire.
- Use a Star to escape a genuinely dangerous screen.
- Do not confuse campaign Stars with Training rewards.
Prioritize Hourglasses during Stages 2 and 7
The Hourglass temporarily prevents the bullet supply from diminishing. In the shooting stages, collect it when a dense wave begins or when several threats appear together. Use the protected ammunition window to eliminate immediate dangers such as gunmen, thrown explosives, rockets, or other attacks that can damage Billy before you can reposition.
Aim before firing and avoid shooting empty background space. Missed shots consume ammunition, while successful hits preserve the shot in the game’s shooting system. In Game B, move the reticle onto a real target before pressing A or B. In Game A, track the same priority targets directly with the NES Gun System. Do not cross an active attack merely to reach an Hourglass; surviving with fewer bullets is better than losing a life.
- Prioritize Hourglasses in both shooting stages.
- Fire at confirmed targets rather than empty scenery.
- Take a missed pickup rather than accepting avoidable fatal damage.
Treat Gasoline Cans as time, not protection
Gasoline Cans add bonus time during the driving stages. They do not repair the vehicle, restore Billy’s Life Line, or prevent a collision. The American driving sections use one-hit vehicle hazards, so a collision or explosion can cost the attempt immediately. Move toward a can only when the route is clear and the pickup does not require crossing a hazard.
Use the extra time to make the rest of the drive more controlled. Release Up or press Down before a difficult turn, reposition with Left or Right, then accelerate once the lane is safe. Use B against enemy limos and other road obstacles, and A against attacking aircraft. A missed Gasoline Can is a smaller loss than a collision caused by chasing it.
- Collect gasoline only when the approach is clear.
- Slow down before turns and obstacle patterns.
- Remember that gasoline adds time but does not repair or protect the vehicle.
Manage score, lives, and continues
The manual awards the first score-based extra life at 20,000 points and one additional life for every 30,000 points thereafter. Take safe score opportunities, but do not enter an active enemy group for a point item. Preserving health and reaching another stage usually creates more value than a risky pickup.
When the game ends, a countdown runs from 9 to 0. Press Start before it expires to continue at the beginning of the stage where Billy died. The manual limits the adventure to five continues. Save them for later stages or for a stage opening you are still learning. If an early death came from a preventable mistake, replaying that opening may be preferable to spending a continue immediately.
- Pursue 20,000 points when it does not expose Billy to major damage.
- Remember that each later extra life requires another 30,000 points.
- Press Start during the 9-to-0 countdown to continue.
- Reserve the five continues for difficult or late-stage attempts.
Keep Training rewards separate from campaign resources
The title screen’s Training option includes street fighting, gun shooting, and car driving practice. Training can award optional assistance for the main game, but it is not required for campaign completion. Use it to learn the three control sets if desired, then choose Game A or Game B before starting the campaign.
The North American release has one ending path and does not apply the Japanese Mad City restriction that changes the result after starting with Training powerups. Using a Training reward therefore does not invalidate the North American ending. Ordinary campaign items remain available and useful: Raw Meat, First Aid Boxes, Bullet Proof Vests, Bullets, Hourglasses, Stars, and Gasoline Cans are not subject to a no-powerup ending condition.
- Use Training for practice or optional assistance.
- Choose Game A or Game B before beginning the campaign.
- Do not impose Japanese Mad City ending rules on the North American cartridge.
- Continue collecting ordinary campaign items normally.
Before you move on
- You can explain that Billy carries one close weapon at a time while the Magnum remains available as long as bullets last.
- You know that Game A starts each shooting stage with 50 bullets, Game B starts with 100, and American bullet pickups add 40.
- You know when to use Raw Meat, First Aid, the Bullet Proof Vest, and the Star without entering an uncontrolled enemy group.
- You understand that Hourglasses temporarily prevent ammunition from diminishing and that careless or missed shots consume ammunition.
- You know that Gasoline Cans add driving time but do not repair the vehicle or prevent American driving deaths.
- You know the first extra life is awarded at 20,000 points, later extra lives require each additional 30,000 points, and the manual allows five continues.
- You understand that Training rewards are optional and do not prevent the North American ending.
- You have kept North American campaign mechanics separate from Japanese Mad City conditions.
Stage 1 — Bayou's Backyard (Brawling introduction)
Stage 1 crosses the bayou through several short brawls, two crocodile encounters, scuba-men fights, and a final lake crossing. Use moving jump-kicks to keep groups from surrounding Billy, collect meat only when the area is safe, and treat the first crocodile pond as an obstacle rather than a battle. The later pond is different: both crocodiles must be defeated before the route opens. Scuba men then provide optional ammunition and a vest before the final lake. Cross that lake without stopping to fight every crocodile, reach the far bank, and keep walking right to begin Stage 2. Training rewards are optional and do not affect North American ending eligibility.
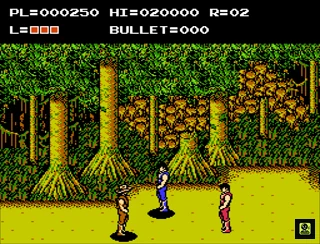
1. Defeat the opening blue fighter
Walk right until the lone blue fighter enters the area. Keep Billy offset vertically instead of standing directly in front of the enemy. Press A and B together while moving to perform a jump-kick, then continue past the enemy before turning around. This lets Billy attack without remaining in contact range for the enemy's counterattack.
If the jump-kick misses, use ordinary kicks with A and retreat after the attack animation. The North American version makes this opening opponent unusually durable: the Stage 1 reference lists approximately 11 punches, 9 kicks, or 6 jump-kicks to defeat him. Do not rush forward while the fighter is still active.
- Defeat the lone blue fighter.
- Use moving attacks instead of trading repeated contact hits.
2. Split up the blue-and-red pair
The next group contains a blue fighter and a faster red fighter. Move toward one side of the area so both enemies remain in front of Billy. If one enemy gets behind you, stop advancing and reposition before attacking again.
The red fighter closes distance more quickly, so focus on whichever opponent is nearest to Billy. Short jump-kick passes are safer than chasing one fighter across the whole screen while the other remains free. Defeat both enemies before moving right.
- Keep both fighters on the same side of Billy when possible.
- Do not advance with one enemy still attacking from behind.
3. Clear the three-fighter group and collect the meat
A red fighter now appears with two blue fighters. One blue fighter carries meat. Attack until the meat is knocked loose, but leave it on the ground while enemies are still close unless Billy has only one life box remaining. Once the group is defeated, collect the meat to restore health.
Use jump-kicks to break up the formation, then retreat toward one side of the screen. Avoid standing in the middle of the group, where one fighter can strike while Billy is facing another.
- Defeat the red fighter and both blue fighters.
- Collect the dropped meat when the area is safe, or immediately if Billy is nearly out of health.
4. Pass the hawks and the first crocodile pond
Two hawks attack near the first water crossing. Move vertically to avoid their flight paths, or punch them if they enter a safe range. Once Billy enters the water, three crocodiles swim around him. These crocodiles are not required for progression.
Billy can punch and jump-kick in the water, but he cannot perform a normal kick there. Keep moving through the pond and change vertical position when a crocodile lines up with Billy. One crocodile may carry meat, but pursuing it usually costs more health than it restores if the earlier fighter already dropped meat. Reach the dry land on the far side.
- Avoid fighting the first three crocodiles unless necessary.
- Cross the pond and continue toward the boulder throwers.
5. Disarm the boulder throwers
Three enemies appear in the next area. Two bring boulders, while the third carries a wooden beam. Attack the boulder carriers quickly so they cannot establish a throwing rhythm. Fallen boulders cannot be picked up by Billy, and an unarmed thrower may retrieve one if the fight stalls.
The wooden beam can be collected after it is knocked loose. Billy can carry only one close weapon at a time, so pick up the beam only if it is better than the weapon currently in hand. Keep the enemies in front of Billy while approaching any dropped item.
- Stop the boulder carriers before they can repeatedly throw.
- Do not waste time trying to pick up fallen boulders.
- Choose deliberately whether to replace the current close weapon with the beam.
6. Evade the knife fighter
A red fighter carrying a throwing knife attacks next. He runs toward Billy and attempts a jump-kick. Move out of his line as he launches, let him land, then counterattack during his recovery. Do not meet the jump-kick head-on.
The knife is optional and replaces Billy's current close weapon. Leave it on the ground if the wooden beam is serving you better. After the fighter is defeated, continue right toward the next pond.
- Avoid the knife fighter's jump-kick.
- Do not pick up the knife automatically if you want to keep the beam.
7. Defeat both crocodiles in the second pond
The next pond contains two crocodiles that must be defeated before Billy can advance. Do not attempt to run through this encounter as you did the first pond. One crocodile carries a wooden beam and the other carries meat, but either animal may retrieve a dropped item by swimming over it.
Remain on dry land near the tree at the left side of the pond. The crocodiles leap toward Billy when they get close enough; strike them as they emerge, then step back to the safer position. If Billy takes damage, move farther from the water's edge and wait for the next leap. Continue until both crocodiles are gone, then collect the meat and beam if useful.
- Defeat both crocodiles.
- Use the dry-land position by the tree to reduce contact damage.
- Collect the meat after the pond is clear if Billy needs recovery.
8. Take the vest and gun pickups from the first scuba group
Three scuba men rise from the water on the land between the ponds. The white scuba man on the right wears a bulletproof vest. Hit him first until the vest falls, then collect it if possible. Removing the vest is important before depending on gunfire against him.
The two scuba men on the left carry guns. Attack them until the guns fall, then pick them up when no enemy is immediately beside Billy. Each gun pickup provides six bullets. Press Select to toggle Billy's gun during brawling sections; the gun remains available separately from the single close-weapon slot.
- Knock the vest loose before relying on gunfire against the white scuba man.
- Collect the gun drops safely if you want extra ammunition.
- Use Select to draw or put away the gun.
9. Fight the heavy enemy and two more scuba men
A heavy enemy carrying a wooden beam approaches while two more scuba men rise from the water. The heavy enemy's beam cannot be knocked from his hands, so do not try to collect it. Use jump-kicks, your own beam, or gunfire instead.
If you shoot the heavy enemy, realign Billy after the first hit. The enemy shifts position to avoid a consecutive shot, and the second bullet can miss if Billy remains stationary. The scuba men behave similarly. Attack one threat, retreat, and re-enter rather than allowing all three enemies to overlap.
- Do not attempt to disarm the heavy enemy's beam.
- Realign Billy between gunshots.
- Keep the scuba men from attacking while you collect ammunition.
10. Clear the final heavy enemy and vested scuba man
Another heavy beam carrier appears with a scuba diver wearing a bulletproof vest on the left. Defeat either enemy first, but remove the diver's vest before spending bullets on him. Use the same attack-and-retreat pattern from the previous encounter, keeping both enemies in front of Billy.
Collect any remaining recovery item only after the surviving enemy is no longer positioned to interrupt Billy. The next section is the final lake, so avoid entering it with critically low health if a safe recovery pickup is available.
- Strip the vest before using gunfire against the diver.
- Finish the encounter without taking unnecessary damage before the lake crossing.
11. Cross the final lake and trigger Stage 2
The final section is a large lake filled with crocodiles. None of these crocodiles must be defeated. Move continuously to the right, using jump-kicks in the water to avoid being slowed. Use the docks as platforms when they provide a quicker route, but do not stop to fight animals behind Billy or turn around for unnecessary items.
When Billy reaches dry land on the far side, continue walking right until the stage transition appears. Stage 1 is complete when Billy reaches the far bank and advances beyond the exit area; defeating every crocodile is neither required nor worthwhile.
- Cross the final lake without stopping for prolonged fights.
- Reach the far bank and continue right until Stage 2 begins.
- Carry any remaining ammunition forward if possible.
- Remember that Training rewards are optional and do not affect North American ending eligibility.
Before you move on
- The opening blue fighter, the blue-and-red pair, and the three-fighter group are defeated.
- Billy has bypassed the first crocodile group and cleared the boulder throwers and knife fighter.
- Both crocodiles in the later pond are defeated.
- Billy has passed the scuba-men encounters and collected useful health, vest, or ammunition pickups when safe.
- Billy has crossed the final lake, reached the far bank, and continued right until the Stage 2 transition appears.
- Any Training-mode reward may be used without affecting North American ending eligibility; no special Training restriction is required for this chapter.
Stage 2 — Deep in the Heart of the Dixie Swamp
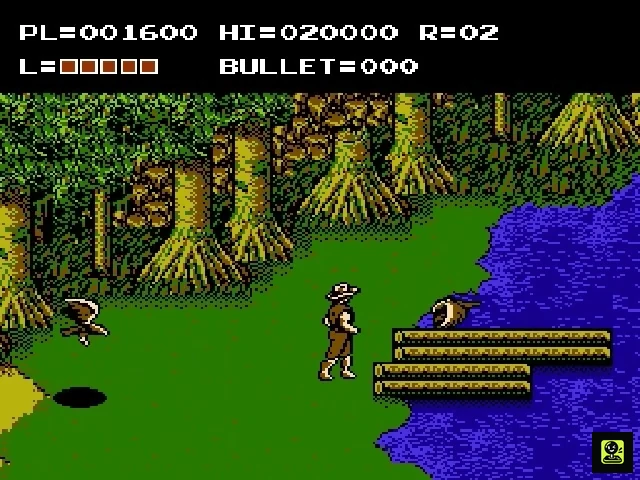
Stage 2 is the first gun-shooting section in the North American NES release. Select Game A for the NES Gun System and Zapper, or Game B for the controller-operated sight. Your starting ammunition depends on that choice: Game A begins with 50 bullets, while Game B begins with 100. Missed shots consume ammunition, but accurate hits do not, so deliberate firing is essential. Gordon’s men attack from both sides and from above with guns, dynamite, and rockets. Destroy immediate threats first, search background cover for supplies, and use the hourglass to preserve your ammunition while it lasts. The stage ends with a blue helicopter that repeatedly crosses the screen and sends gunmen into the fight. Destroy it to advance to Stage 3, Gator Alley.
1. Confirm the shooting mode and starting ammunition
The Game A or Game B choice is made on the title screen and governs the shooting sections later in the campaign as well. In Game A, Stage 2 uses the NES Gun System. Connect the NES Zapper to the second controller port before starting if you intend to use the light gun. In Game B, use the Control Pad to move the on-screen gun sight and press A to fire. The North American manual identifies A as the controller firing button.
The starting ammunition is different between the two modes in this release. Game A begins Stage 2 with 50 bullets, while Game B begins with 100 bullets. This makes accuracy especially important in Game A, but careless firing is dangerous in either mode. You can lose a life when Billy’s health is exhausted or when the bullet supply reaches zero, so do not spend shots testing the controls after the stage begins.
If you are using Game B, move the sight before the first enemy wave appears so you know how quickly it responds. If you are using Game A, position the Zapper where you can react to both sides of the screen without waving it unnecessarily.
- Game A: connect the NES Zapper to controller port two and begin with 50 bullets.
- Game B: use the Control Pad and A button, beginning with 100 bullets.
- Do not waste ammunition testing shots after the stage starts.
2. Watch the sides and upper edge before firing
The stage scrolls automatically to the right and pauses at several encounter points. Enemies enter from either side of the screen, and some drop down from above. They may run around briefly before stopping to attack, so keep the sight near the central lower portion of the screen and shift it toward the active threat instead of sweeping randomly across the entire view.
Gunmen are the most urgent ground targets because their attacks damage Billy as soon as they begin firing. When several enemies appear, shoot the one that is already aiming or firing before chasing a target that is still moving into position. A successful hit does not reduce the current ammunition supply, while a miss does, so wait until the reticle or Zapper is lined up before firing.
In Game B, use short Control Pad movements rather than holding a direction for a long time. Keeping vertical movement limited makes it easier to return to the ground-level firing position when enemies enter from the sides.
- Check both side edges and the upper part of the screen.
- Prioritize active gunmen over enemies that are still approaching.
- Use short sight movements and fire only when a target is lined up.
3. Intercept dynamite and rockets
Some of Gordon’s men throw dynamite, while others launch rockets. These projectiles can be shot before they reach Billy. When a projectile and its attacker appear together, destroy the projectile if it is about to connect, then return to the attacker. This is safer than staying focused on the enemy while an explosive crosses the screen.
Do not fire repeatedly at a projectile that is still far away or moving outside your sight. Misses cost ammunition, and Stage 2 is designed to punish blind shooting. If the projectile is not yet an immediate danger, take a clear shot at a gunman or wait for the object to move into a reliable firing line.
The same rule applies during the later helicopter encounter. A gunman or projectile can cause more immediate damage than the boss vehicle, so divide your attention according to the threat that is currently closest to hitting Billy.
- Shoot dynamite before it reaches Billy.
- Destroy rockets when they enter a clear firing line.
- Avoid repeated blind shots at moving projectiles.
4. Search background cover for supplies
At several pauses, enemies crouch behind trees, grass, water, or other background objects. They are less conspicuous than the attackers in the foreground, but shooting them can reveal useful items. Once the immediate wave is under control, scan these covered positions before the screen resumes scrolling.
Possible rewards include bullet pickups, an hourglass, a medical kit, a bulletproof vest, and a star. Bullet pickups restore ammunition, which is particularly valuable in Game A because the stage begins with only 50 bullets. The hourglass prevents your bullet supply from diminishing for its active period, allowing you to fire through a crowded sequence without losing ammunition in the normal way.
The medical kit restores Billy’s health. The bulletproof vest reduces or prevents damage for a limited time, depending on the encounter. Take defensive or health items when the firing lane is safe; standing still to chase a reward while a gunman is active can cost more health than the item restores. These rewards are helpful but not required for the stage to advance.
- Inspect enemies positioned behind background objects.
- Collect ammunition when the screen is safe.
- Use the hourglass during a dense wave and take health or protection before pursuing optional rewards.
5. Clear the stationary enemy waves
Some pauses present enemies one at a time from trees or other fixed positions. Keep the sight in the area where the next attacker appears and shoot each one as it becomes a clear target. The scrolling resumes only after the required enemies in the encounter have been defeated, so do not waste bullets on scenery while waiting for the next appearance.
A star can appear from a background enemy. Shooting the star clears the enemies currently on screen. There is also an optional extra-life opportunity connected to shooting a particular location or star during the stage. Treat both rewards as bonuses rather than requirements. If a gunman or projectile is active, handle that threat first instead of risking Billy’s health for a reward that may disappear quickly.
Items do not remain available indefinitely. If you have safely exposed a reward, collect it promptly, but never cross an active firing lane merely to reach an optional pickup.
- Defeat each stationary attacker before expecting the stage to continue.
- Use a star as an emergency screen-clearing option when it is safe.
- Treat the extra life as optional and never ignore an active gunman for it.
6. Defeat the blue helicopter
The automatic scrolling eventually stops and a blue helicopter enters the encounter. It moves back and forth across the screen and fires at Billy. Gunmen may also appear during the fight, including men deposited by the helicopter when no gunman is already present.
Track the helicopter across its horizontal path and fire when it crosses the sight. In Game B, holding A can maintain rapid fire, but keep the reticle on the helicopter rather than holding the button while it is off target. In Game A, fire only when the Zapper is aimed at the helicopter or an active ground attacker. Accurate hits conserve ammunition; missed shots continue to reduce it.
Do not focus exclusively on the helicopter. When a gunman appears and begins firing, eliminate that enemy, then return to the aircraft. If a projectile enters the screen, shoot it when it becomes an immediate threat. Continue alternating between the helicopter and supporting enemies until the helicopter’s life meter is empty.
- Follow the helicopter’s left-to-right movement.
- Remove deployed gunmen before they can repeatedly damage Billy.
- Keep attacking until the helicopter’s life meter reaches zero.
7. Recover after failure
If Billy’s health reaches zero or the ammunition counter is exhausted, Stage 2 ends in failure. When the continue countdown appears, press Start before it reaches zero to resume at the beginning of the stage. The North American manual states that the countdown runs from 9 to 0 and that the game permits up to five continues.
If Game A caused the failure, conserve the opening 50 bullets by refusing uncertain shots and prioritizing ammunition rewards from background enemies. If Game B caused the failure despite its 100-bullet start, the usual problem is uncontrolled firing or allowing gunmen to remain active. On the next attempt, keep the sight low and central, move only when necessary, and shoot immediate threats in a fixed order.
A successful retry does not require finishing with a particular health or ammunition total. The practical goal is to reach the helicopter with enough health to withstand an error and enough bullets to destroy it.
- Press Start during the countdown if you need another attempt.
- Use more conservative firing in Game A’s 50-bullet opening.
- Reach the helicopter with both health and ammunition remaining.
Before you move on
- The blue helicopter’s life meter is reduced to zero and the helicopter is destroyed.
- The game automatically advances to Stage 3, Gator Alley.
- No specific remaining health or ammunition total is required; the transition to Stage 3 confirms that Stage 2 is complete.
Stage 3 — Gator Alley: Keep the Stick and Control Each Encounter
Gator Alley is the second brawling stage in the North American NES release. The route contains several armed enemy groups, two crocodile encounters, a bird hazard, recovery opportunities, and a boss wearing a bulletproof vest. Keep the wooden stick whenever possible because it gives Billy useful reach against the ordinary fighters and crocodiles. Move vertically to separate enemies, finish one target before committing to the next, and collect meat only after the surrounding enemies are no longer attacking. Before the boss, preserve as much health as possible. Remove the boss’s vest with unarmed attacks, take the vest for Billy, and then attack while moving up and down to avoid his long strikes and grab. After the boss falls, walk right to trigger the transition to Stage 4, the first driving stage.
1. Take the wooden stick from the opening encounter
Move forward into the first fight, where a red fighter carries a knife and the other enemy carries or uses a rock and has the wooden stick. Stay offset vertically instead of standing directly between both enemies. Attack until the stick is dropped, then collect it when the immediate danger has moved away from the pickup.
The stick is the preferred weapon for this stage. It has enough reach to handle ordinary fighters without forcing Billy directly into their bodies, and it is particularly useful against the crocodiles. If you already have another weapon, replace it with the stick only when doing so does not expose Billy to an active knife or rock attack. Do not hurry into the next section immediately after the first enemy falls; finish the encounter and confirm that the weapon is safely in Billy’s possession.
- Defeat the opening pair without repeatedly trading hits.
- Pick up the wooden stick after it is dropped.
- Carry the stick into the first crocodile section.
2. Clear the first crocodile pond from an edge
Enter the small pond and move toward one side rather than fighting from the center. Two crocodiles attack in this section, and a bird appears after Billy enters. Use the edge of the pond as your working position, then strike a crocodile when it comes within the stick’s range. Reposition along the edge instead of remaining in the water while waiting for another approach.
The bird is a secondary threat. Deal with it when it enters Billy’s immediate space, but do not let it draw you into the crocodiles’ attack range. After both crocodiles are defeated, search around the pond for any meat they may have dropped. The recovery item can be difficult to see against the terrain, so check the area before leaving, but do not spend health trying to collect it while an enemy is still active.
- Work from the pond’s left or right edge.
- Use the stick against both crocodiles.
- Check for dropped meat after the area is safe.
3. Defeat the next two rock carriers
The following encounter has two more rock-carrying enemies, although only one begins with a rock. Keep Billy above or below the enemies’ line rather than standing directly in front of both. Use the stick to pressure one opponent until he is defeated, then turn to the other. This is safer than switching targets whenever one enemy moves away.
If the stick is knocked from Billy’s hands, wait for an opening before retrieving it. Do not cross through an enemy merely to recover the weapon. Once the pair is defeated, make sure Billy is still equipped before continuing. The stick is more useful than the knife for the remaining groups, so avoid replacing it unless the weapon is lost and no safer recovery is available.
- Separate the two enemies vertically.
- Defeat one rock carrier before committing to the other.
- Recover the stick only when the screen is safe.
4. Collect the meat from the blue-and-red pair
The next fight features a blue fighter and a red fighter. The red fighter carries meat. Keep to one side of the screen and let the pair approach instead of walking between them. Strike the nearest enemy with the stick, retreat a short distance, and repeat until one opponent is down. Finish the second fighter before moving onto the meat.
Collect the meat only after both enemies have been defeated or can no longer reach Billy. It is a valuable recovery opportunity before the final ordinary encounters and boss. If Billy has already taken substantial damage, use it before entering the next group. If his health is high, leave it until the area is completely secure rather than risking contact damage for an early pickup.
- Avoid standing between both fighters.
- Defeat the pair before taking the meat.
- Use the recovery item when it meaningfully improves boss preparation.
5. Survive the three-weapon group
Three red fighters appear together. Two carry knives and one carries the stick. This is the most dangerous standard encounter in the stage because several attacks can arrive from different directions. Keep moving around the screen and watch for a knife thrown toward Billy. If a thrown knife lands in a safe position, Billy can pick it up and throw it back, but do not cross through an active enemy just to claim it.
Your objective is to reduce the group one enemy at a time while preserving a usable weapon. Work from one side of the screen and avoid getting trapped in the center. If you still have the wooden stick, use it to keep a little distance while concentrating on the nearest target. After the fight, recover another stick if one is available. Ignore risky score opportunities here; reaching the boss with health remaining is more important than collecting every possible point.
- Keep moving while all three fighters are active.
- Use a dropped knife only when it is safely reachable.
- Preserve or recover the wooden stick after the encounter.
6. Defeat the final red fighter
A single red fighter remains before the boss. Use this short encounter to reset Billy’s position and confirm that the stick is ready. Attack from a slight vertical offset, then move away after the strike rather than standing directly in front of the enemy. With only one opponent on screen, there is no need to use the gun or take unnecessary risks to finish quickly.
Once the fighter is defeated, check Billy’s health and weapon before moving right. The boss encounter follows this section, so do not enter while standing over a safe recovery item or weapon that can be collected without danger.
- Defeat the lone fighter without unnecessary contact damage.
- Keep the stick or another practical weapon for the next room.
- Enter the boss fight with the highest practical health.
7. Remove the vest, then defeat the boss while moving vertically
The Stage 3 boss has a bulletproof vest, unusually long punches and kicks, and a close-range grab that throws Billy and removes a large amount of health. The vest is the first priority. Use unarmed attacks, especially kicks, to knock it off. Weapon attacks such as the stick or knife are ineffective while the vest remains on the boss and can waste the weapon. When the vest falls, collect it as soon as the path is safe; wearing it reduces damage from enemy attacks.
Do not stand still and wait for the boss to enter range. Move up and down, briefly align Billy with him, attack, and immediately continue moving vertically. This creates short attack windows while reducing the time Billy spends in front of the boss’s long-range strikes. If the boss closes the distance, move vertically away before he can grab Billy. Use a jump-kick only when it helps create space; repeatedly jumping at close range can place Billy directly in the grab zone.
If Billy dies during this boss encounter, the continuation returns him to the fight with a full health meter rather than forcing him to repeat the whole stage. Use that opportunity to maintain the vertical movement pattern and finish the fight safely. After the boss is defeated, walk right. The game shows the car carrying Annabelle away and then advances to Stage 4, the first driving stage.
- Remove the boss’s vest with unarmed attacks.
- Take the vest for Billy when it is safe.
- Attack during brief vertical alignments and retreat before the grab.
- Walk right after victory to trigger the Stage 4 transition.
Before you move on
- The opening pair is defeated and Billy has obtained the wooden stick or another usable weapon.
- Both crocodiles and the bird hazard in the first pond section are cleared, with any available meat collected safely.
- The two rock carriers, the blue-and-red pair, the three armed red fighters, and the final red fighter are defeated in order.
- The Stage 3 boss’s bulletproof vest has been removed before relying on weapon attacks, and the boss is defeated.
- Billy walks right after the boss fight and the game transitions to Stage 4, the first driving stage.
Stage 4 — Back Roads
Stage 4 is the first driving stage in the North American NES release of The Adventures of Bayou Billy. Start with a 100-second timer and guide the jeep through a fixed dirt-road route while destroying cars, aircraft, and other obstacles. Hold Up whenever you need maximum speed; releasing Up makes the jeep slow down, while Down brakes more sharply. Steer with Left and Right, fire the jeep’s gun with B, and throw dynamite with A. Cars and ground obstacles are normally handled with B, while dynamite is most important against bomb-dropping aircraft. The course has one gasoline can, positioned after a right curve in the later section and reached by moving left. It adds approximately ten seconds. The North American course has no separate vehicle health bar: a damaging collision or road hazard costs a life, so slow down before compact turns and keep the jeep away from the roadside posts. Clear the final right-right-left sequence to advance directly to Stage 5.
1. Use speed control through the opening turns
The timer begins as soon as the stage starts. Hold Up to accelerate and maintain the jeep’s top speed on open road. Do not treat Up as a toggle: when you release it, the jeep deliberately loses speed, and Down applies a stronger brake. Use those controls before sharp turns rather than waiting until the jeep is already drifting toward a post or obstacle. Once the jeep is lined up after the turn, hold Up again to recover speed and protect the timer.
Shoot the blue car directly ahead with B, then follow the road into the first right turn. Destroy the next car as it enters your path. The right turn quickly changes into a left turn, so begin steering back promptly. The roadside posts follow a fixed zig-zag pattern instead of appearing randomly; keep your corrections controlled and avoid hugging either edge of the road. Cars are usually safer to destroy than to pass, because a vehicle left behind can remain a collision threat during the next bend.
- Hold Up on the opening straight and other clear sections.
- Release Up or press Down before the first sharp right-left combination.
- Destroy the opening blue car and the next car with B.
2. Clear the first straightaway and aircraft
After the opening right-left sequence, the road straightens. A car appears first; fire with B, or use A if the car is immediately blocking your line and you need to remove it quickly. Soon afterward, another car appears, followed by another quick right turn and quick left turn. Reduce speed briefly for these corrections, then accelerate once the jeep is aligned. Because the course is timed, slowing down should be deliberate and temporary rather than continuous.
A plane appears during the following straight section and drops bombs. Use A to throw dynamite at the aircraft when it is clearly lined up. Bombs are easier to avoid on a straightaway than while turning, so keep the jeep’s path predictable until the aircraft has been dealt with. Afterward, make the left turn without drifting into the roadside posts. If a car and aircraft appear together, identify which hazard will reach the jeep first. Cars are commonly the immediate collision threat, but an aircraft already positioned to drop a bomb still requires attention.
- Use B on ordinary cars whenever the shot is safe.
- Preserve A primarily for aircraft and airborne threats.
- Make the second right-left sequence with a short speed reduction.
3. Handle the yellow cars and paired rocks
After the short left turn, destroy the next two cars on the straight. A light left curve follows, then a blue car appears before a hard right turn. Two yellow cars arrive in this section and move more aggressively than the earlier traffic. Keep firing while steering through the hard right. Do not attempt to squeeze between cars and the edge of the road when slowing and shooting gives you a safer line.
An aircraft appears after the hard right. Move toward the right side because two rocks occupy the left side of the road. Throw dynamite at the plane, then remain right until the rocks have passed. Another aircraft follows, so be prepared to use A again. A blue car appears during the next left turn, with another aircraft threatening the same sequence. When several hazards overlap, deal with the one closest to the jeep first while avoiding large cross-screen steering movements.
- Expect the yellow cars to close distance quickly.
- Stay right while the two left-side rocks pass.
- Avoid sweeping across the entire road while a plane is dropping a bomb.
4. Navigate the compact bends and collect gasoline
After the aircraft and nearby cars, make a right turn followed shortly by another right. Continue down the longer straightaway, firing at cars as they enter your lane. The next section combines a right turn, a quick left, and another right while an aircraft appears. Release Up briefly before the tighter corrections, then hold Up again once the jeep is aligned. Use A when the plane has a clear approach rather than throwing dynamite without a target.
Make the following left turn carefully because a rock is positioned on the left. On the next straight, the rock is on the right instead, so do not remain on the same side by habit. An aircraft appears after that rock. Turn right while handling the aircraft and nearby car, then clear two cars on the short straight before turning left and using A on the next aircraft.
After the left turn, follow the right curve and move to the left side of the road. The stage’s only gasoline can appears here. Drive through it rather than steering away. The pickup restores approximately ten seconds, which is valuable if you have slowed for turns or lost time while dodging bombs. Collecting it is optional, but it is the safest way to create extra margin for the final hazard sequence.
- Avoid the left-side rock before the gasoline section.
- Avoid the right-side rock on the following straight.
- Move left after the right curve and collect the stage’s only gasoline can.
5. Clear the final hazards and reach Stage 5
After collecting the gasoline, turn left while firing at the cars. The next rock is on the right, so keep the jeep left after the traffic is cleared. Make another left turn, continue through the straight section, and then turn right. A puddle appears after this part of the route. Avoid it instead of driving through it; the puddle slows the jeep and can leave you badly positioned for the aircraft and rapid turns that follow.
Aircraft appear after the puddle. Use A against them while maintaining a moderate, predictable line. The route then alternates left, right, left, and right in quick succession. Release Up before the tighter corrections or press Down if more braking is needed, then hold Up again as soon as the jeep is aligned. A car appears near the end of this chain; destroy it with B rather than trying to pass through a narrow gap.
The final approach consists of two right turns followed by a left turn. Keep enough speed to beat the timer, but do not hold maximum speed blindly into the bends. A short controlled slowdown is safer than correcting too late and touching a post, rock, car, aircraft bomb, or puddle. In the North American NES version, a damaging driving collision costs a life immediately because these stages do not use the Japanese version’s separate jeep health gauge. The stage ends when the game transitions to Stage 5, Superdome Drive.
- Stay left for the final right-side rock.
- Avoid the puddle before the last aircraft sequence.
- Use dynamite on the aircraft after the puddle.
- Clear the final right-right-left turn sequence.
- Confirm the transition to Stage 5, Superdome Drive.
Before you move on
- The jeep completes the fixed Stage 4 route without a damaging collision or timeout.
- The gasoline can has been collected if additional time is needed; it appears once in the course.
- The final right-right-left turn sequence has been cleared.
- The game transitions directly to Stage 5, Superdome Drive.
- The run used North American NES driving rules: a damaging vehicle or road collision costs a life immediately.
- The player is ready for Stage 5’s highway course, which uses the same basic driving controls but a different hazard layout.
Stage 5 — Superdome Drive
Stage 5 is the North American NES campaign’s second driving stage and takes place on a highway. Billy must reach the end before the timer expires while avoiding enemy cars, oil, aircraft attacks and roadside hazards. Up accelerates; releasing Up reduces speed, while Down applies a stronger brake. Left and Right steer, B fires the forward gun, and A throws dynamite at aircraft. Destroy cars with B instead of trying to pass them, use A for helicopters, and slow deliberately before difficult curves. The route contains several linked turns, a long middle section and a final right-left-right-left-right S-curve. Survive the highway and the game advances to Stage 6, The French Quarter.
1. Control your speed before the first turns
Begin by pressing Up to accelerate, but do not hold it continuously through every bend. Releasing Up actively reduces the jeep’s speed; it is the normal way to shed speed before a curve. Press Down when you need a sharper brake. Once the jeep is aligned with the new direction and the immediate hazard is gone, press Up again to recover speed and protect the timer.
Use brief Left and Right inputs rather than holding a direction for a long time. The driving controls are loose, and a long steering hold can carry the jeep too far across the road. Keep near the center on clear sections, then make only the correction needed for the next car, oil patch, aircraft attack or roadside obstacle. The objective is controlled speed, not maximum speed at every moment.
- Press Up to accelerate.
- Release Up deliberately to reduce speed before curves.
- Use Down for a stronger brake and Up again after alignment.
- Steer with short Left and Right inputs.
2. Clear the opening cars and oil patch
The opening sequence turns right and presents a green car. Fire with B as soon as it enters your path, then handle the next green car during the following left turn. A third right turn brings two more cars. Destroy them rather than attempting to slip past them; an uncleared car can remain in your route while you are already trying to steer through the bend.
The early section also contains an oil puddle. Stay mainly toward the left side to avoid it, but do not make a large emergency movement if a car is arriving at the same time. Deal with the closer collision threat first, then make a small correction around the oil. The puddle slows the jeep, so crossing it can cost both position and time even when it does not immediately end the attempt.
- Shoot the green cars with B.
- Stay left enough to avoid the early oil puddle.
- Do not trade a car collision for a risky last-second lane change.
3. Prioritise cars when helicopters join the route
After another left turn and a pair of cars, turn right toward the first helicopter. Use A to throw dynamite at the helicopter. The aircraft is handled differently from ground traffic: B fires the forward gun, while A is the attack that reaches the airborne threat. After dealing with it, continue through the following right and left turns while watching for cars.
A further helicopter appears before another left turn. If a car and helicopter arrive together, judge which one reaches the jeep first. The car is usually the immediate collision threat, so press B first when the vehicle is close, then use A once the road is clear enough to throw safely. While dynamite is in use, you cannot immediately substitute normal gunfire if another target reaches you, so do not throw it casually at a distant aircraft while a car is about to collide.
- Use B for cars and other ground obstacles.
- Use A for helicopters.
- When threats overlap, handle the target that reaches the jeep first.
4. Slow through the paired-helicopter section
A right turn leads into a section with two helicopters. Throw dynamite at each while keeping enough steering control to stay on the road. The next sharp left is followed by a lengthy right turn. Release Up before entering this combination, and use Down if the jeep still carries too much speed. After the long turn, press Up again only when the vehicle is aligned.
The next long left contains a red car. Shoot it early, then continue through the bend. A right turn and a quick left follow. Finish the steering change before accelerating; pressing Up too soon can carry the jeep wide during the reversal. The time limit matters, but a short controlled slowdown is safer than losing the life to a collision.
- Destroy both helicopters with A.
- Reduce speed before the sharp-left and lengthy-right combination.
- Shoot the red car during the following long left.
- Accelerate again only after the quick left is aligned.
5. Work through the repeated middle curves
After the straightaway, the route turns right, then left, then right again. A car appears during each of these turns except the second left, where a helicopter appears near the end. Approach each bend at a manageable speed, use B for the car in front of you, and use A for the helicopter once it becomes the immediate threat. Do not hold Left or Right through the entire sequence; tap, correct, and release.
Another straightaway follows, leading into a right turn, a left curve, a right turn and another left. The changes are less forgiving when entered at full speed, even though the road may look open beforehand. Continue scanning for both ground and airborne threats. A straightaway is the time to restore speed, not a reason to ignore the next turn.
- Handle the right-left-right group one turn at a time.
- Expect a helicopter near the end of the second left turn.
- Shoot cars before attempting to pass them.
- Use straightaways to rebuild speed.
6. Prepare for the final approach
The next section gives another straightaway, then a left turn and a right turn into a further straight. After that straightaway, shoot the car ahead before making the next right and left turns. Keep the jeep moving; slowing is useful only when it improves control, because excessive braking can leave too little time to reach the finish.
A Stage 5 gasoline can is not a dependable part of the route. The manual confirms that gasoline cans add driving time, but the detailed walkthrough identifies the regular gas-can opportunity in Stage 4 and notes that a Stage 5 can may be absent or easy to miss. Do not make a dangerous detour or change lanes merely to search for one. Follow the road and preserve the attempt.
- Shoot the car before the final right-left approach.
- Keep moving while using only deliberate speed reductions.
- Treat any Stage 5 gasoline pickup as optional, not guaranteed.
7. Clear the final S-curve
The last major hazard is a rapid S-curve: right, quickly left, right, left and right again. This is the point to release Up before the first right and use Down if necessary. Make short alternating steering inputs instead of holding a direction. Let the jeep settle after each reversal, then press Up again when it is aligned with the next section.
Keep watching for cars during the S-curve. The direction changes can occupy your attention, but a car in the lane remains the most immediate collision risk. Do not attempt a risky pass while reversing direction. Survive the final right turn and continue toward the end of the highway before the timer reaches zero. The stage is complete when the game advances to Stage 6, The French Quarter, the next on-foot section.
- Reduce speed before the first right in the S-curve.
- Use short right-left-right-left-right steering corrections.
- Destroy or avoid cars without attempting risky passes.
- Reach the highway’s end before time expires.
- Confirm the transition to Stage 6, The French Quarter.
Before you move on
- The opening green cars and oil patch are cleared without a collision.
- The first helicopter, later helicopter groups and red-car section are survived.
- The repeated middle curves are completed while preserving enough time.
- The final right-left-right-left-right S-curve is cleared.
- Billy reaches the end before the timer expires.
- The game advances from Stage 5, Superdome Drive, to Stage 6, The French Quarter.
Stage 6 — The French Quarter Brawl
Stage 6 is the long North American brawling stage set around Bourbon Street in New Orleans. The manual calls it The French Quarter, and the American version contains more fights than Mad City while omitting the later gun pickup. Begin by clearing switchblade fighters, then close distance against ball-and-chain enemies, whose weapons are most dangerous from farther away. When rooftop whip users appear, knock a whip loose and keep it; the whip's reach is the safest tool for the remainder of the stage. Keep enemies on one side whenever possible, use vertical movement to avoid knives and beam attacks, and delay meat pickups until health is genuinely low. Near the end, collect the vest dropped by the first late beam fighter if it is safe, defeat the paired beam enemies, then disarm and defeat the final vest-wearing whip fighter. Walk right after that fight to enter Stage 7, Gordon's Gateway.
1. Enter the French Quarter and clear the switchblade fighters
The stage begins with a red-shirted and an orange-shirted switchblade fighter. They often hesitate while Billy faces them, so waiting at the edge of the screen can leave you exposed without advancing the fight. Move toward them and use kicks or jump-kicks to start the exchange. Keep both enemies in front of Billy rather than allowing one to pass behind you. If one slips to the opposite side, move vertically until the pair is aligned again, then resume attacking.
A lone blue-shirted switchblade fighter follows. Close the distance immediately and use jump-kicks to interrupt him before he controls the space around Billy. The next encounter repeats the red-and-orange switchblade pair. Treat it as a positioning check: advance only after both enemies are on the same side, and do not let forward movement push Billy into a crossfire. These switchblade weapons cannot be knocked loose for Billy to use, so there is no reason to linger near the dropped or carried blades.
- Defeat the opening red-and-orange switchblade pair.
- Defeat the blue-shirted switchblade fighter.
- Clear the second red-and-orange pair without being surrounded.
2. Close in on the ball-and-chain fighters
The first ball-and-chain fighter is more dangerous at range than at point-blank distance. Walk directly toward him and use jump-kicks once Billy is close enough that the swinging ball cannot connect reliably. Do not circle around the far side of the screen waiting for an opening; that gives the weapon room to hit Billy.
The next encounter combines a ball-and-chain fighter with an orange-shirted switchblade fighter. Defeat the ball-and-chain enemy first. The switchblade fighter generally keeps away until Billy engages him, so removing the longer-range threat reduces the chance of taking damage while Billy is occupied. After the first enemy falls, realign with the switchblade fighter and finish him before advancing.
Two ball-and-chain fighters then appear. The fighter entering from the left carries meat. Leave it on the ground if Billy has plenty of health, and collect it after the fight. If health is already dangerously low, take it earlier rather than risking death before reaching the recovery item. A further ball-and-chain fighter appears with a blue-shirted switchblade man. Again, attack the ball-and-chain enemy first, then move vertically if the blue fighter approaches with his knife.
- Fight ball-and-chain enemies from close range.
- Prioritize ball-and-chain enemies over accompanying switchblade fighters.
- Save the first meat until after the two-enemy fight unless health is critical.
3. Take the first rooftop whip and protect it
Rooftop enemies now begin dropping into the street with whips. Attack the first whip user until the weapon falls, then pick it up promptly. The enemy may move toward the dropped whip, so do not retreat and leave it unattended. The whip has much better reach than Billy's unarmed attacks and is the key weapon for the remaining encounters.
An orange-shirted switchblade fighter follows and also brings a throwing knife. Do not pick up that knife if it would replace the whip. The knife is less useful for the dense fights ahead, while the whip lets Billy strike from safer spacing. Keep the whip selected and use short attacks followed by small vertical adjustments instead of standing directly in front of a knife fighter.
- Knock down the rooftop whip user and take the whip.
- Do not replace the whip with the later throwing knife.
- Use the whip's reach rather than trading point-blank attacks.
4. Group the switchblade and rooftop formations
Three switchblade fighters, each wearing a different shirt color, enter from both sides. Move toward one side of the screen so all three are gathered in front of Billy. Once they are grouped, keep attacking with the whip. The goal is to prevent attacks from arriving from opposite directions, not to rush through the encounter.
Another whip-bearing enemy drops from a rooftop. Keep attacking after the whip falls so he cannot reclaim it. Three more enemies then arrive: two with whips and one carrying a wooden beam. Move into a corner and let them approach from one direction. Attack the nearest target, maintain the whip if it drops, and avoid stepping through the group unless Billy is about to be surrounded. Clearing one enemy at a time is safer than chasing the farthest target.
- Pull the three switchblade fighters to one side.
- Prevent rooftop whip users from recovering their weapons.
- Use a corner to control the three-enemy formation.
5. Pass the Moon Konami club and defeat the beam fighter
Near the Moon Konami club entrance, a red-shirted and an orange-shirted switchblade fighter approach from the right. Stand your ground and use the whip to keep them outside knife range. Do not advance until both are defeated.
The next wooden-beam fighter has considerably more endurance and can grab and throw Billy at close range. Let him approach, attack when he lines up with Billy, and immediately move up or down after the attack. Repeat this attack-and-reposition pattern rather than standing still and trading hits. If the screen is still scrolling, move as far right as the stage allows before delivering the final blows. Defeating him too early can cause another beam fighter to appear, creating an unnecessary extra fight. After this encounter, defeat the lone orange-shirted switchblade fighter.
- Clear the Moon Konami switchblade pair with the whip.
- Use vertical movement after every attack against the beam fighter.
- Reach the right side before finishing the beam fighter when possible.
- Defeat the following orange-shirted switchblade fighter.
6. Use the final recovery items and reach Gordon's Gateway
Three switchblade fighters appear next. The red-shirted fighter carries the stage's final meat pickup. Knock it loose and collect it when Billy needs healing; there is no later meat pickup in this stage. Keep the three fighters in front of Billy and continue using the whip to stop them from splitting around him.
A second tough beam fighter follows, this time wearing a bulletproof vest. Knock the vest loose and collect it when the area is safe. The vest reduces damage from enemy attacks, so it is worth prioritizing over an immediate risky attack on the fighter. The vest is a protection pickup, not an item that should be described as stacking with an earlier vest; simply take the available vest and continue.
Two beam-equipped enemies then attack together. One also carries a throwing knife, but neither wears a vest. Keep them separated if possible, attack one until he falls, and use vertical movement when the other closes in. The last opponent wears a bulletproof vest and carries a whip. Knock the vest and weapon away as quickly as possible, collect them only when Billy is not exposed, and finish the fighter with the whip or another safe attack. Once he is defeated, walk right. The screen transition confirms completion of Stage 6 and begins Stage 7, Gordon's Gateway. The North American route does not provide the later gun pickup associated with the Japanese Mad City version, so do not plan this stage around obtaining one.
- Collect the final meat only when healing is necessary.
- Take the vest from the first late beam fighter when safe.
- Defeat the paired beam enemies without allowing them to surround Billy.
- Disarm and defeat the final vest-wearing whip fighter.
- Walk right to trigger the transition into Stage 7.
Before you move on
- The opening switchblade groups and all ball-and-chain encounters are defeated.
- Billy has obtained the rooftop whip and has not replaced it with the throwing knife.
- The Moon Konami section, rooftop formations, and beam-fighter encounters are cleared.
- The final vest-wearing whip fighter is defeated.
- Walking right after the final fight starts the transition to Stage 7, Gordon's Gateway.
Stage 7 — Gordon’s Gateway
Gordon’s Gateway is the second shooting stage in the original North American NES release. The title-screen choice determines the shooting controls for both Stage 2 and Stage 7: Game A uses the NES Gun System, while Game B uses the controller reticle. Stage 7 begins with 50 bullets in Game A and 100 bullets in Game B; a bullet pickup adds 40 rounds in either mode. Missed shots consume ammunition, while successful hits preserve it under the stage’s shooting rules. Enemies use building fronts, windows, doors, manholes, motorcycles and trees for cover. Prioritize exposed gunmen, watch for enemies stopping at windows, and track motorcyclists until they take three hits. After the second scroll-freeze, one biker drops the Bullet Proof Vest. At Gordon’s gate, defeat the tall gunman first, shoot knives when they threaten Billy, then finish the jumping guard. Clearing both guards advances to Stage 8, Hitman’s Yard. Training rewards are optional and do not affect the North American ending.
1. Confirm the shooting controls and preserve the correct opening reserve
The Game A or Game B selection is made on the title screen before the campaign begins and remains in effect for both shooting stages. In Game A, use the NES Gun System and fire with the Zapper trigger. In Game B, move the on-screen sight with the Control Pad and press A to fire. There is no mid-campaign menu for changing this choice, so use the mode that matches the equipment and aiming method you intend to use through both shooting stages.
The North American Stage 7 reserve depends on that selection. Game A, the Zapper mode, begins with 50 bullets. Game B, the controller mode, begins with 100 bullets. A bullet pickup adds 40 rounds in either mode. These are starting reserves, not guaranteed ammunition totals at the gate: pickups, misses and the stage’s hit-based ammunition rules change the current count as you proceed.
Whether you use the Zapper or controller, do not fire at empty scenery. In Game B, move the reticle over a confirmed target before pressing A. In Game A, keep the Zapper ready near the active part of the screen instead of firing speculatively at windows, doors or the edges of the display.
- Confirm Game A or Game B before starting the campaign.
- Begin with 50 bullets in Game A or 100 bullets in Game B.
- Remember that a bullet pickup adds 40 rounds in either mode.
- Fire only at confirmed enemies, projectiles or useful items.
2. Clear the opening building fronts
Advance through the first street section while scanning both the open ground and the building fronts. Enemies can run from outside into buildings and may stop in front of a window to line up a shot. Exposed men in the street are usually easier to hit, so remove an immediate open attacker first, then return your sight to a window or doorway where another enemy is preparing to fire.
Do not shoot a closed doorway, an empty window or movement that has already left the screen. Wait until the target is visibly present. If the screen scrolls or pauses, use that moment to identify the next enemy instead of spending rounds at the edge of the screen.
When a defeated enemy leaves an item, clear the active threats before collecting it whenever possible. Ammunition is valuable, but taking damage while chasing a pickup can cost more than the item restores. A First Aid Box should be collected when safely exposed because health recovery is comparatively scarce in this stage.
- Scan open ground, windows and doors after each enemy movement.
- Prioritize attackers who are already aiming at Billy.
- Avoid shots at empty cover and collect safe health items.
3. Track and defeat the motorcyclists
Motorcyclists enter during scrolling portions of the stage, fire while moving, and require three successful hits to defeat. Track each rider across the screen instead of firing once and abandoning the target. If the rider reverses direction, keep the sight on the new position and fire again when the motorcycle is clearly exposed.
Motorcyclists leave an item when defeated, commonly ammunition in the North American release. Do not try to collect the drop while another enemy is actively firing. Finish the rider, identify any simultaneous threat, and then take the item before the screen scrolls past it.
Bikers do not appear during the stage’s scroll-freezes, although one may later use stairs between levels. Use the quiet pauses to reset your aim and prepare for the next stationary enemy group. These drops are especially useful before the gate because Stage 7 offers fewer health opportunities than many brawling sections.
- Hit each motorcyclist three times.
- Track riders across the complete encounter.
- Collect their drops only after the area is safe.
4. Manage manholes, scroll-freezes and scarce health
Manholes can produce enemies at street level, so check the lower portion of the screen whenever one appears. During a scroll-freeze, enemies enter one at a time from the sides. Let each target become visible, then fire a deliberate shot rather than trying to predict an arrival.
Health items from ordinary enemies are uncommon. If a First Aid Box appears, shoot it promptly while it is still reachable, but do not accept an unnecessary hit merely to grab it. Keep the reticle or Zapper near the center after a confirmed hit so you can react to the next enemy entering from either side.
There is also an optional extra-life opportunity associated with the first column after the first manhole in the alley. It is not required for progression. Attempt it only if the screen is otherwise safe and your ammunition and health are stable.
- Check street level around manholes.
- Use scroll-freezes to identify enemies before firing.
- Treat the extra-life opportunity as optional, not a required route action.
5. Collect the Bullet Proof Vest after the second scroll-freeze
Continue through the later street encounters and count the scroll-freezes rather than ordinary enemy groups. One motorcyclist drops the Bullet Proof Vest after the second scroll-freeze. Defeat the nearby attackers, then shoot and collect the vest before the scene moves beyond it.
The vest greatly reduces the danger from enemy attacks for its active period, but it is not a reason to stand in gunfire or ignore knives. Continue avoiding enemy shots and close contact instead of treating the item as permanent protection. Its value is highest during the latter part of the stage, where trees and building edges can obscure enemies that are still able to attack.
If an ammunition item and the vest are both available, secure the immediate threat first. Do not waste several rounds on concealed scenery or rush into enemy fire just to collect a pickup.
- Track the second scroll-freeze.
- Take the Bullet Proof Vest from the biker drop afterward.
- Continue treating enemy attacks as dangerous while the vest is active.
6. Approach Gordon’s gate with ammunition intact
Near the end of the route, trees and building edges provide cover for enemies who can still shoot. Watch for the visible portion of each attacker and fire when the target is exposed. If an enemy disappears behind cover, switch to an exposed target and return to the concealed position when it reappears.
The enemies behind the final fence arrive in a controlled trickle. Use this section to settle your aim: line up one target, confirm the hit, then prepare for the next reveal. Do not empty the reserve simply because the screen has stopped moving.
The goal is to reach the gate with enough ammunition to defeat both security men. The exact amount varies with the chosen mode, pickups, successful hits and misses, so there is no reliable fixed gate-entry total. Preserve shots for the gate encounter rather than trying to fire through cover.
- Watch trees and building edges for active shooters.
- Use the fence sequence to conserve ammunition.
- Reach the gate with enough bullets for both guards.
7. Defeat both security men at the gate
The gate encounter has two guards. The taller guard fires a gun, while the smaller guard jumps and throws knives between bounces. Focus most of your fire on the tall gunman first because his gunfire cannot be neutralized as safely as the smaller guard’s knife attacks.
When the smaller guard throws a knife, move your aim to the knife and shoot it if it is about to hit Billy. Return to the tall guard immediately afterward. If both enemies are exposed, the tall guard remains the priority unless a knife is already in flight and threatening to connect.
After the tall guard is defeated, concentrate on the smaller guard. Fire when he is exposed during his jump-and-throw pattern. Continue shooting threatening knives; with only one enemy remaining, keeping him under pressure makes the knife attacks manageable.
If Billy dies, press Start during the countdown to continue at the beginning of the stage where he perished. The manual allows a limited number of continues. Replay the early building and motorcycle sections with fewer misses rather than spending ammunition recklessly at the gate.
Defeating both guards completes Gordon’s Gateway and starts Stage 8, Hitman’s Yard. Training rewards are optional in the North American release and do not disqualify the ending, so using one does not change campaign completion eligibility.
- Defeat the tall gunman first.
- Shoot knives that are about to hit Billy.
- Defeat the jumping knife-thrower.
- Confirm the transition to Stage 8, Hitman’s Yard.
Before you move on
- Stage 7 begins with Game A or Game B controls matching the title-screen selection.
- The starting reserve is 50 bullets in Game A or 100 bullets in Game B.
- The motorcyclists have been tracked and their safe ammunition drops collected where possible.
- The Bullet Proof Vest has been collected after the second scroll-freeze if the run reaches its drop safely.
- The tall gunman at Gordon’s gate is defeated.
- The smaller guard is defeated and threatening knives are stopped when necessary.
- The game transitions to Stage 8, Hitman’s Yard.
- Training rewards may have been used without affecting eligibility for the single North American ending.
Stage 8 — Hitman’s Yard: Clear the Mansion Grounds
Stage 8 is a short brawling section on the front lawn of Gordon’s mansion. It has three encounters: three handgun users, three vest-wearing weapon users, and Gordon’s dog-trainer with attack dogs. The safest plan is to keep moving vertically against the gunmen, take one dropped handgun if possible, remove the vests before relying on gunfire, and attack the dog-trainer before clearing the remaining dogs. A whip is especially useful because it gives Billy reach, while a bulletproof vest reduces the danger from the ranged and close attacks. When every enemy in the yard is defeated, move right to the mansion entrance and begin Stage 9. The gun does not carry into the mansion, so use remaining ammunition when it prevents damage; unused bullets provide bonus points instead.
Begin the yard with the best equipment you carried from Stage 7
Stage 8 starts on the grounds in front of Gordon’s mansion. There is no alternate route around the fights, so begin by identifying your useful equipment. A whip is the safest melee weapon for this stage because it lets Billy attack from farther away than a stick or knife. Keep it if you already have one. A bulletproof vest is also valuable against the handgun users and the later knife attacks, but the stage remains completable without either item.
You may use the gun during Stage 8 if you have ammunition. It is most valuable as a way to finish exposed enemies quickly after their protection has been removed. The gun does not carry into Stage 9, and unused bullets at the end are converted into bonus points, so do not preserve ammunition at the cost of taking repeated hits. Use it when it shortens a dangerous encounter or prevents an enemy from recovering a dropped weapon.
- Keep the whip if it is already equipped.
- Retain the bulletproof vest if you obtained one.
- Treat the gun as a Stage 8 resource rather than equipment for the mansion.
Defeat the three handgun users
The first encounter places three enemies armed with handguns in front of you. Their shots are the immediate threat. Do not remain on the same vertical line and trade attacks with the group. Move above or below the nearest shooter, approach from that different height, and attack until the handgun is knocked away. Changing vertical position makes it harder for all three enemies to fire safely while you close in.
A defeated shooter can turn back toward his dropped weapon, so collect the first handgun as soon as it appears if you can reach it safely. Once you have one, use it against the remaining handgun users; you do not need to disarm every enemy before firing. Aim at a clearly exposed target and avoid wasting shots into empty space. Removing the remaining shooters with the captured weapon is safer than attempting three close-range disarms.
If you enter without a gun, use moving jump-kicks to reach one shooter, then change height immediately after landing. With the whip, strike from its practical range and retreat before the other enemies converge. The encounter is not complete until all three handgun users are defeated.
- Change vertical position before closing with a shooter.
- Take the first dropped handgun before its owner retrieves it.
- Use the captured weapon or the whip to finish the encounter.
Remove the vests from the three weapon users
The second encounter consists of three tougher enemies wearing bulletproof vests. Two carry whips, while the third uses a throwing knife. Your gun is ineffective against an enemy while that vest is still protecting him, so do not spend ammunition on armored targets. Attack with the whip, kicks, or jump-kicks until the protection is removed.
The whip is the safest option because it allows you to damage the group without standing directly beside an opposing whip or the knife user. Back away whenever an enemy closes the gap, then turn and attack again. Keep the three enemies separated vertically when possible. Finish an isolated target before spreading damage across the group; reducing the number of active weapons makes the rest of the fight easier.
After an enemy’s vest has been removed, gunfire can finish that enemy quickly. Use ammunition on exposed targets if doing so prevents further damage, but do not shoot through an intact vest. If your gun is empty, continue with the whip and use jump-kicks only when you have room to land safely. All three enemies must be defeated before the next encounter begins.
- Do not rely on gunfire against an intact bulletproof vest.
- Prioritize the closest or most isolated weapon user.
- Use the whip’s reach and retreat when multiple enemies approach.
Defeat the dog-trainer before clearing the dogs
The final encounter introduces Gordon’s dog-trainer. He uses a whip and can summon attack dogs while he remains active. As many as two dogs may be attacking at once, so the trainer is the priority target. Do not spend the entire fight chasing individual dogs while the trainer continues creating new threats.
The dog-trainer moves away when you approach. Keep pressing toward him while tracking his vertical position, and use the whip at the edge of its range whenever possible. If you have ammunition, first attack him with melee strikes until his bulletproof vest is removed. Only then is gunfire effective. Shooting the protected trainer wastes bullets and leaves the summoning threat active.
Dogs can still damage Billy while you pursue the trainer. Strike a dog that reaches you or jump over it to avoid being pinned against the edge of the screen, then resume closing on the trainer. Once the trainer is defeated, any dogs already on screen remain active. Defeat every remaining dog before leaving the area; clearing the trainer alone does not finish Stage 8.
- Keep the dog-trainer as the main target while he is active.
- Remove his vest before using gunfire against him.
- Defeat every dog still present after the trainer falls.
Move through the mansion entrance
After the dog-trainer and all remaining dogs are defeated, move right across the lawn. The entrance to Gordon’s mansion is the exit from Stage 8, and entering it advances directly to Stage 9, The Perilous Plantation Parlor. There is no separate yard boss reward or additional route to search before the transition.
Before entering, use the best available melee weapon rather than carrying a short-range or weak weapon when a whip is available. The gun will not transfer into the mansion, so your health, melee weapon, and remaining lives are the resources that matter for the final stage. If the dog fight left you near defeat, a failed attempt can be useful for learning the approach, but do not repeatedly enter Stage 9 with no health reserve if a continue gives you a better retry.
The Stage 8 completion condition is straightforward: the three handgun users are defeated, the three vest-wearing weapon users are defeated, the dog-trainer is defeated, and every dog still on screen is cleared. Once Billy reaches the right side and enters the mansion doorway, Stage 9 has begun.
- Confirm that all three encounters are cleared.
- Move right to the front entrance.
- Enter Stage 9 with the best available melee weapon and usable health.
Before you move on
- All three handgun users in the first encounter are defeated.
- All three vest-wearing weapon users in the second encounter are defeated.
- The dog-trainer is defeated, followed by every dog still active.
- Billy reaches the right side of the yard and enters Gordon’s mansion, triggering Stage 9.
Stage 9 — The Perilous Plantation Parlor
Stage 9 is the final brawling stage of the North American NES campaign. Godfather Gordon confronts Billy first, followed by his bodyguards Rocky and Rocco. The fight takes place in one final room, so the objective is to defeat all three enemies rather than search for another route through the mansion. A bulletproof vest reduces the danger from Gordon’s handgun, while the whip gives Billy the safest reach against both Gordon and the bodyguards. Gordon cannot be disarmed and often leaps sideways to evade attacks. Against the bodyguards, keep both men on the same side of Billy so they cannot combine a grab with a free punch. After all three enemies fall, walk right to start the ending and allow the Annabelle rescue and credits to finish. The North American release has one ending; do not apply Japanese Mad City ending conditions to this cartridge.
1. Enter the final stage prepared for one continuous fight
Stage 9, The Perilous Plantation Parlor, is entirely a brawling stage. There is no driving segment, shooting section, exploration route, or additional mansion room after the opening confrontation. Billy enters the final area and must defeat Godfather Gordon before fighting Rocky and Rocco.
Your Stage 8 loadout matters. Keep the bulletproof vest if you still have it, because it reduces damage from enemy attacks and makes Gordon’s handgun less threatening. Keep the whip if you carried it from Stage 8. Its reach lets you attack without standing directly against an enemy, which is especially valuable when two bodyguards are trying to surround you. Do not throw away health attempting to hunt for a replacement after Stage 9 begins; the final area is about controlled positioning, not collecting supplies.
- Enter with as much health as possible.
- Keep the bulletproof vest if it survived Stage 8.
- Keep the whip whenever possible for the safest attack range.
2. Defeat Godfather Gordon without trying to disarm him
Godfather Gordon opens the stage carrying a handgun. The gun cannot be knocked out of his hand, so do not waste attacks attempting to disarm him. He can kick, fire at Billy, leap sideways to evade an expected attack, and grab Billy by the head when he gets close enough.
If you still have the vest, Gordon’s bullets are much less dangerous, but the vest does not make standing still safe. Move vertically to change Billy’s height, then approach when Gordon is committed to a movement or is positioned near the upper or lower edge of the fighting area. Jump-kicks are the quickest dependable way to damage him, but repeating them from exactly the same height gives Gordon opportunities to leap aside. Vary Billy’s vertical position between attacks and continue following Gordon instead of waiting in the center.
When Gordon grabs Billy, the attack may knock the vest away. After the grab ends, recover the vest only if it is safely reachable. Do not run through Gordon to reclaim it immediately; taking a second hit is worse than temporarily leaving the item on the floor. If Gordon fires while Billy has the vest, use the damage reduction to stay calm, reposition, and resume attacking rather than rushing forward.
- Do not try to knock Gordon’s handgun away.
- Change vertical height before repeated jump-kicks.
- Recover the vest only when doing so does not cause another hit.
3. Use the whip or controlled jump-kicks to finish Gordon
With the whip, stand near the edge of its effective range. Let Gordon approach, strike, and retreat before he can turn the exchange into a grab. If he leaps past Billy, turn around and rebuild the distance instead of attacking blindly during the leap. Short advances followed by attacks and retreats are safer than holding the attack while standing beside him.
Without the whip, stay active and use jump-kicks, but do not attack from one fixed alignment. After landing, move vertically and prepare for Gordon’s next leap or grab. The aim is to make him commit to movement before Billy closes in. Do not assume the fight is finished when Gordon’s health is depleted: Rocky and Rocco enter immediately after him.
- Whip Gordon from outside grab range when possible.
- Use jump-kicks only while changing Billy’s height and position.
- Prepare for the bodyguard battle as soon as Gordon falls.
4. Keep Rocky and Rocco together
Rocky and Rocco attack as a pair. One can grab Billy while the other punches him, so the central danger is allowing the two men to approach from opposite sides. If one bodyguard catches Billy, rapidly wiggle the Control Pad to escape the hold. Breaking free is the priority; do not attempt normal attacks while trapped.
The safest plan is to move toward one corner, let both bodyguards pursue from the same direction, turn, and attack with the whip as they close. Then cross to the opposite corner before they split around Billy. Repeat this corner-to-corner movement, keeping both men on one side whenever possible. The whip can interrupt the lead bodyguard while preserving space from the second attacker.
If the whip is gone, use the same positioning plan with jump-kicks. Move vertically as soon as a jump-kick lands and continue crossing the room. Do not remain between Rocky and Rocco after an attack. Their grab-and-punch combination is most dangerous when Billy is caught between their positions.
- Keep both bodyguards on the same side of Billy.
- Wiggle the Control Pad rapidly if a bodyguard grabs you.
- Cross the room before turning to attack when the pair separates.
5. Use a failed attempt to improve the rematch
The bodyguard battle has a special difficulty rule. If Billy reaches it with an item, including a weapon or bulletproof vest, Rocky and Rocco have a longer combined health display. If Billy dies during that first attempt, the carried items are lost on the retry, and the bodyguards return with shorter health bars. A failed attempt can therefore make the next bodyguard fight easier, although losing the vest or whip also removes their defensive and reach advantages.
A continue returns Billy to the beginning of Stage 9 rather than placing him directly at the bodyguards. On the next attempt, use Gordon’s fight to establish a clean position and avoid spending health recklessly. Once the bodyguards appear, repeat the corner-to-corner plan even if their health is reduced. The limited continues are valuable, so do not spend one by abandoning the positioning strategy after an early mistake.
- Expect a Stage 9 restart after death rather than a boss checkpoint.
- Use shorter bodyguard health bars on a retry without rushing.
- Remember that a continue returns Billy to the stage beginning.
6. Walk right and verify completion
After Godfather Gordon, Rocky, and Rocco are defeated, move Billy to the right. This clears the final area and starts the North American ending sequence. There is no hidden route or additional boss after the bodyguards.
Annabelle appears and reunites with Billy. Let the sequence continue through the reunion and staff credits before resetting the NES or beginning another game. Seeing Annabelle rescued and the credits is the practical confirmation that all nine stages have been completed.
The North American NES release has one ending. The Japanese Mad City version has additional ending conditions, including behavior involving Training-mode powerups, but those conditions should not be applied to this North American cartridge. For this edition, completion is defeating the three final enemies, walking right, and allowing the rescue sequence and credits to play.
- Defeat Godfather Gordon.
- Defeat Rocky and Rocco.
- Walk right after the final fight.
- Watch Annabelle’s rescue and the credits.
Before you move on
- Godfather Gordon is defeated.
- Rocky and Rocco are both defeated.
- Billy walks right after the bodyguard fight.
- Annabelle’s rescue sequence appears.
- The staff credits play, confirming completion of the North American campaign.
References for this chapter
- The Adventures of Bayou Billy — Stage 9
- The Adventures of Bayou Billy/Versions — StrategyWiki
- The Adventures of Bayou Billy — Guide and Walkthrough
- Nintendo NES Game Endings: Adventures of Bayou Billy
- Adventures of Bayou Billy — NES Instruction Manual, code NES-MU-USA
- Adventures of Bayou Billy — Nintendo NES Manual PDF
Recovery, Continues, Scoring and Bonus Life Strategy
The North American NES release gives you two separate recovery systems: ordinary lives during a stage and a limited continue option after all current lives are lost. A Game Over countdown runs from 9 to 0; press Start before it expires to restart at the beginning of the stage where Billy died. The manual limits this rescue to five continues for the adventure. Bonus lives come from score: the first is awarded at 20,000 points, followed by another for every 30,000 points gained afterward. Build score through ordinary combat, safe pickups, and normal progress, but never trade health or ammunition for a risky point opportunity. Use remaining lives to learn a stage, then spend a continue when you understand the mistake and are ready to replay that stage from its opening. The driving stages deserve special caution in the North American release because a collision or explosion destroys Billy immediately.
1. Separate an ordinary life loss from a continue
Billy loses a life when his combat or shooting health is exhausted, when he runs out of ammunition in a shooting stage, or when a driving failure destroys the vehicle. In the American driving stages, a collision or explosion is immediately fatal rather than merely reducing a vehicle health meter. A driving timer reaching zero also ends that attempt, so treat both time and collision avoidance as life-preservation concerns.
If Billy still has lives remaining, the game keeps the current run active and returns him to the stage's normal post-death restart behavior. That is not the same as the Game Over continue described in the manual. A continue is offered only after the available lives have been exhausted, and it sends you back to the beginning of the stage in which you perished.
Before trying again, identify the actual cause of death. In a brawling stage, it may be crowding, a missed weapon, or poor spacing. In a shooting stage, it may be wasted ammunition or failure to remove a dangerous gunman. In a driving stage, it may be a lane change, an ignored plane, a roadside obstacle, or a missed gasoline pickup. Correcting one known error is more valuable than spending resources randomly.
- Determine whether the failure cost one life or ended the current supply of lives.
- Identify the specific hazard that caused the death before changing tactics.
- Remember that a continue restarts the stage; it does not return Billy to the exact point of failure.
2. Use the Game Over countdown
When the game ends, a clock appears and counts down from 9 to 0. Press Start before the countdown expires. The game then continues at the beginning of the stage in which Billy died, allowing you to retry that stage without replaying the earlier campaign.
The manual permits a maximum of five continues. Treat this as a finite supply for the entire run, not as an unlimited retry system. Record each use mentally or on paper, especially if you are practicing several late stages in one session. If the countdown reaches zero before you press Start, the current run ends and you must begin the campaign again.
A continue restores the opportunity to play the failed stage, but it does not guarantee a successful attempt. The stage begins normally, so you must again manage its enemies, ammunition, driving distance, timer, and pickups. Use the countdown to decide whether you understand the adjustment needed. If you died because you repeatedly entered a fight with poor spacing, continuing immediately without changing that approach only consumes another chance.
- Press Start while the countdown is still running.
- Expect to begin the failed stage from its opening.
- Keep track of the five-continue limit across the campaign.
3. Decide when a continue is worth spending
Use ordinary lives to learn a stage before committing a continue. In brawling stages, test where enemy groups appear and whether a weapon or health item can be collected without entering another attack range. In shooting stages, learn which targets must be removed immediately and where bullets, first aid, or hourglasses appear. In driving stages, learn the approach to recurring obstacles and slow down before a turn or narrow section rather than trying to maintain speed through a collision.
A continue is most valuable after you have identified the correction. Spend one when a late stage is understood but a single repeatable mistake keeps ending the attempt, when you reached the mansion but died before the final confrontation, or when you know the driving route but lost the vehicle at one predictable hazard. Replaying that stage is generally more efficient than rebuilding the entire campaign from Stage 1.
Do not automatically continue after an early death. Stages 1 and 2 teach the combat and shooting systems and are comparatively useful practice areas. Spending a continue early is acceptable if the run is otherwise strong, but avoid using several continues while repeating the same error. Preserve at least one for a late-stage failure when possible.
- Use remaining lives to learn the stage pattern.
- Spend a continue only after identifying the tactic that must change.
- Prefer late-stage continues over repeatedly rescuing an early failed attempt.
4. Earn bonus lives without gambling the run
The first score-based bonus life is awarded after reaching 20,000 points. Each additional bonus life is awarded for every 30,000 points gained after that. The practical thresholds are therefore 20,000, 50,000, 80,000, 110,000, and successive increases of 30,000 points. The award is tied to the score total, so it can occur during normal play rather than only at a stage transition.
Build score through ordinary enemy defeats and pickups that are already on a safe route. In brawling stages, clear enemies methodically, but do not stand in a crowd merely to defeat one more opponent for points. In shooting stages, remove immediate threats first and collect score-related objects only when doing so does not expose Billy to gunfire or cost irreplaceable ammunition. In driving stages, survival, gasoline, and reaching the distance goal matter more than a risky attempt to collect a point opportunity.
If you are close to a threshold, take only low-risk scoring chances. Missing a few points is preferable to losing a life, especially because a death can cost more score opportunities than the attempted pickup was worth. Consistent progress through later stages is the safest long-term scoring plan.
- Aim for 20,000 points through normal play rather than dangerous detours.
- After the first bonus life, expect another at each additional 30,000 points.
- Prioritize health, ammunition, gasoline, and stage completion over marginal score.
5. Salvage a damaged campaign
A run remains playable after several mistakes. If Billy enters a new stage with limited health or lives, avoid optional risks and take recovery items whenever the route is safe. In combat stages, preserve a useful weapon and avoid being surrounded. In shooting stages, conserve ammunition for unavoidable threats and the boss. In driving stages, prioritize avoiding collisions and explosions; a gasoline pickup is valuable only if collecting it does not force a dangerous lane change.
If a late-stage attempt ends in Game Over, use the continue when the stage's hazards are already familiar. Apply one concrete correction on the retry: slow before the known turn, eliminate a dangerous shooter earlier, preserve bullets for the boss, or keep the strongest available weapon for the final enemy group. Do not treat the continue as a reason to replay the stage identically.
If all five continues are spent and the campaign ends, restart with a revised resource plan. The goal of the next run is not merely to reach the same stage; it is to arrive with more health, better ammunition discipline, and at least one unused continue reserved for the final stretch.
- Continue a damaged run when a safe recovery option remains.
- Use a late-stage continue to avoid replaying the full campaign.
- On a new run, change the decision that caused the previous failure.
Before you move on
- You can identify whether a death merely removed a life or produced the Game Over countdown.
- You can press Start during the 9-to-0 countdown and confirm that the failed stage restarts from its beginning.
- You have recorded the 20,000-point first bonus-life threshold and the 30,000-point intervals afterward.
- You reserve continues for stages where the correction is understood and the replay is worthwhile.
- Your successful campaign reaches the final stage with enough lives and resources to attempt the ending without relying on an immediate restart.
Completion Checklist: Training Rewards and the North American Ending
The original North American NES release of The Adventures of Bayou Billy has one required campaign route: clear all nine stages in order, defeat the complete Stage 9 encounter, walk right after Rocky and Rocco are defeated, and allow the North American rescue sequence and credits to play. Training Mode is optional. It contains street-fighting, gun-shooting and car-driving exercises, and its rewards can help during a normal campaign run, but using one does not block the USA ending. Japanese Mad City has different ending rules and alternate outcomes; those conditions do not apply to the North American cartridge. A completed North American campaign is verified by reaching the ending after defeating Godfather Gordon, Rocky and Rocco, not by avoiding Training rewards or activating a special hidden requirement.
1. Confirm the correct campaign and edition
Use The Adventures of Bayou Billy for the original North American Nintendo Entertainment System release, corresponding to manual code NES-MU-USA. This is the localized USA edition, not the Japanese Famicom game Mad City and not a later remake or compilation. The manual describes a nine-stage adventure, and the stages must be completed in their fixed order without warps or a stage-select shortcut.
The route is Stage 1, Bayou’s Backyard; Stage 2, Deep in the Dixie Swamp; Stage 3, Gator Alley; Stage 4, the back-road driving section; Stage 5, Superdome Drive; Stage 6, the Bourbon Street brawl; Stage 7, Gordon’s Gateway; Stage 8, Hitman’s Yard; and Stage 9, The Perilous Plantation Parlor. The campaign alternates among brawling, shooting and driving, so prepare for the next gameplay style instead of treating the game as one continuous brawler.
- Use the North American NES version of The Adventures of Bayou Billy.
- Complete all nine stages in order.
- Do not substitute Japanese Mad City ending rules for the USA campaign.
2. Use Training for practice or optional rewards
Training is selected from the opening menu and offers three exercises: street fighting, gun shooting and car driving. These exercises correspond to the three gameplay formats used in the campaign. Use street fighting to practice movement, normal attacks and jump-kicks; use gun shooting to learn target placement and firing; and use car driving to become familiar with acceleration, braking, lane movement, dynamite and the vehicle gun.
Completing a Training exercise can award a bonus that may be used in the regular game. The available rewards are optional campaign aids, including a health-related reward from street-fighting practice, an ammunition reward from gun-shooting practice and an extra-life reward from driving practice. You may use these rewards when you need them, or ignore Training entirely and begin the campaign normally.
The North American release has one ending. A Training reward does not disqualify the player from seeing that ending, so there is no USA requirement to avoid Training, refuse a reward or restart after using one. The warning about practice-related ending results belongs to Japanese Mad City and should not be applied here.
- Training includes street fighting, gun shooting and car driving.
- Training rewards are optional survival aids.
- Using a Training reward does not prevent the North American ending.
- Japanese Mad City practice-ending rules do not apply to the USA cartridge.
3. Choose Game A or Game B before beginning
At the title screen, select Game A or Game B before starting the campaign. Game A uses the NES Gun System for the shooting stages. Game B uses the controller as the firearm, with the Control Pad positioning the sight and the A Button firing. The choice governs both Stage 2 and Stage 7, so select the method you intend to use for the entire run.
For brawling, the Control Pad moves Billy horizontally and vertically within the playfield. A performs a kick, B performs the current attack, and pressing A and B together performs the jump-kick. Select switches between normal attacks and the handgun when Billy has ammunition. During driving, Up accelerates, Down reduces speed, Left and Right steer, A throws dynamite and B fires the vehicle weapon.
The USA release uses different opening ammunition depending on the selected shooting method: Game A begins a shooting stage with 50 bullets, while Game B begins with 100. Pick up ammunition whenever it is safe, and prioritize hourglasses because they prevent the bullet supply from diminishing for their active period.
- Select Game A for NES Gun System play or Game B for controller shooting.
- Use the same choice for Stages 2 and 7.
- Remember the different Game A and Game B starting ammunition supplies.
4. Complete Stages 1 through 7 while preserving recovery options
In the brawling stages, carry a close weapon whenever one is available. Billy can carry only one close weapon at a time, but the handgun remains available while bullets last. Use the jump-kick to interrupt groups, move vertically to avoid standing directly in an enemy’s attack line, and retreat after a short attack sequence rather than allowing several enemies to surround you.
Collect raw meat and first-aid boxes when health is low, and take a bulletproof vest when the next fight contains heavy ranged or close damage. Stars can clear enemies on screen, but they are optional and should be saved for a dangerous cluster rather than collected at the cost of health. In the driving stages, gasoline cans add bonus time but do not make the vehicle immune to collisions. Slow down before crowded sections, shoot limos and road obstacles with B, and use A against aircraft or other airborne threats.
Stages 2 and 7 are shooting stages. Aim at immediate threats first, especially attackers that can damage Billy before the next target appears. Do not fire wastefully during quiet portions, because reaching a boss with ammunition is safer than trying to survive the final exchange without it. If a life is lost, the continue screen counts down from 9 to 0; press Start before it expires to restart at the beginning of the stage. The manual allows up to five continues.
- Carry a useful close weapon through brawling sections.
- Use health, armor, ammunition, hourglass and gasoline pickups when they solve an immediate problem.
- Preserve ammunition for the shooting-stage boss encounters.
- Press Start during the continue countdown when a retry is needed.
5. Clear Hitman’s Yard before entering the mansion
Stage 8 takes place in the yard outside Gordon’s mansion and contains three separate fights. The first group uses handguns. Stay at a different vertical height from the shooters while closing in, knock a handgun loose, then collect it and use it against the remaining attackers if you have enough ammunition. Do not spend every bullet here, because later fights are more demanding.
The second group arrives with bulletproof vests. Gunfire is ineffective while the vests remain, so knock the armor away before relying on the handgun. Two of these enemies use whips and another throws knives; if you obtain a whip, use its reach to attack from outside their striking distance. Any gun remaining at the end of Stage 8 is not carried into Stage 9, so treat it as a temporary tool.
The final Stage 8 fight is against Gordon’s dog-trainer and an ongoing supply of attack dogs. Focus on the trainer first. He retreats when approached, but maintaining pressure prevents the fight from filling with additional dogs. After the trainer is defeated, eliminate the dogs already on screen. The battle is not complete until the remaining dogs are gone. Then move right to the mansion entrance.
- Defeat the handgun users.
- Remove the vest protection from the second group before relying on gunfire.
- Defeat the dog-trainer and every remaining attack dog.
- Move right only after the Stage 8 fight is completely cleared.
6. Defeat the complete Stage 9 encounter and verify completion
Godfather Gordon is the first Stage 9 opponent. His handgun cannot be knocked away, and he can evade attacks by leaping aside. At close range he can grab Billy and attack him, often removing the bulletproof vest. Jump-kicks are an effective way to damage him while avoiding a prolonged standing exchange. If you kept a whip from Stage 8, its range makes it easier to attack while staying away from the handgun and grab distance. Recover the vest if Gordon knocks it loose and the screen position allows it.
After Gordon is defeated, Rocky and Rocco enter together. Do not stop after the first boss. Keep both bodyguards on the same side of Billy so that one cannot attack from behind while the other closes from the front. If one grabs Billy, rapidly move the Control Pad to escape before the other bodyguard lands the follow-up punch. With a whip, attack from one side, cross the room to create distance, turn around and repeat. Without a whip, use jump-kicks and move vertically after landing instead of remaining between them.
When Rocky and Rocco are both defeated, walk right. The North American rescue sequence follows, and the game presents its single USA ending. Allow the closing display and credits to play rather than resetting immediately. No Training restriction, Japanese input command, alternate-ending condition or special no-reward run is required for North American completion.
- Defeat Godfather Gordon.
- Defeat both Rocky and Rocco after Gordon falls.
- Walk right after the complete final fight.
- Allow the North American rescue sequence and credits to finish.
Before you move on
- The game played was The Adventures of Bayou Billy on the original North American NES release.
- Stages 1 through 9 were completed in linear order.
- Game A or Game B was selected at the title screen and used for both shooting stages.
- Training was treated as optional, with no special reward restriction imposed.
- Godfather Gordon was defeated first.
- Rocky and Rocco were defeated after Gordon.
- Billy walked right after the final fight.
- The North American rescue sequence, closing display and credits appeared.
References for this chapter
- Adventures of Bayou Billy — NES Instruction Manual, code NES-MU-USA
- The Adventures of Bayou Billy — Walkthrough
- The Adventures of Bayou Billy — Stage 8
- The Adventures of Bayou Billy — Stage 9
- The Adventures of Bayou Billy — Cheats and Ending Differences
- The Adventures of Bayou Billy — Guide and Walkthrough
Finishing up
You have completed all nine stages in order: Bayou's Backyard, Deep in the Heart of the Dixie Swamp, Gator Alley, the Back Roads, Superdome Drive, The French Quarter, Gordon's Gateway, Hitman's Yard, and The Perilous Plantation Parlor.
You defeated Godfather Gordon, then Rocky and Rocco, walked right after the final fight, and watched the North American rescue sequence and credits.
Training-mode powerups are optional; using one does not prevent the North American ending.
The Game A/Game B selection was used intentionally for both shooting stages and the selected campaign was completed successfully.
Choose your next gameScreenshots & video
Game imagery for reference. Follow the written chapters above for the route and strategies.
Sources & references
Our original guide draws on the references below. Check the edition at the top of this page before following controls or unlock requirements.
- Adventures of Bayou Billy — NES Instruction Manual, code NES-MU-USA
- Adventures of Bayou Billy — Nintendo NES Manual PDF
- The Adventures of Bayou Billy — Walkthrough
- The Adventures of Bayou Billy/Versions — StrategyWiki
- The Adventures of Bayou Billy — Zapper Games FAQ
- The Adventures of Bayou Billy — Gameplay
- The Adventures of Bayou Billy — Guide and Walkthrough
- The Adventures of Bayou Billy/Stage 1 — StrategyWiki
- The Adventures of Bayou Billy/Stage 2 — StrategyWiki
- The Adventures of Bayou Billy/Stage 3 — StrategyWiki
- The Adventures of Bayou Billy — Stage 4
- The Adventures of Bayou Billy/Stage 6 — StrategyWiki
- The Adventures of Bayou Billy/Stage 7 — StrategyWiki
- The Adventures of Bayou Billy — Stage 8
- The Adventures of Bayou Billy — Stage 9
- Nintendo NES Game Endings: Adventures of Bayou Billy
- The Adventures of Bayou Billy — Cheats and Ending Differences
About the game & collecting notes
- Platform
- Nintendo Entertainment System
Complete, stage-by-stage walkthrough for the original North American NES release of The Adventures of Bayou Billy. Covers controls, Training Mode, brawling, driving and shooting stages, weapon and survival-item use, the Game A/Game B shooting choice, resource management, continues, and the complete nine-stage route to the North American ending. Training rewards are optional and do not create a separate North American ending condition; Japanese Mad City ending rules are excluded.
Darryl Polo
Darryl Polo loves tinkering with emulation and revisiting retro games. He enjoys exploring how old favorites play on different setups and sharing what he learns along the way. At Joking Joystick, he writes about the games, hardware, and small discoveries that keep the hobby fun.
Our editorial standardsFound a step that needs another look? Help us improve this guide.