Super Mario 64 Walkthrough: A 70-Star Route and 120-Star Completion
Reach the ending of the original Nintendo 64 game with a complete 70-star route, then finish the remaining stars for a 120-star save. Follow course-by-course directions, castle unlocks, cap switches, and all three Bowser encounters, with running star totals and practical help for tricky jumps, red coins, and optional cleanup.

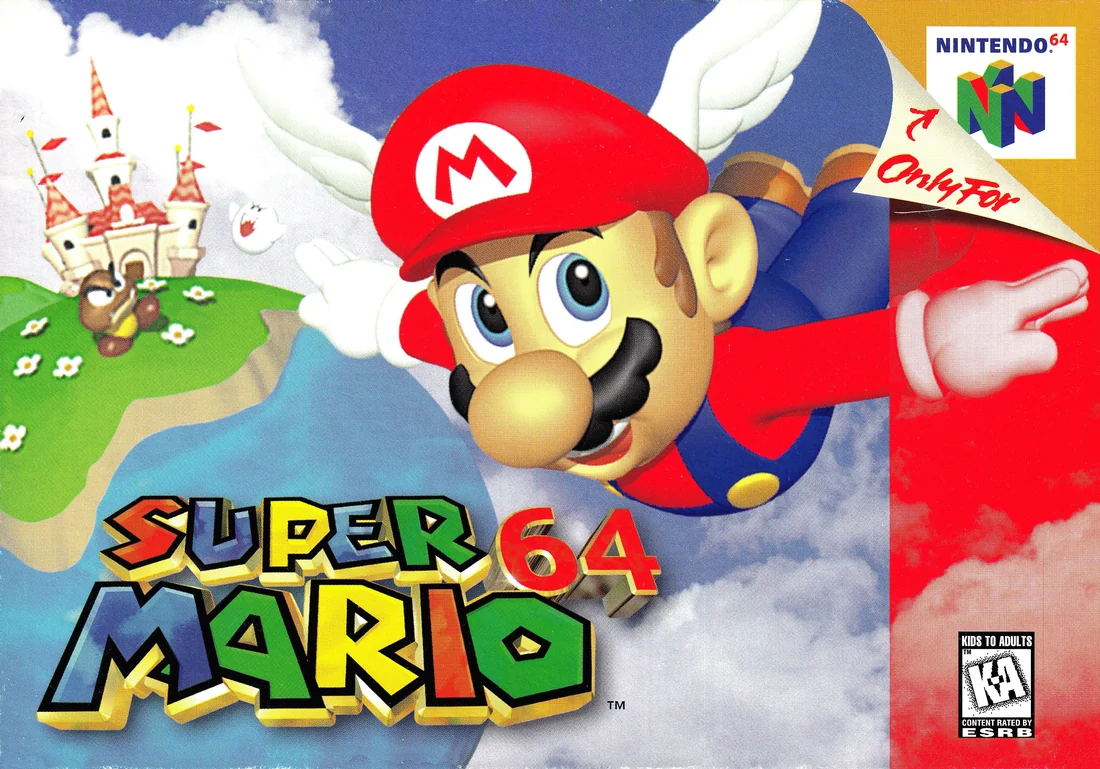
Find a copy
Super Mario 64 Nintendo 64
We may earn a commission if you buy through these links, at no extra cost to you. As an Amazon Associate I earn from qualifying purchases.
Opens retailer search results. Check the model, edition, seller, availability and current price before buying.
Before you begin
This walkthrough follows the original Nintendo 64 version of Super Mario 64. Its main route collects 58 course stars and 12 castle secret stars before the final Bowser fight. You will visit all fifteen main courses, open the castle's major gates, and activate the three cap switches along the way.
The running totals make it easy to check your progress against the pause menu. Extra stars are welcome, but collecting a substitute or a 100-coin star early will put your save ahead of the printed tally. After the ending, use the cleanup chapters to find the remaining course and secret stars and reach 120.
Set yourself up for the run
Use A to jump, B to attack or interact, and Z for crouching and moves such as the long jump and ground pound.
Practice the long jump, backflip, wall kick, and ground pound before attempting narrow or elevated routes.
Adjust the camera before a difficult jump so you can see the landing surface.
Collect coins to restore health and use save-and-continue after earning stars.
Keep optional 100-coin stars for cleanup if you want the main route's totals to match your save exactly.
Remember that pressing a cap switch and earning that cap course's red-coin star are separate objectives.
Speak to pink Bob-omb Buddies before using the cannons they open.
Start a save and learn the moves
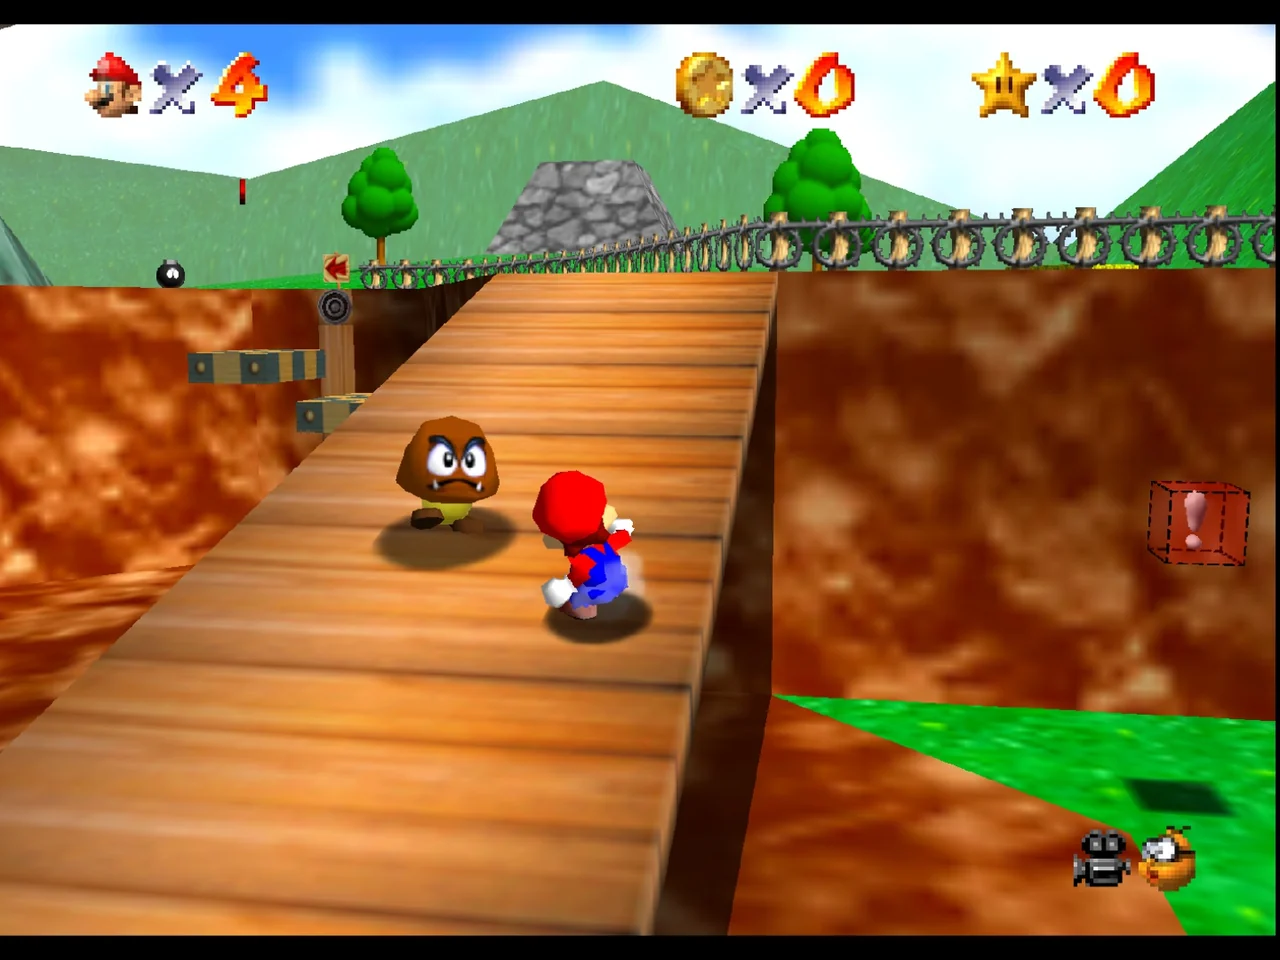
Open a fresh file, learn the original Nintendo 64 controls, and set up the exact 70-star route before you enter the first painting. This chapter is about control, recovery, camera use, saving, and route tracking, so later course chapters can focus on where to go and which stars to take.
Start one file and treat the castle as your route hub
Advance to the Select File screen, choose an empty save, and begin in Peach's Castle. This guide is written for the original Nintendo 64 release with English mission names and ordinary, no-glitch play. Ignore any habits from Super Mario 64 DS, later ports, or speedrun shortcuts.
The castle is your world map. Most main courses are entered through paintings, while several secret stars come from hidden rooms, cap courses, Toads, MIPS, and Bowser stages. After most new Power Stars, Mario returns to the castle automatically. Use that forced return as your checkpoint to compare your total against the chapter target before entering the next area.
- Create one save file and keep all progress on it.
- Use the castle return after each route star as your natural stopping point.
- Do not collect 100-coin stars before the ending route unless you are deliberately making your own custom tally.
Practice the core buttons in a safe place before the first course
On Nintendo 64, A is jump, B is attack and interact, and Z is crouch. B is also how you read signs, talk to characters, pick up many objects, and throw what Mario is holding. Use the Control Stick for movement, speed, swimming direction, cannon aim, and fine adjustment on ledges.
Do a short movement drill in the lobby. First, run a few steps and press Z, then A, for a long jump. This is your distance move and one of the most important tools in the whole route. Use it when you have a clear runway and need to cross space quickly. Second, stand still, hold Z, then press A for a backflip. This is your height move when there is no room to build speed. Third, jump with A and press Z in the air for a ground pound. You will use that to smash stakes, hit switches, break certain objects, and drop safely onto targets.
Now learn the wall kick. Run at a plain wall in the castle, jump toward it, and press A again when Mario touches the wall. The timing matters more than speed. If you press too early, Mario just slides down. If you press too late, he rebounds weakly. Learn it here so later missions that expect it do not become emergency practice.
- Do several long jumps in a row without losing your line.
- Perform backflips from a standstill until the input feels automatic.
- Land at least one clean wall kick and one controlled ground pound.
Use the camera before the jump, not during the mistake
The original camera is part of the challenge, so control it on purpose. C-left and C-right circle the view around Mario. C-down pulls the camera farther back. C-up moves into the close look-around view where you can scout with the Control Stick. If a path looks awkward, stop first and fix the angle before moving.
Build a habit now: before narrow beams, thin walkways, sloped ledges, or jumps with a long fall, plant Mario, point the camera behind him or slightly above the path, then move. A pulled-back camera helps when reading a whole platform section. The close view helps when lining up exact targets or spotting openings that are easy to miss from the default angle.
If the camera becomes stubborn, back away a step and reset it instead of forcing the jump from a bad view. Many early falls come from trying to correct both movement and camera at the same time.
- Rotate the view left and right with the C buttons.
- Pull the camera back and then enter the close look-around view once.
- Before your next narrow jump, set the angle first and move second.
Learn safe recovery for health, water, and bad landings
Coins are healing items, not just score. Yellow coins restore health, and red coins restore even more. Underwater, coins and air bubbles refill air, and surfacing does too. If a water section goes wrong, head for the surface or the nearest bubble instead of gambling on one last turn.
When you land badly on a tiny ledge, do not mash A. Let Mario settle, face a safe direction, and choose the least risky move. A backflip is often safer than a running jump when you need height in place. A long jump is only safer when you already have open ground in front of you. If you are sliding on a slope, steer for a broad platform or a wall instead of trying to reverse direction immediately.
If a mission has gone sideways, pause when Mario is standing still and choose Exit Course. That is the clean reset for entering the wrong mission, losing your cap, or wasting too many lives on a bad attempt.
- Recover health with coins in one early stage instead of ignoring damage.
- Surface intentionally during swimming practice rather than waiting for the meter to become critical.
- Use Exit Course once so you remember the reset option exists.
Know exactly what saves and what counts
New Power Stars give you a save prompt. Bowser keys also let you save. If you step on a red, green, or blue cap switch, that activation can be saved too, but the switch itself is not the star from that cap course. The star comes from collecting that course's eight red coins.
The file and pause screens are your bookkeeping tools. Use them. If your total is higher than this chapter plan expects, you probably grabbed an optional star. That is not fatal, but write it down so later cumulative totals do not confuse you. If you replay a course and collect a star you already own, the game can still end the course and let you save, but your Power Star count will not rise.
Bowser keys unlock progress but do not add to the regular star counter. The final Jumbo Star that triggers the ending does not add to the regular star counter either.
- Always take the save after a route star.
- Check the file or pause total whenever a chapter gives a cumulative target.
- Remember that cap switch activation, Bowser keys, and the ending Jumbo Star are separate from counted Power Stars.
Memorize the 70-star route checkpoints before you begin
This ending route uses 58 course stars and 12 secret stars, for 70 counted Power Stars before the endless stairs. The important castle thresholds are 8 stars for Bowser in the Dark World, 30 stars plus the first basement key to continue basement progress, 50 stars for the upper-floor star door, and 70 stars to make the endless stairs become finite.
Follow these cumulative checkpoints: Bob-omb Battlefield 5; Whomp's Fortress plus Princess's Secret Slide 12; Cool, Cool Mountain 16; Jolly Roger Bay plus Secret Aquarium 21; Bowser in the Dark World plus Tower of the Wing Cap 23; Big Boo's Haunt 27; Hazy Maze Cave plus Cavern of the Metal Cap 32; Lethal Lava Land 37; Shifting Sand Land 41; basement secrets 44; Dire, Dire Docks 47; Bowser in the Fire Sea still leaves the total at 48 because the key is not a star; Snowman's Land 52; Wet-Dry World 56; Tall, Tall Mountain 60; Tiny-Huge Island 64; Tick Tock Clock 67; final secret stars plus one Rainbow Ride star 70; then Bowser in the Sky for the ending.
If you dislike one required star, you can substitute another non-glitch star from a similar point in the game, but from that moment on you must track your own total because the printed chapter checkpoints will no longer match exactly.
- Know that the route reaches the ending at 70 counted Power Stars.
- Keep the cumulative checkpoint list handy as you play.
- Your next target is 5 stars in Bob-omb Battlefield.
Before you move on
- You can explain and perform A jump, B attack or interact, and Z crouch, plus a long jump, backflip, ground pound, and wall kick.
- You know how to rotate, pull back, and scout with the camera before a narrow section.
- You know how to heal with coins, refill air, exit a course safely, and save after stars, keys, and cap-switch activations.
- You have the route checkpoint totals ready and are prepared to enter Bob-omb Battlefield for stars 1 through 5.
Bob-omb Battlefield: the first five stars
Enter the Bob-omb Battlefield painting on the castle ground floor and stay here until you collect the route’s first five Power Stars. This chapter follows the Nintendo 64 original mission set and deliberately skips Mario Wings to the Sky and the 100-coin star for later cleanup. When you leave, your file should show 5 Power Stars total.
Route star 1: Big Bob-omb on the Summit
Jump into the first course painting on the castle ground floor. From the start, cross the wooden bridge, pass the Chain Chomp field on the left, cross the teetering bridge, and follow the stone path into the mountain. Keep moving on the inside of the bends when the iron balls begin rolling down the path so they pass beside you instead of knocking you off.
Continue up the spiral mountain road, cross the narrow wooden plank near the top, and step into the round summit arena. Circle behind the Big Bob-omb and press B to grab him from the rear. If you stand in front of him, he grabs Mario first and throws you.
Throw him onto the summit floor three times. Do not throw him off the platform. A toss off the edge does not count and resets the fight. After each successful throw, step back and wait for him to stand up before trying to grab him again so you do not get caught in his countergrab.
- Use the main mountain path to reach the summit.
- Grab the Big Bob-omb from behind.
- Land three throws on the summit platform itself.
Route star 2: Footrace with Koopa the Quick
Re-enter the course and choose Footrace with Koopa the Quick. Koopa is waiting near the start area before the first bridge. Talk to him to begin the race, then take the normal mountain route back to the summit flag.
Stay clean and consistent instead of trying risky leaps. Long jumps on straight ground save time, but the safest win comes from not falling off the narrow upper path. Keep enough control to cross the final plank cleanly.
Touch the flag at the summit and stay there. The Power Star does not appear until Koopa reaches the top, admits defeat, and finishes his dialogue. If you race well but leave the summit too early, it can look like the win did not register.
- Start the race from Koopa near the entrance.
- Reach the summit flag before Koopa.
- Wait at the goal until he finishes and the star appears.
Route star 3: Shoot to the Island in the Sky
Choose Shoot to the Island in the Sky. First, talk to the pink Bob-omb Buddy near the course start to open the cannons. Cross the first bridge and head toward the open field to the right of the Chain Chomp. Climb the steep pyramid-shaped mound there and drop into the cannon set into its top.
From the cannon view, find the floating island with a tree, a red cap block, and a yellow block. Aim toward the middle of the island and set the angle high enough that Mario rises over the island’s near wall instead of striking its side. If you undershoot, you usually bounce away and must try again.
Once you land on the floating island, hit the yellow block to release the star and collect it immediately.
- Open the cannons by speaking to the pink Bob-omb Buddy.
- Use the cannon hidden on top of the pyramid-shaped mound in the lower field.
- Land on the floating island and break the yellow block for the star.
Route star 4: Find the 8 Red Coins
This route is easiest as one broad loop. From the start, go left toward the Chain Chomp area first. Take the red coin floating above the Chain Chomp’s post by jumping onto the stake, then grab the red coin on the nearby rock in the same area.
Next, cross the teetering bridge into the log field. Two red coins sit in the center of the four wooden posts there, and collecting them now puts you near the Star Marker where the reward will appear later. Continue toward the mountain entrance and pick up the red coin tucked under the bridge leading toward the mountain path.
Move into the mountain base and take the red coin on the steep incline. Then use the lower field cannon again to shoot onto the floating island and climb or hop onto the tree there for the red coin above it. The last red coin is above the moving platforms on the main path near the course start, so return there and ride the platforms up to reach it.
After the eighth red coin, the Power Star appears at the Star Marker in the log field, not on the floating island and not by Chain Chomp. Head back to the log field and claim it.
- Collect the red coins above Chain Chomp’s post and on the nearby rock.
- Collect the two red coins in the four-log field.
- Collect the red coin under the bridge to the mountain.
- Collect the red coin on the steep incline at the mountain base.
- Collect the red coin above the tree on the floating island.
- Collect the red coin above the moving platforms on the main path.
- Return to the Star Marker in the log field for the star.
Route star 5: Behind Chain Chomp's Gate
Re-enter for Behind Chain Chomp's Gate. This is the sixth mission on the course menu, but it is the fifth star in this walkthrough because Mario Wings to the Sky is being saved for later.
Cross the first bridge and run straight to the Chain Chomp enclosure on the left. Jump onto the wooden stake that holds him in place. Press A to jump, then press Z in midair to ground-pound the top of the post. Repeat until you have driven the stake fully into the ground three times.
If the Chain Chomp knocks you away, do not stand in front of him trading hits. Circle wide, regain the top of the stake, and continue. Nearby coins heal lost health if you get clipped. Once the stake is fully buried, Chain Chomp breaks the gate behind him, and the star appears in the newly opened area. Grab it to finish Bob-omb Battlefield with 5 total stars.
- Enter the Chain Chomp field near the course start.
- Ground-pound the stake three times.
- Collect the star from the opened gate area behind him.
Before you move on
- Your save file shows 5 Power Stars after leaving Bob-omb Battlefield.
- The collected stars are Big Bob-omb on the Summit, Footrace with Koopa the Quick, Shoot to the Island in the Sky, Find the 8 Red Coins, and Behind Chain Chomp's Gate.
- Mario Wings to the Sky and the Bob-omb Battlefield 100-coin star remain uncollected for later cleanup.
References for this chapter
- SUPER MARIO 64
- Bob-omb Battlefield - Super Mario Wiki, the Mario encyclopedia
- Big Bob-omb on the Summit - Super Mario Wiki, the Mario encyclopedia
- Footrace with Koopa the Quick - Super Mario Wiki, the Mario encyclopedia
- Find the 8 Red Coins - Super Mario Wiki, the Mario encyclopedia
- Super Mario 64 - Guide and Walkthrough - Nintendo 64 - By RJHarrison - GameFAQs
Whomp's Fortress and the Princess's Secret Slide
Enter the original Nintendo 64 Whomp's Fortress through the 1-star door off the castle lobby and take five route stars in a clean order: Whomp King first, tower second, cannon ledge third, Hoot drop fourth, breakable wall fifth. After that, leave the course and collect both Princess's Secret Slide stars from the castle secret room on the mezzanine. Fortress red coins and the 100-coin star stay for cleanup. If you began this chapter at 5 stars, you should leave it with 12.
Star 6: Chip Off Whomp's Block
From the lobby, go through the 1-star door on the ground floor and jump into the Whomp's Fortress painting. Follow the main uphill route: pass the moving bars, cross the short retracting platforms, continue by the Thwomps, then climb the stairs toward the upper half of the stage. Stay on the main stone path rather than dropping toward the pool and cannon area.
On the upper path, pass the sleeping Piranha Plant, cross the collapsing bridge without stopping in the middle, then wait for the rotating plank to line up before stepping across. Continue past the Whomps and ride the rotating elevator up to the summit. The Whomp King waits on the flat top.
Fight him near the middle, not near an edge. Stand in front of him long enough to trigger his body slam, sidestep, then jump onto his back and ground-pound him while he lies face-down. Repeat this three times. After the third hit, take the Power Star. On later visits, the tower appears where he stood.
- Star 6 collected: Chip Off Whomp's Block
- The Whomp King was defeated with three ground pounds
- The summit tower has appeared for later missions
Star 7: To the Top of the Fortress
Re-enter Whomp's Fortress and climb the same main route back to the summit. The upper approach is unchanged until you reach the area where the Whomp King used to block the way.
Now circle the new tower. Use the narrow ledges and the small moving steps carefully, pausing before each turn so the camera does not hide the next foothold. Bullet Bills can pressure you here, so take the climb one platform at a time instead of trying to rush around the tower in a single sprint.
Reach the very top and collect the second fortress route star. Ignore the cannon, floating islands, and Hoot on this visit.
- Star 7 collected: To the Top of the Fortress
Star 8: Shoot into the Wild Blue
Enter the course again and head for the lower side area with the shallow pool. After the Thwomp staircase, branch left to find the pink Bob-omb Buddy near the pool and speak to it to open the cannon beside the water. This cannon is used for two different route stars, so line up the right target before firing.
For Shoot into the Wild Blue, aim toward the obvious stone outcropping attached to the fortress wall. Do not aim at the breakable corner used later for Blast Away the Wall. Use a slightly high shot so Mario drops onto the outcropping instead of smacking the wall below it.
If the shot leaves you on safe course ground, circle back to the cannon and try again. If you overshoot the course and fall into the void, you lose a life and must re-enter. Land on the outcropping and collect the star for route total 8.
- The Bob-omb Buddy opened the cannon
- Star 8 collected: Shoot into the Wild Blue
Star 9: Fall onto the Caged Island
Start from the course entrance and climb the tree near Mario's starting point to wake Hoot. Grab his talons and immediately turn toward the floating islands near the tower. Hoot gradually loses height, so aim early and do not circle too long before committing to the drop.
Your target in the original Nintendo 64 release is the floating island with a steel fence running around its perimeter. There is no separate small inner cage to enter. Release above the center of the grass inside that fenced island so Mario drops safely onto it and can touch the star at once.
If the approach is going wrong, only release when you can still land on solid course ground such as the starting side or the cannon side and try again from there. Do not treat every miss as safe. Whomp's Fortress hangs over a bottomless void except for its own playable platforms and small pool area. If you fall beyond the course, you lose a life and must make another attempt after re-entering.
- Star 9 collected: Fall onto the Caged Island
- The Hoot drop was made onto the fenced floating island itself
Star 10: Blast Away the Wall
Return to the cannon by the shallow pool. This time the target is not the visible outcropping from Shoot into the Wild Blue. Aim higher and farther at the brown breakable corner of the fortress wall along the upper route, near the collapsing bridge and rotating plank section.
When the shot is lined up correctly, Mario smashes the corner and reveals the hidden star shelf inside. Even a correct impact costs some health, so collect a few nearby coins before firing if you are already hurt. If the wall does not break, adjust toward the outer corner rather than the flat wall face.
After opening the shelf, climb the normal route back up through the fortress. Slow down near the opening so you do not slide off the narrow approach, then step onto the exposed ledge and take the star. That finishes the five required fortress stars for this chapter.
- Star 10 collected: Blast Away the Wall
- Both cannon missions are complete and were aimed at different targets
Star 11: Princess's Secret Slide normal clear
Leave Whomp's Fortress and return to the castle lobby. Go up the central staircase to the mezzanine, enter the door on the right, and look for the Peach stained-glass windows in that room. Jump into the window on the right to enter Princess's Secret Slide.
For the first slide star, only a normal finish is required. Keep Mario centered through the opening turns, make small steering corrections instead of sharp swings, and avoid bouncing off the rails. A calm clean run is better than forcing time-attack lines on this first visit.
At the end of the slide, finish the run and hit the yellow block to release the Power Star, then collect it. This is a separate reward from the under-21-second star.
- Star 11 collected: Princess's Secret Slide normal finish
- The correct Peach window entrance was used from the mezzanine room
Star 12: Princess's Secret Slide under 21 seconds
Re-enter the same Peach window for a second run. The time-trial star appears only if you finish in under 21 seconds. This guide does not require the hidden shortcut. A smooth fast run with tight lines is enough for ordinary completion.
Start moving immediately. Hug the inside of the early bends without scraping hard against the walls, then let Mario carry speed down the longer straight sections. One heavy crash usually costs too much time, so restart quickly if the first half goes badly rather than hoping to salvage a poor run.
When you cross the finish in under 21 seconds, the second Power Star appears in front of the yellow block at the bottom. Collect it to end the chapter with 12 total stars.
- Star 12 collected: Princess's Secret Slide under 21 seconds
- Running save total is now 12 stars
Before you move on
- Your save file total is 12 stars after collecting five Whomp's Fortress route stars and both Princess's Secret Slide stars.
- Whomp's Fortress route stars collected are Chip Off Whomp's Block, To the Top of the Fortress, Shoot into the Wild Blue, Fall onto the Caged Island, and Blast Away the Wall.
- Princess's Secret Slide has been cleared once normally and once in under 21 seconds.
- Red Coins on the Floating Isle and the Whomp's Fortress 100-coin star remain available for later cleanup.
References for this chapter
- SUPER MARIO 64
- Whomp's Fortress - Super Mario Wiki, the Mario encyclopedia
- Fall onto the Caged Island - Super Mario Wiki, the Mario encyclopedia
- The Princess's Secret Slide - Super Mario Wiki, the Mario encyclopedia
- Super Mario 64/Whomp's Fortress — StrategyWiki
- Super Mario 64/The Princess' Secret Slide — StrategyWiki
Cool, Cool Mountain: slide, penguin and red coins
Open the 3-star door on the left side of the castle's first floor and jump into the center snowman painting. Cool, Cool Mountain starts Mario beside the cottage at the top, so you can take the cabin slide first, then deliver the lost baby penguin, then win the race, then do the red-coin sweep. Leave Snowman's Lost His Head, Wall Kicks Will Work, and the 100-coin star for cleanup.
Star 13: Slip Slidin' Away
As soon as you enter the course, turn to the cottage beside you. You do not need to climb up from a lower area; Mario already starts at the top of the mountain. Go inside through the chimney opening to enter the cabin slide.
For this first star, the goal is only to survive the full slide and reach the exit. Stay centered on the straight sections and ease off your stick input before the sharper bends so Mario does not bounce off the outer wall. If you wobble after a turn, straighten first instead of hopping. Jumps are more likely to send you off the edge than to save time here.
About halfway down, a line of yellow coins points into the wall. In the original Nintendo 64 release, that wall hides a shortcut passage. It is safe to use for this mission if you want an easier finish, because there is no race judge here. Whether you stay on the main track or take the hidden passage, keep going until you reach the bottom.
Exit through the door at the end of the slide. The star waits just outside. Grab it before leaving. Clearing this mission is what enables the Big Penguin race objective in the cabin on later entries.
- Enter the center painting behind Cool, Cool Mountain's 3-star door.
- Drop into the cottage chimney right beside the start.
- Finish the slide and collect the star outside the exit door.
Star 14: Li'l Penguin Lost
Re-enter the course and walk up the short snowy rise above the cottage. The correct baby penguin is up here near the top area, above the cabin. Do not waste time with the small penguin near the mother at the bottom; that is the wrong one and she will reject it.
Pick up the baby and carry it back past the cabin. Do not use the broken bridge warp on the right side of the start while carrying it. Instead, take the broad downhill route on the left side of the top area and work your way to the Headless Snowman ledge. This path is longer than a shortcut, but it is much safer for an ordinary run.
Cross the large bridge where the snowmen leap up. Slow down before each narrow section so Mario faces straight ahead instead of skidding sideways. If an enemy clips you and the baby pops loose, stop moving first, pick it back up, and then continue. If the baby falls into a pit or disappears, leave the course and restart rather than wandering the mountain looking for it.
After the bridge, continue down the ramps to the lowest area. The Mother Penguin waits beside the water near the slide exit. Set the baby directly in front of her. If she thanks you and gives a star, you had the correct baby. If she complains, you brought the wrong one and need the baby from above the cottage.
- Take the baby penguin from the top area above the cottage.
- Carry it down the normal mountain route instead of using the warp bridge.
- Place it in front of the Mother Penguin by the water and collect the star.
Star 15: Big Penguin Race
Enter Cool, Cool Mountain again and go straight back into the cottage chimney at the starting area. Now that Star 1 is complete, the Big Penguin is inside and offers a race down the same slide.
Accept the challenge and stay on the intended course from start to finish. Do not use the hidden passage through the wall this time, and do not jump off the track to skip turns. Those shortcuts can invalidate the race, so this mission should be treated as a clean full-route run.
To win safely, hug the inside of the wider curves without scraping too hard, then open your line early so the next bend does not throw you outward. If the penguin crowds you, do not force a shoulder check near an edge. Ease up for a moment, let it drift ahead, and pass again on a longer straight. A calm run is better than a risky one.
When you reach the bottom, stay in the finish area and wait. The star is awarded only after the Big Penguin arrives and recognizes that you won fairly. Listen through the result message, then take the star.
- Enter the chimney again after clearing Slip Slidin' Away.
- Race the Big Penguin down the full slide with no shortcut.
- Wait for the finish dialogue and then collect the reward star.
Star 16: Frosty Slide for 8 Red Coins
This mission is easiest if you sweep from the top down and then ride back up for the spawned star. Start by climbing the tree near the cottage and take the red coin above it. From there, head left and go down the large exterior slide. At the bottom of that slope, just before the Headless Snowman's head, grab the next red coin.
Stay on the upper-middle part of the course for a moment. Near the upper gondola area, there is another red coin at the top end of the ropes the lift runs along. Take that, then cross the large bridge with the jumping snowmen and collect the red coin at the far broken bridge near the star marker. Do not worry about the star marker yet; keep following the ramps down to the lowest snowfield.
Now clear the lower coins in one loop. There is a red coin in the tree near the slide exit. Another sits beside the broken bridge warp near the Mother Penguin. A seventh is at the far edge of the empty snowfield, tucked near the wall before the drop-off. The last lower red coin is on the small platform reached by the short little bridge near that same bottom area, next to the yellow block and ice.
After the eighth coin, the Power Star appears back at the star marker near the broken bridge above the Headless Snowman section. Use the gondola from the lower area to ride back up. Stand still in the middle of the lift instead of jumping around on it. Step off near the upper ledge, cross the big bridge again, and claim the star at the marker.
If you slip from an upper ledge during this mission, do not restart immediately. Finish any lower coins you can see first. Then use the gondola to return to the upper section for the remaining coin or for the star pickup. That recovery is usually faster than repeating the whole route.
- Collect the top tree coin, the exterior-slide coin, the upper gondola-rope coin, and the broken-bridge coin before dropping to the bottom area.
- Sweep the lower tree, mother penguin side, far-edge, and little-platform coins.
- Ride the gondola back up and collect the spawned star at the marker near the broken bridge.
Before you move on
- You should leave Cool, Cool Mountain with stars 13 through 16, bringing the route total to 16.
- The four route stars here are Slip Slidin' Away, Li'l Penguin Lost, Big Penguin Race, and Frosty Slide for 8 Red Coins.
- The remaining course stars saved for cleanup are Snowman's Lost His Head, Wall Kicks Will Work, and the 100-coin star.
Jolly Roger Bay and the Secret Aquarium
Go through the castle's first-floor 3-star door on the right and enter the pirate-ship painting for Jolly Roger Bay. This chapter collects stars 17 through 20 in the bay, then star 21 in the Secret Aquarium from the same room. You will finish the sunken ship, the eel, the ocean-cave chests, the afloat-ship red coins, and the aquarium red coins, while leaving Blast to the Stone Pillar, Through the Jet Stream, and the 100-coin star for cleanup. Your total should rise from 16 to 21 stars.
Star 17: Plunder in the Sunken Ship
Enter Jolly Roger Bay and dive into the deep center of the water. On this mission the ship is still on the bottom, with Unagi the eel blocking the broken side opening. Swim close enough to the eel's face to wake it, then turn away instead of trying to force your way in. If your air is already half gone, surface before the second dive so you start the puzzle with a full meter.
When the eel leaves the opening, swim into the ship. From the entrance, look toward the rear of the room. Open the chest on the raised rear ledge first. Then open the lower chest on Mario's right, the lower chest on Mario's left, and finally the remaining chest in the middle. A wrong chest shocks Mario and resets the sequence, so stop moving between each chest and take the free air bubble from every correct one.
After the last chest, the water drains and the ship rises. Turn and climb the slanted wooden platforms immediately. If you slip, drop back to the lowest plank and climb again rather than trying a desperate side jump. Hit the yellow box at the top for the star.
- Lure the eel away before entering the ship.
- Ship chest order from the entrance: rear ledge, lower right, lower left, middle.
- Climb the drained interior to the yellow box for the star.
Star 18: Can the Eel Come Out to Play?
Re-enter the course. The ship now floats on the surface, and the eel has moved into a wall hole above the trench. Swim down to that hole and stop just in front of it until the eel starts to come out. Back away slightly so its body does not scrape Mario for damage.
The star is attached to the eel's tail. Follow from behind and a little above, then brush the tail star to knock it loose. Do not chase the eel's head. The loose star appears back near the hole, so turn around as soon as you dislodge it.
If the eel retreats before you touch the tail, go back for air and trigger another pass. Clean positioning is easier than forcing a long underwater chase on low health.
- Wake the eel at the wall hole, not at the ship.
- Touch the tail star to make it drop.
- Turn back and collect the spawned star near the hole.
Star 19: Treasure of the Ocean Cave
From the deep middle of the bay, find the tunnel marked by a ring of coins near where the ship used to rest. Swim through it and surface in the cave chamber. On foot, move past the Goombas and watch the stone pillars ahead. They slam down when you walk under them, so move in short bursts and wait for each one to fall before passing its spot.
At the back is another chest puzzle. Use this viewpoint: stand on the open floor facing the four chests, with the sign behind you. Open the far chest first, then the left chest, then the right chest, then the front chest closest to you. If you make a mistake, the shock resets the order, so re-center your view before touching another chest.
The star appears in the middle of the chest group. Grab it before running back through the pillar line.
- Use the coin-ring tunnel to reach the cave.
- Cross the falling-pillar section patiently.
- Cave chest order from the open floor: far, left, right, front.
Star 20: Red Coins on the Ship Afloat
Take the underwater coins first so the star appears on the ship near your final pickups. Four red coins are inside clams. A dependable route is the clam by the cave-tunnel coin ring, the clam below the cannon platform, the clam near the bay's center, and the clam beside the jet-stream trench. Wait for each clam to open fully, swim in for the coin, then leave. If a shell starts closing, pull out and circle back rather than trading health for one coin.
For the fifth red coin, head to the tall stone pillar near the Bob-omb Buddy side of the bay and climb to the top. Talk to the Bob-omb Buddy on the nearby platform to open the cannon for later cleanup, then press the purple switch on that same platform. Blue blocks appear along the wall and give you a safe path toward the floating ship.
Cross the temporary path quickly but carefully and jump onto the ship. The last three red coins are on deck: one near the bow, one near the middle mast area, and one toward the stern. The star appears on the ship, so collect it before the blue blocks vanish. If you fall into the water after six or seven coins, swim back to the switch platform and rebuild the path instead of trying awkward recovery jumps from below.
- Collect the four clam coins without rushing the shells.
- Take the pillar-top coin on the Buddy side.
- Use the purple-switch walkway to reach the three ship coins and the spawned star.
Star 21: The Secret Aquarium
Stay in the same castle room. To the right of the Jolly Roger Bay painting is a small opening high on the wall. Jump into it to enter the Secret Aquarium. There is no place to surface here, so your health meter is your air supply for the whole stage.
The safest route is a smooth rising loop. Start with the lower red coins near the floor, then swim upward through the middle rings, and finish with the higher red coins around the outer curve of the tank. Yellow coins in the rings refill air, so pass through them whenever your meter starts dropping into the lower half. Wide turns are safer than sharp reversals.
After the eighth red coin, the star appears inside the tank. If your air is low, grab one more yellow coin before heading for the star. This stage is simple as long as you treat the yellow-coin rings as planned air refills instead of emergency pickups.
- Enter through the small high opening to the right of the painting.
- Use the yellow-coin rings to manage air while routing all eight red coins.
- Collect the spawned star before leaving the tank.
Before you move on
- You entered Jolly Roger Bay through the first-floor 3-star door and collected stars 17 through 20 in this order: Plunder in the Sunken Ship, Can the Eel Come Out to Play?, Treasure of the Ocean Cave, and Red Coins on the Ship Afloat.
- You also entered the Secret Aquarium from the small wall opening in the same room and collected star 21.
- Blast to the Stone Pillar, Through the Jet Stream, and Jolly Roger Bay's 100-coin star are still being saved for later cleanup.
- Your Power Star total is now 21.
References for this chapter
Bowser in the Dark World and the Wing Cap
With 21 Power Stars already collected on this Nintendo 64 route, use the first Bowser course to add star 22, defeat Bowser for the basement key, then unlock the Wing Cap and take Tower of the Wing Cap for star 23. This chapter only adds two counted stars. The basement key opens the castle basement but does not raise the Power Star total, and pressing the red switch also does not award a star by itself.
Open the first Bowser course and commit to a full red-coin run
From the castle lobby, climb to the upper landing and open the large star door that only needs 8 stars. Follow the short hall toward Peach's picture. The floor opens underneath Mario and drops you into Bowser in the Dark World.
Do not rush straight to Bowser. This stage has one collectible star, earned by taking all 8 red coins in a single visit. The star appears near the final pipe before Bowser's arena, so finish the coin route first, collect star 22, and only then enter the pipe.
- You need at least 8 stars to enter this course.
- The only counted star here is the 8 red-coin star.
- Collect star 22 before jumping into Bowser's pipe.
Take the opening coins, including the temporary-block detour
Cross the first set of moving square platforms to the larger stone platform with the early flamethrower. Just past it is a purple switch that creates temporary brown blocks. Hit that switch immediately.
Take the red coin beside the switch first. Then turn back toward the start and use the temporary blocks to reach the awkward red coin hanging out over the void near the beginning. This pair is the easiest place to lose the run, because the blocks vanish quickly. If they disappear before you reach the far coin, abandon the attempt and restart instead of trying to improvise a risky jump.
Return to the main route. Move through the octagonal platform area and onto the green walkway with crystals and circling Amps. A red coin sits along this stretch. Slow down, watch the Amp movement, and pass through when the lane is open rather than cutting too close.
After that walkway, wait for the yellow rectangular platform to slide into position beside the next stone block. Use it to reach the nearby red coin and get back to solid ground before the platform retracts.
- Red coin 1 is beside the first purple switch.
- Red coin 2 is the one reached by the temporary brown blocks near the start.
- Red coin 3 is on the crystal and Amp walkway.
- Red coin 4 is by the sliding platform and stone block section.
Clear the left branch, cross the seesaws, and claim star 22
At the broad platform where the route splits, go left first. Follow the narrow path to the small octagonal platform for one red coin, then continue farther left to the outer platform area for another. Use plain controlled jumps here. The stage edges are a bigger threat than the enemies.
Return to the split and take the right branch across the two seesaws. Keep Mario near the middle when each board tips so you stay balanced. Behind the second seesaw is another red coin.
From that side, move onto the higher overhanging platforms above the seesaws to reach the last red coin. Once the eighth coin is collected, a Power Star appears near the pipe at the end of the stage. Climb the stepped blocks, hit the final purple switch to raise the staircase, and take the star before entering Bowser's pipe. That is star 22.
If you fall off the course at any point before collecting the star, the entire red-coin run resets and you must do it again from the beginning.
- One red coin is on the left octagonal platform.
- One red coin is on the farther left outer platform.
- One red coin is behind the second seesaw.
- The eighth red coin is reached from the overhanging platforms above the seesaws.
- Take the spawned star by the pipe for star 22.
Defeat Bowser and collect the basement key
Jump into the pipe after the star is safely collected. In this first Bowser fight, one clean throw into a bomb ends the battle. Stay light on your feet. When Bowser lands hard and sends out a shockwave, hop over it instead of standing flat-footed.
Move behind Bowser and press B to grab his tail. Rotate with the Control Stick to build enough speed, then release when one of the bombs on the edge lines up with his path. You do not need a perfect full-speed spin, just a clean angle toward a bomb.
If the throw misses, Bowser comes back onto the platform and you can try again. After one bomb hit, take the basement key. The key is your progress reward here, not another star, so your count remains 22 until the Wing Cap course is finished.
- Grab Bowser from behind.
- Jump over the landing shockwave.
- Hit one arena bomb with a tail throw.
- Take the basement key after the fight.
Unlock the Wing Cap, then re-enter for the actual red-coin flight
Once you have at least 10 stars, stand on the center rug in the castle lobby and switch to first-person view to look straight up into the ceiling light. Mario is sent into Tower of the Wing Cap already wearing the Wing Cap and already airborne.
Use your first visit for the switch, not for the star. Fly down to the tower in the center and land on top. Press the red switch to make red cap blocks solid throughout the game. This is an important unlock, but it is not a Power Star.
After pressing the switch, deliberately drop below the stage to return to the lobby. This does not cost a life here. Re-enter from the same rug by looking up again. Even if the visible shaft of light is gone after activating the switch, the entrance still works from that spot.
Now do the star attempt on a fresh entry. Do not land on the tower first, because the highest coin pair needs the altitude from the initial flight. The red coins come in four pairs. Fly straight ahead for the highest pair on the east side, then bank left and keep circling the tower counterclockwise. Each next pair sits lower than the previous one, so this route matches the way Mario gradually loses height. After the fourth pair, the star appears on top of the tower.
Land on the tower roof and collect the star for star 23. If you drop below an uncollected high pair, do not try to fix it by relaunching from the tower roof. That relaunch is too low for the highest pairs. Instead, exit and re-enter for another fresh flight. If you miss the landing after getting all eight coins, circle back if you still have height, or let yourself fall out and try again.
- You need at least 10 stars to access Tower of the Wing Cap.
- Pressing the red switch unlocks Wing Cap blocks but does not give a star.
- For the star attempt, re-enter and take the highest east-side pair first.
- Follow the remaining pairs counterclockwise as they descend.
- If you fall below an uncollected high pair, exit and re-enter instead of relaunching from the roof.
- Take the star on top of the tower for star 23.
Before you move on
- Your counted Power Star total is now 23.
- Bowser in the Dark World has been cleared for its red-coin star.
- The first Bowser fight is finished and the basement key has been collected.
- The red switch in Tower of the Wing Cap has been pressed, so Wing Cap blocks are active.
- Tower of the Wing Cap has been cleared for its red-coin star.
References for this chapter
- SUPER MARIO 64
- Super Mario 64 - Guide and Walkthrough - Nintendo 64 - By RJHarrison - GameFAQs
- Bowser in the Dark World - Super Mario Wiki, the Mario encyclopedia
- Tower of the Wing Cap - Super Mario Wiki, the Mario encyclopedia
- Super Mario 64/Tower of the Wing Cap — StrategyWiki | Strategy guide and game reference wiki
Big Boo's Haunt: clear the mansion
With 23 stars already collected, Big Boo's Haunt is open and ready. Enter the castle courtyard, defeat the large Boo carrying the cage, and jump into the dropped cage to reach the mansion. This route takes the first four mansion stars only: Go on a Ghost Hunt, Ride Big Boo's Merry-Go-Round, Secret of the Haunted Books, and Seek the 8 Red Coins. None of these four needs the Vanish Cap. When you leave, your file should show 27 stars.
Enter through the courtyard cage and finish Go on a Ghost Hunt
Big Boo's Haunt unlocks once the courtyard Boo sequence is active, which in the original Nintendo 64 release happens after 12 stars. At your current route total, simply go through either wooden door beside the castle lobby staircase, follow the Boo into the courtyard, defeat the large Boo there, and jump into the cage it drops.
Inside the course, run up the path and enter the front door. For this first star, stay on the first floor and clear all five regular Boos in the mansion. Start with the first room on the left side of the foyer. Turn your back to the large Boo picture until two Boos drift out, then turn back and attack when they become solid.
From the left side of the house, continue into the connected back-left area and defeat the Boo in the room patrolled by Mr. I. You do not need to stop and fight the eye; just keep enough space to avoid getting clipped while you line up your hit on the Boo.
Next clear the right side of the first floor. In the room with the collapsing bridge, cross to the far side and beat the Boo near the narrow ledge. Then defeat the final Boo in the room with the square pit and thin walkways. If you fall in either room, you usually only lose time, so climb back up and finish the room instead of restarting the course.
When all five small Boos are gone, Big Boo appears in the foyer. He is vulnerable only while solid, so turn away to draw him close, then turn back as he becomes tangible. A safe method is to hop over him and ground-pound onto his head, but that is not the only option. Rear punches also work if you strike him from behind while he is solid. Land three clean hits either way. After the win, the rear staircase rises automatically. Climb it and take star 24 on the upstairs landing.
- Defeat the courtyard cage Boo and enter the course
- Clear the two Boos from the portrait room
- Clear the remaining first-floor Boos in the back-left room, the bridge room, and the pit room
- Defeat Big Boo with three solid hits from above or from behind
- Take star 24 after the staircase rises automatically
Use the yard shack for Ride Big Boo's Merry-Go-Round
Re-enter the course and stay outside instead of going through the mansion front door. In the yard near the start is a small wooden shack. Go inside, avoid or circle past the eye enemy, and drop through the opening to the basement route.
Ride the elevator down, follow the hallway over the water, and enter the spinning merry-go-round chamber. Boo paintings around the wall release enemies one at a time. Keep moving around the outside so the flames and spinning floor do not trap you. As with the first mission, wait for each Boo to become solid before attacking.
After the wave is cleared, Big Boo appears over the carousel. Fight him exactly as before, but reset your footing after every hit because the floor is turning. Turn away to bait him closer, then use either a clean ground pound from above or rear punches from behind while he is solid. Do not mash in front of him while he is transparent.
When Big Boo disappears, the star appears beside the side door of the chamber, not in the center of the carousel. Step off the spinning floor, heal on coins if needed, and collect star 25.
- Enter the shack in the yard and ride the basement elevator
- Reach the merry-go-round room and clear the Boo wave from the paintings
- Defeat the basement Big Boo with three solid hits
- Pick up star 25 beside the side door
Run the upstairs library for Secret of the Haunted Books
Go back through the mansion front door and climb to the second floor using the staircase unlocked by the first star. Head to the back-left side and enter the long library hallway. Books will fire out from both shelves as you move through, so keep running in a straight line and jump only when a book blocks your lane.
At the curved bookcase at the end, three books stick out farther than the others. Hit them in the correct order by height: top first, bottom second, middle third. On this shelf that means center highest first, right lowest second, then left middle-height third.
If you hit the wrong book, step back until the shelf resets and do it again calmly. Once the order is correct, the shelf slides away and reveals a hidden passage. Go through the door behind it and collect star 26.
- Reach the second-floor library hallway
- Pass the flying books without getting knocked backward
- Hit the protruding books in order: top, bottom, middle
- Go through the opened passage and take star 26
Collect Seek the 8 Red Coins in one mansion loop
For the fourth route star, stay inside the mansion. A clean route is to sweep the first floor first, then finish upstairs. On the first floor, take the room with the Mad Piano and grab the red coin behind it after baiting the piano forward. In the connected room, collect the two red coins on top of the bookshelves. A backflip is the most reliable way to reach each shelf without sliding off.
Still on the first floor, go to the room with the collapsing bridge and narrow side ledge. Cross carefully and take the red coin on the far side. That gives you four coins before you head upstairs.
On the second floor, take the room with the red mesh floor and collect the coin across the mesh. Then go to the room with the caskets and uncover the two red coins hidden beneath them. Do not stand under a casket as it drops back down. Trigger one, back away, take the coin, and repeat for the other.
The last red coin is in the upper room used later for the third-floor wall-kick route. Cross the tilting floor or edge around it, avoid the attacking books, and pick up the coin behind the rear shelf. If that floor dumps you to the lower area, the coins you already collected stay counted, so recover by returning through the mansion or the yard shack instead of quitting.
After all eight are collected, the star appears on the second-floor foyer marker near the window. Return to the upstairs hall and grab star 27.
- Take the piano-room coin and the two bookshelf-top coins on the first floor
- Take the bridge-room coin on the narrow ledge
- Take the mesh-floor coin and both casket-room coins upstairs
- Take the final coin behind the rear shelf in the upper wall-kick room
- Return to the second-floor foyer marker and collect star 27
What to leave for cleanup
Stop after these four stars for the printed 70-star route. Big Boo's Balcony is a later mansion mission and is not needed now.
Eye to Eye in the Secret Room also waits for cleanup because that route uses the Vanish Cap. Do not turn this chapter into a cap detour.
Ignore the 100-coin star for now. If you happen to gather extra yellow or blue coins while learning the mansion, that is fine, but the ending route never counts a 100-coin star before Bowser in the Sky.
- Leave Big Boo's Balcony for cleanup
- Leave Eye to Eye in the Secret Room for cleanup
- Do not stay for the 100-coin star
Before you move on
- Your total should increase from 23 to 27 stars.
- You should now own these Big Boo's Haunt stars: Go on a Ghost Hunt, Ride Big Boo's Merry-Go-Round, Secret of the Haunted Books, and Seek the 8 Red Coins.
- Big Boo's Balcony, Eye to Eye in the Secret Room, and the 100-coin star should still be uncollected unless you intentionally substituted a cleanup star elsewhere.
- After this chapter, move on to Hazy Maze Cave for stars 28 through 32.
Hazy Maze Cave and the Metal Cap
Enter Hazy Maze Cave from the castle basement through the star door and drop into the dark pool beyond it. This route adds five stars in a fixed order: star 28 Swimming Beast in the Cavern, star 29 A-Maze-Ing Emergency Exit, star 30 Watch for Rolling Rocks, star 31 the Cavern of the Metal Cap red-coin star, and star 32 Metal-Head Mario Can Move! Leave Elevate for 8 Red Coins, Navigating the Toxic Maze, and the 100-coin star for cleanup. When you leave, your file should show 32 stars total.
Read the cave before committing to a route
From the entrance pool, the left passage leads toward the rolling-rock chamber, the elevator down to the Underground Lake, Dorrie, the double doors, and the Metal Cap course. The right passage leads into the work-elevator side of the cave and then into the toxic maze.
Keep those halves separate in your head. Left side is for Dorrie, the lake, the mine gate, and the secret Metal Cap course. Right side is for the maze exits. This matters because star 29 and the optional Navigating the Toxic Maze both begin in the same gas maze, but they do not use the same raised opening.
Coins recover health, so if the gas clips you on the maze side, back out and refill instead of forcing the run with a nearly empty meter.
- Left side landmarks: rolling rocks, Underground Lake, Dorrie, double doors, mine gate.
- Right side landmarks: work-elevator room, toxic maze, elevated maze exits.
- Do not mix up A-Maze-Ing Emergency Exit with Navigating the Toxic Maze.
Star 28: Swimming Beast in the Cavern
From the start, go left and long jump the first gap. Cross the rolling-rock chamber carefully, continue through the door at the top of the boulder slope, and ride the yellow elevator down to the Underground Lake.
The star is on the high central island. Swim to Dorrie, ground-pound her back to make her lower her head, then stand on her head as it rises. Face the island so Dorrie starts swimming that way, then jump from her head onto the island and collect the star.
If you slip into the water or Dorrie turns away, just swim back and repeat. Do not waste time trying awkward jumps from the shore. This star is built around using Dorrie as your ferry.
- Take the left route to the rolling-rock chamber.
- Ride the elevator down to the Underground Lake.
- Use Dorrie to reach the center island and collect star 28.
Star 29: A-Maze-Ing Emergency Exit
From the course start, take the right-hand route into the work-elevator room and continue to the toxic maze entrance. Inside the haze, move ahead and then left. Look for the blue coin switch area and the vertical column of blue coins beside a raised wall opening. That first raised opening is the route for this star.
Backflip into that opening, go through its steel door, and follow the corridor to the elevator. Ride the elevator upward, then pass through the next door into the upper rolling-rock chamber. The important correction is here: the hanging mesh is not inside the toxic maze. It is in this upper chamber after you have already escaped the maze by the first raised exit.
Jump and hold A to grab the overhead mesh, move across it to the star platform, then drop safely onto the ledge. If the gas forces you off your line before you reach the raised opening, retreat and try again. Do not take the floor-level exit expecting either maze star; that exit returns to the work-elevator area. The second raised opening in the maze is for the optional Navigating the Toxic Maze, not this chapter's route.
- Go right from the entrance and enter the toxic maze.
- At the maze entrance, go ahead and then left to find the first raised opening by the blue coin column.
- Take the steel door, ride the elevator, cross the upper-chamber mesh, and claim star 29.
Star 30: Watch for Rolling Rocks
Return to the left side of the course and head back into the rolling-rock chamber. Climb the boulder slope toward the upper door, but stop near the top instead of entering immediately.
Look up to spot the alcove with the star above the slope. Wait for a clean gap in the falling boulders, jump at the wall, kick off, and steer onto the ledge. This is a short wall-kick problem in the rock room itself, not a hidden detour somewhere else in Hazy Maze Cave.
If a boulder knocks you down the slope, reset your footing and try again on the next opening. Most failures cost only time unless you rush the setup.
- Return to the left-side rolling-rock chamber.
- Climb near the top door and line up a wall kick to the alcove.
- Grab star 30 from the ledge above the slope.
Star 31: Cavern of the Metal Cap red coins
Go back to the Underground Lake by the left route. Use Dorrie again, but this time face the ledge with the gray double doors instead of the center island. When she rises beside it, jump onto the mesh platform, open the doors, go through the tunnel, and drop into the black pool to enter the secret course.
In the original Nintendo 64 release, Mario enters this course already metal. Follow the stream path toward the switch platform and press the green switch to activate green cap blocks in the castle and courses. That switch press is required progress, but it is not the secret star by itself.
Collect all eight red coins before leaving. Two are in the small side recess before the switch area, two are on the switch platform, and the remaining four are underwater around the back side of that platform near the waterfall end of the cavern. After the eighth red coin, the star appears underwater near the back waterfall. Take it before the current pulls you away.
If the stream starts carrying you toward the one-way waterfall exit, correct early rather than late. Getting washed out dumps you outside the castle and forces a full re-entry through Hazy Maze Cave.
- Use Dorrie to reach the double doors and enter the Metal Cap course.
- Press the green switch to activate Metal Cap blocks everywhere.
- Collect all 8 red coins and grab the spawned star for star 31.
Star 32: Metal-Head Mario Can Move!
Re-enter Hazy Maze Cave and return to the Underground Lake. Near the lake-side path is a green cap block. Break it for the Metal Cap, drop into the water, and sink to the bottom.
Walk to the purple underwater switch and step on it to open the metal gate ahead. Continue through the opened passage, enter the wooden door, and follow the mine corridor. Use long jumps over the two large gaps, then run straight to the star at the end.
The timer matters more than the jumps. If your cap is already about to expire before you reach the purple switch or the opened gate, turn back and refresh from the green block. Clearing the underwater switch first is what makes the long-jump corridor possible.
- Take a Metal Cap from the green block in the Underground Lake room.
- Press the underwater purple switch to open the gate.
- Cross the mine corridor with long jumps and collect star 32.
Before you move on
- Your file total should now be 32 stars.
- Hazy Maze Cave should now show these four route stars collected: Swimming Beast in the Cavern, A-Maze-Ing Emergency Exit, Watch for Rolling Rocks, and Metal-Head Mario Can Move!.
- You should also have the separate secret-course star from Cavern of the Metal Cap.
- The green switch should be activated, making green Metal Cap blocks available from now on.
- Elevate for 8 Red Coins, Navigating the Toxic Maze, and the Hazy Maze Cave 100-coin star should still remain for cleanup.
References for this chapter
- SUPER MARIO 64
- A-Maze-Ing Emergency Exit - Super Mario Wiki, the Mario encyclopedia
- Behind the Waterfall - Super Mario Wiki, the Mario encyclopedia
- Super Mario 64 - Guide and Walkthrough - Nintendo 64 - By Coffee - GameFAQs
- Super Mario 64 - Guide and Walkthrough - Nintendo 64 - By RJHarrison - GameFAQs
Lethal Lava Land: bullies, log and volcano
Enter the large fireball painting in the castle basement after clearing Bowser in the Dark World. This chapter covers the original Nintendo 64 Lethal Lava Land stars 1 through 5, which are route stars 33 through 37 on the file and raise the total to 37. The stage opens with one shared approach, then splits into a left side that leads to the Bowser puzzle and the first Big Bully, and a right side that leads toward the trio of Bullies, the rolling log, and the volcano entrance. Elevator Tour in the Volcano and the 100-coin star are both saved for cleanup.
Reach the course and use lava knockback to recover
From the basement hub, jump into the big fireball painting. Mario starts on a tiny platform with signs and must long jump to the next platform to begin the course. On that next platform, the first split is simple: take the left branch across the path with leaping Podoboos to reach the large platform with one lone Bully. This lone Bully is your main landmark for the rest of the chapter.
If Mario touches lava, he bounces upward and backward instead of sinking immediately. Use that bounce as a recovery move. Steer toward the nearest platform while Mario is airborne, then stop and heal before forcing the next jump. Yellow coins are placed near several fights, and they are the safest way to refill health here. Do not mash forward after a lava hit, because that often sends Mario straight back into the lava a second time.
- Enter through the basement fireball painting.
- Make the opening long jump.
- Use the lone Bully platform as the point where the course branches left and right.
- Steer the lava bounce toward solid ground, then heal with coins.
Star 33: Boil the Big Bully
From the lone Bully platform, take the left side of the course. Cross the drawbridge, pass the grating with Mr. I, ride the tilting platform carefully, and continue over the shifting Bowser picture. After the puzzle, go past the pair of Bullies and the spinning fire-bar platform to reach the far back arena with the Big Bully.
Fight the Big Bully with patience. He charges in straight lines, so let him commit first, sidestep, and answer with short punches, a kick, or a body check. The goal is not damage on a health bar. You must shove him into the lava around the arena. Keep working near the rim instead of trying to launch him from the middle.
When he falls, the star appears on the raised platform nearby and a short set of steps rises from the lava. Start moving as soon as the steps appear. Run straight up without hesitating, because they drop again quickly.
- After the lone Bully, take the left route past the drawbridge and Bowser puzzle.
- Knock the Big Bully into the lava.
- Sprint up the temporary steps to claim star 33.
Star 34: Bully the Bullies
Use the same opening route to the lone Bully, but this time turn right there. Move around the volcano side of the course and cross the sinking and rising platforms. Continue onto the M-shaped walkway and then to the large square arena with three small Bullies. This is a different branch from the first Big Bully route.
Do not rush into the center. Circle the outside until one small Bully drifts away from the others, then hit that one alone near an edge. If two close in together, stop attacking and reset the spacing. The small Bullies are easy to launch once they are isolated.
After all three fall into the lava, a Big Bully appears in the same arena. Beat him exactly the same way as the first one by sidestepping charges and knocking him over the rim. The star appears on that platform when he falls.
- From the lone Bully, take the right-side branch.
- Cross the sinking platforms to the M-shaped walkway and trio arena.
- Separate the three small Bullies and defeat them first.
- Defeat the spawned Big Bully for star 34.
Star 35: 8-Coin Puzzle with 15 Pieces
Return to the lone Bully and go left again. Cross the drawbridge and continue to the shifting Bowser picture. All eight red coins for this mission are on that moving puzzle, and the star appears in the middle after the eighth coin.
The safest method is to collect the outer coins first while staying calm and watching the floor. If a tile begins to move under Mario, step onto a stable piece instead of panic-jumping. Save the more central coins for last so you do not have to cross the puzzle again after the star appears.
As soon as the eighth red coin is collected, turn inward and grab the star in the middle. Taking it immediately is safer than celebrating and then slipping off the shifting tiles.
- Go left from the lone Bully to the Bowser picture.
- Collect all eight red coins on the moving puzzle.
- Take the star from the center right away.
Star 36: Red-Hot Log Rolling
Reach the lone Bully once more, then go right around the course. Near the volcano side, head to the round platform with the two Bullies. Beyond that platform is the black wired platform that carries Mario across the lava toward the rolling log. Stand still and make only small sidesteps while riding so the flamethrowers do not clip you off.
At the far end, step onto the brown log. The log rolls according to where Mario stands, so stay near the top of the curve and make small balance corrections. If the log starts turning the wrong way, do not dash wildly. Ease back toward the crown of the log, let it settle, and then lean the roll the way you want.
When the log reaches the far ledge, hop onto solid ground and go down the short slope to the waiting star. Do not jump too early from the log, because the angle over the lava is worse than it looks.
- From the lone Bully, take the right route to the two-Bully platform.
- Ride the black wired platform past the flamethrowers.
- Roll the log across and dismount on the far ledge.
- Collect star 36.
Star 37: Hot-Foot-It into the Volcano
Use the same opening approach, then take the right side from the lone Bully to reach the spinning ring around the volcano. Wait for a safe moment and jump into the crater. Inside, this mission uses the fixed path that spirals upward around the wall. The elevators belong to a different star later, so ignore the early lift route.
From the starting platform inside, move onto the rock path on the right and follow the climb. Watch the Podoboos, wait out the wall flamethrowers, and avoid pointless fights with Bullies on narrow ledges. A hidden smasher drops from the wall farther up; stop outside its range, let it fall, then run under after it rises. If you are hurt, use coins and the spinning heart inside the volcano instead of forcing the next obstacle at low health.
Near the top, the platforms shrink and the pole jumps become the real test. Turn Mario so his back faces the next pole before jumping. That makes the landing line much cleaner. After the final set of ledges, the star waits at the top of the spiral. This is the straightforward climb. If you start riding elevators and changing between lift tracks, you have wandered onto Elevator Tour in the Volcano, which stays optional for now.
If you lose a life inside the volcano and still have lives remaining, re-entering Lethal Lava Land places Mario back inside the volcano, so you can retry the climb without crossing the outer course again.
- Reach the spinning ring and jump into the volcano.
- Stay on the fixed wall route and ignore the elevator path.
- Wait out the hidden smasher and line up the pole jumps carefully.
- Take star 37 to bring the file total to 37.
Before you move on
- Your file total should now be 37 stars.
- In Lethal Lava Land, the first five mission stars should be collected: Boil the Big Bully, Bully the Bullies, 8-Coin Puzzle with 15 Pieces, Red-Hot Log Rolling, and Hot-Foot-It into the Volcano.
- Elevator Tour in the Volcano and the 100-coin star should still be uncollected if you are following the printed ending route exactly.
- You can move on without extra basement detours.
Shifting Sand Land: pyramid and flight
Enter the fake wall at the basement dead end to the left of the Lethal Lava Land painting to reach Shifting Sand Land, course 8 in the original Nintendo 64 release. This route takes stars 38 through 41 here: Klepto's star, the exterior pyramid summit, the interior pyramid summit, and the red-coin flight star. Respect the sand. The dark quicksand around the pyramid and much of the Tox Box section can swallow Mario almost immediately, while the lighter sand near the outer rim gives you a moment to jump free. Stay on stone, slopes, and the outside edge whenever a straight shortcut would cut through the center.
Star 38: In the Talons of the Big Bird
From the start, head toward the pyramid by using the firm outer sand and stone edges instead of the central pits. The quickest setup is one of the four tall pillars around the pyramid. You can reach a pillar from the safe ground beside it and run up the side to the flat top.
Stand on top and wait for Klepto to circle close. Jump into the bird as it passes. You do not need to knock it off course; one clean hit makes it drop the Power Star. The star lands on the west side of the pyramid, between two of the pillars, so get down carefully and collect it from solid ground instead of chasing Klepto further.
If Klepto steals Mario's cap during the approach, do not leave the course. Tag Klepto again to get the cap back, then repeat the pillar intercept. After the pickup, your total becomes 38.
- Use a pillar to meet Klepto at his height.
- Expect the dropped star on the west side of the pyramid between pillars.
- Recover a stolen cap by hitting Klepto again before exiting.
Star 39: Shining Atop the Pyramid
Re-enter and take the safe route to the pyramid's front ramp. For this mission, climb the outside. Follow the ring of narrow ledges that wraps around the pyramid, turning the camera before each corner so the next step is visible. Do not rush the slanted edges; the drop usually sends Mario back into dangerous sand.
Keep circling upward until the ledges tighten near the top. The Power Star for this mission is waiting on the exterior summit. Take it immediately. Do not jump into the opening at the top yet, because that is for the next route star and later boss access, not this one.
- Approach from the outer edge, not across the middle.
- Climb the exterior ledges all the way to the top.
- Take the summit star and leave the opening alone for now.
Star 40: Inside the Ancient Pyramid
Go back in and enter through the pyramid's front door at ground level. Once inside, take the right-hand path. Pass the Goombas and use the first hopping stone block as your step to the next ledge. From there, move to the pole and climb to the higher floor.
Continue upward across the hanging grate section and the stairs beyond it. When you reach the rolling Spindel, use the side recesses as waiting spots and cross only after it commits to one side. A spinning heart sits partway up the interior, so circle it if you need health before the upper climb.
From the heart onward, stay on the main ascending route past the moving platforms and Amps. Climb the next pole, keep to the high ledges, and continue to the top of the interior. The Power Star is at the interior summit. This is separate from Stand Tall on the Four Pillars and separate from Pyramid Puzzle, so once you reach the top platform, take the star and leave.
- Use the front entrance, not the later top opening.
- Take the right path, then the pole-and-grate route upward.
- Use wall recesses to wait out the Spindel and the spinning heart to recover health.
Star 41: Free Flying for 8 Red Coins
Start with the four ground red coins so the flight only handles the airborne half. First, turn around from the start and run to the back edge behind the starting slab for one coin. Second, go to the stone roof structure near the Tox Box maze and break the block underneath it for another. Third, cross the maze carefully and take the red coin in the middle of that path section. Fourth, go to the oasis and grab the coin in the water.
Now collect the four airborne coins. Walk from the oasis toward the pyramid entrance side and hit the red block on the pyramid slope. Use a triple jump from the ramp to take off. Each of the four pillars has one red coin floating near it, so make one broad circle around the pyramid and take them one by one without cutting low across the dark quicksand. A steady loop is safer than hard turns. If you miss one of the early high coins or lose too much height, land on safe ground and restart from the red block rather than forcing a bad recovery over the center.
After the eighth red coin, the Power Star appears on top of the stone roof structure near the start of the course. Land first, then climb or hop onto the roof for the collection. If Klepto stole your cap earlier, reclaim it before trying to fly, because this mission's aerial half depends on the Wing Cap.
- Ground coins: behind the start, in the breakable block, in the maze, and in the oasis.
- Air coins: one near each pillar while circling the pyramid.
- The red-coin star appears on top of the stone roof structure near the start.
What to leave for cleanup
Do not spend time on Stand Tall on the Four Pillars, Pyramid Puzzle, or the 100-coin star if you are following the printed 70-star ending route. Stand Tall on the Four Pillars opens the top of the pyramid and leads to Eyerok, the two-handed boss in the hidden chamber below. That later mission is optional here.
When you return for cleanup, Stand Tall on the Four Pillars and Pyramid Puzzle can both be taken in the same course without changing the main-game route totals. For now, stop after the four listed stars. Your running total should be 41.
- Optional later stars: Stand Tall on the Four Pillars, Pyramid Puzzle, and 100 coins.
- Confirmed cumulative total after this chapter: 41 stars.
Before you move on
- You collected In the Talons of the Big Bird, Shining Atop the Pyramid, Inside the Ancient Pyramid, and Free Flying for 8 Red Coins.
- You left Stand Tall on the Four Pillars, Pyramid Puzzle, and the 100-coin star for cleanup.
- Your cumulative Power Star count is 41 before moving on.
References for this chapter
- Shifting Sand Land - Super Mario Wiki, the Mario encyclopedia
- In the Talons of the Big Bird - Super Mario Wiki, the Mario encyclopedia
- Free Flying for 8 Red Coins - Super Mario Wiki, the Mario encyclopedia
- Super Mario 64/Shifting Sand Land - StrategyWiki
- Super Mario 64 - Guide and Walkthrough - Nintendo 64 - By CWall - GameFAQs
Drain the moat and collect the basement secrets
This stop in the route collects three basement-area secret stars in a clean order. First, drain the castle moat and clear Vanish Cap Under the Moat for star 42. Next, catch MIPS for star 43. Last, claim the basement Toad star for 44. Keep the rewards separated in your head: flattening the pillars only opens access, pressing the blue switch only unlocks Vanish Cap blocks and prompts a save, and the actual counted Power Star in the cap course comes from getting all eight red coins and then entering the cage to collect it.
Drain the moat from the basement side passage
Start in the castle basement, which opens after you defeat Bowser in the Dark World and use the first key. From the central basement area, go through the wooden door that leads to the short flooded passage with two brick pillars standing in the water. This is separate from the black pool that drops you into Hazy Maze Cave.
Swim to the pillars and flatten both with ground pounds. Do not leave after only one. When the second pillar sinks, the castle moat outside drains and the grate over the outside entrance to the cap course is removed. That change is permanent on the file.
Nothing here gives a Power Star yet. Treat this as setup only. You are opening the route to a secret stage, not collecting star 42 by touching the pillars.
- Both underwater brick pillars are flattened.
- The moat outside the castle has drained.
- You understand that no star has been counted yet.
Enter Vanish Cap Under the Moat and control the opening slide
Return to the castle front, step outside, and circle around the drained moat toward the waterfall side. Drop through the newly opened hole in the exposed moat floor to enter Vanish Cap Under the Moat. In the original Nintendo 64 release, Mario starts the course already under the Vanish Cap effect.
At the start is a sloped opening with four red coins placed on side ledges. Do not rush straight down if you want a reliable clear. Ease toward each ledge, collect what you can cleanly, and keep your camera aligned before moving to the next platform. Missing one of these first four coins does not ruin the attempt immediately if you stay on the course, but it usually means you will need to restart before the end because the star only appears after all eight are collected.
The good news is that falling out of this course does not cost a life. If you slip completely off the route, Mario is sent back outside near the drained-moat entrance by the waterfall, so retries are fast. If you only drop to a lower safe section of the course, continue forward and decide at the bottom whether you still have all the coins you need.
- Entered through the outside hole in the drained moat.
- Collected the opening red coins carefully instead of free-sliding past them.
- Know that a full fall out of the stage ejects you outside without costing a life.
Finish the red-coin route, press the switch, and take star 42
After the slide, follow the lower path of moving and teetering platforms toward the blue switch. The last four red coins are placed along this route. Stay near the center of the boards, wait for a stable moment before each jump, and turn the camera before crossing to the next platform so the landing is straight ahead instead of diagonal.
Once you have the eighth red coin, continue to the end platform and stomp the blue switch. This unlocks blue Vanish Cap blocks throughout the game and lets you save, but it still is not the star itself. The Power Star appears inside the wire cage next to the switch platform.
If your starting Vanish Cap has worn off by then, use the nearby blue block to refresh it, pass through the cage, and collect the star. That is star 42. If you hit the switch and leave without taking the star, the switch remains activated for future stages, but the course star still stays uncollected until you do another full red-coin run and grab it from inside the cage.
- All eight red coins in Vanish Cap Under the Moat are collected.
- The blue switch has been pressed.
- Star 42 has been taken from inside the cage and saved.
Catch MIPS for star 43
Back in the basement, look for the yellow rabbit MIPS in the halls around the Hazy Maze Cave, Lethal Lava Land, and Shifting Sand Land side of the floor. On this route he should be available already, because his first appearance only requires 15 stars and you are far beyond that total now.
Do not spend too long running directly behind him in a straight line. He turns sharply and wastes your momentum. Instead, keep the camera wide, cut across his path, and meet him at corners or narrow hall sections. A dive or quick grab as he turns is much more reliable than a long chase from the rear.
When you catch him, he immediately gives you a Power Star. Pick it up for star 43. If you do not see him anywhere, check whether you already took his first star earlier on this file. This chapter assumes you saved him for now, but the rabbit does not respawn endlessly for extra stars.
- Found MIPS in the basement corridors.
- Intercepted and caught him instead of tailing him forever.
- Collected star 43.
Talk to the basement Toad for star 44
For the last star in this chapter, go to the Hazy Maze Cave room and face the Toad standing near the black pool entrance. Speak to him to receive the basement Toad star. The Power Star appears beside him immediately after the conversation.
Collect it for star 44 and save again. This locks in the chapter total before you move on to Dire, Dire Docks.
If this Toad only gives advice and no star appears, the most likely explanation on this route is that you already collected his reward earlier. In the original Nintendo 64 game, this basement Toad becomes available well before this point, so by the time you are following the 44-star route total he should already be able to award it.
- Spoke to the Toad beside the Hazy Maze Cave pool.
- Collected star 44 from next to him.
- Saved with 44 total stars.
Before you move on
- The outside moat is drained and the entrance hole by the waterfall is open.
- Blue Vanish Cap blocks are now active throughout the castle and courses.
- You collected exactly three stars in this chapter: star 42 in Vanish Cap Under the Moat, star 43 from MIPS, and star 44 from the basement Toad.
- Your running total is now 44 stars before entering Dire, Dire Docks.
References for this chapter
- SUPER MARIO 64
- The Secret Under the Moat - Super Mario Wiki, the Mario encyclopedia
- Super Mario 64/Basement — StrategyWiki | Strategy guide and game reference wiki
- MIPS - Super Mario Wiki, the Mario encyclopedia
- Mushroom Castle (Super Mario 64) - Super Mario Wiki, the Mario encyclopedia
- Super Mario 64/Castle Secret Stars — StrategyWiki
Dire, Dire Docks: open the route to Bowser
Open the 30-star Big Star Door in the castle basement and use this chapter for stars 45, 46, and 47 in the original Nintendo 64 release of Super Mario 64. This route only takes Board Bowser's Sub, Chests in the Current, and Through the Jet Stream. The important basement change happens after Board Bowser's Sub: the Dire, Dire Docks portal shifts to the back of the room and uncovers Bowser in the Fire Sea. The submarine itself is still present inside the course until after Bowser in the Fire Sea is cleared, so do not confuse those two events. Leave Pole-Jumping for Red Coins, The Manta Ray's Reward, Collect the Caps, and the 100-coin star for cleanup.
Enter the 30-star room and recognize both caverns
From the basement hub, unlock the 30-star Big Star Door and follow the long hallway to the water wall at the end. For now, that water portal is Dire, Dire Docks. Enter it to drop into the first cavern, a broad pool with a whirlpool on the floor, a large fish circling nearby, and an underwater tunnel leading to a second cavern with Bowser's submarine.
For this chapter, your targets are stars 45 through 47 only. When practicing the route, keep your swimming calm and deliberate. If your air is running low, surface in the cavern you are already in instead of forcing the next objective underwater.
- 45: Board Bowser's Sub
- 46: Chests in the Current
- 47: Through the Jet Stream
Star 45: Board Bowser's Sub
As soon as you land in the water, dive toward the tunnel in the wall of the first cavern and swim through it into the submarine dock. Once you emerge, angle up to the wooden boardwalk along the wall and climb out there. Do not waste time trying to jump from the water straight onto the submarine deck.
On the boardwalk, step on the purple floor switch near the dock edge. This creates a temporary staircase of brown blocks rising toward the submarine. Run up the blocks, jump onto the top of the sub if needed, then walk across the deck to the Power Star on the far side and collect it.
After taking this star, return to the basement hallway and look at the room again. The Dire, Dire Docks portal has moved to the back, and the hole to Bowser in the Fire Sea is now exposed in front. That room change happens now. The submarine inside the course does not disappear yet; that happens only after Bowser in the Fire Sea is beaten later.
- Swim through the tunnel to the submarine dock
- Press the purple switch on the boardwalk
- Use the brown steps to board the sub and take the star
Star 46: Chests in the Current
Re-enter the course. This mission is in the first cavern around the whirlpool, so stay in the opening area and dive straight down. The danger is not the puzzle itself but drifting over the center and getting pulled into the whirlpool. Keep to the outer edge, line up each chest from a distance, and swim in short bursts.
Use one fixed viewpoint so the order stays clear: face the tunnel entrance from the whirlpool area. Open the chest behind the whirlpool beside the clam first. Second, open the chest below the tunnel entrance next to the seaweed and nearby coins. Third, open the chest behind the whirlpool on the right side. Fourth, open the chest directly in front of the whirlpool.
Each correct chest releases an air bubble, so collect the bubble before moving to the next one. If you open a wrong chest, the puzzle resets; back away, regain control, and restart from the first chest. When the order is correct, the star appears by the wall to the left of the tunnel entrance. Do not cut straight across the whirlpool to reach it. Circle around from the outside, then angle in for the pickup.
- Face the tunnel entrance to set the chest landmarks
- Open the chests in the order: clam side, tunnel side, right rear, front
- Approach the spawned star from the outer edge, not across the whirlpool
Star 47: Through the Jet Stream
This mission takes place in the second cavern and expects the Metal Cap in the original Nintendo 64 game. Re-enter Dire, Dire Docks, swim through the tunnel to the submarine dock, and head down to the floor grate that emits bubble rings. Your first job is not the star itself. You must pass through five consecutive rings from the grate. If you miss a ring or drift out of line, the count breaks and you start over.
Hover near the ring path and swim through each ring cleanly as it forms. After the fifth ring in a row, the Power Star appears above the grate in the strong current. Now separate the second part of the mission from the first: surface, climb to the boardwalk, and hit the green Metal Cap block there.
With the Metal Cap active, make a quick return to the water and sink straight down toward the grate. The current that blocks normal swimming will no longer matter while metal. Walk directly into the star. If the cap timer feels too short because you surfaced too far away or missed your line, do not struggle against the current. Surface again, get a fresh Metal Cap, and make another clean descent.
- Swim through five bubble rings in a row at the floor grate
- Surface only after the star appears
- Use the Metal Cap to sink through the current and collect the star
What this unlocks next
At 47 total stars, this course has done everything the main ending route needs from Dire, Dire Docks. The portal remains at the back of the basement room, and the newly uncovered hole in front leads to Bowser in the Fire Sea.
Do not expect the moving poles for Pole-Jumping for Red Coins yet if you have not beaten Bowser in the Fire Sea. Those poles are tied to the submarine leaving later. For now, the important progress check is simple: the Bowser stage entrance is open, and your counted total should be 47 stars.
- Total is 47 stars
- The Bowser in the Fire Sea hole is open in the basement room
- Optional Dire, Dire Docks stars remain uncollected for later cleanup
Before you move on
- You collected Board Bowser's Sub, Chests in the Current, and Through the Jet Stream in Dire, Dire Docks on Nintendo 64.
- Your running total is 47 Power Stars before entering Bowser in the Fire Sea.
- In the basement, the Dire, Dire Docks portal now sits at the back of the room and the Bowser in the Fire Sea hole is uncovered in front.
- You have not added Pole-Jumping for Red Coins, The Manta Ray's Reward, Collect the Caps, or the 100-coin star to the printed 70-star route total.
References for this chapter
- SUPER MARIO 64
- Super Mario 64/Dire, Dire Docks — StrategyWiki
- Dire, Dire Docks - Super Mario Wiki, the Mario encyclopedia
- Board Bowser's Sub - Super Mario Wiki, the Mario encyclopedia
- Chests in the Current - Super Mario Wiki, the Mario encyclopedia
- Through the Jet Stream (Dire, Dire Docks) - Super Mario Wiki, the Mario encyclopedia
Bowser in the Fire Sea: the upstairs key
After you clear Board Bowser's Sub, the water portal in the Dire, Dire Docks room slides to the back and uncovers the hole for Bowser in the Fire Sea. In the Nintendo 64 original release, this stage has one route star here: the eight-red-coin star. Take that as star 48, then re-enter and beat Bowser for the upstairs key. The key opens the castle's upper floor, but it does not increase your Power Star count, so the total stays at 48.
Enter the stage and survive the opening lava ride
Drop through the hole at the back of the Dire, Dire Docks room. You start on a tiny stone platform over lava with a moving mesh raft ahead. Step onto the raft and stay centered as it carries you forward.
When the raft dips under the lava, jump to the pair of safe stone platforms on the left, wait a moment, then hop back onto the raft when it rises again. Ride it to the far end, then cross the blue sinking platforms to the broad platform with a Bully, three Goombas and a Spinning Heart.
Use this first heart as a reset point. If lava knocks you backward, steer for solid ground, then run circles through the heart until your health is restored before you climb any higher.
- Reach the first heart platform safely.
- Use the heart and nearby coins before pushing on if you took lava damage.
Collect the first four red coins before you leave the cage section
From the heart platform, take the narrow metal path that climbs away from the main route. Red coin 1 floats above the opening at the top of that path. Take it, then return toward the moving pole near the heart.
Jump from the first moving pole to the large tilting platform and grab red coin 2 above it. Cross to the second moving pole and leap into the mesh cage at the top. Red coin 3 is in the back corner of that cage.
Now wake up the square elevator inside the cage by stepping on it, but get off at once. When the elevator rises, it leaves a gap underneath with red coin 4 floating in the middle. Drop straight into that hole for the coin, then get back onto the elevator route. This is the easy coin to forget, so do not leave the cage area until you have it.
- Have all 4 lower red coins before riding the elevator away.
- Make sure the hidden coin under the elevator is already collected.
Climb through the middle section for red coins five and six
Ride the elevator up and follow the path to the next tier. Long jump past the flamethrower gap when the flame is down, then go up the short slope. A side path on the right leads to a round stone platform with a Bully and red coin 5 above the center. Knock the Bully away if it crowds you, then take the coin.
Continue along the main route. Cross the hanging grate, then the moving platforms, and keep going until you reach the rising blue platforms arranged like steps over lava. Wait for a full rise instead of rushing. Red coin 6 hangs above one of the upper blue steps, so let that platform reach its peak and jump up for it.
If you mistime a jump here and touch lava, steer to the nearest broad stone join rather than the narrow moving steps. Heal at the next heart when you get there.
- Red coin 5 taken from the Bully side platform.
- Red coin 6 collected from the rising blue step without skipping past it.
Finish the last two red coins and take star 48
Past the moving stair section, follow the stone road through the last lava box. Watch the fire spitters and move only when the flame clears. Red coin 7 is near the second fire spitter on this stretch.
Keep going to the final Spinning Heart. From there, use the moving poles on the last ascent. Red coin 8 is above the last moving pole before the springboard area. Ride that pole upward and jump for the coin at the top of its rise.
Once all eight are collected, the Power Star appears on the high stone tower beside this final pole section. From the nearby wire platform, set up a clean wall kick onto the tower top and grab the star. If the wall kick fails, land back on the broad ledge or on a pole and try again. Taking the star ends the stage immediately, so this locks in star 48 and sends you back to the castle.
- All 8 red coins collected, including the one under the elevator.
- Red-coin star taken as star 48.
Re-enter and run the direct route to Bowser
Drop into Bowser in the Fire Sea again through the same basement hole. This time ignore the red-coin detours and follow the main route all the way up: moving raft, blue sinking platforms, first heart platform, pole and tilting platforms, cage elevator, flamethrower gap, slope, hanging grate, moving platforms, rising blue steps, final heart, moving poles, then the springboard into Bowser's pipe.
Do not hurry through the last climb just because the boss is close. The safest pauses are the broad stone platforms near each heart and the wider landings before the last pole section. Avoid stopping on narrow beams, tilting pieces or platform edges.
- Reach Bowser's pipe on a fresh run after claiming the red-coin star.
- Top off your health at the last heart before the boss if needed.
Defeat Bowser and claim the upstairs key
This fight still ends after one successful bomb hit. Bowser's extra danger is the arena tilt. He opens by slamming down and tipping the platform toward himself, and the floor can tilt again after missed throws. Whenever that happens, run uphill at once so you do not slide off the low edge.
Stay away from the rim until the floor settles. Circle behind Bowser and grab his tail, or bait his charge and let him hit the edge so he staggers for an easier opening. Spin him, aim for one of the bombs around the arena, and release only when you have a clear line.
If you miss, re-center Mario first instead of chasing Bowser near the drop. One clean bomb throw wins the fight here. After the cutscene, take the upstairs key. Your castle progress advances, but your Power Star total remains 48 because keys do not count as stars.
- Land one successful bomb throw on Bowser.
- Leave with the upstairs key and still 48 counted stars.
Before you move on
- You entered Bowser in the Fire Sea from the hole uncovered after Board Bowser's Sub.
- You collected all eight red coins, including the one revealed beneath the elevator in the cage area.
- You claimed the Bowser in the Fire Sea red-coin Power Star as star 48.
- You re-entered the stage, reached Bowser, defeated him with one bomb hit, and received the upstairs key.
- Your running Power Star total is still 48 because the key is not a star.
References for this chapter
- Bowser in the Fire Sea - Super Mario Wiki, the Mario encyclopedia
- Super Mario 64/Bowser in the Fire Sea — StrategyWiki | Strategy guide and game reference wiki
- Super Mario 64 - Guide and Walkthrough - Nintendo 64 - By NDS_Master - GameFAQs
- Nintendo 64 games manuals | Nintendo 64 | Support | Nintendo UK
- SUPER MARIO 64
Snowman's Land: ice and shell routes
Reach Snowman's Land from the upstairs mirror room and take four route stars here: Chill with the Bully, In the Deep Freeze, Whirl from the Freezing Pond, and Shell Shreddin' for Red Coins. This chapter raises the route total from 48 to 52. Leave Snowman's Big Head, Into the Igloo, and the 100-coin star for cleanup.
Find the course entrance in the mirror room
After Bowser in the Fire Sea, use the upstairs key and climb to the castle's upper floor. Go to the room with the large wall mirror. Snowman's Land is hidden there.
From the doorway, face the mirror. The snowy painting appears only in the reflection, on the left side. Run and jump into the real left wall where that reflected painting should be. Mario passes through and enters Snowman's Land.
- Entered the hidden upper-floor course through the mirror room wall
- Route total before this course: 48
Star 49: Chill with the Bully
From the start, turn right and cross the short gap to the ramp leading to the isolated ice platform. The water around this arena is freezing water. It knocks Mario back and drains health fast, so do not treat it like safe swimming water.
Fight the Chill Bully near the center of the platform. Let it charge, sidestep, then answer with one controlled punch or kick. Short attacks are safer than full strings because the slippery floor can carry Mario outward after contact.
Keep turning the fight so the Bully is facing the edge and you are facing open ice behind it. A few solid hits will push it into the freezing water. If you are knocked in, get back onto the nearest platform immediately and grab coins before trying again. When it falls, the star appears above the arena.
- Reached the right-side ice arena
- Knocked the Chill Bully off the platform
- Star total: 49
Star 50: In the Deep Freeze
Back at the start, head to the large clear ice sculpture near the entrance side of the course. This mission is much closer to the start than the giant snowman area. You do not need the igloo or Vanish Cap.
Use the opening at the back of the sculpture for the easiest entry. Walk inward on the slippery floor until you reach the middle area with the opening above. Jump up through that gap onto the inner ledge.
Turn right along the ledge and jump up once more to the next ledge. From there, continue forward and drop through the hole into the center chamber to land on the star. Use small hops and careful turns inside; wild running makes Mario slide into walls and costs time.
- Found the ice sculpture near the course entrance
- Climbed to the inner ledges inside the ice block
- Dropped into the center for the star
- Star total: 50
Star 51: Whirl from the Freezing Pond
Go from the start toward the freezing pond with the Spindrifts spinning across the water. The ledge beyond this pond is too high for a normal jump.
Stand on solid ground at the pond edge, line up with a Spindrift, then jump onto it. The contact throws Mario upward in a spinning launch. Steer immediately toward the snowy ledge beyond the pond and aim for the flat middle, not the rim.
Once you land on the upper shelf, break the yellow box that contains the star for this mission. Do not hit the other yellow box yet; that one is the shell box used for the next star. If the launch comes up short, retreat and try again from solid ground instead of scrambling around in the freezing water.
- Used a Spindrift bounce to clear the ledge
- Picked the star box rather than the shell box
- Star total: 51
Star 52: Shell Shreddin' for Red Coins
Stay in the course. This mission uses the same upper area beyond the freezing pond, but now you want the other yellow box, the one that gives a shell. Before that, collect the two easy red coins sitting out on the snowfields so you have less to chase later.
Use another Spindrift launch to reach the upper shelf. Break the shell box and hop on. Ride the shell along the snowy stretch there to collect the next four red coins in a smooth pass. Make gentle turns. Sharp steering is the easiest way to bounce into freezing water or lose the shell.
After the upper four, drop beneath the platform that holds the Chill Bully arena and take the final two red coins under that overhang. When you collect the eighth coin, the star appears back at the star marker near the course start. Dismount safely and return to claim it. If the shell breaks early, go back to the same box and restart the shell section rather than forcing the route on foot.
- Collected the two easy snowfield red coins
- Used the shell for the four upper-path red coins
- Picked up the two red coins under the Chill Bully platform
- Returned to the course start marker for the star
- Star total: 52
What to leave for later
Do not stop for Snowman's Big Head during the ending route. The windy bridge by the giant snowman and the summit path are optional here.
Into the Igloo is also optional, as is the 100-coin star. If you dislike one of this chapter's required stars, you can substitute another optional star elsewhere, but then your personal total will no longer match this guide's printed route count exactly.
- Four required Snowman's Land route stars collected
- Optional stars saved for cleanup
Before you move on
- You found Snowman's Land through the hidden left wall in the upstairs mirror room.
- You collected Chill with the Bully, In the Deep Freeze, Whirl from the Freezing Pond, and Shell Shreddin' for Red Coins.
- Your cumulative route total is now 52 stars.
- Snowman's Big Head, Into the Igloo, and the 100-coin star remain available for cleanup.
References for this chapter
- SUPER MARIO 64
- Snowman's Land - Super Mario Wiki, the Mario encyclopedia
- Chill with the Bully - Super Mario Wiki, the Mario encyclopedia
- In the Deep Freeze - Super Mario Wiki, the Mario encyclopedia
- Whirl from the Freezing Pond - Super Mario Wiki, the Mario encyclopedia
- Shell Shreddin' for Red Coins - Super Mario Wiki, the Mario encyclopedia
- Super Mario 64 - Guide and Walkthrough - Nintendo 64 - By Coffee - GameFAQs
Wet-Dry World: water-level puzzles
Enter the large Skeeter painting on the castle's second floor after earning the upstairs key. This chapter is for the original Nintendo 64 release and uses the English N64 mission names. Wet-Dry World changes depending on water height. The higher on the painting you enter, the higher the starting water level. Inside the course, diamond-shaped Crystal Taps reset the water to the height of the tap you touch, so you can fix a bad setup without leaving. This route takes Shocking Arrow Lifts!, Top o' the Town, Secrets in the Shallows & Sky, and Express Elevator--Hurry Up!, raising the overall file total from 52 to 56. Go to Town for Red Coins, Quick Race Through Downtown!, and the 100-coin star stay for cleanup.
Read the stage before you start moving
When Mario lands, face the long bridge behind him. That bridge, the tall stone tower straight ahead, the thin elevator cage on the upper tiers, and the narrow board with two Amps are the main landmarks for this chapter. If you enter too low or too high for the star you want, leaving and re-entering is usually faster than forcing an awkward climb.
Use high water for stars 53 and 54. For star 55, any water level can work because the route uses both lower and upper tiers, but mid to high water keeps the climbs simpler. For star 56, set the water to its lowest level before you begin the real attempt.
If you fall but stay in the course, recover on solid ground first, then decide whether to retouch a Crystal Tap or restart. Wet-Dry World is much easier when you deliberately control the water instead of improvising every jump.
- You know that painting entry height sets the starting water level.
- You know that Crystal Taps change the water again inside the course.
- You know high water is best for stars 53 and 54, while the lowest water is required for star 56.
Star 53: Shocking Arrow Lifts!
Enter the painting high. From the start, turn around onto the long bridge and run to its far end. Step on the purple floor switch there to create temporary steps up the side of the tall stone structure ahead. Climb those steps and touch the Crystal Tap on top. This sets the water to the intended mid height for the mission.
Dive or jump back into the water and swim toward the floating wooden planks below the orange-brick platforms on the far side of the course. Climb onto the square plank, then hop to the gray checkered platform with the Arrow Lifts. Wait for the circling Amp to move away from your landing line before boarding.
Ride the first Arrow Lift, then transfer to the next one only when you have a clear landing. Do not rush the second transfer if the Amp is passing through. On the far side, face the yellow block beside the flame thrower and break it for the star. If you get zapped into the water, circle back through the same plank route instead of trying to jump up from directly below the block.
- Used the bridge switch and the tall-tower Crystal Tap.
- Reached the Arrow Lifts from the floating planks.
- Crossed the lifts safely and broke the yellow block for star 53.
Star 54: Top o' the Town
Enter high again so the upper ledges are easier to reach. From the start area, use the water to reach the stacked brown ledges that spiral up toward the highest terrace. Climb from ledge to ledge until you reach the upper tier with the Chuckya. You can throw it if you want, but the safer play is to give it space and keep moving.
From that top terrace, line up the camera so the long narrow board points straight away from you. Walk or use small hops across it while watching the two Amps. Big jumps are the main way to get clipped off the board here. At the far end, wait a beat if the flame thrower cycles in front of your jump.
Jump to the spinning platform, then to the next ledge, and break the yellow block above it for the star. If you fall into the water after crossing the board, swim back to the stacked ledges and climb again. If you fall before the board, simply rebuild the same route upward; you do not need a special trick route for this star.
- Climbed to the top terrace with the Chuckya.
- Crossed the narrow Amp board with the camera lined up.
- Broke the upper yellow block for star 54.
Star 55: Secrets in the Shallows & Sky
This mission has five secret triggers hidden around the uptown. A number appears each time you trigger one. Start low in the course and clear the two bottom secrets first. Go behind the structure with the cannon on top and push the lower block until it exposes the hidden secret underneath. Then use that same block as a step and punch the yellow block above it for the second secret.
Next, climb to the second tier with the Heave-Ho and find the other pushable block set into the wall. Shove it fully into the opening for the third secret. Continue upward toward the thin elevator cage. Beside that cage is a purple switch; press it and use the temporary stairs to reach the top of the cage, then punch the yellow block there for the fourth secret.
For the fifth secret, move to the small pillar on the third layer with an Amp circling it. Wait until the Amp swings away, then jump up and hit the yellow block on top. After the fifth secret, do not search the upper town for the star. The Power Star appears back on the long bridge where you started the course. Drop safely to the water or retrace the upper ledges toward the start, then collect the star from that bridge.
The two optional downtown missions use the submerged town beyond the high-water section and are not part of this route.
- Triggered the secret under the lower push block.
- Triggered the yellow block above the same lower block.
- Pushed the second-tier block fully into its wall opening.
- Hit the yellow block above the elevator cage.
- Hit the yellow block on the Amp pillar and returned to the starting bridge for star 55.
Star 56: Express Elevator--Hurry Up!
This star requires the water at its lowest level. Enter the painting as low as possible, or touch the lowest Crystal Tap until the course is nearly drained. Go to the tall thin cage that holds the elevator shaft and ground-pound the brown block covering the hole at the bottom. That hole is your re-entry point later, so do not skip this setup.
Now climb to the third tier. Use the Heave-Ho on the second tier to gain height, then continue to the platform beside the cage. Press the purple switch there to create temporary stairs up the outside. Climb to the roof of the cage and stand on the half of the elevator platform opposite the visible star. When you step onto it, the platform starts descending.
The trick is not to stay on top and ride it down like a normal elevator. As soon as it drops, jump off into the shaft opening below and ground-pound late to shorten the fall. Land in the opened bottom hole, then immediately get back onto the elevator from inside the cage before it rises away. A quick backflip, wall kick, or simple climb onto the interior edge can all work, but make the move at once because the timing is the entire mission.
Once you are standing on the interior platform, let it carry Mario back up to the star. If you miss the boarding timing, reset the water low and repeat the full sequence. Do not waste time trying to force your way through the cage wall from outside.
- Water lowered to the minimum.
- Bottom block under the shaft broken open.
- Outside stairs used to reach the cage roof.
- Dropped into the shaft and boarded the rising platform from inside the cage for star 56.
Before you move on
- Power Stars 53, 54, 55, and 56 are collected in Wet-Dry World.
- The file total has increased to 56 stars.
- Go to Town for Red Coins, Quick Race Through Downtown!, and the 100-coin star remain available for cleanup.
- You understand Wet-Dry World's two water controls: painting entry height sets the opening water level, and Crystal Taps reset it inside the course.
References for this chapter
- SUPER MARIO 64
- Wet-Dry World - Super Mario Wiki, the Mario encyclopedia
- Shocking Arrow Lifts! - Super Mario Wiki, the Mario encyclopedia
- Top o' the Town - Super Mario Wiki, the Mario encyclopedia
- 5 Secrets in the Shallows & Sky - Super Mario Wiki, the Mario encyclopedia
- Express Elevator--Hurry Up! - Super Mario Wiki, the Mario encyclopedia
- Super Mario 64/Wet-Dry World — StrategyWiki
Tall, Tall Mountain: summit, monkey and slide
Enter the small painting of mushroom platforms on the castle’s second floor, directly behind the staircase to the third floor. This route collects Tall, Tall Mountain stars 57 through 60 in the original Nintendo 64 mission order used by this guide: Scale the Mountain, Mystery of the Monkey Cage, Scary 'Shrooms, Red Coins, and Mysterious Mountainside. Breathtaking View from Bridge, Blast to the Lonely Mushroom, and the 100-coin star stay for cleanup.
Climb route and mountain landmarks
From the start, face the three Goombas and take the uphill path ahead. Two broken gaps block the first stretch. Long jump both of them with the camera centered before takeoff. Missing the first gap can drop you to lower ground and cost time, but missing the second usually means a lost life.
Beyond the gaps are the mushroom platforms used later for red coins. Keep moving across them and continue to the wall ledges with Monty Moles. Do not stop beside a mole hole; their rocks are more dangerous when you hesitate on a narrow footing. Past that section, the route bends onto a safer dirt path with Bob-ombs and a Chuckya, then crosses a wooden bridge.
After the bridge you reach the waterfall side of the mountain. There are two monkeys on this course. The lower one near the waterfall mostly causes trouble and can steal Mario’s cap, while the mission star uses the monkey at the summit. Keep going past the lower monkey and Fly Guy, then cross the rolling log to the far side.
After the log, either weave up the iron-ball slope or use the side path that goes around it. Both routes meet at a large upper gap. Long jump that gap, then deal with the Fwoosh. This cloud can shove Mario backward and knock off his cap, so stop just outside its wind, point the camera straight down the path, and run through cleanly instead of turning in front of it. Past the wind are rough grass, a narrow stone bridge over the waterfall, and the final rise to the summit.
- Know the full route: two gaps, mushroom platforms, Monty Mole wall, Bob-omb path and bridge, waterfall area, rolling log, iron balls or side path, upper gap, Fwoosh, grassy patch, waterfall bridge, summit
- Use long jumps for the major gaps
- Treat the lower monkey as a distraction and save the summit monkey for star 58
Star 57: Scale the Mountain
Follow the main route all the way to the peak. After the upper gap, ignore the suspicious wall beside the Fwoosh for now and stay on the normal path. Cross the narrow bridge over the waterfall and take the last incline to the top.
The star sits openly on the summit. If the Fwoosh already knocked you down to an earlier solid section, do not restart immediately. Tall, Tall Mountain often lets you recover by reclimbing from that lower ledge. If you get knocked all the way off the course, re-enter and climb again.
- Reach the summit by the main mountain route
- Collect Scale the Mountain
- Running total reaches 57
Star 58: Mystery of the Monkey Cage
Climb back to the summit. The top star is gone, and the correct Ukkiki is now running around the peak. Stay on the wide summit ground while chasing it so you are not grabbing near an edge. Catch it and choose to let it go.
After you release it, follow it back down the upper path toward the waterfall side. Do not get distracted by the hidden slide wall. The monkey stops by the hanging cage near the waterfall. Speak to it there so it jumps onto the cage and drops it, releasing the star onto the piece of ground below.
From the bridge side, line yourself up and drop to the ledge below the cage to grab the star. Aim for the solid landing area under the broken cage, not the open drop beyond the mountain. If you miss onto lower safe ground, climb back up and try again. Falling completely off the mountain costs a life.
- Catch the summit monkey, not the lower waterfall monkey
- Release it and follow it to the cage area
- Trigger the cage drop and collect the star from the ledge below
- Running total reaches 58
Star 59: Scary 'Shrooms, Red Coins
This mission splits the eight red coins into two clean groups. The first four are on the mushroom platforms right after the two opening gaps. Collect those before advancing farther up. Use short running jumps between the mushrooms, and keep your landings near the centers. One of the mushroom platforms can warp Mario to the cannon area, so do not rely on random hops if you want to stay on route.
After the fourth mushroom coin, continue to the wall section with the Monty Moles. The final four red coins are spread along the ledges that climb that wall. Take them in climbing order so you are always moving upward instead of doubling back under rock fire. If a mole appears in front of you, keep running past its position rather than stopping beside it.
When you take the eighth coin, the star appears on the separate mushroom platform beside this wall section, at the star marker. The safest pickup is to step back to a comfortable ledge, line up the camera, and jump across in control. Do not rush a blind leap from an awkward angle just because the star spawned nearby.
- Collect 4 red coins on the early mushroom platforms
- Collect 4 red coins on the Monty Mole wall ledges
- Jump to the spawned star on the nearby mushroom platform
- Running total reaches 59
Star 60: Mysterious Mountainside
Climb to the upper part of the mountain again. After the last big long jump, stop by the Fwoosh instead of running on to the bridge. The hidden entrance is the square wall panel beside and slightly behind the Fwoosh, marked by a short trail of coins. Jump into that wall to enter the secret slide.
The slide begins with a straight downhill stretch and a turn, then feeds into a long U-shaped bend. At the fork after that bend, do not continue straight down the open main chute. That path ends in a fatal drop. Shift onto the wooden side track instead. Stay centered as you slide over its broken sections, then ride through the twisting tunnel and the narrow outdoor strip without making sharp corrections.
The last section ends in a jump into the final room. Land cleanly and drop to the star platform. If you fall off the slide and lose a life without getting a Game Over, jumping back into Tall, Tall Mountain returns you to the slide start, which makes retries much faster than reclimbing the whole mountain.
- Find the coin-marked hidden wall beside the Fwoosh
- Enter the secret slide
- At the fork, move onto the wooden side track instead of the dead-end chute
- Finish the slide and collect the star
- Running total reaches 60
Before you move on
- You have collected Tall, Tall Mountain stars 1 through 4 in this route: Scale the Mountain, Mystery of the Monkey Cage, Scary 'Shrooms, Red Coins, and Mysterious Mountainside.
- Your total Power Star count is now 60.
- Breathtaking View from Bridge, Blast to the Lonely Mushroom, and the 100-coin star are still open for cleanup.
- You are ready to leave Tall, Tall Mountain and continue the 70-star ending route.
References for this chapter
- SUPER MARIO 64
- TMK | Reference | Guides & FAQs | Super Mario 64
- Tall, Tall Mountain - Super Mario Wiki, the Mario encyclopedia
- Mystery of the Monkey Cage - Super Mario Wiki, the Mario encyclopedia
- Scary 'Shrooms, Red Coins - Super Mario Wiki, the Mario encyclopedia
- Mysterious Mountainside - Super Mario Wiki, the Mario encyclopedia
Tiny-Huge Island: change scale and enter the cave
This chapter covers stars 61 through 64 in the original Nintendo 64 version of Super Mario 64. Tiny-Huge Island is the upstairs course in the room just left of Wet-Dry World. The left painting leads to Tiny Island, where Mario is large relative to the terrain; the right painting leads to Huge Island, where Mario is small; the center painting is only decoration. Shrinker Pipes inside the stage switch you between the two island states, and this route depends on using the correct pipe for the correct job. The four route stars here are Pluck the Piranha Flower, The Tip Top of the Huge Island, Rematch with Koopa the Quick, and Wiggler's Red Coins. Five Itty Bitty Secrets, Make Wiggler Squirm, and the 100-coin star stay for cleanup.
Know which entrance and pipe you actually need
Go to the second-floor room left of Wet-Dry World. Enter the left painting when you want Tiny Island and the right painting when you want Huge Island. The center painting is fake. Inside the course, keep two landmarks separate: the near-start Shrinker Pipe is the fast route to the giant Piranha Flower platform, while the upper pipe on the mountain route is the one that helps with the summit path and Koopa setup. Mixing those up wastes time and sends you to the wrong part of the course.
- Left painting leads to Tiny Island.
- Right painting leads to Huge Island.
- Center painting is decoration only.
- Near-start pipe is for the Piranha Flower platform; upper pipe is for the mountain and Koopa routes.
Star 61: Pluck the Piranha Flower
Start from the left painting so you enter Tiny Island. From the starting patch, cross the small platforms immediately near Mario and head for the nearby Shrinker Pipe over the water. This is the intended quick route. Do not climb all the way toward the purple switch or upper mountain pipe for this mission.
The pipe drops you onto Huge Island beside the platform with the five giant Piranha Flowers. Fight them one at a time around the outside edge of the platform so you do not wake several at once. Let a flower rise, move off its center line, then hit it with a punch or kick as it opens. After all five are defeated, the star appears right beside the pipe on that platform.
- Enter through the left painting.
- Use the near-start Shrinker Pipe.
- Defeat all five giant Piranha Flowers on the Huge Island platform.
- Pick up the star that appears beside the pipe.
Star 62: The Tip Top of the Huge Island
Enter through the right painting to begin on Huge Island. Swim to shore and follow the mountain path upward. This route is mostly a careful climb, so slow down at the windy planks and narrow ledges. Before each thin crossing, straighten the camera and walk instead of charging ahead. If wind starts pushing Mario, stop correcting in panic; regain your line, then continue.
Keep climbing past the cannonball area and the upper pipe, but stay on the mountain instead of entering the pipe. Near the summit, do not stop at the race bridge area and assume the mission is done. The reward is inside a yellow block near the peak. Break the block to make the Power Star appear, then collect it.
- Start from the right painting on Huge Island.
- Climb the mountain route without using the cannon.
- Pass the upper pipe and continue to the peak.
- Break the yellow block near the summit for the star.
Star 63: Rematch with Koopa the Quick
Start from the left painting on Tiny Island. Drop to the purple switch area, use the temporary blocks to climb upward, and take the upper Shrinker Pipe. That pipe places you on Huge Island near the upper route, which is the convenient setup for reaching Koopa the Quick. Continue along the path past the iron-ball section until you reach the fenced grassy area where Koopa waits.
Talk to Koopa and accept the race. The finish is the flag in Windswept Valley, not the summit. At the start, cut inside the nearby fenced patch instead of running around its outside edge, then stay clean through the iron balls and the windy bridge. A safe run beats a reckless fast one here. When you reach the flag, stay there. Koopa must physically arrive and finish speaking before the star appears.
- Use the purple-switch climb and upper pipe from Tiny Island.
- Find Koopa in the fenced grassy area on Huge Island.
- Race to the Windswept Valley flag.
- Wait for Koopa to arrive before taking the star.
Star 64: Wiggler's Red Coins
If the cannon is still shut, open it on Tiny Island first. Enter through the left painting and go to the cannon location there to find the Bob-omb Buddy; talking to that Buddy opens the cannon for the course. After that, switch to Huge Island and travel to the corresponding cannon. This order matters: the Buddy is on Tiny Island, but the useful cannon shot for this mission is taken on Huge Island.
From the Huge Island cannon, aim at the lone tree on the cliffside and fire so Mario lands by the tree or grabs it. Move left past the large Goomba and cross the narrow wooden plank into the cave under Wiggler. This is the repeatable intended route, and you do not need to defeat Wiggler first. If the shot misses and you land safely below, circle back to the cannon and try again rather than forcing a bad jump up the cliff.
All eight red coins are inside this cave. Sweep the cave in one loop instead of chasing single missed coins: take the entry-side coins first, continue across the forward platforms, then clear the lower side ledges before finishing with the higher ledges and pillars. The cave punishes rushed jumps more than it punishes slow movement, so stop the camera before each narrow platform hop. If a high coin gives you trouble, clear the rest first so a fall only costs time, not the whole attempt. When all eight are collected, the star appears at the marker between the cave's central pillars, not on the ledge where you grabbed the last coin.
- Open the cannon by talking to the Bob-omb Buddy on Tiny Island.
- Use the Huge Island cannon to reach the lone cliff tree.
- Cross the narrow plank into the cave.
- Collect all eight red coins inside the cave.
- Take the star from the center marker between the pillars.
Before you move on
- You should collect exactly four stars here, raising the route total from 60 to 64.
- The four stars should be Pluck the Piranha Flower, The Tip Top of the Huge Island, Rematch with Koopa the Quick, and Wiggler's Red Coins.
- Five Itty Bitty Secrets, Make Wiggler Squirm, and the 100-coin star should still be left for the cleanup chapter.
References for this chapter
- SUPER MARIO 64
- Tiny-Huge Island - Super Mario Wiki, the Mario encyclopedia
- Pluck the Piranha Flower - Super Mario Wiki, the Mario encyclopedia
- Wiggler's Red Coins - Super Mario Wiki, the Mario encyclopedia
- Rematch with Koopa the Quick - Tiny-Huge Island - Super Mario 64 | Gamer Guides
- Super Mario 64 - Guide and Walkthrough - Nintendo 64 - By RJHarrison - GameFAQs
- Super Mario 64/Tiny-Huge Island — StrategyWiki
Tick Tock Clock: choose the clock speed
Use the upstairs key from Bowser in the Fire Sea to reach the castle's top floor and open the 50-star Big Star Door. Tick Tock Clock changes behavior based on the clock hand position when you jump into the face: 12 stops the machinery, 3 makes it move slowly, 6 produces irregular movement, and 9 makes it move quickly. For this route, take a stopped 12 o'clock entry for Roll into the Cage and The Pit and the Pendulums, then re-enter at 3 for the easier moving-hand setup in Get a Hand. Clearing these three missions gives stars 65 through 67 and leaves the clock's remaining named stars and 100-coin star for later cleanup.
Reach the course and set the clock correctly
After collecting the upstairs key from Bowser in the Fire Sea, go to the upper floor of the castle and open the large 50-star door. In the next room, face the giant clock and jump into its face to enter Tick Tock Clock.
This course changes depending on where the minute hand points when Mario enters. Use 12 to stop moving parts, 3 for slow movement, 6 for irregular movement, and 9 for fast movement. This chapter only needs 12 for the first two stars and 3 for the third.
If you miss the timing on entry, leave and try again instead of forcing an awkward climb. Tick Tock Clock is much safer when the course state matches the route you planned.
- Open the 50-star door on the upper floor
- Enter at 12 for stars 65 and 66
- Enter at 3 for star 67
- Reset immediately if the clock speed is wrong
Star 65: Roll into the Cage
Enter at 12 so the course is completely stopped. From the starting ledge, climb the early platforms through the front side of the clock, crossing the still pendulum and then the block platforms until you reach the first large hand area.
Continue past that hand and climb to the set of spinning platforms. Because you entered at 12, these are frozen in place, so treat them as normal footing and line up short jumps instead of rushing. Beyond them you will see the star inside a cage with a yellow conveyor leading straight into the opening.
Walk across the conveyor yourself and go directly into the cage for the star. In this setup the conveyor does not move at all, so do not stand there waiting for it to carry Mario. If you slip but land on a lower ledge within the course, calm the camera and climb back up. If you miss the structure entirely and fall into open space, you lose a life and must re-enter.
- Use a 12 o'clock stopped setup
- Climb to the spinning platforms past the first hand
- Cross the frozen platforms carefully
- Walk across the motionless conveyor into the cage
Star 66: The Pit and the Pendulums
Re-enter at 12 for another stopped layout. Follow the same climb you used for Roll into the Cage until you reach the cage area. This time, do not enter the opening. Jump over the conveyor and cage entrance and continue upward on the path behind it.
Ahead is a pole with an Amp circling it. Wait for the Amp to drift away, grab the pole, and climb to the platform above. From there move past the Heave-Ho and under the pair of yellow boxes. The next gap leads toward the pendulum section, and with time stopped the usual hazards become much easier to judge.
Cross to the middle platform between the two frozen pendulums, then hop to the far side and collect the star. Keep the camera pointed toward the landing before each jump, because the narrow ledges are easier to judge from a steady angle. If the Heave-Ho bumps you onto nearby footing, recover and continue. If it knocks you into the void, just reset with another 12 o'clock entry.
- Re-enter at 12
- Pass the cage instead of entering it
- Climb the Amp pole to the upper branch
- Cross the stopped pendulum gap for the star
Star 67: Get a Hand
For the third route star, re-enter at 3 so the clock moves slowly. This is the simple intended setup because the large hand will carry Mario across the gap. A stopped 12 o'clock entry makes this star much less convenient, so do not use the frozen setup here.
Climb only as far as the first large rotating hand that sweeps across the wide chasm. Stand on the platform near the hand's base and turn the camera so you can watch both the hand and the alcove holding the star. An Amp circles near the alcove, so it is worth waiting a moment for a clean opening.
Jump onto the hand near its base, where you have more room to balance than at the tip. Ride it across the chasm, then make a controlled forward jump into the alcove when the hand lines up with the star. If the Amp is passing through the opening, stay on the hand until you get a safer moment or step off as soon as the space clears. If you miss the alcove but survive on another platform, climb back to the hand route and try again. A full fall out of the course means re-entering at 3 for another slow setup.
- Enter at 3 for slow movement
- Climb to the first moving hand over the wide gap
- Ride from the base of the hand for better balance
- Jump into the alcove when the hand lines up with the star
Leave the remaining clock stars for cleanup
This ending route stops after the first three named Tick Tock Clock stars. Stomp on the Thwomp, Timed Jumps on Moving Bars, Stop Time for Red Coins, and the 100-coin star are all saved for the cleanup section.
If one of these missions gives you trouble, you can replace it with an easier optional star from another chapter and still continue toward the ending. If you do that, keep your own written tally, because the printed route assumes Tick Tock Clock contributes exactly these three stars here.
When this chapter is finished without substitutions, your Power Star total should be 67. That sets up the final secret-star chapter and then the 70-star staircase check.
- Leave stars 4 through 7 for the cleanup appendix
- Track any substitution on your own tally if you change the route
- Expected route total after this chapter: 67
Before you move on
- You reached Tick Tock Clock through the 50-star door on the castle's upper floor.
- You used a 12 o'clock stopped setup for Roll into the Cage and The Pit and the Pendulums.
- You walked across the stationary conveyor to collect Roll into the Cage instead of waiting for belt movement.
- You used a 3 o'clock slow setup for Get a Hand and rode the moving hand into the alcove.
- You left Stomp on the Thwomp, Timed Jumps on Moving Bars, Stop Time for Red Coins, and the 100-coin star for cleanup.
- Your running Power Star total is now 67 if you followed the printed route without substitutions.
Reach 70 stars
Enter this chapter with 67 counted Power Stars on the original Nintendo 64 route. The final three are one third-floor Toad star, the second MIPS basement star, and one Rainbow Ride course star collected out of menu order. That keeps the printed route exact: you will finish at 70 counted stars, made up of 58 course stars and 12 secret stars. The two Bowser keys still do not count as stars, and the Jumbo Star after the final Bowser fight will not raise the normal counter either. If you chose a substitute optional star earlier, you can still finish the game at 70, but the exact breakdown below assumes you stayed on the printed route.
Star 68: take the third-floor Toad star
Open the 50-star Big Star Door and climb to the castle's highest normal room, the one that contains Tick Tock Clock and the entrance area for Rainbow Ride. The correct Toad is in this room beside the clock, on the right side of the large face if you are looking toward Tick Tock Clock.
Walk up and speak to that Toad for the Power Star. Do not confuse him with the second-floor Toad near Tall, Tall Mountain. That second-floor castle star is intentionally being saved for the cleanup chapter.
If no star appears, check your save rather than wandering the whole castle. The common mistake here is speaking to the wrong Toad or already having collected this room's star on the file.
- Running total becomes 68.
- Correct Toad: the one in the Tick Tock Clock and Rainbow Ride room.
- Do not replace this pickup with the second-floor Toad near Tall, Tall Mountain.
Star 69: catch MIPS for the second basement star
Return to the basement. In the original Nintendo 64 game, MIPS appears once after 15 stars and a second time after 50 stars. On this route you already caught the first one earlier, so this visit is for the second basement rabbit star.
Search the open halls around the Hazy Maze Cave entrance, the Lethal Lava Land side, and the corridor that leads toward Dire, Dire Docks. When you see MIPS, do not stay directly behind him. He turns too sharply and will keep slipping away if you react late.
Instead, run a wider line than the rabbit does, cut across corners, and meet him from the side on a straight stretch. Press B when Mario is alongside him, not when he is still a full body length behind. If you miss, keep moving and set up another interception instead of spinning in place.
If MIPS is nowhere in the basement, first confirm that your star total is really at least 50. If it is, the other likely explanation is that you already caught his second appearance and simply forgot to count it.
- Running total becomes 69.
- Second MIPS is a separate secret star from the earlier rabbit catch.
- If MIPS is missing, check whether your file is below 50 stars or whether you already collected him.
Enter Rainbow Ride from the third-floor alcove
Go back to the third-floor clock room. Rainbow Ride is not behind a painting. Face Tick Tock Clock, then move to the raised alcove on the right wall. Jump onto the ledge there and drop through the small floor hole to enter the course.
When the mission menu appears, it does not matter if Cruiser Crossing the Rainbow is still listed first. In Super Mario 64, the menu does not lock you to the displayed mission. If you can physically reach another mission's star, you may collect it immediately.
That is exactly what this route does. You are taking Swingin' in the Breeze now and leaving the ship route, maze route, house route, and the rest of Rainbow Ride for the cleanup appendix.
- Correct entrance: third-floor floor hole in the wall alcove to the right of Tick Tock Clock.
- Do not wait for Swingin' in the Breeze to become the highlighted mission name.
- Keep this exact route star as number 70.
Star 70: Swingin' in the Breeze
At the start, board the first magic carpet and stay centered on it. Make only small corrections as it curves around the early obstacles. Your immediate goal is the cluster of four spinning platforms ahead. Step off onto them cleanly before the carpet leaves.
From the four spinning platforms, take the pole on the left and climb down to the lower branch. This is the key split the draft was missing. Do not continue onto the straight maze route and do not transfer to the separate carpet path on the right.
After dropping to the left branch, cross to the seesaw. Use it to reach the next section, then move onto the first hanging swing. The swing never settles into a harmless still position, so do not stand around waiting for that. Watch its arc, let it carry Mario toward the far side, and jump off when its motion gives you the forward distance you need.
Land on the falling-block path and keep moving. Hesitation is what makes these blocks dangerous. Cross the blocks, reach the second seesaw, and use it to gain the next ledge. From there, line up the jump beside the flamethrower. Wait only for the flame opening, then clear the gap in one committed jump.
Past the flamethrower, cross the moving platform ahead and climb the wooden ramp by using its built-in steps. Trying to vault the whole incline at once is less reliable than stepping or short-hopping up it.
At the top, take the final swing. Again, do not expect it to calm down. Ride its motion, watch the height of the forward arc, and jump for the star platform beyond the last flamethrower. Grab the Power Star for your exact 70th counted star.
If you miss one of the swing transfers and fall out of the course, re-enter and repeat the same left-pole route from the beginning. Do not change to another Rainbow Ride mission if you want the printed guide total to stay exact.
- Ride the starting carpet to the four spinning platforms.
- Take the left pole downward.
- Follow the route in order: seesaw, first swing, falling blocks, second seesaw, flamethrower gap, moving platform, stepped ramp, final swing, star.
- Time jumps with the swings' motion rather than waiting for them to stop.
- Collect this star even if the menu still names Cruiser Crossing the Rainbow.
Final total check before the endless staircase
After collecting the Rainbow Ride star, your file should show exactly 70 counted Power Stars. This chapter adds one Toad star, one MIPS star, and one Rainbow Ride course star to the 67 you brought in.
The route math still matches cleanly. Before entering Rainbow Ride, the run had 57 course stars and 10 secret stars. This chapter adds one more course star and two more secret stars, bringing the route to 58 course stars plus 12 secret stars.
That exact split matters because the next chapter assumes you have opened the way legitimately. The final Big Star Door on the third floor leads to the endless staircase room earlier, but the staircase itself only stops looping once you have 70 counted Power Stars.
Save, head upstairs, and move on to Bowser in the Sky.
- Star 68: third-floor Toad beside Tick Tock Clock.
- Star 69: second MIPS catch in the basement.
- Star 70: Rainbow Ride, Swingin' in the Breeze.
- Total before Bowser in the Sky: 70 counted Power Stars.
- Route breakdown: 58 course stars plus 12 secret stars.
- Bowser keys are still not part of the star count.
Before you move on
- Your save file shows 70 counted Power Stars before you approach the endless staircase.
- You collected the third-floor Toad star, the second MIPS star, and Rainbow Ride's Swingin' in the Breeze in this chapter.
- The route total reconciles to 58 course stars and 12 secret stars.
- Neither Bowser key has been counted as a Power Star.
- Rainbow Ride's other course stars, the second-floor Toad near Tall, Tall Mountain, Wing Mario Over the Rainbow, and Bowser in the Sky red coins are still reserved for cleanup.
References for this chapter
- SUPER MARIO 64
- Super Mario 64/Rainbow Ride — StrategyWiki
- Swingin' in the Breeze - Super Mario Wiki, the Mario encyclopedia
- Mushroom Castle (Super Mario 64) - Super Mario Wiki, the Mario encyclopedia
- MIPS - Super Mario Wiki, the Mario encyclopedia
- Bowser in the Sky - Super Mario Wiki, the Mario encyclopedia
Bowser in the Sky and the ending
With 70 counted Power Stars and the second Bowser defeated, the endless staircase on the castle's top floor finally becomes a normal staircase and leads to Bowser in the Sky, the last Bowser course in the original Nintendo 64 release. This chapter follows the full obstacle route, leaves the optional red-coin star for cleanup, and finishes with the three-hit final battle. The Jumbo Star triggers the ending, but it is not added to your regular Power Star total.
Open the final staircase and enter the course
Go to the castle's top floor, pass through the large star door, and run up the long staircase. At 70 counted Power Stars, the loop ends and you can reach the Bowser trap at the top. Step onto it to enter Bowser in the Sky.
There is an eight-red-coin star in this stage, but it is a castle secret star and not part of this printed ending route. If you collect it now, your displayed total becomes 71 before the ending. Leave it for cleanup if you want this route to land exactly on 70 before Bowser.
- Have 70 counted Power Stars before climbing the top-floor staircase.
- Use this visit only to clear the course and defeat Bowser if you want to preserve the printed 70-star tally.
Clear the opening platforms to the Whomp
From the arrow-shaped starting platform, head right across the first small platforms and the sliding blue platform. Keep moving so the moving piece does not shove you off. Run straight up the steep yellow ramp; it looks too sharp, but Mario can climb it if you keep your momentum. At the top, continue past the Goombas and across the spinning round platform with the Amp. Adjust the camera before the narrow bend so you can see the next landing clearly.
Go around the bend past the Small Piranha Plant and cross the seesaw without stalling in the middle. Step onto the rotating checkerboard platforms and jump off as soon as the gray path lines up. Ahead is the Whomp. Do not try to crouch underneath it. Move close enough to trigger its attack, step sideways when it falls face-first, and pass behind it while it lies flat. If you want the obstacle gone entirely, jump onto its exposed back and ground-pound it before moving on.
After the Whomp, hop to the blue ledge with the flamethrower, then to the next platform with Chuckya. On this cramped platform, the low-risk play is to keep your distance and long jump past Chuckya instead of trading grabs near the edge.
- Keep forward momentum over the sliding platform, steep ramp, and seesaw.
- Handle the Whomp by baiting its slam and passing behind it, or by ground-pounding its back while it is down.
- Treat Chuckya as a hazard to bypass, not a fight you need to win.
Use the purple switch and ride the long middle section
Past Chuckya, press the purple floor switch and immediately climb the temporary staircase it creates. Follow the bending path with flamethrowers. This stretch is steep but stable, so slow down and weave around the fire rather than trying to rush straight through. At the end, step onto the moving arrow lift. Stay aboard and jump over or around the blocks that would clip you off. If you are hurt, use the Spinning Heart on the blue platform it passes for a quick refill before continuing.
When the lift reaches the far side, cross the rotating circles, avoid the flame thrower and Amp, and climb the pole. At the top, pass the two Goombas and cross the pair of orange sliding bridges by using the center pole as your reset point. Continue along the next bend past the Bob-ombs and flamethrower to the last rotating checkerboard pair. Wait for a clean line, then jump to the gray path beyond.
- Hit the purple switch and commit to the stairs immediately.
- Use the Spinning Heart on the lift route if you need health before the end of the course.
- Use the center pole between the orange bridges as a safe pause point.
Cross the windy island and reach Bowser
The final island has strong wind pushing back toward the course. Stay on the ground as much as possible, because extra jumps give the gusts more time to drift Mario sideways. Use the stone columns as cover if you need to stop, heal at the Spinning Heart if necessary, and then push up the final blue steps into the pipe. There is also a 1-Up behind the last pillar, which is worth grabbing if you are low on lives and expect to need another Bowser attempt.
If you fall anywhere in the course, you lose a life and restart from the beginning of Bowser in the Sky, so play the final windy stretch patiently. If you reach the pipe in poor condition, heal first and enter with full health rather than gambling on the boss room.
- Run low and steady on the windy island instead of making nervous hops.
- Use the columns to break the wind and reset your camera before the last climb.
- Enter the pipe with full health whenever possible.
Defeat final Bowser and take the Jumbo Star
This fight works like the first two Bowser battles, but Bowser now needs three bomb hits instead of one. Circle just outside his reach, wait for the end of an attack, cut behind him, and grab his tail with B. Spin with the Control Stick and release toward a bomb at the rim. If he slams the floor, jump both shockwaves. If he spits fire upward and it rains back down, keep moving through the open spaces instead of chasing risky coins.
After each successful hit, Bowser falls away and returns. After the second hit, the outer edge of the arena breaks off and leaves a much smaller star-shaped platform. On that last phase, stop trying for wild full-speed throws from the rim. Pull Bowser toward a safer angle, release only when a bomb is lined up, and if you miss, recover to the center before setting up the next grab. Bowser is easier to re-grab after being hit, but the platform is much less forgiving.
After the third bomb hit, Bowser drops the Jumbo Star. Touch it to trigger the ending. This reward frees Peach and ends the game, but it does not increase your regular Power Star count. If you skipped the optional red-coin star in this course, you finish the printed route with the intended 70 counted Power Stars.
- Land three bomb throws to win the final Bowser fight.
- Jump both shockwaves from Bowser's slam before trying to get behind him again.
- On the small star-shaped arena, recover your footing first after a missed throw.
- Touch the Jumbo Star to see the ending, but do not expect the regular Power Star total to increase.
Before you move on
- You reached Bowser in the Sky by breaking the endless stairs with 70 counted Power Stars.
- You followed the obstacle course from the opening platforms to the final pipe without relying on the optional red-coin star.
- You handled the Whomp with the correct bait-and-pass or ground-pound method rather than trying to crouch under it.
- You defeated Bowser with three bomb hits, including the final hit after the arena shrank to a star shape.
- You touched the Jumbo Star, saw the ending, and your normal Power Star count did not rise from that reward.
From the ending to 120: the remaining course stars
After the ending route you should have 58 course stars and 12 secret stars. This appendix covers only the 47 remaining course stars so your course total reaches 105 before the separate secret-star cleanup. Each course entry names what the 70-star route already used, then gives the missing missions and a practical 100-coin plan for the original Nintendo 64 release.
Bob-omb Battlefield
Already taken in the ending route: Big Bob-omb on the Summit, Footrace with Koopa the Quick, Shoot to the Island in the Sky, Find the 8 Red Coins, Behind Chain Chomp's Gate. Still needed now: Mario Wings to the Sky and 100 Coins.
For Mario Wings to the Sky, open the cannon, reach the floating island, hit the red Wing Cap block, then use the island cannon and fly through the center coin of each of the five sky rings near the island. Do not aim for the ring edges. After the fifth center coin, the star appears on the ground near the four-post marker used for the red-coin star, not up in the air over the island.
For 100 coins, clear the ground first: enemies, coin lines, the red coins, the flower-bed ring, and the Chain Chomp side. Save the floating-island trip and cannon coins for late insurance. If possible, make your 100th coin on the main field or mountain spiral so the star lands on safe ground rather than during a risky cannon shot.
- Route stars already done: the five named route stars listed above.
- Cleanup stars: Mario Wings to the Sky, 100 Coins.
Whomp's Fortress
Already taken: Chip Off Whomp's Block, To the Top of the Fortress, Shoot into the Wild Blue, Fall onto the Caged Island, Blast Away the Wall. Still needed: Red Coins on the Floating Isle and 100 Coins.
Do the red-coin star on the normal climb, not from a cannon sweep. Pick up the low red coin by the moving wall blocks, continue up for the coin above the Thwomp, take the coin by the Piranha Plant patch, and keep climbing the fortress for the upper coins. Near the top of the fortress, kick the plank down and cross it to collect the two red coins on the floating platforms. When all eight are collected, return to the fortress's base for the Power Star.
For 100 coins, clear the base Goombas and coin trails, get the wall-block area, the Thwomp and tower coins, then finish with the floating-island side. Delay your last few coins until you are on broad stone platforms. Fortress 100 is generous enough that you do not need dangerous cannon improvisation.
- Route stars already done: the five named route stars listed above.
- Cleanup stars: Red Coins on the Floating Isle, 100 Coins.
Cool, Cool Mountain
Already taken: Slip Slidin' Away, Li'l Penguin Lost, Big Penguin Race, Frosty Slide for 8 Red Coins. Still needed: Snowman's Lost His Head, Wall Kicks Will Work, and 100 Coins.
Snowman's Lost His Head starts with the rolling snowball body near the summit, not near the cabin. Reach the upper path, approach the rolling body, and lead it down the intended trail toward the stationary head beside the lower path. Stay a short distance ahead so it follows cleanly, do not let it strike walls, and wait beside the head so the body rolls in and completes the snowman. The star appears there.
For Wall Kicks Will Work, use the cannon if needed to reach the high ledge, then chain wall kicks up the icy shaft to the star ledge. For 100 coins, combine the outside field, bridge coins, red-coin route, and slide coins. The slide is a one-way detour during that visit, so enter it after you have cleared most outside coins and know where you want the final star pickup to happen.
- Route stars already done: stars 1 through 4 in this course.
- Cleanup stars: Snowman's Lost His Head, Wall Kicks Will Work, 100 Coins.
Jolly Roger Bay
Already taken in course progress: Plunder in the Sunken Ship, Can the Eel Come Out to Play, Treasure of the Ocean Cave, Red Coins on the Ship Afloat. Secret Aquarium was a secret star, not a course star. Still needed here: Blast to the Stone Pillar, Through the Jet Stream, and 100 Coins.
Blast to the Stone Pillar is the cannon mission by the cave side. Open the cannon, fire to the top of the stone pillar near the cave opening, then jump across to the ledge with the yellow star box. Through the Jet Stream is the later Metal Cap mission. Go into the cave, hit the green Metal Cap block there, then sink and walk straight through the jet stream to the star. There is no new switch in that cave during the mission.
For 100 coins, use a mission where the ship is afloat so you can combine the deck coins and red-coin layout with cave coins, clam coins, and the underwater floor groups. Save your final coins for the cave floor or ship deck. That avoids having the 100-coin star appear in an awkward underwater spot while your air is low.
- Route stars already done: first four named missions only.
- Cleanup stars: Blast to the Stone Pillar, Through the Jet Stream, 100 Coins.
Big Boo's Haunt
Already taken: Go on a Ghost Hunt, Ride Big Boo's Merry-Go-Round, Secret of the Haunted Books, Seek the 8 Red Coins. Still needed: Big Boo's Balcony, Eye to Eye in the Secret Room, and 100 Coins.
Big Boo's Balcony is the upper-mansion route. Reach the upper balcony, defeat the balcony Big Boo with three hits or ground pounds, then carefully collect the roof star on the sloped middle roof. Eye to Eye in the Secret Room needs the second-floor blue Vanish Cap block. Take the cap, wall kick quickly up into the attic door, enter the Boo painting, and circle Big Mr. I until it disappears and leaves the star. Simply entering the room does not produce the star.
For 100 coins, clear the mansion rooms first: ordinary Boos, books, Mr. I enemies, and the red-coin route. Try to make the 100th coin indoors or on the broad balcony instead of on the roof. If a Boo drops a coin near a stair edge, stop and line it up; falling out of the mansion costs time more than anything else here.
- Route stars already done: first four named missions.
- Cleanup stars: Big Boo's Balcony, Eye to Eye in the Secret Room, 100 Coins.
Hazy Maze Cave
Already taken as course stars: Swimming Beast in the Cavern, A-Maze-Ing Emergency Exit, Watch for Rolling Rocks, Metal-Head Mario Can Move. The Cavern of the Metal Cap red-coin star was a secret star, not part of the 105 course total. Still needed here: Elevate for 8 Red Coins, Navigating the Toxic Maze, and 100 Coins.
For Elevate for 8 Red Coins, take the right-hand route from the start into the work-elevator room. Four red coins are collected with the arrow-controlled lift and the breakable blocks. Then use the pole to reach the upper automatic checkerboard lift and collect the other four. The star appears at the central marker in that same room. Do not go looking for these coins in the rolling-rock chamber.
For Navigating the Toxic Maze, go from the maze entrance ahead and then left. The first raised opening marked by the blue-coin column was for A-Maze-Ing Emergency Exit earlier. Continue deeper for the second raised opening, go through its door, ride the elevator, and follow that route to the star. For 100 coins, stay in Hazy Maze Cave proper: start-area enemies, rolling-rock corridor coins, maze blue coins, lake coins, and the work-elevator red coins. Never enter the separate Metal Cap course during a 100-coin attempt because that is a different level and resets the run.
- Route course stars already done: Swimming Beast, A-Maze-Ing Emergency Exit, Watch for Rolling Rocks, Metal-Head Mario Can Move.
- Cleanup stars: Elevate for 8 Red Coins, Navigating the Toxic Maze, 100 Coins.
Lethal Lava Land
Already taken: Boil the Big Bully, Bully the Bullies, 8-Coin Puzzle with 15 Pieces, Red-Hot Log Rolling, Hot-Foot-It into the Volcano. Still needed: Elevator Tour in the Volcano and 100 Coins.
Elevator Tour in the Volcano reuses the volcano but not the earlier quick route. Enter the volcano, ride the first moving lift, keep climbing past the earlier star path, use the pole and higher lift sequence, and follow the upper interior platforms until you reach the suspended star. If you fall inside, it is usually faster to leave the volcano and restart than to salvage a bad low position.
For 100 coins, sweep the outside lava field first: bully areas, the 15-piece puzzle platform, Mr. I for blue coins, moving-log side, and stray coin lines on stone islands. Enter the volcano only after you already have a strong total, because leaving the volcano ends the visit. Keep a few easy coins in reserve on solid ground so your 100th coin is not collected during a lava bounce.
- Route stars already done: first five named missions.
- Cleanup stars: Elevator Tour in the Volcano, 100 Coins.
Shifting Sand Land
Already taken: In the Talons of the Big Bird, Shining Atop the Pyramid, Inside the Ancient Pyramid, Free Flying for 8 Red Coins. Still needed: Stand Tall on the Four Pillars, Pyramid Puzzle, and 100 Coins.
For Stand Tall on the Four Pillars, touch the tops of all four outer pillars around the pyramid. That opens the top entrance. Drop in and ride down to Eyerok. Defeat both hands by baiting the slam, then jump onto each exposed eye three times. The star appears only after both hands are beaten.
Pyramid Puzzle is not an Eyerok repeat. Inside the pyramid, work your way to the giant sandfall and collect the five secret triggers placed along that route: three on the small ledges just below the top and two in the flowing sand farther down. Once all five are touched, take the spawned star. For 100 coins, clear outside Pokeys, red coins, enemy groups, and easy wing-cap coins first, then enter the pyramid for the large interior coin supply. Avoid making your 100th coin in deep quicksand or on the moving sand stream.
- Route stars already done: the four named route stars listed above.
- Cleanup stars: Stand Tall on the Four Pillars, Pyramid Puzzle, 100 Coins.
Dire, Dire Docks
Already taken: Board Bowser's Sub, Chests in the Current, Through the Jet Stream. Still needed: Pole-Jumping for Red Coins, The Manta Ray's Reward, Collect the Caps, and 100 Coins.
Pole-Jumping for Red Coins is the back-half pole route after the submarine is gone. Climb and swing along the poles over the water, taking the red coins in order as you progress toward the rear platform. The Manta Ray's Reward is a star trigger, not a coin source: swim through five consecutive ring sets from the manta's trail without breaking the chain, and the star appears.
For Collect the Caps, take both the Metal Cap and Vanish Cap from the green and blue blocks on the boardwalk in the second cavern. Long-jump into the water toward the submerged cage, then sink and pass through its grate while the Vanish Cap is still active to collect the star. Both caps come from the boardwalk before you enter the water. For 100 coins, rely on actual coins from red coins, enemies, yellow-coin groups, and the cap route. Do not count manta rings as coins. Try to leave a few safe coins near the central platforms so the 100-coin star lands somewhere easy to grab with air to spare.
- Route stars already done: Board Bowser's Sub, Chests in the Current, Through the Jet Stream.
- Cleanup stars: Pole-Jumping for Red Coins, The Manta Ray's Reward, Collect the Caps, 100 Coins.
Snowman's Land
Already taken: Chill with the Bully, In the Deep Freeze, Whirl from the Freezing Pond, Shell Shreddin' for Red Coins. Still needed: Snowman's Big Head, Into the Igloo, and 100 Coins.
Snowman's Big Head is the giant snowman climb. Work around the course to the snowman's body, then use the walking penguin as cover across the wind-blasted bridge along the snowman's face. Once past the breath, climb onto the head for the star. This is not the rolling-snowball mission from Cool, Cool Mountain.
Into the Igloo uses the shell route. Get the shell, ride to the igloo, crawl inside, then find the blue Vanish Cap block at the back-right side of the maze. Take the cap and run through the ice to the star near the entrance. For 100 coins, gather outside enemies, Moneybags, red coins, and shell-line coins before entering the igloo. Finish inside only if you still need the large safe coin supply there, because the room is compact but the star pickup itself is close to the entrance.
- Route stars already done: Chill with the Bully, In the Deep Freeze, Whirl from the Freezing Pond, Shell Shreddin' for Red Coins.
- Cleanup stars: Snowman's Big Head, Into the Igloo, 100 Coins.
Wet-Dry World
Already taken: Shocking Arrow Lifts!, Top o' the Town, Secrets in the Shallows and Sky, Express Elevator--Hurry Up! Still needed: Go to Town for Red Coins, Quick Race Through Downtown!, and 100 Coins.
Downtown is reached through the high-water tunnel behind the tall corner grate. Enter the painting high so the water starts high enough, or use the cannon to reach the opening if needed. Once in town, lower the water at the central pillar. The red coins are in breakable boxes around downtown, and the star appears there after all eight are opened.
Quick Race Through Downtown! also starts with a trip into downtown. Get the blue Vanish Cap block, run through the cage, and use the interior jumps to reach the star before the cap expires. For 100 coins, clear the main outside stage first: brick blocks, lower blue-coin switch, pole coins, top ledges, and enemy coins. Then go downtown, empty the boxes, and finish there. Draining town and leaving before taking its boxes and blue coins turns the whole run into unnecessary backtracking.
- Route stars already done: first four named missions.
- Cleanup stars: Go to Town for Red Coins, Quick Race Through Downtown!, 100 Coins.
Tall, Tall Mountain
Already taken: Scale the Mountain, Mystery of the Monkey Cage, Scary 'Shrooms, Red Coins, Mysterious Mountainside. Still needed: Breathtaking View from Bridge, Blast to the Lonely Mushroom, and 100 Coins.
Breathtaking View from Bridge comes from the purple switch near the waterfall bridge. Press it, run onto the temporary blocks that form the route into the waterfall alcove, and collect the star before the path disappears. Do not go looking for a water-pressure event or a ride up from below; the switch is the trigger that matters.
Blast to the Lonely Mushroom is the cannon star from the upper mountain. Open the cannon if you have not already, line up the lone mushroom platform, and fire across. For 100 coins, clear the lower trail, mushroom route, bridge area, and mountain climb before taking the hidden-slide detour if you want those slide coins too. Save your last coins for a broad platform such as the summit side or a big mushroom, not the tiny lonely mushroom itself.
- Route stars already done: Scale the Mountain, Mystery of the Monkey Cage, Scary 'Shrooms, Red Coins, Mysterious Mountainside.
- Cleanup stars: Breathtaking View from Bridge, Blast to the Lonely Mushroom, 100 Coins.
Tiny-Huge Island
Already taken: Pluck the Piranha Flower, The Tip Top of the Huge Island, Rematch with Koopa the Quick, Wiggler's Red Coins. Still needed: Five Itty Bitty Secrets, Make Wiggler Squirm, and 100 Coins.
For Five Itty Bitty Secrets, enter Tiny Island and touch the five small holes: the start-arch opening, the cannon hole, the Wiggler cave entrance, the rolling-ball hole, and the summit pool hole. After all five are triggered, use the purple-switch block bridge to reach the reward island and collect the star. This mission is about touching the holes on Tiny Island, not ground-pounding around Huge Island.
For Make Wiggler Squirm, ground-pound the summit pool on Tiny Island to drain it, then switch to Huge Island and climb back to the summit. Drop through the exposed hole into Wiggler's cave and jump on Wiggler's head three times for the star. For 100 coins, combine Tiny Island's enemies and hole-side coins with Huge Island's field, cave, and red-coin supplies. If you need the cave route for coins, talk to the Bob-omb Buddy on Tiny Island before changing size so the cannon is ready when you return on Huge Island.
- Route stars already done: Pluck the Piranha Flower, The Tip Top of the Huge Island, Rematch with Koopa the Quick, Wiggler's Red Coins.
- Cleanup stars: Five Itty Bitty Secrets, Make Wiggler Squirm, 100 Coins.
Tick Tock Clock
Already taken: Roll into the Cage, The Pit and the Pendulums, Get a Hand. Still needed: Stomp on the Thwomp, Timed Jumps on Moving Bars, Stop Time for Red Coins, and 100 Coins.
Remember the entry rule: 12 stops the clock, 3 makes it slow, 6 makes it unpredictable, 9 makes it fast. Stomp on the Thwomp is easiest with time stopped or slow so the climb is controlled. Timed Jumps on Moving Bars is usually easier with a moving clock, especially at 3, because the bars do the carrying that stopped time cannot.
Stop Time for Red Coins is exactly what it sounds like: enter at 12 and collect them on frozen machinery. The conveyor for Roll into the Cage is stationary in stopped time, so walk across it rather than waiting for motion. For 100 coins, use a moving clock so the blue-coin block, moving bars, and enemy coins are all practical in one trip. Leave yourself an easy final coin on a broad ledge; a 100-coin star on a tiny gear can waste an otherwise perfect run.
- Route stars already done: Roll into the Cage, The Pit and the Pendulums, Get a Hand.
- Cleanup stars: Stomp on the Thwomp, Timed Jumps on Moving Bars, Stop Time for Red Coins, 100 Coins.
Rainbow Ride
Already taken: Swingin' in the Breeze. Still needed: Cruiser Crossing the Rainbow, The Big House in the Sky, Coins Amassed in a Maze, Tricky Triangles!, Somewhere Over the Rainbow, and 100 Coins.
Use the four spinning platforms as your branch hub. The maze route goes straight from that hub. Coins Amassed in a Maze is the red-coin mission there, and Tricky Triangles! comes from the lower seesaw route plus the timed purple switch farther along that side. The flying ship and the big house are separate branches; do not treat the house as a continuation of the ship star. Ride the correct carpet branch for each one, then commit, because the carpets are long one-way rides.
For Somewhere Over the Rainbow, go above the maze to find the Bob-omb Buddy and open the cannon. Then use the ship-side cannon to fire to the distant tree and Chuckya platform, and break the yellow star box there. For 100 coins, plan the whole route before you start: early carpet coin lines, maze red coins, the maze blue-coin switch, enemy coins, and branch-specific coin groups. Do not take your 100th coin over a void or on a sinking platform if you can help it. Rainbow Ride is generous enough for 100, but only if you choose a branch order and do not waste one-way carpets on indecision.
- Route star already done: Swingin' in the Breeze.
- Cleanup stars: Cruiser Crossing the Rainbow, The Big House in the Sky, Coins Amassed in a Maze, Tricky Triangles!, Somewhere Over the Rainbow, 100 Coins.
Course-total audit
When this appendix is complete, every main course should show all six named stars plus its 100-coin star for a total of 105 course stars. The earlier ending route already provided 58 of those course stars, so this cleanup chapter adds the remaining 47.
If a course still shows six or fewer stars, compare that course against the route list above before assuming the missing star is secret content. Princess's Secret Slide, Secret Aquarium, Tower of the Wing Cap, Vanish Cap Under the Moat, Cavern of the Metal Cap, the Bowser red-coin stars, MIPS, Toad stars, and Wing Mario Over the Rainbow are all handled outside this chapter.
- 105 course stars total after this appendix.
- 58 route course stars plus 47 cleanup course stars equals 105.
- All 15 main courses now show seven stars each before the secret-star cleanup.
Before you move on
- Bob-omb Battlefield through Rainbow Ride each show all six named missions plus the 100-coin star.
- Your course total is now 105 before any remaining secret stars are added.
- The 70-star ending route's course portion still totals 58, and this appendix has supplied the other 47 course stars needed for full main-course completion.
References for this chapter
- SUPER MARIO 64
- Super Mario 64 - Guide and Walkthrough - Nintendo 64 - By KrocTheDoc - GameFAQs
- Super Mario 64/Bob-omb Battlefield — StrategyWiki
- Super Mario 64/Whomp's Fortress — StrategyWiki
- Super Mario 64/Jolly Roger Bay — StrategyWiki
- Super Mario 64/Hazy Maze Cave — StrategyWiki
- Super Mario 64/Snowman's Land — StrategyWiki
- Super Mario 64/Wet-Dry World — StrategyWiki
- Super Mario 64/Tiny-Huge Island — StrategyWiki
- Super Mario 64/Rainbow Ride — StrategyWiki
- Original Whomp red-coin route and fortress-base reward
- Original Collect the Caps boardwalk pickups and submerged cage
All 15 secret stars and final completion checks
This chapter finishes the three secret stars omitted from the printed 70-star ending route and confirms the full original Nintendo 64 total of 120 counted Power Stars. If your main-course cleanup is done, the only secret stars still missing should be the upstairs Toad near Tall, Tall Mountain, the red-coin star in Wing Mario Over the Rainbow, and the red-coin star in Bowser in the Sky. After those are collected, your save should show 105 course stars plus 15 secret stars. The lake-side castle cannon then opens so Mario can reach the roof and meet Yoshi. That rooftop scene is a completion bonus, not a new campaign and not a playable-Yoshi unlock.
Check the full 15 secret stars before taking the last three
Pause and verify your totals before re-entering special stages. A finished file uses 105 stars from the 15 main courses and 15 castle secret stars. If any main course still shows fewer than seven stars, your missing total is not entirely in the secret-star pool and this chapter alone cannot bring you to 120.
The 12 secret stars already used in the ending route are Princess's Secret Slide, the under-21-second Slide star, Secret Aquarium, Tower of the Wing Cap red coins, Cavern of the Metal Cap red coins, Vanish Cap Under the Moat red coins, Bowser in the Dark World red coins, Bowser in the Fire Sea red coins, MIPS first catch, MIPS second catch, the Toad near Hazy Maze Cave, and the Toad near Tick Tock Clock.
That leaves exactly three for this cleanup chapter: the upstairs Toad near Tall, Tall Mountain, Wing Mario Over the Rainbow red coins, and Bowser in the Sky red coins. If one of those is already marked complete on your file, stop and compare the full 15-entry list instead of replaying random stages.
- Princess's Secret Slide
- Princess's Secret Slide under 21 seconds
- Secret Aquarium
- Tower of the Wing Cap red coins
- Cavern of the Metal Cap red coins
- Vanish Cap Under the Moat red coins
- Bowser in the Dark World red coins
- Bowser in the Fire Sea red coins
- MIPS first catch
- MIPS second catch
- Toad near Hazy Maze Cave
- Toad near Tall, Tall Mountain
- Toad near Tick Tock Clock
- Wing Mario Over the Rainbow red coins
- Bowser in the Sky red coins
Take the upstairs Toad star near Tall, Tall Mountain
Go to the castle's second floor. Move behind the staircase that leads toward the third floor. Near the Tall, Tall Mountain painting, talk to the Toad standing in that back section. On a file that has not claimed this reward yet, he immediately gives you a Power Star.
Collect this one first because it is the quickest confirmation that your secret-star checklist is aligned. If the Toad only gives dialogue and no star appears, that reward was already claimed earlier. Do not assume the game failed to trigger. Your missing star is somewhere else on the 15-secret-star list.
- Speak to the upstairs Toad near Tall, Tall Mountain.
- Touch the star immediately so the save total updates.
- If no star appears, mark this entry as already complete and re-check the full list.
Wing Mario Over the Rainbow, original Nintendo 64 eight-red-coin route
From the top floor room with Tick Tock Clock and Rainbow Ride, enter the hole in the wall opposite Rainbow Ride. This secret course has one star only. You earn it by collecting all eight red coins and then returning to the star marker on the starting cloud.
Take the first red coin on the starting cloud before you do anything else. Break the nearby red block for a Wing Cap. Fly down along the rainbow to a lower white cloud and take the second red coin there. Keep your flight smooth and low enough to land on solid clouds if you need to reset.
Next, move to the pink lower cannon platform. Take the third red coin there and talk to the Bob-omb Buddy if the cannon is still closed. Use the lower cannon to reach the other lower white cloud and collect the fourth red coin. If your cap timer is running short, land on a solid platform with a red block and refresh it before going for the high side of the course.
Return to the cannon route and launch to the upper pink cannon platform. This upper platform is transport only, not a red-coin stop. From there, fire toward the hanging green poles. Grab the poles and move between them to take the fifth red coin. Do not remove this coin from your route. It is part of the original Nintendo 64 layout.
Use the upper cannon again to reach the high cloud above the poles. That cloud holds the sixth and seventh red coins. After taking both, fly through the nearby translucent cloud for the eighth red coin. The translucent cloud cannot be landed on, so treat it as a pass-through target and keep enough height to continue safely.
When the eighth coin is collected, the Power Star appears back at the starting cloud's star marker. Turn back immediately if you still have altitude. If not, land on any safe solid cloud or cannon platform, refresh your Wing Cap from a red block, and make another controlled flight back to the start. Falling into the abyss sends Mario back outside the castle grounds near the lake, so a miss usually wastes time rather than a life, but you still have to climb back to the third floor for another attempt.
- Coin 1 on the starting cloud.
- Coin 2 on the first lower white cloud.
- Coin 3 on the lower cannon platform, then speak to the Bob-omb Buddy if needed.
- Coin 4 on the other lower white cloud from the lower cannon.
- Use the upper cannon as transport only. There is no red coin on that platform.
- Coin 5 is between the hanging green poles.
- Coins 6 and 7 are on the high cloud above the poles.
- Coin 8 is inside the translucent cloud, which cannot be landed on.
- Return to the starting cloud to collect the star.
Bowser in the Sky red coins on a clean upward climb
Re-enter Bowser in the Sky through the finite staircase on the third floor. If this secret star is your final missing counted star, you can leave as soon as you collect it. Bowser's Jumbo Star still triggers the ending, but it does not increase the normal Power Star counter.
Take the coins as you advance so you never have to backtrack over the late-course narrow platforms. The first red coin floats above the second-to-last stair-like platform near the start. Push the nearby block into place and jump from it for the safe grab. After the first spinning platform, take the second red coin from the corner of the stone path where the Small Piranha Plant appears.
On the large stone area below the seesaw and the first Ferris-wheel platforms, look beside the line of yellow coins for a small side ledge with the third red coin. Much later, at the large bending platform with flamethrowers in the upper half of the stage, take the fourth red coin floating above the coin-lined side near the top.
After the arrow lift carries you forward past the jumping platforms and the Spinning Heart, continue onto the wooden section. The fifth red coin floats above the first high wooden platform after that lift segment. The sixth red coin sits near the center of the first spinning platform beyond it, so steady the camera before you jump.
Near the end of the stage, pass the sliding platforms and take the seventh red coin above the pole between the moving platforms. The eighth red coin is on the ledge directly below the final stairs leading to Bowser's pipe. When you have all eight, the secret Power Star appears behind the pipe on the last platform. Take the star before entering the pipe unless you intentionally want to replay the ending fight afterward.
- Use the opening push block for coin 1.
- Do not miss coin 3 on the side ledge below the seesaw section.
- Coin 4 is above the upper bending flamethrower platform.
- Coin 6 is on the first spinning platform after the arrow-lift route.
- Coin 8 is below the final stairs.
- The red-coin star appears behind Bowser's pipe.
Confirm 120 and claim the roof reward
When these three stars are done, your file should read 120 counted Power Stars. The correct math is 105 course stars plus 15 secret stars. Bowser's basement key, upstairs key, and the Jumbo Star from the ending do not add to that count, so do not search for a nonexistent 121st counted star.
After the counter reaches 120, go outside to the castle grounds and head to the cannon by the lake. That cannon opens only after full completion. Use it to fire Mario onto the castle roof. There you can meet Yoshi. In the original Nintendo 64 game, Yoshi is a rooftop bonus character only. He congratulates Mario and rewards him with 100 lives and an improved Triple Jump. He does not unlock a new campaign and he does not become a playable character.
If the cannon is still shut, read the file total again and make sure your course-star total is really 105 and your secret-star list is really 15. The roof reward is tied to full completion, not just to seeing the ending once.
- Save file reads 120 counted Power Stars.
- All 15 main courses show seven stars each for 105 course stars.
- All 15 secret stars are accounted for.
- The cannon by the lake is open.
- Yoshi is on the roof as a completion reward only.
Before you move on
- The three cleanup secret stars in this chapter are collected: upstairs Toad, Wing Mario Over the Rainbow red coins, and Bowser in the Sky red coins.
- The full secret-star checklist is complete at 15 entries.
- The save file total is 120 counted Power Stars, which equals 105 course stars plus 15 secret stars.
- The lake-side cannon is open and Mario can reach the roof.
- Yoshi is met on the roof as the 120-star reward, with no new story route or playable-Yoshi unlock.
References for this chapter
- SUPER MARIO 64
- Over the Rainbows - Super Mario Wiki, the Mario encyclopedia
- Bowser in the Sky - Super Mario Wiki, the Mario encyclopedia
- Castle Grounds - Super Mario Wiki, the Mario encyclopedia
- History of Yoshi - Super Mario Wiki, the Mario encyclopedia
- Super Mario 64 - Super Mario Wiki, the Mario encyclopedia
Fix common roadblocks
When progress stops in the Nintendo 64 original release, do not guess. First read the castle records, then match the symptom to a missing star, a missing key, an unpressed cap switch, or a course state that changed after Bowser. This chapter is a troubleshooting map for the printed 70-star route and for the later 120-star cleanup.
Read the castle record before replaying anything
Stand in Peach's Castle and press Start. In the castle, the pause screen shows your total Power Stars, each main course with its own course total, and all hidden-course rewards grouped together as Secret Stars. Use that screen before diving back into random paintings.
Compare those numbers against this guide's chapter anchors, not just the mission title you last entered. For the printed ending route, the cumulative totals should be getting-started 0, bob-omb-battlefield 5, whomps-fortress 12, cool-cool-mountain 16, jolly-roger-bay 21, first-bowser-and-wings 23, big-boos-haunt 27, hazy-maze-cave 32, lethal-lava-land 37, shifting-sand-land 41, basement-secrets 44, dire-dire-docks 47, second-bowser 48, snowmans-land 52, wet-dry-world 56, tall-tall-mountain 60, tiny-huge-island 64, tick-tock-clock 67, and final-stars 70.
Secret Stars are the easiest place to lose track. The full game has 15 of them: two Princess's Secret Slide stars, Secret Aquarium, Tower of the Wing Cap, Cavern of the Metal Cap, Vanish Cap Under the Moat, three Bowser red-coin stars, two MIPS stars, three Toad stars, and Wing Mario Over the Rainbow. The printed 70-star route uses 12 of those 15 and leaves the second-floor Toad, Wing Mario Over the Rainbow, and Bowser in the Sky red coins for cleanup.
- Pause in the castle, not inside a course.
- Check both your overall star total and the grouped Secret Stars total.
- If one course total looks right but the file total is still short, inspect Secret Stars next.
- Use the anchor names in this guide to find the exact missed objective.
Symptom table for locked doors, endless stairs, and missing characters
Most hard locks come from one of three things: too few counted Power Stars, a missing key from a Bowser fight, or entering the right place before the route has changed state. Match the symptom first, then fix only that requirement.
Remember that Bowser keys and the final Jumbo Star are rewards, but they do not add to the counted Power Star total on your file. If your total is low, only another actual Power Star fixes it.
- Endless stairs before Bowser in the Sky. Cause: fewer than 70 counted Power Stars. Action: compare your file against tick-tock-clock 67 and final-stars 70. If your count is 68 or 69, the fastest fixes are usually MIPS's second star from final-stars or a missed route star in wet-dry-world, tall-tall-mountain, tiny-huge-island, or tick-tock-clock.
- Basement Big Star Door will not open. Cause: fewer than 30 stars. Action: do not search the basement first. Compare your file against first-bowser-and-wings 23, big-boos-haunt 27, and hazy-maze-cave 32 to see where the route first went off count.
- Upper-floor Big Star Door or Tick Tock Clock or Rainbow Ride access is blocked. Cause: either you have fewer than 50 stars or you have not cleared Bowser in the Fire Sea for the upstairs key. Action: verify second-bowser is complete and your counted total is at least 50.
- MIPS is missing in the basement. Cause: you have fewer than 15 stars for the first appearance, fewer than 50 for the second appearance, or you already caught the available rabbit on this save. Action: check your total, then search both basement hallways again after confirming whether you are due the 15-star rabbit from basement-secrets or the 50-star rabbit from final-stars.
- A Toad does not give a star. Cause: you are talking to the right Toad at the wrong point in the route, or you already took that star. Action: the basement Toad belongs to basement-secrets, the third-floor Toad belongs to final-stars, and the second-floor Toad is a cleanup secret. Recheck your Secret Stars count before assuming the save failed.
Symptom table for caps, cannons, and state changes
If a cap block, cannon, or level layout looks wrong, the save is usually fine. In Super Mario 64, these problems normally mean that a switch was never pressed, a Bob-omb Buddy was never spoken to, or a Bowser-related course state has changed.
Cap switches and cap-course stars are separate goals. Pressing the switch enables the colored blocks in the castle and stages, but the course's red-coin Power Star still has to be collected, and if you miss it you may need to re-enter the course.
- Wing, Metal, or Vanish Cap blocks are still outlines. Cause: you reached the course but never pressed its switch. Action: revisit first-bowser-and-wings for the Wing Cap switch, hazy-maze-cave for the Metal Cap switch, or basement-secrets for the Vanish Cap switch, then step on the colored switch there.
- You pressed a cap switch but do not have the star. Cause: you activated the switch and left without taking the red-coin reward. Action: re-enter that same cap course and finish the red-coin run.
- A cannon will not open. Cause: you did not talk to that course's pink Bob-omb Buddy in that same stage. Action: find the Buddy, talk to it once, and the cannon stays open on later visits.
- The submarine is still in Dire, Dire Docks when you want Bowser in the Fire Sea. Cause: you have not completed Board Bowser's Sub yet. Action: finish dire-dire-docks star 45 first so the portal moves back and reveals Bowser in the Fire Sea.
- The submarine is gone, or ceiling poles are present, when you revisit Dire, Dire Docks. Cause: you already beat Bowser in the Fire Sea. Action: this is normal. Use the post-Bowser layout for Pole-Jumping for Red Coins during cleanup, and do not expect Board Bowser's Sub to be repeatable in its original form.
- The castle grounds cannon is closed. Cause: this one is not opened by a Bob-omb Buddy and is not part of the ending route. Action: ignore it until post-120 cleanup.
Wrong mission selected, wrong star collected, or lost coin progress
Mission names in Super Mario 64 are hints, not full locks. In the Nintendo 64 version, most courses change very little between mission selections, so Mario can often collect a different available star than the mission title suggests. That usually means your save is still fine and your route has simply shifted by one objective.
The main exception is a star that needs a special course state or special character setup, such as a Koopa race, the Big Bob-omb fight, Board Bowser's Sub before the submarine leaves, or a cannon star before its Bob-omb Buddy has opened the hatch.
- Wrong star scenario. Cause: you entered one mission and picked up another obtainable star. Action: keep it. The file counts it normally. Reopen the anchor for the skipped route objective and do that star next.
- Lost 100-coin progress. Cause: you exited the stage or lost a life before collecting the 100-coin star. Action: restart the coin run from the beginning. Do not trust memory here; check the course total on the castle pause screen because 100-coin stars are separate from the six named missions.
- A course shows six stars but your file total is still short. Cause: you are missing that course's 100-coin star or a Secret Star elsewhere. Action: if you are still on the 70-star route, look for a missed Secret Star first because this route intentionally skips all 100-coin stars before the ending.
- You beat a Bowser stage and expected your total to rise by one. Cause: the keys and the final Jumbo Star do not increase the Power Star counter. Action: compare your total before and after the fight only when a red-coin star from that Bowser course was also collected.
Fast catch-up targets when you only need one more star
If you are short by one star and do not want to wrestle with a hard late-course mission, take the quickest verified substitute instead. The ending still works at 70 counted stars even if you swap in another legitimate Power Star, but once you substitute, the printed cumulative totals in earlier chapters will no longer line up exactly with your save.
The safest places to recover are short secret courses and nearby castle rewards. For route-only troubleshooting, revisit first-bowser-and-wings, hazy-maze-cave, basement-secrets, and final-stars first, because those chapters contain several short secret-star pickups that are commonly forgotten.
- Need 8 stars for the first Bowser door. Check the two Princess's Secret Slide stars, Secret Aquarium, or an unfinished early main-course red-coin star.
- Need 30 stars for the basement chain. Review first-bowser-and-wings, big-boos-haunt, and hazy-maze-cave to find the first point where your total slipped behind the printed route.
- Need 50 stars for the upstairs door. Recheck basement-secrets for MIPS and the basement Toad, then compare snowmans-land, wet-dry-world, tall-tall-mountain, and tiny-huge-island against the route.
- Need 70 stars for the endless stairs. The quickest route fixes are usually the third-floor Toad from final-stars, MIPS's second star from final-stars, or any skipped late-course route star from tiny-huge-island or tick-tock-clock.
Before you move on
- You can use the castle pause screen to compare your file against the guide's chapter anchors instead of replaying random stages.
- You can tell whether your blocker is a missing Power Star, a missing Bowser key, an unpressed cap switch, or a normal course state change.
- You know that Secret Stars total 15 in the full game and 12 in the printed 70-star route before cleanup.
- You have at least one specific recovery target from this guide's anchors for your next attempt.
References for this chapter
- SUPER MARIO 64
- Super Mario 64 - Super Mario Wiki, the Mario encyclopedia
- Mushroom Castle (Super Mario 64) - Super Mario Wiki, the Mario encyclopedia
- Mission - Super Mario Wiki, the Mario encyclopedia
- Tick Tock Clock - Super Mario Wiki, the Mario encyclopedia
- Super Mario 64/Castle Secret Stars — StrategyWiki
- Super Mario 64/Dire, Dire Docks — StrategyWiki
Finishing up
Reach Bowser in the Sky with at least 70 Power Stars and both castle keys.
Defeat the final Bowser and collect the Jumbo Star to see the ending; it does not add to the ordinary Power Star tally.
For full completion, finish with 105 course stars and 15 castle secret stars.
Save your 120-star file and visit the castle roof for its completion reward.
Choose your next gameScreenshots & video
Game imagery for reference. Follow the written chapters above for the route and strategies.
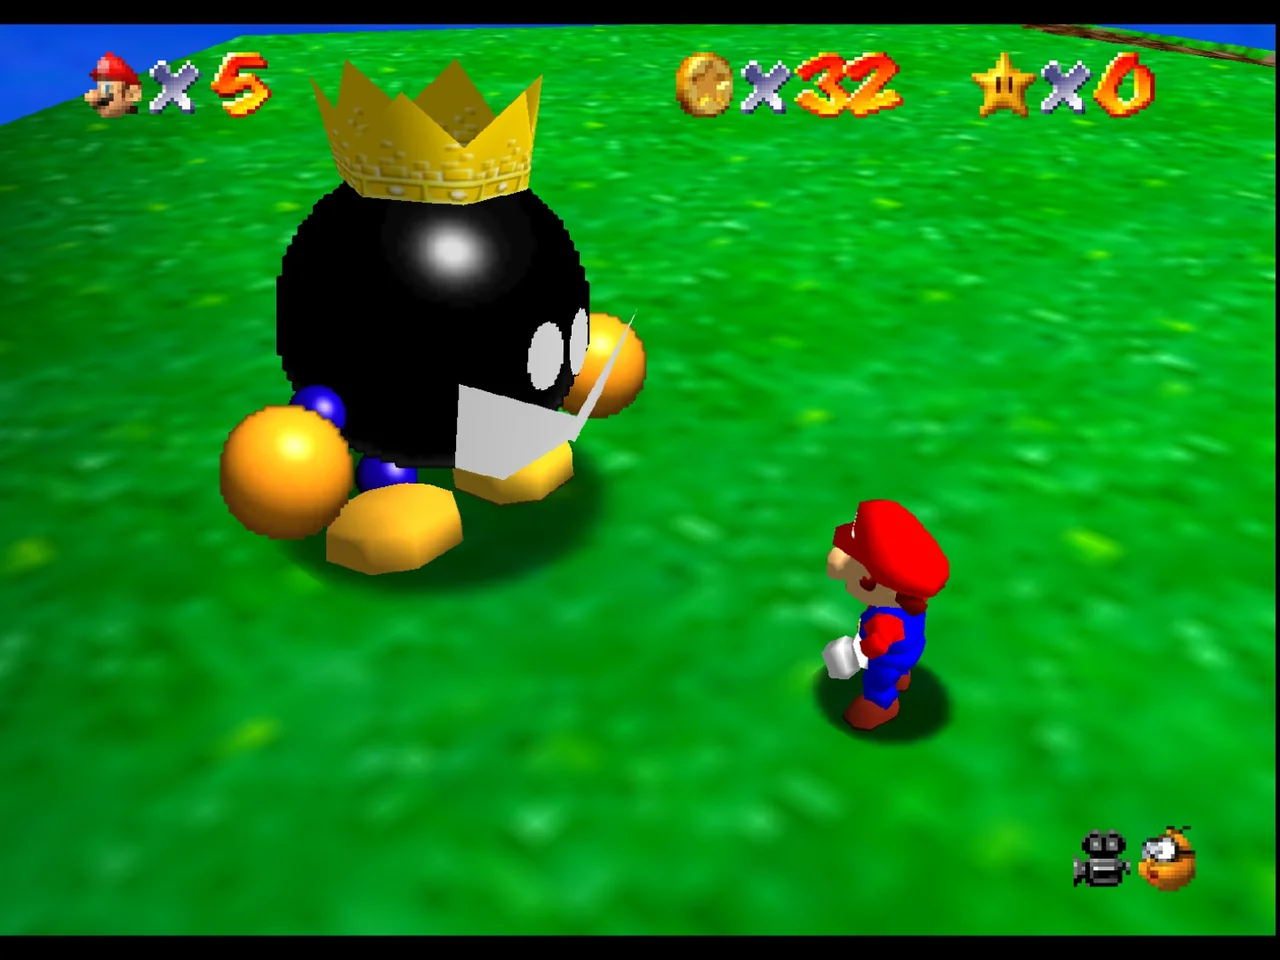
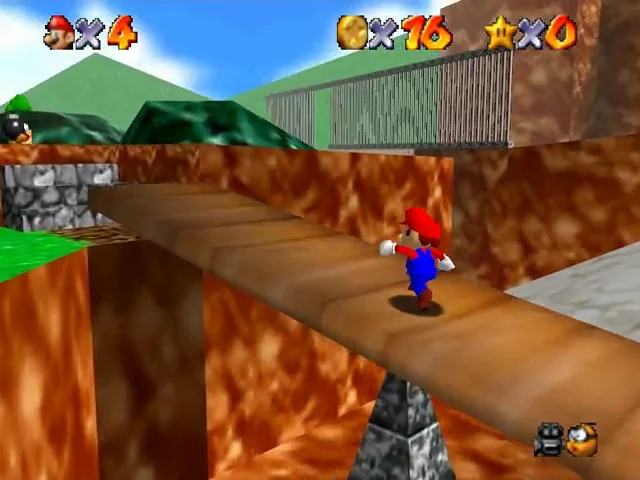
Sources & references
Our original guide draws on the references below. Check the edition at the top of this page before following controls or unlock requirements.
- SUPER MARIO 64
- Super Mario 64 - Guide and Walkthrough - Nintendo 64 - By CWall - GameFAQs
- Super Mario 64/Castle Secret Stars — StrategyWiki
- Bob-omb Battlefield - Super Mario Wiki, the Mario encyclopedia
- Big Bob-omb on the Summit - Super Mario Wiki, the Mario encyclopedia
- Footrace with Koopa the Quick - Super Mario Wiki, the Mario encyclopedia
- Find the 8 Red Coins - Super Mario Wiki, the Mario encyclopedia
- Super Mario 64 - Guide and Walkthrough - Nintendo 64 - By RJHarrison - GameFAQs
- Whomp's Fortress - Super Mario Wiki, the Mario encyclopedia
- Fall onto the Caged Island - Super Mario Wiki, the Mario encyclopedia
- The Princess's Secret Slide - Super Mario Wiki, the Mario encyclopedia
- Super Mario 64/Whomp's Fortress — StrategyWiki
- Super Mario 64/The Princess' Secret Slide — StrategyWiki
- Cool, Cool Mountain - Super Mario Wiki, the Mario encyclopedia
- Li'l Penguin Lost - Super Mario Wiki, the Mario encyclopedia
- Big Penguin Race - Super Mario Wiki, the Mario encyclopedia
- Frosty Slide for 8 Red Coins - Super Mario Wiki, the Mario encyclopedia
- Nintendo 64 games manuals | Nintendo 64 | Support | Nintendo UK
- Jolly Roger Bay - Super Mario Wiki, the Mario encyclopedia
- The Secret Aquarium - Super Mario Wiki, the Mario encyclopedia
- Bowser in the Dark World - Super Mario Wiki, the Mario encyclopedia
- Tower of the Wing Cap - Super Mario Wiki, the Mario encyclopedia
- Super Mario 64/Tower of the Wing Cap — StrategyWiki | Strategy guide and game reference wiki
- Courtyard (Peach's Castle) - Super Mario Wiki, the Mario encyclopedia
- Super Mario 64 - Super Mario Wiki, the Mario encyclopedia
- A-Maze-Ing Emergency Exit - Super Mario Wiki, the Mario encyclopedia
- Behind the Waterfall - Super Mario Wiki, the Mario encyclopedia
- Super Mario 64 - Guide and Walkthrough - Nintendo 64 - By Coffee - GameFAQs
- Lethal Lava Land - Super Mario Wiki, the Mario encyclopedia
- Super Mario 64/Lethal Lava Land — StrategyWiki | Strategy guide and game reference wiki
- Shifting Sand Land - Super Mario Wiki, the Mario encyclopedia
- In the Talons of the Big Bird - Super Mario Wiki, the Mario encyclopedia
- Free Flying for 8 Red Coins - Super Mario Wiki, the Mario encyclopedia
- Super Mario 64/Shifting Sand Land - StrategyWiki
- The Secret Under the Moat - Super Mario Wiki, the Mario encyclopedia
- Super Mario 64/Basement — StrategyWiki | Strategy guide and game reference wiki
- MIPS - Super Mario Wiki, the Mario encyclopedia
- Mushroom Castle (Super Mario 64) - Super Mario Wiki, the Mario encyclopedia
- Super Mario 64/Dire, Dire Docks — StrategyWiki
- Dire, Dire Docks - Super Mario Wiki, the Mario encyclopedia
- Board Bowser's Sub - Super Mario Wiki, the Mario encyclopedia
- Chests in the Current - Super Mario Wiki, the Mario encyclopedia
- Through the Jet Stream (Dire, Dire Docks) - Super Mario Wiki, the Mario encyclopedia
- Bowser in the Fire Sea - Super Mario Wiki, the Mario encyclopedia
- Super Mario 64/Bowser in the Fire Sea — StrategyWiki | Strategy guide and game reference wiki
- Super Mario 64 - Guide and Walkthrough - Nintendo 64 - By NDS_Master - GameFAQs
- Snowman's Land - Super Mario Wiki, the Mario encyclopedia
- Chill with the Bully - Super Mario Wiki, the Mario encyclopedia
- In the Deep Freeze - Super Mario Wiki, the Mario encyclopedia
- Whirl from the Freezing Pond - Super Mario Wiki, the Mario encyclopedia
- Shell Shreddin' for Red Coins - Super Mario Wiki, the Mario encyclopedia
- Wet-Dry World - Super Mario Wiki, the Mario encyclopedia
- Shocking Arrow Lifts! - Super Mario Wiki, the Mario encyclopedia
- Top o' the Town - Super Mario Wiki, the Mario encyclopedia
- 5 Secrets in the Shallows & Sky - Super Mario Wiki, the Mario encyclopedia
- Express Elevator--Hurry Up! - Super Mario Wiki, the Mario encyclopedia
- Super Mario 64/Wet-Dry World — StrategyWiki
- TMK | Reference | Guides & FAQs | Super Mario 64
- Tall, Tall Mountain - Super Mario Wiki, the Mario encyclopedia
- Mystery of the Monkey Cage - Super Mario Wiki, the Mario encyclopedia
- Scary 'Shrooms, Red Coins - Super Mario Wiki, the Mario encyclopedia
- Mysterious Mountainside - Super Mario Wiki, the Mario encyclopedia
- Tiny-Huge Island - Super Mario Wiki, the Mario encyclopedia
- Pluck the Piranha Flower - Super Mario Wiki, the Mario encyclopedia
- Wiggler's Red Coins - Super Mario Wiki, the Mario encyclopedia
- Rematch with Koopa the Quick - Tiny-Huge Island - Super Mario 64 | Gamer Guides
- Super Mario 64/Tiny-Huge Island — StrategyWiki
- Roll into the Cage - Super Mario Wiki, the Mario encyclopedia
- The Pit and the Pendulums - Super Mario Wiki, the Mario encyclopedia
- Get a Hand - Super Mario Wiki, the Mario encyclopedia
- Super Mario 64/Rainbow Ride — StrategyWiki
- Swingin' in the Breeze - Super Mario Wiki, the Mario encyclopedia
- Bowser in the Sky - Super Mario Wiki, the Mario encyclopedia
- Super Mario 64 - Guide and Walkthrough - Nintendo 64 - By WithTheDawn - GameFAQs
- Super Mario 64 - Guide and Walkthrough - Nintendo 64 - By KrocTheDoc - GameFAQs
- Super Mario 64/Bob-omb Battlefield — StrategyWiki
- Super Mario 64/Jolly Roger Bay — StrategyWiki
- Super Mario 64/Hazy Maze Cave — StrategyWiki
- Super Mario 64/Snowman's Land — StrategyWiki
- Original Whomp red-coin route and fortress-base reward
- Original Collect the Caps boardwalk pickups and submerged cage
- Over the Rainbows - Super Mario Wiki, the Mario encyclopedia
- Castle Grounds - Super Mario Wiki, the Mario encyclopedia
- History of Yoshi - Super Mario Wiki, the Mario encyclopedia
- Mission - Super Mario Wiki, the Mario encyclopedia
- Tick Tock Clock - Super Mario Wiki, the Mario encyclopedia
About the game & collecting notes
- Platform
- Nintendo 64
- Developer
- Nintendo
- Publisher
- Nintendo
- Region
- Original Nintendo 64 release; region varies
- Genre
- 3D platformer
- Players
- 1
Super Mario 64 brings Mario’s platforming into three-dimensional spaces linked through Princess Peach’s castle. Players explore courses, complete objectives, and collect Power Stars. Nintendo’s original instruction booklet is the reference for controls and game structure.
This record concerns the original Nintendo 64 game. Nintendo’s later product pages also describe rereleases, whose store dates should not be substituted for an original cartridge’s release history.
For a physical purchase, identify the cartridge’s region and edition, examine its condition, and document any replaced parts. If a box or manual is included, check that the pieces belong to the release being represented. The database has no current value or editorial review score entered for this game.
Collector notes
Distinguish the original Nintendo 64 game from later rereleases and Super Mario 64 DS. Record the specific cartridge and packaging edition.Darryl Polo
Darryl Polo loves tinkering with emulation and revisiting retro games. He enjoys exploring how old favorites play on different setups and sharing what he learns along the way. At Joking Joystick, he writes about the games, hardware, and small discoveries that keep the hobby fun.
Our editorial standardsFound a step that needs another look? Help us improve this guide.