Perfect Dark (Nintendo 64, USA Rev A) — Complete Solo Campaign Walkthrough
A complete walkthrough for the original North American Nintendo 64 release, covering setup, controls, all seventeen regular solo levels in verified order, difficulty-specific objectives, failure recovery, the ending, and optional bonus content. The guide separates required story progression from higher-difficulty objectives, bonus missions, timed cheats and Perfect Dark mode.


Find a copy
Perfect Dark Nintendo 64
We may earn a commission if you buy through these links, at no extra cost to you. As an Amazon Associate I earn from qualifying purchases.
Opens retailer search results. Check the model, edition, seller, availability and current price before buying.
Before you begin
This walkthrough covers the original North American Nintendo 64 release of Perfect Dark, including the full seventeen-level regular solo campaign.
Follow the campaign chapters in order: dataDyne Central, Carrington Villa, Chicago, G5 Building, Area 51, Air Base, Air Force One, Crash Site, Pelagic II, Deep Sea, Carrington Institute, Attack Ship and Skedar Ruins.
Each level chapter identifies the objectives required on Agent, Special Agent and Perfect Agent, the route landmarks that prevent backtracking, common mission-ending mistakes and a concrete completion check.
The four bonus missions and Perfect Dark mode are covered separately after the regular campaign and are not required to view the story ending.
Set yourself up for the run
Install an N64 Expansion Pak before starting Solo Missions; verify that Solo Missions and the Carrington Institute are available.
Create or select an agent file and confirm whether progress is being saved to the Game Pak or Controller Pak before beginning the campaign.
Test the selected control layout, aim behavior, HUD visibility and audio mode in the Carrington Institute or firing range.
Learn the difference between the Data Uplink, Reprogrammer, CamSpy, ECM Mine, Night Vision and other objective devices before attempting timed or stealth-sensitive levels.
Use Agent to learn the route, Special Agent to learn added objectives and Perfect Agent for the highest standard campaign completion. Do not call the difficulty Secret Agent.
Keep a written objective ledger by level and difficulty. Restart after an objective has failed or an escort target has died rather than assuming the state can be repaired.
Controls, Display and Hardware Options
Prepare the original North American Nintendo 64 release before entering Solo Missions. Perfect Dark requires the N64 Expansion Pak for its complete story campaign. The game supports three Game Pak save slots and Controller Pak storage, while the options menu provides control layouts, aim behavior, video presentation, audio mode, and display information. Test these choices at the Carrington Institute before beginning a timed or difficulty-specific mission.
Install the Expansion Pak and confirm the campaign is available
Power off the Nintendo 64 before opening the front expansion bay. Replace the Jumper Pak with a genuine N64 Expansion Pak, then reseat the cartridge and restart the console. Perfect Dark can run some multiplayer content without the Expansion Pak, but the complete story-based Solo Missions require it. If Solo Missions is unavailable and the menu offers only restricted multiplayer content, shut the system down and check the hardware rather than changing agent files or restarting the cartridge repeatedly.
The Expansion Pak is a hardware requirement for this original N64 release, not a difficulty option or a bonus unlock. Confirm that the Solo Missions entry is present on the Perfect Menu before spending time configuring a campaign file. The Carrington Institute training area is also Expansion Pak-dependent, so its availability is another useful setup check.
- The console is powered off while the expansion accessory is installed.
- The Jumper Pak has been replaced by an Expansion Pak.
- Solo Missions is visible on the Perfect Menu.
- The Carrington Institute training option is available.
Create the agent file and choose the save destination
After the opening sequence, the Agent Save Slot screen presents New Agent. Press A, enter the agent name, and choose whether to save the file to the Game Pak or a Controller Pak. The Game Pak provides three save slots. A Controller Pak must have 28 free pages for Perfect Dark data, so insert the Controller Pak into the controller before selecting that destination and make sure it has enough space.
Once the new slot is selected, press A to confirm it and enter the Perfect Menu. Do not assume that the presence of a Controller Pak automatically means the game is using it; the save destination is chosen during agent-file creation. If you later need to copy or delete files, open Change Agent, cycle to the Game Files screen, and manage the Perfect Dark files on the Game Pak or Controller Pak there.
Keep the console powered until any active save operation has ended. Do not remove the cartridge or Controller Pak during saving. Before starting the campaign, verify that the intended agent name and storage destination are selected, and use the Game Files screen later if you need to confirm or manage stored files.
- The intended agent name is visible in the selected slot.
- The chosen storage device has enough space.
- A Controller Pak has at least 28 free pages if it is being used.
- You know where the Game Files screen is located.
- You will not power off or remove storage during an active save.
Choose a control layout and test the essential actions
From the Perfect Menu, tilt the Control Stick left or right to reach Options. Control Options provide four layouts for one controller and four layouts using two controllers. The manual identifies Style 1.1 as the basic single-controller arrangement: the Control Stick moves forward and backward and turns; Z fires; B opens doors, uses terminals, activates handheld devices, reloads when tapped, and accesses weapon secondary-fire behavior; L or R enters aiming mode; C Up and C Down look vertically; and C Left and C Right sidestep.
Start with Style 1.1 unless another layout feels more natural with your controller. In the Carrington Institute, use the Firing Range to test aiming and weapons, the Device Lab to practice handheld equipment, and the Hologram Room to practice movement and combat. Stand at a training terminal and press B to inspect the available program. Confirm that you can open doors, activate terminals, reload, aim, sidestep, look up and down, switch weapons, and crouch before entering a mission.
The original N64 options do not provide a modern numeric aim-sensitivity slider. If turning or aiming feels wrong, try another control layout, confirm that the analog stick is functioning correctly, or adjust your physical seating and grip. Do not begin a timed mission while still confusing movement, aiming, and strafing inputs.
- A control layout has been deliberately selected.
- You can aim with L or R and fire with Z.
- You can use B for doors, terminals, reload, and device interaction.
- You can sidestep and look vertically without losing control.
- The Firing Range, Device Lab, or Hologram Room has been used for testing.
Set aim behavior, display information, video, and audio
Control Options include Reverse Pitch, Look Ahead, Head Roll, Auto Aim, and Aim Control. Aim Control can be set to Hold or Toggle. Hold keeps aiming active while the assigned aim button is held; Toggle changes the aiming state with separate presses. Choose one deliberately and test it in the Firing Range. Reverse Pitch should match the direction your hand expects. Look Ahead and Head Roll can remain at their defaults until you know that you want a different viewing behavior.
Auto Aim is also controlled from this menu. Leave it enabled while learning the campaign if you want the game’s assisted targeting behavior, then test it against moving targets. Turn it off only if you prefer fully manual aiming and have confirmed that you can reliably hit targets with the selected layout. Display Options can show or hide the sight, keep the target reticle visible outside aim mode, show zoom information, display ammunition, identify the current gun function, show subtitles, and display mission time. For a first run, keeping ammunition, subtitles, and mission time visible is practical, while the other choices are preference-based.
Video Options provide Screen Size choices of Full, Wide, and Cinema; picture ratio choices of Normal and 16:9; and a Hi-Res toggle. On a conventional 4:3 television, begin with Full and Normal. Use the presentation that matches the actual display rather than forcing a widescreen ratio. If Hi-Res produces an unstable or unreadable picture through a particular television or adapter, return it to Off. The manual confirms the option but does not establish identical display behavior for every modern converter or monitor.
Audio Options contain separate Sound and Music volume controls and Mono, Stereo, Headphone, and Surround modes. Select the mode that matches the connected equipment. Keep sound effects high enough to hear alarms, weapon fire, and mission dialogue, then adjust music independently.
- Aim Control, Auto Aim, and Reverse Pitch have been tested rather than left accidental.
- Useful HUD information is visible.
- The image is stable and correctly proportioned.
- Hi-Res is enabled only if the display handles it reliably.
- Audio mode matches the television, receiver, or headphones.
Before you move on
- The Expansion Pak is installed and Solo Missions is available.
- An agent file exists in the intended Game Pak or Controller Pak location.
- The chosen control layout has been tested in the Carrington Institute.
- Aim Control, Auto Aim, Reverse Pitch, and display information are set deliberately.
- The selected screen presentation is stable and correctly proportioned.
- The audio mode matches the connected equipment and mission sounds are audible.
- You know how to reach Change Agent and the Game Files screen before beginning the campaign.
Weapons, Gadgets and Inventory — what to carry
Perfect Dark on the original Nintendo 64 rewards a balanced inventory rather than a collection of the strongest firearms. Keep an accurate weapon, a flexible combat weapon, and the mission devices supplied for the current objective. The A-button Quick Menu lets you change equipment without pausing, while the Inventory screen confirms whether a required gadget is still in Joanna’s possession. Do not confuse the Data Uplink with the Reprogrammer: they are separate mission devices with different designated targets.
Keep one accurate weapon and one flexible combat weapon
The Falcon 2 is a dependable backup because it is accurate and useful for controlled shots at medium range. A silenced Falcon 2 is especially valuable in missions where avoiding attention matters. It is not a complete campaign loadout, however; its damage and magazine capacity are limited compared with automatic weapons and heavier firearms.
The CMP150 is a practical automatic weapon for close and medium range. It is commonly taken from dataDyne guards, making it a useful replacement when pistol ammunition is low. Fire short bursts at distant targets and reload before beginning a terminal or device operation rather than waiting for the magazine to empty.
Use a shotgun or another close-range weapon in confined rooms where enemies can rush through a doorway. Use a scoped or accurate weapon against distant guards, rooftop threats, or exposed targets. Reserve explosives and heavy weapons for armored enemies, groups, vehicles, destructible objects, or objectives that specifically call for them. Carrying every heavy weapon you find can make it slower to reach a gadget when an objective suddenly changes.
- Keep an accurate firearm available throughout the mission.
- Pair a sidearm with an automatic or close-range weapon according to the area ahead.
- Reload before starting a terminal, device, or remote-camera operation.
- Do not discard your only weapon suited to distant targets merely to carry a stronger short-range weapon.
Use the A-button Quick Menu and Inventory screen
With the standard original N64 control layout, hold A during play to open the Quick Menu. Move the Control Stick to highlight the required weapon or item, then release A to equip it. The default page is the item-selection page. With the stick centered, tap Z while still holding A to move to the fire-mode page. This is faster and safer than cycling through the entire inventory while enemies are nearby.
The pause menu is useful when you need to inspect the whole loadout. Press Start and move to the Inventory screen. Confirm that the device named in the objective is present before entering the next combat area or triggering a major event. B opens doors, uses computer terminals, and activates handheld devices. Tapping B also reloads the current weapon; holding B toggles its secondary-fire mode.
For quick weapon changes, A cycles forward through the inventory. Press A and tap Z to cycle backward. Return to a firearm immediately after completing a device action, especially if Joanna is standing in an exposed corridor.
- Hold A for rapid weapon or item selection.
- Use the centered-stick Z press while holding A to reach the fire-mode page.
- Use Start and Inventory to verify mission equipment.
- Use B for ordinary interaction and for Data Uplink connections; tap B to reload when a firearm is active.
- Return to a firearm as soon as the interaction ends.
Keep the Data Uplink and Reprogrammer separate
The Data Uplink is the computer and electronic-systems device. In the original N64 campaign it is used for designated electronic locks, computer terminals, downloads, and specific alien or mechanical systems. Examples include electronic access in dataDyne Research: Investigation, downloads in dataDyne Central: Extraction, the Perfect Agent computer-records objective in Area 51: Rescue, and the bomb objective in Carrington Institute: Defense. Area 51: Rescue does not use the Data Uplink to deactivate the Skedar-shuttle bomb; that bomb operation belongs to Carrington Institute: Defense.
Equip the Data Uplink, stand close to the named terminal or system, face it, and press B to begin the connection. Remain still and keep Joanna close to the target until the operation completes. Turning away, moving out of range, or putting the Uplink away can interrupt the connection. Clear nearby enemies first or begin from cover whenever the room allows it.
In Carrington Institute: Defense, reach the Skedar ship on the landing pad after handling the earlier objectives, clear enough nearby attackers to approach safely, equip the Data Uplink, and press B while standing beside the ship. The device installs the virus that sends the ship away from the Institute, allowing the bomb to detonate without destroying the building.
The Reprogrammer is a separate device used for a designated vehicle. Its campaign use is Chicago: Stealth, where Joanna retrieves it with the remote mine from the storm-drain drop point and uses it on the taxi to create the required vehicular diversion. Move close to the marked taxi, equip the Reprogrammer, and press B. Once the taxi takes off, retreat to an alley or the dumpster area and wait for the crash and objective update before approaching the G5 Building entrance.
Do not carry the Data Uplink into a Reprogrammer objective expecting it to substitute for the required tool, and do not assume the Reprogrammer can hack ordinary computers. The devices are related variants, but their mission targets are different.
- Use the Data Uplink on named computers, electronic locks, downloads, and designated alien or mechanical systems.
- Use the Data Uplink for the Perfect Agent computer-records objective in Area 51: Rescue.
- Use the Data Uplink beside the Skedar ship in Carrington Institute: Defense to install the virus and resolve the bomb objective.
- Use the Reprogrammer on the designated vehicle, especially the taxi in Chicago: Stealth.
- Stand close, face the target, press B, and remain in range until the operation finishes.
- Clear the immediate area or identify cover before beginning a connection.
- Check for the objective update before leaving the target.
Deploy the CamSpy from a protected position
The CamSpy is a remote-controlled floating camera that can enter narrow routes and rooms Joanna cannot safely inspect. It is required in dataDyne Research: Investigation to photograph the radioactive isotope and also appears in G5 Building: Reconnaissance. Enemies can see the CamSpy, so it is reconnaissance equipment, not an invisible scouting tool.
Park Joanna behind a wall, around a corner, or in another defensible position before activating the camera. If guards are already close, clear them or retreat first. Move the CamSpy through the required doors, using B to open doors. At the target, press Z to take the required holographic picture. Press A to exit CamSpy mode and return to Joanna.
Have a firearm selected before returning to Joanna. Her stationary body remains vulnerable while the camera is active, and the CamSpy’s view does not protect her. If the camera is destroyed or the picture did not register, return to cover and check the objective status before deciding whether to retry or restart.
- Park Joanna in cover before activating the CamSpy.
- Use B to open CamSpy doors and Z for its still-picture function.
- Press A to return to Joanna immediately after the required action.
- Treat the CamSpy as visible reconnaissance equipment, not as a stealth guarantee.
- Verify the holograph objective before moving on.
Reserve ECM Mines and manage Night Vision
An ECM Mine jams a designated electronic communications or security device. In dataDyne Central: Defection, attach it to the communications or security equipment named by the objective. Approach close enough for the mine to attach to the correct panel or computer. Do not spend an ECM Mine on unrelated machinery simply because it appears interactive, and remember that some effects are temporary.
Night Vision is intended for dark sections, including dataDyne Central: Extraction and Crash Site: Confrontation. Equip it before entering a corridor, tunnel, or room where normal vision is inadequate. Turn it off again in bright areas; the amplified display can wash out the scene and make aiming or navigation harder.
Other specialist equipment, such as the Door Decoder, R-Tracker, scanners, disguises, and Combat Boost, should be treated as objective tools rather than spare weapons. If an objective names a particular gadget, keep it available until that objective is visibly complete.
- Attach ECM Mines only to the named communications or security target.
- Do not waste limited ECM Mines on unrelated machinery.
- Activate Night Vision before darkness prevents reliable navigation.
- Disable Night Vision when bright lighting makes the display difficult to read.
- Keep specialist devices until their objective is confirmed complete.
Recover after a failed device operation
If an ECM Mine misses, a CamSpy is destroyed, or a terminal connection is interrupted, retreat to cover instead of continuing with the wrong item equipped. Open the Quick Menu, select a firearm, reload, and control the immediate threat before returning to the objective.
If a required device seems to be missing, check the Inventory screen and retrace the mission route. Weapons can often be replaced from defeated guards, but mission gadgets usually come from a specific pickup or starting loadout. Do not trigger a major event before confirming that you have the device required for the next objective.
When an area becomes too dangerous, withdraw through the previous doorway and fight from the choke point. After the threat is controlled, select the correct device, face the target, and wait for the objective update. If a required gadget was lost or an objective has become impossible, restart the mission rather than carrying an unrecoverable state deeper into the level.
- After every device use, verify the objective update or resulting mission response.
- Identify nearby cover before beginning an interaction.
- Use Inventory to confirm that a required gadget is still carried.
- Switch to a firearm before dealing with enemies.
- Restart if a lost device makes the required objective impossible.
Before you move on
- You can hold A to open the Quick Menu and select a weapon or device without pausing.
- You can use Start and the Inventory screen to confirm which weapons and gadgets Joanna carries.
- You can use the Data Uplink on a designated computer, electronic lock, download terminal, or alien system by pressing B and remaining in range until the operation completes.
- You can identify the Reprogrammer as the required tool for designated vehicles, including the taxi diversion in Chicago: Stealth.
- You can deploy the CamSpy from cover, open doors with B, take a holographic picture with Z, and return to Joanna with A.
- You can attach an ECM Mine to the named security or communications device without wasting it on unrelated machinery.
- You can activate Night Vision for a dark section and disable it when bright lighting makes the display difficult to read.
- Before each mission-critical interaction, you have a suitable firearm selected, nearby cover identified, and a recovery route planned.
References for this chapter
- Nintendo 64 Game Manuals — Perfect Dark manual PDF
- Nintendo 64 Instruction Manuals: Perfect Dark
- Perfect Dark - Weapons/Devices Guide - Nintendo 64 - By MetroidMoo - GameFAQs
- Perfect Dark - Guide and Walkthrough - Nintendo 64 - By Kajtek - GameFAQs
- Area 51 - Rescue - Perfect Dark
- Carrington Institute - Defense - Perfect Dark Recon
- Perfect Dark - Guide and Walkthrough - Nintendo 64 - By Croco
- Perfect Dark - Game Script - Nintendo 64 - By ironyisntdead
Movement, Stealth, and Enemy Detection
Perfect Dark’s stealth is built around sightlines, patrol timing, camera coverage, alarm behavior and surprise attacks rather than a universal hidden-movement system. Crouching and sidestepping help Joanna use cover, aim and pass through suitable spaces, but they do not make her invisible. A reliable approach is to identify the next threat, remove or bypass it, and keep a defensible fallback position before advancing.
Use crouching and cover correctly
Use the configured duck control when approaching a low opening, lowering Joanna’s profile behind cover or preparing a controlled shot. The Nintendo 64 control scheme also supports sidestepping, which is useful for peeking around doorframes and moving across a gap without exposing Joanna’s entire body. Some missions include ducts, cables or other low routes that require crouching or crawling, but ordinary corridors do not become safe merely because Joanna is crouched.
Crouching is not a universal stealth mode. Guards can still detect Joanna at close range or when she enters their line of sight, and cameras continue to monitor their assigned areas. Treat walls, vehicles, machinery, pillars and doorframes as the real protection. Before leaving cover, identify where Joanna will stop next; crossing from one exposed position to another without a second piece of cover is usually what turns a quiet approach into an avoidable firefight.
Keep a weapon ready after passing through a low route or around a blind corner. A guard may be close on the other side, and the game does not guarantee that a crouched approach will produce a surprise opportunity.
- Use ducking for cover, low routes and controlled aiming rather than invisibility.
- Move between solid pieces of cover instead of relying on darkness or posture.
- Keep a weapon selected before emerging from a duct, doorway or blind corner.
Study patrols and sightlines before crossing
When an area is unfamiliar, stop at the edge of cover and watch the nearest patrol long enough to learn where the guard turns and which passage the guard can see. Also check for a second guard covering the same route, a camera above the doorway or an alarm panel that becomes the enemy’s immediate objective after detection. Move only when the next position is clear, and stop before entering the following sightline if the timing is uncertain.
If a guard is isolated and facing away, a close punch can remove the threat quietly. A punch from behind can produce a one-hit surprise attack, which is useful when ammunition is limited. A controlled shot may be safer when the guard is near an alarm panel or when another patrol is about to turn the corner. Do not fire across a large room simply because one target is visible; the shot may alert guards outside the current view and force Joanna into an open exchange.
Leaving a surrendered guard alone can conserve ammunition, but surrender is not the same as clearing the area. Check whether the guard was near an alarm, whether another enemy can reach the same route and whether the mission requires that character to remain alive.
- Observe the patrol route before crossing an unfamiliar room.
- Look for overlapping guard sightlines and cameras above doors or ramps.
- Use a rear punch on an isolated unaware guard when it is safe to approach.
- Do not assume a surrendered enemy means the entire area is secure.
Handle cameras without creating a larger problem
Security cameras are independent detection hazards. On missions where cameras can be destroyed, shoot the lens or casing from outside its active view, then wait briefly to confirm that it has stopped tracking. If a camera cannot be destroyed or the mission instead provides an ECM Mine, follow the objective’s intended method rather than spending time attacking unrelated equipment. A camera may be positioned above a door, on a wall behind Joanna’s starting point or across a ramp, so check the ceiling and walls before stepping into a new room.
Avoid lingering in a camera’s view while reloading, changing equipment or reading the room. Brief exposure may be enough to trigger an alarm, and the result depends on the mission. Some levels merely alert nearby guards or add opposition; other objectives, especially meetings or stealth demonstrations, fail if the alarm is activated. The safest procedure is to cross the sweep in one deliberate movement, disable the camera first when practical, or retreat behind cover and choose another route.
Do not assume destroying one camera makes a whole building safe. Security systems often contain several cameras, and a later floor may have its own coverage. Mark each camera mentally as you advance and keep the route back to the last cleared room available.
- Scan walls and ceilings before crossing a doorway or ramp.
- Destroy a camera only when doing so is safe and compatible with the objective.
- Never stop in camera view to reload, change items or inspect the map.
- Treat each new floor or security zone as potentially having separate coverage.
Use ECM Mines and remote devices during safe windows
An ECM Mine is primarily a security tool. Select it from the item menu and attach or throw it at the designated security hub, terminal or other objective target. In missions that use the mine to disable cameras or security systems, the effect is temporary, so use the opening to cross the protected area or complete the required action rather than wandering into optional rooms. The objective briefing and completion message determine whether a particular panel is valid; an ordinary computer or alarm box is not automatically an ECM target.
The CamSpy and related remote devices are valuable for reconnaissance and mission objectives, but Joanna remains in the location where the device was deployed. Before activating a CamSpy, place Joanna behind solid cover, clear the immediate approach and know how to exit the area. Remote control is especially risky near a patrol: an enemy can enter Joanna’s position while the camera is traveling through a duct or recording a target. If the area is not secure, stop operating the device, return to Joanna and deal with the threat first.
Do not spend an ECM Mine or other limited device on experimentation during a mission unless the objective permits it. If the device is required later, an unnecessary use can force a restart.
- Use an ECM Mine on the mission-designated security target.
- Treat the ECM effect as temporary when it disables cameras or security systems.
- Operate the CamSpy from cover with a clear retreat route.
- Preserve limited devices for required objectives.
Recover from detection according to the mission
If a guard sees Joanna before an alarm is triggered, move behind the nearest solid cover instead of continuing through an exposed corridor. Doorways and corners are useful defensive positions because enemies must approach through a narrow angle. Reload, check health and identify whether the pursuing guard is moving toward an alarm panel. If the enemy is isolated, eliminate the threat from cover; if the route is crowded, retreat to the last room that was definitely clear and make a new plan.
Once an alarm sounds, do not assume every mission is lost, but do not assume it is harmless either. Read the objective list and mission behavior. Some alarms bring additional guards or place nearby enemies on alert. Some can cause a specific objective to fail, such as preventing a meeting from taking place. Other missions are designed around a later alarm and remain completable. If the failed objective cannot be repaired, restart promptly rather than wasting ammunition on a run that cannot finish.
Perfect Dark does not provide a universal command to reset an alerted area. Falling back may separate Joanna from enemies or put her behind cover, but guards can remain alerted and patrol routes do not necessarily return to their original state. Push forward only when the next objective is still achievable and the new position is safer than the current one.
- Fall back to a known room or doorway when first detected.
- Determine whether the alarm affects the mission objective before committing to recovery.
- Restart when a required no-alarm or protected-NPC objective has already failed.
- Do not treat retreat as a guaranteed reset of enemy awareness.
Before you move on
- You can cross a guarded room by identifying the next cover position, patrol timing, camera coverage and nearest alarm panel before moving.
- You can use ducking, sidestepping and rear punches as practical movement or combat tools without treating them as universal invisibility mechanics.
- You can distinguish a camera alert, a recoverable alarm, an alarm that escalates enemy presence and an alarm that fails a mission-specific objective.
- You can deploy an ECM Mine on the correct security target and use the resulting opening before its effect expires.
- You can operate a CamSpy from cover and return control to Joanna before an enemy reaches her position.
- After detection, you can retreat to a defensible room, decide whether the current mission remains completable and restart when a required objective cannot be repaired.
References for this chapter
Levels 1–2 — dataDyne Central: Defection and dataDyne Research: Investigation
These are the first two levels of the original Nintendo 64 campaign. Defection takes Joanna from the dataDyne rooftop to the laboratory elevator. Research: Investigation continues immediately underground and requires the CamSpy, the Data Uplink and, on higher difficulties, the cleaning hovbot and experimental-technology route. The safest approach is to finish every displayed objective before using the final elevator or opening Dr. Caroll’s door.
Level 1: dataDyne Central: Defection — reach the building interior
On Agent, the only required objective is Gain Entrance to Laboratory. On Special Agent, you must also disable the internal security hub, obtain Cassandra’s keycode necklace and disable the external communications hub. Perfect Agent adds Download Project Files. The route below handles every objective, so it can be followed on any difficulty.
From the helipad, destroy the rooftop security camera before dropping to the lower roof. Enter through the roof door and deal with the guard near the ramp. Continue down the ramps and destroy the next camera when it comes into view. Avoid lingering in the camera’s sightline because an alarm makes the early building section more dangerous.
At the bottom of the ramp, locate the reddish internal security hub on the wall. Equip an ECM Mine and attach it to the hub. The completion message confirms the first higher-difficulty objective. If you are playing Agent, you can simply continue toward the elevators, but clearing the hub is useful practice and does not prevent completion.
- The rooftop and ramp-area cameras have been destroyed or bypassed.
- The internal security hub has been disabled on Special Agent or Perfect Agent.
- The first CMP-150 and other dropped ammunition have been collected if needed.
Take Cassandra’s necklace without killing her
Continue down toward Cassandra’s office. Clear the guards outside the office, then use the desk button to open the large office doors if they are still locked. Put away your weapon before entering. Cassandra must remain alive; approach her and use a punch or pistol-whip attack to knock her unconscious, then collect the keycode necklace.
If Cassandra or her secretary is killed, the mission fails. If the office becomes difficult to enter because guards are alerted, retreat to the stairwell, let pursuing guards come through the doorway, and then make another controlled approach. Do not leave the building section until the necklace objective has registered.
- Cassandra is unconscious rather than dead.
- The keycode necklace has been collected.
- The objective-complete message is visible before you leave the office.
Disable the external comms hub
Leave Cassandra’s office and use the elevator to return toward the foyer and ground-floor security area. Eliminate the guards around the foyer and descend to the lower floor. Enter the security room through the side door and locate the second communications hub low on the wall.
Attach another ECM Mine to this hub. Crouch if necessary so the mine connects with the panel. Once the objective confirms, leave the room and continue toward the project-file section. Do not waste the remaining ECM Mine on ordinary guards or doors.
- The external communications hub has been disabled on Special Agent or Perfect Agent.
- The second ECM Mine was placed directly on the hub.
- The route to the project-file area is clear enough to proceed.
Perfect Agent: download the project files
On Perfect Agent, return to the lower office floors and move carefully because ammunition and health are limited. Destroy the security camera near the elevator corridor before it can trigger an alarm. Continue to the office hallway and enter the room where a dataDyne employee is discussing the project files.
Do not kill this employee. After he notices Joanna, follow him as he runs to the elevator. When he stops at the destination, wait for him to begin the file access procedure. Equip the Data Uplink and use it on the nearby computer when the employee has made the terminal available. Wait for the download-complete message before leaving.
If he runs into a side room, clear the guards around the route and locate him rather than shooting him. The objective depends on the terminal interaction, not merely reaching the office.
- The project-file employee is alive.
- The Data Uplink has been used on the correct computer.
- The project-file download has completed on Perfect Agent.
Enter the laboratory elevator
After the required objectives are complete, return to the ground-floor route near the security room. Look for the small room containing a computer and desk beside the multicolored wall panel. Press the use button on that panel to reveal the concealed passage.
Clear the guards inside and follow the passage around to the blue laboratory elevator. Enter it only after checking the objective list. The elevator ends Defection and begins dataDyne Research: Investigation. On Agent, this is the first point at which you need to use the hidden route; on the higher difficulties, it is also the final step after the ECM, necklace and, on Perfect Agent, file objectives.
- Every objective required by the selected difficulty is complete.
- The concealed wall panel has opened.
- The blue laboratory elevator has been entered and the mission-success transition occurs.
Level 2: dataDyne Research: Investigation — photograph the isotope
When the elevator stops, leave it and follow the initial corridor to the large laboratory room. Take the route marked with the Caution sign. Clear the guards beyond the doors, but do not enter the radioactive chamber as Joanna.
Equip the CamSpy and send it through the next doorway. Guide it straight toward the green crystalline radioactive isotope until it has a clear view, then use the camera command to holograph the isotope. The objective completes when the message appears. You do not need to recover the CamSpy afterward, and the mission does not require Joanna to enter the radioactive area.
If guards destroy the CamSpy before the holograph registers, restart the mission. The isotope photograph is required on Agent, Special Agent and Perfect Agent.
- The CamSpy is operating inside the radioactive chamber.
- The green isotope has been holographed.
- The isotope objective-complete message has appeared.
Special Agent and Perfect Agent: start the security maintenance cycle
Return to the starting laboratory area and wait near the grated service door for the cleaning hovbot to open it. Follow the newly available service passage, staying near the robot. The robot temporarily deactivates security hazards and is essential for getting through the maintenance route safely.
At the maintenance consoles, activate both security-system terminals. The objective is not completed merely by entering the passage or seeing the robot move; both terminals must register. Once the message appears, remain with the hovbot as it progresses through the laser corridors. Do not sprint ahead through active beams.
If the robot moves out of sight, stop and let it catch up rather than crossing the next laser barrier alone. Taking damage here can leave you too weak for the later Dragon-armed guards.
- The cleaning hovbot has opened the service passage.
- Both security-system terminals have been activated.
- The maintenance-cycle objective is confirmed.
- The robot has been followed through the laser sections.
Special Agent and Perfect Agent: shut down the three experiments
Return to the large laboratory area and enter the Sector 2 route. Visit the experiment rooms in sequence. In the first two rooms, aim your weapon at the scientist and order him to shut down the experiment. Keep the scientists alive; killing them does not satisfy the objective and can fail the mission.
For the final experiment, the scientist will run to a control terminal and trigger an alarm instead of cooperating. Follow him immediately, knock him unconscious before the alarm sequence finishes, then use the appropriate nearby terminal yourself. If the objective does not complete, revisit the first two rooms and confirm that each scientist actually shut down his equipment.
Clear guards from the corridor before moving between rooms. A controlled retreat to the previous doorway is safer than chasing a scientist through an occupied laboratory.
- The first experiment has been shut down by its scientist.
- The second experiment has been shut down by its scientist.
- The final scientist has been stopped and the correct terminal has been activated.
- The three-experiment objective-complete message appears.
Perfect Agent: collect the experimental technologies
On Perfect Agent, collect the three prototype technologies while working through the laboratory branches. Search the Sector 2 rooms, including the rooms reached by the internal elevator, and take the prototype items rather than treating ordinary ammunition as mission equipment. One prototype is found in the later route beyond the security doors, so the objective cannot be completed by searching only the first laboratory rooms.
Use the Data Uplink at the security terminal near the Dragon-armed guards when the route reaches it. The terminal unlocks the security doors. Continue through the Restricted and Security sections and enter the side rooms that open beyond them. Take the prototype in the final technology room, then check for the objective confirmation before proceeding to Dr. Caroll.
The experimental-technology objective is separate from the isotope photograph, maintenance cycle and experiment shutdown. If the message has not appeared, backtrack through the Sector 2 branches before entering the final area.
- The required Sector 2 prototype items have been collected.
- The later prototype beyond the security doors has been collected.
- The experimental-technology objective is confirmed before the final approach.
Use the Data Uplink and locate Dr. Caroll
Continue through the laser-protected route with the hovbot, then deal with the guards carrying Dragons near the security terminal. Use the Data Uplink on that terminal to unlock the security doors. This interaction is required to reach the final sector; merely carrying the Data Uplink does not complete it.
Proceed through the unlocked route, the Restricted area and the Security doors. Expect additional guards in the rooms beyond the terminal. Sentry guns cover the final corridor, so destroy them from cover with a weapon that can target them, or move through quickly only if your health and shields are strong. On Perfect Agent, eliminate the extra sentry position around the central structure before crossing.
Open the large final door after all difficulty-specific objectives are confirmed. Dr. Caroll is in Sector 4. Reaching him completes the final objective and triggers the mission-success screen. If the door does not finish the level, check the objective list and backtrack for an unregistered experiment or prototype rather than repeatedly attacking the final security area.
- The Data Uplink has unlocked the security doors.
- The required objective messages for the selected difficulty are complete.
- The sentry corridor has been crossed.
- Dr. Caroll has been located and the mission-success screen appears.
Before you move on
- Defection ends at the laboratory elevator after all objectives required by Agent, Special Agent or Perfect Agent have registered.
- Research: Investigation ends after the isotope has been holographed, Dr. Caroll has been located and the higher-difficulty maintenance, experiment and prototype objectives are complete where applicable.
- The Data Uplink has opened the security doors and the final sentry corridor has been crossed.
- The mission-success screen appears and dataDyne Central: Extraction becomes available as the next regular campaign level.
- Mr. Blonde’s Revenge, Maian S.O.S., WAR!, The Duel, timed cheats and Perfect Dark mode are optional post-story goals and are not required for the regular campaign ending.
Level 3 — dataDyne Central: Extraction
dataDyne Central: Extraction is the third regular level in the original Nintendo 64 campaign. Joanna begins in the darkened foyer with Dr. Caroll following behind her. The immediate task is to reach the foyer elevator without allowing Caroll to be killed. Special Agent adds the destruction of the dataDyne hovercopter, while Perfect Agent also requires reactivating the office elevator before the helicopter can be destroyed. On every difficulty, Cassandra’s bodyguards must be eliminated before Joanna can reach the roof and rendezvous with the jumpship. Dr. Caroll can fall behind during elevator changes, but he catches up during the route and appears at the helipad when the ending sequence begins.
1. Check the difficulty objectives and use night vision
The mission begins in darkness. Equip the Night Vision Goggles immediately. Dr. Caroll is present from the start and must survive the escape. Do not sprint so far ahead that enemies turn their fire toward him, and avoid firing through his position when clearing the foyer.
Agent requires Access foyer elevator, Defeat Cassandra’s bodyguards, and Rendezvous at helipad. Special Agent adds Destroy dataDyne hovercopter between the elevator and bodyguard objectives. Perfect Agent adds Reactivate office elevator before the hovercopter objective, making five required objectives in total.
- Night Vision Goggles are equipped.
- Dr. Caroll is still alive and following.
- The objective list for the selected difficulty is understood.
2. Reach the foyer elevator
Move through the first doorway and eliminate the guard ahead. Continue left into the next room, open the door, and immediately back away far enough to shoot the guard behind the desk without exposing Dr. Caroll. Enter the main foyer and work around the barricades rather than crossing the open center carelessly.
Clear the guards behind the barricades, then move around toward the front of the building. Deal with the guard near the couch and the two guards behind the front desk. From there, go around the corner to the stairs. Kill the guards at the top, call the elevator on the left, and enter it when it arrives.
On Special Agent and Perfect Agent, the darkness is temporary, so prioritize the route over optional weapon pickups. If the lights come back on before the elevator arrives, use the barricades and desk as cover, finish the remaining guards, and continue rather than restarting immediately. The objective completes when Joanna enters the elevator.
- The foyer and stair approach are clear enough to move safely.
- The elevator on the left has been entered.
- Access foyer elevator is marked complete.
3. Perfect Agent: reactivate the office elevator
This section is required only on Perfect Agent. After leaving the foyer elevator, go around the nearby corner and eliminate the guard who may be positioned there. Take his keycard if he drops one, then return to the foyer and enter the security room. The keycard allows access to the room containing the Rocket Launcher and ammunition; the motionless figures there are part of the mission scene and do not need to be attacked.
Return to the upper offices. From the elevator area, follow the corridor around the building and enter the offices on the opposite side. Clear the guards blocking the route, then continue through the offices until you reach the desk terminal. Press B at the terminal to reactivate the office elevator.
The hovercopter may fire through windows while you are crossing this floor. If it begins attacking, retreat behind the elevator structure or into an office, wait for a safer opening, and then continue. Do not remain in a corridor trading fire with the helicopter.
- Perfect Agent only: the keycard route to the Rocket Launcher room has been used.
- The office-floor terminal has been activated.
- Reactivate office elevator is marked complete.
4. Destroy the dataDyne hovercopter
This objective is required on Special Agent and Perfect Agent. Agent does not require the hovercopter objective. On the upper office route, reach the area containing the Rocket Launcher. On Special Agent, follow the upper-floor route to the office floor, eliminate the guard near the launcher, and collect the weapon. On Perfect Agent, use the launcher obtained through the security-room route before returning to the upper offices.
Find a window or glass opening with a clear view outside. If necessary, break the window first, then wait in cover until the hovercopter comes into view and stops or lines up with the building. Fire a rocket directly at it. The targeted function can help, but a carefully aimed normal rocket is also effective. If the first shot misses, retreat into the stairwell or an office and use another rocket rather than standing in the open.
If the helicopter is not immediately visible, do not chase it around the building. Keep moving through the objective route and watch for it to return to a window. The objective completes when the hovercopter is destroyed.
- Special Agent or Perfect Agent: the Rocket Launcher has been collected.
- A clear window firing position has been reached.
- The hovercopter has been destroyed.
5. Defeat Cassandra’s bodyguards
Before going to the roof, search the upper office floors for any bodyguards bypassed during the elevator or hovercopter sequence. On Perfect Agent, this sweep is especially important because the bodyguard objective counts enemies throughout the upper floors, not only the final rooftop group. Use doorways and office corners as cover, and let enemies approach instead of crossing large rooms under shotgun fire.
Once the upper floors are clear, take the available elevator or stairs toward Cassandra’s office and the roof level. Collect the Rocket Launcher ammunition if it remains useful, but do not stop for optional weapons while enemies are active. At the roof approach, Cassandra’s scene begins. The guards become active after her speech and the lights go out.
A reliable response is to face the guard near the light switch before the blackout. Shoot that guard, move to the switch, and turn the lights back on as soon as the room goes dark. The guards’ night vision is disrupted temporarily, giving Joanna a short opening to eliminate the remaining rooftop enemies. Use the CMP-150 for rapid follow-up fire and keep moving between the switch, the ramp, and nearby cover.
If an enemy survives, the bodyguard objective will not complete. Check the roof-level corners and then return down the office route to search for any missed bodyguard before trying the roof again. Cassandra herself is not a combat target in this mission.
- All bodyguards on the upper floors have been eliminated.
- The rooftop bodyguards have been eliminated.
- Defeat Cassandra’s bodyguards is marked complete.
6. Reach the helipad and continue the campaign
After the bodyguard objective completes, leave the combat area through the roof exit. Follow the ramps upward to the helipad. Do not waste time searching for Dr. Caroll if he is not immediately beside Joanna; he catches up during the ending sequence once Joanna reaches the helipad.
The mission ends at the helipad and the campaign advances to Carrington Villa: Hostage One. If Joanna or Dr. Caroll dies, restart the mission and repeat the relevant section. If the mission does not end at the helipad, return to the objective list and confirm that every difficulty-specific requirement is complete, especially Reactivate office elevator on Perfect Agent and Destroy dataDyne hovercopter on Special Agent or Perfect Agent.
- Rendezvous at helipad is marked complete.
- The ending sequence has started.
- The next regular level is Carrington Villa: Hostage One.
Before you move on
- Agent completion requires Access foyer elevator, Defeat Cassandra’s bodyguards, and Rendezvous at helipad.
- Special Agent completion requires Access foyer elevator, Destroy dataDyne hovercopter, Defeat Cassandra’s bodyguards, and Rendezvous at helipad.
- Perfect Agent completion requires Access foyer elevator, Reactivate office elevator, Destroy dataDyne hovercopter, Defeat Cassandra’s bodyguards, and Rendezvous at helipad.
- Dr. Caroll survives the level.
- Joanna reaches the helipad and the game advances to Carrington Villa: Hostage One.
- No optional weapon, cheat, or post-story objective is required to progress the regular campaign.
References for this chapter
Level 4 — Carrington Villa: Hostage One
Carrington Villa is the fourth regular level of the original Nintendo 64 campaign and the only level in Mission 2. On Agent and Special Agent, begin at the observatory and save the negotiator at the pier. On Perfect Agent, begin as the negotiator and escape the opening ambush. The route then leads through the villa, down to the power room and wind generator, back upstairs for the Perfect Agent hacker objective, and finally through the wine cellar to rescue Daniel Carrington. The next regular level is Chicago: Stealth.
1. Handle the opening according to difficulty
On Agent and Special Agent, you begin at the observatory overlooking the pier. Equip the Sniper Rifle and immediately shoot the two dataDyne guards holding the negotiator. Do not spend time searching the observatory first: delaying can allow the negotiator to be killed. Once both guards are down and the negotiator escapes, Save the Negotiator is complete.
On Perfect Agent, you begin on the pier as the negotiator. Draw the Laptop Gun, disarm or shoot the two guards in front of you, and move toward the villa wall. To complete Capture a dataDyne Guard, knock out a guard instead of killing every available target. The unconscious guard must survive until the mission ends, so avoid leaving a captured enemy in an active firefight. Perfect Agent also begins the rooftop-sniper task, so reach cover quickly after escaping the pier.
- Agent or Special Agent: the negotiator has escaped.
- Perfect Agent: Joanna has escaped the opening ambush.
- Perfect Agent: at least one dataDyne guard is unconscious and remains alive.
2. Use the rock route and clear exposed sniper positions
From the observatory, turn around and follow the rocky tunnels behind the building. Eliminate the guards in the passage and collect a CMP150 if you need an automatic weapon. At the lower end of the route, use the rock walls and corners as cover rather than sprinting across the clearing.
On Special Agent and Perfect Agent, eliminate the rooftop snipers. Peek from cover, fire a controlled shot, and retreat immediately instead of standing in the open to trade shots. Check the sniper on the nearby wall, the distant position near the lighthouse or shoreline, and the positions on the villa roof and outer walls. The Sniper Rifle is best for distant targets, while the Laptop Gun is useful on Perfect Agent when a sniper moves into closer range.
Agent does not require the rooftop-sniper objective, but any sniper covering your route should still be removed or bypassed. Use the stairs and villa walls to break their sightlines. Do not cross the large open area until the nearest firing positions are under control.
- The visible sniper positions covering your approach are neutralized or safely bypassed.
- Special Agent and Perfect Agent: Eliminate Rooftop Snipers is complete.
- You have a reliable close-range weapon before entering the villa.
3. Enter through the villa and map the return route
Approach the villa by the stair route and enter through the main doorway. Clear only the guards needed to move safely; there is no requirement to sweep every exterior position. Inside, use doorframes and curved walls as cover, since several guards occupy the kitchen, dining-room and upper entrance areas.
Perfect Agent players should note the computer-room locations during this first pass. The hacker objective will require a fast return upstairs after the wind generator is activated. Also keep the route to the kitchen and basement in mind, because the mission repeatedly sends you between the upper villa and lower complex.
A Sniper Rifle or shield may be available in the villa's side rooms, but these are optional resources. Take them only if doing so does not expose you to nearby guards or delay the required route.
- The villa entrance and kitchen route are safe enough for repeated travel.
- Perfect Agent: you know the route to the dining-room side room and upper main-entrance area.
- You have not wasted time clearing areas unrelated to the objectives.
4. Restore power and activate the wind generator
From the kitchen, descend the stairs and take the brown door leading into the lower basement. Continue through the basement passage to the room containing the two power generators. Clear the guards around the machinery, then activate both switches. Activating only one does not restore the power needed for the next objective.
Return to the basement junction and take the passage toward the wind generator. Several guards defend this approach. Lure them back into the corridor or fight from the entrance instead of standing beside the generator while exposed. Once the area is clear enough to operate safely, activate the wind-generator switch. This completes Activate the Wind Generator on all three difficulties.
- Both power-generator switches are active.
- The wind-generator area is not occupied by an immediate threat.
- Activate Wind Generator is marked complete.
5. On Perfect Agent, stop the hackers without damaging the terminals
On Perfect Agent, Grimshaw reports the hacker attack shortly after the wind generator is activated. Move back upstairs immediately. The first hacker is in the small room beside the dining-room route. The other two are together in the upper main-entrance area. Follow the familiar villa route rather than searching optional rooms.
Shoot the hackers, not the terminals. The objective is time-sensitive, and destroying the computers can prevent completion. If you lose track of the route, use the R-Tracker and return to the marked rooms directly. After all three hackers are eliminated, the objective should register before you go back downstairs.
- All three hackers are eliminated before the alert expires.
- The required computer terminals remain intact.
- Locate and Eliminate the dataDyne Hackers is complete.
6. Clear the wine cellar and rescue Carrington
Return to the lower basement and take the passage across from the wind-generator area toward the wine cellar. Clear the guards near the stairs, then work through the wine racks and connecting corridors. Enemies can be hidden behind the racks, so advance from cover and check both sides before entering the next section.
The last guard in the cellar route drops the key card. Pick it up, return to the locked door at the end of the complex, and use the card to open it. Daniel Carrington is inside. Enter the room to complete Rescue Carrington and finish the level.
If health is low, retreat to the previous corridor and draw enemies toward you one at a time. Do not leave after activating the generator: the mission does not end until Carrington is reached. On Perfect Agent, confirm that the captured guard is still alive and that the hacker objective is complete before opening the final door.
- The cellar guards blocking the key-card route are defeated.
- The key card has been collected.
- Rescue Carrington is complete.
- The mission-completion screen appears and Chicago: Stealth becomes available.
Before you move on
- Agent: Save the Negotiator, Activate the Wind Generator and Rescue Carrington are complete.
- Special Agent: Save the Negotiator, Eliminate Rooftop Snipers, Activate the Wind Generator and Rescue Carrington are complete.
- Perfect Agent: Eliminate Rooftop Snipers, Activate the Wind Generator, Locate and Eliminate the dataDyne Hackers, Capture a dataDyne Guard and Rescue Carrington are complete.
- The mission-completion screen appears.
- Chicago: Stealth is available as the next regular story level.
Level 5 — Chicago: Stealth
Chicago: Stealth is the fifth regular solo level in the original Nintendo 64 campaign. The required objectives depend on difficulty. On Agent, retrieve the drop-point equipment, create a vehicular diversion, and enter the G5 Building. Special Agent adds Prepare escape route. Perfect Agent adds both Prepare escape route and Attach tracer to limousine. The Tracer Bug is a Perfect Agent starting item; it is not a universal starting item on the lower difficulties. There is no escort sequence in this level. Protect the CIA civilians, avoid the invulnerable G5 Guard Bot, and use the taxi or BombSpy to clear the car-park entrance. The mission ends when Joanna enters the G5 Building through the car-park lift. The difficulty matrix and objective order are documented in multiple Nintendo 64 walkthroughs.
1. Identify the difficulty-specific objective list
Before moving, check the mission difficulty and keep the correct objective list in mind. Agent requires Retrieve drop point equipment, Create vehicular diversion, and Gain entry to G5 building. Special Agent requires those three objectives plus Prepare escape route. Perfect Agent requires Retrieve drop point equipment, Attach tracer to limousine, Prepare escape route, Create vehicular diversion, and Gain entry to G5 building.
The level contains no companion who must be escorted. The limousine is an objective target only on Perfect Agent, and it leaves after a short opening window. CIA personnel in the streets count as civilians for mission-failure purposes: do not kill them. They may be knocked out when necessary, but firing into crowds is unsafe.
- Agent: equipment, diversion, G5 entry.
- Special Agent: equipment, escape route, diversion, G5 entry.
- Perfect Agent: tracer, equipment, escape route, diversion, G5 entry.
- Keep all civilians alive.
- Do not attempt to destroy the G5 Guard Bot.
2. Move through the opening street and reach the drains
At the start, round the first alley corner carefully. Knock out or quickly eliminate the nearby guard before he raises an alarm. Move through the opening toward the main street and immediately identify the FBI agents, G5 guards, CIA civilians, and the Guard Bot. FBI agents can call for reinforcements, while the Guard Bot is invulnerable and should be avoided rather than attacked.
Use the side alleys, walls, and corners to cross the street without remaining in the robot’s line of fire. Near the dumpster, clear only the armed enemies blocking the fence opening. Do not shoot the tan-coated CIA personnel. If an FBI agent begins calling for help, stop him quickly; an alarm brings additional pressure and makes the car-park approach much harder.
Enter the fenced area behind the dumpster and follow the drains. Several guards occupy the connecting passages. Clear the enemies that can attack you, then use the quieter drain route leading toward the low opening and the grate. Keep the Guard Bot out of sight whenever possible.
- Neutralize the opening guard before he raises an alarm.
- Kill or knock out threatening FBI agents quickly.
- Leave CIA civilians alive.
- Use the fence opening behind the dumpster.
- Avoid wasting ammunition on the Guard Bot.
3. Perfect Agent: attach the tracer to the limousine first
On Perfect Agent, the Tracer Bug is available from the start and must be attached to the black limousine before it leaves. Do this before exploring optional areas or spending time clearing every guard. From the drain network, use the small passage beneath the street and open the grate below the limousine. Select the Tracer Bug and attach it from underneath. A second workable angle is to approach through the rear alley and throw the bug onto the back of the limousine while remaining out of the guards’ view.
The objective registers as soon as the tracer is attached. Once it registers, stop treating the limousine as an active target. Joanna does not escort it, chase it, or protect it after the attachment. If the limousine departs before the tracer registers, restart the mission; there is no recovery route that reactivates this objective.
After tagging the vehicle, return through the drain route. Deal with the FBI agent near the passage and continue toward the equipment area. The short departure window is the reason the Perfect Agent route should prioritize the tracer before optional fighting.
- Use this step only on Perfect Agent.
- Attach the Tracer Bug before the limousine leaves.
- Confirm the tracer objective registers.
- Do not chase the limousine afterward.
- Restart if the limousine leaves untagged.
4. Retrieve the drop-point equipment
Follow the longer drain passage to the briefcase beneath the grate. Crouch through the low opening and collect the case. This completes Retrieve drop point equipment on all three difficulties. The case contains the Reprogrammer and Remote Mine, which are needed for the normal diversion and the Special Agent or Perfect Agent escape-route objective.
The briefcase can be reached before or after the Perfect Agent tracer, but the tracer must take priority because its departure window is limited. On Agent and Special Agent, collecting the case early is the safest route. After taking it, leave by the drain rather than climbing directly into the Guard Bot’s line of fire.
If guards are waiting at the drain exit, use the passage you already cleared and engage them from cover. Do not run blindly into the street. You are not trying to escort anyone; the goal is simply to preserve Joanna, the civilians, and the remaining objective sequence.
- Collect the briefcase under the drain grate.
- Confirm Retrieve drop point equipment.
- Acquire the Reprogrammer and Remote Mine.
- Use the drain route for safer movement.
- Do not confuse the equipment case with the Tracer Bug.
5. Special Agent and Perfect Agent: prepare the escape route
On Special Agent and Perfect Agent, return to the alley with the fire escape and find the two blocked brick openings. Place the Remote Mine on one of the blocked openings. Do not detonate it. The mine placement registers Prepare escape route and affects the following G5 Building: Reconnaissance mission rather than opening this passage immediately.
The lower opening gives the next mission the shorter escape route. The upper opening gives a longer route but provides access to an N-bomb crate in the following mission. Either placement completes the objective. Choose the lower opening when the priority is a simpler escape; choose the upper opening when the extra explosives are more valuable.
Agent has no Prepare escape route objective. Do not spend the Remote Mine randomly on the street or try to force an objective message that is not present on that difficulty.
- Complete this step only on Special Agent or Perfect Agent.
- Place the Remote Mine on either blocked fire-escape opening.
- Do not detonate the mine.
- Choose lower for the shorter next-level route or upper for the N-bomb option.
- Confirm Prepare escape route registers.
6. Create the vehicular diversion
The standard diversion uses the yellow hovercab taxi near the beginning of the level. Equip the Reprogrammer and use it on the taxi from a protected position, preferably near the drain opening. Once the reprogramming completes, move into an alley or behind cover and wait. The taxi eventually drives away and crashes into the Guard Bot, creating the diversion and removing the robot from the immediate approach.
Do not stand beside the taxi while waiting for it to move, and do not attack the Guard Bot yourself. The robot cannot be destroyed by normal gunfire. The purpose of the taxi is to create the opening automatically and draw the entrance guards away from the car-park controls.
The BombSpy is an alternate method on the difficulties where it is available. Push the nearby dumpster against the explosive barrels, shoot the barrels from a safe distance, and collect the BombSpy from the opened container. Activate it from cover, steer it toward the guards at the G5 car-park entrance, draw the group together near the door controls, and detonate it. The message for the alternate diversion confirms success. Either the taxi diversion or the BombSpy diversion satisfies Create vehicular diversion; do not assume both are required.
- Use the Reprogrammer on the yellow hovercab for the standard method.
- Wait behind cover for the taxi to crash.
- Do not shoot the Guard Bot.
- If using the BombSpy, detonate it among the entrance guards.
- Confirm the normal or alternate diversion registers.
7. Enter the G5 Building and finish the level
After the diversion, move quickly toward the car-park entrance. The guards should leave the lift area to investigate the crash or BombSpy. Ignore enemies who are no longer blocking the route and cross the street using cover. If the guards regroup, break line of sight and approach again rather than chasing them into the open.
Enter the car-park lift only after the diversion has registered. Approaching the lift too early can allow the guard at the controls to lock the entrance, preventing completion. Once the lift route is open, move through it. Gain entry to G5 building registers when Joanna reaches the transition, and the game loads G5 Building: Reconnaissance.
There is no escort recovery procedure because no NPC must be guided through Chicago: Stealth. If a civilian dies, the limousine leaves before being tagged on Perfect Agent, a required FBI-related failure occurs, or an objective is missed, restart Chicago: Stealth and repeat the applicable section. The next mission does not provide a way to repair a failed Chicago objective.
- Wait until the diversion registers.
- Use cover while crossing to the car park.
- Enter through the car-park lift.
- Confirm the transition to G5 Building: Reconnaissance.
- Restart the mission after a failed objective or civilian death.
Before you move on
- On Agent, Retrieve drop point equipment, Create vehicular diversion, and Gain entry to G5 building are registered.
- On Special Agent, those three objectives plus Prepare escape route are registered.
- On Perfect Agent, Attach tracer to limousine, Retrieve drop point equipment, Prepare escape route, Create vehicular diversion, and Gain entry to G5 building are registered.
- The Perfect Agent limousine was tagged before it departed.
- All CIA civilians survived.
- The diversion message appeared for the taxi or BombSpy method.
- Joanna entered through the car-park lift and the game transitioned to G5 Building: Reconnaissance.
- The completed mission is visible in the mission-selection flow after the transition.
References for this chapter
Levels 6–9 — G5 Building: Reconnaissance and Area 51
This sequence covers four consecutive regular N64 solo levels: G5 Building: Reconnaissance, Area 51: Infiltration, Area 51: Rescue and Area 51: Escape. The missions introduce cloaked guards, alarm-sensitive reconnaissance, laser defenses, robot interceptors, low-light corridors, explosive breaches and escort protection. Use the building’s catwalks, cable routes, guard tower, radar facility, hangars, cargo lifts and canyon bridge as orientation landmarks. Review the mission objectives before moving because Special Agent and Perfect Agent add requirements that do not exist on Agent. In G5 Building, the escape route differs by difficulty: Agent uses the breach Dan creates after the backup disk is collected, while Special Agent and Perfect Agent use the Remote Mine placement selected during Chicago: Stealth. Bonus cheats and time trials are not needed for regular campaign progression.
G5 Building: Reconnaissance
The original N64 objectives are: on Agent, Photograph the Meeting Conspirators, Retrieve the Dr. Caroll Backup From the Safe and Exit the Building. Special Agent adds De-activate the Laser Grid Systems. Perfect Agent adds Disable the Damping Field Generator as well as the laser-grid objective. The meeting must be photographed before the conspirators leave, and activating an alarm can cancel it.
At the opening garage, two guards use cloaking devices. Keep moving instead of standing in one place; they become visible when they fire. The second guard drops the keycard for the large door at the rear. Follow the corridor to the wall switch, eliminate the guard near it and activate the switch to enter the next garage. When the lights come on, use the CMP150 or another accurate weapon to handle the cloaked guards. Take the final keycard and continue toward the catwalks.
On Perfect Agent, enter the damping-field room and deactivate the generator without damaging it or the nearby mainframes. Clear the guards first, then use the correct console. On Special Agent and Perfect Agent, deactivate all four laser-grid control switches. Do not mistake the nearby alarm control for one of the switches. Keep the area quiet because the mission can fail if the meeting is cancelled.
Climb the stairs and crawl along the overhead cables. Continue past the locked door until Joanna indicates that the CamSpy should be used. Send the CamSpy through the opening into the meeting room and let it record the conversation. This completes the meeting objective; it is not a holograph objective. After the recording, drop down and deal with the guards near the alarm and locked door before they can complicate the route.
Proceed upstairs to the vault. On Special Agent and Perfect Agent, the upper route may also provide the N-Bombs if the upper Chicago breach was selected, but this is optional. Place the Door Decoder on the vault console. The decoder takes time, and guards arrive while it works, so defend the room without abandoning the device. When the door opens, take Dr. Caroll’s backup disk.
The exit is difficulty-specific. On Agent, leave the vault and use the escape opening that Dan creates; it is the door opposite the stairwell leading upward. Do not ask an Agent player to choose between mined doors because Agent did not place a Remote Mine in Chicago. On Special Agent and Perfect Agent, use the detonator on the Remote Mine placed during Chicago: Stealth. The lower blocked door is opposite the stairwell, while the upper blocked door is up the stairwell near the red-lit area. Detonate the selected mine and leave through that breach.
- Agent: photograph the meeting, retrieve the backup disk and use Dan’s Agent escape breach.
- Special Agent: deactivate the laser grid, photograph the meeting, retrieve the disk and detonate the Chicago Remote Mine.
- Perfect Agent: deactivate the damping-field generator without damaging it, deactivate the laser grid, photograph the meeting, retrieve the disk and detonate the Chicago Remote Mine.
- Use the CamSpy for the meeting and the Door Decoder for the vault.
- Remember which door was mined in Chicago if playing Special Agent or Perfect Agent.
Area 51: Infiltration
The objectives are Shut Down the Air Intercept Radar, Gain Access to the Hangar Area and Make Contact with the CI Spy on Agent. Special Agent adds Plant the Comms Device on the Antenna. Perfect Agent also requires Disable All Robot Interceptors. The guard tower, antenna, minefield, radar building and hangars are the main landmarks.
After the opening briefing, eliminate the nearby guards quickly so one does not reach the automatic gun. Move around the canyon and destroy the first drone gun from cover, then deal with the second gun overlooking the open area. Clear or bypass the guards in the tower and use its switch if you need the main gate opened. Do not cross the open ground carelessly while the tower and automatic guns are active.
On Special Agent and Perfect Agent, lower the antenna with its wall switch and throw the Comms Rider onto the dish. Guards appear after the device is planted, so use the tunnel mouth or another solid wall as cover. On Perfect Agent, destroy the inactive robot interceptors in their stalls and the interceptor that becomes airborne. The Rocket Launcher’s lock-on function is useful against the flying machine; fire from cover rather than trying to duel it in the open.
Obtain the maintenance technician’s keycard. Knocking him out instead of killing him is useful because his survival can open the Phoenix route in Area 51: Rescue, but it is not required for completing Infiltration. Enter the radar building, attach the explosives to the central console and leave immediately. On Special Agent and Perfect Agent, the laser defenses activate during the escape. Crouch and pass each laser section when it clears, then climb the ladder before the radar detonates.
Use the technician’s card at a hangar-lift console. Ride down and move through the first hangar using crates and ramps for cover. You do not need to defeat every guard. Cross the hangar to the next elevator, descend again and follow the lower hangar’s perimeter. Drop from the section without a railing if necessary, then enter the door beneath the ramp. Jonathan is inside; reaching him completes the mission.
- Destroy the radar on every difficulty.
- On Special Agent and Perfect Agent, plant the Comms Rider on the lowered antenna.
- On Perfect Agent, destroy all required robot interceptors.
- Obtain the technician’s keycard and use the hangar lift.
- Reach Jonathan in the lower hangar.
Area 51: Rescue
The objectives are Destroy the Computer Records on Perfect Agent, Locate the Conspiracy Evidence on Special Agent and Perfect Agent, Obtain and Use the Lab Technician’s Disguise on all difficulties, Gain Access to the Autopsy Lab on all difficulties and Rescue the Crash Survivor on all difficulties.
Clear the storage facility, then ride the freight elevator to the catwalk level. Carry the explosive crate to the wall marked for demolition and place it beside the weak section. Move away before firing at it. The crate is the intended breach method, but do not carry it through the rest of the level after the wall is opened.
If the maintenance technician survived Infiltration, he can help open a route to the Phoenix. This is an optional resource advantage, not a required objective. Continue through the breach and locate the lab-technician uniform in the shower area. Equip it as soon as you obtain it. The disguise gives temporary access and should be followed by a direct push toward the research and autopsy areas rather than a long detour.
On Special Agent and Perfect Agent, visit the cryogenic evidence area and confirm the required conspiracy evidence. On Perfect Agent, reach the computer-record terminal, use the Data Uplink to install the virus and destroy the records as directed. Entering the computer room alone does not complete that objective.
Continue through the secured corridors toward the autopsy lab. The correct keycard is carried by a guard in the medical section; eliminate or stun the guard, take the card and use it on the autopsy-lab entrance. Once inside, clear the immediate personnel and reach the chamber containing the crash survivor. The rescue is time-sensitive, so do not linger for optional weapons after obtaining the disguise.
If the explosive crate is destroyed before the breach is made and the route cannot be opened, restart the mission rather than wasting time searching for a nonexistent alternate objective path. If an alarm begins, use the storage structures and catwalk corners as cover, but remember that a dead crash survivor or failed required objective means restarting the current mission.
- Use the explosive crate to breach the marked wall.
- Agent: obtain and use the disguise, access the autopsy lab and rescue the survivor.
- Special Agent: locate the conspiracy evidence in the cryogenic area.
- Perfect Agent: destroy the computer records as well as completing the Special Agent objectives.
- Take the correct keycard and enter the survivor’s chamber.
Area 51: Escape
On Agent, the objectives are Rendezvous with CI Spy, Locate the Secret Hangar and Escape from Area 51. Agent begins with the Alien Tech Medpack already used on the Maian, so there is no separate revival objective. Special Agent adds Revive the Maian Bodyguard. Perfect Agent adds Locate the Alien Tech Medpack and also requires Revive the Maian Bodyguard.
The opening contains nerve gas. Pick up Elvis with the interaction button and carry him through the initial corridors; do not drop him while crossing the hazardous section. Reach the main hallway, turn toward the biotechnicians and clear them quickly. Take Elvis down the ramp into the containment room, leave him there and return toward the cryogenic area.
On Agent, continue through the cryo-room route, across the exterior catwalk and toward Jonathan’s position. Reach him to complete the rendezvous. On Special Agent and Perfect Agent, continue farther through the complex to Jonathan’s storage-area position. On Perfect Agent, obtain the Alien Tech Medpack before completing the rendezvous. Use the console and enter the side storage route to collect it; do not leave it behind because it is a required objective.
After finding Jonathan, stay near him while he moves back through the complex. Clear the guards that appear in the corridors and catwalks, especially the group that emerges near the route back toward the containment area. Jonathan must survive while opening the secret hangar. Stand where you can cover the approach, use the SuperDragon’s grenade launcher against clusters and move away from the wall when he finishes because it will explode shortly.
Enter the secret hangar through the new breach. On Special Agent and Perfect Agent, return to Elvis’s room, equip the Alien Tech Medpack and apply it to him. The revival takes time. Protect the route from the hangar, the breach and the ramp rather than abandoning Elvis immediately. When the revival completes, Elvis joins the escape sequence.
Move with Jonathan and Elvis toward the Maian saucer. Clear guards around the saucer and the nearby catwalk before activating the hangar-door sequence. You may cover Jonathan while he operates the controls, allowing him to leave by hoverbike, or activate the controls yourself and then use the hoverbike route to leave. The hoverbike is an escape option, not a separate required objective on its own. The mission ends after the group escapes Area 51.
- Carry Elvis through the nerve-gas opening and place him in the containment room.
- Agent: rendezvous with Jonathan, locate the secret hangar and escape; no new medpack objective is required.
- Special Agent: rendezvous with Jonathan, locate the secret hangar and revive Elvis with the medpack already supplied.
- Perfect Agent: locate the Alien Tech Medpack, rendezvous with Jonathan, locate the secret hangar and revive Elvis.
- Protect Jonathan during the hangar breach and complete the final escape transition.
Before you move on
- G5 Building: the required difficulty objectives are complete, the meeting has been photographed, Dr. Caroll’s backup disk is collected and Joanna exits through Dan’s Agent breach or the selected Chicago Remote Mine breach on Special Agent or Perfect Agent.
- Area 51: Infiltration: the radar is destroyed, the Special Agent or Perfect Agent antenna objective is complete, all Perfect Agent robot-interceptor requirements are complete, the hangar lift has been used and Jonathan is reached.
- Area 51: Rescue: the disguise has been obtained and used, the required cryogenic evidence and Perfect Agent computer-record objectives are complete when applicable, the autopsy lab is entered and the crash survivor is rescued.
- Area 51: Escape: Agent reaches the ending escape transition without a new medpack objective; Special Agent revives Elvis; Perfect Agent locates and uses the medpack, then completes the rendezvous, secret-hangar and escape objectives.
- The next regular campaign level is Air Base: Espionage. Time-trial cheats, higher-difficulty records and other optional completion goals remain separate from ordinary story progression.
Levels 10–12 — Air Base: Espionage, Air Force One: Antiterrorism and Crash Site: Confrontation
These three stages form Mission 5 of the original Nintendo 64 campaign. Complete Air Base: Espionage, then Air Force One: Antiterrorism, then Crash Site: Confrontation. Their objective lists vary by difficulty, so keep the mission briefing visible when starting a run. Air Base is an infiltration that becomes a firefight after the security system is subverted. Air Force One is an escort and sabotage mission. Crash Site is an open snowfield connected by dark caverns, ending with the rescue of the real President. The next regular stage is Pelagic II: Exploration.
Air Base: Espionage — obtain the disguise and enter the base
At the start, avoid raising the alarm. Incapacitate the nearby Alaskan guards rather than killing the guards whose survival is needed for the disguise approach. Follow the rocky tunnel around its bends until you reach the Head Stewardess with two Alaskan guards. Incapacitate all three targets and pick up the bag containing the stewardess uniform.
Select the uniform from the pause menu and equip it. Switch to Unarmed before entering the base. Return through the tunnel to the entrance and walk up to the receptionist. Let her acknowledge the disguise and unlock the central wooden door. Do not enter while unarmed without the uniform, and do not leave a body where the receptionist can see it, because the resulting alarm fails the mission.
The objective Obtain disguise and enter base is required on Agent, Special Agent and Perfect Agent. The Proximity Mine box near the cable-car end of the tunnel is optional. Take it only if you can do so without compromising the opening section.
- Keep the disguise-related guards incapacitated rather than killing them.
- Equip the stewardess uniform before approaching the receptionist.
- Enter the base while Unarmed.
- Confirm Obtain disguise and enter base before continuing.
Air Base: Espionage — complete the difficulty-specific preparation
The security-console objective is required on every difficulty. After the receptionist opens the central door, enter the base and go down the escalator. On Special Agent and Perfect Agent, first use the elevator near the entrance to reach the upper office. Incapacitate the two office workers and take the white suitcase. Return downstairs, select the suitcase, and place it on the marked pad beside the baggage conveyor. This completes Check in equipment, which is required only on Special Agent and Perfect Agent. Placing the suitcase also removes the contents of your current inventory and starts the limited-time security sequence, so move directly to the console afterward.
From the conveyor area, pass through the security scanner and enter the next room. Incapacitate the NSA guard, turn right into the corridor with the flat pillars, follow it around, and climb the stairs. Deal with the guard carrying the Avenger, then incapacitate the white guard beside the computer. Activate the console. This completes Subvert security monitoring system on Agent, Special Agent and Perfect Agent. Do not skip the console on Agent; entering the base alone does not satisfy the mission.
Perfect Agent adds Obtain flight plans from safe. After activating the security console and surviving the first response, return through the office route. Use the explosive placed near the appropriate office door to break the adjacent glass, crouch through the opening, move the glass panel in the far corner, and activate the control beneath it. Open the safe and take the flight plans. Confirm the objective before leaving the office.
- Agent: activate the security console even though no suitcase is required.
- Special Agent and Perfect Agent: retrieve and check in the suitcase before using the console.
- Perfect Agent: open the safe and retrieve the flight plans.
- Do not linger after the suitcase is checked in; the next objective is time-sensitive.
Air Base: Espionage — survive the response and board Air Force One
Activating the security console triggers a large NSA response. Clear the guards near the stairs before descending so that enemies cannot attack from behind. Use the stair structure and pillars as cover while reloading. Pick up a Dragon or K7 Avenger if convenient, but do not stop in the open to search bodies while the response is active.
On Special Agent and Perfect Agent, return toward the office area and use the elevator at the end of the route. Ride down to the aircraft level, activate the elevator again to reach the boarding level, exit, and turn left toward the shuttle. Perfect Agent players should use this office route because it contains the flight-plan safe.
Agent uses a different practical route because the office door is locked. Enter the side hallway near the pillared area, take the freight elevator to ground level, and clear the guards around the exit. Shoot the console behind you to overload the laser defenses. When the laser field flickers, cross it carefully and climb the ladder beneath the front of Air Force One. The shuttle route remains a valid alternative when accessible. The stage completes when Joanna boards the aircraft.
- Expect a major firefight immediately after using the security console.
- Use cover at the stairs and pillars rather than fighting in the open.
- Use the office route on Perfect Agent to collect the flight plans.
- On Agent, use the freight-elevator and flickering-laser route if the office door is locked.
- Wait for the boarding transition and objective confirmation.
Air Force One: Antiterrorism — retrieve the equipment and locate the President
The starting position depends on how Air Base was boarded. If you begin on the Main Deck, move through the ornate doors and proceed toward the Presidential Suite. On Special Agent and Perfect Agent, locate the cargo bay first. Incapacitate the guard beside the cargo-bay lift, take his key, activate the lift, and collect the suitcase when it rises. Locate and Retrieve the Equipment is required on Special Agent and Perfect Agent only.
The guard’s key can also lower the hoverbike into the cargo hold. This is optional, but the bike can help with movement in Crash Site. Do not mistake this action for a required Air Force One objective.
From the cargo bay, go through the kitchen. Incapacitate the stewards before they create noise, activate the dataDyne panel, crouch into the small dumb waiter, and ride it to the Main Deck. Open the ornate doors, climb the central staircase, and enter the Presidential Suite. Approach the President and remain in the room through the conversation. On Special Agent and Perfect Agent, the suitcase provides the evidence used during this meeting. Wait for Locate the President to confirm before leaving.
- Special Agent and Perfect Agent: retrieve the cargo-bay suitcase.
- Lowering the hoverbike is optional.
- Remain with the President until the conversation and objective confirmation finish.
- Protect the President from the moment the alien craft attaches to Air Force One.
Air Force One: Antiterrorism — escort the President to the capsule
After the craft attaches, return down the aircraft through the cabin route. Clear each short section before allowing the President to advance. Eliminate the bodyguard near the stairs, the guards beyond the exit doors, the cabin guards, and the Mr Blonde guards near Trent. Do not sprint so far ahead that the President enters an uncleared room.
Continue through the final cabin, turn right at the last left-hand door, and drop through the hatch. Open the door ahead and eliminate the guard protecting the route. The President will follow and enter the escape capsule. This completes Get the President to the Escape Capsule. If he is killed, the mission fails and the stage must be restarted.
Perfect Agent adds Secure the Air Force One Flight Path. After getting the President to safety, climb back to the upper deck and follow the right-hand wall toward the cockpit. Enter through the front-side door, pass through the intervening doors, and reach the pilot controls. If the pilots are still alive, their survival satisfies the objective. If the bodyguards have killed them, activate the self-stabilizing autopilot at the cockpit console. This is a Perfect Agent requirement, not an Air Base requirement.
- Clear the cabin in sections before the President reaches each doorway.
- Ensure the President enters the capsule rather than merely reaching the capsule room.
- On Perfect Agent, preserve the pilots when possible or activate autopilot afterward.
- Restart the stage if the President dies.
Air Force One: Antiterrorism — detach the UFO
The final three Air Force One actions can be handled in a flexible order, but the safest sequence is to secure the President first, then activate the flight-path solution, and finally detach the UFO. Return to the area outside the Presidential Suite, equip the Timed Mine, and throw it into the umbilical tunnel joining the alien craft to Air Force One. Move away from the blast. This completes Detach the UFO from Air Force One.
Do not spend the Timed Mine elsewhere. The explosion does not immediately end the mission; the subsequent scripted sequence must finish. On Perfect Agent, verify Secure the Air Force One Flight Path as well as the President and UFO objectives before waiting for the mission-result transition.
- Reserve the Timed Mine for the connecting tube.
- Confirm Get the President to the Escape Capsule.
- Confirm Secure the Air Force One Flight Path on Perfect Agent.
- Wait for the mission-complete transition.
Crash Site: Confrontation — visit Elvis, activate the beacon and retrieve the scanner
Crash Site begins in a snowy open area. If the hoverbike was lowered during Air Force One, it appears near the starting area and can speed up travel, although aiming from it is less stable. Before completing any objective, cross the log and find Elvis’s saucer. Visiting Elvis provides an optional Proximity Mine; this reward is unavailable if an objective has already been completed.
Return across the log and follow the right-hand wall toward the downed escape pod. Eliminate the guards around the pod and activate the red control to complete Activate the Distress Beacon. This objective is required on all difficulties.
Special Agent and Perfect Agent require Retrieve Presidential Medical Scanner. From the escape-pod area, enter the wreckage of Air Force One and search the snow near the main section of the plane for the scanner. Pick it up and activate it. Agent does not require this item. Keep the cliff walls, log and wrecked aircraft as landmarks because the snowfield can easily send you toward the wrong cavern.
- Visit Elvis before activating any objective if you want the optional Proximity Mine.
- Activate the distress beacon at the escape pod on every difficulty.
- Retrieve and activate the medical scanner on Special Agent and Perfect Agent.
- Use the wrecked plane and cliff walls to maintain orientation.
Crash Site: Confrontation — complete the clone and jamming objectives
Use the President scanner when available to distinguish the two targets. From the beacon area, locate the ravine and take the center exit toward the rock pile and large opening. Four guards surround a deep hole. Clear them from above, then use the Sniper Rifle to examine the President-like figure below. The clone lacks the real President’s jacket and has a loose tie. Shoot the clone to complete Retire Presidential Clone, required on every difficulty. Avoid firing toward the real President later in the stage.
Perfect Agent adds Shut Down Enemy Jamming Device. From the ravine, take the far-right passage, descend to the ledge and cave, and continue until the path opens near two drone guns. Destroy both guns from cover. Continue down toward the Skedar craft, eliminate the guards around it, and place the required Remote Mines directly on the craft. Retreat before detonating them. Destroying the drone guns alone does not complete this objective; the Skedar craft is the jamming source.
After the clone is retired, take the cave route toward the hostage area. Four sentry robots guard the President. Fight from the tunnel entrance and use the narrow approach to limit the number of robots attacking at once. Sustained fire will destroy them, but their lasers are dangerous in the open.
- Retire the correct President-like target; use the jacket and loose tie as identifiers.
- Perfect Agent: destroy both drone guns, mine the Skedar craft and detonate the mines.
- Do not treat the drone guns as the complete jamming objective.
- Use the tunnel as cover against the sentry robots.
Crash Site: Confrontation — rescue the President and finish
Enter the hostage room after the sentry robots are destroyed. Trent Easton holds the real President at gunpoint. Drive Trent away by damaging his shield until he retreats, or disarm him if you can act quickly. Do not shoot the President. Move close enough for Locate and Rescue the President to confirm, then make sure the President is following Joanna.
Take the route back through the cave and climb to the surface. Keep rocks between you and the guards while crossing the snow. Head toward Elvis’s saucer, behind the farthest of the prominent rock formations. Touch the saucer to trigger Joanna’s confirmation, then wait while the President reaches it. The closing cutscene begins after the rescue is accepted.
If a required objective is missed, an ally dies, or the President is killed, the current stage must be restarted. There is no safe late-stage recovery that repairs a failed objective. On a difficult run, consider completing the President rescue before the Perfect Agent jamming objective if that leaves the escort route safer, but do not spend the Remote Mines needed for the Skedar craft.
- Drive Trent away without hitting the President.
- Confirm the President is following before leaving the hostage area.
- Touch Elvis’s saucer and wait for the President to reach it.
- Restart the current mission after an objective failure or ally death.
Before you move on
- Air Base: Espionage is complete only when every objective required by the selected difficulty is confirmed: Agent has Obtain disguise and enter base, Subvert security monitoring system, and Board Air Force One; Special Agent adds Check in equipment; Perfect Agent adds Obtain flight plans from safe.
- Air Force One: Antiterrorism is complete when the President is located, the required cargo-bay equipment has been retrieved on Special Agent or Perfect Agent, the President reaches the escape capsule, the UFO is detached, and Perfect Agent’s flight-path objective is confirmed through surviving pilots or autopilot.
- Crash Site: Confrontation is complete when the selected difficulty’s scanner, beacon, jamming-device, clone and rescue requirements are confirmed. Agent requires the beacon, clone and President rescue; Special Agent adds the medical scanner; Perfect Agent adds both the medical scanner and jamming-device objective.
- The regular progression continues from Crash Site: Confrontation to Pelagic II: Exploration. Allow the result screen, ending transition and save process to finish before powering down the Nintendo 64. These three stages are Mission 5, not the end of the seventeen-level regular campaign.
Levels 13–14 — Pelagic II: Exploration and Deep Sea: Nullify Threat
Pelagic II: Exploration is the thirteenth regular level and Deep Sea: Nullify Threat follows immediately as the fourteenth. Pelagic II is a maze-like research vessel where the main route is easier to remember by its colored stairways and corridors. Deep Sea takes place inside the sunken Cetan ship and uses Elvis as a combat partner while teleportals move you between sections. The required objectives differ by difficulty, so follow the difficulty notes instead of attempting to complete every higher-difficulty task on Agent.
1. Prepare for both missions
Keep the Falcon 2 with scope available for distant guards and use the X-Ray Scanner on Pelagic II when checking the power controls. The Shotgun is useful when several guards are packed into a narrow corridor. On Deep Sea, equip the IR Scanner whenever cloaked guards appear and protect Elvis rather than racing too far ahead of him.
Pelagic II has several alarms and many narrow doorways. Use windows and door frames as firing positions, and let guards come to you when possible. On Deep Sea, the main hazards are cloaked shotgun guards, fast Skedar workers and the short escape timer after Dr. Caroll is restored.
- The Falcon 2, Shotgun and required scanners are ready.
- A backup weapon is retained for close-range fights.
- The selected difficulty is confirmed before starting.
2. Disable the primary power source on Pelagic II
From the starting area, clear the first guards and follow the route toward the power section. Deal with the nearby camera before entering the control area. Use the X-Ray Scanner to identify the four green terminals on the central power structure. Activate the green terminals only; the red terminals are not part of this objective.
After the terminals are active, descend into the lower part of the power room and use the control on the large generator. The objective is not complete until both the four green terminals and the lower generator control have been activated. If an alarm starts, retreat behind the doorway and clear the guards before continuing.
- The four green terminals are activated.
- The lower generator control is used.
- The primary-power objective confirmation appears.
- The route out of the power section is identified.
3. Complete the Pelagic II difficulty-specific objectives
Secure laboratories and research data is required only on Perfect Agent. From the upper loop, enter the laboratory section and deal with the camera before approaching the scientists. Put away the firearm and knock all three scientists unconscious with Pistol Whip or Punch. Collect the research disk from each scientist. If one runs upstairs, follow rather than assuming the objective has failed.
Deactivate GPS and autopilot is required on all three difficulties. Reach the control room and speak to the pilot who cooperates. When another pilot attacks, stop the attacker quickly, then interact with the cooperating pilot again so both the autopilot and GPS are shut down. These are separate actions and one confirmation does not replace the other.
Activate Moon Pool lift is required on Special Agent and Perfect Agent. Follow the yellow route to the Moon Pool operation room and use the wall monitor to raise the deep submersible. Agent does not require this separate lift objective, but the route remains useful for navigation.
- On Perfect Agent, all three scientists are unconscious and all three research disks are collected.
- The autopilot is deactivated.
- The GPS is deactivated.
- On Special Agent or Perfect Agent, the Moon Pool lift is activated.
4. Find Elvis and finish Pelagic II
After the first four required objectives for the selected difficulty are complete, return through the ship’s connected hallways toward the rendezvous route. Agent reaches the Moon Pool through the shorter upper route. Special Agent and Perfect Agent require the longer lower-ship route: use the colored corridors to descend into the blue section, clear the guards and continue until Elvis is found.
When Elvis joins you, stay close and clear rooms before he enters them. Avoid explosives near him and do not leave him exposed while chasing distant enemies. Lead him back through the lower and yellow corridors to the Moon Pool. Wait until he reaches the escape position; leaving early can make the final objective appear incomplete.
An alarm increases resistance but does not automatically fail Pelagic II. If you lose the route, return to the yellow stairways and use the blue lower corridors as the reference for the Elvis rendezvous. Do not leave the mission until the results screen appears.
- Elvis is found on the correct route for the selected difficulty.
- Elvis survives the return journey.
- The rendezvous-and-escape objective completes.
- Pelagic II: Exploration is marked complete.
5. Reactivate the teleportals in Deep Sea
At the start of Deep Sea, move through the first doors with Elvis. Turn on the IR Scanner when the cloaking devices activate and use the Falcon 2 or Shotgun to deal with the cloaked guards. Elvis can help, but keep enemies away from him because the opening fights can drain his health quickly.
Continue into the green hallway and then down the slope into the compact maze. On Special Agent and Perfect Agent, shoot the dark lantern-shaped switches in the alcoves to open the sealed doors. Follow the opened passages until you reach the large room containing the teleportal controls.
Clear the guards and the Mr. Blonde in the control room, then wait for Elvis to operate the console. When the objective confirms, return toward the first teleportal. Two cloaked guards appear after the activation, so use the IR Scanner or run past them while keeping enough health for the next section.
- The cloaked guards in the opening areas are dealt with.
- All required lantern switches are activated on Special Agent or Perfect Agent.
- The teleportal control room is reached.
- Elvis reactivates the teleportals.
6. Disable the Cetan megaweapon
On Agent, take the first teleportal and follow the circular chamber to the right-hand door. Stay with Elvis while small Skedar emerge from wall openings. He will operate the console in the auxiliary control area; protect him until the weapon-disabling confirmation appears.
On Special Agent, the first teleportal leads to engineering. Clear the guards on the S-shaped catwalks and in the following room, then take the spiral ramps to the reactor. Elvis must perform the sabotage, so remain near him and use the IR Scanner to watch the vents for Skedar. When he finishes, leave through the teleportal on the far side of the reactor area.
On Perfect Agent, use the Farsight after the first teleportal. Cross the circular bridge while protecting Elvis, then use the active teleportal in the long room to reach the weapon chambers. Destroy the five visible pillars, then use the Farsight through doorways to destroy the ceiling turrets and additional pillars. The final pillars are partly concealed behind walls; target them from a distance. Leave as soon as the last generator is destroyed because more Skedar are released.
- Agent: Elvis completes the auxiliary control sabotage.
- Special Agent: Elvis completes the reactor sabotage.
- Perfect Agent: all required weapon pillars and generators are destroyed.
- The Cetan megaweapon objective confirmation appears.
7. Secure the control room and restore Dr. Caroll
Special Agent and Perfect Agent require Secure the Control Room. After the megaweapon objective, use the return teleportal to reach the control-room side of the ship. Two Mr. Blonde guards with K7 Avengers protect Dr. Caroll. Eliminate both before approaching the doctor. Elvis can provide cover, but do not let the guards reach him.
On Perfect Agent, select the Backup Disk from the inventory before approaching Dr. Caroll. The restoration cutscene completes the Restore Dr. Caroll’s Personality objective. Agent and Special Agent do not have this separate disk objective; approaching Dr. Caroll advances directly to the final escape sequence.
- On Special Agent or Perfect Agent, both Mr. Blonde guards are defeated.
- The control room is secured.
- On Perfect Agent, the Backup Disk is selected and used on Dr. Caroll.
- The restoration or final conversation begins.
8. Escape from the Cetan ship
The ship begins its destruction sequence after the Dr. Caroll scene. You have approximately one minute, so stop fighting unless an enemy blocks the route. Turn right from the control-room area, follow the corridor back toward the first teleportal and take the door leading toward the main entrance.
Several guards, including possible cloaked guards, can appear near the teleportal-control opening. Strafe past them if necessary, then run up the ramp, pass the dead Skedar and go through the large doors into the outer cavern. The mission completes when Joanna exits the Cetan ship; clearing every pursuing enemy is unnecessary.
If the timer expires, if Elvis dies, or if Dr. Caroll is killed before the required scene, restart the mission. After a successful escape, allow the results screen and save process to finish before selecting the next mission.
- The escape route is followed without stopping for optional fights.
- Joanna reaches the outer cavern before the destruction timer expires.
- The Deep Sea: Nullify Threat results screen appears.
- Carrington Institute: Defense becomes available next.
Before you move on
- Pelagic II: Exploration is complete on the selected difficulty.
- Agent Pelagic II requirements are complete: primary power, GPS and autopilot, and rendezvous and escape with Elvis.
- Special Agent Pelagic II requirements are complete: primary power, GPS and autopilot, Moon Pool lift, and rendezvous and escape with Elvis.
- Perfect Agent Pelagic II requirements are complete: primary power, laboratories and research data, GPS and autopilot, Moon Pool lift, and rendezvous and escape with Elvis.
- Deep Sea: Nullify Threat is complete on the selected difficulty.
- On Agent, the teleportals are reactivated, the Cetan megaweapon is disabled, and the Cetan ship escape is completed.
- On Special Agent, the teleportals are reactivated, the megaweapon is disabled, the control room is secured, and the escape is completed.
- On Perfect Agent, the teleportals are reactivated, the megaweapon is disabled, the control room is secured, Dr. Caroll’s personality is restored with the Backup Disk, and the escape is completed.
- The Deep Sea results screen appears and progress is saved.
- Carrington Institute: Defense is available as the immediately following regular campaign mission.
Level 15 — Carrington Institute: Defense
Carrington Institute: Defense is regular solo level 15 of the original Nintendo 64 campaign, following Deep Sea: Nullify Threat and preceding Attack Ship: Covert Assault. Agent requires releasing the hostages, retrieving the experimental weapon and deactivating the bomb. Special Agent adds reactivating the three automatic defenses. Perfect Agent requires those objectives plus destroying the sensitive information in Carrington’s office. The mission becomes much safer if you use doorways, wall partitions and corridor corners instead of fighting in open rooms. The RC-P120 can cloak Joanna for the final run, but its ammunition is limited, so use it only when bypassing a dangerous route is more valuable than engaging enemies.
1. Survive the opening and decide your route
When control begins, turn around the corner and kill the large Skedar at the Institute entrance. Pick up the Mauler it drops if you want a powerful backup weapon. The AR34 remains useful for quickly eliminating guards in hostage rooms, while the Mauler is better reserved for close-range threats.
Do not remain in the center of the lobby or hangar. Fire from the edge of a doorway, retreat behind the wall partition when reloading, and let enemies approach through a narrow entrance. Carrington Institute personnel are present in the combat areas, so avoid uncontrolled fire through rooms containing hostages or technicians.
On Agent, you can proceed directly to the hostage rooms. On Special Agent and Perfect Agent, complete the automatic-defense objective first so it cannot be forgotten during the later evacuation route.
- Kill the opening Skedar.
- Take the Mauler if you want a close-range backup.
- Use doorways and partitions as cover.
- Confirm the selected difficulty’s objective list before leaving the opening area.
2. Reactivate the three automatic defenses on Special Agent and Perfect Agent
This objective is not required on Agent. From the starting area, turn back and descend the ramps. At the bottom, go left across the helipad and enter the doorway on the right. Cross the next helipad, use the next right-hand doorway, then pass through the door ahead. Turn left and then right to reach the first control panel. Activate it and wait for the objective progress to register.
From the first panel, turn around and take the tunnel to its right. Turn right again and pass through the large blue doors. Turn left and follow the tunnel to another blue door. Take the left turn beyond it to find the second panel and activate it.
Return to the tunnel beside the first panel. Go past the boxes and continue through the doors until you reach another doorway. Enter, turn left and activate the third and final panel. Once all three are active, retrace the route up the ramps. You do not need to clear every guard in the lower area; retreat through doorways and let enemies approach one at a time if the route becomes crowded.
- Activate the first automatic-defense panel.
- Activate the second panel beyond the blue-door corridors.
- Activate the third panel after returning through the box-lined route.
- Wait for confirmation that all three defenses are active.
3. Release the hostages
Return to the lobby and take the elevator to the upper floor. Use a Combat Boost before entering the first hostage room if you have one. Move around the wall partition before firing so the guards are exposed while the hostage remains out of your line of fire. Shoot the guards quickly, then leave once the room is safe.
Clear the two upper-floor hostage rooms in sequence. Enter each room from the doorway, identify the guards closest to the Carrington personnel, and use short controlled bursts rather than sweeping the room with automatic fire. If a guard begins firing at a hostage, prioritize that guard immediately. Retreat into the corridor if you need to reload rather than backing into the hostage.
Return to the ground floor and clear the firing-range and training-area hostage rooms. The firing range contains the computer used for the experimental weapon, so secure this room before attempting the terminal. The hostage objective registers after the required groups have been released; do not confuse the optional Devastator reward with campaign progress.
- Save the upper-floor hostage groups.
- Return to the lobby and clear the ground-floor hostage rooms.
- Keep friendly personnel out of your firing line.
- Wait for the release-hostages objective to register.
4. Retrieve the experimental weapon
In the firing range, approach the computer beside the glass case. Activate the computer to open the case, then collect the RC-P120. Picking up the weapon completes the experimental-weapon objective.
The RC-P120’s secondary function provides cloaking, but cloaking consumes ammunition. Do not activate it merely to cross a room that can be cleared from cover. Save ammunition for the lower route to the Skedar ship and the return trip to the hangar.
If you saved the upper-floor hostages, including Grimshaw and the other lab technician, Grimshaw can leave a Devastator. This is an optional reward. It is not the experimental weapon required by the mission, and missing it does not prevent completion.
- Activate the firing-range computer.
- Collect the RC-P120 from the opened case.
- Reserve RC-P120 ammunition for the lower route.
- Treat the Devastator as optional.
5. Destroy sensitive information on Perfect Agent
This objective exists only on Perfect Agent. Take the elevator to the top floor and follow the hallway to Carrington’s office. At the back of the office, use the Laser on the steel plate. Continue firing until the plate is destroyed and the sensitive information behind it is exposed. Use the Laser on the exposed information until the objective registers.
Complete this before starting the bomb sequence. The office is easier to revisit before the lower corridors fill with additional enemies, and finishing it early prevents a return trip after the ship has been disabled. If guards pressure the doorway, step back into the hall, reload behind cover and re-enter when the line of fire is clear.
- Reach Carrington’s office on Perfect Agent.
- Destroy the steel plate with the Laser.
- Destroy the sensitive information revealed behind it.
- Confirm the objective registers before descending.
6. Deactivate the bomb and escape to the hangar
Return to the lobby and descend the ramps near the mission start. Follow the lower corridors to the helipad and continue to the Skedar ship. Equip the Data Uplink and use it on the ship until the bomb-deactivation objective completes. If the approach is heavily defended, use the RC-P120 cloak briefly, then switch it off to preserve ammunition.
After the upload finishes, retrace the route through the lower hallway. Keep to the right and take the right-hand door at the end of the route. This leads to the indoor hangar and the mission-ending sequence. Do not turn back toward the upper Institute or stop to clear every remaining enemy. If you are overwhelmed, retreat behind the previous doorway, reload, cloak only for the exposed section and continue once the route opens.
The mission is complete when Joanna reaches the hangar and the mission-complete screen appears. If the bomb objective has not registered, return to the ship and use the Data Uplink again before attempting the escape door.
- Use the Data Uplink on the Skedar ship.
- Confirm the bomb objective registers.
- Retrace the lower route and keep right.
- Enter the indoor hangar and wait for the mission-complete screen.
Before you move on
- For Agent, confirm release of the hostages, retrieval of the RC-P120 and bomb deactivation.
- For Special Agent, also confirm all three automatic-defense panels were activated.
- For Perfect Agent, also confirm destruction of the sensitive information in Carrington’s office.
- Confirm that Joanna reaches the indoor hangar and the mission-complete screen appears.
- The optional Devastator is obtained only if the relevant hostage group survives; it is not required for regular campaign completion.
- This level’s optional Super Shield cheat requires completing Carrington Institute: Defense under Agent, Special Agent and Perfect Agent within the separate recorded time requirement; that challenge is not part of reaching the story ending.
Level 16 — Attack Ship: Covert Assault
Attack Ship: Covert Assault is level 16 of the original North American Nintendo 64 campaign. Joanna begins imprisoned aboard the Skedar assault ship with only a Combat Knife. The difficulty changes the objective list: Agent requires Disable shield system, Access navigational systems and Gain control of bridge; Special Agent adds Sabotage engine systems; Perfect Agent also adds Open hangar doors. The opening is the most demanding section because you must obtain a Mauler before Elvis and the Maians arrive. The Slayer and Dual Mauler are optional weapons. There is no separate extraction objective: once the bridge assault is defeated, the ending sequence plays and the next regular level, Skedar Ruins: Battle Shrine, becomes available.
1. Escape the cell and disable the shield system
Leave the cell after Cassandra's diversion begins. For a reliable opening, use the Combat Knife's slash function and circle around the balcony toward the Skedar positioned behind the elevator. Attack from the rear while it is looking away. If it survives or turns on you, keep moving around it rather than standing in front of its Mauler. On Perfect Agent, a failed rear attack or a costly exchange is usually a reason to restart because the next section requires precise Mauler shots.
Pick up the Mauler dropped by the first Skedar and switch it to charged fire. Approach the second Skedar near the elevator from the side and fire before it can attack. Do not spend the new weapon's ammunition carelessly. Go behind the elevator to the sunken area containing the three shield consoles. In single-shot mode, destroy all three consoles. On Perfect Agent, the documented ammunition route uses one shot on the first console and four shots on each of the other two; preserve enough ammunition for the Skedar encountered before the hangar-control room. The shield objective is complete only after all three consoles are destroyed.
- Escape after Cassandra's diversion.
- Defeat the first Skedar with the knife and collect its Mauler.
- Defeat the second Skedar near the elevator.
- Destroy all three shield consoles.
- Confirm Disable shield system before continuing.
2. Open the hangar doors on Perfect Agent
This objective exists only on Perfect Agent. On Agent and Special Agent, ride the elevator down after disabling the shields and proceed to the hangar battle. On Perfect Agent, ride down and cross toward the ramp leading into the hangar. Draw the patrolling Skedar toward the ramp, retreat around the corner and use the wall as cover. Fire a charged Mauler shot when a Skedar exposes itself, then collect its ammunition only when the route is safe. Deal with the second patrol in the same way; if ammunition is exhausted, the knife is a last-resort option, but taking heavy damage usually makes a restart preferable.
Enter the hangar and use the opposite ramp to reach the elevator leading to the control room. At the upper level, edge out from the elevator and eliminate the Skedar guarding the room. The two consoles by the window are not interchangeable for this objective: activate the left-hand console to open the hangar doors. Wait for the objective confirmation and for Elvis with the two Maian soldiers to arrive. Elvis then supplies Joanna with an AR34.
- On Perfect Agent, clear the two hangar patrols from ramp cover.
- Reach the hangar-control room by the lower elevator.
- Defeat or bypass the room's Skedar guard.
- Activate the left console by the window.
- Wait for Elvis and the Maians, then collect the AR34.
3. Survive the hangar and access the navigational systems
After Elvis gives you the AR34, help the two Maians hold the hangar. Skedar emerge from the large side doors. Fight from the open area around the ramps, keep moving between cover and collect dropped Mauler ammunition when possible. Do not rush away while the alarm is active; wait until the attack subsides and Elvis calls you toward the rear elevators.
Take the left rear elevator, keeping to the inner side so the Skedar above have less chance to see you before you are ready. At the top, open the forward door from a little distance and eliminate the two Skedar in the first room. The side rooms provide alternate approaches. The right-hand route leads past a Skedar and a shield on a table; collect the shield on Agent or Special Agent if you need protection, then continue through the long room and corridor.
Turn left into the room containing the star-map and navigational machinery. Clear the two Skedar from the doorway or from cover. Elvis must reach the console beneath the rotating green spheres and finish his interaction. Stay nearby until the objective registers. Leaving before the access completes can make it appear that the route has stalled.
- Receive the AR34 from Elvis.
- Help clear the hangar attack or let the Maians finish the remaining targets.
- Take the left rear elevator.
- Clear the rooms and corridor leading to the star-map room.
- Wait for Elvis to access the navigational system.
- Confirm Access navigational systems.
4. Sabotage the engine systems on Special Agent and Perfect Agent
This objective is absent on Agent. From the navigation room, return through the corridor and take the route into the darker upper sections. Keep Elvis with you as you pass the ramps, long corridors and the blue-door section. Use the AR34 for targets at range and the Mauler's charged shot for Skedar that appear immediately beyond doors. If Elvis falls behind, pause in a defensible corridor and let him catch up before triggering the engine-room approach.
Enter the engine area and clear the Skedar around the core. Use the corridor openings as firing positions rather than standing beside the machinery. From cover, aim at the two large arm-like pylons attached to the core; destroy one, move to the opposite opening and destroy the other. The engine core explodes after a short delay, so retreat immediately through the corridor to the larger room and then back to the main route. Wait for the explosion and objective confirmation before climbing toward the bridge.
- Keep Elvis with you through the upper corridors.
- Clear the Skedar around the engine core.
- Destroy both arm-like engine pylons from the corridor openings.
- Retreat before the core explodes.
- Confirm Sabotage engine systems.
5. Reach the bridge and defeat the first defenders
After the engine objective on Special Agent or Perfect Agent, return to the main corridor. Follow the wall opposite the engine-room route to find the opening and ramp leading upward. Clear the Skedar in the upper hallway, then enter the room before the elevator. Two Skedar occupy the raised ramps; shoot from the doorway or lower floor rather than charging up between them.
Call the elevator and ride upward alone when Elvis stops to secure the area. Continue to the second elevator and prepare for the bridge defenders. At the top, use the wall beside the elevator as cover. The bridge contains three Skedar, with the larger commander in the middle carrying dual Maulers. On higher difficulties, lean out from cover and fire at exposed heads, retreating whenever a Skedar begins firing. Defeat the commander first, then the two regular Skedar. The Dual Mauler dropped by the commander is optional but useful.
- Find the upper route from the main corridor.
- Clear the two Skedar guarding the elevator room.
- Ride the elevators to the bridge.
- Use the elevator-side wall as cover.
- Defeat the large central Skedar and the two escorts.
6. Survive the final bridge assault and finish the level
After the initial bridge defenders are defeated, face the two doors behind the elevator and wait for Elvis to enter. He warns Joanna that more Skedar are approaching. Several Skedar then come through the rear doors in groups. Hold a position near the bridge wall, keep Elvis out of the line of fire and use charged Mauler shots or the AR34 to stop enemies before they reach him. Do not chase a retreating Skedar into the side corridors; the mission is completed by defeating the assault, not by clearing every room on the ship.
When the final attackers are defeated, Gain control of bridge completes and the mission-ending sequence begins. Let the scene finish rather than leaving the level through an imagined extraction route. The story continues directly to Skedar Ruins: Battle Shrine, the seventeenth regular solo level.
- Wait for Elvis to reach the bridge.
- Defend the bridge from the rear-door assault.
- Keep Skedar away from Elvis.
- Confirm Gain control of bridge.
- Allow the ending sequence to play.
- Verify that Skedar Ruins: Battle Shrine is available next.
Before you move on
- Agent: Disable shield system, Access navigational systems and Gain control of bridge are confirmed.
- Special Agent: Disable shield system, Access navigational systems, Sabotage engine systems and Gain control of bridge are confirmed.
- Perfect Agent: all five objectives, including Open hangar doors, are confirmed.
- The final Skedar bridge assault is defeated without Elvis being lost.
- The mission-ending scene plays.
- Attack Ship: Covert Assault is marked complete in the Solo Missions list.
- Skedar Ruins: Battle Shrine is available as level 17, the next regular campaign stage.
Level 17 — Skedar Ruins: Battle Shrine
Skedar Ruins: Battle Shrine is the seventeenth and final regular solo level of the original Nintendo 64 campaign. The required route changes with difficulty: Agent requires Identify Temple Targets, Activate Bridge and Assassinate Skedar Leader; Special Agent adds Gain Access to the Inner Sanctum; Perfect Agent adds both Gain Access to the Inner Sanctum and Destroy Secret Skedar Army. The level begins in outdoor ruins, crosses a ravine, enters the shrine through a breached wall, and ends in the leader’s chamber. The leader cannot be defeated by ordinary body damage. Drain his shield, attack the exposed statue pieces while he kneels, and repeat until the center piece is destroyed.
1. Identify the three temple targets
Start by equipping the R-Tracker and clear the first nearby Skedar before exploring. The opening ruins contain five possible obelisks, but only three are valid targets. Their locations are randomized, so do not attach amplifiers to the first three you find. On the R-Tracker, a valid obelisk appears as the required yellow contact aligned with the relevant marker. Attach a Target Amplifier only to those three obelisks.
Search the opening area, the path beyond the central rock, the forked routes and the obelisk near the stairs. Cloaked Skedar can approach from behind, so clear each small area before stopping to inspect the tracker. Most early enemies are unarmed, but Reaper carriers appear farther along the route. When the third correct amplifier is attached, wait for Identify Temple Targets to register.
The two unused obelisks are optional rather than required. If you want extra explosive weapons for the later route and boss, destroy both with Devastator Wall Hugger shots after identifying the targets. The two Phoenixes then appear near the cliff at the ravine. Preserve at least one explosive weapon for the wall breach even if you choose this optional detour.
- The R-Tracker is equipped while checking every obelisk.
- Three valid obelisks have Target Amplifiers attached.
- Identify Temple Targets has registered.
- The two unused obelisks are destroyed only if the optional Phoenixes are wanted.
2. Cross the ravine and open the shrine wall
Return toward the cliff and descend by the available ladder rather than jumping into the ravine. Follow the rocky ledge to the crossing and climb the ladder on the opposite side. Clear the Skedar near the upper path, then drop to the lower section and move toward the back of the area.
Equip the IR Scanner near the dark outer wall. Look for the lighter or otherwise weak section shown by the scanner. Fire an explosive round into that section to create the required opening. If the opening does not appear, check that you are targeting the scanner-highlighted weak patch rather than the surrounding rock.
The wall breach is the route into the shrine interior. It is not itself a separate objective, so continue immediately through the tunnels once the path is open. Mini-Skedar can appear in the interior corridors; an explosive shot is usually safer than allowing them to close to melee range.
- The ravine has been crossed using the ledges and ladder.
- The weak wall section is located with the IR Scanner.
- The wall is breached with an explosive weapon.
- The interior tunnel route is entered.
3. Activate the bridge
Follow the tunnels until the route drops into the interior. Continue through the first door on the right after the drop and eliminate the small Skedar in the room. A movable stone or wall fragment is positioned near the bridge-control mechanism.
Push the stone fully onto the light-colored floor switch. It must remain centered on the switch; merely touching the edge is not enough. Wait for Activate Bridge to register before leaving the room. This switch changes the route across the previously inaccessible bridge, so do not search for another control if the objective has already registered.
Before proceeding, check your explosive ammunition. You need reliable fire for the two Skedar carrying Slayers and for the final leader encounter. If you used most of your ammunition destroying the optional obelisks, collect the Phoenixes and dropped weapons before crossing onward.
- The bridge-control room is entered.
- The movable stone is fully placed on the floor switch.
- Activate Bridge has registered.
- A useful explosive weapon remains available.
4. Reach the Inner Sanctum on Special Agent and Perfect Agent
Cross the activated bridge and keep the IR Scanner ready for the dark corridors. Continue to the area with a side door and an upward ramp. Use the doorway and ramp as cover while dealing with the two Skedar below; both carry Slayers, so retreat when rockets are fired and avoid standing in the open.
Cross the upper bridge after the Slayer carriers are defeated. In the lower area, locate the small shrine or altar that asks for a sacrifice to the Skedar god of war. Drop a disposable weapon beside it by pressing B. Use a Falcon 2 or a Slayer if available, but do not sacrifice the Reaper or another weapon you need for the boss. The sacrifice powers the route forward and completes Gain Access to the Inner Sanctum.
After the objective registers, follow the opened route through the next corridors. There is no escort objective in this level, so your priority is clearing ambushes and preserving explosives for the final chamber.
- The Slayer carriers are defeated from cover.
- The weapon-sacrifice shrine is reached.
- A disposable weapon is dropped with B.
- Gain Access to the Inner Sanctum registers on Special Agent or Perfect Agent.
5. Destroy the secret Skedar army on Perfect Agent
This objective is required only on Perfect Agent. Continue from the Inner Sanctum route into the chamber lined with green suspension containers. When the room lights activate, the hidden Skedar emerge from the containers one at a time. Stay mobile, keep the room’s entrances in view and use explosive weapons to stop enemies before they surround you.
The containers activate in a fixed sequence, but you do not need to memorize it to complete the objective. Watch each green container as it opens and keep searching the chamber after the apparent final enemy falls. If Destroy Secret Skedar Army has not registered, inspect the container rows and corners for a surviving Skedar before moving through the next door.
Collect dropped Maulers if the area is safe. They are useful against the leader because charged shots can damage him and the statue pieces efficiently. Do not spend every explosive round on ordinary enemies if you still have another route to clear.
- The suspension-container chamber has been entered.
- Every emerging Skedar has been defeated.
- Destroy Secret Skedar Army has registered on Perfect Agent.
- Useful Maulers or other explosive weapons have been collected.
6. Defeat the Skedar leader
Enter the final shrine and keep moving laterally. The leader uses a Slayer, so watch for rockets and use explosive shots to detonate them before they reach you when possible. If the leader teleports down to your level, strafe around him and create distance. Summoned Skedar and mini-Skedar can appear during the fight; remove them quickly if they begin to close in.
Shoot the leader until his shield indicator turns green and he moves into position in front of the large five-piece statue. Only during this vulnerable phase can the statue pieces be damaged. Fire at the exposed outer pieces rather than the protected center piece. The outer pieces can be destroyed in succession; the center piece remains protected until the others are gone.
When the leader’s shield returns, stop attacking the statue and resume damaging the leader. Repeat the shield-draining cycle, then destroy the newly exposed statue pieces. Preserve enough Mauler, Phoenix or other explosive ammunition for several cycles. After the four outer pieces are destroyed, weaken the shield again and attack the remaining center piece. Its destruction triggers the finishing transition and completes Assassinate Skedar Leader.
- The leader’s rockets are avoided or detonated safely.
- Summoned Skedar are cleared before they surround you.
- The leader’s shield is weakened before each statue attack.
- The four outer statue pieces are destroyed before the center piece.
- Assassinate Skedar Leader registers.
7. Confirm regular-campaign completion
After the leader is defeated, remain in the mission and allow the victory transition, ending sequence and credits to play. Battle Shrine is the seventeenth and final regular solo level, although the game groups the campaign under nine mission headings. The mission-result record should show Battle Shrine completed on the selected difficulty after you return to the Solo Missions menu.
The regular story ending is separate from optional content. Mr. Blonde’s Revenge, Maian S.O.S., WAR!, The Duel, higher-difficulty records, firing-range rewards, timed cheats and Perfect Dark mode are not required for this ending. Perfect Dark mode is a separate optional mode; its exact unlock threshold for the original North American N64 release is not established here because available references conflict.
- The selected difficulty’s required objectives have registered.
- The Skedar leader is defeated.
- The victory transition, ending sequence and credits play.
- Battle Shrine is recorded as complete in Solo Missions.
- Optional bonus missions and Perfect Dark mode are tracked separately.
Before you move on
- Identify Temple Targets and Activate Bridge have registered.
- Gain Access to the Inner Sanctum has registered on Special Agent or Perfect Agent.
- Destroy Secret Skedar Army has registered on Perfect Agent.
- Assassinate Skedar Leader has registered.
- The victory transition, ending sequence and credits have played.
- Battle Shrine is recorded as complete in Solo Missions.
- Mr. Blonde’s Revenge, Maian S.O.S., WAR!, The Duel, timed cheats, higher-difficulty records and Perfect Dark mode remain separate optional goals.
Campaign route, objective ledger and late-game recovery
The original North American Nintendo 64 release has seventeen regular solo levels grouped under nine mission headings. Complete those levels in their fixed campaign order to reach the story ending. The three difficulty settings—Agent, Special Agent and Perfect Agent—maintain separate records, and the active briefing determines the objectives for the selected difficulty. Skedar Ruins: Battle Shrine is level 17 and the final regular story mission. Mr. Blonde’s Revenge, Maian S.O.S., WAR!, The Duel, Firing Range results, timed cheats and Perfect Dark mode are separate optional completion goals.
Follow the seventeen-level campaign route
Complete the regular solo missions in this order: 1. dataDyne Central: Defection; 2. dataDyne Research: Investigation; 3. dataDyne Central: Extraction; 4. Carrington Villa: Hostage One; 5. Chicago: Stealth; 6. G5 Building: Reconnaissance; 7. Area 51: Infiltration; 8. Area 51: Rescue; 9. Area 51: Escape; 10. Air Base: Espionage; 11. Air Force One: Antiterrorism; 12. Crash Site: Confrontation; 13. Pelagic II: Exploration; 14. Deep Sea: Nullify Threat; 15. Carrington Institute: Defense; 16. Attack Ship: Covert Assault; 17. Skedar Ruins: Battle Shrine.
The nine headings are not nine levels. Area 51 contains three distinct regular missions, and the final two regular stages are Attack Ship: Covert Assault followed by Skedar Ruins: Battle Shrine. Do not count Mr. Blonde’s Revenge, Maian S.O.S., WAR! or The Duel toward the seventeen-level story route.
Use the Solo Missions screen to check availability. If a difficulty-specific stage is unavailable, verify the preceding regular missions on that same difficulty rather than substituting a bonus assignment or a lower-difficulty clear. The Battle Shrine entry must be available for the difficulty you intend to play before you begin the final attempt.
- Record all seventeen regular levels by number and title.
- Count Area 51: Infiltration, Rescue and Escape separately.
- Treat Attack Ship as level 16 and Battle Shrine as level 17.
- Check the Solo Missions screen before attempting Battle Shrine on a higher difficulty.
Maintain a difficulty-specific objective ledger
Before launching a mission, read the briefing for the selected difficulty and record every displayed objective. Use the game’s exact names: Agent, Special Agent and Perfect Agent. A successful Agent run does not complete the corresponding Special Agent or Perfect Agent record, and higher difficulties can add or alter objectives, enemies and hazards.
In the late campaign, do not assume that a familiar objective order applies to every difficulty. Read each new objective message and confirm the result before moving on. For Pelagic II, Deep Sea, Carrington Institute and Attack Ship, complete fragile downloads, terminal actions, rescues and control-system tasks before deliberately triggering a large escape or defense phase when the briefing indicates that those actions are required.
For Battle Shrine, follow the displayed objective list and use the R-Tracker and target-identification process when the mission requires you to identify temple targets. Do not destroy targets based only on memory or appearance. Mark an objective in your ledger only after the game confirms it.
- Copy the displayed objectives before accepting the mission.
- Keep separate records for Agent, Special Agent and Perfect Agent.
- Recheck the briefing whenever changing difficulty.
- Confirm fragile objectives before starting an escape, defense or final-combat phase.
- Use the R-Tracker and target-identification process when Battle Shrine requires it.
Conserve resources and exploit safe terrain
From Area 51 onward, expect darkness, cloaked enemies, heavy weapons, rockets, moving allies and rooms that become more dangerous after an objective trigger. Use the night-vision or infrared equipment supplied by the mission when visibility demands it. Listen for cloaked enemies near intersections and keep high-impact ammunition for armored threats, rocket carriers, structural obstacles and shielded Skedar instead of ordinary guards.
When enemies close in, withdraw through a doorway or narrow corridor before reloading. Use hard cover against rockets and avoid standing in a doorway where splash damage can reach you from either side. Search cleared rooms for ammunition, required weapons and interactable objects before activating a bridge, terminal or other event that changes the level.
During Attack Ship, remain close enough to protect Elvis while clearing threats along his route. In Battle Shrine, identify the correct targets before destroying them, cross the activated bridge promptly and prepare for aggressive Skedar encounters. At the final shrine, weaken the Skedar leader’s shield, wait for the vulnerable statue phase, then destroy the exposed statue arms until the leader is defeated.
- Reserve explosives and powerful weapons for dangerous targets.
- Reload behind hard cover.
- Protect Elvis during Attack Ship.
- Search the current area before triggering the next major phase.
- Do not guess Battle Shrine targets.
Recover correctly after a failed attempt
If the game reports that an objective has failed, restart the current level. Continuing cannot repair a failed primary objective. If an escort or allied character dies, restart unless the game explicitly confirms that the related objective remains complete.
After a late-mission death, replay the opening conservatively. Bypass harmless patrols where practical, collect weapons needed for later objectives and avoid spending rare explosives on weak enemies. Before triggering the final event, stop in the last defensible area available, reload behind cover and identify the likely exit route and enemy positions.
At the results screen, verify every required objective for the selected difficulty. Record the clear under the correct difficulty and do not replace a failed Perfect Agent attempt with an Agent result. If the next mission remains unavailable, return to Solo Missions and check the preceding regular clears.
- Restart after an objective-failure message.
- Rebuild health, ammunition and positioning before the final event.
- Record the exact difficulty of every clear.
- Verify all required objectives on the results screen.
Confirm the ending and track optional content separately
The regular story is complete when all seventeen regular levels have been cleared and Skedar Ruins: Battle Shrine ends with Mission Complete. Allow the final results screen, ending sequence and credits to play. The ordinary story ending does not require Mr. Blonde’s Revenge, Maian S.O.S., WAR!, The Duel, timed cheats, Firing Range medals or Perfect Dark mode.
Track the three difficulty-linked bonus assignments separately: the standard progression references associate Mr. Blonde’s Revenge with completing the regular campaign on Agent, Maian S.O.S. with completing it on Special Agent and WAR! with completing it on Perfect Agent. These are optional assignments after the regular story route.
The Duel is a separate Firing Range-related assignment. Available original Nintendo 64 references disagree over whether Device Training is additionally required. To use an edition-safe procedure, make all 32 weapon tests available, earn at least Bronze with every weapon, and verify whether The Duel appears on the actual cartridge save. If it remains locked after the weapon requirements are met, complete Device Training and check the save again. Do not treat Device Training as definitively required or definitively unnecessary.
Perfect Dark mode is another optional challenge category. Do not apply a threshold from the Xbox 360 release, a remake, or a conflicting reference to this original North American N64 edition. Keep separate records for regular story clears, difficulty-specific objectives, bonus assignments, Firing Range medals, timed cheats and Perfect Dark mode.
- See Mission Complete on Battle Shrine.
- Allow the ending sequence and credits to finish.
- Confirm all seventeen regular levels in the Solo Missions record.
- Track Mr. Blonde’s Revenge, Maian S.O.S. and WAR! separately.
- Make all 32 weapon tests available for The Duel.
- Earn at least Bronze with every weapon.
- If The Duel remains locked, complete Device Training as a safe compatibility step and recheck the actual cartridge save.
- Do not claim an exact Perfect Dark mode threshold without edition-specific proof.
Before you move on
- All seventeen regular levels show completion in the Solo Missions record.
- Skedar Ruins: Battle Shrine ends with Mission Complete and the level 17 results screen.
- The ending sequence and credits have played.
- Every required objective is complete for the selected difficulty.
- Battle Shrine was attempted only after the required preceding regular clears for that difficulty.
- Optional records are tracked separately: Mr. Blonde’s Revenge, Maian S.O.S., WAR!, The Duel, Firing Range medals, timed cheats and Perfect Dark mode.
- For The Duel, all 32 weapon tests are available and every weapon has at least a Bronze result.
- If The Duel is still absent, Device Training has been completed and the actual cartridge save has been checked.
- No disputed Perfect Dark mode threshold has been used as a completion requirement.
Ending verification and regular-campaign completion
Skedar Ruins: Battle Shrine is the seventeenth and final regular solo level in the original North American Nintendo 64 campaign. It appears under Mission 9 in the menu because the campaign is grouped into broader mission headings, but it follows Attack Ship: Covert Assault as the last story assignment. Complete the objectives assigned to the selected difficulty, defeat the Skedar leader by attacking the Battle Shrine during shield-recharge phases, then allow the mission-result screen, ending sequence and credits to finish. Mr. Blonde’s Revenge, Maian S.O.S., WAR!, The Duel, timed cheats and Perfect Dark mode are separate post-story goals.
Confirm Battle Shrine and its availability
Open Solo Missions and select Skedar Ruins: Battle Shrine. The regular campaign order ends with Attack Ship: Covert Assault followed by Battle Shrine. Although the menu identifies it as Mission 9, it is level seventeen of the regular solo progression.
Choose Agent, Special Agent or Perfect Agent deliberately. Mission availability is tracked by difficulty, so Battle Shrine requires the preceding regular missions to have been cleared on the same difficulty. If the assignment is unavailable, check the requirement shown in Mission Select rather than treating it as a bonus mission or a missing stage.
Read the briefing before starting and confirm the objective list shown for the chosen difficulty. The route overlaps across difficulties, but Special Agent adds Gain access to Inner Sanctum, while Perfect Agent also adds Destroy secret Skedar army.
- The selected assignment is Skedar Ruins: Battle Shrine.
- The level is recognized as level seventeen of the regular campaign and Mission 9 in the menu grouping.
- The chosen difficulty is Agent, Special Agent or Perfect Agent.
- Mission Select confirms that the chosen difficulty is available.
- The displayed objective list matches the selected difficulty.
Identify the temple targets
At the beginning of the ruins, equip the R-Tracker. Five black pillars are distributed through the opening section, but only three are mission targets. A target pillar appears as a yellow mark on the R-Tracker. Approach each marked pillar and use a Target Amplifier on it; do not tag an unmarked pillar, because wasting or misplacing the amplifiers can prevent completion of the objective.
Move through the corridors methodically. Cloaked Skedar can appear as you enter or leave an area, and armed Skedar cover several long sightlines with Reapers. Back away into a cleared corridor when a cloaked enemy decloaks, and deal with distant armed enemies before exposing yourself to the next section.
After all three correct pillars have been marked, wait for the objective confirmation and the aerial strike that destroys them. The two unmarked pillars are optional. Destroying both with explosives causes the Double Phoenix weapons to appear near the canyon entrance, which is useful but not required for story completion.
- The R-Tracker is active while checking pillars.
- Exactly the three yellow-marked temple targets receive Target Amplifiers.
- Identify temple targets updates as complete.
- The optional unmarked pillars are destroyed only if the Double Phoenix reward is wanted.
Activate the bridge and choose the correct difficulty route
Return to the canyon and follow the path toward the blocked crossing. On Agent, use the available explosive weapon to clear the obstruction, cross the canyon route and enter the ruins through the weak wall revealed by the IR Scanner. Continue through the dark passages until you reach the room containing the bridge mechanism.
Inside the bridge room, clear the small Skedar and push the movable block onto the recessed floor switch. The bridge extends while the switch is held down. Cross it and confirm Activate bridge before continuing.
Agent has no altar-sacrifice or Inner Sanctum objective. After activating the bridge, follow the Agent route toward the final shrine and proceed through the available passage to the leader encounter. Do not drop a weapon on the altar, spend time restoring power or attempt to complete Gain access to Inner Sanctum on this difficulty.
On Special Agent and Perfect Agent, continue past the bridge into the shrine passages. Defeat the two Slayer-carrying guards and reach the altar marked by the Skedar insignia. When the sacrifice message appears, place a starting weapon on the altar using the action command. This restores power and opens the route to the Inner Sanctum. Follow the newly opened route and wait for Gain access to Inner Sanctum to register.
On Perfect Agent, enter the room containing the suspended Skedar army and destroy the required warriors before leaving. The enemies emerge from the stasis area, so use Phoenix explosive shells, Mauler fire or saved Devastator and Slayer ammunition to kill them while keeping the doorway as a retreat point. Do not leave until Destroy secret Skedar army appears as complete.
- Activate bridge is complete on all three difficulties.
- Agent follows the direct Agent route after the bridge and does not perform the altar sacrifice.
- Special Agent and Perfect Agent complete the altar interaction and Gain access to Inner Sanctum.
- Perfect Agent completes Destroy secret Skedar army before the final encounter.
- Every objective required by the selected difficulty has updated before entering the leader’s arena.
Prepare for the Skedar leader
Keep the Callisto NTG set to High-Impact Shells, or use the Phoenix with explosive shells if you obtained the optional Double Phoenix weapons. The Callisto is useful for repeatedly draining the leader’s shield, while Phoenix explosions can also detonate incoming Slayer rockets when timed carefully.
The Skedar leader fires rockets, can teleport close for a melee attack and may summon additional Skedar. Keep moving around the arena and avoid standing directly in front of a rocket. Leave room to strafe around the leader rather than backing into a wall. If a summoned enemy reaches you, eliminate the immediate threat and then resume attacking the leader.
Shoot the leader until the shield changes from its normal red state to the weakened green state. The leader then moves to the shrine and crouches to recharge. This is the only reliable opening for damaging the Battle Shrine itself. Ordinary sustained fire against the leader will not finish the assassination.
- An effective shield-damaging weapon is ready.
- The arena has enough open space for strafing and retreat.
- The leader’s shield has been weakened to its vulnerable state.
- The leader has crouched at the shrine to recharge.
Destroy the shrine pieces during recharge phases
When the leader crouches at the shrine, stop concentrating fire on the leader and attack the exposed statue pieces above and around it. Four outer pieces are vulnerable across successive recharge phases: the two larger side pieces and the two lower, narrower pieces. Only one piece can be destroyed during each recharge window, so do not expect the whole shrine to collapse immediately.
Strafe to the side of the leader when necessary. The leader’s shield can block shots from the front, while the bases of the lower pieces are easier to hit from an angle. Destroy one exposed piece, then retreat and wait for the leader to resume attacking.
Repeat the cycle by weakening the leader’s shield, waiting for the next recharge, and destroying another exposed piece. After the four outer pieces have been destroyed, the central piece becomes vulnerable. During the next recharge phase, destroy that final central piece. Its destruction defeats the leader and completes Assassinate Skedar leader.
- The leader is crouched and recharging before shrine pieces are attacked.
- The four outer statue pieces are destroyed across successive vulnerability phases.
- The central statue piece is attacked only after the four outer pieces are gone.
- Assassinate Skedar leader updates as complete.
- The leader’s defeat animation finishes.
Verify the mission result, ending and credits
After the final shrine piece breaks, keep control of Joanna and allow the game to proceed. Do not reset the Nintendo 64 or quit to the menu immediately after the leader disappears. Wait for the objective confirmation and the mission-result screen.
Check the result screen against the selected difficulty. Agent must show Identify temple targets, Activate bridge and Assassinate Skedar leader. Special Agent must show those three objectives plus Gain access to Inner Sanctum. Perfect Agent must show all five objectives, including Destroy secret Skedar army.
Allow the ending sequence and credits to play. The regular story completion check is satisfied when the seventeen regular solo levels have been cleared on the selected difficulty, Battle Shrine has registered as complete, and the ending and credits have appeared. If you are maintaining a cartridge save, verify the mission record before shutting down rather than assuming the result was preserved.
A failed objective or failed Battle Shrine attempt requires replaying the current level. There is no need to treat the bonus assignments as part of the ending sequence: they are separate missions that can be pursued after the regular story has concluded.
- The Battle Shrine mission-result screen appears.
- Every objective required for the selected difficulty is complete.
- The ending sequence plays.
- The credits appear.
- Battle Shrine is recorded as completed before shutdown.
- All seventeen regular solo levels are complete on the selected difficulty.
Track optional content separately
Mr. Blonde’s Revenge, Maian S.O.S. and WAR! are bonus assignments rather than continuation requirements for the regular story. Mr. Blonde’s Revenge is associated with completing the regular campaign on Agent or higher; Maian S.O.S. requires the corresponding Special Agent progression; and WAR! is tied to the much more extensive Perfect Agent progression, including the other bonus assignments. These goals should not be used to decide whether the regular ending has been reached.
The Duel is a separate firing-range reward or mini-game and is not required to defeat the Skedar leader or see the credits. Timed cheats are also tracked through their own time records and do not affect the regular campaign ending.
Perfect Dark mode is a separate optional completion category. Because references disagree about the exact original North American N64 unlock threshold, do not use a disputed threshold as the regular-story completion test. Track the mode independently from Agent, Special Agent and Perfect Agent mission clears.
Maintain separate records for the regular seventeen-level clear, each difficulty’s objective completion, bonus assignments, The Duel, firing-range medals, timed cheats and Perfect Dark mode.
- The regular seventeen-level story clear is recorded independently.
- Mr. Blonde’s Revenge is treated as optional bonus content.
- Maian S.O.S. is treated as optional bonus content.
- WAR! is treated as optional bonus content with its separate Perfect Agent requirements.
- The Duel and firing-range progress are tracked separately.
- Timed cheats are tracked separately.
- Perfect Dark mode is not required for the regular ending.
Before you move on
- Skedar Ruins: Battle Shrine is complete as level seventeen of the original N64 regular solo campaign.
- Agent completion includes Identify temple targets, Activate bridge and Assassinate Skedar leader.
- Special Agent additionally includes Gain access to Inner Sanctum.
- Perfect Agent additionally includes Gain access to Inner Sanctum and Destroy secret Skedar army.
- Agent reaches the final shrine without performing the Special Agent altar sacrifice.
- The leader’s shield was weakened before each shrine vulnerability phase.
- The four outer shrine pieces were destroyed during successive recharge phases.
- The central shrine piece was destroyed after the four outer pieces were gone.
- The Skedar leader was defeated and the assassination objective updated.
- The mission-result screen appeared with all required objectives complete.
- The ending sequence and credits played.
- The Battle Shrine clear was recorded before shutdown.
- Bonus missions, The Duel, timed cheats and Perfect Dark mode remain separately tracked.
Aftermath: bonus missions, Perfect Agent runs and advanced completion
The original North American Nintendo 64 release has seventeen regular Solo Missions and four optional bonus assignments. Finish the regular campaign first, then track Mr. Blonde’s Revenge, Maian S.O.S., WAR! and The Duel separately. Mr. Blonde’s Revenge is opened by completing the regular campaign on Agent, Maian S.O.S. by completing it on Special Agent, and WAR! by completing it on Perfect Agent. Available original N64 references agree that The Duel is tied to the Firing Range, but they do not consistently describe every prerequisite. To minimize compatibility problems, make all 32 weapons available through Solo Missions, earn at least Bronze with every weapon in the Firing Range, complete Device Training, and then verify that The Duel appears on the actual cartridge save. Device Training remains a separate Carrington Institute activity rather than part of the regular campaign. Perfect Agent records, Perfect Dark mode, timed cheats, Combat Simulator challenges and Transfer Pak rewards should all be recorded independently.
1. Confirm the regular campaign is complete
The regular campaign contains seventeen levels grouped under nine mission headings. The fixed order is dataDyne Central: Defection; dataDyne Research: Investigation; dataDyne Central: Extraction; Carrington Villa: Hostage One; Chicago: Stealth; G5 Building: Reconnaissance; Area 51: Infiltration; Area 51: Rescue; Area 51: Escape; Air Base: Espionage; Air Force One: Antiterrorism; Crash Site: Confrontation; Pelagic II: Exploration; Deep Sea: Nullify Threat; Carrington Institute: Defense; Attack Ship: Covert Assault; and Skedar Ruins: Battle Shrine.
Skedar Ruins: Battle Shrine is the seventeenth and final regular level. Complete it on the difficulty you are recording, allow the ending sequence and credits to play, and wait for the game to finish saving. The four special assignments are optional post-story content and do not replace any regular campaign level.
Track Agent, Special Agent and Perfect Agent separately. A result earned on a higher difficulty may satisfy lower-difficulty availability in the game, but keep your own ledger clear about which difficulty record you actually completed. Do not count a cheat-assisted result as a valid difficulty completion.
- All seventeen regular levels are complete in the listed progression order.
- Skedar Ruins: Battle Shrine is complete on the intended difficulty.
- The ending and credits have played, and saving has finished.
2. Mr. Blonde’s Revenge: Agent route
Mr. Blonde’s Revenge becomes available after the regular campaign has been completed on Agent or higher. On Agent, the required objective is Locate and escort Cassandra to the helipad.
At the reception area, take the CMP150s from behind the desk. Follow the right-hand corridor, activate the cloaking device near its end and enter the small cubicle. Use the embroidered door to reach the guard and laboratory-lift area. Stay near the far wall until the lift opens, then deploy the Bombspy. Drawing guards toward the stairway before detonating it can make the return route safer.
Clear survivors with charged Mauler shots, take the elevator and use the stairwell route toward Cassandra’s office. Switch to Disarm before entering. Cassandra draws a Falcon 2 and triggers the alarm; disarm her instead of shooting her. Stay close while she moves upward, clear only enemies blocking her route and watch for upper guards carrying N-Bombs.
If Cassandra stops, return to her position rather than continuing toward the roof. The objective completes when she reaches the waiting ship at the helipad. If she is killed or left behind, restart the assignment instead of continuing with an incomplete escort.
- Cassandra reaches the helipad alive.
- Cassandra is disarmed rather than killed.
- The Agent result screen confirms completion.
3. Mr. Blonde’s Revenge: Special Agent and Perfect Agent
On Special Agent, the objectives are Plant the explosive device in the lab lift and Locate and escort Cassandra to the helipad. Use the cloaking device to reach the laboratory lift, plant the Skedar bomb at its terminal and leave immediately. Do not spend the escape window clearing every guard.
Return through the cubicle and stairway, take the elevator on the left and use cover as it opens onto the guarded floor. Reach Cassandra’s office, switch to Disarm and take her Falcon 2. Lead her through the final stairwell to the helipad, clearing only enemies that block the route.
On Perfect Agent, add Eliminate the dataDyne Captain. Plant the bomb first, then leave the Bombspy beside the locked elevator before riding upward. Switch to the Bombspy and detonate it when the captain enters the lift area. Continue to Cassandra’s office, disarm her and escort her upward.
The main hazards are the bomb timer, N-Bomb guards near the roof and Cassandra becoming separated from the route. If the captain does not enter the Bombspy’s position, reposition it or restart. If the timer is nearly exhausted, take the direct elevator-and-stairwell route and avoid optional combat.
- Special Agent: the bomb is planted and Cassandra reaches the helipad.
- Perfect Agent: the bomb is planted, the captain is eliminated and Cassandra reaches the helipad.
- The result screen lists every required objective for the selected difficulty.
4. Maian S.O.S.: Agent route
Maian S.O.S. becomes available after the regular campaign has been completed on Special Agent or higher. The playable character is a Maian with reduced starting health and no weapon. On Agent, the only objective is Activate the distress signal.
At the examination area, let the first scientist draw a Falcon 2 and disarm him. Take the weapon, move into the adjoining room and obtain the Psychosis Gun. Return to the starting area and push the examination gurney against the glass wall. Shoot the gurney until the glass breaks, leave through the opening and clear the guard in the next room.
Follow the route through the hall and showers toward the vent platform. Enter the vent leading to the crate room, ride the elevator upward and take the door leading toward the former Phoenix area from Area 51: Rescue. Continue past the guards to the partitions, break through them and activate the computer terminal beyond.
Use the Psychosis Gun for route control and distractions instead of wasting it on isolated enemies. If an alarm brings too many attackers, retreat through the vent route to a cleared room, reload and approach again. If the terminal route becomes blocked or the Maian dies, restart the assignment.
- The distress-signal terminal is activated.
- The Maian survives until the result screen.
- The Agent result screen confirms completion.
5. Maian S.O.S.: Special Agent and Perfect Agent
On Special Agent, the objectives are Sabotage the enemy medical experiment and Activate the distress signal. Disarm the first technician for a Falcon 2, then disarm the guard entering from behind. Take the Psychosis Gun, push the hover bed against the glass and shoot it with the Falcon 2 to break through.
Use the large doorway to enter the main hall. Disarm the guard with the Dragon if practical, then place a Dragon proximity mine at the next open doorway. Open the double doors and eliminate the technicians around the medical equipment. Shoot the hover bed containing the captured experiment; the sabotage objective completes when the equipment is destroyed.
Return to the corridor, use another proximity mine near the paired cubby holes if needed, advance through the ramps and catwalks, ride the elevator upward and enter the final room. Break the plywood panel, defeat the scientists beyond it and activate the computer to send the distress signal.
On Perfect Agent, add Destroy the captured Maian saucer. Preserve the Psychosis Gun during the opening route. After sabotaging the experiment, follow the cryo-lab route to the captured saucer and destroy it before moving to the upper catwalk and final distress terminal. Low health makes short engagements and doorway cover safer than open firefights.
- Special Agent: the experiment is sabotaged and the distress signal is activated.
- Perfect Agent: the experiment is sabotaged, the saucer is destroyed and the distress signal is activated.
- The result screen confirms every required objective.
6. WAR!: Skedar King routes
WAR! becomes available after the regular campaign has been completed on Perfect Agent. Agent requires Kill Skedar King 1. Special Agent adds Kill Skedar King 2. Perfect Agent adds Kill Skedar King 3.
Begin with the Phoenix set to explosive shells. Move ahead, climb the small hill on the right and enter the opening blown into the shrine. Follow the ramp toward the first king. If the Skedar close in before the Maian team catches up, retreat to the first intersection and regroup.
Cross the bridge with the team and pick up a Mauler. Use charged shots against the kings and Phoenix explosive shells against groups of ordinary Skedar. Protect the Maian leader near the opening; the mission fails if that ally dies. Do not chase every Warrior into side passages, because ordinary enemies continue to appear.
At the generator room, use the generator as cover. Wait for a king to return to its normal position, expose only enough of the head to fire a charged Mauler shot and retreat behind cover. After each king falls, move through the required route instead of clearing every respawning enemy.
On higher difficulties, repeat the protected firing position method and strafe around rockets. A dropped Slayer can help, but avoid firing it into nearby walls. If the Maian leader dies or a required route is lost, restart.
- Agent: Skedar King 1 is defeated.
- Special Agent: Skedar Kings 1 and 2 are defeated.
- Perfect Agent: all three Skedar Kings are defeated and the Maian leader survives.
- The result screen confirms the selected difficulty’s objectives.
7. The Duel: disputed original N64 unlock condition
The Duel is an optional Holo Training Room assignment, not a regular story level. Available original North American N64 references agree that the Firing Range and the full set of 32 weapons are involved, but they conflict over whether Device Training is also required or over the exact order in which the prerequisites are registered.
Use the safe compatibility procedure on the actual cartridge save. First make all 32 weapons available through Solo Missions. Then earn at least Bronze in the Firing Range test for every available weapon. Complete Device Training as well, especially if the mission remains locked after the weapon tests. Device Training is a separate Carrington Institute activity; completing it does not count as a regular campaign mission or as one of the four story bonus assignments.
After each new weapon becomes available, check the Firing Range list and record the result. Do not assume that a weapon visible in another save file is available on yours. The golden Magnum and other late weapons can require progression through later Solo content or bonus content before their tests appear.
The assignment begins in the Holo Training Room with a Falcon 2 and limited ammunition. A barricade divides the room and provides the main defensive landmark. On Agent, defeat the dataDyne guard by strafing during firing pauses or use the barricade to break line of sight while he spends ammunition.
On Special Agent, defeat the dataDyne guard and Jonathan Dark. After the first fight, reload and take the dropped weapon if ammunition is needed. Jonathan moves around the barricade, so either follow him around it or hold your side until he steps into view, then fire while moving.
On Perfect Agent, defeat the dataDyne guard, Jonathan Dark and Trent Easton. After Jonathan falls, reload and use the barricade again. Trent is more accurate, so creep to the edge, step out long enough to fire and retreat before he can answer. If an opponent reaches the open side of the room, break line of sight and reset the engagement.
- All 32 weapons are available through Solo Missions or the game’s normal weapon-unlock progression.
- Every available weapon has at least a Bronze Firing Range result.
- Device Training is complete if The Duel remains locked or if you are following the safe compatibility procedure.
- The Duel appears on the actual cartridge save before attempting its objectives.
- Agent: the dataDyne guard is defeated.
- Special Agent: the guard and Jonathan Dark are defeated.
- Perfect Agent: the guard, Jonathan Dark and Trent Easton are defeated.
8. Keep Perfect Agent, Perfect Dark and cheat records separate
Use the Solo Mission list to identify incomplete Agent, Special Agent and Perfect Agent records. Replay individual levels rather than assuming that a full campaign replay is required. Keep cheats disabled during difficulty-record attempts; a cheat-assisted run should not be treated as a qualifying record.
Perfect Dark mode is a separate optional mode. The exact original North American N64 unlock threshold is not stated here because available references conflict. Do not use completion of the seventeen regular missions, all twenty-one Solo Missions or another disputed threshold as a definitive requirement. If the mode is available on the cartridge or save file, record it separately from ordinary Perfect Agent completions.
Timed cheats use their own mission, difficulty and time limit. Read the requirement displayed by the game before attempting one. A timed-cheat result is not a substitute for a regular mission record, a Perfect Agent record or a bonus-assignment completion.
Combat Simulator goals, Firing Range medals, Device Training, Transfer Pak rewards and timed cheats are separate categories. Completing a bonus assignment does not substitute for the regular-level record that unlocked it.
- Desired regular-level records are valid and cheat-free.
- Perfect Dark mode is recorded separately without assuming a disputed unlock threshold.
- Each timed cheat is attempted under its displayed mission, difficulty and time requirement.
- Device Training, Combat Simulator goals, Firing Range results and Transfer Pak rewards are tracked independently.
9. Final completion ledger
For a broad optional-content target, maintain separate entries for the regular ending, Mr. Blonde’s Revenge, Maian S.O.S., WAR!, The Duel, all seventeen regular Perfect Agent records, Perfect Dark mode, the 32 Firing Range tests, timed cheats, Combat Simulator challenges, Device Training and Transfer Pak-related rewards.
The four bonus assignments are optional after the regular story ending. Completing Mr. Blonde’s Revenge, Maian S.O.S. or WAR! does not add a regular campaign level. The Duel is a separate training combat assignment. Its exact original North American N64 unlock condition is disputed in available references, so use the conservative procedure: make all 32 weapons available through Solo Missions, earn Bronze or better with each weapon in the Firing Range, complete Device Training if needed, and confirm that The Duel is unlocked on the actual cartridge save.
A practical order is to finish the regular story on Agent, replay the regular campaign on Special Agent to open Maian S.O.S., then work through the regular missions on Perfect Agent to open WAR!. Collect and unlock weapons during Solo Missions, earn Bronze or better with all 32 in the Firing Range, complete Device Training, and then check for The Duel. Treat Perfect Dark mode as a separate optional target and do not rely on an unverified unlock threshold.
Practice individual routes before attempting a full Perfect Agent record set. The game does not provide a dependable mid-mission recovery after death or a failed required objective, so restart failed attempts rather than counting incomplete records.
- The regular ending has played after all seventeen regular levels are complete.
- Mr. Blonde’s Revenge, Maian S.O.S., WAR! and The Duel are unlocked and completed if optional Solo content is being pursued.
- All seventeen regular levels have valid Perfect Agent records if pursuing the highest standard campaign target.
- All 32 weapons are available and each has at least a Bronze Firing Range result.
- Device Training has been tracked separately and completed as a safe compatibility step where necessary.
- The Duel has been confirmed on the actual cartridge save.
- Perfect Dark mode has been checked separately without relying on a disputed North American N64 requirement.
- Desired timed cheats, Combat Simulator goals and Transfer Pak rewards are recorded independently.
Before you move on
- All seventeen regular Solo Missions are complete in the correct progression order and the ending has played.
- Mr. Blonde’s Revenge, Maian S.O.S., WAR! and The Duel are unlocked and completed if optional Solo content is being pursued.
- All seventeen regular levels have valid Perfect Agent records if pursuing the highest standard difficulty target.
- All 32 weapons are available through Solo Missions or normal weapon progression and have at least Bronze results in the Firing Range.
- Device Training has been tracked separately and completed where needed as a safe The Duel compatibility step.
- The Duel has been confirmed as unlocked on the actual cartridge save.
- Perfect Dark mode has been checked as a separate optional mode without relying on a disputed original N64 unlock requirement.
- Each desired timed cheat has been completed under its displayed mission, difficulty and time requirement.
- Combat Simulator goals and Transfer Pak-related rewards are recorded separately from the Solo campaign.
References for this chapter
Finishing up
Complete the seventeen regular solo levels in their actual order, confirming every objective required by the selected difficulty before entering the extraction or ending trigger.
Reach and complete Skedar Ruins: Battle Shrine to view the regular campaign ending and credits.
Allow the mission-result and save process to finish before powering down or changing agent files.
Treat the four bonus missions, firing-range goals, timed cheats and Perfect Dark mode as separate optional completion targets with their own requirements.
For a full standard-difficulty ledger, record valid Agent, Special Agent or Perfect Agent results for each of the seventeen regular levels without cheats.
Choose your next gameScreenshots & video
Game imagery for reference. Follow the written chapters above for the route and strategies.
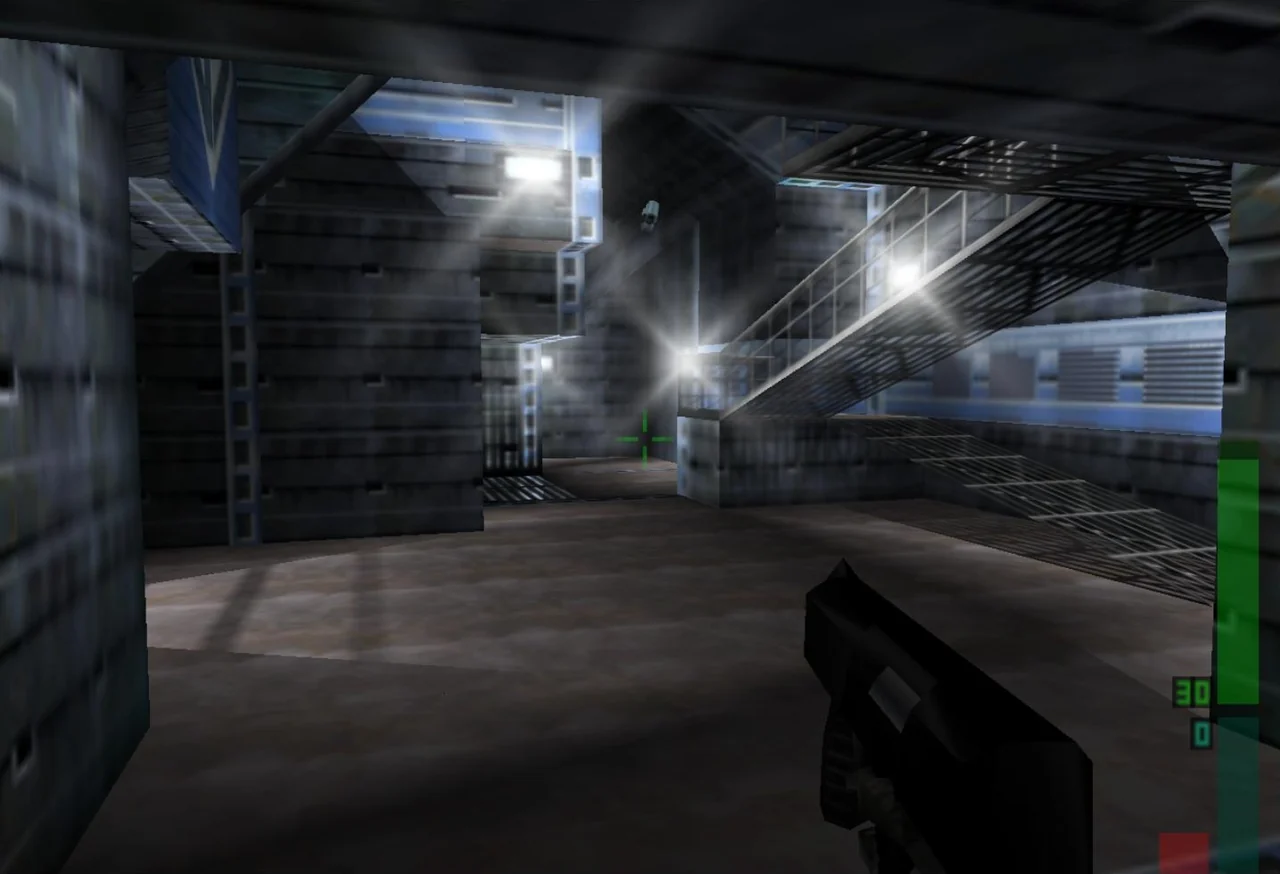
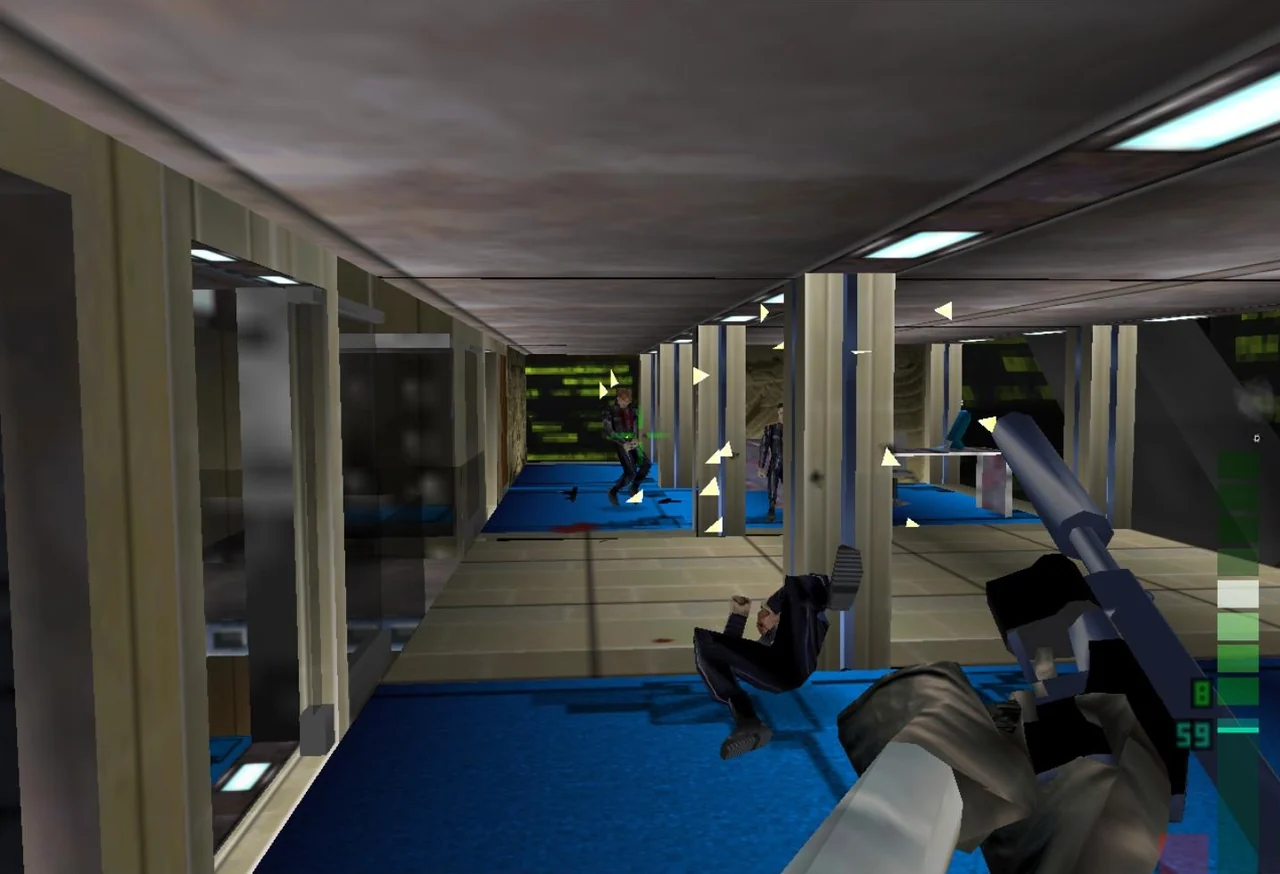
Sources & references
Our original guide draws on the references below. Check the edition at the top of this page before following controls or unlock requirements.
- Perfect Dark Nintendo 64 Instruction Manual transcription
- Perfect Dark Nintendo 64 Game Manual
- Controller Pak - Nintendo 64 Walkthrough & Guide
- Perfect Dark — Guide and Walkthrough — Nintendo 64 — By Nemesis
- Nintendo 64 Game Manuals — Perfect Dark manual PDF
- Nintendo 64 Instruction Manuals: Perfect Dark
- Perfect Dark - Weapons/Devices Guide - Nintendo 64 - By MetroidMoo - GameFAQs
- Perfect Dark - Guide and Walkthrough - Nintendo 64 - By Kajtek - GameFAQs
- Area 51 - Rescue - Perfect Dark
- Carrington Institute - Defense - Perfect Dark Recon
- Perfect Dark - Guide and Walkthrough - Nintendo 64 - By Croco
- Perfect Dark - Game Script - Nintendo 64 - By ironyisntdead
- Perfect Dark – Guide and Walkthrough – Nintendo 64 – Telago
- Perfect Dark - Guide and Walkthrough - Nintendo 64 - By CyricZ
- Perfect Dark — Guide and Walkthrough — Nintendo 64 — By Kodos86
- Perfect Dark — StrategyWiki: dataDyne Central - Defection
- dataDyne Central: Defection — Perfect Dark Recon
- DataDyne Research: Investigation — Perfect Wiki
- Perfect Dark – Perfect Agent Walkthrough – Nintendo 64 – marshmallow and Pyro Vesten
- dataDyne Central - Extraction - Perfect Dark Recon
- Carrington Villa — Hostage One, Perfect Dark Recon
- Chicago — Stealth — Perfect Dark
- Area 51 — Infiltration — Perfect Dark
- Area 51: Infiltration — Perfect Wiki
- Area 51: Rescue — Perfect Wiki
- Crash Site: Confrontation | Perfect Wiki
- Deep Sea - Nullify Threat — Perfect Dark Recon
- Perfect Dark — Walkthrough
- Pelagic II: Exploration — Perfect Wiki
- Perfect Dark - Guide and Walkthrough - Nintendo 64 - By Kildread
- New Perfect Dark Strategy Guide
- Hidden Items - Perfect Dark
- Attack Ship - Covert Assault - Perfect Dark Recon
- Attack Ship: Covert Assault | Perfect Wiki
- Skedar Ruins: Battle Shrine — Perfect Wiki
- Perfect Dark — Mission Guides, Perfect Dark Recon
- Skedar Ruins - Battle Shrine - Perfect Dark Recon
- N64: The Perfect Dark FAQ
- Perfect Dark – Bonus Mission Walkthrough – Nintendo 64 – paladin421
- Perfect Dark/The Duel – StrategyWiki
- The Duel – Perfect Wiki
About the game & collecting notes
- Platform
- Nintendo 64
A complete walkthrough for the original North American Nintendo 64 release, covering setup, controls, all seventeen regular solo levels in verified order, difficulty-specific objectives, failure recovery, the ending, and optional bonus content. The guide separates required story progression from higher-difficulty objectives, bonus missions, timed cheats and Perfect Dark mode.
Darryl Polo
Darryl Polo loves tinkering with emulation and revisiting retro games. He enjoys exploring how old favorites play on different setups and sharing what he learns along the way. At Joking Joystick, he writes about the games, hardware, and small discoveries that keep the hobby fun.
Our editorial standardsFound a step that needs another look? Help us improve this guide.