Paper Mario (Nintendo 64, USA) — Complete Campaign Walkthrough
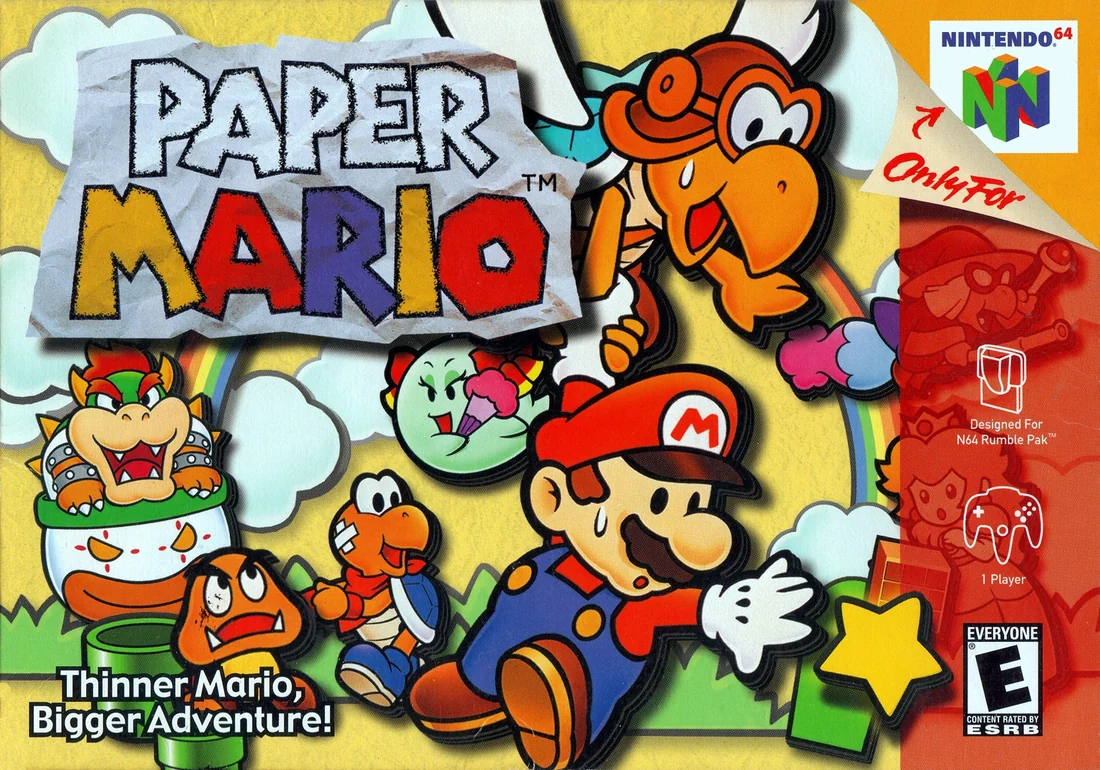
Step-by-step campaign walkthrough for the original Nintendo 64 edition of Paper Mario (USA). This guide leads you through the prologue, every chapter to the final Bowser showdown, and provides practical preparation, partner/badge guidance, and a final-cleanup checklist so you can finish the main story reliably and prepare for 100% completion.

Find a copy
Paper Mario Nintendo 64
We may earn a commission if you buy through these links, at no extra cost to you. As an Amazon Associate I earn from qualifying purchases.
Opens retailer search results. Check the model, edition, seller, availability and current price before buying.
Before you begin
This walkthrough is written for the original North American Nintendo 64 release of Paper Mario.
Follow the prologue and Chapters 1 through 8 in order. Chapters 1 through 7 each end with the rescue of one of the seven Star Spirits; Chapter 8 is the final Star Haven and Bowser’s Castle sequence.
I assume you are playing the original USA release or an officially distributed version of that same edition, not a remake, remaster or later Paper Mario title.
Read each chapter heading and follow its objectives in order.
Save at Save Blocks, restore HP and FP before major battles, and use the partner whose field ability matches the obstacle ahead.
Treat Star Pieces, Super Blocks, badges, letters, recipes, quizzes and sidequests as optional cleanup unless a chapter explicitly identifies one as a progression requirement.
Set yourself up for the run
Use the original Nintendo 64 control layout: the Control Stick moves Mario, A makes Mario jump and confirms selections, B uses the Hammer or cancels where applicable, C-Right changes the active partner, and C-Down uses that partner’s field ability.
Press START to open the status and pause screens, and use the field menu to review items and other available information.
Save at Save Blocks before entering a dungeon, after major key-item events, and before each boss approach.
Keep a practical supply of HP- and FP-restoring items, but do not treat optional fire or ice equipment as mandatory unless the chapter specifically identifies it.
Change partners whenever a field obstacle requires a particular ability: Kooper for remote switches, Bombette for cracked walls, Parakarry for gaps, Bow for concealment, Watt for darkness, Sushie for water, and Lakilester for hazardous ground.
Spend BP on badges that support attacks and resource management, and remove exploration badges before bosses if their BP would be more useful elsewhere.
Remember that Star Power and FP are separate resources; plan Star Spirit abilities independently from Mario and partner FP attacks.
Before the final Star Way sequence, complete any optional cleanup you want on the current save and preserve a separate pre-endgame save.
Prologue — A Plea From the Stars (Peach’s Party / Goomba Road)
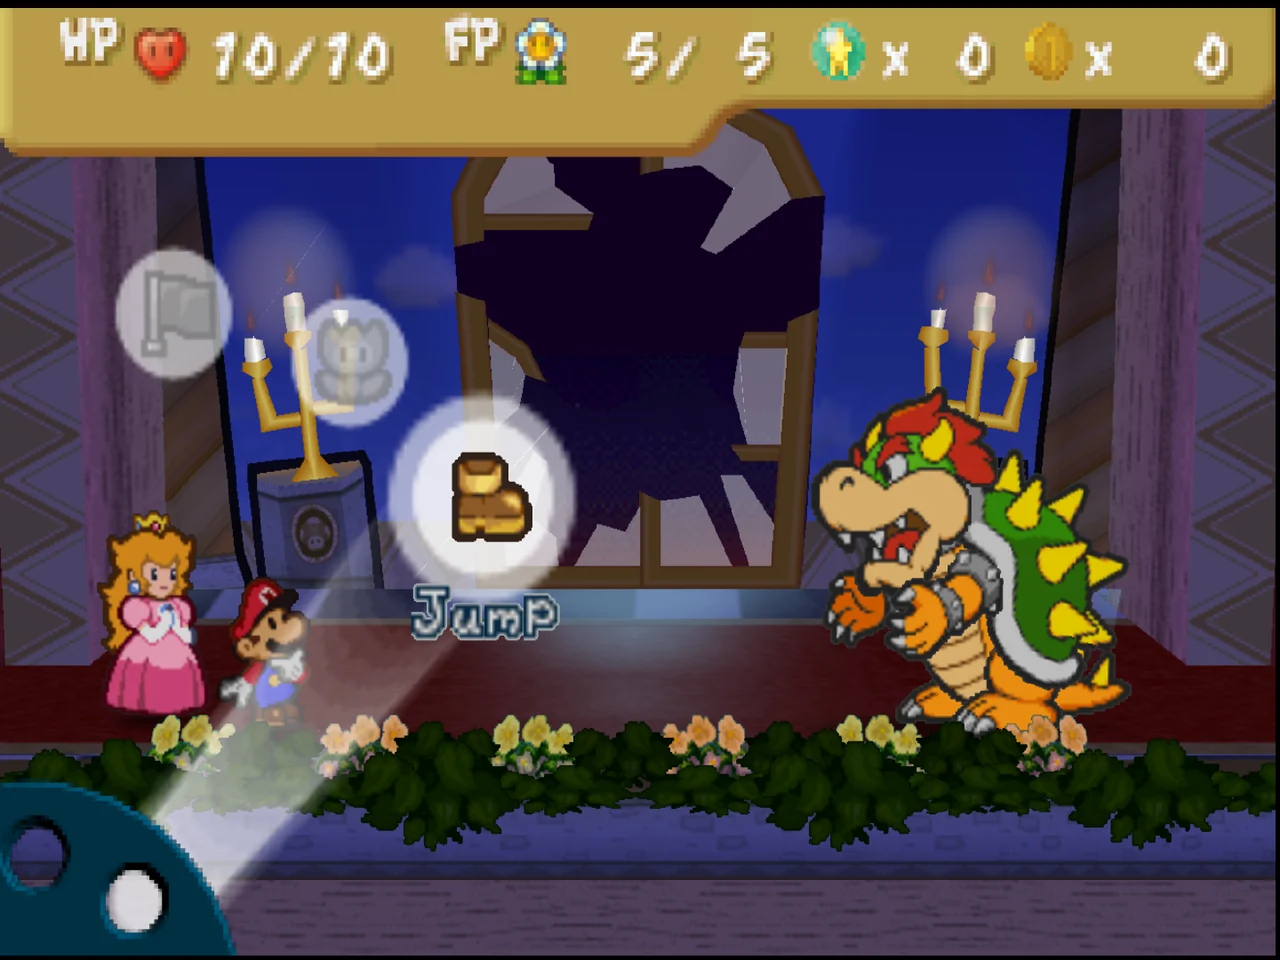
Complete Peach’s Castle, escape through Goomba Village, recruit Goombario, defeat the Goomba King, visit Shooting Star Summit, receive the Lucky Star, and speak with Merlon to open the road to Chapter 1. This route also identifies the early Save Blocks, Star Pieces, and Hammer Throw Badge that are useful for campaign preparation.
1. Complete the party at Peach’s Castle
Move Mario through Peach’s Castle toward the party. Speaking with guests is optional, so continue upstairs and follow the corridors to Princess Peach’s room. After the conversation, Bowser attacks and lifts the castle into the sky.
The first Bowser battle cannot be won. Select attacks if the game allows them, but do not treat the encounter as a normal boss fight or waste items trying to force a victory. The battle ends through the story, and Mario is thrown from the castle before the Star Spirits briefly intervene.
When the scene ends, Mario wakes in Goomba Village. This establishes the main objective: rescue the seven imprisoned Star Spirits and ultimately confront Bowser.
- Reach Peach’s room and complete the party sequence.
- Allow the opening Bowser battle to end normally.
- Confirm that Mario wakes in Goomba Village.
2. Find the Hammer and open the route from Goomba Village
After Mario wakes, go outside and speak with Gompapa near the village’s white gate. The immediate route is blocked, so enter the Goomba family’s home and go out onto the damaged veranda. Mario falls, then discovers a Hammer in the bush near the floating brick block.
Use the Hammer to break the yellow block blocking the village route. While exploring this area, hit the right-hand tree to make Goombaria’s Dolly fall. Return the Dolly to Goombaria later for an optional Star Piece; this reward is not required to finish the prologue, but collecting it now avoids a needless return trip.
Leave through the opened route and enter Jr. Troopa’s playground. Jr. Troopa challenges Mario to a battle. At this point, action commands are not available in the original N64 game, so simply choose Jump whenever Mario’s turn occurs. The fight is intentionally simple, and Jr. Troopa leaves after taking enough damage.
Continue into the next area. Break the yellow block, use the Heal Block, and collect the Fire Flower from the upper ledge by using the spring pad. In the following area, climb the rear steps to reach an optional Star Piece. Then return to Goomba Village and break through the yellow block that was previously blocking the path. Goombario joins Mario as the first permanent partner.
Use the Save Block in Goomba Village before leaving for Goomba Road. This is the first reliable point at which to create a file and preserve the completed village sequence.
- Find the Hammer in the bush near the damaged veranda.
- Break the yellow block and defeat Jr. Troopa using Jump attacks.
- Use the Heal Block and collect the Fire Flower if desired.
- Return to Goomba Village and recruit Goombario.
- Save at the Goomba Village Save Block.
3. Cross Goomba Road and prepare for the first required battles
Proceed through Goomba Road with Goombario active. Normal Goombas can be jumped on, while Spiky Goombas should not be jumped on; use Mario’s Hammer against grounded spiked enemies or have Goombario attack when the target is suitable. You can avoid many encounters, so do not fight every enemy if Mario is low on HP or you want to reach the recovery point quickly.
The prologue does not yet provide action commands. Timed attacks and timed guarding only become available after the Lucky Star is received later, so do not wait for an action prompt during these early battles. Select the attack itself and let it resolve normally.
Use the Heal Block before the Red and Blue Goomba encounter. A Close Call Badge is available from a red Question Block on the route, and a Mushroom can be found by interacting with the nearby sign. These are optional resources. The important requirement is reaching the pair with enough HP to survive the next battle as well.
- Use Hammer attacks against Spiky Goombas instead of Jump.
- Do not expect action-command prompts yet.
- Recover at the Heal Block before fighting the Red and Blue Goombas.
- Take the optional Close Call Badge or Mushroom if useful.
4. Defeat the Red and Blue Goombas and then the Goomba King
Fight the Red and Blue Goombas after healing. Defeat the Red Goomba first because it has less HP than the Blue Goomba. Without action commands, the battle is mainly about choosing the correct target and conserving HP and FP. Use Jump against grounded Goombas and Goombario’s Headbonk when the target can be reached.
After the pair is defeated, use the Save Block before continuing if you did not save in the village. The next encounter is the Goomba King, accompanied by the same colored Goombas. During this battle, use Mario’s Hammer on the marked tree beside the enemies. The falling Goomnut defeats the Red and Blue Goombas and damages the Goomba King, greatly shortening the fight.
Finish the Goomba King with Jump, Hammer, or Goombario’s Headbonk. After the battle, strike the tree in front of the king’s fortress for an optional Star Piece. Then search the bush in the nearby area to reveal a blue switch. Hit the switch to create the bridge toward Toad Town.
Continue through the final Goomba Road screen. Near the Toad Town gate, hammer the tree containing the spring pad. Bounce onto the roof of the gate and open the chest to obtain Hammer Throw. This badge is optional, but it provides a ranged Hammer attack and is a useful early purchase of BP rather than a required story item.
- Defeat the Red and Blue Goombas, preferably eliminating the Red Goomba first.
- Hammer the marked tree during the Goomba King battle to drop the Goomnut.
- Defeat Goomba King and activate the blue switch in the bush.
- Collect the optional Star Piece near the fortress if desired.
- Obtain Hammer Throw from the chest above the Toad Town gate if you want the upgrade.
5. Visit Shooting Star Summit, receive the Lucky Star, and open Chapter 1
Enter Toad Town and use the eastern route to reach Shooting Star Summit. The entrance is beyond the crater where Peach’s Castle once stood. Cross the bridge and climb the steps. Merlow and Merluvlee’s home is available from the lower route, but their services are optional for this prologue.
At Shooting Star Summit, climb to the top and speak with the Star Spirits. They explain that Bowser has imprisoned all seven of them and is using the Star Rod to remain invincible. The visit is required even though no Star Spirit is rescued here.
The story then moves to Peach’s Castle for an intermission. Follow Peach and Twink’s short sequence until control returns to Mario. Walk back toward Toad Town. Twink meets Mario on the route and gives him the Lucky Star. Complete Twink’s action-command lesson if you need the controls explained. This is the point at which action commands become available in the original N64 edition.
A Magikoopa battle follows the tutorial. Treat it as the first practical test of the new system. Use Jump or another suitable attack and try the newly introduced timing prompt. The battle is not a Star Spirit encounter and does not require a special item. Afterward, continue to Toad Town.
The eastern exit is blocked by several dark-colored Toads disguised as the Koopa Bros. Enter Merlon’s house, identifiable by its blue, rotating roof, and interact with the entrance until Mario gets inside. Speak directly with Merlon. He exposes the disguise and clears the way. Leave through Toad Town’s eastern exit and enter Pleasant Path. That transition confirms that the prologue is complete and Chapter 1 has begun.
- Reach the top of Shooting Star Summit and speak with the Star Spirits.
- Complete the Peach and Twink intermission.
- Receive the Lucky Star from Twink and finish or skip the action-command lesson.
- Defeat the tutorial Magikoopa encounter.
- Enter Merlon’s house and speak with Merlon.
- Exit east from Toad Town into Pleasant Path.
Before you move on
- Mario has escaped Peach’s Castle and completed the Goomba Village sequence.
- Jr. Troopa, the Red and Blue Goombas, and Goomba King have been defeated.
- Goombario is in the partner roster and a save file exists at an early Save Block.
- Mario has visited Shooting Star Summit and learned about the seven imprisoned Star Spirits.
- Twink has given Mario the Lucky Star, and the action-command tutorial and Magikoopa encounter are complete.
- Merlon has exposed the disguised Koopa Bros., and the eastern exit from Toad Town leads to Pleasant Path and Chapter 1.
Chapter 1 — Storming Koopa Bros. Fortress
After Merlon opens the eastern road from Toad Town, travel through Pleasant Path to Koopa Village. Resolve the village’s Fuzzy crisis, recover Kooper’s stolen shell through a tracking minigame, and recruit Kooper. Use his Shell Toss to complete the remaining Pleasant Path obstacles, then enter Koopa Bros. Fortress, rescue Bombette, collect the required Fortress Keys, defeat the Bowser Tank and Koopa Bros., and free Eldstar. Optional badges, Star Pieces, Koopa Koot favors, and hidden items can be collected during this chapter but are not required for the story.
1. Reach Koopa Village through the first section of Pleasant Path
Once Merlon opens the eastern road from Toad Town, enter Pleasant Path and follow the main route toward Koopa Village. The first part of the path is accessible without a partner. Fight enemies if you need Star Points, but conserve HP and FP because the route continues after the village event.
At the first major obstruction, do not try to activate the distant blue switch yet. Kooper is not available at this point, so the switch and bridge are part of the return route after the village crisis. Continue through the accessible screens and enter Koopa Village.
Save at the village Save Block and use the Toad House if Mario needs recovery. The village’s shell problem is the required event that recruits Kooper; optional errands and collectibles can wait until the crisis is finished.
- Enter Pleasant Path after Merlon opens the eastern road.
- Reach Koopa Village without attempting to use Kooper’s ability before he joins.
- Save and recover in Koopa Village if necessary.
2. Resolve the Koopa Village shell crisis
When Mario enters Koopa Village, the front Koopa explains that Fuzzies are stealing the villagers’ shells. A Fuzzy soon takes his shell. Chase it on the village screens and hit it with Mario’s Hammer to return the shell. Other affected Koopas can also be helped by recovering shells from the nearby block and tree, but those extra rescues are optional for the main path.
After the initial disturbance, enter the house associated with Kooper, the blue-shoed Koopa Troopa wearing a red bandana. Kooper explains that the Fuzzy carrying his shell is too quick for him and asks Mario to retrieve it. Follow the shell-carrying Fuzzy out of the house and into the adjacent area.
The Fuzzy leads Mario to a shell-tracking minigame. Several Fuzzies move between the branches while carrying or passing the blue shell. Watch the movement and strike the tree containing the Fuzzy with Kooper’s shell. The game has three tracking rounds. Correctly identify the shell’s location each time. A mistake may lead to a brief battle or a recovery opportunity, after which the tracking sequence continues.
When the three tracking rounds are completed, the Fuzzy gives back Kooper’s shell. Kooper then joins Mario as a permanent partner; accepting is mandatory for progression. On the way out of the area, the shell-stealing Fuzzy and its companions may force a battle. Defeat them, then return toward Koopa Village. This battle is separate from the tracking minigame and is not the step that recruits Kooper.
- Help the village’s affected Koopas as needed.
- Enter Kooper’s house and follow the shell-carrying Fuzzy.
- Complete all three shell-tracking rounds.
- Recover Kooper’s shell and recruit Kooper.
- Win the Fuzzy battle when leaving the recovery area.
3. Use Kooper to finish Pleasant Path and reach the fortress
With Kooper in the party, return through the village and take the western exit toward Pleasant Path. Continue to the bridge obstruction that could not be solved earlier. Stand where the blue switch is in line with Kooper’s Shell Toss, activate the partner ability, and send his shell into the switch. The bridge rises, opening the route toward the fortress.
Before leaving the area, you can use Kooper to collect the HP Plus Badge from the raised stump route and to reach nearby optional Star Pieces. These rewards are not required. Equip the badge only if its BP cost fits your current build; do not spend all of your available BP or coins merely to prepare for this dungeon.
Follow the newly opened path to the fortress entrance. A Heart Block and Save Block are available near the approach. Restore Mario and the active partner, then save before entering Koopa Bros. Fortress. The fortress is a long dungeon with several enemy groups, locked doors, traps, and a final two-part boss sequence.
- Return to Pleasant Path only after Kooper has joined.
- Use Kooper’s Shell Toss to activate the blue switch and raise the bridge.
- Collect the optional HP Plus Badge or Star Pieces if desired.
- Heal and save beside Koopa Bros. Fortress.
4. Enter Koopa Bros. Fortress and rescue Bombette
Enter the fortress and follow the accessible rooms until the first locked sections begin. Defeat the enemy groups that block the route and collect the Fortress Keys they drop or reveal. Use each key only on a matching locked door; if a door remains locked, search the current rooms for another path, switch, or enemy group rather than leaving the fortress.
The fortress contains Bob-ombs, Koopa Troopas, Fire Bars, raised and lowered stairways, and rooms whose exits become available only after the enemies are defeated. Move through Fire Bar gaps carefully and use Save Blocks, Heart Blocks, and items between battles. An optional Power Bounce badge is available in one of the early side rooms.
Eventually, the Yellow Koopa’s trap drops Mario into a jail area. This fall is required. Speak with Bombette, the pink Bob-omb, and accept her help. She joins the party and can use Bomb outside battle to destroy cracked walls. Bomb the jail wall to escape, then use the nearby Heart Block if Mario or a partner needs recovery.
After escaping, retrace the fortress route. Bombette opens a cracked cell containing another Fortress Key. Use it to unlock the next section. A separate cracked wall leads outside to the optional Refund Badge. The badge is useful for item-focused play but is not necessary for defeating the chapter boss.
- Collect the early Fortress Keys and open the corresponding locked doors.
- Clear enemy groups that control stairways and exits.
- Fall through the Yellow Koopa’s trap into the jail.
- Recruit Bombette and bomb the jail wall.
- Use Bombette to obtain the next Fortress Key.
- Collect the optional Refund Badge if desired.
5. Open the upper fortress route and prepare for the boss
Continue upward through the fortress after obtaining Bombette and the additional key. In the switch corridor, use Kooper’s Shell Toss to hit the red switches from the available platforms. Each switch changes the barrier arrangement, so move onto the newly opened platform and activate the next reachable switch until the corridor is clear.
In the large staircase section, activate the blue switch to change the stairs. Move to the lower level and use Bombette on the cracked wall to reach the Fortress Key hidden beyond it. Return through the opening, climb back up, and use the key on the locked door.
Proceed through the upper rooms and activate the later blue switch to raise the route toward the Bullet Bill section. Optional rewards such as the Smash Charge badge and a Maple Syrup can be collected along the way. Bombette’s field ability is required for the cracked obstruction; Kooper remains useful for distant switches and some enemies.
Near the end, pass the Bullet Bill launchers and locate the final Heart Block and Save Block. Restore HP and FP, arrange badges for reliable damage and FP efficiency, and save. Keep enough FP for the fight after the tank is destroyed. Do not use every expensive attack on the approach.
- Solve the red-switch barrier corridor with Kooper.
- Use the changed staircase route to reach the hidden Fortress Key.
- Open the upper locked route.
- Pass the Bullet Bill section.
- Heal and save immediately before the final room.
6. Defeat the Bowser Tank and the Koopa Bros.
The final room begins with the Koopa Bros. presenting a mechanical Bowser-like tank. This is the first phase of the chapter boss encounter. Attack the tank with Mario’s reliable Hammer or Jump attacks and use a partner attack when it is efficient. Bombette’s Bomb can deal damage, while Kooper can help conserve FP or contribute after the tank’s defenses have been handled.
The tank’s punch can be guarded with an action command. Watch its movement and attempt the defense timing rather than taking repeated damage. Heal with an item if Mario is in danger, but preserve enough FP for the second phase. The tank is defeated when its HP reaches zero and it explodes.
After the explosion, the four Koopa Bros. form a stacked tower. Knock the tower over with a suitable attack such as Mario’s Hammer, Kooper’s Shell Toss, Bombette’s attack, or a POW Block. While the brothers are on their backs, attack them directly. If the tower reforms, topple it again instead of wasting weak attacks against the standing formation. Continue until all four are defeated.
Eldstar is freed after the Koopa Bros. lose the battle. Let the rescue sequence finish, then use the post-chapter save opportunity. The Star Spirit rescue, rather than merely winning the first tank phase, is the completion point for the fortress objective.
- Defeat the Bowser Tank while preserving resources.
- Guard the tank’s punch when possible.
- Topple the Koopa Bros. tower.
- Attack the exposed Koopa Bros. while they are on their backs.
- Confirm Eldstar’s rescue sequence and save after the chapter ends.
7. Complete Peach’s intermission and begin the next chapter
After the fortress victory, control shifts to Princess Peach in Peach’s Castle. Examine the picture near the fireplace to reveal the hidden switch. Enter the fireplace passage, move through it, and activate the switch beneath the candlestick to open the route toward Bowser’s room.
Enter Bowser’s private room and examine his diary to advance the scripted scene. Continue through the castle sequence until the game returns control to Mario. This intermission is required for the story transition, but it does not require a separate search for optional castle items.
When Mario is available again, leave the fortress area and return toward Toad Town. Rest at the Toad House and save at a Save Block before beginning the next chapter. If you want to perform Chapter 1 cleanup, do it before moving on or during a later intermission: optional Star Pieces, badges, Koopa Koot favors, and quiz appearances are separate from the required Eldstar rescue.
- Reveal the hidden Peach intermission switch behind the fireplace picture.
- Enter Bowser’s room and examine the diary.
- Finish the scripted Peach sequence.
- Return Mario to Toad Town.
- Rest and save before Chapter 2.
Before you move on
- The Koopa Village shell crisis is resolved.
- Kooper’s shell has been recovered through the three-stage tracking minigame.
- Kooper has joined Mario and is available as a permanent partner.
- The Pleasant Path bridge has been raised with Kooper’s Shell Toss.
- Bombette has joined Mario inside Koopa Bros. Fortress.
- The required Fortress Keys have opened the dungeon route.
- The final Heart Block and Save Block have been reached.
- The Bowser Tank and the Koopa Bros. tower encounter have both been defeated.
- Eldstar’s rescue sequence has completed.
- The Peach intermission is finished, Mario has returned to the campaign, and the player has reached Toad Town for the transition toward Chapter 2.
References for this chapter
Chapter 2 — The Mystery of Dry Dry Ruins
Travel from Mt. Rugged through Dry Dry Desert, recruit Parakarry, obtain the Pulse Stone from Moustafa in Dry Dry Outpost, and raise Dry Dry Ruins from the sand. Inside, collect the Ruins Keys, solve the rotating-stairway and sand-level puzzles, recover the Super Hammer and three ancient stones, then defeat Tutankoopa to rescue Mamar, the second Star Spirit.
1. Leave Toad Town, cross Mt. Rugged, and recruit Parakarry
After the Peach intermission following Chapter 1, go to Toad Town’s train station. Bombette must blast the boulder blocking the railroad before the train can leave. Ride the Dry Dry Railroad to Mt. Rugged.
Proceed through Mt. Rugged and look for Parakarry, the mail carrier who has dropped letters around the mountain. Collect the scattered letters and return them to him. Once the delivery problem is resolved, Parakarry joins the party. His field ability carries Mario across gaps that cannot be crossed by jumping.
Continue through the mountain and enter Dry Dry Desert. Parakarry is required for several gaps inside the ruins, while Bombette is required for cracked walls. If you have taken damage on the mountain, recover before beginning the desert search.
- Bombette has cleared the railroad obstruction.
- Parakarry has joined Mario’s party.
- Mario has entered Dry Dry Desert and has enough HP, FP, and healing supplies for the ruins.
2. Reach Dry Dry Outpost and obtain the Pulse Stone
Dry Dry Desert is a collection of small screens with similar-looking sand and rock formations. Follow the routes toward Dry Dry Outpost rather than searching randomly for the ruins. Kolorado’s camp is a useful reference point: the ruins’ pedestal is located two screens east and three screens north of his camp after the Pulse Stone has been obtained.
In Dry Dry Outpost, speak with the residents and complete the information-gathering sequence that leads to Moustafa, the town’s leader. The game does not give Mario the Pulse Stone merely for entering the town; the required conversations and riddle sequence must be completed first. Moustafa then hands over the Pulse Stone.
Return to the desert and follow the stone’s guidance to the stone pedestal. Place the Pulse Stone in the pedestal. Dry Dry Ruins rise from the sand, and a recovery block appears to the left of the entrance. Heal there before entering.
- Dry Dry Outpost has been visited.
- Moustafa has given Mario the Pulse Stone.
- The Pulse Stone has been placed in the desert pedestal and Dry Dry Ruins have risen.
3. Get the first two Ruins Keys and expose the Star Piece
Enter Dry Dry Ruins and listen to Tutankoopa’s first warning. Move right to the Save Block and save before exploring farther. In the next room, three sarcophagi contain Pokey Mummies. Defeat the enemies and check the second sarcophagus for the optional Spike Shield Badge. This badge lets Mario safely jump on enemies with spike defenses, but it is not required to finish the chapter.
Continue to the lower-right opening and collect the first Ruins Key. Return to the previous room, climb the stairs, and use the key on the upper door. Step on the red switch to drain the sand into the lower room.
Go back down, cross the exposed route, and enter the room to the right. Defeat the Buzzy Beetles, then switch to Parakarry and fly across the gap. Use Bombette on the cracked wall beyond the gap. Enter the hidden room, activate its red switch, and collect the Star Piece revealed by the drained sand if you are cleaning up collectibles.
Return to the previous room and drop into the lower area. The second Ruins Key is now accessible. Take it, return upward, defeat the Buzzy Beetles in the lower passage, and unlock the door on the left.
- The first Ruins Key has opened the upper door.
- The first sand switch has been activated.
- The optional Star Piece has been exposed if desired.
- The second Ruins Key is in Mario’s inventory.
4. Clear the Pokey Mummy trap and solve the stairway section
Inside the unlocked room, move left and strike the ? Block with Kooper. The door closes and a group of Pokey Mummies appears, joined by a Swooper. Defeat every enemy in the room. Swoopers begin above normal attack range, so use Quake Hammer, Hammer Throw, or Parakarry’s early attacks to reach them. When the room is cleared, a Ruins Key drops from above. Collect it and use it on the nearby locked door.
Drop down the stairs and defeat the Buzzy Beetles in the lower section. Return up the stairs, use Parakarry to cross the gap, and enter the next room. This is the rotating-stairway puzzle that leads to the Super Hammer.
Activate the green switches to rotate the green stairways into their alternate positions. Use the resulting route to reach the red stairway and its switch. Rotating the red stairway opens the path across the wooden beams. Follow the beams toward the far-left side and press toward the wall when the path appears to end; a hidden passage contains the optional Slow Go Badge.
Leave the hidden passage and drop to the large chest. Open it to obtain the Super Hammer. This is mandatory. It increases Mario’s hammer strength and, more importantly, lets him break gray Stone Blocks. Break the nearby gray block before leaving the room.
- The Pokey Mummy and Swooper room has been cleared.
- The third Ruins Key has been collected.
- The rotating green and red stairways have opened the Super Hammer route.
- Mario has obtained the Super Hammer.
5. Collect the Pyramid Stone and the optional Super Block
Return to the room containing the Pokey Mummy trap. Go right and use the red switch to rotate the red stairs, then climb to the gray block above. Break it and collect the Artifact. The Artifact is optional during Chapter 2; give it to Kolorado later to receive a Star Piece.
Continue right through the Buzzy Beetle rooms until you reach a gray block guarding a treasure branch. Break the block. Two Stone Chomps appear. Defeat both before climbing to the chest area and taking the Pyramid Stone. Stone Chomps have defense, so Parakarry’s Shell Shot, a charged Super Hammer, or another defense-piercing or defense-overcoming attack is preferable to weak ordinary attacks.
Return to the room left of the Pokey Mummy trap. At the bottom, use Bombette on the cracked wall and drop into the lower section. Hit the Super Block there if you want an optional party upgrade; it is not needed to open the route to Tutankoopa. Bomb the wall near the springboard to reach the next treasure branch.
- The Super Hammer has been used to obtain the optional Artifact if desired.
- Both Stone Chomps guarding the Pyramid Stone are defeated.
- The Pyramid Stone is in Mario’s inventory.
- The optional Super Block has been activated if desired.
6. Get the Diamond Stone, Lunar Stone, and final key
In the next treasure room, break the gray block and defeat the two Stone Chomps. Claim the Diamond Stone, then return to the preceding room and use the springboard to reach the route toward the stairway hub.
From the hub, take the lower-right opening. Continue through Tutankoopa’s warning and unlock the upper door with the Ruins Key obtained in the Buzzy Beetle passage. Step on the red switch to drain the sand into the lower room. Note the wall pattern if you want to keep track of the puzzle’s visual clues, then return to the previous room and drop into the newly accessible lower route.
Go right into the next treasure room. Break the gray block, defeat the Stone Chomps, and take the Lunar Stone. Return to the corridor with the Chomp statues. Place the Pyramid Stone in the leftmost statue, the Diamond Stone in the middle statue, and the Lunar Stone in the rightmost statue. The statues activate and lower part of the floor, forming stairs to the final passage.
- The Diamond Stone has been collected.
- The second sand-level switch has been activated.
- The Lunar Stone has been collected and its guarding Stone Chomps defeated.
- The three stones are placed left to right as Pyramid, Diamond, Lunar.
7. Heal, save, and defeat Tutankoopa
Go down the stairs created by the three statues and use the Heart Block. Continue right to the Save Block and save. This is the final preparation point before the boss, so equip badges that improve hammer damage, reach, or FP efficiency and keep a healing item available.
Tutankoopa begins the fight on a raised platform. Mario’s ordinary Super Hammer attack cannot reach him from the ground. Goombario and Parakarry can hit the elevated boss; Parakarry’s Shell Shot is a dependable FP-based option. Quake Hammer can also damage multiple enemies, and Hammer Throw or Smash Charge can help if equipped.
Tutankoopa summons Chomps and can throw shells. His stone attack can strike Mario and the partner, temporarily disabling the partner, or can backfire and damage Tutankoopa instead. Guard with the A Button when the attack connects. Keep the summoned Chomp under control if it is threatening Mario, but do not waste turns on it when a safe attack can damage Tutankoopa. Refresh is useful for restoring HP and FP if Star Energy is available.
Tutankoopa has 30 HP and zero defense. Continue attacking with reachable moves, heal rather than risk a defeat, and defeat the boss. After the battle, Tutankoopa flees while pursued by a Chomp. Mamar’s Star Spirit card appears in the room; walk into it to rescue her.
- Mario has healed at the Heart Block.
- The game has been saved immediately before the boss.
- The active partner can reach Tutankoopa’s raised platform.
- Tutankoopa has been defeated and Mamar’s Star Spirit card has been touched.
8. Confirm the chapter completion and continue the intermission
After Mamar is rescued, the chapter-ending recap appears. Mamar grants the Lullaby Star Power, which attempts to put all enemies to sleep. The game then proceeds to the Peach intermission concerning Tubba Blubba and the next chapter’s threat.
Read through the recap and save when control returns. The required Chapter 2 objectives are complete once Tutankoopa is defeated, Mamar has been rescued, and the completion sequence has appeared. The Artifact, Spike Shield, Slow Go, Star Piece, and Super Block are optional and can be collected or completed as part of later cleanup if they were skipped.
- Lullaby is available among the Star Powers.
- The Chapter 2 recap and Peach intermission have played.
- The save file records two rescued Star Spirits.
Before you move on
- Dry Dry Ruins have risen from the desert after Mario placed the Pulse Stone in the pedestal.
- Mario has obtained the Super Hammer and used it to access the stone branches.
- The Pyramid Stone, Diamond Stone, and Lunar Stone are placed left to right in the three Chomp-statue receptacles.
- The Heart Block and final Save Block have been reached before the boss.
- Tutankoopa has been defeated, Mamar has been rescued, and Lullaby is available.
- The chapter recap and Peach intermission have appeared, and the game has been saved with two Star Spirits rescued.
Chapter 3 — The “Invincible” Tubba Blubba
Cross Forever Forest, clear Boo’s Mansion, recruit Lady Bow, pass through Gusty Gulch, infiltrate Tubba Blubba’s Castle, recover the Mystical Key, defeat Tubba’s Heart beneath Windy Mill, and defeat Tubba Blubba after the Heart rejoins his body. Chapter 3 is complete only after Skolar is freed, the Star Spirit card is touched, and the post-chapter sequence has finished.
1. Cross Forever Forest and secure the Magical Seed
Enter Forever Forest from the Toad Town side. The forest is made of looping screens, but each correct exit has a visible environmental clue. If you choose incorrectly, Mario is sent back toward the beginning, so there is no permanent penalty for testing a route.
After Oaklie explains the danger, follow the clues in order. Watch for flowers that make a different sound, red glowing eyes in a tree stump, a different-looking group of flowers, a face on a tree, the exit with the most mushrooms, flowers that remain alive, and finally the sign that mentions the mansion. Some screens also contain alternate routes to HP Plus or FP Plus badges; these are optional.
On one of the central forest routes, enter the opening and speak to the Bub-ulb to receive a Magical Seed. This seed is required for Chapter 6. You may collect it during this first visit or return later, but it must be in Mario’s possession before you deliver the four Magical Seeds to Minh T. in Toad Town. Do not treat it as optional cleanup.
Continue through the correct exits until the sign directs you to Boo’s Mansion. Heal at the Heart Block and save at the Save Block outside before entering.
- Speak to Oaklie and learn the forest clue system.
- Reach Boo’s Mansion without relying on random exits.
- Obtain the Forever Forest Magical Seed during this visit or mark the forest for a later return.
- Heal and save before entering the mansion.
2. Clear Boo’s Mansion and recruit Lady Bow
Enter the mansion and go upstairs. In the room on the right, examine the wardrobe to begin the Record event. Watch which Boo receives the Record, then chase it and hit it with Mario’s Hammer to recover the item.
Take the Record to the music room. Place it on the record player and press A rhythmically, keeping the meter below the OK marker. When the Boo begins dancing, open the chest to obtain the Weight.
Return to the foyer and jump on the differently colored cushion of the couch. Mario is launched onto the chandelier. Place the Weight there to keep the lower-left door open. Enter that door, descend into the basement, and proceed through the rooms to the chest containing the Super Boots. Select the Boo holding the item correctly during the chest sequence.
The Super Boots let Mario perform Spin Jumps. Use one on the nearby wooden floor to reach the hidden shop area. Hit the blue switch, jump onto the boxes, and Spin Jump the large blue switch to create the stairs. The shop and the hidden Star Pieces are optional, but the Super Boots are required.
Return to the lower foyer and break through the wooden floor. In the library, use Parakarry to cross the gap and retrieve Boo’s Portrait. Use Bombette on the cracked wall to leave the library. Carry the portrait upstairs and place it in the empty frame. The new route leads to the third floor, where Lady Bow is waiting. Speak with her to recruit her. Bow’s Outta Sight is essential for safely passing Sentinels and the castle’s spike room.
- Recover the Record and use it in the music room.
- Obtain the Weight and place it on the chandelier.
- Obtain the Super Boots.
- Recover Boo’s Portrait with Parakarry and place it in the upstairs frame.
- Recruit Lady Bow before leaving the mansion.
3. Cross Gusty Gulch and prepare for Tubba Blubba’s Castle
Leave Boo’s Mansion through the gate on the right to enter Gusty Gulch. Continue right through the area and the damaged Boo settlement. When Tubba Blubba appears, use Bow’s field ability to hide while the scripted encounter resolves.
The route is mostly direct. You can avoid unnecessary fights with Hyper Goombas and Hyper Clefts if Mario is low on HP or FP. A Star Piece is hidden near the start of Gusty Gulch, and another is behind dark rocks in the area immediately before the castle. Both are optional.
Use the Save Block near the castle entrance. Heal at a Toad House, Heart Block, or with items, and make sure Mario has enough FP for Bow’s Outta Sight. Bombette and Parakarry remain useful inside the castle, so keep them available rather than preparing Bow as the only partner.
- Reach the castle entrance.
- Save before entering Tubba Blubba’s Castle.
- Heal Mario and restore FP.
- Collect the two Gusty Gulch Star Pieces only if pursuing optional cleanup.
4. Obtain Castle Key 1 and upgrade Bow
Inside the castle, Sentinels patrol the corridors. If one catches Mario, he is thrown outside. Use Bow’s Outta Sight when a Sentinel approaches, including when it is flashing directly above Mario. Sleeping Clubbas can usually be passed by moving slowly, although fighting them is allowed.
Take the left hallway from the entrance. Enter the second room, climb across the furniture, and collect the Star Piece on the table if desired. Continue through the dining-room route, pass through the rear door, descend the stairs, and Spin Jump the wooden boards at the end of the lower passage. Drop through the floor and open the chest to obtain Castle Key 1.
Use the Heal Block in the lower area. In the adjacent room, strike the Super Block to upgrade Bow. The upgrade is optional for story completion but improves her usefulness in the castle and against Tubba’s Heart. Return outside if you need to save or reset the Sentinel section, then re-enter the castle.
- Collect Castle Key 1 from the lower passage.
- Use the Super Block to upgrade Bow if desired.
- Heal before continuing.
- Save outside before re-entering if Mario took heavy damage.
5. Reach Castle Key 2 and pass the spike room
Use Castle Key 1 on the locked door in the right hallway. Move upstairs and cross the walkway over the lobby to reach the upper-left section. Use Bombette on the concealed wall near the sleeping Clubba.
In the room with the wooden panels, break the upper-left panel first so Mario can return to the upper passage after dropping through the others. Use the upper-right opening to reach the lower room, then have Parakarry carry Mario across the gap to the D-Down Jump badge. The badge is optional.
Use the springboard to return to the upper hallway. Enter the spike room and activate Bow’s Outta Sight to cross safely. Reach the chest and obtain Castle Key 2. Return through the hallway and drop through the broken railing into the lower room to collect the optional Star Piece on the large table.
In the bookshelf room, climb into the concealed area to find the optional Mega Rush badge. Use Castle Key 2 on the locked door in the broken-railing room and climb to the next upper level.
- Open the right hallway with Castle Key 1.
- Expose the hidden route with Bombette.
- Use Parakarry to reach D-Down Jump if desired.
- Use Bow’s Outta Sight in the spike room.
- Obtain Castle Key 2 and open the next locked door.
6. Obtain the Mystical Key and escape
In the upper hallway, Tubba Blubba patrols the route. Do not attempt to defeat him there. Use Bow’s Outta Sight when he approaches and continue through the northern door. Move carefully past the sleeping Clubbas to reach Castle Key 3.
Return to the upper hallway and use Castle Key 3 on the locked door. Heal at the Heart Block and save at the nearby Save Block before entering Tubba Blubba’s bedroom.
Cross the walkway and enter the bedroom. Move behind the headboard and wait for Tubba Blubba to fall asleep. Open the chest to release Yakkey, the talking key. Answer Yakkey’s question, then follow the route opened by the chase. Use Bow’s invisibility when Tubba Blubba or a Sentinel blocks the way.
Escape the castle with the Mystical Key. The Boos hold Tubba Blubba back outside. Return left through Gusty Gulch to Windy Mill, use the Mystical Key on the entrance, and Spin Jump through the wooden obstruction covering the well.
- Obtain Castle Key 3.
- Heal and save before entering the bedroom.
- Open the bedroom chest and recover Yakkey, the Mystical Key.
- Escape the castle and unlock Windy Mill.
7. Defeat Tubba’s Heart and then Tubba Blubba
Descend through Windy Mill and follow the underground rooms to Tubba’s Heart. The Heart has 50 HP and no defense. Its normal attack deals 6 damage. When it charges, its next particle attack deals 12 damage unless Mario successfully defends or avoids it.
When the Heart begins charging, use Bow’s Outta Sight to avoid the particle attack. On other turns, use Mario’s strongest reliable attack and a partner attack that you can perform consistently. Keep enough FP for Outta Sight and heal before Mario reaches danger range. The Heart can still use its regular attack, so do not assume that every turn will be safe.
The Heart leaves the battle when it reaches 5 HP or less. It then flees through the windmill. Follow it back outside. The Heart rejoins Tubba Blubba, starting a separate battle.
Tubba Blubba has 10 HP and can now be damaged normally. Use Mario’s strongest efficient attack and a direct-damage partner move. If you need to avoid an incoming turn, Bow’s Outta Sight remains useful, but the battle should end quickly. Defeating Tubba Blubba frees the Boos and causes Skolar to be released.
- Reduce Tubba’s Heart to 5 HP or less.
- Use Outta Sight when the Heart charges.
- Heal before the second battle if necessary.
- Defeat the 10-HP Tubba Blubba.
- Wait for the Heart to rejoin his body before treating the fight as complete.
8. Finish the chapter and confirm completion
Allow the post-battle events to play until Bow formally joins Mario and Bootler hands over Skolar. Touch Skolar’s Star Spirit card when prompted. The chapter is not complete merely because Tubba Blubba has fallen.
During the Peach intermission, Bowser asks questions about useful items. Choosing Mushroom, Thunder Rage, and Super Soda causes useful items to appear later. These answers are beneficial but are not required for the main campaign.
After the intermission, complete the required return toward Toad Town and save once control returns to the normal campaign. If you are preparing for Chapter 6 cleanup, confirm that the Forever Forest Magical Seed is in your inventory. The other gate-opening seeds come from Toad Town, Mt. Rugged, and the post-Chapter 5 Jade Jungle trade. All four must be delivered to Minh T. before Flower Fields can be entered.
Optional cleanup can include the mansion’s hidden Star Pieces, the Gusty Gulch and castle Star Pieces, D-Down Jump, Mega Rush, HP Plus, and FP Plus. None of these is required to rescue Skolar or advance the campaign.
- Touch Skolar’s Star Spirit card.
- Complete the Peach’s Castle intermission.
- Return to normal campaign control and save.
- Confirm that the Forever Forest Magical Seed is held before the Chapter 6 seed delivery.
- Record optional badges and Star Pieces separately from the required chapter completion.
Before you move on
- Forever Forest has been crossed and Boo’s Mansion has been cleared.
- The Super Boots have been obtained and Lady Bow has joined Mario’s party.
- Tubba Blubba’s Castle has been infiltrated and the Mystical Key has been recovered.
- Windy Mill has been opened.
- Tubba’s Heart has reached 5 HP or less and has retreated.
- Tubba Blubba has been defeated after the Heart rejoins his body.
- Skolar has been freed and his Star Spirit card has been touched.
- The Peach’s Castle intermission has finished.
- A save exists after control returns to the normal campaign.
- The Forever Forest Magical Seed is in Mario’s possession before the four seeds are delivered to Minh T. for Chapter 6.
Chapter 4 — Trials in the Toy Box
Enter Shy Guy’s Toy Box from Toad Town, restore the train by completing the Blue, Pink and Green Station objectives, recruit Watt in Red Station, reconnect the final track, and defeat General Guy to rescue Muskular. The required route includes several returns to Toad Town, so do not treat the Toy Box as a linear dungeon. Calculator, Dictionary, badges, Star Pieces and other rewards are optional unless specifically noted.
Enter Shy Guy’s Toy Box and clear Blue Station
After the Chapter 3 intermission, return to Toad Town. The Toy Box is in the orange-roofed house beside the second item shop. Enter the house, switch to Bow and use Outta Sight. Remain still while the Shy Guy approaches and opens the hidden entrance. Follow him through the trapdoor and use the springboard to enter the Toy Box.
You begin in Blue Station, but the train is missing. Spin Jump in front of the train platform to uncover the station’s hidden Star Piece, then use the left exit. Defeat the Shy Guy carrying Rowf’s Calculator. Returning the Calculator to Rowf later is optional and rewards the I Spy Badge; it is not needed to restore the train.
Return to the station and take the right exit. Spin Jump the boxes to cross the colored blocks. A Star Piece is hidden behind the large lime-colored block. Continue to the dollhouses. Enter the middle dollhouse, climb to its upper level and use Parakarry to glide left for another Star Piece. Then glide to the third dollhouse, drop through it and open the chest containing the Storeroom Key. The enemy guarding the chest depends on the earlier Peach intermission choice, so heal if necessary before opening it.
- Enter the Toy Box using Bow’s Outta Sight.
- Take the Storeroom Key from the chest beyond the dollhouses.
- Treat the Calculator and Blue Station Star Pieces as optional rewards.
- Use the Blue Station springboard to return to Toad Town.
Restore the train and reach Pink Station
Give the Storeroom Key to the proprietor of the item shop beside the Toy Box house. This opens the shop’s storeroom. Take the Toy Train; the other storeroom items are optional. Return to the Toy Box entrance and interact with the Toy Box itself. Choose the option to put the train inside, then re-enter Blue Station.
Speak with the conductor at the platform and ride the train to Pink Station. From this point onward, use the train whenever possible. It is the intended way to move between the four stations, although some switches must be repaired before every destination becomes available.
- Give the Storeroom Key to the nearby item shop.
- Place the Toy Train inside the Toy Box.
- Ride from Blue Station to Pink Station.
Complete Pink Station and obtain the Cake
When you arrive in Pink Station, open the chest on the right for the Mailbag, then Spin Jump in front of the platform for the station Star Piece. These are optional, but the Mailbag can later be returned to the post office for a Star Piece.
Take the right exit first. Use the boxes to reach the higher route, then go left and open the chest containing Defend Plus. Spin Jump the next box to continue. Shy Guys enter through a concealed blue door. Stand beside the doorway and move through immediately after one of them passes, following the hidden route to the far end. The first chest contains Ice Power; the second contains Tayce T.’s stolen Frying Pan. The Frying Pan is required.
Return to Toad Town and visit Tayce T. at the bakery near the Toad Town Tunnels and Forever Forest exit. Give her the Frying Pan and receive a Cake. Do not eat or discard it. Return to Pink Station and take the left exit. Give the Cake to Gourmet Guy. He leaves the tracks and drops the Cookbook. The Cookbook is optional for the chapter’s main route, but it expands Tayce T.’s cooking options.
Cross the cleared tracks and continue right until you reach the pink track switch. Activate it. The repaired track opens the route to Green Station.
- Take the Frying Pan from the second chest in the hidden Pink Station route.
- Give the Frying Pan to Tayce T. and keep the resulting Cake.
- Give the Cake to Gourmet Guy.
- Activate the pink track switch.
Repair the Green Station track
Ride to Green Station and Spin Jump in front of the platform for its optional Star Piece. The route to Red Station is blocked by four colored blocks. The correct order is Yellow, Green, Red, then Blue.
For the intended clue route, take the right exit. Follow the conveyor belts and use Bow’s Outta Sight to pass the fences. Defeat the yellow Shy Guy carrying the Mystery Note. Continue past the slot machine into the moving-platform area. An orange opening in the wall contains a Star Piece. Move above that section and open the chest containing Russ T.’s Dictionary.
Return to Toad Town. Give the Dictionary and the Mystery Note to Russ T., whose home is to the right of the main entrance. He rewards the Dictionary with a Star Piece and translates the note as the colored-block order. The Dictionary and note investigation are optional because the order can be entered without them, but obtaining them completes the chapter’s intended clue sequence.
Return to Green Station and stand before the four colored blocks. Strike them with the Super Hammer in this order: Yellow, Green, Red, Blue. If you use the wrong order, enemies appear and the puzzle remains unsolved. The correct sequence repairs the track and opens Red Station.
- Use Bow to pass the Green Station fences.
- Enter Yellow, Green, Red, Blue on the colored blocks.
- Confirm that the repaired track allows the train to reach Red Station.
Recruit Watt in Red Station
Ride to Red Station and Spin Jump before the platform for its optional Star Piece. Take the left exit. Use the flower platform to climb over the colored blocks, then use the rotating platforms to reach the next wall. Drop down, pass the Pyro Guy, and ride the next flower platform over the wall. Enter the dark room to begin the Big Lantern Ghost battle.
Big Lantern Ghost cannot be targeted normally while the room is dark. Use a multi-hit attack such as Mario’s action-command Jump or Bow’s Smack to strike the lantern and brighten the room. Once the ghost becomes visible, attack the bandaged head. Repeat the process when necessary until the 40-HP ghost is defeated.
After the battle, approach the lantern and break it with Mario’s Super Hammer. Watt emerges and joins the party. Her field ability illuminates dark rooms and reveals invisible blocks; her Electro Dash ignores enemy Defense in battle. Watt is required for the final Toy Box route and General Guy encounter.
Before leaving the area, you may return through the previous room and use the flower platforms and Parakarry to reach the Super Block. Watt is the intended partner to upgrade there. Watt also reveals optional invisible blocks containing useful items and a Deep Focus Badge.
- Brighten the lantern before targeting Big Lantern Ghost.
- Break the lantern with the Super Hammer after the battle.
- Confirm that Watt has joined Mario’s party.
- Use the nearby Save Block and Heart Block before the final route.
Reconnect the final route and reach General Guy
Return to the station area and ride the train toward Blue Station. On the way, pull the lever when prompted. This final track adjustment is required before the General Guy route can be completed. Return to Red Station after the train connection is repaired.
Take the right exit from Red Station. Use the Save Block and Heart Block before continuing. A group of Shy Guys flees across a wall. Switch to Bombette and use Bomb to destroy the wall blocking the route. Follow the Shy Guys into the next area.
Use Watt’s field ability to illuminate the dark room. The Shy Guys flee through another opening; follow them into the next room to trigger General Guy’s encounter. The nearby optional invisible block and Shooting Star are useful but not required. Equip efficient attack badges and carry HP or FP recovery before entering, because the fight contains several consecutive enemy groups.
- Pull the lever while traveling toward Blue Station.
- Return to Red Station after the final train connection is repaired.
- Use Bombette to destroy the wall.
- Use Watt to light the dark pursuit room.
- Heal and save before entering General Guy’s room.
Defeat General Guy and rescue Muskular
General Guy’s battle has four stages. First fight the Shy Squad, which has 15 HP collectively. Defeat it quickly because its attack strikes repeatedly according to the number of Shy Guys remaining. High-damage attacks, Star Storm, or a strong partner attack are useful here.
General Guy then sends two Stilt Guys, each with 7 HP. Attack them until they lose their stilts; once grounded, they are easier to finish. After both are defeated, two Shy Stacks appear. Each has 10 HP. Kooper’s Shell Toss or Mario’s Spin Smash can remove members from a stack, reducing the damage of its slingshot attack, but direct attacks also work.
The final phase is General Guy inside his tank. The tank has 30 HP, 2 Defense and a 4-damage bomb attack. The light bulb is a separate target with its own HP and Defense. Destroy the bulb first. While it remains intact, General Guy can use a lightning attack that damages Mario and disables the current partner. Watt is immune to this lightning attack and is therefore a dependable partner for the phase; her Electro Dash also ignores Defense and can damage the bulb or tank.
After the bulb is destroyed, concentrate on the tank. Use Watt’s Electro Dash, Mario’s strongest available attacks and offensive items such as Shooting Star, Snowman Doll, Fire Flower or Thunder Bolt if you have them. Guard the bomb throw with the action command, and use healing items or Star Power before either character reaches critical HP. When the tank is defeated, General Guy and the Shy Guys flee. Walk into the Star Spirit left behind to rescue Muskular.
- Defeat the Shy Squad, two Stilt Guys and two Shy Stacks in order.
- Destroy the tank’s light bulb before focusing on General Guy.
- Use Watt’s Electro Dash against the bulb or tank.
- Touch Muskular after the tank is defeated.
Before you move on
- Watt is present in Mario’s partner roster.
- The Toy Box train can reach the required stations and the final track connection has been repaired.
- Muskular has been touched and the Star Spirit rescue message has appeared.
- The Peach’s Castle intermission has completed and control returns to Mario.
- For optional Chapter 4 cleanup, return the Calculator to Rowf, the Mailbag to the post office, the Cookbook to Tayce T., and the Dictionary and Mystery Note to Russ T.; collect the station Star Pieces, available badges and the Red Station Super Block if desired.
- Save after the intermission. The file should show four rescued Star Spirits, confirming completion of the chapter rather than only completion of the General Guy battle.
Chapter 5 — Hot Hot Times on Lavalava Island
Travel from Toad Town to Lavalava Island, rescue the five missing Yoshi children, obtain Sushie and the Jade Raven, open the route through Jade Jungle, meet Raphael the Raven, enter Mt. Lavalava, collect the Ultra Hammer, defeat Lava Piranha, rescue Misstar, escape the erupting volcano, and complete the post-chapter Volcano Vase trade. The Volcano Vase must be exchanged with Kolorado for the fourth Magical Seed before Chapter 6 can begin.
Sail to Lavalava Island and reach Yoshi’s Village
After Chapter 4, go to the harbor in Toad Town and speak with the whale. Choose to travel to Lavalava Island. On the beach, follow the path to the right. Kolorado will repeatedly call for help while enemies attack him. You may stop to fight, but these encounters are not the main objective; continue along the route until you reach Yoshi’s Village.
Before leaving the beach, you can hammer the palm tree near the village entrance for an optional Star Piece. In the village, Spin Jump in front of the Raven statue for another optional Star Piece. Rest at the Toad House, use the Save Block, and then continue through the village toward the jungle and volcano approach.
When you reach the volcano entrance, the route is blocked and the story sends you back toward the village. Speak with the Yoshi Village Leader. He explains that five Yoshi children are missing in Jade Jungle and assigns Mario the rescue task. This conversation is required; simply reaching the village is not enough.
- Speak with the whale in Toad Town and sail to Lavalava Island.
- Reach Yoshi’s Village and trigger the missing-children objective.
- Rest and save before entering Jade Jungle.
- Treat the beach and Raven statue Star Pieces as optional rewards.
Rescue the five Yoshi children and recruit Sushie
Take the northern exit from Yoshi’s Village into Jade Jungle. In the first jungle area, interact with the bushes to reveal the route to the right. In the next area, strike the tree several times to knock Sushie down. She joins Mario and provides the water-riding and diving abilities needed for the rest of the rescue route.
Use Sushie at the docks and pools to follow the jungle’s connected waterways. One child is behind bushes that trigger M. Bush battles; defeat the enemies and inspect the remaining bushes to free the child. Continue through the water routes and use the central island and docks to reach the next sections.
A later route leads to a flower that carries Mario to a higher ledge. Clear the bushes there to reveal a warp pipe. Enter the dark room below and use Watt’s field ability to reveal the hidden Yoshi child. Another child is reached by striking a tree stump to create a bridge. Continue through the jungle’s water and stump routes until every child has been found. The children are spread across the jungle, so returning to the previous screen after opening a new route is sometimes necessary.
After rescuing all five children, return to Yoshi’s Village and speak with the Village Leader again. He gives Mario the Jade Raven. This item is required to open the deeper route in Jade Jungle. Do not leave the island expecting a Yellow Seed or another reward at this stage; the required item here is the Jade Raven.
- Knock Sushie from the tree and recruit her.
- Rescue all five Yoshi children.
- Use Watt in the dark room to reveal the hidden child.
- Use the tree stump bridge to reach another child.
- Return to the Village Leader and receive the Jade Raven.
Open the deeper jungle route and meet Raphael
Return to Jade Jungle and take the newly available northern route. Use Sushie to cross the water and reach the large Raven statue. Place the Jade Raven on the pedestal. The statue moves and opens the path toward Raphael the Raven.
The next sequence contains several short puzzle rooms. In the first, inspect the bushes near the pink flower to reveal the exit. In the second, push the blue blocks onto the water sprouts so the large boulder rises out of the way. Move a block again if it blocks the passage. In the vine room, count from the left and pull the fourth vine to open the correct route.
Continue through the room with Putrid Piranhas and a W. Magikoopa. After the fight, the central area contains an optional Star Piece. Enter the large tree and climb the internal steps. When the path reaches the outside branches, follow the branch route for the optional Happy Heart badge, then return inside and keep climbing.
At the top, speak with Raphael. Follow the Raven sequence as the path toward the volcano is constructed. Raphael gives Mario the Ultra Stone. The Ultra Stone allows a partner who has already reached Super Rank to be upgraded at a Super Block; it is not the Ultra Hammer and does not replace the hammer upgrade found later.
- Place the Jade Raven on the Raven statue pedestal.
- Solve the bush, water-sprout, and vine puzzles.
- Defeat the Putrid Piranhas and W. Magikoopa blocking the route.
- Speak with Raphael at the top of the tree.
- Receive the Ultra Stone and use the new transport route to Mt. Lavalava.
Cross Mt. Lavalava and collect the Ultra Hammer
Use the pulley and zipline route built by Raphael’s Ravens to enter Mt. Lavalava. Save at the first available Save Block. The dungeon uses lava platforms, moving ziplines, Fire Bars, Lava Bubbles, Spiny Tromps, and other fire enemies. Falling into lava costs HP and returns Mario to a nearby checkpoint, so wait for moving platforms rather than making rushed jumps.
Parakarry is needed for several wide gaps. In the early pulley section, explore the side routes for optional rewards, including the Fire Shield badge and a Super Block. Fire Shield reduces damage from fire attacks but does not make Mario immune to fire. Other optional rewards include hidden Star Pieces and partner-related upgrades; none is required to reach the boss.
Progress through the rooms that use blue blocks to stop or redirect lava. In one section, push the blocks into position so Parakarry can carry Mario across the lower route. Continue through the next lava room and arrange the blocks to reach the staircase and large chest. Open the chest to obtain the Ultra Hammer.
Return through the dungeon and use the Ultra Hammer on the metal blocks that were previously unbreakable. This opens the remaining route toward the boss. Some side rooms contain optional badges, Super Blocks, and Star Pieces. After the final lava and rolling-enemy rooms, locate the Heal Block and Save Block near the boss entrance. Restore HP and FP before entering.
- Use Save Blocks during the dungeon.
- Use Parakarry for the wide lava gaps.
- Collect the Ultra Hammer from the large chest.
- Break the metal blocks blocking the later route.
- Heal and save at the final approach.
Defeat Lava Piranha’s two-stage encounter
Before entering the boss room, restore Mario and the active partner. Sushie is a strong choice because her water attacks are effective against the boss’s fire-based forms. Ice Power is also useful against fire enemies. Fire Shield can reduce incoming fire damage if you have room for it, but it is optional. Keep enough FP for several attacks and reserve at least one healing or FP-restoring item.
The first part of the encounter includes Lava Piranha and Lava Buds. The buds can create additional hazards, so remove them if they are overwhelming Mario; otherwise concentrate attacks on the main boss. Star Storm, Sushie’s water attacks, Snowman Doll items, and strong single-target attacks are useful options. Use action commands carefully and heal before Mario reaches a dangerous HP level.
When the first part appears to be over, the encounter continues. Lava Piranha returns in its flaming form and the supporting hazards return as well. Jump attacks are unsafe against flaming enemies, so use water-based attacks, ice-based attacks, Star Powers, or items instead. Avoid spending all FP in the first part, because the second part is still required.
After the final victory, wait for Misstar’s Star Spirit card to appear and touch it. This frees the fifth Star Spirit. The chapter is still not complete at that moment.
- Restore HP and FP before the boss.
- Consider using Sushie, Ice Power, and Fire Shield.
- Defeat the first Lava Piranha encounter and its supporting hazards.
- Defeat the returning flaming encounter without relying on jump attacks.
- Touch Misstar’s Star Spirit card after the battle.
Escape the eruption and complete the Volcano Vase transition
Once Misstar is freed, follow the escape route as lava rises through Mt. Lavalava. Keep climbing and follow the required path rather than stopping to search for optional items. When a wall or obstruction blocks the route, use the required partner ability to clear it. Misstar carries Mario and Kolorado out after the escape sequence finishes.
Allow the Peach’s Castle intermission to play through. After control returns, go back to Jade Jungle. Travel to the area near the place where Sushie was found and open the chest on the island. The chest contains the Volcano Vase.
Speak with the nearby Bub-ulb after taking the vase, then return to Kolorado in Yoshi’s Village. Give Kolorado the Volcano Vase. He trades it for the fourth Magical Seed. This is the Jade Jungle seed needed for the Flower Fields route; it is separate from the Magical Bean used later in Chapter 6.
Return to the beach and speak with the whale to travel back to Toad Town. Keep the Magical Seed in your inventory or otherwise available for Minh T. in Toad Town. Before Chapter 6 can begin, Minh T. must receive all four Magical Seeds: the seeds from Toad Town, Mt. Rugged, Forever Forest, and the Volcano Vase trade on Lavalava Island.
- Complete the rising-lava escape after freeing Misstar.
- Let the Peach’s Castle intermission finish.
- Return to Jade Jungle after the intermission.
- Open the chest near Sushie’s former location and obtain the Volcano Vase.
- Speak with the nearby Bub-ulb.
- Trade the Volcano Vase to Kolorado in Yoshi’s Village for the fourth Magical Seed.
- Return to Toad Town and preserve the seed for Minh T.
Before you move on
- All five Yoshi children have been rescued and returned to Yoshi’s Village.
- Sushie has joined the party and the Jade Raven has been received.
- The Jade Raven was placed on the Raven statue pedestal and Raphael’s event opened the volcano route.
- The Ultra Stone was received from Raphael.
- The Ultra Hammer was collected inside Mt. Lavalava and used to break the metal-block route.
- Both sections of the Lava Piranha encounter were defeated.
- Misstar’s Star Spirit card was touched.
- Mario escaped the erupting volcano and the Peach’s Castle intermission played.
- The Volcano Vase was taken from the chest near Sushie’s former location.
- The nearby Bub-ulb was spoken to and the Volcano Vase was traded to Kolorado for the fourth Magical Seed.
- Mario returned to Toad Town with the seed ready for Minh T.’s four-seed Flower Fields sequence.
References for this chapter
- Chapter 5 - Paper Mario 64 Walkthrough
- Chapter 5 - Paper Mario Walkthrough & Guide - GameFAQs
- Lavalava Island - Paper Mario Walkthrough & Guide - GameFAQs
- Mt. Lavalava - Paper Mario Walkthrough & Guide - GameFAQs
- Paper Mario - Guide and Walkthrough - Nintendo 64 - By TDog - GameFAQs
- Paper Mario — Nintendo 64 Official Manual (English PDF)
Chapter 6 — Dark Days in Flower Fields
Open Flower Fields by giving Minh T. four specific Magical Seeds, then solve the garden’s berry, water, sunlight and machine problems. The separate Magical Bean, Fertile Soil and Miracle Water grow the beanstalk to Cloudy Climb. Defeat Huff N. Puff to rescue Klevar, the sixth Star Spirit, and finish the chapter intermission.
Deliver the four Magical Seeds and enter Flower Fields
Before entering Flower Fields, collect the four gate-opening Magical Seeds from the Bub-ulbs in Toad Town, Mt. Rugged, Forever Forest and Jade Jungle. The Jade Jungle seed becomes available after Chapter 5: retrieve the Volcano Vase from the chest in Jade Jungle and trade it to Kolorado in Yoshi’s Village. The other three seeds should already be obtainable from their respective Bub-ulbs.
Take all four seeds to Minh T. in the garden across from Rowf’s shop in Toad Town. Give her the seeds and continue speaking with her until she plants all four. The garden then forms the Flower Gate. These seeds are used only to open the gate; they are not ingredients for the beanstalk.
Enter Flower Fields and listen to Wise Wisterwood. The area has a central hub with six branching paths. Save at the nearby Save Block before beginning the back-and-forth errands. Wise Wisterwood also provides the route back to Toad Town if you need healing or supplies.
- Obtain the Toad Town Magical Seed.
- Obtain the Mt. Rugged Magical Seed.
- Obtain the Forever Forest Magical Seed.
- Trade the Volcano Vase to Kolorado and obtain the Jade Jungle Magical Seed.
- Give all four seeds to Minh T.
- Confirm that the Flower Gate appears.
- Enter Flower Fields and save near Wise Wisterwood.
Defeat the Monty Moles and receive the Magical Bean
From the central hub, take the middle-right path to Petunia’s garden. Speak with Petunia, then defeat the Monty Moles troubling her. You can return to Toad Town between battles if you need to restore HP and FP, but defeated Monty Moles remain cleared.
After the fights, speak with Petunia again to receive the separate Magical Bean. Strike the tree near her garden to collect a Red Berry before leaving. The Red Berry is needed immediately for the red flower on the southwestern route.
The Magical Bean is not one of the four seeds given to Minh T. Keep it in your inventory for the beanstalk near the end of the chapter.
- Defeat the Monty Moles near Petunia.
- Speak with Petunia after the battles.
- Receive the Magical Bean.
- Collect the Red Berry from the nearby tree.
Use the berries to open the lower routes
Return to the hub and take the lower-left, southwestern path. Give the Red Berry to the red flower blocking the way. Continue through the opened passage and strike the tree to obtain a Yellow Berry. Proceed to the next area and speak with Posie beneath the Crystal Tree. Posie gives Mario Fertile Soil.
Return to the hub and take the lower-right, southeastern path. Give the Yellow Berry to the yellow flower. Cross the gaps with Parakarry when necessary, then continue to the next area. Strike the tree near Lily’s area to obtain a Blue Berry and speak with Lily. She explains that the pond needs a Water Stone.
Return to the hub and take the middle-left, western path. Give the Blue Berry to the blue flower. This opens the route into the hedge maze and Rosie’s area. The blue berry only opens the route; it is not the water needed for the beanstalk.
- Give the Red Berry to the red flower.
- Collect the Yellow Berry.
- Speak with Posie and receive Fertile Soil.
- Give the Yellow Berry to the yellow flower.
- Collect a Blue Berry.
- Give the Blue Berry to the blue flower.
- Speak with Lily about the missing Water Stone.
Trade for the Water Stone and collect Miracle Water
Follow the blue-flower route into the hedge maze. From the entrance, push through the upper section first, then use the western passage to reach the pipe and Rosie’s area. The maze loops, so keep checking the northern and western openings rather than repeatedly following the outer edge.
Speak with Rosie. She has the Water Stone but will only trade it for something she considers more beautiful. Return through the maze to Posie beneath the Crystal Tree. Speak with Posie to receive the Crystal Berry, then carry it back to Rosie and trade it for the Water Stone.
Return to Lily by taking the lower-right route again. Place the Water Stone in the dry pond. Lily restores the water and gives Mario Miracle Water. After the pond is restored, use Sushie to cross to the small island in the pond and strike the tree there to obtain a Bubble Berry. This Bubble Berry is required for the northern route.
- Reach Rosie through the hedge maze.
- Return to Posie and receive the Crystal Berry.
- Trade the Crystal Berry to Rosie for the Water Stone.
- Place the Water Stone in Lily’s pond.
- Receive Miracle Water.
- Use Sushie at the restored pond and obtain the Bubble Berry.
Find the Sun and recruit Lakilester
Return to the hub and take the upper-left, northwestern path. Give the Bubble Berry to the Bubble Plant. The plant creates a bubble that carries Mario across the thorny section. Continue upward, use Bombette to destroy the rock blocking the tower route, and climb the tower to speak with the Sun.
After speaking with the Sun, return through the previous area. Lakitu blocks the path and begins a required battle. Spike has 50 HP and is airborne, so use a partner or attack that can reach flying enemies, such as Parakarry’s aerial attacks or Watt’s electric attacks. Defeat Spike, then complete the favorable dialogue that follows. Lakilester joins Mario’s party with Lakilulu.
Lakilester’s field ability lets Mario ride over spikes and thorny vines. Save at the hub before tackling the machine route.
- Use the Bubble Berry on the Bubble Plant.
- Reach the Sun and speak with him.
- Defeat Spike using an attack that reaches flying enemies.
- Complete the favorable dialogue after the battle.
- Confirm that Lakilester joins the party.
Reach and destroy the Puff-Puff Machine
Take the upper-right, northeastern path from the hub. Lakilester is required to cross the thorny areas. The raised-panel puzzle contains seven panels. Number them from left to right as they first appear, then use Ground Pound on the panels in this order: 1, 6, 5, 2, 6, 7. This arrangement raises the platforms needed to reach the upper ledge.
Continue through the log and thorn sections with Lakilester. Optional rewards include a Super Block and other hidden items, but they are not required to destroy the machine. In the final room, defeat the enemies surrounding the Puff-Puff Machine. Once the guards are gone, strike the machine from its accessible sides until it breaks.
The clouds clear and sunlight returns to Flower Fields. Return to the hub and save. If you need recovery, speak with Wise Wisterwood to return to Toad Town, heal at the inn, restore FP and come back. Leaving causes enemies on the routes to respawn.
- Use Lakilester on the northeastern route.
- Solve the panel puzzle with 1, 6, 5, 2, 6, 7.
- Defeat the enemies guarding the machine.
- Destroy the Puff-Puff Machine.
- Confirm that sunlight returns.
Grow the beanstalk and reach Cloudy Climb
Return to the soft soil patch in front of Wise Wisterwood. Use the three ingredients in this order: Fertile Soil first, the Magical Bean second and Miracle Water third. The four Magical Seeds planted by Minh T. are not used here.
The beanstalk grows after all three items are used. Before climbing, restore HP and FP, equip badges suited to your available FP and save your game. Climb the beanstalk to Cloudy Climb.
On the cloud route, an optional S. Jump Chg. badge can be reached by using the cloud platforms. Take the right-hand exit after the optional area to reach Huff N. Puff’s arena.
- Use Fertile Soil on the soft soil patch.
- Use the separate Magical Bean.
- Use Miracle Water.
- Climb the completed beanstalk.
- Reach Huff N. Puff’s arena.
Defeat Huff N. Puff and complete the chapter
Huff N. Puff has 60 HP. Whenever Mario or his partner damages him, Tuff Puffs can appear. The Tuff Puffs attack Mario and can be absorbed by Huff N. Puff to restore the boss’s HP, so avoid allowing them to accumulate.
Use strong single-target attacks on Huff N. Puff and clear the Tuff Puffs regularly. Lakilester’s Spiny Surge is useful for removing multiple Tuff Puffs at once. Avoid unnecessary multi-hit attacks if you cannot deal with the extra clouds afterward. Chill Out can reduce incoming damage, and recovery items or Star Power can stabilize the fight if Mario’s HP or FP falls too low.
After defeating Huff N. Puff, let the rescue sequence finish. Klevar is released as the sixth Star Spirit. Continue through the Peach’s Castle intermission, then save when control returns. Optional Star Pieces, badges, letters and Super Blocks are separate from the required rescue.
- Damage Huff N. Puff with strong attacks.
- Clear Tuff Puffs before they accumulate.
- Use Lakilester’s area attack when needed.
- Defeat Huff N. Puff.
- Watch Klevar’s rescue sequence to completion.
- Finish the Peach’s Castle intermission and save.
Before you move on
- All four gate-opening Magical Seeds were delivered to Minh T.
- Minh T. planted the seeds and the Flower Gate appeared.
- Mario entered Flower Fields and received the Magical Bean and Fertile Soil.
- Mario obtained the Water Stone and traded it to Lily for Miracle Water.
- Mario obtained the Bubble Berry from the restored pond.
- Lakilester joined after the Spike encounter.
- The Puff-Puff Machine was destroyed and sunlight returned.
- The beanstalk grew from Fertile Soil, the Magical Bean and Miracle Water.
- Huff N. Puff was defeated.
- Klevar’s rescue sequence completed.
- The Peach’s Castle intermission finished and the file was saved.
Chapter 7 — A Star Spirit on Ice
After Chapter 6, obtain the Ultra Boots in the deepest Toad Town Tunnels before entering the northern route. Investigate the Shiver City incident, reach Starborn Valley, collect the Scarf and Bucket, open the route through Shiver Mountain, retrieve the Star Stone and solve Crystal Palace’s mirrored puzzles. Defeat Crystal King, rescue Kalmar and finish the intermission that opens the final approach.
1. Obtain the Ultra Boots before entering the chapter route
After completing Chapter 6 and returning to Toad Town, visit Merlon’s house. Speak with Merlon and the Ninji who introduces the Shiver region. This event activates the route to Shiver City in the Toad Town Tunnels.
Enter the Toad Town Tunnels and travel through the lower passages toward the frozen section. You must already have Lakilester, because his field ability is needed to cross the spike-filled passage. Follow the route beyond the water and use the trampolines in the final room to reach the large chest. Open it to obtain the Ultra Boots.
The Ultra Boots add Tornado Jump to Mario’s field abilities. Do not try to proceed to Shiver City without them. Tornado Jump is needed to break the frozen pond in Shiver City and to clear ice obstacles in Shiver Mountain. After taking the boots, return through the tunnel route and use the blue door and pipe leading to Shiver City. Save before entering the town if you have made substantial progress since the last Save Block.
- Complete Chapter 6 and trigger the Shiver-region event at Merlon’s house.
- Reach the deepest frozen section of the Toad Town Tunnels.
- Use Lakilester to cross the spike passage.
- Open the chest and obtain the Ultra Boots.
- Confirm that Tornado Jump is available before entering Shiver City.
2. Solve the Shiver City investigation
Enter Shiver City and save at the town’s Save Block. Go to the mayor’s house on the western side and enter the back room. Examine Mayor Penguin, who appears to be unconscious. His wife and the Penguin Patrol will accuse Mario, and the patrol will stop Mario from leaving town until the incident is resolved.
Leave the house and go to the frozen pond. Use Tornado Jump repeatedly on the cracked ice until it breaks. Switch to Sushie, enter the water and dive to the bottom to collect the Warehouse Key. Return to the surface and use the key on the locked warehouse near the pond.
Inside the warehouse, climb to the upper level and use the springboard to reach the roof. Move across the roof toward the neighboring building, then enter through its chimney. This leads to Herringway’s hidden room. Speak with Herringway and follow him back to the mayor’s house.
Return to the mayor’s back room with Herringway. The scene reveals that Mayor Penguin was not murdered; he fainted after slipping while reaching for a souvenir. Once the scene ends, the mayor gives Mario permission to leave Shiver City. If the exit remains blocked, return to the mayor’s house and verify that Herringway was brought there.
- Examine Mayor Penguin in the back room.
- Break the frozen pond with Tornado Jump.
- Dive with Sushie and collect the Warehouse Key.
- Open the warehouse and reach Herringway through the roof and chimney.
- Return to the mayor’s house with Herringway.
- Receive permission to leave Shiver City.
3. Reach Starborn Valley and open Shiver Mountain
Leave Shiver City through the eastern exit and cross Shiver Snowfield. Jr. Troopa appears during the approach. Defeat him before continuing toward Starborn Valley. His battle is not the chapter boss, but his attacks can make the long snowfield route costly if Mario begins with low HP.
Continue through the snowfield to the entrance guarded by Monstar. Defeat Monstar, then watch the scene that reveals the apparent monster to be a group of Star Kids. Enter Starborn Valley and speak with Merle in his home. Merle explains that the imprisoned Star Spirit is inside Crystal Palace and gives Mario the Fabulous Scarf.
Return to Shiver City and speak with Mayor Penguin again. He gives Mario the Marvelous Bucket. Carry both items back to the snowmen in Shiver Snowfield. Place the Scarf on the snowman missing a scarf and the Bucket on the snowman missing its hat. The snowmen move aside and open the way to Shiver Mountain.
Heal and save in Shiver City before beginning the climb. You can also use the town’s Toad House for recovery. The Scarf and Bucket are required story items; do not leave the snowfield expecting the mountain route to open after receiving only one of them.
- Defeat Jr. Troopa in Shiver Snowfield.
- Defeat Monstar and enter Starborn Valley.
- Speak with Merle and receive the Fabulous Scarf.
- Return to Mayor Penguin and receive the Marvelous Bucket.
- Place both items on the correct snowmen.
4. Climb Shiver Mountain and recover the Star Stone
Enter Shiver Mountain through the passage opened by the snowmen. In the early icy section, use Tornado Jump to break the ice and hit the required switch. Continue through the mountain, using partner abilities when a switch or gap is out of Mario’s reach.
In the area with the raised item pillars, collect the Pebble from the nearby path before taking one of the displayed items. Removing an item causes an ice barrier to appear. Place the Pebble, or another unwanted item, on the empty pillar to remove the obstruction. The Pebble can be used as the replacement item for this puzzle.
Continue until the route leads to a cliff and a cracked wall. Use Bombette to open the wall and enter the Star Shrine. In the shrine, walk through the apparently solid wall on the right. The wall is false. Madam Merlar appears and explains the Star Stone’s role in reaching Crystal Palace. When her scene ends, collect the Star Stone.
Return to the mountain’s star-shaped opening and place the Star Stone. The action raises a long ice staircase to the upper route. A badge and Star Piece can be collected along the climb, but they are optional. Use the Save Block and Heart Block near the top before entering Crystal Palace.
- Use Tornado Jump on the early mountain ice and switch.
- Collect the Pebble before the item-pillar puzzle.
- Use Bombette on the cracked wall.
- Walk through the false wall in the Star Shrine.
- Receive the Star Stone from Madam Merlar.
- Place the Star Stone in the mountain opening.
- Save and recover before entering Crystal Palace.
5. Obtain the Blue Key and Red Key in Crystal Palace
Enter Crystal Palace and use the main-room switch to control the colored doors. Follow the lower route to the chest containing the Blue Key. Return to the main room, set the switch so the blue door lowers and unlock it with the Blue Key.
The blue section contains the palace’s transparent walls and mirrored rooms. Use Bombette on cracked walls where necessary. When you reach a glass-like panel, look for the section without the normal reflection effect and walk through it. On the opposite side, the apparent copies of Mario and Bombette are Duplighosts. Defeat them and continue through the opened route.
Proceed through the upper route and use Tornado Jump on the wooden panel. This action changes the corresponding red-X route. Backtrack to the red-X opening, drop through and use Bombette on the cracked wall. Several Bombettes appear, but only one is genuine. Speak with them and identify the real Bombette by her normal responses; strike the impostors and continue to the Red Key chest.
Return to the main room, operate the switch to lower the red door and unlock it with the Red Key. Save and heal whenever the palace provides an opportunity. The mirrored rooms are easier to navigate if you note which actions changed the opposite side instead of treating each half as an independent corridor.
- Find the Blue Key in the lower route.
- Unlock the blue door.
- Cross the transparent wall and defeat the Duplighost copies.
- Break the wooden panel with Tornado Jump.
- Use the red-X route to reach the Bombette-copy puzzle.
- Defeat the impostors and collect the Red Key.
- Unlock the red door.
6. Retrieve the Palace Key and solve the dinosaur-statue puzzle
Beyond the red door, defeat the required White Clubbas. Their removal affects the matching palace section on the opposite side of the transparent wall. Use the changed room layout to return through the mirrored route and reach the rotating-platform puzzle.
Use Bombette on the relevant switch while Mario stands on the rotating platform. Time the explosion so the platform carries Mario to the opposite side. Continue until you reach the Kooper-copy puzzle. Send Kooper through the opening, then identify the real Kooper after the copies return. Defeat the impostors and proceed.
In the next mirrored section, throw Kooper’s shell so it reaches the blue switch on the opposite side. The resulting bridge lets Mario cross and return through the palace’s transparent divider. Continue to the rooms with the dinosaur statues. Move the small Albino Dino statue as required to expose the lower route, then return to the corresponding side of the palace and follow the opening to the Palace Key chest.
Use the Palace Key on the locked door. The final puzzle has live Albino Dinos and matching statues. Speak with each live dinosaur from the appropriate side so it turns; the matching statue changes its facing direction. Push each statue only in the direction it faces until all three statues cover the floor switches. When all switches are occupied, the route to the recovery area opens.
- Defeat the required White Clubbas.
- Use Bombette and the rotating platform to cross the mirrored section.
- Identify the real Kooper and defeat the copies.
- Use Kooper’s shell to hit the distant blue switch.
- Move the small dinosaur statue.
- Collect and use the Palace Key.
- Turn the live dinosaurs and place all three matching statues on the floor switches.
- Reach the healing and Save Blocks before the boss.
7. Defeat Crystal King and rescue Kalmar
Crystal King has 70 HP and 2 Defense. Watt’s Electro Dash is reliable because it ignores Defense, and other Defense-piercing attacks are useful. Lakilester’s Spiny Surge can damage all Crystal Bits at once. Enter the battle after using the nearby recovery and Save Blocks.
Crystal King begins with three Crystal Bits. Each Bit has 1 HP, but the group supports the boss’s attacks. Remove the Bits with a multi-target attack when they are active, then use Mario’s turn to damage Crystal King. The boss can fire an ice attack that may freeze Mario for multiple turns, so heal before reaching critical HP and guard carefully during the attack’s timing sequence.
Crystal King can recover 20 HP. Continue applying efficient damage rather than spending turns on weak status attempts. Near the end of the battle, he creates three versions of himself. Only one is real. Use a multi-target attack to hit all copies, or test the copies until you find the one that takes damage. Keep removing dangerous Crystal Bits and attack the real King until his HP reaches zero.
After the battle, allow the Star Spirit rescue scene to finish. The Peach’s Castle intermission follows and is not a playable Peach segment. When control returns to Mario, Kalmar raises Star Energy to seven and grants the Up and Away Star Power. This confirms that Chapter 7’s main objective is complete.
- Enter the fight after healing and saving.
- Use Watt or another Defense-piercing attack.
- Remove Crystal Bits when they threaten to compound the boss’s damage.
- Guard against the freezing ice attack.
- Identify the real Crystal King during the duplicate phase.
- Defeat Crystal King and allow the rescue scene to finish.
- Confirm that Kalmar raises Star Energy to seven and grants Up and Away.
8. Finish the transition toward Chapter 8
After Kalmar’s reward and the intermission, return through Crystal Palace and travel back to Toad Town. Save at Mario’s house or another Save Block. Restock HP and FP recovery items before leaving the northern region. Shiver City’s Toad House can provide additional recovery after the Crystal Palace route has been opened, but this is optional.
Travel to Shooting Star Summit and climb to the summit area. The seven rescued Star Spirits create the route to Star Way. Continue through Star Way to Star Haven, recover and shop there if needed, then enter the Star Sanctuary. The Star Spirits restore Star Beam and prepare the Star Ship for the approach to Bowser’s Castle.
The chapter completion requirement is the rescue of Kalmar and the appearance of the seventh Star Power. Reaching Shooting Star Summit is the practical transition into Chapter 8, while completing the Star Way and Star Haven sequence begins the final chapter itself.
- Return from Crystal Palace after the intermission.
- Save in Toad Town and restock supplies.
- Confirm Kalmar and Up and Away are available.
- Reach Shooting Star Summit.
- Use the Star Way route toward Star Haven and the final chapter.
Before you move on
- The Ultra Boots were collected from the deepest Toad Town Tunnels after Chapter 6.
- Tornado Jump is available before Mario enters Shiver City.
- Mayor Penguin has awakened, Herringway has been found and Mario has permission to leave Shiver City.
- Jr. Troopa and Monstar have been defeated.
- Merle provided the Fabulous Scarf and Mayor Penguin provided the Marvelous Bucket.
- Both snowmen received their correct items and the Shiver Mountain route opened.
- Mario obtained the Star Stone from Madam Merlar and placed it in the mountain opening.
- The Blue Key, Red Key and Palace Key routes are complete.
- The three Albino Dino statues are on the floor switches and the recovery area before the boss is accessible.
- Crystal King has been defeated and the Star Spirit rescue and Peach’s Castle intermission have played.
- Kalmar raised Star Energy to seven and granted Up and Away.
- Mario returned to Toad Town and reached the Shooting Star Summit route toward Chapter 8.
References for this chapter
Chapter 8 — A Star-Powered Showdown
After the seventh Star Spirit is rescued, return to Shooting Star Summit and travel through Star Way to Star Haven. Receive Star Beam and the Star Ship, then clear Bowser’s Castle by collecting Castle Keys, escaping the dungeon, stopping the lava fountain, controlling the east-wing water level, solving the Guard Door challenges, and defeating Jr. Troopa. The final sequence contains the first Bowser battle, a short scripted rooftop encounter, Peach and Twink’s battle with Kammy Koopa, and the true final fight against powered-up Bowser. Complete optional cleanup before entering Star Way or preserve a pre-ending save, because the original Nintendo 64 game does not provide a playable post-credits continuation.
1. Finish preparation before Star Way
After the Chapter 7 events and the return route from Shiver Mountain, go back to the top of Shooting Star Summit. This is the point of no return for convenient optional cleanup. Check Toad Town, the Toad Town Tunnels, shops, Star Piece trades, badges, letters, recipes, Chuck Quizmo quizzes, and any other side activities you want to complete before the ending. You may still be able to backtrack during the final chapter, but the route becomes long and the completed game cannot be continued normally.
Make a separate save before entering Star Way if you want a reliable cleanup file. Confirm that all seven Star Spirits have been rescued. Star Way contains Ember enemies, so Sushie is a useful active partner because her water attacks work well against them. Mario can also equip Ice Power or Fire Shield if those badges suit the enemies and your current badge setup.
Travel through the starry path until you reach Star Haven. Avoid unnecessary fights if your supplies are low, or use the area to gain experience if Mario needs it. The goal is Star Haven, not a collectible sweep; finish any major collection work before starting this route.
- All seven Star Spirits have been rescued.
- Optional cleanup has been completed or a pre-Star-Way save has been preserved.
- Sushie is available for the Ember encounters on Star Way.
- Mario has reached Star Haven.
2. Receive Star Beam and fly to Bowser’s Castle
Use the Toad House on the lower level of Star Haven to restore Mario and his active partner. Visit the shop on the upper level and buy strong HP and FP recovery items if needed. This is the final convenient supply point before the castle’s longer dungeon sections, so prioritize recovery over low-value purchases.
Enter the Star Spirits’ sanctuary at the far side of Star Haven. The Star Spirits grant Mario Star Beam, which removes Bowser’s Star Rod protection during the first Bowser battle. They also provide the Star Ship. Board the ship and fly to Bowser’s Castle.
At the castle entrance, the main door is locked. Enter the small side door on the right and defeat the Koopatrol inside. Take the Castle Key, return to the entrance, and unlock the main door. Watt’s Electro Dash is particularly useful against heavily defended Koopatrols, although other defense-piercing attacks also work.
- Star Beam has been received.
- Mario has healed and restocked in Star Haven.
- The first Castle Key has been taken from the right-side Koopatrol room.
- The main entrance to Bowser’s Castle has been unlocked.
3. Escape the dungeon and stop the lava fountain
Continue through the first castle rooms until the Guard Door sends Mario through a trapdoor into the dungeon. In the cell area, switch to Bombette and use her Bomb ability on the cracked wall. Follow the escape route into the lava section.
Use Kooper to hit the first switch and move the platform. Use Parakarry to cross the large gaps. In the next lava room, use Lakilester to reach the distant switch, then return and cross the newly accessible platforms. When a moving platform reaches the lava waterfall, use Bow’s Outta Sight to pass through the dangerous section, then use Parakarry for the next gap.
The locked door at the end of the lava room cannot be opened yet. Instead, use Lakilester to pass through the opening in the lava and reach the upper room. Defeat the Magikoopa and the Koopatrols guarding the switch, then press the switch to stop the lava fountain. The lava cools and becomes a walkable route.
Return through the lava rooms and collect the Castle Key from the chest that was previously inaccessible. The Life Shroom and Deep Focus badge in this area are optional. Return to the locked door and use the Castle Key to continue.
- Bombette has opened the dungeon escape wall.
- The lava fountain has been stopped.
- The Castle Key from the lava section has been collected.
- The locked door beyond the lava route has been opened.
4. Cross the dark caves and reach the recovery area
Use Watt as the active partner in the dark caves. Watt illuminates the rooms and allows attacks against Bony Beetles and other enemies that cannot be targeted normally in darkness. Use Parakarry to cross the large gaps.
At the first two three-way splits, the middle route is the main path. The upper route leads to optional items, while the lower route is a dead end. At the third split, take the upper route and deliberately drop through the gap when the path ends. Continue to the Bowser-faced pillar and push it to reveal the passage back to the Guard Door. The Guard Door now permits passage.
In the area beyond, use the lower eastern route and defeat the Koopatrol guarding the prison key. Open the cells and speak with the Toads. Their cell becomes a temporary Toad House where Mario can heal. A small shop is also available through the upper-left door of the main area. Use the Save Block before moving into the east wing.
- Watt is active in the dark caves.
- The middle route has been used at the first two three-way splits.
- The upper route and drop-through gap have been used at the third split.
- The Bowser-faced pillar has been moved.
- The prison key, temporary Toad House, shop, and Save Block have been found.
5. Control the east-wing water and pass the second Guard Door
Enter the east wing and follow the corridors to the locked doorway. Pull the nearby chain to flood the area. Use Sushie to swim back to the earlier platform and activate the switch. Use the spring and Bombette to reach the wall, then perform a Tornado Jump to reach the next switch and the second chain.
The water must be adjusted in both directions. After reaching the second chain, return through the route and pull the chains in reverse order so the water drains away from the locked door. When the platform with the Castle Key is accessible, take the key and unlock the door.
Proceed through the Bombshell Bill corridors and defeat the B. Bill Blasters blocking the stairs. In the Dry Bones room, Kooper’s Fire Shell is effective against the group. Move the Bowser statues to reveal the hidden rooms. The passage behind the moved middle statue leads to the Castle Key; collect it and unlock the next door.
The next Guard Door presents a memory quiz. Watch the enemy display carefully and answer its questions about the number and type of enemies shown. If three answers are wrong, the Guard Door forces a battle against three Anti-Guys. Passing the quiz is optional only in the sense that the Anti-Guy battle is an alternate route; the door must still be cleared.
- Both chains have been used to control the water level.
- The Castle Key beyond the flooded section has been collected.
- The Bombshell Bill and Dry Bones sections have been cleared.
- The hidden Castle Key behind the statue puzzle has been collected.
- The Guard Door quiz has been passed or the Anti-Guy battle has been won.
6. Cross the east-wing maze and defeat Jr. Troopa
In the next castle section, use Bombette from the upper platform to trigger the switch and reach another Castle Key. Unlock the following door and enter the six-room maze.
Read the lamp pattern in the first room, then take the upper path, lower path, lower path, upper path, lower path, and upper path. In each room, choose the eastern door rather than the western return route. Choosing the wrong sequence sends Mario back to the start.
After the maze, cross the bridge and heal at the Heart Block. Speak to Peach, then walk west until she leaves the screen. Return east and watch the Duplighost reveal itself. Go back to the apparent Peach and strike her several times with the Ultra Hammer. This begins the battle against the Duplighost group.
Heal again and enter the next Guard Door room. The Koopa Bros. appear, but Jr. Troopa interrupts and becomes the actual opponent. He can switch between a normal form, a wand-using form, and a winged, spiked form. Do not use jump attacks against the spiked form, and use Watt or another suitable attack when his defense or position prevents normal attacks.
After Jr. Troopa is defeated, proceed outside toward Peach’s Castle. Save at the outside Save Block before entering.
- The additional Castle Key has been collected.
- The maze route has been completed in the order upper, lower, lower, upper, lower, upper.
- The Duplighost disguised as Peach has been defeated.
- Jr. Troopa has been defeated.
- The outside Save Block before Peach’s Castle has been used.
7. Defeat Bowser in Peach’s Castle and trigger the final sequence
Inside Peach’s Castle, open the wardrobe on the first floor to free the hidden Toad. His room functions as a healing point. Visit the library on the second floor and climb the books to collect the optional Life Shroom. Heal and arrange badges for single-target damage, HP, FP, defense, and reliable timed attacks.
Climb to the upper rooms and confront Bowser. This first battle is a normal boss encounter, but Bowser can immobilize the partner, prevent item use, and heal. Whenever he uses the Star Rod to become protected, use Star Beam immediately. Continue attacking after the protection is removed until Bowser’s HP reaches zero.
Bowser escapes with Peach. Follow him upward to the floating-island arena for a short second encounter. Attack during the scripted battle and use Star Beam when prompted, but the Star Beam cannot overcome the Power Platform’s amplified protection. The scene then changes to Peach and Twink.
- The hidden Toad has been freed and the healing room found.
- The library Life Shroom has been collected or deliberately left.
- The first Bowser battle has been won.
- Star Beam has been used against Bowser’s Star Rod protection.
- The floating-island encounter has triggered the Peach and Twink interlude.
8. Defeat Kammy Koopa and finish the final Bowser battle
During the Peach and Twink section, follow the displayed battle instructions. Peach uses Focus while Twink attacks Kammy Koopa. Continue until Kammy is defeated. Peach then gathers the wishes of the Mushroom Kingdom, allowing the Star Spirits to upgrade Star Beam into Peach Beam.
Control returns to Mario for the true final battle. Final Bowser has 99 HP and can use the Star Rod to become protected, increase his attack power, and heal 30 HP up to three times. Whenever he activates the Star Rod, use Peach Beam immediately. Do not spend the turn on an ordinary attack while the protection is active.
Prioritize survival over risky damage. Bowser can attack Mario and the partner, inflict status effects, and temporarily remove access to the partner, items, hammer, or boots. Use Star Spirit powers, recovery items, and dependable timed attacks. Watt is a strong partner choice because Electro Dash can ignore defense, but the battle can temporarily disable a preferred partner or command, so keep a backup plan.
When Bowser reaches zero HP, the Star Rod is restored and the ending sequence begins. Follow the remaining scenes back to Peach’s Castle. Watch the parade, credits, and final End screen. The original game does not create a normal post-ending save or return Mario to a playable world. Reload the pre-Star-Way or pre-final-battle save if optional cleanup remains.
- Kammy Koopa has been defeated.
- Peach Beam has been obtained.
- Peach Beam is used whenever final Bowser activates the Star Rod.
- Bowser’s healing, status effects, attacks, and command restrictions have been managed.
- Bowser has been defeated and the Star Rod restored.
- The rescue scenes, parade, credits, and final End screen have played.
- A pre-ending save remains available for later cleanup.
Before you move on
- All seven Star Spirits have been rescued.
- Mario has received Star Beam in Star Haven and Peach Beam after the Peach and Twink interlude.
- The lava fountain, east-wing water puzzle, Guard Door quiz or Anti-Guy battle, east-wing maze, Duplighost encounter, and Jr. Troopa battle have all been completed.
- The first Bowser battle, floating-island encounter, Peach and Twink battle against Kammy Koopa, and true final Bowser battle have been completed.
- Bowser has been defeated and the Star Rod restored.
- The ending rescue sequence, parade, credits, and final End screen have played.
- A pre-ending save remains available if optional cleanup is still required.
References for this chapter
Partner, Badge and Battle Systems — How to Build for Progression
Paper Mario’s partners are both field tools and battle allies. Select the partner whose ability matches the obstacle in front of you, upgrade partners at Super Blocks, and rebuild Mario’s badge loadout for exploration, regular battles, and bosses. This guidance applies to the original North American Nintendo 64 release, not a remake or later Paper Mario title.
1. Learn the partners and their field jobs
Goombario joins in Goomba Village during the prologue. His field ability provides information about the current area, nearby characters, or a character Mario is facing. Use him when you need a hint or want to identify something before committing to a route. He is not a movement solution for ordinary obstacles.
Kooper joins during Chapter 1. His shell can travel across a short distance to hit remote switches, collect objects, and activate mechanisms that Mario cannot reach directly. When you see a switch separated from Mario by a gap or positioned behind a narrow opening, try Kooper before searching for another route.
Bombette joins later in Chapter 1. Her field ability destroys cracked walls and other bombable obstacles. A cracked section of wall is a progression clue: bring Bombette close to it and use her ability rather than attempting to jump or hammer the surface. Bombette is also useful for checking suspicious dead ends because some hidden rooms contain badges, Star Pieces, or shortcuts.
Parakarry joins in Chapter 2 and carries Mario across marked gaps. His ability is required for many short chasms in Mt. Rugged, Dry Dry Desert, and later areas. Bow joins in Chapter 3 and makes Mario transparent in the field. Her ability is used for story-specific obstacles and situations where Mario must avoid being seen or interact with an area while hidden.
Watt joins in Chapter 4. Her field ability lights dark areas and reveals hidden blocks or objects that are otherwise difficult to see. Sushie joins in Chapter 5 and carries Mario across water. Lakilester joins in Chapter 6 and lets Mario travel over hazardous ground, including surfaces that would otherwise injure or block him. These field abilities are the reliable signs that a route is intended for a particular partner.
- Goombario: area, character, and enemy information.
- Kooper: distant switches, objects, and mechanisms.
- Bombette: cracked walls and bombable obstacles.
- Parakarry: marked gaps and short chasms.
- Bow: transparency and story-specific evasion sections.
- Watt: darkness, hidden blocks, and concealed objects.
- Sushie: water traversal.
- Lakilester: hazardous-ground traversal.
2. Change partners correctly in the field
On the original Nintendo 64 controls, press C-Right to open the partner selection and change the active partner. Press C-Down to use the selected partner’s field ability. Only the active partner’s field ability is available, so a blocked route is often solved by changing partners rather than by searching for a new item.
Read the obstacle before switching. A distant switch usually indicates Kooper, a cracked wall indicates Bombette, a gap indicates Parakarry, darkness or an invisible object suggests Watt, water indicates Sushie, and dangerous ground suggests Lakilester. Goombario and Bow are more situational in the field, but both are required for specific information or story interactions.
After solving a puzzle, switch back to the partner you prefer for the next battles. Keeping the correct field partner active while crossing a dungeon saves menu time, but there is no reason to leave a puzzle-specific partner active for an entire chapter. You can change partners again as soon as the next obstacle or battle calls for it.
- Change the active partner with C-Right before attempting a partner-specific obstacle.
- Use C-Down only after confirming that the selected partner matches the obstacle.
- Restore a preferred battle partner after completing a field puzzle.
3. Upgrade partners at Super Blocks
Super Blocks improve one partner at a time. The first upgrade raises that partner to Super Rank, increasing the strength of existing attacks and adding a new battle technique. After Mario obtains the Ultra Stone in Chapter 5, later Super Blocks can raise partners to Ultra Rank, which gives another improvement and another technique. Partner upgrades are not required for ordinary field movement, but they substantially improve the party’s options in long dungeons and boss fights.
Do not assume that a Super Block must be spent immediately on the partner currently following Mario. Choose the partner whose attacks answer the current enemies or whose new technique fills a gap in your setup. Watt is valuable when you need an attack that handles high-defense targets, Bow provides strong survival and status options, and Bombette and Sushie offer useful group or specialized attacks. These are recommendations for common situations, not mandatory assignments.
The original game contains enough Super Blocks to bring every partner through both upgrade stages if you find them all. Missing one early block does not permanently prevent later upgrades, so continue the story if a block is difficult to reach. Record unusual side routes and return after obtaining the Hammer, Super Hammer, Ultra Hammer, or another required ability.
- Use early Super Blocks on partners whose attacks solve current combat problems.
- Wait until the Ultra Stone is available before planning Ultra Rank upgrades.
- Return to earlier areas when a Super Block is blocked by a later hammer or partner ability.
- For complete partner development, find and use every Super Block before finishing cleanup.
4. Build an early exploration and battle badge set
Spend BP on badges that improve attacks you actually use. Jump badges strengthen Mario’s jump options, while hammer badges provide reliable damage against targets that are awkward to jump on or that resist jumping. Multibounce is useful when several grounded enemies can be hit in one command; a strong single-target attack is usually better when one dangerous enemy must be removed first.
Damage Dodge reduces damage only when Mario successfully performs the defensive action command. It is useful once you can block consistently, but it does not protect against a missed command. Dodge Master makes action commands easier to perform, so it can help while learning enemy timings or practicing powerful attacks. Remove it later if its BP would be more valuable on direct offense or FP conservation.
Do not equip every available badge merely because BP is free. Keep some capacity available for a badge found in a dungeon or bought from Rowf’s Badge Shop. A compact setup that improves your normal attacks is more dependable than a large collection of rarely used convenience effects.
- Use jump badges against enemies suited to jumping.
- Use hammer badges when hammer damage is safer or more reliable.
- Equip Damage Dodge only if you can perform defensive commands consistently.
- Use Dodge Master as a timing aid, not as a substitute for learning attacks.
- Leave BP available for new badges and upcoming boss preparations.
5. Add FP support and distinguish it from Star Power
FP pays for FP-based attacks used by Mario and his partners. Star Spirit abilities use Star Power instead, so Flower Saver and FP Plus do not reduce the Star Power cost of a Star Spirit move. Recover FP with flowers, items, or recovery points, and recover Star Power through battle actions and other in-game opportunities rather than treating the two resources as interchangeable.
Flower Saver is valuable when your regular attacks repeatedly consume FP because it lowers the FP cost of FP-based abilities. FP Plus increases Mario’s maximum FP and is useful when a dungeon or boss plan depends on using several expensive attacks before recovering. Power Plus and similar direct-damage badges improve output without requiring a new command, while Defend Plus can help when you are still learning a boss’s attack timings.
Peekaboo reveals enemy HP without requiring Goombario’s Tattle. It is a learning and planning badge, not a damage increase. Equip it while studying a new dungeon, then replace it with offense, defense, or FP support once you know the enemy groups.
- Use Flower Saver for a strategy built around repeated FP attacks.
- Use FP Plus when your planned attacks exceed your normal FP capacity.
- Keep Star Power separate from FP when planning boss resources.
- Use Peekaboo temporarily if enemy HP information is more useful than damage.
6. Prepare a separate boss loadout
Before entering a boss arena, save at the nearest Save Block, restore HP and FP, and review your items. Remove badges that matter only for information or occasional exploration if the coming fight rewards direct damage, defense, or resource efficiency. There is no universal best setup; the correct loadout depends on your action-command skill, current level, partner ranks, and the boss’s defenses.
Choose the active partner according to the boss’s reach and defenses. Watt is often useful against enemies whose defense makes ordinary attacks inefficient. Bombette and Sushie are good specialized choices when their attacks can hit the relevant targets, while Bow’s Outta Sight can protect Mario during a dangerous turn. Use the partner whose move answers the actual problem instead of keeping the same partner for the whole game.
Quick Change is a badge that allows Mario to switch partners during battle without spending Mario’s turn. Without Quick Change, changing partners normally uses Mario’s turn, so switch before choosing Mario’s command whenever possible. Quick Change is especially useful when one partner is needed for setup or defense and another is needed for damage. It costs BP, so equip it when the flexibility is worth removing another badge.
- Save before the final approach and restore HP and FP.
- Replace exploration badges with damage, defense, or FP support.
- Select a partner based on the boss’s defenses and attack pattern.
- Equip Quick Change when switching partners during the fight is part of the plan.
- Keep enough items and Star Power for the boss’s later phases or strongest attacks.
7. Reorganize after chapters and during cleanup
After rescuing a Star Spirit, return to a safe area and review badges, partner ranks, BP, HP, FP, and inventory. A new partner technique or badge can change the most efficient way to handle ordinary enemies. Maintain one general exploration setup, then change to a dungeon or boss setup before the next difficult section.
During cleanup, equip field-oriented or information badges only when you are actively using their effect. Do not let convenience badges occupy BP during every battle if a damage or FP-saving badge would help more. Revisit earlier locations after acquiring new hammer levels, partner abilities, and story access because blocked rooms often contain optional badges, Star Pieces, or Super Blocks.
A practical progression is dependable attack badges early, Flower Saver or FP support during the middle chapters, and a flexible late-game set containing direct damage, partner utility, defense, and Quick Change when affordable. Adjust it to the attacks you can execute reliably rather than copying a fixed build.
- Review badges after each BP increase, new badge, or partner upgrade.
- Maintain separate exploration, normal-battle, and boss configurations.
- Return to blocked rooms after gaining new hammer levels or partner abilities.
- Before the final dungeon, verify that every partner and every important badge can be used in a deliberate setup.
Before you move on
- You can identify the appropriate partner for switches, cracked walls, gaps, darkness, transparency sections, water, and hazardous ground.
- You know that C-Right changes the active partner and C-Down uses the selected partner’s field ability on the original Nintendo 64 controls.
- Every partner has been considered for Super Rank and Ultra Rank upgrades, and you understand that the Ultra Stone is required for Ultra Rank.
- You have separate badge plans for exploration, ordinary encounters, and bosses.
- Your boss setup distinguishes FP attacks from Star Power abilities and includes a plan for HP, FP, items, and Star Power recovery.
- You understand that Quick Change preserves Mario’s turn during a battle switch, while ordinary switching consumes the turn.
- Before the final dungeon, you can enter with a suitable active partner, restored HP and FP, usable badges, and enough flexibility to adjust after scouting the first encounters.
References for this chapter
- Paper Mario — Nintendo 64 Official Manual (English PDF)
- Partners and Attack Moves — Paper Mario 64 Walkthrough
- Badge List and Locations — Paper Mario 64 Walkthrough
- Paper Mario 64 Walkthrough — Super Blocks and Partner Upgrades
- Paper Mario — GameFAQs Guide and Walkthrough
- Paper Mario — Super Mario Wiki reference
- Quick Change — Super Mario Wiki reference
Star Pieces, Super Blocks and Key Items — Collection and Cleanup
Star Pieces and Super Blocks are optional for the main ending of the original Nintendo 64 Paper Mario, but they are the two most useful collectible goals for a thorough campaign. Star Pieces are found in ordinary field locations, hidden panels, NPC rewards, letters, quizzes and side activities. They can be exchanged to Merlow for badges, so the number currently in Mario’s inventory is not a reliable completion total. Track every Star Piece obtained, including those already spent. Super Blocks upgrade partners and must be struck directly; finding one without activating it does not count toward a complete upgrade run. Use the ability-based route below to avoid repeated trips and keep the Ultra Hammer and Ultra Boots on their correct progression schedule.
Separate required progress from optional completion
The main campaign does not require collecting Star Pieces, purchasing Merlow’s badges, or activating every Super Block. Required progress instead consists of the chapter objectives, the key items that open each dungeon route, the rescue of all seven Star Spirits, and Bowser’s defeat. Treat the collectible route as a separate checklist so an optional missing item never looks like a story block.
The original game has 160 obtainable Star Pieces and 16 Super Blocks. The 16 blocks provide two upgrades for each of the eight partners: a Super Rank upgrade first, then an Ultra Rank upgrade after Mario receives the Ultra Stone from Raphael the Raven in Chapter 5. If you are tracking broad completion, record each block when the upgrade animation occurs and maintain a separate Star Piece list.
- Record Star Pieces when obtained, even after spending them at Merlow.
- Strike all 16 Super Blocks and confirm the partner upgrade occurs.
- Keep the campaign checklist separate from badges, letters, recipes, quizzes and sidequests.
Begin the first ability-based sweep
Do not attempt a full collection sweep during the prologue or Chapter 1. After Mario receives the Super Boots in Boo’s Mansion during Chapter 3, revisit early roads and villages. Use the Spin Jump to reveal hidden floor panels and reach Star Pieces in Goomba Village, Goomba Road, Pleasant Path, Koopa Village, Toad Town and other previously visited areas. Check suspicious bare floor panels, ledges and corners rather than searching only for visible items.
After obtaining the Super Hammer in Dry Dry Ruins during Chapter 2, revisit Mt. Rugged and the early Toad Town routes to break Stone Blocks. The Mt. Rugged Super Block is beyond the Stone Block near the train-station climb. The Super Hammer is also needed for the first of the gated Toad Town Tunnels routes, so make that visit when returning through Toad Town rather than making a separate trip solely for one block.
During the Chapter 2 route, collect the Super Block in the Dry Dry Desert oasis and the Super Block inside Dry Dry Ruins. In the ruins, look in the two-level stair area and take the left route from the first level. The Pulse Stone, Ruins Keys, Pyramid Stone, Diamond Stone and Lunar Stone are progression items for reaching Tutankoopa; the Artifact is optional and should be tracked separately.
- After the Super Boots, search early hidden panels and Spin Jump floors.
- After the Super Hammer, revisit Mt. Rugged and early Toad Town areas.
- Collect the Dry Dry Desert oasis block and Dry Dry Ruins block.
- Do not substitute the optional Artifact for a required ruins item.
Clear Toad Town and the early tunnel branches
Use Toad Town as the central cleanup hub. Check the plaza, harbor, shops, Club 64, the Dojo surroundings, the Post Office and the routes near Forever Forest. NPC rewards are easy to miss because they do not look like field pickups. Revisit characters after major chapters and track Koopa Koot favors, letters, Club 64 rewards and other exchanges independently from hidden panels.
The Toad Town Tunnels contain four Super Blocks, but they are not all available together. The first tunnel block is reached through the upper route opened by the Super Hammer. The second becomes accessible after the Super Boots let Mario break the wooden floor near the tunnel entrance; hidden blocks and a movable blue block create the bridge to it. The third is behind metal blocks and requires the Ultra Hammer from Mt. Lavalava. The fourth is in the icy tunnel area leading toward Shiver City and cannot be treated as an early Chapter 5 pickup.
Make the first tunnel pass after the Super Hammer and Super Boots. On this pass, collect only the blocks and Star Pieces that those abilities clearly open. Do not label the icy block as a late-Chapter 6 reward merely because it is found before Chapter 7; its practical collection point is the later northern-route preparation after Mario has the Ultra Boots and access to the blue-door tunnel section.
- Early tunnel pass: collect the Super Hammer-gated block.
- After the Super Boots: collect the wooden-floor and hidden-block tunnel block.
- After Chapter 5: return for the Ultra Hammer-gated metal-block route.
- Leave the icy tunnel block for the later Ultra Boots and Shiver-region sweep.
Collect the chapter-route Super Blocks
During Chapter 3, activate the Super Block in Tubba Blubba’s Castle while moving through the upper level. During Chapter 4, collect the block in Shy Guy’s Toy Box in the room with the Ferris wheel and moving platforms. The Storeroom Key and Toy Train are required for the ordinary Toy Box train route: recover the key, return it to Harry in Toad Town, obtain the Toy Train from the storeroom, and place it in the Toy Box. Do not classify the Storeroom Key as an optional reward.
Chapter 5 contains three Super Blocks outside the already visited areas: one in Jade Jungle and two in Mt. Lavalava. Use Sushie to reach the Jade Jungle island route. In Mt. Lavalava, check the fire-bar room reached from a trapeze and the later rope section where a separate path leads to a rock platform. The Ultra Hammer is obtained during this chapter inside Mt. Lavalava, and the Ultra Stone is obtained from Raphael the Raven. Upgrade partners as blocks become available, but remember that Ultra Rank upgrades are only possible after the Ultra Stone event.
- Tubba Blubba’s Castle: activate its block during the upper-level route.
- Shy Guy’s Toy Box: use the train route and inspect the Ferris-wheel room.
- Jade Jungle: use Sushie to reach the isolated Super Block.
- Mt. Lavalava: search both separate block routes.
- Treat the Ultra Hammer as a Chapter 5 item, not a late-game ability.
Finish Flower Fields before moving north
The four Magical Seeds that open Flower Fields are separate from the Magical Bean used later at the beanstalk. Obtain the seeds from the Bub-ulbs in Toad Town, Mt. Rugged, Forever Forest and Jade Jungle. The Jade Jungle seed becomes available after Chapter 5 when Mario retrieves the Volcano Vase and trades it to Kolorado in Yoshi’s Village. Deliver all four seeds to Minh T. in Toad Town before attempting to enter Flower Fields.
During Chapter 6, activate both Flower Fields Super Blocks while solving the garden problems. One lies along the route beyond the yellow gate and thorny patch; the other is on the eastern side where moving platforms and partner assistance lead upward. The Magical Bean, Fertile Soil and Miracle Water are separate required items for growing the beanstalk to Cloudy Climb and must not be confused with the four gate-opening seeds.
Complete ordinary Flower Fields Star Piece and badge searches while the area is open, but do not delay the story for every optional reward if supplies are low. Return after the garden problems are resolved so bridges, sunlight and water routes are available.
- Deliver all four Magical Seeds to Minh T.
- Activate both Flower Fields Super Blocks.
- Keep the Magical Bean, Fertile Soil and Miracle Water separate from the four seeds.
- Finish Flower Fields cleanup before the northern sweep.
Obtain the Ultra Boots and complete the late northern sweep
After the Chapter 6 route has opened the northern approach, return to Toad Town Tunnels and proceed through the deeper passages. Mario must use Lakilester to cross the spike route, navigate the invisible-block section and defeat or pass the tunnel hazards before reaching the chest containing the Ultra Boots. These boots replace the Super Boots and upgrade the Spin Jump into the Tornado Jump, which can break ice and reach higher blocks.
After obtaining the Ultra Boots, meet the required Ninji event at Merlon’s house so the blue-door route in the tunnels becomes usable. Enter the icy section, collect the Super Block on the left, and take the pipe toward Shiver City. This is the fourth Toad Town Tunnels block and belongs in the late preparation for Chapter 7, not in the post-Chapter 5 cleanup.
Continue through Shiver City, Shiver Snowfield, Starborn Valley, Shiver Mountain and the Crystal Palace approach. The Shiver Mountain Super Block is in the second screen after the snowman entrance, up the path at the top. Use the Ultra Boots for Tornado Jump blocks and ice obstacles, then finish the northern Star Piece sweep before entering the final Star Haven and Bowser’s Castle sequence.
- Reach the deeper Toad Town Tunnels route during the Chapter 7 approach.
- Obtain the Ultra Boots from the tunnel chest.
- Open the later blue-door route after the required Merlon’s-house event.
- Activate the icy Toad Town Tunnels block.
- Activate the Shiver Mountain block before leaving the northern region.
Track Star Pieces and required key items separately
Search Star Pieces in three categories: visible field pickups, hidden panels or blocks, and NPC or activity rewards. Chuck Quizmo’s quizzes, Koopa Koot’s favors, letters, Club 64, Merlow’s exchanges and other trades should each have their own checklist line. If you want the broadest practical completion target, record all 64 Chuck Quizmo rewards and all 160 Star Pieces, but do not use the current Star Piece inventory as proof because Merlow purchases reduce it.
The main progression items include the Fortress Keys in Koopa Bros. Fortress; the Pulse Stone, Ruins Keys and three stone items in Dry Dry Ruins; the mansion and castle keys in Chapter 3; the Storeroom Key and Toy Train in Chapter 4; the Volcano Vase exchange that produces the fourth Magical Seed; the Magical Bean, Fertile Soil and Miracle Water in Chapter 6; and the Star Stone plus Crystal Palace keys in Chapter 7. Bowser’s Castle supplies its own internal keys as Mario advances.
The Ultra Stone is optional for reaching the ending but required for fully upgrading every partner. Letters, recipes, most badges, the Artifact, quiz participation and ordinary NPC trades are optional unless included in your personal completion definition. Save before beginning the final approach and keep the completed file separate from any new playthrough.
- Maintain a written 160-Star-Piece record, including spent rewards.
- Track quiz, letter, recipe, favor and NPC rewards separately.
- Confirm every required key item has been used at its intended gate.
- Verify all 16 Super Blocks and both ranks of every partner.
- Complete cleanup before committing to the final Star Haven and Bowser’s Castle run.
Before you move on
- The written checklist records all 160 obtainable Star Pieces, including hidden, NPC, quiz and sidequest rewards later spent at Merlow.
- All 16 Super Blocks have been activated, with every partner receiving Super Rank and Ultra Rank upgrades after Mario obtains the Ultra Stone.
- The four Magical Seeds were delivered to Minh T., Flower Fields was opened, and the Magical Bean, Fertile Soil and Miracle Water were used for the Chapter 6 beanstalk route.
- The Ultra Hammer was collected in Mt. Lavalava, and the Ultra Boots were collected later in Toad Town Tunnels during the Chapter 7 approach.
- The icy Toad Town Tunnels block and Shiver Mountain block were included in the late northern sweep.
- All required chapter keys and puzzle items have been used, all seven Star Spirits are rescued, and no ordinary-world story gate remains unresolved before the final approach.
- A separate save preserves the completed campaign and collectible checklist.
References for this chapter
- Paper Mario — Nintendo 64 Official Manual (English PDF)
- Super Block — Super Mario Wiki
- Toad Town Tunnels — Super Mario Wiki
- Ultra Boots — Super Mario Wiki
- Dry Dry Ruins — Super Mario Wiki
- Shiver Mountain — Super Mario Wiki
- Paper Mario — Super Mario Wiki
- Paper Mario 64 Star Piece Locations — Mario Party Legacy
- Paper Mario — Nintendo 64 Guide and Walkthrough
Final Cleanup — Endgame Checklist and 100% Preparation
Use Mario’s house blackboard for the categories it actually records, then maintain a separate written checklist for side quests, upgrades and other optional goals. Finish the remaining Star Pieces, badges, recipes, quizzes and errands before preserving a cleanup save. Because the original Nintendo 64 game does not place Mario into a normal free-roaming postgame after the ending, keep the completed cleanup file separate from any late Bowser’s Castle replay save.
1. Inspect the house records and create two save points
Return to Mario’s house in Toad Town and inspect the blackboard. Record every category and number that the board currently displays, including Badges Collected, Star Pieces Collected, Tayce T.’s Recipes, Chuck Quizmo’s quiz statistic and the battle statistics shown on your file. Do not treat the board as a universal completion tracker: it does not replace a written record of letters, Koopa Koot favors, Super Blocks, partner upgrades, Dojo progress, permanent key items or every optional errand.
The file-selection screen separately shows Mario’s current level, rescued Star Spirits, file name and time played. These are file details, not a final-completion checklist. Write down the blackboard totals and maintain a separate checklist for everything the board does not confirm.
Save in Toad Town before beginning the cleanup sweep. Keep this file untouched as your permanent pre-final cleanup file. If you later want a replay point immediately before the final confrontation, make a second save at a late Bowser’s Castle Save Block rather than overwriting the cleanup file.
- Record every blackboard category and its current value.
- Write down the separate goals that the board does not track.
- Keep an untouched pre-final cleanup save.
- Use a second file for a late Bowser’s Castle replay point if desired.
2. Clear Toad Town, the tunnels and available intermission tasks
Start in Toad Town. Check Mario’s Mailbox, Tayce T.’s kitchen, Rowf’s Badge Shop, the Toad Town Dojo, the harbor and the Toad Town Tunnels. Visit Merlow at Shooting Star Summit to exchange Star Pieces for badges, but compare your purchases with your written Star Piece and badge lists before spending everything.
Unlock and use the three blue Warp Pipes in the Toad Town Tunnels when possible. The efficient route to Goomba Village, Koopa Village and Dry Dry Outpost requires the Super Hammer and the defeat of Electro Blooper. These pipes are especially valuable for Chuck Quizmo, Koopa Koot errands and letter deliveries.
Find Rip Cheato in the deeper Toad Town Tunnels and complete his purchases when you have enough coins. Check Rowf and Merlow again after later chapters, because not every shop opportunity is available at the beginning. Peach’s Castle is controlled by story intermissions, so complete any available intermission objective when it appears rather than assuming the castle will remain freely accessible after the credits.
- Check the mailbox and record undelivered letters.
- Visit Rowf, Merlow, the Dojo and the Toad Town Tunnels.
- Unlock the three blue regional pipes when the Super Hammer and Electro Blooper conditions are met.
- Check Rip Cheato’s stock and leave enough resources for pending trades.
3. Complete the letter chain and Club 64 music quest
Use Parakarry to deliver every letter still waiting in Mario’s Mailbox. Recipients are spread across the Mushroom Kingdom, so combine each delivery with the regional sweep instead of making isolated trips. Some letters become available only after story progress or after another letter has been delivered. After every delivery, check the mailbox again and update your written list.
For the Club 64 quest, speak with the Master Poet and Pop Diva in Toad Town Harbor. Take the Lyrics to the composer in Dry Dry Outpost, receive the Melody, and return it to the Master Poet at Club 64. The completed performance awards the Attack FX D badge. This badge is optional for the main campaign but belongs on a full badge checklist.
- Deliver every available letter with Parakarry.
- Record Star Pieces received from the letter chain.
- Complete the Lyrics and Melody exchange between Toad Town and Dry Dry Outpost.
- Return the Melody to Club 64 and confirm Attack FX D is in the inventory.
4. Finish Chuck Quizmo, Koopa Koot and cooking
Find Chuck Quizmo throughout the towns and answer all 64 questions correctly. A correct answer awards a Star Piece. The questions appear in a fixed order, but later questions are locked until story progress advances; the available groups progress through the chapters, ending with the final four after Chapter 7. If you answer incorrectly, the same question remains unfinished, so maintain a separate 1-to-64 checklist rather than relying only on the blackboard’s displayed quiz statistic.
Use the three blue Tunnel pipes to rotate among Goomba Village, Koopa Village and Dry Dry Outpost while looking for Chuck. This minimizes travel once the shortcuts are open. In Koopa Village, speak with Koopa Koot and complete every remaining favor. His errands may require items, payments, travel or conversations with named characters, so combine them with your letter and Star Piece route.
Cook every recipe at Tayce T.’s kitchen. Keep ingredients that are needed for uncompleted recipes and record each successful recipe immediately. Continue until the blackboard shows 50 out of 50 recipes if pursuing the full record.
- Complete all 64 Chuck Quizmo questions correctly.
- Track quiz numbers separately from the blackboard statistic.
- Finish every Koopa Koot favor and record each reward.
- Cook until Tayce T.’s record reaches 50 out of 50.
5. Sweep the world for Star Pieces and optional rewards
Sweep in a fixed regional order: Goomba Village and Goomba Road; Pleasant Path and Koopa Village; Mt. Rugged, Dry Dry Outpost and Dry Dry Desert; Forever Forest, Boo’s Mansion and Gusty Gulch; Toad Town Harbor and Shy Guy’s Toy Box; Lavalava Island, Yoshi’s Village and Jade Jungle; Flower Fields; then Shiver City, Shiver Snowfield, Starborn Valley and the Crystal Palace approach. Use unlocked Warp Pipes between major regions.
In each screen, inspect visible question blocks, treasure chests, suspicious floor panels, high ledges and areas behind scenery. Revisit locations after obtaining stronger boots, hammer upgrades or later partners. Use Bombette on cracked walls, Parakarry across gaps, Sushie on water, Lakilester over lava or difficult ground, Watt in dark areas and Bow for transparent passages. Use I Spy while searching if you have it, then restore your preferred battle badges.
The original game contains 160 Star Pieces. The total includes the 64 quiz rewards, Koopa Koot rewards, letter rewards, field pickups, NPC rewards and other sources. Record each pickup by location and compare the result with Mario’s house only after the sweep is complete.
- Revisit all chapter hubs and connected approach areas.
- Use later boots, hammer upgrades and partner abilities on earlier blocked routes.
- Record every Star Piece by location.
- Reach 160 out of 160 Star Pieces for the full collectible target.
6. Complete badges, Super Blocks and upgrades
Compare the badge inventory with a complete original N64 badge list. Collect badges from shops, Star Piece exchanges, chests, question blocks, enemies, hidden rooms and side quests. Merlow’s exchanges require Star Pieces, while Rowf and Rip Cheato require coins or other conditions. Do not assume that collecting every unique badge name is enough: use the game’s displayed badge total as the final badge check.
Find every Super Block and activate it to upgrade partners. Revisit early areas after later field abilities become available, because some blocks are inaccessible on the first visit. Record every upgraded partner separately. Also record Dojo progress, permanent key items, letters and other objectives that are not fully represented on the blackboard.
After the search, remove utility badges that are not needed for the final fight and restore a battle setup that fits your preferred damage, FP management and defense plan.
- Reach 80 out of 80 badges if pursuing the full badge record.
- Activate every Super Block.
- Fully upgrade every partner.
- Record Dojo progress, permanent key items and other non-blackboard goals.
- Restore the intended final battle badge layout.
7. Preserve the cleanup file and finish Bowser
Before committing to the final route, heal at a Toad House or Heart Block, cook or buy dependable HP and FP recovery, clear unnecessary inventory clutter and verify the written checklist. Confirm the seven Star Spirits are rescued and that all optional objectives you personally count toward completion are finished.
Enter Bowser’s Castle and complete the required rooms and encounters. Save at a late castle Save Block only on a separate replay file if you want one. Continue through the final confrontation, rescue sequence, fireworks and credits. The ending confirms campaign completion, but it does not turn the original game into a normal post-credit free-roaming state.
After the credits, reload the pre-final cleanup file if you need to inspect the blackboard, finish an omitted side quest or replay the final route. Preserve the cleanup file even if you later create a file intended only for the completed campaign ending.
- Verify the written cleanup checklist before entering the final route.
- Keep the permanent cleanup save separate from any final-battle replay save.
- Heal and prepare HP, FP, items and badges.
- Defeat Bowser and watch the ending and credits.
- Reload the cleanup file for any later optional work.
Before you move on
- Mario’s house shows 80 out of 80 badges, 160 out of 160 Star Pieces and 50 out of 50 recipes if pursuing the full collectible record.
- A separate checklist confirms all 64 Chuck Quizmo questions were answered correctly.
- All intended letters and Koopa Koot favors are complete, the Club 64 music quest awarded Attack FX D, and all partners were upgraded.
- All intended Super Blocks were activated, remaining shop and field badges were collected, and Dojo progress and permanent key items were recorded separately.
- The file-selection screen confirms the rescued Star Spirits, while the ending and credits confirm the main campaign was completed.
- A separate pre-final cleanup save remains available because the original game does not create a conventional completed postgame file.
References for this chapter
Finishing up
The main campaign is complete when Bowser is defeated, the Star Rod is restored, the rescue sequence and ending have played, and the credits have finished.
The campaign rescues seven Star Spirits: Eldstar, Mamar, Skolar, Muskular, Misstar, Klevar and Kalmar. Chapter 8 does not rescue an additional Star Spirit.
For optional cleanup, track each goal separately: Star Pieces, badges, recipes, Chuck Quizmo rewards, letters, Koopa Koot favors, Super Blocks, partner upgrades and other sidequests.
Because the original game does not provide a normal free-roaming post-ending state, keep a pre-final-battle or pre-Star-Way save for any unfinished optional work.
Choose your next gameScreenshots & video
Game imagery for reference. Follow the written chapters above for the route and strategies.
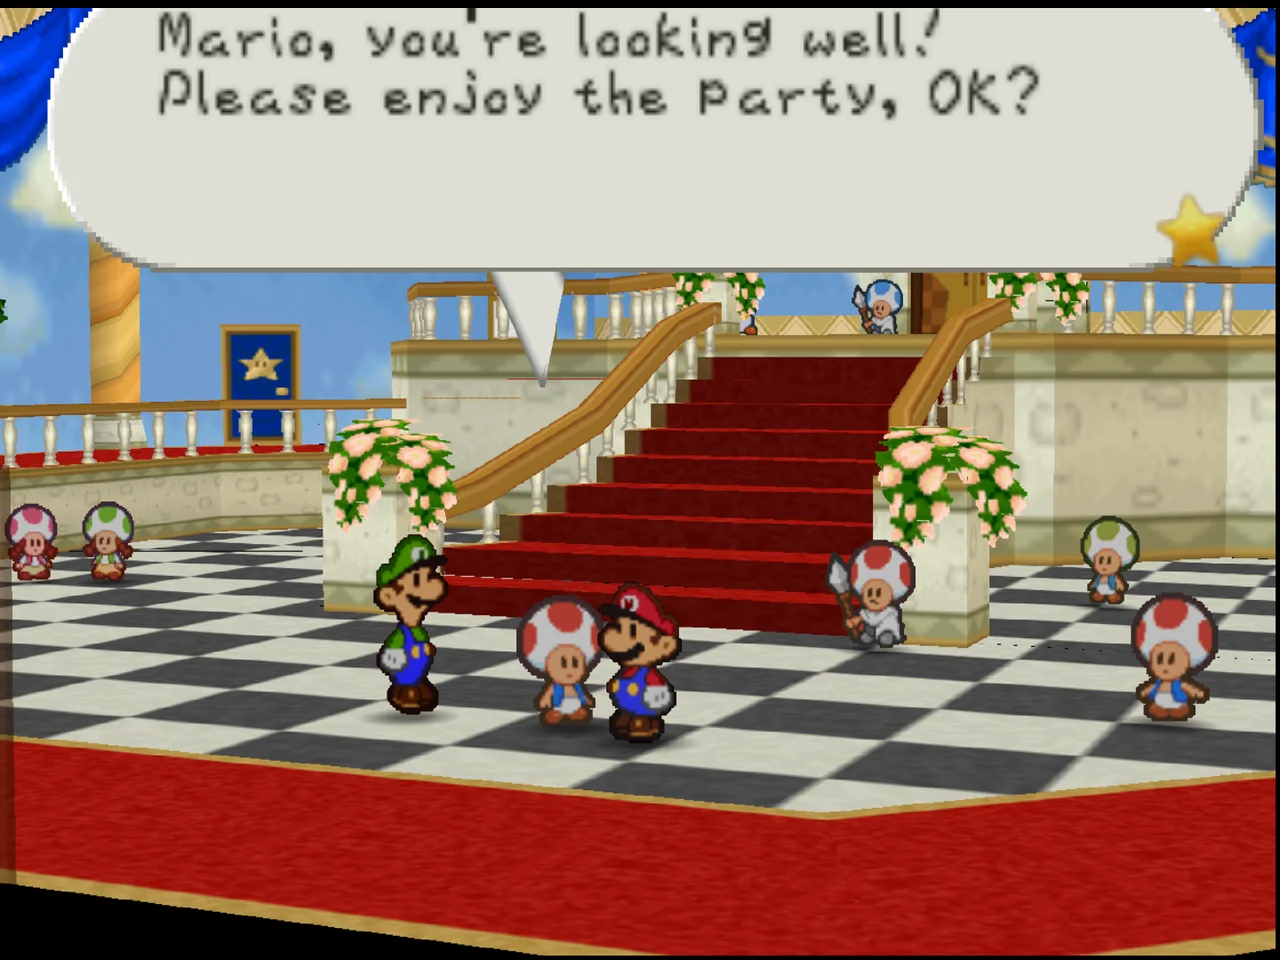
Sources & references
Our original guide draws on the references below. Check the edition at the top of this page before following controls or unlock requirements.
- Paper Mario — Nintendo 64 Official Manual (English PDF)
- Prologue – Paper Mario 64 Walkthrough
- Prologue - Paper Mario Walkthrough & Guide
- Goomba Road - Paper Mario Walkthrough & Guide
- Paper Mario/Prologue: A Plea from the Stars
- Fuzzy Crisis in Koopa Village — Paper Mario Walkthrough and Guide
- Koopa Bros. Fortress — Paper Mario Walkthrough and Guide
- Paper Mario — Guide and Walkthrough, Nintendo 64
- Paper Mario/Chapter 1: Storming Koopa Bros. Fortress — StrategyWiki
- Dry Dry Ruins — Paper Mario Walkthrough & Guide — GameFAQs
- Paper Mario Walkthrough — RPGClassics Shrine
- Dry Dry Ruins — Super Mario Wiki
- Paper Mario Nintendo 64 Complete Guide
- Chapter 3 - Paper Mario 64 Walkthrough
- Forever Forest - Paper Mario Walkthrough & Guide
- Tubba Blubba's Secret - Paper Mario Walkthrough & Guide
- Paper Mario - Guide and Walkthrough - Nintendo 64 - By Kirby021591
- Chapter 4 – Paper Mario 64 Walkthrough
- Paper Mario - Guide and Walkthrough - Nintendo 64 - By Emperor-Justinian-I
- Chapter 5 - Paper Mario 64 Walkthrough
- Chapter 5 - Paper Mario Walkthrough & Guide - GameFAQs
- Lavalava Island - Paper Mario Walkthrough & Guide - GameFAQs
- Mt. Lavalava - Paper Mario Walkthrough & Guide - GameFAQs
- Paper Mario - Guide and Walkthrough - Nintendo 64 - By TDog - GameFAQs
- Chapter 6: Dark Days in Flower Fields — Paper Mario Walkthrough & Guide
- Chapter 6 — Paper Mario 64 Walkthrough
- Paper Mario FAQ/Walkthrough
- Paper Mario Nintendo 64 Walkthrough — Chapter 6
- Chapter 7 - Paper Mario 64 Walkthrough
- Crystal Palace - Paper Mario Walkthrough & Guide
- Shiver Mountain - Paper Mario Walkthrough & Guide
- Paper Mario Chapter 7: A Star Spirit on Ice - StrategyWiki
- Toad Town Tunnels — Super Mario Wiki
- Paper Mario/Chapter 8: A Star-Powered Showdown — StrategyWiki
- Chapter 8: A Star-Powered Showdown — Paper Mario Walkthrough & Guide
- Paper Mario Walkthrough — Chapter 8 Final Section
- Partners and Attack Moves — Paper Mario 64 Walkthrough
- Badge List and Locations — Paper Mario 64 Walkthrough
- Paper Mario 64 Walkthrough — Super Blocks and Partner Upgrades
- Paper Mario — GameFAQs Guide and Walkthrough
- Paper Mario — Super Mario Wiki reference
- Quick Change — Super Mario Wiki reference
- Super Block — Super Mario Wiki
- Ultra Boots — Super Mario Wiki
- Shiver Mountain — Super Mario Wiki
- Paper Mario — Super Mario Wiki
- Paper Mario 64 Star Piece Locations — Mario Party Legacy
- Paper Mario — Nintendo 64 Guide and Walkthrough
- Catching Up on Side Quests 1 — Paper Mario Walkthrough & Guide
- Chuck Quizmo Guide — Paper Mario Walkthrough & Guide
- Paper Mario 64 Walkthrough — Chapter 8 and Ending
About the game & collecting notes
- Platform
- Nintendo 64
Step-by-step campaign walkthrough for the original Nintendo 64 edition of Paper Mario (USA). This guide leads you through the prologue, every chapter to the final Bowser showdown, and provides practical preparation, partner/badge guidance, and a final-cleanup checklist so you can finish the main story reliably and prepare for 100% completion.
Darryl Polo
Darryl Polo loves tinkering with emulation and revisiting retro games. He enjoys exploring how old favorites play on different setups and sharing what he learns along the way. At Joking Joystick, he writes about the games, hardware, and small discoveries that keep the hobby fun.
Our editorial standardsFound a step that needs another look? Help us improve this guide.