Metroid NES Walkthrough: First Clear Route to Mother Brain
Use this route to finish the original North American NES cartridge-style edition of Metroid without sequence breaks or full item cleanup. You will build a dependable loadout in Brinstar and Norfair, defeat Ridley first and the real Kraid second, then enter Tourian with Ice Beam and enough loaded missiles to clear Metroids, Mother Brain and the escape.

Find a copy
Metroid Nintendo Entertainment System
We may earn a commission if you buy through these links, at no extra cost to you. As an Amazon Associate I earn from qualifying purchases.
Opens retailer search results. Check the model, edition, seller, availability and current price before buying.
Before you begin
This walkthrough is for the original North American NES release of Metroid, the password-based version with no in-game map, no save stations and none of the later remake abilities. You will follow a safety-first route through Brinstar, Norfair, Ridley, Kraid, Tourian and the final escape while avoiding advanced tricks that a first clear does not need.
You should navigate by room shape, door side, ledge height, elevators and hidden-block landmarks rather than by color alone. Optional detours are separated from required progress, especially the Wave Beam swap, and the late game assumes you reach Tourian with Ice Beam equipped, a strong current missile stock and enough health to recover from mistakes.
Set yourself up for the run
Keep paper notes or your own simple map. Mark elevators, red doors, bomb floors, fake floors and item rooms as you find them.
Write every 24-character password exactly as shown, including punctuation and letter case. A continue is for recovery, not a full heal.
Practice the core controls early: A jumps, B fires the beam or selected missiles, Select swaps beam and missiles, Start pauses, Up aims upward, and Down activates Morph Ball after you collect it.
Treat missile capacity and loaded missiles as different resources. Before bosses and Tourian, refill your current stock instead of relying on maximum capacity alone.
Farm weak enemies near a restart point when you need health or missiles. Early Brinstar enemies are safer refill targets than pressing deeper while nearly empty.
Use host-system suspend points only as a convenience if your platform offers them. The route itself assumes the original NES rules, item behavior and password progression.
Keep Ice Beam for the main route once you claim it in Norfair. If you choose the optional Wave Beam detour later, follow the explicit Ice Beam reacquisition route before entering Tourian.
This guide deliberately sends you to Ridley before Kraid. Both boss orders can work, but the rest of the route and recovery advice assume that order.
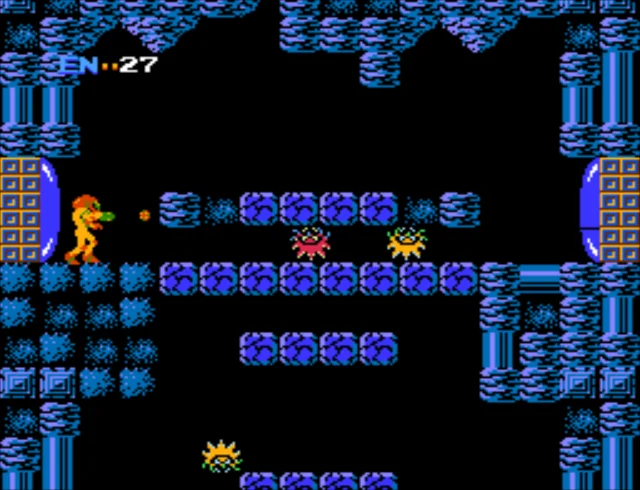
Prepare for the original NES adventure
This guide covers the original North American Nintendo Entertainment System release of Metroid, the 1987 password-based version, not the 1986 Famicom Disk System release and not a later remake or revised mission layout. The route ahead is built for an ordinary new game that records progress with passwords, then develops Brinstar and Norfair in a controlled order before tackling Ridley, the real Kraid, Tourian, Mother Brain, and the escape.
Confirm the controller before you leave the first room
On the NES pad, A is jump, B fires your current attack, Select switches between your normal beam and missiles once missiles have been found, and Start pauses the game. While standing, hold Up to shoot straight above Samus. After you collect the Morph Ball, press Down to curl into ball form, and press B while rolled up to place Bombs after that upgrade is found.
Two different jumps matter from the start. A jump from a standstill is a straight vertical leap for tight ledges and careful landings. A jump while moving produces the spinning somersault, and later Screw Attack only works during that moving spin. Do not expect later-series mobility here: Samus cannot crouch-shoot, cannot aim diagonally, and cannot open an equipment screen to toggle beams. Ice Beam and Wave Beam replace each other when picked up.
- A jumps.
- B fires the beam, or missiles after Select switches weapons.
- Start pauses.
- Up aims straight upward only while standing.
- Down becomes Morph Ball after you have that item.
Treat passwords as your save file
When the game is over, the NES version displays a 24-character password that restores your progress and abilities when entered correctly. Record every character exactly, including upper and lower case and any punctuation. On the password screen, move the cursor with the pad, press A to enter a character, use B to back up over mistakes, and press Start only after checking the whole string against your notes.
Write the code in the same grouped shape you see on screen instead of copying a long uninterrupted line. That makes transcription errors easier to catch. Keep one original copy and one checked copy if you are writing by hand. This game does not use modern save slots inside Zebes, so careful password handling is part of basic survival, not optional bookkeeping.
A Continue or password restart is a recovery point, not a free full heal. In the NES password version, players resume with a light energy reserve rather than full energy, so do not step back into dangerous rooms as if the game just topped you off. Plan to rebuild health and loaded missiles before pushing deeper.
- Copy all 24 characters exactly.
- Preserve case and punctuation.
- Use B to erase an entry mistake.
- Press Start only after a full recheck.
Farm safely after any restart
After a Continue or password load, stay near a door and clear simple enemies in a short loop until you have workable health and enough missiles to open the next red door. Early Brinstar is the best place to learn this habit because weak enemies respawn quickly when you step through a doorway and return. The aim is not to leave at full strength every time. The aim is to avoid entering the next hidden passage search almost empty.
Remember the difference between capacity and loaded ammo. A Missile Tank raises your maximum by five, but a restart does not guarantee that your current stock is full. If a farming loop turns sloppy, cross the nearest door, reset the room, and restart the loop instead of forcing contact damage in a cramped corridor. That same discipline matters even more before Ridley, Kraid, and Tourian.
- Farm near a room transition so you can reset enemies safely.
- Leave with enough loaded missiles to open the next red door.
- Rebuild to a usable health buffer before testing hidden passages.
Make a personal map that is actually useful
Nintendo’s own manual material for the original game tells players to make a map, and that advice is still essential here because Metroid has no in-game automap. Do not label rooms by color alone. Instead, note door side and door height, elevator rooms, visible item statues, bombable walls, false floors, tight Morph Ball tunnels, and any damaging liquid that looked suspicious on first contact.
For vertical shafts, always mark both the side and the height of each exit. A note such as left door high, right door mid, elevator bottom is far more useful than blue shaft. Also mark whether a pickup is already collected or deliberately being left in place as a refill for a later return. That habit prevents wasteful backtracking and makes password recoveries less confusing.
- Mark door side and height.
- Mark elevators, false floors, and bombable walls.
- Mark pickups as collected or saved for refill.
Know the route order and why this guide uses it
The checkpoint sequence for this walkthrough is early Brinstar setup, eastern Brinstar Bombs and an Energy Tank, Norfair entry, High Jump, Norfair Ice Beam and upper missiles, Screw Attack, then a return to Brinstar for Varia and more health. From there the guide descends to Ridley first, comes back out, clears the real Kraid second, opens the statue bridge, and finishes with Tourian, Mother Brain, and the escape.
Ridley comes before Kraid in this printed route because Norfair’s upgrade path naturally builds into High Jump, Ice Beam, Screw Attack, and Varia before the first boss chapter, and Ridley’s victory adds a large missile-capacity increase that makes the Kraid half and the Tourian preparation more forgiving. That is a route choice for reliability, not a claim that Kraid is impossible earlier.
Recommended equipment for this guide includes Long Beam, Bombs, High Jump, Varia, Screw Attack, Ice Beam, and several expansions because they make navigation and boss recovery much steadier. Mandatory for reaching the ending are defeating the real Ridley, defeating the real Kraid, and entering Tourian with Ice Beam rather than Wave Beam. Optional cleanup later is comfort, not a requirement to see the credits.
- Route order: Brinstar setup, Norfair mobility, Ridley, real Kraid, then Tourian.
- Ridley first is the safer editorial route here, not the only possible boss order.
- Do not replace Ice Beam with Wave Beam before Tourian.
Leave this chapter ready to play, not just informed
You are ready for the next chapter when the controller no longer surprises you, your password routine is dependable, and your notes can distinguish similar rooms by exits and landmarks instead of vague memory. From here the guide will assume you can tell a top-left branch from a mid-right connector and that you will stop to restock instead of pushing onward on fumes.
Next comes the opening Brinstar route to the Morph Ball, the first Missile Tank, and the Long Beam. Do not worry about full collection or fast-ending rewards yet. The immediate goal is a stable first clear on the original North American NES password edition.
- You know the full control scheme, including Up aiming and Down Morph Ball after pickup.
- You can copy and re-enter passwords safely.
- You understand the Ridley-first route order used by the rest of this guide.
Before you move on
- You can state the controller functions without guessing, including A jump, B fire, Select switching, Start pause, Up aiming, and Down Morph Ball after pickup.
- You have a reliable method to record a 24-character password with exact case and punctuation and re-enter it using A, B, and Start correctly.
- You know the broad campaign order this guide will follow and why it chooses Ridley before Kraid.
- You are ready to map rooms by exits, elevators, blocked passages, hidden routes, and pickups instead of relying on color memory.
References for this chapter
- Metroid original NES instruction booklet
- Metroid Dread Report Vol. 3: Seven points that define the 2D saga
- Metroid Map Selection - Labeled Maps - Nintendo NES
- Walkthrough - Metroid (Metroid Recon)
- Readable transcription of the same original manual.
- Metroid Cheats, Codes, and Secrets for NES
- List of Metroid passwords | Wikitroid | Fandom
Get the Morph Ball, first missiles and Long Beam
This opening route is for the original North American NES Metroid release with the password system, not the 1986 Famicom Disk System version or a later remake. In this chapter you make one compact Brinstar loop: go left from the start to claim the Morph Ball, return east through the low tunnel, use the first tall blue shaft to reach the second tall orange shaft, drop to the orange shaft’s lower-right corridor for the first Missile Tank, then double back to the blue shaft and open the Long Beam room with those same five missiles. Finish back near the connector between the two tall shafts so the next chapter can continue cleanly into eastern Brinstar.
Go left from the start for the Morph Ball
Samus begins in a horizontal western Brinstar room with rough rocky rises in the floor. Your first move is left, not right. Jump over the uneven ground and keep going until you reach the dead-end item chamber on the western side. The item here is the Morph Ball, called Maru Mari in the original manual, and it is mandatory because the route back immediately passes through a one-tile-high tunnel that standing Samus cannot cross.
After taking the Morph Ball, face right and press Down to curl up. Roll back through the low passage under the rocky obstruction and continue right to retrace the starting corridor. This is the intended early loop: the west room gives you the form needed to leave it efficiently, and there is no reason to linger once the item is yours.
Pass back through the first door and enter the room with the collapsing floor. Treat this room as a landmark only. Run or jump across the crumbling blocks from left to right and leave through the right-hand door. If you fall through by mistake, jump back up and cross again, but do not continue downward into the early Kraid-side routes yet.
- Morph Ball collected from the western dead end
- Returned east by rolling through the low tunnel
- Crossed the early collapsing-floor room without exploring downward
Use the blue shaft to reach the orange shaft and the first missiles
Beyond the collapsing-floor room is a long horizontal passage that leads to your first major vertical landmark. When you enter the next big room, you are in the first tall blue shaft. This is the earlier of the two large shafts in this chapter and it is the one you will return to for Long Beam.
Climb only partway up this blue shaft. The route you want now is the first door you encounter on the right wall. Go through it, cross the short connector corridor, and you will emerge in the second major landmark: a tall orange shaft. The easiest way to keep them straight is their order and function. The blue shaft comes first and later leads to Long Beam. The orange shaft sits immediately east of it and leads down to your first Missile Tank.
Once you are in the orange shaft, do not waste time testing the upper exits. Drop straight down through the shaft until you reach the lowest door on the right side. That bottom-right door leads to the first missile corridor, and this chapter does not need any other branch from the orange shaft yet.
- Reached the first tall blue shaft after the long corridor
- Used the first right-side door from the blue shaft
- Entered the orange shaft and descended to its lowest right exit
Take the first Missile Tank and loop back to the blue shaft
Go through the orange shaft’s lower-right door and follow the horizontal corridor all the way to the end. The first Missile Tank is waiting at the far side. In original NES Metroid, each Missile Tank adds 5 to your maximum missiles, not 10, so this pickup gives you a 5-missile capacity.
That exact 5-missile load is the reason for getting the tank now. The next required item is behind a red door, and opening that door costs all five of your current missiles. As soon as the tank is collected, turn around and retrace the same corridor back to the orange shaft instead of hunting for another branch here.
Climb the orange shaft back up to the left-side door that returns to the narrow connector. Go through that connector to re-enter the blue shaft. If you keep the landmarks in mind, the loop is simple: blue shaft to orange shaft, bottom-right missile corridor, then back to the same connector and the blue shaft again.
- First Missile Tank collected from the orange shaft’s lower-right corridor
- Missile capacity raised by 5
- Returned through the connector to the blue shaft
Climb for the Long Beam, spend all five missiles, then refill nearby
Back in the blue shaft, start climbing higher than before and watch the left wall. The Long Beam route is on the left side of this shaft, but it is not the very highest left exit. If you climb all the way to the topmost upper-left branch, you have gone too far toward the later statue and Tourian side. Use the upper-left door below that highest branch instead.
Cross the corridor beyond that left door. At the far end is a red door. Fire all five of your missiles into it to open the room. If you accidentally spent missiles on enemies or a wrong door earlier, back out and defeat nearby enemies in the shaft or corridor until a missile drop restores you to five loaded missiles, then return and open the red door.
Inside is the Long Beam. Pick it up and leave the item room. With Long Beam equipped, your normal beam now travels the full practical length of the room instead of fading quickly, which makes the next Brinstar corridors much easier to control from safer distance.
Because the red door consumed your entire current missile supply, pause for a moment outside the item room and farm nearby enemies until you recover at least some missiles and health. Then head back right into the blue shaft and descend to the connector that links the blue shaft to the orange shaft. This is the clean handoff point for the next chapter because it leaves the starting area behind while positioning Samus beside the eastern Brinstar routes you will use next.
- Used the correct upper-left blue-shaft branch for Long Beam
- Opened the red door with exactly five missiles
- Collected the Long Beam
- Refilled at least part of your missiles or health from nearby enemy drops
- Returned to the connector area between the blue and orange shafts
Before you move on
- Morph Ball is collected and Samus can use low passages.
- The first Missile Tank has been taken from the orange shaft’s lower-right corridor, giving a 5-missile maximum.
- Long Beam has been collected from the red-door room reached from the blue shaft’s upper-left branch below the highest left exit.
- Samus has returned to the connector area between the blue and orange shafts with at least some missiles or health recovered from local enemy drops.
Cross eastern Brinstar for Bombs and an Energy Tank
From the orange vertical shaft you reached after the first tall blue shaft, use the middle-right door to clear the eastern Brinstar loop. This chapter gives you Bombs and the obvious Energy Tank on that route, then sends you all the way back to the orange shaft so you can descend to the Norfair elevator without detouring into Brinstar's concealed Ice Beam chamber. Nothing here requires High Jump or any awkward escape trick if you follow the upper route, open only the required red door, and keep the hidden lower passage for later.
Leave the orange shaft by the middle-right door
Start in the tall orange shaft, not the earlier blue shaft with the crumbling-floor room and the Long Beam branch. You should be standing near the orange shaft's middle height, entering from the left connector that leads back toward the blue shaft. Take the door directly opposite that connector on the right side. That is the correct branch for eastern Brinstar.
The next stretch is a series of long horizontal rooms with ledges, enemies approaching from the air and floor, and liquid running below much of the route. In this part of Brinstar, treat the liquid as damaging. Stay on the platforms and upper ledges whenever they are available. Use the Long Beam to clear pests before long jumps so you do not get knocked off into the hazard below.
Keep moving right through these long rooms. Do not drop through floors or start bombing every suspicious corner yet. Your immediate landmark is the plainly visible Energy Tank sitting on the main route ahead, not hidden behind a side puzzle.
- Begin at the orange shaft's middle-right exit.
- Stay on the upper ledges through the long eastern corridors.
- Treat the visible liquid on this route as harmful, not safe flooring.
Take the visible Energy Tank and continue to the far eastern shaft
When you reach the room with the obvious Energy Tank, collect it on the spot. This is the early Brinstar tank placed directly on the route to Bombs, so there is no reason to save it for later. The extra reserve helps immediately, because the next few rooms still punish missed jumps and enemy collisions.
After taking the tank, continue right. The route still runs through more horizontal ground before ending at a vertical shaft on the far eastern side of this section of Brinstar. This shaft is your next major landmark. You are not looking for a lower hidden passage here. Climb upward.
As you ascend, watch the left wall for the branch you need. Enter the left-hand doorway higher up the shaft, cross the short corridor beyond it, and stop at the red door at the far end. Spend five missiles to open it and enter the statue room for Bombs.
- Pick up the visible Energy Tank on the main path.
- Continue right until the path ends at the far eastern vertical shaft.
- Climb the shaft and use the left-hand branch.
- Spend five missiles on the red door and enter the Bomb room.
Collect Bombs and learn how to use them safely
Take Bombs as soon as you enter the item room. Bombs only work in Morph Ball form. Press Down to curl up, then press B to drop a bomb at Samus's position. That makes Bombs your first reliable tool for opening hidden floors and walls, for damaging enemies at close range, and for nudging yourself through cramped one-tile spaces.
Use this pickup to build good habits right away. When a room seems to end too neatly, especially at a bottom corner, along a flat dead-end floor, or just beyond a low tunnel, test it in ball form instead of assuming the path is closed. Hidden breaks in Metroid are often a single destructible block rather than a giant obvious wall.
Do not mash bombs when you are trying to move through a short bombed tunnel or lift yourself out of a one-tile recess. Place one bomb, let the blast move Samus, then place the next after you settle. Panicked rapid drops make you bounce in place and lose control. This chapter does not require advanced bomb jumping, only steady ball-form bomb use and careful floor checking.
- Collect Bombs.
- Remember that Bombs can only be placed in Morph Ball form.
- Use Bombs to test dead-end floors and walls before assuming a room is blocked.
- Place bombs with rhythm rather than spamming them in tight spaces.
Return west and deliberately skip Brinstar's hidden Ice Beam chamber
Leave the Bomb room exactly the way you entered. Go back right from the statue room into the corridor, return to the eastern shaft, and descend. Then start retracing the long eastern Brinstar rooms to the left. Pass back through the visible Energy Tank room and continue left toward the orange shaft.
On this return trip you will pass the small connector room with a platform and enemies moving around the lower area. That room marks the hidden Brinstar Ice Beam route if you bomb into the floor and drop below. Do not take that route now. The concealed lower path leads to an alternate Ice Beam pickup and an awkward early way out that this printed route intentionally avoids.
This is also where you should distinguish a real secret from the ordinary hazardous liquid on the chapter's main path. The guide will call out verified safe false-lava passages later when they matter. For now, if you are standing in the eastern Brinstar corridors used for Bombs and the visible Energy Tank, keep assuming the liquid hurts and stay on the upper route until you are back at the orange shaft.
- Backtrack left from the Bomb room through the far eastern shaft.
- Pass the visible Energy Tank room again on the way west.
- Ignore the hidden lower Brinstar Ice Beam path in the small connector room.
- Return to the orange shaft without dropping into the concealed branch.
Descend to the Norfair elevator
Once you are back in the orange shaft, drop all the way to its bottom exit. Go through the bottom door into the same horizontal corridor where you collected the first Missile Tank earlier. This time, cross that corridor to the right instead of turning back after the pickup point.
At the far right end of that corridor, go through the next door to reach the elevator room to Norfair. This is the clean transition the route wants: Bombs collected, one early Energy Tank secured, and the alternate Brinstar Ice Beam chamber left for later so you do not need a tricky escape before High Jump exists.
Before riding down, recover a little if your current health is low. The Energy Tank increased your reserve, but it did not refill every mistake you made on the eastern loop. Farm nearby enemies until you feel stable, then take the elevator with enough current energy and at least a few missiles loaded for the next required red door.
- Descend the orange shaft to its bottom exit.
- Cross the first Missile Tank corridor to the right.
- Enter the room with the Norfair elevator.
- Top off some health from enemies if current energy is poor before descending.
Before you move on
- You collected Bombs and understand they are placed only in Morph Ball form.
- You picked up the visible eastern Brinstar Energy Tank on the main route.
- You returned west to the orange shaft without taking the concealed Brinstar Ice Beam branch.
- You descended from the orange shaft, crossed the first Missile Tank corridor to the right, and reached the Norfair elevator room.
References for this chapter
Enter Norfair and find the High Jump Boots
This chapter covers Samus's first working route through Norfair in the original North American NES Metroid. From the Brinstar elevator, you can take a short recommended western pickup loop for two Missile Tanks, then return to the entrance and push east into Norfair's main purple shaft. The important trick is that the shaft's first visible floor is not the true bottom. Bomb the lower right corner there to open the real continuation, take the first left door below it, and claim the High Jump Boots behind the red door. Finish by climbing back up and stopping in the upper part of the same shaft so the next chapter can start on Norfair's upper branches.
Ride down from Brinstar and mark the Norfair entrance room
Start at the Brinstar-to-Norfair elevator and ride down. At the bottom, Samus arrives in a room framed by the two statue-like creatures beside the shaft. Treat this room as your anchor for the whole area. The elevator is centered above, and the only exits you care about right now are the low left door and the low right door.
Nothing in this chapter requires the Varia Suit. Norfair is dangerous because of enemies, spikes, and lava floors, not because the room itself steadily drains energy the way later Metroid games use heated zones. If you take damage here, it is from contact, knockback, or bad footing, so slow platforming matters more than a special suit check.
If you entered Norfair with weak health, do not force the deep route immediately. The left side detour stays close to the entrance and gives extra missile capacity without committing you to lower Norfair. You can also use door transitions to calm enemy pressure while you collect drops.
- Recognize the Norfair entrance room by the central elevator and the two low side doors.
- Do not wait for Varia before using this route.
- Keep Bombs selected mentally even if missiles are active, because the main path depends on hidden blocks.
Recommended west detour for two nearby Missile Tanks
For the recommended detour, leave the entrance through the low left door. In the first long corridor, the first Missile Tank sits on a pedestal in plain view about halfway through. Take it, then keep moving left instead of turning back right immediately.
At the far left end of that same upper corridor, test the wall with Bombs. The hidden opening there leads into the next part of the loop. Drop down into the adjacent lower passage and move right through that lower branch to the second Missile Tank, which is also out in the open once you reach its corridor.
As soon as you have the second tank, reverse the same route instead of exploring farther. Go back left to the small shaft you used, climb back up through the bombed opening, then retrace the original upper corridor right to the Norfair entrance room. This keeps the detour bounded and safe: two pickups, same rooms back, no need to guess at deeper passages.
- Take the first western Missile Tank from the upper corridor left of the elevator room.
- Bomb the far-left wall of that corridor to reach the lower branch.
- Grab the second western Missile Tank, then backtrack to the entrance room before starting east.
Cross the east corridor to Norfair's first big shaft
From the entrance room, go through the low right door and cross the long lava corridor. This room is straightforward, but do not rush jumps just because the path is horizontal. Use the Long Beam to clear space before landing if enemies are crowding a platform, and favor controlled standing jumps when you need exact footing.
At the corridor's far end you reach the chapter's most important landmark: the tall purple shaft that runs both up and down. Remember this room. Upper Norfair branches come off its higher ledges, while the route to High Jump begins below. Many players think they have already reached the bottom the first time they descend it, but that first bottom is a false stop.
Drop carefully from ledge to ledge until you reach the floor that looks final. Before climbing away, move to the lower right corner and lay Bombs. That corner of the floor is breakable. Opening it reveals the shaft's real lower continuation.
- Take the low right door from the entrance room to begin the main route.
- Use the long lava hall as the lead-in to the tall purple shaft landmark.
- Bomb the lower right corner of the shaft's apparent floor to expose the real way down.
Take the first left door below the false floor and claim High Jump
Once the floor opens, drop through the new hole into the lower section of the purple shaft. Do not keep descending to scout every door. The clean route to the boots is immediate: use the first left door below the hidden opening.
That door leads to a corridor ending at a red door. Spend five missiles to open it, go inside, and touch the Chozo item to collect the High Jump Boots. This is the only required objective of the chapter's main route.
High Jump does exactly what its name says in this version: it increases Samus's jump height. It does not add new aiming options, let you crouch-shoot, or protect you from careless lava contact. What it does give you is more clearance for ledges and a much safer margin when climbing Norfair's shafts.
- Below the hidden floor opening, take the first left door and ignore deeper branches.
- Spend five missiles on the red door.
- Collect the High Jump Boots before resuming any broader Norfair search.
Climb out of the lower shaft and learn the room's real layout
As you leave the item room, take a moment to feel the new jump height in a safe corridor. A standing vertical jump is still the better tool for narrow landings, while a moving spin jump is what will later let Screw Attack work as offense. For now, use High Jump as extra control, not as an excuse to hurry.
Return to the lower part of the purple shaft and climb back upward. Some of the small blocks in this escape route regenerate. That is normal. If a reformed block cuts you off or you slip from a foothold, drop to the nearest safe ledge, shoot or bomb the obstruction open again, and retry with short jumps. The room is built to be reopened as you climb.
The layout you want to remember is simple but vital: upper shaft, visible floor that looks like the end, then the hidden lower-right opening, then the true lower shaft where the High Jump branch begins. Once that picture is clear in your head, later Norfair directions make much more sense.
- Test the new jump height without overcommitting to deeper rooms.
- Use bombs or shots to reopen regenerating blocks during the climb.
- Memorize the difference between the shaft's false bottom and its real lower section.
End in upper Norfair position for the next search
Climb until you are back above the false floor in the tall purple shaft. Stop in the upper half of this room instead of dropping back through the lower-right opening. The next chapter starts from the upper and middle branches of this same landmark, so this is the correct staging point.
Do not head farther down toward the routes that eventually lead to Ridley's side of Norfair. That is later. Right now, success means you entered Norfair, optionally strengthened your missiles on the west side, learned the false-bottom trick in the purple shaft, and left with High Jump while staying aligned with upper Norfair.
If your health or missiles are low after the return climb, use nearby enemies and short door resets for a modest refill before pushing on. The goal is not to max out here, only to avoid starting the next upper-Norfair item search nearly empty.
- Finish above the false floor in the main purple shaft.
- Do not continue deeper toward Ridley's lower routes yet.
- Top off enough health and missiles nearby to handle another red door and a few bad landings.
Before you move on
- You reached Norfair from the Brinstar elevator and identified the entrance room with the two low side doors.
- You optionally collected the two western Missile Tanks and returned safely to the entrance instead of drifting deeper west.
- You crossed the long east corridor to the tall purple shaft and bombed the lower right corner of its apparent floor.
- You used the first left door below that hidden opening, opened the red door, and collected the High Jump Boots.
- You climbed back to the upper half of the purple shaft and ended ready for upper Norfair rather than Ridley's lower route.
Take the Norfair Ice Beam and expand your ammunition
Continue from the main purple shaft after High Jump, or leave the High Jump room through its right door if you stopped there. Climb through the lower barrier and the separate upper concealed ceiling, then use the highest left corridor and its rear loop to reach Ice Beam without needing a frozen enemy first. Reverse that loop, collect the separate three-Missile dead end and lower two-Missile branch, and finish in the High Jump room with Ice equipped. These seven unique Missile Tanks add 35 capacity and provide ammunition; firing spends that stock, so check the HUD and collect enemy drops as needed.
Break back into the main shaft from High Jump
If you continued from the preceding chapter, you are already in Norfair's main far-right purple shaft above the lower breakable barrier; continue climbing from there. If you are starting inside the High Jump Boots room, exit through the right door to the hidden lower continuation of that same shaft and climb through the barrier as described next.
Immediately work upward instead of dropping deeper. The first obstacle is the lower breakable barrier above the High Jump pocket. Stand under it, fire upward to open the blocks, then use the extra height from High Jump and the regenerating footholds to keep climbing before the opening closes again. This lower barrier is not the same place as the upper concealed ceiling near the top of the shaft.
Once you are above that lower barrier, stay in the main shaft and keep climbing. As you rise, note the left-side landmarks in order: first the long lower corridor that holds a separate two-missile pair, then the corridor back toward the Norfair entrance elevator, then the normal front route to the Ice Beam room, and higher still the separate three-missile dead-end branch. Keep passing all of them for now. You want the apparent ceiling at the top of the shaft.
At that apparent top, move to the right side and shoot the ceiling blocks there. Use the same shoot, jump, and stand on regenerating blocks rhythm to rise into the hidden top section. This is the upper concealed ceiling, not the lower floor above High Jump. Once you are standing in the new top section, take the highest left door.
- Exit High Jump to the right
- Climb through the lower breakable barrier above the High Jump pocket
- Stay in the main far-right purple shaft and pass the lower two-missile branch, elevator corridor, front Ice entrance, and three-missile branch
- Shoot through the upper right-side ceiling blocks
- Use High Jump and regenerating blocks to enter the top section
- Take the highest left door
Clear the upper two-missile corridor and enter Ice from the rear
Travel west through the highest corridor. This is a through-route, not a dead end. Pick up the first Missile Tank as you move left, then continue through the same corridor and collect the second Missile Tank farther west. Count these only once even though you will cross this hallway again on the way back.
At the west end, do not stop at the wall. Bomb into the weak wall and keep crawling and bombing left through the orange-block connector beyond it. This passage leads to a separate short auxiliary vertical shaft west of the upper corridor. It is not the main Norfair shaft you just climbed.
Enter the blue door on the left to reach that auxiliary shaft. Descend it to the lower right door, then go right into the orange room at its base. In that orange room, bomb through the weak wall at the lower-right side and keep rolling right through the low hidden passage.
That crawlspace emerges under the Ice Beam statue room. Pop out from behind the statue, shoot the orb, and take Ice Beam. This is the intended pickup for this route. You do not need to open the front red missile door before collecting Ice, and you should not depend on freezing anything to get here because you had no Ice Beam until this moment.
After the pickup, test the beam on a safe enemy only once you are clear of the pedestal area. A frozen enemy can be used as a temporary platform, but another beam shot will unfreeze it, so do not keep firing at the same target while standing on it.
- Collect the two Missile Tanks in the highest westbound corridor
- Bomb through the weak wall at the corridor's west end
- Crawl left through the orange-block connector
- Enter the blue door into the short auxiliary shaft
- Descend and take the lower right door
- Bomb through the lower-right weak wall in the orange room
- Use the rear passage under the statue to enter the Ice Beam room
- Collect Ice Beam before worrying about the front red door
- Confirm that Ice now freezes a normal enemy
Reverse the rear loop and sweep the three-missile dead end
Leave the Ice room the same way you entered it. Roll left back under the statue, reverse the bombed wall in the orange room, and return left to the auxiliary shaft.
Climb the auxiliary shaft and take its upper right door. This sends you east through the same upper corridor where you already collected the two missile tanks. Cross it as a transit room only. Do not add those tanks a second time.
Back in the main shaft's hidden top section, drop to the upper floor and bomb or shoot through the right side so Samus can descend below that upper cap. The first left door immediately below this upper cap is the three-missile branch. Take it now.
Sweep through that corridor and collect all three Missile Tanks. It dead-ends. There is no onward wall passage from this branch to the Ice Beam room, so once the third tank is yours, turn around and come back to the main shaft the same way.
As you descend again in the main shaft, the front Ice entrance is now easy to recognize even though you are not using it. It is the left-side route below the three-missile branch and above the elevator corridor, and its corridor leads to the front missile door of the same Ice room you already entered from behind.
- Return left under the Ice statue and back through the orange room
- Climb the auxiliary shaft and take the upper right door
- Cross the already-cleared upper corridor east without recounting its two tanks
- Drop below the upper cap in the main shaft
- Take the first left door below that upper cap
- Collect the three Missile Tanks in the dead-end branch
- Return to the main shaft after the third tank
Take the lower two-missile branch and return to High Jump
Keep descending past the front Ice entrance and past the corridor that leads toward the Norfair entrance elevator. Just above the lower breakable floor over the High Jump pocket, take the left door into the long western corridor. This is the separate lower two-missile branch.
Work left through the corridor carefully. The route includes a weak wall or barrier near the far end, and the final pair sits beyond it. Now that Ice Beam is active, freezing an enemy to make a foothold is valid here. Freeze one target only when you need the step, cross the barrier, and grab both Missile Tanks.
Reverse the entire corridor to return to the main shaft. Your chapter total is now seven unique Missile Tanks: two in the highest through-corridor, three in the dead-end branch below the upper cap, and two in this lower western branch.
To finish, go to the right edge of the lower floor in the main shaft and bomb through it. Drop below that lower false floor into the hidden continuation. The first left door down here returns to the High Jump room. Do not keep descending in search of a second left door. High Jump is reached from the first left door below this lower floor, not from a door counted down from the upper cap.
If your health is poor after the lower corridor, use nearby enemies for drops instead of treating a death or password restart as a refill plan. The rooms around the High Jump pocket and the safer corridors back toward the Norfair entrance can provide energy and missile drops. Stay until your loaded missiles and energy are comfortable for the next dive.
- Descend to the left door just above the lower breakable floor
- Clear the long lower western corridor
- Use Ice Beam only here if you need a frozen foothold beyond the barrier
- Collect the last two Missile Tanks
- Return to the main shaft
- Bomb the lower floor at the right edge
- Drop into the hidden continuation and take the first left door
- Finish back in the High Jump room with Ice Beam equipped
Before you move on
- Ice Beam is equipped, and you verified it by freezing a normal enemy after the pickup.
- You collected exactly seven unique Missile Tanks in this chapter: two in the highest corridor, three in the dead-end branch below the upper cap, and two in the long lower western corridor.
- You recognized the front Ice entrance as a separate left-side branch in the main shaft but did not rely on it to collect Ice.
- You returned to the High Jump room by bombing through the lower right-edge floor in the main shaft and taking the first left door below it.
- You finished with a workable energy reserve and some loaded missiles, or paused nearby to farm drops before starting the next deeper Norfair section.
References for this chapter
- Metroid instruction booklet
- Metroid - Norfair - Nintendo NES Map
- Metroid Walkthrough – Missile Expansions - Omega Metroid
- Metroid - Guide and Walkthrough - NES - By LightAngelTora - GameFAQs
- Martacus original NES walkthrough describes Kraid taking the remaining 25 missiles then giving 75 in stock. Ridley section explicitly spends ten of the newly awarded 75 on the rear door.
- Readable transcription of the same original manual.
Use frozen footholds to reach the Screw Attack
Starting in the High Jump Boots room with Ice Beam equipped, break into western Norfair, use frozen airborne enemies as temporary steps across the first lava room, uncover the hidden upper route in the green junction, collect Screw Attack, and then reverse course to Norfair's main elevator without dropping into the lower green passages or replacing Ice Beam.
Break out from the High Jump room into western Norfair
Stand in the High Jump Boots room at the Chozo statue where you picked up the boots. Drop into Morph Ball form and bomb the floor directly below the statue. A hidden opening leads into a low tunnel on the left. Keep rolling and bombing through until the passage opens into the next room.
The room beyond is your first real platforming test for this chapter. It has orange block walls, lava below, and flying enemies crossing the open space. Do not try to clear it in one desperate leap. Freeze one of the fliers with Ice Beam and use the frozen body as a temporary platform. High Jump gives you enough height to chain this safely from ledge to ledge.
If a frozen enemy drifts into a poor position, wait for another instead of forcing the jump. Also stop shooting once you have made a platform. If you hit the same enemy again, it thaws and can dump you into the lava. Work left in short, deliberate hops until you reach the blue door on the far wall.
- Bomb open the floor directly below the High Jump statue.
- Freeze the flying enemies in the orange room and use them as stepping stones.
- Reach the far-left blue door without dropping through the room in a panic rush.
Cross the lava caverns and identify the green two-door junction
Go through the blue door and continue left through the narrow connector. This leads into a wider lava cavern with red ground pods that spit fire upward. Stay on the solid ledges and shelves as you move left. Do not test the floor here. This room is a crossing route, not a place to search the bottom for progress.
The safest rhythm is shelf to shelf. Land, clear whatever is directly in front of you, then jump again before a pod's fire rises into your path. Screw Attack is not yours yet, so play this room with ordinary caution and Ice Beam control. If you take a bad bounce from an enemy, recover on the nearest safe ledge instead of trying to save the whole crossing in midair.
At the far left you will enter an important landmark: a green room with a low door on the right side and another door high on the left side. Do not take the obvious lower route and do not bomb down here for side paths. The route to Screw Attack is hidden above the right ledge of this room.
- Cross the narrow connector and the wider pod-filled lava cavern by staying on the ledges.
- Recognize the destination room by its low right door and high left door.
- Ignore the lower route for now and prepare to search the ceiling above the right ledge.
Reveal the hidden upper passage and open the Screw Attack room
Jump onto the right ledge in the green junction room. From there, fire into the ceiling above you to uncover a concealed opening. This hidden ceiling passage is the key to the chapter. Once the blocks are broken, use High Jump to rise through the gap into the upper part of the room.
Now turn left and cross the upper passage to the high left door. Go through it, then continue left in the next corridor. At the far end is a red door. Spend five missiles to open it and step into the item room beyond. This keeps you on the main route and out of the lower green section that leads to later optional cleanup.
If your missile count is getting thin, that is still acceptable as long as you preserve Ice Beam and keep the route clean. The red door only costs five missiles to open. After that, you are claiming the upgrade immediately rather than spending ammunition in a long detour.
- Expose the hidden ceiling above the right ledge of the green junction.
- Use High Jump to reach the upper level and take the upper left door.
- Open the red door with five missiles and enter the item room.
Collect Screw Attack and use it correctly
Take the Screw Attack from the Chozo statue room. On the original NES game, this attack works when Samus performs a moving somersault jump. Begin moving left or right, then jump so Samus spins through the air. While she is in that spinning jump, many ordinary enemies are damaged or destroyed on contact.
Do not confuse that with a straight vertical jump from a standstill. A standing jump is not the same thing. If Samus rises without the moving somersault, you do not get the same offensive protection. Before you leave the room, make one safe moving jump in open space so you can recognize the attack animation and not assume every jump is now an attack.
This upgrade is excellent for the return trip because it clears many nuisance enemies without stopping to fire, but it is not universal protection. Lava is still lava. Hazardous floors and environmental traps still matter. Keep Ice Beam equipped as your control tool for platforms and safety, because this chapter ends with Ice retained and Wave Beam still postponed.
- Collect Screw Attack from the Chozo room.
- Confirm the attack with one moving spin jump, not a stationary hop.
- Keep Ice Beam equipped and do not treat Screw Attack as immunity to lava or room hazards.
Reverse course to the purple shaft and leave Norfair
Leave the item room through the same red door, head right through the corridor, and return through the upper left door into the green junction room. Drop back to the lower floor carefully. From here, reverse the route you used to arrive. Go right across the pod-filled lava cavern, then through the narrow connector, and then through the orange-block room where you used frozen enemies as footholds.
Screw Attack makes the orange room easier because many small enemies can be cleared by your moving spin, but stay disciplined. If your jump line is awkward, freeze another flier and step across the room exactly as you did on the way in. When you reach the opening in the floor tunnel, roll or walk back through it to re-enter the High Jump Boots room.
From the High Jump room, go right into the tall purple shaft. Climb upward until you reach the second door on the left wall. Take that door, then cross the long corridor leading back toward Norfair's main elevator. Ride the elevator up to Brinstar. You should finish this chapter standing back in Brinstar with Screw Attack added, Ice Beam still active, and the lower green Norfair passages left untouched for the later optional chapter.
- Return from the Screw Attack room to the green junction and back through the lava caverns.
- Re-enter the High Jump room instead of dropping into lower green side passages.
- Climb the purple shaft, use the second door on the left wall, and ride the main elevator back to Brinstar.
Before you move on
- You bombed below the High Jump statue and reached western Norfair's orange lava room.
- You used Ice Beam footholds to cross the western approach and found the hidden ceiling above the right ledge in the green junction.
- You opened the red door and collected Screw Attack from its Chozo room.
- You returned through the High Jump route to the tall purple shaft, took the left-side exit back to Norfair's main elevator, and rode up to Brinstar.
- Ice Beam is still equipped and Wave Beam is still uncollected.
Find the Varia Suit and strengthen your health reserve
Start from the Brinstar side of the Norfair elevator, climb back to upper eastern Brinstar for the Varia Suit, then take the nearby upper Missile Tank and hidden Energy Tank before looping down the far eastern Bombs shaft. From there, cut back through lower Brinstar to the blue western shaft, detour for the rocky-overhang ceiling Energy Tank with Ice Beam still active, and finish back at the Norfair elevator ready for the Ridley-first route.
Climb from the Norfair elevator to upper eastern Brinstar
Begin in Brinstar at the room with the elevator down to Norfair. Leave that elevator room through the left door and re-enter the tall orange shaft that has been your eastern Brinstar landmark since the Bombs and first Missile chapters. This is the orange shaft tied to the Bombs side of Brinstar, not the tall blue western shaft that leads toward Long Beam and the early starting side.
Climb the orange shaft to its highest right-hand door. Go through that top-right exit and keep moving east through the green corridor. Wavers can crowd your jumps here. With Screw Attack you can cut through them on a moving jump, but do not forget that Ice Beam is the beam you want to keep equipped for the later Energy Tank setup. If a landing feels awkward, freeze a Waver to steady yourself instead of rushing.
Stay on the upper gray-pipe route when the corridor breaks into stacked pipe tunnels. Keep following the upper run to the right until you enter the compact Waver room that hides the Varia path. This small room is the key landmark. If you fall back to lower Brinstar or reach the blue shaft, you took the wrong branch and should return to the top of the orange shaft.
- Leave the Brinstar side of the Norfair elevator and enter the orange shaft to its west.
- Climb to the shaft's highest right-hand door.
- Cross the upper green and gray-pipe route to the compact Waver room.
Break into the hidden upper route and collect Varia
Inside the compact Waver room, the route is overhead. Shoot the hidden ceiling, then jump up into the passage above. It helps to clear or freeze a Waver before you try the jump, because enemy contact in this cramped room can knock you back out of position.
Once you are in the upper passage, work left to the high left-hand door. Follow the short route beyond it and open the red door guarding the item chamber. Inside, shoot the orb and take the Varia Suit.
Treat Varia as damage reduction, not full environmental immunity. It makes ordinary hits much easier to absorb on the coming boss approach, but it does not turn every lava-looking pit into a safe shortcut. Keep moving carefully, and keep Ice Beam as your active beam when you leave the item room.
- Reveal the hidden ceiling in the compact Waver room.
- Use the high left-hand door in the upper passage.
- Open the red door and collect the Varia Suit.
Take the nearby upper Missile Tank and the hidden eastern Energy Tank
Backtrack to the same compact Waver room, then continue east along the upper route instead of dropping away. Push through the tight corridor and collect the visible upper Brinstar Missile Tank if you have not taken it already. If it is gone from a prior visit, use the enemies here for small health and missile drops and keep going.
Soon you will reach a short dead-end alcove. Stand close to the wall and shoot upward to expose the hidden ceiling opening. Jump through and continue over the obstruction. After this overhead passage, watch for the false wall that lets you pass into the next small room.
The Energy Tank route uses a side opening here. In the small room beyond the false wall, roll into Morph Ball and use a bomb-assisted hop to pop into the opening in the room's right wall. That side opening leads to the hidden Energy Tank. Collect it now if you want the extra reserve immediately. If you already have six carried tanks, or you prefer an emergency full refill later, you can intentionally leave this one untouched and remember the room instead. If you already claimed it earlier, do not search for a replacement here; just farm enemies and continue.
After the Energy Tank, keep moving east. This route does not reconnect to the blue western shaft. It leads to the top of Brinstar's far eastern vertical shaft, the same major shaft associated with the Bombs route earlier in the game.
- Collect the nearby upper Brinstar Missile Tank if it is still present.
- Use the dead-end alcove's hidden ceiling opening.
- Pass through the false wall, then bomb-hop in Morph Ball into the opening in the right wall for the hidden Energy Tank.
- Continue east to the top of the far eastern Bombs shaft.
Loop down the far eastern shaft and return west to the blue shaft
Descend the far eastern shaft. This is the shaft whose lower routes you used when first crossing eastern Brinstar, so use familiar landmarks instead of experimenting with new exits. Go all the way down and take the bottom-left door.
From there, follow the familiar lower Brinstar corridors west. Stay on the established route back toward the orange shaft connection. Once you reconnect with the orange-shaft side of lower Brinstar, keep heading west until you reach the tall blue shaft. This is the western shaft tied to Long Beam and the early starting side. Use this lower return route to reach the blue shaft; the upper eastern tank loop ends at the far eastern Bombs shaft.
If you were hit hard during the upper loop, this westward return is a good time to refill. The corridor enemies between the eastern shaft, the orange-shaft connection, and the blue shaft are safer to farm than forcing the next Energy Tank room at low health.
- Descend the far eastern Bombs shaft.
- Take its bottom-left exit.
- Travel west through lower Brinstar until you reach the blue western shaft.
Detour for the rocky-overhang Energy Tank, then head back to Norfair
From the blue shaft, descend and take the bottom-left route into the early western Brinstar corridor with the large rocky overhang and the low crawlspace beneath it. Roll through so Samus is on the far side of the overhang. The hidden Energy Tank here sits above the ceiling and is easiest to reach with Ice Beam still equipped.
Leave one flier alive if you can. Lure it to a useful height on the right side of the overhang, freeze it, then shoot the ceiling and use the frozen enemy as a temporary foothold to jump into the hidden chamber. This is the practical, intended setup for this guide. If the room is already empty because you collected the tank earlier, use the corridor as a refill stop instead and move on.
When you are done, return east to the blue shaft. From the blue shaft, use the familiar lower connection back toward the orange shaft. At the orange shaft side, head to the corridor that returns directly to the Brinstar room with the Norfair elevator. Stop there only after confirming that Ice Beam is still active. You should now have Varia, the upper Brinstar Missile Tank if needed, and one or two useful Brinstar Energy Tank rooms either collected or deliberately left in mind as future refills.
- Take the blue shaft's lower-left route to the rocky-overhang corridor.
- Use Ice Beam and a frozen enemy foothold if needed to reach the ceiling Energy Tank.
- Return east to the blue shaft, then back across lower Brinstar to the orange-shaft side.
- Finish at the Brinstar room with the elevator down to Norfair, with Ice Beam still equipped and Varia collected.
Before you move on
- You reached upper eastern Brinstar from the top of the orange shaft, uncovered the hidden ceiling route, and collected the Varia Suit.
- You correctly handled the upper detour by taking the nearby Missile Tank, using the dead-end ceiling opening, then reaching the hidden eastern Energy Tank through the false wall and right-side Morph Ball bomb-hop.
- You returned by descending the far eastern Bombs shaft and crossing lower Brinstar west to the blue shaft, rather than assuming a direct upper connection that does not exist.
- You either collected the rocky-overhang ceiling Energy Tank with Ice Beam support or deliberately used that room as a refill stop if it had already been taken.
- You ended back at the Brinstar side of the Norfair elevator with Varia active, Ice Beam still equipped, and a sturdier setup for the Ridley-first descent.
Descend to Ridley's Hideout
This chapter uses the original North American NES route from central Norfair into Ridley's Hideout. Start at the Brinstar to Norfair elevator room, cross to the tall purple shaft on Norfair's east side, bomb through its false bottom, and take the route from the shaft's true lowest exit to the lower elevator. In Ridley's Hideout, the first ceiling Missile Tank is a worthwhile but optional detour above the second gray corridor. The main path then continues left through the long hall, under its apparent dead end by way of a floor tunnel, and into the Energy Tank room. After taking that tank, drop through the hidden floor on the right to reach the eastern shaft before Ridley's side of the hideout. The awkward high missile beyond the shaft gap is optional. If you miss it, keep descending and continue along the lower left route toward Ridley's door. Leave Ice Beam equipped so you are ready to control enemies cleanly in the next chapter.
Cross eastern Norfair and reach the shaft's true bottom
Start in the central Norfair elevator room, the same room that links back to Brinstar. Exit through the right door and cross the long corridor to the east. Treat this as a hazardous enemy hallway, not a modern heated room with automatic suit damage. Use High Jump to clear awkward rises cleanly and keep your footing instead of trying to force low jumps through traffic.
At the far end, enter the huge purple vertical shaft. You have already visited the upper part of this shaft for High Jump and Ice Beam, but this time you are going deeper. Drop onto the solid-looking floor partway down, move to the right side of that floor, and bomb through it. That platform is only a false bottom.
Once you break through, keep descending. Ignore the higher side doors you used on earlier Norfair trips. Continue until you reach the shaft's real lowest level and take the lowest exit from there. That door begins the Ridley route.
- Leave the central Norfair elevator room by the right door.
- Bomb through the false floor on the right side of the tall purple shaft.
- Continue all the way down and use the shaft's true lowest exit.
Take the lower connector to Ridley's elevator
Beyond the shaft is a lower corridor with enemies and damaging floor sections. Screw Attack helps, but do not relax just because you can kill things on contact in a moving spin. Keep your jump timing controlled and avoid treating every hot-looking surface as harmless. Push steadily across the room rather than trying to sprint through blind.
At the end of that corridor, enter the next short vertical connector and drop to its bottom. Use the lowest door there to enter the elevator room and ride the elevator down. The change in area music confirms you have reached Ridley's Hideout rather than another branch of Norfair.
When the elevator stops, leave by the left door. Go left once more into the second narrow gray corridor. This second gray hall is the one with the ceiling passage to the first optional hideout Missile Tank.
- Cross the lower Norfair corridor without wasting unnecessary energy.
- Drop through the next connector to its lowest door and ride the elevator down.
- From the hideout arrival room, go left twice to reach the second gray corridor.
Optional ceiling missile above the second gray corridor
This first hideout missile is recommended, but it is not required to complete the chapter. In the second gray corridor, stand by the right-hand door and shoot the ceiling directly above that doorway to open the hidden passage. To reach it reliably, hop onto the top edge of the door frame, then jump up through the opening.
Once you are above the corridor, go through the left door in the upper passage and continue left to collect the Missile Tank. This is the easy Ridley-area missile, so it is usually worth taking before the boss even on a cautious first-clear route.
After collecting it, head back right, drop through the same ceiling opening into the lower gray corridor, and face left again. Your progress route still goes deeper into the hideout from the lower level.
- Open the ceiling above the right-hand door in the second gray corridor.
- Take the upper missile if you want the safer reserve boost.
- Drop back to the lower corridor and continue left.
Use the long hall's floor tunnel to pass the dead end
The next major room is a long horizontal hall crowded with enemies and low obstacles. Work left through it until you reach the tall wall on the far side that seems to block all further progress. That wall is the key landmark. You do not climb over it. The route goes under it.
From the left side of the room, move back right until you are standing near the third purple floor pillar in the hall. Bomb the floor several blocks to the right of that pillar to open the hidden tunnel. Once the floor gives way, roll into Morph Ball and crawl left underneath the apparent dead end.
Stay in the tunnel until you reach the far left side and can bomb your way back out. Stand up, then use the red door on the left. That door leads to the room with the important hideout Energy Tank.
- Recognize the tall left-side wall as a false dead end.
- Open the floor tunnel near the third purple pillar and crawl left underneath the blockage.
- Use the red door on the far left to enter the Energy Tank room.
Take the Energy Tank, then continue by dropping through the right side
Do not simply walk at the Energy Tank when you enter this room. The floor around the tank is deceptive, and stepping carelessly will dump you downward before you line up the pickup. Approach from the left with a controlled jump and aim to land directly where you can grab the tank cleanly.
If you still have room for more carried tanks, this pickup increases your reserve. If you already hold the maximum six carried Energy Tanks, it still refills your health and is therefore still useful before Ridley. Either way, collect it now.
After you have the tank, do not try to retreat the way you came. The intended continuation is below. Let yourself drop through the hidden floor on the room's right side, then move right into the next corridor.
- Jump in carefully and collect the Energy Tank before drifting into the drop.
- Use it as a refill if your carried tank count is already full.
- Drop through the hidden floor on the right to continue forward.
Reach the eastern shaft and leave the hard missile for later if needed
Follow the rightward corridor into the tall eastern shaft before Ridley's chamber network. Near the top of this shaft, a door on the right leads toward a Missile Tank separated by an awkward gap and low ceiling. Treat that pickup as optional. It is one of the more annoying jumps in the route, and this guide does not require advanced bomb jumping to claim the chapter complete.
If you try the jump and miss, do not panic. The failure state is only a fall down the shaft. You are not trapped, and you have not locked yourself out of Ridley. Just keep descending and continue with the main route from below.
At the bottom, work left along the lower passage toward Ridley's side of the hideout. Ignore any urge to burn energy repeating the upper missile attempt unless your reserve is unusually low and you truly want the extra five capacity. Keep Ice Beam equipped as you advance. Freezing troublesome enemies is more useful than changing to Wave before the boss. Stop when you have reached Ridley's western approach and are ready to begin the fight chapter.
- Treat the high right-side missile beyond the shaft gap as optional.
- If you miss the gap jump, continue from below instead of forcing repeated retries.
- Descend the shaft, turn left along the lower route, and keep Ice Beam equipped for Ridley.
Before you move on
- You started from central Norfair, crossed to the eastern purple shaft, bombed through its false bottom, and used the route from the shaft's real lowest level.
- You rode the lower elevator into Ridley's Hideout and identified the optional ceiling missile above the second gray corridor.
- You passed the long hall by opening the hidden floor tunnel under the apparent dead end and then collected the hideout Energy Tank.
- You reached the eastern pre-Ridley shaft, understood that the high missile across the gap is optional, and continued along the lower left route.
- You finished the chapter at Ridley's approach with Ice Beam still equipped and enough health left to begin the boss attempt cleanly.
Defeat Ridley and leave the hideout
From Ridley’s western approach, keep Ice Beam as your active beam, fight from controlled ground instead of panic-chasing him, collect the 75-missile capacity reward, claim the refill Energy Tank in the room beyond him, and then retrace the safe route out through lower Norfair to Brinstar. One extra Missile Tank near the hideout exit stays optional so a clean escape never depends on a risky jump.
Enter Ridley’s chamber prepared to control the fight
From the western approach room, go through the boss door with Ice Beam already active and missiles ready on Select. Do not enter just to test the room. If your current missile stock is low, back out first and refill in the nearby approach rooms. Defeating Ridley adds 75 to both missile capacity and current ammunition. That reward arrives after the fight, so bring enough loaded missiles to win first.
Ridley’s pressure in the NES fight comes from two things: his repeated hopping movement and the fireballs he throws across the room. You do not need to run after him. Work from the entrance half of the chamber so you have room to step backward from a bad hop and room to switch back to missiles when he gives you a clean line.
Keep your movement compact. When Ridley closes distance, take a short retreat or pass under him only when the gap is obvious. If you run all the way to a wall, his next jump can pin you into taking extra contact damage.
- Keep Ice Beam active before the fight starts.
- Make sure your current missile count is comfortable, not just your maximum.
- Use the entrance side of the room as your working space so you can retreat safely.
Freeze the fireball lane, then punish with missiles
The reliable method here is to use Ice Beam to interrupt the fireballs Ridley sends toward you. Fire into the projectile lane, let the frozen shot break up the immediate threat in front of Samus, then switch to missiles and fire at Ridley when he lands or moves across your height. This keeps the fight controlled instead of turning into a damage race.
Do not waste missiles on rushed shots while he is rising into a jump or dropping behind an obstacle. Wait for moments when he is plainly in front of you and your footing is stable. A smaller number of clean hits is better than spraying missiles into the room and then having to finish the battle on low resources.
If you entered with poor missile reserves and do not want to leave, older NES strategies do allow a rougher close-range fight that trades much more health for steadier hits. Treat that only as an emergency fallback. This route assumes a controlled missile kill, not a blind life-bar trade.
- Use Ice Beam first to calm the fireball traffic.
- Spend missiles on clean grounded or level shots, not on guesses.
- If the fight is going badly early, retreat and refill instead of forcing a low-health scramble.
Collect Ridley’s reward and use the rear door correctly
Keep repeating the same rhythm until Ridley falls: control the fireballs, hold your ground, and fire missiles when his movement gives you a safe lane. His defeat awards 75 additional missiles and raises your missile maximum by 75. This is the first of the two real boss rewards in this route; there is no separate dropped expansion to chase.
Check your current missile number after the reward, and keep ten missiles available for the rear door. The Energy Tank behind Ridley restores health; use enemy drops later if your ammunition needs further replenishment.
After taking the reward, go through the 10-missile door on the far side of Ridley’s chamber from the way you entered. Do not leave the boss room through the entrance side yet. The room behind him holds a valuable Energy Tank and is the safest big refill attached to this chapter.
- Confirm Ridley's defeat and the 75-missile reward.
- Check current ammunition after the reward and reserve ten missiles for the rear door.
- Open the far-side 10-missile door behind Ridley before starting the trip out.
Cross the mixed fake-lava tank room carefully
In the next room, do not assume the whole floor is safe and do not make one huge panic jump. The surface is mixed. Part of what looks like lava is false flooring you can stand on, but a later section really does damage you.
Make a controlled drop from the doorway onto the safe false-lava stretch first. From that footing, cross the remaining dangerous section with one clean jump to the Energy Tank. If your carried tank limit is not yet full, this increases it as usual. If you already have all six usable tank additions, it still restores you, which is exactly why this stop matters after the boss.
Reverse the room the same way. Jump back over the real damaging strip, land on the safe false section near the entry side, and leave through the same 10-missile door to return to Ridley’s chamber. If you take a hit here, pause and settle before the next room instead of rushing straight into more enemies.
- Land on the false-lava stretch first instead of committing to a long blind leap.
- Treat the later lava strip as real damage.
- Use the Energy Tank as a recovery stop even if it no longer raises carrying capacity.
Climb back to Ridley’s elevator
Return through Ridley’s chamber to the entrance side and go back into the western approach room. Continue through the next connector to the hideout shaft you used on the way in. Climb that shaft to the top, dealing with flyers only enough to keep your path clear, then take the upper exit that leads back to Ridley’s elevator room.
If your health is shaky, climb patiently and kill only the enemies that block a landing. Screw Attack is useful while moving between ledges, but do not turn the ascent into a reckless charge. The important part is reaching the elevator with your Ice Beam still equipped and enough life left to finish the long return through Norfair.
Before you use the elevator, decide whether you want the optional bottom Missile Tank. This is a convenience stop only. Skip it if you are already comfortable on missiles or if your health is too low to justify extra room time.
- Leave by the same side you entered Ridley’s chamber.
- Climb the hideout shaft back to the elevator room rather than dropping into unexplored lower passages.
- Pause at the elevator room and decide on the optional missile before going up.
Optional bottom missile, then the full retreat to Brinstar
Optional detour: from the hideout shaft near the elevator room, drop to the bottom and take the lower corridor that leads to the visible Missile Tank. The room has a floor gap near the pickup, so do not run at it blindly. Take the tank, then turn around and return the same way to the shaft. If the enemies or missed jumps start costing too much energy, abandon the detour immediately and go back to the elevator.
When you are ready to leave, ride Ridley’s elevator up into lower Norfair. From the landing, go through the connector into the large purple shaft you used earlier. Climb upward until you break back into the upper section above the bombed false-floor continuation. Once you are back at that upper level, use the left-side exit that returns you to the long corridor leading toward central Norfair.
Follow that corridor back to Norfair’s central elevator room and ride up to Brinstar. You should arrive with Ridley dead, his 75-missile reward secured, the post-boss Energy Tank taken, and Ice Beam still active for the Kraid side and the Tourian preparation that come later.
- Optional missile: take it only if your health remains comfortable after Ridley.
- In lower Norfair, climb the large purple shaft back above the hidden lower continuation.
- Ride the central Norfair elevator up and finish this chapter in Brinstar with Ice Beam still equipped.
Before you move on
- Ridley is defeated and his 75-missile capacity reward has been collected.
- The 10-missile door behind Ridley has been opened and the Energy Tank beyond it has been taken or used as a refill.
- You have climbed back to Ridley’s elevator, ridden up to lower Norfair, crossed back through the large purple shaft route, and returned to Brinstar through the central elevator.
- Ice Beam remains your active beam as you finish the chapter, and the optional bottom Missile Tank was either collected safely or deliberately skipped.
References for this chapter
- Metroid instruction booklet
- Metroid - Mini-Boss Hideout II - Nintendo NES Map
- Metroid Map Selection - Labeled Maps - Nintendo NES
- Metroid - Guide and Walkthrough - NES - By LightAngelTora - GameFAQs
- Martacus original NES walkthrough describes Kraid taking the remaining 25 missiles then giving 75 in stock. Ridley section explicitly spends ten of the newly awarded 75 on the rear door.
- Readable transcription of the same original manual.
Enter Kraid's Hideout and locate the real boss
Enter Kraid's Hideout from the early Brinstar breakable-floor room and use the elevator shaft as your landmark. The first two right-hand branches offer a Missile Tank and an Energy Tank. An optional western loop supplies two more Missile Tanks, then returns to the entrance shaft. The ordinary boss route begins at the third red door on that shaft's right wall: cross east to the far-right crumble-block shaft, descend to its bottom, and follow the left corridor to real Kraid. This approach avoids the cramped bomb-jump shortcut and the fake-Kraid passages.
Drop from early Brinstar to the Kraid elevator
Start in the early Brinstar room just east of the Morph Ball room, the one with the breakable floor blocks that you already used earlier in the game. Bomb the floor open and fall through. The passage below only has one useful continuation for this route, so go right into the elevator room and ride down.
When you arrive in Kraid's Hideout, make the tall entry shaft your reset point. The elevator leaves you at the top of this shaft, and several nearly identical blue-stone corridors branch from it at different heights. If you get turned around later, climb or fall back to this first shaft instead of trying to solve the maze from memory in a random side room.
- Bombed down from the early Brinstar crumbling-floor room
- Took the right connector to the elevator
- Reached Kraid's Hideout and recognized the first tall shaft as the area's anchor point
Take the two short right-side supply detours first
Drop below the elevator landing and open the first red door on the right. This upper-right branch is only a supply stop. Cross the room, climb onto the raised pillar, collect the visible Missile Tank, and come straight back. Do not waste time searching for hidden forward progress here.
Back in the main shaft, drop lower and open the next red door on the right. This second right-hand branch leads to the easy Energy Tank. Follow the corridor until it appears to dead-end at a solid wall. Bomb that wall to uncover the room beyond, take the Energy Tank, then retreat to the main shaft again.
These two right-side branches are worth clearing now because they are near the entrance and easy to identify later. The higher right red door is the pillar Missile Tank. The lower right red door is the Energy Tank route with the hidden wall. Neither one is the path to real Kraid.
- Collected the upper-right Missile Tank on the pillar
- Collected the lower-right Energy Tank behind the bombable wall
- Returned to the main shaft after both short detours
Collect the two western missiles as an optional detour
The western branch is an optional supply loop, so skip to the next step if you already have enough ammunition and want to reach Kraid directly. To collect its two Missile Tanks, take the blue door on the left just below elevator height. Cross west, bomb through the solid-looking wall, and take the first Missile Tank. Continue left to the next vertical shaft instead of turning back yet.
At the far left is a vertical shaft. Descend it to the bottom. The liquid-looking floor here is a fake passage, not a deadly barrier, so drop through it. The much longer fall that follows is the sign that you have reached the deeper section correctly.
At the bottom of that long drop, go right through the lower corridor. Take the on-route Missile Tank there, then keep moving right until you reach the cramped little shaft on the lower-right side. This is the place where many players try to force a narrow bomb jump into the side opening. For this first-clear route, do not do that.
- Used the left blue door just below the elevator
- Bombed the hidden wall in that corridor for the western Missile Tank
- Dropped through the fake floor at the bottom of the far-left shaft
- Reached the lower-right cramped shaft without attempting the shortcut bomb jump
Return to the entrance shaft and take its third right-hand door
If you followed the western missile detour, stop at the cramped shaft at the end of the lower corridor and turn back left. Do not try to climb through its narrow shortcut opening. Retrace that same lower corridor all the way west to the long far-left shaft. Climb the ledges, using Ice Beam on a flying enemy when you need a temporary foothold, and rise through the same fake-liquid layer you dropped through. Continue up to the upper corridor, take its right-hand door, then travel east through the already-cleared hidden-wall passage until you reach the original elevator shaft. If you skipped the western detour, you are already at this starting point.
Now descend the elevator shaft to the third red door on its right wall, counting from the top. The first right-hand red door led to the pillar Missile Tank, and the second led to the hidden-wall Energy Tank. Pass below both of those. The third red door is the one that leads across to the far-right side of the hideout. Open it with five missiles if it is still shut.
Go east through the long blue corridor, using the scattered platforms to stay above the damaging floor and clearing enemies before each jump. At the far right, pass through the door into another tall gray shaft. This is the far-right shaft with the long central columns of crumbling blocks. It is your descent to the real boss and, afterward, your return route. You do not need to visit fake Kraid or cross the green Sidehopper shortcut rooms.
- If you took the western detour, retraced the lower corridor left and climbed back to the entrance shaft
- Passed the two right-hand supply doors and opened the third red door on the right
- Crossed the long blue corridor east and entered the far-right crumble-block shaft
- Stayed on the ordinary boss route without entering the cramped bomb-jump shortcut
Descend the far-right shaft to the real Kraid approach
Before dropping to the bottom, look for the first left-hand door below the one you entered. This short side room contains the remaining Missile Tank in Kraid's Hideout. Take it now if you want the extra capacity, then return right to the crumble-block shaft. You can also leave it for the climb after the boss. It is one pickup, so visiting the room twice does not award a second tank.
Continue down the far-right shaft beside its central block columns, using the permanent side ledges to pause and regain control. These blocks can be broken and later reappear; do not rely on them automatically vanishing under Samus. Keep descending until you reach the lowest door on the left wall. This bottom-left door is the ordinary forward route to the boss.
Take that lowest left door and travel west through the blue corridor. Cross the raised sections above the damaging floor and continue through the next blue door into the small antechamber. The red door on the left of this antechamber opens directly into real Kraid's room. Stop outside it to check health and missiles before the next chapter. No encounter with the decoy is required, and no floor needs to be bombed in the green rooms above this route.
- Collected the optional Missile Tank through the first left door below the far-right shaft entrance, or left it for the return
- Descended the far-right crumble-block shaft to its lowest left door
- Followed the blue corridor west into the small boss antechamber
- Stopped at the red door on the left, directly outside real Kraid
Before you move on
- You entered Kraid's Hideout from the early Brinstar breakable-floor room and rode the elevator down.
- You collected the upper-right Missile Tank and the lower-right Energy Tank behind the hidden wall, then returned to the main shaft.
- You either collected the two optional western Missile Tanks and retraced that loop to the entrance shaft, or skipped the detour to conserve supplies.
- You took the third right-hand red door from the elevator shaft, crossed east to the far-right crumble-block shaft, descended to its lowest left door, and followed the westbound corridor to the red door outside real Kraid.
References for this chapter
- Metroid instruction booklet
- NES Maps original Metroid: Kraid room map
- Chapter 3: The Hunt for Kraid - Walkthrough - Metroid (Metroid Recon)
- BakonBitz original NES guide: third red door route
- StrategyWiki: Metroid/Hideout I
- Martacus original NES walkthrough describes Kraid taking the remaining 25 missiles then giving 75 in stock. Ridley section explicitly spends ten of the newly awarded 75 on the rear door.
- Readable transcription of the same original manual.
Beat Kraid and return with both boss seals cleared
Start in the approach room outside real Kraid. Freeze his projectiles with Ice Beam, land clean missile hits on the small original NES boss, confirm the second seventy-five-missile capacity increase, then open the hidden Energy Tank pocket on the right side of the room before climbing back through the crumble-block shaft to Kraid's elevator. Finish in early Brinstar with Ice Beam still equipped and enough loaded resources to prepare for Tourian later rather than rushing there empty.
Set your loadout before opening the boss door
Pause outside the red door and make sure Ice Beam is the active shot. Real Kraid in the original NES game is a compact boss in a short room, so the fight is about controlling cluttered projectiles and taking direct missile lanes when they appear, not waiting for a giant mouth-opening weak-point pattern from later remakes.
If your loaded missile count is poor, use the approach enemies for a short refill before you commit. Defeating Kraid adds seventy-five to both your missile capacity and current ammunition. You still need enough loaded missiles to win the fight before receiving that reward.
Go in from the approach room and settle yourself near the middle-right side of the chamber rather than hugging the far wall immediately. Kraid stays toward the center-left and throws two main patterns across the room: straight horizontal spikes and higher arcing shots. From a moderate distance you have room to read both patterns without pinning yourself against the right edge.
- Ice Beam selected before the door opens
- A useful loaded missile stock, not just increased capacity
- Enough current health that one mistake does not force a panic retreat
Control Kraid's screen clutter and fire missiles on clean lanes
Use Ice Beam first as crowd control. The straight spikes are the easiest things to freeze, and an iced projectile can briefly buy you space instead of letting the room fill with hitboxes. Do not keep hammering Ice Beam once the lane is safe. The goal is to create a shooting window, switch to missiles, and hit Kraid before the pattern becomes messy again.
The higher arcing shots are what usually punish players who stand too far away. Watch their height and move under them when there is a low gap, or short-hop only when the floor lane is blocked. Because Samus cannot aim diagonally here, rushed jumps often waste missiles into the floor or into frozen projectiles. Keep your feet grounded whenever possible and fire only when your horizontal line is clear.
A good rhythm is simple: freeze the obstructing spike, switch, shoot Kraid, then be ready to return to Ice Beam if the room starts to clog again. If the chamber gets chaotic, stop forcing attacks for a second. Surviving the pattern is more important than squeezing in one bad missile.
If you nearly run dry, a Bomb finish is a real fallback in NES Metroid, but treat it as a last resort rather than a main strategy. Morph close enough that repeated Bomb bursts can catch Kraid, then get out of his body space instead of sitting inside him. This method trades health for damage and is much safer when Kraid is already close to defeat or when you still have a strong energy cushion. Do not assume repeated contact is harmless just because Bombs can finish the fight.
- Use Ice Beam to tame the straight spikes
- Take missile shots only on clean horizontal lanes
- Reserve Bomb pressure for an emergency finish, not the opening plan
Use the boss reward as your confirmation that both real bosses are done
When Kraid explodes, both your maximum missile capacity and current ammunition increase by seventy-five. Since Ridley was already defeated in the route, this is your practical confirmation that both real hideout bosses are now dead and their statues can be activated later. Fake Kraid never gives this result, so the capacity increase is the useful check that you beat the correct boss.
Stay in the room for a moment and gather any health or missile drops that remain. This is also the safest time to handle the hidden pickup on the right side. If you tried to grab it during the battle, Kraid's projectiles could punish the setup. After the fight, the room is quiet and you can line up the trick cleanly.
- Real Kraid defeated
- Second seventy-five-missile capacity increase received
- Immediate drops collected before attempting the tank
Open the hidden Energy Tank pocket on the right side of Kraid's room
Move to the sinking sand on the right side of the chamber. As you drop into it, face right and shoot the wall to reveal the hidden Energy Tank pocket. The tank is concealed inside the right wall rather than sitting openly on the main floor, so do not leave the room before checking this side.
Take the tank after the fight unless you are using it as a desperate mid-battle refill. The safer method is to work from the right edge, slide into the sand, open the wall, and keep yourself tucked to the right so Samus touches the tank instead of bouncing around the pit. If you miss the alignment, climb out and reset the approach instead of flailing for it while low.
This pickup is still worthwhile even if your carrying limit is already full. In the original NES game only six extra Energy Tanks increase carrying capacity, but later tank pickups still refill your life. That makes this one excellent recovery before the long climb back out of the hideout.
- Dropped into the right-side sand and opened the wall with a shot
- Hidden Energy Tank collected
- Health reassessed before leaving the boss room
Backtrack to the crumble-block shaft and take the last on-route missile only if it is still there
Leave Kraid's room through the door on the right, cross the small antechamber, and continue right through the blue corridor. Its far-right door returns you to the bottom of the long central-block shaft used on the approach. Shoot openings into the block columns, jump into the gaps with High Jump, then fire upward and climb again. Use the reappearing blocks as footholds and the permanent side ledges to steady yourself between attempts.
Near the upper part of the shaft, the left-hand side room immediately below the entrance corridor contains a Missile Tank. Collect it only if you left it untouched on the way down. After collecting it, return right to the shaft and keep climbing to the next left-hand doorway above. If the tank was already taken before Kraid, its empty room is not another ammunition pickup.
If you slip during the ascent, rebuild from the nearest stable foothold instead of dropping all the way down in frustration. High Jump and controlled timing are enough here. The only real danger is rushing the crumble pattern and forcing repeated falls.
- Returned to the crumble-block shaft from the real Kraid route
- Climbed steadily instead of losing the whole ascent
- Top Missile Tank taken only if it was genuinely still uncollected
Ride the elevator back to early Brinstar and stop there with Ice Beam intact
At the shaft's upper entrance, take the left-hand door above the Missile Tank side room. Cross the long blue corridor west to return to the third right-hand doorway of the main elevator shaft. Climb the main shaft past the Energy Tank and pillar-Missile branches to the elevator, then ride up to Brinstar. Leave the elevator room through its left door to reach the shaft below the early breakable floor, then climb through that familiar opening to rejoin the corridor east of the Morph Ball starting area.
Do not turn straight toward Tourian yet just because both bosses are now beaten. The important state at the end of this chapter is that both real boss seals are cleared, Ice Beam is still equipped, and you are alive enough to continue the preparation chapters. If you somehow took the optional Wave Beam earlier, this is not a valid stopping point until Ice Beam has been reacquired.
If your loaded missiles are low or your health is ragged after Kraid and the tank grab, use nearby Brinstar enemies for controlled refills before moving on. The route ahead assumes a healthier reserve than a near-empty post-boss recovery state. Tourian opens later because both real bosses are dead, but there is no benefit in approaching the statue bridge exhausted.
- Returned to the Kraid elevator and rode back to Brinstar
- Ended in the early Brinstar corridor, not lost in hideout side loops
- Ice Beam still equipped
- Both real bosses now defeated and resources stabilized for the next preparation steps
Before you move on
- Real Kraid is dead and the second boss-based seventy-five-missile capacity increase has been awarded.
- The hidden Energy Tank in Kraid's room has been opened from the right-side sand pocket and collected.
- You climbed the crumble-block shaft, took the upper Missile Tank only if it was still available, and returned to Kraid's main elevator.
- You are back in early Brinstar with Ridley and real Kraid both defeated, Ice Beam equipped, and enough loaded health and missiles to continue preparation instead of stumbling into Tourian depleted.
References for this chapter
- Metroid instruction booklet
- NES Maps original Metroid: Kraid room map
- Metroid Map Selection - Labeled Maps - Nintendo NES
- Chapter 3: The Hunt for Kraid - Walkthrough - Metroid (Metroid Recon)
- Metroid - Guide and Walkthrough - NES - By LightAngelTora - GameFAQs
- Martacus original NES walkthrough describes Kraid taking the remaining 25 missiles then giving 75 in stock. Ridley section explicitly spends ten of the newly awarded 75 on the rear door.
- BakonBitz original NES guide: third red door route
- Readable transcription of the same original manual.
Optional Norfair cleanup and the Wave Beam detour
This entire excursion is optional for finishing the original North American NES Metroid route. Skip it if you want to keep moving toward the bosses with Ice Beam already active. Take it only if you want the lower-west Norfair rewards: one optional Energy Tank pickup and three unique Missile Tanks. The Wave Beam itself is also optional, and in the NES original it replaces Ice Beam immediately, so anyone who touches Wave must deliberately retake the Norfair Ice Beam before leaving Norfair.
Return from Brinstar to the western green junction
Start at the Brinstar elevator that leads down to Norfair. Ride down, leave the elevator room to the right, and cross the long lava corridor to the main far-right purple shaft. Drop to its apparent bottom, bomb the lower right corner of the floor to reopen the hidden continuation, then fall into the lower section and take the first door on the left to re-enter the High Jump room.
Stand beneath the High Jump statue, enter Morph Ball, and bomb the floor under the statue to reopen the westbound passage. Roll through the tunnel into the orange-block room, continue through the lava cavern, and stop at the upper green junction that previously led to Screw Attack through its concealed ceiling. That upper green room is the hub for the whole optional Norfair cleanup.
- Reached Norfair's main purple shaft from the Brinstar elevator.
- Used the lower right-corner false floor and the first left door below it to return to High Jump.
- Bombed beneath the High Jump statue and arrived at the upper green junction.
Optional Energy Tank branch from the lower green hub
If you want the optional Norfair Energy Tank, stay in the upper green junction and move to the right side of the room. Bomb near the right-hand door to open the drop into the lower copy of this green hub. From that lower room, go right through the long corridor, bomb through its weak wall, and enter the blue door into the small shaft that looks like a dead end at first glance.
Inside that short shaft, do not hunt for a fresh route downward somewhere else. Bomb the floor directly below the door you just entered, using the left-side door bubble as the landmark. Drop to the lower doorway, go left along the branch, and collect the Energy Tank if it is still one of your first six capacity increases. If you already took it earlier, it does not respawn as a refill, so simply confirm the room and reverse the entire branch back to the lower green hub.
- Opened the drop near the upper green hub's right door.
- Entered the small blue-door shaft and bombed directly below that doorway to find the real continuation.
- Collected the Energy Tank if needed, or confirmed it was already gone and backtracked to the lower green hub.
Enter lower west and take the single Missile Tank dead end once
Back at the lower green hub, use the left door. Follow the lower-west route into the vertical room where the lava-looking floor is actually fake. Drop through that surface, bomb the basin's left side to continue down, then use the door at the bottom to enter the deeper lower-west network. This is one of the verified safe fake-lava passages in Norfair; do not generalize that safety to ordinary lava elsewhere.
Work through the lower-west corridor until you can reach the far-right single Missile Tank dead end. Take that tank once, then turn around immediately. Its room is useful as a pickup stop, but it is not the normal way out of lower west and it does not lead back toward the elevator.
- Dropped through the verified fake-lava shaft and opened the left-side continuation below it.
- Collected the lone lower-west Missile Tank at the far-right dead end.
- Turned back instead of trying to force the far-right room into an exit route.
Find the Wave Beam chamber and choose whether to replace Ice temporarily
After leaving the far-right Missile Tank room, head back left through lower west until you reach the hidden floor opening that drops into the Wave Beam branch. Bomb through that concealed floor, continue into the lower chamber, and spend five missiles on the red door at the end. This leads to the optional Wave Beam statue room.
Decide before you touch the item. In the NES version, Wave Beam does not stack with Ice Beam and there is no equipment menu that lets you switch beams back and forth. Wave is powerful and passes through walls, but Tourian requires Ice Beam to freeze Metroids. If you only wanted to locate the room, leave the statue untouched and back out. If you do pick up Wave, treat it as temporary and plan to restore Ice before riding the Brinstar elevator up.
- Reached the hidden Wave branch from lower west.
- Opened the red door to the Wave Beam room.
- Either left Wave alone on purpose or took it knowing Ice was replaced immediately.
Collect the last two lower-west Missile Tanks
Leave the Wave room and continue through the lower-west route until you reach the later green junction on this lower loop. From there, enter the small green shaft that leads to the side room holding the final two Missile Tanks for this optional Norfair chapter. Collect both, then stop extending the route. These are the last unique lower-west missiles here; the nearby main-path corridors are for retreat, not for extra hidden pickups in this chapter.
- Reached the later lower-west green junction.
- Entered the side room and collected the paired Missile Tanks.
- Confirmed that lower west has yielded three unique Missile Tanks total: one at the far-right dead end and two in this side room.
Use the far-left deep shaft to exit lower west cleanly
From the lower two-Missile side room, return left to its small green shaft and climb through the opening into the green junction above. Continue left along the lower main corridor, pass through the west door, and keep going until you reach the far-left deep return shaft. Do not head back to the far-right single-Missile dead end; that room is not the ordinary escape from this loop.
Climb the far-left shaft by exposing the narrow ceiling opening at its upper-left side. From below, shoot upward, use High Jump, and take advantage of the regenerating blocks instead of trying to bomb a floor above Samus. Rise back through the same fake-lava basin used on entry, take the upper right door, cross east through the lava corridor to the lower green hub, then shoot open the ceiling near its right edge and climb back into the original upper green junction. Continue right through the pod-filled cavern and orange room, then use the under-statue tunnel to return to the High Jump room.
- Returned from the two-Missile room to the green junction above it.
- Used the far-left deep shaft, not the far-right dead end, to escape lower west.
- Reached the High Jump room again without needing Ice platforms on the return leg.
Reacquire the Norfair Ice Beam through the rear loop
Exit the High Jump room on the right to the main far-right purple shaft. Climb through the lower breakable ceiling using upward shots, High Jump, and the regenerating footholds. Keep ascending past the lower two-Missile branch, the corridor to the Brinstar elevator, the front Ice Beam entrance, and the separate three-Missile dead-end branch. At the apparent upper cap, shoot through the blocks on the right side and rise into the top section, then take the highest left door.
Travel west through the already-cleared top corridor with two Missile Tanks, bomb through its west wall, and continue left through the orange-block connector to the blue door that opens into the short auxiliary shaft. Descend that auxiliary shaft, take its lower right door, and bomb through the weak wall on the right side of the orange room to enter the low rear passage behind the Ice Beam statue. This is the rear Ice route. Do not mistake the separate three-Missile dead end for an Ice passage.
Crawl through the under-statue passage, emerge into the Ice room from behind, and collect Ice Beam. Immediately freeze a normal enemy so you can see it become a solid platform; that visible test confirms Ice is active again after any temporary Wave Beam use. Then reverse the same rear path: go back left through the passage, climb the auxiliary shaft, take its upper right door, and cross east through the now-empty two-Missile corridor to the main shaft.
Back in the main purple shaft, drop through the upper cap and descend past the three-Missile dead-end door and the front Ice door to the left-hand corridor that leads to the Brinstar elevator. This elevator corridor is above the lower two-Missile branch and above the lower false floor that leads to High Jump. Cross west to the elevator room and ride up to Brinstar only after Ice Beam is restored.
- Returned to the main purple shaft and climbed into its top section through the right-side upper ceiling break.
- Used the highest left corridor, the west wall break, and the auxiliary shaft to reach the rear Ice entrance.
- Retook Ice Beam, froze a normal enemy to confirm it, and left via the Brinstar elevator corridor above the lower false floor.
Before you move on
- You treated the whole lower-west Norfair trip as optional and did not make Wave Beam a requirement for finishing the game.
- You collected only the optional rewards this chapter promises: the lower-west single Missile Tank, the paired lower-west Missile Tanks, and the optional Norfair Energy Tank if you still needed it.
- If you touched Wave Beam, you deliberately restored Ice Beam through the rear Norfair Ice route before leaving the area.
- You performed a visible freeze test on a normal enemy after retaking Ice, then exited Norfair through the Brinstar elevator corridor above the lower false floor.
Check missing upgrades and recover before Tourian
This cleanup chapter is optional for finishing the game, but it is the safest place to repair a weak position before the Tourian bridge. Use it to confirm Ice Beam, recover from a low-resource password restart, and collect only the remaining upgrades that are still worth the trip. It covers the original North American NES release with the password system. End this chapter in western Brinstar beside the tall blue shaft so the statue-room route begins from the right landmark.
Confirm Ice Beam and read missiles the right way
Before doing any cleanup, make sure Ice Beam is the beam currently active. If you visited the optional Wave Beam detour and left with Wave still equipped, return to Norfair and reacquire Ice through the same rear loop used earlier. From the main far-right purple shaft, climb through the lower false ceiling above the High Jump branch, continue upward past the front Ice entrance and the three-missile dead end, break through the upper right-side ceiling, take the highest left door, cross the already-cleared two-missile through-corridor, bomb through its west wall into the auxiliary shaft, descend that shaft, take its lower right door, and bomb through the orange room’s lower-right wall to crawl behind the Ice statue. Pick up Ice, then freeze an ordinary enemy to verify the swap.
Do not misread the HUD. In NES Metroid, the missile number on screen is your current loaded stock only. The game does not show a separate current and maximum pair, and there is no equipment screen that displays your true capacity. You must infer capacity from what you have collected or from a full refill.
The correct maximum is 255 missiles. There are 21 Missile Tanks in the game, each adding 5, for 105 total from tanks. Real Kraid and real Ridley each add 75 capacity when defeated, bringing the maximum to 255. A file can therefore have the right capacity unlocked but still walk into Tourian carrying very few loaded missiles after a bad escape or password continue.
- Ice Beam is active now, not Wave Beam.
- You are reading the HUD as current missiles only.
- You understand that 21 tanks plus both real bosses equals 255 maximum missiles.
Use this area checklist for all eight Energy Tank rooms
Only six Energy Tanks increase carried capacity. There are eight Energy Tank pickups in Zebes, so after the sixth one, any untouched tank becomes a full-heal opportunity instead of another permanent slot. Because of that, do not march back to an already-collected tank room expecting help. If a tank is already gone, use farming instead.
Brinstar has three Energy Tanks. The first is the visible tank on the eastern hazardous route you crossed before Bombs. The second is the upper eastern Brinstar tank on the Varia side route, reached after the upper missile and the small side room with the right-wall opening. The third is the hidden ceiling tank in the early western corridor with the large rocky overhang; keep Ice equipped so you can freeze a flier and use it as a foothold if your jump is awkward.
Kraid’s Hideout has two. One sits on the right side of the main shaft in the branch with red doors and the hidden wall. The other is the hidden tank on the right side of real Kraid’s room above the damaging floor. If you reached six tanks before that boss pickup, treat it as a fight refill and not as lost progression.
Ridley’s Hideout has two more. One is on the long western approach after the floor tunnel that lets you pass the tall obstruction and just before the big drop; watch the false-floor squares beside it. The other is behind Ridley, beyond the missile door and the fake floor in the next room.
Norfair has the final Energy Tank, and it is in the lower-west optional loop, not directly in the High Jump room. From the upper green junction used on the Screw Attack route, bomb down into its lower copy, go right through the long corridor, bomb through its weak wall, enter the small shaft by the blue door bubble, bomb the floor directly below the door you entered, drop to the lower doorway, and go left along the hidden branch to the tank. Reverse that branch to leave.
- Brinstar: eastern visible tank, upper Varia-side tank, early western overhang ceiling tank.
- Kraid: right-branch tank and the hidden tank in real Kraid’s room.
- Ridley: one approach tank and one post-boss tank.
- Norfair: the lower-west optional-loop tank beyond the bombed drop under the small shaft door bubble.
Prioritize missile groups that give the best return
Do not turn this chapter into blind full collection unless you already know every remaining room. Instead, take the clusters that fit the route you have already learned. The easiest Brinstar leftovers are the first Missile Tank off the orange shaft’s lower-right branch and the upper Brinstar missile near the Varia-side passages if you skipped it earlier.
Norfair is the biggest source of clean capacity gains, and it should be counted in five separate groups so you do not count the same corridor twice. Near the Brinstar elevator is the western entrance pair for 2 tanks. In upper Norfair, the highest through-corridor reached through the upper ceiling and leading toward the rear Ice loop contains 2 more. The dead-end corridor immediately below that upper cap contains 3. The long western corridor just above the lower false floor and the High Jump branch contains another 2. The optional lower-west Wave area holds the last 3 Norfair tanks: 1 at the far-right dead end and 2 below the small green junction. That is 12 unique Norfair Missile Tanks in total, but this first-clear route only requires the ones you already chose to collect.
Kraid’s Hideout and Ridley’s Hideout are worthwhile only if you are already nearby. Kraid has several short right-side detours from its main shaft. Ridley has the upper missile above the second gray connector and the bottom return-corridor missile. The one pickup that remains firmly optional is the difficult missile across the upper gap in Ridley’s eastern shaft. If repeated failures are costing health, skip that one without guilt.
- You are counting Norfair as five distinct missile groups, not one vague upper-area total.
- You are using easy route-side tanks first instead of forcing every optional pickup.
- You are treating the Ridley gap missile as optional cleanup, not a requirement.
Rebuild loaded resources safely
If your supplies are low after a password restart, western Brinstar is the safest general refill point. Use the tall blue shaft and the nearby horizontal rooms as a short loop. Clear enemies with Ice Beam or Screw Attack, collect their drops, pass through a door to respawn the room, and repeat. The terrain there is much safer than deep Norfair or the hideouts, and the exits stay close if a room turns messy.
If you are already standing in Kraid’s Hideout, the compact right-side rooms off its main shaft are also acceptable for short farming because they sit close to the elevator. Avoid choosing the lower Ridley approach or the deep lower-west Norfair passages as your primary recovery ground unless you are already strong. A single bad fall into damaging liquid can erase several rooms of pickups.
Use any still-unclaimed late Energy Tank only when the refill matters. If you are already healthy, leave it in place and keep farming drops instead. For Tourian, aim for a substantial loaded missile reserve and several filled Energy Tanks before you stop. Triple-digit loaded missiles is a good comfort target, not a hidden entrance requirement.
- Western Brinstar is your default refill loop.
- Kraid’s right-side rooms are a backup refill only if you are already there.
- You are valuing untouched late Energy Tanks as emergency heals, not routine errands.
Finish in western Brinstar at the tall blue shaft
Do not end this cleanup stranded in a late-game branch. If you are coming from Kraid’s Hideout, ride the elevator up, go left into the breakable-floor shaft, climb back through the broken floor, then take that room’s right exit and travel east through the rocky-overhang corridor to the tall blue shaft. After climbing through the breakable floor, choose the right-hand exit toward the blue shaft; the left-hand exit leads toward the Morph Ball start.
If you are returning from Norfair or Ridley’s region, come back through the central Brinstar elevator and cross to the same western blue-shaft landmark. If you still need a last refill, do one more short loop here rather than deeper inside another area.
Stop with Ice Beam active beside the tall blue shaft. The next chapter begins from this exact landmark because its highest left branch leads to the statue room, the boss bridge, and the Tourian elevator.
- You returned from Kraid by exiting east to the tall blue shaft, not west toward the start area.
- You finished all cleanup in western Brinstar, not inside Norfair or a hideout.
- Ice Beam is active and Samus is parked at the tall blue shaft.
Before you move on
- You can account for all eight Energy Tank rooms by area and understand that only six increase carrying capacity.
- You understand the correct missile maximum: 21 tanks for 105 capacity, plus 75 from real Kraid and 75 from real Ridley, for 255 total.
- You can identify Norfair’s five separate missile groups without double-counting the rear-Ice corridor or the optional Wave-area branch.
- You have rebuilt a comfortable loaded reserve through farming, selective pickups, or a still-unclaimed Energy Tank refill.
- You are back in western Brinstar beside the tall blue shaft with Ice Beam active and ready for the statue bridge chapter.
Open the statue bridge into Tourian
With Ridley and the real Kraid dead, your next job is not to wait for an automatic warp. You must physically return to upper western Brinstar, open the statue chamber, make the bridge appear, and enter Tourian with Ice Beam still active and enough loaded missiles and health to survive the first Metroid rooms. This route starts from the familiar tall blue shaft near the opening area, separates the correct highest left branch from the lower Long Beam branch, explains what an unresponsive statue actually means, and gives a practical last refill plan before you ride down.
Find the correct western Brinstar shaft again
Start in western Brinstar and work back to the tall blue vertical room you used much earlier as the landmark for Long Beam. This is the blue shaft near the starting side of the planet, not the orange eastern shaft that connects toward Bombs, Varia, and the Norfair elevator. If the room you are climbing has several left-side exits at different heights, you have the right landmark.
Climb this blue shaft carefully and ignore the lower left branch that led to Long Beam earlier in the game. Keep going until you reach the highest left-hand door in the room. That uppermost left exit is the Tourian approach. If you leave from the first left opening you can reach, you are too low and have taken the old Long Beam route by mistake.
Go through the highest left door and follow the short corridor west. This is the final approach to the statue chamber. Defeating bosses does not move Samus here automatically, and Tourian does not open until you come back in person and trigger the bridge.
- You are in the tall blue western Brinstar shaft.
- You climbed to the highest left branch, not the lower Long Beam branch.
- You are moving west through the short approach corridor.
- Ice Beam is still your active beam before you continue.
Open the missile door and wake the statue room
At the end of the corridor, spend missiles to open the red door and enter the statue room. Inside is the wide acid pit with the boss statues above it. In the NES game there is no hidden console, no extra miniboss here, and no cutscene that finishes the job for you. You must make the statues respond.
Stand where you can fire upward cleanly and shoot the statues with your normal beam. When both real bosses have been defeated, the statues react and rise, creating the bridge across the pit. Use regular beam fire here so your loaded missiles stay available for Tourian instead of being wasted in the statue chamber.
Once the bridge forms, cross to the left side at once and confirm that the room is now a real passage instead of a dead end. This is your proof that the game recognizes both real boss kills. If repeated beam shots produce no response, stop and diagnose the problem before you press deeper.
- You opened the red door with missiles.
- You used normal beam fire on the statues, not more missiles.
- Both statues responded and the bridge appeared.
- You crossed the acid gap by bridge instead of trying to jump it.
Diagnose an inactive statue the right way
If a statue will not respond, the game is still missing one of the two real boss defeats. The most common mistake is fake Kraid. Kraid's Hideout includes an early false encounter that looks like a boss, but beating that fake does not count for Tourian. If you remember a quick boss room reached too early in Kraid's maze, assume that is the problem and plan to re-enter Kraid's Hideout by the longer real route.
Use memory and visible boss rewards as your check, not an imaginary equipment screen. In NES Metroid, the HUD shows your current loaded missiles, your current energy, and your tank icons. It does not show a separate maximum missile number that you can read at a glance. Real Kraid and real Ridley each add 75 missile capacity, but you can only infer that capacity from your recorded pickups and boss wins, or from reaching a full refill later. You cannot stand in the statue room and read a distinct max value off the HUD.
A helpful clue is statue behavior itself. When the correct boss has been cleared, that statue responds to beam shots. If one side still acts dead, the matching real boss is still unbeaten. Back out to the right and retrace that hideout properly. Do not keep firing here, and do not mistake a large loaded missile total for proof that both boss checks are done.
- You know fake Kraid does not satisfy Tourian's requirement.
- You are judging progress by remembered real boss kills and statue response.
- You are not relying on a nonexistent visible maximum-ammo display.
- You understand that current loaded missiles and total capacity are different things.
Cross left and ride down into Tourian
With the bridge present, cross the statue room from right to left and exit through the left-hand door. The next short passage leads directly to the Tourian elevator. Ride it down to enter the final area. A boss victory alone never moves Samus here, so this return through upper Brinstar is part of the required progression.
Before you go any farther, test your beam on the first safe enemy you see outside the deepest danger. You want Ice Beam active now, not Wave Beam. In original NES Metroid, those beams replace each other instead of sitting in a menu for later switching. If your shot passes through an enemy instead of freezing it, turn back now and fix that before you challenge Metroids.
Treat the elevator landing as your last quiet staging point. You can still back out from here if your health is ragged or your missile count is too low, but it is cleaner to solve shortages before Tourian starts draining resources through missile doors and Metroid fights.
- You crossed the bridge from right to left.
- You used the left exit and found the Tourian elevator.
- Ice Beam is confirmed before you commit to the final area.
- You understand that Wave Beam is the wrong beam to carry into Metroid fights.
Make a final resource check and know the nearest refill loop
Before you commit, review the weapon rhythm you will need immediately. Press Select to swap between normal beam fire and missiles. In Tourian, that means freezing a Metroid with Ice Beam, then switching to missiles to finish it. If that motion still feels clumsy in your hands, pause at the elevator approach and rehearse it mentally before moving on.
Judge readiness by what is loaded right now, not by what your route could hold at full capacity. Even though the full ordinary maximum is 255 missiles from 21 Missile Tanks plus the two 75-missile boss rewards, the NES HUD only shows the number currently loaded. A big possible capacity does nothing for you if red doors and boss rooms left you half empty. The same is true for health. Several filled tanks are a practical comfort target for a first clear, especially if a Metroid attaches or a bad room entry costs contact damage.
If you need a quick refill, retreat from the statue room corridor back to the blue shaft and farm in the western Brinstar rooms you already know well, especially around the Long Beam level and the early Morph Ball side where door transitions are short and the enemies are less punishing than late-game hideouts. If you intentionally left an Energy Tank uncollected as an emergency refill, claim it now. Otherwise, work the nearby rooms until your loaded missiles and current energy look comfortable, then return by the same landmarks: blue shaft, highest left branch, red door, statue room, bridge, left corridor, Tourian elevator.
- You can switch between beam and missiles smoothly with Select.
- Your current loaded missiles are comfortably stocked, not barely above zero.
- Several energy tanks are filled before the descent.
- If you retreat, you know the exact return path through the blue shaft and highest left branch.
Before you move on
- You returned to the tall blue western Brinstar shaft and used its highest left branch, not the lower Long Beam branch.
- You opened the red door, entered the statue room, shot the statues with normal beam fire, and the bridge formed across the acid gap.
- You crossed left through the newly opened path and rode the elevator down into Tourian.
- Ice Beam is equipped, and you enter the final area with a practical loaded missile reserve and several filled energy tanks rather than only a high possible capacity.
Survive the Metroid corridors
Enter Tourian with Ice Beam active, a solid current missile stock, and enough health to survive mistakes. The route is short but expensive if you panic, so move in the fixed order of first shaft, lower right lava corridor, second shaft, then the lower left hall, freezing and finishing Metroids one at a time so you arrive at Mother Brain with loaded resources instead of only a high maximum.
Enter Tourian with Ice Beam ready and treat the first door as a major cost
After the statue bridge, take the elevator down and stop before you rush off the landing. This area is built around Ice Beam use. If you are carrying Wave Beam because of an optional detour, Tourian is the place to turn around and correct it before you commit. Metroids are the whole problem here, and the reliable original NES answer is to freeze one and then finish it with five missiles.
Your route is fixed. Go down the first vertical shaft, open the yellow hatch at the bottom, cross the lower right lava passage, descend the next shaft, then follow the lower left hall into Mother Brain's chamber. That first hatch at the bottom of the entrance shaft costs ten missiles, not five, so count it as a deliberate expense. The later red hatches on the approach are the ordinary five-missile type, and the last door into Mother Brain's room is blue, so do not waste extra shots testing doors you have already identified.
Because the enemies here can refill you, loaded ammo matters more than raw maximum for the next few minutes. Do not enter nearly empty just because your capacity is high. If your current missile stock is poor when you arrive at the Tourian elevator, back out to Brinstar before descending and fix that first.
- Ice Beam is the active beam before the first Metroid notices Samus
- You are expecting a yellow ten-missile hatch at the base of the entrance shaft
- You start Tourian with real loaded missiles and a healthy energy reserve, not just good capacity
Clear the entrance shaft in controlled drops
The first shaft is your introduction to Tourian's rhythm. Do not jump straight down through the whole room. Land on a platform, wait long enough to see whether a Metroid is rising into view, then deal with that one before descending again. Scrolling discipline matters here. If you drop too far, you can wake another Metroid before you have finished the first and turn a manageable room into a scramble.
When a Metroid approaches, keep Ice Beam selected until it freezes in place. Then switch to missiles and land five hits quickly. Do not keep firing Ice Beam after the freeze. In this game that only risks disrupting your timing and letting the enemy resume movement before you have done the real damage. Freeze first, switch once, fire the five missiles, then collect the drop before you scroll farther down.
If one latches onto Samus in this shaft, the dependable answer is to Morph Ball and lay Bombs until it breaks off. A doorway reset is not practical yet because the only exit is still below you. Once it releases, climb back to a platform instead of trying to chase it while falling. Reset the spacing, refreeze it, and finish the fight cleanly. The large health and missile drops from dead Metroids are worth picking up every time, so do not hurry past them.
- Descend from platform to platform instead of dropping the entire shaft at once
- Use the freeze then five-missile kill cycle on each Metroid
- Bomb off any Metroid that latches on before resuming the descent
Cross the lower right lava passage without overspending missiles
At the bottom of the first shaft, open the yellow hatch with ten missiles and move into the long corridor to the right. This room mixes Metroids, ring-shaped Rinkas, floating platforms, and real lava. Treat every exposed gap here as a damage hazard. Varia reduces punishment, but it does not make the lava floor harmless, so keep your jumps short and deliberate.
Keep Ice Beam selected while you advance along the platforms. A Metroid drifting in from ahead is the threat that decides your movement. Freeze it as early as you reasonably can, then switch and spend the five missiles from stable footing. The Rinkas are pressure hazards, not a refill source, so do not burn missiles on them unless a shot also protects your position. If you have room for a safe moving jump, Screw Attack can clear one, but above lava the safer play is usually to stay controlled and focus on the Metroid first.
At the far end of the corridor, open the red five-missile hatch and continue into the second descent. This is the last time on the approach that a door cost can surprise you. Count what you spent in the first shaft and this corridor, then start looking for chances to refill from the next Metroids instead of forcing speed.
- Spend ten missiles on the yellow hatch and five on the corridor's red hatch, no more than needed
- Fight from stable platforms instead of making long panic jumps over lava
- Prioritize freezing Metroids over swatting every Rinka
Work down the second shaft and save drops for before the last hall
The second vertical room is shorter, but the lower area is more crowded and easier to mishandle. Descend a ledge at a time and stop on each one long enough to see whether a Metroid is coming up to meet you. The lower you go, the less room you have to correct a bad grab, so patience is safer than speed here.
Use the same routine as before. Freeze one approaching Metroid, switch to missiles, finish it with five hits, and collect the reward before you drop again. If one attaches to you near the bottom, Bombs are still the reliable emergency release. There is a doorway farther along, but counting on a clean escape while grabbed is worse than simply breaking it off where you are. Once free, get back onto solid footing and re-establish distance before continuing.
Before leaving this shaft, make a point of collecting the large drops from the last kill or two. This is one of your best refill spots before Mother Brain because the next area still offers Metroids but also mixes in more Rinka pressure. Open the red hatch from the bottom-left side and enter the lower left approach with as much of that recovery as you can carry.
- Pause on each ledge and watch below before dropping farther
- Use Bombs as the emergency answer to a grab in the shaft
- Leave this room only after collecting the most recent large drops
Use the lower left hall as the last practical Metroid farm before Mother Brain
The lower left hall is your final sensible place to refill before the boss corridor. Move through it slowly enough that you trigger one Metroid at a time whenever possible. Freeze it from a little farther away than feels necessary, then step into a stable firing spot and spend the five missiles. This keeps the screen from filling with a second Metroid or a badly timed Rinka while you are weapon-switching.
Rinkas matter more here because they can arrive from awkward angles while you are trying to finish a frozen target. Ice timing helps. If a Rinka is about to cross your firing line, briefly control the screen with Ice Beam, then return to the frozen Metroid and complete the kill. Do not stand over lava or at the lip of a drop while switching weapons. A good kill cycle is slower than a reckless dash, but it saves more health and usually returns some of the missiles you spent.
When you reach the blue door to Mother Brain's chamber, stop and judge your current resources, not your theoretical maximum. This is the last place to correct a weak loadout. You want Ice Beam still equipped, multiple filled Energy Tanks or the equivalent health buffer, and a strong loaded missile reserve after paying for the Tourian hatches and recent Metroid kills. If you arrive at this door with only a thin handful of missiles or dangerously low health, turn back through this hall and the bottom of the second shaft and farm another one or two Metroids before you commit. Mother Brain's room will not replace those supplies for you.
- Treat the lower left hall as the final refill stretch before Mother Brain
- Approach the blue boss-room door only after topping up from Metroid drops where practical
- If current missiles or health are weak, backtrack within Tourian and refill before entering
Before you move on
- You followed Tourian in the correct order: entrance shaft, lower right lava passage, second shaft, then the lower left hall to the blue door before Mother Brain.
- You are using the original NES Metroid kill routine correctly: freeze each Metroid, switch weapons, and land five missiles.
- You reached the final chamber door with Ice Beam equipped, several good health buffers, and a meaningful loaded missile reserve rather than a nearly empty stock.
Break the Zebetites and destroy Mother Brain
This chapter begins in the final Tourian corridor, at the door on the left that leads into Mother Brain’s chamber. In the original North American NES game, the last room is a controlled missile fight, not a free-form brawl. You must break through five Zebetites in order, keep the later hazards from knocking you into the pit near Mother Brain, open the glass with a missile, and then keep enough pressure on the exposed brain to finish the battle. Ice Beam is still valuable here, not because it kills the boss, but because frozen Rinkas can briefly clear your firing lane or even give you a foothold if you fall out of position.
Read the room before you commit to the first barrier
Shoot the left door, enter Mother Brain’s chamber, and stop on the right side of the room instead of charging forward. Ceiling turrets begin sending shots across the chamber, and Rinkas start appearing as ring-shaped hazards that drift into your path. If you run left immediately, you are likely to take a hit while jumping and waste both health and missiles before you even start on the barriers.
Keep Ice Beam selected for the first few seconds. Use it to freeze an incoming Rinka if one is about to cross the lane you want to use. This gives you a brief calm pocket to step forward and decide where you want to stand for the first Zebetite. Do not try to clean the room permanently. The hazards keep returning, so the goal is only to create a safe opening, not to eliminate every threat.
Once the first firing lane is readable, switch to missiles and move up to the first Zebetite. From here on, think in short controlled pushes. If a hit knocks you backward, regain a stable foothold first, then continue. The room punishes panic far more than patience.
- Enter from the right and pause long enough to read turret and Rinka timing.
- Use Ice Beam to make space, then switch back to missiles only when you are ready to attack.
- Begin the barrier fight from stable ground instead of a blind running jump.
Destroy each of the five Zebetites completely before moving left
There are five Zebetites between the entrance and Mother Brain. They are the red biological barriers in the corridor, and partial damage does not count. If you stop short of finishing one, it regenerates and you must spend those missiles again. Because of that, never tag a barrier a few times and then advance. Commit only when you can fire a clean uninterrupted string.
For each Zebetite, stand at a range where standing missiles travel straight into its center. Standing shots are the most reliable here because Samus cannot aim diagonally and jumping introduces more chances to miss or get clipped by a turret shot. Fire rapidly until the barrier is fully gone, then walk left to the next pocket of safe ground. Move on only after you can clearly see open space where that Zebetite was.
If a Rinka drifts directly into your firing line or a turret shot forces you off balance, break off the attempt before you waste more missiles into empty air or the floor. Back up a step, freeze the nearest Rinka if necessary, then resume the same barrier. Keep repeating that method until all five Zebetites are gone. The order never changes, and the room becomes safer only one fully destroyed barrier at a time.
- Treat every Zebetite as all or nothing.
- Use standing missile fire whenever possible.
- Advance left only after a barrier has disappeared completely.
Use the fifth barrier position as your main Mother Brain perch
After the fifth Zebetite falls, do not rush all the way to Mother Brain’s tank. The dangerous spot in this room is the gap between the final pillar area and Mother Brain’s side of the chamber. Your best attack position is usually the space where the fifth Zebetite stood, because it gives you a direct line toward the glass while keeping you off the worst edge of the pit.
The small blue platform just to the right of that last opening is your secondary foothold. Use it only for short controlled repositioning when a turret shot or a cluster of Rinkas crowds your main perch. Keep your jumps small and deliberate. Long panic jumps are the usual way to overshoot and fall into the gap.
If you do get knocked down, do not keep forcing yourself left while taking more hits. Recover to the right side of the pit, freeze a Rinka if you need a temporary step, and climb back to the safer fifth-Zebetite area before attacking again. This fight remains recoverable as long as you stop the spiral quickly and rebuild your position instead of flailing in the pit.
- Primary firing spot is the space opened by the fifth Zebetite.
- Use the small platform to the right only as a brief backup perch.
- If you fall, recover to the right and rebuild your position before attacking again.
Open the glass, then pour missiles into the exposed brain
Mother Brain is protected by a glass case. Your first direct missile at the target area must be used to open that glass. Until the glass is broken, shots at the brain do nothing useful. Make that opening shot from a steady perch, not while being knocked around by hazards.
As soon as the glass is open, keep missiles focused on the exposed brain. An exact mental count is less important than maintaining a clean line and continuous pressure, but this is still a missile fight, so do not waste shots by firing while you are drifting backward from a hit. When the lane is cluttered, briefly swap to Ice Beam, freeze the nearest Rinka or two, then return to missiles and continue the damage string.
Stay disciplined near the end. If the room becomes chaotic, reset on the same safe foothold and repeat the pattern instead of gambling on a desperate jump. Mother Brain will eventually show the battle turning in your favor, then the screen will flash and the destruction sequence will begin. Keep your attention on movement, because the chapter is not finished the instant the boss dies.
- Use one clean missile to break the glass first.
- After the opening, keep missiles on the exposed brain whenever the lane is safe.
- Switch to Ice Beam only long enough to reopen space, then return to missiles.
Recognize the win state and open the left escape door
You have won when Mother Brain disintegrates and the room enters the destruction sequence. In the original NES game, this is followed by the Time Bomb warning and the start of the escape countdown. Do not linger in the chamber looking for refills or trying to tidy up the room. The next objective begins immediately.
Turn to the left side of the chamber. A blue door appears there after Mother Brain is defeated, but it still behaves like a normal blue door and must be shot open before you can pass through. Fire, go through at once, and enter the vertical escape shaft.
If you are standing on an awkward platform when the room flashes, make one calm correction back to solid footing and then head left. Avoid extra jumps that can drop you back into the pit after the fight is already won. The chapter ends only when Samus has entered the new left-side door and is positioned to begin the climb out of Tourian.
- Wait for Mother Brain’s destruction cue and the escape sequence to begin.
- Shoot open the newly appeared blue door on the left.
- Enter the door immediately to start the escape chapter.
Before you move on
- All five Zebetites are fully destroyed and no intact barrier remains between Samus and Mother Brain.
- Mother Brain’s glass has been broken and the exposed brain has been destroyed.
- The room has flashed, the destruction sequence has started, and the Time Bomb escape is active.
- Samus has shot open the new blue door on the left and entered the escape shaft.
Climb out of Tourian and complete the mission
Destroying Mother Brain only opens the way out. To finish the original North American NES Metroid, go through the new left door in Mother Brain's chamber, climb the narrow shaft of alternating blue platforms with controlled High Jumps, enter the small room at the top left, and ride the elevator there. The alarm begins at 999, but that display is the game's own countdown readout rather than a promise of 999 real-world seconds, so calm footing matters more than panic. Reach the elevator, watch the ending and credits, and then treat the faster-clear rewards as optional replay goals instead of requirements for a legitimate first clear.
Leave Mother Brain's room and commit to the escape
The moment Mother Brain is finished, turn left and enter the door that opens in the wall behind the tank area. Do not linger to trade shots with Rinkas, and do not step back into the old firing position unless you are correcting a bad doorway approach. The fight is over. Your only job now is to leave Tourian alive.
The next room is the final escape shaft. It is tall, narrow, and built around small blue platforms that alternate from side to side as you climb. There is no extra pickup to collect here and no second boss waiting above. If you reached this shaft, the run is in its last active room.
Before the first jump, plant Samus securely on the floor and look upward. The alarm sound is meant to make you rush into a bad takeoff. Ignore that. A clean first jump from a settled position is safer than bursting out of the doorway with too much sideways speed and drifting past the first useful ledge.
- Go through the newly opened left door as soon as Mother Brain is destroyed.
- Recognize the next room as the final escape shaft.
- Start the climb from a steady standing position instead of a panicked running leap.
Climb the blue-platform shaft with deliberate High Jumps
Read the room as a repeating pattern, not as one desperate scramble. After each landing, stop for a fraction of a moment, find the next platform above, and take only that jump. The platforms alternate left and right all the way up, so you can keep a simple rhythm: land, center yourself, read the next side, then jump.
Use High Jump, but do not assume every leap should be huge. When the next platform is almost directly above you, a straight standing jump is usually the safest option. Use a moving spin jump only when the next ledge is clearly offset to the side. This matters because the common mistake here is not failing to reach a ledge. It is overshooting sideways and sliding off the far edge.
If you land on the outer lip of a platform, tap inward before taking the next jump. That tiny reset is worth more than trying to launch immediately from the edge. The shaft is short enough that steady one-platform progress beats any attempt to skip half the room in one motion.
Do not force long shortcut jumps unless the alignment already looks obvious to you. This route has enough time for a careful climb. A player who advances one platform at a time will usually clear the room more reliably than a player who tries to improvise a speedrun line on a first ending run.
- Climb in single-platform steps.
- Prefer straight jumps for nearly vertical rises.
- Use moving jumps only when you actually need sideways reach.
- Reset your footing after any awkward landing.
Recover from a fall without throwing away the run
If you miss a platform, do not mash into another mistake. Watch for the next safe ledge below and land there. This shaft is recoverable because its pattern repeats. You are not trapped by one missed jump unless you panic and turn one fall into several.
Once you catch a lower platform, stop completely, face inward, and rebuild your rhythm. Read the next ledge, jump once, and resume the same side-to-side pattern. Even a long drop is survivable if you end it cleanly and restart with control.
Treat the 999 display as the game's countdown meter, not as a reason to play sloppily. A calm recovery costs less than another rushed fall. If you slip near the top, recover from the nearest stable ledge and continue. You do not need to restart the entire climb mentally every time you lose height.
- After a miss, aim for the next safe platform below.
- Reset fully before resuming upward movement.
- Return to the same left-right climb rhythm instead of improvising wildly.
Take the elevator that actually ends the game
At the top of the shaft, move into the small room on the left and step onto the elevator there. This lift is the true completion trigger. Mother Brain's defeat begins the ending sequence, but the game is not cleared until Samus leaves Tourian on this elevator.
Once the elevator carries you out, the ending scene appears and the credits roll. That is the full finish for the original North American NES route. If you defeated the real Ridley and the real Kraid, opened Tourian, destroyed Mother Brain, climbed this shaft, and rode this lift, you completed the mission.
Your completion time changes the presentation you see after the escape, but it does not change whether the game counts as beaten. For this NES release, the consistently documented reward thresholds are under five hours, under three hours, and under one hour. Treat those as optional presentation goals for later attempts, not as requirements for a valid clear.
- Reach the top of the blue-platform shaft.
- Enter the room on the upper left.
- Ride the final elevator.
- Watch the ending and credits to confirm the clear.
Use the time rewards as replay goals, not first-clear pressure
For later runs, the best time save is route confidence, not a trick. Keep the same backbone that got you here: early Brinstar setup, Norfair mobility, Norfair Ice Beam, Screw Attack, Varia and health, Ridley first, real Kraid second, then Tourian. What changes on replay is that you can trim optional detours once the landmarks are familiar.
The safest cuts are the optional ones already separated in this guide. Skip the Wave Beam cleanup entirely unless you want it for practice, and skip out-of-the-way missile or Energy Tank pickups that you now know you do not need. That alone can move a careful run toward the under-five-hour range without demanding risky shortcuts.
If you later earn one of the faster suit-removal endings, specialist NES references document an extra replay feature at The End when you press Start. Those same references describe that follow-up run as keeping Samus's major equipment while resetting Energy Tank and Missile expansion progress, so treat it as a bonus mode for repeat play rather than as part of your first-clear planning.
A practical replay ladder is simple. First aim to finish cleanly again with fewer optional detours. Then chase under five hours. After that, try for under three only when Tourian and both hideouts feel routine. Leave the under-one-hour ending for full route mastery. This walkthrough teaches a dependable clear, not a guaranteed speed-ending script.
- Use the under-five, under-three, and under-one-hour marks only as optional replay goals.
- Cut optional detours before attempting riskier time saves.
- Do not assume this safety-first route automatically earns a fast ending.
- If you trigger a faster ending later, use the documented Start prompt at The End as a bonus replay option.
Before you move on
- Mother Brain is destroyed and you entered the new door on the left side of her chamber.
- You climbed the final blue-platform shaft and reached the upper-left room.
- You rode the elevator there and saw the ending sequence and credits.
- You understand that faster completion times only change the presentation and optional replay rewards, not whether the game was successfully finished.
References for this chapter
Finishing up
You reached the core route loadout: Morph Ball, Bombs, Long Beam, High Jump, Norfair Ice Beam, Screw Attack and Varia, plus a comfortable set of tanks and missiles.
You defeated Ridley and the real Kraid, not the fake Kraid encounter, and both boss statues can be activated in the bridge room.
You entered Tourian with Ice Beam equipped and a substantial loaded missile reserve instead of arriving nearly empty.
You crossed the Metroid corridors by freezing each Metroid first and spending five missiles per kill when needed.
You broke all five Zebetites, destroyed Mother Brain, escaped up the final shaft and took the elevator at the top.
You understand that finishing under five, under three and under one hour only changes the ending presentation and replay bonus. Clearing the escape is the real completion check for this route.
Choose your next gameScreenshots & video
Game imagery for reference. Follow the written chapters above for the route and strategies.
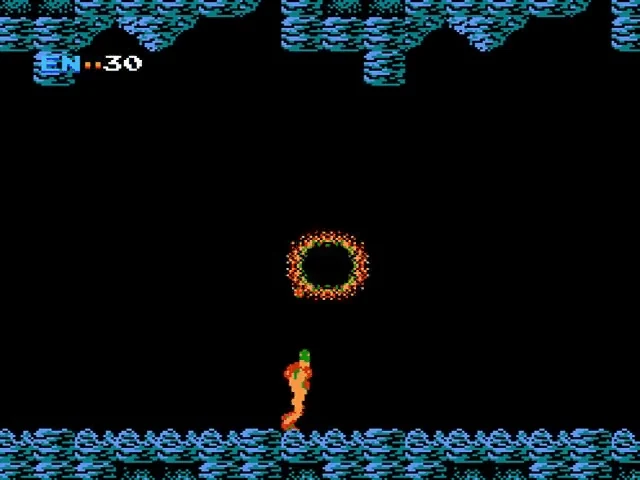
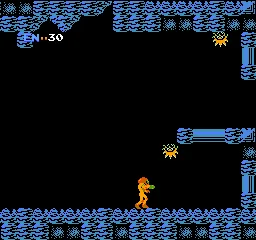
Sources & references
Our original guide draws on the references below. Check the edition at the top of this page before following controls or unlock requirements.
- Metroid original NES instruction booklet
- Metroid Dread Report Vol. 3: Seven points that define the 2D saga
- Metroid Map Selection - Labeled Maps - Nintendo NES
- Walkthrough - Metroid (Metroid Recon)
- Readable transcription of the same original manual.
- Metroid Cheats, Codes, and Secrets for NES
- List of Metroid passwords | Wikitroid | Fandom
- Metroid instruction booklet
- Metroid - Brinstar - Nintendo NES Map
- Metroid Recon: Chapter 1 - Samus' Entrance
- Metroid Dread Report vol. 4: Unraveling a saga 35 years in the making
- Metroid - Norfair - Nintendo NES Map
- Chapter 2: The Bowels of Norfair - Walkthrough - Metroid
- Norfair/Items | Wikitroid | Fandom
- Missile Tank tunnel | Wikitroid | Fandom
- Metroid Walkthrough – Missile Expansions - Omega Metroid
- Metroid - Guide and Walkthrough - NES - By LightAngelTora - GameFAQs
- Martacus original NES walkthrough describes Kraid taking the remaining 25 missiles then giving 75 in stock. Ridley section explicitly spends ten of the newly awarded 75 on the rear door.
- Metroid Walkthrough – The Planet Zebes
- Metroid Walkthrough – Energy Tanks - Omega Metroid
- Metroid Release Information for NES - GameFAQs
- Metroid - Mini-Boss Hideout II - Nintendo NES Map
- Metroid Map Selection - Labeled Maps - Nintendo NES
- Metroid - Guide and Walkthrough - NES - By namelessbob - GameFAQs
- Metroid - Guide and Walkthrough - NES - By eyenot
- NES Maps original Metroid: Kraid room map
- Chapter 3: The Hunt for Kraid - Walkthrough - Metroid (Metroid Recon)
- BakonBitz original NES guide: third red door route
- StrategyWiki: Metroid/Hideout I
- Weapons and items - Metroid (Metroid Recon)
- Entrance to Tourian | Wikitroid | Fandom
- Tourian | Wikitroid | Fandom
- Metroid/Brinstar — StrategyWiki
- Metroid - Tourian - Nintendo NES Map
- List of rooms in Metroid/Tourian | Wikitroid | Fandom
- Metroid Recon: Chapter 5: Final Confrontation
- StrategyWiki: Metroid/Enemies
- StrategyWiki: Metroid/Tourian
- Data Crystal: Metroid/RAM map
- Game endings - Metroid
- Metroid (game) - Metroid Wiki
About the game & collecting notes
- Platform
- Nintendo Entertainment System
Use this route to finish the original North American NES cartridge-style edition of Metroid without sequence breaks or full item cleanup. You will build a dependable loadout in Brinstar and Norfair, defeat Ridley first and the real Kraid second, then enter Tourian with Ice Beam and enough loaded missiles to clear Metroids, Mother Brain and the escape.
Darryl Polo
Darryl Polo loves tinkering with emulation and revisiting retro games. He enjoys exploring how old favorites play on different setups and sharing what he learns along the way. At Joking Joystick, he writes about the games, hardware, and small discoveries that keep the hobby fun.
Our editorial standardsFound a step that needs another look? Help us improve this guide.